|
 Re: Hi, everybody!
[Re: Exit1965]
#38395
Re: Hi, everybody!
[Re: Exit1965]
#38395
08/16/08 12:07 AM
08/16/08 12:07 AM
|
Anonymous
Unregistered
|
Anonymous
Unregistered
|
Yes, I tried to wet sand it after a couple of days, and got those streaks. I was disappointed. However, after the first wreck (Several months later), I sanded it, to repair the damage, and it didn't do that again, so I wet sanded the rest, and it looked great. It reflected so much, that I'm still surprised I didn't get some kind of ticket. I now have sandpaper, and Micro Mesh down to 12,000 grit (< not a typo!) I'll pick a spot to shine up, and post pictures.
|
|
|
Pic
#38396
08/17/08 01:58 AM
08/17/08 01:58 AM
|
Anonymous
Unregistered
|
Anonymous
Unregistered
|
Thanks CJ5. That is a cool jeep. I have been working on my charger since febuary 08, but I have limited time and am taking it all down to metal.
I have 8 coats on this panel, buffed it for about an hour, no wax yet. Need more work on buffing- not as easy as I'd thought it would be. Has a descent shine on it for Rusto stop rust gloss white.
Will post more as I make progress.
|
|
|
Re: New Paint job on a budget thread Part III
[Re: 69DartGT]
#38397
08/17/08 03:13 PM
08/17/08 03:13 PM
|
Anonymous
Unregistered
|
Anonymous
Unregistered
|
Hey everyone. I'm in the process of restroing my 74 Charger and was reading all the posts on rolling cars in rustoleum and I had never heard of people doing that before. Needless to say this sounds alot more affordable considering I'm still in high school haha. But can anyone tell me from pretty much start to finish the process of rolling a car in rusto? Right now I'm still doing sheet metal work but would also like to know what primers, sealers, etc. that need to be used along with other materials. PLEASE HELP!! Thanks! 
|
|
|
Re: New Paint job on a budget thread Part III
#38398
08/17/08 03:56 PM
08/17/08 03:56 PM
|
Anonymous
Unregistered
|
Anonymous
Unregistered
|
Hey Mopar 26. I am working on a 73 charger and am using the rusto method. The original thread started at this link. you have to read through the first few pages, but it's all there. https://board.moparts.org/ubbthreads/show...part=7&vc=1
|
|
|
 Re: New Paint job on a budget thread Part III
#38399
Re: New Paint job on a budget thread Part III
#38399
08/18/08 08:51 PM
08/18/08 08:51 PM
|
Anonymous
Unregistered
|
Anonymous
Unregistered
|
Hey jamesclab. Thanks for the help! That right there just saved me a grand that I didn't have. haha. But as soon as i get the body work done and start rollin I'll post some pictures up and keep ya'll updated. By the way you got any pictures of you car up here? I'd like to see it and what to expect for the final outcome. Thanks again! 
|
|
|
Re: New Paint job on a budget thread.
#38400
08/19/08 01:37 AM
08/19/08 01:37 AM
|
Joined: Aug 2008
Posts: 2
CA
ron_l

member
|
member
Joined: Aug 2008
Posts: 2
CA
|
Quote:
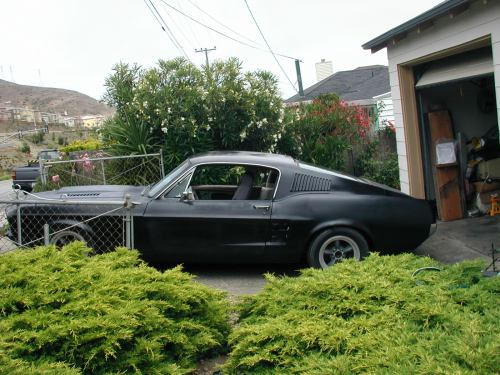
Finished my 2nd paint job. I tried flat black for about a year, it looked good, but I wanted a more finished look. I have decided that this method isn't any easier than spraying, but it is a lot cheaper for a similiar ammount of work, plus the ease of touchup is huge. Color is Rusto Almond, with Rusto satin black. 6 coats, then polished with turtlewax rubbing compound, then polish.
I ended up hand polishing and not using my polisher, I didn't really think that the rotary polisher worked that great, may be my technique.
The car is really shining now though!

You say the hood is now satin, so in your pictures when it was black, was that flat or satin? I thought for sure it was satin then. Can you re-post the link to your photo album? I seem to have lost it.
As far as satin black goes, how hard is that to match if I spray it? Because of our fog I have to paint panels within a few days or it'll rust through the primer, which means painting my car in stages. Will I end up with a multi-hue black? I know 69Charger said he touched up and couldn't tell the difference, but that was gloss.
Here's my car when it was in epoxy primer, before it became a chalky, faded mess about a year later as the rain washed most of it off. I didn't know about UV stability then. Funny thing is, I touched up a few spots with Krylon ultra flat and the door with Rustoleum flat black and those spots are still there after 2 more years of sun and rain. So much for "cheaper" paint, huh?
Here's what the epoxy primer looks like now. $180 literally down the drain.
|
|
|
Re: New Paint job on a budget thread Part III
#38401
08/20/08 02:40 AM
08/20/08 02:40 AM
|
Anonymous
Unregistered
|
Anonymous
Unregistered
|
Hey Mopar 26. I am not finished by any means, and it is taken apart now because of paint- so I can't get a good picture. I have only really finished one quarter panel, but I have a couple coats of paint on more than half of the car. I have a lot going on in the next few months, but hope to have it finished soon.
I spent about 2 hrs buffing and waxing on a quarter panel tonight and I have to say that the shine is coming out finally, but I am really thinking about buying some brightside. There is just no real comparison between the gloss of the two paints.
Anyway, I will post more pics soon.
|
|
|
Re: Pic
#38402
08/20/08 05:58 PM
08/20/08 05:58 PM
|
Anonymous
Unregistered
|
Anonymous
Unregistered
|
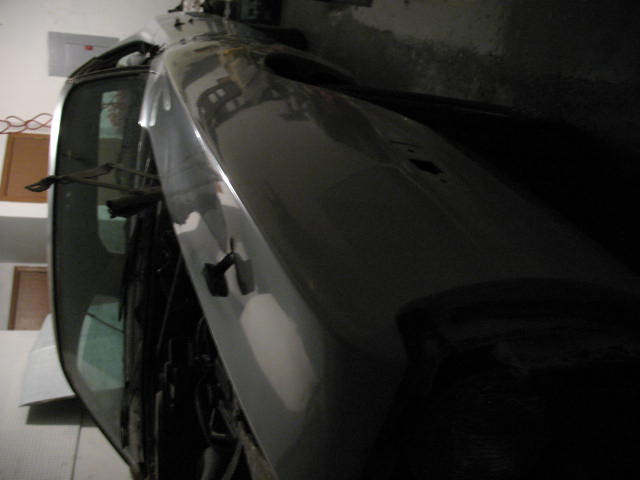
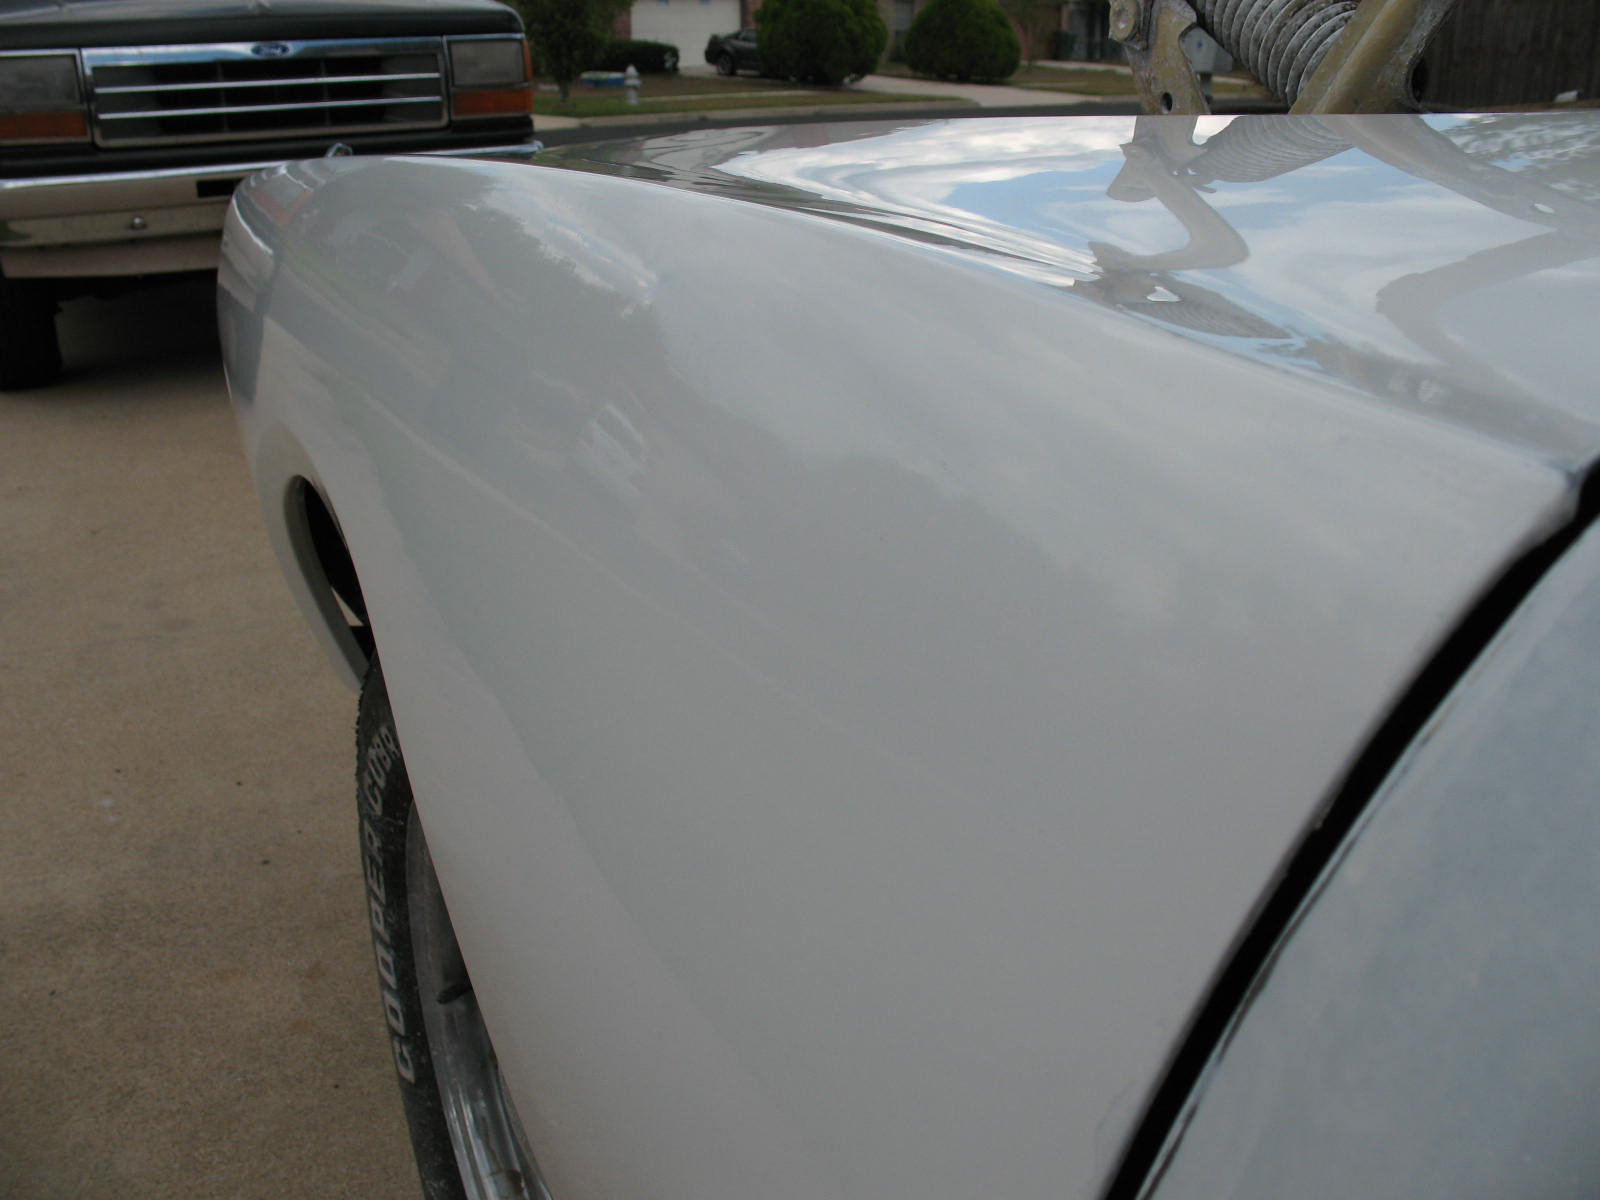
After a 2-3 full hours of buffing and waxing this panel, this is what I got. I believe that I can get more shine out of it when the paint fully cures, but I couldn't wait and wanted to see what wax would do for the shine. I may have to strip the wax off later to buff the paint again when it fully cures.
I am also working with a $25 buffer from wal mart. It definetley doesn't have much power- I can not apply any pressure and have to actually pic up the buffer a little for it not to bog down, but does work a little better than hand.
The shine looks good from an angle, but head on it is very hard to see a reflection.
Will post more pics with progress.
|
|
|
Re: Pic
#38403
08/20/08 05:59 PM
08/20/08 05:59 PM
|
Anonymous
Unregistered
|
Anonymous
Unregistered
|
|
|
|
Re: Pic
#38404
08/20/08 06:16 PM
08/20/08 06:16 PM
|
Anonymous
Unregistered
|
Anonymous
Unregistered
|
|
|
|
Re: New Paint job on a budget thread Part III
#38405
08/20/08 08:20 PM
08/20/08 08:20 PM
|
Joined: Nov 2007
Posts: 103
Tampa, FL
Saint Crispan
member
|
member
Joined: Nov 2007
Posts: 103
Tampa, FL
|
Hello everyone, long-time lurker (all three threads!) but not a first time poster (I'm on other threads on Moparts).
I had a couple of questions which I had been seeking the answers for and which have already been answered:
Prime/Not Prime? It boils down to prep. It seems to me that the more prep you put into it the better off you'll be. Besides, I do have a lot of scale & surface rust which I need to remove, and even a few holes to treat/fill. On top of that, the fella with the Forerunner pretty much brilliantly demonstrated that a consistent bottom coat makes for a better final coat. So I will be priming before I even start the final coat.
Two tone paint job? The original coat on my '72 Satellite is blue/light grey, and a thin chrome moulding piece to separate them. A few of the guys have managed to pull this off and I'm pretty stoked about giving it a shot. Question, tho...when you did yours, you taped off half and rolled the other half. The one guy who had the problem with his truck...I didn't see if he had prepped with primer first; I believe I can avoid the "paint peel" problem with a good, sanded smooth primer coat. I also plan to do the bottom half first, and then work on the top half. PATIENCE is the key here, and I plan to finish the bottom half, let cure for a week, move on to the top half, let cure for a week, repeat, then do the first sanding on both sides.
Rims? I've seen some discussion about doing rims in the same method. My rims are originally chrome, but I plan to have them sandblasted to remove the chrome...but I am undecided on whether to have them re-chromed ($$$) or simply prime and paint with the same light grey I'm going to put on the bottom half. Since they are Magnum 500 rims, I was also going to flat-black the segments. The conversation I read said that Rust/Tremclad of these would not be such a great idea (road damage, etc). Thoughts? Opinions?
Finally, I have a question that I didn't see anyone else bring up in the entire three threads. The main push in these three threads, besides PATIENCE, seems to be PRACTICE. I don't have a junkyard in my backyard to pull parts from, or even a beer fridge which needs a racing stripe...so I was wondering if I could practice on something besides metal surface. You see, I do have a sheet of plywood and I was thinking I could nail down a smooth sheet of wall paneling to it. I figure after priming it, it might be a good surface. Easy enough to remove a botched piece of panel, replace, and start over...whether horizontal or vertical.
Thoughts? Opinions?
|
|
|
Re: New Paint job on a budget thread Part III
#38406
08/20/08 08:21 PM
08/20/08 08:21 PM
|
Joined: Jul 2003
Posts: 3,377
Rancho Cordova, CA
Exit1965
master
|
master
Joined: Jul 2003
Posts: 3,377
Rancho Cordova, CA
|
Quote:
I spent about 2 hrs buffing and waxing on a quarter panel tonight and I have to say that the shine is coming out finally, but I am really thinking about buying some brightside. There is just no real comparison between the gloss of the two paints.
Yep.
|
|
|
Re: New Paint job on a budget thread Part III
[Re: Saint Crispan]
#38407
08/20/08 10:00 PM
08/20/08 10:00 PM
|
Joined: Nov 2006
Posts: 32
Edgerton WI
Donny O.
member
|
member
Joined: Nov 2006
Posts: 32
Edgerton WI
|
Quote:
Two tone paint job? The original coat on my '72 Satellite is blue/light grey, and a thin chrome moulding piece to separate them. A few of the guys have managed to pull this off and I'm pretty stoked about giving it a shot. Question, tho...when you did yours, you taped off half and rolled the other half. The one guy who had the problem with his truck...I didn't see if he had prepped with primer first; I believe I can avoid the "paint peel" problem with a good, sanded smooth primer coat. I also plan to do the bottom half first, and then work on the top half. Thoughts? Opinions?
yes...I suggest doing the top first. when wet sanding and such the water and sanded off paint will run down over the part you already painted and if you don't get it off right away it can be a pain to get off of there and you don't wnat to ruin what you have already painted. on my sidecar i did the top and then was going to clean the bottom and spray krylon fusion on that(it is textured like bedliner so no rolling)....it was a huge pain tying to get the dried wetsanded paint off. I eventualy painted over a lot of it. good thing fusion sticks well!! anyway jsut a thought!!
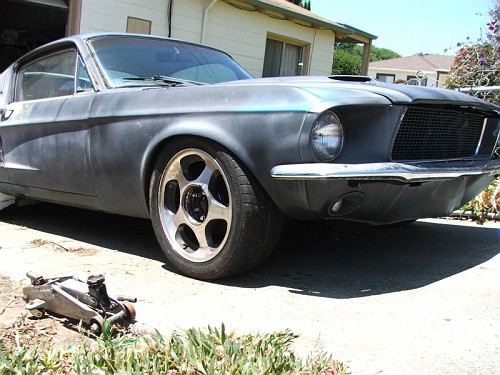
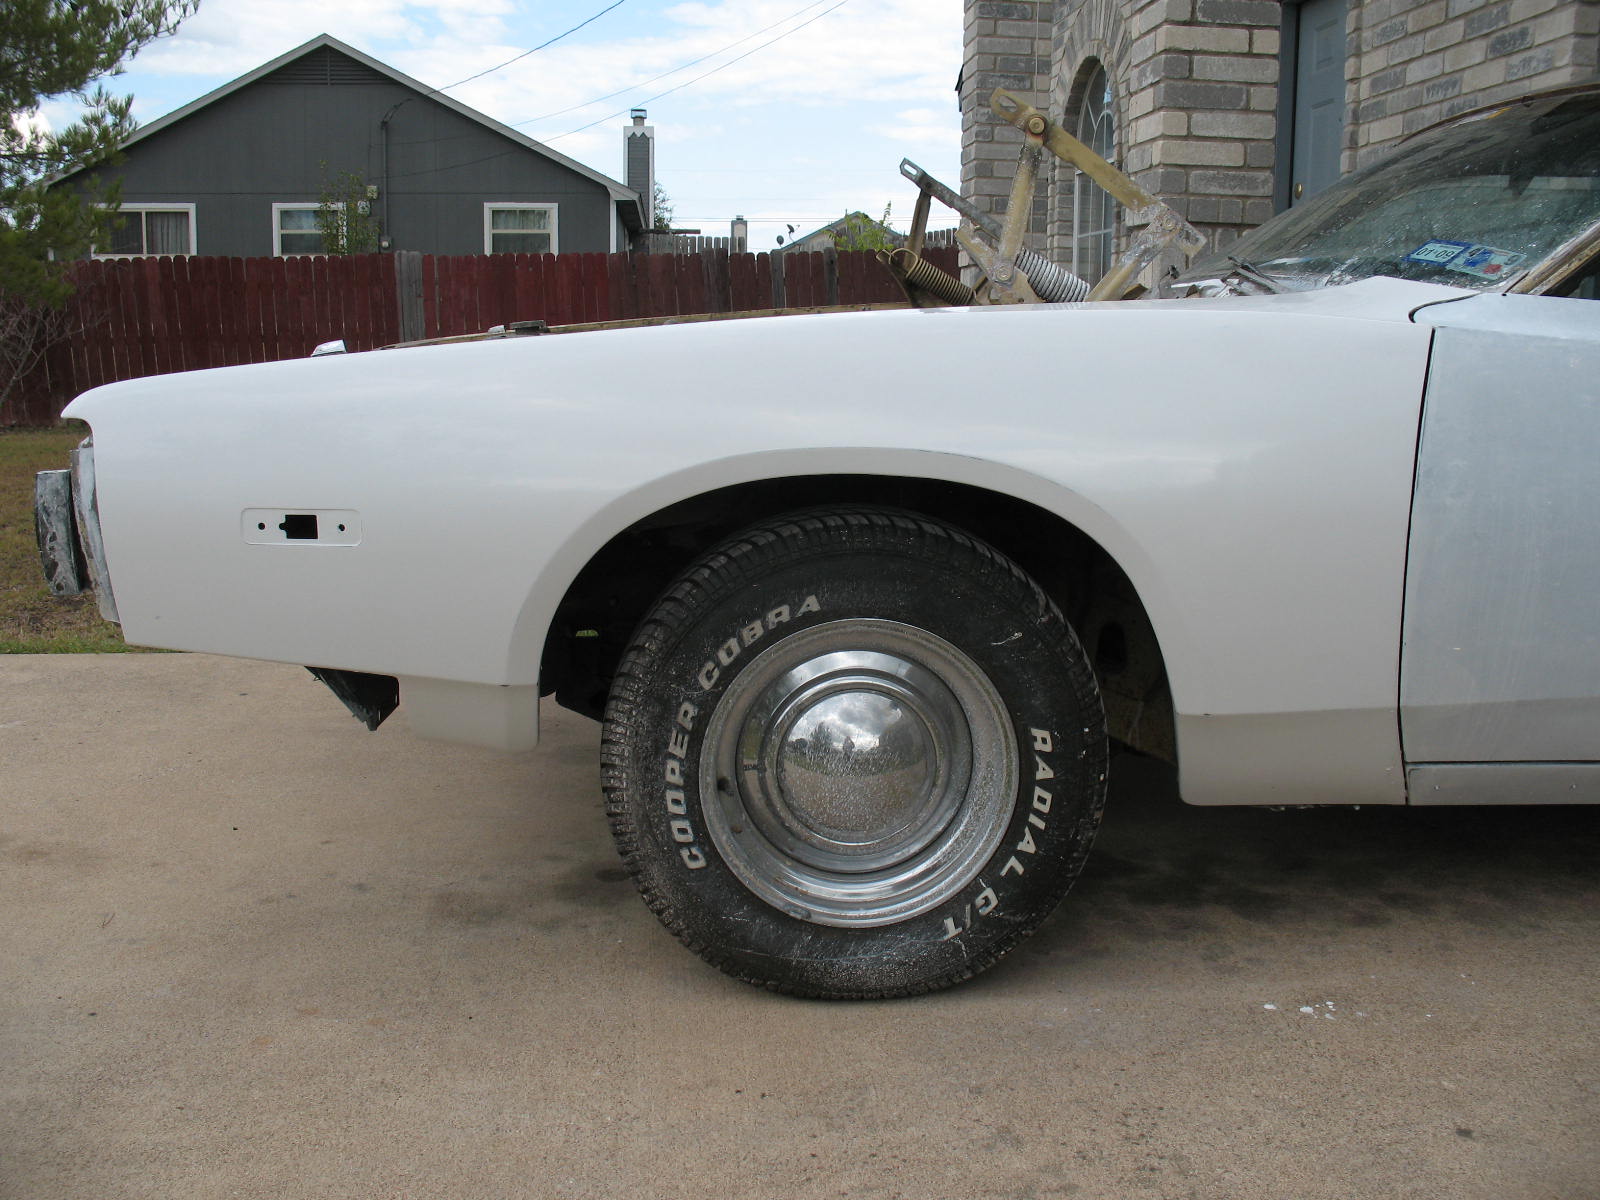
BTW the guy with the white fender a few posts back....get that off your wheel and tire ASAP!!
|
|
|
Re: New Paint job on a budget thread Part III
[Re: Saint Crispan]
#38408
08/20/08 11:40 PM
08/20/08 11:40 PM
|
Joined: May 2006
Posts: 575
Canada
Marq
mopar addict
|
mopar addict
Joined: May 2006
Posts: 575
Canada
|
Quote:
Prime/Not Prime? It boils down to prep. It seems to me that the more prep you put into it the better off you'll be. Besides, I do have a lot of scale & surface rust which I need to remove, and even a few holes to treat/fill. On top of that, the fella with the Forerunner pretty much brilliantly demonstrated that a consistent bottom coat makes for a better final coat. So I will be priming before I even start the final coat.
My thoughts on priming tend to boil down to the state of the body preparation. If you have a prepped body that is showing multiple colors - a primer will definitely save work by providing you with one uniform color on the body for the subsequent paint job to be applied to. This way the whole body changes color at the same rate - with each subsequent coat of paint added.
The other benefit of the primer coat... is that it gives you 'one more chance' to get the initial surface as smooth as possible before laying on the first coat of paint.
IF the body you are working on is basically a good but dulled paint job - where you just have to give it a light scuffing prior to painting, you should be able to bypass the primer stage and start applying the thinned paint. Both Tremclad and Brightside provide anti-rust sealing when applied to beared metal.
Quote:
Two tone paint job? The original coat on my '72 Satellite is blue/light grey, and a thin chrome moulding piece to separate them. A few of the guys have managed to pull this off and I'm pretty stoked about giving it a shot. Question, tho...when you did yours, you taped off half and rolled the other half. The one guy who had the problem with his truck...I didn't see if he had prepped with primer first; I believe I can avoid the "paint peel" problem with a good, sanded smooth primer coat. I also plan to do the bottom half first, and then work on the top half. PATIENCE is the key here, and I plan to finish the bottom half, let cure for a week, move on to the top half, let cure for a week, repeat, then do the first sanding on both sides.
The one problem to watch out for when doing horizontal two tone paint jobs is GRAVITY. Meaning that the odds are that at some point the paint will run. The last thing you want is for the lower section to have just been painted - and then you go to the upper section and it runs down on to the lower section. I think it is better to always start from the upper section, do it, then do the lower section of the two tone paint job. This allows you the opportunity to fix the booboo on the lower section before adding its next coat of paint. Of course though... if you are practicing extreme patience and using a 'barely wet' roller - you won't encounter the 'running' problem and could do the dual paint job as either upper/lower or lower/upper and it won't matter.
Quote:
Rims? I've seen some discussion about doing rims in the same method. My rims are originally chrome, but I plan to have them sandblasted to remove the chrome...but I am undecided on whether to have them re-chromed ($$$) or simply prime and paint with the same light grey I'm going to put on the bottom half. Since they are Magnum 500 rims, I was also going to flat-black the segments. The conversation I read said that Rust/Tremclad of these would not be such a great idea (road damage, etc). Thoughts? Opinions?
Quote:
There are two ways to look at 'doing it yourself' rims. The one beauty of painting the rims.... is that EACH YEAR you can remove the rims and redo them cheaply and fairly easily in order to have them look their best. The main problem with 'paint your own' rims... is that the heat, chemicals, road chips etc really give that paint a beating. Personally... I would rather find a friendly rim jobber and have them professional prepare / restore them. BUT this cost a heck of a lot more then the cost of paint and time you will spend over the next ten years doing your annual 'do it yourself' rim paint job. Another thing you might consider is picking up a spare set of 'beater' rims and do your paint job on them. If you like the result... you can slap them on the car - and start doing a restoration on the original rims at your leisure over the next one year.
Quote:
Finally, I have a question that I didn't see anyone else bring up in the entire three threads. The main push in these three threads, besides PATIENCE, seems to be PRACTICE. I don't have a junkyard in my backyard to pull parts from, or even a beer fridge which needs a racing stripe...so I was wondering if I could practice on something besides metal surface. You see, I do have a sheet of plywood and I was thinking I could nail down a smooth sheet of wall paneling to it. I figure after priming it, it might be a good surface. Easy enough to remove a botched piece of panel, replace, and start over...whether horizontal or vertical.
Thoughts? Opinions?
My only thoughts on a wood panel is that it would probably absorb paint and mineral spirits... Whereas if you are painting on a metal surface, there is no penetration and what you see is what remains on the surface. The el cheapo route might be to go to a junk yard ( auto-recycler ) and tell the guys you want to practice some painting on a trunk lid. ( I say trunk lid instead of a hood simply because they are usually smaller, cheaper and easier to load in your car to take home ). Since you aren't looking for a mint condition trunk lid, you should be able to dicker one away from them for less then $20. After all... there isn't a huge market for used trunk lids on most types of vehicles. An alternative might be to drive around your neighborhood on garbage collection day and you might find something suitable being tossed out - like a metal filing cabinet, maybe a fridge door ( since by law they are not suppose to be attached to a fridge that is being thrown out etc - for the safety of dumb children that might climb in a fridge or freezer that has been tossed out ).
|
|
|
Re: Hi, everybody!
[Re: 69DartGT]
#38409
08/22/08 11:30 AM
08/22/08 11:30 AM
|
Joined: Feb 2006
Posts: 59
St Andrews ,Manitoba ,Canada
C38coupe
member
|
member
Joined: Feb 2006
Posts: 59
St Andrews ,Manitoba ,Canada
|
Hi all, glad to see this thread is still alive and well, remember it from the beginning, wow it's still a great thread.
I have a question from some of you.
I primed my 47 Chrashler Coupe, with Tremclad primer, reduced with medium speed enamel reducer, I shot it on with an elcheapo HVLP gun, it went on very well.
I have used fillers, putty, fibreglass resin over it, all went on well with no ill effects.
I have recently tried 2 k Urethane primer/surfacer on it as well, so far no ill effects, but it is only a test spot.
I have also taken Tremclad paint, mixed it with medium speed acrylic enamel reducer and acrylic enamel Evercoat DOI hardener, it also sprayed on very nicely, and is shiny and rock hard, next to no peel.
I am still a supporter of the "roller method", and have done some things with that system, all successful.
I have a question, have any of you topcated, there Rustoleum or Tremclad paint jobs with either, a 2 k urehtane paint or BC/CC, was there any ill effects or problems?
Good to see you all still here, it has been a while since I have posted.............C38coupe
|
|
|
Re: New Paint job on a budget thread Part III
[Re: Saint Crispan]
#38410
08/22/08 08:48 PM
08/22/08 08:48 PM
|
Joined: Jul 2006
Posts: 1,475
Ontario, Canada
78D150CLUB
My avatar is a self portrait!!
|
My avatar is a self portrait!!
Joined: Jul 2006
Posts: 1,475
Ontario, Canada
|
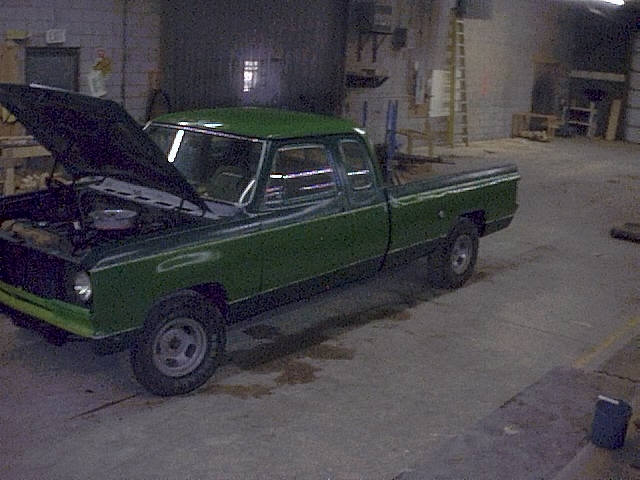
I don't know if it's my truck you were mentioning, but I painted the whole truck in the dark green and then layed the lighter green on top.
I had one minor spot that lifted paint, but I found that wiping the tape with a rag soaked in mineral spirits as it was pulled off worked great.
Pull the tape at about a 45 degree angle and wipe the adhesive as you go.
I think the length of time the tape was on didn't help things either. Took about a week to finish off the two tone work.
I want to die like my Grampa, peacefully, in his sleep. Not screaming in terror like his passengers.
|
|
|
Re: New Paint job on a budget thread Part III
[Re: 78D150CLUB]
#38411
08/22/08 08:49 PM
08/22/08 08:49 PM
|
Joined: Jul 2006
Posts: 1,475
Ontario, Canada
78D150CLUB
My avatar is a self portrait!!
|
My avatar is a self portrait!!
Joined: Jul 2006
Posts: 1,475
Ontario, Canada
|
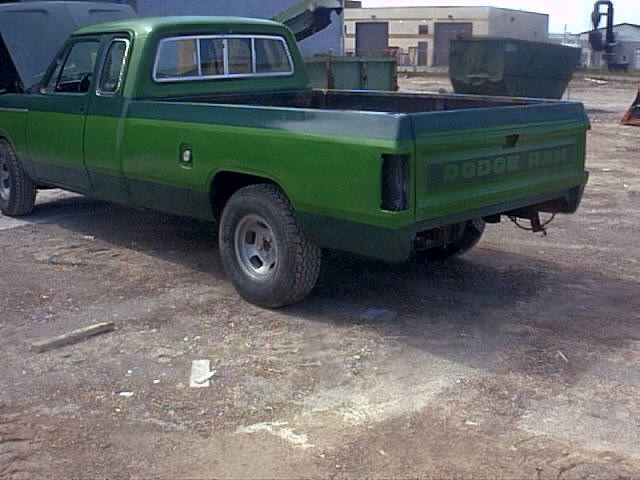
Not the best pics, but this is the result before the trim was installed.
I want to die like my Grampa, peacefully, in his sleep. Not screaming in terror like his passengers.
|
|
|
Re: Help
[Re: ace250xr84]
#38413
08/23/08 08:53 AM
08/23/08 08:53 AM
|
Joined: Feb 2006
Posts: 59
St Andrews ,Manitoba ,Canada
C38coupe
member
|
member
Joined: Feb 2006
Posts: 59
St Andrews ,Manitoba ,Canada
|
Quote:
Well it has been a while since I last posted and I wanted to give an update. The good the bad the ugly and the peel and dry overspray. I somewhat finished and car has paint on it and it's all put back together. Recapp I used HF HVLP gun with Rusto royal blue thinned 15% MS and around 10% flowtrol, First let me list the dont's so maybe it will help others: If you setup a makeshift paint booth and it feels like an oven that is not good, If you grabbed every 100watt and 60watt bulb you could find and it does not look like the car is sitting in daylight in fore mentioned booth it is not enough, If paint looks pretty good on car but could use another coat dont' put it on a few minutes later do it the next day other wise it won't stay peel free, If your gun seems to change it's spray pattern IE more globular don't keep going cause it does make a difference, If you feel like you are not supplying enough VOLUME of air to the gun you aren't IE reg. compressor 90PSI and reg. on gun won't go above 40PSI with trigger pulled you have too much restriction somewhere my gun said 43PSI max at gun so I just chugged along anyway not the brightest move. So to recall I made some serous errors and mistakes but I was under the gun to get project to clompletion one way or another and if time was not a factor I would wetsand and see where I stood but as of now I am done. As I put the car bak together it looks OK and a lot better than before but I was most unhappy with my lack skill when it came to the Horizontal surfaces I got that wet and dry look. here is a side shot
Hi, when using rusto paint with the HVLP, try this, use Medium speed acrylic enamel reducer, a generic type acrylic enamel hardener, such as Evercoats DOI wetlook, the hardener can be used with a 8 to 1 ratio, add reducer up to about 30 % or so, you need this paint thinned enough to shoot out and lay down properly.
Lay on 2 to 3 coats wet-on-wet, allow the paint to flash, 1st coat a lighter tack coat, followed by 2 medium coats.
I have recently tried this with very good results, the nice thing is Tremclad or Rustoleum paint mixes evry well with acrylic enamel reducer and acrylic enamel hardener, and these products are still cheap, add this to a $30 gallon of paint, still under $75.00 for the paint and supplies. I also find the overspray and mess minimal with an hvlp gun, messier than rolling but certainly not bad, if you have the space to do this, and th equipment in the first place.....
|
|
|
|
|


