Re: New how to paint your car on a budget with a roller - 05/11/0702:09 PM
Hard to believe nobody has posted progress pictures here yet
Posted By: Anonymous
Re: New how to paint your car on a budget with a roller - 05/11/0702:34 PM
Here at the shop I think we have decided (as we get bored easy and like to try new things)to paint half of my drag car with this method, and shoot the other half with a dupont mix and see if anyone can tell the difference, and see how each holds up. It will be a bit, we are scheduled out about 4 weeks right now.
Re: New how to paint your car on a budget with a roller - 05/11/0707:51 PM
Don't forget the small foam brushes also. I used brightside fire red and found rustoleum's safety red was a great match for those really hard to reach places like where the bed is next to the rear of the cab on the truck.
Posted By: Anonymous
Re: New how to paint your car on a budget with a roller - 05/12/0712:32 AM
Quote: Hard to believe nobody has posted progress pictures here yet
Re: New Paint job on a budget thread. - 05/12/0703:48 AM
Okay I just found out that only a mod can post on a thread in the tech archives, also I can't move just a portion of the thread here, so I suggest we all use it as a ref and then post results here. I think in the long run a bunch of the things covered early on in the mega thread will be revisited here. Sort of like this: http://carpainting.wetpaint.com/page/Rollering+Interlux+Brightside+Polyurethane+Paint
Posted By: Anonymous
Re: New Paint job on a budget thread. - 05/12/0704:14 AM
WHEW!! I thought I'd lost you guys, I'm new to this Forum thing and kept looking for a link on the old thread to get here. Tonight I decided to search for this and lo and behold here you all are. Thought I'd lost you for sure.
69DartGT: are you saying that if someone asks for advice that we know is in the original thread we should refer them there and try to keep this thread for progress pics only? I have not started my car yet and I may have some questions to ask. Since I have read the entire first two parts I will try to keep my questions to furthering everyone's information. I would assume this will be fine and we are just trying to avoid rehashing old info.
Re: New Paint job on a budget thread. - 05/12/0704:21 AM
Quote: 69DartGT: are you saying that if someone asks for advice that we know is in the original thread we should refer them there and try to keep this thread for progress pics only?
No I don't see this thread any different then the others just a continuation of same. Post as you would have on the old thread.
Re: New Paint job on a budget thread. - 05/12/0710:29 AM
Part III....Now it's a Trilogy
Posted By: Anonymous
Re: New Paint job on a budget thread. - 05/12/0711:01 AM
Quote: Part III....Now it's a Trilogy
"One Web-Ring To Rule Them All!!!"
Posted By: Anonymous
Re: New Paint job on a budget thread. - 05/12/0711:05 AM
Okay, all joking aside, I do have a quick question for those of you who spray bombed thier jambs.... How many coats did you guys do with the bombs on your jambs?
(69DartGT: Thanks for the clarification)
On a sidenote: I just washed a brand new 2008 King Ranch F-350 for a customer here at the dealership. This truck is gloss black. You guys would not believe how horrible the orange peel is on this thing and it's a $55,000 truck. With the attention to detail that we all give, our paint will come out way better than this "factory" paintjob!!!
Posted By: Anonymous
Re: New Paint job on a budget thread. - 05/13/0703:18 AM
Any chance you might go back to the part II thread and tell folks where to find this new thread? A link?
Re: New Paint job on a budget thread. - 05/13/0708:02 AM
I just recently joined "Moparts" and came across this topic. I started painting my car's under-carriage and engine compartment with "Tremclad" Black Satin with spray cans about 2 years ago and I want to finish it with the roller. It's been 4 years now, I Work Slow I am wondering if the Black Satin will Buff out like Satin or Gloss Also I was going to put on Silver Grey Stripes . I bought a can of Gloss Dark Grey and a can of Gloss Aluminum . Will the Two mix OK I guess I will find out One Way or Another
I have a link to my picture gallery on there, if you have a gallery and want to link it please let me know where your pics are and I will make the link.
I'm not selling anything there, just giving info on the process, so hopefully people don't continually ask if they should use primer, or what to thin with
There are links there back to all 3 threads here. In the future I will update the polishing section and maybe make more of a FAQ, but that would entail going through these threads and finding stuff which will take time.
Dave
Posted By: Anonymous
Re: New Paint job on a budget thread. - 05/13/0703:08 PM
EXIT, Great Job!!! Site Looks really good. Already a "favorite".....
Posted By: Anonymous
Re: New Paint job on a budget thread. - 05/13/0707:23 PM
Quote:
On a sidenote: I just washed a brand new 2008 King Ranch F-350 for a customer here at the dealership. This truck is gloss black. You guys would not believe how horrible the orange peel is on this thing and it's a $55,000 truck. With the attention to detail that we all give, our paint will come out way better than this "factory" paintjob!!!
I agree. If you are willing to put in the time wet sanding I think you can have a smoother finish than about 90% of the cars out there. Next time you see a Hummer take a closer look. They are about the worst, with Toyota and Subaru as a close seconds. I wish I had not traded in my 96 Probe. I would probably be painting it right now. I'm seriously considering buying another car just because I want to try this so bad. I kinda wish I never saw this thread.
Re: New Paint job on a budget thread. - 05/14/0712:40 AM
Very quick update. Here is my Triumph TR4. Still needs more wetsanding and buffing, but it's getting there. Thanks to all for your help. Will post more pics when I have time.
Re: New Paint job on a budget thread. - 05/14/0701:16 AM
Sweet TR 4. I love them. Had three or four TR4A IRS's.... ( one of which I dropped a Buick Turbo V6 with an automatic and shift kit into).
And I love the wires. Is that an older one with the painted dash or the 'real burnish walnut wood' dash ?
Posted By: Anonymous
Re: New Paint job on a budget thread. - 05/14/0702:31 AM
arg, i cant figure out how much to thin the paint! Im getting tons of bubbles and runs! I think its too thin, after 3 coats it isnt even coming close to covering up the primer exct. It just looks like its been tinted
you can see all the bubbles, and in the top right corner you can see all the runs
Re: New Paint job on a budget thread. - 05/14/0702:59 AM
Quote: arg, i cant figure out how much to thin the paint! Im getting tons of bubbles and runs! I think its too thin, after 3 coats it isnt even coming close to covering up the primer exct. It just looks like its been tinted
As noted in the past... each layer does look like just a tinting. It is the culmative effect that gives you the final result. Layer upon layer upon layer of 'tint' eventually adds up to a solid color.
So don't get worried about how thin it is applying and not giving instant coverage. You job as you build the layers is to get them as smooth as possible and minimize the bubbles.
Bubbles are 'somewhat' normal during the course of applying the paint. By using the high density foam roller you will minimize the bubbles transferred from the roller to the painted surface.
By using a cheaper foamy type roller... you are almost guaranteed of bubbles when you lay your coats on.
That is why we went in to a fair number of discussions during the course of the thread about how to work the surface as you lay a coat of paint on. In some cases it is a method called 'tipping' where you gently glide a paint brush over the bubbly surface to pup the bubbles.
In some cases you use two high density foam rollers.... one for painting... and a clean one for doing a quick second roll over the surface to pup the bubbles.
In some cases you can get away with gently blowing on the bubbles and they magically disappear.
In some cases you just have to stand back and do nothing... the bubbles will pop on their own. If they are not popping on their own, it usually means that you need to add some more thinner.
Just think of it this way... the only reason a 'bubble' can survive is if its surface tension is sufficient to hold it together. If it can reach the point where the bubble has dried and still held its bubble shape, then this means there was too much paint in the mix - and the surface of the bubble was able to dry and harden without breaking. So by thinning the paint mix more... the thinner will weaken the surface tension of the bubble and allow it to 'pop' on its own long before the paint begins to cure or harden.
Runs are simply natures way of telling you to not overload the roller with too much of your thinned paint mixture. The best time to tackle them is when you first spot them - and hopefully the paint hasn't begun drying yet. Simply take your roller to it and hopefully you can work it out by spreading it around. If it has dried when you spot it... well it is best to sand it out prior to the next layer of paint being applied. If you don't remedy it and instead just keep adding layers of paint... it will basically amplify its appearance. So nail it early rather than later.
The other thing that might cause bubbles or 'pits' is when the surface was not fully cleaned prior to the next application of paint. Again, this has to do with 'surface tension'. The picture you provided almost looks more like 'pits' where the subsurface ( the one being painted over ) had particles of some foreign matter on it. In a situation like that the overall tension of the paint surface will be 'repelled' from the spot where the contaminant is. In that case you just have to make sure that you go through the ritual of wiping the surface down with a tack cloth and then a quick wipe of just thinner ( only on a dried surface ) to ensure that there is nothing on the surface being painted that could cause a spot to repel the paint and cause the 'pit'.
Hope those ramblings help you out...
.
Posted By: Anonymous
Re: New Paint job on a budget thread. - 05/14/0705:46 AM
Everything seemed to be going so smoothly on my test piece, two coats 600, two coats 800, two coats 1200(couldn't find 1500) and then a final once over with 2000. Ahh! finally to the buffing stage. It was then that I realized something was terribly wrong. When I went to buff it out I was burning through the top layer of paint and the difference from that and the next coat down is highly visible. I'm thinking my coats must be far to thin. I thinned my paint around 40% and was "wetting" the surface on each coat but the coats were so thin I burned right through them. Marq, Exit, Charger, Dart...Anyone got a good idea of how I can get a thick enough coat so that I don't wetsand through it?
Re: New Paint job on a budget thread. - 05/14/0706:24 AM
New Air Grabber assembly restoration on a budget, Rustoleum Anodized Bronze Semi flat paint 3.99, Silver paint pen to paint rivets 3.99, no.12X1/2" screws 1.69 plus, the repop rubber parts and sticker. Still cutting and fitting the fiberglass base plate for the air cleaner.
Re: New Paint job on a budget thread. - 05/14/0708:46 AM
Exit, Great Site, Do you think Tremclad Alumimum and dark grey will mix properly
Posted By: Anonymous
Re: New Paint job on a budget thread. - 05/14/0712:30 PM
Hi all,
I have been reading through this thread for about a week now, having linked to it from www.vwt4ownersclub.co.uk Big thank you to all for the great info!
I have been wanting to get my van painted for a couple of years now, but never seem to have the cash, I have now decided to scrap that plan and have gone and bought a couple of tins of black Brightside!
It will take me a while to prep but I will post pics as I progress. BTW I have found myself checking out random cars in traffic and can't believe how rubbish the factory paint jobs can be.
Posted By: Anonymous
Re: New Paint job on a budget thread. - 05/14/0704:35 PM
Have just done a test patch with the Brightside, really easy to work with even straight from the tin, no orange peel and tons of gloss. My optimism is rising!
Posted By: Anonymous
Re: New Paint job on a budget thread. - 05/14/0704:57 PM
do they sell rustoleum clear coat in 1gal. or qt.? if they do, where can i order it online ?
Posted By: Anonymous
Re: New Paint job on a budget thread. - 05/14/0709:41 PM
However, if it has been tryed yet, results have not been posted yet....
Posted By: Anonymous
Re: New Paint job on a budget thread. - 05/14/0711:06 PM
Thanks to all that have made this a great read
I started reading this last year and got serious about rolling my truck about a month ago....since then I bought some Brightside "ocean blue", pre-kote primer and some penetrol...mixed up a batch thinned with about 20% penetrol and a dash of regular mineral spirits and have two coats on my two front fenders. The results blew me away....
It layed down easily and had about a million bubbles....I started to get worried, but continued with the whole fender and then went over it with the second dry roller....badda boom...they were gone!!! Very little orange peel and smooth as a babies behind. Wet sand with 600 or 800 is next on the list...pictures to follow.
Posted By: Anonymous
Re: New Paint job on a budget thread. - 05/15/0712:59 AM
So, I have this grill that after 200k miles is sandblasted to hell and dinged, but I'm too cheap to buy a new one.
So I figure I'd just sand it smooth and use some rattlecan rustoleum "chrome" finish with a shot of clear over top to give it that "mock chrome" look when I notice on the can of rustoleum clear it says specifically not to use over the "Chrome" OR RUSTOLEUM AUTOMOTIVE paints!
Just thought I would pass that on...
I ended up using their silver finish with the clear - it is specifically mentioned as compatible on the can - It isn't chrome, but it does look better than it did.
Make sure to broaden your search to a YEAR, not a week.
You will notice that he has several posts regarding his method and results.
I plan on doing the same thing to my '71 Chevy.
Keep us posted on your results.
Posted By: Anonymous
Re: New Paint job on a budget thread. - 05/16/0703:02 AM
Okay, I decided since I was burning thru layers when wetsanding that my paint was obviously to thin. I mixed up a new batch at a 1 to 4 ratio. Actually I used a measuring cup and mixed 1 cup paint to 1/4 cup mineral spirits. That would be like 20% spirits, right? This gave a much thicker consistency than I used before. Between milk and a "heavy cream" consistency. The orange peel with this mixture is a little more pronounced than before but I may have to live with that to get a thicker coat of paint. All of the bubbles still self popped, leading me to beleive that I was not to thick with this mix. My plan is to give it a once over with 800 grit tomorrow to knock off the dust particles and tops of the higher peels and give it another coat. Then I'll wetsand it with 1200 and 2000. I may skip the 1200 depending on how smooth it dries. I see no need to take off more paint than necessary by doing two wetsands if I can smooth it with 2000 alone. Once again, this is why I agree so strongly with the recommendation of practicing this technique on a scrap piece before you paint your car. I would have been pretty upset to be wetsanding my car and find this info out on a large scale.
Re: New Paint job on a budget thread. - 05/16/0704:32 AM
Thanks, I will post my experiences with rolling soon. I think that old toolbox in the shed will be my first attempt. My wife is an art teacher and she wants to get involved as well. Bob
Posted By: Anonymous
Re: New Paint job on a budget thread. - 05/16/0701:16 PM
Just imported 6 cans of 750ml of Brightside from UK to Spain and about to get started.
Well done on the website Exit1965 but I found a few things missing:
1. They dont mention primer or sanding? Arent they necessary? 2. Do I need to thin Brihgtside, what thinner shall I use that I can find locally? 3. The instructions seem more for rustoleum, how does the method change with brightside? 4. I still cant seem to find an orbital polisher like you have told me about, can anyone point me to more makes and models?
Re: New Paint job on a budget thread. - 05/16/0702:46 PM
It's great to see this thread still going. I'm going to change colors on my eclipse spyder this next week from largo blue bright side to sapphire blue. All the experimentation with penetrol has been helpful as I rolled straight brightside before.
Shall post pictures when done. Keep up the good work and thanks again to everyone who helped me on the way.
Posted By: Anonymous
Re: New Paint job on a budget thread. - 05/16/0704:45 PM
Do post pics please, I am curious to see how the sapphire blue looks.
Test fender got hailed on the other day and all the paints held up fine, and the fender got a pretty good ping in it.
Posted By: Anonymous
Re: New Paint job on a budget thread. - 05/16/0705:31 PM
Re: New Paint job on a budget thread. - 05/16/0706:31 PM
Start here and go back to 118/119 or so. I bought a Porter Cable 7424 off the bag if you look there are some go buys. I don't have a big enough compressor for air tools. https://board.moparts.org/ubbthreads/show...rt=129&vc=1
Posted By: Anonymous
Re: New Paint job on a budget thread. - 05/16/0708:39 PM
eh, guess no one seem my post a little while back but i was not in a hurry to know back then. so i'll ask again.. tomorrow i'll be painting my bumper which is plastic.. so i was wondering how to apply rustoleum to plastic, dose rustoleum adhere to plastic good or do i need to prep it some how to stick good? (same goes for rubber)
i know they make spray paint just for plastic.. i know plastic has a fit with some paints adhering so should i use http://www.marcospecialties.com/mmMS/Images/Fusion2320_100.jpg as a base coat to cover the plastic then go over it with rustoleum or would the rustoleum cover plastic without a problem?
Posted By: Anonymous
Re: New Paint job on a budget thread. - 05/16/0708:48 PM
I recomend using Bulldog adhesion promoter (good stuff) on plastic prior to paint. we did shoot the rear bumper cover for my car with the rustoleum and it seems to flex fine, and is adhering really well.
Posted By: Anonymous
Re: New Paint job on a budget thread. - 05/16/0709:26 PM
Is it possible to rescue a bad final coat?
If on the final coat you get alot of peel, will a good 2000 wetsand and polish save it and prduce the results?
Posted By: Anonymous
Re: New Paint job on a budget thread. - 05/16/0709:36 PM
Thanks for the help 69dartGT but what do you mean 118/119 there are only 80 pages and I cant see any numbering for posts?
What size air compressor does one need to operate air tools?
Re: New Paint job on a budget thread. - 05/16/0709:42 PM
Quote: Is it possible to rescue a bad final coat?
If on the final coat you get alot of peel, will a good 2000 wetsand and polish save it and prduce the results?
100% yes, that is if you have enough paint to wetsand and polish without going thru the paint, making it transparent or opaque. Beware also of the "blochy" issue, if you sand areas too much and reveal the underlying layer of paint. Try and see if it works, what you have to loose?
Posted By: Anonymous
Re: New Paint job on a budget thread. - 05/17/0703:51 AM
i did get my gallon of clear today 717402 and it says to thin with 33% mineral spirits if anybody wanted to know.
Re: New Paint job on a budget thread. - 05/17/0701:33 PM
Quote: Any reason Tremclad Aluminum paint wouldn't mix with Dark Grey without separating ??? I was thinking Stripes
the tremclad aluminum paint is just weird, not like any other colors, i suppose because there is real aluminum content, avoid it, just don't use it.
Posted By: Anonymous
Re: New Paint job on a budget thread. - 05/17/0703:12 PM
Quote:
Quote: Is it possible to rescue a bad final coat?
If on the final coat you get alot of peel, will a good 2000 wetsand and polish save it and prduce the results?
100% yes, that is if you have enough paint to wetsand and polish without going thru the paint, making it transparent or opaque. Beware also of the "blochy" issue, if you sand areas too much and reveal the underlying layer of paint. Try and see if it works, what you have to loose?
The "blochy" issue Charger refers to is exactly what I commented about on the last page. My coat was too thin and when I tried to sand out the imperfections I sanded right through the top layer, no way to recover from that except to apply another coat. I dropped my mixture from 40% to 20% mineral spirits to allow me to lay a thicker coat. I checked on my first coat this morning before work and it has dried extremely smooth. I'm hopeful that a couple of these thicker coats and I'll be able to wetsand off the peel with no problems.
Re: New Paint job on a budget thread. - 05/17/0705:25 PM
Just wanted to add a comment about the flex of the rustoleum-
I have been using aluminum foil in my paint trays so I can easily reuse them. I havent painted the car in about a week. I pulled the aluminum foil out of my tray last night and there was still a fine layer of the red paint that had dried on it. I crumpled up the foil and then reopened it- The paint was unharmed!!!!!!!!!!! I did it quite a few times and the paint didnt peel off or crack. So I would think no problem on the plastic bumpers as everyone has said.
Posted By: Anonymous
Re: New Paint job on a budget thread. - 05/17/0707:32 PM
Well I was finishing up the 6th thin coat on my hood and I was wetsanding with 600 and I noticed spots like this http://img501.imageshack.us/img501/7321/p1010283ry4.jpg is that normal? will it polish out if I have that on my final coat?
Quote: I recomend using Bulldog adhesion promoter (good stuff) on plastic prior to paint. we did shoot the rear bumper cover for my car with the rustoleum and it seems to flex fine, and is adhering really well.
I'll give that a try.. would it be at home depot by any chance or would I have better luck at an auto finishers place?
Posted By: Anonymous
Re: New Paint job on a budget thread. - 05/17/0708:35 PM
Quote: Well I was finishing up the 6th thin coat on my hood and I was wetsanding with 600 and I noticed spots like this http://img501.imageshack.us/img501/7321/p1010283ry4.jpg is that normal? will it polish out if I have that on my final coat?
TehMike, That is exactly the "blotchy" look that Charger and I are talking about, it means you(and I) sanded through the top layer of paint, and Believe me I tried to polish it out but it's kind of like polishing a car with peeling clear coat. You can get both sides of the line(i.e. clear and base coats) to both shine but you still have that visible line in between. Read my last few posts and you will see what my attempted solution is.
Posted By: Anonymous
Re: New Paint job on a budget thread. - 05/18/0702:42 AM
We get it from our local Paint Jobber, I have never seen it anywhere other than auto paint places.
Posted By: Anonymous
Re: New Paint job on a budget thread. - 05/18/0703:07 AM
i got my gallon yesterday 45.00 and it says to thin 33% with sprits and it takes 24 hours to recoat and when you order it from kelly it will take 3 weeks to get it. this weekend i will clear my buick and post pics then i will wetsand and buff and post those.
Posted By: Anonymous
Re: New Paint job on a budget thread. - 05/18/0703:11 AM
thats why i sprayed my car with a hvlp gun to get thick coats without runs. i used 40% thin and it comes out with barly any orange peel but when it is sprayed for the first minute it really looks like crap. then it levels out and its all good...
Posted By: Anonymous
Re: New Paint job on a budget thread. - 05/18/0703:27 AM
Quote: Thats cool. I have not got mine yet and I ordered before you- just my luck I guess.
So how clear is the stuff? I'll bet it's slightly amber colored- right?
Quote: i did get my gallon of clear today 717402 and it says to thin with 33% mineral spirits if anybody wanted to know.
it better not be!!!!!!!! i havent opened it yet this weekend i will spray it on..
Posted By: Anonymous
Re: New Paint job on a budget thread. - 05/18/0701:08 PM
Quote:
it better not be!!!!!!!! i havent opened it yet this weekend i will spray it on..
You had better brace yourself then- I got mine in yesterday and cracked open the can- it is not crystal clear as in you can see to the bottom of the can. In fact it looks very dark looking through that much of it.
However, in the thickness that one would apply it it looks fine. You might notice a slight tint if you applied it over white but other than that it should be OK.
Let us Know how it goes for you,
-Nathan
Posted By: Anonymous
Re: New Paint job on a budget thread. - 05/18/0701:29 PM
I have just finished my test patch and am thrilled with the results!
I used black Brightside and put on three coats straight from the can. Light sand between coats and 1500 on final. I got impatient and tried polishing after only 24 hours and the results are great. I can only imagine how good the van will look when I do it properly with a polisher.
I will sort out the body over the coming weeks and will get painting after that. Will keep you posted with pics as it progresses.
Re: New Paint job on a budget thread Part III - 05/18/0702:01 PM
I just picked up the July '07 issue of Hot Rod magazine, and there it is: "The $98 Paint Job". Yes, it does give credit to Moparts.com. Still reading (gotta squeeze in some work today, darn it) but it looks like they did a fair job on a Falcon. Beware the fallout.
Re: New Paint job on a budget thread Part III - 05/18/0702:55 PM
Quote: I just picked up the July '07 issue of Hot Rod magazine, and there it is: "The $98 Paint Job". Yes, it does give credit to Moparts.com. Still reading (gotta squeeze in some work today, darn it) but it looks like they did a fair job on a Falcon. Beware the fallout.
Wow!
I think it can only serve to help, as people try new things with rollers and post results. Bad news for low end/discount body shops though..
PLEASE TELL ME THAT WAS ROLLED ???? WHAT bRAND and COLOR IS IT... ITS LOOKS TO BE B5 BLUE !!!!!
Posted By: Anonymous
Re: New Paint job on a budget thread Part III - 05/18/0705:00 PM
Quote: I just picked up the July '07 issue of Hot Rod magazine, and there it is: "The $98 Paint Job". Yes, it does give credit to Moparts.com. Still reading (gotta squeeze in some work today, darn it) but it looks like they did a fair job on a Falcon. Beware the fallout.
Any chance you can scan that article and post it as an attachment on here?
Re: New Paint job on a budget thread Part III - 05/18/0706:24 PM
Quote: I just picked up the July '07 issue of Hot Rod magazine, and there it is: "The $98 Paint Job". Yes, it does give credit to Moparts.com. Still reading (gotta squeeze in some work today, darn it) but it looks like they did a fair job on a Falcon. Beware the fallout.
Crap! I had just emailed Mopar Muscle last night saying they should do an article on this before someone else does!
Re: New Paint job on a budget thread Part III - 05/18/0708:07 PM
Quote: Any chance you can scan that article and post it as an attachment on here?
I'm not sure of the copyright implications of doing that, so ... no.
They don't have the new issue on their website as of today, either. Keep checking HRM
You'll find a lot more information in this thread than in any magazine article, but it's fun to see them cover something I've already done.
Posted By: Anonymous
Re: New Paint job on a budget thread Part III - 05/18/0708:28 PM
You can scan it and send it to me Ill host and post them, Im in Spain then cant touch me mcunild@gmail.com
Im going to start painting tomorrow on some brand new body panels they come in a satin black type colour or undercoating, can I apply brightside directly to this or do I sand it first if so with what grain and do I need to primer?
PLEASE TELL ME THAT WAS ROLLED ???? WHAT bRAND and COLOR IS IT... ITS LOOKS TO BE B5 BLUE !!!!!
no, thats a t/a challenger, a friends, yes it's b5, original paint, very low mile car.
Posted By: Anonymous
Re: New Paint job on a budget thread. - 05/18/0710:41 PM
wonder if macco is going to go out of bisness?
Posted By: Anonymous
Re: New Paint job on a budget thread. - 05/19/0702:26 AM
Quote: wonder if macco is going to go out of bisness?
Speaking of Maaco, I'm curious as to how much the roller technique is saving us. It'd be grateful to get feedback from those of you who have contacted the Maacos and Earl Scheibs, especially those who had really bad clear coat peel. Roughly how much have those paint companies quoted you to sand away the peel and paint your car? When I see their quotes of around $200, I'm thinkin that's probably just to throw paint over a body and nothing else. Thanks guys!
(Oh, and congrats for making it on HRM! This is history dudes!)
Posted By: Anonymous
Re: New Paint job on a budget thread. - 05/19/0702:45 AM
Quote:
Quote: wonder if macco is going to go out of bisness?
Speaking of Maaco, I'm curious as to how much the roller technique is saving us. It'd be grateful to get feedback from those of you who have contacted the Maacos and Earl Scheibs, especially those who had really bad clear coat peel. Roughly how much have those paint companies quoted you to sand away the peel and paint your car? When I see their quotes of around $200, I'm thinkin that's probably just to throw paint over a body and nothing else. Thanks guys!
(Oh, and congrats for making it on HRM! This is history dudes!)
theres a pretty big maaco paint job thread on honda-tech.com. some people have gotten very good results, some have had horrible experiences. it seems all are individually owned and operated, so quality and pricing can vary pretty widely with maaco.
Posted By: Anonymous
Re: New Paint job on a budget thread. - 05/19/0704:12 AM
It all depends on what they are doing. I have seen some of the higher end Jobs form the discount places that were laid down well, and the prep work was great, but the person was paying for it. The cheap-o jobs are just that, basically a wipe-down and shoot.
At our shop we do not do any "cheap jobs" and due to our policies I can not give out much info ( I would probably get fired for posting info on here) But we had a customer that just spent about 10 grand on a color changeover on a certain two seat 10 cylinder dodge vehicle. It is a smooth as glass top notch job. You could shave in that sucker.
Heck for that much it should do the shaving, make your bed and cook you dinner!
Re: New Paint job on a budget thread. - 05/19/0706:09 AM
Quote:
Speaking of Maaco, I'm curious as to how much the roller technique is saving us. It'd be grateful to get feedback from those of you who have contacted the Maacos and Earl Scheibs, especially those who had really bad clear coat peel. Roughly how much have those paint companies quoted you to sand away the peel and paint your car? When I see their quotes of around $200, I'm thinkin that's probably just to throw paint over a body and nothing else. Thanks guys!
My tale of the McLaren Mustang is probably representative of a lot of people...
Once upon a time (2001) there was a basket case of a McLaren Mustang.
I did the bodywork, replaced the front nose, repaired a destroyed cowl, installed a new hood, etc.
And so I went proudly to Maaco and a number of other paint shops.... and they all came in with the very same estimate to give it a final sanding and spraying it : $ 3500 (US). I was living in Pennsylvania at the time.
And so the car sat in the driveway because my budget just couldn't cover that kind of hit.
Here is a link with pics and text dealing with the initial restoration to give you an idea of what stage the car was at when I got it and fixed it up initially...
Well... $ 3500 bucks was way out of my budget. I was hoping for about $1000. So I gave up on my hope to get the car painted like so many other people do...
But I loved the car and there was always the hope that I might somehow scrape up $3500 in the future. So I just parked the car.
But fate stepped in and I had to move to Canada. Naturally I took my little unfinished project along with me.
And once I was settled in to the new house I went around to three local Ottawa paint shops ( including yet another Maaco ). And again the magic dollar figure of $ 3500 (CDN) kept popping up. I was broken hearted and so the car was tucked away in my garage and left to sit.
When I first stumbled on this thread my hopes were raised. I had NOTHING TO LOSE trying out the Rustoleum/Tremclad. In midstream of the process I switched over to Brightside paint...
Here is the car at the end of its coats of Brightside... prior to polishing and waxing :
And you can visit the following picture gallery to check out the videos and pictures I took of the car after all the parts were reinstalled and the paint was polished and waxed...
Re: New Paint job on a budget thread. - 05/19/0707:51 AM
Im going to start painting today on some brand new body panels they come in a satin black type colour or undercoating, can I apply brightside directly to this or do I sand it first if so with what grain and do I need to primer?
Im itching to get started so if anyone can answer so I can start id very much appreciate it
Posted By: Anonymous
Re: New Paint job on a budget thread. - 05/19/0711:06 AM
I would have thought that you should give it a light rub down to key the paint, so that it has something to grip on to.
Good luck
Posted By: Anonymous
Re: New Paint job on a budget thread. - 05/19/0711:11 AM
Thanks for the reply im think Ill use 1200 to key it is that ok or shall i go lower to 400? Also should I primer??
Posted By: Anonymous
Re: New Paint job on a budget thread. - 05/19/0712:00 PM
The paint that is on those new parts is basically a primer anyway so you shouldn't need to primer them, I think 1200 is a bit light, you might try 600 or 800 if you think 400 is to harsh. Try to avoid sanding to bare metal if you can avoid it.
Re: New Paint job on a budget thread. - 05/19/0712:45 PM
Quote: The paint that is on those new parts is basically a primer anyway so you shouldn't need to primer them, I think 1200 is a bit light, you might try 600 or 800 if you think 400 is to harsh. Try to avoid sanding to bare metal if you can avoid it.
And don't forget to wipe down the entire surface after with a cloth dampened in mineral spirit to remove any debris or dust after your sanding. You don't want anything left behind that will interfere with you paint adhering to the subsurface.
.
Posted By: Anonymous
Re: New Paint job on a budget thread. - 05/19/0702:22 PM
Quote:
And don't forget to wipe down the entire surface after with a cloth dampened in mineral spirit to remove any debris or dust after your sanding. You don't want anything left behind that will interfere with you paint adhering to the subsurface.
.
I did that and it seems to remove a layer of the black paint straight off the panel but all seems well only one coat but its looking pretty good no bubles and not much orange peel, hope it goes as well on the panels ill be re-using
Posted By: Anonymous
Re: New Paint job on a budget thread. - 05/19/0705:38 PM
Thanks for the feedback JDM and 2.3Turbo! I figured the $200 paint shop ads weren't telling the full story. And Marq that was a great story. Wow! YOU did most of the work and STILL were quoted over 3 grand! OUCH!
One of the reasons this thread is so popular is because of stories like yours. It illustrates the very spirit of hot rodding; another way for average Joes to afford to make their cars stand toe to toe with the rich boys.
Posted By: Anonymous
Re: New Paint job on a budget thread. - 05/19/0708:12 PM
Quote:
Quote:
it better not be!!!!!!!! i havent opened it yet this weekend i will spray it on..
You had better brace yourself then- I got mine in yesterday and cracked open the can- it is not crystal clear as in you can see to the bottom of the can. In fact it looks very dark looking through that much of it.
However, in the thickness that one would apply it it looks fine. You might notice a slight tint if you applied it over white but other than that it should be OK.
Let us Know how it goes for you,
-Nathan
yah when i opened the can it looked black but when thinned its pretty clear. put 1 coat on today and it looks killer!!!!!! thinned it 33% 4 ml have to spray very fast so no runs happed tired of rumnning back and forth for spraying but no runs it flattened faster than the spraybomb stuff!!!!
Posted By: Anonymous
Re: New Paint job on a budget thread. - 05/19/0709:21 PM
Quote:
Quote: wonder if macco is going to go out of bisness?
Speaking of Maaco, I'm curious as to how much the roller technique is saving us. It'd be grateful to get feedback from those of you who have contacted the Maacos and Earl Scheibs, especially those who had really bad clear coat peel. Roughly how much have those paint companies quoted you to sand away the peel and paint your car? When I see their quotes of around $200, I'm thinkin that's probably just to throw paint over a body and nothing else. Thanks guys!
(Oh, and congrats for making it on HRM! This is history dudes!)
Well, I have had three cars painted by three different places, MAACO, Earl Shieb and One Day paint and body.
All three times I paid more than $400 dollars. The guys at Sheib and One Day told me that for the $200 paint that they don't even wash the car. They just tack it down and shoot it. They said that even with wax and crap on the paint it lasts long enough for the customer to get out the door with shiney paint. Typical lifespan of that job is months to a year. He said the people who get that job are the guys selling used cars.
The jobs that I had done looked pretty good because I spent a LOT of time prepping them. But all have since faded and failed. They lasted about three years, which is about how long they said those type jobs would last.
And to top it off, I got NO discounts for me doing the prep work and a lot of masking either. the shops basically said what they charge is what they charge; they would not negotiate a lower price even if they had to do less work. In one case the car was just a shell, they did not have to do anything to it. What they did do though was go over my smooth body work with some rough scuffing pad and left visible scratches under the paint. The only reason to do your own prep work is to get a better job. The old tale of do your own prep and get a cheaper job is a myth from my experience. These places are so busy that they could care less about giving discounts for less work.
Just my experiences.
-Nathan Albuquerque New Mexico
Posted By: Anonymous
Re: New Paint job on a budget thread. - 05/19/0710:48 PM
MyBuick,
What equipment are you using to spray with?
Posted By: Anonymous
Re: New Paint job on a budget thread. - 05/20/0701:07 AM
Ok Guys, a couple of long awaited pics here for you. I wetsanded my test piece with 1200 then with 2000 then used my three stage polish(Thanks Aussie Driver) from Poorboys and polished it out with my Turtlewax random orbital polisher and a terry pad. You can still see a little peel but I can certainly live with that. Note: Obviously only the side of the piece is polished
Posted By: Anonymous
Re: New Paint job on a budget thread. - 05/20/0701:11 AM
This one is my tribute to Aussie Driver the "Straight on-mirror pic". Sorry these are kinda dark, a Thunderstorm rolled in while I was working on it. I'll get some sunlight pics if you guys want to see some.
Posted By: Anonymous
Re: New Paint job on a budget thread. - 05/20/0701:24 AM
Quote: MyBuick,
What equipment are you using to spray with?
i have the guns from eastwood for painting and clearcoat. pn 34272. i have 2 of them one for paint and one for clear.
then i have the durablock kit for wetsanding.
i have 4 canvas wheel masks for drips and dust pn 11844
bufing pads 3m 05725
swirl mark remover 3m 06064
an old sears 7 in buffer from 1970's still kickin
lots of blue painters tape and green masking paper.
2500 grit 3m wetordry paper 02045
and a year of learning how to paint. did the paint job 3 times til i finally got it right this time and it looks great!!!!!!
next a 1989 gmc si5 jimmy rusty but trusty....
Posted By: Anonymous
Re: New Paint job on a budget thread. - 05/20/0705:40 AM
Quote: The guys at Sheib and One Day told me that for the $200 paint that they don't even wash the car. They just tack it down and shoot it. Typical lifespan of that job is months to a year. He said the people who get that job are the guys selling used cars.
...I got NO discounts for me doing the prep work and a lot of masking either... The old tale of do your own prep and get a cheaper job is a myth from my experience. -Nathan Albuquerque New Mexico
Thanks for the feedback Nathan! Brrrrr. That's a horror story if I ever heard one!
Hey dudes, I went down to the local 7-11 and picked up the July copy of Hot Rod Magazine. It's a great article! It starts out just the way I thought it would. "The $98 Paint Job. When (the author) pitched a story on painting his Falcon with a roller, we about fired him on the spot. But d*mn, it turned out good." Also, "For the past couple of years a rumor has been circulating around the Internet that there is a way to paint your car using common enamel paint and- get this- a roller...After a good full-body cringe, our curiosity took over and we began ...to find out more about the 'legend of the roller paint job.'" (DUDES! We're freakin' Urban Legends!) The author illustrates the method pretty much outlined by Exit in his excellent web site. There were a few interesting points and variations. Although they use 100% mineral spirits, they also found no difference in using the odorless kind. They used an air gun to blow out the bubbles. For polish they used a $25 bottle of Norton's Liquid Ice- a polish for synthetic enamel. I liked how they prepped a first timer on what to expect. "That first roll is by far the worst part, and the finish that greets you immediately afterward will likely make you want to reconsider the whole affair, but keep the faith!" The author's final assessment was also realistic. "The finished car has plenty of flaws compared to a well-sprayed job...We'd rank (it) several notches above the typical quickie one-day budget deals. Honestly, for less than $25 in paint it's hard to fault it too much." The author finally tells us not to go overboard in our expectations. "If you're a real perfectionist, trying to get it flawless will drive you crazy."
Wow! This article brought to mind two words. The first is VALIDATION. To have a prestigious magazine like HRM put out an article like this is like flipping off all the "professionals" who have thumb their noses at this technique. I especially remember the moderator snobs on Samba.com (a VW version of Moparts.com) who thought Charger's roller idea was so vulgar, they SHUT DOWN their roller thread. I was so disgusted that I defected to this site.
The second word that comes to mind is GRATITUDE. I can't stop thanking the moderators and the other members of this board for being so open minded and welcoming to this fantastic technique. Hey, you guys thought you generated worldwide traffic to Moparts.com before, wait 'till the HRM article REALLY catches fire! Get those ads ready! You're marketing department might as well make use of this opportunity! Cheers!
Posted By: Anonymous
Re: New Paint job on a budget thread. - 05/20/0705:23 PM
well heres an update of mine.. its not finished being polished yet, i went over it with some meguiars diamond cut and then turtle wax polishing compound, and im still gonna go over it wit some scratch remover and then wax.. but its lookin pretty good so far, just the passenger side may need tro be wetsaned again cuz it seems its not polishing up too good
Posted By: Anonymous
Re: New Paint job on a budget thread. - 05/20/0709:32 PM
so whos the first goin to be to roller clear?
Posted By: Anonymous
Re: New Paint job on a budget thread. - 05/21/0701:39 AM
i sprayed mine on today
Posted By: Anonymous
Re: New Paint job on a budget thread. - 05/21/0704:42 AM
Quote: i sprayed mine on today
how did you spray clear? on new paint(rustoleum) after flash time, or on old paint?
i was thinking that you cant paint rustoleum clear over rustoleum enamel? so how is it?
how many coats ? can you take pic of clear can ?
Posted By: Anonymous
Re: New Paint job on a budget thread. - 05/21/0702:54 PM
how did you spray clear? on new paint(rustoleum) after flash time, or on old paint? new paint waited 24 hours to clear
i was thinking that you cant paint rustoleum clear over rustoleum enamel? so how is it? it has an orange tint to it so if it is a dark color it makes it darker than it is. i wouldnt paint on white color though it will turn it orange.
how many coats ? 2 coats so far went on thick so 2 might be enough
can you take pic of clear can ?
Posted By: Anonymous
Re: New Paint job on a budget thread. - 05/21/0708:46 PM
On my second coat now and what I find strange is my first coat went on beautifully and now the second im having a few problems, when painting im getting streaks of paint coming of the edge of the roller, as if it builds up on one side and then falls out this doesnt fully dissapear no matter how much I roll over it after. So it leaves roller marks.
Also when I apply mineral spirits on the paint to try to help it level out it sometimes takes the paint straight off leaving a strange rough patch.
Anyone able to explain either? Ive been using 10% mineral spirits to the brightside (20ml mineal spirits, 180 brightside) also tried increasing the amount of mineral spirits to no avail.
Re: New Paint job on a budget thread. - 05/21/0710:54 PM
Quote: On my second coat now and what I find strange is my first coat went on beautifully and now the second im having a few problems, when painting im getting streaks of paint coming of the edge of the roller, as if it builds up on one side and then falls out this doesnt fully dissapear no matter how much I roll over it after. So it leaves roller marks.
Also when I apply mineral spirits on the paint to try to help it level out it sometimes takes the paint straight off leaving a strange rough patch.
Anyone able to explain either? Ive been using 10% mineral spirits to the brightside (20ml mineal spirits, 180 brightside) also tried increasing the amount of mineral spirits to no avail.
This could be a one-two type problem....
One : the subsurface paint had not fully cured. If this is true... then the next coating would possibly have the effect of unsettling the lower surface paiint. Normally that would lead to an orange peel type effect. But if there was more paint being applied from the side of the roller, the 'edge is noticable' effect that you are mentioning would possibly be caused by the higher saturation or concentration of fresh paint/mineral spirits being left on the edges of the rollers.
and
Two : the roller was overloaded with paint. You may have to work the paint out of the roller when it is in the paint tray so that you can lay on a thinner layer for the subsequent build up of paint. If the roller is bleeding at the edge... you will just have to make sure that you give extra attention to working the paint out of the edges of the roller while loading it up in the paint tray. Basically just lay more pressure on the two edges while unloading paint in the tray.
Hopefully it is not a situation where there is so much paint in the tray that it is soaking into the middle of the roller where the metal shaft is. That could lead to a potential situation where paint could ooooze out from the ends of the roller. If so... you will just have to be quicker spotting the excess paint during the rolling and roll over to blend it in with the rest of the coatings. The handy second 'clean' roller might need to be put to use if the excess continues while you are trying to work out the excess with your painting roller.
So depending on the enviroment's temperature that you are working in the curing time ( where you wait between coatings ) may have to be lengthened in order to ensure that subsequent applications of coatings doesn't uncure the lower coating.
What seems odd is that under normal circumstances you can normally re-roll right away over the freshly laid coating of paint and 'work out' any imperfections left during the initial application of that coating.
Possibly you might keep a second 'clean' roller on hand to use only when you are re-working a spot where a run or edge-run happens...
Don't know if this helps... but those are my initial thoughts on hearing your problem.
.
Posted By: Anonymous
Re: New Paint job on a budget thread. - 05/22/0707:49 AM
Thanks Marq youre right I wasnt letting it cure I thought since it dried after a few hours I could paint again, big mistake i guess!
I was probably also leaving too much paint on the roller.
Also how long should one wait before wetsanding after having painted, 24 hours? Then how long to let the car dry after having wetsanded and cleaned the car?
Should one avoid painting when its raining because of the increased humidity in the air?
Posted By: Anonymous
Re: New Paint job on a budget thread. - 05/22/0701:58 PM
The budget paint job on the TR4 is far from finished, but I am taking a break from wet sanding etc, so I can actually get driving. I will continue to work on it through the Summer to improve on the quality. 1st classic car show this weekend and I am interested to see what the reaction will be to a roller painted car.
Posted By: Anonymous
Re: New Paint job on a budget thread. - 05/22/0702:37 PM
thats pretty. i miss my tr6's and tr8
Posted By: Anonymous
Re: New Paint job on a budget thread. - 05/22/0703:32 PM
Quote: i sprayed mine on today
Looks really nice. Really gives the black the depth it needs. I am wondering how it will polish out.
I have to do some body work on my car before I can spray it but I am dying to try.
Re: New Paint job on a budget thread. - 05/22/0706:45 PM
I would bet that if you don't tell anyone that its a roller job that few if any would be able to tell. At least that's what I am finding with my friends and neighbors. My car's paint is still very thin, but no one even suspects that it is rolled. They wonder how I can take a break between coats.
Gerbs
Posted By: Anonymous
Re: New Paint job on a budget thread. - 05/22/0706:53 PM
I haven't rolled my car yet(still doing body work) but based on how my test piece came out in comparison to a couple of brand new black Fords here on the lot. I'd say they will definately be able to tell the difference since my rolled on paint looks 10 times better than that factory orange peel crap!!
Re: New Paint job on a budget thread. - 05/22/0707:07 PM
Quote: The budget paint job on the TR4 is far from finished, but I am taking a break from wet sanding etc, so I can actually get driving. I will continue to work on it through the Summer to improve on the quality. 1st classic car show this weekend and I am interested to see what the reaction will be to a roller painted car.
I have a tinge of jealousy surfacing after seeing the TR4... Ah my good old days of owning a number of TR4A IRS's is flooding back...
Believe it or not... when I picked up the Mustang McLaren I was actually shopping around for 'yet another' TR4A IRS. But sanity took hold and I opted for the McLaren instead... just so I wouldn't have to pay through the nose for all the odd little parts that they charge a kings ransom for the TR4.
By the way... we have an auto-wrecker/junkyard up here that is 'mostly British' and he probably has more dismantled TR4 parts then all the other auto-recyclers combined ( in case you ever need some help locating a part ). He also has Healy 3000's & 6's... Jag XKE's and various Mark's... plus Spits and TR6's. I think he might even have one or two Jensens. The guy has been into Brit sportscar for about 45 years now ( and he is the guy that dropped that Turbo V6 Buick engine into my baby blue TR4A IRS
IF you have the TR4A IRS or a TR6 here is a money saving secret. The Datsun/Nissan 240Z U joint is identical in size and fit to the TR U joint - but it is 3 times stronger and 1/3rd the price
.
Posted By: Anonymous
Re: New Paint job on a budget thread. - 05/22/0710:24 PM
Spent about a week reading up on this and tested a small patch on a fender. It's Rustoleum gloss sunburst yellow mixed with mineral spirits (odorless) This is after 4 to 5 thin coats. I let it cure in the hot sun yesterday and it dried alot quicker. Bubbles stopped forming after about the 3rd coat. Anyone try this color out yet? I'm considering painting my 280z. Anyone use this color yet? I might try the Interlux paint.
Posted By: Anonymous
Re: New Paint job on a budget thread. - 05/22/0710:25 PM
here's a better pic. I still have to wetsand and add couple more coats.
Posted By: Anonymous
Re: New Paint job on a budget thread. - 05/22/0710:50 PM
Quote: here's a better pic. I still have to wetsand and add couple more coats.
I don't know if it's just the picture or not but that seems awefully "peely". When I did my test, even with a 20% mineral spirits mix I had a lot less peel than that. I'd be concerned that you will have to burn thru several layers to get it smooth if it's as bad as the picture makes it look, No offense, just trying to help. What type of roller are you using?
Posted By: Anonymous
Re: New Paint job on a budget thread. - 05/23/0701:32 AM
Rolled her out into the sun, the satin black looks better out of the garage
Posted By: Anonymous
Re: New Paint job on a budget thread. - 05/23/0703:01 AM
Quote: Rolled her out into the sun, the satin black looks better out of the garage
AMEN!!!
Posted By: Anonymous
Re: New Paint job on a budget thread. - 05/23/0703:07 AM
I can not recall, did you end up color sanding that at all? Or did the satin just lay down that smooth?
From what I can tell of the pictures you have posted I am thinking no-one here in the shop would believe it was not shot. Gotta love the 69's next to my 66 fastback, they are my favorite.
Posted By: Anonymous
Re: New Paint job on a budget thread. - 05/23/0712:20 PM
No, I did not wet sand, Just layed down 2 thin coats. In places where I had roller marks, I just kept going back over it until the marks blended out. I used the low odor mineral spirits which dry alot slower so you can re-work the whole car for like 15 minutes, using medium-thin paint.
As an aside, I have touched up a few spots on the edges with spray can satin and it blends right in with the rolled satin.
Posted By: Anonymous
Re: New Paint job on a budget thread. - 05/23/0703:57 PM
was the spray cans the stuff with the patio furniture on it? I am sure some are wondering as it was asked earlier.
Posted By: Anonymous
Re: New Paint job on a budget thread. - 05/23/0705:41 PM
Yes, the white can with the patio furnature on it.
After 3 weeks, it is really hard now, I banged it with a ratchet yesterday and didnt scratch at all.
Posted By: Anonymous
Re: New Paint job on a budget thread. - 05/23/0706:32 PM
For MYBUICK, GFEIGHNY, and other present and former sprayers, (Subject:1994 Chevy Caprice) Like Mybuick, I was never completely satisfied with the roller method. I painted a test fender and my garage entry door and I am confident that the roller method can work if you have the time to make it happen; however, my subject is a daily driver and I will only have a week to dismantle it and paint it.
Motivated by the following statement found in part II of the thread: �The sprayed portion was completely hard in a day or two while the rolled on parts took about two months to reach full hardness.� -Trent
I�ve got a full face respirator, a small 30 gallon 1.5 HP compressor and a HF touch up gun, model 46719-1VGA with 1.0 mm tip, a porter cable buffer with assorted cutting and polishing pads.
Questions: 1) Is one week enough time to properly take everything apart, spray it, buff it, and reassemble it? 2) Should I build a DIY booth? I was thinking of covering the floor and walls with plastic, mounting 2 fans high pulling air in, and 2 fans on the ground pushing air out � all using AC filters. Is this overkill? 3) The car is black, the primer I used to cover the repaired areas is black and the new paint will be black, how many sprayed coats will be required? 4) When spraying, did you sand after each coat? If so, what grade paper did you use? 5) It looks like 3 parts Rustoleum Professional and 2 parts regular mineral spirits is the correct mixture � right? 6) This was asked in part II, if I�m going to spray it, should I use a different paint? (I�m sure there are many options, but I would like to stay within a reasonable budget.)
Any other hints and tips about using an HVLP gun and spraying method would be greatly appreciated.
Posted By: Anonymous
Re: New Paint job on a budget thread. - 05/23/0707:33 PM
well i still havent final wetsanded and polished my hood yet and to tell you the truth it almost looks good as is... almost. i'll worry about the finish when i get the rest of the car covered.
offtopic: by any chance would anyone know how to get lock lugs off with out a key.. i need to take my tires off to do some bodywork (first time iv tried taking them off since getting this car a year ago) and tada it has lock lugs so im kind of stuck
Posted By: Anonymous
Re: New Paint job on a budget thread. - 05/23/0708:21 PM
I too experimented with spraying, and I think your downfall is going to be the small compressor.
I sprayed some and it turned out good, but my small compressor 2.5 hp,30 gallons couldnt keep up and so after a few passes I would start to get weak spray and "spittle" from the gun since the pressure was dropping.
I would definatly practice on a hood or something and see if you really like how it turns out. DONT use acetone as recommended. I tried and it flashed hazy since acetone evaporates in like 2 seconds, use mineral spirits.
Curious to see what size compressor MyBUICK used.
Posted By: Anonymous
Re: New Paint job on a budget thread. - 05/23/0709:30 PM
Quote: well i still havent final wetsanded and polished my hood yet and to tell you the truth it almost looks good as is... almost. i'll worry about the finish when i get the rest of the car covered.
offtopic: by any chance would anyone know how to get lock lugs off with out a key.. i need to take my tires off to do some bodywork (first time iv tried taking them off since getting this car a year ago) and tada it has lock lugs so im kind of stuck
Find a socket that just fits on the outside of the luglock and beat it on. then remove. otherwise most tire stores and tool trucks sell sockets that have teeth inside so you can beat them on and remove the locks.
Posted By: Anonymous
Re: New Paint job on a budget thread. - 05/23/0711:51 PM
Hey guys I just joined up because of this thread. I rolled the tailgate of my el camino tonight. I used 5% thinned brightside and 2 high density foam rollers, one to apply, one to work out bubbles. I followed the steps of cleaning the surface and wiping with a tack cloth. After applying it I have major orange peel. I have no idea why it isnt laying flat. Any opnions? I thinned it with interlux brushing liquid. I prepped the paint with 220 grit.
Re: New Paint job on a budget thread. - 05/24/0712:00 AM
Exit, Thanks for putting it all together! I just found good project and thought I'd give it a try.
Posted By: Anonymous
Re: New Paint job on a budget thread. - 05/24/0701:00 AM
Quote: Hey guys I just joined up because of this thread. I rolled the tailgate of my el camino tonight. I used 5% thinned brightside and 2 high density foam rollers, one to apply, one to work out bubbles. I followed the steps of cleaning the surface and wiping with a tack cloth. After applying it I have major orange peel. I have no idea why it isnt laying flat. Any opnions? I thinned it with interlux brushing liquid. I prepped the paint with 220 grit.
u must be putting it on too heavy, i rolled brightside straight and the peel wasnt too bad. u werent doing it in the sun were u?
Posted By: Anonymous
Re: New Paint job on a budget thread. - 05/24/0701:09 AM
Quote:
Quote: Hey guys I just joined up because of this thread. I rolled the tailgate of my el camino tonight. I used 5% thinned brightside and 2 high density foam rollers, one to apply, one to work out bubbles. I followed the steps of cleaning the surface and wiping with a tack cloth. After applying it I have major orange peel. I have no idea why it isnt laying flat. Any opnions? I thinned it with interlux brushing liquid. I prepped the paint with 220 grit.
u must be putting it on too heavy, i rolled brightside straight and the peel wasnt too bad. u werent doing it in the sun were u?
No I didnt do it in the sun. It didnt look too thick when I rolled it? Im gonna sand it tomorrow and try again.
Posted By: Anonymous
Re: New Paint job on a budget thread. - 05/24/0703:23 AM
i have a 6hp 30 gallon craftsman compressor and it kepped up verry well with no spitting and set to 40 psi with a water seperator and i use the 50.00 hvlp gun from eastwood 2 of them 1 for color and 1 for clear.
the 2.5 i think would stay on all the time because i wont fill the tank fast enough while painting it takes me 5 min for 1 coat to lay down and the compressor kicks on once
i had one fan blowing out of a window and the grage door open a foot then when i was done spraying i would open the door and let all the overspray linger out.
Posted By: Anonymous
Re: New Paint job on a budget thread. - 05/24/0703:27 AM
take them off with a hammer and a chisel thats how the crooks steal the rims. if you have a air chisel it will work faster.
Posted By: Anonymous
Re: New Paint job on a budget thread. - 05/24/0711:07 AM
Hey Marq, Aussie Driver or Exit, or others using Brightside....I am using Aussie Drivers ratio of Brightside, penetrol and mineral spirits. the first two coats went down fantastic, almost like glass. I did my first wet sand with 600 and then third coat...that is where things changed a little. I stated to get very small bubbles that would magicaly appear after I thought things were perfect...they came in small patches....so I did my second wetsand with 600 thinking that would clear things up.
on my fourth coat I have some major orange peel and the same small patches of micro-bubbles...this all occured ONLY where I had wetsanded the previous "mistakes".
so I have two questions: do you think those areas were contaminated somehow?
will the final 1000/1500 wetsand and the polish remove this? or do I need to sand again with 600 and lay another coat down and then do the finalsand/polish/wax?
Re: New Paint job on a budget thread. - 05/24/0712:52 PM
Quote: .. I thought things were perfect...they came in small patches....so I did my second wetsand with 600 thinking that would clear things up.
on my fourth coat I have some major orange peel and the same small patches of micro-bubbles...this all occured ONLY where I had wetsanded the previous "mistakes".
so I have two questions: do you think those areas were contaminated somehow?
will the final 1000/1500 wetsand and the polish remove this? or do I need to sand again with 600 and lay another coat down and then do the finalsand/polish/wax?
Ok... here is what I am thinking... Imagine that you went to a tanning shop and got a lovely tan on your skin. But on your way home you tripped and your arm scrapped against a wall.
What would happen is that you now have two different surfaces. One is 'well cured' ( the unscraped area with the tan ) and the other surface is the area where you scraped your skin, removed the tanned layer and exposed the skin below the top layer of skin cells. And we all know that the lower scraped surface of skin is going to have to scab ( create a new hardened outer layer ) and then heal ( reach the same level of health or cure ) as the outer layer, before you will be able to properly tan the area that was damaged.
Ok... so picture this scenario over to the paint job. The paint we add to our car bodies goes on in coats. Each coat goes through three phases when you apply a layer :
The first phase is when you apply a coat. In this phase the paint is one wet layer.
0000000000000000000 <....wet paint added 0000000000000000000 <.../ XXXXXXXXXXXXXXXXXXX <- body surface
In the above picture the two rows of 'o' are actually all one layer of wet paint. I show it as two rows only for the convenience of showing the transition in the following pictures.
----------------------------------------------
The second phase is as that coat is drying. In this phase a skin forms on the outer layer and a wet layer exist between the subsurface and the outer 'drying or hardened' skin.
In the picture above that trapped wet layer is trying to evaporate its gases from the carrier through the hardening outer skin layer.
-------------------------------------------
The third phase is when that coat has fully cured or hardened. In this phase the wet layer that was trapped between the outer skin layer and the subsurface has fully cured to the point where there is no difference between the trapped layer and the outer layer for dryness/hardness.
In this picture I am trying to show that the 'x' layer is now all one layer of fully cured paint.
------------------------------------------
Ok... my initial thought is that the 600 grit sanding may have opened up the flesh and exposed some of the still uncured paint that was still trying to evaporate the carrier ( mineral spirit ). This is a problem that we experience as humans. We tend to look at 'dry' paint as 'all' being 'dry' or 'cured' without realizing that a chemical reaction may still be occuring beneath the surface of what we see as 'dry' paint.
It is not as obvious to the human eye or touch as say a layer of ice floating above a layer of water. Yet in a way this is how you have to envision things when you are painting or working on the layers of paint. You wouldn't skate on 1 inch thick ice... you would wait until the water below the ice surface has hardened and also turned to ice.
If you add paint over uncured paint, where the carrier is still trying to evaporate the mineral spirit ( so it can harden ) what happens is you will get micro-bubbles. Which is basically the evaporatiing 'carrier' getting trapped under the new hardened outer skin of the fresh paint.
It's like your sanded paint is swimming in the bath and farted. The gas rises to the surface and little fart bubbles break the surface of the water's tension.
The answer would probably be to allow more time for the coatings to dry. Patience is a virtue and helps ensure that the previous coating is not still evaporating when you add the next coat of paint.
The temperature you are working in will help determine just how long you need to wait between coats. But the key is to key in on how long it takes each coat to fully harden and not just appear to be hardened. You want each previous layer of paint to have reached the point where the trapped layer between the outer skin and the subsurface are cured to the point of being one layer and not a dry outer layer and a still curing layer beneath it.
Do your sanding and walk away from the project for a few extra days. Hopefully your subsequent coats will not have any adverse reactions.
Re: New Paint job on a budget thread. - 05/24/0702:29 PM
Quote: Rolled her out into the sun, the satin black looks better out of the garage
Gene -
Thanks for posting that pic. I was wondering just the other day what your car looked like out in the sun.
I'm still trying to decide between satin and gloss. Hopefully I'll have the rest of my paint prep done this weekend and maybe even start rolling on Monday.
I know that Satin will be A LOT easier than gloss. But I keep thinking that since I have the car all apart, I might as well try and do gloss. I probably won't have it dis-assembled to this level again for years, and hopefully never. (1 vote for Gloss)
At the same time, Gloss Black is probably the hardest color to get right, not to mention that my potentially less than perfect body prep is going to show up a lot more if I try gloss. (1 vote for Satin).
Could I ask you to post a couple more pics? The last one was slightly blurry, or maybe just low-res (no offense intended).
If I could see a few more, it would help greatly with my final decision.
Re: New Paint job on a budget thread. - 05/24/0702:36 PM
Quote: Yes, the white can with the patio furnature on it.
After 3 weeks, it is really hard now, I banged it with a ratchet yesterday and didnt scratch at all.
Isn't the can with the Patio Furniture on it the Rustoleum "Painter's Touch" line? I thought that was Lacquer, where the stuff from the roll-on can is enamel.
Posted By: Anonymous
Re: New Paint job on a budget thread. - 05/24/0705:55 PM
Steve- If the level of dissasembly is what is holding you up consider this:
Some of the cars we have built for the "rat rod" crowd (and I did on my other drag car) is to edge all of the panels, door openings etc in the color you may end up wanting (gloss). then do the body satin (or with a flattener if spraying normal single or two stage paints)and live with that for as long as you want. it will also help show imperfections, and give a better base under black if you go gloss, as chips will not show as badly.
Then if you go gloss down the road the jambs and such are already edged and you can just back mask it.
Posted By: Anonymous
Re: New Paint job on a budget thread. - 05/24/0709:57 PM
No, just went and looked at the cans to make sure. it says "protective enamel" in big letters. Not painters touch line.
Posted By: Anonymous
Re: New Paint job on a budget thread. - 05/24/0710:02 PM
That's exactly what I did too. I tried the gloss black, but (duh) it revealed all my amatuer body work. plus I got a bunch of bugs caught in it. I did like 6 coats gloss on the hood, and really worked on it but just couldn't get it to a level that I though would pass as a "real" paint job. Black is SO hard, I have MUCH respect for Aussi and others that have made it work.
The gloss is a fine base for Satin, so you could just try the gloss, if it turns out good then keep it if not, then just scuff and throw down a few coats of satin and be done with it until you win the lottery and can get a 5k paint job.
Sorry, the resolution isn't great. If you email me (gfeighny AT gmail dot com) I'll send you the full resolution.
Posted By: Anonymous
Re: New Paint job on a budget thread. - 05/24/0711:44 PM
Marq, thanks for the reply. I have been very patient with the whole project with the exception of the last coat. I have been waiting a couple of days between laying down a coat and then wetsanding....this last coat I wetsanded, washed clean, let dry about an hour and then wiped down with mineral spirits, and the layed the fourth coat on. After thinking about it here is what has been different:
temperature was a little higher with higher humidity.
I was using my mixture that had been stored in a sealed container for a few days and then added some more brightside to thicken it up a little for the final coat (per your reccommendations about 100 pages ago!)
what do ya think?
what about the final wetsand and polish? should I do that now or sand down and lay some more coats on?
Re: New Paint job on a budget thread. - 05/25/0702:35 AM
Quote: Marq, thanks for the reply. I have been very patient with the whole project with the exception of the last coat. I have been waiting a couple of days between laying down a coat and then wetsanding....this last coat I wetsanded, washed clean, let dry about an hour and then wiped down with mineral spirits, and the layed the fourth coat on. After thinking about it here is what has been different:
temperature was a little higher with higher humidity.
I was using my mixture that had been stored in a sealed container for a few days and then added some more brightside to thicken it up a little for the final coat (per your reccommendations about 100 pages ago!)
what do ya think?
what about the final wetsand and polish? should I do that now or sand down and lay some more coats on?
Humidity would definitely be a factor. The higher the humidity the longer you have to wait for it to cure.
BUT humidity would not normally impact just one particular patch. It would tend to affect the whole surface.
If this situation happened to me... I would rework that entire panel rather than go jumping to the polish and waxing stage. IF you can nail it perfectly, you will save yourself work during the final stages.
That is one of the beauties of the 'roller' method. In that if you botch a panel.. you can simply redo that panel and the reworked panel will simply blend in with the other panels and not stand out visually as a reworked panel.
Dunno... that is how I would go about it. Your long term satisfaction will probably be ensured, rather than suffering with that 'long term' 'what if I had taken that extra bit of time and effort' to perfect it...
Re: New Paint job on a budget thread. - 05/25/0704:33 AM
Something to consider regarding whether to go gloss or satin. To the trained eye, there is no difference in how one hides imperfections over the other. To the untrained eye, there is not much difference either, other than the gloss or lack thereof.
I recommend that if the car looks better with a gloss finish, do a gloss finish. If your inadequate body work skills show through, then hone those skills. Don't settle for a finish you don't really want just to try to hide imperfections, because as I said, to the trained eye they will show through anyway and to the untrained eye they would go unnoticed regardless of the gloss/satin finish.
And just to toss my $0.02USD in, a satin or even flat finish works on an old* rat rod, but doesn't work on a Civic for example. Not to say that it can't, just that I haven't seen anyone really pull it off yet.
* where old means ~40 or more years old.
Posted By: Anonymous
Re: New Paint job on a budget thread. - 05/25/0705:10 AM
Hello folks! Hopefully it is not a problem having a member with a Civic here. I am 19 years old, College student up north in Canada and I don't have much $$$.
I am contemplating doing the $50 paintjob very soon. I have the summer off...Working in between in the future.
Anyway just wanted to say hi.
The car is black and has been repainted. Parts have been dulled and other parts have clear coat failure so this will look wayy better.
I plan to use Marine Topside paint because I have heard issues of fading from Rustoleum/Tremclad. Marine paint has UV protection which is an added benefit.
Wish me luck! I'm probably gonna try it.
- Michael
Posted By: Anonymous
Re: New Paint job on a budget thread. - 05/25/0705:19 AM
Quote: And just to toss my $0.02USD in, a satin or even flat finish works on an old* rat rod, but doesn't work on a Civic for example. Not to say that it can't, just that I haven't seen anyone really pull it off yet.
* where old means ~40 or more years old.
id have to disagree, theres been many "modern" cars done in satin that look great. the skunk2 racing 2006 civic drag car is satin black and looks crazy.. also i did my 93 civic in satin and i was very pleased with it and i constantly get praise for it. but to go with a satin or flat, IMO the car gotta have balls. its just kinda what that type of paintjob represents lol.. anyway heres my old civic i rattle canned almost 2 years ago
Re: New Paint job on a budget thread. - 05/25/0708:10 AM
I Love Black Satin. I have a 62 Plymouth Savoy that I have been working on for awhile now. I sand blasted the undercarrige and started painting it with Tremclad Black Satin, then I did the engine compartment. When I finished that I decided to paint the rest Black Satin. I have been playing around with a old piece of hood and I was Thinking, " Why Not Put 4 or 5 Heavy Coats on and then Wet Sand and Polish" Has anyone Tried That ???
Re: New Paint job on a budget thread Part III - 05/25/0702:17 PM
Quote: Has anyone done any tests on the Temclad and Rustoleum paints to see how they hold up to spilled fuel and other chemicals?
i can tell you from real expirence that i have spilt just about everything on my paint over the last 7yrs, gas, brake fluid, tranny fluid (don't ask ) and i have yet to stain/damage the paint in any way. Once i was filling up at the gas station, and it was a really hot day (about 110*F) retarded hot in the sun, as the tank came full, for some reason the pump would'nt shut off, and i sprayed my entire car (hood, fenders, door, everything) pulling out the nozzle and throwing it on the ground where it continued to spray. I used the window washer squeege at the station to get most of the gas off the car, and when i got home (about 3 hours later) washed the car. Paint was still perfect. I also painted a motorcycle (old kawi) about 15yrs ago with black tremclad, and have allways spilt gas on the tank for the last 15yrs and the paint.....you guessed it looks great.
Here's the first car i painted with the "roller", my now wife actually came up with the idea, i was at my dad's cottage and he had a can of tremclad gloss black, and some sponge rollers in the garage, he was painting the 2-door on the cottage. So i pulled my 1985 Honda CRX into the garage, scuffed the paint with 400, and my wife was painting the inside of the doors while i was rollering the body. The old paint was horrible, scratched, and very faded. Well in 1 DAY we painted the CRX, these are the only pics i have of the car that i scanned, enjoy!!!!
i drove that car for 3 yrs, and over 300000kms!!! while going to school in NOrth Bay, Ontario, Canada!!!! If any of you don't know where North Bay is, let me tell you it SNOWS like crazy up there, there was times that i did'nt see my car for weeks because it was under snow!!!.
Re: New Paint job on a budget thread. - 05/25/0702:35 PM
Quote: I recommend that if the car looks better with a gloss finish, do a gloss finish. If your inadequate body work skills show through, then hone those skills. Don't settle for a finish you don't really want just to try to hide imperfections, because as I said, to the trained eye they will show through anyway and to the untrained eye they would go unnoticed regardless of the gloss/satin finish.
And just to toss my $0.02USD in, a satin or even flat finish works on an old* rat rod, but doesn't work on a Civic for example. Not to say that it can't, just that I haven't seen anyone really pull it off yet.
* where old means ~40 or more years old.
It was more the effort involved with gloss that was holding me back. (I'm cheap AND lazy). I figured that satin hiding imperfections would just be a bonus.
Although, when I bought the car my intent was to just shoot it with primer, since I couldn't afford $5k+ for a paint job. After finding this thread I was able to re-think that, but I was kind of liking the mean/evil black primer look.
I suppose that's all subjective. I think the satin 69 mach1 looks great. And I'm STILL peeved at Quinten Tarantino for stealing my black primer idea for his Death Proof car.
I just have to hope that primered Chargers don't become the "Dukes" cars of the new mellinium (with all the disdain that would be associated with it).
Posted By: Anonymous
Re: New Paint job on a budget thread. - 05/25/0703:42 PM
Found this thread through the latest Hot Rod magazine. Can't wait to roll satin black on my '65 Fairlane. Is wet sanding recommended between coats with the satin? I know that info is probably here somewhere but I couldn't find it. Steve C., were we neighbors once upon a time? Check my profile.
Re: New Paint job on a budget thread. - 05/25/0704:00 PM
Quote: Found this thread through the latest Hot Rod magazine. Can't wait to roll satin black on my '65 Fairlane. Is wet sanding recommended between coats with the satin? I know that info is probably here somewhere but I couldn't find it. Steve C., were we neighbors once upon a time? Check my profile.
gfeighny is the member that did the satin on his 69 'stang. He said this in a previoous post:
Quote: "No, I did not wet sand, Just layed down 2 thin coats. In places where I had roller marks, I just kept going back over it until the marks blended out. I used the low odor mineral spirits which dry alot slower so you can re-work the whole car for like 15 minutes, using medium-thin paint.
As an aside, I have touched up a few spots on the edges with spray can satin and it blends right in with the rolled satin. "
Not sure if we were neighbors, although I used to live on Corunna Rd near Seymore - just south of Flushing (that was about 15 years ago).
Posted By: Anonymous
Re: New Paint job on a budget thread. - 05/25/0704:10 PM
I mixed and sprayed a flat finish on a '68 Newport and I dry-sanded/scuffed with 800 between coats.
On a fender skirt I experimented with wetsanding between coats and it made no difference at all over dry sanding.
When it's all finished, you can wetsand it until it's at whatever gloss/flatness you like - again, I experimented and found that wetsand with 1200 then 2000, then a rubbing compound actually made a flat finish into a gloss finish.
Re: New Paint job on a budget thread. - 05/25/0704:52 PM
Quote: When it's all finished, you can wetsand it until it's at whatever gloss/flatness you like - again, I experimented and found that wetsand with 1200 then 2000, then a rubbing compound actually made a flat finish into a gloss finish.
Now that is extremely interesting. I've been wondering about that.
The entire roll-on process could be streamlined if you could just lay down a few coats of satin with no wetsanding, and even minimal dry sanding between coats. If you can take the finished satin and then just buff it out to a gloss you'd eliminate a LOT of work.
Re: New Paint job on a budget thread. - 05/25/0704:55 PM
Quote: I mixed and sprayed a flat finish on a '68 Newport and I dry-sanded/scuffed with 800 between coats.
On a fender skirt I experimented with wetsanding between coats and it made no difference at all over dry sanding.
When it's all finished, you can wetsand it until it's at whatever gloss/flatness you like - again, I experimented and found that wetsand with 1200 then 2000, then a rubbing compound actually made a flat finish into a gloss finish.
wetsanding does produce a smoother finish between coats and the final wetsand just due to keeping the sand paper cleaner. But the biggest benifit to wetsanding is reducing the amount of airborne dust in your painting area. Once the garage door closes for me after a real good cleaning, the door does not open until it's done to avoid as much dirt/dust/hair as possible, that will allways be your biggest battle regardless of how or what method you choose to paint with.
Posted By: Anonymous
Re: New Paint job on a budget thread. - 05/25/0710:07 PM
Just read the latest Hot Rod magazine. seems they finaly caught wind of Martin's baby and all the success rollers from this forum have had. They decided to do several pages on it, even made the cover
However; they failed to mention the thread "much" and failed to give credit to Martin... at all. Personaly, I think that blows, I realize they have deadlines and editors etc, but come on! They did claim in the article, they decided to try the project after reading the whole thread. Seems if they had, they would have known exactly who to thank for it.
My paint has held up great, through months of rain, small hail storm and driving the cab through and under a mesquite tree or 2.
You da man Martin!! Thanks again JFisher
Posted By: Anonymous
Re: New Paint job on a budget thread. - 05/25/0711:25 PM
I've now read the entire thread and I'm ready to give it a go on my 79 MGB roadster. After hearing about many people's problems with bubbles I was wondering if anyone ever tried a paint pad? You know those styrofoam pads with the fine bristles. They also make a smaller version with little wheels for cutting in around doors and windows. It seems to me the very nature of a foam roller will give you bubbles since it is really just a series of small open cells. Each open cell is a potential bubble-maker. The fine bristels on a paint pad won't do that as much. They hold a tremendous amount of paint too. Just wondering since just about everthing else has been tried relating to this process. Keep rolling. Jim
Posted By: Anonymous
Re: New Paint job on a budget thread. - 05/26/0701:53 AM
hey guys, This thread is a lifesaver..I was dreading the thought of having to shell out some big $$$ to get both my rigs painted and this thread has been a big help to me as far as getting my projects moving. One problem Im having right now is with mineral spirits and Primer. If I try to wipe down the dust, The primer softens up. the primer is rattle can stuff meant for automotive touch up couple different brands though, mostly dupli-color, but also some of the generic stuff. I'm using wallyworld odorless mineral spirits. My thoughts on this are, if I thin my paint with the same stuff..won't the paint soften the primer to the point that it will lift? Any help is greatly appreciated. Thanks in advance !
Posted By: Anonymous
Re: New Paint job on a budget thread. - 05/26/0703:50 AM
Dunno much about the softening primer, but if you are using Rustoleum and you still have the "old" paint on your car you don't need to use primer except over the repair spots, may even be easier to paint over the repairs with Rustoleum rattle can of similar color. I have used Duplicolor primer and another brand od self etching primer and did not have good luck with paint sticking to it.
Could be you need to let the primer cure for a week or so fisrt.
If painting over old paint, just rough it up with about 400-600 sandpaper. And roll away.
Re: New Paint job on a budget thread. - 05/26/0712:13 PM
Just a few thoughts, but no real experience. I read a few postes about the edge of rollers "leaving a line". I've noticed that painting walls. Has anyone tried a foam brush to smooth them?
Clear coat. A relative of mine has a furniture company. They use "wipe on" poly for a finish coat. I don't know if it is "exterior".
Re: New Paint job on a budget thread. - 05/26/0712:16 PM
I have tried one of those pads. The finish was very acceptable, BUT I had some of the little fibers on the pad come off and dry in the paint. The next step is probably to get the loose fibers off the pad before painting. I am thinking that blowing with air and/or washing with soap & water and drying out before using would work.
Posted By: Anonymous
Re: New Paint job on a budget thread. - 05/26/0702:33 PM
You can work most of those lines out. Honestly if you are getting them, alot, it probably indicates you fumbled in your mixing.
If you take the time to put on more coats than you think you need, or have the patience to do, just about anything can be fixed in the final color sand and buffing stage.
Re: New Paint job on a budget thread. - 05/26/0705:09 PM
Quote: You can work most of those lines out. Honestly if you are getting them, alot, it probably indicates you fumbled in your mixing.
If you take the time to put on more coats than you think you need, or have the patience to do, just about anything can be fixed in the final color sand and buffing stage.
I gotta agree. If lines are happening... then it is usually because too much paint is being applied per coating. The concept that people MUST get into their head when they do the roller method is to NOT EXPECT INSTANT COVERAGE.
The whole process requires a slow build up of THIN ( almost transparent ) layers of paint.
It is more like tinting the car at each coating rather than 'painting'. The thing is that each time you add another thin translucent layer, it doubles the shade of the 'tint'.
By the time you hit four or five layers the accumulation of these thin translucent layers then begins to add up and become 'coverage'. In some cases you may not hit that coverage stage for 6 to 8 layers of thin coatings depending on the color you are using.
I think this is the most important concept people have to understand and appreciate during their painting process.
The Brightside paint will reduce the number of coatings you need to reach this 'coverage' stage, but that is because their paint has more 'solid' pigments in the paint then say the Tremclad/Rustoleum. But even with Brightside you need to go through the accumulation of tinted layers to get the best possible result.
So don't be in a rush. Don't expect to paint the car like you would a wall in your house ( where routinely you would nail a wall in one or two coats ).
The thinner the layer that you lay down each coating is what you must strive for when rolling. It may take longer to complete the paint job... but the results will be superior and possible problems will be far less by doing the slow buildup of thin layers.
.
Posted By: Anonymous
Re: New Paint job on a budget thread. - 05/26/0709:01 PM
Ok here's a crazy idea. Has anyone ever tried putting clear polyurethane, like you put on furniture, on a car? I redid a table and it smooths out perfece and is high gloss.
Re: New Paint job on a budget thread. - 05/27/0701:33 AM
Quote: Ok here's a crazy idea. Has anyone ever tried putting clear polyurethane, like you put on furniture, on a car? I redid a table and it smooths out perfece and is high gloss.
I've read this entire thread and no I don't think anyone has. but thats what this is all about, experimenting. Why not try it on a test piece and let us all know how it turns out.
Re: New Paint job on a budget thread. - 05/27/0704:08 AM
Quote: How much paint would you need, to do a average car ??? And what is the difference between Satin Black and what "They" refer to as "Hot Rod Black" ???
Hello Anyone !!!
Posted By: Anonymous
Re: New Paint job on a budget thread. - 05/27/0702:46 PM
I did mine with 2 Quarts, but I already had a black base. You have to wait 12-24 hrs between coats anyways, so I'd say just go to Home depot, get 2 quarts. You should be able to get at least 2 coats out of quart if there thin enough.
If you're refering to the Hot Hues brand of Hot Rod black, it looks like it's just alot higher end satin black. 2 Part, so it's probably more durrable than rustoleum (and noxious to work with) However, at 7$ a quart for rustoleum, if it gets messed up, just slap another coat down and move on.
Re: New Paint job on a budget thread. - 05/27/0704:41 PM
Quote:
Quote: Ok here's a crazy idea. Has anyone ever tried putting clear polyurethane, like you put on furniture, on a car? I redid a table and it smooths out perfece and is high gloss.
I've read this entire thread and no I don't think anyone has. but thats what this is all about, experimenting. Why not try it on a test piece and let us all know how it turns out.
The Minwax stuff is clearly labelled "interior".
For a "clear coat", here is a thought. SEM Products sells an enamel based "clear" in rattle cans ( $3.98 each at a local supplier) That looks like about $150.00 in cans. I have never checked to see if they sell it in quarts or gallons. That may, or may not, be susceptible to the "roller technology".
Posted By: Anonymous
Re: New Paint job on a budget thread. - 05/27/0705:27 PM
i sprayed my 71 mustang with rustoleum primer with hvlp gun. got a lot of runs not sure if the presure on gun was to high or my mix primer+ mineral spirits was wrong.( i painted my dodge dart and few other cars before and never got so many runs) now i need to sand it down and get ready to spray top coat( sunburts yellow)
so my q. is. what ratio should i use paint/mineral spirits, and what best presure on gun? thx lukas
Re: New Paint job on a budget thread. - 05/27/0705:52 PM
Quote:
Ok here's a crazy idea. Has anyone ever tried putting clear polyurethane, like you put on furniture, on a car? I redid a table and it smooths out perfece and is high gloss.
The minwax polyurathane would tend to be soft. That is just the nature of that coating. I have several items of furniture that were minwaxed and then give a clear polyurathane finish. That was over five years ago...
I can still do the thumbnail indent in that finish. It just never hardens to the point where it is hard enough to trust on the outside of a car body. It would pick up ever little scratch and present problems when you try to wax or polish it.
Now... possibly if the polyurathane clear coat was being cut and applied as thinly as the polyurathane paint and thinner... it might harden in a way simalar to the paint.
I am not sure that difference is with the polyurathane paint as compared to the clear polyurathane coating... but I can safely say that the polyurathane paint will dry hard enough to equal an enamel sprayed paint job.
Even furniture finishers tend to swing over to clear coat acrylics to get a truly hardened surface. And although acyrlic can be used on high traffic floor areas etc... it still needs maintenance to keep the clear coat acrylic finish shiny and scrach free. But even the acrylic clearcoats are mostly used for interior use and I don't know how it would stand up to long term exposure to sun, uv, heat or water...
Possibly an experimenter might want to try to mix some Viagra in with the clear coat polyurathane or clear coat acryllic to see if it makes it harder and last longer
Re: New Paint job on a budget thread. - 05/27/0709:31 PM
Hi guys,
Today I told myself I am gonna do this. So I went down to Canadian Tire and purchased for now 2 different sandpaper grits, they are 150 grit, and 320 grit. I think charger and others recommended that people should not sand over 400 grit.
They didn't have 400 grit in stock so I ended up getting 320 grit. 320 will be my last sanding before rolling the car with Brightside Black (still have to search for it).
After I will purchase 600 or 800 grit to wetsand between 2 coats, etc...and maybe 1500 after for final coats...I am not sure yet.
I still have to sand all bodywork more, and then fill some dents with bondo, primer the bondo, and I should be ready to roll Brightside with mineral spirits...
It'll take a few days to finish sanding and bondo, but any pointers for the sanding stage?
- Michael
BTW: I sanded for 4 hours...my whole body hurts...lol
Re: New Paint job on a budget thread. - 05/27/0709:42 PM
Quote: i sprayed my 71 mustang with rustoleum primer with hvlp gun. got a lot of runs not sure if the presure on gun was to high or my mix primer+ mineral spirits was wrong.( i painted my dodge dart and few other cars before and never got so many runs) now i need to sand it down and get ready to spray top coat( sunburts yellow)
so my q. is. what ratio should i use paint/mineral spirits, and what best presure on gun? thx lukas
I am wondering the same. I 've been experimenting with a old piece of hood and 4 coats later it still looks like crap. I am starting to think about spraying my car, If I Knew the Mix Ratio. This rolling seems like a lot of Work and I am Not getting the results that everyone is getting. I think I have a problem with the mix ratio. It would be Nice if there was a set ratio, instead of "Should look like 1% milk". Personally I Can't tell the difference between Skim Milk and 2% or Whole Milk for that matter.
Re: New Paint job on a budget thread. - 05/28/0703:25 AM
Quote:
I am wondering the same. I 've been experimenting with a old piece of hood and 4 coats later it still looks like crap. I am starting to think about spraying my car, If I Knew the Mix Ratio. This rolling seems like a lot of Work and I am Not getting the results that everyone is getting. I think I have a problem with the mix ratio. It would be Nice if there was a set ratio, instead of "Should look like 1% milk". Personally I Can't tell the difference between Skim Milk and 2% or Whole Milk for that matter.
I think we would all love a standard recipe for successful mixing. But I believe the reason why we are deliberately vague is the the ratios are different even between colors by the same paint manufacturers.
The ratio for a black paint is not necessarily going to be the same ratio as the white or red etc.
And during the course of this thread... we have discussed primarily three brands of paint, Tremclad, Rustoleum and Brightside. Each of them being subtly different.
And even within the Tremclad and Rustoleu, there were normal versions, pro versions, farm versions etc. Again giving each a subtle difference from each other.
And so instead of trying to say that you need 30 mil of thinner to 70 mil of paint... we have to instead try to describe the wetness or consistency of the paint instead.
Another factor that enters into this 'wetness' or consistency is the mineral spirits themself. We already know that there is an evaporation time difference between regular mineral spirits and the low vapor mineral spirits. But to be honest with you... I suspect there are subtle differences between the different brands of mineral spirits. Logic says that a mineral spirit is a mineral spirit... is a mineral spirit.
But if we look at something like vodka or gin.. we can see that there are subtle differences between all the various brands of vodka or gin. So if the same applies to mineral spirits, this could explain some of the subtle differences in consistencies of the paints when mixing paint to mineral spirit ratios.
As an aside topic and something totally thinking outside the box.... I wonder how these paints would react if they were thinned with pure alchohol ? I know at the liquor store you can buy pure alcohol. Now wouldn't that be a real talking point if you rolled your paint job and it was cut with 30% alcohol from the liquor store.
Ok... so back to the topic at hand. The other factors that get into this ratio mixing question are the local temperatures that you are working in... ( more thinner for hot temps and less thinner in cooler temperatures )....
So this is why it has often been stressed throughout the discussion thread how it is really useful to do some experimenting and testing before laying any paint on your treasured ride.
Another way to look at this ratio/mixing thing is that it is almost like every paint job is truly a 'custom' paint job. In that the right ratio of paint to thinner for your car and color may be quite different from your neighbor down the street who is trying to do a different color on his ride.
So the practice work you do prior to applying the paint on the car will not only help you get your paint applying technique worked out... but as well it will help you determine the best paint to thinner mix that will work with the technique you subsequently yields the best result.
Dunno... but I hope that explains why the technique has not been able to reach the stage where exact measured amounts can be given with any expectation of consistent and repeatable results for everyone.
Re: New Paint job on a budget thread. - 05/28/0705:13 AM
Well, I am thinking I must be thinning the paint too much {Tremclad Satin Black} Anyone Know what the difference is between Paint Thinner and Mineral Spirits I am Thinking it is Just the Evaporation Rate
Posted By: Anonymous
Re: New Paint job on a budget thread. - 05/28/0711:58 AM
Quote: We discussed this 'Top Secret' brand of paint in previous threads and I am wondering if anyone ever got around to experimenting with it ?
They offer 102 different colors and its specs seem to indicate that it should produce results similar to the Brightside polyurathane.
Re: New Paint job on a budget thread. - 05/28/0702:10 PM
Quote: Well, I am thinking I must be thinning the paint too much {Tremclad Satin Black} Anyone Know what the difference is between Paint Thinner and Mineral Spirits I am Thinking it is Just the Evaporation Rate
My can of paint thinner says "100% mineral spirits".
Way earlier on the original thread there was a conversation about what to thin the paint with. It was determined that (for Tremclad/Rustoleum) that using something other than actual mineral spirits was not good.
It wasn't just the evaporation rate, it was something about thinning using a product that was "chemically compatible" with the paint.
Posted By: Anonymous
Re: New Paint job on a budget thread. - 05/28/0702:20 PM
[quote} I am wondering the same. I 've been experimenting with a old piece of hood and 4 coats later it still looks like crap. I am starting to think about spraying my car, If I Knew the Mix Ratio. This rolling seems like a lot of Work and I am Not getting the results that everyone is getting. I think I have a problem with the mix ratio. It would be Nice if there was a set ratio, instead of "Should look like 1% milk". Personally I Can't tell the difference between Skim Milk and 2% or Whole Milk for that matter.
If it helps, I'm using Rustoleum Professional gloss black. I started with about a 40% mix but it was too thin, I switched to a 20% mix for the last two coats and while it sanded smooth and looks great, I think when I do the car I'm gonna go with a 25% mix - or 3/4 cup paint to 1/4 cup spirits. I have some plastic peices that go under my taillights that I am going to start rolling today at the 25% mix. I'll update you on my progress.
Posted By: Anonymous
Re: New Paint job on a budget thread. - 05/28/0702:57 PM
SOMEONE IN THE KNOW PLEASE TEST YOUR PERFECT MIX WITH A VISCOSITY CUP!! Why are we all banging our heads on the mix issue? I've seen 50/50 down to 10%. C'mon, someone be a hero and help us out! This method would take into account everyone's local temps. http://www.amazon.com/Wagner-0153165-VISCOSITY-CUP/dp/B00069P9KG
Posted By: Anonymous
Re: New Paint job on a budget thread. - 05/28/0704:26 PM
Quote: SOMEONE IN THE KNOW PLEASE TEST YOUR PERFECT MIX WITH A VISCOSITY CUP!! Why are we all banging our heads on the mix issue? I've seen 50/50 down to 10%. C'mon, someone be a hero and help us out! This method would take into account everyone's local temps. http://www.amazon.com/Wagner-0153165-VISCOSITY-CUP/dp/B00069P9KG
exactly, why is everyone banging their heads? its not that serious, just experiment a lil and u will find what works for you. there is not going to be any PERFECT percent mix that works for everyone, with every paint, in every climate.
Posted By: Anonymous
Re: New Paint job on a budget thread. - 05/28/0705:07 PM
here is my 71 mach 1 after primer rustoleum white primer 1 coat. sprayed with hvlp gun
Re: New Paint job on a budget thread. - 05/28/0705:52 PM
Quote:
Quote: SOMEONE IN THE KNOW PLEASE TEST YOUR PERFECT MIX WITH A VISCOSITY CUP!! Why are we all banging our heads on the mix issue? I've seen 50/50 down to 10%. C'mon, someone be a hero and help us out! This method would take into account everyone's local temps. http://www.amazon.com/Wagner-0153165-VISCOSITY-CUP/dp/B00069P9KG
exactly, why is everyone banging their heads? its not that serious, just experiment a lil and u will find what works for you. there is not going to be any PERFECT percent mix that works for everyone, with every paint, in every climate.
i've allways said it is highly dependant on temperature and most importantly humidity. When i do the first few coats, if it's a new can of paint, i usually just use the straight paint (no mineral spirits), as i approach the final 4 coats, i typically add about 10%, and near the final coat i'm at about 15%, 20% MAX (regardless of climate). But i can say that there is no set mix, i've never exceeded 20%, and the conditions change as the can is used, so as the can gets older, and has been used i find you have to thin it more and more. But, it's more of a "feel" thing, i know when i'm mixing the paint in my tray, what consistancy i need, you either "got it" or you don't!!!!! I could just lie and say use 10% if that makes you all happy!!!
Posted By: Anonymous
Re: New Paint job on a budget thread. - 05/28/0705:57 PM
exactly^^^^ thats another thing i also noticed, that the paint gets thicker the longer and more times the cans been open. and ive also had the paint thicken up during the course of a coat. by the time ur gettin near the end of a coat and the end of the paint in the tray, its gonna be thicker than when u first thinned it, so u have to really just go by feel
Posted By: Anonymous
Re: New Paint job on a budget thread. - 05/28/0706:09 PM
well im pretty much done.. would like it to be a lil more shiny in some places, looked pretty dull at night. sorry for the crap pics but it was gettin dark, ill get some better ones soon
Posted By: Anonymous
Re: New Paint job on a budget thread. - 05/28/0708:34 PM
Can anyone tell me if inital prep needs to be perfect? I am just done sanding 150 grit and some parts are not that dull yet.
I will be doing 320 grit before painting.
Does the paint stick to parts that are still clear?
Posted By: Anonymous
Re: New Paint job on a budget thread. - 05/28/0710:14 PM
i dont know if i did something wrong but the clear didnt stick. i let it dry for a week then wetsanded then buffed then today i did some trim work and when i pulled the tape of slowly the clear came right off with it in big sheets.
Posted By: Anonymous
Re: New Paint job on a budget thread. - 05/29/0701:06 AM
I don't need primer for Brightside correct?
How has your Brightside held up without primer?? For people who have experience..
Re: New Paint job on a budget thread. - 05/29/0702:25 AM
Ok, before I get started with removing the trim. What is the final opinion, does Brightside work as well as Rustoleum?
Posted By: Anonymous
Re: New Paint job on a budget thread. - 05/29/0702:57 AM
Quote: Ok, before I get started with removing the trim. What is the final opinion, does Brightside work as well as Rustoleum?
From what I've seen, Brightside is better that Rustoleum, and quite a bit more expensive. Since I'm on a major budget I went with Rustoleum Professional. I got a gallon of gloss black at Wal-Mart for $25. I think I read that Brightside is like $30 a quart, someone correct me if I'm wrong.
Re: New Paint job on a budget thread. - 05/29/0703:11 AM
Here is a little info on Brightside. Apparently requires its own thinner, and a max thinning of 10%. Brightside Spec page
Here is what I am not following. Both Rustoleum and Brightside are "enamels". There is a lot of talk here about final sanding and buffing. I always thought that enamel had a "layer" of gloss, and if you went though that you lost the gloss.
Is that true anymore?
Posted By: Anonymous
Re: New Paint job on a budget thread. - 05/29/0703:23 AM
Quote: Here is a little info on Brightside. Apparently requires its own thinner, and a max thinning of 10%. Brightside Spec page
Here is what I am not following. Both Rustoleum and Brightside are "enamels". There is a lot of talk here about final sanding and buffing. I always thought that enamel had a "layer" of gloss, and if you went though that you lost the gloss.
Is that true anymore?
brightside can be thinned with mineral spirits, and it doesnt need to be thinned much. i rolled it straight from the can at first, and thinned the last coats a lil bit. and obviously frm all the results that have been posted here, sanding and polishing brings out shine with these paints.
Posted By: Anonymous
Re: New Paint job on a budget thread. - 05/29/0703:26 AM
Quote: JDMspec,
Have you polished/wetsanded the final coat yet? If so, what did you use?
yes, i wetsanded up to 2000, and polished with a bunch of stuff lol.. meguiars cutting compound, turtlewax polish compound, scratch/swirl remover, mothers power polish, turtle wax super hard shell wax
Posted By: Anonymous
Re: New Paint job on a budget thread. - 05/29/0703:44 AM
question about clearcoating.. with this type of paint or with bc/cc.. do u wetsand the paint b4 u clear? can you?
Re: New Paint job on a budget thread. - 05/29/0705:47 AM
Quote: I don't need primer for Brightside correct?
How has your Brightside held up without primer?? For people who have experience..
YES AND NO... it depends on the body surface you are going to paint.
If you have bondo work... then primer the body. Bondo sucks in paint like a thirsty wall.
If you are just scruffing the original paint on your car... then you can probably go straight to paint.
If you have a car of many colors ( where body parts of different colors have been installed on your car ) then get a primer on there to give one uniform starting color upon which to apply your paint color.
If your final prep work on the body still shows sanding scratches... then you might want to go with a primer layer just to fill in the scratches and to give yourself a better chance at beginning the paint job on as smooth a surface as possible.
If you have bared metal... the choice is yours. All three paints can be applied directly to bared metal... or you can go 'old school' and primer just to absolutely ensure that those bare metal sections will not later have rust problems.
Re: New Paint job on a budget thread. - 05/29/0705:58 AM
Quote:
Here is what I am not following. Both Rustoleum and Brightside are "enamels". There is a lot of talk here about final sanding and buffing. I always thought that enamel had a "layer" of gloss, and if you went though that you lost the gloss.
Is that true anymore?
NO. Brightside is a one stage polyurathane.
Rustoleum and Tremclad are enamels....
Both handle a final finishing equally... and both require about the same amount of work...
All 'glossy' paints have a glossy surface when freshly painted. But by wetsanding that final coat of paint you will be removing that 'gloss' while at the same time removing any surface imperfections and further smoothing and leveling the outer surface. As such... when you go to the polishing stage and waxing stage you will end up with a 'glossier' and 'shinier' surface because you have removed the surface imperfections. The smoother the top surface is, the shinier and better depth of gloss you will get.
Think of it this way. Have you ever seen what happens to stones when the gemologist guys put a bunch of rough rocks into a tumbler ( sort of like a small cement mixer type contraption ). After a couple of hours of being spun around in that tumbler the 'rough stones' end up with highly polished and smooth surfaces that are pretty enough to make into jewelery.
The final wet sanding, polishing, waxing and buffing are simply taking the painted glossy surface and further improving on it.
But in answer to your question... just about ANY paint or surface coating can be improved upon with some degree of wet sanding, polishing and waxing.
Re: New Paint job on a budget thread. - 05/29/0706:21 AM
I got a chance today to actually see the article about the $99 paint job that was in the Hot Rod magazine. I think they made an error in not making it their main story on the cover.
But I do believe that since they published that article, it may become one of the most sought after issues of their magazine as word of mouth spreads about it. Much the same as how word of mouth has spread this message thread on to other auto forums.
I think that article was a pretty decent representation of what has been going on here in this message thread. And as previously noted by one of the folks who first spoted that article in this month's Hot Rod magazine... they have validated that this paint method does work.
Sad to see that Charget didn't get mentioned... and even sadder that they used that beater of a Falcon for their paint job... compared to something sportier and snazzier.... but they did prove to themselves and their readership that folks can get a decent paint job by putting some sweat equity into their paint job and save bucks at the same time.
.
Posted By: Anonymous
Re: New Paint job on a budget thread. - 05/29/0706:38 AM
While looking at the interlux website I noticed a 2 part polyurethane paint that is also meant to be rolled on. The stuff is called perfection and is advertised as "The ultimate 2-part polyurethane gloss finish". Anyone tried this stuff or thinking of trying it? I might use it on my next project to see how well it works out
Re: New Paint job on a budget thread. - 05/29/0707:11 AM
Quote:
Quote:
Quote: SOMEONE IN THE KNOW PLEASE TEST YOUR PERFECT MIX WITH A VISCOSITY CUP!! Why are we all banging our heads on the mix issue? I've seen 50/50 down to 10%. C'mon, someone be a hero and help us out! This method would take into account everyone's local temps. http://www.amazon.com/Wagner-0153165-VISCOSITY-CUP/dp/B00069P9KG
exactly, why is everyone banging their heads? its not that serious, just experiment a lil and u will find what works for you. there is not going to be any PERFECT percent mix that works for everyone, with every paint, in every climate.
i've allways said it is highly dependant on temperature and most importantly humidity. When i do the first few coats, if it's a new can of paint, i usually just use the straight paint (no mineral spirits), as i approach the final 4 coats, i typically add about 10%, and near the final coat i'm at about 15%, 20% MAX (regardless of climate). But i can say that there is no set mix, i've never exceeded 20%, and the conditions change as the can is used, so as the can gets older, and has been used i find you have to thin it more and more. But, it's more of a "feel" thing, i know when i'm mixing the paint in my tray, what consistancy i need, you either "got it" or you don't!!!!! I could just lie and say use 10% if that makes you all happy!!!
So the Way I See it , Basically You Just Keep the Paint the Same Consistency as it was when you First Open the Can. That makes Sense to Me because Tremclad say's Nothing about Thinning the Paint
Re: New Paint job on a budget thread. - 05/29/0709:05 AM
Quote: While looking at the interlux website I noticed a 2 part polyurethane paint that is also meant to be rolled on. The stuff is called perfection and is advertised as "The ultimate 2-part polyurethane gloss finish". Anyone tried this stuff or thinking of trying it? I might use it on my next project to see how well it works out
The Perfection paint is amazing... but the problem with it for our purposes is :
a ) that you don't have anywhere near the wroking time to apply the paint before it starts curing on you. The reason it is 'two part polyurathane' is that one part is the paint and the other part is the catalyst to speed up the curing time and the hardness of the paint and ...
b ) it is not really designed to be thinned down.
That is why I went with the Brightside by Interlux - because it is a one part polyurathane. It gives you more time to 'work' the paint.. and it is compatible with thinners.
And to ice things off... Perfection cost even more than Brightside..
My suggestion would be to stick with a one stage polyurathane because it is more painter/roller friendly.
.
Posted By: Anonymous
Re: New Paint job on a budget thread. - 05/29/0710:06 AM
Not going well for me im getting a lot of roller marks, orange peel and patches of shine and then patches of matt. Ive been thinning 10% with mineral spirits (Disolvente here in Spain) and also tried increasing the amount of thinner and tried applying very little at once and a lot with similar results. Anyone got any ideas from the pics and description, any help very much appreciated;
Re: New Paint job on a budget thread. - 05/29/0712:09 PM
Quote:
Not going well for me im getting a lot of roller marks, orange peel and patches of shine and then patches of matt. Ive been thinning 10% with mineral spirits (Disolvente here in Spain) and also tried increasing the amount of thinner and tried applying very little at once and a lot with similar results. Anyone got any ideas from the pics and description, any help very much appreciated;
What brand of paint are you using ?
And is the mineral spirits (Disolvente in Spain) a 100% pure mineral spirit or is it mineral spirit mixed with other thinner type solvents ?
How many coats of paint is that in the picture ?
It looks like quite a bad case of orange peel. Actually it looks more like the texture on an elephant's bum You will probably have to let it dry for a few days and then sand it down to a smooth surface before adding any more coats of paint.
My initial guess at what happened is that it looks like more than one coat and the first coat was not fully cured or hardened. When the next coat was added, the solvent softened the lower layer of paint and caused the wrinkles.
The flat spots ( without the gloss ) might indicate that the lower layer was not fully cured and hardened before the next coat was added. This would result in the vapors from the mineral spirit of the lower coat evaporating up and through the coat above it. The escaping vapors would give the top surface a matte look.
Those are my first thoughts... But I would probably want more info about the brand of paint and whether the mineral spirits were 100% pure mineral spirits..
.
Posted By: Anonymous
Re: New Paint job on a budget thread. - 05/29/0701:56 PM
Quote: Not going well for me im getting a lot of roller marks, orange peel and patches of shine and then patches of matt. Ive been thinning 10% with mineral spirits (Disolvente here in Spain) and also tried increasing the amount of thinner and tried applying very little at once and a lot with similar results. Anyone got any ideas from the pics and description, any help very much appreciated;
Are you using the white high density "professional" rollers? If so you might try up-ing your mineral spirits ratio to 20% or maybe even 30%. This weekend I brushed some paint straight from the can on the panel behind my tailights and it looks like $%#*, it's way to thick. No biggie there cause you'll never see it anyway, but when I'm rollering my other panels with the 20% mix it lays super smooth. So smooth in fact, that I've done away with all but 1200 and 2000 grit for my wetsands. Anything else is to harsh for the amount of peel I need to remove. BTW what kind of paint is that?
Posted By: Anonymous
Re: New Paint job on a budget thread. - 05/29/0702:44 PM
I totally agree re the amount of dust that wetsanding doesn't create. When I dry sanded between coats, it was more like a wipe to remove little imperfections. And Steve C - I think you could go the satin route and then polish it up to a gloss, but I don't think it would be any easier than it would be to go full gloss anyway. And I'm not sure how glossy the final result would be vs a full-gloss job.
Re: New Paint job on a budget thread. - 05/29/0703:15 PM
OK - did a test fender over the weekend.
I was hitting some of the nooks and crannies with a spray bomb, and it became real clear to me how much effort would be required to get a nice quality finish rolling gloss over the whole car. Maybe I'm too much of a perfectionist, but I think I would end up spending the rest of the summer rolling, sanding, polishing, over and over.
Aussie's car looks great, but I probably have at least twice the surface area to deal with on my Charger.
So I'm going Satin, at least for now. I used Rustoleum, thinned about 25% (give or take) with 100% mineral spirits. It was pretty watery.
My first section was way too thick (I could no longer see the previous red color under the new black). And MAN it was running like crazy. I used a second clean roller to re-work the entire panel, spreading the heavy coat in the first area around the rest of the panel.
I think I'll back down on the thinner a bit for my next coat. Or, it sounds like the mixed paint in the can will thicken up a bit by the next time I get back to it.
Re: New Paint job on a budget thread. - 05/29/0703:17 PM
Here's the after:
This is only one coat. Won't be able to do another coat until this weekend.
Posted By: Anonymous
Re: New Paint job on a budget thread. - 05/29/0703:25 PM
first coat didn't came out to well. i thined paint about 20-25% with mineral spirits, hvlp gun 35psi on gun got so many runs with first coat, now need to wait to dry and wet sand this @#$%.
Re: New Paint job on a budget thread. - 05/29/0703:34 PM
Quote: first coat didn't came out to well. i thined paint about 20-25% with mineral spirits, hvlp gun 35psi on gun got so many runs with first coat, now need to wait to dry and wet sand this @#$%.
any advice befor next coat?
test on an old hood, i can't stress this enough, you have to learn the paint, process ect..... I've sprayed the paint before, using a HVLP gun, and it flowed and sprayed perfectly, actually the nicest paint i've ever sprayed, and the workability was incredible. If you got runs, you for sure put too much paint, or thinned it too much. Have you painted before? Don't stress too much, let it dry a day and wetsand with 600-800, it will go quick. I could wetsand that car by hand in about 3-4 hours regardless of how much peel there is, and runs. If you shoot it right, you should wetsand that car in less than 1 hour. Don't wait too long for it to dry, it will be harder to wetsand.
Posted By: Anonymous
Re: New Paint job on a budget thread. - 05/29/0705:35 PM
Quote:
What brand of paint are you using ?
And is the mineral spirits (Disolvente in Spain) a 100% pure mineral spirit or is it mineral spirit mixed with other thinner type solvents ?
How many coats of paint is that in the picture ?
Its brightside im not sure what disolvente is its the normal thing used to thin paint I used the same stuff to thin the paint I spray painted last year.
Thats about 3/4 coats and despite wetsanding to supersmooth between this is what it looks like. I am using the highest density rollers Ive found in my local paint shops, maybe thats not enough....?? Will wetsand down tomorrow and try to paint another coat but 30% thinned.
I left it 24 hours between coat and its quite hot here.
Posted By: Anonymous
Re: New Paint job on a budget thread. - 05/29/0708:27 PM
Quote:
I left it 24 hours between coat and its quite hot here.
The hotter it is, the thinner your gonna want your paint, it may be that the surface of your coats is curing before you finish working it causing the peel.
Re: New Paint job on a budget thread. - 05/29/0709:04 PM
Quote:
Its brightside im not sure what disolvente is its the normal thing used to thin paint I used the same stuff to thin the paint I spray painted last year.
Thats about 3/4 coats and despite wetsanding to supersmooth between this is what it looks like. I am using the highest density rollers Ive found in my local paint shops, maybe thats not enough....?? Will wetsand down tomorrow and try to paint another coat but 30% thinned.
I left it 24 hours between coat and its quite hot here.
Well... I would not be wet sanding at this point. I would pull out something in the 400 to 600 range and use a sander to level it out. The way some of it looks, it almost appears like you could take a scraper and scrape it off.
The problem with this Spanish " disolvente " is that it may not be 100% mineral spirit. Some companies sell solvents that contain a little of this and a little of that ( oh and some mineral spirit ).
We know through experimentation how 100% mineral spirit ( both regular and odorless versions ) will react with the paint.
But if this packaged Spanish 'disolvente' is a combination of different solvents, it may 'cure' too fast... or it may be more powerful than 100% mineral spirit and have the ability to eat away at the lower coating.
After all... that is what mineral spirit is capable of... helping to remove uncured paint during a clean up... or for washing your hands to get the paint off them.
The one absolute answer to ensuring that the mineral spirit is not part of the problem... is to buy the 'genuine Interlux Brightside thinner'... I believe it is product # 333. At least that way you would be guaranteed 100% compatibility and predictability on how it will blend with the Brightside paint. Might cost a few bucks more than a no-name 'disolvente' - but at least you will know what you are working with.
Since you are using Brightside... the game plan might be to seriously sand the current paint back to square one. I know it is a pain taking 10 steps backward after all that work... but sometimes that is the easiest path to getting a decent paint job in the end.
Ok... so sand the puppy back to square one. Wipe it all down with a cloth that is gently dampened with REAL 100% mineral spirits. LET IT DRY for one or two days.
Take a 'tack' cloth and wipe down the surface of any dust or bugs that landed on it over the two day you let dry out.
Working in the shade... ( no direct sun ) and possibly early in the morning or late at night when the temperature is coolest you will paint.
Take the Brightside paint and don't cut it at all with mineral spirits. Pour it straight from the can into your paint tray. APPLY it thinly.... don't try to get 100% color coverage on this first painting. Just pretend you are trying to 'tint' the color on to the car. The thinner the layer the better. Keep sayin to yourself... 'thinest is bestest'...
Let the vehicle dry in the shade... Don't leave it out in the sun or where the paint will dry faster than it normally would like to. You have to remember that the paint is using this time to self-level... and if it dried too quickly it may not reach its maximum level of smoothness before the drying process stops it from leveling.
Now... let that initial layer dry for two days. Let's just make sure this puppy is 100% dry before going to the next coat of paint.
For your next painting session... again pick a time early in the morning or late at night when temperatures are at their coolest.
IF it is a rainy day.... or foggy day... or the air is heavy with humidity.... don't paint on that day. Wait until you have a day where the air is dry... ( I know it is a pain to have to be relying on the weather so much... but it really does impact how the paint reacts and dries ).
Do your next coating of Brightside... just like you did the first layer. Use as little paint for each section as you can. The idea is not to load up a big wet roller and smear it around. The trick is to take as little as possible on the roller and spread it on like you are the cheapest guy in the world and you are trying to stretch out every drop of paint to its maximum.
Again... once this phase of the paint job is done... leave it in the shade and let it dry for two or three days.
Then come back again on a nice dry and cool morning or evening and repeat the process again. Applying a third superthin layer of paint.
Let it dry for a few days. At this point decide whether you want to add another layer of paint or to do a wet sand to work out any rough spots in the paint that has been applied so far.
If you are lucky... you may be able to go another coat of paint. But even if you have to do a wet sanding... it should not be much work... and your wet sanding should be very light... because the layers of paint can't be too thick at this point.
Hopefully this will help get your from your present state to a much better and more presentable state...
Marq
Posted By: Anonymous
Re: New Paint job on a budget thread. - 05/29/0709:17 PM
"The trick is to take as little as possible on the roller and spread it on like you are the cheapest guy in the world and you are trying to stretch out every drop of paint to its maximum."
LOL, Too Funny!! I was just laughing at myself thinking the exact same thing as I was rolling my taillight panels yesterday.
Posted By: Anonymous
Re: New Paint job on a budget thread. - 05/29/0710:34 PM
Alright, another Satin Black ride!
Posted By: Anonymous
Re: New Paint job on a budget thread. - 05/30/0712:57 AM
For those who sprayed rustoleum... What did u use? and at what psi thinnin %'s etc?
I have a 30 gal speedaire - and a hvlp gun...
What tip size should be used? I tried searching but the threads are over 100 pages... lol
If anyone can help that'd be great!
I'm loving the satin black so that's what im going for...
Posted By: Anonymous
Re: New Paint job on a budget thread. - 05/30/0701:41 AM
Quote: For those who sprayed rustoleum... What did u use? and at what psi thinnin %'s etc?
I have a 30 gal speedaire - and a hvlp gun...
What tip size should be used? I tried searching but the threads are over 100 pages... lol
If anyone can help that'd be great!
I'm loving the satin black so that's what im going for...
rustoleum sunburst yellow + mineral spirits after setting gun right and presure on gun 46psi it came out good still have few runs, but thats my fault still cant get used to hvlp gun its putting much more paint then my old gun, oh yeah for me, mix 6-3 (6 part of paint to 3 part of mineral spirits) work out the best. make sure u use pressure regulator on gun, without it set presure around 10 psi higher on compresor, depends how long your pressure hose is
Posted By: Anonymous
Re: New Paint job on a budget thread. - 05/30/0701:48 AM
20 feet... but im up for getting a new hose... it's leaky once in a while. Also- for some reason my compressor fills up and does not turn off automatically... any idea how i can fix that?
Im going to get some satin black tomorrow and test it on an old fender. Im painting in a garage- as far as ventilation and cleanliness... I assume I have to take everything out and leave the garage door slightly open?
Im new at this... sorry- Thanks for all! I love this thread
Re: New Paint job on a budget thread. - 05/30/0702:09 AM
Quote:
rustoleum sunburst yellow + mineral spirits after setting gun right and presure on gun 46psi it came out good still have few runs, but thats my fault still cant get used to hvlp gun its putting much more paint then my old gun, oh yeah for me, mix 6-3 (6 part of paint to 3 part of mineral spirits) work out the best. make sure u use pressure regulator on gun, without it set presure around 10 psi higher on compresor, depends how long your pressure hose is
One of the best tips shared in the thread by a previous spray painter was to have a couple of those high density 4 inch foam rollers nearby while spraying. IF you spot a run... you can quickly hit them with a clean roller ( not loaded up ) and work the run out. Then it will self-level along with the sprayed on paint and you won't be able to detect where the run occured.
It's more of a problem fixing runs after the paint has cured. So by whacking runs right away with a roller... your fix on the fly will blend right in and be undetectable.
That is one of the benefits of this paint method - whether rolling or spraying... in that the curing time of the paint allows you enough time to work out the problems on the fly...
.
Posted By: Anonymous
Re: New Paint job on a budget thread. - 05/30/0706:52 AM
Thats a good idea! =)
Well, I found out why my compressor wont go off- the pressure switch is messed up... it just stays on weather its set to off or auto/on-
Anyone know where i can get a new one cheap?
Thanks much!
Quote:
Quote:
rustoleum sunburst yellow + mineral spirits after setting gun right and presure on gun 46psi it came out good still have few runs, but thats my fault still cant get used to hvlp gun its putting much more paint then my old gun, oh yeah for me, mix 6-3 (6 part of paint to 3 part of mineral spirits) work out the best. make sure u use pressure regulator on gun, without it set presure around 10 psi higher on compresor, depends how long your pressure hose is
One of the best tips shared in the thread by a previous spray painter was to have a couple of those high density 4 inch foam rollers nearby while spraying. IF you spot a run... you can quickly hit them with a clean roller ( not loaded up ) and work the run out. Then it will self-level along with the sprayed on paint and you won't be able to detect where the run occured.
It's more of a problem fixing runs after the paint has cured. So by whacking runs right away with a roller... your fix on the fly will blend right in and be undetectable.
That is one of the benefits of this paint method - whether rolling or spraying... in that the curing time of the paint allows you enough time to work out the problems on the fly...
.
Posted By: Anonymous
Re: New Paint job on a budget thread. - 05/30/0710:42 AM
Thanks for the help mark Ive got through 2 cans of brightside now so that probably a sign of me laying it on too thick do i need to go back to square one or to a point where everything is uniformly smooth?
Since were only talking about thinning 10% could I apply it without thinning, reason is it took a couple of weeks to get the brightside since I had to import 6 750ml cans from England and I fear the spanish may not have the #333?
Re: New Paint job on a budget thread. - 05/30/0701:17 PM
Quote: Thanks for the help mark Ive got through 2 cans of brightside now so that probably a sign of me laying it on too thick do i need to go back to square one or to a point where everything is uniformly smooth?
Since were only talking about thinning 10% could I apply it without thinning, reason is it took a couple of weeks to get the brightside since I had to import 6 750ml cans from England and I fear the spanish may not have the #333?
I would say that at this point it is worth using a power sander to level out the coatings down to one uniform and level surface.
Depending on how wicked some of those elephant wrinkles are, you may end up having to remove quite a bit to remove all those peaks and level it down to a common level of all the valleys.
In other spots where the elephantitis isn't so bad... you may be able to just reduce the surface to one uniform level and not have to remove as much.
One beauty of the Brightside is that it is designed to be applied by roller straight out of the can. So you can probably avoid having to go the 333 route as long as you stick to the plan to slap on superthin layers the next time you go to apply the paint.
The main benefit the 333 would give you is 'more working time' to work on the paint and do secondary rolling over areas where bubbles might form after you freshly apply the paint or to catch any runs.
I have never been to Spain... but from what I 'think I know' of your climate.. you probably are in a relatively consistently warm climate - but you may have a humidity problem there if you are in the coatal areas of that country. If so, that is where the 333 might be of some benefit to you.
The key thing at this point is to get your subsurface as smooth as possible before restarting your painting.
And don't forget. Act like Scrooge with that paint... Pretend you have the last cans of that paint in the world. I would say that you should use no more than 1/2 of a 750 ml can of paint per painting session.
When pouring your paint into the tray... only put about 1/8th of the can in the tray at a time - and keep the lid sealed tight on the can while you are painting. This will help keep the paint fresh and at roughly the same of freshness as you start each of the four main sections on your vehicle.
So if you follow that recipe... you should only need to pour paint in the tray 4 times during a painting session.
Figure on 1/8th for the roof and hood, 1/8th for the left side panels, 1/8th for the right side panels and 1/8th for the rear trunk area. Yup... the layering should be that thin...
Hopefully that gives you a better idea of how Scroogy you should be with the paint.
Give this recipe a try and hopefully by the time you have laid down that first coat, with just half of a can... you will know whether you should spring for the 333 thinner to give yourself more working time..
Re: New Paint job on a budget thread. - 05/30/0702:21 PM
i went to the book store last night looking for the hotrod article and i couldn't find it, anyone have a copy they can scan and post?
thanks
Posted By: Anonymous
Re: New Paint job on a budget thread. - 05/30/0702:55 PM
Just throw my satin spraying experiences in the mix... I used 4:1 as a Paint:Thinners ratio, and 40psi. I opened the garage door, and that was it as far as ventilation goes. Using mineral spirits meant it wasn't too smelly - so I actually got NO complaints from my wife!! Try that with a Urethane... And the same comments apply re runs - if you get any, just quickly wipe them (and the roller idea sounds better than my finger) and let the coat self level. You can rub them out when the coat's dry anyway...
It depends on the size of your car and the size of your garage, but I'd think that a 20 foot hose might not be long enough, and you don't want to drag the hose across a freshly painted panel...
One thing I did find when I was using a touch up gun for door jambs etc was that the paint would dry at the tip of the gun, and therefore the paint supply disappeared. The cure was to periodically wipe the tip. That only happened on the touch-up gun however - probably because the nozzle was SO much smaller than the 1.2 I used with the real gun.
Posted By: Anonymous
Re: New Paint job on a budget thread. - 05/30/0704:03 PM
Quote: Just throw my satin spraying experiences in the mix... I used 4:1 as a Paint:Thinners ratio, and 40psi. I opened the garage door, and that was it as far as ventilation goes. Using mineral spirits meant it wasn't too smelly - so I actually got NO complaints from my wife!! Try that with a Urethane... And the same comments apply re runs - if you get any, just quickly wipe them (and the roller idea sounds better than my finger) and let the coat self level. You can rub them out when the coat's dry anyway...
It depends on the size of your car and the size of your garage, but I'd think that a 20 foot hose might not be long enough, and you don't want to drag the hose across a freshly painted panel...
One thing I did find when I was using a touch up gun for door jambs etc was that the paint would dry at the tip of the gun, and therefore the paint supply disappeared. The cure was to periodically wipe the tip. That only happened on the touch-up gun however - probably because the nozzle was SO much smaller than the 1.2 I used with the real gun.
1.2mm tip for the car? Cool- Thanks for the info. My garage is very tight- I might have to spray one side, front and back. Wait for it to dry then move the car and spray the other. I dont think i will but would this affect the job?
What filters/water traps did u use? I had to replace the one I had on the compressor as it was an oiler/filter... I mainly used it for air tools.
Also I'm getting a 50 foot hose today aswell as a p/s reg- thanks!
Re: New Paint job on a budget thread. - 05/30/0704:52 PM
Quote:
Quote: Just throw my satin spraying experiences in the mix... I used 4:1 as a Paint:Thinners ratio, and 40psi. I opened the garage door, and that was it as far as ventilation goes. Using mineral spirits meant it wasn't too smelly - so I actually got NO complaints from my wife!! Try that with a Urethane... And the same comments apply re runs - if you get any, just quickly wipe them (and the roller idea sounds better than my finger) and let the coat self level. You can rub them out when the coat's dry anyway...
It depends on the size of your car and the size of your garage, but I'd think that a 20 foot hose might not be long enough, and you don't want to drag the hose across a freshly painted panel...
One thing I did find when I was using a touch up gun for door jambs etc was that the paint would dry at the tip of the gun, and therefore the paint supply disappeared. The cure was to periodically wipe the tip. That only happened on the touch-up gun however - probably because the nozzle was SO much smaller than the 1.2 I used with the real gun.
1.2mm tip for the car? Cool- Thanks for the info. My garage is very tight- I might have to spray one side, front and back. Wait for it to dry then move the car and spray the other. I dont think i will but would this affect the job?
What filters/water traps did u use? I had to replace the one I had on the compressor as it was an oiler/filter... I mainly used it for air tools.
Also I'm getting a 50 foot hose today aswell as a p/s reg- thanks!
My HVLP gun had a 1.5mm tip, that seemed good for anything, single stage acrylic enamel, BC/CC, and tremclad, just make sure you have no water in your system, and i allways like to clamitize my compressor just prior to paint, putting the tank pressure to 5/10psi and putting an elastic on the paint gun trigger which is empty and let it run for 20 mins or so, then clean the gun, and blow out the hose really well, i find that it reduces the amount of water that condenses in the compressor, i also drain all the water out of the tank after running it dry like that. Also i ususally keep the compressor out of the garage, otherwise the intake will get really plugged. I paint typically with 30-45psi on the HVLP gun. You could also do a dry practice run, with no paint in the gun and plan out your spray technique, basically going thru the motions without painting the car just planning your attack of all the pannels, you may find depending on the car your painting, that you've left an area for too long before getting back to it, and you can alter your order of painting. ALso, one big issue you'll have painting in your garage, is fall-out, the paint in the air that likes to settle on your hood and roof, i try to do the sides first, then avoid the roof/trunk/hood, and let the air clear for a bit, and tack the roof/trunk/hood with a tack cloth and then paint the flat surfaces, otherwise you may end up with some fallout on your pannels, espically with single stage paints. With tremclad/rustoleum i did'nt have that problem as much almost not at all. I find the tremclad/rustoleum does'nt linger in the air as long, and smells about 90% less than single stage auto paints.
Posted By: Anonymous
Re: New Paint job on a budget thread. - 05/30/0706:37 PM
As far as the 1.2 tip goes - it was not through any real planning - it was just the one that was on the gun! But it seemed to work OK. And as for water traps....er....I didn't use one. I know that's wrong, and maybe I was just lucky as I didn't get any drips through the gun. That said, I would use one as insurance when I do another car.
And as for painting half the car at a time - you've gotta do what you've gotta do! With a satin finish it'll be more forgiving when you get overspray (as you will when you do the horizontal parts), but you just have to deal with what happens when it happens! Again - don't let it put you off. I have no idea why, but I definitely didn't get as much airborne paint dust with the Tremclad as I have in the past with single stage urethanes. The tip about moving the compressor outside is a good one - if your neighbors don't mind the noise!
And as for the 50' hose - it's worth it for sure, but they're a pain to roll up afterwards, and watch for kinks!!
Posted By: Anonymous
Re: New Paint job on a budget thread. - 05/30/0707:49 PM
also a moisture trap pu tin a bucket of ice when painting will help to remove water from your lines.
Re: New Paint job on a budget thread. - 05/30/0709:20 PM
Quote: i went to the book store last night looking for the hotrod article and i couldn't find it, anyone have a copy they can scan and post?
thanks
IIRC V8Nut offered to host it if someone would PM him a scan. (Since there might be copyright issues if someone here in the states posted it).
I too have been looking for the mag and can't find it. BTW - its a crime that you were not prominently mentioned.
I still remember post like #8 in the original original thread where you posted your pic and the response was "Dude! You did that with a roller?!" That's exactly what I was thinking when I saw the pic. Roller??? Whaaaat????
Posted By: Anonymous
Re: New Paint job on a budget thread. - 05/30/0709:28 PM
Quote:
V8Nut offered to host it if someone would PM him a scan. (Since there might be copyright issues if someone here in the states posted it).
The offer still stands if anyone wants to scan it and email me it I will host it mcunild@gmail.com
Posted By: Anonymous
Re: New Paint job on a budget thread. - 05/30/0711:13 PM
Thanks for all the quick answers... Greatly appreciated.
Update:
Just ordered pressure switch from Grainger.. Was about $45 =( No one else had it...
That's not too bad though because I only got the compressor for $40 hehe. Now it will finally turn off at 125 instead of blowing the safety release every 5 minutes and me having to turn it off. Oh well.
This might be a stupid question but whats the difference between satin and semi-gloss? Is it a shade flatter?
Posted By: Anonymous
Re: New Paint job on a budget thread. - 05/31/0712:48 AM
Re: New Paint job on a budget thread. - 05/31/0701:31 AM
Haven't seen the article yet, but if you aren't mentioned prominently in it, almost seems like a waste of time to read. I like to see credit given where it's due. Meanwhile, back at the ranch...... Looks like I'm almost back to square one with the truck. I found the correct 78 box for it, mild rust in the wells, but clean and straight, front fenders, hood and doors. The only thing I don't have to repaint is the top of the cab Looks like another summer of "rolling on down the driveway" Good to see there is stil a lot of interest and input to this thread.
Posted By: Anonymous
Re: New Paint job on a budget thread. - 05/31/0711:35 AM
Quote:
Quote:
V8Nut offered to host it if someone would PM him a scan. (Since there might be copyright issues if someone here in the states posted it).
The offer still stands if anyone wants to scan it and email me it I will host it mcunild@gmail.com
V8Nut, I just got the article, makes me really miss the 61 Falcon I had. Expect an email from me in the next few days.
Re: New Paint job on a budget thread. - 05/31/0706:50 PM
Quote:
Quote:
Quote: Just throw my satin spraying experiences in the mix... I used 4:1 as a Paint:Thinners ratio, and 40psi. I opened the garage door, and that was it as far as ventilation goes. Using mineral spirits meant it wasn't too smelly - so I actually got NO complaints from my wife!! Try that with a Urethane... And the same comments apply re runs - if you get any, just quickly wipe them (and the roller idea sounds better than my finger) and let the coat self level. You can rub them out when the coat's dry anyway...
It depends on the size of your car and the size of your garage, but I'd think that a 20 foot hose might not be long enough, and you don't want to drag the hose across a freshly painted panel...
One thing I did find when I was using a touch up gun for door jambs etc was that the paint would dry at the tip of the gun, and therefore the paint supply disappeared. The cure was to periodically wipe the tip. That only happened on the touch-up gun however - probably because the nozzle was SO much smaller than the 1.2 I used with the real gun.
1.2mm tip for the car? Cool- Thanks for the info. My garage is very tight- I might have to spray one side, front and back. Wait for it to dry then move the car and spray the other. I dont think i will but would this affect the job?
What filters/water traps did u use? I had to replace the one I had on the compressor as it was an oiler/filter... I mainly used it for air tools.
Also I'm getting a 50 foot hose today aswell as a p/s reg- thanks!
My HVLP gun had a 1.5mm tip, that seemed good for anything, single stage acrylic enamel, BC/CC, and tremclad, just make sure you have no water in your system, and i allways like to clamitize my compressor just prior to paint, putting the tank pressure to 5/10psi and putting an elastic on the paint gun trigger which is empty and let it run for 20 mins or so, then clean the gun, and blow out the hose really well, i find that it reduces the amount of water that condenses in the compressor, i also drain all the water out of the tank after running it dry like that. Also i ususally keep the compressor out of the garage, otherwise the intake will get really plugged. I paint typically with 30-45psi on the HVLP gun. You could also do a dry practice run, with no paint in the gun and plan out your spray technique, basically going thru the motions without painting the car just planning your attack of all the pannels, you may find depending on the car your painting, that you've left an area for too long before getting back to it, and you can alter your order of painting. ALso, one big issue you'll have painting in your garage, is fall-out, the paint in the air that likes to settle on your hood and roof, i try to do the sides first, then avoid the roof/trunk/hood, and let the air clear for a bit, and tack the roof/trunk/hood with a tack cloth and then paint the flat surfaces, otherwise you may end up with some fallout on your pannels, espically with single stage paints. With tremclad/rustoleum i did'nt have that problem as much almost not at all. I find the tremclad/rustoleum does'nt linger in the air as long, and smells about 90% less than single stage auto paints.
Hi all, I have recently primed my 47 Chrysler Coupe in Tremclad grey Primer, it was reduced with 20% Automotive Enamel Reducer and shot with an HVLPgun at 35 to 40 psi. I put on 3 coats wet on wet. The body filler, and and other body work is to follow. I plan on topcoating with Tremclad and the roller method. Tremclad has a new color out, it's Pistachio, was thinkin of trying that color. I have been very impressed with what you guys have been accomplishing with your paint jobs..........C38coupe
Re: New Paint job on a budget thread. - 05/31/0706:58 PM
Another pic from the rear, I know she doesn't look that great now, but you should have ssen what I started with, I hope to do all the bodywork and paint by the end of summer, right now I amsorting out mechanical and safety issues, it's all about time and money, which it seems I have very liitle to spare these days.C38coupe
Posted By: Anonymous
Re: New Paint job on a budget thread. - 05/31/0709:11 PM
hey what's up guys, I'm from www.sr20forum.com, one of the members there recently painted their nissan maxima with rustoleum with great results, so that got me anxious to jump on the bandwagon. I will be rolling rustoleum black on the car as a sort of base (no primer, rolling straight over sanded/body filled surfaces), and topping it with Brightside black paint. I figure I could get by with 2 decent layers of Brightside over the entire car with 2 quarts.
I was wondering if any of you have tried clearcoating brightside? I called Interlux today and they said they did not recommend it, since the resins in the paint resist abrasion. However, I was actually able to put scratches on the surface of my Brightside paint lid (Brightside lids are tinted with the color of the paint) with my fingernail if I tried hard enough. I figure the entire car would look like scratched and swirled after a few months if the paint scratches this easily. I was thinking of buying some House of Kolor's polyurethane clear enamel, since I'm sure it would be compatible with Brightside. I originally wanted to go the Rustoleum route all the way, with a final topping of Rustoleum industrial clear, but I don't believe Rustoleum has UV inhibitors, and in Hawaii, the weather quickly beats up cars sitting outside.
Also, for anyone who's used Brightside, did you ever thin the paint before applying? I'm in high 70's to mid 80's weather, with decent humidity (I'm in Hawaii), so I hope I can get the Brightside on to my car with maximum gloss.
Posted By: Anonymous
Re: New Paint job on a budget thread. - 05/31/0710:52 PM
Charger and V8nut, you have mail
Quote:
Quote:
Quote:
V8Nut offered to host it if someone would PM him a scan. (Since there might be copyright issues if someone here in the states posted it).
The offer still stands if anyone wants to scan it and email me it I will host it mcunild@gmail.com
V8Nut, I just got the article, makes me really miss the 61 Falcon I had. Expect an email from me in the next few days.
Posted By: Anonymous
Re: New Paint job on a budget thread. - 05/31/0710:57 PM
Hey, Just wanted to say, Aloha Brah!! to WorldCrafter. It's the first time in all three parts of this thread that I've seen a brudah' from Hawaii on here.(I grew up in Honolulu). Okay then, Back to the discussion...
Posted By: Anonymous
Re: New Paint job on a budget thread. - 06/01/0702:03 AM
thanks for the welcome The weather here seems decent enough to do the roller method without too many problems. I am doing this paint method on my 94 nissan sentra. I will be going over my current Earl Scheib paint job, which will be sanded/evercoat body filled prior to being painted. I have 6 coats of Rustuleom pro on my trunk at the moment. I noticed that it kind of greys up as it dries. Not sure if it's due to the odorless mineral spirits that I'm using, but I do not like this at all. I will probably end up top coating the trunk with brightside anyway--I want to get all the horizontal surfaces of my car coated with brightside, and I may just stick with rustoleum pro on the sides to cut costs. The Brightside here at the local West Marine store (their website is www.westmarine.com) is a whopping $38 bucks a quart. They also have Interlux perfection, Awl Grip, and West Marine Polyurethane paints available. Might have missed another brand name, not too sure, I was just amazed at their selection/shelf quantities (though quite depressed at the markups).
I am afraid that the paint will only last a little over a year here in Hawaii, but it should be very easy to repaint if necessary, once I get the bodywork nailed down.
I only have a month to do this before summer school starts. I really need to get moving
Posted By: Anonymous
Re: New Paint job on a budget thread. - 06/01/0705:45 AM
Quote:
I am afraid that the paint will only last a little over a year here in Hawaii, but it should be very easy to repaint if necessary, once I get the bodywork nailed down.
I bet you'll be surprised, if you keep it washed and waxed I bet it(the paint) will do better there than you think. other than the salt in the air Hawaii is rather mild compared to the extremes here on the Mainland. My paint will have to withstand below zero temps in winter, 100+ in the summer, ice storms, hail storms, blizzards and high winds sometimes in excess of 60mph, with blowing dirt from the farm fields and 3 foot round tumble weeds smashing into it on the highway at 75mph. And I'm only using Rusto Pro. I'm betting your paint will far outlast mine if you take good care of it.
Posted By: Anonymous
Re: New Paint job on a budget thread. - 06/01/0708:14 PM
My paint has been on going on a year. It's not faded or damaged in anyway. It's awesome. It's brightside. It sat in direct sun in 90-100 degree pa summer last year, sustained rain, sustained cold freezing, ice (and me scraping ice!), hail, and last but not least BIRD CRAP!
Paint looks as good as new. No fading. I'm repainting it next week because I hate the color but durability is AWESOME!
FYI it's been at the beach a bit it's a convertible.
Posted By: Anonymous
Re: New Paint job on a budget thread. - 06/02/0701:36 AM
Quote: My paint has been on going on a year. It's not faded or damaged in anyway. It's awesome. It's brightside. It sat in direct sun in 90-100 degree pa summer last year, sustained rain, sustained cold freezing, ice (and me scraping ice!), hail, and last but not least BIRD CRAP!
Paint looks as good as new. No fading. I'm repainting it next week because I hate the color but durability is AWESOME!
FYI it's been at the beach a bit it's a convertible.
Thats good to know! I am going with Brightside Black. If the paint can last for a few years with no rust coming back (I patched up with Bondo --ya temp solution) and no fading, I'd be really happy.
Once and if the rust appears, I'd simply sand down the area, use some POR-15 (should have done that already) and call it a day.
Re: New Paint job on a budget thread. - 06/02/0704:39 AM
I have been following this thread for a few months reading here and there and it is great. I don't have a car in need of paint bad enough to take the time to do this but i plan to start working on my sidecar this weekend as the paint on it is 20 years old and seen it's better days. still undecided on color as of now. have to go to the store and see what they have I think....might go with a boat paint since it is fiberglass. if it works out well I might paint the bike as well!! here is pics of it if anyone has color ideas!! it is currently black and the bike is marron and silver(but fading). I don't want a bright color like yellow or orange cuz it atracts bees....already had some episodes with bees in the sidecar cuz the kids had bright pillows in there....and dark colors might make it hot in there. so was thinking white, but now i'm thinking maybe a dark color would still be best, like a maroon/burgundy type color. ideas?
Re: New Paint job on a budget thread. - 06/02/0701:32 PM
Quote: I have been following this thread for a few months reading here and there and it is great. I don't have a car in need of paint bad enough to take the time to do this but i plan to start working on my sidecar this weekend as the paint on it is 20 years old and seen it's better days. still undecided on color as of now. here is pics of it if anyone has color ideas!! it is currently black and the bike is marron and silver(but fading). I don't want a bright color like yellow or orange cuz it atracts bees....already had some episodes with bees in the sidecar cuz the kids had bright pillows in there....and dark colors might make it hot in there. so was thinking white, but now i'm thinking maybe a dark color would still be best, like a maroon/burgundy type color. ideas?
Now that is a different roller project...
Here is my first thought on the sidecar... go and visit the web sites of the companies that make those personal water sports vehicles...
Those things are somewhat similar in size to a sidecar ( ie a small scale paint job ) and so you can check out how they have used paint and colors to make these small scale units look their sexiest...
For example, check out the Sea-doo color combinations on the 2008 Sea-Doo's... ( blues, yellows, reds, blacks, white ) But pay attention to how they apply them on a small surface to be the most flattering...
There are other manufacturers, like Polaris, Honda, etc.
Hopefully some of those paint jobs can give you inspiration... Sometimes it pays to think outside the box.. while at the same time benefiting from all the paint and color design work done by those companies...
Re: New Paint job on a budget thread. - 06/02/0702:22 PM
White is likely to attract bees. Bee keepers paint their hives white. From personal experience, bees seem to LOVE building nests in my white shed. At my old house, I had a brown shed and it seldom had bee's nest.
Posted By: Anonymous
Re: New Paint job on a budget thread. - 06/02/0708:44 PM
I think it should work alright. I am going to test it on a fender I have..
Got the Pressure switch, and installed it... My compressor finally turns off! haha
I'm going to head over to home depot soon and pick up some Satin- Anyone recommend a respirator I should use? I was looking at some 3m ones- dont know which to choose... Im probably going to pick up a half-face mask one...
Have new front and rear bumpers... I was wondering if it would be wise to paint certain panels seperatley... such as the bumpers, fenders, trunk and hood...?
I will be putting up some before pictures soon... Started preping the trunk with 500 grit paper... it's nice and smooth =)
Posted By: Anonymous
Re: New Paint job on a budget thread. - 06/03/0709:52 PM
i hate to post such a question but i have been reading through this thread for some time. not the whole thing as i dont have the time in my life to read all the pages;)
i will be doing this paint job on a 85 RX7. i have decided to go with brightside paint. i think i will primer the car as well. the only thing holding me up now is deciding on a color.
i have searched the web for amny hours trying to find pictures of some of the brightside colors. i have found a couple on boats, which is fine. i just need to see examples of the colors. i cant find a blue im really feeling though.
the problem is, as many people have found out, the color chart for the birghtside paint isnt what the paint actually looks like. the medium blue looks like baby blue. as shown on a mustang in a previous post and on pictures i found on the web.
i turned to this thread as my last resort to try to see some examples of these colors. here is a list of the colors im looking for:
largo blue ocean blue***mostly*** sapphire blue dark blue flag blue
i have read on boat forums the flag blue looks black. i assume its a similar color as to some of the newer body style celicas ive seen. it looks black but you can barely tell its blue.
any help is greatly appreciated.
thanks.
i am also emailing interlux as soon as i finish making this post.
Re: New Paint job on a budget thread. - 06/03/0711:45 PM
The flag blue I've seen is dark about what the blue on the US Flag looks like. One good thing if you like the dark blue check ebay there is a seller there that deals only with fire red and flag blue I bought the red from them six quarts for the price of two. http://cgi.ebay.com/6Qt-Cs-Blue-Interlux...1QQcmdZViewItem
Posted By: Anonymous
Re: New Paint job on a budget thread. - 06/04/0702:23 AM
Quote: The flag blue I've seen is dark about what the blue on the US Flag looks like. One good thing if you like the dark blue check ebay there is a seller there that deals only with fire red and flag blue I bought the red from them six quarts for the price of two. http://cgi.ebay.com/6Qt-Cs-Blue-Interlux...1QQcmdZViewItem
i saw that. its a freaking good deal. thats why i want to see some pics of flag blue. im wanting a lighter color, but may use it cause its such a good deal.
Re: New Paint job on a budget thread. - 06/04/0702:36 AM
I just noticed the very interesting variety (from other car makes) of usernames on this thread!
Sorry for the interuption. Carry on!
Dale
Posted By: Anonymous
Re: New Paint job on a budget thread. - 06/04/0703:51 AM
Quote: I just noticed the very interesting variety (from other car makes) of usernames on this thread!
Dang...I wish I could peel out like that! sigh...If they're like me, they dream of one day owning a mopar like yours. That's why this thread is so important. It allows us to save up for one.
Re: New Paint job on a budget thread. - 06/04/0711:00 AM
Quote:
i have read on boat forums the flag blue looks black. i assume its a similar color as to some of the newer body style celicas ive seen. it looks black but you can barely tell its blue.
any help is greatly appreciated.
thanks.
The 'flag' blue is a deep blackish blue. It is named appropriately enough after the color used on a genuine US flag. In fact, the 'flag blue' is almost a universal color among paint manufacturers ( almost like the 'Fire Red' is similar between different paint manufacturers ).
There are some pictures in this thread ( or the part II of it ) where a Mustang was done in one of Brightside blues.
As for the color chips on the Interlux site of the Brightside color samples, I believe they are pretty good representations of the colors. And if you can get one of the actual paint chip samples from Interlux - they are pretty well identical to whats in the can.
Although as we all know, you get an entirely different perspective when it is spread out on a large surface like a car ( as compared to some one inch by a 1/2 inch sample )
Another thing that may cause some variation in the end result color and what you were expecting is the base color or primer color that you laid your coats of paint on. Its a subtle difference.
The only other thing that tends to trip folks up when viewing colors on the Internet is the quality of their monitor and video cards and whether you actually have your monitor properly adjusted to show 'true' colors.
We have also seen that the cameras taking the pictures and the enviromental conditions ( sunny day, cloudy day ) really alter how bright or dark a color looks compared to actually standing in front of it in person.
For my Fire Red... I have pictures that range drom dark red to bright orangey red ( with the bright orangey red being the true end result color ).
So this might be the problem if you place too much dependence on pictures... there are lots of variables that don't guarantee that what you see is what you will get..
.
Posted By: Anonymous
Re: New Paint job on a budget thread. - 06/04/0711:18 AM
aws140, I am currently panting mine with "ocean blue". I am having problems linking here, so go over to this website below and go to the "paint and body" section...look for the $50 paint job thread. I go under the name of Blue 50. Follow my link there and look under all photos in my Yahhoo acct...you will see some pictures of my fenders.
Re: New Paint job on a budget thread. - 06/04/0701:26 PM
old blue,
is your whole truck ocean blue? the whole truck looks to be one color. i think im liking the way ocean blue is looking. i think itd suit my rx7 nicely. the color it is now, and was from the factor, is ocean blue. its just looks different. thanks so much for the link. you have helped me immensely.
marq- i understand what youre saying. ive looked on the interlux website for local dealers. what i plan on doing is going to one and seeing what they have to offer me to see color variations. id rather see it in person than on a computer screen. although, i just got my brand new laptop in that i just ordered for college. its got all teh goodies and set me back a good $$$. maybe i should take it out of the box and see if the colors is shows varies from what i see on my current screen.
thanks for everyones input and advice.
i just received an email back from interlux. theyre sending me a paint color card so i can see it in person rather than through a computer screen. they assure me the card is VERY accurate. now i just need to decide how many quarts i need.
Posted By: Anonymous
Re: New Paint job on a budget thread. - 06/04/0702:55 PM
I bought the case of flag blue off the ebay vendor but haven't gotten to point that I'm ready to roll it on my K5. I did a test piece that was white (which is what I'll be rolling over) and it lightened it up but not alot. Flag Blue is a VERY deep, rich blue that at first glance you think is black.
I picked up the interlux book at West Marine and their sample card in there is even darker. As Marq said, the base coat will influence it but only slightly.
Interesting tidbits on what flag blue actually means. I did not know that is the genuine US Flag color blue. That's pretty cool.
Re: New Paint job on a budget thread. - 06/04/0703:46 PM
Quote:
Interesting tidbits on what flag blue actually means. I did not know that is the genuine US Flag color blue. That's pretty cool.
The only problem is that most people never get to see a 'genuine' US flag in order to see how deep that blue is.
Most folks only see those 'cheaper by the dozen' made in China flags that they sell in novelty stores ( which is inevitably only half the darkness of the 'real true blue'.
The cool thing about the 'true flag blue' is that it does give a car the 'decepticon' look that I love in paint jobs. Meaning the color of the car in bright day light is completely different then its night time look.
And during the day when the sun is hitting it... certain body lines at certain angles will catch a blue highlighting that emphasizes that body part and give almost a two tone type aura about the car. Naturally some cars can benefit from this effect of light reflection better than others.
.
Posted By: Anonymous
Re: New Paint job on a budget thread. - 06/04/0707:47 PM
Quote:
The cool thing about the 'true flag blue' is that it does give a car the 'decepticon' look that I love in paint jobs. Meaning the color of the car in bright day light is completely different then its night time look.
And during the day when the sun is hitting it... certain body lines at certain angles will catch a blue highlighting that emphasizes that body part and give almost a two tone type aura about the car. Naturally some cars can benefit from this effect of light reflection better than others. .
I totally agree. One of the reasons why blue is my favorite color, particularly dark blue. Fortunately, I like black vehicles too so I get the best of both worlds! The body on the 81-87 chevy full sizes have a little ridge about half way down the doors that I think will really pop.
I'm really tempted to paint it before I finish the mechanics just to see it. Might motivate me to get to wrenchin. I can always do touchups...
Posted By: Anonymous
Re: New Paint job on a budget thread. - 06/05/0703:19 AM
this thread is epic, thanks so much to everyone involved. i have a friend with a HVLP so i will spray on my tremclad, still undecided on the colour but here is the car right now.
Posted By: Anonymous
Re: New Paint job on a budget thread. - 06/05/0703:52 AM
Okay here is the deal people. I am gonna go in a few days and pick up my supplies to actually get started painting.
Being cheap (19 year old, no $$) I want to spend less as possible. Help me decide what I really truly need.
My 93 Civic is black right now but my Interlux color choices seem to be this...
- Black (original color is already this...) - Flag Blue (I heard it looks black? But dark blue too...could be interesting...) - Rustic Red (If they still have this, it could look good) - Grand Banks Beige (This could work)
It's gonna be a toss up...lol. I probably am gonna go with something dark like Flag Blue which looks like Black...but I dont know yet.
Do I need to shell out and buy thinner? Is it needed? I thought I was going to wetsand so thinner seems for caution during really hot days. I will probably try to paint during the morning when its cool.
Could I buy only 1 sandpaper grit for during layers? Can 1500 or 2000 be good enough?
Let me know any thoughts or pointers you have.
THANKS
edit: I just realized that I probably do need mineral spirits because I can use that as the "cleaning solvent" before painting and between coats for cleanup purposes.
Posted By: Anonymous
Re: New Paint job on a budget thread. - 06/05/0704:07 AM
Got a gallon of satin black, but can't seem to find 100% mineral spirits... only odorless- would that still be okay to mix and spray?
Thanks all- can't wait to start this... It's still so crappy out here- will take some pics tomorrow =)
Posted By: Anonymous
Re: New Paint job on a budget thread. - 06/05/0704:08 AM
Quote:
Could I buy only 1 sandpaper grit for during layers? Can 1500 or 2000 be good enough?
Let me know any thoughts or pointers you have.
THANKS
I have abandoned the 600 and 800 grits and I wetsand after ever coat(lots of dust out here) with 1200. I will sand my final coat with 2000 only then polish. thats how I did my test piece and it came out awesome.
Posted By: Anonymous
Re: New Paint job on a budget thread. - 06/05/0704:21 AM
Quote:
Quote:
Could I buy only 1 sandpaper grit for during layers? Can 1500 or 2000 be good enough?
Let me know any thoughts or pointers you have.
THANKS
I have abandoned the 600 and 800 grits and I wetsand after ever coat(lots of dust out here) with 1200. I will sand my final coat with 2000 only then polish. thats how I did my test piece and it came out awesome.
Thanks! 2000 grit it is then
BTW: Could I just wash my car with soap and water instead of mineral spirits?
Posted By: Anonymous
Re: New Paint job on a budget thread. - 06/05/0712:19 PM
I didn't really notice that much difference between odorless and pure. Except the odor of course!
Re: New Paint job on a budget thread. - 06/05/0701:25 PM
Quote: BTW: Could I just wash my car with soap and water instead of mineral spirits?
I would think not. The soap could still leave a residue that would potentially affect the paint.
I realize you are on a budget, but I think that the mineral spirits was only about $10. It goes a long way - its not like you are going to pour it in a bucket and slop it on like you are washing your car.
You are just going to get a rag damp with it and start wiping down the metal.
Posted By: Anonymous
Re: New Paint job on a budget thread. - 06/05/0702:10 PM
Maybe someone can provide insight as to why Brightside has become somewhat the exclusive yacht paint maker. I have read really good things about Epifanes which if purchased from the right person is not too terribly more in price. There is also Petit which too is comparable in price and quantity. Any ideas?
Re: New Paint job on a budget thread. - 06/05/0705:44 PM
Quote: Maybe someone can provide insight as to why Brightside has become somewhat the exclusive yacht paint maker. I have read really good things about Epifanes which if purchased from the right person is not too terribly more in price. There is also Petit which too is comparable in price and quantity. Any ideas?
I don't think even the boaters would agree that Brightside is somewhat the exclusive yacht paint maker...
But what you can say about Interlux is that they have distribution channels for their product worldwide.... and they probably do that better than most paint companies. So it is only natural that the most available paint will become a ready choice for a majority of boat painters.
Second, the Interlux and in particular Brightside brand have been around since day one. History tells us that those who have been doing it the longest... usually have a successful product ( otherwise they would have disappeared off the map like many of their competitors ).
Along with longevity... comes progress. If a company is constantly improving their product - then they are going to remain a market favorite. The Brightside paint for example feature UV compontents and Teflon components. This is something they have added to their product to improve upon it. Some companies are still flogging the same paint formulation that they were using 30 years ago.
I think the price factor also helps Brightside maintain marketshare among the boat painters. It is cheaper then many of its key competitors. So in a consumer oriented world, people have no problem paying a fair price for a proven product.
I think another factor is performance in the real world. Companies can make all the boast and ads they want to flaunt their product. That might draw in a boater the first time. But if that product does not live up to the hype - people will use another product the next time they go to repaint their boat. And as well... word of mouth among boaters can kill a product that fails to perform in the long term.
One last thought is that Brightside ONE STAGE polyurathane was designed to be applied by AVERAGE JOES like you and me. The Petit product, although probably superior - is not only expensive but also somewhat more difficult for the Average Joe to apply. It is not a simple 'paint on from the can' product. So if a product can generate consistent and repeatable good/excellent results by Average Joes... then you gotta know that it is going to be a favorite of the Average Joes everywhere.
I could rant on but I think these are just a few of the key reasons why Brightside has the lions share of the market and the consumer loyalty.
I am simply an average Joe... and just as Charger has generated new sales and a use for Tremclad/Rustoleum, I have generated news sales and use for Brightside. And all three of those companies only got our endorsement because their products performed and achieved what we wanted to do
Re: New Paint job on a budget thread. - 06/05/0705:51 PM
Quote: I didn't really notice that much difference between odorless and pure. Except the odor of course!
The difference is the rate of evaporation of the product. Pure mineral evaporate quicker and that allows it to release its 'smell' into the air in a shorter period of time - and hence in a greater concentration of 'smell'.
The 'odorless' mineral spirit evaporates slower. And although it may have just as much 'smell' component to it...the fact that it is evaporating slower means that the 'smell' component is being released over a greater period of time. Hence less concentration of the 'smell' component during a given period of time.
Both will work... but plan on extra wait times between each stage of your painting... to allow for the slower curing of the painting done with 'odorless' mineral spirits.
.
.
Posted By: Anonymous
Re: New Paint job on a budget thread. - 06/05/0707:28 PM
Thanks Marq... Since I am spraying this I assume I would want pure Mineral spirits... quicker cure time for the lease amount of dust to form on the paint...
Have to take some b4 pictures... this car is looking so horrible...
haha
Also... I didn't find any satin or flat brightside- since that seems to be the everlasting paint but I think im going to stick with rusto- so much cheaper...
Posted By: Anonymous
Re: New Paint job on a budget thread. - 06/05/0707:47 PM
Re: New Paint job on a budget thread. - 06/05/0707:52 PM
Quote: Rustoleum Black
You ROCK!
Although I must admit that Satin would have looked positively evil on that car....
Posted By: Anonymous
Re: New Paint job on a budget thread. - 06/05/0707:56 PM
JohnnyZoom, Also being in Tampa, I got a few questions for ya. Did you paint that outside or in a garage? What time of year? How much dry time did it take?
Basically, looking for what to expect with our climate and weather.
Re: New Paint job on a budget thread. - 06/05/0708:44 PM
That Rambler wagon ROCKS! I agree that it would look even cooler with satin black and some red rims with baby moons, lop off the roof rack and add some side pipes. But that's just me. Looks awesome the way it is now tho.
Posted By: Anonymous
Re: New Paint job on a budget thread. - 06/05/0709:06 PM
Johnny, is that Rustoleum regular or professional? I'm using Gloss Black Rustoleum Pro on my Probe.
Posted By: Anonymous
Re: New Paint job on a budget thread. - 06/05/0709:42 PM
hey guys just wanted to give a tip since I didn't see this anywhere in the many pages I have read so far. For cleaning the paint surface prior to painting, I would suggest using a microfiber towel. They are as cheap as real tack cloths, and aren't oily/gummy like the real things. They quickly and easily pull dirt/dust/crap off the paint surface just as good (if not better) than cheesecloth type tack cloths. The local Checker store (Kragen/Schucks for you mainlanders) sells tack cloths at an unbelievable $4 a tack cloth. I went to Wal Mart and bought a 12-pack of cheap microfiber cloths for $5. They are pretty crappy in quality when compared to the high quality cloths I bought and use for my daily driver, but in my experience, they have worked just fine for tacking my car prior to rolling on another layer of paint. They are also great towels for wiping away lifted paint particles when wetsanding
Posted By: Anonymous
Re: New Paint job on a budget thread. - 06/05/0709:49 PM
That Rambler is super cool! Looks like about a '58? When I was in high school in the early 90s one of my friends had a '59 Rambler Super 4 door sedan. It had an interesting feature I've never seen on any other car...it was called a "travel bed". The front seats would fold down flat to meet up with the rear seat forming one giant cushion . It was um...an interesting car for a kid in high school . My VW I had back then had an almost inhumanly small back seat by comparison . Anyway, very cool! Nice job on the paint too.
Posted By: Anonymous
Re: New Paint job on a budget thread. - 06/05/0711:05 PM
Thanks for the compliments.
It's a 1960. I was tempted to do the satin, and I still might, but I saw someone with the same paint job up north so I went with Regular Rustoleum Gloss Black. I'm sealing the top with White Gloss, but will probably do final coat with that Tremclad Cream , I like the aged look. I need a light colored top with Fla heat and black car.
I did one coat each day over Memorial Day weekend at about 10am, outside on blacktop pavement. I think I got better results doing one coat a day and letting it really bake in. Two coats was rushing, even with the heat.
I chose to do three coats before wetsanding due to the condition of the metal on the car. It's a little more wetsanding, but I like having a thicker base before tearing into it. Plan 3-5 more coats before final polish.
Maybe previously posted, but have you guys all seen the Hot Rod Magazine article on this?
Re: New Paint job on a budget thread. - 06/06/0712:57 AM
I noticed on the Interlux-Brightside web site that there is a flatting additive for their paint. So I think you could use this to acheive a satin black. I think I'll try to contact them about it as I plan on a satin black for my Duster. Bob
Re: New Paint job on a budget thread. - 06/06/0701:16 AM
Quote:
Also... I didn't find any satin or flat brightside- since that seems to be the everlasting paint but I think im going to stick with rusto- so much cheaper...
For the Brightside paint... they sell an 'additive' that you add to your standard can of Brightside paint. It turns a glossy Brightside paint into a 'flat satin' finish. This additive was developed because certain parts of the boats deck surface can't have a high gloss or people would be slipping overboard ahhahhah.
They also sell another 'additive' that gives the surface a more granular surface - better for your footing when you are walking around on the deck. I can't see much use for it on our cars... but maybe pickup truck guys might like something like that added to their paint for when they are painting running boards or the bed of pickup
Re: New Paint job on a budget thread. - 06/06/0701:49 AM
Johnnyzoom - that car looks awesome.
I am ready to give up quickly though. I just spent 3 hrs sanding bubbled tremclad off my decklid which I had spent hours prepping -- was smooth as anything... then... not.
I found the more mineral spirits in the mix, the more bubbles appeared -- I've seen them disappear before, so I didn't panic too much, continued, and let it dry..
What an effing mess. I was all enthused at how my work underneath appeared seamless (especially with the glossy black paint on it) -- now, I still have a little more work to bring it down, and then a little more to bring it back to where I started before paint.
I dunno, I have another decklid, I might give spraying a chance -- couldn't seem to get a nice thin coat with the roller -- maybe doing something wrong there...
And how hard does this stuff get? Seems pretty soft to me.. can you add a hardner? At what point does it just make sense to shoot with epoxy, build, and finish.
I'm still going single stage no matter what -- figure that will be the most forgiving, easy to work with, and just plain old school looking anyway.
Re: New Paint job on a budget thread. - 06/06/0702:46 AM
Quote:
What an effing mess. I was all enthused at how my work underneath appeared seamless (especially with the glossy black paint on it) -- now, I still have a little more work to bring it down, and then a little more to bring it back to where I started before paint.
Don't dispair... I encountered a problem doing my trunk lid that sounds identical to your problem. Several coats had been built up successfully on the entire car and then for some unexplainable reason the trunk ONLY went caca.. a slobbering mess. But the rest of the coat everywhere else went on and stayed PERFECT. No reasonable explanation for why the trunk went crappy.
So in my case, I was able to take a heavily soaked cloth ( soaked with mineral spirits ) and I rubbed down the crappy trunk before the mess cured and hardened. That basically got the trunk back to where it was prior to it going south on me.
Suffice to say that the trunk presented no problems after that... but it just about sent me into depression too when it happened. Here is how the trunk looked at the end of the project :
Hopefully that pic will inspire you so that you will know that all is not lost... you may have just suffered a temporary set back..
Marq
.
Posted By: Anonymous
Re: New Paint job on a budget thread. - 06/06/0706:29 AM
Quote:
Quote: Rustoleum Black Rambler
Love that retro look. The second I saw that black with the white roof... I immediately imagined Barney Fife from Mayberry RFD driving it around
Just a little more white paint... an airbrushed star on the side and gumball machine on the roof and 'instant local celebrity mobile'... hehhehhe
.
This is hilarious, got a good laugh out of this.
I started thinking Blues Brothers when I put paint on (I traded a microphone for it, cop shocks, cop brakes). Hard time commiting to a color, red wagons seem overdone, especially Ramblers.
Yet another pro with this stuff, I can use black and white as a base and just keep going with another color, not that big a deal. Might look less Mayberry with the trim back on.
Re: New Paint job on a budget thread. - 06/06/0712:07 PM
Thanks for the encouragement Marq.
One variable that might have been a contributing factor was that I didn't use mineral spirits to wipe down the trunk -- I used a professional grade cleaner (silicone, wax, grease etc) from Sherwin Williams, but as with anything else - mixing solvent based stuff, paints, etc, -- that might have been it... dunno...
Frustrating thing is, I know this stuff will come out just like glass even before any wet sanding, from the way it dried on the back edge. Light sanding with some 1500/2000 and a buffer and it would have been mint...
Satin black: Anyone looking for a good satin black in a rattle can -- check out DupliColor "low gloss" engine enamel/high heat black. Stuff is awesome. I'm using on a lot of brackets etc. -- blends really easily, dries fast, and *really* even.
If all goes well on the deck lid -- I've got a can of Sherwin Williams DTM paint that I'm going to try on the rest of the car. It's one of their industrial/marine coatings, but you can have it tinted to anything in their colour chart. I've got "Fully Purple" waiting to go on if all goes well.
Sherwin Williams also make a water based clear which I'm gonna try (inside trunk, floors, stuff like that) -- again, from the industrial/marine stuff -- and again, if all goes well http://www.globalspec.com/FeaturedProduc...r_Coat_/17777/0
Posted By: Anonymous
Re: New Paint job on a budget thread. - 06/06/0701:51 PM
ok folks I have been following this post for a LONGGGGG time & have reread it over & over & maybe I missed something so I'll just ask..
How many of you folks that have painted thier cars/trucks this way???? I know it a lot but let me know anyway.. Do you use them for daily drivers???? Do you leave them outside???? &&&&& how long have they been painted?????? Just asking the questions that anyone would want to know before jumping on a project like this, PLUS w/the info I might be able to shut the nay-sayers up a little..
I'm asking because this post is on several other forums I belong to & most of the replies about it has been positive(yet surprized) because it's a inexpensive way to get what seems a decent paint job. Even if it is put on w/a roller. But I will admit there are some of those(the forum is easy to find)that thinks its plain BS & say why would anyone waste thier time to paint a car/truck w/rustoleum (type)paint. Along w/saying that a car/truck should ONLY be painted w/automotive paints. Which is an oxymoron to me because correct me if I'm wrong BUT isn't(or was) Enamel used in the automotive field to paint cars/trucks????
&&&&&&&&&&& I'll be honest w/you folks I thought it was total BS myself untill I read about other folks on other forums using this method w/success & I'm thinking about using it on my own project mainly because I'm a cheap SOB and have more time then $$$$$$ to do it. Thanks for any info you can give & thanks for inspiring me to continue to be the cheap SOB that I am.........joe
Posted By: Anonymous
Re: New Paint job on a budget thread. - 06/06/0702:06 PM
i hate to have to ask this question. i have browsed through many pages of these very long threads. i just need to know about how many quarts of brightside im going to need to do my car with. im going to a boatshop friday and i might buy paint then. if i do i dont want to buy too much due to the price, butid rather have too much than too little.
follow this link for an idea of the size of my car. its an 85 rx7. theyre rather small.
Re: New Paint job on a budget thread. - 06/06/0702:14 PM
Quote:
Just asking the questions that anyone would want to know before jumping on a project like this, PLUS w/the info I might be able to shut the nay-sayers up a little..
The debate about whether it is viable or BS ended with the July 2007 issue of HOT ROD magazine - that put the paint and roller to the test on a project Falcon. It passed their test and there are about seven or eight pages of THEM doing the process with results that surprised even them.
The debate ended there. Anyone who wishes to BS the process is either :
a ) works at a paint shop ( obvious vested interest and a hidden agenda behind their comments ) or...
b ) someone who has tons more money than most of us and who thinks nothing of tossing $2000 to $5000 at a paint shop to do the work for them.
Re: New Paint job on a budget thread. - 06/06/0702:21 PM
Quote: i hate to have to ask this question. i have browsed through many pages of these very long threads. i just need to know about how many quarts of brightside im going to need to do my car with. im going to a boatshop friday and i might buy paint then. if i do i dont want to buy too much due to the price, butid rather have too much than too little.
follow this link for an idea of the size of my car. its an 85 rx7. theyre rather small.
Using Brightside.... I would suspect that it would take a maximum of 3 cans of paint and one can of product 333 Interlux thinner.
Part of the answer about 'how many cans' will depend on where you are starting from...
a ) a car where everything is in primer... 3 cans
b ) a car where the body paint is good and just needs to be scuffed and then painted .... 2 cans
c ) a change in paint color from one color to the opposite end of the spectrum ( like white to black - or dark blue to yellow etc. ) ... 3 cans
If you apply it at the rate of about 1/2 can per coating... you may find that you can nail it in two coats ( 1 can ).
But the odds are that you will probably get to a third and fourth coat to get full coverage with good depth to the color. So that would take you to the second can.
The third can is handy to have 'just in case'.
Check on the return policy of the joint where you are buying your paint. Most of those marine paint joints are more than willing to take back an unused can IF it isn't opened and your paint covered fingerprints aren't all over the can
.
Posted By: Anonymous
Re: New Paint job on a budget thread. - 06/06/0702:27 PM
thanks marq. youve helped me once again. i like the way the ocean blue is looking, but that deal on ebay for the flag blue is stuck in the back of my mind. the color im going on top of will be very similar to the ocean blue. its a mazda tender blue. i definately want some extra paint, just to have. ill see how it goes at the boat shop friday. thanks.
Re: New Paint job on a budget thread. - 06/06/0704:01 PM
Quote:
Quote:
Just asking the questions that anyone would want to know before jumping on a project like this, PLUS w/the info I might be able to shut the nay-sayers up a little..
The debate about whether it is viable or BS ended with the July 2007 issue of HOT ROD magazine - that put the paint and roller to the test on a project Falcon. It passed their test and there are about seven or eight pages of THEM doing the process with results that surprised even them.
The debate ended there. Anyone who wishes to BS the process is either :
a ) works at a paint shop ( obvious vested interest and a hidden agenda behind their comments ) or...
b ) someone who has tons more money than most of us and who thinks nothing of tossing $2000 to $5000 at a paint shop to do the work for them.
Marq
.
I think the debate will now morph into: it'll fade in six months, it won't hold up to the weather, it'll start peeling off in a year when you go to the carwash, etc.
The Hot Rod article proved the process is legit, but the naysayers are going to find some other reason to still think its BS. (For the reasons you mentioned above).
We all know that the longevity of the paint is not really an issue (and hey, if I have to do it over again 3 years from now for another $50, so what.)
I think it will take another two or three years before this really becomes an acceptable concept. With the HotRod article, I bet there will be a LOT more people doing this over the next year.
As the word spreads among non-internet people, and more and more rolled cars start showing up at car shows, it will eventually gain acceptance. Particularly when we get to the point in time where its common for people to say "yeah, I rolled it, two years ago. Still looks great, eh?"
Re: New Paint job on a budget thread. - 06/06/0704:49 PM
I rolled white Rustoleum Industrial on my Valiant in early '06. The car has not spent a night (or day, for that matter) in the garage since. It has been through a Texas summer, several West Texas sandstorms, snow, rain, high-speed bug impacts, some neglect, the Walmart parking lot, and a lot of driving. It still shines, at least when I knock the dust off. It has a little parking-lot rash, but no worse than any other car that regularly goes to work or the store. No peeling, no fading that I can tell. I'm happy with it.
Re: New Paint job on a budget thread. - 06/06/0706:33 PM
Quote:
The debate ended there. Anyone who wishes to BS the process is either :
a ) works at a paint shop ( obvious vested interest and a hidden agenda behind their comments ) or...
b ) someone who has tons more money than most of us and who thinks nothing of tossing $2000 to $5000 at a paint shop to do the work for them.
Marq
.
The funny thing is, that I started reading the original thread at about 20 pages because someone over on the Second Generation Owners Group forums put up a link to it making fun of/deriding the process. A couple of days ago i was reading the same forums, and someone referenced the article from the magazine. And, sure enough, the board members started talkin about how this method makes for crap cars. So, I posted a link to pics of Aussie's Miata. One called the photos BS, and others kept saying that you would only do this if you really didn't care about how your car looked....
Closed minds and snobs. The debate will never be over.
Posted By: Anonymous
Re: New Paint job on a budget thread. - 06/06/0707:14 PM
Quote:
Closed minds and snobs. The debate will never be over.
IMHO, there is no debate, just different opinions. And we all know what they say about opinions. This is strictly Do-It-Yourself stuff. If you can do all the mechanical work yourself them you for sure ought to be able to paint it yourself too. Look at the places we are getting our supplies: Home Depot and Lowe's two mega huge businesses built on the DIY principal. I bet before those two businesses were started people laughed at there neighbors for doing projects that were normally left to "professionals". Now the "Pros" shop there too.
Re: New Paint job on a budget thread. - 06/06/0708:16 PM
Quote: ... So, I posted a link to pics of Aussie's Miata. One called the photos BS, and others kept saying that you would only do this if you really didn't care about how your car looked....
Closed minds and snobs. The debate will never be over.
In the car world there are DRIVERS and there are trailer queen owners...
Drivers put their first priority into the mechanics of their cars so that they can DRIVE THEM and enjoy them. I drive my cars. I drive them a lot. I love driving. And nothing killed me worst than having my McLaren grounded in the garage for over 3 years because I could not afford to get a decent and economical paint job on to it.
The trailer queens are the guys who want to go to the car shows or local Friday Night park and shines to show off 'how glamorous' their car looks compared to the next guy. These guys are naturarlly going to take every opportunity to poop on any paint job that cost less then $20,000. Heck they will even find flaws in professional paint jobs that might happen to look better then the one on their own ride.
So the average MAACO paint job is never even going to receive a smiling nod from those type of folks. They are looking for faults in other folks rides in some bent attempt to justify the bucks they spent or to self bloat their own ego about their ride.
And frankly I care about all my cars. My McLaren Mustang is only one of about 1400 that are still on the road an in use. The only two-seater Mustang ever authorised by Ford. That tends to make it a bit unique as a car.... and a survivor.
So I would disagree strongly with anyone that might argue that you only roll paint on cars you don't care about.
But I think we all would agree that if we had a magic bag of cash fall into our lap... we would love to slough the work off on a professional paint shop. But sadly no magic bag of bucks fell into my lap while my McLaren sat in the garage in its primer coat.
The roller paint process allowed me to get the car on to the streets and to enjoy driving it while I wait for that magic bag of cash to come dropping in my lap.
And if by some miracle a magic bag of cash does appear... well it is no big deal to scuff coat my one stage polyurathane paint job to have a one stage polyurathane sprayed on at a professional shop...
The process does not ruin a car and render it untouchable by a paint shop in the future...
Let's steal a line from William Shakespeare to best sum it up " To thine own self be true "
Which means : Don't live to impress others - do what is ultimately best for you.
.
Posted By: Anonymous
Re: New Paint job on a budget thread. - 06/06/0708:25 PM
Quote:
I think the debate will now morph into: it'll fade in six months, it won't hold up to the weather, it'll start peeling off in a year when you go to the carwash, etc.
We all know that the longevity of the paint is not really an issue (and hey, if I have to do it over again 3 years from now for another $50, so what.)
The thing people don't understand is that the basic chemistry of Rustoleum or any of the tractor paints is exactly the same as Synthetic car paint you can buy at any auto body shop. They're all Alkyd enamels. Dupont invented this stuff in the 1920s, and it was factory paint on a lot cars in the 1950s ad 1960s. It really doesn't matter how it's applied, it all works the same. You could dump it straight out of the can and smear it around with your hands if you wanted to. You'd just spend the next 4 months wet sanding the lines out .
It will hold up just as well as any car painted with synthetic car paint. Keep it out of the sun and it'll last forever. If you maintain it (keep it waxed!) you can leave it outside without any problems. Don't wax it, and it'll eventually fade. But who cares? Just use some fine cleaner and buff out the oxidation...wax it, and guess what? It'll look just like new again
Re: New Paint job on a budget thread. - 06/06/0708:48 PM
Alkyd enamel was THE high tech factory paint from the 1930's till the 1960's, as far as I can find. I finished my truck last summer, almost a year and it still polishes up after a wash free Canuck winter, daily use, scrap metal runs and several other indignities. I'm pleased and impressed with the results and anyone who doesn't like it, doesn't need to paint with it. No one is holding a gun to their head. I like the money it let me put into mechanical work and the fact that it no longer looks like a chameleon exploded trying to hide in a box of crayons. I'm about to start the second round using the same method, having bought a new box, hood, fenders and doors. Hmmmmmmm...... sounds like I should just jack up the emblems and drive another truck under them, almost a full rebuild As for cheap, we should all get together and start a company making copper wire by stretching pennies
Posted By: Anonymous
Re: New Paint job on a budget thread. - 06/06/0709:59 PM
i thought rustoleum wasnt sold in canada?
Posted By: Anonymous
Re: New Paint job on a budget thread. - 06/06/0710:17 PM
Quote: i thought rustoleum wasnt sold in canada?
No, Tremclad isn't sold in the U.S. Rustoleum is sold in both countries.
Posted By: Anonymous
Re: New Paint job on a budget thread. - 06/06/0711:04 PM
to aws140:
i did my integra with about 3 quarts of brightside
Posted By: Anonymous
Re: New Paint job on a budget thread. - 06/06/0711:28 PM
No, Tremclad isn't sold in the U.S. Rustoleum is sold in both countries.
lolz that explains it
Posted By: Anonymous
Re: New Paint job on a budget thread. - 06/06/0711:54 PM
one more thing, how does a guy get off the emblems? i have a few chev signs and the words cavalier
Re: New Paint job on a budget thread. - 06/07/0701:37 AM
40 grit wheel on a power sander?
Or, if there are no nuts holding them on, then they are just stuck on with adhesive. Heat it up with a heat gun (or hair-dryer) and you can pry them off.
Posted By: Anonymous
Re: New Paint job on a budget thread. - 06/07/0702:32 AM
ya i think they are just held on by glue, hair dryer it is!
Posted By: Anonymous
Re: New Paint job on a budget thread. - 06/07/0703:42 AM
Quote: ya i think they are just held on by glue, hair dryer it is!
If the emblems are held on with trim tape(the grey foam stuff) a peice of fishing line works great to take them off without bending and breaking them. To remove the remaining foam and adhesive get a 3M eraser wheel from your local parts store that sells auto paint supplies. it's a rubber wheel that goes in a drill it takes off adhesives and vinyl stripes and graphics without harming the paint. My local Napa and Carquest both carry them. be wary if you us a heatgun, they get hotter than you might think and a lot of emblems on newer cars are chrome covered plastic and the will melt and bubble and seperate if you get them too hot.
Posted By: Anonymous
Re: New Paint job on a budget thread. - 06/07/0703:57 AM
Update:
Little over 3 months since I rolled the last coat, finaly had a good enough break rain we've had off and ever since. I took the oportunity to give the truck a good wash and new coat of wax. Still makes me smile to look at it knowing I did it with a roller
Posted By: Anonymous
Re: New Paint job on a budget thread. - 06/07/0710:22 AM
Anyone who wishes to BS the process is either :
a ) works at a paint shop ( obvious vested interest and a hidden agenda behind their comments ) or...
b ) someone who has tons more money than most of us and who thinks nothing of tossing $2000 to $5000 at a paint shop to do the work for them.
These are the same type of people who say you can't solder two pieces of copper pipe together unless you're a union plumber. Baloney.
You might not want to paint a concours muscle car with a roller (although some of the results look darned close) but as others have already said, if you want to get decent looking paint job on the car so you can drive it, get rolling. Let the naysaying showboaters keep walking....
Re: New Paint job on a budget thread. - 06/07/0712:57 PM
That truck looks great!
What about blocking though? Does the multiple coats get rid of hi/lo issues that would be left to work with traditional build primer anyway? I'm concerned that one should be a lot more confident in the body work before laying this paint down, but, it's difficult to see the issues until you get a full coat on (which in this case is a few coats into the effort it seems).
As this stuff is performing the direct to metal job and eliminating epoxy or etch and build primer underneath, has anyone used a build primer in between coats to perfect things? Is this possible? I would think it would be easier to perfect things with improved "sandability". That's my main concern right there actually... I've not found this stuff to sand all that well. Am I not letting it dry long enough? Too thick?
I'm really still leaning towards spraying thin coats vs rolling and relying on the paint more for it's simplicity (no primer etc.), inexpensiveness, and workability rather than errr... rollability
Sorry for rambling...
Posted By: Anonymous
Re: New Paint job on a budget thread. - 06/07/0701:16 PM
I have sapphire blue on the mirrors and I'm rolling it later this weekend on the whole car. I'll take pictures as soon as I can for you. It's a really pretty deep blue color.
Posted By: Anonymous
Re: New Paint job on a budget thread. - 06/07/0701:18 PM
FYI I disassembled the car and the paint was fine under everything but the spoiler. When I took the spoiler up it had little blisters in... I popped them and it seemed like air underneath? I'm thinking that I just put the spoiler on way too soon and maybe the last coat of paint wasn't fully cured yet. Either way no rust or anything.
Wet-sanding 400 grit the entire car takes forever! I had so much peel the last time.
Posted By: Anonymous
Re: New Paint job on a budget thread. - 06/07/0702:33 PM
I'm a regular over earlycj5.com, and one of the guys over there painted his Jeep CJ with Rustoleum spray cans, and Rustoleum clear (rattle can). It came out really nice... Check it out: Here's the thread. http://www.earlycj5.com/forums/showthread.php?t=42745
Here's the finished product:
It came out great, but man you need a lot of rattle cans.
Posted By: Anonymous
Re: New Paint job on a budget thread. - 06/07/0705:29 PM
A few months ago I lucked on to a '65 CJ5 with only 20,650 orig. miles. It had been sitting for 12 years while the orig. owner's grandson served in the Marines so after a major brake overhaul and new fluids I got it back on the road. Trouble was the grandson sprayed black and grey primer over the orig. paint to hold back the surface rust. After spending so much to get it road worthy I couldn't justify $3500 for a paint job. You know the rest of the story. Major thanks to 69chargeryeehaa! Here are some before, during, and after pics.
Posted By: Anonymous
Re: New Paint job on a budget thread. - 06/07/0705:32 PM
That was the finished pic. Here's a during.
Posted By: Anonymous
Re: New Paint job on a budget thread. - 06/07/0705:34 PM
And a before.
Posted By: Anonymous
Re: New Paint job on a budget thread. - 06/07/0705:40 PM
I used less than one qt. of Rustoleum Stops Rust Canvas white thinned 40%, 4 high density foam rollers, a little bit of sand paper, and about a third of a gal. of Ace 100% mineral spirits. Bought a Ryobi 6" buffer from Home Depot for $20 and a tin of Turtle polishing compound that I haven't used yet! It's already shiny enough for an old Jeep. Man, I'm stoked. Now looking for a mid 60s Valiant coupe to continue the fun.
Re: New Paint job on a budget thread. - 06/07/0706:47 PM
Love the LUV!
My son has an '80 2wd LUV that's a real piece of ... uh ... work. It saw horrendous abuse and neglect from previous owners. The body is shot - huge rustouts, mega dents, nasty. Even Rustoleum won't help!
It's good to see one looking as good as yours!
Posted By: Anonymous
Re: New Paint job on a budget thread. - 06/07/0706:53 PM
Hi, I am new to the board and was linked to this thread specifically from a bicycling message board. I've become interested in painting a nice bicycle frame that I have on the cheap and this method sounds like it will fit the bill, I just have a couple of questions:
1) Do I take all the paint off of the bicycle frame so it is bare metal showing and then prime it? Or would it be better to just sand it down a fair bit and leave some of the old paint for the new paint to cling on to?
2) If I want a glossy black or orange, what would be the best mix of mineral spirits to Tremclad to use?
Thanks guys, this thread is fascinating!
Posted By: Anonymous
Re: New Paint job on a budget thread. - 06/07/0706:57 PM
Quote: Love the LUV!
My son has an '80 2wd LUV that's a real piece of ... uh ... work. It saw horrendous abuse and neglect from previous owners. The body is shot - huge rustouts, mega dents, nasty. Even Rustoleum won't help!
It's good to see one looking as good as yours!
Thanks man! Love this truck, told my wife she may have to bury me in it when the time comes.
There's still a few of them around, guy here in town has one that he races, V8, nitrous the works, trying to talk him into rolling his.
Getting harder to find parts and upgrades I had a '77 LUV back in High School, couldn't throw a rock without hittin one back then. But there is a cool sight he may want to visit, devoted to the Chevy LUV www.luvtruck.com My nick over there is 79-LUV'r.
Posted By: Anonymous
Re: New Paint job on a budget thread. - 06/07/0707:19 PM
Quote: And a before.
Wish my '55 looked that good to start with . Really a nice looking rig. I'm guessing early '60s? And am I crazy, or does it have a full float conversion on the rear axle? Can't tell from the pics if it's got lockouts or if it's just the hubcaps...
Posted By: Anonymous
Re: New Paint job on a budget thread. - 06/07/0707:35 PM
Quote: to aws140:
i did my integra with about 3 quarts of brightside
So I am going to the boat shop tomorrow and I figure I am going to try 1 quart of Brightside black to finish my car.
Car is a 1993 Honda Civic Hatchback, pretty small vehicle. Original car is black, some spots are primered or has putty.
You think I can pull it off with mineral spirits mixed with it?
Posted By: Anonymous
Re: New Paint job on a budget thread. - 06/07/0707:53 PM
Quote:
There's still a few of them around, guy here in town has one that he races, V8, nitrous the works, trying to talk him into rolling his.
Was he on Pinks? I saw a LUV that really moved out on the Pinks All Out in Dallas.
Posted By: Anonymous
Re: New Paint job on a budget thread. - 06/07/0708:15 PM
Toolbox, It's a 1965 3-spd and thanks. I like it a lot. It does have locking hubs/full floating conversion in back and let me tell you it was a bear getting the right axle seals and inner bearing/hub seals. I can't say enough good things about the local NAPA parts store and one guy in particular who welcomed the challenge.
Re: New Paint job on a budget thread. - 06/07/0709:26 PM
Quote: 1) Do I take all the paint off of the bicycle frame so it is bare metal showing and then prime it?
No. Only take it down to metal if you have weld or fill.
Quote: Or would it be better to just sand it down a fair bit and leave some of the old paint for the new paint to cling on to?
Not even that much. Clean it, remove the dead surface, then scuff the rest for adhesion.
Posted By: Anonymous
Re: New Paint job on a budget thread. - 06/07/0710:57 PM
Quote: Toolbox, It's a 1965 3-spd and thanks. I like it a lot. It does have locking hubs/full floating conversion in back and let me tell you it was a bear getting the right axle seals and inner bearing/hub seals. I can't say enough good things about the local NAPA parts store and one guy in particular who welcomed the challenge.
Awesome setup if you ever plan to flat tow it. You should check out www.earlycj5.com...lot of good people there that really know their stuff. And it is really nice when you can get people who actually help at the parts store...around here if they can't find it in the computer you're pretty much out of luck. I've got a '55 CJ5 that's completely torn down right now. The tub is OK for it's age, but will need a lot of welding done. I'm seriously thinking about rolling or brushing it if I can find the color I want. I'm doing a stock restoration, and I want to find something as close as possible to it's original Julep Green. Here's what it looked like when I dragged it home:
Long way to go!
Posted By: Anonymous
Re: New Paint job on a budget thread. - 06/07/0711:30 PM
You will probably need to mix up a custom batch if possible. I wanted to match the orig. white on my Jeep but Rusto's gloss white was too white. The orig. color seemed to have a touch of green in it compared to gloss white. And the canvas white I put on is much creamier. I should have tried mixing the two but I was so happy to have a way to go on the paint without spending a few thou. that it was full speed ahead when I was half way through reading the full roller paint thread.
Let me know if you need any photos of how the engine compartment should look during your resto. I still have to paint the inner fender wells and firewall. Am going to use Krylon ivory white spray cans as it was mentioned earlier that it is virtually the same color as Rusto's canvas white. Good luck!
Re: New Paint job on a budget thread. - 06/08/0701:58 AM
My Dart's prepped and ready to be sprayed - now I'm thinking roller it so i can buy those forged pistons and Edelbrock heads ! Only concern is I have to spray engine bay, trunk, and jambs etc.. probably been asked, but can I thin and spray Tremclad/Brightside and roller the rest?
Posted By: Anonymous
Re: New Paint job on a budget thread. - 06/08/0703:17 AM
I'm no expert on spraying but I've read earlier in the thread that others have sprayed it. Go for it!
Posted By: Anonymous
Re: New Paint job on a budget thread. - 06/08/0706:49 AM
Im wondering if I should just shell out the extra $ and get brightside and the additive... How much better than rusto is brightside?
I know it last longer, and that is my selling point.. but i have seen and heard results of those who had rusto hard as a rock and never chipping away. The problem was keeping the shine - time consuming but very possible. This wont have much to do with my satin look but i guess I wont have to go crazy cleaning the paint as much?
Hope everything works so i can get started. I sanded 80% of the car so far.
Quote:
For the Brightside paint... they sell an 'additive' that you add to your standard can of Brightside paint. It turns a glossy Brightside paint into a 'flat satin' finish. This additive was developed because certain parts of the boats deck surface can't have a high gloss or people would be slipping overboard ahhahhah.
They also sell another 'additive' that gives the surface a more granular surface - better for your footing when you are walking around on the deck. I can't see much use for it on our cars... but maybe pickup truck guys might like something like that added to their paint for when they are painting running boards or the bed of pickup
.
Posted By: Anonymous
Re: New Paint job on a budget thread. - 06/08/0712:50 PM
Quote:
Quote:
There's still a few of them around, guy here in town has one that he races, V8, nitrous the works, trying to talk him into rolling his.
Was he on Pinks? I saw a LUV that really moved out on the Pinks All Out in Dallas.
Doubt it was this particular guy, could have been QIKLUV(also a member) he's from the Clute.
Re: New Paint job on a budget thread. - 06/08/0703:07 PM
Quote: My Dart's prepped and ready to be sprayed - now I'm thinking roller it so i can buy those forged pistons and Edelbrock heads ! Only concern is I have to spray engine bay, trunk, and jambs etc.. probably been asked, but can I thin and spray Tremclad/Brightside and roller the rest?
I'm going to spray all that stuff regardless of whether I spray the whole car or not.
Going to then hit the engine bay with a DupliColor clear high heat/engine enamel for protection from oil/gas - not to mention the gloss.
Posted By: Anonymous
Re: New Paint job on a budget thread. - 06/08/0708:11 PM
I just bought everything today in Canada.
Interlux Brightside just kills the budget term.
My total rings in @ 120 with 2 quarts of Brightside plus all the supplies like tape, sandpaper, rollers, etc.
2 Quarts of Brightside by itself was $91 total. Thats messed up, but hopefully it will be worth it.
Posted By: Anonymous
Re: New Paint job on a budget thread. - 06/09/0712:14 AM
It will be worth it even at 120 for everything. Just did my truck in brightside black looks great. Bought mine from wholesalemarine.com for around 24 a quart. But of course im in the states.
Posted By: Anonymous
Re: New Paint job on a budget thread. - 06/09/0701:07 AM
Quote: It will be worth it even at 120 for everything. Just did my truck in brightside black looks great. Bought mine from wholesalemarine.com for around 24 a quart. But of course im in the states.
I believe you! I've only seen good things about Interlux Brightside! Hopefully 2 quarts can be enough.
Original color is black going to repainted black on a relatively small car, 1993 Civic Hatchback.
Re: New Paint job on a budget thread. - 06/09/0703:13 AM
Quote: I just bought everything today in Canada.
Interlux Brightside just kills the budget term.
My total rings in @ 120 with 2 quarts of Brightside plus all the supplies like tape, sandpaper, rollers, etc.
2 Quarts of Brightside by itself was $91 total. Thats messed up, but hopefully it will be worth it.
Ouch... they gouged yah... I paid $ 33 CDN per quart in Ottawa... Whoever gouged you for $ 45 a quart does not deserve any future business from you. In fact, for $45 bucks a quart the place here in Ottawa would have shipped it to your doorstep using Canada Post...
Here is the URL for "The Chandlery' marine supplier in Ottawa. They are suppose to have the largest selection of any marine shop in Canada ( which is hilarious when you normally would think that there would be some shop on the East or West Coast that could hold that title.
And if you catch them at certain times the price is even lower... ( sales - or during the non-boating season ).
But no matter what the price.... just think of it this way.... the Rustoleum/Tremclad paint job is equivalent to the paint used by MAACO for their cheapest paint job. The Brightside paint is a polyurathane and that is what MAACO uses for their most expensive paint jobs that they offer.
So you are paying a little extra for your paint but that pro paint shop would have charged an appreciably higher price for that paint job compared to their budget enamel paint job.
.
Posted By: Anonymous
Re: New Paint job on a budget thread. - 06/09/0704:07 PM
Quote:
Quote: I just bought everything today in Canada.
Interlux Brightside just kills the budget term.
My total rings in @ 120 with 2 quarts of Brightside plus all the supplies like tape, sandpaper, rollers, etc.
2 Quarts of Brightside by itself was $91 total. Thats messed up, but hopefully it will be worth it.
Ouch... they gouged yah... I paid $ 33 CDN per quart in Ottawa... Whoever gouged you for $ 45 a quart does not deserve any future business from you. In fact, for $45 bucks a quart the place here in Ottawa would have shipped it to your doorstep using Canada Post...
Here is the URL for "The Chandlery' marine supplier in Ottawa. They are suppose to have the largest selection of any marine shop in Canada ( which is hilarious when you normally would think that there would be some shop on the East or West Coast that could hold that title.
And if you catch them at certain times the price is even lower... ( sales - or during the non-boating season ).
But no matter what the price.... just think of it this way.... the Rustoleum/Tremclad paint job is equivalent to the paint used by MAACO for their cheapest paint job. The Brightside paint is a polyurathane and that is what MAACO uses for their most expensive paint jobs that they offer.
So you are paying a little extra for your paint but that pro paint shop would have charged an appreciably higher price for that paint job compared to their budget enamel paint job.
.
I guess many of the stores over here don't deserve business...I called like 6 places and the price ranged from 39.95-$43/quart!! And these are all far away from where I live. I live like 1 hour away from Central Toronto, but these stores are @ Downtown Toronto...
I bought it from Fogh Marine...Even tried to bargain them..cash deal $40 each can. Please!! They wouldn't do it. Damnit.
Argh...
BTW: I think I'm gonna paint today or tomorrow...Can you give me any pointers to decrease dust?
Re: New Paint job on a budget thread. - 06/09/0704:21 PM
Quote: BTW: I think I'm gonna paint today or tomorrow...Can you give me any pointers to decrease dust?
I did mine in the driveway I wet it down each morning. Better of course if you can do it inside.
Posted By: Anonymous
Re: New Paint job on a budget thread. - 06/09/0706:14 PM
has anyone tried rattle can clear? and wetanded and polished it?? usually rattle can clear doesnt seem to be very glossy straight from the can, i was wondering how it would work out if we did a few coats and then polished it up just like the paint
Posted By: Anonymous
Re: New Paint job on a budget thread. - 06/09/0709:11 PM
Just washed my car down with soap and water.
I finished it off with Mineral Spirits on a new Micro-fiber towel. Wow! Mineral Spirit took off everything soap and water couldn't. I was amazed, my towel was really black.
Good thing you guys advised me to purchase it and not be half-way.
I think I will paint Monday realistically because tomorrow is gonna be a long day.
BTW: How do I clean my dirty rag?
And is mineral spirits okay to come in contact with your skin?
Posted By: Anonymous
Re: New Paint job on a budget thread. - 06/09/0710:22 PM
i did and it leaves a glitter effect in the clear but it dries hard as a rock and not good for flexible pieces as it will crack and flake off i didnt likr that clear co i got the gallon of the clear from the internet a few pages ago.
Posted By: Anonymous
Re: New Paint job on a budget thread. - 06/09/0710:24 PM
put a chain over a control arm to the concreate
Posted By: Anonymous
Re: New Paint job on a budget thread. - 06/09/0711:16 PM
I'm glad you asked about mineral spirits. In this whole thread I never heard a caution about it but on the back of my can it says it's pretty bad stuff. Starting with, and I quote, "Danger! Vapor Harmful. May affect the brain or nervous systemcausing dizziness, headache, or nausea. Causes eye, skin, nose and throat irritation. Warning: Use of this product will expose you to benzene which is known to cause cancer and to toluol which is known to cause birth defects or other reproductive harm." It is also highly flammable. If you spray it use an approved respirator, etc. So, don't wash your hands with it, don't breath the vapor. Wear nitrile gloves and make sure you have lots of cross ventilation while using it in any manner.
Be careful out there!
Posted By: Anonymous
Re: New Paint job on a budget thread. - 06/10/0703:09 AM
lol nice catch
ya bezene is bad stuff
Posted By: Anonymous
Re: New Paint job on a budget thread. - 06/10/0707:09 AM
Re: New Paint job on a budget thread. - 06/10/0712:19 PM
Quote: I'm glad you asked about mineral spirits. In this whole thread I never heard a caution about it but on the back of my can it says it's pretty bad stuff. Starting with, and I quote, "Danger! Vapor Harmful. May affect the brain or nervous systemcausing dizziness, headache, or nausea. Causes eye, skin, nose and throat irritation. Warning: Use of this product will expose you to benzene which is known to cause cancer and to toluol which is known to cause birth defects or other reproductive harm." It is also highly flammable. If you spray it use an approved respirator, etc. So, don't wash your hands with it, don't breath the vapor. Wear nitrile gloves and make sure you have lots of cross ventilation while using it in any manner.
Be careful out there!
Actually... we have discussed the health effects of various paints and thinners. Usually the discussions centered on warnings related to the 'vapors' that are released into the air.
They key concept is to always ensure 'adequate' ventilation when rolling. When 'rolling' your paint... there is not as significant an amount of vapors released in high concentrations as compared to spraying. But nonetheless as the paint is drying and the 'carrier' is evaporating, the concentrations will increase. So if you are 'rolling' in the garage - leave the garage doors open enough to get fresh air circulating - don't seal up the garage.
But for the guys who were spraying... the key concept was 'lots of ventilation' and even wear a ventilator. You want to block the atomized paint/spirit particles from entering your lungs and you want to ensure a clean supply of oxygen ( so that you don't get stoned out of your gourd and destroy your brain cells ). The atomized vapors caused by the spraying release higher concentrations of 'nasty' things into the air. So you don't want to spray in a closed garage for example...
It seems that just about anything - if given prolonged contact with skin - may pose a threat as a carcinogen. Next time you go to put gas in your car, look around for the 'health warning' signs that they post around the gas pumps. Gasoline is a potential carcinogen. So the gas pump warnings usually advise against 'prolonged exposure of your skin' to gas.
I don't think during the course of 'rollering' your paint job that you purposely soak your hands in the paint or the thinner. The only exception being when you are wiping down the car body with a dampened cloth ( with mineral spirits ) while you are trying to remove any foreign material from the body prior to painting.
I guess you could slip on a pair of rubber gloves while wiping down your car body with the cloth and thinner. Or maybe you might go and wash your hands or rinse them off after you did the body wipe down.
But I didn't bother taking those steps. I guess my theory is that I am not leaving my skin exposed to a 'prolonged exposure' of the mineral thinner. And further... any mineral spirit that does come in contact with your skin is busily evaporating from the moment it first comes in contact. So I don't think it poses as much of a health risk... then say if you were doing a hundred cars a year using this method.
Let's take it a step further. Women's hair dye color products are 100% more carcinogenic causing then mineral spirits or paints. Yet wifey's around the world dye their own hair at home. Some use the rubber gloves that come with the hair dye boxes... and many do not bother using the gloves. Their risk is negated because they usually wash it off their hands after the hair dye is applied to their head. BUT look at the poor hair care salon where the hairdresser is exposed to potentially doing 10 or 20 hair dye jobs per week. They run a greater risk due to the increased frequency they are coming in contact with the hair dye solutions. So in the hairdressers situation it is more advisable to wear the rubber gloves.
Naturally the package warnings are also trying to warn the truly stupid that the product should not be ingested ( eaten or drank ). And that holds the most dire threat to your health. Do not drink any of these products and definitely do not eat a sandwich or burrito while your hand is soaked in mineral spirits.
Further with this safety aspect of the discussion - we have clearly stated that smokers should avoid smoking while wiping down their car with mineral spirits, while thinning their paints or while painting their cars. I don't think the cigarette is going to ignite the volatile vapors that are being released... but the lighter or match used to light that ciggy may ignite the vapors. BUT HEY... if you are smoking... you already are throwing your health fears to the wind anyhow and carcinogens from paint or mineral spirits may be the least of your worries ahhahahh... ( me smoke... me bad )....
In a similar vain... don't use a fire powered heater or have an open source flame in an enclosed area where painting is going on. That warning is probably more important to guys who are 'spraying' compared to the guys who are rolling ( because of the concentration levels involved ). Otherwise your garage and car may be the next thing docking with the space station..
One warning or paranoia that I would definitely share with everyone is how you handle your rags that are coated with paint or mineral spirits. Personally I fear 'instantaneous combustion' where improperly stored rags may 'self ignite'. I always put my used rags in a METAL CAN and at the end of a days work..... I take that can out of the garage and leave it outside ( safely away from anything that it might ignite IF the can and cloths should 'self-ignite'. This is a carryover from my youth when I saw 'linseed' oil soaked rags that would self-ignite ( usually after a couple of hours ). Now... I don't think mineral or paint soaked rags will self-ignite like that.. BUT just call me paranoid and take that little extra measure so you can sleep happily at night knowing that your garage is not going to burn down. The one positive thing about taking this extra step is that you are removing from your garage all the potential 'vapors' that the can of used rags would have released while it was drying and evaporating... ( hence reducing concentrations of vapors in the air when you return to work in the garage the next day ).
.
.
Posted By: Anonymous
Re: New Paint job on a budget thread. - 06/10/0712:38 PM
Boy oh boy! Lots of mineral spirit talk.
I used it to wipe away foreign matter away from my car. I didn't use gloves but next time I will. Plus the vapor was there but I was wiping outside so I didn't really smell it fully, I was wearing a cheap dust mask...no respirator.
So what shall I do with the "dirty" new microfiber cloth that I used to wipe down with mineral spirits? I guess I should re-use it just for that wipe down purpose and then throw it away? I couldn't really clean it...I used soap and water and it got off some black out of the yellow cloth, but still is the same.
- Mike
Edit: Thanks for all the pre-cautions! I will definitely try to be safe as possible.
Re: New Paint job on a budget thread. - 06/10/0701:00 PM
Quote: Boy oh boy! Lots of mineral spirit talk.
I used it to wipe away foreign matter away from my car. I didn't use gloves but next time I will. Plus the vapor was there but I was wiping outside so I didn't really smell it fully, I was wearing a cheap dust mask...no respirator.
So what shall I do with the "dirty" new microfiber cloth that I used to wipe down with mineral spirits? I guess I should re-use it just for that wipe down purpose and then throw it away? I couldn't really clean it...I used soap and water and it got off some black out of the yellow cloth, but still is the same.
- Mike
What you can do with your micro-fiber or even the real cloth rags is take a bucket, fill it with water and toss in some liquid dish soap. Sccccsh it around like the old days where they would wash their rags ( errm clothes ) alongside the river. Scrunge it up up, wring it out and then scoosh it around some more in the soapy bucket of water. Then when you have been able to release as much crap as possible from the cloth... rinse it off with your hose... and then wring out out like you are choking a chicken's neck ahhahha. Then hang it out to dry in the garage or anywhere where it will not fall down and land in the dirt. That is usually sufficient to get futher use out of the cloth once it dries out.
On one occassion I had about 30 cloth rags accumulated... and I was being lazy - - so I waited til they were all evaporated of their mineral spirits and tossed them in the wifey's washing machine hahhhaha. You would be surprised how many loads of wash after that 'experiment' ended up having a slight smell of mineral spirits on them... acckkk... the wifey figured out what I did. Don't do it.
But maybe if you had enough rags accumulated... you could take them to the local laundymat ( you know... that place where people who don't have washing machines go to pay some coins to wash and dry their stuff ). Afterall... you don't really care if your stink up the laundry loads of the other people who use THAT washing machine after you
Yeah yeah.. me bad...
.
Posted By: Anonymous
Re: New Paint job on a budget thread. - 06/11/0705:08 AM
Quote: has anyone tried rattle can clear? and wetanded and polished it?? usually rattle can clear doesnt seem to be very glossy straight from the can, i was wondering how it would work out if we did a few coats and then polished it up just like the paint
Re: New Paint job on a budget thread. - 06/11/0712:02 PM
I tried it... got orange peely result after spraying, didn't bother to wetsand or polish because i read that the clear would NOT hold up to oil, gas, etc. the way the base paint would. Maybe another clear is oil/gas resistant but the rustoleum is not..
Posted By: Anonymous
Re: New Paint job on a budget thread. - 06/11/0703:25 PM
Wow what a fun morning it was!! I prepped the car with mineral spirits and my dad painted for me since he has more experience with rolling.
Anyway we didnt know how much we actually thinned the paint. We knew we couldnt go over 10% but anyway it didn't matter. We experimented along the way.
First coat was on the roof for experimentation. It had killer bubbles! during first rolling. I was like w t h what is going on. I knew it probably needed more mineral spirits. So we add accordingly until it came out like water. I sensed my dad was rolling up the roller with tooo much paint at first because it showed. But he got the hang of it later on and used little as possible.
I will post up pics in a few minutes. BTW: I HATE DUST! We rolled it outside in the morning, it wasn't too windy. But by the time we were finished, dust stuck on to the paint...argh!
Re: New Paint job on a budget thread. - 06/11/0703:54 PM
Quote:
I will post up pics in a few minutes. BTW: I HATE DUST! We rolled it outside in the morning, it wasn't too windy. But by the time we were finished, dust stuck on to the paint...argh!
I like it when the only mosquito, fly or moth from within 50 miles happens to stumble along and happen to land on a fresh coat of paint.
Murphy's Law says that if anything can go wrong - it will..
Roller's Law says that if there is any flying bugs within 50 miles, it will pick your freshly painted car to land on...
.
Posted By: Anonymous
Re: New Paint job on a budget thread. - 06/11/0703:55 PM
Okay here are the pictures I have on my 1st coat. Please tell me what we can do better to minimize air bubbles and stuff in general that you see. Still looks way better than it did before. Interlux Brightside Black is really black!!
Posted By: Anonymous
Re: New Paint job on a budget thread. - 06/11/0704:19 PM
Quote: Okay here are the pictures I have on my 1st coat. Please tell me what we can do better to minimize air bubbles and stuff in general that you see. Still looks way better than it did before. Interlux Brightside Black is really black!!
If I remember correctly you need a second dry roller to "tip" the paint when you use Brightside. After you roll the paint on you go over it very lightly with a dry roller and it pops the bubbles and smoothes the surface. the "tipping" started with using a brush but I read somewhere back there that people were getting better results with a dry roller. Marq or 69DartGT might have a better idea though since they both used Brightside. With Rustoleum all I have to do is blow lightly on the surface of the paint and all the bubbles will pop, my Rusto is thinned 25%. Thats just my though, hopefully someone else might have some additional info for you.
Re: New Paint job on a budget thread. - 06/11/0704:44 PM
Just blow on the bubbles -- if you have a compressor, an air gun works awesome. (as suggested by the Hot Rod article)
After a failed first attempt, I have had really good success with laying down a first coat on a deck lid this weekend.
Used an air gun to hit the bubbles with -- straight down, 2 ft off, would flatten a 1/4 of the finish in one blast.
Posted By: Anonymous
Re: New Paint job on a budget thread. - 06/11/0705:22 PM
Quote: Just blow on the bubbles -- if you have a compressor, an air gun works awesome. (as suggested by the Hot Rod article)
After a failed first attempt, I have had really good success with laying down a first coat on a deck lid this weekend.
Used an air gun to hit the bubbles with -- straight down, 2 ft off, would flatten a 1/4 of the finish in one blast.
Will try that! We have a small air compressor.
I figure we just need to thin our mixture more like water. After a couple of hours now it levels out pretty nice, no roller lines. Some bubbles, but we'll sand down.
Before I paint, can I use mineral spirits to clean the paint again? It won't cut the paint correct?
Posted By: Anonymous
Re: New Paint job on a budget thread. - 06/11/0706:02 PM
A note on compressors:
This maybe stating the obvious, but make sure there is no moisture in the lines, you can imagine the havoc that would cause on fresh paint.
I had thought of using a can of air typically used to clean dust off computers etc. Could never remember to pic some up til I was finished.
Posted By: Anonymous
Re: New Paint job on a budget thread. - 06/11/0706:05 PM
Quote:
Quote: Just blow on the bubbles -- if you have a compressor, an air gun works awesome. (as suggested by the Hot Rod article)
After a failed first attempt, I have had really good success with laying down a first coat on a deck lid this weekend.
Used an air gun to hit the bubbles with -- straight down, 2 ft off, would flatten a 1/4 of the finish in one blast.
Will try that! We have a small air compressor.
I figure we just need to thin our mixture more like water. After a couple of hours now it levels out pretty nice, no roller lines. Some bubbles, but we'll sand down.
Before I paint, can I use mineral spirits to clean the paint again? It won't cut the paint correct?
When I did mine, I always wiped down with M/S after wetsanding and washing, would give it a wipe right before I started rolling the next coat.
Posted By: Anonymous
Re: New Paint job on a budget thread. - 06/11/0707:39 PM
Do you guys think I can sand down with 2000 grit a couple of hours later? Its dry right now. Finished painting @ 12AM, and plan to sand at 7PM.
I should be fine right?
BTW: I'm gonna read up more in these series of threads to see what I can learn and do better about mixtures.
Posted By: Anonymous
Re: New Paint job on a budget thread. - 06/11/0708:12 PM
Marq:
Should I use the interlux 333 brush liquid to thin down the brightside prior to spraying? or would mineral spirits be just fine?
Re: New Paint job on a budget thread. - 06/11/0708:27 PM
Quote: Marq:
Should I use the interlux 333 brush liquid to thin down the brightside prior to spraying? or would mineral spirits be just fine?
thanks!
Not Marq but mineral spirits worked just fine for me..
Posted By: Anonymous
Re: New Paint job on a budget thread. - 06/11/0708:30 PM
Quote: Do you guys think I can sand down with 2000 grit a couple of hours later? Its dry right now. Finished painting @ 12AM, and plan to sand at 7PM.
I should be fine right?
BTW: I'm gonna read up more in these series of threads to see what I can learn and do better about mixtures.
sup bro JDM BALLS from h-t here lol.. anyway with the orange peel u have on that coat 2000 isnt gonna do anythign for you, u should wetsand that with 600 or 800 to cut it down fast. u want to use 2000 only ON your final coat, before u polish.
did u finish painting at 12am midnight or did u mean 12pm noon lol.. if u meant midnight then 7pm should be ok, if u meant noon then no i would wait till the next day.
and yes, before every coat, wipe down with mineral spirits. it removes any oil from ur hands and any residue that might be left, just make sure u wait till its completely evaporated b4 painting. a good idea also is to keep a tack cloth handy and wipe each panel right b4 u paint it, to pick up any dust that might have landed.
Posted By: Anonymous
Re: New Paint job on a budget thread. - 06/11/0709:42 PM
Quote:
Quote: Do you guys think I can sand down with 2000 grit a couple of hours later? Its dry right now. Finished painting @ 12AM, and plan to sand at 7PM.
I should be fine right?
BTW: I'm gonna read up more in these series of threads to see what I can learn and do better about mixtures.
sup bro JDM BALLS from h-t here lol.. anyway with the orange peel u have on that coat 2000 isnt gonna do anythign for you, u should wetsand that with 600 or 800 to cut it down fast. u want to use 2000 only ON your final coat, before u polish.
did u finish painting at 12am midnight or did u mean 12pm noon lol.. if u meant midnight then 7pm should be ok, if u meant noon then no i would wait till the next day.
and yes, before every coat, wipe down with mineral spirits. it removes any oil from ur hands and any residue that might be left, just make sure u wait till its completely evaporated b4 painting. a good idea also is to keep a tack cloth handy and wipe each panel right b4 u paint it, to pick up any dust that might have landed.
Hey man,
I only have 2000 grit on me since Im a cheapo. But I do have 320 grit, so I guess I will be alternating a bit then. Sand longer with 320 and sand less with 2000 grit, hopefully that will put me in between.
Re: New Paint job on a budget thread. - 06/11/0710:22 PM
Quote:
I only have 2000 grit on me since Im a cheapo. But I do have 320 grit, so I guess I will be alternating a bit then. Sand longer with 320 and sand less with 2000 grit, hopefully that will put me in between.
Dude - 320 might take off the entire coat (or more) that you just did. Spend $5 and buy five sheets of 600 or 800.
Posted By: Anonymous
Re: New Paint job on a budget thread. - 06/11/0711:13 PM
I had good luck with 100 grit. I was putting the coats on so light that if i used 800 I would start to get through to the other layer of paint below after a bit. But, 800 works well also for getting the orange peel out, just be careful with it and dont overdo it
Posted By: Anonymous
Re: New Paint job on a budget thread. - 06/12/0712:03 AM
Quote:
Quote:
I only have 2000 grit on me since Im a cheapo. But I do have 320 grit, so I guess I will be alternating a bit then. Sand longer with 320 and sand less with 2000 grit, hopefully that will put me in between.
Dude - 320 might take off the entire coat (or more) that you just did. Spend $5 and buy five sheets of 600 or 800.
Re: New Paint job on a budget thread. - 06/12/0712:05 AM
I have two new fav words. FOAM BRUSH.
I was pleased with my second attempt at a first coat -- but still not satisfied. Many bubbles solved with a blast of air, but still much peel and tricky to roll.. and again, bubbles and such were being a pain.
I spent 1.29 on a 4" foam brush.
I wet sanded the first coat down, thinned another batch, probably around 40%, maybe 45%, and hit it with the foam brush.
Like glass. No bubbles, and it is incredibly easy to lay a *very* even and *really* thin coat. Very easy to blend. I coated in pretty much 4 quadrants of the deck lid and as I finished each one, blended with some nice long sweeps of the brush...well... here's what I got...
And no brush marks. Those lines you see running front to back are the reflection of the ceiling boards.
Re: New Paint job on a budget thread. - 06/12/0712:14 AM
Quote: A note on compressors:
This maybe stating the obvious, but make sure there is no moisture in the lines, you can imagine the havoc that would cause on fresh paint
I remember reading an article where the guy was warning to watch out for some compressors that actually blow oil out of them. I guess this is the oil that lubricates the piston walls of the compressor ?
I can't speak to much to that as I have never pulled a compressor apart... but I can imagine the havoc that a compressor spitting atomized oil particles could do to a paint job...
For an experiment... run your compressor full out and blast the 'air' at some white bristol board or something that would show water or oil getting spit out of the nozzle.
Water is a possibility... simply depending on the humidity in the environment when the air is being compressed in the piston.
If you have never tried this... put your hand over your mouth and blow as hard as you can - puffing up your cheeks like a chipmunk as you build pressure inside your mouth. Then take your hand off your mouth and gently blow the air in your mouth out. You should see what resembles cigarette smoke... a white wispy plum of condensed air.
Same thing applies with compressors that are used in a humid work environment and that don't have measures built into them to avoid the compression of moisture laiden air.
Nuff said... time to take my 'Mr. Science Class' hat off...
Re: New Paint job on a budget thread. - 06/12/0712:18 AM
Quote: Marq:
Should I use the interlux 333 brush liquid to thin down the brightside prior to spraying? or would mineral spirits be just fine?
thanks!
Both worked equally on my car. The mineral spirit might give you a little extra working time before the paint starts setting. The 333 evaporates slightly quicker giving you a little less time to work out any runs or bubbles.
Either way.. the end result is about the same once they dry.
.
Posted By: Anonymous
Re: New Paint job on a budget thread. - 06/12/0712:24 AM
What kind of foam brush are you using BTW? Simple generic kinds?
I am using this foam roller...I saw someone else use it so I think it should be okay?
Re: New Paint job on a budget thread. - 06/12/0712:33 AM
Quote: What kind of foam brush are you using BTW? Simple generic kinds?
I am using this foam roller...I saw someone else use it so I think it should be okay?
At various points during my painting I also made use of a simple foam brush for doing the bubble popping sweep.
At Home Depot and Walmart they sell these grab bags of cheap foam 'paint brushes' They look like a dowl stuffed into a piece of black foam, that is shaped like a paint brush. They had 3/4 inch, 2 inch, 3 inch and 4 inch foam brushes all packed in these assortment bags.
I used the 3 inch and 4 inch to do the bubble popping... because they did a better, less lines or streaks, then a bristol brush.
BUT I stuck with my high density foam roller to lay the initial coats - and then followed it up almost immediately with the foam 'paint brush' to do the bubble popping and quick surface leveling. You just have to let the foam 'paint brush' float over the bubble populated areas to pop em...
BUT... the cheap foam brushes have one weakness... they start to disintergate after prolonged exposure to mineral spirit or 333 brushing fluid. As well... the paint accumulates on them and begins curing. So you should figure on using at least four of the foam 'paint brushes' during one coat on the car..
a ) one for the left side b ) one for the right side c ) one for the trunk and roof d ) one for the hood
Later I also did the two high density foam roller trick when I ran out of the cheap foam 'paint brushes'...
The high density foams stand up to the mineral spirit / thinner better and do not start disintegrating after prolonged use.
One handy thing about those cheap foam 'brushes' is that I was able to poke and prod them into some spots where the roller could not go. I would hit those crevices first with the appropriately size foam brush.. and then smooth out the edges with the roller. I hope that makes sense... use the foamies to paint any hard to reach spots on a panel... then proceed with your rollering of the rest of that surface second - in order to blend in the paint between the edges of the crevices and the rest of the panel.
.
Posted By: Anonymous
Re: New Paint job on a budget thread. - 06/12/0712:42 AM
Quote:
Quote: What kind of foam brush are you using BTW? Simple generic kinds?
I am using this foam roller...I saw someone else use it so I think it should be okay?
At various points during my painting I also made use of a simple foam brush for doing the bubble popping sweep.
At Home Depot and Walmart they sell these grab bags of cheap foam 'paint brushes' They look like a dowl stuffed into a piece of black foam, that is shaped like a paint brush. They had 3/4 inch, 2 inch, 3 inch and 4 inch foam brushes all packed in these assortment bags.
I used the 3 inch and 4 inch to do the bubble popping... because they did a better, less lines or streaks, then a bristol brush.
BUT I stuck with my high density foam roller to lay the initial coats - and then followed it up almost immediately with the foam 'paint brush' to do the bubble popping and quick surface leveling.
Later I also did the two high density foam roller trick when I ran out of the cheap foam 'paint brushes'...
One handy thing about those cheap foam 'brushes' is that I was able to poke and prod them into some spots where the roller could not go. I would hit those crevices first with the appropriately size foam brush.. and then smooth out the edges with the roller. I hope that makes sense... use the foamies to paint any hard to reach spots on a panel... then proceed with your rollering of the rest of that surface second - in order to blend in the paint between the edges of the crevices and the rest of the panel.
.
But I think plum5000 actually stated that he used those foam brushes to paint his hood?
Re: New Paint job on a budget thread. - 06/12/0701:11 AM
Yup! Whole deck lid done with a brush. The biggest differences I found were: with pressure, the brush didn't produce the bubbles, and 2nd, the brush didn't require any pressure vs the roller to get an evenly spread coat.
Could be I just don't have the roller technique down, but I am definitely sticking with the brush.
Re: New Paint job on a budget thread. - 06/12/0701:24 AM
Here's my bug, back from 2000 when i painted it, i had no bubbles, you just have to practice and "learn" the paint, be at one with the paint, be the paint...... little of this few of these by the way, these pics are BEFORE wetsanding and polish, about 1 day after the last coat.
Re: New Paint job on a budget thread. - 06/12/0703:07 AM
Quote: Yup! Whole deck lid done with a brush. The biggest differences I found were: with pressure, the brush didn't produce the bubbles, and 2nd, the brush didn't require any pressure vs the roller to get an evenly spread coat.
Could be I just don't have the roller technique down, but I am definitely sticking with the brush.
This is the one I used:
Well... heed my advice about watching out for those foam brushes to start disintegrating after prolonged contact with paint reduced with mineral spirits or 333 thinner.
Underneath the foam is a small sheet of plastic, which is attached to the wooden shaft. The foam is enveloped over the plastic sheet. The plastic sheet gives a 'bit' of rigidity to the foam brush.
The mineral spirit will first separate the glue that holds the foam to that piece of plastic. That is the first hint that the foam brush is nearing the end of its life.
The next sign will be when you start noticing strange unexplainable black 'stuff' in your paint. That will be when the foam itself is starting to disintegrate.
Switch to a new brush at that point
.
Posted By: Anonymous
Re: New Paint job on a budget thread. - 06/12/0704:33 AM
Thanks much DartGT and Marq =)
I have everything set- car is completely sanded... just waiting for the rain to stop...
My camera died on the first shot- it's charging now...
Re: New Paint job on a budget thread. - 06/12/0710:44 AM
Quote: Thanks much DartGT and Marq =)
I have everything set- car is completely sanded... just waiting for the rain to stop...
My camera died on the first shot- it's charging now...
Well... don't forget our 'enviromental' hints about humidity. It might be worthwhile to wait a day or two extra after the rain - so that the air is not loaded up with humidity.
When I was doing my car.. it started raining when I was preparing to add the final coat of paint. Even though I was painting inside the garage ( protected )... I ended up delaying that final coat for several days after that last rainstorm. And the funny thing is that it rained for almost 7 days... so in total I had to wait almost ten days to get that final coat of paint on.
Now.... I may have been overcautious.. but I did not want anything affecting how that coat of paint turned out. And it certainly was testing my patience to keep delaying the painting.. but I did not want to give in to that impatience and botch up the paint job.
Timing of the painting is essential to obtaining an optimal paint job
Re: New Paint job on a budget thread. - 06/12/0712:52 PM
Greetings from Maine. I was linked here from the 67-72 Chevy Trucks board 2-3 weeks ago. I'm amazed by what you've all accomplished and thought I'd say Hello and offer my praise for your incredible work.
I plan to use one of the Top Secret products, pending the results of MontanaMan's experiments. They seem to have the only color selection that can closely match my Mustard Yellow '73 Cheyenne. Has anyone else tested Top Secret's TS-4 product yet or heard any feedback?
Re: New Paint job on a budget thread. - 06/12/0701:46 PM
If you're looking to match a color, and have a sample -- I also suggest Sico they make a product called Corrostop which is tintable to anything in their regular color chart, and I suspect that they also have the color matching capabilities as others. Basically the same as Rustoleum - if not an improved formula. Direct to metal, rust inhibiting, alkyd.
For the body of my car, I'm using Sherwin Williams DTM. Again, industrial/marine, direct to metal, rust inhibiting alkyd -- tintable to anything in their chart -- or custom/color match.
This way, you can be fairly secure in the ability to get more if you need it. Obviously care should be taken as to where you start/stop/repair or whatever -- but I'm gonna trust their computer controlled mixing a lot more than trying to duplicate a limited home-made mix. I would certainly trust it enough to attempt a blended repair, patch, or a single panel in need of a refresh.
Just my 2 cents for those looking to expand beyond the Tremclad/Rustoleum color chart.
Re: New Paint job on a budget thread. - 06/12/0701:58 PM
Great... another option. Top Secret has 3-4 stock colors that are close to mine. Depending on how it performs for other rollerheads, Sherwin-Williams may be a good second choice for me.
Thanks for the info.
Posted By: Anonymous
Re: New Paint job on a budget thread. - 06/12/0705:22 PM
I hate sanding. Went out and bought 800 grit sandpaper. I sanded down most of my air bubbles away, admittedly very quickly because I'm sick and tired of sanding.
Hopefully I can get these next 2 coats on nicely without any orange peel so I don't have to sand every coat.
It's very hot out today, so I plan to paint later on in the day, maybe around 7PM when the sun is down.
Should I thin my mixture down like milk again? Or should I use a less thinned but more paint mixture and use less paint on my roller?
Posted By: Anonymous
Re: New Paint job on a budget thread. - 06/12/0705:44 PM
I agree sanding is the worst part of this job. My friend and I spent about 18 hours sanding down my convertible this week with 400 grit. The previous paint color had so much peel. It took forever to wet sand through it all. It's all done and nice and smooth now so this new color should go on easy.
I'm hoping to have minimal sanding when finished. The hardest part is removing scratching if you use too low of a grit.
Trick is to do it right the first time. Which I did not in my rush to finish it last summer.
Re: New Paint job on a budget thread. - 06/12/0706:48 PM
Quote:
It's very hot out today, so I plan to paint later on in the day, maybe around 7PM when the sun is down.
Should I thin my mixture down like milk again? Or should I use a less thinned but more paint mixture and use less paint on my roller?
Tip for painting in the evening - when its dark enough that you need to turn on lights you'll attract every insect in the area and every one of them will land on your wet paint.
Posted By: Anonymous
The Kryptonite of Rustoleum paint? - 06/12/0707:10 PM
I'm still in the process of rolling my car. However, I decided that I will no longer roll Rustoleum paint on my car. I am sticking with Brightside from now on (I also have Rustoleum Pro and Marine Coating paint).
I'm pretty messy when I clean up after painting a layer on my car. I usually end up getting Rustoleum all over my gloves after pulling the foam rollers off the handles. I then end up touching my garage door and getting black paint all over it. So I figured I'd try and find a solvent that would loosen the Rustoleum on contact. It turns out I have found the very product that does this. I had a spray can of Carburator and choke cleaner, which, when sprayed onto Rustoleum paint, cracks the paint and makes it immediately lose adhesion to whatever surface it's on.
I tried spraying the carb & choke cleaner on my brightside topcoat, and it does nothing to the paint. whew, good stuff. It also does nothing to the single stage earl scheib paint that is currently on my car. However, I have both Rustoleum Professional and Marine Coating paint, and the Carb/Choke cleaner immediately cuts through the paint without any problem at all. There's no telling what else will remove Rustoleum paint, but what I do know is that a topcoat of Brightside will protect the underlying Rustoleum paint from damage. I have about 8 layers of Rustoleum on my trunk, and it is topcoated with Brightside. It was sprayed with Carb/choke cleaner, and the Brightside created an impermeable layer between the spray and the Rustoleum. The Brightside also stood up to the spray--it looked exactly the same before/after being sprayed with carb/choke cleaner.
Posted By: Anonymous
Re: New Paint job on a budget thread. - 06/12/0707:54 PM
Quote:
Quote: Thanks much DartGT and Marq =)
I have everything set- car is completely sanded... just waiting for the rain to stop...
My camera died on the first shot- it's charging now...
Well... don't forget our 'enviromental' hints about humidity. It might be worthwhile to wait a day or two extra after the rain - so that the air is not loaded up with humidity.
When I was doing my car.. it started raining when I was preparing to add the final coat of paint. Even though I was painting inside the garage ( protected )... I ended up delaying that final coat for several days after that last rainstorm. And the funny thing is that it rained for almost 7 days... so in total I had to wait almost ten days to get that final coat of paint on.
Now.... I may have been overcautious.. but I did not want anything affecting how that coat of paint turned out. And it certainly was testing my patience to keep delaying the painting.. but I did not want to give in to that impatience and botch up the paint job.
Timing of the painting is essential to obtaining an optimal paint job
.
Thanks Marq...
Sadly its still raining! =( I hate the rain. Well my plan is to tarp up the garage - water the floor a few times b4 painting... and shoot away.
For those who are looking for a decent deal on brightside.. I just got 2 quarts from here: only 22.99/QT
Re: The Kryptonite of Rustoleum paint? - 06/12/0708:00 PM
Tip:
No need to pull the rollers off the handles after every coat or use, just get a ziplock baggie large enuff to fit the head and about half the handle, hold the bag, twist the handle a bit while squeezing out most of the air, and hold it closed with a small piece of masking tape etc. I have stored and reused other rollers like this for months.
Posted By: Anonymous
Re: The Kryptonite of Rustoleum paint? - 06/12/0708:27 PM
the reason why I pull the rollers off is because I store them in a paint can filled 1/4 way with mineral spirits. They are definitely reusable (probably indefinitely) as long as they are not contaminated, e.g. you dropped them on the ground.
Posted By: Anonymous
Re: The Kryptonite of Rustoleum paint? - 06/12/0709:33 PM
Quote: Tip:
No need to pull the rollers off the handles after every coat or use, just get a ziplock baggie large enuff to fit the head and about half the handle, hold the bag, twist the handle a bit while squeezing out most of the air, and hold it closed with a small piece of masking tape etc. I have stored and reused other rollers like this for months.
That's pretty much what I do. I just use a regular old grocery bag(with no holes)wrap up the top of the roller and tape it around the handle shaft nice and tight and throw it in the freezer. When I'm gonna paint again I lay it out in the sun(in the bag still) for a little bit while I prep my surface and get my paint tray ready to go. Then I cut the tape and soak the roller in the fresh paint before I use it again.
Posted By: Anonymous
Re: The Kryptonite of Rustoleum paint? - 06/12/0709:48 PM
brightside standing up to brake cleaner is pretty impressive, that stuff will dissolve just about anything.. i once had the bright idea to try to clean a yellowed up headlight with brake cleaner, and it basically kinda melted the plastic and destroyed it
Posted By: Anonymous
Re: New Paint job on a budget thread. - 06/12/0710:19 PM
BTW, I was following this topic way back when it started. haven't been reading it in the last month.
Just thought I would mention that I picked up an issue of HotRodder magazine today. On the frontpage it said something along the lines of good $98 paint job. Knew it was the tremclad stuff. I think there's about 4-5 pages on it. It even mentions this thread.
Also, about a year ago I decided to paint the hood off my racing lawnmower with tremclad. Other then the fact that I didn't thin the paint enough its now ROCK solid! I don't think much could damage the paint. It was even getting hard to key.
I will be painting my 74 Nova SS soon. Its currently grey primer(student on a budget). I can't decide on colours. Either Charleston green(dark green) with big black racing stripes or a blue with white racing stripes. The only problem I'm having right now is that I can't find a dark blue that doesn't look purply. Any advice? I'm limitted to the Canadian TremClad. Have limitted access to the Rustoleum stuff.
Here's a picture of my car when I got it several years ago. If anyone could recommend a choice that would be great! The motor's coming out soon and I wouldn't mind painting the car while the motors out. Then I have something to work on while the paints drying. http://www.renowneddesign.net/nova/DSCF0121.JPG(YES - The hood scoop IS coming off. I have the original which is still burgendy)
Re: New Paint job on a budget thread. - 06/12/0711:05 PM
Some of my old Navy friends are saying Penetrol when added to Brightside really improves the leveling qualities. Here's a link if somebody wants to do a sample peice and report back. On second thought I may try it on the inside of the trucks bed its still in primer. http://www.flood.com/Flood/CustomerSupport/FAQ/DIY/Penetrol+FAQ.htm
Posted By: Anonymous
Re: The Kryptonite of Rustoleum paint? - 06/12/0711:10 PM
I sprayed my headlight and taillights with the carb cleaner, and my headlights were fine afterwards. The rustoleum paint on my lights, on the other hand, wiped off quickly and easily. So I guess for Rustoleum users, buy some carb cleaner spray for removing overspray (or overroll, whatever it may be) from parts that accidentally get painted. But don't spray the actual paint job!
Posted By: Anonymous
Re: New Paint job on a budget thread. - 06/12/0711:39 PM
Quote: Some of my old Navy friends are saying Penetrol when added to Brightside really improves the leveling qualities. Here's a link if somebody wants to do a sample peice and report back. On second thought I may try it on the inside of the trucks bed its still in primer.
Yeah, penetrol works great
Posted By: Anonymous
Re: The Kryptonite of Rustoleum paint? - 06/13/0712:40 AM
Quote: Tip:
No need to pull the rollers off the handles after every coat or use, just get a ziplock baggie large enuff to fit the head and about half the handle, hold the bag, twist the handle a bit while squeezing out most of the air, and hold it closed with a small piece of masking tape etc. I have stored and reused other rollers like this for months.
Thats what my dad did tonight. Finished up 2nd coat. Still sunny outside @ 8PM but sun is not on our side and going away. A cool breeze is good enough for painting. It is stored in the garage to try to prevent dust.
2nd coat looks better. I am really starting to like it.
Plus I can see the potential for shine after cutting compound, rubbing compound and wax.
Some of the body panels on my car look better than others. I guess this should be expected because some are metal and plastic. My plastic fenders looks amazing. Very little minor orange peel but shines, even when thinned.
My dad said he wants to try going un-thinned for the last layer.
Posted By: Anonymous
Re: New Paint job on a budget thread. - 06/13/0712:42 AM
Quote: Some of my old Navy friends are saying Penetrol when added to Brightside really improves the leveling qualities. Here's a link if somebody wants to do a sample peice and report back. On second thought I may try it on the inside of the trucks bed its still in primer. http://www.flood.com/Flood/CustomerSupport/FAQ/DIY/Penetrol+FAQ.htm
Darnit, someone should have told me beforehand. I already used mineral spirits already with my Brightside Black.
Posted By: Anonymous
Re: New Paint job on a budget thread. - 06/13/0712:43 AM
Quote:
Quote: Some of my old Navy friends are saying Penetrol when added to Brightside really improves the leveling qualities. Here's a link if somebody wants to do a sample peice and report back. On second thought I may try it on the inside of the trucks bed its still in primer.
Yeah, penetrol works great
But that is after you used the cutting/rubbing compound right? Did it still look that great (mirror - whoa!) without any final compound?
Posted By: Anonymous
Re: New Paint job on a budget thread. - 06/13/0701:02 AM
Hey Aussie Driver,
Would me mixing up Brightside Black work good like this?
400ml of Brightside paint to 100ml of 100% mineral spirits?
Posted By: Anonymous
Re: New Paint job on a budget thread. - 06/13/0701:22 AM
Quote: But that is after you used the cutting/rubbing compound right? Did it still look that great (mirror - whoa!) without any final compound?
Nope. That pic was taken about 6 hours after painting. But it does show the benefit of using some Penetrol in the Brightside.
I added the Penetrol to the Brightside according to the instructions on the Penetrol can, then I added mineral spirits to the mix until I was able to get a flow rate of 25 seconds from a zhan cup. I then did my painting and the pic above is the result.
Posted By: Anonymous
Re: New Paint job on a budget thread. - 06/13/0701:35 AM
Quote: Nope. That pic was taken about 6 hours after painting. But it does show the benefit of using some Penetrol in the Brightside.
I added the Penetrol to the Brightside according to the instructions on the Penetrol can, then I added mineral spirits to the mix until I was able to get a flow rate of 25 seconds from a zhan cup. I then did my painting and the pic above is the result.
Ok now THIS is some useful information, I already have like 4 gallons of various rustoleum hoarded in preparation, else I'd have to get some penetrol and brightside to duplicate this
Posted By: Anonymous
Re: New Paint job on a budget thread. - 06/13/0701:54 AM
Hey aussie , could you type up a recipe for others to use(more laymans terms) with the brightside,penetrol and mineral spirits? many thanks..looks awesome.
Posted By: Anonymous
Re: New Paint job on a budget thread. - 06/13/0702:42 AM
Quote:
I added the Penetrol to the Brightside according to the instructions on the Penetrol can, then I added mineral spirits to the mix until I was able to get a flow rate of 25 seconds from a zhan cup.
That is my recipe. I don't remember the exact ratio of Penetrol to the Brightside but the ratio is on the Penetrol can. The zhan cup is the little plastic paint viscosity measuring cup that came with a piece-of-crap electric sprayer that I bought years ago. I found that a reading of 25 seconds for the cup to empty to be pretty close to perfect for my painting style. The good part with the zhan cup method is that the 25 seconds to empty viscosity level seemed to work just fine on warmer days and also on cooler days as the viscosity is temp dependent.
Posted By: Anonymous
Re: New Paint job on a budget thread. - 06/13/0704:00 AM
Quote:
Quote: But that is after you used the cutting/rubbing compound right? Did it still look that great (mirror - whoa!) without any final compound?
Nope. That pic was taken about 6 hours after painting. But it does show the benefit of using some Penetrol in the Brightside.
I added the Penetrol to the Brightside according to the instructions on the Penetrol can, then I added mineral spirits to the mix until I was able to get a flow rate of 25 seconds from a zhan cup. I then did my painting and the pic above is the result.
holy crap! i can't believe it looks like that after painting! you have to be really kidding me...
what coat was that? that's literally messed up.
what ratio was that thinned? i want to mimick your results Aussie driver!
btw: You MUST HAVE had a very smooth hood to begin with...
Hey Aussie Driver,
Would me mixing up Brightside Black work good like this?
400ml of Brightside paint to 100ml of 100% mineral spirits?
Posted By: Anonymous
Re: New Paint job on a budget thread. - 06/13/0704:49 AM
ill have to do some research , im not familar with a zhan cup..
Re: New Paint job on a budget thread. - 06/13/0704:56 AM
wow this is a good one with good info I gotta read the entire post from start to finish before I paint my car where do I start ????? there are 3 parts but where do I start from??? The begining
Re: New Paint job on a budget thread. - 06/13/0701:10 PM
Quote: wow this is a good one with good info I gotta read the entire post from start to finish before I paint my car where do I start ????? there are 3 parts but where do I start from??? The begining
It is frightening how large this topic has gotten... but I really believe that it pays to read the thread from the start to finish. And yes... it is probably going to take a few hours out of your life.
But the time spent reading the evolution and experiences in this thread will save you time and frustrations when you actually get to the point where you are going to gather up the painting materials and start trying to do it.
If this thread could be considered the Bible of roller painting... then you can appreciate that like the real Bible you would be doing yourself a disservice if you only read the last pages of the real Bible and felt you could confidently answer questions about it.
The tidbits you pick up throughout the thread will help you deal and understand any eventualities that might occur during the process.
Sadly a lot of the questions that are surfacing in the later part of the thread were previously answered or addressed in depth earlier in the thread.
So things get a bit redundant and tiring when folks haven't read the pearls of wisdom posted earlier and jumped into the project with only a quick skimming of the concept and application for doing a roller job.
It might be almost worthwhile to give a reading of the July 2007 issue of Hot Rod magazine to get a quick overview of the entire process. That will help you to visualize and understand the sequences involved in the process. THEN read this entire thread to put some meat on that magazines skeleton...
Re: New Paint job on a budget thread. - 06/13/0701:50 PM
Quote: ill have to do some research , im not familar with a zhan cup..
Rusty most paint store or places that sell paint have them. No rocket science here.
Posted By: Anonymous
Re: New Paint job on a budget thread. - 06/13/0702:20 PM
This whole thing is about bodywork. If your car is in reasonable shape, without an cracking of paint ot cracking in general, your result would probably be really good.
In my case, it looks good in some areas and looks decent in others. For instance my hood has lots of small cracks from the old abused paint. Thus its probably not gonna be filled in any time soon.
If imagine to get Aussie Drivers "mirror" results your car (his car too) has to be in great body condition. Aussie Driver probably had a super smooth body panel, and that obviously shows.
I'm on my 3rd coat now, going to wetsand the whole car before 4th coat.
Posted By: Anonymous
Re: New Paint job on a budget thread. - 06/13/0703:05 PM
I agree with Marq. Maybe start out with the Hot Rod article, then Exit's site, then read the threads. Even though I've already painted a few cars, I'm still learning. I enjoy scanning other sites too for ideas. This is new, exciting territory Charger has opened up for us. We still need more feedback and fine tuning.
BTW, I like penetrol too, but I did the usual procedure first (as outlined by Charger and Exit)then used Penetrol on the final coats- Brightside Black (5% MS, 30% Penetrol), Pettit Burgundy (5% MS and 40% Pentrol.) I was happy with the minimal orange peel and the HUGE gloss. I did Sanding/Polishing only on the runs and major f**k-up areas. At the time I was painting, I couldn't locate a Zahn cup, so I used 69DartGT's idea-stirred the paint with a stir stick, lifted the stir stick, then started counting. When it started dripping at around 3 seconds, I had the right combination of MS/Paint/Penetrol. But that was ONLY with MY conditions (temperature,paint type, and surface area.) It may be different for the rest of you.
I once used Penetrol too with Rustoleum white (the same ratio as I used with Brightside.)
Posted By: Anonymous
Re: New Paint job on a budget thread. - 06/13/0704:06 PM
Quote: I agree with Marq. Maybe start out with the Hot Rod article, then Exit's site, then read the threads. Even though I've already painted a few cars, I'm still learning. I enjoy scanning other sites too for ideas. This is new, exciting territory Charger has opened up for us. We still need more feedback and fine tuning.
BTW, I like penetrol too, but I did the usual procedure first (as outlined by Charger and Exit)then used Penetrol on the final coats- Brightside Black (5% MS, 30% Penetrol), Pettit Burgundy (5% MS and 40% Pentrol.) I was happy with the minimal orange peel and the HUGE gloss. I did Sanding/Polishing only on the runs and major f**k-up areas. At the time I was painting, I couldn't locate a Zahn cup, so I used 69DartGT's idea-stirred the paint with a stir stick, lifted the stir stick, then started counting. When it started dripping at around 3 seconds, I had the right combination of MS/Paint/Penetrol. But that was ONLY with MY conditions (temperature,paint type, and surface area.) It may be different for the rest of you.
I once used Penetrol too with Rustoleum white (the same ratio as I used with Brightside.)
Can you help me with my Brightside Black mixture? How much should I mix it with mineral spirits?
I don't have Penetrol.
Can you also explain the stirred the paint with a stir stick idea?
Today I mixed up my mixture like this...
400ml of paint to 100ml of Mineral Spirits.
BTW: Is you bug polished? You have a mirror reflection.
Posted By: Anonymous
Re: New Paint job on a budget thread. - 06/13/0704:50 PM
I am going to post up some pictures of where my car stands right now. Hopefully after cutting/rubbing compound it will look better than it does now.
This is technically my 3rd coat. I sanded after the 1st coat because orange peel. 2nd and 3rd coats have less orange peel which is always welcome. I still have dust bunnies on the paint (painted outside, can't stop airborne dust) but hopefully when everything is said and done, it will look better than what it does now.
Some patches are glossier than others. Some other parts look like patches of hazed gloss. Theres gloss and hazed gloss look.
Re: New Paint job on a budget thread. - 06/13/0705:22 PM
Quote: Can you also explain the stirred the paint with a stir stick idea?
Take your stick and stir the paint then lift it straight up and watch the paint it will start as a stream then after a few seconds will turn to drops, the time from when you lift the stick to drops should be around 3-4 seconds. If you haven't added thinner do a test stir to see how long it takes from stream to drops then you'll have an idea what to look for as you add thinner.
Posted By: Anonymous
Re: New Paint job on a budget thread. - 06/13/0706:04 PM
Quote: [Can you help me with my Brightside Black mixture? How much should I mix it with mineral spirits?
If there�s none close to you, I�d just follow Charger�s painting technique. On page 10, check out the smoothness and gloss Charger�s bug had even BEFORE he polished it. That's just Tremclad and MS.
After the final coats, I didn�t sand the hood or front fenders (I suck at sanding), I just hit it with polish and wax. The final finish had minimal orange peel, but so does a $40,000 Mercedes Benz, so that�s ok with me. I had variable areas of gloss/non-gloss like you. The non-gloss areas were the main ones I sanded and polished, but even then I did so hesitantly. Brightside and Pettit have amazing built-in gloss and after paying nearly a hundred bucks for those paints I was leery of sanding away half of my investment.
Posted By: Anonymous
Re: New Paint job on a budget thread. - 06/13/0706:20 PM
Quote:
Quote: [Can you help me with my Brightside Black mixture? How much should I mix it with mineral spirits?
If there�s none close to you, I�d just follow Charger�s painting technique. On page 10, check out the smoothness and gloss Charger�s bug had even BEFORE he polished it. That's just Tremclad and MS.
After the final coats, I didn�t sand the hood or front fenders (I suck at sanding), I just hit it with polish and wax. The final finish had minimal orange peel, but so does a $40,000 Mercedes Benz, so that�s ok with me. I had variable areas of gloss/non-gloss like you. The non-gloss areas were the main ones I sanded and polished, but even then I did so hesitantly. Brightside and Pettit have amazing built-in gloss and after paying nearly a hundred bucks for those paints I was leery of sanding away half of my investment.
Did you apply the final coat un-thinned to keep all the gloss? Thanks for your help! You make me feel things will turn out fine.
Posted By: Anonymous
Re: New Paint job on a budget thread. - 06/13/0706:34 PM
Yeah dude, you'll do ok. You're traveling a path others have tread before. (So read those threads! They're a TIME saver.)
The final coat was 5% mineral spirits, 30% FRESH Penetrol, and the temperature was around 50 degrees at the time. The main thing is to follow Charger's, Exit's and Marq's painting techniques.
Posted By: Anonymous
Re: New Paint job on a budget thread. - 06/13/0706:48 PM
Can I get away by not using penetrol?
3rd coat, still drying
Posted By: Anonymous
Re: New Paint job on a budget thread. - 06/13/0707:10 PM
is it possible to search archived threads? I tried to search for questions I had in the archived $50 paint job threads and it doesn't work... To make us read through the entire [Edited by Moparts - Keep it clean] thing for a single questions is pretty absurd in my opinion.
Posted By: Anonymous
Re: New Paint job on a budget thread. - 06/13/0707:23 PM
I haven't used Penetrol yet, but I may try it out for my final coats. You probably won't have to purchase/use it if you become proficient at constantly/evenly rolling (and rerolling) the paint until the bubbles are popped, before the paint starts getting tacky. It looks like you're rolling the paint when the surface is starting to dry, which results in all those rough spots where your roller is actually lifting paint away from the surface. As long as you don't press down into the paint when it gets to that point, you should be able to wetsand it all out pretty quickly and easily.
Posted By: Anonymous
Re: New Paint job on a budget thread. - 06/13/0707:24 PM
Quote: is it possible to search archived threads? I tried to search for questions I had in the archived $50 paint job threads and it doesn't work... To make us read through the entire [Edited by Moparts - Keep it clean] thing for a single questions is pretty absurd in my opinion.
it works though. I've been reading throughout and its been very helpful!
Posted By: Anonymous
Re: New Paint job on a budget thread. - 06/13/0707:26 PM
Quote:
Quote: is it possible to search archived threads? I tried to search for questions I had in the archived $50 paint job threads and it doesn't work... To make us read through the entire [Edited by Moparts - Keep it clean] thing for a single questions is pretty absurd in my opinion.
it works though. I've been reading throughout and its been very helpful!
yes it is a wealth of information, but I'm already at the point where I know very well what I'm doing, but I just want quick answers to any questions that I may have. And I don't wanna skim through hundreds of pages to get the answer
Posted By: Anonymous
Re: New Paint job on a budget thread. - 06/13/0708:47 PM
Quote:
Quote: Can you also explain the stirred the paint with a stir stick idea?
Take your stick and stir the paint then lift it straight up and watch the paint it will start as a stream then after a few seconds will turn to drops, the time from when you lift the stick to drops should be around 3-4 seconds. If you haven't added thinner do a test stir to see how long it takes from stream to drops then you'll have an idea what to look for as you add thinner.
Is it wise to say that this method can also be used when spraying brightside? Or would that have to be thinned even more so?
Re: New Paint job on a budget thread. - 06/13/0711:20 PM
Quote: Is it wise to say that this method can also be used when spraying brightside? Or would that have to be thinned even more so?
When I spray I count to 8-9 so yes thinned a lot more.
Posted By: Anonymous
Re: New Paint job on a budget thread. - 06/13/0711:56 PM
Quote: I spent 1.29 on a 4" foam brush.
I wet sanded the first coat down, thinned another batch, probably around 40%, maybe 45%, and hit it with the foam brush.
Like glass. No bubbles, and it is incredibly easy to lay a *very* even and *really* thin coat. Very easy to blend. I coated in pretty much 4 quadrants of the deck lid and as I finished each one, blended with some nice long sweeps of the brush...well... here's what I got...
And no brush marks. Those lines you see running front to back are the reflection of the ceiling boards.
I did a little messing around with really thinned out rusto (50%ish) and tried foam brushing it...
it dose self level really nicely....when its a flat plece. I tried a vertical test piece and it got a bit runny. and its still drying after 5 hours, guess I should mess around with it a bit more.
also has anyone used penetrol with rusto yet? or just brightside.
Posted By: Anonymous
Re: New Paint job on a budget thread. - 06/13/0711:57 PM
I thought it would be less time...?
i'm ganna mix it and see what you mean.
hey Marq: It's still raining!!!!! 4 days so far; maybe the car'll be painted in October (I hate NY)
Posted By: Anonymous
Re: New Paint job on a budget thread. - 06/14/0702:34 AM
so...
"technically" I am finished my 3rd coat. I "plan" to wetsand tomorrow with 800grit. Do I "need" to sand the whole car down?
Or can I "get away" with sanding "parts" of the car that look bad and has lines?
Sorry for using those " ", I found it funny for some reason...
Posted By: Anonymous
Re: New Paint job on a budget thread. - 06/14/0703:15 AM
Quote: so...
"technically" I am finished my 3rd coat. I "plan" to wetsand tomorrow with 800grit. Do I "need" to sand the whole car down?
Or can I "get away" with sanding "parts" of the car that look bad and has lines?
Sorry for using those " ", I found it funny for some reason...
yes u "need" to sand the whole car. try to stay away from edges tho, i burned thru the edges so many times, thats probly the most annoying part of the whole job..
Re: New Paint job on a budget thread. - 06/14/0703:16 AM
Quote: is it possible to search archived threads?
I don't see a way to do that, but this forum has a feature I've never seen anywhere else... that is the "show all" feature (look in the lower right corner of the page, to the right of the page numbers.) This allows you to turn an 80 page thread into one BIG page. From there you can do a regular text search with CTRL+F through your browser (or whatever your browser calls it.)
Re: New Paint job on a budget thread. - 06/14/0703:36 AM
Quote: I thought it would be less time...?
i'm ganna mix it and see what you mean.
hey Marq: It's still raining!!!!! 4 days so far; maybe the car'll be painted in October (I hate NY)
Hehehheh... believe me bro I know your pain. When I wanted to get that final coat on... the rain just would not stop. I thought we were facing a Noah's Ark type situation. And boy I was getting itchy waiting to get a clear shot at putting that coat of paint on. But nonetheless I kept waiting so that rain and humidity would not be the cause of any problems. I am glad I waited..
Re: New Paint job on a budget thread. - 06/14/0703:53 AM
Hey folks, I've been following this bad boy for a while now and planning the whole time to apply this technique to the ugly $750 Dart I bought. I've finally gotten around to starting and I'm doing just the trunk as a test. I've been working on the prep for a few weeks now and hopefully tonight will be the last coat of primer before final wetsanding and then paint.
I'm going with Rustoleum Professional in Gloss Black on top of Rustoleum Clean Metal Primer. I took the trunk down to bare metal to deal with dents and horribly checked paint (a repaint, I believe) but I'm hoping to avoid that on as much of the rest of the car as possible. When they say prep is 90% of a paint job they most certainly are not kidding... Black is unforgiving in what it will reveal of a prep job and for that reason I am being patient and meticulous. Nevertheless, I'm prepared to live with whatever imperfections may survive. I mean, for only a a hundred bucks...
Here are a few pics of the process so far. I was totally amazed when I thinned the primer out the first time, went to bed with it looking orange peely, and came back in the morning to find it looking just like it had been sprayed on. Hopefully the paint will act the same for me.
Posted By: Anonymous
Re: New Paint job on a budget thread. - 06/14/0705:14 AM
Quote:
That is my recipe. I don't remember the exact ratio of Penetrol to the Brightside but the ratio is on the Penetrol can. The zhan cup is the little plastic paint viscosity measuring cup that came with a piece-of-crap electric sprayer that I bought years ago. I found that a reading of 25 seconds for the cup to empty to be pretty close to perfect for my painting style. The good part with the zhan cup method is that the 25 seconds to empty viscosity level seemed to work just fine on warmer days and also on cooler days as the viscosity is temp dependent.
Aussie Driver: The Zahn cup is a great idea. Since it was first mentioned on the forum here, I've done some research and found out that Zahn cups come in different sizes. Any idea what size or number cup you have???
http://www.paintcenter.org/rj/Dec02m.cfm If you intend to measure the viscosity of organic coatings, you will want to purchase a Zahn #2 and/or a Zahn #3 viscosity cup. The Zahn #2 cup is intended for coatings that have a relatively low viscosity, generally in the range of 18 - 35 seconds. For high solids coatings you might find that the Zahn #2 cup is too insensitive and that viscosity measurements go well above 35 seconds. I have measured coatings with a Zahn #2 measurement well in excess of 1 minute. For these higher viscosity coatings I suggest that you use a Zahn #3 cup so that with the larger orifice at the bottom of the cup, you can bring the measurements back down to 18 - 35 seconds. The most important consideration in selecting between Zahn #2 and Zahn #3 is that you get a clear break in the paint stream as it effluxes from the cup. If you find that as the cup empties the paint stream stops and starts, and stops and starts again, then you are probably using a cup for which the orifice is too small, and you should probably go to the next higher cup number.
Someone might recommend that you use a Ford #4 cup instead of a Zahn cup. Before you purchase one or the other, here are some differences. The Ford #4 viscosity cup has a very much larger orifice than the Zahn cups, and for the most part they are used in paint or coating laboratories where more accurate measurements are required. They are well suited to laboratories, but probably are less convenient for paint production shops. If you have a mixing table in your paint shop and you want accurate viscosity measurements, then the Ford #4 cup is fine. But if your operation is not so critical of viscosity and if the painters are likely to forget to properly clean the cup after using it, the Zahn cups are probably your preferred choice because they are less expensive.
Re: New Paint job on a budget thread. - 06/14/0706:00 AM
So... Summer is quickly approaching and as a first year teacher I'm looking forward to my first REAL summer vacation.. (one where I have enough money saved to not be eating Top Ramen for weeks at a time).. I'm thinking about rolling my car and my question is regarding mixing paints..
I've seen that Brightside (and Trem and Rusto) can be mixed to produce various colors.. Since my car is an original 881 Bright Blue METALLIC car I'm not going to be able to repaint it in its full glory until a few years down the line when I have cash saved up.. but in the meantime it's in need of something other than Krylon Ultra-Flat Black ($4.99 a can!) and rust.. For pictures and a really out of date description check out members.cox.net/~67barracuda .. And, although my fellow Barracuda Owners Group guys want to see it remain in primer (Satin Black a la the mustang that was posted here IS a possibility) I'm thinking of going obnoxious.. I'm hoping for a rollerized version of Sublime or Panther Pink.. I SUCK at visualization, though (the only guy lacking direction sense...) and I'm imagining Sublime would be a mix of yellow and blue.. Which blue from Brightside would be the best to start from? I'm a trial and error kind of guy when it comes to stuff like color mixing.. I just need to know what the best shade of blue would be since I don't want to buy all the multiple shades of blue Interlux has
Loving you in advance,
Raj 67 beatercuda hoping to be a rollercuda this summer..
Re: New Paint job on a budget thread. - 06/14/0709:50 AM
Quote:
yes it is a wealth of information, but I'm already at the point where I know very well what I'm doing, but I just want quick answers to any questions that I may have. And I don't wanna skim through hundreds of pages to get the answer
Then do as some others and make mistakes that are already documented in this thread and ask why did it mess up on me?
Research costs are minimal compared to correcting mistakes you make that have already been made by others...
-Daty
Posted By: Anonymous
Re: New Paint job on a budget thread. - 06/14/0709:56 AM
Quote:
Aussie Driver: The Zahn cup is a great idea. Since it was first mentioned on the forum here, I've done some research and found out that Zahn cups come in different sizes. Any idea what size or number cup you have???
I have no idea what size my zhan cup is. It came with a really crappy electric sprayer and the cup is probably the only useful thing in the box. If the zhan cups that you have seen come with a flow rate guide then look up the flow rate that they recommend for auto/marine paint and give that a go.
My piece-of-crap sprayer instruction booklet recommended the 25 second flow rate for auto paints even though the stoopid thing couldn't even spray anything that I was aiming at (or even the ground) properly.....
Re: New Paint job on a budget thread. - 06/14/0710:01 AM
Quote: thinking of going obnoxious.. I'm hoping for a rollerized version of Sublime or Panther Pink.. I SUCK at visualization, though (the only guy lacking direction sense...) and I'm imagining Sublime would be a mix of yellow and blue.. Which blue from Brightside would be the best to start from?
Grats on the vacation! I'd try a 60/40 mix of the yellow and saphire blue to get sublime. I'll ask DD if she has any ideas, she's learned in that stuff.
Re: New Paint job on a budget thread. - 06/14/0701:52 PM
Quote:
Quote: is it possible to search archived threads?
I don't see a way to do that,
Try going to the tech/archives forum and at the bottom do a search for say (brightside paint) it gave me a bunch but only out of the archives. BTW I don't know if this only works for mods but give it a try. I'd guess because of the size of that thread you are going to get a whole bunch of hits
Posted By: Anonymous
Re: New Paint job on a budget thread. - 06/14/0706:00 PM
I just wetsanded my car down today for the 4th coat.
Applied the 4th coat just an hour ago, its drying in the garage...
Looks really good! Not like Aussie Drivers Miata, but still darn good, we are making strides!
The current paint process is looking soo much better than the 1st, 2nd and 3rd coat. More glossy, little orange peel/bubbles and the whole car has more coverage (less patches of un-even color) meaning the paint is probably filling in gaps that need to be filled. Half of my hood that previously had cracking has no more. There is still more cracking on the roof, but we need to apply more coats! Finished 1quart of Brightside today as well. So if it takes 4 or more coats with only 1 quart, then I should technically end with 8 coats total. This is minus wetsanding factor.
Will take pictures once it dries properly.
Posted By: Anonymous
Re: New Paint job on a budget thread. - 06/14/0709:00 PM
Quote:
Quote:
yes it is a wealth of information, but I'm already at the point where I know very well what I'm doing, but I just want quick answers to any questions that I may have. And I don't wanna skim through hundreds of pages to get the answer
Then do as some others and make mistakes that are already documented in this thread and ask why did it mess up on me?
Research costs are minimal compared to correcting mistakes you make that have already been made by others...
-Daty
I've already said that I know very well what I'm doing, I just have various other questions I want answered. Being able to search the archives (and by search, I don't mean reading through all the pages one by one heh) would be ultra useful to all of us
Tip: for the roof of the car, I switched to using a 20 inch roller handle for my foam rollers (found one at Home Depot). Before using this, I had to paint the top of my car in quadrants (since my other roller handles were too short to reach the other side of the car), which usually resulted in sections of paint that were thicker than others; I have alot of thick lines in the paint that need to be leveled, or else it'll end up looking like I did some sheetmetal welding underneath all the paint layers. Looks very unprofessional, I'll definitely need to break out my sander (or get real aggressive with my sanding blocks) to get the roof all even...
Posted By: Anonymous
Re: New Paint job on a budget thread. - 06/14/0711:50 PM
Hello folks of Mopar...
Just wanted to check in and give you some images of my 4th coat that I applied today. Here you go. You can see the gloss it has which is really nice and is still thinned! It has a little bit of orange peel but nothing too bad, I can tolerate it.
Looks and went out way better today! Hopefully I can get away with applying 2 more coats before I wetsand again.
Posted By: Anonymous
Re: New Paint job on a budget thread. - 06/15/0702:26 AM
looks good 93civic. I guess I'll share some pics of my paint so far. Using brightside exclusively now, since I found out about carb cleaner being the life ender of rustoleum. I am only rolling the top parts of my car, then will paint one side at a time.
it is windy as heck where I live, so I get alot of crap on the paint surface with every layer. Very poor painting conditions. I may just have to settle with a 10 foot paint job.
Posted By: Anonymous
Re: New Paint job on a budget thread. - 06/15/0702:33 AM
worldcrafter, darn that looks nice!! got it really smooth on your first try, I guess not really first try since you used rustoleum before.
very shiny and little orange peel! nice
BTW: Poor conditions here too, but painting in a garage helps decrease the amount of dust that sits on the paint. Painting outside is horrible, it picks up dust FAST! In the garage dust is there but the amount is less.
Re: New Paint job on a budget thread. - 06/15/0702:38 AM
Well... here is a status update on my paint job for long term durability and appearance.
As you folks know... my paint job officially ended back in August 2006. From Aug 2006 to Nov 2006 the car enjoyed the luxury of being parked in the garage. With winter coming the car had to be left outside for the winter and exposed to all the sun, snow, ice and rain that Canada's winter could throw at it.
When spring arrived the sweet little car remained outside and unprotected from the elements. The sun beat down on it and the rains were ridiculous.
Today I was puttering around in the garage and I found my Porter & Cable. Next I found my 3m Perfection and my McGuiars Pure Carnuba Wax ( banana scented yummmm ).
I washed down the car and then I polished and waxed my way around the entire body. The car looked so friggin amazing that I proudly hopped in it and drove all over the place with the rag top down.
BUT here is the real reason I am writing this. During the course of polishing and then waxing the car I noticed a slight difference in the color of the body - between where I was polishing and where I had not done yet.
There was a slight cloud over the untouched paint. And you would not have been able to spot it if you didn't have a freshly polished and waxed panel immediately next to it to compare it to.
So I don't know at this point if it was an oxidation on the original Brightside paint... or if that was the stage I had left it at when I finished my original polishing and waxing back in August 2006.
And as I said... I had not noticed anything odd about the paint job. It had looked great. BUT after doing this polishing and waxing today the puppy shines like a high gloss polyurathane and looks EVEN BETTER. AND it does appear to have become a deeper and darker red after this polishing and waxing.
So the point to this story is that if you think the car looks good after you do your final wetsanding, polishing and waxing... well wait until you see how it looks after you do the polishing and waxing months later.
I am absolutely thrilled how it looks even better today then back in August 2006.
I think what may have generated such favorable results today are two things :
a ) the weather : when I finished the paint job off back in August 2006 we were into cooler temperatures and high humidity from the rains. The weather today was in the 26 degrees celcius range. I did my polishing out in the driveway in the sun hehehehh. The overall temperature of the car's body was much warmer today when I did the polishing and waxing back in August.
b ) the additional curing time : I suspect that with all the months that have passed since August, the paint had reached a much higher level of curing and hardness.
I don't know if this is 'news' but I thought it might give some insight on how things are working out with the Brightside after TEN MONTHS of real world exposure to the harsh elements of the Canadian climate... and hopefully it will give the rollers something to look forward to months after they finish... that things will probably be looking even better as it gets older...
,
Posted By: Anonymous
Re: New Paint job on a budget thread. - 06/15/0703:21 AM
Sounds great Marq =) I hope in a year I'll say the same.. hehe btw, i decided on gloss black as Im loving everybody else's jobs. And I read your post a while back on automakers making flat paint jobs in 2009-11. I still love the idea... but hate the cleaning part of it. Especially 'cause i have no garage =(
worldcrafter... nice tsuru man! Love those kits. I got stuck with a b14... but im waiting on the n15 bumper to come in =)
93civic.... your car is looking excellent... i love how brightside black looks- i am defiantly sticking with it
Posted By: Anonymous
Re: New Paint job on a budget thread. - 06/15/0703:33 AM
good info Marq, gives me confidence that this will look sweet in the end.
BTW: Just curious, how does Brightside hold up to rust? For example if you painted on top some rust, would it seal the rust from spreading like POR15 or rustoleum?
Re: New Paint job on a budget thread. - 06/15/0705:35 AM
Quote: good info Marq, gives me confidence that this will look sweet in the end.
BTW: Just curious, how does Brightside hold up to rust? For example if you painted on top some rust, would it seal the rust from spreading like POR15 or rustoleum?
I believe that the Brightside works well covering and sealing rust from getting oxygen and moisture. The key would be to remove any surface rust prior to painting. So that there isn't an intermediary surface between the paint and the actual metal surface. If you simply paint over the surface rust.. it may become the weakpoint where the paint could separate and flake off or crack and allow moisture and oxygen to enter through the paint crack and get access to the metal surface ( triggering the production of more rust ).
I imagine rust in two stages :
a ) surface rust stage... where the metal has been exposed to air and moisture.. rust forms on the surface. This is like the earliest stage of rust on exposed metals. In this situation you sand off the rust and the paint should have good adhesion to the pitted ( but clean ) surface. The polyurathane properties of the paint will displace any moisture and seal out oxygen and moisture from reaching the metal surface. No oxygen and no moisture equals an environment where rust cannot live.
b ) metal has turned to rock type stage... where the metal has lost its metalic traits. It's no longer a flexible / bendable metal. This is where the rust is like a rock or piece of shale and can be flaked off or broken like a thin stone. At this point it is better to cut this type of cancer out of the metal as it no longer has the properties of metal. At best.. paint would only serve to glue together the other surfaces.
Re: New Paint job on a budget thread. - 06/15/0707:38 AM
I want to try spraying my hood with Tremclad. How much would you thin the paint ???
Posted By: Anonymous
Re: New Paint job on a budget thread. - 06/15/0702:36 PM
When I sprayed mine, I thinned it 1:4 (spirit:paint), and it went on fine. That was with a siphon feed gun (i.e. not an HVLP).
I used Tremclad paint and Home Depot own-brand Mineral Spirits for thinning. Filtered the paint using a Lordco strainer (30c each). It actually looked too thin to me, but I did it anyway, and it worked great.
It sprayed real easy on the hood/trunk surfaces with no sags/drips etc. (The fact that the surfaces were horizontal helps, of course).
The softness of this paint is still bothering me...
Posted By: Anonymous
Re: New Paint job on a budget thread. - 06/15/0702:58 PM
I really wouldn't worry about 'softness'. Mine's been in paint for about 6 weeks now.
Yesterday, I got a call from my wife, asking if the hood had always had a chip in it....(yeah, of course it has....that's how I painted it... )
Turns out she'd dropped a 2lb stainless steel lamp onto the hood, and according to her 'chipped' the paint.
When I got home, I checked it, and there was indeed, a 1/2 inch scratch. It was barely noticeable, and right by a pintripe anyway, so I was able to break out the Mack and add a stripe to cover it.
Anyway, point is that the paint had not dented, dinged, or gouged, it had scratched exactly like any other cured auto paint would. I sprayed about 4 coats on that hood, so it wasn't thick, but it sure wasn't a thin coat either.
It's only enamel paint. Most cast iron bath tubs are finished (and re-finished) in enamels, and they are known for their hardness!
My experience - and the experiences of many others here - is that the stuff dries hard and solid.
Posted By: Anonymous
Re: New Paint job on a budget thread. - 06/15/0705:01 PM
Quote:
Quote: good info Marq, gives me confidence that this will look sweet in the end.
BTW: Just curious, how does Brightside hold up to rust? For example if you painted on top some rust, would it seal the rust from spreading like POR15 or rustoleum?
I believe that the Brightside works well covering and sealing rust from getting oxygen and moisture. The key would be to remove any surface rust prior to painting. So that there isn't an intermediary surface between the paint and the actual metal surface. If you simply paint over the surface rust.. it may become the weakpoint where the paint could separate and flake off or crack and allow moisture and oxygen to enter through the paint crack and get access to the metal surface ( triggering the production of more rust ).
I imagine rust in two stages :
a ) surface rust stage... where the metal has been exposed to air and moisture.. rust forms on the surface. This is like the earliest stage of rust on exposed metals. In this situation you sand off the rust and the paint should have good adhesion to the pitted ( but clean ) surface. The polyurathane properties of the paint will displace any moisture and seal out oxygen and moisture from reaching the metal surface. No oxygen and no moisture equals an environment where rust cannot live.
b ) metal has turned to rock type stage... where the metal has lost its metalic traits. It's no longer a flexible / bendable metal. This is where the rust is like a rock or piece of shale and can be flaked off or broken like a thin stone. At this point it is better to cut this type of cancer out of the metal as it no longer has the properties of metal. At best.. paint would only serve to glue together the other surfaces.
.
Cool to hear. Brightside feels really hard so I guess it can seal rust.
What I had was some body rust. So I sanded down to metal, and bondo'ed the area. Hopefully it wont come back for 2-3 years.
BTW: Just did my 5th coat today and its now baking in the sun. My dad probably over-rolled some spots because some of them are not gloss black. It seems a little hazed, very different from the rest. He likes to over-roll sometimes. Thats fine because we still have a ways to go. We are gonna wetsand after tomorrow which will be the 3rd coat in a row. Hopefully we can get away with it. Orange peel isn't overly thick yet.
Posted By: Anonymous
Re: New Paint job on a budget thread. - 06/15/0706:34 PM
Hi Everyone! I'm over here from Turbobricks.com. We deal in the world of Turbo RWD Volvo's.
Anyway, like millions of others, I have followed and read the thread for a long time. I went ahead and painted my car this way. It looks great! I painted it Sunburst Yellow. I just thought I would share the results with you!
Here's the pictures.
The car still needs to be polished with polishing compound, but it's now just drying and hardening after the 2000 grit wet sand.
Before pictures:
Tell me what you think!
Posted By: Anonymous
Re: New Paint job on a budget thread. - 06/15/0707:43 PM
The softness of this paint is still bothering me...
Interesting. Doesn't appear to be the usual alkyd enamel hardener...doesn't appear to use isocyonates as the catalyst. The MSDS says you can use an organic vapor respirator with good ventilation, but recommends a positive pressure respirator. If you're just rolling and not spraying (no atomized particles) a regular organic vapor respirator would be OK I think. I've never used this product, but I've used regular hardener, and it speeds up the curing time dramatically. It takes hours to cure "dry to the touch". Leave it in the sun for a few days and it's hard as a rock. It's really nasty stuff though...read the MSDS. Not something to play with if you don't want to take safety precautions.
Posted By: Anonymous
Re: New Paint job on a budget thread. - 06/15/0707:50 PM
Re: New Paint job on a budget thread. - 06/15/0709:44 PM
I have decided to do my 68 camaro. a few questions: 1. it is currently primered black, how much do i need to sand the car before applying the first coat of paint? 2. Afer I sand the primer, I clean it with a tack cloth and M.S., Correct? 3. Apply the paint of choice, any polyurethane (rusolem, boat paint, etc.)
I have the steps down beyone this....
thanks,
Dustin
Posted By: Anonymous
Re: New Paint job on a budget thread. - 06/15/0709:57 PM
Quote: I have decided to do my 68 camaro. a few questions: 1. it is currently primered black, how much do i need to sand the car before applying the first coat of paint? 2. Afer I sand the primer, I clean it with a tack cloth and M.S., Correct? 3. Apply the paint of choice, any polyurethane (rusolem, boat paint, etc.)
I have the steps down beyone this....
thanks,
Dustin
1. You want to get it to about 320 grit(some use 400 grit).
2. Wash it with soap and water when you are ready to paint then wipe it down with a rag soaked with M.S. then just before you paint wipe it down with a tack cloth.
3. Yes, apply the paint of choice, Rust Stop enamel(Rustoleum, Tremclad) or the single part boat paints(Brightside and others).
Re: New Paint job on a budget thread. - 06/15/0710:16 PM
Quote:
Quote: I have decided to do my 68 camaro. a few questions: 1. it is currently primered black, how much do i need to sand the car before applying the first coat of paint? 2. Afer I sand the primer, I clean it with a tack cloth and M.S., Correct? 3. Apply the paint of choice, any polyurethane (rusolem, boat paint, etc.)
I have the steps down beyone this....
thanks,
Dustin
1. You want to get it to about 320 grit(some use 400 grit).
So, sand the entire area with 400 grit until smooth, correct?
Thanks,
Now i am just looking for a nice deep blue
Posted By: Anonymous
Re: New Paint job on a budget thread. - 06/15/0710:18 PM
yep, sand it all smooth wash 'er up, wipe 'er down, and roll on!!
Re: New Paint job on a budget thread. - 06/15/0710:22 PM
Quote: Hi
Anyway, like millions of others, I have followed and read the thread for a long time. I went ahead and painted my car this way. It looks great! I painted it Sunburst Yellow. I just thought I would share the results with you! Tell me what you think!
I think that Sunburst yellow color looks surprizingly nice on a Volvo wagon. Most folks tend to have very subdued and earthly colors on their 'bricks'. So that yellow makes the car seem surpisingly current modelish. The tinted windows and wheels really make it pop.
If that car was an older woman... you just succeeded in making her look 20 years younger.
Marq.
.
Posted By: Anonymous
Re: New Paint job on a budget thread. - 06/16/0712:41 AM
Well I decided to go out and buy some Penetrol and give it a try (its a bit pricey $15 for a smallish tin)
But I seem to be having a nice differance.. I didnt do mixed ratios I just added it till it seemed right but it had a nice effect on my painting.
Almost no orange peal- all ill really have to wet sand out is light roller lines.
Re: New Paint job on a budget thread. - 06/16/0712:54 AM
Power sanding with 2000 grit. I am a little addicted to air tools and was wondering about a sander for the final coat with wet 2000. I think 3M is the only compay to make 2000 in orbital discs, and crazy expensive. Any recommendations? Just a jitterbug?
Posted By: Anonymous
Re: New Paint job on a budget thread. - 06/16/0701:20 AM
Quote: Power sanding with 2000 grit. I am a little addicted to air tools and was wondering about a sander for the final coat with wet 2000. I think 3M is the only compay to make 2000 in orbital discs, and crazy expensive. Any recommendations? Just a jitterbug?
Back on one of the other parts of this thread I recomended the Nortan Norax system for colorsanding. you can use the pads on a fine stroke d/a..
Re: New Paint job on a budget thread. - 06/16/0701:41 AM
rustoelum has an aluminum color, has anyone used it?
and is the general consenus Penetrol over M.S.?
tomorrow is the day..i was thinking of doing the satin black primer until I saw the alumunium color....i wanted blue but cant find the right color
Posted By: Anonymous
Re: New Paint job on a budget thread. - 06/16/0702:01 AM
Quote: and is the general consenus Penetrol over M.S.?
Im using my normal batch of paint that is about 30% - 40% Mineral Spirits and just added a few little splashes (maybe 10%-20%?) of Penetrol, not sure if their supost to be together but i don't seem to be having any problems.
Re: New Paint job on a budget thread. - 06/16/0702:25 AM
Quote: and is the general consenus Penetrol over M.S.?
Remember Penetrol is an additive not a thinner or reducer like M.S. Penetrol helps the paint flow but is not a thinner.
Posted By: Anonymous
Re: New Paint job on a budget thread. - 06/16/0705:14 AM
Quote: rustoelum has an aluminum color, has anyone used it?
and is the general consenus Penetrol over M.S.?
tomorrow is the day..i was thinking of doing the satin black primer until I saw the alumunium color....i wanted blue but cant find the right color
Oh boy here we go again, Round and round. No offense, but does anyone read the whole thread like has been suggested over and over? You cannot use the Aluminum color with this paint method. the makeup of the paint is really different from the other colors and you can't color sand and buff it like the solids. Many people have tried and failed in the past.
Re: New Paint job on a budget thread. - 06/16/0706:16 AM
I bought a cheap HVLP gun. Would the Tremclad paint mix be the same as a siphon gun ??? 1:4 What is the mix ratio for " Normal Auto Paint" ???
Posted By: Anonymous
Re: New Paint job on a budget thread. - 06/16/0701:29 PM
Today we applied our 6th coat (technically).
Tomorrow I will go sand down the whole car with 800 grit and finishing off with 2000grit sandpaper before the final coats are completed.
We are gonna try to apply un-thinned coats straight from out of the can from this point forward for final coats.
Finally today my roof has complete coverage. The layering helps and most of the old cracks are finally filled in.
Looks very glossy thus far thinned, can't wait to apply the un-thinned coats and see how much more shine it can get.
BTW: I have a palm sander with a 6" disc. But I only have small pieces of 2000 grit that was made for those small manual block sanders. Is there a way where I can hook them up to my orbital sander?
Re: New Paint job on a budget thread. - 06/16/0702:43 PM
Quote:
Quote: rustoelum has an aluminum color, has anyone used it?
and is the general consenus Penetrol over M.S.?
tomorrow is the day..i was thinking of doing the satin black primer until I saw the alumunium color....i wanted blue but cant find the right color
Oh boy here we go again, Round and round. No offense, but does anyone read the whole thread like has been suggested over and over? You cannot use the Aluminum color with this paint method. the makeup of the paint is really different from the other colors and you can't color sand and buff it like the solids. Many people have tried and failed in the past.
I read the whole thread 3 months ago, played a little catch up on this new page...
Re: New Paint job on a budget thread. - 06/16/0708:28 PM
Quote: Speaking of Satin Black:
After weeks of prep and crappy weather (too hot or raining) I was able to start rolling again this morning.
I'm hoping to pull it out of the garage later and late it bake in the sun, then I can do another coat this evening.
The bondo just sucks the paint in, so I think I'll start priming those areas first.
I hereby rename Satin black to be SATEN black!
That is one of the reasons that when you have a fair bit of bondo on the body... it pays to lay down a good primer coat. That would basically stop the bondo from sucking in the freshly laid paint and it gives the car body one uniform color to begin the painting from...
Sadly... when you see your freshly laid paint being sucked into the bondo.. what is happening is that the bondo is sucking in the paint carrier. So instead of that carrier slowly evaporating out from the paint to the air... it is getting drawn down and into the bondo. So the paint cures or hardens at a different rate or speed. A possible whacky side effect is that the carrier being drawn into the bondo may in fact work to soften the bondo. And when the paint layer dries, the carrier trapped down in the bondo will not be able to rise and easily evaporate through the skin of the paint. It may cause sort of a blister type effect as the gas evaporating from the bondo and gets trapped under the paint skin.
It may seem like it is adding an extra step to the work... but in the long run putting a good quality primer over bondo actually ends up saving you work and gives a more predictable result along the way.
As I had mentioned previously... the folks who make Brightside paint also make a great primer that you can roll on. The nice thing is that you can use their primer whether you are going to do Brightside as your paint or whether you are going to use Tremclad/Rustoleum. It comes in a standard light gray color or in a blueish color primer. I wish they had a black primer in their line up....
But it rolls on thick enough to equal 3 to 5 sprayed on coats... and that gives you a lot of 'filling' capability ( to fill in any scratches or surface imperfections ) plus you have enough thickness to sand it smooth as a baby's bum.
Re: New Paint job on a budget thread. - 06/16/0708:54 PM
Quote: A possible whacky side effect is that the carrier being drawn into the bondo may in fact work to soften the bondo. And when the paint layer dries, the carrier trapped down in the bondo will not be able to rise and easily evaporate through the skin of the paint. It may cause sort of a blister type effect as the gas evaporating from the bondo and gets trapped under the paint skin.
Argh - didn't think about that.......
Thanks for your input. I think I'll wait a few days before I try and prime the bondo areas or try and do any more coats.
The bondo is mainly a skim coat in the areas where I had to use it, so hopefully that will lessen the potential effect you referred to.
I new it would be easier to cover if I primed it, I just got overanxious since I finally had some time and the weather was co-operating.
After pulling the car outside in the sun I found a whole bunch of minor prep areas that need to be addressed, so I just need to back down and take my time and do it right.
But overall - this is still AWESOME!
Thanks again.
Posted By: Anonymous
Re: New Paint job on a budget thread. - 06/16/0710:34 PM
Re: New Paint job on a budget thread. - 06/17/0702:28 AM
[quote
The bondo is mainly a skim coat in the areas where I had to use it, so hopefully that will lessen the potential effect you referred to.
I new it would be easier to cover if I primed it, I just got overanxious since I finally had some time and the weather was co-operating.
After pulling the car outside in the sun I found a whole bunch of minor prep areas that need to be addressed, so I just need to back down and take my time and do it right.
But overall - this is still AWESOME!
Thanks again.
That's one of the good points about this method of roller painting. As you lay on your first coat... things begin to pop out at you that you hadn't noticed or hadn't caught originally.
So you can bring the entire painting process to a dead stop and fix all the defects that have suddenly become obvious.
With the roller process... your face is working within 2 feet of the car and you can catch things. That is where the roller process can be a little annoying... because we are all striving to do the best job possible. So we get picky - even pickier than a body shop...
But at least with the roller process you can fix those minor glitches and then simply go back to the rolling of paint.
When folks are spraying a car... things are a little different because their spraying session is usually a one step stage. And if any defects are found after spraying... then you have to decide whether to repair the defects and repeat the spraying process or simply let it go.
So that is a positive benefit of the roller process.
I was going to mention that IF you do lay a coat of paint over a thirsty bondo area... you do have the option of simply allowing a longer curing time and then moving on to the next coat. In theory that first coat that got slurped into the bondo will have hopefully fully evaporated. The curing of the first coat of paint over the bondo will work to seal the surface - and in doing so it will serve as a primer for the sealing purposes if it has been given an adequate time to harden and cure.
Re: New Paint job on a budget thread. - 06/17/0702:32 AM
Quote: day one, Petit Electric Blue Paint before
Looks like its off to a good start. The paint looks appropriately thin for a first or second coat... and that passenger rear quarter shot gives a hint of how nice it is going to look on that body...
Are you finding that the Petit Electric Blue paint is basically following the same general recipe as the other paints for mixing and application ?
.
Posted By: Anonymous
Re: New Paint job on a budget thread. - 06/17/0702:53 PM
Quote:
I think that Sunburst yellow color looks surprizingly nice on a Volvo wagon. Most folks tend to have very subdued and earthly colors on their 'bricks'. So that yellow makes the car seem surpisingly current modelish. The tinted windows and wheels really make it pop.
If that car was an older woman... you just succeeded in making her look 20 years younger.
Marq.
.
Thanks!
That's the general consensus. 240's look good in bright colors. There's a green 240 around here and a guy has one painted Coral Reef. It's very nice. But yeah, I'm very happy with how it turned out and also now that I know I can do this to any car. It's nice to have the experience!
The windows have crappy tint right now. It's scratched, but you can't really tell. They're going to get stripped and then I'm probably going to apply 5% in the rears and 15% up front. Should look good. I love the wheels on it.
Re: New Paint job on a budget thread. - 06/17/0707:04 PM
Hey S4Dustin, I'm keeping an eye on your paint experience because that blue looks pretty nice! I'm interested to see how it'll look on a muscle car that usually looks best in a metallic.. My car was a metallic blue originally and I'm sort of iffy about painting it a non-metallic blue.. You're going to be my decision maker, I think.. I'll be looking forward to completion pics
Re: New Paint job on a budget thread. - 06/17/0710:42 PM
Some 20 years ago, my little brother painted some stripes on his car using old house paint and a paint brush. It looked like craap and I still make fun of him to this day for doing something so hillbilly. But now after reading these posts and seeing the results you all have posted, I'm seriously concidering trying this on my truck. I've read this current version of this thread from the beginning, but still have some questions.
My 86 ram has some pretty bad surface rust problems, including a left front fender that has a pretty big rust hole and a left rocker panel that has a small hole. I have a fender to replace with that has been stripped to bare metal and needs just some minor massaging.
A local body/paint guy here suggested that I sand everthing with 180 grit to knock down the rust, then use an epoxy primer to seal it. A quart of epoxy primer and a quart of the catalyst will cost me about $60, so I'm concidering other options, that being rustoleum. I checked at the local Home Depot and the quarts are going for about $8. There was also a rustoleum clean metal primer and a rusty metal primer.
My current thinking is to do like the body guy said and sand the truck with 180 paper, then covering the whole truck and the good fender with the rusty metal primer, mainly because I'm not going to buy a quart of primer just to do one fender. What is everyones opinion about that? Does that sound like the right thing to do?
Another issue is that I will be doing some minor bondo work, which will require more sanding and primering. Can I do the bondo work over the rusto primer or do I need to take it down to bare metal first? Then when I'm doing the bondo work and trying to smooth it out, should I use the rusto primer or use the rattle can primers to sand with then finish with the rusto? I had planned on using a hvlp gun to spray the paint, will that work for the primer also?
Thanks to everyone for your opinions. I hope my truck will look as good as what y'all have done.
Epoxies and 2K's - can I roll ? (long) - 06/18/0702:33 AM
Haven't got to the finish coat yet, but I'm leaning towards this method. My question is regarding prep process, I had a bad day today (despite being Fathers Day) with spraying some high-build 2K primer out of a cheap Harbor Freight gun, I've done this before and not had issues, must be the gun. Anyway, I ended up grabbing a foam brush and brushing on some areas I had done some bodywork. Why could I not use a foam roller and brush for this entire process - bare metal, then epoxy, then roll multiple coats of 2K, guide coat, block, then roll more 2K as needed ? The only issue I see is these primers eventually eat the foam brush/rollers so I may need to swap to a new one after 5-10 minutes (my 2K sets up in 10-15 anyway). I'm just thinking, since I'm blocking the car down as much as necessary, why could'nt/would'nt I roll the sucker. It would be so sweet to not have to worry about water in my airline, pressure regulation, cleaning the friggin' gun 3-4 times, just roll it out and trash your rollers! Block, roll and repeat until you have the conditions you want! Yes ? Why not ? I don't dare ask this question on any autodody website, but any of you that have sprayed over the years - what's your opinions ?
Re: Epoxies and 2K's - can I roll ? (long) - 06/18/0704:01 AM
Quote:
.... Why could I not use a foam roller and brush for this entire process - bare metal, then epoxy, then roll multiple coats of 2K, guide coat, block, then roll more 2K as needed ? The only issue I see is these primers eventually eat the foam brush/rollers so I may need to swap to a new one after 5-10 minutes (my 2K sets up in 10-15 anyway). I'm just thinking, since I'm blocking the car down as much as necessary, why could'nt/would'nt I roll the sucker.
There is no problem rolling your primer. Just treat it like the paint and thin it down a bit with mineral spirit so that it will self level out.
You should not have any problem using the 4" high density foam rollers. They will not disintegrate if they are the white high density foam type. You would have problems with the cheap foam rollers.... either the foam will start to disintegrate or the glue that holds the foam to the plastic core will separate. The other problem with the cheap foam rollers is that they have more air pockets in them... and hence they tend to leave behind more bubbles when being used.
As noted earlier in the thread... you should do all the surface preparation just as you would if you were going to spray it.
As for the metal surfaces, I don't think you have to resort to using an expoxy at all. The Tremblad/Rustoleum and Brightside are all quite capable of going over bare metal and bringing a halt to future rust.
Depending on how many types of surfaces you have on your vehicle ( bondo surfaces, bar metal surfaces and just scuffed paint surfaces... you may go to priming the whole vehicle just so that you have one uniform and consistent color laid down on the vehicle before you go to adding the paint layers.
Like the other case we had just discussed, that primer coat on the whole vehicle may save you seval paint coats later ( and hence save you some work in the long run ).
Re: New Paint job on a budget thread. - 06/18/0704:24 AM
Quote:
A local body/paint guy here suggested that I sand everthing with 180 grit to knock down the rust, then use an epoxy primer to seal it.
The 180 will do a good job at rooting out the rust. It will probably rough up the surface so that you need a high build primer to blend out the surface scratches/scars. The epoxy primer would give you the build up to accomplish that... but I would think you could use the Brightside primer or some other primer liquid in a can to accomplish the build up and seal of the bare metal surface. ( I am not a fan of the aerosol primers when it comes to sufficiently choking the bare metal surface from oxygen or moisture. The areosols lay on too thin a coat - compared to a rolled on primer that is 3 x 5 times thicker. The extent of the sanding into the metal may require a thin skim of bondo to level it out... as the thicker primer just may not be able to build it up level as efficiently as a thin skim of bondo ( which you would primer over after the bondo cures. )
Quote:
A quart of epoxy primer and a quart of the catalyst will cost me about $60, so I'm concidering other options, that being rustoleum. I checked at the local Home Depot and the quarts are going for about $8. There was also a rustoleum clean metal primer and a rusty metal primer.
Rustoleum/Tremclad or Brightside can all go straight onto metal and be pretty successful. But when you have scarred up the surface removing rust, it would be better to lay down a build up layer of primer. The paints will not be able to build up their coats evenly enough to mask out the sand paper scrathes on the bare metal.
Quote:
My current thinking is to do like the body guy said and sand the truck with 180 paper, then covering the whole truck and the good fender with the rusty metal primer, mainly because I'm not going to buy a quart of primer just to do one fender.
This seems like the root to go. My personal preference would be to use the Interlux Brightside primer - simply because I was impressed by its coverage and thickness when applied. It left me lots of room to work it with an 800 grit sand paper to smooth the primer down nicely.
Quote:
Another issue is that I will be doing some minor bondo work, which will require more sanding and primering. Can I do the bondo work over the rusto primer or do I need to take it down to bare metal first? Then when I'm doing the bondo work and trying to smooth it out, should I use the rusto primer or use the rattle can primers to sand with then finish with the rusto? I had planned on using a hvlp gun to spray the paint, will that work for the primer also?
Quote:
I think you have to approach this job in the logical sequence to get the best results.
a) get all your rust removal, overall body sanding and bondo'ing done. Surface prep is where this project is going to make it or break it.
b ) lay down your primer layer over everything. This will stop the bare metal area from rusting.. the bondo from sucking in the paint... and provide good adhesion for the rolled paint layers on the scuffed paint. If you spot any body defects once the primer stage is done.. sand the respect spots, bondo it... and then blend in primer over that spot. Sand the primer layer smooth
c ) start laying down your rolled paint layers as per the recipe we have been following for the roller method.
As previously noted... I think you will get better results using liquid primer that you roller... than the primer spray in the aerosol cans. You will get better coverage with the liquid that is rolled on - and as a bonus you will probably save money ( because the number of aerosol cans of primer will cost more overall then the cans of liquid primer ).
The problem with primer, painting and then trying to go back to certain spots to slap on bondo is that it will make to much work and extra coats of paint to bring that repaired surface back up to the same consistent color as the rest of the body. In some cases the catalyst in the bondo can cause the paint it touches to wrinkle, soften or shrivel up like elephant skin. So it is best to nail down your bondo and surface preparation before going for your primer and paint coats. It will just cut down on the number of opportunities for something to go wrong...
.
Posted By: Anonymous
Re: New Paint job on a budget thread. - 06/18/0712:18 PM
Hey Guys, Finally, today's the big day for the old Probe. We got all of the prep work done yesterday evening and this morning the first coat goes on. I won't bore you all with a bunch of progress pics but I should have some finished pics at the end of the week.
Re: Epoxies and 2K's - can I roll ? (long) - 06/18/0701:06 PM
Don't know if I can thin w/mineral spirits - I know the epoxies can be thinned with acetone and acetone disolves foam of any kind like acid (ever pour acetone into a styrofpam cup ? Pours straight through the bottom !) As far as the 2K, I want a high build anyway, 3-4 or more heavy coats, enough to block sand it out straight. My assumption is regardless how uneven the finish is, if there's onough material to block down straight, I get the same results as spray.
Posted By: Anonymous
Re: Epoxies and 2K's - can I roll ? (long) - 06/18/0701:17 PM
Crazy amounts of peel. I thinned but it's just the weather/paint combination. Anyway here is brightside sapphire blue..
Re: New Paint job on a budget thread. - 06/18/0703:14 PM
Quote:
Quote: A possible whacky side effect is that the carrier being drawn into the bondo may in fact work to soften the bondo. And when the paint layer dries, the carrier trapped down in the bondo will not be able to rise and easily evaporate through the skin of the paint. It may cause sort of a blister type effect as the gas evaporating from the bondo and gets trapped under the paint skin.
Argh - didn't think about that.......
Thanks for your input. I think I'll wait a few days before I try and prime the bondo areas or try and do any more coats.
The bondo is mainly a skim coat in the areas where I had to use it, so hopefully that will lessen the potential effect you referred to.
I new it would be easier to cover if I primed it, I just got overanxious since I finally had some time and the weather was co-operating.
After pulling the car outside in the sun I found a whole bunch of minor prep areas that need to be addressed, so I just need to back down and take my time and do it right.
But overall - this is still AWESOME!
Thanks again.
I am going to colorsand with 1000 grit, how far down do i want to take it?
Re: Epoxies and 2K's - can I roll ? (long) - 06/18/0704:06 PM
Quote: Crazy amounts of peel. I thinned but it's just the weather/paint combination. Anyway here is brightside sapphire blue..
I have 4 coats on. I think I will do 2 more then hopefully I'll be able to wet sand out the peel and polish without having to add anymore paint.
The Sapphire blue is a gorgeous color.
I think what you might consider is this.... take out some 800 grit sandpaper and wetsand the orange peel out before adding any more coats. The let the wetsanded project dry for a couple of days ( upto 7 just to be absolutely certain it has cured ). Then proceed with your two final coats.
The idea being that if you can nail the orange peel at this point.. then hopefully the next two coats of paint will lay down smooth and glossy with little or no peel. Then you would only have to finish off the wetsanding using a 1500 or 2000 grit.
The problem with waiting til the final coat of paint to try to knock back the orange peel, is that you have to imagine the orange peel as looking something like this :
AAAAAAAAAAAAAAAAAAAAAAAAAAA
When you are doing that final wetsanding you are just knocking the caps off the top part of the A and trying to get the peaks knocked down so that the overall surface is equal to the majority or average of all the valleys.
If you just add more paint onto the peel... it will simply raise the valleys and the peaks together. Sadly it doesn't just fill in the valleys....
So if you knock it all down to one peakless surface... the next two coats of paint will stand a better chance of not exhibiting the peel effect and give you a shinier and smoother surface that won't need as much final wetsanding.
One other thing that you may have picked up from reading this thread... is when guys have had to knock back orange peel at the final stage of their paint job... sometimes they find variations in color because when knocking back the peel it may result in three different layers showing.
So by nailing the peel prior to the final two coats of paint, you will also reduce the chances of that happening during the final wetsanding and polishing.
.
Posted By: Anonymous
Re: Epoxies and 2K's - can I roll ? (long) - 06/18/0704:12 PM
Anyways my 93 civic is almost done! today technically was my 7th coat (minus wetsanding factor). I wetsanded everything down with 800 grit and then 2000grit.
We applied our first un-thinned coat today and have like half a quart left. Looks really good, very glossy and even distribution of paint. We have to fix some areas where we rolled over too much. But hardly any bubbles. You just have to roll fast so it doesn't dry up and let air do its work to dissipate the bubbles.
Pics after I am done with it within another day or so.
Re: Epoxies and 2K's - can I roll ? (long) - 06/18/0704:19 PM
Quote:
Don't know if I can thin w/mineral spirits - I know the epoxies can be thinned with acetone and acetone disolves foam of any kind like acid (ever pour acetone into a styrofpam cup ? Pours straight through the bottom !)
To be honest... I am not exactly sure either.
Acetone is basically an evaporative carrier.... much the same as mineral spirits or Interlux's 333.
I don't know if the epoxy based paint or primer would have an adverse effect chemically when mixed.
I do know that the key different between acetone and mineral spirit, when looking at it strictly as an evaporative carrier...is that acetone evaporates much more quickly then mineral spirits.
In normal circumstances... the ideal situation for the roller painting is to slow the evaporation of the carrier and paint sufficiently so that it has time to fully self level before the curing takes hold. This extra bit of working time allows you to work the paint... and for bubbles to self pop or be receptive to popping and not reforming.
You might want to solve the mystery by simply trying a test where you make a little sample of the epoxy with acetone and another with mineral spirit.. and apply them both on some scrap metal surface...
The voice in the back of my head says that the mineral spirit should work. But by doing a test sample you can assure yourself of whether it is viable or not.
One good thing is that the vapors released by the mineral spirits are not as nasty or concentrated as those released by the acetone.
.
Posted By: Anonymous
Re: Epoxies and 2K's - can I roll ? (long) - 06/18/0704:41 PM
Marq thanks for the advice!
I'll take some 800 grit to it tonight. I have complete coverage in all areas by about one coat.. As long as I go lightly when I sand I think I'll be okay and won't cut through the paint. The paint is really thin even with 4 coats at this point.
Would you wet sand (or dry sand) 800 grit? I've been wet sanding lightly every 2 coats so it's due for a sanding really. My first wet sand was 600 grit.
I still have to go and find the post you made for me sometime last fall about how to polish. I have to go and purchase the pads for my porter cable.
Perhaps I can convince friends to come help sand tonight for a few beers... *grin*
Posted By: Anonymous
Re: Epoxies and 2K's - can I roll ? (long) - 06/18/0706:19 PM
nova1313 the sapphire blue looks great. its was a hard decision between sapphire and ocean for me. get up some more pics of that car when it get it finished.
Posted By: Anonymous
Re: Epoxies and 2K's - can I roll ? (long) - 06/18/0706:25 PM
Just don't go with largo blue It was that color before and it looked like a smurf
Re: Epoxies and 2K's - can I roll ? (long) - 06/18/0707:12 PM
Quote: Marq thanks for the advice!
Would you wet sand (or dry sand) 800 grit? I've been wet sanding lightly every 2 coats so it's due for a sanding really. My first wet sand was 600 grit.
I would be tempted to wet hand sand at 800 grit at this point. You will be able to judge how smooth things are going as you rinse off the debris or sludge during the wet sanding.
Also... I find that when you are wetsanding your hands can begin to automatically detect when you have things nicely smoothed by how easily the sandpaper glides over the wet surface.
It is sort of like driving a car and once you reach a certain speed... you don't bother looking at your speedometer because you are judging your speed by the sound of your exhaust...
I guess with this roller project that is where it becomes very Star Wars like... " let yourself feel the force... let it become you... and the force will be with you ". Same goes for wet sanding the orange peel at this particulr point in your project...
Re: Epoxies and 2K's - can I roll ? (long) - 06/18/0707:44 PM
I'm going for it. My weapon of choice... Top Secret TS-4 urethane-reinforced with their thinner. When asked what I used for paint, "That's Top Secret" will sound better than "I rolled it with boat paint".
Since I've never painted, I didn't really want to be the first to try a product but this project will likely take about a year to complete. I should be able to get in a lot of practice in the meantime. I ordered two of the Harbor Freight rechargeable spray cans to jam everything out while the truck is apart. While I await my Top Secret order, I've been practicing rolling Rusto black on my lawn tractor and I have my truck's old fenders for honing my rolling skills with the marine paint once it arrives.
I'm anxious to see the final Petitt Camaro results. I believe it's a similar paint to what I'll be using. Wish me luck.
Re: Epoxies and 2K's - can I roll ? (long) - 06/18/0709:19 PM
Quick prep question:
I've rolled on the first couple coats, and now see some areas that might require bondo touch up.
Most of them are small - like the size of a quarter or less. Can I just rough up the area with maybe 400 grit and bondo over the paint or do I need to sand back down to primer or to bare metal?
Re: Epoxies and 2K's - can I roll ? (long) - 06/18/0709:50 PM
Quote:
I'm going for it. My weapon of choice... Top Secret TS-4 urethane-reinforced with their thinner. When asked what I used for paint, "That's Top Secret" will sound better than "I rolled it with boat paint".
I'm anxious to see the final Petitt Camaro results. I believe it's a similar paint to what I'll be using. Wish me luck.
From everything I have read about the 'Top Secret' paint... I think you should have excellent results. And the fact that they have such a huge color palette to choose from is a wonderful bonus.
And possibly your results will present a very viable polyurathane alternative to the Brightside... Good luck.
Re: Epoxies and 2K's - can I roll ? (long) - 06/18/0710:00 PM
Quote: Quick prep question:
I've rolled on the first couple coats, and now see some areas that might require bondo touch up.
Most of them are small - like the size of a quarter or less. Can I just rough up the area with maybe 400 grit and bondo over the paint or do I need to sand back down to primer or to bare metal?
Or just re-prime it and bondo over the primer?
Thanks!
I have heard some folks who have been successful at just scuffing up the paint... laying on the bondo and then working the surface level ( feathering it into the other layers ) and then priming it. BUT that was fully hardened and cured paint.
My fear with relatively fresh paint is that if you simply scuff it up and smear on a spread of bondo over the area to be worked... the catalyst in the bondo will soften the paint - cause it to curl up ( forming an look like elephant skin ) or that it will deactivate the adhesion of the old paint to the lower sub-surface.
So for myself.. I would tend to sand the area to be bondo'd down to at least the primer layer below the paint. But it wouldn't hurt to take it to the metal below the primer. At least this way you will know that it has as good as a chance at adhesion as you can give it.
Nothing could be worst then to reach the final polishing and waxing of a lovely paint job and then find one of these previously worked areas is separating and pulling away from the body - with the paint skin being the only thing 'temporarily' holding it in place.
I say temporarily... because I think we have all seen where paint separates or loses its adhesion and blisters off the car or whatever was being painted.
.
Posted By: Anonymous
Re: Epoxies and 2K's - can I roll ? (long) - 06/18/0710:40 PM
Hello folks,
Just wanted to share with you my (technically without factoring in wetsanding) 7th coat today. At this point in time this was done with a little less than 1 quart of Interlux Brightside Black remaining. I was scared we were gonna run out, but we should be able to have enough for 1 more total coat un-thinned plus some leftover for touch-ups.
Here is what we did today. All panels EXCEPT bumpers were put on un-thinned. So I was expecting better gloss and BOY OH BOY, more gloss was really there!
Re: Epoxies and 2K's - can I roll ? (long) - 06/19/0712:39 AM
Quote:
Quote:
I'm going for it. My weapon of choice... Top Secret TS-4 urethane-reinforced with their thinner. When asked what I used for paint, "That's Top Secret" will sound better than "I rolled it with boat paint".
I'm anxious to see the final Petitt Camaro results. I believe it's a similar paint to what I'll be using. Wish me luck.
From everything I have read about the 'Top Secret' paint... I think you should have excellent results. And the fact that they have such a huge color palette to choose from is a wonderful bonus.
And possibly your results will present a very viable polyurathane alternative to the Brightside... Good luck.
.
Thanks. The color selection was the deal-maker for me. I tried out Rustoleum's "Catepillar Yellow" farm implement paint first because it was available in spray bomb and can, but it was too bright... kinda school-bussy, so I settled on Top Secret "Retreat" because it was as close as I'll probably get to "Grey Poupon" Yellow and I've seen incredible results from the marine paints thus far. Here's what I'm starting with...
Posted By: Anonymous
Re: Epoxies and 2K's - can I roll ? (long) - 06/19/0701:57 AM
Marq, I wet sanded the entire car (about 3 hours worth) with 800 grit. It was 95% no peel uniform surface I'd say.. I then went and washed it off and then let it sun dry. Surface looked excellent.
I rolled another coat thinned about 40% mineral spirits. It went on so smooth. At this point for 5 coats I've used 1 and 3/4 quarts of brightside. I still have a 1/4 quart left for a coat tomorrow and then a full quart to do jams and touch up's.
I must thank you again though you saved my finish! The car looks like a glassy very glossy surface again! I'm so excited to do the next coat and then reassemble most of the trim! I'll take pictures when done.
Re: Epoxies and 2K's - can I roll ? (long) - 06/19/0703:48 AM
Quote: Marq, I wet sanded the entire car (about 3 hours worth) with 800 grit. It was 95% no peel uniform surface I'd say.. I then went and washed it off and then let it sun dry. Surface looked excellent.
I rolled another coat thinned about 40% mineral spirits. It went on so smooth. At this point for 5 coats I've used 1 and 3/4 quarts of brightside. I still have a 1/4 quart left for a coat tomorrow and then a full quart to do jams and touch up's.
I must thank you again though you saved my finish! The car looks like a glassy very glossy surface again! I'm so excited to do the next coat and then reassemble most of the trim! I'll take pictures when done.
Do me a favor and give this latest coat a couple of extra days of drying time to fully cure before laying on the next final coat.
If you want you could try a 2000 wet sanding on this current glossy coat. Just lightly pass the wet sanding... pretending that you are like a hovercraft just floating over the wetted surface.
This will take out any little surface imperfections prior to the next and hopefully final glossy coat.
I am offering up this suggestion to maximize the chances that the next layer of paint won't do anything adverse to the present 'pretty layer'.
The smoother the surface that the paint goes on... the glossier and deeper the shine...
so you get the brightside paint at boat places? and you cant roll aluminum because you cant wetsand it, but can it be sprayed? anyone testing with clears over this paint yet? the rustoleum clear only comes in spray cans right?
Posted By: Anonymous
Re: paint stuff - 06/19/0712:06 PM
Quote:
anyone testing with clears over this paint yet? the rustoleum clear only comes in spray cans right?
Rustoleum makes an Industrial clear available in gallons only. Some folks here have bought the Industrial clear but haven't reported any results yet, other than how dark it looks in the can.
On the rattle can clear, I tried several different combinations of paint while trying to produce a faux chrome finish for a nose grill I was working on.
Rustoleum rattle can clear will work with Rustoleum "metal" hobby paint - the result is a very bright clearcoat metalic silver. Its not bright enough to simulate chrome, but may be too bright for an entire car. It does lay down nice, though.
Applying the rattlecan clear to rustoleum aluminum and chrome finishes just caused them to darken considerably - gunmetal-ish. In my experience this finish did not last long (I was sanding it off the next day!)
Rustoleum puts "Do not use with Rustoleum Automotive Paints" right on the label of the rattlecan clear.
It also says to apply the clear 10 minutes after the last layer of color, but I had trouble with elephant skin and outgassing bubbles if I didn't let the metal paint properly cure.
It took me three weeks to paint those stupid grills, mostly because of the experimentation and "distance to the paint perfection" effect Marq describes.
Heaven help me when I paint the car...
I don't think there's a clear that won't do that to any "chrome-like" or silver paint, and if you don't cover it, it will rub off. I would say Alsa Corp stuff is probably the best bet. But, it's pricey, and I've read/heard that the rattle can stuff might require some practice -- you want a continuous wet coat to get that shine.
Rustoleum/Tremclad have an "indoor" metallic finish that supposedly won't rub off...but...it's indoor, and I wouldn't subject anything but maybe some interior trim pieces to it...
The only one I've seen hold up to finger prints and produce a shine so far is Dupli Color's high-heat. The stuff for exhaust manifolds and such, up around 1200� I believe. I've had decent success with that as it is, without clear.
But as far as everything else out there that claims to be "chrome" or metallic, or aluminum - meh, aside from the Alsa Corp stuff (which I haven't tried) ... it's all.... blech...
- so you get the brightside paint at boat places? - and you cant roll aluminum because you cant wetsand it, but can it be sprayed?
- anyone testing with clears over this paint yet? the rustoleum clear only comes in spray cans right?
Brightside is mostly available from marine and boat supply type shops. You can find them on the Internet or if you are lucky in your phone book.
The problem with the aluminum paint is that it actually contains aluminum particles. When you go to sand it... the aluminum particles DARKEN and you lose the reflective metalic look. So you can roll it or spray it - but you will get screwed when you go to wetsand it or try to sand any runs or orange peel.
The clear coat concept is not a proven winner at this point. Frankly you don't gain as much with it than without it. Once you put a clear coat on... you can't do simple or quick repairs to scratches. There are concerns about adhesion and whether you really gain anything by attempting to clear coat a Tremclad/Rustoleum or Brightside paint job. Suffice to say with the Brightside it is a polyurathane... and so it already has a built in high level of gloss. And even the Tremclad/Rustoleum can be polished and waxed up to the same level of shine and glossiness.
.
Posted By: Anonymous
Re: New Paint job on a budget thread. - 06/19/0702:34 PM
Someone once told me that if you use more thinner, you get more gloss, so I've mixed up to 50:50 in the past (lacquers). With the Tremclad, I went for a ratio that made it thin enough to spray - 4:1 seemed right!
Posted By: Anonymous
Re: paint stuff - 06/19/0702:38 PM
Quote:
The clear coat concept is not a proven winner at this point. Frankly you don't gain as much with it than without it. Once you put a clear coat on... you can't do simple or quick repairs to scratches. There are concerns about adhesion and whether you really gain anything by attempting to clear coat a Tremclad/Rustoleum or Brightside paint job. Suffice to say with the Brightside it is a polyurathane... and so it already has a built in high level of gloss. And even the Tremclad/Rustoleum can be polished and waxed up to the same level of shine and glossiness.
.
I'm curious what the Rustoleum clear in a gallon can actually is... Most of the cans of clear you see on the shelf are lacquers (well, Testors makes an enamel model paint clear). The Rustoleum enamel spray clear looks like an acrylic enamel by the MSDS sheet. Lacquer clear probably isn't the best choice for a car anyway...it yellows over time, and is a lot more brittle than enamel paint. Unfortunately, if you want a "real" clear coat, you'll have to use catalyzed automotive clear. The reason you can't find a spray can of "real" clear is that once you add the activator, it has a shelf life measured in hours...not months or years like a spray can would need. Marq mentioned adhesion as a problem...talking to people who've sprayed a clear coat on alkyd enamels I've heard "sometimes it works, sometimes not".
I've got a steering wheel I restored for my '60 Oldsmobile, and I'm doing a 2 tone paint job on it with metallic synthetic paint (light grey/shadow grey), and I'm going to give a couple coats of acrylic urethane clear to protect it. I'll let you guys know what happens If it all goes haywire, I'll just be sanding it down for the 50th time and have to get some "real" base coat paint. The steering wheel gets handled enough I want a good hard clear on the metallic paint. I painted the rest of the interior with metallic alkyd synthetic paint, and I'm not worried about the durability...I won't be handling my dash board very often.
I agree with Marq though...I'm not sure it's worth the trouble. These enamel paint jobs are going to look different than a bc/cc job...that's just the nature of the paint. One looks "wet" the other looks "shiny". With everyone going to bc/cc paint, it's actually kind of neat to see car that isn't
Re: New Paint job on a budget thread. - 06/20/0701:11 AM
Thanks for the suggestions on my situation Marq. Taking into account your advice, what I'm now planning to do is, on my bare fender, do the bondo work that is needed, which really isn't very much. I DA'd 98% of it with 80 grit and it's actually pretty smooth. Not a bunch of deep sanding marks. As I do the body work on the fender and the rest of the truck, I'm going to use the spray can primer for sanding. I know that will work good because I did that with with my motorcycle gas tank and the bodywork was flawless. I even stripped it with a scotchbrite pad on my die grinder, and I've got no scratch marks in it at all. The only problem is I used a rattle can to paint it with and when I put gas in it, the paint ran. So after I get all the body work finished, then I will cover the whole truck with the rusty metal Rustoleum primer, and then paint the truck. Still thinking about spraying the paint. Can the primer be sprayed also? BTW...what's the best way to fill in the holes from the emblems and stuff? Weld them or just bondo over them?
Posted By: Anonymous
Re: New Paint job on a budget thread. - 06/20/0711:30 AM
Quote: Thanks for the suggestions on my situation Marq. Taking into account your advice, what I'm now planning to do is, on my bare fender, do the bondo work that is needed, which really isn't very much. I DA'd 98% of it with 80 grit and it's actually pretty smooth. Not a bunch of deep sanding marks. As I do the body work on the fender and the rest of the truck, I'm going to use the spray can primer for sanding. I know that will work good because I did that with with my motorcycle gas tank and the bodywork was flawless. I even stripped it with a scotchbrite pad on my die grinder, and I've got no scratch marks in it at all. The only problem is I used a rattle can to paint it with and when I put gas in it, the paint ran. So after I get all the body work finished, then I will cover the whole truck with the rusty metal Rustoleum primer, and then paint the truck. Still thinking about spraying the paint. Can the primer be sprayed also? BTW...what's the best way to fill in the holes from the emblems and stuff? Weld them or just bondo over them?
You might want to go over that fender with your D/A again with some 150 grit...it'll take out the 80 grit scratches, and it'll take less primer to fill them.
If you only have a couple of holes for the emblems and have a MIG welder, just weld them up...it's not a big deal. You can either use a copper backer, or just cut a small scrap of steel and put it behind the hole and weld it in. Grind it and skim it with filler. You can fill them with body filler, but in order to keep it from just falling through you need a pretty thick layer on top of the holes. Then you need to feather that blob into the rest of the panel. It's hard to get a blob thick enough to be strong and yet small enough it doesn't look funny when painted. Since it has to be raised above the surface of the panel, that's hard to do. If you use a really thin coat and just fill the holes, any pressure at all on them will poke them right through the fender...not cool if you just painted it . Here's my old '73 Chevy 4x4 when I was doing the body work on it...I had just started welding up the trim holes on my replacement fender: (the fender is hanging on there as a test fit). I didn't bother stripping it until I was done welding. When you have a lot of them, it's kind of time consuming but not that big of a deal.
Posted By: Anonymous
Re: New Paint job on a budget thread. - 06/20/0711:58 AM
Words of advice.
If you are near your last coat and it looks really good and don't have too much paint left, you may want to stop and not even do another coat.
I'm putting on the 8th and final coat and for some reason parts that looked good before looked hazed now. Argh!! I shouldn't have messed around with it already looking nice.
Ah well then, I will wait and see what happens. Hopefully buffing can bring a shine back. If not I will get another small quart or pint later on down the road...
Posted By: Anonymous
Re: New Paint job on a budget thread. - 06/20/0702:17 PM
Hey folks,
Can I use alcohol to wipe my car down before painting? My dad accidently poured down old mineral spirits we used to clean our rollers down the clean jug of mineral spirits. Is it still clean to use?
Re: New Paint job on a budget thread. - 06/20/0703:00 PM
Quote:
BTW...what's the best way to fill in the holes from the emblems and stuff? Weld them or just bondo over them?
The 'best' way to fill the holes... depends on whether the hole is in metal.... fiberglass... or in plastic...
For metal.. the best way would be to sand to metal around the hole... and use solder / lead.. with the appropriate flux to fill it in and feather the repair into the surrounding metal. It doesn't require a high amount of heat and you can probably do it with one of those cheap propane 'do it yourself' tanks with the appropriate head on it. But naturally, with a flame near the body... you have to take caution that you don't ignite anything behind the fender ( like undercoating etc ). Keep a hose handy
If the holes are in plastic... I would probably rough up the surface around the hole and squeeze some epoxy into the hole and blend it around the sanded outer surface. The trick with this method is to make sure that the epoxy glue you use notes on its packaging that it is designed to work and function in the 'temperature range' that is appropriate for the area you live in. YOu don't want to fill the hole with something that won't expand and contract equally with the surrounding plastic. Otherwise temperature fluctuations will cause the 'epoxy' to separate or crack between the two surfaces. They do make a bondo that is specifically designed for flexible plastic ( like the flexible plastic bumpers etc ).
In fiberglass... you should go with a filler that is designed to work with specifically with fiberglass. Although you could use most normal bondos... I am not sure if it might become an achilles heel when temperature fluctuations occur. At the very least - if you want to go the bondo route... it hopefully would be on of those hybrid bondos that use fiberglass shreds in it. The best way would be to use a fiberglass repair kit with a piece of fiberglass sheet behind the hole ( if you have access to the backside of the hole ).
Re: New Paint job on a budget thread. - 06/20/0703:05 PM
Quote: Words of advice.
I'm putting on the 8th and final coat and for some reason parts that looked good before looked hazed now. Argh!! I shouldn't have messed around with it already looking nice.
Ah well then, I will wait and see what happens. Hopefully buffing can bring a shine back. If not I will get another small quart or pint later on down the road...
A slight hazing is not necessarily a bad thing. It is on the outer surface. After all... when you do your final wet sanding... the entire surface is going to take on a less than glossy / shiny look. It will then be the job of the rubbing compound, polishing and subsequent waxing that is going to give you your long term shine and gloss.
.
Posted By: Anonymous
Re: paint stuff - 06/20/0703:20 PM
Starting to get there....That's a nice blue you got, and doesn't look too orange peely. It's good to see that even mid-paint job you were able to drive it to Subway! Interesting to see that Packard in the background too.
Posted By: Anonymous
Re: New Paint job on a budget thread. - 06/20/0704:59 PM
Quote:
Quote:
Quote: is it possible to search archived threads?
I don't see a way to do that,
Try going to the tech/archives forum and at the bottom do a search for say (brightside paint) it gave me a bunch but only out of the archives. BTW I don't know if this only works for mods but give it a try. I'd guess because of the size of that thread you are going to get a whole bunch of hits
Google is another alternative (possibly easier) for searching these threads (3 in all now).
Google allows you to limit a search to a specific site (i.e. "domain"). I've tried limiting the search to the specific URL for just one of our budget paint job threads, but it still returns results from anywhere in https://board.moparts.org/
Not a problem. You can still direct Google to search exactly where you want by specifying an exact phrase which ONLY exists in these threads. I use the exact phrase Paint job on a budget because that phrase appears in the title of every post in all 3 threads.
Here's the nitty gritty Suppose you want to search for the word tremclad. Do the following...
Expert Mode: Go to www.google.com and type the following line exactly as it appears in the search entry field: tremclad "paint job on a budget" site:https://board.moparts.org/
For different searches, keep "paint job on a budget" site:https://board.moparts.org/ exactly the same, but vary the term(s) you are looking for in place of the word tremclad
Beginner Mode Go to www.google.com. Click on the tiny Advanced Search link at the right. Then fill in the fields as follows:
Posted By: Anonymous
Re: New Paint job on a budget thread. - 06/20/0706:33 PM
Quote:
Quote: Words of advice.
I'm putting on the 8th and final coat and for some reason parts that looked good before looked hazed now. Argh!! I shouldn't have messed around with it already looking nice.
Ah well then, I will wait and see what happens. Hopefully buffing can bring a shine back. If not I will get another small quart or pint later on down the road...
A slight hazing is not necessarily a bad thing. It is on the outer surface. After all... when you do your final wet sanding... the entire surface is going to take on a less than glossy / shiny look. It will then be the job of the rubbing compound, polishing and subsequent waxing that is going to give you your long term shine and gloss.
.
Hey Marq thanks for the words of encouragement! Today wasn't our day I suppose. My dad was the one doing to rolling as usual. We woke up @ 6AM to complete this.
Let me explain something. This would be technically the 2nd coat after my planned "final wetsanding stage" where I sanded down from 800 and then 2000 grit.
The 1st coat that went on top after wetsanding was my 7th coat. I should have left it alone, I really should have. The car was nice and even in most spots, AND most importantly it was glossy when dried and had little hazed spots.
The biggest thing after that 1st coat after final sanding was there was less pronounced orange peel. You know the rimply peel effect? It was there but wasn't too bad, it was a very thin layer, 1 layer thats all, it looked good.
After our 2nd coat today, that rimply orange peel look has been magnafied more than last coat. I can tell with my own eyes.
Today my roof was glossy in one half, and the other half was hazed and can see lines.
I told my dad "thats okay we will fix it TOMORROW". I said "lets go inside, don't worry fix it tomorrow". So I went inside our home. Big mistake! I went to grab something to eat and then went back to the garage and saw him still there, he was fixing up one small part. I told him again, "you still there, don't worry lets fix it up tomorrow Dad". I ended telling him the third and final time because he kept on doing something...
I go inside the garage the 3rd time and he tells me he accidently mixed up the old mineral spirits we had in a similar 4L jug and then he poured it into the newer mineral spirit jug we were using...
Darnit! Things are getting worse by the minute.
You know what else I notice? My dad tried to fix up the roof when I told him tomorrow! The roof is soo messed up now. He loaded up the paint for some odd reason. He did the whole roof like that when all we had to do is one portion that was bad. The other half was fine and lovely. He loaded up the paint!! And you can see the straight lines from the end of the roller and some drips!! OMG.
Bah. I will just have to live with it because I don't he wants to wetsand anymore.
Tomorrow we just have to fix up the bumper and the hood. God help us, hopefully nothing else will go wrong.
Re: New Paint job on a budget thread. - 06/20/0707:05 PM
Take heart; I've sprayed cars that had a hazy look, some "dry spray" and a couple runs. After wet sanding and buffing they came out looking great! My suggestion would be to wait more than one day before buffing to let the paint set up a bit. I've buffed soggy paint, and it ain't pretty!
Posted By: Anonymous
Re: New Paint job on a budget thread. - 06/20/0709:35 PM
Quote: Take heart; I've sprayed cars that had a hazy look, some "dry spray" and a couple runs. After wet sanding and buffing they came out looking great! My suggestion would be to wait more than one day before buffing to let the paint set up a bit. I've buffed soggy paint, and it ain't pretty!
Thanks very much. Yes I plan to wait for at least 1-2 months to prevent cutting through any soggy paint....Thats the last thing I need right now.
Plus I have to get a better polisher. My dad has this one here, but I don't think its anywhere near what I need for cutting/polsihing...
Re: New Paint job on a budget thread. - 06/21/0704:36 AM
I finally got the first coat on my trunk. After spending forever on the prep work, I rolled on the Rustoleum last night. It turned out that I didn't thin it as much as is prescribed but it still turned out pretty well.
Here's the final stage of primer:
Here's the paint wet:
And here it is in today's sun with a bit of windblown dust on it (black cars get dirty FAST!)
Posted By: Anonymous
Re: New Paint job on a budget thread. - 06/21/0712:41 PM
Well I finished my car my today. My dad and I were fixing up parts where we screwed up. The hood had white spots. Anyway he loaded up the roller again when I told him not to...Some parts are still hazed but mostly even glossy finish. Except the bottom of the hood is tooo orange peely.
But as you guys said, wetsand and polish will fix all our bad work.
Thanks guys and I will have pics up maybe later when the whole car gets baked in the sun for a few days.
Re: New Paint job on a budget thread. - 06/21/0701:00 PM
Quote: I finally got the first coat on my trunk. After spending forever on the prep work, I rolled on the Rustoleum last night. It turned out that I didn't thin it as much as is prescribed but it still turned out pretty well.
Here's the paint wet:
That looks really heavy for a first coat .......I would have expected to still see the primer underneath.
Posted By: Anonymous
Re: New Paint job on a budget thread. - 06/21/0704:38 PM
Quote:
yes u "need" to sand the whole car. try to stay away from edges tho, i burned thru the edges so many times, thats probly the most annoying part of the whole job..
Two general questions: 1.) Edges. I'm looking for advice on dealing with edges. Everyone says, "Stay away from the edges". I'm confused.
I can understand staying away from the edges in the FINAL color sand and polishing stage(s) -- but during metal prep and primering (assuming you're doing this), or initial scuff up of factory paint through intermediate coats... wouldn't the edges need to have some sanding done to provide a "key" for the paint? What's the general rule for dealing with edges from the start?
2.) Windshield or other windows' rubber trim: If not removing the glass and surround, for spraying I've heard of wedging a cord or rope underneath the rubber trim to keep it way from the metal surface. When spraying, this allows some spray to shoot underneath the rubber trim -- so as not to create a hard paint line.
So, for rollering / brushing -- what advice do people have for these areas?
Re: New Paint job on a budget thread. - 06/21/0705:15 PM
Just to say Hello, I've been enjoying this forum, origionally from the Modified Cadillac Forum - Been reading this thread for a few weeks and decided to start doing my own car, a 1954 Cadillac. I'm using the BrightSide Black, to replace the origional dark Cobalt Blue Poly. Because of the size of the car, and all the chrome, I'm breaking it into 2 sections, the roof and front end, and the rest.
Here's a picture of the origional condition, just starting with a bit of body work/primer, some rust, lots of scratches, gouges, dings from things falling on it over the years ...
Re: New Paint job on a budget thread. - 06/21/0705:21 PM
The roof, 1st coat of BrightSide, with 5-10% of the 333 additive ...
I'm really amazed, very good coverage, just barely seeing the primer repairs in spots, very little orange peel, slight lint even protected in the garage as it is ...
I've been using the same roller for 3 days, doing an earlier test sample, just storing it wrapped tightly in regular kitchen SaranRap ...
Re: New Paint job on a budget thread. - 06/21/0705:47 PM
The origional car, just washed after being stored away for the winter, not too bad from a distance, but multiple scratches/dings/touchups/fading ... Looked much worse from even 20 feet away!!!!! Strangely enough, it does look pretty good in this picture, or from a distance if its a bit overcast, but up close, it was unbelieveably rough!!
Re: New Paint job on a budget thread. - 06/21/0705:53 PM
Quote:
Quote:
yes u "need" to sand the whole car. try to stay away from edges tho, i burned thru the edges so many times, thats probly the most annoying part of the whole job..
Two general questions: 1.) Edges. I'm looking for advice on dealing with edges. Everyone says, "Stay away from the edges". I'm confused.
I can understand staying away from the edges in the FINAL color sand and polishing stage(s) -- but during metal prep and primering (assuming you're doing this), or initial scuff up of factory paint through intermediate coats... wouldn't the edges need to have some sanding done to provide a "key" for the paint? What's the general rule for dealing with edges from the start?
2.) Windshield or other windows' rubber trim: If not removing the glass and surround, for spraying I've heard of wedging a cord or rope underneath the rubber trim to keep it way from the metal surface. When spraying, this allows some spray to shoot underneath the rubber trim -- so as not to create a hard paint line.
So, for rollering / brushing -- what advice do people have for these areas?
Thanks in advance, - Dan
Staying away from the edges when buffing keeps you from burning through the paint. Edges places extra surface pressure on the paint surface from the buffing pad. The same is true when sanding. What I did when I was a professional bodyman was sand the edges carefully by hand using sandpaper wrapped in a sponge and kept it extra wet. I turned off the radio and listened for any little "squeak squeak squeak" sound when sanding; this meant either trash was under the paper, or I was bearing down too hard. I machine buffed the entire vehicle, but did all the corners and edges by hand. As for sanding primer, I did the same procedure.
As for rubber trim, use the same method you'd use when spraying, with the rope trick. If you thin your roller paint enough, material will flow underneath.
Well, after reading every post on this topic (all 700 million of them!) I took the plunge this morning. My wife was miffed that I used my last day of vacation to do it rather than clean out the garage and then spend time with her, but oh well.
Anyway, my son totalled my daily driver with only 84K on it but I was able to buy it back from the insurance company for a pittance. With the rest of the money we bought new body and suspension parts, and decided it would be worth doing. It's "only" a 1992 Nissan Sentra but it's been in our family for 15 years, seeing duty only as a back-and-forth-to-work car, 14 miles at a stretch. Not once has it failed me in all those years!
I learned a few things today: 1. I used a gradiated measuring cup, and thinned the Rustoleum Safety Red 5%. That simply is too thick! I got an amazing amount of orange peel, and in this near-100 degree Georgia heat it almost dried instantly. Lesson learned.
2. Even at 20% for the second coat, the orange peel was horrendous. Lesson learned: don't do this in direct sunlight.
3. My house *used to* be in the country, but the developers built three near-million-dollars-each-house subdivisions nearby, and the snooty neighbors do no like to see a fat, middle-aged, shirtless man painting a car in his driveway!
Anyhoo, once this project is done I'm giving this car to my youngest son, who is helping with all the sanding to pay pennance for totalling it. Then we're doing my Dodge Ram (replacement for my beloved Nissan) and my race truck Ford Ranger (5.8/c-4), all in the same Safety Red.
Whoever came up with this process deserves a medal!
Posted By: Anonymous
Re: New Paint job on a budget thread. - 06/21/0707:58 PM
Hello folks,
Finished at last my 93 Civic. Finished up the hood my dad and I messed up the other day. Anyway it's baking in the sun, and we have taken off all of the tape since its good to go.
These pics are without and cleaning or polishing. I haven't and will not wash the car for a bit. I expect to wetsand and polish maybe within 1-2 months tops.
OK, here's a crappy pic of the bumper. This was with the paint thinned 20%; the 5% paint on the fender and spoiler are far more orange-peely. Nothing a little wet sanding tomorrow won't cure, but still it's a bit disappointing.
Posted By: Anonymous
Re: New Paint job on a budget thread. - 06/21/0710:25 PM
My93Civic,
You going to try and knock some more of that orange peel down, or are you pleased with it and going to leave it as is?
Posted By: Anonymous
Re: New Paint job on a budget thread. - 06/21/0711:13 PM
Quote: My93Civic,
You going to try and knock some more of that orange peel down, or are you pleased with it and going to leave it as is?
I can live with it, but yes I am gonna do full wetsand and polish in 2 months time.
Posted By: Anonymous
Re: New Paint job on a budget thread. - 06/22/0712:10 AM
Hey guys! First post after having read a majority of all three threads and I think I am going to try this. I figure it's a hardly anything to lose situation, well, except for time. Aswell, I don't have much money to invest in this. Anyway, I will be painting my 95 BMW roof which is unpeeling and the bare plastic spoiler on back.
So my question is, where can I get the Brightside paint mixed to match the current black color of my car? I guess first off I've got to find the paint but it is sold only at marine/boat places right? Would they mix it there? Could I take it to Home Depot maybe? Thanks!
Posted By: Anonymous
Re: New Paint job on a budget thread. - 06/22/0712:20 AM
Quote: Hey guys! First post after having read a majority of all three threads and I think I am going to try this. I figure it's a hardly anything to lose situation, well, except for time. Aswell, I don't have much money to invest in this. Anyway, I will be painting my 95 BMW roof which is unpeeling and the bare plastic spoiler on back.
So my question is, where can I get the Brightside paint mixed to match the current black color of my car? I guess first off I've got to find the paint but it is sold only at marine/boat places right? Would they mix it there? Could I take it to Home Depot maybe? Thanks!
What are you going to mix it with? There is only 1 shade of Black that Interlux offers...???
Posted By: Anonymous
Re: New Paint job on a budget thread. - 06/22/0701:09 AM
Quote: What are you going to mix it with? There is only 1 shade of Black that Interlux offers...???
Ha, ha... I don't know. There is always gray and white to lighten but I guess if it needs to be darker I'm out of luck. Unless there are other one step premium marine paints similar to the Brightside just another brand in different black shades. Is it even possible to mix the other interlux one step premium paint called toplac with the Brightside? It comes in a jet black shade that I assume is different. Sorry, I don't know much about mixing paint.
Quote: OK, here's a crappy pic of the bumper. This was with the paint thinned 20%; the 5% paint on the fender and spoiler are far more orange-peely. Nothing a little wet sanding tomorrow won't cure, but still it's a bit disappointing.
I would pull out the trusty 800 grit sandpaper and knock down all the peel. If you find it is not knocking it down agressively then resort to the 320 or 400 grit. Then wipe the entire puppy down with a clean rag that is lightly dampened with mineral spirit to remove all debris and foreign crap off it. Then hit the puppy again with a 20% or 30% mineral spirit to paint mix again.
I know that spot on the bumper is a bit of a paint to work around because of all the different surfaces. I did the inner surfaces and more difficult to reach surfaces first and then went after the easier and more accessible surfaces after. This way I could blend out any over-runs coming from the more difficult surfaces.
Now here is a trick I used on the front and rear bumpers of my McLaren which also have those large open areas. Do the sanding as suggested above... and then spray those enclosed difficult to reach spots with an aerosol. Then do your roller routine on the more easily accessed areas - and that will allow you to blend it together nicely.
But you can also do a bit of 'customizing' here if you wanted. For example... do the sanding down as previously described. Now tape and mask all the areas outside of the 'holes'. Take a black Tremclad/Rustoleum spray aerosol and spray those inner holes black. Let it dry thoroughly. Then mask off the inner holes and roll the outer areas like normal. This will give you a nice two tone effect that will set off the holes and give them additional depth visually.
This combination of aerosol and roller trick worked well for that type of situation. And if you have a roller paint that happens to have a matching color in the aerosol then you can do a pretty seamless paint job there. Even though I was using the Brightside 'Fire Red' on my body... I was able to use the Tremclad/Rustoleum 'Fire Red' aerosol to hit those difficult to roll areas.
Quote: OK, here's a crappy pic of the bumper. This was with the paint thinned 20%; the 5% paint on the fender and spoiler are far more orange-peely. Nothing a little wet sanding tomorrow won't cure, but still it's a bit disappointing.
I would pull out the trusty 800 grit sandpaper and knock down all the peel. If you find it is not knocking it down agressively then resort to the 320 or 400 grit. Then wipe the entire puppy down with a clean rag that is lightly dampened with mineral spirit to remove all debris and foreign crap off it. Then hit the puppy again with a 20% or 30% mineral spirit to paint mix again.
Hopefully this time is the charm.
I know that spot on the bumper is a bit of a pain to work around because of all the different surfaces. I did the inner surfaces and more difficult to reach surfaces first and then went after the easier and more accessible surfaces after. This way I could blend out any over-runs coming from the more difficult surfaces.
.
Thanks for the tips. Once the fender settled out and dried it ended up being pretty decent, but that bumper is gonna be a real pain to sand! The spoiler is just as peely as the bumper but it's a flat surface and will be far easier than a flexible bumper with a zillion curves. I'm planning on hitting it all with 400 in the morning and applying another coat. All is not lost just yet! That's what I love about this method; if I sprayed the paint I'd be pretty pissed about now, but with rolling, you can fix a goof pretty easy!
Rustoleum roller here. After putting my first coat on too thick by the guidelines established here, I'm starting to wonder if it might be the right way to do it after all. I wetsanded it down to get the peel out and broke through to primer in a number of areas but was left with a decent coat of black paint.
Last night I did a layer of "properly" thinned paint and while it did lay down with absolutely no peel at all, I'm left wondering about something. There is quite a lot of "stuff" in the paint: dust, fibers, cottonwood lint... I really don't see myself painting a second coat over that junk as prescribed by the method, yet I'm afraid that sanding it enough to remove the stuff will just take my whole layer off, since it's so thin. I'm tempted to just go back to thicker coats and peel sanding. Any opinions on this matter?
Posted By: Anonymous
Re: New Paint job on a budget thread. - 06/22/0707:37 PM
very nice work 93civic. fyi, I have wetsanded and polished my brightside paint only 1 day after rolling it on, without problems. I used both my rotary and DA PC polisher without problems. Even used a yellow LC cutting pad with the rotary, without messing up the paint. Brightside does dry pretty quick (dries to the touch in about 4 hours here in Hawaii). Even with time, however, it dries nowhere near as hard as other paints. The lacquer paint on my friends' cars are like 4X harder than this paint. My spoiler has had brightside on it for almost 40 days, and it is still fairly soft. I was thinking of adding some Japan Dryer to the brightside paint to quicken the drying, since it's available at Home Depot. Also, despite the added teflon in the paint, I find it difficult to clean (especially dried water spots) the surface.
Posted By: Anonymous
Re: New Paint job on a beater - 06/22/0707:54 PM
Quote: Rustoleum roller here. After putting my first coat on too thick by the guidelines established here, I'm starting to wonder if it might be the right way to do it after all. I wetsanded it down to get the peel out and broke through to primer in a number of areas but was left with a decent coat of black paint.
Last night I did a layer of "properly" thinned paint and while it did lay down with absolutely no peel at all, I'm left wondering about something. There is quite a lot of "stuff" in the paint: dust, fibers, cottonwood lint... I really don't see myself painting a second coat over that junk as prescribed by the method, yet I'm afraid that sanding it enough to remove the stuff will just take my whole layer off, since it's so thin. I'm tempted to just go back to thicker coats and peel sanding. Any opinions on this matter?
In my experience so far, rolling uncut Rustoleum is about as time consuming and difficult as rolling it on thin. If you roll it on thick/uncut, it has very very good leveling properties, but ends up creating a peely, almost hammered surface. I'd say more than 50% of the paint will have to be sanded to get it level again, since alot of the paint will be the mountains of peel you will be sanding off.
For brightside users, I absolutely recommended cutting it with mineral spirits, not interlux brushing liquid. Do NOT roll this paint on uncut, I have tried rolling it on uncut on my fender and it really doesn't level at all on the vertical surfaces, and has very very little working time before drying. I imagine I will have to sand off about 70% of this final layer to get it flat and even. Brushing fluid flashes slowly, is expensive (compared to mineral spirits), and it just sucks, period.
The brushing liquid I have added to brightside creates tons of fisheye in the paint as it dries. I bought another can of Brightside and cut it with odorless spirits, and it rolls on and levels much better, and flashes 100X better than the brushing fluid. There are more bubbles in the spirit-cut paint as it is rolled on, but they pop quickly and easily, unlike the paint with brushing fluid.
Posted By: Anonymous
Re: New Paint job on a beater - 06/22/0709:37 PM
Oh baby- these look so nice together
Posted By: Anonymous
Re: New Paint job on a beater - 06/22/0711:30 PM
Hey they look like they belong to the same family! It makes the official Interlux product look like it doesn't belong with the Brightside! They used green when their products have a red package...
Posted By: Anonymous
Re: New Paint job on a budget thread. - 06/22/0711:32 PM
Quote: very nice work 93civic. fyi, I have wetsanded and polished my brightside paint only 1 day after rolling it on, without problems. I used both my rotary and DA PC polisher without problems. Even used a yellow LC cutting pad with the rotary, without messing up the paint. Brightside does dry pretty quick (dries to the touch in about 4 hours here in Hawaii). Even with time, however, it dries nowhere near as hard as other paints. The lacquer paint on my friends' cars are like 4X harder than this paint. My spoiler has had brightside on it for almost 40 days, and it is still fairly soft. I was thinking of adding some Japan Dryer to the brightside paint to quicken the drying, since it's available at Home Depot. Also, despite the added teflon in the paint, I find it difficult to clean (especially dried water spots) the surface.
Thanks! I don't have a DA or Rotary so I am researching what machine to buy, what pads to buy, what products to buy. It's all a learning experience for me! A detailer said I should learn how to use a Rotary...
Posted By: Anonymous
Re: New Paint job on a budget thread. - 06/22/0711:56 PM
I got done painting the car and reassembled. It needs a bit of wet sanding to get out a few brush marks and also some orange peel. Then polishing time
Thanks marq and everyone else that helped me paint it.. Both times
Re: New Paint job on a budget thread. - 06/23/0703:05 AM
Nova.....personaly I like that color a whole lot better than the previous color you used on it. good work!!
my progress has been very slow due to lack of time. I have the trunk of my sidecar sanded and hit part of it with a rattle can of the color I chose to see if that is the color I want and I think i'm gonna go with it....burgundy rustoleum. should get some done this weekend unless my wife comes up with a huge honey-do list!! will come back with pictures!!
Posted By: Anonymous
Re: New Paint job on a budget thread. - 06/23/0703:53 AM
Looking good Nova! I painted a test fender Rustoleum Royal blue and it looks almost the same =)
Nice
Posted By: Anonymous
Re: New Paint job on a budget thread. - 06/23/0704:27 AM
Thanks! After a few coats of rustoleum royal blue it got really dark for me. I tested it on the spoiler before I did a car and decided I didn't like the color. I ended up painting my bike that color then It just wasn't right for this car. I was aiming to get close to daytona electric blue used on nissan 350z's. This is pretty close just not wet looking.
Good luck with the rusto though. Thanks for the comment on the color. This is what I thought the largo blue that I originally used would look like from the color swatch and the online picture. It was severely misleading. I love this color though. I just went the next shade of blue darker after seeing flag blue look almost like a black.
Posted By: Anonymous
Re: New Paint job on a beater - 06/23/0707:49 AM
Quote: Rustoleum roller here. After putting my first coat on too thick by the guidelines established here, I'm starting to wonder if it might be the right way to do it after all. I wetsanded it down to get the peel out and broke through to primer in a number of areas but was left with a decent coat of black paint.
Last night I did a layer of "properly" thinned paint and while it did lay down with absolutely no peel at all, I'm left wondering about something. There is quite a lot of "stuff" in the paint: dust, fibers, cottonwood lint... I really don't see myself painting a second coat over that junk as prescribed by the method, yet I'm afraid that sanding it enough to remove the stuff will just take my whole layer off, since it's so thin. I'm tempted to just go back to thicker coats and peel sanding. Any opinions on this matter?
I just finished rolling my final coat of Rustoleum Professional Gloss black. I did a total of 5 coats. I would have done more but I'm pressed for time since this is my vacation and the car is my daily driver. I used a 1/4 cup measuring cup to measure my paint. I mixed my paint @ 1-1/2 cups paint to 3/4 cups mineral spirits. This mix laid down nice and smooth but was still thick enough that I could wetsand off all of the peel without burning through the layer. I have an old dusty garage and I got lots of dust and even some bugs in my coats. I wetsanded after every coat of paint. Before todays final coat I wetsanded the car with 2000 grit and only cut off the tops of the peel and the dust in order to leave a little more paint thickness on the car. It came out super smooth. I'll post some pics when I get her completed this weekend.
Posted By: Anonymous
Re: New Paint job on a beater - 06/23/0708:08 AM
Okay, I just gotta tell you guys this story because it is too cool. the other night, after we had rolled on coat 3, my neighbor came over to see what we were up too. Normally I would chalk this up to basic curiosity, except that my neighbor is the owner of the local Body Shop and has been a painter nearly all his life. When he saw the Probe he immediately complemented me on how awesome it looked and he asked me how I sprayed it. I then proceeded to explain the whole process to him. I was expecting him to scoff at the idea but instead he quipped that he was going to have to contact his supplier to see if they could get him some rustoleum, so he could try it. He went on to say that the oil based enamel was the type of paint they put on cars pre 1980(he's and older guy) and the process of coating and sanding is exactly how they used to do their enamel paintjobs. In fact he has a Hearse that is his personal project car and he said that coincidentally he is shooting that car with enamel "Old School" before his visit he had seen me working on the car and I thought that he was probably laughing about it. His vist confirmed the opposite and I've beeen stoked ever since knowing that a "Professional" Painter is Endorsing Charger's system
Posted By: Anonymous
Re: New Paint job on a budget thread. - 06/23/0706:59 PM
Hey guys!
I've been reading this for a couple weeks now and think i am ready to try this.
I have one question to ask, that is my car has plastic bumpers and side skirts that aren't smooth their textured so would the paint still adhere to it the same as a smooth piece or should i try to sand it smooth before hand.
I'm thinking of going Tremclad #566 with a yellow tremclad primer
Thanks in advance and all the help this thread has been
Re: New Paint job on a budget thread. - 06/23/0710:51 PM
I too am having fun playing with this whole idea... We rolled the first coat on a 76 corvette. You should see the faces of some of the $5000 paint people. They have a hard time believing that it was put on with a roller.
Just wondering about the front and back plastic bumpers...
Posted By: Anonymous
Re: New Paint job on a budget thread. - 06/24/0712:09 AM
I couldnt wait any longer to see how it looks polished so i did a quick 2000wetsand/polish/wax... 5 minutes tops for all that and i got this... in the last picture you can see some tiny scratches what would that be from? i did wetsand with 800 before the 2000 so it might just be left over 800 that wasnt sanded out.. (this was just a test to see how it cames out buy the way)
Posted By: Anonymous
Re: New Paint job on a budget thread. - 06/24/0701:14 AM
After reading every single post and viewing every attached picture/video, I'm also preparing to follow suit like so many others here. I found out about this thread from a post on MopedArmy.com. Now, personally I think it silly do work through this process on a moped (a real rattle can project), but I know this is a PERFECT project for my convertible.
I've long needed paint on my car. Since the day I got it actually. About 3 years ago I decided it was going to have to be a two-tone job - Dk Red and Black. Going through 1.5 years worth of posts and checking out paint suppliers, I was starting to get depressed thinking I wasn't going to find a sample of what I was wanting - Then I saw pics posted by 73Bugg. He used the colors I wanted, and ironically enough, on a VW too! Only difference is that I'm going the other way around - black on the bottom and red on top.
The car I'm going to be working on is a 1985 VW Cabriolet. Original color (according to the door jams, trunk, and behind all the trim/mirrors/door handles/etc) is Titan Red Metallic. It was a factory BC/CC. A previous owner got a Maaco/Scheib job ontop of that in what i assume once was a true red that has been completely beaten by neglect and weather.
Still haven't decided if I should go ahead and try to add the metal flake like 78D150CLUB has done or not... I think I'd kinda like to get it back... hard to say
anyways Cheers to every one that has helped contribute, and g'luck to everyone working on their projects!
Posted By: Anonymous
Re: New Paint job on a budget thread. - 06/24/0702:44 AM
Quote:
I couldnt wait any longer to see how it looks polished so i did a quick 2000wetsand/polish/wax... 5 minutes tops for all that and i got this... in the last picture you can see some tiny scratches what would that be from? i did wetsand with 800 before the 2000 so it might just be left over 800 that wasnt sanded out.. (this was just a test to see how it cames out buy the way)
i got the same thing on my trunk, and i asked a few friends that paint vehicles on what to do. i will know hopfully tommarow and i will post here.
Re: New Paint job on a budget thread. - 06/24/0703:46 AM
Quote: I got done painting the car and reassembled. It needs a bit of wet sanding to get out a few brush marks and also some orange peel. Then polishing time
The saphire blue is definitely better then the smurf blue. The smurf blue might work well on a large bodied car... like the size of a Satelite Sebring or maybe even a Road Runner... but on the mid-size cars the smurf blue doesn't flatter it.
But I like personally like the look of the blue in the first picture where it looked darker better then more lighted pictures ( which is what I think the Saphire looks more accurately like.
I suspect that the flag blue would have given you that darker more mysterious blue color.
One cool thing as usual... is that if you move to the flag blue... you are probably witin just two coats to get there. Gotta love this roller painting just for the opportunity it gives us to jump from one color to another over a weekend or two But the Saphire does look great...
Re: New Paint job on a budget thread. - 06/24/0704:07 AM
Quote:
I couldnt wait any longer to see how it looks polished so i did a quick 2000wetsand/polish/wax... 5 minutes tops for all that and i got this... in the last picture you can see some tiny scratches what would that be from? i did wetsand with 800 before the 2000 so it might just be left over 800 that wasnt sanded out.. (this was just a test to see how it cames out buy the way)
Tiny scratches... odd that they would not have been worked out during the polishing stage.
My thought would be to ask what brand of wax did you use ? ( It might be something as simple as trying a different brand ). For myself, I tried the Turtle Ice originally.. and the standard Turtle Wax... but in the end I fell in love with the McGuiars Pure Carnuba ( with the lovely banana scent ).
The other factor might be something as simple as the type of polishing rag you were using to apply and get the initial buffing up of the wax. I was using one of those 'Bag-O-Rags' that have something like 10 different types of cloth rags in them. I would use the more tee-shirtish type rages for applying the wax ( or a sponge - which isn't always the wisest )... but for the buffing of shining I would use the cloths that were more like pjama flannel or fleece. The key being that I was using my softer cloths for the final shining up of the wax.
At one point I got lazy and I would simply fold the flannel cloth in two, with the softer side face down on the wax - and then I would using my Porter Cable with the sponge on it to spin the flannel rag... to sort of simulate a 'bionic man' buffing the wax ( a couple hundred spins a minute compared to a manual 20 or 30 spins by hand ).
I know that some of those 'woolish' type polishing mitts or cloths can scar up the paint or wax.... and give the kind of markings you see in your pictures. If you have 'woolie' type polishing mitt.... ditch it
I haven't personally used a microfiber cloth to buff and shine - but some of the lads have reported surprisingly good results using them.
Re: New Paint job on a budget thread. - 06/24/0705:03 AM
Here is what I started with.
Posted By: Anonymous
Re: New Paint job on a budget thread. - 06/24/0705:04 AM
i REALLY hate to post this but ive been browsing the hundreds of pages of this and i cant find an answer.
i bought an orbital skilz sander/buffer tonight. i hope itll make the job a little easier. plus my girlfriend is wanting me to buffer her car. i also got the foam brushes, tray, rustoleum in a spray can for small primer areas and door jams, tape, etc. all i have left to buy is the brightside, penetrol, mineral spirits(i couldnt find 100% mineral spirits at walmart), and a roller.
my question is, is there a specific brand roller i should be getting. i see everyone saying something about a 4 inch roller. the ones i saw at walmart were 9" smooth surface foam roller. they were sold individually. i didnt think they were what i needed to i didnt buy any. do i need to go to home depot/lowes to get the right ones? if someone could give me a list of companies/product numbers thatd be great.
thanks.
Posted By: Anonymous
Re: New Paint job on a budget thread. - 06/24/0705:14 AM
Quote: my question is, is there a specific brand roller i should be getting. i see everyone saying something about a 4 inch roller. the ones i saw at walmart were 9" smooth surface foam roller. they were sold individually. i didnt think they were what i needed to i didnt buy any. do i need to go to home depot/lowes to get the right ones? if someone could give me a list of companies/product numbers thatd be great.
thanks.
those are what im using...
right = home depot left = lowes- i had to go back to lowes and buy a stupid roller handle because those rollers didnt fit on the one i got from home depot. (just so you know)
Posted By: Anonymous
Re: New Paint job on a budget thread. - 06/24/0705:18 AM
Re: New Paint job on a budget thread. - 06/24/0707:24 AM
Quote:
I couldnt wait any longer to see how it looks polished so i did a quick 2000wetsand/polish/wax... 5 minutes tops for all that and i got this... in the last picture you can see some tiny scratches what would that be from? i did wetsand with 800 before the 2000 so it might just be left over 800 that wasnt sanded out.. (this was just a test to see how it cames out buy the way)
I don't mean any disrespect but those scratches were caused by you rushing and not using the proper products.
You should never ever ever do any quick sanding. The wet sanding of our paint jobs is critical to getting a perfect finish. You should never need to use 800 on your top coat. Use 1500 at an absolute minimum (although you really would be better off using 2000) and wet sand slowly and carefully. You should also do all of your pre-detailing wet sanding in short straight strokes.
Proper detailing is very different to just polishing. Polish is designed to give a painted surface a depth of shine. After wet sanding you should be trying to remove all of the sanding marks on the paint surface. To do this you will need a cutting compound or a swirl remover. You should also follow a proper 'polishing' technique whereby you apply the product at low speed with a polisher and once it has been worked into the paint, then increasing the polishers speed and working in the product until most of the residue has been buffed away. Then you wipe away the remenants with a cloth.
The pic below shows my hardtop after two passes with Poorboy's SSR3 with a cutting pad, using my random orbital polisher.
If you take your time wet sanding and then use proper products you can get a 'perfect' finish.
Re: New Paint job on a budget thread. - 06/24/0711:09 AM
Quote:
my question is, is there a specific brand roller i should be getting. i see everyone saying something about a 4 inch roller. the ones i saw at walmart were 9" smooth surface foam roller. they were sold individually. i didnt think they were what i needed to i didnt buy any. do i need to go to home depot/lowes to get the right ones? if someone could give me a list of companies/product numbers thatd be great.
thanks.
EVERYTHING YOU REALLY DIDN'T WANT TO KNOW ABOUT 4" HIGH DENSITY FOAM ROLLERS
I don't think we could build an all inclusive list of the specific brand names underwhich the high density foam 4 inch rollers are sold under.
There may only be one or two companies that actually manufacture them... but they package them and sell them under a wide variety of brand names.
Normally the key things we do know about the high density foam rollers is that :
a ) the packaging usually mentions something about them being high density
b ) the rollers are usually made of a white foam. The crappy 4 inch rollers are almost always yellow foam or black foam. BUT there are 'cheap' or low density foam rollers out there that are white.
c ) I did notice that the real high density foam rollers almost always had a yellowy or hard plastic center core. The cheapo rollers almost always had a black plastic center core. BUT even this is not a consistent way to reliably identify the real high density compared to the cheapo or lower density sponge rollers.
d ) the packaging usually makes mention of the rollers being ideal for painting melanine surfaces
e ) the squish factor. If you pinch a high density foam roller between your fingers... there will be a significant difference in how easily you can squish it betwwen your fingers compared to the low density 'cheapo crappo' foam rollers.
f ) if you look very carefully at the surface texture of a high density foam roller - you will notice that the pores on its surface are something like a marshmallow - meaning that there are only very small air pockets in it. The cheapo crappo rollers look more like a sponge - in that the cheapo rollers have large air gaps in the surface. Naturally this is what makes the difference between 'high density' and 'crappo density'... less air pockets in the foam means that there is a higher density or amount of the foam material compared to the amount of and size of the air pockets.
I was able to find the right type of high density foam rollers at Home Depot, Reno Depot, Loews and just about any 'REAL' paint stores.
At the 'Dollar' type stores - they almost always are selling bogus or look-a-like high density foam rollers. They look like the real thing - but they actually are made of a lower density foam.
It's kind of difficult to tell the difference between the 4 inch foam rollers unless you have actually seen and pinched the two different types. It's sort of like telling someone that you are to paint your car in a coffee color... when different people have a different vision of what 'coffee color' looks like. I put two creams in my coffee for example and other folks drink it black. So my vision of coffee would be far lighter in color then someone who has only seen a black cup of coffee.
So IF you have a genuine paint store in close proximity to you.. Sherwin-Williams, Color-Your-World, Benjamin Moore etc... the odds are extremely high that they would only sell the high density foam roller.
But even in this example, you have to be certain that you are looking at a 4 inch high density roller rather than one of the 10 or 12 inch foam rollers. Normally those larger size rollers are the cheaper lower density foam - because they are designed to roll latex paints and act as a substitute for the more familiar 'fuzzy' type roller.
Once you do stumble on at least ona genuine high density foam roller you will then be able to easily detect the difference with the lower density 'crappy' foam rollers that are out there.
And just to confirm why it is the high density foam rollers that are recommended... it is because the cheapo foam rollers have larger air pockets in them. If you are using a cheapo foam roller, those larger air pockets in the foam will transfer larger air bubbles to the surfaces you are painting ( and that is a bad thing ). The high density foam have smaller and less air pockets - and accordingly they transfer less and smaller air bubbles to the surface you are painting.
Hope this generic synopsis helps you find the 'right' high density foam roller.
The first one... with the 4" rollers look OK... but I would not use the 6" rollers in the second eBay listing.
The 6" high density and the 10 and 12 inch high density don't do this paint rolling job as well. I tried the larger sizes and returned back to the 4 inch.
The 4 inch foam rollers are better suited at delivering a more balanced and equal amount of paint across their entire rolling surface. The larger size foam rollers don't load up the paint or apply it as evenly. Also the 4 inch roller has better manoeverability around a car body then the largers size high density foam rollers.
Re: New Paint job on a budget thread. - 06/24/0703:39 PM
Quote :
" my question is, is there a specific brand roller i should be getting. i see everyone saying something about a 4 inch roller. the ones i saw at walmart were 9" smooth surface foam roller. they were sold individually. i didnt think they were what i needed to i didnt buy any. do i need to go to home depot/lowes to get the right ones? if someone could give me a list of companies/product numbers thatd be great. "
After spending a bit of searching at Walmart, all the rollers here in Spokane's store were crap. I ended up going to Home Depot and got these. They worked great...
Re: New Paint job on a budget thread. - 06/24/0703:45 PM
Quote:
Is that Brightside or Rustoleum?
This is the Rustoleum you buy at walmart. $7.65 a can. So far, it isn't to hard to put on. I also have a few dust bunnies to work out, but overall, as long as I can get it to harden up, I'll be doing it on a few more toys...
A few posts back, someone said that doing it this way gives you a "4 foot" car paint job. Heck, coat 2 did this... I think that if it buffs out and wet sands like everyone says, I'll get a "good" paint job out of all of this for $30.
I think the funnest thing in all this is the fact that it is a vette and I'm rollin' it on... The looks on people's faces.
Re: New Paint job on a budget thread. - 06/24/0703:54 PM
Here is another picture of coat one. Notice the bubbles? I had to "work" them out. It is kinda an art to all this...
Posted By: Anonymous
Re: New Paint job on a budget thread. - 06/24/0705:20 PM
Quote:
I don't mean any disrespect but those scratches were caused by you rushing and not using the proper products.
You should never ever ever do any quick sanding. The wet sanding of our paint jobs is critical to getting a perfect finish. You should never need to use 800 on your top coat. Use 1500 at an absolute minimum (although you really would be better off using 2000) and wet sand slowly and carefully. You should also do all of your pre-detailing wet sanding in short straight strokes.
Proper detailing is very different to just polishing. Polish is designed to give a painted surface a depth of shine. After wet sanding you should be trying to remove all of the sanding marks on the paint surface. To do this you will need a cutting compound or a swirl remover. You should also follow a proper 'polishing' technique whereby you apply the product at low speed with a polisher and once it has been worked into the paint, then increasing the polishers speed and working in the product until most of the residue has been buffed away. Then you wipe away the remenants with a cloth.
The pic below shows my hardtop after two passes with Poorboy's SSR3 with a cutting pad, using my random orbital polisher.
If you take your time wet sanding and then use proper products you can get a 'perfect' finish.
Just the man I've been itching to ask. Aussie Driver, can I see a picture of your random orbital?
I just finished Interlux Brightside Black a few days ago. I am researching which machine to purchase. A detailer from a forum said I should buy a rotary polisher, they said they don't think a random orbital can remove all the wetsanding scratches. But I am curious since you have already experienced this perfectly with a random orbital + SSR2.5.
Please let me know what you can suggest or recommend.
Re: New Paint job on a budget thread. - 06/24/0706:03 PM
Quote:
Just the man I've been itching to ask. Aussie Driver, can I see a picture of your random orbital?
I just finished Interlux Brightside Black a few days ago. I am researching which machine to purchase. A detailer from a forum said I should buy a rotary polisher, they said they don't think a random orbital can remove all the wetsanding scratches. But I am curious since you have already experienced this perfectly with a random orbital + SSR2.5.
Please let me know what you can suggest or recommend.
I think the difference your other guy was referring to is a polisher vs. a buffer. You can get the random orbital buffers anywhere for about $25, but they don't do nearly the same job as a nice variable speed random orbital polisher that'll cost you $125.
You can get vairable speed rotary polishers for less than $125, but they are not random orbital so you have to be REALLY careful not to screw up your paint.
Although, I won't be surprised if Aussie was able to use a $25 buffer to get his gloss because he is THE MAN.
Re: New Paint job on a budget thread. - 06/24/0706:17 PM
Quote:
Quote:
Is that Brightside or Rustoleum?
This is the Rustoleum you buy at walmart. $7.65 a can. So far, it isn't to hard to put on. I also have a few dust bunnies to work out, but overall, as long as I can get it to harden up, I'll be doing it on a few more toys...
That would have been the absolutely ideal body to have done the Brightside on... since the Vette body is so similar to the fiberglass and gel coat used on boats ( for which Brightside is normally applied to ).
It will be interesting to see how the Rustoleum holds up on the Vette body. All I can recall from my past is that bodywork and painting on Vettes usually required slightly different prepping and painting than regular cars at the Pro paint shops. And usually the pro-paints charge more to do them.... and half of the shops wouldn't even try to do them.
If you do encounter adhesion problems with the Rustoleum/Tremclad... at least you will know that you can safely fall back to the Brightside.
.
Posted By: Anonymous
Re: New Paint job on a budget thread. - 06/24/0708:24 PM
Well, looks like I have to hold up on the paint once again. I went to lowes yesterday to get some tarps to line the garage with. And of course what has to happen? Some ^%*((^#&#)% hits my car... I just wished I was there when he did it.
I attempted to bang out as much as I could, but its never going to be straight as an arrow. So it looks like i'm looking for a driver side fender now. =/
I hate dumb drivers... Can anyone drive like a decent human being in NY? NO!
Posted By: Anonymous
Re: New Paint job on a budget thread. - 06/24/0708:26 PM
marq, steve c., roadster-- thanks for the input. marq, your explanation really helped me out. theres a sherwin williams store close to the boat store where ill have to pick up the paint. ill just stop by there and buy rollers.
Posted By: Anonymous
Re: New Paint job on a budget thread. - 06/24/0709:07 PM
Quote:
Just the man I've been itching to ask. Aussie Driver, can I see a picture of your random orbital?
I just finished Interlux Brightside Black a few days ago. I am researching which machine to purchase. A detailer from a forum said I should buy a rotary polisher, they said they don't think a random orbital can remove all the wetsanding scratches. But I am curious since you have already experienced this perfectly with a random orbital + SSR2.5.
Please let me know what you can suggest or recommend.
There are two types of polisher/buffer that you can purchase. A rotary (as suggested to you from the detailing forum) will do a brilliant job in getting the paint to look like a mirror. But, in inexperienced hands they are potentially dangerous to the paint. I have a rotary and I will only use it occasionally on flat surfaces. I have burned straight through a clear coat, the color coat and the primer on one panel that I was learning on. It was dead easy to wreck.
I much prefer to use my random orbital polisher(s). The ones that I have are a similar spec to a PC 7424 and they will do just as good a job as a rotary. They just take a lot longer to get there.
You can see the polisher in the shot above. It is very similar to a PC 7427 but it is made in Australia. This one is an Ozito brand and it is a copy of my other random orbital polisher which is a Ryobi (The Ryobi is blue and the Ozito is grey and that is about the only difference between them).
Tha pads that you can see in the picture are Wolfgang buffing pads. I'm pretty sure that the same pads are available in the US marketed under the Lake County brand. The yellow pad is a cutting pad, and the orange pad is a light cutting pad. The brown polish is Poorboy's SSR3 (cutting compound) and the purple polish is SSR2.5. That shot was taken after the buffing of the hardtop that is further up the page. It does show how much pick-up there is from the cutting compound/cutting pad.
As to which polisher you should buy, I would recommend the PC 7424 and the Lake County buffing pads. They are expensive but they are up to the job and they also give you the opportunity to re-coup some of your costs. I do a bit of detailing on the side and that only started because of my paintjob on a budget. I have paid for my two random orbital polishers and about half of my products just from detailing other peoples cars.
Once they see the shots of what I have done with a roller paintjob, they get a little misty-eyed thinking about how good their "real" paintjob could look after detailing. It's an easy sell!!
Posted By: Anonymous
Re: New Paint job on a budget thread. - 06/24/0711:09 PM
Quote: 2.) Windshield or other windows' rubber trim: If not removing the glass and surround, for spraying I've heard of wedging a cord or rope underneath the rubber trim to keep it way from the metal surface. When spraying, this allows some spray to shoot underneath the rubber trim -- so as not to create a hard paint line.
I just seen this post.. (Yeah, I'm like a week late) dose anyone care to enlighten me on how to do this? - Ive been just taping off my trim and Ive had slight lines that I figured I'd just pinstrip to blend in next to the trim.
Quote: I don't mean any disrespect but those scratches were caused by you rushing and not using the proper products.
You should never ever ever do any quick sanding. The wet sanding of our paint jobs is critical to getting a perfect finish. You should never need to use 800 on your top coat. Use 1500 at an absolute minimum (although you really would be better off using 2000) and wet sand slowly and carefully. You should also do all of your pre-detailing wet sanding in short straight strokes.
Proper detailing is very different to just polishing. Polish is designed to give a painted surface a depth of shine. After wet sanding you should be trying to remove all of the sanding marks on the paint surface. To do this you will need a cutting compound or a swirl remover. You should also follow a proper 'polishing' technique whereby you apply the product at low speed with a polisher and once it has been worked into the paint, then increasing the polishers speed and working in the product until most of the residue has been buffed away. Then you wipe away the remenants with a cloth.
The pic below shows my hardtop after two passes with Poorboy's SSR3 with a cutting pad, using my random orbital polisher.
If you take your time wet sanding and then use proper products you can get a 'perfect' finish.
Like I said I did it really quick.. didnt mean to hit it with 800 before 2000 I was dying to mess with polishing it and see how rusto polishes up first hand.. I was going to put 1 or 2 more coats on it but it had quite a base and figured it was thick enough so I tried to just hit it with 2000 from 800.. as for the polish I just used some old 3M Machine Polish I had laying around but yeah I'm definitely going to try and find some SSR3.
Posted By: Anonymous
Re: New Paint job on a budget thread. - 06/25/0712:06 AM
Well I started on my practice piece and I must say that #566 is one bright green. The first coat i put on had a tiny bit of orange peel but not enuf to worry about till the second coat when I wet sand it,
Any comments on the textured plastic pieces yet? I haven't seen any that have it yet other wise I wouldn't ask.
Re: New Paint job on a budget thread. - 06/25/0701:11 AM
If you mean Tremclad 566, yes it is a bright green. Very close match to SubLime, from my experience. If you're close to London, and need any extra, pm me. I bought a quart and never used it, too bright for what I wanted.
Posted By: Anonymous
Re: New Paint job on a budget thread. - 06/25/0701:12 AM
You probably just sold me on getting a random orbital then. If random orbital's can achieve what you did after wetsanding Interlux Brightside, then there is no reason why I cannot get the same results...
I am using the same paint as you are. So I should get similar results if I mimic what you did.
Thanks Aussie Driver!
Quote:
Quote:
Just the man I've been itching to ask. Aussie Driver, can I see a picture of your random orbital?
I just finished Interlux Brightside Black a few days ago. I am researching which machine to purchase. A detailer from a forum said I should buy a rotary polisher, they said they don't think a random orbital can remove all the wetsanding scratches. But I am curious since you have already experienced this perfectly with a random orbital + SSR2.5.
Please let me know what you can suggest or recommend.
There are two types of polisher/buffer that you can purchase. A rotary (as suggested to you from the detailing forum) will do a brilliant job in getting the paint to look like a mirror. But, in inexperienced hands they are potentially dangerous to the paint. I have a rotary and I will only use it occasionally on flat surfaces. I have burned straight through a clear coat, the color coat and the primer on one panel that I was learning on. It was dead easy to wreck.
I much prefer to use my random orbital polisher(s). The ones that I have are a similar spec to a PC 7424 and they will do just as good a job as a rotary. They just take a lot longer to get there.
You can see the polisher in the shot above. It is very similar to a PC 7427 but it is made in Australia. This one is an Ozito brand and it is a copy of my other random orbital polisher which is a Ryobi (The Ryobi is blue and the Ozito is grey and that is about the only difference between them).
Tha pads that you can see in the picture are Wolfgang buffing pads. I'm pretty sure that the same pads are available in the US marketed under the Lake County brand. The yellow pad is a cutting pad, and the orange pad is a light cutting pad. The brown polish is Poorboy's SSR3 (cutting compound) and the purple polish is SSR2.5. That shot was taken after the buffing of the hardtop that is further up the page. It does show how much pick-up there is from the cutting compound/cutting pad.
As to which polisher you should buy, I would recommend the PC 7424 and the Lake County buffing pads. They are expensive but they are up to the job and they also give you the opportunity to re-coup some of your costs. I do a bit of detailing on the side and that only started because of my paintjob on a budget. I have paid for my two random orbital polishers and about half of my products just from detailing other peoples cars.
Once they see the shots of what I have done with a roller paintjob, they get a little misty-eyed thinking about how good their "real" paintjob could look after detailing. It's an easy sell!!
Re: New Paint job on a budget thread. - 06/25/0701:23 AM
Quote:
That would have been the absolutely ideal body to have done the Brightside on... since the Vette body is so similar to the fiberglass and gel coat used on boats ( for which Brightside is normally applied to ).
It will be interesting to see how the Rustoleum holds up on the Vette body. All I can recall from my past is that bodywork and painting on Vettes usually required slightly different prepping and painting than regular cars at the Pro paint shops. And usually the pro-paints charge more to do them.... and half of the shops wouldn't even try to do them.
If you do encounter adhesion problems with the Rustoleum/Tremclad... at least you will know that you can safely fall back to the Brightside.
.
This vette was a huge basket case befor I got it. They used bondo on a bunch of places and already painted it with whoknows what. They re-sanded it (sort of)and all the fiberglass was covered and the gelcoat was covered with a primer and paint. Not sure if the Brightside would have had the chance to even touch the car to stick to it in the first place. I'm only slapping this together for a driver until I get the 69 Fastback or the 29 roadster on the road. (why waste the money on paint when it is needed elsewhere)
Re: New Paint job on a budget thread. - 06/25/0704:27 AM
Amen Roadster!!! Do a paint job that will look good enough to fool all but the most discrimating eye on it and drive it!!! Vette or not it was meant to be driven!! And truth be told you are probably using a paint very similar to the OEM paint that was on the car. Roll on Brother!!
Re: New Paint job on a budget thread. - 06/25/0705:35 AM
Quote: Amen Roadster!!! Do a paint job that will look good enough to fool all but the most discrimating eye on it and drive it!!! Vette or not it was meant to be driven!! And truth be told you are probably using a paint very similar to the OEM paint that was on the car. Roll on Brother!!
Gerbs
Hell, from where this beast started, 2 coats with a few dust bunnies is way more than anyone would have guessed it would get 2 years ago. When I say "backyard vette", I really mean backyard vette. Here is a picture of the back end almost ripped off. From the ugly brown/brown duck to a black/white swan.
I decided to wait another day to sand it. The paint was pretty hard, but just in case.
Few questions: With putting a bunch of coats on it, does it help with all the sanding / buffing? Do you worry about going through the top coat, or worry about the paint as a whole?
Re: New Paint job on a budget thread. - 06/25/0707:43 AM
Quote:
Quote:
I couldnt wait any longer to see how it looks polished so i did a quick 2000wetsand/polish/wax... 5 minutes tops for all that and i got this... in the last picture you can see some tiny scratches what would that be from? i did wetsand with 800 before the 2000 so it might just be left over 800 that wasnt sanded out.. (this was just a test to see how it cames out buy the way)
Tiny scratches... odd that they would not have been worked out during the polishing stage.
My thought would be to ask what brand of wax did you use ? ( It might be something as simple as trying a different brand ). For myself, I tried the Turtle Ice originally.. and the standard Turtle Wax... but in the end I fell in love with the McGuiars Pure Carnuba ( with the lovely banana scent ).
The other factor might be something as simple as the type of polishing rag you were using to apply and get the initial buffing up of the wax. I was using one of those 'Bag-O-Rags' that have something like 10 different types of cloth rags in them. I would use the more tee-shirtish type rages for applying the wax ( or a sponge - which isn't always the wisest )... but for the buffing of shining I would use the cloths that were more like pjama flannel or fleece. The key being that I was using my softer cloths for the final shining up of the wax.
At one point I got lazy and I would simply fold the flannel cloth in two, with the softer side face down on the wax - and then I would using my Porter Cable with the sponge on it to spin the flannel rag... to sort of simulate a 'bionic man' buffing the wax ( a couple hundred spins a minute compared to a manual 20 or 30 spins by hand ).
I know that some of those 'woolish' type polishing mitts or cloths can scar up the paint or wax.... and give the kind of markings you see in your pictures. If you have 'woolie' type polishing mitt.... ditch it
I haven't personally used a microfiber cloth to buff and shine - but some of the lads have reported surprisingly good results using them.
.
as aussie says a few posts up, you can't just arbitrarily jump from 800grit to 2000grit and expect it to work. you have to take all the steps along the way to level out the scratches from the grit before (i wouldn't start with 800 for a final polish anyway. start with 1000 or 1200). 2000 grit will have a hard time taking out sanding marks from anything gritter than 1500 grit. if you go from 800 to 2000 straight away you're likely just knocking the edge off the scratches from 800 grit instead of leveling them out. so instead of a smooth surface, you get scratches with dulled edges.
if you have to start at 800, then to 800 -> 1000 -> 1500 -> 2000.
Re: New Paint job on a budget thread. - 06/25/0708:42 AM
Quote: Well I started on my practice piece and I must say that #566 is one bright green. The first coat i put on had a tiny bit of orange peel but not enuf to worry about till the second coat when I wet sand it
Hey JP, can we get a photo of that color by chance? I don't see 566 on the tremclad/rusto website but I do see Keylime.. If its truly a stand-in for Sublime Green I'd be able to potentially skip the mixing stage if I went that color for my car.. still undecided..
Re: New Paint job on a budget thread. - 06/25/0711:26 AM
Quote:
Few questions: With putting a bunch of coats on it, does it help with all the sanding / buffing?
Do you worry about going through the top coat, or worry about the paint as a whole?
-Roadster
The wetsanding, polishing and waxing stages are for the purposes of getting the maximum smooth surface. The smoother the surface... the shinier and glossier the paint job. Or another way to look at it... the better the wetsanding and polishing... the closer the paint job will come to looking like a 'genuine' paint job compared to a 20 footer. So yes... those stages are essential if you want to achieve the best looking end results possible.
With regards to the second question... it might be best to use different terminology. Normally... when someone thinks of the 'top coat'... they may think of the overall last skin of paint that was applied. It is possible that your final wetsanding, polishing and waxing may occur on that one final outer skin of paint... but it also may not... The final outer layer of paint for polishing and waxing 'may' consist of the exposed surfaces of one or two lower layers. Naturally the concept is that if multiple layers are exposed during the final wetsanding and polishing, the key is that it hopefully works out that they all feather together with a consistent and uniform color across each of those layers.
Whereas it might be better to think of the 'top coat' as possibly consisting of the top two or three coats.... and some of the wetsanding may in fact consist of some of each of the lower layers being on the 'top'.
Each of the layers of paint that are being applied are trying to give you two things :
a ) coverage of the chosen color on the whole body that is consistent in appearance uniformly on the whole body...
b ) a sufficient build up of paint skins so that you can wetsand the outer layers to achieve the smoothest possible outer surface WITHOUT causing any color variations by exposing layers that may have a slight variation in the overall color.
In that sense it is always best to add 'one more coat' of paint - just to guarantee that you have a sufficient paint build up to give you lots of room to work with when doing the final wet sand.
The key thing about the wetsanding between ever 2nd layer is that you are trying to achieve the smoothest possible surface for the next layer of paint to be applied to ( or in the case of the final wetsanding, for the final polishing and waxing ) to maximize the end shine and gloss.
Re: New Paint job on a budget thread. - 06/25/0701:53 PM
Quote:
The key thing about the wetsanding between ever 2nd layer is that you are trying to achieve the smoothest possible surface for the next layer of paint to be applied to ( or in the case of the final wetsanding, for the final polishing and waxing ) to maximize the end shine and gloss.
.
Marq, thanks for the answer. After going out there this morning, I really think this paint will work. It is as hard as the original stuff on my truck. I'll make sure to do the steps. Everyone is shocked that it is a roller...
Re: New Paint job on a budget thread. - 06/25/0702:50 PM
Quote:
Quote:
That would have been the absolutely ideal body to have done the Brightside on... since the Vette body is so similar to the fiberglass and gel coat used on boats ( for which Brightside is normally applied to ).
It will be interesting to see how the Rustoleum holds up on the Vette body. All I can recall from my past is that bodywork and painting on Vettes usually required slightly different prepping and painting than regular cars at the Pro paint shops. And usually the pro-paints charge more to do them.... and half of the shops wouldn't even try to do them.
If you do encounter adhesion problems with the Rustoleum/Tremclad... at least you will know that you can safely fall back to the Brightside.
.
This vette was a huge basket case befor I got it. They used bondo on a bunch of places and already painted it with whoknows what. They re-sanded it (sort of)and all the fiberglass was covered and the gelcoat was covered with a primer and paint. Not sure if the Brightside would have had the chance to even touch the car to stick to it in the first place. I'm only slapping this together for a driver until I get the 69 Fastback or the 29 roadster on the road. (why waste the money on paint when it is needed elsewhere)
I'm going out to sand coat #2 now...
- Roadster
The front fenders on my 69 charger were fiberglass, i had no problems at all, i even hit a deer on a country twisty road at about 50mi/hr, and i watched as the fender popped up about 10" and back down, paint was intact, i had to straighten the front valance, and had to actually remove the bumper bolts to get the deer a$$ hairs out from under them!!!!! So after seeing that, i'm sure the paint would hold up perfectly on a vette, plus there's been lots of guys painting fiberglass buggies ect....with no issues.
Re: New Paint job on a budget thread. - 06/25/0703:48 PM
Quote:
i'm sure the Rustoleum paint would hold up perfectly on a Vette, plus there's been lots of guys painting fiberglass buggies ect....with no issues.
You are absolutely correct... I forgot about our buggy buddies that have done their roller on an all glass body.
Actually, once I saw the extent or the body condition with its primers and varying colors, I could see that it might not have mattered whether the Tremclad/Rustoleum or Brightside would have probably worked out equally well.
The hood on my McLaren is all fiberglass... and originally it was done in Tremclad ( until I switched later to the Brightside ). There have been no adhesion problems with that initial Tremclad layer.
.
Posted By: Anonymous
Re: New Paint job on a budget thread. - 06/25/0704:03 PM
Quote:
Quote: 2.) Windshield or other windows' rubber trim: If not removing the glass and surround, for spraying I've heard of wedging a cord or rope underneath the rubber trim to keep it way from the metal surface. When spraying, this allows some spray to shoot underneath the rubber trim -- so as not to create a hard paint line.
I just seen this post.. (Yeah, I'm like a week late) dose anyone care to enlighten me on how to do this? - Ive been just taping off my trim and Ive had slight lines that I figured I'd just pinstrip to blend in next to the trim.
Go back a couple pages. Blue195 answered my questions -- on June 21 I think.
On this one it's basically "Yes do the same rope trick". If the paint is thinned enough it will spread out under the trim that is held away from the metal surface by the rope or cord.
Posted By: Anonymous
Re: New Paint job on a budget thread. - 06/25/0709:50 PM
Quote:
Quote: Well I started on my practice piece and I must say that #566 is one bright green. The first coat i put on had a tiny bit of orange peel but not enuf to worry about till the second coat when I wet sand it
Hey JP, can we get a photo of that color by chance? I don't see 566 on the tremclad/rusto website but I do see Keylime.. If its truly a stand-in for Sublime Green I'd be able to potentially skip the mixing stage if I went that color for my car.. still undecided..
Thanks,
Raj
seems i left my camera in the truck to long and the batteries exploded so I'm waiting for my replacement to come in, by that time I'll have it finished and you will be able to see it with polish on it.
I think i know why noone has commented on my question on the textured plastic pieces, the paint will make it smooth by the 3rd coat, so would i be better off putting a thick coat on for the first 2 or just keep them thin?
Re: New Paint job on a budget thread. - 06/26/0702:21 AM
Just an observation, I finished the paint on my truck late last Jan, I noticed the paint on the top on the hood, fenders etc was looking a liitle drab, a quick polish with a paste wax brought all the nice shine right back. IMHO this paint will hold up great Plus job was easy with the Porter-Cable 7424
Re: New Paint job on a budget thread. - 06/26/0702:43 AM
Quote: Just an observation, I finished the paint on my truck late last Jan, I noticed the paint on the top on the hood, fenders etc was looking a liitle drab, a quick polish with a paste wax brought all the nice shine right back. IMHO this paint will hold up great Plus job was easy with the Porter-Cable 7424
That is a confirmation of what I reported a week or so ago. And the fix was the very same... a quick pass of the Porter-Cable 7424 and some carnuba wax and everything was right back to where it was when freshly painted...
And the best part is that the 7424 makes things almost 'fun'... I really can't imagine how I got along with 4 cars without it.
.
Posted By: Anonymous
Re: New Paint job on a budget thread. - 06/26/0704:46 AM
Greetings everyone
I'm a noob here, read through the entire original thread of this, and I'm impressed and will be joining the roller paint club with this:
1994 Jeep Cherokee, with lots of peeling clear and some rattle can repairs that came out pretty bad.
I'd like to go bright orange on it, and I feel like I'm pretty equipped to do this except for one thing. I don't have a decent buffer/polisher so I was wondering what you guys reccomend. In keeping with the theme, I'd like to get a cheap one. Any reccomendations would be much appreciated.
Re: New Paint job on a budget thread. - 06/26/0705:13 AM
Ok, holy crap, I now have spaghetti arms from 4 1/2 hours of sanding. I tried to go over the whole car and only got a haff rough sand with 800 on most of it. I know I could do more, but how much am I supposed to take off with the 800? I think I could spend another 8-10 more hours on the thing, only to re-do it again in 2 more coats!
I think I'll make sure to thin it out a bit more next time to make sure the hint of any orange peel is gone.
I can't even think how little the 1600 grit would do. I'll be out there tomorrow at 9 am washing it, finish the bad spots, then go for coat #3 and #4 by dark.
Re: New Paint job on a budget thread. - 06/26/0707:07 AM
Quote: Ok, holy crap, I now have spaghetti arms from 4 1/2 hours of sanding. I tried to go over the whole car and only got a haff rough sand with 800 on most of it. I know I could do more, but how much am I supposed to take off with the 800? I think I could spend another 8-10 more hours on the thing, only to re-do it again in 2 more coats!
I think I'll make sure to thin it out a bit more next time to make sure the hint of any orange peel is gone.
I can't even think how little the 1600 grit would do. I'll be out there tomorrow at 9 am washing it, finish the bad spots, then go for coat #3 and #4 by dark.
- Roadster
you take off as much as you need to until the orange peel is gone. you can frequently wipe off a spot dry where you're sanding. if it is uniformly matte finish, then you've leveled the paint. if it's matte with shiny spots/dots, then you've not leveled the paint. you're essentially trying to abrade the peaks down to the same level as the valleys. if you need to use 600 grit or something to cut faster, that's fine, as long as it's not your final coat. check the surface frequently and only continue sanding until the surface is uniform, when you reach that point, move on.
if you need to use 600 or 800 grit on your final coat, in all likelihood you will sand through the last coat and into the coat under it before it's perfectly smooth.
personally, i think you could lay it on fairly thickly until the 3rd to last coat. let that set and then sand it smooth with a fairly gritty paper (600 -> 800 -> 1000) then thin the paint more and do your final 2 or 3 coats and let it flow out. then you can wetsand that last step with 1500 or 2000 grit. because in reality, you shouldn't be seeing the 3rd or 4th coat down and spending a ton of time smoothing out the base coats doesn't make that much sense to me. you'd get the same effect as laying it on heavy and sanding at the 80% point of painting.
Re: New Paint job on a budget thread. - 06/26/0704:17 PM
Quote:
The front fenders on my 69 charger were fiberglass, i had no problems at all, i even hit a deer on a country twisty road at about 50mi/hr, and i watched as the fender popped up about 10" and back down, paint was intact, i had to straighten the front valance, and had to actually remove the bumper bolts to get the deer a$$ hairs out from under them!!!!! So after seeing that, i'm sure the paint would hold up perfectly on a vette, plus there's been lots of guys painting fiberglass buggies ect....with no issues.
i'm painting on fiberglass as well with good ole rustoleum. spent a lot fo time sanding this weekend and finaly last night about 10pm I got around to painting my first coat and jsut came in from painting my 2nd coat and so far so good....other than crappy lighting in my garage. I uploadec pictures of before, sanded, coat1 and coat 2 on my webshots page.
Re: New Paint job on a budget thread. - 06/26/0707:43 PM
Quote:
I don't mean any disrespect but those scratches were caused by you rushing and not using the proper products.
You should never ever ever do any quick sanding. The wet sanding of our paint jobs is critical to getting a perfect finish. You should never need to use 800 on your top coat. Use 1500 at an absolute minimum (although you really would be better off using 2000) and wet sand slowly and carefully. You should also do all of your pre-detailing wet sanding in short straight strokes.
Proper detailing is very different to just polishing. Polish is designed to give a painted surface a depth of shine. After wet sanding you should be trying to remove all of the sanding marks on the paint surface. To do this you will need a cutting compound or a swirl remover. You should also follow a proper 'polishing' technique whereby you apply the product at low speed with a polisher and once it has been worked into the paint, then increasing the polishers speed and working in the product until most of the residue has been buffed away. Then you wipe away the remenants with a cloth.
you can actually sand the surface with grits lower than 1500, depending on the compound you use. I have 1Z intensive paste, which actually removes sanding marks as low as 1200 grit. I sanded an area starting with 1000 grit, and worked my way up to 1500 grit, and the intensive paste worked the scratches off no problem. Compounds are normally used with rotary polishers to break down the abrasives in the product, but the instructions on my bottle of intensive paste said it was usable by hand, so I used the product with my porter cable with a yellow cutting pad, and the results came out great--no visible scratch marks after the product was worked in and broken down.
BTW---if anyone wants a really good rotary polisher for a cheap price, Harbor Freight currently has one of their polishers on sale for $29.99:
I have one of these, and just bought another one because it's such a great tool. I actually learned to polish cars with this rotary, before purchasing/learning to use a Porter Cable 7336 heh... That's kind of bass backwards though: I would recommend any polishing newcomers to learn to polish with a PC first, since it is a polisher that is very easy to learn/master, and cannot burn through paint like a rotary can.
Here are some of the products I've used on my car so far:
following 1Z intensive paste with Optimum polish (with a white LC CCS pad, not shown) results in a great shine on Brightside black. I'd post some updated pics of my car but I noticed the bandwidth on my Godaddy account was getting sucked up by this website heh. Maybe when I'm just about done, I'll post more pics.
Re: New Paint job on a budget thread. - 06/26/0708:09 PM
For some of the Canadian members ... The best price I've seen is the Canadian Tire Simoniz 7-in. Sander & Waxer, at $99.00, with the 'Porter Cable'polishers going for $199.99 & $219.99
Re: New Paint job on a budget thread. - 06/26/0709:53 PM
Just came in from the garage. Spent a few more hours sanding, and just finished the 3rd coat. The first section was a bit too thick. I thinned it down a bit more and the rest went really good.
I found out that if it is taking it a while to bring out the bubbles, thin it down a bit more. It really helps and it seemed to let me work the bigger sections longer.
Re: New Paint job on a budget thread. - 06/26/0711:05 PM
Quote: Marq or 69 DartGT. Any idea on how long it took to repolish the paint?
I am not sure where the 'repolish' is beginning from in your question. I have had two 'repolishing' points in the life of my paint job.
The initial repolish occured when all the painting was finished and the final wetsanding was done to that final coat of paint. I then went with my Porter Cable 7424 and used rubbing compound. I believe I worked each panel about 1 hour each. I really wanted to go for the maximum smoothness that I could achieve. I probably took about 15 minutes per panel when applying and buffing out the Carnuba wax that went on.
The second repolishing happened about 10 months after the car was initially finished. The car had sat outside all winter, exposed to the cold, the ice and the wet. I pulled out the trusty Porter Cable 7424 and used it to apply carnuba wax. I worked it for about 10 minutes per panel. Once the wax hazed I just buffed it out. Technically this was more of a 'waxing' stage then a polishiing stage ( but some people don't differentiate between the meaning of polishing and waxing ).
Re: New Paint job on a budget thread. - 06/26/0711:16 PM
Quote: For some of the Canadian members ... The best price I've seen is the Canadian Tire Simoniz 7-in. Sander & Waxer, at $99.00, with the 'Porter Cable'polishers going for $199.99 & $219.99
Has a lot more power than I'll ever use ...
You are in Toronto. It was the Toronto Corvette owners that tipped me off about the REFURBED Porter Cable random orbital sanders that could be picked up for $125 at the 'repair depot' for warantee repairs of Black & Decker/Dewalt and Porter Cable products. Based on the info from the Toronto Vette owners.. I found one of the Porter Cable repair depots here in Ottawa on Laperriere Street. I picked on up for $125 and it came with a one year full replacement warranty.
So the hint we gave people a fair while back was to try to locate the nearest service and repair warranty place to their location and see if they can get their hands on one of these 'refurbed' unit.
You can locate the nearest 'warranty and repair' depot for servicing the Porter & Cable polishers by going to the P & C web site and look around it for where the nearest repair and warranty depot is to your location. Possibly you could cheat by opening up one of the P & C boxes at a regular retail store like Home Depot and checking the warranty and servicing information they provide on the pamphlet in the box
It was worth also noting that not all units returned to the refurb shop are 'used' or 'abused'. The chap at the location in Ottawa was telling me that most of his units were simply returned from the retailers because parts had been taken from the boxes - and so they send them back to these guys. They simply bag the units and add the missing parts - and put them out for sale at their repair depot.
Since you are in Toronto you definitely have access to the refurbs down there. The only problem might be that all the Vette owners in Toronto are also snapping up the refurb units down there
Re: New Paint job on a budget thread. - 06/26/0711:32 PM
I have been watching closely the logs on the web server where I posted the pictures of the McLaren. It is AMAZING how many other web sites and message forums are linking to those pictures. One nice thing is that the server logs tell me exactly where the linking to my pictures are coming from.
So I have been following some of those hyperlinks back to where the pictures were inserted into other discussions about the roller painting method.
What I discovered is that there are literally hundreds of other discussions going on about the roller painting method. But what I ENJOYED the most was seeing all these other vehicles that are being roller painted and blogged on those other web sites.
More Mustangs, trucks, sports cars, Mopars, Fiats, British sportscars etc... the number of works in progress and finished projects is truly amazing.
This message thread could easily quadruple in size if all those other bloggers pop in and post up their pictures here...
So even though we have a farily large number of works in progress and finished here.. we may only be the tip of the iceberg of 'roller painters anonymous'
This 'roller' thing may be spreading even faster than we might have originally thought...
I can't wait til some of them come home to roost here and share their pics... and folks just might be amazed 'what' are being painted out there...
Re: New Paint job on a budget thread. - 06/27/0702:34 AM
Quote:
So even though we have a farily large number of works in progress and finished here.. we may only be the tip of the iceberg of 'roller painters anonymous'
This 'roller' thing may be spreading even faster than we might have originally thought...
Its really amazing to think of how far this has gone. This has washed over the internet to the point that in a year or so your average Joe might not look at you cross-eyed when you say you are going to roller-paint your car.
And I think all of us originally had that "WHHAATT??" attitude when we heard about it.
One other thing that is also amazing is the "brand-neutral" attitude of everyone on these threads for 300+ pages. There's VERY few places that enthusiasts of any make and model can come together, show their ride, and not receive any bashing because they have a brand X or brand Y vehicle.
We all share a common goal and a common bond, regardless of the ride (or even refrigerator, going way back) that we are painting.
On a side note - my 70+ year old father-in-law (who lives in the boonies of northern Michigan) last week declared he was going to start roller painting stuff in general with "Boat Paint". "I heard you can just roll it on and it levels out and it dries hard, and looks like it was sprayed".
Re: New Paint job on a budget thread. - 06/27/0705:21 AM
I just got in from the garage and I kid you not, I had 8 different groups of people stop by just to see the rolled paint on the vette. It was worth all $12 I got into it so far...
At work yesterday, I had to keep showing the co-workers the pictures on the computer. One of them just painted his son's Jeep and had $380 into the basic paint alone. He had to stop by yesterday to see this process. (I think I got him hooked for next time.)
Steve C, I was just on the HotRod.com web site and they had a non-roller paint guy complaining.
Quote from a post:
Quote from the non-roller: --------------------------------------------------------------------------------
"Think so? If you're ever in the L.A. area, stop by the shop and take a look. You'd be surprised how many don't believe it was roller painted, and believe me this was an overly rushed job. It could be done much better.
Naysayers, please re-read the feature. Never once do we assert that this is a show-winning paint job, or one that looks like basecoat/clear. At best, it looks like 60's-70's era basic enamel. (But, I once paid $1500.00 buck for a professional acrylic enamel paint job.) Is it perfect? Not even close. Have I seen worse paint jobs that cost 40 times as much? Absolutely.
Why did we use a $200.00 Falcon? Because there were no plans to ever make the car worthy of a 2-$3000+ paint job (Sound like any of your projects?). Its tentative future was simply as a fun, economical little driver with minimal investment. It had rust, it was faded, heavily oxidized, cracked and peeling, and it didn�t match all over. Now, it�s a very respectable looking car that actually gets compliments and inspires people to share stories. Not bad for $25.00.
What�s the worst case scenario? If you don�t like it, just sand it off.
Anyone that wants to give it a shot and has questions is welcome to send me a PM. I�ll answer to the best of my abilities."
-------------------- Christopher Campbell Associate Editor HOT ROD Magazine
I hope everyone is having as much fun rollin it on like I have.
He also e-mailed me:
Looks cool so far, I even like the unbuffed finish. I think it's great that you're getting your son out there and getting his hands dirty on his first car- he'll appreciate it much more when it's done. I should know, that's what my dad did with me. Good luck with the paint job, just remember to keep a coat of wax on it and it should last just fine.
Re: New Paint job on a budget thread. - 06/27/0712:29 PM
I've been following this thread and watching everyones progress. In fact my neighbor has recently sprayed his beater chevy pickup with green rustoleum after we discussed the roll method a couple months ago. It looks great. He just wanted it to look decent and have one color. There is a thread in the classic forums of stangnet with impressive results from spraying. Unfortunately, I'm not ready to paint my stang yet, I have a lot of fab work yet to do. When I'm done though, I will be rolling rustoleum on the mustang. I think most critics of the method are of the opinion that spraying expensive paint is the only way to get a durable long lasting finish on a car. They are stuck in a paradigm. This thread and others like it across the web are helping to shift that paradigm. Thanks all
Re: New Paint job on a budget thread. - 06/27/0701:15 PM
Quote: I think most critics of the method are of the opinion that spraying expensive paint is the only way to get a durable long lasting finish on a car. They are stuck in a paradigm.
Upon reading the Hot Rod thread linked above, I completely agree. With some folks, there seems to be a level of insecurity with the thought of spending less than a couple grand for a paint job. I'm terribly sorry if I've threatened anyone's manhood, but I'm thrilled by the possibility that with little more than patience and hard work, my finish has the potential to look as good as theirs.
I'm fully aware that it's not for everyone... but at least by trying it, I'll have earned the right to knock it unlike many of these paint-spraying naysayers.
Re: New Paint job on a budget thread. - 06/27/0701:57 PM
Quote:
Quote:
So even though we have a farily large number of works in progress and finished here.. we may only be the tip of the iceberg of 'roller painters anonymous'
This 'roller' thing may be spreading even faster than we might have originally thought...
Its really amazing to think of how far this has gone. This has washed over the internet to the point that in a year or so your average Joe might not look at you cross-eyed when you say you are going to roller-paint your car.
And I think all of us originally had that "WHHAATT??" attitude when we heard about it.
One other thing that is also amazing is the "brand-neutral" attitude of everyone on these threads for 300+ pages. There's VERY few places that enthusiasts of any make and model can come together, show their ride, and not receive any bashing because they have a brand X or brand Y vehicle.
We all share a common goal and a common bond, regardless of the ride (or even refrigerator, going way back) that we are painting.
On a side note - my 70+ year old father-in-law (who lives in the boonies of northern Michigan) last week declared he was going to start roller painting stuff in general with "Boat Paint". "I heard you can just roll it on and it levels out and it dries hard, and looks like it was sprayed".
I about fell off my chair when he said that.
Roll On!
amen to that
i get on average about a kabillion (that's a new # that exceeds 10000000000000!!!) emails a day, and i answer all of them!!!. People add me on msn, and my photobucket acount maxes out every week, steady for the last year. I did a google search for "$50 paint job" and the results are huge, it's all over the net!!! You'd also be supprised of the number of local people that email me asking me to paint their cars, i get about 2 a week, all type of cars, i've even been offered several times to have my flight and accomondations paid for to paint other cars in the US!!!
I also get alot of people telling me that i should have made a dvd, and sold it online, and that i could have made a killing. But it's not why i shared this with all you guys, it's to help everyone out, and that there is allways a different way to get awesome results without having to spend huge $$$$ to get them. I do everything myself, interior, headliners, tranny's, engines, paint, everything i can to save $$$ and spend more on parts, and i drive the crap out of my cars.
I think it's cool to see all the brands of cars, i'm a car guy, not a mopar nut (sorry moparts ) but it's true, i like all cars (typically older ones). Heck i sold my charger, and i'm having a blast with my speedster, and my bug. But i can apprecieate all the other brands even though i may not own one, i still like talking to the owners about our old cars, how we brought them back from the dead, and saved another old car without breaking the wallet. There's nothing (at least to me) that's more gratifying than driving a car YOU built, and YOU painted down the road. Not a car you HAD painted for you, that does nothing for me.
Posted By: Anonymous
Re: New Paint job on a budget thread. - 06/27/0703:04 PM
Quote: For some of the Canadian members ... The best price I've seen is the Canadian Tire Simoniz 7-in. Sander & Waxer, at $99.00, with the 'Porter Cable'polishers going for $199.99 & $219.99
It needs a lil more power still. It's a decent price. I wouldnt call it a steal...
Posted By: Anonymous
Re: New Paint job on a budget thread. - 06/27/0703:05 PM
Quote:
Quote: For some of the Canadian members ... The best price I've seen is the Canadian Tire Simoniz 7-in. Sander & Waxer, at $99.00, with the 'Porter Cable'polishers going for $199.99 & $219.99
Has a lot more power than I'll ever use ...
You are in Toronto. It was the Toronto Corvette owners that tipped me off about the REFURBED Porter Cable random orbital sanders that could be picked up for $125 at the 'repair depot' for warantee repairs of Black & Decker/Dewalt and Porter Cable products. Based on the info from the Toronto Vette owners.. I found one of the Porter Cable repair depots here in Ottawa on Laperriere Street. I picked on up for $125 and it came with a one year full replacement warranty.
So the hint we gave people a fair while back was to try to locate the nearest service and repair warranty place to their location and see if they can get their hands on one of these 'refurbed' unit.
You can locate the nearest 'warranty and repair' depot for servicing the Porter & Cable polishers by going to the P & C web site and look around it for where the nearest repair and warranty depot is to your location. Possibly you could cheat by opening up one of the P & C boxes at a regular retail store like Home Depot and checking the warranty and servicing information they provide on the pamphlet in the box
It was worth also noting that not all units returned to the refurb shop are 'used' or 'abused'. The chap at the location in Ottawa was telling me that most of his units were simply returned from the retailers because parts had been taken from the boxes - and so they send them back to these guys. They simply bag the units and add the missing parts - and put them out for sale at their repair depot.
Since you are in Toronto you definitely have access to the refurbs down there. The only problem might be that all the Vette owners in Toronto are also snapping up the refurb units down there
.
I'm gonna have to try this out! Thanks Marq
BTW: Roll on paint lovers, ROLL ON!
Posted By: Anonymous
Re: New Paint job on a budget thread. - 06/27/0710:31 PM
I came upon this method thru "StumbleUpon" not sure how many of you know what that is but it's a Web community of sorts. Anyway I Stumbled on the page that one guy made detailing how he rollered his Corvair with this method. Thankfully he was grateful enough to Charger and others to add a link to this thread for me to continue my research. That was back when Part 1 was still going. I have completed the paint on the Probe but ran out of time on Vacation last week to finish sanding and buffing her. I'll post pics when she's all done. But Like all of you I know it works and it works awesome!! The parts that are done are beautiful!! One of the things I find so really cool about this thread is that most of the veterans of the process still hang around and keep up to answer questions. You guys are all so awesome for taking your time to help the newcomers get it right. Myself included. Following your lead I intend to hang around as well. I feel there is nothing more powerful here than to see those with experience giving honest and on the money answers to the questions of the new guys. Roll On Brothers!!!!
BTW: Quite a while back one of you guys came up with a "Fraternal Order of Rollers" graphic. If anyone knows a way to get that graphic turned into a vinyl sticker I'd love to see some made for us to put on our rides. I'd obviously be willing to pay for one if someone can get them made.
Posted By: Anonymous
Re: New Paint job on a budget thread. - 06/27/0710:42 PM
Okay, I'm buckling under the pressure(in my own mind) to post a couple pics of the "done" parts. here's how the old Probe Looks "so far".
Posted By: Anonymous
Re: New Paint job on a budget thread. - 06/27/0711:07 PM
Quote: Okay, I'm buckling under the pressure(in my own mind) to post a couple pics of the "done" parts. here's how the old Probe Looks "so far".
Re: New Paint job on a budget thread. - 06/27/0711:10 PM
Dude - that is awesome!
Congrats!
Posted By: Anonymous
Re: New Paint job on a budget thread. - 06/27/0711:18 PM
Quote:
Quote: Okay, I'm buckling under the pressure(in my own mind) to post a couple pics of the "done" parts. here's how the old Probe Looks "so far".
Looks very nice Probe! What paint did you use?
Any bigger pictures? I love it!
That, My friend, is good Ol' Rustoleum Professional!! I'll post some bigger pics when she's all finished up. I had these on the computer here at work to show my coworkers.
Re: New Paint job on a budget thread. - 06/27/0711:35 PM
Quote:
I also get alot of people telling me that i should have made a dvd, and sold it online, and that i could have made a killing. But it's not why i shared this with all you guys, it's to help everyone out, and that there is allways a different way to get awesome results without having to spend huge $$$$ to get them.
The idea of a DVD is interesting, but it would probably cost a lot more to create something that was not painful to watch than you might think..
I think we should get the guy that did the www.rollyourcar.com website to add a link for a paypal account link for you for donations. (Sorry dude - I forgot who you were and the thread is too big to find you)
How many of us have saved THOUSANDS of $'s because of this, or had rides that would never have looked good because we couldn't afford it.
I, for one, would be happy to make my $50 paint job a $70 paint job by donating 20 bucks. I think that everyone that's rolled their car, stood back, and went "Holy Crap!" would feel the same way.
Obviously, 69chargeryeehaw, you don't need to respond to this, but I think we all owe something to you more than "great idea! thanks!".
With the wide variety of people here from other forums, the link would be posted everywhere.
My
Posted By: Anonymous
Re: New Paint job on a budget thread. - 06/28/0712:28 AM
My second till last coat, tomorrow needs to come quicker so I can finally finish and put my last coat on the body... then I have to wait a few days to make it shine! (aka time for rest finally)...
Then I need to start all over again ripping off the doors and doing major bodywork and lot of painting.. yay =/
Re: New Paint job on a budget thread. - 06/28/0712:50 AM
Quote:
Quote:
I also get alot of people telling me that i should have made a dvd, and sold it online, and that i could have made a killing. But it's not why i shared this with all you guys, it's to help everyone out, and that there is allways a different way to get awesome results without having to spend huge $$$$ to get them.
The idea of a DVD is interesting, but it would probably cost a lot more to create something that was not painful to watch than you might think..
I think we should get the guy that did the www.rollyourcar.com website to add a link for a paypal account link for you for donations. (Sorry dude - I forgot who you were and the thread is too big to find you)
How many of us have saved THOUSANDS of $'s because of this, or had rides that would never have looked good because we couldn't afford it.
I, for one, would be happy to make my $50 paint job a $70 paint job by donating 20 bucks. I think that everyone that's rolled their car, stood back, and went "Holy Crap!" would feel the same way.
Obviously, 69chargeryeehaw, you don't need to respond to this, but I think we all owe something to you more than "great idea! thanks!".
With the wide variety of people here from other forums, the link would be posted everywhere.
My
I've actually professionally produced dvd's for customers, but i have my own business in computers/networks, and spent the first 8 yrs or so of my career as a millwright, repairing industrial CNC's and automated assembly equipment. So producing a dvd is right up my alley, but i'm not looking to profit from this at all, i'd be happier with a pat on the back!!!! That's what the true brotherhood is about, not $$$$.
Ok i'm done being a woman, before i cry i'm gonna go have a beer!!!!!!!!!!
Posted By: Anonymous
Re: New Paint job on a budget thread. - 06/28/0709:04 AM
Hey I'm a NOOB here!!!
I've read the Hot Rod Article and read every single thread from you guys. You all Rock! I was just wondering have any of the "Pro's" with this method have come close to "show car" finish. It seems like the skeptics believe isn't possible. What if you rolled on something like Glisten from POR 15? turning the process in to a two stage job? has anyone tried this yet?
Posted By: Anonymous
Re: New Paint job on a budget thread. - 06/28/0703:15 PM
Just thought I'd update...
The flat blue Tremclad custom mix (4:1 flat white/gloss blue) - sprayed on - has been on the car for about 8 or so weeks now, and is rock hard and looking great.
And here's a 'final' (are they ever finished) pic to prove it! [image]http://www.cbodydrydock.com/e107_plugins/coppermine_menu/displayimage.php?album=lastup&cat=0&[Edited by Moparts - Keep it clean]=0[/image]
Posted By: Anonymous
Re: New Paint job on a budget thread. - 06/28/0704:09 PM
Re: New Paint job on a budget thread. - 06/28/0704:21 PM
Posted By: Anonymous
Re: New Paint job on a budget thread. - 06/29/0712:27 AM
Okay something interesting came up. As you know I finished my Civic back on page 14 (June 21, 2007).
I've let my car soak in the hot heatwave ever since and today the 28th, I decided to give the car a wash because it was collecting lots of dust and had some bird poop on it.
Before I washed I noticed 3 poops on the car. One was on the hood, passenger door and drivers front fender.
Okay @ the end of my wash I noticed that the poop I thought was there was gone wasn't...The poop was indeed gone but I think the paint "flared"...Its soo weird. That spot looked like a small dent where you would use touch up paint. A small gash in the door panel.
I tried peeling the thing I thought was poop away. It moved. I think my nails scratched past the paint.
So weird eh? I hope I dont get anymore of these cracks...
After I finished I didnt think too much about it because I figure its gonna be gone once I wetsand the car...So it should be a thing of the past.
Re: New Paint job on a budget thread. - 06/29/0701:19 AM
Quote: Okay something interesting came up. As you know I finished my Civic back on page 14 (June 21, 2007).
I've let my car soak in the hot heatwave ever since and today the 28th, I decided to give the car a wash because it was collecting lots of dust and had some bird poop on it.
Before I washed I noticed 3 poops on the car. One was on the hood, passenger door and drivers front fender.
Okay @ the end of my wash I noticed that the poop I thought was there was gone wasn't...The poop was indeed gone but I think the paint "flared"...Its soo weird. That spot looked like a small dent where you would use touch up paint. A small gash in the door panel.
I tried peeling the thing I thought was poop away. It moved. I think my nails scratched past the paint.
So weird eh? I hope I dont get anymore of these cracks...
After I finished I didnt think too much about it because I figure its gonna be gone once I wetsand the car...So it should be a thing of the past.
hmmm
Car is shiny again though after wash
bird poop is really bad, basically you painted your car 8 days' ago correct??? It takes about a month before the paint is "cured" and i find after 3 months it's rock hard. Durring the first month, you should avoid leaving bird poo on the paint durring a heat wave, that's gotta be the worst thing you can do to any car that has just been painted!!!! bird poo can even ruin old auto paints in the conditions that you have, i had a pickup truck, 2000 GMC Sierra 1/2 ton, and it was midnight blue, and a bird shat on the hood. I whiped it off about 2 hours later (it was really hot out) and the factory paint came right off, and it actually eched the primer under the paint. The right bird, and the right poo can really do bad stuff.
Re: New Paint job on a budget thread. - 06/29/0701:27 AM
Another question concerning the use of rustoleum primer. I'm going to use the primer because I have some bodywork to cover up, as well as a lot of rust and a couple different colors of body panels. My question is, do you thin the primer the same as you do the paint?
Re: New Paint job on a budget thread. - 06/29/0701:43 AM
Quote: Another question concerning the use of rustoleum primer. I'm going to use the primer because I have some bodywork to cover up, as well as a lot of rust and a couple different colors of body panels. My question is, do you thin the primer the same as you do the paint?
I used Rustoleums rusty metal primer on my truck I rolled it straight out of the can, and it went on 10 times better and smoother then the finish paint. It just flat leveled itself out..
Re: New Paint job on a budget thread. - 06/29/0702:02 AM
Quote: Another question concerning the use of rustoleum primer. I'm going to use the primer because I have some bodywork to cover up, as well as a lot of rust and a couple different colors of body panels. My question is, do you thin the primer the same as you do the paint?
I would go straight from the can. This will give you a sufficient build of a primer layer so that you can then do a very very light sanding to smooth the primed surface. Smoothest is bestest.. right.
You could go with an 800 or 1200 wet sanding on the primer layer - but be sure to allow the sanded primer layer sufficient time to dry out fully before laying your first coat of paint on it.
Re: New Paint job on a budget thread. - 06/29/0702:41 AM
Thanks guys. I had another question also, but I can't for the life of me remember what it was. Sucks getting old!
Posted By: Anonymous
Re: New Paint job on a budget thread. - 06/29/0703:01 AM
Quote:
Quote: Okay something interesting came up. As you know I finished my Civic back on page 14 (June 21, 2007).
I've let my car soak in the hot heatwave ever since and today the 28th, I decided to give the car a wash because it was collecting lots of dust and had some bird poop on it.
Before I washed I noticed 3 poops on the car. One was on the hood, passenger door and drivers front fender.
Okay @ the end of my wash I noticed that the poop I thought was there was gone wasn't...The poop was indeed gone but I think the paint "flared"...Its soo weird. That spot looked like a small dent where you would use touch up paint. A small gash in the door panel.
I tried peeling the thing I thought was poop away. It moved. I think my nails scratched past the paint.
So weird eh? I hope I dont get anymore of these cracks...
After I finished I didnt think too much about it because I figure its gonna be gone once I wetsand the car...So it should be a thing of the past.
hmmm
Car is shiny again though after wash
bird poop is really bad, basically you painted your car 8 days' ago correct??? It takes about a month before the paint is "cured" and i find after 3 months it's rock hard. Durring the first month, you should avoid leaving bird poo on the paint durring a heat wave, that's gotta be the worst thing you can do to any car that has just been painted!!!! bird poo can even ruin old auto paints in the conditions that you have, i had a pickup truck, 2000 GMC Sierra 1/2 ton, and it was midnight blue, and a bird shat on the hood. I whiped it off about 2 hours later (it was really hot out) and the factory paint came right off, and it actually eched the primer under the paint. The right bird, and the right poo can really do bad stuff.
Ah crap. I should have taken care of the car more then. I had no idea how bird poop could peel off paint. Darnit. I guess you live and learn. That was a new experience for me.
I will wash the car regularly then. I am going to baby the car better. Probably will make it a routine to wash the car every week to prevent this stuff from happening.
After I wetsand in a month, it'll be gone because its not a big gash. Its like a small stone chip size...
Re: New Paint job on a budget thread. - 06/29/0703:49 AM
Quote:
Ah crap. I should have taken care of the car more then. I had no idea how bird poop could peel off paint. Darnit. I guess you live and learn. That was a new experience for me.
Bird poop is seriously nasty stuff for any paint job... and it can also do a real number waxed bodies... The enzymes in the poo eat away at just about anything...
And when you have poo sitting on a car that is out in the sun.. the poo becomes a sort of concentrator of the heat delivered by the sun. So instead of the body panel being able to dissipate the heat evenly.. it instead concentrates it in one spot.. causing damage to whatever is beneath the poo. Just imagine this to better understand what I am saying... The sun beating down on your car is something the paint was designed to handle... BUT if you used a magnifying glass to concentrate the heat on one spot it will cause damage ( in the same way as an ant can walk around under the sun but it pops and explodes when a magnifying glass concentrates the sun's rays directly on it ).
Sadly I have flocks of Cardinals that fly and poop around my house. And they seem to particularly love eating berries. It's almost bad enough that I would be tempted to buy one of those car covers just to cut down on the crap that falls out of the sky.
.
Posted By: Anonymous
Re: New Paint job on a budget thread. - 06/29/0705:00 PM
Quote:
Quote: Another question concerning the use of rustoleum primer. I'm going to use the primer because I have some bodywork to cover up, as well as a lot of rust and a couple different colors of body panels. My question is, do you thin the primer the same as you do the paint?
I would go straight from the can. This will give you a sufficient build of a primer layer so that you can then do a very very light sanding to smooth the primed surface. Smoothest is bestest.. right.
You could go with an 800 or 1200 wet sanding on the primer layer - but be sure to allow the sanded primer layer sufficient time to dry out fully before laying your first coat of paint on it.
.
Ahhh. I'm really glad the primer question came up. I've been puzzling over this too, since I have a lot of spot bodywork to do. I don't have any rust -- just some dents and dings.
So, given that, how would you guys rank -- or comment on -- the following options for spot bodywork / primering?
Preparation: Remove paint to bare metal, do metal work and bondo work. Now...
Option 1 : Spray a 2K primer with a Preval sprayer. Questions: When I read about these products, it's always being discussed by professionals and they always default to 2 steps: First PRIMER then PRIMER/SURFACER. Is this necessary?
Option 2 : Roll on a primer specifically made for rolling such as PPG's or U-POL. Questions: Sounds great at first, but when you read the literature, it looks like these are primer surfacers. They suggest applying an etch primer to bare steel first. Hmmm. Sounds like 2 steps and 2 different types of primer again... Or -- is my bondo coat the first (DTM) layer so I don't have to worry about this?
Option 3 : Roll on Rustoleum or Interlux primer. Questions: Wondering it this stuff will work well over the bondo and not just soak in. As well, drying times will be longer (than the catylyzed options above) -- which make it a little more of a pain. Especially concerned about it not being fully dry or not drying properly if it sinks into the bondo which might trap solvents deep down...
Thanks in advance -- Dan.
Posted By: Anonymous
Re: New Paint job on a budget thread. - 06/29/0705:40 PM
I had a mix of some light skims of bondo, some bare metal, some scuffed paint, and chrome.
Some of it I spraybomed with Rustoleum/Tremclad primer, some of it I mixed and sprayed with straight Tremclad primer (=the stuff you'd roll), and yet other areas I spraybombed with Duplicolor Primer. Generally I used more Rustoleum than Duplicolor, and all the bonodo was covered by Rustoleum, and it didn't sink in. That said, the bondo was no more than a skim in any of the areas, so there wasn't much to sink into...
Anyway, some of it was White primer, most was grey, and bit was even black (I should say that I did the bodywork over a period of time, and the patchwork of primers was simply because I wanted some paint on the thing to save it from being in bare metal). None of it was Primer/Surfacer.
Anyway, when I came to paint the car - using Rustoleum/Tremclad, the paintjob itself kind of spread from 'I'll just do a test patch' to 'I might as well keep going', and consequently, I went over the whole mess of different surfaces, totally forgetting that I 'should' have used a surfacer.
But - I had no adhesion problems, no flaking, nothing.
The only thing I can say is that each and every bit of primer was totally cured (at least 20 days) before I painted the thing, which probably helped.
Posted By: Anonymous
Re: New Paint job on a budget thread. - 06/29/0709:53 PM
Quote:
Ahhh. I'm really glad the primer question came up. I've been puzzling over this too, since I have a lot of spot bodywork to do. I don't have any rust -- just some dents and dings.
So, given that, how would you guys rank -- or comment on -- the following options for spot bodywork / primering?
Preparation: Remove paint to bare metal, do metal work and bondo work. Now...
Option 1 : Spray a 2K primer with a Preval sprayer. Questions: When I read about these products, it's always being discussed by professionals and they always default to 2 steps: First PRIMER then PRIMER/SURFACER. Is this necessary?
Option 2 : Roll on a primer specifically made for rolling such as PPG's or U-POL. Questions: Sounds great at first, but when you read the literature, it looks like these are primer surfacers. They suggest applying an etch primer to bare steel first. Hmmm. Sounds like 2 steps and 2 different types of primer again... Or -- is my bondo coat the first (DTM) layer so I don't have to worry about this?
Option 3 : Roll on Rustoleum or Interlux primer. Questions: Wondering it this stuff will work well over the bondo and not just soak in. As well, drying times will be longer (than the catylyzed options above) -- which make it a little more of a pain. Especially concerned about it not being fully dry or not drying properly if it sinks into the bondo which might trap solvents deep down...
Thanks in advance -- Dan.
Honestly the easiest thing to do if you're only doing spot repairs (don't need to prime the entire car) is just to use a spray can primer. If you have a lot of deep sanding scratches, tiny pinholes in body filler, or other imperfections you can shoot it with a primer/surfacer and sand it smooth. Seems like most of the ones you find in a can are lacquer based so there probably won't be a compatibility issue with your Rustoleum. The Rustoleum primer in a gallon can is *extremely* high in solids, and takes a lot longer to cure than a spray primer. On the other hand, it covers like crazy . If you use it out of the can, you'll get full coverage in one coat (at least I have).
Over the years I've burned up a lot of rattle can primer, and my favorite brand now is SEM. You won't find it in many regular auto parts stores, but most shops that sell auto body paint and supplies will usually have their stuff. It's not super cheap, but it's really good stuff. I'm a really big fan of their self-etching primer. Their primer/surfacer is really good too. Everyone has their own favorite though...
Re: New Paint job on a budget thread. - 06/30/0703:50 AM
I've got a fender to replace the rusted out one on my truck (see pic in the post above) that I stripped to bare metal, then welded the emblem holes and ground those down smooth. So far there is only three spots that just need a light skim coat of bondo to clean this fender up. I'll know more after I do some block sanding. I'm using some rustoleum spray can primer for my block sanding cause it's cheap and it works. Once I get the fender looking good, I'll roll on the rusto primer to seal it up good. As for the rest of the truck, I'm not going to strip it like I did the fender, but I am going to sand it all real good, and do the same light bondo and spray can primer on the various area that need some massaging, then roll the whole truck with the primer, then paint. What do you all think? I'm also concidering doing a two-tone paint, but I'm not sure what colors. Any suggestions?
Posted By: Anonymous
Re: New Paint job on a budget thread. - 07/02/0702:54 PM
If I want a color that Rustoleum doesn't come in, and I have the color made, i.e., the store has to mix in pigments and then SHAKE IT to mix the pigments thoroughly into the base, how long will I have to wait before I can expect the bubbles in it to dissipate and I can roll it on? Can I just stir it instead and expect the pigment to mix well enough? Anyone with experience with this? Thanks
Re: New Paint job on a budget thread. - 07/02/0706:27 PM
Quote: Ryan I'd say just about as soon as you get it home. Remember you are going to have to deal with bubles caused by the rolling process. Good luck
I agree. Some of these paints, regardless of how they're mixed, will leave bubbles. Bubbles have proven impossible to avoid with the Top Secret marine paint I'm using and a Rustoleum black experiment I did, but I've found the roll-and-tip method using a 3" foam brush highly effective with both paints. As lightly as possible, I chase the bubbles after every 2-3 roller strokes with the foam brush. It's amazing how well the brush strokes will level off.
I'll post some pictures of my results within the next day or two. This Top Secret product is incredible.
Posted By: Anonymous
Re: New Paint job on a budget thread. - 07/02/0707:53 PM
Quote: If I want a color that Rustoleum doesn't come in, and I have the color made, i.e., the store has to mix in pigments and then SHAKE IT to mix the pigments thoroughly into the base, how long will I have to wait before I can expect the bubbles in it to dissipate and I can roll it on? Can I just stir it instead and expect the pigment to mix well enough? Anyone with experience with this? Thanks
if i recall correctly someone way back said that if you put the paint in the freezer the bubbles will dissapate overnight? but i'm not entirely sure that is correct.
Re: New Paint job on a budget thread. - 07/02/0708:03 PM
Quote: if i recall correctly someone way back said that if you put the paint in the freezer the bubbles will dissapate overnight? but i'm not entirely sure that is correct.
That would worry me most paint have a "Do not freeze" warning on them.
Re: New Paint job on a budget thread. - 07/02/0708:22 PM
I haven't heard of that one, but I've had good luck freezing my rollers and brushes in a ziplock bag for re-use later. This worked fine for rustoleum, I haven't yet re-used my marine paint rollers. What's odd is that nothing really freezes when it's loaded with paint. I just let them sit in the sun for 15-20 minutes before rolling.
Posted By: Anonymous
Re: New Paint job on a budget thread. - 07/02/0709:16 PM
i would imagine what i do for resin would work too. take an old igloo cooler. one that seals like the yellow ones for football or what ever. rig up a tube to hook a vacuum hose up to. then turn the vac on. it pulls all the bubbles out of my resin. thats 100x thicker than paint
Posted By: Anonymous
Re: New Paint job on a budget thread. - 07/02/0709:16 PM
Thanks!
Posted By: Anonymous
Re: New Paint job on a budget thread. - 07/02/0709:54 PM
Quote: the Top Secret marine paint I'm using
Which Top Secret are you using, and also what color?
Re: New Paint job on a budget thread. - 07/03/0712:23 AM
Quote:
Quote: the Top Secret marine paint I'm using
Which Top Secret are you using, and also what color?
Thanks.
It's their TS-4 urethane-reinforced alkyd enamel. The color is called "Retreat"... kinda mustardy-tan-ish I guess. I'm extremely pleased with it thus far considering my facilities(back lawn, as close as I can get to the garden hose).
These pictures were taken tonight, two hours after rolling my second coat thinned about 25%with no wet sanding yet. I've got a bit of peel and a fair amount of insects to knock down tomorrow night but I think I'm going to dig the final product.
Posted By: Anonymous
Re: New Paint job on a budget thread. - 07/03/0703:58 AM
I went to Lowe's and they told me they can't mix up different colors in Rustoleum. Anyone know if this is true? Has anyone gotten different colors mixed in Rustoleum and the girl at Lowe's just didn't know wht she was talking about? I wanted to get a teal.
Re: New Paint job on a budget thread. - 07/03/0711:20 AM
I think I recall someone saying that one of the hardware chains can mix Rusto. Ace has been mentioned alot here, maybe give them a call.
Posted By: Anonymous
Re: New Paint job on a budget thread. - 07/03/0702:58 PM
Mixing Rustoleum is not a problem. My local Home Depot offered to mix it (they would shake it rather than stir) but in the end I mixed it myself. I mixed a dark blue and a white to get a light blue, and it came out great. I mixed it at home in my garage in stages. Basically, I had five quarts to mix, and only a four quart pot. So, I'd pour some blue and some white into the pot, stir it, and pour it back into the cans. Then I'd pour some more, stir it, return it to the cans etc etc....It took about 25 minutes to have the whole lot mixed together - and of course, with hindsight if I'd had a 2 gallon pot I could have mixed the whole lot in one go. Anyway, regardless of how you actually mix it - at Lowes, Home Depot, or at home, you can definitely mix the stuff.
Of course, you've got to know what colour you're aiming for before you buy the paint, and you'll have to do some trial and error before you get the exact shade you want, but that's always the case.
Posted By: Anonymous
Re: New Paint job on a budget thread. - 07/03/0705:11 PM
So, that's mixing together 2 colors of Rusto paint, right? What about making a new color with a base of Rustoleum by adding pigments to it to make a color Rusto doesn't offer? Would the pigments mix in with the kind of paint that Rustoleum is? Thanks
Posted By: Anonymous
Re: New Paint job on a budget thread. - 07/03/0705:16 PM
Properly applied and buffed Brightside seems to really produce an incredible shine. Has anyone tried the Interlux Perfection paints? They claim to be the best finish Interlux offers. Great smileys on this board btw. Lol
Posted By: Anonymous
Re: New Paint job on a budget thread. - 07/03/0705:37 PM
Quote: So, that's mixing together 2 colors of Rusto paint, right? What about making a new color with a base of Rustoleum by adding pigments to it to make a color Rusto doesn't offer? Would the pigments mix in with the kind of paint that Rustoleum is? Thanks
If your in a gambling mood I know for certain that Ace will mix custom colors of thier "Rust Stop" brand paint. But as far as I know no one on any of the threads have tried it yet. a couple of guys said they were gonna use it but I never saw them post any results.
Posted By: Anonymous
Re: New Paint job on a budget thread. - 07/03/0705:41 PM
Yes - this was mixing two Rusto colors. Now, as for adding pigments..... I don't know how/if they'd affect the paint at a chemical level. In theory, it should be OK - as long as you had the right pigments. But why go to that trouble/risk anyway? Rusto comes in all the primary colors, plus black and white, so you should be able to mix up any color you like. To try out the colors before you take the plunge and buy some big Rusto cans, maybe you could experiment with some of those little modelers' enamels? What color are you trying to achieve?
Posted By: Anonymous
Re: New Paint job on a budget thread. - 07/03/0710:54 PM
Quote: It's their TS-4 urethane-reinforced alkyd enamel. The color is called "Retreat"... kinda mustardy-tan-ish I guess. I'm extremely pleased with it thus far considering my facilities(back lawn, as close as I can get to the garden hose).
That is good to know. I have been waiting for someone that has used this to post. So I will be monitoring your progress carefully.
Re: New Paint job on a budget thread. - 07/04/0701:08 AM
Quote: [That is good to know. I have been waiting for someone that has used this to post. So I will be monitoring your progress carefully.
Good luck.
Don't be discouraged if it doesn't work for me. Other than what I remember from reading these three threads, I'm clueless when it comes to paint.
Here's what I've learned: -The paint has been curing very well within the 24 hour window. -Excellent gloss but looking first-hand at a wetsanded finish, I'm finding it hard to believe that that jaw-dropping shine can be brought back with my bare hands (A little encouragement here would be cool).
I'm at a crossroads where things could easily turn ugly from here, as I just wetsanded for my first time... EVER. Using 600 grit I knocked down the brush strokes and achieved a smooth surface fairly easily, sanding through in a couple spots but I'm getting the hang of it.
This image has given me a bit of hope:
One thing that concerns me has been these small, shiny spots. Previous layer??? Is the remedy a thicker third coat?
Re: New Paint job on a budget thread. - 07/04/0709:37 AM
Quote: I'm finding it hard to believe that that jaw-dropping shine can be brought back with my bare hands (A little encouragement here would be cool).
Hopefully... 'by hand' means using a power polisher and not literally 'by hand'. and remember that ANY rough surface can be made to shine and have a high level of gloss IF it is polished enough. That is why the final wet sand... final rubbing compound... final polishing and waxing will make the difference between a 20 footer... a 10 footer... and a 2 footer...
Quote:
I'm at a crossroads where things could easily turn ugly from here, as I just wetsanded for my first time... EVER. Using 600 grit I knocked down the brush strokes and achieved a smooth surface fairly easily, sanding through in a couple spots but I'm getting the hang of it.
One thing that concerns me has been these small, shiny spots. Previous layer??? Is the remedy a thicker third coat?
Have you ever gone to a skating rink and watched a Zamboni machine prepare the ice ? In a way that is a good way to envision what you are trying to accomplish. The Zamboni goes over the ice and scrapes away the roughened top layer of the ice and then lays down a fresh coat of water over the freshly scraped surface ( which fills in any scratches below the top layer and creates a new top layer ( which will freeze and provide a smooth and shiny top surface ).
If there are shiny patches... it may mean that that is a lower layer that did not feather in with the wetsanding of a higher layer. Sometimes that happens and all you can hope for is that your next coat will level the two layers to one uniform layer. You could provide that shiny spot with some additional wet sanding... BUT it may be lowering that layer so that the next coat of paint won't be able to top it up enough to bring it equal to the majority of the paint layers.
You must resist the urge to go too thick at this point. It will be far better in the overall process to lay down two thin layers as per the recipe.
Impatience and a rush to speed up the process and thick layers usually lead to the orange peel effect. So just keep working like a Zamboni and you will end up with the smoothest surface
.
Posted By: Anonymous
Re: New Paint job on a budget thread. - 07/04/0702:43 PM
Hi....have read all 100 plus pages and taking the plunge. I do have some questions regarding decals.
I read that after final buffing and polishing that the polishing compound has to be removed for the decals, pinstripe tape, etc., to properly adhere to the surface.
My question is this...should/can the decals and pin striping tape be applied before the final polishing? It would seem that this would be a much easier route as striping tape is so thin.
Question #2....I am painting a VERY large vehicle, a Dodge Ramcharger, with a lot of surface area. Should I do panels, doors, etc. separately?
Thanks for all the great info and kudos to all who have contributed their experiences to a great topic!
Posted By: Anonymous
Re: New Paint job on a budget thread. - 07/04/0703:21 PM
For your first question - Well, you can polish over decals and stripes but... There's a good chance that you'll scuff/tear/remove them with the polish - especially if you use an automated polisher rather than your own hands, and also, you'll find that you get some dried compound around the edges of the decals/stripes which is time-consuming, and sometimes impossible to fully remove.
I'd say your best bet would be to polish the paint before you stick or paint anything on top of it. If the decals don't stick, then you can easily prepare the polished paintwork. First wash it down with a PH Neutral soap and water, then wipe the area down with a grease/wax remover. It's probably best to spray the remover on from one of those garden-spray bottles you can get at any dollar store. While it's still wet, wipe it off. You can maybe do this a couple of times if you want to be really sure it's spotless.
Couple of things to bear in mind - 1. Wait until you're certain the paint has cured fully before you prep it for the decals, and 2. Buy a proper Wax/Grease remover from a proper auto store. There is a difference between Home Depot Mineral Spirits and a proper automotive wax/grease remover. It'll cost you more (I used a Sherwin Williams one before painting pinstripes, and it cost me $22), but it's good insurance. An impure cleaner could lead to adhesion problems with your decals, or worse still - problems with your paint.
Anyway, here's my $0.02. 1. Paint it, 2. Polish it, 3. Prep it, 4. Decal it.
As for your second question - I'll let someone with more experience on bigger vehicles answer up!
Posted By: Anonymous
Re: New Paint job on a budget thread. - 07/04/0706:14 PM
[quote: rmross wrote]So, that's mixing together 2 colors of Rusto paint, right? What about making a new color with a base of Rustoleum by adding pigments to it to make a color Rusto doesn't offer? Would the pigments mix in with the kind of paint that Rustoleum is? Thanks
[quote: tonyvan wrote:]Yes - this was mixing two Rusto colors. Now, as for adding pigments..... I don't know how/if they'd affect the paint at a chemical level. In theory, it should be OK - as long as you had the right pigments. But why go to that trouble/risk anyway? Rusto comes in all the primary colors, plus black and white, so you should be able to mix up any color you like. To try out the colors before you take the plunge and buy some big Rusto cans, maybe you could experiment with some of those little modelers' enamels? What color are you trying to achieve?
I was looking for a teal. Green and blue would be the way to go, probably, huh? Thanks
Posted By: Anonymous
Re: New Paint job on a budget thread. - 07/04/0706:31 PM
Green and blue would definitely give you a turquoise...and knowing the Rusto colors, it would be a pretty dark turquoise at that.
You might need some white in there as well if you want a true teal, and possibly a dash of yellow to save it from being too 'khaki' !
That's why I'd experiment with little Testors-type cans before I mixed up a bigger batch! And of course - take notes about the proportions you use...
Posted By: Anonymous
Re: New Paint job on a budget thread. - 07/04/0709:18 PM
OK, are you supposed to wax it after polishing? im using the green tub turtle wax polishing compound with a 10" random polisher and its not shining up nearly as glossy as it was after the paint tried before i wet-sanded it. My final wet-sanding was done with 2000.
Re: New Paint job on a budget thread. - 07/04/0709:20 PM
Just came in from coat #4. The more I do this, the easier it is to put on. I did find out that you don't want to keep that foam brush in the paint that is thinned already. It started to break down and put crap in the paint. I took a soaked mineral spirits rag and wipped the whole door and t-tops off and started coat #4 over again. Wasted 2 buck in paint too!!! heh...
This might be my last coat due to it being black aready before the paint.
The very large areas to cover can sure be a pain. I had to continue working on around the front to keep from getting the stopping and starting lines.
Re: New Paint job on a budget thread. - 07/05/0712:23 AM
Quote: OK, are you supposed to wax it after polishing? im using the green tub turtle wax polishing compound with a 10" random polisher and its not shining up nearly as glossy as it was after the paint tried before i wet-sanded it. My final wet-sanding was done with 2000.
If you are using one of these
with Turtlewax polish then you pretty much have no hope of ever getting a good shine from your paint. I seriously doubt that one of those things will even make the paint nervous....
If you want a 'good' finish then you will need a proper polisher and a proper range of cutting compound/swirl remover/polish/synthetic sealant/wax.
Posted By: Anonymous
Re: New Paint job on a budget thread. - 07/05/0712:53 AM
what you see here, is i sanded the roof with 2000, and polished with the turtle wax. the pillar wasn't touched since the final coat, and you can see it has a much nicer shine.
yea my polisher is something like that... some $20 bargain bin unit.
what do i need to get it to shine up decently? is there any way of shinning it up nicely without a $200 buffer?
heres the car, only the roof has been touched since the last coat
Posted By: Anonymous
Re: New Paint job on a budget thread. - 07/05/0704:14 AM
One Year Later
Well it's been one year since I painted my old 'scort and the wee beastie keeps on purring,
I posted this pic at the time:
I just wanted to comment on how well the Tremclad paint has held up after sitting outside for the last year without protection.
There is some dulling of the paint. However I never did get around to properly finishing the job and I think I only put four or five coats of paint on it. I didn't polish or wax the car and I am quite certain that this paint requires additional protection to hold up for any duration.
I intend to finish the car and sand out some drips and runs I have. These were the result of a thick mixture applied during a heat wave and the paint dried too quickly.
I also intend to put a Tremclad clear on the car rather than trying to polish out the paint. I believe this will give a satisfactory gloss without polishing and provide better protection.
Posted By: Anonymous
Re: New Paint job on a budget thread. - 07/05/0705:05 AM
69Charger, what kind of buffer/bonnet are you using? Because i notice your getting decent results out of the CT compound.
Would following up with a coat of wax after the polishing compound give it some shine?
Posted By: Anonymous
Re: New Paint job on a budget thread. - 07/05/0707:58 AM
I did this ages ago with my random orbital polisher (similar to a PC 7424), a light cutting pad and Poorboy's SSR2.5 swirl remover. That was about 10 mins work and I did one pass.
This next shot was after using Turtlewax on a polisher similar to yours and I polished for about 20 mins.
I'm not bagging your polishing efforts but if you want to get a 'perfect' finish then you really need to use decent polish and polisher.
Re: New Paint job on a budget thread. - 07/05/0706:22 PM
Quote: 69Charger, what kind of buffer/bonnet are you using? Because i notice your getting decent results out of the CT compound.
Would following up with a coat of wax after the polishing compound give it some shine?
I'm using a $15 buffer 10", random orbit 3800rpm, with a terry bonnet, turtle wax polishing coumpound and water. But i agree with aussiedriver, using the right stuff will get better results quicker, i'm just lazy, spent about half a day polishing the final the day after i painted it, and then waxed it when i was done. The shine was good but not as good as aussie's, i'm not a polisher, but i would'nt think it's that hard, espically if you take aussie's advice. i think my results are better just because i have more expirence laying the paint down well. I almost don't have to wetsand after the final coat, actually the beetle was not wetsanded after the final coat at all, and i only polished the roof a bit, got impaitient and put the car together!!!
Here's a pic, i did'nt wetsand after the final coat, it went on very smooth, just did a little polishing:
here's a pic a day or 2 after paint:
if you get the technique down pat, you almost don't have to wetsand after the final coat, just polish, or even go straight to wax, depending on how good of a finish you want. My beetle was better than any macco paint job by far just after the last coat. I did wetsand between coats, and the last wetsand before the final coat was a really good one, perfect surface then straight to paint.
Posted By: Anonymous
Re: New Paint job on a budget thread. - 07/05/0709:05 PM
ive got it to look not too bad, but when you look at it straight on, into the light thats bouncing off it, it looks preety bad.
maybe part of my problem is the bonnet im using... i have no cluse what it is, it came with the buffer.
what do you mean using water to buff? the instructions i read said to just have the surface dry..
heres my equipment... LOL
Posted By: Anonymous
Re: New Paint job on a budget thread. - 07/05/0710:31 PM
Hey all, I joined here to chat about this DIY paint job, which I am interested in. I am taking the summer off from college and I have plenty of free time, so this sounds like a perfect summer project.
The car: 1997 Acura Integra GSR The photos: Paint fading and peeling on the front fender A dent that goes to the metal, use Bondo or knock dent out from the inside? Paint faded on the hood with etched bird crap Clearcoat tearing off rear bumper Paint fading off of spoiler Paint fading off of passenger quarterpanel
The paint I hope to use (Omni Blue Metallic):
I purchased the following from Home Depot/Lowes/Advance Auto:
3 qts. Paint Thinner w/ Mineral Spirits (though I think I have to return these for 100% Mineral Spirits, since nowhere on the can does it say the amounts of chemicals it contains) 2 4/100 Foam Rollers + Rolling hardware 1 ring of blue painters tape 1 qt. dark grey Primer 1 sheet of 400 grid waterproof sandpaper 1 metal paint spread plate 1 dust mask 1 4"x1" drill attachment sander
Re: New Paint job on a budget thread. - 07/06/0712:13 AM
gittin ready to sand and roll solid gray with red ROLL-bar stripes on the skin
Posted By: Anonymous
Re: New Paint job on a budget thread. - 07/06/0712:22 AM
Quote: Hey all, I joined here to chat about this DIY paint job, which I am interested in. I am taking the summer off from college and I have plenty of free time, so this sounds like a perfect summer project.
The car: 1997 Acura Integra GSR
I purchased the following from Home Depot/Lowes/Advance Auto:
3 qts. Paint Thinner w/ Mineral Spirits (though I think I have to return these for 100% Mineral Spirits, since nowhere on the can does it say the amounts of chemicals it contains) 2 4/100 Foam Rollers + Rolling hardware 1 ring of blue painters tape 1 qt. dark grey Primer 1 sheet of 400 grid waterproof sandpaper 1 metal paint spread plate 1 dust mask 1 4"x1" drill attachment sander
What else do I need?
Heaps more sandpaper. 1 sheet of 400 won't even come close to being enough. Then you should get some 600, 800, 1200, 1500 and 2000 for your between-coats-sanding. Oh and get a sanding block as well. Those drill attachments for sanding have the potential to wreck a lot of good painting.
Posted By: Anonymous
Re: New Paint job on a budget thread. - 07/06/0712:48 AM
What kind of paint to do you have there is looks metalic?
Posted By: Anonymous
Re: New Paint job on a budget thread. - 07/06/0701:06 AM
Hello all I have been following this post for some time now and working every weekend to get my project ready for paint .I plan on doing it the brightside way two tone gray ,one part brightside steel grey the other darker mixed with black {formula TBD} I have a 1936 chevy 5 window master coupe that was media blasted and PPG primmed a long time ago I intend to rough up the PPG primmer and apply the interlux two part epoxy primmer it will act as a filler and is sandable and I dont expect any bonding problems with the paint afterwords.I know it will cost more but I can say I did it myself. The coupe totally apart works out to approx 26 separate pieces to be painted most can lay flat on a table . Should be at it some time in May I will post progress pics
Things have changed {big time} since my April post. I am now going with the tremclad method .I went to home depot and had them scan the brightside paint I had picked out I was going to use tremclad as a base and top the car with brightside. They could not match the steel gray bright side but the color that came out is a nice dark grey { I like it } I am in the process of priming the entire car with tremclad primmer they have a new can primmer that fills minor scratches and is sandable. I hope to be paint some of the body panels this week end.
Posted By: Anonymous
Re: New Paint job on a budget thread. - 07/06/0701:12 AM
Quote:
Heaps more sandpaper. 1 sheet of 400 won't even come close to being enough. Then you should get some 600, 800, 1200, 1500 and 2000 for your between-coats-sanding. Oh and get a sanding block as well. Those drill attachments for sanding have the potential to wreck a lot of good painting.
Yeah I figured I would need a lot of sandpaper, and I will be using a sanding block for them. I only bought the attachment for the initial sanding since I have to strip all of the paint off.
I also borrowed some goggles, and my girlfriend's dad has an air compressor and tools, so if rolling doesn't work I may be spraying.
Quote: What kind of paint to do you have there is looks metalic?
Just that picture, I am trying to contact the seller but so far no good. Worst comes to worst I can find different paint. It's all about prep time now.
Posted By: Anonymous
Re: New Paint job on a budget thread. *DELETED* - 07/06/0701:14 AM
Post deleted by Tonto4706
Posted By: Anonymous
Re: New Paint job on a budget thread. - 07/06/0701:20 AM
Re: New Paint job on a budget thread. - 07/06/0702:19 AM
Love the color, looks to be laying well. Unlike Rustoleum/Tremclad, the marine paint I'm using is super-thick from the can... comparable to the consistency of house paint. Is Brightside similar in thickness?
Posted By: Anonymous
Re: New Paint job on a budget thread. - 07/06/0703:36 AM
Reading some of the more recent posts, I'm getting worried that when I get the last coat on (my '76 VW bus)and I'm ready to finish, I'm going to wetsand, and then the cheap buffer I have will not bring the shine back to even what I have from the final coat. What happens if I skip the last wetsand at 1500 or 2000 grit, and just use the polishing compound and the wax? Thanks
Posted By: Anonymous
Re: New Paint job on a budget thread. - 07/06/0706:53 AM
I purchased more sandpaper and a gallon of 100% mineral spirits (going to take the other stuff back tomorrow)
As for repairing, should I bondo over that dent in the drivers side door? I have limited experience using bondo, but I figure using it on a fist-sized area that's going to get painted anyway is the best way to learn.
Re: New Paint job on a budget thread. - 07/06/0711:53 AM
Don't fear the Bondo... It's far less intimidating than painting.
Posted By: Anonymous
Re: New Paint job on a budget thread. - 07/06/0712:35 PM
The brightside paint I purcased is pre thinned and can be rolled on right out of the can ,if i was going that route I would have thinned it a bit more maybe 5%.The tremclad test panel did is 75% tremclad 25 % mineral spirits with a couple of ounces of penitrol.
Re: New Paint job on a budget thread. - 07/06/0701:14 PM
Quote: ive got it to look not too bad, but when you look at it straight on, into the light thats bouncing off it, it looks preety bad.
maybe part of my problem is the bonnet im using... i have no cluse what it is, it came with the buffer.
what do you mean using water to buff? the instructions i read said to just have the surface dry..
heres my equipment... LOL
I'm using the exact same buffer, from princess auto, and i'm using the terry cloth bonnets that came with it, and you can buy replacments at canadian tire. The key is buff, buff, buff. How long did you spend on that hood for example? I could spend about 30-45mins on just the hood, lots of polishing coumpound, spray water from a water bottle (use quite a bit of water) and don't push on the buffer, let the buffer's own weight do the work for you, you can push just a bit, but don't stress the buffer by pushing too hard.
Posted By: Anonymous
Re: New Paint job on a budget thread. - 07/06/0703:10 PM
Quote: Hey all, I joined here to chat about this DIY paint job ...
...The paint I hope to use (Omni Blue Metallic):
Is this standard automotive paint? If so I see a couple issues. 1.) I don't think anyone here has tried that type of paint yet. No one has tested the self-leveling capabilities of such a paint. As well, you would have to make sure it is a single-stage automotive paint (i.e. NOT a base coat + clear coat system). Even with that, unless you add the catalyst (hardener) like you would when spraying, I'm not sure it would cure properly.
2.) Metallic paint. I don't know if anyone has tried a metallic, but the general thought is that the metallic particles will not say suspended properly as they would with spraying. As well, the wet sanding process will either be hindered by the metallic particles and/or grind them down.
Re: New Paint job on a budget thread. - 07/06/0703:12 PM
Quote: What happens if I skip the last wetsand at 1500 or 2000 grit, and just use the polishing compound and the wax? Thanks
Refer back to page 18 of this thread... 69Chargeryeehaa didn't wetsand the Beetle's final coat and it looks awesome, even years later. If you use Tremclad/Rustoleum, you can pull this off.
Another option may be to rent a good quality polisher. My local equipment rental guy charges $15 per day.
Posted By: Anonymous
Re: New Paint job on a budget thread. - 07/06/0704:19 PM
Quote: I'm using the exact same buffer, from princess auto, and i'm using the terry cloth bonnets that came with it, and you can buy replacments at canadian tire. The key is buff, buff, buff. How long did you spend on that hood for example? I could spend about 30-45mins on just the hood, lots of polishing coumpound, spray water from a water bottle (use quite a bit of water) and don't push on the buffer, let the buffer's own weight do the work for you, you can push just a bit, but don't stress the buffer by pushing too hard.
thanks for the help. the buffer came with 2 different bonnets... one is a tighter woven one that uses a draw string to hold it on, the other is a tighter woven one that has an elastic to hold it on the buffer. I tired both and nither one stood out as being better for me.
ill try again with water today, and work it for alot longer. I was just using the compound and stopping once it got really dry and hard to work.
yesterday i sanded down the whole car... i figured my expectations would be less if i couldnt compare the buffed parts to the untouched parts (it had to be done this way, i had some dust and orange peel)
Posted By: Anonymous
Re: New Paint job on a budget thread. - 07/06/0704:35 PM
Quote:
Quote: What happens if I skip the last wetsand at 1500 or 2000 grit, and just use the polishing compound and the wax? Thanks
Refer back to page 18 of this thread... 69Chargeryeehaa didn't wetsand the Beetle's final coat and it looks awesome, even years later. If you use Tremclad/Rustoleum, you can pull this off.
Another option may be to rent a good quality polisher. My local equipment rental guy charges $15 per day.
Good info. I had seen that but forgot (paint fumes, anyone?). Thanks
Posted By: Anonymous
Re: New Paint job on a budget thread. - 07/06/0704:44 PM
Quote:
Is this standard automotive paint? If so I see a couple issues. 1.) I don't think anyone here has tried that type of paint yet. No one has tested the self-leveling capabilities of such a paint. As well, you would have to make sure it is a single-stage automotive paint (i.e. NOT a base coat + clear coat system). Even with that, unless you add the catalyst (hardener) like you would when spraying, I'm not sure it would cure properly.
Yes, it is automotive paint. From what I can tell, it's just a single stage without extras (though I do plan on clearcoating it with a spray after the paint is done)
Quote:
2.) Metallic paint. I don't know if anyone has tried a metallic, but the general thought is that the metallic particles will not say suspended properly as they would with spraying. As well, the wet sanding process will either be hindered by the metallic particles and/or grind them down.
As long as the paint doesn't run I don't see why the particles would move around, and I don't think wetsanding would be impeded too much given how small these particles are, plus with how many coats I plan on putting on it should cover nicely. I guess I'll find out.
Re: New Paint job on a budget thread. - 07/06/0708:05 PM
Quote:
As long as the paint doesn't run I don't see why the particles would move around, and I don't think wetsanding would be impeded too much given how small these particles are, plus with how many coats I plan on putting on it should cover nicely. I guess I'll find out.
Ahhhh... I think you had better test this all out on some sample. You are introducing too many new variables into the recipe and each of them on their own has proven not to work very well on their own.
The metalic pieces may be small... and that works great with the spray where they are atomized and randomly distributed during the painting. But when you roll.. you are going to find the metal particles concentrating in lines ( that will follow the pattern you rolled the paint on ). The ends of the rollers will leave a slightly greater concentration of metal particles - and hence you will see a pinstriping type effect instead of an even distribution of the particles.
You might as well spray if you are planning to go with that automotive metalic paint. I imagine that any attempt to roll with that paint is going to result in something that is going to have you cursing.
It's a gorgeous color... but the paint and metalic particles is going to prove to be its downfall when rolling and when wetsanding..
Do a sample... but don't do it on the car until you have proven to yourself that it is not going to look like a dogs breakfast
Posted By: Anonymous
Re: New Paint job on a budget thread. *DELETED* - 07/06/0710:07 PM
Does anyone (Aussie Driver) know if there is anything on the market that is more aggressive than a cutting pad made for a Dual Action polisher such as the Porter Cable 7424?
Meaning do they sell any wool pads made to use on the 7424?
I know they have wool pads for rotary circular polishers, but what about for orbitals?
Re: New Paint job on a budget thread. - 07/06/0710:09 PM
Quote:
Quote:
Is this standard automotive paint? If so I see a couple issues. 1.) I don't think anyone here has tried that type of paint yet. No one has tested the self-leveling capabilities of such a paint. As well, you would have to make sure it is a single-stage automotive paint (i.e. NOT a base coat + clear coat system). Even with that, unless you add the catalyst (hardener) like you would when spraying, I'm not sure it would cure properly.
Yes, it is automotive paint. From what I can tell, it's just a single stage without extras (though I do plan on clearcoating it with a spray after the paint is done)
Quote:
2.) Metallic paint. I don't know if anyone has tried a metallic, but the general thought is that the metallic particles will not say suspended properly as they would with spraying. As well, the wet sanding process will either be hindered by the metallic particles and/or grind them down.
As long as the paint doesn't run I don't see why the particles would move around, and I don't think wetsanding would be impeded too much given how small these particles are, plus with how many coats I plan on putting on it should cover nicely. I guess I'll find out.
You'll still need the catylist for the paint as well. That is what makes the paint harden as it dries. If you don't use that, the paint will remain soft and you'll never be able to sand or buff it.
Posted By: Anonymous
Re: New Paint job on a budget thread. *DELETED* - 07/06/0711:22 PM
Quote: Does anyone (Aussie Driver) know if there is anything on the market that is more aggressive than a cutting pad made for a Dual Action polisher such as the Porter Cable 7424?
Meaning do they sell any wool pads made to use on the 7424?
I know they have wool pads for rotary circular polishers, but what about for orbitals?
I don't know of any wool pads for the RO polishers. But If you need that much cutting power then another option would be to sand some more with 2000 and then use the normal cutting pad/light cutting pad on the paint.
Re: New Paint job on a budget thread. - 07/06/0711:24 PM
Quote:
2.) Metallic paint. I don't know if anyone has tried a metallic, but the general thought is that the metallic particles will not say suspended properly as they would with spraying. As well, the wet sanding process will either be hindered by the metallic particles and/or grind them down.
IIRC Metallics were ruled out as unusable in one of the previous 100 page iterations of this thread. Rolling and sanding didn't work well.
Posted By: Anonymous
Re: New Paint job on a budget thread. - 07/06/0711:32 PM
Quote: Ahhhh... I think you had better test this all out on some sample. You are introducing too many new variables into the recipe and each of them on their own has proven not to work very well on their own.
The metalic pieces may be small... and that works great with the spray where they are atomized and randomly distributed during the painting. But when you roll.. you are going to find the metal particles concentrating in lines ( that will follow the pattern you rolled the paint on ). The ends of the rollers will leave a slightly greater concentration of metal particles - and hence you will see a pinstriping type effect instead of an even distribution of the particles.
You might as well spray if you are planning to go with that automotive metalic paint. I imagine that any attempt to roll with that paint is going to result in something that is going to have you cursing.
It's a gorgeous color... but the paint and metalic particles is going to prove to be its downfall when rolling and when wetsanding..
Do a sample... but don't do it on the car until you have proven to yourself that it is not going to look like a dogs breakfast
Yeah I am going to sample the paint on something for sure, and I do have access to a 30-40PSI air compressor and paint guns, so I may have to go that route. Is primer still okay to roll?
Quote: You'll still need the catylist for the paint as well. That is what makes the paint harden as it dries. If you don't use that, the paint will remain soft and you'll never be able to sand or buff it.
From what I have read, you just add the catalyst to the paint in the proper amounts when I am ready to spray?
Update:
I sanded a little today, I went out and got a $20 orbital sander/polisher from Big Lots (Hey, it works), here's the results from my first time (total of 2-3 hours sand time today):
As you can see, there is still semblances of red under what I sanded -- from what I understand, someone painted over the old paint perhaps?
Side shot of the same stuff
Bad color but you get the idea
Much better representation.
How far do I go before I stop sanding? When I no longer see the old color? I am using 50 grit right now, should I up that to a finer grit paper? This is my first time sanding anything. Thanks.
Re: New Paint job on a budget thread. - 07/06/0711:34 PM
Argh - paint prep is driving me crazy!
Every time I think I'm ready for a final roll, I find more stuff to fix. Most of this is related to blocksanding areas that then show brand new low-spots (or high spots). I've primed many of these areas, and sanded some more, but they just aren't perfect.
Question - I'm considering brushing rustoleum straight from the can onto my problem areas to use the paint to fill in the low spots. Will this work?
Most of these areas are probably 2 inches square or so - a weird spot in the middle that I just can't get right with primer and block sanding.
I figured if I brushed it on heavy in my trouble spots, let it dry well (a day or two) and then rolled over it, it should be OK. Has anyone else had this issue or am I just too much of a perfectionist?
FYI - this is satin black I'm working with, not gloss, if that makes a difference.
Help! Thanks!
Posted By: Anonymous
Re: New Paint job on a budget thread. - 07/06/0711:36 PM
I've posted this before but the Ace Rust Stop paint is Rustoleum i'm told at Ace by the paint guy. They have the Safety Green in stock in gallon and rattle cans at least here. Pretty close to a teal, not sure what shade your looking after though.
Posted By: Anonymous
Re: New Paint job on a budget thread. - 07/07/0702:35 AM
Quote: How far do I go before I stop sanding? When I no longer see the old color? I am using 50 grit right now, should I up that to a finer grit paper? This is my first time sanding anything. Thanks.
First thing, I hope you washed the car thoroughly and then used some type of wax/contaminant remover. Prep-Sol is the "correct" cleaner but I've had luck with washing with Dawn dish soap and then doing a mineral spirits wipe down. Wiping the mineral spirits on with one rag and then following up immediately behind with a clean rag to collect the nasty stuff (silicon, wax, etc) trying to rotate the clean rag to not wipe stuff back onto the surface.
I would not sand all the color off. Just sand enough to key the old paint (take the gloss off and give some fine scratches for the new paint to grab onto) and smooth it out (ie get rid of the pits and high spots) without going to metal or bare plastic. Any areas that still have depressions, pits, etc fill by using brushed primer or bondo if necessary and then re-sand the areas to smooth it back out. I would throw that 50 grit into a drawer. It is way too rough for what you need. It will leave scratch marks that you will have to refill with primer/paint to get a smooth surface. For the initial prep sanding of the old paint, I wet sand using 150-220 grit wet/dry paper.
---- Regarding the ACE brand Rust-Stop oil based paint. My local ACE hardware stores have tintable bases and will mix just about any color I would want. I didn't know this before this past week. It would be nice if it was a rebranded Rustoleum, but I wouldn't count on the store workers being able to give correct information.
I'm trying the BPS (Tractor Supply) paint made by Valspar (New Holland yellow). It seems to work fairly well on the test panels I've done so far. I'm going thin on the paint (thinned with about 30% mineral spirits) and the coats (it'll take about 8 to get complete coverage). I helped a friend paint a new metal house door with the ACE Rust-Stop and used some Penetrol at about 15-20% with no mineral spirits and you could see the difference in how the paint laid down and that it increased the working time by quite a bit. You could also feel the difference in the paint on your fingers, it was more "slippery. I would still suggest thinning the mix a bit (maybe 10-20%) with mineral spirits. I plan on trying this next.
Posted By: Anonymous
Re: New Paint job on a budget thread. - 07/07/0703:53 AM
Quote: Regarding the ACE brand Rust-Stop oil based paint. My local ACE hardware stores have tintable bases and will mix just about any color I would want. I didn't know this before this past week. It would be nice if it was a rebranded Rustoleum, but I wouldn't count on the store workers being able to give correct information.
Wish I had known this. I was looking at the Rust-Stop but wasn't willing to gamble on an unknown. Oh well. I started painting today with the Regal Red Rusto. It's looking good so far. I'm just painting it so it looks decent enough to sell.
Re: New Paint job on a budget thread. - 07/07/0704:12 AM
Just came in after doing my 5th coat. I sure am sick of rolling! I think that this was my last coat and I'll be shopping for some wax here real soon. I'll just put it on and we'll see where we go from there. My driver vette sure looks pretty good so far. Hope the wax keeps the shine going! If not, it is way better than what was like before.
One trick that I have found it that if you really screw up a pannel, you can get a soaked rag (mineral spirits)and wipe it all off and start over. Today, I over worked the hood twice, and didn't like the paint mixture, so I wiped it all down and started over on the hood each time.
Hope things are going good for everyone else.
Oh, before I forget, I mixed a batch of paint and really thinned it down. After it dried, it was cloudy. Probably not enough paint in it do cover completely. So be sure not to over thin it...
Here is a recap so far minus the coat i just put on it. It even looks better now at 5 than in the coat 4 pic:
Posted By: Anonymous
Re: New Paint job on a budget thread. - 07/07/0708:34 AM
This may be a stupid questions, but I'll go ahead with it anyway.
I just bought some ACE Rust Stop (International Blue Gloss) from ACE Hardware. I noticed, though, it says "Salvent-Based Enamel" instead of Rust-Oleum's "Oil Based Enamel". Is this OK? Did I mess up? If it is OK, Will I still need to mix the same amount of Mineral Spirits?
Also, how do you mix paint an Mineral Spirits (as in, In what container do you mix it in)?
Re: New Paint job on a budget thread. - 07/07/0710:07 AM
Quote:
Also, how do you mix paint an Mineral Spirits (as in, In what container do you mix it in)?
Thanks, guys!
not sure what others did or if what I did was right but I took whatever bottle was left in the recycling bin with a lid. first was a spagetti sauce bottle and poured paint and MS in it and shook the hell out of it then poured it in the roller tray...then it was a juice bottle then a pop bottle. paint was only good in each for a few days then it started clumping. I cleaned the bottles out good first with water, then mineral spirits.
Posted By: Anonymous
Re: New Paint job on a budget thread. - 07/07/0701:36 PM
I am using old pickle jars for my project.Does not looks like I will be painting this weekend just when you think you are ready something else needs to be prepped and re-ppreped ... Still to many imperfections on some of body panels More bondo and primmer needed.
Posted By: Anonymous
Re: New Paint job on a budget thread. - 07/07/0710:09 PM
Thanks for the answers. Does anyone know about my other question (the solvent based enamel)?
Re: New Paint job on a budget thread. - 07/08/0701:14 AM
I just got in the house to give the arms a rest. I just put my 1st coat (by hand) of "Nu Finish" on the vette. The shine is great and you would have never guessed it was painted with a roller.
I havn't buffed it at all. Just put the Nu Finish on over the last coat I put on last night.
I'll let it harden a bit before I do anything with a buffer.
Now I have a long day in front of me to get it put back together.
Re: New Paint job on a budget thread. - 07/08/0701:21 AM
Here is that Nu Finish stuff... $6.00 at Fred Meyers.
Posted By: Anonymous
Re: New Paint job on a budget thread. - 07/08/0706:48 PM
Tumbleweed rolls by...
Posted By: Anonymous
Re: New Paint job on a budget thread. - 07/08/0708:03 PM
Depending on which Rust Stop paint they had it was either listed as Solvent or Oil based for some reason. Even if it wasn't the exactly same as Rustoleum it should be pretty close, they even had all the popular Rustoleum colors under the Ace label, Harbor Blue, Regal Red etc..
I got some of the Safety Green to practice, i'll post some pics to show what it looks like on a panal when I can get to it.
Posted By: Anonymous
Re: New Paint job on a budget thread. - 07/09/0712:12 AM
That shine is awesome. Great job on the paint.
I've used that nu-finish liquid before. Good stuff as wipe-and-shine products go. It keeps the bird droppings and tree sap from sticking, anyway. Needs to be re-applied every three weeks or so to maintain protection if left to the elements.
You did give the paint a few days to dry first, right?
Re: New Paint job on a budget thread. - 07/09/0712:54 AM
Quote: That shine is awesome. Great job on the paint.
You did give the paint a few days to dry first, right?
Actually, I let it bake in the 100 degree heat for 11 hours and started waxing at the 22 hour mark. The paint was hard as nails. I'll get to buffing it in a month or so...
As my friends say, "It's just a Chevy"
heh...
Posted By: Anonymous
Re: New Paint job on a budget thread. - 07/09/0712:59 AM
Quote: I just got in the house to give the arms a rest. I just put my 1st coat (by hand) of "Nu Finish" on the vette. The shine is great and you would have never guessed it was painted with a roller.
I havn't buffed it at all. Just put the Nu Finish on over the last coat I put on last night.
I'll let it harden a bit before I do anything with a buffer.
Now I have a long day in front of me to get it put back together.
Here is another picture with 5 coats and the wax:
Whoa, thats a good shine even with Nu-Finish...
Posted By: Anonymous
Re: New Paint job on a budget thread. - 07/09/0702:28 AM
Probably should have asked before I did it but...
rustoleum + engine bay = ok right? heatwise I mean.. It looks great but I'm slightly nervous about any problems I might have with heat in the future, Its not like I painted inches from the exhaust manifold or anything but still?
Re: New Paint job on a budget thread. - 07/09/0701:28 PM
Quote:
Probably should have asked before I did it but...
rustoleum + engine bay = ok right? heatwise I mean.. It looks great but I'm slightly nervous about any problems I might have with heat in the future, Its not like I painted inches from the exhaust manifold or anything but still?
Ever seen how HOT beetle rear aprons and engine bays get? Here's a pic of my engine bay in my 74 beetle, they get really really hot, and under the rear apron is a pair of glass packed muflers that sit about 1/2" away from the metal, and the headers sit the same around the sides and top. Also the paint on this motor (the actual tins; blue paint) was painted at the same time I originally painted the car, it's dupli-color's engine enamel, that paint is AWESOME, it sprays like an air brush out of the can and lasts forever!!! I think you'll have no issues with heat at all, just give it at least a week to cure for the really hot areas.
Posted By: Anonymous
Re: New Paint job on a budget thread. - 07/09/0704:28 PM
As my first piece using Tremclad Rust paint, I took off the right front fender, because it had a big chunk rusted out of the edge of the wheel well, and took it into my garage..
After the body work on it, I gave it 7 coats of paint, sanding with 400 after the first coat, then every 2nd coat with 600, 800 and 1000 grit. Every time, I got to bare metal on edges and sharp folds.After the 1000 grit, it was even shinier than I had hoped for, except for the bare spots. I gave it 2 more coats. Now, using 1500 grit, I still have about 20 small bare spots. I'm going to have to get this back on the car, so intend to just touch up the bare spots while on the car. Any advice on this appreciated - I still have the rest of the car to do, and need to know what I'm doing wrong. Thanks, Don
Re: New Paint job on a budget thread. - 07/09/0706:51 PM
I sanded through the edges on my first 2-3 sessions before I realized I needed to do something different. Taping the edges off each time I wetsanded helped me a bunch on my practice panel. It kept me from accidentally knocking the paint off in these areas with the coarser rounds of sanding. Toward the end of each session, I pulled the tape off and touched the edges up carefully, using the finest grit possible.
This technique will also prove useful in your final polishing.
Posted By: Anonymous
Re: New Paint job on a budget thread. - 07/09/0708:08 PM
Quote: I sanded through the edges on my first 2-3 sessions before I realized I needed to do something different. Taping the edges off each time I wetsanded helped me a bunch on my practice panel. It kept me from accidentally knocking the paint off in these areas with the coarser rounds of sanding. Toward the end of each session, I pulled the tape off and touched the edges up carefully, using the finest grit possible.
This technique will also prove useful in your final polishing.
That sounds like a good technique; I'll try it on my next panel. Thanks, Don
Re: New Paint job on a budget thread. - 07/10/0705:32 AM
I spent yesterday and part of today putting the vette back together. Got most of it done.
5 coats of Gloss Black 1 coat of Nu Finish
Posted By: Anonymous
Re: New Paint job on a budget thread. - 07/10/0707:50 AM
Blackstone any updates on the Top Secret? I'm thinking of using the T-100 for a possible up coming project.
Posted By: Anonymous
Re: New Paint job on a budget thread. - 07/10/0712:03 PM
I have waited a bit over three months to do the final wet sanding and detailing on the car. I've mucked around with the hardtop and some other stuff before (and before my accident last year after which I had to re-paint it all again...).
I'm starting with the hood and so far I have spent about 5 hours wet sanding it. I started with a very gentle 1200 sand, basically just to get the crud off the paint and to get through the worst of the orange peel.
Then I spent a couple of hours with 1500 just going really slowly and doing a section at a time until I was happy with the result.
The last couple of hours were spent on some quality time with some 2000. People have mentioned before that the paint starts to get a shine just from the 2000 sanding. You can see what they mean by the pic below.
Once I have finished the detailing of the hood I will post some more pics showing each stage of the process. By then my holidays will be over so I'll then have to try and do a panel per weekend until it's all finished. So I hope that I can avoid women in 4x4's for another couple of months....
Re: New Paint job on a budget thread. - 07/10/0701:15 PM
Quote: Blackstone any updates on the Top Secret? I'm thinking of using the T-100 for a possible up coming project.
I completed my final wetsanding a few days ago, but I'm at a stand still until my brother's polisher becomes available. I don't want to buy one until my budget affords a decent-quality unit, so I tried some Turtle polishing compound with a hand applicator for now. The shine is noticeably coming out and I'm confident that I'll be able to retrieve the shine I had after coat #2(page 17) with a machine polisher and some good-quality compounds. Even with minimal hand-polishing, the shine is approaching that of my truck's current BC/CC finish.
Each of my coats landed around 25-30% thinned with TS-101 thinner. The only variation I plan to try next time is a fine bristle-type tipping brush in lieu of the foam just to see what happens. I experienced a lot of what's best referred to as "ripples" from tipping with the foam brush, but was able to sand them down to an almost-acceptable level. I suspect that the finer lines produced by the bristle-type brush may have an easier time self-leveling, saving a ton of work/time later on.
All that being said, I highly recommend Top Secret's products.
It may prove worthwhile to PM MontanaMan. He purchased a can of TS-100(white I think) back in May but hasn't chimed in yet.
Stay tuned...
Posted By: Anonymous
Re: New Paint job on a budget thread. - 07/10/0703:03 PM
It seems that Rustoleum has a line of topside boat paint as well:
Re: New Paint job on a budget thread. - 07/10/0704:54 PM
If I read it right its not a urethane paint. I could be wrong tho.
Posted By: Anonymous
Re: New Paint job on a budget thread. - 07/10/0709:03 PM
I can't tell for sure. It's definitely an alkyd paint, but it doesn't mention anything about urethane or polyurethane.
Posted By: Anonymous
Re: New Paint job on a budget thread. - 07/10/0711:24 PM
Hello All,
This thread is fantastic! Let me apologize for bringing another Ford into the picture, but I'm convinced that my baby will get some much deserved paint soon.
Just have a couple of questions if anyone has a second, I am looking at doing Regal Red from Rustoleum. For awhile, it seemed that I only had the Stops Rust Brand to choose from, but I happened to go to a Lowe's on the way home from work. They have Regal Red in Professional in Quarts for only about 40 cent more.
Obviously, either way would be extremely cheap...I'm looking for opionions on which one out of the 2 would hold up longer against oxidiation. I'm ruling out the Brightside due to the price and local availability.
By the way, for all the good that 69Charger has done to this world, may the highest place in Beer Heaven be reserved for him.
Posted By: Anonymous
Re: New Paint job on a budget thread. - 07/11/0703:58 AM
Let me apologize for bringing another Ford into the picture, but I'm convinced that my baby will get some much deserved paint soon.
Hey, that's what I'm here for. Now I have a way to make it look better without tripling the purchase price.
Posted By: Anonymous
Re: New Paint job on a budget thread. - 07/11/0705:16 AM
has anyone tried silver in either rustoleum or brightside?
Posted By: Anonymous
Re: New Paint job on a budget thread. - 07/11/0705:20 AM
Quote: If I read it right its not a urethane paint. I could be wrong tho.
I mentioned this paint a few pages back...looking at the can, it's just another alkyd enamel like regular rustoleum. Other than the price tag, I can't find any obvious difference between this and the regular stuff. It's definetly NOT a urethane like Brightside.
Posted By: Anonymous
Re: New Paint job on a budget thread. - 07/11/0705:38 AM
Quote:
Quote: Hey all, I joined here to chat about this DIY paint job ...
...The paint I hope to use (Omni Blue Metallic):
Is this standard automotive paint? If so I see a couple issues. 1.) I don't think anyone here has tried that type of paint yet. No one has tested the self-leveling capabilities of such a paint. As well, you would have to make sure it is a single-stage automotive paint (i.e. NOT a base coat + clear coat system). Even with that, unless you add the catalyst (hardener) like you would when spraying, I'm not sure it would cure properly.
2.) Metallic paint. I don't know if anyone has tried a metallic, but the general thought is that the metallic particles will not say suspended properly as they would with spraying. As well, the wet sanding process will either be hindered by the metallic particles and/or grind them down.
DO IT DO IT DO IT!!! The subject of using this type of paint comes up every once in a while, everyone says it won't work and then the person asking the question doesn't do it. As far as I know, nobody has ever actually tried it. I've read this whole thread a long time ago, and I can't remember anyone ever actually posting the results of trying this. There are lots of reasons it might not work, but until someone actually puts some time into trying I'm not totally convinced it won't work.
I've sprayed a fair amount of metallic paint, and it's definetly not as forgiving as a solid color, but I think you might be able to find a technique to do this with. I would suggest trying to apply it as "dry" as possible...work as much paint out of the roller as you can before putting it on the car.
As far as color sanding it, I don't think it should be any big deal. I've wet sanded metallic paint before spraying a clear on it without any problems. I don't see why it would buff out any different than any other paint. The metal particles in the paint are microscopic. Metallic paints have been around since the 1950s...I'm sure there were plenty of paint jobs back then that got buffed out too. Adding a catalyst is no big deal...I've used hardener with these alkyd enamels and then put it on with both a roller and a brush. The only real difference is the curing time is miles ahead of using straight paint, and you don't get to reuse your old roller .
If I had *any* spare time at all I would have tried this myself...but I don't. I'm really curious to see it done though. It might come out a horrible mess, but until someone tries it we'll never know. And I really dig the color too!
"Ok, so i'm not real impressed with Rustoleums boat paint. Heres what I did:
Sanded the panel with 220 then 400 Washed with mild soap and water Dried Wiped down with mineral spirits and let dry for 2 hours Wiped down with tack cloth Applied paint Waited 48 hours
The paint started flaking right off. I guess I will try the professional series unless anyone can point out a step I did to cause poor adhesion. "
Cool truck by the way, It looks like a good starting point for a decent DIY paint job. My 67 Mustang was pretty much a dead horse when I got it. I was able to get it running and driving down the road...did neither when I bought her. I took the molested body and redid it correctly. After all that who can afford thousands for a paint job? Not me anyway. Let me know how your truck turns out.
Thanks
Posted By: Anonymous
Re: New Paint job on a budget thread. - 07/11/0701:54 PM
Quote:
Quote:
Quote: Hey all, I joined here to chat about this DIY paint job ...
...The paint I hope to use (Omni Blue Metallic):
Is this standard automotive paint? If so I see a couple issues. 1.) I don't think anyone here has tried that type of paint yet. No one has tested the self-leveling capabilities of such a paint. As well, you would have to make sure it is a single-stage automotive paint (i.e. NOT a base coat + clear coat system). Even with that, unless you add the catalyst (hardener) like you would when spraying, I'm not sure it would cure properly.
2.) Metallic paint. I don't know if anyone has tried a metallic, but the general thought is that the metallic particles will not say suspended properly as they would with spraying. As well, the wet sanding process will either be hindered by the metallic particles and/or grind them down.
DO IT DO IT DO IT!!! The subject of using this type of paint comes up every once in a while, everyone says it won't work and then the person asking the question doesn't do it. As far as I know, nobody has ever actually tried it. I've read this whole thread a long time ago, and I can't remember anyone ever actually posting the results of trying this. There are lots of reasons it might not work, but until someone actually puts some time into trying I'm not totally convinced it won't work.
I've sprayed a fair amount of metallic paint, and it's definetly not as forgiving as a solid color, but I think you might be able to find a technique to do this with. I would suggest trying to apply it as "dry" as possible...work as much paint out of the roller as you can before putting it on the car.
As far as color sanding it, I don't think it should be any big deal. I've wet sanded metallic paint before spraying a clear on it without any problems. I don't see why it would buff out any different than any other paint. The metal particles in the paint are microscopic. Metallic paints have been around since the 1950s...I'm sure there were plenty of paint jobs back then that got buffed out too. Adding a catalyst is no big deal...I've used hardener with these alkyd enamels and then put it on with both a roller and a brush. The only real difference is the curing time is miles ahead of using straight paint, and you don't get to reuse your old roller .
If I had *any* spare time at all I would have tried this myself...but I don't. I'm really curious to see it done though. It might come out a horrible mess, but until someone tries it we'll never know. And I really dig the color too!
I agree with toolbox, What do you have to lose, but maybe you outta try a test panel just because all the decent looking cars here have been done with solids. Personally, I'm not crazy about solid blues except on maybe a 50's car or earlier.
Here's my plan of attack if someone would like to put in their 2cents. I'm going to roll rustoleum rusty metal primer straight out of the can based on older posts. This way I have the high solids to smooth out the surface as much as possible before paint. I figure on wet sanding the primer with 400 grit. Then I'll go ahead and due the Regal Red Professional Rustoleum. Wet sanding after two coats and repeat until full coverage is achieved. I'll probably use the Poorboy polish that Aussie recommends.
I'm hoping that the Rustoleum Professional would last longer against fading and that's why I'm choosing it over Stops Rust. I really like LUV4X4's result with the safety red, I'm just looking for more of a "blood red" color.
The only thing I'm not sure of is the Aluminum pieces on my car. The fake side louvers and the hood louvers on my stang are aluminum, as well as my Quarter Panel end caps and probably my headlamp buckets.
Should I use Rusto's aluminum primer on those parts? I want to insure paint adhesion, but I'm concerned about the different colors of the primers. I'm just a little worried that the paint would end up lighter looking on the aluminum parts. Any suggestions would help.
Re: New Paint job on a budget thread. - 07/11/0705:00 PM
Quote:
Quote:
Quote:
Quote: Hey all, I joined here to chat about this DIY paint job ...
...The paint I hope to use (Omni Blue Metallic):
Is this standard automotive paint? If so I see a couple issues. 1.) I don't think anyone here has tried that type of paint yet. No one has tested the self-leveling capabilities of such a paint. As well, you would have to make sure it is a single-stage automotive paint (i.e. NOT a base coat + clear coat system). Even with that, unless you add the catalyst (hardener) like you would when spraying, I'm not sure it would cure properly.
2.) Metallic paint. I don't know if anyone has tried a metallic, but the general thought is that the metallic particles will not say suspended properly as they would with spraying. As well, the wet sanding process will either be hindered by the metallic particles and/or grind them down.
DO IT DO IT DO IT!!! The subject of using this type of paint comes up every once in a while, everyone says it won't work and then the person asking the question doesn't do it. As far as I know, nobody has ever actually tried it. I've read this whole thread a long time ago, and I can't remember anyone ever actually posting the results of trying this. There are lots of reasons it might not work, but until someone actually puts some time into trying I'm not totally convinced it won't work.
I've sprayed a fair amount of metallic paint, and it's definetly not as forgiving as a solid color, but I think you might be able to find a technique to do this with. I would suggest trying to apply it as "dry" as possible...work as much paint out of the roller as you can before putting it on the car.
As far as color sanding it, I don't think it should be any big deal. I've wet sanded metallic paint before spraying a clear on it without any problems. I don't see why it would buff out any different than any other paint. The metal particles in the paint are microscopic. Metallic paints have been around since the 1950s...I'm sure there were plenty of paint jobs back then that got buffed out too. Adding a catalyst is no big deal...I've used hardener with these alkyd enamels and then put it on with both a roller and a brush. The only real difference is the curing time is miles ahead of using straight paint, and you don't get to reuse your old roller .
If I had *any* spare time at all I would have tried this myself...but I don't. I'm really curious to see it done though. It might come out a horrible mess, but until someone tries it we'll never know. And I really dig the color too!
I agree with toolbox, What do you have to lose, but maybe you outta try a test panel just because all the decent looking cars here have been done with solids. Personally, I'm not crazy about solid blues except on maybe a 50's car or earlier.
Here's my plan of attack if someone would like to put in their 2cents. I'm going to roll rustoleum rusty metal primer straight out of the can based on older posts. This way I have the high solids to smooth out the surface as much as possible before paint. I figure on wet sanding the primer with 400 grit. Then I'll go ahead and due the Regal Red Professional Rustoleum. Wet sanding after two coats and repeat until full coverage is achieved. I'll probably use the Poorboy polish that Aussie recommends.
I'm hoping that the Rustoleum Professional would last longer against fading and that's why I'm choosing it over Stops Rust. I really like LUV4X4's result with the safety red, I'm just looking for more of a "blood red" color.
The only thing I'm not sure of is the Aluminum pieces on my car. The fake side louvers and the hood louvers on my stang are aluminum, as well as my Quarter Panel end caps and probably my headlamp buckets.
Should I use Rusto's aluminum primer? I want to insure paint adhesion, but I'm concerned about the different colors of the primers. I'm just a little worried that the paint would end up lighter looking on the aluminum parts. Any suggestions would help.
Thanks,
Not to pee on your parade, but it won't work. Auto paints use a catylist, where a chemical reaction occurs to "cure" the paint. Without hardner, the paint will stay soft for years, too much and it will over dry, become brittle and crack. You'd be trying to roll single stage paint, and you would have to use a hardner, single stage paints are much like bondo, when you mix in the hardner you got about 3mins to work the bondo before it becomes hard and blobs making it impossible to smooth out, which is basically the same mess you'll end up with auto paints. Plus the metalics would be hard if not impossible to keep uniform, even with spraying using HVLP/spray gun (air) it's hard for the inexpirenced painter to get the metalic uniform and not end up with "zebra" strips on their whole car let alone trying to roller metalic paint. The enamels (tremclad/rustoleum) do not use a catylist, the "gas/vent" and dry. To and extent the mineral spirits is a catylist, ineffect decreasing pot life, but at the same time making the paint thinner, and giving you the ability to apply thinner coats and they self level. You may be able to do a small peice with a roller and auto paints like a mirror, but a hood/roof, no way, you'll end up with a big ball roller with auto paint in a stringy mess!!! SIngle stage paints are designed to "flash" litterelly within 20 mins, that's why with single stage paints you have 20-30mins to recoat, or 5 days until it's fully vented (enough to recoat and not disturb/re-wet the underlying layer; which typically presents it'self by "wrinkling". I'd rather explore putting metalic in tremclad/rustoleum, and explore mixing in tremclad clear coat (liquid, only available to us lucky guys in canada!!!); that i think has a really good chance.
Posted By: Anonymous
Re: New Paint job on a budget thread. - 07/11/0705:11 PM
If anyone knows it would be the original roller. Charger has spoken! I figured it was worth a try by someone in the Pioneer spirit of all those here, but a friend of mine did do an amatuer job on a car of his, and even shooting it through a gun he had a zebra on his hands. It was a beater so he didn't mind much.
What about making rusto stick to aluminum parts???
Posted By: Anonymous
Re: New Paint job on a budget thread. - 07/11/0705:54 PM
Quote:
Not to pee on your parade, but it won't work. Auto paints use a catylist, where a chemical reaction occurs to "cure" the paint. Without hardner, the paint will stay soft for years, too much and it will over dry, become brittle and crack. You'd be trying to roll single stage paint, and you would have to use a hardner, single stage paints are much like bondo, when you mix in the hardner you got about 3mins to work the bondo before it becomes hard and blobs making it impossible to smooth out, which is basically the same mess you'll end up with auto paints. Plus the metalics would be hard if not impossible to keep uniform, even with spraying using HVLP/spray gun (air) it's hard for the inexpirenced painter to get the metalic uniform and not end up with "zebra" strips on their whole car let alone trying to roller metalic paint. The enamels (tremclad/rustoleum) do not use a catylist, the "gas/vent" and dry. To and extent the mineral spirits is a catylist, ineffect decreasing pot life, but at the same time making the paint thinner, and giving you the ability to apply thinner coats and they self level. You may be able to do a small peice with a roller and auto paints like a mirror, but a hood/roof, no way, you'll end up with a big ball roller with auto paint in a stringy mess!!! SIngle stage paints are designed to "flash" litterelly within 20 mins, that's why with single stage paints you have 20-30mins to recoat, or 5 days until it's fully vented (enough to recoat and not disturb/re-wet the underlying layer; which typically presents it'self by "wrinkling". I'd rather explore putting metalic in tremclad/rustoleum, and explore mixing in tremclad clear coat (liquid, only available to us lucky guys in canada!!!); that i think has a really good chance.
Any alkyd enamel like Rustoleum,, Tremclad, TSC, Van Sickle, etc. can be used with a catalyst just like alkyd synthetic car paint. Most people don't, and given the safety concerns that's probably a good thing. The TSC/Van Sickle usually has the urethane catalyst sold on the same shelf. You mix it 8:1. Pot time is around 3 hours IIRC (going on memory here...could be longer). I've used this catalyzed paint with both a roller and a brush...never had any problems with the working time. I've never painted a whole car, but I have done the entire trunk of my Olds in one sitting. Never had any problems with lifting/sticking etc. It does cure much faster than a non-catalyzed paint (tacky in about 3 hours, dry to the touch in 4 or 5). Here's the trunk:
Here's the interior:
Both areas are pretty big, and I painted them both in one sitting. Both got a second coat about a week later. I also painted an old junk fender with catalyzed enamel, and a brush. Here was the result:
The paint flows out very well...the brush strokes aren't that hard to sand out. The nice thing about doing it this way vs. a roller is I got this kind of coverage IN ONE COAT. With a brush and hardened enamel, it's probably a two-coat paint job. The only downside is the roller is done for good...the paint cures in it solid. I did manage to clean my brush...leaving it sitting in reducer seems to help a lot.
Anyway, all I'm getting at is that I don't see any reason you couldn't do this with catalyzed car paint. Synthetic car paint is an alkyd enamel just like Rustoleum. Acrylic enamel car paint may very well behave differently...I don't know, I haven't tried it...yet. I've got some PPG urethane clear coat out in the garage...if someone wants to mail me a roller I'd be happy to try and see what happens And I agree that getting a metallic to look decent might be hard if not impossible...but I still think it's worth trying. I'm just going on my own experience here...YMMV, of course .
And if someone does want to make a metallic Rustoleum, any decent size body/paint shop should be able to sell you metal flake. If you can't find it locally, just shop on line.
Re: New Paint job on a budget thread. - 07/11/0705:56 PM
Quote: If anyone knows it would be the original roller. Charger has spoken! I figured it was worth a try by someone in the Pioneer spirit of all those here, but a friend of mine did do an amatuer job on a car of his, and even shooting it through a gun he had a zebra on his hands. It was a beater so he didn't mind much.
What about making rusto stick to aluminum parts???
they sell primer for allum, and galavinized metal. But from what i've seen/done, the stuff sticks to anything like crazy. My plastic recycle bin still has paint on it (from needing something to put the front valance of the charger while painting) and it gets thrown around every week on pavment, and the damm paint is still there strong. I've got a drop on chrome, and that's been there for 7yrs, and i can't get it off!! once this stuff cures it's stuck there for good.
Also, last night i saw my old charger, the new owner just put the General Lee decals on and the car looks sweet, i kinda miss it. It was a sad sight, the car lives outside in the elements, under some big trees, and this guy washed the car once since he's had it. Guess what? The paint still look great, even though the "new" year one bumpers i traded my first born for are rusting, and the engine is starting to rust from sitting outside, but the paint..... I'll get a pic of the car next time i'm over at his house, and post it here.
Re: New Paint job on a budget thread. - 07/11/0706:17 PM
toolbox - anything that uses a catylist in my opinion won't work, a hardner is a different story, they accellerate the drying time, but with single stage paints, including enamels and laq, the reducers used are specific to spraying and have very fast flash times, barley enough time to roller anything before it starts drying. Typically anything with a recoat time of <1 hour, or after 5 days uses a catylist.
One another note, i think it would be quite easy to mix the tremclad products (including the liquid/brush clear coat) with metalics, and there's no doubt it would work. I can see it now, about 10-15% mix of clear to paint, and some small metal flakes, that would be lighter than the paint and keep in a "suspended" state in the paint and not run out of the paint. That would work for sure, and the only expirementing would be with the ratios, but i can "feel" it now.!!!
Posted By: Anonymous
Re: New Paint job on a budget thread. - 07/11/0706:23 PM
Quote:
Quote: If anyone knows it would be the original roller. Charger has spoken! I figured it was worth a try by someone in the Pioneer spirit of all those here, but a friend of mine did do an amatuer job on a car of his, and even shooting it through a gun he had a zebra on his hands. It was a beater so he didn't mind much.
What about making rusto stick to aluminum parts???
they sell primer for allum, and galavinized metal. But from what i've seen/done, the stuff sticks to anything like crazy. My plastic recycle bin still has paint on it (from needing something to put the front valance of the charger while painting) and it gets thrown around every week on pavment, and the damm paint is still there strong. I've got a drop on chrome, and that's been there for 7yrs, and i can't get it off!! once this stuff cures it's stuck there for good.
Also, last night i saw my old charger, the new owner just put the General Lee decals on and the car looks sweet, i kinda miss it. It was a sad sight, the car lives outside in the elements, under some big trees, and this guy washed the car once since he's had it. Guess what? The paint still look great, even though the "new" year one bumpers i traded my first born for are rusting, and the engine is starting to rust from sitting outside, but the paint..... I'll get a pic of the car next time i'm over at his house, and post it here.
Thanks for the info. I'd rather have it stick like a son of a gun instead of peeling off in a month. Like I said, the side and hood louvers were my concerns. When I bought the Mustang the regular autopaint was already mostly peeled off those parts.
I'm sorry to hear that the Charger is not being taken care of the way it should be, but it's nice to know that the paint is holding up well.
Posted By: Anonymous
Re: New Paint job on a budget thread. - 07/12/0712:48 AM
Ok... long story short I bought a 63 220B Mercedes Benz from a friend and decided one day to post on my car clubs forum about how to paint a car, some 6 months later I am here typing this up with the first coat of paint on the car. Ive been following this thread (now the third one I think) for some time, and now its my time to post. And yes... my father thinks Im crazy for trying this with a roller. Any ways I stripped the car of chrome and all and sanded with 40, then moved to 60 then wiped it down with degreaser to make sure it was clean and then shot it with rattle can Rustoleum automotive primer which not only covered the bare metal due to rust removal but covered those hideous sparkles embedded in the 2 mil thick clear coat . http://i14.photobucket.com/albums/a325/Ghia109/P1040672.jpg?t=1184200629
I think I might have made a mistake by repeatedly rolling over the paint after it started to dry. There are tiny bubbles but no runs and some orange peel which seems to be normal. Im planning on adding another coat on tomorrow then wetsanding. Overal I know its not the best and I know it could be better but I have to say I am pretty pleased with the way it has turned out given that I stole the car for 300 bucks. I am wondering if the wet sanding will take care of this, does the direction of how you roll seriously matter, and did you get lines in the paint due to paint collecting on the edge of the roller.
Thanks to every one that has been in this thread. www.autoblog.com wrote about a $50 paint job from some other website and I told them that this place was first and to give you guys credit. Sorry for the length but thanks again.
Re: New Paint job on a budget thread. - 07/12/0701:36 AM
Quote: I rolled on and got this......I think I might have made a mistake by repeatedly rolling over the paint after it started to dry. There are tiny bubbles but no runs and some orange peel which seems to be normal.
1st, I think that you need to thin it way more than 20%. The paint doesn't look "wet" like mine did. I thinned around 50% to the point that it looks almost like water. Like I said in an earlier post, I over thinned it and it turned out really smooth, however it didn't have enough black to cover everything and it looked cloudy up close.
2nd, You have to continue to roll the paint lightly until the bubbles start to work out, almost to being tacky. Then get off it. If the orange peel doesn't level itself out then one of two things: 1) not enough paint was put on -or- 2)not thinned down enough
I ran the roller all sorts of ways and it looks great.
Quote: I am wondering if the wet sanding will take care of this, does the direction of how you roll seriously matter, and did you get lines in the paint due to paint collecting on the edge of the roller.
I ran the brush all sorts of ways and it looks great. You get lines and bubbles on the first few passes, but then they are gone when you run over them time and time again, different ways. You paint a house the same way.
Wet sanding will fix all issues if you sand it long enough.
Re: New Paint job on a budget thread. - 07/12/0702:50 AM
Quote: Any ways I stripped the car of chrome and all and sanded with 40, then moved to 60 then wiped it down with degreaser to make sure it was clean and then shot it with rattle can Rustoleum automotive primer which not only covered the bare metal due to rust removal but covered those hideous sparkles embedded in the 2 mil thick clear coat .
I am wondering if the wet sanding will take care of this, does the direction of how you roll seriously matter, and did you get lines in the paint due to paint collecting on the edge of the roller.
Ok... here is my initial thoughts on your story. First I shivered when you mentioned the 40 / 80 grit sand paper. That is pretty coarse.
And when you sprayed the primer on... I can't imagine it having sufficient build to level up the scratches from the lower grit sand paper. Something in the 320 grit sand paper might have been better.
Once the primer was sprayed... you should have wetsanded that primer to smooth it out. Let's say using a 600 to 800 grit...
The way the picture looks.... it is almost like you rolled the paint onto unsanded primer. That would have explained the fuzzy appearance of the black coat.
IF you had sanded the primer - you also needed to again wipe the primer down with a mineral spirit dampened cloth to remove any foreign matter or debris that was left over from the sanding of the primer. Otherwise... you would have ended up with those dots in the paint appearing like in the pictures you provided.
Given where you were at in this posting... I would suggest getting some 800 grit sandpaper out and wetsanding what you have done so far. The idea being to smoother out whatever black paint is already laid down on the car. As always... the rule of thumb is that the smoother the subsurface... the smoother and shinier the paint will look when you roll it on.
Ok... so you wetsand down with the 800 until you have a fairly smooth surface with minimal defects. Then get out your trustly mineral spirit dampened cloth and wipe all the surface down again to remove the debris and crap left over from the sanding.
One hint is that when you wipe a mineral spirit dampened cloth over your wet sanded paint - it will give it a 'hint of its shine potential' until the spirit evaporates off the body. You can use this as a clue to how the potential shiny factor will be when the next layer of paint is rolled on.
Ok... Hopefully at this point we will have gotten the body and paint back to the point where the next coat of paint can be added and hopefully give better visual results and overall gloss.
At this point and onward through the next couple of coats of paint... you should be working with 800 grit and higher ( 1000 or 1200 ) while wetsanding each subsequent or alternative layer.
Hope this helps you get things on track...
Marq
.
Posted By: Anonymous
Re: New Paint job on a budget thread. - 07/12/0703:04 AM
well, this is just a fun car but Im glad to be learning. I was thinking that the rougher the surface, the better the purchase or bond of the paint would be. I was noticing that the finish was a bit gritty but I will put in the elbow grease tomorrow and try to work it out a little more. Thanks for the help guys. Ill post up once I get the things settled out a bit more.
Posted By: Anonymous
Re: New Paint job on a budget thread. - 07/12/0705:20 AM
Quote: toolbox - anything that uses a catylist in my opinion won't work, a hardner is a different story, they accellerate the drying time, but with single stage paints, including enamels and laq, the reducers used are specific to spraying and have very fast flash times, barley enough time to roller anything before it starts drying. Typically anything with a recoat time of <1 hour, or after 5 days uses a catylist.
Not sure we're on the same page... The hardener I'm talking about is a urethane catalyst that should be just about identical to the hardener used in automotive enamels. It doesn't just speed the drying time, it polymerizes the paint. It's got the same ugly isocyanate ingredients as "real" car paint hardener...which is why I said it's probably good that most people don't use it.
But...that's also why I think there's a good chance you can use "real" car paint for this. The reducers used in automotive paint are just solvents that evaporate at different rates depending on which "speed" you use. For this, I'd probably use a retarder instead, giving you maximum working time. Or, don't use a reducer at all...if you use a catalyst, the paint will cure just fine without it. It might not flow out very well, but that's another issue .
And there are still 1K acrylic enamel paints available that don't use any kind of catalyst at all...you just reduce and spray. Today this has really fallen out of favor...but people still shoot it. The one nice thing about it is since they don't have any iso's, you don't need any special respirator equipment. It's how everything from Chrysler and Ford was painted in the '50s and '60s (GM clung on to acrylic lacquer forever). OTOH, you're not supposed to touch it for a month so it can cure.
I think the answer to whether or not you could use real car paint for this is going to lie with whoever actually tries it. I'd love to see someone with more time on their hands than me do some experiments with a synthetic enamel, an acrylic enamel, and if you want to get really crazy--an acrylic urethane. Try using slow reducer, a retarder, or no reducer...try w/hardener and without. Try a brush, try a roller...see if it works. That's the only way we'll know. Maybe there's no way to make it work. Maybe there is . You can buy car paint in pints, and it's not very expensive.
If it did work...the color palate would be limitless. And the "value" lines from the major paint manufactures aren't that much more expensive than Rustoleum. More expensive yes, but it's really not bad if you look into it.
Anyway...I still think it's worth a shot. Any volunteers...
Re: New Paint job on a budget thread. - 07/12/0705:24 AM
Quote: well, this is just a fun car but Im glad to be learning. I was thinking that the rougher the surface, the better the purchase or bond of the paint would be. I was noticing that the finish was a bit gritty but I will put in the elbow grease tomorrow and try to work it out a little more. Thanks for the help guys. Ill post up once I get the things settled out a bit more.
I understand what you were thinking. Suffice to say that a 320 grit sanded surface will leave plenty of places for the paint or primer to get good adhesion.
But as you will notice... as you add more layers of paint and start wet sanding with 800 / 1000 or 1200 grit paper, the paint will still be able to grab a solid foothold and bond with the paint subsurface that you are rolling on to.
The more important theory to keep in mind is that the smoother you wet sand each subsequent or alternative coat of paint... the smoother and shiner/glossier the paint will turn out.
The other benefit is that as the top surface keeps getting smoother.. it takes far less work to wet sand the top layer in preparation for the next coat of paint. Catch the message I posted just a week ago where I try to explain the concept like a Zomboni ice surfacing machine and the similarity in concept to how we add thin layers of paint.
It all will add up to a great learning experience for you as you progress through the layers of paint. At the very least it is a great exploration into your own limits of patience and meticulousness. It takes time and patience to do this job right... and fortunately it doesn't take the highest levels of skills or secret knowledge to accomplish.
.
Posted By: Anonymous
Re: New Paint job on a budget thread. - 07/12/0702:01 PM
I have a question for the satin/flat roller's out there! Our journeyman was given the task to try this on his project. He is rolling flat black rustoleum. he is on the 5th or 6th coat and it still has really bad roller marks. I went over it as I have been playing with the method for a while, and I had no better success. it goes on easy, but then when it dries it looks bad. I am thinking for flat we may need to shoot it.
Posted By: Anonymous
Re: New Paint job on a budget thread. - 07/12/0704:28 PM
Quote: I have a question for the satin/flat roller's out there! Our journeyman was given the task to try this on his project. He is rolling flat black rustoleum. he is on the 5th or 6th coat and it still has really bad roller marks. I went over it as I have been playing with the method for a while, and I had no better success. it goes on easy, but then when it dries it looks bad. I am thinking for flat we may need to shoot it.
Maybe there's a difference in the satin vs. flat in the way it comes out. I'm sure you saw the 69 Mustang that looks really cool in satin a few pages back...other than that maybe your friend wasn't sanding every other coat. If not then the roller marks from previous coats will just multiply with each layer.
I found that on a test panel where I tried both ways. Saving a few coats to wet sand only the last one did not look nearly as good as the other half where I followed the original method everyone here goes by.
I'm guessing that is not the case and it could be that flat is just tougher to get right compared to the gloss and satin colors.
Re: New Paint job on a budget thread. - 07/12/0704:31 PM
Quote: I have a question for the satin/flat roller's out there! Our journeyman was given the task to try this on his project. He is rolling flat black rustoleum. he is on the 5th or 6th coat and it still has really bad roller marks. I went over it as I have been playing with the method for a while, and I had no better success. it goes on easy, but then when it dries it looks bad. I am thinking for flat we may need to shoot it.
I've been mid-process with Satin for about a month. My first couple coats, thinned probably 35% or more, left no marks whatsoever (and looked really good).
My last coat I think was thinned only around 20% or so, and I did get roller marks.
I'm doing another coat tonight and I plan on going back to 30 to 40% thin mix.
I'm also switching to oderless mineral spirits to have more time to "roll out" the roller marks when doing large areas like the roof, C pillers and rear quarters. (which are all one giant section on my 68 Charger).
Posted By: Anonymous
Re: New Paint job on a budget thread. - 07/12/0705:30 PM
I think he had sanded it every 2nd coat (he is gone today, will have to ask him)
I am not 100% on the mixture, I know doing the run-drip test on the stir stick it was about 4 seconds for it to go to a drip. It went on thin and looked good, it was not untill it dried it looked bad.
I had no issues when I was testing with gloss colors.
I will have to try to play with his mixture.
he thought we were kidding when we told him to try it
Posted By: Anonymous
Re: New Paint job on a budget thread. - 07/12/0706:41 PM
Quote: well, this is just a fun car but Im glad to be learning. I was thinking that the rougher the surface, the better the purchase or bond of the paint would be. I was noticing that the finish was a bit gritty but I will put in the elbow grease tomorrow and try to work it out a little more. Thanks for the help guys. Ill post up once I get the things settled out a bit more.
Very interesting car that you've got...I'm jealous that you got it for $300! You'll have to go very aggressive sanding the paint. Some of the gouges from the grit you used just look to deep from your pictures.
The sandpaper you used initially would have been ideal for prepping the metal for a skim coat of body filler. It was much to rough for any paint or even primer for that matter to level out without a ton of coats.
Try with the 600 like Marq suggested, but keep in mind that you may have to cut into the primer in some spots to get it smooth enough for the next coat.
I hope it turns out well for you! I applaud you for being able to buy such a unique car with the change found in your sofa!
Posted By: Anonymous
Re: New Paint job on a budget thread. - 07/12/0707:01 PM
ok. i feel really rediculous for having to resort to asking this here, but its my last resort.
i have started my project. i finally got my penetrol and everything i need. i have snaded and prepped my replacement fender. i have started sanding the rest of my car.
my question is, how much do i have to sand this thing? the car is a light blue. when i sand a lot i hit three different colors. one, the blue gets darker. i assume this is when im past the clear coat. the next, i hit white. i assume primer. third, i hit metal. ive only hit metal where ive needed to to remove rust.
my paint is good, a little sun faded in parts, but nothing bad. do i have to sand all the way through the clear on the whole car? or do i just need to spend some time on a spot and make sure its rough. i just dont want to waste a lot of time going through the clear on the whole car if i dont have to.
any help is greatly appreciated.
thanks.
just wanted to add. im wet sanding with 400 and a block. im also using a 320 sponge. it doesnt feel like i can get as much done with the sponge, its too soft.
Re: New Paint job on a budget thread. - 07/12/0707:19 PM
There's been a lot of this lately. Sounds like you're oversanding. At least you're not using 50 grit. You don't need to remove any clearcoat except for where peeling exists. Once any defects such as rust, dents, chips, deep scratches are smoothed out, you're only looking to roughen the surface with 320-400 grit to give the new paint something to adhere to.
I think it's OK to dry sand for prep work. I did so with 320 grit. It saved a lot of effort and any scratches were easily filled by my first coat of paint.
Posted By: Anonymous
Re: New Paint job on a budget thread. - 07/12/0707:24 PM
Quote: There's been a lot of this lately. Sounds like you're oversanding. At least you're not using 50 grit. You don't need to remove any clearcoat except for where peeling exists. Once any defects such as rust, dents, chips, deep scratches are smoothed out, you're only looking to roughen the surface with 320-400 grit to give the new paint something to adhere to.
this is my first time doing any body work. so i have no idea. thank your for clarifying it for me. wow. makes my job a lot easier
Posted By: Anonymous
Re: New Paint job on a budget thread. - 07/12/0707:27 PM
Quote: ok. i feel really rediculous for having to resort to asking this here, but its my last resort.
i have started my project. i finally got my penetrol and everything i need. i have snaded and prepped my replacement fender. i have started sanding the rest of my car.
my question is, how much do i have to sand this thing? the car is a light blue. when i sand a lot i hit three different colors. one, the blue gets darker. i assume this is when im past the clear coat. the next, i hit white. i assume primer. third, i hit metal. ive only hit metal where ive needed to to remove rust.
my paint is good, a little sun faded in parts, but nothing bad. do i have to sand all the way through the clear on the whole car? or do i just need to spend some time on a spot and make sure its rough. i just dont want to waste a lot of time going through the clear on the whole car if i dont have to.
any help is greatly appreciated.
thanks.
just wanted to add. im wet sanding with 400 and a block. im also using a 320 sponge. it doesnt feel like i can get as much done with the sponge, its too soft.
Here's what I've done before. If your paint is not cracked then you basically have to scuff sand it with 400 grit. If it's cracked you'll need to sand deeper.
What you'll want to do is pay attention to the small area's that you have been down to bare metal. Maybe rolling the paint is more forgiving, but in the past I've found that you should spray over the bare metal with primer(or roll it on if you prefer), and then feather it down to the same level as the surrounding area on the panel. If not you may notice an uneven patch under your finished paint job especially on darker colors.
I've always been told a good looking paint job depends mostly on the prep before hand. I'm sure it applies here just as much.
Posted By: Anonymous
Re: New Paint job on a budget thread. - 07/12/0707:39 PM
noted.
i should be wet sanding with 400 correct. not dry sanding?
i already primered all the parts where i went to metal. ill wet sand them to insure theyre ready to go.
Re: New Paint job on a budget thread. - 07/12/0707:52 PM
Quote: noted.
i should be wet sanding with 400 correct. not dry sanding?
i already primered all the parts where i went to metal. ill wet sand them to insure theyre ready to go.
How uniform is the current finish now?
If you have sections of varying colors(example; red paint, grey primer) it may show through even after several coats. In extreme cases, it's worthwhile to prime the entire car.
Posted By: Anonymous
Re: New Paint job on a budget thread. - 07/12/0708:53 PM
Quote:
Quote: I have a question for the satin/flat roller's out there! Our journeyman was given the task to try this on his project. He is rolling flat black rustoleum. he is on the 5th or 6th coat and it still has really bad roller marks. I went over it as I have been playing with the method for a while, and I had no better success. it goes on easy, but then when it dries it looks bad. I am thinking for flat we may need to shoot it.
Maybe there's a difference in the satin vs. flat in the way it comes out. I'm sure you saw the 69 Mustang that looks really cool in satin a few pages back...other than that maybe your friend wasn't sanding every other coat. If not then the roller marks from previous coats will just multiply with each layer.
I found that on a test panel where I tried both ways. Saving a few coats to wet sand only the last one did not look nearly as good as the other half where I followed the original method everyone here goes by.
I'm guessing that is not the case and it could be that flat is just tougher to get right compared to the gloss and satin colors.
One thing about sanding flat paint is that if you sand with a coarse paper, you'll get scratches. Which you sand out with progressively fine paper, which also gives you the shine. With flat paint, you don't want that shine, and I don't know of any other way of flattening an imperfect finish without 'polishing', nor restoring a flat finish after it's been rubbed away.
I sprayed mine with flat paint, and although I wetsanded every intermediate coat, the topcoat had to be very carefully applied because I knew I couldn't sand anything out of it!
Posted By: Anonymous
Re: New Paint job on a budget thread. - 07/13/0712:12 AM
This being the 20th page, I thought it would be a good place to put some of the excellent sites that summarize the roller technique. Going through the 200+ pages of these threads might be a bit overwhelming to the newbies.
Re: New Paint job on a budget thread. - 07/13/0703:10 AM
Question about primer and body work. I've been working on the replacement fender for my truck. It looks a lot better than it did, but if you run your hand over it, you can still feel some waves. Short of putting a full coat of bondo over the entire fender and using a long board sander, it's as good as it's going to get. Right now, I'm just working on finishing smoothing it out by wetsanding with 320, then roll a coat of rustoleum primer and sand that with 600. Does that sound ok to all the bodywork guys?
My other question concerns the rest of the truck. There is some rust I need to sand off and I few spots I need to pull out and bondo. The question is, should I sand the whole truck and roll the rusty metal primer, then do the bodywork over the primer, or do the bodywork first, then primer the truck. I'm impatient to primer the truck because I'm tired of looking at the rust.
Posted By: Anonymous
Re: New Paint job on a budget thread. - 07/13/0703:38 AM
i would do the bodywork first. then bondo, then primer, then paint. the paint tends to soak into the bondo and it will take alot of paint to stop soaking into the bondo.
Posted By: Anonymous
Re: New Paint job on a budget thread. - 07/13/0703:07 PM
The paint started flaking right off [with Rustoleum's boat paint].
Thanks, 1967mustang!
Good to know. I'm gonna go with the regular Rustoleum.
Re: New Paint job on a budget thread. - 07/13/0708:49 PM
Quote: The paint started flaking right off [with Rustoleum's boat paint].
Thanks, 1967mustang!
Good to know. I'm gonna go with the regular Rustoleum.
I don't know if I would immediately write off the Rustoleum Boat Paint... When paint starts peeling off in chunks my first thought is that there was something wrong with the surface preparation.
.
Posted By: Anonymous
Re: New Paint job on a budget thread. - 07/13/0708:58 PM
I don't know if I would immediately write off the Rustoleum Boat Paint...
I've already bought the rustoleum, actually... But another idea had crossed my mind: has anyone painted a few base coats of rustoleum and then topped it with a coat or two of Brightside?
That would certainly reduce the overall cost while (possibly) still keeping the excellence of the Brightside.
Posted By: Anonymous
Re: New Paint job on a budget thread. - 07/13/0711:19 PM
Hello Guys, I�m another guy who�s been lurking around this thread for a while. Got to congratulate you all for your efforts and result, its inspiring stuff, and what a great guy this 69charger who let the cat out of the bag, brilliant. I�ve a nice old Mercedes W123 USA spec. 300 Turbo Diesel with a manual box fitted. Goes well and is all good except some superficial body panels that are getting changed next week. I�m a Brit living here in Poland part of the year, and my Polish is rotten, but I manage until I get into technical issues, like finding paint here. That�s my biggest problem, none of the paints mentioned are on sale here. It�s wall to wall Hammerite, but I�ve yet to hear of anyone using this stuff, so if anyone knows of a reference to a success with Hammerite I�d love to hear about it, please. I�m experimenting with a Polish brand of rust paint, the vendor thought I was ding-a-ling when I told him what I was doing, but even if it turns out looking OK who knows how it would hold up? I�m currently chasing a vendor of Interlux Paints, (no idea what he stocks), up on the coast, but with my Polish and his English I�ll probably end up buying a gallon of sheep-dip? So basically what I�m saying here is this, does anyone out there reading this thread have any ideas about what can be used that�s on the market in Poland? Maybe a reader, maybe someone from another forum, I have no idea, I�m just fishing for a �solution�
Re: New Paint job on a budget thread. - 07/14/0712:19 AM
Thanks, mybuick. The entire truck will get a full coat of rusto primer and sanded with 600 before it gets any paint. I was just wondering if I could primer the truck first and do the bodywork and bondo over it. I want to get the rust under control, and this is a long term project as I have very little time to actually work on it. It's also my daily driver right now so I can't do anything that will put it down for a while. I want to get something on it before winter. I was hoping to be putting the 440 in it this month, but I will be putting that off for another couple months while I gather more parts and get more bodywork done.
A question about the paint. I've read people posting about rusto "profesional" and "stops rust" type paints. Are there really any differences in the two? The local Wal-mart and Home Depot only have the "stops rust" type paint. Wal-mart also has a similar paint by Krylon. Has anybody tried that brand? I haven't looked at Lowes or Menards as they are not in my town. I'm assuming I can use the "stops rust" type rustoleum without any problems.
Re: New Paint job on a budget thread. - 07/14/0712:39 AM
Quote: A question about the paint. I've read people posting about rusto "professional" and "stops rust" type paints. Are there really any differences in the two? The local Wal-mart and Home Depot only have the "stops rust" type paint. Wal-mart also has a similar paint by Krylon. Has anybody tried that brand? I haven't looked at Lowes or Menards as they are not in my town. I'm assuming I can use the "stops rust" type rustoleum without any problems.
I used the "stops rust" with the vette. When I was putting on the mirrors, I slipped with the screwdriver and hit the door hard enough to hear a 'thunk'. After the heart started beating again, I looked and it didn't even mark or dent it.... So far, the paint has been great. It's not perfect, but sure looks better. Thanks charger69!
Here is a finished picture, without a machine buff job yet. Nu Finished by hand...
Re: New Paint job on a budget thread. - 07/14/0702:34 AM
Quote:
I've already bought the rustoleum, actually... But another idea had crossed my mind: has anyone painted a few base coats of rustoleum and then topped it with a coat or two of Brightside?
That would certainly reduce the overall cost while (possibly) still keeping the excellence of the Brightside.
That is how I did my McLaren. Four coats of Tremclad Fire Red... and then I switched over to Brightside Fire Red.
Re: New Paint job on a budget thread. - 07/14/0704:14 AM
I just got a call from a guy I met at the swap meet today. He wants to paint his car now. it's like a virus! Everyone comes over, looks at the paint, then their friends want to come over and see it. Not one believes it was rolled...until I show them the pictures and a video of the kid rolling the t-tops. Kind of funny!
Hey Charger69, I saw a Harley (orange and black)painted truck today. The orange was sure looking close to that VW of yours. How close do you think the Rustoleum orange is to the Harley orange color?
I really like the Harley trucks, and will be doing the concept on the picture below. I played around with the photo-shop and came up with the mustang picture on the bottom.
I put chargers VW picture with the Harley truck. Pretty close. Of course, I'll jump over to a ford dealer and try to get something with the color on it to match the Rustoleum orange with.
Just think, the $3000 I saved on the paint will be put back into the car for the fun stuff. I just picked up the blue thunder intake with the dual four barrels that will fit under the 429 Boss scoop. Wouldn't of happened if the paint cost would have been out there...
Re: New Paint job on a budget thread. - 07/14/0703:13 PM
Quote:
I put chargers VW picture with the Harley truck. Pretty close. Of course, I'll jump over to a ford dealer and try to get something with the color on it to match the Rustoleum orange with.
The 'Harley' color package on a Mustang looks like a sharp and unique combination. Can't wait to see it done.
To nail the orange color you might find that straight Tremclad/Rustoleum orange is a bit orangey or light.
You might end up getting into a bit of a custom color mixing to land on the exact color that will best flatter the Mustang's side profile.
Since orange is simply yellow mixed with red... you might try a little bit of color experimenting to nail it down.
For example... take a can of Tremclad/Rustoleum orange and create a color palette on some white card board ( lay down ten or so dots of the orange on the white card board ). Then take a small can of Tremclad Fire Red or Regal Red and add a drop or two to the orange and smooosh them together to see what color they create when blended. The red would be used in small amounts to the orange as a tinting agent.
I am not sure how the black Tremclad/Rustoleum would blend with the orange. From my own experiements using the black as a tinting agent with the Fire Red, it resulted in a pottery brownish color ( rather than the dark blackish cherry red that I was hoping black and fire red would create when blended ).
So I suspect that by using the fire red or regal red with the orange should give you the Harley orangish color.
.
Posted By: Anonymous
Re: New Paint job on a budget thread. - 07/14/0705:34 PM
Quote: Hello Guys, I�m another guy who�s been lurking around this thread for a while. Got to congratulate you all for your efforts and result, its inspiring stuff, and what a great guy this 69charger who let the cat out of the bag, brilliant. I�ve a nice old Mercedes W123 USA spec. 300 Turbo Diesel with a manual box fitted. Goes well and is all good except some superficial body panels that are getting changed next week. I�m a Brit living here in Poland part of the year, and my Polish is rotten, but I manage until I get into technical issues, like finding paint here. That�s my biggest problem, none of the paints mentioned are on sale here. It�s wall to wall Hammerite, but I�ve yet to hear of anyone using this stuff, so if anyone knows of a reference to a success with Hammerite I�d love to hear about it, please. I�m experimenting with a Polish brand of rust paint, the vendor thought I was ding-a-ling when I told him what I was doing, but even if it turns out looking OK who knows how it would hold up?
I have a couple aerosol cans of Hammerite in my garage. In the U.S. I can't recall ever seeing the smooth finish Hammerite sold anywhere -- it's always the "hammered finish" stuff (like what you see on industrial machinery, usually in silver or green color). I've painted outdoor light fixtures with this stuff and it has held up well. Painted direct to metal. Don't think you would want the hammered finish for your Benz though, so make sure you don't buy a can of that...
In the U.S., Hammerite is manufactured by Masterchem (www.masterchem.com). I looked at their MSDS (couldn't find this info on the European site for Hammerite, but it might be there) and compared it with the MSDS for Rustoleum.
Similarities: U.S. Hammerite says it contains an "alkyd resin". Rustoleum says it is an "alkyd topcoat". I think we've established that Rusto is an alkyd enamel (I think).
Differences: Solvents in Rusto are listed as "Stoddard Solvents" -- which from everything I've been able to read is another name for "Mineral Spirits". U.S. Hammerite solvents contain some of the same hydrocarbons which would be found in mineral spirits, BUT also contains a high proportion of Acetone. I know acetone has been discussed somewhere here before -- and I think people have tried using it with/in place of mineral spirits to thin Rusto and it didn't work well. Evaporated too fast, paint didn't self-level as well. So, this could be a potential problem.
I'm not an expert, just getting the ball rolling with a little research.
Re: New Paint job on a budget thread. - 07/14/0707:28 PM
Quote: I just got a call from a guy I met at the swap meet today. He wants to paint his car now. it's like a virus! Everyone comes over, looks at the paint, then their friends want to come over and see it. Not one believes it was rolled...until I show them the pictures and a video of the kid rolling the t-tops. Kind of funny!
Hey Charger69, I saw a Harley (orange and black)painted truck today. The orange was sure looking close to that VW of yours. How close do you think the Rustoleum orange is to the Harley orange color?
"If you can see the imperfections, your to close"
the orange, both tremclad and rustoleum are the same color from what i've seen, but it's really close to "hemi" orange, almost identical. But orange is a funny color to take pic of, it's funny, even with a high end camera, you can take pics 1 after another, and the 2 pics look different in color. But like Marq said, you could eaisly espirement with mixing colors and once you get the ratio's down, i'm sure you could get the exact color you want.
Posted By: Anonymous
Re: New Paint job on a budget thread. - 07/14/0708:55 PM
Here are a few pictures of progress
(the spoiler is just sanded, it's not primered)
Sanded the trunk down to bare metal with an orbital sander at 220 grit and then primered with Duplicolor "Dark Gray" Primer, even though it's about as white as a ghost. I put two coats on and then wetsanded with 400 grit. Smooth! I plan on sanding/primering a piece at a time, the hood is coming next (a little bondoing for the hood will get me some good practice for the big bondo job on the door) and then paint it all at once.
The only problems I forsee is the cost of paint -- I don't really want to go with a Rustoleum/Tremclad or Duplicolor paint unless I have to. I've fallen in love with two paints, the first being that blue metallic (which I have access to spray guns and compressor if I go that route) and Honda's very own New Formula Red (which is pricey but beautiful)
Example of New Forumla Red:
Blue Metallic The Good: Awesome color, real automotive paint, I can get 3 quarts for $60 shipped The Bad: I'll have to sand ever single last bit of red paint off of my car (jambs, inner trunk, under hood, engine bay) or it will look way off
New Formula Red The Good: Awesome color, real automotive paint, won't have to sand down jambs and under hood as they are largely unfaded and still in good condition, and the color will match better than a blue will The Bad: EXPENSIVE (PPG quoted me at least $300 for a gallon)
I'm trying to imagine what a blue metallic with red door jambs will look -- this is my cheapest route
Posted By: Anonymous
Re: New Paint job on a budget thread. - 07/14/0709:20 PM
Thank you very much for your research, much appreciated really. I have been searching around for about two weeks and spoken to numerous people in Poland. There is a �distributor� for Rustolium but they won�t import what I want? Top Secret are looking for distributors and Interlux sent me a list of Polish outlets, but all the phone numbers were unobtainable. Later Interlux sent me two further numbers, one unobtainable the other a guy who told me to call him on Monday, who knows if that could bring a result? In the meantime I am experimenting with a Polish product called Cynkal made by Malexim, their specification sheet, (In Polish), is at this address
I looked at the specification sheet for Rustoleum, it seems quite different to this Polish stuff? What I will do is send the Rustoleum MSDS to Malexim and ask them if they have a product that�s close to the Rustoleum, they have a lot of products in their range. The Cynkal I have applied four coats today, using their thinner it sets rock hard in about 3 hours, even hard enough to wetsand. It flashes a bit quickly but is manageable given a bit of forethought as to how to apply the stuff, and with the foam roller and about a 50/50 mix doesn�t orange peel or bubble. I�m just playing with this stuff but who knows it might be perfect if I can get a gloss on it with polishing? I tried it at first with mineral spirits and it wasn�t hard after 24 hours and still gave off a strong odor of the spirits after that time. So I�ve opted for their thinners just for this exercise. Anyway it�s allowing me to build a familiarity with rolling thin coats and wetsanding. There is a gloss Hammerite here, all I have managed to find out by searching are a few claims that it fades after a year or two, but who knows? It also contains silicon and someone mentioned this can cause �problems�, but what problems they didn�t say? I�m certainly not wanting to re-invent the wheel here, so if I can get Brightside I�ll go for it. What stops me from obtaining Rustoleum�s �Combi Colour�, as it�s sold in the UK, is that it�s $53 for 2.5 lts. and I�d have to pay $100+ for transport to Poland making it over $200 a gallon. So that�s my story so far, and I know I�ll find something, one way or another, and I�ll get it on my car too, I�m totally determined. It would just be nice to drop on the right paint at the right price otherwise I seriously doubt it would be a $50 paint job. Thanks for your help Black Mariah, now I have the Rustoleum MSDS I have another tool to use
Re: New Paint job on a budget thread. - 07/14/0711:01 PM
Quote:
the orange, both tremclad and rustoleum are the same color from what i've seen, but it's really close to "hemi" orange, almost identical. But orange is a funny color to take pic of, it's funny, even with a high end camera, you can take pics 1 after another, and the 2 pics look different in color. But like Marq said, you could eaisly experiment with mixing colors and once you get the ratio's down, I'm sure you could get the exact color you want.
I went to two hardware stores and couldn't find the orange rustoleum. There is a ford dealer on the corner not to far from the house. As soon as I get the orange, I'll snag a pamphlet or a paint code from them to See how close I can get it.
Here is my concept pic:
Posted By: Anonymous
Re: New Paint job on a budget thread. - 07/15/0705:19 PM
Hi, I've spent hours reading through the lists and was wondering if what was ultimately determined to be the best methods/materials have been condensed in a FAQ?
For example I'm still not clear if the std Rustoleum is a poor choice relative to the Professional product, best mineral spirits mixing ratio etc?
thanks
Posted By: Anonymous
My 240sx - 07/15/0706:36 PM
Fellow red s13 owners, Rustoleum Sunrise Red is almost a d@mn near perfect match for your factory paint. Here is a post I put up on a nissan forum.
Just the rear quarters which were rusted and severely faded when I got it. (no wax would save it, trust me)
Q&A:
Q1. Did you take your time? A1. No - and if you did you would have WAY better results. I have a wife and 3 kids, so my time is limited on being in the garage for hours on end.
Q2. Are you happy with the results? A2. Yes, looks a HECK of alot better than it did before!
Q3. Was it easy? A3. Yes, but I hate body work, and fixin around wheel wells is not fun for novices. Its not glass smooth but I'm ok with it. For application of paint, very straight forward.
It's not showroom finish. If the car passed by on the street you wouldn't notice anything out of the ordinary. Up close you can see it. But, I have not wetsanded at all, or waxed or anything. I'm letting it bake in the hot sun for a while.
Here goes...
When I first got the car, seconds after I pulled up in front of the house:
Bubbling purple tint removed, bra removed, body stripe removed (cept for parts of pignose ), and noobie novice patch work performed on rear quarters. POR-15 was used. Rear quarter panels sealed on both sides (interior panels removed to gain access):
another shot:
High Gloss Sunrise Red with roller. Rear quarters on both sides, and all along the rocker panel (removed the rear wiper a while ago too):
The driver side was exactly the same pretty much incase you were wondering.
Whats next you say? Spoiler removed and hatch repainted. Possibly the antenna is gone too. When the wife goes out of town next, the rear quarters are getting wetsanded and the whole car polished. The front area is faded slightly from the bra being on it so long from the previous owner. Oh well.
This car is a daily driver, to work and back, hockey, adverse weather conditions all through the winter and is parked in a shadey area of town while I'm at work (not from the sun either). This car will never get a professional paint job while its in my hands. I take good care of it mechanically, but the money isn't there to spend on it for a paint booth. (car was <500 bucks)
Cheers,
lbrowne
Posted By: Anonymous
Re: My 240sx - 07/15/0710:06 PM
That is a nice little commuter for under 500 bucks.
Thanks to all,
And respects to 69chargeryeehaa,
JP.
Posted By: Anonymous
Re: New Paint job on a budget thread. - 07/16/0702:43 AM
Quote: Proper detailing is very different to just polishing. Polish is designed to give a painted surface a depth of shine. After wet sanding you should be trying to remove all of the sanding marks on the paint surface. To do this you will need a cutting compound or a swirl remover. You should also follow a proper 'polishing' technique whereby you apply the product at low speed with a polisher and once it has been worked into the paint, then increasing the polishers speed and working in the product until most of the residue has been buffed away. Then you wipe away the remenants with a cloth.
The pic below shows my hardtop after two passes with Poorboy's SSR3 with a cutting pad, using my random orbital polisher.
well, i took your advice and went out and bought some fancy polish/cuttting compound last week.. and just now used it, its not poorboys buts its pretty much the equivalent of it and i have to say the $45 i spent for this was well worth it
Re: New Paint job on a budget thread. - 07/16/0701:59 PM
I'm having a very hard time finding the Rustoleum in orange, in a quart size. Home Depot couldn't find it on any ordering sheets. They gave me the rusto phone number. I've found it in a spray bomb, but no can.
After looking on rusto's web site, they have the color listed, but when you search to buy it, can't find it on a search. Is orange a Canada thing only? I guess I could buy a red and a yellow and work a orange out of the two...
Re: New Paint job on a budget thread. - 07/16/0702:07 PM
Quote: Hi, I've spent hours reading through the lists and was wondering if what was ultimately determined to be the best methods/materials have been condensed in a FAQ?
There are so many variables... humidity, temperature, indoors, outdoors, colors, preperation techniques, available paints, primers and equipment all play such big factors that this question may never be answered. All you can do is read the original threads, carefully noting who used what under which conditions as you go along.
Re: New Paint job on a budget thread. - 07/16/0704:20 PM
Roadster, is that a yellow trim stripe between the orange and black paints? Or is it just a shiny reflection from the paint. It looks like a yellow accent strip would look great between the black and orange.
Quote:
I went to two hardware stores and couldn't find the orange rustoleum. There is a ford dealer on the corner not to far from the house. As soon as I get the orange, I'll snag a pamphlet or a paint code from them to See how close I can get it.
Here is my concept pic:
Posted By: Anonymous
Re: New Paint job on a budget thread. - 07/16/0704:50 PM
Quote: I'm having a very hard time finding the Rustoleum in orange, in a quart size. Home Depot couldn't find it on any ordering sheets. They gave me the rusto phone number. I've found it in a spray bomb, but no can.
After looking on rusto's web site, they have the color listed, but when you search to buy it, can't find it on a search. Is orange a Canada thing only? I guess I could buy a red and a yellow and work a orange out of the two...
I had the same issue when I was looking for their orange; finally spoke to someone from Rustoleum about finding a vendor who sold it in non-aerosol form. The response "we do not offer that product in a non-aerosol form". No pints, quarts, or gallons. Only spray-bombs.
Posted By: Anonymous
Re: New Paint job on a budget thread. - 07/16/0705:36 PM
Ace brand has a direct match in gallons and quarts of the saftey orange. The allis Chalmers van sickle paint is a much more red orange even tho they list it as saftey orange.
Oh on the flat paint, it looks like the flattener is settling out of the flat paint when rollering, giving the lines. I am thinking satin might be the flattest paint you can roll.
Posted By: Anonymous
Re: New Paint job on a budget thread. - 07/16/0708:39 PM
Question for Marq. I'd be grateful if you could give me an idea of how much Brightside I might need to paint a Mercedes W123? I might have found a source for this paint but need to order accuratly as it'll be a special order and difficult to 'top up' later. It will be going over about 70% of the car's original black paint, if that makes a difference to the number of coats required. Many thanks.
Re: New Paint job on a budget thread. - 07/16/0709:23 PM
Quote: Roadster, is that a yellow trim stripe between the orange and black paints? Or is it just a shiny reflection from the paint. It looks like a yellow accent strip would look great between the black and orange.
The trucks have a silver stripe between the colors running down the side. The picture was just shiny because I changed the hues to get the orange color. (photoshop stuff)
I'll be trying to do the same to the mustang as they did to the truck.
If I can't find the orange (safety orange is probably to bright), what red should I mix with the yellow to get it.
BTW, I'll be in Canada next week, so I might be able to get some from the store up there.
Re: New Paint job on a budget thread. - 07/17/0712:44 AM
Not Marq but I used just shy of 3 qts on my truck if that helps. If either Fire Red or Flag Blue fits there is a person on ebay selling a six pack of qts for about the price of 2 qts/
Re: New Paint job on a budget thread. - 07/17/0701:36 AM
Quote:
Quote: I have a question for the satin/flat roller's out there! Our journeyman was given the task to try this on his project. He is rolling flat black rustoleum. he is on the 5th or 6th coat and it still has really bad roller marks. I went over it as I have been playing with the method for a while, and I had no better success. it goes on easy, but then when it dries it looks bad. I am thinking for flat we may need to shoot it.
I've been mid-process with Satin for about a month. My first couple coats, thinned probably 35% or more, left no marks whatsoever (and looked really good).
My last coat I think was thinned only around 20% or so, and I did get roller marks.
I'm doing another coat tonight and I plan on going back to 30 to 40% thin mix.
I'm also switching to oderless mineral spirits to have more time to "roll out" the roller marks when doing large areas like the roof, C pillers and rear quarters. (which are all one giant section on my 68 Charger).
OK - I think I'm giving up on Satin.
I just can't seem to get rid of the roller marks. Somehow I did a test panel earlier that looked perfect, but I can't repeat it.
There's nothing worse than rolling paint on your car the LOOKS rolled. My buddies are all "See- told you that wouldn't work"
I did a few panels last weekend with gloss, and they looked OK, didn't get any roller marks.
Where's the guy that did the '69 Stang fastback? Your satin was awesome! How'd you do that?
Posted By: Anonymous
Re: New Paint job on a budget thread. - 07/17/0703:10 AM
Think his call sign is "gfeighny".
That 69 does look really good, I'm really partial to the flat/satin black look....
Re: New Paint job on a budget thread. - 07/17/0703:31 AM
Quote: Question for Marq. I'd be grateful if you could give me an idea of how much Brightside I might need to paint a Mercedes W123? I might have found a source for this paint but need to order accuratly as it'll be a special order and difficult to 'top up' later. It will be going over about 70% of the car's original black paint, if that makes a difference to the number of coats required. Many thanks.
If the car is black and you are going to be working painting it in Brightside black... you will probably need 3 quarts. BUT I would suggest having the 4th quart 'just in case'.
You mention that you would only be painting about 70% of the car... but you may find it worthwhile to scuff up the other 30% and Brightside it as well... juat to have a uniform paint application on the car.
Re: New Paint job on a budget thread. - 07/17/0704:50 AM
Quote: Question for Marq. I'd be grateful if you could give me an idea of how much Brightside I might need to paint a Mercedes W123? I might have found a source for this paint but need to order accuratly as it'll be a special order and difficult to 'top up' later. It will be going over about 70% of the car's original black paint, if that makes a difference to the number of coats required. Many thanks.
The corvette only took 1 1/2 quarts to paint the 5 complete coats. It also was black before the Rustoleum. Of course, I was thinning it around 40-50% each time.
Just my 2 cents worth...
Posted By: Anonymous
Re: New Paint job on a budget thread. - 07/17/0712:40 PM
Thank you lads, didn�t mean to post just to Marq, I�d been reading his website looking for quantities as I believe Marq found the Brightside alternative to Rustoleum. I also meant to say 70% of my car will be in original black paint, the rest will be in primer, I am hoping to paint the whole car. Brightside is my last chance to find a paint here in Poland to do this job, if the Polish agent can supply, which I am still waiting to find out? If I draw a blank with the Brightside then I�ll have to bite the bullet and use the local paint shop
Re: New Paint job on a budget thread. - 07/17/0702:29 PM
Quote: Thank you lads, didn�t mean to post just to Marq, I�d been reading his website looking for quantities as I believe Marq found the Brightside alternative to Rustoleum. I also meant to say 70% of my car will be in original black paint, the rest will be in primer, I am hoping to paint the whole car. Brightside is my last chance to find a paint here in Poland to do this job, if the Polish agent can supply, which I am still waiting to find out? If I draw a blank with the Brightside then I�ll have to bite the bullet and use the local paint shop
One nice thing about Brightside is that Interlux, the manufacturer, does have global distribution. So it should be locatable anywhere in the world.
It's odd that you are encountering difficulty locating a distributor within Poland.
I was taking a quick look at a map of Poland and you have quite a few cities located along the Baltic. The odds are that if there is going to be marine paint suppliers... then they should be located near one of those coastal towns. I see that you may be able to fall back to looking for something along the German Baltic coast as an alternative.
I would tend to think that a town where there is more recreational boating is the most likely town to find an Interlux distributor with stock readily available.
Hope this helps
Marq
.
Posted By: Anonymous
Re: New Paint job on a budget thread. - 07/17/0704:40 PM
Thanks Marq. I have found a guy who's located in Gdansk, he's a stockist of "some" Interlux paints but isn't sure he's got any stock of the Brightside in Gloss Black. He's on holiday just now, hence his inability to give me an answer. Sounds like a one man band operation, so I'll have to wait till he's back off holiday to find an answer. I'll buy 4 litres so if he doesn't stock maybe he'll get some, my problem is I leave here beginning of September, so the clock is ticking. Let me ask whilst I'm writing, do I need any of the #333 thinners for anything whatsoever, if I do I'll get some, I don't want to get stuck for lack of something simple? By the way, very helpful forum and it's been a pleasure reading all this regardless of how my project turns out. I really have learned a great deal about the "mysteries" of painting a car.
Re: New Paint job on a budget thread. - 07/17/0708:17 PM
Quote:
I'll buy 4 litres so if he doesn't stock maybe he'll get some, my problem is I leave here beginning of September, so the clock is ticking. Let me ask whilst I'm writing, do I need any of the #333 thinners for anything whatsoever, if I do I'll get some, I don't want to get stuck for lack of something simple? By the way, very helpful forum and it's been a pleasure reading all this regardless of how my project turns out. I really have learned a great deal about the "mysteries" of painting a car.
Given the difficulties you are encountering... I would say that you can substitute safely the pure mineral spirits instead of the 333 thinner. The pure mineral spirit is probably more commonly available over there and probably quite a bit cheaper then the small tin of 333 thinner. I used both on my car and there wasn't much of a difference in drying time etc.
One nice thing... is that if you are lucky and can do your car with 2 cans of Brightside... you will have enough paint left to go and buy another disposable car and give it a matching paint job ( or better yet charge for your paint and services to do some other chaps car and recover your investment ).
I am curious about the availability of the 4 inch high density foam rollers over there in Poland.
.
Posted By: Anonymous
Re: New Paint job on a budget thread. - 07/17/0711:11 PM
Ok,I hit the car with some 400 (only stuff I had that could be used with water) and it came out really smooth. There are some imperfections but Ill let the picture do the talking. I rubbed it down with spirits and Im about to go mix up some more paint and do a second coat.
Re: New Paint job on a budget thread. - 07/17/0711:39 PM
Thanks Marq mineral spirits here are quite easily available so I'll stick with them if I get the Brightside. Seeing as I've never painted before I might need the extra paint for practice and any misfortunes, now or later. I did manage to find some 4" rollers with squared off ends, the only other type with a rounded end I have seen are 6". I can't say I've really looked too far for foam rollers so there may be others available I've not spotted yet. Now here is a question that's had me thinking. It seems to me that when I roller a thicker layer of paint I'm going to get an orange peel effect. I am wondering what percentage of a coat of paint comprises this orange peel paint. I'm simple thinking that if a thick coat is applied and say 30% is removed then it might be better than removing 30% of a thinner coat. I know some guys don't get much of this orange peel, but being a rookie I'm just not sure I'll achieve such skill. If I've a decent thickness left I've the patience to polish and have a Porter-Cable and Farecla polishes. I think the rollering of paint is going to be my weak point, so I'm thinking how to achieve a decent job if I don't get the rollering quite right. Hope I've explained myself correctly here?
Re: New Paint job on a budget thread. - 07/17/0711:52 PM
Here are a coupes pictures of my trailer, Read about 2 pages and had to give it a try. I did ten coats over two weeks, the last two were very thin and no need to wetsand it turned out great!
Re: New Paint job on a budget thread. - 07/18/0702:08 AM
Quote:
Now here is a question that's had me thinking. It seems to me that when I roller a thicker layer of paint I'm going to get an orange peel effect. I am wondering what percentage of a coat of paint comprises this orange peel paint. I'm simple thinking that if a thick coat is applied and say 30% is removed then it might be better than removing 30% of a thinner coat. I know some guys don't get much of this orange peel, but being a rookie I'm just not sure I'll achieve such skill. If I've a decent thickness left I've the patience to polish and have a Porter-Cable and Farecla polishes. I think the rollering of paint is going to be my weak point, so I'm thinking how to achieve a decent job if I don't get the rollering quite right. Hope I've explained myself correctly here?
It would be better to lay multiple thin coats... then attempt to rush the job by laying on thick coats.
A thin coat dries more thoroughly and completely then a thick coat.
Orange peel 'usually' occurs when you rush your next coat of paint on to the previous layer of paint.
What happens with a thick layer is that the outer skin hardens first and traps the wetter layer between the body and the outerskin of the paint. So when you add the next coat of paint too early it tends to soften up the previous outer layer. It them moves around on the previous uncured middle layer creating the wrinkle or orange peel type effect.
If you put on a thin layer... it takes less time for that middle wet layer to evaporate and harden. So when you add the next coat of paint things don't come alive underneath the latest coat of paint.
I really think the key to orange peel avoidance it to provide adequate time for each layer of paint to evaporate and cure ( or harden ).
The problem with going with thicker layers, expecting peeling and then planning to sand back the wrinkles is that you don't get a uniform outer layer of paint. Instead the outer layer is composed of the last coat of paint plus peaks from various wrinkle layers below. Also... you are doing more agressive and lower grit size to cut back the peeling.
BUT IF you go with the thinner coats... and can do so with minimal peeling... in the end you will probably find yourself just doing some light 800, 1000 or 1500 grit wet sanding to do the final sanding. That to me is less work then trying to knock back orange peel and then having to wetsand the knocked back surface up to a level where it can take an acceptable polishing and waxing.
.
Posted By: Anonymous
Re: New Paint job on a budget thread. - 07/18/0702:41 AM
7D9LRE that trailer certainly looks nice now, thanks for sharing that information, give me more hope. Thanks Marq I do see the logic in what you are saying and will follow it when I paint. I would probably be more settled if I was practicing with the correct pain instead of some Polish product which is quite different to anything suggested on this thread. Maybe I'll try ordering a very small can of Brightside from the UK as postage might not be so savage and it'll give me a chance to get a "feel" for the real paint. Thanks again for your help.
Re: New Paint job on a budget thread. - 07/18/0702:52 AM
Ok, because the orange in Rustoleum is limited to the Safety Orange, (So far and not sure about that color) I'm pretty much leaning to trying to mix the yellow and red to get the "Harley" orange. Not being much of a paint guy, I'm guessing that a 50 / 50 mix of red and yellow will get me the basic orange. Needing a red orange, maybe the 45 /55 red mix will get me close. Any paint gurus out there have an opinion of what rustoleum red I should use and maybe a starting point of the mix if I'm going in the wrong direction?
Option #2 would be to buy a Gloss white and try to get Home Depot to tint it based on the color card that matches the paint. Would the Tint mix in with the white like a base?
Re: New Paint job on a budget thread. - 07/18/0704:07 AM
Quote: Ok, because the orange in Rustoleum is limited to the Safety Orange, (So far and not sure about that color) I'm pretty much leaning to trying to mix the yellow and red to get the "Harley" orange. Not being much of a paint guy, I'm guessing that a 50 / 50 mix of red and yellow will get me the basic orange. Needing a red orange, maybe the 45 /55 red mix will get me close. Any paint gurus out there have an opinion of what rustoleum red I should use and maybe a starting point of the mix if I'm going in the wrong direction?
Option #2 would be to buy a Gloss white and try to get Home Depot to tint it based on the color card that matches the paint. Would the Tint mix in with the white like a base?
Yet another concept picture:
You may be surprised how little yellow will be required to shift a Regal Red or a Fire Red over to an orangey color. You might be looking at something in the 10% to a max of 30% yellow ( 10% probably with Fire Red or upto 30% if you are starting with the Regal Red ).
The one thing most folks who have used the Fire Red have noted is that it is a fairly orangey red when in bright sunlight. So it wouldn't take much to push it into a more orangey overall look. But I think you would end up coming close to an actual fruity orange.
Whereas the Harley Orange that you want to end up with would probably be more achievable if you start with the darker Regal Red and tint it up with the yellow to arrive at the Harley Orange color. The Regal Red is a little darker and bloodier and when mixed with yellow it will give a darker orange color.
.
Posted By: Anonymous
Re: New Paint job on a budget thread. - 07/18/0702:46 PM
I'd go with a red/yellow mix, and try a few ratios until you got what you wanted. If you used a white with a tint, I think you'd end up with a pastel peach color!
Posted By: Anonymous
Re: New Paint job on a budget thread. - 07/18/0704:00 PM
Quote: Ok, because the orange in Rustoleum is limited to the Safety Orange, (So far and not sure about that color) I'm pretty much leaning to trying to mix the yellow and red to get the "Harley" orange. Not being much of a paint guy, I'm guessing that a 50 / 50 mix of red and yellow will get me the basic orange. Needing a red orange, maybe the 45 /55 red mix will get me close. Any paint gurus out there have an opinion of what rustoleum red I should use and maybe a starting point of the mix if I'm going in the wrong direction?
Option #2 would be to buy a Gloss white and try to get Home Depot to tint it based on the color card that matches the paint. Would the Tint mix in with the white like a base?
Yet another concept picture:
You might also look into Van Sickle tractor paint (another alkyd enamel like Rustoleum) ...they carry "AC Orange" as a stock color:
Don't trust that card though...on this monitor the colors are way off from what I've seen in person. The colors are actually a lot brighter. They also list a bunch of "custom colors" here:
They list Kubota Orange, which might be closer to what you're looking for...they also have about 15 other oranges.
Posted By: Anonymous
Re: New Paint job on a budget thread. - 07/18/0704:26 PM
Roadster, I would also recommend www.topsecretcoatings.com. It seems to be a very good paint too, and if you send them a color swatch, they will color match for you.
Posted By: Anonymous
Re: New Paint job on a budget thread. - 07/18/0706:02 PM
Yeah as I mentioned earlier the ac orange is much more reddish than safety orange, and I think is a close match for the Harley color.
Posted By: Anonymous
Re: New Paint job on a budget thread. - 07/18/0711:02 PM
Quote: Ok,I hit the car with some 400 (only stuff I had that could be used with water) and it came out really smooth. There are some imperfections but Ill let the picture do the talking. I rubbed it down with spirits and Im about to go mix up some more paint and do a second coat.
Looks like you'll have a much better restart. From the picture you seem to have a good base. Do invest in finer grit for the remainder of your progress.
I'll start rolling over the weekend. I'll post some pics as I go. Hope it will come out as nice as Roadster's Vette.
Posted By: Anonymous
Re: New Paint job on a budget thread. - 07/19/0712:00 AM
Here's the safety green, I didn't spend too much time on prep though since this was my test panal. Looks more like Grabber green. Ace rust stop safety green, they stock the same safety colors and popular colors as rustoleum. Also can mix about any color you would want. This really picked up the shine with the maguires carnuba wax.
Posted By: Anonymous
Re: New Paint job on a budget thread. - 07/19/0702:02 AM
Re: New Paint job on a budget thread. - 07/19/0704:41 AM
Has anyone found purple paint, simialr to plum crazy. I found it in Rustoleum painters touch spray can, paint number #1961. The place couldn't get it in quarts or gallons so I called rustoleum and they don't make it in quarts or gallons just spray cans.
Anyone find it in another brand?
Or can I get it mixed to match the color I want?
Thanks
Posted By: Anonymous
Re: New Paint job on a budget thread. - 07/19/0706:45 PM
hey guys, I'm getting close to the finish line for my car. Here is a link I posted on sr20forum with pics of my car:
I'm already driving it just to get it on in the sun. I used rustoleum marine black on the sides, and brightside black on top. also sprayed acrylic enamel in various places that were hard to roll. I think my car has about 30 dents, and I only fixed 4 or 5 of them before painting lol. I suck at body work.
Posted By: Anonymous
Re: New Paint job on a budget thread. - 07/19/0708:46 PM
Just a question. Im planning to hit the car with some Rusto clear coat at the very end. It seems that when I hit the paint with spirits, it shines like all get out, but when it dries, it seems like its almost faded or something. Im just wondering if after I get that final coat on, should I sand it, hit it with spirits, let it dry, then use the clear coat? How should I go about doing the clear coat?
Re: New Paint job on a budget thread. - 07/19/0711:09 PM
Quote: Just a question. Im planning to hit the car with some Rusto clear coat at the very end. It seems that when I hit the paint with spirits, it shines like all get out, but when it dries, it seems like its almost faded or something. Im just wondering if after I get that final coat on, should I sand it, hit it with spirits, let it dry, then use the clear coat? How should I go about doing the clear coat?
If you like the look of it when you do the wipe down with the cloth dampened in spirits THEN you should not go to the 'clear coat' stage. INSTEAD you should start hitting that paint with the rubbing compound - followed by the polish - followed by wax. AND you will end up with the same shine as when you passed a dampened cloth over it.
The clear coat strategy is not a 'proven' thing at this point. And the odds are that you will end up with a coating that is going to yellow over the next year. IF your body gets scratched or bumped once the clear coat is on... you will have to repair the entire panel to keep it looking good. WHEREAS if you just polish and wax your paint layers - then any scratch can be repaired and not require the entire panel be redone to fix the scratches or bumps etc.
But I think the key here is that you like the look of the wettened paint job... and that is the result you 'should' end up with if you go with the compounding, polishing and waxing
But to answer your specific question.... IF I was going to go the route of slapping on a clear coat ... I would :
a ) wet sand the final layer... going from 1000 to 1500 to 2000. b ) wash the car down using a bucket of water and just a drop or two of liquid dish detergent. RINSE IT OFF THOROUGHLY. Let it dry fully. c ) take a cloth dampened with mineral spirits and give the body a thorough wipe down. Let it dry fully.
At this point your top surface will be about as good as it is going to get for laying a clear coat down on it.
The reason you still have to go through the 1000, 1500 and 2000 grit wet sanding is to get the surface as smooth and defect free as you can. IF NOT the clear coat will act like a magnifying glass and make every little imperfection standout and look doubly bad.
The clear coat will be able to gain sufficient adhesion with the ultra smooth wet sanded surface because it will try to chemically bond with the exposed top layer of the paint. This is where you have to be applying a clear coat that is designed to go with the specific brand of paint you used.
IF you use one brand of clear coat with 'some other brand' of paint there might be adhesion failure a few months down the road. It would look something like a sunburn on the paint where the skin is peeling away from the paint. The only remedy for that if it happens is to sand off the remaining clear coat, lay on a new layer of paint and refinish that paint layer. So that is why you need to match brands of clear coats to the paint you chose.
.
Posted By: Anonymous
Re: New Paint job on a budget thread. - 07/20/0712:14 AM
Fabulous Thread going here. I am anxious to try this method on my 1998 Black F-150. The roof really needs it. A buddy of mine is going to do this on his jeep. Anyhoo, I got some Rustoleum Professional Gloss Black enamal, low-oder mineral spirits and some rustoleum automobile spray primer. I also got some wet sand paper, a piece of scrap aluminum and(please don't laugh) the metal cone thing that keeps the squirrels from going up the bird feeder to practice on.
I sprayed a couple coats of primer on the cone, and only on half the aluminum bar to see if primer is really needed for bare metal spots. Wet sanded with 400 and it came out pretty smooth. I guesstimate my mineral spirits to paint mix was about 25-30%. I rollered it on with a high density foam roller and it looked awfully splotchy and bad coverage. Maybe I thinned it too much? It was pretty watery. I went over it with a 3" wide foam brush and it made it look much better. Should I have done that with the 3" brush?
Re: New Paint job on a budget thread. - 07/20/0702:28 AM
Other than not popping your bubbles, the rolled-on paint looks about like a proper first coat. Don't expect full coverage on the first coat or two. If you get full coverage, it's too thick. Too thick means a LOT of sanding to make it ready for the next coat, and your arms will fall off by the time you're done. Don't ask me how I know...
Re: New Paint job on a budget thread. - 07/20/0705:33 AM
Quote: I sprayed a couple coats of primer on the cone, and only on half the aluminum bar to see if primer is really needed for bare metal spots. Wet sanded with 400 and it came out pretty smooth. I guesstimate my mineral spirits to paint mix was about 25-30%. I rollered it on with a high density foam roller and it looked awfully splotchy and bad coverage. Maybe I thinned it too much? It was pretty watery. I went over it with a 3" wide foam brush and it made it look much better. Should I have done that with the 3" brush?
It doesn't look like you worked it long enough. I keep rolling it just before it gets tacky and most of the bubbles are out. Very light rolling will get most of the bubbles out. Almost no pressure, with only the weight of the roller pushing down. If you are getting runs, keep rolling until the paint won't run anymore. It does look pretty thin too.
Re: New Paint job on a budget thread. - 07/20/0707:07 AM
For those who have had success with this method, where is a good place to start with the spirits to paint ratio?
Posted By: Anonymous
Re: New Paint job on a budget thread. - 07/20/0712:42 PM
blue195-I ended up working it by dragging the foam brush across. This popped the bubbles and gave it more coverage. I think it gave it too much coverage, as I ended up with classic orange peel.
Sounds like I need to just work the roller more next time instead, and I also need to not make it so thin perhaps?
I guess I am just surprised at how thin it goes on and need to realize that many coats are needed to achieve the final product.
Here is my orange peel. Oh, on my test piece of aluminum(didn't bother to take picture) no orange peel. On it, I just rolled it a couple times and left it.
I guess I will wet sand with like 400 grit and then go at it again.
Re: New Paint job on a budget thread. - 07/20/0701:46 PM
I don't know if what you had there was truly an 'orange peel' type effect. To my eyes it looked more like a 'repel' type effect where the sub surface was not thoroughly preped or given a final wipe down with a clean cloth dampened with mineral spirits. As you may know ( but I will repeat it for everyones sake ) the key purpose of the mineral spirit dampened cloth wipe down is to remove any foreign debris or residue that might still be on the surface prior to applying the coat of paint.
In particular we are hoping to remove any oil or wax molecules that may somehow be clinging to the prepared surface.
Some folks aren't aware that sanding of a surface containing wax or oil residue will not necessarily remove it. It may break it down a bit and make it into smaller bits... but the sanding process may embed those oil or wax particlues into the sanded surface. That is why we want that wipe down with the mineral spirit dampened cloth to remove that potential problem source.
Imagine someone went and took a spritzer and sprayed a mist of oil or wax on to your prepared surface. You then apply a thin layer of paint. What will happen is that the wax or oil on the subsurface has a 'higher tension' value then the paint. So the paint attracts itself to the other paint surface ( to maintain its surface tension ) and would repel from the wax or oil spots.
That is what my eyes are seeing in your picture. The paint surface tension has not been able to hold its surface tension on those spots and has left what appear like little moon craters or vacancies in the paint surface.
To remedy that situation ( if that is what it is ) I would hit the entire surface with a quick 320 or 400 grit wet sanding. Wash it down with water and a drop or two of dish detergent. Rinse it thoroughly. Let it dry. Then give the entire surface a wipe down with a clean cloth dampened with mineral spirits. Let it dry. Then apply the next layer of paint. Let that layer dry thoroughly ( 24 hours ). Then use a tack cloth to wipe down the entire surface ( to remove any dust or bugs that may have landed on it overnight ). Then add a second coat of paint.
At that point the moon craters should be on their way to disappearing and you should be starting to noticing how each layer of paint adds more coverage and the overall paint color is starting to take hold.
.
Posted By: Anonymous
Re: New Paint job on a budget thread. - 07/20/0702:16 PM
My bad, I forgot to mention that I did wipe it with mineral spirits prior to painting. It did kind of appear to not be adhering as you are suspecting, but I have little experience in this. I will do the wet sanding and continue as you counseled.
Wet sand with water or mineral spirits, since it is oil based paint? See my lack of experience!
Posted By: Anonymous
Re: New Paint job on a budget thread. - 07/20/0703:18 PM
Never mind, saw you said water and drop or two of soap. Will do!
Re: New Paint job on a budget thread. - 07/20/0704:36 PM
Quote: To remedy that situation ( if that is what it is ) I would hit the entire surface with a quick 320 or 400 grit wet sanding. Wash it down with water and a drop or two of dish detergent. Rinse it thoroughly. Let it dry. Then give the entire surface a wipe down with a clean cloth dampened with mineral spirits. Let it dry. Then apply the next layer of paint. Let that layer dry thoroughly ( 24 hours ). Then use a tack cloth to wipe down the entire surface ( to remove any dust or bugs that may have landed on it overnight ). Then add a second coat of paint.
.
I'm no expert, and I agree with everything you said, but when I painted the vette, I washed the car, let it dry for about 2 hours (100 degree heat), wiped it down with a soaked mineral spirits rag several times like I was scrubbing it again, then after about an hour of drying and prepping for the paint, I painted. I didn't wait for the 24 hour dry time. I see that many like to let the 24 rule apply with the mineral spirits, but I have actually wiped a bad roll/mixture off of the whole hood while it was still wet and re-started. After the 10 hour dry time with the paint, the mineral spirits didn't pull any paint off when I wiped it down for a quick next coat.
To sum it all up, I didn't find any signs that the 24 hour dry time was critical in this paint process. The Rustoleum is pretty hard stuff, so far.
On a side note, the insurance guy looked at the vette and let me raise the policy $3,000 more. Not a bad return for $26.
The picture shows my 1st pass with coat #1. Notice the bubbles and the coverage of the paint compared to the section on the right. I still had to "work" the bubbles out by rolling several times (various directions)until the bubbles get real small or none at all. The persistent very tiny bubbles, I used my mouth to blow and pop them.
Re: New Paint job on a budget thread. - 07/20/0706:11 PM
Quote:
I'm no expert, and I agree with everything you said, but when I painted the vette, I washed the car, let it dry for about 2 hours (100 degree heat), wiped it down with a soaked mineral spirits rag several times like I was scrubbing it again, then after about an hour of drying and prepping for the paint, I painted. I didn't wait for the 24 hour dry time. I see that many like to let the 24 rule apply with the mineral spirits, but I have actually wiped a bad roll/mixture off of the whole hood while it was still wet and re-started. After the 10 hour dry time with the paint, the mineral spirits didn't pull any paint off when I wiped it down for a quick next coat.
To sum it all up, I didn't find any signs that the 24 hour dry time was critical in this paint process. The Rustoleum is pretty hard stuff, so far.
The benefit you enjoyed that many don't is the hot dry climate. I think you mentioned 100 degree temperatures. As such your drying times are going to be much shorter than some of the folks in the more moderate climates. And of course the humidity in the air is also going to play into the factoring on just how long to wait before moving to each stage.
So that is where the suggested extended drying periods enter into the recipe... as a longer set period of time will ultimately prove to work best for the majority of rollers. But even then... the extra wait time for folks in excellent climates such as yours can't hurt.
What can hurt the process is when someone tries to leapfrog through the steps too quickly. That is why one of the key principles that Charger tried to get us to understand and put into practice is to exercise patience during the process.
In the end... variations on the 'drying times' will vary between users as each has to fine tune their timing based on their local climatic conditions at the time of the paint job
Re: New Paint job on a budget thread. - 07/21/0705:03 AM
Quote:
Quote: I gotta say this sure sounds like a lot of work to save some money! I still say buy a gun and be done with it!!!
It looks like a ton of work and I can't wait to try it!
It's also hard to climb Mt Hood, but some people just got to do it. The way I think about this process is like building a rat rod. (The 29 roadster is up in the loft) Sure you could build the perfect roadster, spend lots of money on it and it'll look like everyone else's - or - you can build a rat rod and have fun doing it, save money for other things, and sit around and BS with everyone who can't believe you built it. I have had 30-40 people (6 today) that have looked at the vette in disbelief that it was painted for $26 and with a roller. That makes it unique, and fun to talk about. Say you painted a vette with a roller and they ALL have to look.
Why did I paint it... A challenge and I knew it would make people cringe to even think of doing it. (Just like building a rat rod)
Re: New Paint job on a budget thread. - 07/21/0704:51 PM
Quote:
The real 29 roadster is after the Mustang...
Have you figured out what color the rat rod will be ?
When I saw that body... two cars immediately jumped into my mind...
and the most famous rat rod in the world...
There is something about red that makes those cars pop...
( and as we all know... Archie after blowing up one of his rat rods with a rocket installed by one guy... won the red jalopy in a raffle. It was subsequently retired and Archie next was cruising around in a Mustang convertible ... )
.
Posted By: Anonymous
Re: New Paint job on a budget thread. - 07/21/0707:35 PM
hey guy's, long time reader, first time poster.. anyways I am experimenting with this on a test pannel, at first I started out with the ALUMINUM SILVER and all I have to say is that Dont use it. it's a totally different paint.. I don't know why, it is not glossy and any attempt at wet sanding just rips it all off.
So I cleaned off the test panel and started over testing with Gloss black, and eventhough it's my first coat, it's looking really good and glossy. I cant wait to throw on the 2nd and then wetsand!
Posted By: Anonymous
Re: New Paint job on a budget thread. - 07/22/0705:32 AM
I've been reading up on this paint process for a long time so I finally decided to get my hands dirty and see whats what. My little black BMW's black paint is in terrible shape. Not only that but I hate black. I want to paint it white. The sunroof especially is almost completely rusted out so I picked up a 'new' sunroof panel at the JY and and used it for practice. I tried to integrate everything I've learned here in a step by step process. Sanded the blue sunroof down with 400 grit at first but I found that too be too mild so I moved on to 320 wet. Once I had it down almost completely to the primer I cleaned it off with mineral spirits. I used Interlux Brightside WHITE. 2 table spoons of paint mixed with one table spoon of mineral spirits. I found the paint process very straight forward using the "roll and tip method". I was amazed how well this paint evens itself out when give a day to cure. Other than some light ridges from the brush, there is no orange peel at all with a light coat. I could still see some of the scratches left by the sanding through the paint. I wet sanded the first coat with 1000 grit, cleaned with mineral spirits and put down another coat this morning in the same proportion of 2 parts paint, one part mineral spirits. Its hard to tell from the pics but I still don't have 100% coverage. I'll do a third light coat tomorrow and that should be it. The pics that follow were taken after the second coat and before any sort of sanding or polishing. I tried to catch as many of the flaws as possible.
Hard to tell anything from this pic
Close up reflection at night with fluorescent light.
Doesn't look that great under extreme close up and the right light but I think the right amount of sanding and polishing should take care of it. Bright white seems to hide flaws very well.
So the plan from here is sand the second coat down with 1000 grit, third coat of 2 to 1 paint, sand with 1000 grit, polish and wax.
Thanks to everyone who contributed to this forum and this paint process. I would have never thought to try something like this before seeing it here. This is the car in question. Let me know what I could change or improve. The Brightside paint is way beyond my expectations and it goes fast. I'm glad I won't have to do 8 to 10 coats as some people have suggested.
Re: New Paint job on a budget thread. - 07/22/0706:11 AM
Quote:
Have you figured out what color the rat rod will be ?
I havn't really been thinking about it. I like the flat/satin black with old school 50's flames. I also have a brother that air brushes pretty much anything. I told hime I wanted a rat flipping off people on the door. He said it shouldn't be too hard...
I'm trying to do the mustang first....I've really been eyeballing that safety orange. I think it would really make that mustang stand out.
On an different note, the wife wants me to paint my truck. I put it together from 3 different trucks and it shows. I use it for a work truck, so if I did paint it, I wouldn't even bother with bondo... Been thinking of two tone white/blue to test the two tone for the mustang.
Here is the truck hauling home roadster #2 for parts. How much paint would it take for this long thing?
Re: New Paint job on a budget thread. - 07/22/0711:43 AM
These ripples are killing me!!!
Roll and tip method may be going out the door. I simply cannot get rid of the ripples until I've sanded to my original paint. I guess I've just got to muster up enough patience to let the thousands of bubbles pop on their own. How do I overcome the fear that they won't pop? Thin, thin, thin, right?
I'm having trouble capturing the ripples with my camera, but here's an example of where I'm at after a round of 2000 and turtle polish (by hand for now):
I'm going to knock the ripples down some with 600, then try 2 more super-thin coats this morning. We'll see what happens.
Re: New Paint job on a budget thread. - 07/22/0703:14 PM
Okay, regarding ripples... Since it worked for Charger, I've been wetsanding by hand without a rubber/foam block for the most part. I wasn't comfortable with the "suction" effect from my rubber block, but I've found that it's the only way to effectively knock down the ripples without sanding through all 6-8 layers I've now rolled. By using my hands, I was merely widening the valleys, in the process making them deeper. The firm rubber block on the other hand, applies most of it's force to the peaks, eventually working the surface to a level state.
What it boils down to is... Would I rather sand ripples or orange peel? We'll find out tonight which is easier.
While I've found the ripple remedy, I decided to apply a 25% thinned coat, then pop the bubbles with light pressure with the roller as prescribed in the very beginnings of the "Paint Job On A Budget" thread. These pictures are only 1 hour after rolling. I can see that I'll be dealing with significant orange peel, but this paint has proven to have good leveling qualities.
Re: New Paint job on a budget thread. - 07/22/0704:23 PM
Way back... probably in message thread one of this epic I shared with everyone what I used to back my sandpaper when wet sanding. I thought I would again tell the tale because it worked for me and proved to be exceptional for the wetsanding task.
I took one of my wife's high density foam knee pads that she uses in the garden to protect her knees when working in the garden
The foam pad is about.. 15 x 18 x 3/4 inch...
At around $ 3.00 to $ 5.00 ( so it is a bargain ). And what you do is take your scissors or exacto knife and slice off a section that is handsize and tailored to fit a half page of sand paper. You simply wrap the sandpaper around the foam block, dip it in the water/soap bucket and it tends to hold together nicely as you use it to work the cars body surface with your wet sanding.
Here is a supplier on eBay that is selling them for $3.00 - $ 5.00 IF you cannot find any at your local garden supply stores..
The key feature of this high density foam is that it holds its shape, keeps surfacing level, it feels great in the hand, you can tailor the size of the sanding block to whatever YOU want and feel most comfortable with. And best of all... for 3 bucks you can make a number of sanding blocks out of the one foam slab.
Nuff said. Hope this helps some folks out.. and once again proves that we can use things designed for one purpose for a totally different purpose than it was intended. Thinking outside the box saves money...
And in case you are wondering... YES.. my wife was mucho annoyed when she saw what I had done to her gardening pad hahahhahhahh... c'est la vie..
Marq
.
Posted By: Anonymous
Re: New Paint job on a budget thread. - 07/22/0705:10 PM
"Honey have you seen my knee-pad?" "Um, well here's the thing. I caught the dog chewing on it, and it was a mess. Why don't you buy yourself a new knee-saver?" I used a kitchen sponge I found under the kitchen sink that I am pretty sure my wife didn't need, and it worked much better than sandpaper alone.
I think I have settled on about 50/50 for mineral spirits and paint mixture. I know now I had it way too thick which is what caused some earlier issues(see picture).
Re: New Paint job on a budget thread. - 07/22/0705:57 PM
Quote: I used a kitchen sponge I found under the kitchen sink that I am pretty sure my wife didn't need, and it worked much better than sandpaper alone.
The problem with most of the kitchen sponges that I know of is that they aren't very dense. So they don't tend to hold a firm level surface when mated up with a wet piece of sandpaper. So instead of cutting the caps off the ridges, it tends to allow the sandpaper to flex into the valleys as well as the caps. The other downside to most kitchen sponges is that they are made out of some crappy synthetic stuff that tends to flake particles off the sponge the longer they are used. Then again... even 100% natural sponges also tend to fall apart when put into situations where there is abrasion going on.
That was another good feature of those gardening knee pad foams... is that because they are high density foam.. they don't tend to disintegrate with water or abrasion. And they always tend to rebound back to their original shape. I think they call that ability a 'memory' in materials.
And I should mention that this type of 'high density foam' is like 10 or 20 times more dense than the 'high density' foam rollers that we use. I thought I would mention that in case there was any confusion about the definition of high density foam when comparing the rollers versus these knee pad thingys..
Re: New Paint job on a budget thread. - 07/22/0706:26 PM
Upon reading your post, I'm afraid that I may have forgotten more than I've learned about the roller process. I've read 90% of the threads 4-5 times and it's amazing how many great ideas will slip your mind each time... stuff that you don't think applies to you so you skim past it.
I have an 8" wide curved panel that runs the entire length of my truck, just above the upper moulding. Since hand-sanding is useless with ripples and the rubber block won't conform to the panel, your foam pad may be perfect for me regardless of which technique I use.
I'm sure glad my truck has plenty of straight, but junk panels. On my most recent test panels, I've learned that I may not have been working the surface long enough with the roller. At 25-30% mixture, I'm getting close to 10 minutes of work time in the sun(85 degrees). The bubbles are gone, orange peel is minimal so we'll see how it levels out. If this works, my tipping brush may be headed for the trash can... this is good!
Posted By: Anonymous
Re: New Paint job on a budget thread. - 07/23/0701:51 AM
This is my first post! whooo! anyways, I hope to join you guys very soon, and plan on painting my celica (im not even a car guy, but I want to repaint the car and practice using bondo on a small dent..) I'll be driving the car on the off days between coats.. anyways! I've read through the first entire thread and partly through the second but it's hard to keep up with all the information.
1. What is the general opinion on what paint to use now? Rustoleum or Brightside?
2. Odor , or odorless Mineral spirits?
3. If possible, is it advisable to use a sprayer instead of a roller?
The rest I've read through about the technique and how to do everything, seems simple enough. If anyone can answer the above two questions I'd really appreciate it. I have down how to avoid the orange peel effecets, and any other defects that may occur, I just want to be up to date on the new products.
Posted By: Anonymous
Re: New Paint job on a budget thread. - 07/23/0703:09 AM
Has anyone used rustoleum charcoal gray??Ill be trying it on a 67 cougar soon.
Re: New Paint job on a budget thread. - 07/23/0705:14 PM
The verdict is in.... Ripples and orange peel both stink.
Ripples are easier to remove from a flat panel but have proven difficult on curved surfaces, where a firm block cannot be used. Unlike orange peel, it needs to be completely removed to look presentable. Orange peel is a bit more tedious, but you can stop sanding once you've arrived at a satisfactory smoothness.
I'll try the foam pad trick on a flat test panel to see how it performs against ripples. If it doesn't work, the most practical solution is to use the roll-and-tip method on flat panels, roller-only method on the curved panels.
Back to the drawing board...
Posted By: Anonymous
Re: New Paint job on a budget thread. - 07/23/0708:17 PM
Well I have to admit, I'm not exactly thrilled with my polishing skills. After the third coat, I gave it another once over with 1000 grit, hand polished with some turtle wax polishing compound and finished it off with carnauba wax. The beautiful gloss of the paint after the third coat is gone, replaced by an endless haze of swirl marks. Go me! So until I can get some kind of power tool or work on my skills, I'll paint the rest of the car and leave the polishing for another time. The paint itself is incredibly smooth to the touch. Theres no ridges, no orange peel, not even a hit of brush marks. Just a bunch of hazy swirl marks. I either figure out a better way to polish this panel or just give it a 4th thin coat. Its good to know I can fix it. You can almost see the swirl marks around the reflection of the sun.
Re: New Paint job on a budget thread. - 07/23/0709:03 PM
tjts1 - it's allmost not possible to get the shine a power polisher will do in 5 mins by hand. With that said, get a polisher, you'd be amazed at how fast they bring that shine back. Otherwise your skills look great as far as painting goes, that's the hardest part to get down pat, the polishing I find is the easy part.
Posted By: Anonymous
Re: New Paint job on a budget thread. - 07/23/0709:09 PM
Marq Wrote:- "One nice thing about Brightside is that Interlux, the manufacturer, does have global distribution. So it should be locatable anywhere in the world.
It's odd that you are encountering difficulty locating a distributor within Poland."
Just wanted to say you were right about the Interlux being available. Every other avenue of enquiry proved fruitless, but the guy in Poland came through today with 4 x 750 ml of Brightside Balck Gloss, it'll be with me by the weekend .... then the fun starts. I've a question about spraying. I picked up on this product from an Australian car forum where a guy was saying he'd had fantastic results using it spraying his car. Here's the URL
Again, none here in Poland but if it seems a good product, (and I've not a clue as I just saw it today), then I might use it for door jams and the engine bay etc. I can buy them in the UK. And if it looks viable for Brightside how much would you guess I'd need to thin the paint? Thanks.
Re: New Paint job on a budget thread. - 07/23/0709:27 PM
Quote: Marq Wrote:-
I've a question about spraying. I picked up on this product from an Australian car forum where a guy was saying he'd had fantastic results using it spraying his car. Here's the URL
Again, none here in Poland but if it seems a good product, (and I've not a clue as I just saw it today), then I might use it for door jams and the engine bay etc. I can buy them in the UK. And if it looks viable for Brightside how much would you guess I'd need to thin the paint? Thanks.
No real experince with them, but Preval units are everywhere here in America. The price is down to about $5.00 each. 4-5 years ago, they were about $13.00.
Posted By: Anonymous
Re: New Paint job on a budget thread. - 07/23/0709:51 PM
The price figures as they are �5.50 ($11) in the UK, the Brits mostly just swop the $ sign for the � sign. I just thought they looked a convenient and simple way to apply a paint in a spray form. If anyone has used them and found they just don't do the job that well it would save me the bother of another purchase from the UK. A handy accessory though, I can think of a lot of uses for this thing. Cheers.
Posted By: Anonymous
Re: New Paint job on a budget thread. - 07/23/0709:53 PM
Quote: tjts1 - it's allmost not possible to get the shine a power polisher will do in 5 mins by hand. With that said, get a polisher, you'd be amazed at how fast they bring that shine back. Otherwise your skills look great as far as painting goes, that's the hardest part to get down pat, the polishing I find is the easy part.
Thanks! I'm kind of surprised that I was able to get away with just 3 coats thinned out with 2 parts paint, 1 part mineral spirits. The sunroof was a test panel that I'll eventually put on the car but I think by the third coat I finally got the hang of not over brushing the paint to get rid of the bubbles. I get better results brushing over the paint extremely lightly and slowly as opposed to hard and fast. I'm just using the weight of the brush itself to pop the bubbles.
Re: New Paint job on a budget thread. - 07/23/0710:19 PM
That's one sweet-looking third coat. I wouldn't have had the heart to sand it... but don't worry, it'll come back. Take it from me... There's nothing worse than waiting for a random polisher to come into your life.
Re: New Paint job on a budget thread. - 07/24/0701:38 AM
Quote: I get better results brushing over the paint extremely lightly and slowly as opposed to hard and fast. I'm just using the weight of the brush itself to pop the bubbles.
You're not getting anywhere near the ripples that I'm getting with this method... what are you using for a tipping brush?
Posted By: Anonymous
Re: New Paint job on a budget thread. - 07/24/0702:06 AM
Quote:
Quote: I get better results brushing over the paint extremely lightly and slowly as opposed to hard and fast. I'm just using the weight of the brush itself to pop the bubbles.
You're not getting anywhere near the ripples that I'm getting with this method... what are you using for a tipping brush?
I'm using the 75 cent 3" wide foam brushes from home depot. I used a new one for every coat. I went through 3 for the sunroof but next I'm going to do the whole roof, trunk lid and hood in one go so I'll get more mileage out of every brush.
Re: New Paint job on a budget thread. - 07/24/0711:24 AM
Maybe I'll give the foam brush another shot. I don't recall having ripples until I re-used my foam brushes. If I wasn't so cheap, I probably would have mastered this process a month ago.
Posted By: Anonymous
Re: New Paint job on a budget thread. - 07/24/0702:13 PM
Well i haven't posted in awhile life got a little hecktic in the last couple weeks, wife had the baby 6 weeks early, baby and mom are both great and healty!
anyways reguarding the foam rollers from the buck store i have used both and i find no difference between the 2 so i loaded up on the buck store ones since there cheaper and you can get packages of the foam brushes think there is 6 in a pack, at the buck store too. also they have roller tray's 2 for a buck. nothing like really budgeting for this lol
Posted By: Anonymous
Re: New Paint job on a budget thread. - 07/24/0703:15 PM
Quote: Anybody try this with SS (OMNI) auto paint? It is enamel, dries quick and its already mighty thin.
Go back about 3 pages and see my comments on this...
Re: New Paint job on a budget thread. - 07/25/0712:54 AM
Long time reader and follower of this thread...first post! I am in Sydney, Australia and after looking at the options available re paint, I have decided to give the local Wattyl KillRust Epoxy Gloss Enamel a try (at $19 a litre, I thought it was worth a try). I am currently painting a 1983 Toyota Corona for my son who will soon learn to drive in it. My daily driver is a Ford Fairmont.
Anyway, I am very pleased with the result so far - 4 coats on, wet sanding after the first two (600 grit) , and after the last two (800 & 1000 grit. Just about to go out and do some more wet sanding in preparation for coats 5 and 6. I will be posting photos soon.
Thanks to all for clear instructions and first and foremost to Charger for giving us all this brillant idea!
Posted By: Anonymous
Re: New Paint job on a budget thread. - 07/25/0701:30 AM
Put down the first coat on the roof and hood.
Sanded.
Painted
Already has a good shine. Pitty I'll have to sand it away before the next coat.
I was being stingy with the paint and put too much pressure on the roller to squeeze the last drop out of it. I got some orange peel. It was also 85f outside with makes the paint dry faster. All my previous coats were early in the morning around 60-65f. It'll all get knocked down when I sand it before the next coat. Only used 2 table spoons of paint to cover the entire hood. I should have used 3.
Posted By: Anonymous
Re: New Paint job on a budget thread. - 07/25/0701:58 AM
here is #566 tremclad sorry it took so long.
this is coat #4 needs to be wet sanded and i might put just 6 coats on and polish it out and see what i get.
Re: New Paint job on a budget thread. - 07/25/0706:17 AM
Quote: Well I have to admit, I'm not exactly thrilled with my polishing skills. After the third coat, I gave it another once over with 1000 grit, hand polished with some turtle wax polishing compound and finished it off with carnauba wax. The beautiful gloss of the paint after the third coat is gone, replaced by an endless haze of swirl marks.
if you're going to try to polish out by hand, then you're going to have to sand with progressively finer paper grits. there's no way you can work out 1000 grit sand marks by hand. move on to 1200/1500 -> 2000 -> 2500/3000. there are limits to what you can do by hand. even if you were going to polish out by machine i'd suggest you sand down to at LEAST 1500 grit otherwise you'd be wasting a lot of time and product.
Re: New Paint job on a budget thread. - 07/25/0706:37 AM
Quote: Put down the first coat on the roof and hood.
Painted
The roller marks in this picture could be worked out by running different directions, and not so much pressure. You can put a bit more paint on it and work it longer until just before it gets tacky.
I work the paint more than most pictures I've seen...
When I put a coat on the vette, I must have went over the whole thing 5-7 times each coat, working it different directions until it stopped running and showing lines. You have to work it lightly.
- Just my 2 cents here.
I totaly agree. i never had lines or marks like that....my coats were transparent but always very even. I went over it and over it spreading it around and evening it out. remember this is the cheap solution not the mirical paint job in a minute job.
BTW i have about 8 coats on my sidecar now but only pics up to the 6th or so. I can still see through it in spots so a few more coats in the works when i get free time again!! here is my pictures of progress.
Re: New Paint job on a budget thread. - 07/25/0702:09 PM
Quote: CAN ANYONE TELL ME WHY THERE ARE SO MANY POSTS THAT SAY STAY AWAY FROM REDS?
I don't think anyone has said to avoid red.
We have agreed to stay away from aluminum paints - because they just don't work.
The only problem with the Brightside and the Tremclad/Rustoleum 'Fire Red' is that it might be too orangey red for some people. It is not a deep blood red color and there is nothing you can do to tint it darker.
Possibly there is a difference between the amount of pigment in red compared to the black, white or blues. Less pigment in the paint means it takes an extra coat of paint to achieve the same level of coverage.
Other than that... I used both the Brightside and the Tremclad/Rustoleum 'Fire Red' and I have no complaints at all about it.
.
Posted By: Anonymous
Re: New Paint job on a budget thread. - 07/25/0703:43 PM
I SEE THAT RUSTOLEUM PROFESSIONAL HAS A SAFETY RED THAT LOOKS PRETTY BRIGHT
Re: New Paint job on a budget thread. - 07/25/0705:00 PM
I'm using the Rusto safety red on my D100 and my son's Nissan, and it is VERY red. Almost like a fluorescent in some lighting situations. I love it. My other pickup will get the regal red so I don't have to paint the interior roof panel. It's a close match to factory.
Posted By: Anonymous
Re: New Paint job on a budget thread. - 07/25/0705:34 PM
im wanting to paint my car, its a red now, but want to use safety orange.
i tried black on a few little pieces and it came out ok.... but thats been long ago.
i used 50% paint thinner, 50% rustoleum...
so what advancements have been made since well 6 months ago? any new tips
thanks all id read through all the thread but over 200 pages in 3-4 different threads... is a little much
Posted By: Anonymous
Re: New Paint job on a budget thread. - 07/25/0708:53 PM
BLUE195....ANY MORE PICS?
Posted By: Anonymous
Re: New Paint job on a budget thread. - 07/26/0712:55 AM
when i stop being too lazy to pull out my polishing stuff again.. ill probably work the rear area a little more its a dap duller then the rest..
ps, anything i should be aware of anything before pulling my doors off to give them extra attention? i havent pulled doors before. (they have the classic inside-bottom rust out crap going)
Re: New Paint job on a budget thread. - 07/26/0706:40 AM
Another one. This one shows some streaks on the bonnet, which I intend to remove with some 1000 wet and dry before the next coat.
Posted By: Anonymous
Re: New Paint job on a budget thread. - 07/26/0712:00 PM
Quote:
ps, anything i should be aware of anything before pulling my doors off to give them extra attention? i havent pulled doors before. (they have the classic inside-bottom rust out crap going)
Make sure you have at least one other person there to help remove them. Two people helping is better...those doors aren't super heavy, but they're a big awkward shape and you don't want to damage them.
You might want to seriously consider replacing the hinge pin bushings while you have them apart. Those doors are so long they put a *lot* of leverage on the bushings and they wear out over time. The bushings are only a couple of bucks. Grease them before you put the pins in. IMHO the hinges they used on 3rd gen F cars were never a very good design...seems like you see a lot of them with saggy drivers side doors. If you can lift the doors without any play in the hinges, you've either got a very low milage car, or you're extremely lucky . Anyway, getting them off is the easy part...hanging them is the hard part. Like I said before, get at least one other person to help hold it...that helps a lot.
Posted By: Anonymous
Re: New Paint job on a budget thread. - 07/26/0702:03 PM
LOOKING GOOD SO FAR. I AM PRESENTLY DOING A 87 IROC. AS FOR THE DOORS...A FLOOR JACK WITH A SOFT PAD WORKS GREAT ON THE REAR CORNER OF THE DOOR.. I USE A FOLDED OLD T-SHIRT ON TOP. I HAVE DONE THIS JOB ALONE USING THIS METHOD BUT STILL WORKS BETTER WITH HELPER. ALS BE CAREFUL OF THE WIRING FOR THE DOOR LOCKS AND WINDOWS
Posted By: Anonymous
Re: New Paint job on a budget thread. - 07/26/0704:28 PM
Quote:
Quote: Put down the first coat on the roof and hood.
Painted
The roller marks in this picture could be worked out by running different directions, and not so much pressure. You can put a bit more paint on it and work it longer until just before it gets tacky.
I work the paint more than most pictures I've seen...
When I put a coat on the vette, I must have went over the whole thing 5-7 times each coat, working it different directions until it stopped running and showing lines. You have to work it lightly.
- Just my 2 cents here.
The problem I found with that is the more times I go over the same spot with the roller, the harder it becomes to tip the paint with the brush after. I've gotten the best results as far as leveling is concerned by rolling on paint once then immediately tipping it with a foam brush. I know the brush marks look bad in that picture but the paint is actually very smooth. Also keep in mind that you are looking at the first of 3 coats. Basically whenever I over do it with the roller, I get orange peel which I think its much harder to get rid of than brush marks. I'm not saying this is a universal rule or anything. Just what I've experienced.
Re: New Paint job on a budget thread. - 07/26/0708:22 PM
Quote: whenever I over do it with the roller, I get orange peel which I think its much harder to get rid of than brush marks.
Just a heads up... If you have any curved test panels, you may want to test the roll and tip method there first. This is where I've had a difficult time smoothing my brush marks out. Since the rubber block won't conform to curves, I've sanded my fender back to the original paint with my hands and the ripples are still there. I've yet to try the foam kneepad trick yet but I'll let you know how it works, maybe ths weekend.
Posted By: Anonymous
Re: New Paint job on a budget thread. - 07/27/0701:42 AM
Re: New Paint job on a budget thread. - 07/27/0702:12 AM
"Roll and tip" is the term used to describe the technique of rolling paint, then using a brush to help level the surface. Using this method will reduce orange peel, but create ripples.
Re: New Paint job on a budget thread. - 07/27/0703:08 AM
i am noticing something disturbing with the rustoleum. it really doesn't seem to stand up to carb cleaner or brake cleaner very well. is this common even for finishes that have been applied for long periods of time? my factory paint won't wrinkle and peel up but the rustoleum does when i accidentally shot it with some carb cleaner while doing another repair. i only ask because i want to paint my engine bay as well and don't want to have to worry.
Posted By: Anonymous
Re: New Paint job on a budget thread. - 07/27/0705:51 AM
I finished my first paint job. Put enough time in on it to make it look 1000% better than it did before I painted, exactly my intention. I didn't do all the bodywork before starting so I didn't bother spending too much time getting the paint as perfect as I could if I wanted to spend lots more time on it. Didn't seem worth it since there were dents and creases, etc. under the new paint. But I was happy with the results. And I credit the new paint with getting many of the 16 interested inquiries, including the new proud, happy owner. Thanks all for mountains of great info in this beautiful thread. Can you tell which is BEFORE and which is AFTER? I hope so!
Re: New Paint job on a budget thread. - 07/27/0707:07 AM
HELP!! While the last coat of paint on the car appears to have gone OK, I seem to notice the roller marks on the roof more than ever before. How can I fix this? Will a thin coat (50/50 mix) do the trick? I note than sanding with 1000 grit does not remove the marks.
Posted By: Anonymous
Re: New Paint job on a budget thread. - 07/27/0704:44 PM
from my (1st rusto)experience if I could still see roller marks I just kept going until enough new paint blended right over them. In other words you probably need more coats.
The thing is I used to own a body shop and this stuff is all contrary to almost everything I learned while running my business. But with a little effort and trial and error it can look nice. here's a truck I just did: new to this site so not sure how to post more pics. By the way I tried that wet sanding stuff between coats. No Way! way to much work. after 3rd coat I just laid em on real smooth with roller did about 8-9coats w/ no primer on a brown background. only reason I wet sanded after final coat was to bring out the shine in the very small metal flake I added to the last coat. after that I put a clear in an air can ad sprayed it on.
Posted By: Anonymous
Re: New Paint job on a budget thread. - 07/27/0704:53 PM
have no clue how to put up pics sorry guys i'll get em posted soon.
Re: New Paint job on a budget thread. - 07/27/0705:38 PM
Ok, I'm about to try this method on my 81 Olds 98...I went to Canadian Tire and I got some Tremclad black rust paint, sand paper, high- density rollers, tape etc.. The only thing I couldn't find was the mineral spirits I asked the guy did they have any and he said low-odor Varasol is the same thing...I haven't tried it yet, but will this work? Or do I need actual mineral spirits? Where can I get them?
Re: New Paint job on a budget thread. - 07/27/0707:07 PM
Quote: The only thing I couldn't find was the mineral spirits I asked the guy did they have any and he said low-odor Varasol is the same thing...I haven't tried it yet, but will this work? Or do I need actual mineral spirits? Where can I get them?
If you have access to a Canadian Tire... then you probably have access to a Home Depot or RENO Depot or Home Hardware.. or maybe even a Walmart.
There is a difference between pure mineral spirits and other products that contain 'some mineral spirits' plus other liquids.
So I would not go with the Varasol. Most people tend to use it as a 'degreaser' - not as a paint thinner. That might be the first strike against it. Guys use it to wipe down furniture prior to staining ( to remove wax ) or to clean engines and car parts ( to remove grease ).
The name Var-a-sol may be the next clue.. It is either telling us that it is made from 'VARious SOLvents or that it does the job of 'VARious SOLvents'. But I am pretty sure that the product sold under the name Varasol cost more than plain old pure mineral spirits.
I do understand that one thing Varasol and pure mineral spirits have in common is that they evaporate at roughly the same rate AND they both burst into flames at roughly the same temperature. But you never will hear anyone saying to pour mineral spirits on to a hot engine... they always recommend varosol.
The truth is that if we were simply looking for 'a thinner' to remove paint off our paint brushes... then the guy is probably right - Varasol would do the same job as a mineral spirit. And the Varasol might even be suitable for the job of wiping down the body of the car to remove wax and debris prior to painting. BUT since we are using the mineral spirit simply as a thinning and evaporative carrier to lay down the paint, the mineral spirit is the proven carrier to do the job.
Even at Home Depot you will see turpentine, varasol and a number of other 'thinners' together. You just have to look for the one that simply says ' Mineral Spirits '. You don't want the ones that simply contain a percentage of mineral spirits blended with other thinning agents.
Re: New Paint job on a budget thread. - 07/27/0707:58 PM
I made an important discovery last night while rolling the umpteenth coat on my trunk: It really helps eliminate runs if you don't load the roller up with paint very heavily. Instead of rolling it through the pool in my tray like usual, last night I tipped the tray and moved the pool to the end while running my roller through the runoff left towards the top. After that I squeezed a bunch out on the tray and then went to work. I'm sure a lot of you have that down already but for anyone who's dealing with runs on vertical surfaces, just try going really light on the paint, where you have to really push hard to get coverage. The tip of my roller was still whitish while I was working.
Posted By: Anonymous
Re: New Paint job on a budget thread. - 07/27/0711:16 PM
Just a little update. I have been making some serious head way in painting. I havent been having a problem with orange peel as the paint seems to level out mostly and if I do start to see it creep up, it seems to help out if I run the roller over it. Ive spent about 2-3 weeks on an off on the car and I like where its headed. Im planning to finish up next week. This paint is as tough as nails man, Ive accidentally wacked it several times with the metal roller arm and no chips or scratches. Very pleased with the outcome thus far, its not perfect and has some gouges from the years but Im ok, gives it a small rat rod flair, and I didnt want it perfect.
Re: New Paint job on a budget thread. - 07/28/0702:14 AM
Calling on the wisdom of Marq, Charger, or whomever... On my test panel, I am using Rusto and am to the point that the formerly brown panel is now definitely red. Paint is thin, following the "roll it in the pan" to squeeze excess off before "wetting" the panel with paint. That seems to work very well for me as far as getting the paint to flow out so I don't get roller marks. But, the paint is drying with a more matte finish, it's not glossy like it would be if I brushed it on very thick and just left it to dry, brush marks and all (It's glossier from where it drips down the side of the can than it is on my test door). My theory is that I still don't have enough layers of paint so either 1. I just need more thickness for it to gloss or 2. I am still seeing the matte finish from where I wetsanded the coat below it. What say those with more experience?
Posted By: Anonymous
Re: New Paint job on a budget thread. - 07/28/0703:42 AM
Umm have anyone or you guys heard of the Meguiars SOLO system? What are your thoughts about it?
It is for freshly painted cars -- for bodyshops. I just finished painting maybe 2 months ago...Can I still use it?
Re: New Paint job on a budget thread. - 07/28/0703:56 AM
Quote: Calling on the wisdom of Marq, Charger, or whomever... On my test panel, I am using Rusto and am to the point that the formerly brown panel is now definitely red. My theory is that I still don't have enough layers of paint so either 1. I just need more thickness for it to gloss or 2. I am still seeing the matte finish from where I wetsanded the coat below it. What say those with more experience?
Ok... so I will make an assumption that you are using the Rustoleum with just pure Mineral Spirits.
It does sound somewhat odd to be getting a matte finish when each coat dries. My first thought is that you may need to use less mineral spirit and not cut the paint so thin. IF the paint is being overly thinned... it may be presenting the paint with a problem creating a sufficient surface tension of the paint to form a uniform and complete skin as it is curing.
So by using a higher percentage of paint and less mineral spirit it should allow the paint to get enough paint to form a smooth skin. And that would give it more of a glossy look to the surface of the paint coating.
The fact that you mention the paint looks glossier where it has run... or when slapped on with a brush tends to support the idea that more paint and less mineral spirits should get more of a gloss to each coating and eliminate the matte you are experiencing.
Thinking outside the box for a moment... I am not sure if the Rustoleum is available in a flat red. I believe the reds only come in a gloss. I know that they do sell a flat black. Hopefully the red Rustoleum you are using is a 'red'.
One experiment you might try... is to take some of the red straight from the can and roll it ( without any mineral spirits ) on to a test piece. Let it dry and see if that test patch has a gloss or shine to it when it dries.... What I would be testing for with this experiment is to ensure that the paint itself is working the way it is suppose to. For example... I don't know how the paint might turn out if it was a particular OLD can of paint... and the chemical composition had somehow changed over the long period of time it might have been sitting in the can. Or similarly.... I don't know what might happen to the can of paint IF it had been exposed to some extreme heat or cold prior to it arriving on the store shelf when you bought it. Or as yet another odd scenario... I don't know what might happen with how the paint performs if the contents in the can had separated while on the shelf. If the straight paint patch dried with a shine then you could just ignore these possible speculations for why the paint itself might be to blame...
In theory... the more layers of paint that you add... the more pigment and solids that will be laid down. The accumulation of the pigments and solids build up the uniform color and the possible glossiness of the outer skin of paint. So a little matte might be possible on the first, second or third coat... but most folks tend to see some hint of a shine or gloss right from the first coat...
Thats a few fast thoughts or why you might be getting a matte finish with your layers of paint.
Re: New Paint job on a budget thread. - 07/28/0711:48 AM
Thanks Marq,
Your theory holds well with what I was thinking was a good possibility for my matte finish. It is Rusto Red with mineral spirits. Further, on previous coats I didn't thin at all and got a glossy but very orange peeled finish. Of course, I had to sand like crazy to put on the next coat. So, I believe the paint is behaving as it is supposed to. I may have it too thin. I didn't get roller marks at all. I'll keep playing. Thanks.
Posted By: Anonymous
Re: New Paint job on a budget thread. - 07/28/0709:07 PM
I've got a question...
I need to get my mag wheels back to their original white. It seems easy enough to just sand 'em and do a thorough rattlecan job, but is there something I should know? A better method or a different paint more suitable for wheels?
Thanks y'all. I should have pictures of my tailgate (the test piece), with blue FORD lettering, in a couple weeks.
Re: New Paint job on a budget thread. - 07/28/0709:52 PM
Quote: I've got a question...
I need to get my mag wheels back to their original white. It seems easy enough to just sand 'em and do a thorough rattlecan job, but is there something I should know? A better method or a different paint more suitable for wheels?
Thanks y'all. I should have pictures of my tailgate (the test piece), with blue FORD lettering, in a couple weeks.
I sanded mine down, applied 2 coats of spraybomb primer, scuffed it up, and hit it with the Rustoleum appliance epoxy paint I got from WallyMart. Rock solid, hard paint when the instructions are followed. So far. The argent silver in a rattle can faded out after a year. This stuff is tougher I think.
Re: New Paint job on a budget thread. - 07/29/0702:21 PM
Quote: I've got a question...
I need to get my mag wheels back to their original white. It seems easy enough to just sand 'em and do a thorough rattlecan job, but is there something I should know? A better method or a different paint more suitable for wheels?
You are lucky if you want to restore your white rims... and I think the answer rest with the appliance white enamel paint. It's positive feature is that it goes on super hard and can resist all the road chemicals that might try to adhere to it and ut can withstand most washing detergents that you might throw at it to keep it clean. The only weak point to the appliance white enamel paint is that because it is so hard - it tends to chip when directly hit.
In most cases a wheel rim isn't exposed to many direct rock or chip hits. And if a rock hits it and chips it.. you can usually dab the spot with white enamel appliance touch up paint.
Oddly enough one of the killers of paint on rims is the heat that is generated from its proximity to the brakes. The appliance enamel is strong enough to withstand most heat ranges ( after all they use that enamel paint on stoves )
One type of paint that might be considered is a high gloss - high heat spray paint. Normally you can find it in two flavors... there are high heat - high gloss paints for engine painting ( and usually it is an enamel ) and also there are the specialized high heat paints sold for painting barbeques (bar-b-q's )). The barbeque paints usually don't have much of a color range ( black ) and usually don't have much of a surface appearance selection ( flat only usually ). But it would give a nice 'flat black' surface and we know it can adhere quite well to even cast iron.
I know several guys with TR6's who sanded their 'metal' rims down and then rattle can bombed their rims with paint to match their car. They went through a procedure something like what we do with surface preparation, even laying multiple layers of paint with 1500 grit wet sanding only at each step. They used the final sprayed layer as the 'shiny' layer and did not put any kind of clear coat on the finished painted surface. Apparently the clear coats tended to scratch up with microscopic scratches like a pair of eye or safety glasses that were constantly rubbed with paper instead of a soft cloth.
One guy.. Carl... with a 1976 mint condition MGG ( and metal rims ) took his rims off for the winter and did a multiple layer spraybomb job on his rims in his basement. In the spring when he revealed his winter project the results were nothing less then spectacular. But in Carls situation.. he was insano and meticulous to the nineth degree. But his efforts showed me just how amazing a rsult you could get with steel rims IF YOU take your time and methodically go about the painting, wet sanding and final polishing and waxing stages.
I guess the real trick to having success with wheel rims depends on what the rims are made of... with steel rims being fairly straightforward working with and with some of the aluminum or other alloy rims requiring surface preparation that is specific to those type of metal surfaces.
My GTA has aluminum honeycomb / snowflake style rims with a 3 inch deep chrome lip. They were looking pretty battle weary and I looked into getting them freshened up. In the end I was fortunate to find a company whose only job is refinishing rims. I got really lucky because when I phoned them they thought I was a 'garage' and they quoted to me the price they charge 'companies'. I think it was about $50 a wheel - and they picked up the rims and returned them ( pick up and delivery included wow ). The reason I mention that story is that those rims would never have accepted any paint job from me. As that type of rim ages it gives off a whitish powder on the wheel surface. Any paint I might have put on would have flaked off within 6 months. So sometimes there are rims that just shouldn't be 'hand painted' or rolled.
I have blathered... but hopefully something in this blathering points you in the right direction..
.
Posted By: Anonymous
Re: New Paint job on a budget thread. - 07/29/0707:07 PM
Thanks, Marq and blue195! I'll do the appliance paint for sure. Fortunately, they're steel per the brochure. I've got no idea why the PO thought it'd be a good idea to paint them grey.
From the brochure:
Posted By: Anonymous
Re: New Paint job on a budget thread. - 07/29/0709:01 PM
Its not white paint but I had pretty good luck with rustoleum "hammered" wheel paint in a spray can. My bmw came with 3 hub caps and the steelies looked horribly rusty and full of brake dusty. The main step that most people seem to miss is sanding and cleaning the wheel down to where you have a good surface for the paint to adhere to. Masking off the tire and stem was a little time consuming but well worth it.
Re: New Paint job on a budget thread. - 07/29/0709:13 PM
If you just rub vasiline on the rubber,you can spray away and them when you are done,and they dry.Just wipe off.Saves alot off masking.
Posted By: Anonymous
Re: New Paint job on a budget thread. - 07/29/0711:23 PM
Finally started painting. I tried the roll and tip method on the running boards but was not happy with the finish so I tryed using the foam brush only method,I like what I am seeing {so far}. I have two coats on the glove box and one coat on the doors,hood parts ,trunk lid and front fenders. Tremclad 70 % mineral spirits 30% then added a couple of ounces of penitrol. I loaded 3" and 4 " foam brushes and made one constant pass that gave me complete coverage no bubbles what so ever after I finished each panel I made only one pass with the foam brush {vertical strokes } . Looks promising so far. Keep in mind My coupe is all apart so I am able to paint almost everything while it sits flat on a table
Re: New Paint job on a budget thread. - 07/30/0702:05 PM
Quote: Finally started painting. I tried the roll and tip method on the running boards but was not happy with the finish so I tryed using the foam brush only method,I like what I am seeing {so far}. I have two coats on the glove box and one coat on the doors,hood parts ,trunk lid and front fenders. Tremclad 70 % mineral spirits 30% then added a couple of ounces of penitrol. I loaded 3" and 4 " foam brushes and made one constant pass that gave me complete coverage no bubbles what so ever after I finished each panel I made only one pass with the foam brush {vertical strokes } . Looks promising so far.
You don't need to do the roll and tip method with the Tremclad. That is supposed to be a method for use with the Brightside Paint. I am using the US equivalent of Tremclad, and just roll it, no tipping necessary.
Posted By: Anonymous
Re: New Paint job on a budget thread. - 07/30/0709:52 PM
3 coats on the hood and its done! I'll let it cure for a couple of weeks before final sanding and polish. Now I feel confident enough to take on the rest of the car. I have 2 coats on the roof and trunk, and as soon as it cools off It'll be ready for the final third coat. In the mean time I can focus on fixing a few small dents and filled in the power antenna hole.
Posted By: Anonymous
Re: New Paint job on a budget thread. - 07/31/0712:48 AM
So, I am almost finished with my 62 Galaxie 500. I am down to the last or next to last coat. I know the conventional wisdom has been to wet sand the last coat with 1500 or 2000 grit paper and then buff and polish. I wonder if it makes sense to sand that last coat? I have such a nice gloss before wet sanding that it seems to me I should just let it cure and then polish?
Re: New Paint job on a budget thread. - 07/31/0701:00 AM
Quote: So, I am almost finished with my 62 Galaxie 500. I am down to the last or next to last coat. I know the conventional wisdom has been to wet sand the last coat with 1500 or 2000 grit paper and then buff and polish. I wonder if it makes sense to sand that last coat? I have such a nice gloss before wet sanding that it seems to me I should just let it cure and then polish?
Am I missing something?
After I sanded, I put two final coats on the vette and went to the polish (Nu Finish) by hand. Looks great, but it's a driver. Not perfect at 1 foot, but from 6 it is... People have had a hard time getting the gloss back once they start sanding things. If you are a pro at polishing, go for it. If you are a back yard $26 painter like me, I'd be careful what you start....
Re: New Paint job on a budget thread. - 07/31/0704:37 AM
Quote: So, I am almost finished with my 62 Galaxie 500. I am down to the last or next to last coat. I know the conventional wisdom has been to wet sand the last coat with 1500 or 2000 grit paper and then buff and polish. I wonder if it makes sense to sand that last coat? I have such a nice gloss before wet sanding that it seems to me I should just let it cure and then polish?
Am I missing something?
If you are happy with the look of the final coat... then it is quite safe for you to hold off the compounding/polishing/waxing stage and let the paint cure for a while and just enjoy the look of the paint in its natural state.
If after a few months you want to dedicate some time to going to the final stage you will have to look at the state of the paint and make your decision on how to proceed...
IF the paint is still looking pretty glossy and sexy... then maybe you should just go to the compounding, then polishing and the waxing stage.
IF the paint is looking a bit rough and not giving a consistent shine or gloss... then go to a wetsanding using the 1500 and then the 2000 grit. Follow that up with the compounding/polishing and the waxing.
If you have a good quality random orbital polisher, then the final stage will not be so intimidating. And believe it or not with the right final handling of your paint job, you will be able to push an even better gloss or shine out of a straight unprocessed paint job.
Re: New Paint job on a budget thread. - 07/31/0704:41 AM
Quote:
Quote: So, I am almost finished with my 62 Galaxie 500. I am down to the last or next to last coat. I know the conventional wisdom has been to wet sand the last coat with 1500 or 2000 grit paper and then buff and polish. I wonder if it makes sense to sand that last coat? I have such a nice gloss before wet sanding that it seems to me I should just let it cure and then polish?
Am I missing something?
If you are happy with the look of the final coat... then it is quite safe for you to hold off the compounding/polishing/waxing stage and let the paint cure for a while and just enjoy the look of the paint in its natural state.
If after a few months you want to dedicate some time to going to the final stage you will have to look at the state of the paint and make your decision on how to proceed...
IF the paint is still looking pretty glossy and sexy... then maybe you should just go to the compounding, then polishing and the waxing stage.
IF the paint is looking a bit rough and not giving a consistent shine or gloss... then go to a wetsanding using the 1500 and then the 2000 grit. Follow that up with the compounding/polishing and the waxing.
If you have a good quality random orbital polisher, then the final stage will not be so intimidating. And believe it or not with the right final handling of your paint job, you will be able to push an even better gloss or shine out of a straight unprocessed paint job.
.
If you are finish sanding with 2000 grit, what grade of polishing compound do you use?
Re: New Paint job on a budget thread. - 07/31/0704:51 AM
I give it a try on my hood and so far the results arn't too encouraging. I tried a mix of 20% mineral spirits and gloss black. Evreyone says to have thin coats with little or no roller pressure, but that way I was getting bubbles everywhere. I found if I put some pressure on it, the paint laid out more evenly but with orange peel instead. Right now I'm on coat 3 with a wetsand after 2. I have to say that 3 is a lot thicker then I put down 1 and 2 and it looks better but it seems kind of dull. Also, in one area the bubbles didn't pop so I guess I'll have to sand that area down. I may just sand the hood down and start over. The first coat was thin, as in you could still see the original blue underneath, but it was very uneven. I think part of the problem was the roller had too much paint on one side causing a sort of checker pattern on the hood. I think I have to improve my roller technique and load up the roller more evenly but with not too much paint?
Posted By: Anonymous
Re: New Paint job on a budget thread. - 07/31/0709:22 AM
I will let the more experienced folks give some more experienced advice, but your mixture sounds kind of thick. Did you finally get some mineral spirits or did you use that Varasol? I know from my research on this that mineral spirits seems to be the desired thinner, NOT paint thinner and other paint thinning alternatives. I am doing 50-50 and bubbles are there initially rolling on but gone very quickly.
Re: New Paint job on a budget thread. - 07/31/0711:35 AM
I've been following this since I found it back in march. You might want to go back and reread some of the beginning where 69charger descibed the procedure. The bubbles seem normal. Some have said to go back over them lightly with a clean roller or foam brush after a few minutes to pop them and let the paint flow out.
On another subject, I got a paint sample for rustoleum "Fire Hydrant Red" (system 7400 Industrial) from Fastenal yesterday. I like it even though its not as dark as I wanted. Its a blood red and will look good on the mustang. I figure if I'm not happy with it I'll scuff it up, buy another gallon and mix it to get a darker version and add a couple of coats. I'll prime the car with a dark primer so it comes out as dark as possible. Once I get the paint I may experiment with a black first coat and see how it turns out.
Re: New Paint job on a budget thread. - 07/31/0701:02 PM
Quote: I give it a try on my hood and so far the results arn't too encouraging. I tried a mix of 20% mineral spirits and gloss black. Evreyone says to have thin coats with little or no roller pressure, but that way I was getting bubbles everywhere. I found if I put some pressure on it, the paint laid out more evenly but with orange peel instead.
Yep, that's what I found too. Little paint in the roller, hard pressure on the car when rolling. The orange peel is probably due to too thick a mixture of paint. If you were just putting too much on, you would have runs and not just orange peel. Add some more mineral spirits to your mix and you should be good.. but a thinner mixture is also more likely to run so be sure to keep the layer thin.
Re: New Paint job on a budget thread. - 07/31/0703:01 PM
Quote: Add some more mineral spirits to your mix and you should be good.. but a thinner mixture is also more likely to run so be sure to keep the layer thin.
I agree...
I was getting runs all the time with the vette. I just kept working them back into the paint. They eventually stop running. I might get 5-7 times rolled over the same spot going from hard pressure to very slight (weight of the roller), all the time trying to get the bubbles and runs to work themselves out.
Posted By: Anonymous
Re: New Paint job on a budget thread. - 07/31/0705:51 PM
I went ahead and wet sanded my Galaxie with 1000 grit paper and I wrapped the paper around an unused foam roller. I was hoping the foam roller would keep me hitting the high spots in the paint -orange peel, ripples etc. and get a little more uniform finish.
I this this worked pretty well. The roller is a little soft but since it soaks up water it does make the process a little faster with less bucket dipping. I think it does help knock down any tough high spots better than hand sanding only.
I also think there is a big diff in using the 1000 grit as it really only takes off the most recent coat and finishes things smoother.
One more coat and then I'll spray bomb the door jams (uggh, 4 door) and think about compounding and polishing.
Posted By: Anonymous
Re: New Paint job on a budget thread. - 07/31/0706:54 PM
Quote:
One more coat and then I'll spray bomb the door jams (uggh, 4 door) and think about compounding and polishing.
Speaking of compounding and polishing, I could use some advice on doing just that. I take it you need to let the paint harden and dry completely, a few weeks. After that, what to use as far as rubbing compounds, polishes, waxes, dunno. I do recall some dunning(and justifiably so!) remarks and pictures of what Turtle Wax and a cheapo polisher will do for me. There's a bunch of Meguiars and Mothers stuff at local auto store, so if anybody has had good results with that, would like to hear.
Posted By: Anonymous
Re: New Paint job on a budget thread. - 07/31/0707:01 PM
Ok you St Louis folks, I'd love to see your cars/trucks up close just to see what kinda paint job it turned out to be. From what I have seen they all look great So how about it would ya care if I came by & took a look or if you out & about & near Cahokia you could come on by my house if you like....joe
Posted By: Anonymous
Re: New Paint job on a budget thread. - 07/31/0709:54 PM
The best thing to do to learn about finishing the paint is to search for and read every single one of Aussie Driver's posts.
Posted By: Anonymous
Re: New Paint job on a budget thread. - 08/01/0701:22 AM
Quote:
Quote:
One more coat and then I'll spray bomb the door jams (uggh, 4 door) and think about compounding and polishing.
Speaking of compounding and polishing, I could use some advice on doing just that. I take it you need to let the paint harden and dry completely, a few weeks. After that, what to use as far as rubbing compounds, polishes, waxes, dunno. I do recall some dunning(and justifiably so!) remarks and pictures of what Turtle Wax and a cheapo polisher will do for me. There's a bunch of Meguiars and Mothers stuff at local auto store, so if anybody has had good results with that, would like to hear.
First of all I agree with the other poster who said read every one of Aussie Drivers post. He is a pro.
Secondly I've been researching my bum off through Autopia, North American Motoring, Meguiars Online, etc a whole bunch. I've actually contacted a detailer on these forums and he gave me a list of what products I should use on my Interlux Brightside Black. He works on black cars everyday so this process is proven.
I've gotten out to purchase a Vector "lookalike" 7 inch rotary polisher. I just need to pick up a backing plate, a wool pad, and some other foam pads once my funds come in. But I am confident that I can pull this one off. I will be learning on the fly, one panel @ a time.
I will be using these products in order.
1. Wetsand from 1500 to 2000 grit. (1500 you dont need if you dont have serious orange peel. I only have serious orange peel on my roof). 2. Meguiars #84 Compound with Megs Wool Pad 3. Meguiars #80 Speed Glaze with foam polishing pad (you need several passes with a polishing pad and finishing pad). 4. Desired wax. I am gonna be putting a glaze thats gonna pop the black color, and Meguiars #21 synthetic wax.
Once August 9th hits, it is going to be 2 months where my paint had time to bake.
I'll update and share my results. I put on 8 coats total on my little Civic. This is minus the wetsanding factor. I suggest for anyone to dump as much coats as possible so that when it comes time to polishing, you won't have problems burning through the color coat.
Posted By: Anonymous
Re: New Paint job on a budget thread. - 08/01/0706:43 AM
Hugger Orange
Posted By: Anonymous
Re: New Paint job on a budget thread. - 08/01/0701:52 PM
nice orange.
i was wondering you guys... ive got a brand new body kit for my cav. im wanting to paint it using the roller method. how would i prep a unpainted fiberglass bumper? just roll it on?
Re: New Paint job on a budget thread. - 08/01/0704:20 PM
Quote: nice orange.
i was wondering you guys... ive got a brand new body kit for my cav. im wanting to paint it using the roller method. how would i prep a unpainted fiberglass bumper? just roll it on?
First thing you would need to determine is whether the fiberglass bumper is 'paint ready' or not.
Most fiberglass autobody parts are either shipped from the factory with minimal surface preparation or 'ready to paint'.
If the surface looks pretty smooth and 'looks' like it is ready to paint on... then you will probably need to give the entire surface a wipe down with cloth dampened with pure mineral spirits. The point of this wipe down is to remove any chemicals on the surface of the body part that might have attached during the molding process. In the molds they usually add some chemical so that when the fiberglass sets... they can easily remove it from the mold. Once the surface has been cleaned of any foreign matter, you should be able to begin rolling as per the Charger recipe.
If the body part surface is not smooth to the touch.. you may have to do a light hand sanding to smooth it out. Again... you will go through the wipe down with the mineral spirit dampened cloth - to remove any foreign matter off the surface of the body panel. Then you can proceed to the rolling as per the Charger recipe.
This topic about surface preparation also applies to the ABS / plastic aero-effects parts as well. As the ABS / plastic parts often are sold with the mold separation chemical still adhering to the part. If you don't clean it off the paint won't be able to secure its adhesion to the body part.
Hope this helps...
.
Posted By: Anonymous
Re: New Paint job on a budget thread. - 08/01/0704:30 PM
thanks marq... its actually pretty smooth to touch. has minor scuffs from shipping... ill prolly sand it down anyway just in case... what grit would you suggest?
Re: New Paint job on a budget thread. - 08/01/0704:56 PM
Quote: thanks marq... its actually pretty smooth to touch. has minor scuffs from shipping... ill prolly sand it down anyway just in case... what grit would you suggest?
If it has a 'gel coat' on the fiberglass, I would not use anything grittier than say an 800 grit. Gelcoat tends to be soft enough to show scratches from lower grit ranges. The thing about gelcoat is that it tends to powder up the sanding paper pretty quickly. So just be very light on the pressure you are using so the sanded off gelcoat can escape from under the paper as you are sanding.
One thing that I had very good luck with when doing the fiberglass hood on my car was the Norton 3X brand of sand paper in the 1200 grit range. It did a smoother surface preparation job and it tended to not clog up the sandpaper.
When doing sanding on gelcoat I would tend to suggest 'doing it by hand' instead of going to a power sander. If you do it by hand you will be able to sand off a finer layer then the hand sander which may oversand the thin gelcoat they usually put on car parts.
.
Posted By: Anonymous
Re: New Paint job on a budget thread. - 08/01/0705:01 PM
so im looking for 800-1200... hmm.
might start with 1200 wet sand. sound good?
Posted By: Anonymous
Re: New Paint job on a budget thread. - 08/01/0707:42 PM
I wanted to paint my car a Gloss Navy Blue but they only have it in this type of paint. I mean if its made for a boat, than it should be able to work on a car right?
Posted By: Anonymous
Re: New Paint job on a budget thread. - 08/01/0707:47 PM
i dont see why not... try it out on a small piece first then go from there.
Posted By: Anonymous
Re: New Paint job on a budget thread. - 08/01/0707:54 PM
Would I still need to mix in mineral spirits?
Posted By: Anonymous
Re: New Paint job on a budget thread. - 08/01/0708:09 PM
id use paint thinner (made from mineral spirits) plus you shouldnt have the odorless problems... i know all i could find was odorless mineral spirits so i used paint thinner that says on the can 100% mineral spirits
Posted By: Anonymous
Re: New Paint job on a budget thread. - 08/01/0708:20 PM
He didn't like the boat paint so much... but it might have not been the paint itself. It didn't adhere.
Posted By: Anonymous
Re: New Paint job on a budget thread. - 08/01/0708:21 PM
Well dang it, the link didn't work so well. Here's what he said:
"Ok, so i'm not real impressed with Rustoleums boat paint. Heres what I did:
Sanded the panel with 220 then 400 Washed with mild soap and water Dried Wiped down with mineral spirits and let dry for 2 hours Wiped down with tack cloth Applied paint Waited 48 hours
The paint started flaking right off. I guess I will try the professional series unless anyone can point out a step I did to cause poor adhesion. "
Posted By: Anonymous
Re: New Paint job on a budget thread. - 08/01/0709:34 PM
Looking at the condition of my car. Where do I start first? I'm planning on painting it red to make it easier. I want a dark red but not too dark. Which one do you guys think is better? carnival red or sunrise red?
Re: New Paint job on a budget thread. - 08/01/0711:58 PM
Quote: so im looking for 800-1200... hmm.
might start with 1200 wet sand. sound good?
You won't need to wet sand the initial fine sanding of an already smooth gelcoat. You should be able to get away with just a superficial / light dry hand sanding with the 1200 grit.
You will have to shake out the paper frequently or smack the powdery debris off your sand paper so that it doesn't clog up.
After it is all smoothed... I would simply take a dry clean towel and do an initial dusting or wiping of the powder off the part. Then once you have gotten rid of all the sanded gelcoat powder you can then move on to the mineral spirit dampened cloth to get whatever powder that might have escaped you dusting with the towel.
I wanted to paint my car a Gloss Navy Blue but they only have it in this type of paint. I mean if its made for a boat, than it should be able to work on a car right?
I think the initial problem with this paint is that it is a " modified alkyd ". Whereas the Brightside marine paint is a polyurathane and the Rustoleum / Tremclad shares most traits of an enamel.
Rustoleum isn't exactly the first name the rolls off the tongues of boaters when asked to name marine paints. If the boaters aren't discussing it... then that is a pretty good indication that it hasn't got wide acceptance or usage in the marine world.
One of the lads in this forum did an experiment with the Rustoleum marine paint and he found that even with careful surface preparation the paint did not get a good adhesion. It basically flaked off in patches at some point.
Re: New Paint job on a budget thread. - 08/02/0712:10 AM
Quote: Looking at the condition of my car. Where do I start first? I'm planning on painting it red to make it easier. I want a dark red but not too dark. Which one do you guys think is better? carnival red or sunrise red?
Uh... explain to me what is wrong with the current paint job ? It looks pretty solid from the pictures you posted. Or are you just looking for a color change ?
. ,
Posted By: Anonymous
Re: New Paint job on a budget thread. - 08/02/0703:43 AM
So, I'm kind of lost here. I've got plenty of paint (8 or more coats) on my car and it looks good but not great. I don't know if this is orange peel that can be sanded out or if it's just a limitation of the method. I've got the paint thin enough and I have sanded to 1000 grit but the paint isn't really flat. I mean that when I spray bomb certain areas I get a much flater level surface than with the roller. It's not bad but I was hoping for more.
Should I continue with the 1500 and another coat or does the compounding and polish work the paint smoother and flater. It looks great from a few feet away but at 2 feet it's just ok.
Anything?
Posted By: Anonymous
Re: New Paint job on a budget thread. - 08/02/0704:38 AM
Quote: So, I'm kind of lost here. I've got plenty of paint (8 or more coats) on my car and it looks good but not great. I don't know if this is orange peel that can be sanded out or if it's just a limitation of the method. I've got the paint thin enough and I have sanded to 1000 grit but the paint isn't really flat. I mean that when I spray bomb certain areas I get a much flater level surface than with the roller. It's not bad but I was hoping for more.
Should I continue with the 1500 and another coat or does the compounding and polish work the paint smoother and flater. It looks great from a few feet away but at 2 feet it's just ok.
Anything?
any pics? how thick ar e you applying? any penetrol?
Posted By: Anonymous
Re: New Paint job on a budget thread. - 08/02/0705:41 AM
think ill start at 800- then 1000- 1200 then paint...
that way ill make sure i get everything taken care of.
sound ok marq?
Posted By: Anonymous
Re: New Paint job on a budget thread. - 08/02/0711:45 AM
Quote:
I think the initial problem with this paint is that it is a " modified alkyd ". Whereas the Brightside marine paint is a polyurathane and the Rustoleum / Tremclad shares most traits of an enamel.
Most (if not all) the the Rustoleum type paints are alkyd enamels. They all share an alkyd resin base (as opposed to an acrylic one). It's a paint technology that dates to the late 1920s, but it obviously still works. It was used as an OEM paint finish until the late 1960s, when acrylic enamels came into use.
I looked at a can of the Rustoleum Marine paint and read the label...other than being a *lot* more expensive than regular Rustoleum, I couldn't tell you what the difference is. If someone had adhesion problems with it, they almost certainly would have had problems with any other alkyd enamel (including regular Rustoleum). I'd avoid it too, if for no other reason than the price... For that money, get some Brightside or other urethane marine paint.
Posted By: Anonymous
Re: New Paint job on a budget thread. - 08/02/0701:16 PM
I've been thinning the paint (rustoleum premium) to about 40-50% with mineral spirits. I ring out the roller pretty thoroughly in the pan and then apply it by overlapping sections until it all looks flat and nice. No bubbles, I go slowly enough that they seem to pop right out on a second pass from the roller.
It just isn't what I would call a flat paint surface. The pics I've seen of other cars are so varied it's hard to tell what to make of the comparision.
Posted By: Anonymous
Re: New Paint job on a budget thread. - 08/02/0705:13 PM
2 of 3 coats with Brightside white on the sides of the car. The end is in sigh.
Closeup of the brush marks. I'll sand those down before the third coat.
Posted By: Anonymous
Re: New Paint job on a budget thread. - 08/02/0708:35 PM
Quote: Uh... explain to me what is wrong with the current paint job ? It looks pretty solid from the pictures you posted. Or are you just looking for a color change ?
It's warped. Theres absolutely no shine to it. In the sun the top looks pink. It looks nice in that picture because I took it when the sun was going down to make the car look nicer.
So should I primer the whole car before I paint it? or am I able to just paint over it in its current condition?
Re: New Paint job on a budget thread. - 08/02/0708:46 PM
Quote: It's warped. Theres absolutely no shine to it. In the sun the top looks pink. It looks nice in that picture because I took it when the sun was going down to make the car look nicer.
Is the paint job just oxidized? If so it would probably be easier to polish away the oxidation paint rather than repaint it.
Re: New Paint job on a budget thread. - 08/02/0708:53 PM
I was surprised at my paint yesterday the top surfaces were sort of oxidized so I went over it with some Poor Boys SR1 and foolwed by wax but the roof needed SR2 & SR1 followed by wax. looks okay now so I put the cover back on the truck its been sitting in the sun the last few months. I never did wet sand this truck and I've been giving that some thought for when it cools off plus I thought maybe redo the roof white
Posted By: Anonymous
Re: New Paint job on a budget thread. - 08/02/0709:09 PM
Quote: Is the paint job just oxidized? If so it would probably be easier to polish away the oxidation paint rather than repaint it.
Yeah thats the only problem. How do I make it look new again without repainting it?
Posted By: Anonymous
Re: New Paint job on a budget thread. - 08/02/0709:27 PM
I am currently rolling a car. But as a test I want to compare the color I using to a color I have in a 1 gallon can of Dupont Lucite lacquer paint. It's been sitting unopened for a long time. I was going to try a small patch sprayed with my HPLV gun but wasn't sure if the paint would be any good. How long can an unopened can of automotive lacquer last in a cool dark place??
Re: New Paint job on a budget thread. - 08/02/0709:51 PM
Quote:
Quote: Is the paint job just oxidized? If so it would probably be easier to polish away the oxidation paint rather than repaint it.
Yeah thats the only problem. How do I make it look new again without repainting it?
I used a porter Cable 7224 polisher along with the poor boys compounds has done wonders for my truck, the red paint here doesn't like a lot of sun over a period of time, I'm sure you can do the same using simualr tools and compunds.
Re: New Paint job on a budget thread. - 08/02/0711:10 PM
Quote: I was surprised at my paint yesterday the top surfaces were sort of oxidized so I went over it with some Poor Boys SR1 and foolwed by wax but the roof needed SR2 & SR1 followed by wax. looks okay now so I put the cover back on the truck its been sitting in the sun the last few months. I never did wet sand this truck and I've been giving that some thought for when it cools off plus I thought maybe redo the roof white
This is the same thing that I experienced this spring. It looked more like a general watermark over the surface. So I just whipped out the Porter & Cable and gave it a quick waxing - and everything went back to normal.
Funny thing is that it only happened on the trunk and the hood - whereas the sides of the car did not require the re-waxing. So I don't know if it was the paint or the previous coat of pure carnuba wax that had hazed OR if it was the sun beating down on the wax / paint.
As your truck had a similar 'occurence' with the top surfaces being involved.. I am susspecting the sun and wax... and not the rain...
If it had been the paint... you would have expected the haze to appear on the top and side surfaces. But instead it only appeared on the top. So I don't know if it was the rain that had sat on the car during three wet weeks... or if it was the sun beating down on the top surface. But since it easily waxed away I won't lose too much sleep over it IF it happens again.
The paint job is now almost ONE YEAR old... and so one hazing in 12 months ain't too bad...
Re: New Paint job on a budget thread. - 08/02/0711:33 PM
Quote: As your truck had a similar 'occurence' with the top surfaces being involved.. I am susspecting the sun and wax... and not the rain...
Marq what's rain probably not oxidized as it was only the top surfaces. I think I could have done a bedtter job on the roof main reason for thinking repainting it white.
Posted By: Anonymous
Re: New Paint job on a budget thread. - 08/03/0702:59 AM
New here, never owned a Mopar � but my mom has a Pacifica �. First heard of this painting alternative on the following thread http://www.toyotanation.com/forum/t196565.html , I have been reading the Moparts threads and a number of those linked on the Moparts threads since the original poster put the links in on June 25th 07. The Gen2 Camry I have does not need paint. I first read about the Hot Rod article from one of those links to another site, one of the 2 page mostly negative threads on July 3rd, and have been looking for a copy since, but since they pull them from the shelves by the 25th of the previous month, no luck. Would be happy to get a pdf of it even.
Well the reason I am here (one of them) �. And my first auto paint project since high school 25 years ago, I bought a Del Sol for my kid last year � fixed most problems and had less than half book value into it, then I had a little accident that demoed the hood that already needed replacement and messed up the bumper cover. Since I have only had hit and run or accident problems with RED Cars I have owned and the paint (looks like cheap repaint) on this Del Sol was chalky on top and looking like different spot repairs on the sides, I had already gotten many BC/CC quotes of $2500 and up plus a month or two to fit into shop schedules and complete. I thought this was outrageous for the second smallest car on the american roads and the car has been sitting in my garage for the last year. Good thing I wasn�t looking to get my 90 F150 repainted. I was looking for a color change � but may go to a darker red, like the Pettit Burgundy of 73Bugg, maybe even a two tone, but not black here in the south even though it looks great and seems most of the better paint jobs I have seen are black. I went to Schieb, they had done a reasonable job on my high school car which I had prepped. Their best $799 job (special price is usually $599) �. The ones I saw coming out of the shop at the time at least, had more orange peel than a bushel of oranges, and the 5+ particles of dust per square inch on top made me feel that I would spend an additional $700 removing that paint for a better paint job. I didn�t even try Macco since they quoted me over $250 to paint my grille surround on my 01 Beetle Sport (first time I saw Chargers Beetle, and his wifes Sport I knew they are way cool). Unfortunatly Hurricane Katrina left the shop that did that job totaled.
After the Del Sol � my F150 has dents and scrapes in all panels except the roof and the hood and right fender which were repainted before I bought it. It is white and the OEM single stage paint is holding up great otherwise. Then there is my long lost project, my 73 Mach 1 which was 80% restored (needed seat covers, carpet and headliner) when it got nearly 3 foot of water during a flood in 95, and I have not done much with it since I didn�t have a garage for it most of that time. It has been through 2 more floods that at least reached the floorboards, Katrina and at least 2 other hurricanes that have brought branches and other debris upon it, AND a Tornado swept up my street earlier this year. So it ain�t looking it�s best anymore, and as always, the cost of painting it (again) has been one of the reasons it has sat untouched. I would love to get that 325hp 351C-4V back on the road, but my 20PSI Beetle fits the speed/performance bill nicely, and it�s sneaky too.
Well, Sorry for the length �. I do have a few questions I will ask later on after I have read all of the thread. I do want to know if I am missing some of the threads � I read all 43 pages of Part1, the first 20 of 80 pages of Part 2, and all 24 of Part III, I keep seeing references to �All 200 Pages.� I can�t find more than 147 pages � and even if I include the 40+ page so far Word DOC I have cut and pasted some of the better posts to, I don�t have 200.
Pix of my Del Sol Project I hope to start painting when the weather cools in October or so. I will be working the body and buying tools that I don�t have until then, especially since I can amortize the cost over at least 3 vehicles I have to paint that I currently own.
What my top paint looks like, gotta be worse than that Z ...
Posted By: Anonymous
Re: New Paint job on a budget thread. - 08/03/0704:42 AM
Quote:
This is the same thing that I experienced this spring. It looked more like a general watermark over the surface. So I just whipped out the Porter & Cable and gave it a quick waxing - and everything went back to normal.
Funny thing is that it only happened on the trunk and the hood - whereas the sides of the car did not require the re-waxing. So I don't know if it was the paint or the previous coat of pure carnuba wax that had hazed OR if it was the sun beating down on the wax / paint.
As your truck had a similar 'occurence' with the top surfaces being involved.. I am susspecting the sun and wax... and not the rain...
If it had been the paint... you would have expected the haze to appear on the top and side surfaces. But instead it only appeared on the top. So I don't know if it was the rain that had sat on the car during three wet weeks... or if it was the sun beating down on the top surface. But since it easily waxed away I won't lose too much sleep over it IF it happens again.
The paint job is now almost ONE YEAR old... and so one hazing in 12 months ain't too bad...
.
It's the sun. I had a '63 Galaxie in College (red with a white top) that was the original paint...the car lived outside and I had to do a *lot* more maintenance on the hood and trunk (the roof was white and so it wasn't as noticeable). The sides never needed that much work, but I used to spend hours working on the horizontal surfaces. Being a poor college student, I didn't have a buffer so I was doing all this by hand. Man, that was a lot of work! I had to take a fine cleaner to it at least once a year to get it to really shine again. All I ever did to the sides was keep some wax on them, and they were fine. Like you said...doing a polish on it once a year with a PC is no big deal.
Re: New Paint job on a budget thread. - 08/03/0712:44 PM
Quote: I first read about the Hot Rod article from one of those links to another site, one of the 2 page mostly negative threads on July 3rd, and have been looking for a copy since, but since they pull them from the shelves by the 25th of the previous month, no luck. Would be happy to get a pdf of it even.
Re: New Paint job on a budget thread. - 08/03/0712:53 PM
Paint job revisited. I went over back over the trunk and rear quarters of the galaxie with 800 to remove what I can only assume is orange peel from too thick an application. I then repainted and by the time I got to the trunk I begain getting organge peel and thick paint again! The quarter panels that I painted first were fine.
I think that here in St. Louis where the temps are in the upper 80's and the humidity nearly the same, that the mineral spirits evaporate from the paint at a much faster rate. I think that by the time I got to painting the trunk, the paint had thickened due to evaporation to a maybe 30% mixture. It's the only think I can figure as to why the trunk would be so much more orange peely than the quarter panels painted from the same mixture, just 1/2 hour earlier.
I sure hope I am making progress this time.
Posted By: Anonymous
Re: New Paint job on a budget thread. - 08/04/0710:43 PM
Quote:
Quote: I first read about the Hot Rod article from one of those links to another site, one of the 2 page mostly negative threads on July 3rd, and have been looking for a copy since, but since they pull them from the shelves by the 25th of the previous month, no luck. Would be happy to get a pdf of it even.
been following this thread <and the other 2 or is it 3 i have lost count> for awhile. While normally I agree with what HotRod mag does they did something that in my eyes is a very VERY big no no. They used a grinder to shorten coils.....this is not the right way to do a lowering on a car. Otherwise it was a good story and loved the outcome of the falcon.....though the scallops should go to the tail of the car on top and the bottom should end just before the fender/door gap IMO. One day when I get my "project" started I will be using this way of painting it to make w truly budget sleeper. How truly a budget sleeper you ask? mid 80's dodge omni fuel injected turbo with alcohol feed system to just kill Honda's for a quarter of the price
Posted By: Anonymous
Re: New Paint job on a budget thread. - 08/05/0704:44 AM
Thanks for the link v8mirage ... and I too don't like the way they riced the front springs, at least they did the rear correctly ... or is it called old schooled the springs???
That omni should be a sleeper ... put a Hemi in it .... something like the Hemispherical 1.8T VW/Audi engine with huge injectors and a t4 turbo. Some of the Omni's did come with VW engines years ago I heard ... hope it wasn't an urban legend.
Now ... for the paint related part ... I see so many people asking how much MS to Paint ... I read that Aussie Driver used a Zahn cup ... or at least a less expensive one. I found one online which fits our budget ... Way less than the $100+ for a Ford 4 or a Zahn 1 to 5. This is not the cheapest one I have found, but the site also has a chart to show you how their cup reads compared to the Ford 4, some of the Zahns and some others ... the price listed is not correct, it is now $5.20CDN. http://www.lemmer.com/ViscChrt.htm I plan to order one, Aussie Driver, is this similar to the one you used. I think if we use these we can get a better messure of how thin the paint is without having to figure in temp and humidity which varys from day to day and region to region.
Posted By: Anonymous
Re: New Paint job on a budget thread. - 08/05/0710:11 AM
Quote:
Now ... for the paint related part ... I see so many people asking how much MS to Paint ... I read that Aussie Driver used a Zahn cup ... or at least a less expensive one. I found one online which fits our budget ... Way less than the $100+ for a Ford 4 or a Zahn 1 to 5. This is not the cheapest one I have found, but the site also has a chart to show you how their cup reads compared to the Ford 4, some of the Zahns and some others ... the price listed is not correct, it is now $5.20CDN. http://www.lemmer.com/ViscChrt.htm I plan to order one, Aussie Driver, is this similar to the one you used. I think if we use these we can get a better messure of how thin the paint is without having to figure in temp and humidity which varys from day to day and region to region.
My Zhan cup looks just like that one except mine is black. I found the cup to be a great help for my painting and I hope that you find yours to be just as useful.
Re: New Paint job on a budget thread. - 08/05/0708:04 PM
Question... my father has a Nissan Sentra from the 90s that has the paint peeling problem. It's not down to metal so it may be able to be restored with some heavy polishing, but if not... I saw cheap Duplicolor Clearcoat Laquer "ready to spray" at Pep Boys. Would this be compatible with OEM paint if I rolled it on to bring back a shine?
Posted By: Anonymous
Re: New Paint job on a budget thread. - 08/05/0709:45 PM
yes Silver they came with VW styled engines in them <in fact if you look at an 80's rabbit and an 80's omni they are almost identical>.
As for the paint fading is it fading or is the clear they used peeling much like it does on the early 90 ford car's/truck? if it's the second one you be better off sanding it down and just repainting it as the clear will keep peeling off and take any new stuff you put on it. not too sure if its faded if you can buff it out though never really dealt with that personally. I figure if you have the time and/or an extra car try your hand at rolling it too see it looks better.
as for my lil project it might be awhile before I can get to it....money is always the one bad spot, but trying to find an omni/horizon without tons of rust is bad in this area now.
Re: New Paint job on a budget thread. - 08/05/0710:17 PM
I believe it's the clear peeling... thanks for the info.
Posted By: Anonymous
Re: New Paint job on a budget thread. - 08/06/0701:46 AM
Well this is paint job on a budget. I know that this is been heavily geared toward rustoleum/tremclad/brightside. I have seen some posts where someone has sprayed the rustoleum through an HVLP gun. I was convinced that I would be rolling the Rustoleum regal red, but I have been farting around re-aligning doors fenders and I still have to get the hood right before I do any sort of painting. Oh I forgot, I also have to make the roof look like it wasn't tap danced on.
I was getting some sanding supplies for the Mustang at a local pep boys, when I saw the Dupli-color paint shop product. Ready to mix Lacquer stuff that Tett mentioned a couple of posts prior. I know all the "pros" are dogging it which is kind of the reason why I'm considering it.
Does anyone have any thoughts on it. I know Lacquer is a short lived shine, but hey some of the nicest muscle cars that I have seen at car shows about 10 or so years back were painted with Lacquer. I'm going to garage it most of the time anyway. Is this something anyone out there has tried. I easily have a week if not longer before I start putting on any sort of paint.
Feel free to throw in your 2 cents.
Posted By: Anonymous
Re: New Paint job on a budget thread. - 08/06/0706:12 AM
First I would just like to thank everyone who put the time into this thread. Before I read this a few months ago I was just going to spray bomb my car flat black!
Background: I have owned this car for nearly four years now. The previous owner had cheaply resprayed over the factory paint. Over years of sitting outside in the sun the paint began to peel off and scatches became more severe. It looked terrible! I had some free time and needed to repaint the car on a poor college student budget.
My steps and method I used: Prepping: *Sanded entire car with 120 grit sandpaper with random orbital sander, long block sander, and by hand until car was even to the touch. On extremely bad areas i used 50 grit sand paper, then used 120 grit to even it out. *Next used Bondo fix a rust bubble and any obvious dents. Sprayed the dried Bondo with 3 coats of Rustoleum Automotive spray primer. *I did a basic job of masking off lights, door handles, trim, and glass instead of removing them. *Washed entire car with dishsoap and water. Once completely dry, wiped car down with tack cloth.
Painting: *Thinned Rustoleum Professional Smoke Gray to just slightly thicker than water using 100% Mineral Spirits (not the odorless kind). *Sprayed car lightly using Black and Decker Pro paint sprayer and wiggly thing attachment. (1st coat was extremely light and careful to avoid and dripping. In a few instances there was slight dripping which could be lightly smudged out, once paint leveled it was nearly unnoticeable.) *After a night of drying, I wetsanded the car using 400 grit sand paper to remove any orange peel. *Applied a second coat of paint using same method. *Let dry another night, wetsanded using 600 grit sand paper to smooth remaining orange peel. *Applied a third coat of paint extremely thin and fine. *Another night of drying, then carefully wetsanded the car using 1500 grit sand paper, then 2000 grit sand paper.
After the final wetsanding, I polished the car using Turtle Wax polishing compound and a cheap orbital buffer.
Results were 1000% better than the car looked before. There is some areas where light orange peel is still noticeable and you can tell we messed up in the painting process. But overall I am extremely satisfied with the outcome!
Total Cost: Around 200 dollars (after many trips to the Ace I stopped keeping count of small expenses) including everything mentioned except the Black and Decker paint sprayer, which I got for free in a promotion.
My initial plan was to roller the car, but after I got the sprayer i decided to experiment a little after doing some reading here and on the Honda forum.
After one week the paint is hard and survived a 200 mile road trip with no unobservable issues or flaws. The paint still has a slight paint smell if you put your nose to it, but I suspect that will go away as the paint continues to harden.
Once again, big thanks to those who pioneered the way and gave me the confidence to do this crazy scheme in my driveway!
oh and sorry for any spelling or grammar mistakes, its late lol
Edit* I had planned to show pictures from various stages of the project, but until i re-gain my old knowledge of BB code one finished picture is all i got:
Posted By: Anonymous
Re: New Paint job on a budget thread. - 08/06/0710:51 AM
I just re-read the article in hot rod about this process. Has anyone rollered fiberglass?I have a fiberglass hood with a 3 inch cowl I'd like to try.
Re: New Paint job on a budget thread. - 08/06/0704:22 PM
Quote: I just re-read the article in hot rod about this process. Has anyone rollered fiberglass?I have a fiberglass hood with a 3 inch cowl I'd like to try.
Yes... I did it... and others... and our tales have been recounted in various post on preparing and rolling fiberglass hoods etc... It works and it looks great..
.
Posted By: Anonymous
Re: New Paint job on a budget thread. - 08/06/0711:58 PM
Just thought I'd post a pic of my 79 MGB I just finished rolling. Six or seven coats of Canvas White Rustoleum. [image]http://st73.startlogic.com/~pokerisb/pics.html[/image]
Re: New Paint job on a budget thread. - 08/07/0704:43 AM
Quote: I just re-read the article in hot rod about this process. Has anyone rollered fiberglass?I have a fiberglass hood with a 3 inch cowl I'd like to try.
I did the vette.... Works great so far.
Now My question:
Has anyone tried the Van Sickle Paint for tractors? I was in Big R and they have a few oranges. I might try the Kubota Orange. I think someone suggested it, but I couldn't find the post. The old Harley orange is pretty close.
Re: New Paint job on a budget thread. - 08/07/0711:43 AM
For the benefit of everyone...
I happened by Stephen Hull's site and posed an inquiry into whether the U.S. had coach paint or something similar. He replied that he had never worked with any, but he provided a link to something that looked similar, even though he couldn't vouch for it. I just offer this as information... I used Rustoleum on my test piece and it worked fine. So I don't suppose we need any new paints, per se, but I would be interested in a good self-leveling paint with long open time just to make it easier and smoother so the wet-sanding goes more smoothly. Here's the link...
Re: New Paint job on a budget thread. - 08/07/0702:30 PM
Quote:
Now My question:
Has anyone tried the Van Sickle Paint for tractors? I was in Big R and they have a few oranges. I might try the Kubota Orange. I think someone suggested it, but I couldn't find the post. The old Harley orange is pretty close.
I was the one that suggested Kubota Orange... I've been using Van Sickle for several projects, and I love it. I actually prefer it to Rustoleum...they're both alkyd enamels, and there may not be any major differences between them but after using a couple gallons of Van Sickle I try to stick with it. It's just a personal preference really. I think the Kubota Orange is pretty close to Harley Orange, but maybe a smidge "brighter". Might be as close as you'll find in a pre-mix color though. If you look at their "custom colors" they have a lot of other shades of orange, but the website doesn't say how to order them... Anyway, I've been nothing but impressed with it so far...
Posted By: Anonymous
Re: New Paint job on a budget thread. - 08/08/0701:22 PM
i demand more pics....
also i plan on starting my test job this weekend to see if i can get this done... does anyone know if it would be ok to use a electric paint sprayer (used for paiting walls and such) to apply the paint? thanks everyone for all the help
Posted By: Anonymous
Re: New Paint job on a budget thread. - 08/08/0708:38 PM
Electric roller, not even necessary. Follow the process as is, time tested and proven to work. No sense trying to re-invent the wheel.
Posted By: Anonymous
Re: New Paint job on a budget thread. - 08/08/0710:35 PM
Quote: Electric roller, not even necessary. Follow the process as is, time tested and proven to work. No sense trying to re-invent the wheel.
But you did re-invent the wheel
Posted By: Anonymous
Re: New Paint job on a budget thread. - 08/09/0703:13 AM
question when mixing the mineral spirits do i mix in paint can or pour both into a seperate container and mix...
also around how many rollers do i need? 1 per coat so they dont dry out or what?
Re: New Paint job on a budget thread. - 08/09/0703:37 AM
Quote: question when mixing the mineral spirits do i mix in paint can or pour both into a seperate container and mix...
also around how many rollers do i need? 1 per coat so they dont dry out or what?
You should pour the paint and mineral spirit into a separate container. ONLY mix as much paint as you need to do one coating of the body. On average it takes about 1/3 of a quart of paint to do one layer on a car body. At our local 'Dollar Store'... I was able to buy 4" X 12" paint trays ( made in black plastic ) at 2 for $1. I bought a dozen of those cheapo paint trays and would pour the paint into the tray, add the mineral spirit... and then blend the two together in the tray.
Rollers... figure on one roller per coat. You can go with two rollers per coat IF you are using one to do the actual paint rolling AND the second clean roller for going over the freshly rolled paint to pop bubbles. IF you seal up a roller between coats in an airtight baggie... you might be able to squeek an extra coat or two out of a roller. But since they are so cheap... splurge and don't go scrooge on rollers
.
Posted By: Anonymous
Re: New Paint job on a budget thread. - 08/09/0704:14 AM
thanks again... i plan on using ace rust stop safety orange (i think its the same as rustoleum) for my job on the cav. gonna do it one panel at a time, first im going to do the front bumper and rear first (cause its a new body kit so why not) then the side skirts... followed by the body. i might have to paint outside and i live on a gravel driveway (not a good thing) so i might get my friends dads garage.
anything else i need to know... i just bought the 10 pack of shurline rollers 4" on ebay. and am planning on getting the paint sometime this week.
i got some body work to do before i paint the body though... bondo to fill the dents i guess. and sand the whole body down with 320....
sound good?
Posted By: Anonymous
Re: New Paint job on a budget thread. - 08/09/0706:04 AM
like a lot of others i have read most of this whole saga. I am here from a jeep site, i am a jeep guy.
my question, I need to be able to drive my jeep while in the process of this paint job. I can stop for a day or 2, but not long enough to do the whole thing start to finish. is that possible?
what would it take different doing it this way? thanks for the help catfish
Re: New Paint job on a budget thread. - 08/09/0712:30 PM
Quote:
thanks again... i plan on using ace rust stop safety orange (i think its the same as rustoleum) for my job on the cav. gonna do it one panel at a time, first im going to do the front bumper and rear first (cause its a new body kit so why not) then the side skirts... followed by the body. i might have to paint outside and i live on a gravel driveway (not a good thing) so i might get my friends dads garage.
The only thing that stalled me when reading this was the mention of the ACE brand anti-rust paint... as I am not sure how successful it has been in this application. Since you haven't bought the ACE paint yet... maybe there is still time for you to source out a supplier for the Tremclad / Rustoleum or some of the other brands of paint where there has been confirmed success ?
I always shudder when I hear products that are touted by shop merchants as being "...just as good as..." or "....its almost the same thing.." hehhehhehhe....
My favorite story in that vain was the time I bought tires at SEARS and the shop guy said... "... their house brand of tires were made by Michelin Tires and they were just as good as the top of the line Michelin's..." What a lie. Within 36 hours of putting those 'knock off' tires on my car the wife lost control of the car accelerating onto the highway. Fortunately no damage done. But she DEMANDED I take those tires back IMMEDIATELY and go get Goodrich or REAL Michelins. I complied.
I wish I could remember which 'brand name' company use to use the advertising phrase "... Accept no substitutes... "
.
Posted By: Anonymous
Re: New Paint job on a budget thread. - 08/09/0712:50 PM
You can roll and drive at the same time with a few minor considerations. Any saftey related trim that you remove, like side mirrors will make it tough to drive.
I did my car over a 3 month period of on and off painting and I found that what I learned during the first two or three coats, I'd forgotten during the time that lapsed between them and coat 4.
Other than these issues I don't see why you couldn't drive it and paint it at the same time.
Posted By: Anonymous
Re: New Paint job on a budget thread. - 08/09/0701:20 PM
thanks marq for the insight
i guess your right i should try to find rustoleum. i got a sister in law that works at lowes so she might be able to get me a hookup....
anything else i need to know?
Posted By: Anonymous
Re: New Paint job on a budget thread. - 08/09/0709:47 PM
okay, been reading this thread for a while, and finally decided to give it a shot. i have a 95 camaro that was really hagard looking, and very faded. figured i couldnt make it look any worse, it couldnt go anywhere but better. i sanded the car using 80, 100, 220, and 400 grit before applying the first coat. everything looks great at this point. from reading through all the posts it says apply 2 coats before wet sanding. I am using rustoleum pro gloss black. applying the 2nd coat was quite hard. it was difficult to see where it was going on, and where it wasnt, and where it was to thick, and so on. i did half the car, and it gave it a lot of orange peel. im concerned at this step. what is the benefit of the 2nd coat before wet sanding?
im thinking of wet sanding to 600, paint, 800, paint, 1000, paint, 1500, paint, 2000, polish.
other steps i see using 600 all the way, and then 2000 on the final coat, what seems to work best?
last question for now, when wet sanding, should you be able to see any of the gloss, or should it be totally hazy (kinda how it looked at 400 right before painting). Ill post of pics for reference when i am at home.
any advice is welcome!
Posted By: Anonymous
Re: New Paint job on a budget thread. - 08/09/0711:14 PM
I thought my Safety Green from Ace went on pretty good, but I havn't tried the Rustoleum to compare it to. Until more try it and post results I could understand where some would be sceptical on using it.
I've decided the green isn't what I want. I went in to Tractor supply and picked up a gallon of gloss white and royal blue in qts the Valspar line, I got what I wanted on clearance, the Ga was $5 and the qts of blue were less than $2 each. I'm going to mix up a light blue and two tone the car with an off white to countermatch the light blue.
Posted By: Anonymous
Re: New Paint job on a budget thread. - 08/09/0711:31 PM
here are some wet sanding examples using 600 grit.
my assumption is it should look like the 1st picture, and not like the 2nd? just trying to make sure im doing this right. will it continue to work like this as i go finer?
here is what it looked like after the 1st coat:
Posted By: Anonymous
Re: New Paint job on a budget thread. - 08/09/0711:53 PM
Quote: Question... my father has a Nissan Sentra from the 90s that has the paint peeling problem. It's not down to metal so it may be able to be restored with some heavy polishing, but if not... I saw cheap Duplicolor Clearcoat Laquer "ready to spray" at Pep Boys. Would this be compatible with OEM paint if I rolled it on to bring back a shine?
That sounds like clear coat failure. No amount of polishing will correct that.
As for rolling on clear coat, I can't tell you anything about that. Maybe somebody here has some ideas.
Re: New Paint job on a budget thread. - 08/10/0704:17 AM
Quote: here are some wet sanding examples using 600 grit.
This needs more sanding. Use the sanding step between coats to create a smooth and uniform surface. It's clear that there is some texture in that paint that you don't want when you are done. Knock that down with 400 - 600 grit wet before you go on to the next coat.
The reason people do two coats before sanding is to reduce the amount of wetsanding (which most people hate.) Personally I would at least scuff lightly with red scotchbrite after the odd numbered coats and wetsand after the even numbered coats.
I don't like to apply paint to any shiny surface unless it's still slightly tacky from the previous coat. If it's dry enough to scuff (wet or dry) then scuff it.
Re: New Paint job on a budget thread. - 08/10/0705:54 AM
I tried an area on my hood with the paint thinned roughly 60/40 and it went down much better than the last try, looks like a thin spray job minimal orange peel, pretty smooth. The only thing is I rushed my crappy body work in a few areas after sanding off my first attempt and scratch marks are easily visible in the paint from some of 220 grit paper I used. I'm wondering will the paint be able to "fill" these or should I go back and be more thorough with 400 or so. I just wish I didn't mess up the first time it would have been alot less work.
Re: New Paint job on a budget thread. - 08/10/0706:41 PM
Quote: I'm wondering will the paint be able to "fill" these or should I go back and be more thorough with 400 or so. I just wish I didn't mess up the first time it would have been alot less work.
The paint will only be able to fill those scratches if you nearly sand all of the paint off. So, that means you have more sanding to do if you want to get rid of the scratches, any way you look at it.
Re: New Paint job on a budget thread. - 08/11/0712:47 AM
Ok, here is what I have and what I want to know.
As you can see its in progress... but the bottom will be flat black. Would it be rediculous to roll on silver with no metallic? I plan on spraying flattener on the car when its all done anyways so it doesn't really matter about being shiny.
Let me know what you think.
- Jon
Posted By: Anonymous
Re: New Paint job on a budget thread. - 08/11/0704:59 AM
so the ace worked for you? do you have any pics? i know i went to lowes and they dont have a gallon of safety orange, but a gallon of ace is 34.00
Posted By: Anonymous
Re: New Paint job on a budget thread. - 08/11/0705:00 AM
WOW !
one month reading all of the posts in this huge thread. I am done reading ! Now let's get painting !
First of all have to thank Charger for passing all this good info and unique method to paint a car and save a ton of money. and also thanks to all that have contributed in a great way, like Marq, Exit, Aussie, and all the Pioneers out there.
ok, here's my plan:
-5 Cars to paint... -Paint One car at a time... -apply (sprayed) 2-3 Coats of Rustoleum and then -another final coat of Brightside (also sprayed) of the matching color.
I have tried the roller method and I see it does work great ... BUT it takes too long !
I have 5 Cars to paint and I need to go faster at it. so I have also experimented with a CHEAP (15 dlls) HVLP gun from Harbor Freight, mixed 10-15% Mineral spirits with Regular Rustoleum Gloss White (The 87 Mustang will be white). and that came out great! I practiced spraying FIRST Royal Blue Rusto (The 86 Suburban will be Blue) on a couple of metal pieces from a Weight Lifting Rack/set that I am fixing, first I sprayed the Blue with a 45-50% MS solution, it came out too thin, creating runs. waited for a couple of days... wetsanded the blue down (and all the runs) and then I tried the Gloss white on a few pieces with the 10-15% MS mix... those I can see that came out awesome ! I'll do another coat and then let them dry, I won't even bother wetsanding those since they are just for a piece of furniture (weight lifting base).
I have already sanded down the top side of the suburban and some of the Mustang and the Legacy GT, but will do the Suburban first to test my spraying skills (First time at that too).
after the Suburban I will try and paint my Brother-in-laws 87 Astro Van, that is green and will probably paint it Hunter green. (I am going to let him do all of the sanding).
then after that I will paint the Black 99 Subaru Legacy GT, the top side is also peeling, I will paint it all Black, I am also going to paint the rims Black.
after that I will paint the 87 Mustang Gloss White... the Old 70 Chevy Nova that you see in one of the pictures will also get re-painted after I change the engine (I swapped a 396 Big Block in for the original 307, now I am going to do an LSx Swap into it. (I love doing engine and interior swaps )
Ok, here is some info on me and my cars. I've had a lot of Muscle Cars over the years, including a 68 Barracuda Fastback (I should have kept that one !), it had a 318, manual tranny and that thing was fast !
I've had tons of Mustangs, Camaros, Novas, Chevelles, etc. (at some point I had 3 Novas and 2 Camaros in front of my house).
Lately I've been on a Ford Kick (If you go to my website you'll see what I mean (Projects "Cobra4Me", "Double Displacement" and Project "SuperCobra" are all my Creations.
anyways, the main reason I got to read this whole thread was to save money on the PaintJob for my 87 Mustang, named "Project Double Displacement" (because it went from a 2.3 4 cyl. engine to a 8 Cyl. 4.6 GT engine), in fact, all of a 2003 Mustang GT drivetrain, interior, suspension, dash, etc. Made it into the 87.
anyways, I'll keep you guys posted on the progress of all these vehicles I plan on painting with Rustoleum and the last coat on Brightside.
Here are some images: Here's the 87 Mustang, in the background you can see body parts from a 2003 Cobra and a 2003 Mustang GT that I used for my projects
Here's the original hood with a rolled coat of Gloss white, (again you can see the yunk Yard I have created in the background)
the first supplies, Now I have bought a Cheap HF HVLP gun and won't be using the rollers.
another shot of the Mustang, rear wing removed
I even sprayed the underside of the hood now.
Here you can see the Suburban, the Legacy GT and the 70 Nova.
this is my First Cobra that I built in 2000 (now Sold) Page for Project: "Cobra4Me"
Here's the Second Cobra that I am still building, (Currently waiting for the body to get paint at a Professional Painter), Page for Project "SuperCobra"
and here's Project "Double Displacement" 87 Mustang with a 2003 GT conversion I have also today acquired a can of Penetrol and will follow directions given by Aussie for applying Brightside as the last coat.
BTW- There's a guy who is thinking on painting his Cobra Replica using the roller method !
Re: New Paint job on a budget thread. - 08/11/0706:02 AM
Alright guys, youve got me hooked. But I started to read through all the posts in the other threads, and THERES TOO MANY!
Can anyone tell me whats generally been accepted as the best way to do this (procedure wise), whats a good number of coats to apply, and if there were any pictures of any blues posted or if anyone is doing blue, can you post a pic with which color it is, as im going to try to match the color on my '67 GTX as best I can since the engine bay is in nice shape and I wasnt planning to paint it. Also, has anyone tried doing this with suspension peices?
Also, what types of rollers have you guys used to best effect? Help would be great. I still cant beleive that this can acutally work, BUT I DONT THINK I CAN GET ANYMORE PROOF WITHOUT DOING IT MYSELF! lol
Posted By: Anonymous
Re: New Paint job on a budget thread. - 08/11/0706:53 AM
well I got the rear end of my car pretty much put back together...
and the inside of my driver door is looking pretty good so far..
Posted By: Anonymous
Re: New Paint job on a budget thread. - 08/12/0701:36 AM
i have a 1969 chevelle that i rolled the first few coats on and it looks good did i mention its 2 tone and i think im going to add pearl on the last 2 coats
Posted By: Anonymous
Re: New Paint job on a budget thread. - 08/12/0702:42 AM
I posted a few pics back on page 21. It was the pre mixed safety green. I could actually pour the last of the mixture on the panal and work it in so I wouldn't waste the paint and blended right in, I think I mixed it about 30%.
Back to my clearance I found at Tractor supply, the qts were $1.90 ea, they had 3qts of safety orange too, but I decided on mixing a light blue instead. All this was Valspar paint, originally the gallons were $28, so the 4.95 I paid was a pretty good geal. Now thats a paint job on a budget , LOL.
One other thing i'll add about the rollers if it hasn't been mentioned, I took them off nightly after painting and put them in a ziplock bag, if I waited a few days they dried out, but than I poured in mineral spirits to keep the rollers damp, worked pretty good.
Re: New Paint job on a budget thread. - 08/12/0711:40 AM
GTX Matt, I am painting my 83 Toyota a shade of blue called Ultra Blue from a local Australian paint company called Wattyl. Dunno how this can help you, but I am attaching a picture for you to check the finish. I have done 9 coats so far, and I have just finished wet sanding with 2000 grit in preparation for cutting and compounding, hopefully next week end. FYI, the blue started looking like a smurf blue after the first couple of coats, but it has darkened a fair bit since, and I am very happy with the way it has turned out and especially how smooth the finish is.
Hoping to have all finished in a couple of weeks, and then relaxing with a cold one!
Re: New Paint job on a budget thread. - 08/12/0711:44 AM
Another picture attached
Posted By: Anonymous
Re: New Paint job on a budget thread. - 08/12/0704:08 PM
chieftain are you getting alot of orange peel? What are you mixing the paint with? mineral spirits? I bought some tractor supply oliver green to put on my old J10 Jeep truck. I use a HVLP turbin sprayer. got alot of orange peel. Not sure if i didnt thin it enough or if i didnt clean the gun good enough.
Just wondering.
Posted By: Anonymous
Re: New Paint job on a budget thread. - 08/12/0704:41 PM
Hey Muskin i am a painter and you have to thin the paint so that you dont get orange peel. I am very experienced with HVLP and various sprayers and you shouldnt get orange peel anyway if you spray but dont spray on heavy and i do know that if you are going to spray you have to thin and it eliminates the orange peel.Thin maybe 30% with orderless mineral spirits (cuts down on the smell)that is good enough to go through an HVLP hope this helps
Posted By: Anonymous
Re: New Paint job on a budget thread. - 08/12/0710:23 PM
Started my paint job today (prep work) and have a question. I had to sand the top down to bare metal in spots and I also used a rust remover (Eastwoods Oxy-Solve) which leaves a zinc oxide coating. Question is this...do I primer directly over the zinc oxide, sand it first and then prime,or what? Thanks for any assistance and especially all the informative posts. Stewart
Posted By: Anonymous
Re: New Paint job on a budget thread. - 08/12/0711:31 PM
I started my paint job but have to relocate to finish it { it is easier for me to put the car back together to move it} I have attached a PIC, you are looking at two coats using foam brush only method . I am very happy with that process if you can have the parts sitting flat on a table .I am sure I will be using the roller method to finish the remainder of the cab. The only thing I am not happy with is my body work skills you need a perfectly flat panel or every imperfection will show. Cheers
Re: New Paint job on a budget thread. - 08/13/0701:04 AM
Quote: GTX Matt, I am painting my 83 Toyota a shade of blue called Ultra Blue from a local Australian paint company called Wattyl. Dunno how this can help you, but I am attaching a picture for you to check the finish. I have done 9 coats so far, and I have just finished wet sanding with 2000 grit in preparation for cutting and compounding, hopefully next week end. FYI, the blue started looking like a smurf blue after the first couple of coats, but it has darkened a fair bit since, and I am very happy with the way it has turned out and especially how smooth the finish is.
Hoping to have all finished in a couple of weeks, and then relaxing with a cold one!
I think that actually looks very close to B5 Blue
Posted By: Anonymous
Re: New Paint job on a budget thread. - 08/13/0702:00 AM
There was some orange peel, I would consider normal. I used regular mineral spirits. My test panal was 8 coats and I didn't spend too much time prepping the panal either.
I would think the spraying would involve mixing even thinner than just rolling. If your getting too much orange peel, I would thin the paint even more. The sooner the better to sand out the orange peel.
Posted By: Anonymous
Re: New Paint job on a budget thread. - 08/13/0703:28 AM
Tonto ... that is looking really good for only 2 coats ... and foam brush only. Is that brightside?
On the subject of Orange Peel ... been noticing it everywhere, a chevy fairly new S-10 today with a repaint, could see some red paint on some of the rubber, nice shine, but the whole door panel had peal. On a lady at works new car .... 3 week old black Vette ... brand new ... all over the place. So even the expensive new cars can't get better than a 5 footer.
Posted By: Anonymous
Re: New Paint job on a budget thread. - 08/13/0711:11 AM
Thanks Chieftain, I got to work 2 more days this week then will be off again for 4 day. {4x4 schedule}. Gonna thin the crap out of it. The oliver green is kinda like an old army green not bad. Guess the first day off will be wet sanding day.
Re: New Paint job on a budget thread. - 08/13/0703:29 PM
Quote: I started my paint job but have to relocate to finish it { it is easier for me to put the car back together to move it} I have attached a PIC, you are looking at two coats using foam brush only method . I am very happy with that process if you can have the parts sitting flat on a table .I am sure I will be using the roller method to finish the remainder of the cab.
Hehehhe.. that car is so cool looking in that inadvertent two tone. I can imagine it finished with white used where the primer was showing and the black where the black presently is. Like an old school cop car
.
Posted By: Anonymous
Re: New Paint job on a budget thread. - 08/13/0710:34 PM
Re: New Paint job on a budget thread Part III - 08/14/0704:46 PM
Thanks to everyone who has shared on these threads. I've read this thread up to page 60 of part II.
I'm running into a problem that I could use help with. I'm painting my motorcycle's gas tank and two side covers using this method with real mineral spirits & regular rustoleom.
I ran into the same issues others had with the paint being blotchy, too many bubbles etc. I fixed that by thinning out the mixture more.
I spent a great deal of time prepping all three pieces. I worked up to 500 grit before painting my first coat and everything was smooth using the finger touch test.
The last two times I've tried a first coat. The paint doesn't want to adhere to one of the side panels. On the 2nd one, it will mostly adhere and dry properly but there are some spots where it won't.
The places that it won't feel very tacky and will easily wipe off with mineral spirits while the gas tank and other side cover do not.
I went through this process before painting last time: used mineral spirits to clean off the old paint, sanded with 500 grit paper, washed the panel with some soap and water, let dry, wiped it down with mineral spirits, let dry, gently wiped with a tack cloth and then applied the paint.
Any ideas guys? This is the 2nd first coat I've had this problem with.
Re: New Paint job on a budget thread Part III - 08/14/0707:44 PM
depends on the bike. the sidepanels on my old cb750 cover the oil tank. it sounds like your side panels have some sort of surface contamination in them that's preventing the paint from sticking. sanding it won't necessarily work. you'd have to wipe them down with some sort of prep-sol or other solvent to get rid of the surface contamination. moto parts get all kinds of crap on them and most of them are abs plastic, so i think they tend to absorb things.
Posted By: Anonymous
Re: New Paint job on a budget thread. - 08/15/0701:04 AM
here is the chevelle
Posted By: Anonymous
Re: New Paint job on a budget thread. - 08/15/0701:05 AM
another
Posted By: Anonymous
Re: New Paint job on a budget thread Part III - 08/15/0701:19 AM
Quote: depends on the bike. the sidepanels on my old cb750 cover the oil tank. it sounds like your side panels have some sort of surface contamination in them that's preventing the paint from sticking. sanding it won't necessarily work. you'd have to wipe them down with some sort of prep-sol or other solvent to get rid of the surface contamination. moto parts get all kinds of crap on them and most of them are abs plastic, so i think they tend to absorb things.
Thanks for letting me know. As an experiment today I put the panel in the direct sunlight to see if it would make a difference. By this evening, no more tackiness!
Looking back on it, in between doing that panel and the rest of the painting I added more spirits to it. So maybe that was it...
Thanks again.
Posted By: Anonymous
Re: New Paint job on a budget thread. - 08/15/0702:47 AM
Quote: here is the chevelle
Would like to see it a bit better ... kinda postage stamp size the pictures are.
Posted By: Anonymous
Re: New Paint job on a budget thread. - 08/15/0707:38 PM
It has been discussed here that cars were painted with brushes in the old days (Model T's and Rolls Royces -- supposedly as late as the 1970's). I've looked for information all over the web on these processes, but didn't find any information. Then it occurred to me to try to find some old books on the subject.
I searched with sellers of antique books. Today I received a copy of Automobile Painting by F.N. Vanderwalker, published in 1919. It looks like an interesting read. It's all about brush painting automobile finishes. So far, no big surprises. Looks like everyone here has successfully re-invented the wheel. Doesn't look like they had rollers in 1919 -- but everything else applies. I'll be reading with interest and posting a summary of any interesting findings here.
Until then -- a couple pages to whet your appetites:
Posted By: Anonymous
Re: New Paint job on a budget thread. - 08/15/0710:47 PM
Anyone done a two tone yet? My concern is that where the top meets the bottom, see pic. Sanding I'm afraid of the two colors meshing and losing that line, although it would be covered with a small silver pin stripe. Wetsanding and the top runing into the bottom, staining the green, etc.
Posted By: Anonymous
Re: New Paint job on a budget thread. - 08/16/0702:19 AM
i am in the process of a 2 tone paint job and when you sand just sand enough to make the line where the colors join smooth mine is coming out fine
Posted By: Anonymous
Re: New Paint job on a budget thread. - 08/17/0707:21 PM
I have been thinking about painting the top of my suburban with Rustoleum paint using a brush. I would be doing the job in a carport.
I would thin the paint with mineral spirits to get a longer wet edge and use a natural bristle brush.
Have you read anything in your old books that would be of interest?
The top is not that visible if it does not work out.
Are their any other threads here that discuss use of a brush?
Thanks
Posted By: Anonymous
Re: New Paint job on a budget thread. - 08/17/0710:32 PM
Quote: I have been thinking about painting the top of my suburban with Rustoleum paint using a brush. I would be doing the job in a carport.
I would thin the paint with mineral spirits to get a longer wet edge and use a natural bristle brush.
Have you read anything in your old books that would be of interest?
The top is not that visible if it does not work out.
Are their any other threads here that discuss use of a brush?
Thanks
I've painted a bunch of the inside of my car with a brush, and also tried testing on a couple of fenders. It actually works pretty well. I didn't thin it at all, but you might want to experiment with it. Use a good brush...I was using a Purdy professional 2.5", with fine bristles. After brushing the paint on, I went over the spots with a lot of lines again (very lightly) with the brush and got most of the lines out. Without wet sanding, it's a good 10 footer. Any lines that are left can be wet sanded out just like any other paint defect. Just use a block to keep it flat. FWIW, I found that I could get complete coverage in just one or two coats of paint, instead of 8 or 9 rolling. The downside is you'll probably spend a lot of time sanding out the lines unless you can get them out when painting. The paint film is a lot thicker when brushing, so it might take longer to dry. That wasn't a problem for me since I was using hardener though.
It works fine...just haven't been that many people who've experimented with it here.
Posted By: Anonymous
Re: New Paint job on a budget thread. - 08/18/0701:53 AM
sorry it took me a minute but you really dont have to primer it because it is a self priming product but i would sand it a little to give it some adhesion and priming is your choice because if ur using rust. pro you dont need a primer
Posted By: Anonymous
Re: New Paint job on a budget thread. - 08/18/0704:31 AM
Henre, I'll answer your question about brushing here quickly (from what I've read in the book so far) and follow up with more detailed information when I can put together a detailed summary.
The book in question (Automobile Painting, published in 1919) first talks about the most common finishes on cars of the day. Apparently, the tried and true method of the time was a "rough coat" and/or "color coat" (actual terms from the book). This was a lead based pigment / paint which provided color, but not gloss. After the color coat was applied, then a varnish coat(s) were applied. Interestingly, this was the early 1900's version of Base Coat / Clear Coat (I guess everything new is old...). When they speak of the action of painting they are referring to laying down this type of color coat (without gloss). The technique for brushing paint is to use as little paint as possible and spread it as thin as possible.
When they get to the Varnish (clear coat) stage, they say that the technique for brushing this is different. (This is important because later they discuss ENAMEL -- which is what Rustoleum is -- and they say that Enamel for color is the same in technique as applying the clear varnish). They say that you want to put on a lot more material and "flow" it for varnish and enamel, brushing in single directions from the starting point on the panel, and then "tipping" in one cross direction then the other to help it self-level. Do this quickly and then leave it the hell alone. Tipping should not cause the brush to drag or bind in the varnish / enamel at all. If so, you have overworked the material or have waited to long to come back for tipping. They reference the fact that after the varnish / enamel is flowed up and tipped, brush strokes will still be visible, but that they should be left alone because they will self level.
Most of the description of technique is for varnish -- but the final chapter discusses enamel paint (at the time it was the modern, production material for painting -- but was typically done with spraying and baking). The chapter basically says 1) enamel is color and "varnish" as one and 2) follow all the techniques for varnish for application. They suggest that a car may only need 2 coats when brushing (not rollering!) enamel because the coats are fairly thick. They recommend thinning the first coat of enamel (30% -- with turpentine -- but I think we all know to use mineral spirits). Let dry 48 hours. Wet sand, then apply the final enamel coat without thinning. They seem to suggest that after the final coat no more sanding / polishing is required.
For runs in enamel / vanish they say to attack immediately and try to flow out with the brush. If brush drags, then a smaller brush with some additional enamel / varnish to help dissolve the local run / sag then flow out with brush into surrounding area. For a more stubborn or more dried run/sag, often times a "heating iron" held close to the surface (but not touching) the panel will cause the run to flow out on its own.
Proper brushes for enamel / varnish: (I'm sure these are out-dated terms, but with a little thought we can probably translate to the modern day). One basic style, but two different bristle varieties. -- In my picture in the previous post, the type of brush for enamel / varnish is Figure 4 -- which is the bottom most brush in the diagram. --- 1)"Extra Fitch Hair Flowing Brush, Double Thick" also known as "Badger Hair Flowing Brush, Double Thick". Has long handle and fairly short bristles. Best ones have the bristles set in rubber. According to the book "Once these are broken in, they are a joy to work with".
2)Same style and shape as #1, but bristles are made of "selected Chinese Bristles" or "finest French White Bristles". They say that this type of brush is stiffer than #1 (requiring more effort in application) and it has longer and thicker bristles. This means it carries more enamel / varnish. Because of carrying more enamel / varnish -- it lays down faster and causes better flowing and self-leveling.
Hope this helps.
-- Dan
Posted By: Anonymous
Re: New Paint job on a budget thread. - 08/18/0705:11 PM
before
Posted By: Anonymous
Re: New Paint job on a budget thread. - 08/18/0705:13 PM
after 1 coat 50/50 mix of gloss white rustoleum and low odor ms, dash of penetrol. another coat goes on this evening. so far so good.
Posted By: Anonymous
Re: New Paint job on a budget thread. - 08/19/0712:21 AM
Thanks Black Mariah for your comments on brush application of Rustoleum.
The reasons I want to brush apply are:
1. I am not up to 6-8 coats with wet sanding in between. 2. I can not remove the roof rack on the top of my suburban because the screws were epoxyied in at installation, which makes it fairly difficult to spray with rack on. 3. My vehicle is 25 years old and I am just doing an inexpensive refurb. 4. The top is really not visible too much.
Here is my plan.
1. I have bondoed all the screw holes that had rusted out from the roof protective runners.
2. I have applied one coat of automotive primer by Rustoleum.
3. I have sanded primer with a fine sponge sanding block that I had laying around.
4. I have applied a second coat of primer tinted to near the final color.
5. I plan to wet sand the primer and apply one coat of Rustoleum enamel with a good bristle brush. I plan to thin the Rustoleum with 20% by volume mineral spirits and a dash of Flotrol in order to keep a wet edge for a decent amount of time; I do not want the paint to dry too fast. I want the paint to flow. Rustoleum recommends no more than 25% thinning or the paint characteristics tend to be lost.
I am having a bit of a problem matching my existing color. I have the paint code, but the one store I went using a computer did not do a good job matching. I only purchased an 8 ounce sample and it was too dark. I may go with a stock Rustoleum color.
It should be interesting to see how this comes out. I plan to implement the old time procedures you talked about.
Thanks again for your quick reply.
Henre
Posted By: Anonymous
Re: New Paint job on a budget thread. - 08/19/0712:24 AM
Thanks Toolbox for your thoughts on brush application of Rustoleum. See my post to Black Mariah.
I am going for one coat of final color and no final sanding!
Henre
Posted By: Anonymous
Re: New Paint job on a budget thread. - 08/19/0712:30 AM
just finished coat number 2, looks grey but its bad lighting, its gloss white. kinda hard to see where you have been, no orange peel at all, lots of bubbles but i just let them sit a while and then roll back over and they smooth out to glass..
Posted By: Anonymous
Re: New Paint job on a budget thread. - 08/19/0712:35 AM
1 more 2nd coat
Posted By: Anonymous
Re: New Paint job on a budget thread. - 08/20/0701:16 AM
after 2 Gloss White Rustoleum Coats, I wetsanded and then today I sprayed a coat of Brightside White using Aussie's formula of 5%MS, 30% Penetrol and 65% Brightside.
man it came out good ! I am going to wait a couple of days then I'll wetsand with 1500 then 2000 then polish (bought a Porter Cable) and see how this test piece looks !
Posted By: Anonymous
Re: New Paint job on a budget thread. - 08/20/0704:26 AM
Okay I suppose I should tell my story here. Over the years I have made a hobby of buying beat up Honda Preludes for cheap and "restoring" them to sell for profit. Sometimes the profit is small but it is fun to me. I had always taken them to Maaco, but Maaco never wants to paint a car for the advertised $250 price. They insidt that it needs a lot of prep blah blah blah and they usually want 5 or 6 hundred to paint a car even if you prepped it before hand. This angers me so I began searching the net for a way to paint a car myself for cheap. Of course I found these threads. I read part 1 & 2 and I just finished reading this new thread here. Ok I will never be sold on the roll-on method, I will never try it, specifically because all that sanding inbetween coats is too much work and too much downtime. Is your time not worth something? Anyway Ive done a couple jobs with the rustoleum pro rattle cans. I had a red prelude with cracking peeling paint. Maaco wanted 600 bucks. Not good enough so I sanded the car, didnt prime it, and sprayed it with the rattle cans "regal red" [image]http://i25.photobucket.com/albums/c99/BAD91Si/nupaint02.jpg?t=1187579737[\image] [image]http://i25.photobucket.com/albums/c99/BAD91Si/nupaint04.jpg?t=1187582363[\image] [image]http://i25.photobucket.com/albums/c99/BAD91Si/bbb03.jpg?t=1187582381[\image] Well, aside from a few runs which isnt the paints fault its mine, I thought it was pretty good for 25 bucks. It took about 7 cans to cover the 'Lude. It did not have a mirror relection, the reflection in the paint was dull, and it was more like a semi gloss finish. I bought some 1500 grit paper (highest grit I could find) and some turtle wax rubbing compound and a $14 buffer at walmart. I wetsanded the trunk lid which left visible scratches in the paint. So I buffed it with the compound and I would swear it did nothing. Do you have to buff it for a really long time or what? I spent about ten minutes buffing the trunk lid and altho the paint was smooth as glass now, it still didnt have the shine I was looking for. That rubbing compound was $7 at pep boys and I think I should have used some 3M expensive cutting compound for better results...... But anyway, my coworkers were telling me the paint looked dull and I need a clearcoat on there for the shine. I let them convince me to go for the clear coat, and sprayed a bunch or rutoleum crystal clear enamel cans on there. No pics of that since it looked horrible. Blotchy, some areas were glossy, others not, some areas were smooth some textured, etc. It was hideous. I didnt like the orangy regal red anyway so I decided to re-do it with rustoleum pro gloss white ( the regal red wasnt "professional" and I thought maybe thats the key) [image]http://i25.photobucket.com/albums/c99/BAD91Si/g02.jpg?t=1187582420[\image] [image]http://i25.photobucket.com/albums/c99/BAD91Si/ddddddd.jpg?t=1187582979[\image] this is after wetsanding 1500 grit and buffing with the turtle wax rubbing compound and that walmart buffer, which has one speed of 2500 rpm. Pics make it look good but in reality it was about a 5-10 foot job. Any closer than 5 feet and it was obvious that the paint was super cheap and kind of dull. Well that car developed some electrical problems that I didnt have any patience for so I traded it for another prelude, a rusty gold prelude with a few dings. After filling the dings and patching the rust I painted it black with Rustoleum cans again. [image]http://i25.photobucket.com/albums/c99/BAD91Si/zz1.jpg?t=1187583002[\image] [image]http://i25.photobucket.com/albums/c99/BAD91Si/cl4.jpg?t=1187583261[\image] Again, pics make paint look good but in real life it was semi-gloss, kinda dull. This is no wetsanding and buffing since I wasnt able to improve the paint any when I did that the last time. Well that car was also a peice so I sold that and picked up another cheap Prelude, this one was a 4 wheel steer (rare and sought after)but had a bad white repaint on it. In one weekend I painted all the door jambs, sunroof, gas cap, engine bay and trunk black, then sanded the car and sprayed it with Rustoleum "appliance epoxy paint" gloss black. I was convinced the epoxy was the way to get a good shine out of a can, however now Im convinced there is no way to get a good shine from cans [image]http://i25.photobucket.com/albums/c99/BAD91Si/b1.jpg?t=1187583579[\image] [image]http://i25.photobucket.com/albums/c99/BAD91Si/b2.jpg?t=1187583605[\image] [image]http://i25.photobucket.com/albums/c99/BAD91Si/b3.jpg?t=1187583620[\image] [image]http://i25.photobucket.com/albums/c99/BAD91Si/b7.jpg?t=1187583674[\image] [image]http://i25.photobucket.com/albums/c99/BAD91Si/be1.jpg?t=1187583690[\image] [image]http://i25.photobucket.com/albums/c99/BAD91Si/fogsonly.jpg?t=1187583742[\image] This is with no wetsanding and buffing because, again, I cant seem to improve the paint with polishing maybe because the compound I used is cheap or maybe the cheap buffer I used doesnt cut it.... But anyway you can see its dull.
I do not admit defeat yet tho, I will concede that I am done with rattle cans, they are best left for the engine bay and door jambs. What I want to try is the Wagner electric HVLP spraygun, with either thinned rustoleum or real auto paint. I was thinking about it and you guys seem to be getting VERY shiny results with the heavily thinned rustoleum, maybe that is the key to a good shine. If I get the electric spraygun I can spray the thinned rustoleum on, I have no compressor, and I live in a small apartment I have no room for a compressor.
But I still must find a way to paint a car myself cheap and fast. The roll-on method will not do in my case. I need to do it all in one weekend.
If anybody has anything to add to my story or any advice it is much appreciated.
-Rob
Posted By: Anonymous
Re: New Paint job on a budget thread. - 08/20/0704:28 AM
OK apparently posting pics here is not the same as every other forum Ive been on, if someone wants to tell me how to post pics I'd be glad to fix the pics.
Posted By: Anonymous
Re: New Paint job on a budget thread. - 08/20/0707:23 AM
Quote: OK apparently posting pics here is not the same as every other forum Ive been on, if someone wants to tell me how to post pics I'd be glad to fix the pics.
Use "image" and "\image" inside your sqaure brackets, instead of "IMG" and everything will work. Or, can use the "Image" html link on the posting web page. Use the plain URL (Photobucket calls it the direct link) in between "image" and "\image".
Posted By: Anonymous
Re: New Paint job on a budget thread. - 08/20/0708:33 AM
If 1500 grit is the highest you can find then you won't get the gloss. Sorry. Follow the thread from the beginning to end. The paint job is cheap but it is labor intensive and you MUST have the right equipment and materials for it to work to your satisfaction. 1500 still too course for any compound or polish!!
Posted By: Anonymous
Re: New Paint job on a budget thread. - 08/20/0709:33 PM
Quote:
Quote: OK apparently posting pics here is not the same as every other forum Ive been on, if someone wants to tell me how to post pics I'd be glad to fix the pics.
Use "image" and "\image" inside your sqaure brackets, instead of "IMG" and everything will work. Or, can use the "Image" html link on the posting web page. Use the plain URL (Photobucket calls it the direct link) in between "image" and "\image".
I changed it accordingly. Still no pics.
Posted By: Anonymous
Re: New Paint job on a budget thread. - 08/20/0709:36 PM
Quote: If 1500 grit is the highest you can find then you won't get the gloss. Sorry. Follow the thread from the beginning to end. The paint job is cheap but it is labor intensive and you MUST have the right equipment and materials for it to work to your satisfaction. 1500 still too course for any compound or polish!!
Dont be sorry! I did read all 3 threads from begining to end. It took me a month. Some of it I just skimmed but still I get the jist.
Where do they sell 2000 grit because they dont have it at Pep Boys, Home Depot, Ace Hardware or Walmart.
Re: New Paint job on a budget thread. - 08/20/0711:24 PM
Quote:
Quote:
Quote: OK apparently posting pics here is not the same as every other forum Ive been on, if someone wants to tell me how to post pics I'd be glad to fix the pics.
Use "image" and "\image" inside your sqaure brackets, instead of "IMG" and everything will work. Or, can use the "Image" html link on the posting web page. Use the plain URL (Photobucket calls it the direct link) in between "image" and "\image".
I changed it accordingly. Still no pics.
The problem is with posting your pics is with your slash. He said to make it "\image" you have it as "/image".
As for the paint problem, your wal-mart buffer is too weak for the job. It might be good for a wax job, but to polish a paint job after wet sanding, you need some serious speed.
Posted By: Anonymous
Re: New Paint job on a budget thread. - 08/21/0701:05 AM
Quote:
The problem is with posting your pics is with your slash. He said to make it "\image" you have it as "/image".
As for the paint problem, your wal-mart buffer is too weak for the job. It might be good for a wax job, but to polish a paint job after wet sanding, you need some serious speed.
Ok, I fixed the slash, incedentally I dont even have a button for that slash, but I copied the one you made and fixed it. Still no pics.
Re: New Paint job on a budget thread. - 08/21/0702:19 AM
Quote:
Quote:
The problem is with posting your pics is with your slash. He said to make it "\image" you have it as "/image".
As for the paint problem, your wal-mart buffer is too weak for the job. It might be good for a wax job, but to polish a paint job after wet sanding, you need some serious speed.
Ok, I fixed the slash, incedentally I dont even have a button for that slash, but I copied the one you made and fixed it. Still no pics.
Don't know what else to tell you. Photobucket does have four options in your photo album for posting pics to sites. I usually click on the bottom one, which says IMG Code, copy and paste in the post box.
Posted By: Anonymous
Re: New Paint job on a budget thread. - 08/21/0702:30 AM
4th coat
Posted By: Anonymous
Re: New Paint job on a budget thread. - 08/21/0702:33 AM
another angle 4th coat.
Posted By: Anonymous
Re: New Paint job on a budget thread. - 08/21/0702:39 AM
Quote: Ok, I fixed the slash, incedentally I dont even have a button for that slash, but I copied the one you made and fixed it. Still no pics.
Not sure if your photobucket is the same as mine, but mine have always worked. Mine shows the following 4 link types, I have never used the 1st one. I know in both IE ver 6 and IE virus 7 under XP, double clicking the picture link saves it to the clipboard, then you just have to post it to the thread.
HTML Tag does not work on most forums, I use it for web pages.
IMG Code does work, but this forum changes the coding to image and /image at the end with the [] around it. Just post the IMG code ... and it will change when you save it and it will work.
For what it's worth, you are better off using the Direct Link, then the folks that wanna see your pix will click them, and those that don't won't eat up any bandwidth limitations on the photobucket site, I don't think I have any since I am a paying member, but going through the 100+ pages and seeing the broken links all over the place tells me that others have had problems with bandwidth due to the volume of readers on these threads.
I took the time to cut and past most of your links .... and looked at most of your pix. Seems like prep is not going so good either. I have not started this method yet, even testing, but from my past experience, any paint will only look as good as the subsurface, unless you put it on real thick and can let is sit a few years to dry ... but then it probably still won't be acceptble closer than 5 feet. Once I get this del sol done I will keep a while, then may move to something else. I don't plan to churn out more than a few a year, hell the last time I sold more than 4 cars in a year the state came knocking on my door wanting me to get a dealer license. I am in my 40's .... how the hell am I gonna be able to drive the hell out of all the desirable cars if I can only do it 4 cars a year. Hopefully they have changed in the last 15 years. Take some time, you may be able to get more when you resell ... maybe even 2000 or more more.
Posted By: Anonymous
Re: New Paint job on a budget thread. - 08/21/0702:53 AM
That is a cool method. Years ago we used to use the heat and shrink method of popping soft dents out .... but with the heavier gauge of metal of our heavy muscle cars we used a torch and doused it with water .... of course that was not good for the paint at all. I know a heat gun would curdle the paint also. But a hair dryer should work well with the thinner body metal on todays cars. I will have to try that on some of the soft dents on the del sol's front fenders.
Posted By: Anonymous
Re: New Paint job on a budget thread. - 08/21/0710:47 PM
Re: New Paint job on a budget thread. - 08/22/0705:18 AM
Quote:
Quote:
The problem is with posting your pics is with your slash. He said to make it "\image" you have it as "/image".
As for the paint problem, your wal-mart buffer is too weak for the job. It might be good for a wax job, but to polish a paint job after wet sanding, you need some serious speed.
Ok, I fixed the slash, incedentally I dont even have a button for that slash, but I copied the one you made and fixed it. Still no pics.
MEAN88Si4WS: Can't believe you don't have the "/" key (forward slash) on your keyboard --- unless you are using some unusual non-English keyboard; but even those should have it since its a standard computer thing. The forward slash is the same key as the ? (question mark) on standard English language keyboards.
I'm going to try posting one of your pics using the Photobucket link from the original post. Let's see if it works for me.
Trying one that worked in a previous post: [image]http://i5.photobucket.com/albums/y172/dmrvos/Vand_0.jpg[/image]
Posted By: Anonymous
Re: New Paint job on a budget thread. - 08/22/0705:28 AM
I tried changing that one before to I M G without spaces .... and it did not work. I am not sure what it is, I know my links for the I M G files have a real filename with a .jpg at the end of the path.
Okay that didn't work, now let me post my I M G one from my pbucket account like I did for my Del Sol
Tried your link again .... it doesn't work when I put it above or below mine ... and it doesn't show my pic either when I have it above or below, but when my link is alone it works.
You may have to recopy all the link in from your pbucket account, instead of editing what is there.
Posted By: Anonymous
Re: New Paint job on a budget thread. - 08/22/0705:46 AM
You guys are seeing my pictures ... or am I just seeing them because I am logged into my pbucket from this machine and my work machine doesn't show pbucket pix so I can't check it there.
I noticed mine did not show when I had IMG or image with the [] edited into the text anywhere, but my cut an paste worked when it was alone, and a few pages back I did more than one pic in a post and I think those are all working.
Posted By: Anonymous
Re: New Paint job on a budget thread. - 08/22/0705:46 AM
OK. New post, fresh copy from Photobucket:
OK. This worked. Not sure why, but it was a new post (not an edit). Did a copy of the "direct link" from Photobucket and then used the "Image" link on the posting page -- which then wrapped it with the [image] stuff. Weird.
BTW -- if it is working, you WILL see the picture displayed when you preview your message before posting.
Posted By: Anonymous
Re: New Paint job on a budget thread. - 08/22/0705:51 AM
Quote: You guys are seeing my pictures ... or am I just seeing them because I am logged into my pbucket from this machine and my work machine doesn't show pbucket pix so I can't check it there.
I noticed mine did not show when I had IMG or image with the [] edited into the text anywhere, but my cut an paste worked when it was alone, and a few pages back I did more than one pic in a post and I think those are all working.
I saw the picture of your Silver Beetle on the trailer just fine.
Posted By: Anonymous
Re: New Paint job on a budget thread. - 08/22/0705:58 AM
Quote:
I was the picture of your Silver Beetle on the trailer.
And I see you with the glass of Chardoney. And that's a dyno ... see the front wheel is blurred. Dissapointingly it only did 179.9WHP that day.
I can't understand why editing it does not work. And having one edited one in the post blows all the others from showing. I have never noticed this on any of the other forums I post pbucket images to.
Posted By: Anonymous
Re: New Paint job on a budget thread. - 08/22/0706:07 AM
Quote:
Quote:
I was the picture of your Silver Beetle on the trailer.
And I see you with the glass of Chardoney. And that's a dyno ... see the front wheel is blurred. Dissapointingly it only did 179.9WHP that day.
I can't understand why editing it does not work. And having one edited one in the post blows all the others from showing. I have never noticed this on any of the other forums I post pbucket images to.
Yep, I see that it's a dyno. As well, to set the record straight, that's a BEER in my hand (don't forget this is a Mopar forum!) in front of a mosque in Istanbul. Kinda funny when you think about it...
Anyway, the image posting here is flaky. Some other things about the forum are less than ideal too. Maybe it's time to start an independent Rollers and Brushers Forum. I'll ponder it in my spare time.
Posted By: Anonymous
Re: New Paint job on a budget thread. - 08/22/0706:34 PM
Just thought I would share with all of you.
I wrote this previously:
#2579603 - Tue Apr 25 2006 12:05 PM
BTW used to have a '70 Dodge Dart Custom with the slant six. It was that nice pale yellow in color with black interior, with green cloth inserts on the seats. Someday I will have another Dart, someday...
Well TODAY is SOMEDAY!!! Just picked up an original owner 1975 Dart Swinger with the 225 slant six!!!
I am ecstatic. The paint is old and needs refreshing and the vinyl top needs to be replaced, and there is some surface rust and probably more due to the vinyl top that I will have to take care of, but overall is it straight, solid, and complete. Even have original registration, manuals, window sticker, etc.
So, this will be a great candidate for the roller method. I will be sticking with a gloss white to keep factory look to it.
Just had to share...
Roll on.
Posted By: Anonymous
Re: New Paint job on a budget thread. - 08/22/0707:49 PM
5th coat
Posted By: Anonymous
Re: New Paint job on a budget thread. - 08/22/0708:15 PM
o ive been on this from teh begining but havent really tried it. tried spraying it and it sux so im probably going to use the roller method. i've been trying to get a darker red color. fire red is to orangey/red. i went to canadian tire and they have a tint base so i asked the lady what colors they have and she pulled out a folder with "tremclad paint codes" and she pulled the section where they had red paints...except i couldnt tell the difference from one red to another because it was printed and it was laminated. anyone have any comments etc?
Posted By: Anonymous
Re: New Paint job on a budget thread. - 08/22/0709:22 PM
try rustoluem red mixed with rustoleum black
Posted By: Anonymous
Re: New Paint job on a budget thread. - 08/22/0710:55 PM
wouldnt it be easier/cheaper to just get it tinted?
Posted By: Anonymous
Re: New Paint job on a budget thread. - 08/22/0711:05 PM
Quote: try rustoluem red mixed with rustoleum black
Re: New Paint job on a budget thread. - 08/23/0701:56 AM
Quote:
Quote: try rustoluem red mixed with rustoleum black
I recall reading that combination makes brown.
i used to work in a paint store (now a painter) and adding black to red will eventually start to brown it out. If you start out fire engine red and add black it will quickly brown. You'll need to find either a deep red base to add the black to or just have something tinted up to the color you prefer.
Posted By: Anonymous
Re: New Paint job on a budget thread. - 08/23/0703:22 AM
Gracias! yea i even emailed rustoleum/tremcald and asked them which "tint code" is a darker/deeper red and they said they cant give that out =\ i think the guy was confused - he kept mumbling that we cant tell you what to mix to get that color? geniuses!
Posted By: Anonymous
Re: New Paint job on a budget thread. - 08/23/0704:44 AM
Quote: Gracias! yea i even emailed rustoleum/tremcald and asked them which "tint code" is a darker/deeper red and they said they cant give that out =\ i think the guy was confused - he kept mumbling that we cant tell you what to mix to get that color? geniuses!
I'm not an expert on mixing, but I played one at a home improvement store 23 years ago. I would think a medium or dark blue or maybe a deep purple ... if they make one. There is a burgundy color I like from Pettit ... look near the beginning of this #3 thread for a beetle with it, don't know if that is what you are going for.
Re: New Paint job on a budget thread. - 08/23/0701:19 PM
Can duplicolor's new DIY paint be rolled?? On duplicolor's site they specify that the paint is already thin enough to spray, will this work for rolling? I just was wondering because of the color selection they have.
Posted By: Anonymous
Re: New Paint job on a budget thread. - 08/24/0704:10 AM
coat 6 , still no wetsanding,no orange peel,thin , thin , thin ,, just painted black rims
Posted By: Anonymous
Re: New Paint job on a budget thread. - 08/24/0705:53 AM
Re: New Paint job on a budget thread. - 08/24/0706:14 AM
i think you guys are getting shiny-er results than me because your thinning the rustoleum.
Has anyone tried the electric HVLP guns? For $60 are they worth getting? Or will it be a waste of more money?
What is the difference between mineral spirits and acetone? The rustoleum says right on the can use acetone to thin it.
I desperately need to find a way to make this car shiny for cheap. I wont mind investing the $60 in the wagner gun as long as it does a decent job and will last many paintjobs....
Re: New Paint job on a budget thread. - 08/24/0704:37 PM
Quote:
i think you guys are getting shiny-er results than me because your thinning the rustoleum.
By thinning the paint and building up layer after layer of thinned paint.. you are giving depth and shine to your paint job. When you slap on straight paint there is no depth to the paint and you are getting your shine only from the top glossy layer.
Quote:
Has anyone tried the electric HVLP guns? For $60 are they worth getting? Or will it be a waste of more money?
It can be done... but it is MESSY... you end up with overspray EVERYWHERE. You also are putting dangerous vapors into the air which will end up in your nostrils and lungs. The whole point of the roller method was to provide a mess free and cheap way of getting a good coat of paint on to your vehicle.
Quote:
What is the difference between mineral spirits and acetone? The rustoleum says right on the can use acetone to thin it.
Two major differences... drying (curing) time and hazardous vapors. Mineral spirits gives the paint plenty of time to SELF LEVEL and be worked. Acetone dries too quickly and the vapors it gives off are dangerous to your health.
Quote:
I desperately need to find a way to make this car shiny for cheap. I wont mind investing the $60 in the wagner gun as long as it does a decent job and will last many paintjobs....
Good results can be had with a spray gun... BUT your average Joe is probably going to botch it up. The roller paint method is more forgiving and mistakes can be made and corrected as you go along.
Sadly all of these questions have been previously discussed at length during the course of this message thread.
.
Posted By: Anonymous
Re: New Paint job on a budget thread. - 08/24/0706:37 PM
Still no image. I don't know if you are editing those or not, but my link from photobucket shows as IMG in all uppercase when I post it into a message, and mine work.
Glad Marq got to you on the other questions ... since power went out here as I was gonna reply.
From what I recall about the lengthy discussion on the Wagner here it was determined that the CHEAPO Wagners do not work for an auto ... if I remember correctly, it was determined that if Wagner was too embarassed to put the PSI of the gun on the box, don't use it. As for all the other particulars, there was some discussion a while back, and most of it started from work found by members of honda-tech or one of the other honda forums. As for all the drawbacks from that method, I think Marq hit on all of them.
Posted By: Anonymous
Re: New Paint job on a budget thread. - 08/25/0702:31 AM
I'm having a problem with the buffing stage - can anyone help?
I finally worked up the nerve to try this method with the Rustoleum and started with my truck's tailgate. Everything went exactly as 69charger-guy said it would waaayyyy back in part one of this discussion and I followed his directions accordingly.
Once I had that 6th and final coat on, I was really impressed. It had such a deep shine, I was tempted to just stop right there, but if you looked closely you could still see tiny little bumps from where the bubbles popped as well as some brush strokes (er...roller strokes I mean), so I decided to go ahead and wet sand a final time with 1500 grit and then break out the orbital buffer.
Problem is, it seems like I've been buffing forever...REPETEDLY...and its just not quite bringing back that deep shine, like how it looks if you wipe the surface down with the mineral spirits to test what it should look like.
In part 1, 69charger said "use a buffing bonnet and turtle wax polishing compound. do the whole car with this, and i'm telling u,depending on the amount of time and paitence you have, the results are amazing".
Am I just not being patient enough or am I doing something wrong? Should I be using something other than a terry-cloth bonnet on my orbital buffer in order to cut quicker? Help!
Posted By: Anonymous
Re: New Paint job on a budget thread. - 08/25/0703:54 AM
On this board the image tag is different than other boards, you need to use the (image)(/image) tags here, the other mistake you are doing is posting the link to the file followed by "?t=1187934955" , this is telling the browser to use the script on photobucket's server so that the image displays only in their pages. the image file should (usually) end in .jpg, .gif, or .png (if allowed by this board) to correctly display here.
HTH
Posted By: Anonymous
Re: New Paint job on a budget thread. - 08/25/0705:42 AM
I just post the IMG Code link .... and when I go back and open the editor to look at those tags, the forum has changed them to the image tags. Take a look at yours above if you posted it from photobuckets IMG link without changing it.
I do agree that this extra stuff he is adding by viewing the full size image on pbucket and copying the properties is probably the problem. Here, I will try his without that here. And I will change his lower case img tags to the same uppercase ones from the photobucket link that you are supposed to copy and post into the forum .... which again seems to work for most of us.
See .... the IMG tag does work ... and this one I just edited what he had above, and like you I removed that extra info that was keeping it from working.
Posted By: Anonymous
Re: New Paint job on a budget thread. - 08/25/0708:27 AM
If you are using Turtlewax to do your buffing then you will need to buff it pretty much for ever before you can get a decent shine out of it.
If you use a decent orbital polisher (like a PC7424) together with some decent cutting compound/swirl remover then you can achieve spectacular results pretty quickly.
The pic below is of my hardtop that I painted with Brightside Gloss Black, wet sanded and then did two passes with my orbital polisher using a cutting pad and Poorboy's SSR3 cutting compound.
There is no reason why you can't achieve similar results if you use 'proper' polishing equipment and a good cutting compound/swirl remover like the Poorboy's.
Posted By: Anonymous
Re: New Paint job on a budget thread. - 08/25/0710:24 AM
Quote: If you are using Turtlewax to do your buffing then you will need to buff it pretty much for ever before you can get a decent shine out of it.
If you use a decent orbital polisher (like a PC7424) together with some decent cutting compound/swirl remover then you can achieve spectacular results pretty quickly.
The pic below is of my hardtop that I painted with Brightside Gloss Black, wet sanded and then did two passes with my orbital polisher using a cutting pad and Poorboy's SSR3 cutting compound. ..... There is no reason why you can't achieve similar results if you use 'proper' polishing equipment and a good cutting compound/swirl remover like the Poorboy's.
I was indeed using the Turtle wax white compound because I was trying to follow 69charger's instructions to the letter. It is working, I can see some improvement, but like you said it looks like it would take another 20 applications to get the results I want.
I have a compound made by AutoMagic called PowerCut Plus. It sounds and physically looks identical to the Poorboy SSR3 - same color and everything, and when I do a search online for SSR3, it has the same description for use. I'll give that a try today.
Quick question - Poorboys instructions say to follow up the use of SSR3 with an application of SSR1. Did you do this to get your results? Should I follow the SSR3 / Power Cut Plus applications with an application of the Turtle wax polishing compound I was using or should I buy the AutoMagic equivalent of SSR1 (which is called Gloss Restorer in their terms) and use that.
....or do I just leave it alone after the SSR3 application?
Posted By: Anonymous
Re: New Paint job on a budget thread. - 08/25/0711:46 AM
For the pic that I posted above, I just used the SSR3. But I wouldn't recommend finishing the job there. On my hood I used SSR3, then SSR2.5, then the Poorboy's Professional Polish and then I topped it off with the EX-P synthetic sealant.
Although to be honest I now wish that I had given it a couple more coats of polish before I applied the sealant....
Posted By: Anonymous
Re: New Paint job on a budget thread. - 08/25/0711:48 PM
ok, i've bought my supplies, but what i need to know and i did try to find it, but the threads are just to big, didnt i read that some have used a foam brush instead of rolling? if so what are the details?
thanks catfish
Posted By: Anonymous
Re: New Paint job on a budget thread. - 08/26/0712:07 AM
well i finally finished restoring the mess my door was and rehung it..
tomorrow ill wetsand my driver fender and put it on but i couldnt help myself to set it in place to see how it looks.
Posted By: Anonymous
Re: New Paint job on a budget thread. - 08/26/0701:31 AM
Thanks for the help Aussie Driver! Since I had some shine on it from the repeated white polishing compound applications, I decided to forgo the SSR3 type-abrasive stuff and start over with the gloss restorer (their version of SSR2.5) and go from there.
I got a nice shine out of it now, but it does appear a little bit orange peely. Peely, but uniformly shiny....it's wierd and hard to describe. It still looks good, but not as good as your the finish in your picture does. Does this mean that I.....
A. Didn't wet sand thoroughly/uniformly enough?
B. Didn't thin the paint out enough with the mineral spirits?
C. Wound up with the peel effect from allowing the millions of bubbles to pop on their own as the paint self leveled?
In short, what did I do wrong and how can I get avoid this with the next panel I do? I really think it was caused by "C", but shouldn't it have been fixed by "A"?
Also, is there any reason I can't dry sand with a random orbit sander in between coats as opposed to wet sanding? I would think a machine would make knock down the high spots more uniformly than doing it by hand.
Posted By: Anonymous
Re: New Paint job on a budget thread. - 08/26/0702:50 AM
If you have orange peel in the paint that you don't want once it's polished then keep wetsanding until it's all gone.
Once you have finished painting then don't worry about finding the cause of the orange peel unless you plan on painting another car. My guess of the cause though would be not enough thinning.
Dry sanding isn't a good idea at all. Every time that you dry sand you end up with a lot of pick-up on the sandpaper. If you were trying to sand paint dry then the pick-up would imprint all kinds of bizzar marks into the paint and leave you with a less-than-perfect finish.
Posted By: Anonymous
Re: New Paint job on a budget thread. - 08/26/0711:26 PM
For you guys wanting to darken the rustoleum red, I suggest adding a dark blue instead of black, too much blue will start to purple it, but it wont start turning brown. Is the flag blue a dark blue? That will do the job. Not so much that it starts to look purple, ya gotta know when to stop.
You could also throw in a pinch of the burgundy.....
Posted By: Anonymous
Re: New Paint job on a budget thread. - 08/27/0701:09 AM
After wetsanding the hood with up to 2000 sandpaper, I painted the fenders, sprayed them with rustoleum, the first coat did not come out too good, I needed to thin the paint more, after wetsanding the fenders with 400, then 600 I sprayed a second coat, diluting the solution to a 70% paint/30% MS and this time they came out great !! will wait a few hours then will spray a third coat without wetsanding. here are 3 images:
Re: New Paint job on a budget thread. - 08/27/0702:19 AM
I have read pretty much the entire thread(s) (ouch) and came up with a question. I know some here have sprayed their paint on with HVLP and used the MS, I am wondering if there is another catalyst that we can use for spraying that thins out the paint, but doesn't retard the drying time as much, like acetone? I have read a few problems spraying it with the MS (runs) so I am thinking something that flashes a little faster would be better to use when spraying? Thanks,
Brew
Posted By: Anonymous
Re: New Paint job on a budget thread. - 08/27/0703:03 AM
Quote: I have read pretty much the entire thread(s) (ouch) and came up with a question. I know some here have sprayed their paint on with HVLP and used the MS, I am wondering if there is another catalyst that we can use for spraying that thins out the paint, but doesn't retard the drying time as much, like acetone? I have read a few problems spraying it with the MS (runs) so I am thinking something that flashes a little faster would be better to use when spraying? Thanks,
Brew
good question Brew.
I will do a test and see how it comes out using Acetone instead of MS.
Re: New Paint job on a budget thread. - 08/27/0703:11 AM
The acetone will flash much quicker.... BUT you better have an oxygen tank slapped on your back to avoid breathing the fumes. And don't have any open source flames where you are putting that acetone laced vapor into the air.
The main flaw I would suspect with the paint flashing too quickly is that it is not going to allow the paint the time to naturally self level.
And acetone is pretty nasty stuff all round. Acetone can eat into plastics, remove enamels, cleans hardened nail polish etc. So based on acetones nasty ability to eat things prior to it evaporating and drying, my biggest fear would be that when the second coat is sprayed the acetone will spend half of its energy trying to eat the paint layer below and the other half of its energy evaporating. IF it is able to eat or soften the lower layer of hardened paint, I suspect you would get a bad case of orange peel or elephant skin
But most importantly keep the health reason in the back of your mind if you plan to experiment with acetone... .
Posted By: Anonymous
Re: New Paint job on a budget thread. - 08/27/0703:26 AM
Quote: The acetone will flash much quicker.... BUT you better have an oxygen tank slapped on your back to avoid breathing the fumes. And don't have any open source flames where you are putting that acetone laced vapor into the air.
The main flaw I would suspect with the paint flashing too quickly is that it is not going to allow the paint the time to naturally self level.
And acetone is pretty nasty stuff all round. Acetone can eat into plastics, remove enamels, cleans hardened nail polish etc. So based on acetones nasty ability to eat things prior to it evaporating and drying, my biggest fear would be that when the second coat is sprayed the acetone will spend half of its energy trying to eat the paint layer below and the other half of its energy evaporating. IF it is able to eat or soften the lower layer of hardened paint, I suspect you would get a bad case of orange peel or elephant skin
But most importantly keep the health reason in the back of your mind if you plan to experiment with acetone... .
good point Marq ! (BTW - Thanks for all of your posts ! Like many others I started reading the whole thread and when I finally finished it, it was obvious to me who the big contributors have been all along, have a lot of respect for you, Exit, Aussie and of course Charger)
I did 2 coats of regular gloss rustoleum, wetsand, and a couple of coats of Brightside White on the Hood and I just finished wetsanding it with 2000, I am waiting for some pads and Poorboys stuff to get here and I'll put my new Porter Cable to work and make that baby shine !
I will do a quick test one of these days using acetone, but as always, I do it outside, not inside the garage, because I have 2 Cobras in the garage, don't want any overspray on them.
Posted By: Anonymous
Re: New Paint job on a budget thread. - 08/27/0704:20 AM
for spraying thick coats instead of rolling thin coats i can see why the faster flash of the acetone thinned paint would be better....
I have a question for the "porter cable" users...
what rpm do you buff at to get the good shine your getting? I have a cheap buffer with one speed of 2500 rpm's....
Posted By: Anonymous
Re: New Paint job on a budget thread. - 08/27/0708:58 PM
I got the paint on pretty satisfactorily and am at the color sanding stage. I am using Meguiar's swirl remover (step one) and following it up with their polishing liquid (step two). It has worked pretty well with my cheapie orbital buffer and shines pretty good, but on a couple of panels I am getting a streaky haze. It's a whitish haze that seems like a wax build up but when I buff it again it comes back later... any ideas? These were the last two panels I did..did I let the buffing pads get too dirty or build up too much polish?
What now?
Posted By: Anonymous
Re: New Paint job on a budget thread. - 08/27/0710:11 PM
Give your buffing pads a good clean by soaking them in a bucket with either the proper buffing pad cleaner or dishwashing liquid, then rinse them in clean water until they look like new.
Wash those two panels with dishwashing liquid instead of a car wash solution and hit those panels with your swirl remover again. Use a high speed (3/4 to full speed)setting on the polisher and really work the polish in until there is hardly any residue left on the panel.
If that clears it up then do a couple of passes with the polish and you should be good. If it doesn't clear it up you might have to try a lighter grade swirl remover to help clean it up.
Re: New Paint job on a budget thread. - 08/28/0712:42 AM
Quote:
good point Marq ! (BTW - Thanks for all of your posts ! Like many others I started reading the whole thread and when I finally finished it, it was obvious to me who the big contributors have been all along, have a lot of respect for you, Exit, Aussie and of course Charger)
Look into my eyes... look deeply into my eyes... you are beginning to feel sleepy from inhaling paint fumes. Your eye lids are getting heavy as you are falling deeper and deeper in to sleep. When I count to three you will wake up... and immediately sign the pink slip of the blue Cobra over to me for no charge... ONE.... TWO.... three...
Thanks for the kind words. I try to do my part
three.. ! Three.. !! THREE... !!! Whats a matter.. can't you hear me...
Darn.. it didn't work.... ;(
.
.
Posted By: Anonymous
Re: New Paint job on a budget thread. - 08/28/0709:27 AM
Quote: If you have orange peel in the paint that you don't want once it's polished then keep wetsanding until it's all gone.
Once you have finished painting then don't worry about finding the cause of the orange peel unless you plan on painting another car. My guess of the cause though would be not enough thinning.
I may or may not attempt another car in the future - but I still need help with this one because I've only done 3 out of 10 panels so far. I took a cautious approach to this because I was still slightly skeptical about rollering a whole vehicle, so I started out doing a comparison - I rollered my tailgate and sprayed my hood, convinced that the spraying would yield better and easier results. How I wish I would've done the opposite! Oh well, I'm learning as I go.
I'm in the middle of doing the roof now, and I will definitely be rollering the rest of the truck entirely. I tried going a little thinner with the mix this time, and now I'm pretty sure that didn't cause my slight orange peel, because it began to run/sag on the roof sides as I applied it. I'm beginning to think maybe I nitpicked a little on the tailgate finish because what I'm seeing and calling "orange peel" isn't as bad as the word implied. I've seen factory finishes with a similar amount in dark colors. I probably could have wetsanded it away with a little more patience. You can see slight roller-strokes in one spot though (if you know to look) and that does bother me a little.
One quick observation for anyone else trying this for the first time - I'm on the 4th coat for the roof and I noticed I seem to be getting smoother results from sanding in a direction perpendicular to the direction I'm rolling (i.e. sanding north to south, painting east to west). It seems like such a simple thing, but I don't know if anyone else mentioned or tried that yet. At first I was worried I'd end up with a checkerboard effect, but that's not the case.
Thanks for all the great tips Aussie Driver, you can bet I'll be back for more!
Re: New Paint job on a budget thread. - 08/28/0704:23 PM
Quote: One quick observation for anyone else trying this for the first time - I'm on the 4th coat for the roof and I noticed I seem to be getting smoother results from sanding in a direction perpendicular to the direction I'm rolling (i.e. sanding north to south, painting east to west). It seems like such a simple thing, but I don't know if anyone else mentioned or tried that yet. At first I was worried I'd end up with a checkerboard effect, but that's not the case.
I don't know about that but it makes sense. I do know when painting a room its better to alternate directions with each coat when rolling. I've been painting a bedroom and practicing my technique with a big roller. Its also helping me to learn patience with the process. I ordered my paint yesterday for the car, Rustolem Industrial fire hydrant red. I'm going to start practicing on my cowl panel & trunk lid. The rest of the car isn't ready yet.
Posted By: Anonymous
Re: New Paint job on a budget thread. - 08/28/0710:17 PM
Hi it's me again, the guy who cant seem to post pics, the same guy who said I will never be sold on the roller method....
...well I just picked up a quart of rustoleum gloss black and a HFD roller, and a can of 100% mineral spirits.... What the **** am I doing? Im about to roll paint onto the hood of my car! Cant make it look any worse I suppose, I'm the guy with a rattle canned black paint job on an old prelude. Wish I could just show the pics but somehow I cant post pics, maybe since my low post count my user privledges dont allow posting pics yet? Well I am in fear that this will be a waste of twenty hard earned bucks today but the car needs repainted anyway so might as well experiment.... If I can make it look better than it is then I suppose the money was well spent?
I still think you guys are getting good results because you're going real crazy with the thinner which when I rattle canned it, that wasnt an option.....
I'm nervous about the whole thing.
And that wagner gun? I'm really nervous about that....
sigh. All the money Ive spent on 4 rattle can jobs and now i'm trying this roller method (on the hood) I coulda gone to maaco and got them to do a presidential.
Posted By: Anonymous
Re: New Paint job on a budget thread. - 08/28/0710:52 PM
Nah, I painted a test peice with the roller, had the mixture slightly thicker than water, and it does level itself out nice and the bubbles self pop, but theres a ton of dust and specs in the paint that arent there when you spray it. I wont be doing this, I cant bring myself to paint my car with a roller, I might as well go try that wagner gun for $60.
The rustoleum is super shiny, I can see my face in the paint and not just a blurry image either, I can see every ugly detail on me like a mirror.
I think my rattle can job of appliance epoxy was just a really hard coat of primer and if I get that wagner and spray the thinned rustoleum on there, I think I can get a shine.
But Ive thought that before and the results werent satisfactory..... Well, since I'm determined, and perhaps a bit stupid, I'm going to get the wagner gun, maybe by this weekend.
I have one quart of gloss black, I'll get another quart of it and some dark navy blue because I want to add just a pinch of dark blue to the black.
Is 2 or maybe 2.5 quarts of paint enough to spray a couple coats with? Plus I'll have mor ewhen I add the thinner....
Posted By: Anonymous
Re: New Paint job on a budget thread. - 08/28/0711:06 PM
Okay ten minutes later I look at the paint and my face has gotten blurrier, as it dries it loses the wet look, what we need is a paint that dries fast and doesnt lose the wet look..... Acetone for the win?
Re: New Paint job on a budget thread. - 08/28/0711:12 PM
I think the acetone would dry way too fast to roll on. That is why I was asking about using it in a gun.
I haven't had a whole lot of experience with acetone, but can't imagine it would be a whole lot worse (for spraying) than laquers would be?
Brew
Posted By: Anonymous
Re: New Paint job on a budget thread. - 08/29/0712:18 AM
Im soured on rustoleum I think. The test peice has dried dull. Maybe you can get it to look great with hours upon hours of polishing but I'm just not up to that job. I will pay the extra 40 bucks or whatever to get real auto enamel that dries shiny with no polishing. After all, thats what all my Maaco jobs have been, single stage cheap enamel, and they all looked great with no buffing whatsoever. They dont buff the 200 dollar job they spray it and push it out the door!
Posted By: Anonymous
Re: New Paint job on a budget thread. - 08/29/0712:58 AM
Sounds like you are just too impatient, and dont want to spend any time.
There's too many great results being performed, providing you actually read all the post's, and follow instructions.
Posted By: Anonymous
Re: New Paint job on a budget thread. - 08/29/0702:23 AM
I really dont want to spend THAT much time, when I could just pony up the extra $40 for paint that needs no polishing..... It seems like the $50 paint job is $50 but 40 hours of hard labor, where as a real paint job might be $70 for a gallon of real auto paint, plus you need a paint gun, but it can be done in an afternoon and done with it.... Factor in the labor and its much cheaper to just spray real automotive paint on there....
Re: New Paint job on a budget thread. - 08/29/0703:08 AM
My co-worker went that route on his s10. Bought regular auto primer, paint, and reducer, and an hvlp gun set. Once he figured out the proper settings on the gun to get a good coat, he'd already painted the entire truck and sanded it all off (because it looked like crap) 3 times. He finally got a good smooth coat of paint on it, but the clear coat is dull, almost like it's not even there. He did finally figure out the problem, but he's not going thru the hassle of sanding the truck and repainting it again. His total investment so far, not counting the guns, is about $400. That's why I'm going to try the roller method on my truck. I can't afford $400 for a do it myself paint job.
Posted By: Anonymous
Re: New Paint job on a budget thread. - 08/29/0703:53 AM
Hi everyone -- first time posting here. I have read through ALL 3 threads on this topic, and have started it on my wagon (not a mopar, sorry) and thought I would post the progress. here.
I bought my paint a long time ago, tested it out on some scrap metal, then painted a motorcycle tank with this method. I finally started the prep work about a month ago on my car-- removed almost everything I can, and doing bodywork right now. Here's a picture of what I started with the pic is about a year old -- it looks much better than it actually is -- paint is faded and dead all over.
Anyway, I'll post progress pics as I go. I'll get a pic of the current stage sometime tomorrow. Hoping to put on the first coat in the next few days.
Posted By: Anonymous
Re: New Paint job on a budget thread. - 08/29/0710:44 PM
Quote: I really dont want to spend THAT much time, when I could just pony up the extra $40 for paint that needs no polishing..... It seems like the $50 paint job is $50 but 40 hours of hard labor, where as a real paint job might be $70 for a gallon of real auto paint, plus you need a paint gun, but it can be done in an afternoon and done with it.... Factor in the labor and its much cheaper to just spray real automotive paint on there....
Nowhere in this exhaustive thread does anybody say this is quicker or cheaper than spraying IF you already have the capital equipment and expertise. That is a big if.
Also, "Real" automotive paint requires you to mix reducers and hardeners in the right combinations for the atmospheric conditions. If you can't handle mixing mineral sprits with rustoleum, you are in for some real disappointment along with your $70 of "real" automotive paint.
And don't get me started about trash in the paint. If you don't have a clean place to roll, you definitely do not have a clean enough place to spray.
Cal96 got excellent results with regular Rustoleum and a Wagner, so it can be done:
If you require more gloss out of the can, might I suggest Brightside. AussieDriver has had good results:
Be realistic with your expectations. This method is not intended to be a shortcut. It is an alternative that allows for a quality paint job with A: little investment in cash and capital, and B: personal control over the finished product.
But it does require time and effort.
Cheap, Good, Quick - pick any two.
PS: If I have linked to images inappropriately, let me know.
Posted By: Anonymous
Re: New Paint job on a budget thread. - 08/30/0701:17 AM
I agree with Mike.
As for the 40 hours .... that might be enough time to get a car with ruff body and paint into condition for the next 40 hours of painting and 40 hours of precision wetsanding and polishing .... but you can cut that down using a better polisher than the $25 single speed ones that won't give the top results you have seen here.
Now the way I figure it .... making $25 and hour that would make this about a $3000 paint job that I will only have to spend not more than $300 hard cash on if I don't have the paint, paper, PC7424, pads and PoorBoys already .... and after that is purchased I can gloss up 2 of my other cars that have good OEM paint for FREE.
And .... I am sure there are a lot of Miata owners that have spent more than 3 Grand for results half what Aussie has.
Can't wait to get started ... with Brightside or Pettit or both.
Posted By: Anonymous
Re: New Paint job on a budget thread. - 08/30/0702:23 AM
Quote:
... that have spent more than 3 Grand for results half what Aussie has.
Thats me. I would have been happy with that metric if anyone could have ever delivered. I have yet to get a paint job as good as promised - at any price.
Conventional wisdom says without access to a booth, compressor and gun, and the chemical expertise to mix modern paints, the average Joe had no choice. When is the last time you saw a non-metalic color other than red, white, black or yellow on a new car?
"...The only way to win is not to play..."
Its a revolution, Baaay-bee, yeah.
Posted By: Anonymous
Re: New Paint job on a budget thread. - 08/30/0704:41 AM
after 2 coats of rustoleumn Gloss White, here's a coat of Brightside White on the fenders, this paint shines!
I got a few runs, so I need to fix those then I'll do a second and final Brightside coat. Pics of Paint JUST sprayed:
Re: New Paint job on a budget thread. - 08/30/0706:16 AM
Hey Aussie, Did you finish the NA completely? If so, do you have any final pics of her?
Quote: For the pic that I posted above, I just used the SSR3. But I wouldn't recommend finishing the job there. On my hood I used SSR3, then SSR2.5, then the Poorboy's Professional Polish and then I topped it off with the EX-P synthetic sealant.
Although to be honest I now wish that I had given it a couple more coats of polish before I applied the sealant....
Posted By: Anonymous
Re: New Paint job on a budget thread. - 08/30/0708:04 AM
Nope, I haven't finished it off yet. I had a day off work last week and I managed to get the hood ready for that pic. I've given up trying to do it all properly now and I'm just aiming to be able to get one panel done every couple of weeks.
I'm still not perfectly happy with the hood at this point either. I can still see a little hazing in that pic between the reflection of the light and the reflection of the air con unit on the wall that I should be able to remove with a little more effort. So I'll keep working away bit by bit until I'm totally happy with the finish.
Posted By: Anonymous
Re: New Paint job on a budget thread. - 08/30/0709:17 AM
Quote: after 2 coats of rustoleumn Gloss White, here's a coat of Brightside White on the fenders, this paint shines!
I got a few runs, so I need to fix those then I'll do a second and final Brightside coat.
Is there some big advantage to using Brightside over Rustoleum? I went with the latter and I love the color I picked (Gloss Royal Blue), but the further I get into this, the more I'm convinced this will not be the only vehicle I paint using this method - it's just too much fun! So if there is a major advantage to using one over the other for the next car, please share
Posted By: Anonymous
Re: New Paint job on a budget thread. - 08/30/0702:53 PM
Quote:
Is there some big advantage to using Brightside over Rustoleum? I went with the latter and I love the color I picked (Gloss Royal Blue), but the further I get into this, the more I'm convinced this will not be the only vehicle I paint using this method - it's just too much fun! So if there is a major advantage to using one over the other for the next car, please share
The advantage is shine, brightside stays shiny even after it dries while rustoleom dulls when it dries, so I am doing 2 coats of rustoleum and 2 coats (all sprayed) of Brightside. There was a guy claiming that rustoleum gets affected by Brake cleaner, it does not, once it is fully dry it won't get affected by Brake cleaner as he claimed. that information scared me a little, so I decided to combine the coats of paint to avoid that.
I am also painting my Suburban with Rustoleum Gloss Royal Blue, love the color, I was planning on painting a couple of coats of Brightside Blue paint on top of that but I think I will stick with all Rustoleum on that Suburban. then I will paint another Car with Gloss Black Rusto.
It is for sure a lot of fun !
Posted By: Anonymous
Re: New Paint job on a budget thread. - 08/30/0703:48 PM
Quote: Is there some big advantage to using Brightside over Rustoleum?
I'm a fan of Brightside. It's a boat paint, so it's designed to resist the three S's: SALTWATER, SUN, and profanity reference deleted The gloss is amazing too. Since it's more concentrated, 2-4 Brightside coats equal about 10-12 coats of Rustoleum. For me, the time and labor savings outweigh the lesser cost of Rustoleum. Just my
Posted By: Anonymous
Re: New Paint job on a budget thread. - 08/30/0708:52 PM
Quote:
Is there some big advantage to using Brightside over Rustoleum?
Yes. Brightside is designed to be put down and left alone.
There was some discussion here initially about abrading the surface of a monourethane with polishing because it is designed to seal on application, and disturbing that seal would theoretically be bad.
However, Aussie and Marq have shown that it polishes up nicely.
If you could lay Brightside down smooth enough it is possible you could perform a decent "roll and go"
Rusto, on the other hand, is old school, literally. Just like your grandfathers Oldsmobile, you have to actually polish the car and keep a coat of wax on it to maintain the surface shine.
Re: New Paint job on a budget thread. - 08/31/0712:07 PM
ROLLER MARKS!!
Hey all - I gave up on Satin black a while back because I couldn't lay it down without leaving lots of roller marks.
I'm now on my 3rd coat of Rustoleum Gloss Black and I'm STILL getting roller marks in the paint. I can't figure out what I'm doing wrong.
With my last coat, if you run your hand over the roller marks you can't feel anything, but you can still see them. So its not like there's a big paint build-up on the outer edge of the roller.
Its almost like the paint is drying before it has a chance to fully self-level. The temperature conditions yesterday when I did my rolling were nearly perfect - 74 degrees and low humidity. I'm using about a 25% thin of mineral spirits, and have 2 to 3 seconds on the the "drip test".
Should I be thinning the paint even more? Should I be using thinner coats?
I'm squishing most of the paint out of the roller before I start, and I'm using a decent amount of pressure on the roller when I apply the paint. I finish each panel by letting the roller just rest on it (no pressure) while I make one more pass across the entire panel end to end. (Basically doing overlapping stripes all in the same direction across the panel).
One thing I've noticed is that I seldom have any bubbles when I lay the paint on, is it possible that I'm putting it on TOO thin?
Posted By: Anonymous
Re: New Paint job on a budget thread. - 08/31/0712:31 PM
Quote: [ Yes. Brightside is designed to be put down and left alone.
Does this mean that I should not sand or polish the last coat? I am now on the 5th coat and to day I will be putting down #6 which will be my last. Thanx!
Posted By: Anonymous
Re: New Paint job on a budget thread. - 08/31/0703:34 PM
Don't panic.
Brightside is designed to be put down and left alone, but judging by Marq and Aussie's results it can be polished with good results...
I'm just saying that if, after your final coat of Brightside, the surface is presentable, you could stop there. As others have noticed brightside dries with a nice gloss.
Most folks, however, have either not perfected their rolling to zero defects, or are perfectionists who can and do achieve better by working the finish.
Of course, some just enjoy the process. YMMV.
The best part is if for some reason you regret sanding your top coat, you can always whip out a roller and add another coat...
Posted By: Anonymous
Re: New Paint job on a budget thread. - 08/31/0709:31 PM
hey it sounds like the problem is you are dry rolling as i am a painter. when u dont put enough paint in the roller it starts to leave little lap marks that are cause by drying paint. to solve this put a little more paint in your roller and dont apply too much pressure use the weight of the roller
Posted By: Anonymous
Re: New Paint job on a budget thread. - 08/31/0711:55 PM
This is my first post, but I have been reading this thread (and other roller painting threads) for the last month. I have experimented some and I must say this ROCKS! Thanks again to ALL who have contributed.
Anyways, I haven't seen much info on the Interlux Toplac paint. A couple others have asked, but I was curious if anyone has actually tried it yet.
I checked some boating forums and some claime it has held up better than brightside, is harder, and keeps its glossiness better.
Anyone have any firsthand experience. If not, I'd be willing to get a can of each and compare....After reading all of this I feel like I owe something to all of the other DIY'ers.
I plan on beginning paintwork on my car this week. Cant wait!
Posted By: Anonymous
Re: New Paint job on a budget thread. - 09/01/0701:14 AM
Look at what I got today:
Plenty of Pads and PoorBoy stuff ! I already have a Porter Cable, so I am going to try and polish part of the hood.
I was going to shoot another coat of Brightside on the fenders but it is about to rain up here on the eastern mountains of San Diego.
Posted By: Anonymous
Re: New Paint job on a budget thread. - 09/01/0706:10 PM
SuperCobra
Where did you get it from .... links please!
Did you get a backing plate also ... don't see it in that picture, My PC didn't come with one, and I wonder which size hook and loop backing plate I should get .... I have seen 5", 5.5" and 6". How should one determine this?
Posted By: Anonymous
Re: New Paint job on a budget thread. - 09/01/0706:28 PM
Quote: SuperCobra
Where did you get it from .... links please!
Did you get a backing plate also ... don't see it in that picture, My PC didn't come with one, and I wonder which size hook and loop backing plate I should get .... I have seen 5", 5.5" and 6". How should one determine this?
darn it, you are right, didn't come with backing plate, have to buy that separate.
Re: New Paint job on a budget thread. - 09/02/0702:34 PM
I have to decided to experiment with the top secret TS-100 paint. I just ordered a quart of paint and a quart of the TS-101 thinner. I'll try thinning some with mineral spirits as well to see if this is a cheaper alternative.
I'll keep you guys updated...I know there are some people curious about this paint.
Posted By: Anonymous
Re: New Paint job on a budget thread. - 09/02/0710:11 PM
well, It was very hot today as it was yesterday, I couldn't take it anymore and decided to shoot the first coat of rustoleum anyways, with thunderous skies a few miles away (but sunny above me) I decided to do this.
Re: New Paint job on a budget thread. - 09/03/0711:40 AM
Quote: I have to decided to experiment with the top secret TS-100 paint. I just ordered a quart of paint and a quart of the TS-101 thinner. I'll try thinning some with mineral spirits as well to see if this is a cheaper alternative.
I'll keep you guys updated...I know there are some people curious about this paint.
Hey jex, what color did you go with?
For what it's worth, I did some test panels with their TS-4 series paint. I tried both thinning agents and didn't see any noticeable difference between TS-101 and mineral spirits. I've yet to paint my project vehicle but I think you're going to like working with Top Secret.
Re: New Paint job on a budget thread. - 09/03/0702:08 PM
Quote:
Quote: I have to decided to experiment with the top secret TS-100 paint. I just ordered a quart of paint and a quart of the TS-101 thinner. I'll try thinning some with mineral spirits as well to see if this is a cheaper alternative.
I'll keep you guys updated...I know there are some people curious about this paint.
Hey jex, what color did you go with?
For what it's worth, I did some test panels with their TS-4 series paint. I tried both thinning agents and didn't see any noticeable difference between TS-101 and mineral spirits. I've yet to paint my project vehicle but I think you're going to like working with Top Secret.
I decided to go with white. This is my first attempt at painting and body work so I wanted what showed the least imperfections.
Posted By: Anonymous
Re: New Paint job on a budget thread. - 09/03/0706:58 PM
Well, I've finished my test piece, the tailgate for my '79 Ford F100 Custom Explorer. All in all, I'm quite satisfied. And additionally, it was one of the most beat up, rusty, and plain difficult pieces on the truck.
As you can tell, my bodywork is poor at best. Even knowing that every scratch would show, and doing what at the time seemed like a good job sanding them out, I am surprised at how bumpy the body is after the paint is on. I'm not particularly worried- the rest of the body is smoother, and the tailgate has too many planes and curves to show too badly. Plus, the white seems to hide the imperfections.
Some people wanted to see lettering/striping, and here's your chance. Letters are difficult. It took a good 90 minutes to tape it off and very carefully cut the curves. Very carefully. It didn't come out perfect, as you can see. They have a rough edge. But from 3 feet away, it's not noticeable unless you're looking for it. I'm thinking that my Explorer striping will actually go better, in that it will be long, straight edges on smooth metal instead of wild curves on stamped letters. I bet it'll be easier to get a smooth line.
Oh, and here's the before:
Posted By: Anonymous
Re: New Paint job on a budget thread. - 09/03/0707:03 PM
Oh, and that's six coats of Rustoleum Gloss White, applied with a foam brush, and the lettering is with a Rustoleum rattlecan of dark blue. My body striping will be that dark blue and safety blue. Oh, and mask off everything when spray painting like that. Even with all that paper, I had some overspray to clean up.
Posted By: Anonymous
Re: New Paint job on a budget thread. - 09/04/0701:27 AM
Quote: For the pic that I posted above, I just used the SSR3. But I wouldn't recommend finishing the job there. On my hood I used SSR3, then SSR2.5, then the Poorboy's Professional Polish and then I topped it off with the EX-P synthetic sealant.
Hey Aussie...thanks for sharing your finishing secrets with us! Is the Professional Polish necessary for a great finish? I'm considering starting with the SSR 2.5 or 2 and then going directly to the EX Sealant with Carnauba.
If you were on a budget and couldn't buy all the aforementioned products, which ones would you consider the bare minimum for an excellent shine?
Thanks!
Posted By: Anonymous
Re: New Paint job on a budget thread. - 09/04/0703:08 AM
This is slightly off topic, but I have a question about filling dings.
I have some small dents and dings, nothing major. I have never used anf fillers, but I was wondering what would be ideal for filling small dents and dings. As of now, I think I am going to try evercoat rage extreme, and get some evercoat metalglaze for the minor scratces.
Any other recommendations?
PS...The topsecret TS-100 should be here later this week. I will have pics posted as soon as I get 2 coats on.
Posted By: Anonymous
Re: New Paint job on a budget thread. - 09/04/0704:00 AM
The Poorboy's SSR2.5 is an awesome swirl remover and if you are careful to keep buffing with it until most of the polish residue had gone then you would probably be able to straight from the SSR2.5 to the EX-P or wax.
Re: New Paint job on a budget thread. - 09/04/0704:08 AM
Any filler will work. I never tried the evercoat stuff, always used the cheap bondo, one time sprung for the "bondo gold" but didn't like it. I preferred the original bondo so I could judge by the color about the mixture.
You can mix in fiberglass resin into any of the hardened body fillers, to make it runnier/smoother (called a skim coat)-- that works really well for filling in scratches, nicks in paint, and over a layer of (already hardened) filler mix to fill in pinholes and sanding scratches. With fiberglass resin, it takes a bit longer to dry.
Posted By: Anonymous
Re: New Paint job on a budget thread. - 09/04/0707:24 AM
Quote: The Poorboy's SSR2.5 is an awesome swirl remover and if you are careful to keep buffing with it until most of the polish residue had gone then you would probably be able to straight from the SSR2.5 to the EX-P or wax.
Thanks! Is there any advantage to going with the EX-P over the wax? Would the EX-P do the same thing as wax?
Also, for the cheapo polishers, what is the equivalent of a cutting pad? I can use micro fiber or terry cloth bonnets with mine. Would I use the SSR2.5 with the terry cloth bonnet and then switch to the microfiber one for use with the wax/EX-P?
Posted By: Anonymous
Re: New Paint job on a budget thread. - 09/04/0709:37 AM
EX-P is a synthetic sealant and it will outlast a wax by months. It won't look as 'wet' as a wax finish will though.
If you have a real super el-cheapo polisher that looks like one of these
then don't even bother trying it on your paint. They are useless.
If you can afford to get even a cheap random orbital sander like one of these
as well as a light cutting pad and a polishing pad you will be in business. Actually one of those polishers and the two pads will give you the chance to recoup your money by doing one or two paying details.
Posted By: Anonymous
Re: New Paint job on a budget thread. - 09/04/0710:59 AM
Aussie I have 2 Dewalt random orbit sander. I was wondering what pads would you recommend for them. They are both 5 inches.
Hey Exit good to see you again. Hows the car coming? Any new pics?
Barry
Posted By: Anonymous
Re: New Paint job on a budget thread. - 09/04/0711:20 AM
Thanks again.
I actually have a 6" random orbital polisher I picked up from walmart for about $15...I think its max speed is just under 3K. I had thought that this would be OK considering that Charger69 said he used the el cheapo units himself.
Before I do my car, I'd like to get the porter cable unit that everyone here talks about. I'm hoping to be able to finish my bike w/o doing so though.
Posted By: Anonymous
Re: New Paint job on a budget thread. - 09/05/0702:02 AM
Quote: Before I do my car, I'd like to get the porter cable unit that everyone here talks about. I'm hoping to be able to finish my bike w/o doing so though.
Always has several for sale, Lowest price, lowest shipping, ships fast. Got mine here in Porter Cable box ... which was inside a spaghetti & chili box to throw the neighbors off for the hours it sat on my porch after the UPS guy delivered. Haven't put mine to use yet ... still have to get the polish and pads needed for it ... may put some wax on my truck with the pad that came with it, but it won't polish with that pad.
Re: New Paint job on a budget thread. - 09/05/0702:31 AM
Quote:
Quote: Before I do my car, I'd like to get the porter cable unit that everyone here talks about. I'm hoping to be able to finish my bike w/o doing so though.
Always has several for sale, Lowest price, lowest shipping, ships fast. Got mine here in Porter Cable box ... which was inside a spaghetti & chili box to throw the neighbors off for the hours it sat on my porch after the UPS guy delivered. Haven't put mine to use yet ... still have to get the polish and pads needed for it ... may put some wax on my truck with the pad that came with it, but it won't polish with that pad.
Just thought I would put in a good word for the Porter Cable. The 7424 has been sold for years as an orbital sander. I have used mine off and on for three years. I just finished sanding smooth the red cedar shingles on the three storey weather side of my house. It whipped right through that and is going strong. I have seen the polisher attachments for about $17.00. Now that I am through sanding for a while, I think I'll buy the polisher attachments.
Re: New Paint job on a budget thread. - 09/05/0704:25 AM
Quote: Aussie I have 2 Dewalt random orbit sander. I was wondering what pads would you recommend for them. They are both 5 inches.
Hey Exit good to see you again. Hows the car coming? Any new pics?
Barry
Hi Muskin, thanks for the re-welcome. Ive been totally focused on getting this thing running so havent been reading about paint lately. Here's a pic of the finished motor:
and here's a little video of it running during break in. first fire was sunday.
i wont be able to work on it for a couple weeks, but it's just about ready to get on the road - need to reattach the bumpers, grill, mirrors, and clean the windows. then i can get some outdoor paint pics. I am planning to do another 2-3 coats with the brightside hatteras white as well-- the drivers side door is not 100% covered and i have some runs i need to sand down, might as well roll the whole panel in that case.
by the way - has anyone found a good way to get this paint mixture off of glass? i tried mineral spirits, and it works but takes a lot of elbow grease..
Posted By: Anonymous
Re: New Paint job on a budget thread. - 09/05/0712:38 PM
Quote: by the way - has anyone found a good way to get this paint mixture off of glass? i tried mineral spirits, and it works but takes a lot of elbow grease..
How about a razor blade? If not that, they have orange plastic paint remover blades for glass too.
Posted By: Anonymous
Re: New Paint job on a budget thread. - 09/05/0702:48 PM
hey sergio,
great job so far,
what are you spraying with?
Posted By: Anonymous
Re: New Paint job on a budget thread. - 09/05/0702:53 PM
Re: New Paint job on a budget thread. - 09/05/0703:53 PM
Quote: Looking good.
What did you coat your headers with?
It's rustoleum silver BBQ paint. i have read of others using the same, or the black stuff. don't know about the longevity, but they seem OK so far after about 30 mins of runtime, some of it over 200 degrees water temp.
Posted By: Anonymous
Re: New Paint job on a budget thread. - 09/05/0707:15 PM
Quote: hey sergio,
great job so far,
what are you spraying with?
I am using an old small oil-less air compressor, a cheapo Harbour Freight HVLP spray gun (about 15.00).
I think I might buy another bigger compressor as this is just too small.
Sergio
Posted By: Anonymous
Re: New Paint job on a budget thread. - 09/06/0703:00 AM
2nd Rustoleum Coat, a few more runs, will wait a couple more days, sand them down and go for the first Brightside Coat.
Posted By: Anonymous
Re: New Paint job on a budget thread. - 09/06/0711:18 AM
looking good.
Posted By: Anonymous
Re: New Paint job on a budget thread. - 09/06/0707:18 PM
Exit1965 you trying to have it feady for Fall Fling in Van Nuys in November? I would love to check it out if you do.
Re: New Paint job on a budget thread. - 09/06/0707:58 PM
Nah I'm not planning on putting it in any shows! Just occasional weekend driving
Posted By: Anonymous
Re: New Paint job on a budget thread. - 09/06/0710:35 PM
Concerning masking for lettering and such (was discussed a few days ago; pictures of a FORD pickup tailgate). I saw an article in Hot Rod many years ago which talked about using a brush-on masking agent.
Can't remember what it was called, but I imagine there are different brands on the market. Idea is to brush it on, let dry (it dries to a thick rubbery film), then cut out areas to receive paint with an X-acto knife.
I haven't tried it myself, but the guys in the article thought it was a lot easier to cut evenly with the knife and created sharper edges than masking tape.
Posted By: Anonymous
Re: New Paint job on a budget thread. - 09/07/0701:56 AM
Re: New Paint job on a budget thread. - 09/07/0703:53 AM
Quote: It's available in quart cans. Available at automotive paint supply stores who sell Metalflake products. http://www.metalflakecorp.com/
I used it on a sign project many years ago, it worked real well.
It is available in rattle cans. I have one in my workshop, but can't remeber the brand name. Think I picked it up in an art supply/craft store.
Posted By: Anonymous
Re: New Paint job on a budget thread. - 09/07/0703:33 PM
I've used the brush on masking solution before...it's kind of like a low-stick latex glue. I got mine from an art supplies store. There's a few caveats... 1. Personally I wouldn't use a spray-on version, as you'd have to reverse-mask everything with tape before you sprayed it, so it won't save you any effort. 2. It doesn't stick too well to glossy surfaces, so you've got to work out how to key the surface somehow.
I had an old '29 Ford with the 'Ford' letters on the tailgate. I painted the whole truck in a cream color, and wanted the Ford script to be white. It worked out FAR easier to paint the whole thing, and then carefully brush-paint the raised letters afterwards with a signwriting enamel (I used One Shot (about $7 a can)), with no masking. You can easily wipe off any over-brush while it's wet, and it gave a perfect result. The letters aren't big enough to show marks or orange-peel.
Posted By: Anonymous
Re: New Paint job on a budget thread. - 09/07/0709:13 PM
Just an update.
My paint still has not arrived (top secret TS-100), but it should be here anyday. In the meantime, I have been gathering supplies and prepping my garage area. I swept it out and lined the ceiling and the walls with plastic. I have a dehumidifier in the painting are so I wont have to worry about humidity. The plan is to lightly mist all the plastic and the floor with water before painting. Hopefully this will eliminate a lot of dust.
Also, I went to the auto body store today to get some filler. The guy working there was very helpful. He said that they have some single stage auto paint (urethane) that could be mixed to almost any color. It was about the same price as the top secret paint (~$30/qt). If the top secret doesnt work out, I'll probably go this route.
One thing I was not sure about. He said that if he were painting my car, he would just wetsand with 600 since the body was pretty slick, then paint. I was under the impression that the paint needed more to "bite" on to. Also, he said that it would not be a problem to apply filler over the paint. Just rough up the problem area with 80 grit, apply filler, etc. Is this ok?
I plan on starting body prep this week. I already have some rocker panel covers prepped. So as soon as I get the paint on those I'll get some pics.
Re: New Paint job on a budget thread. - 09/08/0703:12 AM
Quote: He said that if he were painting my car, he would just wetsand with 600 since the body was pretty slick, then paint. I was under the impression that the paint needed more to "bite" on to. Also, he said that it would not be a problem to apply filler over the paint. Just rough up the problem area with 80 grit, apply filler, etc. Is this ok?
Personally I would not feel comfortable with 600, but would with 400. As for filler over paint, I think 80-grit is too course. I would recommend 150 to 180 (only for small dings of course.) You'll find that it's easier to feather the filler into the paint when you work your way down to the finer grits. You are also less likely to have scratches appear as the paint cures, a year or so down the road.
Posted By: Anonymous
Re: New Paint job on a budget thread. - 09/08/0710:51 AM
I'm almost done with my truck - can't wait to show you guys! My dad is so impressed he wants me to do his race car next (a '67 firebird).
If I do his car, I'm thinking of trying the brightside paint. Aside from being able to potentially skip the final wetsand, do all the same rules apply for painting with it? Do you thin it and roll it the exact same way as the rustoleum? Are the applications done the same way as well - I.E. wetsand 400, 2 coats-wetsand 600, 2 more coats-wetsand 800, 2 final coats- finished. ?
Re: New Paint job on a budget thread. - 09/08/0712:15 PM
Quote: Well, I've finished my test piece, the tailgate for my '79 Ford F100 Custom Explorer. All in all, I'm quite satisfied. And additionally, it was one of the most beat up, rusty, and plain difficult pieces on the truck.
As you can tell, my bodywork is poor at best. Even knowing that every scratch would show, and doing what at the time seemed like a good job sanding them out, I am surprised at how bumpy the body is after the paint is on. I'm not particularly worried- the rest of the body is smoother, and the tailgate has too many planes and curves to show too badly. Plus, the white seems to hide the imperfections.
Some people wanted to see lettering/striping, and here's your chance. Letters are difficult. It took a good 90 minutes to tape it off and very carefully cut the curves. Very carefully. It didn't come out perfect, as you can see. They have a rough edge. But from 3 feet away, it's not noticeable unless you're looking for it. I'm thinking that my Explorer striping will actually go better, in that it will be long, straight edges on smooth metal instead of wild curves on stamped letters. I bet it'll be easier to get a smooth line.
Oh, and here's the before:
do yourself a favor and get some 3M fineline tape to do the initial mask. it's a vinyl tape and leaves a VERY clean edge, and is flexible, so no there's very little cutting/trimming. then just mask with regular painters tape to that.
Posted By: Anonymous
Re: New Paint job on a budget thread. - 09/08/0702:50 PM
Quote:
Quote: He said that if he were painting my car, he would just wetsand with 600 since the body was pretty slick, then paint. I was under the impression that the paint needed more to "bite" on to. Also, he said that it would not be a problem to apply filler over the paint. Just rough up the problem area with 80 grit, apply filler, etc. Is this ok?
Personally I would not feel comfortable with 600, but would with 400. As for filler over paint, I think 80-grit is too course. I would recommend 150 to 180 (only for small dings of course.) You'll find that it's easier to feather the filler into the paint when you work your way down to the finer grits. You are also less likely to have scratches appear as the paint cures, a year or so down the road.
I was thinking 400 would be better as well...
As for the filler, I am using it for small dings (i.e. door dings) so I may give 150 a shot.
Re: New Paint job on a budget thread. - 09/08/0704:07 PM
Quote:
Quote: Well, I've finished my test piece, the tailgate for my '79 Ford F100 Custom Explorer. All in all, I'm quite satisfied. And additionally, it was one of the most beat up, rusty, and plain difficult pieces on the truck.
Oh, and here's the before:
This is a great example of just how practical the 'el cheapo' paint job is. It gives the chaps with 'cop magnets' the ability to spruce up their ride. And this is especially true with a 'working truck' that has seen its share of bangs, scrapes and rusty scratches over the years
I can't wait to see how the truck transforms once you finish up the rest of the body...
.
Posted By: Anonymous
Re: New Paint job on a budget thread. - 09/09/0712:07 AM
great job on that tail gate.
Well to update, I bought one of those Wagner HVLP sprayguns and used it to spray OMNI urethane single stage paint on my Prelude. The wagner is basically a turbocharged hairdryer with a spray device on the end. I cant recommend the Wagner for automotive use. The amount of coverage it does is GREAT, if you got something really big to paint, the wagner will do it FAST. But as far as atomization goes, it doesnt cut it for automotive use. Soemtimes it spits big globs of paint. As a result I have a lot of texture everywhere, but the paint itself looks great, it dried fast and dried SHINY. I can see myself in the paint. Im satisfied with the job I did but in the future I wont use a Wagner to paint a car.
Now that I think about it, if you're going to use a Wagner you probably should go for Brightside cause its made to self level. But whatever the car is shiny and black now and I think anyone that saw it would have to agree its immaculate.
I would post pics but somehow I cant!
Posted By: Anonymous
Re: New Paint job on a budget thread. - 09/09/0712:19 AM
The best thing I like about this is there is nobody on here [now] telling us we shouldn't try this and that its junk or crap for doing this. Keep up the good jobs everybody and the support.
Sorry for taking up bandwidth on a non-painting post but I thought i would throw in my .
Posted By: Anonymous
Re: New Paint job on a budget thread. - 09/09/0712:40 AM
I found a nice little trick thats works well for me, ketchup bottle + rubbing compound + little soap + water all shook together is nice for a home made compound to use after wetsanding... what im doing is on my final paint coat im color sanding about 80-90% then I switch to this homemade compound and use it to knock down the last 10-20%(by hand/lightly!)... it seems to make cutting/polishing easier too after. The pictue above it just my from my homemade compound.
All i have left to do is wetsand both fenders and put one more coat on them, and strip/paint front bumper, eta- 1 - 1� week id guess..
Posted By: Anonymous
Re: New Paint job on a budget thread. - 09/09/0704:54 AM
Nice tailgate patrick!
Quote: The Poorboy's SSR2.5 is an awesome swirl remover and if you are careful to keep buffing with it until most of the polish residue had gone then you would probably be able to straight from the SSR2.5 to the EX-P or wax.
Brightside question to anyone who knows the answer...
Is it a requirement to let Brightside dry for longer than 24 hrs before using polishing compound and sealant or can it be done right after the final coat is dry like the rustoleum?
Posted By: Anonymous
Re: New Paint job on a budget thread. - 09/09/0712:38 PM
Quote: This is slightly off topic, but I have a question about filling dings.
I have some small dents and dings, nothing major. I have never used anf fillers, but I was wondering what would be ideal for filling small dents and dings. As of now, I think I am going to try evercoat rage extreme, and get some evercoat metalglaze for the minor scratces.
Any other recommendations?
Evercoat is good...I've used a lot of RAGE over the years. For smaller spots, I prefer Half-Time though. Once you use a professional grade filler, you won't go back to Bondo...they sand easier and finish sooo much smoother.
Re: New Paint job on a budget thread. - 09/09/0706:28 PM
Quote:
Brightside question to anyone who knows the answer...
Is it a requirement to let Brightside dry for longer than 24 hrs before using polishing compound and sealant or can it be done right after the final coat is dry like the rustoleum?
My personal preference with the Brightside was to let it cure for a few months. Once I had the final coat on it looked quite acceptable - not showroom - but quite acceptable for putting some mileage on. After all, my car had been off road while all this painting process was going on. So I wanted to put some miles on the car and have some fun with it.
My theory was that waiting that extra time would do no harm and would ensure that the paint was 100% cured.
I don't know if I would rush within 24 hours of the last coat to move on to the polishing compound stage and sealant.
The paint in theory is still curing at that point. I would say that you might be better off waiting at least 72 hours... or even up to 1 week before going for the final compounding, polishing and waxing.
The next question would revolve around the type of sealant you are going to lay on it. Some 'sealants' might provide too good a protective outer seal. Just imaine this - the paint is still curing ( which basically means the gases are still evaporating out of the paint ). If you slap on an excellent sealing layer over the paint, the escaping gases or vapors from the paint won't have any where to go. They will rise from the paint and get trapped between the paint and the sealant layer. This could cause some separation of adhesion between the sealant layer and the paint.
If by sealant you meant something like a lovely carnuba wax coating or most natural wax coatings, there would not be this 'trapping' problem - because the waxes don't form enough of a seal to keep the escaping gases from the paint trapped.
Some of the automotive polish/waxes use acrylic or other futuristic compounds to seal the painted surface and to give a shine. Its hard to predict how they may react to the escaping gases from the paint. It may discolor them.. it may cause them to lose adhesion. it may result in no problem.
So it is sometimes better to exercise a little patience when you go to proceed to the final finishing stage, just to eliminate problems that might be caused by evaporating gases/vapors from the paint.
.
Posted By: Anonymous
Re: New Paint job on a budget thread. - 09/09/0709:05 PM
Hi, first of all, I'd like to say thanks to Charger yehaa69 for this useful bit of Internet...
I leaked down from a tread that started over at HybridZ.org but seems to have died.
After reading trough all of the 3 sections of this tread, I have only two things to say, first, good lord my eyes hurt and second is, I'm heading to home depot right now...
Before I start, I have a few questions to as...
1- Can I use Tremclad aluminum paint???
2- How much should i thin my mixture???
3- Could I use Sico latex wall paint, as they seem to have the best color choice available???
JUST KIDDING!!!!!!
PLEASE people, I've been reading trough the whole thing in order to see if some people have had some huge break trough in therms of technique or materials, but everything there is, is: Can I use this or how much should I thin or wouldn't it be better to spray it...
It seems like the first few who started the whole thing, jumped right in with Charger's instructions and went full out experimenting. Now, most of the new posts are about people asking to be spoon fed...
Kudos to Marq for being so patient in answering all of the questions OVER & OVER & OVER & OVER again.
I'll try to see what I can do and will post results, as for asking question for when I run into problems, I THINK it's been covered so far...
Please experiment a bit before posting to make this thing a bit lighter for those of us trying to read the whole thing to see how it evolves.
Thank you VERY much to all before me who have rolled up there sleeves and wet there feet to turn this into an awesome alternative for high dollar paint jobs which we don't necessarily need. I just want to drive the car... Not looking for trophies.
Posted By: Anonymous
Re: New Paint job on a budget thread. - 09/09/0709:42 PM
Hello All!! I'm a newbie here but I've spent the last two weeks reading away on this topic. I'm currenty serving in Iraq and should be home soon from my third long tour. I'm anxious to get home and start painting my car. I'm pretty sure I have all the information needed to get my process going. My question is--> Can two tone paint job be done? What is best procedure (ie. taping, etc)? I'm looking at a blue/grey with red stripe where they meet type of design. I originally wanted blue/silver but have noticed on the rusto site that they only have aluminum and its been said here that its not good. So a variation of grey it is. Any ideas? I've noticed not too many two tone jobs here. Thank you all in advance for the advice. This is the best thing since sliced bread.
Re: New Paint job on a budget thread. - 09/09/0711:47 PM
Quote: Hello All!! I'm a newbie here but I've spent the last two weeks reading away on this topic. I'm currenty serving in Iraq and should be home soon from my third long tour. I'm anxious to get home and start painting my car. I'm pretty sure I have all the information needed to get my process going.
We all wish you a safe, healthy and timely return to a world where dudes can enjoy playing with their cars instead of worrying about whether the next car on the road is bomb laiden with some fanatic behind the wheel...
Quote:
My question is--> Can two tone paint job be done?
Yes... we have seen a number of cars and trucks done here that did two two paint jobs... So yes it is doable...
Quote:
What is best procedure (ie. taping, etc)? I'm looking at a blue/grey with red stripe where they meet type of design.
Yeah that is definitely doable. But I will bow out and let some of the two tone 'experienced' lads pipe in to advise you.
Quote:
I originally wanted blue/silver but have noticed on the rusto site that they only have aluminum and its been said here that its not good.
The main problem is that the paints that had metal flakes in them or the metalized plastic flakes in them do not go on evenly and they do not take to wet sanding very well. Although there was a pick up truck here that did succeed to get a metal flake on to his pick up. His was the exception to the rule...
Quote:
So a variation of grey it is. Any ideas? I've noticed not too many two tone jobs here.
One of the nicest might have been the 240/260 Z car, where the guy did a red, white and blue ( three tone ! ) with slanted vertical stripes off the front fender and hood. There was a neat Volkswagon bug done with a burgundy maroon & black combination. A few of the pick up trucks have also been decked out nicely with two tones. So there are some folks here that have the hands on experience.
Re: New Paint job on a budget thread. - 09/09/0711:51 PM
Been a while since I posted on this thread, but I keep checking back to see what's new. I did my 78 a year ago, in 2 tone green, with the dark green base first and then the lighter green. I taped off the panels and simply repeated the process a second time with the lighter color. Removed the tape using a cloth wetted with mineral spirits to soften the adhesive and prevent pulls on the new paint. Once the tape was off, I wiped the panels thoroughly with MS to remove all adhesive and did the final wet sand and polish on the entire panel. Other than removing the tape carefully, it wasn't a big deal. Just a repeat of the original process on a smaller area. The separation line on mine is covered by the trim, but it came out clean and straight. Make sure the tape is pressed down at the edge and there shouldn't be any bleedover at the edge. To do the stripe as your pic shows,I would wetsand the line smooth at the separation and then tape half the strip width on either side of the line. This will cut down on the appearance of a step at the stripe. My , there are a few others that have done hood stripes and body stripes that have a few pointers as well. Stay safe and good luck with the painting.
Re: New Paint job on a budget thread. - 09/10/0712:01 AM
I think tha was me, Marq. It wasn't too hard to add metallic to the process, just an extra step. I used a silver metallic rattle can between the coats and sprayed very lightly from about 2 ft away. Not enough to apply color, but enough to stick the metallic in place. One color coat. light rattle can for metallic, second color coat, wetsand. Lather, rinse and repeat Didn't turn out perfect, rattle cans tend to spit the occasional glob. It worked out well enough for me, though. This pic is after Moparfest this year with the retirement home on the back.
Posted By: Anonymous
Re: New Paint job on a budget thread. - 09/10/0705:27 AM
Quote: The next question would revolve around the type of sealant you are going to lay on it. Some 'sealants' might provide too good a protective outer seal.
If by sealant you meant something like a lovely carnuba wax coating or most natural wax coatings, there would not be this 'trapping' problem - because the waxes don't form enough of a seal to keep the escaping gases from the paint trapped.
Some of the automotive polish/waxes use acrylic or other futuristic compounds to seal the painted surface and to give a shine. Its hard to predict how they may react to the escaping gases from the paint. It may discolor them.. it may cause them to lose adhesion. it may result in no problem.
Thanks Marq!
The type of sealant I bought is EX Sealant. Is this the kind you'd be concerned about or no since it has carnuba in it?
I also got a bottle of the SSR 2.5 that Aussie recommended for doing the polishing part.
So, what about the dust and small hairs that are stuck in the final coat of paint? Did you just not worry about that stuff while you drove the car around?
If I wetsand them out without polishing, the gloss will be gone. I'm also running out of time as I need to move my bike and can't do that w/o the gas tank hooked back up. It is much easier to paint/polish/seal a gas tank that is not connected to the bike.
Are you recommending that I just suck it up and live with the dirt particles for a little while?
Re: New Paint job on a budget thread. - 09/10/0704:47 PM
Quote:
So, what about the dust and small hairs that are stuck in the final coat of paint? Did you just not worry about that stuff while you drove the car around?
My theory at the time was to look at what could be the worst case scenario while driving around with just a final layer of paint on the car. Yeah it could get dirty, get some bugs splotched on the front end.. and maybe some road tar from freshly paved roads on the fenders. If that was to be the case I planned to just wash down the car, light sand it and then slap on a fresh final skin. BUT after letting three months of usage with just the final coat of paint protecting the car I didn't have any problems.
Any dirt that got on the car simply washed off. After all the paint was designed to do that job. And since the final outer layer of paint had the glossy protection of itself nothing stuck to the paint during those days of driving around.
When it did come time to go for the final wet sand/ compounding, polishing and then waxing, I had no problems performing it on the now aged paint job.
It worked out as planned.
Quote:
If I wetsand them out without polishing, the gloss will be gone. I'm also running out of time as I need to move my bike and can't do that w/o the gas tank hooked back up. It is much easier to paint/polish/seal a gas tank that is not connected to the bike.
Are you recommending that I just suck it up and live with the dirt particles for a little while?
In this particular case I can see how it would be to your advantage to get the majority of the final wet sanding, compounding, polishing and waxing out of the way while the tank if off the motor bike. It will just be that much easier for you because you will have the luxury of having easy access to all sides of the tank and to rotate it around freely to have a horizontal surface to work on.
And once you get it up to a level you are initially satisfied with... you can slap it back onto the bike and later take your time doing further polishing and waxing to tweak up the shine and gloss.
Dunno... that is the way I would look at that particular set of circumstances...
.
Posted By: Anonymous
Re: New Paint job on a budget thread. - 09/12/0703:02 AM
Thanks Marq!
Well, it was decided for me by the time available...as in not much! So, I let it bake in the sun all day today and will put it back on early tomorrow for the move.
Thanks again for all the help!
Posted By: Anonymous
Re: New Paint job on a budget thread. - 09/12/0705:49 AM
I took a munth long break from my Brightside white over black paint job while I concentrated on bigger and better things. I have 3 coats on most of the car. The trunk lid and the areas below the front and rear bumpers still need to be painted. Yesterday I realized the car really needed a bath. It was a good opportunity to snap up some pics of the month old pain. Everything except for the sun roof is as it came off the roller. The sunroof was hand sanded and polished with mixed results. At this point I'm not even sure I going to bother with sanding and polishing the rest of the car. The while paint hides the flaws very very well. On to the pics.
Re: New Paint job on a budget thread. - 09/12/0712:31 PM
Quote: The sunroof was hand sanded and polished with mixed results. At this point I'm not even sure I going to bother with sanding and polishing the rest of the car.
Car looks Great!
I have a question about your comment regarding the sunroof. I'm ready to do my final two coats, and I'm trying to decide whether to switch to brightside, or just stick with rustoleum.
Your comment said "hand sanded and polished" - did you mean "hand sanded, and hand polished"?
Or did you use a machine like a porter cable with the poorboys recipe that Aussie recommended and still have a polishing issue?
I'm really tired of wet-sanding - so I'm hoping that my last two coats go on very smooth and glossy, so I can start polishing. That's kinda why I'm thinking Brightside for my last coat.
Posted By: Anonymous
Re: New Paint job on a budget thread. - 09/12/0703:36 PM
I started the paint job by experimenting on a new JY sunroof panel. I wanted to take panel all the way through the pain job from prep to wax. I didn't have any electric polisher at the time (i still don't) so i tried doing it by hand. Here is the old post. About 3/4 of the way down the page. Big pics. https://board.moparts.org/ubbthreads/show...art=21&vc=1 1/4 of the way down the page https://board.moparts.org/ubbthreads/show...art=22&vc=1
Posted By: Anonymous
Re: New Paint job on a budget thread. - 09/12/0708:31 PM
Real quick question...
I'm sanding my car...plan to start painting this weekend. Do you think 220 sandpaper will show sand marks through the paint? I was thinking that all the coats should cover it up pretty well. I have sanded about 1/3 of my car already.
If it creates a problem, I'll make a quick pass with some 320 or 400.
Re: New Paint job on a budget thread. - 09/12/0710:09 PM
Quote: Real quick question...
I'm sanding my car...plan to start painting this weekend. Do you think 220 sandpaper will show sand marks through the paint? I was thinking that all the coats should cover it up pretty well. I have sanded about 1/3 of my car already.
If it creates a problem, I'll make a quick pass with some 320 or 400.
Somewhere back in the thread I did this little schematic to try to explain what happens when you put Rustoleum/Tremclad/Brightside paint on a surface that is not smooth ( ie 80 grit, 120 grit or even 240 grit )
If you look at my chintsy ascii drawing below, just imagine that you are looking at the surface from a side view. You will notice there are peaks and valleys. The valleys are how far down from the top of the surface that the sandpaper has scratched down to...
A A A A A A A A \/ \/ \/ \/ \/ \/ \/ \
Ok... now that you have that visualization, remember that these paints are 'self leveling'. Most people make the mistake of thinking that the paint will simply fill in the valleys and bring them up to the level of the peak.
A A A A A A A A ---------------------- Paint fills valleys \/ \/ \/ \/ \/ \/ \/ \ but peak still there
But what happens in reality is that 'some' paint does fill in the valley, but also a coating adheres to the peak. So what happens is you are playing a game of catch up. Each time you go to fill in the valley - the peak also rises. I guess after 40 coats the two might catch up... but it never really does. And in the end it effects the overall look and shine, gloss and depth of the paint job.
Sooooooo.... the smoother the initial subsurface the better the results you are going to achieve. And as we have said all along... the real magic to this paint job is a direct result of the initial preparation of the body surface.
Now.... imagine a 600 grit surface with smaller scars and scratches... less valleys
mmmmmmmmmmmmmmmmmmmmmmmmmm < sanded surface
And then imagine if your paint was laid down on it
That concept alone should motivate you to get the surface baby bottom smooth before starting the first coat of paint.
,.
Posted By: Anonymous
Re: New Paint job on a budget thread. - 09/12/0711:47 PM
I second Marq's comments about mmmmmmmmmm smooth surface prep. You can't spend too much time there.
Let me just add that paint "shrinks" in thickness as it hardens.
Soooo initially it can look like you "covered up" those scratches. Once cured, however, the scratches can magically re-appear as the paint dries down in those valleys Marq was talking about.
That is why you always sell an Maaco car right after it is painted. There is no telling what surprises await you when it cures...
Posted By: Anonymous
Re: New Paint job on a budget thread. - 09/13/0702:30 AM
Thx for posting that visual, Marq...I remember seeing it before, but I forgot. I guess trying to catch up from Post #1 is a little overwhelming, but it is worth it!
My car actually had good paint on it less some dings and some minor clear coat chips. I've roughed it up with 220, I'll get 400 next. I'll probably paint after 400...seems to me like it would be smooth enough and provide a good amount for the new paint to bite into.
My Top secret TS-100 (white) and TS-101 thinner arrived today. I plan on having at least 2 coats on my car by sunday. I'll post progress pics afterward!
ALSO, I have been wetsanding with a nice foam pad that is made specifically for wetsanding. After getting halfway done sanding with 220, I noticed something ironic...This particular pad is called "Roller Block"! and the slogan "wrap it and roll".
I thought that was hilarious. For anyone interested, it is made by Motor Gaurd corporation. It works really well.
Posted By: Anonymous
Re: New Paint job on a budget thread. - 09/15/0712:52 AM
OK...I have began painting with the TS-100.
Keep in mind I have practiced with rustoleum and was able to roll it with no problems whatsoever.
When I first held the paint can, I shook it slightly to get an idea on how thin the paint is. I could tell right away that is was very thick (solid content is ~65%). Much thicker than rustoleum. I worried about thinning it so much. If you get this paint, you'll definitely need lots of thinner. I'm going to experiment with mineral spirits to see if it is a viable option. The TS-101 thinner evaporates a little faster than I would like.
I applied the paint 4 different ways:
1. Straight from the can. I would not recommend this. It isnt hard to pop the bubbles, but it results in bad orange peel.
2. Thinned ~30%. It went on smoother, but it still left some pronounced orange peel.
3. Thinned ~50%-60% (thin coat). Went on a little smoother, but I noticed it started leveling much better. Even though it was a thin coat, it covered the paint very well!
4. Thinned ~50-60%(thick coat). This would not be possible on a vertical surface because of runs, but on a horizontal surface it worked great. 1st coat was virtually complete coverage and it levels quite well. There is some slight orange peel, but nothing a little wetsanding wont take care of.
The shine is excellent thus far. I would say it is definitely glossier than rustoleum. I have not tried brightside, so I cant compare the two.
I am out of batteries right now so pics will have to wait til tomorrow.
Posted By: Anonymous
Re: New Paint job on a budget thread. - 09/15/0702:59 AM
here's a second coat of Brightside:
I think I'll do one more tomorrow, this is looking very good Now !
Posted By: Anonymous
Re: New Paint job on a budget thread. - 09/16/0702:42 PM
Ok....so far I have 2 coats of the topsecret paint on the car. I have some wetsanding to do now....gotta knock down some runs and get out some orange peel.
Honestly, I'm not super impressed by the paint. Yes it looks good, but I was able to get similar results with the rustoleum. I'll probably end up giving Brightside a try. From what I've read, everyone seems to agree that it looks a lot better than rustoleum.
The topsecret paint does give good coverage though. I could probably get my whole car done with 1 quart.
Posted By: Anonymous
Re: New Paint job on a budget thread. - 09/17/0708:15 AM
I tried the roller paint method. It's too much work, and I am not very good at it, so I'm selling my stuff cheap for anyone else who wants to try this adventure.
I've got 3 quarts each of 'Gloss White' and 'Sail Blue' Professional Rustoleum. 2 4" Rollers + 8 high density foam refills 14 1" foam brushes. 2 paint trays for 4" or 6" rollers (one tray is used, one is not) Sand papers in 800, and 1000 grit.
Email paint001@indolence.net if you desire any of these things. $45 for the whole set shipped, worth it for the paint alone.
Posted By: Anonymous
Re: New Paint job on a budget thread. - 09/17/0707:09 PM
Quote: I tried the roller paint method. It's too much work, and I am not very good at it, so I'm selling my stuff cheap for anyone else who wants to try this adventure.
I've got 3 quarts each of 'Gloss White' and 'Sail Blue' Professional Rustoleum. 2 4" Rollers + 8 high density foam refills 14 1" foam brushes. 2 paint trays for 4" or 6" rollers (one tray is used, one is not) Sand papers in 800, and 1000 grit.
Email paint001@indolence.net if you desire any of these things. $45 for the whole set shipped, worth it for the paint alone.
how much for just the paint? I'm in SD
Posted By: Anonymous
Re: New Paint job on a budget thread. - 09/18/0701:34 AM
well i rolled on 8 coats of gloss white on my 67 cougar and it looked great but too generic or postal.. i just rolled on 2 coats of satin black and it looks bad to the bone ..sinister ... ill post some pics tomorrow..
Re: New Paint job on a budget thread. - 09/18/0703:02 AM
which satin black did you use?
Posted By: Anonymous
Re: New Paint job on a budget thread. - 09/18/0705:49 AM
Hey guys, been following this for a while now. Have started a test piece on the hood of my Toyota Hilux. Im from Australia and we don't have tremclad or rustoleum here so im using, what i think is the equivalent, "Kill Rust". Have finished number 7 coat on the hood and havent even done a final wetsand or polish yet. I am very impressed by the outcome. Need to go and by myself a buffer now and make this baby shine.
Posted By: Anonymous
Re: New Paint job on a budget thread. - 09/18/0706:07 AM
Here are a couple of pics so far.
before shot:
What it looks like now:
Cant wait to see what it will look like after a wetsand and polish!!
Roll On!
Posted By: Anonymous
Re: New Paint job on a budget thread. - 09/18/0709:20 PM
Well i Got coat number 4 of the topsecret TS-100 on yesterday. It was looking okay....I felt as If i could have done just as good (maybe even better) with rustoleum. This stuff does not self level as well as I would like.
So today I took a trip to West Marine. They did not have any brightside, but they did have a store brand polyurethane topside boat paint. The clerk said it was equivilant to brightside. I figured I'd give it a whirl.
WOW!!!!
There are bubbles to deal with, but they are easy enough to deal with. This stuff flows and covers like a dream...with VERY high gloss!! The topsecret paint was much harder to apply and was prone to runs. I thought it was my technique, but now I know otherwise. I just put 1 coat of the polyurethane on with zero runs and all of the brushmarks leveled out!
I feel like throwing the TS-100 in the garbage!
I learned a lesson.....dont mess with a good thing!
Posted By: Anonymous
Re: New Paint job on a budget thread. - 09/19/0703:01 AM
rustoleum satin black, the one with the patio furniture on the can.
Posted By: Anonymous
Re: New Paint job on a budget thread. - 09/20/0702:35 AM
little dirty and needs a final detailing but its still sexy
Posted By: Anonymous
Re: New Paint job on a budget thread. - 09/22/0712:20 AM
well, final detailing and waxing is done.. so at this point the car is basically done.
todo list: 1. front bumper groundfx - need more paint 2. door groundfx - need more paint 3 stick emblems on 4. go ruin a set of tires.
Re: New Paint job on a budget thread. - 09/23/0703:47 AM
Hottest car colors Friday September 14, 6:00 am ET
by Erin Peterson
In the car color popularity contest, silver continues its reign.
Nearly 20 percent of all 2006 vehicles (the latest year for which figures are available) were silver -- the seventh consecutive year that the color has taken the top spot.
There's good reason for that, says Chris Webb, the exterior color and trend designer for GM North America. "There's no question that silver on a vehicle looks incredible," he says. "When the light hits it and refracts, it shows off the vehicle's architectural form beautifully."
The color has other advantages, too: It hides dirt, it's an enduring favorite and it's easier to resell than other colors. (In the United Kingdom, many police agencies have switched from white to silver, because the silver cars fetch a higher resale price -- up to 10 percent higher than white cars -- after they've been pulled from the fleet.
Silver got a bump in the late 1990s as a result of a growing interest in technology, the future and Y2K, says Karen Surcina, color marketing and technology manager at DuPont. "Metallic finishes -- whether on cars, cell phones or stainless steel kitchens -- really took off," she says. "And now that it's stayed a top color for so long, it's become a safe color."
Still, there are signs that silver's popularity has peaked. "Silver is a cold color, and people are beginning to look for more warm and inviting surroundings," says Teresa Wong, a color designer at Mitsubishi Motors. "Silver isn't going to go away, but it might be declining."
Stuck in neutral?
White, gray and black take the second, third and fourth spots on the list, respectively.
While the colors may be popular, they don't necessarily represent what buyers actually want, says Barb Parker, a color designer for JDSU -- Flex Products.
"In the United States, most cars are bought off the lot," she says. "Dealers pick gray and silver and black because they're safe."
These neutral colors are also popular for rental cars. "A lot of vehicles go into the rental car fleets -- if you look around at rental cars, you'll see that they're silver or other neutral colors," says Parker.
Surprisingly, these neutral color trends are reflected particularly in the youth market, says Webb. The Scion brand, which is heavily targeted to the Generation X buyer, features remarkably subdued hues. "There's not a single bright color on the vehicle," he says. "Youth don't want that, because then they assume it was marketed to them. They associate bright colors with cheap, disposable products."
As a whole, the popularity of neutral color choices reflect a financially unstable climate, where buyers stick to safe, conservative choices, says Webb. The good news is that color is making a comeback.
A more colorful market Henry Ford once famously said that his customers could purchase his cars in any color -- as long as it was black.
Today's consumers, however, have many choices, and they're starting to take advantage of brighter, bolder colors on their vehicles. "People are willing to go further with color," says Webb. "Lifestyles are becoming about extremes now -- for example, we're seeing a lot of extreme reality TV shows -- and the same thing is happening to color."
Medium colors, like the midvalue greens seen on cars in the late 1980s and 1990s, have been abandoned in favor of more saturated hues.
"Colors are very bright and chromatic," he says, noting that purples and oranges are finding their way onto vehicles-- even if they're not yet in the top 10. Some 50 percent of vehicles in GM lines have an orange hue available as an option, a color Webb thought would be a flash-in-the pan trend five years ago.
Parker agrees that color is back. "You'll still have blue cars," (No. 5 on the list) she says, "But instead of navy, you'll see cobalt. Greens (No. 8) might be Kelly green."
She says the change will be particularly notable on sport cars and small pickups, where school-bus yellow (No. 10), bright orange and red (No. 6) make dramatic statements.
Even staid silvers are getting a colorful update-- some of them can now be seen with green and silver tints.
Looking ahead While it's likely that conservative color choices will tend to dominate the car market for years to come, Webb suggests that there is a growing interest in more unusual colors.
"People are starting to want to customize, personalize and express themselves," he says. "One of the easiest ways to do that on a car is to change color."
Color Popularity Survey The numbers reflect the percentage of vehicles manufactured during the 2006 model year in North America, as compiled by DuPont.
1. Silver 19% 2. White 16% 3. Gray 13% 4. Black 13% 5. Blue 11% 6. Red 11% 7. Light Brown 7% 8. Green 4% 9. White Pearl 3% 10. Yellow/Gold 3%
Thanks to new technologies and processing techniques, consumers have color choices and options that weren't widely available years ago. One popular trend is colors that seem to change depending on the light that hits it and the angle at which you see it.
"It's amorphous," says Barb. "Is it gray, is it green, is it blue? These are cars that seem to have a little bit of everything." The high-tech hue-shifting finishes have tiny metal flakes, usually aluminum, added to the paints to create the special effects.
Wong believes another paint trend may make a big impact in the near future. "There's a trend toward water-based paints," she says. It may not look any different on the car, but the paints reduce the amount of harmful emissions known as VOCs, which should pique the interest of environmentally conscious buyers.
And if you want to pick a color that's making a comeback? Try a deep, luxurious brown, says Webb, who says that we can thank Starbucks for the reinvigorated color.
"There used to be a lot of negative connotations to brown -- like mud and dirt," he says. "But now it's a color associated with premium coffee and luxury."
He says that the Buick Enclave, a luxury crossover vehicle, has benefited from brown. Its cocoa exterior is the top-seller among its color choices.
Surcina predicts that golden hues like copper and bronze also will be seeing a resurgence in the next two to four years.
While color trends may suggest what's popular for many, Parker recommends buying a color that you love -- not one that everyone else does. "Don't just buy whatever's on the lot," she says. "Order the color you want, because you're going to look at it every day for years. Let it express who you are."
Posted By: Anonymous
Re: New Paint job on a budget thread. - 09/23/0704:24 AM
Quote: "When the light hits it and refracts, it shows off the vehicle's architectural form beautifully."
I would think Mr. Webb should be quite embarrassed that as GM's color designer he has screwed up "reflect" and "refract"
Re: New Paint job on a budget thread. - 09/23/0704:26 PM
Quote:
Quote: "When the light hits it and refracts, it shows off the vehicle's architectural form beautifully."
I would think Mr. Webb should be quite embarrassed that as GM's color designer he has screwed up "reflect" and "refract"
Refraction is probably the right term...
Refraction = The turning or bending of any wave, such as a light or sound wave, when it passes from one medium into another of different optical density.
This gives cause to how the paint job disperses the colors that are picked up by our eyes when the light hits the surface. You have seen how light reacts when it hits a prism and is refracted as the three primary colors.
In a way refraction is the principle behind 'mystic' paint jobs - which give off a totally different color 'depending on how the light strikes it". If you could paint a car with zillions of microscopic prisms, the light refracting off that paint job would give the car a spectrum of colors depending on how the light hits it.
On my GTA for example, I went with a single light sand color and a multiple layer polyurathane gloss coat. Because of this combination the light refracting off the body does highlight the architecture of the body because the refraction of the one color on different parts of the body give off a different color to your eyes when you see it in sunlight. The lower aero effects are at one angle to the ground. They reflect a darker sand color - which compliments the different sand color of the lower portion of the door panels below the side moldings. And yet another color of sand brown is reflected from the various angles of the body above the molding line. So from a one color paint job I end up with a car of ten shades of sand brown - depending on how the sun hits or refracts against those angles.
WHEREAS..
Reflection = The act of reflecting or the state of being reflected or something, such as light, radiant heat, sound, or an image, that is reflected.
So in this case the reflection can be better described as the ability of the surface to bounce back to your eyes an inverse of the entity being bounced off it.
A ball reflects off a wall, your image reflects off a mirror, your image reflects off a highly shiny and glossy paint job.
And the degree of reflection is something that can be scientifically measured. A mirror used for the Hubble telescope probably rates the nearest to perfection at 99.99% reflection ( because it has the highest degree of perfection and the lowest possible amount of defects ).
A normal commercial house mirror probably rates at 90% to 95% true reflection, with variable like glass compared to plastic, and true silver compared to artificial silver explain the wide difference
A car paint job could probably run from 5% to 10% for a satin flat paint job, to about 50% to 70% for a car paint job depending on variables like the color of the paint and the quality of the finish to the outer surface.
Aussie Driver's mirror black Miata for example would equal a 70% reflection, whereas a MAACO stock paint job probably only rates 50% ( during its first month and then it degrades from then on ). My red McLaren probably rates about a 60% - which means I have a lot of room for improving the shine or reflection of light from my car, but only up to the point that the red paint will let me. Black is obviously a better color to create a higher degree of reflection from.
So given all these facts so far.. you can see that a paint job could have a high degree of refraction while at the same time it has a low degree of reflection. For example, you don't get a very clear image of yourself reflected back at you when you put your face up to a 'mystic' paint job.
And as for the satin flat paint jobs... they tend to have both a low degree of refraction and a low degree of reflection. But as a paint job they may have a high degree of 'absorbtion' - in that they absorb the light being bounced off them and bounce back nothing. The ultimate version of 'absorbtion' in paint would probably be the paint jobs that they slap on Stealth Fighters and Bombers. Not only does their paint absorb light, but as well it absorbs radio spectrum (RF) waves and doesn't bounce anything back.
Which reminds me of the time someone was selling 'genuine' Stealth Fighter/Bomber' paint in a small classified ad in Popular Mechanics magazine. The guy was selling it as a way to beat speeding tickets - because once it was painted on the front of your car the radar guns signal would be absorbed and not bounced back to the officer with the handheld radar gun. The FBI and security agencies quickly investigated it and seized all the paint from the guy - and then went and raided and seized all the paint that had been sold to the 'customers'. The paint is a classified / top secret thing and that is why they did not want it falling into the public's hands ( which in turn might have been spies ).
I always thought that was a neat little story that many of our fellow painters might never have heard of but it did sort of tie in to this discussion about refraction, absorbtion and reflection.
Tee hee... I won't bother raising the point about
Diffraction - which is the change in the directions and intensities of a group of waves after passing by an obstacle or through an aperture whose size is approximately the same as the wavelength of the waves.
Whoops I guess I just did...
.
Posted By: Anonymous
Re: New Paint job on a budget thread. - 09/25/0701:03 PM
I'm getting ready for the Rustoleum/mineral spirits/roller method. Did some minor bodywork followed by Rustoleum Professional red primer in a rattlecan. This was a week ago. Last night I wiped down the area with mineral spirits, and some of the primer came off easily. Do I need to be less vigorous with my cleaning, or has the primer not totally cured yet?
Posted By: Anonymous
Re: New Paint job on a budget thread. - 09/26/0712:14 AM
ok I just got done reading a bunch of the first thread, noticed there was a huge 2nd thread, and even a 3rd and gave up. I would like to try this method this weekend and would like to know if I am missing any steps at all.
1)sand with 80,100,200,400 (use a foam/rubber sanding block) 2)paint two coats and wait 12 hours, paint another coat (paint with rustoleum aklyd enamel mixed with mineral spirits so it is almost like water) 3)sand with 600 4) paint two coats and wait 12 hours, paint another coat 5)sand with 800 6)paint two coats and wait 12 hours, paint another coat 7)sand with 1000,then 1500 8)polish with the cheapest turtle wax compound and buffer
*keep sand paper wet with a spray bottle when wet sanding and use a shammy to wipe off extra water.
I've searched a lot for some sort of step by step just so I could print something off to have and not have to remember it all in my head. Did I miss it somewhere?
just found a good guide. It's about using the brightside but the process seems the same. If anyone want's the link, here it is.
Re: New Paint job on a budget thread. - 09/26/0702:08 AM
Wow that white Interlux Brightside on the Bimmer looks fantastic. I cant believe how flat it lays and how glossy it is straight from the can. Im sold on the Interlux Brightside.
Posted By: Anonymous
Re: New Paint job on a budget thread. - 09/26/0705:24 AM
Ok I am just trying to figure out how much of everything I will need before I place an order over at boatersland.com I just have a medium sized sedan so I am guessing that two quarts Interlux Brightside and one quart of Interlux Brushing Liquid should be enough?
Also, sense I will be using the brightside, do I still mix it with mineral spirits as well?
Thanks everyone, and hopefully I'll have some pics up in a few weeks!
Posted By: Anonymous
Re: New Paint job on a budget thread. - 09/26/0701:46 PM
Hi all,first time poster long time lurker.
I am getting ready to paint my 1969 Camaro, and was wondering if any of the Oranges that Brightside, Tremclad or Topsecret sell that might come close to the good old Hugger Orange Chevy was using way back when.
Re: New Paint job on a budget thread. - 09/26/0706:01 PM
Quote: I'm getting ready for the Rustoleum/mineral spirits/roller method. Did some minor bodywork followed by Rustoleum Professional red primer in a rattlecan. This was a week ago. Last night I wiped down the area with mineral spirits, and some of the primer came off easily. Do I need to be less vigorous with my cleaning, or has the primer not totally cured yet?
I found that the initial wiping of the primer with mineral spirits always produced a residue on the rag. The harder I rubbed, the more residue would come off. So I just stopped rubbing so hard. If you had it curing for a week, that is plenty of time to dry. I think the can says 24-48 hours. (if you are in Alaska and its 30 degrees it might take longer.....)
Note that when you are wiping it down, you are just trying to remove any new impurities (anti-stickients?) that might have settled on top of the paint while/after it dried. So its truly wiping, not vigorous cleaning.
I'm hoping to do my next to last coat of Rustoleum tonight. It seems like I've spent MONTHS painting and sanding, mainly because I HAVE! I'm actually apprehensive about the final two coats because if I screw them up then I'm back to wetsanding (again).
Re: New Paint job on a budget thread. - 09/26/0706:18 PM
While I'm at it - here's a question:
I was originally doing Satin black, but I couldn't get the roller marks to level off well on large panels like the hood and roof. So I gave up and switched to gloss (Rustoleum) knowing that I could sand/buff out any final errors, which I would not be able to do with in a final coat of Satin.
But - I still would really prefer the Satin finish over the gloss. A decent satin finish looks like primer and says "work in progress". I'm worried that a mediocre gloss finish will just say "cheap paint job". And my original goal for the car (68 Charger) was to have more of a rat-rod look, anyway.
Here's my question - I'm at the point where I could do two final coats of gloss and start polishing. If I try (instead) another coat or two of Satin at this point, and I still can't get rid of the roller marks, can I just re-sand and proceed with a final couple coats of Gloss and proceed to buffing? I guess I'm not sure what it would look like during buffing if I burned through the final gloss and got down to my aborted Satin coat. If it would end up all splotchy.
Let me see if I can make that more clear. Here's what I have now: 2 coats satin sand 600gt 2 coats satin sand 800gt 2 coats gloss sand 1000 2 coats gloss sand 1000gt
If I used Satin for the final and it turned out OK, I'd be done. Otherwise I'd have to do two more coats of gloss and end up with (in addition to above):
How likely is it that my final Polishing would go through the final two coats and expose the satin underneath? And could I just keep polishing the Satin layer up to the same gloss as everything else?
Am I even making sense?
Posted By: Anonymous
Re: New Paint job on a budget thread. - 09/26/0707:56 PM
Quote:
Quote: I'm getting ready for the Rustoleum/mineral spirits/roller method. Did some minor bodywork followed by Rustoleum Professional red primer in a rattlecan. This was a week ago. Last night I wiped down the area with mineral spirits, and some of the primer came off easily. Do I need to be less vigorous with my cleaning, or has the primer not totally cured yet?
I found that the initial wiping of the primer with mineral spirits always produced a residue on the rag. The harder I rubbed, the more residue would come off. So I just stopped rubbing so hard. If you had it curing for a week, that is plenty of time to dry. I think the can says 24-48 hours. (if you are in Alaska and its 30 degrees it might take longer.....)
Note that when you are wiping it down, you are just trying to remove any new impurities (anti-stickients?) that might have settled on top of the paint while/after it dried. So its truly wiping, not vigorous cleaning.
I'm hoping to do my next to last coat of Rustoleum tonight. It seems like I've spent MONTHS painting and sanding, mainly because I HAVE! I'm actually apprehensive about the final two coats because if I screw them up then I'm back to wetsanding (again).
Wish me luck.
Thanks, Steve. I'll take it easy on the rest of the car ('64 Triumph TR4).
Posted By: Anonymous
Re: New Paint job on a budget thread. - 09/26/0708:20 PM
I know from experience - with Rusto - that you can indeed polish a flat to a gloss. I tested a bit when I painted my Newport, and it was amazing how quickly the flat finish went shiny. And I didn't use a single coat of gloss on the car anywhere, so it wasn't that I polished through.
I sprayed my flat finish, so I can't help you with the roller marks issue, but as above, I can say that you can make a flat into a gloss pretty quickly!
Re: New Paint job on a budget thread. - 09/28/0702:34 AM
just thought i would share a site i ran across that sells the pc polisher and some polishing stuff. they also have some videos of the using it with tips on how to use some of the stuff. thought someone might get soemthing out of it....and no I don't work for them.
Re: New Paint job on a budget thread. - 09/28/0707:21 PM
So I decided to do this paint on a budget thing. First off, I took off as much paint as I possible can. Unfortunately, there was a chunk of old paint that was impossible to take off. I worked on it for hours and it would not budge. I went ahead and painted over it anyways, now I ran into a problem. I think the pictures will tell it all. Does anyone know a cure for this problem? Please help
Re: New Paint job on a budget thread. - 09/28/0707:30 PM
Quote: So I decided to do this paint on a budget thing. First off, I took off as much paint as I possible can. Unfortunately, there was a chunk of old paint that was impossible to take off. I worked on it for hours and it would not budge. I went ahead and painted over it anyways, now I ran into a problem. I think the pictures will tell it all. Does anyone know a cure for this problem? Please help
I am not sure from the pictures what the problem is : It is either :
a) that you can see the original paint below. If so... that is no problem because we all have been able to see the colors below until we build up enough coats to give full color coverage. OR
b) that the original paint is slightly thicker and and it projects further from the surface than the new paint. If so.... that is no problem because as you build up your layers of coats it should all blend together and not be detectable.
Is there something else about the pictures that I am not picking up on ?
.
Posted By: Anonymous
Re: New Paint job on a budget thread. - 09/28/0709:19 PM
Here is the car that I am going to be working on. Just picked this up. It will be painted black with brightside. I was unable to find any sand paper less then 200 and over 1500, will this be a problem? Also, how well should I clean up those rust spots, and with what? Thanks
Wish me luck.
Posted By: Anonymous
Re: New Paint job on a budget thread. - 09/28/0711:06 PM
Whatcha think of this enamel?
One plus on this Enamel is you can get it in factory colors. IE Hugger Orange.:)
Re: New Paint job on a budget thread. - 09/29/0702:47 AM
Quote: Here is the car that I am going to be working on. Just picked this up. It will be painted black with brightside. I was unable to find any sand paper less then 200 and over 1500, will this be a problem? Also, how well should I clean up those rust spots, and with what? Thanks Wish me luck.
You should be able to do the job with sand papers ranging from 200 to 1500.
To do the rust spots ... it depends on the extent of the rust spot...
If the rust spot is simply 'surface rust' that has not pitted too deeply into the metal, I would hit the spot with a 200 grit paper until I could get it down to mostly shiny metal. At this point you could put on a smooth application of bondo to just level the area up and sand it with a finer grit paper to smooth it out, level it to the rest of the surface and to feather the edgesit with the surrounding unsanded areas, so that the repair blends in and doesn't appear obvious when you add paint. You could at this point hit it with a spray primer or go straight to painting over it. Another possibility would be to add a coat of your chosen paint over the fixed area to act as the primer. The idea being that bondo'd or primered areas tend to suck in paint at first. So by priming it with primer or one application of paint, you will seal the worked area so that it doesn't suck in paint when you go to paint the entire panel.
IF the rust has turned into shale or rock... or has gone all the way through the metal.. you should knock out all the material that has gone from metal to that rock like substance. Depending on the size of the hole needing repair or filling there are a number of potential ways to fill in the hole and bring it all level with the rest of the panel surface. There are so many possible ways to go about this that I really cannot do justice to explaining it here. You might just have to do a little bit of Googling to research that topic.
.
Posted By: Anonymous
Re: New Paint job on a budget thread. - 09/30/0701:50 PM
ok, i have just about completed the painting on the doors of my jeep, now i need to start on the hard top. the previous owner decided to use the roll on bedliner on the top and IT AINT COMING OFF, i can live with the textured paint, but need to shine it up some (its faded black now) so my question is, knowing your not gonna be able to sand down to smooth surface, would you mix the paint any different? I used foam brushes on the doors inplace of a roller because of all the nooks and crannies, do you think i could continue with the foam brush or should i switch to a roller for the top?
thanks sorry for the length. catfish
Posted By: Anonymous
Re: New Paint job on a budget thread. - 09/30/0708:00 PM
Hello rollers. I found the original thread via a link from somewhere I no longer recall, and have been reading it off and on over the past year. I'm not a Mopar guy, but that doesn't seem to be a requirement for this thread. Well, recently a roller opportunity presented itself in the form of my '87 BMW 325i race car. Spraying was too messy, and not much cheaper than Maaco. Being that I'm a racer, saving a buck anywhere is paramount. So, I have elected to give this a try. My home PC is currently down, so I can't post pictures just yet. The patient had peeling clearcoat on all the top surfaces which I spent a lot of time removing. The stuff on the hood literally blew off with a little work from the DA. After much sanding, trying to fix the bigger dents (good training opportunity, this) today I was finally ready to 'roll'. A special thank you to Marq for finding Brightside. I elected to go this route because, frankly, the Rustoleum is too labor intensive for a mediocre gloss IMO. Having just put coat #1 on the car, I am amazed with the Brightside. If you can tolerate it's minimal color choice, this paint is the way to go.
One thing I did find was that it is best to make small 'batches' of thinned paint. I got about half the car done and found the paint began drying quite a bit faster, making it more trouble to get the bubbles out. I am very pleased with the finish thus far but have one question: I don't have horrible orange peel or bubble issues, but there are several areas where the paint isn't 'level' because of overlap and so forth. I'm thinking a good wet sand even at this stage may be wise. Anyone have thoughts? Wasted effort or a good idea? Rolling is actually fun! I'll post some photos as soon as possible.
Posted By: Anonymous
Re: New Paint job on a budget thread. - 10/01/0703:37 AM
Well i never got around to showing my progress on my subaru so here is what i got so far... i went with interlux brightside topside paint in saphire blue. Sprayed on with a HVLP gun and a little 2hp compressor.
hood is wetsanded but only partially buffed, but it looks great. project is taking forever now since i only get to work on it during the afternoon on weekends (weather permiting), but im sure hoping to finish before snow fall haha.
Re: New Paint job on a budget thread. - 10/01/0703:47 AM
So I just went to the store to get some bondo to clean up my rust spots, and noticed that there were a few different kinds of the stuff. What kind am I suppose to use?
Also, I saw something there called "rust converter" has anyone used this, and if so, do you think that it will work well for this project? It's a lot cheaper then the bondo, and seems like it would be a lot easier to use also.
Posted By: Anonymous
Re: New Paint job on a budget thread. - 10/01/0711:50 AM
Without knowing the brand of what you are looking at, I'm going to take a stab at answering you. Rust Converter is usually more of a paint type product that you use to coat the rust and stop it from coming back through. This does not remove the need for 'bondo' to make it smooth.
As for body filler, I would strongly advise against using 'bondo' brand filler. It is a cheap product, tends to shrink, does not sand well, etc. Spend the few extra bucks and buy 'real' body shop filler such as Evercoat Rage. I've been using it on my project and it is so much easier to use than the generic junk sold at most K-Marts and parts stores.
Posted By: Anonymous
Re: New Paint job on a budget thread. - 10/01/0702:05 PM
hmm reading the descriptions, I don't really think that that is what it does.
Q: What is Rust Converter? A: Rust Converter is a synthetic polymeric formula that converts existing rust into a moisture free, black protective coating. Not only does it eliminate existing rust, but it seals out moisture to prevent the possibility of future rust formation and corrosion. Surfaces protected with this primer and an oil based paint resist the effects of weather, sunlight, rain and even salt spray without peeling or cracking as long as the oil based paint is maintained per manufacturer's recommendations. Rust Converter provides an excellent base primer for oil base and epoxy paints. This easy-to-use product is the first step in providing long-term protection of steel and iron surfaces.
Q: How is rust converter different than a rust remover?
A: Rather than removing rust, a rust converter mixes chemically with rust to create a black inert substance that can be painted over, concealing the existence of any rust and preventing further corrosion.
Q: Do I need to apply a primer over Rust Converter before I paint? A: No. Rust Converter is an excellent primer for use under all oil-based paints.
Re: New Paint job on a budget thread. - 10/01/0711:51 PM
Quote:
One thing I did find was that it is best to make small 'batches' of thinned paint. I got about half the car done and found the paint began drying quite a bit faster, making it more trouble to get the bubbles out.
I am very pleased with the finish thus far but have one question: I don't have horrible orange peel or bubble issues, but there are several areas where the paint isn't 'level' because of overlap and so forth. I'm thinking a good wet sand even at this stage may be wise. Anyone have thoughts? Wasted effort or a good idea? Rolling is actually fun! I'll post some photos as soon as possible.
I agree about making small batches at a time. I was using the cheapo 4" wide paint tray... and mixing right in the tray prior to use. That little tray could normally get me most of the way around the car. And yes... by about the last panel I would add a taste of mineral spirit to the paint tray to thin out the remaining paint, reclaim some of the paint that had been squeezed out on the ribbed portion of the tray.
If you are finding that the overall surface is not smooth... feel free to throw a wet sand stage in at that point. The key concept to keep in mind is that the smoother the surface as you go along, the shiner and glossier the end coat will be.
Thanks for the kind words about the Brightside.
.
Posted By: Anonymous
Re: New Paint job on a budget thread. - 10/02/0711:27 AM
Marq, you are truly Da Man. If I ever see my PC again (bad power supply, followed by a bad motherboard, and now dead again...)I will be pleased to post photos. Using my work laptop for now.
I wet sanded it yesterday. Between dust nibs and some questionable brushwork I felt it was best to get it smooth again. I used 1200 grit. One of the things that concerns me is when I use the foam brush and 'tip' the bubbles I am getting ripples, sort of like brush strokes you'd see with a regular brush. I'm guessing this is because the paint is hardening before flowing out completely. Would you say I'd just need more solvent in my batch or does my technique need work? I'm using as light a pressure as possible on the brush to remove the bubbles. I'm not dipping the foam brush into anything or cleaning it, just using it as I go. On the 'end' of my batch I could feel the brush starting to drag, and I know what causes that.
I'm starting with the sides of the car. I will do the top, flat surfaces second in the second color (doing two-tone!). I've read that it's best to have the panels vertical but obviously can't do that with the roof. Any tips for getting best results up there? Thin the paint a bit more and plan on extra coats maybe? I do NOT want to sand and buff the final coat if possible as I don't think it ever gets as good of a gloss to it as straight application unless you really spend time on it, which I'm too lazy to do.
Posted By: Anonymous
Re: New Paint job on a budget thread. - 10/02/0711:30 AM
Quote: That sounds like POR-15 or Rustbullet.
Great for sealing your floorpans or trunk pan. I can't imagine using it on the body.
harminoff, read again what the product says it will do. It will not act as a filler to create a smooth surface, it only treats the metal. It is more like a paint. You will still need to use filler over any irregular surface to get it straight.
Re: New Paint job on a budget thread. - 10/02/0705:00 PM
Quote:
One of the things that concerns me is when I use the foam brush and 'tip' the bubbles I am getting ripples, sort of like brush strokes you'd see with a regular brush. I'm guessing this is because the paint is hardening before flowing out completely.
Quote:
My first thought would be to add a touch more mineral spirit to make it a bit wetter. The one thing you did not mention is the temperatures you are working in. The hotter the temperature the quicker the paint will try to cure or at least form a skin.
What I was doing at one point was doing my rolling at 5:30 in the morning at 11:00 at night. I found the early morning roller job worked out better for me because the overall surface temperature of the body was relatively cool.
The 11:00 at night also was fairly successful, because the car body would have begun cooling down from the day time temperatures it had picked up.
So if the simple addition of some more mineral spirits doesn't help to gain the time needed for the paint to fully self level, then give a try to an early morning session to see if you get better results.
Posted By: Anonymous
Re: New Paint job on a budget thread. - 10/02/0709:21 PM
I just finished painting the second coat. I made smaller batches and used a little more brushing liquid, though the first batch was a bit too thin. Live and learn. Actually, I think my problems were multi-faceted. One, I wasn't being quick or aggressive enough with the brush when hitting the bubbles. If I work it more, I can get things levelled out pretty well before it starts to set. I'm getting some really smooth surfaces now. I also did it in the garage this time to avoid getting so much dirt in the paint. It helps, some. The fumes are pretty brutal though, and I still have to work with a door open so I'm not sure how much I'm gaining there. Due to my work schedule I've been doing this in the middle of the day, but you have a good point with the temperature. However, it's also potentially more humid early in the day from overnight, so I'm not sure it will make much difference? I may be willing to try an early morning hit on the last coat. Unless it really cools off in the evening, I'm afraid I'll get moths and bugs in the shop with the door open. With the 2nd coat, it's looking really good. My only issue now is excessive buildup on the edges of the doors where the roller overlaps. I'll have to try opening the doors and being a bet more conservative at the ends. I'll probably just wet sand a few of the flaws this time and not the whole job. Tip: don't try sticking your tack cloth back in the wrapper while holding it over your freshly painted surface.
Posted By: Anonymous
Re: New Paint job on a budget thread. - 10/03/0702:49 AM
I've been following this topic for an extremely long time. I did a lawnmower hood over a year ago, ended up rushing it and by 3 coats it was completely covered and was orange peeled like crazy.
I've learnt a lot more since then and I've started doing my own bodywork. I'm about to start painting my 74 Nova SS and I'm using the old hood I had on it as a test piece.
I'm using Tremclad Dark Blue.
1st Coat(too thick. I wetsanded it down before continuing)
1st Coat Wetsanded:
2nd Coat:
The lighting really worked out well in the picture of the second coat. That's the colour it actually looks like. The pictures of the first coat turned out way lighter then they actually were.
BTW, I wetsanded using soapy water with 400 grit paper to knock down the extra thick 1st layer. I'm planning on using 600 from now on. 400 Cut's through overdone paint pretty easy. I wouldn't consider using it after the 2nd coat.
I found the best way to mix the paint is "Thin it as much as your comefortable with then thin it some more." I was way to heavy the first time and probably could have thinned some more on the second. I never took a close up yet but you still can see the primer underneath through the 2nd coat.
Posted By: Anonymous
Re: New Paint job on a budget thread. - 10/03/0703:39 PM
In addition to this site, I also like monitoring other roller sites. One can always pick up something new. Anyway, here's one site I've been looking at. It's a British VW van forum called Club 80-90. They have a WIKI describing the technique using Rustoleum. I find this very strange because there in Britain they already have access to a paint called Tekaloid. It�s designed to be brushed on cars. They also mention using Brasso as a polish. (I tried it but found it too messy.)
Re: New Paint job on a budget thread. - 10/04/0703:41 AM
glad i took some good pictures 5 months ago (yeah, it took 5 months but i did a pretty heavy restore job on the body/interior/engine in that time) for before and afters
tomorrow i plain on giving it a good wash and do a little photo shoot with my crappy camera
Posted By: Anonymous
Re: New Paint job on a budget thread. - 10/04/0709:06 PM
I can tell my paint (brightside) is beginning to cure just fine. I will be attempting to polish soon. Cant wait to see what it looks like afterwards!
Lots of people have been amazed.
Posted By: Anonymous
Re: New Paint job on a budget thread. - 10/04/0709:44 PM
Re: New Paint job on a budget thread. - 10/05/0701:58 AM
After reading this thread I decided to try the roller route. I just needed some paint on the roof so I could put the vinyl on so I thought it would be a good chance to try it out. I put on the first coat this morning. the pictures hide all the flaws it didn't look as good in person. I'll keep you all posted. Thats my dad laying down the paint.
Posted By: Anonymous
Re: New Paint job on a budget thread. - 10/05/0702:33 AM
Has anyone tried to put metal flake in their paint? I have a dune buggy I am painting and wondered if it's possible?
I know House of Kolors sells metal flake for integrating into spray paint jobs, just wondering if it would work for this process?
Posted By: Anonymous
Re: New Paint job on a budget thread. - 10/05/0705:14 AM
I'm curious about using tremclad clearcoat at the end with metalic flake in it. I'm not paint pro I'm starting from the bottom and learning from the internet how to do almost all of it. But it sounds like it would make sense to me.
Here's the 3rd coat:
Here's a direct shot:
You can see my dumb mistake in the direct shot. A fairly large piece of "fluff" landed on the paint right before I took the picture. It had already been on there for around 6 hours. It's pretty much dry but without thinking I swiped my fingers across it and left the rub marks.
So far the only way you can see the imperfections is if you get within 5 feet of the car and you look straight at it. From the side it looks amazing! It will definately be worth the investment if my whole car turns out this good. With the improvements I'm making from learning as I go this might just turn out really good.
A test piece is definately a must. I'm a little worried about runs. I haven't done anything vertical yet. We'll see how that goes on the car.
Posted By: Anonymous
Re: New Paint job on a budget thread. - 10/05/0702:50 PM
Metallics don't work with a roller. The metallic elements need to be evenly distributed throughout the coat for it to look right. With a roller, the particles will inevitably end up at the edges of each roller stroke, leaving a stripey effect. trying to even them out will likely make it worse as you'll end up overworking the paint. It gets even worse on vertical panels, as gravity drags the paricles down. When they're sprayed, the paint is dry enough when it hits the panel to prevent them flowing, and to keep them in place.
Even when sprayed, it's easy to get a tiger-stripe effect with metallics, with the edges of each spray stroke becoming visible if the strokes aren't just the right weight.
Metalflakes may act differently - as the flakes are larger than regular metallics/pearls, maybe they'll be less inclined to stripe, but I somehow doubt it.
With any flake job, you've got to put on a LOT of clearcoat to cover the flakes, and a LOT of wetsanding to flatten it all back again.
As with anything - maybe try a small test panel first and see how it works. Make sure you do it horizontally and vertically to get the different effects of gravity on the paint.
Posted By: Anonymous
Re: New Paint job on a budget thread. - 10/06/0702:00 AM
well, I am polishing now the top, I did a test on the cowl a few days ago and it looks awesome!
Pictures: polishing the roof
polishing test panel
and this will be the NEXT car to be get a few coats of Paint, and the Suburban behind will be after that:
Posted By: Anonymous
Re: New Paint job on a budget thread. - 10/07/0705:30 AM
Hi, I have been really wanting to do this, but I have been on a really tight schedule
But finally I have 8 days off and would love to get started on my Jetta
But I am wondering if it is even possible to do this in 8 days
I have all the supplies ready, Just need to start sanding my car and apply around 6 coats
How long would that take?
Thanks ( amazing thread btw )
Posted By: Anonymous
Re: New Paint job on a budget thread. - 10/07/0712:57 PM
I am using Brightside, so YMMV. It takes me about an hour to an hour and a half to do half my car (this is because I'm doing 2 tone). The application process isn't that bad, because you have to work pretty quickly and constantly with the roller/brush method. I can basically do it in an evening with no trouble. Sanding between coats probably takes the same amount of time, depending on how much you need to do. So I sand, then wash the car and let it dry as long as possible to it gets out of the crevices. Maybe do that in the AM. After lunch, paint the car. Let it dry 24 hours, then repeat. Depending on the paint and methods used, you may not have to sand between every coat, so 8 days really shouldn't be a problem. This, of course, depends on how much prep work you have to do prior in dent/rust repairs or removing dead clearcoat. Sanding the entire car with a DA and removing the clear from the top surfaces, masking, removing trim parts, etc was probably 2-3 evenings of work. Then I spent another week of evenings fixing dents and stuff and trying to get things as straight as possible. THAT is the time consuming part, and depends on your level of perfectionism as to how nice you want the car to look. This is the part you should spend the most time on for the best results. I find the paint application process much easier. If you use Brightside, the extreme gloss will amplify every flaw in the body. Panels I thought were straight, aren't. In my case, it's just a road race car and will probably get dented up anyway, but for a street car I can't emphasize the bodywork stage enough if you're going to be particular and want it to look like, say ChargerYeehaw's car.
Posted By: Anonymous
Re: New Paint job on a budget thread. - 10/07/0704:15 PM
Pictures outside, paint has been wetsanded to 2000 grit, polished the top and one cowl panel, will polish it completely soon.
I still have to prepare and paint the tail spoiler and front section of the car.
Posted By: Anonymous
Re: New Paint job on a budget thread. - 10/07/0705:26 PM
Quote: I am using Brightside, so YMMV. It takes me about an hour to an hour and a half to do half my car (this is because I'm doing 2 tone). The application process isn't that bad, because you have to work pretty quickly and constantly with the roller/brush method. I can basically do it in an evening with no trouble. Sanding between coats probably takes the same amount of time, depending on how much you need to do. So I sand, then wash the car and let it dry as long as possible to it gets out of the crevices. Maybe do that in the AM. After lunch, paint the car. Let it dry 24 hours, then repeat. Depending on the paint and methods used, you may not have to sand between every coat, so 8 days really shouldn't be a problem. This, of course, depends on how much prep work you have to do prior in dent/rust repairs or removing dead clearcoat. Sanding the entire car with a DA and removing the clear from the top surfaces, masking, removing trim parts, etc was probably 2-3 evenings of work. Then I spent another week of evenings fixing dents and stuff and trying to get things as straight as possible. THAT is the time consuming part, and depends on your level of perfectionism as to how nice you want the car to look. This is the part you should spend the most time on for the best results. I find the paint application process much easier. If you use Brightside, the extreme gloss will amplify every flaw in the body. Panels I thought were straight, aren't. In my case, it's just a road race car and will probably get dented up anyway, but for a street car I can't emphasize the bodywork stage enough if you're going to be particular and want it to look like, say ChargerYeehaw's car.
Thanks alot man, that really helped
I'm just wondering, Don't you have to wait 24 hours for the paint to dry before you wet sand?
Posted By: Anonymous
Re: New Paint job on a budget thread. - 10/07/0707:42 PM
WOW !
after using PoorBoys swirl remover 3, I am amazed ! I still have to use the softer swirl removers, waxes and sealant and I am truly impressed now.
Posted By: Anonymous
Re: New Paint job on a budget thread. - 10/08/0711:38 AM
Quote:
I'm just wondering, Don't you have to wait 24 hours for the paint to dry before you wet sand?
Yes, I strongly suggest waiting 24 hrs, though I've been able to wet sand after the manufacturer suggested 18 hrs. It depends somewhat on the climate you're working in, and if you can let the thing 'bake' out in the sunshine after the tackiness is gone (do it before, and you'll gain many new surface variables called bugs, grass and general debris).
Sergio, that Mustang looks amazing. You do good work.
Posted By: Anonymous
Re: New Paint job on a budget thread. - 10/08/0712:35 PM
Hello Everyone! I have a few questions since I started my paint job a few weeks ago. I finally got my paint to lay down like glass with a mirror like finish, BUT, if was approx. 75% mineral spirits and 25% Brightside. After reading everyone else's posts about 10% mix or even right out of the can, I thought this was excesssive. Anything above this mix (which I stumbled on by accident) leaves orange peel. FYI, I am in Florida and it has been hot and humid. Also, I am on coat 8 with wet sanding in between all coats.
Thanks for all the great posts!
Posted By: Anonymous
Re: New Paint job on a budget thread. - 10/08/0707:01 PM
I cant find any Sandpaper anywhere
Rona doesnt have anything higher than 600
Home depot is the same deal
Lordco sell all the papers but in Packages which cost 5$ each
Where did you guys buy your sand paper??? I should of started sanding down the car about 2 hours ago
Re: New Paint job on a budget thread. - 10/08/0708:19 PM
RCCS,
I used Rustoleum, but AussieDriver had good luck as well with adding Penetrol to the mixture. My mixture of paint to Penetrol was 50/50 with a touch (unmeasured) of mineral spirits. This was for Rustoleum, mind you, so Brightside may not need any mineral spirits. I can't say enough about Penetrol. I got it at Home Depot. I believe Poorbugr (or something similar) discovered it back in the first thread and it was well worth it for me. I live in Virginia and when I was painting it was hot and humid like it probably is in Florida... I did paint in the shade so I'm sure that helped.
Posted By: Anonymous
Re: New Paint job on a budget thread. - 10/08/0708:32 PM
Thanks for the input Tett.
I too have used the Penetrol but probably was not mixing enough in. Probably 10% or so and then some mineral spirits. I was a little hesitant to mix more than 10% of anything due to the directions on the can of Brightside, but 75% mix with mineral spirits seems to work best.
My biggest concern was lack of gloss or durability by thinning the paint so much, but after a good wet sanding it seems to be holding on very well.
Posted By: Anonymous
Re: New Paint job on a budget thread. - 10/08/0709:04 PM
I could only find the sandpaper at auto body suppliers or better auto parts stores. I had to buy a 5 sheet pack, but I'll probably use all of it. Hardware and home improvement stores don't seem to carry it as it's not really useful for woodworking.
Posted By: Anonymous
Re: New Paint job on a budget thread. - 10/09/0712:15 AM
Re: New Paint job on a budget thread. - 10/09/0701:23 AM
Well, I have some thoughts on Mr. Slade's thoughts. In some parts, I agree. I do agree that spraying is faster. I do agree that spraying is less sanding and elbow grease. And I do agree that spraying is not rocket science either. I have also been to Slade's website prior to discovering the roller method.
But, there are several reasons that I so much enjoyed this roller method. To begin with, I was actually willing to do the roller method. I do not have a garage, just a shed. Having painted the exterior of the shed itself with an airless sprayer, my shoes and the plants all around the shed have a vivid understanding of the term overspray. I wasn't willing to take the steps necessary to prevent that again. I do not know anyone with a gun/compressor setup to borrow, and I didn't feel like renting one. Call me irrational, it doesn't bother me. It's my right as an American, and not worth getting upset over. I mean, there are people out there who bought AMC Pacers and more power to them. What I did have on hand was an old door I borrowed from my cousin, a 12 x 12 shed, and the financial ability to purchase the less than $50 worth of material to paint the door. Also, I already had a Porter Cable Polisher, and given the method, got plenty of opportunities to use it as both a sander and a polisher.
This method worked very well for me. I learned a lot about paint, a lot about prep work, a lot about polishing, and a lot about sanding. I really like not having to mask off the whole garage and my face so I don't get paint in my nostrils. It just suits my schedule also, though I could get spraying to suit the schedule also. More than anything, I am now confident that if I wanted to spray, I could do so. Painting is not magic, but you would think it is by the way some people talk about it.
Case in point: I posted a question about filler elsewhere on this board as I was prepping the door. I even put in the thread that it was for a practice door. I don't even have a car I'm going to paint. One of the responses I got was, to paraphrase as best I remember, "Have you ever painted a car before? Let someone else do it." Trying to be helpful, I'm sure, but I just wanted to do it myself. How else do you learn to do something?
Plenty of folks on here have not liked rolling. Supercobra Sergio is the most recent one I can think of because he posts those nice looking pics. He likes spraying better and we like his results. I like your results too, Mr. Slade. I also recall David Thompson did not like the time necessary to do this and ended up spraying his car and liking the results. Many of the points Thompson made I agree with. I also remember a guy with a Grand National who sprayed. One nice thing is that most everyone is getting off their butt and putting some paint on.
You mention Rick Wrench's site in order to get the "whole story". His page also mentions that he is sold-very- on this method of application. It works for him.
So, I did something I probably would not have done otherwise because of the information here, and someday I may spray too, depending on my circumstances. If that makes me a lemming, then I've learned a lot as a lemming and choose to remain one while I pick up some other skills I want to learn.
Spray on,
Tett
Posted By: Anonymous
Re: New Paint job on a budget thread. - 10/09/0702:44 AM
I've been reading many pages from this thread series. My 300D has a pretty bad sunburn going on, so I'm getting ready to try this for myself.
Major question though! How long should I wait after polishing/waxing to drive the car?
Posted By: Anonymous
Re: New Paint job on a budget thread. - 10/09/0703:18 AM
Quote:
In regards to the popular $50 Rustoleum method, Why anyone would actually want to do this-- knowing anything about the labor involved, and the durability of non-automotive paint to cover a vehicle-- well, I just can't quite understand.
Here is my main page
Spam alert . For only $9.95 Neil will send you the secrets to painting a car...
Thanks for the heads up, Neil.
Posted By: Anonymous
Re: New Paint job on a budget thread. - 10/09/0703:24 AM
After polishing/waxing? - Drive it immediately.
After painting, however, you may want to wait until the paint cures before you sand, polish, wax or drive it. Exactly how long will depend on a combination of the temperature, and humidity of the air it dries in.
Posted By: Anonymous
Re: New Paint job on a budget thread. - 10/09/0703:57 AM
Quote: After polishing/waxing? - Drive it immediately.
After painting, however, you may want to wait until the paint cures before you sand, polish, wax or drive it. Exactly how long will depend on a combination of the temperature, and humidity of the air it dries in.
Hmm, ok. I was gathering from charger's posts that the time between the last paint coat and wetsanding would only be about as long as it took the paint to dry. (24 hours?) Then I also remember reading that the paint doesn't fully HARDEN for 2 or 3 months.
I live in Florida so I guess I'm at a disadvantage, eh? I can wait for up to a week before driving, but hopefully no longer.
Posted By: Anonymous
Re: New Paint job on a budget thread. - 10/09/0705:01 AM
I live in Canada, and it gets pretty cold here, specially during the night
How long should i be expecting to wait until i'll be able to drive the car after the last coat?
Posted By: Anonymous
Re: New Paint job on a budget thread. - 10/09/0711:58 AM
Slightly OT: I don't get the haters. If someone wants to spray their car, good for them. It is the better method. Not everyone has the money, tools or equipment to do that. These 3 threads have proven that rolling is a viable alternative, and convinced me to give it a whirl, and I've sprayed cars in the past. I like rolling.
Back OT: the paint needs time to cure, which pretty much means the solvents have to evaporate and allow the finish to harden. The bulk of this will take place over 24 hrs, but complete hardening will take weeks to accomplish. More heat means faster drying time. Remember, body shops use heat lamps and ovens to 'bake' the finish. So your Florida M-B should be ready to drive within 24-48 hrs. However, you won't want to wax or polish the finish for probably 2-3 months. Waxing it will seal the paint, and you don't want that right away as it's still going to be evaporating solvents for awhile.
As for way up north, I'd keep the thing in a heated environment for the 24 hr period (or a little longer and keep it as warm as possible to speed the initial curing.
Posted By: Anonymous
Re: New Paint job on a budget thread. - 10/09/0712:38 PM
My thoughts exactly and then some. The hardest (and most frustrating) part of the roller painting method is experimenting and getting the right mix and right 'feel' for applying the paint.
I am on week 2 of my project and after 6 coats and 6 wet sandings have finally started to get the hang of it. Once you do, the paint will lay on like glass and will equal and even exceed most factory or aftermarket spray jobs. If you go one 1step further, such as Aussie Driver, Marq, and others have done with the focus on polishing, your paint will be both flawless and stunning with a mirror like finish. I finally did a panel this way yesterday with compound and then polish, and was absolutely blown away with the finish. My negative neighbor who happened by and has a car being painted as we speak, ($6000.00) worth, was actually speechless.
Bottom line is this for naysayers or those who feel intimidated. It works, and it works well, and it is very inexpensive. The whole key is time and patience, and you should really practice on an old fender or deck lid before starting (I didn't).
The most rewarding part of this (other than having a spectacular paint job), is knowing I did it and there are no issues with the paint or body, and I saved $4000.00. Again, practice, practice, get frustrated, and practice, and eventually you get the hang of it. Once you do, your confidence level will soar and you CAN do this.
A few lessons learned:
1. Buy good sand paper such as 3M. Stay away from the junk Harbor Freight sells, it aint worth it.
2. If painting outside (NOT RECOMMENDED), any flying insect within 10 miles will sniff out your freshly laid paint.
3. If you get orange peel, sand and then next coat thin it down more. I had to go 75-25.
4. Wet sanding is no fun but necessary to properly prepare your vehicle for each coat.
5. After much research on these boards and other searches, I chose Brightside paint. After researching, I came to the conclusion that it is probably a better paint to use than sprayed auto paint due to its repairability, UV resistance, and Teflon additives.
6. It has cost me about $200.00 to do a very large vehicle. $140.00 for paint and $60.00 for chemicals, rollers, and sand paper.
7. Work neatly and have a well laid out area with plenty of room.
So bottom line is: stay focused, be patient, and don't be discouraged. Naysayers tend to really motivate me and take things one step further. I am extremely pleased and self satisfied with my roller job and will post pictures early next week to hopefully motivate others who may be apprehensive about the roller method.
Posted By: Anonymous
Re: New Paint job on a budget thread. - 10/09/0712:43 PM
Quote:
I was gathering from charger's posts that the time between the last paint coat and wetsanding would only be about as long as it took the paint to dry. (24 hours?) Then I also remember reading that the paint doesn't fully HARDEN for 2 or 3 months.
I live in Florida so I guess I'm at a disadvantage, eh? I can wait for up to a week before driving, but hopefully no longer.
To drive, you just need to make sure that it is hard enough that bugs and such do not embed themselves easily.
Park that puppy in the Florida sun for a day or two and and I'll bet it will be hard enough to drive with.
If it still worries you, stay below 55mph. In my experience, the amount of bug strikes seem to increase exponentially for every mph faster than 55. Heh. Now, that would be a good research project...
Just give it plenty of time to fully cure before trying to seal it for the reasons mentioned above.
Posted By: Anonymous
Re: New Paint job on a budget thread. - 10/09/0706:31 PM
Haha, ok that sounds good. Thanks guys. I'll post some pics once I get going. I recently had to get a door replaced (don't ask ), so I guess I'll do some testing on the old one.
Re: New Paint job on a budget thread. - 10/10/0703:08 PM
After:
Posted By: Anonymous
Re: New Paint job on a budget thread. - 10/11/0701:16 AM
Congrats, Steve, looks good. Nice gloss. Is that Rustoleum or Brightside?
Posted By: Anonymous
Re: New Paint job on a budget thread. - 10/11/0703:00 AM
I wanted to share my project, Rustoleum #2 water coop. Before pic.
Posted By: Anonymous
Re: New Paint job on a budget thread. - 10/11/0703:02 AM
And after 1/2 quart of Rust-oleum Yellow with brush and roller, cheapo $9.00 gravity gun and 3 coats of Nason (Napa, get the good stuff place) clear. Thanks again to all who have posted and helped me.
Posted By: Anonymous
Re: New Paint job on a budget thread. - 10/11/0703:09 AM
One more pic to show the results that the clear added.
Posted By: Anonymous
Re: New Paint job on a budget thread. - 10/11/0704:46 AM
Quote: Well, I have some thoughts on Mr. Slade's thoughts. In some parts, I agree. I do agree that spraying is faster. I do agree that spraying is less sanding and elbow grease. And I do agree that spraying is not rocket science either. I have also been to Slade's website prior to discovering the roller method.
Plenty of folks on here have not liked rolling. Supercobra Sergio is the most recent one I can think of because he posts those nice looking pics. He likes spraying better and we like his results. I like your results too, Mr. Slade. I also recall David Thompson did not like the time necessary to do this and ended up spraying his car and liking the results. Many of the points Thompson made I agree with. I also remember a guy with a Grand National who sprayed. One nice thing is that most everyone is getting off their butt and putting some paint on.
Spray on,
Tett
I did try the roller method, I found it to be fine, I am sure I could get the hang of it after some practice, keep in mind that I have never painted anything before in my life, (well, except when using a few spray cans to paint the engine bay), but nothing mayor.
I already had a small compressor, I just went to Harbour freight, looked around and bought the cheapest HVLP gun there (11 dollars).... willing to give it a try just to make the painting process faster, started painting a few other things and found that it goes on much easier than rolling. I also painted all these items and the Car outside on my driveway, with the first coats of Rustoleum (remember I am putting 2 coats of Rusto and then 3 coats of Brightside ontop of the rustoleum after wetsanding it, then wetsanding it again, 1000-1500-2000), I was getting a few mosquitoes around after painting with Rusto but no bugs when I sprayed Brightside, I figured what is happening: Mosquitoes get attracted by the Mineral spirits but not by the Penetrol, I use Mineral spirits to dilute the Rusto and Penetrol to dilute the Brightside. There's not a lot of overspray, the HVLP gun does a neat job of directing very small amounts of paint onto the car's surface, very very small quantities of paint, I needed to put 2 coats of Rustoleum and 3 coats of brightside, then after wetsanding in the wrong places (edges) I had to go and put another coat just over those spots.
Again, I do like the rolling method BUT I have 3 cars to paint and not enough time to work on them ! so Spraying is a lot easier (for me). I am almost done with the Mustang, next is the Legacy GT (going ALL black on that one) and the Big Suburban (gonna do a 2 color paintjob on it). On these 2 vehicles I am staying with ALL Rustoleum to make it cheaper, but I am going to dilute it with Penetrol instead of MS. (Have to do a test first, see how it flows).
Posted By: Anonymous
Re: New Paint job on a budget thread. - 10/11/0709:24 AM
You sprayed clear over Rustoleum? Details, please. Was this Napa branded paint? Was it in a spray bomb or can? Did you rough up the rusto first? Roller, brush or spray?
People have been asking about clear-coating rusto since day one.
Re: New Paint job on a budget thread. - 10/11/0712:54 PM
Quote: Congrats, Steve, looks good. Nice gloss. Is that Rustoleum or Brightside?
Rustoleum.
I have good gloss everywhere except the hood, but I think it will buff out fine.
Posted By: Anonymous
Re: New Paint job on a budget thread. - 10/11/0702:19 PM
Quote: You sprayed clear over Rustoleum? Details, please. Was this Napa branded paint? Was it in a spray bomb or can? Did you rough up the rusto first? Roller, brush or spray?
People have been asking about clear-coating rusto since day one.
First some background...I can't paint. after reading this thread for 4 days straight this spring, I thought I would give it a shot with a brush and roller. I had great results and people on the lake can't believe I didn't spray the ski. That was ski #1 below. The first ski was done just like the origional formula, sand, paint, wetsand and buff. I used a little rattle can red for the hard to reach areas. The yellow one above is my 2nd ski I painted using the 69charger method (thanks again 69Charger). The only thing I hated was the buffing all the curves, small areas, etc... it took a LOT of time.
So I painted the yellow ski above the exact same way but I didn't buff it. I just left it wetsanded smooth, flat and dull looking. I ran down to Napa auto and bought a quart of Nason clear and a pint of hardner and mixed a 4:1 ratio. I cleaned the ski, tacked it and shot a coat of clear. I waited about 10 minutes and shot another and the last coat was about 15 minutes after that. I can't tell you how happy I am with the results. This spring I will shoot clear over ski #1 (below) including the graphics.
Yes sir, Nason clear works fine, is cheap ($36.00 for the clear and hardner). I will spray Nason clear on my next project. BTW, I tried spray bomb clear and hated it.
Re: New Paint job on a budget thread. - 10/12/0705:50 PM
I have rolled with brightside and used penetrol & mineral spirits to thin the paint. I did not think that penetrol actually "thinned" the paint by reducing the viscosity, unless I didn't use enough. When spraying the penetrol+brightside mixture, what dilution rate did you use? I am thinking of trying to spray brightside and am wondering how much to thin brightside to get it to spray good.
Posted By: Anonymous
Re: New Paint job on a budget thread. - 10/12/0710:21 PM
Quote: rustoleum satin black, the one with the patio furniture on the can.
Sweet!!, I'm still loving my Satin Job as well. Looks MEAN.
Posted By: Anonymous
Help w/ 6th coat of Brightside on my truck - 10/12/0711:18 PM
I'm going to be applying my 6th and last coat of Brightside tomorrow morning. I've used a 5% dilution w/ 333 for the last 3 coats (10% for the first 2). I've read that for best gloss the last coat should be undiluted. What is the downside to doing this? Are there more problems with lines? Is there anything I should know before doing this
My 5th coat is pictured.
thanks,
Mitch
Posted By: Anonymous
Re: New Paint job on a budget thread. - 10/13/0705:44 PM
So I finally started working on my car, I started sanding it down today with my Electric sander with 80 grit, because theres 4 layers of paint on this car, its really a pain in the [Edited by Moparts - Keep it clean] to get to the primer, so I tried using a belt sander with 80 grit again and it worked well, but in some places I actually got to the baremetal and now I see shiney spots all over
Do I have to primer the car where I reached baremetal or can I just use Tremclad paint right away
Thanks
Posted By: Anonymous
Re: New Paint job on a budget thread. - 10/13/0706:15 PM
Actually one more question
Do I even have to sand the whole car to the last paint layer...Can I just use 80 to roughly go over the car and then 220 and call it a day
Posted By: Anonymous
Re: New Paint job on a budget thread. - 10/14/0701:28 AM
Quote: I have rolled with brightside and used penetrol & mineral spirits to thin the paint. I did not think that penetrol actually "thinned" the paint by reducing the viscosity, unless I didn't use enough. When spraying the penetrol+brightside mixture, what dilution rate did you use? I am thinking of trying to spray brightside and am wondering how much to thin brightside to get it to spray good.
I used what is recommended on the Penetrol Can: 30%
Posted By: Anonymous
Re: Help w/ 6th coat of Brightside on my truck - 10/14/0712:36 PM
Quote: I'm going to be applying my 6th and last coat of Brightside tomorrow morning. I've used a 5% dilution w/ 333 for the last 3 coats (10% for the first 2). I've read that for best gloss the last coat should be undiluted. What is the downside to doing this? Are there more problems with lines? Is there anything I should know before doing this
Gee, 6 coats? I did my car in white with 4! Lines--you mean lines from the roller edge? That's too much paint going on to the surface in one place. What I do to combat that is if I get a line, I go over the spot with the roller repeatedly applying very little pressure until the paint spreads out. The idea here is to not add any more paint to the surface, just work out what you've got on it. I have diluted all of my coats about 10% and wound up with excellent gloss. I would be hesitant to not dilute at all for the final coat because I think the brushing liquid aids the paint in laying flat and hiding your brush strokes. I've gotten excellent results on most of my panels with few brush strokes and only minor orange peel. The gloss level is extremely high.
Posted By: Anonymous
Re: Help w/ 6th coat of Brightside on my truck - 10/14/0710:23 PM
Thanks. Maybe if I had primed better I would have been able to get by with fewer coats. I don't think I was using much paint b/c I had to push fairly hard on the roller to get it to coat the surface. Also I was painting on mornings that were ~ 55-60 (and the truck was probably cooler), this may have thickened the paint some.
I had problems trying to paint some of the less accessible areas well with the foam brush. Thought maybe one could cut a roller, so that it length is reduced by about 3/4. Cut the metal arm also and use this modified setup for those places.
Posted By: Anonymous
Re: New Paint job on a budget thread - 10/14/0710:32 PM
Re: New Paint job on a budget thread. - 10/15/0712:27 AM
I hope you are done with that paint on the mustang! It looks to mean to mess with! This is what my charger will look like!
Posted By: Anonymous
Re: New Paint job on a budget thread. - 10/15/0707:45 PM
hey what color red did u use? and does it have an "orange" shade to it or is it like a deep dark red? thanks
Posted By: Anonymous
Re: New Paint job on a budget thread. - 10/16/0712:52 AM
Keeping it like it is, I love the satin look, and people actually think it is a "final" paint job. Maybe once I fall into a few grand I'll paint it proper. I'm kinda bored of "nice" paint jobs, every yuppie baby-boomer has one.
Quote: I hope you are done with that paint on the mustang! It looks to mean to mess with! This is what my charger will look like!
Posted By: Anonymous
Re: New Paint job on a budget thread. - 10/16/0711:38 AM
The last coat...everything looking beautiful...and then I pulled the tape off: Expletive, expletive, expetive. I know what happened: I got water under the tape from the wet sanding, and it caused the paint to lift. It's pretty apparent on the opposite fender. I have this bit of happiness to deal with on 3 of my panels. Presently, I'm resisting the urge to set the car on fire. Anyone performed any repairs on their finish yet? I'm wondering what the best way to go about this is. My thought is to DA this nightmare and try to feather the paint edge, then maybe just apply a coat or two on the area with the foam brush until I get coverage, wet sand it (NO TAPE!) and then roll on the final two coats. Marq? You out there? Aside from this tremendously deflating disaster, the car actually looks pretty darn sweet (before pulling off the tape/plastic):
Re: New Paint job on a budget thread. - 10/16/0704:59 PM
All I can say is don't give up! I had a setback when I final sanded a corner right through to the prime. I didn't realize that 1500 grit sandpaper on a corner is disaster in the waiting. And like you, mine was where the two colors meet, so I had to feather and repaint both colors.
But I kept trudging along, and today I have met my golas: I set out for a 5 foot paint job for under $250, and I got an OEM equivalent paint job for a little over $300.00 including the body putty and tools.
Hate to say it, but you gotta bust out the sandpaper and primer and get at it again. But do yourself a favor and DO NOT HURRY!
Posted By: Anonymous
Re: New Paint job on a budget thread. - 10/16/0706:40 PM
so sorry to see this !
One word of advice: use BLUE tape ! It comes off easier, maybe avoiding this very thing.
Re: New Paint job on a budget thread. - 10/16/0709:11 PM
I found that wiping the tape with a cloth dampened in mineral spirits as you removed it helped as well. Once you get the tape lifted at one end, wipe the adhesive side in the direction you are removing the tape.
Re: New Paint job on a budget thread. - 10/17/0712:10 AM
Quote: The last coat...everything looking beautiful...and then I pulled the tape off:
Sheeet happens. But not all is lost. The beauty of your paint job is that you can simply re-roll the area back up to level of the rest of the panel... with appropriate sanding between coats to work the edges together. And once you get it up to a point where it has successfully merged physically and visually... just go and give a light sanding to the entire section and lay one final coat over the section being worked on.
That is one of the nice things about the roller method... in that booboo's like this are completely within your ability to repair. No need to rush to the body shop where such a booboo on a 'real paint' job would cost $800 bucks or more to repair. Instead, you take a little time, your handy tray of paint and your trusty roller and you can remedy the booboo yourself.
But I must admit it is a bit of a bummer when something boggles up what appears to be an otherwise successful paint.
But also think of it this way... booboo's happen in parking lots where some lunkhead might back into a door and scrape the paint... or some jerko kids might run a key on your paint job. The difference now is that it is just going to cost you a bit of time to remedy instead of having to take out a bank loan to restore things back to the level you had it at prior to the booboo.
One thing you should take note of :
a ) don't ever use that brand of body tape again. It sounds like it has a nasty and unforgiving adhesion. Get the good stuff through a body shop jobber or auto parts depot. Don't buy any automotive tape that says 'Made in China' or 'Made in Mexico'
b ) I agree with the other suggestion about running a cloth dampened with mineral spirits on it to try to weaken the adhesion of the tape. BUT sometimes the outer layer of the tape is fairly impermeable, even by mineral spirit. In that case you have two possible alternatives...
a ) leave the car out in the bright hot sun and hopefully the heat of the sun will weaken the adhesion factor of the tape... OR b ) take your wife's blow dryer and gently heat up the tape as you try to remove it. Again the idea being to lessen the bond of the tape to the paint.
Good luck...
marq
Posted By: Anonymous
Re: New Paint job on a budget thread. - 10/17/0712:44 AM
Ya I've had that same thing happen to me once I was painting my Civic (paint coming off cuz of tape).
I was using this green painters tape that was good for 8 days it claimed. As you did, I wetsanding and painted with that tape on all the time, what a big mistake.
Things to take note of...
1. You better peel the tape off slowly once you are done painting. Because once I pulled, the paint started to rip at every edge where the tape was. Thats why when you look at my edges, some of the paint is stripped.
I still have to final wetsand and final polish next summer so it will be gone by then.
I painted this summer and wanted to polish this summer also, but along came school so final polishing I will do next summer since theres no point as it feels like Winter.
Good luck! Looks good thus far!
2. Dont wetsand, wash the car with the tape still on, its disaster waiting to happen.
Posted By: Anonymous
Re: New Paint job on a budget thread. - 10/17/0702:05 AM
i have found that you can clear the rustoleum with automotive clear coat (KIRKER) for more protection
Posted By: Anonymous
Re: New Paint job on a budget thread. - 10/17/0702:25 AM
Quote: i have found that you can clear the rustoleum with automotive clear coat (KIRKER) for more protection
details please !
did you wetsanded to 2000 then applied the clear? any pictures?
Posted By: Anonymous
Re: New Paint job on a budget thread. - 10/17/0702:30 AM
Quote: One word of advice: use BLUE tape !
Err, it WAS blue tape. 3M, not cheap stuff. It only did it at these spots. I believe it was due to the water being trapped under it somehow. It pulled off all the rest of the car just fine, even on these same panels for the rest of the length. The one fender had several 'dots' where the paint was, well, not adhered to the primer. Not fish eyes, but dots of lifting paint. I'm pretty sure this is a spot where the plastic sheet was against the fender and probably had moisture trapped under it. Live and learn. I DA'd the spots and primed the bare metal tonight. We'll start building up the coats tomorrow.
Re: New Paint job on a budget thread. - 10/17/0703:47 AM
Another tip when removing tape from new paint is to pull it parallel to the surface, i.e. folded back over itself.
Posted By: Anonymous
Re: New Paint job on a budget thread. - 10/17/0702:57 PM
another bodyshop trick- when you are masking over a fresh painted surface, put the tape across your clean pantleg to break a bit of the adhesive of the tape. It will also help it to keep it from pulling off fresh paint.
Posted By: Anonymous
Re: New Paint job on a budget thread. - 10/17/0704:56 PM
I've read this thing over and over and over again, and I think it's a viable alternative for those of us on a budget. My question is this: I understand that metallic paints can't be used because of the roller problems with metallic, but couldn't you paint the car with the methods here but hand cast the micro flakes, let dry, then knock down with a wet sanding then clear coat it? I seem to remember that back before the spray gun, the metal flakes were hand cast like this.
Posted By: Anonymous
Re: New Paint job on a budget thread. - 10/17/0706:51 PM
I've tried hand casting metalflakes on some very small parts... It worked OK on these parts, as they were REALLY small (like half inch by 6 inch strips), but even then it was EXTREMELY difficult to get an even distribution of the flakes.
I wouldn't try it on a large area, I think it would end up very blotchy.
Posted By: Anonymous
Re: New Paint job on a budget thread. - 10/17/0710:43 PM
I would think that since we're rolling in layers, that if we hand cast over each layer and then wet sand, and then hand cast the next layer and so on , it would and should even out. I have my old satellite hood that I replaced with a Roadrunner bulge hood I think I'm going to try. Just a pinch between the cheek and gums. . .oops, wrong product! I'm thinking maybe something like an old flour sifter or something to help control the dispersal. . .it's worth a try.
Posted By: Anonymous
Re: New Paint job on a budget thread. - 10/18/0701:07 AM
Nice Job otherwise. What brand/color blue is that?
Posted By: Anonymous
Re: New Paint job on a budget thread. - 10/18/0710:48 AM
Thank you. Aside from my moment of disaster, I'm really pleased with it. Brightside Largo Blue and White. I'm trying to pseudo replicate the old Datsun 510 Trans-Am paint job. It'll get red stripes diagonally on the side of the fenders and front doors yet (done in vinyl; I'm not that crazy). I simply brushed a coat of straight Brightside white on my FUBAR areas last night to get some coverage. It actually went on fairly smooth. I may hit it again before the first sanding. I think it will turn out okay; just horribly deflating thinking you're ready to bolt the car back together and have it on the road only to be set back another week of evenings.
Posted By: Anonymous
Re: New Paint job on a budget thread. - 10/18/0702:22 PM
Quote: I'm thinking maybe something like an old flour sifter or something to help control the dispersal. . .it's worth a try.
You know - it definitely IS worth a try. I'm all for experimenting - hence using the flakes on my tail-light surrounds. The flour-sifter idea is just sane enough to maybe work! If you can get it far enough from the panel that the lakes drift down fairly evenly...yeah - it might work. Uh-oh...what about the vertical panels?
Posted By: Anonymous
Re: New Paint job on a budget thread. - 10/18/0703:10 PM
The vertical panels. . .hmmmmm....
I might try putting the car on ramps one side at a time to elevate the vertical panels a smidge so they aren't perfectly vertical and try to continue with the sifter idea or. ...elevate and use an old talcum powder bottle elevated enough for the dispersal. . I would think that since we are working in layers, it would be time consuming but well worth the try. . .hell, they used to hand cast these things back in the day, so there has to be something on the net about it. . .
This is an expensive alternative, but I would think innovators found here could come up with a cheaper alternative
It can be done. . .low pressure air, I wonder if you could use something like an aquarium pump and supplies?
Posted By: Anonymous
Re: New Paint job on a budget thread. - 10/18/0706:49 PM
Hmmmm....if the flakes are small enough, they should be dry-sprayable through any gun with a large enough nozzle, but then we might as well just spray metallics if we've got that kind of equipment. I think the squeezy talc bottle might still give you blotches, as the bulk of the material will be in the initial 'puff' with the surrounding areas getting less.
If you can get the handcasting working on a horizontal panel, why not go for a two-tone? Or even a single tone, but with the flat surfaces 'metallized' - that might be a neat look?
Posted By: Anonymous
Re: New Paint job on a budget thread. - 10/18/0708:25 PM
I was a spray painter over 30 years ago, and at that time one of the "old timers" told me they used to hand cast metal flakes when they first came out. (At the time they were big flakes, and wouldn't fit through the gun nozzel.) I also like the dry spray idea. However, don't sand right on the flakes. They are typically colored aluminum, and sanding them will expose the base color, and turn it dark. The guy I knew years ago said they used to go over them with a roller to flatten them out, then put on a heavy clear coat before sanding. Even when using modern spray equipment, clear should be sprayed over a metalflake coat to make sure the flakes are completely covered before wetsanding. Do a test panel and post pictures! LanceB
Re: New Paint job on a budget thread. - 10/19/0702:00 AM
I had a funny thought about how to randomly get metalflake dust onto a coat of fresh paint without leaving a pattern that may have greater concentrations in some spots and bare spots in others...
OK>.. Imagine this. You have just laid a fresh coat of paint on to the hood of your car. In front of the hood you have a large fan mounted on something so that it is blowing its airflow out and over the hood of the car.
You now stand behind the fan and slowly take little pinches of metalflake fall in front of the fan. It randomly scatters the pixie dust all over the car hood. The key here being that it is randomly spreading it.
And you could move the direction the fan is blowing to send a greater concentration to an area that isnt getting its fair share of the pixie dust...
The only shortcoming with this method is that a lot of pixie dust would be blown all the heck all over the place when it doesn't land on a wet sticky surface to adhere to.
But this is the same sort of principle you would use if you had an aerosol bomb of metalflake pixels. Instead of spray it directly at the surface you would indirectly spray it so that it disperses a little before coming in contact with the car panel...
.
Posted By: Anonymous
Re: New Paint job on a budget thread. - 10/19/0702:35 AM
It is still not done, but putting it back together, the rear spoiler and front section have been painted with 2 coats of rusto, will apply another 2 coats of Brightside. Most of the car has been Polished using PoorBoy's SSR3, will do another coat of SSR2.5 and then another of SSR1
The first part of the video I did in low resolution so it shows a bit grainy.
Posted By: Anonymous
Re: New Paint job on a budget thread. - 10/19/0702:54 AM
Results:
I'm overall very happy with it. Pretty smooth even without the final wetsanding and polishing. This was using the gloss sail blue color.
Posted By: Anonymous
Re: New Paint job on a budget thread. - 10/19/0710:59 PM
I had a crazy idea.
I used Rustoleum primer in my engine bay, which was stripped to bare metal. To apply it I mixed Penetrol with the primer and used the Harborfreight rechargable spray can. That spraycan did not work out so well for me, it just shot little globs of paint, but the best part was that the paint self-leveled well enough so I got a pretty smooth coat of primer.
So the idea is...what about using a $2 plastic spray bottle, like those you can buy at Home Depot (similar to what Windex comes in) to apply the paint? I would think the spay would be localized enough that it wouldn't kick up enough dust to by like really spraying, but should apply the paint in small enough particles that if you thin it it should self-level fairly well an merge into a uniform coat. You would have to set it to the widest spray pattern so it was more like mist than a stream of paint.
Re: New Paint job on a budget thread. - 10/20/0701:38 AM
Quote:
So the idea is...what about using a $2 plastic spray bottle, like those you can buy at Home Depot (similar to what Windex comes in) to apply the paint? I would think the spay would be localized enough that it wouldn't kick up enough dust to by like really spraying, but should apply the paint in small enough particles that if you thin it it should self-level fairly well an merge into a uniform coat. You would have to set it to the widest spray pattern so it was more like mist than a stream of paint.
Is this idea even worth testing?
The trick will be to find 'the right' spritzer bottle. Each type of hand pump spritzer is designed for the viscosity of the fluid it is trying to vaporize.
Windex bottles might not work too well, because the fluid being spritz'd is extremely thin. So you need to find a spritzer bottle that was designed to spritz a heavier fluid.
It might take a bit of shopping around to try to land on 'the right' spritzer to pump out and vaporize thinned paint.
One of the chaps here used one of those self-contained pumpers ( where you slap a C02 cartridge or a can of compressed air on to the sprayer bottle ) They found that it tended to clog up in rather short order.
But the hand pumped type spritzer might be able to do it. The most expensive hand type pumper would be one of those big pumpers that you put insecticide into for spraying your lawn. You pump the handle to propel it out the flexible hose.
But there must be something cheaper out there that can generate enough pressure to spritz the thinned paint out of it...
.
Posted By: Anonymous
Re: New Paint job on a budget thread. - 10/22/0702:21 PM
hello.
so i decided to try this method. i did all the body work primed the car wetsanded and preped it for paint.
i mixed it 1:1 with mineral sprits (im using tremclad/rustoleum), when i apply it on the car its really glossy but this mornign when it dried it was flat no shine whatsoever.
should i be taking out as much pant as i can from the roller then apply very thin coats on the car?
Re: New Paint job on a budget thread. - 10/22/0711:23 PM
Quote: hello.
so i decided to try this method. i did all the body work primed the car wetsanded and preped it for paint.
i mixed it 1:1 with mineral sprits (im using tremclad/rustoleum), when i apply it on the car its really glossy but this mornign when it dried it was flat no shine whatsoever.
should i be taking out as much pant as i can from the roller then apply very thin coats on the car?
thanks
At this point in your painting adventure you should not be looking for any magical shine to happen with the Tremclad/Rustoleum/mineral spirit.
At this point you are simply building up your thin layers of color so that after x number of coats you will have full coverage of the color over the entire car.
At this point... the 'shine' you see while the paint is wet is simply a good indicator of what you 'should' be able to polish, shine and wax the final coat up to.... You can also use the temporary shine while it is wet to identify areas where you may have to pay a little attention during the wet sanding stages.
One of the reasons I shifted from the Tremclad/Rustoleum method over to the Brightside paint is that the polyurathane of the Brightside DOES keep its shine after each coat of paint is added.
But the Tremclad/Rustoleum is an enamel and because it is cut thin with the mineral spirits, you lose the shine that you would have gotten if you had just slapped 100% Rustoleum/Tremclad on the parts being painted. That is why the final stage of the Tremclad/Rustoleum paint job really needs the polishing and waxing at the end of the job to regain the shine on the Tremclad/Rustoleum paint job.
As you may have noticed... there are three derivatives of this roller at the moment.. :
a ) Just Tremclad/Rustoleum and mineral spirits - which requires more final wet sanding, compounding, polishing and waxing to reach a maximum shine...
b ) Just Brightside and mineral spirit or the Brightside thinner... which requires a little less final wet sanding, polishing and waxing since the final coat would have had more gloss then the final coat of Tremclad/Rustoleum
OR the HYBRID... which I and some others have done :
c ) Where we used the Rustoleum/Tremclad to get the paint and color coverage on the car. Then we switched over to the Brightside to do the final coats of paint. This gives us the benefits of B ( more shine and polyurathane protection ) and some of the cost savings of A ( Tremclad/Rustoleum is cheaper per quart then Brightside ).
At this point in your paint job... go with whatever percentage of paint and mineral spirit that works best for you and does not give you the dreaded 'orange peel'. At this stage this is your primary concern when trying to figure out what percentage of paint to mineral spirit to be using.
Hope this helps
Marq
.
Posted By: Anonymous
Re: New Paint job on a budget thread. - 10/23/0703:57 AM
Re: New Paint job on a budget thread. - 10/23/0702:55 PM
I am not clear on what primer/sealer to use. I have a lot of body work done so I am sure that some type of sealer needs to be used before the rustoleum roller process.
Re: New Paint job on a budget thread. - 10/23/0710:45 PM
Quote: I am not clear on what primer/sealer to use. I have a lot of body work done so I am sure that some type of sealer needs to be used before the rustoleum roller process.
We have sort of beaten to death that topic earlier in the thread.... but with both the Rustoleum/Tremclad or Brightside paint you can paint straight over the bodywork.
The only fly in the ointment is that if you have a car of many colors ( ie bondo color different then the majority of body panels etc ), it will probably take extra coats to reach 100% color coverage on the whole car.
The main benefit of using a primer is that it seals the bodywork so that the initial coats of paint over the worked area are not sucked in like fresh paint on an old wall. As noted above, the Rusto/Tremcl and Brights will all perform the function of sealing... but a real primer will possibly save you a coat or two of paint later while trying to reach full coverage.
If you are making a radical shift in the overall color of the paint job of your car, like taking a white car and going black, blue, red etc... or a reverse from a dark car to a light color, then a primer used on the entire vehicle will give the whole car one UNIFORM color to begin painting over.
My paint initial paint, Rustoleum, was applied over scuffed paint, bodyworked and bondo'd areas, fresh fiberglass with a gelcoat, plastic unprimered front and real bumper and several different types of primer. It held up on all those surfaces without any adhesion problems.
.
Posted By: Anonymous
Re: New Paint job on a budget thread. - 10/24/0703:57 AM
i will get some pics soon and i used 800 then applied the clear KIRKER
Re: New Paint job on a budget thread. - 10/24/0702:48 PM
Great summation of the process. I have used some penetrol in the Tremclad mixtures also. I wonder if anyone has any thoughts when using penetrol or not. I have used the penetrol, but don't know if it is affecting the paint job for better, worse, or not at all! It always looks good to me.
Re: New Paint job on a budget thread. - 10/24/0704:31 PM
I have friends that roller paint boats and they swear by the use of penetrol to level the paint. Way back in this thread someplace we talked about it, sounds like you are having good results with it. I plan on a wet sand finally this winter and maybe a couple of extra coats, I installed my door mirrors lower then I like while driving so I'm going to plug those holes and move them a tad higher so will need a little repaint. I will use penetrol then.
Re: New Paint job on a budget thread. - 10/25/0710:48 PM
when the paint was fresh, I just added Penetrol... my ratio was 50%... others have done less than that, 20 - 30%... I was using Rustoleum so Brightside will be different.
After the paint had been open a while, I would add a splash of mineral spirits to help it stay "loose"...
Re: New Paint job on a budget thread. - 10/26/0712:26 PM
Quote: The only fly in the ointment is that if you have a car of many colors ( ie bondo color different then the majority of body panels etc ), it will probably take extra coats to reach 100% color coverage on the whole car.
The main benefit of using a primer is that it seals the bodywork so that the initial coats of paint over the worked area are not sucked in like fresh paint on an old wall.
I would say the bigger fly is not properly blocking or reducing any waves - especially if you have a collection of repaired and painted surfaces underneath. If you are doing any repairs other than just scuffing your old paint and going over it, and you are putting the paint on something more than just a beater that you don't care about - I say prime the whole thing and block in a more traditional manner as much for this reason as any adhesion or colour coverage concerns. In this case I hit any areas with bare metal with an etch primer first. Sherwin Williams makes great stuff in a can. GBP 988
Either way, with respects to adhesion, many of these paint manufacturers of any alkyd enamel DTM "rust paint" will still recommend a priming before hand to achieve a uniform surface that they can more confidently claim good adhesion among other reasons. Mind you, I've never had any real problems with this stuff flaking off - it does pretty much stick to everything ... I'm just saying...
Colour coverage is definitely an added benefit, but I would say the prime reason (hehe, sorry), for, err, priming it first, is for a nice smooth surface as much as anything.
Past all that, cleanliness is VERY important. I'd still use a good quality grease/silicon remover that leaves no residue vs. mineral spirits. And a tack cloth.
As an aside though, with respect to priming for blocking and prep purposes, I have found that the paint I am using, Sico Corrostop...
...sands extremely well. I've found putting a regular thick coat on blocked really well on one piece I was painting. Not sure how many coats would be required to match the at least 3 coats of high build primer you should use, but I'm going to experiment some more in that department.
Posted By: Anonymous
Re: New Paint job on a budget thread. - 10/26/0705:13 PM
HELP!!!!!!!! I've got bubbles MILLIONS OF THEM! Here's my background. This is not my first car to roller paint. I rolled my 1949 Dodge Truck with Rustoleum Sunrise Red and Gloss Black with wonderful results. Used Mineral Spirits to thin. White foam rollers from Home Depot. Now I'm working on my 1943 Jeep Army Green (Equal Parts Rustoleum Hunter Green and Leather Brown). I've done two or three coats on the hood, fenders and grille. Did it just like I did the truck. But the bubbles are horrendous. I've tried blowing them out. I've tried going back over with light, light pressure. Nothing works. They are still there when it dries. What could be going wrong. Wiped everything down with mineral spirits before I started and let it dry. Can't figure this one out. Such failure after such success is really dumbfounding. I can't think of anything different between the truck and the jeep paint jobs. Would temperature make a difference? It was a lot warmer when I was painting the truck. Probably about 70 degrees with the jeep. HELP!!!!!!!
Posted By: Anonymous
Re: New Paint job on a budget thread. - 10/27/0711:55 AM
Two thoughts I'll toss out there for your consideration, and not saying I'm right.
1) Could the bubbles be 'fisheyes'? This is caused by silicone (usually) if the thing has had a lot of Armor-All or something used on it (maybe on the top?). That stuff will stick darn near forever and is very hard to get rid of. It will make little round eyes in the paint sort of like bubbles, but they aren't bubbles.
2) If you are getting bubbles, is your foam roller different than what you used prior? If you get bubbles right after rolling and they don't go away, maybe give the Brightside 'tip' treatment a shot. Go over it with a foam brush and whack the tops off the bubbles to help them lie flat.
Sounds like you've got some great projects there. I love old trucks and Jeeps. Hope you can get this figured out.
Posted By: Anonymous
Re: New Paint job on a budget thread. - 10/27/0703:32 PM
It's not fisheyes, it's actual bubbles. I've seen fisheyes before. Plus my prep work would have eliminated any contaminant. 1) Sanded down to the metal. 2) Primed with Rustoleum Rusty Metal Primer. 3) Wet sanded primer 4) Wiped down with mineral spirits on tack rag. So I don't think it could be something like that. Even when you blow the bubbles and they pop, the paint doesn't seem to flow together like it did when I painted the truck. It doesn't level like it ought to. It's just a bunch of popped bubbles. I've tried changing the amount of mineral spirits but it didn't change the results. The bubbles are there as soon as you roll. Before it just flowed out smooth as could be. Each coat was amazingly smooth and shiny. It's the exact same type of rollers that I used before on the truck.
Posted By: Anonymous
Re: New Paint job on a budget thread. - 10/27/0703:42 PM
Well, it's not fisheyes. These are definitely bubbles. Prep work should have eliminated any contaminants. 1)Sanded to bare metal 2)Primed with Rusty Metal Primer 3) Wet sanded 4) Wiped down with mineral spirits.
I've applied 3 coats to the hood, one fender and gerry can. No problems on first two. Millions of bubbles on third. Also painted the cowl and sides (first coat) at the same time. Bubbles everywhere. It was sanded down to bare metal, washed with soap and water, wiped with mineral spirits, then painted (no primer). So it's the same paint, same mineral spirits, same rollers, same roller pan. This is what baffles me. Even when I blow the bubbles out they don't flow together. They just look like flattened bubbles. Definitely a head-scratcher to me.
Re: New Paint job on a budget thread. - 10/28/0712:00 AM
Quote: Well, it's not fisheyes. These are definitely bubbles. Prep work should have eliminated any contaminants. 1)Sanded to bare metal 2)Primed with Rusty Metal Primer 3) Wet sanded 4) Wiped down with mineral spirits.
I've applied 3 coats to the hood, one fender and gerry can. No problems on first two. Millions of bubbles on third. Also painted the cowl and sides (first coat) at the same time. Bubbles everywhere. It was sanded down to bare metal, washed with soap and water, wiped with mineral spirits, then painted (no primer). So it's the same paint, same mineral spirits, same rollers, same roller pan. This is what baffles me. Even when I blow the bubbles out they don't flow together. They just look like flattened bubbles. Definitely a head-scratcher to me.
It's an interesting problem. You mentioned that the first two coats went down nicely... and it was only on the third coat that it decided to go bubbles on you....
Initially I was thinking that somehow the paint combination ( you created an Army Green (Equal Parts Rustoleum Hunter Green and Leather Brown) but if there was a conflict between the two paints being blended... it in theory would have shown up earlier in the first or second coats.
Now... what I am thinking is this.... WHAT IF the bubbles are actually bubbles... ie gases trying to escape from the previous coats. IF that was the case, the answer might be that you need to allow more time between the coats to let the previous paints cure more and let their gases escape.
I think somehow the difference between this project and your other project probably rest with the blending of paints. It just might be that the brown and the green pigments fight it out a bit longer that your previous blendings on the first project. Or if you are doing your work outside... possibly the green pigments cure faster than the brown pigments ( or vice-a-versa )
I was almost thinking that it might be a problem with the initial metal primer that was wiped down with mineral spirits... but the fact that the first two coats laid down properly sort of rules that out.
What you might do as an experiment is sand out the present bubbles and just heavily rinse the sanding crap off it with JUST water and a clean cloth. Then wipe down with a lightly wetted mineral spirited CLEAN CLOTH. Let it dry for a few hours to ensure the mineral spirit has fully evaporated. Then use a tack cloth to give it a final wipe. Then just lay a mineral spirit thinned coat of your green/brown mixture. By not using any soap in your wiping and rinsing down of the sanding, it will eliminate the soap as having left any residue that buggered things up. By providing extra time for the mineral spirit wipe down to fully evaporate you will be ruling out that it left any artifacts that were still evaporating...
One odd thing about the rinse down and washing of the sanding with water that 'could' impact how the paint lays down is the very water itself that you are using to wash the car. Some folks have to cope with hard water... some folks have to cope with soft water... some folks have extra doses of chlorine in their water... while other folks have high concentrations of sodium or minerals. I don't think that applies in your case, because you were able to successfully do your other vehicle. I am assuming you did it at the same location and so it is the same water this time as previously...
Or... maybe the answer rest with some contaminents during your previous washing... ie there was still soap residue on the body from not having been thoroughly rinsed off.... OR.. maybe the cloth/sponge/whatever you used to wipe the body while rinsing held some contaminants ( previous sanding particles... or maybe the wifey/mom had previously used that cloth/sponge/whatever and washed it with Bounce fabric softener or used it to apply Pledge or furniture oil...
The oddity in this is that your first and second coats laid out properly... and it was only with the application of the third coat that it decided to go all bubbly.
Maybe the answer if the bubbles keep happening is find some of that Penetrol stuff the guys were mentioning here... and see if by adding that to your mixture is buys you some additional 'leveling out' time...
.
Posted By: Anonymous
Re: New Paint job on a budget thread. - 10/28/0710:35 PM
I just started my firt rolling coat of Gloss white just 2 mins ago..and I have a question about bubbles
I thined out the paint but right when roll on the test peice, I see tons of bubbles, i can blow them out and they go away...but is this normal?
Did I thin the paint too much? Is the paint too thick? Is this normal, like does every1 get bubbles to start with and they just level out or what?
Re: New Paint job on a budget thread. - 10/29/0702:14 AM
Quote: I just started my firt rolling coat of Gloss white just 2 mins ago..and I have a question about bubbles
I thined out the paint but right when roll on the test peice, I see tons of bubbles, i can blow them out and they go away...but is this normal?
Did I thin the paint too much? Is the paint too thick? Is this normal, like does every1 get bubbles to start with and they just level out or what?
Someone help me asap
Some degree of bubbles is normal.... and usually the amount of bubbles is a result of the amount of pressure you are using with the roller to apply the paint.
To put it visually... the foam roller has air pockets in it to hold the paint. But not all air pockets get taken up with paint... they have air. And even as you are laying a coat of paint on to the panel.. the paint in the pockets is released and air enters the now empty pocket.
IF you press down too hard... you will see a real swath of bubbles forming after each pass of the roller. So the trick is to learn to lay on 'just the right amount' of pressure to minimize the bubbles.
The thinning of the paint with mineral spirits or Pentrol helps to weaken the surface tension of the bubbles so that they pop on their own. BUT in some cases even our best efforts may not result in self popping bubbles. So that is where the discussions evolved around the 'tipping' technique. Tipping being the art of lightly going over the freshly painted area with a very light pass of a paint brush.... with the intention of gently popping the bubbles as you lightly pass over them.
You were saying that you were able to blow the bubbles and most of them would go away... so I don't think there is any problem with your paint to mineral spirit percentages.
There have been a few different techniques of tipping mentioned so far in this thread and I have tried them all...
a ) use a cheapo foam paint brush for doing the tipping. You can buy like 20 or 30 of them in a bag for not too many bucks. They look like black foam brush shaped things with a wooden dowel stuffed up their butts. The trick with these cheapo foam brushes is to not over use it. When it gets clumped up with paint THROW IT OUT.. don't bother to try cleaning it with mineral spirits, because it will start disintergrating and leaving little black bits of crap in your paint job.
b ) the more standard tipping weapon of choice is a wide good quality paint brush, one designed for use on malanine is ideal. You can re-use it and wash it down after each painting session with mineral spirits and it should be able to be used from the first coat through to the last coat if you properly take care of it at the end of each painting session.
c ) a variation that I enjoyed was the use of a second roller. The first roller would be used like normal to lay down a coat of paint on a panel. Then I would follow up that fresh paint on a panel with a quick light working with the second 'clean' roller ( not loaded up with paint ). IF you work quickly... you can do the entire vehicle with the second 'tipping' roller. Otherwise... you might want to plan on using two rollers during the paint job for the tipping. Use the first tipping roller for all the side panels... and then load on another fresh roller to do the hood and trunk. My theory on this was that I did not want anything screwing up the hood or trunk since they are the most visual to the eyes.
On the topic of bubbles.... this is probably one of the key reasons why Charger initially recommended that people do a little 'test rolling' before digging in at their main project. The technique you develop while testing out the process on a large test piece pays dividends when you actually go to put the technique to work on the real project.
But don't feel bad about bubbles... I don't think too many folks have been able to lay down a glossy slick surface without some bubbles requiring action to assist them at popping. The trick is to learn to minimize the number of bubbles so that you have less to have to assist. That is where 'technique' pays off.
.
Posted By: Anonymous
Re: New Paint job on a budget thread. - 10/29/0703:03 AM
Marq, seriously dude, you're a f'n genius .. Thank you !!!!!!!!! I already layed a coat with just blowing the crap out of the bubbles, but tomorrow i'll prolly wet sand it really quickly and do the 2 foam roller trick
Thanks again man, it's too bad you don't live in Vancouver, would of paid u to give me 15 min lesson
Posted By: Anonymous
Re: New Paint job on a budget thread. - 10/29/0705:17 AM
About a month ago I purchased Little Antropov and it needed a paint job. I had no clue or experience at all about painting a vehicle, talked to a few guys and offered to paint it for a $1000. I thought, wow, that's more than what I paid for it, I needed to find another alternative. Enter.......the internet, on how to paint your own vehicle. After stumbling upon this thread and the man that started it all (69chargeryeehaa) who I'd like to thank for keeping that extra $950.00 in my bank account, I spent days reading and researching this method, which totally freaked me out. I never thought of painting a vehicle myself, let alone with a 4" foam roller. I had to let out a laugh every once in awhile while I read each post. So, I got all pumped about it, went out and purchased all that was recommended and followed each step as best as I could and man, let me tell you, if you're looking for a good paint job and to also save your money, try this out, you won't be disappointed. I'm always getting compliments on my vehicle's paint job, and to be honest, I actually rushed it. Being my first attempt, the whole process took me a week, which I thought was fairly quick. Next time around I'll put more into it, especially the prep work. I even planned on doing a couple of more coats, but it was getting a little chilly in the garage.(not heated) , so I thought, ah, looks better than it did when I bought it, and that's all I wanted anyways. Again, thanks to 69chargeryeehaa and all the others for the valuable information on how to paint your car on a budget. Cheers! Here are some pics...............................
Re: New Paint job on a budget thread. - 10/29/0704:21 PM
Antwon and 69Chevelle, which Nason / Kirker clears did you use? Please post the ID number of the clear, reducer, and the hardener.
Did you use any hardner in the Rustoleum?
Posted By: Anonymous
Re: New Paint job on a budget thread. - 10/29/0706:28 PM
If you are getting excess bubbles and they are not rolling out you may not have thoroughly mixed your paint with thinner.
Another problem may be relative humidity. I had this problem at one stage in my painting and reverted to straight paint out of the can and it worked beautifully. Normally I was having to mix as much as 75%. Try either of these and let us know.
Posted By: Anonymous
Re: New Paint job on a budget thread. - 10/29/0711:48 PM
I used the Kirker Zoom flash dry high solids acrylic urethane clear (v2010g) and the reducer/activator (3075) i rolled it on waaay too many bubbles so spray it and you can also used the reducer/activator to help the rustoleum dry harder and faster
Posted By: Anonymous
Re: New Paint job on a budget thread. - 10/30/0701:41 AM
well guys, i'm going to paint my m body in gloss black, in all my expierience in painting, i'm seeing some very simple mistakes that some have made. A few simple tips. One, stir the paint, don't mix it.. less air better results. once paint is stirred in with your reducer. aka spirits let sit for a while for all of the air bubble to expel. when painting. gently put the roller in there so not to introduce extra air and more bubbles. put on overlapping coats, just like airbrushing or compressed air painting, let dry throughly, I would only wet sand with 1500 grit wet sandpaper for cars. fold the paper in two quarters and keep your fingers togehter and flat otherwise you will see streaks from pressure marks on your paint. I use a few drops of ivory in the warm water to lubricate the paper for ease of sanding. Use a rubber squeege only to remove the water and residue, nothing else. wipe dry with a dry lint free cloth. Orange peel is caused by dirty painting surfaces, aka, oil, grease a mist of wd-40 in the air as you sprayed down your bolts a half a block a way, it all affect the paint and causes orange peel. ON all of the edges do not sand them right to the edge, or raised pieces, you will burn through it in a second. you will not really notice if you don't wetsand just that little bit since it's a very small part of the overall sanding process. Finally buff, if you have a orbital buffer, great, less chance for burn through. If not, keep your speeds low around 3k rpm or so, not screaming, put on the buffing compound liberally and use the buffer to start the job and finish it. It should come out very very good, and a good coat of pure carnuba wax after roughly 30 days and don't wash it either and you should be good to go for years to come. Good luck all and I will post up pics when i'm in the process too.
Posted By: Anonymous
Re: New Paint job on a budget thread. - 10/30/0705:08 AM
entity, Thanks for that, really helped...I plan on picking up a squeegge now.
But I have a question, I just rolled my first layer of Gloss White Tremclad and I ran into a problem
I didnt do enough research here and I kind of just rolled paint on the car and kinda wanted to see what would happen...Everything looks good except that i have a few runs that you can see on the doors, but you can't feel the runs, its really smooth..Do I have to sand it down or can I go ahead and roll my 2nd coat then sand.
I tried sanding with 600 grit, but i found it really hard, its very sticky because of the paint.. even with water..But maybe iam using the wrong sand paper so tommorow i'll go buy some 3M
also another question, do i have to wipe the car down with Mineral Spirits every time i am going to paint? or was that just for the first coat
Re: New Paint job on a budget thread. - 10/30/0701:04 PM
I love the workability of this paint. I've had great success with a foam brush and mixtures at least 60% MS to paint - used on bumpers, small parts, or horizontal surfaces. Basically, anything I can soak evenly from one side of the object to the other - stuff comes out like glass. One single pass defintely seems best, with a quick light catch of drips off the object for a minute after the surface is done.
For everything else though - panels or anything else on the car - I only have three words to say:
Spray. Spray. Spray.
Posted By: Anonymous
Re: New Paint job on a budget thread. - 10/30/0703:10 PM
Marq, Thanks for your help. I'll try some of your suggestions and see if I get different results. I'm going to follow my wife's advice this time: "If it isn't working, quit." I painted the entire front half of the jeep before giving up. I kept thinking the bubbles would lay down but they didn't. Of course, when you finally find a time that you can paint, you hate to go to all that trouble and just paint one fender.
The parts that already had 2 or 3 coats were done at least a couple of weeks ago, so surely it has cured out. Another part of the jeep was freshly sanded down to bare metal. The paint was mixed together over a month ago. I mixed two quarts so I would have the same color each time. Here's some things I check. 1) I didn't give the mineral spirits much time to dry after I wiped it down. Washed, wiped, and painted. (I was losing daylight fast!) 2) My paint may not have been thin enough. It seemed thin but the bubbles were hard to pop. Even when they popped, it didn't seem to level out. 3) I didn't let the paint set after I mixed the mineral spirits either, I just started rolling.
Now I've got to sand, sand, sand! My jeep looks like alligator skin. Thanks
Posted By: Anonymous
Re: New Paint job on a budget thread. - 10/30/0706:19 PM
Quote: I love the workability of this paint. I've had great success with a foam brush and mixtures at least 60% MS to paint - used on bumpers, small parts, or horizontal surfaces. Basically, anything I can soak evenly from one side of the object to the other - stuff comes out like glass. One single pass defintely seems best, with a quick light catch of drips off the object for a minute after the surface is done.
For everything else though - panels or anything else on the car - I only have three words to say:
Spray. Spray. Spray.
Plum500, whatever happened to your Sherwin Williams Fully Purple DTM Paint? I may have missed it, but enquiring minds wanna know!
I ask specifically about the Sherwin Williams Paint since Ace Rust Stop is made by Sherwin Williams for Ace Hardware and is cheaper than Sherwin Williams by a lot and Ace has the ability to custom color match.
Posted By: Anonymous
Re: New Paint job on a budget thread. - 10/30/0711:59 PM
Freaking Dog Hair and Flys are pissing me off..I'm on my 2nd coat and have like 15+ hairs stuck to paint..Hope sanding fixes this
Posted By: Anonymous
Re: New Paint job on a budget thread. - 10/31/0712:57 AM
I have been lurking here for awhile but my experience is that the bugs and hair both sanded out nicely. I finished painting my car just on the weekend.
Re: New Paint job on a budget thread. - 10/31/0701:19 AM
Quote: Freaking Dog Hair and Flys are pissing me off..I'm on my 2nd coat and have like 15+ hairs stuck to paint..Hope sanding fixes this
Hehehehheh... I have three long haired dogs.... and so I know your pain. But if you want the most annoying thing... it was MY OWN HAIR that kept falling out and appearing in the paint.
The dogs are all long black hairs... and I am gray haired. I would say that initially 75% of the hair was MY OWN ! The solution : I started to ALWAYS wear a baseball cap to stop loose hairs from falling on to the fresh paint.
.
Posted By: Anonymous
Re: New Paint job on a budget thread. - 10/31/0701:49 AM
^ LOL...I really hope sanding takes car of it tho..I was planning on using 600 but now i think i got to use 400 since i found hair from the 1st coat, and i have a coat of fresh paint on top of all that ...sigh
Posted By: Anonymous
Re: New Paint job on a budget thread. - 10/31/0711:24 AM
Ugh...hair. I had my fair share in every coat too. I tack ragged, blew it off with air, washed it, yadda yadda yadda. You know what I did that I think finally made a difference? I cleaned the garage! I vacuumed the heck out of it, and then let the dust settle for a day before moving on to the next coat. It really seemed to cut down on the debris. Not that my garage was a sty to begin with, but every little bit of effort helps.
To the guy with the red Niva, Ladas FTW!
BTW, here's another photo of a success story...my road race car doing a autocross this past weekend. It still needs the graphics. Nobody believes I painted it with a roller: BMW at the autocross
Posted By: Anonymous
Re: New Paint job on a budget thread. - 10/31/0702:26 PM
Great job ddavidv, all the other new posters and Angela (aka HeyYou). 'bout time we got some women showing their results on this board. The British boards had quite a few women roller painting, I was wondering when we would get some here.
Re: New Paint job on a budget thread. - 10/31/0705:57 PM
Quote: Ugh...hair. I had my fair share in every coat too. I tack ragged, blew it off with air, washed it, yadda yadda yadda. You know what I did that I think finally made a difference? I cleaned the garage! I vacuumed the heck out of it, and then let the dust settle for a day before moving on to the next coat. It really seemed to cut down on the debris. Not that my garage was a sty to begin with, but every little bit of effort helps.
I also swept my garage then everytime before I painted I sprayed the floor with water to keep me from stiring up dust and if any fell to the floor it would stay there. still had dust in my paint though!!
Posted By: Anonymous
Re: New Paint job on a budget thread. - 10/31/0711:44 PM
Oh yeah! another downfall to the paint in the garage method! Went through it myself but although frustrating, it does 'hone' your fine sanding skills.
Posted By: Anonymous
Re: New Paint job on a budget thread. - 11/01/0703:20 AM
New member also trying the roll on paint job. Decided to go with the gloss black on my 85 Yota 4x4. Thought about the army green like harbison did but I'll save that for my next project (87 Wrangler)
Started with the hood since it had the most surface rust.
Before pic
Really didn't do any serious sanding. Just 180 grit with a DA. Hope that doesn't show up later. Rolled on 1-2 coats of rustoleum gloss black. Had some bubbles form but they all went away after it dried. Which I was suprised how quickly that was considering it was about 39 degrees outside. Really suprised at the shine with only two coats. Hope I didn't put it on to thick. Plan to wet sand and put on more coats tomorrow. Keep yall updated!
Re: New Paint job on a budget thread. - 11/01/0709:56 PM
I finally got around to trying this. (on my beer fridge) I sprayed one coat and it went on great, only problem is that it was a big pain to clean up. So I started trying the roller method, this is what I found out.
to anyone who has been having many problems with bubbles, try to ditch the foam roller and get more of a conventional thin napped roller cover. You can buy them for the same 4" roller you have already. I had some 4" regular roller covers and it worked great, then I tried the foam ones and I started to get bubbles like crazy, so I went back to the woolly type ones. You can buy them that are made to be more shed resistant. I think you will have much better luck.
Brew
Posted By: Anonymous
Re: New Paint job on a budget thread. - 11/02/0712:05 AM
Quote:
Quote: Ugh...hair. I had my fair share in every coat too. I tack ragged, blew it off with air, washed it, yadda yadda yadda. You know what I did that I think finally made a difference? I cleaned the garage! I vacuumed the heck out of it, and then let the dust settle for a day before moving on to the next coat. It really seemed to cut down on the debris. Not that my garage was a sty to begin with, but every little bit of effort helps.
I also swept my garage then everytime before I painted I sprayed the floor with water to keep me from stiring up dust and if any fell to the floor it would stay there. still had dust in my paint though!!
Re: New Paint job on a budget thread. - 11/02/0702:53 AM
I have a quick question about prepwork, after i learned my lesson the hard way but my sander takes the old paint down to bare metal and i was wondering if I should use primer or not
Re: New Paint job on a budget thread. - 11/02/0712:52 PM
Hey HoosierSat, the Sherwin Williams stuff didn't turn out nearly as deep a color as I hoped. I actually took it back and tried to have them darken it up (and noting the changes) but it still didn't cut it. The paint seems great, and but I also found it really expensive. But who knows, it's long term performance might be better.
I do have a can of their SherClear product though, that I still might try out on some components, and maybe in the trunk. Stuff is from their marine/industrial line.
So... off to get some Sico, it was much cheaper, and for all intensive purposes this paint is all pretty much the same stuff. Alkyd Enamel paint with rust inhibitors.
I picked the darkest shade of purple from their chart and went for that. Of course it still didn't dry as deep as I hoped, but in the end, actually pretty much bang on to the photoshop I did of the look I'm going for. So I am pretty happy with it. Though, still in doubt I thought I might have found a darker shade on a CIL chart (took the ICI number to Sico, they mixed it..) but actually not as good as my first Sico choice. So I'm settled on, and happy with what you see here.
Half of this effort is to also get a paint color that I can have reproduced if need be, rather than mixing small batches myself every time -- or down the road if I need it.
Here's a pic of my front bumper so far - after getting enough coats on it I noticed the damn thing has some waves and twists from bangs and repairs -- not nearly the condition I thought I bought... so I might be taking it right back down again to fix them... but...you get the idea...
Car is a '71 Charger - going to be this colour with a white bee stripe (yeah, I know, it's a '71), black vinyl top, hideaways. I have two hoods and decklids, so I'm probably going to alternate between standard hood with a blower style scoop through it, and a bulge hood with a standard air cleaner underneath. One set will probably be blacked out, the other, probably the bulge combo, in purple.... idea will be to flip between an old school '70s look, and a slightly nascar-ish look with a wheel swap as well. TTOs for the old skool... indy slots for the other...
Anyhooo... all that is probably waaay more than you wanted to know, but that's why I am really looking for a good balance between the workability and a way to achieve really good results with this stuff.....
Re: New Paint job on a budget thread. - 11/02/0704:21 PM
Quote:
Quote:
Quote: Ugh...hair. I had my fair share in every coat too. I tack ragged, blew it off with air, washed it, yadda yadda yadda. You know what I did that I think finally made a difference? I cleaned the garage! I vacuumed the heck out of it, and then let the dust settle for a day before moving on to the next coat. It really seemed to cut down on the debris. Not that my garage was a sty to begin with, but every little bit of effort helps.
I also swept my garage then everytime before I painted I sprayed the floor with water to keep me from stiring up dust and if any fell to the floor it would stay there. still had dust in my paint though!!
You can also buy a cheap 20" x 20" box fan, and a few 20" x 20" furnace filters, tape the filters to the back of the fan, and set that close to your work. Have the fan blowing away from you, it will suck much of the dust and other air borne stuff away from the paint. not all, but what can you expect for $15?
Brew
Posted By: Anonymous
Re: New Paint job on a budget thread. - 11/02/0706:50 PM
Quote: Hey HoosierSat, the Sherwin Williams stuff didn't turn out nearly as deep a color as I hoped. I actually took it back and tried to have them darken it up (and noting the changes) but it still didn't cut it. The paint seems great, and but I also found it really expensive. But who knows, it's long term performance might be better.
I do have a can of their SherClear product though, that I still might try out on some components, and maybe in the trunk. Stuff is from their marine/industrial line.
So... off to get some Sico, it was much cheaper, and for all intensive purposes this paint is all pretty much the same stuff. Alkyd Enamel paint with rust inhibitors.
I picked the darkest shade of purple from their chart and went for that. Of course it still didn't dry as deep as I hoped, but in the end, actually pretty much bang on to the photoshop I did of the look I'm going for. So I am pretty happy with it. Though, still in doubt I thought I might have found a darker shade on a CIL chart (took the ICI number to Sico, they mixed it..) but actually not as good as my first Sico choice. So I'm settled on, and happy with what you see here.
Half of this effort is to also get a paint color that I can have reproduced if need be, rather than mixing small batches myself every time -- or down the road if I need it.
Here's a pic of my front bumper so far - after getting enough coats on it I noticed the damn thing has some waves and twists from bangs and repairs -- not nearly the condition I thought I bought... so I might be taking it right back down again to fix them... but...you get the idea...
Car is a '71 Charger - going to be this colour with a white bee stripe (yeah, I know, it's a '71), black vinyl top, hideaways. I have two hoods and decklids, so I'm probably going to alternate between standard hood with a blower style scoop through it, and a bulge hood with a standard air cleaner underneath. One set will probably be blacked out, the other, probably the bulge combo, in purple.... idea will be to flip between an old school '70s look, and a slightly nascar-ish look with a wheel swap as well. TTOs for the old skool... indy slots for the other...
Anyhooo... all that is probably waaay more than you wanted to know, but that's why I am really looking for a good balance between the workability and a way to achieve really good results with this stuff.....
No, I'm always glad to hear from a Mopar lover. The purple looks good on that bumper. I'm beginning a restoration/cloneing of a 74 Satellite Sebring (SS) and turning it into a Roadrunner with a slight bit of a twist. I photoshopped this together, and have after a million variations, came up with this: a 74 Roadrunner SS(SS, short for Satellite Sebring) LMAO, Dodge Rallye Green instead of the Lime or Deep Sherwood it originally came with (ugh), keeping the black vinyl top, blacking out the front valance and bulge hood with white stripes, a 74 Dodge Charger stripe with strobe variation, and gtx rallye stripes (black) on the trunk. Whaddya think? I've found a color that nearly matches what I want and I've ordered a candy green additive for the clearcoat. Am beginning this project after months of reading and researching!
I'm gonna try putting a metallic micro flake, emerald green 14 bucks, on the final basecoat, by dryblowing it on. I found an english site that sells compressed air cannisters you can load with metallic paint, about the size of a rattle can, and will experiment with that.
whaddya think?
Posted By: Anonymous
Re: New Paint job on a budget thread. - 11/02/0709:11 PM
That Satellite's gonna be a VERY nice car - and an ambitious new step forward for this kind of painting!! Candy & Flake!! Good luck, and can't wait to see how it turns out.
One thing - isn't it more of a phantom than a clone? Unless there really was a Roadrunner SS that you're cloning...
Posted By: Anonymous
Re: New Paint job on a budget thread. - 11/02/0710:35 PM
Quote: That Satellite's gonna be a VERY nice car - and an ambitious new step forward for this kind of painting!! Candy & Flake!! Good luck, and can't wait to see how it turns out.
One thing - isn't it more of a phantom than a clone? Unless there really was a Roadrunner SS that you're cloning...
at the very least, a bipolar mopar. . . I like the idea of a Roadrunner SS one off, it pays homage to the satellite line which we all know was the base line for the Roadrunner, but still upgrades the car. I've tried to include a lot of historical Mopar touches, the running birds on the front fenders are an homage to the older 1st gen rrunners, the dodge stripe going from the bulge hood through the doors I think sweep well with the shape of the body and complements the full vinyl, which many of these cars have dumped. The strobes in the rear are a no brainer, I love the strobes over roof on the hardtops, so finishing it off with the strobes had to be there. I found a place on the net that will make an SS badge that will work with the roadrunner badge. The car is going to have a new Mopar 360 magnum and will be converted to a four or five speed manual transmission.
So, I ramble. . .I'm working on fixing the honeycomb grille right now, but will post pics as I finish the pieces! I figure a candy rallye green with emerald micro flakes is a natural progression. The black will be a gloss black, with black candy clearcoat and black microflakes, so you'll see that as soon as the front valance is finished.
p.s. what's cool about this thread is that the wife cannot object to me saving about 13,000.00 bucks in restoration/painting charges. My initial outlay so far just in supplies is 50 bucks, and the satellite I bought three years ago only cost me 700 bucks. So, this whole project will be on the cheap.. .which sits very well with the little lady!
Re: New Paint job on a budget thread. - 11/02/0711:48 PM
Hoosier, what are you planning on doing to that poor, poor satellite? I think you got a bit too much going on there, and the vinyl top does nothing for it, but hey good luck w/ it, will definitely be unique.
Posted By: Anonymous
Re: New Paint job on a budget thread. - 11/03/0702:00 AM
Quote: Hoosier, what are you planning on doing to that poor, poor satellite? I think you got a bit too much going on there, and the vinyl top does nothing for it, but hey good luck w/ it, will definitely be unique.
but that was the seventies, over the top! There was even a Satellite Sunsomething or other. . .what was it called? Outrageous! Look at the Brady Bunch and their astroturf backyard! LOL!
Posted By: Anonymous
Re: New Paint job on a budget thread. - 11/03/0706:35 AM
Could someone who's got more knowledge about this process and is more familiar than I am with all the info set down in these many pages help me out? I painted one car over the summer that came out pretty good, and sold it. I'm ready to try again on my bus that I will be keeping. I've read MANY (100's!?) of pages trying to find out what kind of paint (alkyl enamel, not marine poly) I can find that I can get tinted to particular color swatches. I read that one person was able to get Rustoleum tinted at a HD; my local stores won't. I found "XO Rust" locally with a limited range of colors they can tint to. Anyone know of any other options, other than experimenting with my own mixing of different colors I can get at the local store? Your help would be greatly appreciated! Thanks
Posted By: Anonymous
Re: New Paint job on a budget thread. - 11/03/0703:49 PM
Quote: Could someone who's got more knowledge about this process and is more familiar than I am with all the info set down in these many pages help me out? I painted one car over the summer that came out pretty good, and sold it. I'm ready to try again on my bus that I will be keeping. I've read MANY (100's!?) of pages trying to find out what kind of paint (alkyl enamel, not marine poly) I can find that I can get tinted to particular color swatches. I read that one person was able to get Rustoleum tinted at a HD; my local stores won't. I found "XO Rust" locally with a limited range of colors they can tint to. Anyone know of any other options, other than experimenting with my own mixing of different colors I can get at the local store? Your help would be greatly appreciated ! Thanks
this method has its own wiki now, and it covers the basics. I'd start there for an abbreviated guide.
As far as paint, I found that Ace Hardware has everything I need. Their Rust Stop paint is made by Sherwin Williams, is cheaper than Rust Oleum, and has a tintable base for custom color matching. Don't waste your time on the Ace website, it's not user friendly. Go in to their paint department, pick up a brochure on the Rust Stop paint, then find the most experienced sales agent in the department and talk to them. The first time I went into our Ace, I talked to a young kid and he kept telling me that there was no custom color matching on Rust Stop paint. It took an older sales agent to straighten him out.
Hope that helps. . .
Posted By: Anonymous
Re: New Paint job on a budget thread. - 11/03/0709:03 PM
Quote: As far as paint, I found that Ace Hardware has everything I need. Their Rust Stop paint is made by Sherwin Williams, is cheaper than Rust Oleum, and has a tintable base for custom color matching. Don't waste your time on the Ace website, it's not user friendly. Go in to their paint department, pick up a brochure on the Rust Stop paint, then find the most experienced sales agent in the department and talk to them. The first time I went into our Ace, I talked to a young kid and he kept telling me that there was no custom color matching on Rust Stop paint. It took an older sales agent to straighten him out.
Hope that helps. . .
That's just the kind of tip I was looking for.
Is Rust Stop the same kind of paint as Rustoleum, so it should have the same kind of longevity? Thanks!
Posted By: Anonymous
Re: New Paint job on a budget thread. - 11/04/0712:24 AM
Quote:
Quote: As far as paint, I found that Ace Hardware has everything I need. Their Rust Stop paint is made by Sherwin Williams, is cheaper than Rust Oleum, and has a tintable base for custom color matching. Don't waste your time on the Ace website, it's not user friendly. Go in to their paint department, pick up a brochure on the Rust Stop paint, then find the most experienced sales agent in the department and talk to them. The first time I went into our Ace, I talked to a young kid and he kept telling me that there was no custom color matching on Rust Stop paint. It took an older sales agent to straighten him out.
Hope that helps. . .
That's just the kind of tip I was looking for.
Is Rust Stop the same kind of paint as Rustoleum, so it should have the same kind of longevity? Thanks!
Yep, if you google Ace Rust Stop Paint, it will give you a search result that takes you to Purdue University MSDA reports, and it's an identical match to a lot of the more expensive rust preventitive and acrylic enamel auto paints. . .just cheaper. ..
Posted By: Anonymous
Re: New Paint job on a budget thread. - 11/04/0702:29 AM
How much is the Ace paint, a gallon or a quart.
Posted By: Anonymous
Re: New Paint job on a budget thread. - 11/05/0703:17 AM
I am on the 4th coat right now, and I am still not able to get full coverage, Is this normal?
I am laying the paint down in thin coats, because i've been getting a lot of dripping paint effect on the fenders...but im praying sanding down will get rid of this, I just bought my 800 grit and I'll start tomorrow on it.
Re: New Paint job on a budget thread. - 11/05/0702:29 PM
Quote:
Quote: I am on the 4th coat right now, and I am still not able to get full coverage, Is this normal?
Yes it takes 4 - 6 coats to get full color coverage, if you are thinning it enough. I wouldn't worry about that and keep going.
You will need to sand out the drips on the fenders, don't wait too long to address them or it will take a while to get them sanded smooth again.
Also - its a LOT easier to take care of the drips and runs while you are still working the panel.
I found that good lighting makes a huge difference in spotting runs and drips and other errors so you can roll them out before it dries. I ended up buying a couple of the $29.95 halogen garage lights from Home Depot so I could really see what I was doing.
I had several coats that I thought looked great until I opened the garage door and got to see the side panels in real light. After that, I spent a lot of time arranging spotlights so I could see sideways down the panels. Standing up from 5 feet away it might look great, but when you put your face up the the panel and look down the side of the car you can really see what's going on.
Posted By: Anonymous
Re: New Paint job on a budget thread. - 11/05/0706:47 PM
funny how you mention that, i opened that garage for the first time yesterday as well and saw alot of imperfections, I started running around the house trying to find more lighting, came up with nothing.
I might be picking this up from home depot, i read they were only 30 $
Posted By: Anonymous
Re: New Paint job on a budget thread. - 11/06/0702:32 AM
Hello everyone, I will be starting my paint job this weekend using black Rustoleum enamel. I've got a prep question: Is it ok if I paint over the existing paint if I've scuffed it with 80-grit? I was told that I should gradually increase the grit after each round of sanding to about 400 for a optimal prepping surface - is this true? I did take the shine away from the existing paint with the 80-grit. Any advice/suggestion would be greatly appreciated! Thanks!
Re: New Paint job on a budget thread. - 11/06/0702:51 AM
80 grit is way to rough. the rougher the lower surfaces are the harder if will be for the paint to fill it in and get the layers smooth after every second one. i would at least get down to 320 for the initial layer before laying any paint.
Posted By: Anonymous
Re: New Paint job on a budget thread. - 11/06/0708:00 PM
Quote: How much is the Ace paint, a gallon or a quart.
I picked up a gallon of it for $18.99 + tax.
Posted By: Anonymous
Re: New Paint job on a budget thread. - 11/06/0708:33 PM
Quote: 80 grit is way to rough. the rougher the lower surfaces are the harder if will be for the paint to fill it in and get the layers smooth after every second one. i would at least get down to 320 for the initial layer before laying any paint.
Thanks Jerry, Yeah, I think I'll get down to 400. I just hope the sanding will get easier.
Posted By: Anonymous
Re: New Paint job on a budget thread. - 11/06/0711:56 PM
Quick question, what is the coldest temp you have painted at? I am wondering in low 60's is ok to lay down some brightside. Thanks!
Re: New Paint job on a budget thread. - 11/07/0703:14 PM
Quote: Quick question, what is the coldest temp you have painted at? I am wondering in low 60's is ok to lay down some brightside. Thanks!
this should answer your question:
I painted the orange bug in January, at about -15DEG C, and had some electric heaters that got the garage to about 5-10deg C!!!!! this was tremclad/rustoleum.
Posted By: Anonymous
Re: New Paint job on a budget thread. - 11/07/0710:57 PM
Well, from the looks of Chargers pics, I shouldnt have any issues! Thanks!
Posted By: Anonymous
Re: New Paint job on a budget thread. - 11/09/0703:01 AM
I've been having troubles with paint coming out good with rollers, and Because I want this to be perfect, I am planning on buying a spray gun...
Where can I buy one and how much?
Posted By: Anonymous
Re: New Paint job on a budget thread. - 11/09/0708:27 AM
I've been trying to get HVLP gun for my last 2 coats too, I borrowed a compressor but i've had bad luck finding a cheap gun in Canada, I've checked KMS / princess auto / lordco...i'll keep looking but if you find something let me know
It's been a week since my last coat
thanks
Posted By: Anonymous
Re: New Paint job on a budget thread. - 11/09/0711:51 AM
Fellas....go ahead and roll the final coats. Even if its a bit rough looking, once you wet sand it down to an EVEN matte finish, it will polish out beautifully.
Posted By: Anonymous
Re: New Paint job on a budget thread. - 11/10/0703:03 AM
vridaw, i just got one from princess auto, so recheck them, it was 18$
I'll try spraying a coat tomorrow and see how it goes.. Is there anything that I should know before I start spraying? Like techniques? PSI? how thin of paint should I be spraying?
anything would be great, it will be a learning experience for me since I have never sprayed a car before, but again, I've never rolled paint of a car before either..haha
Posted By: Anonymous
Re: New Paint job on a budget thread. - 11/10/0704:59 PM
If anybody is looking for clear Enamel, I found some.
Re: New Paint job on a budget thread. - 11/11/0712:40 PM
The harbor freight gun is one of the best for under $50. It is on sale for $20 right now. If you have one local, print out the add and bring it in, they will price match.
Re: New Paint job on a budget thread. - 11/14/0701:35 AM
Hey guys. I have been following this post for quite sometime. I am sold on the whole process. I have tried it out and am very pleased with the results. Now my only problem is I want to paint my 72 challenger sublime green. I see that someone had a picture of a hood that was tremclad #566. I live in Michigan and I know that paint is from Canada. Also I looked at their website and I don't even see that Color available. I have checked with my local box stores and no one will tint rustoleum for me. They said they use to but the stopped doing it. So my question is has anybody else have any ideas or found the right rusto color? Thanks in advance.
Posted By: Anonymous
Re: New Paint job on a budget thread. - 11/14/0712:47 PM
Though I used Brightside paint, I found out that Ace Hardware Stores will tint the Rustoleum (in Orlando area anyway). Also, Rustoleum is now selling a line of marine topside paints at Lowes. Brightside rocks but your color pallette is limited.
Posted By: Anonymous
Long time reader first time poster - 11/15/0702:08 PM
My truck was in despereate need of some new paint. The factory black was pretty worn and a collision on the passenger side needs repaired. I figure if this technique works for me then I can save some money over a Maaco job, learn something, and have some fun.
My dad was the one that told me about this process. "There's some guys on the web painting their cars with rollers." He was doing some research for painting his project Beetle and came across it. I laughed because I thought the idea was crazy. A little reading and some experimenting at home and now I believe it is legitimate.
I decided to try it out on the tailgate of my truck. It's small enough and can be removed so I figured it was perfect since I still have to drive my truck everyday to work.
I made a little quickie website to document the progress for my dad and some friends I told about my little project.
I'm taking time off from work tomorrow so I can do the rest of the truck. Wish me luck.
Here's a picture as of yesterday. I did finish polishing the rest of it after this photo but I wanted to show the difference between the polished (Porter-Cable 7424 with Poorboy's SSR2.5) and 1500 wetsanded surfaces. The portion of the tailgate in the lower left corner of the image (from the edge to the handle and F-150 logo). I'd say it looks good. My bodywork isn't awesome and there's still some scratches evident but I am more than pleased.
Posted By: Anonymous
Re: Long time reader first time poster - 11/15/0708:52 PM
Looks good frank... which paint and color are you using?
Posted By: Anonymous
Re: Long time reader first time poster - 11/16/0712:12 AM
He's using Ace Rust Stop (a Sherwin Williams Paint), it's international blue, and the name of his website makes a dirty old man wanna reach for the viagra!
Good job on the tailgate. I'm still hand sanding down my satellite (the guy I bought the car hand painted it with a brush three years ago,and it's filled with orange peel, brush strokes, and runs) and I'm getting ready to rust bullet the underside of my bulge hood.
It's nice to see another Ace Rust Stop guy on the thread...talk about inexpensive paint!
Re: Long time reader first time poster - 11/16/0703:59 AM
Several member have asked about mixing custom colors and who does it. Since I work next door to an Ace Hardware store, I thought I'd see what they had to say. Their answer was they can mix anything that has a tintable base. The Ace Stop Rust paint is available with a tintable base, and they showed me a color chart with about 20 different colors they can mix. They can also mix in three different sizes, pints, quarts, and gallons.
My question is, how much paint will I need to do my 86 1/2ton Ram?
Posted By: Anonymous
Re: Long time reader first time poster - 11/16/0712:36 PM
Quote: Several member have asked about mixing custom colors and who does it. Since I work next door to an Ace Hardware store, I thought I'd see what they had to say. Their answer was they can mix anything that has a tintable base. The Ace Stop Rust paint is available with a tintable base, and they showed me a color chart with about 20 different colors they can mix. They can also mix in three different sizes, pints, quarts, and gallons.
My question is, how much paint will I need to do my 86 1/2ton Ram?
Depends......color changes will obviously need more and your degree of thinning the paint will be a factor also.
I used 3 quarts on my Ramcharger but had to cover existing black paint. When it was hot and it had to be highly thinned, I could do the whole truck with about 4 ounces but coverage was more like a tint. Straight out of the can, the Ramcharger took about 16-20 ounces.
Re: Long time reader first time poster - 11/17/0704:56 AM
So then the amount of paint needed depends on the time of year and temperatures? I wanna try this on my truck, but I'm not sure when I'll be able to do it. Most likely probably next summer. I guess I could always get a gallon of paint, then I would always have mixed paint on hand for repairs nd touch ups.
Posted By: Anonymous
Re: Long time reader first time poster - 11/17/0707:57 AM
frank1380 , what Polishing compound are you using? and what orbiter?
I am going out tommorow to purchase an orbiter and dont want to spend alot of money, could use some help here
Posted By: Anonymous
Re: Long time reader first time poster - 11/17/0712:08 PM
440..I think a gallon for your shortbed should be more than enough. Try to find a cool and dry time of year to paint and save yourself some aggravation.
Re: Long time reader first time poster - 11/18/0712:00 AM
I stopped by ace hardware today. Looked at the colors they had in rust stop. Asked the guy if he could color match a picture of a sublime charger I had. Said he couldnt do it cause that is automotive paint. Said he has no way of cross referencing between auto and stop rust brand. So I looked at the color swatches he had on other paint. I found one that was close but he said he couldn't do it. Something about needing a special base to mix it. I have given up on painting my car a sublime color. I think I am going to go with a standard premixed paint. I see they also sell them in spray cans which might make it easy to paint the hard stuff. Like hood hinges and such. I am now thinking maybe a blue or red. I may just buy a couple of spray cans of paint to get an idea on colors. Cause that international blue used to paint that tailgate looks darker in the color swatch than it does in the pictures. I might have to go through the previous threads and look at more colors also. I appreciate the help guys and happy painting.
Posted By: Anonymous
Re: Long time reader first time poster - 11/18/0712:30 AM
anyone have a link to a step by step Polishing / Waxing?
how do you correctly apply turtle wax polishing compound anyone know?
Posted By: Anonymous
Re: Long time reader first time poster - 11/18/0701:48 AM
Quote: Looks good frank... which paint and color are you using?
It's Ace Hardware's Rust Stop and the color I got is International Blue. I went down there because I read somewhere that they could color match. I wanted a good "Ford Blue" and this one seemed a good match and was one of the pre-made colors.
Quote: My question is, how much paint will I need to do my 86 1/2ton Ram?
I bought 1 gallon for my 1997 F-150 and I may end up using half of it or maybe two thirds. I'm not painting the bed because it has a Line-X spray-in bedliner. The gallon of Ace's Rust Stop was $18.99
Quote: frank1380 , what Polishing compound are you using? and what orbiter?
The orbital polisher I bought is the Porter-Cable 7424. It was the budget blower as it cost me upwards of $150. I'm sure you can get a less expensive one. The polishing compound I bought is the SSR2.5 made by Poorboy's World. But I may end up getting the SSR1 to finish it as it still has some scratch marks in it. I bought the polisher and the compound from Autogeek.net. They also have a couple of good tutorial videos for polishing that I found very helpful.
I'm still updating my little page with the progress on the rest of the truck.
Re: Long time reader first time poster - 11/18/0702:20 AM
Quote:
Quote: Looks good frank... which paint and color are you using?
It's Ace Hardware's Rust Stop and the color I got is International Blue. I went down there because I read somewhere that they could color match. I wanted a good "Ford Blue" and this one seemed a good match and was one of the pre-made colors.
Quote: My question is, how much paint will I need to do my 86 1/2ton Ram?
I bought 1 gallon for my 1997 F-150 and I may end up using half of it or maybe two thirds. I'm not painting the bed because it has a Line-X spray-in bedliner. The gallon of Ace's Rust Stop was $18.99
Quote: frank1380 , what Polishing compound are you using? and what orbiter?
The orbital polisher I bought is the Porter-Cable 7424. It was the budget blower as it cost me upwards of $150. I'm sure you can get a less expensive one. The polishing compound I bought is the SSR2.5 made by Poorboy's World. But I may end up getting the SSR1 to finish it as it still has some scratch marks in it. I bought the polisher and the compound from Autogeek.net. They also have a couple of good tutorial videos for polishing that I found very helpful.
I'm still updating my little page with the progress on the rest of the truck.
Personally I would pull all the badges. If you are going to go through all the work, might as well do it correctly. Usually they held on by double sided tape. Can be removed with a heat gun, hair dryer, or take some fishing like and cut it off first.
Re: Long time reader first time poster - 11/18/0704:40 AM
Quote: I stopped by ace hardware today. Looked at the colors they had in rust stop. Asked the guy if he could color match a picture of a sublime charger I had. Said he couldnt do it cause that is automotive paint. Said he has no way of cross referencing between auto and stop rust brand. So I looked at the color swatches he had on other paint. I found one that was close but he said he couldn't do it. Something about needing a special base to mix it. I have given up on painting my car a sublime color. I think I am going to go with a standard premixed paint. I see they also sell them in spray cans which might make it easy to paint the hard stuff. Like hood hinges and such. I am now thinking maybe a blue or red. I may just buy a couple of spray cans of paint to get an idea on colors. Cause that international blue used to paint that tailgate looks darker in the color swatch than it does in the pictures. I might have to go through the previous threads and look at more colors also. I appreciate the help guys and happy painting.
When I asked, I didn't think about custom colors like that. I just wanted to see if they could mix colors other than white, black, red, blue and yellow. On the color chart I looked at, there was a really cool purple that I think I've settled on, with a flat black hood with gloss black racing stripes with subtle purple ghost flames airbrushed in. Looks awesome in my mind, hope it looks as good when it's finished.
I've been using the Rustoleum automotive spray primer to do my bodywork, as well as flat black spray paint for my grill and headlight surrounds, and Rustoleum "Hammered" black spray paint for my engine brackets to go on my chrysler orange 440. It would be nice to find a matching purple spray paint to paint the hard to reach areas like the door frames, but I will probably have to stick with a brush, or maybe my airbrush. I do have a small touchup gun, maybe that would work.
Posted By: Anonymous
Re: Long time reader first time poster - 11/18/0706:37 AM
^ that truck looks like it's going to be a long project ..hehe
I've been searching about Polish and wax for quite some time on here now, and after 2 of Aussie's posts i am convinced that I'll be returning my "turtle wax polishing compound" that I bought today.
But because we don't get Poorboy's SSR products in Canada, what other Polisher do you guys recommend? Preferably something cheap!
Thanks! Pics to come very soon!!
Posted By: Anonymous
Re: Long time reader first time poster - 11/18/0711:48 AM
I went with 3M rubbing compound and then 3m Finesse It on the first roller job I did. Have since switched to System One and love it as it polishes to a great shine and has everything you need in the kit.
Re: Long time reader first time poster - 11/18/0701:16 PM
if you guys want to find out everything there is to know about polishing, go to autopia.org and do some reading. Just remember as with any forum, every questions has been asked so try to search first.
Brew
Posted By: Anonymous
Re: Long time reader first time poster - 11/18/0701:56 PM
Great product/excellent results. If you want a really awesome shine after final buffing, use the foam pad again and slowly go over your panels with more polish. My red came out amazing with a mirror like finish.
Posted By: Anonymous
Re: Long time reader first time poster - 11/18/0702:04 PM
Tett, almost forgot, I purchased the pro kit which includes the polish, pad, and micro fiber cloth. Their pad setup is great because you can just flip back and forth on the fly and not have to worry about different compound contamination. You will have to wet sand up to 1500 grit (preferably 2000 grit) as it is not as aggressive as 3m rubbing compound. The good thing about using the finer grits of paper is that when you apply the System One, you will get a nice shine almost immediately and not have to work the buffer as much.
Re: Long time reader first time poster - 11/18/0704:41 PM
Great, thanks for the info.
Posted By: Anonymous
Re: Long time reader first time poster - 11/18/0706:10 PM
Quote: I went with 3M rubbing compound and then 3m Finesse It on the first roller job I did.
How did you like the result of those ? It's the only one I can get up here in Canada
Posted By: Anonymous
Re: Long time reader first time poster - 11/18/0709:41 PM
w00t! its done kinda. haha its all blue, hood still needs polishing and so does the drivers side head light, but im lovin it!
Posted By: Anonymous
Cold weather! - 11/19/0705:57 AM
I have been reading a lot on this site and have found tons of helpful info. My project is an 1982 GMC Jimmy (diesel) that is almost ready to roller. I have gray interior and a black hard top that is going to stay black. My body work isn't perfect, but not horrible. I wanted to do Rustoleum Regal Red, but wasn't sure if it would show the imperfections too much? Any suggestions? Also I live in north Idaho and its about 35 to 40 degrees in my garage...do all colors dry the same? thanks a lot for the help.
Posted By: Anonymous
Re: Cold weather! - 11/19/0701:38 PM
I went from black to red also but with very minor body work. You have to always remember that the darker and shinier the paint, the more noticable body work or existing dents and dings will be.
Posted By: Anonymous
Re: Cold weather! - 11/19/0704:41 PM
Thanks RCCS, Its black and primer right now. I just figure anything will look better than it does now. I just am to impatient to wait until the spring for warmer weather.
Posted By: Anonymous
Re: New Paint job on a budget thread. - 11/21/0708:33 AM
Alright everybody i have read every damn page lol! i cant wait to try this! ima do a test piece tomorrow and will have pics in two or three days cant wait dont let this thread die cuz i want input on my pics thanks in advance
Posted By: Anonymous
Re: Cold weather! - 11/22/0701:28 AM
Is anyone still using marine topside paint? It seemed like it was successful but nobody seems to mention it lately.
Posted By: Anonymous
Re: Cold weather! - 11/22/0704:50 AM
^ my blue subaru on the last page was using interlux brightside in saphire blue.
Posted By: Anonymous
Re: Cold weather! - 11/22/0705:46 AM
Your car looks great! Did you prime it before using the brightside? If so, What kind of primer did you use?
Posted By: Anonymous
Re: boat paint - 11/22/0712:23 PM
I used Brightside also. My BMW 2 tone job I only primed bare metal and areas I used filler on. The rest of the car was just DA'd except where the clearcoat was failing, I tried to take all that off down to the base color or primer. Went on like a dream. I sanded between all but one of the subsequent coats as I felt the next coat went on better. I like to give the coats a little something to grab onto, and the 'dull' sanded finish also makes it easier to see where you've painted and where you haven't.
Posted By: Anonymous
Re: Cold weather! - 11/22/0703:17 PM
Quote: Your car looks great! Did you prime it before using the brightside? If so, What kind of primer did you use?
thanks dude, yes i used primper over bear metal and over body filler. i used interlux Pre-Kote primer. on the rest of the body i just sanded off the clearcoat.
Posted By: Anonymous
Re: Cold weather! - 11/22/0705:32 PM
Did some digging around and found a Brightside document that references use at low temperatures, i.e, 5 deg C (40 F). Had not seen any reference to use under 50 deg prior to this. The document is dated 12/06. http://www.cpbsupply.com/paint/pdfs/international_brightside.pdf
I'm still using Brightside (Hatteras Off White 1990). I finished my truck in October, there are pix on the list. Today I applied my 4th and final coat to my truck cap (probably last warm day of the year- no garage). Note the 2 pictures of the curved surface on the rear of the truck. I was able to get that finish w/o polishing, no wax (used 800 grit between coats). Can't say the rest of the truck is that good, but this is what you 'can' get if you work with a lot of care. Brightside is great.
Mitch
Posted By: Anonymous
? about electric sanders and buffers - 11/24/0703:38 PM
Can someone in the know give a little about sanders? I did my last paint job's sanding by hand, thus not so much sanding. This next one I'd like to do a little better. Any advice? I don't want to spend big $ if I don't really have to. I have a little cheap random orbital for woodworking I could use. Thanks for any help.
Posted By: Anonymous
Re: paint job on a budget - 11/28/0702:08 AM
g'day, just wanted to share that i'm giving this poor mans method of painting a go! i'm using an australian paint called white knight rust guard, which is pretty similar except it has some epoxy resins in it as well as alkyd resins. i'm going for an orange with some nice gt stripes in black if i can when i finish the orange!
here's the car before i touched her, she looks good from a distance but that paint was full of chips, cracking and major crows feet.
that vinyl roof and chrome strips down the doors had to go, lots of nice rust under them! heres the car all bogged, primed and sanded.
first coat, thinned wayyyyy too much by accident! got lots of bubbles that wouldn't go away and it ran like crazy!
here she is after the second coat, will sand her down smooth and get rid of all those bloody bubbles!
Posted By: Anonymous
Re: paint job on a budget - 11/28/0702:20 AM
here's a better shot of the second coat, man it looks great in the photo, a lough rougher in reality
Re: ? about electric sanders and buffers - 11/28/0711:30 PM
Quote: Can someone in the know give a little about sanders? I did my last paint job's sanding by hand, thus not so much sanding. This next one I'd like to do a little better. Any advice? I don't want to spend big $ if I don't really have to. I have a little cheap random orbital for woodworking I could use. Thanks for any help.
I would pick up a porter cable 7424. use it for sanding, then use it later to buff the paint out.
I will also remind people to try a regular knapped roller if they are getting too many bubbles.
Brew
Posted By: Anonymous
Re: ? about electric sanders and buffers - 11/29/0703:29 PM
Quote:
I will also remind people to try a regular knapped roller if they are getting too many bubbles.
Brew
I was getting tons of bubbles and going back over the section with the roller without applying pressure didn't do much for me. What I did was do a 2 foot by 2 foot section at a time and then went back over it with the foam brush applying no pressure, just dragging it across. Worked perfectly for me.
These threads have been an awesome read. It took me a couple months reading on and off at work to get through all of the threads.
I don't know much about paint but has anyone thought about trying to roll on Dupli-Color Paint Shop paint? It's a automotive paint line from Dupli-Color but it's single stage made to be a DIY line. It's a lacquer paint so I don't know how well that would work. It's made to dry quickly so I don't know if it could be thinned enough or what you would thin it with to get it to lay smooth and not dry to quickly. If it could be made to work with rolling I think it would probably give great results. Unfortunately I couldn't find much info. about it on their site. http://www.duplicolor.com/products/paintshop.html
Posted By: Anonymous
Re: ? about electric sanders and buffers - 11/30/0712:44 AM
yeah i didnt find the knapped rollers that good, gave a much more irregular surface, just gotta get the mixture right and bubbles aren't a problem
Posted By: Anonymous
Re: ? about electric sanders and buffers - 12/01/0702:28 AM
Quote:
I don't know much about paint but has anyone thought about trying to roll on Dupli-Color Paint Shop paint?
Judging by the response I'd say not.
With so many choices so far, I don't know why I'd look for another. So far we have Tremclad, Rustoleum, Ace hardware, Tractor Supply, Van Sickle and at least one other in the alkyd enamels. In urethanes we have Petit, Brightside, and Rustoleum.
I think the key has always been to look for what is local and/or cheapest and give it a whirl. The magic has always been in the application of the paint, not the paint itself.
The key is not to thin the paint for the sake of making it thin, but rather to delay the dry time as to allow the paint to self-level. As many have reported, heat and humidity will change the optimum mix ratio as both affect drying time.
Most paint-shop paint is designed to be sprayed on and requires addition of hardeners and such. The beauty of alkyd enamel and monourethane is that they require nothing else to cure properly. For me, anyway, the simplicity of painting a car with just a few common tools and supplies found at any hardware store is what amazes me. No complex formulas, no expensive equipment, no overspray to clean up, no toxic cloud of chemicals wafting downwind, no large pile of money to get reasonable results.
Anyway, If it floats your boat, give the Dupli-color a whirl and let us know how it does. It is always nice to add another alternative to the list.
Posted By: Anonymous
Re: ? about electric sanders and buffers - 12/01/0709:19 PM
whats up guys, i just registered cause i had a little input on this subject. i have been reading about this all day, and all last night. from a few different sites. and the first site i read said that the mixture of paint and mineral spirits should be about 50/50. and if there are bubbles in the paint, then it is still too thick. i havent done this on my truck yet, but im in the process of getting stuff together to do it. i have a 99 ford lightning. i was maybe gonna take eitehr the gas cap off and do a test on that, or my tail gate. its black now, and im gonna keep it black. can you get this paint from home depot? the rust oleum? and responses are appreciated..thanks
Posted By: Anonymous
Re: ? about electric sanders and buffers - 12/02/0712:48 PM
Inspired by Aussie Driver�s ability to take this painting technique to the next level, I put together a summary document on 1. Porter Cable sanders/polishers 2. Lake Country Pads 3. Poorboys products 4. Polishing How-to Of course, all of this info is available on the web in various places; I just wanted it in one place so I knew what to buy.
Posted By: Anonymous
Ace Paint ? "Color Matching" - 12/02/0703:14 PM
Ace paint "stop rust" tintable Color Matching? Do you think they"Ace" can get it to match B5 blue or get real close to it? & What do you Thin it with ? & Can you use a HVLP gun"air"? & can you clear coat it? if so what kind of clear coat?
This is for a `70 `Cuda B5 int.&ext.Want to do it cheap.But Don`t want it to LOOK CHEAP!
If you take in a color chip, they'll match it exactly. If you don't have a chip, stroll through a lot of other paint stores with a pic of the b-5 blue and find one that's as near as you can get. Sherwin Williams for example. Then take that in and Ace will match it.
Thin it with Mineral Spirits, odorless. I used the Ace Brand.
I don't know about the HVLP stuff. Sorry.
Posted By: Anonymous
Re: ? about electric sanders and buffers - 12/02/0709:55 PM
Quote: whats up guys, i just registered cause i had a little input on this subject. i have been reading about this all day, and all last night. from a few different sites. and the first site i read said that the mixture of paint and mineral spirits should be about 50/50. and if there are bubbles in the paint, then it is still too thick. i havent done this on my truck yet, but im in the process of getting stuff together to do it. i have a 99 ford lightning. i was maybe gonna take eitehr the gas cap off and do a test on that, or my tail gate. its black now, and im gonna keep it black. can you get this paint from home depot? the rust oleum? and responses are appreciated..thanks
no one has any input for me? i just put the first coat on my gas tank cover, and i guess its gonna take a few days to finish that
Posted By: Anonymous
Re: ? about electric sanders and buffers - 12/02/0710:52 PM
You can get the rustoleum at Lowes, Home Depot, Super Wal-mart, Wal-mart, Ace hardware (the Ace brand is the same thing but cheaper)
and you can get it in gloss black, satin black, and flat black.
You'll have to get the mixture of Mineral spirts to paint just right for black though, it'll show orange peel and runs and any imperfections pretty easy. Do it in a well lit garage so you can see any imperfections and make sure you get the imperfections out before you add another layer, especially with black.
I just spent half the weekend sanding off a black paint brush paint job on a car I bought where the original owner put the paint on too thick and didn't wet sand. It was nothing but orange peel.
To give you an example of black orange peel:
and the sanding job. . .
I'm gonna take the time and prime it again. . . I had to go down to bare metal in some spot. . .
Posted By: Anonymous
Re: ? about electric sanders and buffers - 12/02/0711:42 PM
Quote: You can get the rustoleum at Lowes, Home Depot, Super Wal-mart, Wal-mart, Ace hardware (the Ace brand is the same thing but cheaper)
and you can get it in gloss black, satin black, and flat black.
You'll have to get the mixture of Mineral spirts to paint just right for black though, it'll show orange peel and runs and any imperfections pretty easy. Do it in a well lit garage so you can see any imperfections and make sure you get the imperfections out before you add another layer, especially with black.
I just spent half the weekend sanding off a black paint brush paint job on a car I bought where the original owner put the paint on too thick and didn't wet sand. It was nothing but orange peel.
To give you an example of black orange peel:
and the sanding job. . .
I'm gonna take the time and prime it again. . . I had to go down to bare metal in some spot. . .
ya i actually got everything from wal mart last night. i took the gas cap off the truck to try it. i sanded first wiwth i think 120g REAL REAL light. i think it might have been too much grit. but its not bad. there are little bubbles in it, but im sure when i wet sand those will come out. im using 600, 800, 1200, then 1500 grits in that order. and after all that ima polish it. im sure it will look good. just waiting on the sand paper. i ordered a bunch off ebay for dirt cheap, so im just waiting for them to get here...cant wait!
Posted By: Anonymous
Re: ? about electric sanders and buffers - 12/03/0701:31 PM
Quote:
Most paint-shop paint is designed to be sprayed on and requires addition of hardeners and such.
While it is designed to be sprayed on the thing with this particular type of paint which is why I mentioned it is that it's single stage. You don't mix in any hardeners or anything. You use it straight out of the can. So in theory anyway it could be rolled on. But since it is actual auto paint I would think there could potentially be even better results with it. It's of course more expensive than Rustoleum and the like but significantly cheaper than typical auto paint. It's about $20 a quart. If I had something that needed painting I would give it a whirl.
Quote: Ace paint "stop rust" tintable Color Matching? Do you think they"Ace" can get it to match B5 blue or get real close to it? & What do you Thin it with ? & Can you use a HVLP gun"air"? & can you clear coat it? if so what kind of clear coat?
This is for a `70 `Cuda B5 int.&ext.Want to do it cheap.But Don`t want it to LOOK CHEAP!
Thanks, JZ`Cuda
NEED MORE INFO on the HVLP air gun & Clear coat & can you use Thiner? Thanks again!,JZ`Cuda
Yes, Yes, and Yes. You can use them all, but why bother with this method. If you are going to go that route, you should use regular auto paint (base coat/clear coat.
Quote: Yes, Yes, and Yes. You can use them all, but why bother with this method. If you are going to go that route, you should use regular auto paint (base coat/clear coat.
MONEY! I live in MICHIGAN lost my job. Almost lost my house. times are rough! anyway Got everthing just no paint. Thanks,JZ`Cuda
Posted By: Anonymous
Re: ? about electric sanders and buffers - 12/04/0707:40 PM
Quote:
Quote: whats up guys, i just registered cause i had a little input on this subject. i have been reading about this all day, and all last night. from a few different sites. and the first site i read said that the mixture of paint and mineral spirits should be about 50/50. and if there are bubbles in the paint, then it is still too thick. i havent done this on my truck yet, but im in the process of getting stuff together to do it. i have a 99 ford lightning. i was maybe gonna take eitehr the gas cap off and do a test on that, or my tail gate. its black now, and im gonna keep it black. can you get this paint from home depot? the rust oleum? and responses are appreciated..thanks
no one has any input for me? i just put the first coat on my gas tank cover, and i guess its gonna take a few days to finish that
I've only used Brightside, but worked with diff ratios (from 10-0%) and found I can get bubbles w/ any. There are other variables besides solvent ratio. I think how much paint you apply, how hard you roll and temperature also affect bubbles. And there are multiple techniques for bubble removal. Foam brush, roller, breath..
mitch
Posted By: Anonymous
orange peel - 12/06/0703:48 AM
hey guys, im up to my fifth coat now and i still haven't got full coverage, and i'm finding that even after wetsanding the paint lays down with quite a bit of orange peel, is this normal? does brightside have this problem? if not i may lay down my final coat as brightside. cheers col
Posted By: Anonymous
Re: orange peel - 12/06/0704:41 PM
Hello folks:
I've been reading this great set of threads for a while now, and hopefully this is some decent advice for Aussie:
Orange peel means the paint is drying before it has a chance to fully level, either too thick in one layer (trying to cover too much at once) or the temperature is too hot for your thinning ratio=Paint/spirits.
I've painted cars over the years and talked to lots of car painters. They all hate reds because the paint is "thin" and doesn't cover until there are lots of coats. If these are spray painters saying this, maybe it applies here too.
Thinner coats and more of them. Through the whole history of this discussion there are people who paint red and are not satisfied and those who turned out nicely.
The good ones always said 8-10 coats is what it took for reds.Probably is what you need.
LESS PAINT per layer , Forget complete covering for now, and more total coats. Just try to get level coats with each pass I would say---not having tried this yet myself. If you get enough thin coats on there you WILL have coverage.
Best of Luck
Mike
Posted By: Anonymous
Re: orange peel - 12/06/0710:44 PM
so far, my test is doing awesome. im only doing my gas door for now, im taking my time with it. i actually wet sanded w 600g twice. and last night i did 800g. so i think i have a total of 4 coats now. i could probably even polish it now and i would be VERY happy with it. but im gonna sand w 1000g, then1200 then prolly 1500, and possibly 3000 just for shits and giggles. i may just said with 1000 tonight, then move to 1200g, then put another coat on. mind you, the truck is black. but like i said, it looks VERY good so far! VERY SHINY!! ill post pics!!
Posted By: Anonymous
Re: orange peel - 12/07/0712:46 AM
i just sanded with 1200 and 1500. and applied another coar of paint. am i supposed to sand it one last time after this coat dries? or just polish it? or do i sand and polish it?
Posted By: Anonymous
Re: New Paint job on a budget thread. - 12/07/0704:46 PM
Re: New Paint job on a budget thread. - 12/07/0708:47 PM
I agree, excellent job
Posted By: Anonymous
Re: New Paint job on a budget thread. - 12/07/0709:25 PM
no one gonna answer me?
Posted By: Anonymous
Re: New Paint job on a budget thread. - 12/08/0704:01 AM
I'd wet sand one last time, wipe it down with a mineral spirit dampened cloth, let dry, wipe it down with a tack cloth, and then break out the polish and polisher.
I'm wet sanding in between every coat. ..
Posted By: Anonymous
Re: New Paint job on a budget thread. - 12/08/0708:08 PM
Re: New Paint job on a budget thread. - 12/09/0701:52 AM
Quote: I'd wet sand one last time, wipe it down with a mineral spirit dampened cloth, let dry, wipe it down with a tack cloth, and then break out the polish and polisher.
I'm wet sanding in between every coat. ..
im wetsanding in between every coat too. but after the final coat i sanded with 3000g. and after polishing, i could still see the scratches
Re: New Paint job on a budget thread. - 12/09/0703:31 PM
What are you using to polish with? Alot of times you have to use rubbing compound 1st and then a polishing compound.
Posted By: Anonymous
Re: New Paint job on a budget thread. - 12/10/0710:52 PM
I used a PC with Poorboy's 2.5 swirl remover, followed by Poorboy's polish, and Poorboy's natty's red wax. My results speak for themselves.
I just finished rolling my last coat on a week and a half ago, and I am almost done with the detail work. I was lucky, no orange peel, bubbles or anything!
Re: New Paint job on a budget thread. - 12/11/0712:41 PM
skylark- is that brightside or rustoleum? looks
Posted By: Anonymous
Re: New Paint job on a budget thread. - 12/11/0705:53 PM
Quote: skylark- is that brightside or rustoleum? looks
Thank you I used rustoleum. I'll have to get some better pictures in the sun, seeings that these were taken under my tent, but i'm extremely happy with the product. The paint is actually a combination of gloss navy blue and gloss black. It would be interesting to know if these two colors roll on differently, because i literally rolled it on and all bubles were gone within a few seconds and it selfleveled perfectly.
Posted By: Anonymous
Wow! New to board - 12/12/0708:03 PM
I bought the magazine that pointed to this forum thread and I couldn't help but join! Warning I don't have a Mopar! Feel free to tell me to leave. I have read a significant part of the three parts but some of the stuff is too advanced for a painting rooking like me!
Now for the long boring background part. I do have a question so I will pose it up front: Working with primer, can you wet sand the primer? The primer fills the sand paper very fast (the primer has dried for about 20 hours overnight outside in Calif high humid night), but I am afraid that the water will cause rust to start under the primer. Much that I have read from other sources say that you should go through all the steps (etching, primter, sealer, paint, clear). This discussion says that the Rustoleum goes over bare metal, does that mean that I will get good long term adhesion and rust protections if do the primer and then wet sand the primer? I am using the grep primer on most with the red rust primer (looks like the old red led that we used in the Navy) on the heavy surface rust where the paint is completely gone.-- back to background:
I have a 1972 Chevy pickup that I have owned for 16 years, a 1970 Jeepster (which in a round about way makes me a distant cousin) plus other non-interesting vehicles.
After reading the article it was like a calling. My truck has needed paint since I got it. About 10 years ago I got two estimates to paint it but they were very high. The second guy told me that since there was surface rust there was no hope. That led me to believe that spending all that money would be a waste.
Now this article. Not only could I paint it myself but it wouldn't cost me my retirement. So I have started. I am retired so I have the time. I recently got a real cheap shell that I am painting at the same time. The Rustoleum Hunter Green is almost the same color as my truck. I have some body work to do (a tree limb fell on the top, I backed into a guy and mother nature got to the bottom of the front fender on one side) but since most of the 35 years have been in southern California, it is wonderful shape.
I can post pictures at anytime if there is interest. I have some before pictures and I am starting a log of my learning. Thank you all for keeping all of these three parts, with out them I may not have had the courage to start..... john.
Posted By: Anonymous
Re: Wow! New to board - 12/12/0710:15 PM
Quote: Working with primer, can you wet sand the primer?
Welcome! I'm not sure of the politically correct answer, but i wet sanded my primer before i began to paint. Rustoleum is made to prevent rust, and can adhere (to my experience) anything. I too had surface rust issues, but that was taken care of when i sanded the whole car down (with 60 grit sandpaper) before i started this whole project. There's been a couple people who say dont bother, because Rustoluem can go over rust, but it makes the surface a lot smoother and more uniform. Yes, lets see these pictures!
Posted By: Anonymous
c20 pics - 12/12/0711:41 PM
Truck as I got it years ago! It needed paint then!
Posted By: Anonymous
Re: c20 pics - 12/12/0711:46 PM
Truck as it appears today, started!
Posted By: Anonymous
Re: c20 pics - 12/12/0711:50 PM
Finally (for now), the 80 shell that I got a couple of weeks ago after a a first coat on roof.
Posted By: Anonymous
Re: c20 pics - 12/12/0711:54 PM
Oh yea, the "red leaded door" with the heavy rust primer!. I hope to get it white primer tomorrow and maybe get first coat on Friday.
Ok... here are my thoughts on your project... if I were doing it...
I would sand that puppy to get all the rust off.
Like the other writer said... I would be using an agressive grit for the initial ripping down of the original paint and the rusty surface areas. You might use the 60 grit for the initial ripping... but I would then do a 120 or 180 after just to minimize the 'scratches' that the coarser grit will cause. After all, primer or paint can only fill in 'so much' of the grooves that the coarser grit can cause.
I would think that the truck might be a good candidate for two coats of primer... This will give you more then enough primed thickness to work out the wetsanding etc and not find yourself taking the surface down too thin.
I don't think you should look at using aerosol bombs to spray primer on to the body. You would be better off using a roll on primer. This will give you a far thicker layer of primer and better coverage.
My personal preference, having used about five different types of primers... is the primer designed for Brightside paint. I was blown away by how much better it covered the body when I rolled it on. I think it has a higher percentage of pigment material per drop..
On the other side of the debate, I would be negligent to not mention that there are some practitioners here who have gone straight to the paint stage and bypassed the primer stage. After all, Rustoleum/Tremclad and Brightside are quite capable of going directly on to metal.
But I like the use of the primer in order to get the entire body up to one uniform starting color. As well it gives you an initial idea of any nicks, bumps, defects etc that you might want to do a little further bodywork on before proceeding to the painting stage.
One other fast HINT here is that if you are going to go the primer roll on route... cut your primer with 50% of the paint color you are going to use for the body painting. Let us say you are going to paint that truck red. The canned primer you are going to use is gray. So make a 50 / 50 mix of gray primer and the red paint.
What this will do is lay down a 'starting coat' that is closer to where you ultimately want to end up. The same story would apply to whether you were going white, black, green, blue, etc. Think of this primer hint as being like in a 500 yard dash for your project and you are cheating by starting 50 yards further down the track when the race begins. Its a cool cheat.
I would then primer the entire vehicle so that the whole body is one uniform color. This will make the addition of the paint layers much more uniform. This is especially important when dealing with a body of many colors at the start.
Yes... you can wet sand your primer once it has fully cured ( dried ). BUT what I would make sure of is that one I have completely wet sanded the entire body I would then let it fully dry. I would not want one ion of h20 left clinging to the primer.
And I don't think I would add any soap to the wet sanding of the primer. I would not want to chance any detergent being left behind attached to the primer.
Once you have done the above steps and waited a few days for it to fully dry... I would then go over it with a very very light dry sanding of the primer. This is just to give one final smoothing out of the primer.
Ok... so let us assume we have made it to this stage, I would next go to wiping the entire primered body with a slightly dampened CLEAN cloth ( dampened with mineral spirit ). This is to get any remaining foreign matter off the primered surface.
And AGAIN... let it fully dry so that any of the mineral spirits that were used to wipe down the primer have fully and absolutely evaporated. You don't want any of those mineral spirit molecules left clinging to the primer.
At this point you should be 'good to go' ahead with starting to do the roll on paint job. And one of the benefits of having 'rolled on' your primer is that you will have developed your technique for rolling - and you will have become familiar with all the surfaces and nooks and crannies of the body that they will be later painting.
Don't know if this helps any. But this is basically the recipe I would have done if I was starting with the truck I saw in your pictures.
Best of luck and welcome to the club
And out of curiousity... what color are you going to go with.. ?
Marq
Posted By: Anonymous
Re: c20 pics - 12/13/0707:03 AM
Marq, Thanks for the great info. Can you be more specific on the Brightside primer? I looked on the net and found some marine stuff by Interlux. Is that what you had in mind? The red rust primer from Rustoleum is quite heavy. I posted a picture of the passenger door that I did with that.
I want it to be as close to its original color so I am going with Rustoleum Hunter Green. That is the color that I have on the shell top. I completely stripped the hood and have one coat of rustoleum primer on it. I wet sanded it this afternoon and it is looking ok. I covered the bare spots with rattle can primer to protect it for the night. After reading your post, I think I will put another coat of primer on it tomorrow.
Quote: Marq, Thanks for the great info. Can you be more specific on the Brightside primer? I looked on the net and found some marine stuff by Interlux. Is that what you had in mind? The red rust primer from Rustoleum is quite heavy. I posted a picture of the passenger door that I did with that.
Yes... the Brightside primer is made by Interlux... and you can buy it in light gray or a darker blue gray. I have no problem with the Rustoleum primer though...
Quote:
I want it to be as close to its original color so I am going with Rustoleum Hunter Green. That is the color that I have on the shell top. I completely stripped the hood and have one coat of rustoleum primer on it.
One nice thing about the Hunter Green is that you can add black to it to get it even darker if you wish. You would have to refer back to our previous discussions here on creating a color sample palette to do a little sample color mixing to figure out what ratio of Hunter Green to black you might need to add to get the 'perfect' matching color...
Quote:
I wet sanded it this afternoon and it is looking ok. I covered the bare spots with rattle can primer to protect it for the night. After reading your post, I think I will put another coat of primer on it tomorrow.
The one thing that leaves me a bit leery about the spray on aerosol primers is that I often wonder just how well they penetrate the subsurface and build up an even layer on the surface. Have you ever seen those aerosol can of 'artificial snow' that you spray on windows to give your house that 'Christmas' look of frost in the windows. Some folks also use that artificial canned snow directly on their Christmas tree. Well... I look on aerosol primer as being just like that crap. Half of the 'product' ends up in the air. Lots of the stuff loses its adhesion while being propelled through the air. And even when it lands on the target, it sometimes doesn't gain enough adhesion and just 'sticks' on the surface of the target ( and easily blown off by simply blowing at it or rubbing it with your hand or when the dog walks by and brushes against it.
The canned primer that you roll on goes on 100% with no loss into the air or on to the driveway. And as the added bonus you can cut it with the paint you are planning to use to help you get a head start on laying down the real color.
Since you are heading towards a hunter green... and you are using the Rustoleum 'brownish red' primer.... I would think that a nice black rustoleum paint mixed with the red oxide primer would provide a good color base to build the subsequent Hunter Green paint layers.
.
Posted By: Anonymous
Re: c20 pics - 12/13/0708:54 PM
marq,
Cool ideas! I just used the rattle can to temporary cover the bare spots where I sanded the primer yesterday. I will sand it off today before I roll on another coat of primer. Being close to the ocean, as soon as the night dew hits bare metal, you get surface rust.
I put a second coat of hunter green on the shell this morning and it is already looking very good. I am going to go back to the very early posts and see what the pioneers got after a second coat. I am not having much trouble with bubbles and very little orange peel so I must have the mix close to right.
I do have a question about roller pressure. I saw where you should go over it with just the weight of the roller after laying the paint but how hard to you press the roller when applying the paint. It makes a big difference on how thick the paint is.
And while I am typing, the center of the shell is getting roller over-lap which makes it darker, will that go away as I get more paint on?
Lessons learned, I paint outside because there is a lot less dust there (at least on a nice calm day like today). But yesterday's coat that I put on in the garage had a fair amount of dust and crap in the paint even tho I washed down the garage as best as I could--too much junk to fire hose it .
Regardless of how the truck turns out, the shell is going to far outshine my loftiest expectaions! john
I do have a question about roller pressure. I saw where you should go over it with just the weight of the roller after laying the paint but how hard to you press the roller when applying the paint. It makes a big difference on how thick the paint is.
The question of 'how much pressure to apply' during the initial rolling or the followup bubbble popping roll is kind of hard to quantify or describe in text. It is a technique that you will develop on your own BASED on how things have gone during the course of your painting.
For myself, the trick is to not overload the roller with paint. It's not like painting a wall in your house with housepaint where you load up the roller and repeatedly go over it to spread the surplus paint on the wall. With the car, the trick is to load the roller and then unload a lot of it by repeatedly rolling it off IN THE TRAY before putting the roller on your car body.
With the car roll on paint job, you are adding only a thin layer each time. And so you apply enough pressure to transfer the paint from the roller on to the car body. What you are trying to avoid is glopping on so much paint that you start getting lines of paint on the body from where the paint tends to spread to the two ends of the roller ( where it lays on a thicker amount of paint ).
The lines that you describe happen when a little too much pressure is being applied ( as it is forcing the paint on the roller to the outer edges of the roller ).
You know you are applying too much pressure when you are getting too many bubbles. That is because the air pockets in the foam roller are being squeezed out with the paint when you are pushing down too much on the roller. Since you are not having much problem at this point with bubbles, we can assume your paint to mineral spirit ratio is probably good.
But because you are getting lines, you may be overloading the roller just a bit too much or still applying a little more pressure then you need.
IF you notice you are getting lines ( caused by the outer edged of the roller ), you have two things to keep in mind.
a ) when loading up the roller ( and then unloading the excess in the paint tray ) tilt the roller and apply a little extra pressure on each end of the roller to try to lessen the amount of paint that is gathered on the two ends of the roller.
b ) if lines happen, try to go over the area and 'work out those lines' by gently going over and over the spot to spread the concentration of paint out more. The trick here is to know when to NOT keep working over an area. Its cool to nail it in the first 20 or 30 seconds... the paint is still fresh and workable. But once the fresh layer started to cure it could lead to elephant skin if you try to work it too long.
Quote:
And while I am typing, the center of the shell is getting roller over-lap which makes it darker, will that go away as I get more paint on?
As the layers of paint 'add up', the overall paint job will finally reach a point where the maximum level of pigment on the body or panel is achieved. Once it reaches that point the car will have reached one uniform color overall. IF one area looks a little darker then the rest at the early stages or early coats, that is nothing to worry about.
I would worry if it was still noticable by the time you have six, seven or eight layers on.
Quote:
Lessons learned, I paint outside because there is a lot less dust there (at least on a nice calm day like today). But yesterday's coat that I put on in the garage had a fair amount of dust and crap in the paint even tho I washed down the garage as best as I could--too much junk to fire hose it .
Regardless of how the truck turns out, the shell is going to far outshine my loftiest expectaions! john
I think the one thing people always have to do is to burn into their memory exactly how the project looked when it began. That is why it is a valuable reminder to oneself of exactly how things WERE.
For some reason people's brains are odd. Our brains are designed to 'fill in the blanks' and a memory of a rusto or primered vehicle or faded vehicle sometimes fade as we apply more fresh paint on to the project.
The happiest users of the roll on paint job are usually the folks who know exactly where their vehicle 'started from'. They are able to step back from their project at the end and appreciate the degree to just how much better the vehicle is 'today' compared to when it started.
So hopefully at the end of your project, you will end up with results that are equal to that of a lot of the other folks that have posted up their pictures in this message thread.
And the one thing that should give you confidence in your effort is that most of your fellow users started out at the very same point as you in this rollon technique.
Just be sure to put patience in your tool box. That will be the single biggest asset you can bring to the project. I took my time with my car... because I knew that in the end whatever I put on the car was going to be there a long time ( or else in a disaster scenario I was going to have to spend money to rip it all off and have it sprayed at a body shop ). Since shelling out big bucks to the bodyshop was not going to be possible, I took my time to get each layer as good as I could.
I guess you could say that the time you spend being picky with each layer will hopefully pay for itself with a finished product that will look good for the next couple of years.
One of the most valuable things you can do for yourself during the project is to start looking at other cars paint jos. Whether it be a brand new car sitting on a dealer's lot or some car parked next to you at the shopping mall. Soon you will have an eagle eye at spotting just how crappy even factory or body shop paint jobs really are. Fish eyes, uneven paint concentrations, areas with more shine then others.
Our problem with our projects is that we literally are working one or two feet away from our work. We see every flipping hair, bit of dust or tiny bug that lands on our paint job ahhahhaha. We tend to see every tree in the forest and it becomes hard to step back at just appreciate the entire forest. But once you start staring with an eagle eye at everyone elses 'tree' ( the cars on the dealers lot or in the parking lot or on the road ) you soon begin to appreciate that your 'tree' is equal to or better than that other guy's tree. And at that point you can also begin to appreciate how good your forest or overall paint job looks.
Actually, one benefit of doing a roll your own paint job is that you do become really good at spotting the defects or imperfections on 'real paint jobs'. I often found myself pointing out in disgust to my wife just how shoddy the paint jobs were on vehicles sitting in new car showrooms ( where you would figure that that brand new factory paint job should be the ultimate level of perfection to be envied ).
. .
Posted By: Anonymous
Re: c20 pics - 12/14/0704:35 PM
Quote:
Quote: I often found myself pointing out in disgust to my wife just how shoddy the paint jobs were on vehicles sitting in new car showrooms ( where you would figure that that brand new factory paint job should be the ultimate level of perfection to be envied )
It's soo true. I was in the mall, and they had a few new cars on display and i couldnt believe the shoty work they were presenting! Even the paint on my older cars were better than these new $35,000 cars. It's crazy. However, you're exactly correct. It has made me really appreciate the work i've put into my car, and be proud that i've given it the best chance at a good paint job that i could. And to think, i almost took it to Macco..
Posted By: Anonymous
Re: New Paint job on a budget thread. - 12/15/0712:30 PM
Been rolling (pun) with my all satin black paint job for a year (note, holds up great) but ready for a change, I'm keeping the satin hood, and rear taillight panel, but doing the body in "Almond" rusto. Doing the fender first to make sure I like the color, here's after 2nd coat.
Posted By: Anonymous
Re: New Paint job on a budget thread. - 12/15/0706:39 PM
Quote: Been rolling (pun) with my all satin black paint job for a year (note, holds up great) but ready for a change, I'm keeping the satin hood, and rear taillight panel, but doing the body in "Almond" rusto. Doing the fender first to make sure I like the color, here's after 2nd coat.
The concept of satain black with the almond sounds and looks great! This method is just fantastic. I mean, who else can just decide to jazz up their paint job whenever they feel like? Surely not those guys with $1000 paint jobs. Plus if we ever need to touch up a spot later, we can just hit up lowes for under $10. I feel bad for those other guys
Posted By: Anonymous
Re: New Paint job on a budget thread. - 12/15/0707:39 PM
Quote:
Quote: Been rolling (pun) with my all satin black paint job for a year (note, holds up great) but ready for a change, I'm keeping the satin hood, and rear taillight panel, but doing the body in "Almond" rusto. Doing the fender first to make sure I like the color, here's after 2nd coat.
The concept of satain black with the almond sounds and looks great! This method is just fantastic. I mean, who else can just decide to jazz up their paint job whenever they feel like? Surely not those guys with $1000 paint jobs. Plus if we ever need to touch up a spot later, we can just hit up lowes for under $10. I feel bad for those other guys
Excellent point! Only "Rollers" can change their paint job every year without going broke!
Re: Ace Paint ? "Color Matching" - 12/17/0701:25 AM
Quote:
NEED MORE INFO on the HVLP air gun & Clear coat & can you use Thiner? Thanks again!,JZ`Cuda
JZ, try the Honda-Tech.com board. They have a long thread on the $50 paint job (up to 193 pages as of this afternoon). I know a few of them sprayed on Rustoleum and a couple of other paints.
Posted By: Anonymous
What Yall Think??? - 12/17/0708:58 PM
Hey thanks for all the help from everybody. I finished my truck about 2 or 3 months ago and I'm very pleased with the paint job.. I can say I need more work on my bodywork skills but other than that it turned out great. I didn't even final sand and polish because I was pleased with it and didn't want to mess up a good thing. But thats everybody again...
Should I keep it on the fat 15x10's or take the 22's off my car and put them on my truck???
Posted By: Anonymous
Re: What Yall Think??? - 12/17/0710:06 PM
But don't get me wrong there is orange peel and one or two runs but I'm pleased.. I have a few roller marks too.. I didn't have a polisher all I have is a regular ole car waxer from walmart I figured it wouldn't be able to get the scratch marks out of 1500 or 2000 grit sand paper but if you got any advice I could use please give it to me..
Hey thanks for all the help from everybody. I finished my truck about 2 or 3 months ago and I'm very pleased with the paint job.. I can say I need more work on my bodywork skills but other than that it turned out great. I didn't even final sand and polish because I was pleased with it and didn't want to mess up a good thing. But thats everybody again...
It looks great. Now the big questions : a ) any pics of the original... so we can see the change.. b ) what brand of paint ? c ) and what is the color... cuz folks are always looking to see what these colors look like on 'real vehicles'...
Marq
Posted By: Anonymous
Re: What Yall Think??? - 12/18/0712:45 AM
Quote: But don't get me wrong there is orange peel and one or two runs but I'm pleased.. I have a few roller marks too.. I didn't have a polisher all I have is a regular ole car waxer from walmart I figured it wouldn't be able to get the scratch marks out of 1500 or 2000 grit sand paper but if you got any advice I could use please give it to me..
Thanks
You did a great job! However, perhaps i'm bias because i enjoy detailing, but after i finished rolling my Skylark, i couldnt wait to throw some swirl remover, and the rest of the line up on it. It really makes the paint job, and theres no worry with ruining what you've already got, because detail just enhances the shine you already have. I really hope you're able to get ahold of a good polisher and supplies, it's totally worth it.
Posted By: Anonymous
Re: What Yall Think??? - 12/18/0702:35 AM
Here is a few but you can't really tell that it's scratched up and chipping and had a few bad dents with a new primer hood... The color is Rusteolum Blue with just a little bit of black mixed in... I was going for a darker blue but didn't have enough black I guess to make it work.. But I like the color I came out with.. Will a little walmart car waxer get the 2000 grit sand paper marks out of the paint job with the right polishing compound??
Posted By: Anonymous
Re: What Yall Think??? - 12/18/0706:10 AM
A cheap buffer from Walmart probably wont have the punch to get your swirls and scrapes out. What kind of RPM do they offer, do you know? If you really want an outstanding job, a Porter Cable is really the key, however they are expensive. Here is what my fender looked like after compound, polish and wax with a porter cable.
Posted By: Anonymous
genuine australian rust guard paint job - 12/20/0701:59 PM
hey, so i've just finished my paint job so i thought i'd show off the results! For your unedumacated information she is a '71 Ford Falcon. the GT version of this model is the most popular and in highest demand classic car in australia, it was the fastest four door in the world in its day. though myne isn't a GT (thankfully) i went with some GT themed stripes and boot blackouts. here is a before
and of course here is after more... so now you've seen what i've done i'll tell you about how this all came about. i'm yet another student at university who can't afford to pay someone to paint their car, but i love my car and i hate to see it detiorate, with rust taking hold and generally looking her worst. so i'm very thankful to all of you for giving such detailed and reassuring information that persuaded me to try this.
So anyway i live in australia so we don't have tremclad or rustoleum, but some very common paints we have are two competing products, one called kill rust and one called rust guard. i decided to go with rust guard, just because i like it, have used it before and it seems to work well and holding back rust, and i also had some primer of the same brand already!
now rust guard is slightly different to rustoleum/tremclad because along with alkyd resins (30-60%) it contains epoxy esters (0-10%). i wasn't sure how much this would affect the useability of this paint so i did a test piece on an old toolbox that was rusty and badly pitted, so i thought if i could make this look good i could make anything look good! it turned out amazing so i gave it a crack on the whole car. it was probably too small of a test piece but i just rolled with the punches and worked it out as i went along.
Another difference in this method in australia is we don't have anything called mineral spirits, but the equivalent here is what we call white spirits, and nobody uses it to thin paint!, though the paint already contains it! the paint also contains what we call mineral turpentine which is a turpentine substitute. this is what is recommended on the tin, and what worked alright though i think it could definitely level a little better.
i should also note that we do have brightside here yes but it seemed expensive and a little harder to use as far as prep and possible fish eyes etc. and rust guard was cheap, im poor, easy decision really.
so i layed the paint on, which i thinned with penetrol, about 1L of penetrol lasted 2.5-3 litres (litres are about 101% of a quart) of paint so i guess about a 1:2 mixture. this thinned the paint a lot, and when i added any turps to the mix it got way too thin, ran and bubbled like crazy which scared the crap out of me on my first coat.
after resolving that issue the following coats layed on very nicely, with some buildup of orange peel which took hours on end to sand out. it took me 7 coats to get good coverage, then i layed down an eighth coat for luck, though i could've done more but i needed to get it on the road so i could see family for christmas.
i spray canned the stripes and other black features and learnt a valuable lesson about the tenacity of overspray! she looks pretty good atm without a final high grit sand, but i think i will skip this and just work the paint with a slightly harsher swirl remover to even her out a little once the paint has cured. atm it is about a 4-6ft paint job but should be able to bring her to a respectable level once i get around to the aforementioned compounding.
this took me about a month and a half to complete, including the prep work which involved removing the vinyl roof and welding up the door strip mount holes. the prep work definitely took the most time to get it right, but the glossiness of the paint highlighted areas i had not even been able to feel or see before. i also had to wait for rainy spells to end etc. so it ran on a little longer than expected.
i reckon you yanks and canandians have got it good, because your paint was cheap but this stuff, which is the cheapest i could find was $33 a litre (~quart) and i used more than three litres, plus about a litre and a half of penetrol at about $40 so including all materials and equipment my paint job set me back around $200. also the penetrol seemed to make the paint a lot more glossy than it is on its own! a good point to note.
good on ya if you managed to read my whole post, i hope it will help someone. feel free to ask away if i could give any help.
col
Posted By: Anonymous
Re: Cold weather! - 12/20/0709:46 PM
I was wondering if anyone could tell me if my mixture looks about right: Its about a 50/50 mixture of Rust-Oleum Gloss Black, and paint thinner(its probably about 40/60 with more thinner). Youtube Video
I painted inside where my hood louvers go to see how it will turn out, using the foam brushes, not the rollers. So far it looks good and was wondering if I should paint the hood by using just the foam brushes, and not the rollers?
Re: genuine australian rust guard paint job - 12/21/0703:50 AM
Quote: hey, so i've just finished my paint job so i thought i'd show off the results!
good on ya if you managed to read my whole post, i hope it will help someone. feel free to ask away if i could give any help.
col
It's rather amazing how the color change and the stripe changed the whole look of your car. It went from looking like something grandma would drive to church on Sunday to a high octane roo chaser ( I assume that front crash grill is for wayward roos that wander on to the road ).
It looks sort of like the grabber orange that Dodge use to use on their SCAT Pack cars... and I seem to remember some Ford Mavericks, Boss Mustangs and Eliminator Cougars that used that color combination..
I am betting your color choice is drawing a lot of double glances.. Looks great.
Posted By: Anonymous
Re: genuine australian rust guard paint job - 12/21/0701:03 PM
thanks dude! im stoked it came out good, i didn't really like the grandma look either! yeah the bar is for 'roos, they're real bad around here, they have a knack for timing their jumps just right so you hit them at high speed!
Posted By: Anonymous
Re: New Paint job on a budget thread. - 12/22/0701:35 AM
Here's the Almond and Satin Black combo, after the 4th coat. It's about 50 degrees here, and I'm finding the rolling easier in the cool weather, doesent set as fast so you can really smooth it out.
Posted By: Anonymous
Re: New Paint job on a budget thread. - 12/22/0705:41 AM
I tried the roller paint method. It's too much work, and I am not very good at it, so I'm selling my stuff cheap for anyone else who wants to try this adventure.
3.75 quarts 'Sail Blue' Professional Rustoleum 3 quarts 'Gloss White' Professional Rustoleum 4" roller + 7 high density foam refills 12 1" foam brushes 1 brand new paint tray for 4" or 6" rollers
$50 or best offer for the whole lot, and I won't even charge full price for shipping. It's worth it for the paint alone. Free pickup if you're in San Diego.
I tried to sell this stuff before on the forum, but I screwed up my email server so I didn't get any of the responses, oops.
Re: Technique & Materiel Update - 12/23/0712:27 AM
Well ... I've been reading this threads for 4 straight days now ... right from the beginning of the original thread. That's a lot of reading and quite frankly I'm a bit overwhelmed with all the info. I'm very excited to try this method on my car during the Christmas break. I want as high gloss as possible. Here are some of my questions hopefully Marq and others can help steer me in the right direction.
1) Marine Paint. Do I have to mix Marine Paint with Mineral Spirits? I live in Vancouver so I prefer Marine Top Side Paint. "Exit" has a separate website detailing the technique. On his website it implies that mixing MS with Brightside is the prescribed method. However on this thread ... many have used Brightside without mixing MS. I intend to mix Brightside with 20% MS ... any thoughts?
2) Home Depot sells a CIL Marine paint. It is about the same price as Tremclad for a gallon. Can I use the CIL Marine paint? It looks to be very similar to Brightside except at 1/4 of the price. Here's what CIL's website saids about this product:
CIL Professional Marine Enamel Is a top quality oil based high gloss enamel designed for use on metal and wood. Marine quality, the high gloss finish is perfect for use where maximum durability and protection from the elements is required. Available in a wide range of popular ready mixed colours, or it can be tinted to thousands of CIL colours. Meets CGSB specification #1GP59.
I'm thinking of using a test panel and try both the Brightside vs CIL Marine. Can anyone suggest what's the best way to test the 2 paints?
3) Metallic Paint. I know it is not advised. But has anyone tried using the Tremclad Aluminum and then a Clear Coat, then wetsand? I know it was talked about way back in the original tread ... but has anyone tried it? I think I'm going to try this method on the test panel as well. Any suggestions?
4) Tremclad Clear Coat. Did anyone try this? Does it work? If using clear coat, will it reduce the amount of sanding? Will the procedure need to be changed with use of Clear Coat? Coat, Wetsand, Coat, Wetsand, Coat ... then Clear Coat? Do I have to Wetsand before the Clear Coat? My test panel is getting big ... but it looks like I'll be trying this too.
5) Spray. I've read in recent posts that some have had success using a cheap Black & Decker Sprayer. Sounds like a great idea ... especially if I'm going to use clear coat. Any suggestions? I currently don't have a sprayer, but have been wanting to buy a air compressor for a long time. If I get a air compressor ... I'll pick up a spray nozzle as well. Any suggestion on what I should look for in a air compressor and a nozzle? I think I'll need to get 2 test panels.
Thanks so much for your help.
Posted By: Anonymous
Re: New Paint job on a budget thread. - 12/23/0707:40 PM
i'm stuck without any 110 electric, in the middle of the sonoran desert, but need to put on some high build, polyester primer before rolling on the rustoleum -- the old finsh is aged, crazed(sounds like me!) lacquer, so cant go straight to topcoat, can't use a thin primer, got to fill in the crazing -- has anyone tried rolling on "slick sand", or any other high build polester primer? -- thanks, roky
Posted By: Anonymous
Re: New Paint job on a budget thread. - 12/24/0712:14 AM
Quote: the old finsh is aged, crazed... ...got to fill in the crazing
Roky - I wouldn't think moisture would be a problem in the Sonoran Desert, but I would be afraid of what got under that paint while it has been cracked, and whether that would affect adhesion down the road.
Posted By: Anonymous
Re: c20 pics / FLAT PAINT ROLL ON... - 12/24/0705:34 AM
Hey, I love all of the info, thanks so much for taking the time to share and answer so many questions. Please forgive me if this is a repeat question... I'm wondering if anyone has used this technique to paint a car flat black. I started today on my 66 barracuda and results are decent for my first coat. I guess my real question is, when I am done with my flat paint can I wet sand fine or is there some kind of rubbing compound that will give it the same smooth finish as a gloss only in matte? And is there a way to maintain the velvety finish and combat tiny scratches? Thanks for the help. -MICHAEL
Re: Technique & Materiel Update - 12/25/0702:35 AM
Quote:
1) Marine Paint. Do I have to mix Marine Paint with Mineral Spirits? I live in Vancouver so I prefer Marine Top Side Paint. "Exit" has a separate website detailing the technique. On his website it implies that mixing MS with Brightside is the prescribed method. However on this thread ... many have used Brightside without mixing MS. I intend to mix Brightside with 20% MS ... any thoughts?
Think of the mineral spirit or the 'brushing liquid from Interlux' as a useful tool. Thinning either type of paint basically does two things :
a ) it buys you time. It takes the paint longer to cure or form a skin. So that allows you additional time to work the paint, get the bubbles out, and still leave enough time for the paint to self level out before the top surface of the paint begins to cure. This is probably more essential when you are first developing your rolling technique and working out the kinks on how to apply it just right.
b ) The thinner primarily allows the paint the opportunity to lay on a thinner coat during each coat stage. If the paint is laid on too thick you will get the outer skin of paint drying and trapping 'still moist' paint between the lower surface being painted and the hardening outer skin of the paint. In such a scenario, where softer paint is trapped below a curing outer skin - and you add another coat... it will cause wrinkling ( elephant skin ) on the paint. By laying on a very thinned layer of paint, it has the best opportunity for the entire layer to fully harden and cure before the next coat of paint is added.
Quote:
2) Home Depot sells a CIL Marine paint. It is about the same price as Tremclad for a gallon. Can I use the CIL Marine paint? It looks to be very similar to Brightside except at 1/4 of the price. Here's what CIL's website saids about this product:
CIL Professional Marine Enamel Is a top quality oil based high gloss enamel designed for use on metal and wood. Marine quality, the high gloss finish is perfect for use where maximum durability and protection from the elements is required. Available in a wide range of popular ready mixed colours, or it can be tinted to thousands of CIL colours. Meets CGSB specification #1GP59.
Originally, I chose the Brightside after searching and heavily researching what the boaters were using on their boats. After all, they have been rolling paint on their boats for 10 times longer then any of our car body painters. The overall majority opinion that I picked up was that MOST of the boaters went with Brightside. In some cases it was the ease of application that had sold them, in other cases it was the durability factor. But feelings were quite mixed on most other marine polyurathanes. In the case of the CIL paint... well... it was just not even making it on the radar... no one had much to say about it... nada... So it all boiled down to going with the most popular paint in use by the boaters. Since CIL is not on the radar with a large percentage of the boaters, I would suggest you follow their lead and stay away from it as well. I am not saying it is not up to par... and in fact it may be a marvelous paint - but if the boat painters themselves are all giving glowing praise about Brightside and not talking about CIL, then I would suggest to you that we can infer that the product has not made much of an impact on the boater crowd.
Quote:
3) Metallic Paint. I know it is not advised. But has anyone tried using the Tremclad Aluminum and then a Clear Coat, then wetsand? I know it was talked about way back in the original tread ... but has anyone tried it? I think I'm going to try this method on the test panel as well. Any suggestions?
Just don't bother. It's a no go. At some point you will need to do 'some' sanding, whether wetsanding or dry sanding of the aluminum paint. At that point it will go gray. Aluminum paint does not like being worked....
And it almost seems like the components of the aluminum paint are slighly different compared to their flat / gloss brothers.
To date we have not had any vehicles or even tool boxes that have successfully had the roll on technique applied.
Quote:
4) Tremclad Clear Coat. Did anyone try this? Does it work? If using clear coat, will it reduce the amount of sanding? Will the procedure need to be changed with use of Clear Coat? Coat, Wetsand, Coat, Wetsand, Coat ... then Clear Coat? Do I have to Wetsand before the Clear Coat? My test panel is getting big ... but it looks like I'll be trying this too.
Charger apparently got his hands on some of the Tremclad clear coat... but I don't recall if he ever applied it to any of his projects up to this point. Charger can step in and clarify what ever happened with the clearcoat Tremclad.
Quote:
5) Spray. I've read in recent posts that some have had success using a cheap Black & Decker Sprayer. Sounds like a great idea ... especially if I'm going to use clear coat. Any suggestions? I currently don't have a sprayer, but have been wanting to buy a air compressor for a long time. If I get a air compressor ... I'll pick up a spray nozzle as well. Any suggestion on what I should look for in a air compressor and a nozzle? I think I'll need to get 2 test panels.
There have been some really excellent spray jobs done using the Tremclad and the Brightside. The one thing to keep in mind is that it is a messy affair with overspray going all over. That was one of the reasons why the 'roll on' method gained favor.. in that it is relatively mess free... compared to a spray job for example.
.
Posted By: Anonymous
Clear Coat Question - 12/26/0702:59 PM
I've had some great success with roller paint and rustoleum on my antique cars ('49 Dodge Truck and '43 Ford Army Jeep). Here's my question: I have a 1990 Jeep Grand Wagoneer with peeling clearcoat. They all did it. The paint is a sand metallic. Is there anyway to get the clear coat off and save the paint? I know I can't roll metallic paint. The vehicle is in great shape but the clear coat makes it look worthless. I know rustoleum makes a clear that I can get through Grainger. I just don't know if I can get the clearcoat off without messing up the paint. HELP PLEASE!!!!
Posted By: Anonymous
Re: New Paint job on a budget thread Part III - 12/26/0707:46 PM
A couple of months ago a buddy told me about this thread. I was working on restoring a 67 chevelle malibu for my 16yr old daughter. Knowing that a 16yr old would be driving this car I declined the $3000.00 paint job for the $ 57.00 version and even tried it in black! After 5 days of labor, it looks great. I will post some pictures if I can figure out how to do it.
Posted By: Anonymous
Re: New Paint job on a budget thread Part III - 12/26/0709:20 PM
Quote: I'm still trying to learn how to do these posts. This goes with an earlier on that is sent. This is a 67 chevelle that I used the roller method to paint. It turned out great even in gloss black!
Posted By: Anonymous
Re: New Paint job on a budget thread Part III - 12/26/0709:27 PM
Quote:
Quote: I'm still trying to learn how to do these posts. This goes with an earlier on that is sent. This is a 67 chevelle that I used the roller method to paint. It turned out great even in gloss black!
Posted By: Anonymous
Re: New Paint job on a budget thread Part III - 12/26/0709:34 PM
Quote:
Quote:
Quote: I'm still trying to learn how to do these posts. This goes with an earlier on that is sent. This is a 67 chevelle that I used the roller method to paint. It turned out great even in gloss black!
Posted By: Anonymous
Re: New Paint job on a budget thread Part III - 12/26/0709:40 PM
Quote: Here are a couple of before shots.
Posted By: Anonymous
Re: New Paint job on a budget thread Part III - 12/26/0709:44 PM
Quote:
Quote: Here are a couple of before shots.
Posted By: Anonymous
Re: New Paint job on a budget thread Part III - 12/26/0709:50 PM
Quote:
Quote:
Quote: Here are a couple of before shots.
Posted By: Anonymous
Re: New Paint job on a budget thread Part III - 12/27/0710:01 PM
new to links. just started my very first bodywork and paint job on my 73 fastback. will post some pics up tomorrow. as far as i have been reading it seems pretty easy for the rustOleum painting. But has anyone shot it through a non-compressor paint gun? I have one that has some sort of compressor built in, it is still a HVLP fine spray paint gun. . . anyone think that this will NOT work. if so i probably wont even try it. will post pics of my work.
Posted By: Anonymous
Re: New Paint job on a budget thread Part III - 12/28/0705:01 AM
Hello everybody! I just read this article today, and after much grief of worrying about spending thousands of $$$$ for a paint job just to sell a car that is worth as much ...I have caved in and am crazy enough to try this out myself ...
Here's what I have purchased so far ...
At HomeDepot: Paint Tray for $1.97 Bucket for $4.98 (for water) KleanStrip Mineral Spirits $5.99 KleanStrip Acetone (to clean and dewax) $5.84 Rustoleum Professional Black Glossy 7779 2 total- $15.74 4",2",1" Foam Brush $1.91 1/4" Nap Purdy WhiteDove 9" roller (seems to be better quality) $4.97 Chem Gloves $3.29 HUSKY 2 MIL 9' x 12' Plastic drop cloth $3.29 1 QT paint stir bucket $0.62 24 Terry cloth towels $2.97 (the register rang this up - supposed to be $7.00) HomeDepot Total: $55.44 w/ taxes included.
At WalMart: 1/4" Nap Paint Rollers (Rubbermaid good quality) $4.88 Tar/Adhesive/Wax remover $6.26 Goop $2.32 WalMart Total: 14.50
So ....already I have spent more than what some others have already spent and don't even have the sandpaper yet ...but I expect to possibly get some from work ...along with some tape ..hopefully ... I have 4 days off and plan on doing this then ...I'll update my progress within the week. Somebody wish me some luck along with a total miracle if I end up coming out with as good of a result as what I have seen posted.
Auto Details: 1994 Isuzu Pickup 2.3L 4ZD1, 60k miles - stock everything, but stereo. Live in LV and plan on getting a safer/more economical ride. (Going to make this truck stick out to bring up the selling price and get what it's truly worth)
:realhappy:
Posted By: Anonymous
Re: New Paint job on a budget thread Part III - 12/28/0702:50 PM
has anyone ever used a lacquer based primer before. i read somewhere that its not that great to use, expecially for the RustOleum. anyone have any in-put
Posted By: Anonymous
Re: New Paint job on a budget thread Part III - 12/28/0707:26 PM
Quote:
1/4" Nap Purdy WhiteDove 9" roller (seems to be better quality) $4.97 1/4" Nap Paint Rollers (Rubbermaid good quality) $4.88
Hold on there...
First of all, you need High density foam rollers - no nap. Smooth, white foam, high density. Rollers with any nap will leave you with a textured finish - the longer the nap, the more the texture. Fine for painting walls and ceilings - for cars, not so much.
2nd of all, the process seems to work best with 4" wide rollers. Some have tried the 6" version, but have reported the extra width to be a detriment to achieving a smooth finish - the extra time working the paint negates the time saved with the extra width. I'd say 9" wide rollers would be even worse.
I would add sandpaper in 600, 800, and 1500 grits, and a rubber foam block (one of those rectangular gardening knee cushions can be cut up for this) for wet sanding in-between every other coat to keep it smooth.
Other than that it looks like you are well stocked for fun...
Posted By: Anonymous
Re: New Paint job on a budget thread Part III - 12/28/0707:42 PM
Quote: But has anyone shot it through a non-compressor paint gun? I have one that has some sort of compressor built in, it is still a HVLP fine spray paint gun. . .
Yep. CAL96 did an excellent job on an Acura in Dark Green with one. 3 Quarts of hunter green and one quart of black applied with a wagner power painter:
Posted By: Anonymous
Re: What Yall Think??? - 12/28/0710:06 PM
Hello All!! Can some of you that used any variation of Rustoleum Blue or Grey please post a picture of your final product? I've been window shopping and found Royal Blue and Sail Blue, and Charcoal Grey and Smoke Grey. Trying to narrow down my shade of Blue and Grey for a Two tone job on my Chevelle. Thank all you folks, I'm looking forward to starting my process.
Posted By: Anonymous
Re: New Paint job on a budget thread Part III - 12/29/0701:32 AM
sweet, thats the same paint gun i have. looks like thats what im gonna be doing. now just to finish the sanding job.
Posted By: Anonymous
Re: What Yall Think??? - 12/29/0704:55 AM
Quote: Hello All!! Can some of you that used any variation of Rustoleum Blue or Grey please post a picture of your final product? I've been window shopping and found Royal Blue and Sail Blue, and Charcoal Grey and Smoke Grey. Trying to narrow down my shade of Blue and Grey for a Two tone job on my Chevelle. Thank all you folks, I'm looking forward to starting my process.
I Used Rustoleum royal blue mixed with a bit of black to deepen in a bit, as it was a bit too blue for my liking. Here's my final product:
Posted By: Anonymous
Hello All - 12/30/0706:20 AM
Like many others I have been reading the posts for awhile and decided to finally give this a go.
The project is my 1986 Buick T-Type which has some surface rust and really crappy factory paint.
I started by completely dismantling the car and am now part way through using Aircraft Stripper to remove the crappy paint from the hood (done) roof, and trunk. I will be using it in a few other areas that need it but plan on keeping the decent paint as a base. I will feather out the stripped areas into the decent paint areas by sanding. Anyone forsee a problem with this method?
I tried sanding the original paint but 20 years of sun had hardened it to the point of being like diamond. 80 grit on a rotary sander hardly phased it.
I went and purchased some brightside Steel Gray and the Brightside primer. The car was originally a light silver from the factory.
I have a couple of questions for the experts
What sort of metal prep do I need to do before I apply the brightside primer? On the can it says to contact them for instructions on applying it to steel. I was planning on sanding the surface of the metal to 220 grit and then applying a coat, then sanding that to 400 and applying another coat. This was the suggestion of a friend who is well versed in paint and body. Good idea?
Has anyone used Steel Gray Brightside yet? I'm really curious to see what it would look like on a car. I'm worried that it may just look like shiny primer. Anyone have picts?
and one more q, I have read that mineral spirits used to reduce brightside induces a haze... is that the only negative? I would like to save the 333 I purchased and reduce the primer with mineral spirits instead of the 333 the can recommends.
Thank you all for your help and awesome threads.
Posted By: Anonymous
Re: Hello All - 12/30/0702:20 PM
Quote: What sort of metal prep do I need to do before I apply the brightside primer?
Some have used rustoleum as a color coat metal primer as it is designed to be applied directly to metal.
Same overall process applies with rolling and sanding in alternate coats with progressively finer grit. Less than 600 grit is more appropriate to shaping the surface or removing product. 600 grit and up is best for knocking down the high points of fully dry paint.
As for the 333, I don't know if it really matters with the primer.
Posted By: Anonymous
Re: What Yall Think??? - 12/30/0702:48 PM
Thanks skylark72. Was there a particular ratio of mix for the Black in Royal Blue to deepen the color? I'm looking for that color you have or maybe a bit darker. Was the Royal Blue the darkest blue you could find? -Ted
Posted By: Anonymous
Re: Hello All - 12/30/0705:13 PM
Quote:
Quote: What sort of metal prep do I need to do before I apply the brightside primer?
Some have used rustoleum as a color coat metal primer as it is designed to be applied directly to metal.
Same overall process applies with rolling and sanding in alternate coats with progressively finer grit. Less than 600 grit is more appropriate to shaping the surface or removing product. 600 grit and up is best for knocking down the high points of fully dry paint.
As for the 333, I don't know if it really matters with the primer.
Well I already purchased the Pre Kote primer. Is it worth it to switch to rustoleum? It would seem that the prekote would work better with the brightside. I'm just pulling my hair out trying to figure out how to prep the metal beforehand. Brightside's tech line isn't open for a few more days I don't think. I really wish they would have printed their directions for steel on the can.
BTW the steel on my car is galvanized.. make any difference?
Posted By: Anonymous
Re: What Yall Think??? - 12/30/0706:21 PM
Quote: Thanks skylark72. Was there a particular ratio of mix for the Black in Royal Blue to deepen the color? I'm looking for that color you have or maybe a bit darker. Was the Royal Blue the darkest blue you could find? -Ted
As far as i know, royal blue is the darkest rustoleum goes (that stores carry). I have seen a couple color charts from rustoleum online that had other various colors of blue, but i'm not sure how easy it is to buy those, or where you'd even go to get them tinted. Anyways, the ratio i used was more or less just eye-balling it. I know that doesnt really help you, but even just a LITTLE bit of black drastically changes the blue, so be careful.
Posted By: Anonymous
do i need to add more thinner? - 12/31/0701:49 AM
Hi, im painting my truck with this type of paint, Ace hardware rust stop enamel. Im getting alot of brush strokes in the paint even after it sits and drys, i think its probably too thick, about how much thinner did yall have to put in the paint per can? Im using a foam brush to apply it and i prepped with 320 grit and ive been wetsanding with 800 then doing more coats. i think ill go to a higher grit later but i cant get the brush strokes out.
Posted By: Anonymous
Re: do i need to add more thinner? - 12/31/0701:22 PM
has anyone used a lacquer based primer? wanted to know if anyone has used this or had any problems with it using the RustOleum paint? Or if worst comes to worst should i just use the RustOleum primer? what do you think. . . .
Posted By: Anonymous
Re: do i need to add more thinner? - 12/31/0704:51 PM
You should have no problem using lacquer primer under this paint. Just make sure that you don't apply lacquer based products over an enamel (If you do, it will only take a few seconds to see why.) I have used a lacquer primer as well as rusto primer with no ill effects from either.
Good luck -Trent
Posted By: Anonymous
Re: do i need to add more thinner? - 12/31/0705:32 PM
Quote: You should have no problem using lacquer primer under this paint. Just make sure that you don't apply lacquer based products over an enamel (If you do, it will only take a few seconds to see why.) I have used a lacquer primer as well as rusto primer with no ill effects from either.
Good luck -Trent
so lacquer primer is ok to use under the RustOleum. I just want to be double sure, cuz im getting tired of sanding stuff.
and whats the difference in the RustOleum paints??
this is what im going to be painting.. .
Posted By: Anonymous
Re: c20 pics - 01/01/0807:21 PM
Well the beat goes on. With the holidays I have been a bit distracted but I have had time to continue the project. I now have the top of the shell to 2000 grit sandpaper and I am very pleased with this system. The sides will need a couple more coats but it is ready for windows and installation onto the truck for the trip back to Washington.
I have also started on the truck. I like the red primer as a base because the hunter green appears darker much faster (compare the door to the hood). I may take Marq's suggestion and mix some black paint with the primer when I work the top this week.
Here are a couple of in progress pics. john
Posted By: Anonymous
Re: c20 pics - 01/01/0807:25 PM
the hood
Posted By: Anonymous
Re: c20 pics - 01/01/0807:26 PM
the shell (this is a couple of coats earlier with a couple of light spots showing through).
One of my motivations for using this system is that repairs to the paint can be accomplished later with very little mess! I found a couple bad spots on the shell that I didn't notice when I started so I am sanding and filling them. As I put paint on the truck I will paint those spots. I hope to learn how well the new paint blends with the existing paint.
Posted By: Anonymous
Re: New Paint job on a budget thread Part III - 01/05/0801:01 AM
Mike, Thanks for the feedback ...I currently have sandpaper grits 100/150/220/320/400/600/800/1000/1500 and will get 2000 grit when I get a chance. About the 1/4" nap roller ...I surprisingly got much better results with that roller than I had with the other panels I have done with just m 4" High-density foam sticks. What I did was roll it really slow and with my other hand smooth it out further with the foam sticks. I did this with the large parts (hood and roof). A couple of days ago I sanded the other parts of my truck with 320 grit and removed all wax with acetone before that ...then mixed a much more thin mix of rustoleum with mineral spirits and went really quick all the way around. I think I may even worked too fast because spots would run in places and I had to move all over the place. When it dried, I ended up with tears and the coat wasn't anywhere as thick as my first go ahead with crappy results ....I plan on sanding these parts in prep for my second coat with 400 grit, wetsanding it ....any tips/tricks or help I would greatly appreciate it from anyone .....
Posted By: Anonymous
Re: New Paint job on a budget thread Part III - 01/06/0804:01 PM
I hadn't thought about using the nappy roller as just a way to transfer bulk paint to the surface where you use a foam roller to spread it out. Cool. There are many ways to do this and I am sure there are some new ways to be discovered.
That said, according to the conventional wisdom if you are getting runs, you are putting on too much paint for your mixture/conditions.
You are looking to lay down a thin, smooth coat that won't require as much sanding. The depth of color comes from the multiple coats and if you didn't have to sand as hard between coats, it is much easier to lay those coats down.
I think charger said his wet sanding took like 30 minutes to do the whole car (correct me if I'm wrong). That would only be possible if the paint has laid down smooth.
Posted By: Anonymous
Re: New Paint job on a budget thread Part III - 01/07/0804:01 PM
take your time with the wet sanding, this is where your will either make or brake your paint job. sand too much and to will have light spots in your paint. and use lots and lots and lots of water. i have known a couple of people to use a tiny bit of liquid soap in the water they use to dunk the sandpaper into. this actually serves as a lubricant and makes it a little bit easier to sand. remember water is your friend.
Posted By: Anonymous
Re: New Paint job on a budget thread Part III - 01/07/0805:26 PM
I'm in the process of taking out the trim from the car (1995 Integra 4dr). There are a couple of trim items I don't know how to remove, can you help me with this?
1) Trim on top of the windshield. I was able to remove all the trim around the windshield except for the thin piece on the top. This is the piece that covers top of windshield and roof.
2) Door handles. I don't know how to remove the door handles.
3) Trim piece around the doors. Not the bottom pieces, I removed those no problem. Its the top piece that goes from the rear view mirrors, up the front pillar, along the roof line, then down the rear pillar towards the back of the door. Do I simply yank it out hard?
I've attached some photos too.
Thanks.
Posted By: Anonymous
Re: New Paint job on a budget thread Part III - 01/07/0805:28 PM
More photos
Posted By: Anonymous
Re: New Paint job on a budget thread Part III - 01/07/0805:29 PM
last one
Posted By: Anonymous
Re: New Paint job on a budget thread Part III - 01/07/0806:07 PM
door handles - bolted from the inside. Need to remove interior door panels and plastic vapor barrier. Probably has funky connections to the lock, so take a picture before you start unhooking it if you can.
Posted By: Anonymous
Re: New Paint job on a budget thread Part III - 01/07/0808:47 PM
Hey man, That trim on top of the windshield and back window is tricky. Any of the local auto parts stores should carry a window trim removal tool that looks like this use the hook on the tool to pry under the edge of the trim and pop the clips loose.
the trim piece around the doors should be retained by plastic clips and can be pryed out by working under them at one end with a thin screwdriver and pop the clips out of their holes. Thats how those pieces came apart on my accord, and Honda is pretty good about maintaining uniformity among model lines. If you can get your hands on a shop manual for the car, it will have detailed illustrations on how to take it apart.
Hope that helps, -Trent
Posted By: Anonymous
Re: New Paint job on a budget thread Part III - 01/13/0804:30 AM
Hello, I have been working on another roller project over this past Christmas break. It's my daily driver honda accord.
Here are a few pictures of the car before I started.
I used Interlux Brightside In Dark Blue to paint this car using odorless mineral spirits in about a 1:1 mixture.
Heres the car all dolled up after 7 coats from 1 1/4 quarts of paint.
I have all of the progress shots and detailed journal of this paint job at www.rolledon.com
I think after trying Rustoleum and Brightside I can justify the extra cost of the Brightside for the results that I got.
Posted By: Anonymous
Re: New Paint job on a budget thread Part III - 01/13/0804:58 AM
according to chargers method, 2 coats, wetsand, 2 coats, wetsand process, are these 2 coats back to back? I mean after you apply 1 coat, you follow immediatly with another coat?
Re: New Paint job on a budget thread Part III - 01/13/0811:59 AM
Quote: according to chargers method, 2 coats, wetsand, 2 coats, wetsand process, are these 2 coats back to back? I mean after you apply 1 coat, you follow immediatly with another coat?
NO. You need to allow the first coat to dry and cure properly before slapping on the next coat. If you slap on the second coat before the first one properly cures, you will end up trapping the lower layer while it is curing - which will lead to the paint wrinkling into the orange peel effect. Normally you just need to allow about 1 day for the coat to dry ( with times varying according to the temperature you are working in and the amount of humidity in the air.
Colder temperatures - give it extra drying time Warmer temperatures - 18 to 24 hours Very humid - give it a little extra time Very dry air conditions - 18 - 24 hours
.
Posted By: Anonymous
Re: New Paint job on a budget thread Part III - 01/13/0803:20 PM
god damn...i woke up early morning to start this project around 7am. suns up and cloudy, nothing to serious. 3 hours later i hear thunder in the distance. i turn on the tv to check the weather and sure enough its heading this way.
will the rain ruin the paint?
Posted By: Anonymous
Re: New Paint job on a budget thread Part III - 01/13/0804:17 PM
Any happen to have a link to the post regarding spraying interlux paint with the Harbor freight refilled spray can?
Re: New Paint job on a budget thread Part III - 01/14/0804:49 AM
Quote: god damn...i woke up early morning to start this project around 7am. suns up and cloudy, nothing to serious. 3 hours later i hear thunder in the distance. i turn on the tv to check the weather and sure enough its heading this way.
will the rain ruin the paint?
No... If you are just at the starting layers of painting... the rain will not harm the paint IF you take appropriate procedures before adding the next layer of paint.
For example, rain is full of all sorts of odd chemicals ( if only it was just h20 ). There are acids, sulphurs and other other crapola in rain water.
So before you add your next coat of paint, just give the previous coat a light sanding, a wash with very little liquid dish detergent in in it. Thoroughly rinse off and when the car is dried, give it a final wipe down with a cloth damped LIGHTLY with mineral spirit. That will ensure that all potential contaminants are gone.
If the rain has put a lot of humidity into the air, be sure to allow extra drying time for the paint. Humidity in the air tends to slow down the drying/curing time.
Depending on the air temperature, the moisture in the air tends to be attracted to the body of the car. If you can imagine the condensation that occurs on a hot water pipe that is exposed to cold air, the same type of moisture attaction is occurring at a less visible ( almost microscopic level ) on the car body. The wipe down of the car with the cloth slightly damped with mineral spirit helps to displace some of that near invisible moisture.
I know for myself, that during my paint job we were going through quite a few rainy days. In order to avoid any problems caused by the humidity in the air I chose to just keep holding off on further painting until the weather changed and the humidity was gone. I may have just been overly cautious, but I just wanted to make absolutely sure that if something went wrong with the paint job, it was because I had rushed things.
.
Posted By: Anonymous
Re: New how to paint your car on a budget with a roller - 01/14/0805:17 AM
heres mine. I think it's budget it was done at home in the garage..
Posted By: Anonymous
Re: New how to paint your car on a budget with a roller - 01/14/0805:18 AM
and it's finished
Posted By: Anonymous
Re: New how to paint your car on a budget with a roller - 01/14/0805:20 AM
just incase your wondering was it painted.
Posted By: Anonymous
Re: New how to paint your car on a budget with a roller - 01/14/0801:51 PM
Ok these shots are 1st and 2nd coats. I think i did not add enough mineral spirits. I had bubbles, but they disappeared. using rustoleum gloss black.
Heres my progress.
Is this how the first coat sopposed to look like? ------------ Different angle on my 1st coat (dry) ------------ 2nd coat ------------
Posted By: Anonymous
Re: New how to paint your car on a budget with a roller - 01/14/0805:17 PM
it will look like this until you wet sand and reapply the paint. dont worry. the more coats you lay and the better you wet sand the better it will come out. keep at it.
Re: New how to paint your car on a budget with a roller - 01/14/0808:12 PM
Quote: it will look like this until you wet sand and reapply the paint. dont worry. the more coats you lay and the better you wet sand the better it will come out. keep at it.
Agreed. Do a good wet sand to reduce the peaks to the valleys of that first layer. The trick at this point ( to save work later and to get a smoother, slicker and shinier final job ) is to get that leveled down as much as possible.
The paint will not magically fill in the low area and bring them up to match the high points in that initial layer of paint. So spend a little extra time now nailing that initial layer flat.
One benefit, even if you end up taking it almost back to the original subsurface is that when you repaint it it will go on even smoother and more level the 2nd time.
That first layer will serve as the bond to the subsurface and you won't see the repulsion that might occur on the first coating. The first layer of paint will act like a primer so that the recoating will have solid and unaffected adhesion to the entire surface with no repulsion occuring.
Re: New how to paint your car on a budget with a roller - 01/15/0812:02 AM
Quote: and it's finished
73 Challenger 440 what type of paint did you use? I have been looking for the sublime color. I had ace hardware mix some paint that I thought was close but after painting a fender it looks to yellow to me. Can you help me out?
Posted By: Anonymous
Re: New how to paint your car on a budget with a roller - 01/15/0801:56 AM
it's standox.. it's not a roll on. I am new here, so I posted mine.. I dont know the standox code for it, but ppg is J5.. my Dad took that number and gave it to his friend who works at a body shop that uses standox..
Posted By: Anonymous
Re: New how to paint your car on a budget with a roller - 01/15/0804:44 PM
STAGE II
Wow, this paint is WEIRD. I thought I messed up for a sec. I accidentally grabbed a 220grit and started wet sanding. few strokes in and i realize that i have the wrong grit. damage isn't too bad. I was impressed how i got a real good reflection on my 2nd stage of coating (3rd and 4th coat). but i got real bad orange peel. Before i started 2nd stage of coating, i went ahead and did a scratch test. unfortunately, my 1st stage failed and scratched.
Heres the 2nd stage (3rd and 4th coat)
This is where i accidentally used 220grit --------------- I think i sanded too much. (using 800grit) --------------- Paint coming off too easy --------------- Phase 1 of 2nd stage (3rd coat) --------------- 3rd coat - still wet --------------- ME -- notice orange peel
-After 3rd and 4th coat, what grit should i use? 1000g? -When your applying the paint, do you spread the paint out until roller becomes dry and move to another section? or do you roll the paint over the same spot for better coverage? -My 1st stage of paint can be scratched off with a nail. Does this mean I have to stop and start over?
Posted By: Anonymous
Re: New how to paint your car on a budget with a roller - 01/15/0805:15 PM
Re: New how to paint your car on a budget with a roller - 01/15/0806:28 PM
M2001 - your laying that paint on WAY TOO THICK. Going from red to black, you should still be able to see the red thru the black coats until about the 3rd coat. From your pics you have full coverage after 1 coat, which tells me your painting very thick layers. You have to resist the urge to paint thick layers, thin layers are your friend. The thick layers are causing your excessive orange peel.... keep trying, less paint, continue with just the hood until you get the process down pat...
Re: New how to paint your car on a budget with a roller - 01/15/0807:06 PM
M2001 - it looks like your problems started with the very first coat. It didn't lay flat at all.
Did you pre-sand the hood to prep it? It seems like something on the original surface was rejecting the paint causing it to glom together instead of laying flat.
If it was me, and you've only done the hood, I would sand the crap out of back down to a smooth base coat, and start over. I'd go back to 800 or even 600 grit to make the work go faster. You'll probably have to let it dry for a day or two before you can sand it, if you put it on that thick.
Like was mentioned above, if you sand way back down (even to the point where you see a lot of red showing through), the next few coats will go on easier so its not as bad as you might think.
Re: New how to paint your car on a budget with a roller - 01/15/0810:24 PM
Your car looks very nice 73 Challenger! I really like it. I have seen a few guys paint their cars sublime but I can't seem to find the paint around here. I had ace hardware try to mix some paint that we thought matched the sublime color. But like I said its to yellow for me. The color I saw on here was a tremclad but I cant find it on their website. I guess I am back to either spraying with the correct color or going with a rustoleom stock color.
Posted By: Anonymous
Re: New how to paint your car on a budget with a roller - 01/16/0801:18 AM
Quote: M2001 - it looks like your problems started with the very first coat. It didn't lay flat at all.
Did you pre-sand the hood to prep it? It seems like something on the original surface was rejecting the paint causing it to glom together instead of laying flat.
If it was me, and you've only done the hood, I would sand the crap out of back down to a smooth base coat, and start over. I'd go back to 800 or even 600 grit to make the work go faster. You'll probably have to let it dry for a day or two before you can sand it, if you put it on that thick.
Like was mentioned above, if you sand way back down (even to the point where you see a lot of red showing through), the next few coats will go on easier so its not as bad as you might think.
Quote: M2001 - your laying that paint on WAY TOO THICK. Going from red to black, you should still be able to see the red thru the black coats until about the 3rd coat. From your pics you have full coverage after 1 coat, which tells me your painting very thick layers. You have to resist the urge to paint thick layers, thin layers are your friend. The thick layers are causing your excessive orange peel.... keep trying, less paint, continue with just the hood until you get the process down pat...
I thought I didnt add enough MS to the paint. There was an urge to not add so much MS to the paint...Im going to try a 50\50 and work from there.
Im going to use 800 then go down to 600...will this be enough to get back to the original paint? I did sand the hood down before the first coat. although I forgot to wipe MS prior to the first coat.
major question: when i go back to sanding down to original paint, do I dry or wet sand?
Posted By: Anonymous
Re: New how to paint your car on a budget with a roller - 01/16/0801:55 PM
Quote: Im going to use 800 then go down to 600...
Always sand with lower numbers first. Lower number paper is rougher and cuts deeper than higher number paper.
The trick is to reduce the visible scratches by making them smaller and smaller untill you cant see them.
Quote: will this be enough to get back to the original paint?
If you sand long enough, you could get down to original paint with 2000 grit. It would just take a hell of a lot longer than 600 grit.
Quote: I did sand the hood down before the first coat. although I forgot to wipe MS prior to the first coat.
Here is the thing: old paint can have just about anything embedded in it from normal exposure. Wax, bird droppings, oil, teflon... eventhough many of those items may not be visible - rest asured they can still be in the paint surface. Any contaminant in the surface you are trying to paint can be a problem. Lots of these new wipe-and-shine "wonder waxes" can be a bear to remove from the surface. Even if you haved owned the car from new, it is hard to know what has been applied. The dealer could have trated the paint with something that is no longer shiny, but still there.
To ensure that your new paint adheres properly, you want that surface to be as clean and virgin as is practical for you to get it. Washing with a mild degreaser, and then a thorough rinse, before sanding would be a good start.
Once you have sanded it down to where you want it you want to wash (or just rinse) it down to get the sanding residue (old paint)off. Let it dry. Hit it with MS and let dry. Then hit it with a tack cloth before painting.
Your first coat should lay down smooth and uniform. It will look like absolute crap color and coverage-wise.
As mentioned by another poster it looks as if your first coat was reacting to something on the surface.
If you have orangepeel or runs, you are using too thick a mixture, or too thick a coat.
The picture of when you sanded after your first coat shows shiny spots in the valleys of the paint and dull spots on the tops of the peel. Ideally when knocking down peel, there should be no shiny spots left. You want the surface to be absolutely flat.
Just relax and don't rush the process. Take your time and you can have stunning results. That is the beauty of this method.
Re: New how to paint your car on a budget with a roller - 01/16/0802:05 PM
Good answer!
+1 on the tack cloth after you do the MS wipedown. They only cost a couple bucks.
Re: your planned 50/50 MS mix - that might be a little too thin. I used around 35%, give or take, but it also depends on temperature and humidity, so its not the same ratio for everyone every time.
Remember you are going for a consistency like low-fat milk.
Here's a pic of what a first coat should look like when its done (this is rustoleum gloss black) - notice that there's hardly any coverage at all. The second coat didn't look much better. As Charger said, you won't even start to get coverage until the 3rd cost.
Also - you really want to squish out most of the paint off the roller by rolling it in the tray before you start to apply it to the car. Thin, Thin, Thin.....
Posted By: Anonymous
Re: New how to paint your car on a budget with a roller - 01/16/0803:26 PM
OK got it. thin is the key. i kinda knew that, but everytime i added MS to the paint, i kept thinking i added too much...i had it had the paint at a 10w-30 oil consistency. (I gotta go back to the fridge and double check low fat milk thickness, lol)
So let me get this straight. In order to go back to original paint, i start with a lower grit, 600 and work my way up to 800? and if 800 isnt enough, take the next step and use 1000? what would be the way to sand, wet or dry?
btw - thnx for the help. normally i would of sanded it down and posted pics, but i came out of work late and im DEAD tired. besides, its cold and raining outside.
Re: New how to paint your car on a budget with a roller - 01/16/0807:17 PM
Quote: OK got it. thin is the key. i kinda knew that, but everytime i added MS to the paint, i kept thinking i added too much...i had it had the paint at a 10w-30 oil consistency. (I gotta go back to the fridge and double check low fat milk thickness, lol)
If you've read a lot of the threads, you might recall the "drip test". Put a stick in the mixed paint (like a popsicle stick or something) pull it out, and the paint should run freely for about 3 seconds before it starts to drip.
Also - its helps to mix the paint in a container, not in the try. Take like an empty peanut butter jar, put in two inches of paint, add one inch of MS, stir (not shake) well. That's a good starting point, and you can adjust it by adding small amounts of paint or MS after the drip test.
Quote: So let me get this straight. In order to go back to original paint, i start with a lower grit, 600 and work my way up to 800? and if 800 isnt enough, take the next step and use 1000? what would be the way to sand, wet or dry?
Right now, you're just trying to get back down to a nice flat (smooth) base coat. You can use 600 grit (dry, btw) to sand everything flat smooth. You could very likely end up sanding off nearly all the black paint you previously applied. Once you have it smooth, then go over it once with the 800 grit to take out the major scratches. You won't need to use 1000 grit before you start the first coat.
I think I actually used 800 grit for my wet sanding the first couple times (between coats 2 and 3, and coats 4 and 5. Two coats, then wet sand, two more coats, then wet sand). Then I finally switched to 1000 grit after coat 6, and 2000 after coat 7.
Posted By: Anonymous
Re: New Paint job on a budget thread Part III - 01/16/0807:42 PM
I am trying this painting method on my car hood, which I have removed from the car and am painting in my garage. (I want to get the technique right before I start on the rest of the car.) Anyway, I sanded off the old paint down to the metal then applied a layer of rustoleum primer spray paint. I then applied a layer of rustoleum enamel (exactly what you used except black) mixed 50/50 with mineral spirits. The first coat went on beautifully, I sanded it 24 hours later and prepped it for the next coat. When I applied the 2nd coat however, I guess the mineral spirits began reacting with the first coat and started removing the paint. What is the cause of this? Is my mixture too thin? Not mixed well enough? Did you have any problems with your extra coats removing previous coats? I would greatly appreciate any help anybody could give me. I'll upload pictures if needed.
Posted By: Anonymous
Re: New Paint job on a budget thread Part III - 01/16/0811:41 PM
Quote: I am trying this painting method on my car hood, which I have removed from the car and am painting in my garage. (I want to get the technique right before I start on the rest of the car.) Anyway, I sanded off the old paint down to the metal then applied a layer of rustoleum primer spray paint. I then applied a layer of rustoleum enamel (exactly what you used except black) mixed 50/50 with mineral spirits. The first coat went on beautifully, I sanded it 24 hours later and prepped it for the next coat. When I applied the 2nd coat however, I guess the mineral spirits began reacting with the first coat and started removing the paint. What is the cause of this?
Without pics, I'd say not enough time to dry. Dry time will vary with temp, humidity and MS mixture. Or, if it was lifting off in sheets, not dry enough and an adhesion problem with your surface.
50/50 MS mixture coupled with low temps will extend your dry time considerably. You are adding MS to extend workability, allowing the paint to self-level. Low temps extend dry time as well, so you are doubling down.
Back off on the MS, add some more dry time, or add some temp - whichever is easier to accomplish.
Posted By: Anonymous
Re: New how to paint your car on a budget with a roller - 01/17/0812:11 AM
Quote:
+1 on the tack cloth after you do the MS wipedown. They only cost a couple bucks.
Heh. For years I did not use one out of ignorance. Madness, sheer madness. Years of living with crappy results because the surface had unseen trash of one sort or another, all for lack of a dirt cheap tack cloth.
Cheapest, best ingredient for a good paint job, IMHO.
Posted By: Anonymous
Re: New how to paint your car on a budget with a roller - 01/19/0803:32 PM
Gus, mike da wrench. you guys pics of your projects?
Posted By: Anonymous
Re: New how to paint your car on a budget with a roller - 01/19/0807:02 PM
Ok, finally i got a break from the weather. I used 220 grit and wet sanded it down to this: ----------- A little closer ----------- 600grit wasnt doing nothing, so i used 220 and wetsanded. much faster process. although i passed factory paint to bare metal. It was a little hard to sand the edges. I still factory paint, some black paint and "sunburn" Before i start painting, do i have to sand to bare metal?because i think i got arthritis, lol( i sanded by hand, took less than an hour) ----------- another edge shot
Posted By: Anonymous
Re: New how to paint your car on a budget with a roller - 01/20/0801:08 AM
Quote: do i have to sand to bare metal?
No, just down to smooth or past whatever is causing your paint rejection. Looks like you are pretty much there. Run your fingers over the surface where the color changes. If you can feel a difference, sand some more, it needs to be smooth. Your sense of touch can be sharper than your eyes when it comes to this. Also, 220 can be quite aggressive so look out for sanding marks. Use the 600 grit to smooth out any.
When you lay down the first coat, remember, thin coats. Not just in the paint consistency but the amount applied to the surface. Squeeze out the roller in the pan and just moisten the surface with the paint. It will look like crap, the magic happens with multiple coats. Use the picture gus posted earlier of the charger fender as your guide.
If it beads up or shows any other signs of rejection, stop painting and try to find out what the problem is. No sense putting good paint on a bad surface.
If you do have to backtrack, a layer you just put down is relatively easy to remove with MS and a rag if you can get it before it sets, and it beats sanding.
Keep us posted.
Posted By: Anonymous
Re: New how to paint your car on a budget with a roller - 01/20/0802:14 PM
When I went to pick up the materials for this project, i went to Shermin Williams for a gallon of MS. I went in, asked the guy where are the MS, he took me to the aisle and gave me a gallon of paint thinner that had %100 MS. ive been mixing this with the rustoleum. is that ok if i use that paint thinner\MS? because my local home depot and lowes do not carry anything thats simply %100 MS, except for that odor-less MS.
Re: New how to paint your car on a budget with a roller - 01/20/0803:00 PM
Quote: When I went to pick up the materials for this project, i went to Shermin Williams for a gallon of MS. I went in, asked the guy where are the MS, he took me to the aisle and gave me a gallon of paint thinner that had %100 MS. ive been mixing this with the rustoleum. is that ok if i use that paint thinner\MS? because my local home depot and lowes do not carry anything thats simply %100 MS, except for that odor-less MS.
The 100% mineral spirit is the preferred thinner, but the 'odorless' mineral spirit will also do the job.
The 'odorless' mineral spirit simply takes longer to dry. Here is why : As you know, when you leave a tray of either mineral spirit out it will evaporate. After a while there will be no mineral spirit left as it has all gone into the air. The pure 100% mineral spirit evaporates quicker - thereby releasing its 'smell' or 'odor' into the air quicker and in a greater concentration - because it is evaporating into the air quicker and in a higher density. Therefor it smells.
The odorless mineral spirit isn't really odorless. What it does have is a slower evaporation rate. Therefor it takes longer for it to get into the air. Because it takes longer to evaporate into the air, the concentration or density of the mineral spirit evaporants in the air are lower. There just aren't as many 'smell' molecules being released into the air. Hench the reason it doesn't appear to 'smell' as much.
So... the key thing to take away from this... is that if you are using the odorless mineral spirit, just understand that it will take each coat of paint a little longer to dry or cure - because it is chemically designed to evaporate slower.
OK... so let's tie this into our painting.. and the key thing to remember is that if you are working in a very hot and dry environment, you might prefer to go with the 'odorless' mineral spirit to give you additional time to work with the paint before it starts drying - and it would allow the paint additional time to self level.
If you are working in a very cool environment, you might prefer to go with the 100% mineral spirit ( non-odorless ) to give the mineral spirit a little help evaporating in the cooler temperatures. ( as you know evaporation occurs slower in cooler temperatures ).
You could use the 'odorless' mineral spirit in a cooler environment, but just accept the fact that it will take longer for the paint to dry.
In general this is the theory you have to keep in mind regarding mineral spirits
.
Posted By: Anonymous
Re: New how to paint your car on a budget with a roller - 01/20/0804:48 PM
Thanks for the heads up on odor-less MS, Marq. I went ahead and made up another mixture of MS and paint. To get it the consistancy of milk, I had to add a crap load of MS. Much more than the amount of paint itself. I went ahead prepped the hood and started rolling. It self leveled. I can see still see the paint.. BUT well see for yourself.. ------------------ overkill on MS? some spots did not want to self-level and became "runny" ------------------ Drying up pretty fast ------------------ Here are my MS and rusty paint.
Re: New how to paint your car on a budget with a roller - 01/20/0811:02 PM
Looks to me like you have too much paint on the roller. If its running, and you can't fix it by rolling over it some more, there's too much paint.
Its not like you roll it and sit back and wait for it to self-level: If it starts to run there's too much paint in that spot. Next time, have a second dry roller handy. Use it to re-roll any spots that start to run.
If you can feel bumps in that runny area you should sand it back down again before you try the second coat.
Posted By: Anonymous
Re: New how to paint your car on a budget with a roller - 01/21/0805:42 AM
Call me crazy but now that i look at the latest pictures i posted, If it werent for bare metal showing, the maroone with black tint doesnt look bad.
Re: New how to paint your car on a budget with a roller - 01/21/0805:07 PM
Quote: Thanks for the heads up on odor-less MS, Marq. I went ahead and made up another mixture of MS and paint. To get it the consistancy of milk, I had to add a crap load of MS. Much more than the amount of paint itself. I went ahead prepped the hood and started rolling. It self leveled. I can see still see the paint.. BUT well see for yourself..
That is the way it will look if you are doing it correctly. Just remember that what we are doing is adding THIN layer after THIN layer....
As you add enough THIN layers it will begin to get darker and darker. Each layer is adding on to the previous layers and laying a little more color pigment each time. At some point you will achieve 100% pigment coverage...
The biggest mistake people make is going at this like they are painting a wall in their house and trying to get 50% or 100% color coverage on the first coat or two...
It will take 5 to 8 THIN coats to start nearing the 100% color pigment coverage. But in the process of this addition of thin coats, you are getting a more level paint job.
Another advantage to this is the 'depth' of the shine or color that you end up with in the end. If you just slap on one coat of thick paint... the refraction of the light bounces just off the outer skin of the paint and does not appear to have any 'depth'. But by laying on the thin layers, and depositing just a little pigment with each layer, you basically are giving your finished paint job 'depth'. When the light reflects and refracts off the finished paint job it will echo those various layers.
Imagine a diamond... in the rough a diamond looks like crap. To make a diamond sparkle, they cut facets into the rough stone which allows light to enter the diamond and ricochet around in it. That gives the diamond its sparkle. The final polishing of the diamond simply helps take it to the next level of sparkle. Each layer of thin paint you are laying is like cutting a facet in the diamond.
For trivia sake... let me tell you about my father's Jaguar XK 140 C type. When the car arrived at the dealership, my father did not like the Red. He wanted Black. So they took this brand new Jaguar to the local Rolls Royce dealership and they did a Rolls Royce Black paint job on it. That paint job consisted of 32 coats of paint... with wet sanding happening every 3 or 4 coat. The end result was a black paint job that you would have killed for...
Do you know that red colored, almost translucent plastic that comes with easter eggs ? You know.. it has a hint of red color on it, but you can hold it to you face and look through it to see the world tinted red ?
Ok.. imagine this paint job is like that. Put one sheet of that red color wrapping paper in front of you and the world is slightly red. Now... put two sheets of the red colored wrapping paper in front of you and what you will see through it becomes a darker shade of red.
Each time you add an additional sheet of that red colored wrapping paper in front of you, what you see through it will become even darker red.
At some point, if you put enough of those red sheets of wrapping paper in front of you, you will not be able to see through them. You will just see RED only...
This is the same story for how this paint job happens. Thin layer after thin layer...
One benefit of this 'layer upon layer' process is that at any point you can stop, let it harden fully... and do a quick wet sand to fix any imperfections that might turn up or catch your eye. Then you just go back and add 'yet another' thin layer and keep going.
One frustration that can happen is when you find that you have to wet sand to the point where you might fall back one or two layers.
So it isn't always going to go in a continuous addition of thin layers. At some point you will make corrections to a previous layer and it will have to be re-painted with a new thin layer.
But in the end.... if you take your time and give it the patience that is required, all the layers you lay down will add up to 100% color cover and a nice smooth finish.
Personally, I like to get to 120% coverage... ( ie. get to the point where it is looking like 100% coverage and then add one or two extra thin layers ). This will give you some working room for when you move on to the compounding, polishing and waxing stage.
Re: New how to paint your car on a budget with a roller - 01/21/0811:33 PM
M2001 - looking at your pic again where the paint didn't lay right - it still looks like it was being repelled by something underneath.
Also - I can't imagine you'd need more than 50/50 mix between MS and paint. (As per your post). That would make it the consistency of water. Maybe the brand of MS you are using is causing a problem.
Posted By: Anonymous
Re: New how to paint your car on a budget with a roller - 01/22/0801:15 PM
I went ahead and reapplied the 1st coat couple days ago. this morning I went ahead and added the 2nd coat. laid out pretty good but I got this "grains" of something in the paint. Before I start to paint, I prep the surface by using a leather shammy (sp?)to soak up the morning dew, then finish with a paper towel. then after it dries, i go ahead and give a final wipe down using a tack cloth. apply paint and the surface is kind of grainy. I havent touched the grainy to see if it was dirt yet but it disapears after it dries. so i dont know whats going on there. Here are some pics.
2nd coat ------------- 2nd coat- notice grains on surface and still no full coverage (thats a good thing) ------------- different angle ------------- random dog from the streets ------------- my daily driver (hey this is car forum, right?)
Posted By: Anonymous
Re: New how to paint your car on a budget with a roller - 01/23/0801:36 PM
Sanded with 400grit (lightly) and applied 3rd coat. So far so good? I hope.
I didnt get a picture after sanding but, it seemed i took off 1 coat by sanding and looked like the factory red but with a black tint, a very light tint to it. Call me crazy but to see if there was a coat, i sprinkled a couple grains of salt on the hood to see if it was sitting on a coat or the original paint. sure enough it seemed like it was hovering over the hood. so after sanding, i prepped the hood and rolled on another coat.
EDIT - holy crap, i just compared the shine compared to my previous post. the reflection of the tree is a lot sharper on the 3rd coat!
QUESTIONThe "scratch/nail test". Is this being done with your finger nail? or an actual nail? I remember reading about it a while ago..
Re: New how to paint your car on a budget with a roller - 01/23/0806:58 PM
Quote:
QUESTIONThe "scratch/nail test". Is this being done with your finger nail? or an actual nail? I remember reading about it a while ago..
Its done with your finger nail. Try to avoid doing it until the entire paint job has had a full opportunity to cure and harden. Just remember that each new bath of paint will 'potentially' soften the layer you are painting over.
That is why it is important to let each coat reach a good level of curing before splashing on the next coat.
There is a gentle way to try the nail test... ie just push down with your finger nail and see if it leaves a discernable dent in the paint.
The nastier way of test is to actually scratch your finger nail along the paint. The risk is that if you try this too early and before it is fully hardened, you will possibly get a jagged scratch or patch of paint that 'might' come off ( where you have successfully managed to separate the adhesion of the multilayers of paint from the original body surface that you painted over.
But to be quite honest... if I took you over to MAACO or most other paint shops that don't have the factory capability of 'baking the paint'... the odds are that we could sneak around their backyard and by just using our fingernails we could scratch their paint off the body surface.
One thing folks tend to forget is that at the factory, the body parts that are painted DON'T have rubber and plastic trim on them. Hence the factory can BAKE that surface a heck of a lot HOTTER then an aftermarket paint shop can.
Some full tilt hot days under a baking sun... really can do wonders to approximate the heat of a factory baking. But the paint shot 'baking over' is sort of limited because they don't want to melt or warp your rubber or plastic
.
.
Posted By: Anonymous
Re: New how to paint your car on a budget with a roller - 01/24/0812:21 AM
Hi Marq,
I'm taking my time on this project and just completed removing all the trim and taped off the trim I can't remove. Now I want to sand down the car to smooth level before I paint.
I started using 150 grit sand paper. I didn't wet sand. I just went over the entire car with the 150 grit to smooth out small imperfections in the paint. My question is how perfect do I have to do this initial sanding? There are some sand paper marks on the paint now; I intend to wipe down the entire car with mineral spirits and just roll paint over the sand paper marks.
Will the paint level out those small marks? Or do I have to wet sand it down real smooth with 400 grit paper first before I paint?
Re: New how to paint your car on a budget with a roller - 01/24/0812:41 AM
Quote: Sanded with 400grit (lightly) and applied 3rd coat. So far so good? I hope.
If the surface is now smooth, and you've lost all that weird "pooling up" of the paint from the previous coats you had, you should move up to 800 grit after coat #4. ([edit] - maybe hit it with 600 first, and then with 800 before you moved on to coat 5.)
If it were me, I'd do 800 grit wet sand after coat 4, and then also after coat 6 (but a little lighter) and THEN I'd stop and move onto another body panel. My thinking is that after practicing on the hood and then doing other panels, you'll probably want to do the hood again once last time. By then your technique will be really good, and that last coat on the hood will be the best one.
I'd also recommend that you do the rear decklid next. If you were having trouble with consistency and flow, it'll be easier to tackle a flat surface again with your new-found skills. Fenders and doors can be a lot harder if you don't have the technique and the mix down well. (Because of gravity induced runs, obviously)
Re: New how to paint your car on a budget with a roller - 01/24/0812:46 AM
One of these days I'll get pics up of my 68 Charger that I rolled in rustoleum gloss black. I finished it in September, and I've been letting the finish harden up.
I just bought some Poorboys and some new pads to wheel it out. But, here in MI its like 10 degrees, so I suspect I'll have to wait for it to warm up a little before I buff it.
Re: New how to paint your car on a budget with a roller - 01/24/0801:22 AM
Quote: I prep the surface by using a leather shammy (sp?)to soak up the morning dew, then finish with a paper towel. then after it dries, i go ahead and give a final wipe down using a tack cloth. apply paint and the surface is kind of grainy.
you didn't mention it is your list here but after you get the surface dry you should be wiping it down with a cloth damp with mineral spirits to clean it, then let it dry for a few, then go over it with a tack cloth. cant forget the MS wipe down!!
Re: New how to paint your car on a budget with a roller - 01/24/0803:28 AM
I painted this car in the garage where it sits with a $30.00 Binks 7 knock off. Color sanded acrylic enamel with cat. Wool buff with 1000 grit compound followed by swirl mark remover on a foam pad. Old school but it's EZ. The paint was 7-8 yrs old in the pic. Sold it to build a garage.
Re: New how to paint your car on a budget with a roller - 01/24/0804:49 AM
Quote: Hi Marq,
I'm taking my time on this project and just completed removing all the trim and taped off the trim I can't remove. Now I want to sand down the car to smooth level before I paint.
I started using 150 grit sand paper. I didn't wet sand. I just went over the entire car with the 150 grit to smooth out small imperfections in the paint. My question is how perfect do I have to do this initial sanding? There are some sand paper marks on the paint now; I intend to wipe down the entire car with mineral spirits and just roll paint over the sand paper marks.
Will the paint level out those small marks? Or do I have to wet sand it down real smooth with 400 grit paper first before I paint?
I would sand down to at least the 400 grit... to remove the scratches from the coarser grit that you initially used.
The paint will attempt to fill in some of the 'valleys' from the initial scratchier sand paper... but the layer of paint is THIN and so it won't be able to fill it in. At the same time the paint will be accumulating to the peak of each of those scratches. So the valley and the peak are both rising at almost the same rate with each coat.
So by using a 400 to try to cut down the scratches even more, you will be able to get a smoother and shinier paint job in the end.
Take the extra time and effort at the start of the project and it will pay big dividends during the project and at the end of the project.
.
Posted By: Anonymous
Re: New how to paint your car on a budget with a roller - 01/24/0804:58 AM
Should I be wet sanding with 400 grit or dry sand with 400?
Posted By: Anonymous
Re: New how to paint your car on a budget with a roller - 01/24/0812:03 PM
When I messed up the first time by applying to thick of a coat, i tried to dry sand it back down but took forever. wet sanding made it faster. but I dont know if its the proper method, but it worked out for me!
Posted By: Anonymous
Re: New how to paint your car on a budget with a roller - 01/24/0801:22 PM
Just finished with the fourth coat. Im still not getting complete full coverage. Maybe I thinned the paint too much? Im afraid when i sand with 600 tommorrow morning, im going to remove the fourth coat. What do you guys think?
Heres some shots. --------------------- Closer shot. --------------------- Can this cause any ill-effects? (fog) Ever since I started this whole project, its been foggy every morning. I do dry the crap out of my hood before I start the prep. Im just wondering if the fog can cause any harm.
Re: New how to paint your car on a budget with a roller - 01/24/0804:54 PM
Quote: If its foggy it can definitely effect your finish. I would think that no matter what you do to dry it moisture will settle onto the surface.
My first thought on hearing of the foggy effect... is that you must be in an area where there is condensation in the morning... ie... warm and moist during the day with overnight temperatures dropping to a cooler temperature.
If the car is being left outside to dry... there is not much you can do to beat the effects of morning condensation except park it in the garage overnight to dry or hold off painting until the variance between the environment temperatures ( between night and morning ) levels off and the two temperature ranges become more similar.
If this is happening AND you are already leaving the car in the garage... ( ruling out the outside temperature variance variable ) then you might try adding a slightly higher ratio of paint into your mixture.
The fogging 'may' not turn out to be a problem in the end... because the fogging is technically sitting on the outer skin of the paint. When you get to the compounding and polishing stage at the end of the project, it will be removing that fine outer skin surface of the paint. The subsequent application of wax at the end of the final polishing will seal the exposed polished outer skin to prevent moisture and oxygen from reaching it.
I would assume and hope that when you add a new coat of paint to your build up of coats, that the 'fog' disappears and is consumed by the fresh layer of paint... and that the fog is only re-appearing 'after' the latest coat has dried. IF SO... then just rest assured that your later compounding and polishing 'should' be able to get the paint to the level of 'unfoginess' that you see when the paint is freshly wet or applied.
Re: New how to paint your car on a budget with a roller - 01/24/0807:46 PM
I think he was refering to atmospheric conditions not the look in the paint.
Posted By: Anonymous
Re: New how to paint your car on a budget with a roller - 01/24/0808:08 PM
Wow.... just.... wow. I've spent the last month or so reading the entire thread, front to back... all 200 or so pages over 3 threads. Plus the Hot Rod Article, the rollyourcar.com page, the corvair page, etc.
And I'm going to do it. The GN and the 'Vette really convinced me as I want to try gloss black too. I'm not going to even try to start painting till maybe May when the weather heats up but in the mean time I'm going to start gathering supplies. I think I'm going to use a basecoat of Rustoleum and then switch to Brightside for the last coat or two but I'll have to order that as I'm in the middle of nowhere with no lakes nearby.
I have an '89 Buick LeSabre T Type with really bad paint. It was in a hail-storm in the late '90's and the repair job was done really poorly. The clear and spots of the paint are flaking off the roof and trunk.
Anyway, here are some shots to show what I've got to fix
Looks like I need to start with some 200ish grit paper and work the rest of the clearcoat off, pull some dents, and have at it. I'm replacing both front fenders so I'll use one of the old ones for a practice piece.
I'm going to be doing this outside in my carport so I guess I'll hose the walls down before I start and maybe hang some tarps or plastic dropsheets to keep the dust and bugs to a minimum.
Just wanted to say thanks to everyone for the wonderful ideas and that I'll be back with more pics as I get started
Posted By: Anonymous
Pics? - 01/24/0810:54 PM
Hi Marq!
Having read most of the posts from the very first thread on this subject I feel as if I know a bunch of you already, but it took about a week to get to this point!
Having said that, I (and I suspect many others) would love to see pics of some of the vehicles that were posted two years ago when this thread began but have since been lost because of hosting changes made by the original posters. Your Mustang, for example, is profiled quite a bit but the pictures are no longer available. Would you please repost a few of them? After all the kudos I'd love to finally see it!
On a separate note, I come from a classic Suzuki forum (TheGSResources.com) that has a similarly terrific group of members and a lot of them are interested in ways to repaint on their own. However, the biggest problem with "home jobs" has been the lack of resistance to spilled fuel. As you might imagine, this happens more often to motorcyclists than to the average car owner and there is nothing more frustrating than watching a nice paint job simply melt away the first time the gas spills.
I know that "Charger" has stated that his paint was unaffected by spill issues, but since he hasn't buffed his cars out to the "ultimate" shine I wonder if perhaps he didn't notice a problem because any haze (or loss of shine) the fuel might cause was already there? I'd be much more convinced if "Aussie's" gorgeous work had already proven to be gas resistant, or if your Mustang (which I hear is awesome but haven't seen yet) might have survived a gas spill with no ill effects. Any thoughts, specifically where it comes to the Brightside product?
Thanks in advance to everyone who's continued to prove the viability of this method over time! I have several potential projects in mind where this might be the perfect option! I look forward to your response, and I suspect many others watching this thread will appreciate some expanded discussion of "gas resistance."
Regards,
Posted By: Anonymous
Re: New how to paint your car on a budget with a roller - 01/24/0811:30 PM
Quote:
My first thought on hearing of the foggy effect... is that you must be in an area where there is condensation in the morning... ie... warm and moist during the day with overnight temperatures dropping to a cooler temperature.
Yep, thats Florida in the winter for ya
If the car is being left outside to dry... there is not much you can do to beat the effects of morning condensation except park it in the garage overnight to dry or hold off painting until the variance between the environment temperatures ( between night and morning ) levels off and the two temperature ranges become more similar.
unfortunately for me, i do not own a garage. So this project is taking on all the elements.
If this is happening AND you are already leaving the car in the garage... ( ruling out the outside temperature variance variable ) then you might try adding a slightly higher ratio of paint into your mixture.
The fogging 'may' not turn out to be a problem in the end... because the fogging is technically sitting on the outer skin of the paint. When you get to the compounding and polishing stage at the end of the project, it will be removing that fine outer skin surface of the paint. The subsequent application of wax at the end of the final polishing will seal the exposed polished outer skin to prevent moisture and oxygen from reaching it.
Thats what im suspecting. After I prep the surface, i use a tack cloth not only to pick up junk but also to see if the condensation collects fast enough to leave a streak when wiping down. which it doesnt.
I would assume and hope that when you add a new coat of paint to your build up of coats, that the 'fog' disappears and is consumed by the fresh layer of paint... and that the fog is only re-appearing 'after' the latest coat has dried. IF SO... then just rest assured that your later compounding and polishing 'should' be able to get the paint to the level of 'unfoginess' that you see when the paint is freshly wet or applied.
Re: New how to paint your car on a budget with a roller - 01/25/0801:18 AM
Quote: Wow.... just.... wow. I've spent the last month or so reading the entire thread, front to back... all 200 or so pages over 3 threads. Plus the Hot Rod Article, the rollyourcar.com page, the corvair page, etc.
Dude - I love those cars. Do a pic with the hood flipped open. That front hinge on the hood is really cool. Most people don't know about that.
If you've read all 3 threads, and the hot rod article, you should be good to go. Good luck with your rolling!!!
BTW - I suggest that anyone that attempts this process take the time to read all the threads. It takes a long time, but it'll save you a lot of headaches in the long run. The most commonly asked questions have been already answered.
Having said that, this is a unique experience for everyone, based on their specific car and conditions. So ask on.
If I was a jerk (don't ask my wife that question) I would propose a thread that would be a compilation of the stupidest questions one could possibly ask.
Re: New how to paint your car on a budget with a roller - 01/25/0806:09 AM
Quote: Just finished with the fourth coat. Im still not getting complete full coverage. Maybe I thinned the paint too much? Im afraid when i sand with 600 tommorrow morning, im going to remove the fourth coat. What do you guys think?
I had 8 coats on my sidecar and can still see through in spots......so just keep rolling them on man!!! i know i thinned the paint to much on purpose so that it would be thin and level better saving me sanding time.....I can jsut roll more coats on easier!!
Posted By: Anonymous
Re: New how to paint your car on a budget with a roller - 01/25/0806:27 AM
In reading all these threads the recurring theme that keeps coming back to me is that although you don't HAVE to use primer to get a good bond it seems like even with as many as ten coats you'd still wind up with a more consistent result if you DID use it.
After all, with the varying levels of sanding/buffing needed one will invariably wind up cutting down more coats in one place versus fewer coats in other places, and this could lead to color variations if the starting point is splotchy and dramatically different underneath from area to area. The primer coat pretty much eliminates this hassle by quickly providing a nice even starting point.
My .02
Regards,
Posted By: Anonymous
Re: New how to paint your car on a budget with a roller - 01/25/0802:18 PM
Quote: In reading all these threads the recurring theme that keeps coming back to me is that although you don't HAVE to use primer to get a good bond it seems like even with as many as ten coats you'd still wind up with a more consistent result if you DID use it.
After all, with the varying levels of sanding/buffing needed one will invariably wind up cutting down more coats in one place versus fewer coats in other places, and this could lead to color variations if the starting point is splotchy and dramatically different underneath from area to area. The primer coat pretty much eliminates this hassle by quickly providing a nice even starting point.
Just to back that up, while rolling changes the application paradigm, it does not change the physical realities of painting:
All the surface prep work required for a good spray job are still required for a good roll job.
The surface must be smooth and free of contaminants and debris. Sanding marks, if not removed, will be visible in the final product. If the surface is not clean and smooth, it does not matter if the paint cost $7 or $700, is applied with a mop or a $1500 spray rig in a $150,000 booth, it will still look bad.
This ain't latex. It is "Real" car paint, albeit old-school.
Read the threads, follow the instructions, take your time and have fun. At the very least you will have a good story to tell. Whether that story has a one-foot paint job or a 40 foot paint job to show for it, it will still be a good story.
Re: New how to paint your car on a budget with a roller - 01/25/0802:18 PM
Quote: In reading all these threads the recurring theme that keeps coming back to me is that although you don't HAVE to use primer to get a good bond it seems like even with as many as ten coats you'd still wind up with a more consistent result if you DID use it.
After all, with the varying levels of sanding/buffing needed one will invariably wind up cutting down more coats in one place versus fewer coats in other places, and this could lead to color variations if the starting point is splotchy and dramatically different underneath from area to area. The primer coat pretty much eliminates this hassle by quickly providing a nice even starting point.
My .02
Regards, Steve
I'd have to agree. I think in the attempt to make this process as cheap as possible the primer coat has been ignored. Somewhere in one of these threads there's discussion of roll-on primers, and even a link to an industry press release talking about recommendations for body-shops to roll on primer.
If you've done any body work on your car at all, primer is a must. Bondo will suck in the first 3 or 4 coats of paint, so it takes a lot more coats to get even coverage. If you primer at least those spots first everything goes much easier.
If I was to do another car I think I would try a rolled primer approach first as a base coat.
Re: New how to paint your car on a budget with a roller - 01/25/0802:27 PM
after
Posted By: Anonymous
Re: New how to paint your car on a budget with a roller - 01/25/0803:53 PM
Quote:
Quote: Wow.... just.... wow. I've spent the last month or so reading the entire thread, front to back... all 200 or so pages over 3 threads. Plus the Hot Rod Article, the rollyourcar.com page, the corvair page, etc.
Dude - I love those cars. Do a pic with the hood flipped open. That front hinge on the hood is really cool. Most people don't know about that.
If you've read all 3 threads, and the hot rod article, you should be good to go. Good luck with your rolling!!!
BTW - I suggest that anyone that attempts this process take the time to read all the threads. It takes a long time, but it'll save you a lot of headaches in the long run. The most commonly asked questions have been already answered.
Having said that, this is a unique experience for everyone, based on their specific car and conditions. So ask on.
If I was a jerk (don't ask my wife that question) I would propose a thread that would be a compilation of the stupidest questions one could possibly ask.
#1) Should I use 50 grit?
I agree that this entire thread is worth reading. Granted a lot of people keep asking the same questions over and over:
-Can I use a clearcoat? -Why am I getting bubbles? -What is the "roll and tip" method? -Can I use metal flakes? -How much do I thin X color of paint?
etc etc. Most of that was covered in the first thread, methinks.
Thanks for the props on my T Theres a website for 'em actually... http://www.lesabret.com if you want to check out some more pictures or info. They're neat cars and nobody seems to know what they are anymore. I'm about to pick up a second one here in a couple weeks as a project car too.
The flip-forward hood has brought me much joy in confusing younger mechanics when the hood doesn' open like "normal" and basically anybody when I flip the hood open at the gas station. Its also a heck of a lot easier to work on the car that way too.
Anyway, here are more pictures, as requested
Heres a couple of when I was working on it this summer
And random shots:
I have a flowmaster
Posted By: Anonymous
Re: New how to paint your car on a budget with a roller - 01/27/0806:48 PM
Quote:
Quote:
Quote: Wow.... just.... wow. I've spent the last month or so reading the entire thread, front to back... all 200 or so pages over 3 threads. Plus the Hot Rod Article, the rollyourcar.com page, the corvair page, etc.
Dude - I love those cars. Do a pic with the hood flipped open. That front hinge on the hood is really cool. Most people don't know about that.
If you've read all 3 threads, and the hot rod article, you should be good to go. Good luck with your rolling!!!
BTW - I suggest that anyone that attempts this process take the time to read all the threads. It takes a long time, but it'll save you a lot of headaches in the long run. The most commonly asked questions have been already answered.
Having said that, this is a unique experience for everyone, based on their specific car and conditions. So ask on.
If I was a jerk (don't ask my wife that question) I would propose a thread that would be a compilation of the stupidest questions one could possibly ask.
#1) Should I use 50 grit?
I agree that this entire thread is worth reading. Granted a lot of people keep asking the same questions over and over:
-Can I use a clearcoat? -Why am I getting bubbles? -What is the "roll and tip" method? -Can I use metal flakes? -How much do I thin X color of paint?
etc etc. Most of that was covered in the first thread, methinks.
Thanks for the props on my T Theres a website for 'em actually... http://www.lesabret.com if you want to check out some more pictures or info. They're neat cars and nobody seems to know what they are anymore. I'm about to pick up a second one here in a couple weeks as a project car too.
The flip-forward hood has brought me much joy in confusing younger mechanics when the hood doesn' open like "normal" and basically anybody when I flip the hood open at the gas station. Its also a heck of a lot easier to work on the car that way too.
Anyway, here are more pictures, as requested
Heres a couple of when I was working on it this summer
And random shots: I have a flowmaster
Alibi,
Good luck on your paintjob, that car looks like it will be easy to work on because
1. Not a lot of curves to work with, just long clean lines which will be easy to spread paint on with a roller. Very easy for you.
2. The end result will amazing if done right!
If I can suggest using "Interlux Brightside Black" paint, you will achieve amazing gloss even out of the can.
I have used the Interlux black paint on my 93 Honda Civic since last year and has had no problems to report of, amazing paint and still glossy up to this day.
Posted By: Anonymous
Re: New how to paint your car on a budget with a roller - 01/27/0809:36 PM
I'm still debating over what paints I'm using. I don't have any marine shops nearby so I'd have to order in some of the Brightside whereas Rustoleum is easy to get. I'm thinking about doing 6 or 7 rustoleum coats and then buying 1 small can of brightside for the last 2 or so coats just to get the extra shine.
Otherwise, I'm thinking this car will be pretty easy to paint. I'm staying with the original color so I'm not doing the engine bay, jambs, or in the trunk. And most of the trim is easy to remove. ...and my g/f is going to help me with the prep work.
Anyway, I'll post in progress pics after I get going on the project here in a couple months when warm weather comes.
Re: New how to paint your car on a budget with a roller - 01/27/0809:43 PM
Quote: I'd have to agree. I think in the attempt to make this process as cheap as possible the primer coat has been ignored. Somewhere in one of these threads there's discussion of roll-on primers, and even a link to an industry press release talking about recommendations for body-shops to roll on primer.
I used rustoleums rusty metal primer in the bed of my truck and on the tailgate. I rolled it straight out of the can and it went on dead smooth, not a run, ripple,orangepeel or sag. I only wish I'd done the whole truck that way. Before painting.
Re: New how to paint your car on a budget with a roller - 01/27/0809:54 PM
I have a 91 W250 that I am going to do sometime in February with Rustoleum Navy Blue. I found a birdbath hood and am thinking of painting it a satin black which Rustoleum has. Anyone have any experience with the satin paints. I assume you would still buff after the final coat?
Re: New how to paint your car on a budget with a roller - 01/27/0811:13 PM
Quote: I have a 91 W250 that I am going to do sometime in February with Rustoleum Navy Blue. I found a birdbath hood and am thinking of painting it a satin black which Rustoleum has. Anyone have any experience with the satin paints. I assume you would still buff after the final coat?
I tried real hard to get Satin to work, but I just couldn't get rid of the roller marks. I did a fender, and it looked great. When I did the rest of the car, any large panel like the hood and the roof had roller marks.
I made a valiant attempt, with 4 to 6 coats and wetsanding every two in between. It never turned out right. I ended up switching to Gloss, which came out fine.
Who's that guy that did the '69 Mach 1 in satin? His came out great.
Re: New how to paint your car on a budget with a roller - 01/27/0811:38 PM
I'll look back and shoot him a pm. If need be I guess I could spray the hood.
Posted By: Anonymous
Re: New how to paint your car on a budget with a roller - 01/28/0803:58 AM
Speaking of spraying the hood...
From what I've read through the numerous threads and compilation websites I've found on this method, I've found that there's about 2 ways to go about door jambs and under the hood, as well as other areas that don't need a lot of attention.
69chargeryeehaa said,
Quote: i don't sand/polish the underhood and door jambs, it looks fine just as it is. the wetsanding and buffing is only done for the exterior that you see. it does not look out of place at all, the natural finish looks great, besides those areas such as door jambs are full of curves, ect...and it's hard to even see a difference in finish at all.
Exit1965 said,
Quote: For door jambs, engine bays, etc., it is easier to use spray cans or spray the paint on if you have a compressor. I used a compressor and gun to paint my door jambs, and used a refillable rechargable spray can from Harbor Frieght to paint my engine bay. Using one of those refillable cans allows you to get the exact same color since you're using the exact same paint you're rolling with (although it doesn't need to be thinned quite as much).
So what I'm wondering is... What have other people done? It would be a lot easier to just spray the bottom of the hood and I plan on spraying inside the engine bay with some sort of satin black spray anyways... But what about the little L shaped lip around the hood, have people been painting the hood and then opening it to paint that lip and under the hood? Removing the hood altogether?
And as for door jambs, what have you guys been doing? I'm thinking of just using a small foam brush and a roller when I can, and just do the jambs, inside of the door, then outside of the door... And then close the door for wet sanding and open it again for the next coat?
Maybe I'm making things more complicated than they should be, and I should just go ahead an roll the whole exterior out, get it completely finished and then go back and mask off everything but the jambs and under the hood and spray it?
Anyways, please share what order and what methods you guys have been doing these not-often seen areas.
Having read most of the posts from the very first thread on this subject I feel as if I know a bunch of you already, but it took about a week to get to this point!
Having said that, I (and I suspect many others) would love to see pics of some of the vehicles that were posted two years ago when this thread began but have since been lost because of hosting changes made by the original posters. Your Mustang, for example, is profiled quite a bit but the pictures are no longer available. Would you please repost a few of them? After all the kudos I'd love to finally see it!
Believe it or not... the number of folks who viewed the pics I had posted WERE KILLING MY SERVER. We were chewing up so much bandwidth that I had to take the pics offline so that my regular visitors could make it to my site without suffering massive lag times...
I have attacked some pics to this message and the following messages. Plus a few of the 'BEFORE' pics to let you know what a basketcase this puppy was...
That should hopefully inspire other owners whose cars are looking somewhat dogged...
And just to answer the question before it is asked.... I began by painting the car with Rustoleum/Tremclad Fire Red... and half-way through I switched over and finished with Brightside Fire Red paint.
Enjoy... and thanks for asking.
A nice shot of the McLaren and the Cobra... one went to a pro-paint shop ($3800) and the other was done in my garage with a roller.($250).. ( HINT : the roller job is the shinier one )
One of the easiest ways to spot a McLaren Mustang ( compared to your run of the mill Mustang convertible is that the Mercedes style three window rag top tucks completely under that body hatch and can not be seen at all when you are driving with the top down.
And one more since it is not chewing up my web server's bandwidth
This features my McLaren ( front ), Cobra ( middle ) and my Ferrari hatch GTA Trans Am ( back ). I love American Muscle !
You will see a lovely and comfortable blue recycling bin in front of the garage. I used it to sit on while working on the sides of the car.
Another feature of the McLaren, compared to the standard issue Mustangs... is that they raked the windshield an additional 15 degrees to make the car look sleeker and aerodynamic. In this picture you can see the difference in the angle of the McLaren windshild compared to its brother behind it.
After I put the headlights back on to the car... I took a flat black paint and highlighted the openings of the functional dual ram air gun ports to make them stand out.
And some folks would like to know how this puppy started before the roller job...
The original hood was hopeless and beyond reasonable repair. So I slapped a fiberglass dual port functional ram air on. They arrive in a white gel coat ( and that is what you see ).
I had taken the car to three body shops to get a quote on painting the poor puppy... and they all came in at $4000... ( so the car sat untouched for two years until I stumbled on this message thread and decided to give it a try ).
I was thrilled by how the car turned out and at the saving of $3750...
At some point the rear valance on the McLaren had been damaged and the previous owner simply slapped an LX style bumper on to the car. I replaced it with the proper rear valance which you can see in the shiny red pictures of the finished car.
I also hated the lame dual exhaust tips on the car... and replaced the exhaust from front to back with a true dual Mac system with dual chrome tips on each of the new dual pipes. Nothing sexier on a sportscan then having four exhaust tips purriiing out their musical rumble at the car behind you
Yup... that is how I received it... rough, scruffy and not exactly the car you want to be seen cruising in on Friday nights... ( It was embarassingly and poorly cared for by its previous owner ).
Re: New how to paint your car on a budget with a roller - 01/28/0806:16 AM
Quote:
So what I'm wondering is... What have other people done? It would be a lot easier to just spray the bottom of the hood and I plan on spraying inside the engine bay with some sort of satin black spray anyways... But what about the little L shaped lip around the hood, have people been painting the hood and then opening it to paint that lip and under the hood? Removing the hood altogether?
Because I was painting the car in Fire Red, I was able to buy the aerosol and liquid canned paint in the same color. So for under the hood, I used the spray aerosol. For the inner lip of the fender and the hood I also sprayed with the aerosol bomb. I did all my spraying BEFORE doing the roller job on the more exposed exterior parts. I think at some point I also touched up the inner ffender part that is attached in the engine compartment with a 1" foam paint brush.
While working in the engine compartment I covered the engine and inner fender walls and inner firewall with a sheet of plastic that I taped into position ( just to cut down on the over spray getting in the engine compartment ).
Quote:
And as for door jambs, what have you guys been doing? I'm thinking of just using a small foam brush and a roller when I can, and just do the jambs, inside of the door, then outside of the door... And then close the door for wet sanding and open it again for the next coat?
I just opened the doors and used the aerosol bomb to spray into those hard to reach places. I also spray bombed the bottom of the door panels. The spray bombing went on pretty smoothy and I ended up putting on three coats over a three day period. No additional finishing or waxing was required. It looks like it has always been there. And that was going from black to red.
Quote:
Maybe I'm making things more complicated than they should be, and I should just go ahead an roll the whole exterior out, get it completely finished and then go back and mask off everything but the jambs and under the hood and spray it?
Nah... I went about things the other way around. Get the piddly detail work done first. This way your roller job will not get runs or oversprays that may happen if you did the body first and the 'hard to reach areas' second.
The other advantage of getting the piddly things done first.. is that any overpray on the body can be easily worked over when you do your body sanding and body paint rolling.
In the end... the exterior body is the most important visually to you and anyone who looks upon your roller paint job. Nothing would make you cry more then to do a beautiful exterior body painting... and then foul it up with overspray or paint runs escaping from the 'hard to reach areas'.
BTW - you won't want to buff out your final coat of satin, as that will start to make it glossy. You'd end up with some kind of sem-gloss instead of satin.
Even though my attempt at it didn't turn out well, you can still give it a try. gfeighny proved that it can come out good, maybe I just couldn't get the technique down right. You can always change your mind later if it doesn't turn out to your liking .
Re: New how to paint your car on a budget with a roller - 01/28/0804:20 PM
That's the cool thing about this paint, I only have $8 to lose.
Posted By: Anonymous
Re: Pics? - 01/28/0804:25 PM
Quote: Believe it or not... the number of folks who viewed the pics I had posted WERE KILLING MY SERVER. We were chewing up so much bandwidth that I had to take the pics offline so that my regular visitors could make it to my site without suffering massive lag times...
I have attached some pics to this message and the following messages. Plus a few of the 'BEFORE' pics to let you know what a basketcase this puppy was...
That should hopefully inspire other owners whose cars are looking somewhat dogged...
And just to answer the question before it is asked.... I began by painting the car with Rustoleum/Tremclad Fire Red... and half-way through I switched over and finished with Brightside Fire Red paint.
Enjoy... and thanks for asking.
A nice shot of the McLaren and the Cobra... one went to a pro-paint shop ($3800) and the other was done in my garage with a roller.($250).. ( HINT : the roller job is the shinier one )
.
VERY VERY nice! Worth the wait to see the pics! I have always been a "Ford guy" (though I've also always appreciated other makes) and appreciated the additional info on your cars. Especially interesting about the windshield angle - I was unaware that this mod had been made to the McLarens. I'm currently driving a 2005 Ford Excursion diesel with a Superchips performance upgrade - it's great fun to smoke stock Mustang GT's with my big truck and still get decent fuel mileage - hehe!!
Thanks again for reposting the pics, Marq! I would have loved to see the look on the faces of the body shop guys (or gals) you received quotes from when you showed them your "home roller job!"
One of these days, when my Big X's paint job starts to fade (and we know it will) I'll have to seriously consider going this route, since I'm planning to keep the truck at least ten years and the cost to cover that much "real estate" would probably dwarf the quotes you got on the Mustangs!
Roll On!!!
Regards,
Posted By: Anonymous
Re: New how to paint your car on a budget with a roller - 01/28/0811:22 PM
Marq: Does that mustang have 92-99 Pontiac Bonneville rims on it?
If so, were those painted with Rustoleum as well or how were they done? Or were they on the car when the PO had it?
Re: New how to paint your car on a budget with a roller - 01/29/0803:59 AM
Quote: Marq: Does that mustang have 92-99 Pontiac Bonneville rims on it?
If so, were those painted with Rustoleum as well or how were they done? Or were they on the car when the PO had it?
Actually the story about the rims is kind of interesting. If you look at the BEFORE pictures of the McLaren ( when it was in its black paint job ) those are the original genuine McLaren rims.
They were custom made by ASC for the McLarens. The only problem with them is that they only had about a 1/2 lip of chrome. So there wasn't much depth or 'bling' to their appearance....
It turns out that back in 1988 the McLaren Mustangs were in competition with a rising star in the automotive history " SALEEN ".
McLarens were built for primarily appearance and touring. The Saleens were being built primarily for performance.
Well.. it turns out that in 1988 Saleen liked the look of the McLaren ASC rims. So they had their own version of the rims made... but the big difference was they had a 2 3/4 inch chrome lip on the rim - giving it more depth and bling.
Also.. the McLaren rim could accomodate up to a 225 wide tire at the most... the Saleen rim could accommodate up to a 255 wide tire...
So... imagine this. In 1988 a guy down in Florida ordered a brand new Saleen. When he received it, he immediately took those Saleen rims off and replaced them with the FIVE STAR Mustang rims ( which he thought were sexier ).
Spring forward to 1998... ten years after... and the original Saleen owner has gone through his garage and takes his stored rims out of their time capsule AND he put his UNUSED MINT 1988 Saleen rims on eBay...
I picked up the rims for the grand total of $120 for the FOUR RIMS... Unfortunately I had to pay roughly another $120 to have them packaged up safely and shipped from Florida to my home at the time in Pennsylvania.
And so goes the tale of how a brand new mint set of 1988 Saleen rims ended up on a 1988 McLaren.
And as for my 1988 McLaren rims... well I sold them almost instantly to another member of the McLaren registry for $120.
So the end result was that I was only out of pocket by $100 for the Saleen rims.
Ok... me bad. A 'true' McLaren fanatic would want to have kept the car all stock, with matching numbers and original parts. BUT I am a 'driver' and I want a car that fits me and my taste. I can't afford to be a purist or elitist ( heck a roller paint job alone would be enough to send McLaren purist running for a stiff drink of Scotch ).
Those Pontiac rims in your picture are 'sort of like' the McLaren rim ( with less then 1/2 inch of lip on them ).
It is funny that the Pontiac rim in your picture is almost the same style that I have on my GTA TransAM. But my GTA rims also have about a 2 1/2 inch deep chrome lip. From what I gather they only made the rims on my car for one model year.
Re: New how to paint your car on a budget with a roller - 01/29/0804:04 PM
I just wanted to show a quick project I'm working on in addition to my Dart. The lead seam in the roof of my GTO needed some attention so I stripped the paint off and got busy. Afterwards I decided to try to match the color with Rustoleum. Here are my results. I love this stuff! I even put it on with a foam brush.
Re: New Paint job on a budget thread. - 01/29/0810:51 PM
Someone posted a photo of a sail boat painted with Flag Blue and you would swear that it must be BLACK. I want to see Sapphire Blue!
Posted By: Anonymous
Re: New Paint job on a budget thread. - 01/30/0806:47 AM
This is my first post. I've enjoyed all the info that everyone has posted. I joined just to follow this thread. I don't own any Mopar products, but my interests are in Jeep Cherokees.
Has anyone thought of using a palm sander or some other vibration device (not your old lady's) to vibtrate the bubbles out or help level the paint?
They use to own Interlux Yacht Finishes that makes Brightside. They were the private label for West Marine and several other companies, according to a PDF I downloaded. They also sell gallons of single stage enamel truck paint for reasonable price. No shipping or sale taxes, but they do charge a $19.95 handeling fee on the entire order.
Chris AKA: BigBlue
Posted By: Anonymous
Re: New Paint job on a budget thread. - 01/30/0807:53 AM
Marq:
Very interesting story on the rims. I noticed the newer gold rims were different than the black ones, but the black ones looked like bonnie rims. The funny part is that they would fit the Mustang hubs just fine too :P Lucky you got them back in 1998 or you would have had a heck of a time getting them now considering how much traffic eBay gets these days.
Personally, I would have kept the original McLaren rims in storage just to be able to swap the car back to stock if the need or desire ever arose. The Saleen rims do look better (although I like the black color better) with the wider lip. I'm a fan of modding cars to suit my desires, but I also don't want to hack it up so much that I can't put it back to factory stock for the sake of collectibility.
Its funny that you mention the TA rims... that one year of crosslaces happen to look almost identical to Buick GNX rims and people with Grand Nationals use the TA rims to make a GNX clone. Look 'em up on Ebay, they go for quite the pretty penny.
The Bonnie crosslace rims are used by later-era Pontiac and Buick guys (after the lug pattern was changed) to hint to GNX rims too. The lug pattern of actual GN/Regal rims is different so we have to use the Bonnie rims for our lug pattern. When painted black, Bonnie crosslace rims actually look pretty darn nice: http://www.cardomain.com/ride/2556893/7
Lucky for us, the Bonnie crosslace rims were used from 92-99, were the lightest alloy rims available during that time, and they're easy to find for pretty cheap.
Back on topic, I'm in the works of getting a set and plan on painting them with rustoleum this spring, so thats why I was asking if you happened to paint a set yourself :P
I think I'm going to use aircraft stripper to get the old clearcoat off, and then just spray bomb the crosslace section... I don't see much point in trying to roll the laces.
Posted By: Anonymous
Re: New Paint job on a budget thread. - 01/30/0802:21 PM
Its been a while. finally got another break in the weather. I work nights and scheduled to leave at 6am. So far for the past couple of days its been a little below freezing. So everytime i got out of work, all cars have a sheet of ice on em'. I wasnt about to go outside and get frost bite on my hands trying to take the ice off
So this morning, it was perfect. nice 60 degrees.
I believe this is my 5th coat. After using 800g i almost just almost went back to original paint. I didnt get any pictures right after sanding. I always thought from the beginning I thinned the paint too much. so i added a little more paint to the mix. i laid it out and came out pretty good. No runs, thin but not too thin. I can barely see the original paint.
(Took crappy pics - wrong settings on camera )
As Borat would say, "wow wow wee" -------------------- almost full coverage (cant see original paint on crappy shot) -------------------- drying up pretty quick --------------------
Nice reflections. Hopefully a couple more coats and ill be set to move on!
Re: New Paint job on a budget thread. - 01/30/0802:49 PM
Quote: Marq:
I'm in the works of getting a set and plan on painting them with rustoleum this spring, so thats why I was asking if you happened to paint a set yourself :P
I think I'm going to use aircraft stripper to get the old clearcoat off, and then just spray bomb the crosslace section... I don't see much point in trying to roll the laces.
I haven't done a rim in years. Last time I did a rim was back in 1970 on a Triumph TR4A set of steel rims.
I know with my TransAm rims, they were looking a little dodgy. But fortunately we had a rim refurbishing company that did hotswaps. They would show up at your house with a fresh spanking and sparkling newly refurbished set of rims and take your money and the old rims. The cost was a measly $50 per rim and well worth it.
I did have one friend by the name of Carl who was a bit of a perfectionist. He use to put his car away every winter. So what he did one winter was remove the rims from the car and brought them to his basement. Over the winter, whenever the mood struck him... he would venture down to his basement and do a little sanding... a little painting....... a little wet sanding... a little more painting etc etc etc... all winter long. In the spring he showed us how his rims had turned out and they were nothing short of amazing. I would dare say that they were actually better then the factory originals.
So I know that the rims can be done successfully and with good long term endurance. BUT my main area of concern with open or spoked style rims is the road contaminant that will land on the paint.
Brake dust is particularly nasty if it is allowed to build up. And because you have a paint type coating on the rim... it sort of limits the type of cleansers that you would normally be able to use on a rim.
The other problem is simply all the road chips that will happened to the paint on the rims. If the paint is somewhat soft... then you will get a cratered moon type pitting which will slowly reduce the gloss and shine of the painted areas. If the paint is fully hardened... there is the risk the road chips may smack out or separate little pieces of the paint from the rim.
That was one of the reasons I opted to pay the bucks for the professionally refinished / refurbished rims. Their cleaning methods and chemicals are far superior to anything most of us could bring to play on the taak. As well, they have the paint, paint application methods and ability to bake on the paint. And even for the finished clearcoat they put on it... I suspect they have a superior product available to them.
If we were to try to duplicate the cost of chemicals for the acid bath, surface prep chemicals, paint and clear coat, I suspect the cost would end up over the $50 per rim that I paid. And that was not taking into consideration the 'experience' they have at working on rims etc.
One hint is to get a quote directly from the rim refurbishing company, with yourself pretending to be a garage ( not a consumer ) and not going through some middleman company.
IF I was going to do my rims... I suspect that I would probably lean towards doing the aerosol bomb method as compared to a foam brush etc.
I do know that one guy did an amazing job on his set of spoked/splined style rims using an airbrush to lay on the paint. The guy was pretty good at airbrushing art work... and so he just figured that it would be a natural for the rims. He used the same type of paint that he would use when painting a mural on the hood of a car or on the side of a van. At least he knew that the paint itself was durable for exposure to the elements.
One other chap I knew... did all the surface preparation work on his rims and got them up to the stage where the paint was ready to be applied. But he chickened out of doing it himself and instead took it to a local professional autobody / paintshop. They sprayed his rims using a polyurathane... and then clear coated them. I think the total cost was about $100 and they looked factory fresh..
.
Posted By: Anonymous
Re: New Paint job on a budget thread. - 01/30/0805:05 PM
Have you ever though of maybe building a cheap little quonset with some tarps and cheap lumber? Doing this outside and letting it get rained on and what not are obviously not going to get the best results...
Posted By: Anonymous
Re: New Paint job on a budget thread. - 01/30/0807:53 PM
Quote: No runs, thin but not too thin. I can barely see the original paint.
(Took crappy pics - wrong settings on camera )
As Borat would say, "wow wow wee"
Nice reflections. Hopefully a couple more coats and ill be set to move on!
Looks like you finally got the formula down for your conditions. Congrats, its looking good.
Posted By: Anonymous
Re: New Paint job on a budget thread. - 01/31/0805:26 AM
For rims, I've thought about getting them powdercoated. I know the powdercoating would probably outlast the car... but it just goes back to initial cost.
So I'm thinking that just in the short run of a few years that if I just rattle-can my rims every couple years to keep them looking good, then that would be allright.
But I hadn't thought about having a professional shop do them... I'll have to look into that. Hmm...
Posted By: Anonymous
Re: New Paint job on a budget thread. - 02/01/0807:23 AM
With regard to the question of powdercoating your rims, if you're going to keep the rims for the long term and you can afford it I'd go the powdercoat route. After all, with the durability you'll get why would you want to go through the time and effort to "renew" them yourself every year or two? That's time lost enhancing the vehicle in some other way!
Regards,
Posted By: Anonymous
Re: New Paint job on a budget thread. - 02/01/0801:41 PM
Well okay. I forgot to change the batteries to the camera so I went to use my cellphone camera but I cant find the cables to connect it to my PC!
I just realized I skipped putting on another coat!!
I just got back from sanding with 1000G and putting on another coat. i think im going crazy This must mean i should be taking a vacation from my day (night technically) been working overtime for the past couple weeks has been killing me.
So now that i skipped 6th coat, im going to put 2 more coats on top of the one i just did now.
I have some issues though. The edge of the hood that is parallel to the windshield refuses to hold the paint. This edge is curved upward to meet the angle of the windshield. When I roll over this edge, the paint does not like to sit on this "upward curved" edge. BUT all other 3 edges are fine, even the edge parallel to the bumper, which might I add is curved downward. My paint doesn't run either.
Another thing I want to check is my prep. I just want to go over it and make sure im doing this right. From the beginning..
Before 1st coat;(Assuming surface is sanded and paint is mixed) -wipe down with MS -let it dry a bit -wipe with tack cloth - about this tack cloth, how many times can i use a single sheet?
-begin rolling 1st coat - About rollers, how many times can I use a roller?
-wait 24hrs -wipe down with MS -let it dry a bit -wipe down with tack cloth -apply 2nd coat -wait 24hrs -WET SAND - start off using 600g and gradually move up to 800,1000,1200 after 2 coats - about wet sanding. When I start wet sanding, i notice the paper will glide easily on some parts of the surface and other it will literately get stuck on the surface, as if it was "sucked" to the surface. I'm assuming these are the parts i have to smooth out? Also how much pressure i should apply while wet sanding and how long should a hood take to wet sand?
Re: New Paint job on a budget thread. - 02/01/0804:33 PM
Quote:
- about this tack cloth, how many times can i use a single sheet?
-begin rolling 1st coat - About rollers, how many times can I use a roller?
-about wet sanding. When I start wet sanding, i notice the paper will glide easily on some parts of the surface and other it will literately get stuck on the surface, as if it was "sucked" to the surface. I'm assuming these are the parts i have to smooth out? Also how much pressure i should apply while wet sanding and how long should a hood take to wet sand?
Tack cloth - if you have it folded up into a 4" or so square, you can keep flipping/folding and use it over and over. Basically, as long as it is still "tacky", its good. (Tip - wear a neoprene glove so your hand doesn't get all sticky).
Rollers - if you seal the rollers up in plastic bags with twist ties, they will last 24 hours easy. They'll still be wet when you take them back out. I replaced mine every two coats. For $1 each, what the heck.
Wet Sanding - have a hose or spray bottle handy. When the sandpaper starts sticking its because its not wet enough. Also rinse it in a baucket or hose it off often, as it gathers up paint residue real quick. You should not need to use a lot of pressure, but you should be using some kind of sanding block or something firm to wrap the paper around while you are sanding. I used a stiff foam sanding block that I bought from the local hardware store. Its fairly firm, but you can still make it conform to curves in the panel.
Posted By: Anonymous
Re: New Paint job on a budget thread. - 02/01/0806:25 PM
I think you're getting way ahead of yourself using 1200 after only 2 coats.
Re: New Paint job on a budget thread. - 02/01/0807:31 PM
Quote: I think you're getting way ahead of yourself using 1200 after only 2 coats.
True.
He said "-WET SAND - start off using 600g and gradually move up to 800,1000,1200 after 2 coats"
I hope he meant move up a grade after each two coats, and did not mean doing 600, then 800, then 1000, then 1200 and then do another two coats.
Just to be clear - it should be:
2 coats 600 2 coats 800 2 coats 1000 2 coats 1200
Posted By: Anonymous
Re: New Paint job on a budget thread. - 02/02/0802:43 PM
Hi, all. I read every post up to page 35 in this section, and have to put in my About 10 years ago, I painted a travelling van with Home Depot Aluminum Industrial paint (I don't remember what brand). I wanted the highest reflection possible, because I lived in AZ. I rolled it on one night, at about 2 AM, when it was about 78 degrees out. I wasn't concerned about orange peel, or anything. I painted everything but the glass, and lights (I even "smoked" the signals with a very light spray bomb silver). It stuck to the paint, rubber, plastic...etc.. perfectly, and in about a month, I polished it. I felt sorry for the pilots overhead! It was like bright anodized aluminum! It hurt my eyes, and I'm really surprised I didn't get pulled over for it! Here is a testement to it's durability: I went head on with a new Mustang, both of us going about 35. Mustang: Totalled. I had to pull my fender away from the tire. Paint stuck great except where the original paint underneath flaked off. Then, got rear ended by a teenager. I had to make him get out of the car because he was so scared. His Honda went under my bumper, and peeled back his lights, hood, etc. I buffed out the bottom of my bumper. Got sideswiped by a drunk in Cali., on the freeway. He was raging mad, and rammed my driver side. His Trans Am: TOTALLED! Fiberglass everywhere. He went to jail, I buffed out the paint. It had a 1" deep, 3 foot long crease, but NO loss of paint! April 8, 2004. had a 70 mph front collision with another van that almost killed my passenger, and I, and caught the van on fire, warped the roof in waves all the way back, and pushed the engine back almost a foot. Doors were stuck, etc.. The paint was fine (except, again, the original paint that had flaked off). It was even okay after the fire. So, in my experience, silver is great. The van, however was cursed.
Posted By: Anonymous
Re: New Paint job on a budget thread. - 02/02/0803:29 PM
Quote: So, in my experience, silver is great. The van, however was cursed.
I think you may have neglected to consider one thing here ... the van wasn't cursed, it was camo'd by the polished aluminum paint, which reflected everything and made the vehicle "disappear." No wonder so many other vehicles collided with you ... or maybe they were blinded by the reflection?
Anyway, hope you and your passenger made a full recovery!!!
(sorry for the thread hijack!)
Regards,
Posted By: Anonymous
Re: New Paint job on a budget thread. - 02/02/0804:01 PM
Heheh. Yeah, I guess it was like the birds flying into windows. By the way, I rolled it with the short nap type, straight out of the can, and didn't have bubbles. I unwittingly "tipped' it with a brush, using a technique I refined as a high end fine furniture builder. I would put almost microscopicly thin layers of stain over sanding sealer, and have to even them out perfectly, by brushing so lighly, that it felt like the brush didn't touch the surface. It should be the same as what has been done here, but my goal is to put it on smooth enough to not have to sand at all.
I have a '93 Mazda mx-3 (similar to the Miata) that I'm going to paint brightside black. I'm going to try with just 2 brushes, using the technique mentioned, and let you know how it works. And thanks, Steve. My passenger still got headaches once in a while, and I still get random pains... Being a professional acrobat doesn't help any.
Re: New Paint job on a budget thread. - 02/02/0804:38 PM
Quote: my goal is to put it on smooth enough to not have to sand at all.
It is possible to lay it out smooth enough with just a foam brush that the final sanding and polishing step is optional. I've seen this car in person, and I had to look really hard to find any brush marks. Black will be less forgiving, but I'm sure you can get good results with a minumum of sanding and polishing.
Posted By: Anonymous
Re: New Paint job on a budget thread. - 02/02/0805:27 PM
I would never attempt to use black on my first try anyways...
Posted By: Anonymous
Re: New Paint job on a budget thread. - 02/02/0808:13 PM
Durability update:
It's been quite a while since I've logged in to this site, but I thought it was an appropriate time for an update. I got hooked up with this thread about 2 years ago and did a little experimenting. My first project was to repaint the rusted garage beer fridge (red with white racing stripes) which I still love. Next up was the riding mower, again with Rustoleum's wonderfull Red (no racing stripes this time). That one was completed in April 2006 I think. Photos of both projects are back on the old expired threads on this site. Since that time, the mower has been sitting outside, uncovered, in the South Florida sun (when not performing it's duties!). Over the last few weeks I noticed just how faded the paint was starting to look on the hood. Keep in mind that from day one after the paint dried it has been outside and has NEVER had any wax applied. And as you might expect, it was starting to look pretty bad, but that was kinda the point - see how durable the paint is. Well, I couldn't take it any longer and broke out an old bottle of NU-FINISH car polish (not a compound, just a polish). 15 minutes later, with only elbow grease and a rag, the old mower looked just as shiny as the day I put the last coat on! I gotta say I am very impressed, enough that any doubts I had about putting it on my daily driver are gone. Now if I could only find the time! LOL
Posted By: Anonymous
Re: New Paint job on a budget thread. - 02/04/0802:58 PM
Quote:
Quote: I think you're getting way ahead of yourself using 1200 after only 2 coats.
True. I hope he meant move up a grade after each two coats, and did not mean doing 600, then 800, then 1000, then 1200 and then do another two coats.
Just to be clear - it should be:
2 coats 600 2 coats 800 2 coats 1000 2 coats 1200
yep thats what i meant. after 2 coats, step it up a grade.
------------------------------------------------ well that 5th coat turned out HORRIBLE after it got rained on. it left unwashable water spots on the surface. so i busted out 800g and sanded the hood off.
So basically I just put on another 5th coat, with more bad results
Prepped the surface, laid a the 5th coat and this is where it begins. For some reason, there was a swarm of gnats (small annoying flys) hanging over my trunk. They literally waited till i finished painting to dive bomb the hood. im guessing the smell or the shine must of attracted them. so now i have a wet hood with some bugs on it. oh and I tried to pluck them out, but it was a losing war.
Well here are the pics. NEW 5th coat after sanding original water-spot 5th coat.
loving the reflection, but damn bugs, dog hair and grains of dirt ruin it. ---------------------- Spring time comming up. pollen coated vehicles are a common site around here. ---------------------- niiiiice ---------------------- Ok I did some crappy photo editing in photoshop. Heres a shot of some of the bugs that flew into my paint in the green circle. ---------------------- same shot, no editing.
Guess im going to have to live with it. Its not like im painting for a show quality finish.
Re: New Paint job on a budget thread. - 02/04/0803:52 PM
Quote:
Quote:
Quote:
Damn gnats and bugs. Guess im going to have to live with it. Its not like im painting for a show quality finish.
There might be two things you can try... go to your local hippee store ( or maybe even Walmart ) and buy a 'blacklight'... Put it out in the yard on a lamp that you don't care about. The little gnats, moths, flies, mosquitoes and just about every other flying pest will go 'to the light'. And the fun thing is that blacklights heat up like you wouldn't believe... so any bug that is stupid enough to land on the light will be roasted and toasted before it knows what hit it.
In the meantime they will have been drawn away from your fresh coat of paint...
Now... on the topic of bugs flying on to the fresh paint... I agree with you. It seems there is something in the smell that draws the buggers to it. BUT one thing I learned... is that IF bugs land on the paint DON'T TOUCH THEM.
The odds are that the weight of the bug is not sufficient to penetrate too deeply into the skin of the paint as it is curing. The bug is usually attached on the outermost part of the paint skin.
So you let the paint fully dry... and the bug will fully dry with it... and the odds are that when you take a tack cloth to it after, the dried bug will easily separate from the paint as you are lightly wiping. The only evidence left behind might be a part of their leg hehhehe. The next coat of paint will take care of that tiny glitch. And even if you are moving on to the compounding, polishing and waxing stage, that will also go a long way towards making the gravesite of the bug disappear or become quite a bit less obvious.
I don't know what I would have done if a full size moth had stuck himself into the fresh paint. Fortunately it never happened... although I did have a STUPID cat walk on the hood while it was still curing ( that required a resanding and fresh coat of paint ).
With regards to hair in the fresh paint... it depends if it is human or dog... When I was doing my initial painting I kept seeing human hair in the fresh paint. Sadly I must admit that it was coming off of me. After all, we humans shed hair all the time ( and especially in the shower and when brushing or combing our hair ). The solution to this problem was rather simple - I wore a baseball cap everytime I painted. No more hair from me.
The only time I would try to remove hair from fresh paint is if I spotted that evil hair WHILE I was painting. At least at that point, I could get the hair off the wet paint and re-roll quickly over that spot ( feathering around it to blend it in ).
IF the paint was dried and I noticed a hair... I did not bother trying to dig it out of the freshly cured paint. IF I could use the tweezers on an exposed end of the hair, then I would try that to see how cleanly I could get the hair out. In some cases the layer of paint that it is embedded in is thinner than the thickness of the paint itself. So you could make a greater mess by trying to pluck the hair out. So I just let the next coat of paint cover over it - and it seemed to work out quite well.
One nice thing about the pictures you provided is that it is becoming visibly clear on how much better the car is going to look once it is fully clothed with fresh black paint. A 10 footer is always better then a 50 footer if you know what I mean.
Posted By: Anonymous
Re: New Paint job on a budget thread. - 02/05/0812:57 PM
OK 6th coat and more bad news. I pulled one of those "if it aint broke, dont fix it" type deals here. I went ahead and prepped the hood and did NOT let the MS dry. so i got a new tack cloth and wiped the hood down. MS + tack cloth = garbage. tack cloth become un-tacky. so I applied the 6th coat to a moist hood. moist as in MS, not water. Here are my results
*sigh* I was thinking of wiping it down with a soaked rag with mineral spirits before it dried, but i wasnt sure if was sopposed to look like this or not. ------------------------- I think the MS prevented the paint from flattening out ------------------------- It has begun. first gnats, now mosquitoes. ------------------------- gnats
im seriously going to have to invest in a bug zapper or something.
Re: New Paint job on a budget thread. - 02/05/0804:25 PM
Quote: OK 6th coat and more bad news. I pulled one of those "if it aint broke, dont fix it" type deals here. I went ahead and prepped the hood and did NOT let the MS dry. so i got a new tack cloth and wiped the hood down. MS + tack cloth = garbage. tack cloth become un-tacky. so I applied the 6th coat to a moist hood. moist as in MS, not water. Here are my results
------------------------- I think the MS prevented the paint from flattening out -------------------------
The hood looks like it has orange peeled. You are going to have to do a bit of sanding to get that surface all flush and back to one surface level.
Possibly the wiping down with mineral spirits was a little exhuberant.. ( too much wet ). I would go with a cloth wetted with mineral spirits and then wrung out to get most of the MS out of the cloth before wiping down the car.
Too much MS on a coat of paint causes the outer skin of the paint layer to soften. When you add the next coat of paint on and it begins curing, the lower trapped surface layer gives way and gets pulled at from the forming of the hardening skin on the fresh coat of paint.
So let the hood dry and harden fully and then go at it with the sand paper to knock back the orange peel.
I know it is frustrating to take one step forward and two steps back... but sometimes it is worth the extra effort to get a better finished product.
As for that mosquitoe that attached himself to your hood... that was nasty. Maybe you could burn one of those RAID citronella bug repellant incense things to force the bugs away from your work area.
AND yes... I actually did that one day while working in my garage on the painting The buggers were taking advantage of my concentration on painting to try to feast on me. So I lit up one of those citronella bug repellant incense things and it drove the buggers off.
They work equally well outside. Maybe you could get one of those garden type ones, that are mounted on a bamboo shaft. It would drive away most flying bugs from where you are working.
.
Posted By: Anonymous
Re: New Paint job on a budget thread. - 02/05/0804:45 PM
-------------------------
As for that mosquitoe that attached himself to your hood... that was nasty. Maybe you could burn one of those RAID citronella bug repellant incense things to force the bugs away from your work area.
... I lit up one of those citronella bug repellant incense things and it drove the buggers off.
They work equally well outside. Maybe you could get one of those garden type ones, that are mounted on a bamboo shaft. .
What a GREAT IDEA Marq! I never thought of that! WOW. Home Depot should change their name to "Home and AUTO PAINTING Depot." We roller guys already get our foam rollers, Penetrol, mineral spirits and paint(Rustoleum) from them. Now add Citronella bug repellent to the list. Thanks again for the tip!
Posted By: Anonymous
Re: New Paint job on a budget thread. - 02/05/0809:12 PM
Quote:
-------------------------
As for that mosquitoe that attached himself to your hood... that was nasty. Maybe you could burn one of those RAID citronella bug repellant incense things to force the bugs away from your work area.
... I lit up one of those citronella bug repellant incense things and it drove the buggers off.
They work equally well outside. Maybe you could get one of those garden type ones, that are mounted on a bamboo shaft. .
What a GREAT IDEA Marq! I never thought of that! WOW. Home Depot should change their name to "Home and AUTO PAINTING Depot." We roller guys already get our foam rollers, Penetrol, mineral spirits and paint(Rustoleum) from them. Now add Citronella bug repellent to the list. Thanks again for the tip!
Good thing I work at The Home Depot! I can pick up my supplies after my shift is over. I could of swore the Citronella candles were on clearance too! Im gonna give that a shot. I just hope the neighbors dont think im about to sacrifice a goat or something with all those citronella candles laying around in my backyard.
Posted By: Anonymous
Re: New Paint job on a budget thread. - 02/06/0801:16 PM
I think my paint job is FUBAR-ed! I went ahead and sanded the hood with 1000g to find no shine and tons of fossilized bugs in the hardened paint.
Its sopposed to rain today so all I did was wetsand, no paint. this is how I uncovered the fossilized bugs. Theres somewhat of a shine but definitely not a keeper. What I don't get is that there is 6 layers and after sanding with 1000g to move onto coat 7, there is no shine. I mean right now I should technically be finished, right? or maybe it was because of a thicker 6th coat that messed it up. can someone fill me in on how the final wet sand surface is supposed to look like?
well here are the FUBAR-ed pictures.
Sanded with 1000g after 6th coat -------------------------- Closer shot -------------------------- Fossilized bugs -------------------------- Little to no shine -------------------------- ouch! original paint showing!
Re: New Paint job on a budget thread. - 02/06/0801:55 PM
Quote: I think my paint job is FUBAR-ed! I went ahead and sanded the hood with 1000g to find no shine and tons of fossilized bugs in the hardened paint.
Its sopposed to rain today so all I did was wetsand, no paint. this is how I uncovered the fossilized bugs. Theres somewhat of a shine but definitely not a keeper. What I don't get is that there is 6 layers and after sanding with 1000g to move onto coat 7, there is no shine. I mean right now I should technically be finished, right? or maybe it was because of a thicker 6th coat that messed it up. can someone fill me in on how the final wet sand surface is supposed to look like?
The final wetsanded surface should have an overall dull gloss - almost like a satiin wall paint compared to a glossy wall paint. The dullness should be similar everywhere on the panel or hood that you are working on.
What you are looking for here is to ensure that the final painted coat is all at one level.
For example, if you were to slice your hood in half and look at a side profile it, it should look like this :
====================================== Paint layer XXXXXXXXXXXXXXXXXXXXXXXXXXXXXXXXXXXXXX metal hood
IF you were look at a side profile of the paint and it looks like this :
========wwww========www=======wwwwwwww== paint XXXXXXXXXXXXXXXXXXXXXXXXXXXXXXXXXXXXXXXX metal hood...
Then it means that the paint is not all at one level layer.
Now... taking a close up of the problem layers
WWWWWWWWWWWWWW====== you need to sand the peaks
wwwwwwwwwwwwww====== after light sanding you might be able to get it a little closer. For some people this might work out OK. But the key to a high gloss shine is to get one level contiguous surface...
==================== This is ultimately where you want to get to.
IF you have reached a point where your 1000 grit has successfully dulled the entire surface to the point where you can not see shiny patches, then you are probably at about the right point for the 1000 grit. But you have to remember that the 1000 grit wet sand is not suppose to leave you with a shine. Afterall, it is scratching away at that final outer skin of the paint - removing the paints natural outer shine.
IF you have a uniform dull look to the paint job, then you can start moving up to the 1200 grit, 1400 or even 1600 grit.
You have to remember that each time you are going up to a higher level of grit ( finer ), then the sanding scratches left by the wetsanding will be getting smaller and smaller. As the wet sanding gets finer it takes away from the scratches left by the previous coarser grit sand paper.
If a microscope view of the 1000 paint looks like this :
\ / \/
When you take it to the 1200 grit, it will look like :
\/
And when you take it up to the 1600 grit it will look like this :
__
At each point where you apply a finer grit sand paper to the wetsanding, you will find the overall surface is taking on a more and more shiner overall look.
This is because the scratches from the wet sanding are taking the surface closer and closer to a smooth surface. The smoother the surface, the shiner it gets.
When you move on to compounding and polishing the surface, that is when you will regain the actual shine. But you have to remember that what the compounding or polishing product is doing, it is simply sanding at a higher level of grittiness. I think most compounding paste are probably equal to a 2500 to 3000 grit sand paper. Polishing compounds might range in equivalency to 2500 to 3500 grit. Remember that compound paste and polishing products are not magically putting something into the surface to regain the shine. They are simply making the surface smoother and smoother. The more smooth it is, the better the reflective value. The better the reflective value, the more shiner it becomes.
NOW... when you finally get to the WAX stage, it does a couple of things. It fills in the microscopic scratches of caused by the wet sanding. But wax can only fill in 'so much' of the scratches. And that is why we have gone through a lengthy wet sanding, compounding and wetsanding sequence... to reduce the size of the scratches.
Now... for myself I went with the 100% pure Carnuba wax from Meguirs ( it had a lovely banana or cherry smell to it ). My theory was that pure Carnuba wax would allow the paint below to continue breathing as it evaporates ( and yes, the paint will be evaporating gases from it for a few months after you finish. The carnuba wax molecules are quite translucent and they are big enough to fill in and camoflage larger scratches.
But some guys have gone to the acrylic type polishes ( usually these newer 'wonder car waxes' that claim you only have to wax 'once a year' ( NuCar, NuFinish, Turtle ICE, etc ). Some folks have gotten great results... as the acrylic base liquid waxes are like pouring on a wet final coat that can fill in the scratches. The only problem I suspect is that because they are acrylics, they may cause a 100% non-breathable surface over your fresh paint. That would mean that evaporating gases trapped under the acrylic layer may give the overall look a bit of fogginess after a few months.
.
Posted By: Anonymous
Re: New Paint job on a budget thread. - 02/08/0811:00 PM
Finished my 2nd paint job. I tried flat black for about a year, it looked good, but I wanted a more finished look. I have decided that this method isn't any easier than spraying, but it is a lot cheaper for a similiar ammount of work, plus the ease of touchup is huge. Color is Rusto Almond, with Rusto satin black. 6 coats, then polished with turtlewax rubbing compound, then polish.
I ended up hand polishing and not using my polisher, I didn't really think that the rotary polisher worked that great, may be my technique.
Re: New Paint job on a budget thread. - 02/10/0812:02 AM
Dude - that's beautiful! Nice retro color.
Do me a favor and paint the inserts in the side scoops flat black......That's what we all did with those cars back in the day.
Posted By: Anonymous
Re: New Paint job on a budget thread. - 02/10/0804:15 PM
Thanks, yea, I like the look of a classic enamel color. If you aren't rich and actually want to drive your car this is the way to go. Plus I have kids and they are constantly banging into my car, and my wife set's her groceries on it, etc. I'd be constantly freaking out if I had a 6K paint job.
My opinion, car restoration industry is now full of rich guys, when real hot rodding is rooted in the daily driver, on a budget, weekend crowd. I went to a car show and the "perfect" cars are so common now, and never driven by their drivers because they have like 40k in work in them.
Posted By: Anonymous
Re: New Paint job on a budget thread. - 02/10/0810:53 PM
Hi Marq,
I just lied down my 6th coat of Anodized Bronze, tremclad flat.
I let it dry for 2 days. For some reason the paint is "soft" to the touch. What I mean is that if I rub it gently with the palm of my hand, it feels grainy. It doesn't feel strong or hard.
When I rub it a little more with gentle pressure, you can feel some of the paint coming off.
Tried the finger nail test and I can diffinately scratch it.
My first 2 coats were at 50% mineral spirits. The next 2 coats were at 30%. The last 2 coats were at 25% mineral spirits.
Am I doing something wrong? I haven't wetsand with 1500 grit paper yet, but I'm worried that the paint may not be curing properly.
Should I wait a few more days so that the paint can harden? Or, should I wet sand it with 1500 grit and just polish it up?
The other options is to wet sand with 1500 then spray on a tremcald clear coat to protect the "soft" paint.
Any suggestions?
Posted By: Anonymous
Re: New Paint job on a budget thread. - 02/11/0804:13 AM
Quote: Hi Marq,
I just lied down my 6th coat of Anodized Bronze, tremclad flat.
I let it dry for 2 days. For some reason the paint is "soft" to the touch. What I mean is that if I rub it gently with the palm of my hand, it feels grainy. It doesn't feel strong or hard.
When I rub it a little more with gentle pressure, you can feel some of the paint coming off.
Tried the finger nail test and I can diffinately scratch it.
My first 2 coats were at 50% mineral spirits. The next 2 coats were at 30%. The last 2 coats were at 25% mineral spirits.
Am I doing something wrong? I haven't wetsand with 1500 grit paper yet, but I'm worried that the paint may not be curing properly.
Should I wait a few more days so that the paint can harden? Or, should I wet sand it with 1500 grit and just polish it up?
The other options is to wet sand with 1500 then spray on a tremcald clear coat to protect the "soft" paint.
Any suggestions?
No offense but, I think you missed out on the part where your paint mixture has to be the consistency of low fat milk.;) 50\50 is way to thin. believe me Ive tried, lol.
Re: New Paint job on a budget thread. - 02/11/0804:35 AM
Quote: Hi Marq,
I just lied down my 6th coat of Anodized Bronze, tremclad flat.
I let it dry for 2 days. For some reason the paint is "soft" to the touch. What I mean is that if I rub it gently with the palm of my hand, it feels grainy. It doesn't feel strong or hard.
I would give it a week or so to get to a more hardened state. If it is soft at this moment, it would appear to indicate that the softness is coming from the percentage of mineral spirits that are still trapped with the paint.
One nice thing is that given enough time and warmth, all the mineral spirits will evaporate and the paint WILL harden.
I don't think there are too many options or ways to proceed until the paint coat cures to a more hardened state.
Sanding while the paint is soft to the touch would just clog up the sand paper...
What are the temperatures like at the present time ? Cool, warm or hot during the day ?
.
Posted By: Anonymous
Re: New Paint job on a budget thread. - 02/11/0806:16 AM
I live in Vancouver. Currently the temperature is close to +3 or 4 degrees celcius. It is fairly humid as well.
So give it a week to evaporate, ok ... I'll try that. I should probably open the windows more and plug in the heater to help the drying process.
What I intend to do is probably 1 or 2 more coats in a week or so. Its looking really good.
What I've done to this point is coat 1, then wait 18-24 hrs, then coat 2, then wait 18-24hrs, then wet sand, then repeat coats 3 & 4, then wet sand, then 5 & 6.
So ... on this close to last one, I'll the all the coats 1 week so the mineral spirits can evaporate properly then do the last 2 coats. Then I'll wait another week or 2 before I polish it or clear coat it.
Am I cutting the paint too thick? Should I go back to 50% mineral spirit for the last 2 coats?
Re: New Paint job on a budget thread. - 02/11/0806:35 PM
Quote: I live in Vancouver. Currently the temperature is close to +3 or 4 degrees celcius. It is fairly humid as well.
The higher humidity and the cooler temperatures would tend to indicate that more time is required between coats. So one week should be plenty of time for the major percentage of evaporants from the mineral spirits to escape.
With the Brightside and the Tremclad, I found that my final coats were accomplished with about a 15% mineral spirit to about 85% paint. The paint was wet but not runny.
The real trick was to minimize the amount of paint that I loaded on to the roller from the tray. I would load it up heaviliy and then squeegy it back out of the roller using the draining flat surface with its ribs in the paint tray. I would also give a little extra pressure to each end of the foam roller to offload excess paint from the ends of the foam. The idea being that the majority of paint ( that was left after squeeging it out ) was mostly located in the center of the foam roller.
Then the trick was to act like the biggest miser in the world and see just how much of the panel I could get some level of wet coverage on to with the least number of refills from the paint tray.
Normally I was able to do a panel with only 2 or 3 loadings of the roller. The hood would take usually about 3 or 4 loadings of paint.
And even then, I had my trusty clean roller in my free hand to quickly run over any spots where the laoded roller had left bubles waiting to be popped.
.
Posted By: Anonymous
Re: New Paint job on a budget thread. - 02/12/0803:38 AM
I'm officially done! The stripes were really my biggest problem. When i took the tape up, the paint underneath came with it. Gotta love it. Anyways, it has 10 coats of rustoleum blue mixed with a little black, and poorboy's products sealed the deal. I wish more of you guys would properly polish and wax your completed cars, it's beyond worth the effort! I've asked people who didnt know i painted this myself how much they thought the job had cost, and it's shocking! It's as smooth as glass, and the best part is if i get tired of blue, it wont cost me an arm and a leg to change things up!
Posted By: Anonymous
Re: New Paint job on a budget thread. - 02/12/0805:43 AM
Has anyone tried the rustoleum that comes in a spray can? im assuming its the same paint but thinned so its spray-able.
Re: New Paint job on a budget thread. - 02/12/0812:01 PM
Quote: Has anyone tried the rustoleum that comes in a spray can? im assuming its the same paint but thinned so its spray-able.
It is usable but does not have the same effect.
The aerosol bombs are great for spraying hard to reach places, like door jambs etc.
But if you aerosol spray a body panel, it lays down a fairly thick coat. You have to remember that when you are using a foam roller with a very thinned paint, it leaves a much thinner coat of paint. Being wetter it has time to fully self-level. Whereas the aerosol spray and its evaporant ( carrier ) are designed to dry quickly ( reducing the time the paint has to self-level ).
With the roller system you are looking at laying on multiple coats, with each stage allowing you the opportunity to make corrections by wet sanding before moving on to the next roller coat.
I have seen some 'aerosol' spray jobs that do come out amazing. But these have usually been performed by guys who really knew what they were doing. But to get a 'good' job, they also had to go through multiple wet sandings.
Aerosol spray bombs are pretty unpredictable. Their spray pattern varies between cans and the nozzles on them.
Their spray patterns are not overall uniform in most cases. In some cases they will lay down a greater concentration of paint on the outer area of the spray pattern and sometimes a greater concentration in the center of the spray pattern.
And there is nothing more annoying about aerosol bombs then when they start spitting blobs of paint at the targeted surface.
With spray bombs, the tendency is to lay on a thicker coat. If you were to try to lay on just a minimal 'thin' coat, you would notice that the paint takes on a bit of a furry feel to it. The surface would not be shiny.. it would be fuzzy. That is because the paint content being propelled at the surface you are painting is attempting to dry even in those microseconds it is flying through the air to land on the body surface. So instead of blending in with the paint particles already sprayed on the body part, it instead 'stacks' on top of the paint particles that were previously sprayed. They end up not having a secure adhesion to the lower surface. So if you rub your finger over a 'lightly sprayed' aerosol surface, you would find your finger picking up all the lost paint particles that were not securely adhered to the painted surface.
Then of course there is a simple question of CO$T... with the number of aerosol bombs you would need to do a car or truck taking quite a bite out of your project budget.
Then let us think about the 'overspray' factor, where half the paint content in the aerosol bomb ends up in the air, on the floor, in your lungs, on your hair, leaving a color mist on your garage walls and on your dog
The propellants themselves in the aerosol car are a nasty bit of work on your overall health. That presents a problem if you are working in the confines of your garage. And if you are working outside to disperse or lessen the impact of inhaling the propellants, well the overspray landing on everything around will be increased.
Aerosol spray bombing is possible... and I have seen some end results that were truly amazing. But the kudos for those amazing jobs was more directly due to the people who were doing the work.....
.
Posted By: Anonymous
Re: New Paint job on a budget thread. - 02/12/0805:37 PM
Quote: Has anyone tried the rustoleum that comes in a spray can? im assuming its the same paint but thinned so its spray-able.
You just don't get it do you...
Posted By: Anonymous
Re: New Paint job on a budget thread. - 02/13/0812:21 AM
Quote:
Quote: Has anyone tried the rustoleum that comes in a spray can? im assuming its the same paint but thinned so its spray-able.
You just don't get it do you...
Well before this 50 dollar paint job project, i knew ZERO on painting anything but a wall and paper. I stumbled onto this epic thread back when it was only 30 pages..then after it collapsed on itself, i simply forgot about it. So now that I had some free time i decided to come back and read as much as I can. to be honest with you i never knew what a "spray bomb" was until now. I meant to ask, but never bothered too. so you'll have to forgive my ignorance, im still learning.
Posted By: Anonymous
Re: New Paint job on a budget thread. - 02/13/0812:55 PM
Re: New Paint job on a budget thread. - 02/15/0805:34 PM
Quote: A while back i read in a post that someone mixed some colors together to get a dark red.
I can't remember if it was rustoleum regal red mixed with black or blue.
If anyone can help it would be greatly appreciated.
Ps,i did a search and went back several times trying to find the information but haven't been able to find it,so far.
Thanks in advance if you can help. john
I know that I wanted a deep dark red... and I tried quite a few color combinations to try to get it.... I failed.
If you mix Rustoleum/Tremclad "Fire Red' with any amount of black... you will almost always end up getting a shade of 'pottery brown'... ( that color on those planting pots made of clay ).
It didn't matter if I tried blue or any other color to try to darken the red. They all failed.
YET... we know for example that the blue will mix with black and get a darker blue.... and green will mix with black and get a darker green.
So we have to assume that there is some color element missing in the red ( or maybe there is just not enough color pigment in the red ) to be able to add black and get a darker red.
What you will notice about the 'fire red' in both the Tremclad/Rustoleum AND in the Brightside 'fire red' is that they are 'red with a tint or leaning towards the shade of orange'. So the 'fire red' in either type of paint may have just too much yellow pigment to get around their inclination towards a pottery brown color when black is mixed in.
I should also note, that in my quest to try to get a darker red, I also bought a tube of professional 'black tinting agent'. This stuff comes in a small tube, the size of a midget package of toothpaste. NORMALLY.. if you add that professional paint tinting agent to any color, it will drift the color it is being added to in to a darker shade of the original color. It failed with 'fire red'.
The one thing that we did discover later... is that one of the 'other' paint manufacturers, who produce a polyurathane marine paint DID have a number of shades of red in their color offerings. Had I known about the red variations they were offering, I would probably have given their polyurathane a shot. It would have been the equivalent of the Brightside marine polyurathane paint.
There was also a farmer tractor paint supplier that had an interesting palette of red shades in their enamel paint. This would be equivalent to the Rustoleum/Tremclad paint.
I don't remember 'which' of the two above paint types had it, but one of the colors I remember them offering was 'Coca Cola red'... They also had some other shades of red with names that were similarly identifiable with known red colors that we see in common usage.
Hopefully this brain dump of what I recall about our red discussions will help point you in the right direction.
I think the polyurathane paint supplier was named 'Top Secret'... or something like that... and the farm tractor paint was offered by some farm supply company. You might be able to find our discussions about either of those companies by keying in a search using "Secret' for the polyurathane company and 'Farm" for that tractor paint supplier. Those words are fairly exlusive to our discussions about those paints and shouldn't bring up too many non-relevant discussions in the other message threads.
Marq .
Posted By: Anonymous
Re: New Paint job on a budget thread. - 02/15/0808:44 PM
Hi all, I'm a fellow roller from Australia. I first stumbled upon the part 1 thread at the start of the year and after reading almost all the pages I was sold on the method and decided to buy some Brightside Black and paint my car.
My car isn't a mopar but its a 1989 Holden VN Commodore Wagon. The paint that was on it was in desperate need of some attention as I had tried to patch up various areas using spray cans.
Anyway at the moment I'm currently half way through painting my car but I thought I'd show you all some nice pictures to show you my progress. I've ended up creating a website for my little project as I felt this was easiest to show friends and family how its going. Website here.
Special thanks to 69chargeryeehaa for showing the world this technique and also the likes of Marq, Exit and more for a lot input and tips.
PS: My Brightside paint from the tin was pretty thick, I tried to use it without thinning it down but it was hopeless. I've since found a mix of about 30-40% thinned down works the best for me. I'm also adding a little Penetrol...
Cheers guys.
Posted By: Anonymous
Re: New Paint job on a budget thread. - 02/15/0809:21 PM
Looking great so far!!
Can't wait to see the finished job...
Thanks for sharing - good luck with the rest of the project!
Regards,
Posted By: Anonymous
Re: New Paint job on a budget thread. - 02/15/0810:48 PM
Ok. Im back. I was out thanks to this super cold I had. It was so bad, that one ear went deaf! But i feel much better and went back outside to check up on my project. I wish i took pictures because there was a coat of pollen on my car.
So I left of on a wetsanded 6th coat. After readings Marcs wetsanding info, i went out to wetsand the surface to a dull. perhaps i might of sanded too much in some parts because the original paint is showing. especially the edges of the hood.
This is where i had left off before i got sick. --------------------------- After reading Marc's wetsanding info, i went out and did this. Dull and flat. with some original paint showing. --------------------------- I like how you have to look at a certain angle to see the shine --------------------------- And here are the spots where the paint I guess refused to cure.
So its obvious my mixture is still off. Ill eventually get it. Im going to do 2 more coats and sand with 1200g.
Re: New Paint job on a budget thread. - 02/15/0811:57 PM
First off welcome to the board : Sounds like your ready to go don't forget progress pictures as you go
Posted By: Anonymous
Re: New Paint job on a budget thread. - 02/16/0812:34 AM
Quote: First off welcome to the board : Sounds like your ready to go don't forget progress pictures as you go
Thanks dude.
I've well and truly started, progress pics are on my web page which I usually update every 2 days.
Posted By: Anonymous
Re: New Paint job on a budget thread. - 02/16/0804:23 AM
M2001 you've really gotta' stop doing this outside and letting it get rained on...
And you want to stay away from ridges and and edges while wet sanding so you don't burn through them (you already have).
Posted By: Anonymous
Re: New Paint job on a budget thread. - 02/16/0805:23 AM
Quote: M2001 you've really gotta' stop doing this outside and letting it get rained on...
And you want to stay away from ridges and and edges while wet sanding so you don't burn through them (you already have).
Believe me, I wish I had a garage to do this project. I dont even have a carport(too poor, lol) I wasnt aware to keep away from the edges. ill be more careful next time. remember this is all a whole new learning experience for me. regardless of all the errors i create, ill eventually get it down.
Posted By: Anonymous
Re: New Paint job on a budget thread. - 02/17/0804:59 AM
Quote:
Quote: M2001 you've really gotta' stop doing this outside and letting it get rained on...
And you want to stay away from ridges and and edges while wet sanding so you don't burn through them (you already have).
Believe me, I wish I had a garage to do this project. I dont even have a carport(too poor, lol) I wasnt aware to keep away from the edges. ill be more careful next time. remember this is all a whole new learning experience for me. regardless of all the errors i create, ill eventually get it down.
You're surely not to poor to buy yourself a tarp and some 2x4s and at least try to keep some of the rain off of it.
Posted By: Anonymous
Re: New Paint job on a budget thread. - 02/17/0809:43 PM
Well I started over..again. I pretty much ruined the paint job after burning the edges. Doing so made me REALLY understand the concept of wetsanding and leveling the surface and what marc was trying to explain.
Before I started to paint, I prepped the surface by sanding most of the hood with 220g. The edge still had clearcoat on it. I painted over it. big mistake.
the clear coat served as a layer so it looked a little something like this.(side ways view)
So after I sanded down the rustoleum a bit, the clear coat started to show.
So I sanded that clear coat down. --------------------------------- This is how the hood looked like when i first painted it. --------------------------------- no clear coat (im not to worried about original paint acting as another layer. waaay too thin ---------------------------------- First coat. thin thin thin (still kinda wet\dry) ---------------------------------- look who came to pay a visit, mr.green fangs (good thing he didnt get stuck in the wetpaint) ----------------------------------
Re: New Paint job on a budget thread. - 02/18/0802:14 AM
Quote:
Well I started over..again. I pretty much ruined the paint job after burning the edges. Doing so made me REALLY understand the concept of wetsanding and leveling the surface and what marc was trying to explain.
Before I started to paint, I prepped the surface by sanding most of the hood with 220g. The edge still had clearcoat on it. I painted over it. big mistake.
It's always a bummer when you take one step forward and then two steps backward.
One nice thing is that your adventure up to now could pay big dividends in the next round. Believe it or not each victory and setback has honed your ninja prepping and painting skills. So this next round will benefit from all the hands on experience you have gained so far.
In a way, all of us have gone through minor setbacks that we had to overcome. And I don't think you are the first to reversse engines and start over at square one to improve on the paint job. My nightmare was the trunklid - which for some reason kept pulling all kinds of unexpected antics on me ( which was quite inconsistent with how well the hood and side panels had gone ). At one point I was ready to yank the trunk off the car, jump up and down on it a couple of times, and then go to a junk yark and pick up another trunk lid which might be less jinxed.
But in the end I conquered the evil trunk lid. And believe me... that is one of the greatest satisfactions that you can take away from this paint job in the end. There is a real sense of personal satisfaction when your efforts finally win over whatever adversity the hood may throw at you.
So good luck. We are all silently cheering you on.
Marq.
.
Posted By: Anonymous
Re: New Paint job on a budget thread. - 02/18/0806:11 AM
Hi everyone, I love the forum..
I am planning on doing the paint to my motorcycle. ANy tips? Has anyone done it?
I have read all three threads for about 5 hours. There is so much info. I am almost confused.
I want to get the glossiest black I can get..
Any Suggestions?
Brian
Posted By: Anonymous
Re: New Paint job on a budget thread. - 02/18/0807:15 AM
Hey all,
This is by far the most informative thread I have ever read. Thanks to all.
I'm about to paint my '79 280zx gloss black and wanted to double check all the steps I compiled from this thread: (sure it's not mopar but it was $800 )
Materials - Rollers: 4" wide and about 1 1/2" thick - Tack cloths - Mix --> 66% Rustoleum --> 33% Mineral Spirits --> (use drip test: 3 secs until drip) - Wet-use sandpaper: 80/100/200/400/600/800/1000/1500
Re: New Paint job on a budget thread. - 02/18/0809:04 AM
Quote:
---------------------------------- look who came to pay a visit, mr.green fangs (good thing he didnt get stuck in the wetpaint) ----------------------------------
what the 'beep' is that?? other than the visitor I think you are on the right track....keep up the good work.
Re: New Paint job on a budget thread. - 02/18/0803:12 PM
Quote: Hey all,
This is by far the most informative thread I have ever read. Thanks to all.
I'm about to paint my '79 280zx gloss black and wanted to double check all the steps I compiled from this thread: (sure it's not mopar but it was $800 )
Materials - Rollers: 4" wide and about 1 1/2" thick
Not just 'rollers' BUT high density FOAM rollers.
You probably meant to say that, but I thought I would just enforce that point so that some late reader doesn't make an assumption that we are talking about those fluffy or nappy type painting rollers
.
Posted By: Anonymous
Re: New Paint job on a budget thread. - 02/18/0808:55 PM
I am looking for the proper prep and paint for plastic bumpers both previously painted TPO and also for a new urethane bumper lip that has never been painted. Both are on front bumper of the car.I will be finish painting in gloss black. Will the Rustoleum or Brightside paints hold up without spiderwebbing or cracking? Do I use an adhesion promoter for prep? Primer over that? I would like to use a simple to touch up finish paint without clear coat for easy maintennance for parts that will surely get stone chips. Any advice will be appreciated.
Re: New Paint job on a budget thread. - 02/18/0811:28 PM
Quote: I am looking for the proper prep and paint for plastic bumpers both previously painted TPO and also for a new urethane bumper lip that has never been painted. Both are on front bumper of the car.I will be finish painting in gloss black. Will the Rustoleum or Brightside paints hold up without spiderwebbing or cracking? Do I use an adhesion promoter for prep? Primer over that? I would like to use a simple to touch up finish paint without clear coat for easy maintennance for parts that will surely get stone chips. Any advice will be appreciated.
The front bumper on my Mustang was 'factory fresh', unpainted and in its original black flexible plastic. I used both Brightside and Tremclad on it... plus I also used a spray bomb on it.
The first and most important thing you have to do with a 'fresh' plastic molded part is to seriously wipe it down with mineral spirits. What happens is that these molded plastic things, use a 'release compound' in the mold, so that the item ( a front bumper for example ) will easily release from the mold when it is ready to be released from the mold.
This 'release agent' is normally not too visible to the eye or to the touch. But it lurks in the pores of the formed plastic. Since it is designed to enable and assist in the release of the plastic from the form mold, you can be assured that it will work to also repel paint or primers in an equally effective manner. So seriously wipe it down a couple of times with mineral spirit to wipe and wash away that 'release chemical' off the plastic part.
On my car... I went to a primer instead of going straight to painting on to the plastic. I seriously believe I could have gone straight to painting on the the plastic front bumper without any problem.
However, I used a primer on the entire car to start the entire paint job off from one uniform color starting point. You may recall that my car began as a car of 'many colors'. ( white hood, black plastic front bumper, red body panels ). So I brought them all to a uniform dark gray primer color...
Now.. as to questions of spidering or cracking on flexible body parts : The Tremclad/Rustoleum or Brightside fair no better or worse then a regular paint job. But the roller paint job does have some advantages over a 'real' paint job.
The Tremclad/Rustoleum or Brightside paint job tend to have a little more flex or forgiveness to them. Whereas the sprayed on 'real' paint job tends to be just a bit harder.
When a TR or B paint job on a flexible bumper is flexed, the paint tends to flex with it. The 'real' paint job tends to have less flex to it and it will crack sooner when flexed.
Now... I will tell a quick story that reinforces how a TR or B paint job is better. When I initially finished painting my car and polishing it into a shiny little jewel, I STUPIDLY backed the car out of the garage and caught the rear bumper on the barbeque. It placed a 5 inch SCRAPE along my beautifully finished rear bumper. I cursed, I swore and I cried.
Now the first thing to note is that it 'scratched' off the paint where the barbeque had scraped against it. It was a clean scraping right down to the plastic. But it did not affect the paint beyond the actual point of where the barbeque scraped along it. As you know, if the same thing had happened to a 'real' paint job, the odds are that the extent of the damage to the paint would have extended beyond the point of contact of the scrape. So that was a good thing.
Ok... so here is the good news. I simply drove the car back into the garage... sanded down the area of the scrape to make it all level ( feathering the edges of the scrape and the paint ). Then over the next couple of days I simply re-rolled that area where the scrape had occured. Once it was up to par I did the wetsanding, polishing and waxing and the scrape was totally gone and invisible. No one would be able to find that 5 inch scar unless I pointed directly at it. So the beauty of this is that the 'roller paint' job puts the task of 'touch ups' completely within your control. No need to live with a scrape or tie up the car at the body shop while they do a pro-paint job to repair that scratch ( which could cost you $500 to have done ).
Now... on the topic of the front bumper... the Treclad/Rustoleum are pretty resistant against road chips etc. But i would have to say that Brightside is probably better at withstanding road chips. The reason : Tremclad/Rustoleum are just enamels, whereas Brightside is a polyurathane.. ( think plastic ).
Now... one other fast thought about front bumpers. What you might want to consider is to paint a clear 'gravel gaurd' coating over the lower sections of your front bumper. This is something that will work for some people and not for others. It will really depend on the style of your specific front bumper. On some front bumpers you will be able to apply the clear gravel guard coating over all the areas below the bumper line... on other styles you may only be able to apply the gravel guard coating on the lower four or five inches of the front bumper. It will depend on your specific front bumper style. But the advantage of putting the clear gravel guard coating on there is that it is designed to withstand the impact of rocks and porupines etc. And so it will help to protect the paint job beneath it.
Dunno... those are a few fast thoughts on the topic.
Marq
.
Posted By: Anonymous
Re: New Paint job on a budget thread. - 02/19/0808:29 AM
Howdy, I'm a noob and Ive been reading quite a bit, but have not gotten though all of the threads (that's A LOT of bloody reading!) so i apologize if i ask something that has already been covered.
I'm interested in painting my '64 Riviera, but i wanted to maybe try the "aluminum" rustoleum color OR the "platinum" Interlux color..
I was wondering if anyone has tried these colors and what their results were.
Re: New Paint job on a budget thread. - 02/19/0801:05 PM
Quote: Howdy, I'm a noob and Ive been reading quite a bit, but have not gotten though all of the threads (that's A LOT of bloody reading!) so i apologize if i ask something that has already been covered.
I'm interested in painting my '64 Riviera, but i wanted to maybe try the "aluminum" rustoleum color OR the "platinum" Interlux color..
I was wondering if anyone has tried these colors and what their results were.
thanks,
wes
Short answer : The topic has been thoroughly discussed. Don't use aluminized paint.
.
Posted By: Anonymous
Re: New Paint job on a budget thread. - 02/19/0807:58 PM
Applied 2nd coat. I applied the paint to a hot surface. It was so hot, steam was rising from the paint, lol. Not to sure if this was a smart thing to do. but the paint was still workable. Before I started over, i was painting my car around 7-8am. The sun was barely out and the surface was cool. I switched it up a bit and started these new coats around 1pm-2pm. There are virtually no bugs at this time of the day to ruin the paint job.
Im hoping that im really on the right track this time. im also prepping the whole car now. so far, ever since Ive started this project, ive only mixed enough ms\paint to cover the hood. What I have been using to mix the paint is a measuring paint cup. it has measuring indicators printed on the side. I first pour in a inch of paint followed by 1/4 of an inch of MS.
Well enough talk. here are some pics. These are 2nd coat.
Re: New Paint job on a budget thread. - 02/19/0808:12 PM
Quote: Applied 2nd coat. I applied the paint to a hot surface. It was so hot, steam was rising from the paint, lol. Not to sure if this was a smart thing to do. but the paint was still workable.
Dude - If the surface temp of your hood is that hot you are just asking for more problems. It would be a shame to start all over and then have a completely different set of new issues.
I can't imaging you'll get consistent leveling if its that hot. That may not show up on the coat you just did - but it probably will by the time you are on a 3rd or 4th coat.
If you really can't do this indoors somewhere (and I know you said before that you can't) you should really think about that other guy's suggestion about a tarp and some 2x4's or aluminum poles or something.
Buy a 15x15 tarp, and maybe four or six 2" PVC pipes and some rope, and make a tent.
Posted By: Anonymous
Re: New Paint job on a budget thread. - 02/19/0808:27 PM
M2001, It's painful to watch you battle nature. Is there a Harbor Freight anywhere near you? Get one of these: http://www.harborfreight.com/cpi/ctaf/Displayitem.taf?itemnumber=42211 For $170 you can't lose. I have a garage, but I bought one of these for extra car space out of the elements. It's worth it to get rid of some of the aggravation factor. Also, here's a sanding tip: pro painters put masking tape along the edges of hoods, doors, etc. when sanding to avoid burning through. It's extremely hard to avoid otherwise. Good luck and don't give up! LanceB
Re: New Paint job on a budget thread. - 02/19/0808:35 PM
FYI - not to contradict my own post, but I did a little surfing today and did find people that have successfully rolled their paint outside. Literally out in their driveway.
Maybe its just a matter of timing it right. Don't do it early when there's too much moisture in the air, and don't do it at noon after the car has been cooking in the sun all day.
Posted By: Anonymous
Re: New Paint job on a budget thread. - 02/19/0809:14 PM
Quote:
Quote: Applied 2nd coat. I applied the paint to a hot surface. It was so hot, steam was rising from the paint, lol. Not to sure if this was a smart thing to do. but the paint was still workable.
Dude - If the surface temp of your hood is that hot you are just asking for more problems. It would be a shame to start all over and then have a completely different set of new issues.
I can't imaging you'll get consistent leveling if its that hot. That may not show up on the coat you just did - but it probably will by the time you are on a 3rd or 4th coat.
If you really can't do this indoors somewhere (and I know you said before that you can't) you should really think about that other guy's suggestion about a tarp and some 2x4's or aluminum poles or something.
Buy a 15x15 tarp, and maybe four or six 2" PVC pipes and some rope, and make a tent.
Well the surface only began to steam after I spread out the paint. When it was thin enough then it would start to steam. in any case it does make sense that it wouldnt flatten out correctly. But as of right now, its pretty flat. even to the touch.
Im finally going to end up making a tent out of PVC and tarp if that doesnt work out, ill end up buying that medium portable tent from Harbor Freight.
ME = 0 Mother Nature = 1
Posted By: Anonymous
Re: New Paint job on a budget thread. - 02/19/0809:30 PM
Just to make sure -- when prepping the car before the first coat how far down do I need to go?
Sand it all down to where it is whiteish in the picture?
I had a rust spot (top-left) that sanded down to bare metal when I started sanding it. Will this be fine?
Re: New Paint job on a budget thread. - 02/20/0804:08 AM
Quote: Just to make sure -- when prepping the car before the first coat how far down do I need to go?
Sand it all down to where it is whiteish in the picture?
I had a rust spot (top-left) that sanded down to bare metal when I started sanding it. Will this be fine?
The most important thing about the initial sanding down process is to make sure that you end up with one smooth level surface. Meaning that the edges need to be well feathered so that the edges are no longer defined or obvious.
When you have to take a section or spot down to metal make sure the edges where the metal ends and the original primer or paint begins is blended smooth so that it is not pronounced.
Overall, you normally don't have to go all the way down to metal ( except of course in the case where you are trying to work out some rust spots ). If you were to take a brand new car to MAACO for a paint job, they will just sand the original paint so that it no longer has any gloss or shine to it. You could call it scruffing the paint, compared to sanding the paint, in that you are just scruffing the outer skin and coatings off the original paint - to provide a clean surface ( free of clear coat and free of any painted surface that might be bearing former wax and polish jobs ). It also is slightly scoring the surface so that the paint will have lots to adhere to...
If the rust area requires quite a bit of sanding - to the point that there is a significant differnce between the bottom of the rust sanded area and the top of the scruffed outer skin of the paint, then you might want to lay an extra layer of primer or two ( or maybe even a thin coat of bondo ) to level up the two surfaces.
Just remember the key concept here is that any imperfections in the smoothness of the hood, will be amplified when you start added layers of glossy and shiny paint. The paint job will not be filling in discrepancies between the surface smoothness. So the better you work the smoothness of the surface during prep.... the smoother and shinier the end paint job on that surface will be. The more time spent on the prep stage will add up to greater satisfaction with the overall job at the end of the project. This holds true whether you are rolling your paint or spraying it at a pro-paint shop.
.
Posted By: Anonymous
RE - 02/20/0804:59 PM
Does any1 have any experience on putting a fiberglass hood scoop on a existing hood without a scoop? after you place the scoop on and fiberglass/bondo/rivet it on do you cut away the hood under the sccop? Do you have to re-enforce the hood at that area? please help, want to place a scoop but not sure.
Quote: Does any1 have any experience on putting a fiberglass hood scoop on a existing hood without a scoop? after you place the scoop on and fiberglass/bondo/rivet it on do you cut away the hood under the sccop? Do you have to re-enforce the hood at that area? please help, want to place a scoop but not sure.
I have seen it done in quite a few different ways. The worse and cheapest looking 'attempts' are where the guy has simply riveted it on to the hood and then tried to bondo the edges of the scoop and rivets to try to make it look like it belongs there.
The best I have seen is where the guys have templated the scoop's position on the hood, then cut away from the hood and inserted the scoop piece by attaching it under the hood. The biggest problem is that if the hood has 'bracing' under the area where you want to place the scoop... then you have to cut away the underhood bracing that would stop you from getting a flush fit underneath.
The other problem is what the scoop is made from... and what the hood is made of... For example :
a ) a fiberglass hood with the addition of a fiberglass scoop... is probably the easiest for someone familiar with working with fiberglass. Its probably the easiest situation to adhere and to blend together so that they look like original.
b ) a metal hood with a metal scoop is also fairly easiest to produce a fairly professional look and finish.
c ) a metal hood with a fiberglass scoop is also fairly easy to do and produce a fairly original look with.
d ) a metal or fiberglass hood with a polyurathane scoop is usually the biggest pain in the butt for getting a professional / original look to it. These are those type of scoops you see sold that come with two way tape and the guys just tape them on to their hoods. Ugh...
Part of the game is deciding whether you are going to make it a decorative scoop or a functional scoop. Normally the functional scoop almost always requires that the hood be cut...
And I guess the other part of this equation is whether you are buying some 'third party' scoop ( in which case you simply have to follow the instructions provided by the manufacturers ) OR whether you are being a bit of a customizer and adding some original factory scoop off a similar or different model of car and incorporating it into your vehicle ( in which you are best off imitating how the original manufacturer did their installation ).
One nice thing is that once you have narrowed down your answers to the above questions, I am pretty sure you will be able to hunt down quite a few fully detailed 'how to' instructions via a search with Google. The odds are that no matter how odd or routine your scoop plan is, there is probably someone out there that has already gone that route and lived to tell about it on the Internet
.
Posted By: Anonymous
Re: New Paint job on a budget thread. - 02/21/0801:42 AM
OMG- what the hell is that? I have never seen a bug like that!!!!
-Nathan
Quote:
Quote:
---------------------------------- look who came to pay a visit, mr.green fangs (good thing he didnt get stuck in the wetpaint) ----------------------------------
what the 'beep' is that?? other than the visitor I think you are on the right track....keep up the good work.
Posted By: Anonymous
Re: RE - 02/21/0801:48 PM
Quote:
Quote: Does any1 have any experience on putting a fiberglass hood scoop on a existing hood without a scoop? after you place the scoop on and fiberglass/bondo/rivet it on do you cut away the hood under the sccop? Do you have to re-enforce the hood at that area? please help, want to place a scoop but not sure.
I have seen it done in quite a few different ways. The worse and cheapest looking 'attempts' are where the guy has simply riveted it on to the hood and then tried to bondo the edges of the scoop and rivets to try to make it look like it belongs there.
The best I have seen is where the guys have templated the scoop's position on the hood, then cut away from the hood and inserted the scoop piece by attaching it under the hood. The biggest problem is that if the hood has 'bracing' under the area where you want to place the scoop... then you have to cut away the underhood bracing that would stop you from getting a flush fit underneath.
The other problem is what the scoop is made from... and what the hood is made of... For example :
a ) a fiberglass hood with the addition of a fiberglass scoop... is probably the easiest for someone familiar with working with fiberglass. Its probably the easiest situation to adhere and to blend together so that they look like original.
b ) a metal hood with a metal scoop is also fairly easiest to produce a fairly professional look and finish.
c ) a metal hood with a fiberglass scoop is also fairly easy to do and produce a fairly original look with.
d ) a metal or fiberglass hood with a polyurathane scoop is usually the biggest pain in the butt for getting a professional / original look to it. These are those type of scoops you see sold that come with two way tape and the guys just tape them on to their hoods. Ugh...
Part of the game is deciding whether you are going to make it a decorative scoop or a functional scoop. Normally the functional scoop almost always requires that the hood be cut...
And I guess the other part of this equation is whether you are buying some 'third party' scoop ( in which case you simply have to follow the instructions provided by the manufacturers ) OR whether you are being a bit of a customizer and adding some original factory scoop off a similar or different model of car and incorporating it into your vehicle ( in which you are best off imitating how the original manufacturer did their installation ).
One nice thing is that once you have narrowed down your answers to the above questions, I am pretty sure you will be able to hunt down quite a few fully detailed 'how to' instructions via a search with Google. The odds are that no matter how odd or routine your scoop plan is, there is probably someone out there that has already gone that route and lived to tell about it on the Internet
.
Gee golly gosh, that was very informative. lol. I have a metal hood and the scoop is coming from Jegs (I believe its fiberglass), but thanks alot for the info. I will be showing pics of my work as when and if i descide to do it.
Posted By: Anonymous
Re: RE - 02/24/0807:04 AM
Marq, I still remember the day you first posted pictures of your red (mustang?) I think you mentioned something about that you did not have to thin the paint and you only put 3-4 layers or something along those lines.
Well seeing how I have no choice but to paint outside (working on make-shift carport) and fighting a losing battle against mother nature it would seem that using brightside paint would make more sense. for the fact that I dont have to lay down so many layers, risking the chances of bugs, hair and other debris laying onto my paint.
Would you mind laying out some pros and cons on interlux brightside paint? in the meantime ill type in *gulp* brightside into search and see what i can come up with.
Quote: Marq, I still remember the day you first posted pictures of your red (mustang?) I think you mentioned something about that you did not have to thin the paint and you only put 3-4 layers or something along those lines.
Well seeing how I have no choice but to paint outside (working on make-shift carport) and fighting a losing battle against mother nature it would seem that using brightside paint would make more sense. for the fact that I dont have to lay down so many layers, risking the chances of bugs, hair and other debris laying onto my paint.
Would you mind laying out some pros and cons on interlux brightside paint? in the meantime ill type in *gulp* brightside into search and see what i can come up with.
-thnx
Well... one of the main advantages of the Brightside paint is that it doesn't take as many coats of paint to get full coverage. There appears to be a higher concentration of paint pigments ( or solids ) in their product.
In theory... their product is designed to be painted straight on to boats from the can. Although they do sell a thinner to cut it a bit for situations where the paint is being done in hotter climates or to give the painter a little more working time with the paint. Mineral spirits worked equally well as a substitute for the 'official' Brightside thinner.
The rolling process is identical for the Brightside as the Tremclad/Rustoleum method. But it takes less coats on the overall project.
The main advantage that caught my attention about Brightside was that is is a polyurathane paint ( think plastic ), whereas Tremclad/Rustoleum is an enamel. Although both polyurathane and enamel are both used by professional paint shops for painting cars, the polyurathane is the one that would cost more to have done at a paint shop.
The main selling points of polyurathane over enamel is that it has UV protection built in, it has teflon anti-stick protection built in, it has been successfully used by 'home hobbyist boat painters using rollers' for years etc, and it is specificically designed and developed for use on boats which are exposed to constant extremes of temperature, water and sun.
Now... the one fly in the ointment is that bugs are just as likely to land and stick on wet Brightside paint as they are to land and stick on wet Rustoleum/Tremclad.
So you will end up using less coats of Brightside paint, BUT if the bugs keep flying and landing on it, then you may still end up having to do extra coats if you are forced to repair a bug infested paint job.
The only weak point with the suggestion about building a plastic tarp lean to, is that it will stop rain but not bugs ( unless it is fully enclosed ).
Is there a particular part of the season where you live when the bugs are not as plentiful ? I gotta figure that at various times during the year the number of flying bugs is not so punishing. Maybe you need to time your painting to that 'lull' in the flying bug season. Remember that Charger was able to paint his car in the extremes of winter ( mind you he did have a garage to protect his car from falling snow ).
My other though on this... is that maybe if there was some 'parking garage' near you that you could sneak to and slip a coat of paint on at. For example, where I live we have several universities and colleges with multi-level parking garages. If I was stuck in a situation like you are encountering, I would pop over to the local college parking lot and find a nice remote parking spot in their above ground parking. Slap a coat of paint on the car... wander off to the students bars or pubs or cafeteria ( or maybe even just to their library or bookstore ) and kill a few hours. Then come back to my car and hopefully it is dried enough to make the trip home . Its an environment where cash tight students wouldn't look twice at some bloke painting his car. In fact I think we even had a white Camaro in this message thread who use to paint his car in the outside parking lot at his nearby college...
Shopping center above ground garages are not necessarily as ideal, because they tend to have 'rent-a-cops' patrolling the parking garages looking for muggers or guys trying to break into shoppers cars.
Dunno... just a thought on how you might be able to get the car away from the bugs and fresh rain while the coat of paint cures...
.
Posted By: Anonymous
Re: RE - 02/24/0809:27 PM
I realized bugs are only a concern little before sunrise and sunset really. My property is surrounded by 20ft+ pine trees, so from 10am-11am would be prime time to paint. The sun would be out at this time, but no direct sunlight will be making contact with my car. The only bugs that would be out around 10am, would be dragonflies. which arent an issue.
Regarding the rain. If I were to use BS, i could go ahead and check out the forecast for rain. seeing how it would take 2-3 days to paint VS a whole week for rusty.
Sounds like I should be using BS.
EDIT - what grit sandpaper should i be using with BS?
EDIT - what grit sandpaper should i be using with BS?
Grits etc are basically the very same as for Rustoleum/Tremclad at the respective stages of the painting, wet sanding and finishing.
.
Posted By: Anonymous
surface contamination and adhesion problems - 02/25/0802:39 AM
Last October painted my truck w/ Brightside and have noticed that I have adhesion problems. I think that I didn't sand the old paint sufficiently well prior to repainting. Also, I lightly coated with Duplicolor spay primer (primarily to hide the old darker color). I can see I didn't use sufficeient primer and this stuff might not be chemically compatible w/ the Brightside.
I'm testing an old fender with Brightside's roll on primer after making certain that I sanded properly w/ 120 grit. Ater the paint has had a couple weeks to dry I will test. Should primer be thinned like paint for a smoother coat?
Also, before the failing paint job I wiped down the truck w/ mineral spirits changing rags frequently. Maybe I didn't let it evaporate fully and I contaminated the surface (I see it take 333 a good 10 mins to evaporate on the test piece at room temp.).
"Surface Preparation Guide Incomplete or insufficient preparation is the single greatest cause of paint failures. All surfaces should be sound, clean and dry before painting. Use the guidelines below to prepare your surfaces for painting. STEP 1 Remove dirt, grease, oil and chemicals Dirt, grease, oil or chemicals may interfere with the adhesion of paint. Clean your surface with soap and water, household cleaner or trisodium phosphate (TSP) solution.
Do not use solvents to clean surfaces. Solvents tend to smear grease and oil and levae residue on your surface. Strong solvents can also soften a previous finish and make your new paint application susceptible to wrinkling.
Do you think they are saaying that MS can be a problem?
thanks
Mitch
Posted By: Anonymous
Re: RE - 02/25/0803:48 AM
Quote:
Quote:
EDIT - what grit sandpaper should i be using with BS?
Grits etc are basically the very same as for Rustoleum/Tremclad at the respective stages of the painting, wet sanding and finishing.
.
Then I would be sanding after every coat then, right?
Re: surface contamination and adhesion problems - 02/25/0811:18 AM
Quote:
Last October painted my truck w/ Brightside and have noticed that I have adhesion problems. I think that I didn't sand the old paint sufficiently well prior to repainting. Also, I lightly coated with Duplicolor spay primer (primarily to hide the old darker color). I can see I didn't use sufficeient primer and this stuff might not be chemically compatible w/ the Brightside.
I'm testing an old fender with Brightside's roll on primer after making certain that I sanded properly w/ 120 grit. Ater the paint has had a couple weeks to dry I will test. Should primer be thinned like paint for a smoother coat?
What I found is that the Brightside primer works great when rolled on straight from the can. One rolling of Brightside primer is equal to about 3 to 5 layers of sprayed on aerosol type primers. So the big advantage with the Brightside primer is : a ) rolls on thicker b ) has a higher color and solid content then aerosol spray bombs.
And so you are able to do a very light sanding of the primer with a 400 to 600 grit sand paper on the primer and increase the overall smoothness of the primed surface. If you tried that on a sprayed on primer surface you would not have enough primered coating on the panel to properly sand ( cuz there isn't much on the panel to begin with ). The other advantage of using the Brightside primer is that you can cut it with 20% to 30% Brightside PAINT to assist the primer and give it a head start towards reaching the color you are going to actually be painting it with.
I did a little rant about spray on primer's within the last ten pages of this thread... and if Brightside primer rolled on is a 10, then a Duplicolor spray primer is a 2 in my books. I also ranted about how most primer in aerosol sprays goes into the air or builds loosely on itself with loss of adhesion ( due to flying through the air )
I don't think there is a compatibility problem with Duplicolor primer and Brightside. I think the problem is that the Duplicolor spray bomb primer is an inferior product.
Quote:
Also, before the failing paint job I wiped down the truck w/ mineral spirits changing rags frequently. Maybe I didn't let it evaporate fully and I contaminated the surface (I see it take 333 a good 10 mins to evaporate on the test piece at room temp.).
A bigger problem usually occurs when people use a little too much soap in the water when they are wet sanding every second coat of paint OR they are not effectively rinsing off with water to remove any sanding sludge that is loosened up by the wet sanding.
One thought that did strike me about the 'rinsing off' stage following the wetsanding, is the very water itself. One variable between different locations in North America and around the world is the mineral content of the water, additives added to water by the local water distribution companies and whether it is a 'hard water' or a 'soft water'. I do know that in some locations the body shops have to invest money in water softeners or water treatment devices to eliminate the quality of their local water as a variable in how their work turns out.
"Surface Preparation Guide Incomplete or insufficient preparation is the single greatest cause of paint failures. All surfaces should be sound, clean and dry before painting. Use the guidelines below to prepare your surfaces for painting. STEP 1 Remove dirt, grease, oil and chemicals Dirt, grease, oil or chemicals may interfere with the adhesion of paint. Clean your surface with soap and water, household cleaner or trisodium phosphate (TSP) solution.
Do not use solvents to clean surfaces. Solvents tend to smear grease and oil and levae residue on your surface. Strong solvents can also soften a previous finish and make your new paint application susceptible to wrinkling.
Do you think they are saaying that MS can be a problem?
It's like what we were saying previous about 'dampening' the cloth with mineral spirits rather than saturating the wiping cloth. I believe I tried to describe it as soaking the cloth and then wringing it out to remove almost all of the mineral spirit from the cloth. A soaking wet cloth would leave excess mineral spirits on the surface being wiped and this excess might be all it takes to soften the paint onthe wiped surface. As well, a soaked cloth would just swish and move around any foreign matter on the body panel... where as a slightly dampened cloth will tend to pick up the foreign matter and attach it to the wiping cloth.
Posted By: Anonymous
Re: surface contamination and adhesion problems - 02/25/0807:01 PM
My problem is the Brightside not sticking to the truck (layer to layer I don't have any problems). The paint will pull off the truck with masking tape.javascript:void(0)
I'm wondering should the clearcoat have been removed or just roughened up?
thanks
Posted By: Anonymous
Re: surface contamination and adhesion problems - 02/25/0807:07 PM
I was looking at some other projects with people using brightside and notice there was some guys who had orange peel. I thought BS did not to be thinned? Or is it because they soaked the roller and did not roll out the excess paint?
Posted By: Anonymous
Re: surface contamination and adhesion problems - 02/25/0807:10 PM
Quote: My problem is the Brightside not sticking to the truck (layer to layer I don't have any problems). The paint will pull off the truck with masking tape.javascript:void(0)
I'm wondering should the clearcoat have been removed or just roughened up?
thanks
Ive had nothing but bad experience with painting over clear coat. especially when it came time to wet sand. but then my clear coat was chipping off. I would sand off *all* clear coat. but thats just me.
Re: surface contamination and adhesion problems - 02/25/0808:06 PM
Quote: My problem is the Brightside not sticking to the truck (layer to layer I don't have any problems). The paint will pull off the truck with masking tape.javascript:void(0)
I'm wondering should the clearcoat have been removed or just roughened up?
thanks
I may stand to be corrected, but my personal thought on the clear coat is that it should be fully removed. Something in the back of my memory seems to tell me that ever professional paint shops will remove the previous clear coat during prep in order to paint a car ( yuppp... even MAACO I believe ).
Re: surface contamination and adhesion problems - 02/25/0808:20 PM
Quote: I was looking at some other projects with people using brightside and notice there was some guys who had orange peel. I thought BS did not to be thinned? Or is it because they soaked the roller and did not roll out the excess paint?
All paints have the ability to orange peel if their application is not timed correctly etc.
As noted before... but always worth mentioning, orange peel happens when a coat of paint is applied over a previous paint that has not fully cured.
The drawing I have always tried to use to explain the orange peel phenomena is this :
When the paint is 'curing' you have the sublayer, uncured paint layer and the more quickly curing outer skin :
------------------- outer skin XXXXXXXXXXXXXXXXXXX uncured paint layer ___________________ sublayer being painted on
So if you look at the above picture the outer skin could have the appearance of being cured and that the paint job has hardened suitably enough to add another coat of paint. BUT as noted in the picture, if you paint it toooooo soon, before that uncured paint layer fully cures, you basically have a : --------- hard surface sitting on XXXXXXXXX a soft uncured surface... which is on _________ a hard sublayer surface.
So think of a banana peel on the ground. If you step on the hard outer skin of the banana, the odds are that the soft inner layer of the banana is going to slip and move against the hard sublayer ( the ground ).
Sooo... if you add a coat of paint to this setup, the fresh coat of paint will soften the previous cured outer skin that it is painted on. BUT at the same time the new outer skin of the new painted layer will begin curing and tightening up. BUT now the two soft lower layers, with the slightly cured previous outer layer will start to move and shift as the new outer layer hardens up.
So the lower trapped previously outer skin will heap and rise like a paved road in the spring. This heaving will cause the orange peel effect to form. THEN as the new outer skin fully hardens, the heaving will all be frozen in the last position they were at while undulating.
Gawd... I wonder if anyone can actually follow that attempt to technically explain how orange peel can happen with any paint IF you add another coat before the previous coat ( and not just its outer skin ) is fully cured.
.
Posted By: Anonymous
Re: surface contamination and adhesion problems - 02/25/0808:53 PM
Re: surface contamination and adhesion problems - 02/26/0805:03 AM
Quote: I may stand to be corrected, but my personal thought on the clear coat is that it should be fully removed.
Just like any other base you may want to paint over, clear coat must be in good condition and adhering to the the paint beneath it if you want to paint over it. If it's cracking or pealing, then certainly remove it in the areas where it's a problem (usually horizontal areas that get direct UV exposure.)
It should be apparent while you are sanding what kind of condition the clear coat is in. It should feather without leaving any sort of edge if it's sticking well. If it's tough to get it to feather without leaving an edge, then it's not sticking well enough to paint over. Another clue that it's not sticking is if it lifts around the edges of where you tried to feather it when you spray primer over it.
When in doubt, remove any questionable primer/paint/clear. Never try to bury old problems under new paint, they always come back to haunt you.
Posted By: Anonymous
Re: New Paint job on a budget thread. - 02/26/0810:10 PM
I'm back with some updates. Picture attached is the second coat on the passenger side.
Re: New Paint job on a budget thread. - 02/26/0810:11 PM
And another...
Posted By: Anonymous
Re: New Paint job on a budget thread. - 02/28/0804:33 AM
Hey all,
I just stripped all the paint down (aircraft remover), sanded with 220 then 400 and then laid on the 1st coat (rustoleum gloss black).
I used about 65% rustoleum and 35% mineral spirits.
Am I right in thinking that I put this 1st coat on way too thick? How can I fix it? Can I just wetsand it before the 2nd coat or could I get by wetsanding after the 2nd coat?
First Coat (unsanded)
Posted By: Anonymous
Re: New Paint job on a budget thread. - 02/28/0805:53 AM
Yup, way too thick. trying rolling out the excess paint in your tray.
First coat is sopposed to be REALLY thin.
You wont get full coverage till 3rd or 4th coat.
Posted By: Anonymous
Re: New Paint job on a budget thread. - 02/28/0806:00 AM
Yeah that's what I thought. I did get about 90% of the paint off the roller before applying. I guess I need more MS.
Thanks for the reply btw. Can I fix the 1st coat with a 400g wetsand when it dries?
Posted By: Anonymous
Re: New Paint job on a budget thread. - 02/28/0806:56 AM
Quote: Yeah that's what I thought. I did get about 90% of the paint off the roller before applying. I guess I need more MS.
Thanks for the reply btw. Can I fix the 1st coat with a 400g wetsand when it dries?
yep, 400g wetsanding should do the job. I personally use 220g as an "eraser" but again, 400g should be fine.
Marq, about how many brightside quarts do you think is necessary to paint my car?
Posted By: Anonymous
Re: surface contamination and adhesion problems - 02/29/0801:43 AM
Hi, I was searching the web for cheap paint jobs and found this site. i used this technique to paint my friends car and here are the results after 2 coats of paint over original paint that was wet-sanded down by 600 grit papers. hope it will work out. any comments/advice is all welcome.
thanks
sorry for the big pics
Posted By: Anonymous
Re: surface contamination and adhesion problems - 02/29/0805:17 PM
Are you using brightside, Caiden? how many quarts did you use? BTW nice Z!
EDIT Nvm, I think i see a gallon of rustoleum in one of those pics. you say that was 2 coats? is the car originally white?
Posted By: Anonymous
Re: surface contamination and adhesion problems - 03/01/0806:06 AM
Quote: Are you using brightside, Caiden? how many quarts did you use? BTW nice Z!
EDIT Nvm, I think i see a gallon of rustoleum in one of those pics. you say that was 2 coats? is the car originally white?
the original color was white and i used around 1 and half quarts to coat it 2 times. on the pictures the right side of car was 2 coat left was one haha. we left the car in the garage for one night and tonight we leaving it out in the cold to see how the tough the paint will be.
Re: surface contamination and adhesion problems - 03/01/0806:11 AM
Marq, I have a question about your comments about primers. What kind of primer would you recommend for doing the bodywork? I'm removing the emblems and filling in the holes on my 86 Ram and (after welding and grinding) I'm using a thin coat of bondo to smooth it out. (I know, people are going to recommend avoiding bondo, but I've used it before and it works.) I've done one fender I have off the truck to replace the cancerous one on the truck and so far I've used the spray bomb rusto primer. Would I do better rolling the primer on for this or is the spray better for bodywork? I've got some other minor bodywork to do around the rest of the truck, but I was going to roll on a couple coats of primer over the whole truck before painting. I was just wondering if the roll on primer would stick to the sprayed on primer after it had been wet sanded. Thanks.
Posted By: Anonymous
Re: surface contamination and adhesion problems - 03/01/0807:12 AM
Quote:
Quote: Are you using brightside, Caiden? how many quarts did you use? BTW nice Z!
EDIT Nvm, I think i see a gallon of rustoleum in one of those pics. you say that was 2 coats? is the car originally white?
the original color was white and i used around 1 and half quarts to coat it 2 times. on the pictures the right side of car was 2 coat left was one haha. we left the car in the garage for one night and tonight we leaving it out in the cold to see how the tough the paint will be.
A little off topic but, im willing to bet that you got most of your material at The Home Depot?
Posted By: Anonymous
Re: surface contamination and adhesion problems - 03/01/0811:42 PM
Ive been spending some time trying to create a shelter of some sort for my project. I managed to pull it off at no expense. Only labor, which still wasnt too bad. I went into the woods and chopped down pine trees ... with a machete
Im still not done building it. I ran out of sun. I'll be finished tomorrow. Nothing too serious, but itll get the job done. Here are the pics.
These pines trees are thin, but STRONG. When I was cutting them down, i chopped off about %95 of the wood and it was still standing strong. -------------------------- -------------------------- I even got to put back the original grass -------------------------- -------------------------- Oh BTW here is a 3rd coat -------------------------- -------------------------- Spray bomb testing
Sorry about the quality. That third coat pic looks so much better in person. My gf lent her camera, the one ive been using, away for a week to her father which is on vacation.
Ill post pictures of the makeshift-country-ghetto-pine sol-smelling-shelter tommorrow
Re: surface contamination and adhesion problems - 03/02/0801:14 AM
Quote: I've done one fender I have off the truck to replace the cancerous one on the truck and so far I've used the spray bomb rusto primer. Would I do better rolling the primer on for this or is the spray better for bodywork? I've got some other minor bodywork to do around the rest of the truck, but I was going to roll on a couple coats of primer over the whole truck before painting. I was just wondering if the roll on primer would stick to the sprayed on primer after it had been wet sanded. Thanks.
I would probably go with sanding down the original sprayed on primer and roll on the liquid primer.
Like the Brightside primer, you can cut the Tremclad primer with a percentage of the actual paint color to give it a helping hand at getting started towards the eventual color you have chosen.
Tremclad / Rustoleum paint is designed to be a rust inhibitor. I assume their primer is also designed to provide rust inhibition.
The one nice thing about rolling on a liquid primer is that it will go on thicker... and thereby leave you with a little extra coverage that can be wet sanded to further smooth out the primered surface.
The real key will be to make sure that the surface you are primering is sanded down sufficiently to remove the 'furry' feel that aerosol primer would have.
Re: surface contamination and adhesion problems - 03/02/0805:40 AM
Thanks, Marq. After doing the bodywork on this fender, I've wet sanded the primer with 400g, all the fuzzies are gone. So I will go over it with the liquid primer, I guess I should be ok with that. I did sand the hood down to bare metal to clean up a lot of surface rust, and spray primered that. Haven't sanded it yet, but will before I go any further with it. The rest of the truck is just filling in emblem holes and removing the trim studs, so I may just use the spray primer for these areas and cover the whole thing with the roll-on before paint. Thanks for the help.
Posted By: Anonymous
Re: New Paint job on a budget thread. - 03/02/0807:44 AM
Finally finished the roof, in this pic its a bit dusty but you get the idea...
Posted By: Anonymous
Re: New Paint job on a budget thread. - 03/02/0807:45 AM
Re: New Paint job on a budget thread. - 03/02/0811:43 AM
i have a question on how you guys did the door jambs and trunk jambs. did you actually use a roller and brush or did you spray bomb the jambs?
Posted By: Anonymous
Re: New Paint job on a budget thread. - 03/02/0810:41 PM
Quote: i have a question on how you guys did the door jambs and trunk jambs. did you actually use a roller and brush or did you spray bomb the jambs?
I haven't done my door jams yet, only the tailgate jam. I used the roller as I was able to sqeeze it into all the areas.
I should be able to use the roller for the door jams aswell as my doors can open pretty wide and there's not too much fidly bits, but i guess it all depends on the particular car...
Re: New Paint job on a budget thread. - 03/03/0804:01 AM
Quote: i have a question on how you guys did the door jambs and trunk jambs. did you actually use a roller and brush or did you spray bomb the jambs?
I began my paint job by using a Tremclad spray bomb to spray the inner door jams, underside of the hood and underside of the trunk. Since I was rolling the car body in Tremclad 'Fire Red', the aerosol is the same color as the liquid paint - so no problem on matching. And when I switched to Brightside it also was 'Fire Red' which is identical in color to the Tremclad 'Fire Red'.
At this moment, with my car in its completed state, it would take a really trained eye to spot where I used the aerosol bomb on the hard to reach spots and the more visually exposed body areas that were finished using Brightside.
I found it simply more easy and convenient to spray those hard to reach areas. As well, those areas are less exposed to road rocks or chipping, so the aerosol holds up quite well in those areas and maintains a good shine.
What I did do to give the aerosol a fighting chance is :
a ) high pressure hosed those hard to reach areas to get rid of any oils, dirt or other crap that were in there....
b ) I then followed that up by using an aerosol bomb of 'brake cleaning spray' to ensure that there was no soap or oil left on those areas. If you are going to spray this area with the 'brake cleaning spray', just make sure that you use the one that doesn't leave anything on the surface when it dries.
Also, it is important to mention that I did all those hidden areas BEFORE starting painting on the body panels or rockers. The reason : because the 'brake cleaning spray' would have eaten away any fresh paint on the rocker panels or any where else the brake cleaning spray might have flowed to. So it just makes sense to do things in their right sequence.... do the inner jambs, and undersides of the trunk and hood before you move on to the body panels.
. .
Posted By: Anonymous
Re: New Paint job on a budget thread. - 03/03/0808:49 PM
Anyone got any supplies they want to sell?
Posted By: Anonymous
Re: New Paint job on a budget thread. - 03/05/0811:38 PM
Re: New Paint job on a budget thread. - 03/06/0805:22 AM
Quote:
Poor mans canopy, amazon head hunter tribe style.
To Quote John Wayne : " A man's gotta do... what a man's gotta do "
I think its pretty creative to see what you have been able to put together. If we were on Survivor Island, I would like to have you as a team mate. At least we would have a shelter on our first day on the island...
Now... if we were on Gilligan's Island, I would probably want the Professor to be my team mate. Heck he could build a three floor condo with just coconuts
.
Posted By: Anonymous
Re: New Paint job on a budget thread. - 03/07/0811:29 PM
Does anyone know of a website that sells cheap materials? My local Home Depot and Lowes sell foam rollers for 6-7 bucks.
Posted By: Anonymous
Re: surface contamination and adhesion problems - 03/09/0812:31 AM
Ok sorry to butt in here.... Im new to site and simply wont to post a thread... And get started how the heck do I do this? Is it the threaded button that takes you to a huge list... help help please... anybody
Posted By: Anonymous
Re: surface contamination and adhesion problems - 03/09/0808:01 AM
Quote: Ok sorry to butt in here.... Im new to site and simply wont to post a thread... And get started how the heck do I do this? Is it the threaded button that takes you to a huge list... help help please... anybody
Assuming that huge list are the threads in "Moparts Question and Answer", look for the "POST" button. Thats how you create a new thread.
back on topic - are you guys using angle grinders to polish your vehicles?
Re: surface contamination and adhesion problems - 03/10/0802:49 AM
Quote: ..back on topic - are you guys using angle grinders to polish your vehicles?
Random orbital polishers... with a preference towards the Porter & Cable model but some good results have been obtained with some of the cheaper models of 'random orbital sanders'.
The problem with angle grinders is that they do not really emulate hand polishing. Random orbital sanders don't just spin around and around in circles... they also shift side to side while spinning. In effect this is like how you would rub or polish if you were doing it by hand. Angle grinders are ideal for ripping and quickly grinding rust off metal surfaces however...
The angle grinder is spinning in circles only. So it is almost natural that it will put circular swirls into whatever surface you are polishing.
Now... I seem to recall some folks mentioning that the angle grinders spin at a higher RPM compared to the random orbital sanders. The word was that this higher rate of spin on the angle grinders would 'burn' the paint or finish because it would be too difficult for the average person to keep the movement of the grinder flowing sufficiently so that one spot doesn't get over revved compared to another spot.
I guess lastly... there are tons of add ons designed for the random orbital sanders especially for the purposes of polishing and buffing surfaces. Whereas I don't think there are too many add ons designed for the angle grinders for the purposes of buffing and polishing ( although I suspect some clever lads have found ways to adapt random orbital sander add ons to work on the angle grinders.
If a Porter Cable random orbital sander is not already in your tool kit or the bucks might not be there for such a useful purchase, then you can go ahead with one of the cheaper random orbital sanders and it will approximate the same quality of finish in the end. The biggest difference between the Porter Cable and the $39 Simonize type buffer/polisher are longevity and user comfort. The cheaper product will die faster and vibrate your arms...
.
Posted By: Anonymous
Polishing with Angle Grinders - 03/12/0801:05 AM
One thought.. an angle grinder (unless its brand new) has likely been used for ginding. Therefore there's a good chance that some small paricles of metal or another hard substance are clinging to it. It wouldn't take much under the high speed wheel to damage your pristine paint job. There may even be some grit that blows out from the motor.
Re: New Paint job on a budget thread. - 03/12/0801:19 AM
Quote: Hey all,
I just stripped all the paint down (aircraft remover), sanded with 220 then 400 and then laid on the 1st coat (rustoleum gloss black).
I used about 65% rustoleum and 35% mineral spirits.
Am I right in thinking that I put this 1st coat on way too thick? How can I fix it? Can I just wetsand it before the 2nd coat or could I get by wetsanding after the 2nd coat?
First Coat (unsanded)
I think that looks a tad heavy.....BUT there's 2 ways to look at it, since you layed it down very nice and smooth, you'll get coverage faster, and you could lay 2 coats as you did, and wetsand (which i actually find quite quick to do myself) and then another coat, really good perfect wetsand, and polish.....done...
the key being you layed a good coat down quite smoothly, and anytime you can do that your ahead in my book. You could be done in 4 coats....
Posted By: Anonymous
Re: Let me introduce myself - 03/12/0802:39 AM
Ok well Sorry cant seem to figure out how to not highjack a post to post...
Im doing a 1979 cj7 frame up rebuild... But not more than just a back yard wont to be mechanic.. Best thing is Im learning alot and been amazing my self with results so far... All my body parts been stripped down to metal.. Had really no choices but to use filler however in some arears.. Really been reading and debating to pay $1100.00 to get it painted, cheapist I got quoted.. Or follow you all in your expierence's... Im going to do the $100 route... Only thing have not purchased is primer! Denver has West Marine and but cant find Brightside primer in there phone book of products..
Visited Napa today... They have that tractor primer stuff that is rollerable... But beeing that I have it down to bare metal... Sounds like the Bright side primer will cover better, to give me better sanding surface... How important is the primer?
Little worried that either would work with the Rust Sunburst Yellow I'll be using... Speaking of Yellow Ive learned its also hard to paint Yellow... But if I can avoid fish eye ect. then Im willing to put the extra time in coverage coats.. Sence I cant go metalic, yellow will make it POP...!
Or follow you all in your expierence's... Im going to do the $100 route... Only thing have not purchased is primer! Denver has West Marine and but cant find Brightside primer in there phone book of products..
Visited Napa today... They have that tractor primer stuff that is rollerable... But beeing that I have it down to bare metal... Sounds like the Bright side primer will cover better, to give me better sanding surface... How important is the primer?
Little worried that either would work with the Rust Sunburst Yellow I'll be using... Speaking of Yellow Ive learned its also hard to paint Yellow... But if I can avoid fish eye ect. then Im willing to put the extra time in coverage coats.. Sence I cant go metalic, yellow will make it POP...!
Ok... first off... I would not hesitate to use a tractor primer. It would provide good anti-rust protection and probably lay down a nice thicker coat of primer that can be sanded ( old farmers are pretty demanding about products performing or they would have bad mouthed the product in to extinction ).
NOW... after looking at your pics... my mind started formulating how I would approach that project... and the first thing that jumped in my pea size brain is ' Rhino-Coat or maybe it is called Rhinohide ). As you know... they sell a paint/coating that is designed to be rolled or spray bombed in the back of pickup truck beds. It is something like a highly platicized or rubberized coating. The idea behind the product is that it can take a heck of a beating and physical contact and keeps on shining and performing. It has amazing adhesion qualities and it has superior sealing capabilities.
OK>.. so that being said... I would get a gallon of that Rhinohide type coating ( in black ) and use it to paint down all the cockpit floorboards and interior surfaces ( like even the faux interior trunk area, under the rear seats etc. Heck you could even use that stuff to slap a few layers on the underside of wheel panels. It might even be good enough to slap on the underside of the floor panels. It would not only provide you with a superior surface coating for those exposed areas, but it would also provide sound deadening capabilities.
I popped over to your message thread and noticed you had already been using a product called Herculined. I assume it is probably in the same category as the Rhinocoat stuff. I don't know anything about Herculine. But what I do know about the Rhinocoat is that it does give a very durable and attractive 'finished' appearance when it dries. And I don't think the Rhinocoat can be chipped out when rocks hit it or you accidentally drop a brick on the floor panels etc.
I figure that paint on those interior parts of a Jeep would not stand up as well in the long term due to all the direct contact of those surfaces.
OK>.. once I had all those interior parts Rhino coated... I would then move on to the roller primering of all the body panels and then the roller painting of those panels.
Marq.
.
Posted By: Anonymous
Re: Let me introduce myself - 03/12/0803:18 PM
Quote:
Quote:
Ok... first off... I would not hesitate to use a tractor primer. It would provide good anti-rust protection and probably lay down a nice thicker coat of primer that can be sanded ( old farmers are pretty demanding about products performing or they would have bad mouthed the product in to extinction ).
Well good... Napa is 5min away and westmarine is about 40min... So Nappa it is...
Now Marq... I did use Herculiner on inside and out side bottom of tub... But it will not be painted... Black looks fine and will give it good contrast to the Yellow.... So just painting the exterior of this jeep... Herculiner does fade over time from the sun.. But is a product that sprays on with UV protectant in it to help avoid that..
Thanks for the input... Puts me that much closer to getting started...
Posted By: Anonymous
Re: Let me introduce myself - 03/15/0801:51 PM
hey all just joined today though not a current mopar owner have been in the past.('73 duster,'77 diplomat) and owned an amc ('74 javelin)currently own a '83 ford fairmont futura always looking for new ideas and restoration tips.i have been up late the past few nights reading various posts on this subject i'm considering it myself i put some primer on the front fenders and hood using the rustoleum and it dosen't look that good.so i bought a quart of white primer and a couple of rollers so i'm gonna give it a shot here in the next few days.i'll keep you posted and will try and upload some pics thanks.
Posted By: Anonymous
Re: Let me introduce myself - 03/17/0811:01 PM
Need some more rope to tighten the tarp down and im done!
$25 Car port
Posted By: Anonymous
Re: Let me introduce myself - 03/18/0803:49 AM
With a hut like that, you likely won't be voted off first!
This guy is a HOOT! He claims that the $50 paint job is a myth, but that you can get professional results for just a bit more by simply buying his DVD... borrowing a compressor... and a paint gun... and a garage.
He even links you to a site where a guy got amazing results with rolled Rustoleum to prove that rolled Rustoleum doesn't work... Huh?
Quote: This guy is a HOOT! He claims that the $50 paint job is a myth, but that you can get professional results for just a bit more by simply buying his DVD... borrowing a compressor... and a paint gun... and a garage.
He even links you to a site where a guy got amazing results with rolled Rustoleum to prove that rolled Rustoleum doesn't work... Huh?
Of course it doesn't work, since he is trying to SELL his DVD, and i'm not trying to sell $hit... His misconception about roller painting pi$$es me off.
He keeps going on about sanding, sanding, well you get the point, the reality of the fact is that within about 10 hours you can easily wetsand, and when you get the process down pat for example, i wetsanded my charger between coats in less than 2 hours. Start to finish, took me 3 days, BUT not solid, about 3 hours a day work. Plus you can do this in a residential area, where if you spray, someone will likely call the police, as happened to me.
I look at his civic, great, the reality is that the novice will most likely screw up the paint job, spraying is HARD. I've done both, many many times. I'd love to race this guy in a paint job, the reality is you have to tape the car up, which in itself would take longer than a few wetsands between coats. Plus his pics SUCK, if his painting skills were good he'd show pictures like this:
I rest my case. I'm not shooting down spraying a car, actually i prefer to spray a car, I'd just like to debunk his referrals to the roller paint job, plus remember this guys motive, he's profiting from this venture, sure he will shoot down the roller paint job; after all he probably lost 90% of his business since this came out. It has really gone a lot farther than i thought it did, if someone told me it would go this crazy I'd never have believed it. Plus i shared it with you guys for FREE!!!!!
Quote: Plus i shared it with you guys for FREE!!!!!
... And cheapskates like me worldwide sure appreciate it!
Posted By: Anonymous
Re: I'm speechless - 03/19/0807:26 PM
Quote: This guy is a HOOT! He claims that the $50 paint job is a myth, but that you can get professional results for just a bit more by simply buying his DVD... borrowing a compressor... and a paint gun... and a garage.
He even links you to a site where a guy got amazing results with rolled Rustoleum to prove that rolled Rustoleum doesn't work... Huh?
3) Buy the paint. Your cost? $31 for a quart of great quality single stage urethane paint. $13 for activator (hardener) $10 for reducer (thinner). Okay guys, get out your calculator. Uh, $55. If you decide to do a radically different color, you may need a little more paint."
He makes it sound like my only neighbor, a 78 year old widow, has a HLVP gun and a air compressor for me to borrow.
Neil Slade Method<69chargeryeehaa method
not to mention primer and primer sealer, and the reducers (hardener) for all of it. plus urethane paint is hard to lay down. I used duplicolor paint on one car, probably the cheapest paint you can buy, it was single stage acrylic enamel, supplies cost me about $300, for the paint, primer, primer sealer, and reducers. I don't know what paint this guy is referring to, but any auto paint that cheap is bound to be CRAP.... plus you need a decent compressor to shoot using HVLP, over 7scfm at 40psi minimum, which usually works out to be 7+HP and over a 50gal tank, unless you like to paint and stop alot to let the compressor catch up...been there done that....
Posted By: Anonymous
Re: I'm speechless - 03/19/0811:30 PM
hey Charger i checked out his site and he is so full of crap i have a 69 chevelle that i rolled when i first read this thread about a year ago and you did a damned good job at showing us how and yes i am a painter 14yr pro (cars,houses,anything that will accept paint)so hats off to you for leading the way
Quote: hey Charger i checked out his site and he is so full of crap i have a 69 chevelle that i rolled when i first read this thread about a year ago and you did a damned good job at showing us how and yes i am a painter 14yr pro (cars,houses,anything that will accept paint)so hats off to you for leading the way
Sadly I wasted a few minutes visiting that guy's crappy site. Maybe he should spend a few of the bucks he has generated from flogging his DVD to get someone to build him a less childish looking web site. My first overall impression of his site was 'snake oil salesman'. But it is all the non-car painting crap on his site that totally detracts from me taking him serious or even being slightly motivated to part with my money to buy his DVD.
ANYONE can find books on autobody work and spray painting. Oddly enough there are no books on the $50 roller paint job method ( although I bet that Hot Rod magazine saw their sales shoot through the roof when they did that eight page article putting the roller method to the test on their project Falcon ).
Now... I am not going to flame the spray method. It can produce good results and of that there is no doubt. But it's cost is definitely not in the $50 paint job league.
As well, the spray method is not as forgiving IF you make mistakes along the way. The roller method allows you to slow down the process where a mistake can be corrected and the paint job continued.
Possibly he chose to deliberately not mention the Interlux Brightside marine paint part of this thread - because that would have pitted a polyurathane paint job directly against his polyurathane paint job for shine and durability.
Oh well... the Internet is full of snake oil opportunist who hope to make their fortune flogging some odd crap to the gullible. Have you ever seen on E-Bay where some LOSER cuts pages out of old car magazines and trys to sell the full page advertisements to some enthusiast ? A sucker born every minute.
But probably what Charger noted is the best way to sum up that guy's attempt to make money selling his DVD... and that is that this message thread and the roller process was posted FOR FREE and no one here has made any money trying to sell this process or method. I tend to trust the folks who do something or share something for the love of it... over the snake oil salesman whose only motivation is to make some coin...
Quote: hey Charger i checked out his site and he is so full of crap i have a 69 chevelle that i rolled when i first read this thread about a year ago and you did a damned good job at showing us how and yes i am a painter 14yr pro (cars,houses,anything that will accept paint)so hats off to you for leading the way
I'm not sure exactlly where it is but this site has been posted here before and didn't receive much support those times either, guys just came off wrong for the people here I guess.
Posted By: Anonymous
Re: I'm speechless - 03/20/0810:07 AM
On the leadup to painting my car using the roller method I came across that guys pathetic website somehow... I LOL'd...
Anyway I'm still working on my car and I reckon I'll have it finished over the next week or so.
I've attached a pic when I pulled it out of the shed and gave it a dust off, looks great out in the sun.
Quote: I'm not sure exactlly where it is but this site has been posted here before and didn't receive much support those times either, guys just came off wrong for the people here I guess.
Funny, I was browsing these threads today and it turns out that Neil himself was in here peddling his system and trashing ours. As one can imagine... most of that discussion was deleted.
Posted By: Anonymous
Re: I'm speechless - 03/20/0810:56 PM
Quote: looking good, wilso! how many coats you got on it so far?
Thanks guys for your comments.
In those pics I have 7 coats on the side (finished), 9 on the roof (finished) and 3 on the tailgate (not finished).
Roof isn't made of glass, I think I just got it at a good angle
Hey Blackstone Any more pictures of your results with Top Secret TS-4?
Thanks to this thread, I'm getting ready to make my rusty orange 78 W-150 less rusty and more orange and I would love to be able to order the Sunset Orange TS-4 paint. I have recently finished all of the three threads and I think you are the only active participant who ended up using TS-4. One earlier guy tried the TS-100, didn't like it and switched to Brightside. MontanaMan has not posted back with any results.
You seem to be the only guy who has followed through. Your earlier pieces looked good. Just wondering if you have newer pics or more info.
Thanks in advance to you and to all the others who have made this the best (not to mention longest) forum thread that I have ever seen.
Any other lurkers out there with Top Secret experience?
Unfortunately I have no new developments since I posted my pictures on page 22(thread III). I haven't given up, I just spent the fall building my garage, then it got cold, now all five of my vehicles need bodywork thanks to old man winter.
When I shelved the project, I think I had the process pretty well figured out. I checked on my test panel just yesterday, which has sat in direct sunlight exposed to the elements since July. It looks even better than I remembered. From what I've read, the characteristics of the TS-4 are nearly identical to that of Brightside... and man, do they have colors!
I'm anxious to do some more rolling once I wrap up a few other misc projects. We should be seeing 50-degree days any time in the next few weeks, which may even help give the paint more time to self-level. I picked up a Wagner that I may experiment with, but I expect I'll like the rolled results better. In any case, I should get a better finish now that I have four walls and a roof between my project and the bugs/weather/dust.
Meanwhile, I'll subject my test hood to some gratuitous violence... see how much punishment it can withstand. I'll report back next week to let you know if it talks.
Stupid question but is there an "Actual" method to rolling paint?
Once you have worked out 'how much' paint you should have on your roller and the appropriate blend of thinner to paint ratio, there is the actual painting pattern to use when laying on the coats of paint :
When I went to roll each coat on my car, I always followed the same painting pattern.
First I would lay on the horizontal surfaces first : hood, roof and trunk. This way... if there was any drippage or runs, it would dribble to the vertical surfaces.
Once I had my coat on the horizontal surfaces, I would then begin at the drivers rear quarter panel and go to the drivers door, drivers front panel, front bumper area, passenger front panel, passenger door, passenger rear quarter and rear bumper panel.
By following this pattern consistently it allowed me to make sure that all edges were nicely feathered and blended as I transitioned between each panel. But the thing to note is that I completed each panel, going from top to bottom, before moving on to the next panel in the sequence.
The other thought that was always in the back of my mind is this : Normally I was only making small batches of paint, blended with the mineral spirits right in the roller tray. My concern was that the amount of pigment in my paint mix might be slightly higher or lower during a coating, depending on how much mineral spirit I might add to the paint as I rolled. By following the same painting patter each time it ensured that any color transition between panels was so similar that you could not see any color difference between the panels ( even though each panel had been rolled on its own before moving on to the next panel ).
When doing the vertical side surfaces, I always started from the top of the panel. Again the logic being that if there is any running of the paint ( due to me overloading the roller or pushing too hard on the roller ), that gravity would flow it down into the lower areas of the panels which I would next be rolling. So runs never posed a problem because my pattern of painting always took into consideration that 'if' they happened, it would simply be flowing towards where my roller would next be going....
When doing the hood... I usually always started in the center of the hood... I would start by going from the windshield end to the front bumper end. Then I would follow that pattern while working my way out to the side of the hood.
On the trunk... I usually always started from the center of the trunk area nearest to the rear windows AND UNLIKE THE HOOD I would go from one fender side to the other fender side. Then I would follow that pattern while working my way out to the read bumper end.
IF my car had a roof to paint ( its a convertible remember ), I would have started by going from the center front to the center back of the hood. Then I would work my way out following that pattern towards the drivers door side. Then I would go over to the passenger side and work out from the center towards the passenger door.
Stupid question but is there an "Actual" method to rolling paint?
I kind of followed Marq's method. So far it has worked very well for me.
As for the pattern that you made on your hood, I would finish up with long strokes, it seemed to make it easier to get rid of the edges and stuff.
Posted By: Anonymous
Re: I'm speechless - 03/22/0805:33 AM
damn, i need to go back and take some vocabulary test again. I wasnt looking for a method on rolling paint, i meant pattern. although seems some of you knew what I meant.
Posted By: Anonymous
Am I doing something wrong? - 03/22/0806:01 PM
I have a fiberglass hood that I started to paint using this method. I sanded it with 400 to get rid of the gel coat finish and give something for the paint to adhere to. I wiped the hood down with mieral spirits and made sure it was nice and clean. I used a 40% mineral spirits mixture with the rustoleum paint. Rolled on a coat, and everything went smooth. I then waited until the next day to roll on another coat. Let that dry for about 10 hrs, I could tell that the coverage was getting darker.
The problem is, that when I went to wet sand with 600, Just about all the paint came off. I thought maybe 600 was too much, so I tried some 800 and the same thing happened. Am I doing something wrong here?
I just ended up wet sanding with some 600 and getting the whole thing nice and smooth. This took away about 90% of the paint that I layed down.
Posted By: Anonymous
Re: Am I doing something wrong? - 03/23/0812:05 AM
Im pretty much having the same issues as sn95stangman is having with burning thru the paint. After sanding the 4th coat with 800g, I burned through a couple of spots already. not much though. I got some pics. I also fell in love with my hood after I hosed it down.
I got most of the "shiny" parts off. Just wanted to know if this is fine to paint on ------------------------------------ Heres the shots I fell in love with after wetting the hood. ] ------------------------------------
So yea, like I said before, ive burned through a couple of spots before. its only really noticible while the hood is wet. But when its dry, you can barely tell.
Re: Am I doing something wrong? - 03/23/0805:14 AM
Quote:
So yea, like I said before, ive burned through a couple of spots before. its only really noticible while the hood is wet. But when its dry, you can barely tell.
The whole secret to the wet sanding is that the sand paper should have hardly any pressure applied while doing the wet sanding.
What I did to wet sand was buy one of those foamie kneeling pads that gardeners use to get down on their knees and work in their garden. It is a dense foam, usually about 1" to 1 1/2" thick. ( Actually I simply stole the one my wife had bought to work in the garden ). I cut a 4" x 8" chunk out of this knee pad and I would wrap my wet sanding paper around it.
Next. I would take a bucket and shoot about 1 tablespoon of Sunlight liquid dish detergent into the bucket and then add water.
I would next take my foam wrapped with 800 grit wet sanding paper and let it soak in the bucket for a minute or two.
Ok.. so at this point I have a nicely soaked wet sanding paper. I would then take my hose and put the nozzle to a fine mist. I would give the painted surface an initial wetting to get the surface generally wet.
With one hand I would begin wet sanding, while with the other hand I kept the nozzle and the fine mist of water spraying the area that I was wet sanding. This kept the surface I was working on constantly wetted.
NOW... this is the most important thing... the wet sanding should be like a hovercraft on that wetted surface. You should not be really applying much if any pressure to your sanding block. The whole idea of the wet sanding process is to simply skim over the surface letting the sand paper nick off any high points in the overall surface.
The reason I was using a 4 x 8 surface to wrap my sandpaper is to distribute evenly and over a wider surface the sanding process. This lessens the chances of too much of a concentration of sanding on one spot.
Now the only deviation in this process is when you are working on the edges ( whether they are the outer edges of the panel you are working on, or maybe even the edges of any shapes that have been stamped into the metal or fiberglass surface ). At those spots you really do have to lighten up even more and use as little pressure as possible. The high point of the edge will always want to sand down faster then the lower surfaces around it. So just back down on the pressure being applied there.
Ok... so once I have gone over the entire surface I then turn the hose loose at maximum spray and blast the entire surface. The whole point at this point is to try to fully remove any artifacts or 'mud' ( the wet sanded paint that was loosened and mixed with the detergent ).
Hopefully after a good blasting of water during this 'rinse' cycle, there are no contaminants left of the freshly wet sanded surface. I then let it dry thoroughly.
Ok... I should mention at this point, hopefully the water you are spraying the car with does not contain high mineral content or heavy amounts of chlorine ( like some well waters or heavy type waters where you have to use water softeners in it ). If you are stuck in that unfortunate situation, hopefully the next stage will level the playing field for you. The following also applies to those of you who have normal water as well.
Ok... assuming the surface is now thoroughly dried, it is time to take a clean cottony cloth rag ( preferably white ) and pour some mineral spirits on to it and get it good and damp. Next ring out the cloth so that it is not soaked... but overall it is wetted lightly. Now... give the entire surface a good wipe down.
This should do two things...
a ) it will remove any leftover artifacts that the rinsing stage did not get. Your white wiping cloth may show some color being picked up.
b ) it will put a temporary shine on the wet sanded surface. This is kind of cool because you can visually see how that wiped area might look if you had polished and waxed it....
Ok... at this point I would give the surface 30 minutes to an hour to dry and let any of the mineral spirits that were spread on during this wiping stage to fully evaporate.
You could at this point have your paint prepared, rollers at the ready and whatever else you need for adding the next two coats of paint. You could, just prior to applying the next coats run a 'tack' cloth over the surface just to remove any dust, hair, dandruff, bugs or whatever else may have fallen on to the surface during the intervening 30 minutes to an hour.
That is about as sanitized and prepped things are possible. So you should be able to go ahead now and start laying on your next two coats of paint.
PS : That picture of your car hood freshly soaked with water glistened like a mirror. You should be happy. With any bit of luck that is where things will be ending up by the 8th or 10th coat. Water is an invaluable tool at helping us see how things will look at the end of the project.
Marq
Posted By: Anonymous
1st coat primer - 03/23/0803:09 PM
Well getting started... I sprayed the grill with one of the baby bottle things from home depot.. Not looking too bad so far... Started the primer on hood, fenders, and door's.. The primer is tractor primer from NAPA.. Im getting some peel look... But I figured and know will need alot of wet sanding before apply color. I wont the primer to be thick... Going over high spots and edgdes with more coats..
? Primer and mineral spirits.. To help lesson the peel would I be better off thinning it way down? If so would I need more coats of primer to achieve thickness!
Heres some pics... I also mixed a little yellow with the bottom hood and fender... Dont really think its going to make a diffrence in helping coverage down the road... Or should I add more yellow to primer... I did notice the mixed prime and yellow scratches easy than just plain primer... Is that a concern?
And again sorry dont know how to just add a fresh post to this thread with out high jacking and starting from someone elses post ?
Re: New how to paint your car on a budget with a roller - 03/23/0804:04 PM
while I am about two weeks off from trying the rolling method. My question is has anyone tried to spray the door jams and such. If so how much did you thin the paint. I am thinking 4:1 for Rustoleum but am worried that might be the wrong mix. Thanks
Re: New how to paint your car on a budget with a roller - 03/23/0805:10 PM
Quote: while I am about two weeks off from trying the rolling method. My question is has anyone tried to spray the door jams and such. If so how much did you thin the paint. I am thinking 4:1 for Rustoleum but am worried that might be the wrong mix. Thanks
I sprayed the door jams, underside of the hood and underside of the trunk lid using the matching color in the Rustoleum spray bomb. No need to foul up a spraying machine to do those areas when the spray bomb in the matching color works excellent ( and no need for thinning ).
Re: New how to paint your car on a budget with a roller - 03/23/0806:22 PM
thanks Ill be buying some spray paint then...probably what 4 cans or so?
Posted By: Anonymous
Re: Am I doing something wrong? - 03/23/0810:51 PM
Quote:
Quote:
So yea, like I said before, ive burned through a couple of spots before. its only really noticible while the hood is wet. But when its dry, you can barely tell.
The whole secret to the wet sanding is that the sand paper should have hardly any pressure applied while doing the wet sanding.
What I did to wet sand was buy one of those foamie kneeling pads that gardeners use to get down on their knees and work in their garden. It is a dense foam, usually about 1" to 1 1/2" thick. ( Actually I simply stole the one my wife had bought to work in the garden ). I cut a 4" x 8" chunk out of this knee pad and I would wrap my wet sanding paper around it.
Next. I would take a bucket and shoot about 1 tablespoon of Sunlight liquid dish detergent into the bucket and then add water.
I would next take my foam wrapped with 800 grit wet sanding paper and let it soak in the bucket for a minute or two.
Ok.. so at this point I have a nicely soaked wet sanding paper. I would then take my hose and put the nozzle to a fine mist. I would give the painted surface an initial wetting to get the surface generally wet.
With one hand I would begin wet sanding, while with the other hand I kept the nozzle and the fine mist of water spraying the area that I was wet sanding. This kept the surface I was working on constantly wetted.
NOW... this is the most important thing... the wet sanding should be like a hovercraft on that wetted surface. You should not be really applying much if any pressure to your sanding block. The whole idea of the wet sanding process is to simply skim over the surface letting the sand paper nick off any high points in the overall surface.
The reason I was using a 4 x 8 surface to wrap my sandpaper is to distribute evenly and over a wider surface the sanding process. This lessens the chances of too much of a concentration of sanding on one spot.
Now the only deviation in this process is when you are working on the edges ( whether they are the outer edges of the panel you are working on, or maybe even the edges of any shapes that have been stamped into the metal or fiberglass surface ). At those spots you really do have to lighten up even more and use as little pressure as possible. The high point of the edge will always want to sand down faster then the lower surfaces around it. So just back down on the pressure being applied there.
Ok... so once I have gone over the entire surface I then turn the hose loose at maximum spray and blast the entire surface. The whole point at this point is to try to fully remove any artifacts or 'mud' ( the wet sanded paint that was loosened and mixed with the detergent ).
Hopefully after a good blasting of water during this 'rinse' cycle, there are no contaminants left of the freshly wet sanded surface. I then let it dry thoroughly.
Ok... I should mention at this point, hopefully the water you are spraying the car with does not contain high mineral content or heavy amounts of chlorine ( like some well waters or heavy type waters where you have to use water softeners in it ). If you are stuck in that unfortunate situation, hopefully the next stage will level the playing field for you. The following also applies to those of you who have normal water as well.
Ok... assuming the surface is now thoroughly dried, it is time to take a clean cottony cloth rag ( preferably white ) and pour some mineral spirits on to it and get it good and damp. Next ring out the cloth so that it is not soaked... but overall it is wetted lightly. Now... give the entire surface a good wipe down.
This should do two things...
a ) it will remove any leftover artifacts that the rinsing stage did not get. Your white wiping cloth may show some color being picked up.
b ) it will put a temporary shine on the wet sanded surface. This is kind of cool because you can visually see how that wiped area might look if you had polished and waxed it....
Ok... at this point I would give the surface 30 minutes to an hour to dry and let any of the mineral spirits that were spread on during this wiping stage to fully evaporate.
You could at this point have your paint prepared, rollers at the ready and whatever else you need for adding the next two coats of paint. You could, just prior to applying the next coats run a 'tack' cloth over the surface just to remove any dust, hair, dandruff, bugs or whatever else may have fallen on to the surface during the intervening 30 minutes to an hour.
That is about as sanitized and prepped things are possible. So you should be able to go ahead now and start laying on your next two coats of paint.
PS : That picture of your car hood freshly soaked with water glistened like a mirror. You should be happy. With any bit of luck that is where things will be ending up by the 8th or 10th coat. Water is an invaluable tool at helping us see how things will look at the end of the project.
Marq
Once again another insightful post by marq. I still remember when you posted the pic of your wife on the garden pad. I could of swore I read that you have taken it without her consent. (I do the same ) Did she ever find out?
Ive also seen how it important it is that you clean and sanitize the surface prior to painting. I pretty much have that process down and have yet to come across bonding issues with the surface and paint.
The water im using is pretty pure/clean. being in the country, we have a well system. but also have an *expensive* rain bird water filter system. So I can pretty much drink the water that comes out the hose. I actually use a hose to provide water when wet sanding. ill have to try the soap n water technique sometime. seems logical in a way.
I'm going to be busy the next couple days. Ill probably get to work on my project this Tuesday and post pics real soon.
One more thing before I go. I want to give marq a special thanks. Ive learned A LOT not only from the board and member but especially Marq. your always there leaving excellent reading materials (paint layer diagram ftw) and always help everyone out. good lookin out. thnx everyone.
Posted By: Anonymous
Re: New how to paint your car on a budget with a roller - 03/23/0810:55 PM
Quote:
Quote: while I am about two weeks off from trying the rolling method. My question is has anyone tried to spray the door jams and such. If so how much did you thin the paint. I am thinking 4:1 for Rustoleum but am worried that might be the wrong mix. Thanks
I sprayed the door jams, underside of the hood and underside of the trunk lid using the matching color in the Rustoleum spray bomb. No need to foul up a spraying machine to do those areas when the spray bomb in the matching color works excellent ( and no need for thinning ).
.
Same here. I use rustoleum spray bomb also for hard to roll areas. Actually im still practicing spraying the paint on a door handle. Those pics i provided are sprayed, not rolled.
Re: Am I doing something wrong? - 03/24/0804:04 AM
[quote} ill have to try the soap n water technique sometime. seems logical in a way.
Funny enough.. the soap in the water serves two functions... it acts like a lubricant ( helping the wet sanding paper glide over the surface better ) and it helps to suspend the 'mud' ( artifacts removed by the wet sanding ). This makes it easier to blast the residue or mud off the part when you give it the final rinsing off with the hose. I guess the other thing that the soap does is that helps the wet sanding paper to not get clogged up with the stuff you are wetsanding...
During the wet sanding process I am constantly sticking the foam with the wet sanding paper on it in to the bucket and swishing it around to get the stuff stuck to the sand paper off it... and to reload it with more soapy water.
Thanks for the kind words. Like a lot of people here I had a lot of questions during the painting of my car. So I know when it comes to an important thing like rolling paint on our 'ride' the more information that is available will help others during their painting.
.
Posted By: Anonymous
Re: New how to paint your car on a budget with a roller - 03/24/0804:54 AM
any tips on spray bombing parts? I have the rustoleum gloss paint and planned on using it to spray the underside of the hood. The hood is not on the car, so I can position it any way I need to. Thanks
Re: New how to paint your car on a budget with a roller - 03/24/0801:58 PM
Quote: any tips on spray bombing parts? I have the rustoleum gloss paint and planned on using it to spray the underside of the hood. The hood is not on the car, so I can position it any way I need to. Thanks
I referenced this topic before for door jams, undersides of hoods and even the underside of trunk lids, but in short, my suggestion is to buy a spray can of brake cleaner.
This sequence HAS to be done before you start painting or priming the body panels. If the part is off the vehicle you can figure out what to do from this sequence..
So what you should do is
a ) take a high pressure hose and spray the surface down to get rid of any loose dirt or debris that is stuck there. IF your door jam or the underside of your hood looks truly crapped up with dirt and stuff... you could take something like a toilet brush and scrub away at the surface while blasting away at the surface with the hose.
b ) next take your spray can of brake cleaner and spray the entire surface. You will have better success IF the previously wetted surface was dry before hitting it with the brake cleaning spray. If you are dealing with the underside of a trunk or hood... then spray that entire underside. If the part is on the vehicle it would pay to spread some plastic sheets on the respective surrounding body panels to minimize overspray on them. If the part is off the vehicle then you don't have to worry about the overspray.
c ) let the brake cleaner spray sit on the surface for about 20 minutes. It will eat away and loosen any oils, waxes, or other crap on the surface that can be loosened by the solvent in the brake cleaning spray. The reason we use brake cleaning spray is that it can eat away most of those things WHILE not leaving behind any residue like an engine cleaning foam would...
d ) ok... after 20 minutes give the entire surface or door jams another rinsing with the hose to rinse away any of the debris loosened by the brake cleaning solvent.
e ) let it the surface dry thoroughly...
f ) you can now bomb the surface or door jams with your paint spray aerosol and there is no reason it should not adhere properly and look like it belongs there.
.
Posted By: Anonymous
Re: New how to paint your car on a budget with a roller - 03/24/0810:12 PM
Quote:
...
c ) let the brake cleaner spray sit on the surface for about 20 minutes. It will eat away and loosen any oils, waxes, or other crap on the surface that can be loosened by the solvent in the brake cleaning spray. The reason we use brake cleaning spray is that it can eat away most of those things WHILE not leaving behind any residue like an engine cleaning foam would...
d ) ok... after 20 minutes give the entire surface or door jams another rinsing with the hose to rinse away any of the debris loosened by the brake cleaning solvent.
...
.
Marq, Just curious about what sort of brake cleaning spray you're talking about. The aerosol brake cleaner that I have used evaporates really fast. Forget 20 minutes, 60 seconds is more like it.
Just curious. I've never sprayed this stuff on a painted surface (for obvious reasons), so maybe it behaves differently there. Just trying to make sure I'm not missing anything...
Re: New how to paint your car on a budget with a roller - 03/25/0802:46 AM
[quote
Marq, Just curious about what sort of brake cleaning spray you're talking about. The aerosol brake cleaner that I have used evaporates really fast. Forget 20 minutes, 60 seconds is more like it.
Just curious. I've never sprayed this stuff on a painted surface (for obvious reasons), so maybe it behaves differently there. Just trying to make sure I'm not missing anything...
-- Dan
I am pretty sure we are both talking about the same type of spray bomb brake cleaner. And you are right, it does evaporate pretty quickly and a 20 minute wait may be a bit of an overkill
The aerosol brake cleaning spray is pretty potent when it lands on fresh paint or fairly recently painted surfaces. It can literally lift the paint or send it into elephantitist ( where the freshly painted surface wrinkles up ). Hehehehe... don't use a dictionary to look up the word elephantitist or you will get a shiver up your backbone
On a fully cured painted surface, like the original manufacturers paint job that you would usually find under a hood, trunk or in a door jam, the brake cleaning spray would 'normally' just eat away any waxes, dirt, dust, oil and other such things that might get sprayed up in the engine compartment.
.
Posted By: Anonymous
Re: New how to paint your car on a budget with a roller - 03/25/0806:46 PM
Guys I'm having a terrible time painting my truck black.... I was going to two tone it blue on top black on bottom but I can't get the black to act right.... I have already paint my truck blue once and it worked out great. And I got the top blue to go on good but the bottom is giving me problems... Orange Peel out this world.. I have thin it as much as you can basically running off the fenders hahaha...
I'm to the point now that I'm going to quit and try a new color if I can't get any better than that.. Maybe a white???? Is it just the color or am I doing something wrong... Mixing it basically 50/50 Rustoelum / Mineral Spirts.... Will white come out better?? Show less orange peel... I have wet sanded and wet sanded.... I just started sanding it all off so that I can just start over...
I see people painting black all the time on here!!! Why can't I get the same results.... I was on about my 4 or 5 coat an it wasn't getting any better so I need a Executive Decision White OR Black!!!!!
Re: New how to paint your car on a budget with a roller - 03/25/0808:15 PM
Some colors are more freindly than others, but I wouldn't give up on black just yet. Generally, 50/50 is thin enough to minimize orange peel, although I've heard of some people having to resort to 60% spirits.
Several "rollerheads" have reported far greater self-leveling properties using a dash of penetrol. I'd certainly try that before considering a color change.
Another factor may be humidity. Has the weather significantly changed since you rolled the blue paint?
Other than that, I'll recommend the obvious just to be sure: 1)Load up the roller as lightly as possible with paint
2)spread the paint as far and as thin as possible while painting a panel... Pretending that Rustoleum costs $1000 per quart and you've got to cover three cars with one can or else your wife gets the waterboard.
Hopefully this helps
Posted By: Anonymous
Re: New how to paint your car on a budget with a roller - 03/25/0808:24 PM
you dont have to go 50/50 its better if you go 35-40% the paint is not really that thick but it cuts down on the saggs and runs. if you go 50/50 you are cutting the paint down a whole lot therefore giving you more runs and sag. i have been doing this alot and i use about 35% thinner and roll all the paint out of the roller and going back over it to work out some of the orange peel with the weight of the roller
Posted By: Anonymous
Re: New how to paint your car on a budget with a roller - 03/26/0812:23 AM
Quote: Several "rollerheads" have reported far greater self-leveling properties using a dash of penetrol.
I agree, when I started using Penetrol the self-leveling was far better.
In fact here is the paint mixture receipe that worked for me, I was using Brightside Black: 375-400ml paint 100ml penetrol 75ml mineral spirits (mineral turps)
This mixture worked perfect as I had a 575ml glass jar that I used for the paint. When the jar was about 33% full (66% used) I added a probably 25ml mineral spirits to overcome any evaporation that had occurred.
Hope this help anyone out there that's painting with the Brightside, but once again you'll have to find the ratio's that work best for you.
Re: New how to paint your car on a budget with a roller - 03/26/0802:47 AM
Quote: Several "rollerheads" have reported far greater self-leveling properties using a dash of penetrol.
I have a couple of friends that paint boats on a regular basis using a roller and they both tried to talk me into using penetrol when I roll my truck, hindsight being 20-20 I shold have listened. I like to thin by using the count the drips method, I stir then lift the stir stick and count & as soon as I get a count where the paint goes from a stream to drops about a 7 or 8 cont worked good for me.
Re: New how to paint your car on a budget with a roller - 03/26/0801:35 PM
Quote: you dont have to go 50/50 its better if you go 35-40% the paint is not really that thick but it cuts down on the saggs and runs. if you go 50/50 you are cutting the paint down a whole lot therefore giving you more runs and sag. i have been doing this alot and i use about 35% thinner and roll all the paint out of the roller and going back over it to work out some of the orange peel with the weight of the roller
I think you may be on to something... I'm guessing that we're dealing with verticle panels, where what's percieved as orange peel could actually be sagging paint due to an over-thinned mixture.
I wonder if this mixture would behave differently when rolled onto a horizontal surface???
Posted By: Anonymous
Re: New how to paint your car on a budget with a roller - 03/26/0806:18 PM
Hi guys,
i too am another long time lurker of this thread and its taken me quite a while to purswade myself to be brave and try this paint job!
i found the site from honda-tech.com and im really impressed with the paint jobs i have seen. im going to be painting a honda civic hatchback!
just wanted to post some pics and get some reactions from you guys.
Before
first couple of coats
Few more Coats!
Few more coats!
and where i am now.
wondering if could get some comments on the test peice. im using brightside snow white. to me it dosent look as glossy as other photos i have seen. those last photos are drying photos taken inside in low light.
ive been rolling thin layers sanding loads off and have very little orange peel. just worried about the lack of gloss ive got. ive seen previous users on here saying about the gloss they have got from coat one. but im on coat 12 or so and still dont have much gloss!
the color covderage is very slow for me as i was going from navy blue to white. my actual car is red so im going to be using some prekote primer.
any critique welcome!
thanks guys, scott
Posted By: Anonymous
Re: New how to paint your car on a budget with a roller - 03/26/0811:23 PM
holy crap, 12 coats with BS and no gloss? Im still a noob myself and would like to know why there is no gloss.
wait. are you using the same grit everytime you wetsand?
Posted By: Anonymous
Re: New how to paint your car on a budget with a roller - 03/27/0812:37 AM
nope different grits
gone up from 200, 400, 800, 1000, now on 1200,
but i have just ran out of paint for the test peice and decided to do the final sand and hand polish with some really cheap polish.
the shines defo there ill post some pics tomorrow when there is some light. but still id like to know why there was no gloss up until now!
Posted By: Anonymous
Re: New how to paint your car on a budget with a roller - 03/27/0801:30 AM
what are you cutting it with because usually after the first coat there is gloss make sure that you bought gloss and not satin
Posted By: Anonymous
Re: New how to paint your car on a budget with a roller - 03/27/0802:00 AM
im using it streight out the can,
and yup its defo gloss
anyone elce used snow white before?
looking at the gloss ive got from the limited polishing ive done its still not that shiny compared to some unpolished jobs on here. it might be different in the natural light tomorrow. ill have a look (its 2am over here in the uk)
Re: New how to paint your car on a budget with a roller - 03/27/0802:19 AM
Quote: while I am about two weeks off from trying the rolling method. My question is has anyone tried to spray the door jams and such. If so how much did you thin the paint. I am thinking 4:1 for Rustoleum but am worried that might be the wrong mix. Thanks
Thin by using the count the drips method, I stir then lift the stir stick and count & as soon as I get a count where the paint goes from a stream to drops about a 7 or 8 cont worked good for me.
Posted By: Anonymous
Re: New how to paint your car on a budget with a roller - 03/27/0812:42 PM
Back again, I'm finally done painting and I'm now putting my car back together. Due to rain I only got 2 pics...
Posted By: Anonymous
Re: New how to paint your car on a budget with a roller - 03/27/0812:43 PM
And the other one...
Posted By: Anonymous
Re: New how to paint your car on a budget with a roller - 03/27/0812:50 PM
looking good!
what paint are you using? and is that all polished up or is it the rain making it look soo shiney!
Posted By: Anonymous
Re: New how to paint your car on a budget with a roller - 03/27/0801:02 PM
got a pic of the slightly polished test peice here guys
what you think about that, still not as shiney imo
Posted By: Anonymous
Re: New how to paint your car on a budget with a roller - 03/27/0803:44 PM
ok another long time lurker here first of all thanks to 69chargeryehaa for coming up with the idea and all the rest of top people here developing the whole system
i am hoping to paint my 1988 renault 9 with this method in the very near future and i have been experimenting with a small can of combi color (rustoleum ) gloss black for the last few weeks on a spare rear spoiler i have here . the results so far are pretty promising , i have used a 4" foam roller and a very good quality bristle brush to get rid of the bubbles which works fine .
however i have a few questions here ;
1- the original paint on my car is a creamy white which has no laquer coat on top and i have been told this is a 2k paint . i remember reading the older posts some people mentioning rustoleum/tremclad etc will have reactions with 2k paint ?? trials on the spoiler worked fine so far by the way .
2- also having no clear coat on the original paint can i just skip the initial 240g dry sanding step and start from 400g to key the paint ??
3- what does the flexible sanders everyone use look like ?? i have been wrapping the sand paper around a sponge to cover the non flat surfaces . does this sound right ??
4- whats the best way of getting the flattest surface on the final wetsanding step ?? anyone tried using a guide coat before ??
5- i know this is rust paint and all that but for extra peace of mind ,can i use a brush on rust killer on bare metal (kurust, granville ) before bondo and primer ???
6- i have gone a little impatient on the 5th coat and went polishing after wet sanding with 1000g to see what kind of shine i can get but in the process i took too much paint off from a few corners where i can see the original white paint now ,is white/mineral spirits good enough to clean the remains of the polish as i know there will be adhesion problems if i try another coat of paint on this surface ???
here is me after 5th coat, not wet sanded !!
Posted By: Anonymous
Re: New how to paint your car on a budget with a roller - 03/27/0805:27 PM
looking real good man,
you say that last pic was before wetsanding and polishing!?
damn its going to come out good!
Posted By: Anonymous
Re: New how to paint your car on a budget with a roller - 03/27/0807:21 PM
Quote: looking real good man,
you say that last pic was before wetsanding and polishing!?
damn its going to come out good!
yeah thats the paint touch dried and not wet sanded. but what you cant see in that picture is tiny bits of crap everywhere which wet sands out fine .
Posted By: Anonymous
Re: New how to paint your car on a budget with a roller - 03/28/0812:29 AM
Quote: got a pic of the slightly polished test peice here guys
what you think about that, still not as shiney imo
My first thought was that you had over thinned the paint, which makes for a dull finish. With that many coats, you should have had shine without the polish.
You thin the paint to give it more workability which helps the self-leveling. How thin depends a lot on where you are and what the ambient conditions are. If it is cold and damp, your ideal mixture is going to be different than somebody painting in hot and dry conditions.
What is your ratio of paint to mineral spirits?
Posted By: Anonymous
Re: New how to paint your car on a budget with a roller - 03/28/0801:39 AM
Quote:
Quote: got a pic of the slightly polished test peice here guys
what you think about that, still not as shiney imo
My first thought was that you had over thinned the paint, which makes for a dull finish. With that many coats, you should have had shine without the polish.
You thin the paint to give it more workability which helps the self-leveling. How thin depends a lot on where you are and what the ambient conditions are. If it is cold and damp, your ideal mixture is going to be different than somebody painting in hot and dry conditions.
What is your ratio of paint to mineral spirits?
thats the worrying thing the first few coats was 10% spirits but as i got confident the last 8 coats or so were direct from the can. i've been putting on super thin coats
maybe it was just a dodgey can of brightside?
Posted By: Anonymous
Re: New how to paint your car on a budget with a roller - 03/28/0805:34 AM
Quote: looking good!
what paint are you using? and is that all polished up or is it the rain making it look soo shiney!
I'm using Brightside black. I haven't polished anything as yet, I'm going to let the paint cure properly for a month before i do that.
Re: New Paint job on a budget thread. - 03/28/0812:04 PM
Dude, I was just checking out your website... That's a rear-drive with a 3.3 Buick! That bulletproof engine was only offered in '89-'93 front-drive Cutlass Ciera and Buick Century in the US. I love Australian cars. If they make 3.8-powered rear-drive cars, I'm coming down there... I'll be the guy at the airport with an Eaton supercharger under my arm!!
Posted By: Anonymous
Re: New how to paint your car on a budget with a roller - 03/29/0802:51 AM
Quote:
maybe it was just a dodgey can of brightside?
That has to be it. At 10% to straight out of the can it should have tons of gloss. See the Black Holden wagon for brightside shine reference.
Hang in there, you have the smooth application down, just need the right product.
Re: New how to paint your car on a budget with a roller - 03/29/0804:33 AM
Quote:
thats the worrying thing the first few coats was 10% spirits but as i got confident the last 8 coats or so were direct from the can. i've been putting on super thin coats
maybe it was just a dodgey can of brightside?
That is a good possibility.... For example, marine paint like Brightside (or even Tremclad or Rustoleum ) doesn't always tend to fly off the shelves of retailers like fresh hamburger.
Depending on where you bought the paint, it may have been six weeks old from the manufacturer or one year old. Some colors sell more then others... and are restocked more frequently.
Some stores move a lot of product... and some stores might only sell a can or two in a month.
I even recall hearing about a shipment of paint that had been exposed to extreme cold during its shipping from the factory to the warehouse and later to the stores. It turned out to be a rather troublesome lot of paint for the folks who bought them...
The older the product, the more likely that settling may have occurred - where the color pigment sinks to the bottom of the can.
In a case of extreme aging, there could even be a separation of the various chemicals used in the paint.
In most cases this can be sold by doing a really good and thorough mixing or stirring of the can.
BUT... heavily whipping up the can to mix the paint may introduce bubbles into the paint. So you may have to let the can sit for a day or two before using it - to let the bubbles float to the top of the can.
I wasn't too confident when I stirred my paint with one of those 'official' wooden stir sticks. So I took a coat hanger and made a shape out of some of it that looked like a long T shape. I attached it to my power drill and lazily used it to stir up the paint. The neat thing about the T is that when you stick it into the can the top of the T is what is spinning around at the bottom of the can. So that pretty well ensures that you have stirred up any of the pigment that had sank to the bottom and clumped there.
One thing that I will say in favor of Brightside and that folks may not have noticed is that on the bottom of the can they mark the LOT number which that can of paint was produced.
NOW... the lot number tells you two important things
a ) the higher the number - the more recent the can of paint was manufactured ( hence it is fresher from the factory ).
but even more important...
b ) you want to get your cans of paint all with the same lot number. Like any product being produced, there are variances in color between one lot and another. The ladies who knit and buy wool know this already. When they are buying wool to make a sweater or an afghan blanket, they always try their best to make sure all the wool they buy came from the same lot. This is the only way to ensure that they all have the same color.
Ditto for paint. If you look under the cans on the shelf at a retailer and there are
a ) 4 cans with a lot number of 441 b ) 4 cans with a lot number of 522 and c ) 1 can with a lot number of 599
And you need four cans for your project, then you would take the four cans from lot 522. The 441 would have been the older product, so the 522 would be the preferred one to grab since it is more recently produced. And you would leave the one can of lot 599 because you cannot be certain that its color will be an exact match - even though it is a fresher can of paint then the 522 .
I don't recall whether the Tremclad or Rustoleum make use of lot numbers on their cans...
.
Posted By: Anonymous
Re: New Paint job on a budget thread. - 03/29/0810:48 AM
Quote: Dude, I was just checking out your website... That's a rear-drive with a 3.3 Buick! That bulletproof engine was only offered in '89-'93 front-drive Cutlass Ciera and Buick Century in the US. I love Australian cars. If they make 3.8-powered rear-drive cars, I'm coming down there... I'll be the guy at the airport with an Eaton supercharger under my arm!!
Hey mate, It's actually the 3.8 litre engine, and yes they are bulletproof! Great things the Buick engine.
I'll pick you up from the airport, lol
Posted By: Anonymous
Re: New how to paint your car on a budget with a roller - 03/29/0811:49 PM
Quote:
Quote:
thats the worrying thing the first few coats was 10% spirits but as i got confident the last 8 coats or so were direct from the can. i've been putting on super thin coats
maybe it was just a dodgey can of brightside?
That is a good possibility.... For example, marine paint like Brightside (or even Tremclad or Rustoleum ) doesn't always tend to fly off the shelves of retailers like fresh hamburger.
Depending on where you bought the paint, it may have been six weeks old from the manufacturer or one year old. Some colors sell more then others... and are restocked more frequently.
Some stores move a lot of product... and some stores might only sell a can or two in a month.
I even recall hearing about a shipment of paint that had been exposed to extreme cold during its shipping from the factory to the warehouse and later to the stores. It turned out to be a rather troublesome lot of paint for the folks who bought them...
The older the product, the more likely that settling may have occurred - where the color pigment sinks to the bottom of the can.
In a case of extreme aging, there could even be a separation of the various chemicals used in the paint.
In most cases this can be sold by doing a really good and thorough mixing or stirring of the can.
BUT... heavily whipping up the can to mix the paint may introduce bubbles into the paint. So you may have to let the can sit for a day or two before using it - to let the bubbles float to the top of the can.
I wasn't too confident when I stirred my paint with one of those 'official' wooden stir sticks. So I took a coat hanger and made a shape out of some of it that looked like a long T shape. I attached it to my power drill and lazily used it to stir up the paint. The neat thing about the T is that when you stick it into the can the top of the T is what is spinning around at the bottom of the can. So that pretty well ensures that you have stirred up any of the pigment that had sank to the bottom and clumped there.
One thing that I will say in favor of Brightside and that folks may not have noticed is that on the bottom of the can they mark the LOT number which that can of paint was produced.
NOW... the lot number tells you two important things
a ) the higher the number - the more recent the can of paint was manufactured ( hence it is fresher from the factory ).
but even more important...
b ) you want to get your cans of paint all with the same lot number. Like any product being produced, there are variances in color between one lot and another. The ladies who knit and buy wool know this already. When they are buying wool to make a sweater or an afghan blanket, they always try their best to make sure all the wool they buy came from the same lot. This is the only way to ensure that they all have the same color.
Ditto for paint. If you look under the cans on the shelf at a retailer and there are
a ) 4 cans with a lot number of 441 b ) 4 cans with a lot number of 522 and c ) 1 can with a lot number of 599
And you need four cans for your project, then you would take the four cans from lot 522. The 441 would have been the older product, so the 522 would be the preferred one to grab since it is more recently produced. And you would leave the one can of lot 599 because you cannot be certain that its color will be an exact match - even though it is a fresher can of paint then the 522 .
I don't recall whether the Tremclad or Rustoleum make use of lot numbers on their cans...
.
WOW! thanks for all that info,
ill make sure to give it a really good stir, im starting the prepwork tomorrow, bondoing some parking dings out,
i suppose the same would apply for the prekote primer im going to apply.
i havent attempted to lay this down before - has anyone elce tryed it? does it lay the same as the brightside?
Posted By: Anonymous
Re: New how to paint your car on a budget with a roller - 03/30/0812:11 AM
why are you putting primer on ?? with this stuff it is not necessary as far as i know .
Posted By: Anonymous
Re: New how to paint your car on a budget with a roller - 03/30/0801:04 AM
Quote: why are you putting primer on ?? with this stuff it is not necessary as far as i know .
your right its not necessary at all
but i have a couple of reasons for wanting to do it
- its going to take less coats to go from red paint to white paint if i use a primer.
- im doing a lot of bondo work and it will suck in the paint like god knows what.
Posted By: Anonymous
Re: New how to paint your car on a budget with a roller - 03/30/0805:13 PM
fair enough
are you using a flexi block for wet sanding non flat surfaces evenly?? if so can you get a picture of the block you are using ?? i seem to be sanding the edges badly where i can see the old white coat
Posted By: Anonymous
Re: New how to paint your car on a budget with a roller - 03/30/0808:49 PM
im using two different blocks for sanding.
both available from wilkinsons. but on the edges i try to do it without - i allways find myself sanding too much paint off the edge!
ill try and get some pics up
i have one thick plastic one that ive used for prepwork and just a cork sanding block for wetsanding the paint.
Posted By: Anonymous
Re: New how to paint your car on a budget with a roller - 03/30/0809:42 PM
Quote:
Quote:
thats the worrying thing the first few coats was 10% spirits but as i got confident the last 8 coats or so were direct from the can. i've been putting on super thin coats
maybe it was just a dodgey can of brightside?
That is a good possibility.... For example, marine paint like Brightside (or even Tremclad or Rustoleum ) doesn't always tend to fly off the shelves of retailers like fresh hamburger.
Depending on where you bought the paint, it may have been six weeks old from the manufacturer or one year old. Some colors sell more then others... and are restocked more frequently.
Some stores move a lot of product... and some stores might only sell a can or two in a month.
I even recall hearing about a shipment of paint that had been exposed to extreme cold during its shipping from the factory to the warehouse and later to the stores. It turned out to be a rather troublesome lot of paint for the folks who bought them...
The older the product, the more likely that settling may have occurred - where the color pigment sinks to the bottom of the can.
In a case of extreme aging, there could even be a separation of the various chemicals used in the paint.
In most cases this can be sold by doing a really good and thorough mixing or stirring of the can.
BUT... heavily whipping up the can to mix the paint may introduce bubbles into the paint. So you may have to let the can sit for a day or two before using it - to let the bubbles float to the top of the can.
I wasn't too confident when I stirred my paint with one of those 'official' wooden stir sticks. So I took a coat hanger and made a shape out of some of it that looked like a long T shape. I attached it to my power drill and lazily used it to stir up the paint. The neat thing about the T is that when you stick it into the can the top of the T is what is spinning around at the bottom of the can. So that pretty well ensures that you have stirred up any of the pigment that had sank to the bottom and clumped there.
One thing that I will say in favor of Brightside and that folks may not have noticed is that on the bottom of the can they mark the LOT number which that can of paint was produced.
NOW... the lot number tells you two important things
a ) the higher the number - the more recent the can of paint was manufactured ( hence it is fresher from the factory ).
but even more important...
b ) you want to get your cans of paint all with the same lot number. Like any product being produced, there are variances in color between one lot and another. The ladies who knit and buy wool know this already. When they are buying wool to make a sweater or an afghan blanket, they always try their best to make sure all the wool they buy came from the same lot. This is the only way to ensure that they all have the same color.
Ditto for paint. If you look under the cans on the shelf at a retailer and there are
a ) 4 cans with a lot number of 441 b ) 4 cans with a lot number of 522 and c ) 1 can with a lot number of 599
And you need four cans for your project, then you would take the four cans from lot 522. The 441 would have been the older product, so the 522 would be the preferred one to grab since it is more recently produced. And you would leave the one can of lot 599 because you cannot be certain that its color will be an exact match - even though it is a fresher can of paint then the 522 .
I don't recall whether the Tremclad or Rustoleum make use of lot numbers on their cans...
.
also i think you hit the nail right on the head there mate.
i used a 250ml can for my test peice - lot number 602
my cans for the actual painting are both lot number 2509
i suspect there isnt much demand for the 250ml cans of brightside in the boating world!
Posted By: Anonymous
Re: New Paint job on a budget thread. - 03/31/0803:37 AM
Complete pic 1
Posted By: Anonymous
Re: New Paint job on a budget thread. - 03/31/0803:38 AM
Complete pic 2
Posted By: Anonymous
Re: New Paint job on a budget thread. - 03/31/0803:38 AM
Complete pic 3
Posted By: Anonymous
Re: New Paint job on a budget thread. - 03/31/0803:40 AM
Complete pic 4
I have to say I'm damn happy with how it has turned out. It's good to see heap of other people having success with this method aswell. Cheers to you all!
Re: New Paint job on a budget thread. - 03/31/0805:37 AM
Quote: Complete pic 4
I have to say I'm damn happy with how it has turned out. It's good to see heap of other people having success with this method aswell. Cheers to you all!
That is a kewl wagon... and it looks great in black ! If I saw that car going down the road here.. there is NO WAY I would have ever guessed it was an 89... That car is blessed with one of those bodies that has the style that looks as sexy as any of the other newer import wagons on the road today. Kudos to you !
.
Posted By: Anonymous
Re: New Paint job on a budget thread. - 03/31/0808:04 AM
Im with Marq on this one. I also would of never guessed that your ride is a 89, even though im always clicking the link in your sig!
Good job! I hope mine comes out like yours!
Posted By: Anonymous
Re: New Paint job on a budget thread. - 03/31/0810:10 AM
Quote: Complete pic 4
I have to say I'm damn happy with how it has turned out. It's good to see heap of other people having success with this method aswell. Cheers to you all!
woww ,very impressive finish you got there few questions if i may ;
have you taken out the front and rear windscreens out for painting to avoid paint line on the rubbers ?
looking at the pics on your blog,i understand you have not done any wet sanding between coats ?? was the brightside paint able to lay down that good ?? if i am right ,how much of thinners did you use to thin down the paint ??
Re: New how to paint your car on a budget with a roller - 03/31/0806:59 PM
Quote: why are you putting primer on ?? with this stuff it is not necessary as far as i know .
Look at the differance between the door coverage and the rest after first coat. Door was primed..
Posted By: Anonymous
Re: New Paint job on a budget thread. - 03/31/0807:19 PM
those finished pics are absolutly stunning!!
congrats man, all that hard work and effort has really payed off!
heres a beer from me!
here is some progress pics of my bodywork today.
the palm tree had to be moved becuase it was outside the door of the carport and the car wouldent go in that easy!
old place of the palm tree,
new relocated palm tree!
here are the pics of the prep work
the last picture of her ever to be seen with a red shine!
and how she sits now drying for tomorrow.
the fillering i have done has acutally come out much better than expected. i doubt there will be any signs at all when its painted.
one problem ive had is the hatch for the boot. the rust was so much that im going to get a new one and paint it seperatly after the paintjob. it would of taken a whole day of work to get that one right. and i just cba!
bright and early tomorrow the primering starts!
am i right in thinking that the prekote will only need 8ish hours to be sandable? thought i read somewhere in the 2nd thread that it takes less time to dry!
Posted By: Anonymous
Re: New Paint job on a budget thread. - 03/31/0809:33 PM
Quote: woww ,very impressive finish you got there few questions if i may ;
have you taken out the front and rear windscreens out for painting to avoid paint line on the rubbers ?
looking at the pics on your blog,i understand you have not done any wet sanding between coats ?? was the brightside paint able to lay down that good ?? if i am right ,how much of thinners did you use to thin down the paint ??
Thanks everyone for the comments.
I better answer these to clear things up.
I didn't take out the windscreen or rear window, instead I used a thick cord and placed it around underneith the window rubber, therefore when I painted, the paint was able to ge underneith the rubber.
I did wetsand between ever single coat, I didn't put any pics up of this as I felt they were pretty boring shots.
Brightside was great paint to work with, I still have almost a litre of paint left (used 3 litres on my car) so I have plenty to do any touch ups.
Here is my paint mixture I used: 375-400ml paint 100ml penetrol 75ml mineral spirits (mineral turps here in Australia)
Re: New Paint job on a budget thread. - 03/31/0811:45 PM
Your project is well under way, Looking at the pictures I'd say sanding on one of those small cars is much better than a truck, I can't roll the truck on its side for easy access to the lower quarters.. Just kidding of course...
Posted By: Anonymous
Re: New Paint job on a budget thread. - 04/01/0812:53 AM
Quote: Your project is well under way, Looking at the pictures I'd say sanding on one of those small cars is much better than a truck, I can't roll the truck on its side for easy access to the lower quarters.. Just kidding of course...
lol, well the chassis code for them is EG so they often get refered to as the EGg!
Re: New Paint job on a budget thread. - 04/01/0801:17 AM
BTW England is one of my favorite places to visit, I love English beer especially the bitter and porter
Posted By: Anonymous
Re: New Paint job on a budget thread. - 04/01/0811:53 AM
Has anyone seen or used the new EASTWOOD automotive paints? its Single stage urethane enamel.I was thinking of useing the Cruise Night Blue Metallic. looks like B5 for $69.99 Gal + activator 32oz$19.99 Mix 3:1 . http://www.eastwoodco.com/shopping/produ...ProductID=21248 ?? And can I use Lacquer Primer under the urethane paint or do i need to use Urethane Primer?
Re: New Paint job on a budget thread. - 04/01/0801:35 PM
Don't know about Eastwoods paint. But I used lacquer primer under the BS paint no problems. Are you going to try and roll the Eastwood paint?
Posted By: Anonymous
Re: New Paint job on a budget thread. - 04/01/0805:43 PM
I am planning on using the roller metthod but want to use the flat black tremclad. Understanding that the final polishing stage will be eliminated, I assume the wet sanding stages will still help give a nice smooth finished job? Any tips or advice with a flat paint?
Thanks in advance.
Posted By: Anonymous
Re: New Paint job on a budget thread. - 04/01/0805:55 PM
Right update of todays work.
masked everything off and all that goodness. then when i had the car in the carport to start the wiping down. i went to turn the key for the radio on and slipped turning it too far. it was in gear :cry: quite a big dent has formed on the drivers side wing. didnt have tim to fix it as im on a limited time scale here so ill get another wing and paint it off the car at a later date.
all the primer went on really well, didnt know what to expect as id never practiced with the primer but its not that much different. waiting overnight beforet the wet sanding starts!
Re: New Paint job on a budget thread. - 04/01/0810:08 PM
Quote: quite a big dent has formed on the drivers side wing
And a wing is????
Primer looks great, I used Rustoleums rusty metal primer in the bed of my truck straight out of the can no thinning it went on great. If needed yiu can use a foam brush for the hard to roll area's Keep the progress pic's coming
Posted By: Anonymous
Re: New Paint job on a budget thread. - 04/01/0810:38 PM
not too sure what you guys call it over there, a fender maybe??!!
Re: New Paint job on a budget thread. - 04/02/0803:18 AM
Quote: not too sure what you guys call it over there, a fender maybe??!!
the panel above the front wheels!
Fender is correct, I did know what a bonnet and boot were though...
Posted By: Anonymous
Re: New Paint job on a budget thread. - 04/02/0811:35 AM
Thanks for the input! no iam not going the rollon looks like to much exta work.Iam going to shoot it on with a HVLP gun I have everthing lacquer primer / air /hvlp gun \etc. But need the paint and the price is right in my range color looks close to B5! Next should i clear coat it or not required and how much paint 1 gallon? Need to do door jams/trunk & hood jams/backside of hood&trunk/& rest of car & maybe bumpers F&R. `70 `Cuda mix 3:1
Thanks, JZ`Cuda
Posted By: Anonymous
Re: New Paint job on a budget thread. - 04/02/0804:22 PM
update day 3!
did a quick wetsand today of the first primer, just mainly to get rid of the grit/dust etc that have got into the paint while drying. also put my final coat of primer on. i put a thicker layer on this time and im going to give it a mental wetsanding session tomorrow to remove orange peel and get it super smooth for the first coat of paint!
one lesson ive learnt is poundland tape is [Edited by Moparts - Keep it clean], im going to have to paint alot of the black plastic black again. not too bothered tho as i was planning on doing this anyway!
to the pics . . .
Posted By: Anonymous
Re: New Paint job on a budget thread. - 04/02/0807:30 PM
Quote:
Quote: woww ,very impressive finish you got there few questions if i may ;
have you taken out the front and rear windscreens out for painting to avoid paint line on the rubbers ?
looking at the pics on your blog,i understand you have not done any wet sanding between coats ?? was the brightside paint able to lay down that good ?? if i am right ,how much of thinners did you use to thin down the paint ??
Thanks everyone for the comments.
I better answer these to clear things up.
I didn't take out the windscreen or rear window, instead I used a thick cord and placed it around underneith the window rubber, therefore when I painted, the paint was able to ge underneith the rubber.
I did wetsand between ever single coat, I didn't put any pics up of this as I felt they were pretty boring shots.
Brightside was great paint to work with, I still have almost a litre of paint left (used 3 litres on my car) so I have plenty to do any touch ups.
Here is my paint mixture I used: 375-400ml paint 100ml penetrol 75ml mineral spirits (mineral turps here in Australia)
Cheers all
i like the cord trick ,i will deffo use it
i think i will move onto bright side myself as well even though my test piece is not looking bad with a small can of rustoleum i used so far .
i have been reading about the penetrol stuff through out these threads . can you tell me if it makes the paint self level better and reduce orange peel ??
also could you tell me how you prepped the body before rolling the first coat ?? what grit papers did you use ,wet or dry etc ??
i would be well happy if my car looked like yours in the end
Posted By: Anonymous
Re: New Paint job on a budget thread. - 04/03/0805:18 AM
Has anyone ever tried to paint a school bus with this method? I bought a bus Im converting and it still has the school bus yellow on it, I plan on changing the color to a dark blue or maybe black. Just curious if anyone has tried this on a large scale yet?
Posted By: Anonymous
Re: New Paint job on a budget thread. - 04/03/0803:00 PM
just wondered if anyone knows how effective it is just doing a very light westsand inbetween coats and on the final coat doing quite a harsh wetsand to remove the orange peel.
its just ive got a limited amount of time for laying paint down (renting a garage to do it in) but i can do wetsanding as much as i need to on my drive.
Re: New Paint job on a budget thread. - 04/03/0803:45 PM
Quote: Has anyone ever tried to paint a school bus with this method? I bought a bus Im converting and it still has the school bus yellow on it, I plan on changing the color to a dark blue or maybe black. Just curious if anyone has tried this on a large scale yet?
Hmmmm.... I guess it is doable... but it would really take a fair bit of time to get completed to a level where you would be proud and the bus wouldn't look like one of those 1960's hippy buses that were obviously painted with rollers and house paint. Even the hippy flower stick ons could not camoflauge it...
BUT big projects are not beyond the scope of the 4" foam roller and the Brightside paint ( and probably the Rustoleum or Tremclad paint ). You have to remember that the Brightside paint was designed for guy who 'roll their boat' - and some of these boats have surface areas larger then a bus.
NOW... if I was going to take on a bus... I would probably spend a few bucks and buy one of those Wagner electric spray guns. Not the wide spray cheapo ones they sell for blasting fences.. but instead one that has a higher pressure rate at the nozzle and a more controlled spray nozzle. It may take a little more time to properly mask the areas on the bus that you don't want to spray... BUT spraying a bus would probably save you an equivalent amount of time.
AND if I was painting a yellow bus... and changing it over to blue etc... I would probably begin by using a large foam roller ( and an assortment of smaller foam brushes for the smaller niches that might be difficult for the foam roller to cover ). Get a solid primer coat down on the entire bus so that you have a solid blue/gray primer on the entire surface. Properly wetsand it all down after to get its surface well smoothed out. Then move on to your spraying of the blue paint. This will cut down on the number of coats of paint that you will have to spray to get 100% color coverage over to the color of your choice. Overall, the spraying may also cut down on the amount of time you will need to spend wet sanding. If you are lucky you will be able to lay down sufficiently smooth coats that won't need wetsanding. And I would guess spraying would make for a lot easier task when trying to lay down multiple coats of paint on that huge and difficult to reach surface known as 'the roof' ( which is about the size of a small football field hehehhhehe ).
Dunno... that's my first thoughts on painting a bus
Re: New Paint job on a budget thread. - 04/03/0803:55 PM
Quote: just wondered if anyone knows how effective it is just doing a very light westsand inbetween coats and on the final coat doing quite a harsh wetsand to remove the orange peel.
its just ive got a limited amount of time for laying paint down (renting a garage to do it in) but i can do wetsanding as much as i need to on my drive.
It's doable... BUT the end results will not be as good as if you had tackled the orange peel, when and as it appears. The secret to a highly glossy and professional looking end product is to be laying each coat of paint down on as smooth a surface as you can provide.
.
Posted By: Anonymous
Re: New Paint job on a budget thread. - 04/03/0806:32 PM
right then, ill get up super early and sand off the peel then!
here are the pics of my first coat.
primered sitting in the sun . . .
first coat on (a little to thick)
i think the good mixing i gave the paint has really sorted the shine out! much more allready than my test peice had!
tomorrow is a harsh sand to remove the peel and coat 2 (a bit thinner this time!)
wish me luck
Posted By: Anonymous
Re: New Paint job on a budget thread. - 04/04/0805:38 PM
here is a pic of todays coat.
i gave it a good wetsand before the next layer but the peel seemed to of come back. i only have one day of painting left so im going to attempt to give it a light sand tomorrow to remove the dust and get two thinnish coats on tomorrow giving about 12hours inbetweem.
then im relying on there being enough paint on the car for me to sand it all level in a week or so! if not ill have to lay another coat on - just not going to be easy!
im hoping that the pc 7424 copy im getting and poorboys polish ect will make up for the shine lost through the orange peel removal at the latest stage.
any opinions would be great.
thanks scott
Posted By: Anonymous
Re: New Paint job on a budget thread. - 04/04/0810:30 PM
from the description above it sounds great and comes in numerous colors. Although, the mfr doesn't supply a chip card. the price also seems pretty good. Notice they also have a hardener for this paint. Does this sound like a good idea?
thanks for any ideas
Posted By: Anonymous
Flat black rolling - 04/05/0811:32 PM
I've started rolling flat black onto my car, is there a certain way to roll it so you don't see the outlines of the roller after it dries? Or is that part of the process?
Quote: I've started rolling flat black onto my car, is there a certain way to roll it so you don't see the outlines of the roller after it dries? Or is that part of the process?
Practice practice practice, I found after I'd rolled a couple of coats on I got much better at leaving those lines out, I overlapped a tad also. How many coats so far?
Posted By: Anonymous
Re: Flat black rolling - 04/06/0812:38 AM
Quote:
Quote: I've started rolling flat black onto my car, is there a certain way to roll it so you don't see the outlines of the roller after it dries? Or is that part of the process?
Practice practice practice, I found after I'd rolled a couple of coats on I got much better at leaving those lines out, I overlapped a tad also. How many coats so far?
thats what I thought, pratice and more pratice. So far only around 3 for my trunck, 4 for my roof, and 1 big thick layer on my hood, I mean thick, I've been using a 220 grit paper with water to take it down again and smooth it out. My hood was my first go at it and I put too thick of a layer on it, I thought you were suppose to make it so it doesn't show the bottom paint. My friend said it might show though up to 4-6 coats later.
...thats what I thought, pratice and more pratice. So far only around 3 for my trunck, 4 for my roof, and 1 big thick layer on my hood, I mean thick, I've been using a 220 grit paper with water to take it down again and smooth it out. My hood was my first go at it and I put too thick of a layer on it, I thought you were suppose to make it so it doesn't show the bottom paint. My friend said it might show though up to 4-6 coats later.
The problem with the world is that when we are painting things... like walls, bikes, tractors and patio furniture we expect to nail it in one or two coats. And that is kewl for those types of items.
But to do a car paint job with the roller, you need to lay down coats of paint that are thinned down with mineral spirits in order to achieve self-leveling. For the paint rolling job... self leveling is our first priority and the color coverage is simply something that we acquire as we lay on our layers of leveled paint.
And that means that with the roller jobs YOU MUST EXPECT to take four or five coats of thinned paint to achieve color coverage.
The paint coverage comes from the amount of pigment in the paint you are rolling on. So simply imagine it this way... IF each coat of thinned paint is only equal to 25% pigment coverage... then the first coat that is laid down with be almost see through ( since there is only 25% of the color pigment in what has been laid down.
When you add your second coat of paint... you now have gotten 50% pigment coverage ( 25% from the first coat and 25% from the second coat ). You will still see through the paint to the original paint that you are painting over BUT it will be slightly tinted more towards the color you are trying to achieve.
When you add your third coat of paint... you now have gotten to 75% pigment coverage... fourth coat... gets you to about 100% pigment coverage... fifth coat gets you to about 125% pigment coverage etc.
But you also have been doing some wet sanding between every second coat and that DEDUCTS a percentage of the pigment coverage up to that point.
So the bottom line is that you are slowly building up your layers of percentage coverage to finally reach a true 100% or higher coverage.
NOW... with regards to the flat paint and lines. It probably is the result of the paint mixture being slightly too thick. Thin the paint mixture down a bit so that you are not getting so much pigment color coverage with each applied coating.
As well... when laying on a coat... feather the paint over the demarcation line of where your rolling is at. Basically what I am saying is that if your paint is sufficiently thinned, you should be able to overlap the last area you just had laid down. I had to do the same thing with the high gloss paint... feathering each section with the previous just rolled area.
NOW the other thing that I found important in reducing lines is how I loaded and unloaded the foam roller before applying the paint. What I tended to do is this : I would roll the roller around in the paint tray to load up the paint on to the roller. THEN I would slighly unload some of the paint off the roller in the tray. THEN I would tilt my roller and apply a little extra pressure while rolling the roller in the tray to more significantly reduce the amount of paint on the end or tip of the foam roller. THEN I would tip the foam roller the other way to reduce the amount of paint on the opposite end of the foam roller.
00000000000000 if this is the foam roller
XXX00000000XXX I would have applied more pressure while the roller was in the tray to the end tips.
The whole point to this being to reduce any excess paint at the ends of the roller and leave the greater concentration of paint in the middle of the foam roller.
SO... when I actually put the roller on the car and start spreading the fresh paint, it is the center of the roller that is primarily spreading out the paint. And as you roll it back and forth on the panels surface, the paint from the center of the roller will spread out to the tips to give you coverage.
This quirky method of loading up your roller and then unloading the tips will greatly reduce the chances of a concentration of paint at the end of the tips building up and producing those lines.
WHAT you see in your picture of your roof.. are lines that were created when the paint at the end of the tips was laid down in a higher concentration then at the center of the roller. AND when you laid down the next section of paint, the concentration of paint at where you overlapped, basically double or tripled the concentration or percentage of color pigment where the overlap occurred.
As long as the paint self leveled out, it would eventually disappear and not be as noticable when all areas of the roof hit 100% color pigment coverage. You can have areas of 100% color pigment coverage and areas with a higher color pigment coverage and yet the EYE will only visually see 100%. BUT if the actually thickness of the paint at those overlap areas is thicker then you would still see the lines - NOT because of the amount of color pigment that is laying there, but because of the way light will defract differently against the two different thicknesses of paint on that surface. A light wet sanding might be in order to cut back any 'extra thickness' that has been built up so far and to give you one level starting point from which to continue with your build up of coats of paint.
Hope this info helps.
Marq
Posted By: Anonymous
Re: Flat black rolling - 04/06/0809:23 AM
excellent info there marq!
can anyone help me decide about these polishers? not too sure if they are orbtial and look upto the job!
I did not see on the UK e-Bay our personal favorite random orbital sander... the Porter Cable 7424... I did find an example of one up for auction on the US e-Bay...
The Porter Cable 7424 will outlast most of your cars and be with you well into the future. I found that using this puppy made the polishing and waxing so easy that you actually looked forward to polishing and buffing your car. You will actually be looking for excuses to fire it up and give the car a spread of wax and buffing it.
It cost a few bucks more up front... BUT because it will outlast most other 'random orbital' polishers... you actually end up saving money and have a 'heritage' tool ( meaning that it will last so long that you will probably 'hand it down' to your kids when they lock you up in the old age home ).
I just don't know if they sell the Porter Cable 7424 in the UK... and so that is why I also spotted that other Porter Cable unit that was listed on the UK e-Bay...
I did note from the first Porter Cable polisher that the guy mentioned :
Quote:
Please note: you will need to connect the Porter Cable to a 110 volt transformer before you can use it on a 240v mains supply.
So I am guessing that the Porter Cables that do make it to the UK are all the US 110 volt type units... and that you need to have a 110 volt transformer in order to operate them on the UK 240 volt power supply.
Possibly there are some actually 7424 Porter Cables ( or their PC equivalent for the UK market ) that are specifically built to operate directly on the 240volt power grid. This is something that you will be able to figure out easier than I since you are in the UK.
.
Posted By: Anonymous
choice of paint - 04/06/0809:09 PM
before i order the paint can someone please confirm brightside is the ultimate choice for the best shine ??
i done my tests with combi color and the whole self flatting process seems to be working fine with minimal peel ,but of course if i can get a better glos with brightside i would like to buy that for doing the whole car ?
Posted By: Anonymous
Re: New Paint job on a budget thread. - 04/06/0810:47 PM
Hi Guys !
I see this thread keeps on going !
all good info ! for the newbies out there, keep it going, don't give up !
As I posted before I tried the rolling method and I liked it, but I have limited time and a bunch of cars to paint, so I decided to paint my cars using 2-3 Coats of rustoleum and then 2-3 coats of Brightside with a 10 dll. spray gun from Harbor Freight.
Here's an update on my cars:
The Mustang is almost done, It should've been done by now but limited time made me stop with only a few trim pieces to assemble to finish the exterior, the interior is another story. remember this car has EVERYTHING from a 2003 Mustang GT, EVERYTHING: Before: (4cyl. engine still there)
and then I decided to paint my 99 Subaru Legacy GT also, the Clearcoat was peeling badly, for this car I decided to paint it Flat Black after seeing how the flat black looked on the trim in the Mustang, and needing no wetsanding, just shoot and let it dry. Here's before: and after: I even painted the rims !
Next is the Suburban in the background, I've decided to go also with Flat Black.
Quote: before i order the paint can someone please confirm brightside is the ultimate choice for the best shine ??
i done my tests with combi color and the whole self flatting process seems to be working fine with minimal peel ,but of course if i can get a better glos with brightside i would like to buy that for doing the whole car ?
Rustoleum & Tremclad are enamel paint... Brightside is a polyurathane paint...
Polyurathane is basically a plastic and has a naturally higher level of gloss built in to it...
BUT most importantly... the paint can only get you so far with a high shine and gloss. The real secret in the end rest with the final wet sanding, polishing, waxing and buffing.
In theory... in the hands of a good 'detail' man, you could paint your car with HOUSEPAINT and with the right wet sanding ( color sanding some folks call it ), polishing and final waxing and buffing you can make even it shine like a jewel. That is why there have been numerous discussions in this thread about the products to use when going for the final polishing stage etc.
My personal feeling is that the polyurathane wins when it comes to high gloss and shine. I think it takes less wet sanding and polishing to maximize its shine.
BUT above all, the key consideration with a polyurathane paint job is that in theory it is the more 'premium' paint job for the long term.
IF you call up MAACO... their cheapest ( errmm.. lowest cost ) paint jobs are the enamel ones. BUT if you check out their 'top of the line' paint job, you will find out that it is a polyurathane. So that should give a bit of a hint that a one stage polyurathane must have some features in it that are a few notches above an enamel paint job.
But getting back to maximum shine... just remember that it is the finishing work that will be delivering the maximum shine and gloss that can be achieved... ( and this holds true even if you had sitting in front of you a 2009 Corvette or a new Dodge Cuda with a factory paint job ). Even a factory paint job can be cranked up to a shiner and glossier level in the hands of a detailer ).
Posted By: Anonymous
Re: New Paint job on a budget thread Part III - 04/07/0802:28 AM
My name is Joe and i have been reading this thread for the last month or so. It just seems great! I have been thinking about painting my car for quite a while and found this thread about a month ago. I have been reading and getting real excited about trying out the process for a while. I just started with my first coat today! i really need some practice. From what i have read i found the best results seem to come from really thin coats. So this is what i did. I think my paint was too thin. I went with a 50/50 mix and it ran everywhere. No big deal though, i am still in th practicing stage so i am experimenting right now. I think things will turn out well. I will update with pictures every so often. Im sure i will have some questions as i go too so i figured id start posting now with my intro.
Here is my car as is now:
I know the paint doesn't look bad but it had just been washed in the pic and looks much better then usual. But i am using Rustoleum gloss white and i may add a flat black stripe around the bottom when i am done. Hope all goes well. I love the idea and process so far. I am 19 years old and do not have a bit of painting experience in my life. So if i can do this then anyone can. Im even having my little brother help as i go and he is 15
Re: New Paint job on a budget thread Part III - 04/07/0804:13 AM
Quote:
I just started with my first coat today! i really need some practice. From what i have read i found the best results seem to come from really thin coats. So this is what i did. I think my paint was too thin. I went with a 50/50 mix and it ran everywhere. No big deal though, i am still in th practicing stage so i am experimenting right now.
If you are getting a lot of paint running... then it simply may be that you are loading tooooo much of the paint mixture on to your roller. Use that ramp thing in the paint tray to squeegy out most of the paint that the roller has loaded up. It's better to starve the roller of paint then to overload it and have runs.
Instead of thinking of this process as 'painting'... instead think of it as simply uniformly wetting the panels.
Painting tends to imply that you will see coloring results... whereas if you are simply trying to evenly wet the surface with just a glistening of the paint/spirit mixture, you will get better results.
Keep chanting this little mantra to yourself as you go along.. :
- Less is best... ( paint on the roller )
Pretend that your paint/spirit mixture is costing you $1000 AN OUNCE. You know how stingy you would be applying it if it was costing you that much.
A cool game to play with yourself is to see how little paint you can actually use each time to put a uniform wetting on the whole car. Let's say the first coat took about 1/2 of a can... the next coat try to use only 7/16ths of a can... the next coat try to cut it back to just 3/8ths of a can. You may not be able to get it down that low... but if you are trying your best to be stingy with your paint... then you will be able to achieve the less is best mantra.
The key to remember is that by the time you have laid down your 8th or 9th super thin layer you should AT THAT TIME have full color coverage and no longer be able to see the original color that you first began painting on.
Good luck and get miserly with your paint on the roller !
.
Posted By: Anonymous
Re: choice of paint - 04/07/0810:13 AM
Quote:
Rustoleum & Tremclad are enamel paint... Brightside is a polyurathane paint...
Polyurathane is basically a plastic and has a naturally higher level of gloss built in to it...
BUT most importantly... the paint can only get you so far with a high shine and gloss. The real secret in the end rest with the final wet sanding, polishing, waxing and buffing.
In theory... in the hands of a good 'detail' man, you could paint your car with HOUSEPAINT and with the right wet sanding ( color sanding some folks call it ), polishing and final waxing and buffing you can make even it shine like a jewel. That is why there have been numerous discussions in this thread about the products to use when going for the final polishing stage etc.
My personal feeling is that the polyurathane wins when it comes to high gloss and shine. I think it takes less wet sanding and polishing to maximize its shine.
BUT above all, the key consideration with a polyurathane paint job is that in theory it is the more 'premium' paint job for the long term.
IF you call up MAACO... their cheapest ( errmm.. lowest cost ) paint jobs are the enamel ones. BUT if you check out their 'top of the line' paint job, you will find out that it is a polyurathane. So that should give a bit of a hint that a one stage polyurathane must have some features in it that are a few notches above an enamel paint job.
But getting back to maximum shine... just remember that it is the finishing work that will be delivering the maximum shine and gloss that can be achieved... ( and this holds true even if you had sitting in front of you a 2009 Corvette or a new Dodge Cuda with a factory paint job ). Even a factory paint job can be cranked up to a shiner and glossier level in the hands of a detailer ).
thanks for all that info marq i think the price difference between combi color (rustoleum ) and brightside makes more sense now . i am deffo ordering brightside today .
could you give me some ideas on what grits to use for the prep process on my car ?? as i have not got a clear coat on the original paint i dont know whether to start with a higher grit than 80 /120 like most people did here
since yous eeem to have all the answers, how do you wetsand a two tone paint job? i would like to add stripes or something on top of the base rustoleum job. should the stripes be sprayed? i am tempeted to do the stripes flat black so i don't have to wetsand.
Posted By: Anonymous
Re: New Paint job on a budget thread Part III - 04/07/0812:35 PM
from the description above it sounds great and comes in numerous colors. Although, the mfr doesn't supply a chip card. the price also seems pretty good. Notice they also have a hardener for this paint. Does this sound like a good idea?
thanks for any ideas
I can speak for the TS-4. I rolled a test panel last summer and left it facing the sun for about 10 months. I went out back last week and gave the hood a few whacks with a hammer... NOTHING! I'm convinced that this stuff will stand up to anything it meets on the road, at least as durable as a typical factory finish.
Regarding shine, I really can't say since I never followed up with final polishing. One thing's for sure, it looks just as good as it did when I left it last summer. If the TS-4 is this good, TS-100 can only be better.
could you give me some ideas on what grits to use for the prep process on my car ?? as i have not got a clear coat on the original paint i dont know whether to start with a higher grit than 80 /120 like most people did here
I am pretty sure I would stay away from an 80 grit for sure. A 120 would work out nicely and even a 180. Sometimes it depends on the sandpaper itself.
One of the sandpapers I was using was the next nearest thing to useless on the paint. It either would not sand anything off or it would clog up with whatever particles it was able to sand off.
My best luck came with one of the 3m papers that I bought at Home Depot. But before coming to that conclusion I had gone through a couple of sheets of crappier sand paper.
The key thing to think about with the sandpaper is you don't want it to be scoring up the body panel surface too much. Some of the grits can really cut quite a good scar into the original paint ( or even the later coats of paint that you apply ).
Since the paint is being put on in such thin layers, it may happen that a badly scarred surface will not find the scratches ( or the low area of the scratch filled in fully with each coat of paint.
As we had discussed previously in this thread, when you add a layer of paint to a scarred surface, equal amounts usually end up deposited in the valley of the scratch and on the peak of the scratch. So the original scratched surface ends up not really being leveled out. That is why we use the increasing grit size of the sand paper during the process to lessen and lessen the size of any scratches created by the previously used lower grit of sand paper.
So you may have to experiment with the different brands of sandpaper out there to find the one that does the best job for you, with the least scratching and clogging.
I seem to recall that my favorite 3m sand paper was an aluminized type sandpaper and there was actually a patter in the paper so that the sanded off artifacts could be channeled out of the sand paper so that it didn't clog up while sanding.
When I moved on to wet sanding, I went with the 3m wetsanding paper ( which is pretty universally available ) and is manufactured on a cloth like material that can handle repeated wettings without falling apart.
since yous eeem to have all the answers, how do you wetsand a two tone paint job? i would like to add stripes or something on top of the base rustoleum job. should the stripes be sprayed? i am tempeted to do the stripes flat black so i don't have to wetsand.
Tee hee... nope... I didn't do a two tone... so I never had to cross that bridge. BUT it has been definitely discussed earlier in this message thread by a 240Z owner that laid three stripes on the side of his car, a truck owner who two toned his pickup truck and there are a few who two toned their hoods to make their scoop lines stand out. They will probably be able to answer any specific questions...
Posted By: Anonymous
Re: choice of paint - 04/07/0806:10 PM
Hmm, I'm asking them to send me a chip card for TS-1. They didn't have one for TS-4. They've got an awful lot of colors.
I'm curious about the epoxy's gloos compared to a urethane. I previously used Brightside which had a wonderful gloss.
The TS-1 description sounds almost as though its being marketed for low cost (roller) body panel painting.
thanks
Posted By: Anonymous
Re: choice of paint - 04/07/0806:54 PM
Quote:
Quote:
could you give me some ideas on what grits to use for the prep process on my car ?? as i have not got a clear coat on the original paint i dont know whether to start with a higher grit than 80 /120 like most people did here
I am pretty sure I would stay away from an 80 grit for sure. A 120 would work out nicely and even a 180. Sometimes it depends on the sandpaper itself.
One of the sandpapers I was using was the next nearest thing to useless on the paint. It either would not sand anything off or it would clog up with whatever particles it was able to sand off.
My best luck came with one of the 3m papers that I bought at Home Depot. But before coming to that conclusion I had gone through a couple of sheets of crappier sand paper.
The key thing to think about with the sandpaper is you don't want it to be scoring up the body panel surface too much. Some of the grits can really cut quite a good scar into the original paint ( or even the later coats of paint that you apply ).
Since the paint is being put on in such thin layers, it may happen that a badly scarred surface will not find the scratches ( or the low area of the scratch filled in fully with each coat of paint.
As we had discussed previously in this thread, when you add a layer of paint to a scarred surface, equal amounts usually end up deposited in the valley of the scratch and on the peak of the scratch. So the original scratched surface ends up not really being leveled out. That is why we use the increasing grit size of the sand paper during the process to lessen and lessen the size of any scratches created by the previously used lower grit of sand paper.
So you may have to experiment with the different brands of sandpaper out there to find the one that does the best job for you, with the least scratching and clogging.
I seem to recall that my favorite 3m sand paper was an aluminized type sandpaper and there was actually a patter in the paper so that the sanded off artifacts could be channeled out of the sand paper so that it didn't clog up while sanding.
When I moved on to wet sanding, I went with the 3m wetsanding paper ( which is pretty universally available ) and is manufactured on a cloth like material that can handle repeated wettings without falling apart.
Dunno if this helps...
.
nice one marq ,i got a big roll of 120 grit aluminium oxide paper made by BLACKSPUR which should be up to the task for DRY sanding . than will hit it with 240 and 400 before i roll my first coat , am i right thinking i can do the 240 and 400 grit sandinG WET ????
as i am quite impressed with the results wilso got i will follow his recipe for mixing the paint but i cant find penetrol in u.k for some reason however i might have found a susbstitute called OWATROL , from what i read this stuff is doing exactly what penetrol is supposed to do and it says it can be used on OIL BASED paints WILL THIS DO THE JOB ?? http://www.nwepaints.co.uk/acatalog/RustTreatments.html
also managed put the final coat on my test piece done using combi color (rustoleum)and gone up to 1000g and 1500g papers over it ,very smooth but totally dull looking surface at the moment .will give it a few days to harden more and hit it with some rubbing compound .
Posted By: Anonymous
Re: jeep progress - 04/08/0805:09 PM
Hood doors with only 2 coats..
Posted By: Anonymous
Re: jeep progress - 04/08/0805:16 PM
Full pic of jeep so far.. I primed everything and but found after sanding that needed more sanding.... I figured paint would fill in more, but was wrong... Tub had 3 coats on it before I got real agressive with 320 grit and block sanded it down with paint... Now has another 2 on it... Can see just a little orange peel in places... Hope with more coats it will lesson... The Rust Sunburst Yellow has no issues showing it's gloss... Think she will look pretty sharp!!!
Posted By: Anonymous
Re: jeep progress - 04/08/0805:21 PM
Quote:
Posted By: Anonymous
Re: jeep progress - 04/08/0805:22 PM
one more
Posted By: Anonymous
Re: jeep progress - 04/09/0808:26 AM
Quote: one more
paint looks very nicely levelled on those pictures. is there any peel closer ??
what paint are you using ??
Posted By: Anonymous
Re: jeep progress - 04/09/0802:13 PM
Quote:
Quote: one more
paint looks very nicely levelled on those pictures. is there any peel closer ??
what paint are you using ??
Im not really not getting any orange peel from the Rust SUNBURST YELLOW... I do have just a little from my pre primer job.. Only in the low spots... I didnt wont to sand to far down in those areas and create a bowl like look... Im hoping with sevearl coats they will feel in.. Pic quality not to great... Teenagers friens must have sticky fingers.... My $500 sony camera and $100 chip is gone... Back to a 2 pixel crap camera.. Some have issues with bubbles... I get em also but a hair dryer works well... I just hold it in other hand and follow behind the roller.. When bubbles pop I find it does leave I high circle... Key is I just keep going over same area several times, let paint get a tad tacky... Last passes are just with the weight of the roller, very light passes.. Sometimes its even better to move to the next panel and then go back 5 minutes later and roll again real light, get the stuborn bubbles... I pass the roller over 2 inches at a time... This way no roller marks at all... Start the roller at one end and finish at or off the panel.. Comes out very even... Dont turn the roller mid pass... It takes away paint as you turn..
I think my bottle for mixing is 6ounces... I just do 2 mineral spirits and 4 paint.. I even shake the hell out of it to mix it.. Bubbles with my methods dont matter what so ever.. One thing also is Im painting in about 45-50degrees... This doesnt allow the paint to set up as quick and lets you rework and area.... When Im done I bake it with my turbo heater to about 80 in my garage.. So all you in the heat, may have the paint set up to quick to re-roll it... But think same can work if you just time it right..
Ok time to go paint...
Posted By: Anonymous
Re: jeep progress - 04/09/0808:01 PM
Has anyone tried Green? I dont have time to go though million posts
Pictures please!!! Green paint!! Thanks
Posted By: Anonymous
polishing stage - 04/09/0809:42 PM
ok here is my test piece done with combi color (RUSTOLEUM ) final coat wetsanded 1000g and 1500g than i hit it with SIMONIZ BLACK WAX/POLISH using the cheapo orbital polisher i got here and all i get is this kinda dull shine .
i worked about 5-10 minutes with the polisher by the way . now first i am thinking the polisher is not up to the task (may be i could get some decent shine after 30 minutes on 1 section ? ) secondly the polish that contains wax is no good ??
Quote: ok here is my test piece done with combi color (RUSTOLEUM ) final coat wetsanded 1000g and 1500g than i hit it with SIMONIZ BLACK WAX/POLISH using the cheapo orbital polisher i got here and all i get is this kinda dull shine .
what to do next ??
You didn't mention whether you had hit it with a rubbing compound....
The original choice by Charger was the Turtle Rubbing compound... others have focused on the Poor Boy products. I used the 3m Rubbing Compound....
When you have taken the paint to your highest grit for wetsanding, you should move next to the rubbing compound to further smooth the surface.
I can't speak to much about the Simonize product, but it is probably more of a cleaner/wax then a polish/wax. The difference being that the cleaner/wax does not have any grit to it... so it is simply cleaning surfactants off the surface and trying to lay down a wax coating. Whereas a polish/wax does have some grit to it and it is able to minutely grind some of the surface layer while laying down the coat of paint.
IF you go with the rubbing compound... that should actually be able to work you up to a dull shine all on its own.
You could then go on to just a straight carnuba wax after the compunding...
What you might want to try at this point is take your 2000 grit sandpaper, and do a very light wetsanding again. Then hit it with the rubbing compound to reach the dull shine stage. Then go for your choice of wax to lay down a protective sealant layer ( and max out the shine and gloss that you are able to achieve ).
You mention that you were using a Simonize Black type wax. IF it is one of those 'colored' waxes that have color loaded into them... I should mention that they are primarily for use on oxidized surfaces. It tries to impregnate the painted surface with the black die in the wax. It works great on a heavily oxidized surface that will suck in the black die color like a thirsty sponge. However, on a relatively sealed surface that isn't as porous as an oxidized surface, the black pigment may actually be interfering in your trying to get a maxxed out shine.
And just to round out the topic... the polisher machine... and the types of cloths or bonnets you put on the machine to spread and work the waxes or rubbing compound all have an effect on how the final product turns out.
Actually marq, i used turtle wax polishing compound, not the rubbing compound. I did the final wetsand and polish the day after the last coat, tried lots of different compounds (3M, Maguires sp?, mothers...ect...)but i found the $2 tub of polishing compound gave the best polish hands down. I used a 10" 3800rpm random orbit polisher with a terry cloth bonnet, and lots of water (very handy to use a spray bottle). Now I'm not a expert polisher, but i can say it was a total no-brainier to polish with the turtle wax polishing compound, there was no way I'd ever burn thru the paint, this stuff must be 2000+ grit compound... I've used it to polish everything, even my newer cars (bc/cc) that had perty bad scratches, the thing i love about this polish is that it's so fine, there is almost no skill required....my kinda polish.
here's a pic:
I'm sure there is more potential and better cutting compounds/pads, but I'm not an expert polisher...
Posted By: Anonymous
Re: polishing stage - 04/10/0809:21 PM
Im glad you guys brought up the subject of waxing. I myself have never waxed a car before. I always owned older daily drivers. When I was younger I went to apply at car detail joint and they handed me an orbital polisher and told me to polish a hood of some old Cadillac well needless to say, I didn't do too good. I mean I didn't damage the hood or anything, but just plain out didn't do it right.
I can find out how to wax a car on the internet, but id like to also get personal input from you guys. I hear a lot about poorboys products and would probably start using it. for some reason I think turtle wax rubbing compound will dull my projected mirror-like reflection
Picture was taken after 1000g sand down and hosed it down. this ISN'T after polishing.
I'm finished with my hood with 9 coats. yea 9 coats, I ran outta paint I finished it with a 1000g and when it came to wet sanding, I wondering even though I have lightly sanded the surface, there are tons of small shiny spots on the hood(sorry no pics) I want to go back and sand it to a dull surface, but im afraid ill hit back to the original surface. do i have to dull the hood? or can I go ahead and polish it?
Posted By: Anonymous
Re: polishing stage - 04/10/0809:34 PM
69charger, Exit, and Marq
I want to thank you all for ALL the information you've shared. It's amazing seeing how things have progressed over time.
I have to admit, I haven't read all the pages YET. I started reading from the beginning and am only halfway through 'Paint job on a budget!? CONTINUED..page44'. I'm getting too excited and wanted to ask some questions as I catch up and really get started.
I scanned a couple of the most recent pages in this thread and I'm really glad to see 69charger and Marq still posting!
My project car is a mess at the moment, with different pieces on and off the car. If I bought some Brightside paint and tested it out on some panels, how long do you think that container of paint would be good for? 1 month, 2 months, more?
After reading the very first thread, I was so excited last night that I went out and bought a qt of rustoleum to test out. Today, I caught up on reading and was impressed with the Brightside results! My plans of having my car painted have been pushed back so many times now that I completely gave up on it a year or so ago. Reading as far as I have has renewed my interest in completing my project!
Funny thing is that I actually read about this back in 2006, but didn't really consider it at the time. I should have stuck with it then!
Thank you
Posted By: Anonymous
Re: polishing stage - 04/10/0810:09 PM
Quote: Im glad you guys brought up the subject of waxing. I myself have never waxed a car before. I always owned older daily drivers. When I was younger I went to apply at car detail joint and they handed me an orbital polisher and told me to polish a hood of some old Cadillac well needless to say, I didn't do too good. I mean I didn't damage the hood or anything, but just plain out didn't do it right.
I can find out how to wax a car on the internet, but id like to also get personal input from you guys. I hear a lot about poorboys products and would probably start using it. for some reason I think turtle wax rubbing compound will dull my projected mirror-like reflection
Picture was taken after 1000g sand down and hosed it down. this ISN'T after polishing.
I'm finished with my hood with 9 coats. yea 9 coats, I ran outta paint I finished it with a 1000g and when it came to wet sanding, I wondering even though I have lightly sanded the surface, there are tons of small shiny spots on the hood(sorry no pics) I want to go back and sand it to a dull surface, but im afraid ill hit back to the original surface. do i have to dull the hood? or can I go ahead and polish it?
dude what paint are you using to get that shine after 1000g wet sanding
Posted By: Anonymous
Re: polishing stage - 04/10/0810:23 PM
Quote:
Quote: ok here is my test piece done with combi color (RUSTOLEUM ) final coat wetsanded 1000g and 1500g than i hit it with SIMONIZ BLACK WAX/POLISH using the cheapo orbital polisher i got here and all i get is this kinda dull shine .
what to do next ??
You didn't mention whether you had hit it with a rubbing compound....
The original choice by Charger was the Turtle Rubbing compound... others have focused on the Poor Boy products. I used the 3m Rubbing Compound....
When you have taken the paint to your highest grit for wetsanding, you should move next to the rubbing compound to further smooth the surface.
I can't speak to much about the Simonize product, but it is probably more of a cleaner/wax then a polish/wax. The difference being that the cleaner/wax does not have any grit to it... so it is simply cleaning surfactants off the surface and trying to lay down a wax coating. Whereas a polish/wax does have some grit to it and it is able to minutely grind some of the surface layer while laying down the coat of paint.
IF you go with the rubbing compound... that should actually be able to work you up to a dull shine all on its own.
You could then go on to just a straight carnuba wax after the compunding...
What you might want to try at this point is take your 2000 grit sandpaper, and do a very light wetsanding again. Then hit it with the rubbing compound to reach the dull shine stage. Then go for your choice of wax to lay down a protective sealant layer ( and max out the shine and gloss that you are able to achieve ).
You mention that you were using a Simonize Black type wax. IF it is one of those 'colored' waxes that have color loaded into them... I should mention that they are primarily for use on oxidized surfaces. It tries to impregnate the painted surface with the black die in the wax. It works great on a heavily oxidized surface that will suck in the black die color like a thirsty sponge. However, on a relatively sealed surface that isn't as porous as an oxidized surface, the black pigment may actually be interfering in your trying to get a maxxed out shine.
And just to round out the topic... the polisher machine... and the types of cloths or bonnets you put on the machine to spread and work the waxes or rubbing compound all have an effect on how the final product turns out.
.
sorry should have mentioned ,i have not used a rubbing compound after 1500g went straight to that black polish .
however today i hit it with various other stuff (must say i have no clue what most of them are for ) here are some pics of the stuff i used ,the surface is very smooth and is also pretty shiny but it has not got that wet look .
note the can of paint in the pic !!
this is what i got after using rubbing compound and everything else on that picture
I believe none of those are what you need. well maybe the rubbing compound but then after that you need a good polishing compound like charger posted.....no wax or sealants, just polishing compound. put some on there, keep it wet while you work it very good with the orbital. that piece will not be a 5 minute job. you have to work the polish and the surface for a while and the polish breaks down and the tiny scratches you make get smaller and smaller and eventualy it loosk shiny. like charger said he spent at least 10 hours poishing his car. the results are worth the work.
of course I didn't get much sleep last night and could be completely wrong!!!
Posted By: Anonymous
Re: polishing stage - 04/11/0805:12 AM
So i read up on this process for a couple monthes trying to decide whether or not to try it out and after searching around at different paint shops, not one of them offered a satin/flat finish. so i decided to give it a shot! so now i finished my 6th coat, using all the correct materials and wetsanding steps etc.. my only question now is it looks like i have a completely solid color with no thin spots but you can see alot of roller edge lines.
does this indicate: to thin coats, not enough coats or should they all disappear with the last wetsand/buffing step??
Quote: Im glad you guys brought up the subject of waxing. I myself have never waxed a car before. I always owned older daily drivers. When I was younger I went to apply at car detail joint and they handed me an orbital polisher and told me to polish a hood of some old Cadillac well needless to say, I didn't do too good. I mean I didn't damage the hood or anything, but just plain out didn't do it right.
I can find out how to wax a car on the internet, but id like to also get personal input from you guys. I hear a lot about poorboys products and would probably start using it. for some reason I think turtle wax rubbing compound will dull my projected mirror-like reflection
Picture was taken after 1000g sand down and hosed it down. this ISN'T after polishing.
I'm finished with my hood with 9 coats. yea 9 coats, I ran outta paint I finished it with a 1000g and when it came to wet sanding, I wondering even though I have lightly sanded the surface, there are tons of small shiny spots on the hood(sorry no pics) I want to go back and sand it to a dull surface, but im afraid ill hit back to the original surface. do i have to dull the hood? or can I go ahead and polish it?
dude what paint are you using to get that shine after 1000g wet sanding
Thats regular rustoleum black.
Posted By: Anonymous
Re: polishing stage - 04/11/0802:40 PM
Quote:
Quote:
Quote: Im glad you guys brought up the subject of waxing. I myself have never waxed a car before. I always owned older daily drivers. When I was younger I went to apply at car detail joint and they handed me an orbital polisher and told me to polish a hood of some old Cadillac well needless to say, I didn't do too good. I mean I didn't damage the hood or anything, but just plain out didn't do it right.
I can find out how to wax a car on the internet, but id like to also get personal input from you guys. I hear a lot about poorboys products and would probably start using it. for some reason I think turtle wax rubbing compound will dull my projected mirror-like reflection
Picture was taken after 1000g sand down and hosed it down. this ISN'T after polishing.
I'm finished with my hood with 9 coats. yea 9 coats, I ran outta paint I finished it with a 1000g and when it came to wet sanding, I wondering even though I have lightly sanded the surface, there are tons of small shiny spots on the hood(sorry no pics) I want to go back and sand it to a dull surface, but im afraid ill hit back to the original surface. do i have to dull the hood? or can I go ahead and polish it?
dude what paint are you using to get that shine after 1000g wet sanding
Thats regular rustoleum black.
i am kind of speechless on your results . i know the packaging will differ slightly but does that regular rustoleum black look anything like this one ??
cause i slightly worry i am using the wrong stuff if thats what you get after wet sanding ??
Posted By: Anonymous
Re: polishing stage - 04/11/0804:30 PM
I have yet to polish the hood yet. That shot was taken after my 9th coat/1000g wetsand. All I did was hose it down with water.
As for the packaging, I have a different looking can. lemme see if I can dig up a picture.
i'm not to sure the people asking about your shine realised it was WET still. they were thinking you did a 1000g wetsand and that is the shine you have on your paint, but it is the water shining. lets see a picture dry!!
Posted By: Anonymous
Re: polishing stage - 04/12/0801:49 PM
Quote:
Quote: I have yet to polish the hood yet. That shot was taken after my 9th coat/1000g wetsand. All I did was hose it down with water.
As for the packaging, I have a different looking can. lemme see if I can dig up a picture.
i'm not to sure the people asking about your shine realised it was WET still. they were thinking you did a 1000g wetsand and that is the shine you have on your paint, but it is the water shining. lets see a picture dry!!
very good point there ,just noticed the water drops by the front edge must learn to read properly
Posted By: Anonymous
Re: polishing stage - 04/12/0808:53 PM
I hope you guys dont think I was trying to trick anyone into thinking the picture I posted was the final results of my hood. I think I made it clear that it was a wet hood after a 1000g sanding.
I was told that when I polish it, it should come out just as good as it looks when wet. Ill get a picture of the hood dry though. its very dull with little reflection.
Posted By: Anonymous
Re: polishing stage - 04/13/0811:05 AM
Quote: I hope you guys dont think I was trying to trick anyone into thinking the picture I posted was the final results of my hood. I think I made it clear that it was a wet hood after a 1000g sanding.
I was told that when I polish it, it should come out just as good as it looks when wet. Ill get a picture of the hood dry though. its very dull with little reflection.
no mate ,its my bad i never read your post properly in the first place .
Posted By: Anonymous
New guy here!!! Gonna' give it a shot....... - 04/13/0810:24 PM
Well, i've been lurking around here long enough, I'm ready to start my project, a '79 Dodge b-100 van. Will try to post pics as i go. Right now it's a faded metallic blue, and I hope to end up with a nice white paint job when i'm done. Have a little body work to do also, so wish me luck. I may need some help from the "Pro-Rollers" on here!
Re: New guy here!!! Gonna' give it a shot....... - 04/13/0810:25 PM
best advice? Use a paint gun!!!
Posted By: Anonymous
Re: polishing stage - 04/13/0810:29 PM
Also, 69charger,.....
Posted By: Anonymous
Re: New guy here!!! Gonna' give it a shot....... - 04/13/0810:36 PM
Quote: best advice? Use a paint gun!!!
Whats the worst that could happen, I'd have to strip it all off?? Ive seen alot of nice paint work in this thread, and i dont have a few hundred bux laying around for a BC/CC paint job.
Re: New guy here!!! Gonna' give it a shot....... - 04/14/0802:01 PM
Quote:
Quote: best advice? Use a paint gun!!!
Whats the worst that could happen, I'd have to strip it all off?? Ive seen alot of nice paint work in this thread, and i dont have a few hundred bux laying around for a BC/CC paint job.
Now that we know the preferred method of people who have cash flying from their butts...
Which paint do you have in mind?
Posted By: Anonymous
Re: New guy here!!! Gonna' give it a shot....... - 04/15/0801:11 AM
hey guys i have done this before so i guess i am a veteran i did chargers method about a year and a half ago and it work just fine for me dont use a spray gun causes too much overspray as i am a painter and have used all sorts of paint
Posted By: Anonymous
Re: New guy here!!! Gonna' give it a shot....... - 04/15/0801:51 AM
I'm gonna use the white "Stops Rust" paint. The van is like i said a dull, faded metallic blue. I think i'll spray the jambs, and around the tight spots first, then start with the roller. The plan is to get the body as straight as i can, then use the rust-oleum primer (rolled on), wet sand that, and then paint it. I used to work in a body shop as a mechanic, but I did alot of watching and learning from the body men there so I think it should turn out ok. I'm not building a "show van", i just want it to look good as a daily driver.
Posted By: Anonymous
Re: polishing stage - 04/15/0811:48 PM
just finished final wet sand on test piece, now on to polishing. What have people been getting best results with? and where can i get whatever you are using. I have read that the poorboy stuff is good. Where can i get that stuff? also any other suggestions on what to use would be great.
Posted By: Anonymous
Re: polishing stage - 04/15/0811:52 PM
Quote: Actually marq, i used turtle wax polishing compound, not the rubbing compound. I did the final wetsand and polish the day after the last coat, tried lots of different compounds (3M, Maguires sp?, mothers...ect...)but i found the $2 tub of polishing compound gave the best polish hands down. I used a 10" 3800rpm random orbit polisher with a terry cloth bonnet, and lots of water (very handy to use a spray bottle). Now I'm not a expert polisher, but i can say it was a total no-brainier to polish with the turtle wax polishing compound, there was no way I'd ever burn thru the paint, this stuff must be 2000+ grit compound... I've used it to polish everything, even my newer cars (bc/cc) that had perty bad scratches, the thing i love about this polish is that it's so fine, there is almost no skill required....my kinda polish.
here's a pic:
I'm sure there is more potential and better cutting compounds/pads, but I'm not an expert polisher...
Oops guess i missed this post. Where can i get this stuff? walmart maybe?
New Paint job on a budget thread Part III - 04/16/0803:50 PM
Quote: Pretty sure Walmart's got it. If not, most parts stores stock it.
Should be an easy find at any parts store..
Posted By: Anonymous
Re: New Paint job on a budget thread Part III - 04/17/0801:22 PM
yep it was there. I have finally finished my first piece. It looks good i just have a small problem. It looks like the paint had water spots in it? i know they aren't water spots because i polished and waxed and they are still there. I was wondering if anyone else has had this problem and if so what have i done wrong? Do i need to wet sand better?
Posted By: Anonymous
Re: New Paint job on a budget thread Part III - 04/17/0802:47 PM
hey yeah i had this same problem, looks like some residue left over from wet sanding the car stopped the next coat of paint sticking, looks shocking up close on myne but you don't notice it from a few feet away...
Posted By: Anonymous
Re: New Paint job on a budget thread Part III - 04/18/0801:40 AM
it is my last coat so I'm done painting. But i was hopeing there was way to get rid of it. It looks good from a distance but from a foot or so you can notice the dull water mark look.
Re: New Paint job on a budget thread Part III - 04/18/0804:04 AM
Quote: it is my last coat so I'm done painting. But i was hopeing there was way to get rid of it. It looks good from a distance but from a foot or so you can notice the dull water mark look.
There is an old woodworkers trick that 'may' help make the mark disappear "if" it is a waterspot.
Take a clean cloth and wet it with alcohol ( pure rubbing alcohol, gin, vodka etc ( but not beer
Wipe the white spot. Now... here is the magic... take a blowdryer and blowdry the area with heat on. Take care not to direct toooo much heat to the spot... just keep it a safe distance back from the painted surface so as to not burn or overheat the paint.
IF it is a waterspot, this 'should' remove the whiteness found in the waterspot.
This trick works definitely on wood furniture that has watermarks in it ( so just remember this helpful hint the next time one of your beer bottles leaves a white mark on one of your wooden tables etc.
Re: New Paint job on a budget thread Part III - 04/18/0804:12 AM
Not sure this would work on a car but a lady in our RV club took some of my cigar ash and mixed it with water to make a paste and removed a water mark from her coffee table.
Posted By: Anonymous
Re: New Paint job on a budget thread Part III - 04/20/0807:22 PM
Sure-Fire Bubble Popping Method
After reading this thread starting from the original page 1 and now seeing where it's gone, I came up with a sure fire bubble popping method.
If your paint is thinned properly and you're getting a ton of bubbles....
Hit it with a heat gun.
Warm up the heat gun on the low setting, roll your paint, and follow right behind with a heat gun in your other hand. Make quick passes and you'll see the bubbles pop like magic. The trick is that the high heat is enough to fast-evaporate the thin shell of mineral spirits thats holding the bubble together, but nowhere near enough to skin over or dry the paint.
Tried it with rustoleum and it worked great.
Posted By: Anonymous
Re: New Paint job on a budget thread Part III - 04/20/0811:26 PM
Can anyone tell me if it is safe to use Rust-Oleum on moving undercarriage parts (like the driveshaft for example)?
Also regarding the undercarriage, should I spray it on or roll it on? And should I first apply Rust-Oleum primer and then Rust-Oleum paint, or should I skip the primer and just use the paint?
I'm in the process of painting an old school bus I'm turning into a camper. The upper body is pretty decent for being 20 some years old, but the undercarriage has quite a bit of rust.
Re: New Paint job on a budget thread Part III - 04/21/0801:40 AM
Quote: Can anyone tell me if it is safe to use Rust-Oleum on moving undercarriage parts (like the driveshaft for example)?
Also regarding the undercarriage, should I spray it on or roll it on? And should I first apply Rust-Oleum primer and then Rust-Oleum paint, or should I skip the primer and just use the paint?
I'm in the process of painting an old school bus I'm turning into a camper. The upper body is pretty decent for being 20 some years old, but the undercarriage has quite a bit of rust.
For the undercarriage of a car or bus... you should be able to directly spray bomb the Rustoleum or Tremclad on. It would be easier than attempting to get into every nook and cranny with a roller and brush.
As for the driveshaft... you should have no problem slapping a coat of paint ( by brush or spray bomb ). The weight of the paint is so insignificant that it should not cause vibrations in the driveshaft.
One thing I would most certainly do prior to spraying the underside of a vehicle ( whether bus or car ) is to use a high pressure washer to blast all the road crap, dead animals, flakes of surface rust and other undercarriage debris off. This would give the paint a better chance at getting a strong adhesion directly to the undersurface.
Since Rustoleum/Tremclad are designed to be 'anti-rust' paints... they will do a good jobs at sealing up the undercarriage surfaces.
The main reason for thoroughly cleaning off the undercarriage prior to painting is also to ensure that the paint won't peel away or somehow separate from the painted surface. The integrity of the Tremclad/Rustoleum as an anti-rust solution under the vehicle might be compromised if water is able to find a way to get between the paint layer and the surface that has been painted.
The weak point to the plan is that once you have fully painted the undercarriage of the vehicle, I would assume that you in the future would have to be doubly cautious when putting a torch under the vehicle. I don't know for sure... as I have no real life incidences that I can fall back to explain this... but imagine the vehicle is in the shop and they are using a torch to cut off the muffler system or bolts off to do a replacement... I am not sure if a Rustoleum painted undercarriage might be more susceptible to catchings on fire ?
I would assume the risk is higher in the first year or so after the undercarriage is painted. After that I would assume that most of the flamable components of the applied paint will have been rendered neutral and not pose any greater risk then say motor oil or transmission fluid that tends to leak and gravitate to the undercarriage of the vehicle.
One potential benefit of the Tremclad/Rustoleum undercarriage painting is that it may work as a sound deadener and give better sound proofing then say an oil undercoating on the undercarriage. The paint has a thicker skin when dried then a lot of the undercoatings sprayed on the bottom of vehicles.
The other benefit is that a year after 'the initial' Tremclad/Rustoleum undercarriage painting, you could probably take your garden hose, spray the undercarriage to loosen any road dirt and give it a supplemental spray bombing with the Tremclad or Rustoleum to simply touch up or boost the protection that you already have.. or to touch up any spots where road rocks have flown up and scarred the paint and exposed the metal surface below.
.
Posted By: Anonymous
Re: New Paint job on a budget thread Part III - 04/21/0803:50 AM
Wow Marq, thank you for taking your time for the explanation about painting the undercarriage. You made a great point the possible use of a torch later on after painting the undercarriage.
I too would be interested in hearing what everyone else thinks in regards to the issue of using a torch on the undercarriage of a vehicle, after the undercarriage has been painted using Rust-Oleum.
Could any Rust-Oleum experts give their opinions on this?
Posted By: Anonymous
Re: New Paint job on a budget thread Part III - 04/22/0808:37 PM
Can anyone tell me or point me to a post that discusses the difference between the Rustoleum professional "high performance" paint as opposed to the qt size "Stops rust" paint. I am having a time trying to find the "high performance" sunburst yellow. The only place I've found it was acehardwareoutlet.com and they only sell it as 2 gallons. Would I gain anything by getting the "professional high performance" stuff.
Re: New Paint job on a budget thread Part III - 04/23/0803:00 AM
I have been lurking for well over a year and I have read it all from the beginning. I do love MOPARS I just don't have one on the road anymore ( 1978 Volare, 1963 dart ) thats later projects. The current project 1988 OLD's delta 88 that I saved from the scrap heap But I need to make it look like it does not belong their anymore. The question I have for the GURU's of restoration is how does the side molding come of this semi modern GM car without totaly shredding it. I hope to be able post progress pics.soon The car is Fadded silver hardly any clear coat left anywhere and light surface rust on all top surfaces. . The plan prime atleast all horizontal surfaces, maybe all and Rusto royal Blue. Thanks to all for this GREAT thread.
Re: New Paint job on a budget thread Part III - 04/23/0811:23 AM
One of the best and most straightforward articles that I have read on wetsanding and buffering the paint job ( also known as color sanding ) is at : Automedia.com
Re: New Paint job on a budget thread Part III - 04/24/0803:14 AM
a pic of the OLD's today , Sorry about the highjack this should have been a new subject in this thread But I did not see how to do it did you notice 78 in the back ground it's been off the road for about 6 years
Posted By: Anonymous
Re: New Paint job on a budget thread Part III - 04/24/0803:57 PM
DAMN! I got some real bad luck here!
For the past month, we haven't gotten any rain. So today I wake up extra early to work on my project. I go outside and check out the conditions. No rain clouds? check. warm temp? check. all signs were go. this time, I'm done with rusty paint and I bust out the interlux brightside black and start on the trunk. While prepping the surface, i looked up for rainclouds and looked good so far. I start to lay down the BS paint. this paint is THICK, like tar thick, lol. I was really tempted to mix some mineral spirits with it. but i was told I didn't have to do so. well, the first coat gave complete coverage and sure enough, I had orange peel, not much though.I'm hoping when I sand it with 600g and when it dries, it'll get rid of the orange peel. or maybe i didn't squeeze the excess paint before rolling?
I went to triple check the weather online. So after painting, i went inside for about 30 min. ate breakfast and went to weather.com. turns out we had %30 chance of scattered rain clouds. so I go outside to see dark clouds out in the distance and the ground wet. i ran over to my car and saw this
in those 30 min while i was inside, it rained. I go outside to find it sunny.
Re: New Paint job on a budget thread Part III - 04/24/0805:13 PM
I always loved that generation of Olds 88's. Comfy and low-maintenance. Looks like you've got a good bit of prep ahead of you... Those cars are famous for peeling paint.
Posted By: Anonymous
Re: New Paint job on a budget thread Part III - 04/24/0810:54 PM
ok... Long time reader, first time poster.
I have decided to roller my '79 Fiat Spider (hi, Dwight!) with a combination of Hunter Green and Sunburst Yellow in an attempt to get Green Go.
I grew up in Mopars- my first six cars were Mopars ('67 Coronet, 66 Polara, 75 Cordoba, 71 Charger RT, 70 'Cuda, and a 90 Dakota)... Add in my brother's 71 Duster, my best friend's 72 Charger and 71 Challenger, and we bleed Mopar!
Anyway, I'm partial to the Green Go color, even though I never had a car that color.
The paint I'll be using is Rustoleum's regular paint, since I don't see a suitable green or yellow to mix on their website. Are the techniques the same for using the regular Rustoleum as opposed to the Professional Rustoleum?
Al
(Splitting time between Vegas and Houston) '79 Fiat Spider2000
Re: New Paint job on a budget thread Part III - 04/25/0801:45 AM
Quote:
The paint I'll be using is Rustoleum's regular paint, since I don't see a suitable green or yellow to mix on their website. Are the techniques the same for using the regular Rustoleum as opposed to the Professional Rustoleum?
Al
(Splitting time between Vegas and Houston) '79 Fiat Spider2000
Hi Al... yes both paints are quite similar and you use the same techniques for both...
Re: New Paint job on a budget thread Part III - 04/25/0803:28 AM
Your right about being a good cumfy ride sometimes it is hard to believe it is front wheel drive it really rides like a big car and the 3800 V6 is strong and tuff. The whole body work prep and paint has me alittle nervous. My last attempt at body work was in the late 80's on the 63 dart project I never finished but I did get it painted with no real idea ( I was still in High school )at what I was doing 5 gal. of bondo, wire screen, fiberglass, cheap spray gun, cheap paint, osfo disaster,,,, Lets just say it was not to good. I will say that I redid the dash (metal) with a spray bomb two tone krylon I think and it looked awsome atleast compared with rest of the car.
Posted By: Anonymous
Re: New Paint job on a budget thread Part III - 04/26/0804:27 AM
hey all...
long time lurker... first post.
Found this thread through the nastyz28.com forums and have read avidly.
I must say... this is the greatest idea in a LONG time, and I am quite glad to have happened upon it! I picked up my 1981 Camaro for $75. Non-running, has not been registered since 1994 with 130k miles on it. The poor car had been horrifically tagged when I got it. I went about doing all the necessary body work, which in actuality was minor. The hardest part was getting off the spray paint... but now I am seeing I didn't even need to do that! :O However... I am glad to have gotten it all smooth for the experience, and my peace of mind. I then proceeded to roll on the ACE Rust Stop flat black in a THICK coat, which I let dry for 2 days here in the AZ sun, wetsanded with 600, and now have put on 2 coats of the blue..... the results are nothing less than extraordinary! This is how it looked when I started.....
I look forward to doing my 1991 Camaro RS convertible next!
Posted By: Anonymous
Re: New Paint job on a budget thread Part III - 04/26/0809:15 AM
New to the board, but I've been reading quite a bit about rolling on paint on a car. It's great to see a way to get a paint job without having to get a second mortgage out on a house. Anyway, I have to ask what's likely a stupid question. Never painted a car before and the car I'd like to paint has faded and had the clear coat coming off with the paint underneath going too, showing bare metal in spots. I drive it to work every day and was hoping I could get some advice on whether I should do take up this project on my days off and it'd be fine to drive to work and back without messing the whole thing up, or would it only be possible to make this project work if I found alternate transportation and parked this car while I painted?
Either way, it's going to get done. If all goes well, I've got a '56 Studebaker Transtar pickup I'd love to finish the bodywork on and paint up.
Re: New Paint job on a budget thread Part III - 04/26/0806:11 PM
Quote: New to the board, but I've been reading quite a bit about rolling on paint on a car. It's great to see a way to get a paint job without having to get a second mortgage out on a house. Anyway, I have to ask what's likely a stupid question. Never painted a car before and the car I'd like to paint has faded and had the clear coat coming off with the paint underneath going too, showing bare metal in spots. I drive it to work every day and was hoping I could get some advice on whether I should do take up this project on my days off and it'd be fine to drive to work and back without messing the whole thing up, or would it only be possible to make this project work if I found alternate transportation and parked this car while I painted?
Either way, it's going to get done. If all goes well, I've got a '56 Studebaker Transtar pickup I'd love to finish the bodywork on and paint up.
The biggest advantage of doing the car without making use of it between painting stages, is that you would lessen a lot of the additional cleaning up and 'remedying' prior to the addition of the next coat of paint.
For example, lets say you put a coat of paint on the car on Friday night. Let it dry and do a second coat on Saturday morning. Let it dry and maybe do a third light coat of paint on Sunday.
At this point you would not want to do a wetsanding - BECAUSE - you plan now to drive it as it is for the next Monday to Friday.
When the next Friday evening comes along, you would at that time do your wetsanding that you skipped the week earlier. The reason for this is that by driving the car through the week you have added dead bugs and just about everything else that can flip up on to your car during your weekday driving. So this wetsanding would do two jobs.. it would be your time to smooth out the surface of any roughness - while at the same time removing the surface layer of the previous coat of paint that all the road crap 'contaminated'.
So on that second Friday you would do the wet sanding, lay on the next coat of paint, let it dry til the next day and then add the next coat of paint.
Now... if it happens that some areas of the car are masked off with newspaper or tape - you may find that you will be adding and removing that tape at the beginning and finishing of each painting sesssion. I don't think any of us would want to bear the embarrasment of driving down the road with painters masking tape all over our cars. But then again, it would be such a ghetto look that it might start a new car fashion trend ( sort of like those guys who wear baseball hats with the price tags still attached - or who wear pants so low down to their knees that although questionably fashionable, it presents a real problem when they are trying to run from the police hahahhah ).
So I guess it is "do-able'... you just have to plan ahead a bit for the debris, rain, squirrels, tree and bird droppings, flying insects and other nasty things that will land on your coats of paint.
The advantage of the car sitting in one place is that you are not under the gun to complete the task and you are not exposing the freshly dried paint to potential contaminants. In the end, this means less actual work for you - in that you are not having to take three steps forward and one step backward each week due to circumstances beyond your control.
Overall, if the car sits in one place... you would have the ability to make use of a few hours each weekday when you come home from work, to add a coat of paint.. or to wetsand.... etc. Overall, this could reduce the amount of actual 'downtime' of not having your car to drive. You might be able to get the real grunt work down over a two week period instead of spreading it out over a four or six weeks of part time painting..
But as we have seen earlier in this thread... there have been some 'daily drivers' that have been used all while coats of paint were being applied. I recall a white Camaro that added his paint and did his work each day when he drove to College. Prior and after going to class he did his work in the College parking lot.
So it is 'do-able' - it just takes a different type of planning - to plan the logical steps of doing the painting to fit your 'daily drivers' actual time that it is required to be on the road and being driven.
Posted By: Anonymous
Re: New Paint job on a budget thread Part III - 04/27/0806:50 AM
That all was exactly what I was thinking. I just was curious if I needed to allow the paint to cure for so long before letting it take the chance in the elements. I don't mind an extra sanding session every weekend and considering that the boat paint sounds terribly promising on cutting down the number of coats, I may well jump into this. Don't mind if my car looks less than par in between the weekends anyway since it's not exactly A-class style at the moment anyway. Still, once all is said and done, should I let the last coat cure for a while before driving it about? I would imagine an overnight setting then a final buffing. Should that then sit for a week or would it be good to go after another night setting?
Thanks so much for all the info, btw Marq. I noticed you've been an incredible help to so many already. Then again, makes me wonder if you have too much to do with so many very detailed replies.
Posted By: Anonymous
Re: New Paint job on a budget thread Part III - 04/27/0810:52 PM
Hey guys I had a question. Part of my car is already bare metal while parts of it still have the old paint of when it was first bought. Now im told to prime the bare metal part only but I'm not sure if that will really level out the surface of the car. Also, its almost impossible doing it that way for my car because the bare metal parts of the car are random so it would be impossible to mask it off and then only prime those parts. I was wondering if I could priming the entire car (so I would be priming the bare metal parts and the already painted parts) layer by layer that eventaully they would both become the same shade of the primer colour (which would tell me that they are now level). Will this idea work or does anyone have any other ideas/solutions on this one? Many thanks
P.S I did use a paint stripper (came in spray form) from my local Canadian tire (the only thing they had to strip paint) and it didn't work out that well. If anyone has used a certain product/chemical that worked amazingly, please do tell!
Re: New Paint job on a budget thread Part III - 04/28/0803:30 AM
Quote:
Still, once all is said and done, should I let the last coat cure for a while before driving it about? I would imagine an overnight setting then a final buffing. Should that then sit for a week or would it be good to go after another night setting?
Thanks so much for all the info, btw Marq. I noticed you've been an incredible help to so many already. Then again, makes me wonder if you have too much to do with so many very detailed replies.
Well... I would try to plan my weekend painting schedule so that one coat goes on Saturday in the morning... and the second coat goes on Sunday in the morning. This would give that second coat the rest of Sunday and the early morning hours up to when you drive to work on Monday to dry.
When you reach the point were you have gotten to the 'last' coat of paint I would let that coat sit on the car for a week or two before going to the final wetsanding, polishing, waxing and buffing stage. The key reason for delaying that final stage is to let the paint fully evaporate and get hardened. It would be great if you got a few clear days where the final coat of paint could be left out in the sun to get some additional baking. The reason we don't want to rush to that final finishing up stage is that the waxing will be sealing up the surface. If there are any gases still evaporating from the curing paint, it will cause the waxed surface to whiten slightly - which will require further polishing and waxing to get rid of.
I don't mind slapping out as much info as I can when I try to answer a question. In a way it saves me work, because it sometimes will answer or explain other questions that might arise if I just gave a skimpy answer. ( and that fact that I type at 240 words a minute makes it no big deal to try to give a full explanation ). If the more detailed answer ends up answering other peoples questions, then I have saved myself from some future typing .
Re: New Paint job on a budget thread Part III - 04/28/0804:04 AM
Quote: Hey guys I had a question. Part of my car is already bare metal while parts of it still have the old paint of when it was first bought. Now im told to prime the bare metal part only but I'm not sure if that will really level out the surface of the car. Also, its almost impossible doing it that way for my car because the bare metal parts of the car are random so it would be impossible to mask it off and then only prime those parts. I was wondering if I could priming the entire car (so I would be priming the bare metal parts and the already painted parts) layer by layer that eventaully they would both become the same shade of the primer colour (which would tell me that they are now level). Will this idea work or does anyone have any other ideas/solutions on this one? Many thanks
P.S I did use a paint stripper (came in spray form) from my local Canadian tire (the only thing they had to strip paint) and it didn't work out that well. If anyone has used a certain product/chemical that worked amazingly, please do tell!
The short answer ( as if I have ever done that... ) is that you should get out your powersander with a nice 180 or 240 grit paper on it and sand down the surfaces to narrow the gap between the edge of the old paint and the areas where it is already bare metal. This will at the least feather the edges so that they blend in and are not so prominent.
Then I would probably use the Brightside primer ( which you can roll on ) to lay down a coat of primer over the entire surface. Now.. the reason I am specifying the Brightside primer in this instance is that it is thicker when rolled on then some of the areosol spray bomb primers which go on pretty thin. This would be your best shot at getting the bare metal surface to level off with the sanded painted surfaces.
Once you roll on your first coat of the Brightside primer you can let it dry and then put the car under some sunlight and start inspecting to see if you were able to get one level surface coating where you can't detect where the bare metal layer was and the sanded painted surfaces were.
IF you are able to spot slight differences in the elevations of the two surfaces, I would be tempted to lay down a second coat of the primer.
At this point you would have 100% color coverage of the primed surfaces and enough of a build up of primer so that you could now wetsand the primer with a nice 1200 grit wet sanding paper to smooth out the surface.
I would probably want to put the wet sanding paper on something wide and flat - with a bit of firmness to it. The idea here is that you want the wetsanding paper to maintain a wide flat surface for when it is in contact with the primered surface. IF you used a flexible backing or too small a surface the wetsanding would ride up and down between any surface deviations and not really help the situation any. But with the wider and firmer wetsanding, it will be spread over a wider surface and tend to produce a smoother overall surface.
Imagine this : YOu are on a bicycle and you ride the bike into a pothole. The odds are that the thin bike wheel or tire will drop down in to the pothole. BUT if you had a nice wide low profile car tire on your bike, like a 235 x 50 x 15, it would tend to ride over the pothole and give you a smoother ride. So in the example about the wetsanding, you won't be riding the 'potholes' ( if any ).
But I suspect with two coats of Brightside primer rolled on to your car there will be sufficient build up of primer that there probably won't be much in the way of potholes.
IF you go with a spray on primer, I don't think I could guarantee that you would be happy with the results. It simply can't lay down a thick enough layer of primer.
And to answer your other question... primer tends to 'build up'. That means when you are spray primering, it is building up the bare metal surface at the same rate that it is building up the painted surface. So they tend to go up in height similarly, leaving the original difference in surface elevation still visible. AND if you go and spray extra primer on the metal surface to try to level it up with the painted surface, what you will notice is that it tends to crack as it dries. ( the only way to avoid that is spread out that type of spray over a couple of days so that each previous days priming has fully dried ).
Just to confirm some other questions :
Yes you can substitute the liquid Rustoleum/Tremclad primer for the Brightside primer when rolling.
Yes... you can use either primer with either type of paint. There are no problems in compatibility.
AND don't forget that you can add 15% of paint to your primer to help get it started at pre-coloring the primer for when you start actually using that color of paint on the car. Be sure to allow a little extra time for drying when you are adding that tinting touch of paint to the primer.
OH... and bye the bye... the only canned paint stripper that I can think of that would really rip the old paint down to metal is AIRCRAFT PAINT STRIPPER... That can rip a paint down to metal pretty quickly BUT IT IS NASTY stuff to work with. That stuff eats rubber, hands and driveways.
Because you mentioned that you had attempted to use a 'stripper' on your old paint - I would strongly suggest :
a ) take a bucket with some dish detergent in it and warm water. Take a clean cloth and wash down the car thoroughly. I know it will look funny to your neighbors giving your patchy looking car such a loving sudsy washing... but do it. Then rinse it down like you were planning to eat your dinner on it... !
b ) once it dries, give the entire body a really thorough wiping down of the surface of the car with a rag that is damp with mineral spirits.
You really have to take this extra bit of effort to assure yourself that NOT A HINT OF that previous stripper remains embedded or absorbed in your old paint or in the old exposed primer. The dang spray stripper stuff is at this point a potential contaminant that may have an effect on your primering or painting. So be Mr Clean and get that surface contaminant free before you get moving on to the next stages..
At least that's the closest I could find to what I remembered using. I tried a lot of other chemical paint stripper products, and nothing else came close to working as well.
That said, unless you have several paint jobs worth of paint to remove, three or more, you are usually better off sanding. Everywhere you strip chemically, still has to be sanded. If you leave any trace of stripper residue, the new paint on top will do something you don't like. That goes for all the lesser stripper products too.
If you apply stripper to paint, and that paint doesn't all come off, then it must be completely removed because it has absorbed some of the stripper and will cause problems later if painted over.
I would say that there are few cases where chemical strippers are less work than just sanding.
Posted By: Anonymous
Re: New Paint job on a budget thread Part III - 04/28/0802:15 PM
Thanks guys. If i do use brightside, and god forbid I am not able to level it out, I assume I'd have to go to the extent of sanding down my whole car down to metal. To do this, I was thinking of using a orbital sander with an 80 grit disk. Then once that is done (is 80 grit okay?) Now i know before I prime the metal has to be sanded but wouldnt it already be sanded with the 80 grit disk or do I need to sand again? And then I would prime, and then etc. A friend of mine showed me the idea as atelast 60% of my car is bare metal :/. And when I do prime, do I only need one coat since the tremclad has its own primer in it anwaysor would I need more than once coat of primer?
Re: New Paint job on a budget thread Part III - 04/28/0802:37 PM
Quote: Thanks guys. If i do use brightside, and god forbid I am not able to level it out, I assume I'd have to go to the extent of sanding down my whole car down to metal.
I am pretty sure that 99.9% of the newbies can use the Brightside roll on primer and get a smooth surface within 2 coats and some wet sanding... If the difference in elevation between the metal surface and the highest point of the original paint is more extreme then the Brightside primer is capable of building up, then probabbly laying a layer of bondo is about the only way you might have leveled it up otherwise ( skimming a skin ). But even that method is fraught with problems for folks who don't have an experienced hand at doing it.......
Quote:
To do this, I was thinking of using a orbital sander with an 80 grit disk. Then once that is done (is 80 grit okay?) Now i know before I prime the metal has to be sanded but wouldnt it already be sanded with the 80 grit disk or do I need to sand again? And then I would prime, and then etc. A friend of mine showed me the idea as atelast 60% of my car is bare metal :/.
I would work with at least a 120 to 160 grit. Using an 80 grit is pretty agressive and will leave scratches that you are going to have to use an additional build up of primer to mask or level off. At least with the 120 to 160 grit the scratches will not be so deep.
IF you have gone so far as to remove all the paint off using the sanding, then you would be able to go to primer right on to the exposed metal.
Just remember to thoroughly wipe down the subsurface with a clean cloth dampened with mineral spirit - to clease the surface of any loose particles and to rid the surface of any potential contaminants...
Posted By: Anonymous
Re: New Paint job on a budget thread Part III - 04/28/0803:48 PM
Thanks Marc! man you are definetly amazing!. I will definetly post up pics when I'm done. How long do you reckon it will take me to strip my entire car off to bare metal with the power sander (home depot minimum rental time is 4 hours, would I be able to strip to abre metal by that time)? Also from your previous post, if i strip to bare metal...I jsut want to confirm, I only need one coat of primer after that right? I also noticed your in Canada, so I'm assuming you've used tremclad to pull this "50 dollar paint job" off. I went to homedepot but they only had the "rust paint" series. Is this is the series I should be using because I have read previous pages and apparently they need to be acrylic/enamel (or have it written on the tub somewhere). Where exactly do I check to see if it is acrylic/enamel, or is the rust paint series the wrong series I am looking at?
Re: New Paint job on a budget thread Part III - 04/28/0808:37 PM
the rusto and tremclad are "Alkyd enamel" (oil based paint) good stuff. some are using Brightside Polyurethane (one-part polyurethane) and some say even better Not acrylic, I do believe their is such an animal (paint) but I do not think it has been used by anyone on this forum,yet but I could be wrong since many different paint brands have been tried. I also did read in one of the offshoot web sites refer to rustoleum as acrylic and I believe that was just a mistake. Hope that little bit of info helps
Re: New Paint job on a budget thread Part III - 04/29/0805:20 AM
Oyevayboy,
I too came over from the NastyZ28 site back when the original thread was at around page 21. Boy, they STILL say this is a crappy way to paint a car over there, don't they?
I bought my '79 Sport Coupe for $750, and I plan on using this method to paint it black. Yeah, I know, hardest color. But, I used to have a black '79 Berlinetta, so black it is.
Re: New Paint job on a budget thread Part III - 04/29/0805:48 AM
Quote: How long do you reckon it will take me to strip my entire car off to bare metal with the power sander (home depot minimum rental time is 4 hours, would I be able to strip to abre metal by that time)?
I dunno... but all things considered, I would probably just go to Walmart or Canadian Tire and buy a decent quality sander. If you 'rent' a unit you are going to be working 'under the gun' and constantly checking your watch. Buy a decent unit and its one of those tools that you will always find future uses for ( sanding furniture, powersanding walls, woodworking projects etc ) And in a worst case scenario ( not that I want to promote anyone doing anything unethical... ) you can run that powersander you buy 20 hours a day on your project for weeks AND if it should just happen to die, well Walmart and Canadian Tire are pretty friendly about giving you a refund for a burned out unit. But a decent powersander is the kind of tool that you will get many years of good use out of... ( its in the same category as having screwdrivers, socket sets and vice grips )
Quote:
Also from your previous post, if i strip to bare metal...I jsut want to confirm, I only need one coat of primer after that right?
You only need one coat of primer IF you are satisfied that it has given 100% coverage to the metal below and that it has produced a fairly smooth surface or one that can be wetsanded to make even smoother. The main benefit of going to 2 coats of primer is to guarantee your sealing of the metal surface from oxygen getting through to it. Also a 2nd coating of primer guarantees that you have a sufficient build of primer that you can do a thorough wet sanding to maximize the smoothness of the surface. As previously noted... the key to the best finished product begins with the smoothness of the surface that you are painting on. The smoother the beginning surface, the shinier and better finish you will get as you add on the coats of paint and when you get to the final polishing, waxing and buffing.
Quote:
I also noticed your in Canada, so I'm assuming you've used tremclad to pull this "50 dollar paint job" off. I went to homedepot but they only had the "rust paint" series. Is this is the series I should be using because I have read previous pages and apparently they need to be acrylic/enamel (or have it written on the tub somewhere). Where exactly do I check to see if it is acrylic/enamel, or is the rust paint series the wrong series I am looking at?
The Tremclad paint is a rust paint, just like the Rustoleum is a rust paint. The stuff you find at HomeDepot, Loews, Canadian Tire, Reno, Walmart, etc are the ones we have been using.
There are different 'qualities' of Tremclad/Rustoleum, where you have the standard issue stuff and the 'Professional Grade' stuff... and I think there is even a 'Marine Grade', 'Farm Grade' and an 'Industrial Grade'. Basically all these variations are the same thing and follow the same rules and processes as the 'standard issue' Tremclad/Rustoleum. Possibly the only advantage to the more premium versions of Tremclad/Rustoleum is that they 'might' have a higher concentration of color pigment. IF SO the theory would be that they would give faster color coverage when you are painting. Possibly the more premium versions may also have a little something different that might give them better color fastness, or UV protection or resiliancy. But I would suggest that if you are interested in getting those kind of benefits guaranteed, then you might as well jump over to Brightside paint by Interlux and enjoy the benefits of a polyurathane
BUT just to confirm, I began with the Tremclad, but after four or so coats I made the change over to Brightside and just started using it over the initial Tremclad coats. I found that the Brightside had better coverage AND as such I used it to reduce the number of overall layers or coatings that I would have to do if I had stayed with Tremclad. ( also I wanted the additional advantages of the polyurathane, compared to the enamel ).
I have read of people who have painted cars using acrylics and laquers... but neither are really suitable for this 'roll on' painting method. And frankly I don't think the average Joe can really do a paint shop quality job using either of them. However, on small projects, like a motorbike's gas tank or fender, I suspect anyone could work wonders with them given enough time, sweat and effort. One problem with acrylics and laquers is that they don't tend to flex and don't have much forgiveness when chipped by road gravel etc.
Re: New Paint job on a budget thread Part III - 04/29/0806:15 AM
Quote: Oyevayboy,
I too came over from the NastyZ28 site back when the original thread was at around page 21. Boy, they STILL say this is a crappy way to paint a car over there, don't they?
Sadly not everyone is blessed with gobs of cash in the bank to toss into the ultimate pimp makeover of their ride. And also unfortunately there are elitest snobs that would consider this painting method to be sacrilege on a car. But I have never tried to let purist dictate what I do with my rides...
I have a 91 Mustang Cobra - but I dropped the charcoal leather interior from a 2005 Mustang in to it. Purist cry that it is 'not original' - but I happen to like the charcoal leather... so I ignore them. I even went a step further at irritating the 'purist' by dropping a Saleen Mustang leather backseat into that car.
My 88 Mclaren Mustang is a genuine limited edition car ( not just a badge that says so ). The 'original' McLaren Recarro's were totally destroyed by the previous owner - dried up, cracked, holes and foam missing). To remain 'true' to the marque, I would have had to spend about $2000 to replace the seats with original replacements. So I found a 'Mercury Mountaineer' set of light gray leather seats from a 2006 Mountaineer that had been wrecked with less then 550 miles on it. The seats were mint and almost identical in appearance to the Mclaren hight bucket. So I dropped them into the McLaren at the bargain price of $50 EACH ! My bum can't tell the difference, but McLaren 'purist' would cry and hold crosses in the air when they see what sacrilege I have done
My 84 Firebird TransAM also went through a similar transformation, using the tan leather interior from a 2006 TransAm, the spoiler from a 91 Camaro, the GTA body parts of a 1990 etc etc. Purist cry... but the car looks great, feels great and is built to please me.. not them.
The only thing I will say about elitist is that sometimes their quest to be purist or true to their marque is at the expense of their pocket book. So they will drop $5000 on a paint job so that their snobby purist friends won't frown on their paint job or to get some kind of boasting rights about how much they paid for their paint job.
But a funny thing just struck me... they are called the NastyZ28's ? I wonder how they feel about the fact that the 'same year' Firebirds were the more premium cars - just as the Cuda is the richer mans version of the Challenger. If there is any snobbier allowed, then it really should go to the Cuda and Firebird guys... since they were the upper scale or more premium cars ?
Dunno... but with most world economies in financial trouble at this time, and the economic crunch reaching down in to everyone's budget... I guess the best laugh you can have at any snob who wants to put down a 'roll you own' paint job is this :
Two guys have Z28's. Both cars are in identical need for a paint job. One guy rolls his own paint job and spends about $250 on paint, supplies and equipment - the other guy spends $5000 at the pro paint shop.
In the end you have a pleasant to look at $250 freshly painted Z28 and a lovely showroom quality painted Z28. One of these drivers still has $4750 left to buy some engine performance parts or to buy a ton of gasoline...
When you get down to the economics of 'rolliing your own' compared to sending the car off to a pro-paint and body shop... well I think I would prefer to have that extra cash in MY pocket to do with what I want...
Re: New Paint job on a budget thread Part III - 04/29/0812:13 PM
Quote:
When you get down to the economics of 'rolliing your own' compared to sending the car off to a pro-paint and body shop... well I think I would prefer to have that extra cash in MY pocket to do with what I want...
.
AMEN!!!!!
Posted By: Anonymous
Re: New Paint job on a budget thread Part III - 04/30/0802:27 AM
Quote:
Quote: Oyevayboy,
I too came over from the NastyZ28 site back when the original thread was at around page 21. Boy, they STILL say this is a crappy way to paint a car over there, don't they?
Sadly not everyone is blessed with gobs of cash in the bank to toss into the ultimate pimp makeover of their ride. And also unfortunately there are elitest snobs that would consider this painting method to be sacrilege on a car. But I have never tried to let purist dictate what I do with my rides...
I have a 91 Mustang Cobra - but I dropped the charcoal leather interior from a 2005 Mustang in to it. Purist cry that it is 'not original' - but I happen to like the charcoal leather... so I ignore them. I even went a step further at irritating the 'purist' by dropping a Saleen Mustang leather backseat into that car.
My 88 Mclaren Mustang is a genuine limited edition car ( not just a badge that says so ). The 'original' McLaren Recarro's were totally destroyed by the previous owner - dried up, cracked, holes and foam missing). To remain 'true' to the marque, I would have had to spend about $2000 to replace the seats with original replacements. So I found a 'Mercury Mountaineer' set of light gray leather seats from a 2006 Mountaineer that had been wrecked with less then 550 miles on it. The seats were mint and almost identical in appearance to the Mclaren hight bucket. So I dropped them into the McLaren at the bargain price of $50 EACH ! My bum can't tell the difference, but McLaren 'purist' would cry and hold crosses in the air when they see what sacrilege I have done
My 84 Firebird TransAM also went through a similar transformation, using the tan leather interior from a 2006 TransAm, the spoiler from a 91 Camaro, the GTA body parts of a 1990 etc etc. Purist cry... but the car looks great, feels great and is built to please me.. not them.
The only thing I will say about elitist is that sometimes their quest to be purist or true to their marque is at the expense of their pocket book. So they will drop $5000 on a paint job so that their snobby purist friends won't frown on their paint job or to get some kind of boasting rights about how much they paid for their paint job.
But a funny thing just struck me... they are called the NastyZ28's ? I wonder how they feel about the fact that the 'same year' Firebirds were the more premium cars - just as the Cuda is the richer mans version of the Challenger. If there is any snobbier allowed, then it really should go to the Cuda and Firebird guys... since they were the upper scale or more premium cars ?
Dunno... but with most world economies in financial trouble at this time, and the economic crunch reaching down in to everyone's budget... I guess the best laugh you can have at any snob who wants to put down a 'roll you own' paint job is this :
Two guys have Z28's. Both cars are in identical need for a paint job. One guy rolls his own paint job and spends about $250 on paint, supplies and equipment - the other guy spends $5000 at the pro paint shop.
In the end you have a pleasant to look at $250 freshly painted Z28 and a lovely showroom quality painted Z28. One of these drivers still has $4750 left to buy some engine performance parts or to buy a ton of gasoline...
When you get down to the economics of 'rolliing your own' compared to sending the car off to a pro-paint and body shop... well I think I would prefer to have that extra cash in MY pocket to do with what I want...
.
For some reason or another the thought of painting you car inexpensively and easy just ticks some people off. I plan on rolling my '64 VW beetle for three reasons, 1. cost, 2. I can do it in my garage without fear of making my neighbors made 3. It's easy for me to do.
I'm excited!!
Posted By: Anonymous
Re: New Paint job on a budget thread Part III - 04/30/0807:52 PM
I'm a newbie, and although I have read alot about the budget paint job, I had to try some stuff out on my own, make some mistakes and get the feel for it.
Re: New Paint job on a budget thread Part III - 05/01/0801:35 AM
well I checked out your web site. This forum is full of trial and error experiments and thats one of the resons I like it so much. I do know for a fact that many guns have been used but that perticular one has not ( I think ) but I did notice that turbine gun and was tempted but decided NOT.... I hope it all comes together. I will say that acetone versus mineral spirits has been discused way way back. Mineral spirits won, acetone flashed " evaporated " to fast to allow the paint to level out. I distincly remember one guy had great results with rusto paint, mineral spirits and a air sprayer had very good results and virtuly no orange peel. from your test pieces I would say you should be able to get the mix with the right thinner ( MS )and get a smooth finish without all the orange peel
Posted By: Anonymous
Re: New Paint job on a budget thread Part III - 05/01/0802:00 AM
Quote: I will say that acetone versus mineral spirits has been discused way way back. Mineral spirits won, acetone flashed " evaporated " to fast to allow the paint to level out.
Yeah I've been reading as much as I can but I didn't get to that part. I was hearing so many different opinions and I just wanted to start getting familiar with the equipment. I think I got a bad taste for mineral spirits when I stupidly jumped in and added a boat load to some rustoleum I had lying around, dumped it into a compressor fed HVLP gun and started painting like it's 1999. The compressor was small and not powerful enough to atomize the paint properly. I read a post on set up of the gun and tried to set it up to those specks, but I didn't really understand the physics of what was going on and needless to say, it was like somebody drank a bunch of yellow milk and threw up everywhere. I tend to throw myself at the wolves when starting out, pick myself back up, spray on some bactine and throttle back. I think I need to revisit the mineral spirits, because I unfairly cast a little blame on it. No hard feelings right mineral spirits? See!...We can all get along.
Posted By: Anonymous
Re: New Paint job on a budget thread Part III - 05/01/0802:45 PM
Marq, Ive laid down 3 coats of brightside on my trunk (see last picture I posted) it really reflective but its also got some orange peel. now, It seems like for every coat of BS, its like 2 coats of rusty\trem. So far Ive wet sanded with 600 and 800. The final third coat has not been wet sanded. I know to wet sand with 1000g now, but if I wet sand it using 1000g it will become dull. im guessing this is where the polishing comes in. but what im trying to ask is, when you polish a surface, will it become dull again when the wax eventually wears off?
Re: New Paint job on a budget thread Part III - 05/01/0810:55 PM
Quote: Marq, Ive laid down 3 coats of brightside on my trunk (see last picture I posted) it really reflective but its also got some orange peel. now, It seems like for every coat of BS, its like 2 coats of rusty\trem. So far Ive wet sanded with 600 and 800. The final third coat has not been wet sanded. I know to wet sand with 1000g now, but if I wet sand it using 1000g it will become dull. im guessing this is where the polishing comes in. but what im trying to ask is, when you polish a surface, will it become dull again when the wax eventually wears off?
i'm not marq but.....you should go to a higher grit sand paper before polishing jsut to make polishing easier.....1200, or 1500, or even 2000. the higher(or lower depending on how you look at it) grit you go the dullness will get less and less. polishing should make it shine....the wax is jsut a protectant and the paint should shine before the wax is even applied. if you don't keep it waxed and the paint starts to oxydize(sp) or get dull you can polish that out and re-wax.
Re: New Paint job on a budget thread Part III - 05/02/0802:17 AM
Quote: Marq, Ive laid down 3 coats of brightside on my trunk (see last picture I posted) it really reflective but its also got some orange peel. now, It seems like for every coat of BS, its like 2 coats of rusty\trem. So far Ive wet sanded with 600 and 800. The final third coat has not been wet sanded. I know to wet sand with 1000g now, but if I wet sand it using 1000g it will become dull. im guessing this is where the polishing comes in. but what im trying to ask is, when you polish a surface, will it become dull again when the wax eventually wears off?
Basically the previous writer got it right. Between every second coat you should use a lower grit wet sanding to knock back any orange peel that may happen. Otherwise, if you have successfully laid down two coats and it is looking pretty decent, you can just lightly skim or wetsand the paint in preparation for the next addition of two more coats.
When you reach the point where you have gotten enough coats on to give 100% color coverage and it looks fairly decent, you then move to your wetsanding to prepare the surface for maximum shine.
You will note at this point... the earlier wetsandings were more structural - in that they were knocking back any orange peel OR simply scuffing up the previous dried coatings to prepare them to receive the next coats of paint.
The final wetsanding should be thought of more like a polishing stage. Yes, you are going to lose the paints natural shinier outer layer - but that is all part of the plan. You start working your way up gradually through higher density grits until you make it to 1500 or even 2000.
What happens during this polishing type wet sanding is that you are smoothing the outer surface shinier and shinier.
Think of it this way. Have you ever seen those souvenier gem stones or rocks that they sell on keytags or for jewelerly or for rock collectors. The rocks are sooooooooooo smooth and shiny that they look like they have been dipped in liquid plastic.
What has in fact happened is that the rock guy has put those rocks into something that looks like a cement mixer or a laundry dryer with sand. They then set it on tumble mode and let it turn and turn adinfinitum. What happens is that the formerly rough and craggy stones rub against the sand and against the other rocks and slowly their craggy features disappear. Then as time goes on it simply smooths itself further and further until it reaches a point where that formerly rough rock has taken on a super smooth look and its surface is soooo smooth that it looks like it is glass or plastic coated.
Another quicky example to get this point across... are the pebbles you see along a beach that are all round and smooth. Over the years, the water and the movement in the sand has smoothened them out.
Ok... now look at the paint job. You begin with an 800, move to a 1000, move to a 1200, then on to a 1600 and even 2000 grit. At each of these polishing stages you are making that paint job shinier and shinier because each higher grit is making the 'scratches' on the paint surface smaller and smaller and smaller. THE LESS SCRATCH or the smaller the scratch the shinier the paint.
So yes... the paint will be dull at some point during your polishing wetsanding stage. BUT as you progress to the higher grits of sand paper things will reverse where it begins getting naturally shinier and glossier.
BUT we don't stop there... that is why we talk about the various rubbing compounds or polishing paste that we use on the paint once we are satisfied that we have done about all we can at the 1500 or 2000 grit stage. BECAUSE those polishing compounds are actually taking things to the 2500 or even 3000 grit level.
So in theory ( and in practice ) that surface should reach a mirror smooth finish. As noted, the smoother the outer skin of the paint, the more depth and gloss the paint will appear to the eye.
NOW when we finally get to the waxing stage, although it is also trying to add more gloss and depth to the paint, its main benefit at this point is to seal the outer skin of paint from oxygen and moisture.
In theory you don't have to do the waxing stage because if you did the polishing stages correctly and patiently, you should have a 'new car' level of shine to the paint. BUT as I said the main benefit of the addition of wax at the end of it is all to seal your work and to give it that final ooooomph of shine, reflection and depth to the paint.
NOW... yes... the odds are that in one year, or maybe even in 6 months, you may have to re-wax your car. If you invested in a decent orbital polisher like the Porter & Cable, that wax job will be a 20 minute snack that you can blow through easily. So future re-waxings are not something to worry about. The quality of the wax you use and your driving and enviromental setting will dictate how often you need to re-wax.
If you take the car through a brush style car wash... the lifespan of the wax coating will be shortened. If you go to a touchless car wash, the wax will last longer. If you bucket wash your car, the soap or cleanser you put in the bucket to make the lather will either help or shorten the life of the wax. I can't really speak of how some of those sprayers with wax and cleaner in it ( like the Mr Clean system ) would help or hinder the wax coating. So many variables eh...
But the whole point of this essay was to best explain how each of the wet sanding stages build upon each other to achieve as smooth as possible an outer finish in the end.
Oh... and just to give you some kind of measure to compare things with..
a ) most new car paint jobs are probably equal to about a 1200 grit sanding and wax.
b ) a clear coat finished paint job is on about par with a wetsanded car that has gone to 2000 grit and then been hit with rubbing compound up to about 3000 with a high quality wax.
The main advantage obviously of a genuine clear coating is that it is probably 5 to 10 times thicker then a wax layer. Hence it is capable of giving off a visually deeper depth of color and shine because the light ( sunlight ) is able to have more depth in which to refract.
So although a clear coat can probably kick our butts for sheer depth and accordingly gloss ( as well as durability ), the wax on our 2000 to 3000 grit wet sanded vehicle should be giving off visually just as much bling...
But I would be cautious about jumping over to some of the acrylic type car polishes in an attempt to boost your bling in the hope that an acrylic polish might rival a clear coat job or one of our wetsanded wax jobs. The acrylics normally only look good for the first ten days and then shortly thereafter start going downhill. Just take a look at any acrylic picnic glasses that you might have lying around and you will see how easily acrylic scratches ( and as such loses its over all shine ). .
Posted By: Anonymous
Re: New Paint job on a budget thread Part III - 05/05/0812:49 PM
Hey Everyone, Been reading this thread (from the start on thread 1) just cant stop reading, and just wanted to post my bit of info... First off i own a 78 chevy nova, its blue, almost ford blue so i am gonna paint it gloss black, theres a few dings and abit of rust behid driver door that i need to take care of first... but have began to paint the trunk as my test peice, this is my daily driver so i couldnt just paint the whole car, so im doing the trunk, then the hood, then roof, doors, quarters, etc... i have currently put on 4 coats and will finish the trunk and polish it this weekend, the 4th coat looks just stunning!
i put on 1 coat and when it dries i wetsand with whichever grade of grit im using on that coat and then paint the next coat... so im sanding after every coat to make sure i got bubble/line free surface...
I find it easier to paint when its 40 degrees out, it doesnt drie to fast and gives you more time to correct any errors... as i painted when it was 80 degrees (i live in illinois one day it was 40 the next 80, the next 50... its insane here) and the paint dried WAYYYYYY to fast!!!! then again it was sorta windy out and i was painting outside instead of in garage as i wanted to see how it went...
but anyways i dont have any pictures just yet, i work 12 hour shifts 3 days on 3 days off, so on my 3 days off as soon as i get off i wetsand, paint... next morning wetsand paint, that night wetsand paint, so i can get each section completely done in my 3 days, im trying ot take my time and do it right!
but this paint and method is amazing, i was at autozone the other day and had a buddy there testing my alternator (been running into some electrical issues ) but i told him to take a look at my trunk, and he said it looked pretty good... i told him i rollered it on (remember just 4 coats, no finish and polish yet) and his face just droped... he couldnt believe it!
with that i want to thank everyone for keeping everyone updated with how this is done, and offering all the information you can give about your projects...
and i know exit was having prblems with drying time, im not sure if he ever got it figured out yet as i havent read that far, but i remember he may of thought it was the mineral spirits, but im using the oderless mineral spirits (which its not oderless it has such a strong smell almost to knock you on your a** with a big sniff) but the dry times are fine... and might i add a warning when your painting to keep your face away from the paint surface, i get 6 inches away from the surface at a 50 degree angle or so to check the lines and bubbles i may have missed, as im painting, and i have to use a paint mask cause the mineral spirits does have a strong smell... oderless, right...
Good luck everyone and ill continue to keep my project updated and have pictures hopefully this weekend
Posted By: Anonymous
Re: New Paint job on a budget thread Part III - 05/05/0806:17 PM
I have been reading this thread over the past 2 weeks. I began on the first thread of 2006, and have decided to take this route myself. I have built this truck for GO, not for SHOW! It gets used off-road a lot, so finding a route that was durable was key to me. Not to mention something I could do in the garage without having to create a paint booth!
As I only own a Mopar when I am sleeping (dreaming), my current ride, a 1985 Toyota 4 Runner got a Ace Hardware's Brand 'Yellow' Rust Stop. Here in Maricopa County we can't buy gallons of Enamel Oil Based paint. I picked up 4 Quarts of paint and 3 Quarts of Rustoleum White Primer. I put down two coats of Rustoleum White Primer first and then wetsanded with 400/800. Here is my results after 2 coats of primer and one coat of paint. Remember, this is just the first coat of paint w/o being wetsanded. I am not expecting it to be glass the first time. Thus far, I am very pleased with the results I have gotten. As others have stated, it's not just in the paint, it's the prep work that makes the finished product! Man, are my arms sore though!! LOL
Please, provide some feedback as you guys are the GOD'S when it comes to this! Thanks 69Charger for beginning this thread! And big thanks to MARQ for posting up so many tips and suggestions!
Hope everyone enjoys the pictures:
Prepped:
Primered:
First Coat Yellow:
The weather has been perfect here in Arizona for this! It's averaged about 92 degrees and 10-18% humidity. I hope to get 6 more coats total. One more coat, then wet sand w/ 400. 2 coats and wet sand w/800. Two more and then wetsand with 1200 or 1500! I am glad I decided to go the white primer route, it really helps the first coat stand out!!
I will keep you posted on the progress for those who like what they see!
John
Posted By: Anonymous
RE: On e question though.... - 05/05/0808:43 PM
Do you guys (Marq, 69Charger, others?) think I should lay down the second coat THEN wet sand or would it be too meticulous to wet sand with 600 and then apply the second coat?
I am just curious if at this point in the process if the orange peel I have is minimal or excessive. Being unfamiliar in this area, just want to make sure I am on the right track. When I go to apply a second coat, I don't want to create a mess by adding MORE orange peel. Attached is a full size image so you can get a good clear shot of the paint.
Please chime in with opinions and comments.....
I am very interested to other people's thoughts!
Thanks!
John
Posted By: Anonymous
Re: RE: On e question though.... - 05/05/0810:25 PM
LUV24BY, how thin is your paint? I might be wrong but you shouldn't have any orange peal if your paint is thin enough. Your project is looking great.
Posted By: Anonymous
Re: RE: On e question though.... - 05/05/0810:48 PM
Thanks Todd! I mixed the paint/mineral spirits about 4 to 1 ratio. Because I see so many doing paint w/o primer, I am a bit hesitant on where the quality of my attempts are. I don't see a great amount of orange peel, however I am looking with untrained eyes. There was a spot on the hood that I had to wetsand the primer down, exposing to the original blue color. Then I painted with the yellow. I see the blue through the first coat of yellow, and it looks very transparent. I just wanted to get the input of others before I get too far and end up doing it all wrong. Guess you can say I am being overly cautious! LOL
Re: RE: On e question though.... - 05/06/0802:00 AM
The one thing that keeps drawing me back to this site each day is the hope of seeing yet another project underway or nearing completion ( or even completed ). I get a kick out of seeing how some of the projects have turned out.
I think the move to the white primer to begin was a big time saver for you - and with the yellow on it, it should make that yellow really pop.
Now... my first instict would be to knock back the orange peel at this stage - before adding another layer of paint on to it.
In other areas you can just do a very light web sanding to skim the surface. And where the orange peel is more pronounced, you can level it out now.
Since you are early in the paint process, it is better to defeat the orange peel and get things fully smoothed out. By the time you add your 2nd and 3rd coat you will have enough color coverage that you won't know where the original areas were that needed that extra bit of wet sanding.
I am surprised by how strong the yellow color took over the white primer. If you had told me it was a 4th coat I would probably have believed you.
Now... what I would be tempted to do is allow more drying time before adding another coat of paint. For example, if you go ahead and do the above referenced wet sanding to knock back the orange peel, let it sit for a few days. This is just to ensure that any paint that has been exposed after skimming off the top skin layer will fully cure. Those hot Arizona days will probably help quite a bit.
And as noted, thin back the paint just a little more - OR - stick with your current paint to mineral spirit ratio AND then add about 5% more of that Penetrol product.
I would like the coats going on to be a little thinner. In the back of my mind, I would have imagined the first coat on the white primer looking more like it had been 'just yellowed' by a giant dog peeing on it. Sort of a situation where you can see it is yellow but it is fairly faint. After all, the best results take a number of coats before you can get 100% color coverage. So that first coat on bright white should have appeared like it only was giving 25% of the color coverage that it will ultimately end up with.
BUT you are in a good position with what I can see so far and so nothing has been lost and you are a in a good position to built on what you have achieved so far.
That yellow really pops on that truck. It should look sharp when you are done.
Marq
.
Posted By: Anonymous
Re: RE: On e question though.... - 05/06/0803:55 AM
Thanks for the quick response Marq. I was hoping to have you chime in! Does orange peel begin to disappear as the paint cures to it's final hardness? It seems like the paint is showing less orange peel as it has longer to dry! Weird....
This thread / topic is absolutely amazing on how far and wide it's reached. Personally, I would like to know the website/user count/statistics before and after around the beginning of the second thread. I am sure website traffic jumped!
I am pleased that instictively you feel the same way I do. I felt that I should wetsand, yet inexperience kept me second guessing. Having the White Primer has one down fall - it's tougher to gauge the 'thinness' of the paint. I will have to cut the enamel a bit more. I kept the paint to the consistancy of milk, in fact it was very runny and seemed really thin (could see a seperation of mineral spirits and paint even after lots of mixing!)
To address your direct statements, there is a considerable amount of 'see through' on the truck. The white primer under it really deceives the eyes (and camera) to make it look like there's so much more Yellow than there is. The areas where the paint flashed after running, shows the runs are twice the yellow then the remaing paint around it. Tonight, I tested a small area on the back quarter panel with some 600 grit and the spray bottle. The difference between the wetsanded and non sanded area (to the touch) didn't feel hardly any different.
So, my thought (and instinct too) is to wetsand the truck down. If I get some white primer coming through, that's fine. Just wetsand now, cure a day or so, then coat 2. Let that sit in the direct sunlight for 8 hours, wetsand again with 600 and let it sit another day. Then, third coat and let that cure for 2 days in the sun. With taking the coats back, I can get that 'the dog pee look!' LOL
With the 'intense' direct sunlight Arizona provides for curing, and taking back paint by wetsanding after every coat, by the 4th or 5th coat I should have a good foundation to bump the wetsand to 1000 or 1500. Then, I will do a rub w/ mineral spirits to see what kind of finish I have. If I am not satisfied, then one more coat and some 2000 grit.
Lord knows it's cheaper to let the truck sit (not being driven) and take the time to do this than to drive it everywhere and fill up the tank every 3 days. The truck is my daily driver, and it only sees about 25 miles round trip to the office.
I am hooked on this thread and can't wait to post completed pictures! I will keep the camera close by and the progress/experiences listed here! I hope you all don't mind lot's of pictures!! <------ Is this a mullet toss or a mohawk? Inquiring minds want to know!
Posted By: Anonymous
Re: RE: On e question though.... - 05/06/0804:24 AM
Marq, below is the outcome of my Royal Blue/Smoke Grey rusto job. I'm pretty pleased with it except for some orange peel in the grey. It seems to me that the flat surfaces are harder to deal with. The blue came out almost flawlessly. In the pic, I haven't wetsanded or polished. Now I'm experimenting on my tunk lid with Black as I will paint either the whole car black or just the top part and have a Black/Blue car. I'm having a hell of a time trying to get the black on with coverage. It gets a little disapoiinting when I keep wetsanding down to the grey. I'm thinking I should just put like a good 6 thin coats before I wetsand. Better yet, maybe I'll check out our local boat supply store to see if they have Brightside. Any direction would be apprecieated. Thanks to all. This thread rocks!!! -Ted
Re: RE: On e question though.... - 05/06/0811:25 AM
Here are some before, and current pictures I have of my car. Its been a long road with 3 active kids, but I am making great progress. I may even have it all put together this summer.
Re: RE: On e question though.... - 05/06/0811:29 AM
And here is the car currently.
Posted By: Anonymous
Re: RE: On e question though.... - 05/06/0807:39 PM
How thin are you guys applying your coats? What does the paint/mineral spirits look like after mixing it by hand. Is it really super thin and almost like the mineral spirits are seperated (kind of like a oil and water type separation?)
Thanks!
John
Posted By: Anonymous
Re: RE: On e question though.... - 05/06/0810:45 PM
My mixture was 50/50. It looked just like the paint but thinner. I didn't see the oil/water separation that you describe. On my Malibu I used 7 coats of each color before I was done.
Re: RE: On e question though.... - 05/06/0811:28 PM
Quote: My mixture was 50/50. It looked just like the paint but thinner. I didn't see the oil/water separation that you describe. On my Malibu I used 7 coats of each color before I was done.
-Ted
Wow! A 50/50! I guess I was thinking I was cutting too much with it being about 75/25. Ok, I guess I will have to revisit this and get off my butt. I have to replace the fan clutch (oh yay) so, that is going to take presidence. I also have 2 girls (4 & 6) that missed me this past weekend because I spent most of my time in the garage painting!! LOL - so, I will probably do the fan clutch tonight, get some wet sanding done Wednesday or Thursday and then maybe a coat or two this weekend (I hope!)
I was wondering Oyevayboy, seeing as your in AZ, what did you find was your final cut for our climate? I don't have any paint measuring cups, so I am kind of improvising with tupperware!
Re: RE: On e question though.... - 05/07/0812:00 AM
Quote: How thin are you guys applying your coats? What does the paint/mineral spirits look like after mixing it by hand. Is it really super thin and almost like the mineral spirits are seperated (kind of like a oil and water type separation?)
Thanks!
John
I would say I am close to 50/50 as well. Otherwise I get a lot of orange peel. Sometimes I have to add MS when I get close to the end if I have been painting a while or it gets kinda thick again.
I don't see any separation of the paint and MS, but it does take a while to mix sometimes.
Re: RE: On e question though.... - 05/07/0802:21 AM
Quote: Thanks for the quick response Marq. I was hoping to have you chime in! Does orange peel begin to disappear as the paint cures to it's final hardness? It seems like the paint is showing less orange peel as it has longer to dry!
The story on orange peel is pretty straight forward and it explains why you would see a rise of the orange peel and then a settling back of the orange peel to a lower level.
Ok... so there is a coat of paint on the car, or bike or tool chest or whatever. And so we fall back to my lame ascii graphics to explain this :
Ok.. here is a fresh coat of paint applied to a surface
Now... when you add a new coat of paint on to this it looks like this :
NNNNNNNNNNNNNNNNNNNNNN - fresh coat of paint XXXXXXXXXXXXXXXXXXXXXX - previous coat of paint ---------------------- - original surface paint applied to
Now... that XXXXXXXX layer is the one that will decide whether you get orange peel or not. Because the XXXXXXXXXX layer is actually two layers. If you were to look at it from a side profile :
0000000000000000000000 - outer skin of coating xxxxxxxxxxxxxxxxxxxxxx - paint trapped between skin and subsurface ______________________ - original subsurface
What you see above is that the coat of paint as it cures forms an outer skin as it hardens.
The xxxxxxxxxx layer is the paint that is trapped between the outer skin and it is slower at curing and hardening because its curing time is slowed by the formation of the other skin. The carrier or gases have a harder and slower time evaporating out through the hardened outer skin.
That xxxxxxxxx trapped layer needs to reach a point of curing or hardening where it is no longer any curing happening. Otherwise it is still somewhat moist.
IF you slap a new coat of paint on the paint while only the outer layer of the previous coat is cured and its underlayer is still moist, the new coat of paint will weaken the tension or hardness of the previous layers outer skin.
AS the new coat of paint now begins to dry, it will be contracting and forming a new tension on its outer skin. But since the previous paint formation's outer skin has been weakened and it has a moist layer still trapped beneath it, this causes the lower layer of paints skin to contract and shift - this forms the orange peel
Soooooooo... one of the key things we harp on in this roll your own method is to make the paint/mineral spirit mix pretty thin.
Based on what I have just explained above you will see and be able to guess that if you are applying a superthinned layer of paint... there isn't as much paint being trapped between its curing and hardened outer skin and any paint trapped below it. HENCE the entire layer of thinned paint is able to fully cure and harden from top to bottom - without leaving a trapped moist layer beneath the outer skin.
When the coat of paint is rolled on too thick, you can almost guarantee that without a long drying time between coats of paint, you are guaranteed that moist layer is trapped underneath what appears to be a cured outer skin layer.
This whole story or concept is the key to success with the roll your own paint job and avoiding orange peel along the way.
Thinner is better because it helps you avoid any trapped moist layers that can become future orange peel sites...
And patience or properly timing your coats of paint is important to ensure that you have allowed enough time for the layer of paint to have evaporated its gases and formed a solid layer.
So the orange peel, when it happens, contracts the lower weakened skin and rises to its maximum height. Then as the trapped layer evaporates the gases or carrier out it retracts as the gases are expelled, until the lower layer is hardened and cured. But it is unable to return to a flat surface because it has bunched up the lower layers skin and hardened to its wrinkled shape.
Uh... I think I just put 20,000 people to sleep explaining the concept...
.
Posted By: Anonymous
Re: RE: On e question though.... - 05/07/0804:17 AM
That's a great write up Marq, and i have read your previous 'novels' you have posted before! And I have yet to be put to sleep!
I think that it's not as much orange peel dissappearing as it is my eye getting used to seeing the paint on the truck. As the first day or two, i wwas all over it with a fine tooth comb and looking at it from every angle. I was being my own worse critic. So, Orange peel is what i saw and that is what I got used to. As others have previously stated, I have looked at other cars in the parking lot and they don't have much less orange peel. The first coat of primer dried over night. The second sat in the direct sunlight for 3 hours (can said it could be wetsanded in about 5 hours normal drying) and then was wetsanded. I then waited about 2 hours after wetsanding to apply the first coat of paint. So, it may not be as cured as a O/N dry, but it was very strong and hard to scrape with a fingernail.
Check out this picture I took last night. You can see some blue visible from where i sanded the primer coats down exposing the original blue (old paint) and where there's some white areas(primer) - this yellow paint layer isn't as thick as may look. I think that is the white primer giving off a misperception. Also, look at the reflection of the light on the hood, it's dull but shows how little orange peel there truly is. It has been two days of sitting in the sun baking. Tomorrow I am going to begin wetsanding. The previously tested area I sanded already hardly got much sanding to expose white primer.
It's so cool though, just one coat and already people began stopping by and commenting on how good it looks. Imagine 5 more coats and a mirror finish!! I CAN'T WAIT!
Thanks for the input so far all! It's *VERY* appreciated!
Re: RE: On e question though.... - 05/09/0803:50 PM
can the rustoleum primer be used as a filler/primer? safe to do many coats and sand back down liek the paint? any problems using the white clean metal primer over original painted surfaces or over previous surface rust that has been sandblasted? i still really want to spray the aluminum and spray clear over it.
Posted By: Anonymous
Re: RE: On e question though.... - 05/09/0807:52 PM
Marq,
I have a 66 chevy van that i am going to roll with tremclad but first am going to roll on some primer to even out the base. My question is, do I mix the primer with the mineral spirits? If so, to the same consistancy?
Thanks
Posted By: Anonymous
Re: RE: On e question though.... - 05/09/0809:34 PM
I did not cut the Primer with Mineral Spirits. I opened the Rustoleum can and after mixing, found it to be really thin to begin with. I didn't want it too thinned out by adding MS. Honestly, I think this would be too thin to use as a filler. Perhaps a different primer, thicker style would be better for filler purposes.
I bought three quarts of white primer, ended only used 1 1/4 quarts for 2 complete coats on my truck. I ended up decided on two coats of the primer, and then paint. The first coat of primer went on and showed some original paint. By the second coat of primer, the original paint was not visible.
Depending on what color paint you will use (a bright color like red, yellow or silver) would definately benefit from white primer. I would even consider a white base with something like Grabber Blue, just to make it pop!
I just checked and I didn't take any pictures of just the first coat of primer. Only after the second coat. Here is a before and after picture:
Hope the two of these shows the difference two coats of primer makes!
Re: RE: On e question though.... - 05/10/0802:23 AM
Quote: Marq,
I have a 66 chevy van that i am going to roll with tremclad but first am going to roll on some primer to even out the base. My question is, do I mix the primer with the mineral spirits? If so, to the same consistancy?
Thanks
If you were using the Brightside primer... I would use it straight out of the can... with the intention of doing a very light wetsanding afterwords to make it as smooth as possible.
If I was using the Rustoleum primer... I would probably treat it the same as the Brightside and use it straight out of the can with the intention of doing a very light wetsanding.
In both cases you could add a little mineral spirit to wetten the primer so that it rolls on and has a bit more time to self-level. The more the primer is able to self-level, the smoother the dried primer will be - requiring less light wetsanding to smoothen up the primed surface prior to painting.
You will note that both of these primers are liquid in a can and both can be rolled on. I would not use the aerosol or spraybomb type primers because they don't deliver enough adhesion or color pigment.
AND don't forget the other advantage of the roll on liquid primers is that you can put 20% of the actual color paint into the primer to get it started leaning towards the color you are going to ultimately end up. Just be sure to allow a little extra drying time.
Just for reference sake : In the case of the above white primered truck, that is heading towards yellow... he could have put 20% yellow paint into his white primer and basically started with a yellowish primer upon which to build his later yellow coats.
.
Posted By: Anonymous
Re: RE: On e question though.... - 05/10/0804:11 PM
I never thought about diluting the primer with paint, that would have been a good thought. Well, that's the whole thing though, this is a learning process and will be a trial and error kind of undertaking.
One question I have to you guys, I have decided to change the flat black to a lighter color. Being an Arizona truck, summers will be brutal with the black. What other color would you recommend to go with the Yellow? How bout a silver or light to medium grey? Eventually, I want to make the interior grey. Would a complimentary color be the choice or a primary?
Would a white look better than Grey? I don't necessarily want it to look like a huge golf cart!
Re: RE: On e question though.... - 05/10/0811:29 PM
Quote:
One question I have to you guys, I have decided to change the flat black to a lighter color. Being an Arizona truck, summers will be brutal with the black. What other color would you recommend to go with the Yellow? How bout a silver or light to medium grey? Eventually, I want to make the interior grey. Would a complimentary color be the choice or a primary?
Would a white look better than Grey? I don't necessarily want it to look like a huge golf cart!
Any suggestions would be apppreciated!
Thanks!
Ok.. first off... forget the aluminum or silver. They tend to fail under extreme heat and sun exposure.
Now... I was closing my eyes and thinking about your truck... with its yellow ... and my first thought was Tweety Bird.
Ok.. so I went to Google and looked up the images of Tweety Bird to see what colors they used to compliment that famous bird...
What I found and liked.... was the dark ( almost burnt ) orange color that they used on Tweety's feet. NOTE : I am talking about that darken orange on Tweety's feet - not the lighter orange background that they used in that picture.
I think that dark bronzy orange goes amazing with flaming yellow...
Black and yellow car color combinations are the most common... and I have always liked the the bumblebee effect.
But your truck is already going to be black on the visible undercarriage and tires.. and yellow on the majority of the body. So the burnt orange could be a nice 'between' color ( between yellow and black - so I guess that would make it a complimentary color to the overall package ).
.
Posted By: Anonymous
Re: RE: On e question though.... - 05/12/0806:44 PM
Thanks for the suggestions Marq. Based upon your thoughts, I have made up a couple Photoshop (poorly done mind you) attempts to see the options you mentioned. This may give a different perspective to see it on the truck itself.
DECIDED COLOR:
So far, I have 3 coats yellow put down.
John
Posted By: Anonymous
Re: RE: On e question though.... - 05/12/0807:22 PM
LUV24BY,
I would have to say to go with the same yellow, because you have the black tinted windows to compliment them. Just !! BTW, looks great so far!!!
Re: RE: On e question though.... - 05/12/0807:43 PM
I like the yellow or the orange but not in the color sceme you show them in. IMHO if you mix the two keep it suttle nice the tweetybird.
Posted By: Anonymous
Re: RE: On e question though.... - 05/12/0808:23 PM
Quote: LUV24BY,
I would have to say to go with the same yellow, because you have the black tinted windows to compliment them. Just !! BTW, looks great so far!!!
Thanks Tim, I would agree completely. The damn answer was staring me right in the face LOL. I don't know why it didn't click initially! I added a image with the closest color yellow in photoshop I could find. I think that will be my choice. I appreciate your input, it was funny, I was @ my friend Tracie's cubical talking to her about it and you basically said the same thing she did. I will have to get working on the top too!
One question I haven't seen asked though: How many coats are you re-using your foam rollers for? I have three coats on one roller and it seems to be really nasty. I clean them after every coat w/ Mineral Spirits, but they still get nasty. I am replacing all my roller pads and roller tonight for the next 3 coats.
Re: RE: On e question though.... - 05/13/0812:42 AM
Sorry... I didn't know the color was going on the rear cover. I thought it was just a complimentary color for accenting...
Ok... how about this variation on your all yellow version. Just use a bit of black strategically to give the illusion of a large tinted rear window... and also the door window trim. Then yellowize your mirror...
New Paint job on a budget thread Part III - 05/13/0812:44 AM
Quote: One question I haven't seen asked though: How many coats are you re-using your foam rollers for? I have three coats on one roller and it seems to be really nasty. I clean them after every coat w/ Mineral Spirits, but they still get nasty. I am replacing all my roller pads and roller tonight for the next 3 coats.
One I used a new one for each coat, figured they were cheap enough why not. Yellow Wanted to do yellow on my truck but the wife talked me out of it because my Dart was already yellow.
Re: RE: On e question though.... - 05/13/0812:51 AM
Quote:
One question I haven't seen asked though: How many coats are you re-using your foam rollers for? I have three coats on one roller and it seems to be really nasty. I clean them after every coat w/ Mineral Spirits, but they still get nasty. I am replacing all my roller pads and roller tonight for the next 3 coats.
John
That is a good question. I am bad. I used a fresh foam roller EACH TIME I did a coating. I didn't want any dried paint skin on my roller or any variations in the foams firmness where some spots were drying.
The cost of these high density foam rollers is such that you can afford to splurge on the foamies.
Some of the guys have gotten away with multiple re-use of their rollers. Tricks like thorougly cleaning them off with mineral spirit and then placing them in a sealed jar or wrapped up in a plastic baggie to deprive them of air have been used by some folks.
The one thing about even the high density foam rollers is that 'at some point' even the high density foam will start degrading and disintegrating. You will know when that time has arrived because your roller will start leaving bit of foam on your rolled paint.
As I said... for me.. it was worth it to always start a new coating with a fresh brush.
The funniest thing was... imagine these white tampon shaped foam rollers being tossed in to my garbage can at the end of each painting session. And I was painting RED. I can't imagine what the garbage man thought when he dumped the garbage can into the back of the garbage truck and he saw what looked like a slew of bloodied tampons...
.
Posted By: Anonymous
Re: RE: On e question though.... - 05/13/0803:58 PM
Quote:
Quote:
One question I haven't seen asked though: How many coats are you re-using your foam rollers for? I have three coats on one roller and it seems to be really nasty. I clean them after every coat w/ Mineral Spirits, but they still get nasty. I am replacing all my roller pads and roller tonight for the next 3 coats.
John
That is a good question. I am bad. I used a fresh foam roller EACH TIME I did a coating. I didn't want any dried paint skin on my roller or any variations in the foams firmness where some spots were drying.
The cost of these high density foam rollers is such that you can afford to splurge on the foamies.
Some of the guys have gotten away with multiple re-use of their rollers. Tricks like thorougly cleaning them off with mineral spirit and then placing them in a sealed jar or wrapped up in a plastic baggie to deprive them of air have been used by some folks.
The one thing about even the high density foam rollers is that 'at some point' even the high density foam will start degrading and disintegrating. You will know when that time has arrived because your roller will start leaving bit of foam on your rolled paint.
As I said... for me.. it was worth it to always start a new coating with a fresh brush.
The funniest thing was... imagine these white tampon shaped foam rollers being tossed in to my garbage can at the end of each painting session. And I was painting RED. I can't imagine what the garbage man thought when he dumped the garbage can into the back of the garbage truck and he saw what looked like a slew of bloodied tampons...
.
LOL thats probably one of the few things that'll gross out the trash man.
Posted By: Anonymous
Re: RE: On e question though.... - 05/13/0804:51 PM
Quote:
The funniest thing was... imagine these white tampon shaped foam rollers being tossed in to my garbage can at the end of each painting session. And I was painting RED. I can't imagine what the garbage man thought when he dumped the garbage can into the back of the garbage truck and he saw what looked like a slew of bloodied tampons...
.
HAHAHAHA!!! That is great, and I can imagine the trash collector looking at these things going "I wonder who LIT the FUSE on this Tampon!"
The thing about the top on these 4 Runners, The area that is the 'blacked out' is a window. They actually partially wrap up the top edge. Here is a stock photo of a 1985 Toyota 4 Runner. So, really, though you idea is good on the black out, I would have to paint over glass to accomplish that!
This is a good shot of a '85 Runner showing the windows from a top angle. The area that is white on this particular picture is completely removable on all 1984-1989 Toyota 4 Runners:
Re: RE: On e question though.... - 05/14/0805:24 AM
Quote: I would have to paint over glass to accomplish that!
You may be surprised how well paint will stick to glass. No need to sand it, just clean it really well and wipe it with mineral spirits like you would the rest of the panels.
I really like Marq's idea. Here is my attempt at it, with an extra corner rounded.
Posted By: Anonymous
Re: RE: On e question though.... - 05/15/0802:55 PM
Marq,
Do you think one quart of Interlux Pre-Kote Primer would be enough to lay down 2 coats without trying to get every drop of paint from the container?
Re: RE: On e question though.... - 05/15/0803:22 PM
Quote: Marq,
Do you think one quart of Interlux Pre-Kote Primer would be enough to lay down 2 coats without trying to get every drop of paint from the container?
I have a 1995 Nissan 240sx, not a very big car.
Thanks
One quart should be enough ( without scraping the last drips out of it ). The primer has a high amount of pigment and primer 'solids' in it - so the first coat should give the 100% color coverage... leaving plenty of primer still in the can to complete the 2nd coat to give a build up of the solids.
.
Posted By: Anonymous
Re: RE: On e question though.... - 05/15/0809:11 PM
Quote:
Quote: Marq,
Do you think one quart of Interlux Pre-Kote Primer would be enough to lay down 2 coats without trying to get every drop of paint from the container?
I have a 1995 Nissan 240sx, not a very big car.
Thanks
One quart should be enough ( without scraping the last drips out of it ). The primer has a high amount of pigment and primer 'solids' in it - so the first coat should give the 100% color coverage... leaving plenty of primer still in the can to complete the 2nd coat to give a build up of the solids.
.
Thanks for the quick response. It will take some time until I get around to starting this, but I'll be sure to come back with pictures!
Posted By: Anonymous
Re: RE: On e question though.... - 05/15/0810:59 PM
Thanks for the suggestion! I personally like the 'S' or 'Z' line of the top between the rear sliding windows and the farthest window on the side of the truck (the on that wraps to the top!)
Here is a picture of the truck after the first coat of Primer on the back. Per Marq's suggestion previously, I mixed about 20% of the Yellow with the Rustoleum White Primer. I plan on one more coat and then paint. This top is not going to have a mirror sine due to the texture of the fiberglass. To me, it looks tan. In certain light, it looks yellow. Very strange!
Hope you guys don't mind the progress pictures! If so, I will hold off until the finished product!
Re: RE: New Paint job on a budget thread Part III - 05/16/0807:04 PM
Transtar Roll on primer? Anyone try this, here's a link scroll down until you get to 6464 roll on primer and read the data sheets, its made to go on with a foam roller. http://www.tat-co.com/productCategory.asp?id=1
Posted By: Anonymous
Re: RE: New Paint job on a budget thread Part III - 05/20/0806:18 AM
Question about satin. I want to do this on my probe but I have to do a little body work first. Ive read that the satin rustoleum rolls on just as well as it sprays from rattle cans. I was wondering if I should just spray bomb it. If I'm going to roll it i think i would have to take the entire car apart (bumpers, mirrors, fenders, etc) the only reason is because i would want to get all the little cracks and everything painted. so which method would yield the best results?
Re: RE: New Paint job on a budget thread Part III - 05/20/0810:17 AM
Has anyone found a clear that can be used over the rustoleum paint? i know that it technically doesn't need it, but i would like to try it and see if it brings up the shine a little. just wondering if i can roll this on as well or will the clear need to be sprayed.
Re: RE: New Paint job on a budget thread Part III - 05/21/0801:23 AM
Quote: Question about satin. I want to do this on my probe but I have to do a little body work first. Ive read that the satin rustoleum rolls on just as well as it sprays from rattle cans. I was wondering if I should just spray bomb it. If I'm going to roll it i think i would have to take the entire car apart (bumpers, mirrors, fenders, etc) the only reason is because i would want to get all the little cracks and everything painted. so which method would yield the best results?
You will get a better overall effect by rolling on your satin paint.
I gave this speech previously... but it does explain the benefits of rolling on a paint compared to using a spray bomb...
When you are rolling on a paint.... it self levels. This is because you are directly rolling the paint and its carrier ( the mineral spirit ) on to the target part. You lose none of the paint in to the air during the transfer and 100% of what goes on the roller ends up on the target part.
When you are spraying with an aerosol or spray bomb, the paint particles are propelled out of the can and the particles fly through the air until they land on the car. While the paint particles are in flight... they are losing some of their adhesiveness. So some particles of the spray hit the target part with 100% of their adhesion quality intact... whereas other particles have underwent a various percentages of adhesion loss during the flight. SOOOOOOOooo.. when the particles hit the target surface they tend to build on top of each other. These paint molecules do not all land in an orderly fashion as they build up their coat of paint. There will be air gaps created between some particles AND in other instances you will have these 100% adhesion molecules landing on paint molecules that had lesser percentages of adhesion. That makes them very unstable and easily rubbed off.
Ok... so the roller paint goes on the car and it fills in all the air gaps and creates a uniform adhesion between all the paint molecules and the subsurface that is being painted. As the paint dries and the carrier ( mineral spirit evaporates ) the paint molecules fill in all the air gaps with the paint molecules and create a strong bond amongst itself while it self-levels. You cannot take your thumb or brush against the paint with your leg or sleeve and dislodge the paint once it has self leveled and cured.
Whereas the spray bomb job leaves a paint on the surface of the vehicle that on looking at it under a microscope would make you think that it looks kind of fuzzy. That fuzziness when rubbed with your thumb, pant leg or sleeve will rub off.
Satin paint jobs are a big enough pain in the butt to keep looking good and flat. The roll on method gives you that chance to keep that 'flat' look longer because of what I explained earlier.
Re: RE: New Paint job on a budget thread Part III - 05/21/0801:33 AM
Quote: Has anyone found a clear that can be used over the rustoleum paint? i know that it technically doesn't need it, but i would like to try it and see if it brings up the shine a little. just wondering if i can roll this on as well or will the clear need to be sprayed.
Believe it or not... I find that my car gets shinier and shiner each time I polish it. But I will admit that I have been less then pleased with some car polishes then others.
My personal favorite is still the Meguiars Pure Carnuba. It gave me the best shine. But I got even better results using the Turtle War that is specifically designed for red paint jobs. It not only darkened my red paint job while laying on a great shine.
Today I was at a 'liquidator' store and they liquidating Black Magic 'synthetic' wax. It had a lovely almond smell and was selling for $1.49 - so I figured that even if it was crap, it wouldn't be a big loss. Well.... let me tell you... the stuff worked great. I will have to go back and grab a few more tubes of the stuff.
I had bad luck with a number of the 'detailer' quality sprays that promise to tweak up your paint's shine for show and go. I bought the Lucas brand and for the first time ever I was disappointe in a Lucas product. I had to repolish it after, using the Turtle wax to restore the shine and depth of color.
I also had no luck whatsoever with the super-advanced 'Turtle Ice' or the 'NuFinish'. The Turtle Ice held great promise and i really liked the idea that it dried clear ( so you can't see wax dried out in the gaps on the car ). But overall it had the same whacked out effect as the Lucas detailing shine stuff. ( oh... by the way.. I am now only using the Lucas shiney stuff on my TIRES - I won't allow it on the paint job )
I know you started the topic by looking for a quick fix coating that might help to give your paint job a 'clear coat' look. But in my own humble way I am trying to say that each time you polish and wax your paint job you will see the shine and depth of color continuing to improve.
Naturally a Porter & Cable helps to make each polishing and waxing session a pleasure.
Re: RE: New Paint job on a budget thread Part III - 05/21/0803:00 AM
Clear coat on rusto has been talked about way way back, back and forth banter, freind or foe, and some serious time and effort was put in. Tremclad does offer clear in a bucket can, rusto only spray bomb unless things have changed. I do rember one guy with a black paint job( was it a buick regal GN, clone ?) that went all the way. Hopefully someone with a little more brain power will rember this example or know how to search for it in this epic trilogy of a thread. Unfortuatly after a couple of attempts it was deemed a falure. I think his last attempt was mixing up tremclad clear in a spray gun and shot it on the car and it looked great but it peeled off later.
Posted By: Anonymous
Re: RE: New Paint job on a budget thread Part III - 05/21/0811:27 PM
FWIW, If you are a member of TheSamba, a VW forum, don't dare post anything in "their" body/paint section on the forum about the roller method. Evidently they don't like it and will not allow it to be discussed. You gotta tow the line or your posts will be deleted, even if the post was started by another member.
A member asked how he could paint his ride cheaply. One member said rustoleum spray can, I said the Roller Method and pointed him to this discussion. Of course it was removed.
I'm still scratching my head trying to figure out why some people get really upset when you start talking about painting your car with a roller. It's almost as if you were telling them there isn't a God.
Re: RE: New Paint job on a budget thread Part III - 05/22/0812:54 PM
Quote: FWIW, If you are a member of TheSamba, a VW forum, don't dare post anything in "their" body/paint section on the forum about the roller method. Evidently they don't like it and will not allow it to be discussed. You gotta tow the line or your posts will be deleted, even if the post was started by another member.
A member asked how he could paint his ride cheaply. One member said rustoleum spray can, I said the Roller Method and pointed him to this discussion. Of course it was removed.
I'm still scratching my head trying to figure out why some people get really upset when you start talking about painting your car with a roller. It's almost as if you were telling them there isn't a God.
Wow, Democratic Underground treats Conservatives better than that!
Posted By: Anonymous
Re: RE: New Paint job on a budget thread Part III - 05/23/0803:06 AM
i used a high build clear over my rusto job i will look in the garage and give you the name. and it turned out fantastic
Posted By: Anonymous
Re: RE: New Paint job on a budget thread Part III - 05/24/0801:31 AM
Hello, new member here. I just wanted to thank everyone who has contributed to this thread and gone through the trial and error in order to make this process work. I've read every page of all 3 sections of this budget paint job and Im ready to do it myself, i'll be using black brightside on my 79 camaro Z28.
I remember reading a while back in this thread that someone applied brightside over duplicolor primer and it fell off?? Did you guys ever figure out of it was due to poor surface prep or was it a compatability problem between he two products??? Right now my car is in black duplicolor primer(rattlecan). I just wanna make sure the brightside will stick to it since i've already put in countless hours doing the body work to get the serface straight as an arrow and ready for paint. Any elp would be appreciated thanks
Re: RE: New Paint job on a budget thread Part III - 05/24/0804:24 AM
Quote: I rolled mine on over dupilcoloe primer and had zero problems. Could be he had a prep problem?
I agree. I would wet sand the primer with no less than 400 grit and roll with confidence. Like Marq has said in numerous posts about spray bombing, the areosol paints and primers don't lay on very even. However, after a good wet sanding, all the loose paint or primer will be sanded away and what is left will be a solid base to paint on.
BTW...69dartgt, what did you do about the area between you cab and the bed? Did you pull the bed off to paint the area or just leave it alone? Just curious for when I paint my truck.
Posted By: Anonymous
Re: RE: New Paint job on a budget thread Part III - 05/24/0807:37 AM
little update...just to get a feel for the brightside i painted an empty 2 liter of pop, after about 24hrs though it was still slightly tacky. Has any one els experienced that?? so i put it next you one of those small cheap space heaters and the tack went away and got nice and hard, it's been another 24hrs since then (at normal temp, was only by the heater for an hour or so) and its hard like glass! To test it's polishability i scuffed part of the surface with a 3M scuffing pad, and used 3M rubbing compound and then 3M swirl remover and it had a beautiful shine equal to its natural gloss. Looks like the paints still wet....and it was so easy to polish too, almost like this piant wants to shine lol, i can honestly say i've never been this impressed with any hand applied paint as much as i've been with brightside, it shines like glass and is rock hard. Can't want to get this stuff on my car
Posted By: Anonymous
Re: RE: New Paint job on a budget thread Part III - 05/24/0807:52 AM
Something else i'd like to add, several weeks ago i did another practice piece. I used .96 cents a can cheapo enamel spray paint, and covered an empty 2liter pop bottle with a few coats. I gave it the better part of a week to harden up and then i wet sanded, rubbed, polished and waxed it. Now, it certainly wasn't as easy to polish as brightside, but when i had a few coats of wax on it it looks almost as good as the brightside. Examined it under indoor phlorescent light as well and outside in the sun and it is a deep black swirl free (dare i say show car) shine. So, it just really goes to show that if you're patient and go through the surface finishing process you can make even really cheap paint have a damn near show car shine. It really pays to practice polishing, especially on cheap paints to develope the patience, a carefull eye and hand, and a feel for the technique needed to do a profesional job. If you can make cheapo paint shine you'll have no problem whatsoever with brightside
Posted By: Anonymous
Re: RE: New Paint job on a budget thread Part III - 05/24/0808:10 AM
Quote: I rolled mine on over dupilcoloe primer and had zero problems. Could be he had a prep problem?
awesome, that makes me feel a lot better since your truck turned out awesome; how long has it been since you painted it?
Re: RE: New Paint job on a budget thread Part III - 05/25/0812:29 AM
69DARTGT, what did you do about the space between your cab and the bed? Did you just leave it unpainted or find someway to get the paint in there? Or maybe remove the bed. Just curious. Want to know what I should expect when I paint my truck. Thanks
Re: RE: New Paint job on a budget thread Part III - 05/25/0803:35 AM
Quote: 69DARTGT, what did you do about the space between your cab and the bed? Did you just leave it unpainted or find someway to get the paint in there? Or maybe remove the bed. Just curious. Want to know what I should expect when I paint my truck. Thanks
I used rustoleum's safety red & sprayed it down as far as I could also along the sides pretty hard to tell the bed wasn't off.
Re: RE: New Paint job on a budget thread Part III - 05/26/0802:33 AM
So, I guess unless you really look, you really can't tell any difference? I didn't want to have to remove the bed to paint, although with the surface rust right under the rear window, I may have to.
Re: RE: New Paint job on a budget thread Part III - 05/26/0803:13 AM
i tried to roll out some silver paint today. it actually laid out pretty flat. the biggest problem i have is that it doens't have the shine the non metallic colors have. that being the case, i think this would need a clear coat. i found another alkyd enamel that has a clear and thats krylon. i will try and get my hands on some and keep you guys posted. i'm far from finishing the car, but i'm debating whether to keep going or send it off to a professional.
Re: RE: New Paint job on a budget thread Part III - 05/27/0801:45 PM
Quote:
Quote: Question about satin. I want to do this on my probe but I have to do a little body work first. Ive read that the satin rustoleum rolls on just as well as it sprays from rattle cans. I was wondering if I should just spray bomb it. If I'm going to roll it i think i would have to take the entire car apart (bumpers, mirrors, fenders, etc) the only reason is because i would want to get all the little cracks and everything painted. so which method would yield the best results?
You will get a better overall effect by rolling on your satin paint.
I gave this speech previously... but it does explain the benefits of rolling on a paint compared to using a spray bomb...
When you are rolling on a paint.... it self levels. This is because you are directly rolling the paint and its carrier ( the mineral spirit ) on to the target part. You lose none of the paint in to the air during the transfer and 100% of what goes on the roller ends up on the target part.
When you are spraying with an aerosol or spray bomb, the paint particles are propelled out of the can and the particles fly through the air until they land on the car. While the paint particles are in flight... they are losing some of their adhesiveness. So some particles of the spray hit the target part with 100% of their adhesion quality intact... whereas other particles have underwent a various percentages of adhesion loss during the flight. SOOOOOOOooo.. when the particles hit the target surface they tend to build on top of each other. These paint molecules do not all land in an orderly fashion as they build up their coat of paint. There will be air gaps created between some particles AND in other instances you will have these 100% adhesion molecules landing on paint molecules that had lesser percentages of adhesion. That makes them very unstable and easily rubbed off.
Ok... so the roller paint goes on the car and it fills in all the air gaps and creates a uniform adhesion between all the paint molecules and the subsurface that is being painted. As the paint dries and the carrier ( mineral spirit evaporates ) the paint molecules fill in all the air gaps with the paint molecules and create a strong bond amongst itself while it self-levels. You cannot take your thumb or brush against the paint with your leg or sleeve and dislodge the paint once it has self leveled and cured.
Whereas the spray bomb job leaves a paint on the surface of the vehicle that on looking at it under a microscope would make you think that it looks kind of fuzzy. That fuzziness when rubbed with your thumb, pant leg or sleeve will rub off.
Satin paint jobs are a big enough pain in the butt to keep looking good and flat. The roll on method gives you that chance to keep that 'flat' look longer because of what I explained earlier.
Hope this helps
Marq
.
I disagree. The whole problem with thr roller/brush method vs spraying is that it introduces the very real (probable) imperfections/inconsistencies that are a direct result of the roller/brush. As much the reason why you need to sand the hell out of it as the peel. I'm not poo pooing the roller, I'm just saying that thinning the hell out of the paint (at least 50%) reduces those inconsistencies as much as any peel.
This stuff sprays *really* nicely I find - however, it is nice to have it thicker than a 50/50 mix to spray. The right ratio - and there is very little, if any, peel at all, and you avoid the (sometimes overwhelming) task of rolling or brushing while avoiding the natural characteristics of... rolling or brushing paint. However, you still have the issue of one of the biggest drawbacks of this paint - the drying time.
Anyhoo... just my 2 cents.
But, in anycase, for satin black - hands down, my favourite paint - period - is Dupli-Color Low Gloss Black Engine Enamel. The stuff sprays (rattle can) to an awesome satin finish. It blends effortlessly. It dries (to the touch) in minutes. And, it will be durable - and resist all the nasty stuff that an engine enamel is going to resist. Trust me. If you want a quick and cheap and dare I say, wicked satin black finish - buy a few cans of this stuff.
Posted By: Anonymous
Re: RE: New Paint job on a budget thread Part III - 05/27/0810:42 PM
Well its been a while. Finally got some time to get back on this project. For those who dont know, I started with rusty paint on my hood a couple pages\months back (pg 45?) and I eventually got the process down and started using brightside paint for the whole vehicle. I said to hell with the molding and decided that i will scrap, sand or brush it off later on. I know, stupid move. I applied 1 coat to my car and here are the pics.
Actually let me get a before and after shot.
BEFORE AFTER I kind of got ahead of myself. The after shot has only 1 coat and isnt finalized.
Re: RE: New Paint job on a budget thread Part III - 05/28/0801:18 AM
I was wondering were the suvivor painter went. That car is already looking good. I did a little experimenting with a shelter/ temp paint booth and totally went [Edited by Moparts - Keep it clean] had a good idea but blue harbour freight tarp could not handle the tension, plus inadequate engineering, and I could not get it to shed water so in short order I took it down before the elements did. I could of just started the body work. Trim I hate it, my Olds has layers and layers of the stuff. I got most of it off and most of is not fit to go back on. but unfortunatly it is held on with plastic clips that mount onto metal "studs" all down the car and some parts were mounted using " bolts ". So now I have lots of studs to grind down and holes to fill in or put that gawdy trim back on. and I still have the trim on the bumbers that " matches " the side trim, decisions decisions. I think a cleaner look, will better? Oh one more thing on trim, the rear quarters had side markers recessed in the trim I need to add a aftermarket side marker to the list.
Posted By: Anonymous
Re: RE: New Paint job on a budget thread Part III - 05/28/0811:48 PM
Today is NOT my day.
This is my first time having issues with adhesion. I havent done anything different. EXCEPT for being to hasty. prior to laying down the 1st coat, i prepped the surface as usual, BUT after I let the mineral spirits evaporate, I was quick to lay down a coat. usually this the route I go. but this time the surface was still "moist". not from mineral spirits but condensation. youd think id learn my lesson from the past winter about painting earlier in the morning. but again, I got hasty. Either that or I didnt leave it to cure enough, but I doubt this. ALTHOUGH, after another 12 hours, I went back outside and hosed it down to find the paint does not come off at all. so I dont know if it hasnt had enough time to dry off or the surface had contaminants.
well, tomorrow is another day. Heres a picture of what the car might of looked like CAR IS SOAKING WET
Oh and for reference this shot here, shows what your surface should look like after wetsanding. Notice that the left side of the hood, the water is flat. while the un-wetsand side is collecting the water.
Re: RE: New Paint job on a budget thread Part III - 05/29/0801:33 PM
Mx2001 - your adhesion issues are not from mineral spirits being on the surface. You problem is you did'nt prep the original paint correctly, IT'S STILL SHINY!!!!! you should have completely sanded the original paint and prepped with 400 UNTIL THERE WAS NO SHINE IN THE PAINT>>>>> THERE"S YOUR PROBLEM!!
Re: RE: New Paint job on a budget thread Part III - 05/29/0803:19 PM
Quote: Mx2001 - your adhesion issues are not from mineral spirits being on the surface. You problem is you did'nt prep the original paint correctly, IT'S STILL SHINY!!!!! you should have completely sanded the original paint and prepped with 400 UNTIL THERE WAS NO SHINE IN THE PAINT>>>>> THERE"S YOUR PROBLEM!!
Also wipe it down with a good grease/wax remover before you sand. This will work just be patienct
Re: RE: New Paint job on a budget thread Part III - 05/29/0810:39 PM
well I was not real happy the the rusto 'burgundy' that i painted my sidecar. it was still to 'red' so i decided to try a different color and went with charcoal grey. it is still lighter than i expected but i think it will be good. it is closer to matching the silver on the bike than the burgandy was to matching the bike. up to coat 2 so far and have put those pictures on my webshots page for the repaint. will update as I paint more. pics are here at the end.
Re: RE: New Paint job on a budget thread Part III - 05/30/0806:14 AM
Quote: Mx2001 - your adhesion issues are not from mineral spirits being on the surface. You problem is you did'nt prep the original paint correctly, IT'S STILL SHINY!!!!! you should have completely sanded the original paint and prepped with 400 UNTIL THERE WAS NO SHINE IN THE PAINT>>>>> THERE"S YOUR PROBLEM!!
Long time no see!
That would explain why I never had any adhesion issues since I started, I was always having to sand back down to original paint, lol.
Posted By: Anonymous
Re: RE: New Paint job on a budget thread Part III - 05/31/0802:37 PM
Thanks to the 3hrs of intense sanding, I now have Popeye arms
While sanding, I came to the conclusion that there are 3 factors that contributed to the peeling of my first coat.
- Didn't sand the original paint.(chargeryeehaa) all the years of the elements probably acted as another layer on top of the clear coat . -Not washing the car. bit embarrassed to say, i just acted like the mineral spirits was going to eliminate all contaminants. -painting to early in the morning. condensation builds in the morning. although I did dry surface. it was still somewhat moist.
I was REALLY REALLY close to giving up the whole project to tell you the truth. but I made it too far to just quit. besides this keeps me busy and away from the xbox,wife and kid
enough jibba jabba, here are some pics.
Heres a WET SHOT Heres a DRY SHOT Random shot
Just finished washing the car! most are WET SHOTS
Tomorrow morning Ill start painting again.
Posted By: Anonymous
RE: New Paint job on a budget thread Part III - 06/04/0803:39 AM
So im looking to repaint a cavalier thats dark purple into a red. Probably like a brighter red. Where can i see a list of colors of paint. what paint do you recomend? I think im gonna go with brightside. Wheres the link for rustoleums marine paints? And about home much time goes into the whole project?
Re: RE: New Paint job on a budget thread Part III - 06/04/0805:40 PM
I got a good but on a six pack of quarts off ebay but that person doesn't sell anymore, I used their frie red but rusto;eums safety red is the same, almost impossible to tell the colors apart. Took about a week and a half to do the truck the weather was good the whole time. Hindsite being 20-20 I should have primed the whole truck before I started.
Posted By: Anonymous
Re: RE: New Paint job on a budget thread Part III - 06/07/0812:39 AM
So, I have decided to roll out several layers first then spray the last set of coats. One MAJOR problem i'm having is that I can clearly see roller strokes in the paint. Ive tried using thicker and thinner paint and I can still see the strokes ant he layers arnt going on too even at all. How do I fix this?
Re: RE: New Paint job on a budget thread Part III - 06/07/0812:56 AM
Quote: So, I have decided to roll out several layers first then spray the last set of coats. One MAJOR problem i'm having is that I can clearly see roller strokes in the paint. Ive tried using thicker and thinner paint and I can still see the strokes ant he layers arnt going on too even at all. How do I fix this?
You needed to wet sand that first. Roller marks are high and low spots.. I have a few also been toying with the idea of spraying on a high build primer and starting another coat..
Re: RE: New Paint job on a budget thread Part III - 06/07/0801:07 AM
I haven't been here or caught up on any new methods but sounds to me like you need to use a thinner mixture and lay it on real light. I dont remember seeing any roller marks when painting, or if I did, they went away on their own when rolling over the area after applying the coat (to even things out). Thicker paint will just stay there and not self level, and too much thin paint would probably run.
By the way here's a pic of my Dart on the road..there are a couple scratches on it from working on it, so im thinking of going with another couple light coats of the old Hatteras white.
Posted By: Anonymous
Re: RE: New Paint job on a budget thread Part III - 06/08/0804:24 PM
Its soo thin right now that its super bubbly. and a tiny bit runny so i thickend it up a little.
Posted By: Anonymous
Re: RE: New Paint job on a budget thread Part III - 06/09/0810:56 AM
Hey guys, i created a blog on my progress with this project. Tons of pictures on my project are up, if you guys want to check it out.
Re: RE: New Paint job on a budget thread Part III - 06/09/0803:03 PM
Well I have been slowly but steadilly working on the Olds it has been kind of rough, time is short and the days are HOT. I have a couple of questions for the ones that have gone before me. The top surfaces were in sad shape no clear coat left, cracked paint surface rust and what look like scratches with surface rust in them. I sanded with a 1/3 sheet power finish sander with 220 grit my first thought was it probably be too aggressive but it looks silky smooth afterwards, only original primmer left, for the most part excepts where those scratches with surface rust in them were the surface actually is shinnier than before sanding, strange? My first question is how much filling will Rusto rusty metal primmer fill, I do NOT want to take the surface to bare metal and should the primmer be thinned like the paint. My second question is concering the sides. The very top of side that roll to the Horizontal plane are like the top no clear coat left, paint comes off easy now shows original primmer like the top of car but as you go down clear coat is intact and that stuff is Hard 220 grit + power sander just does dull it up. The hart of the question is for adhesion for new primmer and paint How do you know if is scuffed enough so the new stuff will be permanent. One more if you don't mind about Bondo Surface prep for application what grit and does it need to be bare metal. I have a couple dozen spots that need attention ranging from dents, a couple rust spots, Holes from bolts that held the side trim and a whole bunch of metal studs that I grinded off that held the same side trim on. Thanks
Re: RE: New Paint job on a budget thread Part III - 06/10/0801:58 AM
Nice to see your Dart on the road where it belongs and it really looks good. Glad you and some of the other pioneers still helping us first timers out. I am struggling with time...and what little of it some people think I should be spending on it . If I ever get to putting pigment on I hope it goes faster. I still have a little intial sanding to do and body filler to apply. Not sure if I made it clear but the primmer I plan on using is rustoleum rust metal in the quart can.
Re: RE: New Paint job on a budget thread Part III - 06/12/0803:25 AM
Quote: Well I have been slowly but steadilly working on the Olds it has been kind of rough, time is short and the days are HOT. I have a couple of questions for the ones that have gone before me. The top surfaces were in sad shape no clear coat left, cracked paint surface rust and what look like scratches with surface rust in them. I sanded with a 1/3 sheet power finish sander with 220 grit my first thought was it probably be too aggressive but it looks silky smooth afterwards, only original primmer left, for the most part excepts where those scratches with surface rust in them were the surface actually is shinnier than before sanding, strange? My first question is how much filling will Rusto rusty metal primmer fill, I do NOT want to take the surface to bare metal and should the primmer be thinned like the paint. My second question is concering the sides. The very top of side that roll to the Horizontal plane are like the top no clear coat left, paint comes off easy now shows original primmer like the top of car but as you go down clear coat is intact and that stuff is Hard 220 grit + power sander just does dull it up. The hart of the question is for adhesion for new primmer and paint How do you know if is scuffed enough so the new stuff will be permanent. One more if you don't mind about Bondo Surface prep for application what grit and does it need to be bare metal. I have a couple dozen spots that need attention ranging from dents, a couple rust spots, Holes from bolts that held the side trim and a whole bunch of metal studs that I grinded off that held the same side trim on. Thanks
If it were me, to deal with those deep scratches and not strip to bare metal.... I'd make sure all the rust was out of the scratches - sand em', then use some light spot putty to deal with them. Fill them, blend them, then shoot the areas you puttied with a rattle can primer - scratch fill - and go a fair bit outside your repair area. Give a light sand to blend all that to your original primer.
Posted By: Anonymous
.... - 06/12/0805:21 PM
Ok, I am sure most of you have realized that the profesional painting community does not agree with this method.
Question, is there a reason (other than cost)that the Rustoleum or Brightside paints are used for this technique? Could a more recognized automotive paint be used sucessfully? If not, why not? If so, what would be recomended?
Quote: It will be interesting to see how long these low buck paint jobs last after a couple years of exposure to the sun and weather. This is what separates the cheap paint from the more expensive automotive paint.
well 69chargerXXXX posted pictures of his charger and bug after years of sun, rain, snow, etc and said they looked as good as the day he did them.
Quote: It will be interesting to see how long these low buck paint jobs last after a couple years of exposure to the sun and weather. This is what separates the cheap paint from the more expensive automotive paint.
The Brightside for one is marine paint, used in some pretty harse climate, mine is two years old and still looks just fine.
Quote: It will be interesting to see how long these low buck paint jobs last after a couple years of exposure to the sun and weather. This is what separates the cheap paint from the more expensive automotive paint.
My Mustang McLaren ( painted in Brightside Red ) is now 2 years old and still as shiny as the day it was finished. So I would say that it has held up 'quite nicely' - and probably is in the same overall state as if I had a professional paint job at that time.
Now... I will admit that I enjoy taking my Porter & Cable out and slapping fresh coats of wax on the car every couple of months... but I would have probably have done that with a 'pro' paint job too.
Now.. if I had a pro-paint job with a clear coat, I probably would not have had to bother waxing this puppy...
But overall I am extremely pleased how this 'cheap' paint job went. The single biggest benefit to date is the fact that I was able to make the car look RESPECTABLE AGAIN. I was able to USE the car for the last two years. You have to remember that previously the poor little car had sat hidden away in my garage FOR FOUR YEARS because I did not have the $3800 that THREE PAINT SHOPS wanted for painting it.
IF ONLY I HAD KNOWN about this SIX years ago... I would have been able to drive the car for six years, instead of hiding it away in a garage.
So yes... I am pleased.... no thrilled on how this whole adventure turned out.
.
Posted By: Anonymous
Re: .... - 06/13/0801:51 AM
Quote: It will be interesting to see how long these low buck paint jobs last after a couple years of exposure to the sun and weather. This is what separates the cheap paint from the more expensive automotive paint.
You have a crystal ball? Have you seen these rolled projects fail? So far so good. Maybe expensive paints are over priced versions of the cheap paints?
I also agree that these paint jobs finished off with rustoleum will not keep there shine like an automotive paint. I don't know about the brightside paint though. I am sure with frequent waxing and some elbow grease you can keep them looking like a professional paint job though. I am not knocking this idea just voicing my thoughts. We use rustoleum at work and yes after a couple of years out in the sun it does get faded and a chalky look to it. So I may go this roller route or paint booth haven't made up my mind just yet. Just depends on if I want to wax a couple times a year or just wash, dry, and go. Hats off to you roller guys though your rides are looking good. Jay
"Real" automotive paint (base coat / clear coat) is much different than rustoleum chemically. Both types of paint have advantages and disadvantages.
The primary advantage of base / clear paint is superb resistant to UV light. UV light from the sun causes the surface of paint to "chalk". Base / Clear paint is very resistant to this natural process. It will look great for many years even if the vehicle is always outside. A second advantage of base / clear is excellent corrosion resistance.
The primary disadvantages of base / clear paint include: It's dangerous to apply requiring personal protective equipment. It should not be sprayed in some places. (townhomes for example) It requires a large (expensive) compressor and other equipment for spraying. When sprayed the overspray goes everywhere!
Rustoleum or similar paints, when applied as recommended in this tread and given several months to dry, are quite scratch resistant. These paints are comparatively easy to apply with very few health risks.
The primary disadvantage of Rustoleum is it will chalk and start to look bad after a period of time. (1-2 years) 69Charger, the originator of these posts, has recommended frequent waxing to slow the chalking process. When the paint chalks, rubbing compound / polish will bring back the shine.
I know a fellow who sprayed synthetic enamel on an antique truck approximately 20-25 years ago. (Synthetic enamel is very similar to Rustoleum) His truck still looks fine. Of course his truck spends 360+ days a year in a climate controlled garage under a cover. He washes and waxes it regularly. I'd be surprised if this truck has traveled 5,000 miles since he painted it. He probably has the ideal conditions for paint to last.
In summary, every type of paint has a "lifespan." How long a paint lasts is determined by the environment the paint is in and the level of care given to the paint. Which type of paint a person should use is very much dependent on their situation and the intended use of the vehicle. There is no correct answer for everyone. I'm using rustoleum on some parts of the car I'm restoring. (such as interior metal parts) My current plan for the outer sheet metal is base / clear. I like the look of base /clear better and I like the lower maintence of it.
Edit: I'm thankful for the posts on this method. I'd never considered using rustoleum anywhere on a vehicle till reading these posts.
my , my duster was painted 17 years ago with Dupont Cronar single stage enamel, and it it still as shiney as it was the day it was painted. granted it is garaged, but it's got 50k miles on it in that time, and sits outside a fair amount, especially when I drive it to work. I have no doubt brightside will hold up as well, as it's very similar to the sprayed on single stage uerethanes and enamels. my car is starting to show some bubbling in the quarters, and in a few years when I tackle the bodywork, I'm going to use the roller method with a boat topside paint. I dropped $4k on painting my 5th ave 2 years ago, and am overall fairly happy, but it's not as good as I think $4k is worth. so if the duster doesn't turn out perfect I will have nobody to complain about but me, and it will be significantly less than having it done at a body shop.
I'm thinking of maybe changing the color on my car again using this roller method. The car was red from the factory and i did it black and then decided to do it in bright white rustoleum and that was about 1 and a half years ago and it still looks as nice now as it did then. I'm kind of undecided though about maybe doing it a two tone black over white or all black.
Posted By: Anonymous
Re: .... - 06/16/0803:03 AM
Quote:
When I move to Tennessee in two years, we'll compare paint jobs on our cars, then YOU can tell me if there is a difference.
You're up a rope.
I would love to spray my car myself but I respect my neighbors and have no desire in polluting my house with fumes. Sorry, I don't own a paint booth, wasn't in last years budget. What's wrong with me wanting to paint my car myself, saving a lot of money, and having a lot of fun doing it myself?
And what it looks like now. The nice thing about the roller paint job is that I can go back and recreate it with a quick trip to the hardware store for paint and sand paper.
Re: RE: New Paint job on a budget thread Part III - 06/17/0812:50 PM
Thanks for the response I beleive your are right that light rust needs to get out of their. One thing I did not get when rounding up supplies Glazing putty. I recently made some progress on the sides of the car were the body trim studs use to be filled with bondo then sanded back to smooth hopefully staight surface. Next are the holes about 1/4" some are perfect round others are oblong.
My The so called Auto paint is just a realative term depending on the year and make of car if you are talking Factory paint. Most modern Factory base/clear coat has been highly regulated by the Gov. for clear air act, low VOC paint, water based and in the beginning dissaster and evan today not as forgiving to the elements that a lot of people think, 1997 PLY. voyager after year 8 hood and roof totally trashed. On 78 volare shop repaint with single stage acrylic after year 5 highly faded and rust was back. 1988 Olds factory paint has ZERO clear left on all Horizontal surfaces and as smooth as concrete but I do not have the time frame on deteroation. Just look around next time your are driving around town all the factory auto paint that is faded, peeling, chipping, or covered by orage peel. Most purest Hot rodders will only use laquer paint for its high gloss but to get it ... you guessed right color sand, then polish, then wax, it is never used by auto makers any more today... labour intensive and not very durable to the elements. Alkayd enamal has been used by Auto industry in the past. Up to a point most factory paint is designed to last 5 years ... The pay of date for most of us poor debt laiden fools. Since car prices have gone up over the last several years I geuss it is resonable to assume the life expectency of the factory paint to at least match it. I also have fond memories of an Old 1960 something blue ford pickup with original paint that would chalk out and about once a year, help dad wax it up and the deep, smooth, gloss blue would return again.
Ace250xr84, Part of the reason you see paint failing so quickly is your location. Florida's climate ruins paint fairly quickly. I'm not 100% on all the technical reasons, but one of the testing methods used by ASTM to measure industrial paint durability is exposure to Florida sun.
In this part of the country, base / clear paint will typically last 10 years. Of course it depends on a LOT of factors. (care, application, initial quality, etc.) Yes, some vehicles had poor quality paint from the factory. One of my cars is in this catagory. It's only 6 years old, but will be repainted within the next year or two.
Every type of paint will fail at some point. I sprayed some Alkyld Enamel on my tractor 9 or 10 years ago. Just thinned it and sprayed it without any other additives. It's been faded badly for the last few years. (It's never been waxed, polished, etc.) Now it's starting to rust underneath the paint, so it's going to be repainted this summer.
The appearance of the tractor is not real important. The appearance of my car is MUCH more important. So even though the car's paint is in better condition than the tractor's paint, both will be repainted.
Quickdodge you hit it square on the head EVERY paint system will fail and the sun is punishing to paint here. Time till destruction and the amount of money spent are really the two main factors. Plus when it comes to paint its just about like mechanic work if you can do it yourself your better of. My 2 experiances with repaint shops have not been that good (1)(local independent shop) My 78 had good shine and little peel but they did have a few big ol fish eyes and a sag that looked like they painted over a couple slugs getten it on. Since it was getten a color change they painted the jams and oversprayed the whole interrior, white vinyl with a dusting of Burgundy ....nice... (2)factobake, dads 1992 conversion van with their top dollar job. The hard to get to spots they just didn't, between front window and roof drip rail peeling off, the roof was nearly skipped and it shows. So to draw to a close the car I am painting (rolling) Would NEVER be taken to a shop for a couple reasons and money is a big part of it, and until this method was put forth it would have stayed in its factory Auto Paint that had already grenaded so this method seems more than adequate and I hope I can pull it off. I fully realize that for around $1000-$2000 I can get it painted but would a $1K-$2k paint job really be that good evan with REAL AUTO paint.
Thanks for the info everyone. I'd like to do this to my truck but after wading through over 100 pages I'm still confused about prep work. Should I use the rustoleum primer over the original paint? The previous owner took a rattle can to one of the quarter panels so I'm worried that the paint will react different in that area. Any help is appreciated. Thanks in advance.
Quote: Thanks for the info everyone. I'd like to do this to my truck but after wading through over 100 pages I'm still confused about prep work. Should I use the rustoleum primer over the original paint? The previous owner took a rattle can to one of the quarter panels so I'm worried that the paint will react different in that area. Any help is appreciated. Thanks in advance.
When in doubt... sand it out...;)
The easiest way to put your mind at ease with compatibility is to sand down the alien primerered area. This way you can ensure that it is your primer job that is providing the full foundation for the roller paint to be applied on.
The odds are that you would not encounter any compatibility problems with the alien primer itself. The problem normally exist with how the other person applied it. By sanding it down and reprimering the area, you basically ensure that YOU KNOW how it was prepped and primered - and you aren't relying and hoping that the other person did the job right.
.
Posted By: Anonymous
Re: my mopar - 06/23/0810:54 PM
I'm glad to see this thread is still alive! Quick question for anyone who has used brightside or pettit paint.
Did you have to use an expensive primer? I talked to someone at pettit who suggested that rustoleum primer would work but I just wanted to chime in to hear from someone who may have actually done it.
Quote: I'm glad to see this thread is still alive! Quick question for anyone who has used brightside or pettit paint.
Did you have to use an expensive primer? I talked to someone at pettit who suggested that rustoleum primer would work but I just wanted to chime in to hear from someone who may have actually done it.
I've painted right over rustoleum with brightside and that works fine - so you don't need something that says "primer" on the can, but it wouldn't hurt. Since rustoleum itself doesn't need primer, you can rough the surface and use rustoleum (color) as a primer coat for your brightside.
Posted By: Anonymous
Re: my mopar - 06/24/0801:09 AM
Thanks for the tip.
Posted By: Anonymous
Re: .... - 06/27/0801:16 AM
Quote: It will be interesting to see how long these low buck paint jobs last after a couple years of exposure to the sun and weather. This is what separates the cheap paint from the more expensive automotive paint.
We have proof that these "low buck" paint jobs are still shiny after 2 years from members on the board, but we all know that their cheap paint will chalk up and fall off any day now.
And, if it doesn't fade and fall off, its only because the owners practice an ancient form of sorcery called *gasp* polishing and waxing! Some of these liars even say they enjoy practicing this waxing witchcraft! They are truly mad.
I won't even get into the hassle of finding a reputable shop that will do an honest job prepping and spraying a 5' paint job for under $6,ooo. ...Or the months it will take for them to finish, ...or the hassle of inspecting to make sure they did what they said they would, ...or the HORROR after three or four months when that spray job cures and all of the sanding marks from the poor bodywork magically become visible, and there is nothing you can do because it is UNDER the clear.
BTDT. Hey, what did you expect for $4000, Ya know, real paint jobs can run twice that... and life goes on.
Some of us have opted out of that roller coaster of happiness.
...And have found peace and contentment is as easy to attain as a 4" foam roller - longevity of the finish be darned.
I painted a test piece in my garage with some brightside. I noticed I got a lot of dust particles in the finish. The feel and gloss of the paint is very impressive, and from 3-4 feet away it looks mint. But when you put your nose up to it and feel it, it's dust speck city.
If I wetsand will these specs go away? Or will I just end up going through the paint before these specs are gone? Then what happens when I put the next coat on? More dust? Any suggestions?
Quote: I painted a test piece in my garage with some brightside. I noticed I got a lot of dust particles in the finish. The feel and gloss of the paint is very impressive, and from 3-4 feet away it looks mint. But when you put your nose up to it and feel it, it's dust speck city.
If I wetsand will these specs go away? Or will I just end up going through the paint before these specs are gone? Then what happens when I put the next coat on? More dust? Any suggestions?
unless you do it in a clean room you are going to get dust. there are things you can do to reduce the amount...clean the garage good, wet the floor, etc..but some will still be there. it wet sands out very easy. i would bet it would even polish out of the final coat without sanding!!
Yes, that's part of the reason you are sanding between coats. Knock down the dust specks, the orange peel, stray bugs, etc... before you proceed to the next coat. Attempts to bury them will likely just make them bigger.
In addition to the excellent advice of DonnyO, make sure _you_ are clean too. If you've been doing prep work prior to painting, dust can fall out of your hair or off your clothes and end up in the paint.
Clean the work area, clean yourself, clean the surface you are going to paint. And, while tack rags will make your hand sticky, they do a good job of picking up dust, so use them.
Quote: I painted a test piece in my garage with some brightside. I noticed I got a lot of dust particles in the finish. The feel and gloss of the paint is very impressive, and from 3-4 feet away it looks mint. But when you put your nose up to it and feel it, it's dust speck city.
If I wetsand will these specs go away? Or will I just end up going through the paint before these specs are gone? Then what happens when I put the next coat on? More dust? Any suggestions?
I have to agree with what the other lads have already said. Dust specs are nothing compared to whacked out mosquitoes, micro-flies, dumb spiders and even your own falling hair landing on wet paint. Dust is almost a pleasure to deal with... as it does polish out.
But lets be honest here. If you took your car to a pro paint shop ( and I am including MAACO and the other paint shop chains ).... the truth is that they paint your car in a clean room... but they don't leave it in there. As soon as they can they wheel it out and move the next car in to the clean room for painting. At that point their paint also becomes vulneralbe to dust and flying things UNTIL the paint flashes and seals itself sufficiently to keep 'things that land on it' from sticking.
Sadly... a lot of these freshly painted 'pro paint jobs' get parked outside after painting. In some cases the car is pushed off to some spot in the shop where they have tried to reduce the amount of 'things in the air' from landing on the car.
The point being to not hold a pro paint job up as perfection until you go to a pro shop and closely examine the fresh paint job with the same critical eye that you would to your own 'roll your own' paint job. The reality is that it is really easy to spot similar or equal 'flaws' on a pro-painted car. It is only when YOU pay a higher premium for your pro-paint job that the shop takes extra steps to ensure every square of the paint job is FLAWLESS.
But bouncing further deeper into the reality of paint jobs... GO TO YOUR LOCAL car dealership's showroom and put that critical eye to work on the showroom creampuffs. You will see orange peel, you will see runs, you will see specs in the paint, you will see shade or depth differences between the panels. I have even seen Mustangs in the showroom where the hardtop had a different shade of metalic red compared to the body.
When parking in shopping lots I am always looking at the level of shine on the vehicle parked next to me. I am always surprised how new cars DON'T have a mirror shine. Normally their paint jobs have a hint of an orange peel that reduces the mirror effect of reflection that a perfectly smooth surface would have.
AND IF YOU SHOULD ever spot a showroom new car or a freshly painted pro-paint job car that has a mirror smooth and flawles paint job... well I am willing to bet dollars to donuts that car has had its paint job PROFESSIONALLY DETAILED by a detailer who knew how to polish and wax that surface into the flawless jewel you are seeing.
And when you get down to the nuts and bolts of this 'roll your own' paint job... one of the aspects of the work involved is the final compounding, polishing and waxing. So in a way, our roll your own paint jobs are simply taking it to the next step that is not normally executed on the factory paint job.
To be honest... when I first finished my paint job it was quite visually acceptable. BUT in my heart I just knew that if a professional detailer had my car for a day he could probably increase the shine by 100% - simply because they know how to do just that - its their stock and trade.
The whole 'roll your own' paint job requires three phases to be completed well, in order to assure a finished job that you will be proud of :
a ) attention to detail during the PREP stage, b ) taking your time and having patience during the 'rolling your paint' stage... and finally... c ) attention to detail during the final compounding, polishing and waxing stage.
.
Posted By: Anonymous
Re: .... - 06/30/0803:23 AM
Thanks for the reply Marq. I think I'll be rolling primer over the whole body just to be safe.
Has anyone used rustoleum burgandy? I'd like to match the original color as close as possible and I think the burgandy color will be close but I'd like to be sure. If somebody could post a pic of rustoleum's burgandy color I'd appreciate it. Actually, if you have pics of any shade of red I'd like to see how it turned out. Please include the name of the color you used with the pic. Thanks!
Posted By: Anonymous
Integra paint problem - 07/01/0802:04 PM
Hi Marq,
I need help again. I did about 6 coats, but the paint never hardened. I think the problem was that I live in Vancouver where it is very humid during the winter months. I did my paint during the winter.
So my plan is to strip off the old paint and start over again. This time I'll use a dehumidifier between coats to ensure that each coat has hardened before I paint over it.
My question is: what's the best way to strip off the old paint? The last 4 coats of the old paint didn't cure properly ... and it clutts up the sandpaper ... even when I wet sand at 400 grit.
Please help.
John
Posted By: Anonymous
Re: Integra paint problem - 07/01/0810:59 PM
Quote: Hi Marq,
I need help again. I did about 6 coats, but the paint never hardened. I think the problem was that I live in Vancouver where it is very humid during the winter months. I did my paint during the winter.
So my plan is to strip off the old paint and start over again. This time I'll use a dehumidifier between coats to ensure that each coat has hardened before I paint over it.
My question is: what's the best way to strip off the old paint? The last 4 coats of the old paint didn't cure properly ... and it clutts up the sandpaper ... even when I wet sand at 400 grit.
Please help.
John
out of curiosity, how long did you let each coat dry?
I need help again. I did about 6 coats, but the paint never hardened. I think the problem was that I live in Vancouver where it is very humid during the winter months. I did my paint during the winter.
So my plan is to strip off the old paint and start over again. This time I'll use a dehumidifier between coats to ensure that each coat has hardened before I paint over it.
My question is: what's the best way to strip off the old paint? The last 4 coats of the old paint didn't cure properly ... and it clutts up the sandpaper ... even when I wet sand at 400 grit.
Please help.
John
Hmmmm.... ok... so your paint is still tacky and that is clogging up the sand paper... So if I was faced with that situation I would just stop work and leave the painting alone for two weeks. If you could park it in a nice hot garage, even better. But even being left out on the street or in the driveway where it can get whacked by the sun would help greatly to get the paint to fully evaporate the carrier and harden it up.
I don't think I would try any forced or chemical strippings of the paint at this point. IF you can get it to fully harden or cure by just leaving it alone, that would be better in the long run. IF it should reach a point of hardening where you can finally use sandpaper on it, then you will be almost certainly assured that it is going to be a well adhering base coat when you do get around to sanding it.
I understand what you mean about the humidity of Vancouver being a factor. Humidity does slow down the curing process. In a warm dry climate you can usually apply 'the next coat' within 12 to 24 hours. With cooler or humid conditions, the curing time between coats could go up to 48 hours between 'the next coat'.
IF the coats of paint you apply roll on fairly thin, with the mineral spirit being able to evaporate fairly freely ( due to the warm environment ) times will be speeded up between coats.
IF the coats of paint you apply rolled on slightly thicker.. it will take a little more time between coats of paint ( because the thicker rolling will end up forming an outer skin that will attempt to trap the evaporating mineral spirit beneath the skin. In that case you just have to walk away and give it anywhere from 36 to 48 hours to cure.
NOW... one thing you might want to experiment with is using acetone instead of mineral spirit. The acetone works like the mineral spirit to thin out the paint BUT it has a faster evaporation rate. The fast 'flashing' of acetone would not be good for someone in a warm ( hot ) environment, but in a cooler and more humid environment, the faster flashing of the acetone would actually be like the normal flashing of the mineral spirit in a hot climate.
Overall, I don't think that the paint remaining tacky will be helped by slapping even a dozen dehumidifiers in the garage. At this point heat or time are the key factors that will evaporate the carrier (mineral spirit).
IF the paint was 'ridiculously tacky'... I might try the suicide move that I faced when my trunk initially screwed up. For some reason the trunk had chosen to rebel and went elephantine. And like your situation the paint was tacky. I had resigned myself to just walking away from the project and letting it dry itself hard ( and then I was going sand it back a few coats and redo it ). But in a suicidal move I took one of my clean cloths - thorougly SOAKED it with mineral spirits - and I began wiping down the surface. My oddball theory was that if the paint was not curing... then possibly by overdosing it with straight mineral spirit and rubbing with the cloth with strip the damp layer of paint off a few layers until it reached a fully cured layer ( which would not be as affected by the soaking wet wiping cloth ). In my case it did exactly that. The bad coats of paint began rubbing off. In the end the truck lid lost all the bad coats of damp paint and passed them on to the cleaning rag. I was able to wipe the trunk lid down to one even sublayer of cured paint. I then walked away from the project for three days to let the trunk lid fully recure and evaporate all the mineral spirits that I had hit it with. When I came back to it... it was dry and hard - and so I hit it with a 400 grit sandpaper, wiped it down with a clean cloth with mineral spirt, walked away from it for the evening ( to let the wiping down evaporate ) and the next moring I applied a new coat of paint to that trunk.
Well I stopped at my sanding and bondo stage and jumped ahead put a layer of rusto red primer on and I thought it looked good. I made a few discoveries, Do test peices, and you need lots of LIGHT. I put the car outside yesterday in the sun for a light wet sanding. What a rude realization it sucks. Not sure what went wrong rusty rusto red with around 10% pentrol 10% mineral spirits. No pics sorry yet. some of is lack of prep under primer but most is primer faults itself, orange peel or unevan not smooth. I started with 400 wet progress to slow ( in my mind ) I am thinking it just about all has to come off ? In a fit of rage power sander with 320 wet took almost all of hood. After dinner now dark put car back inside dry hand sand with 320 paper clogs so fast its not gummy but I just don't know a few more thoughts of the lighter fluid sitting next to the charcoal and break out the power sander again dry this time. The dust the clogging paper I just do not know where to go from here. Time is not on my side I need to finish for my sanity I have to many complants from wife and I Do have other things I need to do. anybody have a plan or really how things should go because I just don't know right now. I am not sure how this primer is suppose to act when sanding and how long should it take to do hood or trunk. Thanks
I've read that the car manufacturers want orange peel in the paint on new cars to hide some of the minor flaws and imperfections from the metal stamping process. The human eye can see imperfections which are measured in the thousandths of an inch on real glossy surfaces. (think of a tightly gapped spark plug) The orange peel hides these minor imperfections which eliminates the need for car manufacturers to block sand the cars prior to painting.
Posted By: Anonymous
Re: Help - 07/02/0807:27 PM
I figured out what color I need to match my truck. The burgandy color is a near perfect match.
I tried emailing rustoleum but they never responded so hopefully you guys can answer this. Can I use rustoleum SPRAY primer under rustoleum roll on paint? Or will the two react with each other? Thanks in advance.
Quote: I figured out what color I need to match my truck. The burgandy color is a near perfect match.
I tried emailing rustoleum but they never responded so hopefully you guys can answer this. Can I use rustoleum SPRAY primer under rustoleum roll on paint? Or will the two react with each other? Thanks in advance.
I used the burgandy on my sidecar at first and it's ok but didn't match good enough for me so i switched colors. you can see pictures of it here....before, during, after and on to my next color even. I need to update with new pics as i'm up to about 6 or 7 coats not and ready for polishing!! http://rides.webshots.com/album/559630508GUGsFC
you are probably right about hiding imperfections same reason drywall usually has texture. I tried to take some pics of car but I did not force flash and it was inside garage and you can't see any detail at all. Perhaps I was a little hasty in my sanding. I was was just really let down when I thought i had something that I did not (ultra smooth primer) I am still a little unsure the best way to sand primer in prep for first coat paint? literally. I'll a pic any way maybe it will show enough detail. Pic of trunk after some sanding.
Posted By: Anonymous
Re: Help - 07/04/0804:07 AM
Quote: ...I am still a little unsure the best way to sand primer in prep for first coat paint? literally.
This was mentioned earlier in the 10000 pages but bears repeating.
An old body shop trick is to use two contrasting colors, like a very thin coat of black over the gray primer, as a guide coat for sanding.
As you sand, the black paint remains in the valleys of the scratches and thus are easy to see to sand smooth due to the high contrast in color.
I'm not an old bodyman, so feel free to correct me If I got any of that wrong.
Mike I believe your are correct on the guide coat and they even make " special guide coat paint " I do not think I will go that far. Over the long weekend I wet sanded whole car 320 and 400 mainly using 3M sanding blocks. I do not think that was the right choice. The car looks kinda like a tiger or " LIGER " new primer, original primer, original paint. Total opposet of what primer was suppose to accomplish " uniform color and smooth " I will post Pic later. I think I should have done by hand (No rigid or semi rigid block )? I did try a couple of section hand only and I still burned through here and their and took forever to get peel/texture out. Now I wonder if all that mix match surface will show up? I think I might have to forgo any more primer and go straight to paint. I do believe I will spray I can't sand any more I just don't know what I'm doing. So now I have to buy a gun, more tape, and learn how to spray I feel Like an GOOBBER , But I have to do something in the shortest amount of time. Any help would be appreciated. I going to go mess. board diving I know spraying rusto has been talked about and there are somethings I just do not remeber. Like thinners, recoat times and how many, how not to get orange peel.
I wanted to post a couple of pics for some reveiws and what the consinces would be on next step. More sanding, more primer, get the gun and shoot it. these are after primer orangy/textured then wet sanded. Dry sanding just did not work to good paper loaded up real fast like 10 strokes.
Naturally the ideal situation would be to have one uniform color. BUT your present 'tiger' configuration will work just as well in the long run.
The key thing to keep in mind is that your 'tiger' look will be visible for about 4 to 6 coats ( depending if your paint/mineral spirit mixture is thinned enough - and also depending whether you are using the Rustoleum/Tremclad paint or the Brightside paint ).
BUT that is ok... because you are not suppose to get instant 100% color coverage when rolling. The 'ghost' of the tiger will slowly disappear as each new coat of paint is rolled on.
At this point, just satisfy yourself that your tiger is as smooth as you can get it. The layers of roller coated paint will make the tiger go away... but more importantly the smoothness of the initial surface will have a bigger impact on the final shine etc.
Just don't be tempted to thicken up the paint mixture too much in a rush to get the tiger to go away. Some folks get impatient and try to rush getting some color coverage and encounter problems later because it didn't lay down ( self level ) as well as it could have if it had been thinned out. Also.. if you lay down too thick a coat in a rush to get some color coverage... well you might end up with the coats not curing ( hardening ) as quickly as they should.
.
Posted By: Anonymous
Re: Help - 07/09/0806:42 PM
Quote:
Quote: ...I am still a little unsure the best way to sand primer in prep for first coat paint? literally.
An old body shop trick is to use two contrasting colors, like a very thin coat of black over the gray primer, as a guide coat for sanding.
This stuff looks interesting for guide coat application. Has anyone tried it?
Well Marq you are probably right on the coverage and paint thickness. i am kind of bummed, I wanted to do this method. I feel really bothered by the amount of time I have spent on this project, granted all of it was an 1 or 2 hours time slots but a far number of half days. I have now run into 10 hour days at work so after work projects have just about been wiped off my plate. I need to speed up the process so spraying looks like a real good option. I really appreciate all the help, if any of the paint pioneers have some advice on spraying rusto with a harbour freight gravity HVLP gun. Should label thinning recomendation be ignored like when rolling (can says no more than 5%) recoat 24hrs in optimum conditions 48hrs if NOT should I go with 7-8 sec. drip test? 1,2,or 3 coats expected?
Posted By: Anonymous
Re: Help - 07/11/0807:57 PM
Quote: I feel really bothered by the amount of time I have spent on this project, granted all of it was an 1 or 2 hours time slots but a far number of half days.
Here's the deal. and there really is no way around it no matter how you apply the paint:
Prep is the same. The time it took to make the body smooth is essential to make the car look good whether it is sprayed or rolled.
There was a fellow who used a wagner power painter with excellent results, but there was a caveat about capacity or flow rate, I can't remember which right now. Bottom line was that the $29 cheapies were not the best choice.
The best things I have picked up from this thread is that
1. you don't need special expensive two-part "automotive" paint to get a good durable finish.
2. Fancy paint, special booths, and skilled painters cannot hide poor prep work.
So, the investment you made in time to prep is not lost, just unrealized. Banked, if you will. Seal it up with whatever you have time for, its ok.
Mike are you the one with that beutiful Corvar that was rusto rollered? If so that is one sweet ride very inspiraring. I appreciate the words of wisdom. If I ever make the switch to try and spray it will be with compresor powered. Either HVLP or conventional I am leaning towards HVLP. Right now the compresor I will use is out of service. Like literally the day I made my mind up to ask my dad if i do some spraying at his house the 5hp electric motor died. The motor is at the shop so I will know in few days if its a go. In the mean time I plan on painting (trying to )the bumber trim trust me it was in sad shape and intergral to the top plastic filler for the bumber. The original black was chalky white and the quarter round at the top that use to be so called chrome with clear plastic over it was flaked out chrome with yellow to brown plastic covering it. When I primered car the trim got a good covering too. I will first do a little adhesion test to make sure the primer is really on before I paint black. I think I will use flat instead of gloss.
Posted By: Anonymous
Re: Help - 07/12/0803:35 PM
Quote: Mike are you the one with that beutiful Corvar that was rusto rollered?
No, not me. I have done the process on some test panels and even put a wicked black finish on a home built HTPC, but have not had either the block of time, or the garage space for an incremental marathon session, to start on my car yet.
Its just as well because I can't decide whether to go with the original green or switch to black.
Quote: I plan on painting (trying to )the bumper trim trust me it was in sad shape and integral to the top plastic filler for the bumper. The original black was chalky white and the quarter round at the top that use to be so called chrome with clear plastic over it was flaked out chrome with yellow to brown plastic covering it.
That clear plastic covered chrome is trouble. If the plastic covering is not solid it all has to go. Back to that prep work - a clean, smooth, and solid base for your paint is essential. If the black part is chalky, make doubly sure the surface is stable and not embedded with old waxes or other contaminates.
Well I had some time this week and now that my cast is off and I'm a little more mobile it was time to give this a test shot.I had the materials from last year when I wanted to try this.
This is what i got so far after mixing (50/50) 1 part rustoleum paint to 1 part mineral spirits and using a 4" foam roller.1st pic is what I started with sanding lightly with 320 a little body filler and primed only where I did some work,2nd is after 2 coats and wet sanding with 600.3rd pic after 4 coats,sanded with 800 after,4th pic after 6 coats you can see the orange peel sanded with 1000 after.5th pic is where I made my mistake and didn't sand enough with 1000 grit.6th pic is sanded with 1500 and 2000 after 8 very thin coats,now it's starting to look like it was worth it,has a nice shine after wet sanding and before polishing.
Final 3 pics are after polishing using turtle wax polishing compound.1 of the pics with the polisher in it,I wanted to show a small area that hadn't been polished yet next to what was polished so you get the idea what it looks like.I know I can still get more shine with more polishing and a final wax coat.I am pretty pleased with the results and I know where I made my mistakes.Remember I really didn't do much prep work or it would look a lot better.I just wanted to see what it would look like if I paint my car this way without sanding down to metal.
I found it is very important not to get lazy when you wet sand.I was afraid I'd take to much off,and that's where the orange peel came in.So my last stages of sanding where brutal just to get it out.I know there's some still there,but that's ok since I know what to do now.
Sorry for the confusion just checking, The clear plastic looks solid. The black trim got a good shot of 120 grit then 320 grit before cleaning with MS. Trust me I wanted it gone but just looked like the worst of the two options. Other parts of project I did passenger side door jams with rattle can rusto and it looks pretty good. Very promissing.
A short story on the process... - 07/14/0801:30 PM
Our weekend community paper had a salute to classic cars, which was pretty cool. However, one of the stories involved using Rustoleum to paint. It also referenced the original thread here on Moparts.com., and has a neat before and after shot.
Re: A short story on the process... - 07/20/0803:35 AM
ok...me and a couple guys bought a 76 chev g20 van, already did most bondo work, and prepping. Were planning on painting it a flat black with gold trim, wheels with chrome bumpers, and beauty rings. Wondering about a few points...
a) what is the thinning procedure for 1 gallon of tremclad flat black paint? How much mineral spirits do i have to mix in?
b)What do i all have to buy?
c)What is the difference between roll-on vs. spray on? (air comp, gun and location already taken care of)
Posted By: Anonymous
Re: A short story on the process... - 07/20/0806:40 PM
Re: A short story on the process... - 07/21/0807:50 PM
Pearl has been discussed at length. I believe there was a blotchy consistency problem similar to that of metallics which couldn't be remedied without spraying.
Posted By: Anonymous
Hi all! New Paint job on a budget thread Part III - 07/25/0803:59 AM
wow...4 days of educational and often times entertaining reading...
found this thread from an article in hot rod magazine. i've read every post and feel like i know many of you already.
ive got an '81 ford f-150...when i pulled it out of the field it was in it had dodge rims so i hope that counts...lol
anyway..ive been in the house painting business for years and know a thing or two about oil based paints. ive painted many surfaces, structures, and vehicles over the years, but never thought to roll my truck. i already had figured i'd use rustoleum or something similar but intended to spray it. what i hate about spraying oil based paints is how the overspray rolls and gums up the surface...ive painted cars in the past by hand but always rolled the paint on then back brushed it. so as i read all of your trials, experiments, insights, and successes i began prepping my truck for paint. i descided to pretty much take 69 chargers method. i like penetrol and jap drier but opted out. also being that i was going red i was worried about coverage so i ended up using ace rust stop tractor paint....international harvester red..it covers better and if its good enough for a tractor its good enough for me.
here are a few shots...just put the first coat on today. relatively large amount of orange peel....roughly 20% spirits, but wanted a good base coat. i dont mind sanding either. ill be moving to thinner coats as more get applied.
i did use the foam roller which worked okay, however the roller itself is a cause for bubbles...all my bubbles did disapear though. i will be switching to a velour roller. ive used them for years painting elevator doors, cabinets, and other furniture items that were not practical to spray. thanks again to you all for the inspiration and advise. i look forward to meeting you all.
Re: Hi all! New Paint job on a budget thread Part III - 07/26/0803:04 PM
Looking great that is quite a transformation BTW like the color
Posted By: Anonymous
Re: A short story on the process... - 07/27/0801:13 PM
From personal experience, I can tell ya that the guys at Paint With Pearl are great and this is one customer that will continue going back to them.
I would never recommend Top Secret Coatings however.
There is a problem with roller painting pearl and flakes. But there is an easy way around it should you want a two stage--or even one stage--paint with rollers and a little extra.
I'd follow all of the instructions found here and get down to a final glass like surface. Not polished of course.
Then I'd use a rechargeable rattle can and fill the clear coat with pearl and/or metal flake and add the pearl coats on with that method.
They're not that expensive, and they're reusable. Or if you're patient, buy a very inexpensive air brush set from ACE, cheapest I could find, and try that. But the rattle can from Eastwood would make more sense.
I'm in the same situation as most of you, trying to find the cheapest way to work on our cars and city codes and ordinances keep me from spray painting the car with anything other than rattle cans. The roller method fills a need and does it well.
If you want just a metal flake, then try hand casting the flakes over a wet coat like they did back in the day when the flakes were larger and would clog the spray nozzles. Hand casting a micro flake from Paint With Pearl is pretty easy since it is such a small flake, you don't have to worry about knock down sanding since it settles into the paint rather well.
I know that this works, I tested the process on a Sattelite Hood and it came out looking good. Black base, emerald green flake. (no, I don't have pictures, it's been over a year since I did this and I don't have the hood anymore.)
There's always a way around a problem and if you're jonesin' for a Pearl coat, I'd recommend trying this.
Re: Hi all! New Paint job on a budget thread Part III - 08/01/0809:35 PM
Quote: wow...4 days of educational and often times entertaining reading...
found this thread from an article in hot rod magazine. i've read every post and feel like i know many of you already.
ive got an '81 ford f-150...when i pulled it out of the field it was in it had dodge rims so i hope that counts...lol
anyway..ive been in the house painting business for years and know a thing or two about oil based paints. ive painted many surfaces, structures, and vehicles over the years, but never thought to roll my truck. i already had figured i'd use rustoleum or something similar but intended to spray it. what i hate about spraying oil based paints is how the overspray rolls and gums up the surface...ive painted cars in the past by hand but always rolled the paint on then back brushed it. so as i read all of your trials, experiments, insights, and successes i began prepping my truck for paint. i descided to pretty much take 69 chargers method. i like penetrol and jap drier but opted out. also being that i was going red i was worried about coverage so i ended up using ace rust stop tractor paint....international harvester red..it covers better and if its good enough for a tractor its good enough for me.
here are a few shots...just put the first coat on today. relatively large amount of orange peel....roughly 20% spirits, but wanted a good base coat. i dont mind sanding either. ill be moving to thinner coats as more get applied.
i did use the foam roller which worked okay, however the roller itself is a cause for bubbles...all my bubbles did disapear though. i will be switching to a velour roller. ive used them for years painting elevator doors, cabinets, and other furniture items that were not practical to spray. thanks again to you all for the inspiration and advise. i look forward to meeting you all.
Welcome! But that's some pretty brutal orange peel. If that's coat #1 I'd say you are putting it on way too thick. I'd sand the crap out of it, (and you'll probably end up sanding a lot of it off, back down to the original paint) and give it another try.
With full respect given to your experience in house painting, I'd advise against using a velour roller. You'll end up with WAY too thick of a coat. And you'll never fill in all the orange peel by adding new (and or thick) coats.
Re: Hi all! New Paint job on a budget thread Part III - 08/01/0809:43 PM
After #2:
I'm still having a problem with the hood - needs more wet-sanding and power-buffing.
Thanks to everybody that helped me with this. When I first read this thread I laughed that someone would be stupid enough to paint their car with a roller and rustoleum. Now I'm a convert.
Re: Hi all! New Paint job on a budget thread Part III - 08/01/0811:45 PM
gusteve, where you able to wetsand the stipes with the black as well? or did you have to mask off and only wetsand the stripes, after wetsanding the whole body?
If any of these home paint jobs is going to be at the nats or norwalk chrysler classic please say so (car year color etc) cause I would love to see some of these in person.
Re: Hi all! New Paint job on a budget thread Part III - 08/03/0809:34 PM
Quote: gusteve, where you able to wetsand the stipes with the black as well? or did you have to mask off and only wetsand the stripes, after wetsanding the whole body?
I had the body all wetsanded and buffed with my porter-cable polisher before I put the stripes on. (No wax on it, just poor-boys cutting compound stuff). I carefully sanded a little (1500 grit dry) where the stripes would be painted after I taped it off.
Just a note: there IS a difference in masking tape when doing stripes - I have a tiny bit of bleeding where I used cheaper tape.
At this point, on the rear decklid I'm just going to hit the thing one more time (stripes and all) with poorboys compound and then move on to wax. The spray-bomb went on so well that I don't need to wet-sand it. That's due to a lifetime of spraybombing stuff - when it starts to almost look good - STOP. Wait for it to dry for a day and do another coat. If you put it on too thick it looks like crap.
The hood is a different story, I didn't prep it well and now I'm paying the price. I'll need to wetsand the whole thing again (stripes and all) and then start from scratch on the poorboys compound regimen. And to be honest, I'm still not sure I even like the red stripes on the hood.
But - that's what's great about this! I can always re-sand and do the entire hood from scratch if I need to, and not have to worry about the rest of the car.
Lastly, I got a little red overspray on the back of the car when I did the decklid stripes. I though I had it masked well enough, but I ended up with overspray a good 3 feet from where I was painting. If this had been a REAL paintjob, I would have ruined it with the overspray. In the roll-on world, I just re-buffed those areas with cutting compound. Woohoo - problem solved!
Re: Hi all! New Paint job on a budget thread Part III - 08/05/0811:18 PM
I finaly got around to finishing my sidecar and putting it all back together. I didn't like the first color i went with last year so this year i changed it. got it back together last week and took my kids for a 250 mile ride this weekend to a rally where I had lots of positive feed back. one guy kept going and grabbing others and bringing them by to see it he was so amazed. a quick wash today to remove bug guts and took some new pics. they are at the end in this album on my webshots page.
no polishing or waxing yet. last coat went on less than 2 weeks ago. the top is krylon fusion gloss black from a spray bomb. the middle is rustoleum charcoal grey rolled on...and the bottom was textured like bedliner stuff so i just sprayed that with krylon fusion satin black.
Re: Hi all! New Paint job on a budget thread Part III - 08/06/0801:46 AM
Well I figured I'd get some more practice in and that red trunk lid that you saw a couple of posts ago,I painted it black.Now it's never going to be as nice as a base-clear job,but it's certainly good enough for a very nice driver if your willing to put the time in.
The only thing I did different besides sand a little more,is instead of using a foam roller I went with a velour roller as suggested.It cuts down on bubbles,and goes on very smooth.Just be careful because it absorbs more paint then the foam so don't press to hard when rolling or squeeze some out before painting.
It just needs a little more polishing,but I went through two 6" bonnets already.
Re: New Paint job on a budget thread Part III - 08/09/0802:15 PM
I have "discovered" a new paint brand called Hammerite. It comes in smooth and also a finish called hammered. Looks like another interesting type of paint..Anyone have any experience with this stuff?
Re: New Paint job on a budget thread Part III - 08/09/0811:22 PM
Quote: I have "discovered" a new paint brand called Hammerite. It comes in smooth and also a finish called hammered. Looks like another interesting type of paint..Anyone have any experience with this stuff?
I actually did the bumpers on my truck with the hammered finish stuff.
Posted By: Anonymous
Re: New Paint job on a budget thread Part III - 08/10/0805:47 PM
Quote: I have "discovered" a new paint brand called Hammerite. It comes in smooth and also a finish called hammered. Looks like another interesting type of paint..Anyone have any experience with this stuff?
I've used the Hammerite spray can product on a number of things around the house (hammered copper on outdoor light fixtures, hammered green on a golf club (putter) I restored). It's supposed to look like the "hammered" finish that you find on machine tools and other equipment. (Think about the green uneven surface you've seen on equipment like drill presses...) As far as this type of finish goes, Hammerite comes close to the real thing, but is a lot smoother than what you'd see in a real industrial hammered finish. They use glass flakes in this paint and I guess the flakes that pass through an aerosol nozzle have to be pretty small.
It is a direct to metal paint. Where I've used it, it has held up very well. I have no experience with the smooth Hammerite and don't know how it would polish up for an automotive finish. Also, I've never brushed it.
Posted By: Anonymous
(Color Mixing) Re: New Paint job budget Part III - 08/10/0805:54 PM
Suppose I want to mix a custom color on my own (with Brightside or Rustoleum)... I'm wondering about what type of measuring accuracy is required (and what types of measurement tools folks have used) to prevent visible color variations.
The situation I have is that I want to start out on a practice panel, but if that panel goes well, it is likely going to go on the vehicle. So, I'll be going all the way to the end steps on that panel. I don't want to mix up all the paint I'll need for the entire project at once. So, I'm trying to figure out what type of measuring accuracy I need if I mix the color in different batches.
As well, this would apply if I ever need to do repair work in the future on just one panel or one area of paint.
Re: (Color Mixing) Re: New Paint job budget Part III - 08/10/0806:28 PM
I'd make sure I used the same manufactures paint for the mix and mix enough to do the whole job. Don't see where that would be a problem. A few have tired for a metalic look but it didn't work out for some reason.
Posted By: Anonymous
Re: (Color Mixing) Re: New Paint job budget Part III - 08/12/0802:14 PM
I've been using multiple 10ml syringes to mix up paint in small batches, it works really well as its easy to measure and make small adjustments to the quantity of paint.
However each syringe generally only lasts 4 plunges before the friction builds up on the sides of it and causes the rubber to pull off, but at <$1 each its not that bad! I mix it up in small glass jars just by shaking them for a bit
as stated, your probably best to mix up paints of the same brand/type to ensure compatibility. i've been using brightside paint and it mixes fine, and i've nearly made up my mind as to what colour i'm going to do after about 20 different variations!
-Evan
Posted By: Anonymous
Re: Help - 08/13/0804:47 PM
I got a little lost in this thread and I was just wondering has anybody figured out what to use for clear coat on the rustoleum? Is it possible to spray a automotive clear coat over it? I know the tremclad has a clear but has anybody found a alternative that works for the rustoleum? Thanks
Posted By: Anonymous
Hi, everybody! - 08/14/0806:41 AM
I posted a while ago about painting a van silver. I am going to paint my car black, but the weather hasn't been good enough when I have time. I haven't read the pposts since last time, so hopefully this is helpful! I just painted my 33 foot Winnebago silver. I rolled it on straight, until it started hardening, and added Interlux brushing liquid as needed. I'l put up "after" pictures later. I did my van the same way, about 10 years ago, and the paint survived 5 wrecks, imcluding the one that ended the life of the van with flames. It never faded, or came off, and even stayed on the exhaust pipe, just as shiny as the rest. It went on thick, of course, and the Orange peel looks like it would if I were a bug, but it levels out quite a bit. The paint is thick enough that I can buff it out. I buffed the van to the point that it burned my eyes (it got annoying). It reflects heat amazingly well, and seems to harden to a coat of aluminum. I'm going to buff at least one part, to show you guys, but probably not soon, since I'm taking this to the high Desert in about 1.5 weeks. This is the ultimate paint for this purpose.
Posted By: Anonymous
Re: Hi, everybody! - 08/14/0807:40 PM
Hi all! I am another that has been reading for some time and has not yet posted. I am in the Army and am stationed at Ft Hood TX. I just returned from Iraq in Jan 08. I picked up my '73 Charger from my dad's house and brought it here. Those old chargers run great, but the paint was gone. I got the same old $2k-4k song and dance and planned on saving up for it. One night I googled "cheap dodge paint job" though. At first I read the same old paint recomendations and then some crazy dude interjected that he painted his bad [Edited by Moparts - Keep it clean] looking car with a roller. It has been said many times before, but I was hooked at that point. I was so exited that I could not stop reading for days after that! Then I realized that this had started two years earlier! I am just catching up to the current posts. I want to thank Charger first, then those that took it and ran with it and all those that have posted thier motivating results! You have motivated and given an awesome tool to myself and many other do it yourselfers. I have limited time but will plst results as I can. Would anyone give me some help on how to post pics- my attachments will not show up- are they too big possibly? - Thank you
Posted By: Anonymous
Re: Hi, everybody! - 08/15/0806:32 PM
First of all, thank you for your service. I also found this thread over a year after it started. Bringing my Jeep back to life after a 12 year sleep, it just needed paint to be looking and driving good again. No way I could even afford a $1000 quick spray. Now I've got the power of the roller in me. Here's the Jeep 16 months after I rolled Rusto canvas white. Be patient with the prep as everyone says. Took me about a month total to do 6 to 8 coats.
Regarding the Rustoleum silver and buffing it.. have you done that before? I know it's not buffing, but when I tried to wetsand that stuff it went all wacky, black and silver streaks everywhere.
Posted By: Anonymous
Re: Hi, everybody! - 08/15/0811:28 PM
Is there a trick to go around the edges and hard to reach places with the roller?
FowlJesse I had to look twice I thought you were painting an Airstream with a cream color BTW looks great
Posted By: Anonymous
Re: Hi, everybody! - 08/16/0804:07 AM
Yes, I tried to wet sand it after a couple of days, and got those streaks. I was disappointed. However, after the first wreck (Several months later), I sanded it, to repair the damage, and it didn't do that again, so I wet sanded the rest, and it looked great. It reflected so much, that I'm still surprised I didn't get some kind of ticket. I now have sandpaper, and Micro Mesh down to 12,000 grit (< not a typo!) I'll pick a spot to shine up, and post pictures.
Posted By: Anonymous
Pic - 08/17/0805:58 AM
Thanks CJ5. That is a cool jeep. I have been working on my charger since febuary 08, but I have limited time and am taking it all down to metal. I have 8 coats on this panel, buffed it for about an hour, no wax yet. Need more work on buffing- not as easy as I'd thought it would be. Has a descent shine on it for Rusto stop rust gloss white. Will post more as I make progress.
Posted By: Anonymous
Re: New Paint job on a budget thread Part III - 08/17/0807:13 PM
Hey everyone. I'm in the process of restroing my 74 Charger and was reading all the posts on rolling cars in rustoleum and I had never heard of people doing that before. Needless to say this sounds alot more affordable considering I'm still in high school haha. But can anyone tell me from pretty much start to finish the process of rolling a car in rusto? Right now I'm still doing sheet metal work but would also like to know what primers, sealers, etc. that need to be used along with other materials. PLEASE HELP!! Thanks!
Posted By: Anonymous
Re: New Paint job on a budget thread Part III - 08/17/0807:56 PM
Hey Mopar 26. I am working on a 73 charger and am using the rusto method. The original thread started at this link. you have to read through the first few pages, but it's all there. https://board.moparts.org/ubbthreads/show...part=7&vc=1
Posted By: Anonymous
Re: New Paint job on a budget thread Part III - 08/19/0812:51 AM
Hey jamesclab. Thanks for the help! That right there just saved me a grand that I didn't have. haha. But as soon as i get the body work done and start rollin I'll post some pictures up and keep ya'll updated. By the way you got any pictures of you car up here? I'd like to see it and what to expect for the final outcome. Thanks again!
Re: New Paint job on a budget thread. - 08/19/0805:37 AM
Quote: Finished my 2nd paint job. I tried flat black for about a year, it looked good, but I wanted a more finished look. I have decided that this method isn't any easier than spraying, but it is a lot cheaper for a similiar ammount of work, plus the ease of touchup is huge. Color is Rusto Almond, with Rusto satin black. 6 coats, then polished with turtlewax rubbing compound, then polish.
I ended up hand polishing and not using my polisher, I didn't really think that the rotary polisher worked that great, may be my technique.
The car is really shining now though!
You say the hood is now satin, so in your pictures when it was black, was that flat or satin? I thought for sure it was satin then. Can you re-post the link to your photo album? I seem to have lost it.
As far as satin black goes, how hard is that to match if I spray it? Because of our fog I have to paint panels within a few days or it'll rust through the primer, which means painting my car in stages. Will I end up with a multi-hue black? I know 69Charger said he touched up and couldn't tell the difference, but that was gloss.
Here's my car when it was in epoxy primer, before it became a chalky, faded mess about a year later as the rain washed most of it off. I didn't know about UV stability then. Funny thing is, I touched up a few spots with Krylon ultra flat and the door with Rustoleum flat black and those spots are still there after 2 more years of sun and rain. So much for "cheaper" paint, huh?
Here's what the epoxy primer looks like now. $180 literally down the drain.
Posted By: Anonymous
Re: New Paint job on a budget thread Part III - 08/20/0806:40 AM
Hey Mopar 26. I am not finished by any means, and it is taken apart now because of paint- so I can't get a good picture. I have only really finished one quarter panel, but I have a couple coats of paint on more than half of the car. I have a lot going on in the next few months, but hope to have it finished soon.
I spent about 2 hrs buffing and waxing on a quarter panel tonight and I have to say that the shine is coming out finally, but I am really thinking about buying some brightside. There is just no real comparison between the gloss of the two paints. Anyway, I will post more pics soon.
Posted By: Anonymous
Re: Pic - 08/20/0809:58 PM
After a 2-3 full hours of buffing and waxing this panel, this is what I got. I believe that I can get more shine out of it when the paint fully cures, but I couldn't wait and wanted to see what wax would do for the shine. I may have to strip the wax off later to buff the paint again when it fully cures. I am also working with a $25 buffer from wal mart. It definetley doesn't have much power- I can not apply any pressure and have to actually pic up the buffer a little for it not to bog down, but does work a little better than hand. The shine looks good from an angle, but head on it is very hard to see a reflection. Will post more pics with progress.
Re: New Paint job on a budget thread Part III - 08/21/0812:20 AM
Hello everyone, long-time lurker (all three threads!) but not a first time poster (I'm on other threads on Moparts).
I had a couple of questions which I had been seeking the answers for and which have already been answered:
Prime/Not Prime? It boils down to prep. It seems to me that the more prep you put into it the better off you'll be. Besides, I do have a lot of scale & surface rust which I need to remove, and even a few holes to treat/fill. On top of that, the fella with the Forerunner pretty much brilliantly demonstrated that a consistent bottom coat makes for a better final coat. So I will be priming before I even start the final coat.
Two tone paint job? The original coat on my '72 Satellite is blue/light grey, and a thin chrome moulding piece to separate them. A few of the guys have managed to pull this off and I'm pretty stoked about giving it a shot. Question, tho...when you did yours, you taped off half and rolled the other half. The one guy who had the problem with his truck...I didn't see if he had prepped with primer first; I believe I can avoid the "paint peel" problem with a good, sanded smooth primer coat. I also plan to do the bottom half first, and then work on the top half. PATIENCE is the key here, and I plan to finish the bottom half, let cure for a week, move on to the top half, let cure for a week, repeat, then do the first sanding on both sides.
Rims? I've seen some discussion about doing rims in the same method. My rims are originally chrome, but I plan to have them sandblasted to remove the chrome...but I am undecided on whether to have them re-chromed ($$$) or simply prime and paint with the same light grey I'm going to put on the bottom half. Since they are Magnum 500 rims, I was also going to flat-black the segments. The conversation I read said that Rust/Tremclad of these would not be such a great idea (road damage, etc). Thoughts? Opinions?
Finally, I have a question that I didn't see anyone else bring up in the entire three threads. The main push in these three threads, besides PATIENCE, seems to be PRACTICE. I don't have a junkyard in my backyard to pull parts from, or even a beer fridge which needs a racing stripe...so I was wondering if I could practice on something besides metal surface. You see, I do have a sheet of plywood and I was thinking I could nail down a smooth sheet of wall paneling to it. I figure after priming it, it might be a good surface. Easy enough to remove a botched piece of panel, replace, and start over...whether horizontal or vertical.
Re: New Paint job on a budget thread Part III - 08/21/0812:21 AM
Quote:
I spent about 2 hrs buffing and waxing on a quarter panel tonight and I have to say that the shine is coming out finally, but I am really thinking about buying some brightside. There is just no real comparison between the gloss of the two paints.
Re: New Paint job on a budget thread Part III - 08/21/0802:00 AM
Quote:
Two tone paint job? The original coat on my '72 Satellite is blue/light grey, and a thin chrome moulding piece to separate them. A few of the guys have managed to pull this off and I'm pretty stoked about giving it a shot. Question, tho...when you did yours, you taped off half and rolled the other half. The one guy who had the problem with his truck...I didn't see if he had prepped with primer first; I believe I can avoid the "paint peel" problem with a good, sanded smooth primer coat. I also plan to do the bottom half first, and then work on the top half. Thoughts? Opinions?
yes...I suggest doing the top first. when wet sanding and such the water and sanded off paint will run down over the part you already painted and if you don't get it off right away it can be a pain to get off of there and you don't wnat to ruin what you have already painted. on my sidecar i did the top and then was going to clean the bottom and spray krylon fusion on that(it is textured like bedliner so no rolling)....it was a huge pain tying to get the dried wetsanded paint off. I eventualy painted over a lot of it. good thing fusion sticks well!! anyway jsut a thought!!
BTW the guy with the white fender a few posts back....get that off your wheel and tire ASAP!!
Re: New Paint job on a budget thread Part III - 08/21/0803:40 AM
Quote:
Prime/Not Prime? It boils down to prep. It seems to me that the more prep you put into it the better off you'll be. Besides, I do have a lot of scale & surface rust which I need to remove, and even a few holes to treat/fill. On top of that, the fella with the Forerunner pretty much brilliantly demonstrated that a consistent bottom coat makes for a better final coat. So I will be priming before I even start the final coat.
My thoughts on priming tend to boil down to the state of the body preparation. If you have a prepped body that is showing multiple colors - a primer will definitely save work by providing you with one uniform color on the body for the subsequent paint job to be applied to. This way the whole body changes color at the same rate - with each subsequent coat of paint added.
The other benefit of the primer coat... is that it gives you 'one more chance' to get the initial surface as smooth as possible before laying on the first coat of paint.
IF the body you are working on is basically a good but dulled paint job - where you just have to give it a light scuffing prior to painting, you should be able to bypass the primer stage and start applying the thinned paint. Both Tremclad and Brightside provide anti-rust sealing when applied to beared metal.
Quote:
Two tone paint job? The original coat on my '72 Satellite is blue/light grey, and a thin chrome moulding piece to separate them. A few of the guys have managed to pull this off and I'm pretty stoked about giving it a shot. Question, tho...when you did yours, you taped off half and rolled the other half. The one guy who had the problem with his truck...I didn't see if he had prepped with primer first; I believe I can avoid the "paint peel" problem with a good, sanded smooth primer coat. I also plan to do the bottom half first, and then work on the top half. PATIENCE is the key here, and I plan to finish the bottom half, let cure for a week, move on to the top half, let cure for a week, repeat, then do the first sanding on both sides.
The one problem to watch out for when doing horizontal two tone paint jobs is GRAVITY. Meaning that the odds are that at some point the paint will run. The last thing you want is for the lower section to have just been painted - and then you go to the upper section and it runs down on to the lower section. I think it is better to always start from the upper section, do it, then do the lower section of the two tone paint job. This allows you the opportunity to fix the booboo on the lower section before adding its next coat of paint. Of course though... if you are practicing extreme patience and using a 'barely wet' roller - you won't encounter the 'running' problem and could do the dual paint job as either upper/lower or lower/upper and it won't matter.
Quote:
Rims? I've seen some discussion about doing rims in the same method. My rims are originally chrome, but I plan to have them sandblasted to remove the chrome...but I am undecided on whether to have them re-chromed ($$$) or simply prime and paint with the same light grey I'm going to put on the bottom half. Since they are Magnum 500 rims, I was also going to flat-black the segments. The conversation I read said that Rust/Tremclad of these would not be such a great idea (road damage, etc). Thoughts? Opinions?
Quote:
There are two ways to look at 'doing it yourself' rims. The one beauty of painting the rims.... is that EACH YEAR you can remove the rims and redo them cheaply and fairly easily in order to have them look their best. The main problem with 'paint your own' rims... is that the heat, chemicals, road chips etc really give that paint a beating. Personally... I would rather find a friendly rim jobber and have them professional prepare / restore them. BUT this cost a heck of a lot more then the cost of paint and time you will spend over the next ten years doing your annual 'do it yourself' rim paint job. Another thing you might consider is picking up a spare set of 'beater' rims and do your paint job on them. If you like the result... you can slap them on the car - and start doing a restoration on the original rims at your leisure over the next one year.
Quote:
Finally, I have a question that I didn't see anyone else bring up in the entire three threads. The main push in these three threads, besides PATIENCE, seems to be PRACTICE. I don't have a junkyard in my backyard to pull parts from, or even a beer fridge which needs a racing stripe...so I was wondering if I could practice on something besides metal surface. You see, I do have a sheet of plywood and I was thinking I could nail down a smooth sheet of wall paneling to it. I figure after priming it, it might be a good surface. Easy enough to remove a botched piece of panel, replace, and start over...whether horizontal or vertical.
Thoughts? Opinions?
My only thoughts on a wood panel is that it would probably absorb paint and mineral spirits... Whereas if you are painting on a metal surface, there is no penetration and what you see is what remains on the surface. The el cheapo route might be to go to a junk yard ( auto-recycler ) and tell the guys you want to practice some painting on a trunk lid. ( I say trunk lid instead of a hood simply because they are usually smaller, cheaper and easier to load in your car to take home ). Since you aren't looking for a mint condition trunk lid, you should be able to dicker one away from them for less then $20. After all... there isn't a huge market for used trunk lids on most types of vehicles. An alternative might be to drive around your neighborhood on garbage collection day and you might find something suitable being tossed out - like a metal filing cabinet, maybe a fridge door ( since by law they are not suppose to be attached to a fridge that is being thrown out etc - for the safety of dumb children that might climb in a fridge or freezer that has been tossed out ).
Hi all, glad to see this thread is still alive and well, remember it from the beginning, wow it's still a great thread. I have a question from some of you. I primed my 47 Chrashler Coupe, with Tremclad primer, reduced with medium speed enamel reducer, I shot it on with an elcheapo HVLP gun, it went on very well. I have used fillers, putty, fibreglass resin over it, all went on well with no ill effects. I have recently tried 2 k Urethane primer/surfacer on it as well, so far no ill effects, but it is only a test spot. I have also taken Tremclad paint, mixed it with medium speed acrylic enamel reducer and acrylic enamel Evercoat DOI hardener, it also sprayed on very nicely, and is shiny and rock hard, next to no peel. I am still a supporter of the "roller method", and have done some things with that system, all successful. I have a question, have any of you topcated, there Rustoleum or Tremclad paint jobs with either, a 2 k urehtane paint or BC/CC, was there any ill effects or problems? Good to see you all still here, it has been a while since I have posted.............C38coupe
Re: New Paint job on a budget thread Part III - 08/23/0812:48 AM
I don't know if it's my truck you were mentioning, but I painted the whole truck in the dark green and then layed the lighter green on top. I had one minor spot that lifted paint, but I found that wiping the tape with a rag soaked in mineral spirits as it was pulled off worked great. Pull the tape at about a 45 degree angle and wipe the adhesive as you go. I think the length of time the tape was on didn't help things either. Took about a week to finish off the two tone work.
Well it has been a while since I last posted and I wanted to give an update. The good the bad the ugly and the peel and dry overspray. I somewhat finished and car has paint on it and it's all put back together. Recapp I used HF HVLP gun with Rusto royal blue thinned 15% MS and around 10% flowtrol, First let me list the dont's so maybe it will help others: If you setup a makeshift paint booth and it feels like an oven that is not good, If you grabbed every 100watt and 60watt bulb you could find and it does not look like the car is sitting in daylight in fore mentioned booth it is not enough, If paint looks pretty good on car but could use another coat dont' put it on a few minutes later do it the next day other wise it won't stay peel free, If your gun seems to change it's spray pattern IE more globular don't keep going cause it does make a difference, If you feel like you are not supplying enough VOLUME of air to the gun you aren't IE reg. compressor 90PSI and reg. on gun won't go above 40PSI with trigger pulled you have too much restriction somewhere my gun said 43PSI max at gun so I just chugged along anyway not the brightest move. So to recall I made some serous errors and mistakes but I was under the gun to get project to clompletion one way or another and if time was not a factor I would wetsand and see where I stood but as of now I am done. As I put the car bak together it looks OK and a lot better than before but I was most unhappy with my lack skill when it came to the Horizontal surfaces I got that wet and dry look. here is a side shot
Quote: Well it has been a while since I last posted and I wanted to give an update. The good the bad the ugly and the peel and dry overspray. I somewhat finished and car has paint on it and it's all put back together. Recapp I used HF HVLP gun with Rusto royal blue thinned 15% MS and around 10% flowtrol, First let me list the dont's so maybe it will help others: If you setup a makeshift paint booth and it feels like an oven that is not good, If you grabbed every 100watt and 60watt bulb you could find and it does not look like the car is sitting in daylight in fore mentioned booth it is not enough, If paint looks pretty good on car but could use another coat dont' put it on a few minutes later do it the next day other wise it won't stay peel free, If your gun seems to change it's spray pattern IE more globular don't keep going cause it does make a difference, If you feel like you are not supplying enough VOLUME of air to the gun you aren't IE reg. compressor 90PSI and reg. on gun won't go above 40PSI with trigger pulled you have too much restriction somewhere my gun said 43PSI max at gun so I just chugged along anyway not the brightest move. So to recall I made some serous errors and mistakes but I was under the gun to get project to clompletion one way or another and if time was not a factor I would wetsand and see where I stood but as of now I am done. As I put the car bak together it looks OK and a lot better than before but I was most unhappy with my lack skill when it came to the Horizontal surfaces I got that wet and dry look. here is a side shot
Hi, when using rusto paint with the HVLP, try this, use Medium speed acrylic enamel reducer, a generic type acrylic enamel hardener, such as Evercoats DOI wetlook, the hardener can be used with a 8 to 1 ratio, add reducer up to about 30 % or so, you need this paint thinned enough to shoot out and lay down properly. Lay on 2 to 3 coats wet-on-wet, allow the paint to flash, 1st coat a lighter tack coat, followed by 2 medium coats. I have recently tried this with very good results, the nice thing is Tremclad or Rustoleum paint mixes evry well with acrylic enamel reducer and acrylic enamel hardener, and these products are still cheap, add this to a $30 gallon of paint, still under $75.00 for the paint and supplies. I also find the overspray and mess minimal with an hvlp gun, messier than rolling but certainly not bad, if you have the space to do this, and th equipment in the first place.....
I think you are right about thinning probable should have gone a little more. The thinning agent I would not know where to start on what to pick. I did basically what you mentioned on coats real light tack coat and then two wetter coats I just did not have a real good feel of the paint so I went a little to far and the dry overspray from bad techniques. here is shot of the roof
here is a pretty good shot from rear quarter and I did not put as much paint so it is pretty smooth but It did end up being slightly transparent in a couple places wher I can see original gray where my rusto red primmer was sanded down, of course I could not see that in moonlit paint booth. It really does not stand out and you probably won't see it in the photo.
Okay one of the front that shows that plastic bumper trim that I opted to paint. I sanded 120 then 220 primed with rusto red/brown then I did a test with rusto flat black in the little tin with a foam brush but that did not work to good so I rattle canned with rusto flat black. I will note that the very top peice that looks like quaerter roun was only sanded with 220 and 400 before painting as it was a different type of plastic.
Hope yall don't mind one more this shows some of the potential the overall paint job could or should of had but I just did not reach it. Again this is paint only no wet sand or polish or wax driver side rear door. also as a side note I got a new set of hubcaps from advanced auto. Just plain faux alloy look and kind of borring but I figured it's HUBCAPS. My disapointment was the very next day the whole troop went to Wally world and they had a better assortment of hubcaps at about half price.
Looks just fine but you do realize you cheated and did it the old fashioned way with a spray gun Of course you did prove these cheaper paints can be sprayed and get a nice look. Bottom line keep the cost down.
C38Coupe, You asked about using a 2K Clear over regular enamel. It was discussed very briefly a while back in this thread. I believe someone used Nasson (by Dupont)clear over rustoleum. If this is the plan, using some hardener in the rustoleum is a good idea. The hardener will add a significant amount of chemical resistance to the paint. If I recall correctly, it increases the chemical resistance by like 40%. This increase in chemical resistance may enable the rustoleum to withstand the strong chemicals used in 2K clearcoats.
Adding hardener to the Rustoleum is probably not essential if the correct clear is used. I've read that there are some regular basecoats (for base / clear systems)which do not use any hardener in the base. So using a clear coat that's compatable with a non-hardened base may work fine with regular enamel. (I've not personally tried it though)
For what it's worth, there is a hardener specifically intended for regular enamel paint. I've bought it at agricultural supply places.
Safety precautions must be followed with any hardener. The isocyanates used in hardener are very dangerous. Most paint manufactures recommend a supplied air respirator when spraying these chemicals. A few respirators on the market can remove these chemicals, but there is no way to know when the respirator is saturated as the isocyanates have no odor. If a person is considering using a respirator, get one from an automotive paint supply shop. There are charcoal respirators available at many hardware stores which will remove the smell of the paint chemicals, but wil NOT remove the isocyanates.
Lastly, I'd suggest counting up the cost of the clear, harder, reducer, and enamel. It probably would not cost much more to spray some regular automotive single stage or base clear. (PPG's Omni or Duponts Nasson lines are decent quality with reasonable prices. Of couse there are Kirker, SPI, Transtar, Western, and other discount brands. SPI has a decent reputation and their single stage black was around $100 a gallon a while back.
I'm not against rolling paint. In some situations, this may be the only practical option. But if a person is going to spray paint, it makes sense to consider regular automotive paint.
Posted By: Anonymous
Re: Help - 09/02/0807:53 AM
this probably seems like a dumb question, but here goes nothing..
i have an audi (1993, 90s) that i bought about a month ago, and the paint on the hood, roof, and a few other places is going through some unpleasant clearcoat failure, making what looks to me to be a potentially sexy car very pos-like.
so when prepping it, do i have to sand all the factory paint to look like the messed up paint does now (that is, the part that has undergone clearcoat failure)? or even as far as bare metal? or do i only need to sand of enough to make it a bit rough so the rustoleum can stick? or can i just get by fine without any sanding?
you need to sand down enough so that the rustoleum has someplace to bite into and stick to the old paint. also the goal with sanding is to get the car smooth. once its there you can apply paint, if that means going to metal than so be it, if it means just a light wetsanding then your lucky.
so when prepping it, do i have to sand all the factory paint to look like the messed up paint does now (that is, the part that has undergone clearcoat failure)? or even as far as bare metal? or do i only need to sand of enough to make it a bit rough so the rustoleum can stick? or can i just get by fine without any sanding?
A simple concept to keep in mind when sanding a failed or failing clearcoat is this : if it is failing, then it is separating from the painted layer. SO... imagine if you painted on to some clearcoat that is about to fail... the odds are that it will still separate in the future and take whatever fresh paint is on it with it when it goes.
It would be best to get the clearcoat off ( since it has already shown you it would be the achilles heel of any fresh paint put on top of it ).
As noted by the other commenter... the key is to get the sanded surface as smooth as possible. Don't look to the new paint to magically level up any uneven surfaces. Get them level and if you have to spray or roll on a bit of primer to level things out, so be it. Keep saying to yourself : the smoother the surface I am going to paint on - the shiner and better the end result will be.
This is the point in our usual speech where we pause and repeat our manta : More time and patience spent in the initial surface preparation will result in less work overall when painting and better results.
.
Posted By: Anonymous
Hi - 09/11/0809:20 AM
I've been reading up on this roller paint process (including dozens and dozens of pages here on moparts) so I have an understanding of the instructions and the process. I'm thinking about painting my car, possibly next summer when my schedule will allow it, and I have a couple of questions. I'm sorry if these were previously answered, I did read a ton on here but just don't have time to dig through hundreds of posts for an answer which may or may not even be here, so here goes:
First, metallic paint. I know some have said it won't work because the flakes won't be evenly distributed, which makes sense. What I'm wondering is, has anyone actually tried to roll metallic paint on a test panel, and are there any photos of the results? Or how about a rolled paintjob with just the last coat being a metallic spray? I don't know how well that'd work. I'm asking because my car is originally a light icy metallic blue, but it has a clear coat problem that's only getting worse, so it's looking flaky... and I'll be sad to lose the neat metallic quality, but I'd like to know if anyone has tried and had success or failure with it.
The other question is about the current types of Rustoleum paint. I understand people have used the oil-based "protective enamel" and also the "high performance/professional" version...but do the finishes actually come out looking any different? Is the pro. paint worth it? And has anyone tried the Rustoleum topside paint yet? I saw it on their website HERE and I see that some of you are trying out different topside boat paints, so if anybody has tried it, how does the Rustoleum version stack up?
And on a similar note, are there any paint bonding issues with using the enamel for the first coats and then finishing with a topside paint for the last couple of coats? I would think the topside would stick to the enamel paint ok, but I have very little painting experience so I'm wondering what you all have experienced with it so far.
April I think some have tried themetalic and it didn't work so well and as for the final coat being sprayed metalic i'm sure it can be done but kind of defeats the purpose of rolling the paint. unless you have all the equipment already.
as for the topside stickign to the enamel it will work fine. a few here have switched over in the middle of painting with no problems.
If you can spray the metallic, why bother rolling? Believe me, once you try rolling I'll be amazed if you can resist just grabbing the spray gun and shoot it that way.
Someone earlier asked about Transtar 6071 2k roll-it primer. Yes I've been using it for the past year and it works well. It goes on real thick, the data sheet says 5mil compared to ~2 mil for a sprayed on primer. It cures hard so it's a heck of a surface to sand but it makes a great filler for sand scratches around repair areas. I only use it on deeply scratched areas and where there's a chance of bleed-through. The rest of the car I spray with Transtar 1k speed prime which is thinned with acetone.
The cracked areas I used speed prime on lifted both Rustoleum and Brightside, so be careful. If your paint is so old that it shows cracks then sanding, priming, and filling will not fix it! It needs to be sanded down to the next layer of paint and the 2k primer used to level it back up. Blocking and guide-coating did not show these problems but as soon as paint went on things went down the toilet. I've stripped and painted my trunk twice already because of this. The cracks and ghost lines are gone thanks to the 2k primer. Now I'm being more careful with the rest of the car.
You can be very frugal with the 2k roll-it by using small cups to measure the 4:1. I use graduated plastic cups that came with my mold-making supplies, they hold about 1oz. per cup. The cups that come with cough syrup work great, too. 2oz. of primer mixed with the appropriate amount of hardener is enough to roll at least an entire panel enough to block out deep sanding scratches. Try doing that with a spray gun! The down side is I paid ~$30 a quart, and that's through my friend that owns a bodyshop. The 1k speed prime was ~$50 a gallon.
Re: New Paint job on a budget thread. - 09/11/0810:49 PM
Rolling paint? You mean like with a roller like to put latex paint on walls with?? I painted a truck (56 Dodge 1/2 ton) years ago with a brush and it turned out pretty good. But a Roller?? How can I get to the beginning of the original thread? This one apparently starts on page 44(?)I want to read up on this!!
Posted By: Anonymous
Re: New Paint job on a budget thread. - 09/12/0801:17 AM
Part 1 starts HERE. Part 2 HERE. And you are in Part 3.
When I first read about somebody rolling paint on their car I was kinda skeptical about how it would turn out, but seeing people's results on here has made me seriously consider it.
Posted By: Anonymous
Re: Hi - 09/12/0801:35 AM
Oh ok, any idea if there were any pics posted of what the metallic paint did? A visual would help me decide if it's completely out of the question or if I'd consider living with the results. And yes spraying on the last coat would sort of defeat the purpose, I guess I was thinking in terms of only needing a very small amount of paint mixed up to save $, and only having to mask the car once so there's no worry of dust from wetsanding coming off the masking paper onto your next coat. Or possibly even having a shop quote a price on a one coat job with a metallic once you've got the rest of your base coats on... although I don't know if a shop would do just a single layer, or what it would cost as compared to a whole job.
Thanks for the info. on the topside. I'm in Superior, just about as far north and west as you can go in this state lol.
And ron I'll keep the roll-it primer in mind but probably will just go with a simple rattle can primer. I don't think my car has any deep scratches, just surface ones that I'll take care of when I sand it down. There's only one dent I need to repair which I just might be able to get out with a dent puller or might end up using bondo, we'll see, but I think the rustoleum primer spray can should work fine.
Oh, I edited to add one more question about priming. The primer's purpose is to give you a good surface to start painting on, but I was wondering if you all have been sanding on the primer before you start painting, or just leaving the primer as is?
Re: New Paint job on a budget thread. - 09/12/0803:52 AM
Quote: Part 1 starts HERE. Part 2 HERE. And you are in Part 3.
When I first read about somebody rolling paint on their car I was kinda skeptical about how it would turn out, but seeing people's results on here has made me seriously consider it.
Excellent! Thnx for the links!! My Chally will never be a 100 point car, but I do want it to look nice and it seems like it would be a great way to apply a bullet proof coat of paint without the liability of getting over spray on the Ol'-lady-next-door's petunia bed
April, You'll definately want to sand the primer before painting, especially if you use the rattle can. Marq had a very detailed explaination of why a page or two back. Basically, it comes down to the way the primer (or any rattle can paint) flows onto the surface. The sprayed on primer would have a fuzzy surface to it that would not allow good adhession of the paint. By wetsanding the primer, you remove the fuzziness and provide a solid base for the paint to stick to. Also, the rattle can layers of primer would be extremely thin so there isn't much base protection. For example, the hood of my truck had some pretty bad surface rust, so I sanded the entire hood with 80 grit paper, then sprayed it with 2 coats of rustoleum rattle can primer. It's been about 8 months, but the hood is starting to rust again. I know that primer isn't meant to be a weather sealer, but it's the best I could do at the time. So now, I'm going to sand the hood again and this time I'm going to roll on rustoleum's rusty metal primer. Eventually, I'll get the ret of the body work done on the rest of the truck and paint the whole thing.
One really good reason for using primer before painting is to provide a solid base of one color so the vehicle doesn't look splotchy, especially if changing colors.
Posted By: Anonymous
Re: Hi - 09/12/0803:26 PM
Oh alright thanks! (and thanks Scott)
I didn't know that about the primer surface. I'd seen cars rattle can painted without sanding the primer before, so I wasn't sure how much it mattered. Granted, the cars were stock ice racers so the paint job didn't matter too much and didn't have to last very long. But yeah if I'm going to go through this painting process I'll definitely take one more step and sand between primer and paint too. I got tired of reading after about 50 pages of posts (starting in first thread) and then started jumping around and skimming and looking at people's before and after pics... so I didn't see Marq's explanation, thanks for the tip.
Bummer about the hood rusting through, but I guess it's better to happen now than later on after you've got a nice complete paintjob on the whole truck. Good luck finishing your project. It's funny, with "rust" in their name, shouldn't all Rustoleum paints have better-than-average rust blocking properties? lol.
Quote: Anyone having any problems with the paint cracking on Plastic Bumpers due to flexing? Is there any special prep required for the plastic parts?
I ended up using both Rustoleum and Brightside on my flexible plastic parts ( front aeroFX spoiler and bumper and the rear aeroFX bumper and skirt ). I have had no problem with cracking at all.
The only glitch I encountered was when I initially finished painting the car and I went to take it for a drive. I backed the car into a barbeque and it scratched the paint on the rear bumper. It just scratched out the paint at the point of contact and did not spread or lift any other paint. I just sanded down that area and re-rolled it - and things were back to normal and the paint blended in with the earlier painting.
My first thought about possible cracking on the flexible body parts would be 1 of 2 things. :
a ) the paint was applied too thick or...
b ) the surface preparation of the flexible body part left the paint adhering more to itself then to the subsurface that you were painting on to.
NOW... if the paint was applied too thick ( or not thinned out enough ) then paint is paint is paint and it would tend to crack on any surface. What would be happening is that the outer skin of the paint had cured before the layer of paint between the outer cured layer of paint and the subsurface that it had been painted on to.
The outer layer would have become rigid prior to the trapped middle layer ( which is still uncured and flexible.
IF you were to really carefully look at the spider cracks... you should see one of two things :
a ) the crack is just on the outer layer of the paint skin - but inside the crack it will only go as deep as the middle layer of the paint. OR
b ) the crack extends all the way from the outer layer of the paint skin - and the crack will go all the way down to the subsurface that it was painted on to.
This visual inspection will tell you if it was too thick and cracked or if it was an adhesion problem.
IF the surface was not properly prepared then you would find the paint being attracted to itself RATHER then adhering to the subsurface that it is being painted on to.
Flexible body parts come in three types really :
a ) brand new part from the box - needs special prep to ensure that the plastic surface is fully cleansed of all lubricants used at the mold making factory to allow easy separation of the part from the mold.
b ) used car part where there is just the original factory paint job on it. This is hopefully the easiest to work on since you just have to 'scuff' that painted surface, make it dull - removing the shine, and hopefully your paint on to that surface has the best chance of adhesion.
c ) used car part where there has been various body work and paintings applied on to it prior to you coming along and trying to add yet another layer of paint. This situation puts your paint job at risk, because you are depending on all those previuos paint jobs to hold up and not fail. If they subsequently fail ( below the surface ) then they will crack and spider your layer of paint that you put on them. The answer for a flexible body part with so many multiple layers of paint is to sand down as many of those 'extra' coats of paint as you can.. trying to reduce the number of potential previous layers that might fail.
On my McLaren... the original owner had painted the car THREE TIMES. The front air dam and air intake of the front spoiler was thick with paint. So much so that even those layers of paint were cracking. I had two choices... attempt to sand down and remove those previous cracking paint jobs OR just replace the whole front plastic bumper and airdam. I just went an replaced it because even with substantial sanding I knew that I would never be able to trust those previous paintings to not fail. So by replacing with a new part from the box.. all I had to do was seriously wipe down and cleanse the new part and get the mold silicants off the part.
Don't know if this helps... but those are the initial thoughts off the top of my head on the topic.
Quote: They make an additive especially for flexible parts. I don't remember the name of it.
Hmmm... the name Flextrol seems to ring a bell in the back of my head. But I could be wrong. But you are right that there is some additive available that will give the applied paint a little more flexibility when it cures...
.
Posted By: Anonymous
Re: Hi - 09/20/0807:48 AM
The thread has died down for a few days. I'm gonna repost my questions that nobody answered: Has anyone tried Rustoleum's topside paint yet (I've only seen Brightside brand so far) and how'd that go? Also for those using Rustoleum enamel, is the regular oil-based "protective enamel" or the "high performance/professional" version better? Did anybody do a comparison panel test?
Quote: The thread has died down for a few days. I'm gonna repost my questions that nobody answered: Has anyone tried Rustoleum's topside paint yet (I've only seen Brightside brand so far) and how'd that go? Also for those using Rustoleum enamel, is the regular oil-based "protective enamel" or the "high performance/professional" version better? Did anybody do a comparison panel test?
I have read every page of this thread over the past 2+ years and I don't recall anyone trying rustoleum topside or anyone doing a comparison test of the others either....but hey my memory has never been perfect!!
since it is slow I will share that I started another project. very happy with how my sidecar turned out so I offered to paint my father in laws van.
typical mid 90's chrysler van with the paint peeling off. he tried spraying a few spots with a can and it looked even worse. so far I power washed the loose stuff off and scraped the rest off with a putty knife/scraper. only doing the roof and hood as they were the worst....might do the rest later if it turns out good. i'm now up to the second coat of paint and will wet sand today and lay another. I took pictures of before anything, then after scraping and sanding then after the first coat. will try to take more as time goes along and update..
Lovely sidecar. This is truely amazing method, and I am looking forward to painting my mustang. I have read metallic paint doesn't work, but has any one tried a silver or silver like gray. At the moment my car is jet black, and I was thinking of taking it back to its original colour (well close to)which was silver. I know brightside does make a light gray "settle gray" which is very close to silver, rustoleum does have a silver and also an aluminum but they look like metallic paint. Anyway just wondering if anyone has tried a light gray / silver and can post a pic. Thanks for the very interesting read and method, hope this thread keeps going because there is some great info here.
I found this thread a month or so ago and was so amazed that I went out and bought some sandpaper and primer. My paint (clear flaking off and paint faded terribly) and dented old 88 4 Runner need work before I can do any painting. I am going to do this. I am amazed that the thread is still going. Glad as well. I have not read through all 200 or so pages, but think I have a good knowledge base to proceed when I want to finally paint. I only wish the pics would come up from the older pages. Anyway, being new to painting and never done any bodywork, I will learn as I go.
Any good tutorials or links on bondo that anyone can recommend? I think this will be my most glaring weakness.
Thanks, to all before me in this low $$$ painting thread. Phil
Posted By: Anonymous
Re: Hi - 09/22/0802:01 AM
Hi all.
I am new to moparts, but have been following some of the other forums on the roller paint job. I am about half way thru painting my 1970 Mustang Fastback. I am painting it jet gloss black using the Brightside teflon paint. I am getting good results except for some light-coloured blotchy marks you can see if you look up close and against the light. Has anyone elese painted their car gloss black using the Brightside paint ? I suspect these marks wont show on lighter colours. Here is a pic if the completed front guard. It was polished using a Festo rotary polisher.
I am now trying Brightside's own undercoat called 'PreKote' to see if that gets rid of the blotches. The guard in the pic has 8 coats and cured for 30 days prior to final wet-sanding with 2000 grit paper and then polishing.
I tested cosmetic glitter. The possibilities are intriguing. It's inexpensive, *very* fine and seems to land flat. It definitely contours well. The thickest areas feel slightly finer than 400 sandpaper- I haven't tested clear coat over it yet but will soon.
*I don't know... this afternoon I saw a boxy suv thing in a parking lot that appeared to have had this very method inflicted upon it. Silver flakes even but sparse over black. it wasn't pretty.
Quote: I tested cosmetic glitter. The possibilities are intriguing. It's inexpensive, *very* fine and seems to land flat. It definitely contours well. The thickest areas feel slightly finer than 400 sandpaper- I haven't tested clear coat over it yet but will soon.
*I don't know... this afternoon I saw a boxy suv thing in a parking lot that appeared to have had this very method inflicted upon it. Silver flakes even but sparse over black. it wasn't pretty.
I tried a few experiments with fine mist like flakes. I used gold, silver and a tri-color of red,silver and gold.
It just didn't look right.
The only way that I think that you could 'possibly' get away with the addition of a metal flake is to buy five or six cans of some metalflake AEROSOL ( spray can )... and put a light sprayed mist over your Rustoleum, Tremclad or Brightside paint job AS IT NEARS THE FINAL COAT.
The reason I suggest using a spraybomb with metalflake in the paint... is to get the kind of atomization and dispersal so that you don't end up with some areas heavy in metalflake and other areas sparse.
Then once it dries you lay a final rolled coat of your rolling paint over it. This will help to seal the metalflakes that were propeled onto your paint job.
Basically, people looking to see your metalflake would be looking through the translucency of that final thin coat. So it will slightly tint the light refracting and reflecting off the metal flakes trapped below that final layer.
.
Posted By: Anonymous
Re: Hi - 09/24/0801:48 AM
Thanks. I remember in the beginning somewhere people had used both the regular and professional enamel, but I don't remember ever reading a comparison between the two. I'm not sure how much of a difference there is. I was at my local Menard's and went to look at their paint a few days ago - and it appeared that the regular enamel only comes in a few colors, and they will only mix different colors using the professional enamel tint base. Maybe that's the difference between the paints? The regular only comes in the basic Rustoleum colors? I don't know, I have to do more research.
Anyways, nice job on the sidecar. Be sure to post your progress on the van, and when you're finished let us know how much paint you used on it. I'm thinking of painting an '89 Crown Victoria, and it probably has a comparable amount of surface area lol.
Posted By: Anonymous
Re: metallic flakes - 09/24/0801:54 AM
You wouldn't happen to have taken any photos of your tests, would you?
And I agree that a metal flake would likely need to be sprayed on to get it even enough. I'm not sure about putting the final coat of paint over the flake though, I know the coats are supposed to be thin, but I'd think the paint would cover up most of the flake effect. Guess that's something I'll have to experiment with next summer.
I have been reading these posts for several months and getting ready to paint my 63 Mercury Comet white with blue Shelby stripes. I plan on rollerizing most of the car and spraying the hard to get places, like door jams and trunk. I am still sanding and filling and have some time for planning... Just curious if the jams and hard to reach places are painted before or after the large panels are rolled? Thanks!
i finally started on my car after reading since january 2006. figured i would be an expert on the subject by now. a few friends and i started by cleaning the car, sanded with 400 grit, cleaned off, the one friend used the foam brush in tight areas while i rolled large areas and tried to smooth out his runs and sags. i have only put clean metal primer on so far cut with black to speed up the process(maybe about 50%/50% and also added some mineral spirits, but the primer is already pretty thin. the weather was maybe 60% humidity and maybe 65-70* the 400 grit did not leave the paint/primer as rough as i thought it would, and i also noticed some area that i rolled over lifted (it seemed),possibly just wiping off. waited about 13 hours(70-75% humidity this morning) and went out to the car today to wipe down with mineral spirits and see if the my hurting too short of finger nails could scratch the paint....it scratches off pretty easily in some areas, and taking mineral spirits to it after that made the paint sort of easy to rub off. i still plan on using 600 to scuff the primer before putting my black down, but figured primer would give me better adhesion. car is outside at the moment, wanted to get it painted in the natural light and hopefully bake on before moving it back into the garage, but it is supposed to rain friday and saturday. i only have a few hours tuesday and thursday before school, and only long day is wednesday before school to work on things....no electricity in my garage. am i doing anything wrong? is it possible that using windex to help clean initially messed up my adhesion?
Posted By: Anonymous
Re: Painting the Door Jams - 09/25/0811:51 PM
Quote: I have been reading these posts for several months and getting ready to paint my 63 Mercury Comet white with blue Shelby stripes. I plan on rollerizing most of the car and spraying the hard to get places, like door jams and trunk. I am still sanding and filling and have some time for planning... Just curious if the jams and hard to reach places are painted before or after the large panels are rolled? Thanks!
Mercurymarc,
Frankly I wouldn't bother spraying the door jambs - I painted mine with a foam brush and they came out great. Too much hassle with masking and overspray by spraying them.
Good luck ! Frank.
Posted By: Anonymous
Re: Painting the Door Jams - 09/25/0811:54 PM
Andy.
Try wiping down with Prepsol or a similar degreaser/cleaner before laying down the black. Methylated spirits work OK too. Use a tack cloth if you have one.
yes i would think windex could definitly be causing a problem. there are things like prepsol as frank said that are made to clean the surface before you paint. I usualy just did my sanding then rinsed good and wiped down a few times with mineral spirits and never had a problem!!
Posted By: Anonymous
Re: Hi - 09/27/0802:35 AM
I have read a lot of this thread but not everypage.
My question is, I have a sodablasted 69 vw bug im interested in using the brightside method on. But i beleive it will need to be primered since it is all bare metal. What is the recommended primer to use with the brightside? the interlux brand, rattle can, rustoleum primer. Just not sure if anybody has painted a care with this method that had been completely stripped.
I don't know what's recommended, but I used brightside over rattlecan primer and it's fine.
You can put rustoleum over bare metal too, so a similar color rustoleum to your final goal of brightside would be a good base and would reduce the number of brightside coats.
Posted By: Anonymous
Re: Hi - 09/27/0805:34 AM
One last question. Are you guys mixing all your paint and storing it. Or are you mixing paint with mineral spirits at each coating. in small batches?
Also would a better color match be acheived if all 3-4 qt cans of color were mixed in a large container and then divided back into smaller ones for storage. has there been any color differences noticable from a fender doen with one can and a hood fro another?
Quote: One last question. Are you guys mixing all your paint and storing it. Or are you mixing paint with mineral spirits at each coating. in small batches?
Also would a better color match be acheived if all 3-4 qt cans of color were mixed in a large container and then divided back into smaller ones for storage. has there been any color differences noticable from a fender doen with one can and a hood fro another?
thanx
I have been doing small batches in a seperate container, but thats jsut me. as for color matching the person that started all of this(69chargeryeehaa) said he did his bug then 3 years later bought another can and did the fender on the car and it matches perfectly so I don't think there would be an issue!!
Quote: I have been reading these posts for several months and getting ready to paint my 63 Mercury Comet white with blue Shelby stripes. I plan on rollerizing most of the car and spraying the hard to get places, like door jams and trunk. I am still sanding and filling and have some time for planning... Just curious if the jams and hard to reach places are painted before or after the large panels are rolled? Thanks!
Mercurymarc,
Frankly I wouldn't bother spraying the door jambs - I painted mine with a foam brush and they came out great. Too much hassle with masking and overspray by spraying them.
Good luck ! Frank.
Jerry and Frank- Thanks for the advice. -Marc
Posted By: Anonymous
Re: Painting the Door Jams - 09/29/0812:44 AM
I have mixing small batches also. Also I have been adding a product called 'Penetrol'. I am not sure if is available in the US under that name. Basically it helps paint spread and stick. I mix 100ml batches using the following formula : 70ml paint 15ml Penetrol 15ml mineral turps. Initially I wasn't using a primer, but I am using Interlux's own primer called 'Prekote'. What I did notice with this is that is really soaks up the first coat or two so you dont get a gloss finish until about the 3rd coat. But I am thinking using a primer will give a better result in the end. Cheers, Frank.
Yes it is called Penetrol here in the states also,i've seen it at Lowes hardware / home improvement stores. I've never tried it though,i just use rustoleum and mineral spirits without any primer over bare metal.Painted my car with the roller using this method when the original thread first started and it still looks as good now as it did then.
Posted By: Anonymous
HVLP turbine??? - 09/29/0804:17 AM
Has any one thought about trying to spray the rustoleum with an electric hvlp rig like the one at harbor freight. I know this thread is all about rolling it on. But this would still be really cheap and fast!! i wonder if it would be better to thin with acetone than mineral spirits. there is an rx7 on youtube the guy sprayed with a conventional setup that looks like it came out pretty good
If I paint the bottom of my truck should I paint full strength with Rustoleum or should I do thin layers? The appearance isn't a factor but would a thick layer ever become fully dry?
Is there a way to scuff and wetsand a factory textured roof? I guess I wouldn't have to wetsand between layers but maybe the final layer would benefit from it. It may be difficult to buff but I guess a textured roof doesn't need much of a shine to it anyway? I don't want to lose the texture. It looks decent now but if the rest of the truck is painted it may not look as good. I may also want to change the roof color. Would it even be possible to get full coverage without a nappy roller cover? I'm thinking a foam roller might only put the paint on the high areas although it would flow but maybe it would pool up in the low areas?
How well is a thin layer of paint going to protect from rust? The truck has had 1 paint job in addition to the factory paint. I will probably have to sand at least down to the original paint and I'm sure some areas will be bare metal. If I paint the first layer and the truck sits for a week will the thin layer be enough to protect it from flash rust?
Posted By: Anonymous
Re: HVLP turbine??? - 10/01/0801:44 AM
Hi Trimmer. I guess it would work OK, but why bother ? You may as well use normal auto enamel BC/CC or acrylic. I think the whole purpose of this was to avoid spraying - plus - in terms of using the Brightside paint, the point is that it can be rollered due to its self-levelling properties. I am not sure if Rustoleum is similar. Spray painting takes some skill I believe - rolllering , once you trial and error a test panel and work out a good formula is pretty easy. Hence the beauty of it. My 2c of course. Cheers, Frank.
Here's a funny story- When I decided to roll on paint was after my son wrecked my car a couple years ago. The other party's insurance company gave me a big check for the car's repair, and I repaired it myself for under $500, including the Rustoleum safety red and all the paraphernalia to paint it. Pocketed the rest.
Fast forward one year, on the same week one year later, my son wrecked the car again, same panels involved as last time, again not his fault. This time I was working out-of-town and told him just take it to the body shop, and squared it all away with the insurance company, etc. by phone.
So, when he got there yesterday to pick up the car all the body shop people stopped working and came to the counter. The shop foreman asked him "Where did you get that paint?" My son said he didn't know, that his dad painted it. So the shop foreman asked the question everybody at the body shop wanted to know: "Well, we use a computerized camera system to match paint. The computer selects the year, make, and model of the car from a few photographic samplings of your car and matches them so we can custom mix the paint to each car. Where the hell did your dad get the Lamborghini Countach paint? Does he have one?"
I wish I had been there to tell them it was Rustoleum I rolled on with a roller and mineral spirits!
Posted By: Anonymous
Re: HVLP turbine??? - 10/03/0804:24 AM
Hi Soopernaut. I cant picture the textured roof - is it like a vinyl roof ? I guess you could scuff it with a soft wire brush. It wont be a problem rollering it as long as you dont put too much paint on the roller. The foam will contour to the texture as you roll I believe. As for one thin coat on the bottom, that will prob be OK for flash rust, but in the long term it will be too thin to protect from stones etc. I would go straight unthinned on the bottom - or maybe 5% thinned. Cheers, Frank.
Posted By: Anonymous
Re: Wow - 10/03/0804:27 AM
Quote: "Where the hell did your dad get the Lamborghini Countach paint? Does he have one?"
Quote: Hi Soopernaut. I cant picture the textured roof - is it like a vinyl roof ? I guess you could scuff it with a soft wire brush. It wont be a problem rollering it as long as you dont put too much paint on the roller. The foam will contour to the texture as you roll I believe. As for one thin coat on the bottom, that will prob be OK for flash rust, but in the long term it will be too thin to protect from stones etc. I would go straight unthinned on the bottom - or maybe 5% thinned. Cheers, Frank.
Thanks for the reply.
The roof has a simulated vinyl texture created with paint.
For the bottom I didn't plan on leaving just 1 thin layer. I just thought there could be a bit of time between the first and second layer and didn't know if the protection against rust would be there. I guess I'll put in on full strength because it probably won't matter if it doesn't fully harden. I'm not going to buff it or anything.
Quote: As for one thin coat on the bottom, that will prob be OK for flash rust, but in the long term it will be too thin to protect from stones etc. I would go straight unthinned on the bottom - or maybe 5% thinned. Cheers, Frank.
OR... what you could do is this. Most cars have a rockguard or chipguard type coating on their lower panels. It is a clear plastic coating that looks somewhat like a smooth ornage peel with a plastic coating over it.
Sooooooooo... what I would do... I paint the lower sections at the same time as you paint the upper panels BUT NEVER go back and sand those lower panels. This way you will build up a faster and thicker layer of paint on those lower panels. You would continue as usual to do all the proper sanding and finishing on the upper panels.
In the end... if you follow this pattern of painting and not sanding the lower panels, the paint accumulated will be at least twice as thick as the uppper panels.
When the entire paint job is finished and you have been able to let the paint job fully cure... you could go to your automotive jobber shop and buy a can of the clear plastic 'chipguard' or 'rockguard' or whatever they call that stuff. Then you would just roll a layer of that coating over the unsanded lower panels... sealing the paint under the safety of the plasticky and fairly durable chipguard coating.
NOW... if you car was painted black... you might be able to cheat a little... by buying a can of that Rhinoskin ( or Rhinoguard ) or whatever the heck they call it. It is a black plasticky coating that they sell to protect the bed of the pckup trucks. It has great adhesion and it is more then durable enough to withstand rock gravel that may bounce off it. I am not sure... but I think it only comes in BLACK. That is why I was suggesting that it might be a good alternative coating for the lower panels on a black vehicle.
I havent been around in a while. I have been painting the car on and off when I could. I still would like to put one more layer on both the red and the black and I havent polished it yet but its lookign pretty good.
Quote: As for one thin coat on the bottom, that will prob be OK for flash rust, but in the long term it will be too thin to protect from stones etc. I would go straight unthinned on the bottom - or maybe 5% thinned. Cheers, Frank.
OR... what you could do is this. Most cars have a rockguard or chipguard type coating on their lower panels. It is a clear plastic coating that looks somewhat like a smooth ornage peel with a plastic coating over it.
Sooooooooo... what I would do... I paint the lower sections at the same time as you paint the upper panels BUT NEVER go back and sand those lower panels. This way you will build up a faster and thicker layer of paint on those lower panels. You would continue as usual to do all the proper sanding and finishing on the upper panels.
In the end... if you follow this pattern of painting and not sanding the lower panels, the paint accumulated will be at least twice as thick as the uppper panels.
When the entire paint job is finished and you have been able to let the paint job fully cure... you could go to your automotive jobber shop and buy a can of the clear plastic 'chipguard' or 'rockguard' or whatever they call that stuff. Then you would just roll a layer of that coating over the unsanded lower panels... sealing the paint under the safety of the plasticky and fairly durable chipguard coating.
NOW... if you car was painted black... you might be able to cheat a little... by buying a can of that Rhinoskin ( or Rhinoguard ) or whatever the heck they call it. It is a black plasticky coating that they sell to protect the bed of the pckup trucks. It has great adhesion and it is more then durable enough to withstand rock gravel that may bounce off it. I am not sure... but I think it only comes in BLACK. That is why I was suggesting that it might be a good alternative coating for the lower panels on a black vehicle.
.
Thanks for the reply. I was actually refering to the bottom of the floors not the bottom of the side panels. This will be painted separately probably in a different color.
Is this Rhinoskin something you roll on or spray on? I think Rustoleum paint would serve the same purpose and may be cheaper so I'm leaning that direction.
Oh... ok... well the bottom of the floors needs some clarification then...
Do you mean bottom of the floors... ie the part of the floor pans that you feet touch and that face inward in to the cockpit of the vehicle... or
Do you mea bottom of the floors... ie the part of the floor pans that face down towards the ground ( ie underneath the vehicle ).
If it is the interior floor pan... you could slap on the paint normally ( not thinned ) and just do two coats... You could also use that truck box liner paint on the interior floor. It would probably hold up better over the long run because carpets can get wet and it would be nice to have a surface coating that repeals water because of its platicky properties.
IF you were talking about underneath the car.. you could spray on Rustoleum paint straight out of the can.. and nail it in one or two coats. It would probably provide excellent anti-rust protection.. but eventually the road rocks would chip away openings to the metal surface below. You would have to plan on repainting the undercarrage every couple of years to ensure that your surface remains sealed. I would not use the Rhinoskin type stuff on the undercarriage... just because of the cost...
.
Posted By: Anonymous
Re: HVLP turbine??? - 10/09/0803:54 AM
Hey guys i'm new here i've spent the past week or so reading my way through from the first post and i have just started painting my camaro rustoleum gloss black..
i have a few questions though
on my first coat on the hood i sanded with 100/220/400 and it felt completely smooth to the touch. the first coat went on alittle thick and i could clearly see some sanding marks that must've stayed through from the 100g sanding. to continue should i just wetsand with 400 until its smooth again or must i completely sand it off and start over?
also this weekend im looking at buying a polisher. i'm a college student currently on a break and i dont have much money. i've read great things about the PC 7424, but i've also been looking at a chicago electric rotary from harbor freight. the rotary is only 50 bucks
would someone with no polishing experience but an exceptionally high learning curve be able to use the rotary to polish or will it be worth it in the end to just buy the porter cable?
The 100 grit sand paper is a little too scratchy to serve as your initial surface for painting on. I would be tempted to sand your initial coat of paint with the 400 grit to knock back the high points that the initial paint coat did not level off.
As for the Porter Cable, I would suggest spending the extra bucks to get one. It will last years longer and make each time you use it a pleasure ( and less work ). So you may get bitten a little harder on your initial cash outlay... but in the long run you will have a piece of hardware that you will be happily using years from now...
One of the secrets I shared with folks is how I got a Porter Cable cheap... I found we had a local factory warranty outlet in our city. I popped over there and they had the PC's all bundled up and going for 89 bucks.... They had refurbished units and new units all bunched together.
The new units were simply new units that had been returned from stores because people had stolen things out of the retail box. So they send them back to the refurb shop who are not allowed to sell them as 'new'... so they get unloaded through the refurb shop at the reduced price. Plus they also come with a full warranty or a slightly reduced full replacement warranty.
You might be able to find a used unit in your local Pennysaver type news paper... or in the want ads of your local paper. Possibly you might be able to catch a price reduced unit on eBay.
Since these things are built like tanks, I would have no qualms about buying a used one.
Quote: also this weekend im looking at buying a polisher. i'm a college student currently on a break and i dont have much money. i've read great things about the PC 7424, but i've also been looking at a chicago electric rotary from harbor freight. the rotary is only 50 bucks
would someone with no polishing experience but an exceptionally high learning curve be able to use the rotary to polish or will it be worth it in the end to just buy the porter cable? thanks
I don't think the Harbor Freight one is random orbital like the Porter Cable. If you are not experienced, you are more likely to screw something up if you don't have the random orbital feature.
BTW - maybe you could rent one from your local hardware / tool rental store. You really only need it for a day, to buff out everything when you are done. Probably only cost you $20.
Re: New Paint job on a budget thread Part III - 10/09/0807:57 PM
Ok I wish I had pics to show you but my computer wont allow me to upload them from my camera....so I will try to describe what I have done....I wet sanded the hell outta my car.....sprayed two coats of grey primer over entire car....wet sanded again with 400....rolled two coats..wet sanded with 400....rolled two coats....wet sanded with 600....rolled two more coats....wet sanded with 600....rolled two more coats, first I used the turtle wax rubbing compound....with a cheap random orb polisher from wally world, then I have been using the turtle wax polish like a mad man and the damn car is still dull....I mean like primer.....what am I doing wrong? I am so mad I could . I only waited about 24 hours before I started polishing should I have waited longer?
James
Posted By: Anonymous
Re: New Paint job on a budget thread Part III - 10/09/0809:41 PM
Quote: Ok I wish I had pics to show you but my computer wont allow me to upload them from my camera....so I will try to describe what I have done....I wet sanded the hell outta my car.....sprayed two coats of grey primer over entire car....wet sanded again with 400....rolled two coats..wet sanded with 400....rolled two coats....wet sanded with 600....rolled two more coats....wet sanded with 600....rolled two more coats, first I used the turtle wax rubbing compound....with a cheap random orb polisher from wally world, then I have been using the turtle wax polish like a mad man and the damn car is still dull....I mean like primer.....what am I doing wrong? I am so mad I could . I only waited about 24 hours before I started polishing should I have waited longer?
James
did you wetsand with at least 1000 on your final coat, from what i've read you should westand with at least 1000 on your final coat before polishing
Re: New Paint job on a budget thread Part III - 10/09/0809:50 PM
You are saying wet sand after my coat is dry then polish??
Posted By: Anonymous
Re: New Paint job on a budget thread Part III - 10/09/0810:43 PM
well from what i've read is on your final coat to wetsand with 1000 and if you want 2000 and then polish to get a glass shine, but going from 600 to polish is too much i think
Quote: You are saying wet sand after my coat is dry then polish??
Re: New Paint job on a budget thread Part III - 10/10/0812:25 AM
I went from 600 to paint then rubbing compound to polish.....my paint looks smooth just NO shine its flat....It had an ok shine before I started cutting it....it was just a touch blotchy looking.
Thanks for the reply. I was actually refering to the bottom of the floors not the bottom of the side panels. This will be painted separately probably in a different color.
Is this Rhinoskin something you roll on or spray on? I think Rustoleum paint would serve the same purpose and may be cheaper so I'm leaning that direction.
Oh... ok... well the bottom of the floors needs some clarification then...
Do you mean bottom of the floors... ie the part of the floor pans that you feet touch and that face inward in to the cockpit of the vehicle... or
Do you mea bottom of the floors... ie the part of the floor pans that face down towards the ground ( ie underneath the vehicle ).
If it is the interior floor pan... you could slap on the paint normally ( not thinned ) and just do two coats... You could also use that truck box liner paint on the interior floor. It would probably hold up better over the long run because carpets can get wet and it would be nice to have a surface coating that repeals water because of its platicky properties.
IF you were talking about underneath the car.. you could spray on Rustoleum paint straight out of the can.. and nail it in one or two coats. It would probably provide excellent anti-rust protection.. but eventually the road rocks would chip away openings to the metal surface below. You would have to plan on repainting the undercarrage every couple of years to ensure that your surface remains sealed. I would not use the Rhinoskin type stuff on the undercarriage... just because of the cost...
.
The interior floor pan would be the top of the floors. The bottom of the floors would be the bottom of the floors,aka the bottom side of the sheetmetal underneath the floors of the vehicle.
Re: New Paint job on a budget thread Part III - 10/10/0802:34 AM
where the hell would I get 2000 grit paper...I have some 1000.....and do you really think that will work? I am just about ready to F it and spray the damn thing.
Re: New Paint job on a budget thread Part III - 10/10/0803:54 AM
Quote: where the hell would I get 2000 grit paper...I have some 1000.....and do you really think that will work? I am just about ready to F it and spray the damn thing.
Wood workers and blade smiths use 2000 grit. Not sure if it comes in wet or dry. I would assume so, but that is how the custom knife makers get a mirror finish on stainless as well as non-stainless steels
Re: New Paint job on a budget thread Part III - 10/10/0804:34 AM
Quote: where the hell would I get 2000 grit paper...I have some 1000.....and do you really think that will work? I am just about ready to F it and spray the damn thing.
I think i picked mine up at autozone....bout 1000, 1500, and 2000. but what i think the real problem is that the polisher you are using is not powerful enough. i had the same problem. so I jsut thinned the last coat very thin and left it like that with no sanding or polishing....until I get(can afford) a good polisher!!
Re: New Paint job on a budget thread Part III - 10/10/0801:31 PM
Quote:
Quote: where the hell would I get 2000 grit paper...I have some 1000.....and do you really think that will work? I am just about ready to F it and spray the damn thing.
I think i picked mine up at autozone....bout 1000, 1500, and 2000. but what i think the real problem is that the polisher you are using is not powerful enough. i had the same problem. so I jsut thinned the last coat very thin and left it like that with no sanding or polishing....until I get(can afford) a good polisher!!
I'm thinking its both: final sand and crappy buffer. 600 grit for the final sand is not even close. You gotta get to at least the 1000 grit wet sand stage before you try and polish.
And NO - 24 hours is not long enough to wait before you polish.
And - most people do not get good results with the cheapo $30 buffer. There have been a few exceptions, but not very many.
Re: New Paint job on a budget thread Part III - 10/11/0808:51 PM
I have given up...I have been sanding and polishing this damn thing for two days......here comes the spray gun. Should I use spirits or acetone to thin it?
Re: New Paint job on a budget thread Part III - 10/13/0812:28 PM
Quote: I have given up...I have been sanding and polishing this damn thing for two days......here comes the spray gun. Should I use spirits or acetone to thin it?
Don't use acetone unless you have an oxygen respirator pack on. The fumes will kill your brain and your kidneys. It also makes one heck of an explosive mixture when atomized in the air and finds a spark ( yes something as simple as the spark of the rotator brushes in the electric motor of cheap electric spray guns.
There was some discussion earlier in the thread about the right mixture or flow rate to cut your paint with mineral spirits to get a good vaporization of the paint when spraying.
.
Posted By: Anonymous
Re: New Paint job on a budget thread Part III - 10/14/0802:30 AM
Just an FYI, as you seem to have given up the rollering. I waited 30 days before final sanding. My final sand was 2000 wet - any good auto parts or auto paint store will have that. I am lucky I guess as a friend has a Festool Rotax polisher - $800 here in Australia. Cut it twice with that and then polished. I am using Brightside BTW gloss black. Best way I could describe the finish is black chrome. Awesome. Incredibly smooth. My only issue is I have some marks in one of the layers of the paint - trying to figure that problem out now. Cheers, Frank.
Re: New Paint job on a budget thread Part III - 10/15/0812:52 AM
well here in Illinois we only have MAYBE a month of good weather left and I would like to drive it with out it looking like some flaming POS.....its been down for three weeks already...kinda bummed. I do think I will roll my truck but its a pos anyway.
Posted By: Anonymous
Re: New Paint job on a budget thread Part III - 10/15/0803:36 AM
Well you could drive around in the final coat. It wont be great, but not terrible either. Mine has a decent shine, not much peel and very little dust inclusions. Drive it for 30 days, then do the final 2000 wet sand and polish. Just a thought.
Cheers, Frank.
Posted By: Anonymous
Re: New Paint job on a budget thread Part III - 10/16/0802:24 PM
Sorry, not a mopar but proof the technique does work. I used brightside marine paint and it really,really looks great!!!
Posted By: Anonymous
Re: New Paint job on a budget thread Part III - 10/16/0802:31 PM
Re: New Paint job on a budget thread Part III - 10/22/0812:36 PM
Quote: no, it was red. pretty rough condition.
Now the big question. Like a lot of us... you probably wanted to go the 'pro paint job' route... Did you ever get any quotes on what it would have cost you to have it painted professionally ?
I am just curious if you have any numbers to indicate how much money remained in YOUR POCKET ( to spend for further work or goodies for the car ) by 'rolling your own'
Re: New Paint job on a budget thread Part III - 10/22/0802:40 PM
How long do these finishes hold their shine w/o a clearcoat? That looks awesome. is it years? Do they need to be buffed out every year,which would cut the layers down....
Posted By: Anonymous
Fixing up the new Toy - 10/22/0804:57 PM
I purchased a little toy, a 65 mustang, a couple of months ago. The previous owner put in quite of bit new sheet metal, however, he did not prime or scuff the surface of this new metal. Now the once nice paint job is chipping and flaking all over the place.
So I plan on stripping her down to the bare metal, fix or replace any rusted areas and change colour from white with blue shelby stripes to blue with white shelby stripes using Brightside.
What is the best way to paint the underside of hood and trunk lid?
I was thinking of removing the hood and trunk lid, buying a cheap hvlp sprayer for these areas and spraying Brightside undiluted.
Is this what you would do? How may sprayed coat would be sufficient for these areas?
Posted By: Anonymous
Re: New Paint job on a budget thread Part III - 10/23/0812:13 AM
Quote:
Quote: no, it was red. pretty rough condition.
Now the big question. Like a lot of us... you probably wanted to go the 'pro paint job' route... Did you ever get any quotes on what it would have cost you to have it painted professionally ?
I am just curious if you have any numbers to indicate how much money remained in YOUR POCKET ( to spend for further work or goodies for the car ) by 'rolling your own'
.
I didn't get any quotes (car wasn't running) but I know of another sterling owner that paid $5,000 for a black paint job, so I did save quite a bit.
What is the best way to paint the underside of hood and trunk lid?
It will depend on the color and paint you choose to use.... I know for my Mustang I used a spray bomb to do the underside of the hood and trunk. With all the frame and strengthening structures in some hoods and trunks, it was the easiest way to get color coverage in to all the nooks and crannies.
Now... you can go about it one of two ways... with them on the car and with them taken off. If you are doing the spraying with them on the car... then it pays to cover up as much of the rest of the car to avoid the overspray landing all over.
Ideally, you will take both of them off the car... and that will make the painting task a lot easier. With them placed on a work bench, or between two work horses or even placed on a bunch of plastic milk carriers ( you know those plastic things that milk comes in to the stores and that we use to steal to put our record albums in ). With the hood or trunk lying horizontally... you can easily spray bomb it or even do a combination of rolling and foam paint brushing of them. You would hit the harder to hit nooks with the foam brush and then follow up with the roller to level things out and get the more flat areas.
But I found the spray bomb gave me the easiest application, best coverage and a pretty smooth ( and shiny finish ).
In my case, I was using Brightside Red to paint the cars body. And fortunately the Rustoleum/Tremclad red spray paint is the very same color. The same story probably works out for the blacks and some of the other colors.
JUST BE SURE to thorougly scrub the hood down with mineral spirits, followed up by a thorough rinse down with a bit of soap and water to removed all the engine compartment splatterings that have found themselves attached to the underside of the hood. The trunks normally don't need as extensive a cleaning prior to painting.
I did not have to sand the underside of the trunk or hood. The above referenced cleaning was sufficient surface preparation to get things ready for painting.
And before you ask... YES... both Brightside or the Rustoleum/Tremclad work well in the engine compartment and are not affected by the heat in the engine compartment
Quote:
I was thinking of removing the hood and trunk lid, buying a cheap hvlp sprayer for these areas and spraying Brightside undiluted.
I can't speak to the spraying of the Brightside... but I would think that you will probably have to thin it using the 'brushing thinner' that Interlux sells for the Brightside paints. Out of the can, the Brightside might be too thick to properly atomize through most cheap sprayers.
But as I mentioned... depending on the color you are choosing, you might be able to use aerosol spray bomb paint instead of using an HVAC.
Quote:
Is this what you would do? How may sprayed coat would be sufficient for these areas?
Using the spray bombs... I ended up using 4 spray bombs for the underside of the hood and 2 spray bombs for the underside of the trunk.
For the hood... I would take one bomb... and spray it all over.. trying to get as much coverage as possible. Then walk away from it for 24 hours before emptying the next spray bomb on it. Then take another 24 hour break before laying a third bomb on to it. Then... yup.. another 24 hours to hit the final coat on it. This will ensure that you don't get any orange peel forming on the paint.
With the trunk lid... you follow the above pattern of allowing 24 hours drying time between coats. And although you only have 2 spray bombs for the trunk lid, only dump half a can on to it per session. This way it will take 4 days to complete four coats ( using just the two spray bombs ) on the innner trunk lid.
.
Posted By: Anonymous
Re: Fixing up the new Toy - 10/23/0811:03 PM
Marq,
I want to thank you for the detailed answer and for your willingness to help everybody out.
I did the bottom of my hood basically the same way Marq described, and you DO need to let it set in between coats, I tried to rush it once and spent a bunch of time fixing up a mess of orange peal.
Posted By: Anonymous
Satin/Flat finish - 10/24/0805:11 AM
Hello all. I'm Peter. A few months ago, my car was struck by a girl going through an intersection. Needless to say, my car is in the 'rebuild' stage. I have spent most of my $$ on go fast goodies - Kenne Bell S/C along with supporting mods - and I don't have much left for paint.
I have spent the better part of two months reading, looking at pictures, etc, on this site, amongst others - btw, this is definitely the best site in terms of DIY paint - especially using the rolling method.
I have decided to roll paint on my 89 Mustang LX. I plan on doing a two tone - satin black bottom, and a charcol grey (debating a flat/satin grey) on top.
I have driven everyone who will listen crazy with this, especially the wife as I'm sure the majority of you have first hand experience.
Anyhooo...why I'm here. I've been to about 5 outlets (home depot, canadian tire, rona) and can not find Satin black in quarts. I emailed Tremclad/Rustoleum and they said mixing Flat and Semi-gloss will give me the Satin that I am looking for. Does this make sense?
Also, I have seen a few guys do the satin finish, but I am confused on the final stage...if I am correct, once the final layer is applied, I should not be wetsanding. Is this correct?
Most of the guys using gloss polish their paint afterwards, is this NOT necessary with Satin/flat?
I appreciate your help with this...I have been trying find it on my own, but as you can imagine, three different threads, with over 200 combined pages makes finding this info a little tedious.
I want to know how you polished all of those tight areas on the Sterling like the headlights, etc. and what do you do w/ areas that you can't get teh buffer to. That car looks great. I want to roll my Coronet R/T and will need to polish areas like that....
Also, if you had your car etched, primed etc ready for a commercial job and you decided to roll, however didn't like the results, how far yould you have to take it down to get ready for a good spray job again?
Also, if you had your car etched, primed etc ready for a commercial job and you decided to roll, however didn't like the results, how far yould you have to take it down to get ready for a good spray job again?
Thanks, Pete
Hi Pete...
Let us say that you did a roller job and didn't like the end result.. or maybe you won some money at the local casino and could afford to take the car to a 'real' paint shop. The amount of surface prep that you would have to do prior to getting it professionally sprayed depends on a number of factors...
a ) are you planning to spray it yourself or take it to a paint shop...
b ) IF you are taking it to a commercial paint shop... is it the el-cheapo paint shop or the 'we take pride in every paint job we do type paint shop'
If you are planning to spray it yourself, you would scuff the surface just as you would if you were going to send it to MAACO ( or similar type shops ). The amount of surface scuffing would entirely depend on just how much 'scuffing it takes to remove the outer gloss and end up with as smooth a surface as you can...
If you are planning to take it to a 'real' paint shop that beats their chest about the pride they take in every paint job... the odds are that they would want to do the surface preparation prior to painting. They always like to proclaim " it's the only way we can be absolutely sure that if the paint fails it is our fault'. These are usually the same shops that will spray your car ( with your surface preparation ) and warn you before hand that ' you don't get a guarantee with that paint job ( again echoing how their surface preparation work is the only true one that they can guarantee the coating of paint on ( and for which they charge you an extra 10 hours of labor on your bill ).
Back to the paint for a moment... Tremclad/Rustoleum is an enamel. Brightside is a polyurathane. As such... they are the same types of paints as used for commercial automotive painting. So that is mentioned just to confirm to you that there should not be any compatability problems with your base coat of Tremclad/Rustoleum or Brightside, with a commercially sprayed paint job on either of them.
I mention that because some shops might try to lie and say... ohh... there is a compatibility problem with that 'rolled on paint'.... and we have to strip your car back down to metal and reprime it. Which basically is their way of outright lying and saying that '... we want to charge you 20 hours of surface preparation...".
Now I don't want to be too harsh on some automotive paint shops... that might want to strip a rolled on paint job to bear metal and re-prime. After all, some shops do take really great pride in every car that rolls out of their shop with a fresh coat of paint. And be taking things back to square one is the only way they can assure themselves that their end result will live up to their 'standards'. That's a cool corporate attitude... but unfortunately their 'pride in their work' means mucho more money out of your pocket. And assuming you went the roller route in the first place, it is not likely you would even be stepping foot in that paint shops doorway ( unless of course the lottery win or day at the horsetrack suddenly plumped up your wallet ).
Bottom line... either the Rustoleum/Tremclad or Brightside rolled on paint job can serve as an excellent basecoat for subsequent spraying. Surface prep 'should' be no different then if you had a car with a normal but worn out paint out that was going in to be sprayed.
.
Posted By: Anonymous
Re: Satin/Flat finish - 10/24/0811:59 PM
Quote: I want to know how you polished all of those tight areas on the Sterling like the headlights, etc. and what do you do w/ areas that you can't get teh buffer to. That car looks great.
I pretty much just used a 6" super cheapo buffer, which worked fine. Really the only place I had to hand buff was in the rear scoops.
Hey 65 Pony- Love the White/Blue paint job! That's what I have planned for my 63 Comet. So when you repaint yours from blue on white to white on blue, mine will fill the void...
Nice car, and it looks like you have a great website. Please keep us posted on your project. What is that stuff you used instead of welding a patch, does it hold up is it some type of glue, looks like a nice clean patch.
Posted By: Anonymous
Re: Fixing up the new Toy - 10/29/0804:08 AM
started painting my hood sanded it down to 220. cleaned everything with the MS and layed down my first coat. Its drying right now but some how little pieces of hairs or somthign got in the paint so im going to have to sand that all out. here are some pics.
Quote: What is that stuff you used instead of welding a patch, does it hold up is it some type of glue, looks like a nice clean patch.
I used some 3 M Panel Bonding material- it is supposed to be as strong as welding as long as the part is not structural. I like it since I prefer not to weld and the patches were small. This is used in auto shops but I got mine on eBay. If you prep correctly (grind, sand, clean, and degrease) it is supposed to last forever and even comes with a lifetime warranty. The applicator gun costs $150 so instead I made a dual plunger out of scrap wood (seen on the right) that I jammed into my $2 caulk gun and it worked fine. I'll post new paint pics when I get'em but I am making slow progress.
I have a question regarding painting now that it's getting cold outside. I plan on using the roller method to paint my truck eventually, but I still have a lot of body work left to do. I'm currently working third shift so I don't presently have a whole lot of time to really do anything right now, nor really the money to do it, but I have to do something soon. Awhile back, I sanded the hood down to bare metal to take care of some rust issues, then just shot with a couple coats of Rustoleum spray primer and left it at that. Now, it's starting to rust through the primer and, with winter coming, I know I need to get some kind of paint on it quick. So I just figured for a quick fix, I'm going to resand it, primer, then spray some paint on it. The thing is, I sleep all day, this is my daily driver and I don't have a garage to keep it in. My concerns are about driving it with relatively fresh paint (if I was to paint it around 5pm and I go to work at 10pm), and what might happen with a cold, dewey, or frosty morning. Also, when I resand this, should I use the rust converter/primer, or just use the Rustoleum primer again? Any advice out there?
Quote: I have a question regarding painting now that it's getting cold outside. I plan on using the roller method to paint my truck eventually, but I still have a lot of body work left to do. I'm currently working third shift so I don't presently have a whole lot of time to really do anything right now, nor really the money to do it, but I have to do something soon. Awhile back, I sanded the hood down to bare metal to take care of some rust issues, then just shot with a couple coats of Rustoleum spray primer and left it at that. Now, it's starting to rust through the primer and, with winter coming, I know I need to get some kind of paint on it quick. So I just figured for a quick fix, I'm going to resand it, primer, then spray some paint on it. The thing is, I sleep all day, this is my daily driver and I don't have a garage to keep it in. My concerns are about driving it with relatively fresh paint (if I was to paint it around 5pm and I go to work at 10pm), and what might happen with a cold, dewey, or frosty morning. Also, when I resand this, should I use the rust converter/primer, or just use the Rustoleum primer again? Any advice out there?
Ok... so let's break this down :
a ) cold temperatures mean a longer curing time is required or the paint/primer stays soft
b ) moisture, humidity or gawd forbid snow means the paint will take a foggy appearance and a slightly slow drying time.
I would probably suggest the following prescription for your situation :
a ) sand the primer down to smooth it all out and to remove where the rust stain is breaking through.
b ) don't prime. Go straight to laying on a coat of Rustoleum/Tremclad or Brightside. They all have the ability to serve as a basecoat/primer and they have the ability to stop oxygen from getting through to the metal ( therefor starving rust of the oxygen supply that it needs to grow ).
Ok... now what I would do.... is for that first coat of paint ( after the removal of the primer and rust ) is to be a bit of a farmer ( no offence meant ) and just lay on a straight coat of paint ( undiluted or with very very little mineral spirit added to it ).
The idea being to get as nice thick coat down to ensure the starvation of oxygen from the rust/bare metal.
The thing is that when you next have the opportunity to do a sanding and your next coat, you will be able to sand off any irregularities in the smoothness of the painted surface.
The subsequent coats of paint will be done with the normal dilutions of mineral spirit ( in order to lay only a very thin coat of paint for each subsequent layer ).
There is no problem if you have foggy paint for the initial layers. The wet sanding prior to each coat will remove the outer skin layer where the fog is actually located ( if it happens at all ).
A lot of this will also depend on what color you are going to be using. For obvious reasons the fogging is more noticable with the darker colors... and less noticable with the lighter colors.
EVEN if there is a slight fog on your final coat of paint... that is something that the final wetsanding, polishing and waxing should be able to make disappear.
NOW.. there is no problem with driving the vehicle during the painting. But you have to keep in mind that the paint will be slightly less cured ( hardened ) depending how soon after painting you hit the road and cruise. You also will having all kind of 'road crap' landing on the curing paint. So all that means is that WHEN you go to do the next layer of paint, you will have to spend a little extra time preparing the surface to be painted. It may require a little more wet sanding ( to take the previous coat of paint to a clean surface of paint ) AND it will require a little more attention to thoroughly wiping down the wet sanded surface to remove all the artifacts lifted by the wet sanding ( since you are removing the sanded off crap and any contaminants that may have landed on the paint ( bird poo... dust... bugs that have splattered on to it... strange liquids that have landed on it from cars in front of you or that sprayed off their tires. ( its amazing the crap that is turned up by the cars in front of you.. dust, dirt, road oils etc ). So that is why you have to do a thorough disinfecting of the surface prior to adding your next coat of paint.
Just curious about the technique used by the guys who are using the panel bonding adhesive.
There appear to be 2 possible ways of fitting the patch panel into the existing /remaining structure so that it has a flush fit.
1. Create a flange either on the patch panel or the remaining work.
2. Place "backing plates" or "backing strips" behind the edges of the remaining work, and then placing a flat patch panel against those.
Here a great article and series of photos showing the second method. Couldn't find any visuals on the first. If my explanation isn't clear, I think you guys will get it from looking at this.
Quote: Just curious about the technique used by the guys who are using the panel bonding adhesive.
There appear to be 2 possible ways of fitting the patch panel into the existing /remaining structure so that it has a flush fit. 1. Create a flange either on the patch panel or the remaining work. 2. Place "backing plates" or "backing strips" behind the edges of the remaining work, and then placing a flat patch panel against those. Here a great article and series of photos showing the second method. Couldn't find any visuals on the first. If my explanation isn't clear, I think you guys will get it from looking at this. Kevin Tetz Bonding Want to know what you've found works and what is easiest or best.
I used option #3- I just put the patch behind the panel and did not flange it- instead I used bondo over the slightly depressed patch (maybe 1/16 of an inch) and feathered it.
I was a bit worried about the backing plates not being strong enough, and the single oversized patch that sits behind the hole seems to me to be stronger. Also, even if I got the metal patch panel recessed I doubt the surface would be perfect to I'd have to bondo it anyway.
I used a pair of those flanging pliers that look like a funny vise grip, the fasteners across the top of the patch are cleco's they are spring loaded to hole the panel in place but require a #30 hole. The panel adhesive is agreat filler for cleaning those up.
Posted By: Anonymous
Re: paint job on a budget!? - 11/07/0808:07 PM
I'd like to thank everyone over the last three years for giving my life new direction. lol Can't wait to get started!
Posted By: Anonymous
err - 11/10/0808:42 PM
Im back, its been a while. Its almost been a year since ive started this project. Now I understand home improvements running gag, ya know Tim's car he never finishes?
Quote: ok excellent. the sanded surface should go back to its original color after polishing right?
that is the idea. I would go to 1500 then maybe 2000 grit paper before polishing or else it will take forever polishing!!
Posted By: Anonymous
Re: err - 11/13/0808:56 PM
This is probably a dumb question, but I dont have access to a spray gun or air compressor, can I buy automotive paint and add reducer and apply it with a brush? Would it self level like the rustoleum? Im not looking to paint a car, but a motorcycle tank.
If u want an auto finish that's easy use dupli-color its very easy...tons of colors...if you want to roll it on you are kinda limited to color choices ..I still haven't been able to get much of a shine on mine!!!
Quote: This is probably a dumb question, but I dont have access to a spray gun or air compressor, can I buy automotive paint and add reducer and apply it with a brush? Would it self level like the rustoleum? Im not looking to paint a car, but a motorcycle tank.
Thanks,
Why not see if you can get the color you want in . a rattle can set up or one of those power packs, if the color is a Rustoleum color use thier spray cans.
Posted By: Anonymous
Re: err - 11/14/0801:03 AM
Don't know if this is what Dart69GT meant by "power packs", but it's possible to get automotive paint packaged in an aerosol can. I've read that professional paint supply houses will do this.
I've also seen places on the web that advertise this. You can supply a factory color code and they will supply an aerosol that matches.
I even recall seeing a special aerosol setup that had a device where you popped a seal on the can right before spraying, to release the hardener into the paint (if that's the type of paint "system" you're after).
Posted By: Anonymous
Re: err - 11/14/0803:13 AM
Quote: If u want an auto finish that's easy use dupli-color its very easy...tons of colors...if you want to roll it on you are kinda limited to color choices ..I still haven't been able to get much of a shine on mine!!!
I've been experimenting with a couple different things and have used a couple of the Duplicolor cans but the silver colors just have too much sparkle in them. Looks odd. Over the past couple of days, Ive experimented with black Rustoleum enamel with a brush and have gotten a really nice finish. (I'll be finishing my headlight bucket with black) But they dont make Rustoleum in silver.
Napa carries a pint of auto paint for $16. Reducer is $27. I was curious if I can just mix this and brush it on since I dont have the painting equipment. Didnt they used to brush enamel on in the old, old days?
I have purchased automotive paint in spray cans from these folks before: http://www.automotivetouchup.com/ Perfect color match (Toyota "Natural White", code 056 if I remember correctly.) It's a good option if the area you need to spray isn't too big. Your color choices span the whole array of OEM colors and include base/clear systems.
Quote: If u want an auto finish that's easy use dupli-color its very easy...tons of colors...if you want to roll it on you are kinda limited to color choices ..I still haven't been able to get much of a shine on mine!!!
I've been experimenting with a couple different things and have used a couple of the Duplicolor cans but the silver colors just have too much sparkle in them. Looks odd. Over the past couple of days, Ive experimented with black Rustoleum enamel with a brush and have gotten a really nice finish. (I'll be finishing my headlight bucket with black) But they dont make Rustoleum in silver.
Napa carries a pint of auto paint for $16. Reducer is $27. I was curious if I can just mix this and brush it on since I dont have the painting equipment. Didnt they used to brush enamel on in the old, old days?
Try some tractor paint....lots of choices....brush or spray
Posted By: Anonymous
88 dakota - 11/22/0805:41 AM
Well I�m new here, I don�t even know how I got directed to this website but is pretty awesome, I have an 88 dodge Dakota that I�d like to paint, I started reading the 200 page long post but its way to much info for one day, anyways I bought all the supplies i think I�ll need to paint the truck, i sanded the hood today will prep it with bondo and paint the firs two coats tomorrow, I chose rustolium royal blue has anyone tried that paint? Any ideas before I have at it? ?
Quote: Well I�m new here, I don�t even know how I got directed to this website but is pretty awesome, I have an 88 dodge Dakota that I�d like to paint, I started reading the 200 page long post but its way to much info for one day, anyways I bought all the supplies i think I�ll need to paint the truck, i sanded the hood today will prep it with bondo and paint the firs two coats tomorrow, I chose rustolium royal blue has anyone tried that paint? Any ideas before I have at it? ?
Still warm enough to let it dry thoroughly in your area? Not below 60 degrees even at night? BTW, Welcome to the forum
Haven't tried the Royal Blue, but if you can, please post some pics. My Goddaughter is thinking about that choice for her '70 Duster. Thanks and good luck.
Posted By: Anonymous
Re: 88 dakota - 11/22/0811:21 PM
hi everyone
been reading this thread for months now and brillnt must of read it few times through now
i shall be taking this route with my work van as money does not allow and a profeshniol job will only get damaged .
i am painting it red the base couler is already red so am hoping it covers quite easy fingures crossed , there is slight diffrence in the to coulers so i shall be doing the door shut's etc .
i shall be using a small compresor with hlvp gun with rustoluim red.
how many coat's do pepole recomend and is it easyer wet sanding and getting a better finish with only spraying thin coat's on ??
the size of the van is a vw split screen so how much paint would i need and what else is required apart from the paint and minreal spirit's and spray gun ?? is there anything else i can add to the rustoulem to make it lay better and save myself time when buffing etc ??
how many hrs do pepole think would take from start to finish just as a ruff guide all body work prepped ready ??
many thanks and sorry about all the questions and poor spelling .
Hello All. I've spent most of my spare time this past week reading all three threads. I appreciate everyone sharing their sucesses and failures. It has been very educational and entertaining!
My project is a 69 Cougar that I think will look very with single stage paint. I plan to do the body work this winter and paint next spring. I visited my local West Marine today and spoke with a very helpful salesman who gave me brochures for Interlux and Petit and also a West Marine painting guide. He told me the Petit Easypoxy was comparable to Interlux Brightside. I only mention this because Petit has some different colors including a nice burgundy that some folks were looking for.
I do have a question about the timing of the final wetsand and polish. Martin's advice to do this within a couple of days makes most sense to me, but others have advised to wait weeks or months. It seems like the wetsanding and polishing would be easier (and more successful) while the paint is relatively soft. I understand that paint needs to breathe so it shouldn't be waxed, but is there any reason hold off on the polishing?
Makin' Progress on the Blue Comet- Priming Done - 11/28/0803:35 PM
Thanks to the great folks on this forum I am on my way to a great looking finish! I have created a webpage to document my adventure- for those who want to see the project you can check out:
It may bet time to change the title from Blue to White!
Thanks for everyone's help.
Posted By: Anonymous
Re: Makin' Progress on the Blue Comet- Priming Done - 11/28/0807:05 PM
Good work Mercurymarc and nice website too. Impressive that you are willing to tackle that much rust especially out here on the left coast where we don't usually give rusty cars that much love. A v8 Comet though deserves to be saved.
Posted By: Anonymous
Re: Satin/Flat finish - 12/01/0803:16 AM
Quote: I want to know how you polished all of those tight areas on the Sterling like the headlights, etc. and what do you do w/ areas that you can't get teh buffer to. That car looks great. I want to roll my Coronet R/T and will need to polish areas like that....
Also, if you had your car etched, primed etc ready for a commercial job and you decided to roll, however didn't like the results, how far yould you have to take it down to get ready for a good spray job again?
Thanks, Pete
anyone?
I have a small 3" pneumatic buffer that will get in to most areas. Can also do it by hand.
#2 depends on how much you are spending on a professional paint. If you are going to go with a $2k job, you can just sand and rough up the paint and spray over the top. If you are going for a $10k + show car paint job, have it sand blasted back to bare metal. JMHO though.
Brew
Posted By: Anonymous
Re: - 12/05/0808:53 AM
Marq!
I'm reading all the 3 topics for about 1 week now non stop! Good job for introducing the Brightside paint! I'm from the Netherlands, and I'm going to paint a Nissan 240SX in Brightside Fire Red.
Most of your information is pretty clear, but I still have some questions mate. I hope you will answer these by yourself.
1/ You use a 4inch high density foam roller for applying paint, and a second roller for popping the bubbles and flatting the paint. What kind of roller must this second roller be? Also a 4inch foam roller? or an other kind of roller?
2/ My car has a lot of difficult places that are impossible to roll. I want to spray this with rustoleum fire red. In what order is this the best way to do it?
I'm planning to brush the paint in all the corners and hard places. How much paint can I brush on this places? A thick layer? or a thin layer ? Then I want to let it dry for about 24hours, after that wet sanding with grit 400 and use spirit, and then begin to roll my entire car for the 1st layer. Is this the right way?
3/ How much paint did you use on your car? Here in holland we can buy the Brightside paint only in 1 Liter (=0.264 gal) or in 2.5L (=0.650 gal)
4/ Where are all your photo's mate of your car? Al the links are dead in the old topics from 2006.
Quote: Well I�m new here, I don�t even know how I got directed to this website but is pretty awesome, I have an 88 dodge Dakota that I�d like to paint, I started reading the 200 page long post but its way to much info for one day, anyways I bought all the supplies i think I�ll need to paint the truck, i sanded the hood today will prep it with bondo and paint the firs two coats tomorrow, I chose rustolium royal blue has anyone tried that paint? Any ideas before I have at it? ?
I have a sort of light-blue (B5) on my 1972 Plymouth SSP. I tried to get a quart of Royal Blue and a cup of White, and thought I could simply lighten the Royal Blue with some White to get the light-blue color on my SSP.
Guess what: Royal Blue is actually a combination of dark blue and maroon. When I lightened it with some white, it turned into a sort of faded purple shade. In retrospect, it makes sense, since what is the favorite color of royalty? Maroon...maroon crowns, maroon capes, etc, etc.
I think my next pick is going to be a gallon of Safety Blue, and I'll ad the Royal Blue to that to darken it, if need be. Or black, or something.
BTW, after sandpaper, sander, and a few experiments with paint, this project has exceeded $50. (Just sayin'.)
1/ You use a 4inch high density foam roller for applying paint, and a second roller for popping the bubbles and flatting the paint. What kind of roller must this second roller be? Also a 4inch foam roller? or an other kind of roller?
Well.. .first I will tell you a story behind the 'tippling' effect. For the boat enthusiast using Brightside paint, they recommended using a roller to apply the paint... and then follow it up immediately after with a soft-fine-wide paint brush ( obviously one with tightly held bristles ( so they they don't fall off and stick to the paint ). The idea behind the marine application method is that the follow-up brush lightly sweeping over the freshly applied paint is that it would pop any bubbles from the roller - and yet the paint would be fresh and wet enough to 're-heal' itself and self level any depth changes in the freshly applied paint.
Ok... so what I ended up doing is just being lazy. Since I was buying these white high density foam rollers pretty cheaply, I decided to use one of them as my 'follow-up' roller.
A nice clean 'follow-up' roller does an amazing job. But the key is to not use it once it has too much paint built up on to it. Otherwise it will begin leaving tracks or patterns when it is lightly rolled over the freshly applied paint.
So I would end up using two new 'follow-up' rollers during a coating of the entire car.
IF you are moving pretty quickly along with your rolling... your first 'follow-up' roller can be promoted to the job of the paint applicator half way though the coating of the car ( and you toss out the original foam roller that was being used initially to roll on the paint ).
IF you decide to instead use a wide-soft paint brush... it will work. But you will have to spend more time keeping it clean - so that paint doesn't build up on it or begin to harden or it. ( Obviously if the paint begins to harden or cure on the brush it would no longer be a 'soft' paint brush ).
Trouble is that to get a good quality paint brush, it usually cost 5 or 10 times more then a pile of high density foam rollers. So that is the logic on why I went with the 4" inch high density white rollers.
I did experiment with 6" and 10" high density foam rollers.. BUT they just didn't have the ability to manouever around the lines of a car easily. HOWEVER... if you were doing something with a ton of flat surfaces ( like a van, bus, panel truck, Winnebago etc ) I would probably go with the 10" high density foam roller ( because the ability to manoever it around the surfaces wouldn't be so important ).
Quote:
2/ My car has a lot of difficult places that are impossible to roll. I want to spray this with rustoleum fire red. In what order is this the best way to do it?
I faced the same situation. So I first cleaned like crazy all those nooks and crannies to get all the dirt, oil, debris and crap out of them. The point being to remove anything that would interfere with the paint's ability to adhere to those hard to get surfaces. I even dumped about three cans of aerosol brake cleaning solvent into those spots ( since it cleans everything off and leaves no residue ). Then I left it for a day to let the brake cleaning solvent thoroughly evaporate.
Then I hit those nooks and crannies with the spray bomb 'fire red' paint. I hit it first with a light coat - just to sort of prime the surface and ensure good adhesion. The next day I went back over those spots and laid down a proper full coverage coating ( taking care to try to avoid runs etc ).
IF any spray ran on to the rest of the body... you immediately take your handy 4" high density roller and work it out to flatten it or thin it down.
Once I had all my nooks and crannies done... I then was able to go after all the external and more easily reached parts. The beauty of this 1 - 2 procedure is that your roller job will be able to cover any 'overspray' or 'paint mist' that might have reached those external body panels.
IF you had painted the external body parts first... and then sprayed the nooks and crannies after.. the odds are that you will get furry, fuzzy overspray or atomized paint on your rolled paint.
Quote:
I'm planning to brush the paint in all the corners and hard places. How much paint can I brush on this places? A thick layer? or a thin layer ?
I also used some assorted FOAM paint brushes of various sizes to do some pain in the butt spots on the car. They sell assortment packs of these cheap foam paint brushes ( which are basically black porous foam with a wooden stick shoved up them. They come in 1/2 inch, 1 inch and 2 inch sizes in the assortment pack.
When painting with them, I followed my spraying routine... that being get a thin layer on to provide good adhesion for the next coat. Then when I did the second coat over the area... I would aim for more fuller coverage. The number of coatings will depend on how much of a color change you are going from and trying to get to.
Quote:
3/ How much paint did you use on your car? Here in holland we can buy the Brightside paint only in 1 Liter (=0.264 gal) or in 2.5L (=0.650 gal)
I was doing a McLaren sportscar... basically imagine a Mustang Fox convertible. So I didn't have as much overall body surface to paint. However... I was going from BLACK to FIRE RED... and that required extra coats to ensure 100% color coverage.
I would say that when you go to buy your paint.... go with four 1 liter cans. The odds are that with 'thinning' taken into consideration... you 'should' be able to squeeze at least three overall coatings per can.
And again depending on whether you are going to do the underside of the hood ( bonnet ) and trunk ( boot ) you might want about 4 aerosol cans of the red paint ( this will also be used for the nooks and crannies that you will be spraying.
And just to answer the question before it is asked : Yes... the Armorall or Tremclad aerosol Fire Red is the same color as the Brightside Fire Red. And YES... both paints are friendly with each other. In that i originally painted the car doing the Armorall/Tremclad paint... and changed half-way through the paint job to the Brightside marine polyurathane. I have had no compatibility problems.
Quote:
4/ Where are all your photo's mate of your car? Al the links are dead in the old topics from 2006.
I had to take the pics off my web server. The bandwidth consumption was killing me and interfering with the normal flow of visitors surfing the web sites.
I will try to attach a picture to this message so you can see how Brightside Fire Red turned out on my car
The picture I have attached was taken in July of 2006. And although it looks pretty sharp there.. it looked even better when I finished the job 'officially' in August 2006. This pic was before I started going maniac with my polisher and waxes Then it really shined. And the body was soooooo smooth that if I put the polish container on the car.. it would slide right off the car. I use to put the two videos of its slipperyness online - but the bandwidth of those videos being viewed were killing my server. You would be amazed by just how many people have read this thread about the roll your own paint job
As you look at the picture... just remember that the car 'was' basically black, black primer, gray primer, some white panels, a white fiberglass hood... and the front airdam and bumper were black unpainted molded plastic. So it was quite a zebra to begin with. Once you understand where the poor little car began from... you can better appreciate just how far along it came doing this 'roll you own' paint job
We are now sitting at Nov 2008 and if anything the car is more shiny then ever. Whenever I am bored I take out my Porter & Cable polisher and spend 20 minutes giving the car a fresh polish and wax. No problems. No defects. Just smoother and shinier each time I do it.
I got the impression that using a coat of white primer under the paint (which is a spot-on match for the original paint) makes the color a lot more briliant. The paint seems to be laying down nicely, and in about a week, I'll come back and put a second coat on it...after that, I'll sand it with 400, wipe with MS, and give it a third coat. A week later, fourth coat. Then in a week, sand with 600, wipe with MS,...two more coats, and a final sanding with 1000, a wipe with MS, then wax. I'll post pics as I go.
Also, FYI, the small amount I mixed up (about a 2/3 cup), was enough to "cut in" the area around the windshield twice and also to cover half the roof...the part from the windshield back to the chrome molding studs. I can see that if I'm going to cover the entire car in the same shade, I'm going to have to mix up a LOT of the same color.
The blue stripes are actually painter's tape, put on there because I wanted to see what it looked like with white and blue detailing. Yes, I know, it's ersatz...which reminds me.
Anyone know what is the correct strobe pattern for an SSP? I see that there are two types of patterns in the 71-72 B-Body Satellite/Roadrunner/GTX: 9 stripes and 6, thicker, stripes.
Re: 1972 Plymouth SSP - first coat - 12/08/0805:20 AM
Did you use a roll on primer or spray on
Posted By: Anonymous
Re: - 12/08/0808:31 AM
Marq,
Thanks for asking my questions,
1/ okay, I buy 12, 4inch high density foam rollers I should do 4 coates of paint on my car, So about 3 rollers that I can use for 1 coat. 1 for rolling the paint, and 2 for popping the bubbles.
What do you think marq, seems to be enough rollers?
2/ clear! thanks!
3/ Why is 4 cans of 1 liter better than 2 cans of 2.5 liter? Here in Holland they doesn't sell 1 liter cans
4/ nice nice nice pictures!!
=======================================
I have one new question for you..
5/ Did you use Interlux 333 Brushing and Thinning fluid, also for thinning the paint? or was your paint NOT thinned at all?
6/ Can I also whipe my car with this fluid before painting?
7/ Do you advice to mix the Brighside paint? Or just paint it out of the box?
Re: 1972 Plymouth SSP - first coat - 12/08/0801:53 PM
Quote: Did you use a roll on primer or spray on
I rolled on the primer. The primer is Rustoleum as well, says on the label that it's ok for anything (paint, wood, metal); I figured if I was going to sand the rust down to metal but only "rough up" the rest of the paint, that it'd be the perfect primer. Keep in mind that primer is, at best, a temporary stage. I forgot that (I let the car sit for more than three weeks) and developed some rust patches even under the primer. I guess it's also possible that I didn't roll it on heavy enough.
In any case, I ended up sanding the roof with 400 and doing another coat of primer, about two weeks before I put this first coat of blue on.
It says earlier in this thread that you can put the alkyd enamel Rustoleum over anything, so I'm not really worried about the rust patches. The primer was more so I could get an even color on the car, as well as allowing me to sand to metal the surface rust.
okay, I buy 12, 4inch high density foam rollers I should do 4 coates of paint on my car, So about 3 rollers that I can use for 1 coat. 1 for rolling the paint, and 2 for popping the bubbles.
What do you think marq, seems to be enough rollers?
I think that is a safe amount to start with. You 'may' have to go buy more.. but with 12 in your kit, you won't have to rush to the store for more for a while
Quote:
Why is 4 cans of 1 liter better than 2 cans of 2.5 liter? Here in Holland they doesn't sell 1 liter cans
Bizarre... I didn't see any 2.5 liter cans offered in Canada. So 2 cans of 2.5 should be enough..
Quote:
Did you use Interlux 333 Brushing and Thinning fluid, also for thinning the paint? or was your paint NOT thinned at all?
Oddly enough, I began by using the 'official' 333 Brushing and Thinning fluid. BUT part way through a coating I ran out. So I just substituted pure mineral spirits and it worked the very same and at a much lower cost. So go with the mineral spirits to save some bucks.
Quote:
Can I also whipe my car with this fluid before painting?
You can use either the 333 or the pure mineral spirits for the wiping. BUT just remember that you are only 'dampening' the cloth... not soaking the cloth. Too much on the cloth would lead to too much softening of the previous coat of paint. So if the cloth is only slightly dampened, then it will be able to wipe off any artifacts on the surface without leaving any surplus of the solvent to weaken the previous coating.
Quote:
Do you advice to mix the Brighside paint? Or just paint it out of the box?
I found it worthwhile to add 'a little' mineral spirit to the paint. This gives you a little more time to 'work' with the paint when you apply it to the car.. and it gives the paint an additional bit of time for it to reach its self-leveling point. Paint straight out of the can tends to go on too thick and doesn't reach its level of self-leveling before the outer skin of the fresh paint begins to cure ( harden ). That might lead to orange peel later. So just a little thinning buys you some forgiveness in the paint and buys you a little extra time when rolling. IF the temperature you are working in was extremely hot.. you could add even a little more thinner to buy additional time ( as a hotter working area will be speeding up the evaporation of the solvents and carrier in the paint
Posted By: Anonymous
Re: - 12/09/0801:46 AM
Hello Marq...I am on the west coast and I want to paint my car with the Satin Enamel which appears to be used only with the Rustoleum product ...Is this available in Canada?..Wonder how the semi gloss Tremclad would look like? ..thanks for any input Ron
Quote: Hello Marq...I am on the west coast and I want to paint my car with the Satin Enamel which appears to be used only with the Rustoleum product ...Is this available in Canada?..Wonder how the semi gloss Tremclad would look like? ..thanks for any input Ron
Ok... so you are trying to go for a flat finish ( or semi-flat look ) ?
I can't speak to the Tremclad or Rustoleum product as I didn't really look at their semi-gloss products.
BUT I do know for a fact that Brightside ( Interlux paints ) does sell an additive that you can add to your Brightside paint and it turns the Brightside paint from a high gloss to a semi-gloss or flat (mat) paint ( depending on how much of this additive you add to the high gloss paint.
.
Posted By: Anonymous
Re: - 12/09/0807:07 AM
Marq,
1/ Should the paint as thin as water when mixed? Just as the Rustoleum paint?
2/ Ok, so about 4 liter is enough for an average car
3/ ok, I buy mineral spirits for thinning and whipping my car
4/ Do you know the brand "Motip" ? I primed a little bit of the rust pieces of the car with this spray. I hope the Brighside will stuck on this primer.
5/ One thing is not clear for me... In what direction did you roll 1 piece of the car? For example the hood.
Begin in the corner on the bottom, and go up and down al the way horizontally?
| | | | | <-- in vertical lines?
-------- <-- or in horizontal lines?
6/ How much roller "paintholders" did you use? Also 12 ?? every roller a new holder? (I don't know the English word haha)
7/ Is mineral spirits the same as White spirit ?
8/ Do you have a picture of the 4inch roller you used? Must this be a mohair roller? or a high density foam roller?
9/ Did you also used the foam brushes?? Or only the paint spray for in the corners? If so.. how much foam brushed did you uses? Also 20 brushes?
10/ Why did you use brake cleaner in the corners that are difficult to reach? Can't you use mineral spirits in this corners?? Or is a spray easyer?
1/ Should the paint as thin as water when mixed? Just as the Rustoleum paint?
Brightside straight from the can is already thinner then Tremclad or Rustoleum from the can. You do not have to thin Brightside as much as Tremclad or Rustoleum. I would describe the fluid as being almost like coffee cream ( the 10% type ) in thickness and fluidity ). Just keep in mind that you should just be adding enough mineral spirit to the Brightside to make it 'a little more wetter'. Don't look at it as trying to make it mucho thinner.... just a little more wetter. And it is better to put less in to test your mixture then too much. You will get a pretty good idea of whether you have a workable mixture when you attempt to roll your first couple of strokes. It should not be providing strong color coverage when applied. It should only be applying a thin wet layer that will mildly tint the surface you are coating. It is only with repeated layers of this 'tinting' that will eventually accumulate up to 100% color coverage. You can also guage how appropriate the wetness of your mixture is by watching the bubbles. If the bubbles pop all on their own... then you probably are pretty close to the right mixture. If the bubbles tend to be too slow at self-popping.. that means that it needs just a little more mineral spirit to help weaken the tensile strength of the bubble surface ( which is held together by the paint and polyurathane molecules ). So the thinner is just being used to weaken slightly the attraction of those paint and polyurathane molecules that hold the bubbles surface together.
Quote:
4/ Do you know the brand "Motip" ? I primed a little bit of the rust pieces of the car with this spray. I hope the Brighside will stuck on this primer.
Brightside appears to be pretty compatible with most other paints. BUT you mentioned that it was a 'spray'. So just make sure that you sand that primer with a 400 or 600 grit paper to smooth it down... then wipe it down with your 'dampened' wiping cloth to remove any artifacts left from the sanding. This is to ensure that the Brightside is able to securely adhere to the surface. Some aerosol sprays don't get 100% adhesion when sprayed on because their adhesion ability is weakened as the paiit molecules fly through the air and their 'carrier' ( the solvent that keeps them wet ) evaporates slightly while in flight.
Quote:
5/ One thing is not clear for me... In what direction did you roll 1 piece of the car?
Quote:
Ok... when doing side panels... do it one panel at a time. Starting from the top corner of the panel, go horizontally (side to side of that panel )... working your way downward. This way you are able to catch any runs that might have flowed downward.
Now.. on the hood... I would begin at the point of the hood nearest to the windhsield. I would roll towards the front of the hood. Again this is more of a gravity thing.. because paint tends to flow downward. Now the question about the hood is 'where on the hood to begin. Start from the corners and work your way eventually towards the center of the hood or start from the middle and work your way outwards towards the panels.
In a way it depends on the look and physical shape of the hood. On my McLaren, you will see that my hood has a lot of shapes ( scoops ) on it. So what I found worked for me was to start on the drivers side windshield corner and roll continuously towards the front of the hood. Then I would go back to where I started, move the roller over just a bit to allow for overlap and again go all the way down to the front of the hood.
Now...when I have reached about the center of the hood I would go to other side of the car and continue rolling from the center of the hood and continuing to lay coats so that eventually my final coat will end up being from the passenger side top corner down to the front of the hood.
The trunk lid also requires a bit of strategical thinking before you do it. You have to look at how your trunk surface merges with the panels and body parts around it. In my case, it turned out to be ideal by starting from the driver side top corner.. and rolling horizontally across from left to right. The final roll being from the bottom driver side corner to the bottom passenger side corner.
But everyone may have a different rolling pattern, based on the shape and size of their trunk. IF my trunk had been a big wide mother.. I probably would have followed the pattern I used on my hood.
And some folks are going to have to take into consider whether their side panels overlap up in to the overall surface of where the trunk or hood blends in to the body.
On my car, the front left and right side fender paels are part of the overall hood surface (roughly 6" on each side of the hood ). So I had to treat those upper surfaces of those fender panels as being part of the hood when laying down my coats. And I would stop at the point where the horizontal surface of fender panel transforms in to the vertical surface of the fender panel.
I hope I have been able to explain how you have to take into consideration the overall layout of your surfaces when planning how to roll your particular vehicle. As you can see, there is no one pattern of rolling that will suit all vehicles.
Quote:
6/ How much roller "paintholders" did you use? Also 12 ?? every roller a new holder? (I don't know the English word haha)
I was a bit wasteful. We had a 'dollar store' that sells cheap plastic formed 4" roller trays for 2 for $1 - so I bought about 10 of them ahhahahha. And I was using a new tray each time I went to lay down a new overall coating. BUT some folks are quite successful at simply cleaning out their trays after each usage. I just didn't want to waste the effort cleaning the cheapo paint trays. And I also was figuring that a fresh tray each time was the surest way to ensure that no previously dried paint or skin was left in the tray when I went to begin a new overall coating.
Quote:
7/ Is mineral spirits the same as White spirit ?
I don't know. What you have to look at are the actual contents in the bottle. Some types of mineral spirits are not 100% mineral spirits. Some companies cut their mineral spirits with other types of solvents ( kerosene, naphta etc ). What you hope to find on the packaging is that there are no additives mixed in with the mineral spirits.
Part of the problem is the localization of product names. In your country it may very well be that white spirit is the common name for mineral spirits. BUT then again... white spirit could be pure alcohol for all I know. In North America... spirits usually refers to an alcohol that is derived by distillation. Whiskey, scotch, vodka and gin are 'spirits' in North America
When in doubt try to consult with an actual paint shop that employs someone who actually knows about paints ( and hopefully not some high school kid who is working part time there as an after school job ). A real house painter in your country could probably clarify the difference.
Quote:
8/ Do you have a picture of the 4inch roller you used? Must this be a mohair roller? or a high density foam roller?
High density foam rollers are a tight/high density foam. They are normally white in color and when you look at their surface closely.. you won't normally see gaping air pockets in them. They don't look like sponges. When you pinch them between your fingers... you will notice that they resist squishing and are a little firm. That is because they don't have large airpockets in them. In some cases you may be able to find the high density foam rollers labeled on their packaging as 'being ideal for use on melamine".
Quote:
9/ Did you also used the foam brushes?? Or only the paint spray for in the corners? If so.. how much foam brushed did you uses? Also 20 brushes?
As noted in my previous posting. I used spray bombs and I used foam paint brushes. Check the previous posting on that as I went into some detail about it.
Quote:
10/ Why did you use brake cleaner in the corners that are difficult to reach? Can't you use mineral spirits in this corners?? Or is a spray easyer?
In some locations it is difficult to get a wet cloth covered in mineral spirits on to to remove the crap that has built up in those nooks and crannies. The aerosol brake spray cans, come with little straws that attach to the cap of the spray bomb and allow you to focus your blast of brake cleaner at those hard to reach spots. Between the flow of the cleaner and the air propelling it... you are able to dislodge most crap out of those little nooks and crannies.
In areas where you have easy access, sure make use of a wet cloth to wipe the surface down and get the road crap off it. The aerosol brake cleaner was mostly for those hard to reach spots for folks whose hands are too big to reach them.
Posted By: Anonymous
Re: - 12/10/0807:10 AM
Okay thanks!! It's time to begin with my project I post some photo's soon on this forum.
Uhmm one thing.. Where did you mix the Brightside? In the paint holder every time with each panel? Or mixed the whole can with 750ml paint ?
That should match up nicely with the Brightside 'Fire Red'. I used the Tremclad 'Fire Red'... but I am not sure what the 'red' name is for the Rustoleum product. I didn't think it was called 'bright red'. But I do know that the Rustoleum product line and the Tremclad product line are identical colors ( since the same company owns both product brand names ).
Absolutely nails it as being the very same thing. At the bottom of the white spirit topics, there is a cross reference to mineral spirits. And what you will find common to both is that they are both Stoddard solvent... So we all have now learned that 'white spirit' is the very same thing as 'mineral spirit'.
Re: Brightside or Rustoleom green - 12/13/0808:38 PM
Anyone have any pictures using the greens offered, I wanted to use brightside on a project car, but the sea green doesn't look dark enough for the color Im looking for. The color is verde green Any help appreciated
Posted By: Anonymous
Re: Brightside or Rustoleom green - 12/15/0807:27 AM
Quote: Anyone have any pictures using the greens offered, I wanted to use brightside on a project car, but the sea green doesn't look dark enough for the color Im looking for. The color is verde green Any help appreciated
If you have any marine / boat stores or suppliers near you which sell Brightside, there's a good chance they will have a color chip chart. I saw one of these at a "West Marine" store. I remember the Sea Green. It is a fairly dark green -- at least it looks darker on the chip than it does on the Internet color swatches.
I guess the best way, though, would be to buy the smallest quantity you can and see for sure. I can never tell what something will look like life size from one of those small chips.
Quote: That should match up nicely with the Brightside 'Fire Red'. I used the Tremclad 'Fire Red'... but I am not sure what the 'red' name is for the Rustoleum product. I didn't think it was called 'bright red'. But I do know that the Rustoleum product line and the Tremclad product line are identical colors ( since the same company owns both product brand names ).
I used Brightside "fire red" and Rustoleum's "safety red" great match.
Re: Brightside or Rustoleom green - 12/16/0807:32 PM
If you have any marine / boat stores or suppliers near you which sell Brightside, there's a good chance they will have a color chip chart. I saw one of these at a "West Marine" store. I remember the Sea Green. It is a fairly dark green -- at least it looks darker on the chip than it does on the Internet color swatches.
I guess the best way, though, would be to buy the smallest quantity you can and see for sure. I can never tell what something will look like life size from one of those small chips.
-- Dan
Thanks for the responce. Unfortunetly there's no marine store's in my town, nearest is like 100 miles away. I was hoping to get lucky with someone that actually used it and had some photo's. It is encouraging that you say its darker than the color charts on the internet. This is the chart I was looking at http://www.jamestowndistributors.com/userportal/images/Multi/Interlux/large/64s.jpg
Thanks again
Posted By: Anonymous
Re: Brightside or Rustoleom green - 12/17/0805:40 PM
Quote:
... Unfortunetly there's no marine store's in my town, nearest is like 100 miles away.
Yep, I see Arizona in your signature. Bodies of water are few and far between there.
Hmmmm. Looking at THAT chart, I have to say it's fairly close to what I remember (at least it is on MY computer monitor. That's the problem with internet and digital photos -- colors will represent differently on different monitors.)
Looking at that chart, I would tell you to imagine that color swatch in a gloss finish and a tiny, tiny bit darker and you have what I saw on their physical color chart/card. It is NOT a British Racing Green (which to me, looks darker that Brightside green. To me British Racing Green looks like it has a little blue in it to darken it). The Brightside green appears to me as a fairly pure (but not "bright") green. It is definitely NOT a green which is tending towards grey or black. Green isn't very popular on cars these days. The British Racing Green you see on a lot of Jags. I can't think of any popular cars to point you to that look like that Brightside green.
What you're looking for is this (in a printed version) :
I'll bet if you called one of these places they might mail you a printed card. Alternatively, the marine supply place I've been to just moved to a couple miles from my house. I drive past there on a regular basis. I'll stop in over the next few days and see if I can secure a card. If I can, it's yours. I'll let you know by way of this thread...
Re: Brightside or Rustoleom green - 12/17/0810:03 PM
Hmmmm. Looking at THAT chart, I have to say it's fairly close to what I remember (at least it is on MY computer monitor. That's the problem with internet and digital photos -- colors will represent differently on different monitors.)
I hear you brother, when looking at it on this site it appears darker, than the actual color shown on that site.
Im not a big fan of greens, but I wanted to keep it the same color and try to get away without painting the door jambs, underside of the trunk lid, cause there cherry. I found a complete 69 Buick GS 400 in the arizona desert that hasn't been registered since 1977 that has a perfect rustfree body, but the arizona sun has taking its toll on the exterior paint from sitting in a field for 31 years. I just want to give a fresh coat till I can do a minor restoration. This is a picture of a verde green 69, but again the color comes out lighter in this picture than it actually is
Posted By: Anonymous
Re - 12/18/0811:32 AM
Marq,
One question!!!
Quote: I would say that when you go to buy your paint.... go with four 1 liter cans. The odds are that with 'thinning' taken into consideration... you 'should' be able to squeeze at least three overall coatings per can.
And again depending on whether you are going to do the underside of the hood ( bonnet ) and trunk ( boot ) you might want about 4 aerosol cans of the red paint ( this will also be used for the nooks and crannies that you will be spraying.
I have an average car (nissan 240sx) Here they sell the paint in 0,75L cans. I sprayed the inside of the trunk, and under the bonnet (not rolled)
So the paint is only for rolling the large places. Do you think 3 can's of 0,75L is enough for my car? I'm going from dark red, to fire red So that's not a very though colour to do.
I have an average car (nissan 240sx) Here they sell the paint in 0,75L cans. I sprayed the inside of the trunk, and under the bonnet (not rolled)
So the paint is only for rolling the large places. Do you think 3 can's of 0,75L is enough for my car?
I'm going from dark red, to fire red So that's not a very though colour to do.
Greetings!
It all depends. It depends on whether the original red paint is basically intact and you are just having to scuff it to remove whatever surface gloss it has, before painting. In that case, it definitely could be done with 3 cans.
IF you have done bodywork and primering... then it 'may' work out ok with 3 cans... but 4 cans might likely be necessary.
.
Posted By: Anonymous
Re: Brightside or Rustoleom green - 12/18/0805:18 PM
I'll still pick up the Brightside color card in the next couple days but... the Brightside green is not the same color at all as the Buick in your picture. The verde green on the Buick has an Olive tone to it. Definitely not the case for Brightside green. If you're just looking for any green to somewhat match the jams, trunk and hood underside, etc. then I guess it would be sorta OK.
If you like that Verde Green color and want to keep to something pretty close to it, I think you're going to have to experiment with mixing your own color.
...OR... Just had another thought. Somewhere in this extensive discussion it was mentioned that the Ace Hardware rust covering enamel paint is the same thing as Rustoleum AND that Ace Hardware will do custom color mixing. I imagine these stores have a color scanner which figures out the mix. So, if you can find a sample of the color you want -- you could take it to an Ace Hardware and get it mixed exactly. The advantage of doing this (vs. trying it yourself) is that once you get it right, they will also supply you with the ratios of pigments used in the mix -- so you'll always be able to have it duplicated later.
Posted By: Anonymous
Re: Re - 12/19/0807:58 AM
Marq,
Did you also used 1 can of 333 fluid? I know you used mineral spirits, in that case, how much bottles of spirits did you used to thin the paint?
Did you also used 1 can of 333 fluid? I know you used mineral spirits, in that case, how much bottles of spirits did you used to thin the paint?
Originally I only purchased 1 can of the 333 ( because it is expensive compared to pure mineral spirits. But I ended up buying a second can. And it was when that second can ran out in the middle of a coating that I turned to the mineral spirits to finish the job. Since it worked so well ( as well as the 333 ) I ended up sticking with the mineral spirits from that point on..
Did you also used 1 can of 333 fluid? I know you used mineral spirits, in that case, how much bottles of spirits did you used to thin the paint?
Not Marq but he may do as I did, I use the stir and drip method, thin to a point where when you stir and raise the stir sitick (I use a old clean screwdriver) the time it takes for the paint to go from a stream to drip/drops shpuld take an easy 6-8 count. Worked great for me, I'm sure Marq will chime in.
Posted By: Anonymous
Re: Re - 12/22/0809:44 AM
What do you mean DartGT? My english is not very well, I don't get the 6/8 method translated
Just thin the paint in the paint holdster, long enough until you can stir the stick without a large amount of force?
Stir the paint after adding a little thinner, then lift the stir stick up out of the paint, the paint will run off the end as soon as you lift it up and as the paint runs off the stir stick it will be in a solid stream but after a couple of seconds or so it will go from a stream to drips, I add thinner until the time it goes from a stream to drip is me counting from 1 to 6 or 8. Hope that helps.
Posted By: Anonymous
Re: Re - 12/24/0809:36 AM
Marq,
The second roll, for popping the bubbels. Did you roll this roller in the oppositie direction of the paint you just rolled with the first roller? Or follow-up the same direction?
Re: How thin should the paint be? - 12/27/0804:08 PM
I read a lot of the posts and have to agree the the best way to determine the thinning of the paint and the rolling technique is to try it yourself. It is sort of something you get a feel for. My advice is to just go ahead and try it- better to thin than too thick... Things I learned: 1) If it doesn't run on the vertical surfaces it is too thick 2) Better to apply it to thin than too thick 3) If it runs, then that's good and go over it again in a few minutes with a roller with less paint to pick up all the runs 4) When done with the paint session, go over the entire car again with the nearly dry roller to take out any runs- especially the places where the runs accumulate such as the door creases on the vertical surfaces 5) If you get any runs, then it is much easier to roll them out while the paint is wet than the sand them off when the paint dries 6) consistency of nonfat milk worked for me 7) best bet is to have thin paint, but very little on the roller (roll it hard on the tray 6-8 times until no more paint squeezes off) before applying to the car 8) use a new roller and foam brush for the edges with each application 9) It takes me 60-75 minutes to roll my car each time, and I have to add a bit of mineral spirits to my tray every 15 minutes since it evaporates and gets to thick
Re: How thin should the paint be? - 12/28/0810:14 PM
Great post Marc. I haven't seen a better condensed version of how to do it in the whole 3 part thread. Did my Jeep over a year ago in Rusto Canvas White and couldn't be more happy.
Posted By: Anonymous
quick question - 12/30/0807:59 PM
Hey guys, I'm a long time reader of the thread and plannin on rollin my '74 Charger. And I was wondering if a primer (Rustoleum Primer) would be recomended considering I'll be replacing half of both quarter pannels, rockers, and a small patch on front fender. I'm going with a dark gloss forest green and wasn't sure how well it would cover without having a solid base coat of something.
Re: quick question about primer - 12/31/0801:11 AM
Not sure about a dark color like green. For white painted over my dark blue original paint, the primer makes a big difference (for rustoleum). The few places that I sanded through the primer take many coats of thinned white gloss to cover (6-10 coats) any blue that shows through.. It's a pain to keep painting the whole car again since a few spots have blue color fading through, but the benefit is that the whole car gets smoother and glossier with each coat. This is after 2 coats of primer and then 2 coats of glossy white rusoleum. Good Luck!
Re: quick question about primer - 12/31/0804:33 AM
Ya thats what I was figuring too with the dark green, and I suppose since the car is already green it wouldn't be neccessary. Is the primer white?
Wow thats looking good! And thats only 2 coats!? I'm keepin my fingers crossed that I have good luck with it ..looks like you are! haha Keep up the good work and thanks!
Posted By: Anonymous
Weather Question - 12/31/0805:15 AM
It's cold here in NY and right now is the only time I'm gonna have to salvage my cars exterior till God knows when. So I wanted to know what process should I take when painting in cold weather like this? I have a garage but it's not heated.
Re: quick question about primer - 12/31/0805:57 PM
This is the same stuff I used, too.
Posted By: Anonymous
Re: Weather Question - 12/31/0806:30 PM
Alrighty thanks,
And now that I think of it, looking a ljohnson's post about cold weather, is there anything that has to be done different in cold weather? Because I'm planning on painting this winter too, and considering I live in northern MN we woke up to a brisk -22F this morning. haha
Quote: It's cold here in NY and right now is the only time I'm gonna have to salvage my cars exterior till God knows when. So I wanted to know what process should I take when painting in cold weather like this? I have a garage but it's not heated.
Ok... just remember the whole theory behind the 'roll your own' paint job. We are thinning down the paint ( whether Rustoleum, Tremclad or Brightside ) to lay down very thin coatings. The mineral spirits that we add to thin the paint are what you can refer to as the 'carrier'. The thing about mineral spirits or other such solvents is that they EVAPORATE quicker in warm environments. And naturally... in colder environments the 'carrier' or mineral spirits evaporate slower in cold temperatures.
So what you need to do in a colder environment is follow the standard recipe for thinning your paint with mineral spirits BUT allow more time for the mineral spirits to evaporate before adding your next coat of paint...
Charger has previously shown pictures of his garage, in the midst of winter, with snow all around... and he was successfully painting even in a cold environment.
In some ways... as long as you have time and patience... it could work to your benefit. Because the other 'theory' involved in the 'roll your own' paint job is that when you apply the paint to the body panels... it attempts to 'self-level'. Obviously, the more the paint self-levels, the smoother and shinier the result. Or to look at it from the opposite way... in overly hot conditions... the 'carrier' or mineral spirit may evaporate faster then the paint can fully self-level itself. So as you can see... painting in the cooler temperatures is not necessarily a bad thing and if you take your time it could prove beneficial to the overall look of the project at the end.
Hopefully this gives you some insight in to the theory and helps answer your question about cold climate rolling.
And the nice thing about a car 'trapped' in a garage for the winter... is that it gives you an ideal situation to take your time between coats. You could probably afford to step in to the garage just once a week... do your painting etc.. and then walk away from the car and let the paint fully cure ( dry ) before returning the next weekend to do it again
.
Posted By: Anonymous
Re: Weather Question - 01/02/0912:13 AM
So I have to wait a week for the paint to dry? What's the shortest time I'd have to wait in cold weather?
Quote: So I have to wait a week for the paint to dry? What's the shortest time I'd have to wait in cold weather?
I painted my truck in the driveway two years ago, not real cold here low 50's at night, but it would warm up around 9 or 10 and I'd put coat on it, so over night worked for me. Just don't get in too big a hurry.
Quote: So I have to wait a week for the paint to dry? What's the shortest time I'd have to wait in cold weather?
Well... one thing about paint... is that it has a different ( lower ) freezing point then mineral spirits. So the problem you face when trying to speed up the process in the winter is that although the mineral spirit may have evaporated... the paint itself may not have fully cured ( hardened ). If you lay down another coat of paint too soon ( over an un-hardened coat of paint ), the result will be the dreaded orange peel. That is why I was trying to take advantage of your situation, with a car stuck in the garage for the winter, to schedule the re-coats from weekend to weekend. That would practically guarantee that the mineral spirits will have evaporated and the paint itself will have cured sufficiently to allow painting over without fear of orange peel.
It may be possible to cut times down to every three days for a re-coat... but temperatures will be fluctuating from day to day.
Up here in Ottawa, we went from -24 degrees celcius ( bloody lip numbing cold ) up to almost a luxurious +10 degrees celcius all in the span of one week. And we are just getting in to our winter season. That kind of temperature variance would play havoc trying to guesstimate how many days you could wait between recoats. And to top it off... we have also been getting RAIN storms instead of snow storms. So that buggers up the humidity factoring for trying to guess how many days to wait between coats.
So overall... although it may pain you or push your patience... it is always better to err on the outside and give it more time between re-coats, then less.
I know for my final two coats... I actually and intentionally waited about 3 weeks between those final coats. I wanted to wait until the optimal weather conditions were present ( no rain or humidity )... and so I just kept holding off and waiting. And believe me... it killed me not being able to get the project finished. BUT I was more interested in nailing it right for those last two coats and I didn't want any of the 'enviromental' variable to be a factor in how it turned out. Mostly I was dealing with a consistently wet summer... but the same reasoning would have been applied in the colder part of the season.
One other nice thing about doing your paint job over the winter... and spacing out the re-coats by the weekends.. is that there is nothing to stop you going out to the garage on the Thursday to spend a couple of hours doing a very careful wet sanding ( in order to prepare the surface for the next re-coat on the weekend ). Since you are not being rushed, you have the luxury of doing the surface prep to perfection prior to the next re-coat. And that also helps allow for a better finished product at the end.
.
Posted By: Anonymous
Re: Weather Question - 01/02/0902:00 AM
I think I'm gonna have to walk away from this one till the weather warms up. I was planning on using my parents garage while they where out of town since they're completely against me trying anything like this.
White Comet Progress -12 Coats! - 01/20/0903:47 AM
I just finished the 12th coat of thinned rustoleum and put back enough parts on the car to drive it on the street while I wait several weeks before buffing. I could have stopped at 8 coats (for coverage of white over white primer over blue base) but I put on 4 more coats because I am a novice and wanted to give myself some "insurance" as a first time buffer! Looks much better than the original paint for sure...
Unfortunately, unless you paint in a booth you are going to have some dust in it. This is part of the beauty of this method, you wet sand the junk out of the paint.
Quote: This guy is a HOOT! He claims that the $50 paint job is a myth, but that you can get professional results for just a bit more by simply buying his DVD... borrowing a compressor... and a paint gun... and a garage.
He even links you to a site where a guy got amazing results with rolled Rustoleum to prove that rolled Rustoleum doesn't work... Huh?
Go with the Flag Blue... it is a more dark blue... almost edging to the black side. But when it is applied to the car and catching the sunlight it will give off roughly the same color as that Mustang in the pic.
Posted By: Anonymous
Painting with Pearl - 03/08/0909:19 PM
While watching the Nascar race I was surfing the web and came across this post from a home theater forum. They were discussing painting a projector screen with pearl paint and this statement caught my eye:
"..One trick to rolling any Pearl/Metallic paint is to BEVEL THE NAP at both ends of your roller..... the final 1 inch is enough to bevel.... so as to reduce/eliminate...... the edge/line .....the bevel will help feather out the edge that normal rollers leave with this kind of paint. [PS I undestand beveled roller tubes are available commercially but may be hard to find.]
Hey Everyone. Tried searching and that didnt work. Unfortunately I dont have time to search all pages of this paint thread.
I need help with my semi-gloss paint. I tried rolling Rustoleum Semi-gloss and got lots of roller marks. So I switched to painting with my HVLP gun. Im gettting these tiger striped streaks in it when it is dried. I tried more mineral spirits, less spirits, More paint, less paint.. The streaks only show up on the flat surfaces- Hood, roof, trunk, tops of fenders.
I put the last layer on really thick on the roof and hood and it didnt help.
The rest of the car looks freaking AWESOME but if I cant get these streaks to go away, Im going to switch to a gloss job where I can polish them out. I really dont want to do that.
Can anyone give me suggestions so I can get the car to look uniform.
Posted By: Anonymous
Hole... - 03/10/0910:58 PM
Guys I've got a moderately big hole ( Cause of rust ) What is the best way to go for fixing such a thing? Bondo wont hold I guess
it was the original number two from the movie,he showed up at the 40th Herbie aneversary, I even got to sit in him, lol.
heres some of the cars that showed up
heres my bug
and for you mopar guys heres what I spoted on the way
Posted By: Anonymous
Re: Fixing up the new Toy - 03/17/0907:23 AM
Marq,
I'm almost ready with the car.. The dust that is now on the paint on the car, how can this be removed??? polishing?? or wetsanding with p2000??
Posted By: Anonymous
Easiest color? - 03/17/0910:43 PM
Alright I'll be starting body work on sunday and test piece on monday. I was wondering which is easiest, black or flat black? Which requires more coats and what would happen if I were to sand flat black after every 2 coats and wax at the end ?
I'm almost ready with the car.. The dust that is now on the paint on the car, how can this be removed??? polishing?? or wetsanding with p2000??
I guess it depends on 'how much' dust is on the paint ( or stuck to it ).
If there is a fairly significant layer of dust... I would probably go the 'wash it with some liquid dish soap in a bucket' and hose it down. That would dislodge most surfactants.
In theory if the dust is not too embedded in the paint, you could probably move on to a very very light wetsanding using a minimum 2000+ grit paper, and some running water.
If the dust is barely negigible.. you could just go straight to the polishing stage. 'Polishes' are like a 3000+ grit so it is something like using a finer degree of wetsanding.
I like the scarab effect on the hood... but the 'cloth over the hard top and the small side window portholes looks kind of yukky...
I would say the most dangerous thing about that layout of "Horace" is that it must be a nightmare to drive because of all the blindspots. It basically blocked out all visibility outward from the driver and passenger rear quarters. And what is even funnier is the driver wearing the aviator flight style goggles... which wipe out any peripheral vision of the driver. If the driver actually wears them when driving.. it must be like 'tunnel vision' where they can only see straight ahead...
It reminds me of the old 70's Mustang Fastbacks.. where the main reason they ended up in auto-wreckers is that they were constantly getting hit in the rear left and right quarters - BECAUSE the drivers could not see through the blindspots created by the rear pillars that formed the 'Fastback'.
I liked the agressive tires on Horace... beatles always looked cool with meaty wheels..
.
Posted By: Anonymous
Re: Fixing up the new Toy - 03/18/0906:40 AM
Quote:
Quote: Marq,
I'm almost ready with the car.. The dust that is now on the paint on the car, how can this be removed??? polishing?? or wetsanding with p2000??
I guess it depends on 'how much' dust is on the paint ( or stuck to it ).
If there is a fairly significant layer of dust... I would probably go the 'wash it with some liquid dish soap in a bucket' and hose it down. That would dislodge most surfactants.
In theory if the dust is not too embedded in the paint, you could probably move on to a very very light wetsanding using a minimum 2000+ grit paper, and some running water.
If the dust is barely negigible.. you could just go straight to the polishing stage. 'Polishes' are like a 3000+ grit so it is something like using a finer degree of wetsanding.
.
The amount of dust is a fairly significant layer.. So you suggest to use a bucket with lquid soap? What is the purposel of the soap ?? polishing effect??? or does it wipe the dust off?
And if I use a 2500 grid wetsanding paper, does this remove the gloss of the paint?? or does this only remove the dust and not the gloss?
The amount of dust is a fairly significant layer..
So you suggest to use a bucket with lquid soap? What is the purposel of the soap ?? polishing effect??? or does it wipe the dust off?
And if I use a 2500 grid wetsanding paper, does this remove the gloss of the paint?? or does this only remove the dust and not the gloss?
Ok... soap basics 101... the way in which all soaps work is this... the soap molecules encapsulate ( surround ) the dirt, dust, grease particles. Once those elements are encapsulated by the soap molecules, it allows you to rinse them off and they can no longer cling to each other. Since the soap encapsulation forms a strong bond around the dirt particles, it helps to break the bond of the dirt particles that hold it to the surface of the car, or your hair, or your skin etc. That is why the crap on the surface of those various surfaces are referred to as 'surfactants' - in that they are crap on the surface... ( bird poo for this purpose could be politely called a surfactant - even though 'bird poo' is a more descriptive term.
The one thing you have to look out for.. is that I was recommending liquid dish detergent. You have to make sure that it is not one of those 'liquid dish detergents' that has chemicals in it that are designed to stay on the surface that is being cleaned. For example, some dish detergents have vitamin E in them, aloe vera and other things designed to 'make your hands lovlier and softer after washing by hand.
The problem with those type of liquid dish fluids is that you on one hand are removing the dirt and grease, but you may be leaving behind some of these 'added' chemicals which will be left behind even after you rinse the car off. These are possible chemicals that might react adversely if you try to paint over them etc.
Now.. on the topic of the 2500 grit sand paper.. Well yes... initially a 2500 grit sand paper will remove some of the gloss of a top layer of paint. BUT... at some point the physical top layer of paint will reach a smoothness where the whole surface is at roughly one level. At that point it starts to shine and gloss up...
So if you can understand what I am trying to say.... is that all sanding will cut back the original gloss where the sanding is knocking back any rises in the surface. Imagine a mountain range where you are running a giant sand paper over it. At first you would scrape off the peaks of those mountains. And as you continue sanding with your giant sandpaper, you would be sanding away the middle of the mountains. With enough sanding, you would have sanded away all semblance of mountains and have leveled them all down to the level of their valleys.
Ok... so on a gigantic scale, that is what is happening microscopically with the paint on the car. Your initial wet sanding is knocking back the peaks. At that time you will see the gloss being knocked back...
But when you hit the valley level of the paint job your sanding will be now starting to polish that uniform surface.. and the shine and gloss returns. That is why you will eventually take the sandpaper up to the 3000 grit level... because it will be leaving even smaller and more minute scratches.
Let's face it. A lot of folks don't really grasp the magic of sand paper. We all know that it scrapes surfaces smooth... But what a lot of folks tend to skip over is that the various grits of sand paper go from very coarse to ultra ultra smooth. And no matter what grit you are using, they all scratch the surface they are being used on.
Naturally the coarser ( lower number ) grit leaves the largest scratches on the surface it is being used. 120 grit means there are 120 PARTICLES of scraping material per inch on that sand paper. 3000 grit means there are 3000 particles of scraping material per inch on that sand paper. No rocket science needed here to figure out that the particles on that 120 grit paper are physically 25 times LARGER then the particles on the 3000 grit paper. That means the 120 grit paper is leaving scratches that are 25 times larger then a 3000 grit paper.
Soooooooooo.... as we work on the paint jobs... and we go from low grit up to the high grit... we are knocking back the larger scratches and replacing them with smaller and smaller and smaller scratches.
The smaller the scratches left behind.... the shinier and glossier the surface we are sanding...
I'd recommend using lots of water and no soap. No point in introducing another variable. Just keep that sandpaper clean, and change it often. Lots of water.
Quote: I'd recommend using lots of water and no soap. No point in introducing another variable. Just keep that sandpaper clean, and change it often. Lots of water.
Well.. as I mentioned... the one value of the soap is to encapsulate the dirt/dust/bugs and allow them to be rinsed off easier.
With just water, there is the chance that the static bond of the dust to the small particles may enable them to cling to the body parts ( almost like a magnetic attraction )unless you really are forcibly spraying the water hard at the areas being rinsed.
But you did make me think of another more scarey variable that has to be taken into consideration... and that is the 'quality' of the water you are rinsing with.
Let's face it... some folks in the rural areas or even in the suburbs have what is known as 'hard water' - in that it is heavily laced with chemicals etc. Normally in those areas, the households have 'water softeners' in their house to remove the 'hard water chemicals' for drinking and for laundry. I don't know the overall effect that a 'hardwater' rinsing would have on a coat of fresh paint etc...
Another wild variable that impacts other areas, is where the water is heavily laced with chlorine. The water filtration plants use the chlorine to kill cetain nasties that their water filtration plant is unable to remove via filters. Chlorinate water could be a real beeech on some paints ( probably more affected on the black or very dark paint job ). Usually you can tell if your in an area with overly chlorinated water, just by the taste alone. BUT for some folks who have never known 'real water' or 'simply pure water' and who have always drank chlorinated water, they might not be able to tell that their water is highly chlorinated.
I know that in our city, the water is ranked in the Top Ten for North America... for purity and for taste. And I do know that when I travel and drink a glass of water in smaller towns... well their water usually sucks. To me it has a flat boring taste. I don't know if that means their water is simply not filtrated enough or what their problem is...
Tee hee... see... you raise a question about whether or not to use a bit of liquid detergent ( we are only talking about less then a tablespoon full in a regular size water bucket ), and I go off on a tangent about the quality of water for rinsing in different regions..
But I guess the moral to the story is that there are indeed a lot of variables involved in all stages of the painting... and you have to think through how each thing might impact your final result ( temperatures, humidity, water quality, etc etc etc )
.
Posted By: Anonymous
Re: Fixing up the new Toy - 03/20/0907:04 AM
hi guys i done my corolla with brightside marine paint as you may have seen a few weeks back the paint had been on for about 2 months the other day i used some automotive paint on the car and had a serious reaction where it worked like paint stripper and the whole side of the car is fubar. i have fixed it all up and am now going to spraywith cheap export paint in pressure pack cans.
Wayne, it's likely the paint on your Toyota was not completely cured yet. I know it was dry to the touch, but many air or moisture cured paints (such as Rustoleum and Brightside) will take 3 to 6 months (or more) to completely cure. The time required is determined by many factors such as temperature, humidity, etc.
One illustration to help you understand this: If you painted the car and then parked it in the garage over night several days later, it's likely that the next morning you could smell fresh paint upon walking into the garage. This smell is gasses being released from the paint into the air in the garage. This process continues for months after the paint it applied. It gradually slows and within a week or so the paint no longer gives off any noticable smell, but it is still releasing solvents at a slower rate.
Some chemicals in regular automotive paint are quite strong. In fact, there are times when one brand of automotive paint will lift another brand of automotive paint. That's why it's best to do a test panel first to verify compatability when changing brands of paint.
There are several ways to reduce the chance of this problem. The first is to use hardner in the enamel paint. I have no idea if it's even available for the brightside paint. Of course when using hardener, one MUST take all the safety precautions necessary for isocyanates. (proper respirator, paint suit, proper gloves, etc.) The painting can't be done in your home garage! This obviously removes this option from consideration for most of the folks on this board.
The second option is to use a sealer between the brightside and the traditional automotive paint. Talk to your automotive paint store about this option. The store fellows will probably have no idea what will work with a marine paint. So you may need to ask them how to paint over some synthetic enamel which was applied without any hardner.
The third option is to wait a longer period of time before applying the automotive paint.
A forth option is to find a brand of automotive paint which has chemicals which are not as strong.
Posted By: Anonymous
Flat black car - 03/20/0906:31 PM
I'll be painting my car flat black but am concerned about how hard it must be to keep it clean. Was wodnering if polishing would ruin flat black totally, or just give it a semi-gloss like finish
I like the scarab effect on the hood... but the 'cloth over the hard top and the small side window portholes looks kind of yukky...
I would say the most dangerous thing about that layout of "Horace" is that it must be a nightmare to drive because of all the blindspots. It basically blocked out all visibility outward from the driver and passenger rear quarters. And what is even funnier is the driver wearing the aviator flight style goggles... which wipe out any peripheral vision of the driver. If the driver actually wears them when driving.. it must be like 'tunnel vision' where they can only see straight ahead...
It reminds me of the old 70's Mustang Fastbacks.. where the main reason they ended up in auto-wreckers is that they were constantly getting hit in the rear left and right quarters - BECAUSE the drivers could not see through the blindspots created by the rear pillars that formed the 'Fastback'.
I liked the agressive tires on Horace... beatles always looked cool with meaty wheels..
.
lol, the funniest part is the whole car its self was not...thought out very well. In the old build pictures you can see that the fenders and other stuff are a bunch of differant colors. I found out that it was acctualy peiced together from at least 6 differant bugs they found in various junk yards. Every time they would do a driving sceen they would have to replace somthing. The cloth top was put over the vents under the rear window which play a major part in cooling VWs, so it would overheat really badely in the driving sceens. The holes on the side of the car for the molding strips they filled them by putting aluminum tape over them and cheap bondo. The guy who owns it says he basicly had to redo the entire electrical system, replace the motor, the whole front suspension and alot of other stuff just to get it road worthy!! The only well done thing on the whole car was the cloth top!
it still has the bad paint job and body work on it, but its going to be redone pretty soon. The funniest thing is this car is this guys daily driver!!!
on the other hand the 6 Herbie cars used for the movie were compleatly restored from the ground up
Quote: hi guys i done my corolla with brightside marine paint as you may have seen a few weeks back the paint had been on for about 2 months the other day i used some automotive paint on the car and had a serious reaction where it worked like paint stripper and the whole side of the car is fubar. i have fixed it all up and am now going to spraywith cheap export paint in pressure pack cans.
wayne watt
A lot of those 'touch up' or 'matching' type spray paints are lacquer based. That would tend to eat most enamels like Tremclad or even polyurathanes like Brightside. It is sort of like apply pure acetone on the paint ( sort of like nail polish remover ).
Then again, those touch up paints also react rather nastily against 'original' automotive paint jobs. I know that with one of my cars, there were some 'road chips' on the front of the hood. So I bought a 'matching' touch up paint ( I think it was called Duplicolor )... and I sprayed a bunch of it in to the cap of the spray can. I let it swish around a little to evaporate some of the 'carrier' and thicken up the paint. I then used a Q-Tip as a paint brush and dabbed a little of it in to the road chips to fill the hole and protect the metal that had be exposed. Within 1 minute the edges of the original paint around the chip hole began to pucker up and curl. The little drop of paint from the aerosol was actually eating away at the original paint.
So I guess the moral to the whole story is to stick with compatible type paints when touching up. And if you don't know for sure whether it is going to be compatible, well... do a little patch 'test' in some obscure and hidden spot on the area to be painted.
on the other hand the 6 Herbie cars used for the movie were compleatly restored from the ground up
Funny stories for your from my past. I had a Volks Beetle for one winter ( back when I was in University in the 70s ). What I remember the most about that car is that it used the GAS POWERED HEATER... where there is basically a gasoline burning flamethrower under the hood of the car. Well... something went seriously wrong with the heater and I had tons of smoke filling the passenger compartment - the whole damn heater had caught on fire and was doing a meltdown. So I raised the hood and stuck a chemical powder fire extinguisher into the intake of the heater and blasted the sucker, putting the fire out. The funny part is if you had seen the inside of the car after. All that yellow fire extinguisher power had filled up every nook and cranny of the interior of the car...
One thing I don't know at this time, and you reminded me of it when you mentioned the full restoration done on those Herbies... and the question is : Are they not still producing Volkswagon Beetles down in South America somewhere ? I know that for the longest time after they stopped selling them in North America, they were still building them down in South America ( where there were less stringent safety and enviromental laws ).
well, technicly the heater uses heater boxes that surround the outside of the exhaust manifolds and the fan inside the shroud blowes air into the boxes and into the car, so your experiance was...unique to any thing I've heard.
and your semi right, the mexico plant just stoped production of the "classic" bug in 2003. A very sad day in the life of a bug fan, I begged and begged my parents to take me down to the farwell serimony but they said it was to much work.
Quote: well, technicly the heater uses heater boxes that surround the outside of the exhaust manifolds and the fan inside the shroud blowes air into the boxes and into the car, so your experiance was...unique to any thing I've heard.
and your semi right, the mexico plant just stoped production of the "classic" bug in 2003. A very sad day in the life of a bug fan, I begged and begged my parents to take me down to the farwell serimony but they said it was to much work.
Nope... time to do a little more research... on the various heating systems used on Volkswagons... in other countries... and in particular in cold climate countries - like Canada where I live
The heating system you describe was also known as the German Gas Chamber... it was a known serious flaw of the Beetles and in particular the Volkswagon Camper / Hippie Vans. The deadly flaw ( that only would reveal itself after a number of years... is that with rust, age, cracks etc, the exhaust fumes were piped directly in to the heating chamber and in turn directly in to the passenger compartment.
Here is a quote from a VW web site that describes that particularly fatal design flaw :
Quote:
The heater boxes are known to rust out and/or get really oily. If they are rusted, the boxes should be replaced because of the potential for exhaust to get into the hot air stream. Be especially cautious if you have even a hint of exhaust smell in the passenger compartment. Exhaust contains the deadly gas carbon monoxide, which is colorless and odorless. Only the smell of exhaust may give the hint that there is carbon monoxide in the car.
Now... on to what I was describing regarding the gasoline fed flame thrower heater system in Beetles. I think I understand why you were not exposed to it... you don't live in Canada As you know, Canada has two seasons - winter and summer. Not much else. We are either freezing or roasting. As you also would know... the exhaust system mounted heater box is crap. It can barely heat the Beetle in California on a cool morning. So you can imagine that in Canada the 'stock heater system' just would not cut it up here. So our Beetles were equipped with the flame thrower gasoline fed heater systems...
Quote:
Some folks in the cold north use some kind of heater supplement (usually a gas heater) when driving in the winter.
What I was describing is a genuine gasoline fed heater system that burned gasoline to generate the heat. The best way to describe it... is that when you lifted the hood of the Volks Beetle, connected to the firewall at the drivers side, there was this gizmo that looked like a small cylindrical vacuum cleaner ( we use to call them 'pigs' ). This device was about 22 inches long and roughly 6 inches in circumference. A line fed raw gasoline in to this unit. In the car, there was a thing that could best be described as a choke cable. What you did is you pulled on that knob a couple of times and it basically spritz or vaporized raw gas in to this burner (priming the heater) I forget how we use to instruct the thing to ignite the gas... possibly it was a heater switch that lit up an element to ignite the gas and turn on the heater fan. There was a fairly powerful fan mounted on the one end of this pig that blew air in to the pig, and that air, along with the burning gas would be propelled towards the heating ducts that lead in to the passenger compartment of the car. It was a noisy affair... with that powerful fan blowing and the gasoline igniting. Quite noisy. Almost like standing in the middle of a typhoon. But when it worked... it could completely heat up the insides of a Volks in about 3 minutes.
Something that you might be familiar with...is a heating device used by home builders called a 'Salamander'.. which is a propane powered heating device. It is probably the large scale equivalent to the gasoline powered heater.
At this point.. all the other car owners are probably piddling their pants and laughing at the very thought of have a heater on their car that is basically a gasoline powered flame thrower attached to their 'firewall'...
And at this point you will have a better understanding why I piddled my pants and dumped that entire fire extinguisher into the thing when it caught on fire. I really feared that the fire would spread to the gas line that fed the heater from the gas tank. I was trying to prevent the Volks from being blown sky high...
I tried to find some info about this on the Internet, but the best i could find was a web site that described all the various 'supplemental' gas powered heater systems made for the Volks campers to supplement their exhaust powered heaters.
Anyhow... the whole point to the story is that Canadian and cold climate countries had these flame throwing gasoline powered heaters installed by the factory... so that is why you probably have never seen one in the warmer climates of the States .
wow....I stand corrected for the first time in my life. I've read so many books, talked to so many people, read ever magazine related to VW's I could possibly get ever month, and I have never ever heard of this system?
I'm speechless for one thing, I know I never would have gone through the trouble of finding all that just to prove a point. Although I did learn somthing, the guys down at the club meets are gonna get a kick outta this. I mean I have heard some CRAZY stories related to these little cars but a friggin flame thrower that they basicly adapted for a heater?
I'd be afraid to
Posted By: Anonymous
Adhesion??? - 03/23/0912:10 PM
Alright its like 0 degrees celsius here and was wondering if I put paint on my rims if it was gonna stick to it?
Years ago mid 70's I had a VW crewcab pick up a 65 I think but it came with one of the gas heaters, I never installed it, not needed here but it did bring a good fee when I sold it.
oh yeah, I love the old pickup buses. No offence but dodge kinda copied them with that.
not to mention chevy copied VW in general with the whole rear mounted air coold engin corvair sayng it was state of the art technology when VW had already been doing it since the thirties
Posted By: Anonymous
Re: Adhesion??? - 03/25/0906:36 AM
marq,
after how many days you suggest to polish the paint to remove the dust pieces?
I'm almost ready with the final coat on the passengerside...
after how many days you suggest to polish the paint to remove the dust pieces?
I'm almost ready with the final coat on the passengerside...
Well... I am confused.... with the sequence you just described above. I would not be 'polishing' to remove dust and then following it up with a 'final coat'.
IF you are planning to add one final coat of paint... I would be only doing a very high grit wetsanding to prepared the surface ( and nail the dust at the same time ).
Marq, I'm pretty sure this question has been asked before. I looked through the thred and its litteraly three in the morning and I can't find the answer any where.
if I use the grey rusto primer and roll it on, will I have any problems when I put the canvas white on?????
Posted By: Anonymous
Re: Adhesion??? - 03/26/0909:17 AM
Quote:
Quote: marq,
after how many days you suggest to polish the paint to remove the dust pieces?
I'm almost ready with the final coat on the passengerside...
Well... I am confused.... with the sequence you just described above. I would not be 'polishing' to remove dust and then following it up with a 'final coat'.
IF you are planning to add one final coat of paint... I would be only doing a very high grit wetsanding to prepared the surface ( and nail the dust at the same time ).
.
no, sorry for the confusing.. The car is now ready, all the paint is on the car. Now there is some dust on the car on the top paint... Not very much, but it's good visible..
So I think polishing is the best way to do I think. What do you think? and when can I do this? How long must the paint harden
Quote: Marq, I'm pretty sure this question has been asked before. I looked through the thred and its litteraly three in the morning and I can't find the answer any where.
if I use the grey rusto primer and roll it on, will I have any problems when I put the canvas white on?????
Ok... whatcha do is this :
Take one can of bight white rustoleum and one can of gray primer. Mix them 50/50. Use that mixture as your primer. What happens is that you can add some color ( the bright white rustoleum ) to lighten the gray primer.
You could say that you are 'priming the primer'...
Ok... once the car is primered, get the primed surface just as smooth and sanded as if you were applying a coat of your canvas white paint mixture. This will give the canvas white a head start by having a uniform light color base on which to build on...
The car is now ready, all the paint is on the car. Now there is some dust on the car on the top paint... Not very much, but it's good visible..
So I think polishing is the best way to do I think. What do you think? and when can I do this? How long must the paint harden
Ok... in that case go through the washing down with a bucket of lightly soaped water to remove any large dust/bug/dog hair type artifacts.
You can then move on to using a polishing compound to try to work up the shine. It will remove any small dust / marks.
The 'hardening time' is a bit of debate as there isn't exactly one straight answer. Everyones situation will be different due to temperatures, humidity, overall environment where the car was kept, and even variances between how different colors appear to have slightly different 'full curing' times.
At the least... I would want to give the final coat a minimum of 7 clear days of neutral weather. IF it rains for two of those days... well add two more days on to your waiting time.
Charger was able to get excellent results without waiting too long to go to the final polishing stage. Some folks feel that a slightly softer surface is easier to polish. Others have found that if the paint is not fully cured their sand paper clogs up when web sanding.
When in doubt... do a little test area where if it botches up things won't be so noticeable.
Re: New Paint job on a budget thread Part III - 03/26/0908:17 PM
thank you very much marq, I was acctualy just wondering if I was going to have some sort of adhision problem. Like if I was going to get eliphant skinn or cracks. But you also gave me some very good advice as far as the color mixing. I almost forgot how the bottom layer of what ever your painting on tints the acctual paint job
Re: New Paint job on a budget thread Part III - 03/27/0908:57 AM
Quote: thank you very much marq, I was acctualy just wondering if I was going to have some sort of adhision problem. Like if I was going to get eliphant skinn or cracks. But you also gave me some very good advice as far as the color mixing. I almost forgot how the bottom layer of what ever your painting on tints the acctual paint job
IF you have prepared the body surface properly... there 'should' be no adhesion problems at all. Just take your time and allow enough time between coats. Since your base primer coat ( even with paint to tint mixed with the primer ) is going to be the foundation for the subsequent layers of 'just paint'.. be sure to really nail your primer coat or coats to the best that you can. Treat it just like a painted coat for wetsanding and surface smoothing prior to actually laying paint down on it. The smoother your primer coat, the better and shinier the subsequent painted coats will go on and look.
.
Posted By: Anonymous
Re: New Paint job on a budget thread Part III - 03/27/0912:20 PM
ok,
So first I wash the car with a sponge and little liquid soap in a bucket, then wetsand the car with 2000+ grid paper, and final use some polish stuff.
Right??
Posted By: Anonymous
Re: Adhesion??? - 03/27/0905:37 PM
I can answer to that
I've read pretty much all thsoe pages and it seems the general answer is 3-4 weeks after the final coat
thats what I live by when painting, your final product is only as good as your prep work.
Posted By: Anonymous
$100 Paint Job - 03/28/0903:27 AM
Just wanted to show a quick before and after. I used Sunburst Yellow Rustoleum with odorless mineral spirits. It took about 8 coats for full coverage, sanding between every two coats. I didn't use primer, just painted over bare metal and paint.
hey guys, I was just going over the very first page that started all this. Its rather funny really, the second 69charger posted that pic and said how he did it, the roller idea took off like a mopar funny car dragster.
Re: RE: New Paint job on a budget thread Part III - 03/28/0910:23 AM
Quote: I haven't been here or caught up on any new methods but sounds to me like you need to use a thinner mixture and lay it on real light. I dont remember seeing any roller marks when painting, or if I did, they went away on their own when rolling over the area after applying the coat (to even things out). Thicker paint will just stay there and not self level, and too much thin paint would probably run.
By the way here's a pic of my Dart on the road..there are a couple scratches on it from working on it, so im thinking of going with another couple light coats of the old Hatteras white.
PLEASE tell me this is canvas white, because if it is, rustoleum had me in mind!!
I remember readin exit1965's posts and last I heard that was the color he used!?
Re: New Paint job on a budget thread Part III - 03/29/0903:31 AM
Quote: What should I use to thin Rustoleum when I shoot it through a gun?
You use automotive enamel reducer, say medium speed, this is for temps of 55 to about 80 or so degrees farenheit. You can also add an acrylic enamel hardener, such as Evercoats DOI Wetlook Hardener. The mix ratio is 8 parts Rustoleum, 4 parts reducer and 1 part hardener. This will give you a super glossy finish that will be very durable with the hardener added to the mix.....
Re: RE: New Paint job on a budget thread Part III - 03/29/0912:31 PM
Quote:
PLEASE tell me this is canvas white, because if it is, rustoleum had me in mind!!
I remember readin exit1965's posts and last I heard that was the color he used!?
Nope, it's Brightside Hatteras white. Canvas white is a similar color, but Rustoleum did not have the shine. I'll stop beating a dead horse re: the shine difference..
Re: RE: New Paint job on a budget thread Part III - 03/30/0912:54 AM
aw crud.
well, thanks for the info
Posted By: Anonymous
Re: RE: New Paint job on a budget thread Part III - 03/30/0910:14 PM
This is Rusto Canvas White and I like it. And you can make it as shiny as you want. Just takes patience. This whole process takes patience so no hurries, no worries.
Re: RE: New Paint job on a budget thread Part III - 04/01/0912:07 AM
thank you CJ, I remember seeing your posts a while ago, your pictures are acctualy what made me decide on canvas white. I just kinda forgot about them. The color may be a tiney bit off but no ones gonna notice the differance besides hard core VW nuts.
Posted By: Anonymous
Re: RE: New Paint job on a budget thread Part III - 04/01/0902:26 AM
Hey folks.. been following this for a while and turned my uglymino into something presentable.
Now I have a question.
I'm approaching the final coat- on the last coat do you have to wet sand with 800, then 1500, or can I just go straight to the 1500?
Re: RE: New Paint job on a budget thread Part III - 04/02/0910:01 PM
hey, check this out. I was on the Love Bug fan site, and I saw a car with a familiar looking paint job on it. I asked him how he painted the car and he told me he rolled it on!! even the gum balls and stripes are rustoleum!
Re: RE: New Paint job on a budget thread Part III - 04/03/0911:22 AM
hey Marq, I've been contemplating the brightside paint. They do have the EXACT color I want and apperantly it shines better. I looked on the brightside site and its only about $10 more than rustoleum so maybe if I beg my parents the'll buy me some. But my question is this, can I use the rustoleum primer with brightside?
Re: RE: New Paint job on a budget thread Part III - 04/03/0904:19 PM
Quote: hey Marq, I've been contemplating the brightside paint. They do have the EXACT color I want and apperantly it shines better. I looked on the brightside site and its only about $10 more than rustoleum so maybe if I beg my parents the'll buy me some. But my question is this, can I use the rustoleum primer with brightside?
Yes.. you can use the Brightside paint over the Rustoleum primer OR the Rustoleum paint.
You can save a few bucks by doing your initial painting with the Rustoleum primer... and then painting with the Rustoleum paint. Once you have color coverage using the Rustoleum paint, you can then switch to the Brightside paint to do the final coats.
Basically that is how my car ended up being done... because I switched paints half-way through the paint job...and still no problems.....
Re: RE: New Paint job on a budget thread Part III - 04/04/0910:09 PM
Quote: hey Marq, I've been contemplating the brightside paint. They do have the EXACT color I want and apperantly it shines better. I looked on the brightside site and its only about $10 more than rustoleum so maybe if I beg my parents the'll buy me some. But my question is this, can I use the rustoleum primer with brightside?
I used both rusoleum primer and lacquer primer under my Brightside piant no problems.
Re: RE: New Paint job on a budget thread Part III - 04/05/0909:27 AM
cool, thanks 69dart.
Posted By: Anonymous
Re: RE: New Paint job on a budget thread Part III - 04/05/0904:17 PM
I have a question about what you guys are talking about. Once you wet sand the final coat, and you're left with a dull finish, is the final "shine" really the result of the polishes that you buff the car with? Once you wet sand topside and one you wet sand rustoleum , they're both dull right. So is the polished topside still shinier than the polished rustoleum, or are you guys suggesting that the un-wetsanded topside is a lot glossier than the un-westanded rustoleum.(which i know that must be the case) I'm just curious how much the polishes play a roll in the finished outcome when comparing the two different paints.
Re: RE: New Paint job on a budget thread Part III - 04/05/0904:24 PM
Hey Marq and 69DartGT, how is the durability of your brighside painted vehicles? How does that paint seem to be holding up to scratches compared to a regular single stage or bc/cc automotive paint job?
Re: RE: New Paint job on a budget thread Part III - 04/05/0906:46 PM
Ok, next question. This is the hood on my truck. I had sanded it to bare metal and shot it with Rustoleum rattle can primer a year or so ago. As you can see now, it has a few spots of rust. I just replaced the left fender and before I put it on, I filled the emblem holes, covered it all with rattle can primer, sanded it good, then rolled it with Rustoleum rusty metal primer.
My actual question is, do I need to resand the hood before I roll it with the rusty metal primer, or can I just roll it as is?
Re: RE: New Paint job on a budget thread Part III - 04/06/0907:07 PM
Quote: Hey Marq and 69DartGT, how is the durability of your brighside painted vehicles? How does that paint seem to be holding up to scratches compared to a regular single stage or bc/cc automotive paint job?
Mines better than two years old, I'm very happy with the way its held up, but it does need a waxing right now..
Re: RE: New Paint job on a budget thread Part III - 04/07/0903:31 AM
Quote: My actual question is, do I need to resand the hood before I roll it with the rusty metal primer, or can I just roll it as is?
When in doubt, re-sand.
It doesn't matter if you are planning to apply primer or paint, you always want the best surface prep to assure the best adhesion. In this case there is no doubt, re-sand.
Re: RE: New Paint job on a budget thread Part III - 04/07/0903:39 AM
Quote: Hey Marq and 69DartGT, how is the durability of your brighside painted vehicles? How does that paint seem to be holding up to scratches compared to a regular single stage or bc/cc automotive paint job?
I have had no problem at all with the Brightside... One thing that I take pleasure in is putting the Porter/Cable polisher to work and tweaking up my shine etc. So my paint has never just sat exposed to the sun or weather without a polishing session for any length of time.
But I guess that is no different then a lot of paint jobs that enjoy and revel in a polishing/waxing etc.
As per the overall hardness and durability... I have no complaints at all. No chipping... no scratching... etc.
Re: RE: New Paint job on a budget thread Part III - 04/07/0903:48 AM
Quote: Ok, next question. This is the hood on my truck. I had sanded it to bare metal and shot it with Rustoleum rattle can primer a year or so ago. As you can see now, it has a few spots of rust. I just replaced the left fender and before I put it on, I filled the emblem holes, covered it all with rattle can primer, sanded it good, then rolled it with Rustoleum rusty metal primer.
My actual question is, do I need to resand the hood before I roll it with the rusty metal primer, or can I just roll it as is?
Ok... IF your hood presently has rust stains showing through the spray on primer... then I would resand it down to rid as much of that rusty surface as possible.
I would next go to the canned primer and roll it on. I don't think I would go with the spray can primer, as I don't have much faith in it for truly sealing oxygen from getting to the rust sites. Starve the rust of oxygen and it can't grow or spread.
Then sand that primered surface to get it a nice dull but extremely smooth surface upon which you can lay your coats of paint on to.
Re: RE: New Paint job on a budget thread Part III - 04/07/0911:21 PM
Thanks. I was actually planning to sand it anyway. I guess I was wondering if the Rustoleum might work like those rust converter coatings that claim to convert rust to paintable primer. As I think about it, probably not. I just hope the roll on rustoleum primer helps prevent the rust from coming back. I've got the left fender primered, as seen in the previous photo, next is the hood then the right fender. Then I'll work back to the doors and cab, then on back to the bed.
Thanks again. I can't wait to get this truck all one color, even if it is just a primer.
Re: RE: New Paint job on a budget thread Part III - 04/08/0902:30 AM
I don't know if it helps but I used Rustoleums rusty metal primer straight out of the can on the inside of my truck bed, use foam brush in the tight area's and rolled the rest, no runs, drips or errors it went on very well.
Re: RE: New Paint job on a budget thread Part III - 04/09/0902:51 AM
If you have a spray gun just go down to your local autoparts store and get a quart of Dupilcolor gray lacquer primer along with some lacquer thinner and shoot the car, then a light sand tack rag and start rolling. Look at the door then the rest I fully primed the door & the coverage was much better.
Re: RE: New Paint job on a budget thread Part III - 04/09/0903:03 AM
I don't really have access to a spray gun or a compresser, so I'm just going to have to go back and ask the guy to give me the RIGHT stuff. The whole car is going to be primerd evenly though one way or another
Re: RE: New Paint job on a budget thread Part III - 04/09/0903:21 AM
If you have a test piece maybe a spare old fender try rolling rustoleum rusty metal primer on it, I rolled it straight out of the can in my trucks bed it went on great actaully better than the finish paint, it self leveled zero high spots ridges etc, be worth a try.
Re: RE: New Paint job on a budget thread Part III - 04/09/0909:53 AM
hey Marq, is this what you had in mind for an evil Herbie
Posted By: Anonymous
Re: RE: New Paint job on a budget thread Part III - 04/11/0903:31 PM
Read your guide Marq,and have some questions about Brightside. Sorry about my rusty english.
1.Original paint is good, no rust or flaking. I'm not sure what primer i must use. INTERLUX PRE-KOTE or YACHT PRIMER? What is the difference between these two? And can something happend when i'm using a 1k primer when the original paint on my car is 2k? Chemical reaction?
2.Do i have to sand the whole car before i apply INTERLUX PRE-KOTE or YACHT PRIMER? Can i just sand away paint that is a little higher than the rest after some touch-up over the years? Original paint is pretty good. I'm going to wash the car first with soap, then use some grease remover a couple of times.
3.If i sand through to metal when preparing the car, must i use a different primer than INTERLUX?
4.Is it better to use dry paper than wetsanding the INTERLUX PRE-KOTE or YACHT PRIMER?
5.I've read the manual (PRE-KOTE and Brightside), and i'm a little unsure about the drying time and laying the first coat of paint. I'm going to paint the car outside, so if it rains a couple of days i must wait to apply the first coat of paint. But in the manual it says this(pre-kote, UK manual): Apply 1-2 coats. If maximum overcoating time of previous coating/primer is exceeded, abrade using 220-320 grade wet or dry paper. How important is it to follow the manual in this case? Dp i really have to sand down the primer if i exceed the overcoating time?
6.When using thinner NR333 with a cloth before laying a new coat of paint, how long must i wait before painting?
7.When sanding, do you sand up and down, circles? Is there a special direction you sand?
8. How important is it to use High Density Foam Rollers? I'm not sure what i can get here in Norway.
Hope you can answer some of the questions. Thanks!
Re: RE: New Paint job on a budget thread Part III - 04/11/0903:51 PM
captianc, 1st welcome to the board. Brightside goes over most all primers, I used lacquer primer from my local auto parts store. To thin the brightside I used mineral spirits, worked great, Marq should chime in soon.
Re: RE: New Paint job on a budget thread Part III - 04/12/0901:32 AM
captainc, If you had not mentioned it, I would not have noticed that english was not your first language.
Regarding sanding, nobody likes to sand any more than they have to. Unfortunaltely you must sand everywhere you want paint/primer to stick. If you skimp on that vital part of the paint preparation process, the new paint will eventually peel and flake off in the areas where the sanding was inadequate. That is also true for primer that was allowed to dry past the time specified in the instructions on the primer container.
Re: RE: New Paint job on a budget thread Part III - 04/13/0909:48 PM
alright, I finnaly went out and bought the RIGHT primer for the car. At least I'm hoping its the right kind, will the white bare metal rusto primer do the job?
Re: RE: New Paint job on a budget thread Part III - 04/13/0910:08 PM
heres the stuff
Posted By: Anonymous
Re: RE: New Paint job on a budget thread Part III - 04/16/0905:33 PM
I don't see why not. Especially if you're going with Canvas White. My Jeep still had the original paint with no bare metal so I skipped the primer and just hit it with 400 before starting to roll. How's it going? Any more pics?
Re: RE: New Paint job on a budget thread Part III - 04/16/0910:23 PM
cool
its going well, I'm making progress, slowely but shurley. Not quite ready for progress pics yet, it'll look pretty much exactly the same as it did in the last pics. I'm almost done with the sides of the car, I still need to do more work on the deck lid and rear apron, then its just this damn roof. I'm finnaly making head way on the roof but its taking forever!
Re: RE: New Paint job on a budget thread Part III - 04/18/0902:20 AM
Do you guys strongly suggest a roll-on primer before the paint? If its bare metal you are rolling the paint on, what do you sand it to for best adhension? what about if your applying the new paint on old paint, then what do you sand to? Thanks
Re: RE: New Paint job on a budget thread Part III - 04/18/0905:50 PM
Quote: .....your kidding...right?
No I'm not, the only thing is you can't put lacquer or enamel over it. I used the rusty metal primer of my truck wothout any problem's I also used lacquer primer on my door and a few other places its all good.
Re: RE: New Paint job on a budget thread Part III - 04/18/0905:53 PM
Quote: Do you guys strongly suggest a roll-on primer before the paint? If its bare metal you are rolling the paint on, what do you sand it to for best adhension? what about if your applying the new paint on old paint, then what do you sand to? Thanks
Think I used 360? on all surfaces and just spot primed where I sanded to bare metal, rustoleum rattle can primer in some places. I'm lazy so all my large surfaces I could get to I machined sanded.
Re: RE: New Paint job on a budget thread Part III - 04/18/0908:04 PM
Hey guys, I live in Iceland and I have a 96 Ford Ranger. I have few questions a bout that paint job and would be glad if you guys could answer it for me.
1. Here in Iceland there are not the same covers on the Rust-oleum bottles. is it the same as you are using?
2. I also wana know what type of pads you guys are using on your buffer, and what type of polish to remove the scratches and what you use to make the surface shine after wetsandig after the last coat?
Re: RE: New Paint job on a budget thread Part III - 04/18/0908:06 PM
Quote: One thing to remember that is an "oil based" primer so when we use that type you are limited to using Rustoleum type paints over it. Not a big deal.
Sorry not true, I use Rustoleum/Tremclad primer all the time, sprayed on reduced with enamel redcuer up to 50%. This takes a bout 10 days to 2 weeks to fully cure, and often is fine in 7 days. To date, I have used all fillers over it, 2 k urethane primers, epoxy primers, acrylic enamel paint, etc. Tremclad primer is a dream to sand, blocks very nicely. The thing when you reduce it with automoitve enamel redcuer, it dries faster and harder, this is stuff(medium speed automotive enamel reducer) is mostly xylene and toluene. I am not trying to be a no it all, but this is my experience. If rusto primer is laid on thick with a roller or brush, it will need a long time for full cure, once this happens, anything can be laid on it, this primer has super adhesion, and good corrosion protection. I have taken a rag soaked in lacquer thinner and wiped panels that have been primed with Tremclad, with zero effect on the primer. The secret is to have a fully cured primer, then you are in business. I also use Tremclad quite often gloss black mixed with medium speed reducer, and gloss hardener, when sprayed the result is a super shiny, super smooth, tough hard finish, muc like acrylic enamel...............
Re: RE: New Paint job on a budget thread Part III - 04/18/0909:24 PM
My friend a painter told me you can't paint lacquer or enamel over the oil based rustoleum primer because the paint not the primer will curdle. But if you've tried this then I stand corrected.
Re: RE: New Paint job on a budget thread Part III - 04/18/0909:42 PM
Quote: My friend a painter told me you can't paint lacquer or enamel over the oil based rustoleum primer because the paint not the primer will curdle. But if you've tried this then I stand corrected.
One thing for sure, anytime anything is being introduced that is from a diffeent paint system, proceed with caution, try small test areas first. the ruto/tremclad rpimer is not much different that old time enamel rpimer used by auto manufacturers way back in the 40s. Once the tremclad/rusto primer is fully cured, even lacquer primer surfacer can go over it. What I do with 2 k urethane high build primer is this, I spray a mist coat first, then spray on heavier coats, this I have done as recently as last night, right over a car with tremclad primer on it. So be aware, and test areas when not sure, if tremclad or rusto primer is soft and not cured, then a lacquer based or 2 k urethane primer will wrinkle it for sure. When I tell people I add reducer and hardener to tremclad paint, people figure it won't mix, but infact it does quite nicely........
Re: RE: New Paint job on a budget thread Part III - 04/21/0912:41 AM
how long do you wait in between coats? is it a few minutes or a couple hours, or just until the previous coat is dry? And if i do a coat in one day, can i do the next coat whenever (say even 2 weeks if i was super busy?) And lastly its about 90ish over here, im guessing i can still paint in this weather but dry time will be very fast
Re: RE: New Paint job on a budget thread Part III - 04/21/0902:27 AM
Quote: how long do you wait in between coats? is it a few minutes or a couple hours, or just until the previous coat is dry? And if i do a coat in one day, can i do the next coat whenever (say even 2 weeks if i was super busy?) And lastly its about 90ish over here, im guessing i can still paint in this weather but dry time will be very fast
I did I rolled a new coat every day except the days I sanded, waether for the most part was nice here. My coats were very light, you'll know test a section that doesn't show well but with temps in the 90's I'd say no worries.
Re: RE: New Paint job on a budget thread Part III - 04/21/0904:11 AM
thanks.
Can i get a picture of walnut white? or any other whites? Can tremclad/brightside be used over rustoleum oil-based primer?
And i have been decided on orange over white for my truck for a year now, and the orange that 69charger has is peerrfect. BUT, rustoleum and brightside dont have anything close... safety orange is way to bright it looks like.
If i could get tremclad real orange shipped to me somehow that would be amazing but im not sure that would ever happen. i wish i had canadian family up there
Re: RE: New Paint job on a budget thread Part III - 04/21/0901:51 PM
Quote: didn't someone put together a manual on this method of painting with a roller? would low odor mineral spirit work ok?
I think Marq has a link to one I did have it but not on this computer, I have a PM into him hoping for the link. It is some place among the 6000+ post on this subject, either he listed it & I did also at a little date, I'll see if I can locate it later.
Re: RE: New Paint job on a budget thread Part III - 04/21/0903:45 PM
I think I had the wrong person in mind it was Exot1965 that had the link. Both these members Exit1965 & Marq are really the guru's on this subject. Try this http://rollyourcar.com/default.aspx
Re: RE: New Paint job on a budget thread Part III - 04/22/0910:21 PM
If your temp is anything like ours say 24 hours and you should be good to go. If you have a spare fender then do a test, if no do just one fender 1st. Should have added depends on how thick or thin you mix your paint. Mine dried over night but these were thin coats.
Re: RE: New Paint job on a budget thread Part III - 04/23/0901:13 AM
right now the wether has been around 80 degrees lately. Like I said I've got a bunch of spare body parts. If I could ever get the roof done on the car maybe I could acctualy start painting.
Re: RE: New Paint job on a budget thread Part III - 04/23/0901:17 AM
Quote: Will tremclad work fine over rustoleum's oil based primer? if not then what do i use on my bare metal before the tremclad??
I went down to Autozone and bought Duplicolor lacquer primer and thinner, I think the paint went on better over the area's I primed then the area's I just sanded..
Re: RE: New Paint job on a budget thread Part III - 04/23/0911:43 AM
Quote: well, I guess the only thing I can do is try it on a test fender. I really would perfer being able to use hatteras white.
so by letting the primer cure, dose that mean days, weeks, months?
You won't need a long cure time, to topcoat it with Rustoleum, it's when you want to go over it with say, a 2 k Urethane primer,it matters. The solvents are not aggressive in the Rusto paint or primer, so not a huge deal.....
I e-mailed a company in the UK at one point to ask about the cost of shipping true "coach paint" to the US. It didn't work out, but they mentioned Combicolor as a (lesser) alternative.
I got lucky when I bought my Brightside there was a guy on Ebay selling a six pack of either fire red or flag blue for $46 I still have a couple of quarts left when the weather stablizes I'm going to redo my roof & finish the bed which I've never done.
I have been following these threads since I found out about them on April 19th this year. Currently, I'm on page 72 with a long way to go, but I wanted to ask a question that may have already been brought up. If so, I'm sorry I haven't gotten there yet.
I have my car, a 1970 Falcon, completely disassembled as I was planning on taking it in for media blasting, and then to be painted. Of course, that process has put a hold on my project because of the costs involved. Then I ran across these threads, and have been hooked for the past week. I really think I want to try to do this as well.
My car is a rust free Colorado car with badly faded original paint. There are a few parking lot dings here and there, but no major repairs are needed.
My main question is, has anyone else gone down to just the body shell, and then did the complete process to the entire body? I'll be doing a color change from a burnt orange metallic, to solid white with the possibility of adding a couple of blue stripes down the center much like you would see on a Mustang.
Thanks to Charger, and the rest of the regulars that I have been following through the first 72 pages. I plan on reading all, but wanted to ask this question now.
Thanks, Otto...
Posted By: Anonymous
Re: - 04/28/0911:31 PM
Here's a photo as it sits now.
Posted By: Anonymous
Re: New how to paint your car on a budget with a roller - 04/29/0901:45 AM
I've given this a roller thing a shot and, although it scared the (enter your choice of words) out of me, I am starting to get the hang of it.
I'm working with a Dynasty/Imperial project (my cardomain page should be in my sig if I've figured out how to use this forum software correctly). Really long story short, its a mutt made from a combination of Dynasty, New Yorker, and Imperial parts. I would consider myself experienced when taking about fiberglass work and fiberglass fabrication, as you can see from the pics this is not a normal imperial front end (that's just what I used to start with).
I had originally intended to do this car in flat black, using rustoleum flat black rattle cans. But I had a lot of problems getting proper coverage with the spry cans of flat black, it was flashing dry so fast that it wasn't leveling and was just looking like crud. I then tried wet sanding it smooth... that made it worse (if I had known about the 1st of these roller threads I'd have known about the probs of wetsanding flat paints!).
So, in frustration I basically said the heck with this and painted the car using rattle cans of primer black. It was cheap, it didn't look completely terrible... and I could make it a nice dark flat black by taking a rag of oil to it. Problem was, its very porous so it isn't good for a daily driver, it couldn't be kept clean, and it isn't UV-friendly. Within 6 months my primer black turned into primer gray!
I thought about the blitz black since they carry that in spry cans but I have read that too is porous, and I need something that won't rust my car out.
Well, in hearing about this I decided to try it, but using satin black. I've read through the first 1.6 threads, that far into it I didn't see that anyone had tried this yet.
My results actually weren't bad. I am using ordorless mineral spirits and in mixes ranging from 1/1 to 1/4 (mineral spirits/paint), and haven't found anything particularly different between such extreme ranges of mineral spirits. However if I go thicker than 1/4 I do find myself having problems with the texture (bad orange peel texture), and if I go thinner than 50/50 I have problems in getting the paint under control (runs etc).
It took some experimenting for me to figure out how to do this, the first coat I tried (just on the front of the car) was so bad I really started to wonder if I had just made a mistake in attempting it, orange peel & runs like I'd never seen on a car before. My observation was, that the first 1-2 coats no matter how I did it, or what part of the car I did it to, would look absolutely disgusting. But every subsequent coat after that would make it look more and more presentable and by the 3rd & 4th coat I had a "10 foot" paint job.
Now, unlike the people I've been reading in these threads who are trying to go glossy or "wet", I don't want that at all. I want satin black, no clear coat, no "wet" look, and most importantly I want texture. So I am not wet sanding down to perfectly smooth, in fact the only prep work I have done between coats so far is in sanding out rogue runs, and using a tact cloth to remove any pollen/dirt. The question becomes "can i get the final coat good enough to where i can simply polish/wax it, and have it look the way I want?" The short answer is yes, I've been able to get my hood and roof to look the way I want the whole car to look (roof only has 2 coats, hood 4- no sanding outside of removing runs between coats!).
In these pics you'll see the car looks "better" the closer you get to the front of the car, and the worse the farther back you look- thats because I have been painting 1 section at a time, and the rear only has 1 coat, the front has 4- everything between that has something within that range.
Mind you the car is not finished, my quarter panels are removed, the rockers aren't painted, and the green hue is from all the pollen (its spring). But for no wet sanding, and just minor removal of occasional runs- I am liking what I see. I am not perfectly satisfied with the doors or rear pillars, too many runs I need to take out. But the texture of the rest is close to what I am looking for.
I went and compared it to my neighbor's car, which has a professional satin black $5k paintjob (no clear, and textured) and its comparable only mine has more "mistakes" (small runs here and there I need to fix, a couple areas have more of an orange peel texture). I think that someone -could- get a show car satin black paintjob this way, the question would be how many coats it would take them to put down a final coat without any errors (as there would be NO room for error with a paint you can't wet sand).
If this weren't a daily driver, I would have probably disassembled more, I probably would have fixed the front pass door (has a dent) but, I am really just waiting until I find a rust free dent-less door so I can replace it instead of trying to bondo something that can be cheaply found at a upullit.
I was surprised how much paint this would take, I assumed since I was thinning 25-50%, I would get more out of it. But I am getting about 1 coat of the whole car out of 1 quart can of satin black. Its also next to impossible to find, only one rustoleom dealer around me had it!
You can see how much better it looks than faded primer black (picture is from 1st test application, rums & peel everywhere b/c I didn't know what I was doing yet):
I think it would be a decent paintjob by the time I'm around 6-8 coats, as there are still some low spots (i.e. the picture of the roof).
I am not convinced I'd do this to a high dollar show car, but for my application its great. I gotta wonder if anyone would want to try the roller method only without as much work (less worrying about runs or orange peel) to give it that "old school rat rod" feel to it. After all, its not like rat rod builders originally had all the high tech spry tools & paints that people are using today to build rat rods ....
Quote: My main question is, has anyone else gone down to just the body shell, and then did the complete process to the entire body? I'll be doing a color change from a burnt orange metallic, to solid white with the possibility of adding a couple of blue stripes down the center much like you would see on a Mustang.
If you are talking about a complete color change inside and out, IMHO this process while it could be done just doesn't lend its self very good to it. If it were me I'd shoot the inside parts like the truck, underhood and the interior, much faster and with all the nooks and crannies easier to cover. It takes a lot of coats to get good color via a roller where you could shot it in one maybe two coats. Just my
Speaking of that I'm going to pick up a quart of Brightside white and do the roof of my truck.
Posted By: Anonymous
Time to apply coat, and upholstery question - 04/29/0906:57 PM
A couple questions--first, how long does each coat take? I know it's somewhat dependent on the particular vehicle. I'm looking at either late nights or early mornings so I want to know how much earlier I'm going to have to wake up for this. Can't wait to start, although I may do my upholstery first.
Also, I looked around a bit, but didn't find much on upholstery. I'd love to see a forum that was so friendly to the quality and budget-minded DIY-er, but with an upholstery bent as I need to do that, too. Anyone see info on upholstery around?
OK--one more question. Any of these paint jobs in San Diego? I'd love to see one.
Posted By: Anonymous
Re: Time to apply coat, and upholstery question - 04/29/0907:07 PM
Quote: A couple questions--first, how long does each coat take? I know it's somewhat dependent on the particular vehicle. I'm looking at either late nights or early mornings so I want to know how much earlier I'm going to have to wake up for this. Can't wait to start, although I may do my upholstery first.
Also, I looked around a bit, but didn't find much on upholstery. I'd love to see a forum that was so friendly to the quality and budget-minded DIY-er, but with an upholstery bent as I need to do that, too. Anyone see info on upholstery around?
OK--one more question. Any of these paint jobs in San Diego? I'd love to see one.
I have been unable to do one complete coat (as in the whole car) at once, for a few reasons.
-The paint in my tray will start to get gummy before I can apply a coat for the whole car
-I need to really watch what I put down on vertical surfaces so I can roller over it, as needed, to get rid of runs- if I do the whole car I can't give the vertical areas the individual attention they need.
Far easier to do it in manageable sections, i.e. just the roof, or just the hood, or just a side of doors. And then after I get that done I can mixup some more and do another section where the 1st is drying (like I could do the trunklid, then after that mix more and do the hood, then a fender, etc). In two hours I can cover most of the car when split up, not counting mixing or prep work time.
Today I was bored and decided to paint a hood I have laying around the farm. I just scuffed it with 220, I then took Tremclad Recreational white, and added a few table spoons of Tremclad gloss black into the 6 0unces of paint (now very light gray hue to it), I then added about 3/4 of an ounce of Evercoats DOI wetlook hardener, and 2 1/2 ounces of generic medium speed enamel reducer(xylene content). I used my not-so expensive, HVLP 1.4 tip gravity feed spraygun, and layed on a mist coat, on the one side of the hood, let this flash about 20 minutes and then shot on a nice medium coverage film. It looks great, no runs, no peel, and it is still flashing, might add a 3rd coat. I realize this is a roller thread, but there might be people reading this who would like to spray enamel paint. Once you add hardener to synthetic resin enamel(tremclad,rustloeum,XO rust), it becomes a modified alkyd enamel, takes on many traits of an acrylic enamel, harder, shinier, more fad resistance,dires faster). this mix sprays real nicer, and you don't need high end sprayguns to do it, just a halfway decent home compressor, spraygun, line filrers to keep out moisture and some practice................
Posted By: Anonymous
Re: - 05/01/0906:51 PM
Quote: Today I was bored and decided to paint a hood I have laying around the farm. I just scuffed it with 220, I then took Tremclad Recreational white, and added a few table spoons of Tremclad gloss black into the 6 0unces of paint (now very light gray hue to it), I then added about 3/4 of an ounce of Evercoats DOI wetlook hardener, and 2 1/2 ounces of generic medium speed enamel reducer(xylene content). I used my not-so expensive, HVLP 1.4 tip gravity feed spraygun, and layed on a mist coat, on the one side of the hood, let this flash about 20 minutes and then shot on a nice medium coverage film. It looks great, no runs, no peel, and it is still flashing, might add a 3rd coat. ....
What are the suggested safety precautions when doing this? That is, does the hardener contain isocyanates?
Of course it does contain harmful elements, you do not breath this, you do not do this in an attached garage, or in an urban center, I am on the farm. This hardener is not a urethane catalyst, but does need safety pre-cautions. I wear a 3M respirator, and my garage is well ventilated. If I were painting with 2 k Urethanes, I would be using an air supplied respirator, and doing the painting in a controlled booth. But this is an enamel paint, with a generic enamel hardner, but with all chemicals proceed with caution. If in doubt, do not attempt thgis, or do some research first, follow all safety precautions ALWAYS.
ADDENDUM: Yes folks, Evercoats DOI Wetlook Hardener does contain Isocyanates, so follow all safety procedures, while working with this stuff. The good news is this, although Tremclad, Rustoleum,XO Rust Paint, are all syntheic resin enamels( alkyd enamels), once you introduce a catalyst hardener, it takes on very much the same prooperites of a 2 pack SS acrylic enamel, the finish will be harder, glossier, and will not fade as easily as without. Using enamel reducer for automotive use, is basically a faster solvent, ie xylene, naptha,toluene. You cannot use these faster solvens when rolling, as you need slow thinner like mineral spirits.......
Posted By: Anonymous
Re: - 05/01/0909:35 PM
Hello, new member here. I've been reading a lot of pages and you guys have inspired me to get a roller and go for it. I've used a primer first and now I'm doing my third layer. I use very thin paint, a little thicker than water, but I'm expericing a lot of airbubbles in my paint. What did I do wrong? First I thought, they'll disappear when it starts to dry. But this was not the case. The conditions are ok, a little sunshine, not too warm (20 degree Celcius) and like I said, very thin paint. Is the paint too thin? Or did I paint too fast? I hope you guys can help me, because it's a lot work to sand of the airbubbles, and very frustrating. Thanks in advance.
I belive you needed to waite longer imbetween coats. The minneral sprits didn't have enough time to evaporate first. How quickly have you been putting coats of paint on after the previous coat?
New Paint job on a budget thread Part III - 05/02/0909:28 PM
I used two rollers what with paint and one dry, I use the dry roller to knock down the air bubbles. you'll find out the more you do this the less air bubbles will be a problem.
Posted By: Anonymous
sapphire blue - 05/02/0911:03 PM
Does anyone have pictures of brightside sapphire blue on any car?
I've started my project black but now I'm itching to finish her off in blue
Posted By: Anonymous
Re: New Paint job on a budget thread Part III - 05/03/0905:26 AM
Ok thanks, that's an idea. I've rolled before and never before I had this problem with airbubbles. Nomather how thin the paint is. If I paint slow or fast, no pressure at all always those %$#@ bubbles.
Yesterday, I've painted as a test my rightfrontfender with only a brush, and that helped. No bubbles and the result looks promising.
Re: New Paint job on a budget thread Part III - 05/04/0901:42 PM
I have been following this thread for a long time. I have to thank all of you for your work on this topic. My biggest obstacle on this was trying to get others to believe you that it WILL work.
This spring I just finished painting my 94 dodge drag truck. The best part so far was when I showed a guy the truck this past weekend and he didn't believe me when I said I painted it for ~$100 with a roller! Started with this stock 200k mile truck
Then made it into this.
New paint!!
It is by no means perfect. We learned a lot on this first project, all the way to the end of the project. Trial and error made it turn out pretty good in the end.
Re: New Paint job on a budget thread Part III - 05/04/0901:48 PM
Some more pics of the process. The color is rustoleum dark hunter green, black and aluminum mixed to get the color I wanted. Oh and the hood in the action photo is rustoleum flat black. We have a hood for the stack and one for street legal exhaust.
Re: New Paint job on a budget thread Part III - 05/04/0902:45 PM
Dude, that's a bad a$$ truck! But we need more info! How did you shorten it for the shortbed? What's that bar seen under the bed? Some kind of 4-link or something? With the aluminum paint mixed in, I'm assuming it has a metalic look to it. How did that turn out with all the sanding and stuff? Truck really looks great!
Posted By: Anonymous
Having an issue - 05/04/0906:00 PM
Alright, so I got 2 layers of paint on my car but I can see roller marks big time
I'm doing it in flat black by the way if that helps to solve my problem
So basically, I cant paint without having thos horrible roller marks. I am now wetsanding it all in order to get a uniform ( lol ) coat to try again
Also, I barely get any orange peel with flat color, I could almost call my car done if it wasnt for the horrible roller marks. Is there a way to avoid it? I'm very bad at this
Re: New Paint job on a budget thread Part III - 05/04/0908:06 PM
Quote: Dude, that's a bad a$$ truck! But we need more info! How did you shorten it for the shortbed? What's that bar seen under the bed? Some kind of 4-link or something? With the aluminum paint mixed in, I'm assuming it has a metalic look to it. How did that turn out with all the sanding and stuff? Truck really looks great!
Thanks for the compliments Bar you can see is a traction bar used with the factory leaf springs.
The paint turned out like what you see in the second picture of my second post. That is a close up of the front fender after 3 coats, 1 sanding of 800, and then one more coat.
Re: New Paint job on a budget thread Part III - 05/04/0908:31 PM
I'm about ready to start the body work on my 51 ford truck, I had it sandblasted a number of years ago and it has since developed some surface rust, I am going to hit it with phosphoric acid then prime and do the bodywork. I think I've seen on here that you can use body filler over rustoleum primer and just wanted to make sure that would work OK.
Re: New Paint job on a budget thread Part III - 05/08/0903:12 PM
Quote: What type of polish and what type of pads do you guys use for buffing after last wetsand?
PADS: with my Cable Porter, I simply use the white foam pad that comes with that polisher. I use it to apply rubbing compounds, polishes and waxes. Occassionally I will put a microfiber cloth between the foam head and the paint... and use the microfiber to get the best shine I can.
I do know that some of the guys have used the wooly head on their polisher when doing the rubbing compound stage. That is because the wooly head gives them additional 'cutting' when trying to polish the surface. But you have to be careful because it may give 'too much' cutting IF YOU don't keep the polisher constantly moving and stay too long on one spot.
Now... back to a quick chat about rubbing compounds, polishes and waxes..
Once you have the paint wetsanded to its best point, you next move to using a Rubbing Compound. I believe originally that Charger made use of the Turtle Rubbing compound... which basically looks like a brown clay in a tub
The thing to keep in mind is that after you have taken your paintjob to the smoothest point using wetsanding.... you basically are continuing to further polish the surface with a rubbing compound. For example, if the sandpaper you worked it up to was 2000, 2500, or 3000 grit... well the rubbing compound is simply the next highest grit to get the surface even smoother.
Other then the Turtle Rubbing compound, there are also excellent polishing and cutting compounds made by 3M which basically do the same job. They are just like using liquified sandpaper - but at a higher level of grit.
You follow your 'rubbing compound' stage with a polish. Even plain old Turtle polish can be used at that point. Or just about any other car polish.
You need to watch out what is actually in the various polishes that are sold. Some are solely polishes... some are polishes with cleaners... some are polishes with waxing compounds... some are polishes with acrylic or synthetic shine compounds.
Ideally you want just a straight polishing wax... but you can substitute a polishing/cleanser as well.
Once you nail down the polishing stage..... you next move to the final 'waxing' stage. I tend to prefer using Meguirs 'pure Carnuba' wax... but most car waxes can do the job equally well. You have to remember that the whole objective of the waxing stage is to achieve 3 things :
a ) you are sealing the paint surface to reduce the amount of oxygen or other foreign matter that might want to get to the paint. It also provides some Ultra Violet protection to reduce future fading from the UV of the sun.
b ) you are trying to tweak up the shine by adding a layer of the refractive qualities of the wax. This gives the paint more depth and shine.
c ) you are trying to put a coating on the paint that will repel road grit, bird poo and smashed bugs from embedding in to the paint.
One thing that I have learned is that the acrylic type 'waxes' or the synthetic type waxes, that promise one year shines or diamond hard coatings, are best to stay away from. At this point you want a real wax on the car and not some synthetic shine.
Although I held high hopes for the Turtle ICE wax, NuShine and other synthetic shines... they all were crap in the end. I would have gotten the same result by spraying Armorall on the paint. It looks good when wet and fresh... but dries out to look like crap or that nothing was used.
Re: New Paint job on a budget thread Part III - 05/09/0903:15 PM
So the aluminum rustoleum does work, I want to do my car silver (aluminum). The mix you made it really good, did the aluminum mix make the paint look uniformed because there was talk that metallic paint will not work with the roll-on method.
Re: New Paint job on a budget thread Part III - 05/10/0903:42 PM
You have to keep it mixed really well. Other than that I did not have any trouble applying it. Not heavy spots, no sanding issues, etc. Everyone is different. Maybe it would have turned out better without it I don't know. I am happy with it.
Re: New Paint job on a budget thread Part III - 05/12/0905:00 PM
Quote: I�m going to paint my ranger in june, should i put primer before paint og should I just wetsand the original paint and put the paint on.
What primer is the best? How do you guys do it. Do you roll the primer og spray it on?
I will post pictures of my car when I start my paintjob.
Just sanding the original paint is fine, but I did find that the area's I primed (just used lacquer primer) actually covered much better than the area's I sanded. I cheated and sprayed the primer though.
I was thinking of adding it to a shade of blue if it would work. Also has anyone had home depot mix rustoleum paint to your desired color? Thanks for any help
I was thinking of adding it to a shade of blue if it would work. Also has anyone had home depot mix rustoleum paint to your desired color? Thanks for any help
Nah... don't think so. If you read the ebay ad, it mentions that you put this stuff in with 'clear coat'... and that makes sense.
If you put that stuff in with Tremclad or Brightside, our paints would totally envelope those color pigments and you wouldn't even know they were there or mixed in with the paint.
To try to explain this at the simplest level... imagine you put a cup of white rice in with black paint or red paint etc. You wouldn't see the white of the rice... because the paint would completely cover it up.
But if you poured a cup of rice in to a clear coating... well you would be able to see every detail of those rice and their color.
That stuff might be handy at the end of a 'roll your own' paint job. Do up your car to completion in the color that you wish... and at the final stage spray on a clear coat with that stuff mixed in ( or have that spray job done by a pro paint shop ).
Re: New Paint job on a budget thread Part III - 05/16/0904:48 AM
Read a little deeper Marq, it says mix with any clear coat or paint. With as thin as is recommended to apply rustoleum (or which ever brand you choose), the effect should appear with no problem. The big problem is going to be the same problem as with metallic paints: getting the flakes, or particles, to lay correctly and not completely sand it away. The question in application, at least in our roll-on case, would be whether to use the product at the first application of paint or at later stages. I think the two different choices might yield two entirely different results.
I would be really interested to see how it turns out.
Re: New Paint job on a budget thread Part III - 05/16/0901:43 PM
I don't know... I would still hold to my original speculation that the paint would overwhelm the color particles and alter or block the particles ability to refract/reflect light.
I understand what you mean about the roll on paint being extremely thin with each layer that we apply. That does make it a 'little more' possible then if it was just straight paint ( without the heavy thinning that we put it through )
And I can also see how a build up of multiple layers of our thin mixture 'might' give give some effect... ( here we are dealing with how light would reflect/refract off the multiple depths of the paint with those color particles in them.
But I suspect that even our thinned paint mix would lay on 'some' color coating that would greatly reduce the effect that those color particles can give.
In the case of a multi-layer paint job with the particles, I would suspect that the accumulative layering of colored paint would basically 'tint' away the full color spectrum that those particles are designed to give. For example, if you used them in a multi-layers baby blue paint... the particles would tend to take on a baby blue effect and lose the other colors of the spectrum.
The best place for the optimum effect of those color particles is on the final layer only. Because you have to just imagine how they work... they need the light spectrum to be able to reach them, in order for them to refract/reflect the color spectrum back at you.
Anything that affects the amount of light that reaches those particles will in turn reduce the amount of reflection/refraction that they give off.
That is why a 'clear coat' applied as the final layer... is the most optimal situation to allow the particles to do what they are designed to do... refract/reflect colors of the light spectrum.
Maybe someone will invest a few bucks and give it a 'real world test' to see if my understanding of light refraction/reflection proves correct or wrong in actual practice
.
Posted By: Anonymous
Re: New Paint job on a budget thread Part III - 05/16/0909:59 PM
what part of the paint gives this the mettalic look?? and can you replicate it with brightside
Re: New Paint job on a budget thread Part III - 05/16/0910:57 PM
DSLstuff, who originally posted that pic of his paint job, said that he mixed hunter green, black, and aluminum to get the color he wanted. It would be my guess that it is the aluminum paint mixed in that gives it the metallic look. I would assume that using the same technique you could do the same thing with brightside paint.
Posted By: Anonymous
Re: New Paint job on a budget thread Part III - 05/18/0910:15 AM
has anyone tried painting a car with a wagner hvlp? i know its not intended for automotive use and will not spray as fine as a hvlp driven by a compressor
but for the sake of saving time can anyone tell me why it would be a bad idea to use one of these?
Re: New Paint job on a budget thread Part III - 05/18/0911:01 PM
There is actually a post about this topic back among these many pages of this thread. It wasn't recommended, and I wouldn't recommend it either. Going by experience, the Wagner Power Painter I painted my house with did not coat evenly, and when the cup got low, which was very quickly, the paint would glop and spatter.
Works great on the house, not on a car.
Posted By: Anonymous
Re: New Paint job on a budget thread Part III - 05/19/0903:10 AM
The gun i posted is not a powerpainter
It's called the control spray and it's basically a handheld version of a turbine powered hvlp gun
much better finish than the powerpainter or so I've been told
Re: New Paint job on a budget thread Part III - 05/19/0906:21 PM
Quote: I don't know... I would still hold to my original speculation that the paint would overwhelm the color particles and alter or block the particles ability to refract/reflect light.
I understand what you mean about the roll on paint being extremely thin with each layer that we apply. That does make it a 'little more' possible then if it was just straight paint ( without the heavy thinning that we put it through )
And I can also see how a build up of multiple layers of our thin mixture 'might' give give some effect... ( here we are dealing with how light would reflect/refract off the multiple depths of the paint with those color particles in them.
But I suspect that even our thinned paint mix would lay on 'some' color coating that would greatly reduce the effect that those color particles can give.
In the case of a multi-layer paint job with the particles, I would suspect that the accumulative layering of colored paint would basically 'tint' away the full color spectrum that those particles are designed to give. For example, if you used them in a multi-layers baby blue paint... the particles would tend to take on a baby blue effect and lose the other colors of the spectrum.
The best place for the optimum effect of those color particles is on the final layer only. Because you have to just imagine how they work... they need the light spectrum to be able to reach them, in order for them to refract/reflect the color spectrum back at you.
Anything that affects the amount of light that reaches those particles will in turn reduce the amount of reflection/refraction that they give off.
That is why a 'clear coat' applied as the final layer... is the most optimal situation to allow the particles to do what they are designed to do... refract/reflect colors of the light spectrum.
Maybe someone will invest a few bucks and give it a 'real world test' to see if my understanding of light refraction/reflection proves correct or wrong in actual practice
.
Thanks for all the reply's fella's
Im going to try spraying some mixed in rusto this weekend. If that doesn't work, I'll try it in a clear coat. I have several trunklids to practice on Im thinking Marq is most likely right, but what the hell, its worth a try
Re: New Paint job on a budget thread Part III - 05/21/0908:31 PM
My truck has been sitting in the driveway since the 1st of the year under a cover, just pulled the cover off and it looks like its time to break out the Porter-Cable and compound and bring the color back out.
Re: New Paint job on a budget thread Part III - 05/25/0906:35 AM
I'm in the process of stripping the paint off my car. I'm going to paint it with brightside black. I'm also going to primer the whole car with rustoleum rusty metal primer before painting it.
I have some rustoleum prof. gloss black paint left over from previous painting.
A question i have is would it be of any help as far as coverage goes to apply the rustoleum prof. gloss black first and then lay the brightside black over it or just use the brightside paint.
Re: New Paint job on a budget thread Part III - 05/25/0906:03 PM
Quote:
I have some rustoleum prof. gloss black paint left over from previous painting.
A question i have is would it be of any help as far as coverage goes to apply the rustoleum prof. gloss black first and then lay the brightside black over it or just use the brightside paint.
Ok.... there would be no problem using the Rustoleum gloss black first and later using the Brightside. That is basically what I did on my McLaren, albeit I was using fire red.
The main advantge would be cost. It is cheaper to lay on those first initial coverage layers using the Rustoleum, since it cost less. That is about the only advantage to using Rustoleum for the initial coats... as the amount of work and ongoing surface preparation will be basically the same.
One nice thing about using the Rustoleum for the base and initial coats is that you can easily buy spray aerosols of the Rustoleum high gloss black for spraying in to the nooks and crannies of the doors and other hard to reach spots where a brush or roller have difficulty reaching.
White Comet Finished- Thanks Mopar Forum!!! - 05/25/0908:18 PM
Thanks to all the helpful folks on this list- my blue Comet has now emerged glistening white! I got the ultimate compliment when driving to the local auto parts store when a guy stopped me and told me he loved the paint! And he almost fainted when I told him rolled the car with stuff from the local hardware store!!!
Re: New Paint job on a budget thread Part III - 05/26/0905:47 AM
Thank you Marq
Posted By: Anonymous
Re: White Comet Finished- Thanks Mopar Forum!!! - 05/26/0910:32 PM
Quote: Thanks to all the helpful folks on this list- my blue Comet has now emerged glistening white! I got the ultimate compliment when driving to the local auto part store when gut stopped me and told me he loved the paint! And he almost fainted when I told him rolled the car with stuff from the local hardware store!!!
Re: White Comet Finished- Thanks Mopar Forum!!! - 05/27/0905:47 PM
Quote:
Thanks to all the helpful folks on this list- my blue Comet has now emerged glistening white! I got the ultimate compliment when driving to the local auto part store when gut stopped me and told me he loved the paint! And he almost fainted when I told him rolled the car with stuff from the local hardware store!!!
One of my favorite reasons for hanging around in this forum is to see when projects get completed... the pics make all the words worthwhile
PS : I popped over to your web site and the car looks great from all the shots you posted. Enjoy.
New Paint job on a budget thread Part III - 05/28/0901:19 AM
im almost ready to paint my truck but i noticed that the old maaco paint is flaking off. I can scratch the jagged edges of the old maaco paint and it will flake off revealing metal underneat. Do i have to strip the whole truck or 90% of it to get all this flaking off so it doesnt make my rustoleum flake off?
New Paint job on a budget thread Part III - 05/28/0901:04 PM
Quote: im almost ready to paint my truck but i noticed that the old maaco paint is flaking off. I can scratch the jagged edges of the old maaco paint and it will flake off revealing metal underneat. Do i have to strip the whole truck or 90% of it to get all this flaking off so it doesnt make my rustoleum flake off?
Definitely sand the old paint down to the point where you have a stable surface to paint on. If you paint over 'old paint' that is barely clinging on to the body... well it won't be too long before that bad subsurface lets go and takes the fresh paint on it with it...
Just remember how much emphasis we have always made about the initial surface preparation having the most effect on the final finished product for appearance and longevity.
New Paint job on a budget thread Part III - 06/01/0903:12 AM
I am doing body work right now, getting ready to paint but i need these questions answered please!
has anyone put brightside over a very large area of bare metal? The way the old paint is flaking im going to have half of the whole truck in bare metal so im hoping the brightside sticks as well as what i hear. id rather not use rustoleum primer but i guess i will if the brightside doesnt like bare metal as much as it would primer.
also, i remember a member here painted his dart red but it wouldnt buff well so he had to change colors. will i have problems buffing the brightside fire red with Aussie driver's suggestions?
and lastly, what should the body work be finished off with on the old paint, bondo and bare metal so the brightside sticks well?
Re: New Paint job on a budget thread Part III - 06/01/0905:41 PM
You need to prime over the bare metal and the body filler, I found the Brightside actually gave better coverage over he parts of my truck that had been primered.
Re: New Paint job on a budget thread Part III - 06/02/0901:08 AM
Quote: hmmm ok i will. what kind of primer? rustoleum rattlecan?? what do i finish sanding my whole body with for the brightside to stick the best?
I just used Duplicolor lacquer primer nothing fancy, bought it at autozone down the street worked just fine. You need to sand every part that the paint will go on, the time you send now will show up in the finished paint job. my door in prime after major repair.
Re: New Paint job on a budget thread Part III - 06/02/0902:04 AM
Thanks. im guessing the duplicolor laquer primer is a rattlecan? I spent all today and got half the truck sanded with 60 grit. what should i finish sanding all the body with so the paint will stick the best? i read someone here suggested 120 and 69charger said he prepped with 400 for paint. which one
Re: New Paint job on a budget thread Part III - 06/02/0903:56 AM
I used 320 in a power sander & 400 by hand, 60 takes a lot off fast but leaves big scratches that have to be filled or sanded out. I used a spray gun to shoot the lacquer primer, I think it gave better coverage than a rattle can.
Re: New Paint job on a budget thread Part III - 06/03/0904:21 AM
This will work right? i just bought two cans of it for tomorrow. Does it matter what grit sandpaper I use to sand the metal and bondo to for this primer to stick the best? im guessing i'll sand the metal and bondo to about 120, then spray the primer, then sand it all down with 400 for paint??
THanks for the help, this should be the last of the questions. I am doing all the painting through next week. I'll post pictures when done!
Re: New Paint job on a budget thread Part III - 06/03/0904:35 AM
For work over body fillers, you normally want a "primer surfacer." That is, a high-build primer to fill small scratches and other minor imperfections. "Primer Sealer" is used after you have the surface perfect and just want a uniform surface to paint over. It is a thinner primer and won't fill scratches like a primer-surfacer will. It also helps reduce the amount of penetration of the paint solvents into the lower primer layers.
My experience with rattle can primers is that even the "high-build" primer-surfacers are really thin and don't fill minor scratches well. And they swell when painted over, and later shrink to expose scratches that you thought you filled. Moral of the story: don't spray rattle can primer over scratches more coarse than about 200-grit.
Re: New Paint job on a budget thread Part III - 06/03/0904:46 AM
sounds good, thanks! tomorrow i will trade in the primer sealer for their primer surfacer, and ill use may be 240 grit for sanding before the primer.
im ording the brightside right now, how many quarts would you guys guesstimate for a long bed truck? including interior and inside bed. Im guessing 3 quarts? and 1 quart of #333 brushing liquid for thinner
Posted By: Anonymous
Re: New Paint job on a budget thread Part III - 06/03/0905:49 AM
There is a hell of a lot of reading to do in these threads. Add to them the various web pages on this and there is a lot to take in.
I've started this process on my daily driver, 318... bmw (perhaps one day it'll get a warmed over 318 v8 then perhaps the badge won't be so misleading).
Anyhow I'm having some interesting issues with painting mine rustoleum gloss black, I definitely believe for sure now it is in fact the hardest color to do.
I'm getting weird rings/lines in my paint. Here is the latest coat on my hood after sanding some 2000 grit on the 8th coat.
Note: the parts that are really shining are still quite dark black.
It seems to be the coat(s) below, but I've also sanded those coats, perhaps not well enough? the process I followed was 320 grit to get the old paint ruffed up and the pealing clear coat off, then after 2nd coat it was 400 grit, then the 4th coat 400 grit, the 6th and 8th coats were 800 (couldn't get hold of any 600). My paint is pretty close to 50/50 and roughly the thickness of milk, may be a bit thinner. Painting in the Spring Southern California sun with little to no humidity.
Right now on coat 10 I've tried both 1000 and 2000 grit and if I get rid of some of the lines in one spot, another spot seems to "go through" and I have to go after that one. Not enough sanding, not enough dry time between coats (about 3 hours between coats, and a minimum of 6 hours for sanding)? The paint feels very dry when ever I sand or even paint, and I make sure the paint is smooth enough not to catch a finger nail or have any feel-able dips in the paint.
Thanks, and sorry if I'm asking something thats been answered, I tried reading as much of the threads as I possibly could.
Dustin
PS, here is a shot of the "completed" trunk with 6 coats on it, and 600 grit after every other coat and 2000 grit, rubbing compound and a polish. In red I outlined the same problem I'm having as above
Re: New Paint job on a budget thread Part III - 06/03/0902:24 PM
Im wondering how much paint should be on the truck for a single coat? Im following the 4 coat process that another member posted. I just need an idea of how thick a single coat is. Do i follow the rustoleum idea of very thin coats? I dont think so because with only 4 coats that would not be alot of coverage. when should my old paint, and primer be covered, 2nd or 3rd coat? thanks
Re: New Paint job on a budget thread Part III - 06/05/0912:20 AM
hey guys. I havn't really fallen off the face of the earth, just been really buisy. I've redone a few things as far as body work goes, might get some pics soon. All the latest projects are looking really good
Re: New Paint job on a budget thread Part III - 06/05/0904:33 AM
alright i exchanged the primer sealer for the duplicolor heavy build primer. right now ive got all the bondo spread on the trucks dents/rough spots, tomorrow, saturday and sunday i will spend all day sanding the truck as straight as i can.
Quote:
I have amended your recipe for using the Brightside paint
At this point I believe that it is better to plan on four coats. For boats the manufactuer says that two coats of paint straight from the can will do the job. But what we have learned through trial and testing is that a boat owners quest for a high gloss shine is different than our quest for a super-high-gloss shine on a car.
Since I am suggesting cutting the paint with 10% product 333 Brushing liquid for the first two coats... I look at that as only equaling one coat. The third coat is cut with 5% Brushing liquid... because hopefully you are more comfortable with the rolling technique at this point and we are laying on a little more color solids. By the time you hit the fourth layer you can go with straight paint or cut with 5%.
The extra bit of paint using this four coat system will leave you with enough paint on the car ( after having gone through a number of wet sandings that removed some of the paint ) so that you still have plenty for when you go at the paint with the polisher and the compounding polish.
The following recipe may require some alteration on the fly depending on a) whether you encounter problems with any of the layers that needs drastic corrections or repainting.. and b) the choice of color that you have chosen. It would appear that the percentage of solids ( color pigments ) in the various colors varies. One color may provide better coverage then another. I find that red in both Brightside and the Tremclad/Rustoleum is more translucent then say a white or a dark blue.
At this point the bodywork is all done.
Step #1 a) Wash car down thoroughly with cloth and bucket of water with a little bit of liquid detergent ( dish detergent ). Rinse thoroughly. Let sit and thoroughly dry. b) using a Tack cloth wipe down entire body of car. c) Coat #1 thinned 10% with #333. No need to wet sand this step. d) Let paint cure for 24 hours.
Step #2 a) using a Tack cloth wipe down entire body of car to get any dust, bugs, hair or other contaminents that may have fallen on your first layer of paint while it was curing. b) Coat #2 thinned 10% with #333. c) Let dry 24 hours. d) Wet sand with 400 to 600 grit looking to level the surface so that it is level, with no ripples, bubbles, etc. e) Wash car down thoroughly with cloth and bucket of water with a little bit of liquid detergent ( dish detergent ). Rinse thoroughly. Let sit and thoroughly dry.
Step #3 a) using a Tack cloth wipe down entire body of car to get any dust, bugs, hair or other contaminents off the paint. b) Coat #3 thinned 5% with #333. No need to wet sand this step unless there are any visual defects that you want to address. If so...wet sand with 400 to 600 grit looking to level the surface so that it is level, with no ripples, bubbles, etc. e) Wash car down thoroughly with cloth and bucket of water with a little bit of liquid detergent ( dish detergent ). Rinse thoroughly. f) Let sit for 24 hours .
Step 4 a) using a Tack cloth wipe down entire body of car to get any dust, bugs, hair or other contaminents off the paint. b) Coat #4 thinned 5% with #333 or straight from the can ( depending on your confidence level at this point ). c) Let dry 24 hours. d) Wet sand with 800 or 1000 grit looking to level the surface so that it is level, with no ripples, bubbles, etc. e) Wash car down thoroughly with cloth and bucket of water with a little bit of liquid detergent ( dish detergent ). Rinse thoroughly. Let sit and thoroughly dry.
You should at this stage be able to do a 1500 wet sanding and then a 2000 wet sanding - with thorough washings and rinsing at the end of each wet sand session.
The body 'should' have a uniform dull shine at this point with no patches of 'shiny' in the otherwise dulled but somewhat shiney surface.
How long between painting and wetsanding? - Always at least 24 hours... the manufacturer recommends 18 hours... but times will vary due to temperatures, humidity, etc.
How long between wetsanding and painting? The body needs to be thoroughly washed down after the wet sanding. So 24 hours is a good rule of thumb to ensure that no moisture is left in the roughened paint.
How long between wetsanding and polishing? When you get to the final step four.. you will be doing a series of wet sandings, increasing the grit with each sanding. Then you will have to again give the car a thorough wash down. So again it is worthwhile to let the car dry for 24 hours if for no other reason than to give yourself a break and so that you can be 'fresh and wide awake' when you begin the polishing stage.
How long between polishing and waxing? Once you complete your polishing to a level of shine and gloss that is acceptable to you... you can proceed to the wax stage almost immediately to seal up all the work you did.
Hope this info helps...
This was posted by another member here quite a few pages back, i forget where or else i would include the poster name. But he mentions thinning it with 333 (which i have with me right now) 10% and 5% later. I am guessing brightside is different than rustoleum because this seems like barely any thinning. so i would fill my paint cup to 9 and complete it to 10 with the 333 brushing liquid?
69dartgt, is this basically what you did? or did you thin yours more?
THanks! i should be laying paint down in a few days.
Re: New Paint job on a budget thread Part III - 06/05/0904:33 PM
I used mineral spirits and thinned and stirred to the point where when I pulled the stir stick up I'd count 1 thru 10 hoping to see the paint go from a stream off the stick to drops around the count of 6-8 at that point I'd start painting. Hope that makes sense. Nothing wrong with the 333 but figured what the heck nothing to loose. BTW I had to sand my 1st coat off because I put the paint on too thick, many light coasts are better then a few heavy coats.
Posted By: Anonymous
Re: New Paint job on a budget thread Part III - 06/06/0903:56 AM
So been reading this for awhile and decided to give it a shot. Against my tuner religion to sign up for a Mopar site being a JDM head but I have not skimmed or come across anyone who has painted carbon fiber.
Did I miss it or has no one thought about doing it yet? Only reason I am considering it is because I have a carbon fiber hood and due to the elements and the car sitting the hood is now faded. I am very much a fan of the "sleeper" look and would love to paint it but unsure if the process would differ due to the material. Any advice would be awesome.
Re: New Paint job on a budget thread Part III - 06/06/0910:35 PM
welcome, We've had a few tuner guys here before. So I don't think you'll have to worry.
I've seen carbon fiber painted before. The prep prosess isn't any differant from any other matirial, I've got a friend who painted his carbon fiber wing about three years ago and it still looks great.
Posted By: Anonymous
Re: New Paint job on a budget thread Part III - 06/07/0901:06 AM
I was just being a smart guy about the tuner/JDM part.
Would the paint, ratio, and directions still the same or is there something I would need to do differently (i.e. sealant or type of paint to use) since the carbon fiber is not metal/fiberglass?
Re: New Paint job on a budget thread Part III - 06/07/0902:34 AM
try a coat or three of filler primer and then wet sanding it smooth. From what I know carbon fiber has a little texture. Other than that its exactly the same.
Re: New Paint job on a budget thread Part III - 06/10/0903:38 AM
Can i get away with putting the brightside on bare metal? i dont see why it would be a problem unless its just not meant for it. The reason i ask is because the whole inside of my bed is pretty much bare metal from being used alot by the previous owner and i'd rather not buy a bunch more primer and hose it all down with it. I guess if you can't put it on bare metal i will rhino-line the bed but i like a painted bed much more.
ive got the trucks body work 90% done. all filler has been layed out and blocked down, high build has been sprayed on it all i have to do is sand down the highbuild a little.
Re: New Paint job on a budget thread Part III - 06/10/0901:49 PM
1971ford, I used rustoleum's rusty metal primer straight out of the can, I both brushed and rolled it, went on great, no runs, drips or error's, 1qt was more then enough. The the red brightside will cover it great. Mine was super rusty from age so I just used a power steelwire brush to knock down the bad stops and a good wash down with hot soaap and water followed by a wipe down to remove any remaining grease etc.
Re: New Paint job on a budget thread Part III - 06/11/0905:20 AM
hmmmm ok i think ill just pick some of that up. Either that or a rattlecan primer. Man this $50 paintjob has turned into a $200 paintjob so far, but thats because i think i went a little overboard on the paint. I got 3 quarts of red for the top section, interior and inside of bed and i got 2 quarts of white for the bottom section and roof. That was $180. Then the brushing liquid was $30. Foam rollers was something like $15 for a 10 pack. Plus i got some foam brushes, and i got a preval sprayer for hard to get areas like inside the door jambs. Well hey, im still about $1,000 cheaper than what i was going to do with paint and htis way is easier on me.
Re: New Paint job on a budget thread Part III - 06/11/0905:26 AM
ok just to make 100% sure im thinking straight on the paint application. So I take my brightside paint and i thin it down about 5-10 % for the first couple coats... so that was mean i would fill a paint cup to 9 and then top it off at 10 with brushing liquid for a 10% brushing liquid ratio. Then i apply this on the truck very thin. then repeat this until i get total coverage over any underlying colors plus then a couple more coats. sorry im just nervous, i don't want to paint the whole truck and find out I wasted alot of paint by putting it all on too thick or something.I would like to get it right haha.
Re: New Paint job on a budget thread Part III - 06/18/0904:14 AM
little update on the bug. I've been selling off all the old parts, stuff like fenders, hoods, etc. I'm going to buy one of those sliding ragtop sunroofs http://www.slidingragtops.com/7.html so I don't have to deal with all the dents in the roof. I'm only about a $100 away from my goal, so wish me luck
Re: New Paint job on a budget thread Part III - 06/24/0902:30 AM
I'm doing a little touch up on my truck, when I mounted the door mirrors I put them a lot lower then I wanted so its fill the holes repaint and buff the rest of the truck out. Still toying with the idea of painting the top white.
Re: New Paint job on a budget thread Part III - 06/24/0903:11 AM
I still check for post everyday, I still need to finish my engine work before I get around to the body work. Can't wait until the time to roll. Still tossing between silver grey and black. My car has a black vinyl top which I will be keeping and the body is black.
Re: New Paint job on a budget thread Part III - 06/24/0906:34 AM
Quote: I'm doing a little touch up on my truck, when I mounted the door mirrors I put them a lot lower then I wanted so its fill the holes repaint and buff the rest of the truck out. Still toying with the idea of painting the top white.
I've seen your style truck with a two tone paint job before, the red and white were separated by the body line. It looked awesome!!
then again theres always the option of going with a "Dude" tribute
Posted By: Anonymous
Re: New Paint job on a budget thread Part III - 06/24/0910:01 PM
I have been working on my baby for 3 weeks. I laid down some clean metal primer after sanding. First 4 coats of color were 50/50 paint mineral spirits. The next 4 coats have been using a mix of hardener, reducer, mineral spirits and paint.
After the last coat my finish isnt as glossy as it was for some reason. What am I doing wrong? I sanded with 1500 before this coat, do I just have too much orange peel? Im scared to sand too much because even after 9 coats of paint and primer I can still see though some spots. Any ideas?
Re: New Paint job on a budget thread Part III - 06/25/0911:14 PM
hey, I've decided to make an album of some of the best rusto/termclad/brightside paint jobs I've seen on here. If any one has some sugestions or cars they'd like to see in it I'd love some input
Re: New Paint job on a budget thread Part III - 06/29/0906:50 AM
I've been following this thread for a few months now. I've spent hours reading on peoples failures and victories. I decided to try this paint job on my 90' eagle talon awd. I spent A LOT of time on this project but for the $$$$, it turned out pretty good. Let me know what you guys think.
Re: New Paint job on a budget thread Part III - 06/29/0901:16 PM
Quote: I decided to try this paint job on my 90' eagle talon awd. I spent A LOT of time on this project but for the $$$$, it turned out pretty good. Let me know what you guys think.
I'd like to thank the "godfather" who started this all, 69chargereehaa.
Re: New Paint job on a budget thread Part III - 06/29/0901:21 PM
The car looks great. And I love the 'before' picture.. because it reminds me of where I started from AND why I was so thrilled to finally get the car together and looking respectable.
My car sat for quite a while in the same sad and unusable shape as your 'before' pic. It was one thing to get all the mechanics up and functioning - but that final touch of a uniform coat of paint is the one thing that kept it from hitting the streets. Once it got the 'roll your own' paint job I was able to finally bring the car out of the garage and start driving it...
So kudos on the end product. And whenever you have any doubts or qualms about how it looks now - just take a look at your 'before' picture and remember just how far your car has truly come.
.
Posted By: Anonymous
Re: New Paint job on a budget thread Part III - 06/29/0905:39 PM
thanks!!!!
I towed this car home for $400. The motor was laying on the rear seat, it got hit and needed a new front bumper and fender. I also had to strip about 60 coats of paint off the rear bumper.
I got the car running and driving and then dug into the paint.
I used rusto professional thinned w/ mineral spirits until "it's a little thicker then water" It took a few more coats then what I would have wanted but I can't complain, I PAINTED IT WITH A ROLLER
Re: New Paint job on a budget thread Part III - 07/02/0908:44 PM
Done should have taken before and after pictures, but didn't. Monday I'm going to take the Porter-Cable to it with some compound and make the rest look like the touched up area's.
Re: New Paint job on a budget thread Part III - 07/03/0905:46 PM
I'm the guy who painted the vette.... I've had fun this last year letting people look at the thing really close then almost always thinking I'm joking. Pretty fun, actually.
So here I am again. I have just hauled home a 1961 Valiant. I'll be starting the body work soon, and will have it in paint shortly.
- Darrin
Posted By: Anonymous
New Paint job on a budget thread Part III - 07/04/0912:26 AM
Finally started fixing my 65 mustang coupe. Cheapest paint job I could find was $3000 so I decided what do I have to lose. With the $3000 I am saving I can add some more hp to my anemic 6 cyl motor.
Anyways here is what I started with:
I am reversing the color scheme using Brightside Blu-Glo white for the Leman stripes and Flag Blue for the rest of the body.
I did about 4 coats of blue and it looked really orange peely so I sanded it way back. What I found out is I could not push down hard enough with the roller on the cheap throw away plastic paint trays without them collapsing on me. This caused me to have way to much paint on the roller. I went to Lowes and spent 40 cents more and bought a thick plastic tray instead of the cheap ones. What a difference. I was able to press much harder on the roller in the tray removing most of the paint. This allowed me to get a nice thin and smoother coat.
Here is where I am at now:
Here is a link to some more pictures for those who are interested. Rolling a 65 pony
I am also playing with adding pearl to the paint. I kept hearing that it won't work but I am pig headed and needed to try it myself. I made two batches of paint one with Silver Satin Pearl and the other with Purple Pearl to the flag blue and applied each to half a fender skin I had kicking around. So far so good. There does not seem to be any blotchy areas and the pearl seems well disbursed.
Again thanks to all the blazed the trail. I can't wait to go to some car show and tell people I roller painted the car.
Re: New Paint job on a budget thread Part III - 07/04/0904:27 AM
Quote:
I am reversing the color scheme using Brightside Blu-Glo white for the Leman stripes and Flag Blue for the rest of the body.
The Flag Blue looks quite nice. And the white stripe really pops. I was almost wondering how a gray silver stripe might have looked... but after seeing the white... I think you made the right choice.
I think when folks see the kind of 'nice cars' that we have done 'roller jobs' on... it gives them confidence to take a chance with their ride.
Re: New Paint job on a budget thread Part III - 07/04/0904:31 AM
Quote: I'm the guy who painted the vette.... I've had fun this last year letting people look at the thing really close then almost always thinking I'm joking. Pretty fun, actually.
So here I am again. I have just hauled home a 1961 Valiant. I'll be starting the body work soon, and will have it in paint shortly.
- Darrin
The funny part is that the first time is always the hardest, because it is all a bit of a learning curve to figure out what works best for you. BUT everything you learned from the 'first one' is going to flood back in to your memory and the Valiant is going to benefit...
Any choice of color and type of paint yet ?
And that pickup truck tow vehicle looks like it would thank you for a nice 'roll your own' in a high gloss black
Re: New Paint job on a budget thread Part III - 07/04/0905:06 AM
Quote:
The funny part is that the first time is always the hardest, because it is all a bit of a learning curve to figure out what works best for you. BUT everything you learned from the 'first one' is going to flood back in to your memory and the Valiant is going to benefit...
Any choice of color and type of paint yet ?
And that pickup truck tow vehicle looks like it would thank you for a nice 'roll your own' in a high gloss black
.
I've always been a hands on guy. I'm sure the paint will be pretty easy to get back into. I'm actually looking at painting it Rusto white, kinda like the old race cars in 1960 and 1961 (Marvin Panch & Richard Petty).
My brother just dug out an old 72 duster snorkel hood scoop that looks pretty cool on the Valiant. I'm heading towards the 225 race stuff anyways... (18 cars at Woodburn Oregon dragstrip with slant six 3 weeks ago)
As for the 70 Chevy 4x4 (Dad was 2nd owner from 1976) I have to wait a while before he lets me do too much to it... I have wheels, power steering, and yes, paint ready for it soon. 86k original on truck with a 396 375HP from a 69 chevelle. (I told dad he wasn't going to get rid of it...
People still can't believe the vette was rolled.
Posted By: Anonymous
Re: New Paint job on a budget thread Part III - 07/04/0903:15 PM
Here are some pic's of my pearl test piece.. This is one coat straight flag blue coat with one coat of the pearl on top. I did not prep the fender and this definitely shows. The pictures do not correctly reflect how the piece looks. It actually looks better than the pictures. I will play around with the camera and see if I can improve it.
Satin Silver:
Purple:
Here you can see the difference between the purple pearl (left) and the silver satin (right)
I am going to prep the test piece better and try again.
Re: New Paint job on a budget thread Part III - 07/06/0905:51 AM
excitingness!
tomorrow... i begin painting my '69 f100 two tone Brightside red/white!!! I am going to lay the first coat on the inside of the cab, doors, front of bed, rear of cab, edges of fenders, jambs and firewall. then i am going to put all body panels back on and then it will be a truck again after a few years! then i am going to spend time sanding the body then paint.
i will be updating my whole paint job here with pictures. hopefully, the whole truck will be painted all coats within 1.5 months.
Re: New Paint job on a budget thread Part III - 07/06/0910:53 PM
wow, finally some paint on the truck! here is the first coat of my brightside fire red and off white.
I am painting everything that i wont be able to get to when the body is put together.
the nice thing is that everything i am painting this week is stuff that you won't see easily so its good practice for the exterior body.
a few first coat shots. the part that appears i "missed" on the firewall is going to be black. once i hang the inner fender sim going to paint that part which will be on the wheel well side, black. i am going to tape it in a later coat for a clean line. it sure will look patriotic with the old blue paint, the red and the white FYI there used to be a big gaping speaker whole in one of the doors
i can't wait until saturday when its all fully coated and i start putting it back together so i can paint the whole body!
Re: New Paint job on a budget thread Part III - 07/07/0903:35 AM
thanks! you're bug is looking good too. we have both been on this thread for a while and now we are finally getting paint on ourselves!
I can't wait to get that second coat on tomorrow! I think i am applying the coats at a good thickness, if you look at the kickpanel you can see where i welded/ground holes shut. Painting a project is so exciting!
Re: New Paint job on a budget thread Part III - 07/07/0903:45 AM
thank you
I'm still pretty behind on body work. Plus I'm waiting on having enough money to get the rag top kit that'll finish the roof off. So I've still got a ways to go, but you look like your on the home stretch!!
Re: New Paint job on a budget thread Part III - 07/08/0905:34 AM
coat number two went on this morning! only took me 1.5 hours this time!
tomorrow i wake up early and wetsand it all, then wait to the afternoon when its dry and lay on coat 3, then coat 4 on thursday. then put it back together on monday
Re: New Paint job on a budget thread Part III - 07/10/0906:36 AM
coat 3 yesterday.... orange peel. can't wait to buff it out!
coat 4... I had to do this after work today and it got dark as i finished... camera's flash wasnt working so here are the horrible pictures. Im going to put whole body back together in the next couple days and ill break out the good camera for that. anyways... i am done painting for a while as i sand the exterior body
oh and not to mention that i havent seen it in sunlight yet! im going to throw some wheels on it and roll it outside to put it back together and get pictures of the real color, not pictures of a color that the flash brightened and the tan garage roof affected.
soooo excited to put it back together and rol it out!! Then again im going to see some spots that i didnt cover well probably. ill probably have to do some touch up.
Re: New Paint job on a budget thread Part III - 07/12/0903:16 AM
yeah i can't wait to drive it! i have only driven once, when i drove it around the parking lot when i bought it. that as for about 45 seconds, i wish i drove it more! also im 15 and i just got my permit so im driving my other truck (71 f250 offroad racer) but i want this one on the road!
According to the previos owner, it hasn't been driven on the streets in 17 years.
Re: New Paint job on a budget thread Part III - 07/12/0903:39 AM
Quote: According to the previos owner, it hasn't been driven on the streets in 17 years.[/image]
If that is the case, make sure you check the brake system out and look for leaks, at the backing plates and rear axle seals. Don't ask me how I know this. Take a little time to double check everything. Be safe. BTW at 15 I have 3 grandkids that age...
Re: New Paint job on a budget thread Part III - 07/12/0904:12 AM
oh trust me, not one thing on this truck isn't getting rebuilt! I took the truck down to the bare metal frame, new bushings, bolts all that. i swapped on a disk brake front end as well, but i still have to completely rebuild the brake system, steering, and the rearend as well as swap out the gears.
Posted By: Anonymous
Re: New Paint job on a budget thread Part III - 07/14/0901:26 AM
I borrowed this from a buddy of mine. The only way to get straight lines...
Anyways here is where I'm at on the mustang, I am pretty happy so far.
Re: New Paint job on a budget thread Part III - 07/14/0907:08 AM
Quote: yeah i can't wait to drive it! i have only driven once, when i drove it around the parking lot when i bought it. that as for about 45 seconds, i wish i drove it more! also im 15 and i just got my permit so im driving my other truck (71 f250 offroad racer) but i want this one on the road!
According to the previos owner, it hasn't been driven on the streets in 17 years.
cool stuff! I've had my bug since I was twelve, I've rebuilt the motor, redone the brakes, and done an entire back date. It was a 72 and now its a 63!!
I just turned 16 so I'm hoping to get my permit soon
Re: New Paint job on a budget thread Part III - 07/18/0912:41 AM
Quote: Looks Good!!
Without going through the 3 posts...Has anyone tried to roll the Duplicolor Premixed paint for spray guns? Would they be too thinned out??
You could try it on a test piece, I thin to about what I would use in a spraygun so try it without thinning. Lets see a picture if you can.
Posted By: Anonymous
Re: New Paint job on a budget thread Part III - 07/18/0903:10 AM
Hey all, new guy here.
I'm about to paint my car with gloss black Topside rustoleum. I was wondering has anyone put hardener in there paint before rolling it on? Is hardness a problem?
Hello I have been lurking and looking at the thread and the method for a few years. Thanks for all the contributors that share the info, I now have an 86 MR2 that is covered with 6 coats of Rustoleum Sun Rise Red.
The car looked good. There are still a couple of areas that need more coverage over the darker shade primer color. And I still have to wait a while for the paint to harden before the last wetsanding and polishing step.
I am the first one to admit that I made mistakes and some area looked really bad plus a lot of orange peel of different levels. And this is what I found.
I found that if you have the mixture of paint and thinner close. The paint will have enough time to level out.
The amount of paint on the roller ..... for me seems to have some effect. I think the ideal situation is to have the whole panel drying together after the paint completely saturated. If it does not run, leave it. If there is some unevenness, too much paint from end of roller, go over with a pretty dry roller and just run it slowly over the the area to smooth it out. Again keeping the whole area as one.
The problem is some areas got painted first and is drying faster. I found that if I had to fix a run, to run the roller over, not having enough paint on the surface or roller, the surface will dry to have sever small orange peel.
Now it's funny to look at the runs. There is no orange peel in the run. ?????
Now I think too much paint on the roller/surface does not give more orange peel than not enough paint.
The upper part, I went over with a very wet roller thus smoother. But the part not went over with a wet roller is rougher.
--> laying down too thin a coat can lead to orange peel. (anytime when the paint is drying too fast)
Hmmm... my initial thoughts on seeing that orange peel was... break out the sanding paper and knock that orangy surface back to smooth. Then carry on painting from that point.
It's enough to make you cry... when you take five steps forward and have to take three steps backward. But the price and effort you pay now will reap dividends later when the orange peel is just a distant memory and a glossy shine is looking you in the face.
On my car... everything worked out perfect EXCEPT the trunk lid. I had to keep re-working that dim-damn trunk... over and over.. until I finally got it to a level where it was as respectable as the rest of the car.
But be agressive on that orange peel sanding and reach a smooth starting point from which to start re-applying paint.
Quote: When I wipe something down I use two rags, one with solvent the other dry, wipe then dry turning the rags often.
I agree... it's possible that there are all kinds of foreign matter on that 'primed' hood.
Its the same type of situation as 'brand new' reproduction fiberglass or molded plastic parts. In the molds, they use some kind of liquid to allow the parts to be removed easily from the molds. That coating is like a paint repellant
So you sand down the priming on metal parts, wipe it down with the mineral spirits and wipe dry with a clean cloth.
With the 'brand new' fiberglass parts you use a very fine sanding paper to remove the outer coating and then wipe down with a mineral soaked cloth to break up any surfactants that might still be there.
The 'brand new' injected plastic parts usually just need a wipe down with a mineral soaked cloth - unless of course they have sprayed some kind of 'primer' on to the plastic part. Then you would just lightly sand the surface and then follow up with the dampened mineral spirit cloth to rid any remaining surfactants.
thank you for the advice guys, I'll try it and see if it works.
Posted By: Anonymous
Re: Myth of Orange Peel! - 07/23/0907:32 PM
I am finishing a fiberglass hardtop for my MGB. I'm doing it on a budget, so I've been investigating roll on/brush on methods in lieu of a $400 professional spray. I don't have any spray equipment myself.
This forum has confirmed my research on Interlux topsides paint as a possibility.
I've had some concerns that the final coat will show brush marks and lint/hair/etc. unless I wet sand and polish after the final coat. However, Interlux technicals advise not to wet sand or polish the final coat, or I will damage the finish and destroy the gloss. Reading through the forums, I find that some do final wet sanding, some do not with the Brightsides paint. Do you have any experience with wet sanding these marine paints?
I was thinking to use the two part Perfection, as I thought it would look better, and be a more durable finish for a hardtop that is being taken on and off the car fairly frequently. But after reading the forums, I'm not sure any more. Cost difference is not an issue, as I'm not using much paint on the top. Is Brightsides adequate? Has anyone experience in wet sanding the final coat of the two part system?
I was also thinking that the two part system, at least the primer phase, would be better for refinishing of an old fiberglass (gelcoated) top to stabilize the surface. Am I being paranoid?
I was also thinking that the two part system, at least the primer phase, would be better for refinishing of an old fiberglass (gelcoated) top to stabilize the surface. Am I being paranoid?
The Brightside paint and a removable fiberglass convertible top are a natural match - since the Brightside was designed for use on boats
I would sand that top with a 600 grit... and just get it as smooth and dull as possible ( to provide a good surface for the paint to anchor itself on.
As for doing wet sanding on Brightside paint. You must remember that the final shine requirements for a car compared to a boat are different. For the car... we want the maximum shine. In order to get the maximum shine you have to wetsand things as you go along and with the final coat in order to maximize the smoothness of the surface. The smoother the surface... the more gloss and reflection it will have.
As for the durability.. I do not think you are going to encounter any difference in how you would handle a Brightside rolled top... as compared to one that had been sprayed with automotive paint. Either way you will be exercising caution when removing or storing the top.
Further on the durability... just remember that it is a 'boat paint'... and as such it is designed to take all the typical abuses ( both physical and enviromental ) that a boat would be subject to.
I would stick with the one stage Brightside paint ( as compared to the two stage version ), simply because it is more forgiving of mistakes during the rolling process.
But if you follow the suggestions posted regarding the rolling process, you should not encounter glaring brush streaks etc.
In fact... you probably have one of the most ideal projects for doing a 'roll you own'. It is small and relatively flat surface. You can probably lay 20 coats of ultra-thinned paint on to that puppy and still have it all finished in two or three weeks ( and that is including all the time spent doing wetsanding etc ).
Quote: Has anyone here used a Porter Cable 7424 for correction of paint after wet sanding?
I'm curious to see some sample of this.
I LOVE my Porter Cable 7424... and I use it whenever I am bored and looking for a fun way to kill an hour polishing my cars
I don't really understand what you mean by 'correction' of paint after wet sanding.
If your wet sanding has not gotten the painted surface smooth enough... about the only use the P&C would be... is if you slapped the wooly bonnet on it and used it to try to further smoother the surface.
But what you must remember is that to go from a completed paint job to a finished product.... you go through the wetsanding stages by using finer and finer grit sand paper. The whole point being that you are improving on the smoothness of each previous level of sanding.
Normally... the Porter Cable comes to work once you have finally used sand paper at the highest grit level and the sand paper can no longer improve on the smoothness of the painted surface.
Or a simply way of looking at things... the sand paper... through the various grits... takes you from 800 grit... up to 2000 grit. AND the Porter Cable is simply a further refining of the grit you are throwing at that surface to smoothen it... So the P&C is going from 2000 grit and up to a possible maximum of 4000 grit ( depending on what type of product you are applying to the painted surface - ie rubbing compound or polish )
Clarification : just remember that a "polish' is simply a further higher level of 'gritiness' and should not be mistaken for the 'waxing or protective stage'. Manufacturers are too blame for the confusion between polishing products and waxing products.
BUT if your painted surface is sitting at roughly the appearance of an 800 grit... well it is kind of useless trying to put the P&C to work using its 2000 to 4000 grit to try to knock back the 800 grit.
Now, I have heard of some folks who swear that by using the 'wooly bonnet' on their paint... they are able to get a more agressive polishing of the surface. So for arguments sake, let us just specualte or guess that the wooly bonnet is providing say a 1000 or 1500 'grit equivalent'.
So the 'wooly bonnet' might be useful to go nuts on an 800 grit equivalent surface and rapidly get it to a 1000 or 1500 'grit equivalent'. BUT the warning here is that because it is more agressive then a 'wet sanding'... you run the risk of literally polishing away your paint IF you allow the polisher to remain on one spot too long. So it is do-able, but you must take great care when doing it.
As for me... I would tend to think that the P&C's greatest charm and benefits come when you are using it to :
a ) applying a rubbing compound ( like the Turtle Wax rubbing compound - the murky brown clay looking stuff - or something like the 3m or other manufacturer type 'rubbing compounds'. At this point the 'rubbing compound is providing the equivalent to a 2000 - 3000 grit equivalent - and is really just further enhancing the smoothness of the surface.
b ) applying a good quality polishing compound which is simply taking things to yet a higher level of fine gritiness ( let's say from 3000 to 4500 grit )
c ) applying a good quality waxing compound, which should have no gritiness to it... but instead is attempting to seal the painted surface and lay down a protective barrier on to the paint to keep the Ultraviolet out, the oxygen out, water out and repel any other crapola that might land on the paint.
One thing you need to watch for, as you shop the aisles at your local automotive shop for rubbing compounds, waxes and polishes is to read carefully what each of the products is designed to do by the manufacturers.
For example, there are a lot of 'hybrid' products out there that 'try' to make your life easier by combining two aspects of the task together. For example... a wax with a cleaner, or a wax with a polish, or inversely a polish with a wax etc.
In your mind....... as you pick the products or even the method by which to apply them, you have to visualize how each of those products are helping you to progress further towards achieving the absolute smoothness of the surface that fits with your level of patience
So I hope this long winded explanation touches on some things and explains the process better, so that you can bring about your own conclusion on whether the Porter and Cable should be deployed at a certain stage to accomplish some 'corrective' measure.....
The simple and short answer would be " IF you figure that the finish needs to be additionally tweaked to get it smooth... the odds are that the easiest answer probably rest with choosing the proper grit of sand paper and doing some further wet sanding.... and to save the Porter and Cable for the finishing tweaking of the surface to maximize its final smoothness.
Re: New Paint job on a budget thread Part III - 07/29/0903:14 PM
Looks good!! You can always tell a good paint job when you can see a barefoot in the reflection Glad the hood came out so good. Keep taking your time and you will have a car to be proud of.
Re: New Paint job on a budget thread Part III - 07/29/0908:48 PM
THANK YOU!!!
I think thats only about three coats, I'm still going with brightside but I'm using the Rusto to get good coverage first.
I decided to push the car out into the drive way to get a look at it out in the sun. The paint is so shiney its hurting my eyes...in a good way I'm finnaly going over my car!!
it actualy looks much better in person, my camera sucks
Re: New Paint job on a budget thread Part III - 07/30/0902:21 AM
I'm curious what is your plan as to how you are going to paint the rest of the car, a panel at a time? I'm thinking at some point you need to do the whole car in one day, maybe that light color won't be a problem but seems to me at some stage you need to coat the car all in one so some aren't darker or lighter then others?
Re: New Paint job on a budget thread Part III - 08/01/0908:13 AM
painting an old beetle on a budget..... but had money to buy that thing
where's the scratching head smiley???
Posted By: Anonymous
Re: New Paint job on a budget thread Part III - 08/01/0903:28 PM
I am new here and a Chevy owner (69 Chevelle). Just looking for opinions on the color combo. When I got the car in 85 it was black/parchment. I am thinking about putting it bac to factory Dover White/Parchment, but am not sure if I like the combo. Had the body off, new quarters, fenders, and it is an original SS car with the original #'s matching standard bore engine/trans/rear end. I mixed up some Rustoleum white and almond to match the factory color. Please click on the link below.
Re: New Paint job on a budget thread Part III - 08/01/0908:13 PM
This may be a Mopar site, but "all that other junk" is more than welcome in this thread. One of the guys with the best advice did his work on a Mustang. This topic is open to ALL who wishes to try it.
Re: New Paint job on a budget thread Part III - 08/01/0908:22 PM
Barry, I would say that all depends on what you want for the look of the car. All though it is a numbers matching car, my guess is you aren't concerned with overall value since you are using the rustoleum roll-on approach to painting it. In my opinion, white is such a bland color. I would say paint it however you want, just make it look good.
BTW, I may be a Mopar guy myself, but my first car was a 68 Chevelle.
Posted By: Anonymous
Re: New Paint job on a budget thread Part III - 08/02/0912:25 AM
hey barry i was an earlier member years ago and i painted my chevelle with rusto and it looks good trust me i have a yellow and black combo
Re: New Paint job on a budget thread Part III - 08/02/0903:39 AM
Quote: I am new here and a Chevy owner (69 Chevelle). Just looking for opinions on the color combo. When I got the car in 85 it was black/parchment.
Almond white looks clean and sharp. I would probably go that route then 'yet another black' one... And best of all... the almond white combo will bounce heat, hide dust and bird droppings... and is the most forgiving for any imperfections during the painting process.
White with parchment works for me... and reminds me of the color combo on the 70's Z-28s..
Re: New Paint job on a budget thread Part III - 08/02/0908:08 AM
Quote:
Quote: This a mopar site. We don't care about that other junk.
Completely uncalled for. There have been owners of LOTS of different makes involved in this thread, and as stated, the most helpful is a Mustang guy.
not only am I a VW guy but I'm also a Mopar guy, I love anything with a 318 to a 440 and anthing imbetween. My dad is the Ford guy (his car if you haven't figured that out by now ) but I definatly know how to appriciate a very fine peice of artwork such as the Shelby...although a new Challenger RT8 would have been nice
Posted By: Anonymous
Re: New Paint job on a budget thread Part III - 08/02/0908:10 AM
hi guys i am back the cheap export spray cans was a bad idea so i will now be going brightside black.
Posted By: Anonymous
Re: New Paint job on a budget thread Part III - 08/02/0905:14 PM
I used to kinda be that way too. If it wasn't a Chevelle, it was junk. I understand that, and also expected to see it sooner or later. Now I want at least one of everything and will go to any kind of car show and drool. The reason I went ahead and began rolling the car is because I didn't want to spend a ton of money to have it painted and then hate the color. I know myself, and if I got it home and didn't like it, I would probably go out in the garage at 2am and start sanding because I wouldn't be able to stand it. I've had the car since I was 17 (1985) and will give it to one of my kids one of these days. Resale value is of no interest, but part of me thinks that since it is an original big block car, and the #'s match, I should put it back to like new condition. Part of me wants to put it back like it was when I bought it and fell in love with it to "yet another black one", and there are a lot of them. Also, I have never personally seen another Dover White/Parchment one. Very few people I've talked to have. I am incredibly surprized at how well the roller paint job can turn out and REALLY appreciate the information here and owe the man with the orange 69 Charger a big thanks for getting it all started.
Re: New Paint job on a budget thread Part III - 08/02/0910:08 PM
Quote: I used to kinda be that way too. If it wasn't a Chevelle, it was junk. I understand that, and also expected to see it sooner or later.
That's cool. I think maybe the longer members here may have been offended by the other guys comments. I know I was. Over three incarnations of this topic, I don't know of anyone else who has ever been so narrow minded as this guy. And that's after people have posted about their Toyota's, Honda's, VW's, Saab's, and whatever they drive over in other countries. All have been welcomed. I'm sure glad this guy doesn't speak for me.
YoungGun, I'm not a real big fan of Bug's, but I've seen some pretty cool ones over the years. I remember a couple from when I lived in Phoenix. One was a Baja Bug with a 455 Olds with the transaxle mounted in the back! And another was a custom shorty Bug with a one piece nose and a one piece fiberglass roadster body. You lifted the nose, then tilted the body forward to get to the engine. I may have some pics around. I'll have to see if I can find them and post them for you, if you want.
Re: New Paint job on a budget thread Part III - 08/02/0911:45 PM
Quote:
I have never personally seen another Dover White/Parchment one. Very few people I've talked to have. I am incredibly surprized at how well the roller paint job can turn out and REALLY appreciate the information here and owe the man with the orange 69 Charger a big thanks for getting it all started.
I think we all have gone through the 'great color debate' in our minds. My McLaren Mustang... came from the factory black, was converted by ASC McLaren and painted a bright red... a subsequent owner painted the car back to black... I got my hands on it and I went through the same 'color debate' in my mind.
In the end... I took the car back to Fire Red... because I didn't want to endure the hassles and patience required to get things to a level of perfection required for black.
BUT in my heart... the color I truly want on that car is the Ford Mineral Gray that they used on the 2007 Mustangs. Because in my heart I really believe that ultimately you need to slap a color on to the car that PLEASES YOU ! To h*ll with purist who will turn up their snoot if it is not a concours matching color... To h*ll with folks who might not like YOUR CHOICE of color. The bottom line is to do whatever satisfies you. Your the dude that has to pay the bills... so who is a stranger or family to tell YOU what color 'it should be'.
At some point in the future... when money is a plenty and I can afford it... my car will ultimately lose it's 'roll your own' paint job and graduate to the genuine Ford Mineral Gray paint job done in the top of the line polyurathane. BUT until that magic bag of money drops in to my lap, I am more then pleased to enjoy my ride in its 'roll your own' Fire Red. Chicks dig red sportscars anyhow
Another thing to think about regarding color choices... is that the color palettes of various cars over the years has been overly influence by Detroit designers who in some fashionable way DICTATE to the market ( consumers ) what color YOU may have.
Sadly these Detroit fashion designers did not always make available the colors that were most flattering for the particular body line or look of a car. That is the beauty of paint shops ( or even within the limited color palette of the roll-your-owns' in that we can use colors that were not made available.
In the end... we should all fall back to the immortal words of William Shakespeare... who said : " To thine own self be true "... and that in a nutshell sums it all up... do what pleases you...
Re: New Paint job on a budget thread Part III - 08/03/0912:32 AM
in the very far future I plan on stuffing in a 2.0 Porsche 914 engine in it. The car only weighes about 1000lb so power to weight ratio will make it insane, way more than I need!
but for now I love it, even my Shelby driving dad likes it. The only thing I can compare driving a VW to would be like driving a go cart at the fair. Not to mention they have really tourqey bottom ends.
Re: New Paint job on a budget thread Part III - 08/03/0906:26 PM
Quote: The only thing I can compare driving a VW to would be like driving a go cart at the fair.
growing up VW's were some of the only cars we could afford. Unfortunately, comparing it to a go cart is pretty much dead on.
Yes we even had a bug that my dad drove to work for a few years. He would have to dress in his hunting gear to stay warm enough in the winter, especially since he had to drive with the window down so he could scrape the outside of the windshield while he drove.
Re: New Paint job on a budget thread Part III - 08/03/0908:24 PM
lol, yeah the defrosters aren't to up to date on these cars. Considering they are 1930's technology.
I still like em none the less, my mom was the same way. Every one in her family always had VW's. She said they weren't as cool as they are now. Just basic transportation.
Re: New Paint job on a budget thread Part III - 08/05/0912:09 AM
Here�s an update. I finished my 69 Bug with Rustoleum in August 2007. It has lived mostly outside since then, and been in daily use. It�s had one wax job, and nothing special as far as care. The paint still looks great, the car gets lots of compliments, and I�m a happy camper. Couple months ago it got swiped on the front fender ( my wife!), so I pulled the fender, straightened it out, 4 coats of paint and it looks terrific.
This is a great way to make your car look decent at a very reasonable cost. You are trading your time for money, but it�s been a good deal for me.
Re: New Paint job on a budget thread Part III - 08/06/0901:01 PM
OK, I spent about a week using the roller method to paint my truck, and here's how it went.
DAY 1
I decided to go with the Gloss White, since I would not have to worry about it fading too much. I spent an entire day prepping, namely taping around the headlights, tail lights, and grill and rubber around the windows. Then I got some 120 grit sandpaper and went over the entire truck, then 220, then 400. Then i wiped the truck down with a damp cloth (probably should have used mineral spirits though). That was a lot of work, and I assumed the worse was over.
DAY 2
The next day, I mixed up some primer with the gloss white, about 50-50 (in hindsight, I think this was dumb and feel I should have used straight primer) Then I thinned the mix out with mineral spirits, to about the consistency of milk. It was around 105 degrees that day, so the paint did not need a whole lot of thinning. I think I used between 1/2 and 1/3 mineral spirits. So I put on the first coat.
I had previously done a test section on the inside of my tailgate which yielded some impressive results once wet sanded. However, I found that the paint ran like crazy when applying it to the sides of the truck. Also, many drips would occur several minutes after the paint had been applied, while I was working on a different panel. So needless to say, I got a ton of drips, probably due mostly to putting the paint on too thick. I figured (wrongly) I could just sand out the drips the next day. After this coat dried, I applied a second coat and let it dry overnight.
I saw a lot of orange peel finish before going to bed, but assumed it would level out. It didn't.
DAY 3
I could see the paint was obviously not dry, so I gave it an extra day to dry.
DAY 4
I got out some 600 grit paper and tried wet sanding, but soon discovered that the paint was still only partially dry. And the drips (which I most wanted to sand down) were quite rubbery and could be scored easily with my fingernail. When I tried to sand them, I ended up sanding off all the paint around the drip, plus clogging up the sandpaper. Also, the paint went on quite rough and failed to "level out" like i expected. Also, in addition to drips, I had roller marks everywhere, plus terrible orange peel texture. The roller marks were a nightmare to try to sand down, probably more difficult than the drips.
So I smoothed out the paint the best I could and went through about 10 sheets of wet/dry sandpaper of various grits. Some places I had sanded right through to the undercoat, and there were so many drips and roller marks that it would have taken days (and most of the paint I had just applied) to smooth out every single one.
So I mixed up some paint and mineral spirits for coat # 3, assuming that the new paint would smooth over some of the orange peel and mistakes I made on coats #1 and #2, but nothing doing.
You could see every little imperfection, and the original factory paint was still showing through in lots of places (probably my fault for going from factory metallic blue to white). Worse yet, the Rustoleum / mineral spirits mix seemed to be beading right off an areas where the factory paint had been exposed by excessive wet sanding. VERY frustrating.
Also, I can't emphasize enough how important it is to lay down your first two coats smoothly, without roller marks or drips. Applied coat # 4 that night.
DAY 5
Another wet sand, still using 400 grit paper. I took off a ton of paint I had applied the day before, and tried as hard as I could to smooth everything out and spent a good 6 hours wet sanding. Both hands had blisters and I kept getting blood on the white paint from my hands, so i had to wear plastic gloves to prevent this from happening.
I was determined to have a smooth finish for coats #5 and #6, and I think I accomplished this. However, I still got nasty orange peel and roller marks, no matter how careful I was. I did develop a game I would play in my head, to keep from applying too much paint. I would tell myself that the paint coat $1000 an ounce, and my goal was to use as little of it as possible. This worked well to keep me from putting the paint on too thick.
So applied coats #5 and #6, which were supposed to be the last ones, but there were still spots showing through. I stupidly hit the exposed spots with primer white just before painting, but the primer, being slightly darker was now showing through quite badly. So I decided I was going to need 8 coats total instead of 6.
DAY 6
More wet sanding, applied coats #7 and #8.
This was a week ago, and I'm still waiting for the paint to FULLY dry before I do the final wet sand. Meanwhile, I bought a can of spray on Gloss White and have been touching up the door jambs and I took the bed off and sprayed in between the bed and the cab. It looks fine now because it's pretty dark in there and you can't tell it was sprayed on. BTW, the spray-on paint goes on A LOT smoother than I was ever able to get the regular paint to go on.
So all in all, this was a hell of a lot more work than I anticipated, and the drying time of the paint has been a major headache, along with the roller marks and orange peel finish. So I don't know if I would recommend this method unless you have a huge big chunk of time on your hands.
I never did see this "self leveling" phenomenon occur. The paint went on about as smooth as interior paint in your house does with a roller (maybe a little smoother). I was not impressed at all, and the wet sanding is an absolute nightmare.
If I had it to do over again, I think I would take extraordinary care to lay the paint on smoothly, and just put on 6-8 coats. Then let it dry for a week to 10 days and then worry about wet sanding. Because I kept losing all the smoothness I had gained each time I put on a new coat. All that wet sanding between coats was totally wasted effort, I thought
Re: New Paint job on a budget thread Part III(help!) - 08/07/0912:17 AM
Hi, I've been reading a lot on this forum, and i really wanna do this to my Van, which is yellow on top and white on bottom, I was reading a lot about the method(the 50$ with RUSTALEUM), but i'm not exactly sure what materials to use. I'm not sure if I wanna use Primer(which one??), and after that i'm not sure about the using rollers, i found this and wondered if this would substitute all(primer,mix):
Re: New Paint job on a budget thread Part III - 08/07/0912:24 AM
This is UNREAL! I laid out coats 4 and 5 on the hood, trunklid and fenders of my Chevelle, thinned it so much I was scared and after it sat for about 20 minutes, it looks GREAT! My earlier coats were too thick and had orange peel about like DuPont Centari used to. I took my time wetsanding and thinned the paint more and there is NO orange peel and no runs. It is very humid in the St Louis area right now, and the only bad spots are where sweat hit the paint. I figure 2-3 more coats and it should look beautiful. I can't thank you all on this board enough.
Posted By: Anonymous
Re: New Paint job on a budget thread Part III(help!) - 08/07/0912:28 AM
My roof was bare sandblasted metal, my quarters and fenders had the factory primer that new sheet metal comes with and my doors, hood and trunklid had $1400 worth of bodywork, primer and white sealer on them. There is NO difference in how the paint turns out. The primered parts looked like they covered better at first becaust the primer was white, but once you get about 4 coats on, there is no difference. Unless you are smoothing something out with a high build primer, don't waste the time. Spend 10 bucks on a package of 10 high density foam rollers, get the mineral spirits and a gallon of whatever color you want and go to town.
Re: New Paint job on a budget thread Part III(help!) - 08/07/0901:30 AM
I don't know that I would say it's a "no no" at all, as long as it's compatable. I know that there has always been a general "rule" drilled inot all of our heads that you have to primer everything, but it doesn't apply with this paint. Look at 69Charger's original posts and he said it over and over, "no need to primer with this paint", and he was right, you can go direct to metal with it, or paint over primer, paint, etc.
Re: New Paint job on a budget thread Part III(help!) - 08/07/0906:02 PM
Quote: I don't know that I would say it's a "no no" at all, as long as it's compatable. I know that there has always been a general "rule" drilled inot all of our heads that you have to primer everything, but it doesn't apply with this paint. Look at 69Charger's original posts and he said it over and over, "no need to primer with this paint", and he was right, you can go direct to metal with it, or paint over primer, paint, etc.
Actually the rule of thumb about whether to use primer or not......
a ) if you have a car of many colors - it pays to primer the car all to one uniform color. It just makes the later painting easier and more evenly colored as you proceed. It could save you the effort of one or two painted coats later...
b ) if you have a relatively rough sanded surface to start with - you might use the primer to build up the surface so that it can be sanded smooth. The idea being that the smoother the starting surface, the better the paint will apply and the shinier the end product.
Otherwise, the Brightside paint or the Rustoleum/Tremclad paint can go directly on without a primer. Basically both paints seal out the oxygen from getting to the exposed metal ( if there is any ) and that does the anti-rust function of a primer.
Re: New Paint job on a budget thread Part III(help!) - 08/07/0909:12 PM
I used Rustoleoms rusty metal primer in the rattle can and rolled Brightside over that. On my door I used lacquer primer and rolled Brightside over that. I feel better having primer on bare metal rather then rolling over bare metal.
It's a Rustoleum product... and so I would assume that to get the 2X coverage they have just doubled up the amount of pigment being sprayed.
It should be compatible as long as it is the pigment that has been doubled and not the amount of paint being sprayed. Even if it is a different formulation of paint and carrier - the odds are that 'since it is Rustoleum, it in theory should be compatible with previous Rustoleum paints - and that in turn would mean that it is compatible with Brightside.
Re: New Paint job on a budget thread Part III - 08/09/0906:37 PM
Quote: Here�s an update. I finished my 69 Bug with Rustoleum in August 2007. It has lived mostly outside since then, and been in daily use. It�s had one wax job, and nothing special as far as care. The paint still looks great, the car gets lots of compliments, and I�m a happy camper. Couple months ago it got swiped on the front fender ( my wife!), so I pulled the fender, straightened it out, 4 coats of paint and it looks terrific.
This is a great way to make your car look decent at a very reasonable cost. You are trading your time for money, but it�s been a good deal for me.
Posted By: Anonymous
Re: New Paint job on a budget thread Part III - 08/10/0902:37 AM
Against everyones advice regarding adding pearl to a rolling paint job, I decided to give it a try. I figure if it didn't work 220 grit paper and a couple of hours of wetsanding would bring me back to square one.
I added Satin Silver Pearl from "Painting with Pearl", and rolled 3 coats. I added .75 tablespoons per 200 ml of brightside paint. Each time before loading the roller I would stir the paint to make sure the pearl was well mixed. I spread the paint in many direction to reduce the chances of streaking and finished with lightly rolling in one direction along the length of the car.
I think it looks pretty good and I did not see the streaking that was expected and it did make the paint sparkle in the sun light.
I am now starting the final wetsanding process, I plan on finishing one panel including polishing to see how it turns out, before moving on.
Re: New Paint job on a budget thread Part III - 08/10/0907:23 AM
today I decided to play around with buffing, I wet sanded with 1000 grit and used some cheap scratch remover stuff (one of those gimik waxes thats supposed to magicly remove giant scars in your paint) I worked it in for a while and the results were shocking!!!
I can't even fathom what it will look like once I use Brightside, 2000 grit, a buffer, polishing compound, and wax!!!
Posted By: Anonymous
Re: New Paint job on a budget thread Part III - 08/10/0909:01 AM
making a few changes dash will now be black and gunmetal grey got new sports steering wheel car is going brightside black
Posted By: Anonymous
Re: New Paint job on a budget thread Part III - 08/10/0909:04 AM
Re: New Paint job on a budget thread Part III - 08/11/0905:00 PM
Thanks for the attaboy Younggun53. I think you�ll be really happy with your results. The bug was my first time with body work, paint prep and painting. My only regret is that I got impatient during prep and didn�t block sand as well as I should have. The finish will show every short cut. Most folks can�t see the problems, but I can. That said, I feel like a million bucks driving a car that I rescued from the crusher and restored myself. Can�t beat that with a stick !
Re: New Paint job on a budget thread Part III - 08/12/0903:25 AM
Beaverton is cool, I used to live on Allen Ave. I really miss it, especially the Summers.
Anybody see a problem with the method I suggested above, which eliminates wet sanding between coats?
My idea was, do all your body work, then sand with 120, then 220, and then 400. The a coat of primer, followed by two light coats a day of your thinned out paint until you have 6-8 coats down. Give it a week or two or maybe three to completely dry.
Then start your wet sanding, beginning with 600 (400 for especially rough areas) followed by 800, then 1000, then 1500. Then do your buffing with Turtle Wax compound, then wax.
I really don't see the point of all that wet sanding between coats, why not wait until all your paint is down and dry?
I found I was spending hours wet sanding off a lot of the paint I had just applied, then I would lay down another coat and the paint would look just as rough as it did before I sanded. Seemed like a waste of time (and paint) to me.
Re: New Paint job on a budget thread Part III - 08/12/0905:42 AM
Hey Peckinpah, I�ve lived about 3 blocks from Allen for 30 years. Looking at your post, you most likely didn�t thin enough, ( orange peel ), and applied too much paint ( runs ). It really is a juggling act to find the balance, but you�re probably not that far off. When you wet sand, if you dry an area you�ve just finished, you should see a very consistent flat ( not shiny ) surface. Anything in the way of dimples or craters needs to be sanded some more. In the early coats, you are adding color and filling in small imperfections. Take your time painting each panel, and as you finish each new patch, go back and check your previous one for runs. There�s time to still work runs out with the roller ( or foam brush ) so you don�t have to sand them later. By the time you get to your last 2 coats, you�ll have a perfectly flat surface to buff and wax. If you were to do all your painting and then come back and wet sand, you�d have to sand right through several coats of paint to get it flat, and you would be able to see where you burned through.
Re: New Paint job on a budget thread Part III - 08/12/0901:16 PM
I did wet sand between coats, and put the paint on very light after the first two coats (i.e. one roller load for the entire hood) and thinned it out too (1/3 to 1/2 mineral spirits). But I still got orange peel anyway.
I'm thinking maybe this paint does not like 105 degree weather, which is how hot it was when I applied it.
It's been two weeks since my final coat and I have still not wet sanded. I kinda like my orange peel finish, since it has a nice gloss, but does not cast too many reflections.
I have been playing around with drips and one spot where accidentally I scraped off 8 layers of paint putting my bed liner back on. The paint is very hard on the surface, but still a tiny bit pliable underneath. I think it probably will take an entire month to dry all the way through.
I'm already thinking about painting my other car, so I'm happy with the results, but trying to eliminate some of the work next time, if possible.
Re: New Paint job on a budget thread Part III - 08/12/0902:29 PM
Not trying to give you any grief, but enough paint to do the whole hood is way too much. As an experiment, try going to the other extreme and squeeze almost all the paint out before you roll. You should do 1/3 to � your hood and then be out. That will cure most of your runs. As far as thinning, thin it even more than 50/50. It took me so long to figure this out that I painted in temps from 25F to 95F ( Feb to August ). Lots of guys did it in weeks, so I don�t claim to be the brightest bulb, but I am persistent. It will not hurt anything to over-thin while you experiment. Get all this sorted on one panel to minimize your trouble. I would recommend a door, because that�ll expose runs if you�re going to have them. And it really will self level when you find the right thinning ratio. When I had to repaint my fender after my wife hit it, I did 2 coats over the weekend and didn�t sand the last one. Put the fender on and drove til the following weekend, and did the last 2 coats. It came out perfect.
Posted By: Anonymous
Re: New Paint job on a budget thread Part III - 08/13/0907:39 PM
Quote: interior pic
Dude, your dashboard, pedals, and steering are backwards. ..
Re: New Paint job on a budget thread Part III - 08/13/0909:22 PM
Quote:
I really don't see the point of all that wet sanding between coats, why not wait until all your paint is down and dry?
The whole point to the wet sanding between every second coat is to keep the surface as smooth as possible. The smoother the surface that you are applying the thin coats on to.. the shinier the paint will be when you finish.
IF there are slight imperfections in one coat... the later coats will act like magnifiers and make them more visually pronounced. So if you can knock those slight imperfections back as you go along... well the next coat will hopefully look 'that much better'.
Although the paint ( when thinned ) does 'self level', that doesn't mean that it is going to self level imperfections.
But in a way it is kind of a 'you will probably wet sand' anyway situation... because wet sanding helps you eliminate the bugs, spiders, hair and other foreign matter that 'may' land on your fresh coats of paint
Re: New Paint job on a budget thread Part III - 08/14/0912:31 PM
Quote:
Quote:
I really don't see the point of all that wet sanding between coats, why not wait until all your paint is down and dry?
IF there are slight imperfections in one coat... the later coats will act like magnifiers and make them more visually pronounced. So if you can knock those slight imperfections back as you go along... well the next coat will hopefully look 'that much better'.
.
That's not what happened to me. I would spend hours wet sanding off the orange peel finish until my fingers bled, then put on the next coat and the orange peel would come right back.
Additionally, in places where I sanded all the way down to the original factory paint, the thinned out Rustoleum would simply bead off those areas. So I'm afraid to thin it out any more than I did for fear that I'd get no coverage at all.
BTW, the factory paint and clear coat were well sanded beforehand (120, then 220, then 400) so I don't know why the Rustoleum was not sticking and being repelled off the factory paint like it was. I suppose this is one of the problems inherent in going from a darker color to white like I did.
Posted By: Anonymous
Re: New Paint job on a budget thread Part III - 08/14/0901:04 PM
i tend to agree everytime time i wet sand i go back to far i and have to start from scratch in those areas so i am thinking get a few decent coats on first then wetsand then start my layers from that point.
Posted By: Anonymous
Re: New Paint job on a budget thread Part III - 08/14/0901:12 PM
? for marq if you remember i had the problem of putting autopaint on my car after a couple of months and had it all bubble up. so i gave up on the roller method but i am now back rolling after a few days drying i decided to try a test patch and put some autopaint over the brightside and nothing happened and i thought this is cool well after sand ing the brightside smooth i tried the autopaint again and it bubbled only around the edge of areas where i had sanded thru the brightside. other than that the brightside is looking fantastic.
Re: New Paint job on a budget thread Part III - 08/14/0901:30 PM
Quote:
Additionally, in places where I sanded all the way down to the original factory paint, the thinned out Rustoleum would simply bead off those areas. So I'm afraid to thin it out any more than I did for fear that I'd get no coverage at all.
BTW, the factory paint and clear coat were well sanded beforehand (120, then 220, then 400) so I don't know why the Rustoleum was not sticking and being repelled off the factory paint like it was. I suppose this is one of the problems inherent in going from a darker color to white like I did.
That is weird. It sounds like you well sanded the surface and there shouldn't have been anything to cause a repellant type effect. The only thing I could think of would possibly be if you didn't use a clean cloth, dampened with mineral spirits, to wipe down the entire surface prior to painting....
Re: New Paint job on a budget thread Part III - 08/14/0901:41 PM
Quote: ? for marq if you remember i had the problem of putting autopaint on my car after a couple of months and had it all bubble up. so i gave up on the roller method but i am now back rolling after a few days drying i decided to try a test patch and put some autopaint over the brightside and nothing happened and i thought this is cool well after sand ing the brightside smooth i tried the autopaint again and it bubbled only around the edge of areas where i had sanded thru the brightside. other than that the brightside is looking fantastic.
wayne
The thing about Brightside paint is that it is designed to be used on all surfaces of a boat. So it is designed to withstand most chemical agents that might come in contact with it on a boat.. ( oil, gas, alcohol etc ). BUT like any paint there are some acetones ( like the carrier in some automotive spray paints - or nail polishes ) they can usually eat their way in to anything.
I can see the 'edge' being an achilles heel. In fact... even if you spray painted your entire car in automotive paint... and later went back to touch up some paint chips with - the odds are high that the edges of the paint chip would curl up and wrinkle. I have had that happen to me 'back in the old days' when I used automotive spray paint to do touch ups on road chips in my paint.
So I really think that there may be 'some' automotive paints that are unfriendly to 'other' paints - but even more importantly - they also tend to be unfriendly to themselves. The carrier - or liguid that carries the color pigment is actually the reason for the adverse reaction.
But we do know that enamel based paints and polyurathane single and two stage paints are compatible - and that their 'carrier' doesn't appear to have adverse reactios like acetone or other similar 'quick flashing ( quick drying ) paints ).
Re: New Paint job on a budget thread Part III - 08/14/0904:18 PM
Peckinpah, It would be wise to experiment with the thicker coats of paint on an old fender, mail box or something. I'm going to guess that thicker paint will mean trouble getting the paint to cure in a reasonable time frame. If the paint is not sufficiently dry, it will be impossible to sand and polish it. (It will gum up the sand paper) I've seen thick coats of paint take many months to cure.
If a hardener is mixed into the paint, the thicker coats MAY work. (Hardener is Dangerous, so proper safety gear is required) The second option would be to bake the paint. (No idea on the required temperature, time needed, etc,)
One final thought, read the find print on the paint can. A lot of paint manfacturers recommend paining at temperatures below 90 degrees. You should also be aware of metal temperature. If the car has been out in the hot sun it needs time to cool before applying paint.
Re: New Paint job on a budget thread Part III - 08/14/0910:31 PM
[QUOTE]That is weird. It sounds like you well sanded the surface and there shouldn't have been anything to cause a repellant type effect. The only thing I could think of would possibly be if you didn't use a clean cloth, dampened with mineral spirits, to wipe down the entire surface prior to painting....[/QUOTE]
Marq, as I recall, I think I might have just used a damp cloth to wipe down the truck after sanding down and roughing up the factory paint, then let it dry before applying my 50 50 mix of gloss white Rusto paint and white Rusto primer.
I bought a can of spray on Rusto in gloss white, and was thinking of using that to cover up the places where the factory paint is showing through, just to get some initial coverage to keep the factory paint from showing, then brushing or rolling on a couple coats of Rusto from the can with mineral spirits in the regular way.
I have a few places, like the edge of my hood, that I keep accidentally sanding down to the factory paint, and then when I try to brush on or roll on new paint, it just won't stick and is repelled similar to an oil and water effect. However, the spray on stuff sticks fine, even to unsanded factory paint, ad doesn't show through either.
Has anyone here combined rattle can spray on Rusto and the regular paint? I used spray on for my door jambs, and while it's not a perfect match, it's good enough for my purposes. I'm just worried though that the spray on paint might react with the roll on paint if the two are layered on top of each other.
If no one else has tried this, I guess I'll be the guinea pig and let you guys know how it goes.
Re: New Paint job on a budget thread Part III - 08/15/0907:06 PM
Quote: Has anyone here combined rattle can spray on Rusto and the regular paint? I used spray on for my door jambs, and while it's not a perfect match, it's good enough for my purposes. I'm just worried though that the spray on paint might react with the roll on paint if the two are layered on top of each other.
If no one else has tried this, I guess I'll be the guinea pig and let you guys know how it goes.
I used Brightside 'Fire Red' to roll but door jams and other area's hard to reach I used Rustoleum 'Safety Red' rattle can spray paint to do those area's, the match is so close you can't tell it.
Re: New Paint job on a budget thread Part III - 08/16/0912:08 PM
Didn't you say you had some coverage problems where the primer underneath was showing through in some spots?
My idea is, shoot some rattle can paint over those areas where the roll on paint is too thin, then put a couple of coats of roll on paint over that and wet sand as usual.
Re: New Paint job on a budget thread Part III - 08/16/0902:05 PM
hello everybody, i'm not getting much shine on my paint job using RUstoleum's Painter's TOuch 2x Spray Paint(white color) I can't put pictures up right now but there's no shine, (there' are some small spots w/ some shine) I sanded the hood, w/ 2000, and put some rubbing compound, but that didn't do much. Any1 have any ideas on how to make this paint shine? will clear coat do it? HELP!!!
Re: New Paint job on a budget thread Part III - 08/16/0905:56 PM
Quote: hello everybody, i'm not getting much shine on my paint job using RUstoleum's Painter's TOuch 2x Spray Paint(white color) I can't put pictures up right now but there's no shine, (there' are some small spots w/ some shine) I sanded the hood, w/ 2000, and put some rubbing compound, but that didn't do much. Any1 have any ideas on how to make this paint shine? will clear coat do it? HELP!!!
In theory.... anything can be made to shine. The best example being simple stones that are put in a tumbler and spun and spun until their glossy.
My first thought about the problems you are having with the spray paint... might be that the paint itself simply doesn't have any gloss component. It's like there are three types of spray paints... flat, regular and gloss. It would take less work to encourage a higher shine on a high gloss paint as compared to the extra work you would have to put in to getting a shine on a flat paint...
I would not go to putting an artificial shine or coating over the paint. In the end you would find that it fails and requires ongoing maintenance to keep a shine on it.
The best way to clarify the color sanding is to give a read of this article.
Maybe you will pick up something that can help improve the situation...
.
Posted By: Anonymous
Re: New Paint job on a budget thread. - 08/16/0906:26 PM
Hi, I've been researching the $50 rustoleum paint job and have 2 weeks off. I started 2 days ago but am running into some problems.
1) The number 1 main issue is really 2 things, and those are that I'm getting orange peel and when wet sanding the next day the paint scrapes off very easily. I can actually scrape it off with my fingernail with little effort.
2) Number 2 is how do I know when the paint is actually dry?
3) and Number 3 is what is the purpose of wetsanding and how much pressure do I apply during each stage? As stated in number 1, I'm getting straight down through 2 coats to the original paint, that without really digging in.
I guess I would also like to know if leaving it out in the sun will help dry and harden it quicker.
Re: New Paint job on a budget thread Part III - 08/17/0912:02 AM
Quote: Didn't you say you had some coverage problems where the primer underneath was showing through in some spots?
My idea is, shoot some rattle can paint over those areas where the roll on paint is too thin, then put a couple of coats of roll on paint over that and wet sand as usual.
Would this cause problems, I wonder?
My really wasn't a problem just that the area's where I primed like my doors covered sooner but I still put the same number of coats on them as the rest, I'd just keep rolling how many coats so far?
Re: New Paint job on a budget thread Part III - 08/17/0912:36 AM
8 coats so far, but I have these places where the primer dripped. My primer was a lot darker white than the Gloss White I'm painting over it. These same exposed drips keep coming back when I wet sand. Over and over again.
Plus I have sharp edges, like the edge of my hood where if I wet sand, I take the paint off right down to the factory coat, and then when I try to lay more paint on these bare spots, it beads right off.
So what I did today was use a can of spray-on Rustoleum in the same color the hit all these spots. Then tomorrow, I'm gonna slap on two coats with a roller right over these spots I sprayed today.
I'll post my results, but I really wont know until two days from now when I wet sand these areas, and see just how well the experiment it went.
Re: New Paint job on a budget thread Part III - 08/19/0901:30 AM
The fun continues. The spray-on paint went on well, and seems to blend in quite well with the roll on paint. Now whether it will peel off prematurely, I don't know, but so far so good.
I actually like using the spray on paint for touching up areas where I sanded thru to the factory paint. Much more convenient, IMHO, to use the spay can for touch-ups.
One problem though is that I accidentally bought the Turtle Wax red Buffing Compound instead of the Polishing compound. That stuff is bad news for white paint job, it leaves a nasty red residue that seems like it's etched right into the paint. Any ideas on how to get rid of this red residue?
Also, I'm still having problems with the paint beading off areas where the factory paint is exposed. I'm having this with the spray on as well as roll on Rustoleum. It goes on OK, but after a few seconds it beads up into tiny beads about two millimeters across. Very frustrating. It's almost as if the body of my truck has some kind of static charge that's repelling the paint. Any ideas? Is this happening to anyone else?
It was about 95 degrees today, if that makes a difference, but it was still happening earlier when the temps were in the high 80's.
Posted By: Anonymous
Re: New Paint job on a budget thread Part III - 08/19/0901:38 AM
Well I have given up on trying to add pearl to the roll on method. I was able to successfully roll on the pearl paint and it looked great, however, once I started to wet sand the paint took on a blotchy look. Its too bad because I really liked the pearl paint. I might continue on my test fender to see if I can get to the point where I can sand the pearlized paint.
Anyways I took some 320 grit paper and did a quick sanding job and will apply the non-pearl brightside over it. I will probably add 3 coats before I get to the final sanding....
Re: New Paint job on a budget thread Part III - 08/19/0904:23 AM
Quote:
Also, I'm still having problems with the paint beading off areas where the factory paint is exposed. I'm having this with the spray on as well as roll on Rustoleum. It goes on OK, but after a few seconds it beads up into tiny beads about two millimeters across. Very frustrating. It's almost as if the body of my truck has some kind of static charge that's repelling the paint. Any ideas? Is this happening to anyone else?
Any idea how 'virgin' that 'original' paint was ? For example, could it have been subjected to one of those acrylic quick shine type polishes in its lifetime ? Or could it have been subjected to one of the polishes that have teflon in it ?
What I am trying to figure is this : In 99% of the cases, a virgin paintjob should not be causing these kind of repellings. BUT I can imagine where some synthetic polish, teflon based polish or an acrylic type polish may have bonded with the old paint - and even with some sanding of that old paint... there is still enough of one of those potential repellants being able to give new paint a problem....
The only way I can describe this is to use a hair coloring story. Women love to change or supplement their hair color. BUT most of them are not aware that certain chemicals they may put on their hair can interfere when they go to do a hair coloring.
A lot of women like slapping stuff called HENNA on their hair. Basically henna is like a die colorant that simply sits on the outside of the hair shaft and gives off a color when viewed. BUT... if that same woman goes to her hair salon and wants to get her hair colored... the hair salon HAS TO strip off that henna coating or else the die colorant won't be able to penetrate the hair shaft and change its color.
In some cases the chemicals women slap on their hair penetrate the hair shaft. When the hair color die is applied... it may react nicely or adversely with that other chemical that is already resident in the hair shaft. You have heard of the famous hair job that turns green or orange.... or where the hair dries out and ends up looking like straw.
So the point of those stories is just to explain my train of thought on how some 'past' chemical applied to the old paint job... may be coming back to haunt you now with its repelling capability.
In a worse case scenario, if the surface sanding and wipe down with the mineral spirit dampened cloth has removed such artifacts, the only way to ensure proper adhesion may be to sand down to the original primer of the original paint. Hopefully by that point you would have eliminated any potential artifacts in the old paint that might be causing the repelling effect.
Re: New Paint job on a budget thread Part III - 08/19/0904:31 AM
Quote: Well I have given up on trying to add pearl to the roll on method. I was able to successfully roll on the pearl paint and it looked great, however, once I started to wet sand the paint took on a blotchy look. Its too bad because I really liked the pearl paint. I might continue on my test fender to see if I can get to the point where I can sand the pearlized paint.
Anyways I took some 320 grit paper and did a quick sanding job and will apply the non-pearl brightside over it. I will probably add 3 coats before I get to the final sanding....
This is what we figured out about the aluminum dust and other things that could be put on to the paint. BUT there is one way you could still get the pearl effect....
What you do is roll your pearled paint up to the point where you are pleased with its overall look on the car. THEN you add 3 coats of JUST PAINT without the pearl. Since the 3 just paint coats are thin... they would be translucent enough that you will still see the effects of the pearl below.
This way... you would have the 3 additional thin coats acting somewhat like a protective layer that would allow you to wet sand the paint only layer and go for the shine. But since the three thin layers are 'see throughable'... well the pearl would still be visible.... below the surface. Although the pearl will get a bit of tint...
For example, if your pearl is silverish... and the three thin coats of protecctive layer paint is blue... the pearl when seen below will take on a blue tint. But the pearl effect will still be visible - albeit somewhat subdued compared to when it was on the surface.
.
Posted By: Anonymous
Re: New Paint job on a budget thread Part III - 08/19/0909:03 PM
definitely food for thought. I will try this on my test fender and see how it goes.
I am anxious to get the car on the road so I might try this the next time I paint a car
Re: New Paint job on a budget thread Part III - 08/20/0901:31 AM
I hear ya, I made every possible mistake on my first attempt )my truck) so as soon as I finish that, I wanna paint my car and put into practice all the stuff I learned, and all the pitfalls to avoid.
I would be amazed if anyone gets this process 100% right the first time, at least without some previous car painting experience.
Re: New Paint job on a budget thread Part III - 08/20/0904:39 PM
Clear coats have been a bit of a challenge for roll on painters. I believe someone once posted that Tremclad, the Canadian branch of Rustoleum, makes a clear coat.
A second option is to use a regular automotive clear coat. There are several problems with these clear coats.
1. They all contian isocyanates which are flat out dangerous to human health! Automotive clear coats are generally more dangerous than automotive primers and base coats. So proper safety gear is required.
2. These paints are formulated to be sprayed, not brushed. These paints normally dry very fast. I've read of folks brushing these clear coats on small areas. (5-10 square feet) On a project the size of a car, it would most likely be very difficult (or impossible) to apply these clear coats fast enough with a roller.
3. Automotive clear coats may contain chemicals which will mess up the rustoleum / brightside. You definitely want to experiment a test piece to ensure compatiblity.
4. The prices on some automotive clear coats may shock folks used to buying hardware store paint.
A long time ago, someone on this website posted that they SPRAYED some Nasson clear over some Rustoleum or Brightside. I don't believe they ever posted WHICH Nasson clear they used though.
Someone else posted in a previous thread that they tried rolling on Kirker urethane clear, but it did not work out. They later sprayed the Kirker and that turned out.
I've read that some of the new waterbased automotive clear coats can be applied over ANY paint, even lacquer. Some of these are also reported to be available in spray cans. Try a Google search for "U-Pol" and/or "Instant clear". I'm 100% unfamiliar with these products. If you find some good information on these products please let us know.
Re: New Paint job on a budget thread Part III - 08/20/0906:55 PM
KIRKER!
that is the brand that someone posted a link, but i can't remember if it was acrylic enamel clearcoat... does that sound right?
i planned on having it sprayed
also, i didn't want to risk not sanding between coats, and having the paint wasted...i would really like to get a few coats on first then d.a. it down and get a smoother coat...
Re: New Paint job on a budget thread Part III - 08/21/0903:58 AM
Quote: KIRKER!
that is the brand that someone posted a link, but i can't remember if it was acrylic enamel clearcoat... does that sound right?
i planned on having it sprayed
also, i didn't want to risk not sanding between coats, and having the paint wasted...i would really like to get a few coats on first then d.a. it down and get a smoother coat...
thanks for the help.
There's nothing more frustrating than getting to like your 4th coat of paint and accidentally sanding all the way through to the undercoat. Except maybe having this happen on your 8th or 10th coat. Then you gotta try to build the paint back up to the same thickness as the surrounding areas, let it dry for a week or so, and then try to make it blend in.
I think I have spent half my time trying to fix areas where I sanded through, and then having the paint not stick or go on really rough. If I could have just avoided that one problem, I'd have been done two weeks ago.
As it is, I have easily 100 hours into this project, and I still have to wet sand the areas I repainted (and hope I don't burn through again) and then use the polisher and hope I don't burn through with that either.
Also, you are smart to not apply paint over unsanded previous coats. If you really don't want to wetsand, at least go over it with a red ScotchBrite pad to knock the shine off.
There was a guy who posted on another web board that he sprayed some Omni 2.1 VOC clear over some rattle can enamel. He applied 6 coats of enamel and baked it prior to spraying the clear. He reported that it turned out perfect.
When planning to apply any automotive clear coat, it would be a REAL good idea to mix some hardener into the rustoleum. Hardener will increase the chemical resistance of the paint significantly. Of course the hardener contains the isocyanates which means it must be done in a safe location and with the proper safety gear and equipment. Hardener smells real bad!! Neighbors, the little woman, and even your dog will be mad if subjected to the smell of it!
One exposure to isocyanates can injure a person for life. These chemicals can cause all kinds of health problems. Asthma is one of the more common problems caused by isocyanate exposure. But there have been some deaths attributed to these chemicals as well.
To achieve adequate personal protection the correct gloves, painters suit, respiratory and eye protection is a minimum. Don't assume just any respirator will do the job. Read the fine print and make SURE it's rated for isocyanates, not just paint. Many "painting respirators" are NOT rated for isocyantes. The eye protection must protect against paint splashes, fumes and overspray.
Sufficient ventilation is essentail when dealing with isocyantes. The worse the ventilation, the higher the potential concentration of isocyanates. Some respirators will only last 15 minutes in an environment with a high concentration of spray mist. The same respirator may last 6+ hous in a low concentration environment. The problem is that isocyanates have no smell so it's impossible to know when the respirator has ceased to filter them out of the air. A supplied air respirator is safer.
To achieve sufficient ventilation a BIG fan(s) is required. Paint booths in automotive body shops often have fans driven by 5 hp electric motors. A home painter may or may not need that large of a fan. It will depend on the size of the booth, etc.
The previous paragraphs are only an outline of the necessary safety precautions. (This off the topic of rolling paint on one's car at home) So do some additional research on how to safely apply paint with isocyanates. There is a LOT of info on the internet, in books, from paint manufacturers, etc.
Just remember, there is not a car on this planet that's worth destroying a person's health over, so be safe!!
Posted By: Anonymous
Re: New Paint job on a budget thread Part III - 08/22/0909:35 PM
Duplicolor makes a nice engine enamel clear that comes in a rattle can, and it's only about six bucks a can. It's advertised to have superior gloss retention and protection, and it's still an enamel. I bought a few cans for the bumper I'm restoring. . .
scroll down that page linked above and find DE 1636. . .I love the Duplicolor engine enamel line. ..stuff dries on like it's a powder coat. .
Posted By: Anonymous
Re: New Paint job on a budget thread Part III - 08/24/0902:03 PM
Question about rolling on primer
Okay, small question about rolling on primer:
I diluted the primer (Valspar's Oil Based Sandable Primer) until it was pretty much like greay skim milk. I roll it on, tip it with a clean roller (high density foam roller), keep a watchful eye out for runs, let it dry, then sand it down with an inbetween coat hand sanding, wipe it down, shop vacuum the garage for any dust sniglets running around, then wipe it down with a clean cloth with mineral spirits, let dry, and inspect.
I'm still finding areas of orange peel. Since this is a primer (I'm on my second coat) will the primer eventually fill in the orange peel or do I continue sanding that down?
Re: New Paint job on a budget thread Part III - 08/24/0902:42 PM
So you're just now getting ready to apply your second coat of primer? If so, I'm not really sure you really need two coats of primer, just one coat with full coverage. Though some say you don't actually need any primer at all with this paint.
To answer the orange peel question, no, successive coats will not "fill in" the orange peel finish. And since your primer is gonna be a different color than your main coat, you wanna get that primer as smooth as possible, to avoid sanding through to it later on while wet sanding your main coat and having it show through. If this happens, you'll have to repaint these areas and this is a huge hassle best avoided.
Also, how much time are you allowing the paint to dry? Are you sure it's completely dry? I like to wait until the paint is completely hard to the touch, and not the slightest bit rubbery at all, to where my hand slides smoothly over it and does not "drag" even the slightest bit. And also, the areas of thickest coverage won't leave score mark when I press in with my fingernail.
For me, this can take as long as a week, but some people have said that I'm putting on too much paint and / or not thinning it out enough. I get orange peel no matter what I do, so they may be correct.
Good luck and it sounds like you're being very cautious, which is a good attitude to have since mistakes made early on can come back to haunt you, like when I allowed my primer to drip, and some of these drips are still visible, even though I'm done painting now and waiting for my last coats to dry completely prior to buffing.
Posted By: Anonymous
Re: New Paint job on a budget thread Part III - 08/24/0903:29 PM
Quote: So you're just now getting ready to apply your second coat of primer? If so, I'm not really sure you really need two coats of primer, just one coat with full coverage. Though some say you don't actually need any primer at all with this paint.
To answer the orange peel question, no, successive coats will not "fill in" the orange peel finish. And since your primer is gonna be a different color than your main coat, you wanna get that primer as smooth as possible, to avoid sanding through to it later on while wet sanding your main coat and having it show through. If this happens, you'll have to repaint these areas and this is a huge hassle best avoided.
Also, how much time are you allowing the paint to dry? Are you sure it's completely dry? I like to wait until the paint is completely hard to the touch, and not the slightest bit rubbery at all, to where my hand slides smoothly over it and does not "drag" even the slightest bit. And also, the areas of thickest coverage won't leave score mark when I press in with my fingernail.
For me, this can take as long as a week, but some people have said that I'm putting on too much paint and / or not thinning it out enough. I get orange peel no matter what I do, so they may be correct.
Good luck and it sounds like you're being very cautious, which is a good attitude to have since mistakes made early on can come back to haunt you, like when I allowed my primer to drip, and some of these drips are still visible, even though I'm done painting now and waiting for my last coats to dry completely prior to buffing.
Two coats of primer. ..I had to sand down black orange peel paint from the original owner of the project, and do some major sheet metal/bondo work. So, I thought a nice thick coat of primer couldn't do anything but help.
I may not be allowing it time to dry between coats, and that could be the problem. I was only allowing about two days between coats.
I have the hood of the car looking like grey glass--which is a feat unto itself since it was a factory vinyl top car with a huge rust hole on the passenger side pillar--and the roadrunner bulge hood is perfect. I'm just having a little problem with orange peel on the fenders and rear quarters.
Yes, I'm still working on the car. Between my challenges with my stupid disease and the effects of the summer heat on that disease; and two daughters who continually need more money than they can earn, I'm a bit. . .behind. Years behind. Kinda hard to make any headway restoring a car when your budget is less than a hundred bucks a month.
AND I'm definitely gonna need to get some body glaze. . .it's a thirty-six year old car and I can see some pin holes in the body filler I used on the rear quarter and passenger fender. . .
Re: New Paint job on a budget thread Part III - 08/24/0906:06 PM
If the paint rubs off when you try to sand it, it's obviously not dry. Or if it clogs up the paper and won't rinse off, that's another clue it's not dry yet.
Drying time has been a major pain for me so far, so either I'm doing something wrong, or the Rustoleum paint they sell in CA uses a different formula that takes much longer to dry.
I thought this was gonna be a 3-4 day project, but it's been about a month, and 100+ hours, and I'm still not done yet. So try to be patient.
Posted By: Anonymous
Re: New Paint job on a budget thread Part III - 08/27/0909:41 AM
Hi. As soon as I shelled out all that money for compressor, guns, air fed mask, chemicals, 2K paints and all those consumables and not to mention a couple of �How to Spray Your Car� DVDs, it was obvious I would eventually end up on this thread on this forum � so hello!
My story starts with my metallic red Peugeot 206 which I bought with a few scratches on the driver�s door and the hood which I wanted to fix myself. The door jobs were fine, but the hood has never come out perfect, I guess because the panel faces up and catches any crud in the air.
A number of points bring me to rolling the paint. Many of them will be familiar to you.
In Cornwall, UK we are surrounded on three sides by sea. There is hardly ever a dry day. This means any electric compressor has to be in the workplace with the paint vapours and a car with a tank load of fuel � not good if the compressor sparks when it kicks in.
No mobile compressor is big enough to cope with a spray gun without running all the time and this leads to warm vapour loaded air going through the gun, leading to cratering in the finish.
Every time the compressor kicks in, the roar of the machine and the smell of 2K clearcoat makes the neighbour two doors down jump up to try to see what�s going on, and quite rightly so as the 2K paints are bad news and I wouldn�t want a neighbour spraying that stuff in my air space.
When it rains I can�t have my electric air fed mask (Hobbyair) outside the work area, so this means if it is raining I can�t work and it rains most days (see above).
The spray jobs I have done I have always had to sand out orange peel anyway so all these factors have led me to consider rolling/brushing as a real alternative and one that may give me better results than spraying in my garage.
My compressor was collected this morning as I sold it on eBay for 60% of the price I paid and it is two years and four jobs old so I�m OK with that. My guns went the same way a few weeks ago. At present I am keeping my air fed Hobbyair as I don�t know where my rolling will take me.
My projects will be slightly different to many on here as they won�t be complete repaints. My work would be to repair scratches or whatever needs doing, blend the basecoat and then clear the entire panel. I cannot use Rustoleum or the like as I am painting to match the existing other panels, not painting a complete. Sure I could paint the hood in a different colour (black?), but not a side wing or door as this would be odd.
The experimenting I am doing on scrap panels is to lay a blending coat of 1K base coat (in the UK we don�t seem to have 2K basecoats not even in professional booths) and then I aim to roll or brush enough 2K clearcoat layers to be able to wetsand out any brush marks or defects to a high gloss. So far small patches have given good results. My local supplier is able to prepare exact basecoat to match my own car in a rattle can with a high end nozzle which gives as good a spray as a spraygun in my opinion and blends well. Expensive this way but I am only doing spot blends.
Then I will be brushing or rolling out 2K clear. Someone said I would not be able to roll or brush the clear over a new base as it would move the paint underneath, but this seems to depend on how good the basecoat paint is; cheaper paints run under the clear whereas the refinishing one I use stays sharp so long as you don not press on the first coat of clear.
Sorry this is a long story, but it tells you how I came to be here.
I would welcome any feedback from anyone who has tried rolling or brushing 2K urethane paints and what results you got, good or bad. I figure my spray jobs were so high in orange peel, brushing can�t be worse and may turn out better.
I will be using my Hobby air mask when hand painting the 2K paints even though I am not spraying them. That�s how dangerous I consider them to be. UK regulations do say that it is safe to roll or brush 2K without a mask so long as there is a continuous through draft of fresh air to the user. I�m not sure about this � surely if you can smell the paint you are also breathing isos which do not smell.
Re: New Paint job on a budget thread Part III - 08/27/0903:53 PM
Zippy, Welcome to Moparts!
For painting small areas consider using a Prevail sprayer. It's almost as convient as a spray can, yet the paint can be mixed to your exact requirements.
Most 2K paint is formulated for spray application. Brushing or rolling a paint intended for spray application may have a negative effect on the finish. (durability, appearance, etc.) The reason is that paint intended for spray application will have different solvents than a paint intended for a brush / roller application. I've never heard of anyone testing the idea of brushing a paint intended for spray application. It may work, but it should work best when sprayed.
Some industrial 2K paints are formulated for brush / roller application or spray application. I have no experience using these paints.
If using isocyanates, be very cautious. Personally, I put on all the safety gear prior to opening the can of paint and wear all the safety gear until I'm finished and leave the area.
One time I rolled a little alkyd enamel with hardener on a small project without any eye protection. My eyes hurt for several days afterwards!
Re: New Paint job on a budget thread Part III - 08/27/0906:08 PM
FYI..in S.E. Michigan you can get those Prevail sprayers at ACO Hardware.
Posted By: Anonymous
Re: New Paint job on a budget thread Part III - 08/28/0909:22 AM
Hi � thanks for the info on the Prevail sprayer. I have contacted the company for a UK stockist or USA outlet. It would certainly be cheaper than having an aerosol made up as I could buy the �ready to spray� basecoat and use the Prevail instead.
Hi Quickdodge: Re your comments about brushing or rolling a paint intended for spray application possibly having a negative effect on the finish. (durability, appearance, etc.). I hear what you are saying, but my understanding is that the solvent in 2K car paints is designed to atomise and carry the paint to the panel and then evaporate out by flashing and curing, then the paint cures as it catalyses with the isocyanate hardener.
I am hoping that delivering the paint to the panel by brush and roller will have no different effect as the chemical and curing reaction will be the same. In fact the brushed or rolled finish should be easier to wetsand smooth as my spray set up was never powerful enough to avoid the dreaded OP. I would need to watch that I did not load too much paint on at any time to give enough time for solvents to flash, to avoid solvent pop.
The fact that you have never heard of anyone testing the idea of brushing a paint intended for spray application is enough to get me to have a go as that is what started this thread and the roller concept in the first place. Nothing to lose and loads to gain - if only experience! I have got as far as applying primer and blocking a scrap panel and will soon be applying base and 2K clear and will post the results here at some point soon.
In the UK there is an official safety spec sheet that deals with application of 2K clear with rollers or brushes so it must be something that is practiced in some professional booths as we amateurs are not allowed to use the stuff are we.
I agree with your caution on using isocyanates, which is another strong reason for me discontinuing the practice of spraying 2K in my garage. The isos in my garage could give me asthma. The isos that escape wouldn�t do my neighbours much good either! Strangely it is not 2K that affects me, but 1K primers which give me a tight chest for a couple of days after, but that is probably because I am so scared of isos that I use all protective gear so I am not exposing myself to them whereas I have been more relaxed using primer so I have breathed this stuff in using only a respirator. For painting 2K I use an air fed mask (Hobbyair) even if I am using roller or brush � not worth the risk relying on the draft from an open door for clean air.
Oh and Hi ZIPPY, from Z1PPY!
Posted By: Anonymous
Re: New Paint job on a budget thread Part III - 08/28/0909:31 AM
QUOTE: "I can see the 'edge' being an achilles heel. In fact... even if you spray painted your entire car in automotive paint... and later went back to touch up some paint chips with - the odds are high that the edges of the paint chip would curl up and wrinkle. I have had that happen to me 'back in the old days' when I used automotive spray paint to do touch ups on road chips in my paint." END QUOTE.
Definitely had this one with 2K paints. Went to touch up a 2mm chip in the bonnet with rattle primer the edges wrinkled and I had a 6cm patch to deal with as I had to apply the primer so thinly as not to unsettle the edge of the repair.
Another way around this would be to seal the chip first with some 2K clear but as you say this can eat the edges away as well.
One other way would be to seal the repair edge with water based clear as I understand this does not react with 2K solvent paints. Just a thought.
Re: New Paint job on a budget thread Part III - 08/29/0909:32 PM
While 2K paints are good, I'd not recommend 2K paints for most home painters for several reasons.
1. Low priced paint jobs should generally be done on low priced vehicles. Low priced vehicles usually won't last more than a few years. (Why put a 10+ year paint job on a car which will only last 3-5 years?)
2. 2K paints are much more expensive, dangerous, and difficult to apply.
3. Older cars originally painted with synthetic or acrylic enamel will look period correct with an enamel paint.
If anyone still decides to apply 2K paints at home, be aware that if the garage is attached to a home, isocyanates could get into the home through any cracks, openings, etc. between the garage and house.
Z1ppy, My limited understanding of paint chemisty is that paint formulated for spray application will often contain different solvents. There are solvent(s) which help to atomise the paint when it's sprayed. These solvents often separate from the paint betweeen the paint gun and the painted surface. Then other solvents in the paint allow the paint to level and flow out on the painted surface.
When Brushing or rolling paint formulated for spray application, the solvents which atomize the paint will be in the paint film applied to the painted surface. These solvents may affect how the paint cures or performs long term. (What kind of effect, whether the effect is significant or measureable is unknown)
I'd be very, very grateful if you can share the results of your experiments!! I have a little painting project in a few weeks. It's one of those deals where masking the areas which are not be be painted will take many times longer than the actual painting process. Brushing the paint would be SO MUCH easier!!!!
Incidently, the company which makes the brightside marine paint also makes a 2K brushable paint. It was mentioned a long time ago in this, or one of the previous, threads. Seems like someone posted that it's not a whole lot better than the brightside paint. It is more expensive, more dangerous, and I believe harder to apply. Maybe someone who knows more about this can post some details.
Posted By: Anonymous
Re: New Paint job on a budget thread Part III - 08/30/0909:24 PM
I'm getting ready to roll my '64 beetle. I'm slowly getting the body ready and hope to have it perfect in a few months. I have sanded down the rusty areas in some places to bare metal. I treated these areas with a product called phosphate and etch. The phosphate and etch inhibits further rusting and also (according to the product info)makes an excellent sub-surface for any paint.
My next step is to prime the entire car by rolling Rustoleum Clean Metal primer.
My question: Should I thin the primer also before rolling or can I roll it straight out of the can?
The reason I want to prime is because I have a lot of filler work that I want to cover before painting. I think the primer will give a good foundation for the paint.
Re: New Paint job on a budget thread Part III - 08/30/0910:23 PM
If I had it to do again, I would not use primer. My reason is that when I'm wet sanding, if I sand down too far, I'll have primer showing. I would rather have my first coat of paint showing through than primer (which is a different color). It's like you're wasting your time with those first one or two coats of primer, because they'll show through the same as bare metal would.
Anyway, I took a picture of the problem I have been having with my Rustoleum Gloss White beading up on me (see below). Yu can see the factory paint showing through, it's a metallic light blue. And yes, I sanded off the factory clearcoat before painting. Paint is thinned out to about 50-50 paint to mineral spirits.
It goes on smooth enough, but rather than "leveling out" as it's supposed to do, it does the exact opposite and beads up, resulting in terrible orange peel, no matter how smooth the surface is that the paint is applied to. It's especially bad in areas I need it most, namely places where I sanded through to the factory paint.
So I would really like to see this "leveling out" phenomenon, but have yet to experience it. Needless to say, I have had to do a ton of wet sanding after every two coats, due to the orange peel, and over and over again wind up sanding all the way through to the factory paint, especially in rough areas and on drips (which I have learned to avoid at all costs).
So has anyone else experienced this beading up behavior on every single coat like I have? It's extremely frustrating. BTW, the area shown is a close-up taken near my door handle, and the patch that's showing through is about 2 inches long by about 3/4th's of an inch wide.
Posted By: Anonymous
Re: New Paint job on a budget thread Part III - 08/30/0911:00 PM
How did you clean the surface prior to rolling? Is it possible you could have contaminates such as oil or wax causing this?
Re: New Paint job on a budget thread Part III - 08/30/0911:10 PM
So I take it this is not normal?
This is an area I'm touching up where I had a drip, and tried to sand it out and wound up sanding all the way through. I have something like 10 coats of Gloss White Rustoleum on the truck now.
The surrounding area is unwaxed and has been wet sanded then cleaned with mineral spirits. The paint behaves almost as if there was a static charge or something, which seems possible since I'm in an area with low humidity, and all the wet sanding may have built up some sort of static charge. But this is about the only theory I can come up with.
Re: New Paint job on a budget thread Part III - 08/31/0902:53 AM
Nope, no contaminants, AFAIK.
Maybe I should try try a different brand of mineral spirits. I currently use the odor-free kind that Home Depot sells.
In any event, I'm almost done with the job, but I'm not a happy camper because this problem has caused me to spend at least triple the time wet sanding than I otherwise would have.
Re: New Paint job on a budget thread Part III - 08/31/0908:22 PM
Quote: Nope, no contaminants, AFAIK.
Maybe I should try try a different brand of mineral spirits. I currently use the odor-free kind that Home Depot sells.
That is really weird. As most folks have said... that is what things look like if there is a foreign contaminant on the surface. Where the paint is attract unto itself... rather then leveling out.
Could that possible contaminant be too much soap in the water you are using when wet sanding ? Normally you are suppose to use only 1 or 2 drops of liquid dish detergent in the bucket of water that you are wetting your 'wet sanding block' in.
That kind of mottling is what I would expect to see if the surface was soapy and you added an oily liquid on to it. Same effect as how a drop of soap in a sink of dirty dishes will spread across the surface of the sink water.
Another thought, regarding the soap used in the wetsanding is to make sure it is just a pure liquid soap and not one of these dishwashing soaps that has all kinds of additives in it to : make hands softer, put an aroma in the air, etc.
Ok... lets pretend that it is none of the above...
So what I would do with that bad puppy is this :
a ) sand that surface down with an agressive sandpaper and get everything LEVEL again. Yes.. even if you have to get things back down to the primer level.
b ) take an absolutely clean COTTON cloth, dampen with 100% pure mineral spirits, and wipe this area down. Walk away and let it fully dry for several hours.
c ) use the Rustoleum/Tremclad full strength to repaint this surface. Put the undiluted paint in your roller tray and roll your roller through it... using the upper part of the tray to really squeegee out any excess paint. Basically trying to minimize the amount of paint that is on the roller.
d ) Ok... roll this barely wet paint roller on to the surface we are going to try to cover. Roll it thin and work it around to get as much coverage as you can with this barely loaded roller. Walk away from the job for a day... let it dry and see if what you laid down on that spot stays flush or whether it tries to mottle up like you have previously seen.
e ) IF the paint doesn't mottle, then repeat step C again. Hopefully the initial layer will serve as a good foundation on which to lay down another thin layer. Get it on, get it on thin, get it on even... then walk away for another day. Hopefully by giving it plenty of time to dry, this will eliminate the curing process as being the reason for the mottling.
f ) IF the paint did mottle... I would be personally pizzzzzzed off. I would probably sand it all off again... and then break out my handy dandy propane torch. I would out of frustration BURN that surface ( carefully ) with the crazy hope that 'whatever is causing the problems' would probabbly not survive a burnoff. The I would go back to step A and see if the burnoff got rid of whatever the mysterious mottling is being caused by. ( tee hee.. I bet you thought the use of the torch was without a legitimate reason ). NOTE : If it comes to using the torch... clear the work area and keep a running hose of water handy...
Re: New Paint job on a budget thread Part III - 08/31/0908:40 PM
Hey Marq, thanks for the extensive reply.
First off, I didn't use any soap at all while wet sanding. Also, spray-on Gloss White Rustoleum does the exact same thing.
The patch in the picture already was sanded down to the factory paint, and wiped with mineral spirits, so I don't see how there could possibly be any contaminants.I have also tried wiping the surface down with water and letting it dry and the same thing happens.
I have learned to expect this to happen, and so I have been dealing with it. But I can't tell you how frustrating it is to spend two days wet sanding the previous coat down to glass-like finish and then having the next coat mottle up on me again.
I buffed out and waxed my hood and roof today, and they look very nice, but I see a lot of rough and uneven areas and a few roller marks I didn't sand out.
But what's most noticeable is the places where I sanded down to either the primer or the factory paint while trying to get rid of that stupid orange peel.
Re: New Paint job on a budget thread Part III - 09/01/0903:53 AM
I have seen a really persistent problem like that only once in the years I worked in a body shop. It was on the flat black stripes on the hood of a late 70's Firebird Formula. The owner had been applying Armor-All to them. Sanding didn't help, wiping with prep-solvent (Kril-Kleen) didn't help, and wiping with lacquer thinner didn't even work.
What finally worked is a product called PolyCracker. It sprays on like water and a quick wipe down later the problem was gone.
Re: New Paint job on a budget thread Part III - 09/01/0911:49 AM
Apparently there is a name for this, it's called "fisheyes":
"FISH-EYES
(Crawling, poor wetting) - This paint failure occurs when paint fails to flow in an even and continuous film over its undercoat. it separates or breaks, leaving exposed areas of the undercoat."
The article I found says it's caused by contaminants found in oils and wax. All I can tell you is that it's been a nightmare, and has turned my first painting attempt into a six weeks of extreme frustration. And I had no way of knowing that things were not going right since it was my first attempt.
However, what I can't figure out is, why is this still happening when I try to paint over surfaces that already have 2, 4, 6, or even 8 coats of Rustoleum laid down? You can see in my picture that there is a reflection and the paint is doing the same thing over the already painted area (just not quite as bad).
The smoothest I have ever been able to get this paint to lay down with a roller, even over previously painted areas, is about the texture of an eggshell. No matter how smooth the previous coats of Rustoleum are sanded down.
So this is why I was saying earlier, why not lay down all six coats first and then wet sand at that point. For me, this would have made much more sense.
Posted By: Anonymous
Re: New Paint job on a budget thread Part III - 09/01/0903:26 PM
The brownish tan stuff at the top of the picture. Is that headliner/carpet adhesive?
Re: New Paint job on a budget thread Part III - 09/01/0904:52 PM
Quick question. I'm using Brightside white thinned about 40% - 50% with their 333 thinner and I'm nearly done. Its working great, but my only concern is that its fairly transluscent and I don't want sanding scratches visible under the paint. Is there any danger to not sanding between coats? This paint seems pretty sticky to me.
Re: New Paint job on a budget thread Part III - 09/01/0907:27 PM
Quote: The brownish tan stuff at the top of the picture. Is that headliner/carpet adhesive?
Ha ha, no that's some masking tape over my door handle. I had a heck of a time painting around those, I strongly suggest removing them before you start to paint. Trying to paint around them is extremely frustrating, and will inevitably end up looking very bad.
I got paint on my door handles when laying down my initial 8 coats, even though they were covered up with tape. Then I found gaps between the door handle and the body that got no paint at all. Plus I got drips trying to paint around them.
So I finally took them off, sanded the body all around the handles down to the factory paint. But the Rustoleum I applied beaded up and would not stick to the factory paint, and dripped right off. So I sanded that off and tried once more, and finally got semi-decent coverage by using very thin coats and being extremely careful. I think I spent about 4 days messing with those dumb door handles, where if I had just taken them off initially, it would have been a breeze.
Re: New Paint job on a budget thread Part III - 09/01/0907:39 PM
Quote: Quick question. I'm using Brightside white thinned about 40% - 50% with their 333 thinner and I'm nearly done. Its working great, but my only concern is that its fairly transluscent and I don't want sanding scratches visible under the paint. Is there any danger to not sanding between coats? This paint seems pretty sticky to me.
Don't sand sticky paint, wait until you can rub your hand over it and you don't feel any drag. If the paint is still wet you'll feel a slight drag.
You can also tell its dry when you try to score it with your fingernail and it doesn't leave a mark. And when you tap on it with your nail it makes a sharp sound rather than a dull thud.
If you try to sand wet paint it'll rub right off and and clog up your sandpaper like crazy. But dry paint will rinse right out of the sandpaper.
I know the OP of this thread said you could wet sand the next day, but I have found my paint can take as long as 5-7 days to dry enough to wet sand, depending on how many coats I apply. A single coat takes me about two days to dry, FWIW.
Re scratches, you shouldn't get any with 800 grit paper, provided the paint is dry and you use plenty of water to wet sand. I like starting with 800 grit for wet sanding.
Re: New Paint job on a budget thread Part III - 09/01/0909:04 PM
Yes, 800 is working well for me at this stage. Id just like to ensure no sanding marks under the last coat as it seems I'm using thinner paint than most. Would 1000 grit be too fine prior to the final coat or would I be better off not sanding at all?
I guess my question is does the paint need a "tooth" from sanding to bond properly, or is it sticky enough on its own?
Re: New Paint job on a budget thread Part III - 09/01/0909:14 PM
1000 sounds like a safe bet. I can't imagine any paint so thin that scratches from that would show through.
As far as sanding improving adhesion, I'm not sure about that. I always thought that wet sanding between coats was more to smooth out slight imperfections in the previous coat than for purposes of improving adhesion. After all, when paint is sprayed on in many layers, nobody ever wet sands between coats, as far as I'm aware.
But like I said, I'm no expert on that and will wait for someone else to chime in.
Re: New Paint job on a budget thread Part III - 09/02/0902:28 AM
Quote:
I always thought that wet sanding between coats was more to smooth out slight imperfections in the previous coat than for purposes of improving adhesion. After all, when paint is sprayed on in many layers, nobody ever wet sands between coats, as far as I'm aware.
The wet sanding does two jobs at various points during the paint job... you have to break the paint job in to two different phases when talking about wet sanding :
BUILD UP PHASE WET SANDING - this wet sanding happens after every second or third coat of paint as you are building up your color coverage. It smooths out the surface to which the next layers of paint are going to be put on. It also removes some of the gloss off the previous coats so that the next addition of layers of paint have something to grip on to.
FINAL POLISHING AND SHINE WET SANDING - this wet sanding happens to your very last FINAL coat of paint. It is going for the maximum smoothness of the outer layer of the final coat of paint. Because you are using your highest grit of sand paper... you are actually polishing the surface.
Hopefully that explains the difference in purpose between the two different phases of wet sanding that happen during the rolling process.
Re: New Paint job on a budget thread Part III - 09/02/0908:46 PM
Final results, using approximately 10 coats of Rustoluem Gloss White and wet sanding every two coats (see below). The picture is a spot between my driver side door and the back of the cab of my truck.
I have a few areas where I was able to get a fairly smooth finish, but they were kinda random. My roof and hood have both smooth and rough areas. This picture though is typical of the problems I experienced with every single coat I applied.
I would get deep pits that looked similar to acne scars, that went almost all the way down to the factory paint. Sanding them down smooth would reveal the factory coat in many spots. Then trying to fill in these spot where I sanded through would start the whole process all over again, Very frustrating.So I just left many rough areas alone, for fear of burning through to the factory paint once again.
So I'm glad some people had success using this method. I was not one of them. I'm somewhat happy with my results after buffing and waxing, but the process did not go anywhere near as "smooth" as I had hoped. I wound up with a "10 foot paint job". It looks good as long as you stay at least 10feet away.
Posted By: Anonymous
Re: New Paint job on a budget thread Part III - 09/02/0911:40 PM
Is it possible you simply have some bad paint or mineral spirits? It looks like you have something like water or other contaminates in one of them.
Re: New Paint job on a budget thread Part III - 09/03/0901:24 AM
How many coats is that? 2? Looks nice.
Could you post a pic showing how smoothly the paint is going on? Maybe a close-up shot with a reflection in it so that the texture of the paint will show.
I'd like to see what having paint go on smoothly is supposed to look like.
Posted By: Anonymous
Re: New Paint job on a budget thread Part III - 09/03/0901:39 AM
Very nice!! Is that Rustoleoum canvas white? I will be rolling my '64 beetle(was L87 Pearl White) soon with canvas white.
What are your plans for under the fenders and the wheel wells? I'm thinking about rolling a product called Rustfre Rubberized under coating on mine.
Re: New Paint job on a budget thread Part III - 09/03/0901:55 AM
Quote: How many coats is that? 2? Looks nice.
Could you post a pic showing how smoothly the paint is going on? Maybe a close-up shot with a reflection in it so that the texture of the paint will show.
I'd like to see what having paint go on smoothly is supposed to look like.
this is 2 coats of primer and 1 coat of paint.
here's the front quarter panel after wet sanding and polishing.
Re: New Paint job on a budget thread Part III - 09/04/0911:16 PM
the 1990 one is a little greyish, the other one is on the car I showed you
Posted By: Anonymous
Re: New Paint job on a budget thread Part III - 09/05/0907:25 PM
started this a few days ago. I'm starting on my hood first to see how it goes (the paint was faded and cracking in some areas anyways).
sanding down took forever, I ended up switching to 150 grit then back to 220 then 400 before the first coat. This was dry sanding. It's a red car so I have a bunch of rags and clothes that are now a nice pink color. I ended up having to wet some rags just to pick up all the powder that was coming off. I really hope I haven't messed something up. Most of this process so far I have had the feeling of inexperience, ie wondering whether I should do one thing or another. then I shrug and try it one way, and rely on the fact that it's one hood and if I really need to I can replace the hood (it's a 97 honda civic, with a nasty water leak, so it's not worth a ton anyways).
A few questions:
- how many times can I use a rag before throwing it out or washing it? can/should I wash these pink rags or just buy a block of rags?
- how many times can I use a sheet of sandpaper? discard after each wet sanding or keep reusing?
- how should I handle edges and underside of the hood? so far I've been trying to go to about 5mm around the underside of the metal.
I wouldn't use it on the wet sanding, but for the initial preping it sure was tempting. Anyone use it? Would it be worth using on the next panel I do?
thanks for keeping this thread going, it's really useful, and I'm sure I will learn more about body work than I would have if there were no $50 paint job.
Re: New Paint job on a budget thread Part III - 09/05/0911:29 PM
heres my two cents
"- how many times can I use a rag before throwing it out or washing it? can/should I wash these pink rags or just buy a block of rags?"
it doesn't really matter as long as its clean
"- how many times can I use a sheet of sandpaper? discard after each wet sanding or keep reusing?"
you should be able to feel if theres a difference in the roughness of the paper, i.e how well it sands. I use sandpaper over and over again as long as it still has grit to it.
"- how should I handle edges and underside of the hood? so far I've been trying to go to about 5mm around the underside of the metal."
for the underside of the hood you should try to find a spray can of the paint your using, its much much easier.
I wouldn't use it on the wet sanding, but for the initial preping it sure was tempting. Anyone use it? Would it be worth using on the next panel I do?"
for the inital preping yes, but you should always end with a sanding block. Espessialy with areas that have body filler on them.
and definatly do not use an electric sander for wet sanding!!
Re: New Paint job on a budget thread Part III - 09/06/0908:52 AM
So assuming my paint problems were caused by wax residue, how does one removed old wax? Soap and water is obviously not gonna do it. Do mineral spirits remove wax?
That is one of the variations on the 'roller' paint job that we have discussed in the course of this thread.
The original 'roller job' was done with just 5" high density foam rollers.
A variation was developed where you used a 5" high density roller to lay down the paint and then immediately go over it with a fresh 5" high density roller OR a foam paint brush to 'tipple' the rolled on coat ( tippling is lightly running the second roller or brush over the rolled paint to spread it evenly and pop any air bubbles that may have appeared
There also were some folks who had good luck using high quality paint brushes ( and even those black foam brushes ) to do the entire paint job - from painting to tippling.
The only achilles heel of using just those black cheap foam paint brushes... is that their foam is not really designed to be continuously saturated with mineral spirts. And so the black foam paint brushes may start disintergrating as you use them... leaving little black artifacts of the disintegrating paint brush behind. As well, the cheap black foam brushes are basically glued on to the plastic stick that they are on. That glue eventually craps out from being continuously saturated in mineral spirits.
The problem with the high quality paint brushes, with a good density of hairs on the brush... is that they are expensive. We aren't talking the 'el cheapo' cheaper by the dozen type paint brushes. The cheap ones continuously have hairs or bristles coming out of them and sticking to your paint job.
The one value of the white high density roller is that the foam has a proven track record or history of not disintegrating or deteriorating during the course of a paint job. So that eliminates the changes that part of the roller will find its way sticking to your fresh paint.
Other then that... the chap was basically following the $50 paint job that has been pretty heavily explored and discussed during the course of these three threads dedicated to the topic.
His car looks excellent at the end of his efforts and except for the glitch he encountered on the bumper from not sanding properly, he seems to be giving the whole project two solid thumbs up... even after his one year update after a snowy winter.
.
Posted By: Anonymous
Re: New Paint job on a budget thread Part III - 09/07/0901:20 AM
^ Ah, very informative (as usual), thanks.
Quote: His car looks excellent at the end of his efforts and except for the glitch he encountered on the bumper from not sanding properly .
I didn't really follow what he did wrong. He said something about "palming" it. Did he entirely miss sanding some parts of the bumper? If he did get them, just did it wrongly, what exactly did he do wrong that we can avoid?
Re: New Paint job on a budget thread Part III - 09/07/0902:29 AM
He just failed to sand in some "nooks and crannies" and of course the new paint flaked off the areas that were not sanded.
I have seen that car "in the flesh" and I can tell you that it isn't cleaver camera angles or lighting that make it look good. It really does look good. I had to hunt to find any brush marks. There are a few but they're hard to find. And, remember that's without any final sanding and polishing. If he wanted to go to the additional effort of sanding and polishing, the finish could be near show quality.
Posted By: Anonymous
Re: New Paint job on a budget thread Part III - 09/07/0904:23 PM
Another q. I don't have a garage, so I'm doing this outdoors. It's supposed to thunder storm later today. Should I put a tarp over the coat I put down earlier today? (coat #4)
Re: New Paint job on a budget thread Part III - 09/07/0907:23 PM
Hey guys, long time follower, first time poster. I recently sanded down the rear half of car, I started with a whipe over of all the panels with goo-gone( a common household solvent) and soap and water. After I was satisfied with the clean, I sanded with 100, 150, 220, 320 and finally 400. It felt pretty smooth. I washed it down with smelly mineral spirits and then let it dry for 45 minutes. Since I had quite a bit of filler,I then rolled on a layer of rustoleum, clean metal primer (white colored stuff). I rolled it on with a 9" roller for some odd reason, it was just what I had around and it had a black foam cover thing on it. This was ultimately not the best idea as it gave it quite a bit of texture and was hard to maneuver. However, I saw no drips and the orange peel was very easy to deal with. I was satisfied with my result even though several places I had accidentally sanded down to bear metal when sanding down some more bondo I had put over the primer and then covered with rattlecan filler primer. So yesterday, I had cleaned the car and whipped down my panels with odor MS. Letting these dry for roughly half an hour, I mixed my rustoleum black *came in a quart* with mineral spirits till it seemed to be about the thickness of water *It ended up being about 60% mineral spirits*. I then rolled it onto my car with a 4 inch high-density roller. Instantly, I noticed a TON of bubbles which I needed to blow on very very hard to pop. So I tried chasing it with a 3" black foam brush. First thing I noticed were brush marks from the brush, it seemed to push the paint around too much and the primer underneath was exposed. It looked bad. So I decided not to chase it and see if I could just pop these bubbles with my roller, just rolling back over them with my roller. The roller seemed to even the paint out a bit but still left plenty of bubbles. This annoys me like crazy but I figured the bubbles would pop and self level. Well they did pop, but they seemed to leave thicker spots of paint around them so now it looks very blotchy. I also noticed I have tons of runs. In sanding out the runs and bubbles, I wetsanded with 400 grit like I did on the primer coat. This seems to cut quickly through the paint around the imperfections. it took a long time to get through the drips and bubbles and often cut straight through to the factory paint. I was using a block for most of this sanding. Also, the paint is not very even at all but seems to be alot better on verticle panels like my rear fenders rather than the hood lid. Any suggestions? I'm thinking thicker paint, any other ideas? Thanks for the help!
Re: New Paint job on a budget thread Part III - 09/07/0907:45 PM
Quote: Another q. I don't have a garage, so I'm doing this outdoors. It's supposed to thunder storm later today. Should I put a tarp over the coat I put down earlier today? (coat #4)
I did mine in the driveway, each morning I'd wet the driveway down to keep the dust down, had rain one night so I just wiped it down, tack rag and rolled another coat on.
Posted By: Anonymous
Re: New Paint job on a budget thread Part III - 09/07/0909:36 PM
Paint/spirits ratio is a moving target based on humidity and temperature. Just guessing I'd say you've got too much paint on the roller. You're not looking for coverage but rather super thin translucent coats. Can take 6 coats or more to get even color and good coverage. Lots of runs is my clue that you're not squeezing enough paint out of the roller before application.
Re: New Paint job on a budget thread Part III - 09/07/0909:59 PM
I kinda liked the advice someone here gave, to pretend that the paint costs $1000 an ounce, and make it your goal to use as little as possible and still get complete coverage.
My problem that I was always trying to get the maximum amount of paint down without it dripping, but that's definitely the wrong way to approach it.
Re: New Paint job on a budget thread Part III - 09/07/0910:47 PM
Quote: Paint/spirits ratio is a moving target based on humidity and temperature. Just guessing I'd say you've got too much paint on the roller. You're not looking for coverage but rather super thin translucent coats. Can take 6 coats or more to get even color and good coverage. Lots of runs is my clue that you're not squeezing enough paint out of the roller before application.
Ah thanks. I usually would push down like 8-10 times pretty hard on the bumps in my tray before going back at it, maybe I'll try 11-14. But if they're supposed to be semi-transparent, I did mine WAY wrong because I have almost full coverage of black over white with just the first coat. Should I just wetsand like crazy and put another layer on to hope it looks better than the first? My first layer actually looks fairly glossy in the parts where it didn't spread strangely. ATtached is a picture of where the bubbles where and how it reacted. Note, this is AFTER a light wetsanding with 400 grit.
Re: New Paint job on a budget thread Part III - 09/08/0912:06 AM
Quote: Are you sure you wanna use black? That color is the most unforgiving there is. If you have any imperfections, they're gonna really stand out.
You paint looks like it's going on similar to how mine did:
Yeah, I noticed that. I'm thinking about using some engine degreaser on the other half of my car before starting the sanding. I have a feeling it may be from turtle wax applied recently. Or the large amount of soap in my water I washed the car with. But I have to go for black, its the OEM color and I have to change my title and registration and insurance if I paint it and I don't wanna go through the trouble.
Re: New Paint job on a budget thread Part III - 09/08/0912:25 AM
I have a sneaking feeling that this might be caused by too much mineral spirits. I know that paint and MS try to separate when you mix them initially. Why should this stop happening once the mix is applied with a roller?
I would try a mix with less mineral spirits or even no mineral spirits at at all on a test patch and see what happens.
Re: New Paint job on a budget thread Part III - 09/08/0912:52 AM
Quote:
I'm thinking about using some engine degreaser on the other half of my car before starting the sanding. I have a feeling it may be from turtle wax applied recently. Or the large amount of soap in my water I washed the car with. But I have to go for black, its the OEM color and I have to change my title and registration and insurance if I paint it and I don't wanna go through the trouble.
An odd thought just struck me... OK... do you know how to clean a windshield that has wax on it ? The answer is AMMONIA - that high smelling liquid.
Most windshield cleaners make use of ammonia to cut grease and wax off a car's windshield. In fact, when I am buying windshield cleaner like Windex, Bon Ami and others.. I always make sure that it says 'ammonia' on the can or bottle - to ensure that it will get the windshields squeaky clean and wax and smeer free.
Soooooooo... I was thinking... maybe you might want to try adding a bit of pure ammonia to a bucket of water and using that for a thorough wipe down ( instead of a dampened mineral spirit cloth ).
The recommended solution for ammonia to water is 5% to 10%. You can not use higher percentages of ammonia because it not only stinks like h*ll, but in a 100% form it is capable of etching glass and metal. So it is pretty potent......
I would suggest that a 5% to 10% solution of ammonia to water should strip just about any wax or greasy chemical that is clinging to the surface. This could be the nuclear bomb of paint wiping down... as wax, grease and silicon things should not survive this solution being wiped over it.
I would make sure that you do it in a well ventilated area. I would even go so far as to suggest that you take one of your wife's, mother's or girlfriend's yellow latex dishwashing gloves to protect your hands during the wipe down. The stuff is pretty potent - even in a 5% to 10% solution and it could cause skin irritation.
I am not sure if ammonia in a 5% to 10% solution can discolor clothing like bleach does. But I would take care to wear some crappy clothes that you really don't care if they get discolored by the ammonia diluted water.
DO ME A FAVOR THOUGH... definitely try this on a test panels or test spot that is low on the car. Because I really can't guess in advance how this 5% - 10% solution may react with 'relatively fresh' paint ( or primer for that matter ). My initial thought is that on a shiny coat of paint it may remove the surface gloss of a freshly painted area. But in theory it should just clear off the surfactants without doing any harm to the paint when you keep things in the 5% to 10% dilution range.
And I would definitely give the car a good chance to fully evaporate and dry after the wipe down... just to make sure that none of it is left on the car.
Re: New Paint job on a budget thread Part III - 09/08/0904:06 PM
I had a spot on my dash do that type of thing, even after cleaning it with Mineral Spirits. I removed all he paint I put on with Lacquer thinner, and THEN wiped down with Mineral Spirits, and the problem went away.
Posted By: Anonymous
Re: New Paint job on a budget thread Part III - 09/08/0909:27 PM
Anyone here ever use Duplicolor's primers? I'm currently sanding down OG paint(not to bare metal)and doing some filler work. I'm mostly curious about Duplicolor's sandable and high build primers. Does the high build or sandable fill 80, 180, or 220 grit?
Can I sand the entire car with 80 then 220..then spray either the filler or high build primer?
I would then dry sand the entire car with 400 grit, then roll first coats of paint?
Posted By: Anonymous
Re: New Paint job on a budget thread Part III - 09/08/0909:29 PM
Re: New Paint job on a budget thread Part III - 09/08/0909:29 PM
Quote: Hey guys, long time follower, first time poster. I recently sanded down the rear half of car, I started with a whipe over of all the panels with goo-gone( a common household solvent) and soap and water. After I was satisfied with the clean, I sanded with 100, 150, 220, 320 and finally 400. It felt pretty smooth. I washed it down with smelly mineral spirits and then let it dry for 45 minutes. Since I had quite a bit of filler,I then rolled on a layer of rustoleum, clean metal primer (white colored stuff). I rolled it on with a 9" roller for some odd reason, it was just what I had around and it had a black foam cover thing on it. This was ultimately not the best idea as it gave it quite a bit of texture and was hard to maneuver. However, I saw no drips and the orange peel was very easy to deal with. I was satisfied with my result even though several places I had accidentally sanded down to bear metal when sanding down some more bondo I had put over the primer and then covered with rattlecan filler primer. So yesterday, I had cleaned the car and whipped down my panels with odor MS. Letting these dry for roughly half an hour, I mixed my rustoleum black *came in a quart* with mineral spirits till it seemed to be about the thickness of water *It ended up being about 60% mineral spirits*. I then rolled it onto my car with a 4 inch high-density roller. Instantly, I noticed a TON of bubbles which I needed to blow on very very hard to pop. So I tried chasing it with a 3" black foam brush. First thing I noticed were brush marks from the brush, it seemed to push the paint around too much and the primer underneath was exposed. It looked bad. So I decided not to chase it and see if I could just pop these bubbles with my roller, just rolling back over them with my roller. The roller seemed to even the paint out a bit but still left plenty of bubbles. This annoys me like crazy but I figured the bubbles would pop and self level. Well they did pop, but they seemed to leave thicker spots of paint around them so now it looks very blotchy. I also noticed I have tons of runs. In sanding out the runs and bubbles, I wetsanded with 400 grit like I did on the primer coat. This seems to cut quickly through the paint around the imperfections. it took a long time to get through the drips and bubbles and often cut straight through to the factory paint. I was using a block for most of this sanding. Also, the paint is not very even at all but seems to be alot better on verticle panels like my rear fenders rather than the hood lid. Any suggestions? I'm thinking thicker paint, any other ideas? Thanks for the help!
I've been using both a foam brush and a roller for the second pass and my experience is that the timing is critical and is dependant on which tool you're using.
If you're using a brush for the second pass then you should hit it immediately to avoid leaving brush strokes. If you do this and you're still getting brush strokes, then you're paint is probably too thick.
If you're using a roller for the second pass, its best to wait 3 - 4 minutes for the paint to begin to set. You want to use very light pressure to just pop the bubbles. If you start the second roller too soon, you'll just be creating more bubbles in the meantime.
Regardless of method, thin paint applied sparingly will reduce the amount of sanding and give a better finish.
Re: New Paint job on a budget thread Part III - 09/08/0911:08 PM
Well, here is what I got. The fender on my truck has been sanded to bare metal with an electric orbital sander with 80 grit paper. Then the holes for the emblems have been welded in, ground down, and filled smooth with bondo. There were also some minor areas that also have a thin coat of bondo. These areas have all been block sanded with 80, 220, 400 grit paper with Rustoleum spray can primer between each working. After everything was done to my satisfaction, I rolled on 2 coats of Rustoleum Rusty Metal Primer, straight with no diluting. I haven't sanded this primer yet, I was going to wait til I'm ready to paint the whole truck, but the fender looks perfect. Absolutely no sanding marks at all and you can't even tell where the filler is. BTW, the hood was also sanded with 80 grit on the orbital, then straight to the Rusty Metal Primer rolled on with no sanding marks there either.
Re: New Paint job on a budget thread Part III - 09/09/0902:19 AM
I used white primer with my Gloss White paint job. I kept accidentally sanding thru to it, and it looks gray compared to the bright white color of the Rusto main coat. I can imagine that red would be a nightmare to try to cover up and that if you ever accidentally sanded thru to it, there'd be no hiding it.
If I had it to do over again, I'd use no primer at all, except in areas where I had used bondo. The reason is, if I'm gonna sand thru to my undercoat, why not sand thru to the color of your main coat instead of sanding thru to some primer that's a different color? In other words, why waste your time with applying two layers of primer when you could have an extra two coats of your main color instead?
With this paint, I really don't see the point of using primer.
Re: New Paint job on a budget thread Part III - 09/09/0903:46 AM
Quote: Anyone here ever use Duplicolor's primers?
I've used it. I was not impressed. I don't know how it compares to other rattle-can primers, but I suspect any primer that has to go through the nozzle of a rattle can isn't really "high build." It takes forever to dry and clogs up sand paper like crazy too.
Quote: Can I sand the entire car with 80 then 220..then spray either the filler or high build primer?
Only use 80-grit to sand areas where the paint needs to be stripped off. If the paint is in OK condition and just needs scuffed up, go straight to 220, 240, 320. Any of those are ok for regular sanding.
Quote: I would then dry sand the entire car with 400 grit, then roll first coats of paint?
Change that to _wetsand_ with 400.
Fine grits, 400 and above, clog up really quick when used dry. You'll find sanding with 400-wet to just work better.
Re: New Paint job on a budget thread Part III - 09/09/0911:23 AM
Quote: Anyone here ever use Duplicolor's primers? I'm currently sanding down OG paint(not to bare metal)and doing some filler work. I'm mostly curious about Duplicolor's sandable and high build primers. Does the high build or sandable fill 80, 180, or 220 grit?
Can I sand the entire car with 80 then 220..then spray either the filler or high build primer?
I would then dry sand the entire car with 400 grit, then roll first coats of paint?
I would not use high build primer anywhere that you don't have chips. When I used it, it filled in chips in my original paint very nicely but it did take a little while to sand down. I didn't notice any problems with clogging or the like, and it sprayed on pretty nice. Just make sure to clear the nozzle after each use and you should be okay. I don't recommend doing an entire panel with it however as it really does build and you'll have trouble keeping some of the original shape. Just my .
Re: New Paint job on a budget thread Part III - 09/09/0902:34 PM
Todd, yes you can use the primer on painted surfaces after sanding those surfaces first. And you can also use the clean metal primer instead of the rusty metal primer like I did. The reason I used the rusty metal primer is because I have some rust issues on my beater and even though I sanded the rust away, this primer is supposed to help seal it.
Peck, the biggest reason to use primer over sanded painted surfaces is to provide a uniform surface to paint over. An example would be my truck. It is currently at least 5 different colors and each color would cause the paint to appear differently, especially with the first thin coats. If it was all one uniform color, the paint will cover more evenly. Also, the key is to not sand down to the base coat.
Posted By: Anonymous
Re: New Paint job on a budget thread Part III - 09/09/0904:41 PM
Quote:
Peck, the biggest reason to use primer over sanded painted surfaces is to provide a uniform surface to paint over. An example would be my truck. It is currently at least 5 different colors and each color would cause the paint to appear differently, especially with the first thin coats. If it was all one uniform color, the paint will cover more evenly. Also, the key is to not sand down to the base coat.
This is exactly my issue, plus some bare metal.
Thanks, I'll try the clean metal primer. I'll roll it straight also.
Re: New Paint job on a budget thread Part III - 09/09/0907:50 PM
Sounds like a good plan. However, don't tell yourself, "Oh it's only primer, I don't need to be too careful laying it down."
That's what I did and wound up with a lot of drips and rough areas and roller marks. These areas take a week or more to dry all the way through (because the paint is so thick) so most of them didn't get sanded smooth.
As a result, not only do they show through my main coat, but I also kept sanding through to them while wet sanding later coats, and they really stuck out because my primer is a darker color. And once that happens, you have to try to build the paint back up to the same level as the surrounding paint and let it dry and that's an f'in nightmare.
So be really careful to avoid drips, roller marks and rough areas, and when it's dry, wet sand your primer as absolutely flat as you can get it, because believe me, any rough areas will definitely show through your main coat and cause big headaches. .
Re: New Paint job on a budget thread Part III - 09/09/0908:11 PM
Quote: Sounds like a good plan. However, don't tell yourself, "Oh it's only primer, I don't need to be too careful laying it down."
That's what I did and wound up with a lot of drips and rough areas and roller marks. These areas take a week or more to dry all the way through (because the paint is so thick) so most of them didn't get sanded smooth.
As a result, not only do they show through my main coat, but I also kept sanding through to them while wet sanding later coats, and they really stuck out because my primer is a darker color. And once that happens, you have to try to build the paint back up to the same level as the surrounding paint and let it dry and that's an f'in nightmare.
So be really careful to avoid drips, roller marks and rough areas, and when it's dry, wet sand your primer as absolutely flat as you can get it, because believe me, any rough areas will definitely show through your main coat and cause big headaches. .
I had good results in mixing my can of primer with mineral spirits, about a 10:2 dilution. It rolls on very nice and stays workable for a long time. No drips in my final coat, and this was with a 9 inch foam roller *shakes head*.
Re: New Paint job on a budget thread Part III - 09/10/0902:38 AM
I am no expert but I would agree with some of the others it looks like contamination. On my Olds I painted I had a very similar problem but only in small doses in the door jams where the ruber seals contact the body Armorall was the culprit being used to help soften those old seals. One thing I noticed was it did not occor all the way around but sporadically, I did not sand the jams just cleaned and sprayed aresol parts cleaner on it not sure what is a sure fire way to remove stuff like that and perhaps if I would have been more aggresive the spray but I was trying not to get it everywhere and it dries pretty fast when sprayed on a rag and I only had one partial can on hand to clean 4 doors.
Re: New Paint job on a budget thread Part III - 09/10/0903:08 AM
Hmmm. Armor All? That makes sense, because the picture was taken right near my door handle, and my door handle is plastic and so I would have definitely have used Armor All on it several times over the last 18 years I've owned the truck.
Apparently when you're dealing with Armor All, something a bit stronger than Mineral Spirits is needed, but what? Oh well, I'm done with the paint job, bit i have an old Volvo I may start painting next, so I may have a chance to do more experiments.
Re: New Paint job on a budget thread Part III - 09/10/0912:35 PM
It could, but if you don't soak it down too much it won't bother anything. I used in on my dash when I got a bad case of fish-eyes, it did take the paint off that I just applied but I wanted it to do that since it was all messed up. I always use it for the first cleaning, after sanding and getting ready for paint. I even used it on my dashpad just before painting, and it did take some of the dye off, but I had no problem with the new dye sticking.
Just make sure you let it dry before you paint, and do a quick wipe down with Mineral Spirits before painting.
Re: New Paint job on a budget thread Part III - 09/10/0903:27 PM
I have never used lacquer thinner, but it sounds similar to that nasty "nail polish remover" I used to play with when I was a kid. We used to soak cotton balls in that stuff and kill insects with it for our bug collections.
Posted By: Anonymous
Re: New Paint job on a budget thread Part III - 09/10/0906:51 PM
The active ingredient in most nail polish removers is Acetone. This is what gives it that characteristic harsh / pungent smell.
Lacquer Thinner is a blend of various organic solvents -- usually Toluene and Xylene, but can also contain MEK (Methyl Ethyl Ketone) or Acetone.
Lacquer Thinner will have a more "aromatic" (think petroleum distillates) odor than straight Acetone.
Re: New Paint job on a budget thread Part III - 09/11/0901:47 AM
OK, thanks. I used to work with Methyl Ethyl Ketone in the printing industry. We used it to strip glazed dried-on ink off ink rollers used in printing presses.
That was some awful-smelling stuff, and you just knew when you got it on your hands that it was very bad for your health. It was very "cold" to the skin and just soaked right in and made a beeline straight for your liver.
Re: New Paint job on a budget thread Part III - 09/13/0904:33 AM
regular old dawn will remove wax, grease, pretty much everything. But they do also make a special cleaner for wiping the car before you paint. Kinda pushes you over the $50 part, but if you are going to do it, why not do it right? i think it is called wax/grease remover or something like that. Pretty much any parts store will have it.
Brew
Posted By: Anonymous
Re: New Paint job on a budget thread Part III - 09/13/0912:35 PM
hi everyone;
I just want to ask some questions I could find my answer in the board but articles and replies many many pages long so I`m sorry if I ask questions already replied.
1. I live in a flat and we got only car park. I haven`t got separate garage. So I thought If I buy rustoleum paint and Fast air dry hardener, Can I mix them and spray them. If I can, I can go to picnic in a sunny day and spray it in a open area.
2. If I mix them, How much paint,hardener and thinner i have to put in a mixture?
3. I want to paint candy pearly blue white. So I thougth I can paint car with rustoleum white and I can spray clear code with blue candy pearls. Is this possible? What do you think about idea?
Re: New Paint job on a budget thread Part III - 09/13/0902:07 PM
My thoughts:
Using a roller in that situation would not be a problem, but every time I have tried to spray outdoors, the amount of paint drifting away has been just unbelievable. I'm lucky if half the paint goes where I want it. So you're gonna end up using a lot of paint and also painting any other car within 10 feet of you.
Also, if you use the roller method, and then sand the paint smooth and buff it out with an electric buffer, there's no need for a clearcoat. As far as I know you can't use a roller for clearcoat.
Finally, the roller method also won't work for metallic paints, because they require a clearcoat (see above).
So what I would suggest is, using a roller and avoiding clearcoats and metallic paints if you want the job to turn out right. Unfortunately, this thread is not about spray-on paint jobs, so not much of the info here will pertain to using that method. Not that there's anything wrong with using that method, but this thread does not really discuss it. Also, I don't think Rustoleum is formulated to be sprayed on (except for the kind that comes in a rattle can) so that's another reason not to run it through a sprayer.
Re: New Paint job on a budget thread Part III - 09/13/0902:28 PM
Quote: regular old dawn will remove wax, grease, pretty much everything. But they do also make a special cleaner for wiping the car before you paint. Kinda pushes you over the $50 part, but if you are going to do it, why not do it right? i think it is called wax/grease remover or something like that. Pretty much any parts store will have it.
Brew
So if I use Dawn dish washing detergent to wash my truck, I'm stripping off the wax? I hope not, because I just use and ounce or so of regular dish washing detergent in a couple gallons of water to wash my truck. If it's stripping off the wax, I'll use something else.
Posted By: Anonymous
Re: New Paint job on a budget thread Part III - 09/13/0903:38 PM
Quote: My thoughts:
Using a roller in that situation would not be a problem, but every time I have tried to spray outdoors, the amount of paint drifting away has been just unbelievable. I'm lucky if half the paint goes where I want it. So you're gonna end up using a lot of paint and also painting any other car within 10 feet of you.
Also, if you use the roller method, and then sand the paint smooth and buff it out with an electric buffer, there's no need for a clearcoat. As far as I know you can't use a roller for clearcoat.
Finally, the roller method also won't work for metallic paints, because they require a clearcoat (see above).
So what I would suggest is, using a roller and avoiding clearcoats and metallic paints if you want the job to turn out right. Unfortunately, this thread is not about spray-on paint jobs, so not much of the info here will pertain to using that method. Not that there's anything wrong with using that method, but this thread does not really discuss it. Also, I don't think Rustoleum is formulated to be sprayed on (except for the kind that comes in a rattle can) so that's another reason not to run it through a sprayer.
Thanks for your reply. In this situation if I paint with a roller in my car park, some people can touch wet paint especially children. Also I live in UK so drying time can be long because of weather is not hot enough. Because of that I thought If I put some air fast dry hardener in a paint it drys with in minutes and I can sand and apply another coat if it is needed.
Are there any body else has got any experience with rustoleum paint in a sprayer.
Re: New Paint job on a budget thread Part III - 09/13/0904:09 PM
From my experience, spray on paint can stay wet for quite a while too. I have used both spray on and roll on paint and find that either one usually takes about an hour before it's dry to the touch.
So in other words, I'm not aware of spray-on paint drying any faster than roll on paint, especially when the roll on paint is thinned way down with mineral spirits. In fact, the roll on stuff might actually dry faster in some cases.
Posted By: Anonymous
Re: New Paint job on a budget thread Part III - 09/13/0904:19 PM
ohh I shocked really. Because as I said above I thought spray paint dry faster that roller. So If its like that I can roll it. But I have to hope not to rain. As known UK is rainy all the time.
Re: New Paint job on a budget thread Part III - 09/13/0905:50 PM
I have not had to deal with rain, my problem has been the 100-105 degree temps we have in inland California during June, July, August and September.
Some other people in this thread have mentioned having their paint getting rained on while drying, and I don't recall anyone saying it ruined it, though I could see how if you had a major thunderstorm with high winds and torrential rain, that might cause problems, especially if your paint is still wet to the touch. But short of that happening, I can't really see how rain is gonna affect your paint job too much, except the humidity you get during a rain storm will probably cause drying time to take longer.
Maybe someone who has dealt with rain while painting could share their experiences, because as I said, I have not encountered that problem yet.
Re: New Paint job on a budget thread Part III - 09/14/0901:09 AM
Quote:
Quote: regular old dawn will remove wax, grease, pretty much everything. But they do also make a special cleaner for wiping the car before you paint. Kinda pushes you over the $50 part, but if you are going to do it, why not do it right? i think it is called wax/grease remover or something like that. Pretty much any parts store will have it.
Brew
Sawn is a great grease and wax remover, switch to a real car wash soap..
So if I use Dawn dish washing detergent to wash my truck, I'm stripping off the wax? I hope not, because I just use and ounce or so of regular dish washing detergent in a couple gallons of water to wash my truck. If it's stripping off the wax, I'll use something else.
Re: New Paint job on a budget thread Part III - 09/14/0904:44 AM
its finally starting to look like a car again!
Posted By: Anonymous
Re: New Paint job on a budget thread Part III - 09/14/0908:49 PM
Beautiful!! What is it about a Beetle that makes my heart flutter? Do you have any plans for the wheel wells? I'm thinking of going with spray on truck bedliner to do my inner wheel wells and inside of my fenders. Would that be a bad idea?
Quote: its finally starting to look like a car again!
Re: New Paint job on a budget thread Part III - 09/14/0911:56 PM
Quote:
Quote:
Quote: regular old dawn will remove wax, grease, pretty much everything. But they do also make a special cleaner for wiping the car before you paint. Kinda pushes you over the $50 part, but if you are going to do it, why not do it right? i think it is called wax/grease remover or something like that. Pretty much any parts store will have it.
Brew
Dawn is a great grease and wax remover, switch to a real car wash soap..
So if I use Dawn dish washing detergent to wash my truck, I'm stripping off the wax? I hope not, because I just use and ounce or so of regular dish washing detergent in a couple gallons of water to wash my truck. If it's stripping off the wax, I'll use something else.
69dartGT is correct, do not use dawn for regular washes. It will remove the wax you have (if any anymore. ) the car wash soap is pretty cheap, probably $5 for a gallon. probably cheaper than dawn anyway.
Brew
Posted By: Anonymous
Re: New Paint job on a budget thread Part III - 09/15/0912:11 AM
Quote:
Quote:
Quote:
Quote: regular old dawn will remove wax, grease, pretty much everything. But they do also make a special cleaner for wiping the car before you paint. Kinda pushes you over the $50 part, but if you are going to do it, why not do it right? i think it is called wax/grease remover or something like that. Pretty much any parts store will have it.
Brew
Dawn is a great grease and wax remover, switch to a real car wash soap..
So if I use Dawn dish washing detergent to wash my truck, I'm stripping off the wax? I hope not, because I just use and ounce or so of regular dish washing detergent in a couple gallons of water to wash my truck. If it's stripping off the wax, I'll use something else.
69dartGT is correct, do not use dawn for regular washes. It will remove the wax you have (if any anymore. ) the car wash soap is pretty cheap, probably $5 for a gallon. probably cheaper than dawn anyway.
Brew
The Dawn Power Dissolver foam detergent for baked on grease will also remove paint. There was a lengthy discussion on thesamba(Volkswagen forum)about using it to strip paint. It was extremely effective.
Posted By: Anonymous
Re: New Paint job on a budget thread Part III - 09/16/0905:07 AM
Iv'e been reading through his entire thread for the last three weeks, using it for reference as I have chosen to try this roller method. I started rolling my hood about 2 weeks ago following all the steps involved but I will describe what I have done for the experts here and hopefully you guys can lead me in the right direction.
I started with rusto pro. gloss white and thinned to the 3 second run method, I would guess my mix was about 60 paint 40 m.s. I started on top of primer, sanded smooth to the touch and no imperfections showing while wet or dry. I put two coats on sanded with 600 grit wet, repeated this process 4 times for a total of 8 coats. I then sanded with 1000, 1500, and lastly used 2000 grit sandpaper all wet. The paint looked GREAT before I sanded and thought I was on the right track, but as soon as I finished the sanding, I went to buffing/polishing and I feel I got terrible results. 1st, I have lots of scratches left over as well as discoloration throughout the entire paint. I resanded the entire hood trying to get the color variance out but I'm not having any luck. As soon as the hood looks good dry, no shiny spots, no color variance, no orange peel, I go back to buffing and this all re-appears in the paint. When I look at he paint against the light, it shows everything, if I look at it from the side, it looks wonderful (without direct light). My question is am I being too picky, should I just live with it the way it is, or have others had the same problem with the gloss white paint. I'm starting think a different color would not show the color variation that I'm getting but I just don't know. The picture attached is showing the part of the hood that I have buffed, as well as a section that has not been buffed.
Re: New Paint job on a budget thread Part III - 09/16/0901:03 PM
What do you mean by "discoloration"? I see a large area in your picture that looks a little darker. Is that it?
I used Gloss White too, but my paint looks very uniform. Could the discoloration be your primer showing through? I do have a few areas where my primer went on rough that show through the main coat. That's the only discoloration I have, but it's not that bad and I doubt anyone else would ever notice it.
Also, the scratches, are they from buffing or are these scratches ones that are underneath your paint that didn't really fill in? If they're scratches from buffing, are you using the white Turtle Wax Polishing compound? Because the red Buffing compound can cause very noticeable scratches because it's so coarse. It can also leave a very bad red discoloration, especially on a white paint job.
Using the very limited info I have to go on at present, it sounds to me as if you might need a few more coats, and / or to thicken up your paint a bit. But that's only a semi-educated guess.
Also, did you give the paint several weeks to dry completely? The color variation could be areas where the paint has not completely dried and hardened yet.
Re: New Paint job on a budget thread Part III - 09/16/0909:32 PM
This is a 93 cavy that I use as a toy/winter beater. It has ported head, cat back, 1.6:1 rockers, bigger TB, shift kit and a reprogrammed chip. I've fixed up cars since the early 70's and with this car rusting out horribly, I decided to try the cheapo way. It was going to be a RWD V8 transplant, since its hard to find unrusty Vega's, but I let it go too long, then saw the fast and the furious and just had to make this run better. Not a big problem since we race midgets with 300hp 4 bangers, including the pontiac version of this motor.
Synopsis of the car before work started: There were no rockers, lower doors, left fender flare or right quarter left. Rather than replace it with metal, I build skis, so I thought I'd use some of that on the car. The left flare was molded from the intact right one, and the right quarter was molded from the left. From the molds I used triax glass and epoxy to recreate the parts, which were installed with regular glass. The triax and epoxy will be strong enough to take the snow blobs that build up and break off regular fiberglass/bondo.
total cost for this was $141.69 - and I have many new supplies left over. That includes the bodywork stuff too - lots of expensive triax fiberglass, and I used the epoxy I use for building ski's, which is much more expensive than fiberglass resin. But it releases from molds easily, and its super strong - needed that since the lower quarter panels and one fender flare are solid glass now - don't want snow accumulating and breaking things off! That also includes the plaster of paris and other things to create molds from the good side for the bad side - most people wont need that. Actual paint supplies was $46.41
If anyone tries this, here's what I learned (the hard way).
1. Spraying is much easier, but requires more taping 2. If you do roll it on, roll it very thin and wet sand after every 2 coats 3. Change the tape every 2 coats. I'm spending more time removing paint hardened tape than I did actually painting! 4. Contrary to the internet lore, I found 6" rollers easier to keep the paint even with 5. THIN!! I can't say it enough! The thinner a coat you apply, the smaller the orange peel, and the less sanding you'll have to do 6. Make sure to wait at least a couple weeks of hot weather before final sanding and buffing. Oil based enamels take longer to harden than acrylic enamels do 7. This is the biggie - make sure your surfaces are as perfect as you want your paint to be. If you don't mind dings and dents showing after your done, go for it. A light sanding and cleaning, and rustoleum will stick fine. If you want it to look like a mirror (and this paint will shine up that good), you need a perfectly smooth surface. Trust me - any little flaw looks 100x worse after its got shiny paint on it! And if you are changing colors, get a can of spray paint in the same color for the door jambs, under the hood and trunk, and any places you cant reach easily (like under door handles). Spray those first, then the rest of the paint will blend in perfectly
Re: New Paint job on a budget thread Part III - 09/17/0908:20 AM
Ok, lesson learned, but first thanks for the advice on the gloss white paint issue. As I was reading this thread and taking it all in before I started, I remembered lots of people saying to make sure your working in a VERY well lit area. I used to own an aquarium shop and had some metal halide lights stored away. I figured this would be the perfect light source for me to use while painting as I'm painting in a climate controled garage and no outside. WRONG idea.. I pulled the car out of the garage today to take a closer look and the paint looks flawless no scratches no discoloration at all. Metal halide lights are literally brighter than the sun and 10k spectrum will make you go batty if your using them to identify blemishes. Sure there are scratches but none of the problems I listed in the earlier post show up in any other kind of light at all. I figure no one else probably has metal halides but if you do, a little fyi. DON'T inspect your buffing job with them!! I am going to continue on to the rest of the car as the paint looks great. I'll post some pics of the completed project in a couple of weeks. Thanks again guys, it's always nice to see such good folks willing to help.
Re: New Paint job on a budget thread Part III - 09/19/0907:48 PM
sweat equity.. Its all in how you wet sand it and rub it out. Unfortunately my camera makes it look kinda pinkish, but its basically fire engine red.
And I really could have gone to 1200 grit for an even better shine. But the car had massive clear coat failure and surface rust over the whole thing in addition to the rotted panels. All I wanted was for it to not be embarrassing to drive - wifey wouldn't even ride in it before! And it was her car she bought brand new in 93!
I had some pics of the sunset reflecting that looked really cool, except the low light made the images look grainy.
Little better image of the wheel well (ignore the ugly dude and uncleaned bumper cover)
Re: New Paint job on a budget thread Part III - 09/19/0909:29 PM
What a transformation , that paint looks really nice.
Posted By: Anonymous
Re: New Paint job on a budget thread Part III - 09/20/0909:13 AM
Gorgeous finish. Looks like it came out of a professional booth. No, sorry - it looks like it has been restored by someone with a passion!
I have been looking to see if it is possible to roller or brush the modern 2K car paints in the same way and have posted in the forum today "Can you Roller or Brush 2K paints". Maybe give it a look sometime?
Posted By: Anonymous
Re: New Paint job on a budget thread Part III - 09/21/0906:12 PM
Quote: 5. THIN!! I can't say it enough! The thinner a coat you apply, the smaller the orange peel, and the less sanding you'll have to do
I hear you -- and many, many others -- who recommend really thing coats. I don't doubt that's important.
But can you go too thin? A few times I've squeezed so much paint out of the roller, it goes on blotchy and ends up being matte. It seems like there's simply not enough paint on there for it to level. Could that be the case? Maybe one needs to put as little as possible paint, yet still enough that it can level?
Re: New Paint job on a budget thread Part III - 09/21/0908:51 PM
the way I did it was to put it on thin and even, then roll over the top different directions with just the weight of the roller doing the work to make it perfectly uniform thickness. It smoothed it so good I never had to worry about it leveling. It also made the orange peel much finer.
The first coats I did bit thicker - I was experimenting a bit. But I ended up sanding most of what I applied to get it smooth again. Then I tried different mixtures and thats when I found 50/50, 6" rollers and thin coats smoothed the way I outlined worked perfect.
This paint method is basically foolproof. Once you have the needed thickness, what makes it look so smooth is the sanding. The polishing brings out the shine - but I'm sure everybody knew that already.. lol
Re: New Paint job on a budget thread Part III - 09/21/0911:52 PM
Quote: the way I did it was to put it on thin and even, then roll over the top different directions with just the weight of the roller doing the work to make it perfectly uniform thickness. It smoothed it so good I never had to worry about it leveling. It also made the orange peel much finer.
The first coats I did bit thicker - I was experimenting a bit. But I ended up sanding most of what I applied to get it smooth again. Then I tried different mixtures and thats when I found 50/50, 6" rollers and thin coats smoothed the way I outlined worked perfect.
This paint method is basically foolproof. Once you have the needed thickness, what makes it look so smooth is the sanding. The polishing brings out the shine - but I'm sure everybody knew that already.. lol
My problem with ultra-thin coats is this: In order to apply another layer you have to sand off the gloss right? Well when I sand off the gloss it seems as though all the paint I had just applied is gone. I see miniscule improvements after 2 coats and after sanding my blotchy(yet smooth) base coat of primer shows through again. Is it necessary that ALL the shine be gone to apply another layer? I guess I don't have this wet sanding thing down quite yet.
Re: New Paint job on a budget thread Part III - 09/22/0903:12 AM
Yeah, tell me about it. I had the same problem. That's why i was thinking it might be better to get all 8 or 10 of your layers down before you start wet sanding.
I spent countless hours sanding off the paint I had just applied, only to end up with about as much paint as I had before I started sanding. Or even less, in the spots where I sanded all the way through to the primer.
Posted By: Anonymous
Re: New Paint job on a budget thread Part III - 09/22/0904:51 AM
Quote: the way I did it was to put it on thin and even, then roll over the top different directions with just the weight of the roller doing the work to make it perfectly uniform thickness. It smoothed it so good I never had to worry about it leveling. It also made the orange peel much finer.
Did you also squeeze out most of the paint by rolling the brush hard on the ridges? how many rolls would you do if so?
Posted By: Anonymous
Re: New Paint job on a budget thread Part III - 09/22/0907:02 PM
Satin Black Question: Okay, I've never worked with Satin Black Rust Paint, and I've painted my RR Bulge Hood, front valence, and 1/2 the roof the satin black. I used this method, roller method, fifty percent mineral spirits, and sanded in between coats.
I now have a very slick surface, no orange peel, no drips, no runs on the areas where I wanted a matte black appearance and it looks good. I do have a few small dings that showed up in the black that I didn't see with the primer layers, and this weekend I'm getting some body glaze to fill those in and repaint.
I've never seen a car with matte/satin black, so I'm not familiar with the surface of the paint at the end result. I'm treating this more like a primer and not wet sanding. Just sanding down the orange peel and sometimes the runs with increasingly finer grits of sandpaper. All in all, it's a very level, evenly covered surface that feels smooth as silk, but without the gloss of the high gloss paints.
Is this the end result I want for matte black, or should it feel like an unsanded surface, rough to the touch? Will I have to polish with an orbital polisher? Again, at the tender age of 52, I've never seen a matte black surface on a car.
Stupid questions I know, but man, I'm stoked with the look.
Re: New Paint job on a budget thread Part III - 09/22/0910:48 PM
Hey, that's a good idea to start a forum on the subject, I just wish he hadn't gone for the "all black" look on his board. I hate trying to read sites like that which a black background and white type.
Seems like it takes twice as much effort to read every sentence.
Re: New Paint job on a budget thread Part III - 09/22/0911:04 PM
yeah.. not a fan of black websites either.. but there are some really good paint jobs there, as well as some that should have never touched a car!! Good for the comical value.
The guy that won his class at the Street Rod Nationals in St Paul this year got Rustoleum interested enough to figure out there are a ton of people doing this kind of paintjob. So maybe they might come out with some more specialized paint for us..
Re: New Paint job on a budget thread Part III - 09/23/0912:12 AM
Does anyone have any advice for me as to fixing several small chips that still show through even AFTER a coat of primer and 3 coats of black paint? I was thinking bondo but these chips are extremely small and I doubt I could make them look all that great with bondo due to the way it has to be applied. I heard something about a glazing compound or something? Should I give that a try? I tried using duplicolor filler primer but its messy and I get overspray and ect... Any advice?
Re: New Paint job on a budget thread Part III - 09/23/0901:21 AM
glaze is basically thick primer in a tube - its great for deep scratches, chips, etc. It dries fast, but it also shrinks and cracks if its too thick, so you want to do several layers.
My car chases storms, so I had to fill a few hail dents that way. They were too shallow for bondo, and I was on a budget.. lol I have a ton of pics on facebook from start to finish that shows how bad the car really was. I don't think they will show unless your a friend though...
Re: New Paint job on a budget thread Part III - 09/24/0901:19 PM
I take it these pictures are from before wet sanding, since the paint is so shiny. Are you using Brightside or Rustoleum? What type of mineral spirits?
Whatever you're doing, it seems to be going very well.
Re: New Paint job on a budget thread Part III - 09/25/0904:17 AM
looking good guys. i havent painted since my last update of painting the inside of the cab, firewall, etc. However i have noticed that the inside of the cab needs one more coat to hide the previous blue.
Starting this weekend i am going to be working on the truck 100% again, i want to get that hting painted! SOoo tired of sanding though
Re: New Paint job on a budget thread Part III - 09/25/0910:30 PM
the texture you see is just a few sanding marks. Since I thinned out the paint more it dried right away and has absolutely positively no orange peal whats so ever
Re: New Paint job on a budget thread Part III - 09/26/0904:12 AM
Youngster, you are doing a great job What do your folks think? "Should have bought a bigger car for him" I like it, have you given any thought to doing the fenders darker? Good look for a bettle.
Re: New Paint job on a budget thread Part III - 09/26/0906:09 AM
Thank you 69dartGT. I came here almost a year ago as a kid who knew very little about body work and a vegue idea about painting, let alone with a roller. I just took my time, learned from any mistakes, and kept going until everything was perfect.
I did have to rethink a few things along the way, case in point using fiber glass patches instead of aluminum tape and bondo (what was I thinking!!?)
One of my favorite things about this method was the workability of this paint. With expensive automotive paint, after you spray it on once thats it, your done and can't go back to fix any mistakes. When your rolling rustoleum you can easily see any imperfections once the paint becomes reflective and quickely go back and touch something up, maybe a small ding that you missed before. Not to mention no smell, no over spray, fumes, etc...
I'm hopeing to drive the car durring senior year in highschool. My dream has always been to show up to the parking lot and stick out a little amongst the cookie cutters with a nice, respectible, painted bug.
Thanks to 69charger that dream may become a reality very soon
Re: New Paint job on a budget thread Part III - 09/26/0907:10 PM
I have a grandson your age, unfortunately he lives in another state or I'd have him involved in a similar project. Still think a set of brown fenders (if the color was right) would look great on that car.
Re: New Paint job on a budget thread Part III - 09/27/0902:17 AM
I don't think you can spray Tremclad, it wasn't designed for that, unless you mean the rattle can type. If you mean that stuff, yeah, you ought to be able to do two coats in a day.
When I rolled on my paint, I did two coats a day, and waited 4-5 hours between coats. I tried to sand the next day, but it wasn't always dry enough for my taste, so I ended up waiting more like 2-3 days before wet sanding.
Re: New Paint job on a budget thread Part III - 09/27/0902:48 AM
Just to say in a way thanks to the community; I'll post my pics after using 10 Cans of RUSTOLEUM 's 2x PAINTER'S TOUCH SPRAY PAINT because of simplicity:
[image]http://www.homedepot.com/catalog/productImages/300/a3/a3cf0e44-8ae9-47c4-aab1-88894b1c719e_300.jpg[/image] BEFORE [image]http://claspics.com/23831527/1240175249-759.JPG.php?p=*full-image[/image] [image]http://claspics.com/23831527/1240175896-978.JPG.php?p=*full-image[/image] AFTER [image]http://claspics.com/610/173998/1253576352-775.JPG.php?p=*full-image[/image] [image]http://claspics.com/610/173998/1253576437-652.JPG.php?p=*full-image[/image] I did not get shine; but then again i only did 3 coats and did not do a final sanding nor polishing(the hood I experimented w/ rubbing compound but did not get results). When wet thou it looks really good. Next time i'll try rollers
Sorry don't know why these are showing I tried to fix one but not luck. Tom
Posted By: Anonymous
Re: New Paint job on a budget thread Part III - 09/27/0905:26 AM
Quote: I don't think you can spray Tremclad, it wasn't designed for that, unless you mean the rattle can type. If you mean that stuff, yeah, you ought to be able to do two coats in a day.
When I rolled on my paint, I did two coats a day, and waited 4-5 hours between coats. I tried to sand the next day, but it wasn't always dry enough for my taste, so I ended up waiting more like 2-3 days before wet sanding.
Your mileage may vary.
It seems like the paint is prone to runs but you can defnitely spray it..
i gave up on the rolling technique after all the sanding i had to do to get the texture out (i realize now if i had been more patient it could have turned out for the better)
but now I've moved on to spraying with a 90 dollar harbour freight turbine hvlp sprayer
Re: New Paint job on a budget thread Part III - 09/27/0907:46 PM
you can spray it for sure - we've used it for years on our race car chassis and roll cages. Its cheap, easy to fix every week, and the yellow/whites show any cracks after wrecks or weld failures.
Shine doesn't matter for that, but I'm sure it would sand and rub out with a long enough dry time. We spray it straight or 10% mineral spirits, depending on the temps. Most of our work is in the winter in a 50 degree shop...
Re: New Paint job on a budget thread Part III - 09/30/0908:53 PM
Hey guys, my car is about 5 coats from being done and its about 40-50 degrees here in western new york. Can I finish my paintjob? Anything I should watch out for in the cold weather?
Re: New Paint job on a budget thread Part III - 09/30/0910:20 PM
shiny new parts....
I'd use a little more thinner at those temps and give it longer to dry. If you can get some cheap infrared lamps that would help it along if its inside. Direct sunlight will also help a lot. 50 degrees might be 90 on the surface.
And the final dry time when your ready to start finishing - I'd give that as long as you possibly can.
Your other option is to add some hardener. This thread has some info on that..
Re: New Paint job on a budget thread Part III - 10/01/0901:15 AM
I love bugs.. my first car was a 68 I paid $25 for - rod through the block. Bought a $175 baja bug jumped so much the doors wouldn't close. Put the 2 together, finished it when I was 15 and blew it up a few weeks after my license. I was doing lots of burnouts in my driveway till I was legal though
Re: New Paint job on a budget thread Part III - 10/02/0908:58 PM
back in the 80's-90's our midget sprint cars were pushing 320hp N/A on methanol using the flat 4's. You could run one of those motors on E-85. My fav bug was my first - had an 1835, dual Dell'Orto's, killer cam and stinger exhaust. My last one was a 67 baja bug with a warmed over 1600, but it would run all day in the desert around Palm Springs (Windy Point)
I love the california bug look and would gladly buy another.. or a vega.. or a 69 cuda.. or a demon.. or.....
Re: New Paint job on a budget thread Part III - 10/06/0904:21 AM
and i found that when you have red paint all over your hands that you just could simply not get off, everyone at school will look at you weird and ask how the heck you got your hands so bloody.
Re: New Paint job on a budget thread Part III - 10/07/0907:11 PM
lol, that was my first bug. It used to be a Peg Prego electric car, working lights, horn, detailed gear shift with two speeds and reverse, real working brakes, detailed VW wheels, the whole shot!
unfortunately the electricals fried and the steering broke. So I salvaged the body and mounted it on a pedal car chaise. Pretty soon I'm going to put a weed eater motor on it and have a field day!
Re: New Paint job on a budget thread Part III - 10/09/0902:44 AM
well i did coat #2 on Monday, wetsanded on Tuesday, nothing on wednesday, and today i layed down coat #3. I am doing farely thick coats, because i am running out of time, i will just have some extra quality time with mr. buffer when its back together
Overall i am satisfied with how the paint is laying down but not satisfied with my rushed body work. it definately shows, but really if you saw what i started from it isn't htat bad... Considering it had a part of the bump smashed in 2 feet long, tons of dents, didnt have that gas door, etc.
So tomorrow i will put on coat 4 and touch it up, and this weekendi will probably start putting the whole truck back together!!! Im going to keep the paint out because i know there will be some things i missed or need to touch up.
Re: New Paint job on a budget thread Part III - 10/09/0903:18 AM
over all I think the truck looks great, that shine is fantastic!!!!
the body work isn't that bad, getting something perfect takes a very very very long time. I've been doing body work on my bug since January and I'm still not all the way done!!
Re: New Paint job on a budget thread Part III - 10/09/0903:29 AM
Thanks. It should look 100x better when i buff it out all perty . And when all the chrome trim, emblems, bling bling is back on so your not looking plainly at the paint job.
I can't wait until i start getting things back on it!!! (a few days!). It is truely amazing when a 3 year long project goes back together after paint. wow!
Re: New Paint job on a budget thread Part III - 10/12/0901:36 AM
I have a question for the guys here. Does anyone know of a place that would mix Rustoleum to look like a certian color? I've been to Home Depot and Lowes, neither of them can do it?
Posted By: Anonymous
Re: New Paint job on a budget thread Part III - 10/12/0905:15 AM
Quote: I have a question for the guys here. Does anyone know of a place that would mix Rustoleum to look like a certian color? I've been to Home Depot and Lowes, neither of them can do it?
I remember reading somewhere that you can mix it with colored paint powder from a hobby shop. Unfortunately I have no idea what kind of powder or if it really works. Anyone know?
Re: New Paint job on a budget thread Part III - 10/12/0901:10 PM
Quote: I have a question for the guys here. Does anyone know of a place that would mix Rustoleum to look like a certian color? I've been to Home Depot and Lowes, neither of them can do it?
I think the only way you can do 'custom' Rustoleum or Tremclad colors is to 'do it yourself'.
Custom mixing of Rustoleum or Tremclad is not as simple as housepaints ( where they can match colors to whatever you want ). It is just the nature of the paint.
Most of us end up 'experimenting' and custom mixing our own paint. Some of those experiments work well and others just lead to frustration. Because you have two wild variables at play when you are custom mixing Rustoleum and Tremclad paints.
For example : Both companies produce a 'Fire Red'... and you would 'tend to think' that if you added a little black to it, then you might be able to shift the fire red over to more of a darker red. BUT instead you end up with something in the lines of a murky brown... or depending on the percentage mix, you might get a flippin purple.
So the problem we face is that we have to create custom colors by blending two or three existing colors. Whereas custom house paints, automotive paints and other customizable paints can have shots of base tints or base colors blended together in precise amounts to arrive at very specific or unique colors.
Anyhow... if you want to play around with trying to figure out a percentage ratio of mixing Tremclads and Rustoleum paints together... we talked way back in the message thread about how to make something like an artist pallete for testing out various percentage rates of blending to see on a small scale how blends would look...
I would be reluctant to add any tint or additive to try to alter the natural color of a given Tremclad or Rustoleum paint. You just never know how it will react over the long run...
.
Posted By: Anonymous
Re: New Paint job on a budget thread Part III - 10/12/0905:14 PM
I have heard (but not verified for myself) that the ACE Rust Stop enamel (supposedly the same formula as Rustoleum) is supplied as a tint-able neutral base, which can then be custom mixed to any color.
The question is whether every ACE store does this, or only select ones.
Re: New Paint job on a budget thread Part III - 10/12/0906:09 PM
hm, I guess I might have to get creative. L87 Pearl White is a very strange color, it always looks completely different depending on the light. It also has many different shades of beige, green, gray, white, etc...
I do have a paint sample of the color, but like you said. trying to match it might cause a lot of frustration
Re: New Paint job on a budget thread Part III - 10/12/0911:17 PM
Just to say in a way thanks to the community; I'll post my pics after using 10 Cans of RUSTOLEUM 's 2x PAINTER'S TOUCH SPRAY PAINT because of simplicity of spray paint
BEFORE AFTER
I did not get shine; but then again i only did 3 coats and did not do a final sanding nor polishing(the hood I experimented w/ rubbing compound but did not get results). When wet thou it looks really good. Next time i'll try rollers
Re: New Paint job on a budget thread Part III - 10/13/0912:41 AM
I used the gloss white on my truck, and used a combination of spray on and roll on Rustoleum. They matched perfectly, and for me, I thought the spray actually went on a lot smoother, but tended to run if I went too heavy.
Overall, I like the roller method better, because it's 1.) cheaper, and 2.) doesn't drift like the spray and get all over everything else, and 3.) less wasteful because of lack of drift, and 4.) can be touched up if it runs, but if the spray-on stuff runs, you're pretty much out of luck, and 5.) you can load more paint on per coat without it running.
Posted By: Anonymous
Re: New Paint job on a budget thread Part III - 10/13/0902:15 AM
Ace Rust Stop Enamel has a tintable base. I picked up a gallon of Mopar's Tahitian Gold for the Serious Satellite project. I went with the non metallic base, but I'm going to try a quart of Tahitian Gold metallic base after I lay the non metallic down.
At two different Ace stores in the Dayton area I've been in they can mix up the custom colors.
I matched up the paint I wanted with a paint chip. I actually had to go to Lowe's to matchup the paint from 1974 with a chip of similar color, then took it to ACE and they mixed it off of that chip. Pretty easy. And cheap.
Re: New Paint job on a budget thread Part III - 10/13/0904:27 PM
If you have a Menards they might custom mix Rustoleum paint. They sell tintable bases there but they also have a brochure that shows custom colors. I asked if they only make the colors in the brochure or if they would make a custom one. The guy told me he could make a color if I brought in a sample. The next time I inquired about it I was told they didn't color match Rustoleum so maybe it depends on who is working there.
Re: New Paint job on a budget thread Part III - 10/14/0902:27 AM
hi guys.
about 2 years ago i read through this whole thing.
i didtn go the roller route. i sprayed the rustoleum. it turned out really nice and glossy. but i wetsanded with 2000, then used turtlewax rubbing compound, then turtlewax polishing compound. its lost all of its shine. from a sharp angle it looks nice and glossy but if you look at it straight on it appears hazy. how can i get that shine back?
Re: New Paint job on a budget thread Part III - 10/14/0902:58 PM
Did you ever wax after you finished? These paint jobs really need a good coat of wax to protect them, unlike factory paint jobs where the clearcoat provides most of the protection.
Unwaxed paint with no clearcoat acts almost like a sponge for dirt and dust and road grit and bird poop and everything else a car's paint job is exposed to.
I'm finding that myself, since I park under a tree where birds roost at night. When they crap on my white paint, the stuff can in some cases become almost etched into the paint. I have yet to find a way to remove the really stubborn stuff. About all I can think of is to put another coat of wax on and hope that helps.
Re: New Paint job on a budget thread Part III - 10/14/0903:30 PM
no no wax yet. i just finished spraying it on sunday. it is still in the paint booth lol
Posted By: Anonymous
Re: New Paint job on a budget thread Part III - 10/14/0906:26 PM
I also just finished! Now I'm wondering:
- should I wait a while before polishing, to let the paint harden?
- should I polish at all?! this guy on youtube has good results; supraghost and others say it takes any shine you do have out!
- thinking about getting this polisher from Can tire to use. it's on sale half price
By the way.. I just did the hood of my car to start. It looks decent, but the shininess is not equal over the entire hood. I'm hoping some shine or waxing will help that out.
Re: New Paint job on a budget thread Part III - 10/15/0912:11 AM
Quote: waxing the whole car with a porter cable polisher from harbor freight is a must after using polishing compound.
got another coat on, I'm on a "roll"
is it wrong that I'm starting to become attracted to my car?
its funny isn't it? I'm seriously thinking of driving my new car all winter and parking my 'winter beater' - and kinda hoping it gets a little rust so I can paint that one too!!! lol
Re: New Paint job on a budget thread Part III - 10/15/0904:52 AM
I have not read any of the other 138 pages of posts about the stated topic but I am a little confused about how some people in the last page or 2 are after a decent paint job starting off using inferior products. To spend a bunch of time on the prep work then use a crap paint then spend a bunch of time trying to make it look like something better after it's painted seems like 1 step forward & 2 steps backwards. Why not buy a cheaper line of paint like delstar/centari that shines good, is easy to apply, covers many imperfections, is more resonably priced and not require anything once done? Is that still beyond the budget part of this post or did I miss something in the other 138 pages? no I'm not going to go back and read them all
Re: New Paint job on a budget thread Part III - 10/15/0911:11 PM
yeah, you should read back. You will find many that:
a) don't have the budget b) car isn't worth the cost of a paint job (me!!) c) painted so many cars correctly this method fascinated them (again me!)
My project was to make an embarrassing rusted out car look as good as it ran - its got a lot of drivetrain mods, but I did it on a car that was primarily the winter beater to my good car. So now instead of being worth maybe $500, I've increased the value to many thousands more. And looking at it there's no way you can tell its rolled on - it actually has a better finish than my other 2 cars
And I didn't need a paint booth, no overspray into my shop or house, no cleanup, and I got a good workout at the same time!
Re: New Paint job on a budget thread Part III - 10/16/0902:10 AM
I also have to agree about the troubles spraying, it gets EVERYWHERE!!
when I first attempted to paint my car with rattle cans I had breathing problems almost a year after, not to mention it caused a ton of arguing between me and my mom.
I never would have been able to afford a spray on paint job for 10 years if I didn't do it this way.
all in all it really isn't much more work than spraying on paint.
Re: New Paint job on a budget thread Part III - 10/16/0904:20 PM
After
Posted By: Anonymous
Re: New Paint job on a budget thread Part III - 10/16/0905:52 PM
Quote: polishing definitely brings out the shine - unless you try to do it when the paint is still curing. Then it just gets more dull the more you do.
this was waiting a couple months for wet sanding/rubbing out and final polish - but before wax
ok maybe I'll just wait till next spring. Then I wet sand with a high grit (2000?) then use polishing compound and a buffer?
Re: New Paint job on a budget thread Part III - 10/16/0909:03 PM
Quote:
Quote: polishing definitely brings out the shine - unless you try to do it when the paint is still curing. Then it just gets more dull the more you do.
this was waiting a couple months for wet sanding/rubbing out and final polish - but before wax
ok maybe I'll just wait till next spring. Then I wet sand with a high grit (2000?) then use polishing compound and a buffer?
im not waiting until next spring. im ordering some mcquires rubbing compound and tech wax 2.0 and ill try it in a few weeks.
Posted By: Anonymous
Re: New Paint job on a budget thread Part III - 10/17/0912:18 AM
It'll be pretty cold out then, that won't affect anything?
Also... the highest grit sandpaper I could find anywhere was 1500 at partsource. can I buy the higher grit stuff here or order in? or will 1500 do for this final step?
thanks I'm looking forward to finishing up and hopefully getting the nice shine like I see in those pics!
Re: New Paint job on a budget thread Part III - 10/17/0901:37 AM
Now
Posted By: Anonymous
Re: New Paint job on a budget thread Part III - 10/17/0904:51 PM
Question, Anybody with experience doing a rusto base and a brightside top coat? I am about to do black and I am wondering if there is any benefit to slapping 5-6 coats of brightside (more expensive) as opposed to 4 rusto coats then 2 brightside. Wouldn't this be the smarter move? Adhesion issues? It seems more economical and I can't see much benefit in going all brightside. Input appreciated.
Re: New Paint job on a budget thread Part III - 10/18/0912:48 PM
Quote: Question, Anybody with experience doing a rusto base and a brightside top coat? I am about to do black and I am wondering if there is any benefit to slapping 5-6 coats of brightside (more expensive) as opposed to 4 rusto coats then 2 brightside. Wouldn't this be the smarter move? Adhesion issues? It seems more economical and I can't see much benefit in going all brightside. Input appreciated.
Yes... you can start with Rustoleum/Tremclad and then finish it with coats of Brightside. That is how I did my McLaren Mustang
Posted By: Anonymous
Re: New Paint job on a budget thread Part III - 10/18/0901:32 PM
Thanks for the response Marq. I figured it was doable just wanted to make sure if I cheap out and only buy one quart of brightside, it will be enough for full coverage and shine after final wet sanding and such. Anything I miss out on by not going all brightside coats? Durability? Also, since I am going so few brightside coats, final coat should be full strength for sure or can I still get away with a little thinning?
Re: New Paint job on a budget thread Part III - 10/19/0903:01 AM
i guess i will update you guys again since the truck is half way back together. Ill update another time once the truck is all together, and again when the paint is buffed. As it sits now notice how everything is very straight except the bed. I am going to completely re-do the body work on the bed in a few months.
Re: New Paint job on a budget thread Part III - 10/20/0901:45 PM
Rustoleum Gloss White in bright sunlight is almost blinding. I was looking at my paint job recently and comparing it to other cars in a parking lot, and it appears that other people's white paint jobs are either old and faded, or car manufacturers use more muted tones of white on their factory paint jobs.
Also, after driving in the rain a couple of times, I'm kind of annoyed at how every single speck of dirt shows up. I think I spend twice as much time washing my truck with the new white paint job as I used to. And with no clearcoat, the road grime seems much harder to remove.
Re: New Paint job on a budget thread Part III - 10/21/0912:45 AM
Yes sir! It is a V8! I do love how the Rustoleum Bright White looks. Its identical to the GM Frost white, which is a color I love. The best thing about that white is how it makes everything else pop, like the parking lights and tail-lights or anything else you put on it.
Posted By: Anonymous
Re: New Paint job on a budget thread Part III - 10/21/0902:35 AM
hey guys I've spent copious hours reading this thread then gave up on page 30 or so. and just had a few questions. sadly i don't own any American muscle all I could afford is a Honda. and its paint job was decent but a wreck made quick work of that so now im wondering would this method of painting work well if I rolled everything but the front bumper? which I could roll but was looking to save some time on it because of it's shape. i do say that i am sold on this method. but another question will the enamel stick well to the plastic bumper covers front and back or is some plastic primer required or should i chose a more flexible paint. ...oh one last thought which is a better white? gloss white or canvas white? in the RustOleum line of colours. i love my car but i cant afford a real paint job (full time student)but i do think i could take a week or two get a paint job done if i borrowed a car. so thanks in advance for the help it's greatly appreciated.
Re: New Paint job on a budget thread Part III - 10/21/0911:41 AM
I say with the Rustoleum paints that the flexibility is not an issue. I was asked the same question on another board, so I took my plastic paint tray, that I use to paint, and turned it inside-out. None of the paint cracked pealed or chipped. I have the flexible rubber front and rear bumpers too and have had absolutely no trouble with them from flexing during assembly. I would think that the Brightside paint may be just as good as it it made to go on fiberglass boats, with do flex as well, but I don't have any experience with it.
Posted By: Anonymous
Re: New Paint job on a budget thread Part III - 10/21/0902:38 PM
Thats good. well i think i'm going to start buying supplies. and i', going to spend the extra money and make a make shift paint booth out of LOTS of home depot sheet plastic to prevent dust. and i have and orbital buffer will that work as a sander too if i get some sanding pads? or should i go with blocks. the car is small but not small enough that i would want to do the whole car by hand.
Re: New Paint job on a budget thread Part III - 10/21/0903:57 PM
Re the plastic bumper, I think there was another guy who had some adhesion problems on his plastic bumper, but IIRC, this was because he did nothing to prepare the surface prior to painting (i.e., no sanding).
I can see how a smooth surface like that, especially one that shrinks and expands depending on temperatures, might cause problems if not prepped. So I would be sure to rough up the surface with some fine grit paper (maybe 400-600) to give the paint something to adhere to.
Re blocks, I didn't use any, but now wish I had. I had to do a ton of wet sanding and my fingers were literally bleeding at one point. But I have not of anyone using an orbital sander for sanding, most people tend to think it would be too powerful, but i have not tried using one myself.
Also, I burned through the paint in a lot of spots and suspect a block might help prevent that, at least on flat areas. Be sure to watch out for edges when you're sanding, it's really easy to over sand, so I would err on the side of sanding places like that too little rather than risking burning through.
Finally, watch out for drips. I let far too many of them slide on early coats, thinking I could sand them down, but it's almost impossible to sand them perfectly flat. Fortunately, since I used gloss white (probably the most forgiving color) they're not too noticeable as long as the paint has a good shine. The reflections really do a good job of keeping the eye from seeing them.
I think a week to 10 days should be enough down time to get all your coats down and then reassemble the car. The final wet sanding and all that can be done days or weeks after you finish laying down you last coat, and the car can be driven while it's drying. Good luck and post some pics when you're done.
Re: New Paint job on a budget thread Part III - 10/21/0905:20 PM
Quote: i guess i will update you guys again since the truck is half way back together. Ill update another time once the truck is all together, and again when the paint is buffed. As it sits now notice how everything is very straight except the bed. I am going to completely re-do the body work on the bed in a few months.
I've seen a few 2 tone paint schemes in this thread over the years but I'm still curious when another one is posted how the poster did this.
1971Ford, did you paint one color for several layers with a taped line and then move the tape and switch to the other color? I would think tape would be required to get a decent line. Obviously you are putting trim over the area where the colors meet so the line quality doesn't have to be great.
Do you wetsand both colors at the same time?
Do you mask off the lower portion when painting the top or was the top completed before the bottom was even started?
I guess an explaination of what you did would be better than me asking a million separate questions.
Posted By: Anonymous
Re: New Paint job on a budget thread Part III - 10/21/0907:29 PM
hey thanks for all the answers you guys have provided i should be starting soon and i for sure will post up some picturs of how it went along the way and if like the final results. basically i've conlcuded it's all going to come down to how much prep i do and if i put the effort and time into it to make it look good. so i'll keep ya all posted.
one more question i have a 8" orbital buffer that i was going to use to wax the car could i put some sanding pads on it and would that work for my wet sanding and some of the prep work?????????
h a i love the avatar selection the forum has !!
Posted By: Anonymous
Re: New Paint job on a budget thread Part III - 10/21/0907:38 PM
oh also maybe so this gets answered if some one could pm their answer. i was reading above and saw that you can do RustOleum / Tremclad under coats then finish up with interlux bright side..
so my question is brightside > RustOleum ????
and will i like the Rustoleum White over the Brightside White? has any one seen these two?
Re: New Paint job on a budget thread Part III - 10/21/0907:41 PM
I have heard of people using vibrating sanders for prep work, but I would think an orbital sander would spin too fast even for prep work, and you might end up damaging stuff you didn't want to sand. Might be OK for large flat areas like the roof. Try it out and see how it goes.
However if you used an orbital sander for wet sanding you'd get swirls like crazy, I would think. My .02 cents FWIW.
Posted By: Anonymous
Re: New Paint job on a budget thread Part III - 10/21/0909:32 PM
ok sounds good. cause i have a vibrating sander and the orbital it's pretty big so maybe it's good for the roof or hood. and i always have my hands.
but whats every ones opinion on what paint to use should i go few coats rusto then top coats brightside? what the advantage or should i just do all rusto?
Posted By: Anonymous
Re: New Paint job on a budget thread Part III - 10/21/0909:46 PM
Quote: ...
but whats every ones opinion on what paint to use should i go few coats rusto then top coats brightside? what the advantage or should i just do all rusto?
General experience is that Brightside has more shine to it, and some have been able to lay down final coat of Brightside and stop there (no final buffing to get appropriate shine). Of course, Brightside can be final buffed / polished for better shine and finish if desired.
For Rustoleum, the general experience has been that final appearance almost always requires final buffing / polishing.
There is also some thought that Brightside may be harder and provide a more durable finish than Rustoleum. This could mean less ongoing maintenance (buffing and waxing) of Brightside. Brightside is intended to be UV resistant on its own, whereas Rustoleum requires waxing for best durability.
The idea of Rustoleum first, then final coat or coats with Brightside is simply because Rustoleum is so much less expensive. All of the properties outlined as Brightside advantages above should be gained with Brightside just as the final coat(s) -- assuming, of course, that the earlier coats of Rustoleum are fully cured before laying down the Brightside.
Posted By: Anonymous
Re: New Paint job on a budget thread Part III - 10/22/0902:58 AM
oh ok that sounds good then but one of the main reasons i liked the idea of rustoleum was they had a spray can wich i was hoping to use on the front bumper wich would be time consuming to roll on. but i guess i could spray the rist coats and then roll on the bright side. ok thats good to know. but since the bright side is harder will i have a problem with it being on the plastic front and back bumper covers?
Posted By: Anonymous
Re: New Paint job on a budget thread Part III - 10/22/0903:24 AM
sorry even after lots of reading i still have tons of questions. but i guess i dont need to know every thing, but i do need to know exactly wich line of bright side paint to choose there were like 10 i'm assuming i want Interlux Topside Paint or do i want bottom side? and there were like 3 types of bottom side or 5 but i dont know what any thing is.
sorry im sooooo impatient i'm stoked to give this a try
Posted By: Anonymous
Re: New Paint job on a budget thread Part III - 10/22/0906:26 PM
Quote: ... but i do need to know exactly which line of bright side paint to choose there were like 10 i'm assuming i want Interlux Topside Paint or do i want bottom side? and there were like 3 types of bottom side or 5 but i dont know what any thing is...
You want Brightside, which is a topside paint. Interlux is the manufacturer and Brightside is the paint line.
Interlux makes two other topside paints, but you don't want those : Toplac and Perfection.
Toplac is not as high gloss as Brightside and is available is available if far fewer colors than Brightside.
Perfection is a 2 part paint (meaning it is mixed with a hardener). Again, it is available in far fewer colors than Brightside. The 2 part nature means that it will cure faster (and maybe be harder in the end), but people painting boats with it have said it is much harder to work with than Brightside.
You do not want any bottom side paints. These are meant to be below the waterline of a boat. The final finish of these paints does not need to be high gloss and they do not need to be as UV resistant as the topside paints which are meant to cover all exposed surfaces above the water.
Posted By: Anonymous
Re: New Paint job on a budget thread Part III - 10/22/0906:43 PM
k thats good to know thanks very much. so i got paid today so i will be going to home depot and cleaning out the garage this week end so there is room for my car. i guess my list is... sanding blocks sand paper (400, 600, 800, 1000, 1500, 2000) Cause i have some body work to do rustoleum professional white, also a can or to of spray incase i get lazy mineral spirits(unless there is something better)
and i'll check to see if they have bondo i think i'll have to check an auto supply store for the bondo and i'll be getting a sealer too.
and whats a good website for the brightside paint? oh i'll be picking u pa bottle of meguires as well
i'm super syked and i think i'll do a pretty decent job.
i'm pretty sure i know what to do. and i'm going to practice the process on our beater first, but if there is anthing i forgot let me know
Posted By: Anonymous
Re: New Paint job on a budget thread Part III - 10/22/0908:02 PM
One more thing, the official name is Brightside Polyurethane. That's the one you want.
I think they have another paint which is called Brightside traditional enamel.
Don't know the best place on the web to purchase. Just do a Google search for Interlux Brightside and compare prices. There are even some people on eBay who sell it from time to time. Some places on the web only have limited colors.
If you happen to live near a body of water, find a local boat supply house (like West Marine). They will probably have it on the shelves. If they do, they will probably also have a paint chip card so you see what the colors really look like. They will likely also have smaller cans so you can purchase just to try it out -- then buy more in bigger quantities on-line once you decide exactly what you want.
Re: New Paint job on a budget thread Part III - 10/22/0911:56 PM
DON'T use bondo for rust repair, unless you like doing it every few months. Body filler should be used only for a very thin finish layer
Posted By: Anonymous
Re: New Paint job on a budget thread Part III - 10/23/0912:26 AM
k well i dont have my camera right now but i do have a corner with a 3/4" by 3" spot where i can rust and i want to grind it down and put a nuetralizer down then odds are i will have some sort of indentation so what do i put there? i'm assuming some sort of body filler i dont expect the missing metal to be deep i just dont know any products and i have a very small door ding that is big enough to notice could i fill that?
ha ok i'll look around cause i live right by the great salt lake and they had to paint all those sail boats some how so i guess it's worth looking around and there are reservoirs every where.
so yah help me under stand the body work i need to do.
Posted By: Anonymous
Re: New Paint job on a budget thread Part III - 10/24/0912:50 PM
For very small areas, I used fiberglass cloth covered with jb weld. Sands pretty easily, hardens well, and is better than bondo. A thin coat of body glaze over the top, feathered, and primered and...bada bing, nada ding...or rust!
Re: New Paint job on a budget thread Part III - 10/24/0907:12 PM
Hey guys, I've got a baron convertible. Great car,crappy paint job. I had a few adventures in rustoleum land and totally botched the results so I'm starting over after a good sanding and cleaning. One change I'm making this time is removing more of the trim. Has anyone had experience with this disgusting 16 year old rubber trim adhesive? I can usually pry off the piece by cutting the adhesive with a razor. Then I am left with a sticky rubbery material on the metal. I can usually get most of it gone with a heat gun and a razor blade. Would laquer thinner work here? Same goes for my pinstripes, I can still see adhesive there even after I scraped them off and rubbed down rigorously with lacquer thinner. Is there something I'm missing? Thanks!
Re: New Paint job on a budget thread Part III - 10/24/0910:20 PM
Well after practicing on a trunk lid which I posted here last Summer,I found the opportunity to try this method on a car.My Son will be driving soon,and I had this low milage 87 LeSabre that my Brother let sit for a couple of years. I fixed it up and got it road worthy,but as in most late 80's early 90's cars the car had peeling on the roof,trunk,and hood.The sides where good,so I decided since I'll never match the Charcoal gray,I'll two tone it with Black.
Using the Rustoleum method I finished her up yesterday,which took a couple of weeks because of weather and work. It came out very good,but as I had read in earlier posts I encountered some hazing in spots. Now,I read posts that said the reason for this is there's no hardner in the paint,let the paint cure before buffing,and use better polishing compounds along with PC 7424.
What I don't understand,is why my roof came out almost flawless while my hood and trunk have the dreaded hazing.Like others,looks good from 5ft, but as you close in the cloudiness appears.I used Turtle wax polisher and a Craftmens rotary polisher,but put the terry bonnet over a foam one to prevent me from burning through.
Did I miss a post about conclusions on hazing? Should I wait a couple of weeks and polish again? Here are some pics,thanks for reading.
Re: New Paint job on a budget thread Part III - 10/24/0910:50 PM
My first rubbing out hazed like that. I thought I left compound on the car...
I went on vacation and redid it 5 weeks later or so - it came out perfect.
I'm not sure what the haze is, but I have seen it.
After I did the final polish it never came back. I can only assume some volatiles were trapped and worked their way out - probably where the paint was thicker
Re: New Paint job on a budget thread Part III - 10/25/0901:57 AM
tt455,
It looks like you need more dry time. A soft paint will not polish well. The harder it is, the easier it will be to bring out a nice shine.
Not many people have been ambitious enough to tackle black. I suspect that's why we haven't seen a lot more of these "hazy" problems. Black and other dark colors are going to show those types of problems more prominently than lighter colors.
Re: New Paint job on a budget thread Part III - 10/25/0902:32 AM
Quote: tt455,
It looks like you need more dry time. A soft paint will not polish well. The harder it is, the easier it will be to bring out a nice shine.
Not many people have been ambitious enough to tackle black. I suspect that's why we haven't seen a lot more of these "hazy" problems. Black and other dark colors are going to show those types of problems more prominently than lighter colors.
Thanks. So can this still be saved? Can I still polish this out at a later time?
Re: New Paint job on a budget thread Part III - 10/25/0901:49 PM
Quote:
Quote: So can this still be saved? Can I still polish this out at a later time?
If you already have enough paint to survive more polishing, then just wait a month or two and polish again.
If you burn through or it gets thin enough that you can see thin spots, it can always be saved by sanding and applying more paint.
Should have plenty of paint,I put 10 coats on and only polished once. Why the roof came out so good with only one quick polish is still a head scratcher.I did everything the same,unless the roof dried quicker?
Re: New Paint job on a budget thread Part III - 10/25/0905:07 PM
Quote:
Why the roof came out so good with only one quick polish is still a head scratcher.I did everything the same,unless the roof dried quicker?
I suspect that roofs turn out better then hoods, is because the hood has also been subjected to heat from underneath during its lifetime. Whereas the roof only is subjected to the heat and UV of the sun from above...
The other thing about hoods is that they are the most visible for spotting any imperfections since they catch the suns rays and give off reflections and refractions with every beam of light. Although it doesn't explain the hood situation, except that you are not able to stand at the same angles looking down at it ( as compared to the hood ) to see similar possible imperfections.
Anyhow... I found that during the course of my waxing and polishing I tried a number of different products and each had somewhat different effects on the end shine.
My best luck at the final waxing was with just pure Carnuba wax ( by McGuiars ).. it smells like bananas. It seemed to penetrated better, take away any fogging, and put a better overall shine on the surface.
This is where you have really read the labels of the products that you are using - to fully understand exactly what it is claiming that it will do.
Possibly the worst product to use for the final waxing is one of the hybrid products that claims that it both cleans and waxes. Those ones tend to use some type of petroleum distillate as their 'cleaning' component. The wax or shiny chemical blended with those products may be compatible together... but you can't be sure how the petroleum distillate component may react with the paint you are applying it to.
.
Posted By: Anonymous
Re: New Paint job on a budget thread Part III - 10/26/0904:28 PM
Possibly the worst product to use for the final waxing is one of the hybrid products that claims that it both cleans and waxes. Those ones tend to use some type of petroleum distillate as their 'cleaning' component. The wax or shiny chemical blended with those products may be compatible together... but you can't be sure how the petroleum distillate component may react with the paint you are applying it to.
.
It is funny you should mention this as I thought a couple people (or at least 1) had used Meguiar's Mirror Glaze #7 with success. This contains petroleum distillates and I would think is safe for our paint jobs. I will probably give a test area some attention with this to see how it works out. Is that comment from experience, something you read etc.?
Posted By: Anonymous
Re: New Paint job on a budget thread Part III - 10/26/0910:36 PM
k guys the time has come!! i get paid next week and it's time to put my parts list together!
so i will be putting down rusto metal primer and doing bottom 4-5 coats rusto gloss white and doing the rest with bright side. so i can only afford one quart of bright side so thats how many coats i'll be doing of that.
but how many quarts (rusto produacts) will i need to do a teeny car? and how many cans of MS? also getting.....
12 dense foam rollers lots of sand paper 220, 400, 500, 600, 1000, 1500, and a lil 2000
and some foam brushes from a craft store. i will also be making a tent in my garage because i'm sure i'll be pretty anal about how this looks.
i've read around but i dont recal reading what the proper application technique is so could some one explain how much paint to put on and stuff like that?
oh yah what dillution should all the coats be? from primer to final coats? 50/50 ?
Re: New Paint job on a budget thread Part III - 10/26/0910:46 PM
On my paint I noticed I applied much thinner coats to the roof - not intentionally. Thats just the way it turned out. Part of it is the angle your viewing it at makes it look thicker, and part of it is that its much harder to make it look smooth, so you tend to roll over and over again till it looks smooth, which makes it thinner.
When I figured that out, I started checking other spots out at angles around 60-70 degrees.
That really helped on the sides where it looked good straight on, but sitting in my shop looking out at the car at almost a 90 degree angle, I could see every little flaw where it was too thin or orange peeled
Re: New Paint job on a budget thread Part III - 10/26/0910:51 PM
sorry for not having any pics in the past week or so, I've been buisy experamenting with paint. Since I no longer have an Ace hardware near me and no one could mix rustoleum I decided to take on the challenge myself. To my suprize I actually got it pretty darn close
heres what I'm shooting for
and heres what I got
I did it by mixing gloss white, almond, hunter green, and smoke gray. I've put another coat on since that picture so the color is a little different. I made about two and a half quarts which I'm hopeing should be enough for now or any future (god forbid) fender benders.
Re: New Paint job on a budget thread Part III - 10/26/0911:01 PM
Quote:
It is funny you should mention this as I thought a couple people (or at least 1) had used Meguiar's Mirror Glaze #7 with success. This contains petroleum distillates and I would think is safe for our paint jobs. I will probably give a test area some attention with this to see how it works out. Is that comment from experience, something you read etc.?
I am basing it on two things... one being my hands on experiments with various polishes and waxes, and the other being simple logic...
The simple logic is that our paint jobs made extensive use of 'mineral spirits' to thin down the paint for applying. And we already know that it takes X amount of time for the mineral spirit ( which is being used as the 'carrier' ) to fully evaporate from the layers of paint we lay down. So it only would be logical that if you put something on to our paint ( before it is 100% cured ) that contains a distillate, then it may act to weaken the paint or at least cause some form of discoloration. This is even more likely when we are polishing and actually removing a thin layer of the outer skin of the paint and exposing a less cured or less hardened surface underneath.
Now... flip back to a 'genuine' factory paint job for a second. Those puppys are baked on at high heat. Hence no carrier is sitting in the paint at all. And since most folks would never lay a cleansing polish on a fresh factory paint job... it is only an aged or absolutely cured paint job that you might safely use one of those 'cleanser' type polishes that contain a distilate.
Re: New Paint job on a budget thread Part III - 10/26/0911:31 PM
alright, I've got a really crazy question for you Marq. I've heard of guys painting things like viynl door panels, head liners, and convertible tops with auto paint by simply adding a "flex agent" and spraying it on.
I was curious if its possible to do the same with rustoleum and roll it on?
heres an example of what I mean
Posted By: Anonymous
Re: New Paint job on a budget thread Part III - 10/27/0912:44 AM
could some one plz not forget my post above? i'm still curious and i dont think i'll need the 500 grit and some rough guesses put me around 200 dollars wich comes out to $90 paint $110 supplies. but thanks for your advise on looking at it straight on for finding imperfections i think i'll be looking all over the thing.
but i need a rought guess on how much paint to buy? primer (rusto)
Re: New Paint job on a budget thread Part III - 10/27/0912:53 AM
I'm sure you could get away with 320, 400, 1000, 1500, and 2000 grit.
as far as how much paint you need it all depends on how big the car is. The normal amount is about 2 quarts.
this is normally titled "$50 paint job" but to get perfect results you probably will have to spend around the 90-100 dollar range.
hope this helps
Posted By: Anonymous
Re: New Paint job on a budget thread Part III - 10/27/0904:29 AM
yah that helps cause it's a small honda civic and i'm doing half rusto half brightside so i'll grab a quart of each and also i will be primering too. but since i'm missing lots of supplies i'll probably spen around 200 once i do all my prep work and body stuff.
Re: New Paint job on a budget thread Part III - 10/27/0911:27 AM
Quote: alright,
I was curious if its possible to do the same with rustoleum and roll it on?
heres an example of what I mean
I would think that the rustoleum would just sit on top of the plastic or vinyl. It certainly would be ok on the steel parts. I would go to Eastwood to get the right stuff for the interior.
Re: New Paint job on a budget thread Part III - 10/27/0911:28 AM
Quote: alright, I've got a really crazy question for you Marq. I've heard of guys painting things like viynl door panels, head liners, and convertible tops with auto paint by simply adding a "flex agent" and spraying it on.
I was curious if its possible to do the same with rustoleum and roll it on?
heres an example of what I mean
My first instinct is to say that for durability you would be better off just buying the paint which is actually designed for recoloring vinyl. I think the key here is the durability factor... as the painted surface will be exposed to more 'touching' and hence more eventual wear and tear.
I have used these vinyl paints in the past and they did an excellent job for color coverage and long term durability.
But ultimately, in the end, nothing beats hunting down used interior panels of the color that you wish. In the Mustang Fox world, there was a real hunt on for black interiors. Guys were paying a premium dollar for mint black vinyl interiors. And occassionally you would have some poor dude who would try to paint his gray vinyl over to black - and it just never seemed to work out and last in the long run.
The other option is to take the vinyl parts to an upholstery shop ( automotive or boating ) and simply have them re-skin them with the vinyl of your choice. It cost more but it does ensure you end up with something that looks great.
I ended up taking the rear section of my passenger compartment and having it redone by a boat/auto upholster. For the front door panels, I searched e-bay and eventually bought three sets of gray vinyl trim ( that were all in mint condition... just slightly different styles of the same thing ). For the seats, I also went to e-bay and bought a mint set of leather seats that were literally brand new ( less then 100 miles on them ).
So the point of all that is that even though I had played with the vinyl paints in the past, in the end I ultimately went with OEM used parts and newly re-upholstered parts in order to do the color change of my interior.
Afterall...in the end... your butt is going to be sitting in those seats and looking at that interior for the next x number of years. You might as well do it right rather then a mediocre job that will bug you everytime you climb in the car
Re: New Paint job on a budget thread Part III - 10/27/0907:12 PM
thaks for the advice
also I probably should have mentiond that in all of the Herbie movies they painted the interior of the car a flat gray color so the camera lighting wouldn't make a glare durring filming.
Obviously they wern't thinking long term when they did this, so for those of us trying to make an exact replica we have to make due with what we can.
that car in the picture the guy spent 8 years and $40,000 restoring it, and he still had to paint the door panels, lol.
as far as seats go they do sell repro covers with any color under the sun from at least 6 different manufacturs. The problem I'm facing is that my headliner is in perfect origional shape, so I'd hate to tear it out to put a new one in just to have the color I want.
I have heard of the vinyl paints, so that may be a possibility.
Re: New Paint job on a budget thread Part III - 10/28/0911:02 PM
Has anyone had experience dealing with small rust holes? My dad says that I should just stick ducttape on the back of the panel and bondo over it, I have also heard something about fiberglass reconstruction. I can't mig weld nor is the car worth enough for me to invest in someone who could. Here is a picture: It is on my rear quarter panel, roughly two inches by maybe an inch tall. Rusted straight through the panel. Any help? Thanks!
Re: New Paint job on a budget thread Part III - 10/28/0911:58 PM
Quote: Has anyone had experience dealing with small rust holes? My dad says that I should just stick ducttape on the back of the panel and bondo over it, I have also heard something about fiberglass reconstruction. I can't mig weld nor is the car worth enough for me to invest in someone who could.
The problem with that surface rust is that they probably have eaten all the way through. A disk angle grinder could chew through that rust etc and you would find out pretty quickly how extensive the problem is. And if you were going to lay down a new fiberglass skin, well having that entire surface grounded down is going to be needed anyhow.
If I was looking at that problem on one of my lower rear quarters... here is the recipe I would probably take to go at it:
a ) use an angle grinder and chew that panel down to as much metal showing as possible. You can use a very coarse grinding surface to really rip the paint and rust off it down to metal ( while also leaving a fairly chewed up surface for the fiberglassing to adhere to.
b ) take out a sheet of fiberglass and trim it to cover fully the surface and the edges. Now make a second sheet identical to the first one. Soak the first fibreglass sheet in the resin preparation and slap it over the entire surface. Then for good measure, take the the second sheet of fiberglass, soak it in the resin preparation and slap it on. The second sheet should end up with a smoother overall surface.
c ) let it fully cure.
d ) get a can of spray on anti-rust chemical and now soak like h*ll the back surface to stop the metal from trying to reform rust underneath the fiberglass.
e ) you should be able at this point to lay on a thin skin of bondo just to smooth out the surface and work out any imperfections in the overall look of the fiberglassed area.
------ the problem with the duct tape behind the hole and bondo over the hole solution is that it might only have a 1 year or two year lifespan before it comes back to haunt you.
------ the absolute best way to go around the problem is to replace that section with a new skin of metal - whether a new replacement skin designed for that spot... OR... maybe you could located that particular section in good shape at an autowrecker. Trim the piece out, rivet it in and then bondo over the rivets etc.
Re: New Paint job on a budget thread Part III - 10/29/0901:33 AM
I know its a bit off topic but this is a BIG part of my car getting done. Since my roof had so many dents I decided to solve the problem with a "ragtop" kit. I had to save all summer for it and spend every penny I had but it was worth it. It just showed up at my door yesterday!
Re: New Paint job on a budget thread Part III - 10/29/0902:43 AM
This is a long term update to My use of roll on paint jobs. I first posted on the thread back in May of 2007 and showed pictures of my 1973 Ranchero Squire Cobra Jet that I had painted in early 2007. Now that it has been almost three years since I painted it I thought some people would like to see how it has held up to almost three years of exposure to Mountain weather without the aid of a garage.
Original photo when I first got the car home in December of 2006
As it looked in early 2007 after being pained.
Through 2 Winters <img src="http://www.supermotors.net/getfile/765212 /fullsize/snow-2.jpg">
The only noticeable change was to some slight fading of the stain on the top edges of the squire trim molding from the winter snow. This was easily touched up without even having to remove the trim.
[img]http://www.supermotors.net/getfile/735558/fullsize/1.jpeg[/img] I also had to do a minor touch up on the hood after it was scratched from the protect-o-top bed cover being blown off and over the car during a wind storm. The sanding and repaint were done within 24 hours. Something I would not have been able to do with a conventional spray paint job.
Here is how it looks now almost three years later. Regular polishing and waxing and it is still looking good.
Re: New Paint job on a budget thread Part III - 10/29/0911:09 AM
Quote: Also, here is the 1973 Cougar Convertible I painted October of 2008 using Rust-Oleum Safety Yellow and Gloss Black.
It's kind of neat seeing how the original Cougar ( which looked like a family-mobile ) turned into something way-more-sporty with just a color change. It changed the entire personality of the Cougar - in a good way
Re: New Paint job on a budget thread Part III - 10/29/0910:09 PM
Quote:
Quote: Also, here is the 1973 Cougar Convertible I painted October of 2008 using Rust-Oleum Safety Yellow and Gloss Black.
It's kind of neat seeing how the original Cougar ( which looked like a family-mobile ) turned into something way-more-sporty with just a color change. It changed the entire personality of the Cougar - in a good way
Thanks for the update.
I agree, when I first decided on painting it I wanted to do something that would be better at bringing out the body lines on this car and I think I accomplished that. I think the biggest difference was on the rear end appearance. I know some hard core Cougar fans don't like the idea of pained bumpers but on this model I think it improves the appearance.
Here is what an OEM bumper finish looks like on a '73 Cougar. I think it looks awkward.
Here is mine after paint.
As it turns out according to the Marti Report I have on My Cougar it is one of only 88 1973 Cougar Convertibles that was originally painted bright Yellow.
Posted By: Anonymous
Re: New Paint job on a budget thread Part III - 10/30/0907:01 PM
Quote: ... I think the biggest difference was on the rear end appearance. I know some hard core Cougar fans don't like the idea of pained bumpers but on this model I think it improves the appearance.
How did you paint the chrome? What sort of prep was required?
Re: New Paint job on a budget thread Part III - 10/31/0904:03 AM
Quote: chrome? What sort of prep was required?
Sand it lightly and apply a coat of etching primer, then prep like any other body panel.
I did the bumpers on my '69 Camaro back in '86 and they still look good.
Posted By: Anonymous
Re: New Paint job on a budget thread Part III - 10/31/0905:00 PM
Quote:
Quote: chrome? What sort of prep was required?
Sand it lightly and apply a coat of etching primer, then prep like any other body panel.
I did the bumpers on my '69 Camaro back in '86 and they still look good.
My understanding (from conventional body / paint wisdom) is that a self-etching primer then requires a normal primer over top of it. Is this what you did?
Also, in keeping with the rolled-on, brushed-on nature of this discussion -- can anyone suggest a good self-etching primer which they have either rolled or brushed -- or found in a spray can?
Re: New Paint job on a budget thread Part III - 10/31/0906:18 PM
There are several types of primer. I used what's called a wash primer, and it did require another primer over it. That other primer in my case was a primer sealer that normally goes on before paint is sprayed on. I didn't need any primer surfacers.
There are also etching primer surfacers that are suited for application directly over bare metal. I have been out of that world for ~25 years though so I can't really recommend a specific product by name since I'm sure they've all changed by now.
Re: New Paint job on a budget thread Part III - 11/07/0901:47 PM
Quote: Has anyone had experience dealing with small rust holes? My dad says that I should just stick ducttape on the back of the panel and bondo over it, I have also heard something about fiberglass reconstruction. I can't mig weld nor is the car worth enough for me to invest in someone who could. Here is a picture:
It is on my rear quarter panel, roughly two inches by maybe an inch tall. Rusted straight through the panel. Any help? Thanks!
Re: New Paint job on a budget thread Part III - 11/09/0901:41 AM
Quote: tt455,
It looks like you need more dry time. A soft paint will not polish well. The harder it is, the easier it will be to bring out a nice shine.
Not many people have been ambitious enough to tackle black. I suspect that's why we haven't seen a lot more of these "hazy" problems. Black and other dark colors are going to show those types of problems more prominently than lighter colors.
You where so right with the dry time.I waited 2 weeks and yesterday I buffed,and today I used the turtle wax scratch and swirl remover. All the haze came out, I am so blown away with the results. There is a shot with the trunk where the right side is done and the left shows the swirls.The rest of the pics are after polishing. It came out so good,I'm thinking of painting the whole car now.
Re: New Paint job on a budget thread Part III - 11/10/0907:02 PM
Has anyone used marine topside paint such as interlux or epifanes over rustoleum primer? I will be going from metallic blue gray to cream, and will need a lot of primer. Using rustoleum for the primer layer would save a lot of money vs epifanes or interlux primer.
Re: New Paint job on a budget thread Part III - 11/10/0909:28 PM
Quote: Has anyone used marine topside paint such as interlux or epifanes over rustoleum primer? I will be going from metallic blue gray to cream, and will need a lot of primer. Using rustoleum for the primer layer would save a lot of money vs epifanes or interlux primer.
Thanks!
Been previously discussed in depth. Short answer is YES you can paint Brightside on top of Tremclad/Rustoleum...
Re: New Paint job on a budget thread Part III - 11/11/0910:53 PM
one of my customers is a car dealer - he's been sitting on a 74 nova for months. No repairs needed and the paint is straight enough to paint over. Its got a mild engine, but I'm thinking of trading some of my services or maybe a couple new PC's for it (I own a computer shop) He wants $4000 - I think $2000 :P
Re: New Paint job on a budget thread Part III - 11/20/0902:51 AM
they get so numb I have to keep stoping to put them under warm water. Oh well, I guess that was my fault for taking so long. At least the car is almost done.(thank god!)
Re: New Paint job on a budget thread Part III - 11/24/0902:12 AM
your looking at one right now
I mixed almond, gloss white, hunter green, and smoke gray to create a stock Volkswagen color called L87 Pearl White. It took A LOT of trial and error along with gaining a sample of the real paint and studying cars with that color for a long time, but I'm finaly happy with it.
Re: New Paint job on a budget thread Part III - 11/24/0902:13 AM
Quote:
also has anyone had a problem with their paint being so bubbly its almost foamy??
less paint, roll it on light, and go over and over the same spots till its even.
I found pressing too hard on the roller gave not only bubbles but lines where the edge of the roller was - so I had the foamy stuff with solid lines of thick paint.
Random rolling directions seems to help too
can't wait to see how it turns out... looking darn good so far. Just remember the final wet sanding is the key.... and let it dry in that hot cali sun for a couple weeks before rubbing it out
I'm as excited to see how it comes out as if it was my car!!
Re: New Paint job on a budget thread Part III - 11/24/0902:25 AM
thats what I figured, it hasn't happend before or after that. Today the paint went on wondefuly, so I guess that was just a freak one time thing?
and thanks a lot, I put a ton of hours into this paint job so I could get it just right. I can't waite to drive the car again, I got a lot of looks before so I can't imagen how its going to be now!
Re: New Paint job on a budget thread Part III - 11/26/0904:25 AM
Quote: Hey guys, I've done two of these paint jobs with very satisfactory results, but I have a few questions....
1) Do the new VOC laws mean that Rustoleum and other oil-based paints that we need for this method are going to be discontinued?
2) Can the dry time between coats be sped up by the use of a heat gun if i'm only doing one small panel?
3) Do you need to protect Rustoleum from freezing temperatures?
Thanks in advance!
I don't know the answer to 1 and 2 but as for number 3.
If you are talking about protecting the paint before applying it, yes it should not be applied in temperatures below 48 degrees. If you are referring to the finished product I have experienced no issues with the paint from exposure to extreme weather. I have no covered parking and my 1973 Ranchero Squire Cobra Jet has been through three mountain Winters so far and My 1973 Cougar Convertible Cougar one Winter since being painted. Winter photos
Re: New Paint job on a budget thread Part III - 11/26/0904:27 AM
Quote: almost done
It's looking great!
Posted By: Anonymous
Re: New Paint job on a budget thread Part III - 11/26/0905:20 AM
I spent the better part of a week reading and studying and making notes concerning rolling on "Rustoleum". I was fascinated reading the first 46 or 47 pages when the thread began and thought I was ready to proceed with my own paint job. I then learned that there's more than 100 pages further to read and skipping to the last few pages I find that there are other procedures and other products discussed.
I don't have time to read the entire thread on this matter and I would really appreciate it if someone would post the latest acceptable procedure and products that are now recommended for a "roll on"paint job from beginning to end.
I joined this site today because the people here are the most courteous and helpful on the Internet.
Re: New Paint job on a budget thread Part III - 11/26/0910:29 PM
as far as the products go you can get great results with the simplest stuff, the car you see above is just plain rusto, odorless minneral spirits, and 4 inch foam rollers from Lowes.
its really all in the prep work and technique, the smoother you get the surface to paint on the better it will look. If you take your time you eventually get it down to a science, some of the older fellas might be able to explain the actual process a bit better. Happy rolling, and welcome to the forum
Re: New Paint job on a budget thread Part III - 11/27/0902:20 AM
not trying to spam for another forum, but www.rolledon.com is dedicated to this stuff, and its better organized than trying to read though thousands of posts.
My method, and everybody's it seems is different. For one, because I have a largely flat surfaced car got better results with 6" rollers. I hate sanding and don't mind rolling so I used super thin coats. Others used less coats and more sanding.
The beauty of this method is its really foolproof. The idea is to build up a solid layer of paint, then wet sand and rub it out. How you get there really doesn't matter - its the labor you put in to make it look right that matters.
Other than the application method, its the exact same procedure we used to use back in the 70's and 80's with acrylic enamel auto paint
Re: New Paint job on a budget thread Part III - 11/28/0902:12 PM
Quote: Hey guys, I've done two of these paint jobs with very satisfactory results, but I have a few questions....
1) Do the new VOC laws mean that Rustoleum and other oil-based paints that we need for this method are going to be discontinued?
2) Can the dry time between coats be sped up by the use of a heat gun if i'm only doing one small panel?
3) Do you need to protect Rustoleum from freezing temperatures?
Thanks in advance!
Thanks for the reply. I wasn't referring to freezing temperatures when you apply it however, I meant do you need to keep stored cans out of a garage where they could be affected by freezing weather.
I'm really surprised no one seems to know about the VOC law thing. I would think anything that could potentially eliminate this great discovery would put the roller painting community all abuzz.
Re: New Paint job on a budget thread Part III - 12/03/0906:14 AM
nice, your results are awesome. Can't wait to see the black one out in the light, keep us posted!
Posted By: Anonymous
Re: New Paint job on a budget thread Part III - 12/03/0905:24 PM
WOW just WOW. what more can one say. WOW in such extreme that I plan to try this on my cars and see what happens.
One problem. I want a metallic color. How do I get this using rustoleum or brightside?
can I "ADD" metallic? I want a nice cobalt or sapphire blue metallic (think medium blue then shift just a bit toward light)
both brands have a blue I like but not metallic. Suggestions? maybe in a few years I will have managed to read the literally hundreds and hundreds of pages in this thread. (every random page I read is addictive!) so if this has been talked about already I would GREATLY appreciate a link to the section of the thread that handles this.
Re: New Paint job on a budget thread Part III - 12/03/0905:59 PM
there is one guy with a mustang a while back who used metallic flakes, it looked alright.
But another guy who had this really nice Dodge drag truck that he painted hunter green, with the "aluminim" rusto paint added. It looked fantastic! and gives that affect your looking for. All you really have to do is make sure the paint is well mixed while your rolling it on and have the right amount mixed in..
Re: New Paint job on a budget thread Part III - 12/04/0912:40 PM
central peumatic or whatever the harbor freight gun is. its their slightly more expensive gun (like $70 lol). the first two cars i did like this i thinned 1 to 3 using white, but it was so cold when i did my supra that i had to thin it 1 to 2. the white seemed to run a little easier (even though it was mixed thicker) but the black shows every little spec of anything in it. once it is wetsanded its gonna look great.
Re: New Paint job on a budget thread Part III - 12/05/0901:50 PM
Quote: that looks unbeleivable!
I'm planning on cheating a little and spraying the inside of my car for simplicity since theres so many strange shapes. So this info helps a bit
ive always owned cars with bad paint so ive been following this thread for a few years. but rolling it on is sooo much work. i figured i would just do it right with a hvlp gun and real paint.
the first car i did was my gf's civic egk and she was on a budget so we figured we would try spraying rustoleum... since we had the paint booth and everything anyway.
turned out good enough that my cousin wanted his 94 rx7 twin turbo done. so we sprayed that white also. and then i did my supra.
spraying isnt very hard imo, and it goes much faster than rolling. i can spray the entire car in 20 minutes with rustoleum.
Quote: I just love the bright white that some have been using, to me it is easily my favorite out of all these cars.
Long time no post... So I took my Comet to car show this summer and no one could believe I painted it with a roller! I added the Shelby stripes using spray paint. Holding up well so far... Thanks to all the helpful folks on the forum!
Re: Speaking of white cars..... - 12/18/0905:19 AM
That car is so nice. How are the patches holding up, I am going to try some of the 3M stuff on my car. I have two small areas that need to be patched and have no welding tools.
Re:New Paint job on a budget thread Part III - 12/21/0909:19 PM
Quote: That car is so nice. How are the patches holding up, I am going to try some of the 3M stuff on my car. I have two small areas that need to be patched and have no welding tools.
I used it and and after 4-5 years its still going strong.
Re: Speaking of white cars..... - 12/22/0903:54 AM
Quote: That car is so nice. How are the patches holding up, I am going to try some of the 3M stuff on my car. I have two small areas that need to be patched and have no welding tools.
Re: New Paint job on a budget thread Part III - 12/22/0903:37 PM
Finally got my last coat on. Now to wait till spring to final sand and polish. I'll install the new top and maybe the interior by then. [image][/image]
Re: Speaking of white cars..... - 12/23/0904:49 AM
How did you get the two panel to meet(flush), did you attach a backing plate first? I take it is held in place with all those clamps until the 3m set ups. I have the same condition the lower door.
Re: Speaking of white cars..... - 12/23/0907:26 AM
little update. Still not wetsanded or anything. Also i have decided im gonig to get another quart of each color, and block sand the truck down A LOT and re- apply some more paint. I rushed the body work a ltitle, it relaly only shows on the bed but Im just going to re-do it since i have the time. Still looks sweet though I still don't know what im doing iwth the bed floor. Probably line it or something.
Re: New Paint job on a budget thread Part III - 12/23/0908:40 PM
Quote: How did you get the two panel to meet(flush), did you attach a backing plate first? I take it is held in place with all those clamps until the 3m set ups. I have the same condition the lower door.
I bought a pair of flange pliers from Eastwood, look like a pair of vice grips with special jaws, very easy to use that let the panel fit flush, the copper fasteners are cleco's we used them for sheet metal repair on airplanes. I jus clamped the bottom. After picture:
Re: New Paint job on a budget thread Part III - 12/24/0905:43 AM
Quote: [image][/image]
sweet, I didn't know there was a Ghia lurking in the shadowes here, looks great!
Posted By: Anonymous
Re: New Paint job on a budget thread Part III - 12/24/0903:57 PM
Thanks, yeah I've been lurking and reading for about 6 or 7 months while I did the final body work. I rolled the paint in Oct, and Nov. I replaced the bottom 8 inches all around the car. [image][/image]
Re: New Paint job on a budget thread Part III - 12/27/0901:57 AM
its getting there, I need to fix a few things on the roof as it was the most beat up thing on the car.
Right now I'm focusing mostly on the interior, the dash is going to take the longest as I have a lot of fixing and back dating to do on it. I might get it done by summer, I just don't know which one
Posted By: Anonymous
Re: New Paint job on a budget thread Part III - 12/28/0903:22 PM
Quote: thats why I consider myself very lucky to live in Cali, rust scares the heck outta me!
you did a fantastic job though, did you need to replace the pans?
The pans were rusted though under the back seat, the rest or the pans were perfect, so I welded in new steel where the rust was while I had the body off the pan. My garage doesn't smell like mineral spirits now, It really wasn't that bad at the height of paint rolling activity. I rolled it outside and let it dry for an hour or two, then pushed it back in the garage till the next roll session.
Re: New Paint job on a budget thread Part III - 12/29/0901:27 AM
I decided to do my ugly black stock bumpers and trim with the same semi-gloss that the lower panels are painted. Prepped them real good, allowed lots of drying time before painting (I fear porous plastic!) but it came out real good. No pics of it till spring though - car that was supposed to be my winter beater is now my 'summer' car, so its parked and buried under global warming
Re: New Paint job on a budget thread Part III - 12/29/0909:23 PM
After reading the first 20 or so pages of the thread I decided to try and repaint my bmw. I did a test run behind my license plate. I don't know if I thinned it enough? It looked very orange peely, and had some bubbles in it. Is this normal for the first coat or should I thin it more? I can post pics of my progress if anyone would like, I plan on doing the whole car if I get the hang of it.
Re: New Paint job on a budget thread Part III - 12/30/0903:18 AM
So I now am pretty sure I did not thin the paint enough, it seemed pretty thin when mixing, but it felt thick when rolling it on? Maybe I just need some better technique. I got a lot of orange peeling, and some bubbles. There was a spot on the right side that looked and felt better than the rest though.
The picture was taken after a quick sand. It's also not very hard and I could easily peel it off. Which may just be because I laid it on too thick? I'm still very hesitant about doing the entire car. Here's a before picture also, so you can see why I am painting my car.
Re: New Paint job on a budget thread Part III - 12/30/0906:20 AM
I would definatly thin it out some more, a 50/50 mix usually does it for me. Though I haven't painted much since its gotton cold out.
make sure you sqeez as much paint out of the roller before you touch the car to.
as for the hardness, paint takes much longer to dry in the cold.
also you would probably benifit a lot from more sanding, I'd go from 120 to 400 to 800 before painting. Take it down until theres no more shiny areas at all, maybe even some primer showing through. Prep is always key.
Re: New Paint job on a budget thread Part III - 12/30/0907:09 AM
Quote: I would definatly thin it out some more, a 50/50 mix usually does it for me. Though I haven't painted much since its gotton cold out.
make sure you sqeez as much paint out of the roller before you touch the car to.
as for the hardness, paint takes much longer to dry in the cold.
also you would probably benifit a lot from more sanding, I'd go from 120 to 400 to 800 before painting. Take it down until theres no more shiny areas at all, maybe even some primer showing through. Prep is always key.
Thanks, I think I did have too much paint on the roller. Luckily that was just a test area and can be covered by the license plate. I think I may start sanding for the real thing tomorrow.
Re: New Paint job on a budget thread Part III - 01/14/1004:54 AM
quick question, would it be possible to mix gloss paint and flat paint to creat a semi gloss look without any drying/adhesion/chemical reaction problems?
I would avoid this product at all costs and the difference between this and normal "odorless" mineral spirits is night & day.
first difference is that the spirits are WHITE in color. I could never get a properly thinned mix, it always maintained a thicker consistency and when I did get it thin the paint completely lost it's shine. In comparison the coats with the "green" mineral spirits were much duller. I was always scratching my head to why, well now I know.
Also, for the brushes & paint trays I found the best place is Wal Mart, they have multi-packs of foam brushes for $1.50, which is great & 3 packs of roller trays for 1.50. The trays also seem a little thicker and tougher than the white ones I was using previously.
just did this today, I used a cheap hplv gun I bought at a garage sale for $5 and my dads air compressor. It came out WAY better than I expected. I'm very happy with the results!
Re: New Paint job on a budget thread. - 01/23/1002:29 AM
So I dont have to sand down to bare metal. I got like two layers of paint I know of. I also have a spot that bubbled so I took it down to bare metal and just sprayed rustoleum on it. DO I just sand down tothe first coat and rough that up a bit or just hit the top of the out coat. The person just painted over the original.
Re: New Paint job on a budget thread. - 01/23/1006:12 PM
Quote: So I dont have to sand down to bare metal. I got like two layers of paint I know of. I also have a spot that bubbled so I took it down to bare metal and just sprayed rustoleum on it. DO I just sand down tothe first coat and rough that up a bit or just hit the top of the out coat. The person just painted over the original.
Make a carefull check on the rest of the paint if its bubbled sand it smooth, but no need to go to bare metal. Just a smooth clean surface, remember the time you take here reflects on the final paint.
Re: New Paint job on a budget thread. - 01/23/1008:36 PM
Quote:
Quote: So I dont have to sand down to bare metal. I got like two layers of paint I know of. I also have a spot that bubbled so I took it down to bare metal and just sprayed rustoleum on it. DO I just sand down tothe first coat and rough that up a bit or just hit the top of the out coat. The person just painted over the original.
Make a carefull check on the rest of the paint if its bubbled sand it smooth, but no need to go to bare metal. Just a smooth clean surface, remember the time you take here reflects on the final paint.
So just clean my paint and scuff up the paint and fix any flaky bubble spots befor that before I paint. having no experience I started to flake off some spots of the top coat and I even have one larger spot down to bare metal. Im thinking of using the gloss white on it. Man im excited but I will do my tailgate first.
Re: New Paint job on a budget thread. - 01/23/1008:49 PM
I guess Im getting a little post happy but doing construction I think I will use a bucket and one of those screens to drip my paint before applying. Just a thought
Re: New Paint job on a budget thread. - 01/25/1002:03 AM
Quote: I guess Im getting a little post happy but doing construction I think I will use a bucket and one of those screens to drip my paint before applying. Just a thought
Are you talking about like a paint screener/strainer, like you would use for an HVLP gun? That might reduce orangepeel, anyone else think so?
Re: New Paint job on a budget thread. - 01/25/1005:43 AM
Quote: So just clean my paint and scuff up the paint and fix any flaky bubble spots befor that before I paint. having no experience I started to flake off some spots of the top coat and I even have one larger spot down to bare metal. Im thinking of using the gloss white on it. Man im excited but I will do my tailgate first.
If there is bubbling then I'd sand it until the surface is smooth and there are no more bubbles. I used 80, 180, then 320 before priming. I do not think you really need to get to bare metal. I do not think that the screen will help the orange peel. The ONLY thing that helped me was THIN paint. Thinner is better. It's WAY easier to apply another thin coat then to sand off a thick coat with orange peel (don't ask me how I know this...). Good luck and keep us posted!
Re: New Paint job on a budget thread. - 01/25/1007:22 PM
Quote:
Quote: I guess Im getting a little post happy but doing construction I think I will use a bucket and one of those screens to drip my paint before applying. Just a thought
Are you talking about like a paint screener/strainer, like you would use for an HVLP gun? That might reduce orangepeel, anyone else think so?
Like the ones you put in a bucket when your doing int/ext paint on a house with a roller. Just a thought to make draining off your roller easier.As far as hvlp guns I dont know much about that
Re: New Paint job on a budget thread. - 01/25/1007:24 PM
Thanks mercury. Ive been reading like mad on this thread and im at a cross between spraying or rolling but I see all the results here are amazing which ever way. Great site, pleasant atmosphere.
Re: New Paint job on a budget thread. - 01/27/1004:36 PM
If you spray instead of roll do you still put on very light coats or just use the paint and mix according to can. Like normal "automotive paint." I am think about using the brightside primer and paint. Spraying interior, door jambs, engine bay,and other hard places. Then Rolling exterior body.
Re: New Paint job on a budget thread. - 02/03/1009:44 PM
Quote: If you spray instead of roll do you still put on very light coats or just use the paint and mix according to can. Like normal "automotive paint." I am think about using the brightside primer and paint. Spraying interior, door jambs, engine bay,and other hard places. Then Rolling exterior body.
That's basically what I did, I shot the interior and behind the truck cab between the bed and cab area. I mixed the paint for spray.
Re: New Paint job on a budget thread. - 02/13/1005:03 AM
Has anyone used the Rust-Oleum Topside, which is suppose to have a higher gloss finish than the regular Rust-Oleum? I have had great success using the regular Rust-Oleum, but I found that I can order the Topside online and have it delivered for less than what it cost me to drive down the Mountain and buy the regular Rust-Oleum fron the store. If you have used the Topside, is there any difference in the thinning or sanding process?
Re: New Paint job on a budget thread. - 02/15/1009:51 PM
Is there any special protocol for painting directly over metal? I sanded down my bondo and surrounding areas were stripped of paint completely. This was done with 60 grit and then worked 60-100-120-240. Is this smooth enough? Should I use primer or something first? Thanks for the help.
Re: New Paint job on a budget thread. - 02/22/1010:14 PM
Hey, I just joined so i could share everything thats been going on with the paint job on my 88 rx7, and ask a few questions. Ive been working on this in all my free time the past couple of weeks. I used brightside fire red lightly thinned (last 5 coats at least) with pentrol/mineral spirits. Used the roll and tip method, the double roller technique kept leaving orange peel for me. Here are some before shots Here it is in primer (should have went with white i think)
Here is the first coat, i was pretty troubled by all the runs/uneven coverage, i found that if I scraped a razer perpendicular to the panel along the run i could get it mostly flat before sanding it down a little more.
Final coat, (6th coat) Hood polished, i had alot of texture in this, its hard to see on the pictures but various roller lines etc. kinda looks like subtle waves, i cant really feel them, and everything was dull from wetsanding.
Re-sanded the hood again 1000 grit this time (aggressive i know), burnt through some paint I can live with it for right now, any ideas on a fix? On the hood i used just straight meguiar's ultimate compound, took a while to buff out, probably 2 hrs.... i picked up some more aggressive polishing compound today to try.
Here are some reflections etc.
Burn through More shiny reflections
So far i would like to say thanks to the person who recommended the squegee during wetsanding, works great. And of course thanks to 69charger, and the fellow who tried brightside.
Looks great! The only solution to repair paint that you've burned through is to resand the surface and then repaint the area. Thinner is better as it is much easier to roll on another thin coat then to sand down a thick coat. Keep up the excellent work! Marc in SF 63 White Comet Marc's White Comet Page
Re: New Paint job on a budget thread. - 02/26/1001:51 AM
Quote: that looks amazing!!
lets see some daylight pics!
Will do when turbo gets back from rebuild. I might start from scratch on the hood after I drive it for a few months. I only drove it once since I bought it 3 weeks ago.
Quote: Looks great! The only solution to repair paint that you've burned through is to resand the surface and then repaint the area. Thinner is better as it is much easier to roll on another thin coat then to sand down a thick coat. Keep up the excellent work! Marc in SF 63 White Comet Marc's White Comet Page
Thanks for the answer that's what I was figuring. I guess that's another good thing about this paint job .... easy touch up.
Firstly a big thankyou to all contributors, without your detailed posts I wouldn't have the confidence to undertake this.
I'll be using brightside paint, I want to paint my car white but my store only has "blue glo white". Can anybody describe the colour, or better yet post pics, as I couldn't find any photos of it.
If this colour isn't white enough then i'll be painting with Largo Blue.
Sorry i havent posted any pictures of it in the sun, i had some trouble with the mechanical side of my project (shorting the MAF wiring and forgetting to hook up an intercooler pipe ) I also started repainting the anodized red portion of the rims, and compunding the black portion to get most the scuffs out.
I did get to drive it though, and it looks rough in the sun, i didnt sand enough, so i started to go back over it using some fine steel wool it works great on getting the orange peel down fast and then finishing with 1000, 1500, 2000 meguiars ultra compound and megiuars swirl x. The couple of test sections came out great and i really think this will be a good paint job.
I was taping off sections of the car and sanding those sections and i found a good example of what color sanding does compared to what was under the tape. Heres the portion that was under the tape and didnt get sanded. Noticed the deformations in the reflection. Here is a portion that i sanded with 1000, 1500, 2000, and use ultimate compound on.
Alright everyone. I am in!! I going to try this on my Dakota!
I would like to paint it orange (like the original poster's 69ChargerYeeHaw Charger). I want to paint the top black. Anyone have any luck with doing two-tone paint jobs? Also, stripes??
Welcome Johnny V. I know a couple pages back someone was doing a pickup two tone. MercuryMarc did stripes, turned out very nice, after he was done with the base color he taped the outline and sprayed rustoleum over it, take a look at his paint page that is on his signature, its a very good read.
Thanks for the info. Props to MercuryMarc for a great website and a great car too! I was inspired by www.rickwrench.com. I even bought a 66 Corvair just like his but I have since sold it.
I am planning on starting tomorrow morning on my test panel (the tailgate). I have a lot of body work though. Long story short, I was driving down the interstate and my tailgate fell off. It was late at night so there wasn't much traffic but I looked in my rear view mirror and saw a shower of spark flying through the air. It was majestic.
It seems that many are having a lot more success here in this third part of this thread. I read the entire 43 pages of the first part of the thread and there was a lot of experimenting and not a lot of true successes.
We have also been experimenting with hardeners, which real seem to help on the final results.
Can you summarize what is known about the hardeners?
I was one of the first here to paint my car with Brightside, no hardener, and even now (3+ years later??) I can make a mark in the paint with my fingernail.
My car is garaged all the time, and I don't drive it much, but I wonder if sun exposure would harden it. Something tells me it's about as hard as it's going to get at this point, having spent 3 summers in a garage that gets up to 110 degrees or so on the hottest days.
Exit1965 - I read all about your woes with your test panels. I was hoping that you had gotten better results once you painted your car white.
I have already started my tailgate on my truck with one coat of paint. My original plan was to paint my truck with the exact stuff that 69ChargerYeeHaw used. Should I start over and try a hardener? Any help would be nice.
(I would post a pic but I can't get it to load right.)
Sam and Johnny V- thanks for the comments about my website... Good luck with the rolling! Thinner is better, that's for darn sure! My paint is hard enough (White thinned about 30% until it was like nonfat milk). I think you don't really need test panels- I used my hood a took my time. It got a few more "practice coats" than the rest of the car but I figure it protects better that way against rock chips... Here is my ride after 1 year as my daily driver on a nice March afternoon in San Francisco...
Does anyone have any experience with high build primer? The paint on my hood is highly oxidized so there are little pits and scratches all over, but it's only in the paint. I sanded 60-100-120-220 and I can still see the pits and ect. I really don't want to bondo the entire hood, not do I have any desire to sand down to metal. Could I simply roll a high-build automotive primer over the well-sanded paint and expect it to fill these minor imperfections?
We have also been experimenting with hardeners, which real seem to help on the final results.
Can you summarize what is known about the hardeners?
I was one of the first here to paint my car with Brightside, no hardener, and even now (3+ years later??) I can make a mark in the paint with my fingernail.
My car is garaged all the time, and I don't drive it much, but I wonder if sun exposure would harden it. Something tells me it's about as hard as it's going to get at this point, having spent 3 summers in a garage that gets up to 110 degrees or so on the hottest days.
The problem with the paint staying soft is usually too thick of layers when you paint, or not letting it dry long enough between layers. What happens is the surface flashes and traps the volatiles underneath. It never completely hardens.
Sun might help, but I doubt it. It probably also doesn't shine up nearly as good as it could if its that soft.
Hardener reacts with the volatiles and the enamel, acting as a catalyst that chemically changes them, so no trapped volatiles and a much harder paint
Quote: Does anyone have any experience with high build primer? The paint on my hood is highly oxidized so there are little pits and scratches all over, but it's only in the paint. I sanded 60-100-120-220 and I can still see the pits and ect. I really don't want to bondo the entire hood, not do I have any desire to sand down to metal. Could I simply roll a high-build automotive primer over the well-sanded paint and expect it to fill these minor imperfections?
my whole car looked like this:
I used the rustoleum primer for rusty metal to fill in the imperfections. Bare metal was even pitted on mine!
How did the primer stick? I did primer on one section of my car with a 9" roller and surprisingly enough it turned out pretty well. I didn't thin at all, is it customary to thin primer?
I didn't thin mine. I tried spray bombs but it wasn't thick enough so i used the primer. It dries faster and harder than regular paint, but sand it down as thin as you can. Primer has a tendency to shrink if its thick
well my truck hasn't seen any paint work within last update, but I am just starting to re-sand the body down to get rid of the waves i have from rushed body work earlier. I'll be throwing a few more coats on soon, then color sanding. I can't wait!
I actually just got done putting the body onto a 4x4 f250 chassis.
I tried to add pictures of my progress but they wouldn't show up. Is there something I am doing wrong?
Anyway, I have rollered my first coat. It was a little over two days ago. I performed a scratch test and it is rock hard, despite the cold and crappy weather here. I'm gonna continue tomorrow with a second coat and so on.
Question : Should I have primed it after I laid down body filler? I noticed that the areas of filler are not as shiny as the rest of the paint.
probably should have sealed it and primed it. There may be some color change, and if you use hardener in the paint, some of that can seep into the filler and cause it to shrink a little.
If it looks bad after a couple more coats you may want to sand it down and primer it. No big loss.. you'll be able to match the paint back up easily
images can be added with
[ img]file_location[/url] - file_location being the address/image name of the website your hosting pics on
Okay I've gotten three coats on the tailgate. I think that it is laying down real smooth, but I think I may be thinning it too much so I am going to try to thicken it a little tonight for the fourth coat. Coat 1 Coat 2 Coat 3
Quote: well my truck hasn't seen any paint work within last update, but I am just starting to re-sand the body down to get rid of the waves i have from rushed body work earlier. I'll be throwing a few more coats on soon, then color sanding. I can't wait!
I actually just got done putting the body onto a 4x4 f250 chassis.
Have anyone use a spray gun? I thought I seen somewhere in the early articles someone use a spray gun... I like to give that a try I wanting to repaint my truck and was thinking of the roller method any thoughts?
actually we do our race cars with rustoleum yellow on the chassis and cage (easy to see cracks with yellow). We spray that and we spray some of the other parts.
It sprays just like any other single stage paint. The advantage of rolling it is you can do it anywhere, with no overspray. Plus its cheaper if you don't have a paint gun setup already. You'll use more paint spraying, since some of it becomes overspray
spraying it is exactly the same as any single stage paint job - same results.
Rolling it will give you equally good results.. but coming at it a totally different way
Spraying gives you a nice even coat that needs little sanding, but has all the problems associated with it - overspray and problems with the air supply - mainly water in the lines on humid days.
Rolling gives you nice even coats, but with orange peel, which you sand out every couple coats. Your trading sweat equity in the rolling/sanding for not needing expensive spray equipment, no overspray getting on everything, etc
either way comes out the same if you take the same care prepping it.
Hey, does anyone have any knowledge on painting thin fiberglass? I just pulled a spoiler from the junkyard and it's faded and awful and the wrong color, so what is the procedure? It seems like I shouldn't start at too low a grit because it will gouge the fiberglass. So is it like start with 400 grit wetsanding or something? Thanks for the input.
almost done with the bug! I'm putting on the final coats now!
big tip to follow, reuse rollers by washing them in mineral spirits then rinsing with water. They get very very expensive after a while. I only wish I'd known this earlier
Quote: almost done with the bug! I'm putting on the final coats now!
big tip to follow, reuse rollers by washing them in mineral spirits then rinsing with water. They get very very expensive after a while. I only wish I'd known this earlier
Do they stay like... normal? When I washed mine I would get like patterns and uneven coats. I found home depot sells 6 packs of the high-density foam 4 inch rollers for like 8 bucks.
you have to make sure you wash them right after you get done applying a coat, if you let the paint dry on the roller it creates those patterns. hope this helps some
Quick update, I had everything sanded and polished, and got it out in the sun and noticed a lot of thin spots, scuffed the paint up again and applied two more coats... Now im wetsanding again. LOL I have about 4 more panels to finish, then i will post some pics of it in the sun (if we ever get any sunny days in the land of rain) Couple quick tips i picked up though, for a sanding block go find a free car classifieds (or another magazine) roll or fold it to the width you want and tape it. Works great! Also, if your sand paper is loading up i found i can get a little more life out of it by wiping the dust out.
Another thing i noticed, this paint is definately sensitive to high temps. The prior owner didnt put any heat shielding on the t3/t4 so after a hard nights driving i noticed a dark spot, and it was way too hot to touch. The paint is still adhered, but a slightly different color even when cool. I don't think the factory paint had shown any effects from it... yet.
Quote: almost done with the bug! I'm putting on the final coats now!
big tip to follow, reuse rollers by washing them in mineral spirits then rinsing with water. They get very very expensive after a while. I only wish I'd known this earlier
I always jsut put mine in a plastic bag and put it in the freezer til I needed it again. could get 3 or 4 uses out of it. I would take it out when I was ready for a new coat. take out of the freezer walk to the garage wipe down what i was painting with spirits and tac cloth, get my paint ready in the tray and the roller was thawed and ready to use.
Hey everyone hows it going, I'm real glad I found this forum board.
I have a question that I need answered if possible guys. I found out about the roller method paint job which is what I am currently doing to my 1999 Chevrolet S-10 Single cab, I've done alot of research and reading all over the boards on this method.
I'm repainting the whole car but I'm currently working on my Tailgate at the moment. I sanded down the factory clear coat with 60 grit sandpaper until it was all off. I then went up with 180 grit, 220, 400 and I believe I finished with 800 if not mistaken.
Heres the deal, the Tailgate was nice and smooth after I got done sanding it, I cleaned it off with Mineral Spirits and let it dry before applying the first coat of Gloss Black Rustoleum (the tailgate is white). I didn't apply any primer so I applied the Black Gloss mixed nicely, the Black coat came out nice with no runs or orangle peel at all but my problem is I see sanding marks and swirls after it got done drying.
I'm worried because I'm not sure if those sanding marks will stay visible through the rest of the coats and wet sanding.
So please, what should I do at this point? Like I said, I only have the first light Gloss black coat on that has been drying for 2 whole days now. Thanks!
Quote: well my truck hasn't seen any paint work within last update, but I am just starting to re-sand the body down to get rid of the waves i have from rushed body work earlier. I'll be throwing a few more coats on soon, then color sanding. I can't wait!
I actually just got done putting the body onto a 4x4 f250 chassis.
wow your doing a ton of work on that thing!
whats the plan for the frame overlap?
Yep! I'm taking the bod back off this summer, to fully restore the 4x4 f250 chassis! Tons of work but it needs to be like new for me. The truck (chassis) used to have a snow plow on it im guuessing, and those huge brackets that are bolted on i will be simply unbolting. I just picked up stock bumper brackets so i can mount my original chrome bumper
Has anyone had problems with rustoleum spraypaint? Whenever I try to use it, I get strange bands even though I do light coats. I thought it was uneven coverage but I'm not sure how it started. I'll post pictures. Here are pics: Rest of album: http://smg.photobucket.com/albums/v611/joeshmo14760/wing/ Any tips? Should I wet sand and see if it gets better?
thats a problem all spray cans have. Instead of spreaying an oval pattern like an airgun would so you can overlap 50% and cover your tracks, spray cans have a round pattern that makes it extremely hard to keep even.
I have the same kind of pattern on my lower panels that I used semi-gloss black on. Its not really noticable because its a flatter paint, but I'd never use a spray bomb anywhere except really tight curves, to get in hard to reach areas like behind door handles, and of course door jambs and hood and trunk areas
Quote: Has anyone had problems with rustoleum spraypaint? Whenever I try to use it, I get strange bands even though I do light coats.
That last picture shown here clearly shows your technique is poor for application. Spray cans only paint reasonably well if they have a "Fan Spray" tip/nozzel on them. That is your first problem.
The second problem is that shaking-the-can-all-over-the-place technique you use to apply. That will NEVER give good results, and I HATE seeing people doing that! I even see it on those DIY TV shows!
Smooth, steady, even, side-to-side strokes will give you the best results.
Then again, why people won't spend $35.00 for a half-way decent detail gun is beyond me? Keep at it, you'll get it!
Thanks for the tips! I generally spraypaint shaking the can whilst spraying which works fine on flat paint but apparently not with glass. Do standard rustoleum paint cans have fan-spray nozzles? Thanks for the help!
hey i have a question. ive got a chevy camaro z28. i know this is a mopar forum lol but i found this thread through google.
i need to paint my front bumper cover. my car is arctic white. is there any way to color match it with rustoleum? i mean would it not look right with the rest of the car if i did it?
i noticed most of you guys paint the whole car with roll on paint.
well from my experiance theres no body I've seen that can mix rusto paints, if your skilled enough though you could attempt mixing it your self.
since you only want to do the bupmper though it is possible to go to an automotive paint store and ask for individual spray paint cans of your exact paint color. All you have to do is give them the code.
Hi Orange Charger- the Godfather of all rollers! Look what you started! Thanks for launching this thread. -Marc in SF -63 White Comet Rolled with Rustoleum
Hi guys, I got here from sccoa.com, I am president of Super Coupe Club of Ontario and my ride needs paint job badly. I was quoted over 3000 for one, but hard to dish so much money out. I was very excited to find this thread and followed it for a long time. But before painting my car, I decided to start with the trailer first. Not your average trailer thought) It's a minime Thunderbird SC! I had a hard time looking for the real orange paint, (red and yellow have been discontinued two years ago). Finally found two gallons in one of the Canadian Tires. By the time, I was in expert in Tremclad, was telling those guys where to look, how to mix and so on. Funny. I spent about a week doing body work on the trailer, sending and getting all the equipment. Today I finally sprayed primer and first coat goes on tomorrow! Here's how it started:
O.k. I need advice. Ran into a problem. I had a lot of runs spraying Tremclad. Does it meat I put too much paint? Should I mix it more? Or move faster? Or increase air pressure (currently 2.0 bar)?? Tomorrow I am going to sand all those runs flat and spray another coat. Thanks
I think it depends on how thick the runs are. If theres a bunch of tiny runs then your paint is to thinned, but if theres only a few big globs then your probably holding the spray gun to close for to long. Hope this helps
Well. I've done two coats so far, tomorrow going to wet send with 600 and maybe will shoot few pictures. Then another coat. Should be done painting this week end.
Quote: Hi Orange Charger- the Godfather of all rollers! Look what you started! Thanks for launching this thread. -Marc in SF -63 White Comet Rolled with Rustoleum
your welcome, i'm glad it helped so many get their junk on the road!!!
Hi Martin, glad to see that you are still around) Since you and I are in Toronto, do you think we can meet up for a few minutes. I am dying to see your car and got few questions to ask you. Let me know please!
Made some progress over last few days, but weather wasn't cooperation, other wise I would be done by now. I am really glad I started with the trailer not my car))) Made few silly mistakes that took me some time and foul language to fix. I am painting with the roller one of the panels that will go on top as a roof. Apparently it comes out nicer with the roller. Maybe because rolling is a second nature for me, been painting for about three years, one of the duties of my job
Well, tomorrow I am going to wetsand it and apply last coat and let it sit few days before I do any polishing and waxing.
P.S. I really wish I did better job prepping the car before paint. But I was getting tired and frustrated. Maybe some time later I will find time to fix all the imperfections.
I litteraly spent a year getting all of the body work exactly perfect on my car, its no fun at all and definetly the most tedious thing I've ever had to do, but I learned a lot and all of it came out fantastic.
So what are people adding for hardners to rustolum to make it not so soft and harden up more. Also what's a good amount to ruduce to be able to spray it out with a gun?
Beautiful job. Can't even tell it's rusto. Body work turned out really nice, just get that interior put together! Also, does that top thing compromise the structural integrity of the car? Just curious as I've seen the tops of cars become distorted when the frame shifts and I'd hate to think of what would happen if the top couldn't absorb any torque.
and as far as I can tell the thick meaty aluminum frame has acctualy made the roof stronger, these cars acctualy came with fold back sunroofs at one time stock. Since I had many dents in the roof that I didn't feel like fixing I thought this was an appropriate option
Indeed, a soft top would make that alot easier. Dents in the roof are a pain to get right. I just know that my convertible has underbody and pillar reinforcements in case I roll or flex and it wouldn't pass inspection otherwise, I was just curious to see if cutting a large section out of the roof would compromise the structural integrity, although with a bug it's so compact I doubt it matters and if it came stock it must be a-okay!
I know nothing about polishing/buffing. Tried different pads, foam pad, cotton pad with Turtle Polishing Compound as Charger69 advised and results were terrible - cloudy and velvet area. much worse than it was before wetsending and buffing. I kept the bonnets pretty wet, didn't force it, took my time...what gives? Any input is welcome. Thanks
Stopped by and read this thread when it was only the middle of Part I! And now it's still going!
The biggest hurdle is the prep. It'll save time if you don't use too rough a grit for prep. Not much discussed on the threads about especially what grit to use for the sanding. You can run into a lot of extra work by using too rough a grit to prep. This person tried to remove the entire clear coat by wet-sanding at first! Lots of pictures, too, from a novice's perspective. Using Rustoleum and 100% mineral spirits and roller, but it turned out nice. www.moparts50dollarpaintjob.webnode.com
Hey all, new here because of this thread. I've read almost every single page and I absolutely love everyone's work! Awesome cars and paint jobs. You all have given me hope that I can pull this off.
I do have a few questions, if I may:
1)Where can I find Brightside paints in Ohio, if anyone knows?
2)Is brightside paint superior to Rustoleum Professional?
3)I have a white car, and am debating doing black. Looking it over, there are a ton of rubber seals - do I just tape those off and paint? Won't the white show a bit next to those seals? Or do I just need to get my tape PERFECT and it will fix that issue? This is a big one for me, and I'm leaning to just doing white to make it easy.
4)My wheels are painted white right now, will these paints be safe to paint on the wheels? I seem to recall reading it's not a good idea, is that true? If I can't paint them, then that makes my color choice easy and I'll stick with white.
1) you should be able to find it at most boat supply stores
2) I've heard that it can be, but I got great results with rusto
3)getting the tape perfect is ESSENTIAL, allong with proper prep work. For easy masking I suggest the professional grade 3M tape, its usually green, and its about $7 a roll, but way worth it.
4) I've seen guys get great long lasting results on their wheels with Rusto, some prefer it over powder coating!
black is an awesome color, but, it shows defects in the paint and body work much more, its a little harder to keep clean, and it can be VERY hot in the summertime.
Has anyone had any experience with racing stripes on their cars after rusto? Do the adhesive ones mess with the top coat? I'm contemplating adding stripes but I think using spraypaint would be difficult and subpar. Thanks all.
I know this is slightly off topic, but has anyone ever used the rustoleum Hammered? I got a can of rustoleum hammered black to use on my rims and recently applied two coats. They seem to stick well but I am worried about nicks and scratches. I have some clearcoat in a can that is like ace brand. How long should I give the color coat to cure before spraying clear on it? Thanks!
My rims actually turned out fairly decent. Before: After:
The texture hid the *many many many* flaws in the metal and I wet-sanded the outer ring to get a faux-chrome appearance. I was gonna clear coat just the outer ring but turns out the clear coat reacts with the hammered paint =P.
Also, just put the first layer of paint on my car. After sanding and bondo: After second coat of primer: After wetsanding with 400 grit and more bondo patching and dent pulling. First color coat:
Didn't achieve full coverage but I rolled it on pretty thin (1:1 ration paint to thinner). Any thoughts/comments? Thanks!
looks pretty good for a first coat, hopefully the blotchyness and flat spots will go away after the second or third. It usually does, if not you may be thinning the paint a little to much.
Thanks younggun! I was surprised on how well the rims were for just spraycan and they seem fairly durable. Did you ever post completely finished pics of your car?
Does anyone have suggestions to reduce roller marks? I'd like my paint to lay down as one coat and not be like more glossy in some areas than in others. I have complete coverage and I'm about to wet sand with 1000 grit before my fifth coat. Currently I mix the paint with mineral spirits 1:1 and roll it on pretty thin, wringing the paint out of the roller until I have to apply a fair bit of pressure to get it onto my car. What am I doing wrong that makes it look uneven from certain angles?
due to the warm weather and time of the season, try thinning the paint a little less and leaving more paint on the roller. I had the same problem but that combo seemed to fix it.
Joeshmo, use two rollers, one for paint and one to level and knock down the bubbles. I didn't mix 1-1 but used a screwdriver to stir after adding thinner. I'd stir then lift the screwdriver out of the paint and count 1, 2, 3 etc watching for when the piant coming off the tip went from a stream to drips should be around a count of 8 this worked well for me when I did my truck.
Quote: Joeshmo, use two rollers, one for paint and one to level and knock down the bubbles. I didn't mix 1-1 but used a screwdriver to stir after adding thinner. I'd stir then lift the screwdriver out of the paint and count 1, 2, 3 etc watching for when the piant coming off the tip went from a stream to drips should be around a count of 8 this worked well for me when I did my truck.
Hey, thanks for the tip with the two roller thing but I still created a horrendous amount of roller marks. I thinned pretty thin, roughly 1:1. I tried it and rolled on, lots of little bubbles that popped with one pass of the dry roller. Good. However from an angled side one could still observe the roller marks. Not happy. So I tried the next panel with the same solution, only saturated the roller more. Lots of runs as it was a vertical panel but still little bubbles that rolled out nice and easy. And yet I still had marks from the side that would not disappear no matter the amount of dry rolling. Switched to a 2:1 ratio paint to thinner. Rolled on thicker, and my work time seemed to be LESS and even MORE roller marks. What gives? What am I doing wrong here? This was what I hopped to be my final coat(coat 6+2 primer coats). I have a decent 15 foot paint job but I didn't realize I'd have roller marks galore! Any tips? Thanks!
Try using less pressure on the roller. It seems to me I had that problem if I was pushing down too hard on the roller. Let it glide over the surface barely touching it.
I saw someone post a picture before with roller marks and it looked like they rolled the paint on in strips and never worked it around. once you roll the paint on you have to work it around to even it out. when I painted I rolled on and covered the spot I was doing then went over it a few times in about every direction I could with light pressure and never had any lines. that make sense?
Thanks to everyone who has contributed their time and knowledge to this thread. You guys have this down to a science. I had NO idea results like this were possible at such low cost. I've been considering this cheap and solid but pretty ratty looking older Corolla for an econo-ride. It's looking a lot better by the minute.
Hey guys, just wanted to let you know I finished my paint job. Came out alright, good from a 5 foot viewpoint. This is prior to sanding and buffing and waxing as I am waiting for the paint to finish drying. 6 coats of rustoleum gloss black on top of 2 coats rustoleum rust-primer. Aside from unnevenness on horizontal surfaces and my shoddy bondo work and several bubbles/areas of extreme orangepeel, I'm satisfied with it. Much better than when I got it anyway.
(Pardon my missing trim piece, still trying to get that back on.
Hello everyone. I've been reading this site for the last 4 weeks and feel I've got a pretty good handle on everything, but I just had one quick question before I begin testing on some panels.
Now its actually a wood sander, but I would think that it would do the job I need it to for removing the paint on the car. I have a lot of cracks and so forth all over the car and they need to be sanded down pretty good. Here's what I'm thinkin . .
1.) Wash the car with dish soap with no aloe/oil/etc. 2.) Grab Makita sander, throw some 150 grit on there and goto town. Sand down until I have gotten all the cracks leveled out somewhat. 3.) Use Rusto. primer (2 coats) to help fill the cracks. 4.) After that block sand the primer down again, this time using something like 250 to smooth it out. Then follow that up with some 400 again. 5.) Move on with the standard rolling instructions and so forth.
I've never done bodywork, but this site has given me a ton of info to work with. I'm sure I'll be posting some info/questions here myself. I'll be painting a 73' 240Z Brightside Gloss White. I hope mine can come out like yours!!!
I would not expect primer to fill scatches from 150 grit. I would go up to 320 personally. I used 400 wetsanding on my primer coats and it came out gloss smooth. Make sure to wipe car down with mineral spirits or tar and wax remover prior to each coat of paint, ESPECIALLY after wetsanding! Good luck!
Ditto what joeshmo said regarding primer not filling 150-grit scratches.
In addition, do not attempt to fill cracks in the paint with primer either. Keep sanding until the cracks are gone, even if it means sanding all the way to the metal. If it comes to that, there is undoubtedly rust that needs a good sanding when you get that far anyway. It is only necessary to go to the metal if the cracks go that far, and only in the areas where there are cracks. In areas where the paint is in good condition, just give it a good sanding with 320 and move on.
Is the sander I'm looking to use good enough for the job? I have used it before on wood and it works wonders. But, I don't know if it will work to well on automotive paint. Can anyone give any ideas on that before I start my work on my test piece?
a power sander is good for the initial sanding, but even before primer you want to take 400 and a block to hand sand the entire car. It takes a while but the results are worth it in the end.
That sander should be fine for the low grit stuff but higher grits (above 220 grit) should be done by hand. Sanders are really only good for large flat panels. Avoid using it on the body curves as you may burn through the paint very quickly! Also use two layers of masking tape and a layer of duct tape over the trim that you do not want sanded. Let us know how it goes!
Thanks guys . . . here's what I have to work with . .
73' 240Z when I bought it 4 years ago . .
Here's what it looks like now...
I've noticed that I have some bad cracking, and I plan to start with 150 grit with the sander in these spots, and then work my way up to 400 before primering . .
Far away shot . .
Clost up . .
Where's she's at now . .
Do you think those cracks will be good if I start with the 150 and then work my way up to 400 using the block (150 with sander, then 220 with block, then 330, then 400)?
I highly doubt it. Even epoxy primers can only cover so much. I would go 220 then 320 before primer. 180 is still pretty deep. It is much easier to sand better now that trying to correct it after gloss paint.
Re: Paint job on a budget!? CONTINUED - 08/09/1012:07 PM
Well thats good news...both the fact that your car will be done soon AND the thread isn't dead...After reading and reading and reading and reading and reading and then reading some more I finally started my test panels and poof everyone dissapears for a week.
Question for anyone out there. As I wetsand I am finding burning through the edges is almost unavoidable. It seems for me that the only orange peel I am getting is of course right along the edges (about 1/2 inch leading up to the edge). So naturally I have to spend more time wet sanding in these areas. All flat or otherwise curved surfaces are coming out amazingly smooth. Any Tips?
2nd question...I'm painting a 95 ranger and there are two body lines that go the length of the test piece, one is recessed the other is a curved step up...see pics. Not real visable in the pics but I'm having a real hard time geting the foam roller to contour to these areas without leaving behind a smeared mess. I put pressure on it but it just smears; wont get into the area otherwise. I am approaching the top line with perpendicular strokes and that seems to be helping, but the bottom one is killing me. If I use a foam brush it looks like crap (are you using high density foam brushes or just those crappy grey ones?). Has anyone found an alternate applicator for real tight lines like these?
PS...junk fender...will not be used...rust be damned
Re: Paint job on a budget!? CONTINUED - 08/11/1004:13 PM
Well, I decided to finally join to show my progress. I'm no stranger to the roller paint job. I've redone my car 3 times now! It's addicting. haha. I drive a Nissan 240sx. But you don't want a big wall of text, right? You want pictures... so here we go.
The start of this project: Camo primer... rough looking.
Supplies!
Shaved the antenna and began the laborious task of body work.
And so it begins.
A couple in progress shots:
Wetsanding!
And finished product:
Then I got bored and painted it white... the easiest of all the colors.(IMO) No progress pics..
And then here we are today... I went with the sunrise red because it resembles the factory color so much. Pretty happy with the results.
Old wheels, new paint.
And how she looks as of now, new wheels, sunrise red.
Thanks for looking! I have better pictures on my computer at home, but I wanted to share what I could. This really is a great budget minded alternative.
Thanks for all the advice and tips throughout this thread!
Nope... we are still lurking here and posting when needed. But this thread has pretty well covered off most of the simple and complex questions that arise when doing a 'roll-your-own' paint job.
The compliment to the thread is that most questions have had thorough explanations - and most of the time we don't have to respond to new queries ( because the answers are already there ).
As for me... I keep popping in here because I like to see the pictures of how some folks projects turned out. And I suspect for a lot of folks those pictures help convince them to dip their toes in the water and give it a shot as well.
I like the recent pics of the black.. then white... then red car. The red (most recent) looks the best in my eyes......
Has anyone had experience with hvlp guns and rustoleum? What size tip and how much thinning? Any decent cheap brands? Anyone tried the walmart campbell hausfeld guns? They have gravity fed ones for roughly 20 bucks and I was thinking to throw a cheap white paintjob on my other car. Also how important is keeping a wet edge and keeping an industrial water/oil filter on it? Thanks for the tips guys!
Re: New Paint job on a budget thread Part III - 08/19/1004:42 AM
If painting a car was as easy as using a roller or a spray can I would be out of business. It kills me to think how much time and money people waste trying to save money. A simple paint job on a car with body work additional is a minimum of 5k. I run a shop that does mostly insurance work and some restoration work. There is a reason why spray cans and rollers dont work, they are CHEAP!!!!!!!!!
Re: New Paint job on a budget thread Part III - 08/19/1005:49 AM
Quote: If painting a car was as easy as using a roller or a spray can I would be out of business. It kills me to think how much time and money people waste trying to save money. A simple paint job on a car with body work additional is a minimum of 5k. I run a shop that does mostly insurance work and some restoration work. There is a reason why spray cans and rollers dont work, they are CHEAP!!!!!!!!!
So what is your point? Our decent and more than decent looking paintjobs aren't actually decent looking? A simple paint job shouldn't cost over two, at least not around here.
Re: New Paint job on a budget thread Part III - 08/20/1004:43 PM
Quote: If painting a car was as easy as using a roller or a spray can I would be out of business. It kills me to think how much time and money people waste trying to save money. A simple paint job on a car with body work additional is a minimum of 5k. I run a shop that does mostly insurance work and some restoration work. There is a reason why spray cans and rollers dont work, they are CHEAP!!!!!!!!!
It seems your main objection is this method takes too much time. Fine. But understand this is a hobby for us. The time we spend painting our cars is not wasted. Its something to do for fun.
No one claimed this is an efficient way to paint a car and no one rolling paint jobs is going to put you out of work. But you're missing the point. For someone who has the time and wants to paint their own car, this is a valid option.
Re: New Paint job on a budget thread Part III - 09/02/1005:19 PM
I've heard positive things about tractor and implement paint, particularly a color called Blitz Black by John Deere. Unfortunately I think they fade more readily that rustoleum but I'm not sure.
I recently bought an HVLP gun for my compressor and played around with it the last couple of days, painting a muffler(don't ask why, it's just what scrap I had laying around). Primer thinned 10% with mineral spirits went on like a dream, perfect uniform coat. I had one run because I didn't know what I was doing and held the gun too close. Full coverage in one coat with no thin spots. I didn't even prep this thing, I just washed it and scrubbed it with a soap pad thing.
Then I thought I'd throw gloss black on it. I had an interesting result. Orange peel was pretty bad but I got complete coverage in one coat, as opposed to the 6 it took me on my car. I may sand and buff just to get an idea of how it looks. I can say however that spraying, even with my cheap HF gun, was about 10x easier than rolling, particularly with the gloss coat.
Check it out: (Note, the uneven areas are rust. I didn't sand this at all or prep it like I should have, I just wanted to get a hang of my gun.)
Re: New Paint job on a budget thread Part III - 09/04/1010:37 PM
that white cougar looks amazing.
i am doing my 85 hatch mustang in white, i hope it turns out just as nice.
was that buffed?
i know that it has been covered, but is anyone at all having any issues at all with flexible bumper covers? just use the paint as normal, but use an adhesion promoter?
i bought rustoleum form my former work and didn't notice until the other day, that it is not "professional". when i bought new stuff, i bought "professional".
i am happy with how high the gloss is on the non-pro, and it seems to be pretty hard (in the areas that got sun), but has anyone ran into any problems between the two?
Re: New Paint job on a budget thread Part III - 09/14/1012:06 AM
Quote: If painting a car was as easy as using a roller or a spray can I would be out of business. It kills me to think how much time and money people waste trying to save money. A simple paint job on a car with body work additional is a minimum of 5k. I run a shop that does mostly insurance work and some restoration work. There is a reason why spray cans and rollers dont work, they are CHEAP!!!!!!!!!
I don't have 5K or more for a paint job. Does that mean I should just tow my car to the junk yard? Drive it with crappy paint until it rusts out? Take it to an inexpensive "professional" paint place? (Did that. Cost me $1000 and after a year the paint's oxidized and flaking.) Just give up and take the bus to work?
You're essentially posting on a thread that's somewhere around 160-170 pages long in three parts. Before you speak, go back through ALL the previous posts and look at the paint jobs. I've also seen hundreds of posts about rolling on the Honda Tech forum, the Miata forum, a couple of VW forums, RolledOn.com, and a couple of other individual websites. I'm sure there are many more forums with $50 Paint Job threads that I've never seen. There are many people with 200 hours to do the rolled on paint job to excellent results, that don't have 5K of free money laying around. That's the reason for the rolled-on/sprayed-on Rustoleum/Brightside/"name-your-favorite paint" method of painting. It's trading time for money. Simple logic.
When I read your post, all I saw was someone who makes his living painting cars, and is either: a) pissed that he's losing business to the Do-It-Yourselfers, b)afraid of losing business to DIYers, c) worried that people will see that painting a car isn't a job that only professionals with years of experience can perform for exorbitant amounts of money, or d) just a paint snob who looks down on anyone who doesn't do it the way HE thinks it must be done.
Over the four years and eight months since this thread started (on 01/23/06), I've read dozens of people say that this method is for cheap a**es, won't last, is stupid, is for people who don't care about their cars, is for....... I've also seen MANY excellent paint jobs done this way. Before you make negative comments on this thread, and nothing you've said hasn't been said many times on all the rolled-on paint threads, go back and look at all the previous posts. They'll tell you who reads this board, why they read it, and what they're capable of accomplishing. Your previous comments are, to me, the same as a Chevy person coming on here and saying that Mopar cars are crap. I'm 47, and I've seen a lot of Mopars in that time that WERE crap. But I don't call all Mopar crap. And I don't do it on a board or a thread that is for Mopar lovers.
You make your living painting cars. Good for you. In this economy I'm happy for anyone who is gainfully employed. But I have no patience or respect for someone crapping on other people's efforts.
Re: New Paint job on a budget thread Part III - 09/15/1002:03 PM
Hey all, It's been awhile since I've been back to this thread, but I must say it's still the most useful thing I've ever found on the internet. I've had 3 vehicles benefit from this method!
Anyhow, there may be a fourth if I can figure something out. Has anyone successfully found a way to add metal flake to the rustoleum paint? I know there was a guy who did it with a dark green, but I'm looking to mimic the metallic Pearl white that GM has used on cars in recent history.
Re: New Paint job on a budget thread Part III - 09/17/1007:12 AM
the way that guy did it with the green dodge was by mixing in a bit of that aluminum rusto paint, it seemed to work really well. Maybe if you try adding a little almond and red to a white base with just a little bit of the amuminum paint you migh get that GM color.
Re: New Paint job on a budget thread Part III - 09/21/1012:08 AM
Today I got some 3m Rubbing compound at the local NAPA.
Pros: Cheap (10 bucks) Is 10 times better than turtle wax polishing compound Very VERY shiny easy to use Works with the pad that came with my HF buffer
Cons: Paint job now shows ALL of my flaws. Before, it was a satin texture that looked okay but slight grungy. You can see EVERY SINGLE DEFECT in my paint job. Sanding marks, bad bondo, old unfilled chips I thought primer would cover. I suppose you live and learn, I may shoot some rustoleum over it with my hvlp gun now because I figure I can do it in less than a week, sanding, compounding and all.
Re: New Paint job on a budget thread Part III - 09/22/1001:33 AM
honestly dude, just be happy with what you got! I spent over a year getting every single little defect I could possibly find absolutly perfect, and I found something.
It was no longer fun any more, the more you get to drive and enjoy your car the better!
Re: New Paint job on a budget thread Part III - 09/22/1007:22 AM
Just thought I would post some pics of my 1994 Mazda MX-3. I'm just wrapping up the paint job. Used Interlux Fire Red for paint, 10 coats. I wetsanded it and today I compounded it with Meguiars M105 Ultra Cut Compound via rotary buffer. I'll be at it again tomorrow applying Meguiars M03 Machine Glaze with the rotary. After that it'll get a coat of Liquid Glass Polish/Finish topped with Meguiars NXT. After all is said and done, I wish I would have sprayed it on instead of rolling. I may even go back later and spray another couple of coats on, just to fix my mistakes and give a more uniform finish. It's definatly better than what I started with, and i'm happy with what I accomplished, espesially for the money i've got in it. On to the pics...
Re: New Paint job on a budget thread Part III - 09/22/1002:11 PM
As much as I like the red/ black look, I decided this past week to go back to the black. This time I'm using a mixture of 1 part Penetrol, two parts paint and about a half part mineral spirits. I'm getting really good results. These pictures are after three coats. I still have three more to go. I can't wait to wet sand and buff this thing.
Sorry about the phone camera quality, but you get the idea. I love this Penetrol stuff. It flattens the paint out really nicely. More pics after I finish up this weekend.
This paint job just gets better every time I do it. I've already got friends asking me to paint their cars. (The same friends who laughed at first when I told them about the roller part.)
Re: New Paint job on a budget thread Part III - 09/24/1007:26 PM
Anyone have tips for those of us who started with (ugh) 80 or even (lord forbid) 60 grit sandpaper? Would an epoxy primer fill these or should I just go out and get a new hood and trunk? That's where most of the scratches are. Now that I have an hvlp gun, I can do a decent paintjob in two days. I just started buffing and I can now see all of the scratches from being a bit over-eager with my sandpaper.
Re: New Paint job on a budget thread Part III - 09/24/1008:09 PM
Quote: Anyone have tips for those of us who started with (ugh) 80 or even (lord forbid) 60 grit sandpaper? Would an epoxy primer fill these or should I just go out and get a new hood and trunk? That's where most of the scratches are. Now that I have an hvlp gun, I can do a decent paintjob in two days. I just started buffing and I can now see all of the scratches from being a bit over-eager with my sandpaper.
Is the metal scratched, or just the paint? I'd start with 180 on that then go to 240 or 320 before the painting.
If the metal is scratched, you can try a skim coat of bondo mixed with fiberglass resin (google for a recipe, but it's basically the regular bondo mix with the fiberglass resin mixed in to make a slick coat). Then you'll have to sand the entire surface of course (you could start with 150? grit or even 80 if you have big ridges), but it'll be smoooooth.
Re: New Paint job on a budget thread Part III - 09/27/1011:56 PM
Quote:
Quote:
Quote: If painting a car was as easy as using a roller or a spray can I would be out of business. It kills me to think how much time and money people waste trying to save money. A simple paint job on a car with body work additional is a minimum of 5k. I run a shop that does mostly insurance work and some restoration work. There is a reason why spray cans and rollers dont work, they are CHEAP!!!!!!!!!
I don't have 5K or more for a paint job. Does that mean I should just tow my car to the junk yard? Drive it with crappy paint until it rusts out? Take it to an inexpensive "professional" paint place? (Did that. Cost me $1000 and after a year the paint's oxidized and flaking.) Just give up and take the bus to work?
You're essentially posting on a thread that's somewhere around 160-170 pages long in three parts. Before you speak, go back through ALL the previous posts and look at the paint jobs. I've also seen hundreds of posts about rolling on the Honda Tech forum, the Miata forum, a couple of VW forums, RolledOn.com, and a couple of other individual websites. I'm sure there are many more forums with $50 Paint Job threads that I've never seen. There are many people with 200 hours to do the rolled on paint job to excellent results, that don't have 5K of free money laying around. That's the reason for the rolled-on/sprayed-on Rustoleum/Brightside/"name-your-favorite paint" method of painting. It's trading time for money. Simple logic.
When I read your post, all I saw was someone who makes his living painting cars, and is either: a) pissed that he's losing business to the Do-It-Yourselfers, b)afraid of losing business to DIYers, c) worried that people will see that painting a car isn't a job that only professionals with years of experience can perform for exorbitant amounts of money, or d) just a paint snob who looks down on anyone who doesn't do it the way HE thinks it must be done.
Over the four years and eight months since this thread started (on 01/23/06), I've read dozens of people say that this method is for cheap a**es, won't last, is stupid, is for people who don't care about their cars, is for....... I've also seen MANY excellent paint jobs done this way. Before you make negative comments on this thread, and nothing you've said hasn't been said many times on all the rolled-on paint threads, go back and look at all the previous posts. They'll tell you who reads this board, why they read it, and what they're capable of accomplishing. Your previous comments are, to me, the same as a Chevy person coming on here and saying that Mopar cars are crap. I'm 47, and I've seen a lot of Mopars in that time that WERE crap. But I don't call all Mopar crap. And I don't do it on a board or a thread that is for Mopar lovers.
You make your living painting cars. Good for you. In this economy I'm happy for anyone who is gainfully employed. But I have no patience or respect for someone crapping on other people's efforts.
'nuff said.
Did you miss what he said? He spent 1k for a professional paint job with, I'm assuming, 2K paints. With adequate waxing and care, rustoleum can last 5 years, at LEAST 2 years. Auto paint, even a 5k paintjob, exposed to sun and rain and snow every day is likely to be fairly deteriorated after 10. Especially in the salt states. Now let's do the math.
Your paint job costs 5k. Looks great for 10 years and then will need another job(likely less than 10 years in my state).
My paint job costs $60. Looks great for 2 years at least. If I choose to repaint my car (which was made in 1992, guess the resale value on that) every 2 years: Labor: 40 hours TOPS for a rustoleum paint job with my cheapo HVLP gun and rotary sander/buffer. Even at 20 dollars an hour (which is way more than I make), my labor cost would be 800 dollars. If my paint job lasts roughly 1/5 the length of a professional paint job: 5x860=$4300. That's 700 dollars for gas, parts, and ect. The benefit becomes even MORE apparent when my transmission dies in 4 years. Rather than sticking a new transmission in a dieing car just because I spent 5K on the paint job, I can sell the car for parts and buy another car. Another benefit: I can repaint dents, dings, scratches and rust all myself for next to free.Just think about the other side of the argument before you try to tell everyone that it is a terrible idea.
Re: New Paint job on a budget thread Part III - 09/29/1001:07 AM
sadly I don't have pictures of my finished car but after driving it around for one day I already got plenty of questions about the paint. 2 of them "professionals" asked me if it was single stage.
"you get what you pay for" may apply to the mainstreem way of painting, but here its "you get what you put into it"
I spent a year doing the paint job, but I only spent $30 in paint, and maybe $30 in supplies. I feel much better about doing the work my self and paying as little as I did.
Honestly, I'd feel ripped off if I'd gone to someone like you. Your the perfect example of a greedy shop owner who sits behind his desk counting his money and thinking about the sucker he just milked dry.
Now if you'd be so kind as to stop being an internet troll and leave us to our hobby I think we'd all be greatful.
Re: New Paint job on a budget thread Part III - 09/29/1004:38 AM
Quote:
sadly I don't have pictures of my finished car but after driving it around for one day I already got plenty of questions about the paint. 2 of them "professionals" asked me if it was single stage.
"you get what you pay for" may apply to the mainstreem way of painting, but here its "you get what you put into it"
I spent a year doing the paint job, but I only spent $30 in paint, and maybe $30 in supplies. I feel much better about doing the work my self and paying as little as I did.
Honestly, I'd feel ripped off if I'd gone to someone like you. Your the perfect example of a greedy shop owner who sits behind his desk counting his money and thinking about the sucker he just milked dry.
Now if you'd be so kind as to stop being an internet troll and leave us to our hobby I think we'd all be greatful.
Im 33 yrs old and work in my shop everyday for 10-12 hours a day including weekends to pay for my mopar habit. 65 dodge 2dr post drag car and 70 challenger street car that I bought and redid both myself. As for ripping people cant help you there but I unlike most "mopar guys" I have only owned and drove mopars. 69 rr,70rr,70 challenger, 67 belvedere and a 97,02, and currently 05 3500 dually. I am greedy though I enjoy spending as much time with my two girls as I can.
Re: New Paint job on a budget thread Part III *DELETED* - 09/29/1004:47 AM
What part about this thread being about roller paint jobs did you miss? Why stir up crap just because you don't roller your car, there are plenty here who have and are happy with it and don't care to read about your $5000 paint job which I'm sure looks great, but you missed the point its about roller paint jobs.
Re: New Paint job on a budget thread Part III - 09/29/1002:15 PM
Here is the 69 Tempest that I painted last year around this time according to the information laid out on this thread. I can report on durability because this car saw almost a year of street driving and was never inside. We use it as a daily driver beater automobile.
Re: New Paint job on a budget thread Part III - 09/29/1002:28 PM
The car was completely apart and was built from scratch using whatever spares and extras I had so its not a 'survivor' or barn/garage kept little-old-lady-car. I decided to paint it with a roller and Rustoleum because I thought it would be the perfect car to try this technique on. The paint-job was labor-intensive and there were many times I regretted doing it this way because of time constraints. However, there were also many times I painted at night or during poor weather when I could not have sprayed. The painting really was not a problem, it was the wet sanding between coats that proved to be the time killer. The paint has held up reasonably well in the last year. There are some chips and its VERY easy to scratch. There are many areas that did not have complete coverage, probably also due to me rushing the job near the end and not really applying as much paint as I should have. Where the paint gets sandblasted from road grit, it wears away quickly and surface rust forms. This car was driven in the winter in the snow, slush and salt spray and those 'thin' areas show up fast. Overall, its a good-looking car from a daily-beater point of view but there is no way I would claim 'show-finish' or 'professional results' from this technique. The advantages are clear: I did not have to breathe isocyanates in or build a booth for spraying and its dirt-cheap. The dis-advantages are also clear: time-consuming wet sanding and rolling and relatively 'soft' paint. It's pretty cool when someone comes over to admire the car and I tell them I painted it with a roller and Rustoleum!!
Re: New Paint job on a budget thread Part III - 09/30/1002:56 AM
Quote:
Quote:
sadly I don't have pictures of my finished car but after driving it around for one day I already got plenty of questions about the paint. 2 of them "professionals" asked me if it was single stage.
"you get what you pay for" may apply to the mainstreem way of painting, but here its "you get what you put into it"
I spent a year doing the paint job, but I only spent $30 in paint, and maybe $30 in supplies. I feel much better about doing the work my self and paying as little as I did.
Honestly, I'd feel ripped off if I'd gone to someone like you. Your the perfect example of a greedy shop owner who sits behind his desk counting his money and thinking about the sucker he just milked dry.
Now if you'd be so kind as to stop being an internet troll and leave us to our hobby I think we'd all be greatful.
Im 33 yrs old and work in my shop everyday for 10-12 hours a day including weekends to pay for my mopar habit. 65 dodge 2dr post drag car and 70 challenger street car that I bought and redid both myself. As for ripping people cant help you there but I unlike most "mopar guys" I have only owned and drove mopars. 69 rr,70rr,70 challenger, 67 belvedere and a 97,02, and currently 05 3500 dually. I am greedy though I enjoy spending as much time with my two girls as I can.
fasinating, I'm 17 and I have no cash. I had to build a respectable car on my parents budget, which was quite small.
This topic accepts all car owners, we work together as a team to create something we can be proud of.
I really don't understand what type of point your attempting to prove but your really not getting anywhere, I highly doubt you will convince anyone otherwise about this process by trolling. Thats what Youtube is for.
Re: New Paint job on a budget thread Part III - 10/05/1011:27 PM
I'm new and across the water in UK. Just wanted to add that many of us are rollering VW Vanagons (known as the T25 in UK and T3 in Germany) and we recently created a 45 min DVD to explain how to do the $50 paint job from start to finish.
Re: New Paint job on a budget thread Part III - 10/06/1011:14 AM
I actually got a very acceptable $60.00 paint job on my race car by using Valspar paint, available at Tractor Supply Company. I did use a cheapo spray gun rather than a roller. Now that race season is over for me, I'd like to get some more durability and gloss by "clearing" the car. Is there any clear that is preferred to use over the enamel? What about a 2k clear. I have already water sanded with 600.
Re: New Paint job on a budget thread Part III - 10/07/1004:01 AM
Quote: I actually got a very acceptable $60.00 paint job on my race car by using Valspar paint, available at Tractor Supply Company. I did use a cheapo spray gun rather than a roller. Now that race season is over for me, I'd like to get some more durability and gloss by "clearing" the car. Is there any clear that is preferred to use over the enamel? What about a 2k clear. I have already water sanded with 600.
I am currently considering clearing my rusto for the winter with the cheapo 70 dollar a gallon martin senour paint line from napa. I also know that duplicolor makes their laquer line (called paint shop, available at autozone), that may add gloss and durability. Unfortunately, from what I have heard about the paint shop line, this may not last for long before it begins to deteriorate. I've also read about people using minwax spar polyurethane(like you'd use on wood floors) although I am skeptical and think it is likely to yellow.
Re: New Paint job on a budget thread Part III - 10/10/1008:39 PM
Ok fellow rollers, I'm very intrigued about roller-ing my truck. It's a 1991 Jimmy, Full size, gold on black (currently). It's a west coast truck so it's rust free and the body on it is fairly straight. It's really straight for a '91. The truck will be very easy to pull apart, except for the top. It probably weighs 200lbs or better and it has never been removed. My question is this, I will be rolling it in my driveway as it's too tall to fit in the garage, would you guys recommend doing to top of the cab first since it will be the hardest? The paint will be going on in spring, as I don't want to fight rain and morning dew. I will be doing the truck in gloss black and as I learn, I may do so air brushed real flames in blue on the front. The nice thing about this paint, is if I screw up the flame job or just don't like it, I can redo the hood and fenders.
Re: New Paint job on a budget thread Part III - 10/11/1002:35 AM
Quote: Ok fellow rollers, I'm very intrigued about roller-ing my truck. It's a 1991 Jimmy, Full size, gold on black (currently). It's a west coast truck so it's rust free and the body on it is fairly straight. It's really straight for a '91. The truck will be very easy to pull apart, except for the top. It probably weighs 200lbs or better and it has never been removed. My question is this, I will be rolling it in my driveway as it's too tall to fit in the garage, would you guys recommend doing to top of the cab first since it will be the hardest? The paint will be going on in spring, as I don't want to fight rain and morning dew. I will be doing the truck in gloss black and as I learn, I may do so air brushed real flames in blue on the front. The nice thing about this paint, is if I screw up the flame job or just don't like it, I can redo the hood and fenders.
Gloss black is a HARD HARD HARD color to get right.Prep work really makes it. Any little ding or sanding scratch will show through on the final coat. But yes, painting the hard areas first would be a good idea. You might even get an extension arm for the roller, that might help!
Re: New Paint job on a budget thread Part III - 10/11/1004:25 AM
well guys its been a long time waiting but here it is!!
I was participating in a recreation of the race in the first Love Bug movie, so I had plenty of expensive paintjobs to compare my car to. No one could tell the difference!
Re: New Paint job on a budget thread Part III - 10/11/1005:33 AM
Yes, I know.... but I'm ahead of the game as the truck is already black and shows all it's dents and dings. The whole truck will be blocked sanded before even getting it's first coat-- It's really straight now, actually, it has a good one on the hood from a rock, a small dent on the pass quarter and about two dings on the driver door. Of course, when I block sand it, I'm sure I'll find some more. Spending the time on the truck, isn't going to bother me much as it's not a daily driver. It's a weekend warrior so if it's down for a couple of months for paint, so be it. The biggest pain on this truck will be aligning doors and fenders, they just never fit quite right on these rigs, even when they were new, GM panel alignment was a joke. It gets worse if they have been "twisted" off road any and mine has.
As for the body, the previous owner took pretty decent care with this truck. I honestly can't find that many places where doors have hit it. Could be the nurf bars on the sides, could be that when you look at the truck, it looks like a charter member of the NRA owns it... I just don't know, but I'm telling ya, for a twenty year old truck, it's pretty dang good.
BTW: TheYoungGuns bug is just awesome... That is one clean ride! All the work you put in, really shows.
Re: New Paint job on a budget thread Part III - 10/18/1006:01 PM
I would like to thank everyone for the motivation thru all these posts.
Here is my contribution. My poor old 84 D250 beater truck. I finally decided it was worth a try.
I wont bore you all with the details, basicly done over a 2 week period in the driveway. Just finished up last week. I mixed some blue and white Rustoleum to get the final color.
Great old truck, just a little over 100000 miles. I got it about 7 years ago and havent really done anything to it. Looks like someones old farm truck, lots of surface rust and faded paint. One big dent in the side.
Re: New Paint job on a budget thread Part III - 10/19/1002:39 AM
wow!! you tottaly breathed new life into that old girl!!
Rustoleum makes a kitchen appliance paint sold in airsol cans thats really durable, its what I used to paint the wheels on my bug. It will match the stick color perfectly to, I believe it was called Biskut.
Re: New Paint job on a budget thread Part III - 10/20/1008:49 PM
Fantastic job, Young Gun! I've been waiting and watching patiently since you first started posting. I'm glad that it's finally done and look ing great. Now you can cruise the town in your bug and turn heads. Also, since it's done, you now have more time for chasing girls.....
Re: New Paint job on a budget thread Part III - 10/24/1001:02 AM
I'm really glad to see that you've dealt with all the questions and concerns and " got it done"! They are never perfect, but usually you're the only one noticing the flaws. Enjoy the compliments ( you've earned them), but mostly enjoy your car. It's what you saw in your imagination and you made it come true. I'm 2 years down the road, and I still get compliments, stories ( I had a ...blah blah blah,and the best part is I enjoy my car every time I get in it. It's a daily driver, been used as a prop in the Fall Pendelton catalogue, and made me happy every day I get to drive it. Yours looks incredible, I hope you can have fun with it.
Re: New Paint job on a budget thread Part III - 10/24/1009:11 PM
thank you very much! This car will probably be used as a daily driver, unless I find some cheap beater to tool around in. Until then though I'm definetly enjoyng what I have!
Also one question, I always wonderd how you got away with towing that dirt bike behind your bug?
Re: New Paint job on a budget thread Part III - 11/03/1010:17 PM
I plan on uploading some pictures of gloss black on a hood with a HF Hvlp but the prep is killing me. I've been using spot putty on all the little chips that the heavy-rust primer didn't fill and there are TONS of them. Anyone have any tips for this kind of thing?
I've been reading this thread on and off for a while now. I saw a while back that someone was going to try Sherwin Williams because they mix custom colors. Has anyone had success with a sherwin williams paint. If yes, what paint did you use?
Quote: I've been reading this thread on and off for a while now. I saw a while back that someone was going to try Sherwin Williams because they mix custom colors. Has anyone had success with a sherwin williams paint. If yes, what paint did you use?
Sherwin williams makes real auto paint (cheaper than PPG but will definitely work on a car). I would be hesitant to use it with a roller however.
Quote: I've been reading this thread on and off for a while now. I saw a while back that someone was going to try Sherwin Williams because they mix custom colors. Has anyone had success with a sherwin williams paint. If yes, what paint did you use?
I've been using Sherwin-Williams automotive paint for several years now and I've been pretty happy with it. There are pros and cons mainly because of color match to factory on some colors (Panther Pink come to mind).
The price is waaay cheaper than PPG (about 1/4 the price).
This Duster was done in their urethane. The Hood blackout is their urethane version of organasol.
Re: New Paint job on a budget thread Part III - 11/05/1004:52 AM
Quote: I've been using spot putty on all the little chips that the heavy-rust primer didn't fill and there are TONS of them. Anyone have any tips for this kind of thing?
The preferred method to get rid of chips is to sand them out and feather the paint as necessary. Primer does just like you found, shrink. Spot putty will too. Even if it looks good when you get around to applying paint, it will still shrink a little more over time. One of the things that makes for good prep work is little details like that.
Sorry, I should have been more specific. Sherwin Williams makes a Rustoleum equivalent that can be custom mixed. It sells for about $35/gal. I was wondering if anyone had tried to roll this any success. BTW, sweet looking Duster. David
That Duster looks great.I cant read through all this but theres a product called Penetrol out there that helps flow alkyd enamels but for roll painting dont know if it would help..I use it painting derby cars and it looks acrylic almost.
Re: New Paint job on a budget thread Part III - 11/06/1011:47 PM
Quote: I'm new and across the water in UK. Just wanted to add that many of us are rollering VW Vanagons (known as the T25 in UK and T3 in Germany) and we recently created a 45 min DVD to explain how to do the $50 paint job from start to finish.
Re: New Paint job on a budget thread Part III - 11/12/1012:10 AM
hey man, respect the van! They had a production run with rear engined water cooled setups, some with all wheel drive. Swap in a 2.0 turbo subaru motor and you've got a hotrod with room
Re: New Paint job on a budget thread Part III - 11/12/1001:50 AM
Alright,
for those of you that have done the rustoleum paint technique, how does it seem to be holding up? my car will be a daily driver and i've got a black jeep that i've touched up with rustoleum. after about 2 years in the sun, the black touched up patches seem to be fading. i realize that rustoleum doesn't have all the uv blockers that other paint does, but do the lighter colors discolor less?
Re: New Paint job on a budget thread Part III - 11/13/1002:53 AM
did you keep up with washing and waxing it? also polishing it occasionally will bring the shine back no problem. Any car will fade if not properly cared for and left out in the elements.
Re: New Paint job on a budget thread Part III - 11/19/1005:55 PM
Any color Rustoleum will require some maintenance. The fading will just be more obvious on the darker colors.
Brightside or similar urethane is the way to go if your car sees a lot of weather and you don't want a lot of upkeep. Its quite a bit more expensive, but it will last longer.
Re: New Paint job on a budget thread Part III - 11/23/1004:14 PM
I have simple question Help please~
What brand of rustoleum paints are we using? I went to homedepot and I see "regular rustoleum (white can)" and I see "professional high performance " paints.
I asked what brand dries harder? and the person at HD told me "it should be "professional high performance (grey can)" ( he is not 100% sure).
But! On professional high performance brand you can't thin it with "mineral spirits" but can thin it with acetone.
But, on regular rustoleum you can thin it with mineral spirits(only).
Re: New Paint job on a budget thread Part III - 11/23/1011:08 PM
Quote: I have simple question Help please~
What brand of rustoleum paints are we using? I went to homedepot and I see "regular rustoleum (white can)" and I see "professional high performance " paints.
I asked what brand dries harder? and the person at HD told me "it should be "professional high performance (grey can)" ( he is not 100% sure).
But! On professional high performance brand you can't thin it with "mineral spirits" but can thin it with acetone.
But, on regular rustoleum you can thin it with mineral spirits(only).
So which one is it???
Professional and stops-rust are pretty much the same. Both can be thinned with mineral spirits and I doubt one paint is truly superior to the other. The advantage to the stops-rust paint is that it comes in quarts and professional comes in gallons only. I would go with stops-rust myself simply for this fact, because a contaminated quart of paint is much less harmful than a wasted gallon. Just my
Re: New Paint job on a budget thread Part III - 11/25/1002:34 AM
The advantage to the stops-rust paint is that it comes in quarts and professional comes in gallons only. I would go with stops-rust myself simply for this fact, because a contaminated quart of paint is much less harmful than a wasted gallon. Just my
I have been buying the rustoleum professional paint in quarts from Lowes Home Improvement for a few years. Maybe your Home Depot store just prefers to stock it in gallons.
I have tried the regular rustoleum and the professional and just recently i tried Brightside boat paint and it is absolutely the best paint i have used for rolling and i used mineral spirits to thin it with. I would only use the rustoleum as an undercoating to build up the layers of paint and use the Brightside paint for the final top coating.It looks 10 times better and this is without getting to the polishing stage.
Re: New Paint job on a budget thread Part III - 11/25/1008:12 PM
Quote: Ok Thanks... now whats this "Brightside paint" ? I thought everyone was using rustoleum paints??
Brightside is a 1 part urethane yacht-paint that can also be rolled like rustoleum. It's a bit more expensive but they say it has better gloss and UV protection and ect.
Re: New Paint job on a budget thread Part III - 11/25/1009:11 PM
Actually the Brightside paint isn't that much more expensive when you consider what you get in return.
I'm painting using black paint and the Brightside is at least 4 shades darker than the rustoleum and the gloss of Brightside is unreal just rolling it on. I could get away with just doing a light wetsanding with 1500 and skip the polishing it looks that good. I do roll it on pretty smooth though.
The Brightside polyurathane paint now has teflon added in to make it easier to keep clean.
I found a supplier online that sells Brightside paint for $26.00 shipped to the lower 48 states.
Re: New Paint job on a budget thread Part III - 12/18/1002:08 AM
Quote: Hey, the car was originally a gold color,
And i am using bright side fire red marine paint which my dad had lying around, this is just a test piece.
Would a color such as black require less coats, and show results quicker?
I seem to have roller marks as well, do i need to thin the paint more?
Roller marks are taken out with wetsanding and buffing eventually but thinning more may help reduce them. What temps are to rolling at and what kind of roller are you using?
Re: New Paint job on a budget thread Part III - 12/18/1006:53 AM
would adding a white base coat make any difference?
Also I read way back in the thread some people were not putting any thinners in the bright side paint, and were getting full coverage after just 2 coats? any negatives to this?
Re: New Paint job on a budget thread Part III - 12/18/1007:23 AM
Quote: would adding a white base coat make any difference?
Also I read way back in the thread some people were not putting any thinners in the bright side paint, and were getting full coverage after just 2 coats? any negatives to this?
Not adding any thinner would make the paint apply much more thick and you would probably get a considerable amount more orange peel. Going over a base or primer will let you cover in a fewer coats but your progress looks pretty good. You're using actual turpentine for thinner though? I suggest mineral spirits or thinning fluid from brightside. Also, that seems like a bit much penetrol but I might be wrong. Try a coat without penetrol at all.
Re: New Paint job on a budget thread Part III - 12/18/1011:56 AM
Here is a close up,
I just painted the bonnet white, and didn't thin the pain at all, i think it came out much better. I did put alot more effort into the prep work this time though
Re: New Paint job on a budget thread Part III - 12/18/1010:35 PM
Quote: Here is a close up,
I just painted the bonnet white, and didn't thin the pain at all, i think it came out much better. I did put alot more effort into the prep work this time though
1st coat unsanded.
Those both look pretty good. I'd say one more coat and then wetsand and buff on the red. Put your last coat on unthinned and see how that goes, the thicker the coat the more gloss you will have. The disadvantage to thick coats is orangepeel which is solved by wetsanding and buffing if you can.
Re: New Paint job on a budget thread Part III - 12/22/1007:03 PM
Quote: Okay, how much should i thin the paint, an can you give me any tips on actually rolling the paint on.
I think you are supposed to thin about 10% with interlux but it will say on the back of the can. For applying: go look on youtube for roll and tip. It involves leveling out the paint by lightly passing over the freshly rolled paint with a fine quality foam or natural brush. Works really well for these applications. Also: I would try not to work the paint too much, if you work it dry it will cause texture and orangepeel. Try to keep your coats fairly wet but experiment with wetness to see what causes runs!
Re: New Paint job on a budget thread Part III - 01/01/1111:45 PM
That looks great younggun! I have a slight problem with my rusto paintjob however. It has been snowing/freezing here for weeks and it finally thawed and melted and I found that there is a spot where paint is missing on my hood. The odd thing is that my paint is gloss black and where the paint is missing is white. I used brown-oxide primer (the rustoleum for rusty metal primer) so where in the world did the white come from? I'll post pictures tomorrow.
Re: New Paint job on a budget thread Part III - 01/09/1109:10 AM
You need to use better compound. Either use 3m buffing (followed by machine glaze if you can) or Meg's Ultimate compound. Those white marks and hazes are either scratches caused by wetsanding that the polish didn't get out, scratches caused by the polish or holographing from buffing incorrectly.
Note to the forum: I have decided to relent and take off the rustoleum and lay down some real auto paint. It was good for the price but not what I was looking for. The rustoleum gloss-black, even when finely buffed and polished, is nothing special. It has a hint of gray in it, in the bad way. It is not especially durable and just since this summer the road has taken a toll upon it. Chips, scratches and rust spots that were not present with OEM paint now manifested. D'Oh! I'll still be around and all with my advice (if anyone wants it) but my car deserves better.
Another Note: No one realized I had painted the car with rustoleum and a roller unless I told them. It looked alright for the price. Just not for me.
Re: New Paint job on a budget thread Part III - 01/24/1104:13 AM
Quote: Sambo101 how long has the paint been on the car?
joeshmo, I didn't like rustoleum either reason I used brightside.
Gorgeous truck, I am planing to put real urethane paint on mine. I just cracked. Roller paint definitely has some advantages and it has it's uses but when you have a compressor and a gun available, there is no reason to use it.
Re: New Paint job on a budget thread Part III - 01/25/1105:31 AM
Quote: if you don't want to deal with messy overspray its a better alternative.
Absolutely true. Rusto-black just doesn't suit me as it is grayish. I will however post my findings of putting real auto-paint over rustoleum. Most people say it will lift but I plan on doing a test-hood and I bet with proper primer it'd be fine.
Re: New Paint job on a budget thread Part III - 02/06/1107:55 PM
if oyu let the paint cure for about 3 weeks to a month and then do the final wet sanding and polishing you will get much better results. Soft paint doesn't wet sand or polish to well.
Re: New Paint job on a budget thread Part III - 02/06/1111:14 PM
Quote: That looks great younggun! I have a slight problem with my rusto paintjob however. It has been snowing/freezing here for weeks and it finally thawed and melted and I found that there is a spot where paint is missing on my hood. The odd thing is that my paint is gloss black and where the paint is missing is white. I used brown-oxide primer (the rustoleum for rusty metal primer) so where in the world did the white come from? I'll post pictures tomorrow.
I have been reading some info on the Rustloeum forums and the company recommended not using the rusty metal primer on any meatal that was not covered in rust. They said that the rusty metal primer contained fish oils and other additives that is used to coat the rust but if it was used on clean metal it would likely cause the top coat not to adhere properly.
Re: New Paint job on a budget thread Part III - 02/08/1102:35 AM
Quote:
Quote: That looks great younggun! I have a slight problem with my rusto paintjob however. It has been snowing/freezing here for weeks and it finally thawed and melted and I found that there is a spot where paint is missing on my hood. The odd thing is that my paint is gloss black and where the paint is missing is white. I used brown-oxide primer (the rustoleum for rusty metal primer) so where in the world did the white come from? I'll post pictures tomorrow.
I have been reading some info on the Rustloeum forums and the company recommended not using the rusty metal primer on any meatal that was not covered in rust. They said that the rusty metal primer contained fish oils and other additives that is used to coat the rust but if it was used on clean metal it would likely cause the top coat not to adhere properly.
I have read this as well but it has only had adhesion problems on select parts. Mainly parts immersed in UV.
Re: New Paint job on a budget thread Part III - 03/21/1106:21 PM
has anyone had good luck with rolling rustoleum paint over or even using it under rustoleum brand paintable undercoating?
i didn't get to fully finish my car, and i have surface rust showing through the areas where i used spray undercoating.
my process for undercoating: sand regular and prep as regular put down 2 thin coats spray undercoating following directions for time, follow up with multiple coats of undercoating
i drilled holes in my new fenders to mount some trim, and touched it up with white paint. the paint never seemed to dry over top of the undercoating, turned brown, and i still wound up having rust around my drilled holes (in my new fenders!).
i planned on doing two tone on my older fox hatch and have a color mixed to match the original lower gray, but now i am wondering if the paint will just even change color, not adhere, or even rust from the backside-out......
has anyone used other products? anyone try the spray bedliner with rustoleum roll paint?
Re: New Paint job on a budget thread Part III - 03/29/1103:02 AM
To anyone still interested in doing this, I will post pictures of the utter decimation of my rustoleum paintjob from 6 months of New York winter and snow. Several rust spots that weren't present prior to painting, several topcoat failures on the hood and trunk, chips, scrapes, shrinkage. Not durable enough for my taste. Going to urethane as soon as it is warm enough.
Re: New Paint job on a budget thread Part III - 03/29/1103:45 PM
mine held up through ohio winter(tons of salt in my specific area).
i am just upset that what i had used to protect certain vulnerable areas had failed me. i honestly think that the paint looks really good, and without washing it through the winter, i am very surprised at the shine that it had kept.
Re: New Paint job on a budget thread Part III - 04/18/1104:10 AM
First off, I'd like to thank everyone here for ruining my life I discovered this topic via a link from The Samba, which I see many of us have made the pilgrimage from. I as up until sunrise last night reading this, and not sleeping because I couldn't stop thinking about it. I paid $5K for a paint job for one reason and one reason alone: I didn't have the facilities. If I could build a booth in my garage, I would've sprayed this thing, but I'm already pressed for space with just the car. Seeing this topic made me feel crushed. But, this car has been a learning experience for me, so the next one will be better (and $5K cheaper!) Have a few questions, though: 1. Definitely want to go the Brightside route. Sounds all around better. Has anyone put together a thorough guide on how to do it, yet? I've picked up bits and pieces from this topic, but hoping someone collaborated everything in one place. 2. Can Brightside paints me mixed with each other? As in can I add some white to the light blue to make it even lighter? I'm talking only using Brightside paints, not mixing other brands into it or tinting it. 3. How does the paint store? I was hoping to buy a gallon of the stuff, mix up my color, and save it to fix up dings and such without having to worry about mixing more and not getting the right color. 4. Foam rollers are awesome, I laid down Masterseries on my chassis with one beautifully, but not applicable in certain places. What about doing car rims, for example, which aren't very flat and full of curves and holes and such? Thanks guys. Hoping to use this stuff to paint my rims and some interior pieces I have left. And to do many, many more cars in the future
Re: New Paint job on a budget thread Part III - 04/20/1103:56 PM
To paint wheels,brackets, and other odd shaped pieces, I'd spray the paint. The easiest and cheapest route is to use rattle cans from the hardware store. A better plan is to use the little Preval sprayers. These sprayers are similar to the rattle cans, but allow a person to spray better quality paint. In fact, regular automotive paint can be used with these. (but wear all the necessary safety gear) These little sprayers are available at Hardware stores, paint stores etc. To see what they look like:
It is critical to get the paint mixed thin enough so it will spray properly. If it's to thick the results will NOT be good!! (or it may not spray at all!) I'd suggest spraying some on a practice piece first.
Re: New Paint job on a budget thread Part III - 05/08/1103:56 AM
Hey guys, it's been a while. Forgot to post some pictures of my project of last year. I decided to paint my Tbird with Tremclad Flat Black. Turned out better than I even anticipated.
Re: New Paint job on a budget thread Part III - 05/08/1102:35 PM
Well, it have no problems with any. Just like any other paint. I make sure I wash my car on regular basis to keep it looking clean and mean))) Can't describe how much more attention I am getting now comparing to the regular black colour that it came from the factory
Re: New Paint job on a budget thread Part III - 05/15/1101:05 AM
Seems like that flat finish would be a magnet for dust, dirt, tree sap, etc., since there's no protective layer of wax, no clearcoat, and not even a buffed out finish.
I used Rusto Gloss White, and have tons of problems with things like bird crap, tree sap, road tar, and bug juice soaking right into my paint, requiring me to use bleach to get rid of etched-in stains.
Plus, with no protective clearcoat, I have to scrub twice as hard to get the paint clean.
I am considering either a spray-on clearcoat or simply painting over the Rustoleum with Brightside that's the same color (Gloss White).
Re: New Paint job on a budget thread Part III - 05/15/1102:56 AM
The Brightside does have Dupont something-or-other which I think has to do with ease of cleaning.
My car is in the garage, and even it gets crap on it, but it has been easy to clean with the Brightside on it.
The Brightside will also give you a much nicer gloss.. since your car is already white, it shouldn't take more than 2 coats to get a nice shiny Brightside finish on it..
I want to paint my car soon and I want to use this, but I have no experience painting and I'd just like to see if anyone had experiences with it and if they had any tips before I get it.
Re: New Paint job on a budget thread Part III - 05/19/1111:04 PM
Quote: First off, I'd like to thank everyone here for ruining my life I discovered this topic via a link from The Samba, which I see many of us have made the pilgrimage from. I as up until sunrise last night reading this, and not sleeping because I couldn't stop thinking about it. I paid $5K for a paint job for one reason and one reason alone: I didn't have the facilities. If I could build a booth in my garage, I would've sprayed this thing, but I'm already pressed for space with just the car. Seeing this topic made me feel crushed. But, this car has been a learning experience for me, so the next one will be better (and $5K cheaper!) Have a few questions, though: 1. Definitely want to go the Brightside route. Sounds all around better. Has anyone put together a thorough guide on how to do it, yet? I've picked up bits and pieces from this topic, but hoping someone collaborated everything in one place.
Its pretty much the same process as rustoleum. Roll it on and sand every other coat with progressively finer grades. I thinned my mixture to the 2% milk consistency using Brightside's thinner, but others have rolled it straight.
Quote: 2. Can Brightside paints me mixed with each other? As in can I add some white to the light blue to make it even lighter? I'm talking only using Brightside paints, not mixing other brands into it or tinting it.
Quote: 3. How does the paint store? I was hoping to buy a gallon of the stuff, mix up my color, and save it to fix up dings and such without having to worry about mixing more and not getting the right color.
My experience is that Brightside does not store well after being opened. The top layer will harden. This thick layer of paint can be removed and the remaining paint stirred, but you may be losing some important paint properties in the process.
Quote: 4. Foam rollers are awesome, I laid down Masterseries on my chassis with one beautifully, but not applicable in certain places. What about doing car rims, for example, which aren't very flat and full of curves and holes and such? Thanks guys. Hoping to use this stuff to paint my rims and some interior pieces I have left. And to do many, many more cars in the future
I painted my steel rims with small foam brushes and a brstle brush to get in the seam where the wheel center joins the rim. It was very slow work, but it is doable if you're not in a hurry.
Re: New Paint job on a budget thread Part III - 06/09/1107:45 AM
Bug turned out great
If you don't remember the username, i'm the one with the old ford truck... was painting it red/white two tone.. well i never finished the paintjob (never painted the hood). Today i'm back on it..
here's my race truck, the reason i never got around to finishing the 4x4 restoration. This thing took quite some time to get to where it is. And it fits in this thread somewhat because it's a rattle can paintjob from years ago
and the 4x4 with the rolled on brightside paint. I pulled the bed and built a flatbed. This also happens to save me probably 50 hours of body work because the bed was a bodywork disaster. Although i am going to do bodywork/paint on it eventually so i can swap beds whenever i want.
Today I welded all the trim holes back up, smoothed them down, and started block sanding the truck again. The body work i did was pretty bad, i just didn't spend enough time block sanding out all the low spots i put in the old paint with the wire wheel when i was looking for bondo after i got the truck (back when it was a 2wd f100!). I have most of them blocked out already. Truck should be pretty dang straight soon. 99% sure i'm getting rid of the two tone. I like it but i don't want to run trim (it will get mangled), and two tone with no trim is hard to make look right.
Re: New Paint job on a budget thread Part III - 06/10/1105:08 AM
been a busy two days, tomorrow is another entire day of body work, should be done tomorrow, or at least very close. blocking the paint shows the waves right off the bat. The block skims over the dips making them easy for me to spot.
Re: New Paint job on a budget thread Part III - 06/13/1104:56 AM
I assume you are wondering if you could skip all the sanding between coats and get a flat finish? That would give it crazy orange peel, it wouldn't be flat. For a flat finish you still wouldn't want orange peel, you'd have to figure out how to flatten the paint itself.
I'm spraying paint tomorrow! Made a big mistake and rolled rustoleum primer all over the truck and it ended up being the craziest orange peel mess ever. I spent ALL day today sanding the primer orange peel down and there is still tons of it. I could spend another week doing body work and get the final product nicer but I'm worried that if i put a month worth of work into this paint them I'll be to scared to take the truck on any good trails. SO i'll be spraying it tomorrow, so excited... really want to see how it's going to turn out. I'm not expecting much, as I know there are flaws but it's going to be a lot better than it was before, and should be pretty darn good for a 4x4 that does get used moderately.
I think i am going to spray 4 coats. The two people i found that sprayed brightside said they did 3 coats in there little build threads on rolledon, so I'm thinking i'll give it an extra coat. Then I can colorsand and buff the heck out of it if need be.
Re: New Paint job on a budget thread Part III - 06/13/1109:35 PM
Turned out pretty good. Damn good for a 4x4 that will see trails anyways
Quite a bit of orange peel. Can't wait to colorsand and buff it out, or atleast some/most of it. I think i'll wait one week before sanding any paint though.
I just can't wait to un tape it in an hour and roll it outside into the sun.
Re: New Paint job on a budget thread Part III - 06/14/1103:05 AM
Thanks, I thinned it with interlux 216 thinner. I didn't measure it out, simple poured paint to where it was about 3/4 of my tubaware cup thing, then added thinner to where I thought it was about 5%.
I bet if i had really dialed in the right amount of thinner, and dialed in the gun spray pattern better, and waited a tad longer in between coats, I probably could of eliminated almost all my orange peel. I got excited and went a little fast. Oh well, just more wetsanding and buffing, and a couple runs to sand out...
Re: New Paint job on a budget thread Part III - 06/20/1105:00 AM
I have a dumb question... What would be the smallest compressor would you use? I have a 10 gal compressor like to use,but I thing it might just be too small for the job... now I thinking maybe I could do a panel at a time would this work? or would it be to labor intense? I don't think I could roll on the paint being I Have a bulging disc in my neck... I don't think I could hold the spray gun that long also... I would like to give it a try to paint my 80 dodge truck...
Re: New Paint job on a budget thread Part III - 06/20/1107:22 AM
The size of the tank is not as important as the size of the motor. I'm going to assume this is probably a small compressor. It will probably be a little difficult to do a full job but I could see a panel-by-panel job being feasible. The purple cheapo harborfreight HVLP gun uses 6 cfm. I could see you being able to paint a panel at a time with your compressor running constantly. Grab an in-line dryer filter thing (they are little red orbs) and go for it. You'll have to experiment with the paint thinning and get to know the hvlp a little. The guns really are very light and since you really don't need to paint more than a panel at a time and you can mix up paint on the fly more-or-less because it doesn't need a hardener, I think you would be fine shooting the paint. The sanding however is hard work... I'm not sure if you'll be able to do that. I'm pretty young and sanding is definitely hard on your neck/back/arms. I would recommend getting a piece of scrap to practice on with the hvlp before shooting a car.
71Ford: Nice Job! Lookin good in red! I hope you're ready to cut and buff though. To tell you the truth, I just buffed parts of my car and the gloss improved ALOT and it was pretty easy. Used 3m buffing compound on my cheap HF rotary with the wool bonnet on the foam pad. Took the gloss from semi-gloss (almost flat black, ew) to glossy. I didn't even wetsand (even though I should have.) If you wanna knock out that peel, I would start with 1000 grit then follow up with 1500 then 2000 then some good hard buffing!
Re: New Paint job on a budget thread Part III - 06/29/1106:15 AM
Well, I figured I'd post my progress. I started working on the truck about a month ago. I have about 3-4 coats of paint on various parts of the truck, and I'm still working on it. I really want to get this truck back together by the 4th of july but.... You know how these things go! You tube channel: http://www.youtube.com/user/mrRhwalden?feature=mhee
Re: New Paint job on a budget thread Part III - 07/02/1104:05 AM
Hi all. I've been lurking here for quite some time gathering information about how things should be done. I really appreciate the efforts of everyone before me and the moderators for keeping the various threads alive.
I do not have a Chrysler.Mopar vehicle, so please don't hold it against me. Though my first car was a 1971 Dart 2-door with a 318.
I am painting my car with Interlux Brightside (white) using an HVLP sprayer.
I've removed everything I could. Windshield (to correct other damage), bumpers, lights, trim, quarter windows etc.
I scuffed the entire car with a Scotch bright pad and repaired what few rust spots the car had and filled in with spot putty. Where I have exposed metal, I primed with white Interlux Prt-Kote primer.
I'm thinking I probably should not have used white primer as it's kind of hard to see where I've painted (oops)
I waited about a day after priming and I sanded the primer with 320 paper to flatten it out and put down 2 coats of paint thinned down with 10% Interlux 216 thinner.
Question, should I sand the primer? Or is the texture of the un-sanded primer better for paint adhesion?
The car is 20 years old and overall the original paint is in good condition, though I don't know what kind of paint it is originally (Volvo) I do know that it was a basecoat only and not a base/clear application.
So far I've painted the trunk. I have some orange peel. I know it's something of an inevitability, but what suggestions are there to lessen it's appearance? Add more thinner? More paint and less air in the mix? The last time I painted a car, lacquer was was still the way to go. I don't recall this much orange peel. It's not that bad, but it is noticeable. I have the gun set to lay own a vertical pattern using about 38-40 PSI. I have up to about 90-100 PSI @ 15CFM available to me.
After painting, I'm planning on basically reassembling the car(lightly) and wait for it to harden up for 30 or so days. Then I'll wet sand it then polish it out. What's the preferred polishing compound these days? I have a dual action polisher as well as a 5" 8" (D/A) buffer and a single action polisher with a wool buffing pad.
I know much of this may have been covered, but I was hoping if there were recent developments or updated procedures that anyone might have available.
I won't clog up this thread with photos, so here is my photo bucket link to the painting project page:
Re: New Paint job on a budget thread Part III - 07/02/1105:12 AM
It has been a while since I've mixed any paint up, but I think 10% is too thick, not enough thinner. I also sprayed one of my coats, and did not have terrible orange peel. I was using mineral spirits.
Re: New Paint job on a budget thread Part III - 07/04/1107:34 PM
Ursan: You need to play with your gun until you get the least- orange peel possible. Thinning about 10% sounds right as long as it comes out of the gun pretty well. It is a good idea to sand your primer using a hard block and sand it until it is FLAT with no texture to it. A final sanding with 400 grit is great to ensure there are no scratches showing up in your color coat. As for buffing a single-action buffer with a wool pad (I'm kindof assuming that single action is the same as a rotary) and some coarse compound (in the real auto-paint world we use Meguiars M105 or the consumer grade product- ultimate compound) after a good wetsanding with 1500 and then 2000 grit sandpaper works very well. You'll get even better shine if you follow this with a DA polisher and some fine polishing compound (such as Meguiars m205 or scratch-x) and a softer pad. This will remove any swirl marks from your rotary. A final coat of wax and you're all set.
Since you have all this equipment, it is kindof a bummer you didn't simply spray catalyzed automotive urethane. It would have cost you about the same (~300 dollars for primer and color coat with all the activators and reducers) and probably lasted you much longer. Well anyway, good luck with the rest of your paintjob.
Re: New Paint job on a budget thread Part III - 07/07/1104:18 PM
Joeshmo, I got the gun dialed in thank you.
My steps were to prime those areas that were bare metal. The car originally had 4 (four) layers of primer plus the base. It wasn't clear coated from the factory so in accordance from Interlux, I shot directly onto the cars original paint which I had gone over with a scotch pad and or 320 grit paper. Where I had the primer I also sanded..
The procedure was: scuff original paint and primer (using a block) (Friday)apply paint allow to dry 12-18 hours (Saturday)wet sand 800 grit second coat allow to dry (Sunday) wet sand 800 grit third coat allow to dry (again, 12-18 hours) (Monday)wet sand 1200 grit fourth coat. Leave alone for 48 hours in nice warm garage.
I'll wait a few weeks to wet sand 2000-2500 and give it a final buffing.
The main reason I didn't do the catalyzed paint is my concern over painting directly over the existing paint and using special primers. The gallon of interlux, solvent and 2 cans of primer came to less than a single gallon of the catalyzed paint not including what ever specific hardeners and primers it might have required, at least according to the pricing over at The Eastwood Company . Plus I don't have access to a respirator or anything else like that.
At the moment I'm just starting to re-assemble the car. The trunk went back on last night. Just handling the paint it still feels like it's not quite set even though I did the final coat this past Monday (today is Thursday)
Re: New Paint job on a budget thread Part III - 07/07/1106:44 PM
Quote: Joeshmo, I got the gun dialed in thank you.
My steps were to prime those areas that were bare metal. The car originally had 4 (four) layers of primer plus the base. It wasn't clear coated from the factory so in accordance from Interlux, I shot directly onto the cars original paint which I had gone over with a scotch pad and or 320 grit paper. Where I had the primer I also sanded..
The procedure was: scuff original paint and primer (using a block) (Friday)apply paint allow to dry 12-18 hours (Saturday)wet sand 800 grit second coat allow to dry (Sunday) wet sand 800 grit third coat allow to dry (again, 12-18 hours) (Monday)wet sand 1200 grit fourth coat. Leave alone for 48 hours in nice warm garage.
I'll wait a few weeks to wet sand 2000-2500 and give it a final buffing.
The main reason I didn't do the catalyzed paint is my concern over painting directly over the existing paint and using special primers. The gallon of interlux, solvent and 2 cans of primer came to less than a single gallon of the catalyzed paint not including what ever specific hardeners and primers it might have required, at least according to the pricing over at The Eastwood Company . Plus I don't have access to a respirator or anything else like that.
At the moment I'm just starting to re-assemble the car. The trunk went back on last night. Just handling the paint it still feels like it's not quite set even though I did the final coat this past Monday (today is Thursday)
Whenever I have priced interlux, it goes for about 30 dollars a quart which is about what I pay for my catalyzed paint (actually less, a gallon with hardener runs me about 80$). I can definitely understand the concern over base-coat stability though.
Your plan sounds good with the 2000 grit but IMO there is little need to go to 2500 grit. You might be better off going 1500-2000 then buffing it nice and shiny. If you do end up doing that, here is a tip: Wetsand at a 45 degree angle and alternate directions. For example, sanding with 1500 grit I will sand diagonally towards the driver side mirror. When I start with 2000 grit, I will sand diagonally towards the pass. side mirror. This way you can see when you have sanded uniformly as all the scratching marks will be going in only one direction.
Re: New Paint job on a budget thread Part III - 07/08/1105:25 PM
How long should I realistically wait before wet sanding and polishing?
The reason I ask is I can't replace the drip molding until the polishing is done and therefore I can't replace the rear quarter windows. Or if I do, I can't seal them into place as they need to be.
I can use the car for a short while with them just screwed into place, but I don't want to press my luck.
Re: New Paint job on a budget thread Part III - 07/08/1110:35 PM
Quote: How long should I realistically wait before wet sanding and polishing?
The reason I ask is I can't replace the drip molding until the polishing is done and therefore I can't replace the rear quarter windows. Or if I do, I can't seal them into place as they need to be.
I can use the car for a short while with them just screwed into place, but I don't want to press my luck.
It kinda depends. Can you still dent the paint with your fingernail? If so it is much too soft. With catalyzed 2k I can usually wetsand/buff the next day. With uncatalyzed urethane... maybe a week? Hard to say.
Re: New Paint job on a budget thread Part III - 07/14/1106:09 AM
I just today shot four coats of medium-wet single stage automotive urethane on a section of my hood. The rustoleum is roughly a year old and has been sitting outside for a year. There were no adverse reactions between the urethane and the oil-enamel. I will post a comparison picture of the unbuffed urethane and the buffed rustoleum if anyone is interested but it is kindof a sad comparison. All I can say is that rustoleum black is not black at all but is more of a gray.
Re: New Paint job on a budget thread Part III - 07/15/1104:44 PM
Started wet sanding and doing the polish tonight. Wet sanded with 1200 grit paper to flatten things out. Then I follow up with Meguiar's 105 and then finish off with Meguiar's 205
Re: New Paint job on a budget thread Part III - 07/26/1106:54 AM
Holding up like a beast!!!!!!! still haven't wetsanded/buffed. guess i'm too lazy. These pictures do not do any justice to the paint, almost makes me not want to post them. Scratchy Scratchy. No scratches in the paint though!
Re: New Paint job on a budget thread Part III - 10/02/1106:20 PM
So, been a long time since i was on here....but i still keep getting emails on how the paint is holding up, ect....so here is a pic that was taken a few months ago so it's recent and shows the paint condition after 8 or so years....give or take. And this car gets DRIVEN!!! the paint still looks like the day i did it!!!
Re: New Paint job on a budget thread Part III - 10/03/1112:04 AM
Quote: So, been a long time since i was on here....but i still keep getting emails on how the paint is holding up, ect....so here is a pic that was taken a few months ago so it's recent and shows the paint condition after 8 or so years....give or take. And this car gets DRIVEN!!! the paint still looks like the day i did it!!!
Awesome! You're Bug still looks great!
I just spent the past couple weeks working my way through the whole epic saga (5 years+?!!) of this thread. I wondered if you still stopped by to check in. So glad to see you do and that you brought an update. I know you've heard it a million times before, but THANKS AGAIN for pioneering this method. I plan to go with Brightside (if I can get the right color) method because Aussie Driver's results were so amazing.
69ChargerYeeHaa, did you ever use the free clear Tremclad sent you? I don't remember seeing it in the thread, but it was a long journey and I could have missed it. I'd like to know if you got Rustoleom/Tremclad to shine like Brightside.
Glad to see you and THANK YOU THANK YOU THANK YOU!
Re: New Paint job on a budget thread Part III - 10/04/1102:35 PM
streetvanfan - thankyou so much for all the kind words I'd also like to thank MOPARTS for tolerating this thread!!
But ya, i still have that case of clear in my basement, and a case of more orange paint!! i experimented with the clear coat stuff and it was really nice and when i thinned it just a bit, it went on like glass, basically no buffing....which kinda turns this into a base/clear process but i haven't painted anything large with it, i just tried it on a old VW engine lid. The results were very very nice. I could picture just laying down what would be the base, and wetsanding it with 800 or so until completely dull and perfectly smooth, and just hit it with the clear...it would make it very easy!!!
But the brightside option looks very nice...i would like to try that one day to compare. I never thought about that stuff, but i have used it on a boat before a long time ago, not sure if it was brightside or not, but i remember the results were very amazing, smooth and very shiny.
Re: New Paint job on a budget thread Part III - 10/08/1112:29 AM
Charger, just wanted to tell you that I have read every page of this 5+ year thread. You are a pioneer and trendsetter. I can't believe your bug looks that great after all these years. It literally looks identical to the pictures you posted in 2006. Beautiful work my man, and that Charger? All it's missing is a black 01 on the side of the doors and flag on the roof (as was stated 5 years ago. haha) Anyways, amazing jobs you did. I have started work on my 1983 CJ7. I practiced on my doors, and although not perfect because I had to work outside, and the last 2 coats were put on while it was WINDY, and they got dust and a few tiny bits blown onto it, it still looks fantastic. I hung the doors today even though I haven't wet-sanded and put on another coat if it needs because of the wind blown contaminants, but because it is so cold today and I needed to use Jeep to pick up kids from school, I just couldn't keep them off any longer. lol. Picture does show some stuff sticking to door, but I can wipe those off as it's just random leaves and such that is currently blowing on everyone's cars. Anyways, here is picture of it on my jeep I just took this afternoon. Makes the rest of my Jeep look like crap. haha. I owe it to you my friend. Maaco said minimum of $2500 to paint my jeep without the top. I am only in this Jeep for $120, and that includes a gallon of black (I know, hardest color cause shows everything), bondo, tape, rollers, trays, tack cloth, mineral spirits, grinders, sandpaper, other tools, etc... You saved me a ton. If you're ever in Denver, I'll buy you a beer! http://imageshack.us/f/855/20111007114158.jpg/
Re: New Paint job on a budget thread Part III - 10/11/1106:50 PM
Two coats Brightside seattle gray sprayed with an hvlp gun, sanded down to 2000 grit wet, cut with 3M compound and hand polished with Klasse 3 in 1 polish. I'm sure I'll find some areas that need to be blocked and re-cut/ polished when I get it into better light, but I'm very happy with the results.
Re: New Paint job on a budget thread Part III - 12/02/1108:51 AM
Well I guess it's my turn to give this a try. Just wanted to say thanks to all that have supplied the valuable information that I have read over the past month or so and to charger for paving the way in this endeavor.
After getting my Maacco estimate for over #3800.00 for a basic paint job I figured for a couple of hundred bucks and my time I can do better. So here is what I am starting with
1973 Pontiac Grand Prix
The body is in real good shape except for a couple of dings in the drivers door and the Vinyl Top. The worst part of the body was the vinyl top. Was not thrilled about taking it off but it really looked like crap and it was bubbling all over so here is what I found underneath
Since I was thinking about putting a new vinyl top on it I figured I would use some Por 15 I had leftover on the roof for the rust. Seeing how it actually looked pretty good when I rolled it on, I can see how rolling rustoleum on would actually work.
I am looking at doing this in Orange but I have been unable to locate Brightside in orange, anyone know if it's available? If not I'm thinking about doing it in yellow, trying to get it as close to my old Challenger as I can. It's Corvette Yellow, hopefully the yellow of Brightside will be close
Either way it should be an interesting project. I hopefully will be getting the rest of the body work (minor dents and dings) finished in the next few weeks and get started on it soon. Oh and another thing for anyone who has changed from black to a lighter color. I'm thinking that I would primer it to hopefully make it not as difficult to cover, any suggestions?
Re: New Paint job on a budget thread Part III - 12/16/1103:20 AM
you may actually want to keep the black as a base. You will get a little darker color that way, cause I'm pretty sure the brightside paint is a fairly light yellow.
Re: New Paint job on a budget thread Part III - 01/03/1212:58 AM
Well, I had to give this roller method a shot. I have a '96 neon that has been sitting for 3 years. It runs like a top, but after 15 years and 230k plus miles, cosmetically it was pretty much too embarrassing to drive. lol
If I was going to do this project, I had to be different though, so I went for a two-tone.
Overall, I'm very happy with the end result, but I have to admit, it was work! That's a lot of sanding! If time is on your side though, this is definitely the way to go. There's no way anyone would believe this was rolled on, and some who have seen it don't believe me.
The original canvas. All the clear was gone, most of the paint as well, and I was pretty much left with factory primer.
After a junk yard door, and a decent amount of prep on the entire car, it was ready to roll.
I originally had my doubts...
But after a few coats, we got coverage...
Time to paint the white....
I ended up spraying the door handles, but the white is done!
As you can see, there is a reflection, but not the greatest. At this point it's about a 15ft paint job.
Wet sanded with 1000, 1500, then 2000.
Then bought a cheap $30 Harbor Freight Rotary, a wool pad with Meguiars Ultimate Compound, and a black pad with Meguiars Ultimate Polish, and it looks MUCH BETTER! Those are dust specs. Amazing what the camera will pick up.
Added a 1/4" vinyl pinstripe (wish I had stuck with my original plan and went with Mopar Blue as the silver kind of gets lost against the white).
And we're done!
And ready to come out of retirement for some autocross action.
Re: New Paint job on a budget thread Part III - 01/03/1203:49 AM
I used good ol' Rustoleum.
I mixed the black between 40% and 50%, and that seemed to work very well, but the white for some reason did not act the same way as the black. I only thinned it about 25-30%.
Re: New Paint job on a budget thread Part III - 01/21/1207:07 AM
Sorry if this has been covered before, but there's just too much to try to keep up with when you have six years worth of posts.
I picked up a '98 Dakota Sport with pretty crappy paint. I want to roll it with Rustoleum Satin Black. My question is, do you still wetsand it when you're doing a satin or flat finish?
Re: New Paint job on a budget thread Part III - 01/29/1204:52 AM
Five coats done on the tailgate, I started with that just to test it. Couple more coats and it should be good. I'll be doing the first coat on the rest of the truck tomorrow.
Re: New Paint job on a budget thread Part III - 07/09/1207:18 PM
Hate to rehash anything that's been covered, but I'm still working through the span of posts... good stuff!
Two main questions at this point
1) Is the Rustoleum Topside (marine) paint that much better than the regular/Professional Rustoleum stuff in terms of durability? I know it has UV protection, but I'm not sure if that's totally necessary for me. I know there are other brands/types out there, but due to availability, I'm going with Rustoleum of some type.
2) Is there any benefit to adding an amount of Penetrol to the thinner/paint? Does it help level, or is it counterproductive?
Thanks for your help... this has been a great read so far, and I still have a ways to go!
Comet Update- Rolled 3 years ago - 08/12/1207:55 AM
I rolled my Comet 3 years ago with Rustoleum White and it looks great- it is my daily driver and lives outside. Thanks for all the help and support. My Daily Driver:
Re: Comet Update- Rolled 3 years ago - 08/17/1206:30 PM
i need help please
I live in canada and Im using this trick to paint... but something I dont understand and noone ad that problem... I bought tremclad+ mineral spirit....when I put 50% paint and 50% mineral spirit in the tray to paint... I roll and start painting the car but the paint wont even stay on the car.... the mineral makes the paint go away...
When I split it in a bucket it was 50% was on top and 50% was on bottom..it doesnt mixed,,, can you hel pme^ whats the problem???
because now it rained this night and this morning the car was having alots or like (goutte de pluie and coulissE)
well thx for helping me and desperate now
no I dont have a garage
So I just painted the car with the paint, no mineral...since the 2 togther didnt worked
Re: Comet Update- Rolled 3 years ago - 09/01/1207:04 AM
Well first off 50/50 sounds like Waaaay too much. Have you read anything from the first post? It says about the same as water, a little thicker.
Second, did you sand your car first? You have to sand it down a bit at least so the paint will stick.
and as far as just using straight paint, that would take forever to dry. Thats why mineral spirits are needed. It helps thin the paint and helps it flash/dry.
You Need to read more about this. Google $50 rustoleum paint job. should be enough tutorials
Re: Comet Update- Rolled 3 years ago - 02/07/1307:26 PM
This has truly been an awesome ready, and unfortunately I should have taken notes.
I have a quick question that I know was answered, but I honestly can't remember where in this enormous thread. In regards to the mineral spirits, was there an issue using odorless mineral spirits over the regular smelly kind?
Everything else I believe I have locked away in my brain. Can't wait to start my test piece.
Re: Comet Update- Rolled 3 years ago - 08/15/1309:05 PM
I've kept coming back to this thread for a while now, and even though it's been relatively quiet, I keep chugging along. I remember quite a while back someone asked about color matching the color Autumn Bronze, and one of the admins said it couldn't be done. So, I took that as a challenge. Autumn Bronze is my favorite auto color in the Mopar library, and I thought...why in the heck do I have to settle for paint droplet experiments, or eyeballing paint chips and getting it wrong?
I posted an article that details a method I use to color match any auto paint to a Pantone paint code. I posted the thread in the Rolled On forums, which are a bit more active, but I wanted to post here, the father of the Rolled On Paint projects, too. The Pantone code can get you a clean, new paint chip of any auto paint color you want, no matter the year or auto manufacturer. Once you get that paint chip (cheaply) you can take it to ANY store that custom mixes any Rust Stop Acrylic Enamel paint, i.e. Ace Hardware, Sherwin Williams. And it links to a site that sells Acrylic Polyurethane topside paint in 200 colors, and custom color matching using...you guessed it..the Pantone Color code you provided. And price per quart is competitive with Brightside or Epifanes.
Re: Comet Update- Rolled 4 years ago - 11/15/1308:46 AM
Furr a few ... I started this paint ona' budget topicS ..... I guess some are even more FLOORED than I am ..,. Now is this one about a Comet being painted with a roller ? .... I have seen one done that way and it was not that bad !!!
Re: Comet Update- Rolled 4 years ago - 04/10/1412:43 AM
Hey guys, I've been following this from the very beginning and just read through them again for a refresher. Im painting my '89 D150 longbed in gloss charcoal gray and gloss black accents. Was going to use satin black but I think the gloss will make for better durability and easier upkeep. Bed will be Rustoleum roll on bedliner. Im getting ready to by my supplies but have a couple of question areas that I don't remember seeing answered.
#1. After bodywork I want to start with a solid base. Can I use Rustoleums's flat white "clean metal primer" over everything including my prepped paint? Or should I get their black automotive primer. Both can be rolled on, but the automotive is $40 for a qt vs $8 for the clean metal. Is the Automotive worth the extra?
#2. When you use the tipping method, is your brush loaded with paint too? And when you glide over the paint is it just the weight of the brush, or even lighter than that?
#3. What is the preferred method for the underside of the hood? Im leaning towards the spray bomb.
Re: Comet Update- Rolled 4 years ago - 04/15/1407:04 AM
Well, I've started. I went with the flat white clean metal primer. It was cheaper. Here are some progress pics. Primer was applied straight from the can, body prepped with 220 on random orbital sander.
Re: Comet Update- Rolled 4 years ago - 04/15/1407:15 AM
Fenders and hood first. Next will be the cab. Then the bed. Primer is still drying in the pics.
And this primer has me thinking that the truck would look really good in gloss white instead of the Charcoal Black that I plan on using. Not to mention it will hide dents and flaws better from my first ever attempt at body work.
And in primer. Sorry for the crappy pics, it was dark and I was using my phone.
Update. After putting on 2 thick coats of unthinned primer to the fenders and hood, then sanding most of it back of, I decided to do 1 thinned coat to the whole truck. Full strength it builds quickly which is great for filling small surface imperfections. But too thick it takes longer to fully dry.
Also, doing the primer help me get comfortable with the rolling technique. As I went along I got much better at laying down smooth coats and reducing roller lines. There are lines where my coats overlapped areas that had dried already. And I also think that I will see less roller marks on the color coats when the paint is thinned much thinner than I did the primer, and the paint doesn't dry as fast which will give me more time to work it.
Pics:
You can see the dent I need to fix just in front of the rear wheelwell.
Darker white areas like at the top of the fender are where there was primer left after sanding it back smooth
The lighter spots are where there is the thin coat of primer over areas that went lower than factory paint (metal/factory primer)
After getting the whole thing in primer, I'm still thinking it might look really good in gloss white. But Im going to stick with the charcoal grey for now.
I've been debating blacking this out with gloss black, but for now Im going to leave the factory gray. Its in great shape. Only two small spots where the paint was scratched off and there is surface rust. You can see them at the bottom. Im just going to sand those two areas and hit them with some of the charcoal gray.
There is a small dent at the first D in Dodge, and another in the center/bottom of the tailgate. Im also deciding whether to paint the hitch black or body color.
These are the two holes that I will bondo/feather, then primer back over on the drivers bed rail.
Well, here is the next update. Its a little behind schedule, but that's whats great about this method. If time constraints pop up, then you can just wait and continue when you are able. This is after 1 coat to the entire body. In spots where coats overlapped, I think Im going to really like the color, its a nice deep, dark gray.
I don't think the roller lines will be a problem for 2 reasons. 1. Everyone elses progress pics that I saw pretty much had the same look on the first 2-3 coats. 2. Im getting better at avoiding them all together. I can see bigger and bigger areas without the roller marks as I get better.
Finally, I see that I am no bodyman, . I was able to make a lot of dents less noticeable, but definitely not perfect. And I missed a couple of dents as well. But I don't need it to be perfect either, and Im NOT backtracking now to try and fix them. Anywho, heres the pics...
There was a really noticeable dent right in front of the rear wheelwell.
I will either pull and paint the cowl vent panel, or pull another at the junk yard, prep and paint, then swap them out.
When I get full coverage I can see this having a nice gloss in it.
Dent in the bottom/middle of the tailgate made much less visible. Forgot about the one in the first D in Dodge. Also, with all of the nooks and contours, this tailgate is a paint in the butt to paint.
As of right now the strip at the bottom of the truck will be painted gloss black. May even do black bedliner when I do the bed.
This is the bedrail that I patched a couple of holes up with Bondo. Turned out pretty well.
Coat #2. Im really liking this color. Starting to get full coverage now, and the depth and gloss is pretty impressive with just a natural finish. The coats dry very hard very quickly because of the thinness of each layer, and after 2 coats the orange peel is about the same as my 2013 Durango. Well, heres pics...
check out the gloss and reflection with just the natural finish
See my shotty attempt at repairing some dents in the front of the roofline.
straight on pic
a little closer
Inside the jamb is factory color with metallic in it, where you see the vehicle reflection is the Rustoleum color. They're close enough to where I don't plan on painting the jams. The run you see at the top of the pic is the only one I've noticed on the car so far. It came from paint that built up and ran down the drip rail. Ironic huh?
closeup
another closeup. You can see the texture in the far right of the pic. Compare the orange peel to that of the next pic of my Durango's paint.
Durango
Also, I was supposed to put another coat on today, but I want to let the paint bake in the sun. I tried today but it has been overcast all day long.
Also, Im at the point where Im supposed to wetsand and then apply two more coats. But Im really worried about burning through the paint with all of these edges and curves, especially on the tail gate. We'll see how it turns out. I think without wetsanding the peel would be too much for my liking, so Im going to try it. I figure that with the wetsanding I will have to do 4 more coats and call it a day. Then I can do the gloss black around the bottom edge of the truck, and Im going to do the roll on bedliner for the bed and bed rails. Last step for the exterior is to try again to track down 4 of the 20" steelies that come as full size spares on the new Rams
Great work what is your ratio on it?? Im in miami attempted to do the same thing on my motorcycle but when i did the last wet sanding i started to put on was then polish and it didnt have the the mirror finish. I am upset since this is my second attempt to get this right
I have a 71 yellow beetle I want to replace the read fenders and found a pair of light blue - since I am changing the color would it be a bad idea to maybe spray these with matching yellow rattle can first and then roll? maybe that will speed up the color coverage?
Quote: Great work what is your ratio on it?? Im in miami attempted to do the same thing on my motorcycle but when i did the last wet sanding i started to put on was then polish and it didnt have the the mirror finish. I am upset since this is my second attempt to get this right
I don't know the ratio as I used the drip test. I stir mineral spirits into the paint a little at a time and once mixed well I pull the stick out. When the paint goes from stream to drip in 2-3 seconds that's the consistency that I want it at.
If I can get a final cost that is pretty free of imperfections and trash, I don't plan on doing a final wet sand. Just plan on letting it cure then go straight to polish and wax.
Quote: This looks great - more progress pics please!
I have a 71 yellow beetle I want to replace the read fenders and found a pair of light blue - since I am changing the color would it be a bad idea to maybe spray these with matching yellow rattle can first and then roll? maybe that will speed up the color coverage?
I don't know when my schedule is going to let me do some more work but I'm itching to work on it again. I will post results as soon as I do.
On the painting tips, I'm not likely to be the best source. In my opinion though it was easier for me to start with a more uniform colored base. By going with the primer I am getting pretty even coverage and color over the whole truck. As opposed to others who were having a pretty big color and coverage variance when they painted directly over varying surfaces. So I would say they to start the car at a uniform starting color.
Next update. Finally had a chance to put in some more work. This is coat #3 after doing some sanding. I sanded too aggressively in a couple of spots and went too low so you'll see that, especially where I was trying to sand away a run by my passenger door. I think I'm going to be a lot less aggressive sanding from here on out and either stay away from edges as I knock down the little orange peel that I get, or not even worry about orange peel and only scuff it enough for the paint to grab every two layers.
Starting to get better coverage and I figured out how to get better coats with less roller lines. Before I was working smaller areas maybe 36x36" as I worked my way around the truck. That particular area was really smooth but you would see lines from area to area because of the paint starting to set. This time I would work really fast to cover an entire panel then go back over to knock down bubbles/level the paint. It made for much better smoothness and uniformity on the panels without that segmented look.
Looks GREAT!!! I painted a 73 RR I had a few years ago doing this method and am on the fence to do my sons Charger with the roller.....one thing is for sure I would recommend a hardener in the paint.
Quote: Looks GREAT!!! I painted a 73 RR I had a few years ago doing this method and am on the fence to do my sons Charger with the roller.....one thing is for sure I would recommend a hardener in the paint.
Any update pics to show how its help up over the past 3 years or so? I think others are just as curious as I am.
Next update. Here is after coat 4 with everything prepped to do the black accent at the bottom of the body, and the DODGE on the tailgate. Im still deciding on a butt stripe as well. Im leaning towards yes... It was late so I just took these to show the prep work. I haven't decided if Im going to do another coat of gray to the body or not. It looks good but because I was less aggressive with my sanding, there is a pretty good level of orange peel. Not a lot, about equal to the factory job on modern cars. Its just that I know that I can get it smoother if I want to, which will make my final buffing/polishing turn out a better shine/reflection. Im just so ready to drive it that I don't wanna wait. Decisions.... Im either going to leave it like it is, or go back and wetsand with 600 grit, then one final coat. This black should go really fast because its such a small area, I can get 2 coats in per day about 12 hours apart. Then I can move on to the rustoleum roll on bedliner, and I want to have my sliding back glass replaced with a one piece.
Overall I think Im leaning towards sanding and doing one more coat of gray with less peel.
Oh, and I still have to do the cowl vent.
This part was time consuming, taping it up and then cutting the letters out with a razor blade was nerve wracking. I'd never done anything similar to this.
Ok, here are some pics of the truck as it sits now. So far Im happy with the results. The finish right now is without sanding, polishing or waxing. Its just the natural gloss of the paint. Im probably going to lightly sand and hit the black with two more coats, then see where it stands. But so far Im happy with my $100 paintjob.
From this:
To this:
Its funny how much getting the black on there made the truck look so much more complete.
Those are cloud reflections you see, not paint issues. I'll try to get some pics while its still sunny out.
Cloud reflections
This is the worst spot on the truck. I had sprayed the body line with spray bomb to get in there, and a 10 minutes later while rolling I forgot and rolled back over it and it caused the paint to wrinkle.
Next up is rolling on some Rustoleum bedliner. This whole truck is going to be the product of rustoleum products and a roller
Central Texas in your location must mean near Killeen.
Yep smack dab in the middle of Killeen. I left it as Gainesville for so long, but I finally gave in and changed it to TX. Might help me meet some members in the area.
I'm also embarrassed now. Stepped out of the house with my daughter to take some pics and got caught on camera without my cover.
And I'd say the reflection is pretty nice, especially with it being unpolished. That house you see is across the street,then you can see the fence behind it and the house on the backside of them. Im pretty stoked about the transformation.
Well here are some pics after working on it all day yesterday. I would have more done but I was layed up all day with naseau/vomiting/diarrhea . Please excuse the grass, today was yard day but because of the NVD I didn't get to it. I still need to paint the cowl vent panel,re-install the bumpers, add the chrome drip rail molding, and do the bed in rustoleum. Then I'll start on the interior. Im going to keep it burgundy. The dash is pretty nice so I'll either clean up my door panels and dye them with aerosol stuff from the parts store, or pull some better ones from the J/Y and do the same. Then I'll just shampoo and detail it really well and drive the wheels off. And I want to have a one piece rear glass put in. Im going to have to stop myself so I don't sink more money into this than I planned on.
Im really excited about how the trim came out. The metal portion was really, really bad looking. It was yellowed, and dirty. I honestly didn't think that it would come clean. But I mixed some dawn dish soap with some Purple Power, and used a red scothbrite pad to scrub it and with some elbow grease they came out nice. Just have to hit it with some polish now.
My 92 has those large body side moldings and they're in rough shape. The chrome is peeling on several of them. Instead of the chrome wheel opening moldings I've got the wide rubber pieces. The paint is coming off in sheets now. I thought I'd gotten lucky and wouldn't have that issue. Sadly, it's caught up with me and the paint is now in full retreat.
Central Texas in your location must mean near Killeen.
Yep smack dab in the middle of Killeen. I left it as Gainesville for so long, but I finally gave in and changed it to TX. Might help me meet some members in the area.
I'm also embarrassed now. Stepped out of the house with my daughter to take some pics and got caught on camera without my cover.
Dustergirl, thanks for the compliment.
My apologies for the OT post: Roe, how long has the Army referred to them as "covers"? I thought that was just a Jarhead thingie, LOL Semper Fi!! and thank you for your service Truck is looking good, btw. I've been doing some body repairs on my challenger and using this technique on the finish. So pleased with the results, I plan to do the whole car in the end
My 92 has those large body side moldings and they're in rough shape. The chrome is peeling on several of them. Instead of the chrome wheel opening moldings I've got the wide rubber pieces. The paint is coming off in sheets now. I thought I'd gotten lucky and wouldn't have that issue. Sadly, it's caught up with me and the paint is now in full retreat.
Feets I didn't know you had a truck. Any pics to share?
Central Texas in your location must mean near Killeen.
Yep smack dab in the middle of Killeen. I left it as Gainesville for so long, but I finally gave in and changed it to TX. Might help me meet some members in the area.
I'm also embarrassed now. Stepped out of the house with my daughter to take some pics and got caught on camera without my cover.
Dustergirl, thanks for the compliment.
My apologies for the OT post: Roe, how long has the Army referred to them as "covers"? I thought that was just a Jarhead thingie, LOL Semper Fi!! and thank you for your service Truck is looking good, btw. I've been doing some body repairs on my challenger and using this technique on the finish. So pleased with the results, I plan to do the whole car in the end
Scott
Scott I've been in for a little under 5 years and I've always heard it called a cover. Even the guys who've been in for a while. Thanks for your service as well. My uncle was in the Marines during Vietnam....doesn't talk about it much.
Thanks for the compliment on the truck. Now is the real test of how long and how tough the paint will hold up.
Do you have a build thread going on the challenger as you tackle the body work? I find that lately I really like following the repairs and projects as people work through them.
I must say though, I have really enjoyed the look on my neighbors faces when I tell them that I did it with a roller...after they compliment how good it's looking.
My Dad (who was also my recruiter ) was also in Nam and he too didn't speak much of it so I know how that goes.
I do have a build thread in the "projects and survivor" section. The body work is kinda peppered through the thread but most of what I've done so far is around the rear window where the former vinyl top took its revenge LOL I need to update as the current pics don't show the little paint so far (which was actually brushed with a foam brush) on a test area to see if I was thinning correctly and to test drying time. Its been a long haul but I'm finally making some progress and weather permitting plan to start rolling some tomorrow
Quote: Feets I didn't know you had a truck. Any pics to share?
Here's a pic from 4 years ago before the paint started falling off.
D s a pic from 4 years ago before the paint started falling off.
That's a lot of pounds of Chrysler products with those two vehicles. I really like the grills on those years. I wonder if they swap over to my year, 1989? When I was looking for my truck I came across one in Dallas, IIRC, that looked a lot like yours that was for sale. I think it was a standard cab though, I can't remember, but it had no motor or trans and he only wanted $1500 for it. Truck was in really nice condition.
Re: Comet Update- Rolled 3 years ago - 09/24/1404:07 AM
Quote: i need help please
I live in canada and Im using this trick to paint... but something I dont understand and noone ad that problem... I bought tremclad+ mineral spirit....when I put 50% paint and 50% mineral spirit in the tray to paint... I roll and start painting the car but the paint wont even stay on the car.... the mineral makes the paint go away...
When I split it in a bucket it was 50% was on top and 50% was on bottom..it doesnt mixed,,, can you hel pme^ whats the problem???
because now it rained this night and this morning the car was having alots or like (goutte de pluie and coulissE)
well thx for helping me and desperate now
no I dont have a garage
So I just painted the car with the paint, no mineral...since the 2 togther didnt worked
I think I know what the problem is here. I did a little googling and one hit said when using Tremclad, thin with lacquer thinner; NOT mineral spirits. This site said no paint thinners (No mention of lacquer thinner) will work on the NEW Tremclad. I was reading this as everything BUT lacquer thinner, but I've never heard of Tremclad until this thread. It was the "When I split it in a bucket it was 50% was on top and 50% was on bottom." comment that caught my eye and made my inquiring mind want to know
Re: New Paint job on a budget thread Part III - 12/02/1506:29 AM
An update on my project. I know this thread is old, but I just thought an update on my truck wouldn't be a bad thing for anyone considering a roller paint job. I painted my truck just over 4 years ago. Still looks sharp. Here is a picture that was taken just before Halloween
.
Granted, I have to keep it waxed, but the truck still looks sharp.
Here is a video of how I applied the paint. You can actually see the paint flatten out.
Re: New Paint job on a budget (still a thing?) - 02/28/2102:16 AM
Been a long time. Thinking about rolling a Corvair project. I live in an HOA and really don't have room for spray equipment. (small garage) also have health concerns that keep me away from chemicals. Sorry to post something that no doubt has been covered. But here goes... Primer, what should I use? Eastwood is a bit pricey but its made to roll. SPI tells me rolling is fine but doesn't play well with Rust Mort and POR 15. My car has rust but I feel strongly about giving it another decade or two. Not worth it for a pro to do. I think I will have some block sanding of primer/surfacer before I can roll Regal Red. Didn't see much on the first couple threads re: primer. I'm open to Rustoleum primer but I will have clean metal, maybe some old paint (had 4 or 5 coats of paint I'm razor blading off) and some sanded rust. I feel good about the painting process I just need direction on primer/prep work. PS I started with Mopars 1st car was a 68 Dart GT, 2nd 66 Barracuda, 3rd 72 Challenger Rallye. I honestly didn't read all 150 some pages, Sorry... Hoping a few of the roll on crowd is still around?
Re: New Paint job on a budget (still a thing?) - 03/03/2101:11 AM
Originally Posted by TJP
Have you looked into wrapping ??
Just a little. I'm seeing about 3500 for a full wrap but have not gotten an estimate locally. Have bodywork to do either way. Not opposed to the idea but I like the project aspect of the rolling.
Re: New Paint job on a budget (still a thing?) - 03/03/2102:16 PM
Pretty nice. I'm no GM person but the Corvairs (especially the later ones) were great little cars. One of my friend's sister had a '69 four speed with the 110 hp motor. Wow, what a blast to drive.
Paint Job on a Budget- 7 Year Update - 05/17/2308:01 AM
Sorry for the tardy update. Thanks to the helpful folks on this forum I painted my 1963 Mercury Comet in 2009 then sold it in 2016. The paint held up great and yes, it was Rustoleum and I used the 4 inch foam rollers. Here is the last pic as the new owner drove it away: The paint looked pretty good for 7 years parked outside and $50 for the paint job... More pier here: 1963 Comet $50 Paint Job
Re: Paint Job on a Budget- 7 Year Update - 05/18/2302:02 AM
Amazing: heard of paint jobs in red-oxide primer, even flat black. But 1st I've seen a glossy paint this way. Practice must of been your virtue using thinned paints as such, considering the potential with runs/sags. But 1500 grit between coats seems all too smooth, wrt bonding of coats. But Hey: the proofs-in-the-pudding.
Re: Paint Job on a Budget- 7 Year Update - 05/18/2302:20 AM
Originally Posted by PhillyRag
Amazing: heard of paint jobs in red-oxide primer, even flat black. But 1st I've seen a glossy paint this way. Practice must of been your virtue using thinned paints as such, considering the potential with runs/sags. But 1500 grit between coats seems all too smooth, wrt bonding of coats. But Hey: the proofs-in-the-pudding.
Definitely a project for someone with more time than brains (that would be me...). Yes, the glossy paint held up just fine.
Re: Paint Job on a Budget- 7 Year Update - 05/19/2304:00 AM
Originally Posted by Mercurymarc
Originally Posted by PhillyRag
Amazing: heard of paint jobs in red-oxide primer, even flat black. But 1st I've seen a glossy paint this way. Practice must of been your virtue using thinned paints as such, considering the potential with runs/sags. But 1500 grit between coats seems all too smooth, wrt bonding of coats. But Hey: the proofs-in-the-pudding.
Definitely a project for someone with more time than brains (that would be me...). Yes, the glossy paint held up just fine.
"You'll never know what you can do if you don't try" Don't under credit yourself.


 I am wondering if the Black Satin will Buff out like Satin or Gloss
  Also I was going to put on Silver Grey Stripes . I bought a can of Gloss Dark Grey and a can of Gloss Aluminum . Will the Two mix OK


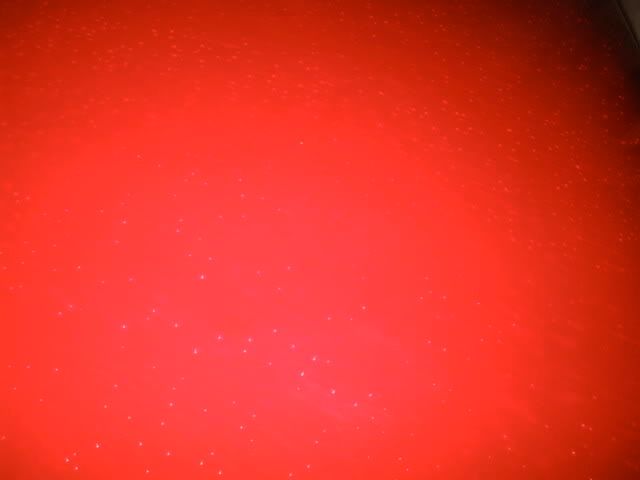
 Everything seemed to be going so smoothly on my test piece, two coats 600, two coats 800, two coats 1200(couldn't find 1500) and then a final once over with 2000. Ahh! finally to the buffing stage. It was then that I realized something was terribly wrong. When I went to buff it out I was burning through the top layer of paint and the difference from that and the next coat down is highly visible. I'm thinking my coats must be far to thin. I thinned my paint around 40% and was "wetting" the surface on each coat but the coats were so thin I burned right through them. Marq, Exit, Charger, Dart...Anyone got a good idea of how I can get a thick enough coat so that I don't wetsand through it?


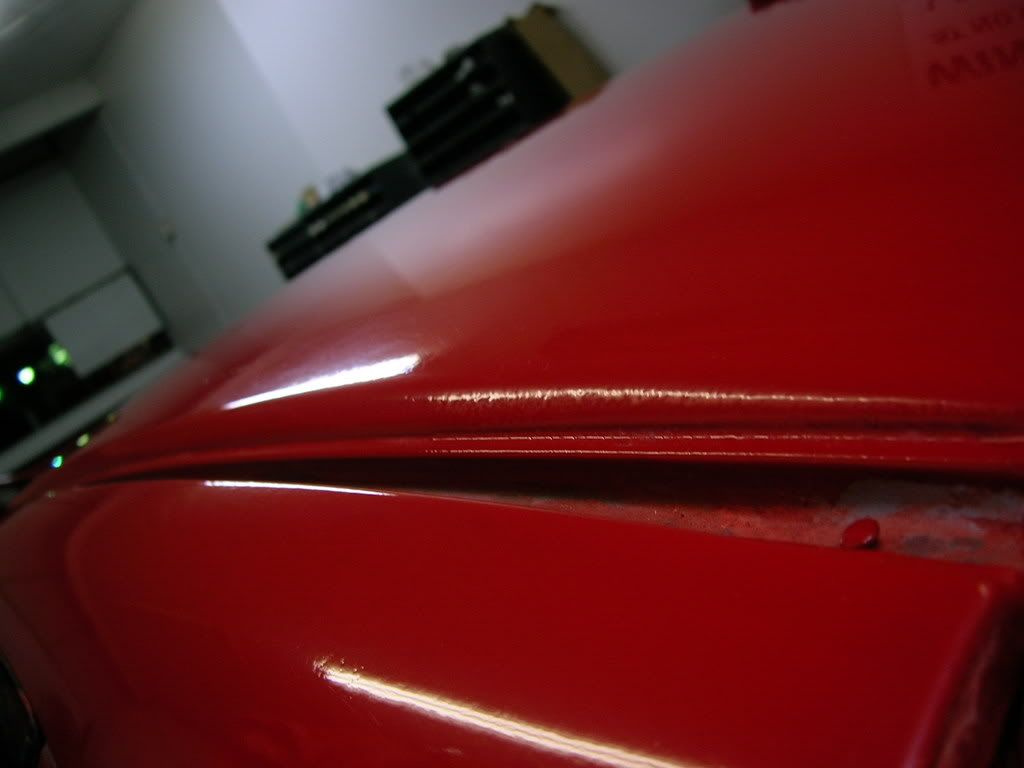
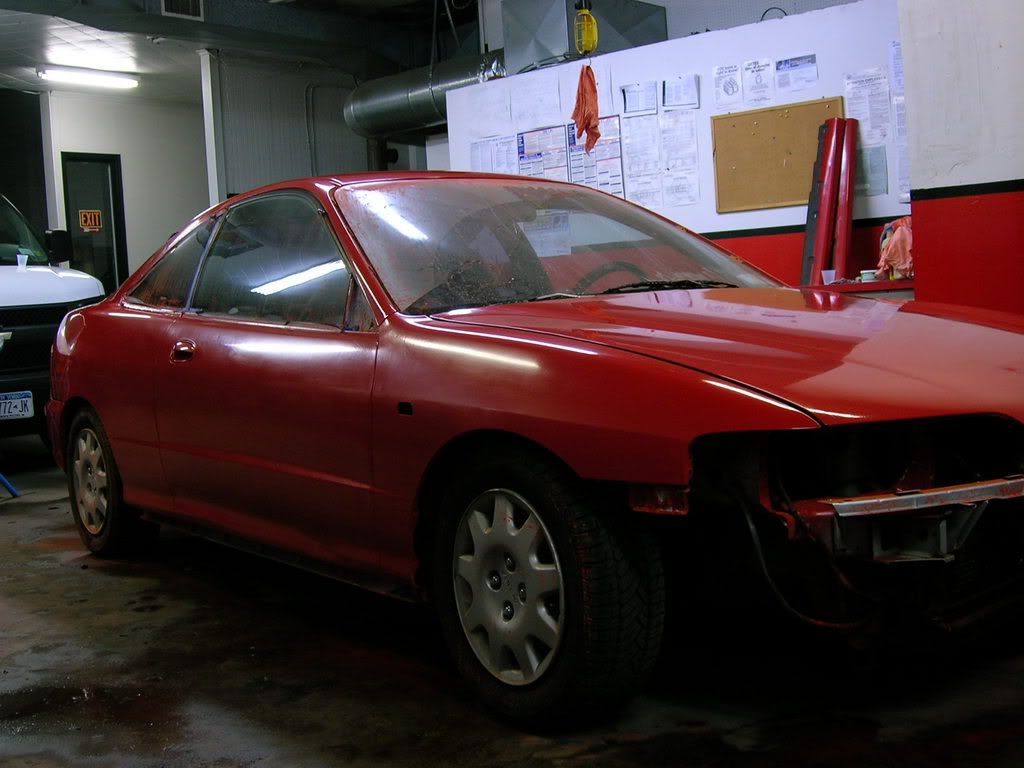

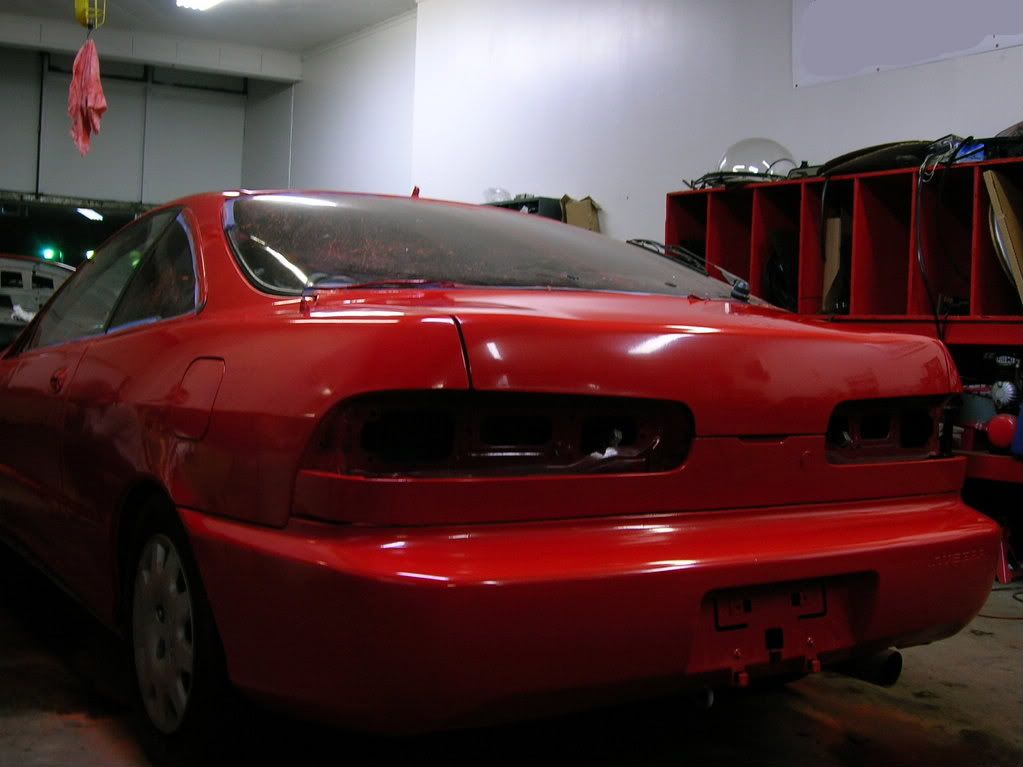


 What type of roller are you using?


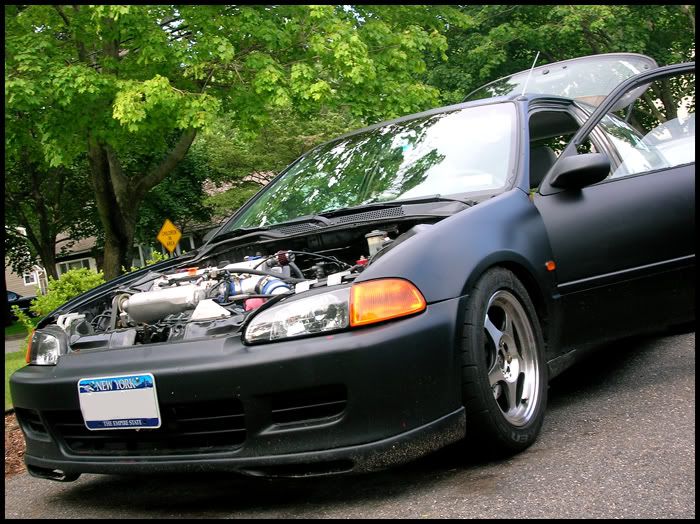
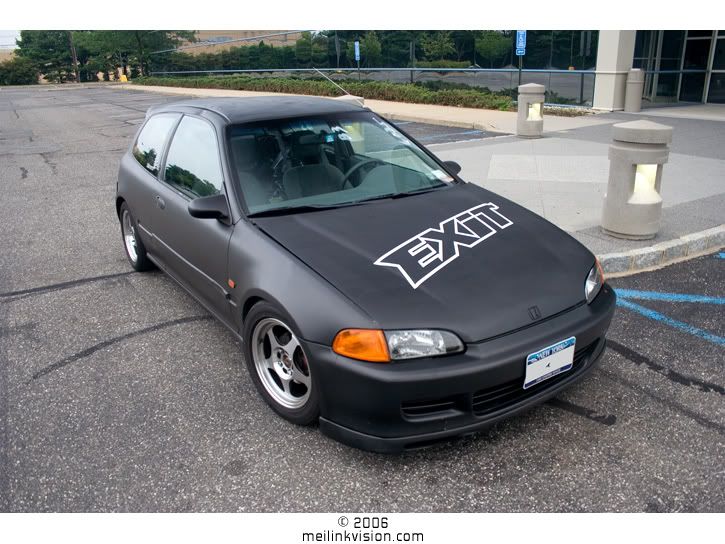
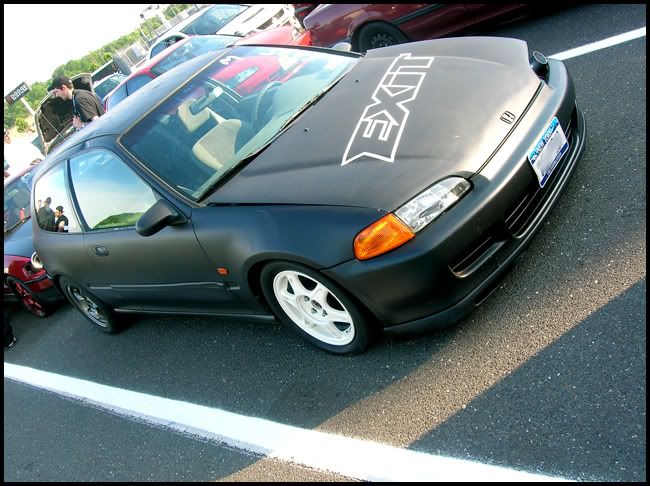
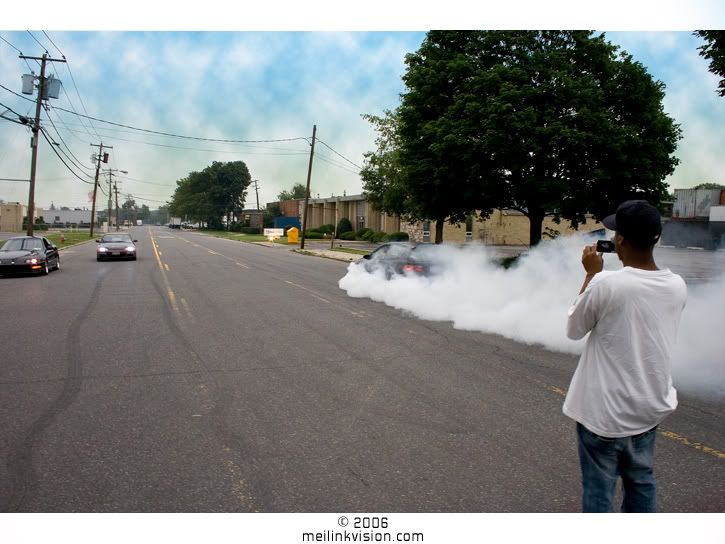
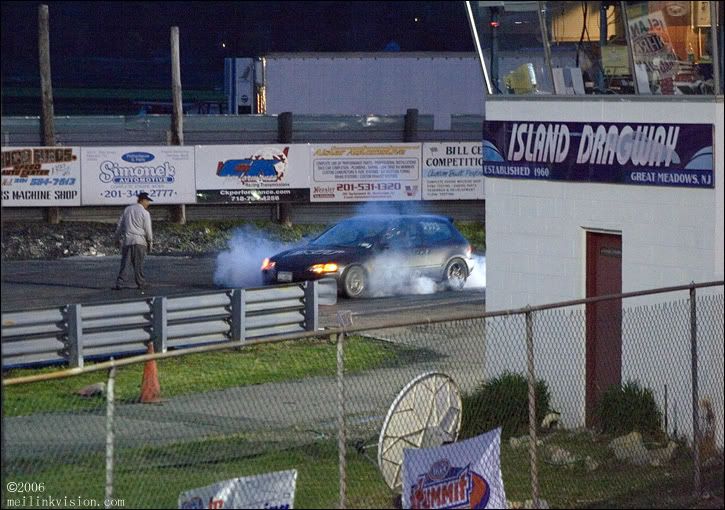
 ) and i have yet to stain/damage the paint in any way. Once i was filling up at the gas station, and it was a really hot day (about 110*F) retarded hot in the sun, as the tank came full, for some reason the pump would'nt shut off, and i sprayed my entire car (hood, fenders, door, everything) pulling out the nozzle and throwing it on the ground where it continued to spray. I used the window washer squeege at the station to get most of the gas off the car, and when i got home (about 3 hours later) washed the car. Paint was still perfect. I also painted a motorcycle (old kawi) about 15yrs ago with black tremclad, and have allways spilt gas on the tank for the last 15yrs and the paint.....you guessed it looks great.

 Thanks in advance !


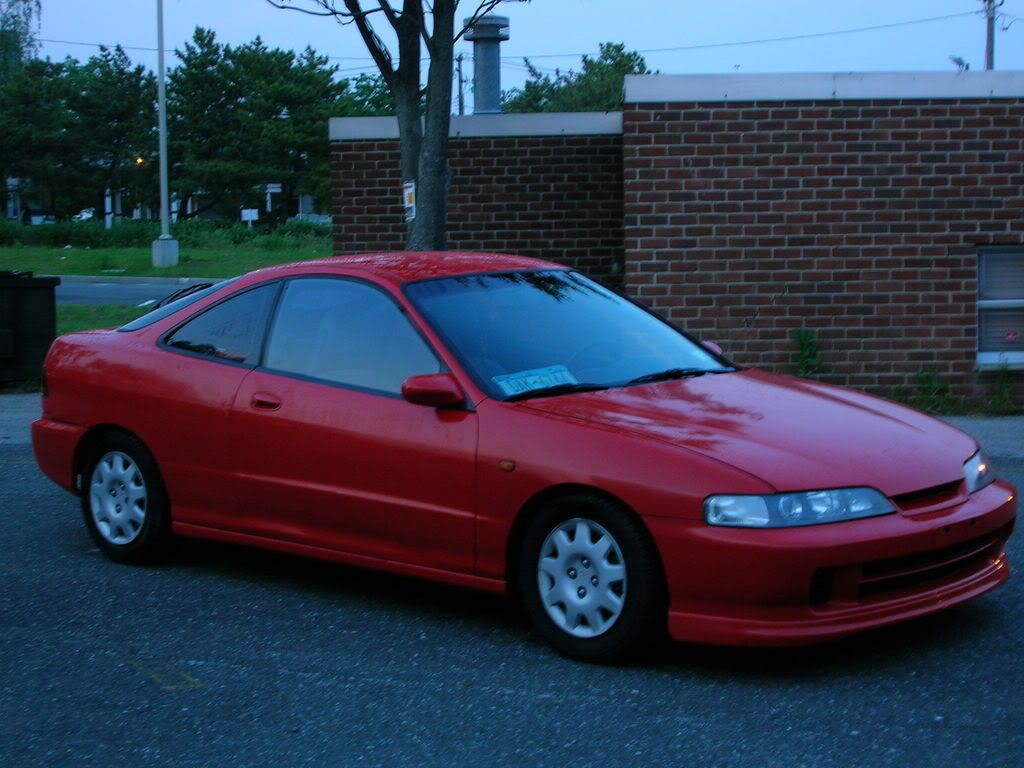
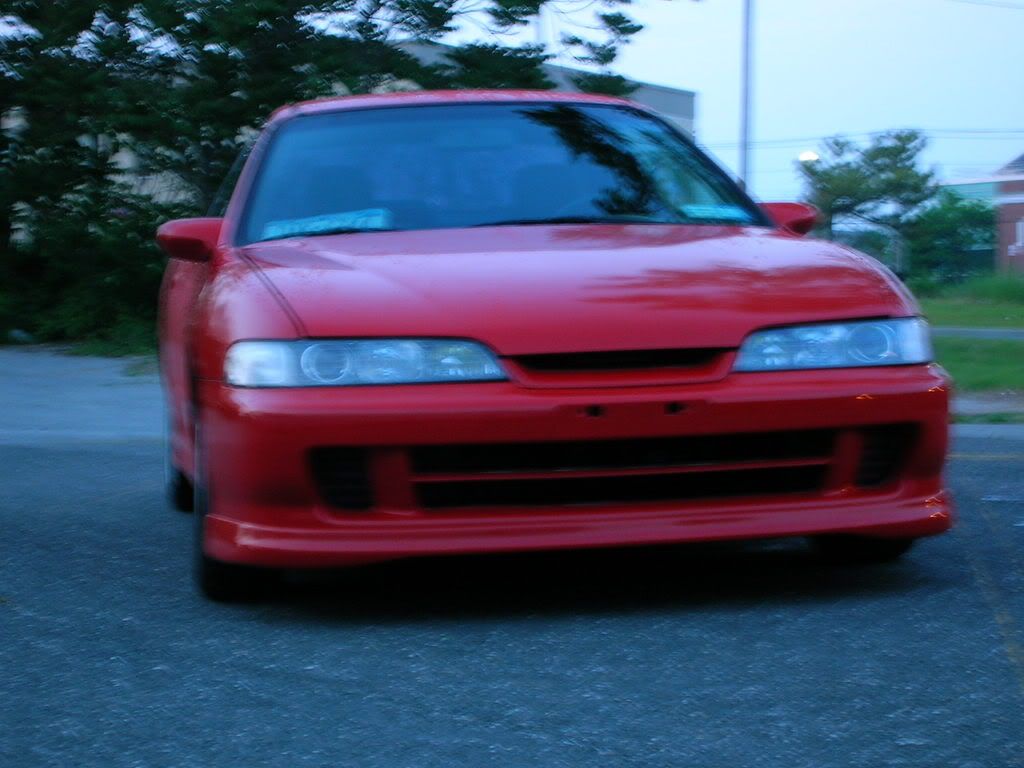


.JPG "3536630-maymorning(1).JPG")

.JPG "3536649-may07(1).JPG")
 Hey, Just wanted to say, Aloha Brah!! to WorldCrafter. It's the first time in all three parts of this thread that I've seen a brudah' from Hawaii on here.(I grew up in Honolulu). Okay then, Back to the discussion...


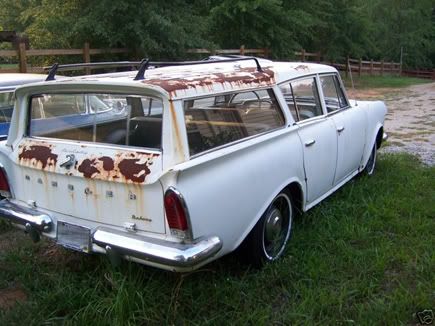

 . My VW I had back then had an almost inhumanly small back seat by comparison


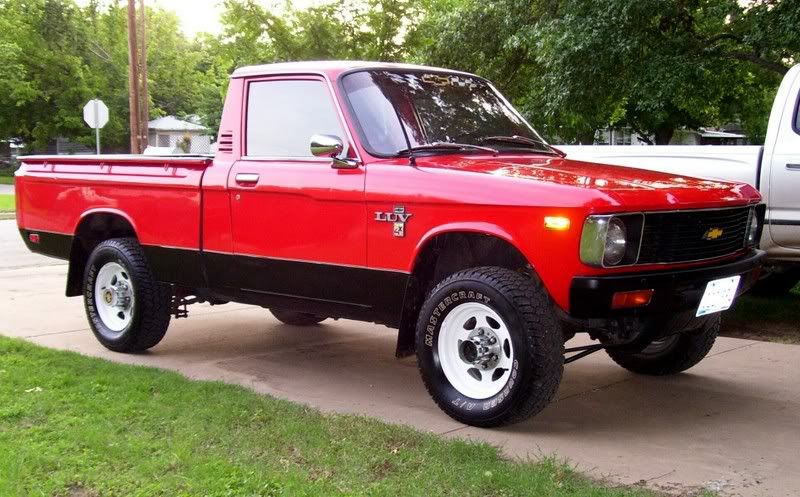
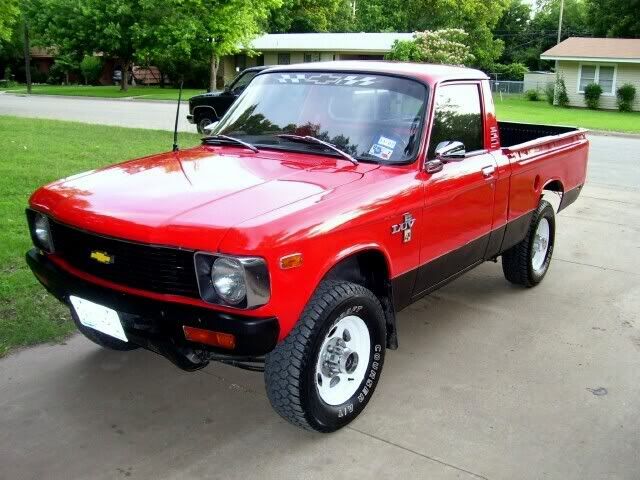
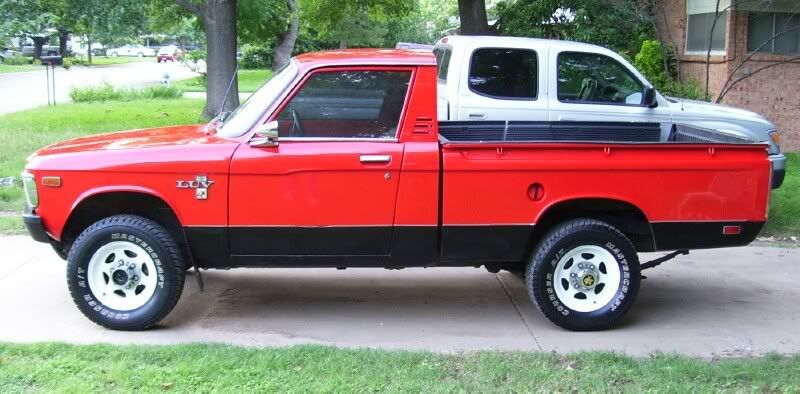


.JPG "3551754-65jeep002(Small).JPG")

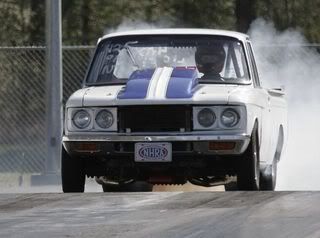


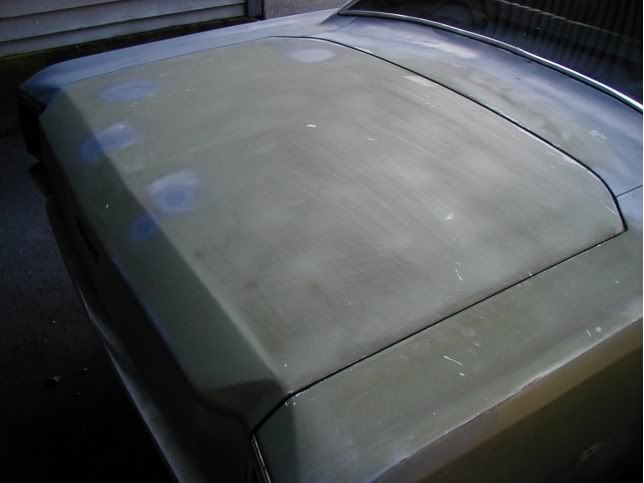

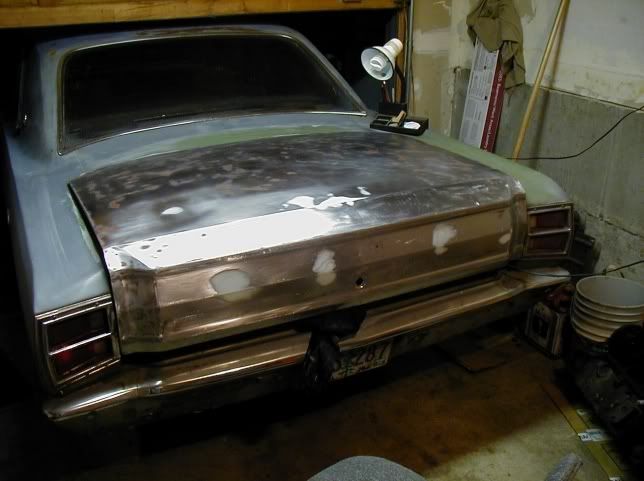
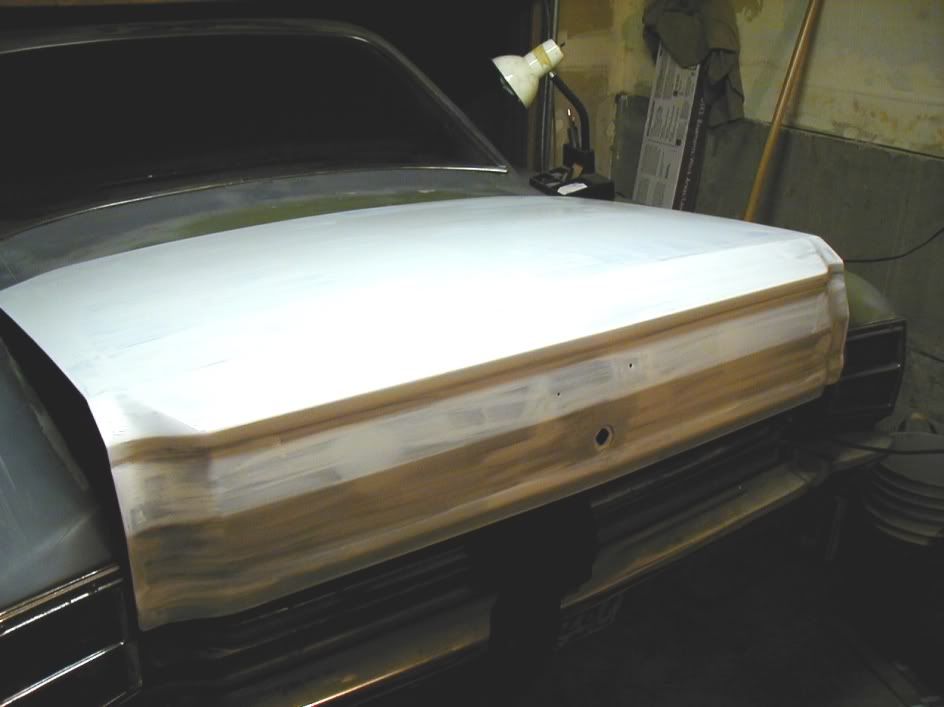
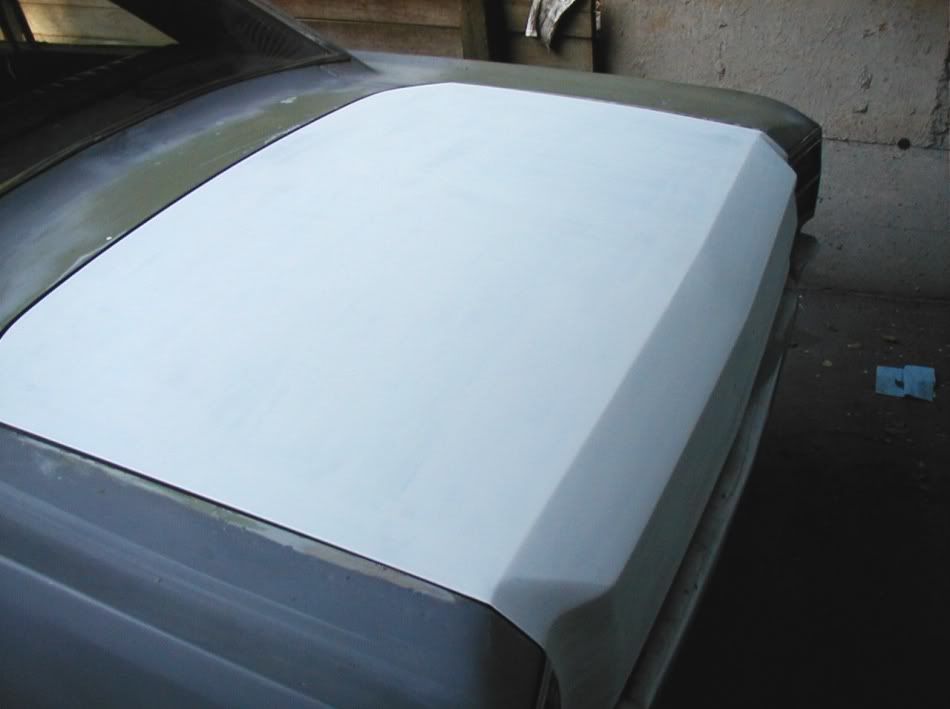


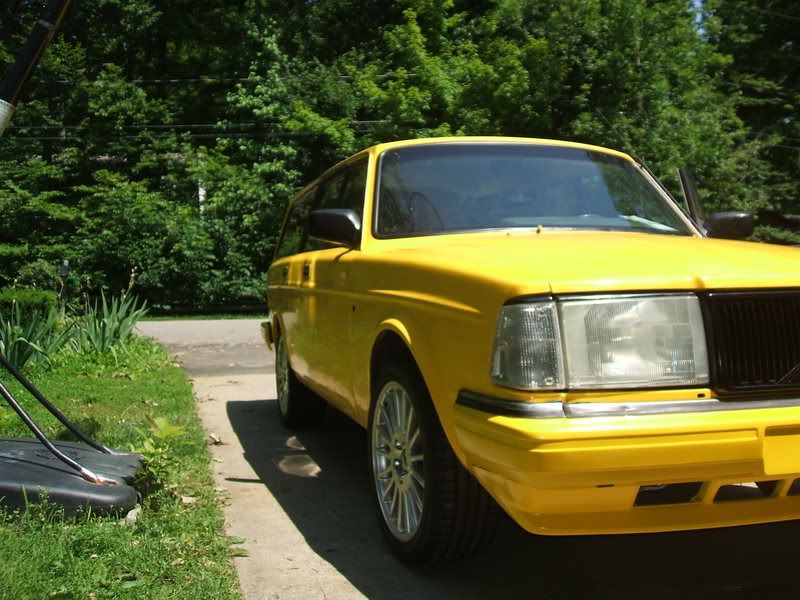
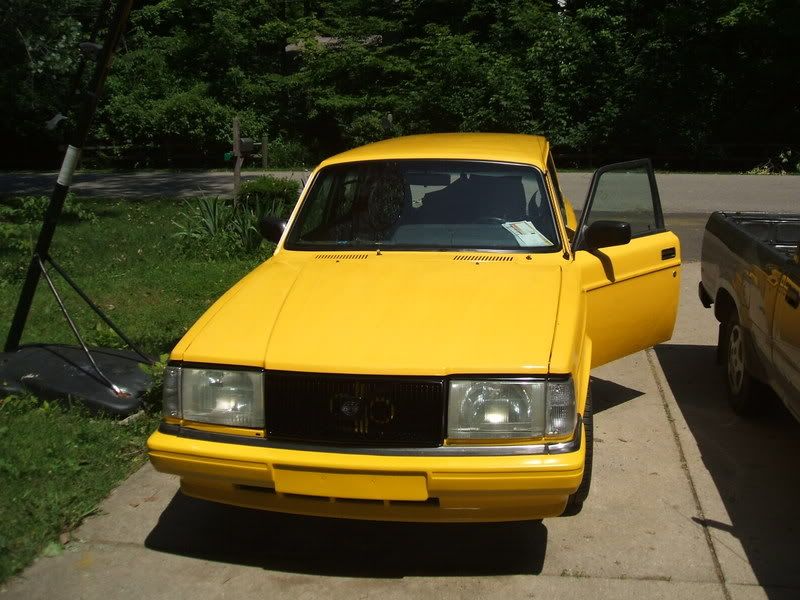
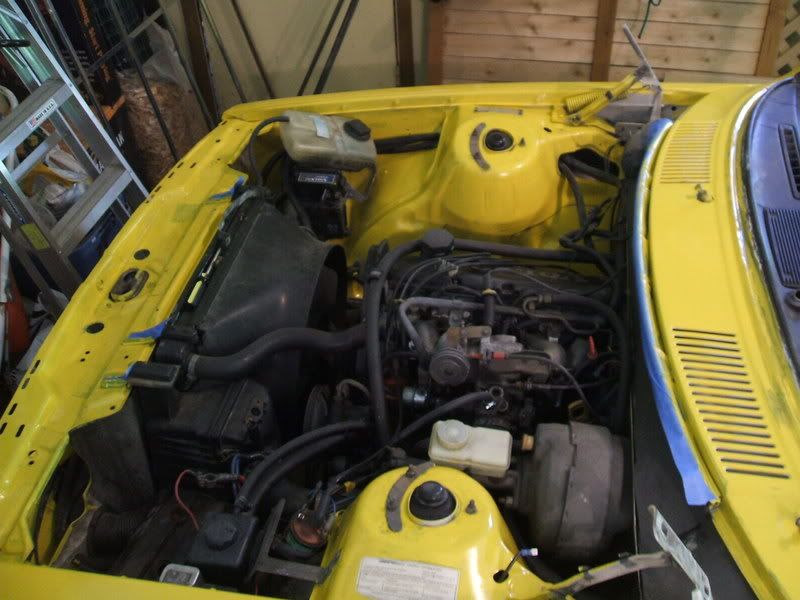
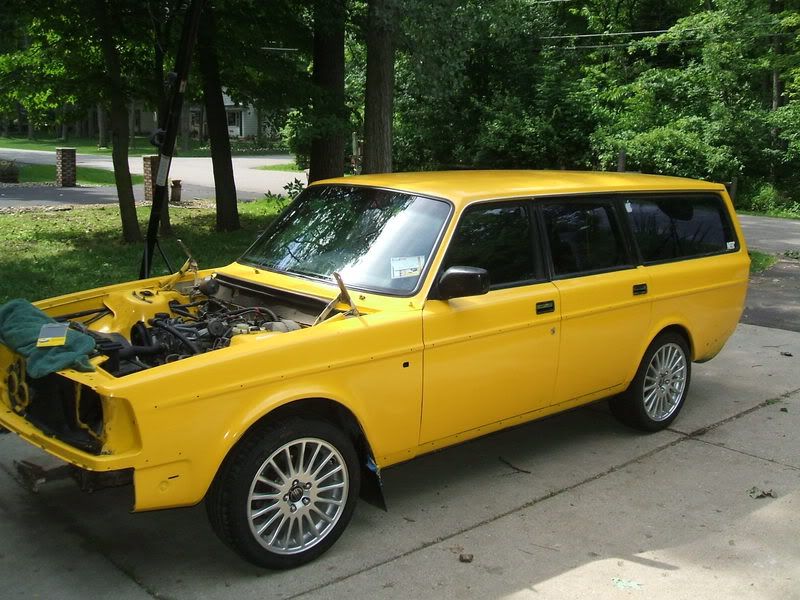
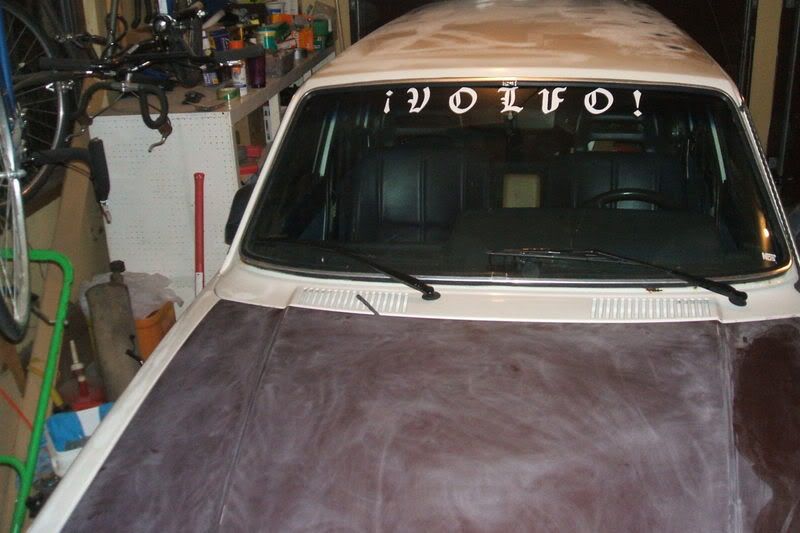
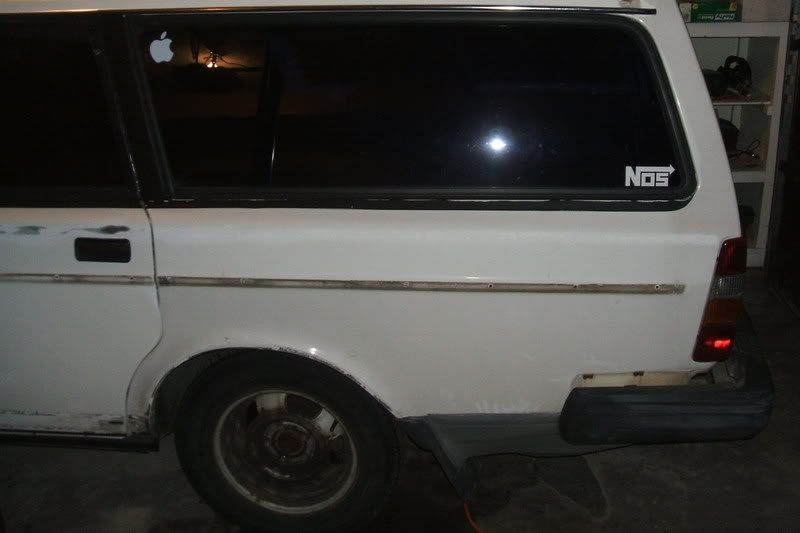


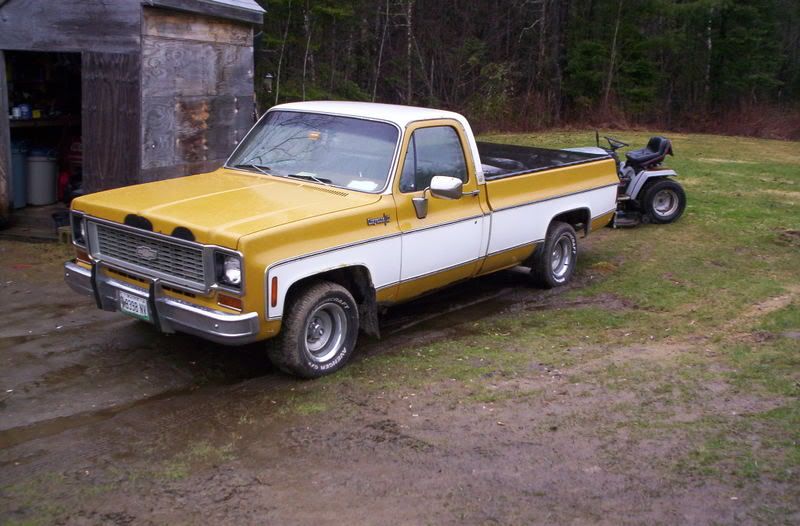
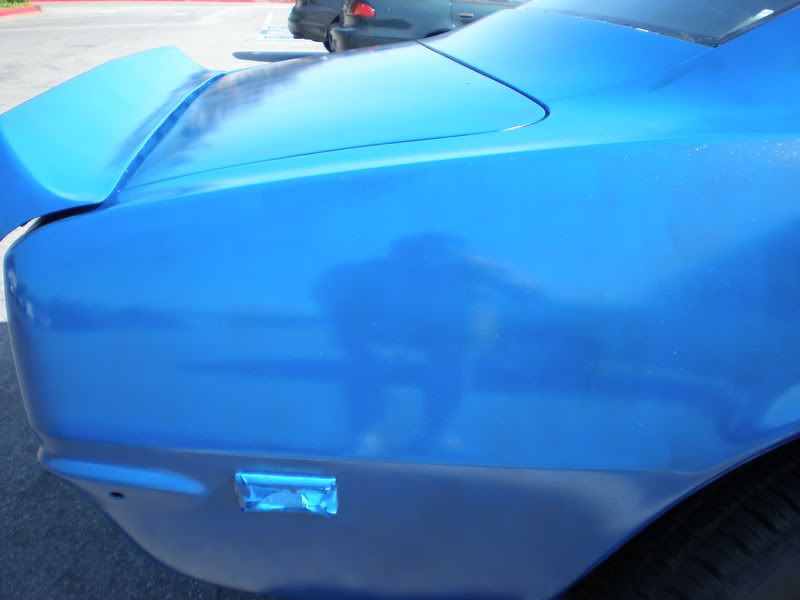
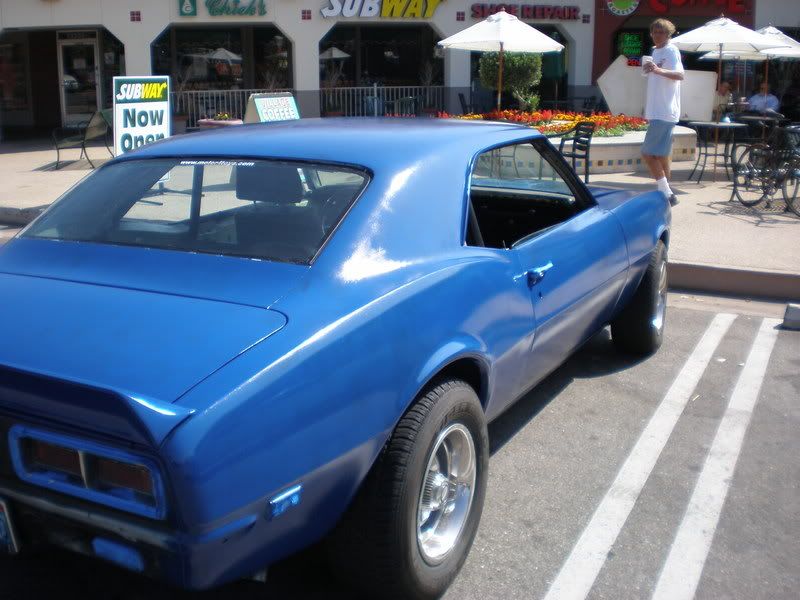
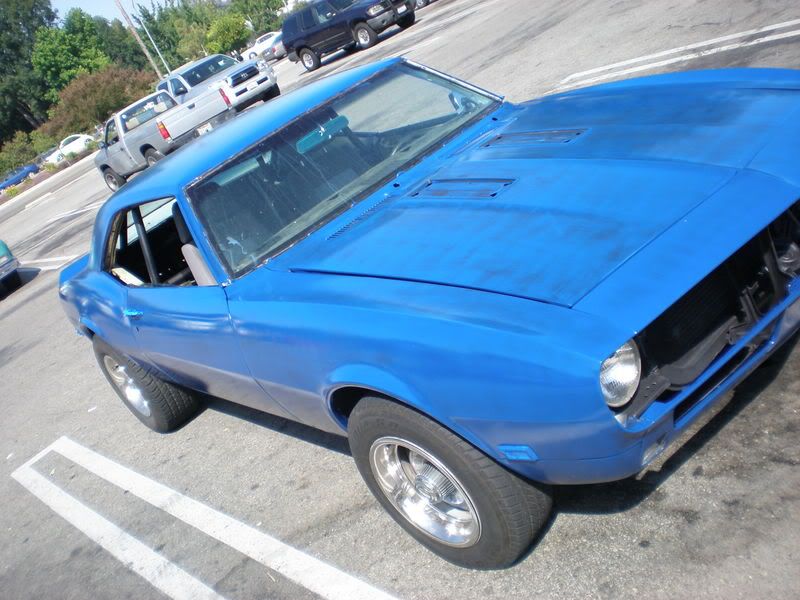
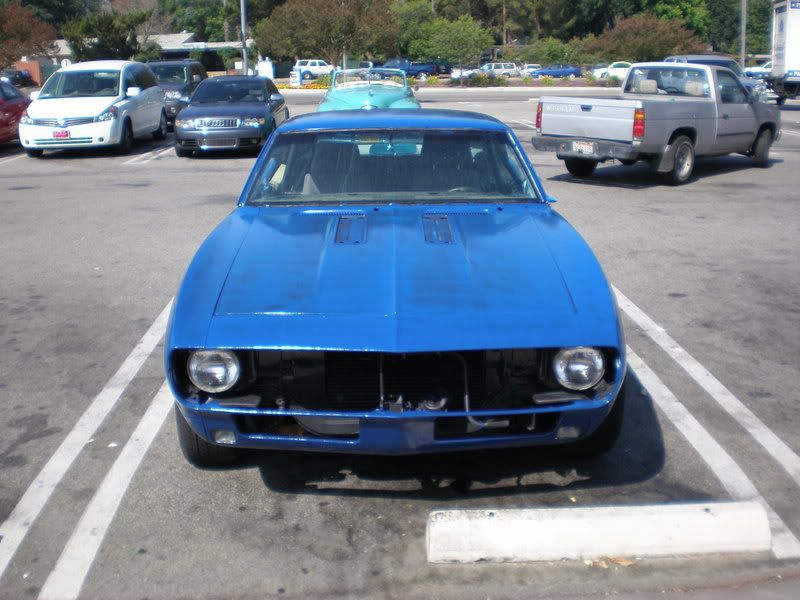
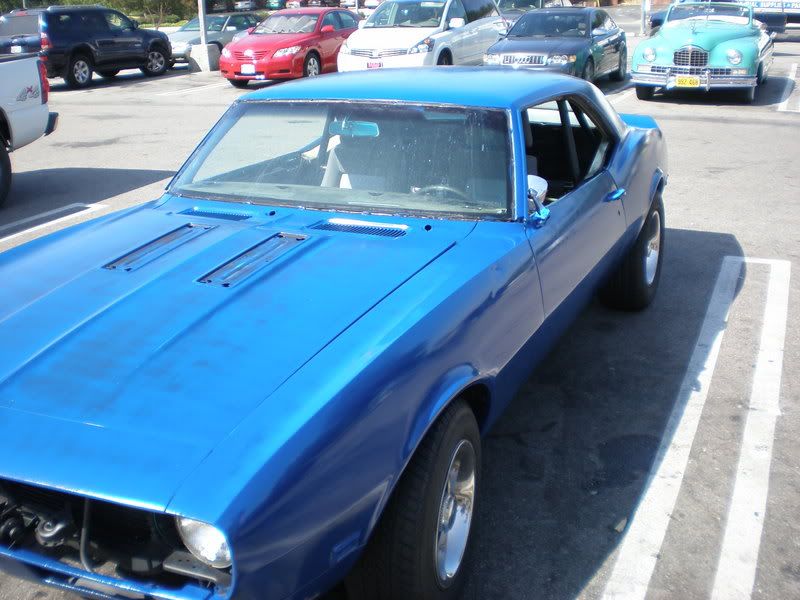
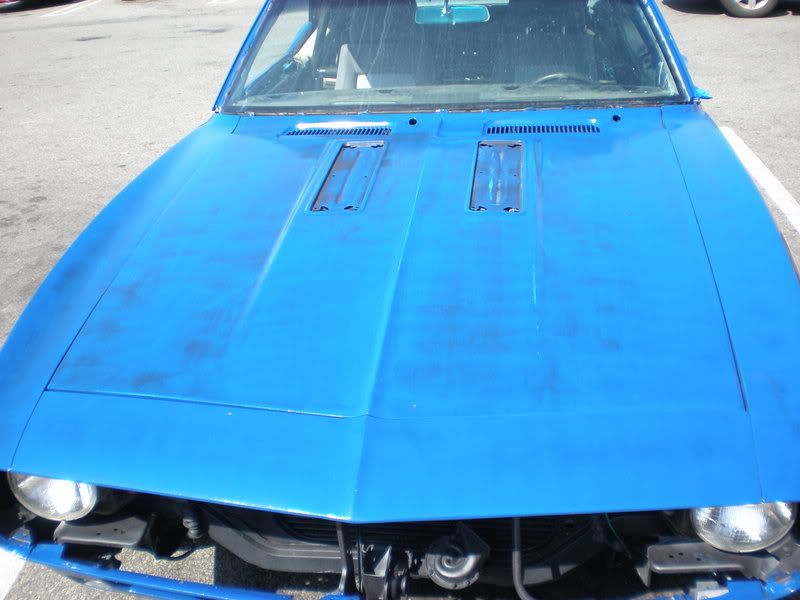
 . Here's my old '73 Chevy 4x4 when I was doing the body work on it...I had just started welding up the trim holes on my replacement fender:
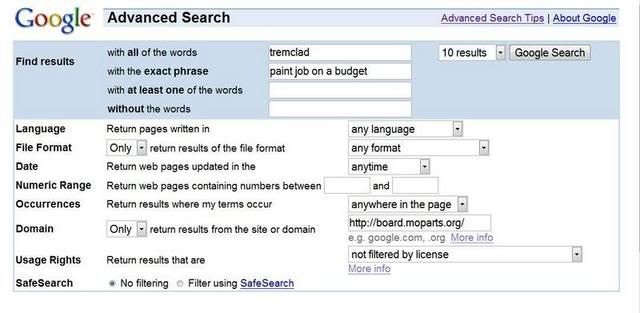
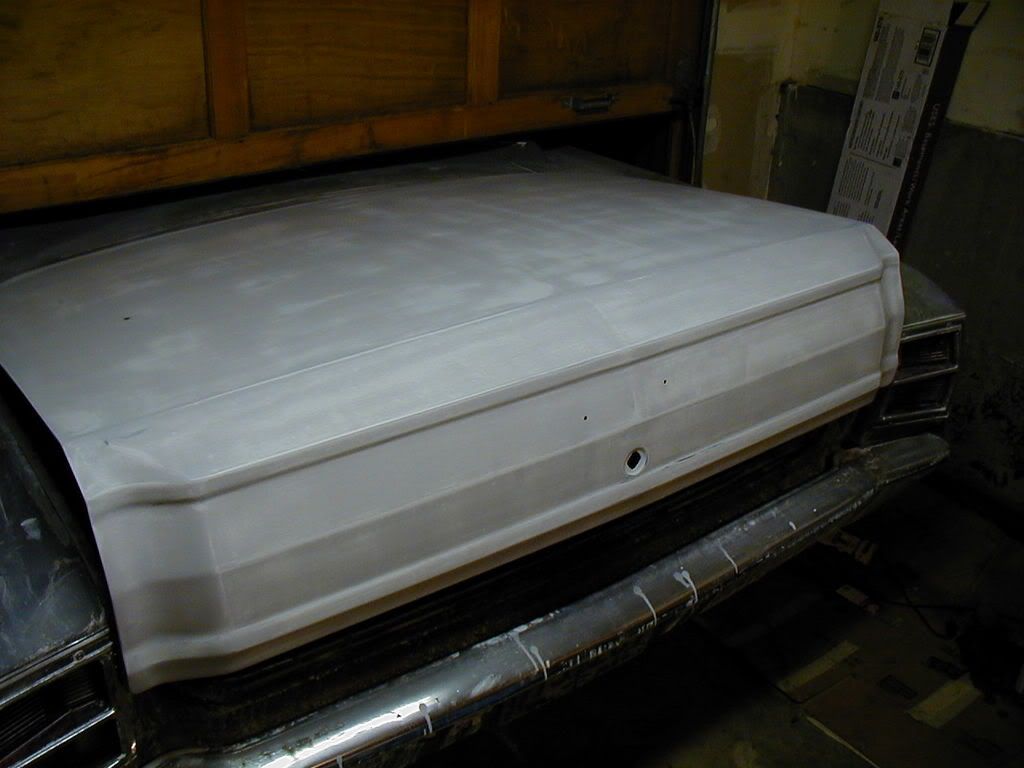
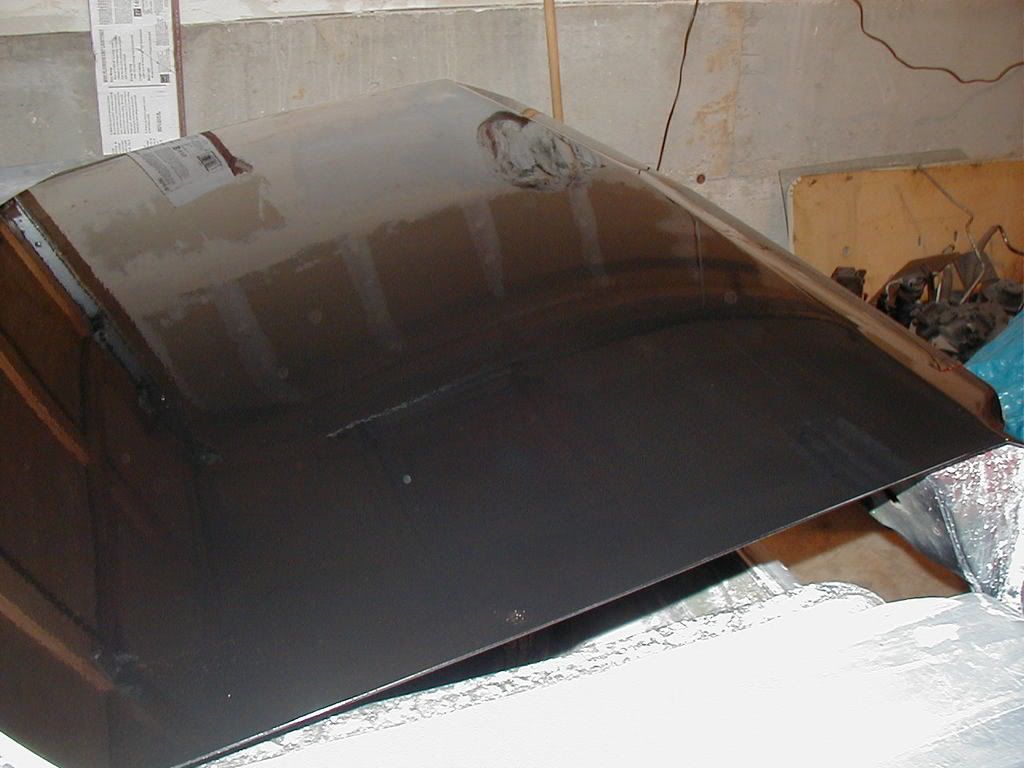
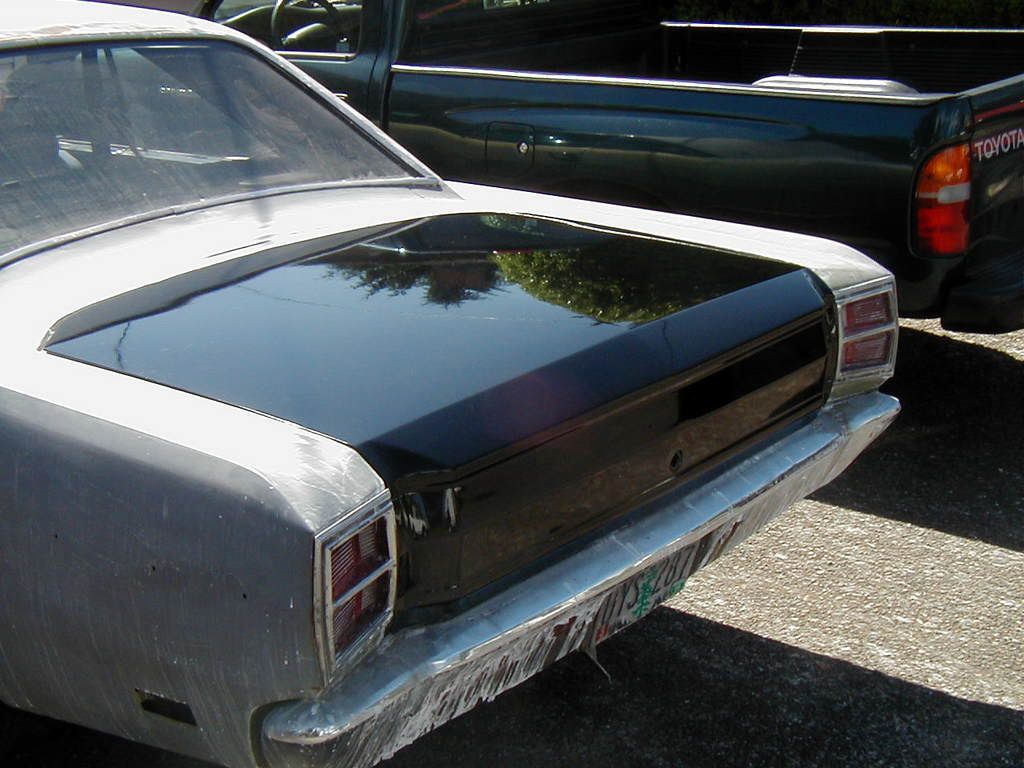
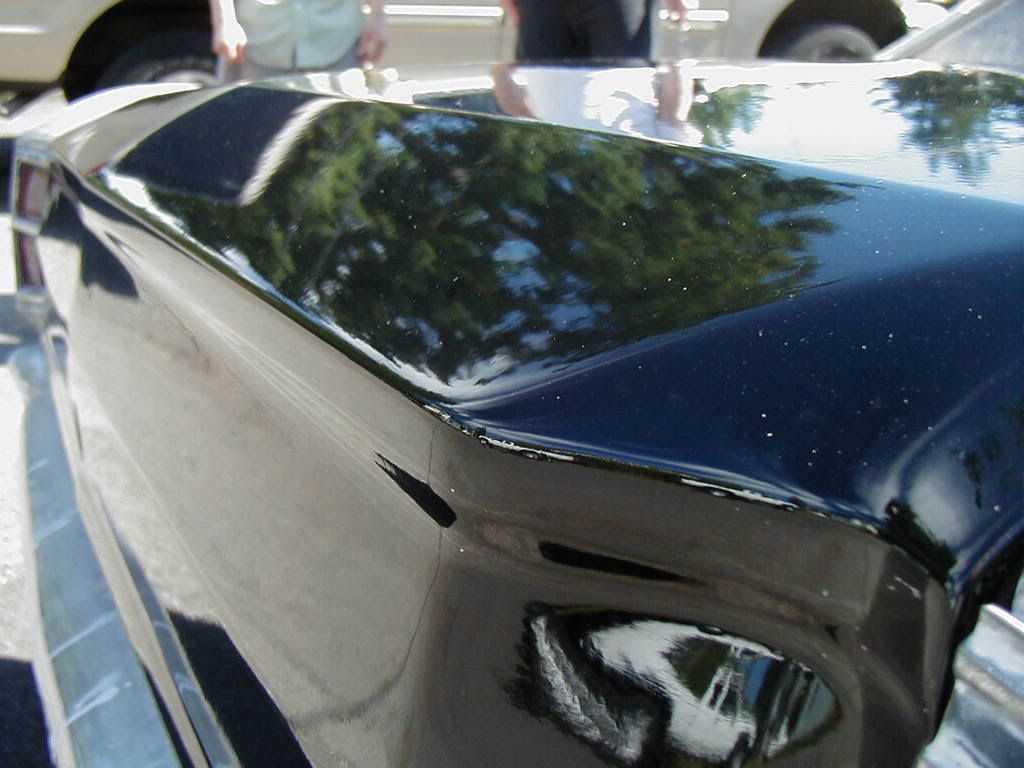


 but I was able to buy it back from the insurance company for a pittance. With the rest of the money we bought new body and suspension parts, and decided it would be worth doing. It's "only" a 1992 Nissan Sentra but it's been in our family for 15 years, seeing duty only as a back-and-forth-to-work car, 14 miles at a stretch. Not once has it failed me in all those years!


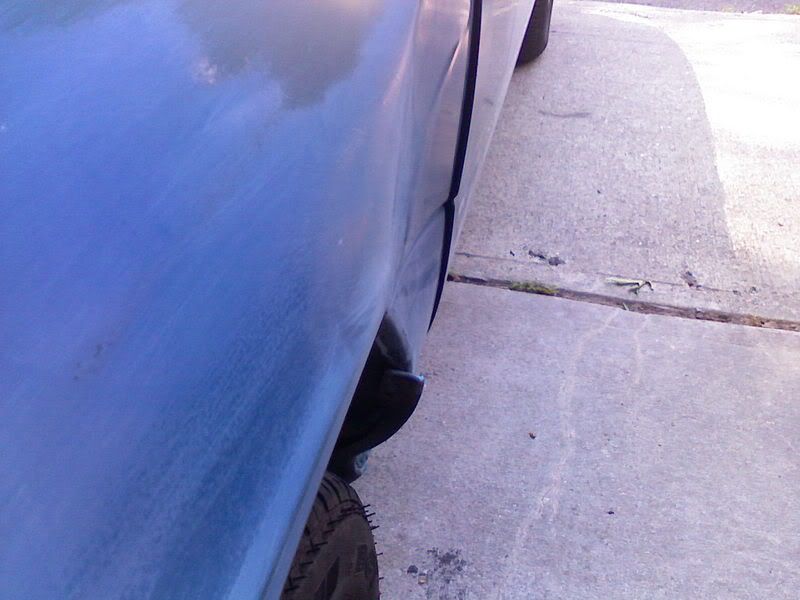


 ) but it's true, i like all cars (typically older ones). Heck i sold my charger, and i'm having a blast with my speedster, and my bug. But i can apprecieate all the other brands even though i may not own one, i still like talking to the owners about our old cars, how we brought them back from the dead, and saved another old car without breaking the wallet. There's nothing (at least to me) that's more gratifying than driving a car YOU built, and YOU painted down the road. Not a car you HAD painted for you, that does nothing for me.
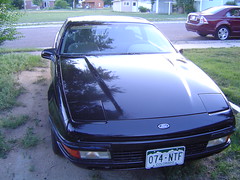
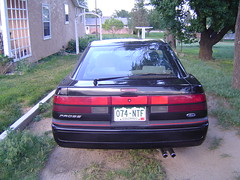


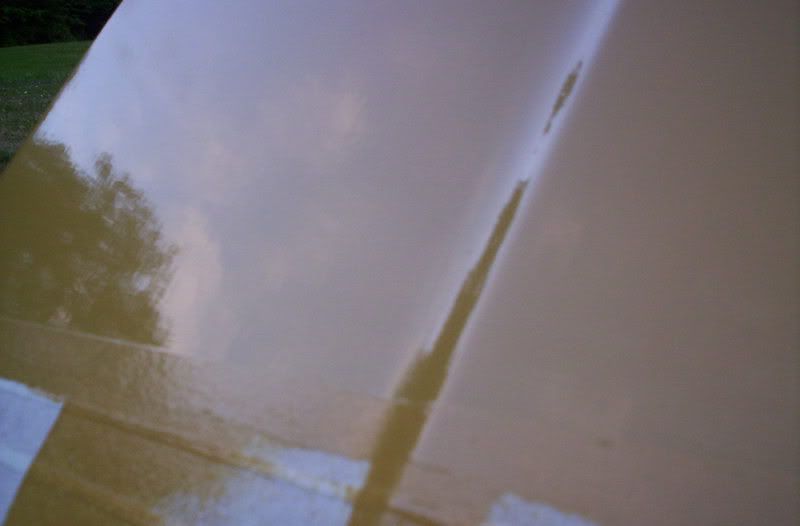
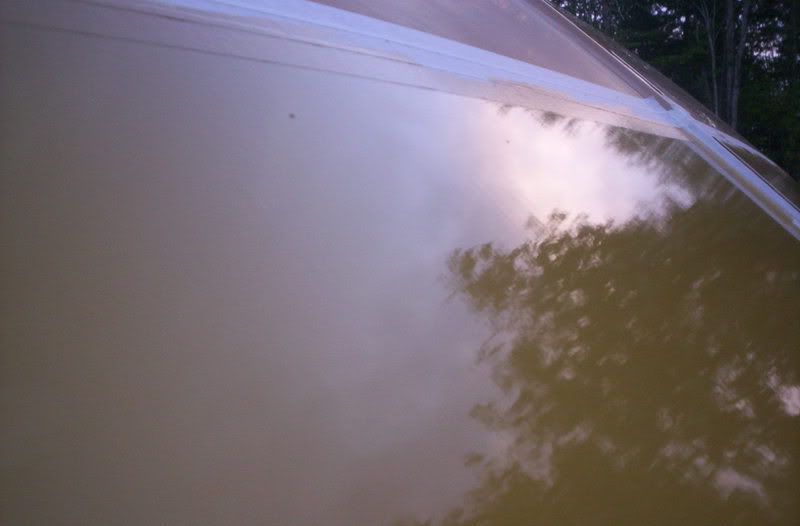
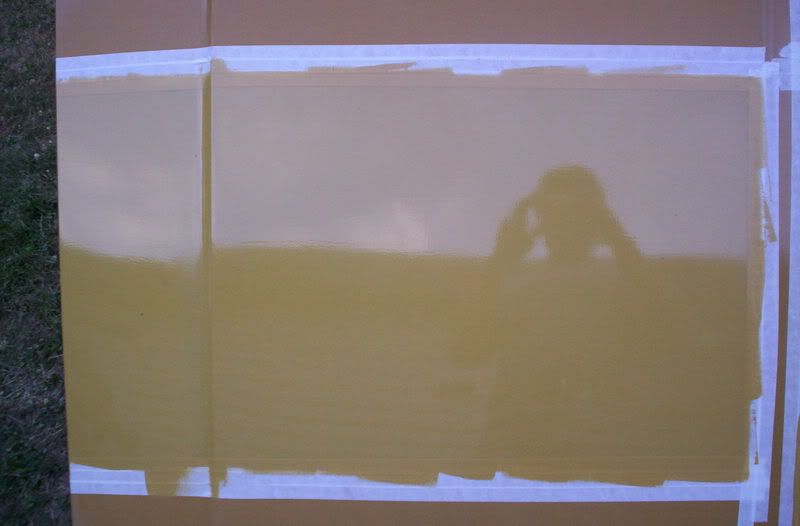
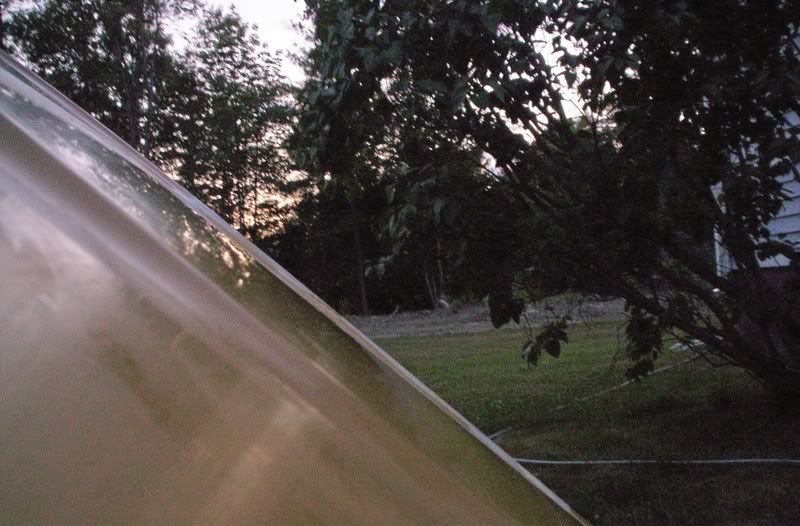


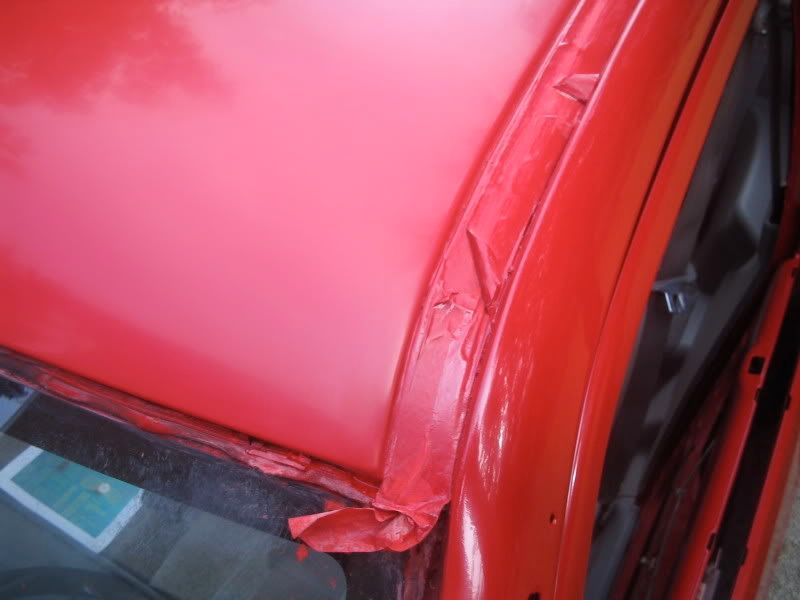
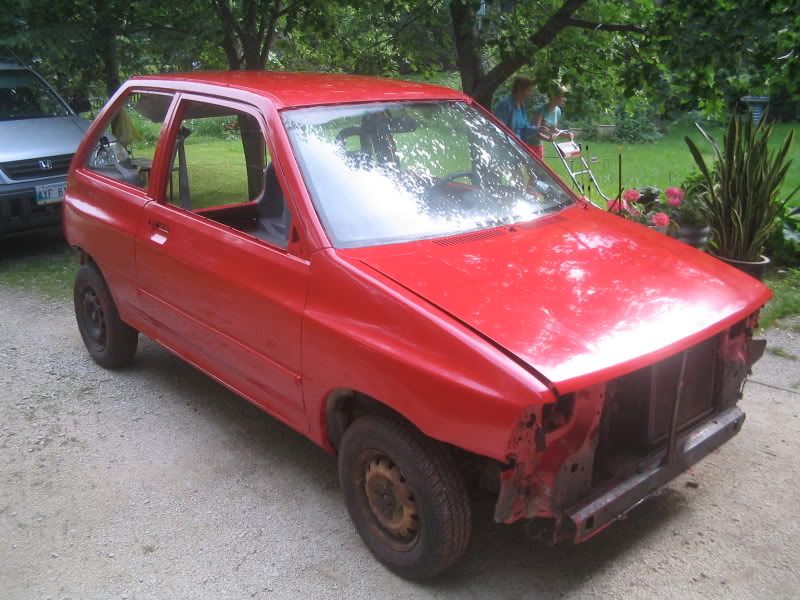


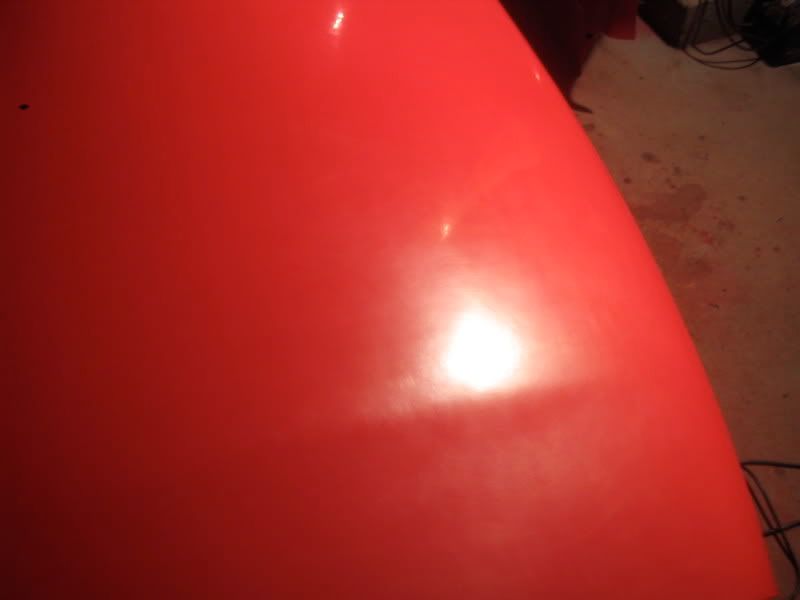
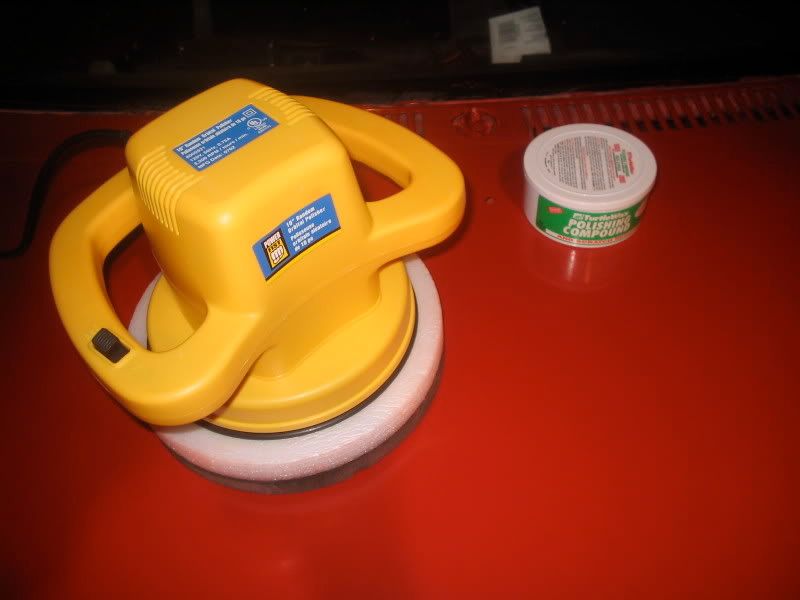


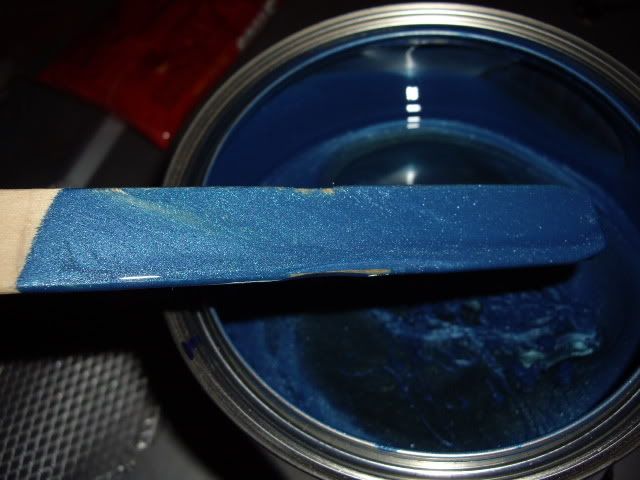


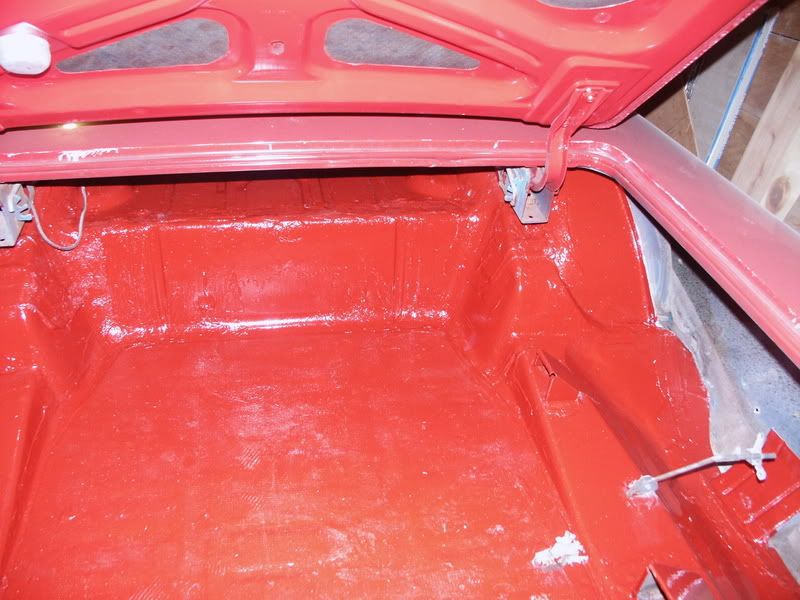
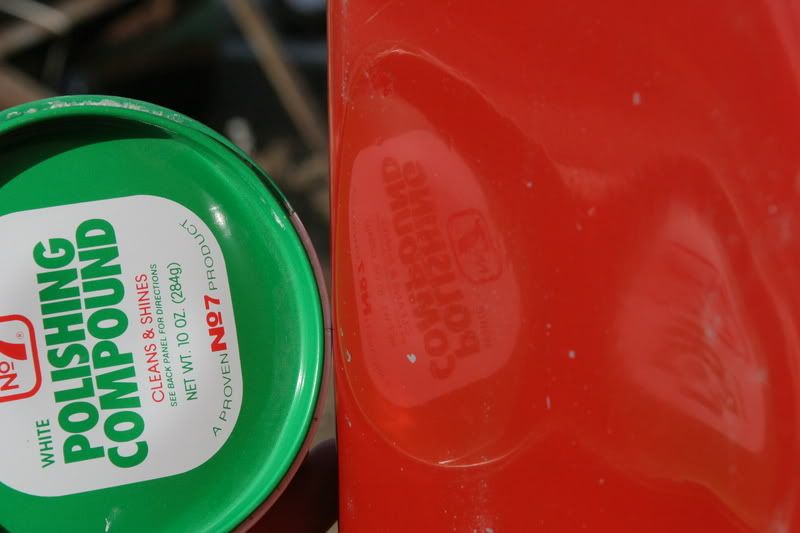
 .
.


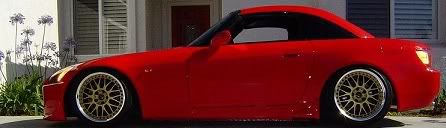


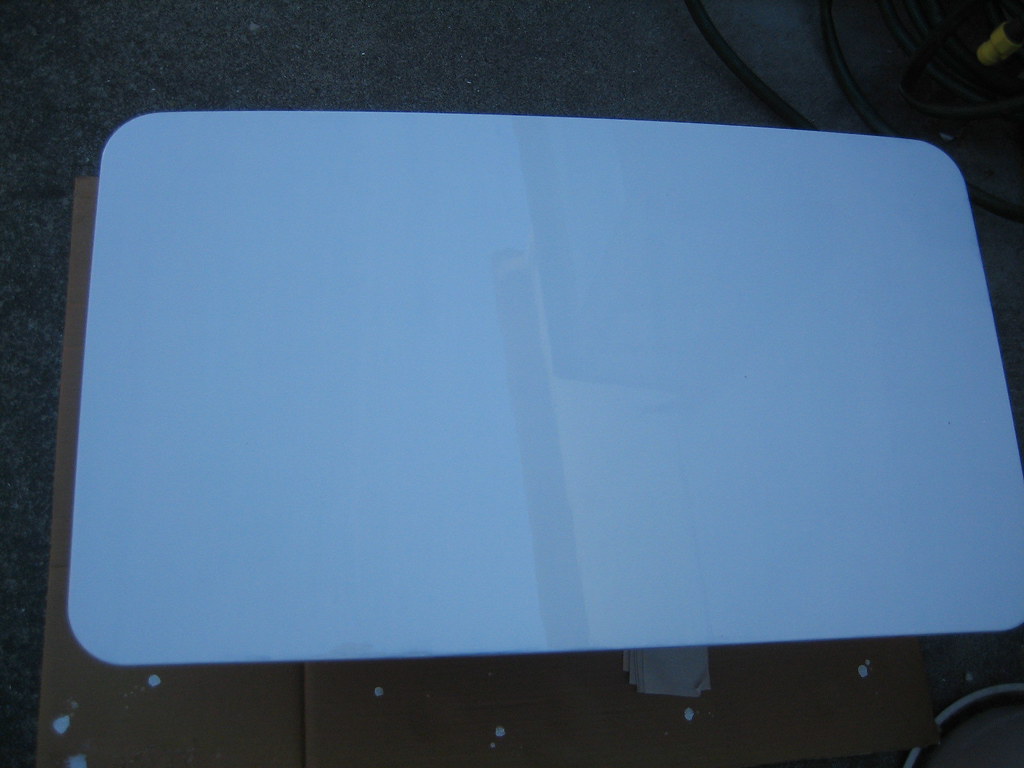
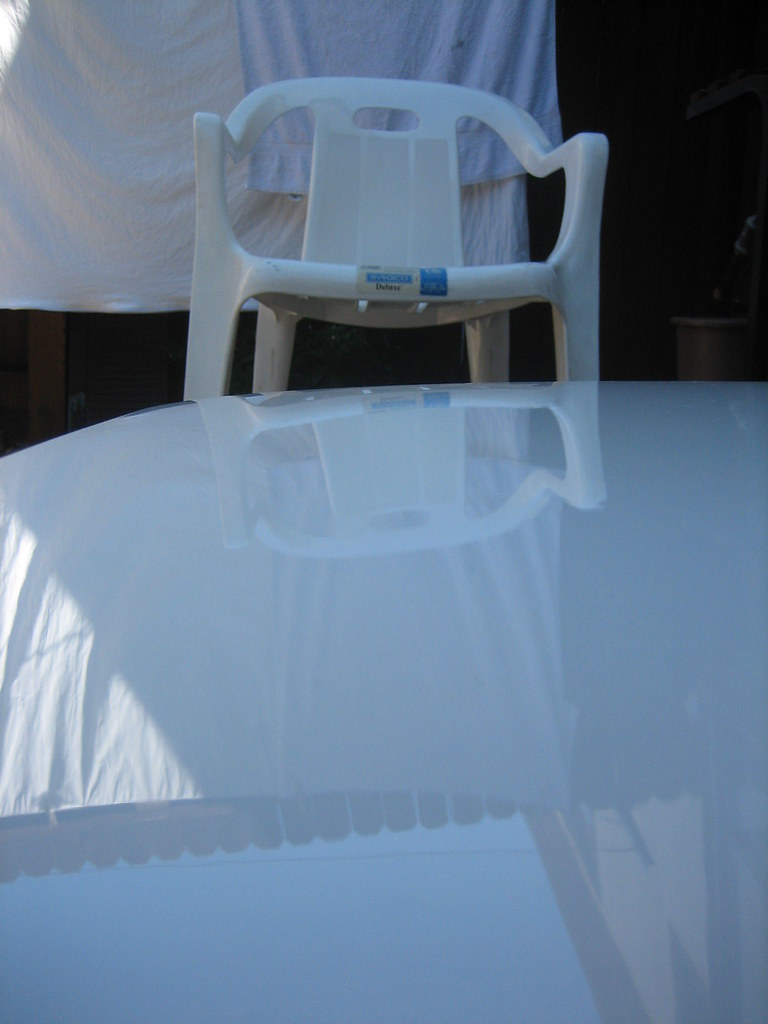
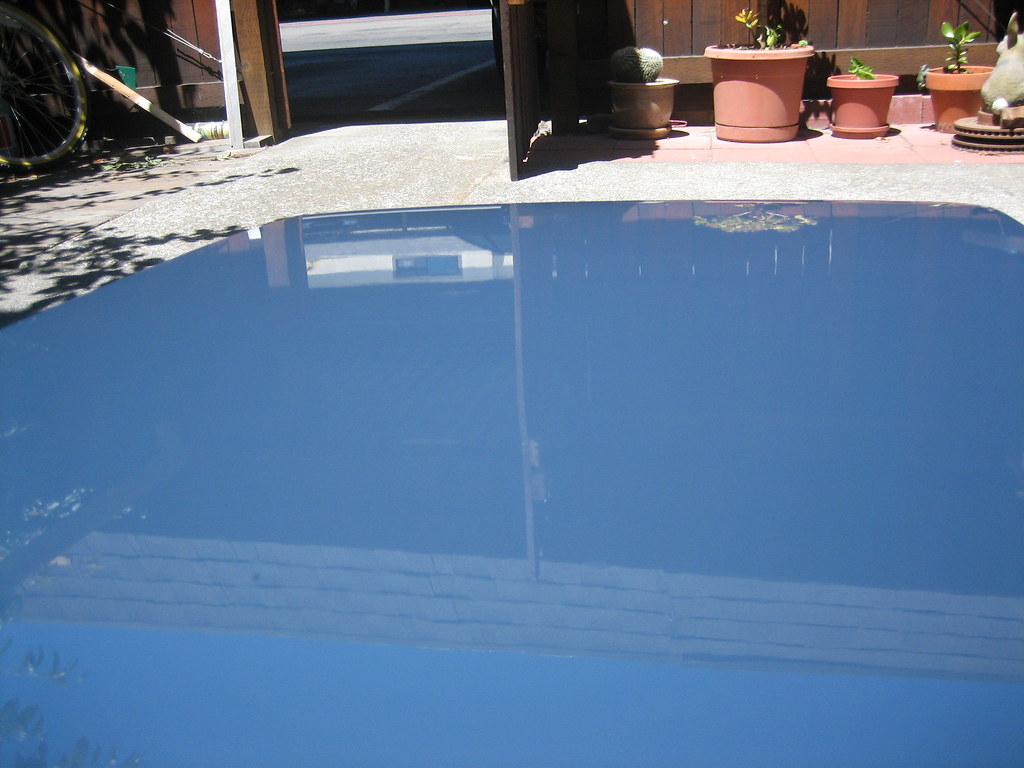
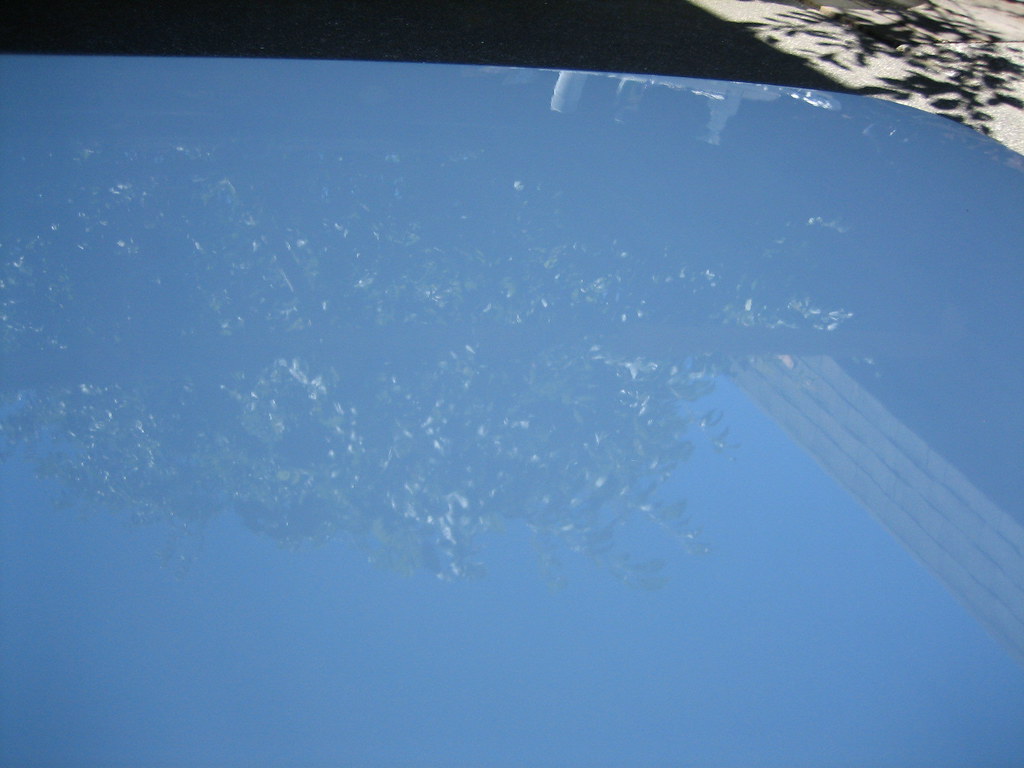
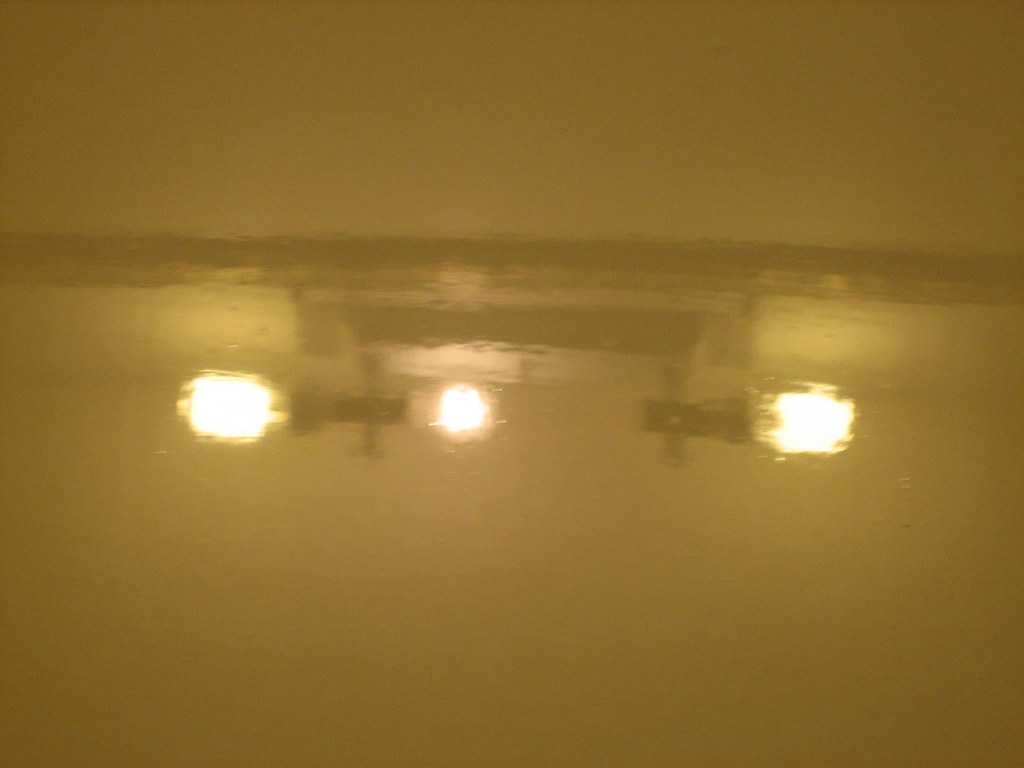

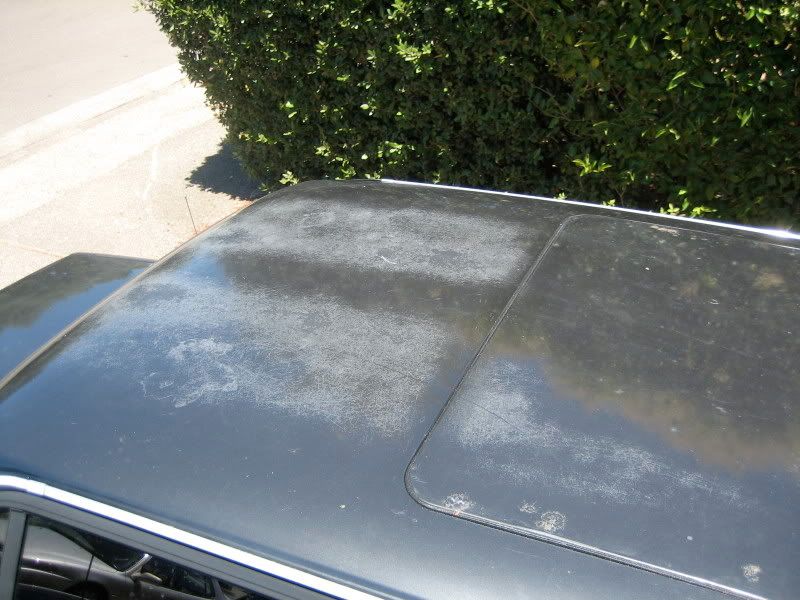

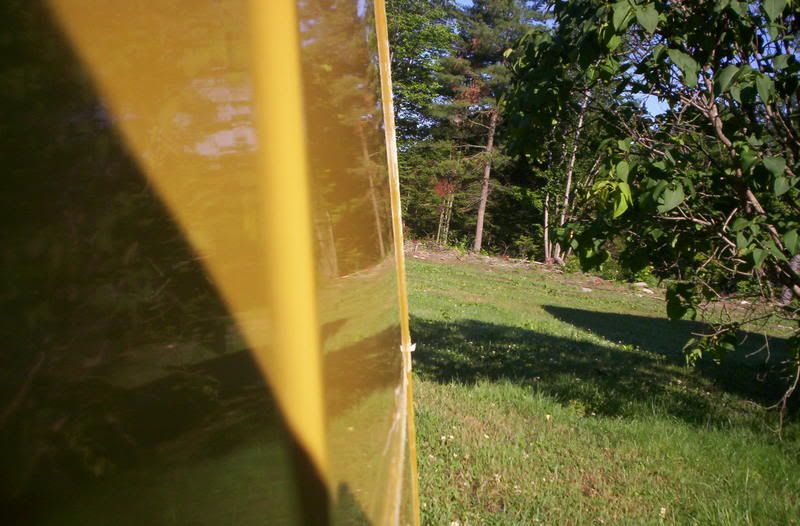


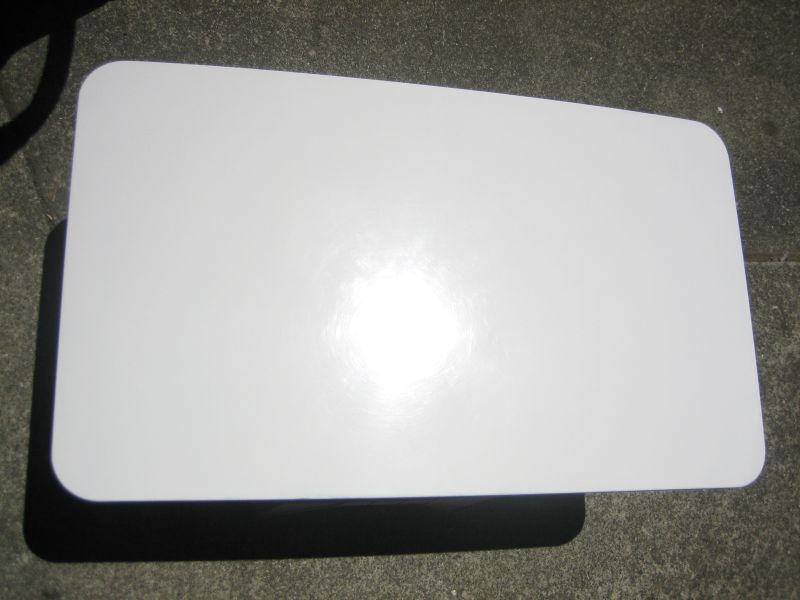

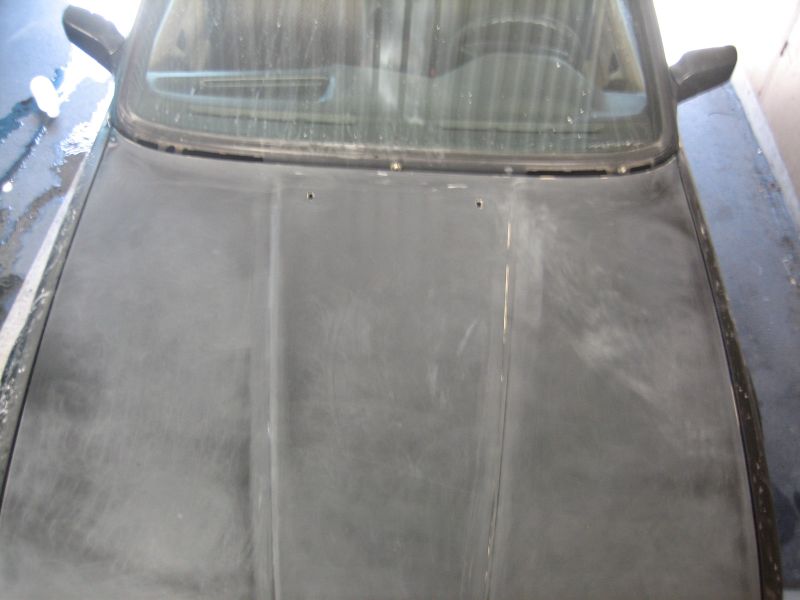
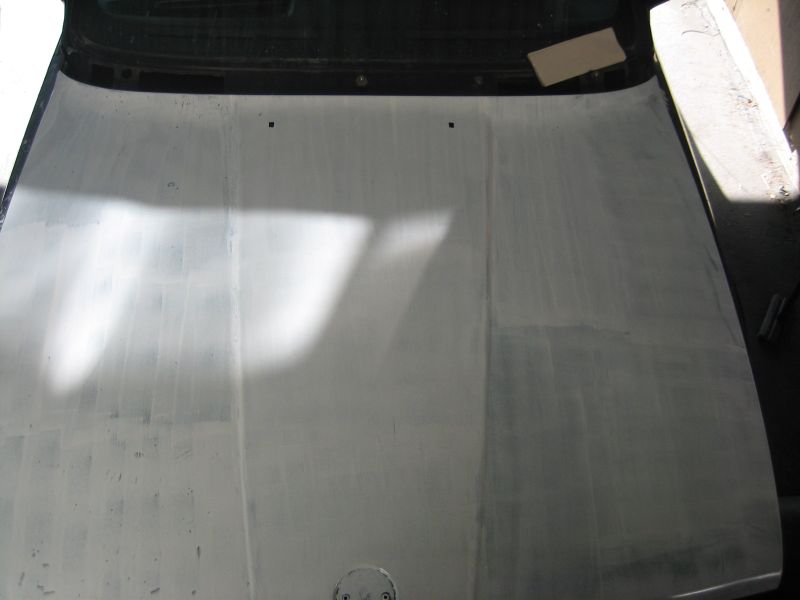
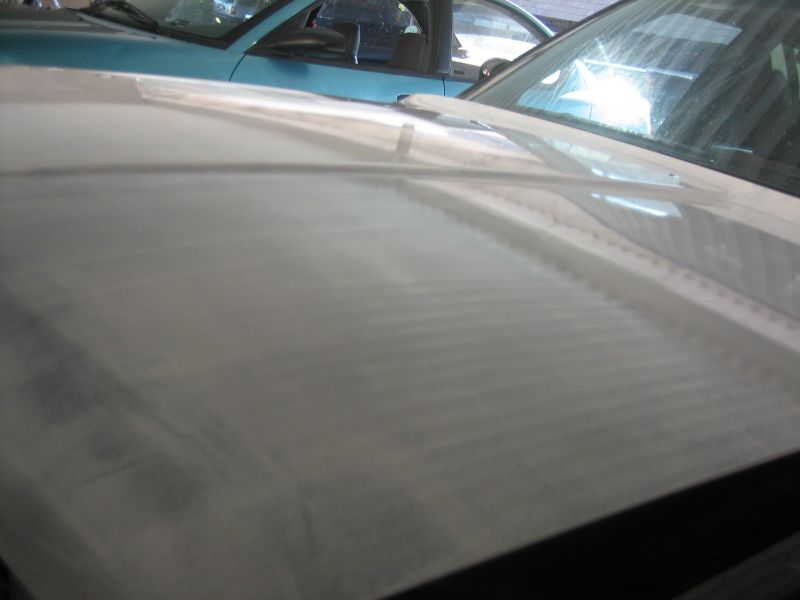
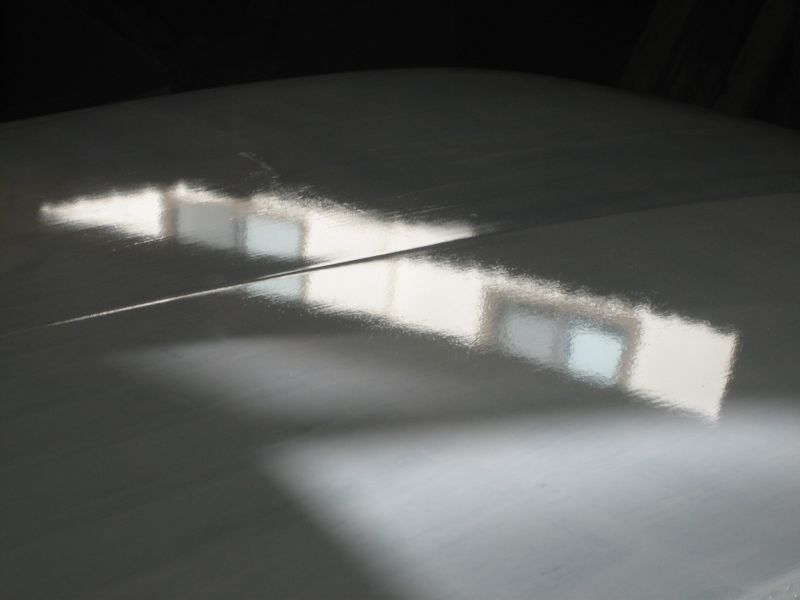
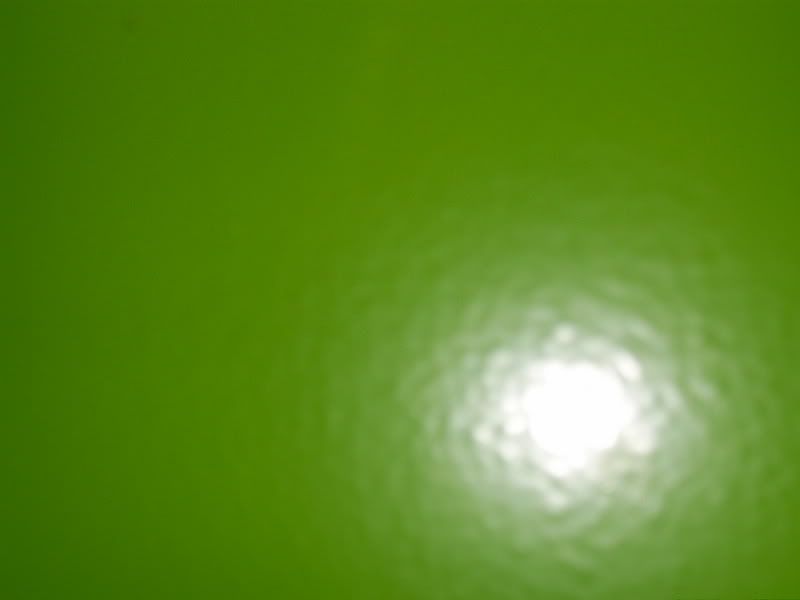
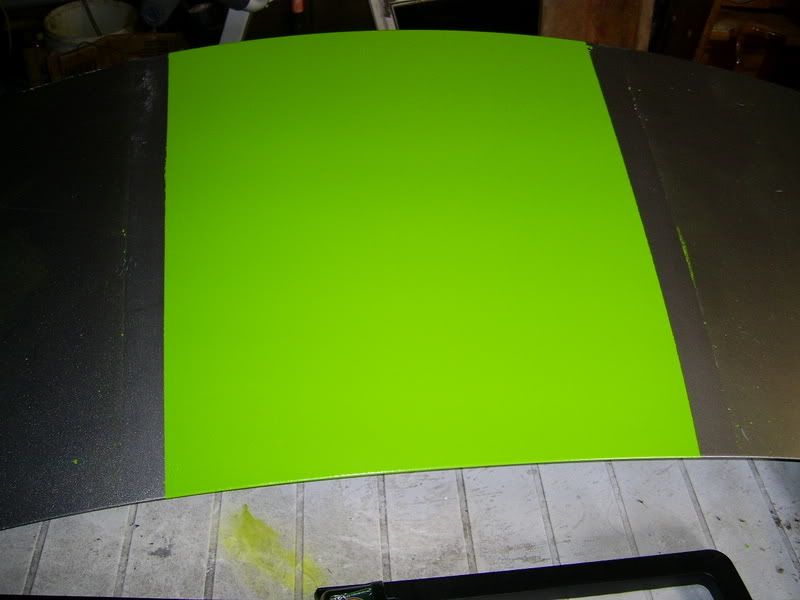


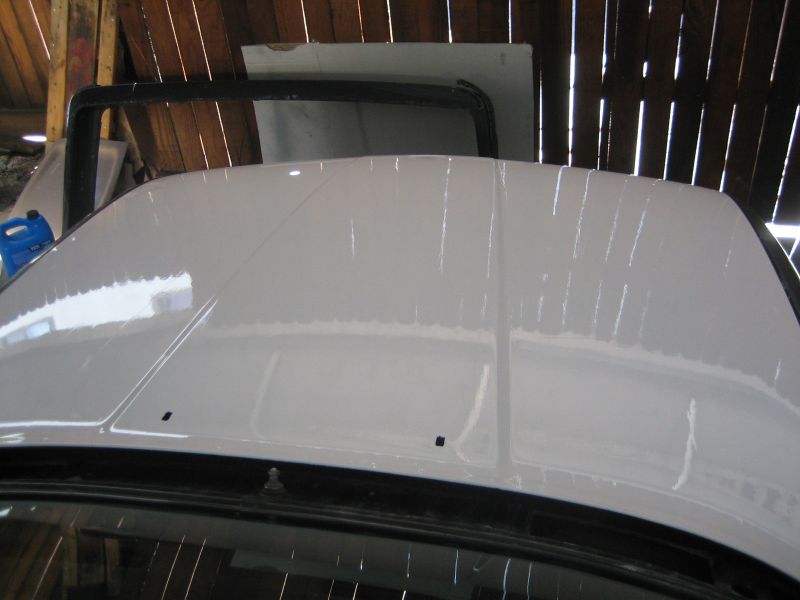
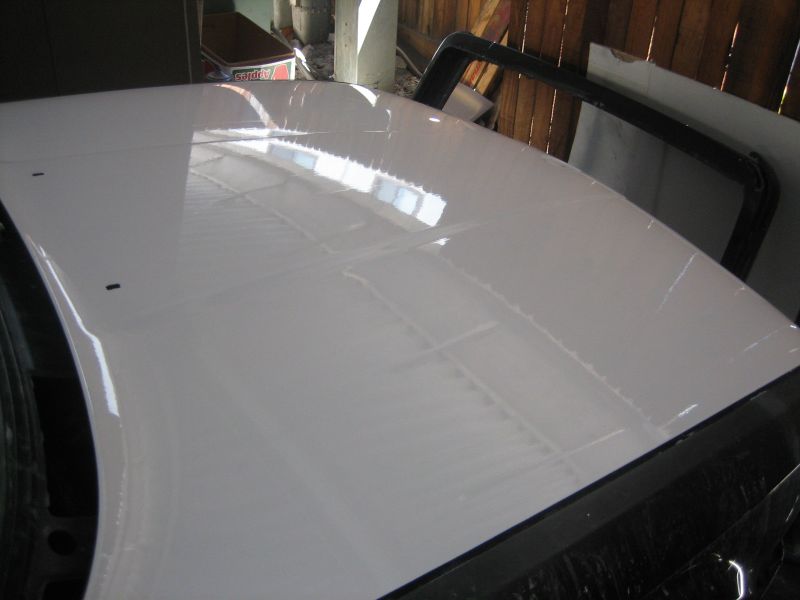
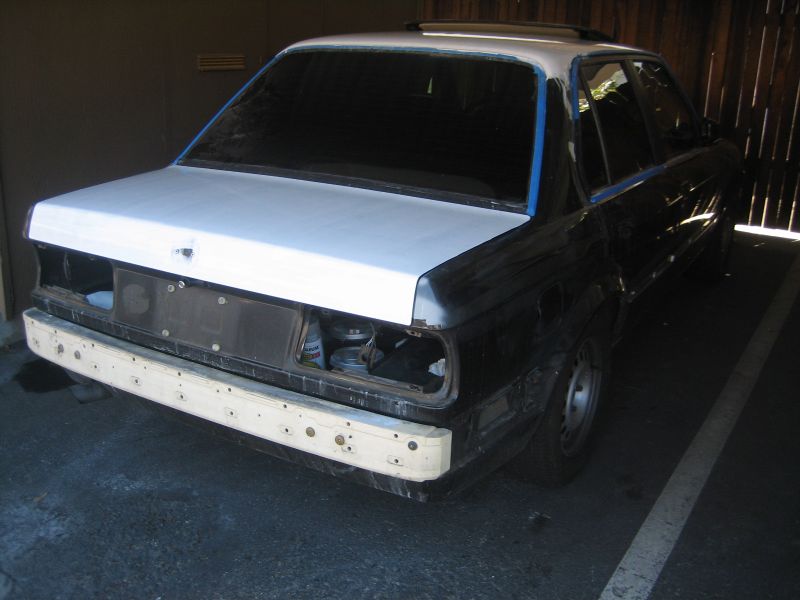
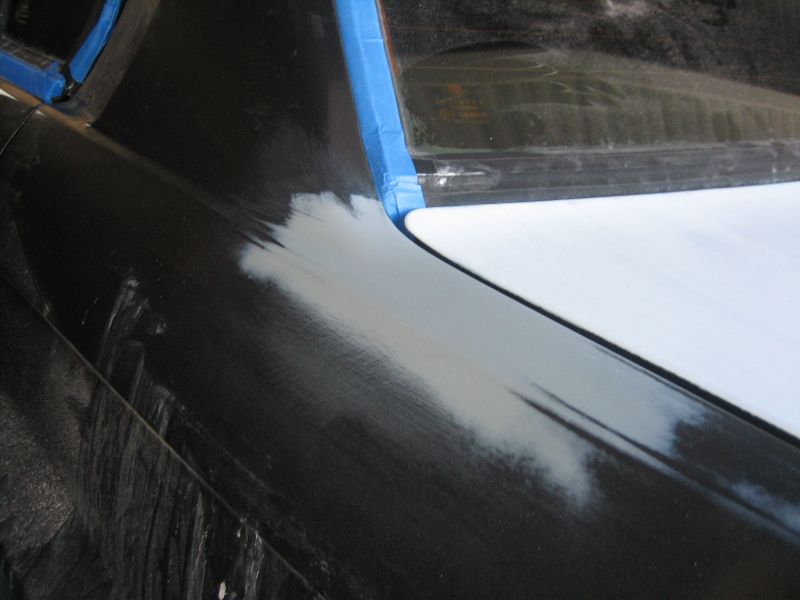
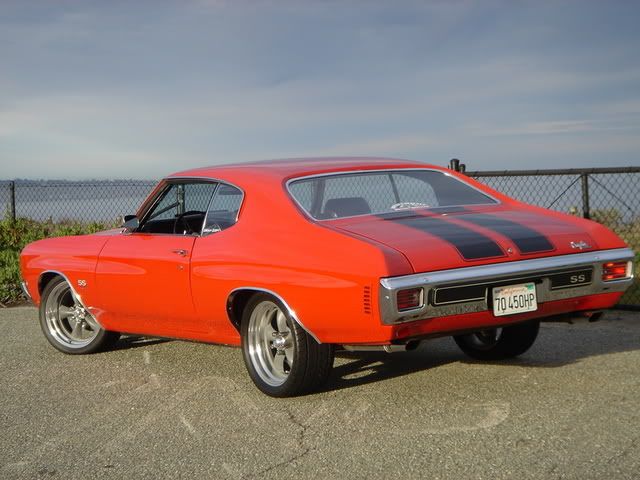


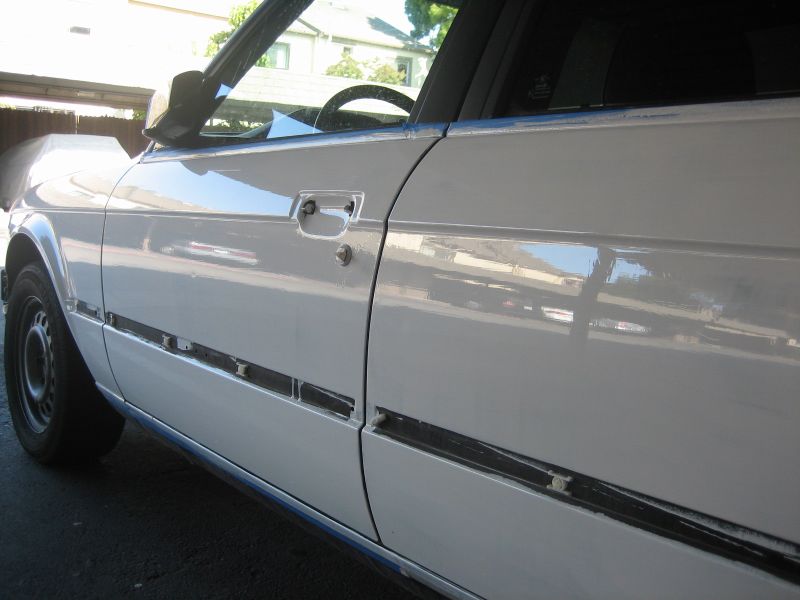
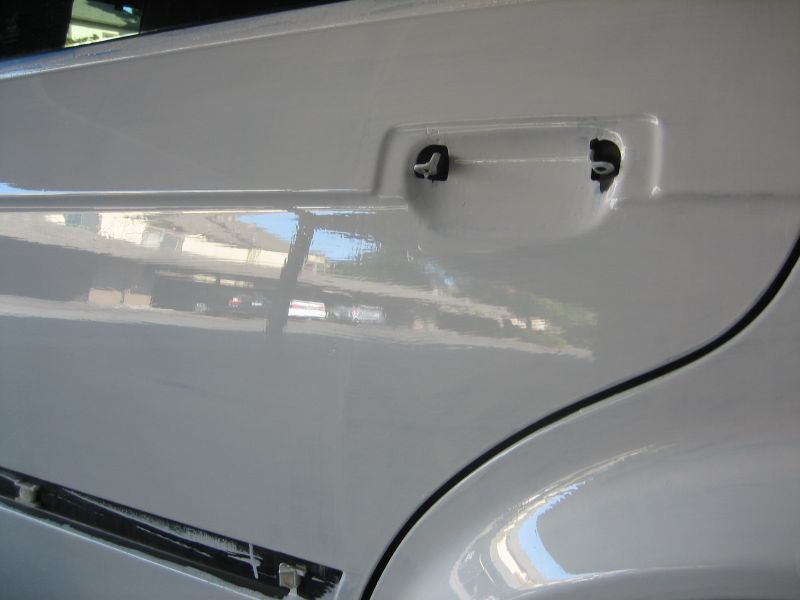
 probably not oxidized as it was only the top surfaces. I think I could have done a bedtter job on the roof main reason for thinking repainting it white.


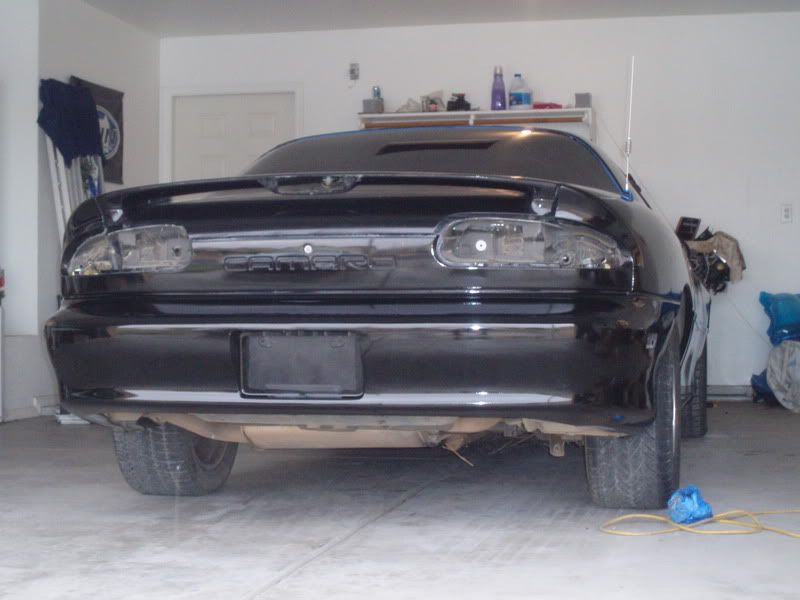
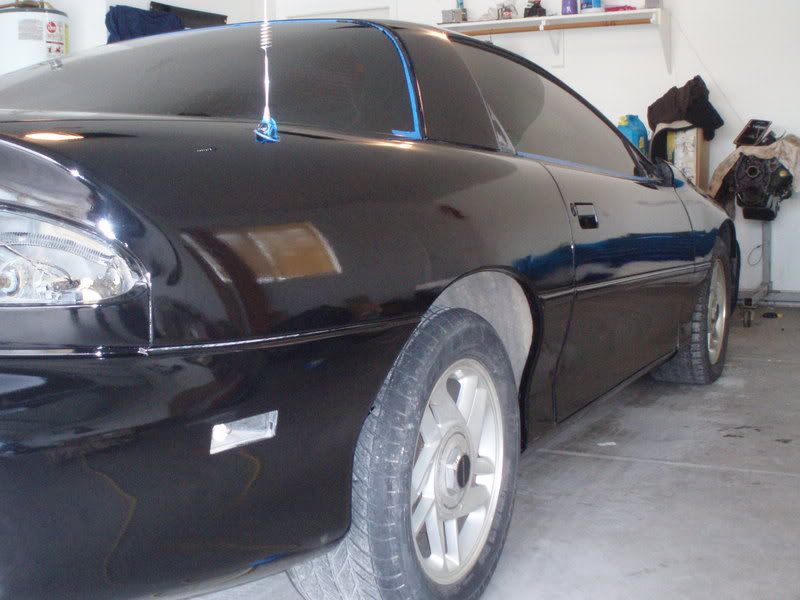

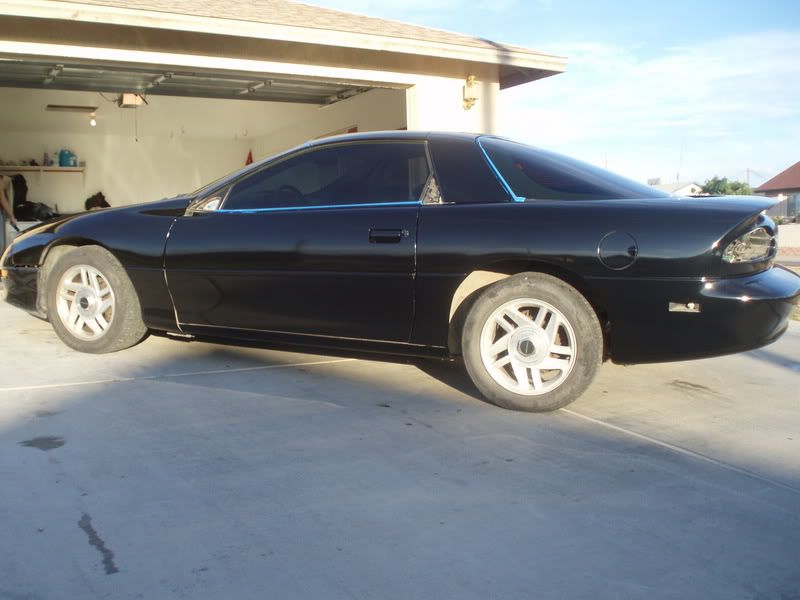

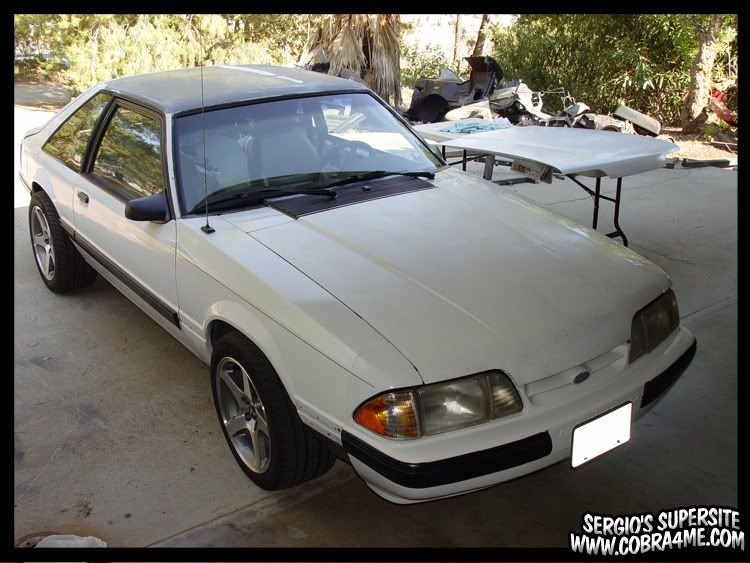

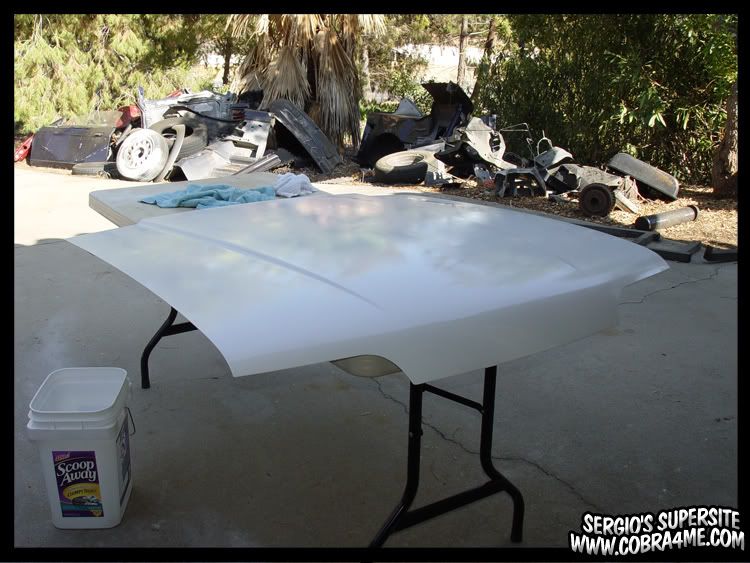
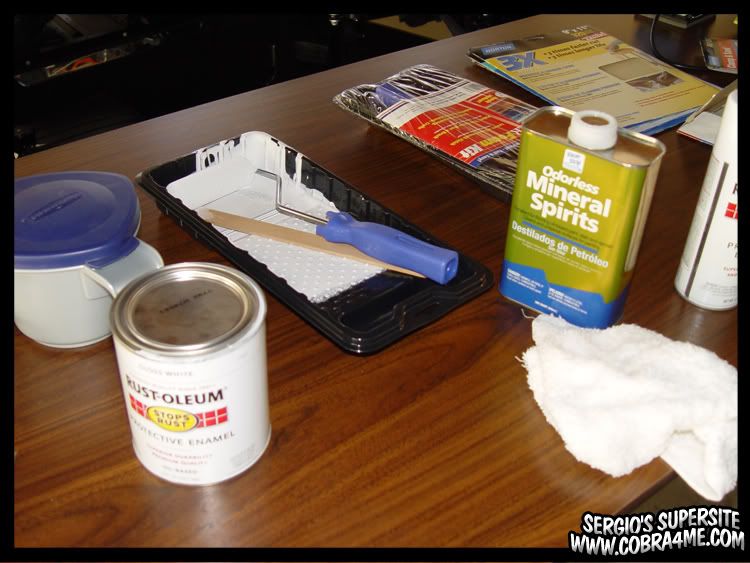
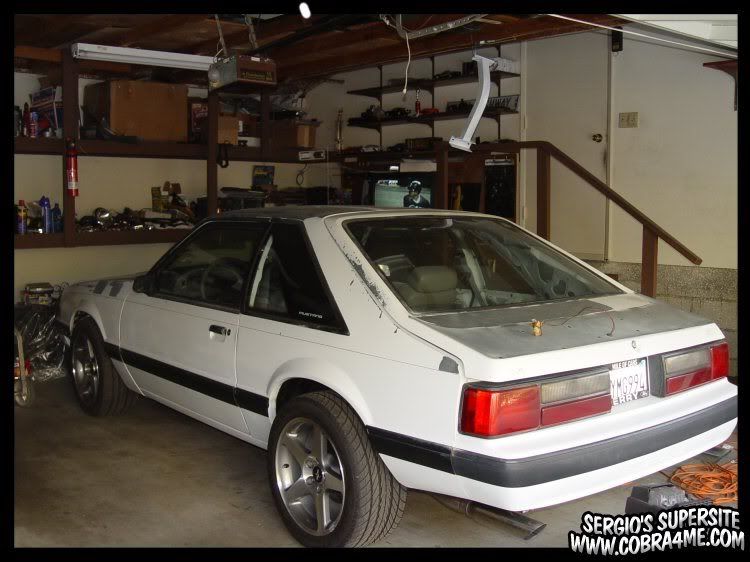
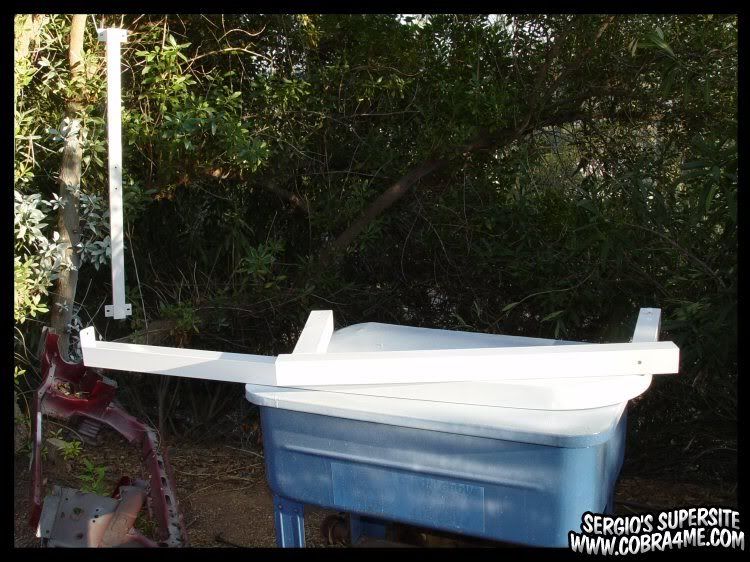

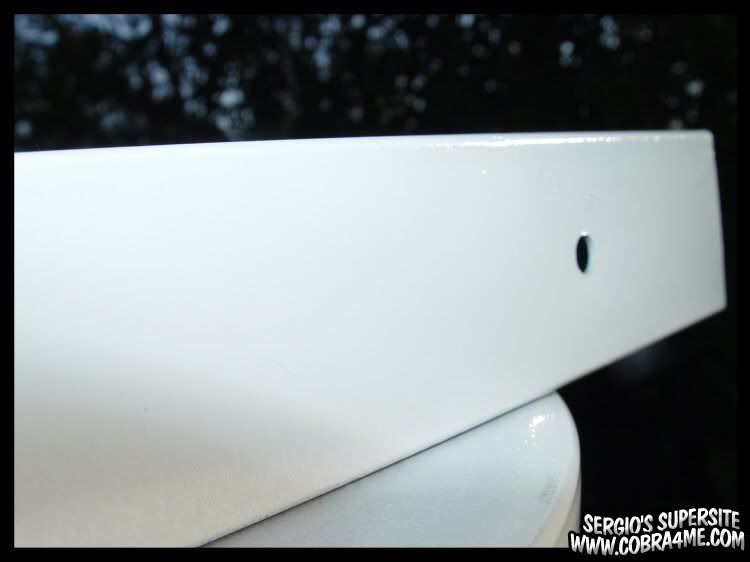
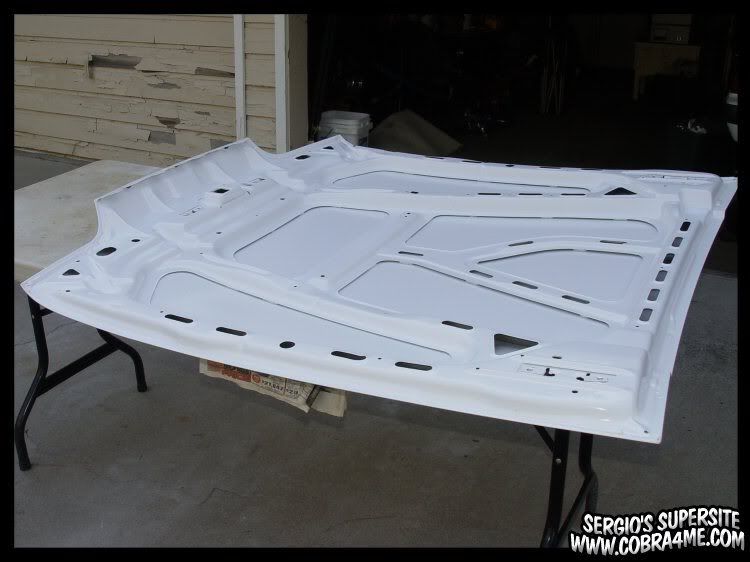
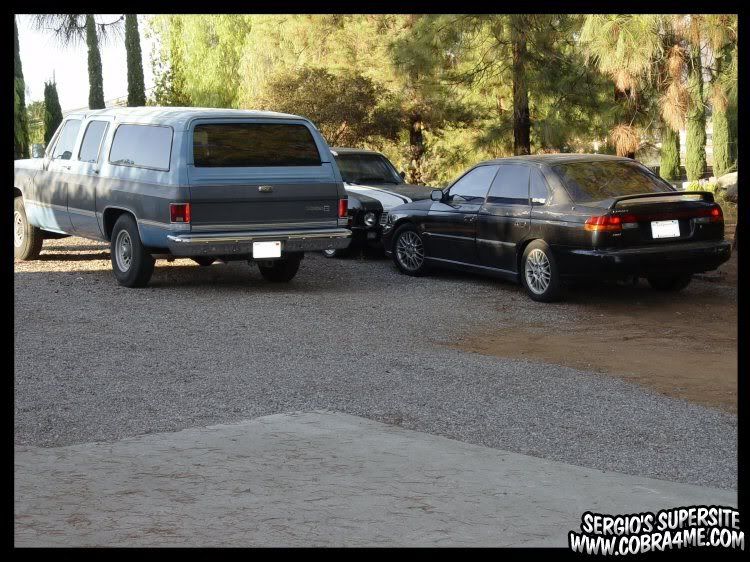


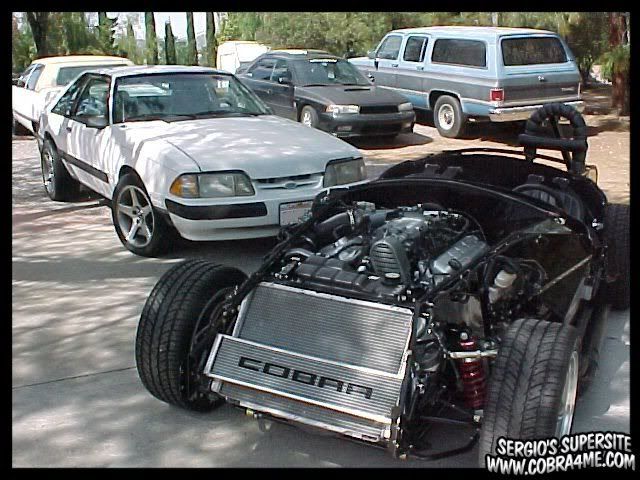


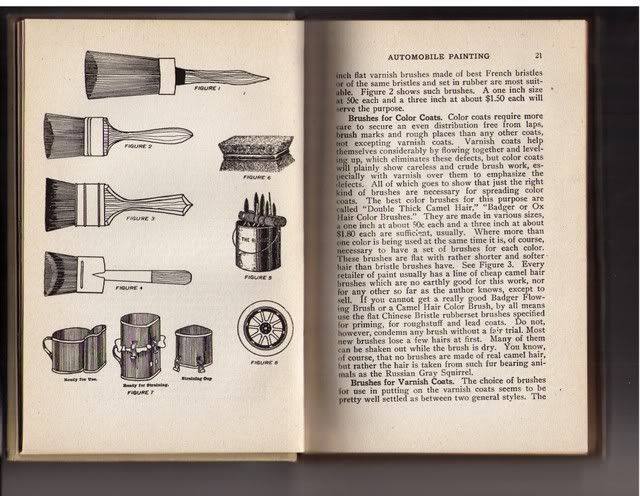


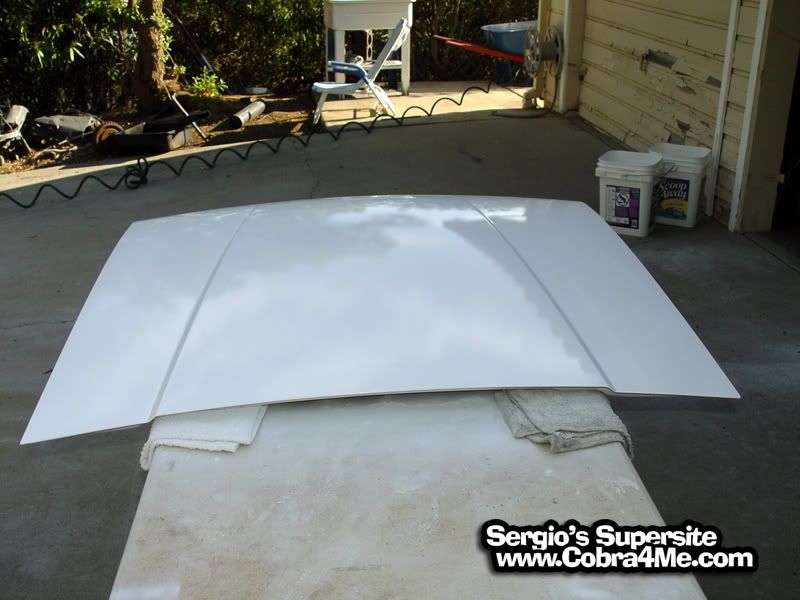
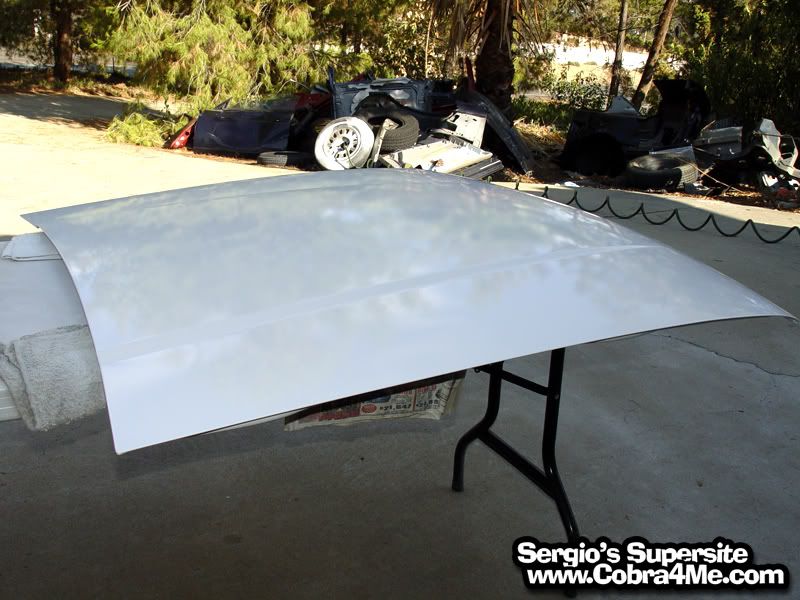
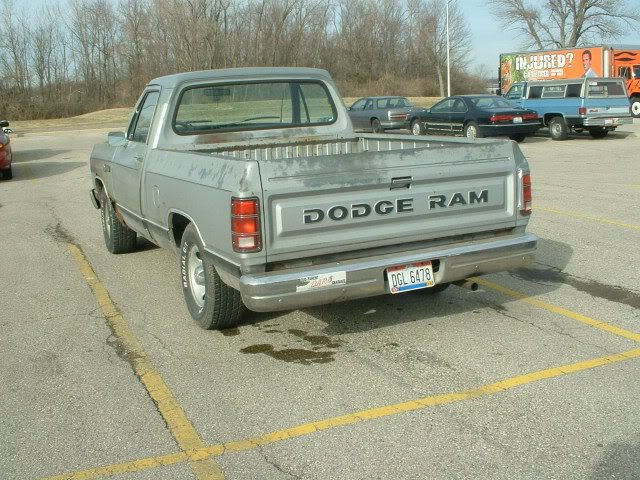


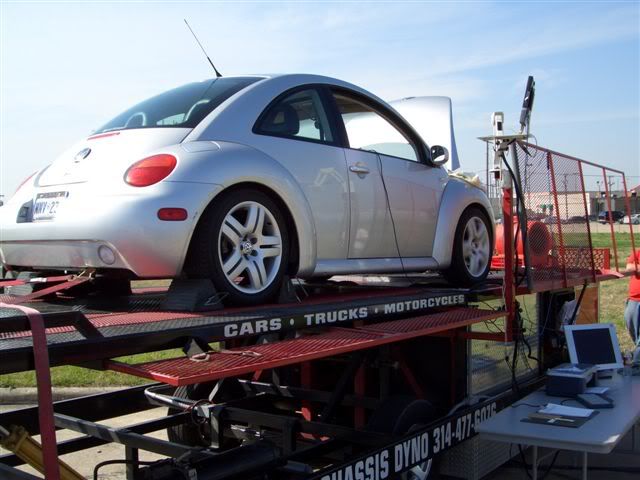


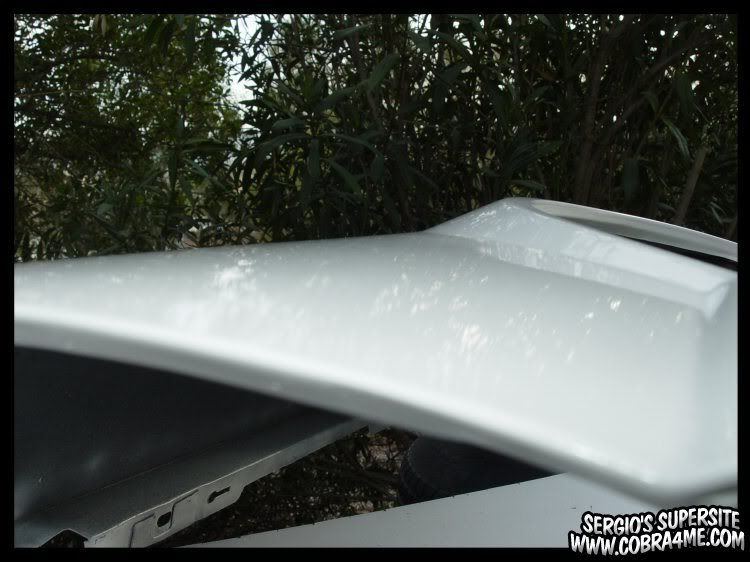
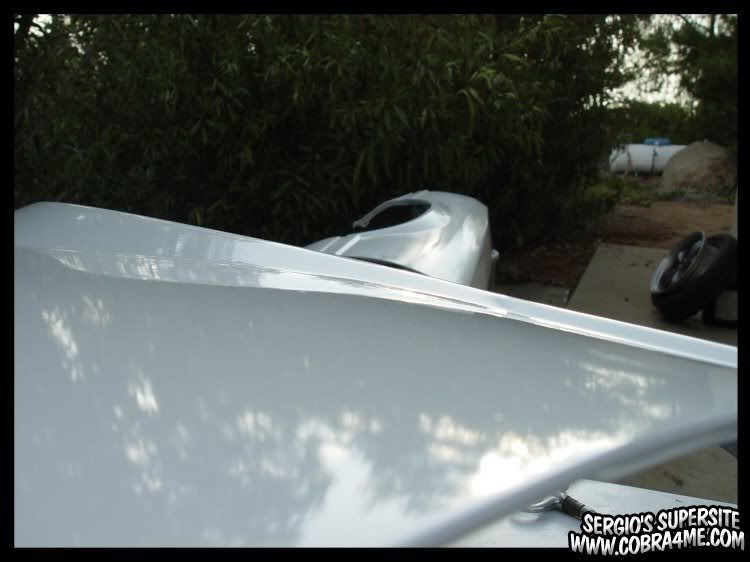
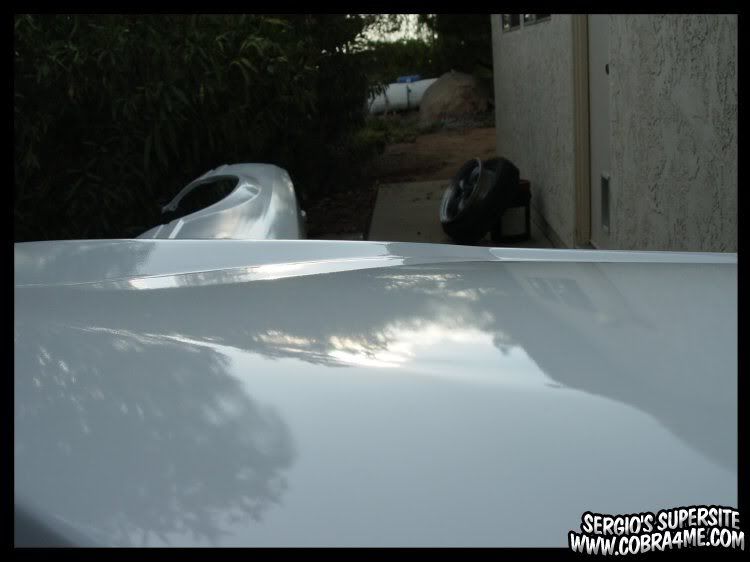

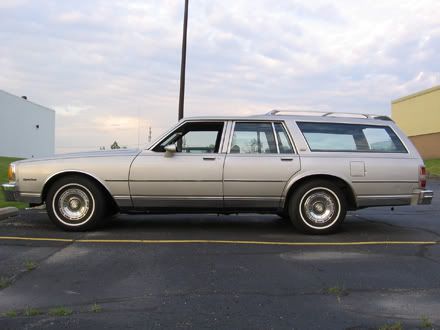
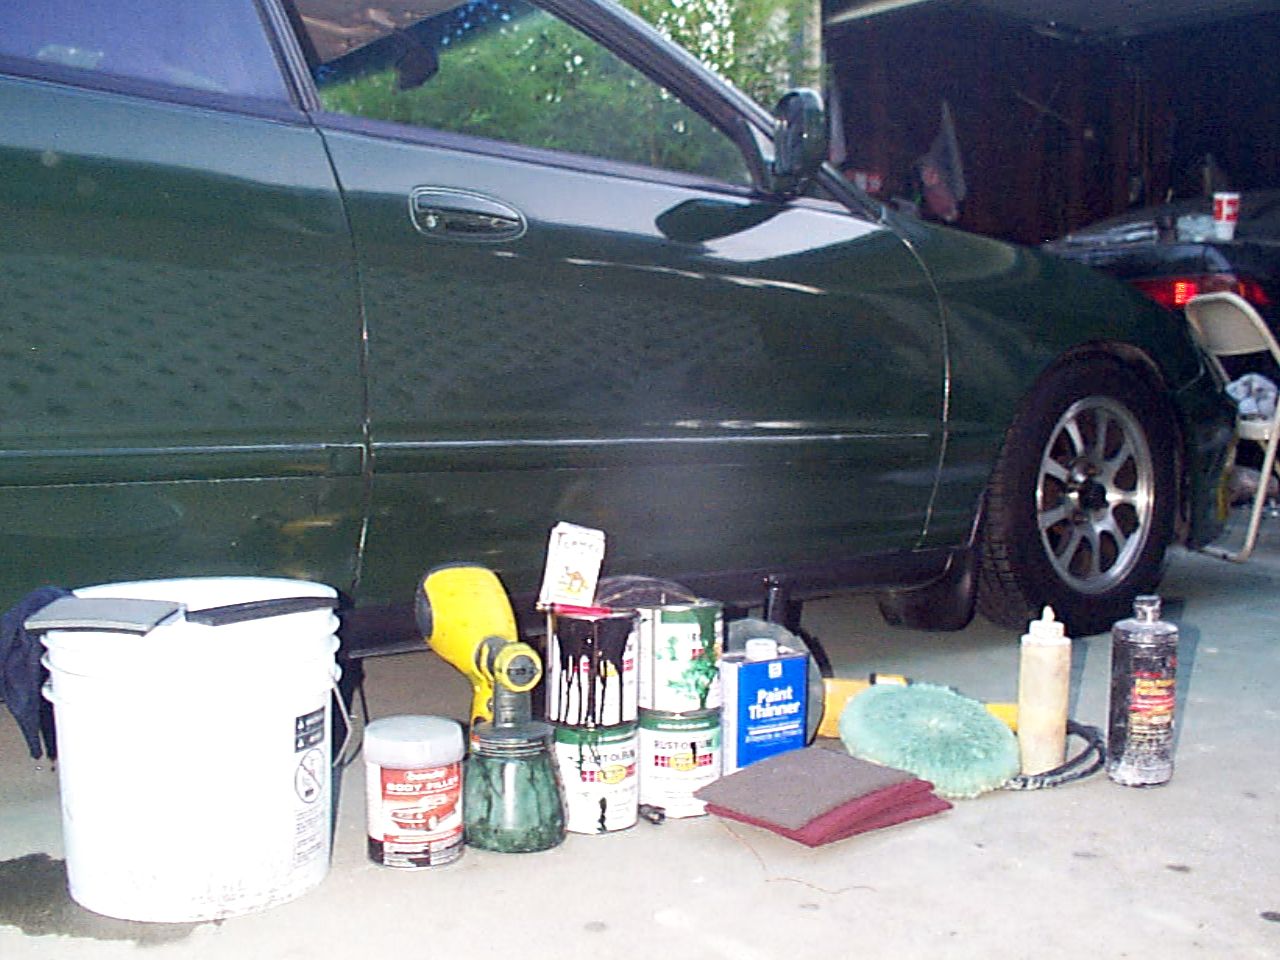
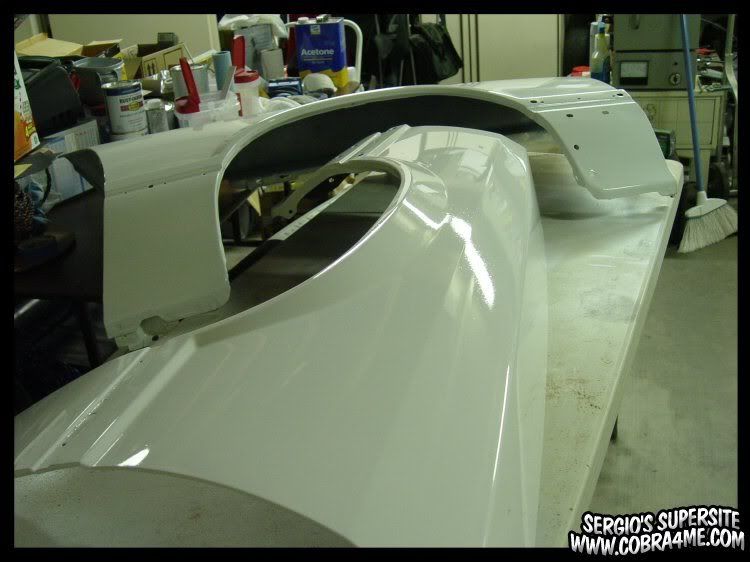
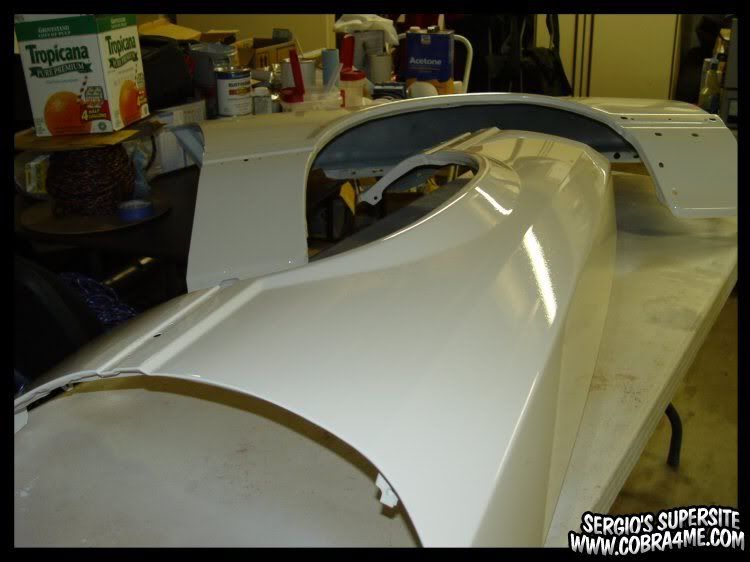

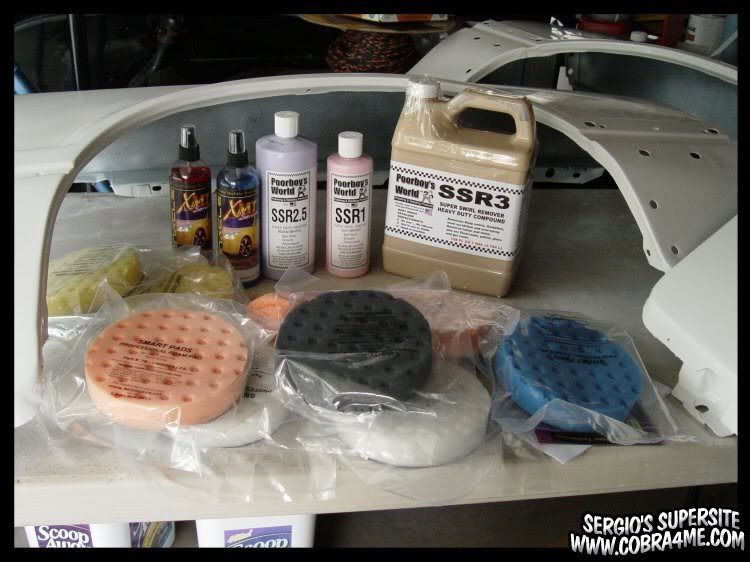
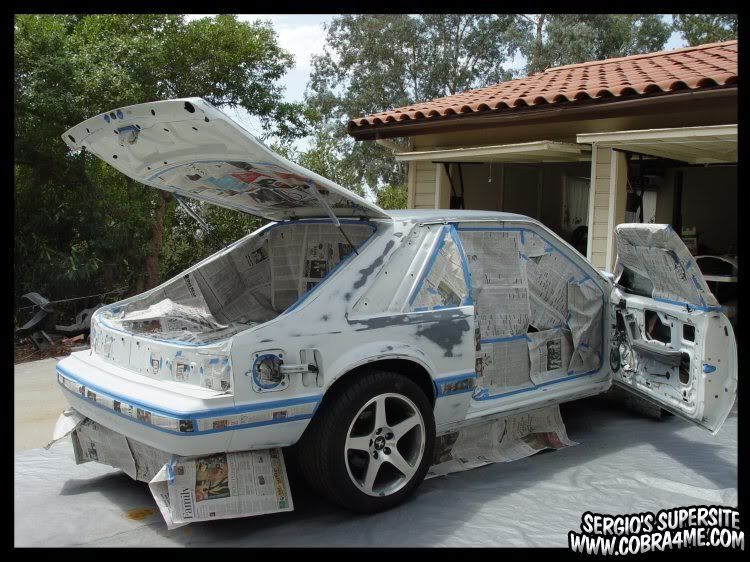
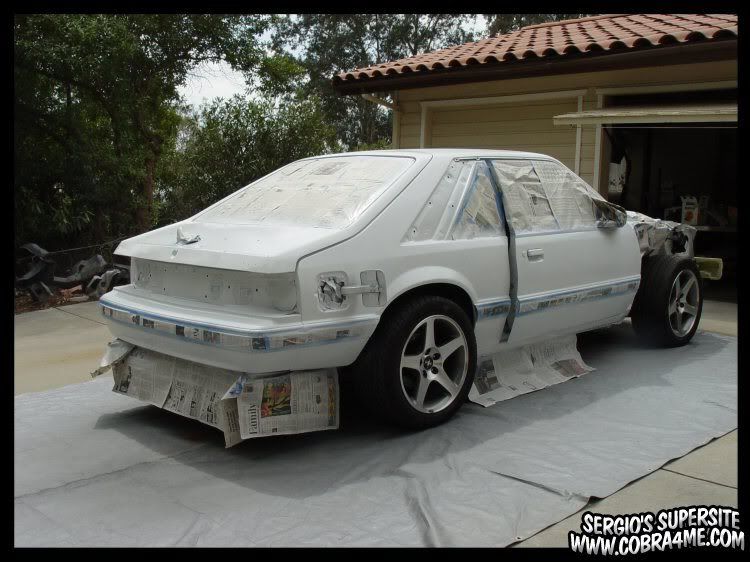
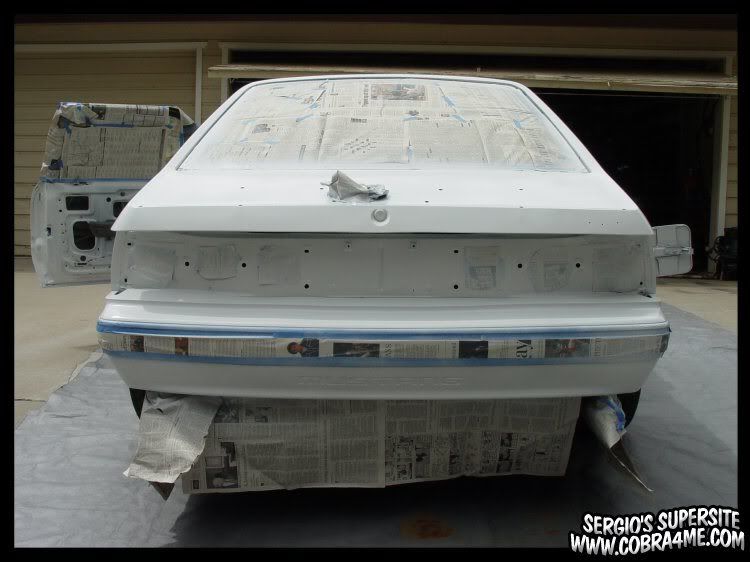
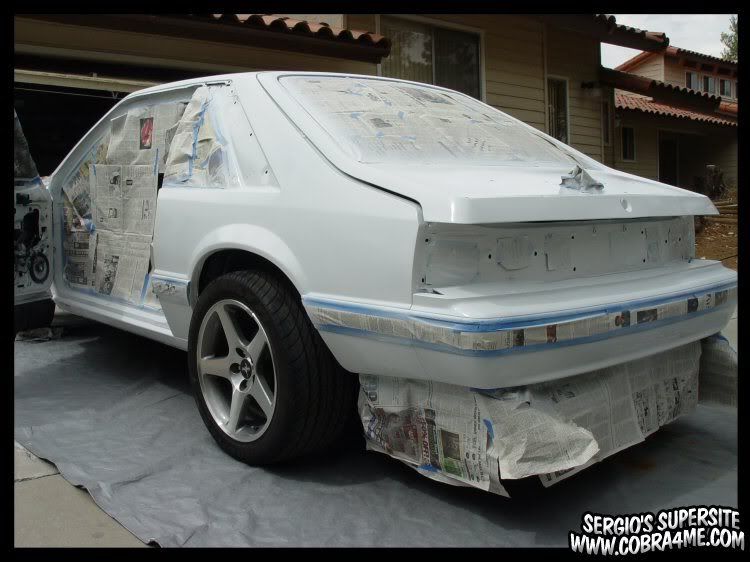
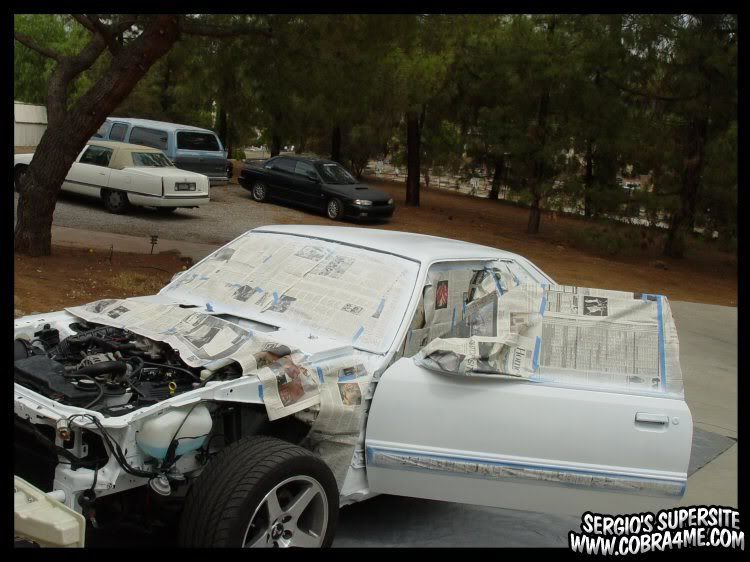


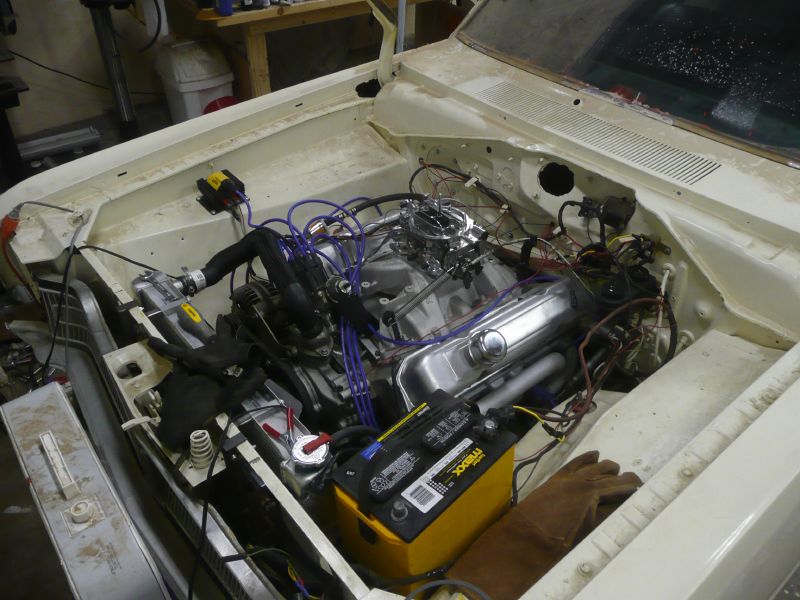
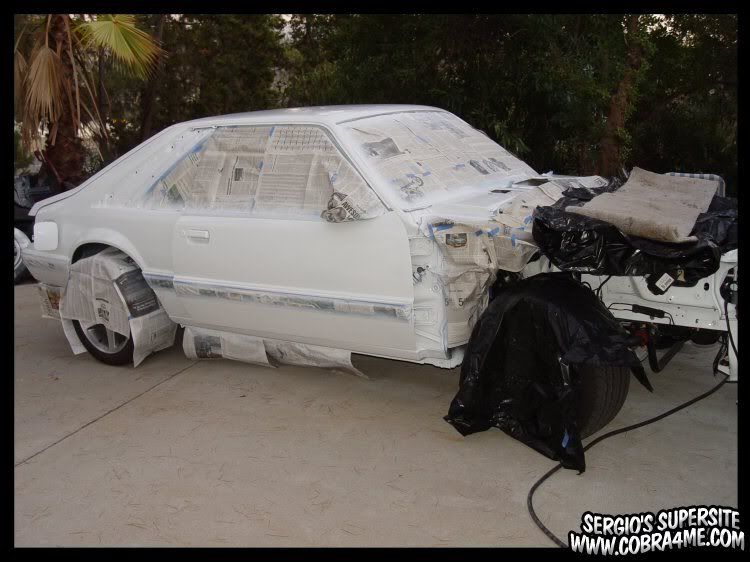
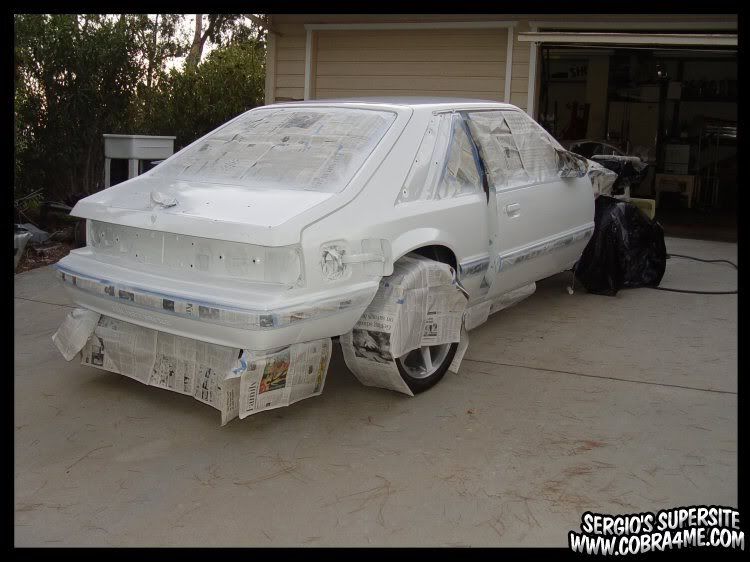

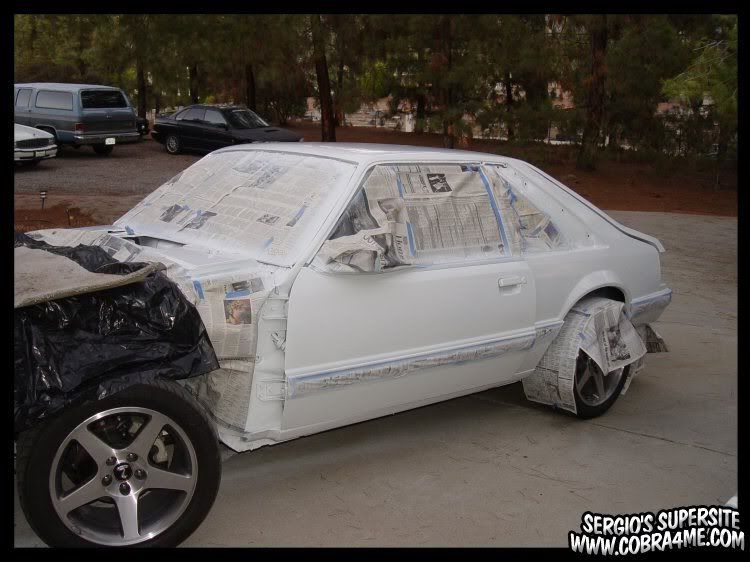


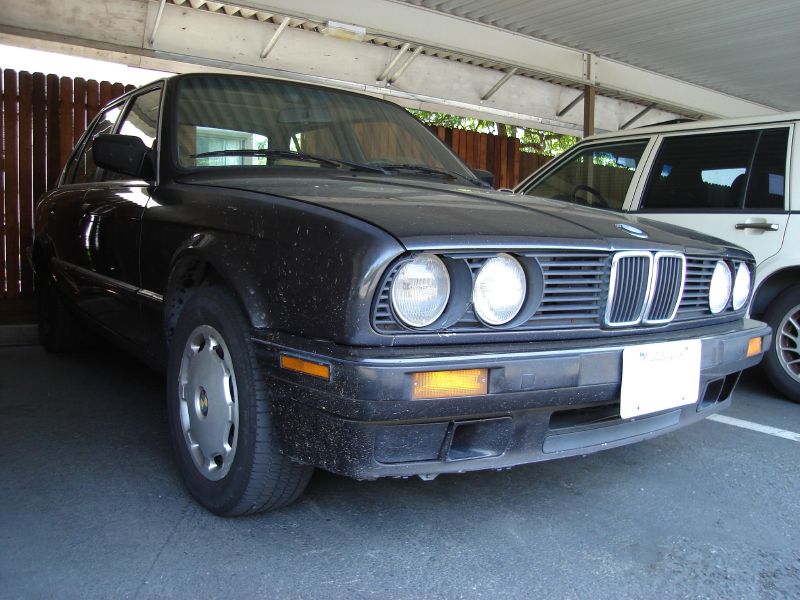
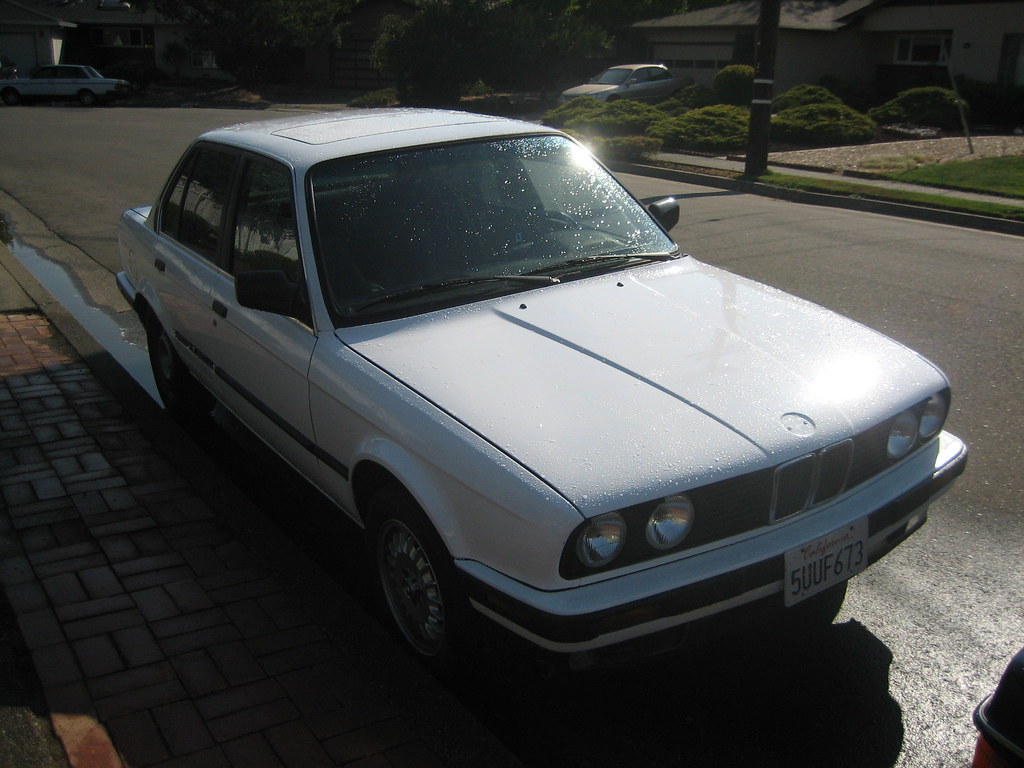

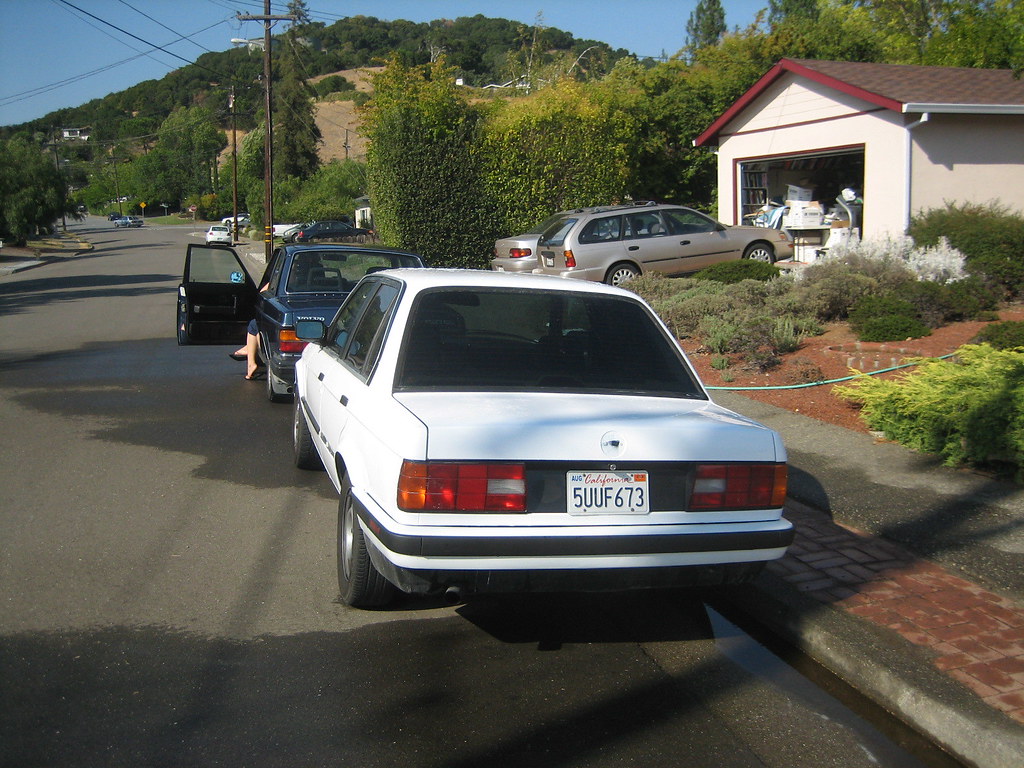
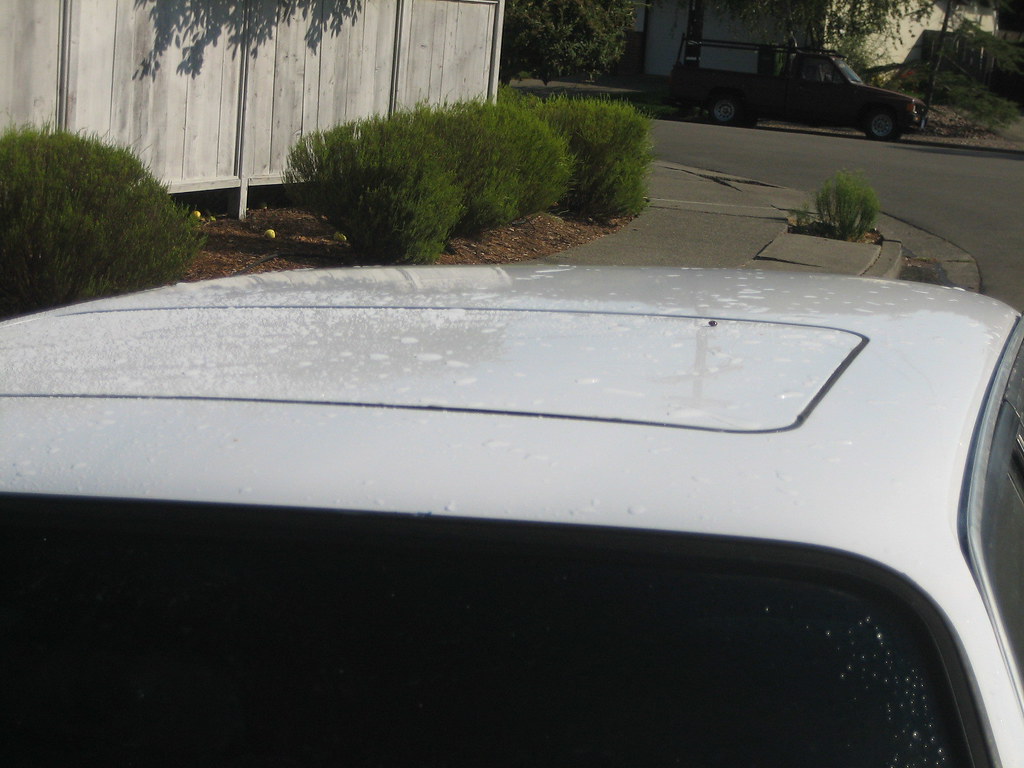
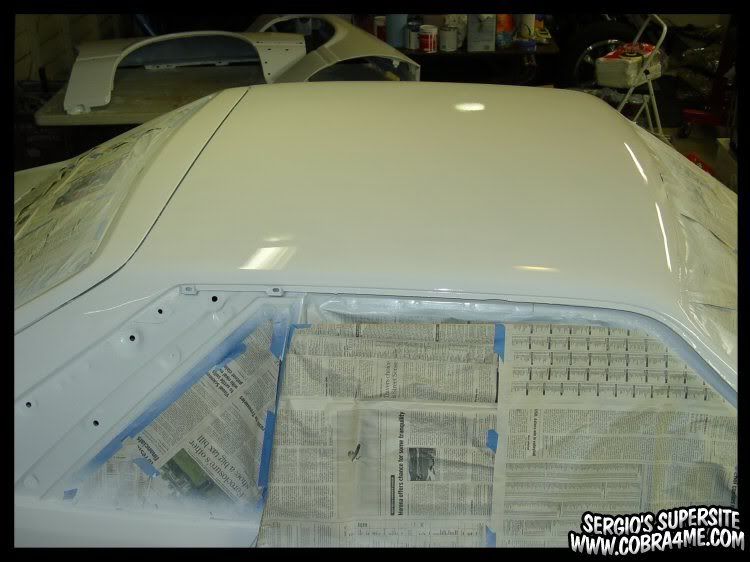
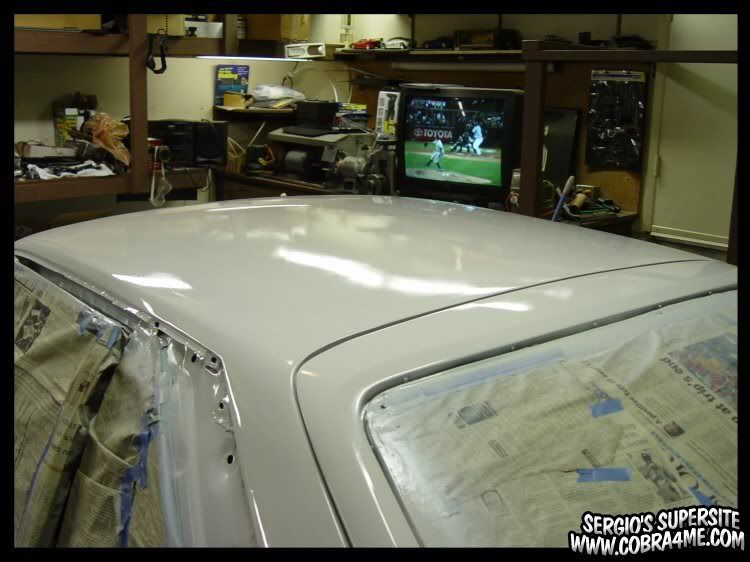

 ... ill post some pics tomorrow..


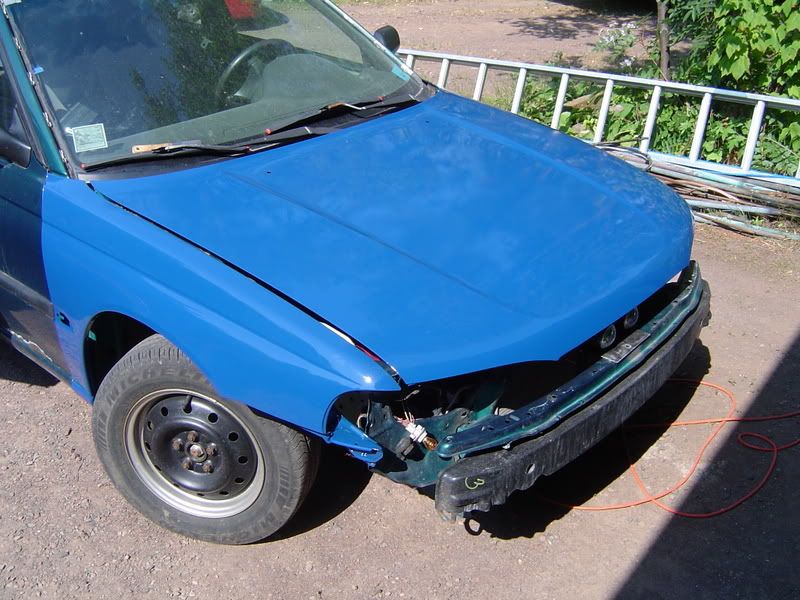
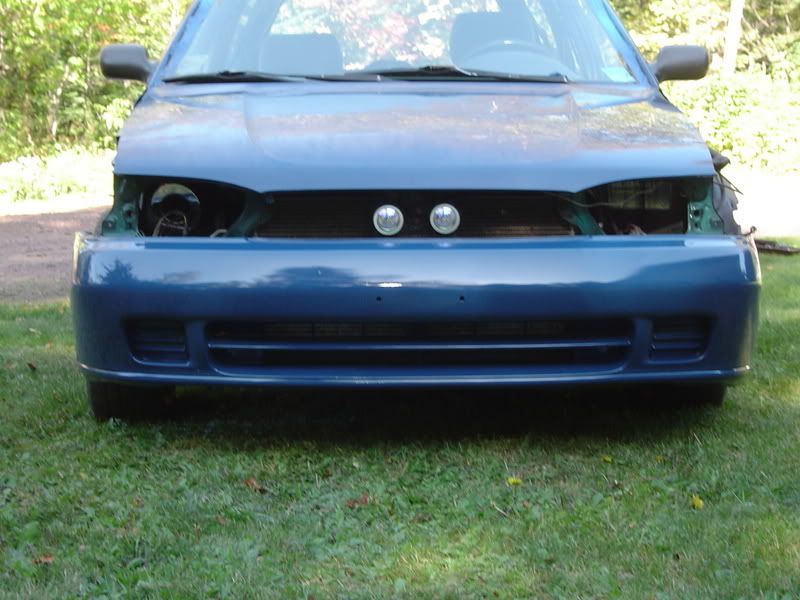
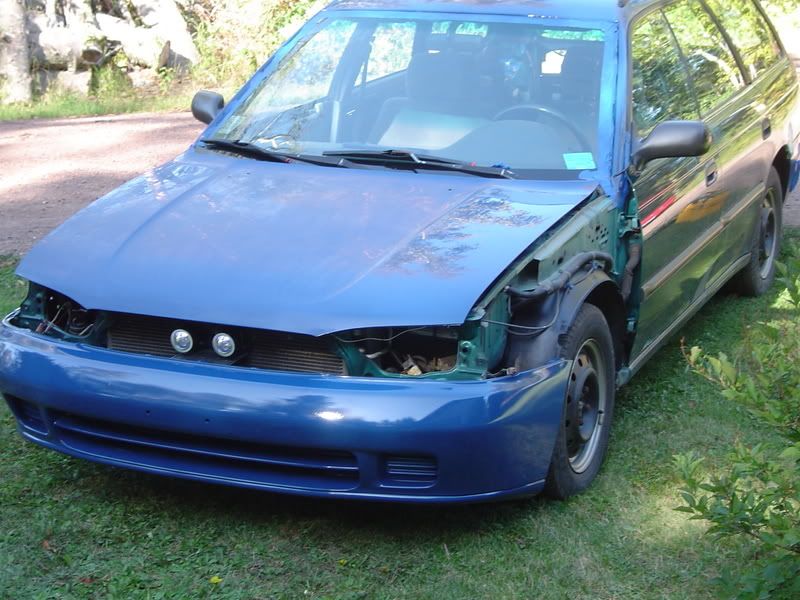

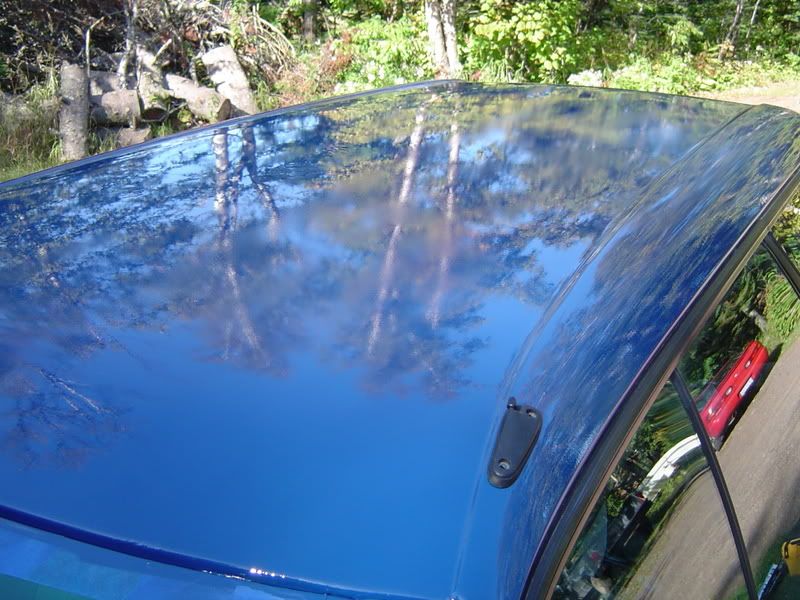


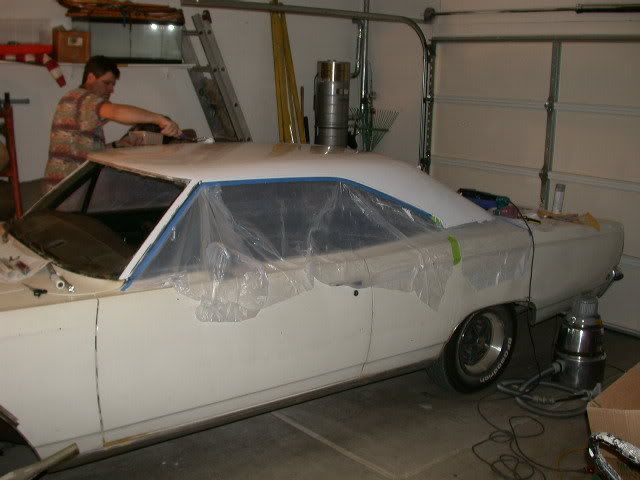
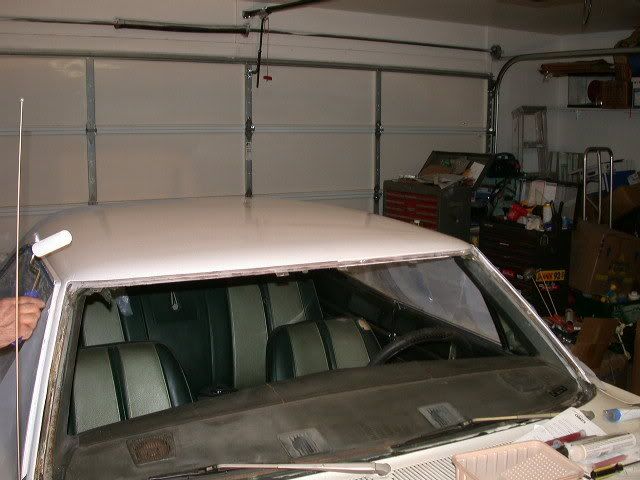


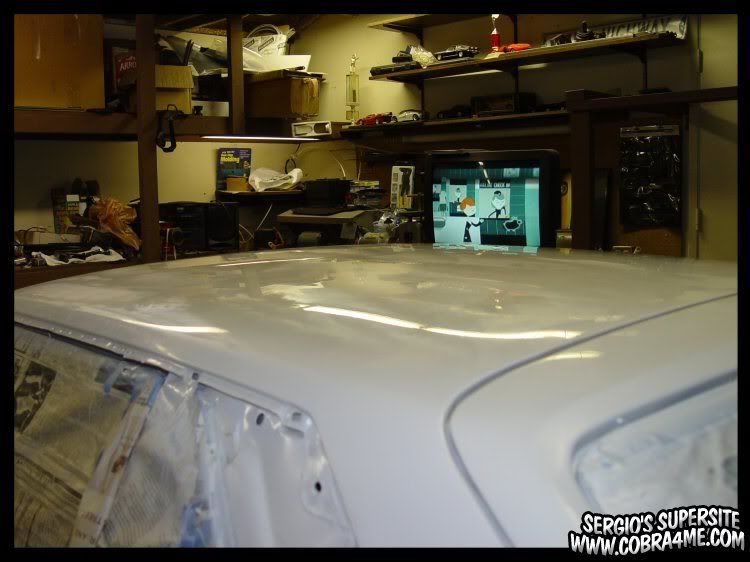
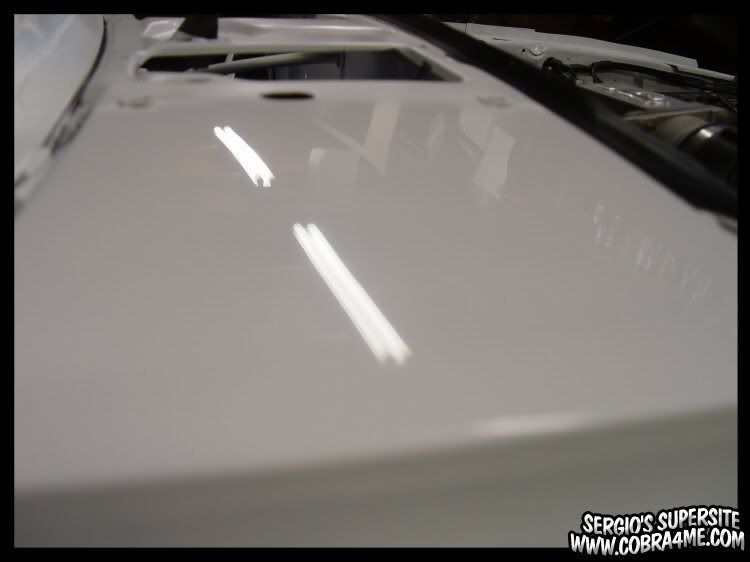
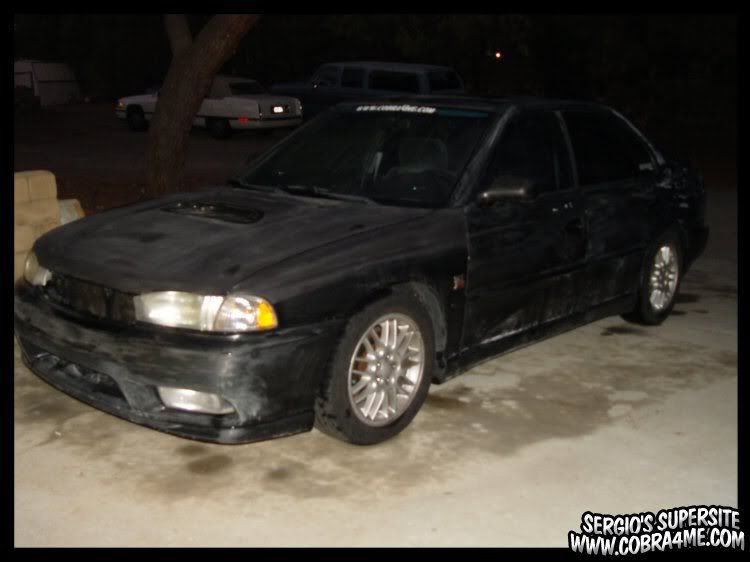
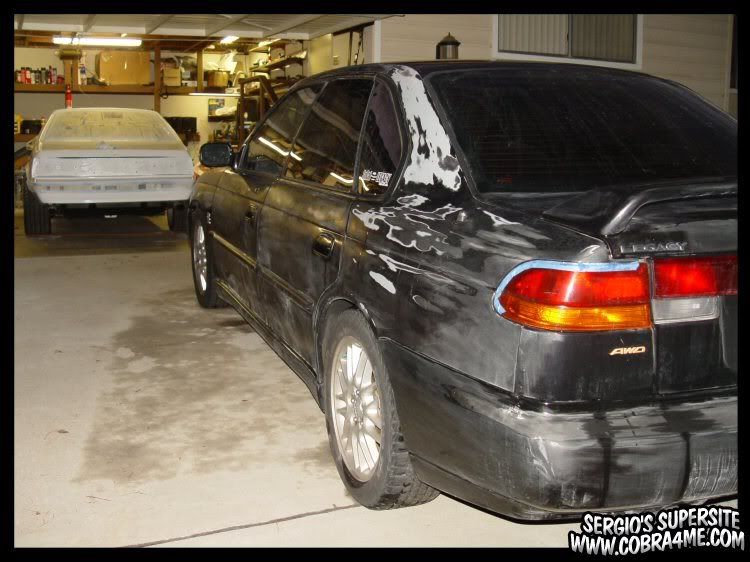

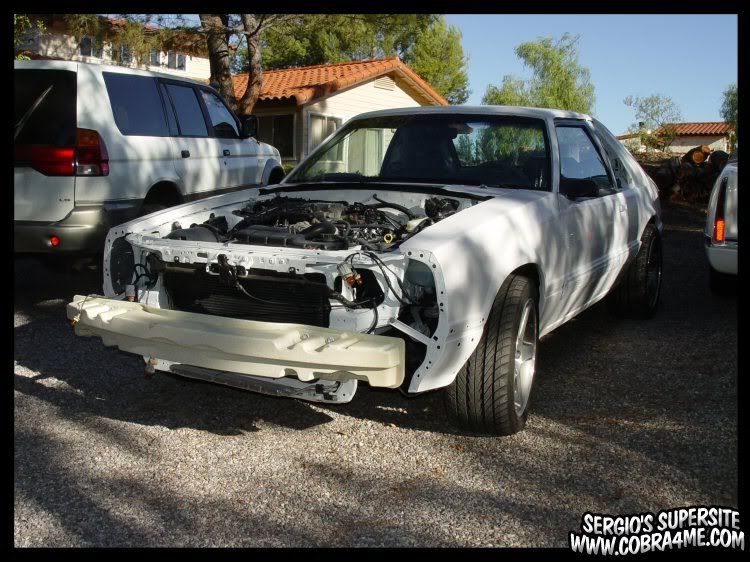
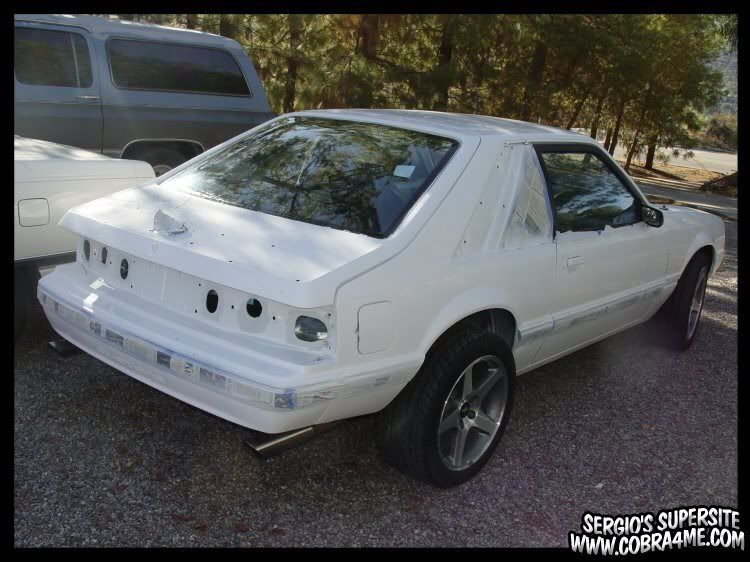
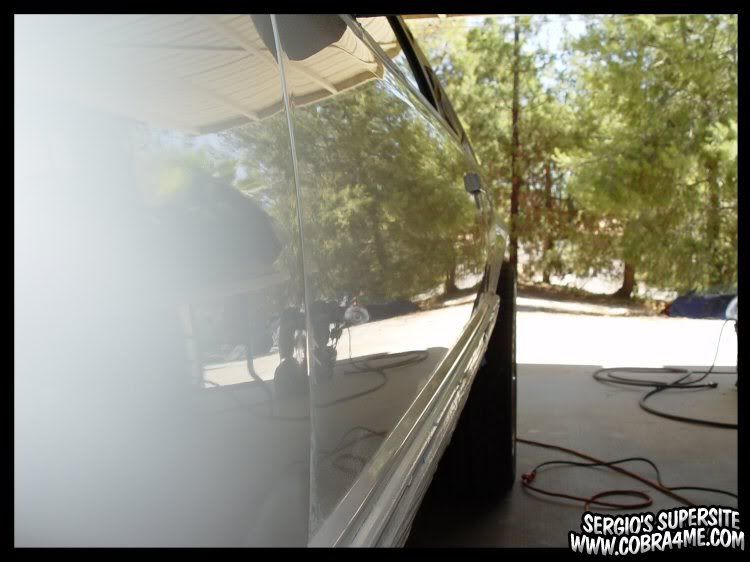
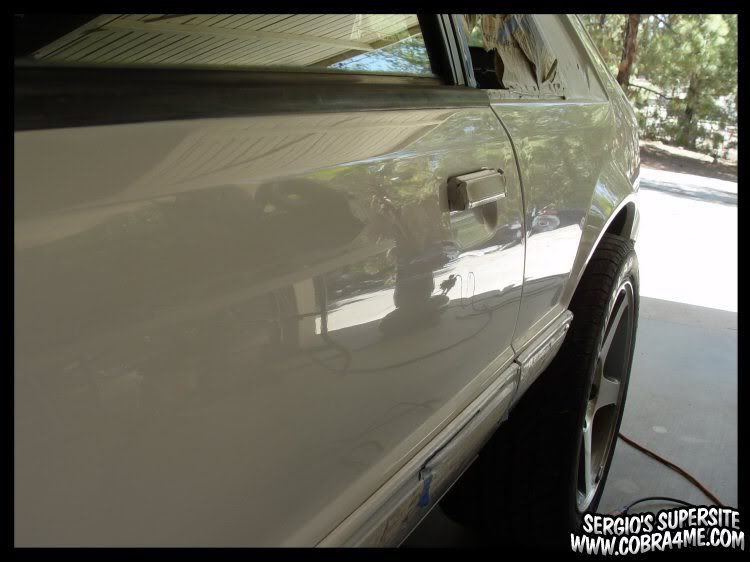
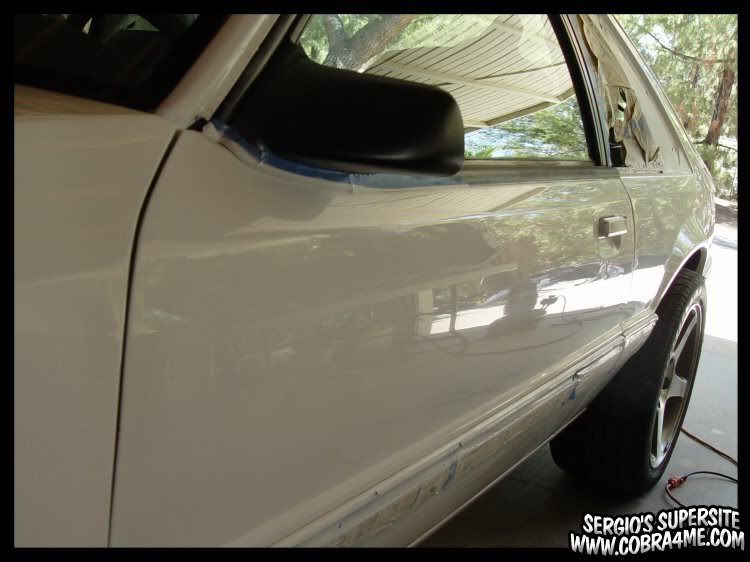
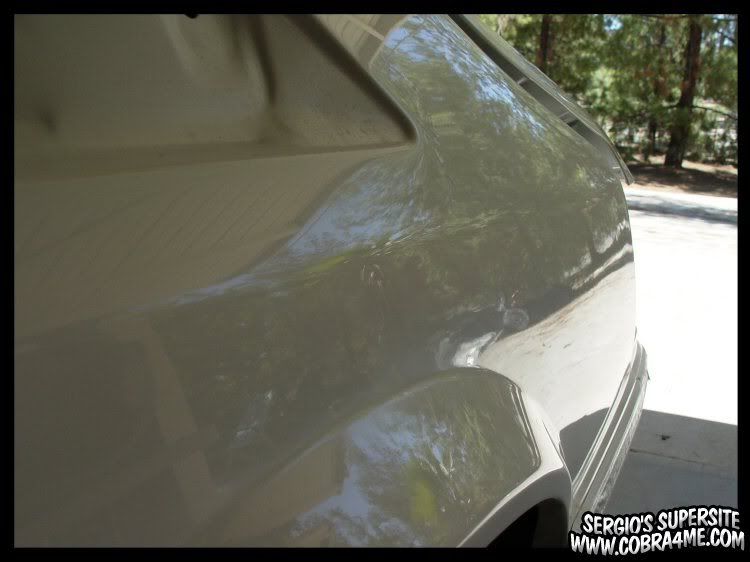
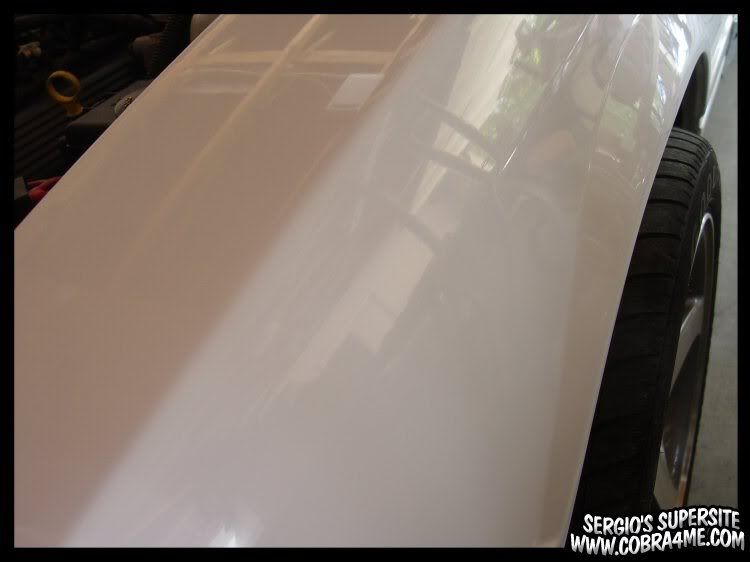


.jpg "3875634-100_1114(1016x762).jpg")
.jpg "3879490-100_1133(1524x1143).jpg")


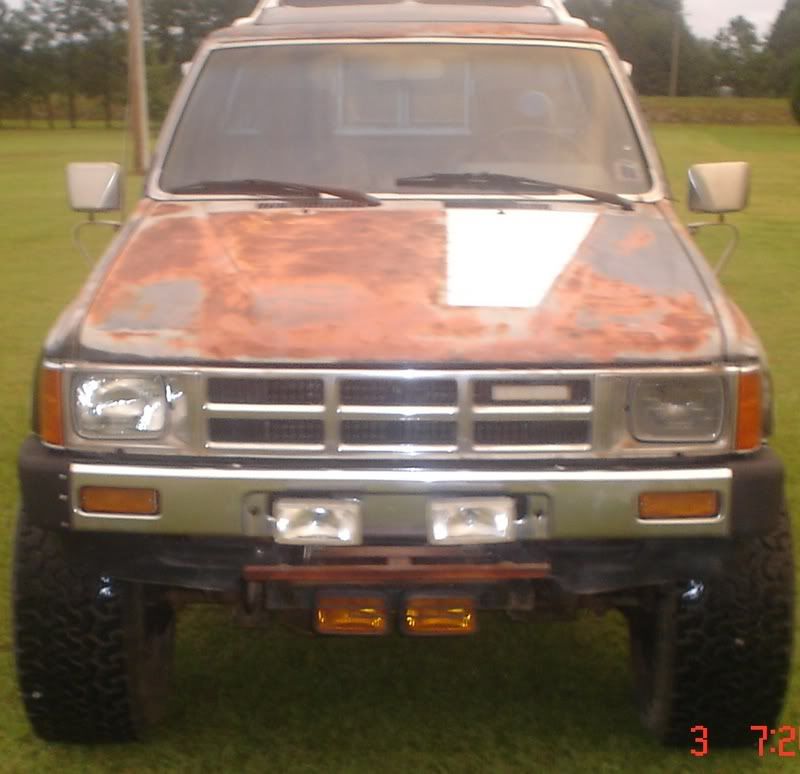


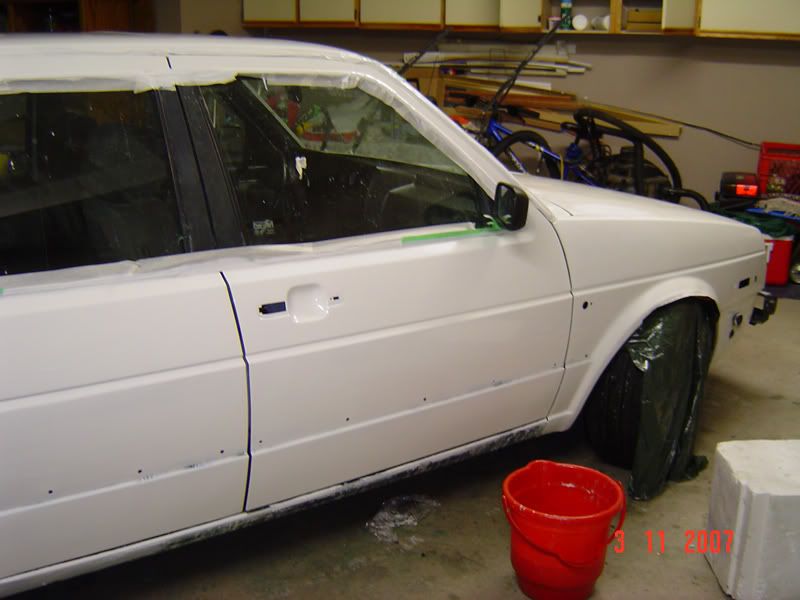
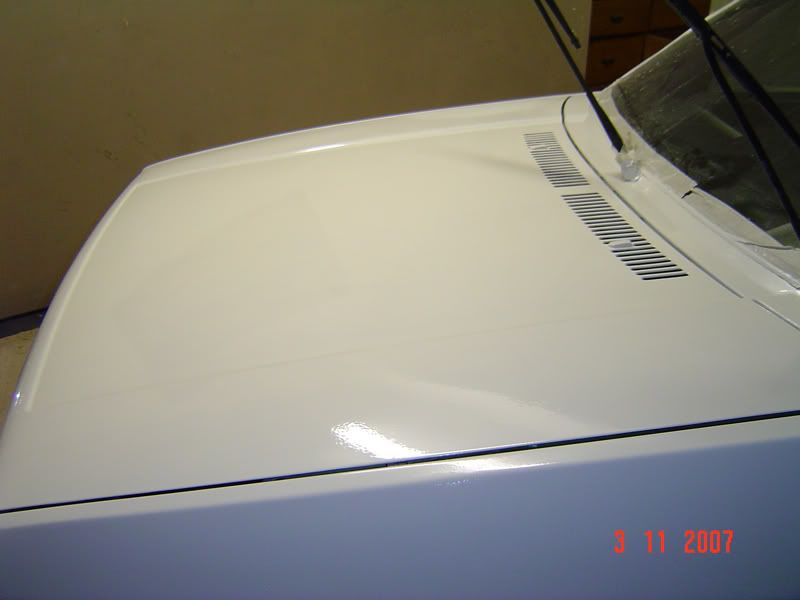
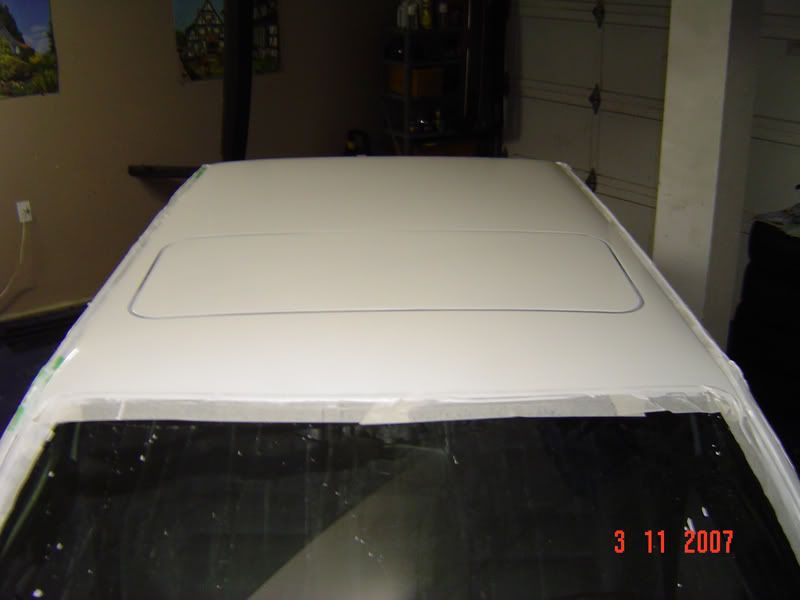
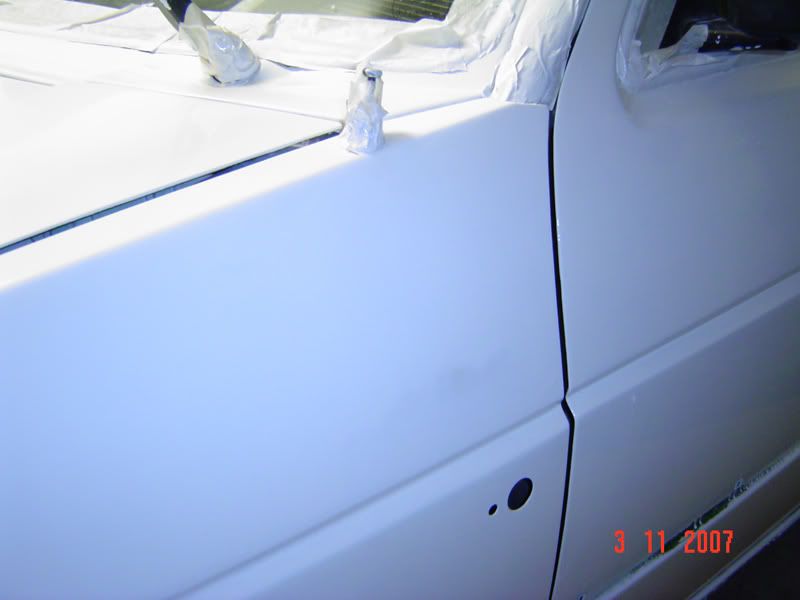


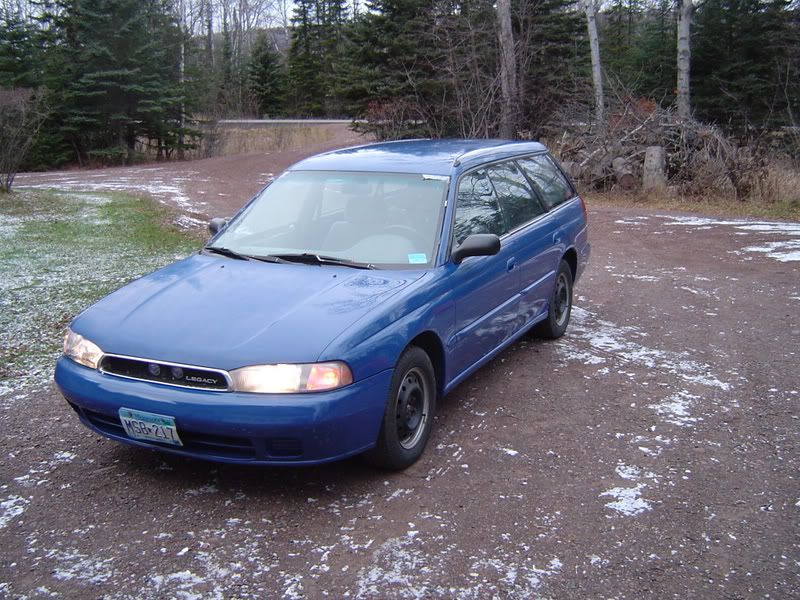
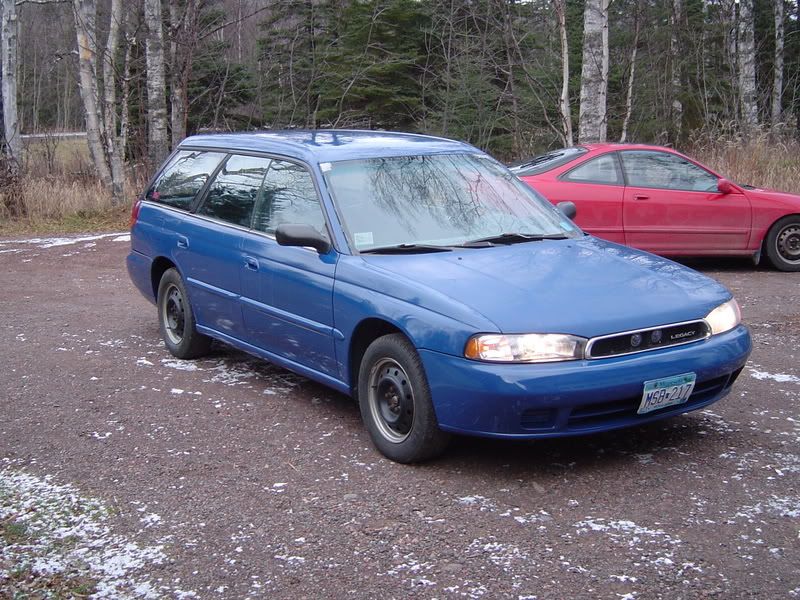
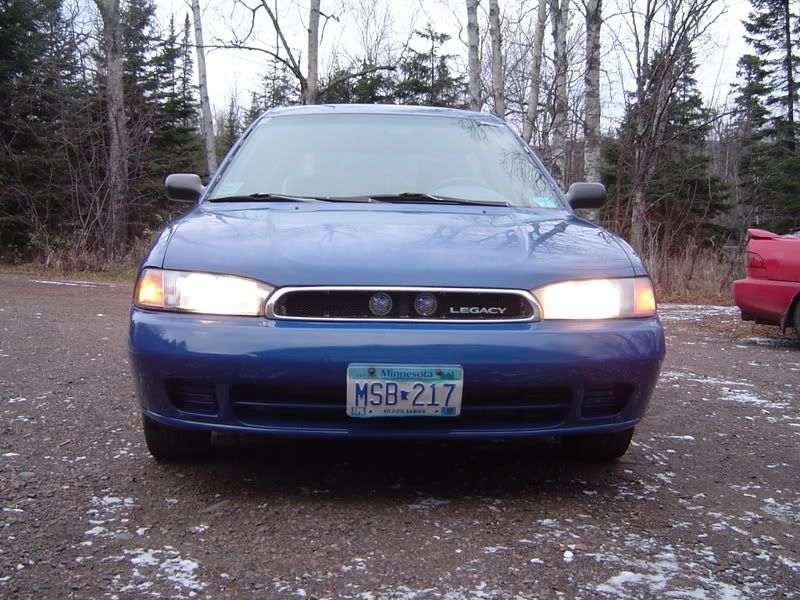
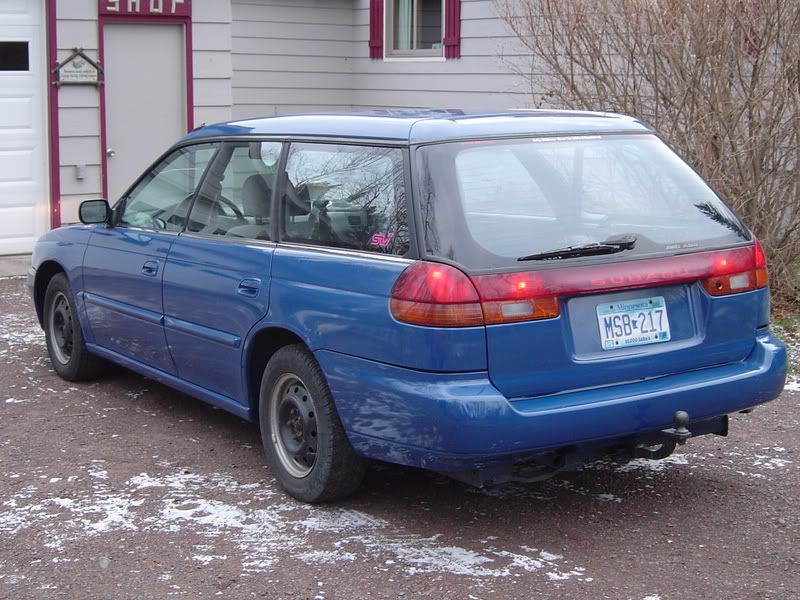
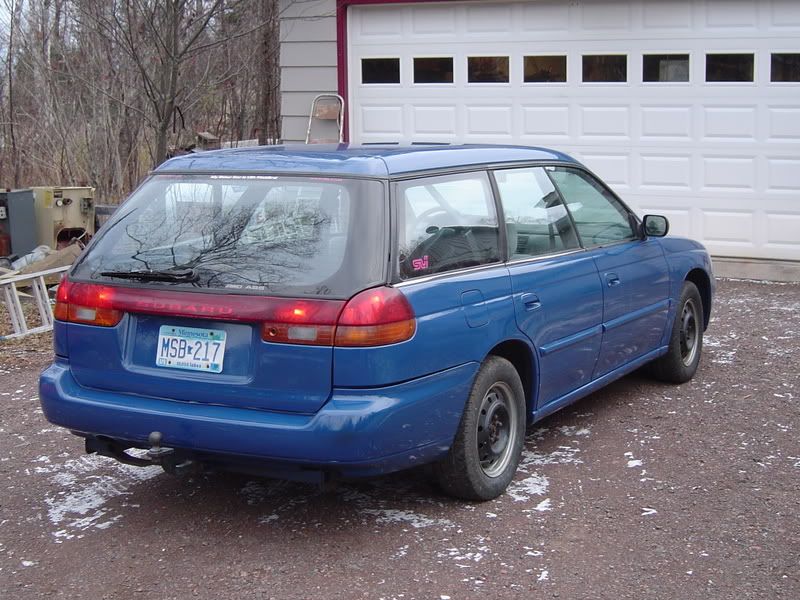
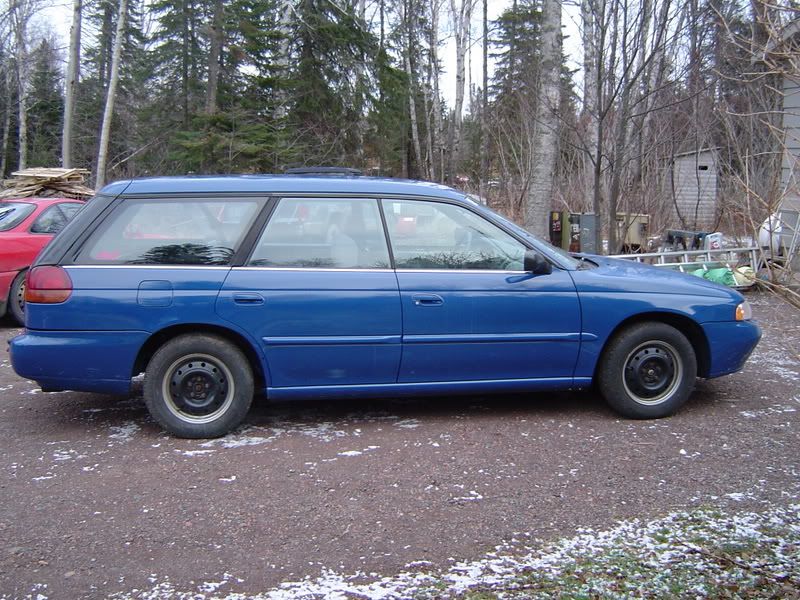


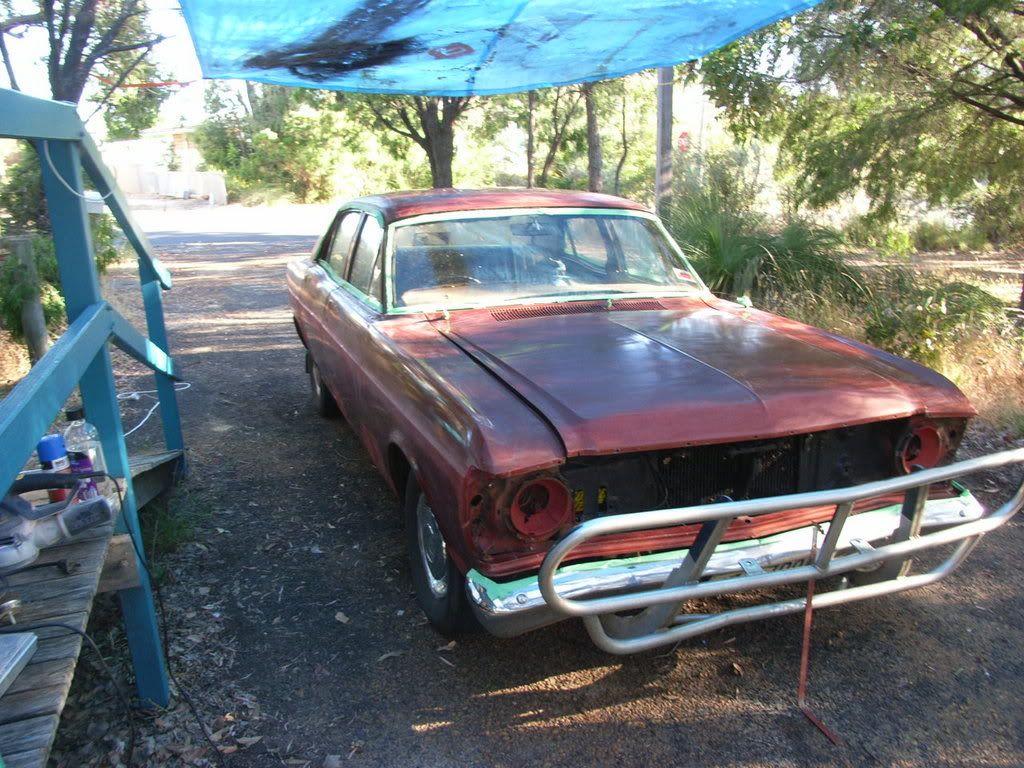
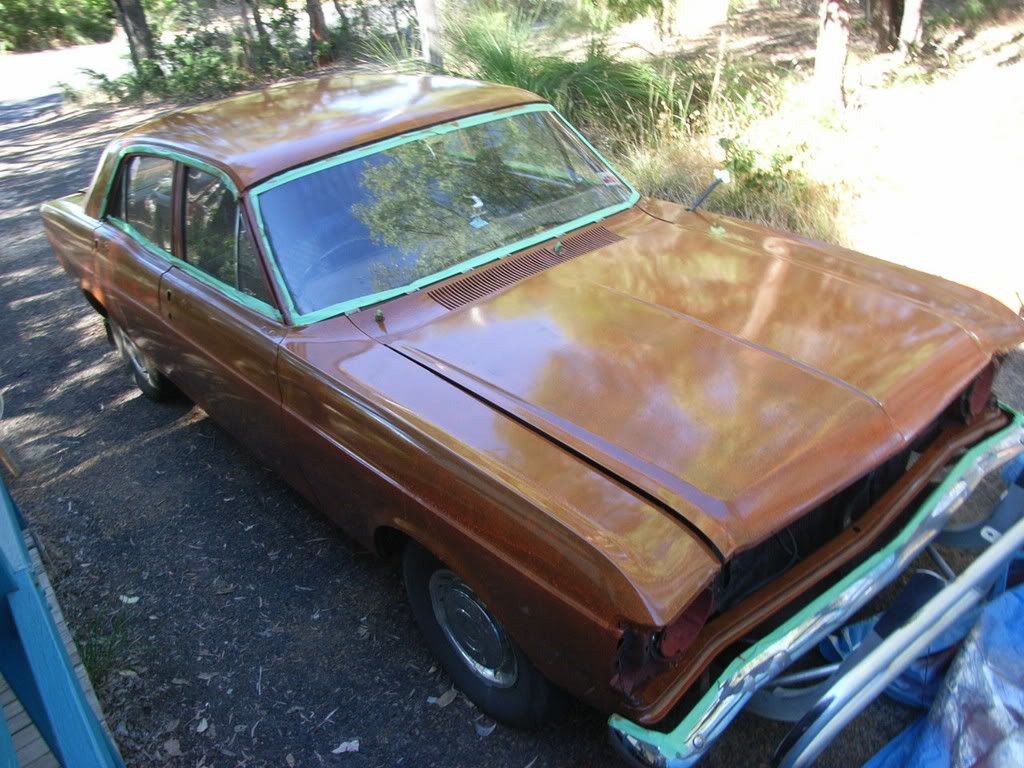
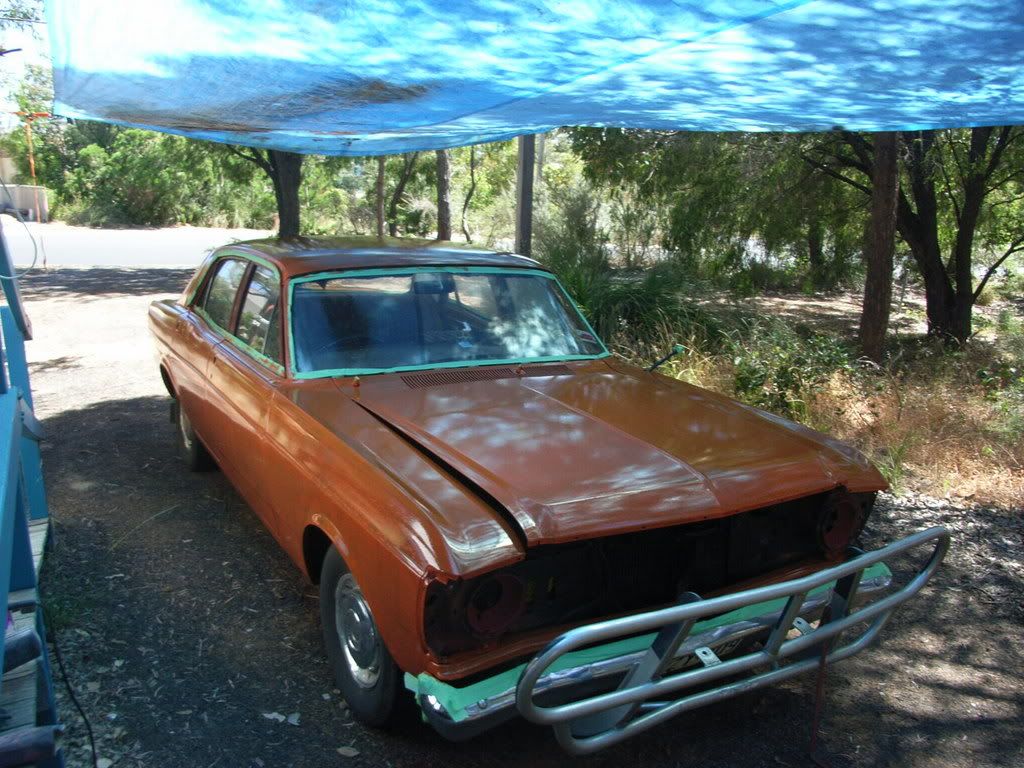

 & can you clear coat it? if so what kind of clear coat?


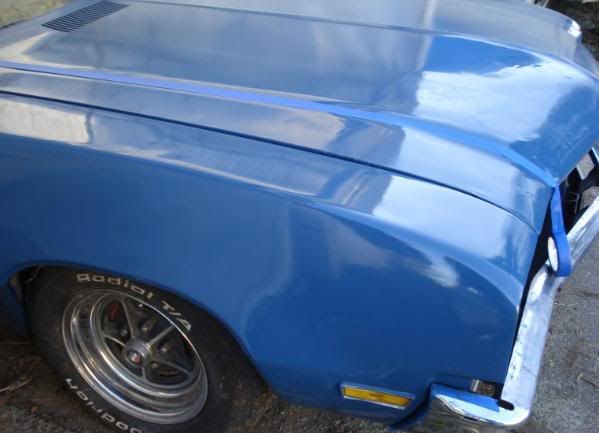
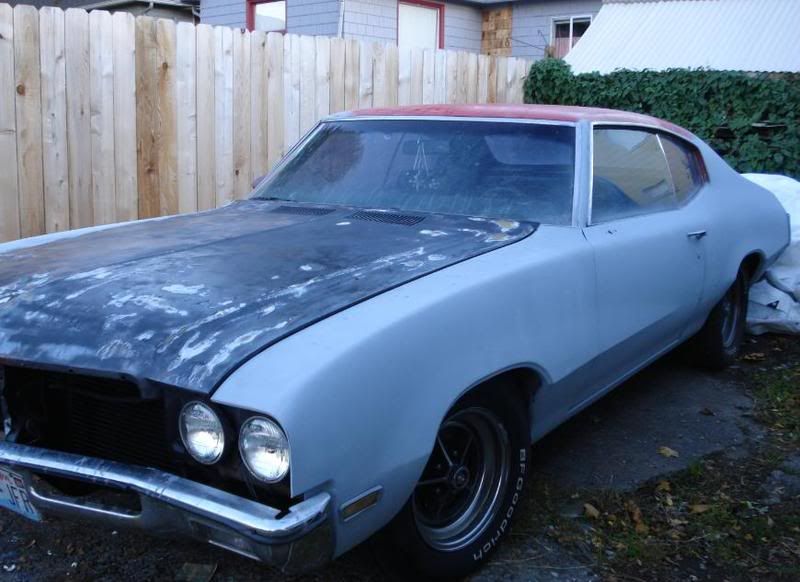
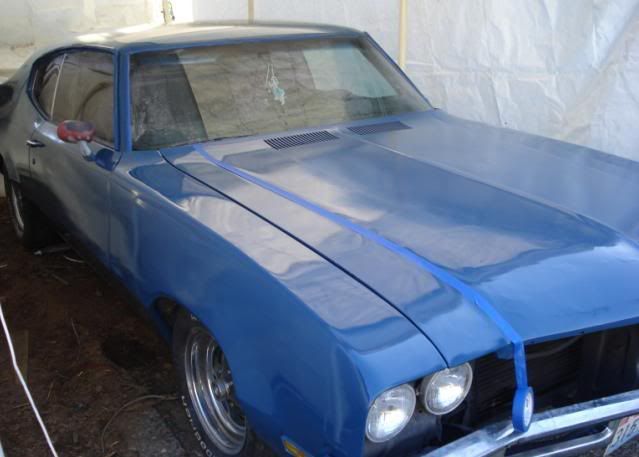

.jpg "4021615-GreenChevyCamperLeftFrontQuarter(compressed).jpg")
.JPG "4021628-CIMG0551(compressed).JPG")
.JPG "4021636-CIMG0562(compressed).JPG")
.JPG "4021650-CIMG0564(compressed).JPG")


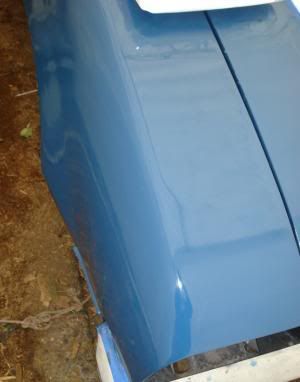

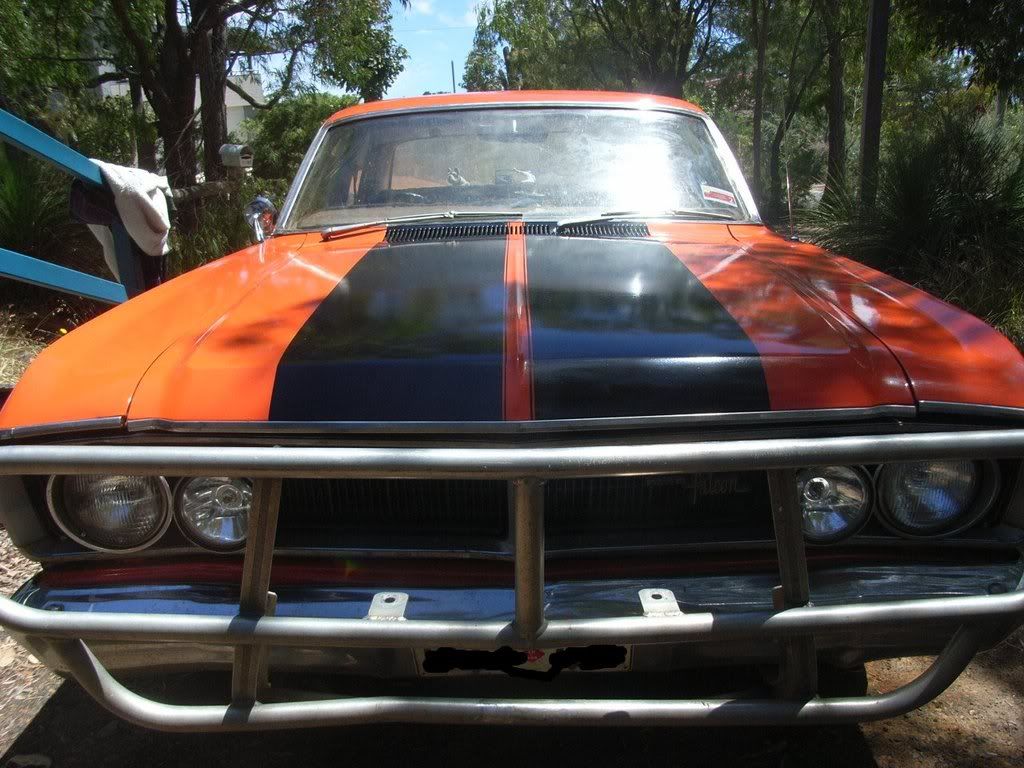


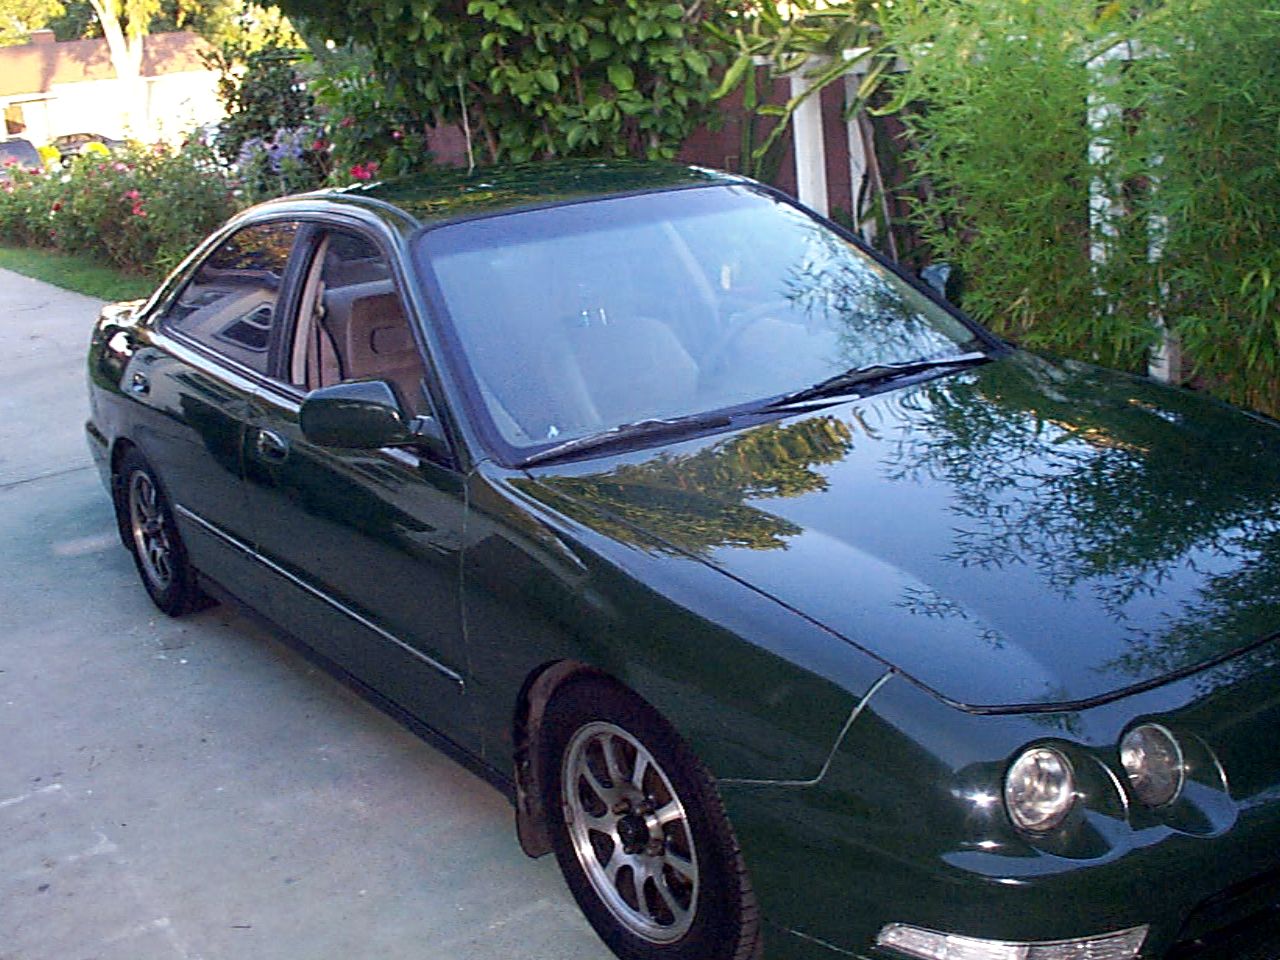
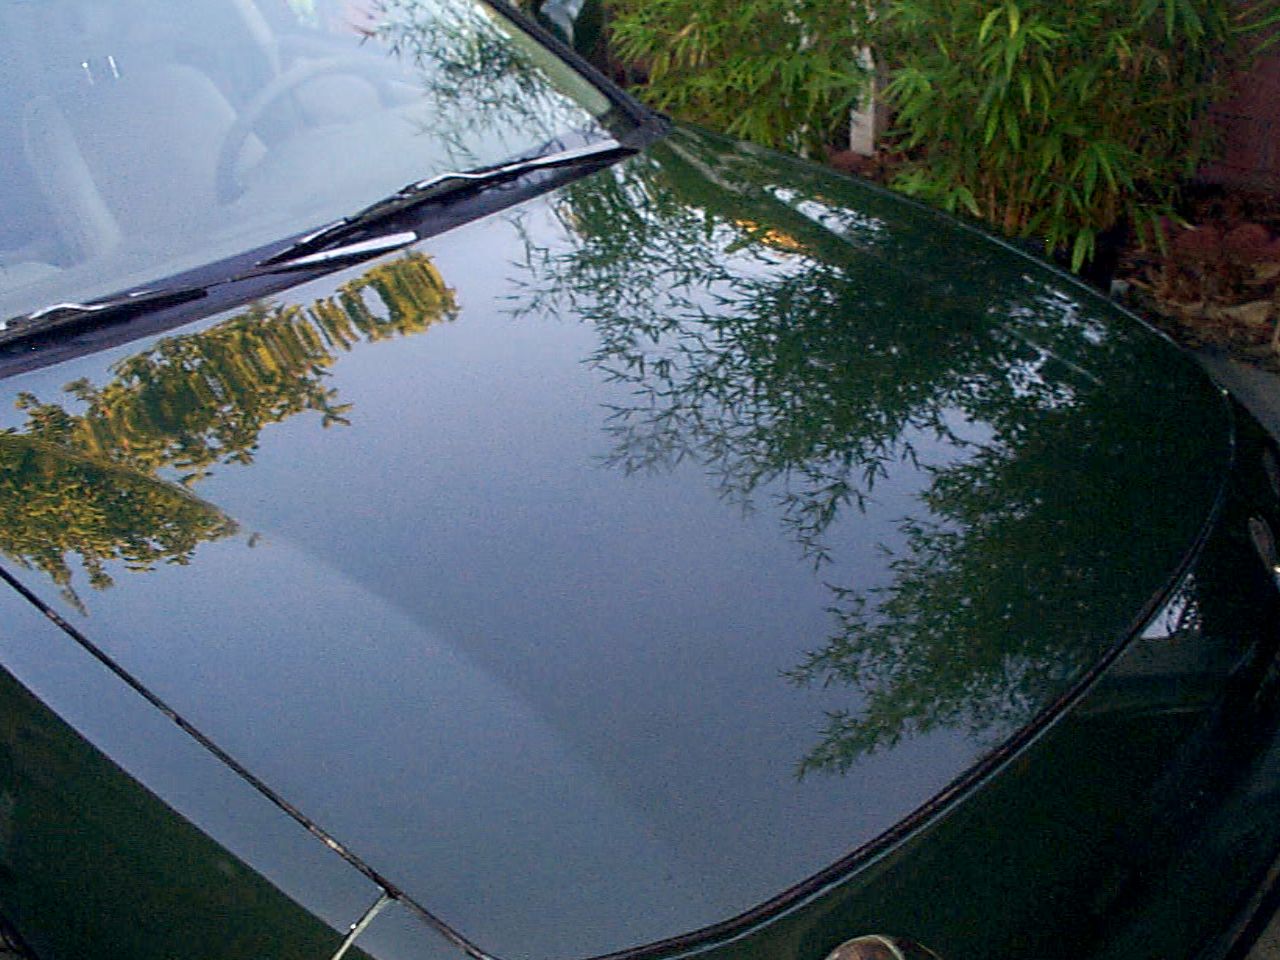
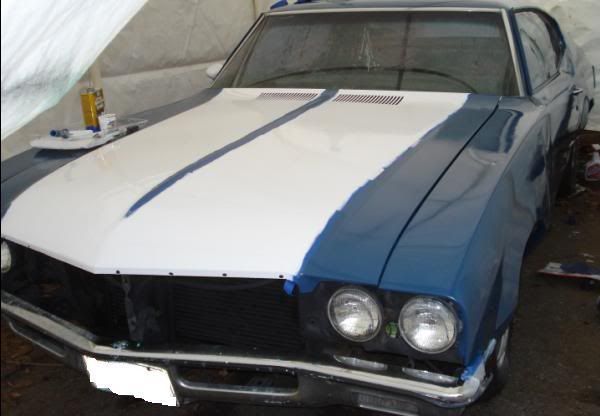


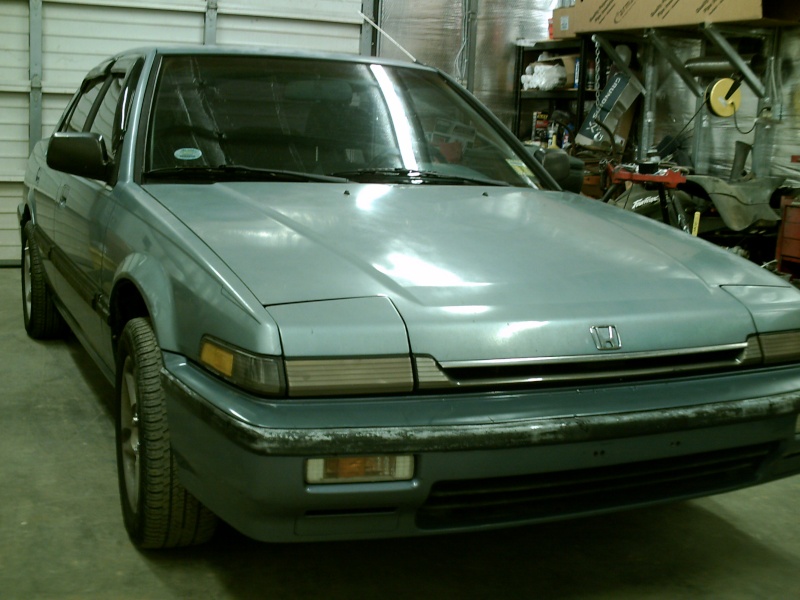
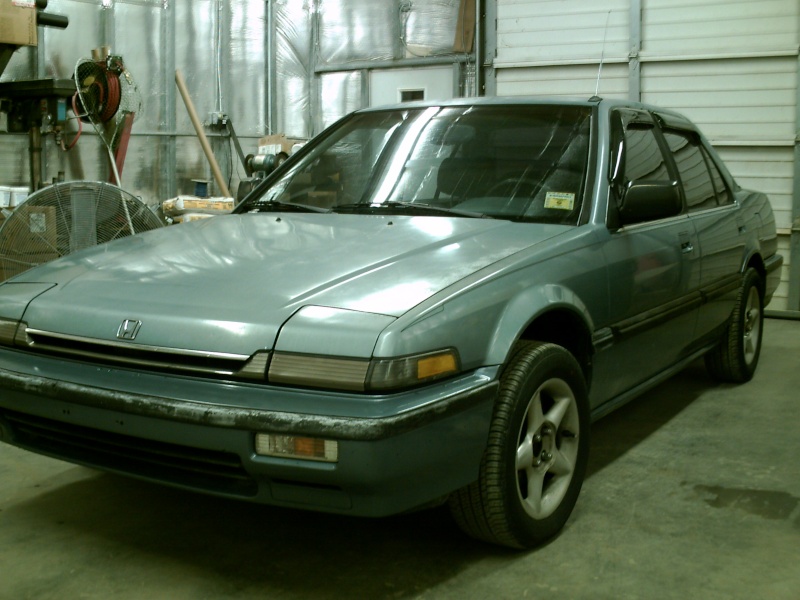
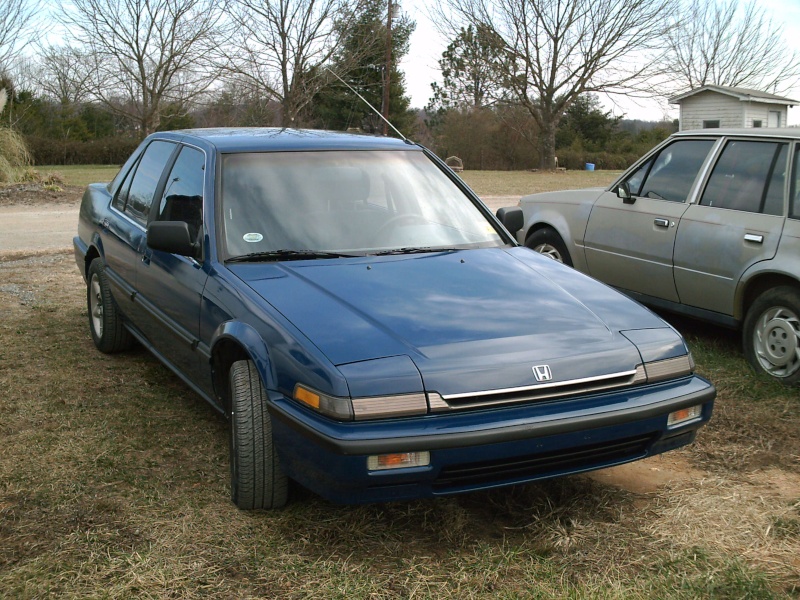
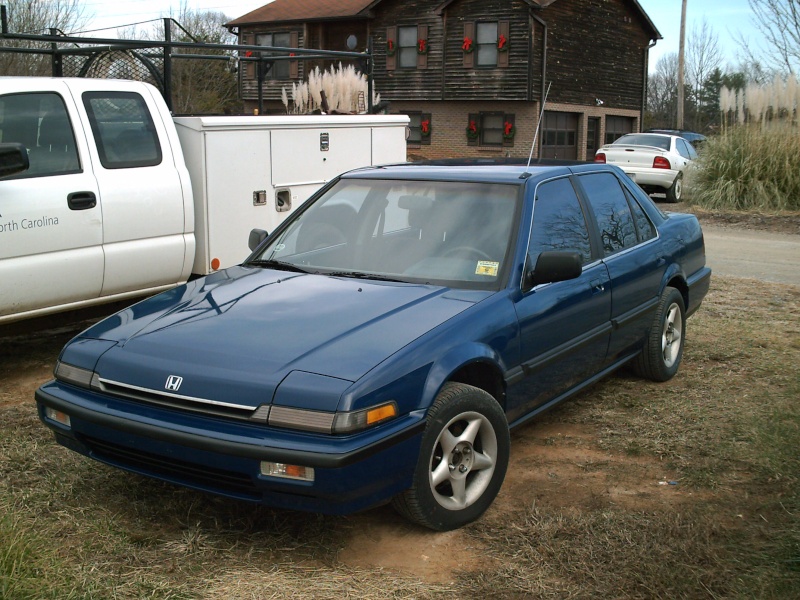
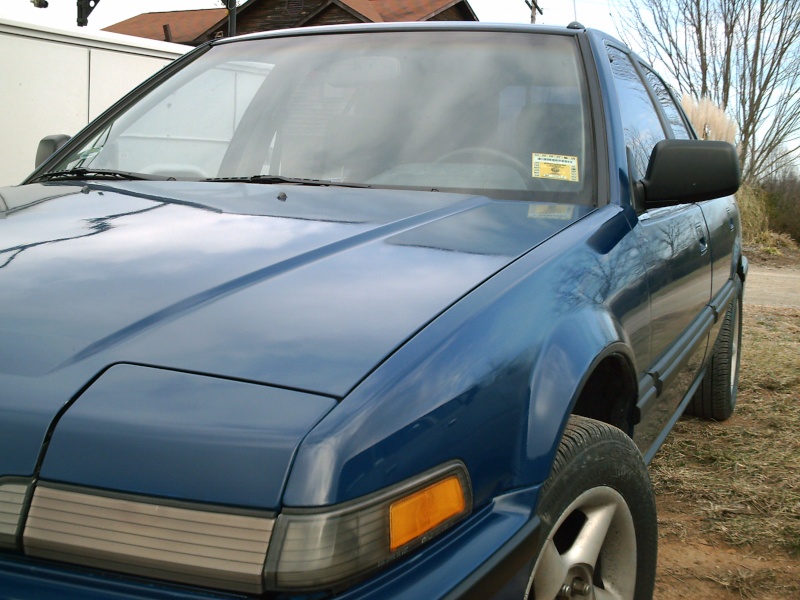


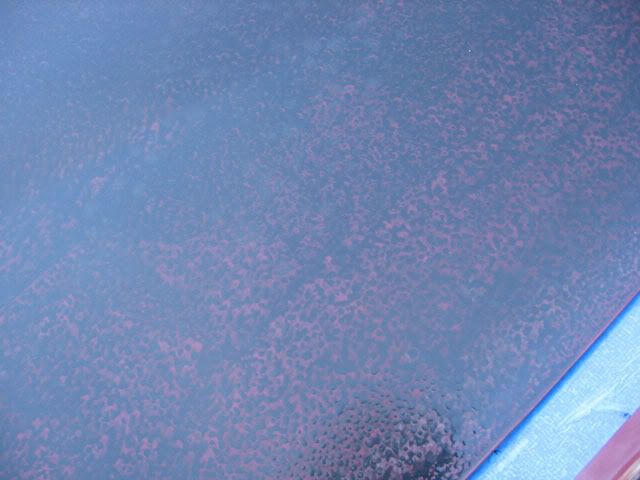
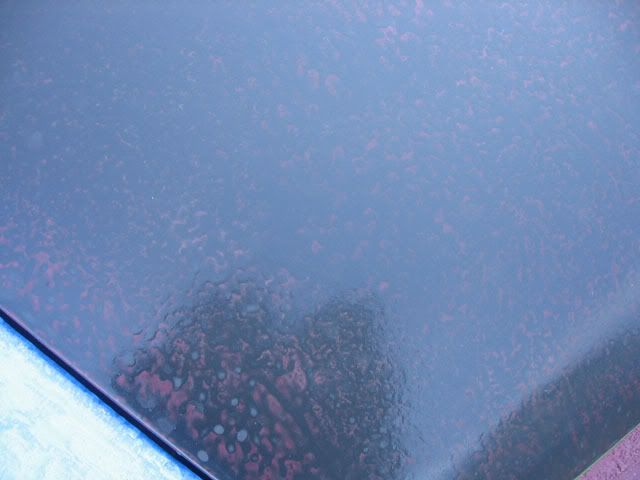
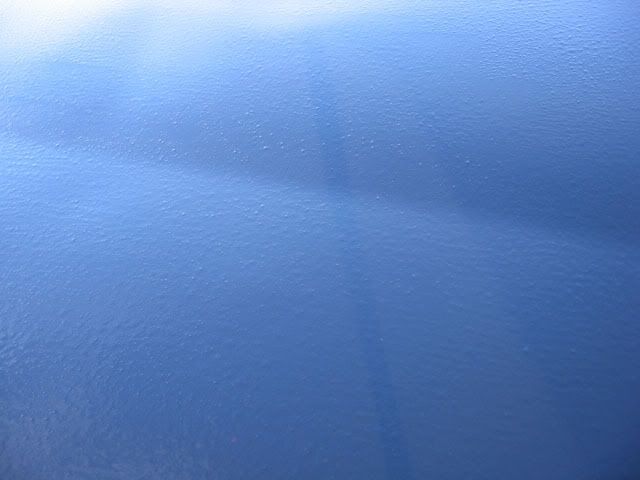
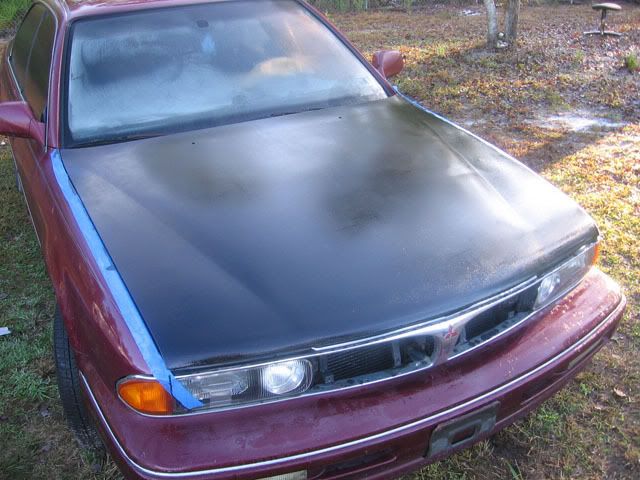


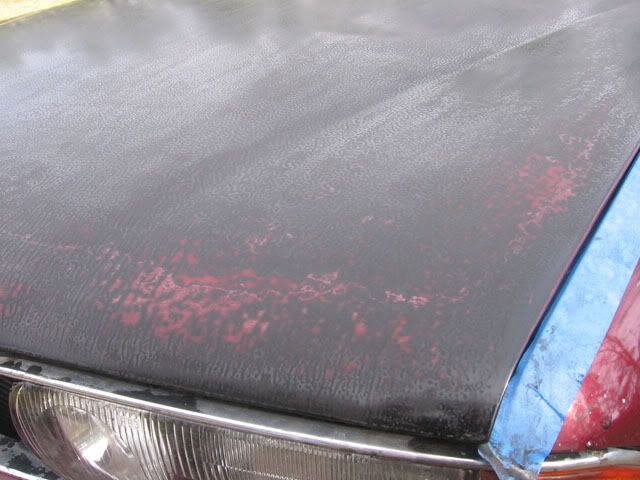
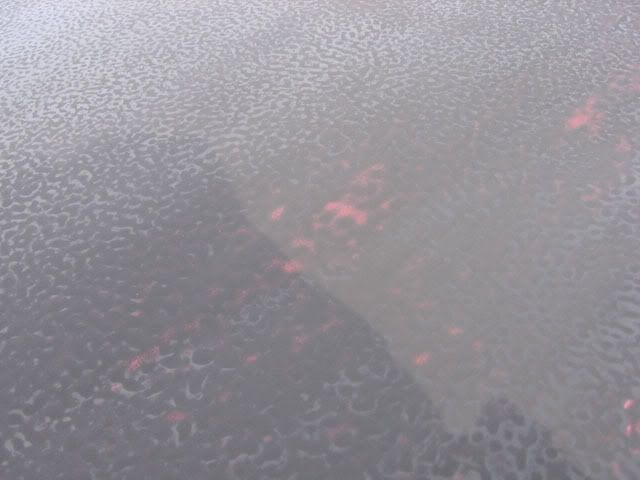
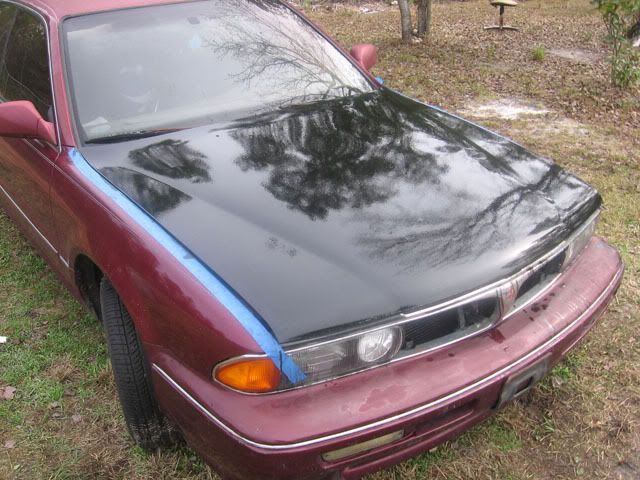
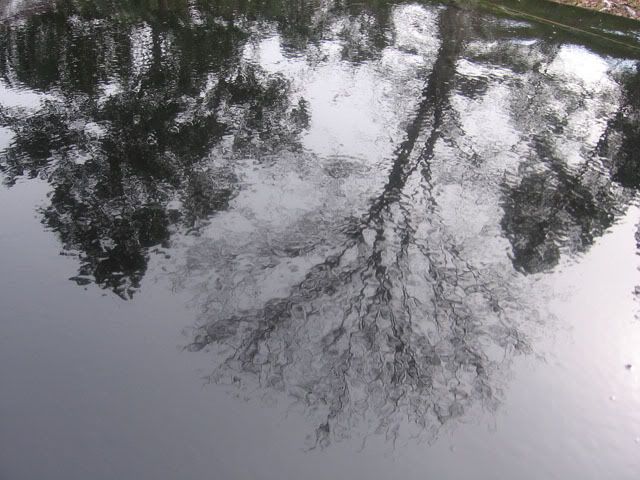
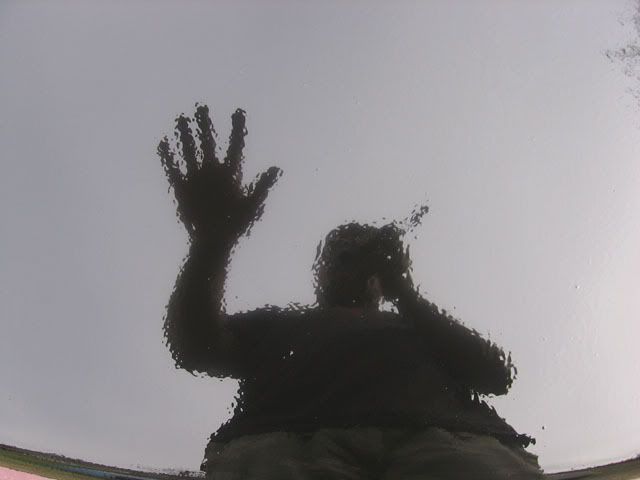

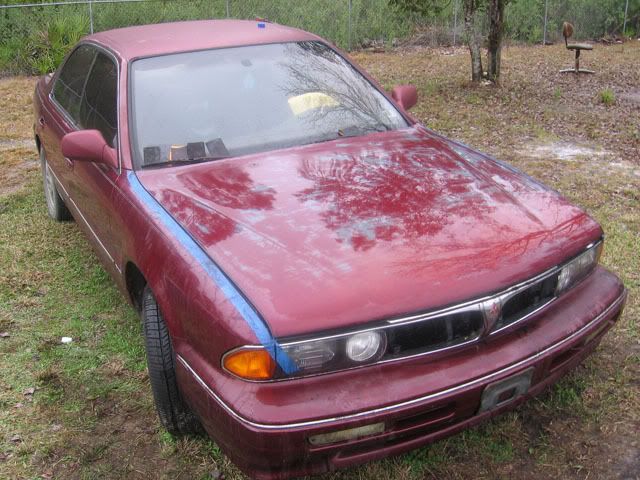


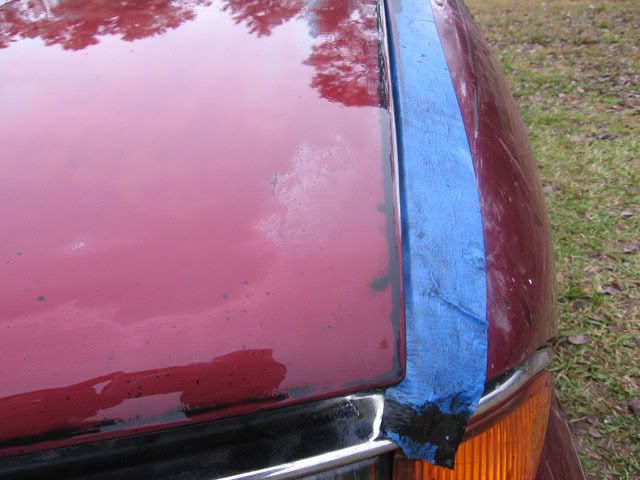
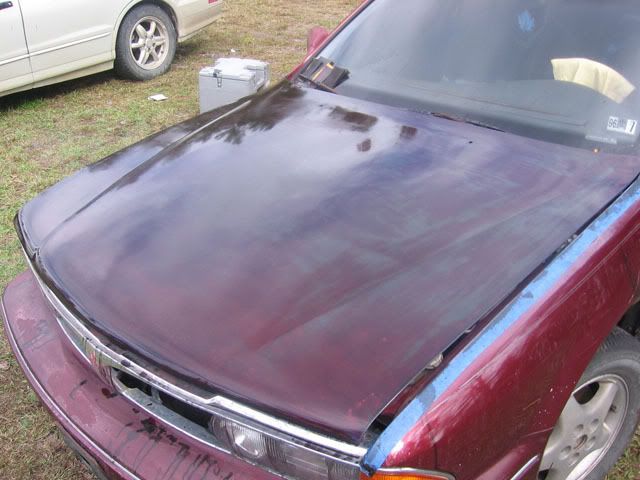
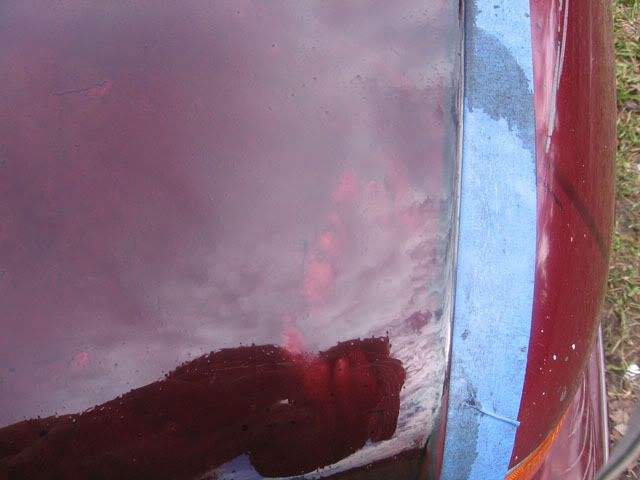
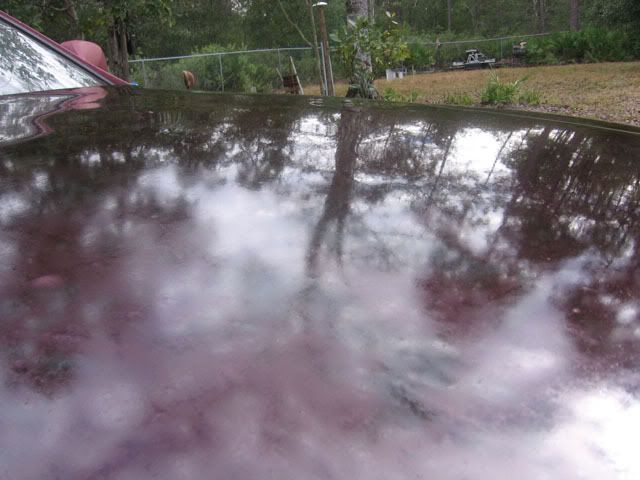

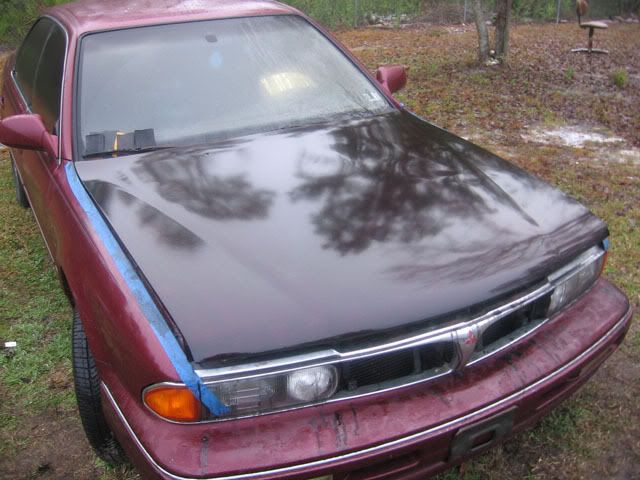

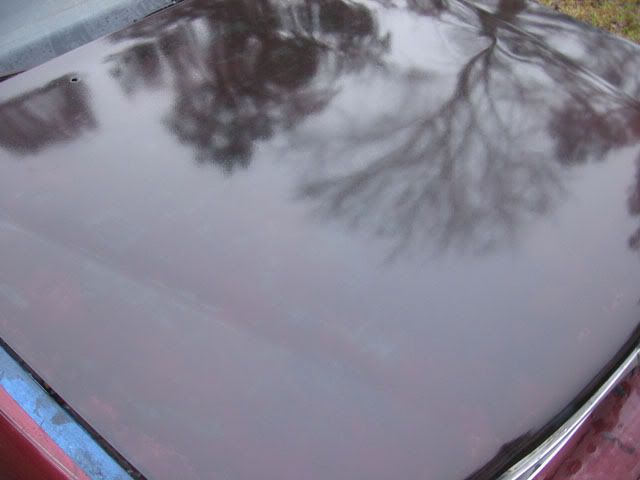
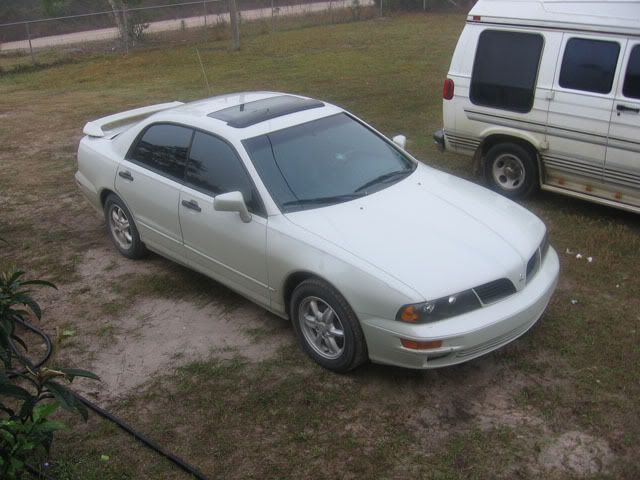
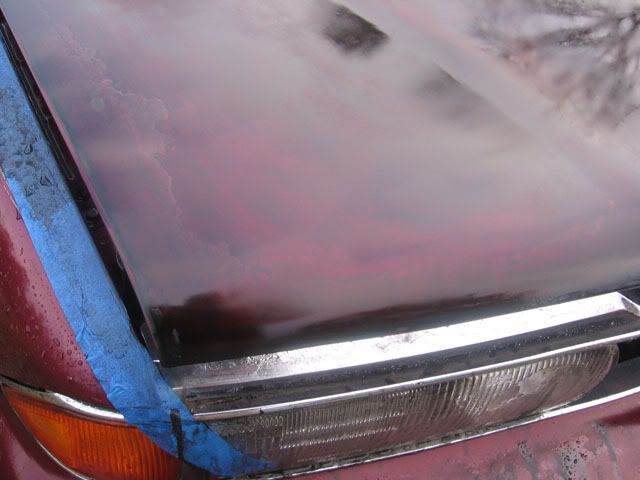
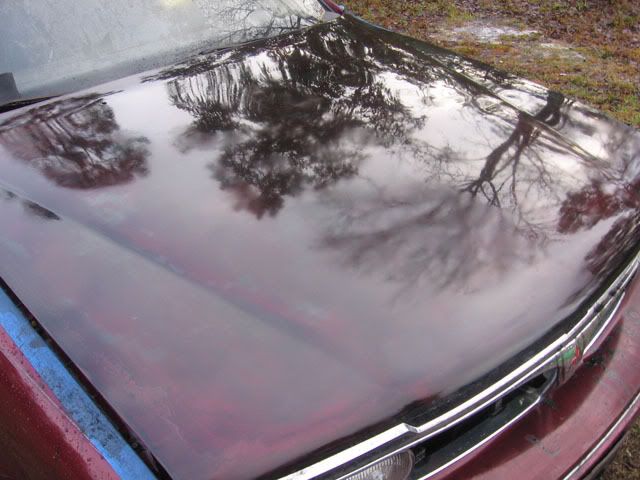

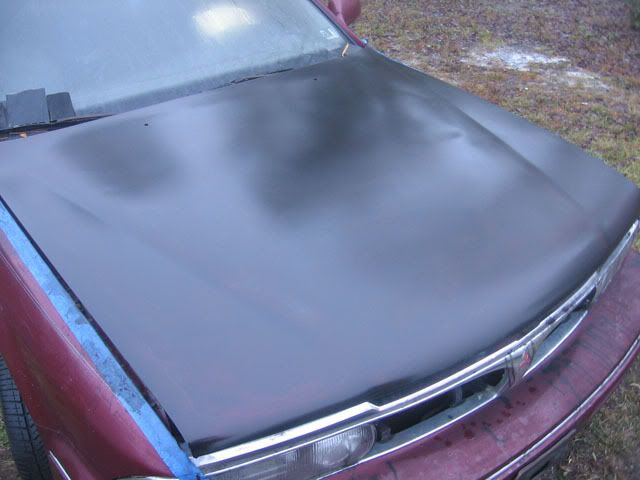

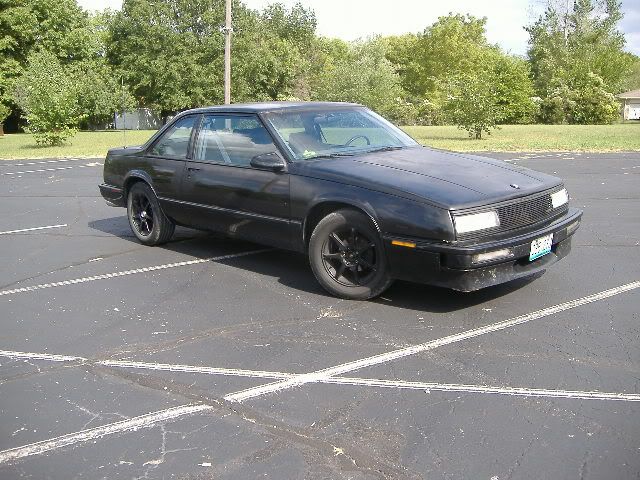
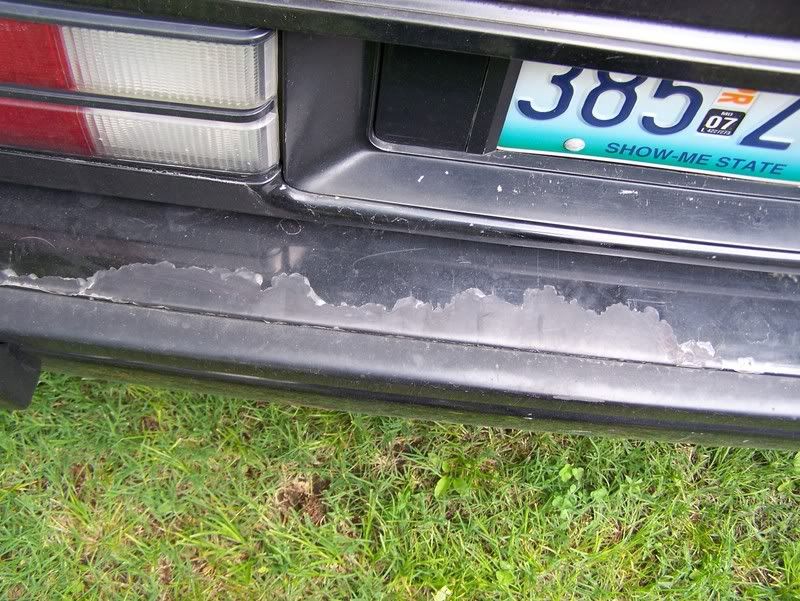
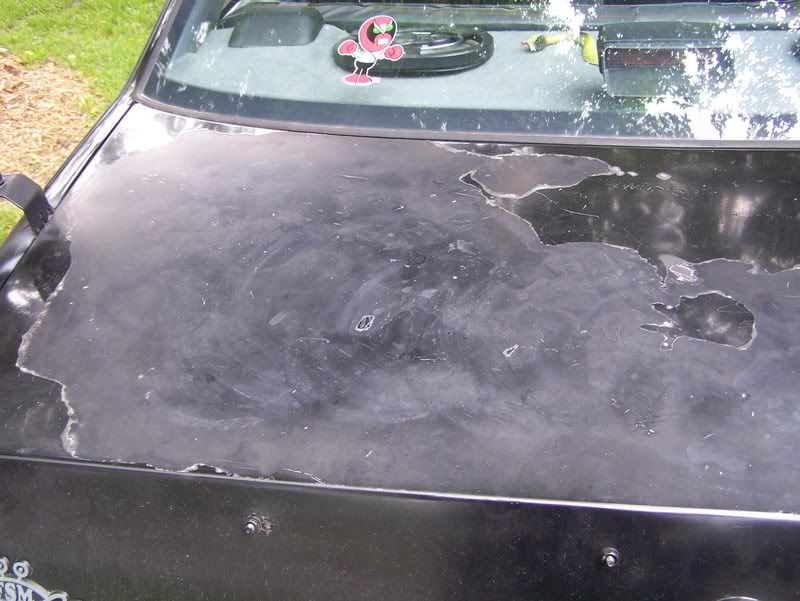
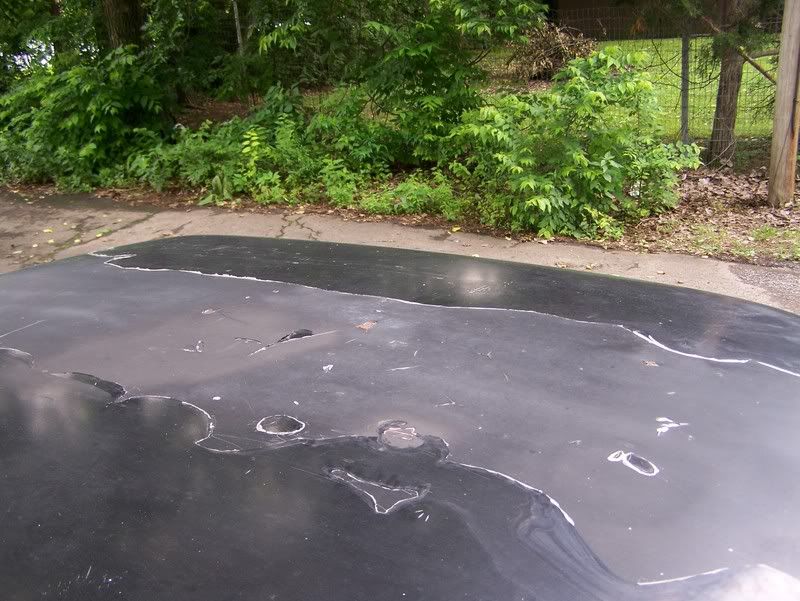
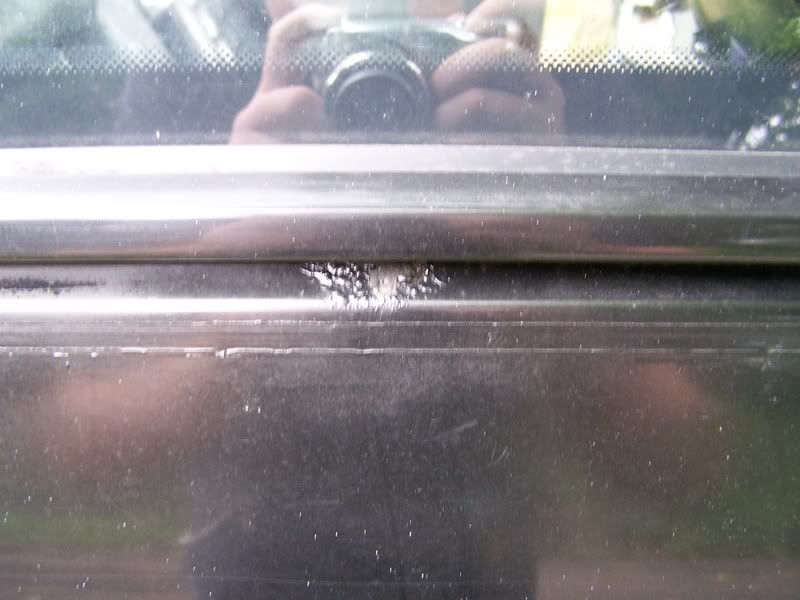


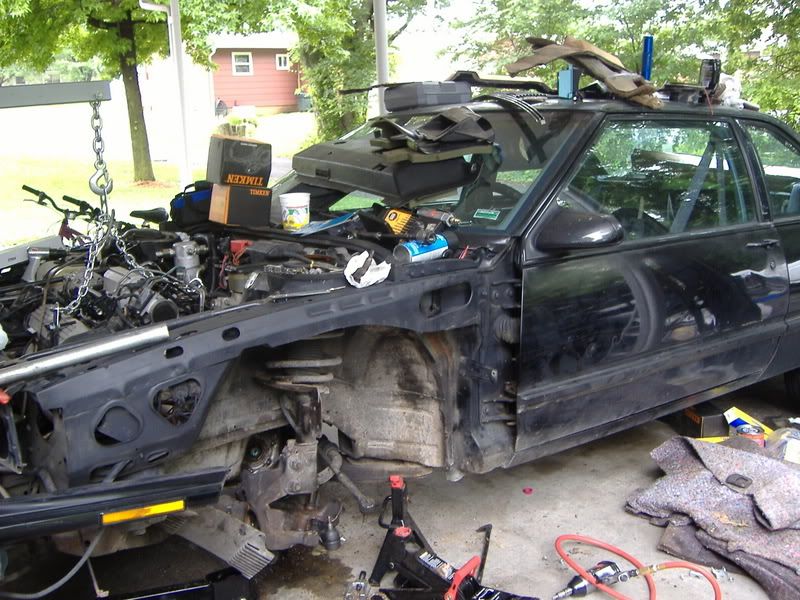
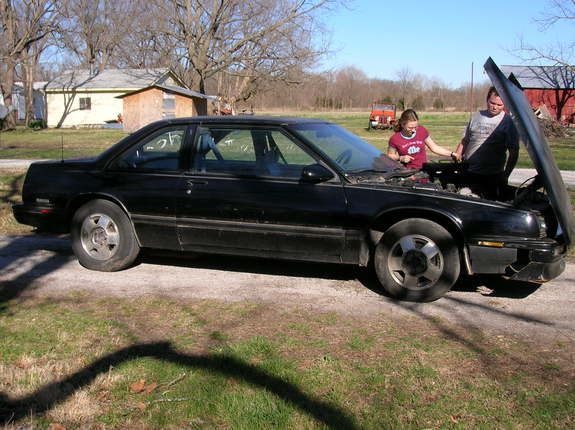
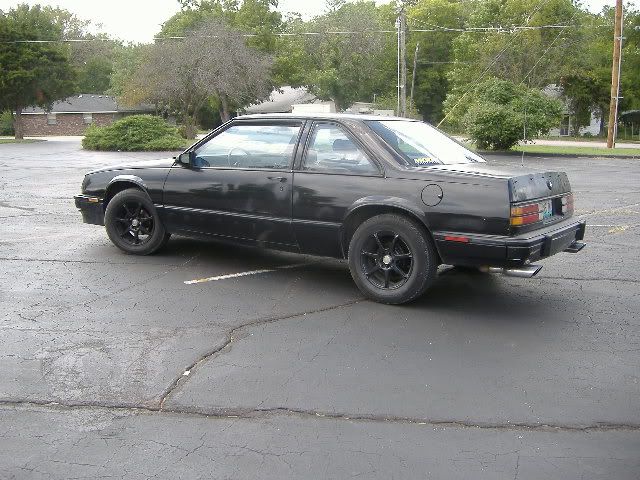
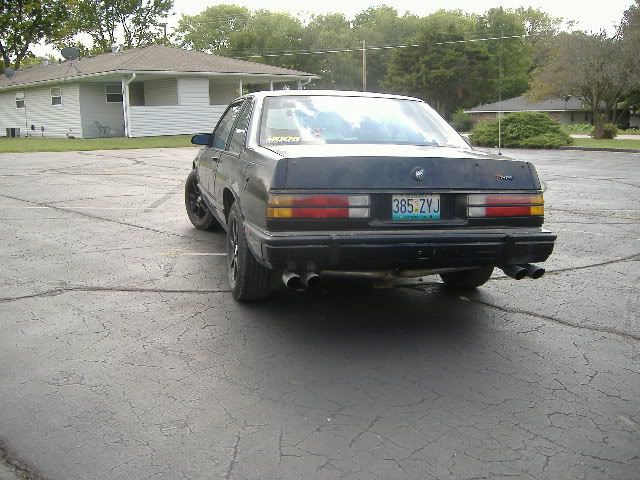


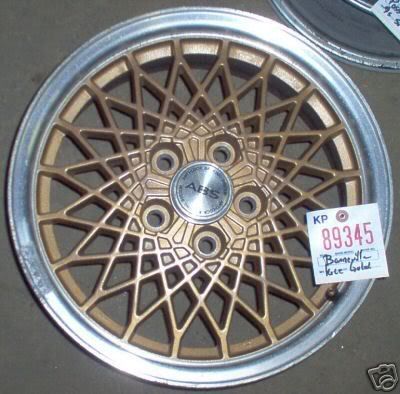


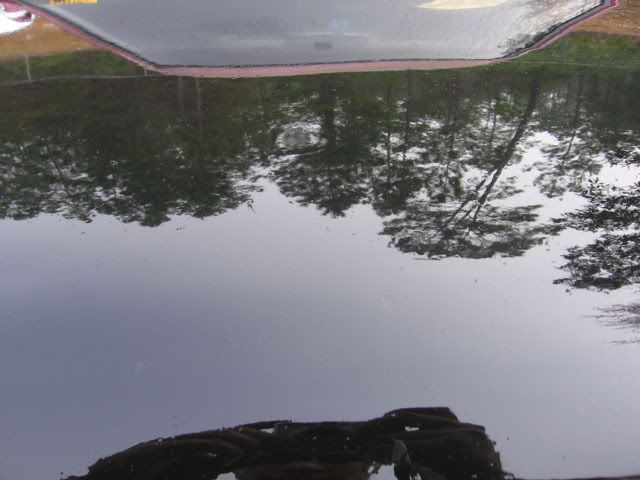
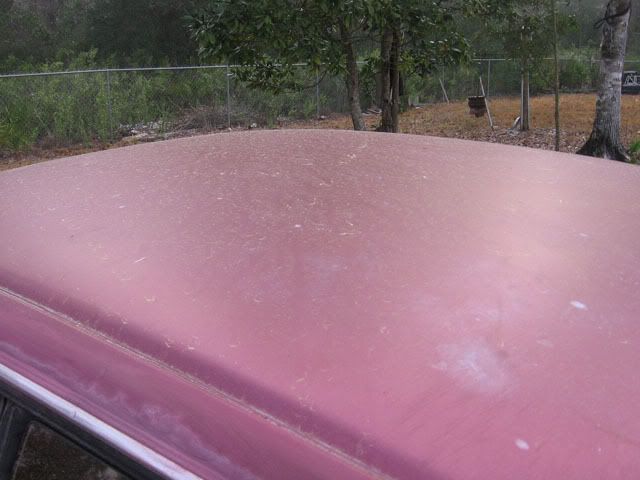


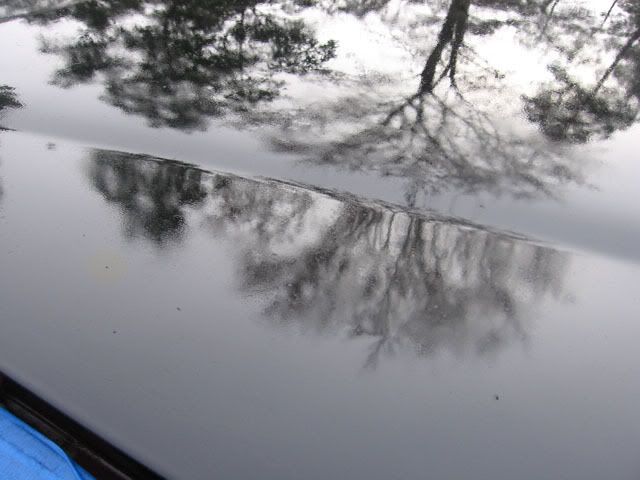
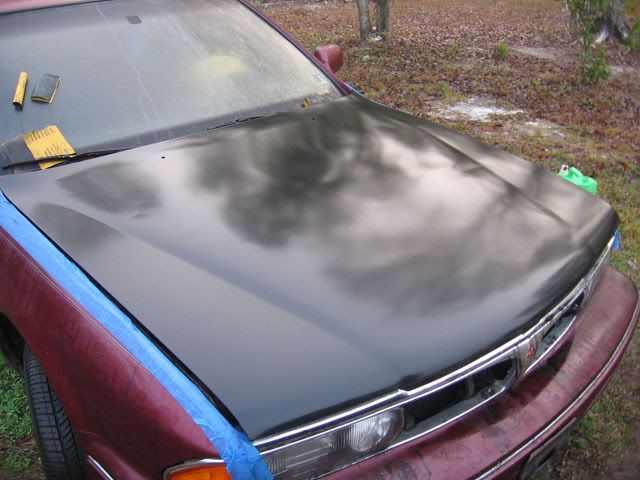
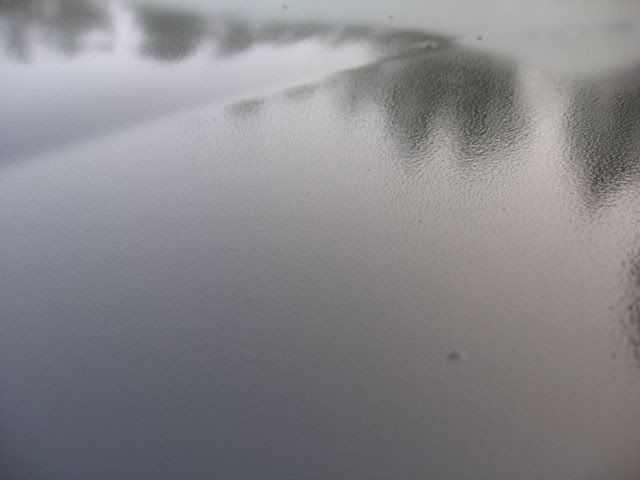
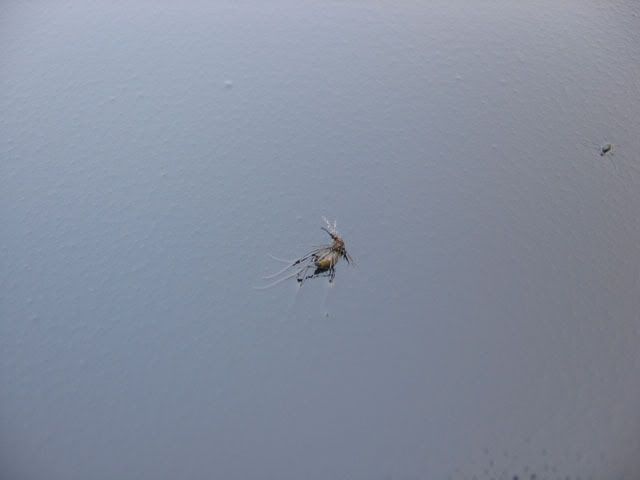
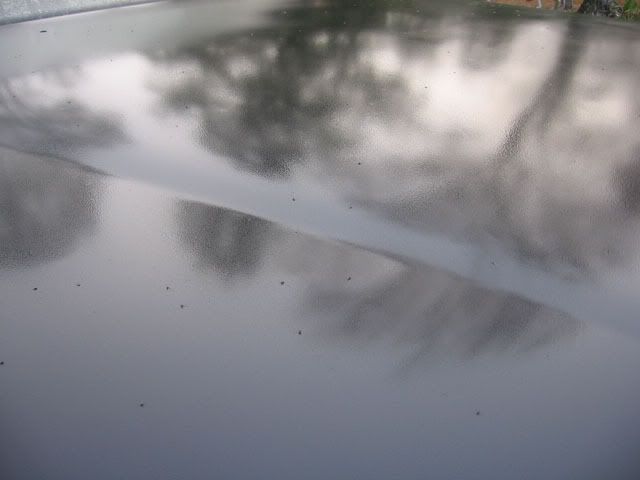
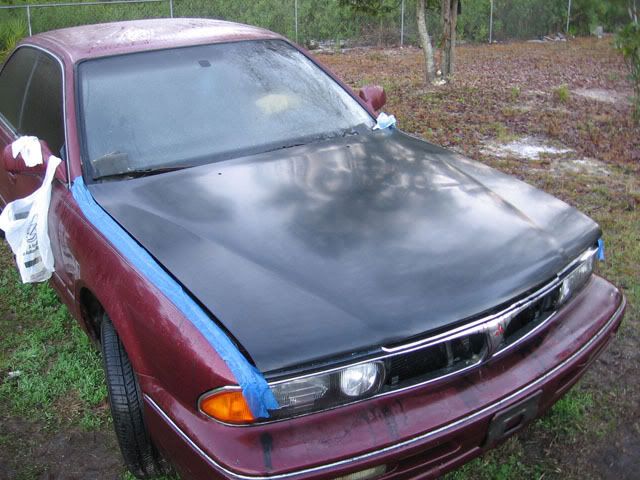
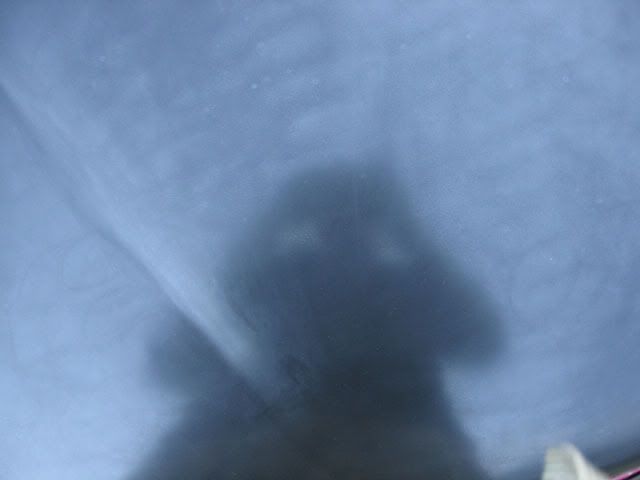
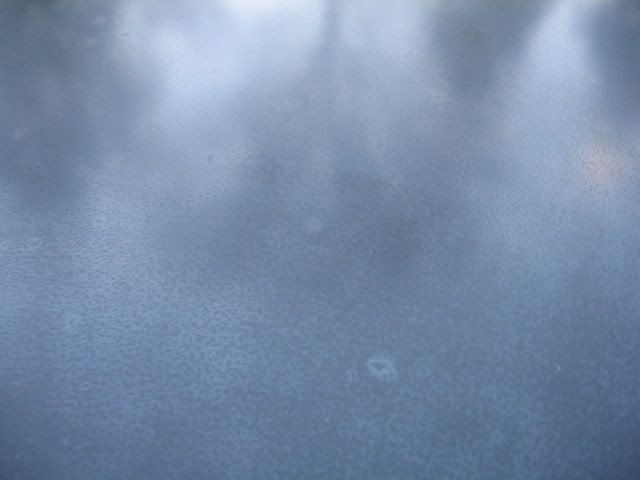
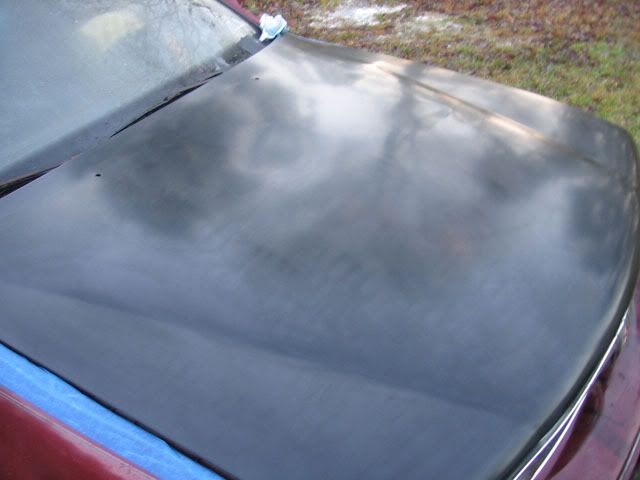

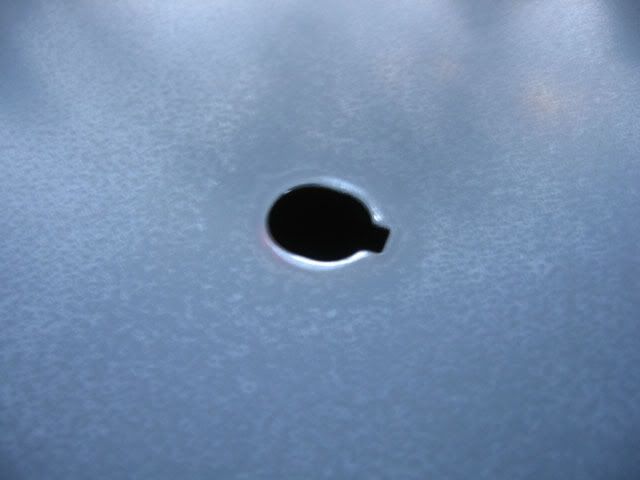


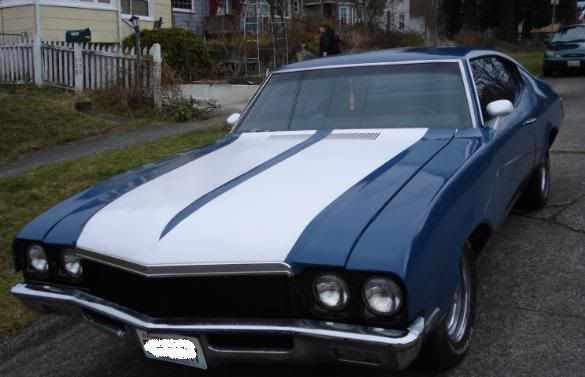
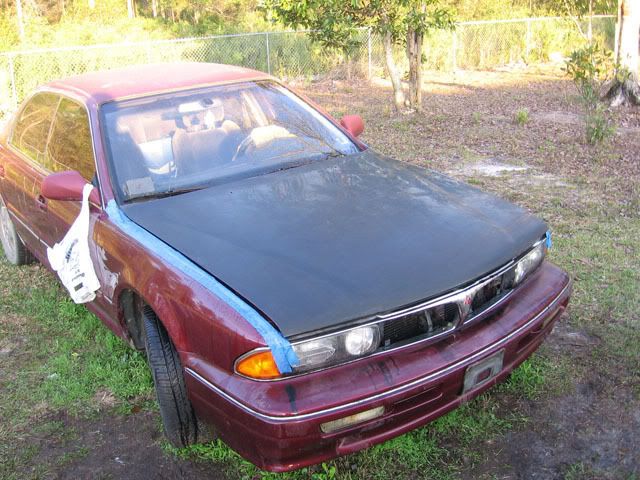

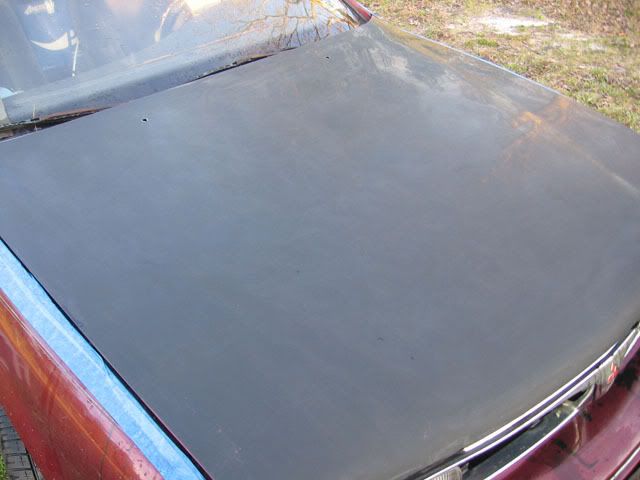

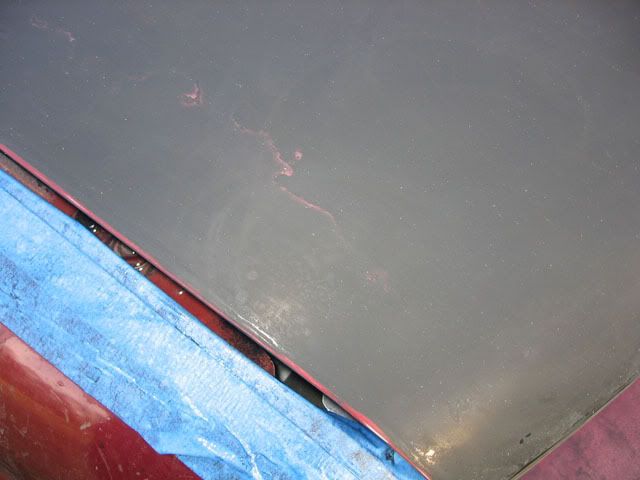


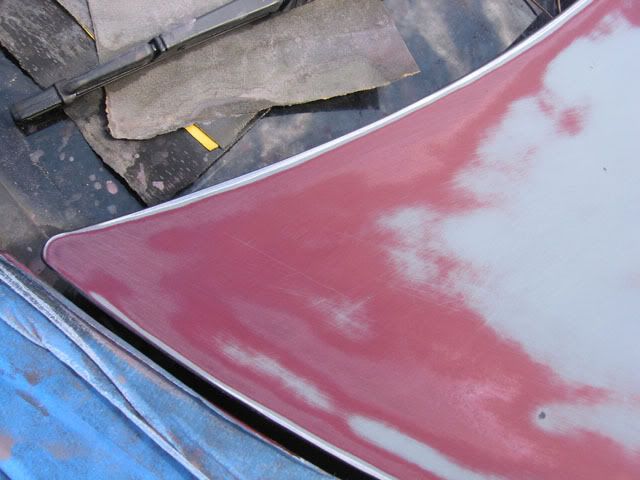
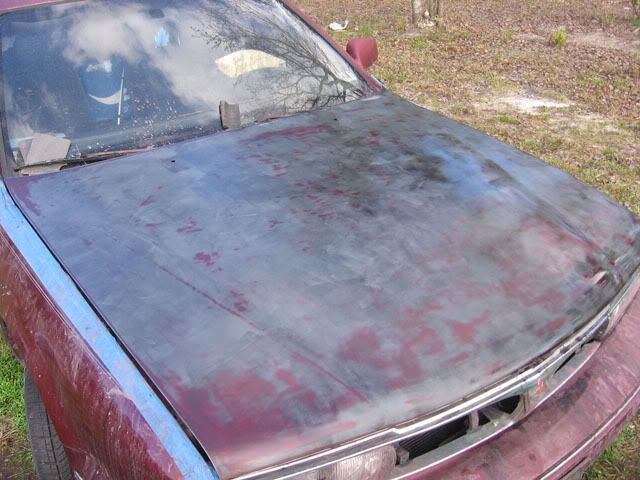
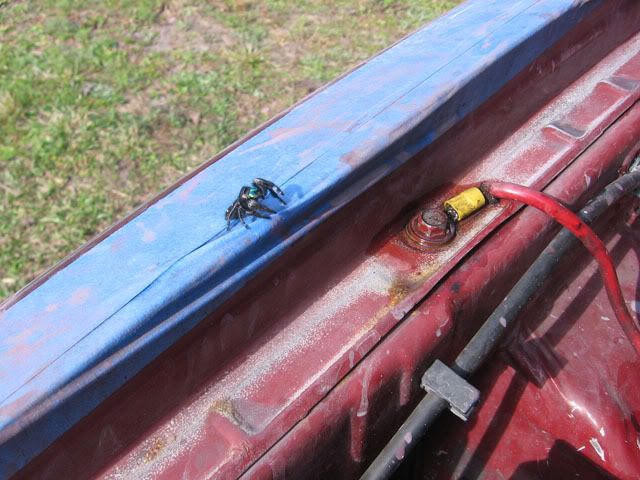
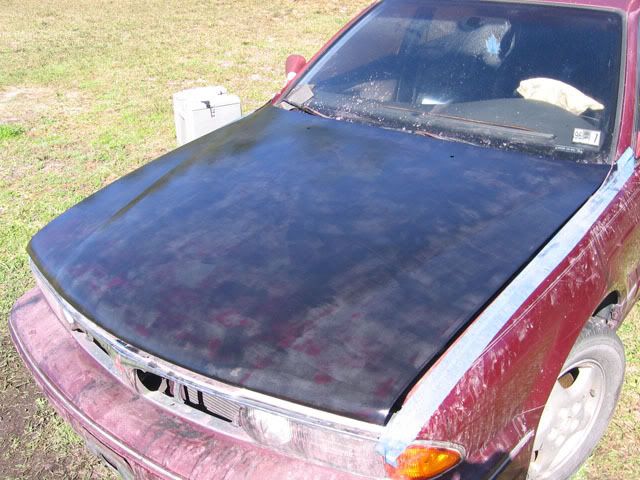
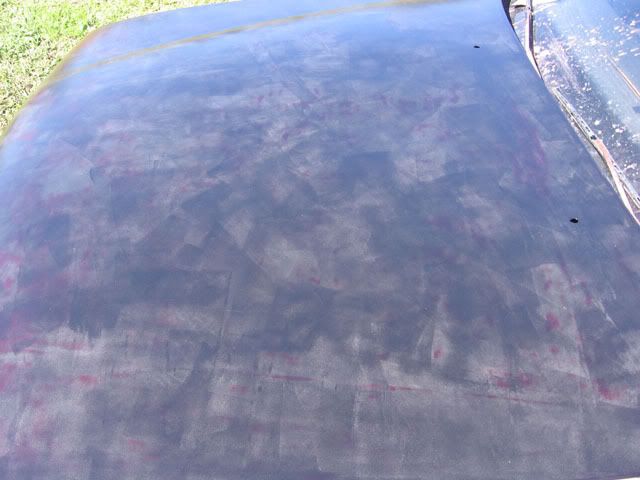


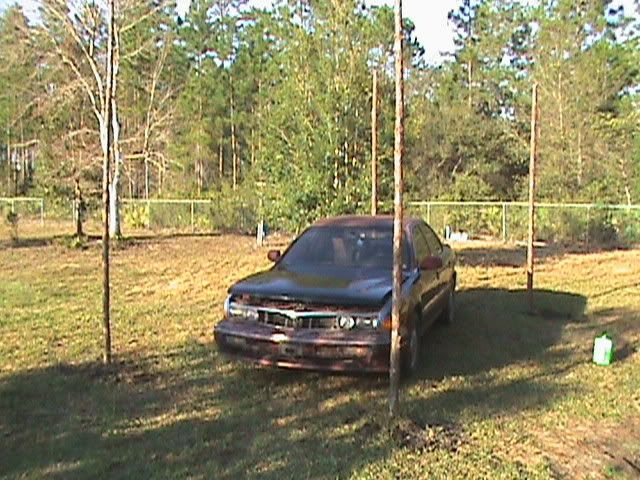
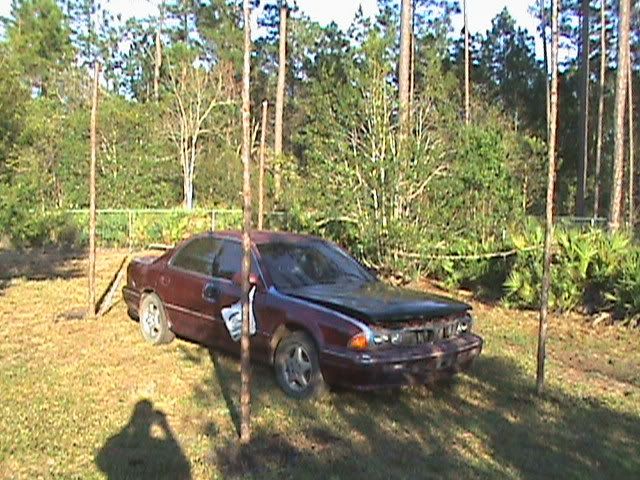


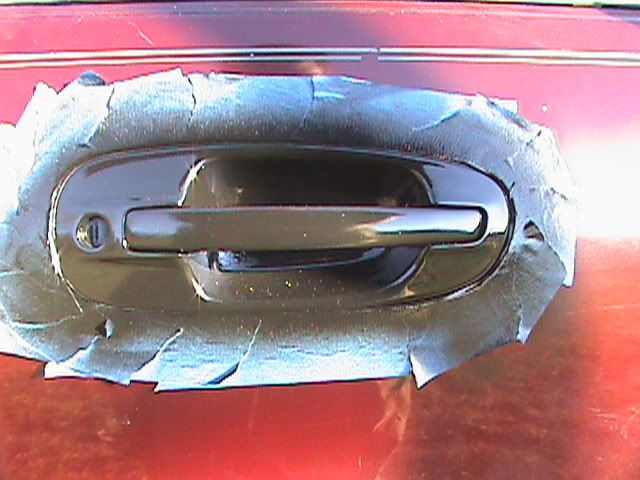


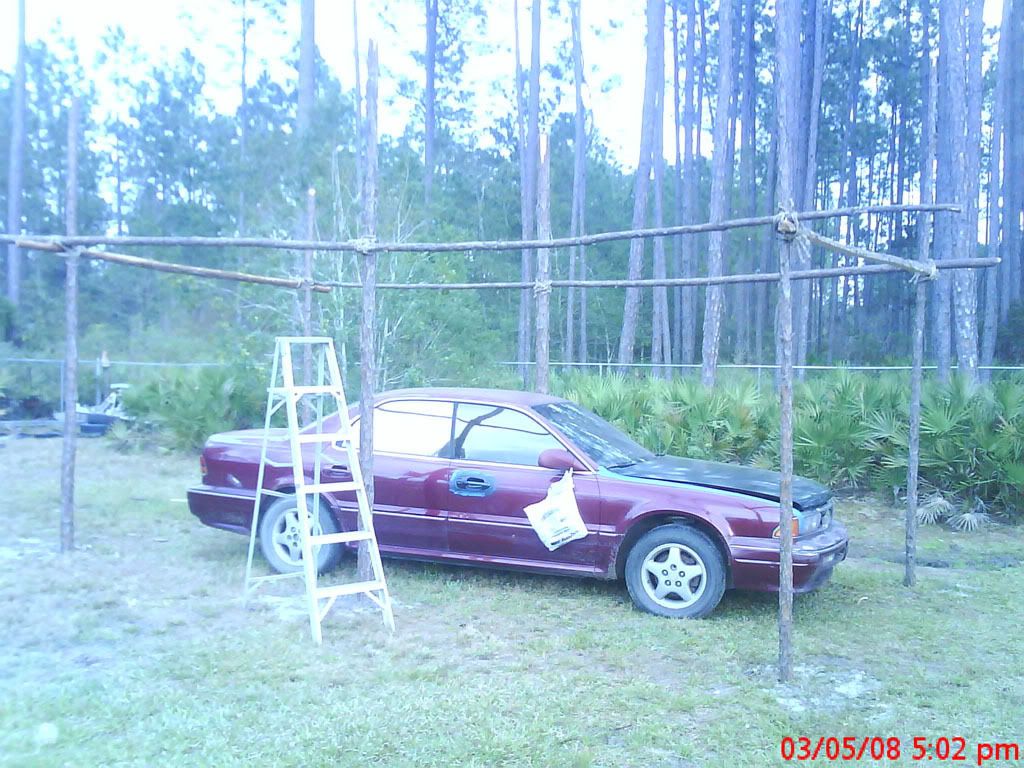

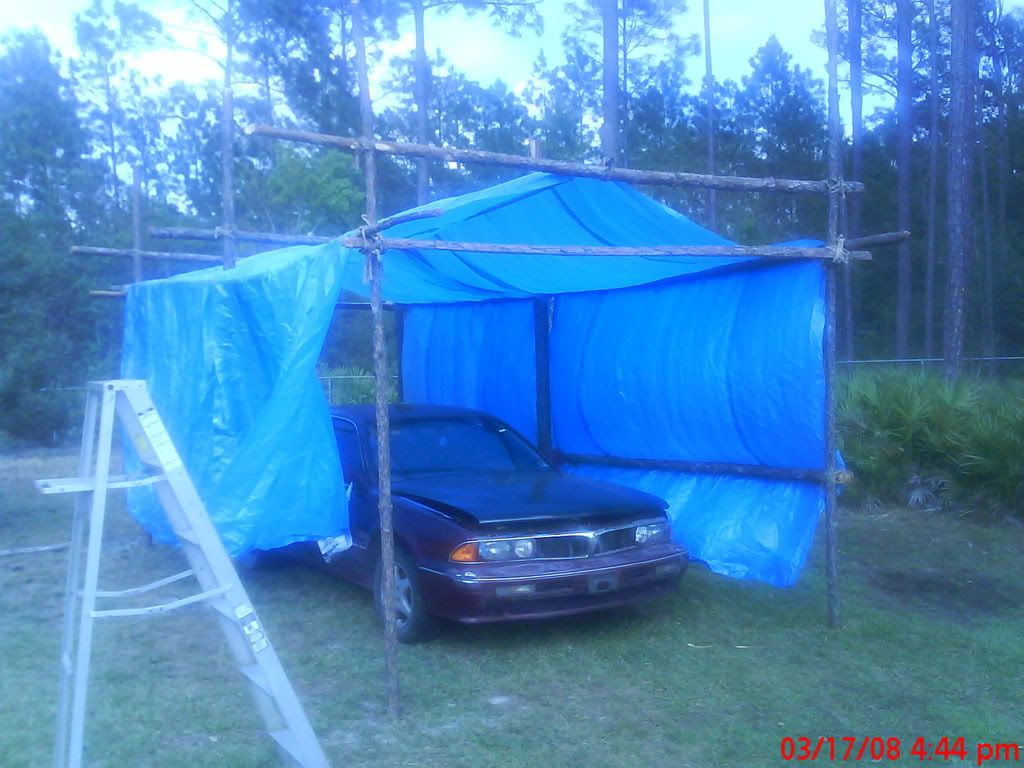


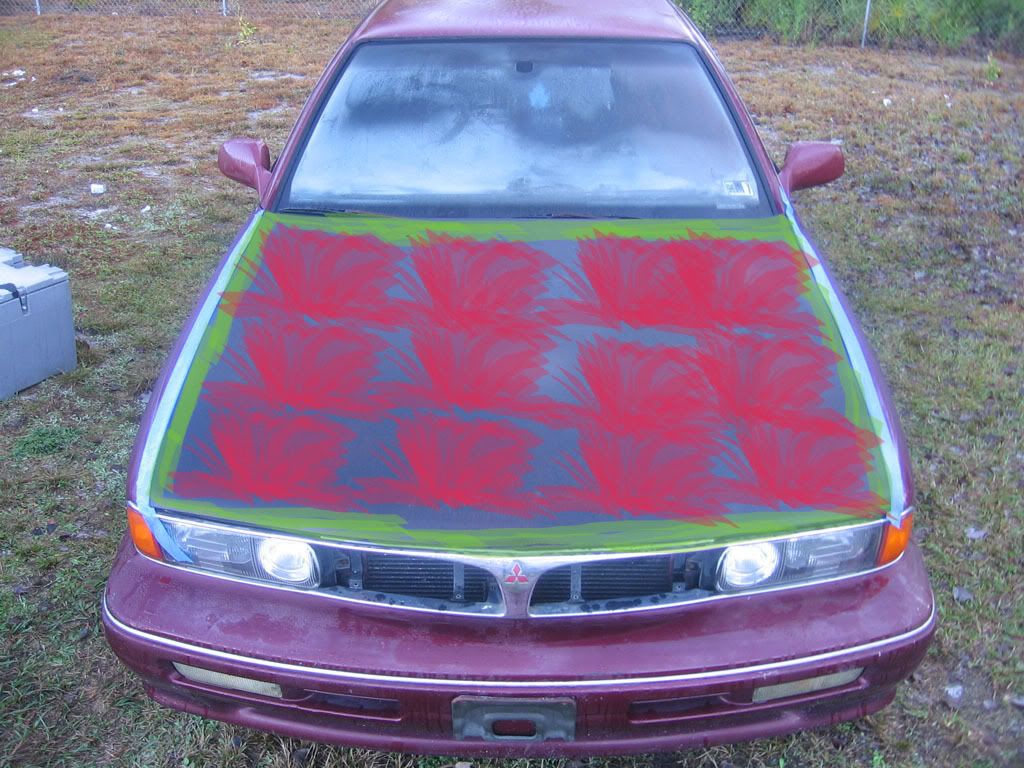


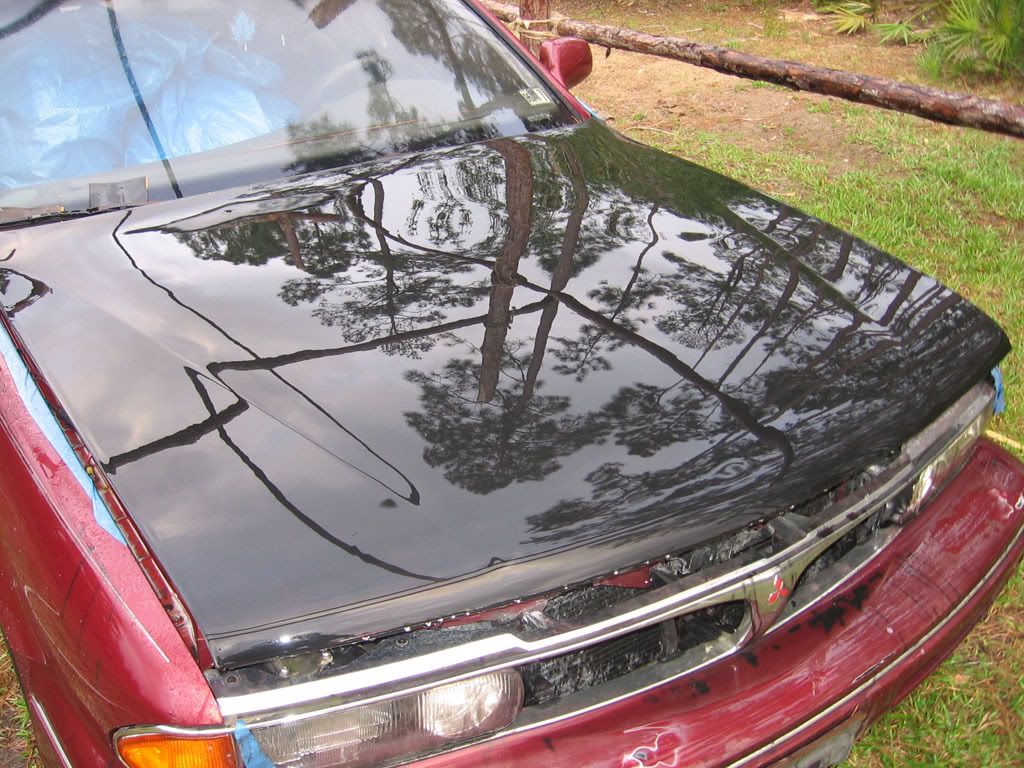 ]
]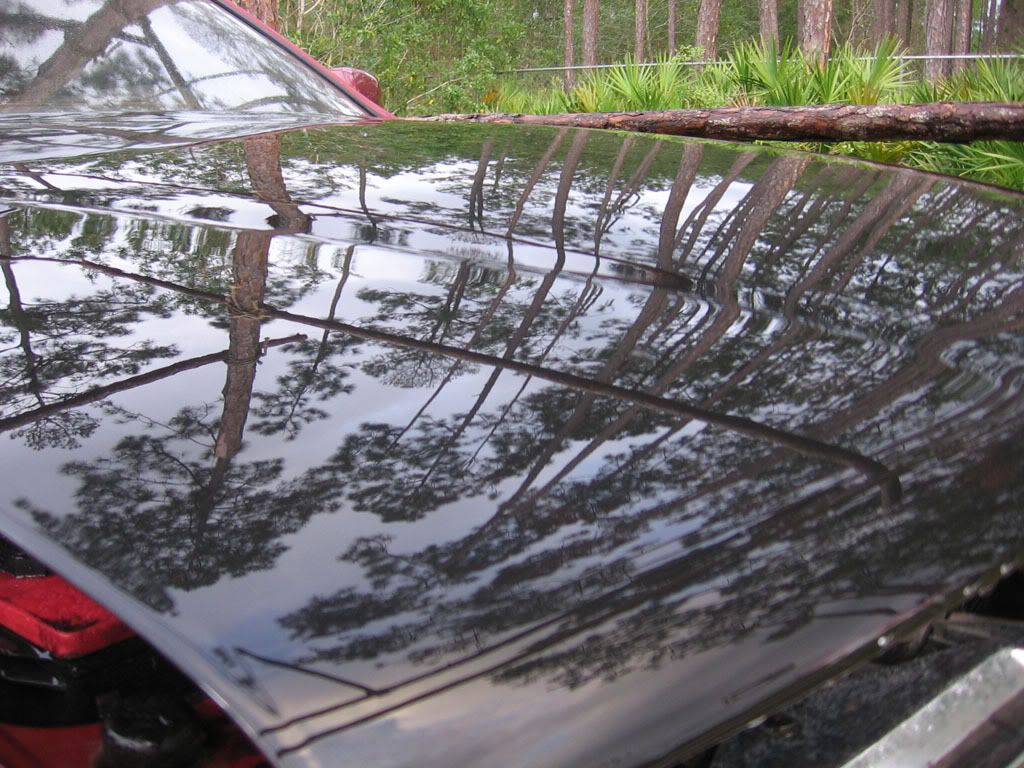


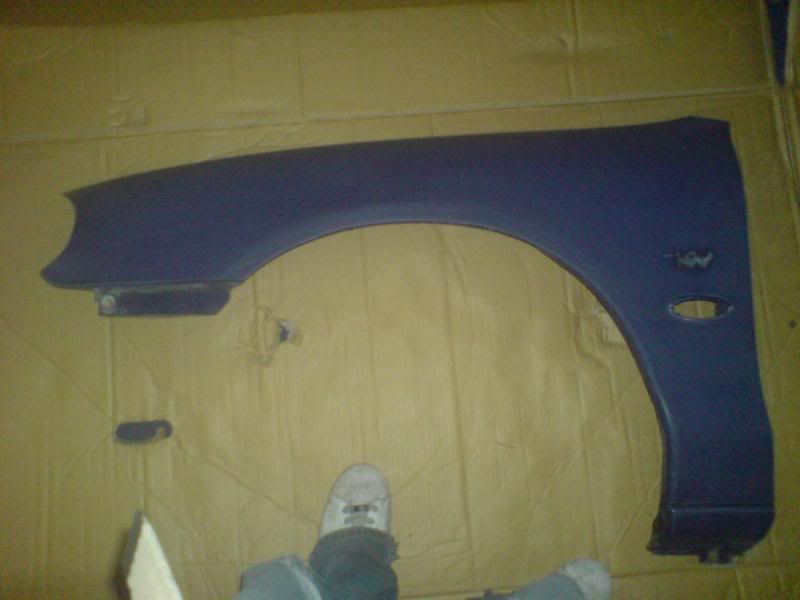
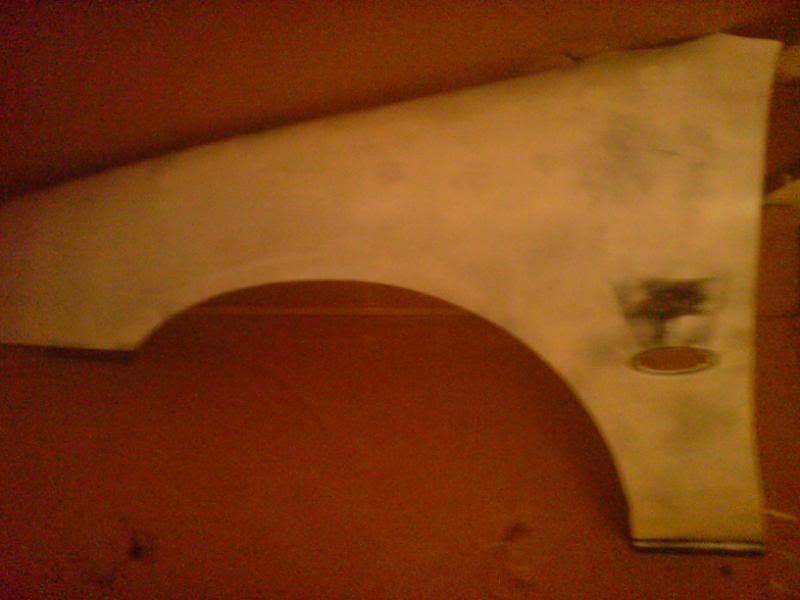
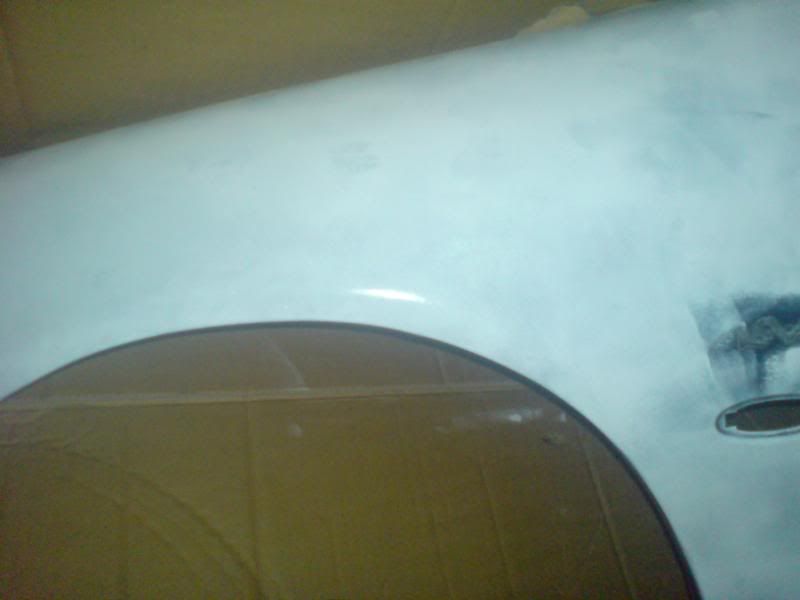
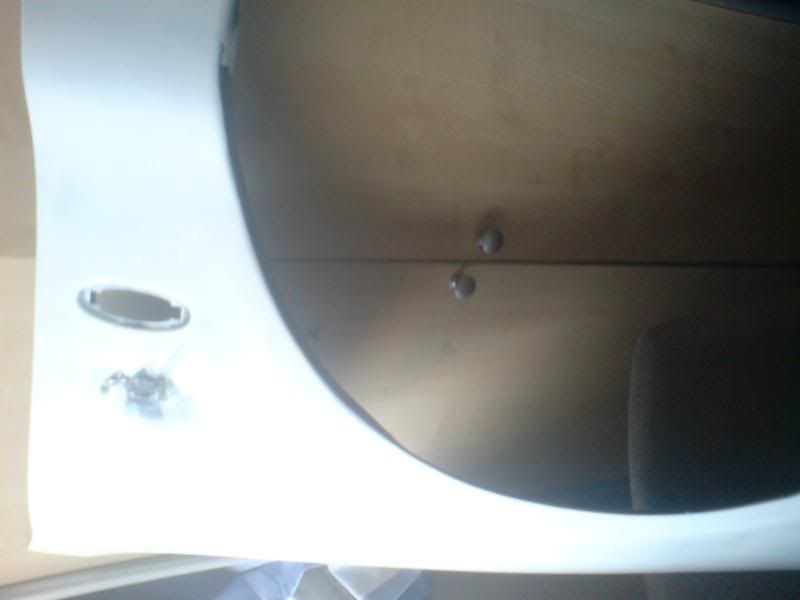
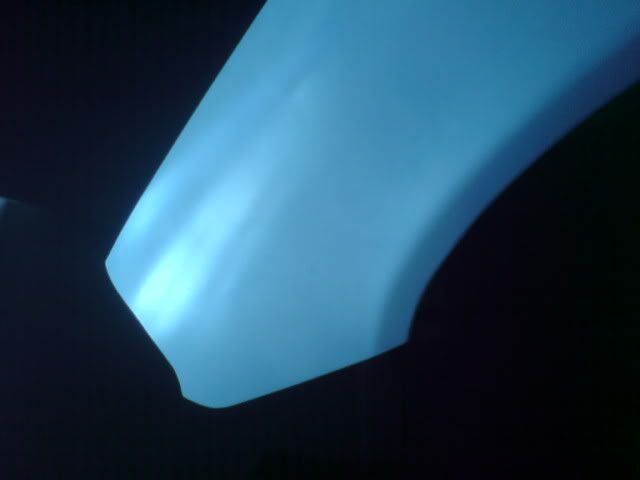
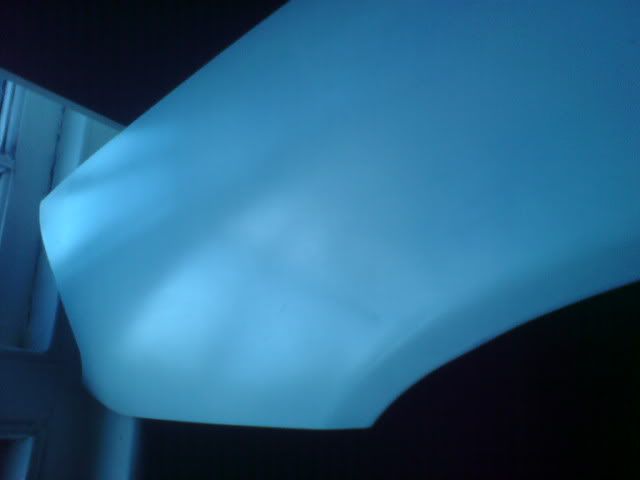


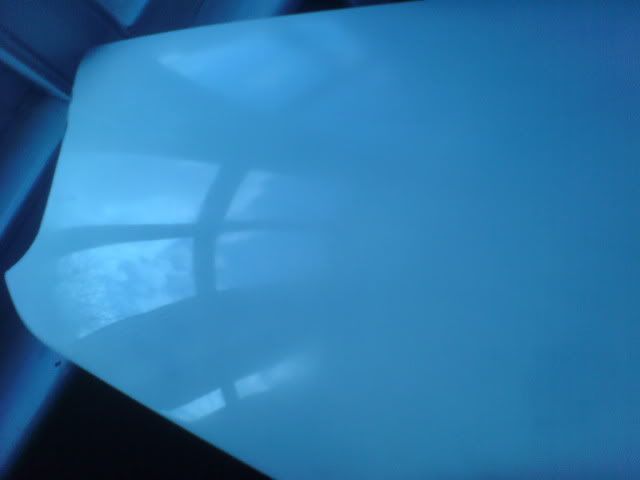


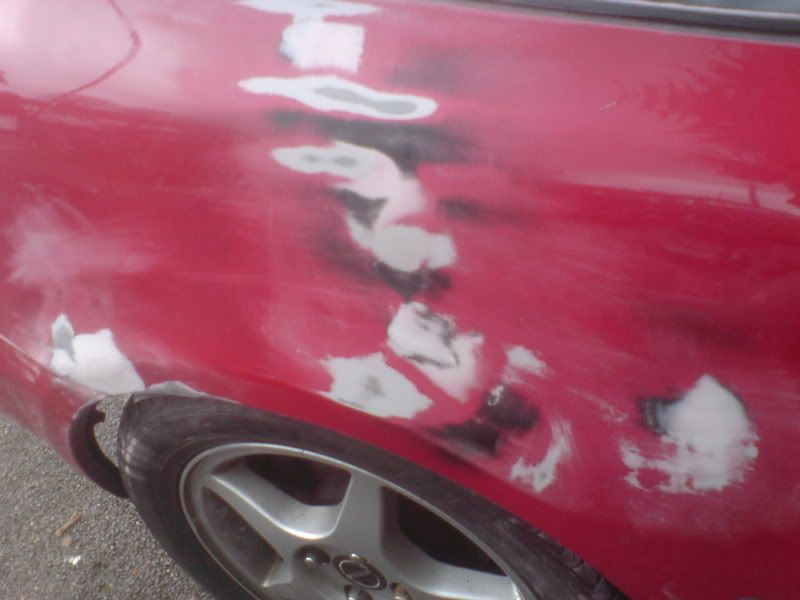
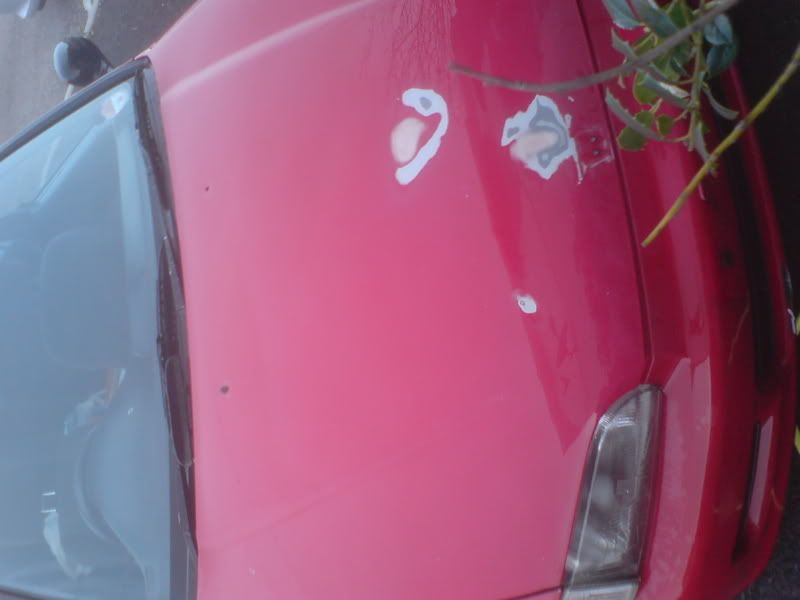
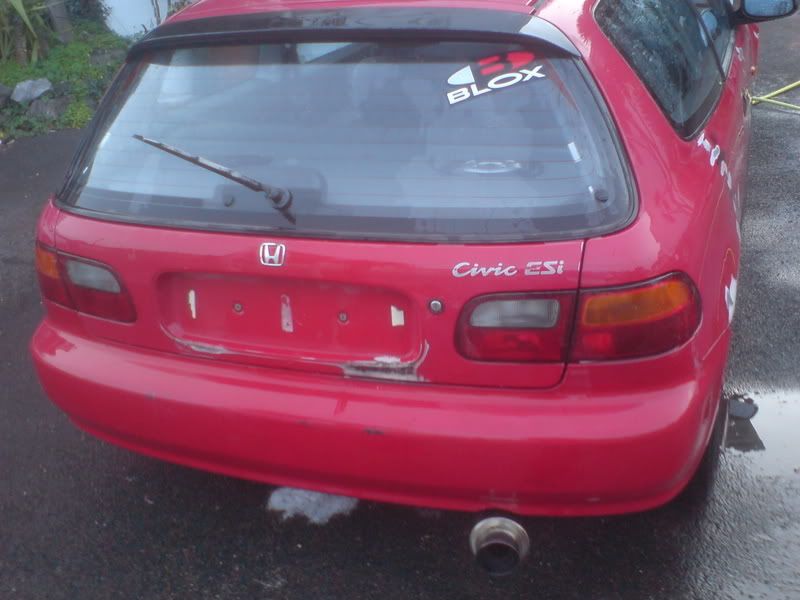

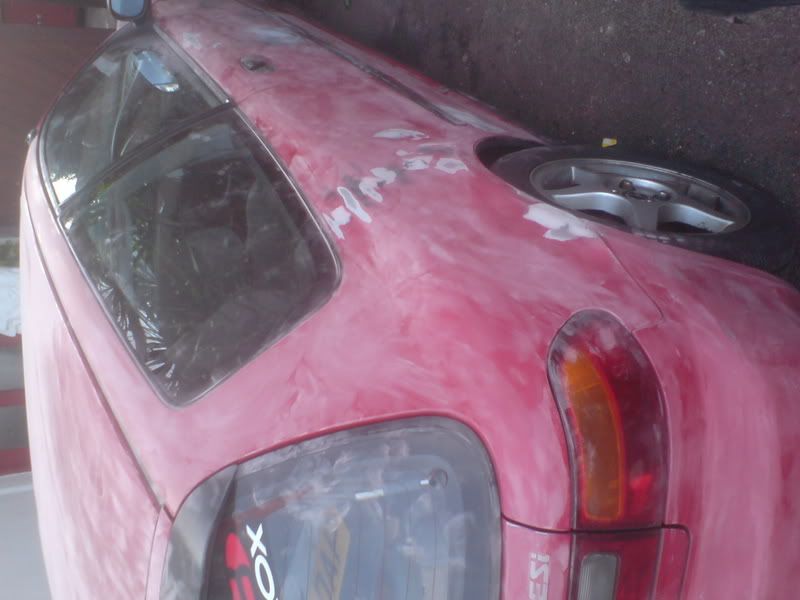
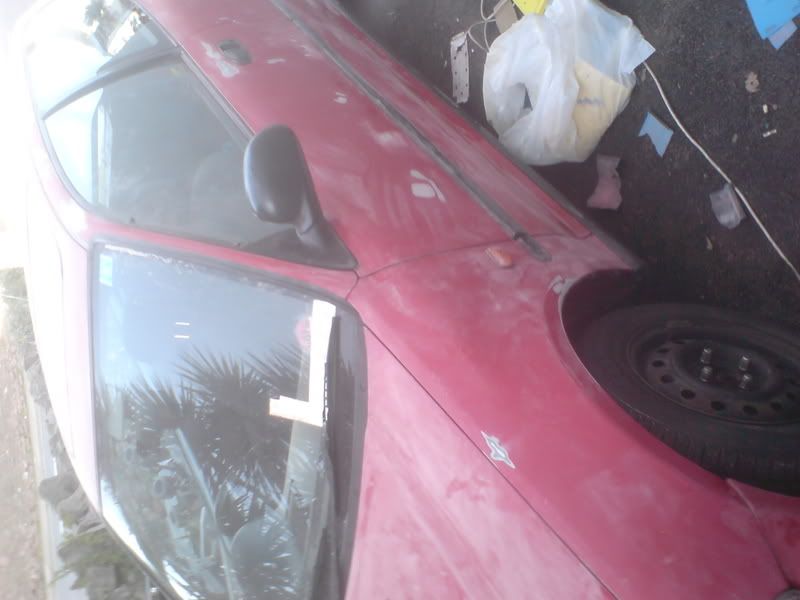
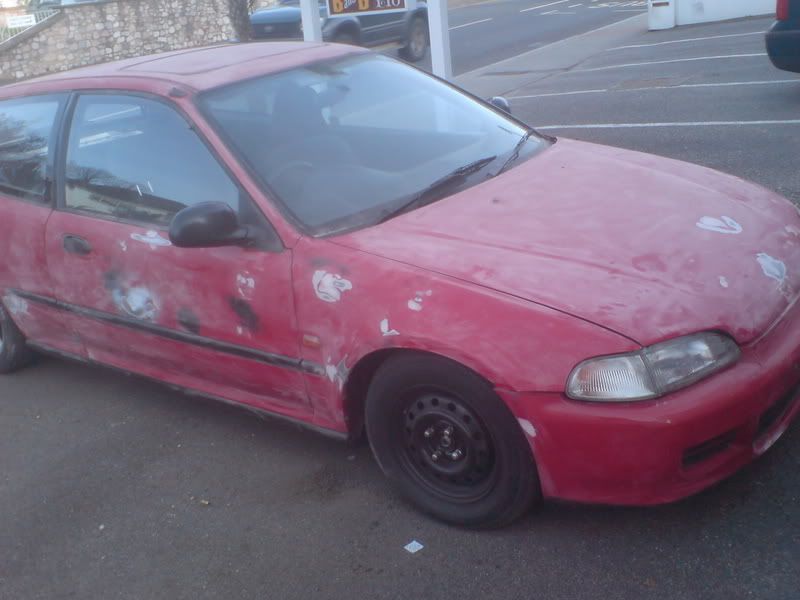
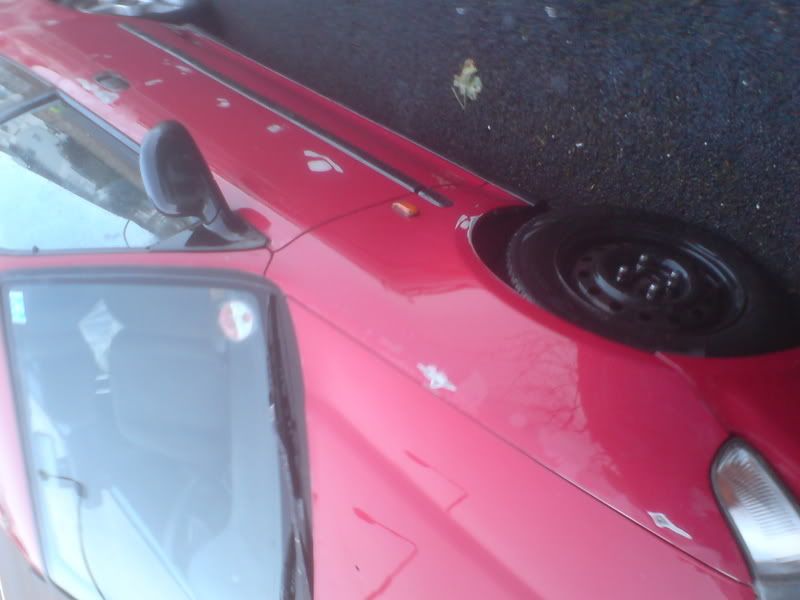
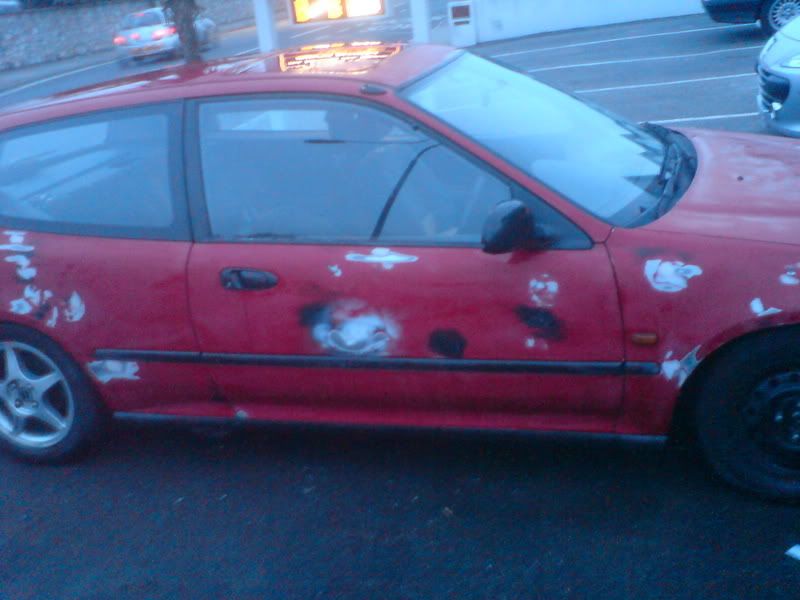
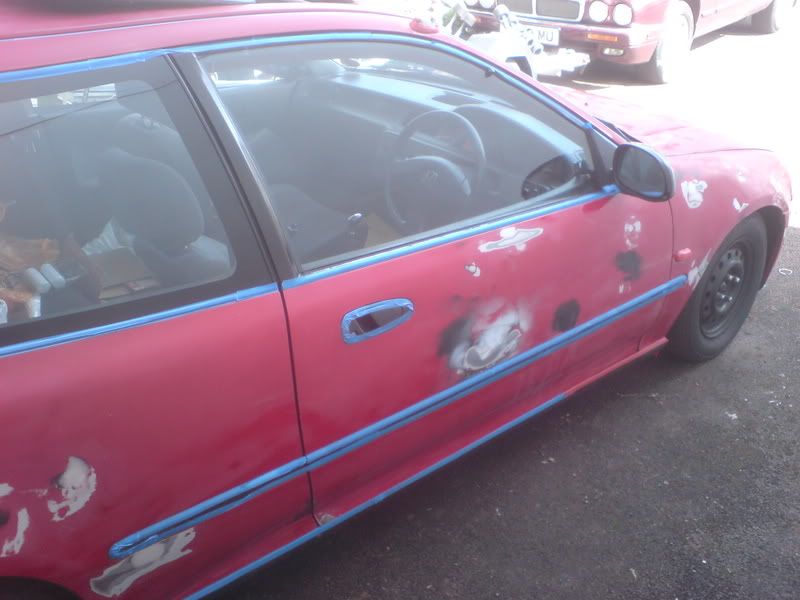
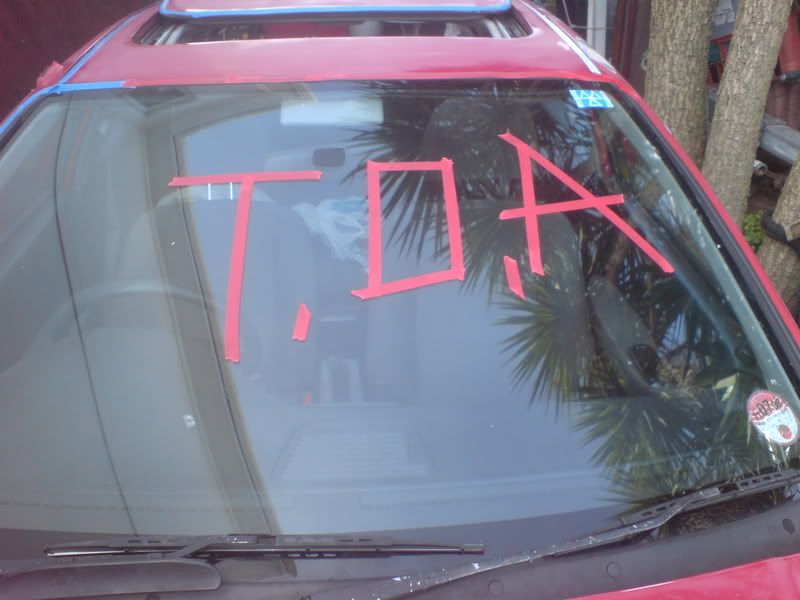
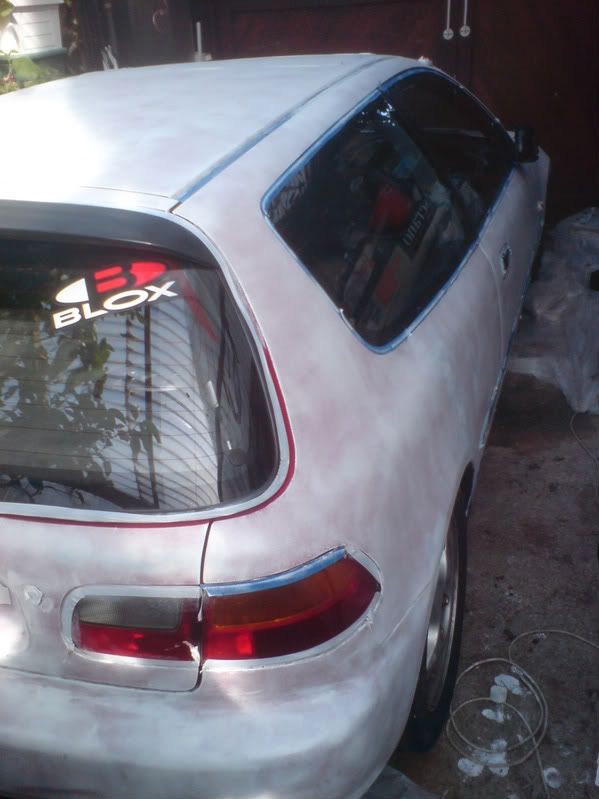

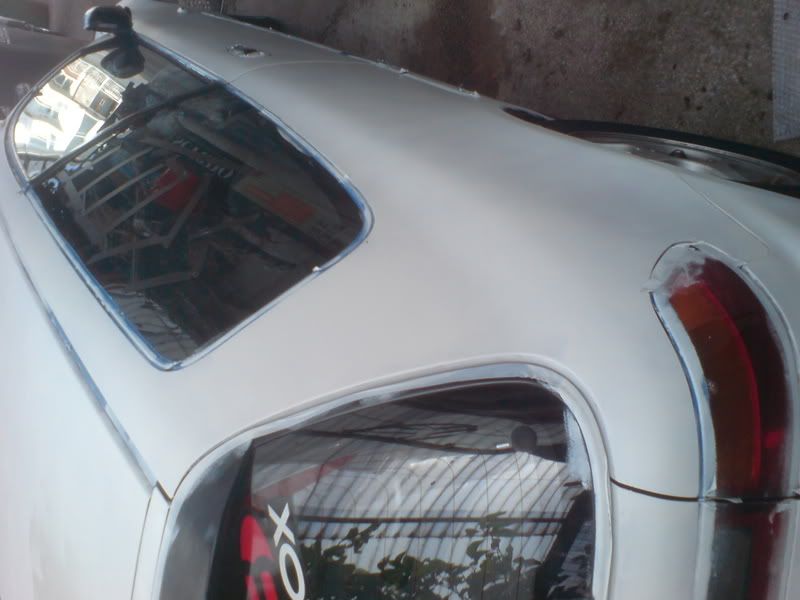
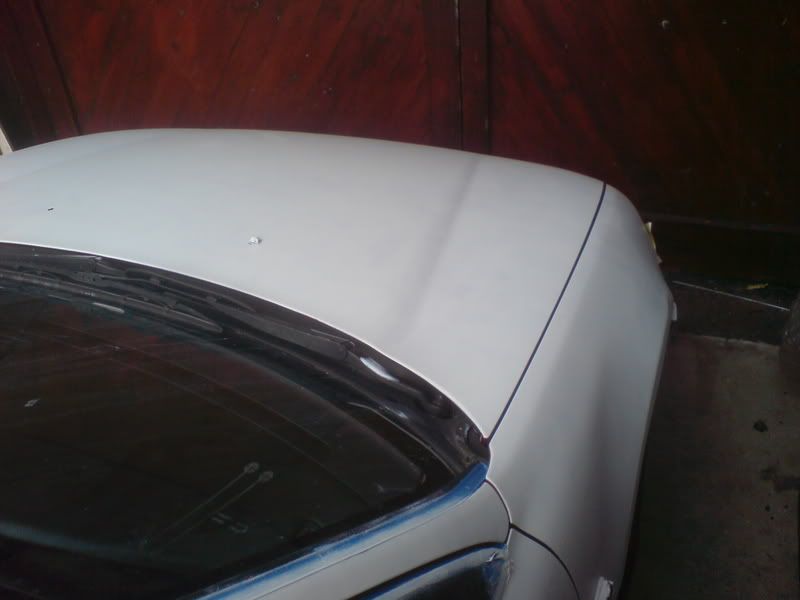
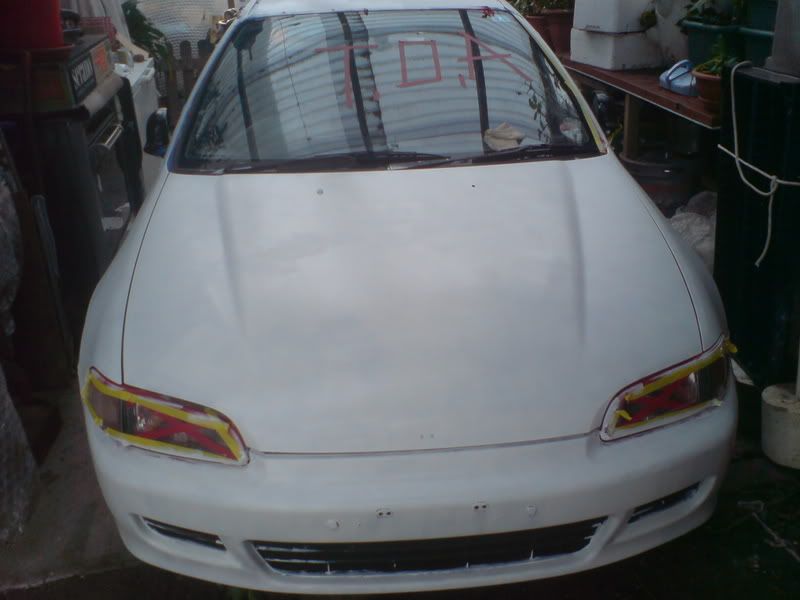

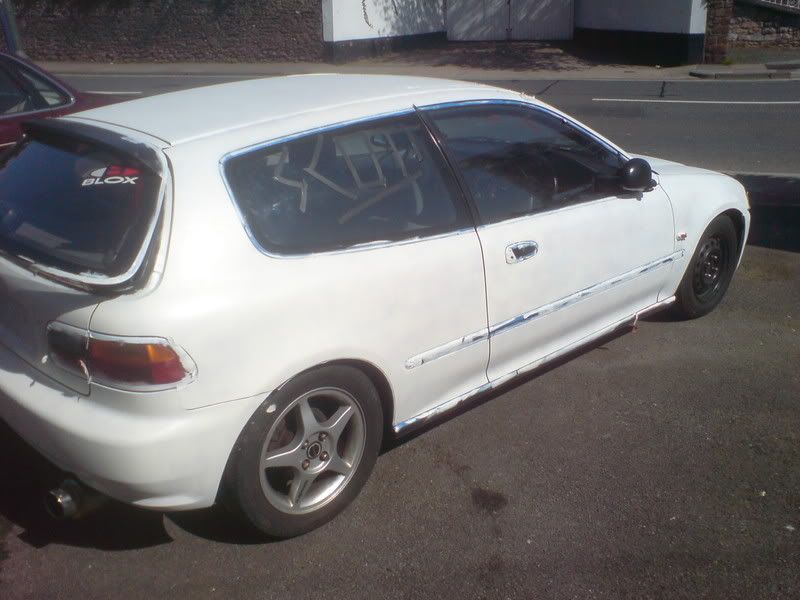
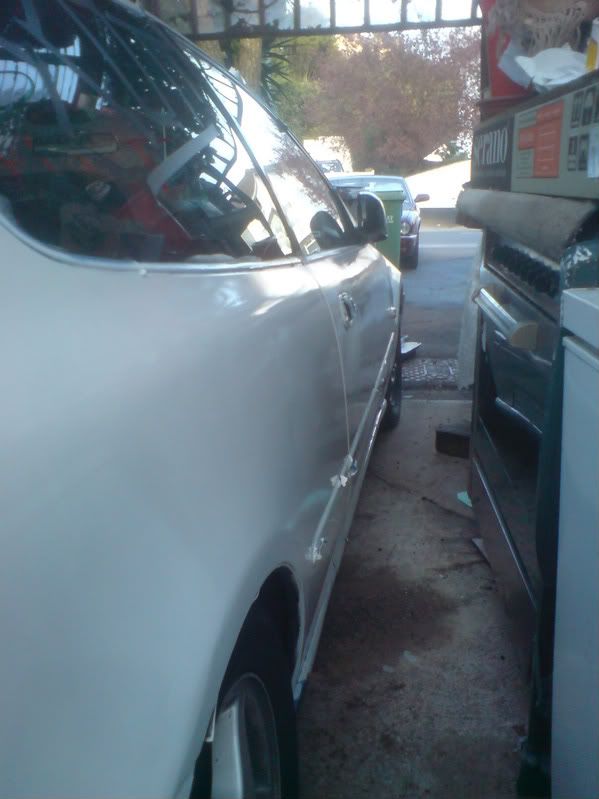
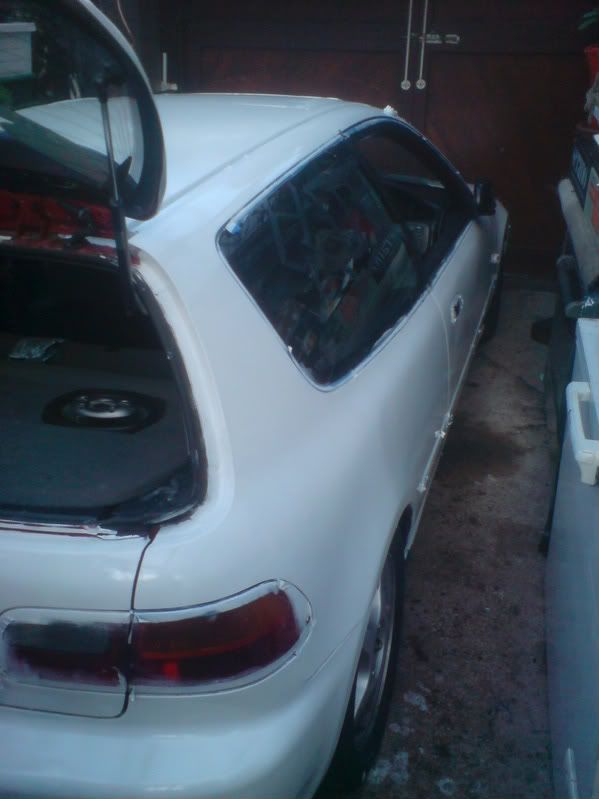
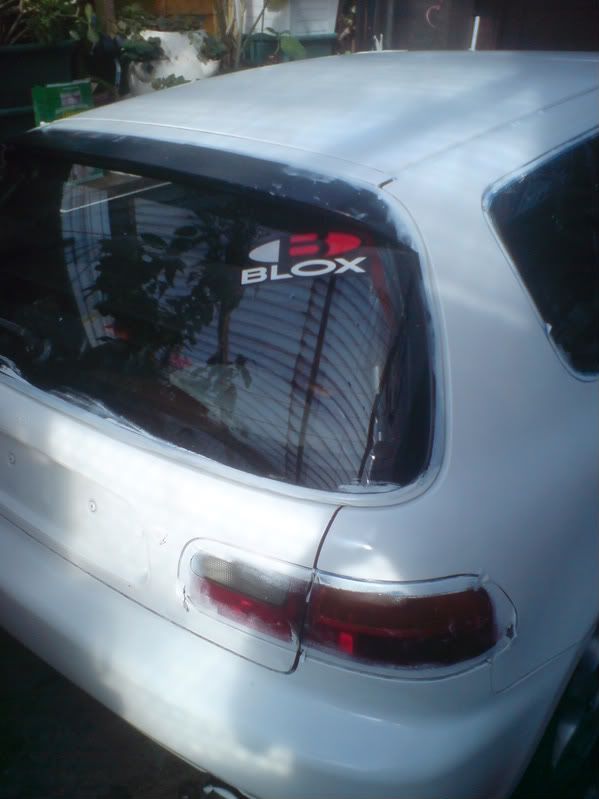


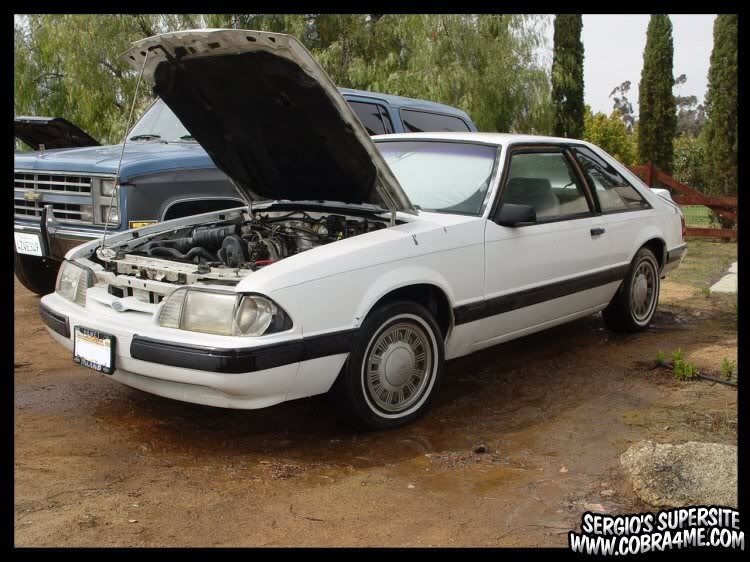
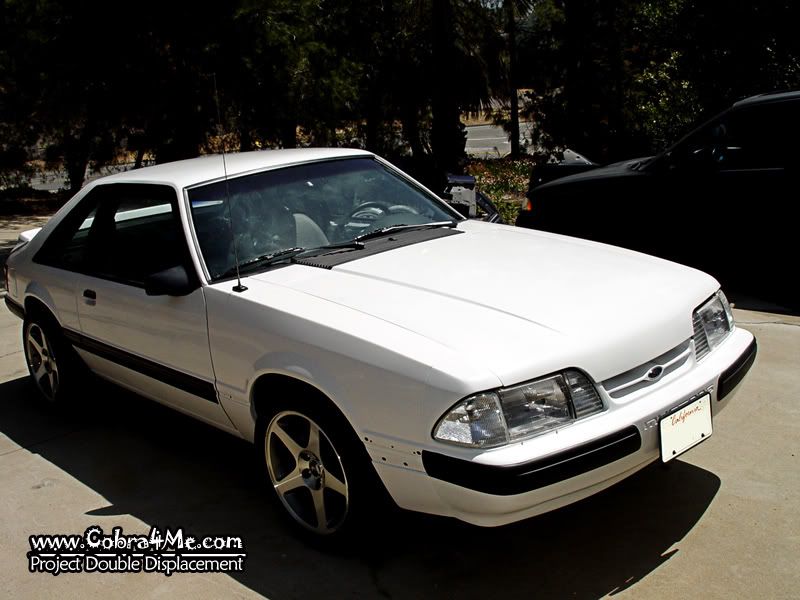


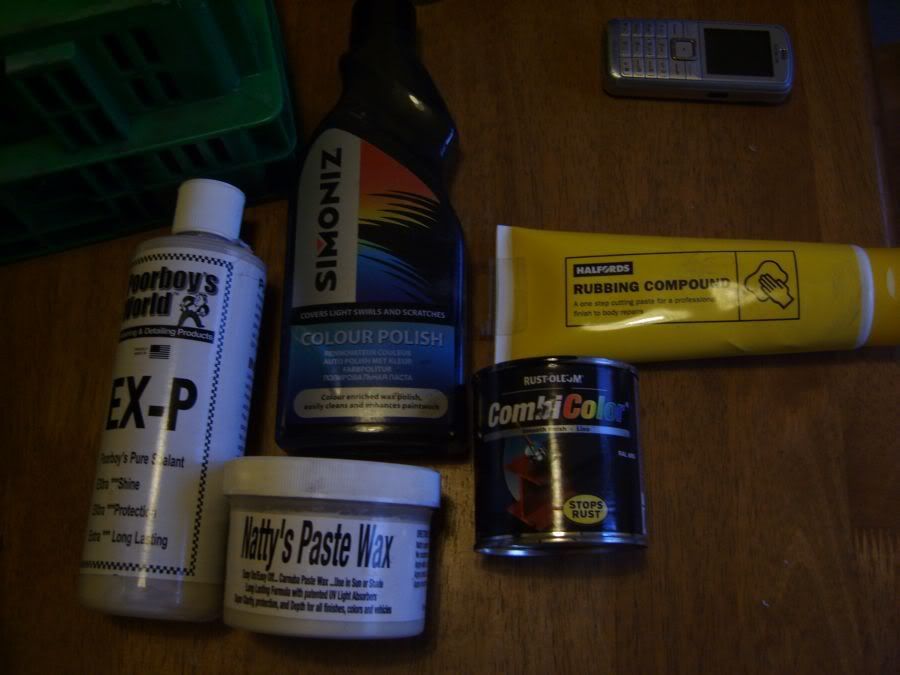


.JPG)


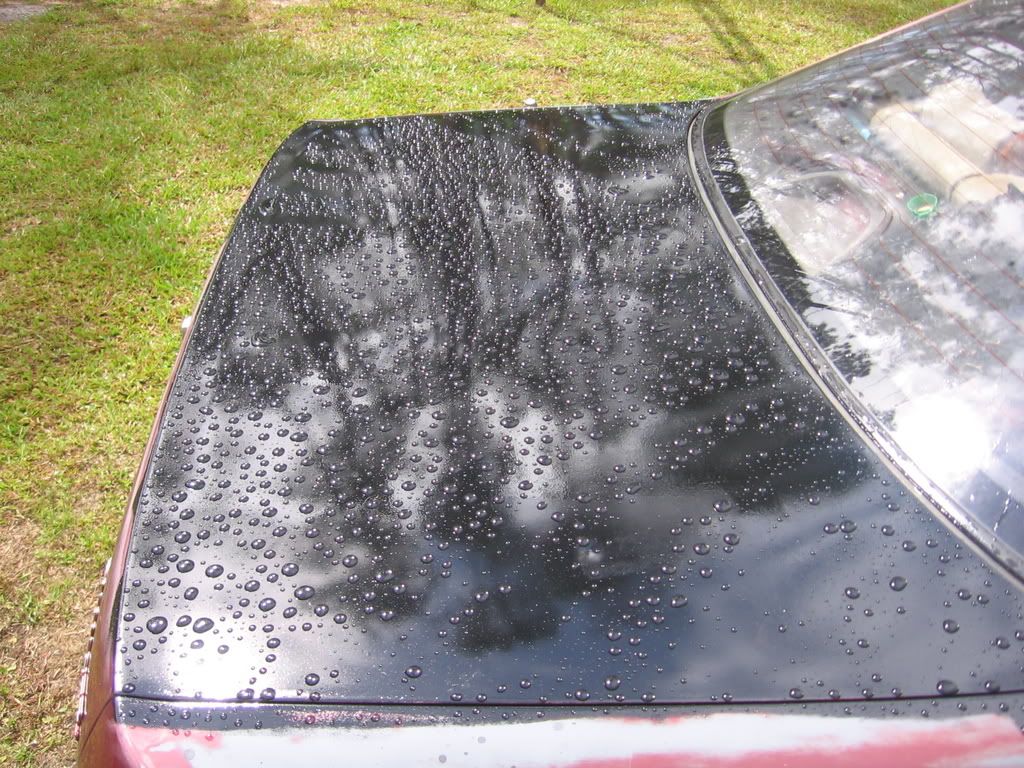
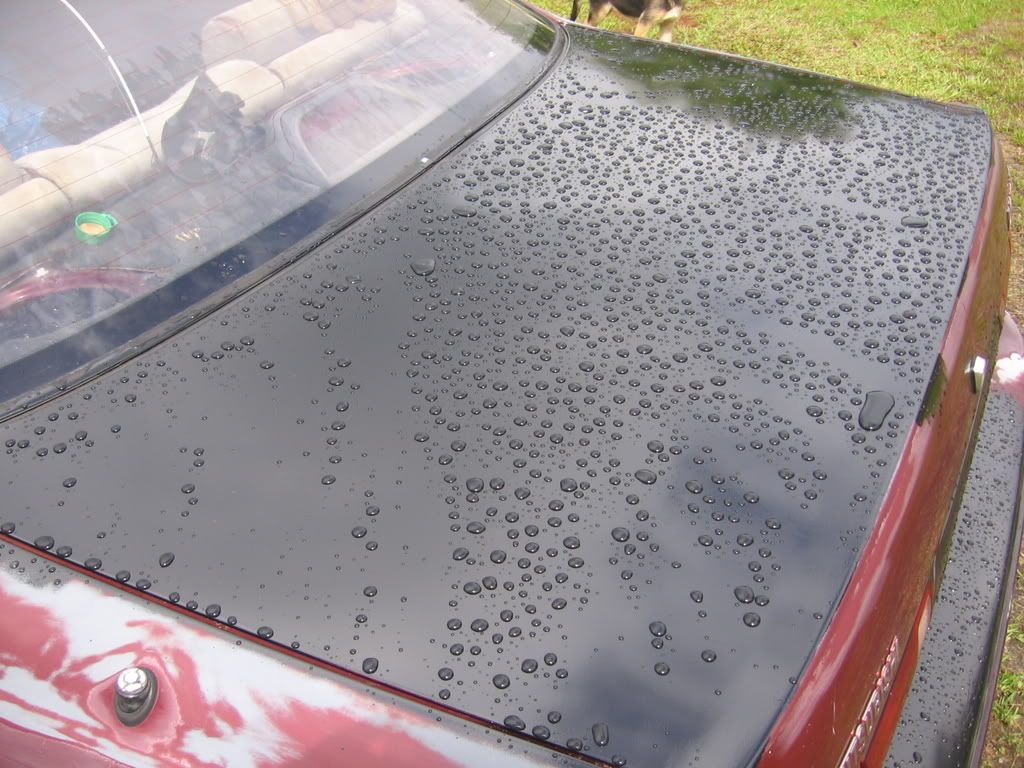
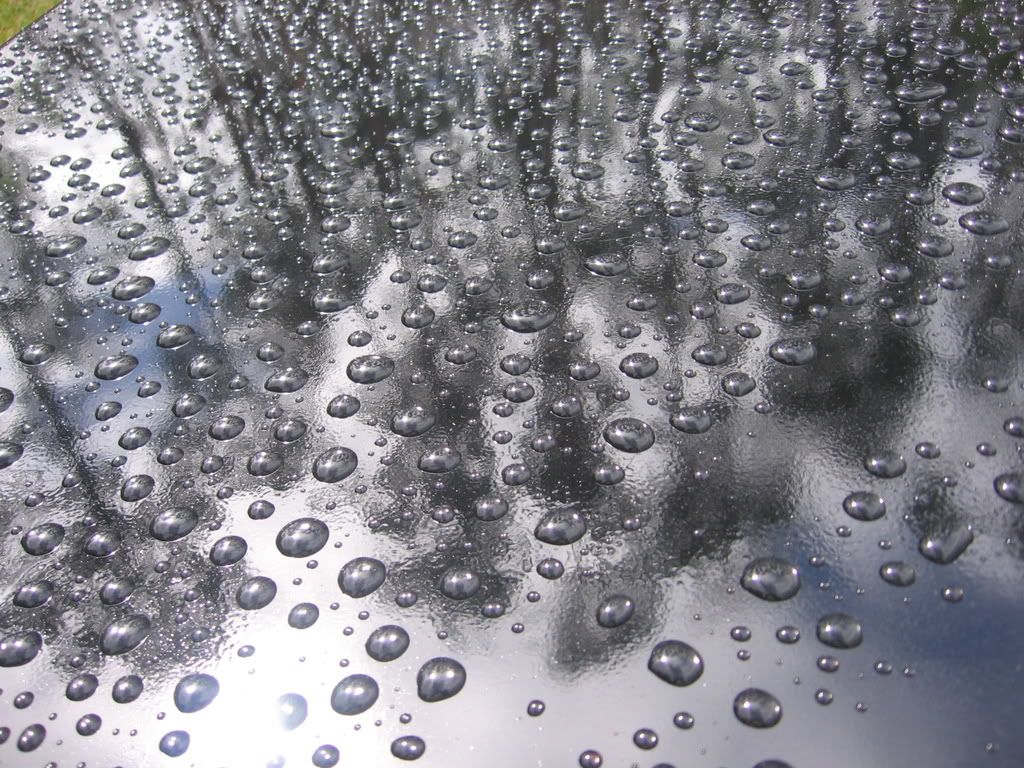


 [/image]


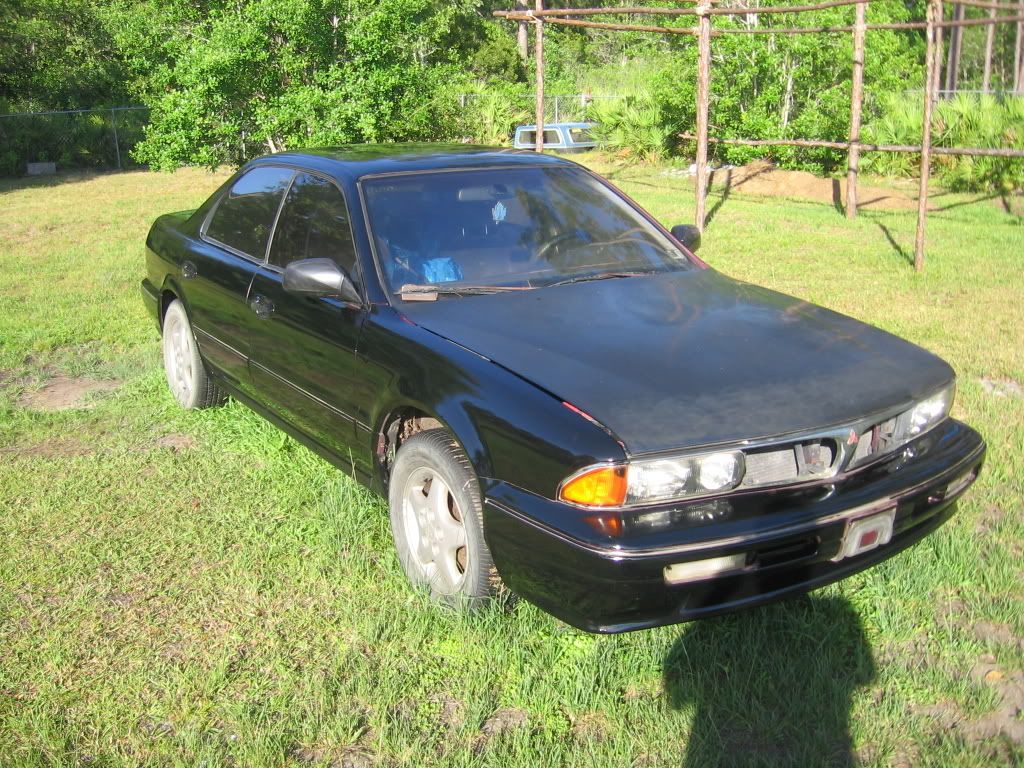
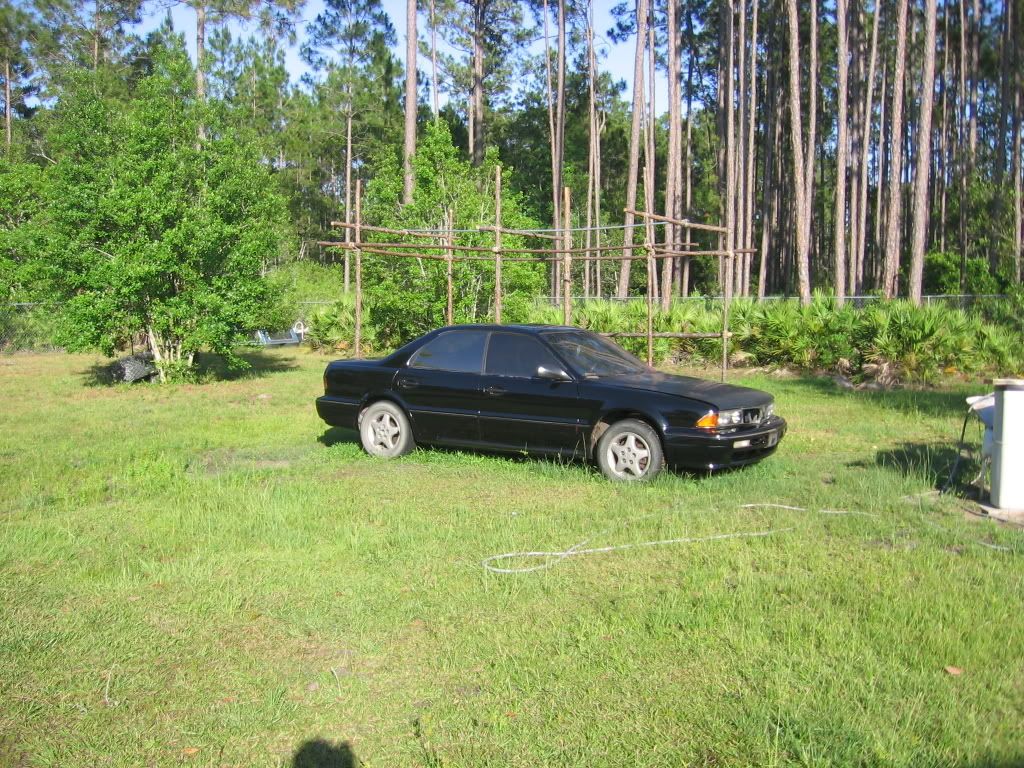
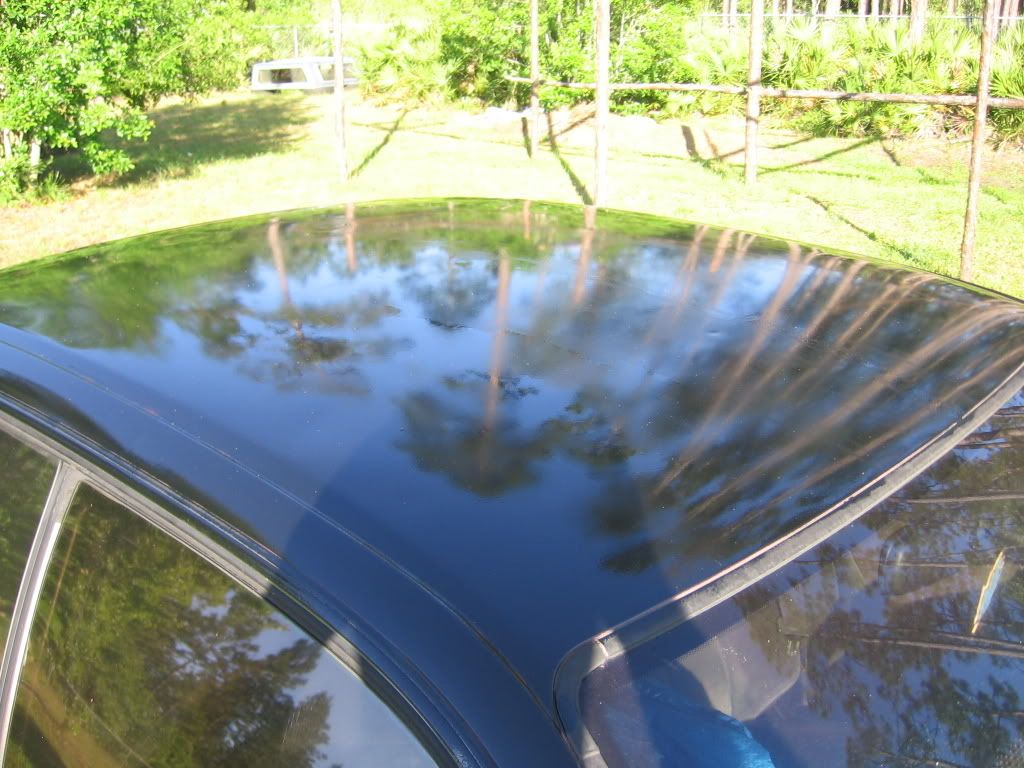
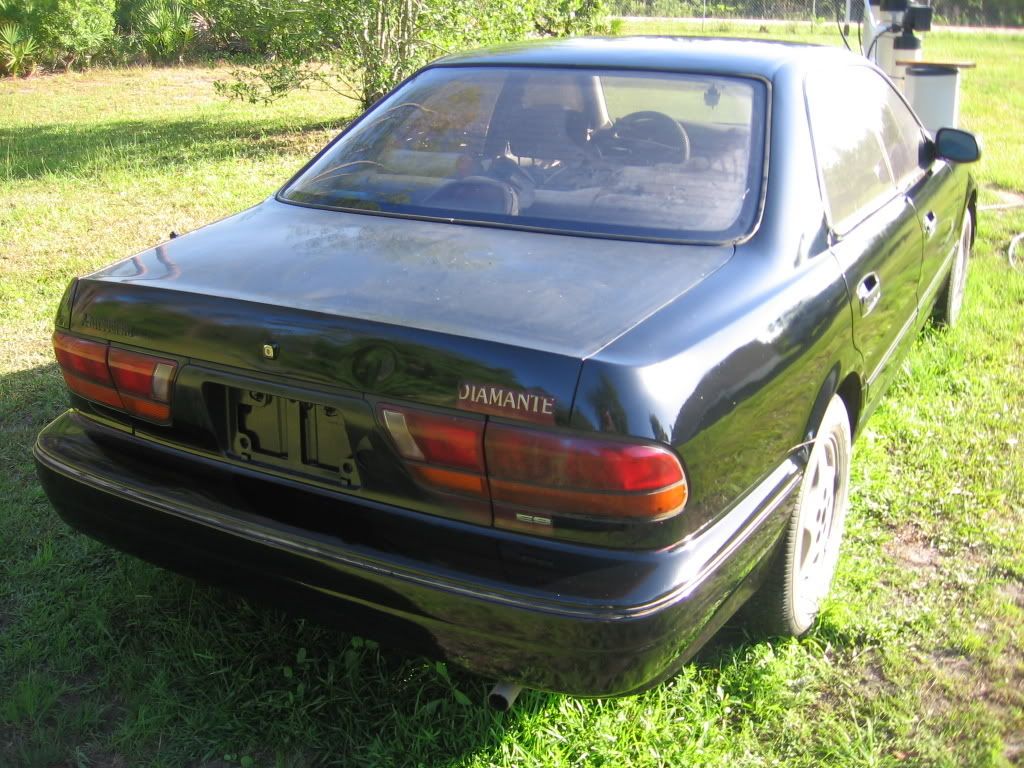
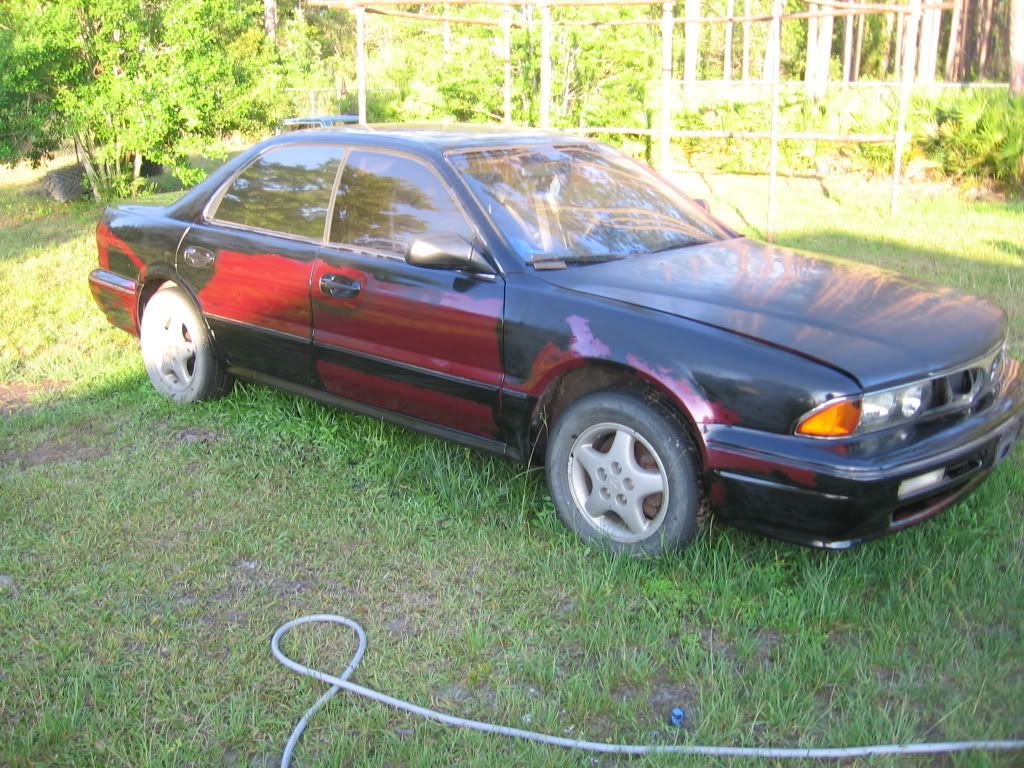
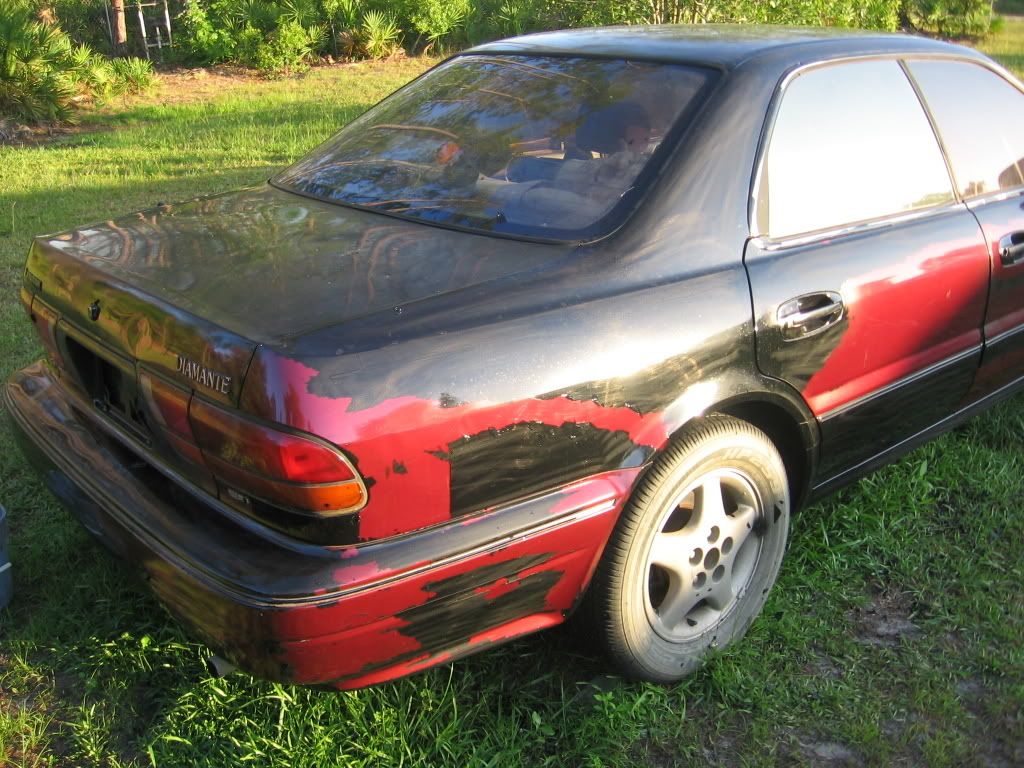
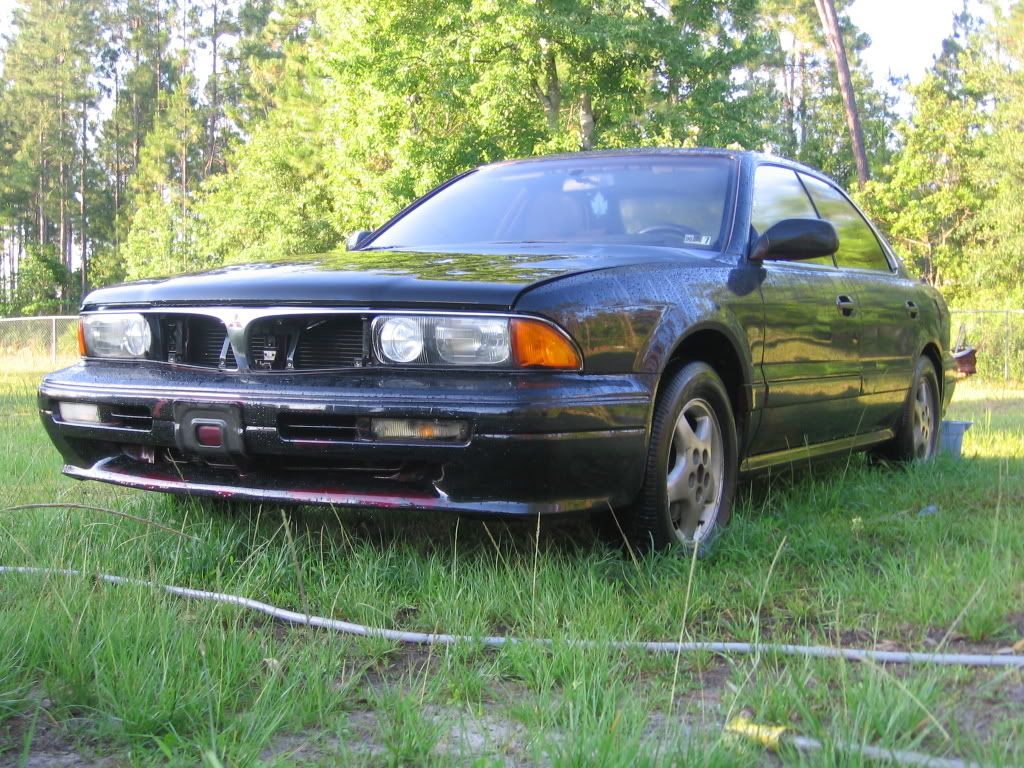
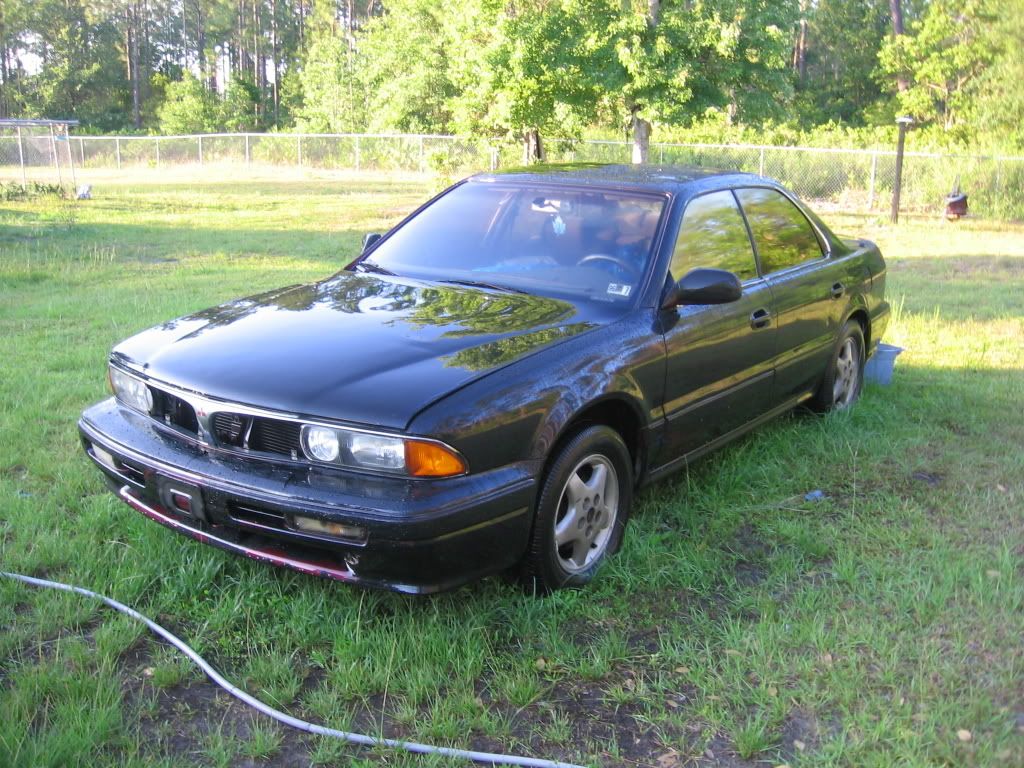
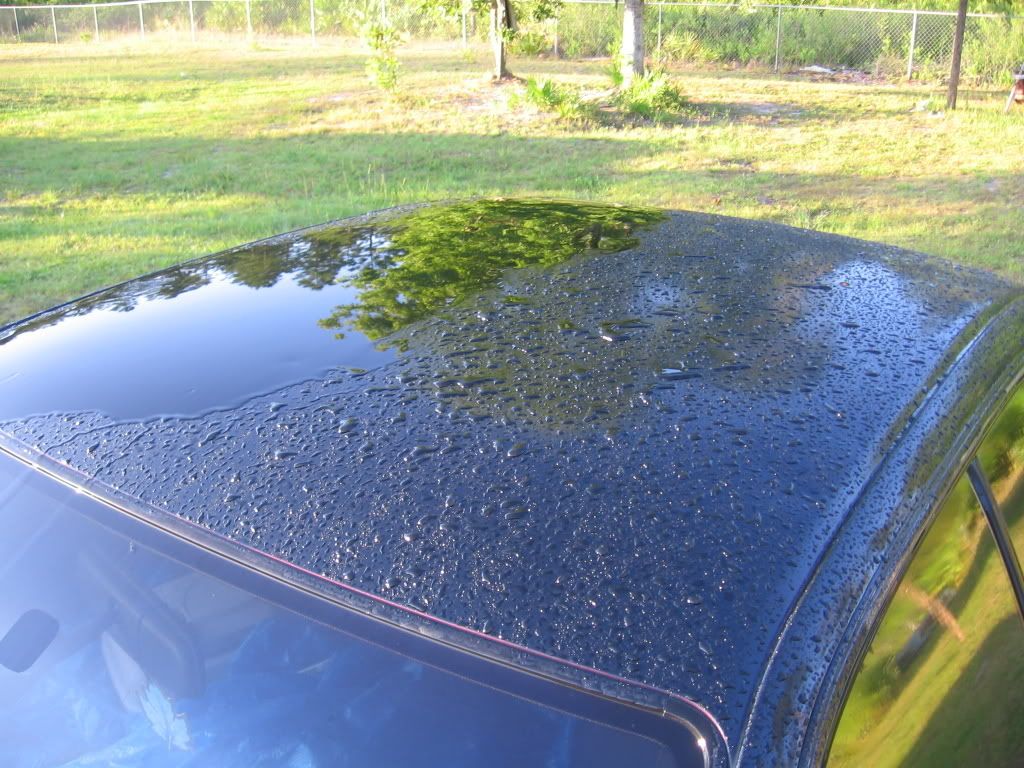
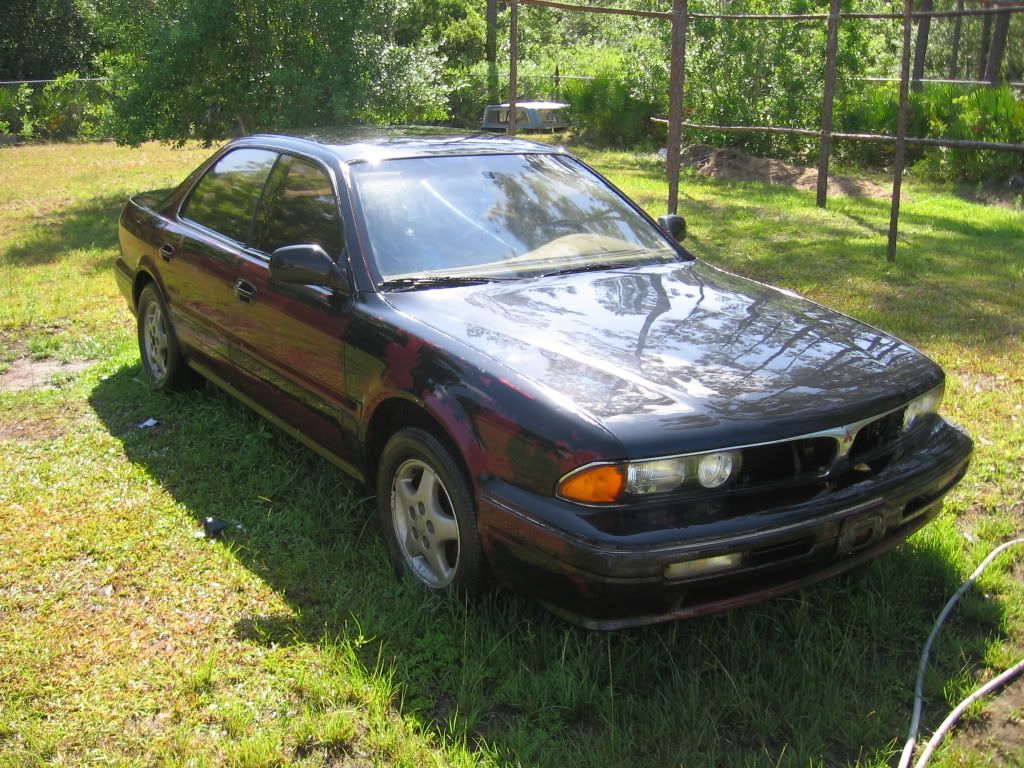
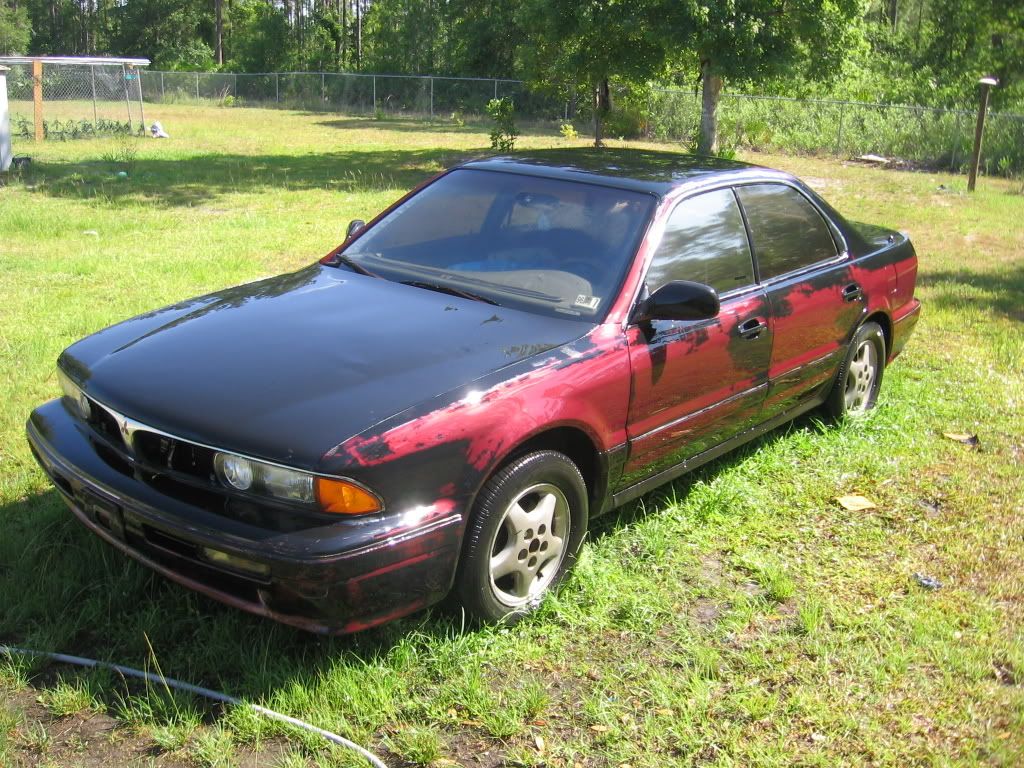
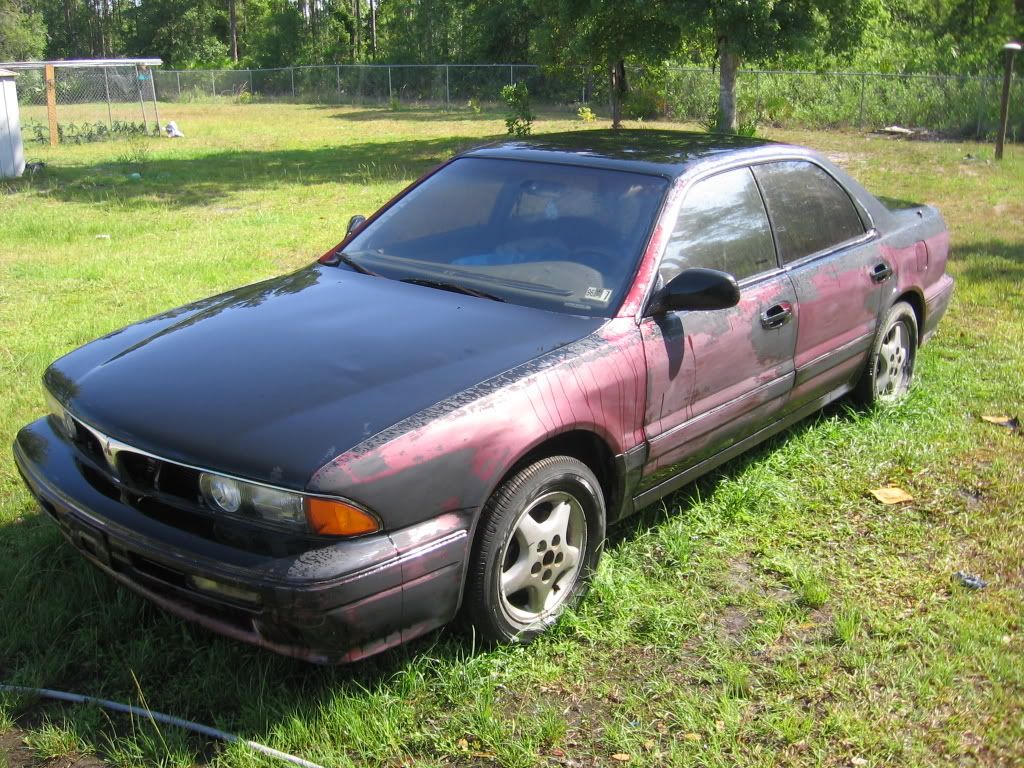
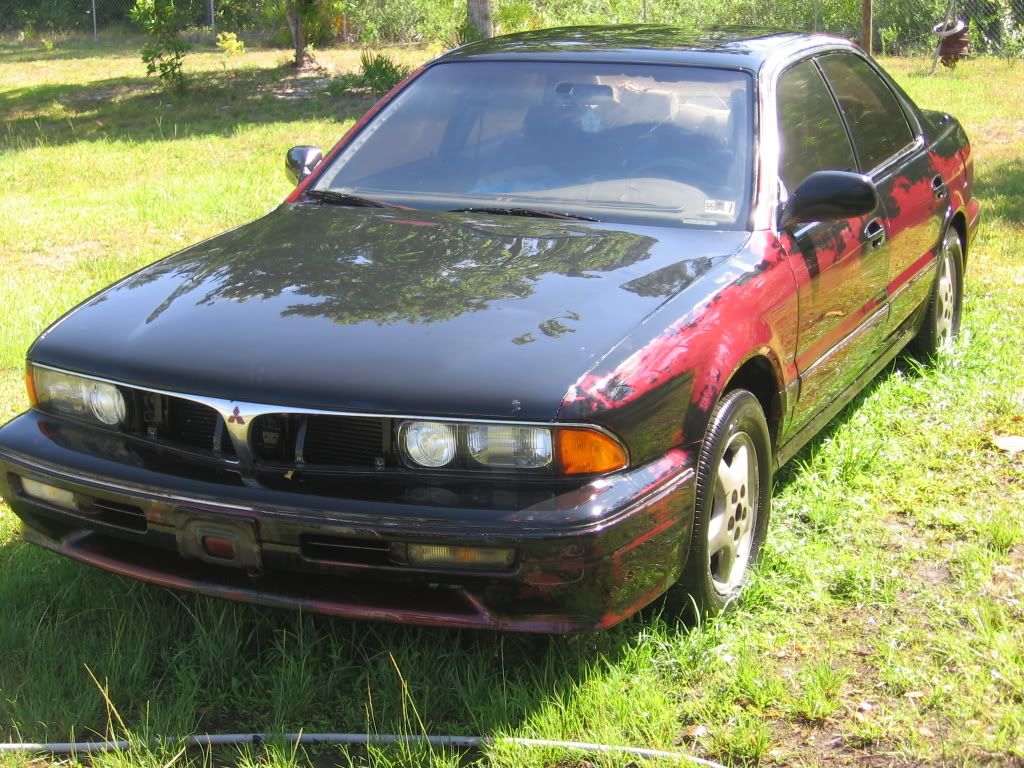
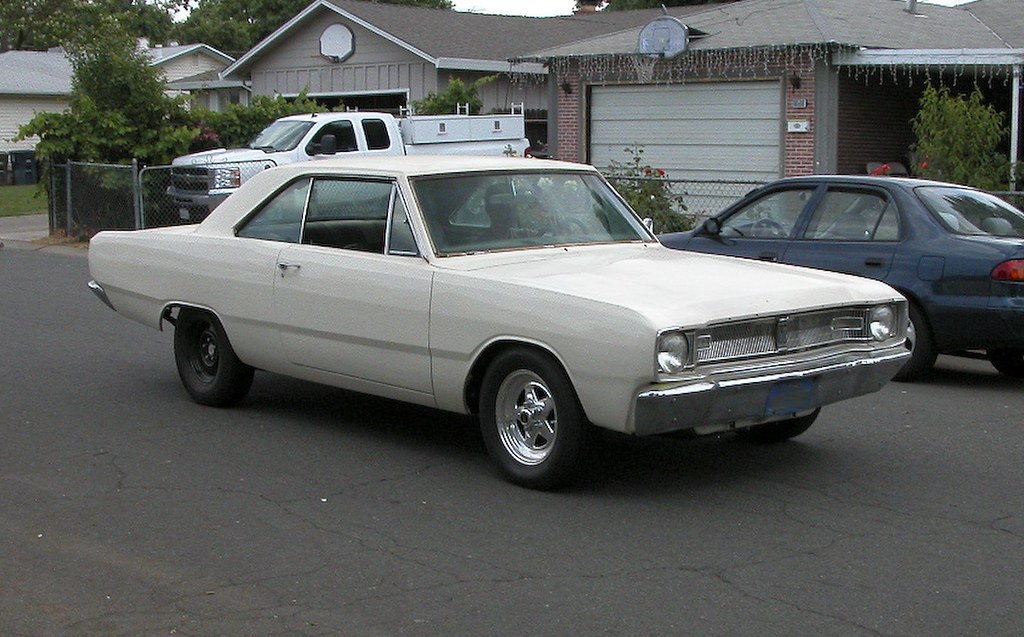
 ranging from dents, a couple rust spots, Holes from bolts that held the side trim and a whole bunch of metal studs that I grinded off that held the same side trim on. Thanks
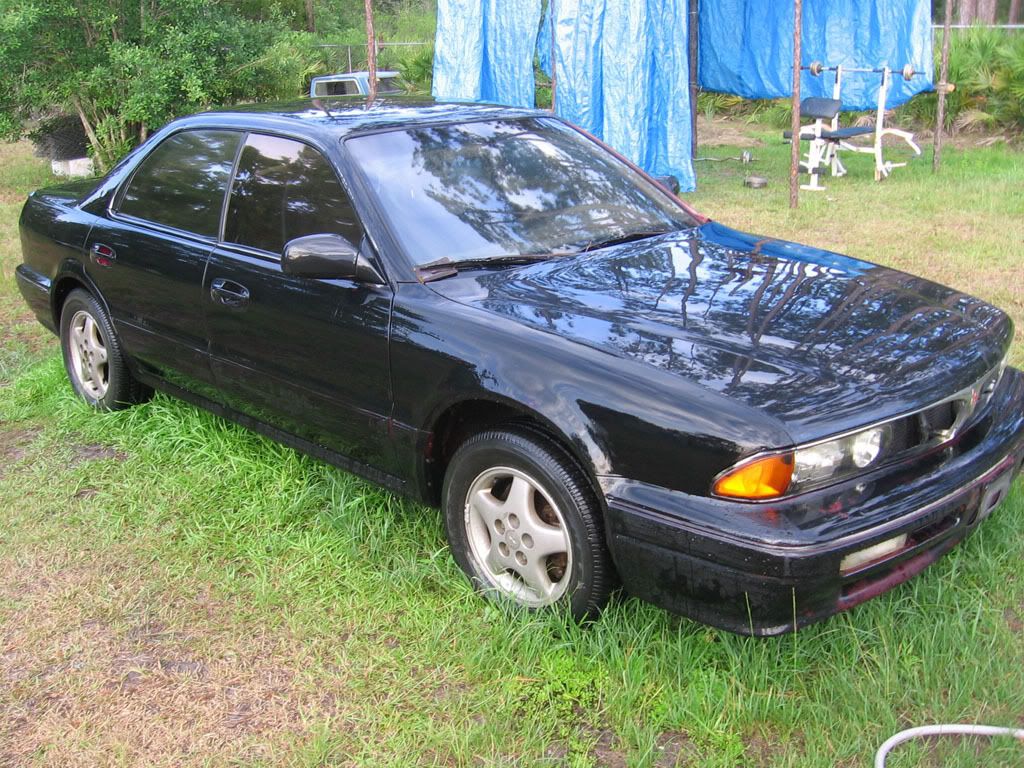


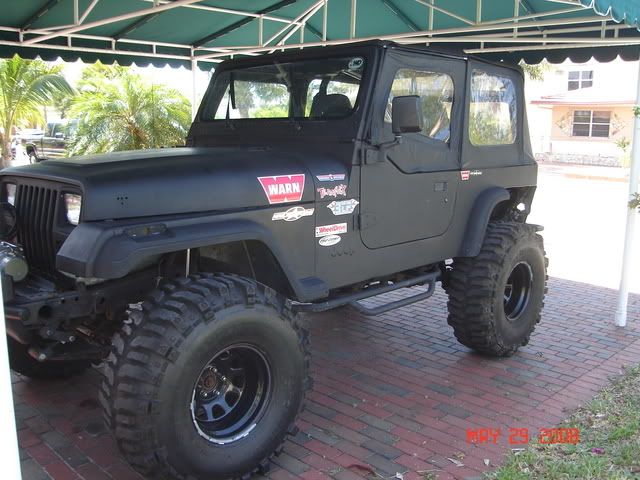
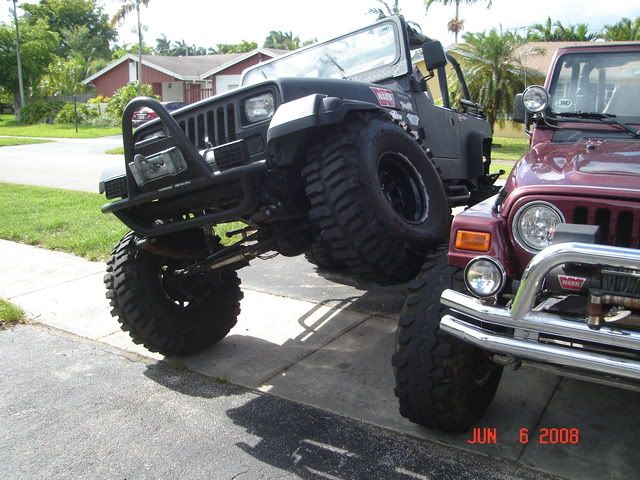


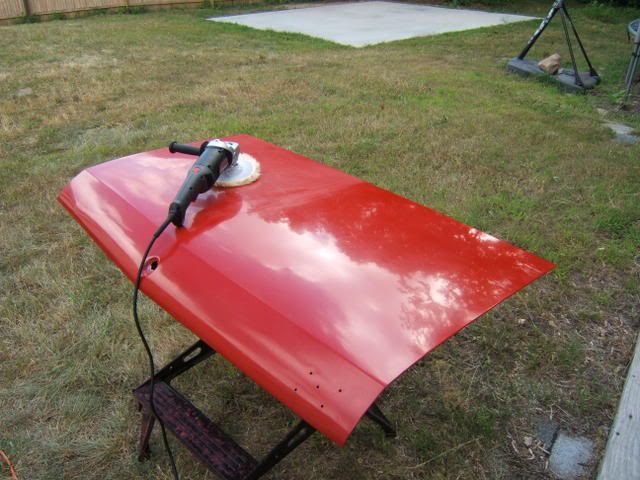
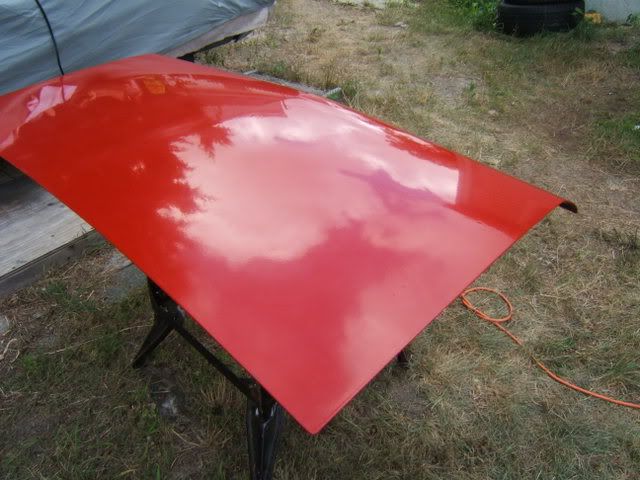
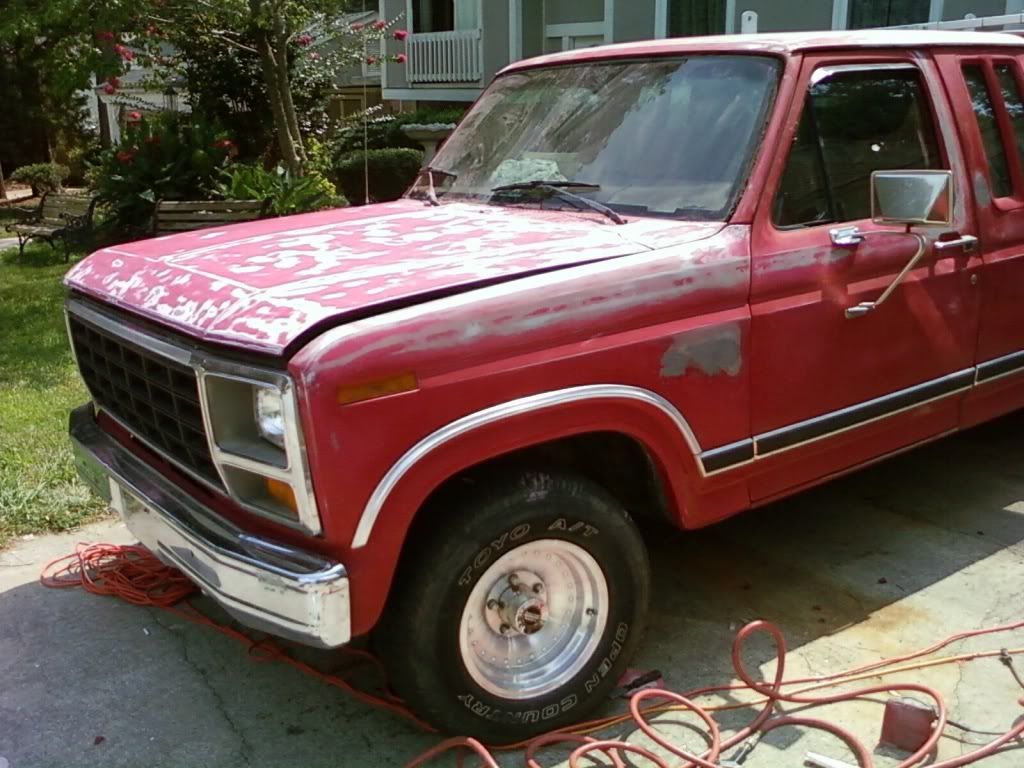
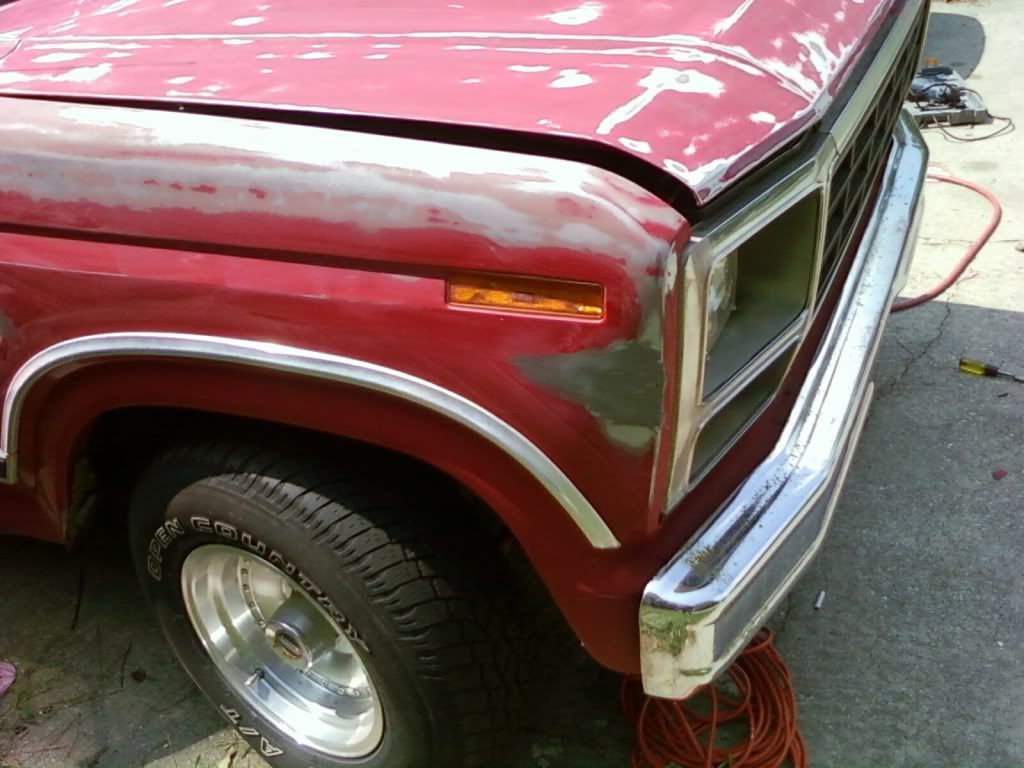

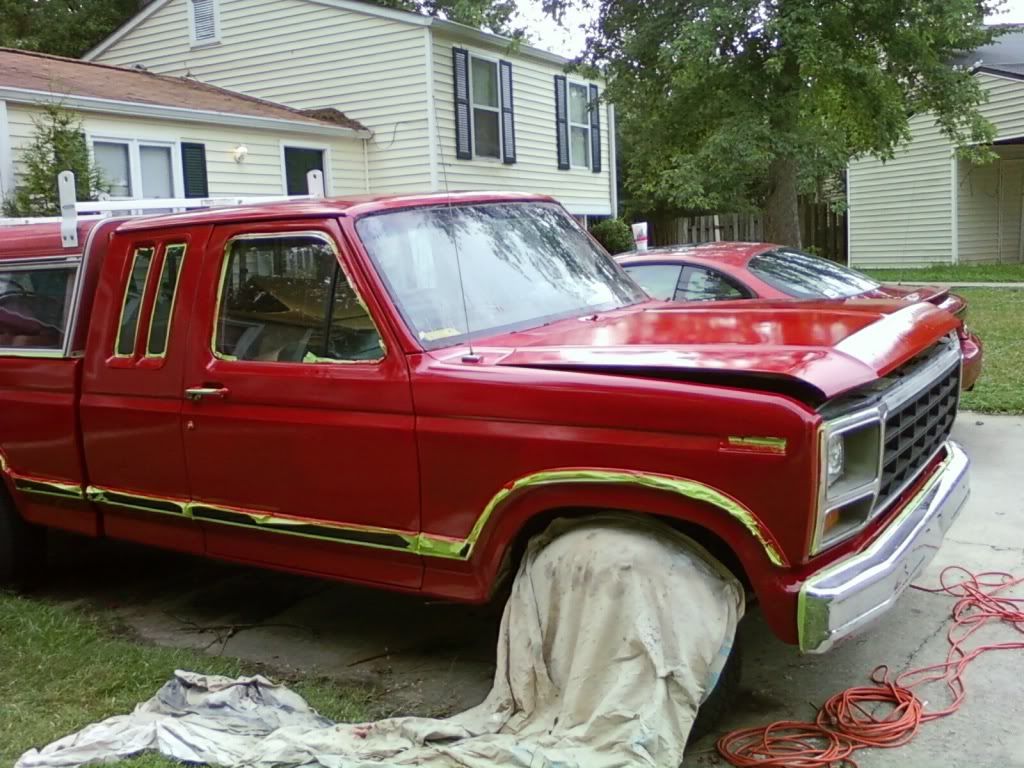
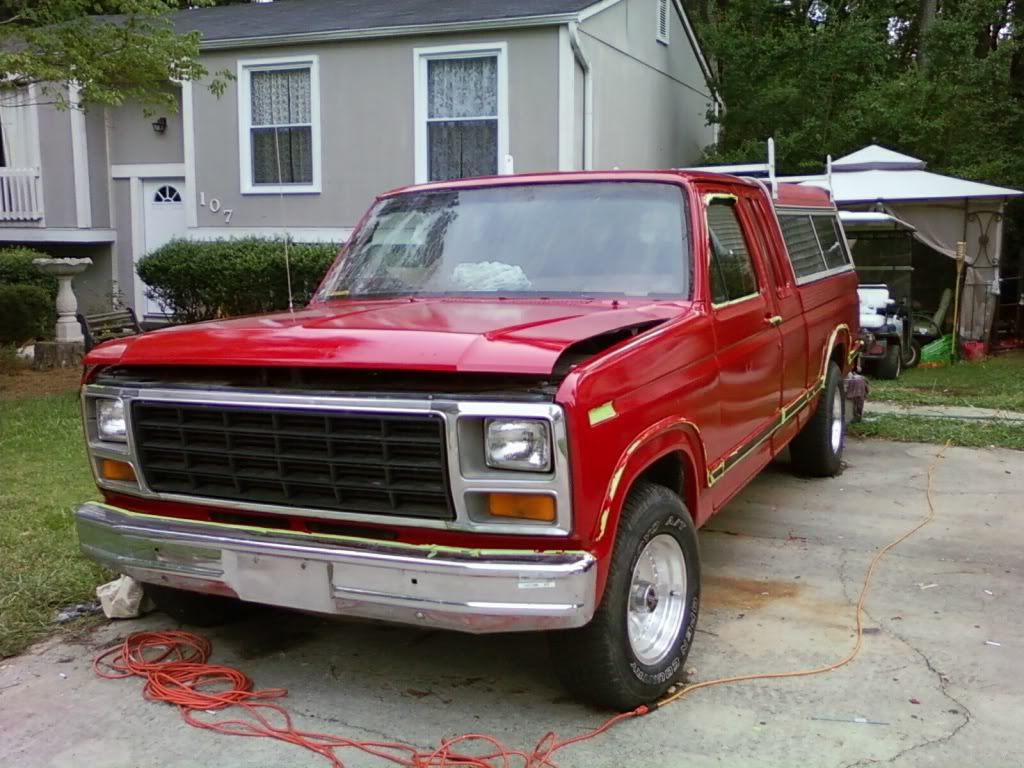
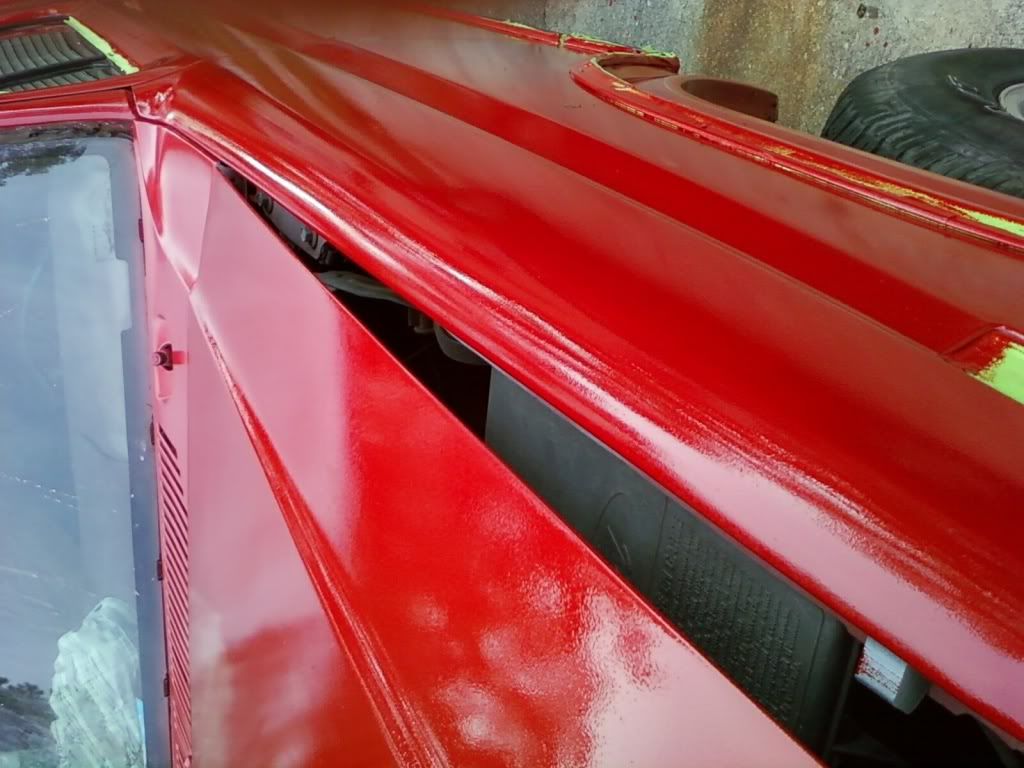


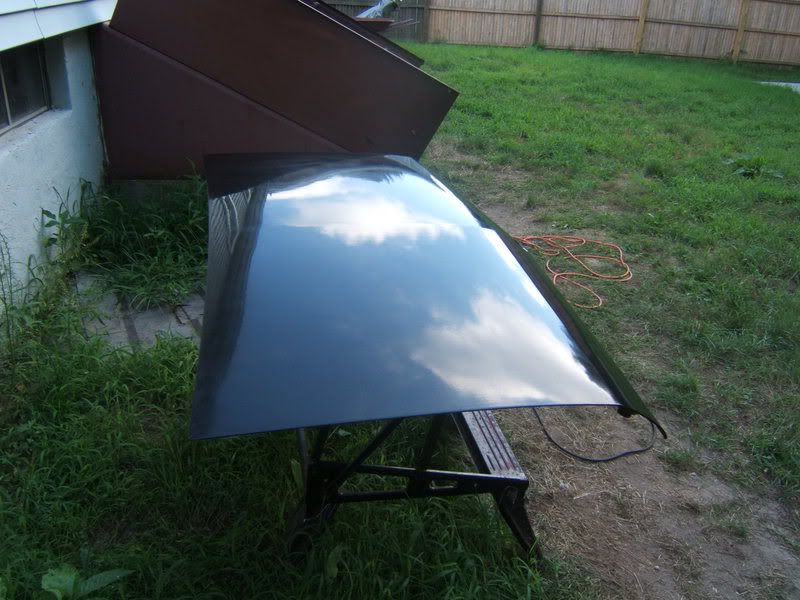
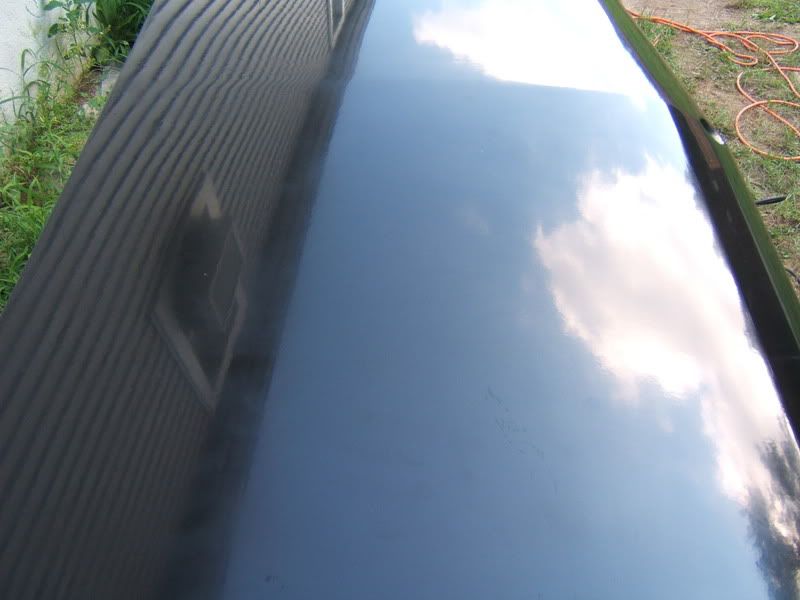


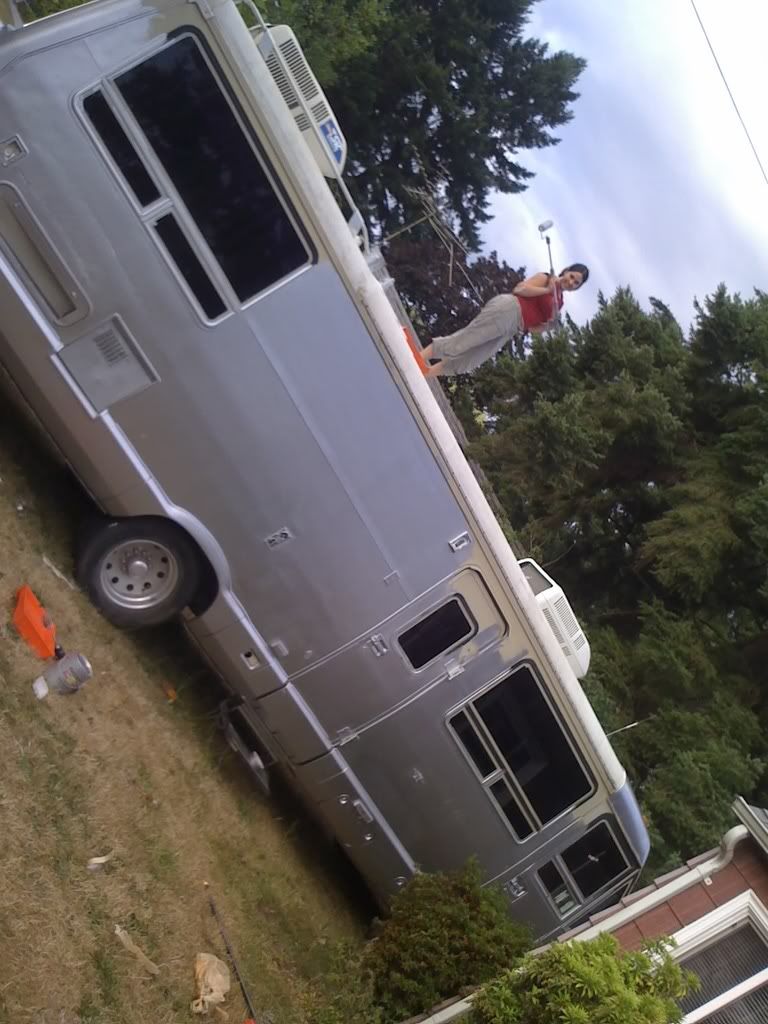

.JPG "4621232-IMG_1211(Small).JPG")

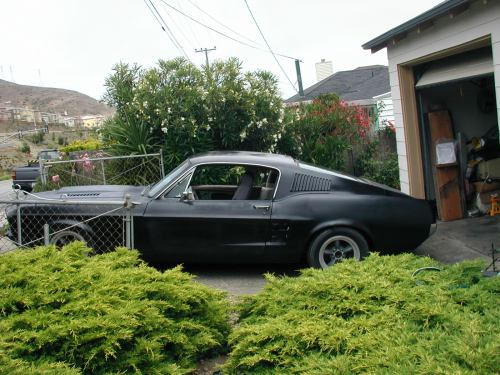
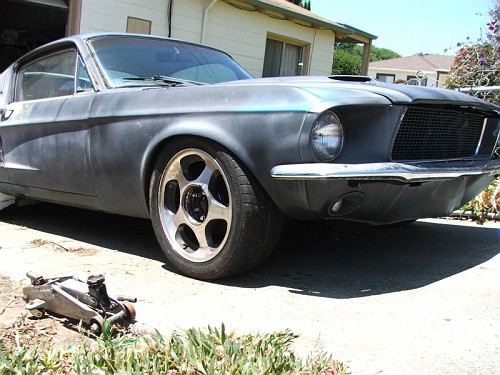


 [/URL]
 [/URL]


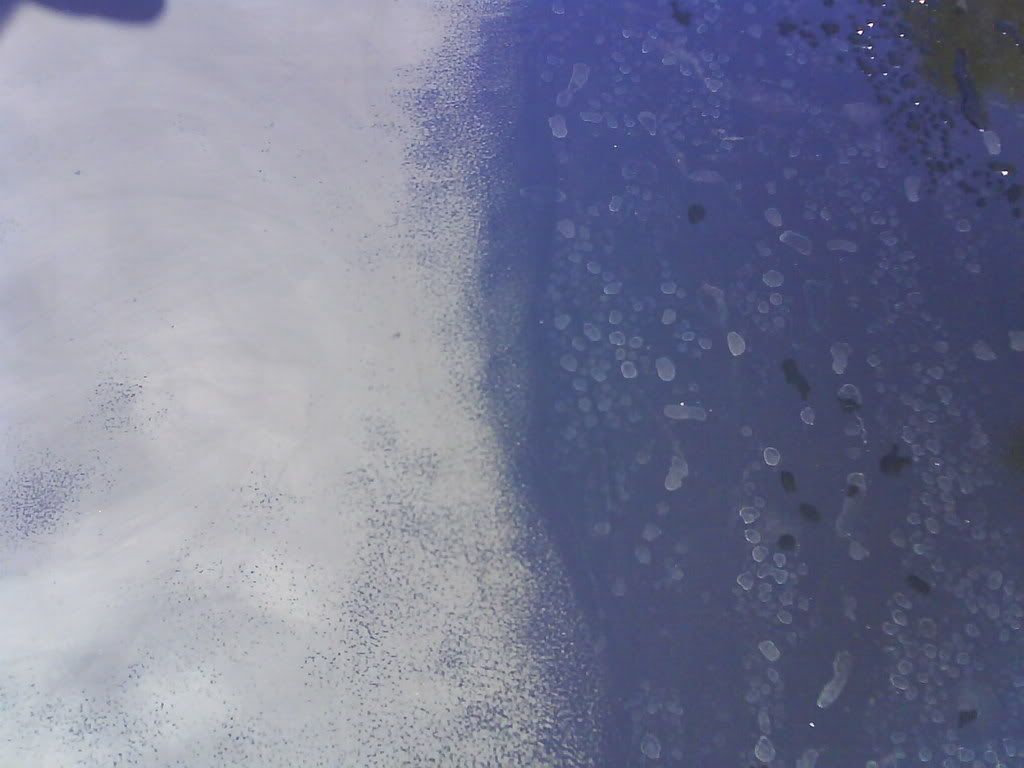
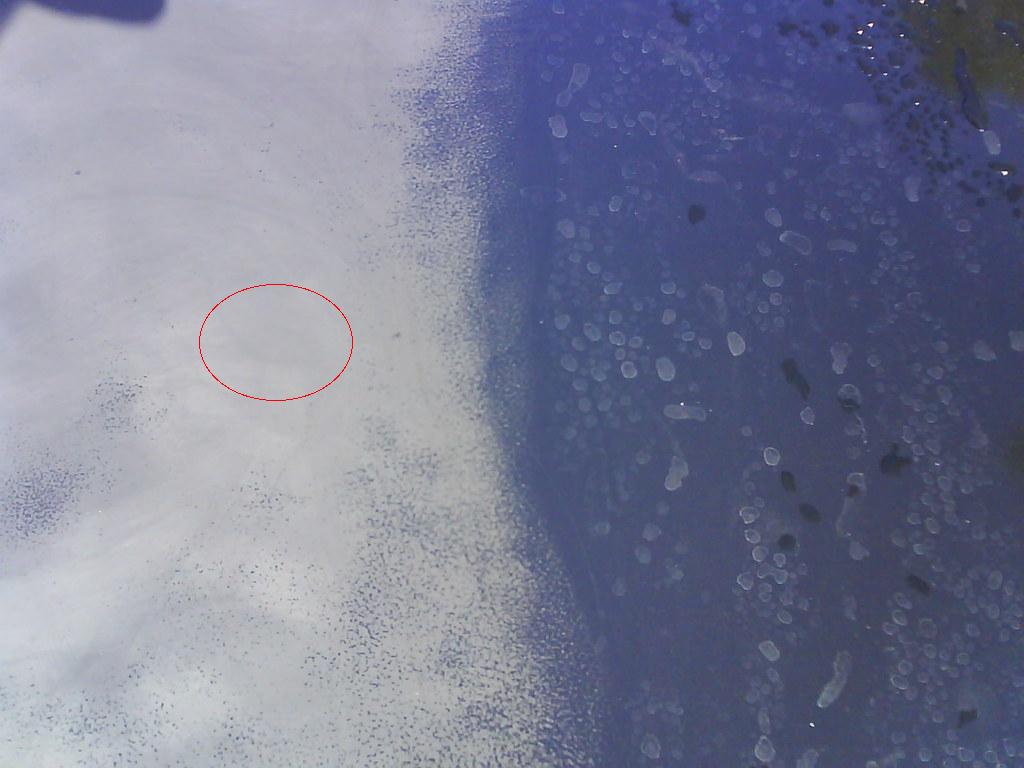


.JPG "4906700-IMG_1218(Small).JPG")


.JPG "5130091-DCP_3933(Medium).JPG")

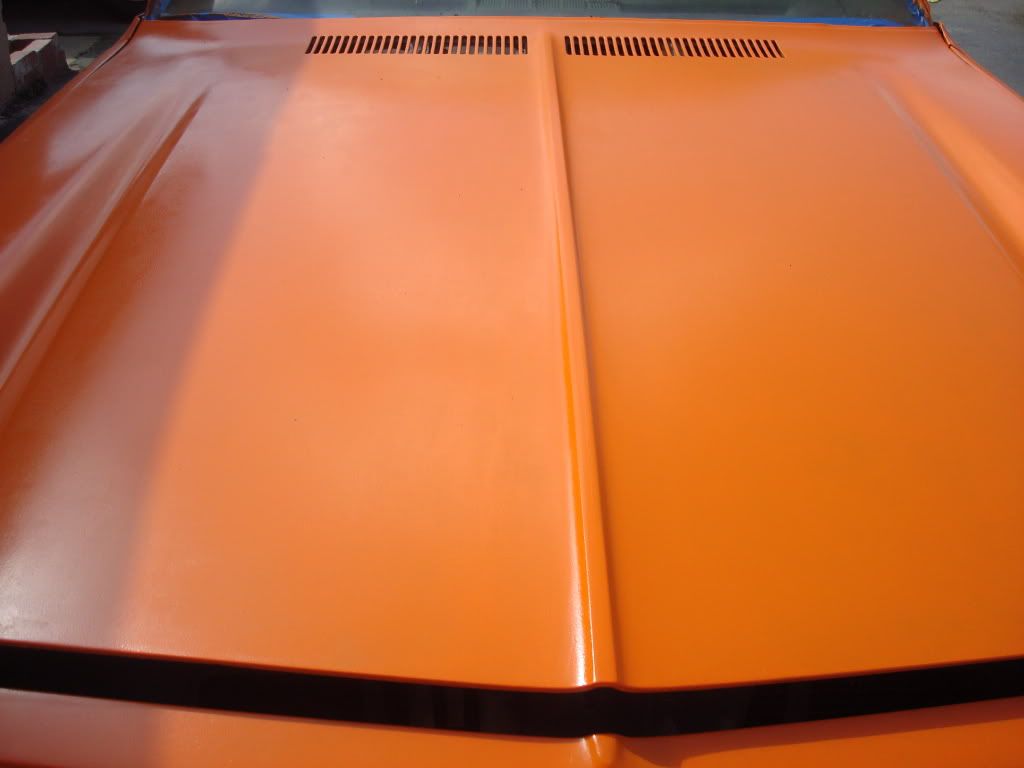

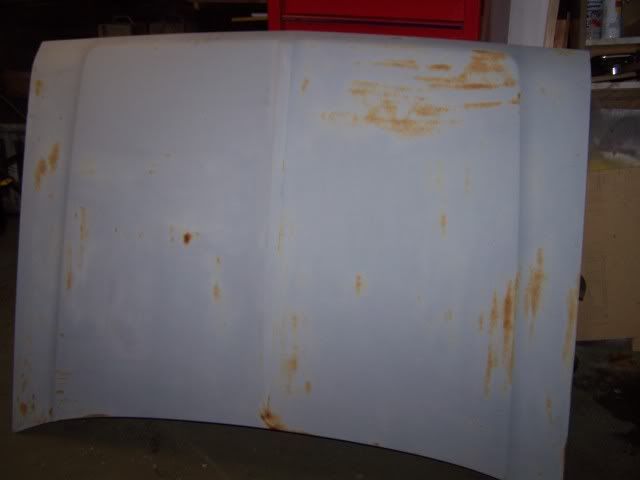
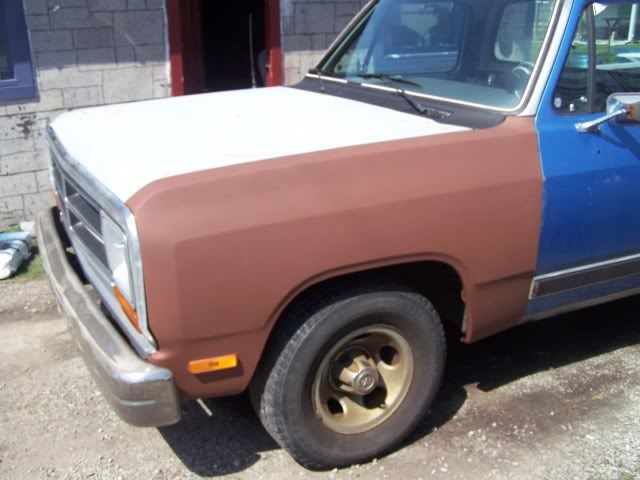


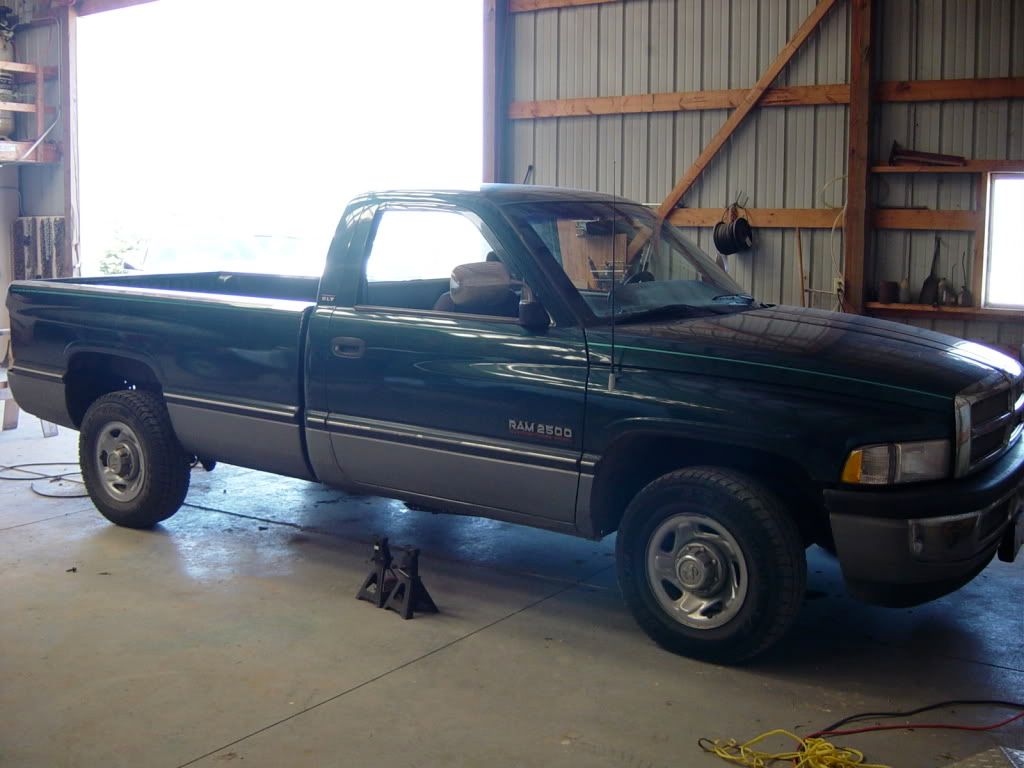
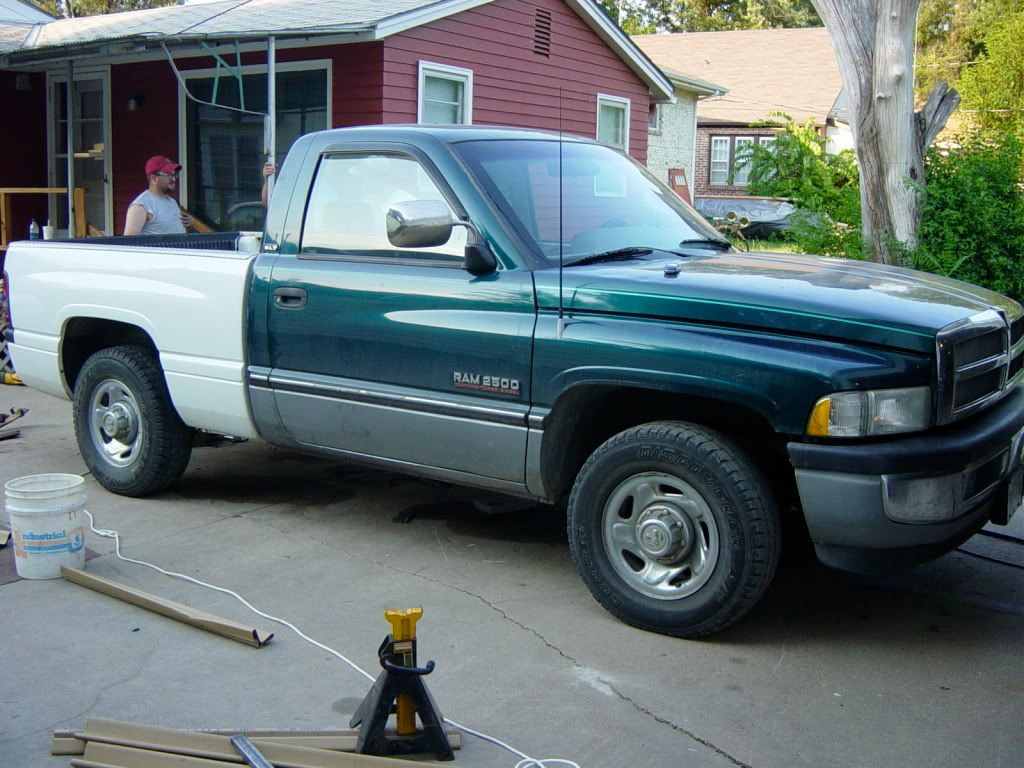
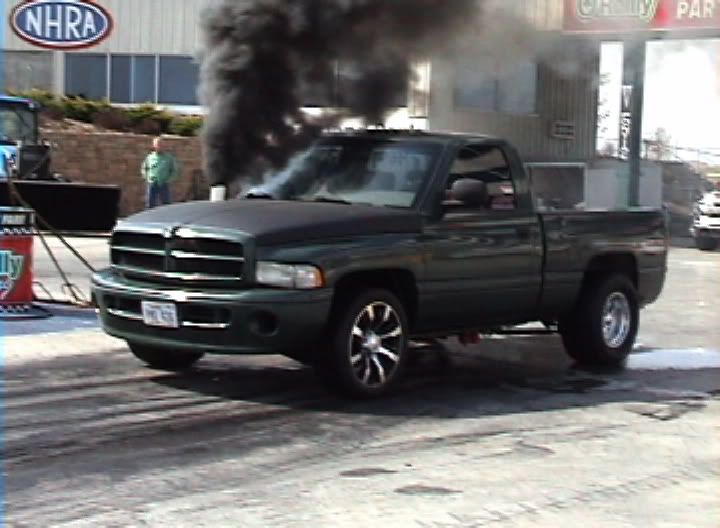
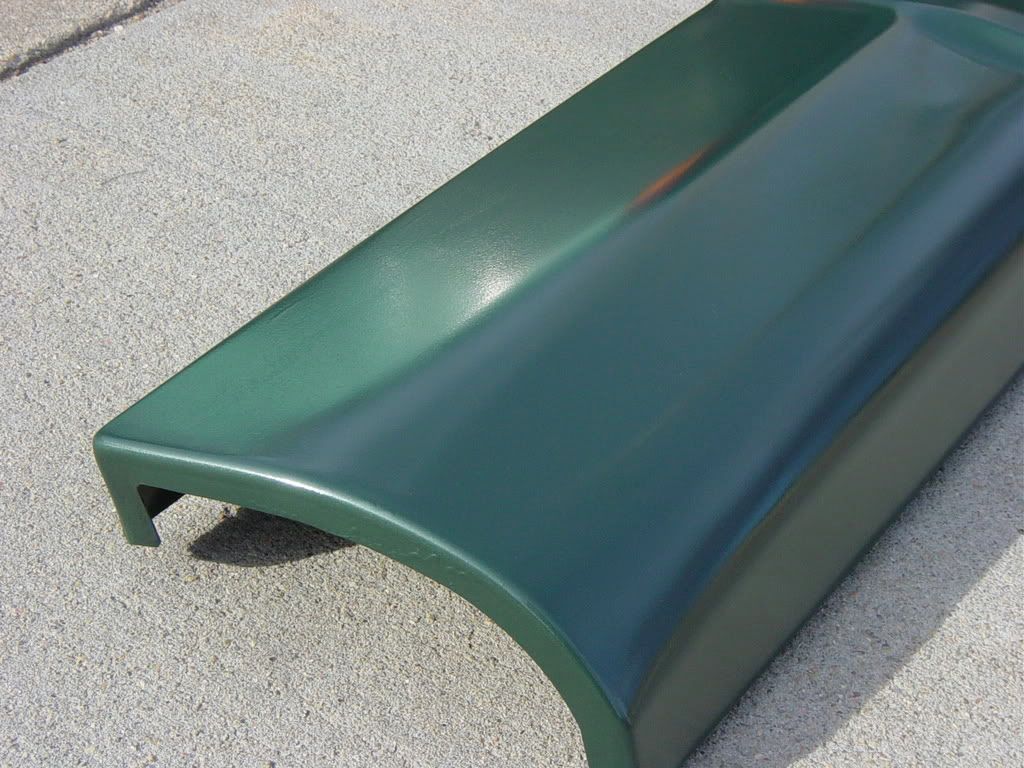
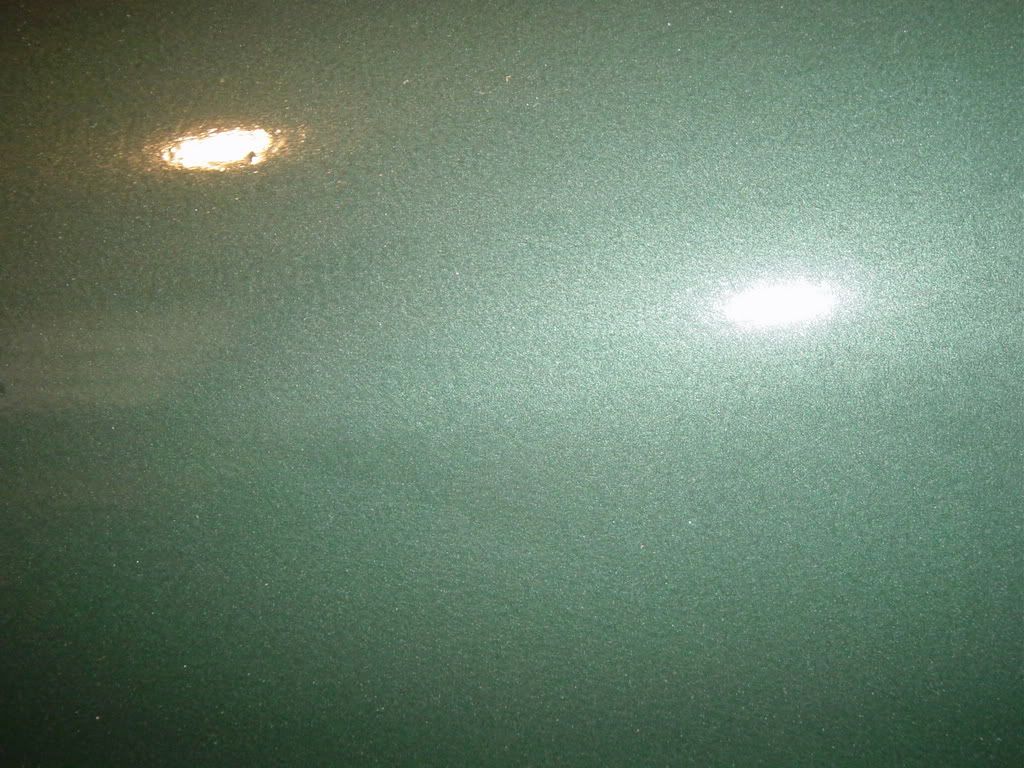
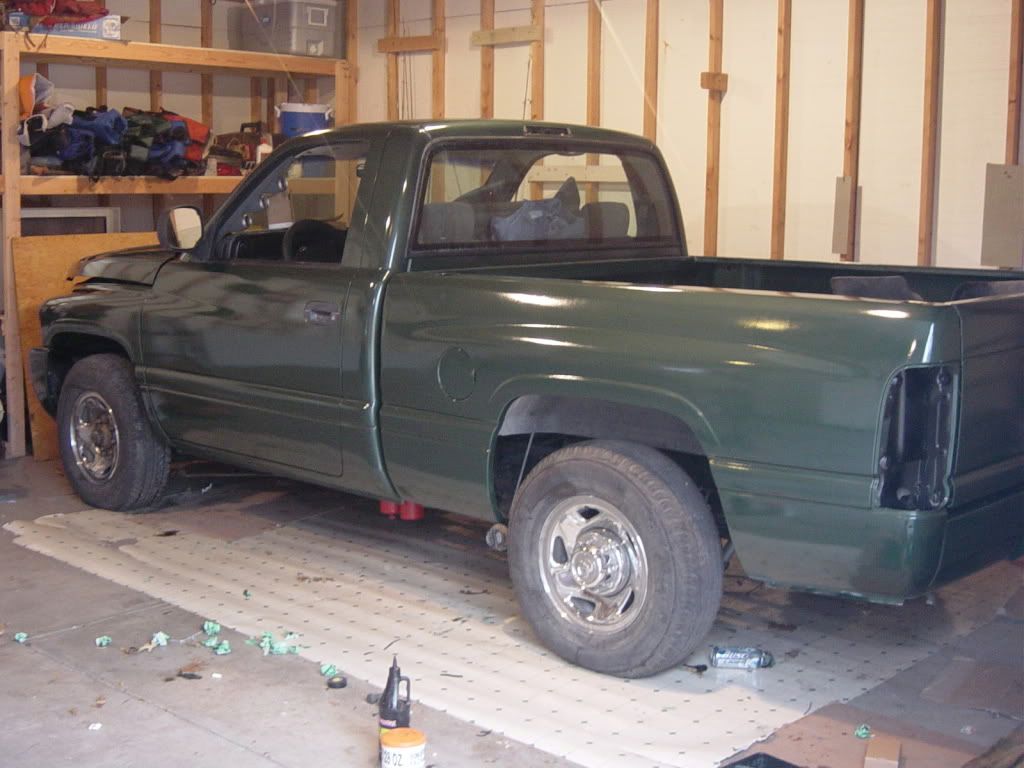
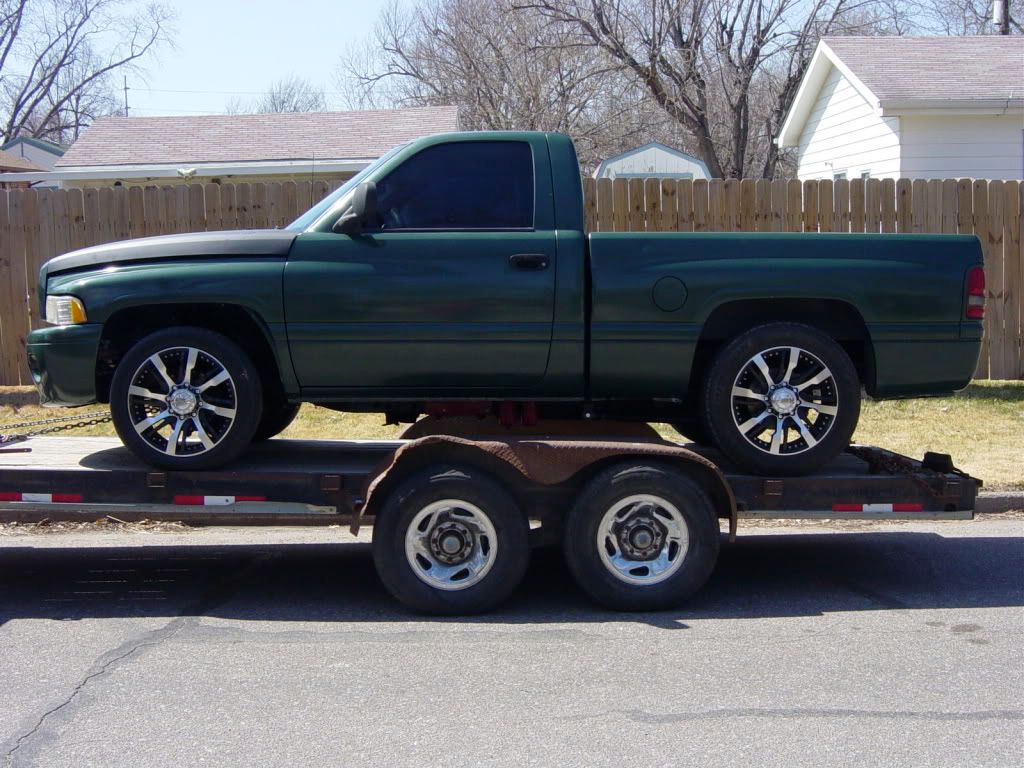

.JPG "5253955-IMG_1211(Small).JPG")


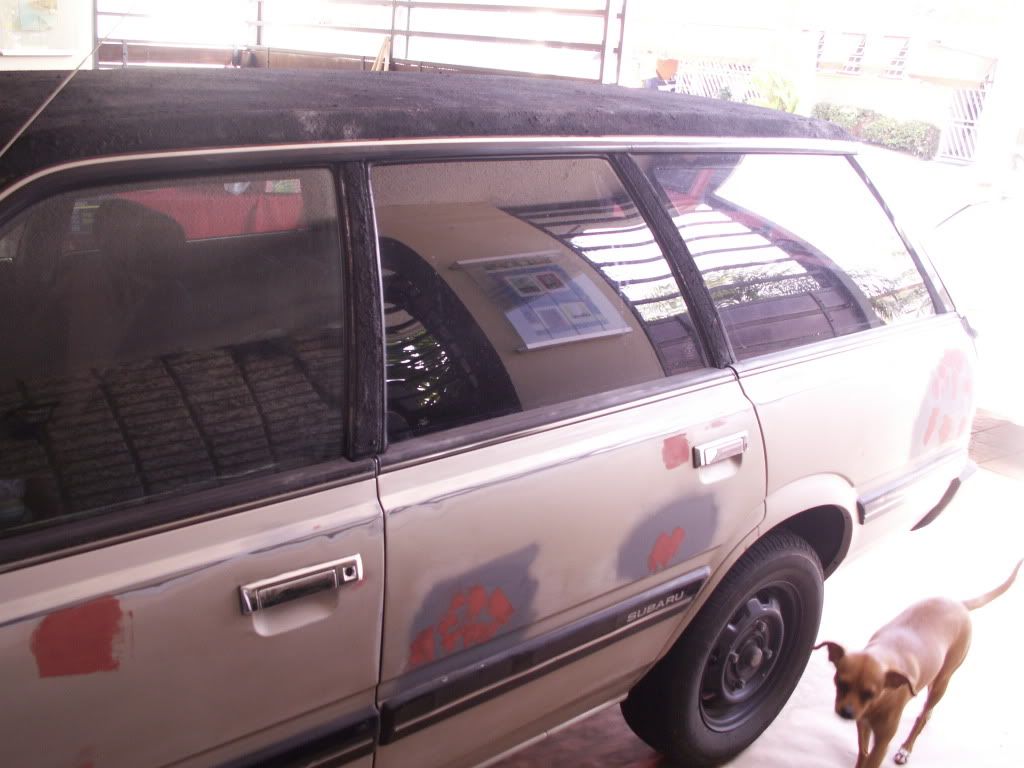
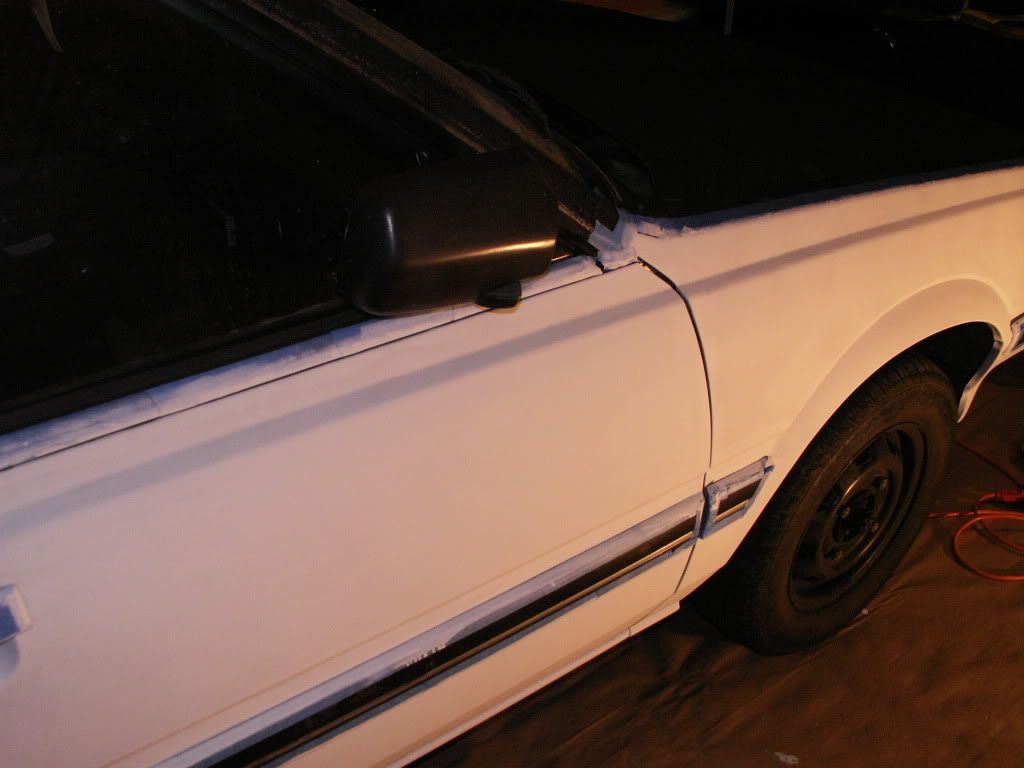
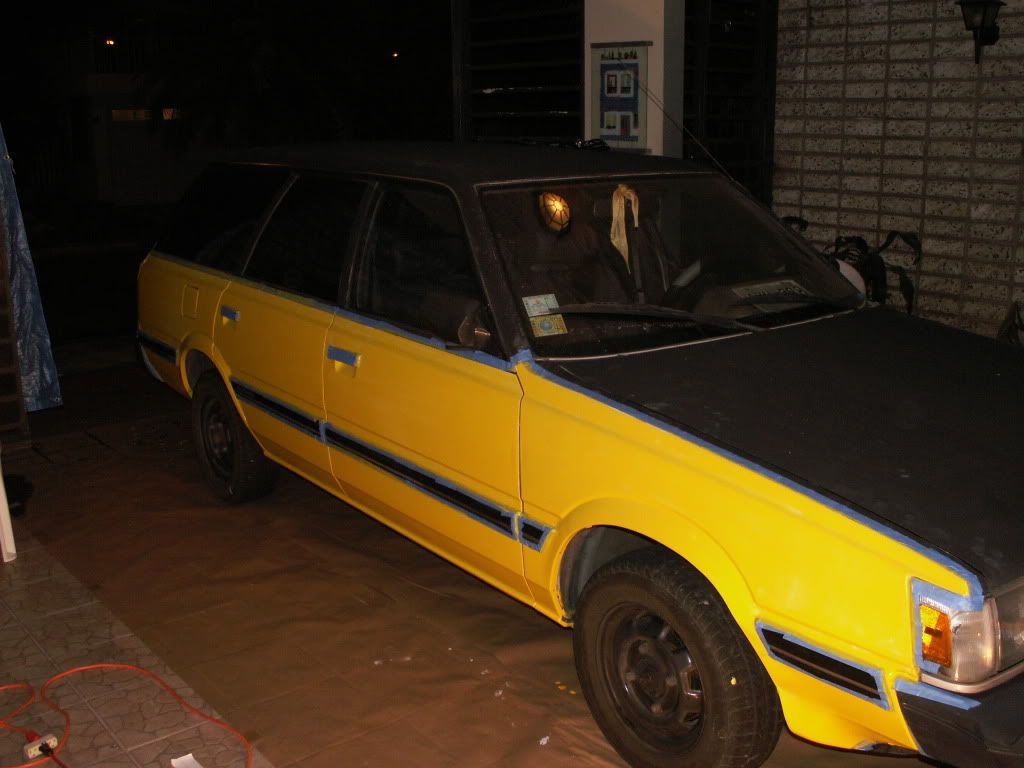

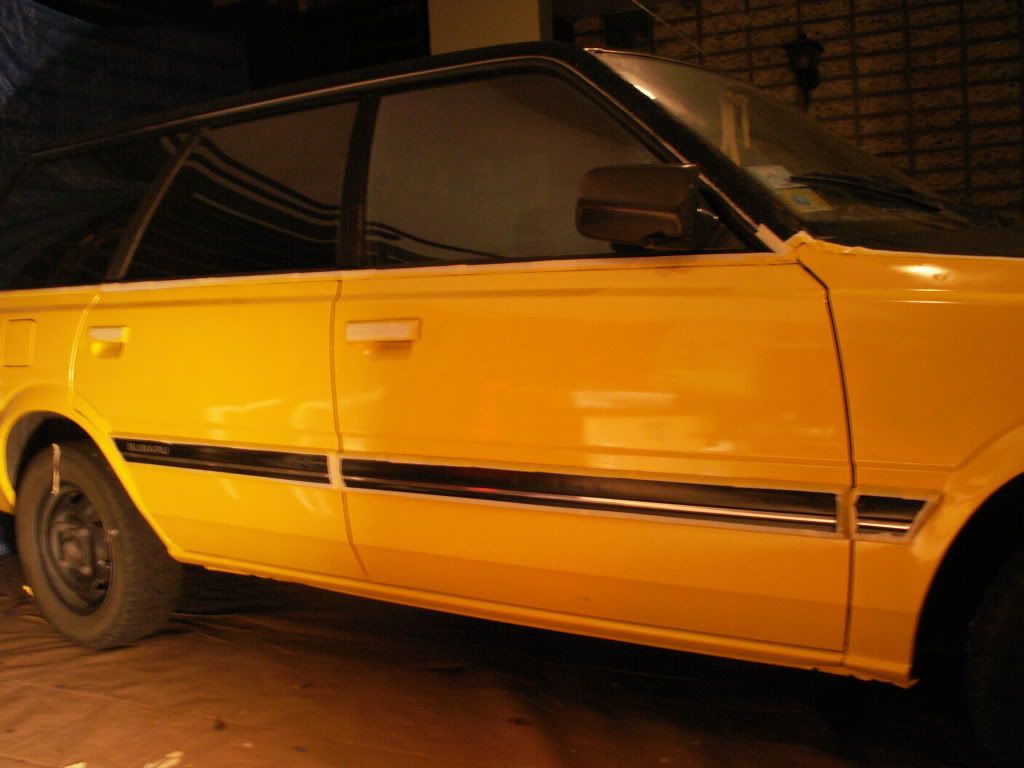
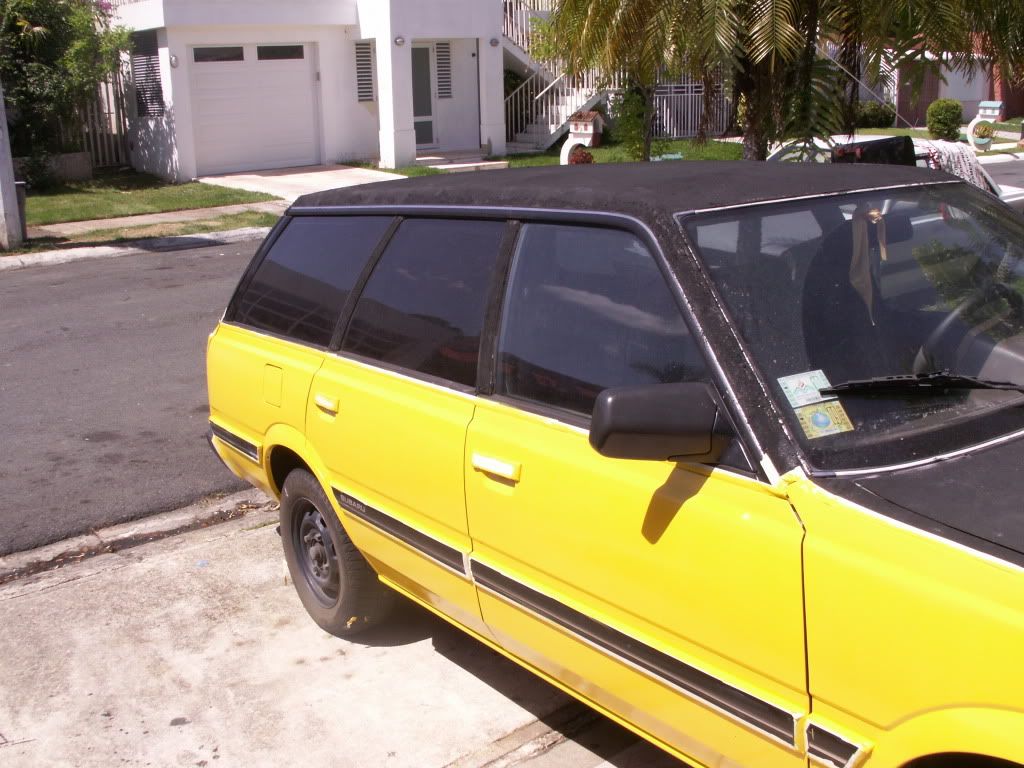
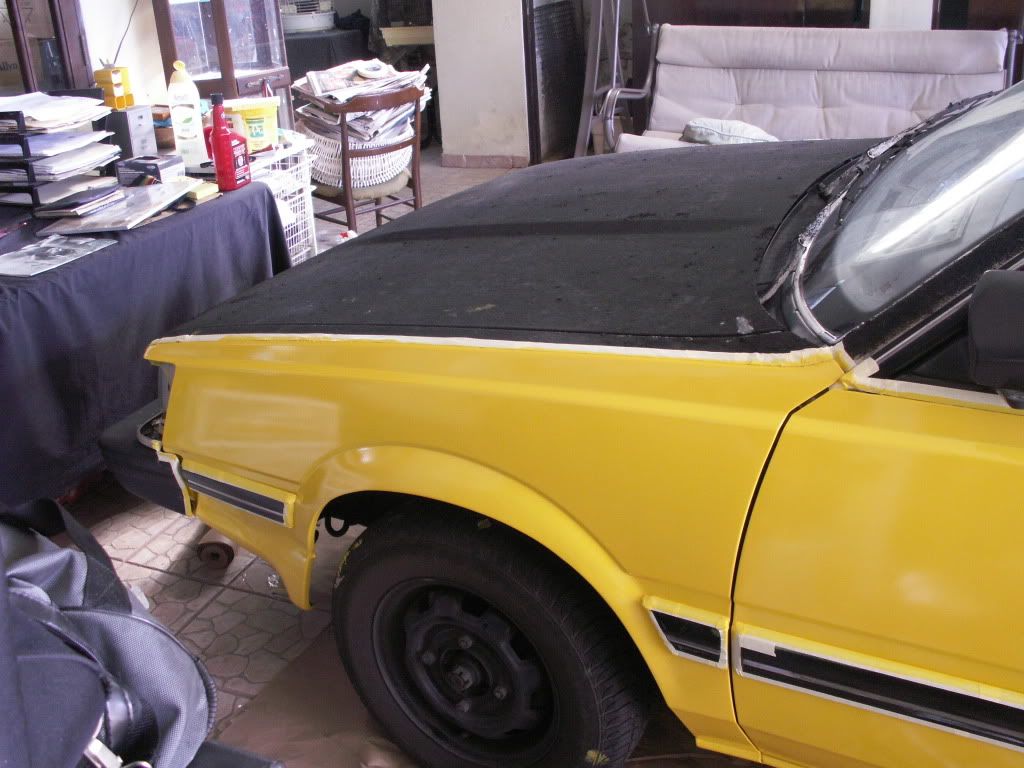
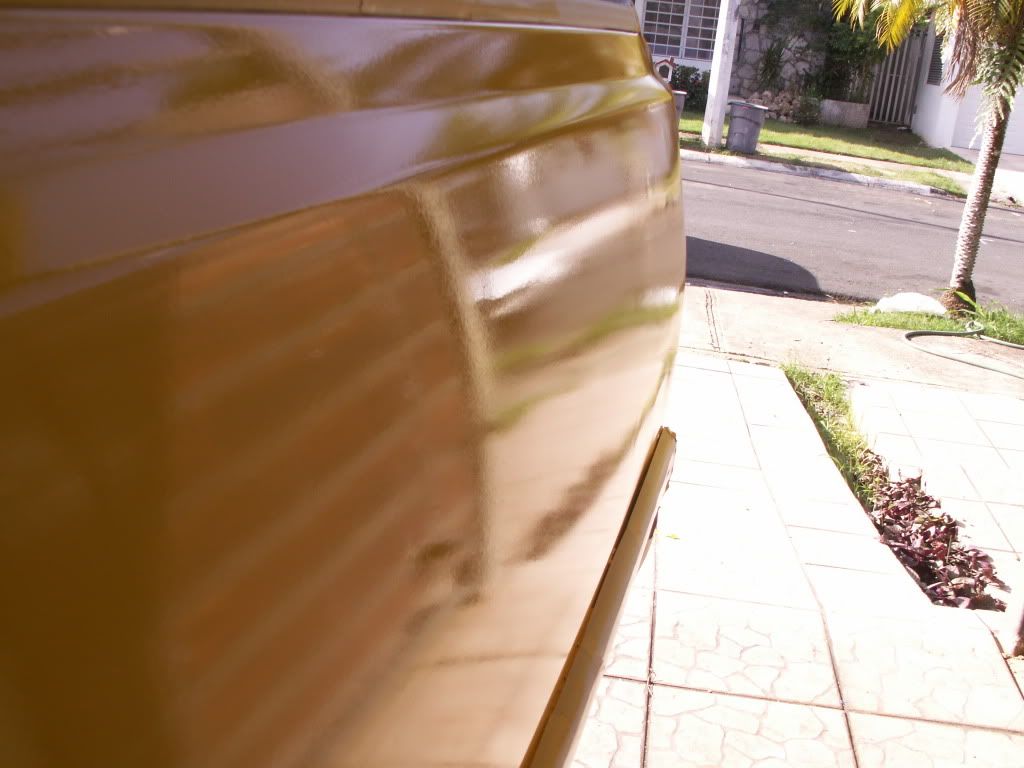
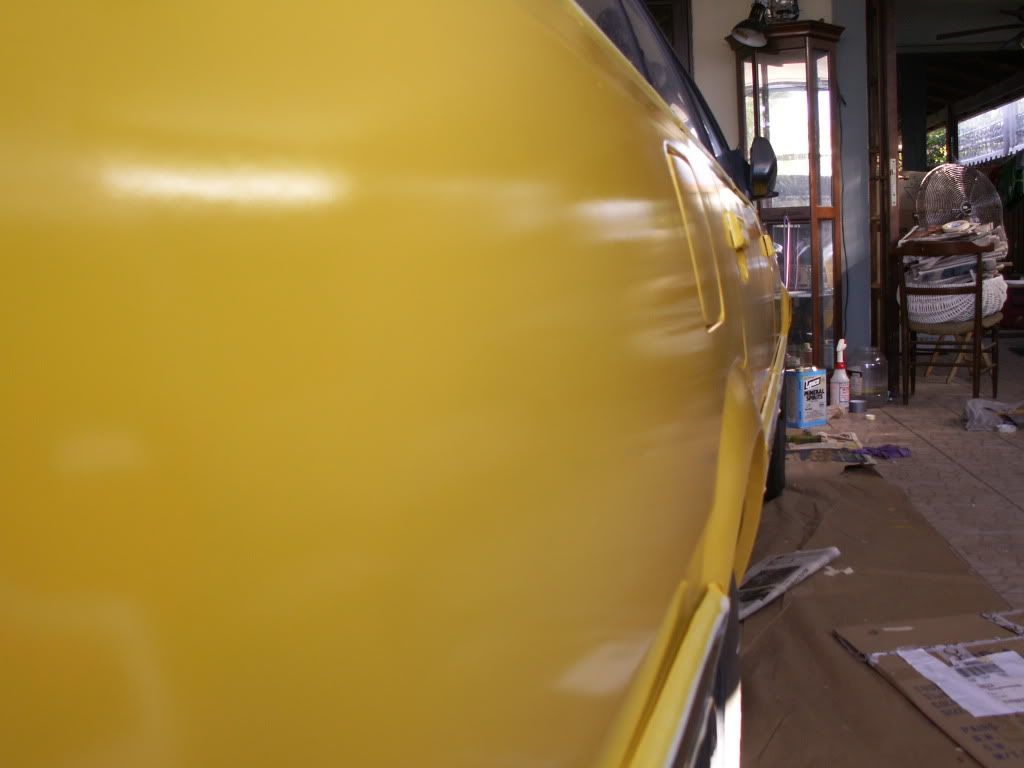


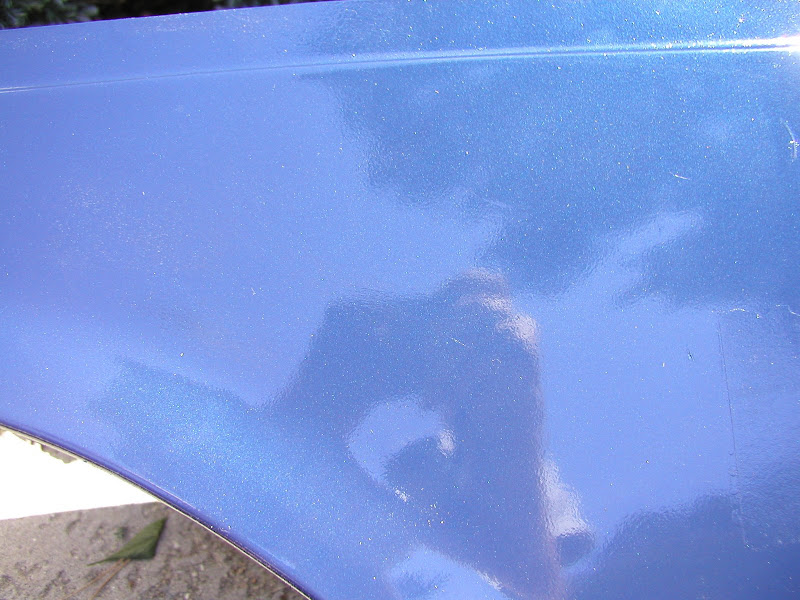
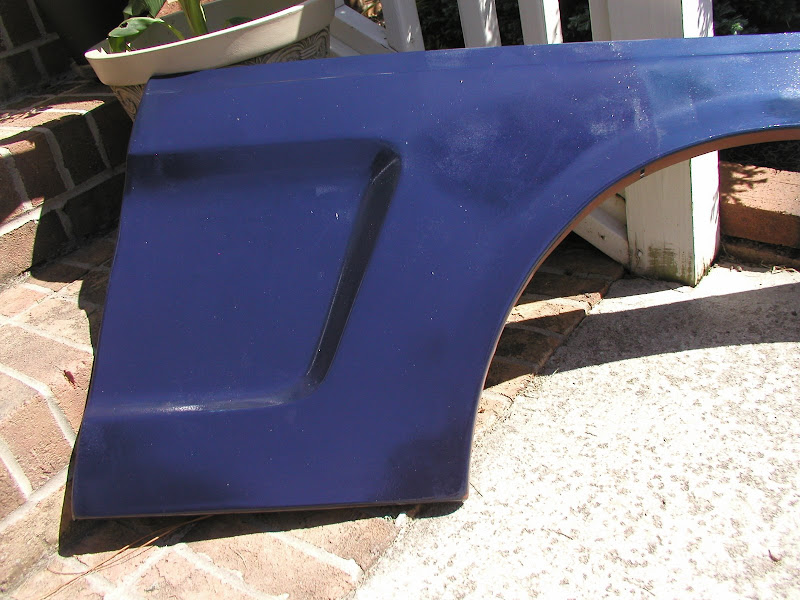
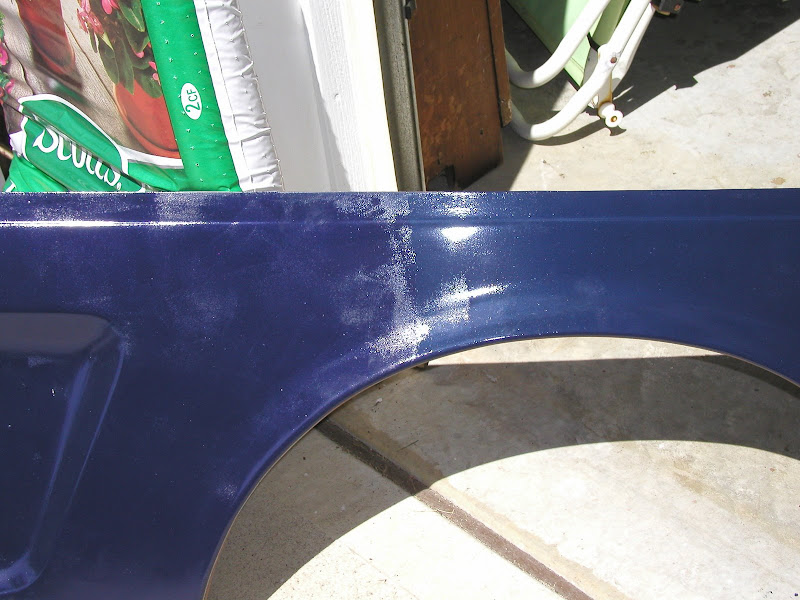


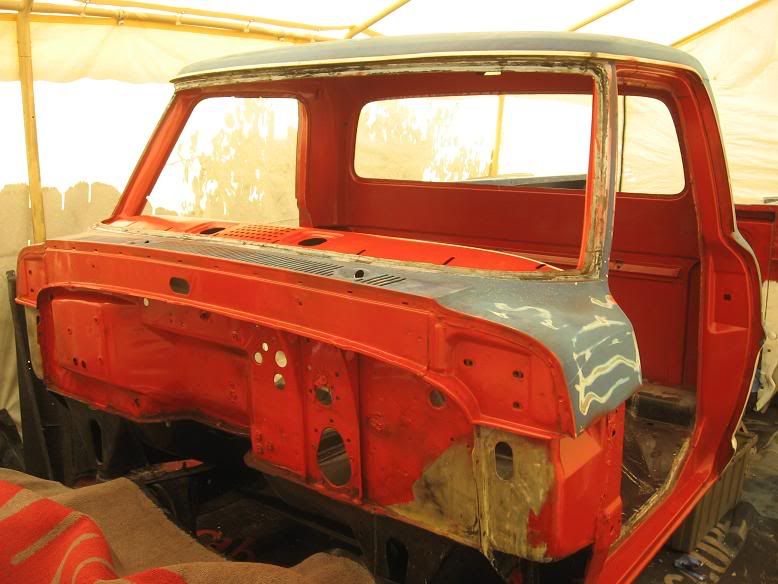
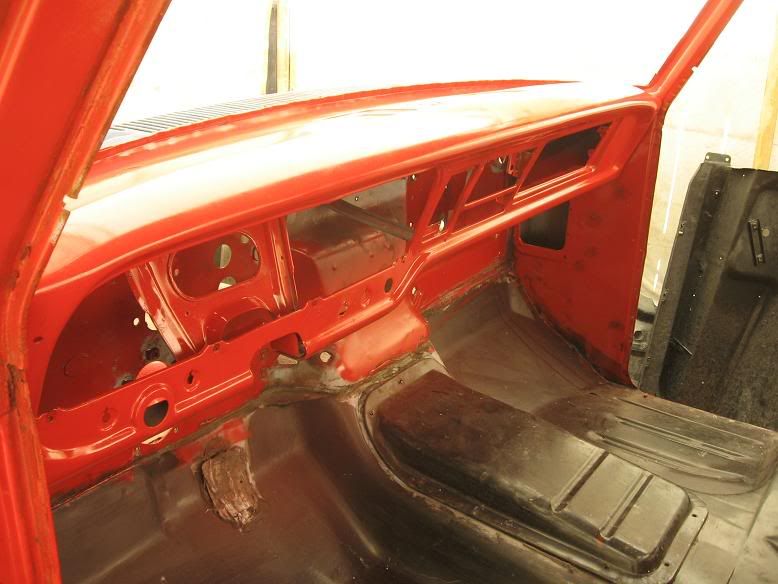
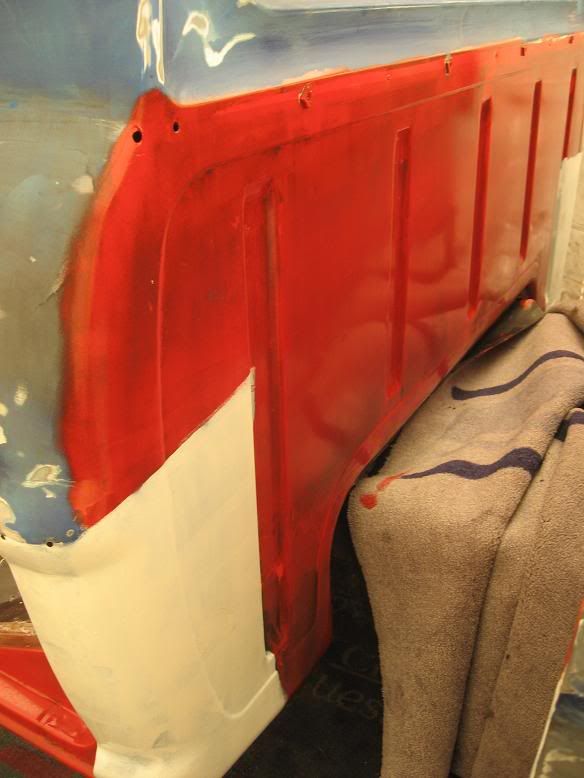
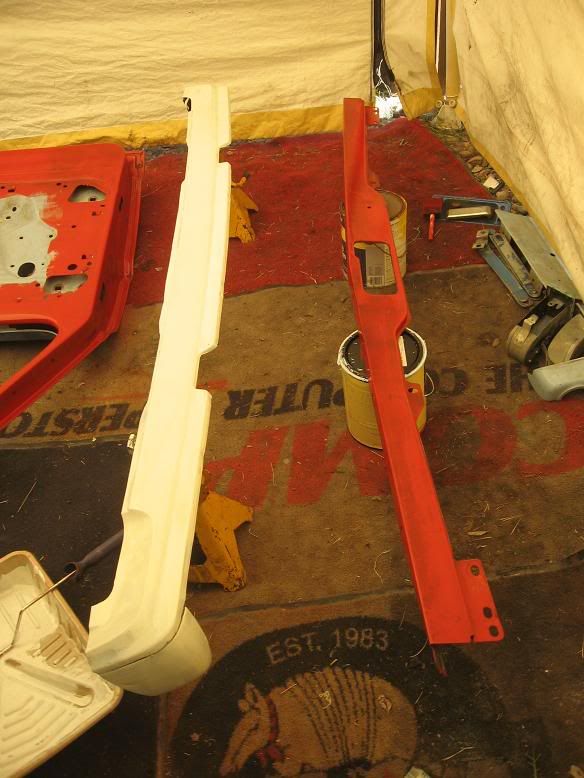
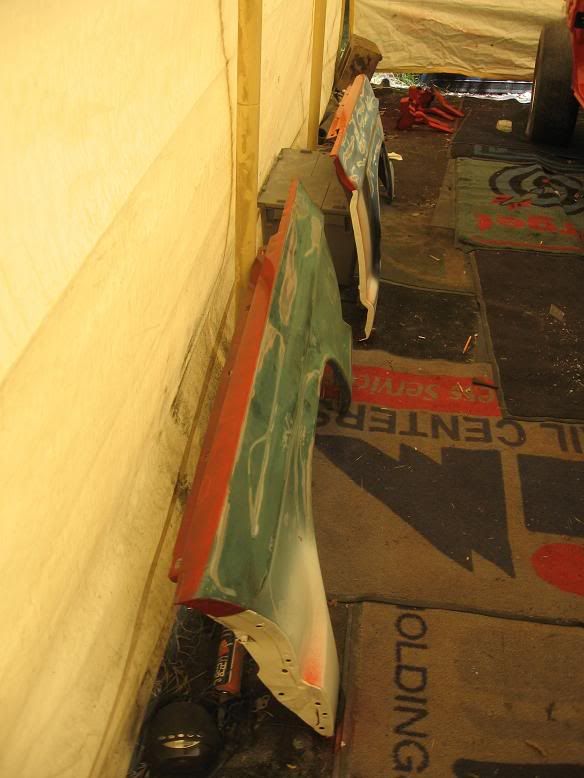
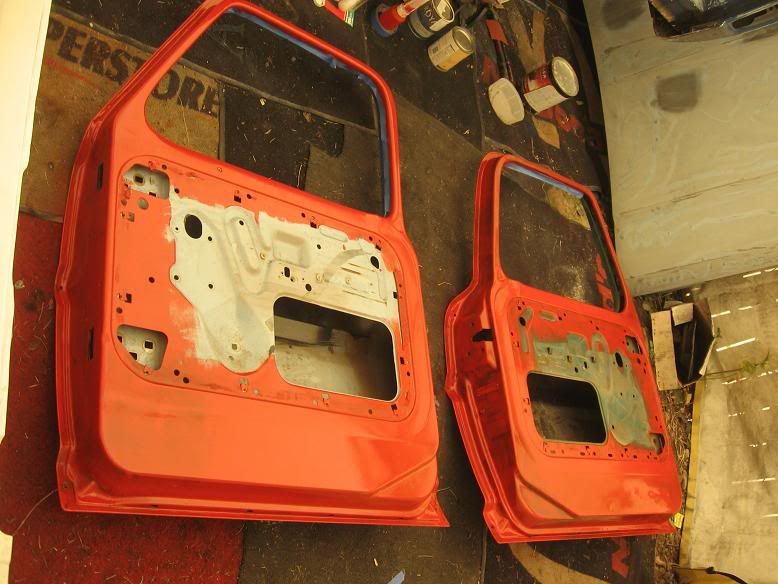


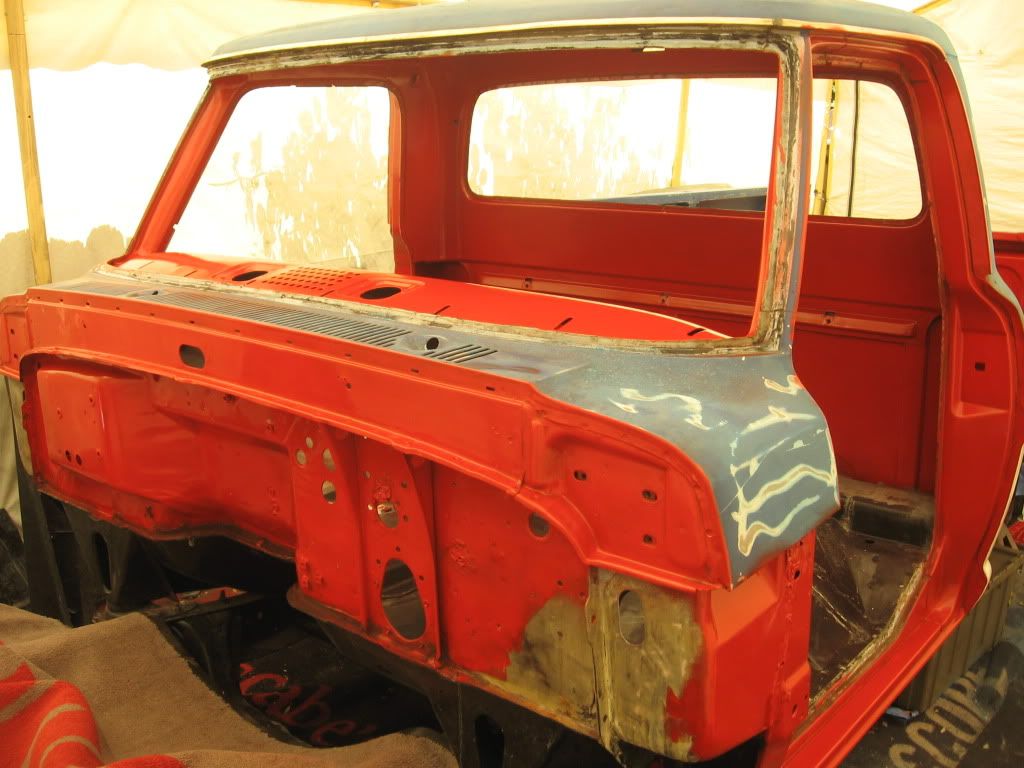
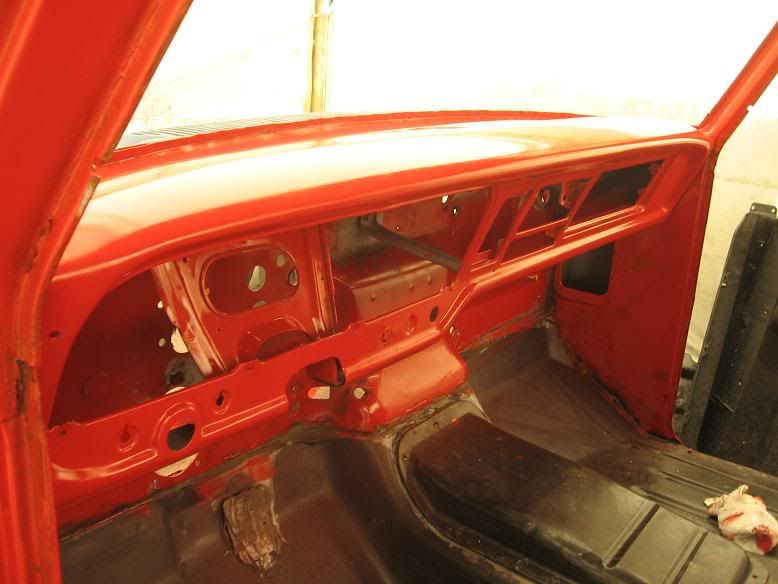


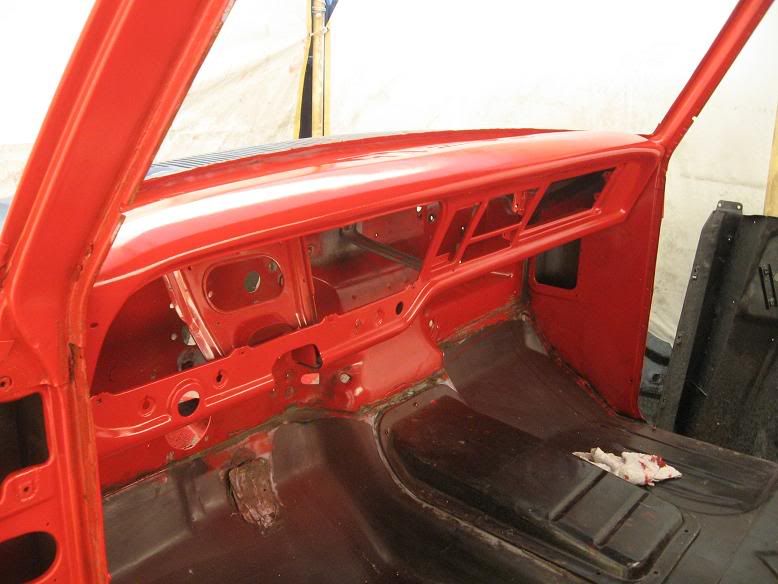
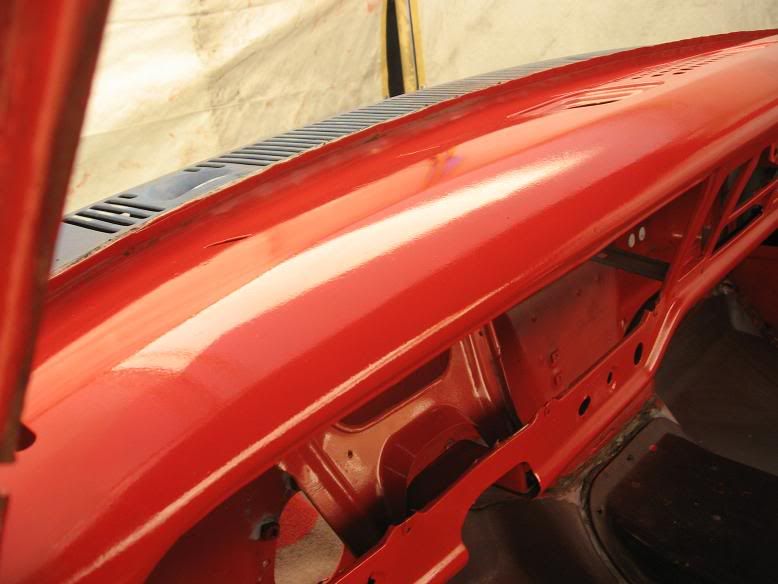

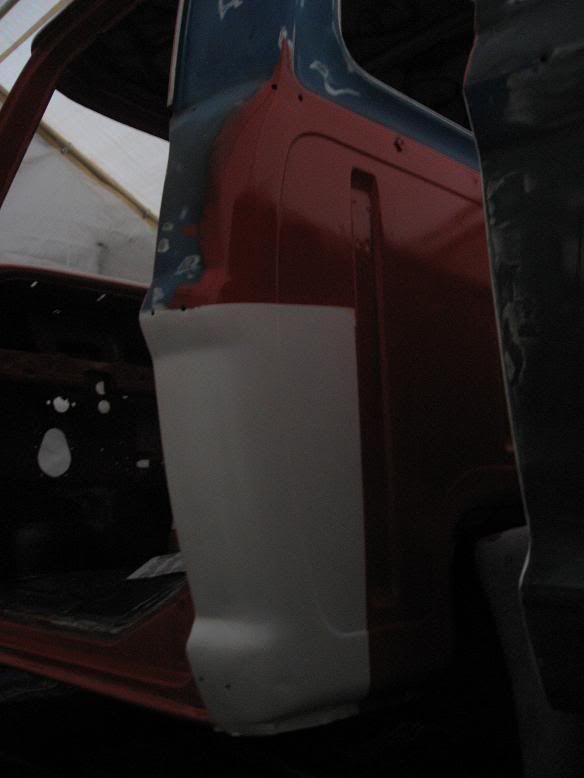

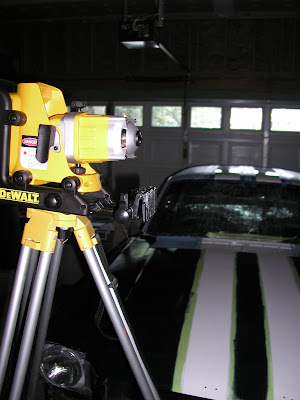
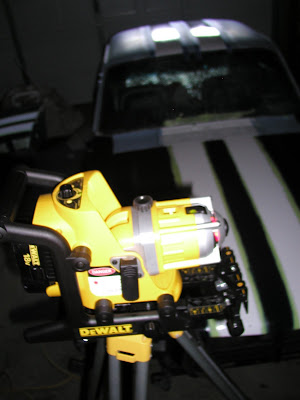


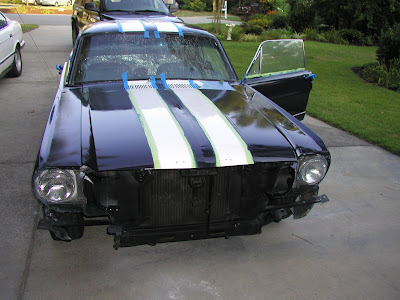


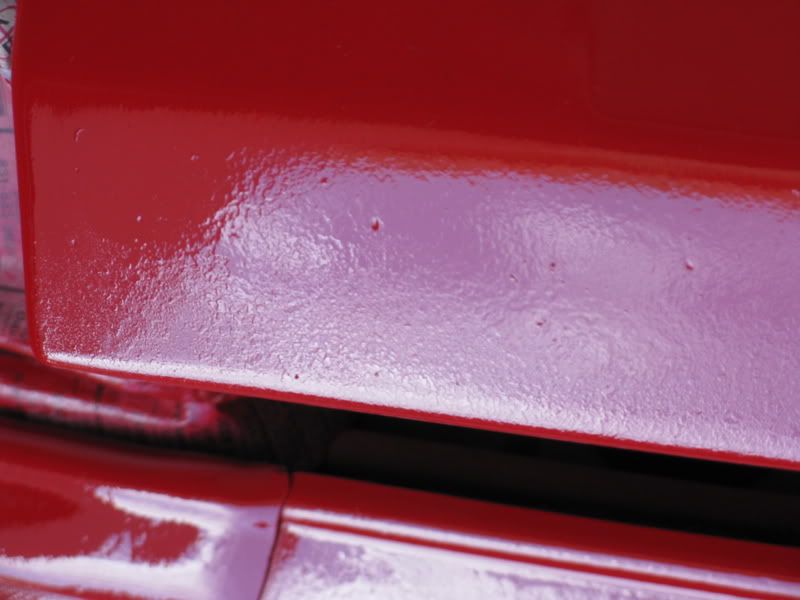
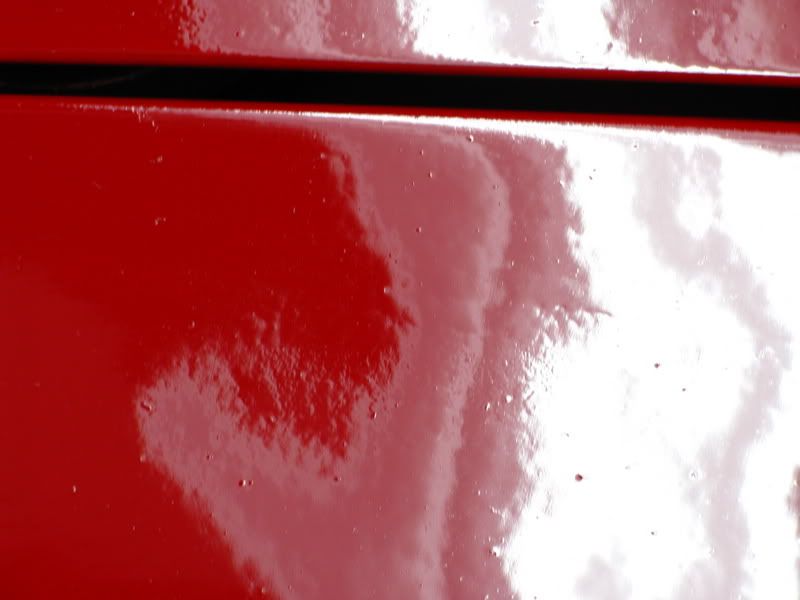


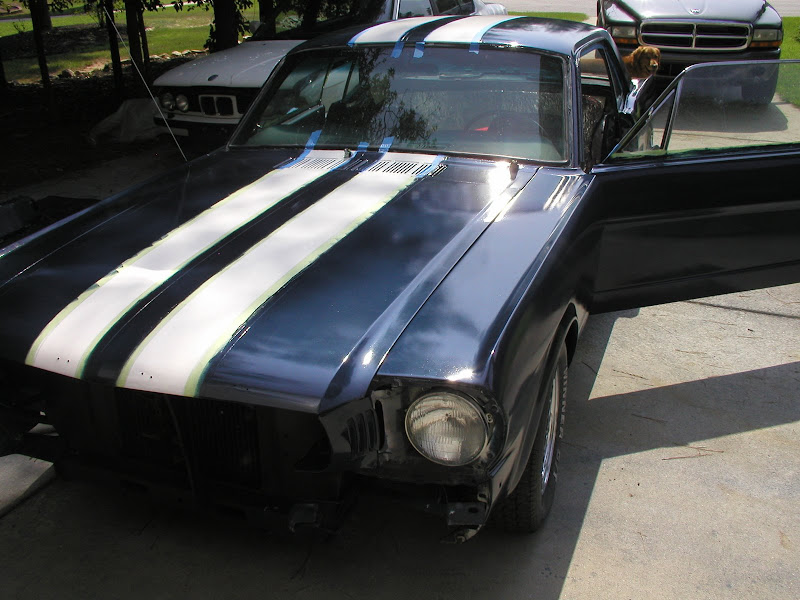
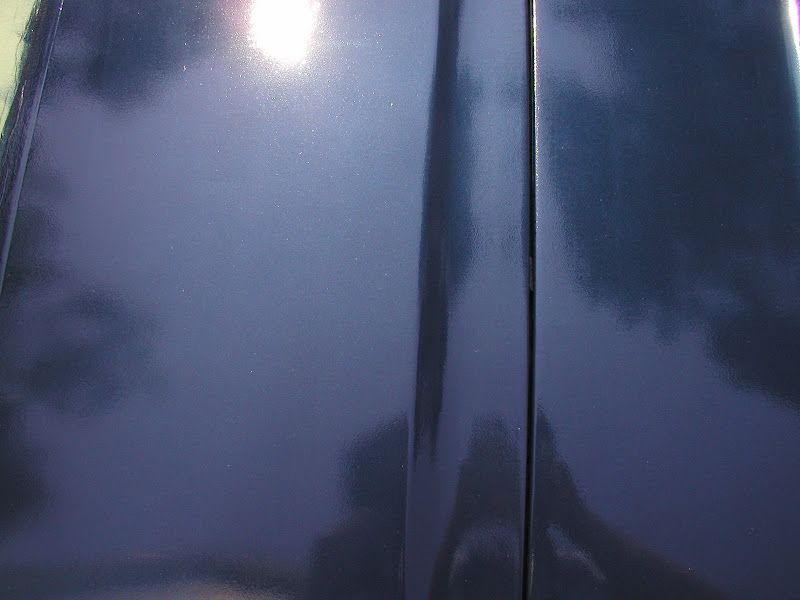
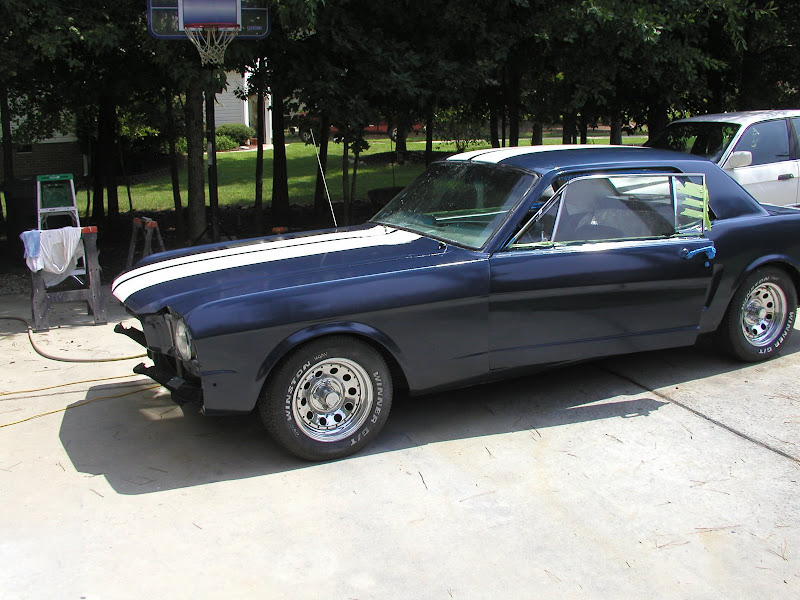


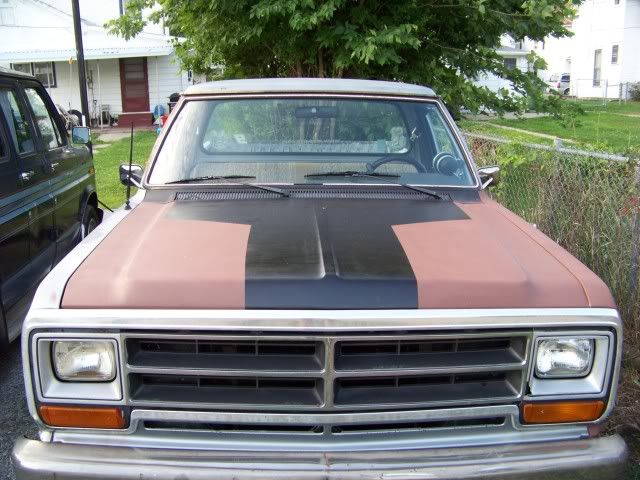


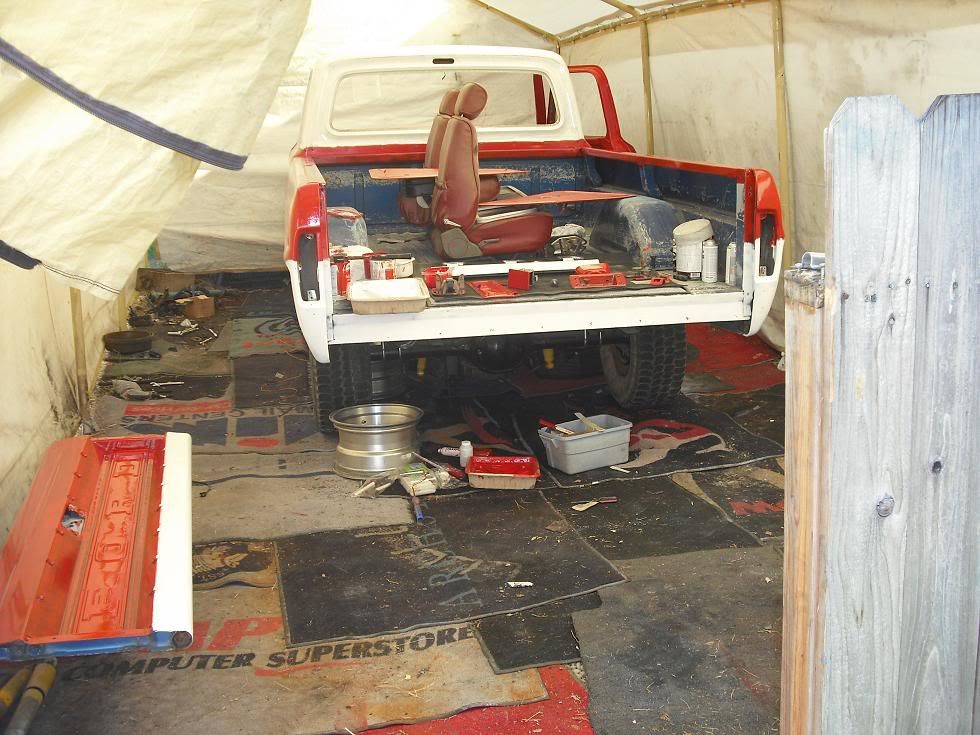
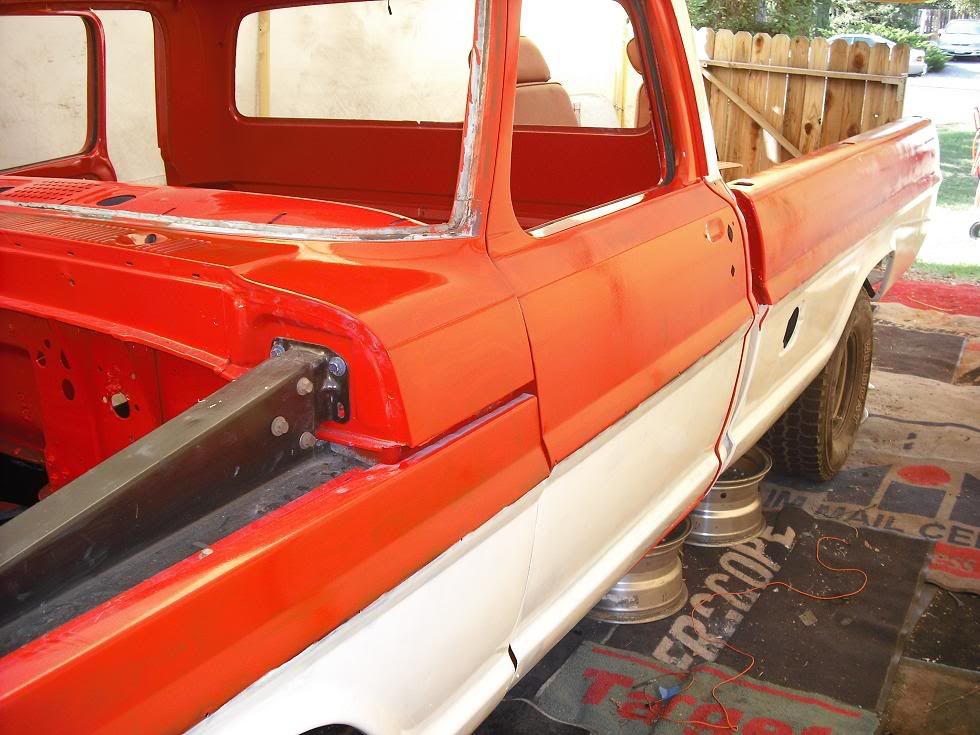
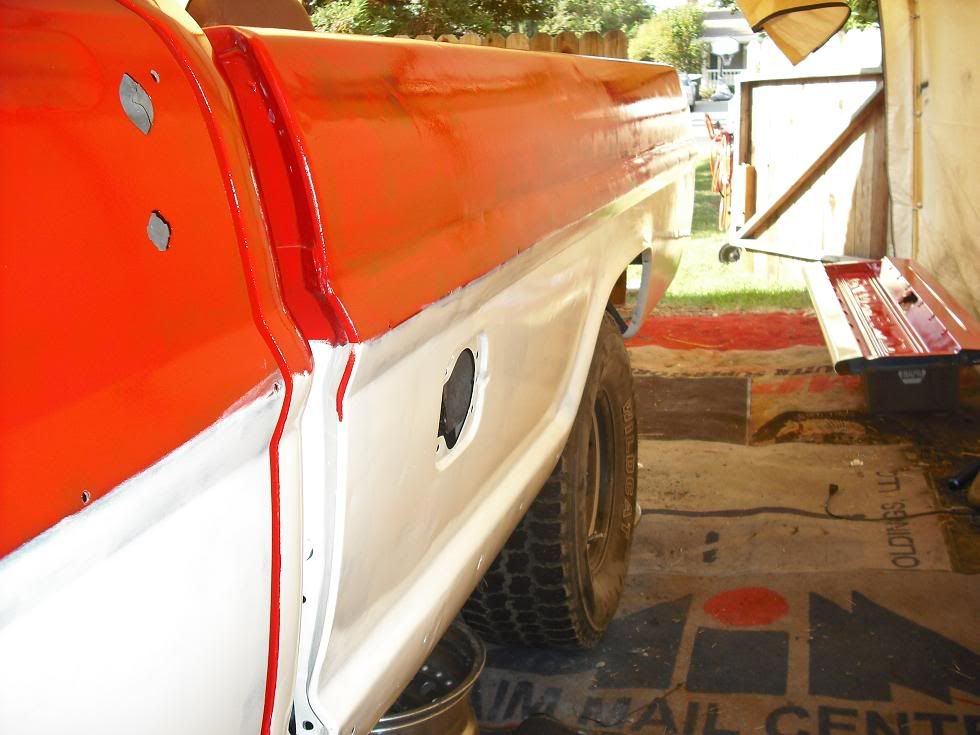


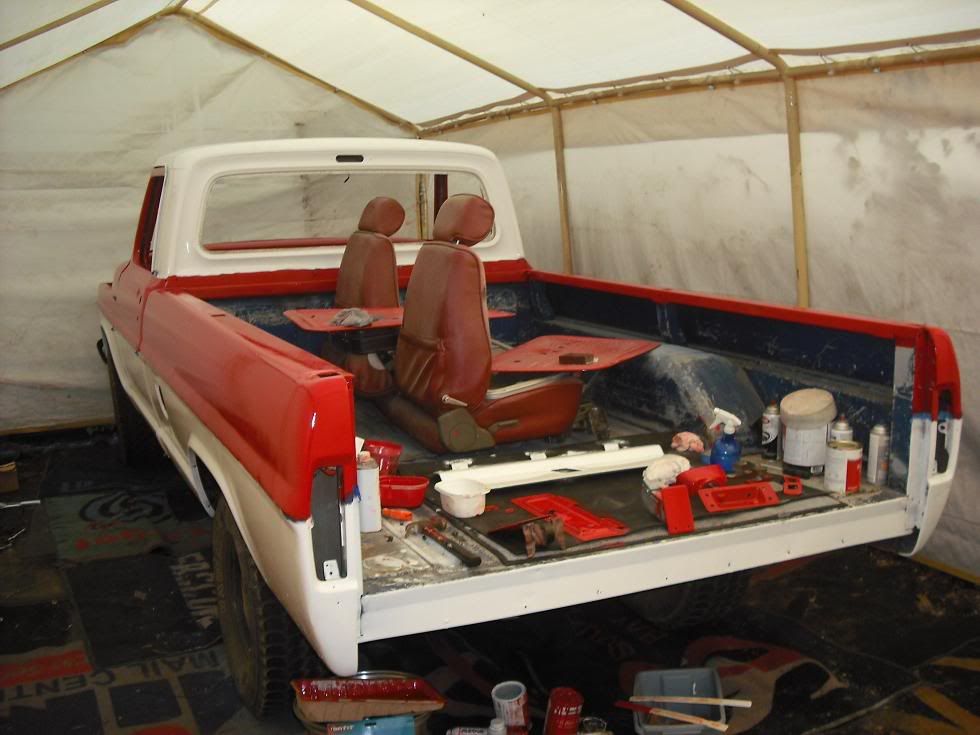
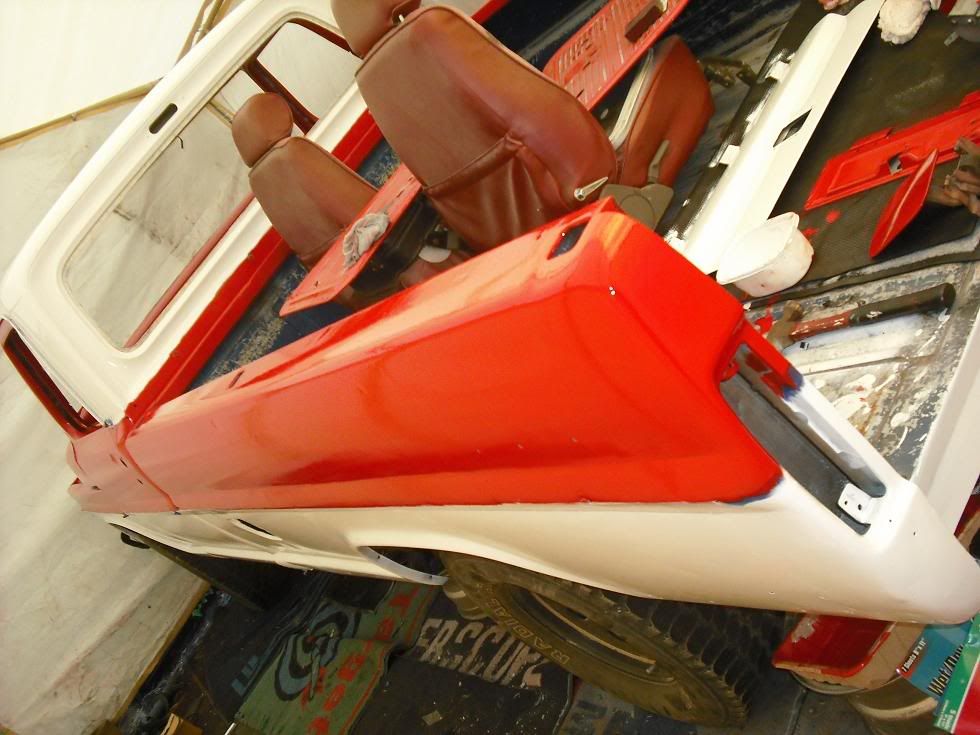
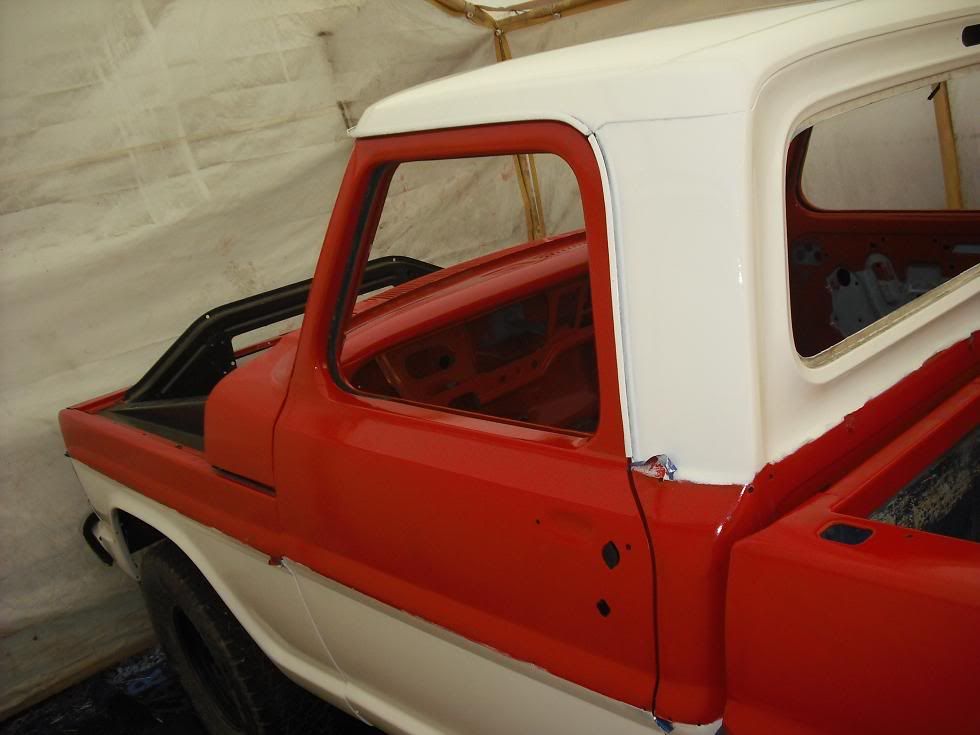


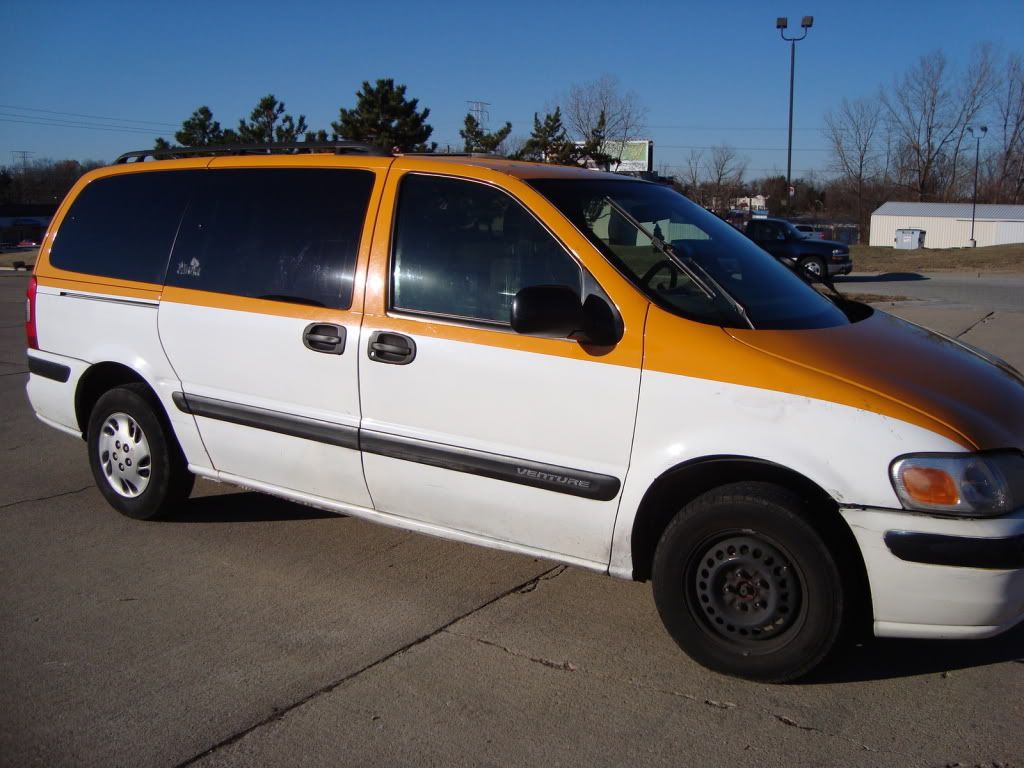
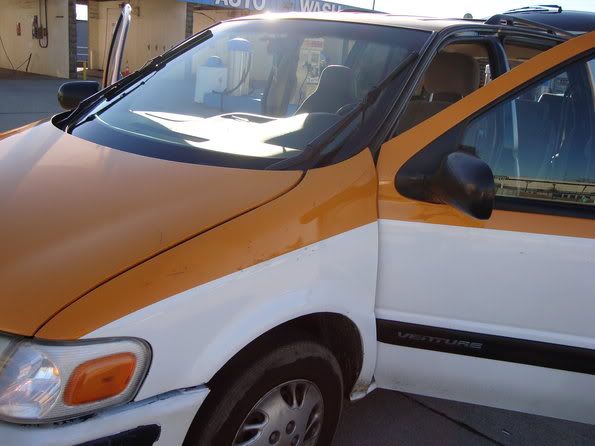
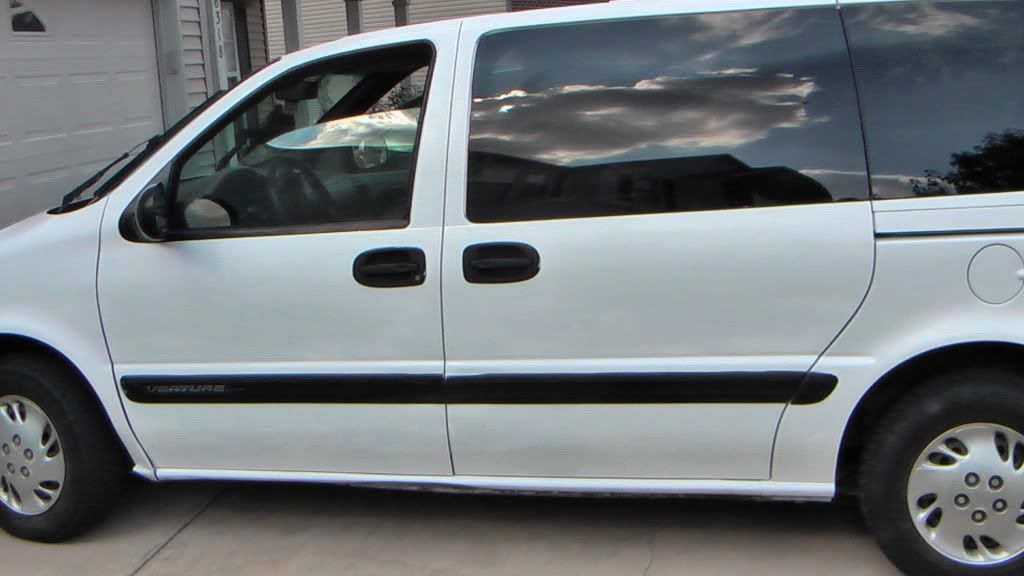
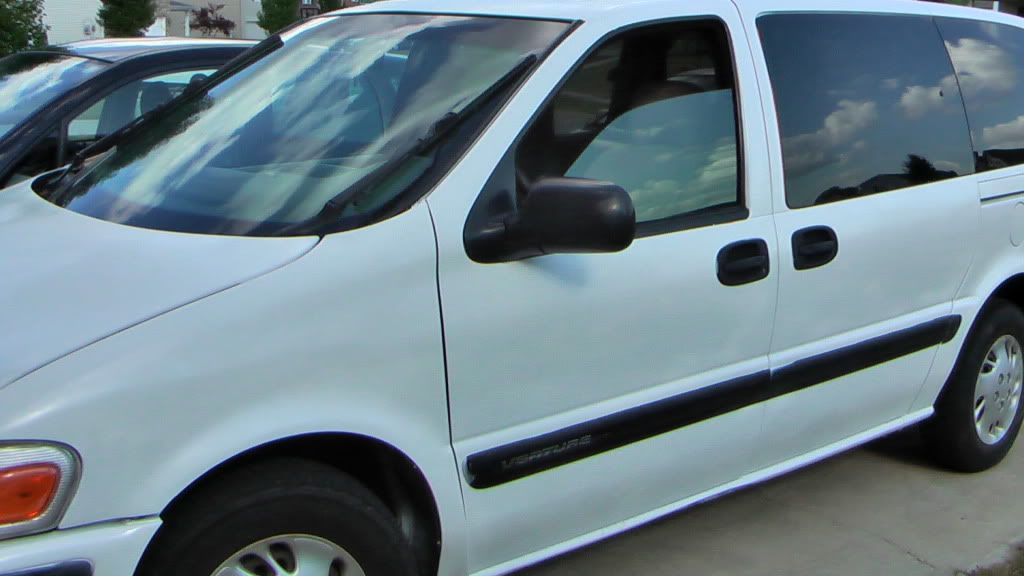


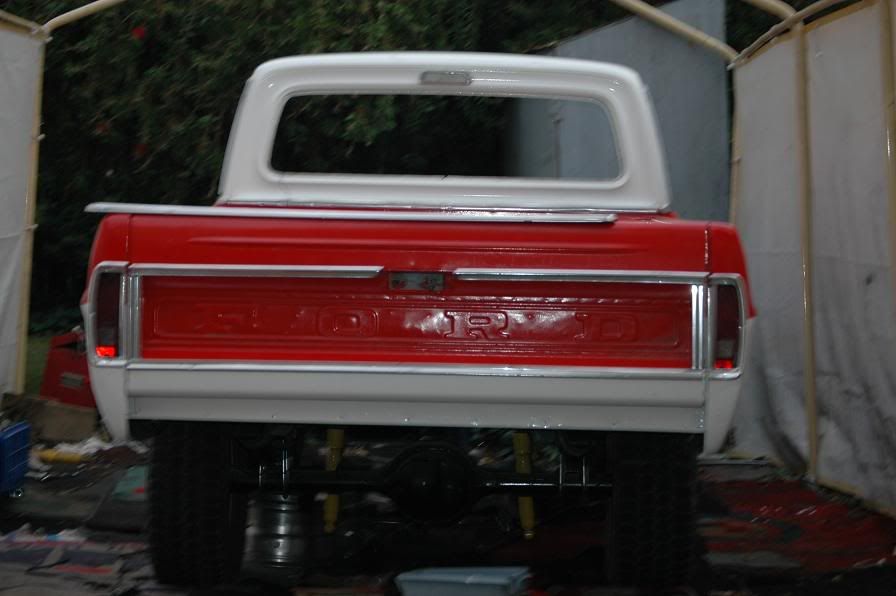
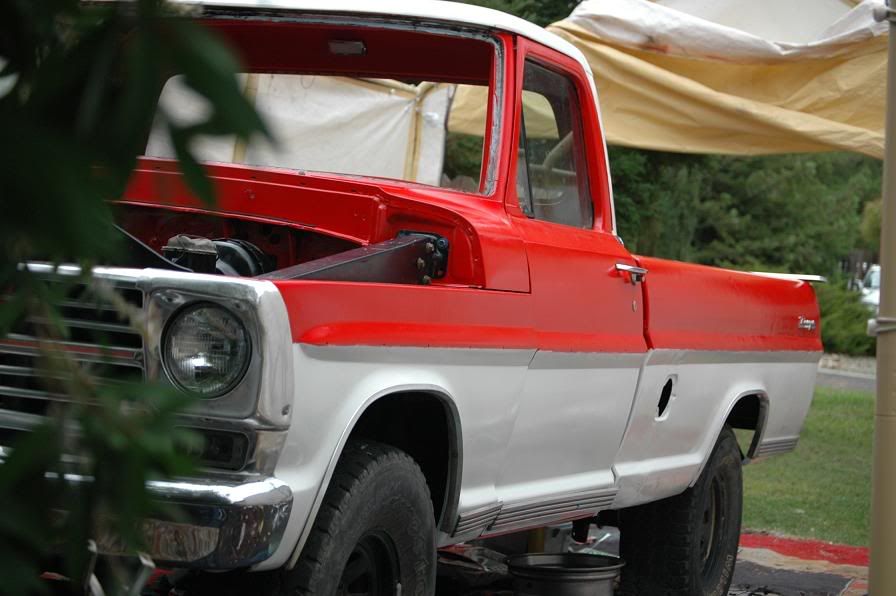
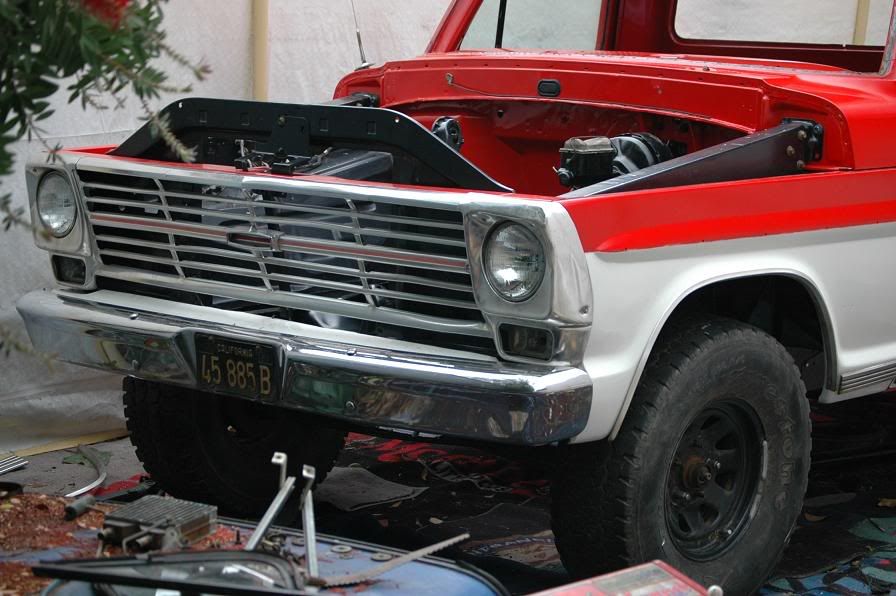


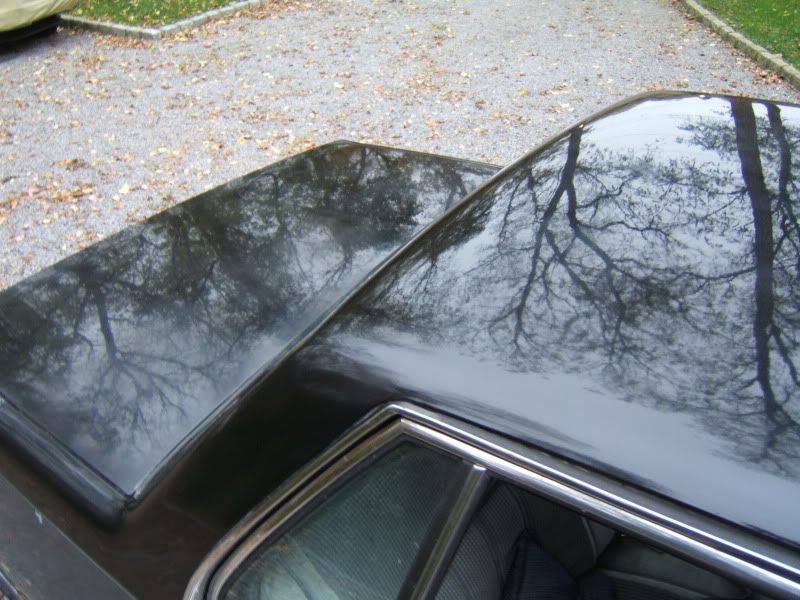

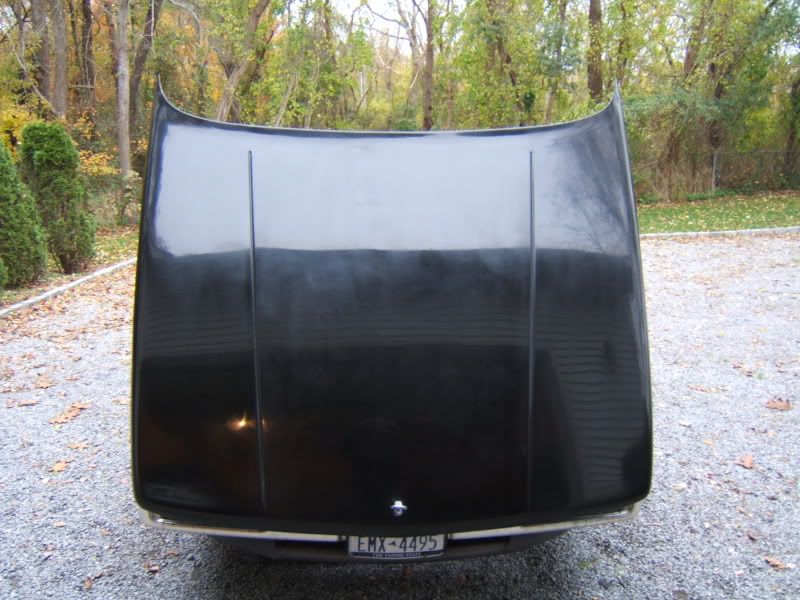
 <------thats gunna be me mixin' the paint


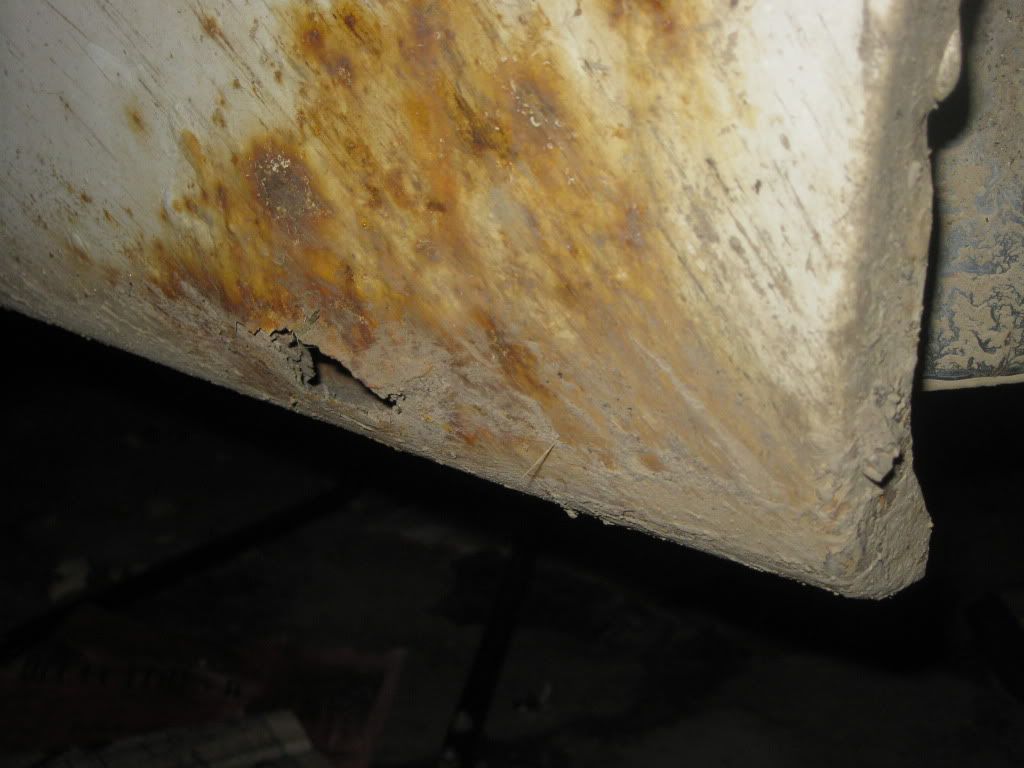


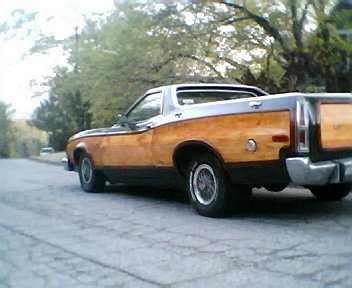


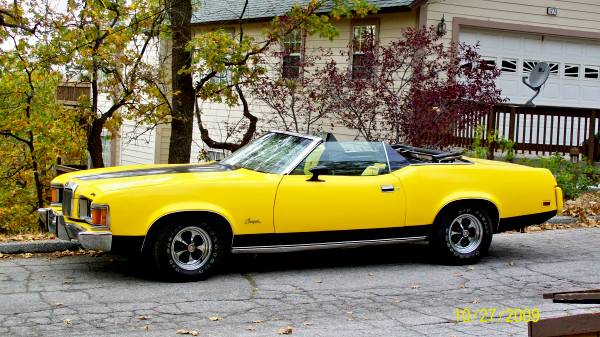
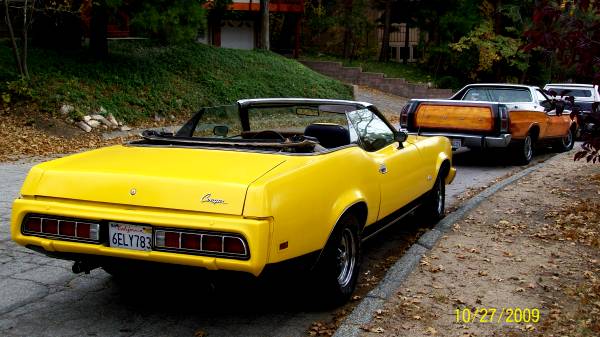


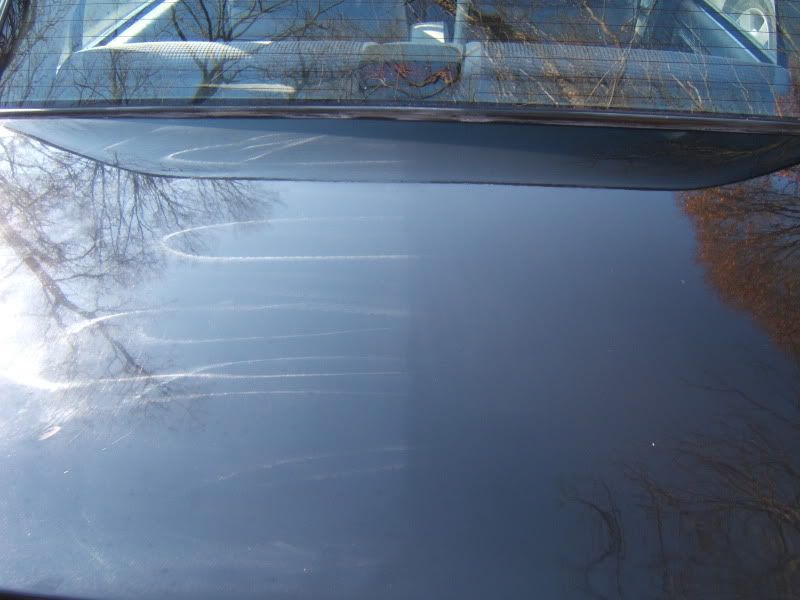
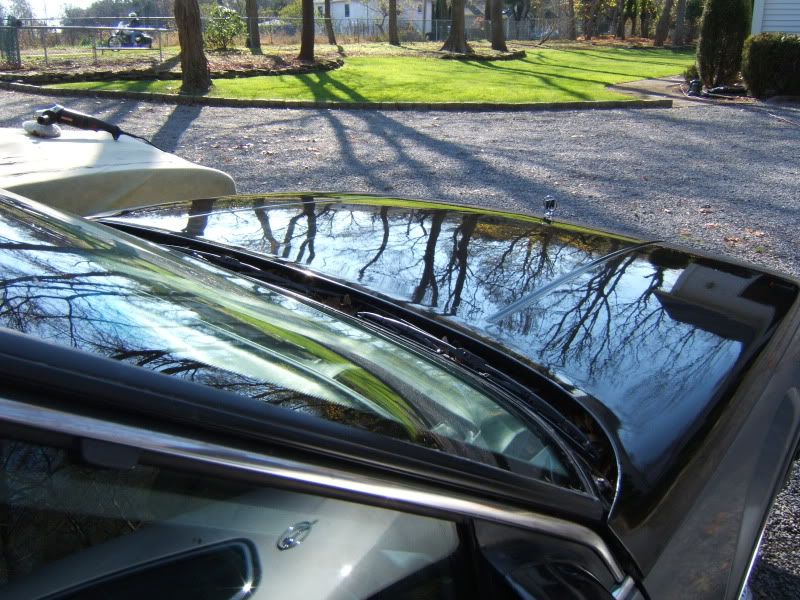
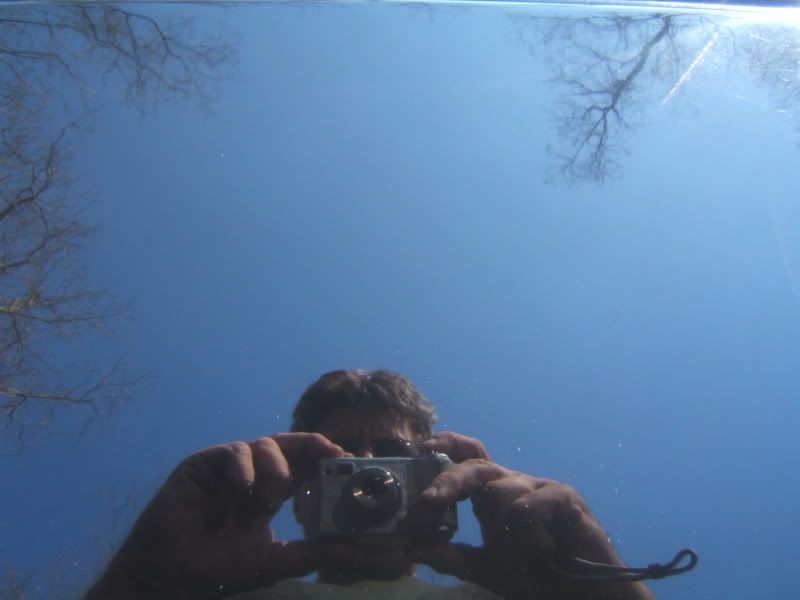
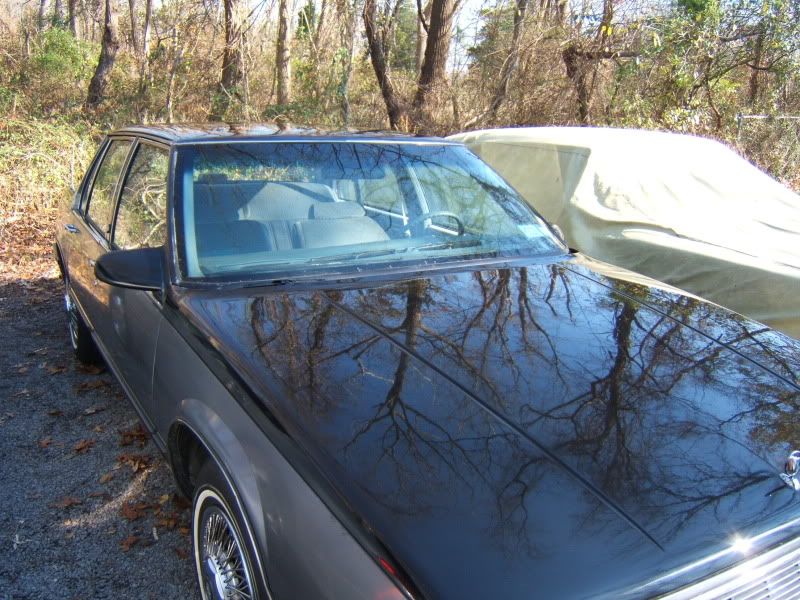
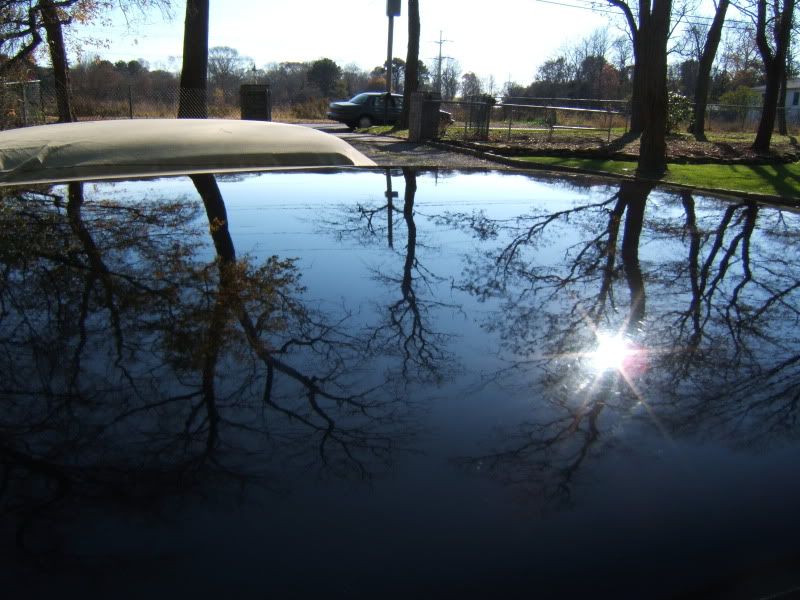


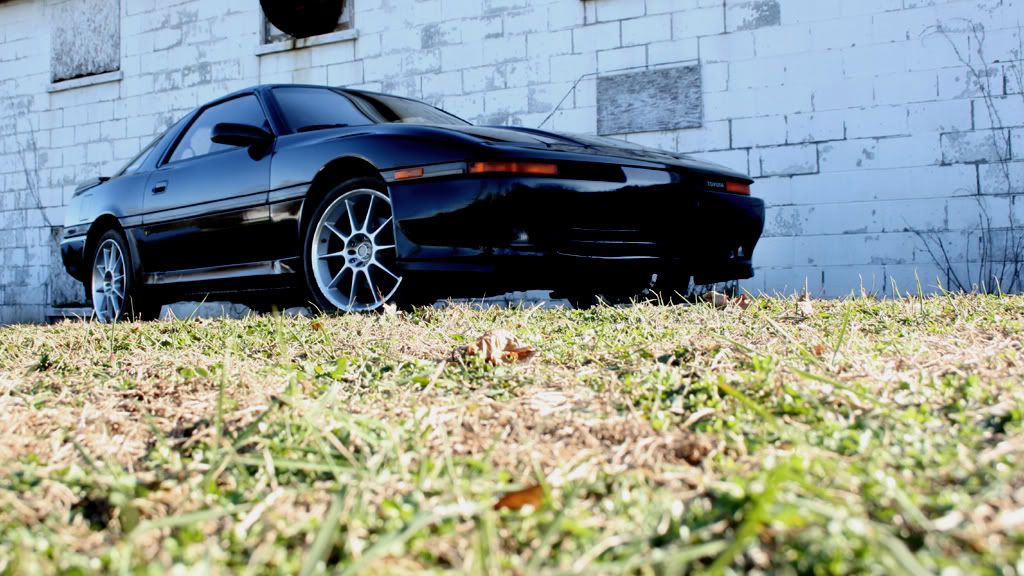


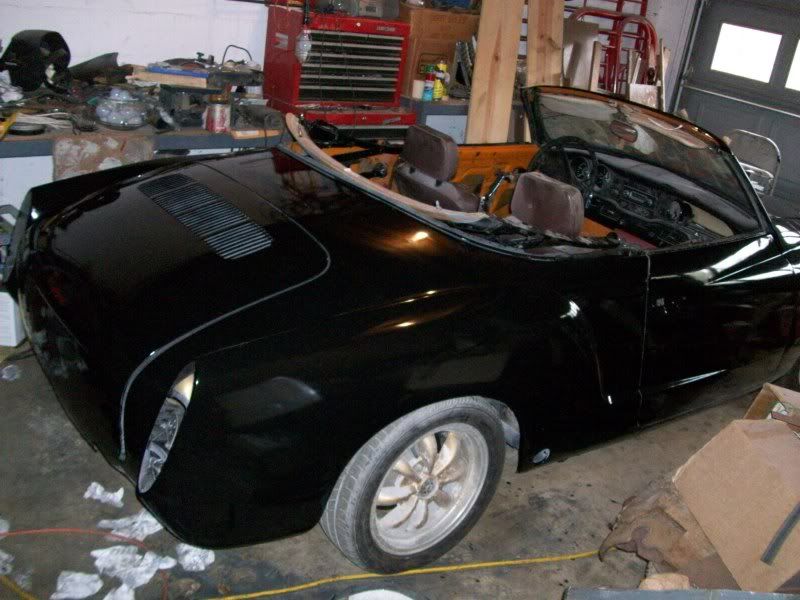 [/image]
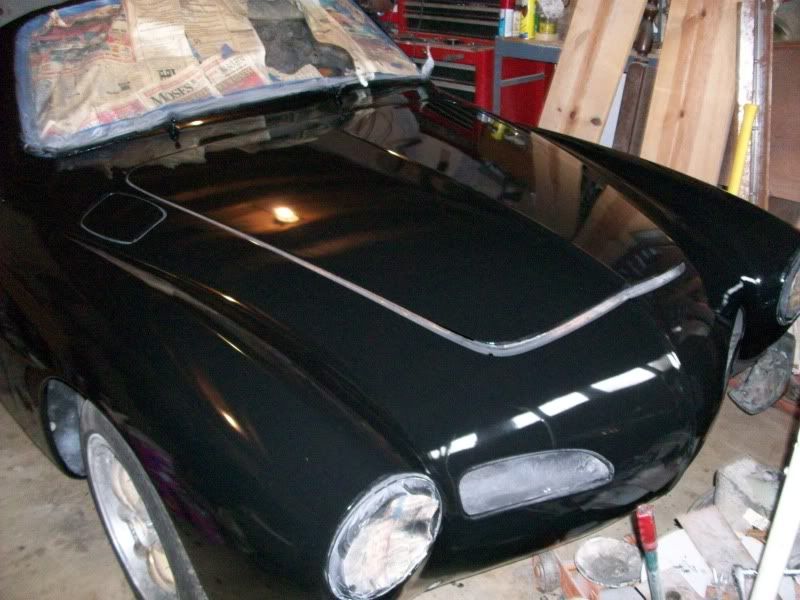
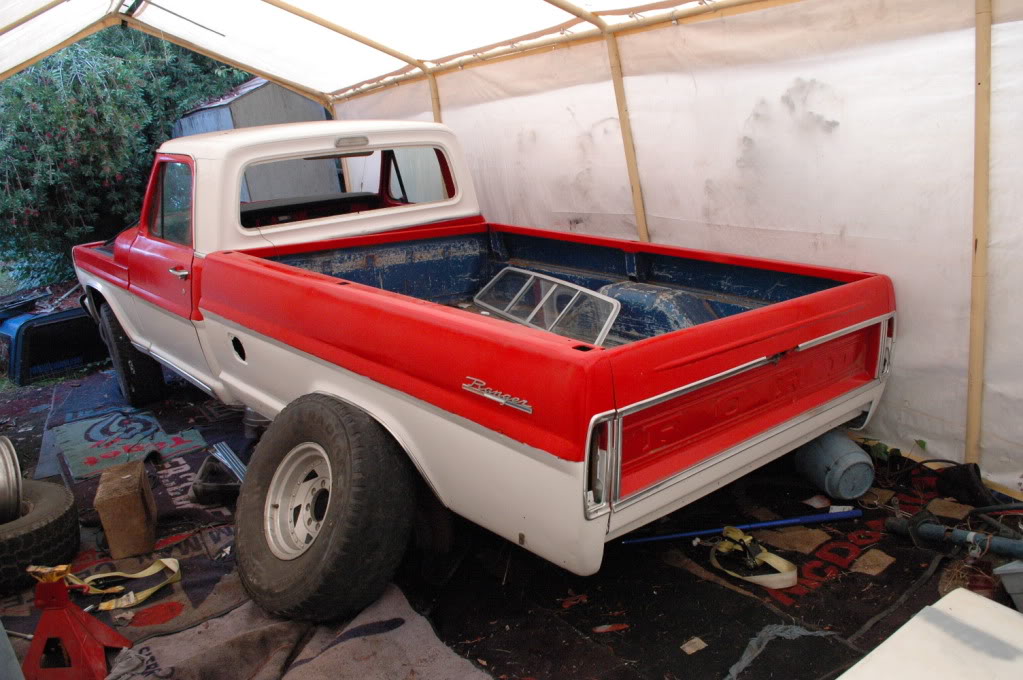
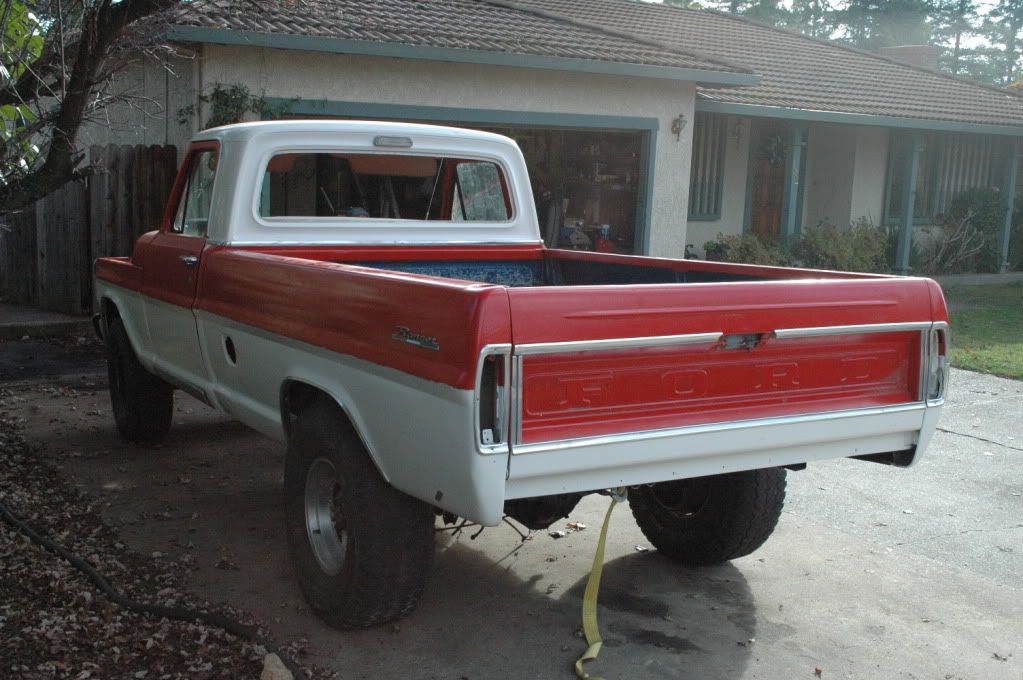
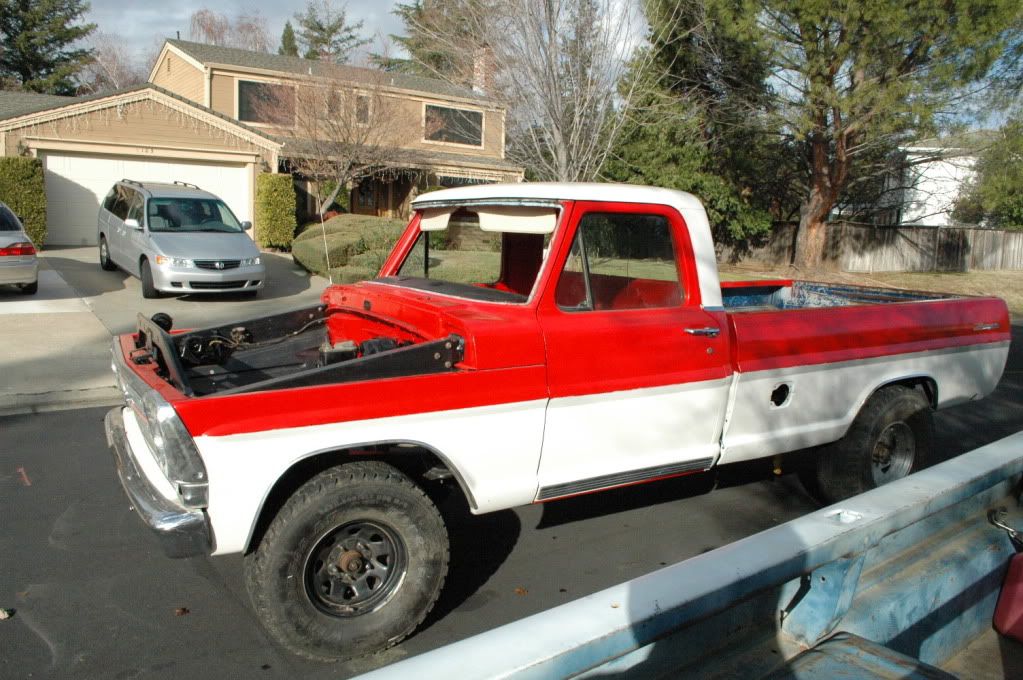
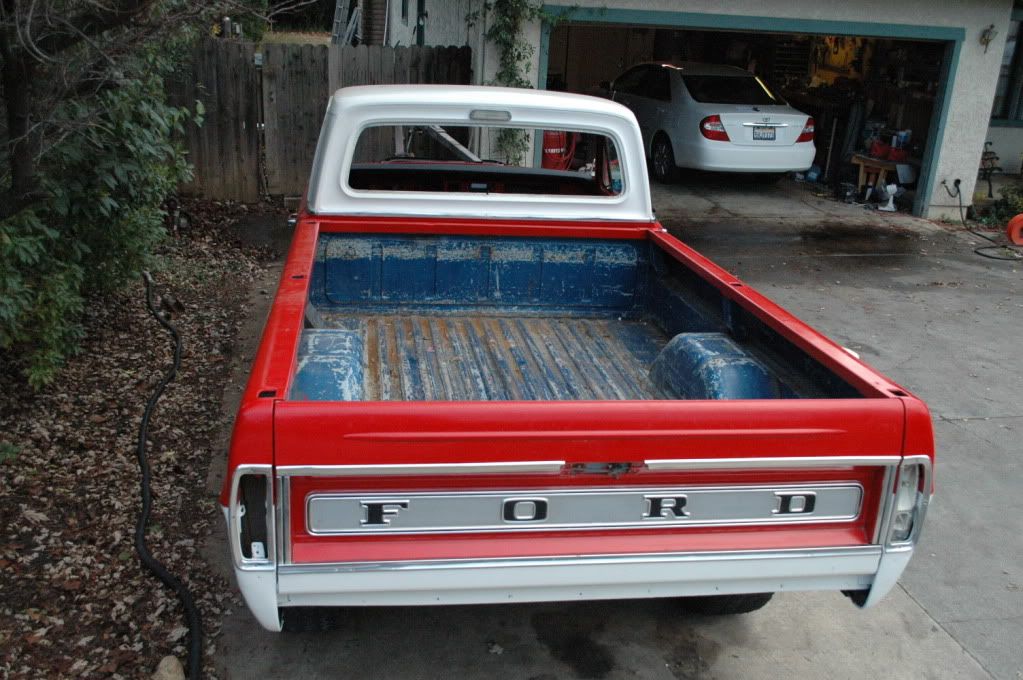
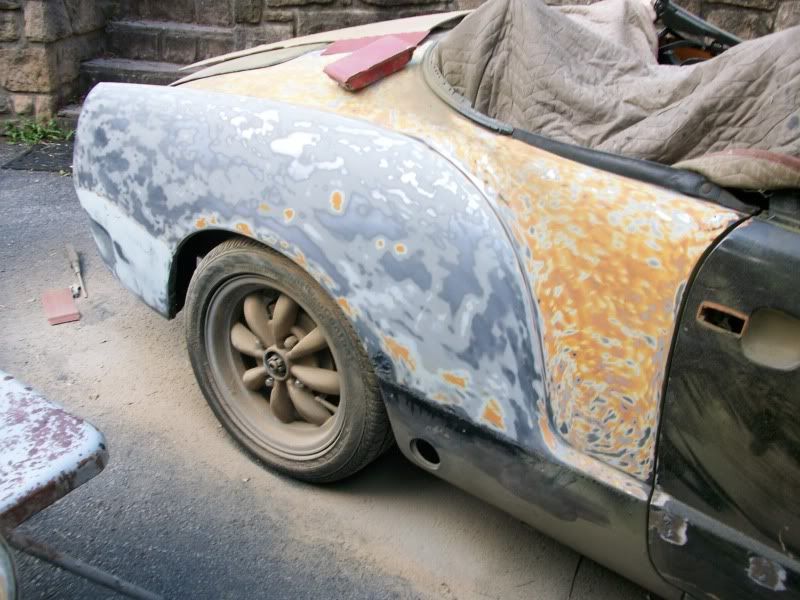 [/image]


 <br>
<br>


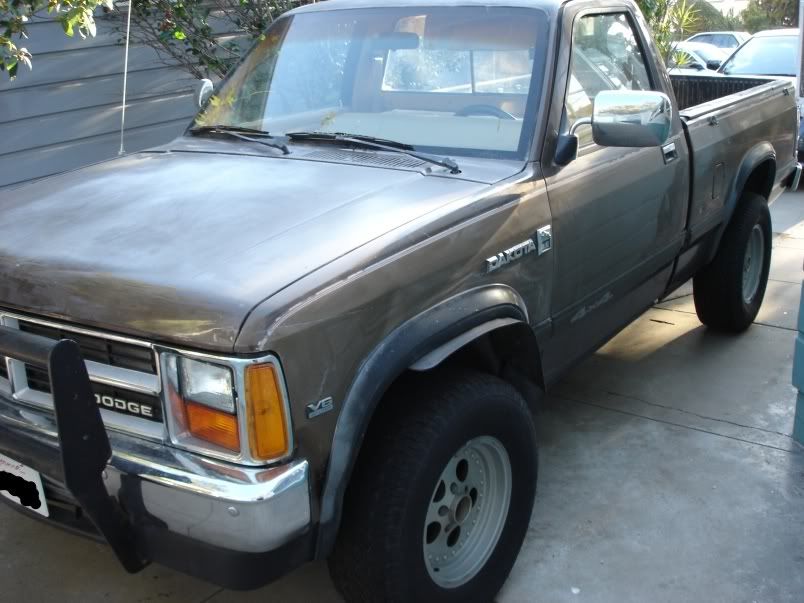
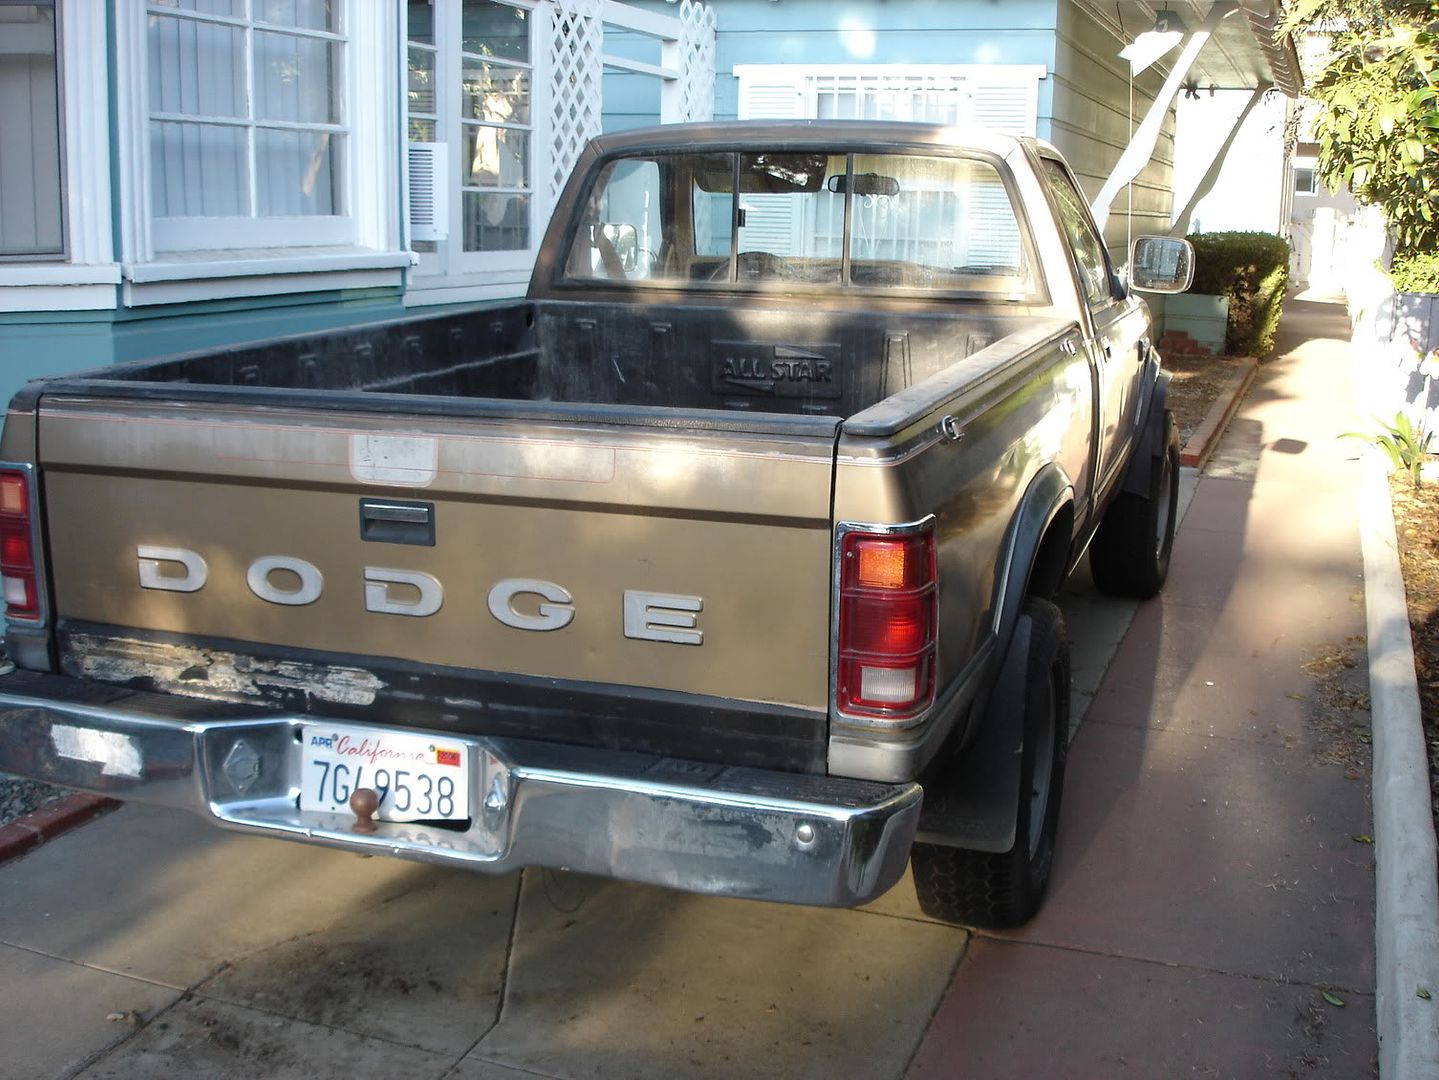
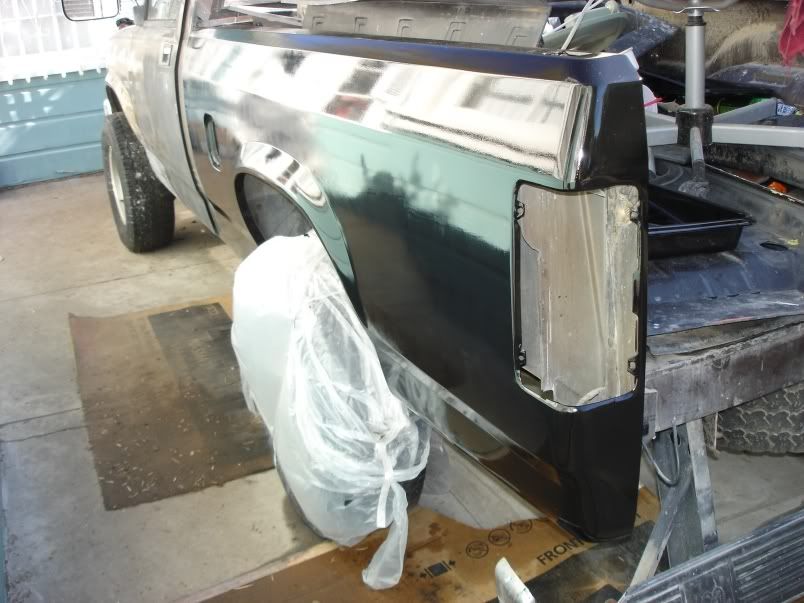


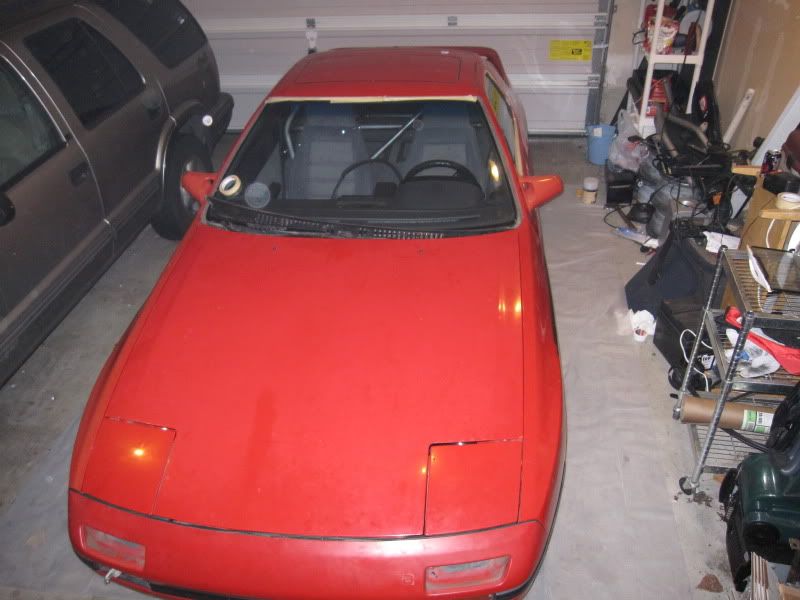
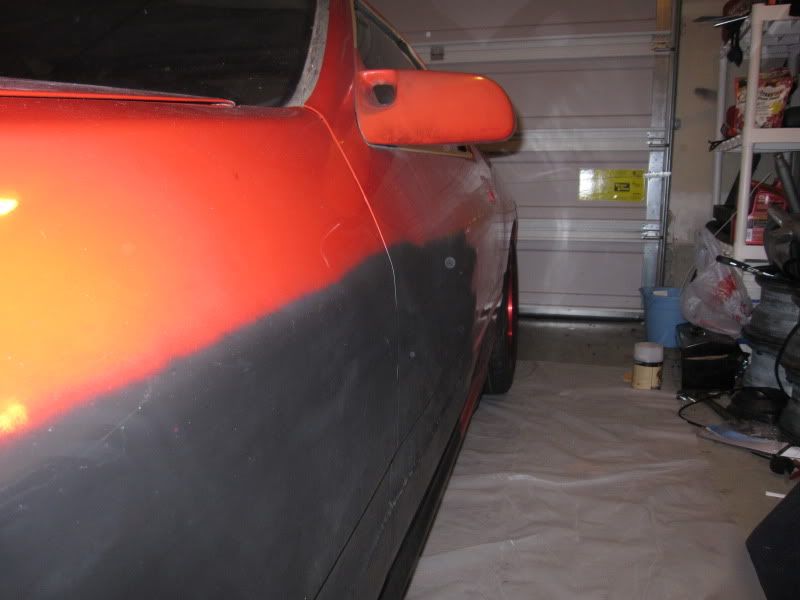
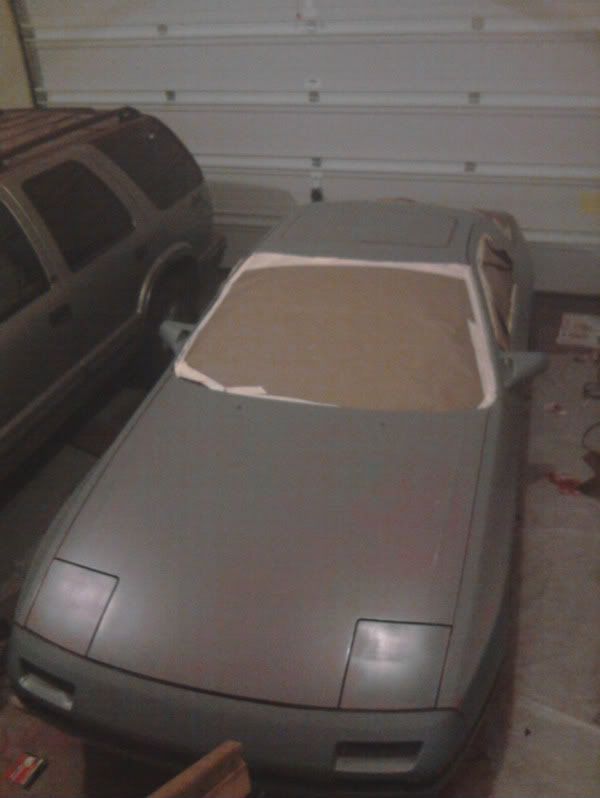
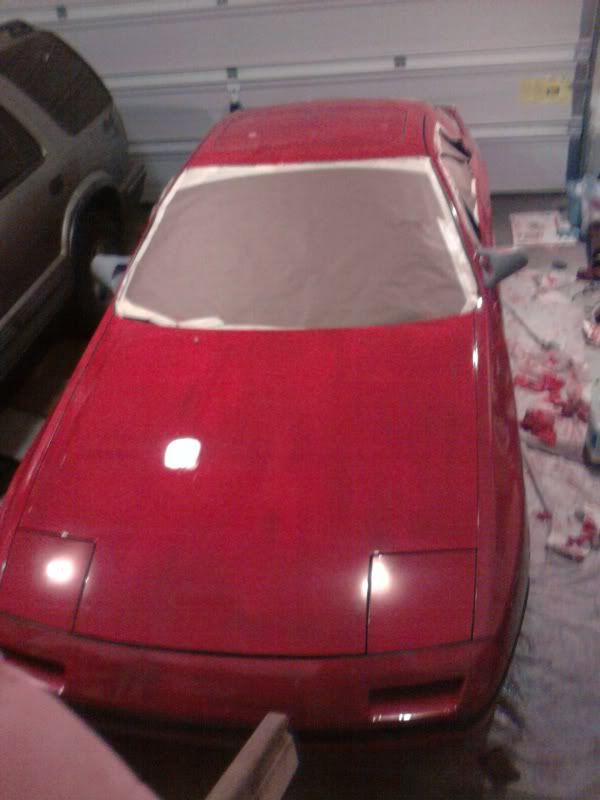
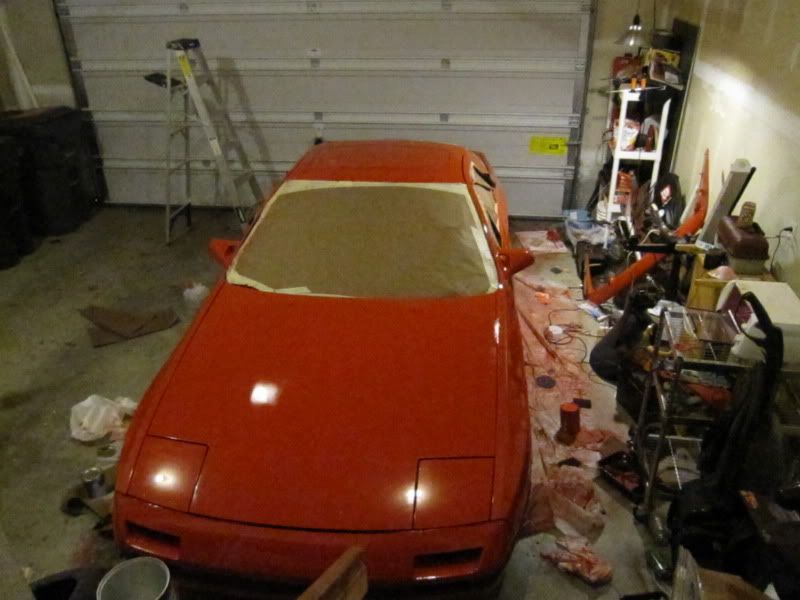
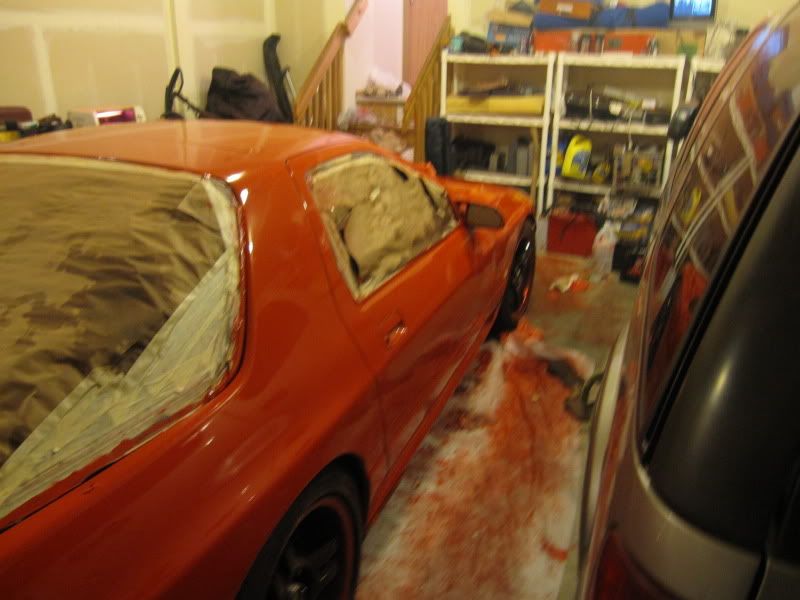

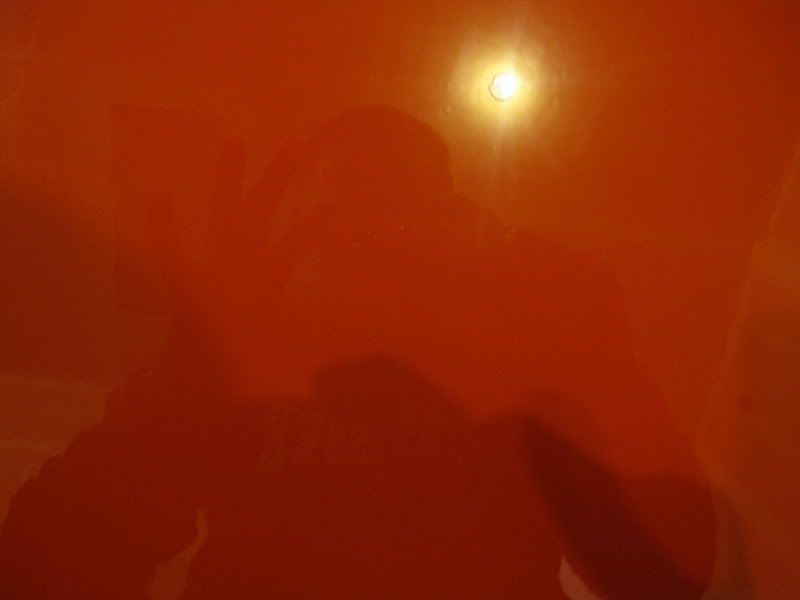

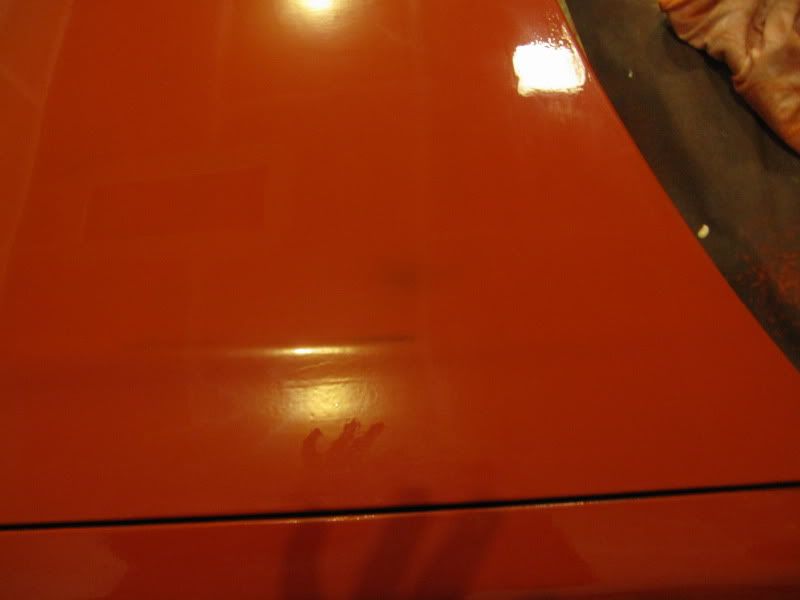
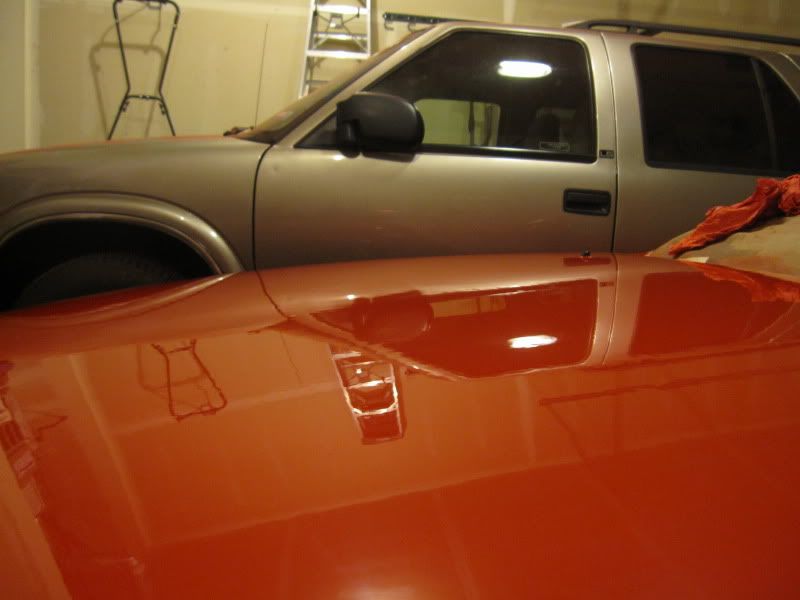


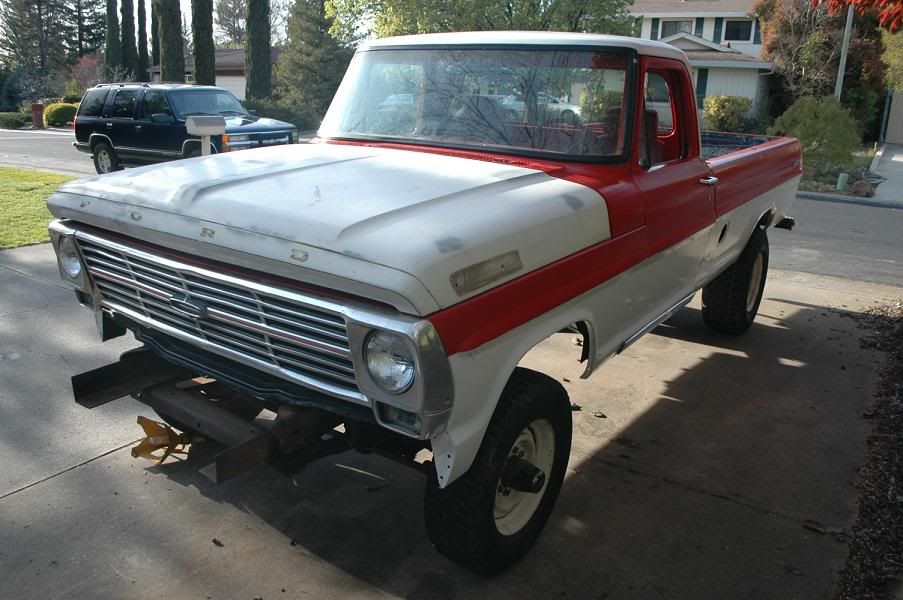
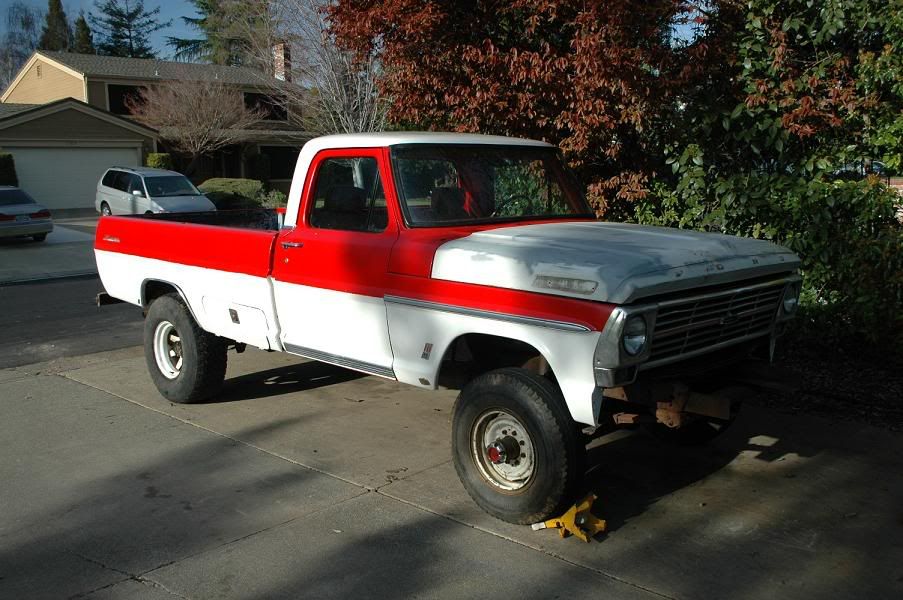
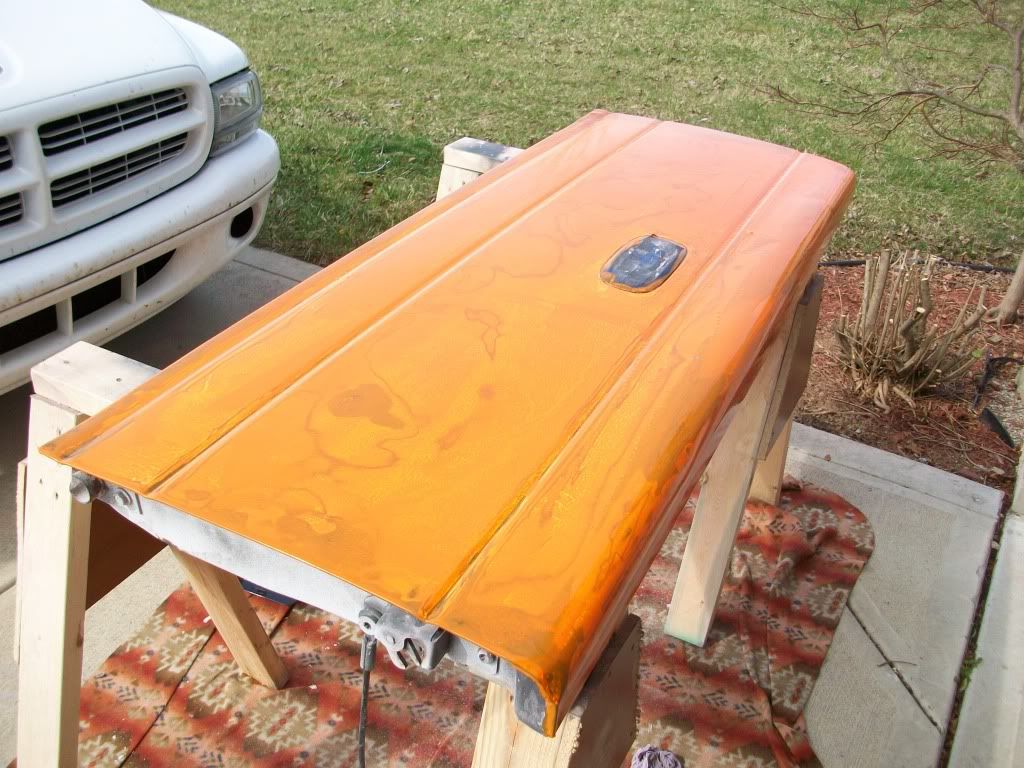
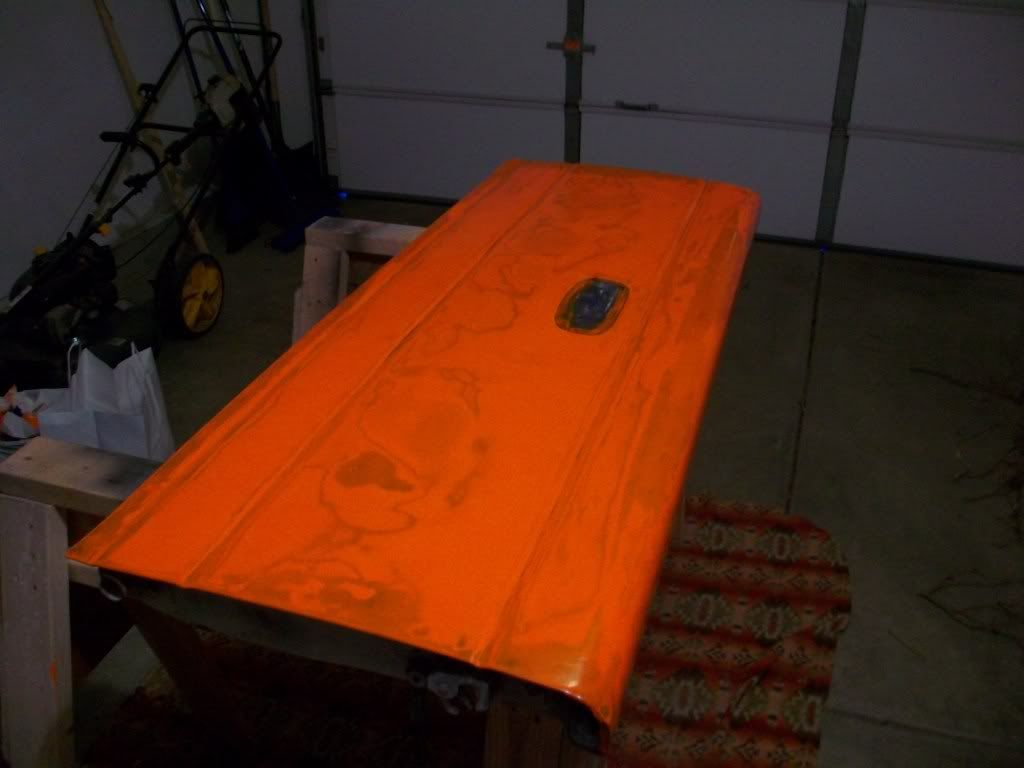


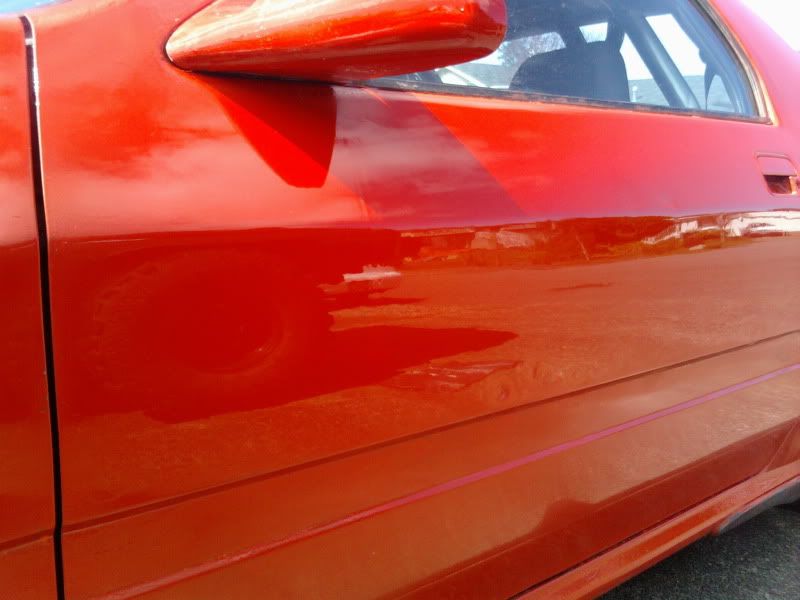
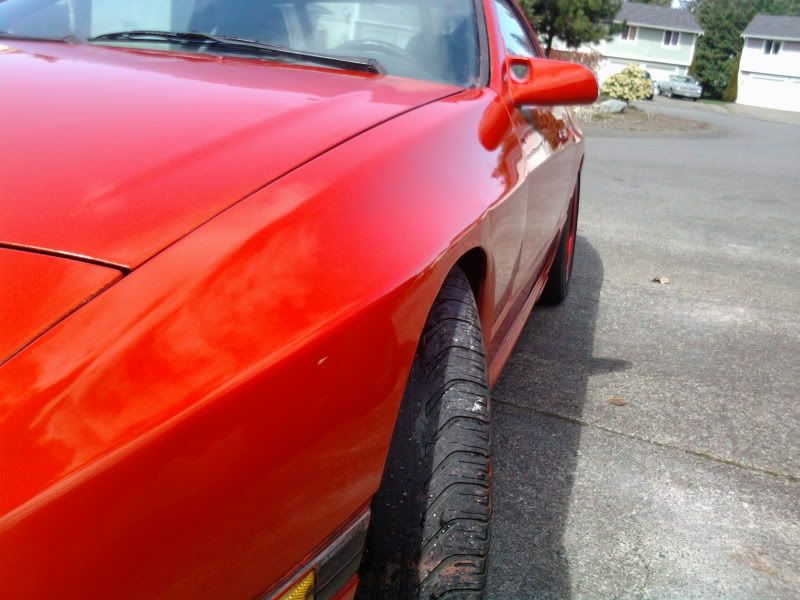

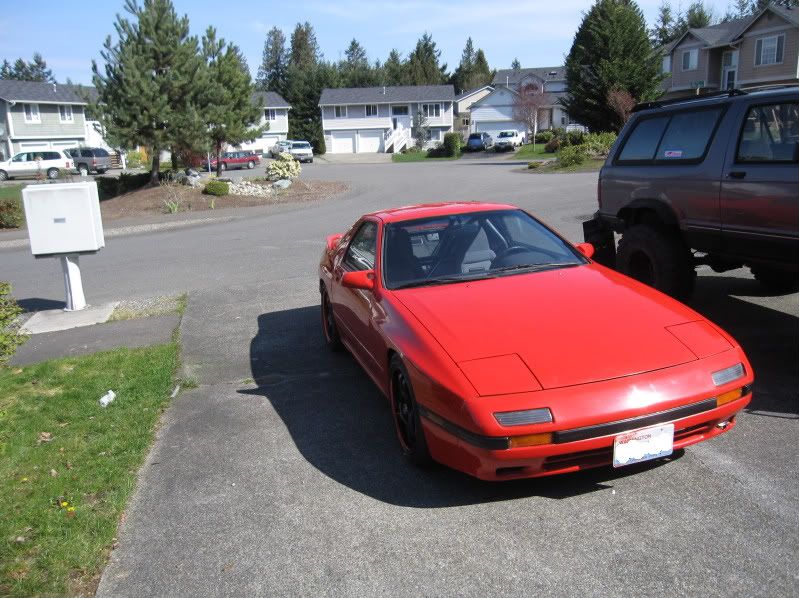

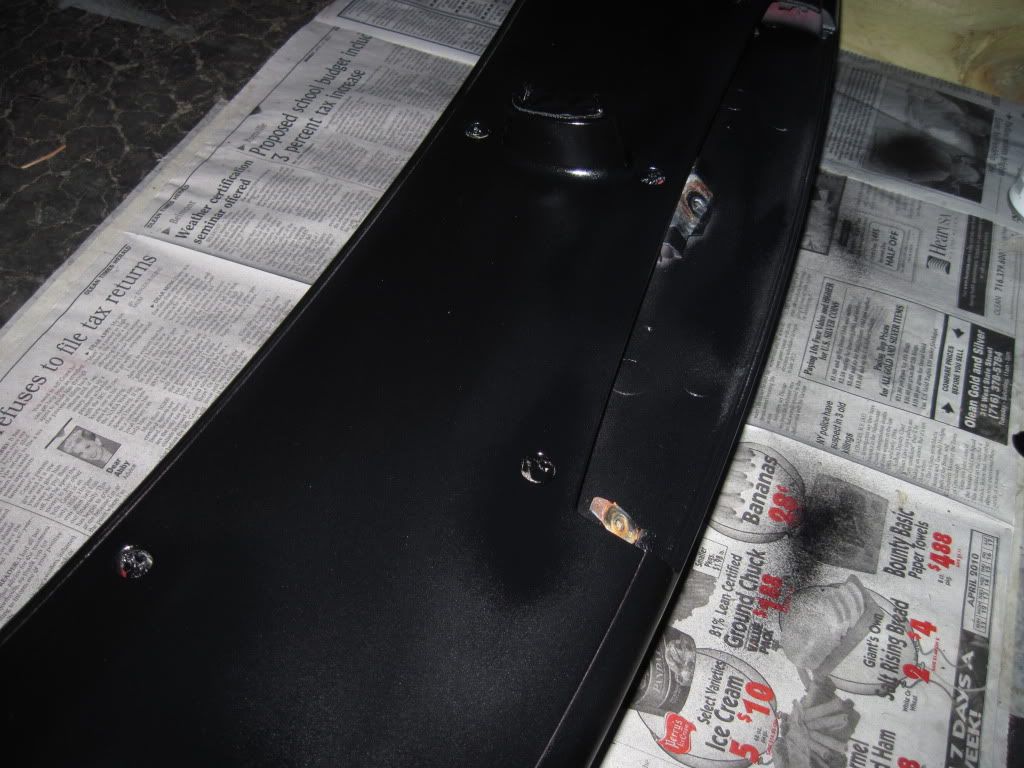


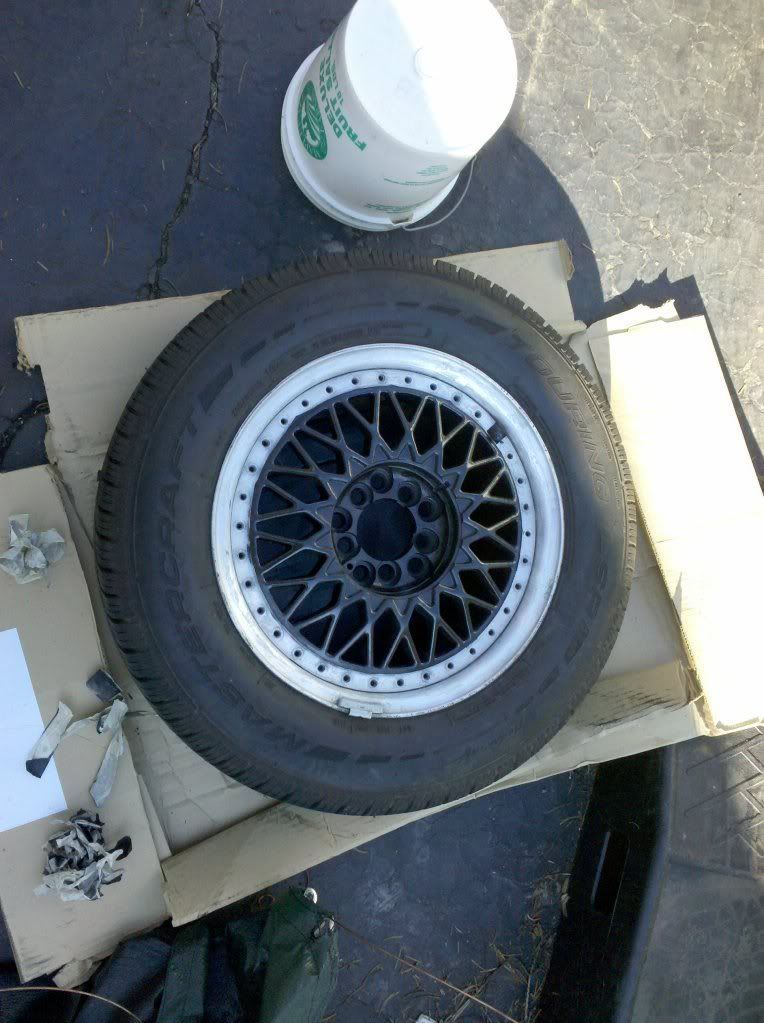
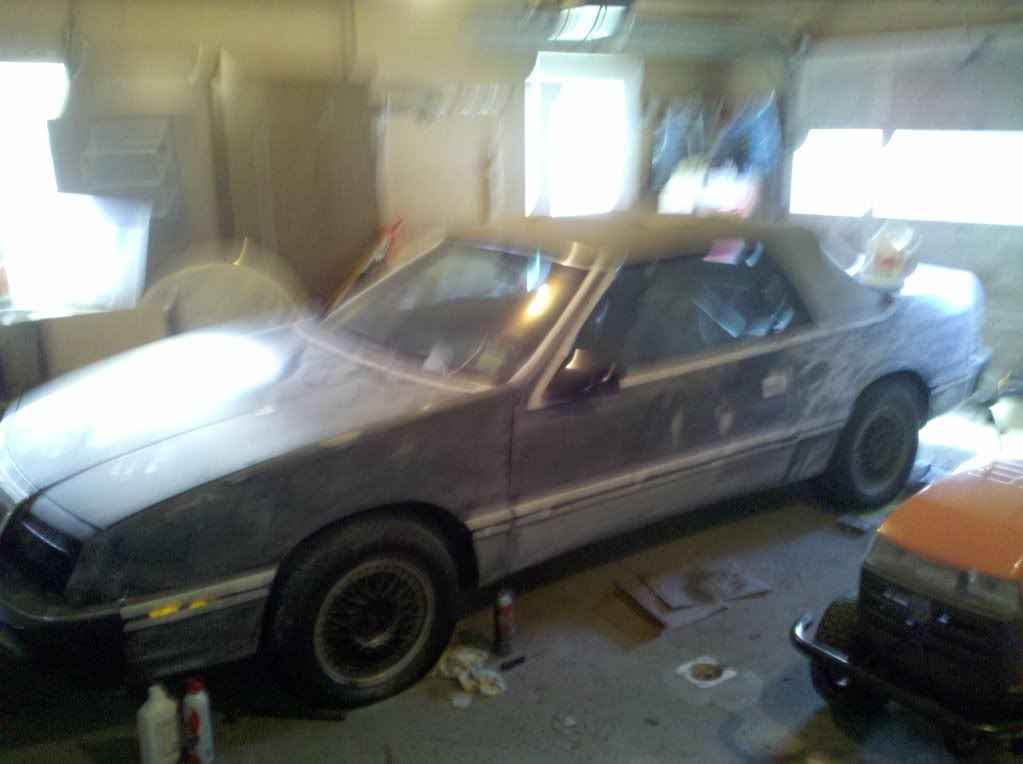
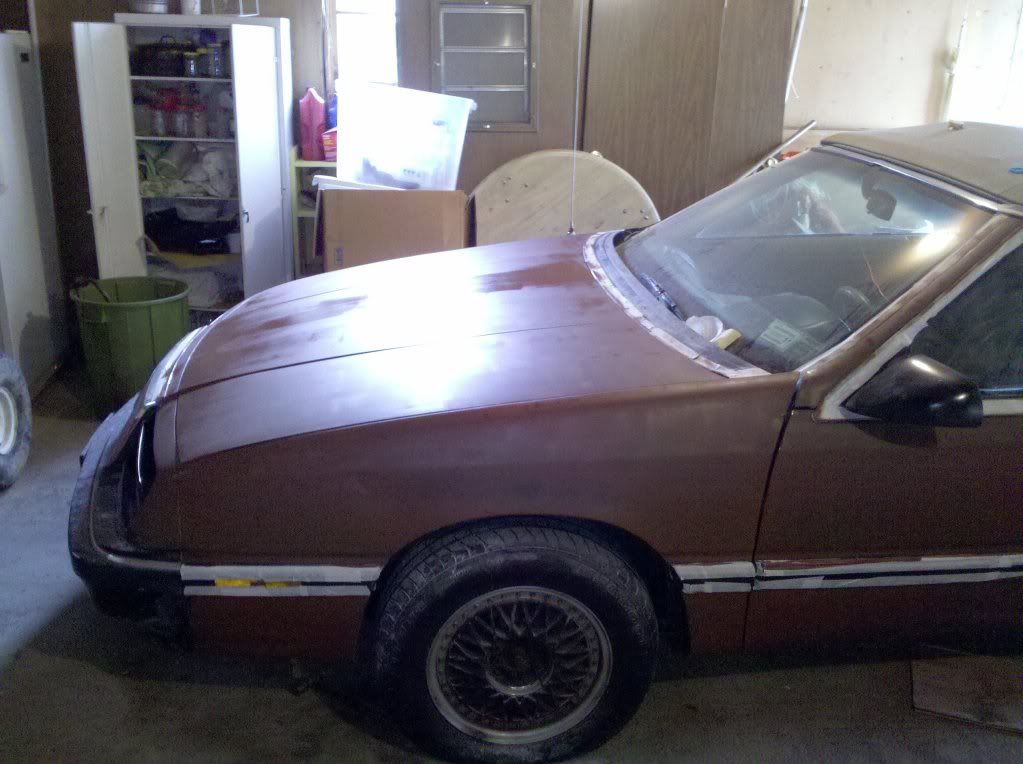

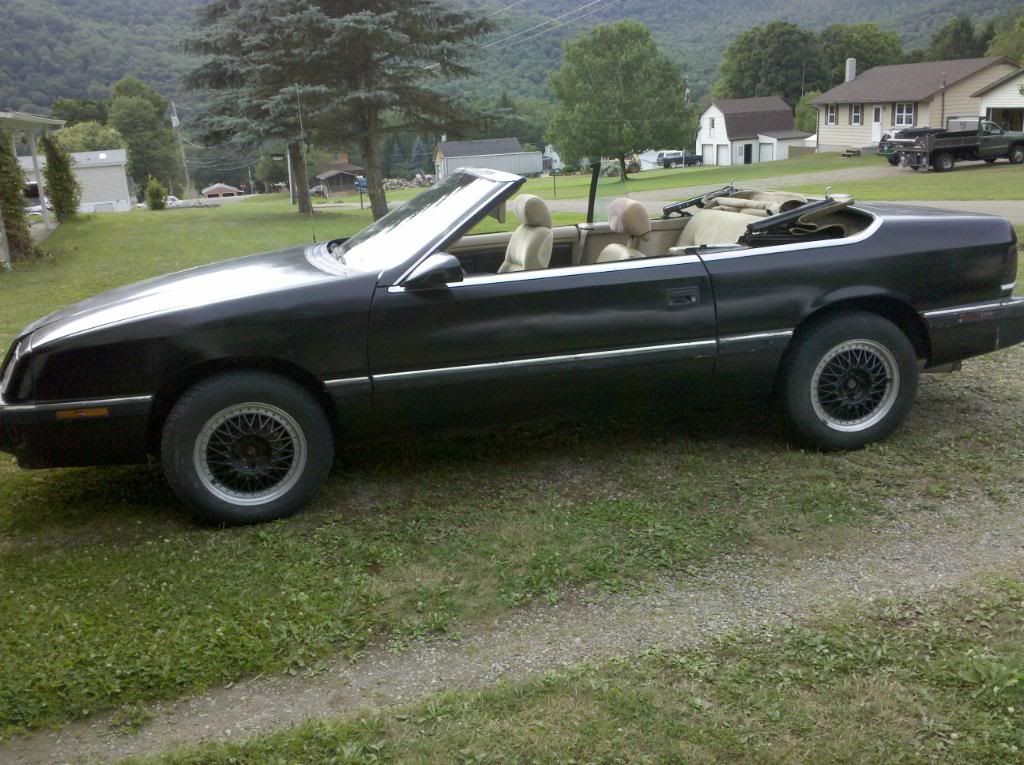
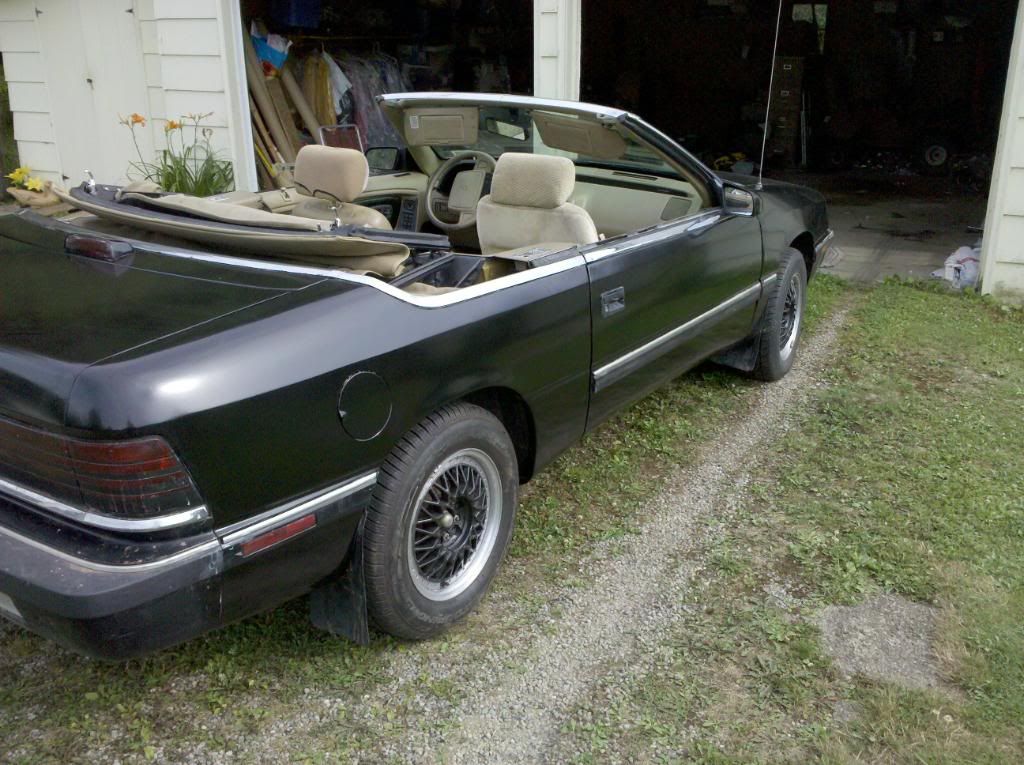
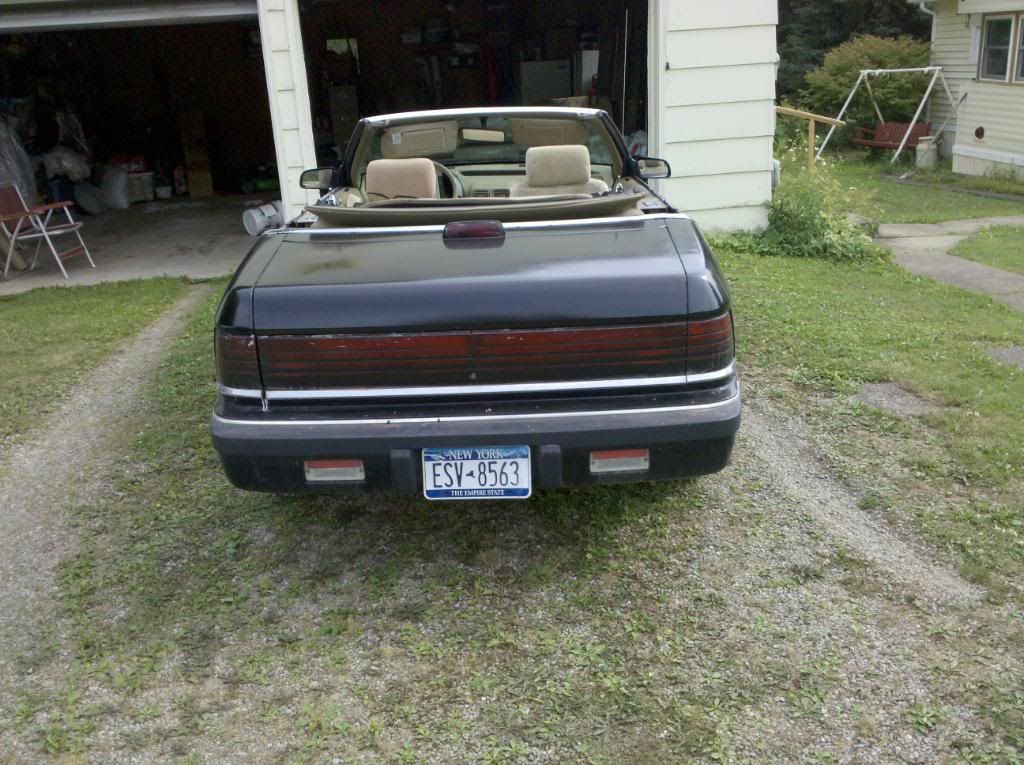
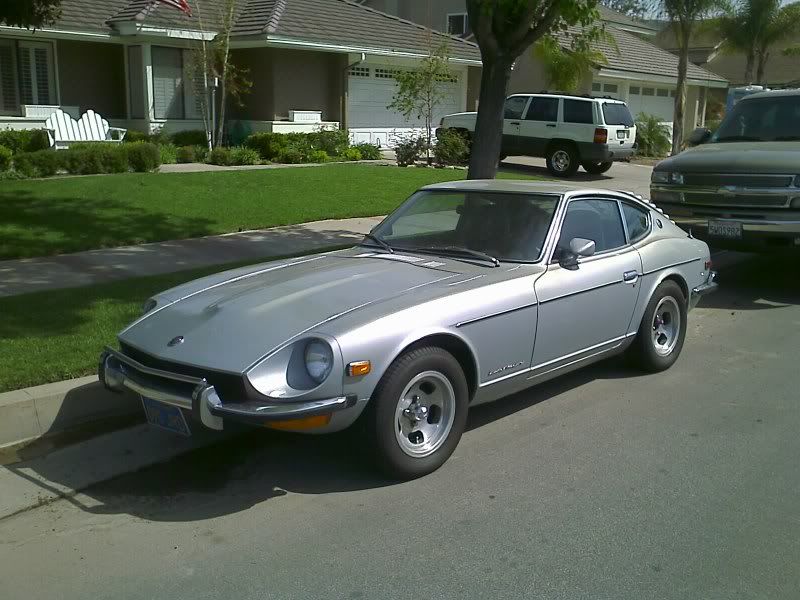
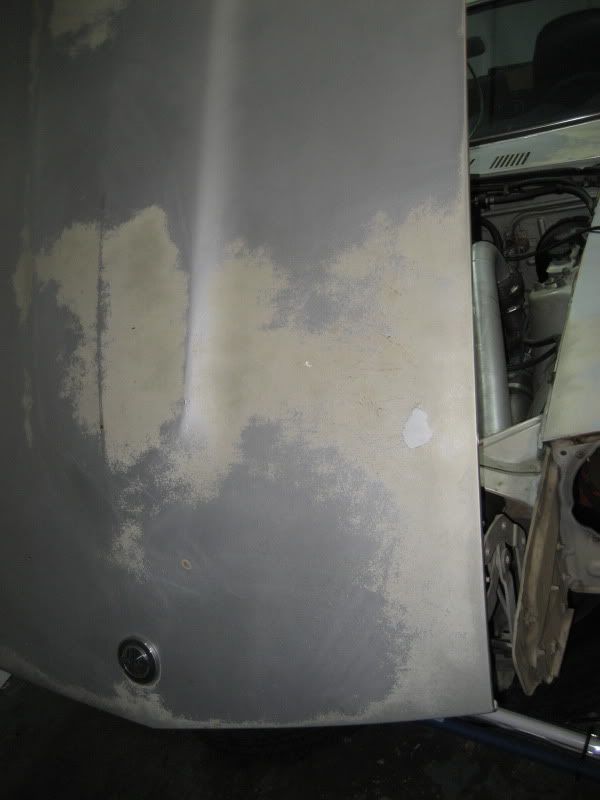
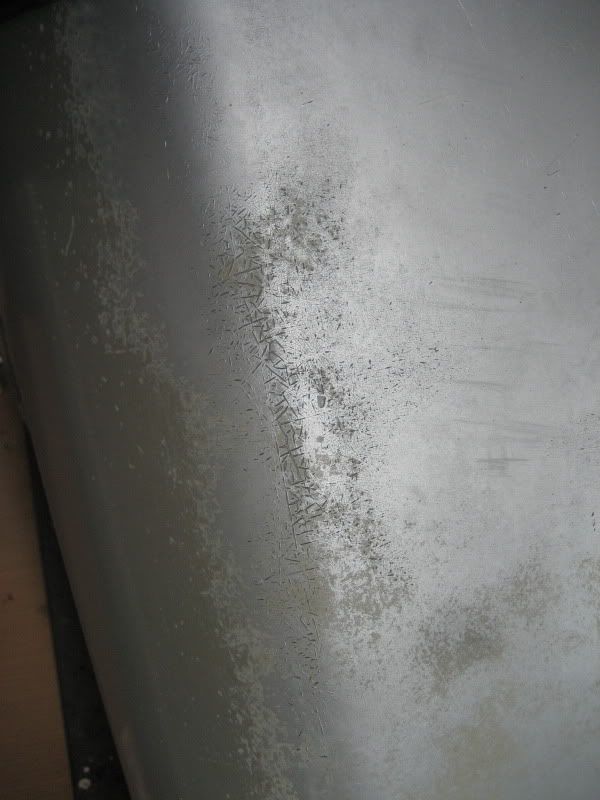
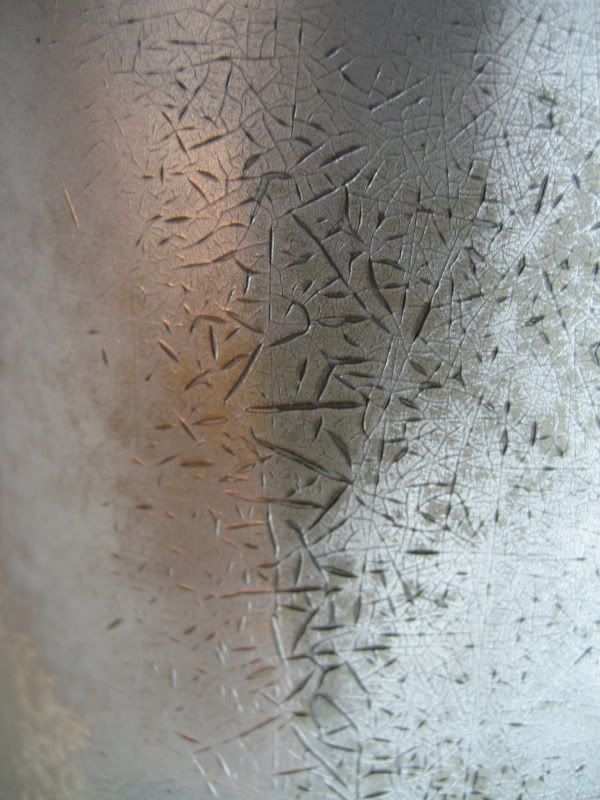
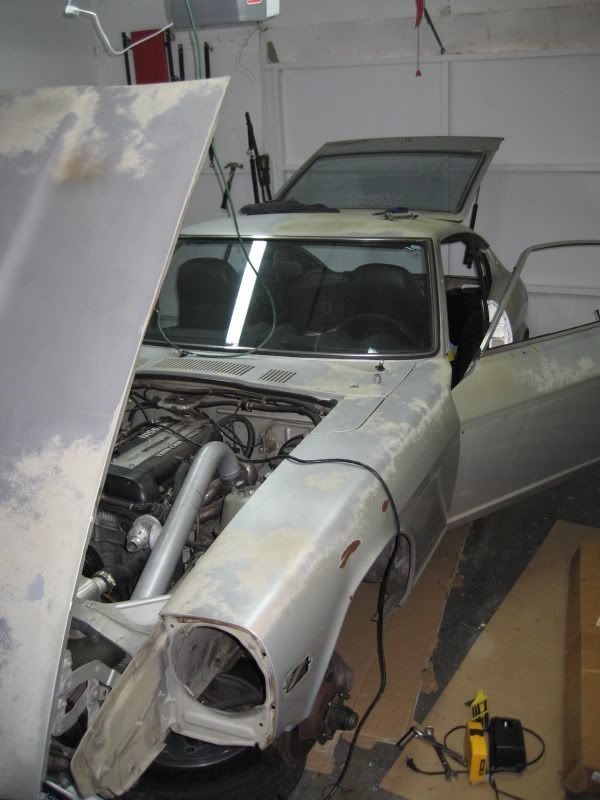


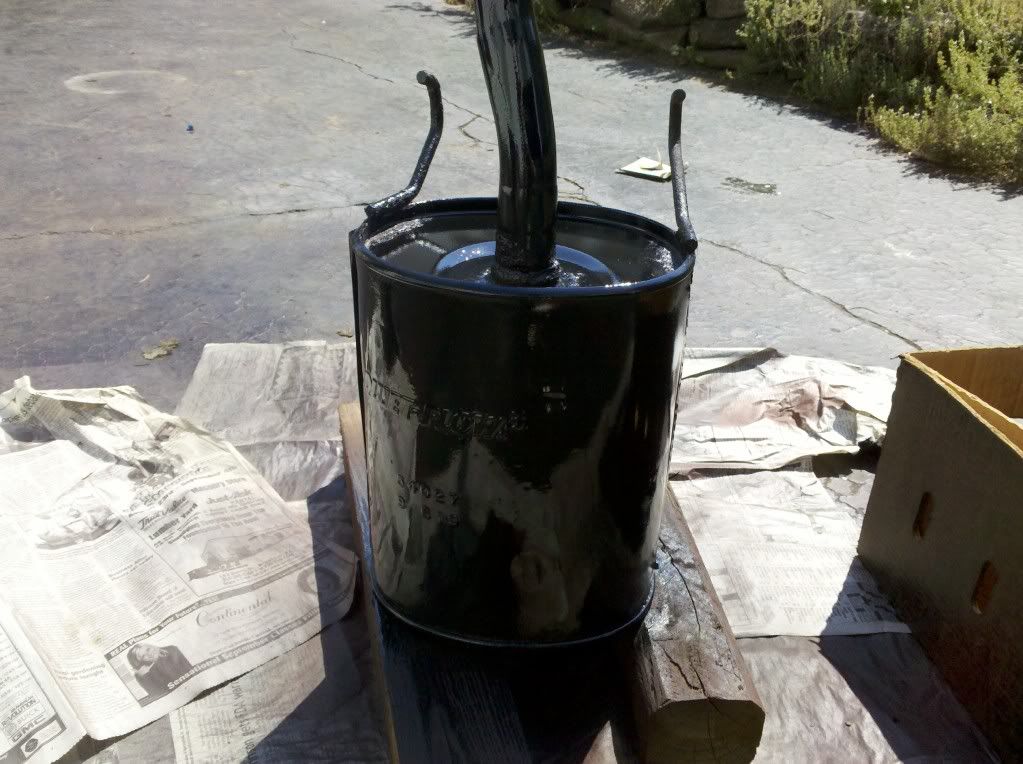

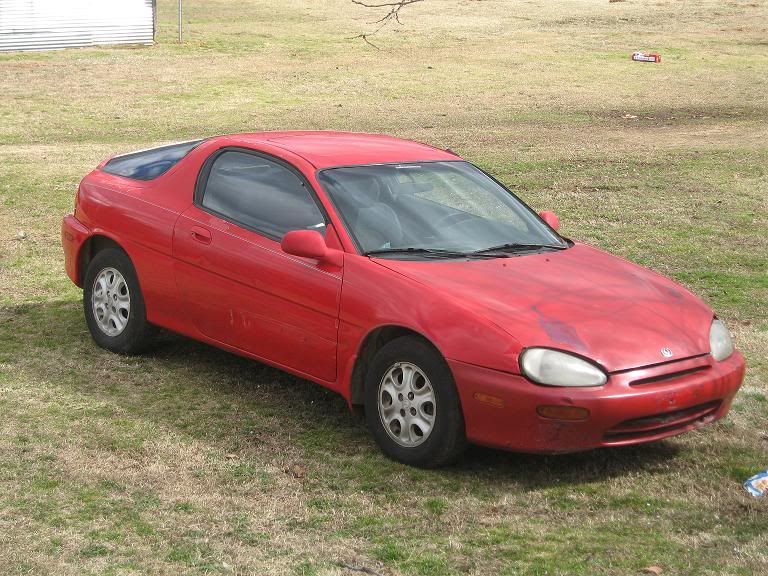
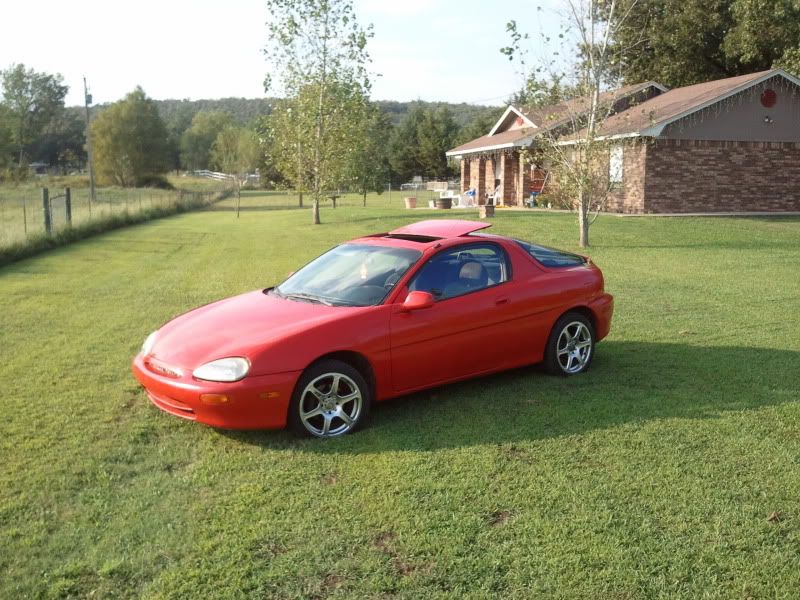
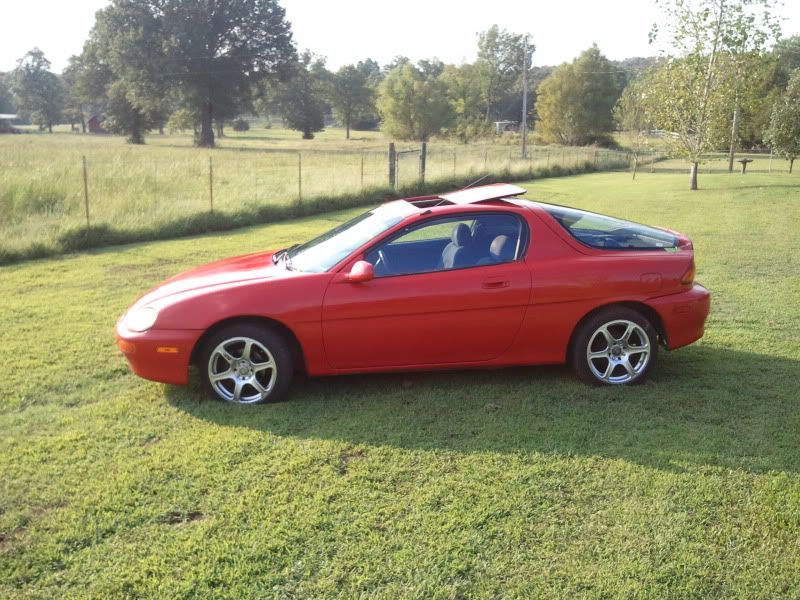

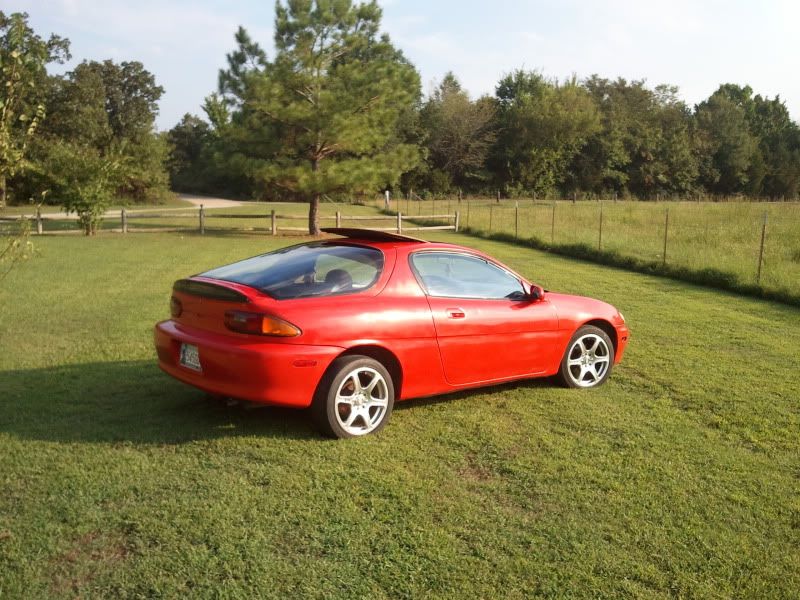


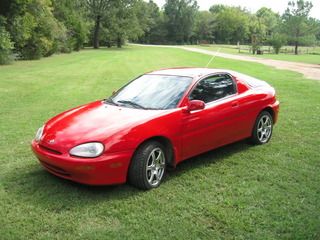
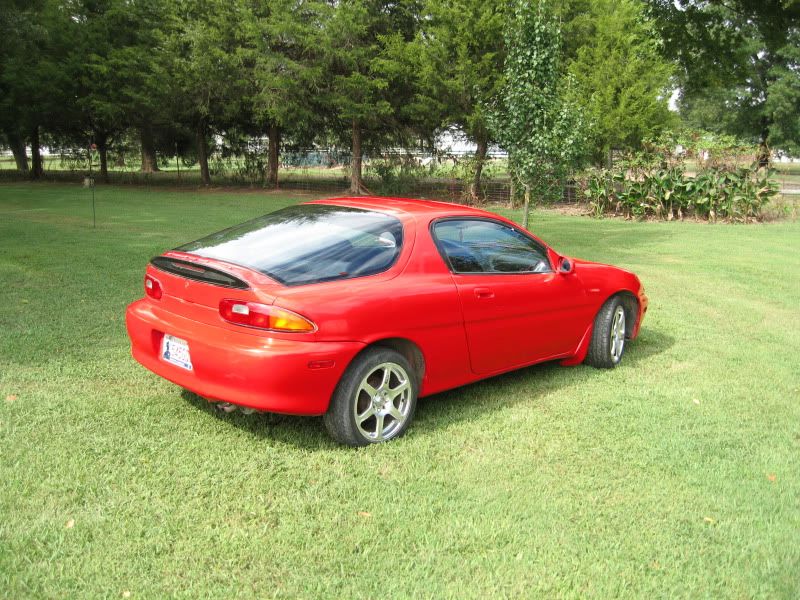


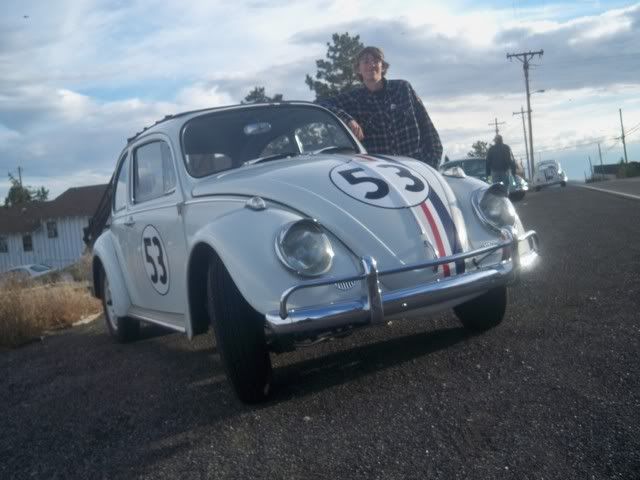
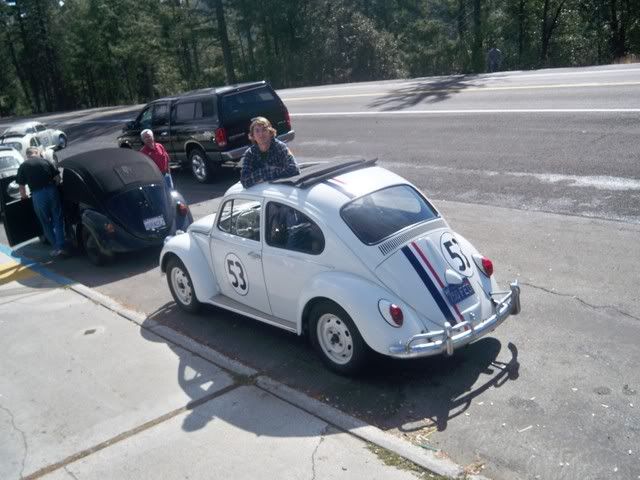
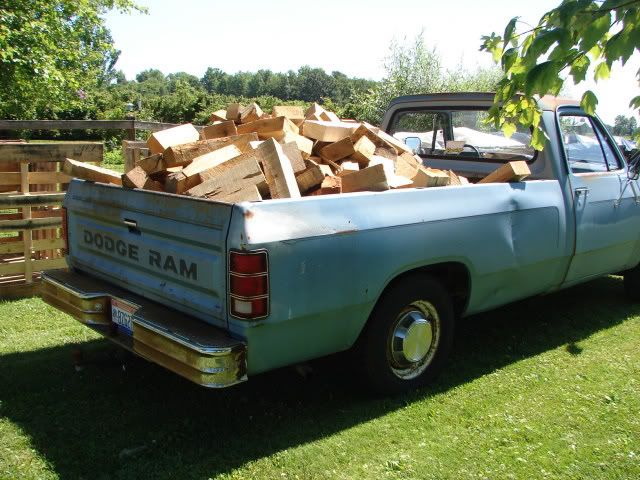
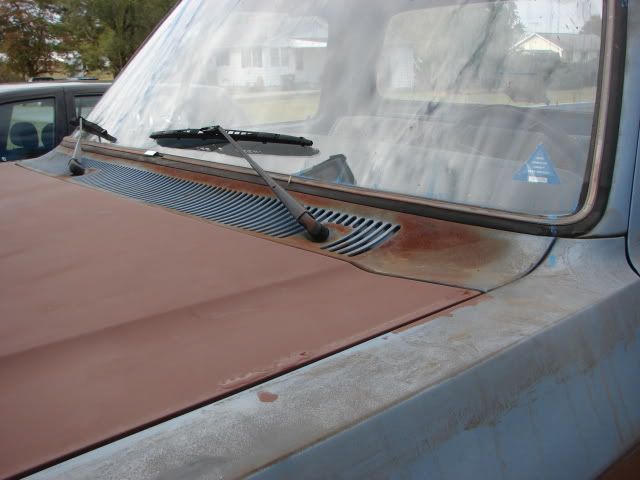
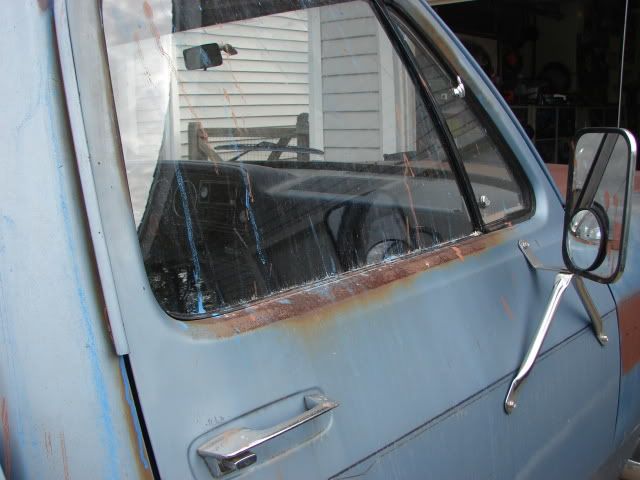

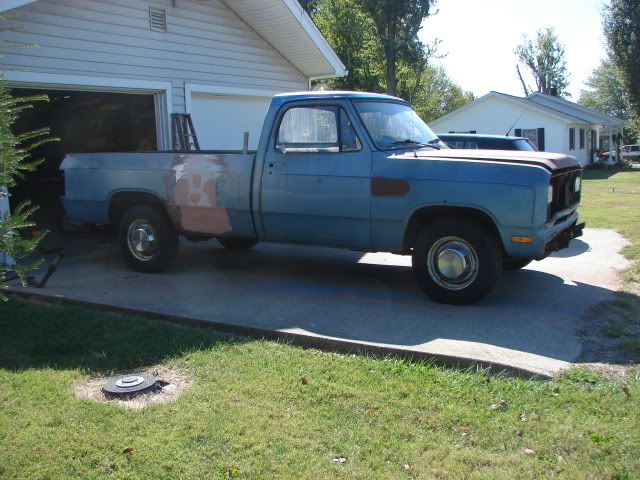
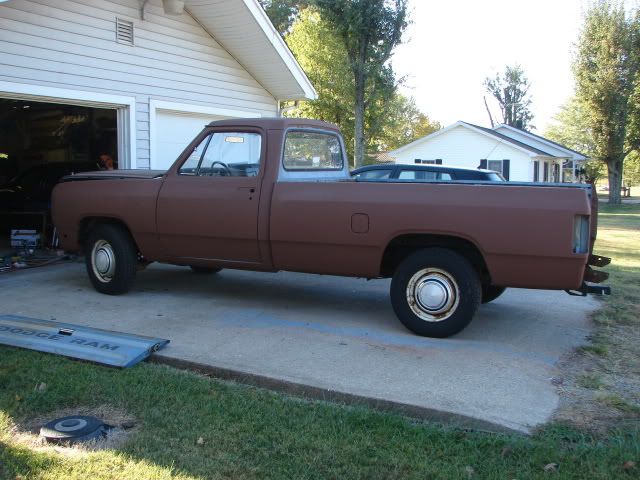
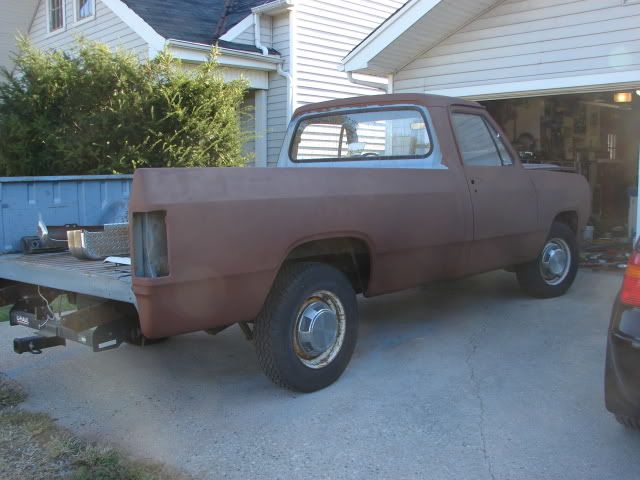
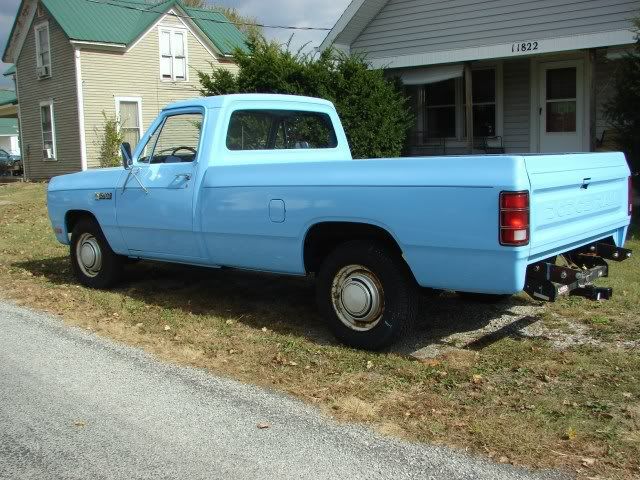
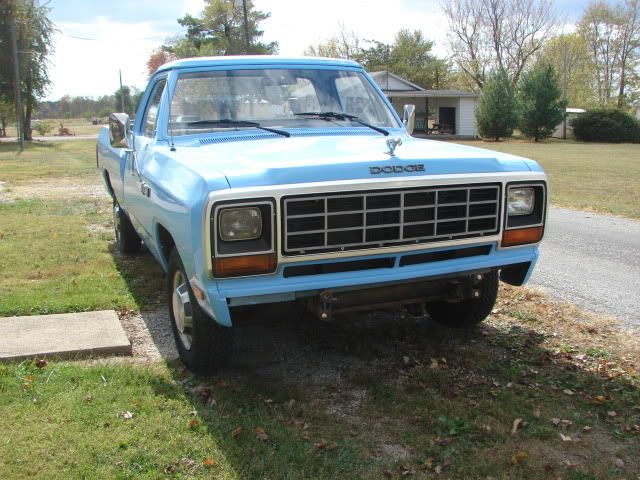
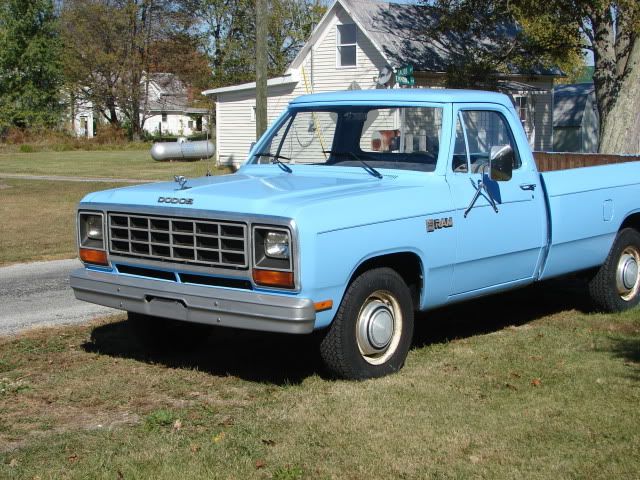
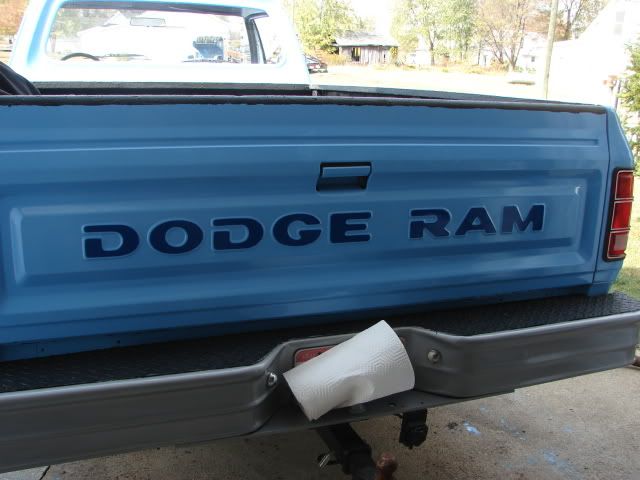
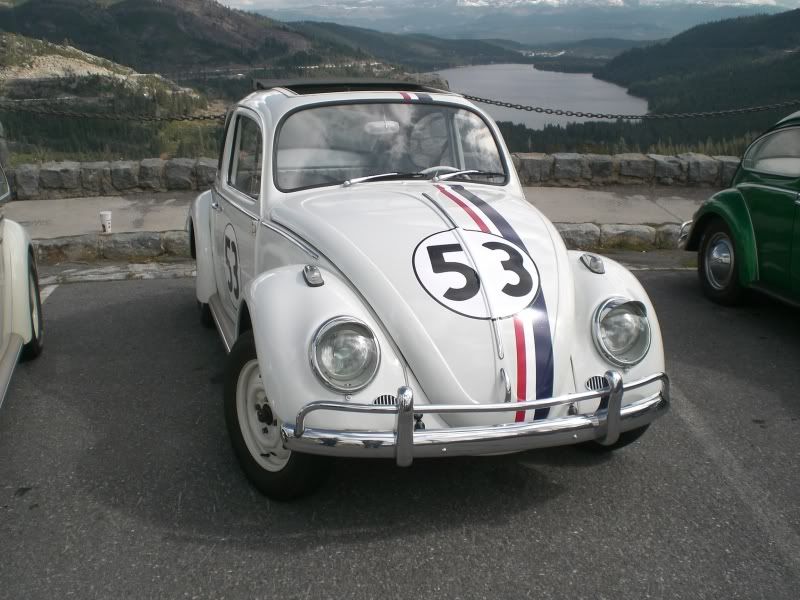
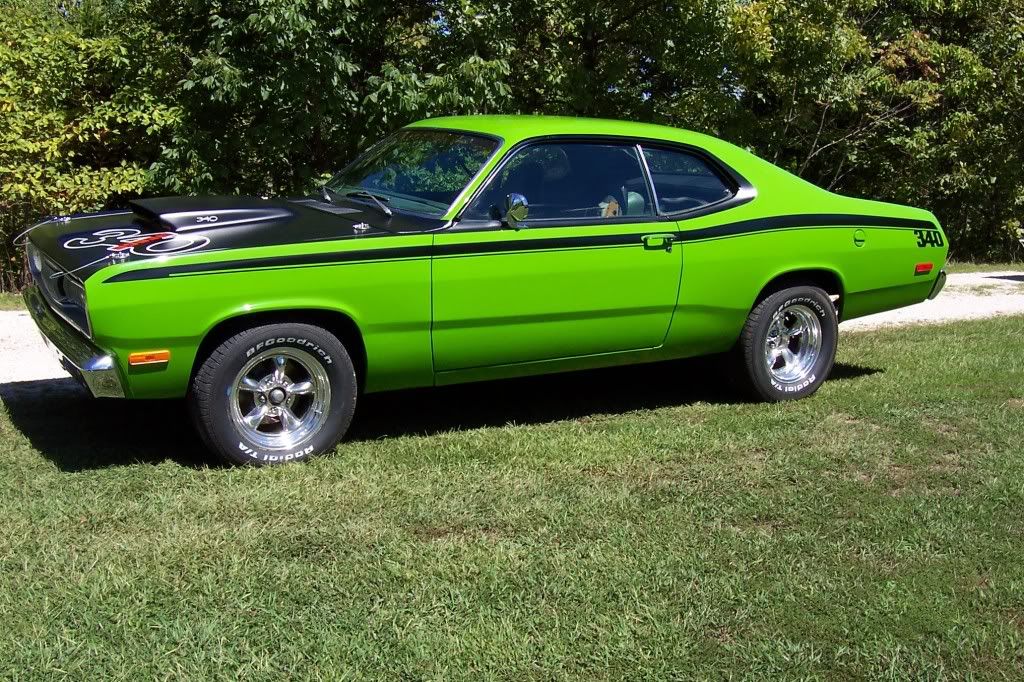


 '
'


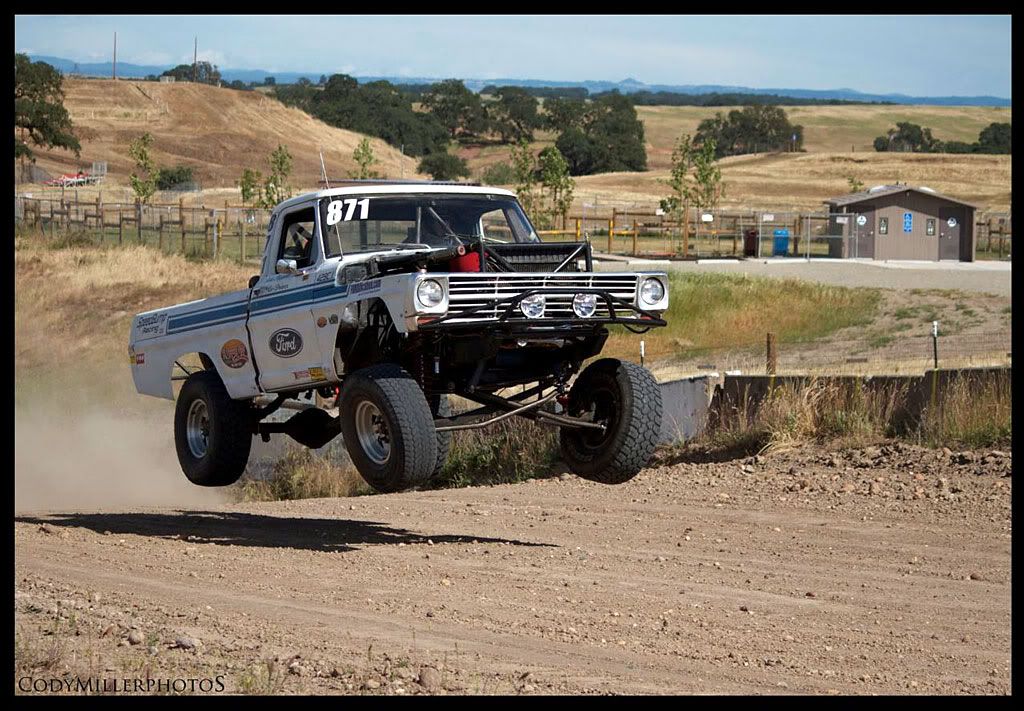
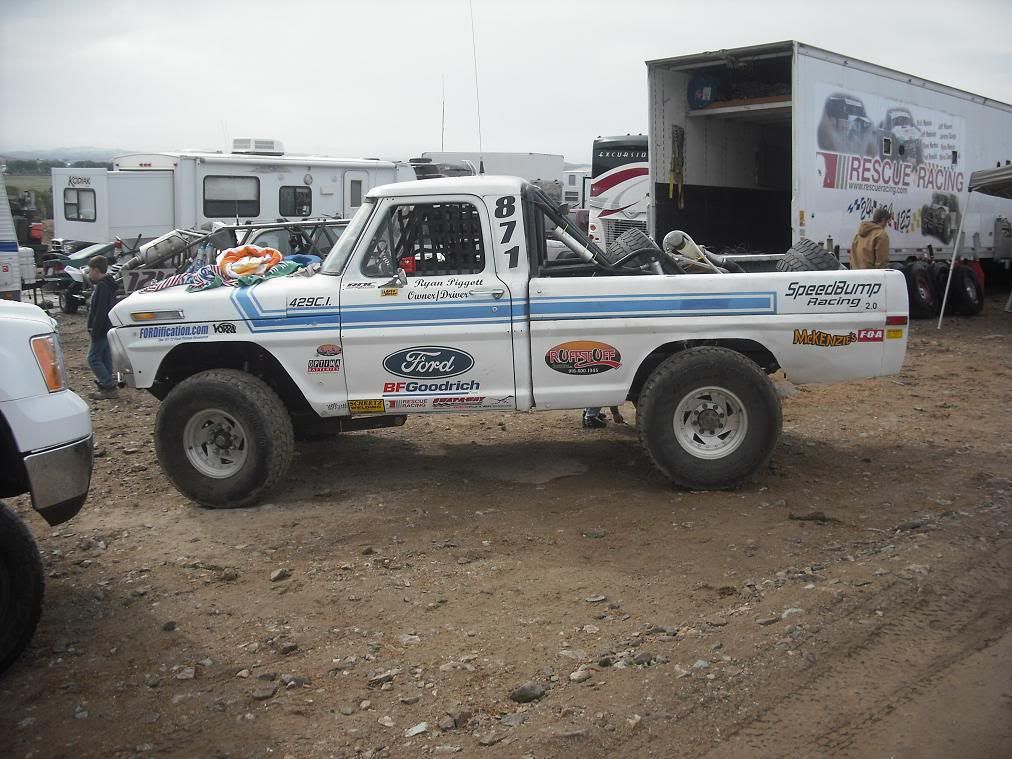
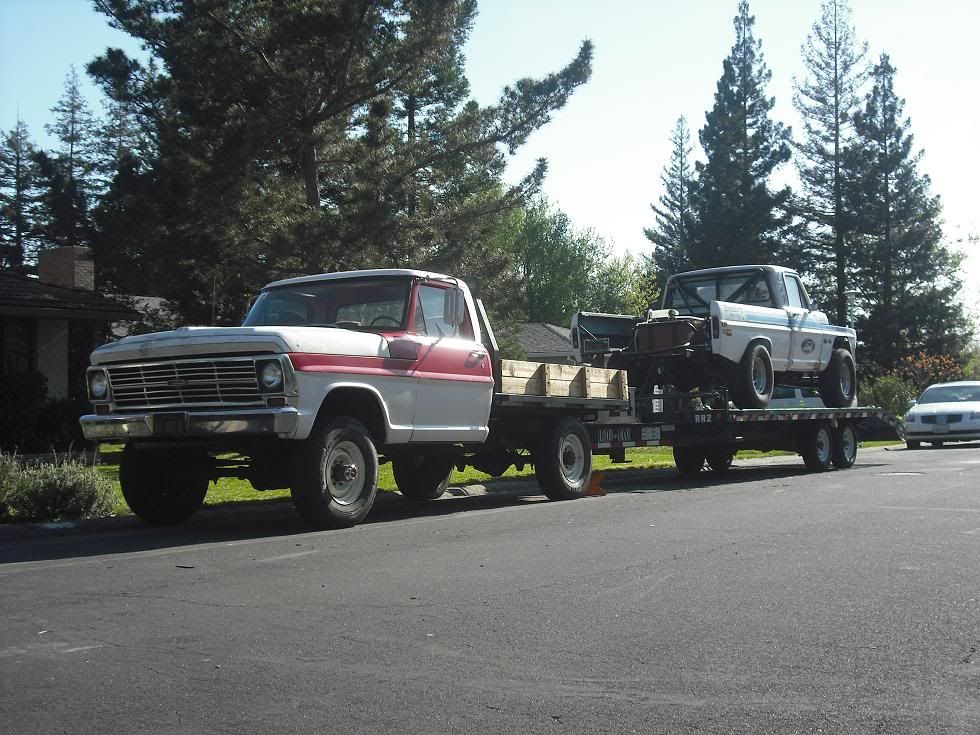

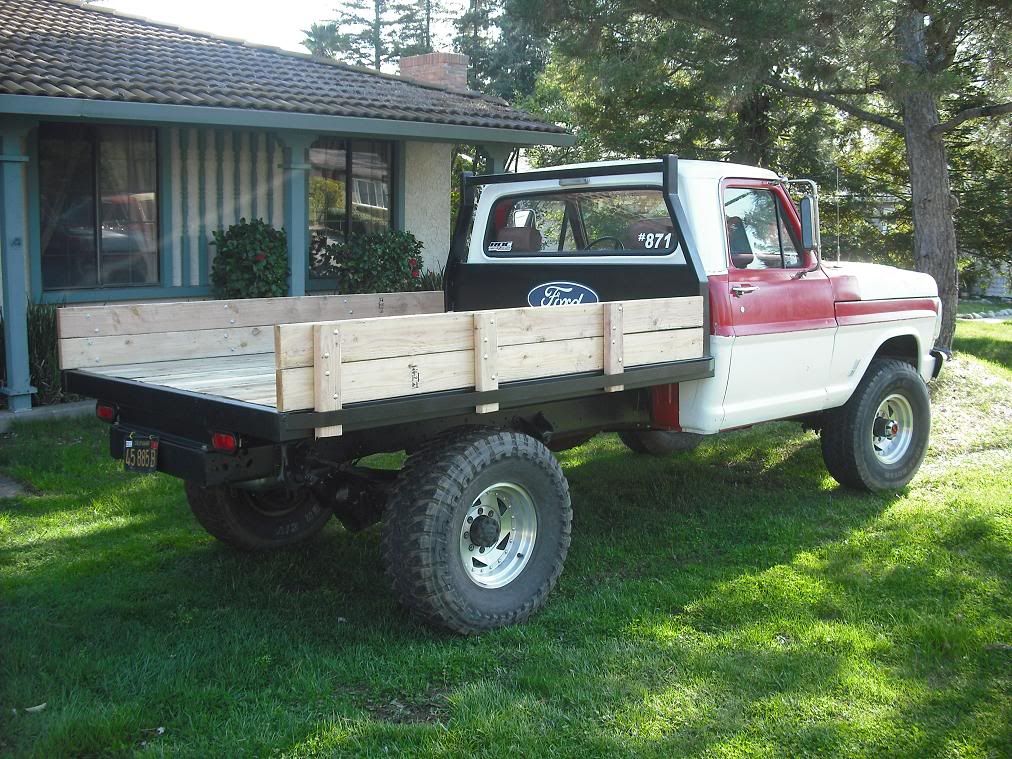

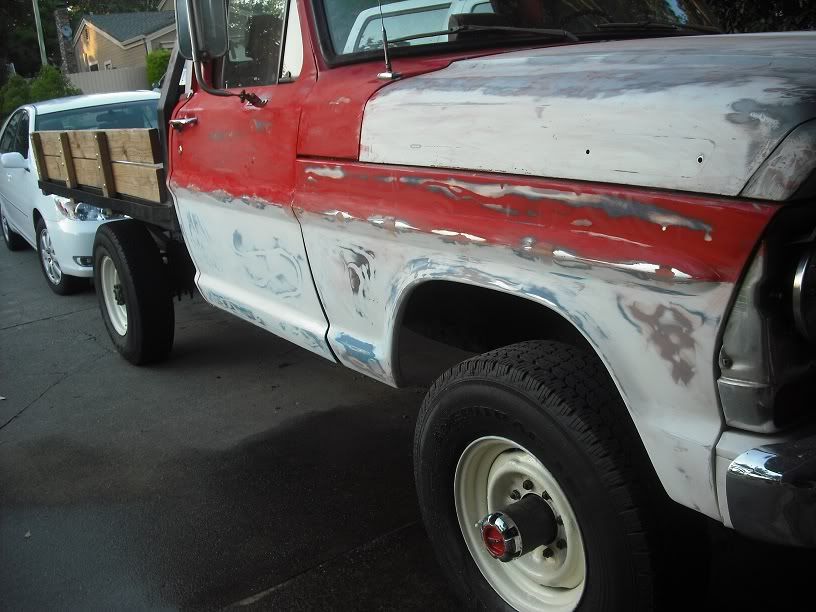
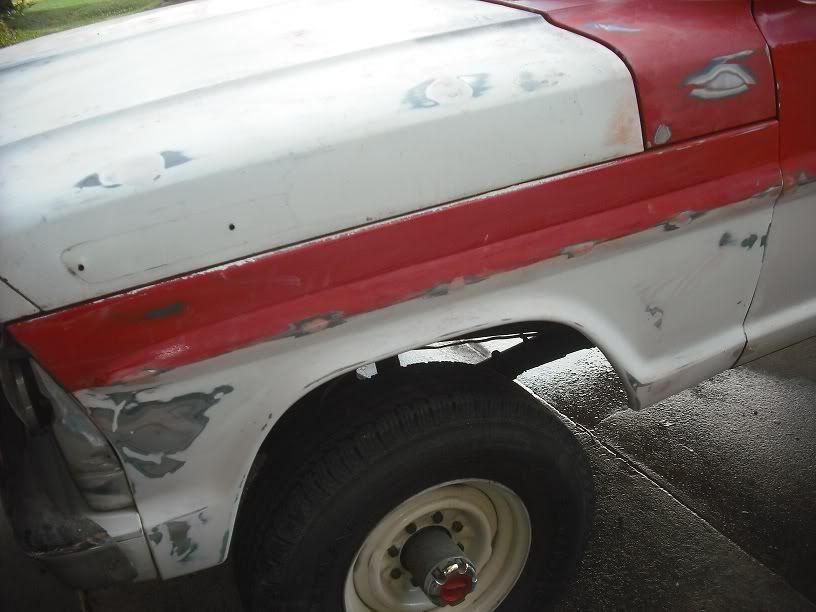
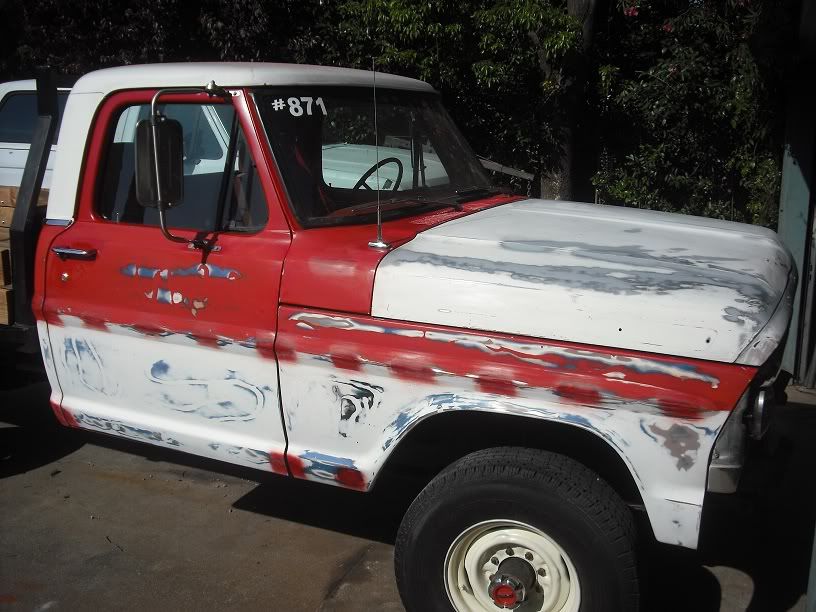
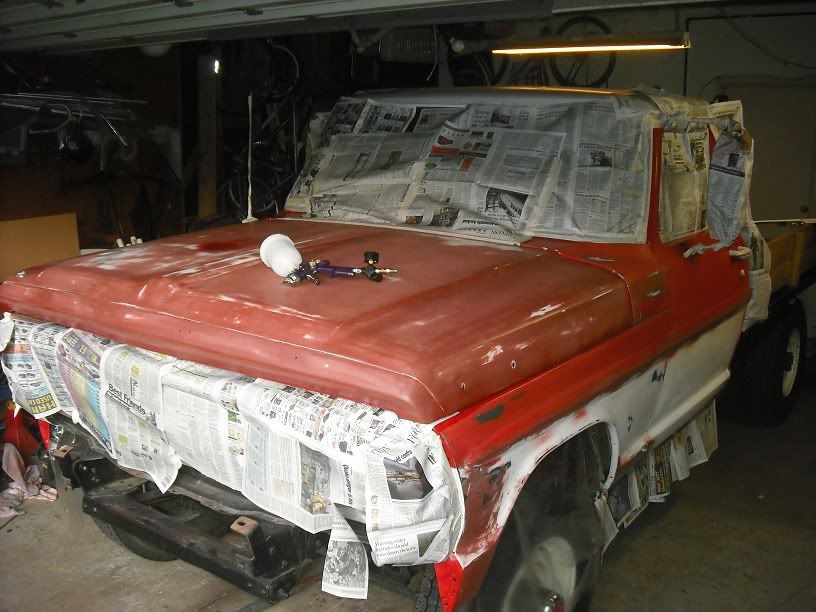
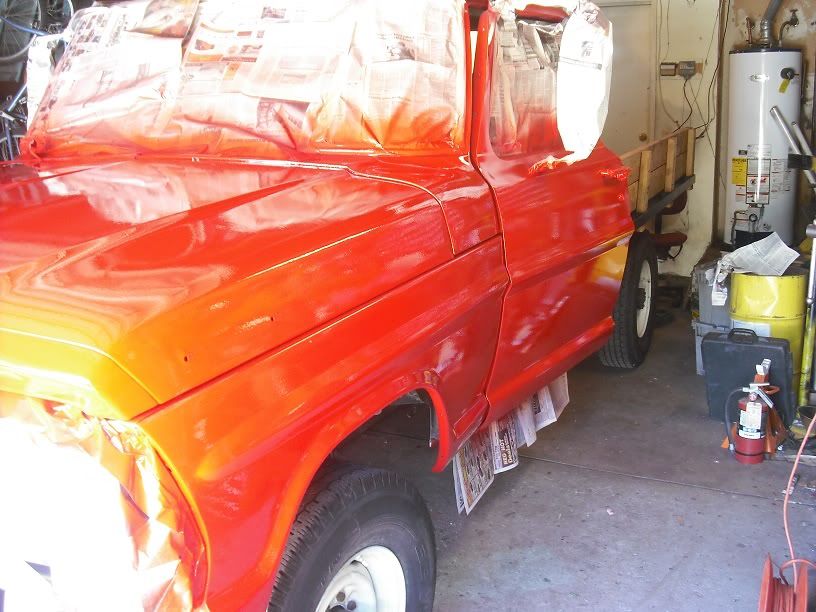
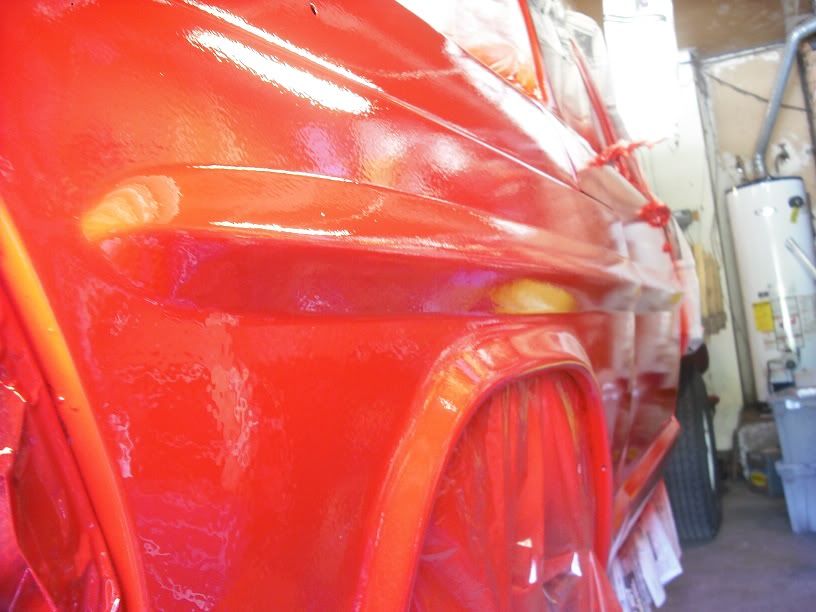
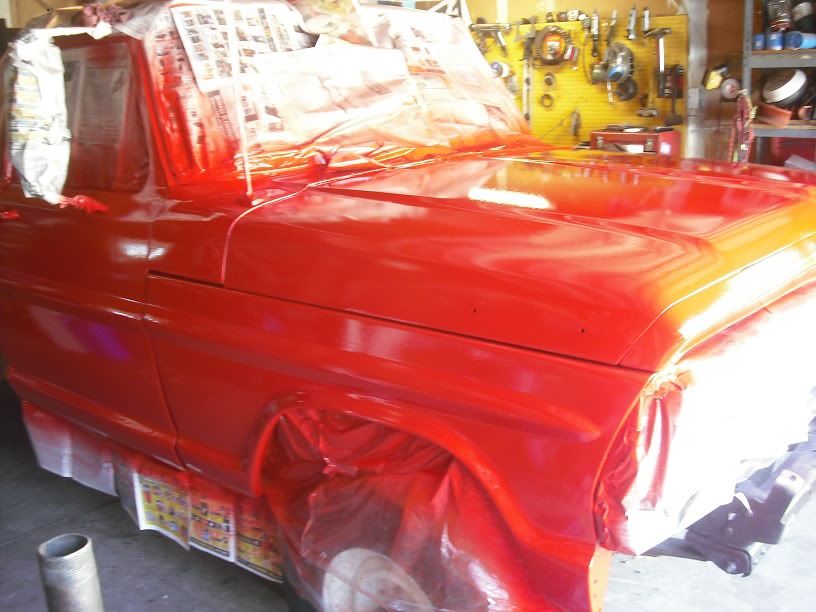
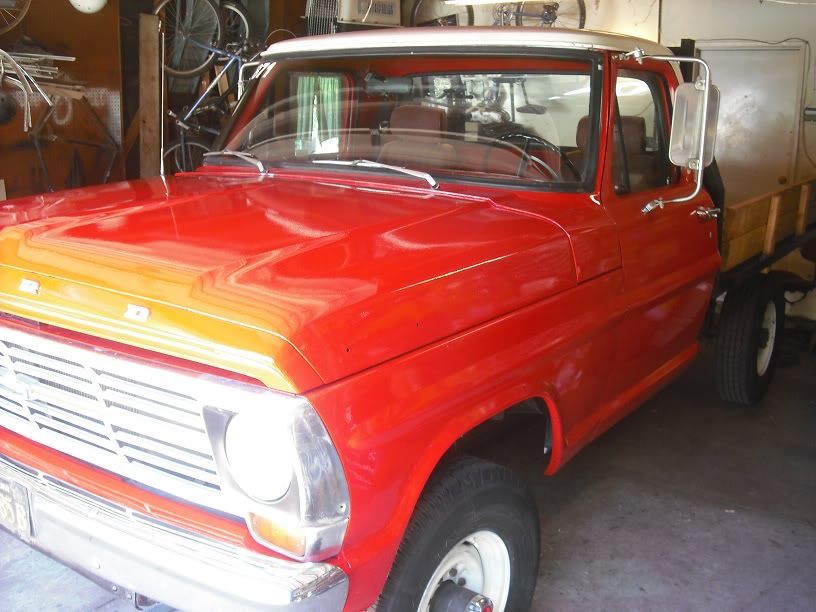
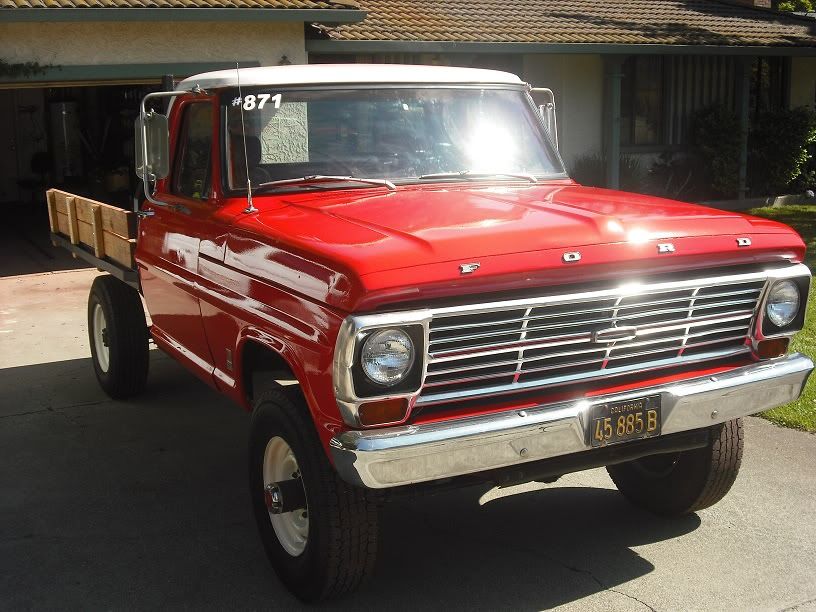
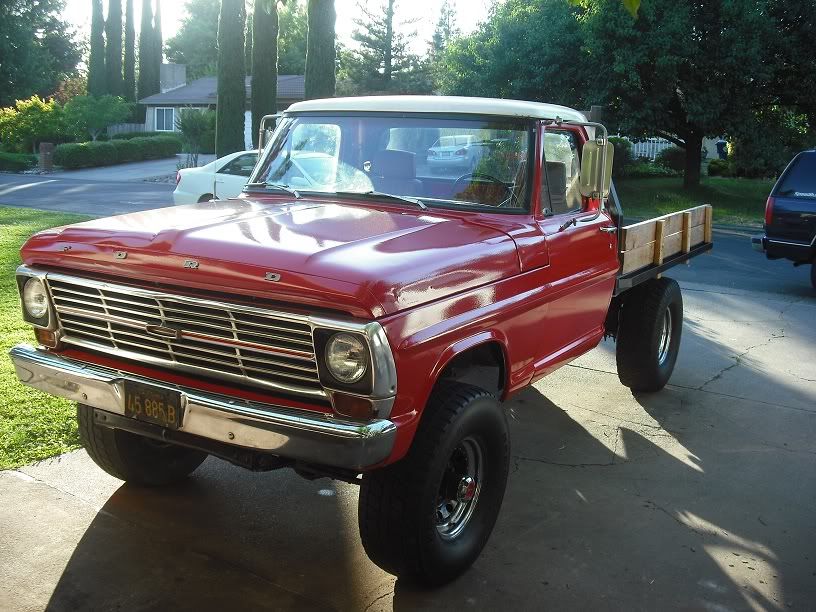

 and then finish off with Meguiar's 205


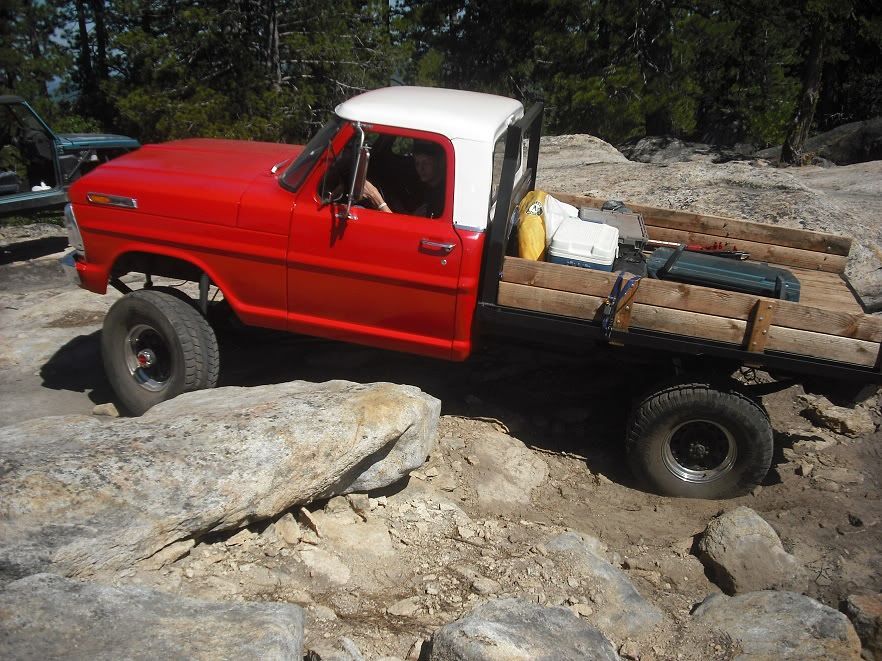
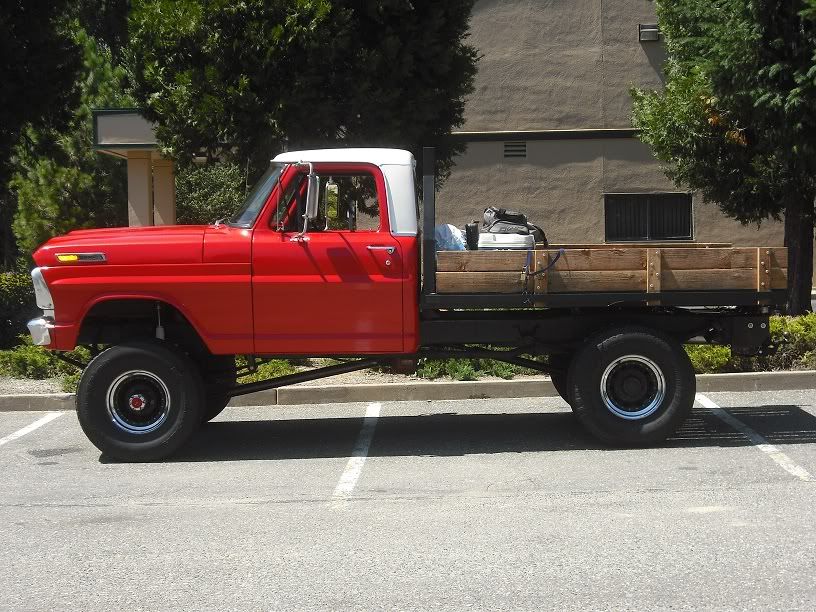
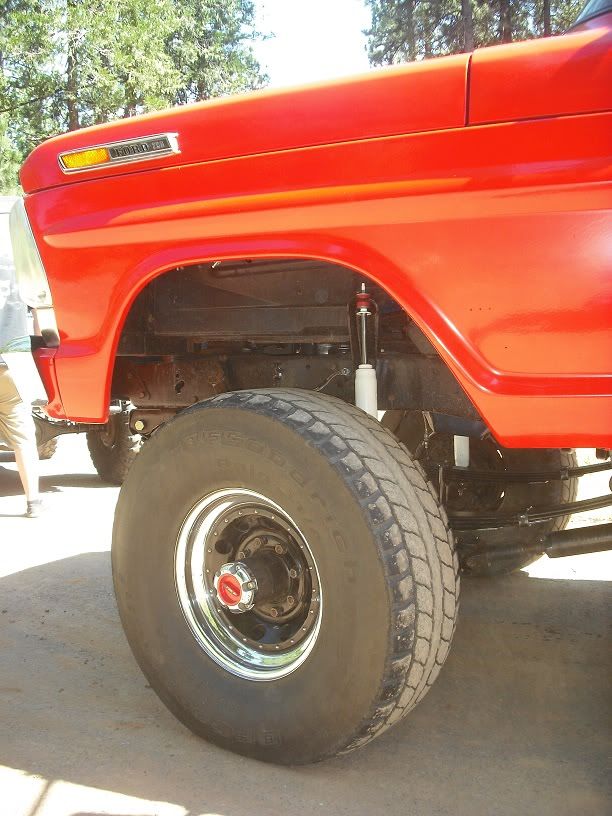
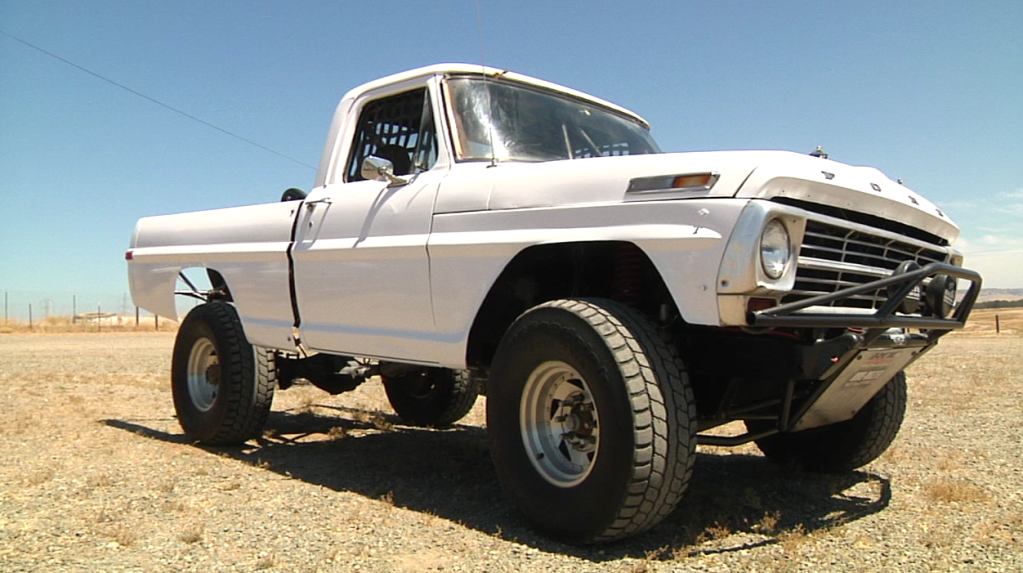


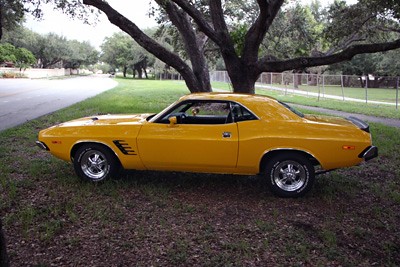


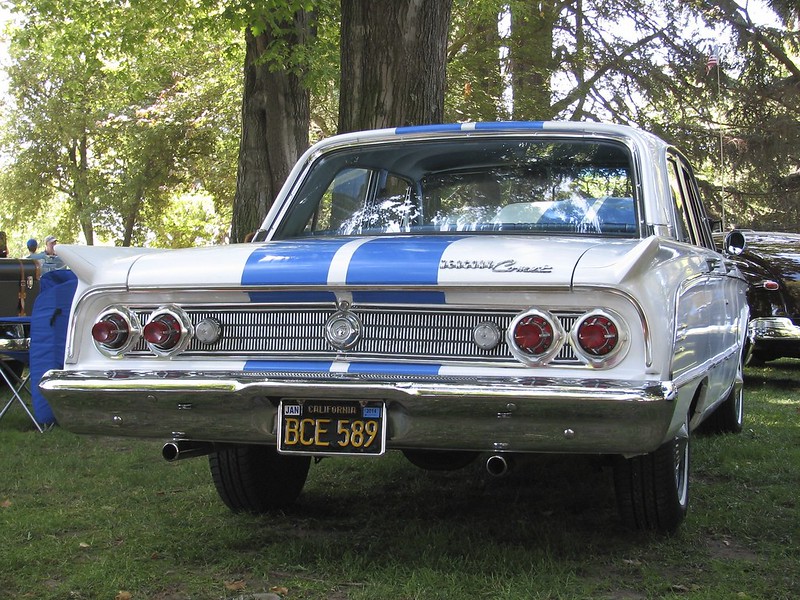


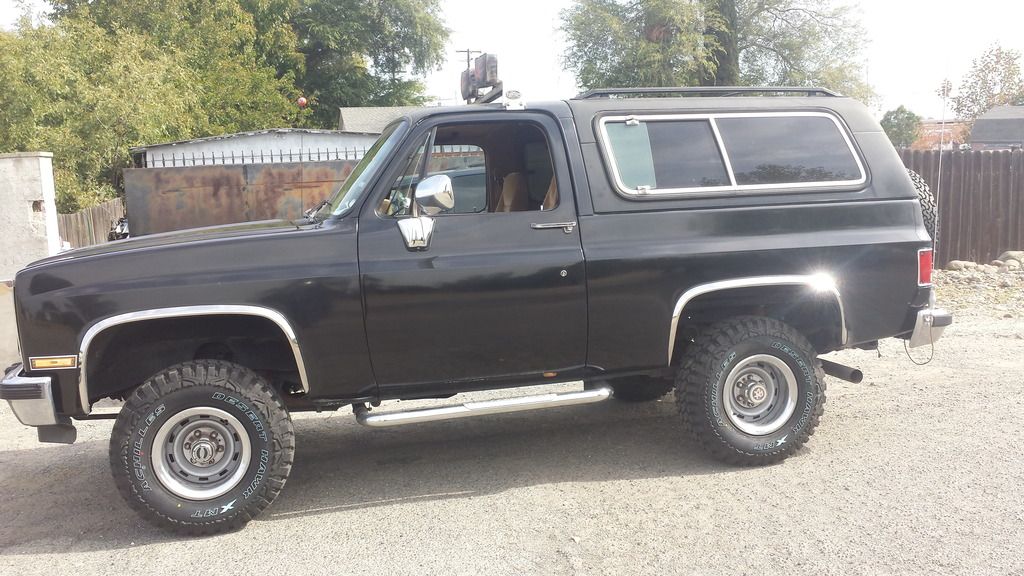 .
.
![[Linked Image]](https://live.staticflickr.com/4255/34831287164_d766c4af5a_z.jpg)