Well hello all. I am sorry for the long time between updates here but I had some problems. I had a two period there that I was down and out with a back injury and couldn't work on it and I have a home remodel project that seems to have taken over my life that put a real slow down on this project. Also I was taking pictures all along of the progress and my Daughter deleted all of the new pics on the camera by accident. So all pictures from here on out are after everything is in place and running. So I left off on the cross member. I got the cross member all made and had it powder coated. I have access to a powder coater so I can get that done for free.

Turned out nice. I changed the mount I used a Napa #620-1070 instead of the #620-1233 I have pictured. The stud is offset a bit and made everything line up better with the orignal mounting holes.
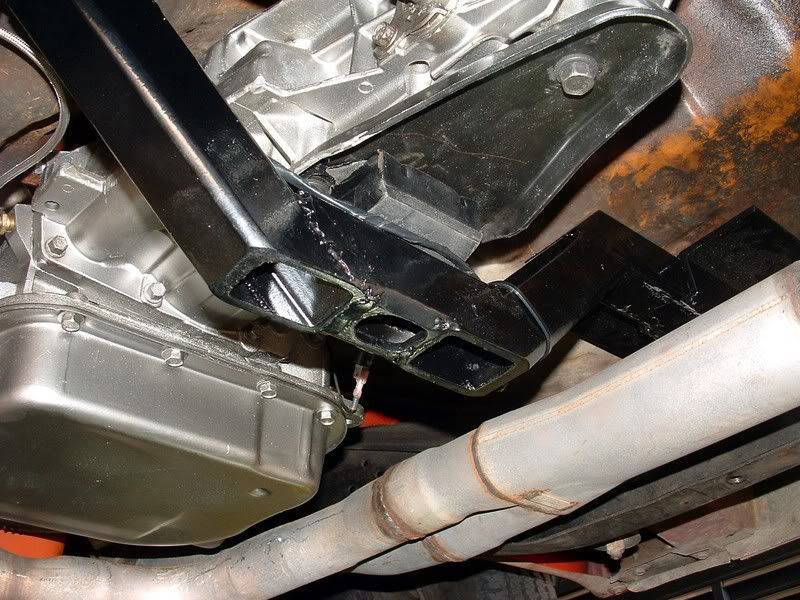
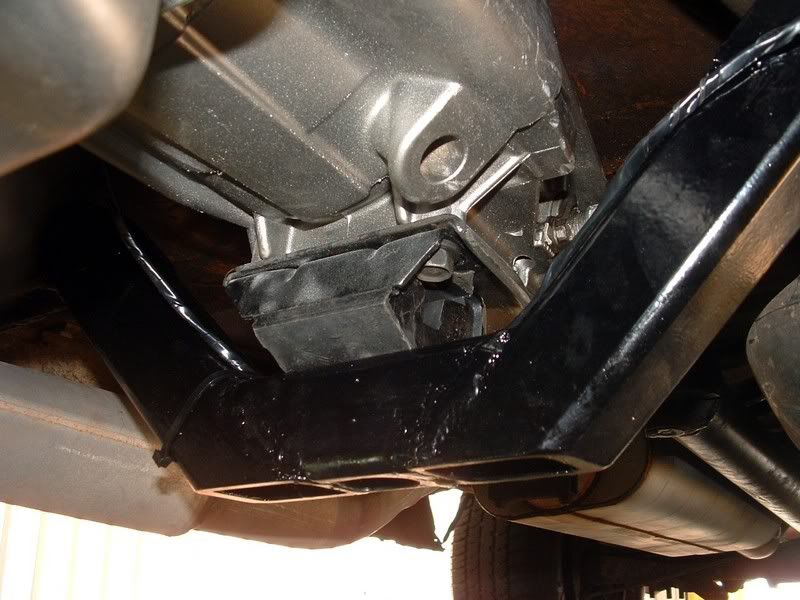
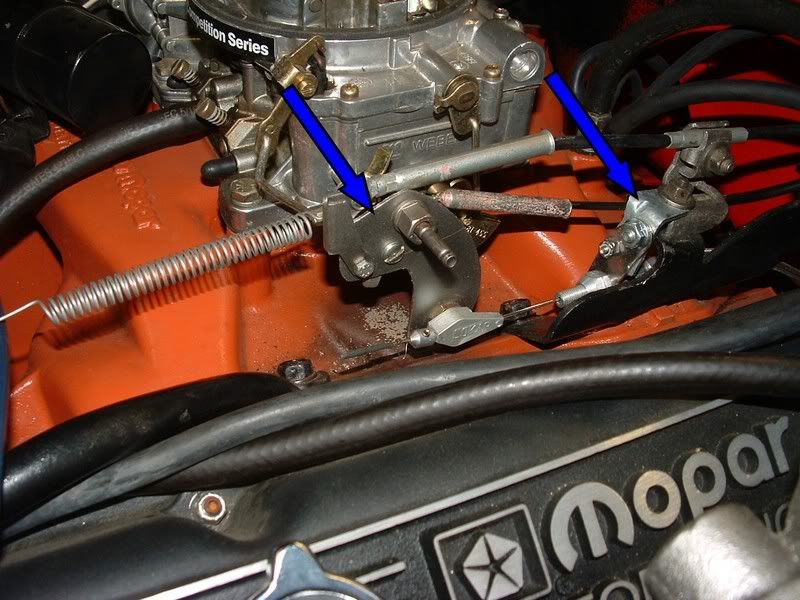
So now that worked out nice and it was time to make the shifter linkage bracket on the trans bell. I made it out of 3/16" plate formed it around the bell made an L in it to mount the shifter bracket and drilled and tapped two hole in the bell housing. Also had to make a little bracket to attach the kickdown cable return spring. These two brackets have arrows pointing at them.

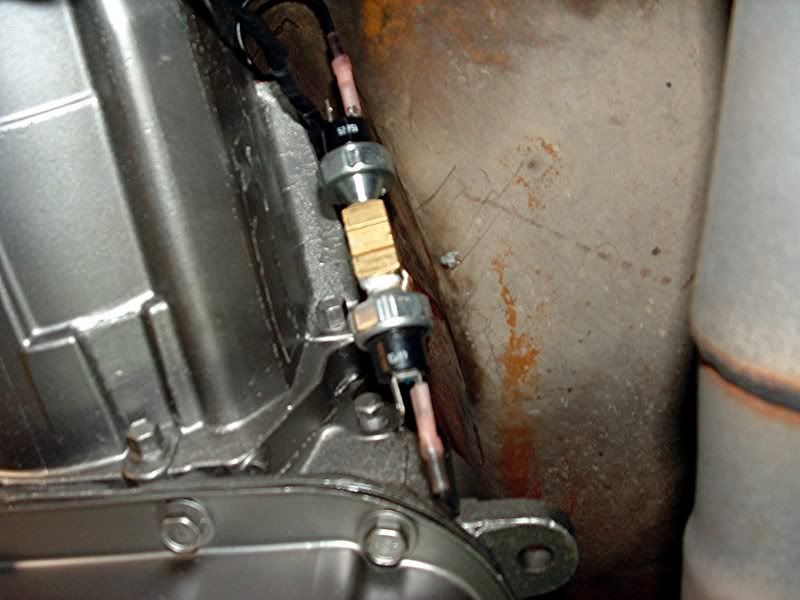
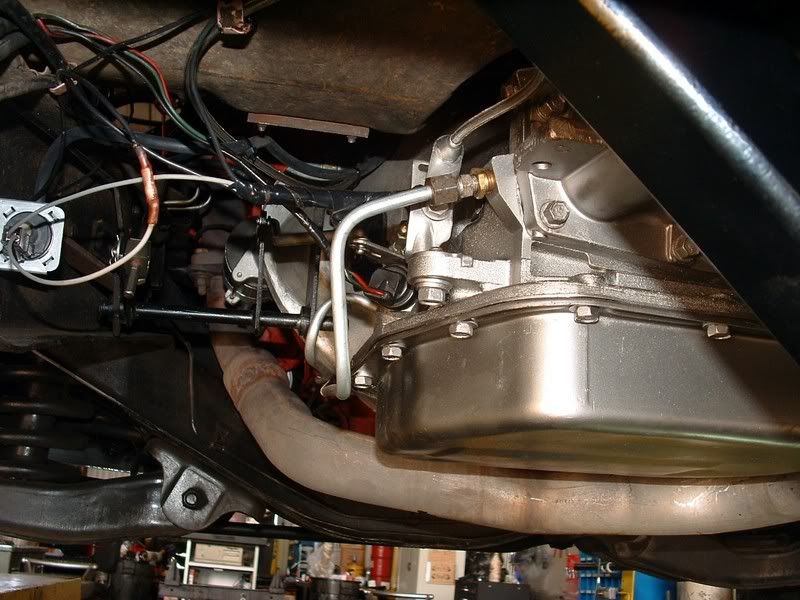
Next on to the pressure switches, the pressure switches go into the trans at the pressure port that is shown in picture #14 of the post. It is a 1/4" pipe plug locatated just in front of the purple arrow in that picture. You will need to be sure you have floor pan clearence here as well. I used a short 1/4" nipple out of the trans then a 90 degree fitting a couple of 1" long nippels and a tee to plumb this for the 44psi & 52 psi switches. 44psi is for the overdrive and 52 psi is for the lockup torque converter. On a side note I used the A518 flex plate it bolted right up to my crank and of course it bolted up to torque converter.
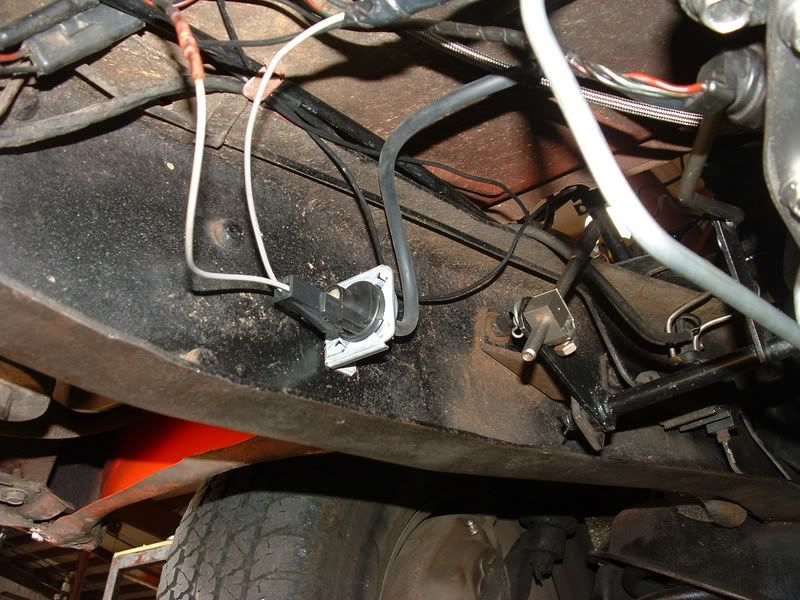
Vacum switch was installed on frame rail, vacum line ran from vacum port behind carb.
The wiring of all this is pretty straight forward.
You run a switched power wire with an inline fuse to the vacum switch. Then run the other lead of it to the middle wire on the three wire trans plugin. The other two wires of the trans plug are to establish ground not power. Front wire is overdrive, rear wire is lockup. Take the front wire on the trans plug run it to a toggle switch which I mounted in an already drill hole in my dash, run from the toggle switch to one side of the 44psi switch. Don't hook the other side of the psi switches to anything they are self grounding when they get to the desired pressure. Run the rear wire from the trans plug to the 52psi switch and your done wiring.
Now onto the kickdown cable I used Lokar cable #KD-272HT. Worked like a charm after fabricting more brackets. I had to make brackets at the carb so the cable would be pulled as I step on the gas pedal also a small L braket to hold the cable still. Brackets have arrows pointing to them.
On the cable at the trans I used the orignal cable bracket from the A518 to mount the cable.
I had to use my orignal shift lever for the trans as the hole where the shift linkage clipped to was to large. The shift lever simply unbolts and the orignal one bolted right on. Kickdown lever is the A518 one. Used orignal 727 dipstick & tube. Seemed to read right with fluid. Made new trans lines you'll have to get a couple of adapter fitting for you lines.
Well at this point I'm pretty close and then I ran into a big problem. I hadn't put the starter in yet. So I got to put it in place and low and behold it won't fit.

I try to put it in the bell housing it stops about 1/2-3/4" short of bolting flush to the bell housing. I work and work

and it still don't fit Finally I get the starter one time to sort of start into place so I think the bolts will pull on in. BAD IDEA

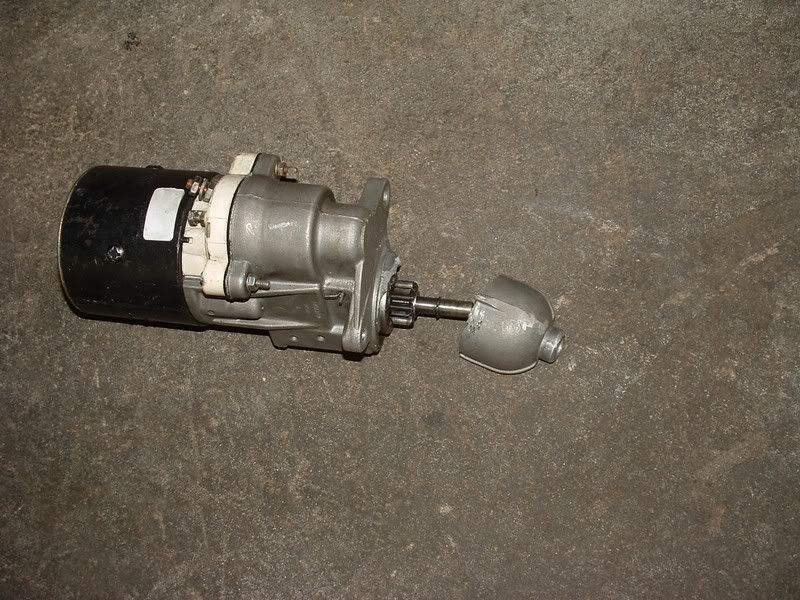
Broke the nose right off the starter. So this is on a Sunday no way to call the people that made the bell to get help. So I guess that maybe they made the Bell for a late model mini starter. So I go get a mini starter. The mini starter won't go either. To line up with pilot hole in the bell where the nose on the starter goes the mini starter is hitting the block. So I quit for that day. Monday morning I am on the phone with JW trying to figure out the problem, "we've never had a problem out of these bells" I'm told. "If you'll ship the bell and both starters to use we'll figure it out". This means pulling everything and I do mean everything back apart as this was one of the last things I was doing. I didn't want to

but I didn't know what else to do. So apart all my hard work comes. Only good thing about taking this all back out now I could make better dents in the floor pan for clearence, remember dent the floor before installing the trans. So now with the trans in the floor I get to trying to figure out the problem. I find that with the old big starter the pilot hole is to small for the nose of my starter to go in. Either my starter nose is bigger than most or they miss machined the bell. My vote is the later (miss machined). So now for the mini starter the nose goes in the hole but lacks about 1/8" of completely seating against the bell. I look at it close. There is no bevel to the edge of the pilot hole in the bell and the starter has a small raised area on it that with no bevel won't go all the way in. so I think easy fix on that just bevel the pilot hole on the bell. I did and now the starter goes all the way in. But I still had a problem with the mini starter hitting the block. So I had another bare 440 block in the garage, I took the bell off the trans and bolted it to the 440 block, put the mini starter up there and it hit the block
Now what? So I get to reading some tech articles on Moparts (Thanks Moparts

)about mini starters on big blocks hitting the block and having to grind the body of the starter a little and thats what I did and it bolted right up.

So with all these issues figured out its back together with it all. But I bolted the starter up as soon as I had the trans in place this time rather than last thing. It fit like a glove, YEAH. So I warn all of you that are using the ultra bell be sure before you ever install it take your starter an fit it into the bell housing. Such a small detail cost me a lot of time and a lot of cusing.
So now that all that was in place I got it finished bolted up. Hooked all my wiring back up, refilled with fluid. Adjusted the kickdown cable per instruction which is to have no slack in cable, as soon as you step on the throttle it should be pulling on the kickdown cable. On first test drive I found this not quite the right adjustment as the trans held the shift from 2nd to 3rd really long and when it shifted it was very harsh. I readjusted it to have about 1/8" slack at idle and it shifted like a champ. Everything worked perfect. I drove it today for the first time put several miles on it, worked great
. Trans shifts smooth and easy downshifts very well. Overdrive seems to come on at about 48-50mph step on the throtle vacum drops and it makes it drop right out of overdrive just like it should couldn't ask for any better. So far I like it. I can tell a big differnce in the rpms at highway speed just from listening. Don't have a tach to say (some of you know why but thats a whole nother story) but I'd say at least 1000rpm less than normal. Don't have enough miles to say what kind of mpg differnce it made. I know for sure what I got before. So I will report that as I know. Now in conclusion on this long winded post. Is it worth it to overdrive? It's more work than I thought it would be. More fabricating and figuring out things than I thought there would be. I'd say it's not all that hard most any of you could do it. Even with all the trouble spots I have had it hasn't been that bad other than the starter issue. Remember check the starter first thing & ding the floor pan before the trans is in. I think fabbing a cross memeber is a better deal than tring to make the orignal work. Worked better for me. As of right now I'd say I can tell a big difference in the way the truck drives. Shifts so well and just all around seems better. I like it. I will let you know about mileage as soon as I have a true figure. I have a 100 mile drive coming up to Knoxville TN on July 14th so I should get some good data on highway milage then.
I hope you found all this useful and not to boring. If you have any question about how I did anything or how any of this worked just ask I'll do my best to answer. I will be more available now than I have been.
Thanks
Larry