|
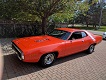
 My 69 HEMI Charger got paint!!!! :)
#1102654
My 69 HEMI Charger got paint!!!! :)
#1102654
10/27/11 02:56 PM
10/27/11 02:56 PM
|
Joined: Jan 2003
Posts: 9,670
Lima, Peru
domingo
 OP
OP
EL Master
|
OP
EL Master
Joined: Jan 2003
Posts: 9,670
Lima, Peru
|
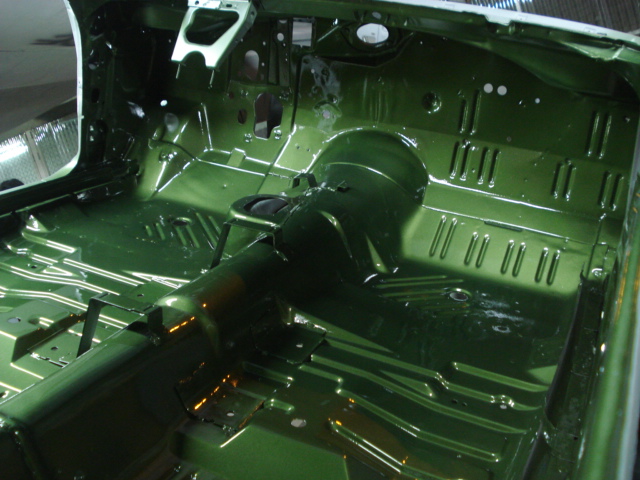
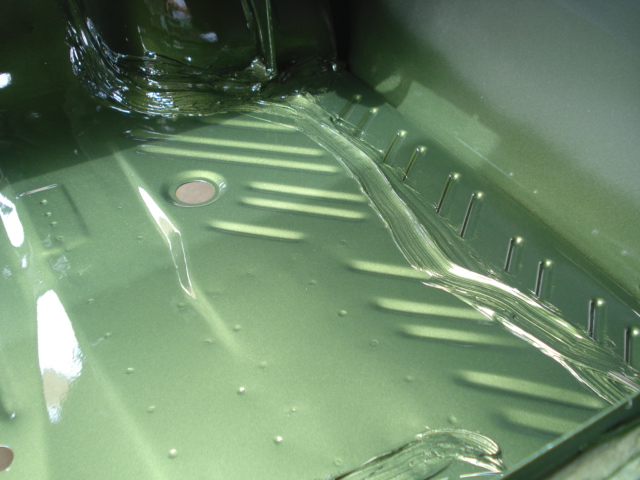
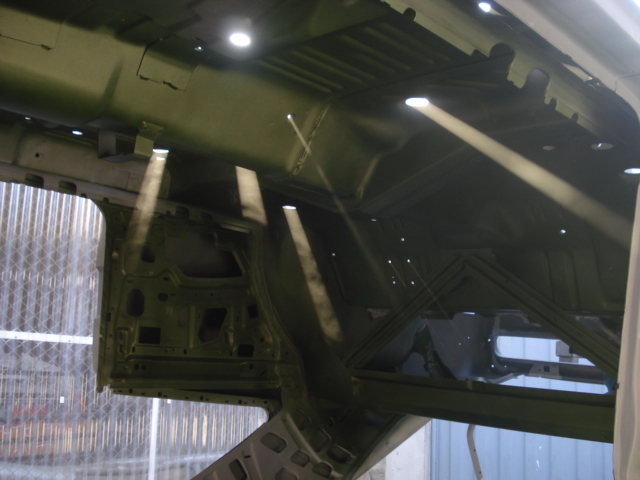
Underside....  Dip Primer gray with F8 Green overspray... Actually it's 2 stage paint mixed to match the dip primer grey (thanks Rick Kreuziger for sending me color match samples of the primers!!!  ). Then we dusted the f8 paint in the overspray patterns and then we got all clearcoated with matte Glassurit clear!!! Looks good, hard to tell its not primer, and it should provide years of protection and it will be super easy to wipe clean if stained!!!
|
|
|
Re: My 69 HEMI Charger got paint!!!! :)
[Re: domingo]
#1102655
10/27/11 02:57 PM
10/27/11 02:57 PM
|
Joined: Jan 2003
Posts: 9,670
Lima, Peru
domingo
OP
EL Master
|
OP
EL Master
Joined: Jan 2003
Posts: 9,670
Lima, Peru
|
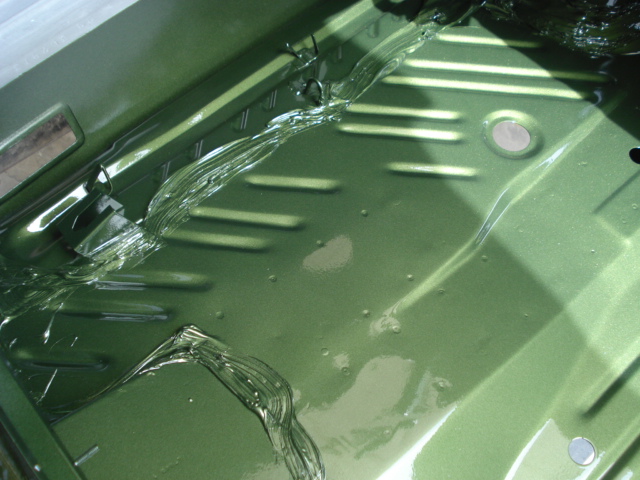
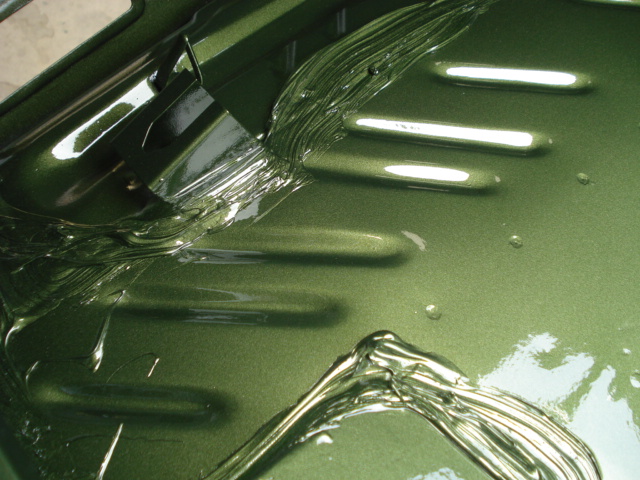
Floorpans....still need to apply the sealer!!! Its 2 stage Glassurit... 
Last edited by domingo; 10/27/11 02:58 PM.
|
|
|
Re: My 69 HEMI Charger got paint!!!! :)
[Re: domingo]
#1102660
10/27/11 03:06 PM
10/27/11 03:06 PM
|
Joined: Jan 2003
Posts: 9,670
Lima, Peru
domingo
OP
EL Master
|
OP
EL Master
Joined: Jan 2003
Posts: 9,670
Lima, Peru
|
At one point I thought I was gonna be abducted by aliens!!! LOL
Last edited by domingo; 10/27/11 03:06 PM.
|
|
|
Re: My 69 HEMI Charger got paint!!!! :)
[Re: JohnRR]
#1102663
10/27/11 03:58 PM
10/27/11 03:58 PM
|
Joined: Jan 2003
Posts: 9,670
Lima, Peru
domingo
OP
EL Master
|
OP
EL Master
Joined: Jan 2003
Posts: 9,670
Lima, Peru
|
Thanks! Yes, I will mask everything off to protect it... I know what you are saying John, why not let the natural overspray get under the car when painting it, and be done with it.... I did not because I still need to prep the exterior body panels on the car and all would get messed up with the blocking dust. So Id rather finish the inside, bottom, mask it, and forget about it.... Its the way i chose to do it. All that matters is the end result right??? Besides, I wanted for the underside to look like it looks now for a long time....and as I'm sure you know, for proper paint adhesion you only have a time window to apply a layer of paint atop the other, and if I only did the dip primer, and if it was just a few days later that I did the exterior paint (which will be actually more than that) the paint and clear overspray wouldnt have proper bonding with the dull clearcoated dip primer gray, and i didnt want stuff to flake off or come off if I wiped the road and dirt grime later on if I wanted to keep the underside of the car clean. The whole point for me is to drive these cars, not to display them and drive em off and on a trailer. So whatever looks original, but will actually protect the car for years to come and keep looking just like the day I did it, is what Im looking for here!!! trust me, Ive thought this over plenty!!!
|
|
|
Re: My 69 HEMI Charger got paint!!!! :)
[Re: gygeneral]
#1102672
10/27/11 06:32 PM
10/27/11 06:32 PM
|
Joined: Jan 2003
Posts: 9,670
Lima, Peru
domingo
OP
EL Master
|
OP
EL Master
Joined: Jan 2003
Posts: 9,670
Lima, Peru
|
Quote:
Great job, can you share how you achieved the slop look with the seam sealer?
Thanks
Just urethane sealer, I bought those tubes that you have to apply with an aplicator gun. I cut the tip the biggest I could, and really applied it on REAL THICK. Then I just bought a brush and cut it in small pieces (as big as a barbers brush) and I brushed and spread the sealer. Its better to use a brush that has stiff bristles.
The key hear is to do it fast and not overdo it, you want to brush and push the sealer right in the middle to make the sealer get into the seam and leave the edges of the sealer just spread out so the spread and habve a "round" oozed off look on the sides. You want to brush just once, max twice and be done with it.
Thats it!
To those who are wondering why I left the passenger compartment sealer off, as well as the inner quarter panel undercoat...there is a reason. Yes I know that those were also applied BEFORE paint and clear....but, it was black petroleoum based sealer, and the undercoat was also petroleoum based. So it was applied, and then the floors and trunk got painted while it was still kinda fresh so after a while the sealer ended up sucking up - vanishing the paint to the point where it almost seams that the black sealer and undercoat were applied AFTER the paint. But when you look close you can see that you can still find some traces of paint over the sealer and undercoat.
So thats why Im gonna applied the sealer and undercoat over the paint, let it dry for about a month and then Im gonna dust some f8 paint over it to achieve the look that you find when looking at an original survivor type car. Ive done it before and it does look like the real thing that way.
|
|
|
Re: My 69 HEMI Charger got paint!!!! :)
[Re: Morty426]
#1102673
10/27/11 06:33 PM
10/27/11 06:33 PM
|
Joined: Jan 2003
Posts: 9,670
Lima, Peru
domingo
OP
EL Master
|
OP
EL Master
Joined: Jan 2003
Posts: 9,670
Lima, Peru
|
Quote:
D-
Why aren't you doing a single stage?
M-
Because 2 stage is so much nicer!!!
And on the underside, I also used 2 stage because you cant get single stage paint in a matte (non shiny) finish. At least down here we dont have matte single stage paint.
|
|
|
|
|


