|
 Re: err
#38534
Re: err
#38534
11/14/08 12:29 AM
11/14/08 12:29 AM
|
Joined: Jul 2006
Posts: 44
USA
_Scott_

member
|
member
Joined: Jul 2006
Posts: 44
USA
|
Off the topic of rolling... I have purchased automotive paint in spray cans from these folks before: http://www.automotivetouchup.com/Perfect color match (Toyota "Natural White", code 056 if I remember correctly.) It's a good option if the area you need to spray isn't too big. Your color choices span the whole array of OEM colors and include base/clear systems.
|
|
|
88 dakota
[Re: ridin98ci]
#38536
11/22/08 01:41 AM
11/22/08 01:41 AM
|
Anonymous
Unregistered
|
Anonymous
Unregistered
|
Well I�m new here, I don�t even know how I got directed to this website but is pretty awesome, I have an 88 dodge Dakota that I�d like to paint, I started reading the 200 page long post but its way to much info for one day, anyways I bought all the supplies i think I�ll need to paint the truck, i sanded the hood today will prep it with bondo and paint the firs two coats tomorrow, I chose rustolium royal blue has anyone tried that paint? Any ideas before I have at it?  ?
|
|
|
Re: 88 dakota
#38537
11/22/08 02:00 AM
11/22/08 02:00 AM
|
Joined: Aug 2008
Posts: 1,568
Omaha, Nebraska
Scott Carl
pro stock
|
pro stock
Joined: Aug 2008
Posts: 1,568
Omaha, Nebraska
|
Quote:
Well I�m new here, I don�t even know how I got directed to this website but is pretty awesome, I have an 88 dodge Dakota that I�d like to paint, I started reading the 200 page long post but its way to much info for one day, anyways I bought all the supplies i think I�ll need to paint the truck, i sanded the hood today will prep it with bondo and paint the firs two coats tomorrow,
I chose rustolium royal blue has anyone tried that paint? Any ideas before I have at it?
?
Still warm enough to let it dry thoroughly in your area? Not below 60 degrees even at night? BTW, Welcome to the forum 
Last edited by Scott Carl; 11/22/08 02:00 AM.
|
|
|
Re: 88 dakota
[Re: vdriver]
#38539
11/22/08 07:21 PM
11/22/08 07:21 PM
|
Anonymous
Unregistered
|
Anonymous
Unregistered
|
hi everyone been reading this thread for months now and brillnt must of read it few times through now  i shall be taking this route with my work van as money does not allow and a profeshniol job will only get damaged . i am painting it red the base couler is already red so am hoping it covers quite easy fingures crossed , there is slight diffrence in the to coulers so i shall be doing the door shut's etc . i shall be using a small compresor with hlvp gun with rustoluim red. how many coat's do pepole recomend and is it easyer wet sanding and getting a better finish with only spraying thin coat's on ?? the size of the van is a vw split screen so how much paint would i need and what else is required apart from the paint and minreal spirit's and spray gun ?? is there anything else i can add to the rustoulem to make it lay better and save myself time when buffing etc ?? how many hrs do pepole think would take from start to finish just as a ruff guide all body work prepped ready ?? many thanks and sorry about all the questions and poor spelling . 
|
|
|
Makin' Progress on the Blue Comet- Priming Done
[Re: Mercurymarc]
#38541
11/28/08 11:35 AM
11/28/08 11:35 AM
|
Joined: Sep 2008
Posts: 33
San Francisco
Mercurymarc
member
|
member
Joined: Sep 2008
Posts: 33
San Francisco
|
Thanks to the great folks on this forum I am on my way to a great looking finish! I have created a webpage to document my adventure- for those who want to see the project you can check out: Marc's Blue Comet It may bet time to change the title from Blue to White! Thanks for everyone's help.
Marc in SF
63 Blue Comet 260 Sedan- White w/blue stripes
Done using the "$50 Paint Job" method!
|
|
|
Re: Makin' Progress on the Blue Comet- Priming Done
[Re: Mercurymarc]
#38542
11/28/08 03:05 PM
11/28/08 03:05 PM
|
Anonymous
Unregistered
|
Anonymous
Unregistered
|
Good work Mercurymarc and nice website too. Impressive that you are willing to tackle that much rust especially out here on the left coast where we don't usually give rusty cars that much love. A v8 Comet though deserves to be saved.
|
|
|
Re: Satin/Flat finish
[Re: p d'ro]
#38543
11/30/08 11:16 PM
11/30/08 11:16 PM
|
Anonymous
Unregistered
|
Anonymous
Unregistered
|
Quote:
I want to know how you polished all of those tight areas on the Sterling like the headlights, etc. and what do you do w/ areas that you can't get teh buffer to. That car looks great. I want to roll my Coronet R/T and will need to polish areas like that....
Also, if you had your car etched, primed etc ready for a commercial job and you decided to roll, however didn't like the results, how far yould you have to take it down to get ready for a good spray job again?
Thanks, Pete
anyone?
|
|
|
Re: Satin/Flat finish
#38544
12/01/08 01:38 AM
12/01/08 01:38 AM
|
Joined: Aug 2007
Posts: 20
MN
tsbrewers
member
|
member
Joined: Aug 2007
Posts: 20
MN
|
Quote:
Quote:
I want to know how you polished all of those tight areas on the Sterling like the headlights, etc. and what do you do w/ areas that you can't get teh buffer to. That car looks great. I want to roll my Coronet R/T and will need to polish areas like that....
Also, if you had your car etched, primed etc ready for a commercial job and you decided to roll, however didn't like the results, how far yould you have to take it down to get ready for a good spray job again?
Thanks, Pete
anyone?
I have a small 3" pneumatic buffer that will get in to most areas. Can also do it by hand.
#2 depends on how much you are spending on a professional paint. If you are going to go with a $2k job, you can just sand and rough up the paint and spray over the top. If you are going for a $10k + show car paint job, have it sand blasted back to bare metal. JMHO though.
Brew
|
|
|
Re:
[Re: tsbrewers]
#38545
12/05/08 04:53 AM
12/05/08 04:53 AM
|
Anonymous
Unregistered
|
Anonymous
Unregistered
|
Marq! I'm reading all the 3 topics for about 1 week now non stop! Good job for introducing the Brightside paint! I'm from the Netherlands, and I'm going to paint a Nissan 240SX in Brightside Fire Red. Most of your information is pretty clear, but I still have some questions mate. I hope you will answer these by yourself. 1/ You use a 4inch high density foam roller for applying paint, and a second roller for popping the bubbles and flatting the paint. What kind of roller must this second roller be? Also a 4inch foam roller? or an other kind of roller? 2/ My car has a lot of difficult places that are impossible to roll. I want to spray this with rustoleum fire red. In what order is this the best way to do it? I'm planning to brush the paint in all the corners and hard places. How much paint can I brush on this places? A thick layer? or a thin layer ? Then I want to let it dry for about 24hours, after that wet sanding with grit 400 and use spirit, and then begin to roll my entire car for the 1st layer. Is this the right way? 3/ How much paint did you use on your car? Here in holland we can buy the Brightside paint only in 1 Liter (=0.264 gal) or in 2.5L (=0.650 gal) 4/ Where are all your photo's mate of your car?  Al the links are dead in the old topics from 2006. So much thanks for answering Greetings
|
|
|
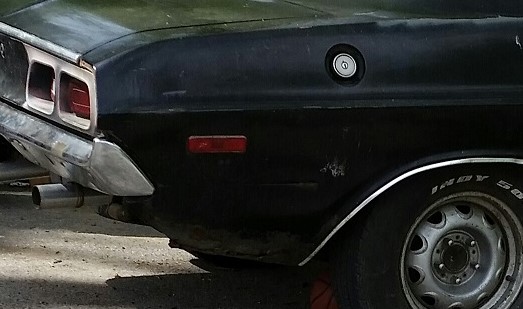
Re: 88 dakota
#38546
12/05/08 03:24 PM
12/05/08 03:24 PM
|
Joined: Nov 2007
Posts: 103
Tampa, FL
Saint Crispan
member
|
member
Joined: Nov 2007
Posts: 103
Tampa, FL
|
Quote:
Well I�m new here, I don�t even know how I got directed to this website but is pretty awesome, I have an 88 dodge Dakota that I�d like to paint, I started reading the 200 page long post but its way to much info for one day, anyways I bought all the supplies i think I�ll need to paint the truck, i sanded the hood today will prep it with bondo and paint the firs two coats tomorrow,
I chose rustolium royal blue has anyone tried that paint? Any ideas before I have at it?
?
I have a sort of light-blue (B5) on my 1972 Plymouth SSP. I tried to get a quart of Royal Blue and a cup of White, and thought I could simply lighten the Royal Blue with some White to get the light-blue color on my SSP.
Guess what: Royal Blue is actually a combination of dark blue and maroon. When I lightened it with some white, it turned into a sort of faded purple shade. In retrospect, it makes sense, since what is the favorite color of royalty? Maroon...maroon crowns, maroon capes, etc, etc.
I think my next pick is going to be a gallon of Safety Blue, and I'll ad the Royal Blue to that to darken it, if need be. Or black, or something.
BTW, after sandpaper, sander, and a few experiments with paint, this project has exceeded $50. (Just sayin'.)
|
|
|
Re:
#38547
12/06/08 03:43 PM
12/06/08 03:43 PM
|
Joined: May 2006
Posts: 575
Canada
Marq
mopar addict
|
mopar addict
Joined: May 2006
Posts: 575
Canada
|
Quote:
Marq!
1/ You use a 4inch high density foam roller for applying paint, and a second roller for popping the bubbles and flatting the paint. What kind of roller must this second roller be?
Also a 4inch foam roller? or an other kind of roller?
Well.. .first I will tell you a story behind the 'tippling' effect. For the boat enthusiast using Brightside paint, they recommended using a roller to apply the paint... and then follow it up immediately after with a soft-fine-wide paint brush ( obviously one with tightly held bristles ( so they they don't fall off and stick to the paint ). The idea behind the marine application method is that the follow-up brush lightly sweeping over the freshly applied paint is that it would pop any bubbles from the roller - and yet the paint would be fresh and wet enough to 're-heal' itself and self level any depth changes in the freshly applied paint.
Ok... so what I ended up doing is just being lazy. Since I was buying these white high density foam rollers pretty cheaply, I decided to use one of them as my 'follow-up' roller.
A nice clean 'follow-up' roller does an amazing job. But the key is to not use it once it has too much paint built up on to it. Otherwise it will begin leaving tracks or patterns when it is lightly rolled over the freshly applied paint.
So I would end up using two new 'follow-up' rollers during a coating of the entire car.
IF you are moving pretty quickly along with your rolling... your first 'follow-up' roller can be promoted to the job of the paint applicator half way though the coating of the car ( and you toss out the original foam roller that was being used initially to roll on the paint ).
IF you decide to instead use a wide-soft paint brush... it will work. But you will have to spend more time keeping it clean - so that paint doesn't build up on it or begin to harden or it. ( Obviously if the paint begins to harden or cure on the brush it would no longer be a 'soft' paint brush ).
Trouble is that to get a good quality paint brush, it usually cost 5 or 10 times more then a pile of high density foam rollers. So that is the logic on why I went with the 4" inch high density white rollers.
I did experiment with 6" and 10" high density foam rollers.. BUT they just didn't have the ability to manouever around the lines of a car easily. HOWEVER... if you were doing something with a ton of flat surfaces ( like a van, bus, panel truck, Winnebago etc ) I would probably go with the 10" high density foam roller ( because the ability to manoever it around the surfaces wouldn't be so important ).
Quote:
2/ My car has a lot of difficult places that are impossible to roll.
I want to spray this with rustoleum fire red.
In what order is this the best way to do it?
I faced the same situation. So I first cleaned like crazy all those nooks and crannies to get all the dirt, oil, debris and crap out of them. The point being to remove anything that would interfere with the paint's ability to adhere to those hard to get surfaces. I even dumped about three cans of aerosol brake cleaning solvent into those spots ( since it cleans everything off and leaves no residue ). Then I left it for a day to let the brake cleaning solvent thoroughly evaporate.
Then I hit those nooks and crannies with the spray bomb 'fire red' paint. I hit it first with a light coat - just to sort of prime the surface and ensure good adhesion. The next day I went back over those spots and laid down a proper full coverage coating ( taking care to try to avoid runs etc ).
IF any spray ran on to the rest of the body... you immediately take your handy 4" high density roller and work it out to flatten it or thin it down.
Once I had all my nooks and crannies done... I then was able to go after all the external and more easily reached parts. The beauty of this 1 - 2 procedure is that your roller job will be able to cover any 'overspray' or 'paint mist' that might have reached those external body panels.
IF you had painted the external body parts first... and then sprayed the nooks and crannies after.. the odds are that you will get furry, fuzzy overspray or atomized paint on your rolled paint.
Quote:
I'm planning to brush the paint in all the corners and hard places.
How much paint can I brush on this places? A thick layer? or a thin layer ?
I also used some assorted FOAM paint brushes of various sizes to do some pain in the butt spots on the car. They sell assortment packs of these cheap foam paint brushes ( which are basically black porous foam with a wooden stick shoved up them. They come in 1/2 inch, 1 inch and 2 inch sizes in the assortment pack.
When painting with them, I followed my spraying routine... that being get a thin layer on to provide good adhesion for the next coat. Then when I did the second coat over the area... I would aim for more fuller coverage. The number of coatings will depend on how much of a color change you are going from and trying to get to.
Quote:
3/ How much paint did you use on your car?
Here in holland we can buy the Brightside paint only in 1 Liter (=0.264 gal)
or in 2.5L (=0.650 gal)
I was doing a McLaren sportscar... basically imagine a Mustang Fox convertible. So I didn't have as much overall body surface to paint. However... I was going from BLACK to FIRE RED... and that required extra coats to ensure 100% color coverage.
I would say that when you go to buy your paint.... go with four 1 liter cans. The odds are that with 'thinning' taken into consideration... you 'should' be able to squeeze at least three overall coatings per can.
And again depending on whether you are going to do the underside of the hood ( bonnet ) and trunk ( boot ) you might want about 4 aerosol cans of the red paint ( this will also be used for the nooks and crannies that you will be spraying.
And just to answer the question before it is asked : Yes... the Armorall or Tremclad aerosol Fire Red is the same color as the Brightside Fire Red. And YES... both paints are friendly with each other. In that i originally painted the car doing the Armorall/Tremclad paint... and changed half-way through the paint job to the Brightside marine polyurathane. I have had no compatibility problems.
Quote:
4/ Where are all your photo's mate of your car?
Al the links are dead in the old topics from 2006.
I had to take the pics off my web server. The bandwidth consumption was killing me and interfering with the normal flow of visitors surfing the web sites.
I will try to attach a picture to this message so you can see how Brightside Fire Red turned out on my car
The picture I have attached was taken in July of 2006. And although it looks pretty sharp there.. it looked even better when I finished the job 'officially' in August 2006. This pic was before I started going maniac with my polisher and waxes  Then it really shined. And the body was soooooo smooth that if I put the polish container on the car.. it would slide right off the car. I use to put the two videos of its slipperyness online - but the bandwidth of those videos being viewed were killing my server. You would be amazed by just how many people have read this thread about the roll your own paint job Then it really shined. And the body was soooooo smooth that if I put the polish container on the car.. it would slide right off the car. I use to put the two videos of its slipperyness online - but the bandwidth of those videos being viewed were killing my server. You would be amazed by just how many people have read this thread about the roll your own paint job
As you look at the picture... just remember that the car 'was' basically black, black primer, gray primer, some white panels, a white fiberglass hood... and the front airdam and bumper were black unpainted molded plastic. So it was quite a zebra to begin with. Once you understand where the poor little car began from... you can better appreciate just how far along it came doing this 'roll you own' paint job
We are now sitting at Nov 2008 and if anything the car is more shiny then ever. Whenever I am bored I take out my Porter & Cable polisher and spend 20 minutes giving the car a fresh polish and wax. No problems. No defects. Just smoother and shinier each time I do it.
Marq
.
Last edited by Marq; 12/06/08 05:05 PM.
|
|
|
1972 Plymouth SSP - first coat
[Re: Saint Crispan]
#38551
12/07/08 03:20 PM
12/07/08 03:20 PM
|
Joined: Nov 2007
Posts: 103
Tampa, FL
Saint Crispan
member
|
member
Joined: Nov 2007
Posts: 103
Tampa, FL
|
Ok, after priming the car, I put a coat on the roof. The area I chose on the roof will be covered with vinyl, anyway, so it makes a good practice area. First coat, shot 1 First coat, shot 2 First coat, shot 3 First coat, shot 4 I got the impression that using a coat of white primer under the paint (which is a spot-on match for the original paint) makes the color a lot more briliant. The paint seems to be laying down nicely, and in about a week, I'll come back and put a second coat on it...after that, I'll sand it with 400, wipe with MS, and give it a third coat. A week later, fourth coat. Then in a week, sand with 600, wipe with MS,...two more coats, and a final sanding with 1000, a wipe with MS, then wax. I'll post pics as I go. Also, FYI, the small amount I mixed up (about a 2/3 cup), was enough to "cut in" the area around the windshield twice and also to cover half the roof...the part from the windshield back to the chrome molding studs. I can see that if I'm going to cover the entire car in the same shade, I'm going to have to mix up a LOT of the same color. BTW, here's a shot of the whole car: Body in primer, 1 And another shot: Body in primer, 2 The blue stripes are actually painter's tape, put on there because I wanted to see what it looked like with white and blue detailing. Yes, I know, it's ersatz...which reminds me. Anyone know what is the correct strobe pattern for an SSP? I see that there are two types of patterns in the 71-72 B-Body Satellite/Roadrunner/GTX: 9 stripes and 6, thicker, stripes.
|
|
|
|
|

 its very easy...tons of colors...if you want to roll it on you are kinda limited to color choices
  ..I still haven't been able to get much of a shine on mine!!!


