|
 Re: New Paint job on a budget thread.
[Re: Marq]
#37214
Re: New Paint job on a budget thread.
[Re: Marq]
#37214
07/28/07 05:07 PM
07/28/07 05:07 PM
|
Anonymous
Unregistered
|
Anonymous
Unregistered
|
I've got a question...
I need to get my mag wheels back to their original white. It seems easy enough to just sand 'em and do a thorough rattlecan job, but is there something I should know? A better method or a different paint more suitable for wheels?
Thanks y'all.
I should have pictures of my tailgate (the test piece), with blue FORD lettering, in a couple weeks.
|
|
|
Re: New Paint job on a budget thread.
#37215
07/28/07 05:52 PM
07/28/07 05:52 PM
|
Joined: Dec 2006
Posts: 69
Lake George
blue195

member
|
member
Joined: Dec 2006
Posts: 69
Lake George
|
Quote:
I've got a question...
I need to get my mag wheels back to their original white. It seems easy enough to just sand 'em and do a thorough rattlecan job, but is there something I should know? A better method or a different paint more suitable for wheels?
Thanks y'all.
I should have pictures of my tailgate (the test piece), with blue FORD lettering, in a couple weeks.
I sanded mine down, applied 2 coats of spraybomb primer, scuffed it up, and hit it with the Rustoleum appliance epoxy paint I got from WallyMart. Rock solid, hard paint when the instructions are followed. So far. The argent silver in a rattle can faded out after a year. This stuff is tougher I think. 
|
|
|
Re: New Paint job on a budget thread.
#37216
07/29/07 10:21 AM
07/29/07 10:21 AM
|
Joined: May 2006
Posts: 575
Canada
Marq
mopar addict
|
mopar addict
Joined: May 2006
Posts: 575
Canada
|
Quote:
I've got a question...
I need to get my mag wheels back to their original white. It seems easy enough to just sand 'em and do a thorough rattlecan job, but is there something I should know? A better method or a different paint more suitable for wheels?
You are lucky if you want to restore your white rims... and I think the answer rest with the appliance white enamel paint. It's positive feature is that it goes on super hard and can resist all the road chemicals that might try to adhere to it and ut can withstand most washing detergents that you might throw at it to keep it clean. The only weak point to the appliance white enamel paint is that because it is so hard - it tends to chip when directly hit.
In most cases a wheel rim isn't exposed to many direct rock or chip hits. And if a rock hits it and chips it.. you can usually dab the spot with white enamel appliance touch up paint.
Oddly enough one of the killers of paint on rims is the heat that is generated from its proximity to the brakes. The appliance enamel is strong enough to withstand most heat ranges ( after all they use that enamel paint on stoves )
One type of paint that might be considered is a high gloss - high heat spray paint. Normally you can find it in two flavors... there are high heat - high gloss paints for engine painting ( and usually it is an enamel ) and also there are the specialized high heat paints sold for painting barbeques (bar-b-q's )). The barbeque paints usually don't have much of a color range ( black ) and usually don't have much of a surface appearance selection ( flat only usually ). But it would give a nice 'flat black' surface and we know it can adhere quite well to even cast iron.
I know several guys with TR6's who sanded their 'metal' rims down and then rattle can bombed their rims with paint to match their car. They went through a procedure something like what we do with surface preparation, even laying multiple layers of paint with 1500 grit wet sanding only at each step. They used the final sprayed layer as the 'shiny' layer and did not put any kind of clear coat on the finished painted surface. Apparently the clear coats tended to scratch up with microscopic scratches like a pair of eye or safety glasses that were constantly rubbed with paper instead of a soft cloth.
One guy.. Carl... with a 1976 mint condition MGG ( and metal rims ) took his rims off for the winter and did a multiple layer spraybomb job on his rims in his basement. In the spring when he revealed his winter project the results were nothing less then spectacular. But in Carls situation.. he was insano and meticulous to the nineth degree. But his efforts showed me just how amazing a rsult you could get with steel rims IF YOU take your time and methodically go about the painting, wet sanding and final polishing and waxing stages.
I guess the real trick to having success with wheel rims depends on what the rims are made of... with steel rims being fairly straightforward working with and with some of the aluminum or other alloy rims requiring surface preparation that is specific to those type of metal surfaces.
My GTA has aluminum honeycomb / snowflake style rims with a 3 inch deep chrome lip. They were looking pretty battle weary and I looked into getting them freshened up. In the end I was fortunate to find a company whose only job is refinishing rims. I got really lucky because when I phoned them they thought I was a 'garage' and they quoted to me the price they charge 'companies'. I think it was about $50 a wheel - and they picked up the rims and returned them ( pick up and delivery included wow ). The reason I mention that story is that those rims would never have accepted any paint job from me. As that type of rim ages it gives off a whitish powder on the wheel surface. Any paint I might have put on would have flaked off within 6 months. So sometimes there are rims that just shouldn't be 'hand painted' or rolled.
I have blathered... but hopefully something in this blathering points you in the right direction..
.
|
|
|
Re: New Paint job on a budget thread.
[Re: Marq]
#37217
07/29/07 03:07 PM
07/29/07 03:07 PM
|
Anonymous
Unregistered
|
Anonymous
Unregistered
|
Thanks, Marq and blue195! I'll do the appliance paint for sure. Fortunately, they're steel per the brochure. I've got no idea why the PO thought it'd be a good idea to paint them grey. From the brochure: 
|
|
|
Re: New Paint job on a budget thread.
[Re: Marq]
#37218
07/29/07 05:01 PM
07/29/07 05:01 PM
|
Anonymous
Unregistered
|
Anonymous
Unregistered
|
Its not white paint but I had pretty good luck with rustoleum "hammered" wheel paint in a spray can. My bmw came with 3 hub caps and the steelies looked horribly rusty and full of brake dusty. The main step that most people seem to miss is sanding and cleaning the wheel down to where you have a good surface for the paint to adhere to. Masking off the tire and stem was a little time consuming but well worth it. 
Last edited by tjts1; 07/29/07 05:05 PM.
|
|
|
 Re: New Paint job on a budget thread.
#37220
Re: New Paint job on a budget thread.
#37220
07/29/07 07:23 PM
07/29/07 07:23 PM
|
Anonymous
Unregistered
|
Anonymous
Unregistered
|
Last edited by Tonto4706; 07/29/07 07:45 PM.
|
|
|
Re: New Paint job on a budget thread.
#37221
07/30/07 10:05 AM
07/30/07 10:05 AM
|
Joined: Sep 2006
Posts: 58
MD, USA
v8mirage
member
|
member
Joined: Sep 2006
Posts: 58
MD, USA
|
Quote:
Finally started painting.
I tried the roll and tip method on the running boards but was not happy with the finish so I tryed using the foam brush only method,I like what I am seeing {so far}. I have two coats on the glove box and one coat on the doors,hood parts ,trunk lid and front fenders.
Tremclad 70 % mineral spirits 30% then added a couple of ounces of penitrol.
I loaded 3" and 4 " foam brushes and made one constant pass that gave me complete coverage no bubbles what so ever after I finished each panel I made only one pass with the foam brush {vertical strokes } . Looks promising so far.
You don't need to do the roll and tip method with the Tremclad. That is supposed to be a method for use with the Brightside Paint. I am using the US equivalent of Tremclad, and just roll it, no tipping necessary.
|
|
|
Re: New Paint job on a budget thread.
[Re: v8mirage]
#37222
07/30/07 05:52 PM
07/30/07 05:52 PM
|
Anonymous
Unregistered
|
Anonymous
Unregistered
|
3 coats on the hood and its done! I'll let it cure for a couple of weeks before final sanding and polish. 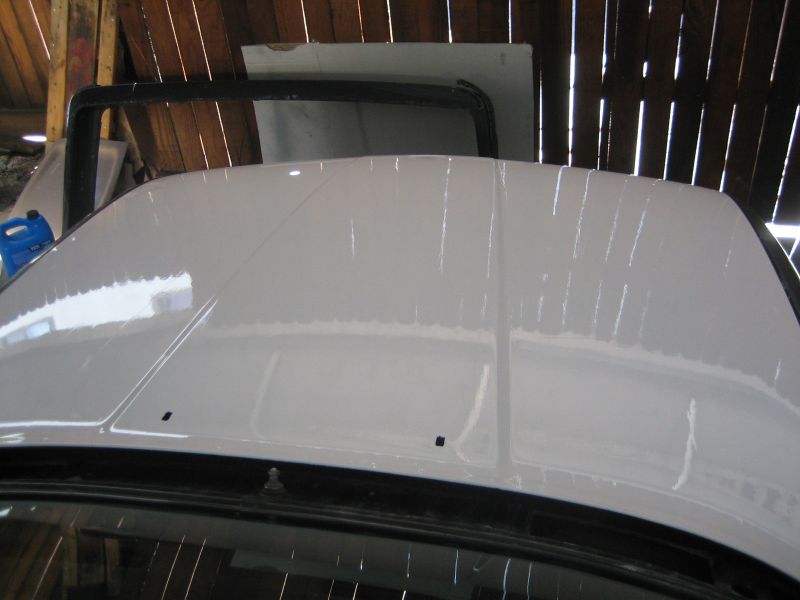 Now I feel confident enough to take on the rest of the car. 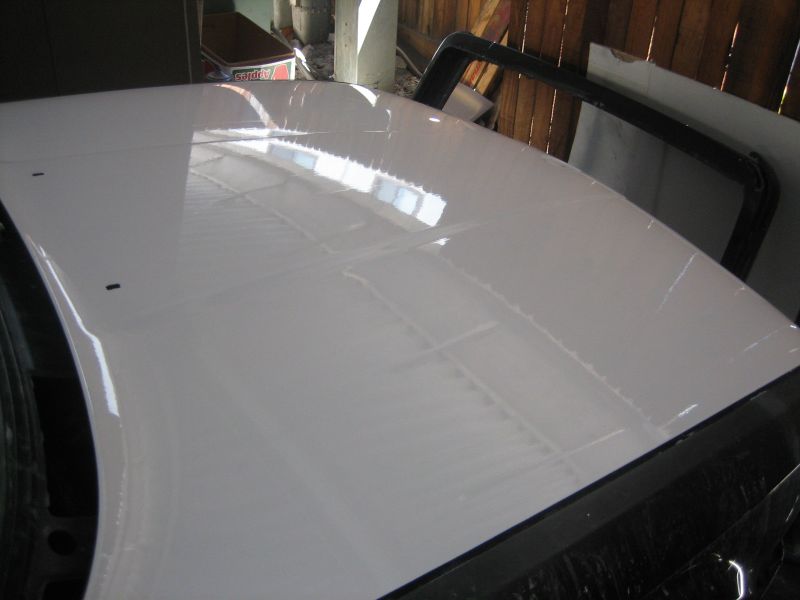 I have 2 coats on the roof and trunk, and as soon as it cools off It'll be ready for the final third coat.  In the mean time I can focus on fixing a few small dents and filled in the power antenna hole. 
|
|
|
Re: New Paint job on a budget thread.
#37223
07/30/07 08:48 PM
07/30/07 08:48 PM
|
Anonymous
Unregistered
|
Anonymous
Unregistered
|
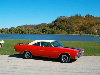
So, I am almost finished with my 62 Galaxie 500. I am down to the last or next to last coat. I know the conventional wisdom has been to wet sand the last coat with 1500 or 2000 grit paper and then buff and polish. I wonder if it makes sense to sand that last coat? I have such a nice gloss before wet sanding that it seems to me I should just let it cure and then polish?
Am I missing something?
|
|
|
Re: New Paint job on a budget thread.
#37224
07/30/07 09:00 PM
07/30/07 09:00 PM
|
Joined: Jun 2007
Posts: 40
WA State
Roadster_wa
member
|
member
Joined: Jun 2007
Posts: 40
WA State
|
Quote:
So, I am almost finished with my 62 Galaxie 500. I am down to the last or next to last coat. I know the conventional wisdom has been to wet sand the last coat with 1500 or 2000 grit paper and then buff and polish. I wonder if it makes sense to sand that last coat? I have such a nice gloss before wet sanding that it seems to me I should just let it cure and then polish?
Am I missing something?
After I sanded, I put two final coats on the vette and went to the polish (Nu Finish) by hand. Looks great, but it's a driver. Not perfect at 1 foot, but from 6 it is... People have had a hard time getting the gloss back once they start sanding things. If you are a pro at polishing, go for it. If you are a back yard $26 painter like me, I'd be careful what you start....
|
|
|
Re: New Paint job on a budget thread.
[Re: Marq]
#37226
07/31/07 12:41 AM
07/31/07 12:41 AM
|
Joined: Jan 2003
Posts: 2,386
Massachusetts
Faust
top fuel
|
top fuel
Joined: Jan 2003
Posts: 2,386
Massachusetts
|
Quote:
Quote:
So, I am almost finished with my 62 Galaxie 500. I am down to the last or next to last coat. I know the conventional wisdom has been to wet sand the last coat with 1500 or 2000 grit paper and then buff and polish. I wonder if it makes sense to sand that last coat? I have such a nice gloss before wet sanding that it seems to me I should just let it cure and then polish?
Am I missing something?
If you are happy with the look of the final coat... then it is quite safe for you to hold off the compounding/polishing/waxing stage and let the paint cure for a while and just enjoy the look of the paint in its natural state.
If after a few months you want to dedicate some time to going to the final stage you will have to look at the state of the paint and make your decision on how to proceed...
IF the paint is still looking pretty glossy and sexy... then maybe you should just go to the compounding, then polishing and the waxing stage.
IF the paint is looking a bit rough and not giving a consistent shine or gloss... then go to a wetsanding using the 1500 and then the 2000 grit. Follow that up with the compounding/polishing and the waxing.
If you have a good quality random orbital polisher, then the final stage will not be so intimidating. And believe it or not with the right final handling of your paint job, you will be able to push an even better gloss or shine out of a straight unprocessed paint job.
.
If you are finish sanding with 2000 grit, what grade of polishing compound do you use?
|
|
|
Re: New Paint job on a budget thread.
[Re: 440newport]
#37228
07/31/07 05:22 AM
07/31/07 05:22 AM
|
Anonymous
Unregistered
|
Anonymous
Unregistered
|
I will let the more experienced folks give some more experienced advice, but your mixture sounds kind of thick. Did you finally get some mineral spirits or did you use that Varasol? I know from my research on this that mineral spirits seems to be the desired thinner, NOT paint thinner and other paint thinning alternatives. I am doing 50-50 and bubbles are there initially rolling on but gone very quickly.
|
|
|
Re: New Paint job on a budget thread.
[Re: 440newport]
#37229
07/31/07 07:35 AM
07/31/07 07:35 AM
|
Joined: Mar 2007
Posts: 13
Ohio
69stanger
member
|
member
Joined: Mar 2007
Posts: 13
Ohio
|
I've been following this since I found it back in march. You might want to go back and reread some of the beginning where 69charger descibed the procedure. The bubbles seem normal. Some have said to go back over them lightly with a clean roller or foam brush after a few minutes to pop them and let the paint flow out.
On another subject, I got a paint sample for rustoleum "Fire Hydrant Red" (system 7400 Industrial) from Fastenal yesterday. I like it even though its not as dark as I wanted. Its a blood red and will look good on the mustang. I figure if I'm not happy with it I'll scuff it up, buy another gallon and mix it to get a darker version and add a couple of coats. I'll prime the car with a dark primer so it comes out as dark as possible. Once I get the paint I may experiment with a black first coat and see how it turns out.
Freedom Of Speed!
|
|
|
Re: New Paint job on a budget thread.
[Re: 440newport]
#37230
07/31/07 09:02 AM
07/31/07 09:02 AM
|
Joined: Jul 2003
Posts: 3,377
Rancho Cordova, CA
Exit1965
master
|
master
Joined: Jul 2003
Posts: 3,377
Rancho Cordova, CA
|
Quote:
I give it a try on my hood and so far the results arn't too encouraging. I tried a mix of 20% mineral spirits and gloss black. Evreyone says to have thin coats with little or no roller pressure, but that way I was getting bubbles everywhere. I found if I put some pressure on it, the paint laid out more evenly but with orange peel instead.
Yep, that's what I found too. Little paint in the roller, hard pressure on the car when rolling. The orange peel is probably due to too thick a mixture of paint. If you were just putting too much on, you would have runs and not just orange peel. Add some more mineral spirits to your mix and you should be good.. but a thinner mixture is also more likely to run so be sure to keep the layer thin.
|
|
|
Re: New Paint job on a budget thread.
[Re: Exit1965]
#37231
07/31/07 11:01 AM
07/31/07 11:01 AM
|
Joined: Jun 2007
Posts: 40
WA State
Roadster_wa
member
|
member
Joined: Jun 2007
Posts: 40
WA State
|
Quote:
Add some more mineral spirits to your mix and you should be good.. but a thinner mixture is also more likely to run so be sure to keep the layer thin.
I agree...
I was getting runs all the time with the vette. I just kept working them back into the paint. They eventually stop running. I might get 5-7 times rolled over the same spot going from hard pressure to very slight (weight of the roller), all the time trying to get the bubbles and runs to work themselves out. 
|
|
|
Re: New Paint job on a budget thread.
[Re: Roadster_wa]
#37232
07/31/07 01:51 PM
07/31/07 01:51 PM
|
Anonymous
Unregistered
|
Anonymous
Unregistered
|
I went ahead and wet sanded my Galaxie with 1000 grit paper and I wrapped the paper around an unused foam roller. I was hoping the foam roller would keep me hitting the high spots in the paint -orange peel, ripples etc. and get a little more uniform finish.
I this this worked pretty well. The roller is a little soft but since it soaks up water it does make the process a little faster with less bucket dipping. I think it does help knock down any tough high spots better than hand sanding only.
I also think there is a big diff in using the 1000 grit as it really only takes off the most recent coat and finishes things smoother.
One more coat and then I'll spray bomb the door jams (uggh, 4 door) and think about compounding and polishing.
|
|
|
Re: New Paint job on a budget thread.
#37233
07/31/07 02:54 PM
07/31/07 02:54 PM
|
Anonymous
Unregistered
|
Anonymous
Unregistered
|
Quote:
One more coat and then I'll spray bomb the door jams (uggh, 4 door) and think about compounding and polishing.
Speaking of compounding and polishing, I could use some advice on doing just that. I take it you need to let the paint harden and dry completely, a few weeks. After that, what to use as far as rubbing compounds, polishes, waxes, dunno. I do recall some dunning(and justifiably so!) remarks and pictures of what Turtle Wax and a cheapo polisher will do for me. There's a bunch of Meguiars and Mothers stuff at local auto store, so if anybody has had good results with that, would like to hear.
|
|
|
|
|