Previous Thread
Next Thread
Print Thread
restoration steps....kinda long #552711
12/13/09 02:54 PM
12/13/09 02:54 PM
Joined: Feb 2007
Posts: 908
North Chicagoland
N
newbee69 Offline OP
super stock
newbee69  Offline OP
super stock
N

Joined: Feb 2007
Posts: 908
North Chicagoland
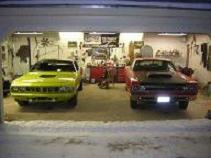
dont know if I should put this in question and answer, its kinda general questions.

I am in the process of rebuilding front end, disc brake swap, scraping and repainting underside, and then some other stuff. Id like to know in what order I should do this. I was planning on something like this.

1) finish scraping underside, then paint. Most likely POR-15? but thats another thread when I get to that point.
2) install front end and components.
3) disc brakes.
4) leaf spring paint and bushings
5) redo rear drums
6) install tires and roll out of garage so I have clearance to pull motor and trans.
7) take car down to bare metal, body work, prep for paint.

So do these steps sound right to you or what would you switch around? Also, dumb question, but would it be easier to take doors and fenders off or leave them on?

Sorry if these seem like newbee questions but this is my first time doing this work and I want to do it right.

Also, I am not planning on pulling the interior out as it is in very good condition and nothing needs to be done. I did pull out carpet and checked floor pans and they are good, but do I need to pull it in order to get a paint job? I mean, I dont want a Maaco paint job, but I also dont need the trophy winner paint job either. The car is a driver and just needs new paint. I hate to say this, but is there such a thing as a semi-resto/paint job as opposed to a complete resto?

Thanks for letting me ask these newbee questions and helping me out, but I gotta start somewhere.
Any and all suggestions and comments are appreciated.

Oh, BTW, 69 B body if it matters

Re: restoration steps....kinda long [Re: newbee69] #552712
12/13/09 03:06 PM
12/13/09 03:06 PM
Joined: Jan 2003
Posts: 20,623
Eagle, Idaho
Neil Offline
The Doctor is in.
Neil  Offline
The Doctor is in.

Joined: Jan 2003
Posts: 20,623
Eagle, Idaho
I think you would get a better detailed paint job if the car was torn down to a shell.

I would hesitate to leave any repainted suspension parts or anything like that on the car unless you are 100% sure that the shop will mask that stuff off each and every time they are spraying anything. I know most say they will, but they won't and then you'll have primer and paint dust all over your parts.

I'd paint the bottom with a grey or black paint like the factory primer and then let the shop paint the car. Any overspray that winds up underneath will end up looking close to what the car originally looked like when it was new.

Buy or build a caster wheel setup so you can roll the shell on and off the trailer to get it to the paint shop, or take it to the shop with the k-frame attached and then swap over to the caster wheel setup and take your suspension parts home with you.

Re: restoration steps....kinda long [Re: Neil] #552713
12/13/09 04:43 PM
12/13/09 04:43 PM
Joined: Jan 2004
Posts: 27,347
Today? Who Knows?
1_WILD_RT Offline
Management Trainee
1_WILD_RT  Offline
Management Trainee

Joined: Jan 2004
Posts: 27,347
Today? Who Knows?
Lots of cars get less than a full on resto... If you do it right the result can be very acceptable... That said I would make a serious effort at getting the door, trunk & engine compartment jambs very nice.. On the doors that means the trim panels & carpet have to be out of the way... Crappy halfazz jambs really catch my eye & I know plenty who feel the same way... Don't paint the latch or striker.. Don't paint the latch hardware... Replace the stickers in the jamb.. You pass through the jamb every time you get in or out of the car & others that are admiring you car see them too.. Another thing to consider when doing a partial resto is any dirt that's trapped in a crevice somewhere that you can't access will invariably fly out & land in your fresh paint job.. Just the way it is..

Re: restoration steps....kinda long [Re: 1_WILD_RT] #552714
12/13/09 05:10 PM
12/13/09 05:10 PM
Joined: Jan 2006
Posts: 3,535
Canuckville
68Cbarge Offline
master
68Cbarge  Offline
master

Joined: Jan 2006
Posts: 3,535
Canuckville
It is best to pull the interior.
Why?
To save it from any welding sparks,overspray,general dust and dirt,etc.
My interior is also in good condition yet I pulled it.I wrapped the rear seat backs and stowed them away.The front bench was also wrapped and set in the corner of my shopout of harm's way.All hardware gets bagged and tagged and the plastic panels are marked and stowed away.
I pulled out all the body plugs and then proceeded to strip the floor pans--inside and out.
I used epoxy primer before painting the floorpans.
I replaced a couple doors and redid the edging myself.So,I stripped the doors before painting.

Little things like that makes all the difference.It may take a bit more time but worth it in the end.


'68 Newport Custom Barge on a Budget!! BOAB
1973 Satellite WAGON! 318- 3 on the tree!!
2008 Chrysler 300c HEMI!
Re: restoration steps....kinda long [Re: 1_WILD_RT] #552715
12/13/09 05:13 PM
12/13/09 05:13 PM
Joined: Feb 2007
Posts: 908
North Chicagoland
N
newbee69 Offline OP
super stock
newbee69  Offline OP
super stock
N

Joined: Feb 2007
Posts: 908
North Chicagoland
thanks for the replies guys. It definitely wouldnt be a problem to gut the interior, Im just runnin out of room. Haha.
Anyone else have any opinions?

Re: restoration steps....kinda long [Re: newbee69] #552716
12/13/09 05:35 PM
12/13/09 05:35 PM
Joined: Jan 2006
Posts: 3,535
Canuckville
68Cbarge Offline
master
68Cbarge  Offline
master

Joined: Jan 2006
Posts: 3,535
Canuckville
I forgot to mention that removing all parts from underneath nets a better result.While all the parts are out you can clean,paint,repair and detail them before re-installing.
My car was on axle stands for 21 months.

Basically you are doing a 1:1 scale model kit.
BEFORE:

AFTER:


'68 Newport Custom Barge on a Budget!! BOAB
1973 Satellite WAGON! 318- 3 on the tree!!
2008 Chrysler 300c HEMI!
Re: restoration steps....kinda long [Re: 68Cbarge] #552717
12/13/09 06:44 PM
12/13/09 06:44 PM
Joined: Feb 2007
Posts: 908
North Chicagoland
N
newbee69 Offline OP
super stock
newbee69  Offline OP
super stock
N

Joined: Feb 2007
Posts: 908
North Chicagoland
Nice...good pics 68C. I am also cleaning up and repainting control arms, struts, leaf springs, etc. while they are off and obviously replacing bushings, ball joints, tie rod ends.
So I will definitely be scraping and repainting the underside before installing any suspension parts.
Actually, I think Ill just take your guys advice and take it down to a shell. That way, I just just build it back up again from scratch.
Thanks for the help guys.
Back underneath with the torch....black boogers...Haha.

Re: restoration steps....kinda long [Re: newbee69] #552718
12/15/09 01:38 AM
12/15/09 01:38 AM
Joined: Sep 2003
Posts: 2,968
Far Northeast.
mymcodebee Offline
master
mymcodebee  Offline
master

Joined: Sep 2003
Posts: 2,968
Far Northeast.
Here is the factory sequence from Resto Rick's Site. Much more than you need but will give you some data.


ASSEMBLY SEQUENCE:
(some variation with different body types)
(from bare painted body shell)
Spray radiator saddle blackout
Rocker panel pinchweld blackout (if applicable)
Front frame rail side blackout (if applicable)

1. trunk weatherstrip
2. body rubber bumpers
3. trunk latch mechanism
4. hood latches & release mechanisms
5. main body brake & fuel tubing
6. fuel tank & fuel hose connections
7. emissions tubes & hose connections (if applicable)
8. inner cowl insulation pad
9. firewall insulation pad
10. swing pedal(s)
11. brake booster (if applicable)
12. master cylinder
13. defroster duct
10.kick panel insulation pads
11.LH vent box (if applicable)
12.E-brake pedal assembly & front cable
12. heater box assembly
13. wiper mechanism
14. wiper motor
15. cowl vent screens (if applicable)
16. accelerator pedal & cable
17. dash assembly (completely assembled outside
of car including instrument cluster, dash pad, glove
box liner, radio, speaker, wiring, etc.)
18. Vent pull cables, defroster & vent cables
19. windshield
20. proportioning valve & metering block (if applicable)
21. firewall brake tubing
22. starter relay
23. forward lamp harness
24. engine harness
25. starter wiring
26. washer bottle & hoses
27. ballast resistor
28. voltage regulator
29. horn relay (Bbody cars)
30. horns
31. heater hoses
32. headlights
33. fender inner splash shields (front & rear of wheel)
34. rear suspension stop bumpers
35. rear seat belts (some bolt tips get undercoating)
36. rear shocks bolted in at top only & compressed
37. grille & headlight doors
38. front bumper
39. front valance (if applicable) with directionals
40. front & rear side marker lamps
41. rear bumper
42. radio antenna
43. fender emblems (if applicable)
44. rear of fender splash shields
45. undercoat wheelwells
46. exterior emblems
47. windshield & backlite stainless trim
48. windshield wiper arms & blades
49. other exterior trim
50. taillights
51. mid body/rear lamp wiring harness
52. dome lamp wiring harness
53. shoulder harness clips (if applicable)
54. rear grip strips (Bbody)
55. headliner
56. roofrail c-channels
57. roofrail weatherstrips
58. windshield & backlite moulding clips
59. windshield & backlite
60. upper control arms on body
61. fuel hose clamped on body side fuel tubing
with keystone crimp clamp
63. install rear leaf springs front only
64. position rear end housing on springs
65. loosely fasten u-bolts
66. lift rear axle into position and install shackles
67. connect e-brake cables
68. connect brake line tubing & hose
69. DRIVETRAIN SUBASSEMBLE
a. K-member
b. engine
c. carb(s)
d. starter
e. alternator
f. fan & fan clutch
g. power steering pump (if applicable)
h. belts
i. motor mounts
j. trans & related hardware
k. lower control arms
l. strut rods
m. center link, idler arm, tie rods
n. steering box & pitman arm
o. fuel pump and tubing
p. fan blade
q. radiator hoses

70. drop body onto drivetrain subassembly
71. connect heater hoses
72. install trans crossmember
73. install driveshaft
74. connect shift linkages
75. install z-bar (if applicable)
76. connect clutch linkage (if applicable)
77. plug in electrical connections to engine
78. position fan shroud over fan blade
79. install radiator & connect hoses
80. connect trans cooler (if applicable)
81. bolt up fan shroud
82. install torsion bars
83. install exhaust system
84. install rear valance (if applicable)
85. set car on the ground
86. install & align door and quarter glass
87. install steering column
88. install carpeting
89. install seat belts
90. install quarter interior trim panels
91. install rear seat
92. install console (if applicable)
93. install front seat(s)
94. install trunk mat
95. install spare tire
96. install bumper jack

Re: restoration steps....kinda long [Re: mymcodebee] #552719
12/18/09 06:01 PM
12/18/09 06:01 PM
Joined: Feb 2004
Posts: 936
O
OLD318 Offline
super stock
OLD318  Offline
super stock
O

Joined: Feb 2004
Posts: 936
Quote:

Here is the factory sequence from Resto Rick's Site. Much more than you need but will give you some data.


ASSEMBLY SEQUENCE:
(some variation with different body types)
(from bare painted body shell)

12. heater box assembly
13. wiper mechanism
14. wiper motor


/quote]

I agree with most of this except 12-14.
Personally, I would do the wiper motor,
then the wiper mechanisms then the heaterbox.
especially if it's an A/C car...
Once that heater box is in, it's a royal PITA
to do the wiper motor stuff...


Re: restoration steps....kinda long [Re: OLD318] #552720
12/18/09 06:03 PM
12/18/09 06:03 PM
Joined: Jan 2003
Posts: 42,714
Spokane Washington
ScottSmith_Harms Offline
Mr Wizzard
ScottSmith_Harms  Offline
Mr Wizzard

Joined: Jan 2003
Posts: 42,714
Spokane Washington
Whatever you decide on doing, leave off one step for sure....STEP AWAY FROM THE POR15! I wouldn't want that crap anywhere near a proper restoration.

Re: restoration steps....kinda long [Re: OLD318] #552721
12/18/09 08:54 PM
12/18/09 08:54 PM
Joined: Feb 2003
Posts: 2,304
WI
RestoRick Offline
top fuel
RestoRick  Offline
top fuel

Joined: Feb 2003
Posts: 2,304
WI
Quote:

Quote:

Here is the factory sequence from Resto Rick's Site. Much more than you need but will give you some data.


ASSEMBLY SEQUENCE:
(some variation with different body types)
(from bare painted body shell)

12. heater box assembly
13. wiper mechanism
14. wiper motor


/quote]

I agree with most of this except 12-14.
Personally, I would do the wiper motor,
then the wiper mechanisms then the heaterbox.
especially if it's an A/C car...
Once that heater box is in, it's a royal PITA
to do the wiper motor stuff...


This was thinking E-body...
yes I'll flip those around... B-bodies this is very true!

Rick

Re: restoration steps....kinda long [Re: RestoRick] #552722
12/18/09 08:58 PM
12/18/09 08:58 PM
Joined: Feb 2003
Posts: 2,304
WI
RestoRick Offline
top fuel
RestoRick  Offline
top fuel

Joined: Feb 2003
Posts: 2,304
WI


Powered by UBB.threads™ PHP Forum Software 7.7.1