|
 Re: Paint job on a budget!? CONTINUED..page 44........
#25498
Re: Paint job on a budget!? CONTINUED..page 44........
#25498
08/11/06 02:08 AM
08/11/06 02:08 AM
|
Anonymous
Unregistered
|
Anonymous
Unregistered
|
Quote:
I was about to stop at three coats (the black is very opaque and provide excellent coverage when evenly applied - even when slightly thinned) but my wetsanding has revealed 2 or 3 of the tiniest thin spots. My last coat will be undiluted for just a little bit heavier top layer.
I tried a fourth coat full strength, but I don't think I was laying on heavy enough. By the time eveything was spread and I started tipping, it was a bit too tacky, and not quite thick enough to cover in some spots. I did the thinner-soaked roller trick to level and gloss everything out. Looks better, but I wish I'd layed on more heavily to begin with. One interesting bonus of full-strength application seems to be a distinct lesser number of bubbles.
|
|
|
Re: Paint job on a budget!? CONTINUED..page 44........
[Re: Exit1965]
#25499
08/11/06 05:07 PM
08/11/06 05:07 PM
|
Anonymous
Unregistered
|
Anonymous
Unregistered
|
What's your procedure for keeping the refillable spray can clean? I've have one for about a year, but only used it for solvents. Seems as if the rustoleum would be difficult to remove (I've tried cleaning it off other items with acetone and it's a painful process).
|
|
|
Re: Paint job on a budget!? CONTINUED..page 44........
#25500
08/11/06 06:26 PM
08/11/06 06:26 PM
|
Joined: Nov 2004
Posts: 25,050
Texas
GoodysGotaCuda

5.7L Hemi, 6spd
|
5.7L Hemi, 6spd
Joined: Nov 2004
Posts: 25,050
Texas
|
Cutting through orange peel? My very first coat is on my duster. i have a couple roller lines and some peel. I have to sand the entire car, currently i'm looking to get the car decently covered in one color. i'm not aiming for a awesome quality paint job. I'm wondering if i can run dry 400grit to cut down on time, or is wet 600 the way to go? thanks 
|
|
|
Re: Paint job on a budget!? CONTINUED..page 44........
[Re: Dart360sav]
#25504
08/12/06 08:43 AM
08/12/06 08:43 AM
|
Anonymous
Unregistered
|
Anonymous
Unregistered
|
Hi Guys, I'm new to this forum and I read the previous thread up to page 21 before I decided to go ahead and tackle this. Lucky I have a some rocker panels to test on..however now I'm having some slight issue.  So I put on the first cost just fine: http://www.ss14.net/tmp/firstcoat.jpgI let it dry overnight and when I put on the second coat...this happens: http://www.ss14.net/tmp/wha.jpgAnyone have an idea what I did wrong? It's as if the paint came off when rolling. Did I put too much mineral spirits in the mix? TIA P.S. I like the smilies 
|
|
|
Re: Paint job on a budget!? CONTINUED..page 44........
#25505
08/12/06 09:57 AM
08/12/06 09:57 AM
|
Joined: Jul 2003
Posts: 3,378
Rancho Cordova, CA
Exit1965
master
|
master
Joined: Jul 2003
Posts: 3,378
Rancho Cordova, CA
|
Quote:
Hi Guys,
I'm new to this forum and I read the previous thread up to page 21 before I decided to go ahead and tackle this.
Lucky I have a some rocker panels to test on..however now I'm having some slight issue.
So I put on the first cost just fine: http://www.ss14.net/tmp/firstcoat.jpg
I let it dry overnight and when I put on the second coat...this happens: http://www.ss14.net/tmp/wha.jpg
Anyone have an idea what I did wrong? It's as if the paint came off when rolling. Did I put too much mineral spirits in the mix?
TIA
P.S. I like the smilies
That adhesion doesn't have anything to do with the % of mineral spirits, there must have been something on the surface that the paint didn't like. Don't know what that is because I haven't run into the problem myself.
As for letting it dry overnight, consider letting it dry longer than that before recoating. The previous layer should be very dry before anything is put over the top of it, so 24 hours is a safe bet but can be longer depending on weather.
|
|
|
Re: Paint job on a budget!? CONTINUED..page 44........
[Re: Exit1965]
#25506
08/12/06 02:31 PM
08/12/06 02:31 PM
|
Anonymous
Unregistered
|
Anonymous
Unregistered
|
Quote:
Quote:
Hi Guys,
I'm new to this forum and I read the previous thread up to page 21 before I decided to go ahead and tackle this.
Lucky I have a some rocker panels to test on..however now I'm having some slight issue.
So I put on the first cost just fine: http://www.ss14.net/tmp/firstcoat.jpg
I let it dry overnight and when I put on the second coat...this happens: http://www.ss14.net/tmp/wha.jpg
Anyone have an idea what I did wrong? It's as if the paint came off when rolling. Did I put too much mineral spirits in the mix?
TIA
P.S. I like the smilies
That adhesion doesn't have anything to do with the % of mineral spirits, there must have been something on the surface that the paint didn't like. Don't know what that is because I haven't run into the problem myself.
As for letting it dry overnight, consider letting it dry longer than that before recoating. The previous layer should be very dry before anything is put over the top of it, so 24 hours is a safe bet but can be longer depending on weather.
Thanks for the reply,
I was hoping I can finish the whole car over three days. But waiting a day for each layer means it will take a week to finish it. :/ Then again...the temperature outside will be 80+ so I think it will dry faster.
|
|
|
Re: Paint job on a budget!? CONTINUED..page 44........
[Re: Marq]
#25508
08/12/06 06:56 PM
08/12/06 06:56 PM
|
Joined: May 2006
Posts: 575
Canada
Marq
mopar addict
|
mopar addict
Joined: May 2006
Posts: 575
Canada
|
In preparation for the 'polishing' and 'waxing' of my Brightside paint job I finally concluded that I want a Porter & Cable 7424....
But I am a cheap b4st4rd and I really couldn't justify paying retail for one of those puppies.
I was surfing over at the Corvette message forums and one of the guys had mentioned how he had picked up a 'refurbished' 7424 at his local Porter & Cable repair depots for $150 CDN ( $130 US$) and it came with a one year replacement guarantee.
So I visited the Porter & Cable web site, located where their local 'repair and warranty' depot was in my area and was pleased to find out from a phone call that they have FIVE refurb units sitting in stock at the moment... for only $145 (CDN $ ) and with the full one year replacement warranty on them.
Now... I have seen some advertisers on eBay listing them for about $119 US$ - and kits loaded up with pads for anywhere from $169 US$ up to $250 US$. Not including their shipping and handling charges.
So I just thought I would mention this to anyone who is considering buying the Porter and Cable 7424 and don't want to pay full retail for the units to check out their nearest repair and warranty depot for that company.
One nice thing about refurbs is that normally they are thoroughly gone over before they attempt to sell them. Whatever went bad has been replaced. Often when they replace a blown part they install a better or more cureent part. And with the one year warranty your butt is covered in case it smokes and dies.
Just thought I would toss this info into our conversation in case anyone else is looking to get one of the most popular random obital sanders for polishing and waxing...
.
Last edited by Marq; 08/12/06 06:56 PM.
|
|
|
Re: Paint job on a budget!? CONTINUED..page 44........
[Re: Marq]
#25509
08/12/06 09:42 PM
08/12/06 09:42 PM
|
Anonymous
Unregistered
|
Anonymous
Unregistered
|
Quote:
For example, because that is an aero-effect I assume that it is plastic.
Did you sand all the original paint down to the plastic or possibly just expose that one patch of plastic where the failure occured ?
Yes its plastic and no I did not sand all the way down to the plastic. There are just two spots where that happened..but those are not the areas where I'm having that issue.
Quote:
Did you primer the surface or go straight to paint ?
Went straight to the paint.
Quote:
Was there any previous paint on there that might have been different then the rest of the original paint on that part ? Like say where some scrapes were previously sprayed with and aerosol "color match up" spray bomb ?
No previous paint, everything was original.
Quote:
Did you wash down the sanded parts with water and a 'touch' of dish detergent ?
No, I washed down with mineral spirits, wiped with a lint-free cloth, then used a tack cloth before painting.
Quote:
Did you give the part a final wipe down with a rag and mineral spirit to get any potential contaminants, grease, oil from your hands or remnants of the sanded paint etc ?
I was using latex gloves. I will admit I forgot to change them before painting.
Quote:
Was the part thoroughly dry before you added the first layer of paint ? ( It's amazing what a hint of water embedded in the previously sanded surface might do to affect adhesion.
Completely dry before painting.
Quote:
Dunno... I would probably sand that part smooth again... even if it meant removing the current coats of paint. Then... starting from scratch lay on a primer layer to begin with to ensure adhesion and a uniform color on to which to lay your paint color.
I can't think of too many other factors that would have cause that paint to separate from the original layer although we did notice earlier in this thread where one of the chaps had problmes with the paint on his front 'plastic' bumper because the mold release agent ( for when the bumber was manufactured ) was able to act as a barrier between the paint and the bumper..
Thank you for the reply and questions. It looks like I have to start over again..think goodness this was a test. I did however put on a third coat just to see what would happen. The other areas look fine and now I have a better grasp on how I should mix the paint and roll it on. Also the importance of wetsanding after say..the 2nd coat. 
|
|
|
Re: Paint job on a budget!? CONTINUED..page 44........
[Re: Marq]
#25511
08/13/06 01:43 PM
08/13/06 01:43 PM
|
Anonymous
Unregistered
|
Anonymous
Unregistered
|
|
|
|
Re: Paint job on a budget!? CONTINUED..page 44........
#25512
08/13/06 02:14 PM
08/13/06 02:14 PM
|
Anonymous
Unregistered
|
Anonymous
Unregistered
|
I wouldn't let that stop you. I've painted cars in parking lots way back in high school. Drove the car in red and Drive out yellow. Just do a panel at a time anywhere you can. For anyone interested in Custom Colors..... Home Hardware (canada) had a paint called Armor Coat. Its Alkalyd Enamel. Same Base colors as Tremclad. You can get it mixed from their color chart any color you want 2-3 thousand combinations. I just repainted the scirocco from Med blue to Monaco Blue. This time I used a Wagner and a roller and it went on fast. You need the roller as the Wagner tends to "SPIT" paint at the most in-appropreate times. Going to let it cure for the week and then buff and wax. Or perhaps change the color again who knows 
|
|
|
Re: Paint job on a budget!? CONTINUED..page 44........
[Re: Exit1965]
#25514
08/13/06 02:25 PM
08/13/06 02:25 PM
|
Anonymous
Unregistered
|
Anonymous
Unregistered
|
Two heavy coats. It went on nice for the most part. the only problem was when it ran low and spits paint . I had no issues with peel and it did atomize the paint well. I had that dry roller in hand for any little runs or "spits" found.
|
|
|
Re: Paint job on a budget!? CONTINUED..page 44........
#25515
08/13/06 02:53 PM
08/13/06 02:53 PM
|
Anonymous
Unregistered
|
Anonymous
Unregistered
|
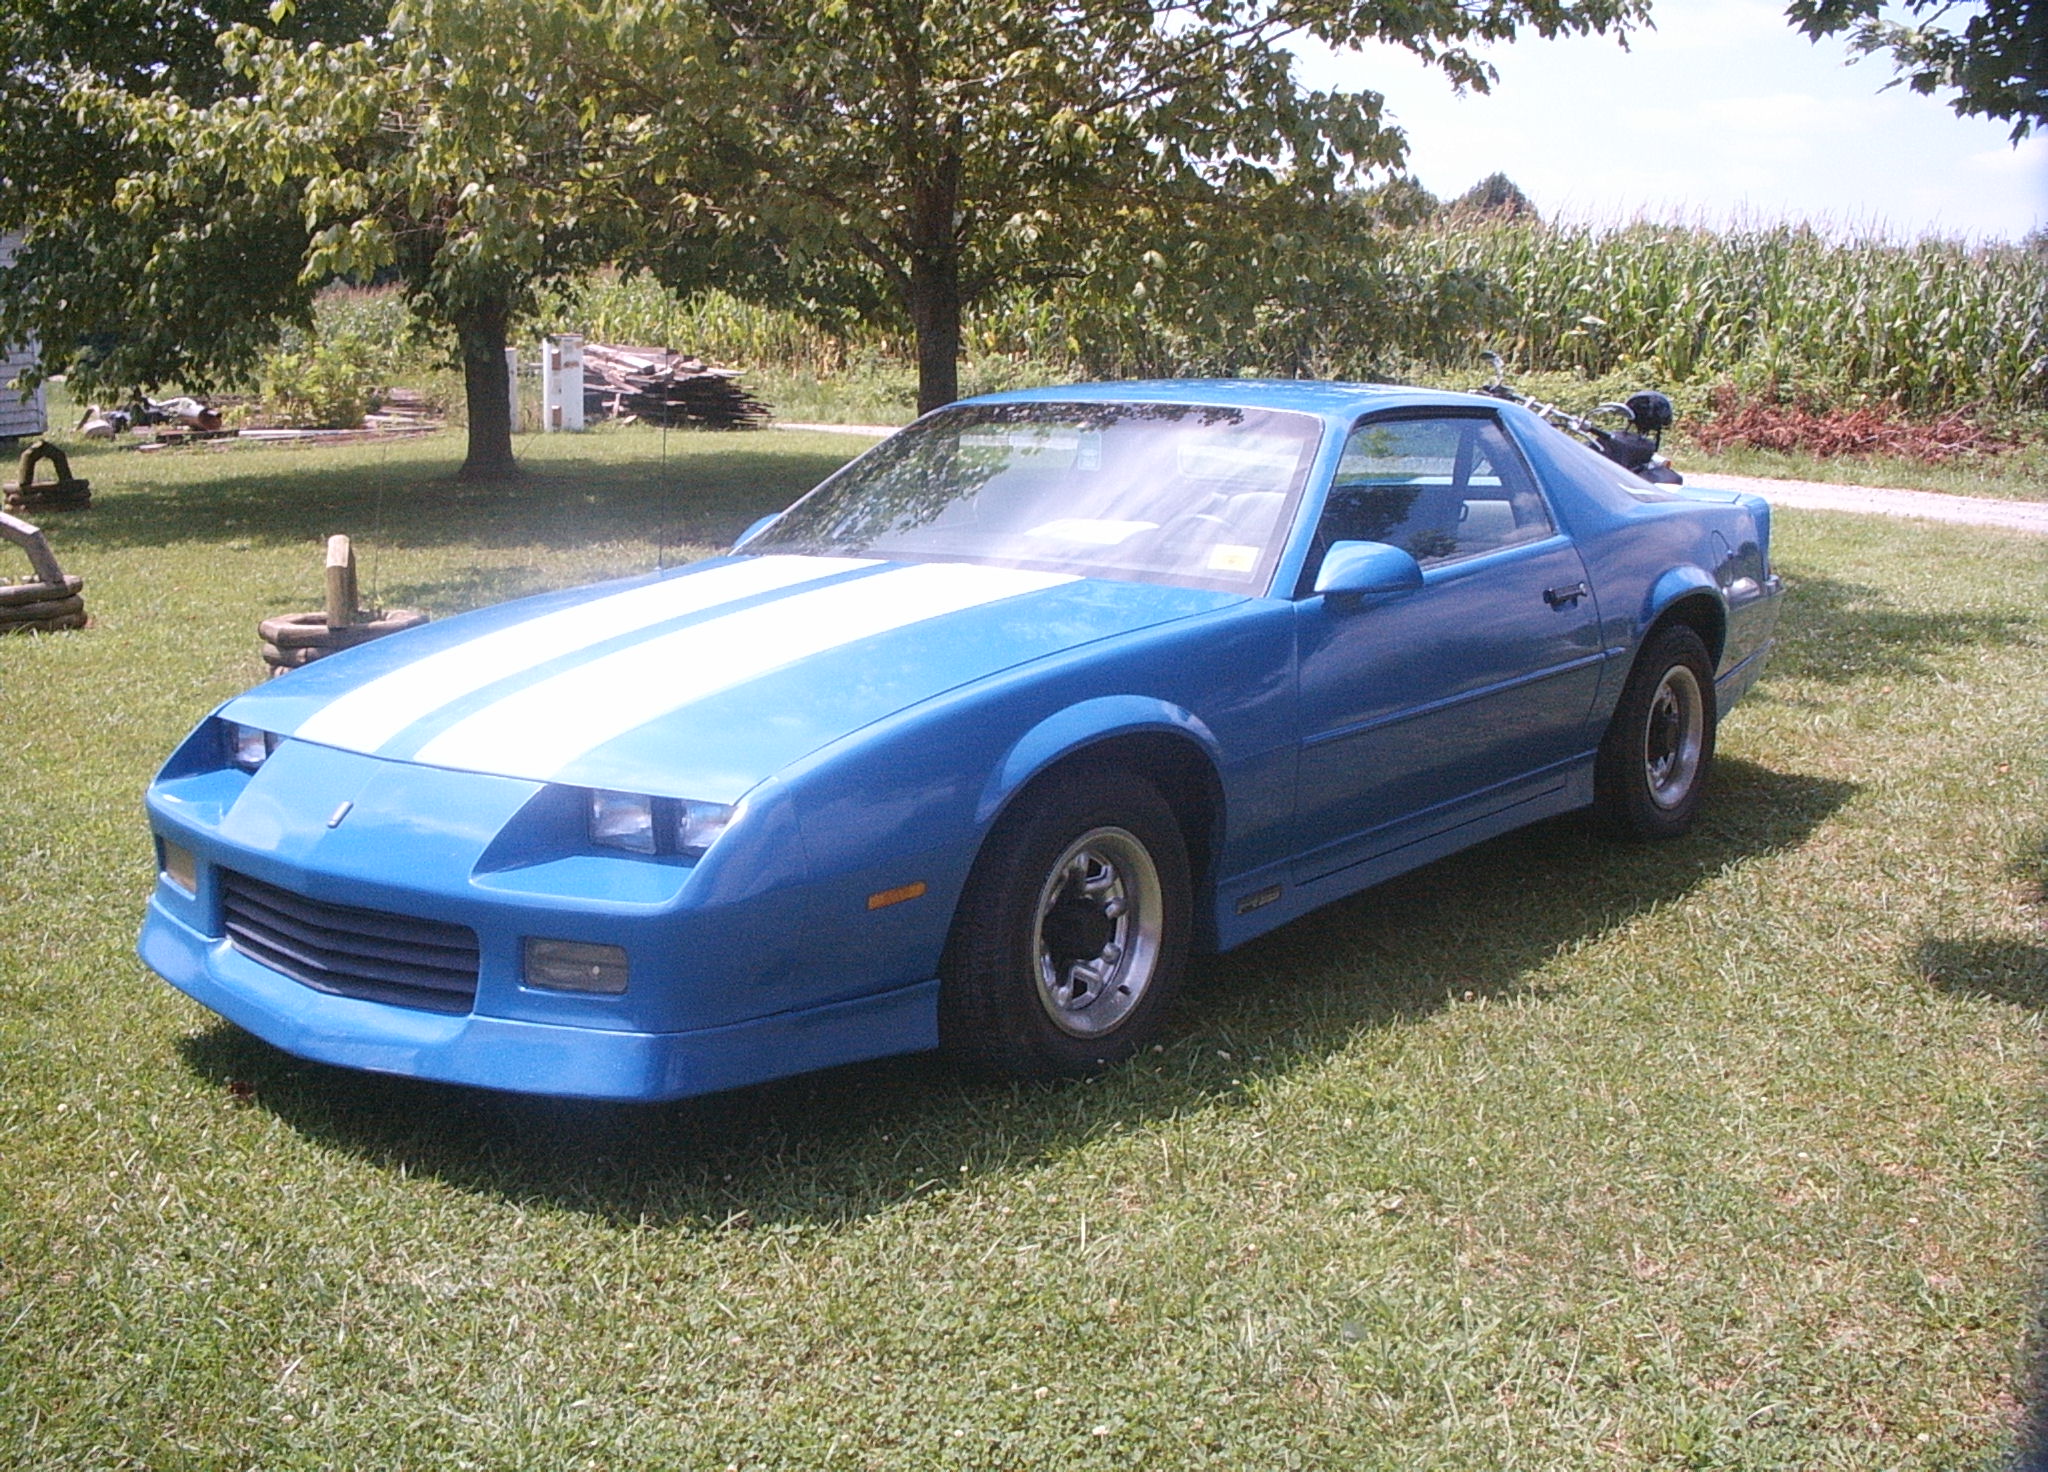
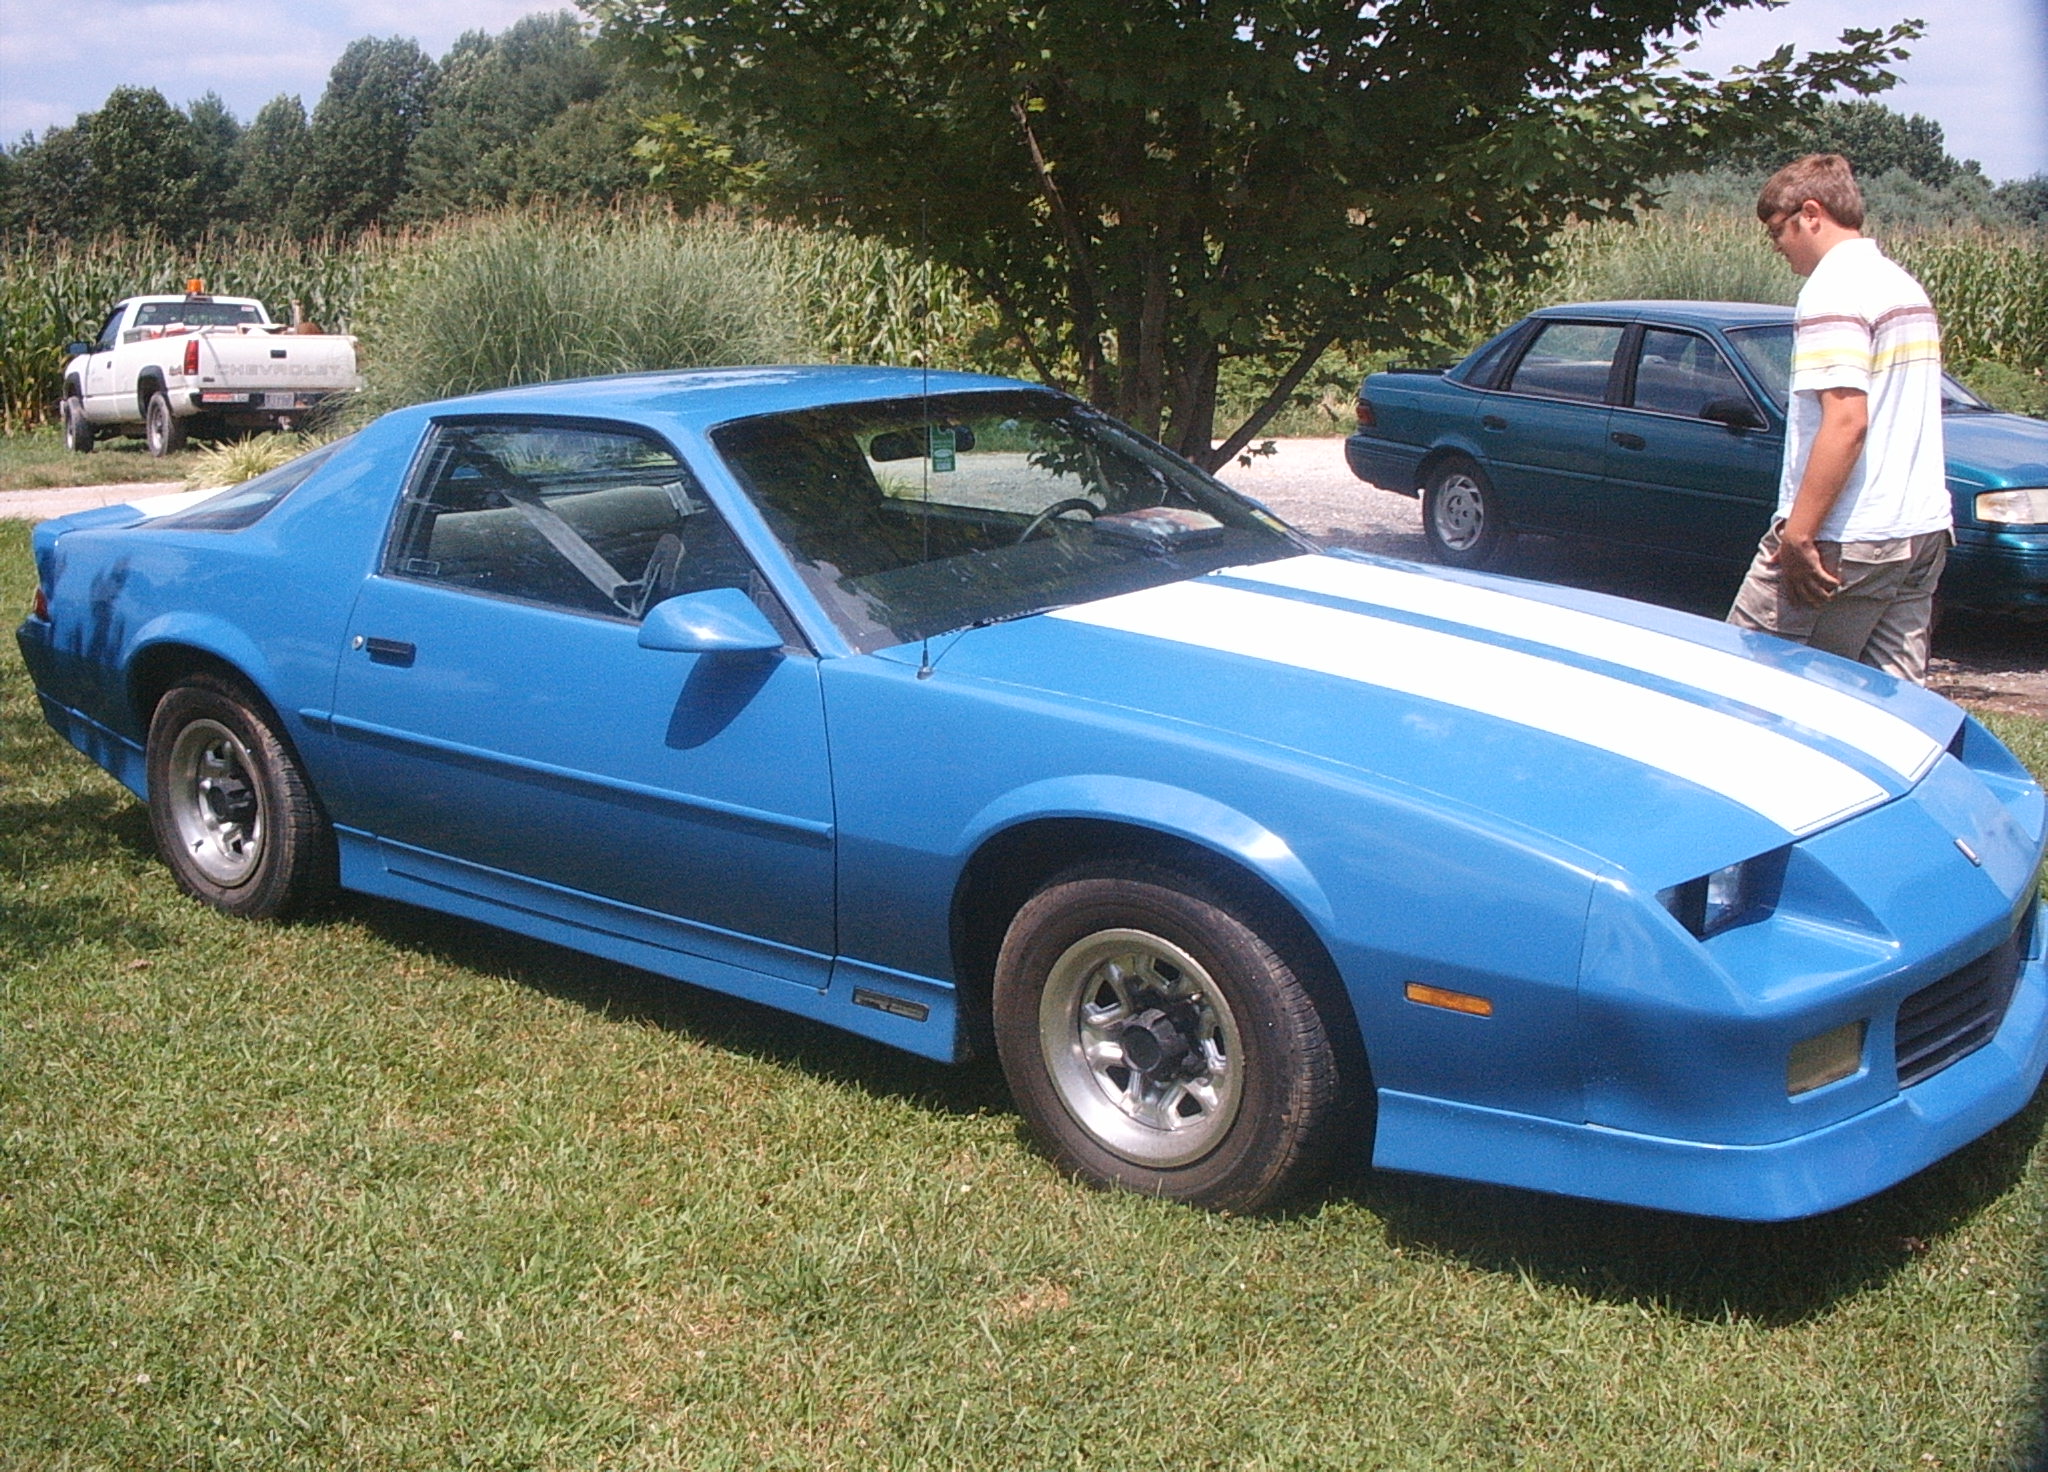
I have been following this thread since last May. Over my summer vacation from NC State my brother and I decided to paint his Camaro using this process. We got some of the car painted with a roller and we concluded that we couldn't finish before I left for Raleigh so we borrowed an HVLP spray gun and shot the rest of the paint. We sprayed two coats on the car outside and rolled the car in the garage after we finished spraying. the paint is rustoleum professional Royal blue and gloss white. I polished out the paint with a rotary buffer and a 3M hookit foam pad using the turtle wax polish suggested by 69charger. I'll let the pictures speak for themselves, but I will add that the color is a lot darker in person than it appears in the pics.
|
|
|
Re: Paint job on a budget!? CONTINUED..page 44........
#25516
08/13/06 02:54 PM
08/13/06 02:54 PM
|
Anonymous
Unregistered
|
Anonymous
Unregistered
|
|
|
|
Re: Paint job on a budget!? CONTINUED..page 44........
#25517
08/13/06 02:56 PM
08/13/06 02:56 PM
|
Anonymous
Unregistered
|
Anonymous
Unregistered
|
last pic... that's my lil brother in the background
|
|
|
|
|


