Moparts
Paint job on a budget!? CONTINUED..page 44............
Posted By: 69chargeryeehaa
Paint job on a budget!? CONTINUED..page 44............ - 05/27/06 12:45 AM
-
Posted By: Exit1965
Re: Paint job on a budget!? CONTINUED..page 44........ - 05/27/06 01:01 AM
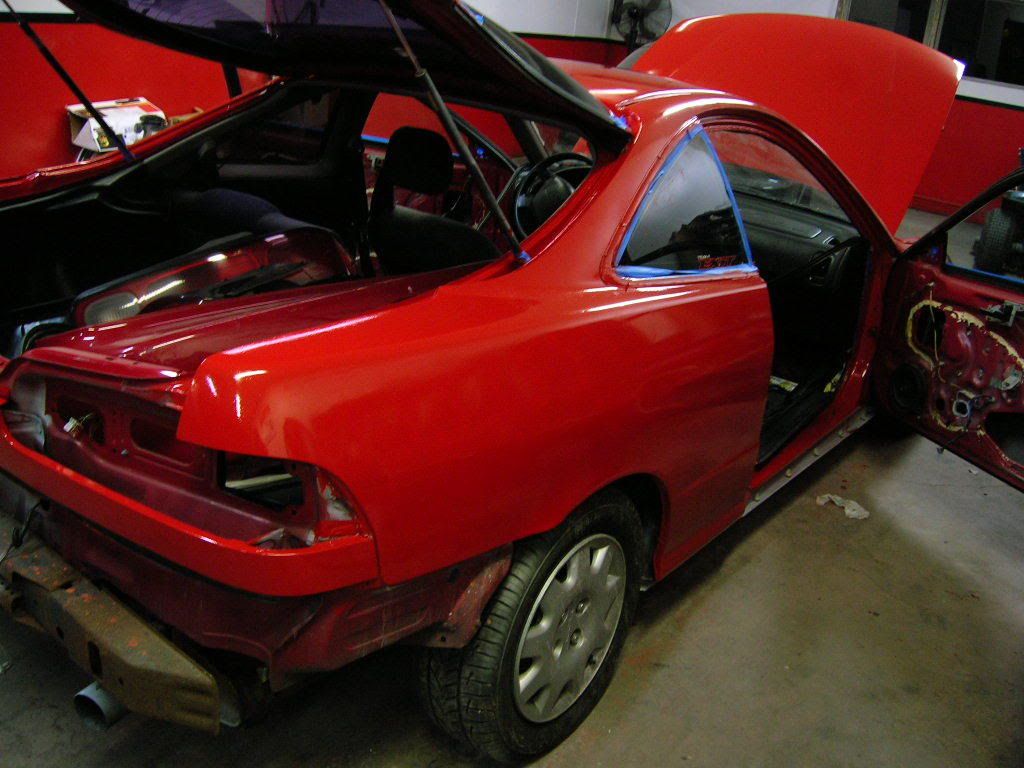
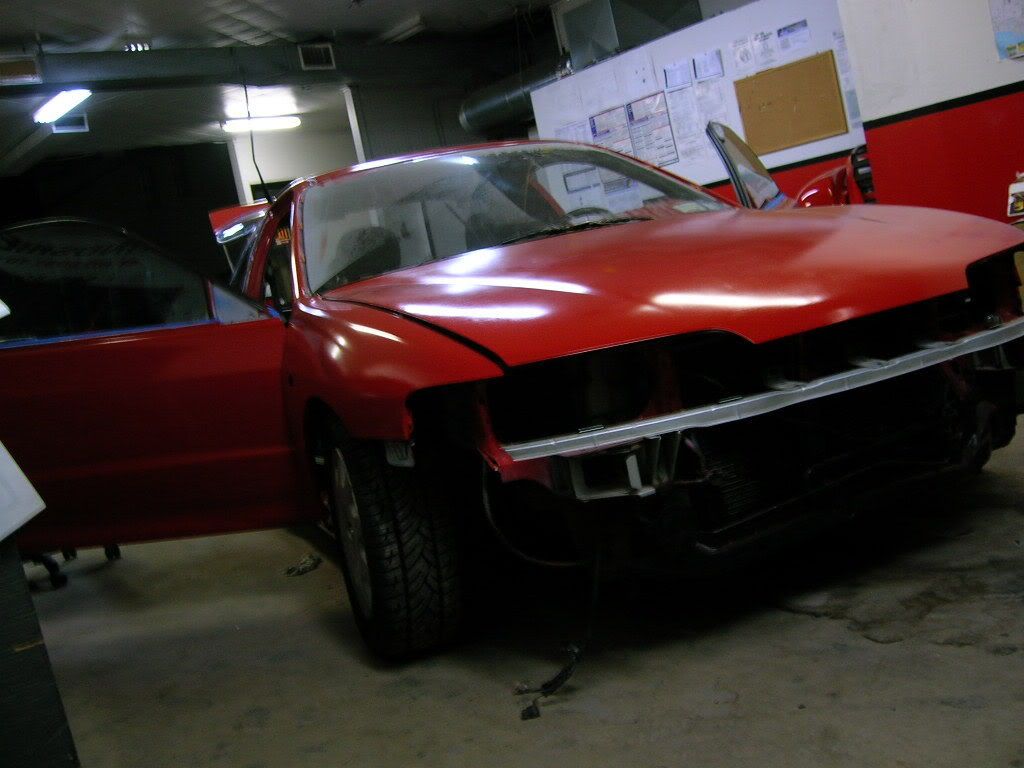
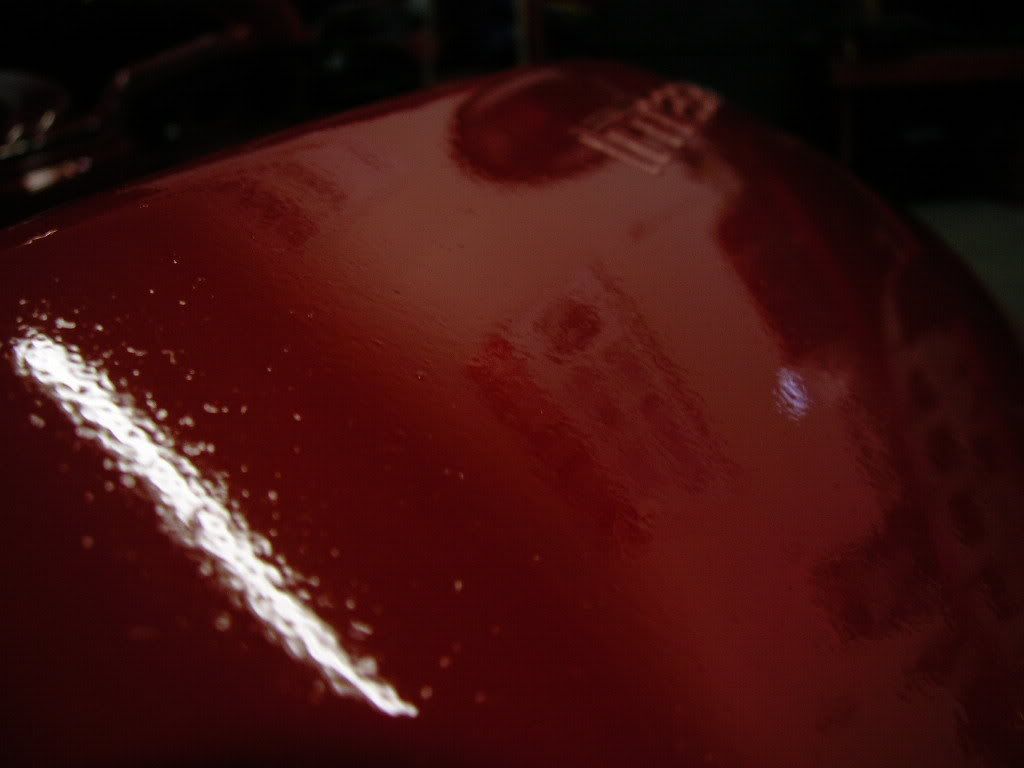
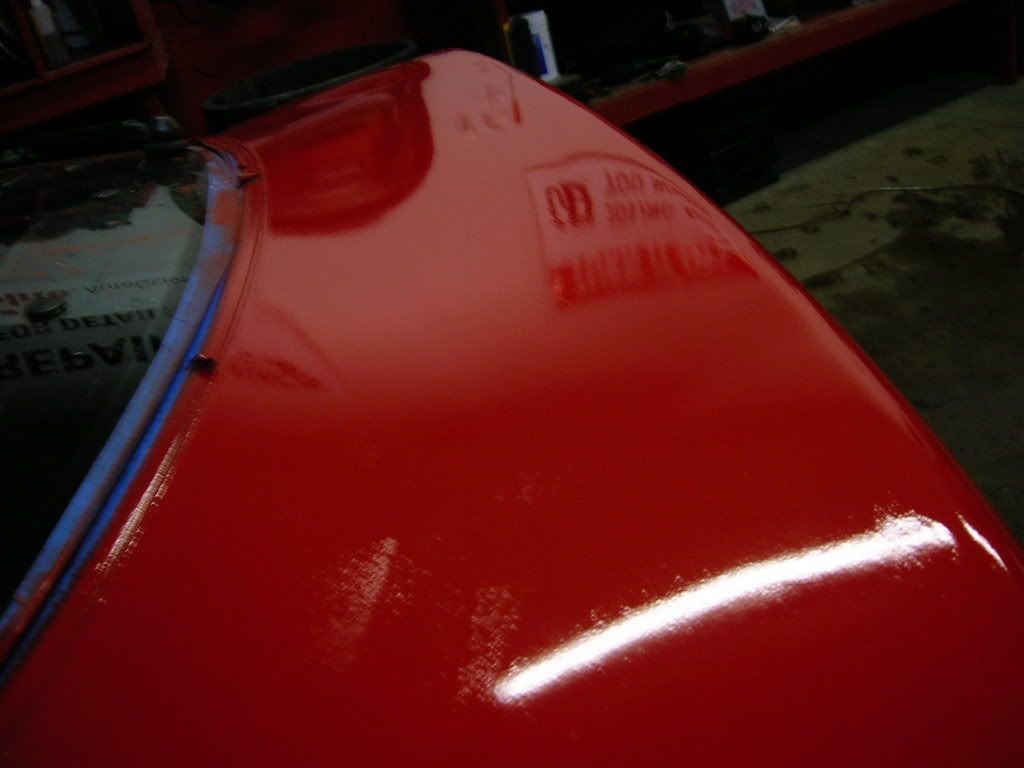
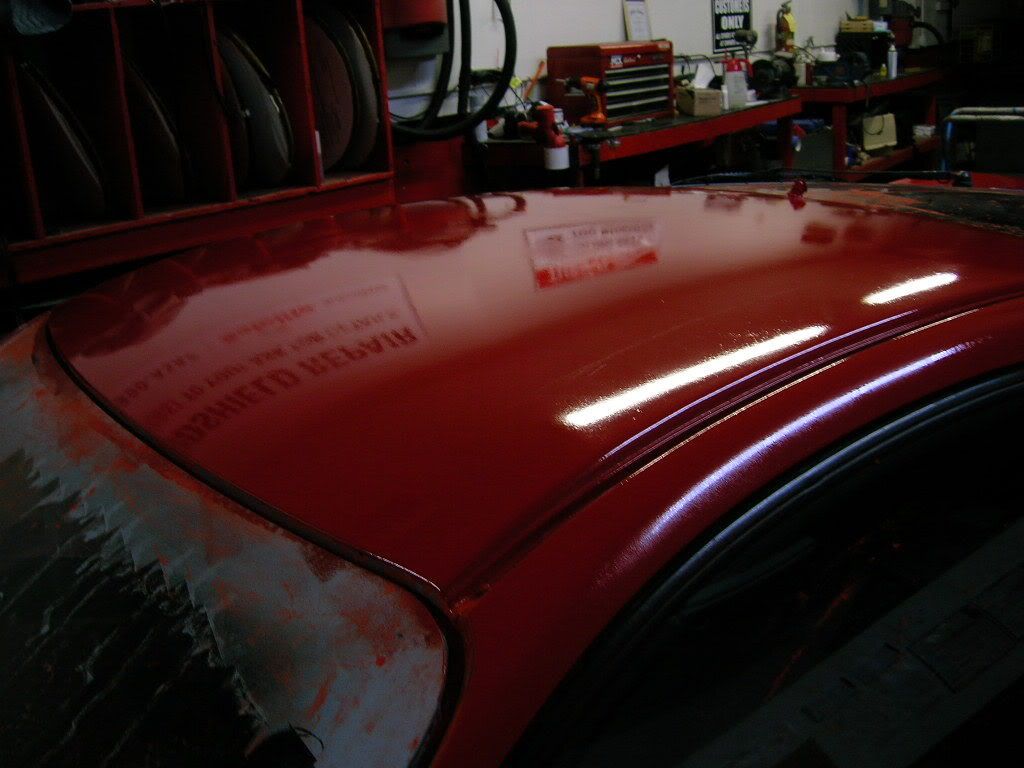
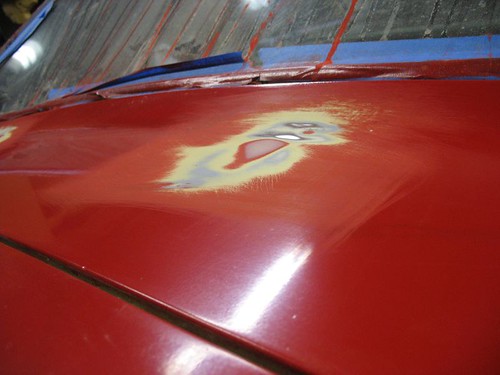
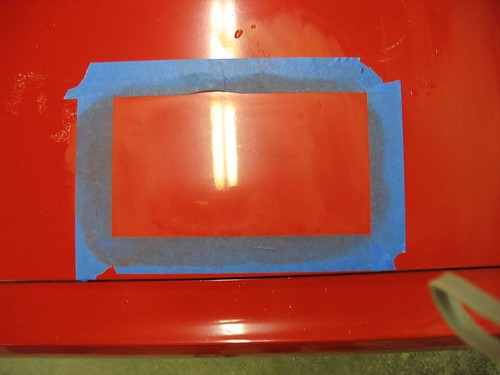
I wanted to ask you how you go about touching up this paint? I have some spots where I've applied some bondo, and to avoid painting the entire panel again I want to know how to apply the paint only to this area and yet have it look as nice as the rest of the area. See pic.
Posted By: 69chargeryeehaa
Re: Paint job on a budget!? CONTINUED..page 44........ - 05/27/06 01:07 AM
Posted By: Anonymous
Re: Paint job on a budget!? CONTINUED..page 44............ - 05/27/06 01:12 AM
OK People,
Been watching this thread from day one and realy got interested. I used to paint a lot of vehicles with a brush and after getting the feel of it, was hard to tell the differance between my brush jobs an a factory paint job. So i know it can be done. Glad to see that some of you folks are so persistant. Nevern tried it with a roller and i'm impressed with your results. I just finnished joining this site so i can go back and look at the old posts. Cant seem to figure out how to get to them. Can anyone help with that?
Lets Roll!

Posted By: Ira
Re: Paint job on a budget!? CONTINUED..page 44............ - 05/27/06 01:21 AM
the original post is in the moparts tech archive, click 'main index' below the ads at the top of the page, then go down the index page to 'moparts tech archives'

Posted By: Exit1965
Re: Paint job on a budget!? CONTINUED..page 44........ - 05/27/06 01:22 AM
Go to the main list of forums and look in the Moparts Tech Archive. It was in there this morning..
Posted By: GTSDave
Re: Paint job on a budget!? CONTINUED..page 44........ - 05/27/06 04:32 AM
Posted By: Magnum
Re: Paint job on a budget!? CONTINUED..page 44........ - 05/27/06 07:34 AM
Has anyone tried black yet?
I have the typical 80's peeling clear coat on my truck hood and roof.

Posted By: 69chargeryeehaa
Re: Paint job on a budget!? CONTINUED..page 44........ - 05/28/06 07:13 PM
Quote:
Has anyone tried black yet?
I have the typical 80's peeling clear coat on my truck hood and roof.
first car i ever painted this way was a 85 honda crx and it was painted black, looked killer, i should scan and post the pic, it was in the time before digital pictures. 


Posted By: dalbers
Re: Paint job on a budget!? CONTINUED..page 44........ - 05/29/06 04:49 AM
My old paint is shrinking and peeling in spots. Question is do I have to take all the old paint off down to the bare metal or can I just take the peeling paint off? My concern is that if I paint over it, it will peel off later.
Posted By: Anonymous
Re: Paint job on a budget!? CONTINUED..page 44........ - 05/29/06 05:08 AM
They keep deleting posts.
Posted By: Anonymous
Re: Paint job on a budget!? CONTINUED..page 44........ - 05/29/06 05:10 AM
Just joined the forum, This is a great topic and I have done a few cars with roller and spray on before. My 70 Duster had just about every color tremclad made. One note you cannot paint over the Aluminum paint. Anything applied over this will peel off badly.
The last post refering to the "stock paint" and painting over. As long as all the loose paint is properly removed and you properly prep the surface you can paint right over.
I've sprayed about five cars with tremclad and seems that the thinned paint is very important with that process as well. Like has been said before the R&B method is less dust and less stink which is always nice.
My newest project is an 82 scirocco that I've reserected out of a wrecking yard here in northern alberta. Body work almost done and I'm going to start laying on the paint very soon. goin to go with the Med Blue gloss as it is close to original color. I was browsing at Can tire and they have a Base Tint with about 50 different color variations
anyone try that yet??
Posted By: Exit1965
Re: Paint job on a budget!? CONTINUED..page 44........ - 05/29/06 05:22 PM
Put the 8th coat on yesterday. There's about 5-6 places that i discovered dings that I didnt see before painting, so I have just fixed those and will have to repaint those panels with an extra 7-8 coats.
The areas that were fixed from the start still aren't covered 100%. I think the cover is about 80% now, so I'm in for another 3 coats minimum on the whole car.
Posted By: GTSDave
Re: Paint job on a budget!? CONTINUED..page 44........ - 05/29/06 05:27 PM
Exit,
That is a great color on a Dart! I like it much better than the almond / cream you were experimenting with. Man your car is going to look very nice!
-Dave
Posted By: Anonymous
Re: Paint job on a budget!? CONTINUED..page 44........ - 05/29/06 06:23 PM
Quote:
Put the 8th coat on yesterday. There's about 5-6 places that i discovered dings that I didnt see before painting, so I have just fixed those and will have to repaint those panels with an extra 7-8 coats.
The areas that were fixed from the start still aren't covered 100%. I think the cover is about 80% now, so I'm in for another 3 coats minimum on the whole car.
Looking great! Would you mind taking a shot with something sharp reflecting that's maybe 3-4 feet away from the car? I'm trying to judge how your (lack of) orange peel compares to my results...
Posted By: sunroofgtx
Re: Paint job on a budget!? CONTINUED..page 44........ - 05/29/06 09:37 PM
I agree. Any different angle shot's?? That look's incredible !! You must feel very good about your effort's. They sure look to have paid off !! I am getting my Satellite media blasted all the way to metal. I also need alittle bondo/ skimming in a couple of places.. Is there any difference with the application or coats from the metal to the bondo's area's ??

Posted By: 69chargeryeehaa
Re: Paint job on a budget!? CONTINUED..page 44........ - 05/30/06 12:30 AM
Posted By: Exit1965
Re: Paint job on a budget!? CONTINUED..page 44........ - 05/30/06 12:35 AM
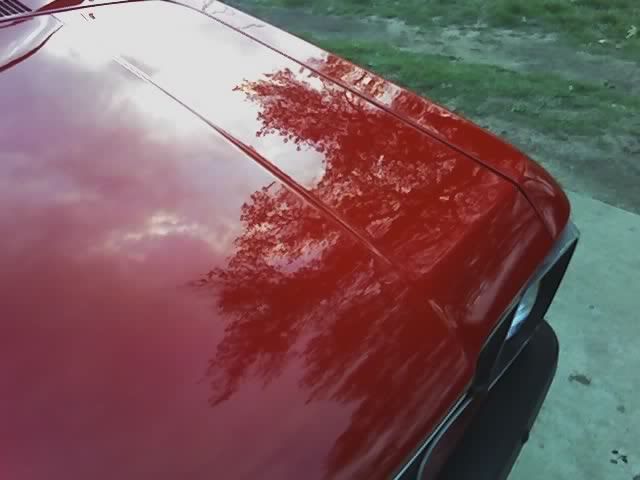
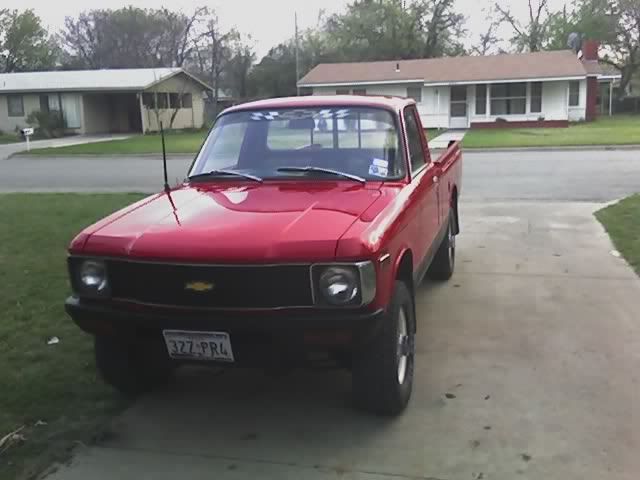
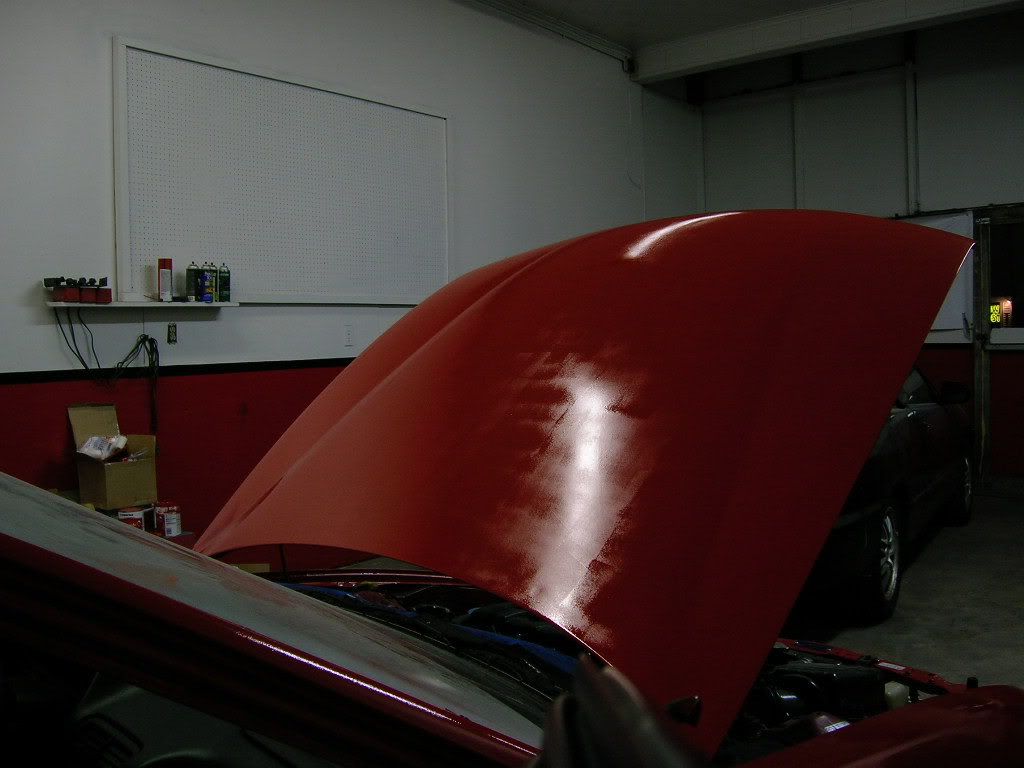
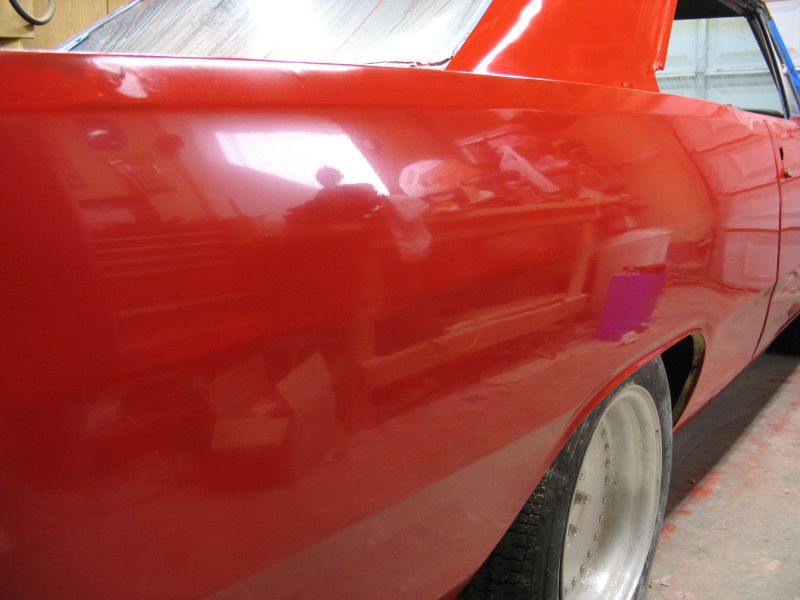
I just wetsanded with 1500 so there's not enough shine to take any pics, but I'll try again after the next coat. There really isn't any orange peel but here is another shot before the sanding.

Here are some other pictures after that 8th coat, they are top 4 pics on my photo page here:
http://www.flickr.com/photos/xit1965/There isn't any difference applying it where there's bondo, except the bondo soaks up the 1st coat pretty good.
I need to play with polishing at this point, probably on the hood since I'm not going to use it. I remember the guy with the Z with the stripe (sorry, can't recall the name) had some issues with getting the red to shine.
Posted By: Exit1965
Re: Paint job on a budget!? CONTINUED..page 44........ - 05/30/06 04:49 AM
I'm having a little bit of an issue. I tried something on the hood, I quickly wetsanded with 2000 then went to the turtle wax polish and a little 6" random orbital buffer/polisher. The surface does come out nice and smooth, but the light shines on it, there is like a white haze. The same sort of light haze the paint has after wetsanding. Anyone know what the deal is with that?
I wonder if it just needs more paint layers in order not to do that?
Ill try it again tomorrow and take pics. Im only worried about final sandnig and polishing on certain areas. the bulk of the side of the car comes out without any issues, but the deck lid and some of the horizontal parts tend to have more dust and crap in them.
Posted By: Anonymous
Re: Paint job on a budget!? CONTINUED..page 44........ - 05/30/06 07:18 AM
Quote:
Has anyone tried black yet?...
Yes, I am using black. I can post some pics tomorrow if you like.
Posted By: Anonymous
Re: Paint job on a budget!? CONTINUED..page 44........ - 05/30/06 07:30 AM
Quote:
I'm having a little bit of an issue. I tried something on the hood, I quickly wetsanded with 2000 then went to the turtle wax polish and a little 6" random orbital buffer/polisher. The surface does come out nice and smooth, but the light shines on it, there is like a white haze. The same sort of light haze the paint has after wetsanding. Anyone know what the deal is with that?
Refer to my earlier post...I talked with a local 'pro', this paint has no hardener and you cannot buff without scratching...the finer the grit, the smaller the scratches but scratches non the less. I'm in the process of sanding mine down for a re-coat with BC/CC (and it's a b*tch to get off!). Good luck, Chuck
Posted By: Anonymous
Re: Paint job on a budget!? CONTINUED..page 44........ - 05/30/06 11:48 AM
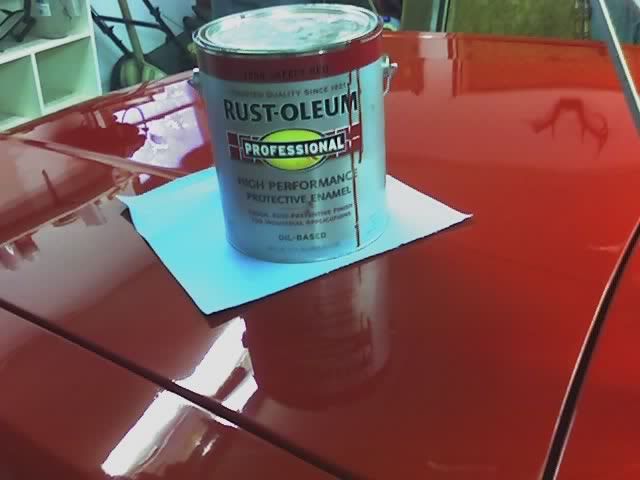
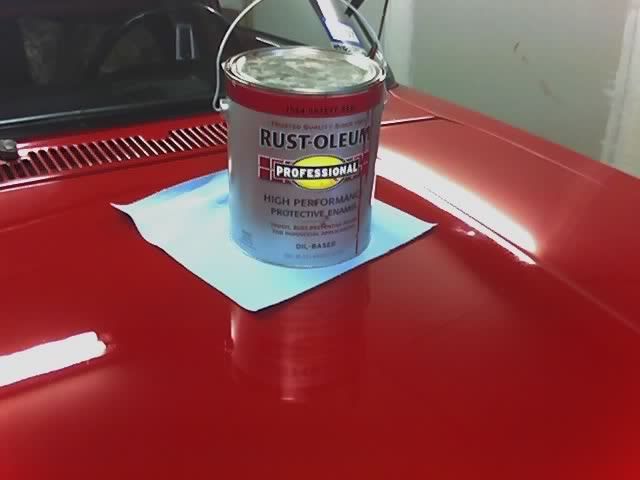
Finally got to experiment with the paint/process this weekend. I painted our front door and storm door with hunter green Rustoleum. Since the original surface wasn't smooth I was really just playing with the mixture and roller method for practice. I wasn't too worried about orange peel. I must admit I was impressed and can definitely see the potential in the process. I can't wait until I get my Sprite project ready for paint.
Posted By: Exit1965
Re: Paint job on a budget!? CONTINUED..page 44........ - 05/30/06 01:02 PM
Quote:
Quote:
I'm having a little bit of an issue. I tried something on the hood, I quickly wetsanded with 2000 then went to the turtle wax polish and a little 6" random orbital buffer/polisher. The surface does come out nice and smooth, but the light shines on it, there is like a white haze. The same sort of light haze the paint has after wetsanding. Anyone know what the deal is with that?
Refer to my earlier post...I talked with a local 'pro', this paint has no hardener and you cannot buff without scratching...the finer the grit, the smaller the scratches but scratches non the less. I'm in the process of sanding mine down for a re-coat with BC/CC (and it's a b*tch to get off!). Good luck, Chuck
I remember you saying that. But I've seen pics of charger's car, and of admactanium's test piece.. they are not red, but they are orange and I didn't see any of this haze there so I'm not sure why I'm seeing it.
I would think the haze would show up in any dark colors, but other people seem to be doing OK. I'll try some more tonight, maybe I need to wetsand a bit more than I'm doing.
Posted By: Exit1965
Re: Paint job on a budget!? CONTINUED..page 44........ - 05/30/06 10:27 PM

In the worst case, I can always switch back to Canvas White.
Posted By: Anonymous
Re: Paint job on a budget!? CONTINUED..page 44........ - 05/30/06 10:52 PM
Quote:
I just wetsanded with 1500 so there's not enough shine to take any pics, but I'll try again after the next coat. There really isn't any orange peel but here is another shot before the sanding.
Here are some other pictures after that 8th coat, they are top 4 pics on my photo page here:
http://www.flickr.com/photos/xit1965/
There isn't any difference applying it where there's bondo, except the bondo soaks up the 1st coat pretty good.
I need to play with polishing at this point, probably on the hood since I'm not going to use it. I remember the guy with the Z with the stripe (sorry, can't recall the name) had some issues with getting the red to shine.
That looks really fantastic.
Couple questions since you're doing a little better than I at this point...
Did you have any orange peel problems at all once you figured the process out, or does it go on 100% smooth?
How much time are you spending wetsanding between coats? For instance, how much time does the hood take to sand sufficiently?
Thanks.. you're doing some great stuff there!
Posted By: Exit1965
Re: Paint job on a budget!? CONTINUED..page 44........ - 05/30/06 11:01 PM
Quote:
Quote:
I just wetsanded with 1500 so there's not enough shine to take any pics, but I'll try again after the next coat. There really isn't any orange peel but here is another shot before the sanding.
Here are some other pictures after that 8th coat, they are top 4 pics on my photo page here:
http://www.flickr.com/photos/xit1965/
There isn't any difference applying it where there's bondo, except the bondo soaks up the 1st coat pretty good.
I need to play with polishing at this point, probably on the hood since I'm not going to use it. I remember the guy with the Z with the stripe (sorry, can't recall the name) had some issues with getting the red to shine.
That looks really fantastic.
Couple questions since you're doing a little better than I at this point...
Did you have any orange peel problems at all once you figured the process out, or does it go on 100% smooth?
How much time are you spending wetsanding between coats? For instance, how much time does the hood take to sand sufficiently?
Thanks.. you're doing some great stuff there!
It goes on nice and smooth, if there's any orange peel its very hard to see. I do see a little orange peel on the flat surfaces though, Ive probably put on too much paint there but even then the peel isn't bad and a quick wetsand gets rid of it. I've been waiting about 24 hours before wetsanding just to be safe but that is partially due to the fact that it fits into my schedule that way.
Things arent going that great though in terms of how it looks after wetsanding even with 2000 grit. 
Posted By: Anonymous
Re: Paint job on a budget!? CONTINUED..page 44........ - 05/31/06 01:17 AM
Quote:
Things arent going that great though in terms of how it looks after wetsanding even with 2000 grit.
Hazy?
Posted By: Exit1965
Re: Paint job on a budget!? CONTINUED..page 44........ - 05/31/06 01:26 AM
Quote:
Quote:
Things arent going that great though in terms of how it looks after wetsanding even with 2000 grit.
Hazy?
Exactly. Here it is after wetsanding with 2000 grit after the 8th coat:
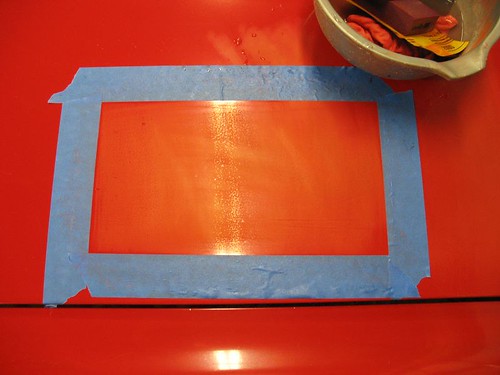
then after an attempt at polishing:
its a hazy orange red now. Anyone got ideas on this?
If not I'm going back to plan A which is Canvas White (sorry GTSDave  ).
).
Posted By: Anonymous
Re: Paint job on a budget!? CONTINUED..page 44........ - 05/31/06 02:13 AM
Exit it looks like you didn't polish it enough the turtle wax polish is not that aggressive and it takes longer to polish it. It took over 30 minutes and about 6-7 coats of polish on the small area I did. It might work faster to use some Meguiar's diamond cut polish.
Posted By: Anonymous
Re: Paint job on a budget!? CONTINUED..page 44........ - 05/31/06 02:14 AM
Man, it was looking good until that haze issue. I was expecting it to come out like a mirror after seeing the before wetsanding pics!!
As far as touchups? Man... kind of sucks.... after 800gt sanding when you do touchups the paint doesnt seem to match just right.. it is almost better just to sand down the entire panel and put the additional coats needed. It can be done I guess if you take your time.. I guess it would be like any other touch up job.. except you need to be able to feather the edges from the roller pretty good..
I have a major problem with sanding through my edges.. I just cant stop doing it. I touched up some stuff.. a lot.. and I can see where I did it. The reason is because I just dont have the time to spend to do it right. It sucks having to constantly look over my shoulder for the popo or someone that isn't happy with me painting on their property.
Anyway, I called it quits.. finished up with what I had. The paint job sucks but much better than how it orignally looked. It is just too hard trying to rush this process out in the elements and having to drive it everyday, too.
I'll post some images and maybe a video soon. Putting the car back together. Just dont mind the orange peel ^_^
Blah.. speaking of oranges.. I dripped some citrius paint stripper on my paint...

stuff works really good.. had it for a second on there and it ate through the top coats. Screwed up one of the nicer parts of the car too! Anyway, should come out with buffing but I already waxed... so maybe in the next couple months I will get it worked out.
Posted By: Anonymous
Re: Paint job on a budget!? CONTINUED..page 44........ - 05/31/06 02:17 AM
oh, and for polishing it took me about 10hrs to polish my car.. the sun cooked me. Then I went over with a less aggressive polisher.. but didnt put in enough time on it.. I think just 3hrs.. it looked good enough with the turtle wax - for me.. after waxing it looked stupid shiny.. I can see every drip, peel, thin paint, inconsistancy, etc.. [Edited by Moparts - Keep it clean].. but _still_ looks ok, haha

Posted By: GTSDave
Re: Paint job on a budget!? CONTINUED..page 44........ - 05/31/06 02:58 AM
Exit it is the polisher you are using. Orbital has never worked good for me. I have one and if yours is the one I am thinking of, it is barely good enough for waxing a car.
You need to use the right machine. It WILL remove the haze you are seeing.
-Dave
Posted By: Anonymous
Re: Paint job on a budget!? CONTINUED..page 44........ - 05/31/06 03:55 AM
Quote:
Exit it is the polisher you are using. Orbital has never worked good for me. I have one and if yours is the one I am thinking of, it is barely good enough for waxing a car.
You need to use the right machine. It WILL remove the haze you are seeing.
-Dave
I used a 7" Variable Speed Polisher/Sander and it was just as bad if not worse...it's just not gonna buff out because the paint isn't hard and buffing it just adds more scratching and hazing effect.
Check out the item on this web page...if this stuff hardens on its own, why would they sell hardeners? Take one of your test pieces thats had a day or two or week or whatever and try to sand it with 80/100 grit sandpaper...the paint will not powder, it balls up ('cause it's gummy)...you remember the scratch test? Here's a variation: rub the tip of your fingernail or the side of a penny across the paint. Don't try to scratch off the paint, just apply hard pressure or roll back and forth...it will leave an indention. This will not happen with any other style of painting that has hardener...go roll your finger or penny across your family car - it's hard as concrete.
I don't mean to be the bearer of bad news but look up 'Alkyd Enamel' (what we're using) on google and do some research. When this stuff is used without hardener, its baked on and cannot be buffed...what you spray is what you get...and as far as wax, the local jobber here says your not even supposed to wax BC/CC for several weeks. The wax prohibits the drying of the paint which is an even BIGGER problem with this technique since we're not using hardener.
As far as everyones pictures looking good, my car looked good too (from 5-10 feet away). Digital pictures do not always show the finer details...
Don't take my word for it...Take some time and research 'Alkyd Enamel', 'hardener', etc right here on the 'net...go visit or call your local Body Shop Supply store. They're usually more than glad to answer questions for potential customers (they did for me)...
Posted By: Exit1965
Re: Paint job on a budget!? CONTINUED..page 44........ - 05/31/06 04:10 AM
That was using evercoat medium cut compound followed by megiuar's scratch remover follwed by meguiar's hand glaze.
I'm painting it canvas white. It'll look just as nice but the imperfections in the paint wont be as noticeable. This counts other light-colored scratches that may occur after it's painted that red would highlight.
GTSDave- thanks for the tip, but I can see myself spending more and more money on this trying to get it right only to end up frustrated and having spent too much on a $50 paint job.
At some point, I'll think I've put so much time and money into it that starting it wasn't worth it all when I could have just paid a few hundred and have it shot. One thing I'm glad about is that I saw the bodywork I missed with this red paint on it and I had a chance to fix it. I know I can get satisfactory results with white, and that will only cost me another $15 after I return the unused red paint, so that's the route I'm going.
I'll post some pics when there's no more red..
Posted By: Anonymous
Re: Paint job on a budget!? CONTINUED..page 44........ - 05/31/06 05:01 PM
Exit, before you give up on red and all the work you've done, remember you almost gave up on the whole process once before as you were learning. You might want to work with the polishing some more before changing directions. The paint you've laid down so far is incredible, I'm betting you can work it out and get the shine you're after.
Posted By: Anonymous
Re: Paint job on a budget!? CONTINUED..page 44........ - 05/31/06 05:24 PM
Quote:
Exit, before you give up on red and all the work you've done, remember you almost gave up on the whole process once before as you were learning. You might want to work with the polishing some more before changing directions. The paint you've laid down so far is incredible, I'm betting you can work it out and get the shine you're after.
I agree... Exit, you've done better than probably anybody who's tried it so far, and it'd be a shame to give up without giving it a heck of a try. 
Could it be that the paint hasn't hardened sufficiently yet? Would it be possible to 'bake' a small area under a hot lamp or something and see if it'll polish easier?
Posted By: Anonymous
Re: Paint job on a budget!? CONTINUED..page 44........ - 05/31/06 09:16 PM
Exit those pics you posted that show smooth paint and great reflections 8th coat I think.
If it looks so good why wet sand the last coat live with it for a few weeks/months to harden and maybe if needed polish it then.
Just a thought
Posted By: 69chargeryeehaa
Re: Paint job on a budget!? CONTINUED..page 44........ - 05/31/06 09:31 PM
i agree, exit, are you sure your not just seeing it worse than it really is? bacause your starring at it up close, and know every flaw on your paint??? try getting the wife to have a look at it, they're really good at pointing out everything wrong, espically when it's your hobby car!!!!! i'd stick with the red, it looks killer on that car. also when you pull it into the sun, it's a whole different story, trust me, even on my newer cars with BC/CC, you see flaws in the paint in the garage.

Posted By: Exit1965
Re: Paint job on a budget!? CONTINUED..page 44........ - 05/31/06 09:32 PM
Quote:
Exit those pics you posted that show smooth paint and great reflections 8th coat I think.
If it looks so good why wet sand the last coat live with it for a few weeks/months to harden and maybe if needed polish it then.
Just a thought
That sounds like a decent idea. Im going to give it another shot on the hood tonight, skipping wetsanding and going right to polish and see if that looks any better. I dont think the sides need any sanding, but junk falls on the horizontal surfaces. Since I'm not using that hood most of the focus will be on the decklid. I suppose I could even take that off and paint it separately so that stuff doesnt fall on it.
Posted By: Exit1965
Re: Paint job on a budget!? CONTINUED..page 44........ - 05/31/06 09:37 PM
Quote:
i agree, exit, are you sure your not just seeing it worse than it really is? bacause your starring at it up close, and know every flaw on your paint??? try getting the wife to have a look at it, they're really good at pointing out everything wrong, espically when it's your hobby car!!!!! i'd stick with the red, it looks killer on that car. also when you pull it into the sun, it's a whole different story, trust me, even on my newer cars with BC/CC, you see flaws in the paint in the garage.
how does this paint maintain shine if nothing is done to it? thinking of just finishing the red job and leaving it and not doing any sanding or polishing on it since it seems to look good like that. eventually it will probably need to be at least polished though right?
Posted By: Anonymous
Re: Paint job on a budget!? CONTINUED..page 44........ - 05/31/06 09:45 PM
Exit I would kill for that shine on mine- Don't do it!
Found this post on Fordsix.com, literally as I was about to hit a $300 budget place for my 64 Comet 404.
CHARGER 69 you deserve a tickertape parade. Thanks a million for showing everybody this.
While I need to do a lot more wetsanding and have a lot of rollermarks, I'm really happy with the results so far, here's some before and after pics (6 coats, not polished yet).

That's ROYAL BLUE, it's a little darker than in pictures. Great website, thanks everybody
Posted By: 69chargeryeehaa
Re: Paint job on a budget!? CONTINUED..page 44........ - 05/31/06 10:34 PM
Quote:
Quote:
i agree, exit, are you sure your not just seeing it worse than it really is? bacause your starring at it up close, and know every flaw on your paint??? try getting the wife to have a look at it, they're really good at pointing out everything wrong, espically when it's your hobby car!!!!! i'd stick with the red, it looks killer on that car. also when you pull it into the sun, it's a whole different story, trust me, even on my newer cars with BC/CC, you see flaws in the paint in the garage.
how does this paint maintain shine if nothing is done to it? thinking of just finishing the red job and leaving it and not doing any sanding or polishing on it since it seems to look good like that. eventually it will probably need to be at least polished though right?
if you just polish with the turtlewax polishing compound, and then wax, it will look great, and alot more shiny with the polish and wax than just paint alone.
Posted By: 340wedge
Re: Paint job on a budget!? CONTINUED..page 44........ - 05/31/06 11:40 PM
Looks great, but can you get these paints in any colors or just there own colors they make?
Posted By: Anonymous
Re: Paint job on a budget!? CONTINUED..page 44........ - 06/01/06 01:18 AM
Quote:
Looks great, but can you get these paints in any colors or just there own colors they make?
You can't color match the Rustoleum, from what HD told me.. because it isnt setup in the computer like that. They do sell tintable bases (Masstone, Yellow, Red, and Pastel) but it is being discontinued. The tintable bases were used for mixing to preselected color choices. There were maybe 100 different colors to pick from, I think. I still have one of the pamphlets.
Not sure if anyone noticed- but all of the rustoleum colors seem to have a prefaded look to them.. like if they had been bleached by the sun.. with a few acceptions ofcourse- like black and yellows.. but things like the Regal Red remind me of an old weathered mailbox where the sun and dirt transformed the orignal color over time.
I really wanted that Apple Red color that comes in their interior "Painters Touch" (something like that) line. If you can find the Tintable Red then you can have it made in oil based.
Also, when Rustoleum says that their professional lines are more resistance to chipping, does that mean there are more softeners in it? I am using the tintable "stops-rust".. not sure where that weights in on durablity. Seems tough.

Posted By: Anonymous
Re: Paint job on a budget!? CONTINUED..page 44........ - 06/01/06 02:06 AM
Can somebody answer a question really quick? I know the answer is in the older thread, but after going through pages and pages I couldn't find it -- and I have to go someplace right now and can't look through the rest of the pages.
Anyways...on my first test piece I did 2 coats in yellow and it looked awesome. No problems with bubbles. It really seemed like I had a lot of room for error with the amount of mineral spirits I could put in. But the dry Arizona air might have helped with all of this. Anyways, after 2 coats I wet sanded with 1500 grit until it it "felt" smooth to the touch. But obviously it looked flat.
So I did another 2 coats like I'm supposed to and just sanded it again with 1500. But it's flat looking again.
When I get to coat 6...I was planning on wetsanding with 2000 and then polishing with this electric orbital buffer I bought today. Is that the proper procedure? I know I probably should have sanded with 800 after the first coat...but too late for that now...if I do the 2000 and then the polishing compound is that the right procedure for me to get it to shine? I just want to double check before I go putting more paint and such on.
Thanks guys!
Posted By: Anonymous
Re: Paint job on a budget!? CONTINUED..page 44........ - 06/01/06 02:13 AM
I shouldnt answer this because I screwed up on my body.. but I did do it right on my gndfx and mirrors and it came out flawless. Anyway, the mirrors and gndfx, after I did the final coat, I sanded with 1000 then 1500 then 2000. The 1000 really does a great job cleaning everything up. It is much harder just using 1500.. and doing it with 2000.. arf.. sucks, trust me... I sanded the body twice with 2000 and then went back and actually _read_ the posts and saw I screwed up.. d'oh! waste of time and effort.
Anyway, someone else should answer this. Just dont do what I did or you will regret it a bit :P
Posted By: Anonymous
Re: Paint job on a budget!? CONTINUED..page 44........ - 06/01/06 02:41 AM
hmm, strange.. I went to use the turtle wax polish on my gndfx and mirrors and I didnt have a lot of paste left (fell off the car and landed upside-down so I had to remove a lot).. anyway, I used a new bonnet.. so it wasnt saturated.. usually get good results when it is loaded.. anyway, buffed and it didnt come out anywhere as good as the car or the spoiler I tested :S kind of hazy it seems ... on the body and test piece I used gobs of the paste and it seemed to be working.. going to buy more tomorrow and see if I can fix the gndfx up.

Posted By: Anonymous
Re: Paint job on a budget!? CONTINUED..page 44........ - 06/01/06 03:40 AM
Quote:
Can somebody answer a question really quick? I know the answer is in the older thread, but after going through pages and pages I couldn't find it -- and I have to go someplace right now and can't look through the rest of the pages.
Anyways...on my first test piece I did 2 coats in yellow and it looked awesome. No problems with bubbles. It really seemed like I had a lot of room for error with the amount of mineral spirits I could put in. But the dry Arizona air might have helped with all of this. Anyways, after 2 coats I wet sanded with 1500 grit until it it "felt" smooth to the touch. But obviously it looked flat.
So I did another 2 coats like I'm supposed to and just sanded it again with 1500. But it's flat looking again.
When I get to coat 6...I was planning on wetsanding with 2000 and then polishing with this electric orbital buffer I bought today. Is that the proper procedure? I know I probably should have sanded with 800 after the first coat...but too late for that now...if I do the 2000 and then the polishing compound is that the right procedure for me to get it to shine? I just want to double check before I go putting more paint and such on.
Thanks guys!
I took some pictures so you guys can see what I'm talking about. See how it's...like...bumpyish? Well, I guess it feels smooth...but...what do I do?
Sand it down until that goes away? Or is it just fine?
It's not as bad as it looks where the light is reflecting...look at the other areas besides that.

Posted By: DaytonaTurbo
Re: Paint job on a budget!? CONTINUED..page 44........ - 06/01/06 03:55 AM
I'd definately go back to a lower grade of sandpaper and sand that until it went away. As for the issue of people getting hazyness and stuff when buffing, has anybody tried painting a panel or something, then spraying it with clearcoat? I've seen that clear coat is sold in spray cans, mask and do the whole car with it, then wetsand and buff the clearcoat? Should help protect the paint seeing as the clear coat should harden better than the paint???
Posted By: Anonymous
Re: Paint job on a budget!? CONTINUED..page 44........ - 06/01/06 05:30 AM
Try forcing a cure on a spot with a heat lamp or heat gun etc., and see if it hardens enough to accept the polishing correctly. Heat and cool it a few times over a few days and then see how it goes......just a suggestion.
Posted By: Anonymous
Re: Paint job on a budget!? CONTINUED..page 44........ - 06/01/06 11:13 PM
another thread eh..man your a popular man, ill post some pics of my car within the next few days, i havent even wetsanded yet, it already looks great, i cleaned my chorme up (lincoln lsc) ill get pics, [Edited by Moparts - Keep it clean] i love this thread and im glad i found it, i get compliments already and its not even done..lol
Posted By: Anonymous
Re: Paint job on a budget!? CONTINUED..page 44........ - 06/02/06 04:00 AM
I'm wondering if you could do the 1500/2000 grit wetsand on final coat and then wipe with mineral spirits and Clearcoat without the polish. I'm willing to try but have to get body work done. Painting starts this weekend
Posted By: Exit1965
Re: Paint job on a budget!? CONTINUED..page 44........ - 06/02/06 04:41 AM
Quote:
I'm wondering if you could do the 1500/2000 grit wetsand on final coat and then wipe with mineral spirits and Clearcoat without the polish. I'm willing to try but have to get body work done. Painting starts this weekend
Are you talking about rustoleum clearcoat or a hardened automotive clear coat?
Posted By: Anonymous
Re: Paint job on a budget!? CONTINUED..page 44........ - 06/02/06 05:12 AM
I'd be using the Tremclad clearcoat to try that test. I assume the Rusto and Trem clears are the same. I dunno about the Automotive clears Prob best to stick with the same brand right through the job.
Posted By: Anonymous
Re: Paint job on a budget!? CONTINUED..page 44........ - 06/02/06 06:44 AM
Wow, you guys scared me! I was the last to post on the old thread and kept checking back for replies and saw nothing, so I figured I had killed the thread.
What I wanted to say was that I am experimenting with �Varathane Colours� plastic enamel. I went to choose the colour for my car tonight and saw this product so I purchased a small pot to try. Made by the same people who make Tremclad/Rustoleum. Claims are for durability, suitability for exterior and marine use. They actually indicate it can be used on boats. It�s not tintable so you are stuck with limited colour choices.
I am comparing it head to head with Tremclad.
I thinned it 10% with mineral spirits as suggested on the package. I used a syringe to measure out all portions precisely. The dark blue I chose covered in one coat and produced a very glossy solid surface. Tomorrow I will know more but I am very impressed so far.
The Tremclad (white) was thinned 20% as recommended on this forum. It was thinner, much closer to a water like consistency. Only one coat but it was looking spotty, showing potential orange peel. I hope the high humidity today didn�t cause this.
The surface tested was an old car door sanded with 220 grit. I used the same foam rollers suggested, as was the mineral spirits, all purchased at Home Depot. Both paints produced a surprising amount of bubbles when first rolled out but the Varathane was in the end smoother.
My experiments will continue after the weekend as I am going fishing tomorrow.
On another note I saw a product with the odd name �Japan Dryer� which claims to harden all oil based paints. A Google search turned up little. Perhaps something worth trying.
Posted By: Exit1965
Re: Paint job on a budget!? CONTINUED..page 44........ - 06/02/06 01:27 PM
Apparently japan dryer is a powder added to speed up drying time of oil based paints. I dont know if thise would get it any harder, just make it get to it's final hardness faster?
they sell it here. i have also read that people used to get it at home depot.
http://www.builderdepot.com/seo/WMBARRCOINC_BM/251649_PJD40_PINT_JAPAN_DRIER.ihtml
Posted By: Anonymous
Re: Paint job on a budget!? CONTINUED..page 44........ - 06/02/06 02:50 PM
Senna,
It took me awhile to find it aswell, it wasn't until I was going to make a comment that it was odd no one had posted over the US long weekend, and realized that I couldn't post. I edit my post (2nd last) with the link to this new thread, but since you have the last post maybee you should edit your last post to link over to here (with a comment), so if anyone else has the same problem it will be easier to realise and find the new thread.
Smite
Posted By: Anonymous
Re: Paint job on a budget!? CONTINUED..page 44........ - 06/02/06 03:34 PM
Quote:
I took some pictures so you guys can see what I'm talking about. See how it's...like...bumpyish? Well, I guess it feels smooth...but...what do I do?
Sand it down until that goes away? Or is it just fine?
My hood looked very similar to that, and I ended up sanding off several coats to make it flat again. My problem was laying it on too thick the first few coats; now I'm doing ultra thin coats and am very paranoid about making sure it's nice and smooth. It looked OK until you saw a light reflect off it and then you saw tons and tons of orange peel... just wasn't going to cut it for me.
Posted By: Anonymous
Re: Paint job on a budget!? CONTINUED..page 44........ - 06/02/06 03:58 PM
Quote:
My hood looked very similar to that, and I ended up sanding off several coats to make it flat again. My problem was laying it on too thick the first few coats; now I'm doing ultra thin coats and am very paranoid about making sure it's nice and smooth. It looked OK until you saw a light reflect off it and then you saw tons and tons of orange peel... just wasn't going to cut it for me.
So basically wet sand until that goes away (i.e. really smooth) and then just paint even thinner layers? I'll try that this afternoon.
Posted By: Anonymous
Re: Paint job on a budget!? CONTINUED..page 44........ - 06/02/06 04:22 PM
Hey all,
I was referred to this thread from Customtacos.com
I have a 99 Tacoma that has red oxidized paint and is faded to hell. I have just a few questions. I'm completely new to this stuff and was wondering if you used your hands to sand or a machine. Also, how do I "wet" sand? I'm about to go to home depot to pick up all the stuff I need to do this. I don't know if I'm going to use a test piece. I just want to start painting after prep. So I prep my truck by sanding it down with 800 grit sandpaper first, then I can immediately start painting. Please give some tips for a complete noob.
Thanks
Posted By: Exit1965
Re: Paint job on a budget!? CONTINUED..page 44........ - 06/02/06 04:35 PM
Quote:
Hey all,
I was referred to this thread from Customtacos.com
I have a 99 Tacoma that has red oxidized paint and is faded to hell. I have just a few questions. I'm completely new to this stuff and was wondering if you used your hands to sand or a machine. Also, how do I "wet" sand? I'm about to go to home depot to pick up all the stuff I need to do this. I don't know if I'm going to use a test piece. I just want to start painting after prep. So I prep my truck by sanding it down with 800 grit sandpaper first, then I can immediately start painting. Please give some tips for a complete noob.
Thanks
I don't think you need to finish sand with 800 grit, you can probably go to 320 or 400 to save yourself some time. Maybe even 240. You should do it by hand because machines can gouge if you're not careful. To wetsand, have a container of water and a spray bottle. Run the sandpaper (wrapped around a foam sanding block) through the container to get it wet, and spray the surface, then go back n forth till the surface is smooth and the dust/hair is gone, spraying water on as you go and rinsing/wetting the sandpaper as you go. It's very wet. When it's still wet, before the sanding slop has had a chance to dry, wipe it off with some highly absorbent material, rinse it, continue..
If you're going to paint it red, be prepared to put more than 6 coats to completely cover what's underneath it.
Posted By: Anonymous
Re: Paint job on a budget!? CONTINUED..page 44........ - 06/02/06 05:11 PM
Quote:
Quote:
My hood looked very similar to that, and I ended up sanding off several coats to make it flat again. My problem was laying it on too thick the first few coats; now I'm doing ultra thin coats and am very paranoid about making sure it's nice and smooth. It looked OK until you saw a light reflect off it and then you saw tons and tons of orange peel... just wasn't going to cut it for me.
So basically wet sand until that goes away (i.e. really smooth) and then just paint even thinner layers? I'll try that this afternoon.
That is what I ended up doing. Mine was bad enough that I sanded down with 320 dry. But it's worth it now that it's turning out much nicer.
Posted By: Exit1965
Re: Paint job on a budget!? CONTINUED..page 44........ - 06/02/06 05:44 PM
Quote:
Quote:
My hood looked very similar to that, and I ended up sanding off several coats to make it flat again. My problem was laying it on too thick the first few coats; now I'm doing ultra thin coats and am very paranoid about making sure it's nice and smooth. It looked OK until you saw a light reflect off it and then you saw tons and tons of orange peel... just wasn't going to cut it for me.
So basically wet sand until that goes away (i.e. really smooth) and then just paint even thinner layers? I'll try that this afternoon.
Yup, with orange peel like that it's only going to get worse if you don't sand it off now.. keep those coats thin.. another member said that yellow took more coats, just like red does, so be prepared to put more than 6 thin coats on it to fully cover.
Posted By: Anonymous
Re: Paint job on a budget!? CONTINUED..page 44........ - 06/02/06 06:39 PM
Quote:
Yup, with orange peel like that it's only going to get worse if you don't sand it off now.. keep those coats thin.. another member said that yellow took more coats, just like red does, so be prepared to put more than 6 thin coats on it to fully cover.
That was me.
I'm thinking 8-10 coats is probably about right for yellow.. I have 6 on the fenders now and they're starting to look good and solid, but just barely so.
Posted By: Exit1965
Re: Paint job on a budget!? CONTINUED..page 44........ - 06/02/06 07:52 PM
Quote:
Quote:
Yup, with orange peel like that it's only going to get worse if you don't sand it off now.. keep those coats thin.. another member said that yellow took more coats, just like red does, so be prepared to put more than 6 thin coats on it to fully cover.
That was me.
I'm thinking 8-10 coats is probably about right for yellow.. I have 6 on the fenders now and they're starting to look good and solid, but just barely so.
Forgive me Moose
The red is the same way. I put on coat #8 and it's really getting there but even at this point I saw a few more dings that I just fixed that are going to require the full 10+ coats the whole car will get.
I'm going to stick with the red and try to avoid polishing or sanding it. I will put wax on the sides when its safe to do it and try to protect the paint as best i can..
Posted By: roe
Re: Paint job on a budget!? CONTINUED..page 44........ - 06/02/06 07:59 PM
Hey Exit, would it be possible for you to put several coats on just those spots where you had to fix the dings, and then once its built up, feather it in with the rest of the paint to make everything smooth and even. OR would that cause those spots to be visible? Did I word that right, does that make sense?
roe
Posted By: Exit1965
Re: Paint job on a budget!? CONTINUED..page 44........ - 06/02/06 09:50 PM
Quote:
Hey Exit, would it be possible for you to put several coats on just those spots where you had to fix the dings, and then once its built up, feather it in with the rest of the paint to make everything smooth and even. OR would that cause those spots to be visible? Did I word that right, does that make sense?
roe
I know what you mean.. but to feather would require sanding I think (or maybe polishing with something abrasive) and I'm trying to avoid that since I haven't had luck getting the haze to go away after wetsanding. If I'm ever forced to sand after the final coat then I'll have to try some better polish or a different polisher but until then I'm going to try to avoid that.
Posted By: Anonymous
Re: Paint job on a budget!? CONTINUED..page 44........ - 06/02/06 10:18 PM
I am not sure what the hell happened but I just started putting on my gndfx, mirrors, and gaslid and they are all a different color than the body!

I think the sun played a big -roll- in my project
Posted By: The Avg. Valiant
Re: Paint job on a budget!? CONTINUED..page 44........ - 06/03/06 12:47 AM
I just went out and bought PPG roll on primer. It cost 50 bucks a quart and it should take 2.5 quarts to primer the valiant. The guy said that one coat goes on like 4 of spray primer. Oh well, I wanted to see how it works. Then once it dries and sanded, time to paint the beast.
Jacob
Posted By: Anonymous
Re: Paint job on a budget!? CONTINUED..page 44........ - 06/03/06 12:48 AM
Quote:
I am not sure what the hell happened but I just started putting on my gndfx, mirrors, and gaslid and they are all a different color than the body! I think the sun played a big -roll- in my project
The # of coats makes a huge difference. My fender looks pretty solid color at this point but compared to the hood it's not matching at all. I think you just need to keep laying it on until everything is the same shade.
Posted By: Exit1965
Re: Paint job on a budget!? CONTINUED..page 44........ - 06/03/06 12:55 AM
Quote:
Quote:
I am not sure what the hell happened but I just started putting on my gndfx, mirrors, and gaslid and they are all a different color than the body! I think the sun played a big -roll- in my project
The # of coats makes a huge difference. My fender looks pretty solid color at this point but compared to the hood it's not matching at all. I think you just need to keep laying it on until everything is the same shade.
also, was the new paint dry when you looked? on the red I'm using, when it's wet it looks more orange but it dries a darker red.
Posted By: Anonymous
Re: Paint job on a budget!? CONTINUED..page 44........ - 06/03/06 01:25 AM
[Edited by Moparts - Keep it clean]-[Edited by Moparts - Keep it clean]-[Edited by Moparts - Keep it clean]-[Edited by Moparts - Keep it clean]... 6 coats on them and like 9 on the car.. but I sanded the piss out of the car.. really there is probably like an equivilant 5 coats on it now, haha..
Here are some differences:
1) Body painted outside, in the sun
GndFX painted on patio in shade
2) Body has about 9 coats
GndFX 6
3) Used a nice white terry cloth bonnet on body
bought a blue replacment with longer strands
for GndFX.. and it sucks.. left a blue color
while polishing but I thought it was just the
cotton fibers and not dye. If it was dye then
that would explain a lot.
4) Body cured in the sun and feels super hard
GndFx cured in shade and paint feels a little
softer.
I think those are the major differnces. Number there is good.. that white terry cloth bonnet that came with the buffer was awesome! I bought a replacement of the same brand but they had a "fits 5-7" only version.. anyway I stopped using it because the 6" would just swim inside no matter how much I tied it. The blue replacements I bought at autozone and they fit awesome.. better than the ones that came with the buffer. They have an elastic band and everything fits snug. No need to worry about it coming untied or anyhing.. but what really sucks about them is that they are blue.. that is so stupid, IMHO.. and another thing is that it doesnt hold that TW polish. I was used to goobing it up with the white bonnet.. anyway, I got a full face and body coating of the TW paste. I dont think it is a good idea to get any colored bonnets for this type of work.. sticking with white american cotton would probably be best.
Oh, and I got a good compliment tonight while putting on my spoiler.. a man walked by and said "NICE!!"... so that was cool.. however, I think it was just because it was the only word he knew in english. I dont care. I will take what I can get ^_^
Posted By: roe
Re: Paint job on a budget!? CONTINUED..page 44........ - 06/03/06 07:46 PM
Quote:
Quote:
Hey Exit, would it be possible for you to put several coats on just those spots where you had to fix the dings, and then once its built up, feather it in with the rest of the paint to make everything smooth and even. OR would that cause those spots to be visible? Did I word that right, does that make sense?
roe
I know what you mean.. but to feather would require sanding I think (or maybe polishing with something abrasive) and I'm trying to avoid that since I haven't had luck getting the haze to go away after wetsanding. If I'm ever forced to sand after the final coat then I'll have to try some better polish or a different polisher but until then I'm going to try to avoid that.
Exit, I wasnt saying to feather in on the final coat. I was thinking of building up that spot, then feathering (sanding) it in to smooth that spot out and even it up with the surrounding panel. Then doing the additional coats to the whole car. That way you dont have to do 10 extra coats to the whole car. You could just do 10 coats to that spot, then 2-3 coats over the whole car, or however many coats you needed. I dont know much about bodywork/painting so I may be way off base here.
roe
Posted By: Exit1965
Re: Paint job on a budget!? CONTINUED..page 44........ - 06/03/06 10:28 PM
Interesting idea Roe. I know what you mean now, build it up, feather it in then coat the whole panel.
At first I wasn't that worried about it since I would just have to repaint a single door, or the rear trunk shelf.. but now I have about 6 spots like that, and using what you suggested could definately save me some time.
In fact even in areas that have the original 8 coats on it that have dark colors, I could probably try that there too. I think what I'll do is another 3 coats over the whole car, then if the bulk of the car is colored well, I can try what you suggested on the spots that show through, then do the whole car with 2 more coats when those freshly fixed parts are colored.
Posted By: Anonymous
Re: Paint job on a budget!? CONTINUED..page 44........ - 06/03/06 10:45 PM
Making slow progress, been busy with work and school. Here's a shot of the current state--it's in the middle of drying so that's why it looks a little uneven and mixed dull/gloss. The cladding's going to be painted with bumper paint so not worrying about spilling a bit on it here and there.
I'm probably a couple coats away from the hood/fenders being done, and the roof currently has 5 coats on it. Will continue with the doors and the rear portion next.

Posted By: Anonymous
Re: Paint job on a budget!? CONTINUED..page 44........ - 06/04/06 12:51 AM
Quote:
I'm wondering if you could do the 1500/2000 grit wetsand on final coat and then wipe with mineral spirits and Clearcoat without the polish. I'm willing to try but have to get body work done. Painting starts this weekend
So I'm going to try to get some of the painting done this weekend. I'm still curious if anyone has thought if this would work better than just polish and wax after last coat. Anyone still have an old hood thats been done and can try this process.
I was just browsing a local paintstore site and found these 2 products.
1: http://www.cloverdalepaint.com/html/catalog_spec.asp?prodcode=A-69
2: http://www.cloverdalepaint.com/html/catalog_spec.asp?prodcode=A-68
I think this is the answer to the Peel problems. I once painted a canoe with TClad and an addative called paint smoothie that I beleive is the same as the #1 link above.
cheers
Posted By: Anonymous
Re: Paint job on a budget!? CONTINUED..page 44........ - 06/04/06 01:30 AM
Quote:
I think this is the answer to the Peel problems. I once painted a canoe with TClad and an addative called paint smoothie that I beleive is the same as the #1 link above.
cheers
And what did the smoothing additive do to it? Good results?
I just sanded 90% of that orange peel out with 1500 grit. That was a pain in the butt. I probably should have gone out and bought 800, but I'm a poor college student until the next payday.
If it's still a big issue after the current layer dries, I guess I'll have to get something rougher.
With the coat I just put on I thinned it a lot. Was almost like water. Hmmm...I guess I'll find out what it looks like in a little bit...
Posted By: Anonymous
Re: Paint job on a budget!? CONTINUED..page 44........ - 06/04/06 01:41 AM
For a Canoe it came out great. we used a bristle brush and the paint self leveled great. The problem here is that we are now leaving the $50 zone. I suppose a person's time sanding peel is worth something too.
Posted By: Anonymous
Re: Paint job on a budget!? CONTINUED..page 44........ - 06/04/06 01:44 AM
Yeah...but my time is free
Posted By: Anonymous
Re: Paint job on a budget!? CONTINUED..page 44........ - 06/04/06 03:43 AM
Okay, this last coat came out a lot better. It would have been even better if I had gotten rid of the Orange Peel 100% instead of 90%. I might have to actually go buy 800 grit...grrr

Posted By: Marq
Re: Paint job on a budget!? CONTINUED..page 44........ - 06/04/06 03:45 AM
Ok... from what I have read so far... it is not possible to use the aluminum Tremclad paint because when you sand it the aluminum elements in the paint go blackish...
So that got me to wondering if anyone had tried the following method :
a ) lay down a coat of aluminum paint... then
b ) lay down a Tremclad clearcoat ... then
c ) wetsand
d ) repeat a to c three more times.
The trick here would be that the sanding would never be directly on the aluminum... it would be on the clearcoat layer. Hence you would never be turning the aluminum layer black and losing the shiny metalic look ?
I notice one of the other posters mentioned that you 'cannot' put a Tremclad clearcoat over aluminum Tremclad. But I didn't read anything to that effect on the Tremclad aluminum paint can. Anyone got any first hand experience on whether there is a compatibility problem between these two Tremclad products ?
If there is no compatibility problem, I would guess that this method would give a nice depth to the aluminum while maintaining the full reflectiveness of the metalic look ?
Anyone try this out yet to get the aluminum look ?
--------------------------
On another color trick... I was wondering about how you might go about and get a black-cherry red color effect.
I notice that when you combine the Tremclad Fire Red with the Tremclad Black... the result seems to come out almost in a shade of brown.
The problem with the Tremclad color range is that it is fairly limited to the most basic colors. And unfortunately a simple combining of black into the red can't seem to make a dark red that is bordering on the black.
Now I was wondering if anyone had tried this Budget paint job trick using two colors - one color for each layer... for example :
a ) lay a thin layer of high gloss black... then
b ) lay a thin layer of Fire Red... then
c ) wetsand
d ) repeat steps a to c three more times.
My theory is that because each layer is super thin and almost translucent, the color by the third repeat of this color recipe would be red with a hint of black ( hopefully giving a cherry black effect ?
Posted By: Exit1965
Re: Paint job on a budget!? CONTINUED..page 44........ - 06/04/06 03:46 AM
Quote:
For a Canoe it came out great. we used a bristle brush and the paint self leveled great. The problem here is that we are now leaving the $50 zone. I suppose a person's time sanding peel is worth something too.
If the stuff is applied right, there shouldn't be any peel to sand off. If there is any peel, it's much less than is found on factory paint jobs. I'm usually guity of putting the first 2 coats on too thick, but after I sand the peel out of those, the rest go on smooth as long as you put on a little bit of paint and the paint is thinned right.
Posted By: Anonymous
Re: Paint job on a budget!? CONTINUED..page 44........ - 06/04/06 06:52 AM
Posted By: Anonymous
Re: Paint job on a budget!? CONTINUED..page 44........ - 06/04/06 06:55 AM
and this is how it looks before
not the yellow one, the yellow one is mine

Posted By: Anonymous
Re: Paint job on a budget!? CONTINUED..page 44........ - 06/04/06 02:06 PM
Quote:
Now I was wondering if anyone had tried this Budget paint job trick using two colors - one color for each layer... for example :
a ) lay a thin layer of high gloss black... then
b ) lay a thin layer of Fire Red... then
c ) wetsand
d ) repeat steps a to c three more times.
My theory is that because each layer is super thin and almost translucent, the color by the third repeat of this color recipe would be red with a hint of black ( hopefully giving a cherry black effect ?
I have kept up with this thread and no one has posted about alternating color coats as you suggest. Why don't you experiment on a spare hood or something and let us know if it works? Could be an interesting idea.
Posted By: Marq
Re: Paint job on a budget!? CONTINUED..page 44........ - 06/04/06 04:05 PM
The only difficulties I can see with the alternating color layers would be that the sanding of each second layer would have to be pretty precise so as to not sand down to the lower layer in spots...
The reason this layering effect first bubbled up in my head is that my car was done in a black primer. I took the black primer down to an 800 grit finish. Then I added my two layers of almost translucent Fire Red. The color was EXACTLY what I would have wanted ( a Black-Cherry ).
But I could see that by each additional Fire Red layer I was moving farther and father away from the optimal Black-Cherry and moving closer and closer to the Fire-Red.
And unfortunately I am not a clever enough color mixer to figure a way to blend two Tremclad basic colors to arrive at a Black-Cherry. As I previously noted I did try to cut the FireRed Tremclad with some Black... but the color combination resulted in something closer to a pottery brown.
Maybe there is some color mixing genius out there that can suggest which of the Tremclad basic colors could be combined to arrive at a deep blackish red.
As for the aluminum / clearcoat layering idea... I would be tempted to try it... as the only problem I see with that layering effect is that :
a ) again you have to be very careful with your sanding between second coats in order to avoid cutting through to the lower layer... and
b ) each layer would have to be consistently layered on GOING IN THE SAME DIRECTION so that the underlying aluminum layer has a consistent direction to its layer ( otherwise you might end up with a crosshatching or weaving of the underlying pattern ).
I would experiment with this... but I am already in the midst of 'going Black Cherry' or at the least FireRed... and the 'brushed high gloss aluminum' look would not be as appealing on the particular car body that I am working on at the moment.
Let me just say this : This thread has been the single most important automotive discovery that I have stumbled on in the last couple of years. I had a sportscar quietly sitting in a garage... all mechanics done, all bodywork done... and just waiting for a bag of money to fall into my hands so that I could afford the $3500 that the bodyshops all wanted to charge me to paint the car. And so the car just sat. THIS THREAD INSPIRED ME.
I got out my sanders, did a final sand on the primered body, bought the supplies and followed the recipes that we have concocted here - AND I WAS AMAZED with the initial results. I gotta say that again... I WAS AMAZED and totally re-inspired.
I don't know how perfect I will be able to achieve in the end... but I do know that this thread gave me the hope and inspiration to put some time into a project that had become totally stalled due to the HIGH COST of body shop paint jobs. And so far I am truly impressed by the results this Tremclad Rollerjob is doing.
Posted By: Anonymous
Re: Paint job on a budget!? CONTINUED..page 44........ - 06/04/06 05:09 PM
Maybe we can get a poll together on methods and results?
I'll start.
Paint used: Rustoleum non-professional Sunburst Yellow
Thinner: 100% Mineral Spirits, odor free
Coats required for complete coverage: Approx 8-10
Applicator: ultra high density foam roller
Orange peel: Some. A fair amount of wetsanding with 600 definitely required every other coat.
Posted By: Exit1965
Re: Paint job on a budget!? CONTINUED..page 44........ - 06/04/06 05:21 PM
Marq, you may want to try a base coat of the bottom color, then do final coats with the primary color you want. I'm painting red and I can still see dark (on the surface before I started any painting) through 8 very thin coats. I could have painted my whole car black with say 4 coats to get it all one color, then do 5-6 coats of red and I bet it would achieve what you're describing.
In fact it would probably have been a good idea to paint the car black with 4 coats just to see where the dings were, then fix them, get it totally black again, and do 5-6 coats of the primary top color.
Posted By: Anonymous
Re: Paint job on a budget!? CONTINUED..page 44........ - 06/04/06 05:27 PM
Quote:
Marq, you may want to try a base coat of the bottom color, then do final coats with the primary color you want. I'm painting red and I can still see dark (on the surface before I started any painting) through 8 very thin coats. I could have painted my whole car black with say 4 coats to get it all one color, then do 5-6 coats of red and I bet it would achieve what you're describing.
In fact it would probably have been a good idea to paint the car black with 4 coats just to see where the dings were, then fix them, get it totally black again, and do 5-6 coats of the primary top color.
Seems like it would be awfully hard to get even though. Looking at the yellow after 5-6 coats it was just darker patches, not a uniform color.
Posted By: Anonymous
Re: Paint job on a budget!? CONTINUED..page 44........ - 06/04/06 11:46 PM
LOL!! Compairing my old photos with the new semi-final ones right now.. WOW what a difference! I can not believe I was actually driving my car like how it used to look

I got my new emblems on and it looks hot and clean.. very streamlined looking.
I would have posted pictures today BUT I cant get my new rims on. The 2" spacers dont fit on the car right. There is like a 1/16th little lip about a 1/4inch long around the base of the rotor hub preventing the spacer to slip on completly.
Anyone know what I can do? Can I get the spacer bored to fit? Where would I go for something like that? I was thinking to grease it up and bolt it on

but I think that would just create more problems for me!

Quick thoughts anyone?
Thanks,
-Serp
Posted By: Anonymous
Re: Paint job on a budget!? CONTINUED..page 44........ - 06/04/06 11:48 PM
here is a picture. As you can see, that lip is about 1/16th high at the base and about a 1/4inch in width.
 Full Size (5MBish)
Posted By: Exit1965
Re: Paint job on a budget!? CONTINUED..page 44........ - 06/05/06 01:19 AM
Maybe you can get a machine shop to open it up for you a tad.
But back to paint. Last week when I was reconsidering the canvas white, I took some with no thinner and slopped it onto a piece of sheet metal I had so I could see the color. It was put on way too thick (to make sure I could see the color), and 6 days later I could easily scrape it off with my fingernail. Today I put it out on my deck in the sun. it was in the sun probably 8 hours or so, at between 80-90 degrees of ambient temperature. Now, it's unscratchable..
So anyone who has a running driving car, consider setting it out in the blazing sun, turn it every 5-6 hours, and that should help the hardness. I'll be holding off on any polishing until after my car's running and I can sun bake it for a day or two.
I know 69charger mentioned this before, just thought I'd remind people of it. It even works with unthinned paint that was globbed on way too thick as my little test demonstrates.
Posted By: Marq
Re: Paint job on a budget!? CONTINUED..page 44........ - 06/05/06 02:45 AM
One bit of clarification I uncovered today while visiting the Rustoleum / Tremclad web site, on their Q & A page... is that according to the folks at Tremclad / Rustoleum YOU CAN PUT THEIR CLEARCOAT OVER THE ALUMINUM PAINT.
I assume that this works only when you use TremClad's clearcoat over a Tremclad color or metalic paint. Non-Tremclad clearcoats might not work ( although they don't specifically say that )
The other chap in an earlier message had posted that it had been his experience that the clearcoat separated from the aluminum paint. So either a different brand of clearcoat might have been used in his situation... or maybe the preparation procedure was not followed as per Tremclad's recommendations.
Just thought I would add this bit of info for anyone who wants to experiment with the clearcoats on the aluminum Tremclad.
Posted By: Anonymous
Re: Paint job on a budget!? CONTINUED..page 44........ - 06/05/06 03:49 AM
yar, you just need to make sure you get a nice, clean, smooth coat with the aluminum. I am curious if it would be better to just do one perfect thick coat with the hardener and that smoother additive. I dunno, seems a bit tricky..
Posted By: 69chargeryeehaa
Re: Paint job on a budget!? CONTINUED..page 44........ - 06/05/06 02:53 PM
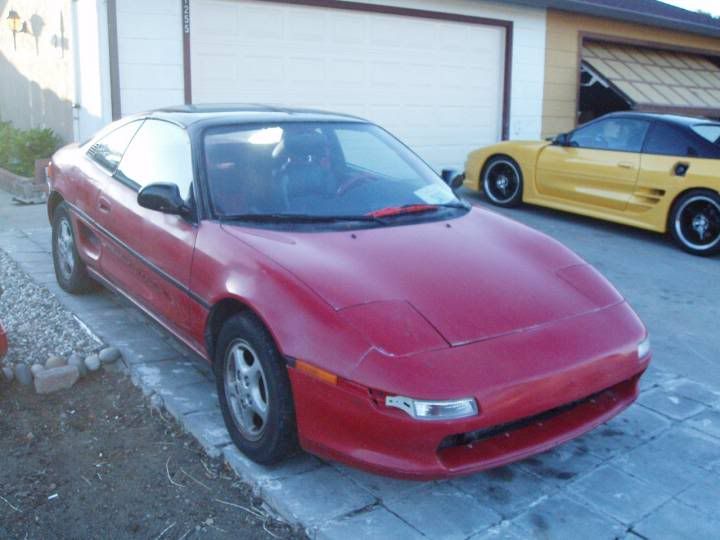
Nice job widebody mr2, looks really nice, alot nicer then it did before.
exit1965 - i think your applying so many coats to fix your repair issues, dents you noticed after painting. the key to doing body work, and prep to paint is to listen to your hands, and not your eyes, you can "feel" dents alot better with your hands rather than just looking at it. Your saving sanding work by applying really thin coats with less peel. my charger has 6 medium/thin coats on it with wetsanding every 2 coats, and i got full coverage after the 4th coat, but i was painting orange over orange. so if your changing colors, it does take more coats to cover solid. but i'm sure you got the tequnique where it takes about 1 hour to do 1 coat on the car like it took me. i found it relaxing, and easy to apply, but i took a break after every pannel to admire my work

.!!!!
as for the buffing, i used the terry cloth bonnets, white, they are the best that i've used.
as for the drying of the paint, sitting in the sun really really helps the paint harden, all my painting was done inside my garage, but after 3-4hrs of drying time with fans in the garage, i would open the door and let it dry for another 5 hours or so, and then after it was all done, i rolled the car outside and let it sit for 1 day in the sun, then polished/buffed it in the garage. also one more thing, i did use those 1500W work lights in the garage so it was like daylight when i was painting in my garage, funny that i noticed that there is a sticker on the worklight warning of uv rays emmitted from the light, and that you should be a minimum of 6' from the light or you could get a sun burn!!! maybe those lights actually cure the paint inside?
i had about 5 of them going while painting so i had perfect lighting.
Marq - that allum paint is really tricky, i used it on the wheels of the 2 old vw beetles, and it's really prone to fish eyes, and very uneven in the way it lays out where the metalics in the paint almost settle out unevenly. it's ok for a wheel, but i'd never do my car with it. and i did spray it on using their rattle cans. i found that it needed about 2 mist coats first to avoid all the funky stuff that paint does, then do a few med coats, but like i said that was using the spray can version, i would immagine the liquid stuff is really difficult to apply. As for the clear coat tremclad stuff in brush grade (liquid), remember you have to use LAQUIRE THINNER, not mineral spirits. when i did my testing with clear coat a long time ago, i found it to shine the same as the paint, so i did'nt bother to do the whole car with it, but it would certainly make the process eaiser, because the flaws in the layers could be non visible, and like in exit's case where there was a repair done after paint, you could just feather the repair area, then clear the whole pannel after wetsanding. after talking to the tremclad guys, and they sent me like 2 cases of paint and clear coat for free
, i did test a small peice of the clear on a peice with the paint and used mineral spirits to thin the paint and laquir thinner on the clear coat, and the clear shines like crazy, the clear coat really does look like a BC/CC paintjob on my test peice, and i did'nt wetsand it at all. but the bad news is all the people in the US that don't have tremclad clear coat in a brush grade. tremclad told me that the clear coat should be thinned with laquir thinner, and if you use mineral spirits you kill the shine, and they're right.
had i would have known that the clear coat would look so nice i would have done my car with it, but for now i'm driving the crap out of it so i'm happy, maybe in a few years i will repaint the charger from all the stone chips, stuff i drop on the car ect....
Posted By: GTSDave
Re: Paint job on a budget!? CONTINUED..page 44........ - 06/05/06 03:15 PM
Also keep in mind that lacquer thinner will turn foam brushes into mush in a matter of seconds.
-Dave
Posted By: 69chargeryeehaa
Re: Paint job on a budget!? CONTINUED..page 44........ - 06/05/06 03:20 PM
Quote:
Also keep in mind that lacquer thinner will turn foam brushes into mush in a matter of seconds.
-Dave
depends on the foam brush, the 4" white professional high density ones i used to paint the car say right on the package safe for use with lacquer paints, and your only thinning the clear coat no more than 5% since it is allready the consistancy of water to begin with, but good point, read the package.
Posted By: Anonymous
Problem with Penetrol mixture.... - 06/05/06 05:26 PM
Sorry it took me so long to start up, but plumbing problems in the home trumped fun in the garage:
Finally had the time to experiment with Rostoleum and Penetrol, rather than mineral spirits.
1st test: 3 parts paint to 1 part Penetrol. It never really got thin enough. After mixing and mixing, I decided to see how it would work (since I was testing on an old piece of sheet metal). Went on very nicely, covered very well (like 75 percent of the gray beneath it) and the bubbles y'all mentioned popped with a little encouragement.
BUT: came back after 2 hours in the semi-sun...still wet. Since it was all for science, I laid another coat on top of half if it, leaving the other untouched. Almost immediately the brush began grabbing the first coat, creating a gawdawful mess. I let it sit overnight. The next day, the untouched side was still tacky, and the two-coat side was a pure mess...totally covered, but a pure mess.
Upped the mixture to two parts paint to one Penetrol. Paint was much runniers, but still thicker than the "water" grade. Flipped the metal over and tried again. Much smoother, more bubbles and less coverage, so I'm guessing it's more what we're looking for.
Let it sit all day. At the end, it was still tacky, but very few ridges. However, it still would chip off using the fingernail test.
That was yesterday. I'll check it again this evening. Anyone got an idea? I figured a 2-1 ration would really be too thin, but it seems to still be a touch thick. Maybe I should add some mineral spirits just to make the mix proper?
But the orange looks great...once you get past my miserable rolling. I'll scan y'all some art this evening.
Posted By: 69chargeryeehaa
Re: Problem with Penetrol mixture.... - 06/05/06 09:03 PM
Quote:
Sorry it took me so long to start up, but plumbing problems in the home trumped fun in the garage:
Finally had the time to experiment with Rostoleum and Penetrol, rather than mineral spirits.
1st test: 3 parts paint to 1 part Penetrol. It never really got thin enough. After mixing and mixing, I decided to see how it would work (since I was testing on an old piece of sheet metal). Went on very nicely, covered very well (like 75 percent of the gray beneath it) and the bubbles y'all mentioned popped with a little encouragement.
BUT: came back after 2 hours in the semi-sun...still wet. Since it was all for science, I laid another coat on top of half if it, leaving the other untouched. Almost immediately the brush began grabbing the first coat, creating a gawdawful mess. I let it sit overnight. The next day, the untouched side was still tacky, and the two-coat side was a pure mess...totally covered, but a pure mess.
Upped the mixture to two parts paint to one Penetrol. Paint was much runniers, but still thicker than the "water" grade. Flipped the metal over and tried again. Much smoother, more bubbles and less coverage, so I'm guessing it's more what we're looking for.
Let it sit all day. At the end, it was still tacky, but very few ridges. However, it still would chip off using the fingernail test.
That was yesterday. I'll check it again this evening. Anyone got an idea? I figured a 2-1 ration would really be too thin, but it seems to still be a touch thick. Maybe I should add some mineral spirits just to make the mix proper?
But the orange looks great...once you get past my miserable rolling. I'll scan y'all some art this evening.
use the mineral spirits? 
Posted By: Anonymous
Re: Problem with Penetrol mixture.... - 06/05/06 09:28 PM
Where did you find ORANGE? Rustoleum told me they don't make orange in gallons so I switched to yellow. Which is fine, I'm perfectly happy with yellow....
but...w t f?
Posted By: DaytonaTurbo
Re: Problem with Penetrol mixture.... - 06/05/06 10:28 PM
hey 69charger, thanks for the info on the tremclad clear coat, I'll definately be giving that stuff a try when I paint.
Posted By: Anonymous
Re: Paint job on a budget!? CONTINUED..page 44........ - 06/06/06 01:42 AM
All,
I have read all 40 some odd pages of this thread, and obviously it's some awesome information. I am going to do my Roadster in Gloss black (why go easy?) and i have a couple questions that weren't fully answered along the way. Can some one give me their opinion on the following:
1) I have a couple of spots that need body work that i know i'll have to sand to bare metal. Should i sand the rest of the car to bare metal? or should i just start with 80 and sand it all smooth? If i should go all the way to bare metal, should i primer it all afterwards? I know that Charger said you don't "have" to but "should" I?
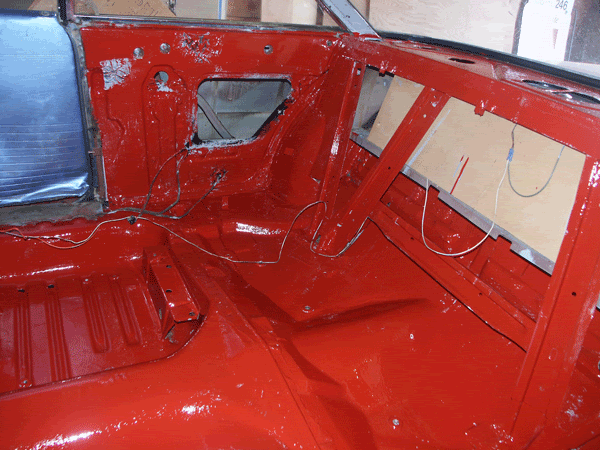
2) How should i do my engine bay? as you can see (hopefully) it's rather difficult to roll that, so should i spray bomb it with matching color? if i do, should i sand it also, and do several coats like the rolled parts? and should i do that (and the trunk) first, then blend the fenders in that I'm going to roll? also, the engine bay is very dirty and grimy, how can i adequately prep it for painting with spray or otherwise?
I hope that wasn't too many questions at once, but they're the only ones i have left. not so much technique, but opinions. thanks.
Rufus

Posted By: Anonymous
Re: Paint job on a budget!? CONTINUED..page 44........ - 06/06/06 01:43 AM
another pic...thanks.

Posted By: Marq
Re: Paint job on a budget!? CONTINUED..page 44........ - 06/06/06 04:06 AM
On the engine compartment... I would probably clean up the engine compartment by :
a ) taking a spray bomb of foaming engine compartment cleaner and let that cleaner do its work. You could probably help it out by taking a scrub brush to help loosen the dirt and oil that exist in the compartment.
b ) rinse the engine compartment with water to flush out everything that the engine cleaner was able to loosen.
c ) take a sander or sandpaper to prepare the surface for painting.
d ) take a clean rag and wipe down the entire engine compartment with mineral spirits - to make sure that there is no cleaner, oil residue or dust left over from the sanding
e ) once the mineral spirits evaporate and the compartment is dry... start spray bombing it in light coats.... building up the layers slowly
Now... as for the specific black paint to use in the engine compartment... I would probably use the Tremclad or Rustoleum HIGH HEAT black SPRAY paint.
This is probably the most convenient method to go about the engine compartment.
I would tape off the fender lips and other areas so that the spray is confined 100% to the engine compartment. I would probably build up the layers by laying a fine mist per each spraying session.
The decision would have to rest with you as to whether you use the HIGH HEAT flat black or the HIGH HEAT gloss black.
I tend to think that the high heat GLOSS might be the better choice because it wouldn't trap the dust, dirt and splattered oil that splats around in the engine compartment with a flat version of the paint.
It would be possible to do the paint that is thinned down with mineral spirits ( and a brush and roller )in the engine compartment... BUT it would probably be a pain in the butt having to sand down the 2nd layers as you build up the color.
A spray can bombing of the engine compartment would probably prove to be better at getting into all the nooks and crannies in the engine area.
Posted By: Anonymous
Re: Paint job on a budget!? CONTINUED..page 44........ - 06/06/06 04:48 AM
Thanks Marq, that was exactly what i was hoping for, and very detailed. I will surely do that...
Anyone got any thoughts on question number 1?
Thanks a million for this thread!!! My buddies all think i'm insane already for wanting to roller my car, but hey, i DO live in Tennessee....
Posted By: Anonymous
Re: Paint job on a budget!? CONTINUED..page 44........ - 06/06/06 01:52 PM
Quote:
As for the clear coat....... i would have known that the clear coat would look so nice i would have done my car with it, but for now i'm driving the crap out of it so i'm happy, maybe in a few years i will repaint the charger from all the stone chips, stuff i drop on the car ect....
So if you were going to use the Tremclad Clear as a top coat "69" how would you go about using it?
Thin with lacquer thinner 5%, use a white foam roller and....?
Would you still sand the final 6th coat with 1500- 2000 grit and then topcoat with clear, or
no sanding and just clear?
Posted By: patrick
Re: Paint job on a budget!? CONTINUED..page 44........ - 06/06/06 01:57 PM
after seeing exit's issue with coverage with the red paint, I'd be tempted to "prime" the whole car with a single color, be it white or whatever.
Posted By: 69chargeryeehaa
Re: Paint job on a budget!? CONTINUED..page 44........ - 06/06/06 02:28 PM
Quote:
Quote:
As for the clear coat....... i would have known that the clear coat would look so nice i would have done my car with it, but for now i'm driving the crap out of it so i'm happy, maybe in a few years i will repaint the charger from all the stone chips, stuff i drop on the car ect....
So if you were going to use the Tremclad Clear as a top coat "69" how would you go about using it?
Thin with lacquer thinner 5%, use a white foam roller and....?
Would you still sand the final 6th coat with 1500- 2000 grit and then topcoat with clear, or
no sanding and just clear?
i would finish the last coat and sand with 800-1000, leave the "dull/flat" finish (no polish) and go straight to clear, maybe 2 coats, the stuff is allready thin as water almost, it would need a very small amount of laquir thinner, then i would wetsand with 1000 and polish after the 2nd coat, or maybe do 3 coats, depending on how thin you apply them, the stuff levels better than the paint, and goes on super smooth, you could almost get away with just a polish if you do it right, and skip the wetsand. it all depends on your application of the clear, and how good you are at it.
Posted By: 69chargeryeehaa
Re: Paint job on a budget!? CONTINUED..page 44........ - 06/06/06 02:32 PM
Quote:
after seeing exit's issue with coverage with the red paint, I'd be tempted to "prime" the whole car with a single color, be it white or whatever.
exit is taking alot of time to make his car "perfect" that requires alot more work, thin coats, and more of them. the result will be a really nice paint job, i just did 2 med/thin coats to get coverage, and went succesivly thinner in coats when i approached the 6th coat, so i would'nt have to wetsand. the alternative is to just apply 2 medium coats to get coverage, then wetsand that, then proceed with really thin coats to get that perfect finish. But exit- you really should pull the car in the sun and have a look at it, in the garage, under artificall light, i can see flaws on my 2000's cars factory paint, in the sun it's a totally different story.
Posted By: 69chargeryeehaa
Re: Paint job on a budget!? CONTINUED..page 44........ - 06/06/06 02:38 PM
Quote:
Thanks Marq, that was exactly what i was hoping for, and very detailed. I will surely do that...
Anyone got any thoughts on question number 1?
Thanks a million for this thread!!! My buddies all think i'm insane already for wanting to roller my car, but hey, i DO live in Tennessee....
Marq gave excellent advice, marq - u must be in the business!!!! lol,
i can tell you from expirence that you really don't need to use the high heat stuff, just use the same paint as you would on the car, rustoleum/tremclad. As i mentioned a long time ago, the paint is very good at tollerating heat, my 74 beetle was painted underhood, and the rear apron with the tremclad, and air cooled VW's run HOT, VERY HOT, 6yrs and no issues with dammage to the paint from heat, so any water cooled car would have no issues at all. i would prep the area following marq's suggestions, they are excellent, and use the spray can in matching color gloss to do all the nooks and cranny's, resist the urge to apply heavy coats, and let each coat dry overnight, apply the first 2 coats as a "mist" coat and you'll be fine. if you spray it right with thin coats, there's no need to wetsand, the finish will be excellent. BTW the paint is very resistant to gas/oil/coolant, trust me i know, don't ask me how  , lets just say "i know a guy"!!!!!
Posted By: Anonymous
Re: Paint job on a budget!? CONTINUED..page 44............ - 06/06/06 02:38 PM
I have a few questions before I get started. My friend just picked up an EF hatch, the car is in well good condition but the paint and body definately is not, so we are deciding to paint it this method (we want to do it to our main cars but don't wanna mess them up).
Now the car does have rust and we will have to prep it, I've read probably every page of this but I just have a few questions.
What is the easiest way to get rid of the rust? Just sand it down and use the rustoleum over it, or should I apply something over the rusted areas first?
And secondly, what is the easiest way to prep your car, or can I get some tips. I'm planning on picking up a small palm sander and using that for the larger parts (hood, roof, trunk, side...etc) and then for the corners and areas that contour just using my hand and the sand paper? And preferably what grits should I use to prep it with. Last...I know a lot of people say after they prep it they basically get it down to where it feels like glass, is that what I should be looking for?
The palm sander I'm talking about is something like this
http://i5.photobucket.com/albums/y196/mattthecommie/untitled.jpgLet me know if theres anything better.
Thanks, Matt.
Posted By: 69chargeryeehaa
Re: Paint job on a budget!? CONTINUED..page 44............ - 06/06/06 02:48 PM
Quote:
I have a few questions before I get started. My friend just picked up an EF hatch, the car is in well good condition but the paint and body definately is not, so we are deciding to paint it this method (we want to do it to our main cars but don't wanna mess them up).
Now the car does have rust and we will have to prep it, I've read probably every page of this but I just have a few questions.
What is the easiest way to get rid of the rust? Just sand it down and use the rustoleum over it, or should I apply something over the rusted areas first?
And secondly, what is the easiest way to prep your car, or can I get some tips. I'm planning on picking up a small palm sander and using that for the larger parts (hood, roof, trunk, side...etc) and then for the corners and areas that contour just using my hand and the sand paper? And preferably what grits should I use to prep it with. Last...I know a lot of people say after they prep it they basically get it down to where it feels like glass, is that what I should be looking for?
The palm sander I'm talking about is something like this
http://i5.photobucket.com/albums/y196/mattthecommie/untitled.jpg
Let me know if theres anything better.
Thanks, Matt.
this paint method is like any other, you prep the same regardless of what paint you use. don't take short-cuts repairing rust, or it'll be back quick. grind all rust out until you see clean bare metal, then grind a bit more, even though you can't see it, the metal is still oxcidzed, and will rust again. it's better to completely remove all rust and even use bondo or fiberglass if you have to and don't have a welder to put in new metal than to just sand the rust and paint alone. how you prep the car determines the end quality of the paint job, it's the most important step in painting.
Posted By: Anonymous
Re: Paint job on a budget!? CONTINUED..page 44........ - 06/06/06 09:00 PM
Hi charger, do u have a pic of what the can of clear paint looks like? so i get an idea of what i hve to get?
Posted By: Exit1965
Re: Paint job on a budget!? CONTINUED..page 44........ - 06/06/06 09:02 PM
Good luck finding that roll on clearcoat in California. Rustoleum doesn't make it so you'd need to get some from Canada unless someone else makes a roll on clear coat in the USA.
Posted By: batjac
Re: Paint job on a budget!? CONTINUED..page 44........ - 06/06/06 09:51 PM
Well, the Rustoleum website doesn't offer Professional in clearcoat, but under the Stops Rust page it lists clear in quarts.
Would this be comparable?
Posted By: Exit1965
Re: Paint job on a budget!? CONTINUED..page 44........ - 06/06/06 10:29 PM
I looked around for it here in Sacramento, and online, and couldn't find it. Finally I called Rustoleum tech line and they said it was not available in anything but spray. I know the stops rust page says broadly that the stuff is available in spray, pints or quarts but that's not very specific and Rustoleum says they don't.
Posted By: Anonymous
Re: Paint job on a budget!? CONTINUED..page 44............ - 06/06/06 10:39 PM
Quote:
Quote:
I have a few questions before I get started. My friend just picked up an EF hatch, the car is in well good condition but the paint and body definately is not, so we are deciding to paint it this method (we want to do it to our main cars but don't wanna mess them up).
Now the car does have rust and we will have to prep it, I've read probably every page of this but I just have a few questions.
What is the easiest way to get rid of the rust? Just sand it down and use the rustoleum over it, or should I apply something over the rusted areas first?
And secondly, what is the easiest way to prep your car, or can I get some tips. I'm planning on picking up a small palm sander and using that for the larger parts (hood, roof, trunk, side...etc) and then for the corners and areas that contour just using my hand and the sand paper? And preferably what grits should I use to prep it with. Last...I know a lot of people say after they prep it they basically get it down to where it feels like glass, is that what I should be looking for?
The palm sander I'm talking about is something like this
http://i5.photobucket.com/albums/y196/mattthecommie/untitled.jpg
Let me know if theres anything better.
Thanks, Matt.
this paint method is like any other, you prep the same regardless of what paint you use. don't take short-cuts repairing rust, or it'll be back quick. grind all rust out until you see clean bare metal, then grind a bit more, even though you can't see it, the metal is still oxcidzed, and will rust again. it's better to completely remove all rust and even use bondo or fiberglass if you have to and don't have a welder to put in new metal than to just sand the rust and paint alone. how you prep the car determines the end quality of the paint job, it's the most important step in painting.
When you say "grind" do you use any special tool, or just a low grit sand paper? Again, I've never painted a car or anything so I'm pretty new to most of this stuff and want to try my best the first time around.
Posted By: 69chargeryeehaa
Re: Paint job on a budget!? CONTINUED..page 44............ - 06/06/06 11:19 PM
Quote:
When you say "grind" do you use any special tool, or just a low grit sand paper? Again, I've never painted a car or anything so I'm pretty new to most of this stuff and want to try my best the first time around.
weather u use a grinder, wire wheel, sand paper, it does'nt matter, just make sure you have clean metal with no rust, then grind/sand more.
Posted By: Anonymous
Re: Paint job on a budget!? CONTINUED..page 44............ - 06/06/06 11:23 PM
Sounds good, thanks.
Posted By: Anonymous
Re: Paint job on a budget!? CONTINUED..page 44........ - 06/07/06 10:13 PM
Just thought I'd share this...
While I'm still getting through the last few coats that I'm painting on my cowl grill, I've decided to use a shortcut for places that are difficult to roll or a pain in the butt to sand.
For instance, door jams, the water catch undernear my rear hatch (280z), bottom side of the cowl panel, etc etc.
I've already done this to the bottom side of my cown panel because I didn't see the point in making it look 100%. Nobody is EVER going to see that except me. So what I did is find the same color in a spray can and spray it. I think I did 2 coats -- maybe 3 -- and it looks great. I could probably wet sand it and buff it, but for areas that don't get seen much, it is saving me time and looks just fine.
The water catch area underneath my rear hatch is partially going to be covered with new weather stripping once I put it back on. But don't mistake me, I'm still preping the area just as I would any other surface. That's a must. But this way those little areas get color easily.
Anyways, just thought I'd give a random tip.
Posted By: Anonymous
Re: Paint job on a budget!? CONTINUED..page 44........ - 06/08/06 12:04 AM
Quote:
Just thought I'd share this...
While I'm still getting through the last few coats that I'm painting on my cowl grill, I've decided to use a shortcut for places that are difficult to roll or a pain in the butt to sand.
For instance, door jams, the water catch undernear my rear hatch (280z), bottom side of the cowl panel, etc etc.
I've already done this to the bottom side of my cown panel because I didn't see the point in making it look 100%. Nobody is EVER going to see that except me. So what I did is find the same color in a spray can and spray it. I think I did 2 coats -- maybe 3 -- and it looks great. I could probably wet sand it and buff it, but for areas that don't get seen much, it is saving me time and looks just fine.
The water catch area underneath my rear hatch is partially going to be covered with new weather stripping once I put it back on. But don't mistake me, I'm still preping the area just as I would any other surface. That's a must. But this way those little areas get color easily.
Anyways, just thought I'd give a random tip.
That�s a great idea. In fact, after brushing my bug I thought of the same thing. It would�ve been easier to just rattle can a few areas (grill areas, door sections around the windows, etc.)
I�ve also had the same problems of the paint being too transparent in some areas. The rattle can fixed that. Do notice how when you spray from cans, the spray is really solid? It must be because it flashes so quickly. Anyway, after I brushed some white paint and noticed the original paint showing through, I rattle canned the darker areas with white paint, let it dry, sanded a bit then brushed again. I�ve used the same technique where I had to put putty primer to fix pinholes. So far, so good.
If you have any doubts about the durability of rattle can painting a vehicle, check out these sights:
http://www.pirate4x4.com/forum/showthread.php?s=&threadid=190280
How to Do it:
http://www.pirate4x4.com/forum/showthread.php?t=249432
Posted By: Exit1965
Re: Paint job on a budget!? CONTINUED..page 44........ - 06/08/06 04:50 AM
Just finished coat 10 (I think). The color is almost fully covering the dark spots. My plan is one more coat, a strong wetsand with 600 or 800 to get it very smooth, then another coat or two to finish it off. Then I can go back and paint the areas I touched up which are mainly on the passenger side.
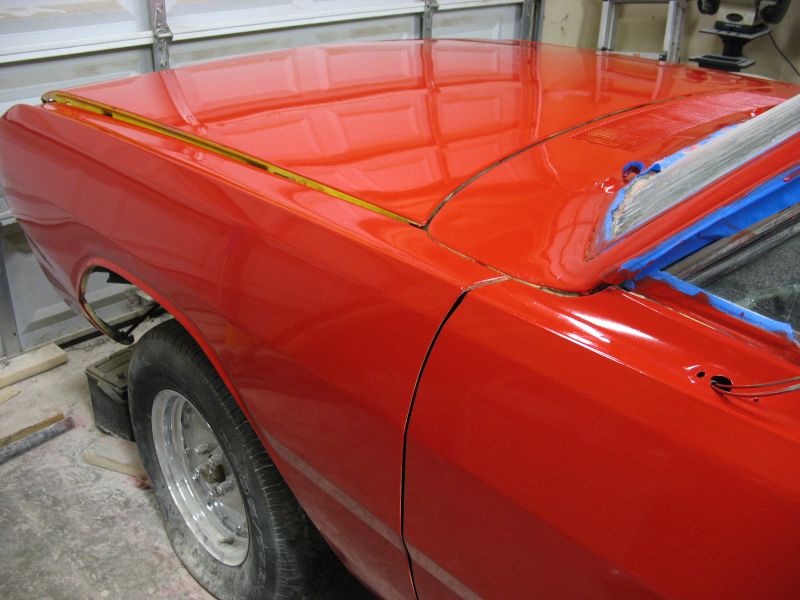
If you look at this pic you can see the driver's quarter behind the gas cap has more of a dull reflection than it should (the middle section). I may have rolled over it after it started to self level and it never recovered. Or maybe I just didnt' wetsand it well last time. It seems to be the only area of the car where the shine is this dull because I take it the surface is not as flat/smooth. If it dries like this, I'll wetsand this panel before I lay the next coat on, then the reflection should be as sharp as it is on the door or even forward of the gas cap, after the next coat.
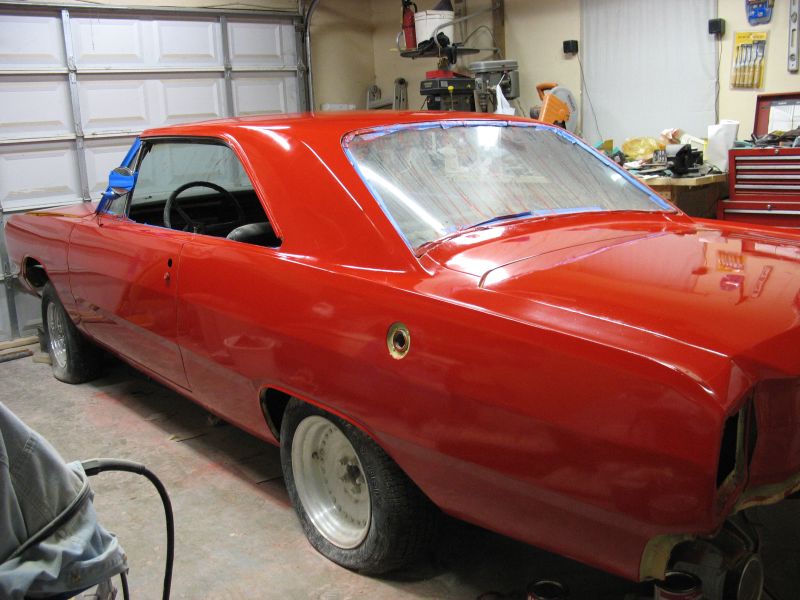
Posted By: dalbers
Re: Paint job on a budget!? CONTINUED..page 44........ - 06/08/06 05:40 AM
that is looking really awesome. nobody will believe how you did it
Posted By: 69chargeryeehaa
Re: Paint job on a budget!? CONTINUED..page 44........ - 06/08/06 02:00 PM
Posted By: BigTerry
Re: Paint job on a budget!? CONTINUED..page 44........ - 06/08/06 03:27 PM
what the total length of time you have on your project now?
Posted By: Exit1965
Re: Paint job on a budget!? CONTINUED..page 44........ - 06/08/06 03:58 PM
Quote:
exit - pull it out in the sun, you will see the light looks killer. 
Thanks. I took a closer look at that dull patch, and it's orange peely more than the rest. Im definately going to hit it with some sandpaper before going any further..
By the way, I can't pull it out into the sun. My driveway is on a slant and it would take more people than I have available to try to push it back in. All the more motivation to get it running after the paint dries..
Posted By: Anonymous
Re: Paint job on a budget!? CONTINUED..page 44............ - 06/08/06 06:21 PM
I know earlier I asked about rust and how to remove it. Is grinding the only way, or are there any such items that would assist in the removal? Just wanting to see what my options are since a lot of it is deep rust and I want to remove it all.
Posted By: dynorad
Re: Paint job on a budget!? CONTINUED..page 44............ - 06/08/06 06:52 PM
You might try phosphoric acid to attach the rust. If you apply it in a way that it stays wet, i.e. a wet paper towel covered with plastic wrap you can let it sit and it will take less work. I alternate between acid application and wire brushing. I can get a clean but pitted surface without making the metal as thin as you would with a grinder.
Be careful if you are working close to seams not to get the acid in there.
Posted By: Exit1965
Re: Paint job on a budget!? CONTINUED..page 44........ - 06/08/06 08:07 PM
You can get one of those rust stripping things for your drill, they are some kind of hard plastic and they work pretty well. They work great for light rust and paint removal but you'll need to fill where you use it because they will gouge right through the paint.
http://www.vwtrendsweb.com/tech/0401vwt_super15_s.jpgIf you're grinding though, that will gouge through the paint and into the metal, so you might start with one of those rust removal discs on a drill before you go to the grinder.
Posted By: 69chargeryeehaa
Re: Paint job on a budget!? CONTINUED..page 44........ - 06/08/06 08:55 PM
Quote:
You can get one of those rust stripping things for your drill, they are some kind of hard plastic and they work pretty well. They work great for light rust and paint removal but you'll need to fill where you use it because they will gouge right through the paint.
http://www.vwtrendsweb.com/tech/0401vwt_super15_s.jpg
If you're grinding though, that will gouge through the paint and into the metal, so you might start with one of those rust removal discs on a drill before you go to the grinder.

the rust removers, be it acid or chemicals are very messy, toxic, and can ruin anything it touches, but it does work, almost too good, but i have seen some people who've used it and had trouble 6 months after with new paint, bubbles, flaking, peeling, and we're not talking about tremclad/rustoleum. so i'd be a little afraid to use it. i've used it on engine parts and it works like a dream, but be prepared to lower your life span by about 30-50%, and loose some skin/limbs/hair/fertility/knowledge!!!!!
Posted By: Anonymous
Re: Paint job on a budget!? CONTINUED..page 44........ - 06/08/06 10:27 PM
Quote:
Quote:
You can get one of those rust stripping things for your drill, they are some kind of hard plastic and they work pretty well. They work great for light rust and paint removal but you'll need to fill where you use it because they will gouge right through the paint.
http://www.vwtrendsweb.com/tech/0401vwt_super15_s.jpg
If you're grinding though, that will gouge through the paint and into the metal, so you might start with one of those rust removal discs on a drill before you go to the grinder.
the rust removers, be it acid or chemicals are very messy, toxic, and can ruin anything it touches, but it does work, almost too good, but i have seen some people who've used it and had trouble 6 months after with new paint, bubbles, flaking, peeling, and we're not talking about tremclad/rustoleum. so i'd be a little afraid to use it. i've used it on engine parts and it works like a dream, but be prepared to lower your life span by about 30-50%, and loose some skin/limbs/hair/fertility/knowledge!!!!!
If all you have is surface rust, try this stuff
http://www.safestrustremover.com/
the pics are extremely convincing and one guy I know says it DOES work but will not really help if rust is "dug in"
Posted By: Anonymous
Re: Paint job on a budget!? CONTINUED..page 44........ - 06/08/06 11:46 PM
I too am joining the legions of roll on car painters. I got here from the samba.com where I learned of this technique. I have a 68 bay window bus I will be painting soon.
I went to the Home Depot today to investigate the "professional" rustoleum paint. The instructions for thinning state that only acetone should be used. I have read the whole thread and see that most are using mineral spirits as it was done with the Tremclad stuff.
I just I was hoping if someone would be able to confirm success using the mineral spirits despite the directions for thinning on the can. I am looking forward to painting my car. I enjoy seeing the variety of rides being improved for next to nothing here. Keep up the good work.
I'll post dome pics if I can get this project rolling soon.
Posted By: Anonymous
Re: Paint job on a budget!? CONTINUED..page 44........ - 06/09/06 02:33 AM
Quote:
I too am joining the legions of roll on car painters. I got here from the samba.com where I learned of this technique. I have a 68 bay window bus I will be painting soon.
I went to the Home Depot today to investigate the "professional" rustoleum paint. The instructions for thinning state that only acetone should be used. I have read the whole thread and see that most are using mineral spirits as it was done with the Tremclad stuff.
I just I was hoping if someone would be able to confirm success using the mineral spirits despite the directions for thinning on the can. I am looking forward to painting my car. I enjoy seeing the variety of rides being improved for next to nothing here. Keep up the good work.
I'll post dome pics if I can get this project rolling soon.
I have painted my bug with the professional stuff. First I followed the instructions from the can (thinning with acetone) but the problem is that it dries way too fast; there is not time for the paint to self-level. Use mineral spirits like everybody else and you will be fine.
Good luck
Posted By: Anonymous
Re: Paint job on a budget!? CONTINUED..page 44........ - 06/09/06 03:57 AM
Thanks! I remember thaere was a reason why mineral spirits was better, but I lost it in the 40+ pages of this thread.
Posted By: Exit1965
Re: Paint job on a budget!? CONTINUED..page 44........ - 06/09/06 04:37 AM
Yep, what Superchango said. My can of pro says acetone only also, but it's working ok with mineral spirits..
Posted By: Anonymous
Re: Paint job on a budget!? CONTINUED..page 44........ - 06/09/06 04:58 AM
Quote:
I too am joining the legions of roll on car painters. I got here from the samba.com where I learned of this technique. I have a 68 bay window bus I will be painting soon.
Hi Bowerbird. I'm a Samba.com defector too. This thread is awesome, but what's even better are the moderators here and Moparts.com. You guys are the BEST for being so welcoming and open minded to new ideas! THANK YOU SO VERY MUCH!!
Samba.com has basically shut down the thread on roller painting. Here's one of the (cleaned up) responses from the "moderators" on that site:
"allright,...last "advice" i will give in this thread.
doing all this work only to use Rustoleum is doing a job half***! ...waste of time. Rustoleum is NOT auto paint.learning how to spray is a good thing to learn... cutting corners claiming it's because cost is a sh****y excuse as auto paint is 90 bucks and cheaper for everything you'll need sans paint gun and compresser...if your that cheap you can't get up 90 bucks for auto paint then collecting cars isn't what you need to do!
putting Rustoleum on a car is a horrable idea
thank you
the moderator!"
Posted By: Anonymous
Re: Paint job on a budget!? CONTINUED..page 44........ - 06/09/06 06:54 AM
73bugg-
That's retarded. As a college student, I'm trying to avoid collecting too much crap. I already have more than enough tools and such...what I DON'T need is to be hauling a compressor and paint system around with me when I move. Hell, when I graduate and commission in the Marines, I don't want to lug a compressor around with me all over the country.
And I don't see anything wrong with the rustoleum method. If it's okay for tractors, what's wrong with a car? Metal is metal.
Posted By: 70Coronet500Vert
Re: Paint job on a budget!? CONTINUED..page 44........ - 06/09/06 11:45 AM
autopaint is NOT $90.
I spent $300 to paint my Junior dragster and that was BC/CC a quart of each! A gallon of each and will be close to $1k in material by the time I add reducer & such.
Posted By: 6T6Cuda
Re: Paint job on a budget!? CONTINUED..page 44............ - 06/09/06 12:34 PM
Hello,
So what happned to the first 44 pages, I wanted to save this away and now it is gone???
Thanks,
Richard
Posted By: Exit1965
Re: Paint job on a budget!? CONTINUED..page 44........ - 06/09/06 01:24 PM
It's in the tech archive.
Posted By: Anonymous
Re: Paint job on a budget!? CONTINUED..page 44........ - 06/09/06 02:28 PM
Exit,
I remember you saying to use a 3m sanding sponge for wet sanding, am i correct? i only saw sponges that already have a grit on them. Do i just wrap the new grit paper around that sponge so i have something soft and flat? I was just concerned that if it ripped through the paper, the rougher grit underneath would ruin my work. Thanks.
Rufus
Posted By: 69chargeryeehaa
Re: Paint job on a budget!? CONTINUED..page 44........ - 06/09/06 02:36 PM
Quote:
Quote:
I too am joining the legions of roll on car painters. I got here from the samba.com where I learned of this technique. I have a 68 bay window bus I will be painting soon.
Hi Bowerbird. I'm a Samba.com defector too. This thread is awesome, but what's even better are the moderators here and Moparts.com. You guys are the BEST for being so welcoming and open minded to new ideas! THANK YOU SO VERY MUCH!!
Samba.com has basically shut down the thread on roller painting. Here's one of the (cleaned up) responses from the "moderators" on that site:
"allright,...last "advice" i will give in this thread.
doing all this work only to use Rustoleum is doing a job half***! ...waste of time. Rustoleum is NOT auto paint.learning how to spray is a good thing to learn... cutting corners claiming it's because cost is a sh****y excuse as auto paint is 90 bucks and cheaper for everything you'll need sans paint gun and compresser...if your that cheap you can't get up 90 bucks for auto paint then collecting cars isn't what you need to do!
putting Rustoleum on a car is a horrable idea
thank you
the moderator!"
oh don't even get me started on that one. But i so agree, the moderators on MOPARTS ROCK 
i thought the whole point of boards like this is for fellow enthusists to share how they've done stuff to help out other members. not everyone will agree with this method and that's ok, everyones entitled to their own opinion, but i find the mopar community far more welcoming of "out of the box" thinking and methods, and the moderators leave things be. like i've said a million times, i'm not trying to compete with professionals, just offering a alternative low cost solution to get alot of rides on the road that otherwise would sit in a garage until $ can be afforded to paint. after all, it's only paint, you can strip it off and repaint, if anything your preserving your car for the future. the fact that there's overwhelming responces and a huge interest in this thread proves that there are people that really could benifit from this info. i'm glad it's helped so many people out. My opinion of the VW community, espically the samba has totally changed, what i thought was a tight-nit community is just wrong, i'd rather be a "mopar" guy now. what happened in the samba thread was there was a few idiots that came in and ranted about how crappy the method is, and they got ugly, then the moderators shut down the thread, so because of a few idiots, everyone that was reading the thread and very interested in it suffers because of the idiots and moderators, the samba is a substandard board run by a$$O's (pardon my french).
sorry for the vent, i just hope all the people from the samba that have defected here should really be happy they belong to a "real" community, get a mopar, don't get me wrong, i love my vw, just not the community.!!!
Posted By: 69chargeryeehaa
Re: Paint job on a budget!? CONTINUED..page 44........ - 06/09/06 03:09 PM
exit1965 - progress update? i'm dying to see the finished product
what do you have to do to get it running otherwise?
Posted By: Exit1965
Re: Paint job on a budget!? CONTINUED..page 44........ - 06/09/06 03:44 PM
Quote:
Exit,
I remember you saying to use a 3m sanding sponge for wet sanding, am i correct? i only saw sponges that already have a grit on them. Do i just wrap the new grit paper around that sponge so i have something soft and flat? I was just concerned that if it ripped through the paper, the rougher grit underneath would ruin my work. Thanks.
Rufus
That's what I did rufus. I would get the lightest grit one they have, which I think is like 220, maybe 320, since you're just using it as a semi firm sponge. The coarser grit ones might only sand well where the actual grit pieces are. I'm using a 150 grit and that seems ok but if I started over, i'd probably get a finer one. I don't think it would ever rip through the paper though. It can slide off if you're not careful, but if you're using a wet 320 grit sponge, it's not going to do much damage even if it does slide off for a second.
Posted By: Exit1965
Re: Paint job on a budget!? CONTINUED..page 44........ - 06/09/06 03:47 PM
Quote:
exit1965 - progress update? i'm dying to see the finished product what do you have to do to get it running otherwise?
No progress update yet. I took last night off but tonight I'll wetsand the 1/4 panels and do another coat.
I have to do a lot to get it running. It's just a rolling chassis now but it's got a nice 8 3/4 with a 3.55 suregrip. I have a 383/727 to put in it after I do some work to the 383. Maybe it will be running in a few months if I can afford it..
Posted By: Anonymous
Re: Paint job on a budget!? CONTINUED..page 44........ - 06/09/06 05:20 PM
Another question about the process...
I was wondering about how much paint quantity I should count on getting. I imagine I will use more than the average as I will be painting a bay window bus. Perhaps someone here can give me a ballpark. Thanks.
Posted By: 69chargeryeehaa
Re: Paint job on a budget!? CONTINUED..page 44........ - 06/09/06 05:48 PM
Quote:
Another question about the process...
I was wondering about how much paint quantity I should count on getting. I imagine I will use more than the average as I will be painting a bay window bus. Perhaps someone here can give me a ballpark. Thanks.
1 gal should do it. just over maybe so u could get a quart too.
Posted By: Exit1965
Re: Paint job on a budget!? CONTINUED..page 44........ - 06/09/06 09:35 PM
I am using red, and have done 10 coats and I've just opened the 3rd quart. I am putting it on real thin but that's the only way I can avoid orange peel. I bought quarts because the formulation is different between gallons and quarts, at least in California, because the gallons are VOC regulated where the quarts or not.
Posted By: Anonymous
Re: Paint job on a budget!? CONTINUED..page 44........ - 06/10/06 02:21 AM
Has anybody tried spraying the aerosol cans and then wet sanding between coats of that?
If nobody has I'm considering doing a test to see what it looks like. I've found that while doing the "hidden spots" with the spray, it's waaay easier to apply. Two or Three coats and it's good. Plus I don't have to deal with cleaning out my rolling pan, mixing, buying new rollers, etc.
It'd probably be more expensive, I don't know how many cans you would go through to do that. But I think it's worth testing on a test panel. I don't have a test panel to use, so it'd be great to see if somebody else has done this already.
Posted By: Anonymous
Re: Paint job on a budget!? CONTINUED..page 44........ - 06/10/06 02:55 AM
I just wanted to say in response to the sour grapes at other websites- This is punk rock! Ben Franklin would have painted his 62 Electra with a roller.
It's just car snobs who've spent 5gs on a paintjob on a car they only take out on Sundays, and they're threatened at the thought of all these DIY'ers having something comparable to their car. Bitter creeps, THEY'RE the ones who shouldn't be "car collectors"!
Posted By: Exit1965
Re: Paint job on a budget!? CONTINUED..page 44........ - 06/10/06 04:49 AM
Just did another coat.
I'm back to wondering if red was the right color choice. Seems the more I paint and the more time I put into it, the more it bugs me to see little imperfections in the paint like the hair, the dust speck. I think even the roller gives off some of it's foam sometimes. The concern is I haven't been able to get a haze free finish after wetsanding (which removes those imperfections), and Jagdstealth, who did a nice paint job of his Z and used red for a stripe, also said he first got a haze, then after a lot of work, ended up with a finish much more dull than the white paint.
What I'll probably do is keep going with the red a couple more coats, and then bring some people over to help me move it into the sun, and see how it looks there as charger has suggested.
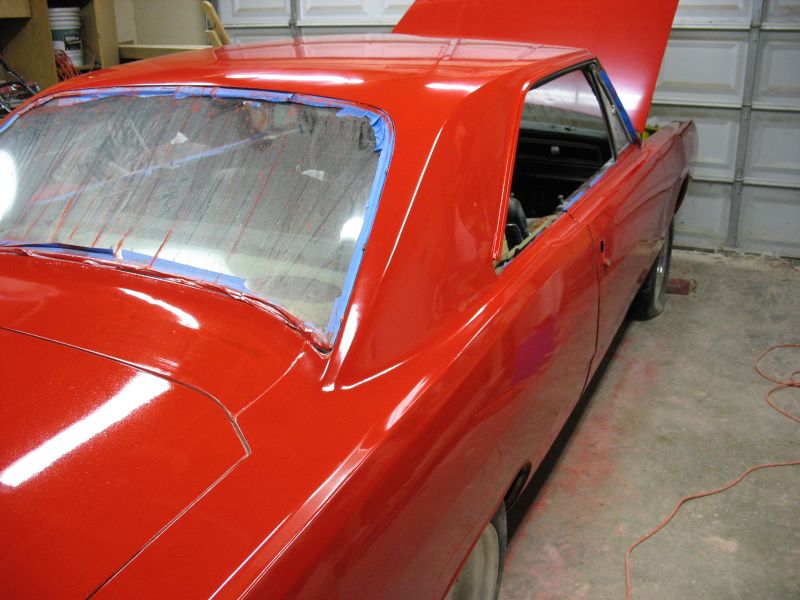
Posted By: Anonymous
Re: Paint job on a budget!? CONTINUED..page 44........ - 06/10/06 11:13 AM
Quote:
Just did another coat.
I'm back to wondering if red was the right color choice. Seems the more I paint and the more time I put into it, the more it bugs me to see little imperfections in the paint like the hair, the dust speck. I think even the roller gives off some of it's foam sometimes. The concern is I haven't been able to get a haze free finish after wetsanding (which removes those imperfections), and Jagdstealth, who did a nice paint job of his Z and used red for a stripe, also said he first got a haze, then after a lot of work, ended up with a finish much more dull than the white paint...
You'll probably have to learn to live with it 'cause that's the best it's gonna get...let me tell ya, this stuffs a b*tch to get off!! Sanded for days and have finally got mine in primer...oh well, live and learn (maybe)!! Chuck
Posted By: Exit1965
Re: Paint job on a budget!? CONTINUED..page 44........ - 06/10/06 02:56 PM
Would normal hardened primer and car paint not work with rustoleum under it?
Posted By: Anonymous
Re: Paint job on a budget!? CONTINUED..page 44........ - 06/10/06 08:10 PM
Starting to take shape....

Posted By: Anonymous
Re: Paint job on a budget!? CONTINUED..page 44........ - 06/10/06 08:15 PM
Quote:
Would normal hardened primer and car paint not work with rustoleum under it?
No...that's the tricky part. As the enamel slowly cures under your new primer and/or paint, the enamel can move and can also cause all sorts of adhesion problems with the layer on top of it. This is what causes the 'turtle shell'/cracking look you see on some cars...you have to get the enamel off before adding layers... 
Posted By: Anonymous
Re: Paint job on a budget!? CONTINUED..page 44........ - 06/10/06 08:20 PM
Exit, have you tried sticking a heat lamp or similar next to one panel to accelerate curing? I wonder if you're getting a hazy look because the paint's still a little soft.
Posted By: Exit1965
Re: Paint job on a budget!? CONTINUED..page 44........ - 06/10/06 10:15 PM
I'll give it a shot Moose..
Posted By: Anonymous
Re: Paint job on a budget!? CONTINUED..page 44........ - 06/10/06 11:01 PM
Does anyone have any pictures of what the hunter green looks like once it's finished? I'm really interested in doing my car at the end of the month but would like to see a few pictures of the final product before I start. Smite, I know you were working with the green, do you have any finished pictures?
Posted By: Anonymous
Re: Paint job on a budget!? CONTINUED..page 44........ - 06/10/06 11:52 PM
Moose...hey looks great. I just did my 9th coat of yellow last night on my cowl. Are you thinning so much that it drips a lot off the side? How often do you change rollers? I've been trying to preserve mine in plastic bags, but I think maybe that might be a bad idea.
I really gotta finish the rest of this body work so I can start painting everything else. Stupid school!
Posted By: Anonymous
Re: Paint job on a budget!? CONTINUED..page 44........ - 06/11/06 12:09 AM
Quote:
Moose...hey looks great. I just did my 9th coat of yellow last night on my cowl. Are you thinning so much that it drips a lot off the side? How often do you change rollers? I've been trying to preserve mine in plastic bags, but I think maybe that might be a bad idea.
I really gotta finish the rest of this body work so I can start painting everything else. Stupid school!
I've actually left the roller in the pan (with the foam laying in the paint) and just covered it with saran wrap. Works fine overnight or even for a couple of days, though you might need to thin it out a bit more the next day.
And no, no drip... I use extremely light coats, basically I make sure that I have to press the roller a bit to get paint out of it, then once coverage is good I do the light pressure rolling all over to smooth things out. It takes a lot of coats, but I like the results so far. The drip you see on the bumper is just from wetsanding...
Posted By: 318Bruiser
Re: Paint job on a budget!? CONTINUED..page 44........ - 06/11/06 06:08 AM
Hey all. Sweet thread. I started yesterday, reading most of it and found myself looking at the clock 4 hrs later lol. Has anyone seen the finished Harbor Blue from rustoleum? Its almost the same color as my 77 volare I am thinking of painting. I'm just starting to dismantle the car and want to see some pics of the harbor blue before I try. Thanks for all this exciting info.
P.S. If anyone finds a thread or site on info on rebuilding my 318 it would be most appreciated, Just want to compare parts and specs.
Posted By: Anonymous
Re: Paint job on a budget!? CONTINUED..page 44........ - 06/11/06 06:17 PM
i am repainting my 87 buick grand national and the paint is great it goes on with alot of peel but then is smooth as glass... heres a pic

very glossy!!!!! i wanted to know if i can paint the bumper fillers, seeing that they are urathane and they flex
Posted By: Marq
Re: Paint job on a budget!? CONTINUED..page 44........ - 06/11/06 07:51 PM
I don't think you will have any problem with the 'flexibility' of the Tremclad roller paint method. The Tremclad paint when dry retains equal if not more flexibility than the original paint on the 'flexible' body parts.
I am doing a McLaren at the moment and it has the flexible skirts, aero-effects, spoilers etc. I am pretty confident that the Tremclad will flex better on thos parts then say a regular bodyshop paint job - which tends to shatter the paint and cracks it off or allows it to peel off when somone backs into rear bumper or nose piece.
Posted By: Anonymous
Re: Paint job on a budget!? CONTINUED..page 44........ - 06/11/06 08:12 PM
Quote:
Samba.com has basically shut down the thread on roller painting. Here's one of the (cleaned up) responses from the "moderators" on that site
(deleted)
That's mostly 'cuz the forum moderator in question is an opinionated ar$e who thinks he knows what's best for everyone. I've seen him try to throw his weight around in forums there where he's *not* a moderator ... and get shot down by the other mods. 
I've been making slow progress on painting parts of my VW Fastback, mostly because of the weather. The big work is still ahead of me -- get the dents&waves out of the roof and paint the body. I've just been doing fenders & trunklids so far. It'd be *much* easier if I could get the car in the garage, or even under the carport.
Posted By: Anonymous
Morning all! Weekend update.... - 06/12/06 10:56 AM
...and a cautionary tale for rookies who choose to paint outside...
Four full coats with paint, spirits and a dash of Penetrol to help with adhesion. I think the Penetrol is also slowing down the drying, since the paint seems to be tacky long than I anticipates. But since it'll be a week before I can get back to it, there's plenty of time to dry.
A couple of things I learned that are probably covered in the 40-plus pages before...
1. Different paints produce different results. I'm going glossy white Rustoleum on the roof and posts, and it's been a dream to work with. Using the same mixture with Coronado anti-rust orange produces a paint that glides on, but is giving me some serious orange (literally) peel. I've provided an example.
Having rain every evening hasn't helped matters either, but since I'll be sanding and re-rolling it's not a big deal.
What IS a big deal is bugs. All sorts of flying critters who decide the orange is just too pretty to pass by. I've has to tweezer two dozen flying things out of the finish, which creates little blotches all over the place.
I hadn't seen this problem addressed, so I'll ask. Anyone know how to keep bugs out of the process while painting outdoors?
Oh, and here's a couple of in-progress pix....

Posted By: Anonymous
Here's the orange peel.... - 06/12/06 10:59 AM
Obviously, the mixture's too thick...got a weekend of sanding coming up.

Posted By: Anonymous
Re: Paint job on a budget!? CONTINUED..page 44........ - 06/12/06 07:02 PM
FarFire70,
I've been doing my test peice at my parents which is a couple hours away. I haven't been there in awhile, but its fathers day this weekend so maybee I can get a few more coats and take a couple pics for you. It might not be perfect, but atleast it will give you the idea of what it looks like.
Smite
Posted By: Anonymous
Re: Paint job on a budget!? CONTINUED..page 44........ - 06/12/06 08:50 PM
Been following this thread with interest.
Regarding Chuck's comments about no hardener: Your paint guy doesn't know what he's talking about, I don't think. My paint guy (who could beat up your paint guy,

) says that when he was spraying enamel regularly that it never had hardener in it, and would off-gas for at least six months. That said, it was sandable in the thick (relative to this process) coats he was putting down in a couple of days, but it shouldn't be waxed for a month or more.
If you can wait a few weeks for final polish, I bet it comes up just fine, though it will not be the same look at a urethane bc/cc paint job. Incidentally, this guy is painting one of my cars...$9,000 for a show quality job. $50 sounds REAL good in comparision.
Posted By: Anonymous
Re: Paint job on a budget!? CONTINUED..page 44........ - 06/12/06 09:50 PM
For the bugs...i would suggest one of those blue lights that zaps the bugs when they fly to it. They might like that better than orange.
Or you could try adding some bug repellant into your paint...
Posted By: Anonymous
Re: Paint job on a budget!? CONTINUED..page 44........ - 06/12/06 11:05 PM
Quote:
Been following this thread with interest.
Regarding Chuck's comments about no hardener: Your paint guy doesn't know what he's talking about, I don't think. My paint guy (who could beat up your paint guy, ) says that when he was spraying enamel regularly that it never had hardener in it, and would off-gas for at least six months. That said, it was sandable in the thick (relative to this process) coats he was putting down in a couple of days, but it shouldn't be waxed for a month or more.
If you can wait a few weeks for final polish, I bet it comes up just fine, though it will not be the same look at a urethane bc/cc paint job. Incidentally, this guy is painting one of my cars...$9,000 for a show quality job. $50 sounds REAL good in comparision.
I'm not trying to rain on this parade...sometimes people just wanna believe something (regardless of what common sense tells you).
I have answered a question about why the paint is dull and will not shine after wetsanding and polishing...the reason I answered was I HAD THE SAME PROBLEM...I have personally tried this process and spent the last several weeks trying to fix my mistake! So, I speak from experience...not what someone else has told me. I'm just trying to help the next poor soul who has 'great expectations' about what this paint technique will accomplish.
Don't get me wrong...if you have a rusty, primered beater in your drive, go for it. Just do the research and realize what your getting into. I painted a fairly nice car expecting something that I ultimately didn't get...
Read this web page for some other views...Chuck
Posted By: Anonymous
Bugs in paint - 06/12/06 11:08 PM
Try coming out to the shop to 500 little baby spiders that have hatched above your car and landed on the paint . Oh well they wet sanded out fairly well. I've got some pics of Med Blue that I'll post later this eve. They are 5th coat pics.
Posted By: Anonymous
Re: Paint job on a budget!? CONTINUED..page 44........ - 06/12/06 11:46 PM
Chuck, I'm not trying to be an jerk, either.
Paint is 93.6% (scientifically measured) prep. The rest, on a non-clearcoat job, is the materials and a willingness to work. Frankly, I bet the "rust stopping" part of the paint's claim is just hot air, but over a nicely prepped body, it's just enamel paint.
Now, I haven't used this rustoleum enamel and it might just be crap paint, but I have some glass smooth and polished bookcases here that I painted with plain-jane house paint which was wet-sanded and then polished, and they look pretty nice.
I think if you could put the car in the oven for an hour at 200 when you were done, you'd find the paint very hard. The single most durable paint I've ever run across was brushed-on oven-baked enamel on an old motorcycle frame. That stuff did NOT come off except in a sandblaster, and then VERY reluctantly. I wonder if a tent of black plastic on a hot summer day would help to really set the paint...
The guys in the thread you point to actually kinda sound like idiots. They heard roller and simply made assumptions that have nothing to do with the way this system actually works. It doesn't really matter how you apply the paint as long as you're willing to work to make it smooth afterwards (this assumes that you don't try to put it on an inch thick, etc.).
The point I was originally trying to make was that the paint will harden eventually, which I thought you had said your paint guy had said would never happen. It just might take a long while.
Posted By: Anonymous
Re: Paint job on a budget!? CONTINUED..page 44............ - 06/13/06 12:09 AM
Posted By: Marq
Re: Morning all! Weekend update.... - 06/13/06 01:49 AM
Maybe the answer for folks doing outside painting ( and having problems with bugs ) is to invest in one of those propane powered BUG KILLERS - OR - maybe one of those black light electric bug killers.
Park it about 20 feet away from where you are working and listen to the sizzle of the little flying bugs as they get their butts smoked or shocked ...

-
Posted By: 69chargeryeehaa
Re: Morning all! Weekend update.... - 06/13/06 02:39 AM
I understand why everyone is putting this method down, people who have no paint expirence figure they can try this method and have perfect results. the fact of the matter is that it takes SKILL to do, and that can only be learned. most people don't practice on a test area and go right to their car roller in hand and go crazy, then they are left with a big mess on their hands, get all pissed off and say that the method is crap. the reality is that there is nothing wrong with the paint, it's a good quality durable paint, and if applied correctly with minimal investment you will end up with a great paint job. i've painted 5 cars with this method, 2 i still have, and 1 other died with that paint job

and 2 others that went about 5 yrs and then i had them painted using single stage acrylic enamel regular auto paint and had no issues painting over the tremclad. hardness has never been a issue with the paint for me, a good day in the sun and it's fine. the moral of the story is that it is alot of work, but my time is free, it's not like i'm doing it while i could be making $50/hr, and the ease of work is what i really like. rock on roller buddies

exit1965, if your having seccond thoughts, just polish it up, and pull it out in the sun, i guarentee you that your face will look like this:

in that order!!
Posted By: Marq
Re: Paint job on a budget!? CONTINUED..page 44........ - 06/13/06 02:51 AM
As I have ventured along in this 'project'... I have come across some additional thoughts that I have not seen specifically mentioned.
Basically I have found that in order to do a 'good job' you really have to take your time and not try to rush the project. To get the best results you really do have to take your time and toss in a few additional steps that I haven't seen posted here yet.
What I have found is that
a ) lay down one thin coat. Let it dry !
b ) lay down second thin coat. Let it dry !
c ) I am wet sanding with 600 grit.
d ) wet sand one section at a time
e ) have a bucket of fresh warm water ( with a dash of dish detergent ) and a towel. Wipe down the freshly wet sanded section and try to remove as much of the 'mud' created by the wet sanding.
I found this better than attempting to wash down the panels after all the body is wet sanded. This eliminates the 'muds' chances of drying onto the freshly sanded surface.
Once the entire car has been wet sanded and each panel has received its initial 'wash down'... take the car out into the driveway and wash the entire car down again with a fresh bucket of warm water ( and a dash of liquid detergent ) and towel.
HOSE the entire car down and get everything well rinsed off.
Now put the car back in the garage and let it DRY OFF THOROUGHLY. You do not want any moisture left in the pores of the paint ( no matter how miniscule or microscopic ). Let it DRY !
---
Unfortunately this extra bit of cleanliness makes for a bit of extra work on your part. But it pays big dividends when you proceed to add the next two layers of paint.
---
When the car has finally dried you should prepare for the next painting session by :
a ) wipe the entire body down with a clean rag. This will hopefully loosen and remove any dust, bugs, or other airborne crap that landed on your body.
b ) now take a TACK CLOTH and go over the entire body AGAIN. Hopeully the tack cloth will pick up any loose particles or hair that the towel loosened.
Now... there may be a difference between how some people handle this part of the preparation prior to painting. Some folks may be doing a mineral spirit wipe down to clean their surfaces prior to the next layer of painting. But I have avoided that because I suspect that the mineral spirit wiped down may soften and weaken the top layer. So I am content to let the washing down of the body ( the bucket of water and dish detergent ) and thorough rinsing with water be my final prep prior to painting.
And after all... the next layer of paint is going to have sufficient mineral spirit in it - so there is the potential for orange peel if you wipe down with mineral spirit, weaken the top layer - and then paint with the mineral spirited paint - which further weakens the layer that you are painting on top of.
At this point the body is about as clean and free of contaminants as it is going to get. Now you proceed back to the painting sequence and repeat it again for three or four sequences.
As you get up to the third or fourth 'session' you should move from the 600 grit to the 1000 grit and maybe in your final sequence move to the 1500 grit level.
---
So far my results are still pretty amazing. But I am really taking my time and not trying to rush this sequencing of the various stages.
---
Now... one thing I can say after having completed two complete sequences of this process is that Tremclad does dry as hard as nails. The key being that you really do have to lay a sufficiently thin layer and permit it to fully dry before layering on another layer.
Prior to reading about this cutting of the Tremclad with mineral spirits to lay down super thin layers, I was familiar with how plain Tremclad on an object works. Straight uncut Tremclad really does take quite a long time to thoroughly cure on its own. But it seems that the ultra-thinning of the Tremclad with the mineral spirits appears to alter the Tremclad and the hardness that it dries at when cured.
Frankly, I have never seen 'straight' Tremclad dry to the level of hardness that this thinned out solution produces.
I am sorry if these random thoughts have blabbed on too long or put anyone to sleep. I just thought I would share my experiences so far and the steps that I have been taking to ensure that each layer of paint is placed on as clean a surface as I can achieve in my garage and driveway.
Hopefully it might give some folks some additional insights.
.
Posted By: Anonymous
Re: Paint job on a budget!? CONTINUED..page 44........ - 06/13/06 03:26 AM
alright... i tried polishing my car with the turtle wax compound and got no shine what so ever, also tried waxing after that, no shine. Then tried just waxing it, and also no shine... HOW CAN I GET SHINE!!! someone please give me some advice on how to get some shine into the paint
Posted By: Anonymous
Re: Paint job on a budget!? CONTINUED..page 44........ - 06/13/06 03:56 AM
OK, I'm going to put my $50 where my mouth is. I have plenty of old body panels laying around. I live out in the sticks, and the local Ace Hardware has their own house brand of the oil acryllic "rust-stopping" paint. When it's all done, I'm going to leave it out in the weather for a year. What color is most likely to fade? Red?
I was going to cover areas and pull the covers off at set intervals so a comparision can be made.
Hell, I should just paint my brush hog, that would be about as harsh a test as any I could come up with.
Posted By: Anonymous
Re: Paint job on a budget!? CONTINUED..page 44........ - 06/13/06 04:02 AM
I think this was just recently discussed.....do final sand with 1500-2000 grit then hit it with a clear coat. I dont know if anyone has actuall dont this yet but I think this is the cure for the Dull apperance after the final wet sanding. This is the method I'm going to use. first I'm going to let the paint "cure" for a few days while I drive around, this is before I even get to the final wetsand. Then I'm going to finish sanding and do the Tremclad Clear on my final sand.
attached is a pic of the car with the 6th coat.

Posted By: Anonymous
Re: Paint job on a budget!? CONTINUED..page 44........ - 06/13/06 10:03 AM
I have just a few last questions before starting my project. I got all my supplies and am ready to start prepping the car tomorrow. I've gotten multiple grits for prep work and just want a suggestion on it. Should I start with my lowest grit (I think it is 80) sand the car down, and once it is fully sanded wash it and then go to the next grit, or maybe just wipe it down to remove the dust and junk?
Also, I know that the paint before applying should be at the consistency of about water, now I remember either Exit or Charger posting a ratio of paint to mineral spirits or something like that, but I cannot find that at all. Anyone have a suggestion, I doubt its 50-50, but if you have any suggestions on a ratio of paint to mineral spirits, please post it. Thanks!
Posted By: Anonymous
Different folks have tried different ratios - 06/13/06 10:42 AM
...and I suspect the results have been close to the same.
I tests small amounts with different mixtures Eventually settling on what I'd call 75 percent paint, 25 percent mineral spirits (and just a splash of Penetrol. It worked like a dream in the white Rustoleum pro, but still seems a tad thick for my orange (which was Coronado, so the chemistry is likely off a touch.)
The off-the-cuff description of mixing until the paint runs like water really is the best. Any thicker and you slow down the process. Of course, if you're painting in Sacto in the summer, you should have a nice sunny environment to bake the paint quick.
Matt, if you haven't practiced with the paint on some spare metal somewhere, please stop and do that first. When these guys say the paint lays down differently, they aren't kidding. An afternoon of practice saved me a lot of time making up for some sloppy mistakes.
Above all, take your time and enjoy the transformation. I'm only about halfway done and folks are already walking up and complimenting the truck. Can't wait for the weather to clear to get back to it!
Posted By: Anonymous
Re: Paint job on a budget!? CONTINUED..page 44............ - 06/13/06 12:07 PM
Cal: is that the royal blue I had sent you links to or did you go with navy? It looks light, like royal.
Posted By: Exit1965
Re: Paint job on a budget!? CONTINUED..page 44........ - 06/13/06 01:12 PM
You shouldn't use 80 grit on the whole car just to scuff the paint. 80 grit is for shaping bondo or removing paint quickly. You can safely sand the whole thing with 240 and scuff the paint quickly without putting the deep scratches the 80 grit would put in.
Posted By: Anonymous
Re: Paint job on a budget!? CONTINUED..page 44........ - 06/13/06 06:56 PM
Quote:
alright... i tried polishing my car with the turtle wax compound and got no shine what so ever, also tried waxing after that, no shine. Then tried just waxing it, and also no shine... HOW CAN I GET SHINE!!! someone please give me some advice on how to get some shine into the paint
try reading some more on this thread. you may have miss a step or two.
here's a quick reference from another forum:
http://cars.500megs.info/forum/viewtopic.php?t=13
Posted By: Exit1965
Re: Paint job on a budget!? CONTINUED..page 44........ - 06/13/06 07:12 PM
That is a nice post! You can see the microscratches in the sunlight reflection, but he could probably get those out with more polishing or using a different compound.
Posted By: Anonymous
Re: Paint job on a budget!? CONTINUED..page 44........ - 06/13/06 09:52 PM
anyone experienced dust being on the paint after a whjile the car being finished with new paint?
Posted By: Anonymous
Re: Paint job on a budget!? CONTINUED..page 44........ - 06/13/06 10:44 PM
Ok, I'll be picking up some more sand paper, prob 220 since thats what I know HD has and start prepping, still my only question is, I know sanding makes a ton of dust and crap, would it be better if i just swept it off with a hand brush, or to just rinse it off with some water?
As to doing a test section, I haven't done that yet, but the car is a friends of mine and we are bothing going to test it out tomorrow on one panel first and see how it lays down and stuff, then proceed from there.
Posted By: Anonymous
Re: Paint job on a budget!? CONTINUED..page 44........ - 06/13/06 10:45 PM
I keep finding dust particles or something like it in the fresh paint of panels I rolled. i think it is most likely microscopic parts of the roller coming off. I dont see any in the cowl and grill i painted with the foam brush only.
Bob
Posted By: Marq
Re: Paint job on a budget!? CONTINUED..page 44........ - 06/14/06 12:38 AM
If you read my message above... you will note the lengths to which I go prior to laying a fresh coat of paint on to the car.
The only time there should be sanding dust in your work area is when you do the final body prep prior to laying down the first coat of paint.
Once you start laying down coats of paint you will be doing 'wet sanding'. The one beauty of 'wet sanding' is that all the sanded areas get trapped in the water and form a mud like material.
Hence there shouldn't be any dust being generated from the sanding process.
Now... there is the possibility that your work area may have dust in it. That is pretty much the norm for everything except a clean room with reverse air flow and filters.
What I did to minimize the effects of any dust created during the pre-sanding prior to laying down the first coat of paint was to HOSE DOWN my garage. This got all the dust, grass, dirt, wood chips, dead bugs and other crap lying on the floor out of the work area. The beauty of this being the water from the hose not only traps the dust etc.. but it also makes it easy to spray it right out of the garge and leave my floor clean and small particle free.
Now... once you complete your 'pre-sanding' of the body... prior to laying down your first coat of paint... you should put the car outside ( if you can ) and wash the entire car down with a bucket of water ( with a few drops of dish detergent ) and a towel to slosh it around on your body. Then HOSE the body down thoroughly. You can then put the car back in the garage and let it dry. As a final measure prior to laying down the first coat of paint... you can give the body a wipe down with a clean white cotton rag that is wetted with mineral spirit. This will ensure that any contaminants that might adversely affect the initial coat of paint ( like oil from your hands etc ) are removed from the body surface. Then wait and let the body thoroughly dry out and move on to your initial layering of paint.
.
Posted By: Marq
Re: Paint job on a budget!? CONTINUED..page 44........ - 06/14/06 12:48 AM
Now as for the mysterious 'dust particles' that might be making their appearance on your freshly painted body... you might be surprised to find that they 'might' be coming off your clothing or your head.
It's surprising to see how many head hairs magically fall out and land on your freshly painted body. I guess the only solution for this is to wear a baseball cap or a food preparation 'net' on your head.
The other thought that struck me is dandruff... yuppper... some folks are constantly shedding dandruff while they are hoverin over their body laying down the paint.
And depending on how you 'snack' prior to going and painting your car.. there is also the possibility of 'food crap' that was clinging to your clothes and magically decides to fall off your clothing while you are working away on the body.
Unfortunately 'dust', flying bugs and other mysterious crap are bound to keep appearing in the area where you are working with paint.
There is probably some 'Murphy's Law' that says - " When you paint, magic dust and bugs will be drawn to the area that is freshly painted'
Now... one thing I would agree with you on is the potential for the 4 inch rollers to start self-destructing. I noticed this 'self-destruction most on the rounded end of the roller when I was working in tight areas. I guess the combination of mineral spirits and body edges leads to a premature failure of the integrity of the roller. That is one reason why I have used a brand new roller for EACH TIME I am about to lay down a new layer of paint.
Hope these rambling thoughts help out...
.
Posted By: Anonymous
Re: Paint job on a budget!? CONTINUED..page 44........ - 06/14/06 01:04 AM
Hi,
Been following this from the beginning.
Haven't started yet, was going to go with black but am now sticking with original color of car(white) to avoid doing the engine bay, trunk, etc... Three questions,
1)I do have light rust, some medium rust, do I need to bondo these areas or use rust-killer? I am afraid to just paint over these areas and have the rust come back.
2) Should I do a light sand(230 or so) to scuff the existing paint?
3) What is the best product to do a whole-car preclean with? DuPont Prep-Sol or anything else someone can recommend? I've heard something about VarSol maybe?
Waited for the warm weather again, it's here, can't wait to get started!!!!!!!!!!!!
Posted By: Anonymous
Re: Paint job on a budget!? CONTINUED..page 44........ - 06/14/06 04:34 AM
what i mean is...my paint is already dried and such, but i didn't drive it for couple days, and it got dirty/dust, and when i put my hand on it, it feels like a very rough surface instead of very smooth like it was when it was first done, i wipe it with a wet tower, the dust was gone but the surface remain rough(like sand paper)
Posted By: Anonymous
Re: Paint job on a budget!? CONTINUED..page 44........ - 06/14/06 05:53 AM
For the rust use a good rust converter, Scrape sand the rust then soak it in the converter the stuff I have from permatex has a sandable film that forms almost like an epoxy sealer, that can be sanded as well.
Yes do a Pre sand with the 200+ grit. After the sanding I used The mineral spirits to wipe down let dry and went to paint. There is a product called Wash and Wipe that I've used as well and it gets all wax and oils off without wreaking havok on paint finish.
Posted By: Anonymous
Re: Paint job on a budget!? CONTINUED..page 44........ - 06/14/06 05:58 AM
Have you done the final wetsand? You wont have a smooth finish until you do your final wetsand and polish. The little bubbles left behind from the roller I find leave the "rough" surface. this in turn collects the dust you are talking about.
Posted By: Anonymous
Re: Paint job on a budget!? CONTINUED..page 44........ - 06/14/06 08:26 AM
Posted By: Marq
Re: Paint job on a budget!? CONTINUED..page 44........ - 06/14/06 02:02 PM
Fast thought on the problem some folks have reported with their WHITE PAINT turning yellowish when used on the car...
You might want to try adding some drops of ROYAL BLUE ( or very dark blue ) to your white paint. This is an old painter's trick for stabilizing white and eliminating yellow. You just need to add a few drops of dark blue per liter/quart of white paint.
Hope this helps someone
.
Posted By: Marq
Re: Paint job on a budget!? CONTINUED..page 44........ - 06/14/06 02:18 PM
I finally got my camera out to take a couple of pics on how the car is looking after two sessions of this process ( total of 4 layers of paint )
At the point of 4 layers of Fire Red paint I can still see ghost of the black primer. This was expected and is no big surprise at this point in the layering of the red paint over the black.
But otherwise the red is shiny, smooth and doing quite well.
There is a minimal amount of orange peel located on the passenger rear quarter. It will be gone following the wet sanding this evening.
The following pictures are not as good as seeing it the car live and in person. But hopefully it will share with you the results I am obtaining so far. And yes... the paint is HARD as nails at 4 coats..
Front drivers quarter :
http://www.snpx.com/mclaren/mclaren/mclaren1.jpgFront drivers side profile :
http://www.snpx.com/mclaren/mclaren/mclarendriver.jpgFront passengers profile :
http://www.snpx.com/mclaren/mclaren/mclarenpassenger.jpgRear drivers quarter :
http://www.snpx.com/mclaren/mclaren/mclarenrear.jpgThe car will be baking in the sun today. Hopefully no birds will poop on it. Then it will be going back into the garage to cool the body temperature down. Then I am going to start hitting it with 1200 grit wet sanding prior to adding the 5th and 6th layer.
I can't wait to get it up to 8 or 10 layers
.
Posted By: vynn3
Re: Paint job on a budget!? CONTINUED..page 44........ - 06/14/06 04:05 PM
I've been following this thread from day one, and just had a question.
Ummm, I'm no paint and body expert, but shouldn't everyone be removing all moldings, ground effects, mirrors, and trim, rather than painting it all on the car? Seems like the paint will tend to fill in all the cracks, and make sanding difficult...
Just wondering.
VM
Posted By: Anonymous
Re: Paint job on a budget!? CONTINUED..page 44........ - 06/14/06 05:47 PM
to get the best job yes. I did that on mine. Otherwise you miss stuff. Older cars it's probably not as bad. I drive an eclipse spyder it has lots of curves and cracks so I had to take off the stuff.
Posted By: 69chargeryeehaa
Re: Paint job on a budget!? CONTINUED..page 44........ - 06/14/06 06:44 PM
Marq-excellent advise, i'm glad your here to really take the time to answer all questions, you obviously are very knowledgeable in this department, and relaly help out with great advice, i agree with 100% of all you advice.
use a new roller every time you paint, they're cheep, plus hose your garage, be very clean, the more time you take to prep and work in a clean enviroment the better job you'll end up with. also i completely dissassemble my cars, windows, bumpers, handles, chrome, emblems, mirrors, everything, it adds 2 days of work, but the result is 100% better.
Posted By: Anonymous
Re: Paint job on a budget!? CONTINUED..page 44........ - 06/14/06 10:41 PM
Hi there. I'm here from nissanforums... I got a 95 200sx that im working on. It seems that this thread has a great following. And I cannot help to be one of them. I have read all the pages and pages.
I must thank all those who are working on this method and spending time to answer questions and show their results. especially 69 charger for bringing this idea to light.
I am in the process of preping my car for this paint method. My car is orininally teal green. And I am looking to paint it 'Sail Blue'. I just came back from both Loews and Home Depot with no luck but the spray bomb. I was going to go for the Royal Blue but it was so dark.
Where else can I find this paint? It seems that the stores I have tried are very limited on their rustoleum products. One thing I did notice is that home depot had the regular and loews had the pro grade. Both had rollers and such.
Question for Exit. I was looking for the sponge sander you were refering to. but there were quite a frew to choose from. Is there a way you can take a photo of it so I may see what to get. I am very excited to see the reults of your car. It seems so nice.
One of the few that doubt this method is that chuck fellow. Seeing others come out with amazing finishes on their test peices mock his remarks, yet I will also test this paint on a few junk mirrors to see. I know that if you use the right polisher and wetsanding methods this paint will shine very well. He had mentioned that the paint never hardens which would make no sense in the results of charger and the others.
With that out of the way I am anticipating great results and will post all the steps I have taken to achieve this.
Aside from the 2 questions I had asked I have a few others. What is the suggestion on polishers? 10" or 6"? And as far as the engine compartment goes I was going to spray a flat high heat sail blue but I wonder if I should just spray the rustoleum gloss version. Would that be bad for heat?
One of my maot obsticles is that I have no access to a garage and my car is a daily driver. So this will surely be a weekend gig. I know the rule of thumb is to paint in the shade, let it dry and then let the sun cure it. I was hoping someone in my position, Serpent or anyone else can enlighten me further on preperations for doing this in the hell that is outside...

Posted By: Exit1965
Re: Paint job on a budget!? CONTINUED..page 44........ - 06/14/06 11:42 PM
This is what I used

Posted By: Anonymous
Re: Paint job on a budget!? CONTINUED..page 44........ - 06/14/06 11:48 PM
Cool. Thanks much. Hows everything coming along?
Posted By: Anonymous
Re: Paint job on a budget!? CONTINUED..page 44........ - 06/15/06 12:27 AM
Quote:
One of the few that doubt this method is that chuck fellow. Seeing others come out with amazing finishes on their test peices mock his remarks, yet I will also test this paint on a few junk mirrors to see. I know that if you use the right polisher and wetsanding methods this paint will shine very well. He had mentioned that the paint never hardens which would make no sense in the results of charger and the others...
You hear alot of good things and alot of bad things about this unique method of auto painting, but the truth is there are only a few who are actually seriously trying this technique. Let the facts speak for themselves:
About half-way up the previous page, posted by 'PsYcHo-DoUgHbOy'...can't get a shine after wetsanding...
Also from the previous page, 'widebody mr2' says his car 'was super smooth until i let the car sit for a few days and it collected dust and it seems like it's making the smooth surface rough again'...
'Exit1965' is having the same problem trying to get a decent shine after wetsanding...
Look closely at the pics of Marqs mustang (forth post from the bottom of the previous page)...there is considerable 'orange peel' on this car...
I personally painted my whole car with this method after doing several test pieces and tried various tips including Penetrol and spraying with a paint gun...looked good until the end when I tried to wetsand and polish...
I'm not trying to change anyones mind...i'm just reporting the results as I see them. If you want to try this method, give it a shot...
Posted By: Marq
Re: Paint job on a budget!? CONTINUED..page 44........ - 06/15/06 01:36 AM
Hi Chuck...
Actually... after four coats there was NO orange peel EXCEPT on the rear passenger quarter where the fuel door is. And the reason for that specific spot having the orange peel is that I added some extra paint to that spot after bumping into it with my leg. The fresh paint on the non-cured paint caused that spot to do the orange peel.
As for the rest of the body... it is smooth and no orange peel at all.
The illusion you might see is possibly a fault of my camera. It is an 8 megapixel camera and the pictures were taken with the highest setting. Each picture was originally about 8 megs in size. So I loaded the pictures into Corel and reduced the size down to a more manageable and downloadable size. During this process Corel does wonderous mathematical calculations to reduce the pixels. In the course of the downsizing of the picture you get what are known as jpeg artifacts... and pixelations... imperfections in the picture. I suppose this may be what gave you the impression of orange peel city.
For the best way of confirming this... look at the picture at :
http://www.snpx.com/mclaren/mclaren/mclarenrear.jpgNow... note the Mustang coupe sitting next the McLaren. Note the white pinstripe that runs laterally along the side of the Mustang coupe. That is a 100% solid and unbroken pin stripe. And yet the picture when downsized distorts the stripe and makes it appear to be interupted and not contiguous.
The other problem I faced with the pictures is that the McLaren's finish is indeed smooth and shiny as h*ll and giving off one heck of a mirror of its surroundings. It was difficult to get a clear picture of the car that wasn't echoing in the mirror finish all the things surrounding the car and being reflected.
I should also note that those pictures were taken with the 4th coat and no wet sanding. Even I was surprised by how mirror smooth AND LACK OF IMPERFECTIONS it was. I was almost hesitant about going to the wet sanding at this stage because there were no imperfections or orange peel ( except at the fuel door ) to smooth out.
I think Chuck that this discussion is going to boil down to two camps... those using Tremclad ( as per the original recipe or using the US "almost equivalent brother product' Rustoleum.
It's quite possible that the Rustoleum dudes may not be able to get the same results as the Tremclad folks. And when folks start using odorless mineral spirits that might also slow down the curing process and affect the end results.
I know at our Home Depot, Canadian Tire and even Walmart offer both the Rustoleum and Tremclad products... and I figured that it was safer to stick to the 'original' recipe that called for Tremclad.
So I can see where you might have good reason to play the devils advocate in this discussion. You may be 100% correct for the chaps that are in the States and only have access to the Rustoleum product.
As for me... I am still properly impressed at this point. And with the discussions so far about how to handle the final stage... well I am still formulating how I will handle that stage when I get there.
At this moment I am undecided between two camps on how to finalize the project where I arrive at that point.
a ) on one hand I am thinking that the final coat will be left on the car for one or two months to let it achieve whatever maximum curing the paint may require. Once it has achieve maxium hardness I would then go with the final 2000 grit wet sanding... followed by the polishing.
or
b ) I am intrigued by the chatter about the Tremclad UV clearcoat. I might be tempted to avoid the polishing stage and take a shot at the clearcoat method. But again this wouldn't occur until at least 2 months after the final layer was painted and the body had ample time to fully cure.
Oh well... this whole exercise has been a great hoot and for my cost of investment in time and money I am having fun. And at least my little project car now has a skin on it rather than the black primer that it had to wear while parked in my garage over the last three years.
I too may sour on the process in the end. But at least I am having fun and my sweet little car is getting some long overdue attention.
.
Posted By: Anonymous
Re: Paint job on a budget!? CONTINUED..page 44........ - 06/15/06 02:21 AM
There is a great chance that the tremclad is far more suseptable and shines better, but we are all trying that. I hope through my own tests that this "shine" can be reached.
I do think that Marq is right about the curing period. And the fact that there is no clear coat used as such with bc/cc or single stage. The shine matching that will be hard to reach. Time will only tell in Exit or Marq's case if this paint can be close or equal to a SS job.
That being said I am going into this with very little money and a fair paint job at the moment. If all else fails and my paint does not cure or does not shine after curing. Then it's live and learn. =)
But atleast I'll have that experience under my belt. Over the course of this thread I have learned a lot about painting, preping, techniques of other paint applications. Hell, your experiences are also an attribute to what I now know. And I thank all who participate in this thread.
If my outcome is bad or good, i wont stress. =)
Posted By: Anonymous
Re: Paint job on a budget!? CONTINUED..page 44........ - 06/15/06 02:33 AM
also there were a few:
JeffS and admactanium that had a lot of sucess as far as getting this paint to shine. "so i was just curious to see if regular ole rustoleum (or xo rust or whatever) could be polished to a nice shine. i'm convinced that i can be and if the surface prep and the color sanding steps are done properly a paint job using this method would be virtually indistinguishable from a pro-shot paintjob. and in many cases, if you do those steps effectively, it could look much better than 95% of the professionally shot paintjob out there. it just seemed like there were people dismissing this technique wholesale because they couldn't get enough shine out of the paintjob in the end when in all likelihood it was their colorsanding and buffing technique that caused the problem. they would likely have just about as flat a paintjob from a professional gun with 2k paints as they would with rustoleum because they were not finishing the job correctly.
of course, this doesn't answer any of the questions of durability in regards to the elements, sun, gasoline, grit and other crap that cars get put through, but at least this is encouraging enough to let me know that the paint can look awesome given that the proper care is taken that you would use for ANY paint job."
Takin' from page 28.
Posted By: Anonymous
Re: Paint job on a budget!? CONTINUED..page 44........ - 06/15/06 03:07 AM
Maybe I missed it, but has anybody done the clear coat thing yet? Any pictures?
Posted By: Marq
Re: Paint job on a budget!? CONTINUED..page 44........ - 06/15/06 03:28 AM
One thing I am curious about for the chaps that have been polishing their Tremclad paint jobs...
From what I gather the original recipe for this process called for using the cheapest type of Turtlewax. The key being that it was to produce a shine but not contain much in the way of abrasives.
Now I know that most polishes contain varying amounts of abrasives in order to micro-grind the oxidized layers of paint to reach a paint layer that is free of oxidation etc.
Now... since we are talking about brand new paint that has been wet sanded with 2000 grit paper, I would tend to think that no abrasives whatsoever would be better than one that contains any abrasives ?
Would a straight carnuba wax with no abrasives not be better at creating a shine without adding further abrasion to the paint surface ?
My other thought is that a clear wax as compared to the white and pasty wax might give a better shot at not having a foggy haze appear after waxing. I would have to think that some of these white pasty waxes are leaving remnants behind in the paint. And although they may be relatively clear when initially done, they would tend to whiten as they dry out ?
If that is correct then the more clear the wax... then possibly the better for reducing the chances of a fog appearing later.
Another wax that might be good is the colored wax that is available in the primary colors. I know there is a black, red, brown, gray, yellow and green. Possibly this wax might have a better chance at cutting down on the whitish fog.
I guess when the time comes I will spend a little more time researching the zillion types of waxes that are available at the store.
But for some reason I am thinking that the more expensive carnuba wax ( with no abrasives ) would probably be the best for this particular surface.
Dunno... some of you polishing pros might have a better insight in this...
And I guess we really have to look at the quality of the polishing and buffering pads used on the polisher. There are some polishing pads that probably are harsh enough to create micro-abrasions in the Tremclad paint ( especially if the paint hasn't fully cured ).
For example, I would definitely not use a used or washed buffer or polishing pad on my polisher. I would tend to think that a virgin pad ( of higher quality ) might be the ticket for reducing the chances that the pads might do any harm to the Tremclad paint...
All these thoughts about waxing and polishing are making me more tempted to consider the Clearcoat method ( if we can get some feedback that it works and is compatible with the layers of Tremclad paint that it goes on...
I did take a look at Home Depot and Canadian Tire today and unfortunately neither of them were stocking the clear coat except in the aerosol spray bombs...
.
.
.
Posted By: Exit1965
Re: Paint job on a budget!? CONTINUED..page 44........ - 06/15/06 04:54 AM
I'm planning to use something like turtle wax "ice" or another of those clear waxes. They are supposed to fill in swirl marks somewhat also.
What's left to do on my car is first, smooth out the roof with some bondo, then do a good strong wetsand with 800 and put 2 more coats over the whole body. Those coats could be the final coats for the body, except for the spot painting I have to do of the rest of the car (both doors, one fender, the roof, the decklid and the passenger 1/4).
As far as cure time, I dont expect it to be fast. I took my nail to the lower 1/4 panel and was able to scrape the paint all the way off, but I only did a very small amount and it will be easy to touch up. However the test areas I painted a few months ago are all much harder, and I cannot scratch that paint off but I can still put a nice slice in it with my nail if I run my nail sideways across it, pushing down hard. Part of the problem there is I was using odorless spirits and not letting enough cure time between coats.
I am hoping though that leaving at least 24 hours between thin coats with this red paint will lead to some good hardness after a few months. Its not likely that something will deliberately slice to make a scratch on the paint anyways so it's not a big concern.
The pro. safety red I got in a spray can and sprayed my door to check the color - that was rock hard after a few weeks. I can probably get away with one thick coat on my engine bay and door jambs, because I put that test coat on real thick and it's very hard.
Im still a bit tempted to switch colors to canvas white, but I know I need to finish this red paint job and look at it in the sun before I make any decision like that. The other benefit to a plainer off white is that people will not scrutinize it or notice it as much as they will when the car is red. If there are imperfections in it, which there will be if I dont wetsand, that may or may not bother me. But I'm not far off finishing this red paint job so I'll go head and do it. Now that the body continues to get straighter, if I do decide to change colors I could probably do the whole job in a week or so.
Posted By: Anonymous
Re: Paint job on a budget!? CONTINUED..page 44........ - 06/15/06 05:20 PM
Chuck,
I agree with your interpertation of the orange peel on Marq's car (look at drivers side front pic). I haven't fully tested this method myself, but am quite worried about your results. Maybee a hardener can be added so the paint could be sanded properly. Seems like most are ignoring or hoping what you have said isn't true for them. Sometimes it also seems like we are getting snowed over by a couple of Tremclad employees/marketers.
I'm a little worried about this method as well because of the orange peel everyone is experiencing and labeling as "Flat as Glass". If it were a spray job, I would demand my money back becuase that much orange peel is unacceptable. The only "Flat as Glass" results I have seen yet are Jeff's and Admactanium's (*sp). It is discouraging when you hear its going on "Flat as glass" and "looks like a mirror" but then you see pics after and its not.
I'm not trying to knock anyone here. I guess what I have realised is that everyone sees something different and everyones expectations are different.
If I have time this weekend, I will try to get some hardener and see if it changes anything. As of right now, the majority of results are too discouraging to apply to a daily driver, maybee a beater.
Ok people, time to prove me wrong here (I want this method to work). Lets see some clear pictures without the orange peel. Take 2 pictures: Picture 1, 1-2 feet away, straight on or slight angle and in the shade. Picture 2, same distance, but on an angle reflecting a straight line in the background (close to the car, 4 feet away or so).
Love it or Hate it; it had to be said!
Smite

Posted By: 69chargeryeehaa
Re: Paint job on a budget!? CONTINUED..page 44........ - 06/15/06 05:54 PM
i would just like to comment on my expirences with the paint issue, shine, peel ect.
before i do, exit, that turtle wax "ice" clear synthetic wax is the best wax i used hands down, i bought some 2 months ago, after using it and seeing the results, i gave all my mothers/mequires wax to my mom, and only use the ice wax. the stuff goes on super easy like whiping your car, it's clear and you can do it in the sun, which i did. i waxed my 2002 mustang gt, and my wifes 2001 vw new beetle sport in 30 mins start to finish. the thing i love about this wax is that you can get it on black plastic, glass, ect...and it leaves no residue, like when you use a liquid or paste wax that stains black plastic white that's there for life, or a really really long time. after 2 months since i've waxed the cars which sit outside all the time, the water still beads, and i've washed the cars once since, they are still clean, and seem to stay clean just as well when compared to a high end wax like mothers, ect.... not to mention the stuff almost just wipes off without buffing, you gotta love that. i used about 3% of the bottle contents to wax 2 cars. geez, looking back i almost feel like i should work for turtle wax!!!! but trust me i don't, but if they're reading i'll take some royalities. the wax rocks, it is the BEST wax i've ever used, and seems to last long, just as a comparable mothers/mequires wax, with less effort, and ease of application.
Now lets get back to the paint. basically i painted my charger in 5 days, start to finish not including body work and prep. keep in mind i've done it alot, i could whip on a coat in 1 hour or less. while i'm waiting for the exterior for the next coat i'd do the door jambs, and trunk area. my process was 2 coats, wetsand, 2 coats wetsand, 2 coats wetsand and polish. now my car was painted the same color, it was previously orange, if i was changing colors i'd do 2 more coats. my first 2 coats were medium coats, that helped get coverage fast, and fill all prep sanding marks/scratches. then i did a good wetsand and the following coats were thin coats with wetsand every 2 coats with 1000, and finished with 1500, then polish. the reason why i use the turtle wax polishing compound is that it is the equivelant of i'd say 3000+ grit, meaning the process is slow, but works great, does'nt harm the paint from over polishing, and it's cheap!!! after the last coat, i waited overnight, and let the car sit in the sun for a day, the next day i wetsanded and started buffing. i wetsanded from about 7 am to 12pm, then buffed until about 10pm, and the next day from 8am to 10pm. so the buffing took a day and a half to do the whole car exterior only. basically get a beer, buffer, bonnets, compound, chair, more beer, and let the buffer do the work. you could use a more aggressive compound, and cut it alot faster, but this is fresh paint, and the turtle wax stuff is impossible to over buff and burn the paint. it's easy work. mind you i did rush it to get the car on the road and

, but it has excellent shine. right after buffing, i waxed it no issues. then followed by alot of
. the paint does remain "soft" for about a month, after that it's rock hard, espically if you
it. you could let it cure for 2 months, then cut it in 5 hours with a aggressive compound, of not do a final wetsand and just wax it, drive it for 2 months, and then wetsand/polish but then you cut corners, because it's alot eaiser to do when the car is stripped. for 5 days, when you know what your doing, not including body work i painted my car, body work took me 3 solid days to prep, not including stripping the bumpers, handles, rubber, trim, ect...if you have the time then wait, let it cure, then buff later, but if your like me and are like
damm i gotta
this thing then use the turtle wax polishing compound and a buffer, or if you cut paint for a living, and really know your stuff cut with whatever you want. if i polished for another 2 days combined with more wetsanding, there's no doubt in my mind that i could pull off a pro looking job. but i really don't care since i drive my car alot, go sideways on dirt roads, ect...plus it's really only me that sees the flaws, nobody that's looked at the car has seen where i sanded a bit too much and went thru in a 2" area on a body line, i'd have to show you it for you too see it. the problem is when your painting your car, you're evaluating it under a microscope in artifical light, where flaws are most visible. to 99% of other poeple out there, your paint looks perfect. you are your worst enemy when it comes to painting, because you are hyper aware of all flaws, the 71 beetle i sprayed single stage auto paint on for my dad has 2 flaws, one microscopic run, and 1 fish eye, i see it from a mile away because i know it's there, but nobody else could spot it. that's where exit, i would reccommend you get a few buddies to come check out your car, and give you their honest opinion, you'll be plesantly supprised with their comments, it will change your mind completely, and allow you to be less critical on yourself, trust me, plus at a 120mph it's just a blur!!!!
again marq, excellent advise.
Posted By: Exit1965
Re: Paint job on a budget!? CONTINUED..page 44........ - 06/15/06 06:09 PM
Quote:
Chuck,
I agree with your interpertation of the orange peel on Marq's car (look at drivers side front pic). I haven't fully tested this method myself, but am quite worried about your results. Maybee a hardener can be added so the paint could be sanded properly. Seems like most are ignoring or hoping what you have said isn't true for them. Sometimes it also seems like we are getting snowed over by a couple of Tremclad employees/marketers.
I'm a little worried about this method as well because of the orange peel everyone is experiencing and labeling as "Flat as Glass". If it were a spray job, I would demand my money back becuase that much orange peel is unacceptable. The only "Flat as Glass" results I have seen yet are Jeff's and Admactanium's (*sp). It is discouraging when you hear its going on "Flat as glass" and "looks like a mirror" but then you see pics after and its not.
I'm not trying to knock anyone here. I guess what I have realised is that everyone sees something different and everyones expectations are different.
If I have time this weekend, I will try to get some hardener and see if it changes anything. As of right now, the majority of results are too discouraging to apply to a daily driver, maybee a beater.
Ok people, time to prove me wrong here (I want this method to work). Lets see some clear pictures without the orange peel. Take 2 pictures: Picture 1, 1-2 feet away, straight on or slight angle and in the shade. Picture 2, same distance, but on an angle reflecting a straight line in the background (close to the car, 4 feet away or so).
Love it or Hate it; it had to be said!
Smite
Smite, I don't think orange peel is the problem here. Several people have refined their technique and are avoiding orange peel altogether since they are now putting on thin coats. If orange peel is your problem, reread the posts and see how people have put on thinner coats. Here's a pic. There is probably SOME orange peel here, but it's certainly not enough to notice or to care about. [edit: by the way, I see now one of my dogs decided to make a cameo in the picture]
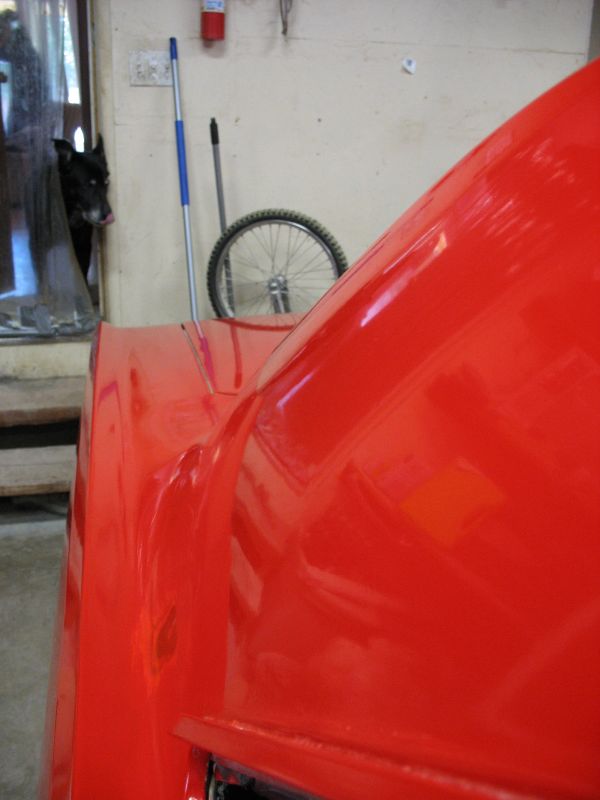
The problem in my eyes is that it seems easy to scratch, perhaps until it has a long time to cure. And maybe it's not a problem after all if it does end up being rock hard eventually.
Posted By: Anonymous
Re: Paint job on a budget!? CONTINUED..page 44........ - 06/15/06 06:33 PM
Exit,
Orange peel isn't an issue with me. I know I can refine the process to get it out, or possibly sand it out. Thats not the problem. My problem is that 85% or more of the results I have seen, I hear only good things about the paint and result. Like, no orange peel, flat as glass and mirror finish. When you see the pictures afterwards the pictures aren't what they are said to be (or too far away to tell). How can I beleive how good this paint/paint process is when the pictures aren't showing what they are saying. So that right there makes me doubt any of the claims of the poster.
Also, I didn't want to say anything yet, because I may not being doing it quite right yet, but I can sort of relate to what Chuck was saying. After 12 hours, I sanded the paint down dry and I noticed it was gumming up the sand paper (600 grit). This makes me wonder about what Chuck said. It makes sense what was said if it doesn't harden enough, and also makes sense that it might stay a little soft since it is rust paint.
I know I'm just going to have to finish this myself, but my problem is I live in the city, and my paint is a 2 hour drive away. I'm only able to paint a little once every month or every other month. I would like to see some good results. You are doing well keeping the orange peel down, and I can't wait to see it buffed. You may be the changing factor in my mind; I know how much work you have been putting into this, unlike others I have a feeling is a pretty quick jobby.
I hope I'm not being over critical here and expecting too much.
Smite
Posted By: Anonymous
Re: Paint job on a budget!? CONTINUED..page 44........ - 06/15/06 06:43 PM
Looking good exit. My car has its problems. I got hit in the rear and quarter panel and am fixing and sanding the whole car as we speak. I am going to be painting the front and rear bumpers first, but before that I am testing the paint on an old set of mirrors. I recall serpent had an issue with the paint matching when he had to deal with the fuel door. I wonder if the same problem would happen in my case with the mirrors and the rest of the body if painted seperatly.
I am only doing that so I can reach all the crevises and such.
As far as spray bombing the doors jams and engine bay- would the same prep be applied or it doesn't matter being it isn't seen nearly as often?
Posted By: Anonymous
Re: Paint job on a budget!? CONTINUED..page 44........ - 06/15/06 07:00 PM
When I sprayed out my jams I just hit it with a 400 grit, just to scuff it up a bit after I cleaned it. Hit it with one coat. Let it sit for a bit less then an hour (as can says) hit it with another. Waited 48 hours wiped with mineral spirits to clean off dust and hand grease, then hit it once more. The spray takes a while to dry but it's very hard when it does. It seemed to self smooth in all but one place. I'm not sure why but I knocked down the bumps there and hit that jam part with another quick coat. It looks great.
I just painted my bicycle this way (roll and a bit of spray). Pictures later maybe.. It matches my car (the parts thar are finished almost perfect) Really crappy prep job though... It shows :/
Posted By: 69chargeryeehaa
Re: Paint job on a budget!? CONTINUED..page 44........ - 06/15/06 08:22 PM
Posted By: Anonymous
Re: Paint job on a budget!? CONTINUED..page 44........ - 06/15/06 08:40 PM
HAHA, Nice close up of the turtle wax!
Posted By: 69chargeryeehaa
Re: Paint job on a budget!? CONTINUED..page 44........ - 06/15/06 08:46 PM
Quote:
HAHA, Nice close up of the turtle wax!
lol, i have some more recent pics, high res of the charger, close up shots, just trying to find a place to host them, they're huge.
Posted By: Marq
Re: Paint job on a budget!? CONTINUED..page 44........ - 06/15/06 08:54 PM
Quote:
Smite said.... "
Also, I didn't want to say anything yet, because I may not being doing it quite right yet, but I can sort of relate to what Chuck was saying. After 12 hours, I sanded the paint down dry and I noticed it was gumming up the sand paper (600 grit). This makes me wonder about what Chuck said. It makes sense what was said if it doesn't harden enough, and also makes sense that it might stay a little soft since it is rust paint. "
.. My thought on this was previously explained and I guess you didn't read my post. Chuck is 100% right that Tremclad and even Rustoleum have a natural tendency to be soft even after a week or a month etc... IF YOU ARE APPLYING STRAIGHT paint.
But my theory is that by cutting the paint to a more watery point changes the way this paint performs. That is why I think the evaporation rate of the mineral spirit the thiness of the layers applied is very important to the end results.
If you don't put the right mix of mineral spirit to paint... then you are either going to end up with something that may not have the ideal combination to result in a quick hardening.
Too much paint and the curing process for each layer is going to be longer...
Too much thinner and the excess mineral spirit may have some impact on the layer that you are painting over ( probably leading to orangepeel ).
But please let me also re-clarify something that I had to explain to Chuck... I know what orange peel is. I know how to spot it and I know how to remove it. When I say that the ONLY spot on my car that had orange peel WAS THE REAR QUARTER near the fuel door... I have absolutely no reason to to glorify the results that I am obtaining. I am just reporting things as they stand at four coats...
I think the only thing that anyone should be afraid of in this Tremclad paint project is the number of VARIABLES that we have seen and how it is a tiny bit of voodoo science to land on the exact recipe that will work on a given car..
a ) Rustoleum or Tremclad
b ) odorless or regular mineral spirits
c ) environment temperature
d ) environment humidity
e ) even the color you choose seems to require some deviances in the recipe...
And these variables are what can ultimately trip up a user that is trying this... So maybe the odds are stacked against someone because you have to go through eight or ten layerings to get to the end of the project.
Heck.. I could get tripped up on the fifth or sixth layering... or maybe my fate is awaiting me at the nineth or tenth layering. It's a real gauntlet and I suppose that patience is the last variable that has to be thrown into the mix.
So I am not a Tremclad cheerleader yet. All I can do is report on how things are proceeding and to explain what measures I have taken to try make this job repeatable with consistent results.
.
Posted By: 69chargeryeehaa
Re: Paint job on a budget!? CONTINUED..page 44........ - 06/15/06 09:11 PM
Marq - my thoughts on that are:
a ) Rustoleum or Tremclad - SAME STUFF.
b ) odorless or regular mineral spirits - ONLY REGULAR MINERAL SPIRITS.
c ) environment temperature - NEVER EFFECTED MY WORK, JUST THE MIXTURE RATIO OF SPIRITS TO PAINT, 2 HOURS DIFFERENCE DRYTIME FROM -10*DEG C, TO +25*DEG C.
d ) environment humidity - QUITE HONESTLY PLAYED NO ROLE IN DRYTIME OR APPLICATION.
e ) even the color you choose seems to require some deviances in the recipe... - ONLY IN THE CASE OF COLOR, SOME COLORS ARE SLIGHTLY MORE TRANSLUCENT THAN OTHERS REQUIRING MORE COVERAGE.
Also i've repeated my results, 6yrs apart, same color, new paint (purchased 6yrs apart) perfect color match. (ie: 69 charger and 74 beetle, both orange.)
That's based soley on my expirences, others results may be different, no animals were killed to paint my car!!!.
Posted By: Anonymous
Re: Paint job on a budget!? CONTINUED..page 44........ - 06/15/06 09:40 PM
question for u charger, do u have any issue with ur paint(consider it being dried for so long), are there any dust on ur paint, seems like the dust that my car collected from sitting in the driveway has gotten my smoothed surface rough, even after a wash, the surface is somehow ruined by the dust... any advise? thanks
Posted By: ct71rr
Re: Paint job on a budget!? CONTINUED..page 44........ - 06/15/06 10:07 PM
Hello, I've been following this thread since day one (like many others). I just have one observation about the orange peel issue. There is far less orange peel on the successfully painted cars than there is on my 2001 Dakota factory paint job!! Quite frankly, my factory paint job sucks!! Well, that's my
anyway. Keep up the good work..you guys rock
Posted By: 69chargeryeehaa
Re: Paint job on a budget!? CONTINUED..page 44........ - 06/15/06 11:54 PM
Quote:
question for u charger, do u have any issue with ur paint(consider it being dried for so long), are there any dust on ur paint, seems like the dust that my car collected from sitting in the driveway has gotten my smoothed surface rough, even after a wash, the surface is somehow ruined by the dust... any advise? thanks
it's super important that your work area is clean, and it really should be done in a garage, pretend your doing open heart surgery. also the first 8 hours or so of drying time should be done in a garage, and only after that you should be ok to pull it outside to wetsand and clean it. those first 8 hours or so is critical, any dust that lands on the car could stick in the paint just as with any other paint including automotive paint, things like when you leave the garage, open and close the door really slowly as to not kick up dust.
Posted By: Anonymous
Re: Paint job on a budget!? CONTINUED..page 44........ - 06/16/06 01:44 AM
i see, but all my layers are already done, i finished final wetsand and wax/buff already...surface was super smooth until it started to collect dust..
Posted By: Anonymous
Re: Paint job on a budget!? CONTINUED..page 44........ - 06/16/06 01:52 AM
Quote:
Chuck,
I agree with your interpertation of the orange peel on Marq's car (look at drivers side front pic). I haven't fully tested this method myself, but am quite worried about your results. Maybee a hardener can be added so the paint could be sanded properly. Seems like most are ignoring or hoping what you have said isn't true for them. Sometimes it also seems like we are getting snowed over by a couple of Tremclad employees/marketers.
I'm a little worried about this method as well because of the orange peel everyone is experiencing and labeling as "Flat as Glass". If it were a spray job, I would demand my money back becuase that much orange peel is unacceptable. The only "Flat as Glass" results I have seen yet are Jeff's and Admactanium's (*sp). It is discouraging when you hear its going on "Flat as glass" and "looks like a mirror" but then you see pics after and its not.
I'm not trying to knock anyone here. I guess what I have realised is that everyone sees something different and everyones expectations are different.
If I have time this weekend, I will try to get some hardener and see if it changes anything. As of right now, the majority of results are too discouraging to apply to a daily driver, maybee a beater.
Ok people, time to prove me wrong here (I want this method to work). Lets see some clear pictures without the orange peel. Take 2 pictures: Picture 1, 1-2 feet away, straight on or slight angle and in the shade. Picture 2, same distance, but on an angle reflecting a straight line in the background (close to the car, 4 feet away or so).
Love it or Hate it; it had to be said!
Smite
What i'm saying and what Smite is seeing and relaying in his post is...the results are just not there. I see alot of people that are close, but it's always something like 'after two more coats', 'after I buff with a different compound', 'maybe I should use a different grit of sandpaper'...there's always one or two more steps left to this elusive paint job.
Believe me, I wanted this to work as much as anyone. I tried the different techniques...I started on a test piece and it looked ok and I thought to myself 'i've learned from my mistakes and the next piece will be better'...I moved to just the trunk lid and yes it was better but it still wasn't without it's problems...the thing is these problems that everyones discovering are never going to cease. Your always going to be just one step from finishing.
It's been well over a month and i'm still having problems getting this paint off my car (and it's 90+ degrees here)...I think as we move ahead in this 'paint experiment', we may be surprised at how many different problems occur. There are so many obvious mistakes being made...has anyone every read a guide for applying auto paint? It's a very timed, meticulous job and you DO NOT add wax for 30+ days - and this is for auto paint that hardens!! And somehow we figure we can paint with $20 hardware store paint and get the results of veteran painters that know what they're doing. Right now, the most enthusiastic people are the ones just getting started and haven't experienced the final stages of the painting process...
Posted By: Marq
Re: Paint job on a budget!? CONTINUED..page 44........ - 06/16/06 01:57 AM
It's an interesting question that you raise concerning the problem you are experiencing with dust spoiling your finished and highly polished work.
I was tossing that scenario around in my mind and the first thought that popped into my head was that the dust might be reacting with the sunlight to concentrate pockets of heat on your finish ?
Bear with me. If the surface was 100% dust free - the sun beating down on the paint and wax would be evenly distributed over the paint.
BUT... if there were dust particles on the car and they heated up under the sun to a higher temperature then the paint or wax benath itbelow... I wonder if it might be able to melt into the wax ?
Now the other thought that struck me was a question about the actual structure of this 'dust'. For example, is the dust simply road dust or dirt that has gotten stirred up and landed on your car... or could this dust be pollen from tress in the area... or maybe even dust from some guy down the street mixing his own batch of concrete mix ? Both of those scenarios would probably place dust on your car that are giving off some nasty chemical type reactions ( in the same vain as bird poop could eat away even the best of waxes or professionally applied paint jobs.
The scenario you are describing is kind of odd and so I think you have to think outside of the box for the answer.
Now another scenario might be the wax and the 'still curing' paint beneath it. Let us pretend that the mineral spirits have not yet 100% evaporated from the paint job. Could the 'still evaporating mineral spirits' not possibly have an adverse effect on the wax ? I am imagining a scenario here where the paint job is sort of like some Martian landscape with little geisers lurking just below the Martian surface. Every now and then a little spurt of gas eeks its way to the surface as the sun beats down on it. That could possibly create a scenario where these gases escaping could damage the wax surface above it. In this type of scenario the dust could simply be a red herring and not the direct cause of the damage to the waxed surface ? Or the dust could simply be gravitating to these little geiser pot marks in the waxed finish ?
All I know for sure is that the mineral spirit does have the ability to strip most types of car waxes off a car ( like when you were initially prepping the body for painting ).
If these scenarios sound like they might explain the problem... the answer would be to hold off further waxing for quite a while and let the paint and its constituent of mineral spirit reach the maximum level of curing. Maybe you have to hold off for three months before waxing again... or maybe even six months.
Of course the circumstances by which your car is exposed to the heat of the sun also would be a variable in how long or fast this 'absolute' curing point would be reached.
And I have the strange lurking feeling that the odorless mineral spirits would probably take longer to reach a level of 'absolute' curing then the regular mineral spirits which don't have an inhibitor to slow down its rate of evaporation.
Dunno... I am no scientist but those are the first thoughts that popped into my mind to explain what you might be experiencing.
Maybe you could try a little experiment by ;
a ) slapping your favorite wax on a normal car paint job...
b ) take your the mineral spirit that you are using and soak a clean cloth with it.
c ) now wring out the mineral soaked cloth until it is almost completely dry.
d ) place the cloth over the 'waxed' area and just leave it there for twelve hours. Don't bother rubbing the wax. Just place the cloth over the waxed spot.
e ) then remove the cloth after 12 hours and see if the vapours that would have still been evaporating from the moist rag had any impact on the shiny wax surface ?
This is similar to the old experiment where you take the mercury from an old fashioned thermometer and place it about 5 inches away from something that contains real silver. The gases that evaporate from the mercury has the ability to turn all silver that the airborn vapor comes in contact with to turn into an irreversible BLACK color.
.
Posted By: Anonymous
Re: Paint job on a budget!? CONTINUED..page 44........ - 06/16/06 04:51 AM
I thought I would pass on an observation I made.
A couple of months ago I painted a metal railing using Rustoleum gloss black. I took my finger to it a few days ago and found I could still scape it. Now this was during the day with the sun on it. It should have cured as much as it would by now. The other night I was on the deck and tried to scape the same spot and it was rock hard. It dawned on me that the heat of the sun softens the paint. Now I have put parts I have painted with this paint in the oven to cure after painting with good results. What I would suggest is that when one goes to polish the paint do it out of the sun where it is cool. The paint will be harder and you should have better results.
Posted By: Anonymous
Re: Paint job on a budget!? CONTINUED..page 44........ - 06/16/06 01:06 PM
Quote:
[edit: by the way, I see now one of my dogs decided to make a cameo in the picture]
I'm in agreement with your dog... that paint looks delicious.
Exit, I shared your observations several months back with the soft paint results (laying on too thick). It eventually DID harden to a rock solid finish (Sunrise Red - not the professional line). I had done 4 heavy coats and wetsanded coats 2 and 4. I let it sit for a while because of frustration over the softness and have lurked here ever since, seeing guys come up with some pretty good stuff.
A couple of weeks ago I hit the panel with 3M machine glaze on a right angle buffer for just a bit and the stuff really took on a shine. I then hit it with 3M scratch remover and am really impressed with the results. In retrospect I could have taken the finish lower on the final wetsand to be more smooth, but the stuff looks great.
BTW, guys I found the good stinky mineral spirits at Advance Auto Parts. It's from Duplicolor and labeled Paint Thinner, but says 100% Mineral Spirits ( See Here). It's not the "safe" kind found at Wal-Mart.
Posted By: GTSDave
Re: Paint job on a budget!? CONTINUED..page 44........ - 06/16/06 01:18 PM
Quote:
the surface was super smooth until i let the car sit for a few days and it collected dust and it seems like it's making the smooth surface rough again...even after i washed off the dust, i can still feel that it is rough
widebody,
It sounds like you have some solvent pop going on. I don't think you will have dust sticking several days after polishing. I do think that since you put it in the sun, trapped solvents are starting to work their way to the surface. When this happens what you get is very small blisters that work their way to the top then once the solvent evaporates, they harden again. Sorta like little goose pimples that harden.
I have seen it a lot with regular auto body paints that were laid on without sufficient flash time between coats. That is one of the reasons I like to let my primers sit for a few days before applying top coat.
One sure fire way to tell is to smell your paint. Park it in the sun for a little while then smell the paint. If you can still smell it, then it has not fully cured yet and there is a good chance you have solvent trapped in it.
-Dave
Posted By: Exit1965
Re: Paint job on a budget!? CONTINUED..page 44........ - 06/16/06 01:36 PM
JP- tell me about your wetsanding experience. When I wetsand mine with 2000, even after 3 days of dry time, the shine goes away and there is a dull haze where I wetsanded. I tried it again yesterday, same haze.
Did you get that haze?
Posted By: 69chargeryeehaa
Re: Paint job on a budget!? CONTINUED..page 44........ - 06/16/06 01:49 PM
I can understand all the concerns about cutting and waxing the paint so soon after it is done, but i can say from my expirence that this paint does not continue to vent/gas for more than the first 4hrs of drying time. If it was, then re-coating after 8-10hours would really cause some problems. Funny thing is that nobody has ever complained that when re-coating that there is a reaction or issues with the relationship between the two layers of paint. With single stage acrylic enamel there are alot of steps and timing is critical as someone mentioned, and they are absoultly right. with single stage, after applying the primer sealer application (depending on the brand; there are slight differences) you have a window of 30 mins to go to color top-coat, or 15 days!!! the reason for this is to allow each layer to gas or "flash", and if you apply another layer outside the window then the two layers interact with eachother and cause bubbles, ect, by making the underlying layer (which has vented off partially) to basically get "wet" again and the two layers dry at different rates, causing a big mess. this is also true of all successive layers of paint, they must be applied within a window, and the correct reducer or ammount of hardener must be used to thin the paint for spraying, and provide the correct rate at which the paint layers flash, too much hardner/reducer for the conditions (relative to temperature and humidity) and the paint can over-dry, and start to crack or seperate from the underlying layers, too little and it could never fully dry. Auto paints should never fully dry in the sence that it is completely dry, otherwise it would loose adhesion from being heated and cooled in the sun, and a certian amount of flexability has to be maintained or any movement of the pannels would cause the paint to crack. What i'm trying to say is that people are trying to compare the process of regular automotive paint (be it single stage or BC/CC) with this method, and i can tell you it's not comparing apples to apples. this "rust" paint is actually formulated to remain "soft"; that is part of it rust inhibiting abilities, but by applying thin coats, and using a much higher concentration of mineral spirits to thin the paint solves that issue. it is the mineral spirits that flashes out of the paint, and to a degree the paint flashes itself too, but the properties of the paint makes it probabally one of the eaisest paints to work with in my opinion hands down. I can honestly say that this paint is not prone to alot of the issues that auto paint is prone too, if it were, then people would have issues like i mentioned earlier with re-coat windows. i've cut and buffed including waxing the paint 2 days after painting the last coat, and i have absoultly no issues with the paint, acheving gloss, or durability, that has to be a testament to reinforce the point i'm trying to get accross, we have to stop comparing the regular auto paint process with this method, because the theories and process steps, and formulations are not the same. the rules that apply to regular auto paint somewhat apply, but the processes vary too greatly to compare them.
Posted By: Anonymous
Re: Paint job on a budget!? CONTINUED..page 44........ - 06/16/06 02:55 PM
Quote:
i see, but all my layers are already done, i finished final wetsand and wax/buff already...surface was super smooth until it started to collect dust..
shouldn't be any problem doing outdoor. some people have it turned out pretty good even outdoors with dust, tree particles, insects all around, etc.
here's someone's post awhile back, i think it's a good process to follow. looks pretty good being painted outside.
http://cars.500megs.info/forum/viewtopic.php?t=13
even if you are finished with the final buff and all, you can still put more coat on. if it's rough, wetsand it down and repolish or put another coat of paint.
Posted By: Anonymous
Re: Paint job on a budget!? CONTINUED..page 44........ - 06/16/06 03:49 PM
When I wetsanded the panel, I was using 800 or so because I was planning on laying a couple more coats before polishing. There was zero shine in the panel after the wetsand. I'm not sure if this is what you're experiencing as haze? I never made it up to 2000 grit. By haze, do you mean wetsand scratches?
Anyway, with the softness of the paint at the time (after the wetsand), I just put the panel away for a while and forgot about it while I worked on the myriads of other issues on the car. I came back to it because I was tired of working on the car and wanted to try out my buffer (high speed - beware).
Sorry, I don't have any pics of the panel (camera's on the fritz)...
Posted By: Exit1965
Re: Paint job on a budget!? CONTINUED..page 44........ - 06/16/06 06:25 PM
Well, I finally had some luck getting this red to shine after polishing. My earlier problem with haze, I am not sure what to attribute to. But this coat had dried for several days, was wetsanded yesterday, then polished with a cheap 6" buffer today. I used the cheap turtle wax polish, and this area (above the body line) took about 2 minutes. Maybe with more time it would be better than this.
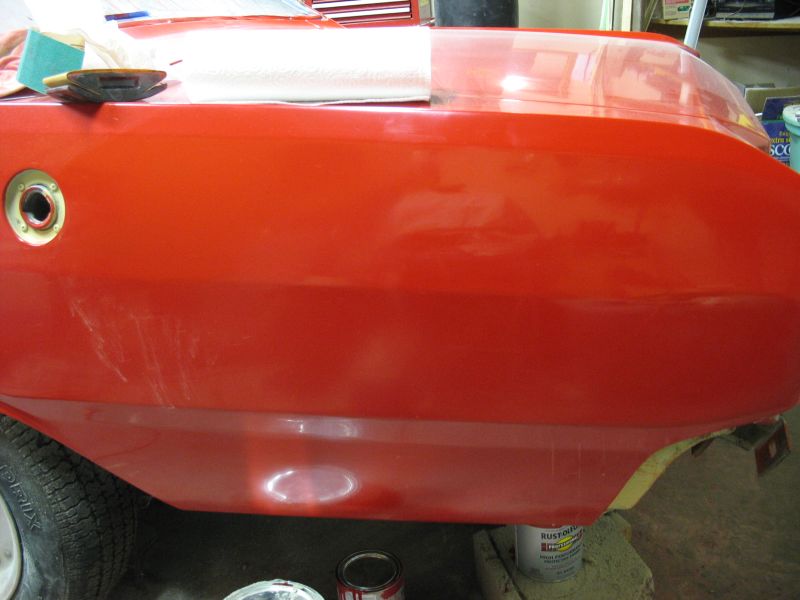
You should be able to see the area that was not sanded and polished (just the paint there) forward of the area that was. This polished area also has some spray bottle Eagle "nanowax" which is a clear carnuaba wax.
edit.. opened the garage and let some natural sunlight in on it. Im liking the red now so Ill just finish the d*mn thing before I change my mind again.
by the way, this was sanded with 2000 grit, and there is _no_ orange peel. [edit: looked closely, and there is some orange peel deep down. Maybe hitting with a harder grit before 2000 would help it shine better]
Posted By: Anonymous
Re: Paint job on a budget!? CONTINUED..page 44........ - 06/16/06 06:26 PM
So I've been
Is it possible to lay on really really thin coats of the rustoleum clear coat once the top layer has been sanded down to 2000 grit or so? I found it at HD in spray can, and I wonder if you could be really careful and use extremely light coats to get decent results without having to wet sand later. That might add the gloss people are looking for. I might have to give it a go on a test piece...
And if wetsanding is required, has anybody successfully tried wetsanding the clear enamel?
Posted By: Anonymous
Re: Paint job on a budget!? CONTINUED..page 44........ - 06/16/06 06:47 PM
Exit, that polished part looks killer. You can also look at the trunk and see the vertical lines of the stuff in the background. The reflections have no waves. Perhaps the haze you saw was microscratches from the wetsanding...(?)
Question: of those who have used the spray paint for the jambs, does it seem to match pretty well? I have to paint the inside part of the tub of the dune buggy and think it would be much easier to spray the footwell areas than roll.
Posted By: Exit1965
Re: Paint job on a budget!? CONTINUED..page 44........ - 06/16/06 06:50 PM
It probably was the microscratches that I saw, but for some reason they wouldn't go away before.
Posted By: patrick
Re: Paint job on a budget!? CONTINUED..page 44........ - 06/16/06 07:02 PM
honestly, exit, it shines about as good as the single stage paint job on my duster. good work!
Posted By: 69chargeryeehaa
Re: Paint job on a budget!? CONTINUED..page 44........ - 06/16/06 09:10 PM
Quote:
honestly, exit, it shines about as good as the single stage paint job on my duster. good work!
finish it and pull it out in the sun, your being too critical, it looks , immagine how much better it will look with the bumpers, trim, handles, rubber, ect....also be prepared to polish for at leats 1 solid day, i'd spend 2 hours on that rear quarter, stop, clean with spirits and polish more, it's the polishing that bring the shine and it is permenant, polish, polish, and when your done, polish more. i've had the best luck with the turtle wax polishing coumpound and the white terry bonnets. Also don't forget your looking at a stripped car and once it's all back together you'll be happy as a pig in $h!t!!!!!!!!!!!!!
Posted By: Anonymous
Re: Paint job on a budget!? CONTINUED..page 44........ - 06/17/06 01:18 AM
anyone whos interested in spraying this stuff who dont have a compressor check out this thread
http://honda-tech.com/zerothread?id=1555133&page=23 and go to like page 25 or soemthing ...and see the results =)
Posted By: roe
Re: Paint job on a budget!? CONTINUED..page 44........ - 06/17/06 03:40 AM
Quote:
anyone whos interested in spraying this stuff who dont have a compressor check out this thread http://honda-tech.com/zerothread?id=1555133&page=23 and go to like page 25 or soemthing ...and see the results =)
Those guys are gettig some pretty good results with the Wagner gun. And the guy who rattle-canned his engine bay with the gloss green got some really nice and shiney results.
Posted By: Anonymous
Re: Paint job on a budget!? CONTINUED..page 44........ - 06/17/06 04:27 AM
yea, they did...not only that the guy who did his roof gloss black with the rattle can :thumbsup:
Posted By: roe
Re: Paint job on a budget!? CONTINUED..page 44........ - 06/17/06 08:52 AM
Quote:
yea, they did...not only that the guy who did his roof gloss black with the rattle can :thumbsup:
Yeah, I forgot about him. I added that forum to my favorites just so I can see their results, both rattlecanning it, and spraying it with the Wagner.
Posted By: Anonymous
Re: Paint job on a budget!? CONTINUED..page 44........ - 06/17/06 02:30 PM
Interesting results. I imagine you end up with less orange peel with the spraygun than with the roller, but kick up more dust and debris, so it would only be "better" (i.e. less wetsanding) if the increase in dust problems offsets the amount of orange peel you get with a roller. I think that with enough practice and the correct ratio you could keep the roller-peel to a minimum.
I see using the Wagner HLVP with Rustoleum as an intermediate step between the roller (very low cost, lots of labor/technique) and a full-on BC/CC spray job (very high cost). The next intermediate step would be to spray with the Wagner HLVP a BC/CC job in your garage. That would be more expensive than Rustoleum, but not as costly as either buying a compressor and gun or having someone spray for you.
I like the fact that the roller doesn't kick up any dust to get into the paint, so you can really do it in your average home garage (or even outside as many here have done).
Posted By: Anonymous
Re: Paint job on a budget!? CONTINUED..page 44........ - 06/17/06 06:41 PM
Quote:
Interesting results. I imagine you end up with less orange peel with the spraygun than with the roller, but kick up more dust and debris, so it would only be "better" (i.e. less wetsanding) if the increase in dust problems offsets the amount of orange peel you get with a roller. I think that with enough practice and the correct ratio you could keep the roller-peel to a minimum.
I see using the Wagner HLVP with Rustoleum as an intermediate step between the roller (very low cost, lots of labor/technique) and a full-on BC/CC spray job (very high cost). The next intermediate step would be to spray with the Wagner HLVP a BC/CC job in your garage. That would be more expensive than Rustoleum, but not as costly as either buying a compressor and gun or having someone spray for you.
I like the fact that the roller doesn't kick up any dust to get into the paint, so you can really do it in your average home garage (or even outside as many here have done).
thats all true but i see most of them doing it outside...and i've actually tried spraying in my garage there is a lot of paint in the air but no dust if u wet the floor, but good results with the spray method
Posted By: 69chargeryeehaa
Re: Paint job on a budget!? CONTINUED..page 44........ - 06/17/06 07:06 PM
Posted By: Anonymous
Re: Paint job on a budget!? CONTINUED..page 44........ - 06/18/06 12:29 AM
Not soooooo fast. I saw a link to this thread from Jeeps Unlimited.com. I just need a quick update. From what I have read the paint I need is oil based enamel from rustoleum and mix it with mineral spirits and use a dense foam roller to apply up to 10 coats on a sanded surface, metal or primed.
Wet sanding each or every other coat will rid the orange peel and remove impurities. ( I detail, so wet sanding and buffing and my specialty)
Does this sound correct? If so, I have a few questions. I found some of the rustoleum at lowes, the same stuff others on here have used, and it says do not use on surfaces that reach 200 deg. F. It also says do not use for surfaces submerged in water. A car spends its time outside and is always wet, and hoods will go over 200 easily.
Have any of you had any negative effects from using this paint in the outdoors exposed to snow, rain, salt, etc for several years? Or does this stuff hold up well?
Also, how much do I thin the paint with mineral spirits?
Posted By: Anonymous
Re: Paint job on a budget!? CONTINUED..page 44........ - 06/18/06 12:49 AM
Not fortunite enough to be a MOPAR owner, but this thread has gone all over the world, I got the link from a few other sites and at first i was laughing it reading that people were actually doing this. It seemed so "White-trash"! Well, thanks to all the details from others and mainly 69chargeryeehaa, I gladly carried the torch and went with the "Royal Blue"


This is after 4 really light coats and still need to wetsand, buff and wax. I just wanted to say "Thank you"!
And just to throw in my $.02, What I learned is "thin coats" means thin coats in order to avoid orangepeel, consistancy needs to be REALLY thin, like water... I used about 1 quart for four coats on entire car... and VERY happy with the results thus far.
Posted By: Marq
Re: Paint job on a budget!? CONTINUED..page 44........ - 06/18/06 01:45 AM
If the Rustoleum / Tremclad marketing people were REALLY SMART they would seize on this and put together some 'gathering' where all the Rusto cars and Tremclad cars could gather for a 'car show'....
Tee hee... a gathering of cheap but well motivated car enthusiast...
But then again... since we are all so 'budget' minded we probably wouldn't want to drive to far to get to this Concours... ahahhhhah....
Anyhow... on the update with my car... I just sanded down the paint and I can assure anyone who wonders about the 'hardness' of the Tremclad when applied this way that the sanding only produced DUST... dry as desert dirt dust... There was absolutely NO gumming up or clogging of my sandpaper. And this was from a 3 day old application of paint.
On other topics... I have been following that other thread where the guys are using cheap Wagner electric spray guns to apply their paint.
So I took a trip over to the Home Depot to scout out the units that they have there. It turns out that the guy in the hardware section had experimented with the range of Wagner sprayers AND RUSTOLEUM.
From what I gather from his experiences, the cheap bottom end Wagner sprayers 'might be able to do the job'... but he does not recommend them.
You can spot the weaker and less likely to succeed Wagner electric sprayers by the fact that THEY DON'T GIVE THE PSI ( pounds per square inch ) pressure rating on their boxes. These units are usually in the $50 to $70 range ( CDN$)
In fact these Wagners are the ones you tend to find at Walmart etc. Instead of telling you the PSI their boxes they usually make some idle claim about " you can paint 15 feet of fence in 10 minutes' or some crap like that.
For some odd reason Walmart was charging about $20 to $30 per unit more than Home Depot for these lower end Wagners. I was a bit surprised that Walmarts price was so 'uncompetitive' compared to Home Depot.
The Depot guy says to avoid those ones that don't tell you right on the box what their PSI is. Wagner is embarassed to say it.. so you should avoid it. They only have about 1200 PSI and you would have to cut your Rusto/Tremclad with about 35% to 50% mineral spirit for them to function properly.
The ideal or dream Wagner electric sprayer is rated at 2200 PSI and proudly proclains that on their box. You pay a bit more for this puppy - but it has the ability to atomize even straight Rustoleum or Tremclad - and it has the valve to handle that density of paint. However, the Depot guy says that you should cut the paint with mineral spirits ANYHOW.
There was also a 1500 PSI model and an 1800 PSI model Wagner. Again note that Wagner clearly indicates the PSI on the boxes of both of these products. Both are up to the task of atomizing Rustoleum and Tremclad. The Depot guy gave his personal thumbs up to the 1800 PSI model. But again he suggest that the results will be better if you cut the Tremclad / Rustoleum with about 10% to 20% mineral spirits.
The 1800 PSI unit was going for about $89 bucks CDN and the 2200 PSI unit was going for about $109 CDN$.
Strangely enough the Walmart no PSI Wagner was also going for about $109 CDN ( and since we know it is only a 1300 PSI model that price difference is what made the Walmart unit seem so overpriced ).
The end user is supposed to test out their sprayer / paint and mineral spirit mix by fiing against a 4 x 8 sheet to fine tune the spray being delivered and the runability of their paint and mineral spirit combination.
The only caveat that I was given about the Wagner that is shown in the earlier message ( the ultimate control and minimize overspray model ) is that they don't show on the box what the PSI is for that unit. As such he thinks it may be a 1200 or 1300 psi model. Therefore you would probably have to cut your paint to mineral spirit something like 40% mineral spirit in order to not clog the valves and for the spray gun to
onsistently atomize the paint it is spraying.
So the conclusion to this tale is that :
a ) if the Wagner spray gun doesn't tell you the PSI on the box... it is probably best to avoid it.
b ) the one labeled with its PSI rating on the box ( and especially the one rated at 1800 PSI is probably the best bang for your buck and can perform a thousand other duties when it isn't being used to Rusoleum or Tremclad a car body.
Hope this info helps someone out who might be considering the electric spray method of applying their paint.
.
I am seriously thinking about this option because it sounds like an ideal way to deliver a consistent and thin black layer and then overcoat it with a red layer ( getting that deep black cherry look that I want - instead of just settling on the standard issue Fire Red color on its own ).
Posted By: Anonymous
Re: Paint job on a budget!? CONTINUED..page 44........ - 06/18/06 02:07 AM
Hi Scott, It looks more like Sail Blue or fresh blue to me... when I looked at the can of rustoleum royal blue it was very dark... I am looking for the same color you car is but I dont was a dark blue...
Lemme know, thanks. Btw, it looks awesome... =)
Posted By: Anonymous
Re: Paint job on a budget!? CONTINUED..page 44........ - 06/18/06 02:16 AM
It is "Rust-Oleum, Gloss Royal Blue #7727, Protective Enamel, Superior Durabilty Premium Quality, Oil-Based" (I'm looking at a can) I never saw on the posts how much it would take to cover, that is why I posted the amount. I also used the "Odorless Mineral Spirits" and don't see any issues with it.
Posted By: Anonymous
Re: Paint job on a budget!? CONTINUED..page 44........ - 06/18/06 02:25 AM
The color on the camaro seems to be the same as on my Scirocco which is a Tremclad Medium Blue. Its almost to "bright" but its way nicer than the fade I had on the origional paint.
On a side note for anyone else here is an interesting read on "runs" and "peel"
http://www.auburn.edu/~byrdmic/orangepeel.htmthis guy got rid of some serious runs the hood of his car.
This attaced pic is still 6th coat "rough"

Posted By: Anonymous
Re: Paint job on a budget!? CONTINUED..page 44........ - 06/18/06 03:49 AM
He dry sanded that hood. If you wet sand it you will get a better result most times. Also, use an orbital (like the ones u get from sears with different pads)and use some swirl remover to remove the buffer swirls. You know, that look a black car gets in the sun after a fresh detail from someone who didnt use swirl remover...the spiraly type lines in the paint.
Posted By: Anonymous
Re: Paint job on a budget!? CONTINUED..page 44........ - 06/18/06 04:23 AM
marq - no matter wat paint gun ur using ur still going to have to mix mineral spirt with the paint because if u dont the paint is to thick when u apply it...and u dont get that "glossy shine" even when u wet sand and wax...cuz i tried it. so even if ur sparaying do about 30% mineral sprit
Posted By: Anonymous
Re: Paint job on a budget!? CONTINUED..page 44........ - 06/18/06 02:17 PM
Hi guys i have been following this forum since day one but never got a chance to post over here. I have experimented with the roller and a cheap paint gun(hlvp control spray) I have been using rustoleum professional gloss black. exit is right that the professional does have some good features. Also crazygoat is right you still going to have to add mineral spirits to get the right amount.

here is a picture where i rolled on with a gloss balck see the orange peel but still made its shine

Here it is with the cheap paint gun i got from home depot. I sprayed about 2 inches away adding thin coats. I add one thin caot and let it dry for 15 minute to be on the safe side and added more coats. once the lights coats covered the area the next day i sanded and did the same process until the third and polished. see the results.
Posted By: Anonymous
Re: Paint job on a budget!? CONTINUED..page 44........ - 06/18/06 02:27 PM
Wow. I guess the can is way off. It's a lot brighter than the can represents I guess. I will get a quart to test it. I was going to buy Sail Blue cause the color on the can looked like the color I wanted and the color you have and the guy who used medium blye had.
How come the color is so much brighter? I wonder if sail blue is too bright...
thanks Scott. =)
Posted By: Anonymous
Re: Paint job on a budget!? CONTINUED..page 44........ - 06/18/06 02:33 PM
Stuff--
I can't tell b/c your spray picture isn't a close-up like the roller pic, but are you saying that you got a much smoother application with the spray gun, ie less orange peel? It looks really good from that distance, does it look as good up close?
Posted By: Anonymous
Re: Paint job on a budget!? CONTINUED..page 44........ - 06/18/06 02:41 PM
its good at a distance, up close is ok you still can see minor orange peel here is a pick up close from the third coat.

I worked my butt off trying to get all the orange peel once i get to the sixth coat it started to look better. Be warned when working with black its very hard to shine.
I used a technique wheni paint my rims or whatever. I kept applying thincoats around the area of my trunk lid going back and forward, i also made very sure i have no drips using the paint gun. I basically kept applying thin coats one after another. The thin coats dry quickly Ill make a video later today if i get a chance. I did get smoother application using the gun, i also got smoother application using the roller. Ill probably put both together to see what it would look like. wetsanding is key though.
Posted By: 69chargeryeehaa
Re: Paint job on a budget!? CONTINUED..page 44........ - 06/18/06 05:00 PM
scotts67 - i really like the color, blue is my favorite color, nice work.
nice job too stuff215, that looks killer.
i did try a long time ago with one of those wagner spray guns, about 3 yrs ago and i went with the top of the line one, and i was'nt too thrilled with it, you still get the mess, smell and battle dust/dirt/hair. the one issue i had with that gun was keeping it consistent, i would spray globs after i'm done like painting 1/2 of the car, and then i'd have to stop, clean the gun, and continue, and leave that pannel to dry and fis the globs/runs that it left behind. when it did work it worked great, but it left more work to fix it when it started spitting. i exchanged it for another one, it did the same thing, then i returned it and continued with the roller.
the one thing about using the roller, is that after you get the hang of it, and can apply smooth thin coats, it's a walk in the park. it is soo easy to do with the roller, no mess, no fuss, you can really accurately cut in the hood, have a break, to the fender, take another break, and continue on, and not have a gun to clean, all the over spray, tape up the whole car, ect....allthough i did notice spraying the paint with a hvlp gun did result in very little overspray when compared to the single stage auto paints i've sprayed, that basically gets paint on everything your own, and your picking snoot out of your nose for weeks colored in the paint you sprayed with!!! and that's even with a resperator!!.
i'll stick with the roller, if you get the hang of the roller, you'll know what i mean, best is to practice on anything, old hood is the best, and prefect the tequnique, and thinning of the paint. but it's a skill, either you have it or you don't, it's like playing a insturment, to some people it comes naturally, some can't play anything no matter how hard they try.
Posted By: Anonymous
Re: Paint job on a budget!? CONTINUED..page 44........ - 06/18/06 10:47 PM
Looks good there. Yes according to the tremclad page 27009 Medium Blue is definatly brighter than royal Blue 7727
It looks more like rustoleums' 7524 Safety Blue and mayber brighter.
Tho the blue is looking great on all the cars that chose it. It's reinforcing my decision to paint it blue. Royal Blue-
I will pick up a quart today and see for myself. I do hope it comes out the same color as scotts...
I will post pics very soon as I continue to sand my car down with 400. And the test peice... a set of JDM power folding mirrors for my Lucino conversion. (aka turning a sentra into it's japan counter part)
If this method works well for me I will be re-painting my fastback. =)
Posted By: Exit1965
Re: Paint job on a budget!? CONTINUED..page 44........ - 06/18/06 11:47 PM
That test piece sounds like you will get practice in polishing and sanding, but with something as small as mirrors, the technique to apply thin coats to a flat surface is not really going to be practiced (unless you are just seeing how the color looks?).
With something that small, try getting the roller nearly empty or the roller will hit one of the edges/contours and dump a lot of paint in that one spot.
Best piece is a large flat panel, either a hood or preferably something you can put so the surface is perpendicular to the ground (i.e., not laying flat) as the sides of a car are where runs occur if the technique isn't right.
Posted By: Anonymous
Re: Paint job on a budget!? CONTINUED..page 44........ - 06/19/06 12:30 AM
How much should I thin the paint? LIke how much to cut it down with? 50/50 mix or 90/10? And does each batch of thinning make a diff? should the thinning be measured so I can duplicate it each time?
Posted By: Anonymous
Re: Paint job on a budget!? CONTINUED..page 44........ - 06/19/06 12:33 AM
I see. Besides wanting to see how it would look as far as color I wanted to see how it would polish out. I do know that it would be easier to paint a non-daily driven car as yours when it comes to stripping and such. But I dont have that possibility.
I have to tackle it outside. For the mean time however should I take out the fender to paint first instead of the mirrors? Or perhaps even the front bumper?
thanks for your suggestions Exit. How's everything on your end?
Posted By: Exit1965
Re: Paint job on a budget!? CONTINUED..page 44........ - 06/19/06 04:48 AM
The fender would be a good place to start. Once most of the paint is out of the roller you can roll the mirrors and not worry about getting too much paint on them.
On my end, things are OK, just applied another coat. It's getting there. It's also starting to be consistently hot over here so I'm working in a garage about 94 degrees. Soon it'll be done..
Posted By: Exit1965
Re: Paint job on a budget!? CONTINUED..page 44........ - 06/19/06 04:50 AM
Quote:
How much should I thin the paint? LIke how much to cut it down with? 50/50 mix or 90/10? And does each batch of thinning make a diff? should the thinning be measured so I can duplicate it each time?
You'll just want to mix it until it flows really easily, something like regular milk, maybe a tad thicker. After a few times you'll know what works right, what goes on smooth with minimal bubbles and does not run. Start with maybe 30 percent I would guess.. (?)
Posted By: roe
Re: Paint job on a budget!? CONTINUED..page 44........ - 06/19/06 04:50 AM
Quote:
The fender would be a good place to start. Once most of the paint is out of the roller you can roll the mirrors and not worry about getting too much paint on them.
On my end, things are OK, just applied another coat. It's getting there. It's also starting to be consistently hot over here so I'm working in a garage about 94 degrees. Soon it'll be done..
pics, pics, pics, pics
Posted By: Anonymous
Re: Paint job on a budget!? CONTINUED..page 44........ - 06/19/06 05:56 AM
More on the sanding and applying Clearcoat. I had a quick chance to do a test on the rear panel of my car today. (it was quick) but the results were nice. took and wetsanded what is the 6th coat and wiped down. I had on old can of Trem Clear and gave it 2 quick sprays. This is definatly they way I'm going to go after my last coat. Got to get some Clear in a 1L can. I could prob do the whole car with 4 spray cans of clear as well.

Posted By: Anonymous
Re: Paint job on a budget!? CONTINUED..page 44........ - 06/19/06 06:04 AM
here is the pic after second shot of clear. The stuff drys real fast as well little bugs had no time to get stuck as it dryed before they had time to find the sprayed spot.

Posted By: Anonymous
Re: Paint job on a budget!? CONTINUED..page 44........ - 06/19/06 07:43 AM
ok .. so heres the million dollar question.. i have a pontiac fiero and well as some of you guys may or may not know, the body is plastic. its really starting to become faded and i want to get it painted badly. i like the idea you guys have, the only problem i have with it... will it work on plastic... metal i would have no problem, but my car is all plastic, gotta love pontiac. pieces are super easy to take off.. all the body panels come off seperatly. which makes it so much easier for painting, but the problem i run into is i dont know if it will work on plastic.... anyone done it or tried it???
(below is a picture of what the car looks like roughly, not my car though.)(sorry for spelling errors)

i would liek to get a shiny look to it.. almost liek a candy... liek this..

Posted By: Anonymous
Re: Paint job on a budget!? CONTINUED..page 44........ - 06/19/06 10:38 AM
Well, I've started the prep work, but have one last question. People have said (after sanding, prep work I mean) that it feels like glass, is that the basic kind of feel I'm going for after doing the prep sanding?
Just to give a descriptive idea of what it actually looks like, his hatch was red, no fading on it, now when I sanded down the hood with 150 grit its pretty much a dusty white with some red, not much though and does feel really smooth like glass after wiping it down.
Thats what I should be aiming for correct?
And we are taking pictures of our project, so once we actually get to the painting, will post some pictures and any tips or errors we run into.
Thanks, Matt.
Posted By: Marq
Re: Paint job on a budget!? CONTINUED..page 44........ - 06/19/06 11:56 AM
I started with a 220 grit... and that seemed to give a pretty smooth surface to lay the first coats down on. From then on I used 600 grit or 800 grit for leveling the layers. The final layers will end up being wet sanded with a progression of 1000, 1200 or 1500 and then ending up with a 2000.
150 may be okay for ripping down the initial layer but I would be tempted to do a 220 or even a 600 just to remove or level out any of the scoring that a 150 would have left. It just makes it that much easier for the first coat of paint to go on smoothly and not find the paint trying to fill in the scoring to get the initial coat level.
Dunno... someone else may find 150 a good place to start....
.
Posted By: Marq
Re: Paint job on a budget!? CONTINUED..page 44........ - 06/19/06 12:05 PM
I don't think you should have any problem with the paint reacting with the plastic of a Fiero.
The paint appears to have no problem with compatibility on plastic bumpers, moldings etc on other cars.
BUT... maybe the smartest thing to do would be to do a test piece. You can probably find some section of a Fiero at the auto wreckers / recyclers. You could do a full out test on that piece and take it to one or two complete sequences of the process.
The only reason I am a little hesitant about giving a 100% thumbs up to going ahead without a test piece is that the type of plastic used in Fiero bodies is a bit of an unknown... Even if you were to test out the process on just one of your own piece. you will be assuring yourself that there won't be any adverse reactions when the mineral spirits and paint start accumulating on the body parts.
I don't recall anyone ever mentioning that Fiero's are handled any differently at body shops then say a starndard car. So I think you will be able to use the process with success... but do a 'test' piece just to assure yourself ( and to help develop your technique )
.
Posted By: Anonymous
Re: Paint job on a budget!? CONTINUED..page 44........ - 06/19/06 01:54 PM
Quote:
Well, I've started the prep work, but have one last question. People have said (after sanding, prep work I mean) that it feels like glass, is that the basic kind of feel I'm going for after doing the prep sanding?
Just to give a descriptive idea of what it actually looks like, his hatch was red, no fading on it, now when I sanded down the hood with 150 grit its pretty much a dusty white with some red, not much though and does feel really smooth like glass after wiping it down.
Thats what I should be aiming for correct?
And we are taking pictures of our project, so once we actually get to the painting, will post some pictures and any tips or errors we run into.
Thanks, Matt.
wat they mean by "glass" is when u appl ur first coat of paint, it will be this glossy thin layer of paint that will be see through. when u prep the car make sure u wash the car down then dry it wiht lint free cloth then get some sort of wax/grease remover and go over the whole car or ur paint area then start the paint process.
Posted By: Anonymous
Re: Paint job on a budget!? CONTINUED..page 44........ - 06/19/06 05:45 PM
alright so you guys got me hooked.. i really wanna do this now.. so heres the del i got an extra door skin lying around so ill try it on tat and if all goes well ill do the car. approximately how long is it(its kinda my daily driver and my baby, jsut got the collector plates for it).. and if you could, can you do a step by step process. ive never painted a whole car, just a few simple parts. seeing as my panels are removable, i will prolly take them off and paint them seperatly. but if someon could do a step by step procces, tell me everythign i need, and were in the usa i can possibly get the supplies i will be all ready to go..
thanks
matt
ps u guys rule
Posted By: Anonymous
Re: Paint job on a budget!? CONTINUED..page 44........ - 06/19/06 06:57 PM
Quote:
alright so you guys got me hooked.. i really wanna do this now.. so heres the del i got an extra door skin lying around so ill try it on tat and if all goes well ill do the car. approximately how long is it(its kinda my daily driver and my baby, jsut got the collector plates for it).. and if you could, can you do a step by step process. ive never painted a whole car, just a few simple parts. seeing as my panels are removable, i will prolly take them off and paint them seperatly. but if someon could do a step by step procces, tell me everythign i need, and were in the usa i can possibly get the supplies i will be all ready to go..
thanks
matt
ps u guys rule
its all in the forums. i think the mods need to sticky a thread for the process or have an FAQ section LoL.
basically prep ur car, fix dings (if u konw how) and remove rust by sanding the car with a da 80grit. then go over with 120 then maybe something high like 400 range. so its a nice and smooth then tape off ur car, thin the paint until like water or some ppl are doing 30% mineral sprit and the rest paint, then paint it on using thin coats...verry thin, first few coats u'll be able to see through the paint. until about the 4th or 5th coat it'll start to hide and dont forget to wetsand between every 2 coats. once painted the desired amount of coats let the paint dry/cure for a day or 2 then u can either wax or let it dry for longer then spray on gloss clear coat then wax that.
im sure u konw wat supplies to use? if not i encourage u to read all 44 plus pages :P so u konw wat everyone did and wat u could do to make it work for u. u can spray it or roll it. process will take a few days to a week.
Posted By: 69chargeryeehaa
Re: Paint job on a budget!? CONTINUED..page 44........ - 06/19/06 06:58 PM
Quote:
alright so you guys got me hooked.. i really wanna do this now.. so heres the del i got an extra door skin lying around so ill try it on tat and if all goes well ill do the car. approximately how long is it(its kinda my daily driver and my baby, jsut got the collector plates for it).. and if you could, can you do a step by step process. ive never painted a whole car, just a few simple parts. seeing as my panels are removable, i will prolly take them off and paint them seperatly. but if someon could do a step by step procces, tell me everythign i need, and were in the usa i can possibly get the supplies i will be all ready to go..
thanks
matt
ps u guys rule
https://board.moparts.org/ubbthreads/show...&PHPSESSID=
Posted By: 69chargeryeehaa
Re: Paint job on a budget!? CONTINUED..page 44........ - 06/19/06 10:08 PM
Hey guys, here are some pics i just uploaded, dial-up beware, big high res pics get a
and enjoy.
http://s32.photobucket.com/albums/d13/69martin/new%20paint%20pics/
Posted By: Anonymous
Re: Paint job on a budget!? CONTINUED..page 44........ - 06/20/06 05:03 AM
Posted By: Exit1965
Re: Paint job on a budget!? CONTINUED..page 44........ - 06/20/06 12:55 PM
I don't think anyone has done enough experimenting with metallics. I've tried using "aluminum" color which is metallic, but after sanding it looks horrible, probably due to uneven moving of the metallic flakes.
Some people have asked what would happen with a light coat of metallic paint, covered by a coat or two of regular paint, so that the metallic paint itself isn't sanded. That might work, don't know if anyone's tried it yet.
The color you see on the dart is "safety red" professional rustoleum.
"regal" red in regular rustoleum is closer to candy apple red. here's some put on thick with penetrol:
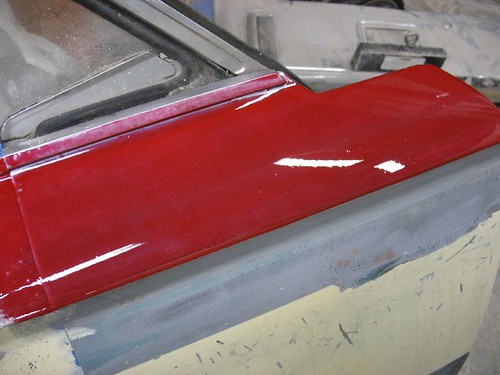
Posted By: Anonymous
Re: Paint job on a budget!? CONTINUED..page 44........ - 06/20/06 02:19 PM
http://www.rustoleum.com/Product.asp?frm_product_id=32&SBL=1&dds=15oil based clear coat...i wonder if you can spray this over our rust-oleum
Posted By: Anonymous
Re: Paint job on a budget!? CONTINUED..page 44........ - 06/20/06 03:05 PM
i think i might experiment with that do one coat of the matallic, cover by one, maybe two coats of saftey red, sand, and go from there. do you think that that will be enough coats? as far as underneath, my car is already red so after i sand it down, and not too much cus it is plastic after all, i dont think ill need that many coats. ill try the metallic though see how it looks and if i cna find the digital cam post my results.. thanks exit.
Posted By: Exit1965
Re: Paint job on a budget!? CONTINUED..page 44........ - 06/20/06 04:12 PM
My car took over 10 coats. But they went on really thin. That's the only way I know how to avoid orange peel without having to spend time sanding down the orange peel every 2 coats. I was sanding more to take out imperfections like dust specs and hair.
If you start with a solid color car, i.e. no black spots or light colored spots, you can probably get away with fewer than 10 coats.
Let us know how you fare with the metallic stuff. Be careful to put it on thin, since you wont be able to sand it smooth.
Posted By: BigTerry
Re: Paint job on a budget!? CONTINUED..page 44........ - 06/20/06 04:19 PM
Quote:
Interesting results. I imagine you end up with less orange peel with the spraygun than with the roller, but kick up more dust and debris, so it would only be "better" (i.e. less wetsanding) if the increase in dust problems offsets the amount of orange peel you get with a roller. I think that with enough practice and the correct ratio you could keep the roller-peel to a minimum.
I see using the Wagner HLVP with Rustoleum as an intermediate step between the roller (very low cost, lots of labor/technique) and a full-on BC/CC spray job (very high cost). The next intermediate step would be to spray with the Wagner HLVP a BC/CC job in your garage. That would be more expensive than Rustoleum, but not as costly as either buying a compressor and gun or having someone spray for you.
I like the fact that the roller doesn't kick up any dust to get into the paint, so you can really do it in your average home garage (or even outside as many here have done).
wouldn't hosing the area you going to be working at be the thing to do to keep the dust down??
Posted By: texczech
Re: Paint job on a budget!? CONTINUED..page 44........ - 06/20/06 05:36 PM
What is the Wagner part number for the sprayer you used? I would like to investigate this further.Any other tips on using the Wagner sprayer? Thanks.
Posted By: Anonymous
Re: Paint job on a budget!? CONTINUED..page 44........ - 06/20/06 07:39 PM
got soem bad and good new on the fiero project... couldnt get metallic in a quart, they only make it in spray according to lowes.. good news is.. i started on my test peice today using differnt ammounts, pressures and im gonan see which way works the best.. so far after 10 min the thinest least pressure layer looks the best..
also, i dont know if i liek the way the saftey red is looking at the moment, its really orangy kinda brigtish red, i may mix it with sumthing and see.. dunno.. otherwise painting plastic i think is gonna be a bit easier than metal. i wont know for sure until i paint my brothers car, but im hoping to get mine to work out first and then see. but otherwise ya.. really wanted the metallic stuff though.. and my rents wont let me do the project if there is any spraying involved.... oh well... ill keep u guys posted hopefully gonna put a second coat on tonight.. and try a scratch test on some of the dry stuff... supposed to be totally hard in 8hrs according to can.. lol.. almost wishing i could go with the regal now lol.. anways.. i think ill stick wit the saftey for now..
also need some help wit the painting decisions... i plan on putting a black stripe down the middle, my dad will help me with tat, but... what shoudl i do with all the moldings.. jsut lookign for some opinions .. right now all the moldings are balck.. see first picture on my other post(pg 7)...
should i go liek this..
[image]http://www.motorcities.com/media/image/640/05JGM021409530A/1988-Pontiac-Fiero-GT-A.jpeg[/image]
or jsut paint all the moldings and jsut have the black stripe going downt the middle as the only differnt color.
Posted By: Anonymous
Re: Paint job on a budget!? CONTINUED..page 44........ - 06/21/06 03:35 AM
ok got 2 coats on today and gonna wet sand tommorw.. ran into a few small snags.. i think i may have put too many mineral spirits into the paint.. but hey its only a test peice and ill learn soon enough.. lol.. anways.. the other snag i ran into was my parents.. neithor of them wants me to paint it

.. they dont think i can pull it off.. and they say its gonna end up costing me 200 dollars more to get it removed and taken to macco when i mess up.. so i dunno im gonna keep running my tests on the door panel.. for an 18yr old im not stupid.. ive read and re read alot of what you guys did .. i have all the materials to do the whole car as of right now.. and i belive i can do it.. seeing how i did the test doors i dont belive it will be too bad..the only thing tat worries me... is all the wet sanding.. i got the paint mixture down pretty well after doing 2 coats and 1 coat on another.. so im at the moral delema.. do i listen to the parents and let them win.. or.. do the paint job i think i can do and show them wrong.. .. decisions decisions..

do you guys think im capable of doing it??
it is my car.. and i was told i can do as i want.. but they stressed they dindt want me too
also, after 10 hrs i didnt run into the scraping problems exit did.. mine was pretty much solid and i was using non oderless mineral spirits.. i could scratch it if i pressed hard.. but i couldnt peel it off.. but i could always do tat to the regular fiero body so not much differnce..
Posted By: DaytonaTurbo
Re: Paint job on a budget!? CONTINUED..page 44........ - 06/21/06 03:55 AM
I say go for it, if you want you can just start out by doing a full fender on the car, and work it until it's done, just so you can see how it'll be before you do the whole car. Worst case scenario you messed up a fender, not the end of the world.
Posted By: Exit1965
Re: Paint job on a budget!? CONTINUED..page 44........ - 06/21/06 04:15 AM
Yeah keep rolling. Direct them to some of the photos in this thread if they think it can't be done. The good thing is with this paint job, if you screw up on a coat you can just wetsand it smooth with 600 and keep right on going.
Also be careful if you're putting 2 coats on in one day. If the paint isn't well cured, there will be mineral spirits (solvents) trapped by the next coat and eventually it will flake off, like in a few days. Either that or it will remain soft for eternity.
Here's a pic of what it looks like.
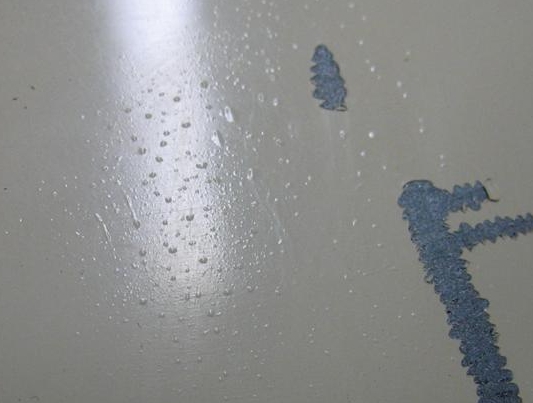
Posted By: Anonymous
Re: Paint job on a budget!? CONTINUED..page 44........ - 06/21/06 04:29 AM
thats why i set up two tests.. im doing one coat a day on one spot.. and im doing 2 coats a day on another.. seeing how it works out..
i really need to find a digital camera.. so i can get u guys some pics.. it looks so cool on the plastic.. has a little differnt effect than the metal i think.. its pretty cool actually.. color looks great and i only put on one coat.. it covers everything with jsut one coat pretty much.. i think if i did the bare minimum.. i could get away with only 3 coats.. but i plan on doing 4 to six at least.. posibly up to 8.... im doing lots of testing on my door skin i had left over.. so far i got 3 differnt things going.. i did a thin coat that is going on once a day.. i did a thin coat going on twice a day , each of these will be sanded the next morning and process will continue.. and the third test is alot of paint just kind of slopped on with little care.. figured id try and see all sides of the spectrum.. and find solutions to deal with problems before i get to doing the real thing..
the main problem im worried about with doing my car.. is how to do all the little cracks and crevices... im thinking high density little foam brush.. and rub it thin.. i think thatll do it.. i wanted to start the car on saturday of this week.. and end it wensday of next week.. becuse otherwise i gotta wait a few more weeks.. so im hoping i can complete all my tests by friday.. tape off the car same day.. and get started doing the car on saturday.. would you guys say its best to put a coat on the whole car all at once.. or do differnt sections at a time..
exit do you happen to have any type of messanger? like aol instant messanger, yahoo messanger.. that way i can get faster responses if i need them...(sorry for spelling mistakes.. its form spending too much time on messanger programs.. lol)
hey .. i got some industrial strenght soap.. with like lemon stuff and sand in it.. works well. but does not get all the paint off my hands.. wats the best way to get it off..??
Posted By: Anonymous
Re: Paint job on a budget!? CONTINUED..page 44........ - 06/21/06 09:23 AM
Thanks to 69charger for posting so much info on the roller paint job. Your fame is spreading worldwide
Here are a couple of pics of my efforts on my MX-5/Miata.
Pre painting

First coat

Second coat

I spent weeks practising on a spare boot lid and I'm really happy with the way that everything is progressing. I'm using a paint called Tremco Metal Armour which is the closest match I could find to the Rustoleum thats available Down Under.
Thanks for the inspiration and the know-how guys, you are all dead set legends!!!
Posted By: Anonymous
Re: Paint job on a budget!? CONTINUED..page 44........ - 06/21/06 10:18 AM
Wow, that looks pretty good Aussie Driver!
Posted By: Exit1965
Re: Paint job on a budget!? CONTINUED..page 44........ - 06/21/06 12:57 PM
The little foam brush works for cracks and crevices. As long as the paint gets in there you should be OK, since you dont need to worry about sanding and polishing there. When you're doing that, you can move the paint around with the foam brush even to where it looks slightly uneven (it's tough to get it to look even unless there is a thick glob of paint), in my experience it levels/evens out on its own.
and a quick rub with mineral spirits works wonders to get the paint off. I've been doing that, and I'm not dead yet.
Posted By: Anonymous
Re: Paint job on a budget!? CONTINUED..page 44........ - 06/21/06 05:19 PM
I've been following this thread for about three weeks now and I'm planning to begin my paintjob next weekend. I've started to compile a guide based on all the posts, but I still have some questions about the the type of paint that can be used:
I can't find any store that carries quarts or gallons of Navy Blue (Royal blue is too light for my tastes), so I'm thinking of using a tinted store brand. Lowes carries tintable akyld and acrylic enamels, which kind should I be using?
Posted By: Anonymous
Re: Paint job on a budget!? CONTINUED..page 44........ - 06/21/06 05:28 PM
talk to the people at lowes.. im sure they can order it.. i know the one in wisconsin had almost everycolor in stock.. jsut ask.. they might be able to get it.. otherwise i dunno.. try home depot and stuff too.. i found home depo carried less colors.. but i know they can order alot too..
Posted By: Anonymous
Re: Paint job on a budget!? CONTINUED..page 44........ - 06/21/06 06:55 PM
would there be a problem if i buy 2 different kind of colors and mix them to get a color you like? example i have forest green but id like it to be darker...if i buy black and tint it a little... it would get a darker forest green... anyone?
Posted By: 69chargeryeehaa
Re: Paint job on a budget!? CONTINUED..page 44........ - 06/21/06 07:08 PM
Quote:
would there be a problem if i buy 2 different kind of colors and mix them to get a color you like? example i have forest green but id like it to be darker...if i buy black and tint it a little... it would get a darker forest green... anyone?
you can mix anything you want, maybe try small amounts frist, see if you like the color.
Thanks Aussie Driver.
Posted By: Exit1965
Re: Paint job on a budget!? CONTINUED..page 44........ - 06/21/06 07:11 PM
I tried unsucessfully to mix colors once. It was probably just my weak understanding of what colors when added equal the correct color. I had some red and some yellow, and was trying to get a reddish orange. Yellow and red is orange, right? Instead I got something that looked like thousand island dressing. Good on a burger, not on a car. Hopefully adding black to green will be more straightforward.
Posted By: Anonymous
Re: Paint job on a budget!? CONTINUED..page 44........ - 06/21/06 07:40 PM
alright guys hers and update on my testing.. hit a few more snags today...
i am now doing three tests, the first test started on tuesday morning. i layed down a thin layer on part, and a moderate layer on another.. let that dry while i was at work, came home.. it was solid and dry no problems, so i put on a second coat and i started another test spot with a real thin layer. let both those dry last night, woke up this morning and decided i was going to wet sand the one with 2 coats. i was using 600 grit, real wet.. the paper and the door. well it took most the paint off and i hadnt been sanding for more than 15 seconds with moderate pressure. but it took most of it off leaving spots everywere. was not too happy with tat. is that normal? anways i put a second layer on the other real thin one i started yesterday. i think it was a bad idea to use the same brush, even though i cleaned it well last night. so i did half of tat second test wiht a new.. and the other with the old. i belive if i do the whole car i will use a new brush for every layer.. jsut to not take the chance.. but its jsut testing right now so no biggie. i think im gonna wait till the 4th coat on tat test before i sand.. it really levels smooth on the plastic for some reason, and other than a few things in the paint which i blieve are form the old brush, and not taking alot of care in my mixing i think it will look pretty good. the problem i think i may have had with the first test is tat i put the layers on too thin.. but is tat possible??? i had total coverage of the test area..maybe plastic abosorbs the paint a little bit.. or it lays differntly i dunno.. itll be interesting to see how all of thes turn out.. i also started another test today.. with real care taken into the prep.. i made sure the surface was perfect with no imperfections.. there were a few scratches .. but it should turn out well.. i dunno.. ill post pics when i can..
il keep trying test until i find a way tat works.. oh.. and thanks the spirits work wel on takign the paint off your hands.. only thing is i wish i had the oderless lol.... kinda smells like old gas lol..
Posted By: Anonymous
Re: Paint job on a budget!? CONTINUED..page 44........ - 06/21/06 09:00 PM
Ok guys, MAJOR revelation here!
As you all know, we�ve been trying to reverse engineer the old technique of �Coach Painting� as explained in this web site:
http://www.stephen.hull.btinternet.co.uk/ For decades, guys in Britain have painted cars, double decker buses, Rolls Royces with a brush and alkyd enamels designed for vehicles. The only problem is, the paint they use (Tekaloid) is not available outside of Britain.
So we�ve been stuck trying to tweak a rust paint to behave like an auto paint. Another problem, is the fact that neither Rustoleum or Tremclad have offered us any documented advice or assistance on the feasibility of their paint for autos.
As much as I hated TheSamba.com, there was one post in there that peaked my interest. Someone mentioned using paint from a company called Fine Paints of Europe.
I wrote Fine Paints of Europe to see if their paint was similar to Tekaloid. Here�s the PRESIDENT�S reply:
�Yes indeed our Dutchlac enamel paint is suitable for use on automobiles.
Quite honestly a brushed applied enamel is not going to have the same appearance as a professional �baked� finish applied in a clean room. The paint will however be serviceable and is it suitable for re-painting automobiles from an appearance and durability perspective.
Cars should be painted in a relatively dust free environment � this is normally easily achieved by parking the car in an enclosed garage and soaking the floor 24 hours before the paint is applied in order that dust can settle out. The temperature of the sheet metal on the automobile should be less than 80 degrees F and the paint should be applied in thin, even coats. The ideal applicator would be the Omega Spalter or Lily Varnish as featured in the Specifier�s Manual.
For first class work we would recommend that the automobile be gently abraded with fine emery cloth and washed before painting. Any areas of rust must be primed and then sanded out � primed with Ferrous Metal primer.
Dutchlac brilliant enamel will work fine at either full strength or slightly diluted. Please understand that paints of this caliber will dry overnight but require a full 28 days to �cure� to maximum hardness.
If you are interested in achieving a sprayed on appearance with brush on paint, it is possible to allow the paint to cure for 28 days (the car can be used while you wait) and then polish the car out with pumice and then rottenstone to provide a beautiful buffed out appearance. If you wish to take this final polishing step please contact me by phone directly in order that we can discuss the method directly.
There are innumerable Volkswagens and Volvo driving around New England with paint jobs from Fine Paints Of Europe.
Thank you for your interest.
Cordially,
John Lahey
President
Fine Paints of Europe
Phone: 802-457-5899
Fax: 802-457-3984
Email:
exec@finepaints.com PS. Our paint is also widely used by craftsmen who restore coaches. It�s a small market but on in which we take great pride"
Here�s their website guys:
http://www.finepaintsofeurope.com/index.htmlNote they DO have local locations for most of us.
Those of you trying to refine Charger�s technique, please continue to do so ( I am, 'cause I've already gone too far with it.) It�s just that here�s an alternative for those who are just starting out.
Posted By: Anonymous
Re: Paint job on a budget!? CONTINUED..page 44........ - 06/21/06 09:20 PM
Quote:
talk to the people at lowes.. im sure they can order it.. i know the one in wisconsin had almost everycolor in stock.. jsut ask.. they might be able to get it.. otherwise i dunno.. try home depot and stuff too.. i found home depo carried less colors.. but i know they can order alot too..
Home Depot refuses to order anything for me -- and they carry the spray version of the color. They offered to do a tint, but they can't do a dark blue, which is what I'm looking for. I'll try talking to Lowe's, but the one around here doesn't carry *any* Rustoleum.
Posted By: Anonymous
Re: Paint job on a budget!? CONTINUED..page 44........ - 06/21/06 09:29 PM
Quote:
Quote:
talk to the people at lowes.. im sure they can order it.. i know the one in wisconsin had almost everycolor in stock.. jsut ask.. they might be able to get it.. otherwise i dunno.. try home depot and stuff too.. i found home depo carried less colors.. but i know they can order alot too..
Home Depot refuses to order anything for me -- and they carry the spray version of the color. They offered to do a tint, but they can't do a dark blue, which is what I'm looking for. I'll try talking to Lowe's, but the one around here doesn't carry *any* Rustoleum.
maybe get blue and buy a quart of black. mix and see if it would come out dark blue
----
so nobody is going to try the gloss clear i posted? you would need a clear coat if your going to use metallic cuz your not suppose to sand after spraying or rolling from what i remember.i guess i will
Posted By: Exit1965
Re: Paint job on a budget!? CONTINUED..page 44........ - 06/21/06 11:01 PM
Quote:
Quote:
talk to the people at lowes.. im sure they can order it.. i know the one in wisconsin had almost everycolor in stock.. jsut ask.. they might be able to get it.. otherwise i dunno.. try home depot and stuff too.. i found home depo carried less colors.. but i know they can order alot too..
Home Depot refuses to order anything for me -- and they carry the spray version of the color. They offered to do a tint, but they can't do a dark blue, which is what I'm looking for. I'll try talking to Lowe's, but the one around here doesn't carry *any* Rustoleum.
Wow that's bad. I've had the opportunity to order stuff from home depot, but i have to order it by the case. If they wont do it, try finding anyone else who sells rustoleum. For paint only stores, they probably have a rustoleum contact person in their region that can get the stuff. If not, you can order it online somewhere. just google the color name, "rustoleum" and "quart"..
Posted By: Anonymous
Re: Paint job on a budget!? CONTINUED..page 44........ - 06/22/06 01:17 AM
Check out my (soon to be) pimping whip! 
Put the first coat of paint on my ghetto wheels today. I started yesterday thinking that after one or two hours of work I'd be ready to paint. Boy was I wrong. Grinding and filling took much longer than I had hoped. I was using polyester finishing putty rather than the regular Bondo and it was hardening up too fast. In fact I finally said enough was enough and threw down my first coat of paint. I did the prep sanding with 320 and 400 grit and wiped the car down with wax and grease remover.
And it already looks fantastic!
Paint went down smoooooth. In fact I only used 3/4 of a cup of paint mixed with a measured 15% mineral spirits to do the first coat.
I can't believe how smooth and even the first coat went down. I am guessing the by the second or third coat I will have achieved a solid colour.
I will have to go back and finish the body work later. In fact one of the reasons I never fixed the problems earlier was I knew I could never properly match the metallic paint on the car - now not an issue with the Tremclad Dark Blue.
The one thing I will pass along is that the time and effort involved may at the end of the whole thing make a $200 MACCO job feel like a bargain.

Posted By: Anonymous
Re: Paint job on a budget!? CONTINUED..page 44........ - 06/22/06 01:18 AM
First coat of paint.......

Posted By: Marq
Re: Paint job on a budget!? CONTINUED..page 44........ - 06/22/06 02:04 AM
Quote:
would there be a problem if i buy 2 different kind of colors and mix them to get a color you like? example i have forest green but id like it to be darker...if i buy black and tint it a little... it would get a darker forest green... anyone?
I did a test with a can of Fire Red and a can of Black ( both high gloss versions )
I took a sheet of wood and placed 10 drops of red on the sheet.
Then I took the black paint and dropped 1 drop on the first red spot, 2 drops of black on the second red spot, 3 drops of black on the third red dot etc etc etc.
I was extremely disapointed to see that instead of darkening the Fire Red... it instead changed it to almost a pottery brown color.
And this color change held true in a 50/50 ratio ( one drop black and one drop of red ) up to a 10 to 1 ration ( 10 black to the 1 red ).
Even more interesting in this color palette is that there was almost no difference in the color of the 1 to 1 ratio and the 10 to 1 ratio.
Frankly it didn't make any sense to me... as I believed that if you cut the red with black it would result in a more blacker or darker version of red.
So I tried to reverse the experiment by laying out 10 single dots of black... and then added an increasing number of red drops to each single black. The theory here was to try to overwhelm the black with an increasing amount of red.
Oddly enough... the results were almost identical. The pottery brown color appeared in all ten of the test dots.
So my theory at this moment is that cutting a colored Tremclad color or mixing it with a black Tremclad paint MAY NOT result in the expected darker color change.
Because this color mixing did not work... I went and spent some time reading up on everything I could find about color mixing. My theory was that possibly with the Tremclad paint you might have to do something weird like cutting the red with some other color... like maybe a purple with a red or a green with a red... But I never found any answer on what color combination might have the desired end result color. In theory the black paint mixed with the red should have done the darkening job I wanted.
NOW... here is something that I did notice. When I first opened a can of Fire Red... ( that had not been shaken and had obviously sat on the shelf at the Home Depot for a while ) there was definitely a streak of black floating on the surface of the can of paint. Now that tells me that the Fire Red does have a streak of black added to it at the factory - or that the black color had separated from the red paint while it was sitting on the shelf.
SOOOOOO... possibly the 'shot of black' that is added by Tremclad at the factory into the can could be something you might want to explore with the paint shop where you buy your paint... ie... don't waste time trying to mix paint with paint - because the end result color may be unpredictable. INSTEAD... as the folks in the paint department to shoot a shot of BLACK tint into the can of paint. Get them to shake the can... and then have it opened to see if it has arrived at the color you want. If not.. get them to shoot another shot of the black into your can. Obviously you will need to keep track of how many shots of black tint it takes to arrive at the ideal color ( so that you can order an identical batch when you need more paint. )
Possibly that is what you were referring to when you mentioned adding a tint to your color choice. I can't speak to whether a shot of tint at the paint mixing booth is viable. I do know that the store is going to make you pay for the can of paint even if the end results are no where near what you had hoped for. That's the only problem with being the pathfinder or first to test the 'shot of tint' at the paint mixing station.
NOW... that having been said... the one conclusion that we have arrived at regarding darkening colors is to lay down a thin layer of black Tremclad.. and then lay one or two thin layers of your choice of color over it. Due to the relatively transparent nature of these thin layers, the upper layer tend to inherit some of the darkness of the layer beneath it. This is the theory I am following in my quest to end up with a very blackish red ( black cherry ).
Maybe the short answer for you and your Green is to try the drip experiment. Lay out 10 drops of green paint on a palette and then drop onto each one an increasing number of black drops... ie
1 green * 1 black
1 green * 2 black
1 green * 3 black etc.
Then mix or blend each individual combination with your finger to see what the resulting combination creates... Maybe you will end up with the theoretical darkening dots that would be normally expected... or maybe you will end up with 10 dots of similar colonial green.. :0
Hope this info helps in your quest
.
Posted By: Exit1965
Re: Paint job on a budget!? CONTINUED..page 44........ - 06/22/06 02:20 AM
Quote:
First coat of paint.......
Wow that looks like it was applied perfectly, sweet..
Posted By: Exit1965
Re: Paint job on a budget!? CONTINUED..page 44........ - 06/22/06 02:23 AM
73bugg, that is good info! The most important thing I see there is that the metal surface should be under 80 degrees. I bet that has to do with how fast the paint hardens up. Too fast and it wont have time to settle down flat. I'll remember that on my next coats. I'll try to do them in the morning.
And 28 days sounds like a good amount of time to wait between the final coat and the wetsand/polish/wax..
Posted By: darenrt
Re: Paint job on a budget!? CONTINUED..page 44........ - 06/22/06 02:26 AM
marq, maybe try a dark blue mix for the dark red color your looking for.
Posted By: Anonymous
Re: Paint job on a budget!? CONTINUED..page 44........ - 06/22/06 02:55 AM
what color is that Senna?
Posted By: Anonymous
Re: Paint job on a budget!? CONTINUED..page 44........ - 06/22/06 03:57 AM
well my dark green came out how i wanted to be. just add black if you want to darken it...and mix it GOOOD! i will have pictures tomorrow and my bondoed car
. as for the clear gloss i didnt find any
nice picture Senna!
tomorrow ill be sanding everything down to 400 and buying the sprayer
Posted By: Anonymous
Re: Paint job on a budget!? CONTINUED..page 44........ - 06/22/06 04:35 AM
good idea! but today i was messing with it in a small container.i just added drips of black in my green till its noticably different or the color i wanted it. after that i panted a few parts and it came out good...but a few times the black would fight (i would call it) with green and black would show up like web pattern..im guessing that happened because i didnt mix it well enough...weird, but i did few more spots and it came out like i wouldnt want to color sand it

Posted By: Anonymous
Re: Paint job on a budget!? CONTINUED..page 44........ - 06/22/06 04:41 AM
it went well. its only for darkening a color
i remeber back when i had art class, they gave me a color wheel and it would give you what to mix for the outcome but [Edited by Moparts - Keep it clean] i have no idea where it is. maybe google
look what i found
http://www.paintquality.com/color/index.html# click on the digital color wheel
hope this helps.
Posted By: Anonymous
Re: Paint job on a budget!? CONTINUED..page 44........ - 06/22/06 11:44 AM
Quote:
I can't find any store that carries quarts or gallons of Navy Blue (Royal blue is too light for my tastes), so I'm thinking of using a tinted store brand. Lowes carries tintable akyld and acrylic enamels, which kind should I be using?
My local WallyWorld had 6 or 8 quarts of Navy Blue in their clearance ailse last night for $4.00 each. That doesn't help you other than to suggest you might want to check out Walmart.
Posted By: Anonymous
Re: Paint job on a budget!? CONTINUED..page 44........ - 06/22/06 11:48 AM
[quote
I did a test with a can of Fire Red and a can of Black ( both high gloss versions )
I took a sheet of wood and placed 10 drops of red on the sheet.
Then I took the black paint and dropped 1 drop on the first red spot, 2 drops of black on the second red spot, 3 drops of black on the third red dot etc etc etc.
Something tells me thats way too much black to red ratio for the color you're aiming for. I had some paint tinted for home use and the amount they added to a gallon for a big shift in shade was something like 20 drops. Been a while since I had that done so I don't remember the details, I just remember being shocked that they added so little.
Posted By: Marq
Re: Paint job on a budget!? CONTINUED..page 44........ - 06/22/06 12:09 PM
Quote:
Something tells me thats way too much black to red ratio for the color you're aiming for. I had some paint tinted for home use and the amount they added to a gallon for a big shift in shade was something like 20 drops. Been a while since I had that done so I don't remember the details, I just remember being shocked that they added so little.
You are right... but the 'shot of color' that they add to the paint at the paint mixing area is a concentrated amount of that color and they control how much it affects the gallon or quart by the amount they shoot into the can.
But when you are mixing two cans of paint the color is not as concentrated. That was why I mentioned to the other chap about getting them to shoot a shot of black into the can AT THE PAINT STORE - at the mixing station - so that he gets the concentrated black added to his paint as a darkener.
But from what I was reading above... the chap was able to get the color he wanted by just adding some black paint to his can of green paint.
Here's a little update : Home Depot sells a small tube of BLACK TINT. The tube is about the size of the creme hardener tube that comes with Bondo or other body patching materials. It is super concentrated. I put ONE LOUSY DROP into roughly 1/2 quart of Fire Red and it turned the WHOLE FRIGGIN CAN brown. Now this is great news if you want a fantastic and unique brown on your car ( something like a terra cotta pot with a high gloss on it )... But if you are looking for the secret to the darker red... well black paint and the black tint are definitely no goes..
I guess I will just have to accept the Fire Red as it is..
.
Posted By: Anonymous
Re: Paint job on a budget!? CONTINUED..page 44........ - 06/22/06 02:40 PM
Marq,
From the link that Cal96 posted, Red + Black = Brown. Maybee some other color will make it darker. Good luck.
*edit: From what I read, you may want to try mixing brown to make a darker red.
Posted By: Anonymous
Re: Paint job on a budget!? CONTINUED..page 44........ - 06/22/06 03:36 PM
Quote:
I can't find any store that carries quarts or gallons of Navy Blue (Royal blue is too light for my tastes), so I'm thinking of using a tinted store brand. Lowes carries tintable akyld and acrylic enamels, which kind should I be using?
http://dragosupply.com/drago/servlet/CyberVendor/category/G4501296/catalog/group.jsp/
Posted By: Anonymous
Re: Paint job on a budget!? CONTINUED..page 44........ - 06/22/06 07:27 PM
Hi All,
Here's where I'm at--three thin coats of white Rustoleum professional, wetsand with 800, one thin coat more, going two more coats then let it "dry," "harden for a month," then wetsand with 1500 or 2000 and polish, then clearcoat. Only on the trunk so far, will try to post pictures tonight. I have to say, even after seeing others fine work, that I am pleasantly and completely surprised so far.
2 questions
1) How are others working around edges/how can I get under/around weatherseal/trim?
2) Is there a uv protection clear coat that I can spray on?
Will try to post the pics tonight.
In my mind the before/after pics really do this technique justice.
Posted By: Anonymous
Re: Paint job on a budget!? CONTINUED..page 44........ - 06/22/06 09:13 PM
Quote:
73bugg, that is good info! The most important thing I see there is that the metal surface should be under 80 degrees. I bet that has to do with how fast the paint hardens up. Too fast and it wont have time to settle down flat.
And 28 days sounds like a good amount of time to wait between the final coat and the wetsand/polish/wax..
28 days or longer. Coach painting guru, Stephen Hull said this, �Alkyd (enamels) CAN be polished mechanically but only after six months or so when the surface has become sufficiently hard to accept rubbing compounds.� But then again, the dude lives in foggy, rainy Britain. We could go for a much shorter time because we have the advantage of sun baking.
This paint (DUTCHLAC Brilliant Gloss Enamel) should be a huge leap in our accumulated efforts. It�s a proven paint that not only can be sprayed on but more importantly, BRUSHED on. Over 6000 color choices (unfortunately, no metallics), coverage in 2 coats, fade resistant, self-leveling, a finish that dries to a mirror/porcelain-like surface.
I�m gonna finish off my bug with Charger�s method, but on my other car I�m gonna utilized a combination of the techniques mentioned on this thread: Wagner spray white Rustoleum primer, sand smooth then roller/sand layers of a Rustoleum black. Between layers I�ll rattle can a light mist of an alternating color to find low spots. Once I know the surface is even I�ll apply the 2 coats of DUTCHLAC gloss black enamel with a brush as outlined in Stephen Hull�s instructions (brush left to right, then up and down, repeat while each time applying less pressure on the brush-
http://www.stephen.hull.btinternet.co.uk/brush.html )
I�ll then wait a month, sun bake this enamel when I can, then hit it with 2000 grit and Turtle wax polish.
There�s a Fine Paints of Europe store ( http://finepaintsofeurope.com/ ) a few miles from me, but I can�t get to it until Saturday. I can hardly wait!
Posted By: Exit1965
Re: Paint job on a budget!? CONTINUED..page 44........ - 06/22/06 09:37 PM
I checked out the page..
http://www.finepaintsofeurope.com/dutchlac_brilliant.aspx#maintenanceIt looks like it's $90 a gallon? And it says it cannot be rolled on, must be brushed on. I would love to see someone's results with this paint and method for comparison to rustoleum. I wonder if this stuff is not similar to the industrial grade alkyd enamels made by valspar, rustoleum, or sherwin williams. They are a bit cheaper. But I wonder why this stuff would be able to be painted on with a brush at full strength, yet still self level, and with no thinner or hardener...?
Posted By: Anonymous
Re: Paint job on a budget!? CONTINUED..page 44........ - 06/22/06 10:10 PM
Yeah, I saw that. That's why I'm gonna do a base coat with rustoleum and then get 3/4 Liter of the Dutchlac for $30 to use as the final coat.
The site said, "DUTCHLAC Brilliant can be applied over clean, previously painted oil finishes in good condition."
As far as not needing thinner, Coach painting sites mentioned brush marks blend away 'cause the paint dries REAL slow. So your car would have to stay protected from dust and the elements at least a day. The sites also mention some coach painters use a roller, but they use the tip of a brush held at a 45 degree angle to even out the paint and smooth out the bubbles.
I know this method would go above our $50 theme, but hey, it's STILL cheaper then Maaco.

Posted By: Anonymous
Re: Paint job on a budget!? CONTINUED..page 44........ - 06/22/06 11:27 PM
I assume when the Fine Paints people think of a roller they are thinking of a thick-knap roller as used to paint walls and ceilings. I would think you could get a smoother application than a brush with the high-density foam (ultra-smooth finish) rollers we are talking about in this thread, especially if the paint self-levels.
I'd also be interested in how much they recommend thinning the Ducalac with their mineral spirits for rolling.
All told the Fine Paints primer and paint system plus their mineral spirits would put you around $200. That's still cheap compared to getting your car painted, but you could probably by automative paint to roll on for those kind of dollars.
I think the Fine Paints system is interesting if we could adapt them to this method. On the website you can order a free small container of the paint; might be worth doing to try some experimentation.
Posted By: Anonymous
Re: Paint job on a budget!? CONTINUED..page 44........ - 06/23/06 01:29 AM
Quote:
My local WallyWorld had 6 or 8 quarts of Navy Blue in their clearance ailse last night for $4.00 each. That doesn't help you other than to suggest you might want to check out Walmart.
Turns out you were right! I stopped by Walmart to pick up some detergent, and I found three quarts of gloss navy in the clearance aisle. I didn't think I would, because they only carried gloss black and white in their paint aisle.
My car is pretty small (1990 Toyota Celica), so it should be enough paint. I'm taking two days off work next week so I can start painting, I'll keep everyone updated.
Posted By: Exit1965
Re: Paint job on a budget!? CONTINUED..page 44........ - 06/23/06 01:32 AM
Well, if it self levels, takes a long time to dry, and covers fast, it sounds like the result you get when mixing rustoleum with penetrol...
Posted By: Anonymous
Re: Paint job on a budget!? CONTINUED..page 44........ - 06/23/06 04:13 AM
exit any updates on the dart at all?? did ya finish it?? can i get a few more pics.. i really wanna see the color out in the sun since its the same one im doing.. i know mine plastic and urs is metal so itll look some wat different.. but jstu to get an idea..
Posted By: 493_DART
Re: Paint job on a budget!? CONTINUED..page 44........ - 06/23/06 07:11 AM
quick question: i looked back thru the old threads and cant find this-- when you apply the 2 coats of paint in one day, what time frame is that? one coat right after the other ? or one coat then wait a couple hours and apply the 2nd ?
Posted By: Anonymous
Re: Paint job on a budget!? CONTINUED..page 44........ - 06/23/06 10:00 AM
I'd say the latter since some people were having issues if they applied the 2nd coat too early (while the 1st coat is still somewhat wet).
Best suggestion I saw is just to be patient and give it sufficient time to dry, if you're in an area that is pretty hot then it should speed up the drying time.
Posted By: Anonymous
Re: Paint job on a budget!? CONTINUED..page 44........ - 06/23/06 11:36 AM
Quote:
Quote:
My local WallyWorld had 6 or 8 quarts of Navy Blue in their clearance ailse last night for $4.00 each. That doesn't help you other than to suggest you might want to check out Walmart.
Turns out you were right! I stopped by Walmart to pick up some detergent, and I found three quarts of gloss navy in the clearance aisle. I didn't think I would, because they only carried gloss black and white in their paint aisle.
My car is pretty small (1990 Toyota Celica), so it should be enough paint. I'm taking two days off work next week so I can start painting, I'll keep everyone updated.
Cool, glad I could help. Now you're really talking budget paint job at $12 for your paint!
Posted By: Exit1965
Re: Paint job on a budget!? CONTINUED..page 44........ - 06/23/06 12:24 PM
Quote:
exit any updates on the dart at all?? did ya finish it?? can i get a few more pics.. i really wanna see the color out in the sun since its the same one im doing.. i know mine plastic and urs is metal so itll look some wat different.. but jstu to get an idea..
Didn't finish it yet, and it's hard to get it out into the sun. I did the polish/quickie wax job on a fender which was near the garage door so I could see it in the sun, and there was a weird slight haze to it. The haze was probably on the 1/4 panel area I did before, but couldn't see it because only natural light was on it. If you're using red be sure and wait awhile before doing the final polish so the paint is as hard as it can get.
There are various pics here.
http://www.flickr.com/photos/xit1965/sets/72057594131616795/
Posted By: 69chargeryeehaa
Re: Paint job on a budget!? CONTINUED..page 44........ - 06/23/06 02:56 PM
Quote:
quick question: i looked back thru the old threads and cant find this-- when you apply the 2 coats of paint in one day, what time frame is that? one coat right after the other ? or one coat then wait a couple hours and apply the 2nd ?
i painted at lets say 8 am, wait 8-10 hours, recoat, no less than 8 hours, or wait next day, wetsand in the am, paint and let sit overnight. you can try wet sanding a hidden area, if it sands good without plugging up the paper, and balling up, you're good to go.
Posted By: 69chargeryeehaa
Re: Paint job on a budget!? CONTINUED..page 44........ - 06/23/06 03:06 PM
Posted By: Exit1965
Re: Paint job on a budget!? CONTINUED..page 44........ - 06/23/06 03:40 PM
Dunno about the bandwidth but if you have a problem there, open a flickr account. It's free, unlimited bandwidth, hot linking pics as I usually do..
Posted By: Anonymous
see attachment - 06/23/06 06:41 PM
Quote:
Hi All,
Here's where I'm at--three thin coats of white Rustoleum professional, wetsand with 800, one thin coat more, going two more coats then let it "dry," "harden for a month," then wetsand with 1500 or 2000 and polish, then clearcoat. Only on the trunk so far, will try to post pictures tonight. I have to say, even after seeing others fine work, that I am pleasantly and completely surprised so far.
2 questions
1) How are others working around edges/how can I get under/around weatherseal/trim?
2) Is there a uv protection clear coat that I can spray on?
Will try to post the pics tonight.
In my mind the before/after pics really do this technique justice.

Posted By: Anonymous
and another - 06/23/06 06:44 PM
another

Posted By: Anonymous
Re: and another - 06/23/06 06:47 PM
last one-sorry, bad lighting!

Posted By: Anonymous
Re: and another - 06/24/06 12:48 AM
The trunk looks like a different white...??
Well I finally went to home depot and bought a buncha crap. $63 later... I should be set. I like how the blue looks. I spray bombed part of the door to see how the color looks. I still like how sail blue looks as far as the cap and all, but I know it'll be a lot brighter.
On to body work! hehe
Anyone ever seen green bondo? Where can I get that?
Posted By: Exit1965
Re: and another - 06/24/06 01:08 AM
Quote:
The trunk looks like a different white...??
Well I finally went to home depot and bought a buncha crap. $63 later... I should be set. I like how the blue looks. I spray bombed part of the door to see how the color looks. I still like how sail blue looks as far as the cap and all, but I know it'll be a lot brighter.
On to body work! hehe
Anyone ever seen green bondo? Where can I get that?
I think the hardener is what you can get in different colors. I like the regular red hardener and cheap gray bondo, because the bondo spreaders I use are made to be the same color as the correct mixture of bondo/hardener.
I've tried the bondo gold (gold in color, with red hardener) but did not notice much of a difference, so I went back to the standard, cheap gray bondo and included red hardener. The evercoat rage stuff is supposed to be good, but I wasn't risking the extra $ when I was comfortable working with regular bondo.
Body work is fun, especially in a hot garage. enjoy
Posted By: pdqvsix
Re: Paint job on a budget!? CONTINUED..page 44........ - 06/24/06 01:21 AM
I've been following this thread for a couple of weeks, i stumbled accross it on another bb. And would like to say thanks to 69chargeryeehaa for all the information he has shared to let everyone know what materials to use and how apply the paint to get a decent paint job very cheap.
I'm slowly doing the body work and it's almost done. I'm not going to start painting until it's all done,because i really want this project to come out good. The car is an 83 Buick and i'm painting it gloss black.
Posted By: Anonymous
Re: Paint job on a budget!? CONTINUED..page 44........ - 06/24/06 02:43 AM
Just a quick update on my painting progress.
The front quarter panel after the fifth coat....

Posted By: Anonymous
Re: Paint job on a budget!? CONTINUED..page 44........ - 06/24/06 12:16 PM
wow! nice shine! mines only look like that if i pour water on top of it

when you guys start water sanding...doesnt the color come off too? whatever happen to the gloss

Posted By: pdqvsix
Re: Paint job on a budget!? CONTINUED..page 44........ - 06/24/06 01:40 PM
Aussie Driver,
That shine looks great!
Do you have any more pictures of the whole car?
You did paint it black,right?
Posted By: BigTerry
Re: Paint job on a budget!? CONTINUED..page 44........ - 06/24/06 01:45 PM
Posted By: Anonymous
Re: Paint job on a budget!? CONTINUED..page 44........ - 06/24/06 04:18 PM
I'd like to share my observations-
1) This does work...it's not the greatest paint job in the world ande it does have some limitations, but it does work.
2) I thinned at 40% mineral spirits (measured) that worked well for me.
3) The less paint, the less problems. Keep the coats very thin. Push all the paint out of the roller then apply. Orange peel will be greatly reduced.
4) Bubbles will happen, don't panic. Get the area you are tying to paint covered, then wait 40-60 seconds, most bubbles will be gone. Then very lightly go over it with just the weight of the roller to smooth everything out.
5) I would suggest just one coat a day to allow the paint to dry in the sun in between coats.
6) If you lay the paint on smooth, then you don't have to wet sand as much...I just very lightly wet sanded. 2 coats 600, 2 coats 600, 2 coats 600, 1 coat 2000.
7) If you don't have one but a buffer. I got a 6 inch buffer from Harbor Freight for 13 bucks and it made all the difference in the world.
8) The Turtle Wax Polishing Compound works wonders. Take your time, lots of buffing.
9) Each color is a bit different. I used a test fender and tried Gloss Black, Sail Blue, Regal Red and Smoke Gray. All of the "Stops Rust" variety.
10) All turned out well, but here are some thoughts. The Smoke Gray and Sail Blue hid imperfections better than Regal Red and Gloss Black. Regal Red will take more than 7 coats to cover (this has been talked about already) Gloss Black can be done, but it has a very small margin for error.
11) I think I will end up doing gloss White or the Light Gray color.
Here is the fender I worked with. I got it for free, it was in bad shape (high and low spots) and my kids have been playing with it, but it will give you an idea.
I'm going to paint a 92 sentra with my son and I'll post pics once its complete.
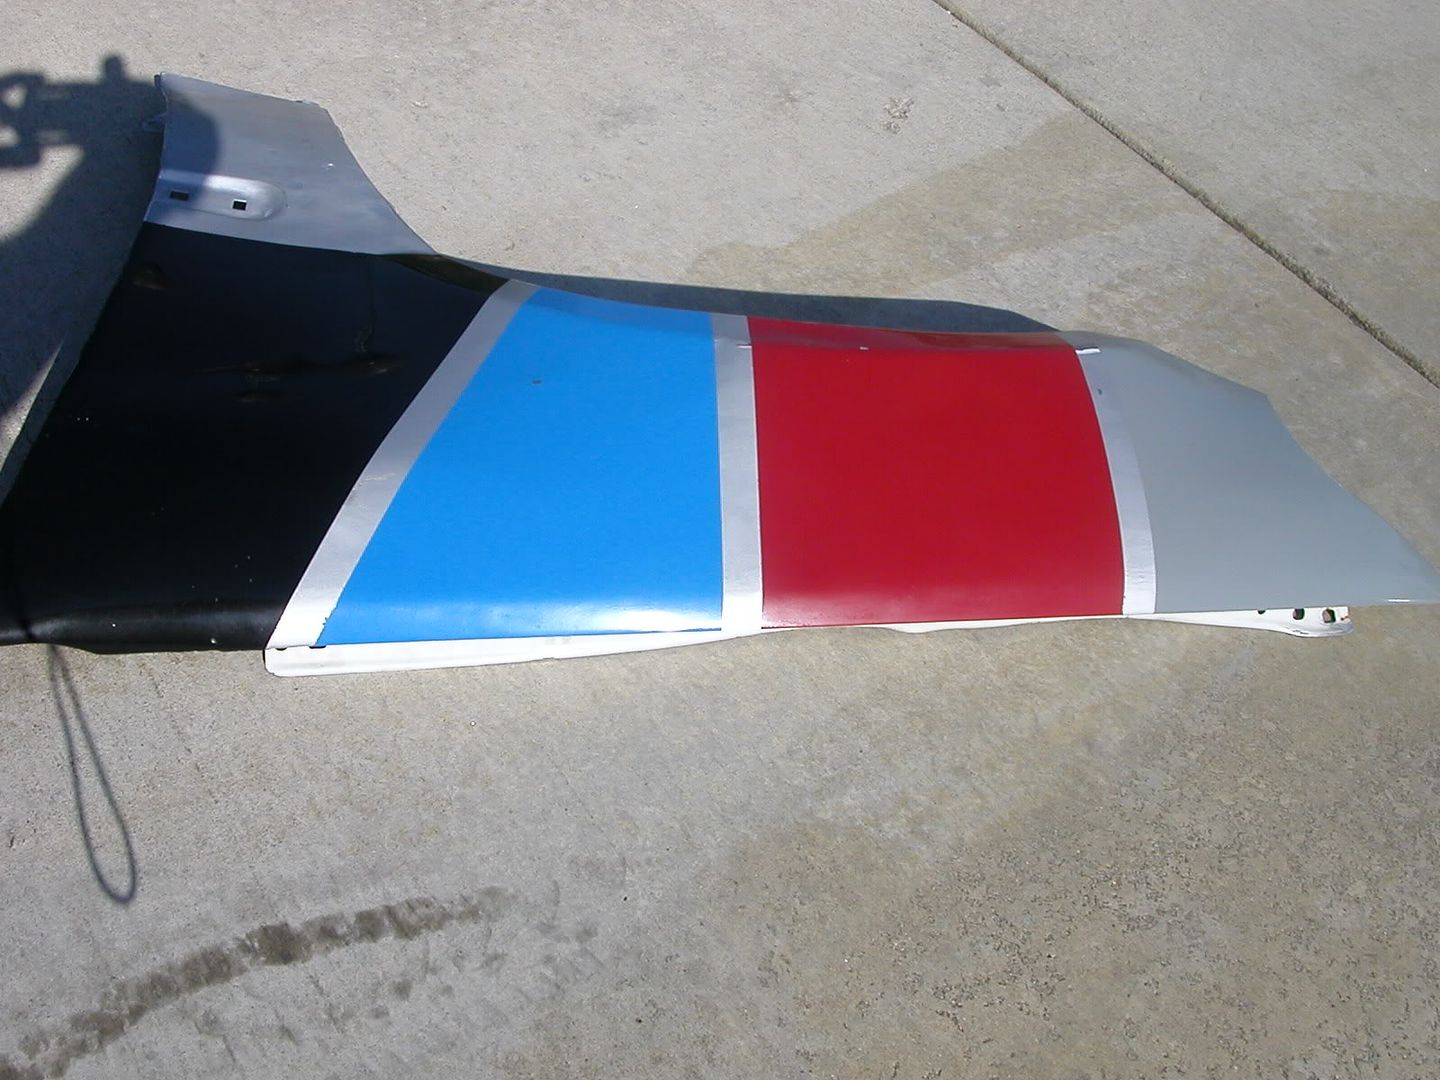
Posted By: Exit1965
Re: Paint job on a budget!? CONTINUED..page 44........ - 06/24/06 04:54 PM
Cool work, that actually looks like an interesting color combo. I still think the gray looks just like primer though.. the color on the can is much darker.
Here's a guy who mixed smoke gray with 1/2 pint of black and got the actual color that's on the can label. looks really nice to me but i think this would show imperfections pretty well.
http://www.honda-tech.com/zerothread?id=1555133&page=23
Posted By: pdqvsix
Re: Paint job on a budget!? CONTINUED..page 44........ - 06/24/06 10:08 PM
Well i'm waiting for my final body filler to dry.
So i decided to practice mixing the paint and test the roller technique on the rear spoiler.
I was very impressed with the results with this just being the first time doing it. The paint went on smoothly with some bubbles and orange peel but leveled out after just a few minutes after running the roller back over it after waiting a couple of minutes. If the whole car comes out that nice it will be well worth all the preparations and effort.
I had the passenger door replaced and painted by a professional painter who used an air compressor and high dollar paint gun about 3 years ago, and the paint i just applied with the roller so far looks a lot better then what he did. I can't wait to apply a second coat and then do the wet sanding, then see the results.
I will be taking my time while doing the painting just as i have with doing the body repairs.
I will wait a full day between coats.
Posted By: Anonymous
Re: Paint job on a budget!? CONTINUED..page 44........ - 06/25/06 02:08 AM
I registered over at that Honda forum after waiting like a week for the guy named Rev210k to post more pictures. Finally I registered so I could PM him, but the stupid forum is setup so I have to wait 5 days before I can really do anything.
If anybody is already registered over there, could you get him over here with more pictures? I really want to see more pics of how he is doing with the blue and that wagner gun.
Thanks!
Posted By: Marq
Re: Paint job on a budget!? CONTINUED..page 44........ - 06/26/06 02:00 AM
Quote:
I'd like to share my observations-
9) Each color is a bit different. I used a test fender and tried Gloss Black, Sail Blue, Regal Red and Smoke Gray. All of the "Stops Rust" variety.
10) All turned out well, but here are some thoughts. The Smoke Gray and Sail Blue hid imperfections better than Regal Red and Gloss Black. Regal Red will take more than 7 coats to cover (this has been talked about already) Gloss Black can be done, but it has a very small margin for error.
I am glad that you did this side by side comparision. It pretty well confirms what I have suspected about the Fire Red paint. It is probably the hardest to work with because it has the weakest color pigment of the color range. It probably takes two or three times more coats to effectively lay it down and get full coverage.
Black may reveal imperfections in the bodywork... but at least it provides faster coverage in less coats than the Fire Red.
I am on my sixth coat of the Fire Red and at this point I figure I will probably need at least 2 more coats to finally provide 100% coverage of my car so that you can no longer see the white of the fiberglass or the black of the primer that lays below it.
Fire Red is a sharp color but possibly it should only be attempted by those who have the maximum of patience and plenty of time to spare on their project car.
I like how it is turning out... but I was thinking wispfully the other day how much simpler life would have been if I had gone with straight high-gloss black or Arctic White ( Glacier White ) - in order to get the benefit of quicker coverage.
Just thought I would share this thought so that anyone considering Fire Red might be forewarned
Fire Red needs MORE pigments ( solids ).
.
Posted By: Anonymous
Re: Paint job on a budget!? CONTINUED..page 44........ - 06/26/06 03:28 AM
Posted By: Anonymous
Re: Paint job on a budget!? CONTINUED..page 44........ - 06/26/06 03:58 AM
Quote:
Quote:
i agree, exit, are you sure your not just seeing it worse than it really is? bacause your starring at it up close, and know every flaw on your paint??? try getting the wife to have a look at it, they're really good at pointing out everything wrong, espically when it's your hobby car!!!!! i'd stick with the red, it looks killer on that car. also when you pull it into the sun, it's a whole different story, trust me, even on my newer cars with BC/CC, you see flaws in the paint in the garage.
how does this paint maintain shine if nothing is done to it? thinking of just finishing the red job and leaving it and not doing any sanding or polishing on it since it seems to look good like that. eventually it will probably need to be at least polished though right?
hey exit. hope ur not to stressed...i actually tried somethign in ur situation. it seems wiht red if u wetsand with 1500 and polish it doesnt give that "dull" look but if u do it with 2000 and polish it does. its weird i cant explain it...but try it on a different pannel (spare) and see if thats how it turns out. good luck
Posted By: Anonymous
Re: Paint job on a budget!? CONTINUED..page 44........ - 06/26/06 05:50 AM
Exit, how slow are you going when you are painting? I have 3 coats on and have tried a few different speeds but I get a ton of bubbles (98% pop on their own) but I am still getting noticeable orange peel.
Also, I know people have said to wait a day to paint but I dont have the luxury of time. Right now I have been putting the car out in the sun for a few hours in 80 degree weather and trying to get another layer of paint on in 7 hours.
I can run my fingernail over it and all it does is a light scratch BUT if I really try, I can scratch it fairly deep.
The question is, Although you could say its soft, would putting another coat on hurt it in the end? Should I have some beers and wake up the next day on the floor?
I am wondering on the tolerance of having paint layers.
Posted By: Anonymous
Re: Paint job on a budget!? CONTINUED..page 44........ - 06/26/06 08:21 AM
Also, how are you guys getting good results with the foam brushes? I am using the ones in the posted pic and when I go over a body panel with it, it usually leaves lines (streaks of paint) and is not really uniform. I have been using them then rolling over the area with the roller but I have a front bumper with an intricate mesh pattern that no roller could get near.
HELP!

Posted By: Anonymous
Re: Paint job on a budget!? CONTINUED..page 44........ - 06/26/06 10:05 AM
^prior to your painting, are you whiping it down with mineral spirit? its to clean unwanted chemicals. also make the paint like milky, a tad thicker. hope that helps.
Posted By: Marq
Re: Paint job on a budget!? CONTINUED..page 44........ - 06/26/06 12:05 PM
Quote:
Exit, how slow are you going when you are painting? I have 3 coats on and have tried a few different speeds but I get a ton of bubbles (98% pop on their own) but I am still getting noticeable orange peel.
Also, I know people have said to wait a day to paint but I dont have the luxury of time. Right now I have been putting the car out in the sun for a few hours in 80 degree weather and trying to get another layer of paint on in 7 hours.
I can run my fingernail over it and all it does is a light scratch BUT if I really try, I can scratch it fairly deep.
The question is, Although you could say its soft, would putting another coat on hurt it in the end? Should I have some beers and wake up the next day on the floor?
I am wondering on the tolerance of having paint layers.
Ok... first off.... by putting the paint out in the 'sun to bake'... you may be speeding up the curing of the paint to a point where it is hardening on the surface ( forming a skin ) rather than evaporating the mineral spirits from the inside out. In essence you are trapping the mineral spirits BELOW the skin and it cannot easily escape. This will keep the paint soft and not reach the hardened state that you really want in order for this to succeed.
I don't think you need to worry about the orange peel unless it is REALLY PRONOUCED. This orange peel that you are experiencing is probably also related to your rushing the job and trying to bake things in the sun to speed up the process. Normally the orangepeel ( in any paint job - whether professdional or econo ) is related to there not being enough mineral spirit. The paint needs the 'right amount' of mineral spirit in order to keep the paint 'wet' while it tries to self-level. Too little mineral spirit causes the paint to attract to itself rather than to the surface below that you are trying to adhere to. So by trying to speed up the evaporation of the mineral spirit you are not only getting the orange peel... but as well you are hurting the ability of the paint to get a good adhesion on the surface you are painting.
The only good news is that you can wet sand down the orange peel to regain a level surface to paint the next layers on to. In a the case of a more horrible orange peel you can resort to a more agressive sand paper grit in order to regain a level surface.
The moral to this story is that you really cannot rush this paint job...
.
Posted By: Anonymous
Re: Paint job on a budget!? CONTINUED..page 44........ - 06/26/06 12:20 PM
Agree with above by Marq. I didn't wait long enough between coats, thought hot Fla sun would compensate, but at the 4th coat started to have problems, especially on hood, top and trunk (sides weren't too bad), even noticeable rollermarks. Going to sand and redo, taking more time.
As far as foam brush, I had to dab or stab tight spots with the point of it, couldn't really use as a brush. Surprisingly, those are some of the better looking spots on my car.
Posted By: Anonymous
Re: Paint job on a budget!? CONTINUED..page 44........ - 06/26/06 01:17 PM
Quote:
Also, how are you guys getting good results with the foam brushes? I am using the ones in the posted pic and when I go over a body panel with it, it usually leaves lines (streaks of paint) and is not really uniform. I have been using them then rolling over the area with the roller but I have a front bumper with an intricate mesh pattern that no roller could get near.
HELP!
Your not supposed to use the foam brush on the body panels; use a high density foam roller. The foam brush is used to get into hard to reach places, then lightly roll over with the roller if you can reach.
Hope this helps,
Smite
Posted By: Anonymous
Re: Paint job on a budget!? CONTINUED..page 44........ - 06/26/06 04:24 PM
hmm. ok I will give it a good sand to not only level the paint but to also see how tack the paint ins underneith.
I am only using the foam brush for areas like under the door handle and in tight places on the front bumper. But that is the type of brush you guys are using right?
I am coming to facts that it will take more time to do this than I planned. It's looking pretty good after the 3 coats though. I'll get pics up as soon as I get my camera back from a buddy.
Posted By: Anonymous
Re: Paint job on a budget!? CONTINUED..page 44........ - 06/26/06 07:39 PM
also if anyone is spraying this paint thin it out just like water and when ur spraying the coats should "glisten" and u should be able to see ur reflection...
Posted By: Anonymous
Re: Paint job on a budget!? CONTINUED..page 44........ - 06/27/06 12:57 AM
when you want that "glistening" look then you spraying a little too much...and doing that it wont dry underneath. but i do have some "glistening" few spots on my paint (couldnt help it)hope it drys well.
69charger, want to sell me your tremclad clear coat? also are you sure that tremcldad clear coat or any oil based clear coat sandable? how does it stand agaist the heat from the engine bay? what ever happen to the pple that used clear coats? nobody trie dth automotive clear either?
Posted By: Anonymous
Re: Paint job on a budget!? CONTINUED..page 44........ *DELETED* - 06/27/06 04:28 AM
Post deleted by Ira
Posted By: Anonymous
Re: Paint job on a budget!? CONTINUED..page 44........ *DELETED* - 06/27/06 12:51 PM
Post deleted by Ira
Posted By: Exit1965
Re: Paint job on a budget!? CONTINUED..page 44........ - 06/27/06 01:30 PM
Let's not get this thread closed up, there are still things to be learned and questions to be answered.

In other news, I tried some penetrol on my hood and it came out really orange peely.. must not have used enough. Back to mineral spirits.
I'm taking some days off later this week and I'm going to see how close to done I can get this car. Until then there's really not much to look at.
Posted By: 69chargeryeehaa
Re: Paint job on a budget!? CONTINUED..page 44........ - 06/27/06 02:24 PM
Quote:
when you want that "glistening" look then you spraying a little too much...and doing that it wont dry underneath. but i do have some "glistening" few spots on my paint (couldnt help it)hope it drys well.
69charger, want to sell me your tremclad clear coat? also are you sure that tremcldad clear coat or any oil based clear coat sandable? how does it stand agaist the heat from the engine bay? what ever happen to the pple that used clear coats? nobody trie dth automotive clear either?
i did play with the clear coat, but found that it shined just about the same as just straight buffed paint....BUT.....the guy from tremclad that sent me a case for free told me that you must thin the clear coat with laquir thinner and NOT mineral spirits or you kill the shine. so knowing this now the next time i paint a car using this method i'll defineatly try the clear coat out so NO you can't have it....nana
you can sand any clear coat, some are eaiser then others, but for now i'm happy with my paint and i continue to drive my cars until they need a repaint. i did test a small peice using the clear and laquir thinner and it shines like a BC/CC job, but i just did a really small test peice and it really looked awesome. definatly will give it a try. The tremclad guy said the clear coat stuff reflects 90% at 60*deg of light, so it is highly reflective, but you must use laquir thinner not mineral spirits.
By the way, i found another use for mineral spirits, i cleaned my tires with it, and man, they look like brand new. on my 74 beetle, i used to dress the tires with all that tire shine stuff, for the "wet" look" and over the winter it left this residue that would'nt come off, like a brown crud that almost looked like sticker residue. the mineral spirits really makes your tires look like new, not the shiny look, but like brand new rubber, try it, you'll be amazed, mineral spirits has so many uses i'm just discovering, it also safely removes paint over-spray from lenses, rubber, ect....i cleaned my carb with it, and it shines like new.
Posted By: Exit1965
Re: Paint job on a budget!? CONTINUED..page 44........ - 06/27/06 04:00 PM
Does the clearcoat you played with get as hard and tough as the tremclad paint?
I'd like to get some roll on cleacoat to play with sometime. In the meantime though, I noticed that even though the red paint on my car is still a tad "soft", the red paint I sprayed onto the door is ROCK and I mean ROCK hard. So maybe the spray on clearcoat is worth a serious look..
Posted By: Anonymous
Re: Paint job on a budget!? CONTINUED..page 44........ - 06/27/06 04:33 PM
Anyone looking for a good price on paint, check out this link:
Cheap Paint 
Saw that and just had to share it
Posted By: 69chargeryeehaa
Re: Paint job on a budget!? CONTINUED..page 44........ - 06/27/06 06:02 PM
Quote:
Does the clearcoat you played with get as hard and tough as the tremclad paint?
I'd like to get some roll on cleacoat to play with sometime. In the meantime though, I noticed that even though the red paint on my car is still a tad "soft", the red paint I sprayed onto the door is ROCK and I mean ROCK hard. So maybe the spray on clearcoat is worth a serious look..
the paint will get rock hard exit, after 3 months of driving the car and sun exposure trust me it will be super hard. and yes the clear dries harder than the paint, almost no thinning is requred as it is allready really thin out of the can, and needs about 5% thinning with laquir thinner, rolls better than the paint.
Posted By: Anonymous
Re: Paint job on a budget!? CONTINUED..page 44........ - 06/27/06 08:52 PM
I'm ready to start painting my car tonight. Body work is done. I have only one question. I'm still confused about the mix of mineral spirits to paint. I've seen anywhere from 10% to 40%. Am I correct to assume that one of the biggest factors is sunlight and heat? I live in Arizona. It gets hot here. Will that effect the percentage?
Posted By: Exit1965
Re: Paint job on a budget!? CONTINUED..page 44........ - 06/27/06 09:04 PM
Yeah, I think the hotter it is the faster it dries. You should mix it till it's like water but keep the coats very thin or you'll have runs. I think the best advice is to paint when it's under 80 degrees, if that's possible in early morning.

Posted By: Anonymous
Re: Paint job on a budget!? CONTINUED..page 44........ - 06/28/06 12:31 AM
Here is another Aussie update with my Miata.
Most of my painting is now finished, and the car is going to sit out in the sun for a few days to help cure the paint.


I'm really impressed with the way that it has turned out. If it looks this good now, I can't wait to see how it will look once it's polished!!
Posted By: Anonymous
Re: Paint job on a budget!? CONTINUED..page 44........ - 06/28/06 12:48 AM
Hey, this is sideglide. I have ZERO clue as to why I was banned. I am just a fellow car enthusist that was trying this cool paint job.
The only think I can think of was that I left the computer on at a public place and someone might have messed with it.
I just wanted to say this place is cool and this paint tech is going good for me. I hope that I will be able to continue to post as I have some good pics coming.
Thanks for your understanding.
Posted By: Anonymous
Re: Paint job on a budget!? CONTINUED..page 44........ - 06/28/06 01:20 AM
alright guys, i need some help here. I really need some rustoleum clear, and i cant find it anywhere. So can someone buy some and ship it to me?
email me at
big_blue_mnm@hotmail.com, that is also my msn, and my aim is p8intballer12.
Thanks
-Greg
Posted By: Anonymous
Re: Paint job on a budget!? CONTINUED..page 44........ - 06/28/06 01:29 AM
Posted By: Ira
Re: Paint job on a budget!? CONTINUED..page 44........ - 06/28/06 02:33 AM
Brandon,
post as slideglede, its turned back on,
try to not leave the computer unattended, sorry for the confusion
and now back to the subject
Posted By: Exit1965
Re: Paint job on a budget!? CONTINUED..page 44........ - 06/28/06 03:10 AM
What color is that, slideglide?
Posted By: Exit1965
Re: Paint job on a budget!? CONTINUED..page 44........ - 06/28/06 03:16 AM
Quote:
alright guys, i need some help here. I really need some rustoleum clear, and i cant find it anywhere. So can someone buy some and ship it to me?
email me at big_blue_mnm@hotmail.com, that is also my msn, and my aim is p8intballer12.
Thanks
-Greg
Where have you looked? I've seen it at walmart, home depot, lowes, OSH hardware.
If all else fails, you can try emailing this place:
http://www.hardwareworld.com/contact.aspx
in a google search, it showed up for them, but the don't seem to have it on the site anymore. They have a bunch of other rustoleum at good prices. You're looking for Crystal Clear #7701.
Also, might try calling Rustoleum and ask them where you can get it, see if they tell you somewhere new..
Posted By: Anonymous
Re: Paint job on a budget!? CONTINUED..page 44........ - 06/28/06 03:25 AM
Quote:
Quote:
alright guys, i need some help here. I really need some rustoleum clear, and i cant find it anywhere. So can someone buy some and ship it to me?
email me at big_blue_mnm@hotmail.com, that is also my msn, and my aim is p8intballer12.
Thanks
-Greg
Where have you looked? I've seen it at walmart, home depot, lowes, OSH hardware.
If all else fails, you can try emailing this place:
http://www.hardwareworld.com/contact.aspx
in a google search, it showed up for them, but the don't seem to have it on the site anymore. They have a bunch of other rustoleum at good prices. You're looking for Crystal Clear #7701.
Also, might try calling Rustoleum and ask them where you can get it, see if they tell you somewhere new..
i dont know if your talking about the spray, or in quarts/gallons. ive looked at walmart, lowes, home depot. I can find the spray, but not in quarts etc.
Posted By: Exit1965
Re: Paint job on a budget!? CONTINUED..page 44........ - 06/28/06 03:54 AM
That explains it. There is no such thing as RUSTOLEUM clear in anything but a spray. I've posted this before more than once but I'm sure not everyone's seen it. This is straight from the horse's (rustoleum's) mouth. I searched high and low for quarts and gallons too, then finally called rustoleum and it does not exist except in spray.
82Scirocco uploaded some pics a few pages back of what he got with the spray on kind, and it looks like a pretty sweet deal.
edit: I see now that 82scirocco was using tremclad clear in a spray can and not rustoleum. as nice as his looks I hope rustoleum spray isn't far off. I have read good things about rustoleum clear on other sites though, just never talking about cars in particular.
Posted By: Anonymous
Re: Paint job on a budget!? CONTINUED..page 44........ - 06/28/06 04:20 AM
well... i guess that does explain everything... maybe there is another company that has an oil based paint in clear? ill see if i can find some
Posted By: Exit1965
Re: Paint job on a budget!? CONTINUED..page 44........ - 06/28/06 04:41 AM
Quote:
well... i guess that does explain everything... maybe there is another company that has an oil based paint in clear? ill see if i can find some
POR15 has some that uses a hardener and can be brushed on. I'm planning on trying the Rustoleum spray..
Posted By: Anonymous
Re: Paint job on a budget!? CONTINUED..page 44........ - 06/28/06 04:48 AM
im guessing its thin then? thats what i was worried about with the spray... it spraying it on too thick.
Posted By: Anonymous
Re: Paint job on a budget!? CONTINUED..page 44........ - 06/28/06 06:51 AM
Quote:
What color is that, slideglide?
Thanks Ira, won't happen again.
Exit, that is the Light Machine Gray in the professional grade. Unfortunately, I had to buy 2 gallons to get it. I guess I could always strip the car and paint the inside...
I just put on another coat tonight, sorry no pics. Its looking pretty good except a few places here and there that had to be sanded down more.
Posted By: Anonymous
Re: Paint job on a budget!? CONTINUED..page 44........ - 06/28/06 11:51 AM
Very impressive!!! I've got two gallons of the Rustoleum Gloss Black Professional sitting in the garage, and my Miata (daily driver) is just BEGGING for a new suit! I'm afraid it'll have to wait a while (weather & work load) before I can get started, but your efforts are definitely inspiring.
Question: Did you use the same paint for the bumpers? I'm very curious to see how they came out. I guess where I'm most concerned it the flat panel section of the front bumper, just in front of the center hood section. The plastic in this area is quite flexible and I'm hoping the paint is flexible enough as well to hold up. At this point, wouldn't make much difference anyway, mine is so rock/gravel/sand blasted that anythng would look better!
More photos, please?
BTW, are you familiar with "the Blue Potato"? Finest looking Miata on the planet IMHO, wish I had the money to get the look. The mod can still be bought, it's from Japan - might be cheaper for you than me. I have link for a USA distributor if you're interested, they might know who to contact. Here's a photo:
http://www.thebluepotato.net/exterior/fingerz/street1.jpg
Posted By: Anonymous
Re: Paint job on a budget!? CONTINUED..page 44........ - 06/28/06 12:11 PM
Out of curiosity has anyone experienced fading? My parents are concerned because items they have painted with rustoleum spray have faded after a year or so being left outside. as such they are holding up a large part of my painting process.
Posted By: Anonymous
Re: Paint job on a budget!? CONTINUED..page 44........ - 06/28/06 12:31 PM
Thanks for the positive comments Ricklandia!!
I have used the spray can version of the paint on the bumpers, and they look just as good as the rest of the car. I haven't attached them to the car yet as I have only just repaired the beaver panel (where the rear plate and badges sit) and I've been busy modifying the nose cone for a ram air intake (or two).
Anyway here are a couple more shots of the car.


There are some more pics at my blog site here
web page That blue miata certainly looks interesting, but I guess that it would cost a fortune!!
Posted By: pdqvsix
Re: Paint job on a budget!? CONTINUED..page 44........ - 06/28/06 07:52 PM
It looks like you have the technique down pretty good.
The car looks fantastic!
Posted By: Exit1965
Re: Paint job on a budget!? CONTINUED..page 44........ - 06/28/06 09:08 PM
I agree, sure looks like any BC/CC black paint job I've looked at.
What process did you use? How many coats between wetsanding, etc?
Posted By: Anonymous
Re: Paint job on a budget!? CONTINUED..page 44........ - 06/28/06 10:02 PM
alright... what about Valspar Anti-Rust in a "Clear Base Coat"?? Would that work as a clear coat?
heres a link...
http://www.hectorshardware.biz/shop/product.asp?dept_id=150503&sku=777148&
Posted By: Anonymous
Re: Paint job on a budget!? CONTINUED..page 44........ - 06/28/06 10:36 PM
Thanks guys and in particular Exit 1965, a compliment from one of the guys who inspired me to start this progect certainly means something special.
I used a slightly different process to everyone else. I did one coat per day like you are doing but between every coat I wet sanded with 1200 and then 1500 with the later coats. I found that I was getting a lot of debris on the paint and I was afraid that I'd end up with a crappy result, so I decided to wet sand between each coat. I did seven coats in total.
Those shots are of the seventh coat with the car sitting out in the sun for a couple of days before I do my final wetsand with 2000, then hit it with the Turtle Wax and then I'm going to Zaino the hell out of it.
(Fingers crossed and touching wood), I'm hoping to get it looking like a black mirror....
Posted By: Anonymous
Re: Paint job on a budget!? CONTINUED..page 44........ - 06/28/06 10:40 PM
this is tremclad... not exactly rustoleum... i believe.
as for the clear coat i guess theres no quarts
only in canada, so anyone from canada would like to ship a few here in the states
Posted By: Anonymous
Re: Paint job on a budget!? CONTINUED..page 44........ - 06/28/06 11:16 PM
I saw that Blue Potato in Grassroots Motorsports magazine. It is definitely a cool car. He has the individual throttle-bodies for each cylinder, right?
Man, GRM should totally do a story on this method of painting.
Posted By: Anonymous
Re: Paint job on a budget!? CONTINUED..page 44........ - 06/29/06 01:38 AM
hey ya'll ok i found another paint that works well but this one u can tint..it doesnt come pre tinted...works just like rustoleum/tremclad heres the link
http://www.sico.com/En/Architecture_Autcor.aspalso in regards to sending out the tremclad clear if i find a place that has it and at that point i'll let ya'll konw and send it out to whoever wants it?
Posted By: Anonymous
Re: Paint job on a budget!? CONTINUED..page 44........ *DELETED* - 06/29/06 07:12 AM
Post deleted by Ira
Posted By: Marq
Re: Paint job on a budget!? CONTINUED..page 44........ *DELETED* - 06/29/06 11:34 AM
Post deleted by Ira
Posted By: Anonymous
Re: Paint job on a budget!? CONTINUED..page 44........ *DELETED* - 06/29/06 01:41 PM
Post deleted by Ira
Posted By: 69chargeryeehaa
Re: Paint job on a budget!? CONTINUED..page 44........ - 06/29/06 02:50 PM
i wish we could stay focused on the task at hand, and not start the whole debate of macco, or getting it done professionally, it's been done over and over in this thread.

This method if done correctly is for a person who is "PAINTING ON A BUDGET", the end result is as good as YOU make it, the time you put into it (free), and doing it at home with virtually no $, or expensive equipment. As you can see from all the people who have tried it (including myself) it works, and can yeild a very respectable paint job, and that's the point of this thread, to help people, not everyone has $5000 to dump on a paint job, and i'd rather invest $100 on my own paint job, and not throw away $500 for a cheapy macco paint job, that i know will in no way be better than my work period. if you don't cut corners, prep right, and strip you car of chrome, ect...you will have a awesome paintjob, with the satasifaction of being able to say you did it yourself, that's all that matters.
Exit1965- i really think you should skip the clear, just finish the paint as best as you can, and pull the car outside, get a few buddies to come over and look at the car, give you honest opinions. i think your car look killer
i'm dying to see it done.
the issue with the clear is that basically the work-ability of the paint is gone, scratches, stone chips, ect...much harder to fix. that's why i'm not too excited to do it, but my car is done allready, and i like it, maybe next time (not for a while) i will try the clear on a repaint, but quite honestly, the paint alone buffed satasifies me very well. you need to go to a cruise night, look at some of the rides there, my paint is nicer than 80% of the stuff there except for the high dollar stuff. you should see the stuff some people drive, and they're happy lol.
Posted By: Anonymous
Re: Paint job on a budget!? CONTINUED..page 44........ - 06/29/06 03:41 PM
I dont think so (throttle bodies), last i saw it was supercharged. Then again, he's always tinkering with it. The main website is
http://www.thebluepotato.net , has a ton of photos and other stuff.
You're definitely right, Grass Roots Motorsports should definitely get hip to what's happening here, it's right up thier alley. Anyone got an email address for them? Send 'em a link to this thread!
Posted By: Anonymous
Re: Paint job on a budget!? CONTINUED..page 44........ - 06/29/06 04:07 PM
Quote:
I dont think so (throttle bodies), last i saw it was supercharged. Then again, he's always tinkering with it. The main website is http://www.thebluepotato.net , has a ton of photos and other stuff.
You're definitely right, Grass Roots Motorsports should definitely get hip to what's happening here, it's right up thier alley. Anyone got an email address for them? Send 'em a link to this thread!
Must be a new thing. Here's a picture from his website (check out the trumpets!):

I bet it sounds pretty sweet at redline.
Back to the topic at hand: GRM has their own forum and I've seen a couple of posts referring back to the original "roller" thread here. But I was thinking GRM should definitely do a test run of this method on one of their budget project cars, maybe they could give us some scientific tests as to dilution %, regular vs Pro Rustoleum, etc.
Posted By: Marq
Re: Paint job on a budget!? CONTINUED..page 44........ - 06/29/06 04:16 PM
Well... I had a most interesting revelation that ties in completely with this Tremclad/Rustoleum paint method... and I think it may provide a solution to some folks that are sitting on the fence.
I was talking to my older brother about the work I have been doing on my car. I described to him the method by which to apply Tremclad in order to get a hard paint job with a decent look to it on a budget.
He started laughing and explained to me that THERE IS AN EVEN BETTER WAY to do this and it has been done for YEARS with guaranteed REPEATABLE and CONSISTENT results.
Well that caught my ears, because the only weakness with using the TremClad / Rustoleum method is that the results are inconsistent between users and there is almost a hint of Voodoo science for the beginner to get near perfect results...
OK... SO WHAT WAS MY BROTHER'S SECRET ALTERNATIVE ?
.... Marine Paint.
It turns out that the guys with the boats have been HAND PAINTING AND ROLLING the paint jobs on their boats FOR YEARS. The have it down to a science and YOU CAN ROLL a paint like Interlux Brightside STRAIGHT FROM THE CAN - no mixing - no hoping you get the mineral spirit mixed in the right ratios.
The boaters face problems that are identical to car owners.... wear - shine - durability - effects of weather ( sun - moisture etc ).
And best of all Marine paint is designed to HARDEN....
And even better... the Marine paint SELF-LEVELS.
And even better yet... 10 years is the average life expectancy of a Marine paint by hand job...
And maybe the icing on the cake... at most it will take only 2 or 3 coats to get complete coverage.
One last bonus with the marine paint is that you can get a ONE STAGE Polyurethane that is equivalent to the top of the line paint used by MAACO ( their most expensive premium paint job ) and the paint has such a high gloss that it always appears WET.
Ok... I cannot speak here about any Marine paint here except the Interlux BRIGHTSIDE... because my brother is only aware of it being used successfully on CARS.
Here is what the manufactuer says about this product :
------------------------------------
Brightside Polyurethane is the most technically advanced one-part polyurethane available. Brightside now contains Teflon� for better resistance to staining, abrasion and easy cleaning.
Brightside uses Polyflow 4000�, a unique polyurethane resin, which yields excellent flow and leveling characteristics as well as incredible abrasion and chemical resistance. Brightside also takes advantage of the latest in ultraviolet technology which insures longer color and gloss retention.
Together these technologies create a one-part polyurethane which gives the look of a two-part polyurethane with the application ease of a one-part enamel.
Application Details - Brightside Polyurethane
Area Above the waterline
Finish/Sheen High Gloss
Number of Coats: 2 minimum
Method of application: Brush / Roller / Airless Spray / Conventional Spray
Available colors: View color chart and sales codes
Pack sizes: 1 US Quart / 1 US Gallon / (Some colors only)
-------------------------------------
Did you notice where they SPECIFICALLY SAY BRUSH/ROLLER... and it is DESIGNED to be UV resistant and has Teflon to repel chemicals and stains ( like bird poop ).
http://www.yachtpaint.com/usa//product_g...cePageID=6660#1You can check out the COLOR SELECTION at this link :
http://www.yachtpaint.com/USA/general/colorcard_topsides.aspNOTE : You need to go to the middle of the color card for the TWENTY-FOUR BRIGHTSIDE color choices...
Brightside
Blue-Glo White Y4259
White Y4359
Hatteras Off-White Y4208
Hatteras Off-White 1990 Y4218
Off White Y4381
Matterhorn White Y4360
Seattle Grey Y4205
Dusk Grey Y4233
Kingstone Gray Y4190
Steel Grey Y4250
Grand Banks beige Y4217
Yellow Y4152
Sundown Buff Y4237
Bristol Eeige Y4207
Ocean Blue Y4253
Fire Red Y4248
Sea Green Y4247
Light Blue Y4351
Flag Blue Y4990
Dark Blue Y4316
Largo Blue Y4100
Medium Blue Y4353
Sapphire Blue Y4241
Black Y4258
Better yet... find your local marine paint dealer that sells Interlux and get a copy of their color chips - they are even better in person than the color samples on the Internet.
Ok... so that is TWENTY-FOUR colors that you can use DIRECTLY from the can to your car without mixing in any mineral spirits etc.
This will have to be considered the premium version of the Tremclad paint job - in that the Brightside paint goes for $19 to $45 per quart ( depending on where you buy it from.
And yet is is a 'roller job' designed paint and your methodology is the same as we have been discussing for the Tremclad / Rustoleum method. Yes... we get to keep using our little 4 inch high density foam rollers.
And if you get the urge to want to 'thin' the paint out.. they have a product called 333 that is specifically designed to thin this paint out and make it even more workable with the roller ( a helpful product for those users that are working in areas where the temperature is always averaging 80 degrees or higher ).
Oh... did I mention that it is enamel compatible and you can sand down your last Rusto/Tremclad layer and lay this paint over it
So you are going to pay a little more per can for this stuff... BUT I think the reduced number of coats required for coverage, the elimination of the mixing of thinners, the fact that it is a one stage Polyurethane, the fact that it is roller and brush ready from the can... makes it a worthwile candidate to consider if you want to try the 'budget paint' process on your car.
And the surface preparation requirements for a boat are the same as what everyone has to do to prepare for Tremcladding.
We all know how sharp the paint jobs on speed boats look... and the conditions under which that type of paint must operate. So it is a natural for bringing over to the home do it yourself car enthusiast.
And I don't think I need convince anyone about the durability of marine paint jobs.
Nuff said. I really wanted to share this info with everyone because I think it is definitely the next step up from the Tremclad roller job - and that it solves the repeatable and consistency problems that folks have experienced.
Say goodbye to orangepeel... when you are only having to lay 2 or 3 layers you just reduced greatly the chances of an orangepeel breakout during the 6 to 10 layers of Tremclad you have to lay to get full coverage.
ONE LAST BONUS.... They have a video for viewing off their web site THAT SHOWS HOW TO ROLL AND TIP a paint job onto a boat. The principles are the very same for doing a CAR. You can see them applying the paint and the end results. This could be the final sells point that will convince folks of the applicability of this BRIGHTSIDE paint to your car. Please note that the video is for doing it with their PERFECTION brand paint - but the methodology and results are the same for the BRIGHTSIDE paint.
http://www.yachtpaint.com/USA/hotlinks/perfection_intro.mpegEnjoy the movie
Marq
.
Posted By: Anonymous
Re: Paint job on a budget!? CONTINUED..page 44........ - 06/29/06 04:52 PM
Quote:
Well... I had a most interesting revelation that ties in completely with this Tremclad/Rustoleum paint method... and I think it may provide a solution to some folks that are sitting on the fence.
I was talking to my older brother about the work I have been doing on my car. I described to him the method by which to apply Tremclad in order to get a hard paint job with a decent look to it on a budget.
He started laughing and explained to me that THERE IS AN EVEN BETTER WAY to do this and it has been done for YEARS with guaranteed REPEATABLE and CONSISTENT results.
Well that caught my ears, because the only weakness with using the TremClad / Rustoleum method is that the results are inconsistent between users and there is almost a hint of Voodoo science for the beginner to get near perfect results...
OK... SO WHAT WAS MY BROTHER'S SECRET ALTERNATIVE ?
.... Marine Paint.
It turns out that the guys with the boats have been HAND PAINTING AND ROLLING the paint jobs on their boats FOR YEARS. The have it down to a science and YOU CAN ROLL a paint like Interlux Brightside STRAIGHT FROM THE CAN - no mixing - no hoping you get the mineral spirit mixed in the right ratios.
The boaters face problems that are identical to car owners.... wear - shine - durability - effects of weather ( sun - moisture etc ).
And best of all Marine paint is designed to HARDEN....
And even better... the Marine paint SELF-LEVELS.
And even better yet... 10 years is the average life expectancy of a Marine paint by hand job...
And maybe the icing on the cake... at most it will take only 2 or 3 coats to get complete coverage.
One last bonus with the marine paint is that you can get a ONE STAGE Polyurethane that is equivalent to the top of the line paint used by MAACO ( their most expensive premium paint job ) and the paint has such a high gloss that it always appears WET.
Ok... I cannot speak here about any Marine paint here except the Interlux BRIGHTSIDE... because my brother is only aware of it being used successfully on CARS.
Here is what the manufactuer says about this product :
------------------------------------
Brightside Polyurethane is the most technically advanced one-part polyurethane available. Brightside now contains Teflon� for better resistance to staining, abrasion and easy cleaning.
Brightside uses Polyflow 4000�, a unique polyurethane resin, which yields excellent flow and leveling characteristics as well as incredible abrasion and chemical resistance. Brightside also takes advantage of the latest in ultraviolet technology which insures longer color and gloss retention.
Together these technologies create a one-part polyurethane which gives the look of a two-part polyurethane with the application ease of a one-part enamel.
Application Details - Brightside Polyurethane
Area Above the waterline
Finish/Sheen High Gloss
Number of Coats: 2 minimum
Method of application: Brush / Roller / Airless Spray / Conventional Spray
Available colors: View color chart and sales codes
Pack sizes: 1 US Quart / 1 US Gallon / (Some colors only)
-------------------------------------
Did you notice where they SPECIFICALLY SAY BRUSH/ROLLER... and it is DESIGNED to be UV resistant and has Teflon to repel chemicals and stains ( like bird poop ).
http://www.yachtpaint.com/usa//product_g...cePageID=6660#1
You can check out the COLOR SELECTION at this link :
http://www.yachtpaint.com/USA/general/colorcard_topsides.asp
NOTE : You need to go to the middle of the color card for the TWENTY-FOUR BRIGHTSIDE color choices...
Brightside
Blue-Glo White Y4259
White Y4359
Hatteras Off-White Y4208
Hatteras Off-White 1990 Y4218
Off White Y4381
Matterhorn White Y4360
Seattle Grey Y4205
Dusk Grey Y4233
Kingstone Gray Y4190
Steel Grey Y4250
Grand Banks beige Y4217
Yellow Y4152
Sundown Buff Y4237
Bristol Eeige Y4207
Ocean Blue Y4253
Fire Red Y4248
Sea Green Y4247
Light Blue Y4351
Flag Blue Y4990
Dark Blue Y4316
Largo Blue Y4100
Medium Blue Y4353
Sapphire Blue Y4241
Black Y4258
Better yet... find your local marine paint dealer that sells Interlux and get a copy of their color chips - they are even better in person than the color samples on the Internet.
Ok... so that is TWENTY-FOUR colors that you can use DIRECTLY from the can to your car without mixing in any mineral spirits etc.
This will have to be considered the premium version of the Tremclad paint job - in that the Brightside paint goes for $19 to $45 per quart ( depending on where you buy it from.
And yet is is a 'roller job' designed paint and your methodology is the same as we have been discussing for the Tremclad / Rustoleum method.
Oh... did I mention that it is enamel compatible and you can sand down your last Rusto/Tremclad layer and lay this paint over it
So you are going to pay a little more per can for this stuff... BUT I think the reduced number of coats required for coverage, the elimination of the mixing of thinners, the fact that it is a one stage Polyurethane, the fact that it is roller and brush ready from the can... makes it a worthwile candidate to consider if you want to try the 'budget paint' process on your car.
And the surface preparation requirements for a boat are the same as what everyone has to do to prepare for Tremcladding.
We all know how sharp the paint jobs on speed boats look... and the conditions under which that type of paint must operate. So it is a natural for bringing over to the home do it yourself car enthusiast.
And I don't think I need convince anyone about the durability of marine paint jobs.
Nuff said. I really wanted to share this info with everyone because I think it is definitely the next step up from the Tremclad roller job - and that it solves the repeatable and consistency problems that folks have experienced.
Say goodbye to orangepeel... when you are only having to lay 2 or 3 layers you just reduced greatly the chances of an orangepeel breakout during the 6 to 10 layers of Tremclad you have to lay to get full coverage.
Hi, marq
Do you still do the same process with the wet sanding? Will you still get the same shine results on a car as tremclad/rustoleum? 
Posted By: Marq
Re: Paint job on a budget!? CONTINUED..page 44........ - 06/29/06 04:57 PM
Yes... the process is the very same for the wet sanding. Boaters don't need to do it... but I went and scouted out a NUMBER of boater 'do it yourself' web sites where they have been wet sanding it between layers to get an even deeper color and higher level of gloss.
The common thread throughout most of the boater message threads was the 'surprise' most of them experienced with just how wet, deep and glossy the paint was without doing the wet sanding.
About the only thing the boaters tend to argue about was the different brands of marine paints to which they swear allegiance to. The BRIGHTSIDE paint by Interlux seemed to be the majority favorite based on COST, ease of use and quality of the end result.
.
Posted By: Exit1965
Re: Paint job on a budget!? CONTINUED..page 44........ - 06/29/06 04:58 PM
Certainly interesting Marq! Their website says to use primer, does your brother's experience include the primer?
Posted By: Exit1965
Re: Paint job on a budget!? CONTINUED..page 44........ - 06/29/06 04:59 PM
Also Marq do you have any pics of this stuff after being applied with a roller? (boat or car..?)
Posted By: Marq
Re: Paint job on a budget!? CONTINUED..page 44........ - 06/29/06 05:10 PM
Watch the movie they provided that gives a brief example of how to paint a boat.... ( I just added this link to the original post ).
In the free booklet the dealers hand out, there are more detailed instructions on the 'roll and tip' method of applying paint. Which you will find is the same as what we are already doing with the 4 inch high density foam rollers.
The fat guy in this movie is using just a brush to apply and level it...
http://www.yachtpaint.com/USA/hotlinks/perfection_intro.mpegThey only provide the 'intro' on their web site, but at the dealer they have a CD with the full movie on it that they give out ( when they have them and they haven't all been taken ). You might be able to request one be mailed to you by Interlux if your local dealer doesn't have the CD
As for the primer... when you get a hold of the fact sheet or their booklet that they hand out at the store... the 'primer' is a nice luxury but not necessary EXCEPT when applying the paint over certain materials... like aluminum or worn out gelcoat etc.
The main thing I read through quite a few boater message boards is that you can lay this marine paint directly over sanded enamel paint.
The problem with the PERFECTION brand paint is that it is so potent that it can wrinkle up old paint trapped beneath it. So in its case the primer is a definite necessity. But the BRIGHTSIDE is compatible with the enamel and has no reported ill effects.
Personally, I might be tempted to use their primer for two reasons :
a) to establish a uniform color on the car body from which to layer your chosen color. The biggest problem with the Tremclad method is that if you had multiple colors that you were painting over, it took extra layers to get 100% coverage of a uniform color.
b ) their primer would provide the absolute best surface on to which you would be assured the maximum of adhesion of the BRIGHTSIDE paint.
However, I did read on another site where a user did an adhesion test by trying different substrates with this paint. His conclusion was that he got the same level of adhesion on 'their primered surfaced' as on a sanded surface. It was all quite scientific how the guy went about testing it and the results look pretty authentic and not based on theory etc.
I think you can also find the 'roll and tip' information in greater detail on the yachtpaint.com web site
http://www.yachtpaint.com/usa/default.asp.
Posted By: Anonymous
Re: Paint job on a budget!? CONTINUED..page 44........ *DELETED* - 06/29/06 05:15 PM
Post deleted by Ira
Posted By: Anonymous
Re: Paint job on a budget!? CONTINUED..page 44........ *DELETED* - 06/29/06 05:35 PM
Post deleted by Ira
Posted By: Anonymous
Re: Paint job on a budget!? CONTINUED..page 44........ - 06/29/06 05:46 PM
A little update on my paint status. Exit, I'm going with the same color you did, Safety Red Professional. It takes forever to not see the ghost of the previous color beneath and/or bondo. This pic is after the 6th coat. I'll be wetsanding and applying my 9th coat tonight. I can't wait to see it in the sun! It flows very well at the milk consistency. Any waves are fiberglass waves as this buggy body is probably 30 years old.
I won't do the dial-uppers a disservice by embedding these pics:
front pic - dried coat 6 top pic - dried coat 6 BTW, for those of you on the humid coast like me, a dehumidifier in the room will speed the drying of this stuff. Before using it, the paint wasn't ready for recoat w/in 12 hours.
Posted By: Ira
Re: Paint job on a budget!? CONTINUED..page 44........ *DELETED* - 06/29/06 06:47 PM
guys, lets keep this on topic and not turn it into a debate about the quality of maaco, thats a different subject,
thanks
Posted By: Anonymous
Re: Paint job on a budget!? CONTINUED..page 44........ - 06/29/06 07:07 PM
I couldn't find this Interlux Brightside paint anywhere under $25-$30 a quart online (their's nowhere locally here to buy it that I have found), but here a deal........
--------------------------------------------------
http://cgi.ebay.com/6Qt-Red-Interlux-Bri...1QQcmdZViewItem --------------------------------------------------
Posted By: Anonymous
Re: Paint job on a budget!? CONTINUED..page 44........ *DELETED* - 06/29/06 07:15 PM
Quote:
guys, lets keep this on topic and not turn it into a debate about the quality of maaco, thats a different subject,
thanks
Ira, nice to know you can post too! Dude, I just wanted to thank you and the other moderators for being so open minded and allowing this thread. You guys ROCK!
I am continually amazed at how this technique keeps evolving: rollering with Tremclad only to rollering with a variety of paints like Rustoleum, Valspar, Tremco, Dutchlac and now Interlux; applications with a rollers, brushes, Wagners and even rattle cans.
Bottom line, for years we all thought cars could ONLY be painted with compressors, paint booths, masks and spray guns. All of you guys are proving this is not true.
As for me, I'm still working on the Dutchlac variation. It's just GETTING there that's so hard. Like Exit, I keep finding body imperfections that keep popping up. Painting will be the EASY part!
Keep up the good work all of you!
Posted By: Anonymous
Re: Paint job on a budget!? CONTINUED..page 44........ - 06/29/06 07:32 PM
One question marq,
Do you know if the Brightside is as thin as the Rustoleum/Tremclad after thinned or is it thicker like reg. paint?
Posted By: Marq
Re: Paint job on a budget!? CONTINUED..page 44........ - 06/29/06 07:59 PM
Well. I bought four cans of the Interlux BRIGHTSIDE Fire Red... and I did a quick shake test of the can to try to answer your question.
It sounds a little bit wetter than a unmixed can of Tremclad... the glub glub sound splashing around in the can was a splashier higher pitch.
My curiousity got the better of me and so I opened up a can after a minute of gentle rocking of the can to mix it.
Out of the can the paint is indeed slightly wetter than straight Tremclad.
Part of the reason that you are able to apply BRIGHTSIDE in its virgin state is that it was chemically designed to be able to be applied thinly to whatever you are painting. They make some specific reference to some polymer or chemical in the product that gives the paint the specific property to be painted thin and self level.
Ok... I have just done a 'test experiment' on my car...
Using my 4" high density roller I laid a test patch of the Brightside over
a) a wet sanded section of Tremclad... and
b) an unsanded section of Tremclad
RESULT : No compatibility problemms at all. It went on, adhered and self-leveled. No eating or wrinking of the Tremclad substrate.
I have only done some test areas for the purposes of this compatibility test and here are my observations :
a ) when you roll the BRIGHTSIDE with a 4" high density roller, you get a similar 'bubble' effect as Tremclad with the right mix of mineral spirit.
b ) in the first seconds that the paint is rolled on it looked kind of sueded. As per their recommendations you immediately take a 3 or 4 inch foam brush and pass it over the freshly rolled paint. LIKE FRIGGIN MAGIC ALL THE SUEDE or BUBBLES disappear and it leaves behind a GLOSSY surface.
c ) the color coverage appears to be about equal to the Tremclad. I was a little disappointed that the pigment wasn't a little thicker. So a primer might be a good idea if someone is starting with a multicolored body - just to provide a uniform base over which to paint.
d ) the paint rolls on smoothly and is thick enough that it adheres immediately and can easily be worked in both the horizontal and vertical without RUNS or dripping
Yippee
At this moment I am thrilled. The result exceeds how things were progressing at 6 coats of Tremclad and the gloss and depth of the color with this one THIN pass of the roller is amazing. I could clearly see my reflection in the gloss.
The secret to working with this stuff is pretty much the same rules that we used with the Tremclad experiment. But I would say the sequence could be revised to :
a ) lay on a thin coat of the Brightside to one section or panel of the car at a time. That is pretty much the rule we have applied when doing the Tremclad.
b ) immediately go over that same area with a 3 or 4 inch foam BRUSH ( traveling in one uniform direction ) to magicly wipe away the bubbles/suede. This is something that was not necessary with the Tremclad - but with the Tremclad you needed to have the right mix of paint and mineral spirit to get the bubbles to self-disappear.
c ) let dry ( a minimum of 8 hours as per the Interlux instructions. Considering that one layer of Brightside is equal to two layers of Tremclad.... that works out to a reasonable waiting time.
d ) wet sand with a 1500 or 2000 ( because this puppy is going to self level and have a smooth glossy surface...
e ) repeat steps a to d until you reach a level of uniform color
f ) lay down one final coat with no wet sanding.
AN IMPORTANT NOTE FOR THE FINAL COATING : I have read on the Interlux site and on the various boaters boards that for the final coat YOU NEED TO LAY IT DOWN WHEN THE HUMIDITY IS VERY LOW AND THE TEMPERATURE IS COOL. This will MAXIMIZE the quality of the gloss on that final coating. This HELPFUL HINT may also be applicable to the Tremclad painters. So ideally the final coat should probably be laid down in the early morning of a non-humid day.
At this point I would guess you let it cure for a while to reach maximum hardness - and then we can look at polishing techniques to maximize the gloss ( although that final level of gloss may be better than most people would have expected.
I notice over at the Interlux web site they have created washes and waxes for the BRIGHTSIDE paint... so maybe we can get our hints for what to do from there or by scouring the boating message forums and learn from some nautical salts what they do..
marq
Posted By: Anonymous
Re: Paint job on a budget!? CONTINUED..page 44........ - 06/29/06 09:16 PM
Marq, great information you have gathered. Get us some pics of the test areas you have done... I am curious to see, as I am sure others are too. BTW did you lay on the brightside straight out of the can, or did you cut it some to thin it out?
For someone who is still in the body prep stages any further information you guys are providing is priceless and greatly appreciated.
Posted By: Exit1965
Re: Paint job on a budget!? CONTINUED..page 44........ - 06/29/06 10:16 PM
Marq- how hard/soft are you touching it with the foam brush afterward?
This stuff sounds like a magical version of rustoleum at this point, but then again parts of this remind me of rustoleum mixed with penetrol since (if mixed right anyways) it inevitibly leads to self leveling. The gloss quality is probably where the difference is. But the problem still exists that crap is going to happen to that final coat to where wetsanding is necessary. Perhaps not as necessary on a boat because how close do you actually get to that part of a boat to see the stuff that's wrong with it? But on a car there will be the dust specs, the dog hair, the foam roller particles, which people will notice when walking up to the car etc. After the final wetsand of either type of paint, the shine will be on the shoulders of the person who will polish it, and it seems like tremclad and rustoleum shine well in the right hands (even in my hands, I got the safety red to shine OK).
Another thought -do you know if they make spray cans of this stuff for touchups (or in the case of cars, doorjambs and engine bays), or is it just in liquid form?
Also I'll tell the gang here that I have switched colors, to canvas white which I think looks better than the almond or plain white for this car. Safety red just didn't do it for me. I know a lot of people liked it, and so did I, just not for my car. Anyways I've put my 2nd coat on this morning, and hope to have it 90% done by next Tuesday. Right now, the true shade of canvas white is not showing through but it's already covering much faster than the Red. 4 coats should have it solid, another 2 for good measure. I took 3 days off work to be able to paint it in the mornings while it's under 80 degrees F.
Here's a familiar shot:
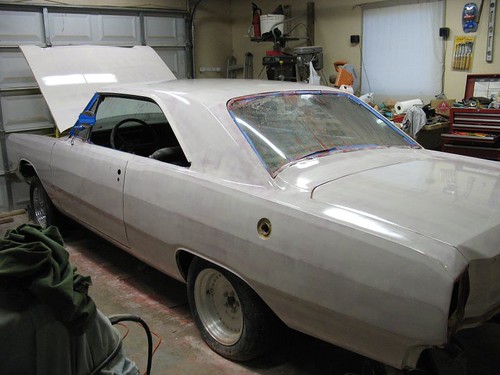
Posted By: Anonymous
Re: Paint job on a budget!? CONTINUED..page 44........ - 06/29/06 10:25 PM
Quote:
alright... what about Valspar Anti-Rust in a "Clear Base Coat"?? Would that work as a clear coat?
heres a link... http://www.hectorshardware.biz/shop/product.asp?dept_id=150503&sku=777148&
.
Posted By: Anonymous
Re: Paint job on a budget!? CONTINUED..page 44........ - 06/29/06 10:47 PM
[Edited by Moparts - Keep it clean]! Exit1965, your fast! did you went over the red? your using Brightside now?
since this boat paint hardens instead of that wait...(for it to really hardens) i can spray this maybe 2 coats and be done (over my green rusto) thats great info marq, im thinking about it
Posted By: Exit1965
Re: Paint job on a budget!? CONTINUED..page 44........ - 06/29/06 11:18 PM
Quote:
[Edited by Moparts - Keep it clean]! Exit1965, your fast! did you went over the red? your using Brightside now?
since this boat paint hardens instead of that wait...(for it to really hardens) i can spray this maybe 2 coats and be done (over my green rusto) thats great info marq, im thinking about it
Umm, no not that fast. I'm sticking with Rustoleum. I'm going to take advantage of the spray for certain areas like door jambs and probably the engine bay.
Posted By: Marq
Re: Paint job on a budget!? CONTINUED..page 44........ - 06/30/06 01:15 AM
Ok... some quick answers to a bunch of questions....
- Forget about ValSPAR... it will always remain too soft to be practical on a car. My wife used the Valspar products to refinish two sets of dresser drawers. It is beautiful but soft ( even 5 years after she did it ).
- I painted the WHOLE CAR tonight. I was very excited by the test patches. It turned out amazing for one coat. The gloss of the entire body will blind you
- I used the BRIGHTSIDE straight out of the can without cutting it with their thinning product #333.
- You roll it just like you would the Tremclad. Then, when you finish a section and you take your foam 3 or 4 inch brush and lightly brush over the entire surface. You will know when you are using the right pressure when the bubbles all disappear magically after just one pass of the brush.
I will try to take pictures by Saturday. I should have been able to wet sand the current coat and laid on the 2nd coat. I believe you will fall in love with what this stuff is doing.
- The only thing I noticed tonight is that I was putting about 1/3 of a can into my tray. By the time I had worked my way around to using most of that allotment of paint, it had begun to thicken - having evaporated from the tray the solvents. You can tell when the tray needs to be refreshed with a fresh bunch of paint when the paint you are applying to the car does not pop the bubbles as easily when you run the foam brush over it. Add some fresh paint to your tray and things will begin working just like when you began.
- The coverage of the paint over the body did prove to be better than the thinned out Tremclad. The Brightside was able to do a fairly decent job of covering up the white, black and red colors on the prepared body surface.
- I am not sure if they have spray cans for this product. I seem to think that I read somewhere that they did... but I know the marine store where I picked up my quarts did not have a spray version... just the liquid form. I guess that is because more of the boat guys do the 'roll and tip' method. The other reason might be that it is a health hazzard spraying this type of paint. You will notice that Interlux even says " if you want to sprary this stuff then contact us directly for more information ".
- Exit... do me a favor ( and yourself ) and locate even just one can of Brightside to experiment with. Because it is a poly finish it is automatically closer in chemical structure to the automotive paint of the same type. Therefore the finish polishing would be exactly the same as if you had the car sprayed with MAACO's top of the line paint. I think if we can get you to play with this stuff you will defect over to the Brightside camp. And as my full painting of the car tonight proved.. the Tremclad underneath presented no problems to the application of this Brightside paint over it. So all your Rustoleum work will not be lost. But most of all... you are probably in the best position to confirm my observations about using this stuff.
Heck... if they had an ORANGE Brightside paint I suspect that even Charger might try a little experiment with this stuff just to check out its ease of application and highly glossy results.
- And a message to that guy who was having a problem convincing his parents about a 'roller paint job'. Your parents had concerns about 'fade' of the Rustoleum / Tremclad method. I think you should have no problem convincing them about the merits of the BRIGHTSIDE paint. Since the paint is designed to be put on boats - which in most cases are worth a HECK OF A LOT MORE than our cars.. and those boats are exposed to the elements etc... the fade factor is a non-factor for this boat paint. Hope this helps you to convince them and put their minds at ease...
marq
.
Posted By: Anonymous
Re: Paint job on a budget!? CONTINUED..page 44........ - 06/30/06 03:14 AM
Marq--Photos! I want to see this.
Posted By: Anonymous
Re: Paint job on a budget!? CONTINUED..page 44........ - 06/30/06 11:36 AM
Exit, you're killing me man! You must be one crazy perfectionist, your car was looking great in red. However, I know that wasn't your first choice in colors so I understand. And I knew you were up to something because you were keeping pretty quiet, I actually wondered if you were switching colors.
As for Grassroots Motorsports, I post over there and actually found this thread when another GRM member posted it on our board. I'm surprised it didn't generated the same kind of buzz over there. Maybe there are more like me though, following it closely over here.
Posted By: Anonymous
Re: Paint job on a budget!? CONTINUED..page 44........ - 06/30/06 12:31 PM
Thanks much for your help. I'm not sure what my parents are hung up on more that I might get paint on there garage floor in drips or that the color might fade.
Either way a friend and I are going to try to get the paint from a marine store this weekend. The royal blue I have been painting with isn't the perfect color for me but it was close enough. I'm going to try one of them. So far I have the fenders, ground fx's, and spoiler done. But I'm sure they are easy to reroll.
My dad's been complaining because he likes the car in red. Says I shoudl live with the rust and if I wanted it in blue kept searching around (only they didn't make a 2g eclipse spyder convertible in blue!). I had a black one last year that I lived with the color. I had an accident this winter and grabed the first 2g 5 speed turbo model convertible of it I could find. They get even more rare in the spring time usually. Unfortunately it's red, has keymarks down the one side and a bunch of rust on the hood.
Pictures by monday hopefully!
Posted By: Marq
Re: Paint job on a budget!? CONTINUED..page 44........ - 06/30/06 02:12 PM
I won't be able to get any pics of my car with the Brightside paint posted until at least Saturday.
But I did find three pics of a Camaro that was JUST FINISHED and had been painted with Brightside 'yellow'... and hopefully that will show you what the paint looks like on a car... The guy mentioned that this was after THREE COATS of Brightside. That he had wetsanded between each coat. And that these pics were taken BEFORE ANY FINISH BUFFING OR POLISHING...


That is one nasty looking high gloss !
.
Posted By: 69chargeryeehaa
Re: Paint job on a budget!? CONTINUED..page 44........ - 06/30/06 02:14 PM
Marq - i actually have used that brightside paint about 6yrs ago to paint a old sail boat (14'), and did find it to be very good paint. the only reason why i use the tremclad is the cost, and the benifit of rust-inhibiting, and that i'm 100% confortable with using it, and know the paint will hold up for a really long time. my sail boat was prepped properlly, and the paint lasted about 2 yrs and then went to poop on that sail boat, granted it was exposed to the elements all year round, this was at the cottage. it basically recieved no attention, cleaning, or waxing, so it's not a fair comparison to it's potential longevity. it was great paint to work with. i'm really happy with the shine of the tremclad, it is just as good if not better than the original paint on these cars - enamel. plus enamel is known for it's durability. i've had no fade issues on my beetle for 6yrs, all i do is wax the car every year, but it does'nt see any winter driving. i basically stubmled accross this method when i was really poor, and my first car (85 honda crx) needed paint bad. i painted the car in 2 days, including body work, tremclad gloss black, and the car looked awesome, and lasted 3 years thru canadian winters and salt, and in access of 400,000kms (about 250,000mi)!!! yes, i drove the snot out of that car, and the tremclad black still looked great for a 2 day job. I'm sticking with the tremclad, just because i know how the paint behaves, and i know how to work with it and get really good results. if i wasn't happy with the shine/durability i would use and expirement with other paints, but for me i'm 100% happy, plus if you hit the paint with a buffer every year for an hour it will look just like the day you painted it. i have yet to buff my 74 beetle, i'm actually thinking about re-doing the 74 beetle, just deciding on color, and i might try the clear coat, i want to do a PERFECT job on the 74 bug, because it's small and easy to do, when i'm done with it, it will be show quality paint, lots of hours wetsanding. i actually just did the orange really quick because i wanted to see what it would look like, it's the original color, i'm thinking something blue
because that's my favorite color, besides orange

.
i'm actually thinking about building a stroker (200+hp in a 1300lb car =
)for my 74 beetle, race trans, porsche fuch rims, also considering snail power
ect.....so i want a killer paint job, it's going to be a winter project, since i'm driving the car alot (espically with the gas prices) and it will probabally take me 6 months to decide on a color!!!
here's a pic of the car (74 beetle painted in 2000, tremclad "real orange"):

Posted By: 69chargeryeehaa
Re: Paint job on a budget!? CONTINUED..page 44........ - 06/30/06 02:35 PM
here's a some pics of my 85 crx i just scanned, it was painted about 14yrs ago, with the help of my now wife, with some left over paint my dad used to paint the house (notice the cottage in the backround; tremclad was used to paint the doors, and 2-door wood, still looks good!!!) my dad was mad i used all his paint, and rollers
, she did the hard to reach areas with the foam brush, and i used the roller, it's about 3 coats, perty heavy coats, no wetsanding/buffing at all between coats or after!!!!! i miss that car alot, it died a respectable death, and served me well, i don't want to talk about it

Posted By: Anonymous
Re: Paint job on a budget!? CONTINUED..page 44........ - 06/30/06 02:56 PM
I painted coat number 9 last night of Safety Red on the buggy. This morning, I pushed it outside and took these shots. I'm letting it bake in the sun today (well, what sun it CAN get with all those trees in the yard). I'm stoked... I can't wait till it fully cures so I can hit it with the buffer.
front - before final wetsand side - before final wetsandBTW, Marq... that yellow looks awesome on that camaro. Serious shineage. If I'm not happy with the Rusto way, I'm glad to see I have an alternative. Right now... I'm ready to slap this thing back on the road and drive it.
Charger, I'm considering a winter performance engine/tranny build for the buggy, too.
Posted By: Anonymous
Re: Paint job on a budget!? CONTINUED..page 44........ - 06/30/06 03:22 PM
One caution about polyurethanes- I did a test using Varathane Colours which I believe may be a polyurethane paint - they call it�plastic enamel� on the can and they say it can be used for marine applications which I would guess means boats. I found that it covered well and was smooth but two weeks later it was still soft and would gum up the sandpaper when I tried to wet sand it. I gave up on the product.
I ran into some problems with my latest (third) coat of paint. Some patches dried before the bubbles had time to dissolve and have left me with a pimpled surface. I am knocking them off with 400 grit easily enough but I don�t want this to happen again. Am I using too much or too little thinner? Right now I am using a measured 16% mineral spirits (6:1).
Tip: I found a measured shot glass in the garage I use for measuring pesticides. I marked some disposable cups at � cup (6oz) and I measure out the mineral spirits using the shot glass. Gives me a very accurate way to measure out the paint.
Yesterday I had the car baking out in the sun when we were hit with a number of thunderstorms. The hail was very intense at one point. I have attached a photo. The paint is Tremclad Dark Blue BTW.

Posted By: Anonymous
Re: Paint job on a budget!? CONTINUED..page 44........ - 06/30/06 03:32 PM
Just in case anybody was wondering how much the Marine paint is I called a Marine supplier. $39 Cdn a quart for the one part ( Brightside ) and the two part is $79 Cdn a quart.
I paid $12 for the Tremclad.
Posted By: Anonymous
Re: Paint job on a budget!? CONTINUED..page 44........ - 06/30/06 03:41 PM
Senna, I had more issues with bubbles last night than previously. I had mixed up a bit of a thicker concoction of paint for my final coat. It took me about a half hour longer to apply this coat because I had to do the light pressure roller technique over and over on the sections to get the bubbles to lay down. I have had more luck comparing the resulting mixture with known consistencies (ie. 2% milk, whole milk, creamer) than measuring exact ratios.
My earlier coats where the bubbles ALWAYS popped automatically was with the 2% milk consistency. Last night, the bubbly coat, was more of a creamer consistency. I don't know if this helps anyone, but...
Posted By: Marq
Re: Paint job on a budget!? CONTINUED..page 44........ - 06/30/06 04:06 PM
Quote:
One caution about polyurethanes- I did a test using Varathane Colours which I believe may be a polyurethane paint - they call it�plastic enamel� on the can and they say it can be used for marine applications which I would guess means boats. I found that it covered well and was smooth but two weeks later it was still soft and would gum up the sandpaper when I tried to wet sand it. I gave up on the product.
Nah... the Varathane is a different animal totally. But I will agree with you.. Varathane tends to stay SOFT. It never quite hardens to the level where it could resist finger nail digging or even the brushes at the carwash..
I just finished the first wetsanding of my BRIGHTSIDE paint job The car had sat in the garage curing for about 12 hours. The paint was HARD and it sanded EASILY. The 1200 grit paper I was using did not gum up at all.
.
Posted By: Marq
Re: Paint job on a budget!? CONTINUED..page 44........ - 06/30/06 04:15 PM
Quote:
Just in case anybody was wondering how much the Marine paint is I called a Marine supplier. $39 Cdn a quart for the one part ( Brightside ) and the two part is $79 Cdn a quart.
I paid $12 for the Tremclad.
I think paying a slightly higher cost for your paint might prove to be money well spent. I provided a number of reasons in a previous message that explain why you might want to pay a few buck more at the start.
But I don't think anyone needs to push their wallet to the PERFECTION paint two stage paint at $79... Even the boaters all tended to agree that the BRIGHTSIDE did the job and was easier to use. The only comments that I read in support of the PERFECTION is that it tends to give 'an even harder finish' then BRIGHTSIDE. But then the boaters would all say that AWLGrip is even harder... oh well.. I never saw any argument in support of PERFECTION 2 part that could convince me to use it over Brightside.
Just remember the words of the FRAM Oil Filter man... " you can pay me now... or you can pay later... ".
.
Posted By: Anonymous
Re: Paint job on a budget!? CONTINUED..page 44........ - 06/30/06 04:52 PM
Quote:
Senna, I had more issues with bubbles last night than previously. I had mixed up a bit of a thicker concoction of paint for my final coat. It took me about a half hour longer to apply this coat because I had to do the light pressure roller technique over and over on the sections to get the bubbles to lay down. I have had more luck comparing the resulting mixture with known consistencies (ie. 2% milk, whole milk, creamer) than measuring exact ratios.
My earlier coats where the bubbles ALWAYS popped automatically was with the 2% milk consistency. Last night, the bubbly coat, was more of a creamer consistency. I don't know if this helps anyone, but...
^^^ I agree, its way better to have a visual reference than a ratio. I go by a 1% milk consistancy. Its slightly thicker than water. I had to sand after my 3rd coat too with 400 grit because I was letting orange peel get the best of me. Since then, I have gone with the 1% milk mixture and have had zero problems with bubbles or drips.
I am at the point where I just kinda splash som spirits and call it good. Experience definately helps this process. I paint sooo much better and faster now that I am comfortable with the technique.
I would say to try one of the consistencies listed above and roll slow enough that the roller stays flat. Take your time because thats the only way you will be happy with the results. Go over 30-1 minute after rolling an area with no extra paint on roller and hold the roller like you would a paint brush, very light. As stated before, letthe weight and only the weight take away the bubbles.
Goodluck!
Posted By: Exit1965
Re: Paint job on a budget!? CONTINUED..page 44........ - 06/30/06 05:49 PM
Just wanted to say again how awesome this topic is. This technique is definately becoming more known and already has a cult following, and it can only keep getting better as we experiment with different paints and tweaking the methods here and there.
Speaking of experimenting, I picked up some rustoleum crystal clear spray at walmart today. I'm going to try it out over the safety red I sprayed on my test door. I wetsanded with 2000, and I'm just about to put a couple coats of the crystal clear on it. It says "recoat anytime" so I will probably put a couple thin coats on over a few minutes.. pics to come..
Posted By: 69chargeryeehaa
Re: Paint job on a budget!? CONTINUED..page 44........ - 06/30/06 06:23 PM
exit - i'm actually able to make a diagnosis about your condition, it's stumped me until now, but i just looked it up in my medical index and sure enough it's as clear as day. you suffer from a rare condition, only diagnosed by 2 other people - "chronic experimentation complex"; definition: one who chronically must experiment, results are made from unobtanium, a result that can never be reached; to never finish a project before starting over. see your doctor, there is help, you CAN lead a normal life with the right therapy and drugs, i don't know i'm a rocket scientist, not a doctor!!!! haha
sorry i couldn't resist, all in good fun, i wanted to see your red all done in the sun, you could have at least taken a pic.
Posted By: Anonymous
Re: Paint job on a budget!? CONTINUED..page 44........ - 06/30/06 06:49 PM
So the information on the BRIGHTSIDES by Marq peaked my interest so I started some searching on the web.
Found a guy (Tim Lackey) that painted his boat with Brightsides in March/April of '99. I asked about durability, gloss retention, etc. Here is what he wrote back to me:
<<I have experience with Brightsides. It is fairly durable, but is
nowhere near as colorfast as Awlgrip. Dark colors begin to lose their depth
after a couple years, and the high gloss that is present immediately after
application tends to lessen after a year or so. The finish becomes more of
a satin-type gloss--still glossy, but not with the intense depth and shine.
As a result, I think Brightsides is more successful in lighter colors.
For what it is, Brightsides is pretty decent paint. But it won't hold up as
successfully as Awlgrip.
>>
So... just a little more food for thought. Haven't looked into Awlgrip, but seeing that Marq mentioned it too, that might be something to look into.
Nevertheless I love the experimentation and the DIY attitude displayed with this technique. Kudos to everyone in the process.
For me, until I get some better info on marine paint, think I am still leaning towards Rusto because of availability, price, and availability of spray cans for hard to reach places (door jambs, engine bay, etc).
Posted By: Exit1965
Re: Paint job on a budget!? CONTINUED..page 44........ - 06/30/06 07:16 PM
Quote:
exit - i'm actually able to make a diagnosis about your condition, it's stumped me until now, but i just looked it up in my medical index and sure enough it's as clear as day. you suffer from a rare condition, only diagnosed by 2 other people - "chronic experimentation complex"; definition: one who chronically must experiment, results are made from unobtanium, a result that can never be reached; to never finish a project before starting over. see your doctor, there is help, you CAN lead a normal life with the right therapy and drugs, i don't know i'm a rocket scientist, not a doctor!!!! haha sorry i couldn't resist, all in good fun, i wanted to see your red all done in the sun, you could have at least taken a pic.
Thanks for the diagnosis, Doc. Where do I send my check?
Actually I stuck with the red a bit longer just because I didn't want the paint to "win"- so I got it to shine successfully, then painted over it.
It's totally about the color.. I'm just not a red car guy, but I thought I'd try something different with the dart, until I pictured driving around in it, then I had to make it a more subdued color.
If you want a pic of it in the sun, just look at the pics of the buggy in the same color.
And yes I am a chronic experimenter, and if I wasn't I'd be out of a job, so I can't stop now.
The experiment with the clear coat turned out bad. Spraying alone led to lots of orange peel, terrible orange peel in fact. The regular color never had orange peel like that. I'll let it dry real good then wetsand and polish it but I think you're on to something when you say the shine should be very close with just the paint alone, and easier to deal with.
Posted By: 69chargeryeehaa
Re: Paint job on a budget!? CONTINUED..page 44........ - 06/30/06 07:51 PM
i agree, for all the work i'm not so sure the clear will help, espically the spray version, you would love the liquid brush grade tremclad clear stuff, i've used it on a new brass mailbox, stuff like that and it does shine extreemly well, sands nice, ect...but then the paint is "sealed" and touchups are hard, ect... the tremclad clear coat is the perfect thickness, and just needs a "splash" of laquir thinner. i liked the red on your dart, but i agree, i'm not a red car guy. have you given some thought to orange? or like a sublime green??
i'd say stick with the light colors, white is eaisest, and on a dart would look great. perhaps blue? so your going back to the "almond" like color?
Posted By: Exit1965
Re: Paint job on a budget!? CONTINUED..page 44........ - 06/30/06 08:36 PM
Quote:
i agree, for all the work i'm not so sure the clear will help, espically the spray version, you would love the liquid brush grade tremclad clear stuff, i've used it on a new brass mailbox, stuff like that and it does shine extreemly well, sands nice, ect...but then the paint is "sealed" and touchups are hard, ect... the tremclad clear coat is the perfect thickness, and just needs a "splash" of laquir thinner. i liked the red on your dart, but i agree, i'm not a red car guy. have you given some thought to orange? or like a sublime green??
i'd say stick with the light colors, white is eaisest, and on a dart would look great. perhaps blue? so your going back to the "almond" like color?
It's called Canvas white. Hopefully a couple more coats and the true color will be visible. Here's a tractor painted with the stuff:
Posted By: Marq
Re: Paint job on a budget!? CONTINUED..page 44........ - 06/30/06 10:44 PM
Quote:
For what it is, Brightsides is pretty decent paint. But it won't hold up as
successfully as Awlgrip.
>>
So... just a little more food for thought. Haven't looked into Awlgrip, but seeing that Marq mentioned it too, that might be something to look into.
From what I gathered as I surfed the various boater message boards, the discussions comparing Brightside versus AWLGrip reminded me a lot of folks arguing about their preference for Coke versus Pepsi.
The only real difference that tended to come out of the discussions was that :
a) AWLGrip cost much more then Brightside.
b) AWLGrip was argued to be 'harder' when fully cured than Brightside.
c) Brightside was considered easier to apply for the 'Do It Yourselfer'
d) Brightside was considered far more forgiving and self-correcting
e) AWLGrip delivered its best performance and appearance when SPRAYED...
Possibly AWLGrip may become the 'third' step up in our selection of potential paints for doing budget home paint jobs
I just wasn't ready to part with the cash that it would have cost to experiment with the AWLGrip.
Neither paint was the clear winner in the boater discussions and arguments for each were fairly strong. In the end it all reminded me of folks arguing about Coke and Pepsi
Possibly the Rustoleum / Tremclad would be the RC Cola in their discussions...
Based on everything that I read... I do have the feeling that MOST boaters would 'prefer' to have AWLGrip on their boats - but COST seems to be the deciding factor that ultimately persuaded them to make use of Brightside. And that reminded me of people who like SONY televisions... but are willing to settle for Panasonics because the quality is similar - but the others are all 'cheaper' costwise compared to the Sony.
.
Posted By: Anonymous
Re: Paint job on a budget!? CONTINUED..page 44........ - 07/01/06 12:05 AM
I just joined the site (sorry don't have a MOPAR unless my Dodge Ram counts) and one of the only reasons I joined was due to this thread. I found out about it from the ClassicBroncos site.
Thank you for all the invaluable info. I started reading the entire topic about 2 weeks ago and then tried it out for myself.
EXIT, your paint job looked amazing and caused me to pick the same color. I have just finished the one door (in case it did not turn out too well) but I will start on the rest of the truck this weekend (1970 Ford Bronco). I am very happy with the results. The pictures are with the 6 coats per the original instructions and I have yet to wetsand and polish the final coat. I figure I will wait until I finish with the rest of the truck and then wetsand the final coat on the whle truck at the same time.
Thanks again for this tip and keep up the great progress. One of the best threads I have read in a while.
Bill

Posted By: Anonymous
Re: Paint job on a budget!? CONTINUED..page 44........ - 07/01/06 12:06 AM
Another pic

Posted By: Exit1965
Re: Paint job on a budget!? CONTINUED..page 44........ - 07/01/06 05:53 AM
Quote:
Edge, your paint job looked amazing and caused me to pick the same color. I have just finished the one door (in case it did not turn out too well) but I will start on the rest of the truck this weekend (1970 Ford Bronco). I am very happy with the results. The pictures are with the 6 coats per the original instructions and I have yet to wetsand and polish the final coat. I figure I will wait until I finish with the rest of the truck and then wetsand the final coat on the whle truck at the same time.
Thanks again for this tip and keep up the great progress. One of the best threads I have read in a while.
Bill
Edge? If that's me, thanks for the compliment!
Looks like you've got the technique down. Did you paint it as it sits or was it vertical like a door would be? I only ask because people tend to practice on things that are laying flat, but really the tough part is painting something that's not flat and keeping it from running and avoiding orange peel too.
well i just put on the 3rd coat. I took this pic after painting the roof and driver's 1/4 panel, but before painting the driver's door and fender. So there's the difference one coat makes. The white is going on nice and smooth, and it seems to go on fine at higher temps (above 80+) as long as the mixture of mineral spirits and paint is right, which tonight was pretty thin.
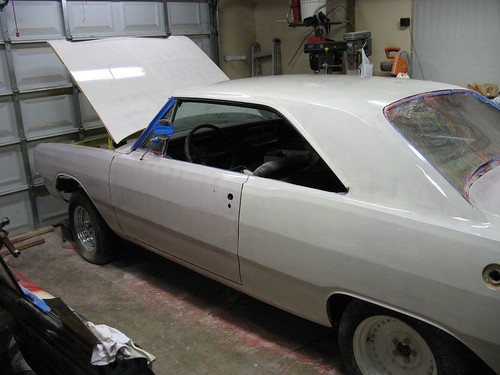
this one makes it look like it's more solid color that it actually is at this point.
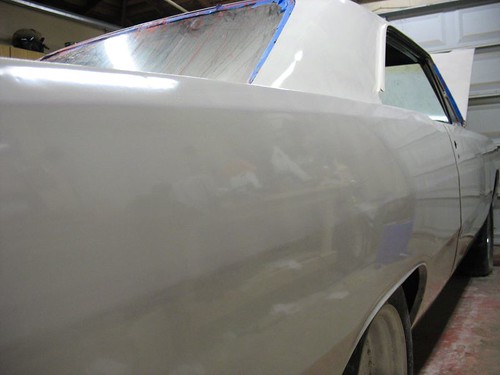

Posted By: Anonymous
Re: Paint job on a budget!? CONTINUED..page 44........ - 07/01/06 11:34 AM
Sorry, meant Exit
Long day.
Yes I did paint it on a horizontal surface instead of vertical as it would normally sit. I think it is better to start this way to get the feel of the roller and fine tune the mixture of the mineral spirits. I also found that I always had to error on the side of more mineral spirits.
Color is Safety Red, Rustoleum Professional Series, Duplicolor 100% Mineral Spirits (NOT low oder) that I got from Advance Auto, and I am using a spray can of Safety Red to get into areas that would be too hard with a roller.
Posted By: Anonymous
Re: Paint job on a budget!? CONTINUED..page 44........ - 07/01/06 11:35 AM
Hi again everyone its been a while sinced i painted my trunk lid black. Goods news i am going to paint my whole car gloss white. I am painting the car because I was hit I think a couple of hours ago by a dirt bike in the city streets(i know why would someone ride a dirt bike in the city street dumb
) As i was turning left the guy thought he was superman and decided to run the stop sign going 35 and hits me. Buts it cool tried to hit and I hit him back with my club alls well.
Anyways this is to Exit how many coats are you planning to do with the canvas white?
Posted By: Marq
Re: Paint job on a budget!? CONTINUED..page 44........ - 07/01/06 01:36 PM
If it's Saturday... then it must be 'pictures as promised day'.
Ok... I drove the McLaren out into the daylight and here are some pictures of TWO COATS of BRIGHTSIDE (by Interlux).
This is WITHOUT WETSANDING and after letting the car dry overnight from its 2nd coat of paint.
I am sorry if the pics are a bit large... but for some reason if I make the pictures smaller or at a lower resolution my camera distorts things. At least these pics will let you know how things turn out when you paint Brightside over Tremclad


Today I plan on wetsanding this puppy to prepare it to receive its THIRD coat of BRIGHTSIDE.
I am very confident at this point that it will ONLY take THREE coats of paint to complete this.
Marq
.
Posted By: Exit1965
Re: Paint job on a budget!? CONTINUED..page 44........ - 07/01/06 01:42 PM
Probably will be able to get away with 7 coats. Based on the pics being after 3 coats I think 7 will work..
Posted By: texczech
Re: Paint job on a budget!? CONTINUED..page 44........ - 07/01/06 02:06 PM
I have been lurking on this great discussion all along. I haven't seen much talk about a simple sprayer called a Preval. It is a self pressuring paint sprayer that you can put your own paint in and spray! I have been experimenting with this Preval and noticed that you must dilute the paint very thin (like water) in order for it to spray nicely. I even removed the small pre-filter in the pickup part of the spray tube in ordr to get the paint to work better. I have left paint in the lower part of the sprayer several days, and it hasn't hardened or gelled yet. May be an answer to reaching tough spots, or even to touch up as needed. Check it out and see what you think!
Posted By: pdqvsix
Re: Paint job on a budget!? CONTINUED..page 44........ - 07/01/06 03:24 PM
Marq,
How much paint did it take to do those 2 coats?
The car looks great!
Thanks,
Posted By: Pool Fixer
Re: Paint job on a budget!? CONTINUED..page 44........ - 07/01/06 04:21 PM
Marq, that car looks unreal!! You should post those pics on another board and tell people you just got it back from the bodyshop and are starting to put it back together. ask some routine question about putting the lights back in or something.
then drop the bomb on them that you did it out of a can with a brush and roller.
Seriousely, that looks so good, plus I like the mclaren mustangs anyway....
Posted By: Marq
Re: Paint job on a budget!? CONTINUED..page 44........ - 07/01/06 04:42 PM
To do one coat on the McLaren with the Brightside it takes about 1/2 to 2/3's of a one liter can ( roughly equal to 1/2 to 2/3rd of a quart can.
I would suspect that on an 'average' size car ( like a Dart ) with a ROOF it would probably take one full can per coat.
In the case of Charger's Charger... it would probably take 1 1/3 can because those cars had a lot of surface area to cover.
.
Posted By: pdqvsix
Re: Paint job on a budget!? CONTINUED..page 44........ - 07/01/06 05:54 PM
Thanks Marq,for the info.
I guess i will continue with the Rustoleum paint project since i've already bought everything to complete it and the cost is very low.
The closest place i could find that carries the Brightside paint is 60 miles away and costs $32.99 per quart and since my car is average size and at one quart per coat that would be out of my budget right now. It is good to know there is another paint that can be applied with a roller and brush and have great results with though,maybe next time if i do it again i'll try it.
Posted By: Anonymous
Re: Paint job on a budget!? CONTINUED..page 44........ - 07/01/06 06:59 PM
New question:
Has anyone tried to use the rattlecans to paint an entire panel? My parking area is extremely dusty, so any paint wiht a long drying time (>4 hours) gets absurd amounts of contaminants.
Posted By: Anonymous
Re: Paint job on a budget!? CONTINUED..page 44........ - 07/02/06 03:35 AM
Quote:
New question:
Has anyone tried to use the rattlecans to paint an entire panel? My parking area is extremely dusty, so any paint wiht a long drying time (>4 hours) gets absurd amounts of contaminants.
yes, check the honda-tech.com link i posted some guy in their painted his whole hood with the rustoleum/tremclad black...it looks just as glossy and good of a job as u doing it with the roller.
Posted By: Marq
Re: Paint job on a budget!? CONTINUED..page 44........ - 07/02/06 05:05 AM
Quote:
Has anyone tried to use the rattlecans to paint an entire panel? My parking area is extremely dusty, so any paint wiht a long drying time (>4 hours) gets absurd amounts of contaminants.
I have heard of quite a few folks who have spray bombed their car.... working one panel at a time.
From what I read of their adventures, the majority of them opted for the 'Krylon' brand of spray paint. I think their 'conclusions' for why they opted for the Krylon spray paint is that if you sprayed it fairly thin, you could build up layers without the paint running AND that it dried fairly hard - compared to the other spray bombs.
The biggest trick involved with spray bombing is reaching that tricky point in painting where you are laying on enough paint to start forming decent coverage - but not so much paint that you get any runs. But if you spray too lightly or from the wrong distance you end up getting a rough surface that requires multiple layers of spraying with wet sanding between each supplemental spraying.
I don't recall reading of any of the spray bombers who were working in a particularly dusty environment. Most of them were bombing their cars in their house garages or outside in their driveways.
Tremclad does make two versions of their spray bombs... 'regular' and 'fast drying'.
You may be able to use that 'fast drying' paint to get a build up of several layers - where each layer would have the opportunity to dry before too many contaminants were able to land or adhere to the fresh paint.
But from what I read... you should be expecting to do a number of sessions of wetsanding between every one or two coats in order to achieve a smooth finish that will give a flattering gloss when everything is all said and done.
I think the one common factor for all the 'successful' spray bomb paint jobs is that the users were 'superior' or 'highly skilled' at their sanding skills. That would be the key trait shared by the spray bomb jobs that are not laughable or embarassing.
If you plan on spray bombing the Tremclad... then take your time.... lay on very thin layers... and build it up slowly. You have to remember that the trick to the Charger method of applying Tremclad is that we are THINNING it with mineral spirits and those thin layers we build up are able to 'harden' and 'self-level'. Whereas with the spray bomb you are going to be laying on the paint without that doping of mineral spirit. Hence if you spray it too thick or build up your layers too fast it will remain fairly soft...
The pictures that I saw from the spray bombers were actually quite acceptable and probably speak extremely well to their technique and patience at building up the layers smoothly and the appropriate level of sanding at each step of the way to maintain a smooth surface.
If I was thinking of spray bombing... I would certainly :
a ) only work on one panel at a time or maybe two if they were adjoining each other.
b ) tape off and protect all surrounding areas to eliminate overspray from the surrounding panels. Cleaning up 'overspray' can double or triple your work.
c ) make sure you are working in a well ventilated place because the fumes from the spray bombs is pretty potent Spray bombers are probably exposed to 10 times the 'bad stuff' in the air than the roller paint jobbers. A respirator might be well recommended....
I had given consideration to spray bombing... but I think it takes more skill and patience to get a professional or even semi-professional end result. Since I know my limitations... I opted to avoid the spray bomb except in the trunk, door jams and whatever crevices I didn't really worry about the level of quality of the finished product.
.
Posted By: Anonymous
Re: Paint job on a budget!? CONTINUED..page 44........ - 07/02/06 04:40 PM
I think a saw it somewhere, but can't find it now. Can you recomend an order of painting? I'm guessing
1) Door Jams, Inside of Trunk and Hood (Rattle Cans)
But after that I'm unsure....any suggestions?
Also, for a car with good, but old paint...you suggest scuffing with 320 prior to painting or another finer grit?
Thanks for the help
Posted By: Exit1965
Re: Paint job on a budget!? CONTINUED..page 44........ - 07/02/06 04:59 PM
Quote:
I think a saw it somewhere, but can't find it now. Can you recomend an order of painting? I'm guessing
1) Door Jams, Inside of Trunk and Hood (Rattle Cans)
But after that I'm unsure....any suggestions?
Also, for a car with good, but old paint...you suggest scuffing with 320 prior to painting or another finer grit?
Thanks for the help
I asked the same question in the original thread (in the archive now). 69charger gave the order he painted his car, I think it started with the hood and decklid. I tried that the first time, and now I just kind of go in a strange order that I've been using on the, 12+ coats I've done since then:
roof then along the top of both 1/4 panels, then driver's 1/4 panel, then psgr 1/4 panel, then psgr door, then cowl, then hood, then psgr fender, then driver's fender, then driver's door, then the rear window area and deck lid.
Not sure why but that's just the way I've done it.
With all the wetsanding and coats you're going to put on it, 320 will work fine, you could probably do fine with 240 but 320 will be nicer.
As far as painting the door jambs/around the trunk and hood openings etc., you might opt to do that all at once instead of doing it while you're rollering. personally im focusing on teh body first then i'll get to the door jambs after the hard part is done
Posted By: Anonymous
Re: Paint job on a budget!? CONTINUED..page 44........ - 07/02/06 08:40 PM
I've got to be another person to say that Charger is doing great things for the car community with this. Nothing like painting your own car and being sure of the quality.
Well it's been a long four days of reading but I have successfully read from page 1 to now and I feel like I have an encyclopedia of information in my head. I have everything I to start on my test peice (the fender off a 47 Jeep) except for the mineral spirits. Because of all the debate I have seen, I am going to be using the regular mineral spirits but have only found it at sherwin-williams for 12.99 a gallon. I'm hoping to find it cheaper elsewhere. I know Kelly Moore has it but they don't have any store here in the East.
I have gotten nearly all my questions answered by reading this but still have a question about the sun. I know there was a discussion about letting the paint dry for a few hours then pull it out into the sun to harden. Is this a good idea or are most people keeping the car inside the entire job?
Also, is everyone agreed that we shoudl wait a few weeks to do the final polish? And if so, do you apply the 6th coat and wait then wetsand and polish weeks later or apply the 6th coat, wetsand and then polish weeks later.
So far these are the only details I have left before I start tomorrow night. I'm going to be trying the Hunter green and since no one has posted pictures of it completed, I'm kinda anxious to see how well it will look on my camaro. I'm iffy about it but the original color is turquoise and I don't want to go with too extreme of a change. Heck, at only $25 a gallon, I can redo it if I end up hating it.
Forgot one more question, what is the suggested polisher, 6" or 10". I just bought the 10" but am wondering if the 6" will give me more control. Charger, I thought I read that u used the 10". If so, how would you go about doing around the windshield and the tighter areas. I feel like the 10" will be easier to stand for hours holding onto only because of the handles on the sides and there is more weight to keep it under controls.
Posted By: Anonymous
Re: Paint job on a budget!? CONTINUED..page 44........ - 07/02/06 11:39 PM
Quote:
To do one coat on the McLaren with the Brightside it takes about 1/2 to 2/3's of a one liter can ( roughly equal to 1/2 to 2/3rd of a quart can.
I would suspect that on an 'average' size car ( like a Dart ) with a ROOF it would probably take one full can per coat.
In the case of Charger's Charger... it would probably take 1 1/3 can because those cars had a lot of surface area to cover.
.
Im going to use this paint you speak of. im going to get 4 quarts of Steel Gray and paint my car. I was thinkin of maybe getting:
3 quarts of steel gray
1 quart of black
and mixing all 4 cans for a gunmetel colorish paint. what do you think?
Posted By: Exit1965
Re: Paint job on a budget!? CONTINUED..page 44........ - 07/02/06 11:59 PM
Farfire- good question about waiting to wetsand or waiting to polish. The reason to wait is so that the paint is hard enough to polish out the scratches put in by wetsanding.
Whether it makes any difference or not, I don't know, but I would wetsand a day or more after the final coat (a few days, or whenever convenient would be more like it), then wait a few more weeks before polishing. The reasoning being that the surface of the paint, which will be polished, will become the hardest. Again, not sure if there is any difference but it stands to reason that the paint on the very surface is going to be the driest/hardest part of the paint, so polishing that part (which has been exposed directly to dying air for a month) should be easier than polishing something that hasn't been directly exposed to the air quite as long (which is the surface slightly under the original surface that would be exposed after wetsanding).
Such a minute difference, maybe inconseqential, but there's my
.
Posted By: Marq
Re: Paint job on a budget!? CONTINUED..page 44........ - 07/03/06 12:36 AM
Quote:
Im going to use this paint you speak of. im going to get 4 quarts of Steel Gray and paint my car. I was thinkin of maybe getting:
3 quarts of steel gray
1 quart of black
and mixing all 4 cans for a gunmetel colorish paint. what do you think?
One of the grays by Brightside is a lovely color that looks something like Ford Mustang's 'Mineral Gray' ( without the metalflake of course ).
Next to the Fire Red... that darkest color of gray would have been my next choice in colors. It is dark enough to stealth the lines of a car and give it a myseriously deceptive look... while at the same time not being so dark that it shows any imperections in the bodywork etc.
Oh... ONE IMPORTANT thing that I only caught on to tonight regarding the painting of cars or boats with the 'roller and brush method'.
As you know... you apply the Brightside straight out of the can using the high density foam 4" roller... in thin coats.
As you complete a small section you are then suppose to float your 3" or 4" foam brush over the surface and that magically pops any surviving bubbles.
What I ONLY LEARNED TONIGHT was that if you are rolling from north to south.. then you brush wipe from east to west. If you are rolling from side to side.... then you brush wipe from up and down.
I had been following the path of the roller. If I rolled from the left side of a door to the right side of a door... I was mistakenly brush wiping by going from the left side to the right side.
So to anyone who is planning to use the Brightside paint method... just note that you roll your paint in one direction... and then brush it by going across the rollings - not with the rollings.
Hope this info helps. I am planning to use this new found knowledge on my third coat of Brightside.
.
Posted By: _Scott_
Re: Paint job on a budget!? CONTINUED..page 44........ - 07/03/06 01:07 AM
Hi all,
Like many other people I linked into this topic via another forum at about page 7 of the original thread. I went to the beginning and have been following ever since. I have about 5 years of experience working in a body shop (but have since moved on), so I think I'm qualified to offer a few pointers.
Something that has been mentioned a few times, but I believe has not been emphasized strongly enough is the prep-work. This thread is about paint on a budget which evolved into the roller and mineral spirits method of applying rust paint (
props to 69Charger for figuring out how to get rust paint to harden BTW.) I'm afraid there are people who are getting so excited about having shiny paint for $50 that they don't even think about the prep work, and it shows in some of the pics we've seen. Prep work can make or break the end result. If your favorite color is applied by whatever method (brush, roller, spray, fingers) to a turd, all you end up with is a shiny turd in your favorite color.
So a word of advice to those who don't already have experience prepping a car for paint, learn that first. There are several forums worth looking at, here is one to get you started:
http://www.autobody101.com/forums/index.phpWhen wetsanding, you must sand all the peaks of the surface texture off until they are even with the valleys so you have uniform finish before moving on to the next step, whether that be more paint or polishing. Here is a link to a pic that illustrates the difference between not enough and just right:
http://tinyurl.com/lbgfa The area highlighted in red is properly wetsanded, the area highlighted in yellow is not. (
NOTE: I "borrowed" that pic from here: http://www.autobody101.com/forums/about5183.html , to illustrate the point. That's a good thread, I recommend people read through it.) Also, when wetsanding don't skimp on the water. Don't allow dust or any gritty particle get under your wetsand paper. If it does, stop sanding and rinse immediately then go back over the area where you noticed the gritty particle.
Now to answer a few questions.
Order to do things. Ultimately it's up to you, but I recommend starting with the hardest part first. If it's body damage, fix it first. If you have rust, deal with that next, If you are going to be painting the jambs and/or engine bay, clean and prep them next. Prep the exterior. Clean and paint the jambs/engine bay. Mask off painted areas and paint the exterior.
Quote:
regular mineral spirits...only found it at sherwin-williams
I've seen 100% mineral spirits at Sears for ~$8USD/gal. You may find it at Kmart too (since they own Sears.)
Quote:
Also, is everyone agreed that we shoudl wait a few weeks to do the final polish?
At least. A few months would be better.
Quote:
And if so, do you apply the 6th coat and wait then wetsand and polish weeks later or apply the 6th coat, wetsand and then polish weeks later.
Wetsand right before either paint or polish. I would discourage people from sanding one day then driving the car to work for a few days and then painting over that sanded area. At least go back over with a light sanding before painting to make sure you haven't picked up any miscellaneous grime or residue that will interfere with the adhesion of the paint. Remember that not everything is soluble in mineral spirits.
I didn't plan to type all that when I started, but I hope it helps some people to achieve an end result they can be proud of.
Posted By: Anonymous
Re: Paint job on a budget!? CONTINUED..page 44........ - 07/03/06 07:48 AM
for someone who used primer, guided coats etc...this picture should of came out cleaner...then again,very shapey, rounded areas are hard to sand if you arent using the right tool...
nvm, i thought he was some pro!
awesome work!
but [Edited by Moparts - Keep it clean] them old skool porsche is something i must have one day.
Posted By: Anonymous
Re: Paint job on a budget!? CONTINUED..page 44........ - 07/03/06 08:37 AM
Quote:
One of the grays by Brightside is a lovely color that looks something like Ford Mustang's 'Mineral Gray' ( without the metalflake of course ).
Next to the Fire Red... that darkest color of gray would have been my next choice in colors. It is dark enough to stealth the lines of a car and give it a myseriously deceptive look... while at the same time not being so dark that it shows any imperections in the bodywork etc.
Oh... ONE IMPORTANT thing that I only caught on to tonight regarding the painting of cars or boats with the 'roller and brush method'.
As you know... you apply the Brightside straight out of the can using the high density foam 4" roller... in thin coats.
As you complete a small section you are then suppose to float your 3" or 4" foam brush over the surface and that magically pops any surviving bubbles.
What I ONLY LEARNED TONIGHT was that if you are rolling from north to south.. then you brush wipe from east to west. If you are rolling from side to side.... then you brush wipe from up and down.
I had been following the path of the roller. If I rolled from the left side of a door to the right side of a door... I was mistakenly brush wiping by going from the left side to the right side.
So to anyone who is planning to use the Brightside paint method... just note that you roll your paint in one direction... and then brush it by going across the rollings - not with the rollings.
Hope this info helps. I am planning to use this new found knowledge on my third coat of Brightside.
.
Another thing are you just using 1200 and 1500 grit sandpaper? or are you starting off the 1st wetsanding with 600g?
Posted By: Anonymous
Re: Paint job on a budget!? CONTINUED..page 44........ - 07/03/06 09:25 AM
You were talking about the preval I bought one and was testing it out from my experiences its pretty good for working on small cars. I was using it on a fender and have to say when the paint is thinned at the right amount the preval sprays like a proffesional gun. Everything thinned out and from the right distance its good. Good for going to one panal at a time.


Posted By: Anonymous
Re: Paint job on a budget!? CONTINUED..page 44........ - 07/03/06 02:39 PM
Marq, the mustang looks incredible. Congrats, man.
Posted By: Marq
Re: Paint job on a budget!? CONTINUED..page 44........ - 07/03/06 02:48 PM
Quote:
Another thing are you just using 1200 and 1500 grit sandpaper? or are you starting off the 1st wetsanding with 600g?
I started off with a 400 grit... then I went over that same area with a 600 grit for the first wet sanding.
For the second wet sanding I went with an 800 grit and then I went over that same area with a 1000 grit.
I just completed the third wet sanding by using a 1000 grit and then I went over that same area with a 1200 grit.
I have not read enough yet to decide how to finalize the final coat. For the boaters using Brightside paint, it appears that they just stop with the final coat of paint. I do know that I probably shouldn't do anything to the final coat for a couple of months.
I know on my Firebird GTA - with a polyeurothane paint job - that I have never polished or done anything to it since the day it was done. The only thing I do with it is wash it and it still maintains the same WET LOOK that it had when it was painted about 12 years ago.
So the odds are that the final coat may never get anything more than a wax polishing if the high gloss shine holds up like I suspect it will.
And as previously noted, it appears that the paint folks at Interlux have a specific wash and wax for this Brightside paint. I don't know if I will buy that specific brand.. or whether I will try to track down the chemical equivalent that is available 'off the shelf' and probably much cheaper than the Interlux specific brand.
.
Posted By: Anonymous
Re: Paint job on a budget!? CONTINUED..page 44........ - 07/03/06 04:52 PM
Marq - Thanks for your suggestion. I went and ordered some largo blue this weekend. I hope it's not too light. I couldn't find any pictures of boats with it online. Everyone had saphire and that was hit or miss because of the light around it...
Anyhow a few questions
How many coats total? 3?
So your process is: sand car with 400ish, paint a coat, sand with 800, paint a coat, sand with 1000-1500, lay on final coat?
The drying time in between is about 8 hours correct?
Did you do body work before? If so did you primer over any bondo or just paint over? I've heard of people doing it both ways with the rustoleum.
Posted By: Marq
Re: Paint job on a budget!? CONTINUED..page 44........ - 07/03/06 09:27 PM
Quote:
How many coats total? 3?
The number of coats will depend on what color or colors you are painting over. But three is the most likely amount of coats that it will take.
Quote:
So your process is: sand car with 400ish, paint a coat, sand with 800, paint a coat, sand with 1000-1500, lay on final coat?
That is the route I have followed so far. IF you do a really excellent first coating ( lovely and smooth etc ) you might be able to bump up to the 800 or 1000 grit from the start. Things will depend on how smooth you work that first and subsequent layers.
Quote:
The drying time in between is about 8 hours correct?
The manufacturer recommends eight hours... and so far I would tend to agree. I usually paint at night and come back to the car the next day... So I am probably giving it a little in excess of the manufacturers suggested curing time.
Quote:
Did you do body work before? If so did you primer over any bondo or just paint over? I've heard of people doing it both ways with the rustoleum.
That McLaren was an 'accident' write-off. It had a front end collision that totalled the car. But the owner held on to the wreck and dragged it around with him for ten years - until I popped up and bought it away from him.
The reconstruction of the car has just about a little of everything on the subsurfaces... fiberglass bondo... regular bondo... straight fiberglass... gray primer, black primer, bare metal... and also several layers of Tremclad ( as per the Charger method of application.
The Brightside has been applied on just about each of those substratas and there have been no problems for coverage and adhesion.
Once you are confident that the bodywork is up to par or acceptable to you... the decision on whether to use a primer is probably going to be a decision related to the color you have chosen and the color of the substrata of your car's body.
For example... if you have very light colored car with some bondo work... and you want to go to a midrange blue... then I would probably recommend slapping a gray primer onto the body to give yourself a uniform starting point to layer your paint on.
If you have a very dark color car with some bodywork and you want to go to a midrange blue... then I would probably primer it up with a light gray primer ( if you want to end up with a lighter version of your selected blue color - OR - you could use a black primer in order to have a darker appearance to your selected color.
If your vehicle's body is at a stage where it doesn't have body work... you would probably be able to simply sand the car with the 220 grit and go straight to painting over the scuffed original coat.
From what I have read at the manufacturers site, in their pamphlets and from reading the boater's message boards... this paint can pretty well go straight over anything including fully cured bondo.
At this point I think the primer is more valuable as providing a solid based upon which to lay your paint in a uniform color and layering. The fact that it may provide increased adhesion is more like a bonus...
In my car... I already had six coats of the Tremclad laid down on my car ( while adhering to the Charger painting process. When I made the decision in mid-flight to switch to the Brighside paint... all I had to do was smooth out the Tremclad layers using a 220 grit.... and then start painting with the Brightside. In my case, the old Tremclad could be described as something similar to a primered surface, with the bonus being that my Tremclad was Fire Red and the Brightside paint was also a Fire Red. So you could say that my Tremclad 'primer' was the same color that I was switching over to. But at this point the Brightside has been in contact and adhered to just about every substrata material on my car without any problem..
.
Posted By: Anonymous
Re: Paint job on a budget!? CONTINUED..page 44........ - 07/03/06 10:12 PM
Wonder if a coat or two of Rustoleum and then finishing with Brightside would give best of both worlds, rust protection and easier to work with finish?
Posted By: Anonymous
Re: Paint job on a budget!? CONTINUED..page 44........ - 07/03/06 11:19 PM
Marq, when you get done with your final coat. make sure to upload the pics ASAP!
Posted By: Anonymous
Re: Paint job on a budget!? CONTINUED..page 44........ - 07/03/06 11:38 PM
Been away from the posts for a few days now and see some new ideas and thats great. I got to the roll on clearcoat on my car finally...... Interesting results. Couple of things worth mentioningon the clear. First is that it states on the can that if your painting over a freshly painted surface to wait at least 72 hours to fully cure.
I hope this answers the age old question for when its a good time to Polish and wax. I think the 72hr wait period is a "tested" cure time that tremclad has come up with.
On to the application, The Clear goes on differently than the Paint. I went with undiluted Clear as it states you can do Dilited (laquer thinner) or un-diluted. It layed on kinda like a thin Honey, and lots of bubbles. Going over the rolled areas lightly again gets rid of the bubbles.
The weird part is if you wait too long (2mins or more) Before rolling out any bubbles you get a Spider Web like material that wafts off the roller and falls onto everything. It seems to absorb back into the Clear but if the Web stuff is too large it hangs on the surface and looks nasty. I'm going to wetsand the clear tonight and do a second coat as it seems to have "soaked" into the paint and looks dull in spots, I think this is going to take at least 3 coats of clear to look "polished" like the final coat of paint looked. I also think that the SprayCan Clear is different than the Roll on Clear as the test spot I did with the spray on was way nicer than that of the Roll on. The Clear does dry fast. I did the hood first and by the time I did the rest of the car it was completly dry.
Included is a pic of clear.
Cheers

Posted By: Marq
Re: Paint job on a budget!? CONTINUED..page 44........ - 07/04/06 02:05 AM
Well... each day brings a new learning discovery... and hopefully we can share what we learn about working with Brightside to help others out....
a ) When working with Brightside.... you are suppose to roll on the paint... and then go over that area with a foam brush gently to make the bubbles disappear. Today I must have looked like a mad man because what I was doing was :
a ) rolling on the paint
b ) using a 3 inch foam brush to float over it and magically pop the bubbles
c ) then using a second 3 inch brush to go over the area and lightly assist the paint to level.
The way things work out... the first brushing of the rolled paint tends to pick up paint on the roller. Yet by the time I use the clean second foam brush it is able to glide over the paint and enhance the levels. So if you don't mind looking foolish with one roller and two foam brushes in your hand... this technique may help you get even smoother results.
b ) Today was very hot and humid. I was noticing that after about 20 minutes of painting, the paint in the tray was applying differently on to the car. I did not have as much 'grace time' to work the bubbles and then do the leveling pass with the second roller. It would appear that the solvent in the paint was evaporating fairly quickly due to the hot working conditions in my garage today.
Now... this Brightside paint uses M. E. K. (METHYL ETHYL KETONE as a thinner.
They say that Ketone is very similar to Acetone but with a much slower evaporation rate and that it can be used for the same applications as Acetone. But from what I am seeing in very hot working conditions... this Ketone stuff is evaporating fairly quickly...
NOW... by accident I decided to try cutting the Brightside paint with some of the 'regular' mineral spirits that I had left from my Tremclad experiment. It works and the paint acts just like it is suppose to with the bubbles, the magic wipe of the first foam brush to pop bubbles and the level assisting wipe with the second foam brush.
So the point of this bit of exploration and discovery may be of assistance to anyone applying Brightside in very hot working conditions. You can cut the paint with about 5% to 10% Ketone OR mineral spirits and you will have a little more 'working time' for applying and perfecting each layer that you are applying.
c ) The third discovery today is a way to detect when the surface that you have just rolled is drying too fast and that you should touch up the paint in the tray with a little mineral spirit or Ketone...
When the paint is drying too fast because of the heat... you will notice that when you drag your foam brush over the paint ( to pop the bubbles or to assist in leveling ) that the foam brush will 'stutter' as you drag it over the paint. It is almost like the paint grabs the brush, lets it go... grabs it.. lets it go ... and the faster the stuttering of the foam brush the sooner you had better quit dragging the brush over the paint or it will leave a record of the 'stuttering' in the paint you are working on.
If this 'stuttering' happens to you... do not try to rework or rewet the area to remedy it. Simply stop working on that spot. There is a good chance that it may 'self level' itself. However, if when it dries you can see where the 'stuttering' took place, just hit it with the wet sanding to remove the 'stuttering.
If you rewet the area by reloading your roller or your foam brush on that area... you will just exagerate the problem and it 'may' lead to too much paint on that spot ( which you are going to have to wet sand out anyhow ).
I was really please with the results that I got today... but I may have to lay one more coat because I can still places in the substrata where the white is still slightly visible. If I had used a primer and had a uniform colored substrata then I probably would have been finished at three coats.
Oh well... at least I am having fun and this hardly seems like work...
We are now looking at painting my nephew's F150 pick up truck ( with the extended cab ) in black Brightside. He was blown away by how the Fire Red turned out and could see this technique working wonders on his old beater. Argh...
.
Posted By: Marq
Re: Paint job on a budget!? CONTINUED..page 44........ - 07/04/06 02:22 AM
Quote:
Wonder if a coat or two of Rustoleum and then finishing with Brightside would give best of both worlds, rust protection and easier to work with finish?
If I was starting from scratch... I think I would go straight to the Brightside.
Instead of layering down a layer or two of Rustoleum, I would probably rather lay down a coat of primer, samd it to perfection and than start putting on the coats of Brightside.
I don't think you would be gaining any additional 'rust preventive protection' by priming up the body with Tremclad or Rustoleum.
If you have properly worked your bodywork... and primered any exposed metal surfaces, then that should provide the necessary anti-rust protection to the metal surfaces. And with the Brightside paint subequently sealing the outer surface from oxygen and moisture, I can't really imagine how rust is going to take hold.
.
Posted By: Exit1965
Re: Paint job on a budget!? CONTINUED..page 44........ - 07/04/06 02:32 AM
Keep the pics coming Marq. Try a straight on pic too if you get a chance. One question, is applying the brightside stressful? I have noticed that using rustoleum is slightly stressful since you're on the lookout for dog hair, runs, missed spots and so forth, but with 2 brushes and a roller, and fast evaporating paint plus all of the above.. sounds like a stressful time. I would probably have my own hair falling into the paint instead of my dogs
Seriously though, if the brightside works well and holds up I wouldn't be against putting some on my dart down the road when I'm ready for a color change, maybe to a dark gray.
I'm making good progress with the rustoleum/mineral spirits. I think another 3 coats over the whole car will do it, then maybe another 1 or 2 on the hood and roof. I like the color a lot. Almost sleeper like..
I set my camera to flourescent light mode, now the actual color of the canvas white can be seen a bit better as opposed to stark white.
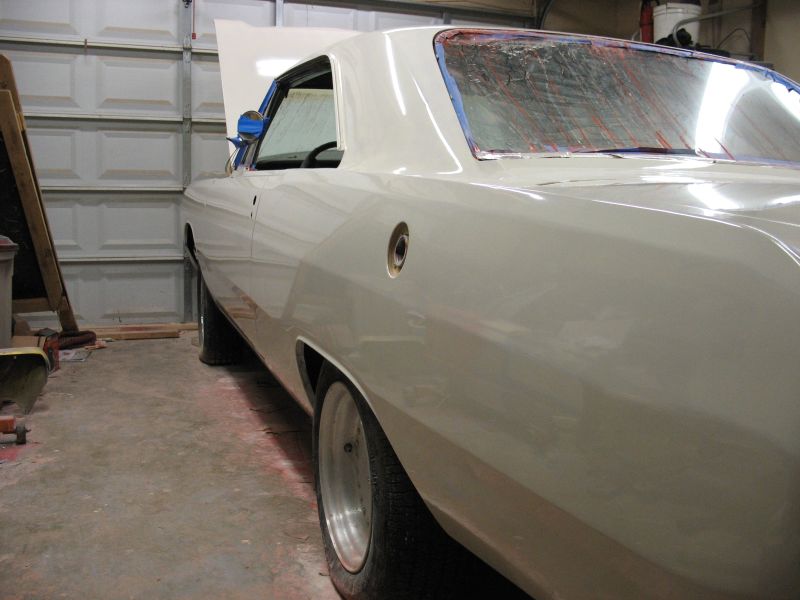
Posted By: Anonymous
Re: Paint job on a budget!? CONTINUED..page 44........ - 07/04/06 02:33 AM
i use a hvlp gun with the rustolium and thin it 20% with mineral spirits and spray it on. then let it sit over night and wet sand after 2 coats. i am using black paint.


Posted By: Marq
Re: Paint job on a budget!? CONTINUED..page 44........ - 07/04/06 02:52 AM
Quote:
I have noticed that using rustoleum is slightly stressful since you're on the lookout for dog hair, runs, missed spots and so forth, but with 2 brushes and a roller, and fast evaporating paint plus all of the above.. sounds like a stressful time. I would probably have my own hair falling into the paint instead of my dogs
I sit in the position of having tried both methods... ( six layers of Tremclad ) and I think I can safely say that the Brightside method was like diving in to a cool swimming pool after having walked across a scorching desert.
Oh... and I have three long hair dogs running around... plus I have to wear a painter's hat just to make sure none of my hair mysteriously drops onto the paint . Lately the biggest danger is sweat POURING off my forehead while working in these hot temperatures ( something I solved by putting a bikers bandanda across my forehead. Gawd I must look like a sight to my neighbors when I come out of the garage to take a breather...
Anyhow, I think the Brightside is definitely less stressful than the Tremclad method.
It was amazing to lay down that first layer of Brighside and see an amazingly deep and high gloss right away.
I found that the Tremclad method gave me more work and was a little more stressful trying to hit on the right mixture of mineral spirits to paint in order to keep getting consistent and repeatable results.
That is why I think it would be significant to this discussion for you to try even one test door or trunk or something with the Brightside. All the techniques that you have perfected with the Tremclad method would be directly applicable to plying some object with Brightside. So there would be no learning curve for you to make a test and give us your considered opinion of the two types of paint for this 'budget' paint job.
The toughest thing about the Tremclad method is that the high gloss results don't really happen until you have completed all your layers... and even then you have to get into perfecting the surface with the mild abrasive waxing compound and polishing it up. Whereas with the Brightside you start seeing the gloss from the first painting... and you get to watch it gain more depth and gloss with each additional layer.
So no. I think the Tremclad method was more stressful for me...
.
Posted By: Anonymous
Re: Paint job on a budget!? CONTINUED..page 44........ - 07/04/06 03:00 AM
Ok here is wat i did so far with my test peace. I am using gloss white. I find that lighter colors are easier to work with then dark colors here is my result. I did a thick coat and let it dried and then after that I started to do thin coats. I came up with these because i was think one thick coat will cover the area and will be easy to sand and smooth. Also once the thick coat finished drying the thin coats would bring out the shine I think. This pic was taken in the basement with a dimm light I am amazed with gloss white.

Posted By: Marq
Re: Paint job on a budget!? CONTINUED..page 44........ - 07/04/06 03:17 AM
Are you Tremclading ( Rustoleuming ) or Brightsiding ?
Nice results either way.
.
Posted By: Anonymous
Re: Paint job on a budget!? CONTINUED..page 44........ - 07/04/06 03:24 AM
Guys, I have had a major breakthrough tonight!
I�ve just come in from painting, it�s almost 11:30pm, and I can�t� tell you how excited I am. The last few days I�ve had to sand off all these warts, pimples and boils that formed after the last coat of paint. I have mentioned them before in an earlier post. They were caused be the paint drying before the bubbles could pop and self level. It�s been very hot and humid here in Toronto the last few days and that didn�t help.
Well I tried the roll and tip method that Marq had mentioned the boaters were using. It�s magic! Bloody magic! Thin the paint as normal and apply with the foam roller. Once you have done a small area go over that, ever so lightly, with the tip of a foam brush. The bubbles disappear and the brush streaks fade to nothing in a minute of two. The finish is hard to believe, glass smooth. Will post pics tomorrow
Posted By: Anonymous
Re: Paint job on a budget!? CONTINUED..page 44........ - 07/04/06 04:22 AM
Quote:
Guys, I have had a major breakthrough tonight!
I�ve just come in from painting, it�s almost 11:30pm, and I can�t� tell you how excited I am. The last few days I�ve had to sand off all these warts, pimples and boils that formed after the last coat of paint. I have mentioned them before in an earlier post. They were caused be the paint drying before the bubbles could pop and self level. It�s been very hot and humid here in Toronto the last few days and that didn�t help.
Well I tried the roll and tip method that Marq had mentioned the boaters were using. It�s magic! Bloody magic! Thin the paint as normal and apply with the foam roller. Once you have done a small area go over that, ever so lightly, with the tip of a foam brush. The bubbles disappear and the brush streaks fade to nothing in a minute of two. The finish is hard to believe, glass smooth. Will post pics tomorrow
Interesting.
I took care of the bubbles by using gigantic fans.

But I'm not really getting the kind of shine I was hoping for. Hopefully with another coat plus 1500 grit wetsand I'll get there... and then polishing on Friday. We'll see.
Posted By: Exit1965
Re: Paint job on a budget!? CONTINUED..page 44........ - 07/04/06 04:58 AM
Senna - I have done some painting now in various temperatures. Have you tried just thinning the paint more than normal to make up for the extra heat?
The reason I ask is that I never have any bubbles hanging around as long as I'm putting on thin coats of a thin mixture. I've painted a few times at 95 degrees and a few times around 75 and 80 degrees, never bubbles when it goes on thin.
Posted By: Exit1965
Re: Paint job on a budget!? CONTINUED..page 44........ - 07/04/06 05:09 AM
Sottilde- you should definately be getting more shine. Try thinning the mixture more and pushing down on the roller firmly when applying it, to be sure you're getting a thin, even coat. There shouldn't be any runs or bubbles and shouldn't be much of any orange peel, and there should be a good shine when it goes on thin.
e.g. this is after a thin coat:
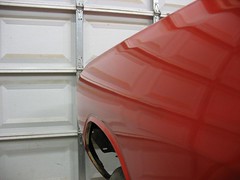
There is probably a tradeoff in time between putting on thick orange peely coats with bubbles, and putting on potentially 2+ more thin coats of the thinner stuff, but I am on the "thin coat" side of the fence since I hate wetsanding and cleaning up the mess.

Posted By: Anonymous
Re: Paint job on a budget!? CONTINUED..page 44........ - 07/04/06 06:12 AM
There's alot of information in this thread. I haven't been able to read through the entire thread but am worried about missing some vital piece of info before attempting this myself. I'm sure I'm not the only person in this boat.
Has anyone started organizing all this info into a wiki? website? if not please let me know and I'll get it started.
-- Aaron
Posted By: Anonymous
Re: Paint job on a budget!? CONTINUED..page 44........ - 07/04/06 07:39 AM
For those that are completely done, What methods did you use to clean up the little paint mistakes like getting some on window trim, window glass, etc?
I am about 2 coats away from being done with the 2-tone paintjob and my windows have some paints drips and the black trim has some paint that managed to get through the tape.
I wanna be careful not to damage the paint on the panels though.
Posted By: Anonymous
Re: Paint job on a budget!? CONTINUED..page 44........ - 07/04/06 08:05 AM
If you got paint on moldings or the window etc, take paint thinner or paint remover and dab it on a small cloth and rub it out. If you get it on glass you use a razor blade and scrap it out.
Posted By: Anonymous
Re: Paint job on a budget!? CONTINUED..page 44........ - 07/04/06 02:30 PM
Looking great Exit. I'm about to start with my test peice hopefully later today. I still need to go find plain mineral spirits. when you are applying the thin coats, what consistence would you say you're using? I've heard everything from water (the original suggestion) to 2% milk to creamer. I would think you're at about water if you're going really thin but I'm interested in what you're doing because I really like your results and am about to start.
Posted By: Exit1965
Re: Paint job on a budget!? CONTINUED..page 44........ - 07/04/06 03:27 PM
Here's a movie showing the consistency I'm using. It's in quicktime format. Next time I paint (tonight maybe) I'll get some video of it going into the tray, and some rolling. The mixture is only part of it, I think as important is that the roller is applied firmly (otherwise barely any paint will come out) with very little paint on it, leaving a smooth wet surface behind.
http://rochaneering.com/Documents/consistency.mov
Posted By: Anonymous
Re: Paint job on a budget!? CONTINUED..page 44........ - 07/04/06 06:04 PM
Quote:
There's alot of information in this thread. I haven't been able to read through the entire thread but am worried about missing some vital piece of info before attempting this myself. I'm sure I'm not the only person in this boat.
Has anyone started organizing all this info into a wiki? website? if not please let me know and I'll get it started.
-- Aaron
Here you go.
$50 Paint Job Edited and Condenced
Posted By: Anonymous
Re: Paint job on a budget!? CONTINUED..page 44........ - 07/04/06 06:55 PM
Quote:
Here's a movie showing the consistency I'm using. It's in quicktime format. Next time I paint (tonight maybe) I'll get some video of it going into the tray, and some rolling. The mixture is only part of it, I think as important is that the roller is applied firmly (otherwise barely any paint will come out) with very little paint on it, leaving a smooth wet surface behind.
http://rochaneering.com/Documents/consistency.mov
That's a great video. Definatley helps. Do you make a batch in that jar one layer at a time or fill the jar then us it for a few layers? I'm going to have to find myself something good and air-tight to use for mixing.
Posted By: Anonymous
Re: Paint job on a budget!? CONTINUED..page 44........ - 07/04/06 07:02 PM
I stumbled across this thread from fordification.com last week and have read it all. I am totally amazed at your results. But I do have a couple of questions. I understand how to thin and apply the paint. My question is which paint to use. Some used "stops Rust" rustoleum, others used the "Professional" series of rustoleum, some even had rustoleum tinted to a color of their choice others used Brightside and I am sure I missed some others.
I saw that exit1965 had problems with the standard rustoleum hardning up. Did others have the same problem? I am ready to go get the paint but I dont know if the standard rustoleum is as good as the professional or not. I know that there are different colors availiable in the standard rustoleum.
I would appreciate it if ya'll would chime in on the type of paint you found to be better. Thanks a million guys. I am finishing up the bodywork today and will begin my $50 paint job as soon as as I figure out what type of paint to buy.
Rob
Posted By: Anonymous
Re: Paint job on a budget!? CONTINUED..page 44........ - 07/04/06 08:47 PM
Quote:
I stumbled across this thread from fordification.com last week and have read it all. I am totally amazed at your results. But I do have a couple of questions. I understand how to thin and apply the paint. My question is which paint to use. Some used "stops Rust" rustoleum, others used the "Professional" series of rustoleum, some even had rustoleum tinted to a color of their choice others used Brightside and I am sure I missed some others.
I saw that exit1965 had problems with the standard rustoleum hardning up. Did others have the same problem? I am ready to go get the paint but I dont know if the standard rustoleum is as good as the professional or not. I know that there are different colors availiable in the standard rustoleum.
I would appreciate it if ya'll would chime in on the type of paint you found to be better. Thanks a million guys. I am finishing up the bodywork today and will begin my $50 paint job as soon as as I figure out what type of paint to buy.
Rob
im using the stop rust rustoleum quart size and i have no problems with hardening whatsoever. not to mention my "thin coats" are probably thicker then pple who roll ( just from looking at these pictures). best thing is thin application and let it bake in the sun. my car sits outside where i paint it and the car cures faster then my side mirrors..which is in the garage. good luck with your project!
Posted By: Anonymous
Re: Paint job on a budget!? CONTINUED..page 44........ - 07/04/06 08:52 PM
Quote:
Looking great Exit. I'm about to start with my test peice hopefully later today. I still need to go find plain mineral spirits. when you are applying the thin coats, what consistence would you say you're using? I've heard everything from water (the original suggestion) to 2% milk to creamer. I would think you're at about water if you're going really thin but I'm interested in what you're doing because I really like your results and am about to start.
i think im the only one using non 100% mineral spirit...and have no problem at all. im using the one from homedepo thats for thinning and it contains mineral sprits. $4 a container, i bought 2. good luck.
Posted By: Exit1965
Re: Paint job on a budget!? CONTINUED..page 44........ - 07/04/06 08:57 PM
Quote:
Quote:
Here's a movie showing the consistency I'm using. It's in quicktime format. Next time I paint (tonight maybe) I'll get some video of it going into the tray, and some rolling. The mixture is only part of it, I think as important is that the roller is applied firmly (otherwise barely any paint will come out) with very little paint on it, leaving a smooth wet surface behind.
http://rochaneering.com/Documents/consistency.mov
That's a great video. Definatley helps. Do you make a batch in that jar one layer at a time or fill the jar then us it for a few layers? I'm going to have to find myself something good and air-tight to use for mixing.
I bought some mason jars for it, I use the same jar to hold the paint throughout weeks of painting. When it gets to under 1/2 full of the mixture, I add more paint and mineral spirits so that it's 75-90% full. Seems to work well.
Posted By: Anonymous
Re: Paint job on a budget!? CONTINUED..page 44........ - 07/05/06 12:02 AM
Quote:
Senna - I have done some painting now in various temperatures. Have you tried just thinning the paint more than normal to make up for the extra heat?
The reason I ask is that I never have any bubbles hanging around as long as I'm putting on thin coats of a thin mixture. I've painted a few times at 95 degrees and a few times around 75 and 80 degrees, never bubbles when it goes on thin.
The one coat I did was at 15% and was likely too thick. It was OK earlier in the week when it wasn't as hot and humid. The one I did last night was at 30% and went on very smooth but was a little runny. I think there is a fine line between too thick and too thin. Too thick and you get bubbles, too thin and you get the runs.
The advice to thin the paint to a milk consistency bothers me because of my experience airbrushing. That's how I thin paint for spraying and to try and roll paint that thin I think is asking for trouble. Also not to measure your paint/thinner ratio and to go by eye every time is a mistake too in my book. You've got a much better chance of finding and fixing mistakes if you know exactly what you've done before.
Posted By: Anonymous
Re: Paint job on a budget!? CONTINUED..page 44........ - 07/05/06 10:34 AM
I used non 100% mineral spirits also. It did indeed work just fine. I think the original problems with it were people were just putting it on way too thick.
I've now switched to brightside as I liked the color better.
Posted By: Anonymous
Re: Paint job on a budget!? CONTINUED..page 44........ - 07/05/06 03:56 PM
Is anyone else painting in a high-humidity + high temperature environment? I'm always getting bubbles and thinning the paint out more doesn't seem to do anything. I'm using 100% Mineral Spirits with Navy Gloss Stops Rust paint.
Quote:
There's alot of information in this thread. I haven't been able to read through the entire thread but am worried about missing some vital piece of info before attempting this myself. I'm sure I'm not the only person in this boat.
Has anyone started organizing all this info into a wiki? website? if not please let me know and I'll get it started.
I wrote up this guide for myself before I started painting, I'm attaching it as a PDF. I'll add more information as I continue with my own paintjob.
Posted By: Exit1965
Re: Paint job on a budget!? CONTINUED..page 44........ - 07/05/06 04:43 PM
Part of it is the thinning, part of it is putting it on thin. If the roller has little paint in it and exists uniformly within the roller, you should be fine.
A couple times when I'm painting, some paint from the inside of the roller seems to come from the top and as I'm smoothing out an area, it leaves a small trail of paint which includes bubbles. I then have to go over it a few times to spread out that trail/streak. But if I concentrate on getting as much paint out of the roller (within reason) before rolling, everything's fine and no bubbles.
Posted By: Anonymous
Re: Paint job on a budget!? CONTINUED..page 44........ - 07/05/06 06:09 PM
Been watching this thread for a while...this has blown up so big, it's amazing. Great job charger.
As far as the Brightside marine paint goes...I found this guy on eBay selling red and blue quarts for $9.99 a quart on eBay. Is this the same stuff that Marq used?
http://search.stores.ebay.com/TheySoldIt...1781922QQsofpZ0
Posted By: Anonymous
Re: Paint job on a budget!? CONTINUED..page 44........ - 07/05/06 10:11 PM
Fourth coat. Lots of touch ups needed. Bumpers were sprayed using Tremclad cans. Planning on white racing stripes down the middle of the car.

Posted By: Anonymous
Re: Paint job on a budget!? CONTINUED..page 44........ - 07/06/06 12:49 AM
This Brightside paint is starting to interest me it may cost more for the paint but you still do it your self and is still far from a $3,000.00 plus paint job.
I should be in paint mode hopefully by fall and am considering the "brightside way" with a two part roller primer- filler base coat.Dropped by my local marine supply store today and scored a color chart {see attached} it is $38.99 a quart up here still afordable for a do it your selfer I think.

Posted By: Marq
Re: Paint job on a budget!? CONTINUED..page 44........ - 07/06/06 01:18 AM
Quote:
As far as the Brightside marine paint goes...I found this guy on eBay selling red and blue quarts for $9.99 a quart on eBay. Is this the same stuff that Marq used?
http://search.stores.ebay.com/TheySoldIt...1781922QQsofpZ0
I am still trying to figure out how the guy on eBay is able to sell the Brightside soooooo cheap.
I can't believe there is like a 400% mark up on the paint at the stores... AND YET the guy has a very good track record with satisfied customers...
And his price on a six pack of cans is close to what I am paying for one can at our local marine supply store... go figure.
At less than $10 bucks a can for that eBay Brightside that would make the Brightside paint job more economical than the Tremclad paint job ( which go for $11 to $14 per can ).
Then again... when you add in the shipping and handling cost for the eBay Brightside that would bring it almost at par with the Tremclad / Rustoleum...
Posted By: Exit1965
Re: Paint job on a budget!? CONTINUED..page 44........ - 07/06/06 01:23 AM
Doesn't that guy only have a few select colors (red and blue?). When I saw the low price I figured he somehow got a hold of a big load of red and blue stuff and is trying to get rid of it. If he can get the other colors, that's a different story.
Potential good news for anyone else using Rustoleum Canvas White, the good people at Krylon make a color in a spray can called "Ivory Gloss" for interior/exterior that matches Canvas White.
I bought a can of this (only 2.50 at Walmart), since I can't find canvas white in a spray can locally and online I can only buy it in a pack of 6... and put some on a test piece of sheet metal. It appears to be a perfect match and is VERY glossy. I am hoping that it sands and polishes OK (in case there's orange peel and other imperfections to tame) and that it can handle the heat of being under hood next to header pipes. If not I might have to go with a high temp paint of a different shade, maybe dark gray would look nice in there.
Posted By: Anonymous
Re: Paint job on a budget!? CONTINUED..page 44........ - 07/06/06 02:06 AM
Ok, got my first coat finished on my test piece. Let me know how the thinkness looks. The lighter spots were bare metal.

Posted By: QuickDodge
Re: Paint job on a budget!? CONTINUED..page 44........ - 07/06/06 02:24 AM
Marq,
First, your car is looking good in the pics you've posted. I really like it!
Secondly, Thanks for posting the link to the video on how to apply the perfection paint. That was interesting!
And lastly, when you first started talking about the Brightside paint you mentioned it susposed to last for up to 10 years. I'm wondering where you got this information. (The interlux website does not seem to have any technical data sheets with ASTM ratings for any of their paints)
Posted By: Anonymous
Re: Paint job on a budget!? CONTINUED..page 44........ - 07/06/06 02:30 AM
Another

Posted By: Anonymous
Re: Paint job on a budget!? CONTINUED..page 44........ - 07/06/06 02:35 AM
Another.

Posted By: QuickDodge
Re: Paint job on a budget!? CONTINUED..page 44........ - 07/06/06 03:07 AM
69 Charger,
A long time ago you mentioned spraying automotive paint over the Tremclad. I'm wondering about spraying an automotive clear coat with hardener over the Rustoluem. Do you have any suggestions or recommendations on doing this?
Thanks again for taking the time to answer all these questions! I've used this technique on some non-automotive applications and it WORKS!!
Posted By: Marq
Re: Paint job on a budget!? CONTINUED..page 44........ - 07/06/06 03:19 AM
Quote:
Marq,
And lastly, when you first started talking about the Brightside paint you mentioned it susposed to last for up to 10 years. I'm wondering where you got this information. (The interlux website does not seem to have any technical data sheets with ASTM ratings for any of their paints)
I picked up that average number from discussions going on the boat message boards. Folks were discussing the merits of the AWLGrip paint versus the Brightside and folks were piping in how long their finishes had held up in 'real world' usage.
Now the problem with boat guys... is that a speed boat in some warmer climate ( where it is summer all year round ) and some boat guy up in Canada where they might only have their boat in the water for 3 months of the year tends to distort their 'real world' experiences.
But the overall drift that you would have picked up from their discussions is that this paint job 'should' have 'at the minimum' the same life expectancy as a professionally applied paint job.
The other key factors for the long life expectancy of the Brightside is :
a ) it contains a UV protectant - to lessen fading over the years..
b ) it contains Teflon - to reduce or eliminate staining - or at the least make the clean up easier while protecting the paint by providing a Teflon surface that crap like bird poop and road tar can get a solid grip on etc.
I wouldn't expect the manufacturer to be bold enough to post any claims about the life expectancy of their product because there are just so many variables that could impact the long term viableness of a paint job. So all we can rely on are these 'old salts' who have applied the paint and had some long term experience with it on their boats.
About the lowest life expectancy that I saw quoted by some of these boaters was 'that they had to repaint after three years'. But as you read on in their message, they would mention that they had been banging the boat against the wharf, beaching the boat on to the sandy beaches and other such things that would help cut short the life expectancy of the best of paints
.
Posted By: Exit1965
Re: Paint job on a budget!? CONTINUED..page 44........ - 07/06/06 03:21 AM
Wow Farfire that's a strange looking setup you have there.

But it looks good to me. I have the problem myself on the first coat of putting it on too thick, but that looks very thin and like it will dry flat. Is that hunter green?
That Krylon test piece I shot, it dried very un glossy. Back to a six pack of Rustoleum..
Posted By: 69chargeryeehaa
Re: Paint job on a budget!? CONTINUED..page 44........ - 07/06/06 02:10 PM
Quote:
69 Charger,
A long time ago you mentioned spraying automotive paint over the Tremclad. I'm wondering about spraying an automotive clear coat with hardener over the Rustoluem. Do you have any suggestions or recommendations on doing this?
Thanks again for taking the time to answer all these questions! I've used this technique on some non-automotive applications and it WORKS!!
i've painted oh.....lets see, about 5 cars this way, and 2 of them later recieved a traditional paint job, mostly single stage, and the prep was just like any other paint job, and the paint went on great, and had no reactions with the tremclad, durability was the same as if done to bare metal, meaning the underlying tremclad was fine, that was on a 86 mustang GT, i owned that for about 5yrs, after my crx died. i painted it with tremclad, and drove it for about 3 yrs tremclad red, and then came into some extra $ and had it painted charcol silver metalic.
as for the clear coat, really the only one i would spray over would be the tremclad clear, thinned with laquir thinner, and that was my mistake when i tried the clear coat, and used mineral spirits, the same as the paint, and that kills the shine. i could see going from lets say 5-6 coats of tremclad, to final wetsand only (no polish), and go straight to clear coat either rollered or sprayed on, then just buff no wetsanding at all, since the stuff is really easy to put on with no peel. the clear coat paint in a liquid by tremclad is allready very thin, just about thin enough to roller on straight, just needs a splash of thinner, if i were to spray it, i would cut it down alot more with the laquir thinner, just so it goes like glass, and it would, i did a small test peice with laquir thinner, rollered it on, and it's just as good as any automotive clear for shine, and is made to be used over the tremclad.
Exit, i like the color your going with, that will look great when done.
also just a note, i see everyone saying to polish the paint 3 weeks after it's done minimum to polish the final, and really, with auto paints that's true, but i found with the tremclad/rustoleum stuff that it just needs 1 day in the sun, if that and a over night dry time, and using only the turtle wax polishing coumpound, because it's so non-aggressive, it's actually eaiser to cut/polish when it's still "soft", but this applies only to this paint, and not automotive single stage acrylic enamels/laquirs, ect.....don't ask me why, it just works. the turtle wax polishing coumpound i think is purposly geared to the consumer who does'nt have any polishing expirence and tries to polish, the equivelant grit of this polish appears to me to be about a 3000+grit polish, meaning it's a very gental polish that can't burn thru the paint, and that's what you want to use on still "soft" paint.
Posted By: Anonymous
Re: Paint job on a budget!? CONTINUED..page 44........ - 07/06/06 06:12 PM
Quote:
Quote:
As far as the Brightside marine paint goes...I found this guy on eBay selling red and blue quarts for $9.99 a quart on eBay. Is this the same stuff that Marq used?
http://search.stores.ebay.com/TheySoldIt...1781922QQsofpZ0
I am still trying to figure out how the guy on eBay is able to sell the Brightside soooooo cheap.
I can't believe there is like a 400% mark up on the paint at the stores... AND YET the guy has a very good track record with satisfied customers...
And his price on a six pack of cans is close to what I am paying for one can at our local marine supply store... go figure.
At less than $10 bucks a can for that eBay Brightside that would make the Brightside paint job more economical than the Tremclad paint job ( which go for $11 to $14 per can ).
Then again... when you add in the shipping and handling cost for the eBay Brightside that would bring it almost at par with the Tremclad / Rustoleum...
The guy who I mentioned in an earlier post about the red & blue Brightside I emailed him thru ebay & this is what he emailed me back..............................................
"Hi, I was wanting to find out if you can get this Brightside paint in other colors or is red & blue all you can get? Thanks, Litsa"
"Hi Litsa,
Sorry, the only colors we carry are the red and blue, but thank you for your interest in our auctions.
TheySoldIt"
Posted By: Anonymous
Re: Paint job on a budget!? CONTINUED..page 44........ - 07/06/06 09:52 PM
Quote:
also just a note, i see everyone saying to polish the paint 3 weeks after it's done minimum to polish the final, and really, with auto paints that's true, but i found with the tremclad/rustoleum stuff that it just needs 1 day in the sun, if that and a over night dry time, and using only the turtle wax polishing coumpound, because it's so non-aggressive, it's actually eaiser to cut/polish when it's still "soft", but this applies only to this paint, and not automotive single stage acrylic enamels/laquirs, ect.....don't ask me why, it just works. the turtle wax polishing coumpound i think is purposly geared to the consumer who does'nt have any polishing expirence and tries to polish, the equivelant grit of this polish appears to me to be about a 3000+grit polish, meaning it's a very gental polish that can't burn thru the paint, and that's what you want to use on still "soft" paint.
I think I'll give this a try when I finish. I'll put it out in the sun for a day or two then go ahead an polish. I'll post my results and if all else fails, I'll just put on another coat, let that dry for a while and polish.
I'm just starting my test piece now but will be starting bodywork all day next friday and then the paintjob. I have two questions about the prep.
1) Do I need to do anything if I apply bondo since I heard people say that it retains water. also, how long should I wait after applying it before painting over it.
2) I found that a wirewheel takes down the paint real nice and since nearly my entire car is peeling, I want to get most of the car down to bare metal. I also have a lot of rust growing under paint so I want to expose that. Do you think I'll have must of an issue with doing this. I know that Charger has said repeatedly that this works well on bare metal but then I thought I read Charger saying that if you take most of the car down to metal, you should primer it. I really don't have the money to be dumping into primer right now with school starting around the corner.
Would I be all right if I took off most of the paint with the wirewheel, sanded with 320, whipped off the dust with a cloth, whip down with mineral spirits, paint the first THIN coat?
Posted By: Exit1965
Re: Paint job on a budget!? CONTINUED..page 44........ - 07/06/06 10:25 PM
You can paint over bondo by the time it's sanded and worked. When you're done working it (assuming you've used 80 grit then maybe 180 then maybe 240 or 320) it should be ready to paint. It does suck up the paint a little bit. I fixed some dents on my roof before starting with the canvas white, and after 4 coats it's still a slightly different surface where the bondo is.
I didn't have much rust so I can't help you there.
Posted By: Anonymous
Re: Paint job on a budget!? CONTINUED..page 44........ - 07/06/06 10:54 PM
In regards to the ebay Brightside vendor I emailed and asked how old the paint was to which they replied (summarized)
"we do not know how old the paint is. We have no way of deciphering the code. We have not received any complaints so far however"
Interlux states the paint is good for 2 years, so my concern is that they are able to sell it so cheaply because they got an old batch.
Maybe not, but it is also a possibly that it is.
My .02
Posted By: Anonymous
Re: Paint job on a budget!? CONTINUED..page 44........ - 07/06/06 11:07 PM
The car we are working on had tons of rust (we had to replace a fender and do a lot of fiberglassing and bondo). We didn't prep anything over the bondo, painted right on top of it (I wasn't there for that coat but was advised this). It comes out pretty decent, we didnt get it perfectly shapped to the wheelwell, but it looks 1000x better then it did before.
As for bare metal and primering I don't think so. We had some spots of rust here and there and we took it all the way down and it was fine, I believe thats the good part of this paint. Since it is a rust resistant paint I don't believe you need to primer, unlike other paints which you may need to primer before applying.
I have little knowledge on painting cars, but this is pretty much what we have done and the car looks so much better then it did before (2 wheelwells rusted, multiple holes because of rust, replaced a whole fender that was rusted up..etc).
Posted By: Anonymous
Re: Paint job on a budget!? CONTINUED..page 44........ - 07/07/06 01:11 AM
Some thoughts about softness:
I put another coat of paint on my hood last night, using exit's advice. It worked out really well, the paint went on evenly and there were few bubbles.
I came back 18 hours later, and I noticed I had gone over the edge of my hood in some spots. When I tried to pick off the 'overroll' with my fingernail, it came off real easy. When I tried the same thing on the hood, I could barely scratch it with my fingernail. The thickness of the coat seems to have a lot to do with it, the thicker the 'overroll' was, the easier it was to pick off.
So in conclusion - if your paint is soft, you've either been slacking with the prep work or putting on coats that are way too thick.
Posted By: Anonymous
Re: Paint job on a budget!? CONTINUED..page 44........ - 07/07/06 02:45 AM
Well, did my second coat and everything seems to be going well. I've posted my pictures in my webshots:
WebshotsI like how the paint is sitting down on the bare metal, seems to be going well. There seems to be some orange peel going on but I'm hoping the wetsanding tomorrow night will take care of most of that. I read earlier on that people we looking at other car's factory paint and seeming orange peel so I decided to look around. It's amazing how badly the orange peel is on brand new cars. I'd really like to get it to sit down flat but a little here and there will be nothing compared to those cars. I wonder how much sanding those cars go through... my money's on little to none.
Posted By: Exit1965
Re: Paint job on a budget!? CONTINUED..page 44........ - 07/07/06 03:12 AM
Quote:
Well, did my second coat and everything seems to be going well. I've posted my pictures in my webshots:
Webshots
I like how the paint is sitting down on the bare metal, seems to be going well. There seems to be some orange peel going on but I'm hoping the wetsanding tomorrow night will take care of most of that. I read earlier on that people we looking at other car's factory paint and seeming orange peel so I decided to look around. It's amazing how badly the orange peel is on brand new cars. I'd really like to get it to sit down flat but a little here and there will be nothing compared to those cars. I wonder how much sanding those cars go through... my money's on little to none.
That's looking very good. Yes, the wetsanding will get rid of the orange peel completely. You'll be able to see the water laying flat on the surface after you go over it with the sandpaper.
And when you've done your last coat and wetsand with 2000 grit then polish and wax, it will be nice and smooth.
Speaking of wax, I know we talked about Turtle Wax ice before, but has anyone here tried Meguiar's NXT paste? Over on autotopia, the guys there seem to prefer that for durability, though they do admit the Ice goes on easier.
Posted By: Anonymous
Re: Paint job on a budget!? CONTINUED..page 44........ - 07/07/06 12:53 PM
if your going to use bondo, i suggest after you bondo and even after its dry. wait like at least 3 days before putting paint over it...i waited 2 days i believe and its dry and all but its not fully cured (wrong word)? so after i painted it..id say down the road i noticed some slight lump on the bondo area where it wasnt before. so the bondo actually expanded and finally did its cure. maybe its the cheap bondo...its the grey and red hardner. you should try the gold or yellow one. those sand easier and lighter, its better, and cures faster.
as for me im just sticking to it out of bondo and out of sand paper. and your average peeps cant tell.lol last coat right now and im done! cant wait till the buffing part!
Posted By: Exit1965
Re: Paint job on a budget!? CONTINUED..page 44........ - 07/07/06 01:37 PM
As far as I know, bondo doesn't need to cure over several days. Look at the production body shops, I do not think they wait several days and that bondo changes shape over those days.
Plus I think it's not curing, it's hardening chemically. After a couple of hours that's as hard as it gets and as long as you use a block or a board to sand with, you should get pleasant results and not see any surprises once you start putting paint on it. I have used the cheap bondo and have not had this problem, and a guy who works at a body shop came over to help me fix a dent on a fender, and he had the whole thing done and primed (with one coat of bondo, and one skim coat) in about an hour. I've done other small dents only a couple of hours before painting, like when I found things I hadn't seen before painting. No issues as long as the bondo is mixed right.
For the final pass of bondo once you have the shape right, mix bondo with fiberglass resin, then the bondo hardener. This will fill in scratches and will not have any pinholes. But it takes a bit longer to dry.
Posted By: Anonymous
Re: Paint job on a budget!? CONTINUED..page 44........ - 07/07/06 08:47 PM
Well today I did my first wetsand and applied my 3rd coat. Charger is totally right when you apply that third coat and everything suddenyl looks like one color. It's still a little light in areas but it's looking good. When I first did the coat I was worried that it was too think because of how well the color came through and it had a fair amount of orange peel. However once I went over it about a minute later with the roller, it was much less orange peely and self-leveled nicely.
There's a definate learning curve for the painting but I found the wetsanding to be even harder. I had the piece out in my driveway and was using the hose to spray while I was sanding. I have a 600 grit piece around a sponge and it seemed to work pretty well. Can anyone provide any tips for wetsanding, expecially those wetsanding in a garage because my method I used today got me and the surrounding area very wet.
There was a lot of orange peel to take down on the areas that had original paint but I figured a lot of that was texture coming through from the paint being poorly preped, after all my prep on this panel didn't last much more than 5 minutes. Since
I figure I'll be grinding down to bare metal, I decided to strip a large section on the fender to improve my sanding technique since today the bare sections were where I focused and got the best results. I posted more pictures and included a shot of the fender next to my car to compare the color. It's definately a change but I think with a really nice shine it'll look good. I've seen older pickup from the 50s era in this color but they are typically a flat or semigloss so I can't compare. I think that right now people considering this color can have a good idea on how the Hunter Green will turn out.
Webshots
Posted By: Anonymous
Re: Paint job on a budget!? CONTINUED..page 44........ - 07/07/06 08:49 PM
Quote:
As far as I know, bondo doesn't need to cure over several days. Look at the production body shops, I do not think they wait several days and that bondo changes shape over those days.
Plus I think it's not curing, it's hardening chemically. After a couple of hours that's as hard as it gets and as long as you use a block or a board to sand with, you should get pleasant results and not see any surprises once you start putting paint on it. I have used the cheap bondo and have not had this problem, and a guy who works at a body shop came over to help me fix a dent on a fender, and he had the whole thing done and primed (with one coat of bondo, and one skim coat) in about an hour. I've done other small dents only a couple of hours before painting, like when I found things I hadn't seen before painting. No issues as long as the bondo is mixed right.
For the final pass of bondo once you have the shape right, mix bondo with fiberglass resin, then the bondo hardener. This will fill in scratches and will not have any pinholes. But it takes a bit longer to dry.
Thats pretty much what my friend did to our test car, we had one wheelwell that was rusted a ton and had a few holes, he fiberglasses it once, then a second time to make sure it was fully covered, then did a coat of the bondo, and once it was dry (only a few hours of work), he shaped it all with I believe 80 grit sandpaper. It came out pretty decent, we did let the car sit for a few days so I can't vouch for saying how long you should wait, but I wouldn't imagine waiting more then a day since it dries so fast.
Posted By: Exit1965
Re: Paint job on a budget!? CONTINUED..page 44........ - 07/07/06 09:51 PM
I'm wetsanding in the garage.. what I use is a soft sanding sponge (320 grit, but it doesn't matter since I just wrap the paper around it), a bowl of water, a lint free cloth for cleaning the car (bought a 6 pack at walmart), and a spray bottle.
I start by spraying down the entire surface to be sanded. The water usually stays there in beads. Then I'll dunk the paper and sanding sponge into the water, and start sanding while spraying. I do the whole panel (the whole hood, whole fender etc.) before wiping it down. First wipe it dry with the cloth, then rinse out the cloth a few times and go over it a few times with the cloth still moise, until the residue is gone.
Also, as Charger suggested way back when, it works well to use your hand to hold the sandpaper, especially on tight spaces. Also on tight, contoured spaces I will bunch up the cloth and put the sandpaper around that, so it takes the shape of whatever I'm pushing it down and sanding on.
If anyone out there knows where to get a quality spray bottle, let me know. All of mine eventually start working badly, leaking or the lever thing starts sticking..
Posted By: Anonymous
Re: Paint job on a budget!? CONTINUED..page 44........ - 07/08/06 12:21 AM
Quote:
I'm wetsanding in the garage.. what I use is a soft sanding sponge (320 grit, but it doesn't matter since I just wrap the paper around it), a bowl of water, a lint free cloth for cleaning the car (bought a 6 pack at walmart), and a spray bottle.
I start by spraying down the entire surface to be sanded. The water usually stays there in beads. Then I'll dunk the paper and sanding sponge into the water, and start sanding while spraying. I do the whole panel (the whole hood, whole fender etc.) before wiping it down. First wipe it dry with the cloth, then rinse out the cloth a few times and go over it a few times with the cloth still moise, until the residue is gone.
Also, as Charger suggested way back when, it works well to use your hand to hold the sandpaper, especially on tight spaces. Also on tight, contoured spaces I will bunch up the cloth and put the sandpaper around that, so it takes the shape of whatever I'm pushing it down and sanding on.
If anyone out there knows where to get a quality spray bottle, let me know. All of mine eventually start working badly, leaking or the lever thing starts sticking..
From what you described it sounds similar to my technique except I was using the hose since I still need to pick up a bottle. I'm doing short quick linear motions which seems to work well. I started sanding through on a few spots but am pretty sure that it was because they were high spots from the original prep. I just looked over the piece a few minutes ago and saw it was laying down very nicely. The two original bare metal spots have no orange peel to speak of so I'm VERY happy with the results. I just found a crack in my front bumper's ground effects so I'll need to replace that but I figure I'll paint the current ones then paint new ones once I get them with the same amount of coats. The way Charger described it, the colors will still match which is perfect for me.
Charger, since you've been doing this for a while I figure you may know how this paint will handle snow. I know your beetles and charger are living in a garage but have you ever had ice buildup on this paint? My car lives out in the elements so I'm curious how this will handle ice and snow. I know it's for mowers and tractors but we're applying it slightly different so I figured I'd ask.
Posted By: 69chargeryeehaa
Re: Paint job on a budget!? CONTINUED..page 44........ - 07/08/06 02:20 AM
Quote:
Charger, since you've been doing this for a while I figure you may know how this paint will handle snow. I know your beetles and charger are living in a garage but have you ever had ice buildup on this paint? My car lives out in the elements so I'm curious how this will handle ice and snow. I know it's for mowers and tractors but we're applying it slightly different so I figured I'd ask.
no issues, my crx drove thru 3 hard canadian winters in North Bay Ontario, where it really, really snows, paint survived great, every spring and fall i would wax it.
when wetsanding i would only do small 3' x 3' areas, and have a spray bottle in one hand and hand sand the car, first spraying the area with the spray bottle, and i'd also have 2 buckets full of water and a shammy in one, the other bucket i rinse the sand paper in. after i'm finished sanding a area, i use the shammy to clean the area before it dries, it's alot eaiser to do it that way, then rinse the paper,and move onto another area. every so often i'd change the water in the buckets, about every 1/2 a car's worth. then when i'm all done, put new water in the bucket, and shammy down the car rinsing the shammy often, and repeat, then whipe down the whole car with spirits, and then clean with a tack cloth (regular auto body tack cloth) and then go to paint. i cannot stress how much the tack cloth helps, it probabally cuts down 90% of the dirt/dust/dog's a$$ hairs!!!. and they only cost about $1 each, plus i got these really nice shammys from the dollar store, you know the ones you allways see a guy at a show with the booth spilling coke on the carpet and showing that the shammy holds like 2 gal of water....same stuff at the dollar store - the orange ones, about 3' x 3'. also if you need a spray bottle follow these steps: 1. go to the wifes cleaning closet, 2. remove any spray bottle, 3. empty contents into a sutibale container (you will need it later), 4. use spray bottle, windex ones work best:), 5. when finished using the bottle, return stored contents back into spray bottle, place back into cleaning closet, and deny any involvement in it's use when confronted by wife/girl friend/mistress/boyfriend(to be politically correct)!!!!
Posted By: 78D150CLUB
Re: Paint job on a budget!? CONTINUED..page 44........ - 07/08/06 03:37 AM
Just started using this method on my 78 Adventurer SE. Too dark for a good pic atm, but I will try to get one tomorrow. Followed your method all the way, and so far it looks great. It will be a treat to drive something that doesn't look like a chameleon hiding in a box of crayons.
Hat's off to you, charger. I wouldn't have painted until I got a correct pre-81 longbox for Godzilla, but this is the best of both worlds.
P.S.: Pic is early this spring after much work to get it back on the road.

Posted By: Anonymous
Re: Paint job on a budget!? CONTINUED..page 44........ - 07/08/06 07:54 AM
I felt that some of this threads information would be easer served up on a wiki. for those out of the know a wiki is an editable web page that anyone can edit. The address is:
http://carpainting.wetpaint.com/I'm affraid I haven't added much more than Morwan's pdf and a few headers and links to kinda direct the basic layout. (though I'm sure that will evolve soon enough). I plan on going through the thread page by page and adding information. It's just getting late tonight. Oh and yea I tried to make the site very general to allow for it to expand into other areas of car painting. I noticed some over lap on this thread. ie prep work and rattle caning it. One will have to create a user account to edit the pages but it's quick and if most of us use the same user id's we'll be able to tell who's who.
Later,
Aaron
Posted By: Anonymous
Re: Paint job on a budget!? CONTINUED..page 44........ - 07/08/06 03:53 PM
Excellent idea, I joined up and made a few small comments. Gotta admit, it's my first go round with a wiki, and it feels a bit odd editing someone elses words! LOL I suppose it's not uncommon for these things to get a little heated? Anyway, it's a great idea. I've had asperations of creating a website dedicated to this method of painting for some time now - interviewing some of the more active testers/painters, creating links, having a step-by-step "how to" gallery, etc. Unfortunately, my workload has been such that I just don't seem to have any free time, but I suppose that's a good thing too!
Posted By: 78D150CLUB
Re: Paint job on a budget!? CONTINUED..page 44........ - 07/08/06 04:56 PM
Second coat went on today
Dry roller well in tray, and apply paint so thin it only has one side.
Trying something new, between coats rattle canned a shot of metallic, let dry, and softly wiped excess powdery substance from surface. Still left lots of sparkle visible thru second coat

Posted By: 78D150CLUB
Re: Paint job on a budget!? CONTINUED..page 44........ - 07/08/06 04:56 PM
another

Posted By: 78D150CLUB
Re: Paint job on a budget!? CONTINUED..page 44........ - 07/08/06 04:58 PM
last one

Posted By: Anonymous
Re: Paint job on a budget!? CONTINUED..page 44........ - 07/08/06 06:20 PM
Quote:
I felt that some of this threads information would be easer served up on a wiki. for those out of the know a wiki is an editable web page that anyone can edit. The address is: http://carpainting.wetpaint.com/
I'm affraid I haven't added much more than Morwan's pdf and a few headers and links to kinda direct the basic layout. (though I'm sure that will evolve soon enough). I plan on going through the thread page by page and adding information. It's just getting late tonight. Oh and yea I tried to make the site very general to allow for it to expand into other areas of car painting. I noticed some over lap on this thread. ie prep work and rattle caning it. One will have to create a user account to edit the pages but it's quick and if most of us use the same user id's we'll be able to tell who's who.
Later,
Aaron
I thought a lot of the text looked familiar.
My original guide was pretty inaccurate since I wrote it up with no actual painting experience... But now that I do have some experience, hopefully my contributions will be more useful.
Posted By: Marq
Re: Paint job on a budget!? CONTINUED..page 44........ - 07/08/06 06:26 PM
Quote:
Trying something new, between coats rattle canned a shot of metallic, let dry, and softly wiped excess powdery substance from surface. Still left lots of sparkle visible thru second coat
This is an experiment that I believe 'should' work and I am glad you are giving it a try. Lay on a coat of color, hit it with a light coat of metallic spray then lay on a coat of paint to protec the metallic during the wet sand. So I look forward to how this goes and hope you have success with it.
On a slightly similar topic... and taking things from a 'slight metallic look' to an 'eye burning metallic look' I struck upon yet another variation that someone might want to experiement with while I was at the Walmart and farting around in the crafting & paints section... I noticed the 'sparkle' type paint. This is a clear lacquer based paint ( although sometimes it has slight tint ) and it contains sparkles in various colors....
This 'sparkle' spray paint is also available at Michael's Stores. department stores and might even be available at Loews or Home Depot...
There is a silver sparkle, a gold sparkle, a red sparkle, a green sparkle, a blue sparkle and a 'rainbow' sparkle that has red, silver and gold in one spray bomb.
Using this selection of paints.... you could try variations to get different effects...
a ) take a green paint job and use the 'green' sparkle between layers..
b ) take a green paint job and use the 'silver' sparkle between layers...
or if you had a red paint job...
a) take a red paint job with the 'red sparkle' between layers
b) take a red paint job with the 'silver or gold' sparkle paint between layers
if you were using a blue paint.... then you get the idea... ( use the blue sparkle or silver sparkle etc ).
This 'sparkle' crafters spray paint uses fairly sizable 'sparkle' material in its paint. I would suspect the 'sparkle bits' are about 10 times larger then the microscopic metallic particles you would find in most 'metallic' spray paints.
So these 'sparkles' would have more of a pronounced 'eye popping' bling bling type visual effect on a car sitting out in the sun...
The visual effect of these 'crafters metallic' spray bombs trapped between two layers of either Tremclad/Rustoleum or Brightside would or should produce an amazingly light catching and reflecting appearance. So these 'sparkles' would have more of a pronounced 'eye popping' bling bling type visual effect on a car sitting out in the sun...
And with these 'sparkle' materials trapped between alternating layers of thinkly layered paint would be protect from any adverse effects during the wet sanding process.
Now... the only thing that I don't know... or have enough info to speculate on... is how the Tremclad/Rustoleum or the Brightside paint might react to
a ) having this lacquer based paint sprayed on it OR
b ) how the Tremclad/Rustoleum or Brightside might react when you put a layer on over the lacquer based metallics paint.
I suspect it should work without any compatibility problem and I would guess that the reflection quality would give the paint job a very unique light reflecting ability - with each of these metallic sparklers catching and reflecting light like little color matched diamonds in the sun...
I don't think you would get the 'mystique' color shifting type effect by doing this 'sparkle' method... but I suspect the light spectrum reflections should make the paint job rather unique and attactive.
Just thought I would share this thought in case someone is looking for something unique and would like to try a small experiment to see if this would be a feasible method to add a little 'sparkle' to their paint job.
.
Posted By: Anonymous
Re: Paint job on a budget!? CONTINUED..page 44........ - 07/09/06 01:20 AM
I have finished my painting and I am currently up to polishing. I have found an Australian website that has a heap of tips and has lots of examples of professional detailers work on cars including what products they have used.
I have found it to be an excellent source of information.
Detail Paradise The Detailing Tips towards the bottom of the first page are well worth a read and the Forums button on the top of the page leads towards the main forum. I have found the Detail Paradise forums underneath the Sponsore forums to hold bucketloads of useful info.
So if you want to know how to turn this

into this

then have a look at the link above.
PLEASE NOTE THESE PICS ARE FROM THE WEBSITE MENTIONED ABOVE. They are not my work, they are the reults obtained by a professional detailer. I listed them bacause the detailer who did them described what products and equipment he used to obtain these results.
Hopefully they han help us to achieve similar results ourselves.
Posted By: Exit1965
Re: Paint job on a budget!? CONTINUED..page 44........ - 07/09/06 01:54 AM
Aussie, you seem to be quite talented with the black and the roller, from your previous pics. Be sure and post some close ups of your job when it's done, and then let us know how you did it
I will be there soon, just put the 5th coat on last night and the 6th will go on tonight.
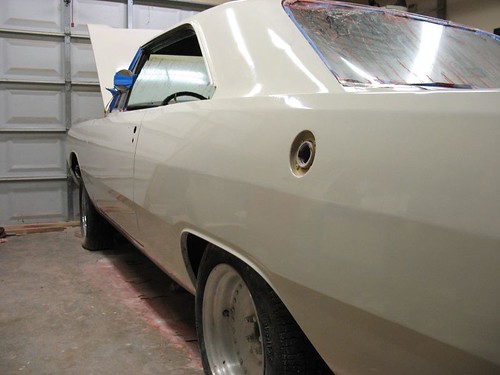
Posted By: Anonymous
Re: Paint job on a budget!? CONTINUED..page 44........ - 07/09/06 02:55 AM
Looking good Exit. Can't wait to see you get that out in the sun. I just finished my 4th coat on my test piece and things seem to be going well. Thursday I'll be tearing down my car to start prep work so I'm going to continue playing with my test piece till then.
Posted By: Exit1965
Re: Paint job on a budget!? CONTINUED..page 44........ - 07/09/06 05:27 PM
Thanks Farfire. Looks like your project is coming along well too.
I opened up the garage today and let some natural light in, unfortunately there was barely any sun that touched the car. I can see that on the edges of the body lines, there is still not full coverage while the rest of the panel there is. So that means at least 2 more coats for the whole car, then a few extra coats as needed for the roof and window sill areas. This is with 6 thin coats:
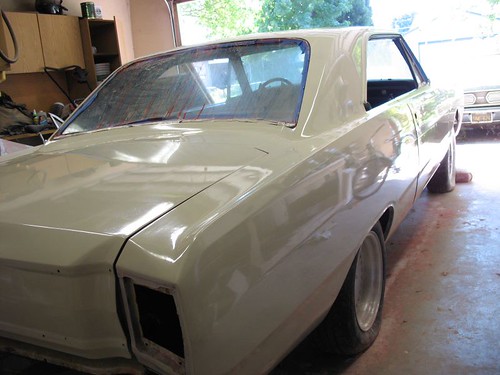
Here is an example of the difference between canvas white and the plain white roller tray. I'm really liking canvas white..
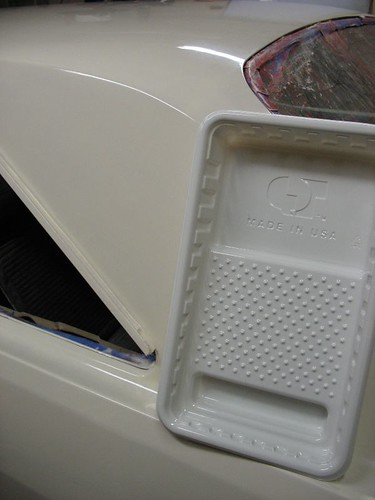
Posted By: Anonymous
Re: Paint job on a budget!? CONTINUED..page 44........ - 07/09/06 07:24 PM
Looking good. You have an amazing shine going there. I really need to work on my technique. I'm getting orange peel really bad. Take a look at my pictures from my 5th coat:
5th coat Orange Peel I'm confused on where the solutions lies for this. I'm using the same exact roller pan as you are shown above and when I fill up the roller, i move it to the bumpy section and roll with a lot of pressure and watch the paint seap out. I think put the paint over the edge into the flatter part and do this a few times. So I know my layers are thin. Also, I have no bubbles to speak of so I think that my mixtures it pretty good. I mixed it up initially for the first coat then add a little mineral spirits for each coat. Any suggestions would be great cause I'm getting a little iffy about starting on the car since I'm having this trouble now.
Also, look at my wetsanding shot, I'm really only focusing on the initially bare metal sections since the other painted areas were poorly prepped. When I wetsand, I work the area then wash it off, wipe with a cloth then let it draw and see out the color is. If the color is a solid hazy green then I continue. If there are dark and light spots, I continue. Is this a good practice? Hope you all can help me because I'm excited about this paint and would love to see it working smoothly for me.
Posted By: Anonymous
Re: Paint job on a budget!? CONTINUED..page 44........ - 07/09/06 07:34 PM
Ok, those pictures were immediately after the paint was applied about a half hour ago and I just went down and the orange peel is fading a little so the self-leveling it working good. Maybe I'm worried about nothing but is that how everyone else's looks right after you initially apply a coat?
Posted By: 78D150CLUB
Re: Paint job on a budget!? CONTINUED..page 44........ - 07/09/06 08:16 PM
First, that white is really looking good, exit. I liked the red as well, but the work in both cases looks great.
Farfire, I'm using the same color as your tests, although it seems muchdarker. Hunter Green, and then I'm gonna do the two tone section with a custom tinted green.
I found that the paint was just the right thickness if you can create bubbles when pressing the roller out in the tray, and then watch the layer of bubbles. They should look like coke or root beer sizzling, then the paint is thin enough. I press the roller almost dry, and apply very thin, working across first and rolling out up and down. Hard to describe, but with practice it becomes second nature.
These pictures are from today, 5th coat on driver side, 3rd on passenger.

Posted By: 78D150CLUB
Re: Paint job on a budget!? CONTINUED..page 44........ - 07/09/06 08:18 PM
another one

Posted By: 78D150CLUB
Re: Paint job on a budget!? CONTINUED..page 44........ - 07/09/06 08:19 PM
passenger side

Posted By: Exit1965
Re: Paint job on a budget!? CONTINUED..page 44........ - 07/09/06 11:19 PM
Quote:
Looking good. You have an amazing shine going there. I really need to work on my technique. I'm getting orange peel really bad. Take a look at my pictures from my 5th coat:
5th coat Orange Peel
I'm confused on where the solutions lies for this. I'm using the same exact roller pan as you are shown above and when I fill up the roller, i move it to the bumpy section and roll with a lot of pressure and watch the paint seap out. I think put the paint over the edge into the flatter part and do this a few times. So I know my layers are thin. Also, I have no bubbles to speak of so I think that my mixtures it pretty good. I mixed it up initially for the first coat then add a little mineral spirits for each coat. Any suggestions would be great cause I'm getting a little iffy about starting on the car since I'm having this trouble now.
Also, look at my wetsanding shot, I'm really only focusing on the initially bare metal sections since the other painted areas were poorly prepped. When I wetsand, I work the area then wash it off, wipe with a cloth then let it draw and see out the color is. If the color is a solid hazy green then I continue. If there are dark and light spots, I continue. Is this a good practice? Hope you all can help me because I'm excited about this paint and would love to see it working smoothly for me.
Hmm well I know if you have orange peel on from previous coats, a new coat with a little orange peel will make it look worse. When wetsanding, and spraying, you should be able to see the water sitting level on the surface after running wet sandpaper over it. If not, then keep wetsanding until it does that. 400 grit will get you there fast but I've been using 800 grit at this point since the orange peel isn't that bad.
I have noticed to that the coats tend to flatten out when initially I'm worried about orange peel. I usually have the worse orange peel on the hood, decklid and roof (flat sections) so they take more wetsanding. But the good thing is, even now you have added more paint. If it dries with orange peel, just wetsand it down FLAT and do your next coat. It looks like the last coat was on there pretty thick, try thinning the mixture more next time, as it sounds like you are OK in how you're putting little of it on, but I think it just needs to be thinner to sit down flat.
I would not go by how the surface looks (solid hazy green) but more on how the water lays on it once you move the sandpaper over it. You might try also sanding with deliberate strokes, and push down so you get some traction, then you'll see the flatness come about quicker I think.
Posted By: Anonymous
Re: Paint job on a budget!? CONTINUED..page 44........ - 07/09/06 11:57 PM
That's looking good. I think I'll try thinning the paint down a little to get the right consistance. I think I'll wetsand tomorrow to try using the water technique exit is mentioning. To get an idea, how long would it take you to wetsand the door? I think my problem is with my wetsanding...
Posted By: Exit1965
Re: Paint job on a budget!? CONTINUED..page 44........ - 07/10/06 12:03 AM
The door probably 10 minutes with 800 grit, 7 minutes with 400 grit
Posted By: Anonymous
After four coats.... - 07/10/06 12:35 AM
...this was with the Penetrol mixture, for those with longer memories.
The good news is the flow was excellent and it dried quicker than I feared.
The bad new has been a laborious amount of wet sanding to knock down the orange peel.
But it's an option for those who don't mind the elbow grease....

Posted By: Anonymous
and another shot from the front.... - 07/10/06 12:38 AM
BTW, I'll use pinstriping to keep the two colors separate. Right now the truck passes the 10-foot test, after another (sigh!) wet-sanding and eventual polishing, I anticipate reaching the 5-foot barrier...which is all my poor old beast ever dreamed of.
This has been a great adventure! Thanks to everyone who's been taking part!

Posted By: 78D150CLUB
Re: and another shot from the front.... - 07/10/06 01:02 AM
That's looking good, Rev! Polishing and pinstripe should really finish it up nice. I'm actually going for the speed factor on my lump
If some one running for their life doesn't spot the mistakes, I'm Happy
Looks like some great results and some interesting variations on a theme here. Keep up the great work, and remember the one ingredient most necessary: Patience ( I know, some say it's beer
)
Posted By: Exit1965
Re: After four coats.... - 07/10/06 01:47 AM
Looks nice Rev, polishing should do wonders for it.
As far as the orangepeel. The very first time I tried penetrol was with regal red. I mixed quite a lot of it in there, put a THICK coat on, and it dried with no orangepeel at all.
Fast forward a few months and painting my dart, I tried penetrol on the hood and got orange peel. I think though that I must not be thinning it enough. Do you know about how much you thinned the paint with Penetrol?
Posted By: Anonymous
Re: After four coats.... - 07/10/06 10:55 AM
Looking good exit, can't wait to see the final product, I really do like the Canvas White over the Red. Seems to go better with the car.
I finnally got some pics of the car me and my friend have done, some before, and after (granted these were taken with my cell phone and my phone doesn't have a good camera, so you do the math). We've done about 7 coats, or something, so far. Now granted...we are not taking our time, we are doing a halfway decent job, we just wanted to get the idea of wetsanding, polishing, rolling on the paint, how to do the thickness, with the whole car and not just a test piece (we do stuff like this a lot, sort of dumb if you ask me

).
I've got a couple of the before pics, and the after ones, and we should be finished in a few days (wetsand once more, another coat, final with 1500 and polish and wax). Once we finish completely I will get a good digital camera and get good pictures.
I really feel bad for not getting pictures of the rusted spots (there were full blown holes in the fenders), they look so immaculate now.
http://s74.photobucket.com/albums/i272/efhatchpaintjob/Pictures there, the red was the original, smoke grey is what we used.
Posted By: Anonymous
Thinning with Penetrol - 07/10/06 01:38 PM
First two coats, I thinned 25 percent with Penetrol. The white came out fine, but the orange showed the peel more...as colors are likely to do.
I added a splash (literally) maybe 5 percent of mineral spirit to the orange, thinking it would thin the paint and ease the peel. It seemed to help. For the last two coats, I'll add another splash (a smaller splash, since there's less paint remaining.
That'll put us at 65 paint, 25 penetrol and 10 mineral spirits. Sort of like finding the perfect barbecue sauce.
And yes, I cheated and shot hammmered metal on the grill, just for fun.
I think my biggest problem has been inexperience, Southern humidity and bugs. But considering where this fellow was and where he is now, it's been great.
Posted By: Anonymous
Re: Thinning with Penetrol - 07/10/06 08:37 PM
I just applied my 6th coat and things got a little more complicated. I over-thinned the mixture and it ran a little on me but I made sure the coat was thin enough that it stopped running after I rolled over it ligthly. Tomorrow I'm going to wetsand with 1000 then apply another coat, see how it sits and maybe wrapped it up with 1500 and then 2000. Here's pictures:
6th Coat Gallery The orange peel looks more extreme in the pictures than it is and if this coat follows the last, most of the orange peel will level out. Plus this gives me a chance to work on my wetsanding.
I also found this wesbite on wetsanding.
Car Craft How To WetsandIf you look at the pictures, they help a lot in giving a visual guide. This is very similiar to what I am doing but I think I am working the surface too harshly once the orange peel begins to disappear and am taking off more paint than needed.
Posted By: Anonymous
Re: Paint job on a budget!? CONTINUED..page 44........ - 07/11/06 12:50 AM
MARQ
How is the next {or}last coat of the brightside paint job coming?
Would love to see the finshed product.
Has anyone else tryed the brightside way yet ?
I have a spare door for my 36 chev coupe I may try it on.
Thanx
Bryan

Posted By: 78D150CLUB
Re: Paint job on a budget!? CONTINUED..page 44........ - 07/11/06 01:48 AM
I'd love to see the finished product, Marq. I can't add a pic of mine, camera battery is pushing up daisies. The metallic dusting between the unsanded layers seems to be working out, though. Subtle sparkle, but still there.
BTW, is anyone thinking of hitting Moparfest on the 19/20 of Aug in New Hamburg? I'm close enough that I think i might take Godzilla out for a couple of days on the fun field.
Posted By: Marq
Re: Paint job on a budget!? CONTINUED..page 44........ - 07/11/06 04:29 AM
Quote:
MARQ
How is the next {or}last coat of the brightside paint job coming?
Would love to see the finshed product.
Has anyone else tryed the brightside way yet ?
I have a spare door for my 36 chev coupe I may try it on.
Thanx
Bryan
I might be in position to snap some pictures this Saturday. I have been swamped with non-automotive activities this week.
I did learn one more thing about working with Brightside on a car....
The Interlux primer is called Pre-Cote. According to the folks at Yachtpaint.com, you should use the primer to provide a single color substrate to lay your paint on.
Ok... we all knew that. It makes sense and it is something that I concluded would help to make the best finish possible.
But what I picked up in the way of new info is that you can lay a second layer of primer AND YOU CAN ADD 50% OF YOUR color choice to the primer before laying it on. Apparently this gives the final finish an even deeper and richer look to your color.
I assume that if someone ONLY wanted to put on one layer of Pre-Cote primer... they could do the 50 / 50 trick in that one layer of primer.
And as I learned about that, it struck me that I had seen at the craft store these jars of metallic sparkles. That's right just the sparkles ( not in a spray bomb ). I started wondering if this 50 / 50 mix of primer and paint might be an interesting spot to dump those powdered sparkles... and lay them on in this primer coat.
I guess you just have to make sure that the sparkles are evenly distributed and suspended in the paint / primer solution.
Oh wll.. yet another potential experiment in the quest fo 'get something different and unique'
.
Posted By: Anonymous
Re: Thinning with Penetrol - 07/11/06 05:02 AM
Quote:
First two coats, I thinned 25 percent with Penetrol. The white came out fine, but the orange showed the peel more...as colors are likely to do.
That'll put us at 65 paint, 25 penetrol and 10 mineral spirits. Sort of like finding the perfect barbecue sauce.
Hi Rev! Great job with the truck by the way! That's about the same proportions I used. White worked fine with Penetrol alone but black dried too quickly. Adding mineral spirits until I got a milky consistency made the mixture easier to work with.
It also seems that the trick to using the Penetrol variation is to just immediately tip the rolled on paint with a brush. Bubbles become a non-issue...just brush them away. I used a brush similar to what Coach painters use- one with flags (i.e., split ends.) I found one at Dixieline Lumber. After rollering a horizontal cover coat, I brushed in a downward motion, then again using light pressure. This gave me super-fine brush marks. In some areas there were no marks at all. I found the brush marks easier to sand away then orange peel.
Letting the paint sun bake also helped (at least in my experience.) When I first tried polishing after a day, I got the haze Exit had mentioned before...probably because the paint was too soft. For my Black Mustang I let the paint dry in the shade a day and then it sat out in the sun for the rest of the week. This gave me a harder surface to polish. After using Turtlewax polish I also finished off with a Scratch and Haze remover then wax. (See before and after pics on attachment.)
The polish surface was not only mirror smooth, it also revealed a problem others came across...transparency. But then again I was only up to 4 coats. In addition, this combo does tend to dilute the pigment more than normal. Also, I'm only using the Rustoleum/Penetrol combo as a base coat. It allows me to see low spots and other imperfections (sometimes more than I care for) that I still need to work on.
After I get the imperfections out (the question is when?  ) I'll apply a final gloss coat of Dutchlac marine paint, let that dry a month then polish it.

Posted By: Anonymous
Re: Thinning with Penetrol...nice job, Bugg! - 07/11/06 10:17 AM
I'll try that for the next round. Of course, my truck's a working-class sort of guy, and anything that shows off the dings and imperfections may be counter-productive. I've enclosed an attachment to show what we had to start with...
But that's a great finish you've worked up. If I can't find a flagged brush, would foam work tolerably? Or should I go with a high-end brush?
Second question for the room...has anyone tried this on the inside of their vehicle?

Posted By: Anonymous
Re: Paint job on a budget!? CONTINUED..page 44........ - 07/11/06 11:46 AM
Yeah I picked up the brightside largo blue as I said earlier and completed all body work last night god that was touch. I did the initial sanding then went to bed.
My car has some bondo'ed surfaces and I don't plan on laying down primer. It'm hoping it won't make much of a difference. Did you notice any problems when you did your mustang marq?
So it's off to paint tonight for me. I have pictures of the process so far, pictures to come once I start to roll the stuff. To clarify with the brightside I just roll straight out of the can making sure that I empty my roller out almost completely before each coat like they are doing with the rustoleum then go the other way across my stroke with a foam brush? Sounds simple. God I hope this looks nice...
I had the oh crap what did I do to my car moment last night after I had sanded it to scratch it up...
I sanded with 120 the entire car. Should I sand with a higher grit before painting now? Or will the paint cover it up? I'm not sure how this will work. With rustoleum that process was fine and worked quite well.
Posted By: Marq
Re: Paint job on a budget!? CONTINUED..page 44........ - 07/11/06 03:19 PM
At this point my feeling is that to 'save work' you should go ahead and use the primer. But you can 'spike it' by cutting it 50 % primer with 50 % of the paint color of your choice.
This will ensure that you have a uniform color below the paint that you are applying.
I would lay down the primer/paint mix and then sand it with anything from a 180 to a 320 grit. I kinda like the 220 grit personally..
.
Posted By: Anonymous
Re: Paint job on a budget!? CONTINUED..page 44........ - 07/11/06 03:37 PM
Quote:
I sanded with 120 the entire car. Should I sand with a higher grit before painting now? Or will the paint cover it up? I'm not sure how this will work. With rustoleum that process was fine and worked quite well.
You should sand it down with a finer grit, when I used 220 I could still see the scratches after two coats. When I prepped my car, I used 220 then 320. I've only been able to put one coat on the car (stupid rain), but I definitely don't see any scratches.
Posted By: Anonymous
Re: Thinning with Penetrol...nice job, Bugg! - 07/11/06 03:38 PM
Quote:
I'll try that for the next round. Of course, my truck's a working-class sort of guy, and anything that shows off the dings and imperfections may be counter-productive.
But that's a great finish you've worked up. If I can't find a flagged brush, would foam work tolerably? Or should I go with a high-end brush?
Thanks Rev. Yeah, I'd leave the dings and imperfections on a working truck. It's what gives it "character."
When applying base coats I just used the regular foam brushes. The ones at Dixieline have a plastic back bone that goes almost to the tip. It gave me the most control. I'd only use the flagged brush if you're going for a final, polished finish. The disadvantage of the flagged brush is that ya gotta clean it later. The beauty of Charger's method is that once you've done a few coatings, you can throw away your equipment.
Your primered truck inspired me. I see so many like them. There's no reason they should go on with only primer. Over a weekend, one could give those vehicles a decent covering ... character dings and brush marks included, and it would still look better than it did before. (There's a profit making idea for you guys.)
Posted By: Anonymous
Re: Paint job on a budget!? CONTINUED..page 44........ - 07/11/06 04:55 PM
I've been following this post for awhile and it is great. About 5 years ago I applied black semi gloss rustoleum to the top of my 68 Charger with a very textured roller. Looks just like a real textured vinyl top. Looks as good today as when I put it on and I don't worry about moisture and rust under a real vinyl top.
Posted By: Anonymous
Re: Paint job on a budget!? CONTINUED..page 44........ - 07/11/06 07:15 PM
Okay back to sanding again tonight. I want to make sure it's all taken care of. I have about 5-6 sheets of 320 left. I guess I have to go out and get more. I went through it pretty fast on the spoiler, tonnau cover, mirrors and ground fx.
Posted By: Anonymous
Re: Paint job on a budget!? CONTINUED..page 44........ - 07/11/06 11:46 PM
I plan on priming before my first coat of brightside to guarentee a consistant coat/ finish since we are looking at less coats the first to me would be the most important.
just my 2 cents
Bryan
My test will tell me later
Posted By: Anonymous
Re: Paint job on a budget!? CONTINUED..page 44........ - 07/12/06 12:30 AM
Well I added more pictures of my wetsanding with 1000 grit and 7th coat. My new section on the back of my test piece had a lot of orange peel so I had to sand down very far to almost 1 coat left of my 4 but I added more paint to my mixture to make it thicker than before because of runs and my horizontal sections had little to no orange peel and my vertical section had much less orange peel than before. I think I'm going to be sanding inbetween each coat from now on if orange peel appears at all. Check my signature link for the new pictures.
Posted By: Marq
Re: Paint job on a budget!? CONTINUED..page 44........ - 07/12/06 01:37 AM
Quote:
I plan on priming before my first coat of brightside to guarentee a consistant coat/ finish since we are looking at less coats the first to me would be the most important.
just my 2 cents
Bryan
My test will tell me later
As I mentioned earlier... if you are going to use just one layer of primer... make a mixture of 50% primer and 50% paint. That will give you the coverage to hide any color variations on your substrates.. while giving you a head start on a color that can be built upon to give you a deeper and richer color. ( That tip comes from the Interlux booklet ).
If you are going to lay 2 layers of primer... do the first one normal and the second one as described above.
.
Posted By: Anonymous
Re: Paint job on a budget!? CONTINUED..page 44........ - 07/12/06 01:34 PM
I sanded with 320 then last night but the scratches were still deep. I could see them but not feel them. once I rolled on a coat of paint they really showed through up close..
I have some primer thats spray on. I used it over my bondo work and those area's look good. But they weren't sanded down.
Is this how I should go about fixing the scratching? I was thinking of going over the scratchy area's hood, rear fenders and trunk lid then going and sanding it flat again and painting. But will the primer do the same thing and settle into the cracks? Am I completely screwed?
Posted By: Exit1965
Re: Paint job on a budget!? CONTINUED..page 44........ - 07/12/06 04:14 PM
If it's on bondo, you can fill scratches quickly using a skim coat of bondo and fiberglass resin. Then you'll have to sand again with 80 then 180 then 240 and you'll be done.
For scratches not on bondo, I would just mix up some skim coat and go around putting it on the scratches, then start the sanding with 180 then finish with 240.
Posted By: Anonymous
Re: Paint job on a budget!? CONTINUED..page 44........ - 07/12/06 04:57 PM
Quote:
I have some primer thats spray on. I used it over my bondo work and those area's look good. But they weren't sanded down.
Is this how I should go about fixing the scratching? I was thinking of going over the scratchy area's hood, rear fenders and trunk lid then going and sanding it flat again and painting. But will the primer do the same thing and settle into the cracks? Am I completely screwed?
You were probably applied too much pressure with the rough grits, I did the same thing my first time around. I found that 220 worked best if I was trying to strip paint, anything lower gouged the hell out of it.
I used some spray on sandable primer to fill in the scratches I made on the hood. I put down two thin coats, sanded with 400, and that left a fairly smooth surface for the rusto to bind to. There's probably a better way to do this, but that worked for me.
As for my own paintjob, I'm switching over to rattlecanning the stuff. I need to finish this paintjob by next week, and it takes too long for rolled on paint to dry with St. Louis weather. I rattle canned the bumpers and they came out beautiful, but I need to figure out how to properly spray onto horizontal surfaces.
EDIT: I need to know if this will work:
I have a single coat of paint that I rolled on Saturday. I worked Sunday and it's been raining since Monday, so I haven't been able to put another one down. Would wetsanding with 600 be good prep for rattlecanning?
Posted By: Anonymous
Re: Paint job on a budget!? CONTINUED..page 44........ - 07/12/06 09:11 PM
hey guys, awesome topic here
im from honda-tech, and have read all 40+ pages of it. my civic is coming along really nicely.
But, i am having an adhesion problem on one part. On my brand new bumper (polyurethane), i used the rustoleum auto primer spray, wetsand that then rattle-canned it. did 1 light coat, and left it alone for a week while i worked on the rest of the car. today, while i was hosing down the driveway, i decided to hose off the car, and the pressure from the hose completely stripped the paint off the bumper, and i can peel the paint off like a banana peel.
so the rustoleum primer doesnt stick to polyurethane. what should i do now?
Posted By: Anonymous
Re: Paint job on a budget!? CONTINUED..page 44........ - 07/12/06 09:23 PM
Quote:
hey guys, awesome topic here
im from honda-tech, and have read all 40+ pages of it. my civic is coming along really nicely.
But, i am having an adhesion problem on one part. On my brand new bumper (polyurethane), i used the rustoleum auto primer spray, wetsand that then rattle-canned it. did 1 light coat, and left it alone for a week while i worked on the rest of the car. today, while i was hosing down the driveway, i decided to hose off the car, and the pressure from the hose completely stripped the paint off the bumper, and i can peel the paint off like a banana peel.
so the rustoleum primer doesnt stick to polyurethane. what should i do now?
No, it very well may, you didn't try it. The primer you used doesn't stick to your bumper. Why doesn't the primer stick? Well, I don't know...but if you didn't scuff up the bumper before you painted it that sounds like a pretty good reason.
Posted By: 69chargeryeehaa
Re: Paint job on a budget!? CONTINUED..page 44........ - 07/12/06 09:25 PM
Quote:
hey guys, awesome topic here
im from honda-tech, and have read all 40+ pages of it. my civic is coming along really nicely.
But, i am having an adhesion problem on one part. On my brand new bumper (polyurethane), i used the rustoleum auto primer spray, wetsand that then rattle-canned it. did 1 light coat, and left it alone for a week while i worked on the rest of the car. today, while i was hosing down the driveway, i decided to hose off the car, and the pressure from the hose completely stripped the paint off the bumper, and i can peel the paint off like a banana peel.
so the rustoleum primer doesnt stick to polyurethane. what should i do now?
quite often the new bumpers still have the release agent from the mold, no paint would stick to it, you should clean any new plastic parts with mineral spirits, or some solvent, acetone might eat it, but you really should clean it first. i played that game too once, but only once, good thing is that the paint comes off easy
Posted By: Anonymous
Re: Paint job on a budget!? CONTINUED..page 44........ - 07/12/06 09:59 PM
so should i sand it with 600, then wipe it clean with mineral spirits?
Posted By: Marq
Re: Paint job on a budget!? CONTINUED..page 44........ - 07/12/06 10:00 PM
Quote:
and the pressure from the hose completely stripped the paint off the bumper, and i can peel the paint off like a banana peel.
so the rustoleum primer doesnt stick to polyurethane. what should i do now?
I am somewhat agreement with the cleansing of the new bumper or other new moldings with the mineral spirit or acetone or ketone etc.
I would only use an SOS pad ( or steel wool ) and one of the above fluid cleansers to get whatever is on that surface that is blocking the adhesion process.
The nice thing about the steel wool is that is will have sufficient scouring capabilities to make sure you get the cleansing fluid to wherever the problem is.
The nose chin on my Mustang was brand new from the shops and I did that procedure on it just as a matter of making sure I got all the greasy fingers and hands off the material. You would be surprised by how many hands may have touched that bumper before you fingers even got on it.
And in a worst case scenario... your unit may have been on display at the shop where you bought it and they might have put Armoral or some other liquid shine fluid on it to attract the buyers eyes...
Fortunately I think the problem you are facing is going to be easily overcome...
.
Posted By: Anonymous
Re: Paint job on a budget!? CONTINUED..page 44........ - 07/12/06 10:30 PM
heres some pix i took real quick. its really cloudy out, not an ounce of sunlight. its actually thunderstorming right now.
the adhesion problem:

peels easily:

now some pix of the finished parts, polished by hand. the shine is actually much better, just that theres no sun out right now.


Posted By: Anonymous
Re: Paint job on a budget!? CONTINUED..page 44........ - 07/12/06 10:52 PM
Jamestar, what Charger and Marq have told you, and after seeing your pics, I have to wholeheartedly agree. I had a subaru legacy that was in a fender bender, and my paint did the same exact thing... except it was factory match paint that was shot on.
Moral of my story.. listen to the gents, scour, clean, try again. You will be pleased.
Posted By: Anonymous
Re: Paint job on a budget!? CONTINUED..page 44........ - 07/12/06 11:02 PM
another pic just to show how nice and glossy it is
using menzerna intensive polish by hand

Posted By: 69chargeryeehaa
Re: Paint job on a budget!? CONTINUED..page 44........ - 07/12/06 11:41 PM
Quote:
another pic just to show how nice and glossy it is
using menzerna intensive polish by hand
that looks great, you definetly have a issue with some residue on that bumper, the only time that will happen if there is something like a release agent that they use so that the bumper does'nt stick to the mold when it's molded, they injection mould those bumpers, and you need to get all traces of that stuff off, like by sanding with 600, then washing with soap and water, then mineral spirits. like i said i had that EXACT thing happen to me with a new skirt for my old mustang, using single stage paint, at least i figured it out before i put it back on, plus i just sanded it and repainted it, no issues.
Posted By: _Scott_
Re: Paint job on a budget!? CONTINUED..page 44........ - 07/13/06 12:10 AM
jamesjstar - Your paint is looking great. You do need to sand new urethane parts though. Red Scotch-Brite pads work well for that application, and you can use them wet or dry. Also, to remove silicone mold release agents, there is a product called Polycracker that works better than anything else I've used. Autobody supply stores should stock it.
The good news is that a high pressure washing should remove the paint that's still on there. Then you're not far from a great end result.
Posted By: Anonymous
Re: Paint job on a budget!? CONTINUED..page 44........ - 07/13/06 12:10 AM
Greetings, a fellow observer... Nice polish / reflection on the previous post...
I've been practicing with black... By seeing other's results, I see some colors need more layers to cover the initial color, I had almost 100 percent coverage with black (over gray primer).
I used Rustoleum and oderless mineral spirits... no runs, no orange peel, I did wetsand between each coat... the only main problem I had was dust and stuff, but I didn't clean the garage as it was just a test piece... I was amazed at the gloss and how it always slef leveled....
I got to about the 6th coat... I tired the turtle wax polish & a randam orbit polisher (turtle wax 4000 rpm) and now it doesn't shine as much.... I left a 1/4th of the piece undone (no turtle wax) and it was much more glossier. So I tried by hand with the polish and a terry cloth pad... now it's less shiny, just like the rest... I kept it damp and moistened it throughout... I noticed swirl makrs now that weren't there before... exactly what type of pad shoudl I use? Any other tips?
I may try and hunt down some regular mineral spirits, but I would like to see this through.
I am legally bilnd, do not have a driver's license... Ironically, I'm building a Kitt car
69chargeryeehaa, photo op after I paint'er up?
Posted By: C38coupe
Re: Paint job on a budget!? CONTINUED..page 44............ - 07/13/06 12:22 AM
Hey Charger I can't believe this thread is still going, right on my hats are off to you again. It's been a while since I have logged on here, been cruisin on my main site.Just to let the other readers know how tough Tremclad paint can be, let me share some of my most recent experiences with the paint. I recently painted my steel work bench using uncut tremaclad and a high density foam roller, even like this it turned out great. I had some left over when I finshed the job and painted a strip over a bare metal spot on my coupe. Within a couple of days I could not scratch or scrape this painted spot, I also cleaned the roller in mineral spirits, some got on my finger nails and has not come off very easily and is still on my fingers in spots after 3 weeks. I will post more of my latest experiences with this paint later. Good to see you ROLLING
on with this Charger, all the best...C38Coupe
Posted By: Anonymous
Re: Paint job on a budget!? CONTINUED..page 44........ - 07/13/06 12:23 AM
I'm getting ready to start on my truck, still trying to decide on a color. I stopped by Sherwin Williams today and they have an oil based enamel called "All Surface Enamel" that seems to be very similar to Rustoleum. They can also tint the paint to most colors. Has anyone tried this type of paint? I wonder how the tinted base will hold up to fading? Thanks guys.
Rob
Posted By: Anonymous
Re: Paint job on a budget!? CONTINUED..page 44........ - 07/13/06 01:30 AM
Quote:
another pic just to show how nice and glossy it is
using menzerna intensive polish by hand
Looks very nice. The steel wool would be okay, but I vote for at least 600 grit paper and mineral spirits afterwards.
Posted By: Anonymous
Re: Paint job on a budget!? CONTINUED..page 44........ - 07/13/06 02:25 AM
Ok, I've been trying to improve my technique at wetsanding. After my 7th coat went on so smoothly I decided to go ahead and wetsand with 1500 and 2000. Look here at my before and after pictures:
Wetsand with 1500 then 2000 grit I put down another coat because the color was still semi transparent but my main question is whether the shine will come back to that. The color is very dull and I am having trouble seeing that it will come back. I'm going to pick up some of the rubbing compound tomorrow and try it out after another wetsand but is that what I should be seeing before my polishing?
Posted By: Exit1965
Re: Paint job on a budget!? CONTINUED..page 44........ - 07/13/06 03:35 AM
So has anyone used one of these yet? It's a refillable aerosol can available at Harbor Freight for $10.

Or anyone use a Preval?
http://www.prevalspraygun.com/home.htmedit: see some people have commented on the preval and liked it. anyone tried the refillable harbor freight one?
I'm thinking I could go with one of these to spray the jambs and engine bay, rather than getting a six pack of spray bombs.
Posted By: Anonymous
Re: Paint job on a budget!? CONTINUED..page 44........ - 07/13/06 03:48 AM
FarFire--
Yes, after you buff it the flat look goes away and it shines.
Exit--
No, haven't tried those. That would get expensive in a hurry. I did buy a wagner on monday though. The rolling was just going so slow for me -- especially with the yellow -- and since I only had done one panel so far I decided to buy the wagner and switch to royal blue. I have to say...it is awesome.
I'm still trying to figure out what is exactly the best mixture setup for the spraying...and I've had a couple of drips here and there...but overall it's awesome. Cleanup is quick, application is even quicker. Plus I don't have to keep buying rollers.
Don't get me wrong, the rolling was working just fine for me, but the yellow just takes too many coats. You REALLY have to want it.
Anyways, I'll have some photos up by tomorrow afternoon. I really hope to get the welding and prep done on the rest of the car very soon. I'm getting tired of smelling like welding.
Posted By: Anonymous
Re: Paint job on a budget!? CONTINUED..page 44........ - 07/13/06 01:28 PM
jamesjstar,
Look at the bumper under where you pulled off the paint. See the water bead up? Like a fresh wax job? That's your problem.
I bought some of the Hunter Green professional. Going to experiment with it when I get some time. Up to my eyeballs in wrenching work right now getting ready for Sturgis, Megasquirting my 20v 'Rolla and the timing chain on my DD RN Truck went out. Anyway, I am hoping that Hunter Green is close to British Racing Green for my Locost.
Posted By: Anonymous
Re: Paint job on a budget!? CONTINUED..page 44........ - 07/13/06 04:52 PM
Quote:
so the rustoleum primer doesnt stick to polyurethane. what should i do now?
Try using an adhesion promoter, like Bulldog. You can get it at Walmart for $6 a can, it's in the bodywork aisle next to the aircraft paint stripper.
Posted By: Anonymous
Re: Paint job on a budget!? CONTINUED..page 44........ - 07/13/06 05:35 PM
Hi there, I came across this thread randomly. I started reading from the beginning, read up to about page 15 and then realized there's another 30 pages, then the link and then another 15! So I am sorry to have skipped so much and came to here. Starting from around page 10, there was a discusssion about Tremclad in Canada vs Rustoleum in USA and people were concerned whether they are indeed the same paint. I started using Tremclad some 15 years ago and IMO Tremclad is by far the best off the shelf Enamel paint ever existed and is not the same as other enamel rust paint. I've tried many other brands (mainly rattle can versions) that are available at Canadian Tire, Home Depot, Rona and none give the same results. Here in Vancouver, we can get Rustoleum brand paint as well, not only are they more expensive, they are not nearly as good. Tremclad sticks to anything including bare metal really well, while Rustoleum and other brands tend to chip and flake off easily. With Tremclad fully cured, I can take a hammer and put a dent on a steel surface and the paint goes in with the dent, while Rustoleum come apart from the metal and flake off. Tremclad paint really does self-smooth but not so with other paint brands.
I first learned about the idea about paint a car using Tremclad and 4" hi-density roller about 2 years ago from Sean's Turbo Niva site
www.turboniva.ca He painted all his Niva's that way. I decided to do the same to my Niva. (yes I have heard all the Lada jokes thank you very much) I went to Rona to get paint and because Tremclad didn't have a colour I wanted I asked them to tint me a deep orange colour with their house brand rust enamel paint which they said was exactly the same quality as Tremclad. I sanded the car quickly with a sand block, wiped the car with paint thinner, and painted the hood, doors and rear hatch straight out of the can no thinning (I didn't really care, the Niva is a bush wacker!). The paint went on ok but a LOT of orange peel. I didn't like the colour after painting those parts and I ended up going back to Rona and got another can of paint. This time I got the Tremclad Recreational white. Again, without thinning I rolled it on and what a difference with paint quality. Much easier to roll on, great coverage, and the self smoothing was incredible, no orange peel at all. I've attached a few pics, they were taken over a year ago and about 6 months after the paint job. I sold the car last year and it is sorely missed
I only did one thick coat. I didn't sand the hood, doors and rear hatch after I painted them orange. The pictures were not taken intending to show paint quality but you can kind of see that the hood and doors are orange peely, while the roof and the rest are really smooth and shiny. It's almost not possible to get orange peel from Tremclad because it really smooths out itself. I did paint in the winter so temperature might have made a difference. The grill, mud flaps, the rubber pieces on the bumper and wheels were painted with Tremclad gloss black rattle can version. The wheels were rusty but the paint stayed on them as long as I had the car.
Sorry for the lengthy post, just thought I would share my roller paint experience. By the way, Tremclad has a colour called Aluminum. The colour is exactly the name, Aluminum. It looks real good, looks just like aluminum and has a metalic tint. I painted a lot of wheels with it. But I do not recomment paint the car with it. The colour never really cure, and you can always rub some off. And it cannot be re-coated with another colour! I emailed Tremclad about it and they said you can paint the Aluminum over another colour but never the other way, can't even put clear coat on it. So in case someone wants to mix colours and get some metalic look in the tremclad, don't do it! I heard that Sean at turboniva.ca mixed Aluminum and Black 50/50 and got a really wicked colour and painted one of his Nivas but the paint ended up peeling off. So definitely don't use the Aluminum to paint your cars!

Posted By: Anonymous
Re: Paint job on a budget!? CONTINUED..page 44........ - 07/13/06 05:36 PM
pic

Posted By: Anonymous
Re: Paint job on a budget!? CONTINUED..page 44........ - 07/13/06 05:38 PM
another pic

Posted By: Anonymous
Re: Paint job on a budget!? CONTINUED..page 44........ - 07/13/06 05:39 PM
one more

Posted By: Anonymous
Re: Paint job on a budget!? CONTINUED..page 44........ - 07/13/06 06:01 PM
Oh by the way, if you want to check out another nice Tremclad/roller job, look at the pics of Sean's yellow Niva
www.turboniva.ca , I think he did an outstanding job and the paint on his Nivas get a lot of abuse: snow, sand, rocks, salt, mud, rivers! Mine was definitely FAR from professional but the paint definitely held up really well, shiny after wash, and looked very presentable.
Posted By: Anonymous
Re: Paint job on a budget!? CONTINUED..page 44........ - 07/13/06 06:18 PM
This might give you an idea how tough Tremclad paint is.
Just found this:
http://www.turboniva.ca/photos/picpage5.html
Posted By: Anonymous
Re: Paint job on a budget!? CONTINUED..page 44........ - 07/13/06 06:32 PM
I came here from accordwagonclub.com where a buddy of mine did his wagon with this method. I have read all of this thread and the original thread and cannot WAIT to get started. I will be trying a test piece first of course to perfect my technique. My Accord coupe is all sanded down and waiting. I of course, do have one quaetion which I can't remember if it was answered.
When painting, are you painting a section at a time, or do you roll the entire car at once? Was just curious.
You guys have a great forum and alot of helpful folks here. Thanks for the great info!!
I've added a pic of the project car half sanded.

Posted By: C38coupe
Re: Paint job on a budget!? CONTINUED..page 44........ - 07/13/06 06:53 PM
Hi all, here's a pic of one of my original test pieces, it is a rusty metal dash that I only gave a quick sand before painting it with Tremclad using the Charger Airless Roller System or (C.A.R.S.) Registered Trademark name and system, Just throwin in some fun Charger, but it's not a bad idea.
This test piece was painted with 6 coats reduced by 20 to 25 % with mineral spirits, it was sanded after 2 coats with 1000, then 2 more coats were applied followed by wet sanding with 1000, then finished up with 2 more coats of paint follwoed by wet sanding with 2000.
I then used turtle wax brand polishing compound and hand buffed the piece as I don't own a buffing bonnet, the results were very good. but would have been many times better with an electric bonnet buffer.........Fred

Posted By: Anonymous
Re: Paint job on a budget!? CONTINUED..page 44........ - 07/13/06 07:06 PM
cyclingches-
I think if you had gone further in that last thread, somebody talked to somebody official at Rustoleum and they said Tremclad and Rustoleum were virtually the same product. In fact, I think somebody said Rustoleum improved the formula of Tremclad after they took it over.
But I haven't read that last thread for a while, so somebody correct me if I'm wrong.
In any case, your paintjob looks pretty good
Posted By: Anonymous
Re: Paint job on a budget!? CONTINUED..page 44........ - 07/13/06 07:42 PM
C38coupe what color did you use on your dash?
Posted By: Anonymous
Re: Paint job on a budget!? CONTINUED..page 44........ - 07/13/06 07:43 PM
Well, I can only speak of the Rustoleum paint that we have here in Canada. At Home Depot they sell Rustoleum and Tremclad but I've only tried the spray can version. There is no way they are the same in my experience of using them on bare metal. I used to paint bicycle frames using them and I had bikes that I used to commute on, so they always get locked up against railings, posts, bike racks, etc...always getting banged up. The Rustoleum version will always chip off, while the Tremclad'd bikes just get scratches on the paint but the paint doesn't come off. The Tremclad sticks miles better than the Rustoleum on bare metal in my experience. Better yet, if you use Tremclad's metal primer first the adhersion is even better. I don't remember what they are all for, Tremclad has Grey, Brown and another colour for their rust primers but I used the grey one.
Tremclad takes a lot longer to cure fully than automotive paint. But once cured, they are really tough. I remember the car smelled like fresh paint for several weeks after it was painted (maybe because I didn't thin the paint). My friends and coworker always joked about it, then one day the smell was not there anymore.
Posted By: C38coupe
Re: Paint job on a budget!? CONTINUED..page 44........ - 07/13/06 09:02 PM
It was wild raspberry tremclad paint bought at Canadian Tire Store in my part of Canada. I did the test piece in February 06.
The Tremclad paint is now sold in tintable bases, not sure what it's like though.
I have had discussion with the Tremclad people in Toronto, The Rustoleum corp now owns Tremclad but the Tremclad paint is still a different product and formulation. It did utilize some part of the rustoleum formulation, in order to get tremclad more resistant to fading, a problem Tremclad was having in the past.
Tremclads chemist did explain the difference, it was based on formulation as well as VOC laws differing between Canada and the USA.
Hope this helps and good luck with your rolling.............C38Coupe
Posted By: Anonymous
Re: Paint job on a budget!? CONTINUED..page 44........ - 07/13/06 11:35 PM
look for this container at an automotive paint store. its a blue container and made esp. for your situation and its almost like clear white inside. white cap , white writings..lol sorry dont know the brand name. also bulldog works too. just scuff it.
as for rustoleum and tremclad being the same..i always new it was different but simmiliar...when someone showed their miata finishing job, i mentioned it was tremclad that he painted it with and not rustoleum...anyhow, im buffing the car today, i should have pics tonight!
Posted By: Marq
Re: Paint job on a budget!? CONTINUED..page 44........ - 07/14/06 02:04 AM
ON THE TOPIC OF INTERLUX PRECOTE PRIMER
AND
SIX INCH HIGH DENSITY FOAM ROLLERS...
I was playing around today with the Interlux PreCote primer. It comes in two basic flavors... a white primer and a blue-gray primer.
The folks at Interlux recommend you use the 'blue-gray' primer for the dark Brightside colors... like black, dark blue, racing green etc.
They don't really give you any clue which primer would work best with Fire Red. I guess if you cut the white primer 50% with the Fire Red you would end up with a nice vanilla cherry base coat... and if you use the blue-gray primer and cut it with 50% Fire Red paint you will end up with something that is bordering on a blown / purplish primer. So just by choosing either the white primer or the blue-gray primer will have an impact on the final resulting color after you lay a few layers of straight paint over the primer.
For my latest experiment with this primer I took the 'blue gray' and cut it with 50% Fire Red.
The primer rolls on and is EXCELLENT at providing hiding coverage to any of the colors that were on the test piece. So I can now say, based on first hand experience, that this primer will definitely give you one uniform color after it is applie.
The primer self levels quite nicely and using the 4 inch roller produces NO bubbles. It just goes on and starts self levelling. Within about 3 hours it appeared to be cured. But I will wait until tomorow to give it a little rub down with 1000 grit paper.
I give this stuff 'two thumbs up'... it was amasing to work with.
--------------
On other news fronts... I was at the local paint specialty store ( Benjamin Moore ) and was curious about larger high density foam rollers.
Interestingly they had SIX INCH VERSIONS of that same lovable 4 inch high density foam roller. And it clips on to the 4 inch roller handle without any problems.
While over at Home Depot I noticed they too now had the six inch high density foam rollers in stock. This is something that they did not have up to two weeks ago....
Home Deport was charging about $6.50 for two... whereas the Benjamin Moore paint store was selling the same thing for $2.25 EACH. I don't know how to explain why Home Depot is charging far more than a boutique paint store...
I thought I would mention this for folks who might want to lay down more coverage with each pass of their roller. This will also cut down on the number of 'wet edge lines' that you get with the 4 inch roller. For example, if you go over a 24 inch wide surface with a 4 inch roller, it will take six passes and leave a potential 6 'wet edge lines'. Whereas with a six inch high density roller you would only make 4 passes and only rish 4 potential 'wet edge lines'.
I picked up 4 of these six inch rollers and will give them a try when I go to lay some paint on this freshly primered test piece.
...
Posted By: texczech
Re: Paint job on a budget!? CONTINUED..page 44........ - 07/14/06 02:05 PM
Did you go over the freshly rolled area with a foam brush or another "exploded tip" brush like it is reccommended? And how long did you wait before brushing over the wet paint? I am curious about that second brushing procedure to get it to self level.
Posted By: Marq
Re: Paint job on a budget!? CONTINUED..page 44........ - 07/14/06 03:43 PM
If we are talking about the Brightside paint... if you are doing the 'roll and tip' method to remove the bubbles... it should be done very soon after the layer of paint is put on. This gives the popped bubble the maximum chance to merge in with the paint and become self leveled. If you wait tooo long... the paint and the bubble will have started to get 'tacky' and the movement of the brush over a tacky surface would just create extra work for you sanding the surface.
One thing I noticed about the Brightside paint is that it is possible to treat it just like Rustoleum/Tremclad.. in that you can add extra 'brushing fluid' ( Interlux product number 333 ). You can basically wet the Brightside paint to as thin as the Tremclad paint. When the paint is thinned to this consistency it paints on thinner... but the bubbles have a tendency to self-pop just like the diluted Tremclad.
The only problem with using highly diluted Brightside is that it will obviously take more coats to get full coverage... and you will need to revert to just straight uncut Brightside for the final layer in order to get the maximum shine and gloss on that final layer. ( Highly thinned Brightside doesn't produce anything near the high gloss of the unthinned product ).
Now... if you were talking about using the roll and tip with the Tremclad/Rustoleum paint the same rules probably apply. It is best to pass the magic brush over the bubbles as soon after applying the paint. Since the coating of Tremclad/Rustoleum is pretty thin it should only take a very light passing of the brush.
I have been doing some additional reading about the 'roll and tip' method used by boater and the 'very best' results that they obtain seem to be one of the following two methods :
a ) use your one favorite 4" china bristle paint brush... and between each panel put it in the mineral spirit or thinning fluid to clean the brush... or
b ) if you are using the disposable foam brushes... try to use three brushes... one for each side of the car and one for the hood and trunk.
The biggest problem the boaters find with the 'roll and tip' is that the 'tipping brush' tends to load up with paint.
If you are only using one tipping brush and if it takes about one hour to completely walk around the car rolling and tipping... then the paint on the 'tipping brush' could conceivably be up to one hour old on the brush by the time you hit the last panel.
So by using a number of fresh brushes OR keeping your one good brush constantly cleaned between doing panels you can avoid the problem of 'paint build up' on the brush having an adverse effect on the effective smoothing of the coating you are popping bubbles on.
It all sounds so logical but it was hard to hunt down that little secret involving the 'roll and tip' method. I don't know if that is because the practitioners of the 'roll and tip' assume that everyone knows that... or if it is really a secret of the folks who take their 'roll and tip' methods seriously and don't like giving away their little trade secrets
.
Posted By: Anonymous
Re: Paint job on a budget!? CONTINUED..page 44........ - 07/14/06 05:51 PM
Hello all, I have been a lurker since page 20 of the first thread and I am finally ready to paint.
Thank you very much Marq for trying and explaining how to use the boat paint. Please keep the pictures coming, the mustang convinced me to try it.
I have an orange 1970 porsche 914 that was repainted before I got it. Totally orange peeled and scratched. I have ordered some orange boat paint from epifane (20 bucks for 750ml) and will attempt this technique on my rear trunk lid to begin with. That company is the only one I could find that makes orange in a one-part eurathane.
My plan is to hit the old paint with a degreaser, wetsand with 320, then 400, then first coat of epifane with just a splash of thinner (mineral spirits according to the company), roll and tip, then sand with 600 once dry, then another coat very slightly thinned epifane, sand with 800, then 1000, then a final full strength coat of orange. In between each step I will wipe the lid with mineral spirits to clean it off.
I am a little concerned with the working time of the paint, which is why I plan on thinning it just only slightly. That should extend the working time, shouldnt it? I figure I need 15 minutes from rolling to tipping, and I dont want the paint to get too tacky in that time frame. Im working in Berkeley where the humidy is very low and the temp should be 65-75.
I will post pics when I am done.
Thanks to everyone who has contributed to this thread!
Posted By: 78D150CLUB
Re: Paint job on a budget!? CONTINUED..page 44........ - 07/15/06 02:54 AM
Things are looking awsome!!! no pics tonight, but I will have some tomorrow. 8th coat on the truck box, and 5 on the hood now. The metallic in between layers works excellent!! All that's needed is just a dusting of metallic paint, to adhere some of the sparkle to the surface, and then lay the next coat right over it.
So far, i've had absolutely no problem with orange peel or runs. Like Krylon put it at one point, No runs, no drips, no errors
I'm getting fidgety waiting to put the final polish on it.
Just a note on the wet sanding, I've found that 800 is the best grit to start with, simply because I'm a touch too aggressive with 400
I tri-fold the sheet, and wrap it around an ordinary kitchen sponge, then only sand until the drag of the paint is gone, and the paper glides across the surface. Seems to work good for me, so far
Amazing results as far as I can see at this point. A month ago, before reading this post and seeing the results others have had, I would have said it was impossible to do. ( maintenance tech with lots of industrial painting experience, grab the can and brush and slap at the machine as fast and thick as possible )
Keep up the fantastic work, guys, it's worth the effort in my opinion.
BTW, FarFire, you should really be impressed with the Hunter Green, it looks awesome when the layers add up.
Posted By: Marq
Re: Paint job on a budget!? CONTINUED..page 44........ - 07/15/06 03:50 AM
Quote:
I have ordered some orange boat paint from epifane (20 bucks for 750ml) and will attempt this technique on my rear trunk lid to begin with. That company is the only one I could find that makes orange in a one-part eurathane.
Tee hee... you could have taken the Brightside Fire Red and the Safety Yellow... combined them and created you own custom mix orange You could have experimented with your mix of red and yellow and come up with just about any variation of orange that might be flattering on your car.
Quote:
My plan is to hit the old paint with a degreaser, wetsand with 320, then 400, then first coat of epifane with just a splash of thinner (mineral spirits according to the company), roll and tip, then sand with 600 once dry, then another coat very slightly thinned epifane, sand with 800, then 1000, then a final full strength coat of orange. In between each step I will wipe the lid with mineral spirits to clean it off.
The only caution I would throw at your plan is the 'wiping between steps with mineral spirits. You should have said " I will wipe between sandings using WHATEVER THINNER is recommended by that paint manufacturer.
I mention that because 'if' your paint uses Ketone or Acetone as the thinner... and you use mineral spirit as the 'wipe down' fluid... there is always a chance of a reaction between your paint and the mineral spirit. Something between an orange peel and wrinkling ( elephant skin) ...
So by using 'whatever' fluid is recommended for thinning by your paint manufacturer you will cut down on the 'chance' that there 'might' be a compatibility problem.
For example, Brightside uses Ketone ( which they package and sale as their product number 333 Brushing and Thinning fluid. Although it 'appears' that I could thin Brightside with mineral spirits... I have stuck with the thinner actually mentioned by Brightside.
One nice sand paper that does a wonderous job at ripping down the original botched up paint is the 220 grit 3X sand paper. You can get it at Home Depot and the packaging says that it last 3 times longer than normal sand paper. It cost a bit more.. but it really is worth the few extra bucks. The second you open the package you will feel the difference between the 3x paper and regular stuff. The 3X feels almost like it is linel paper ( sort of like the paper they use for money )...
The only other thing I would like you to consider is the use of a PRIMER at the start of your work. You might want to use a white primer if you want a bright and light orange color... or maybe use a darker colored primer to end up with a darker orange when all the coatins have been added. I am so impressed by how well the Interlux Precote primer worked on my test piece and I can say that the few bucks you may spend on putting down a good uniform color via a primer may end up saving you work, time and paint in the long run. Consider it... cuz I don't think you will regret it.
Quote:
I am a little concerned with the working time of the paint, which is why I plan on thinning it just only slightly. That should extend the working time, shouldnt it? I figure I need 15 minutes from rolling to tipping, and I dont want the paint to get too tacky in that time frame. Im working in Berkeley where the humidy is very low and the temp should be 65-75.
I can't speak for the brand of paint that you have chosen and I don't know much about its ability to level, gloss or how long you have to work with it while doing the rolling and tipping.
In theory though... thinning the paint 'should' give you more time to work on the paint before it starts to become tacky. Cooler temperatures are also a big plus at giving you more 'working time' on the paint before it starts getting tacky.
High humidity is another factor that fits into this... in that the higher the humidity... the less gloss the paint has when it dries. I don't quite know why humidity has an effect on the final gloss... but this has been confirmed in numerous conversations and messages on the boater forum..
Posted By: Anonymous
Re: Paint job on a budget!? CONTINUED..page 44........ - 07/15/06 04:42 AM
thanks marq for the input!
The guy at epifane I spoke to assured me the correct thinner for the paint is just regular mineral spirits.
I guess I could have mixed the brightside paint colors, and I might try that if I dont like the epifane paint or the color. good point!
I was at home depot yesterday and saw the sandpaper you mentioned, I didnt get any, I thought 220 might be too harsh, leave too many scratches, but I will pick some up tomorrow.
I also thought about a primer, but my car is already orange and I am painting it a similar color, so I decided to skip it. I found my paint at
www.epifanes.com, check it out if you get a chance. Their varnishes seem to get good reviews, but I couldnt find much on the net about their paints. We will see how their paint compares to brightside.
My paint should be here monday and I cant wait to give this a shot!
Posted By: Marq
Re: Paint job on a budget!? CONTINUED..page 44........ - 07/15/06 01:34 PM
I took a look over at the Epithanes web site... and I am confused..
a ) the monoeurethane doesn't come in orange... the mono is their 'one part' eurathane...
b ) the polyurethane paint that does come in orange is a 'two part' paint.
Based on what I saw on their web site, I believe you have purchased a 'two part' polyurethane...
All I know about the 'two part' paints is that their fumes are far more wilder ( dangerous to humans ) than the fumes given off by the 'one part' paints. The one part paints take a little longer to cure ( more working time ) because they don't have an accelerant/catalyst. The two part dries faster because the fumes are evaporating quicker and in a higher concentration then the one part paint.
It's sort of like a reverse situation of the mineral spirits... where the 'odorless' mineral spirit doesn't evaporate as quickly and hence gives off lower concentrations of fumes... and the 'regular' mineral spirits evaporate more quickly.
On the topic of the one part paint systems and the two part paint systems.. Brightside is a one part urethane. No mixing and you use it straight out of the can... But Interlux also makes a 'two part' eurathane called 'Perfection' - which although it had better hardening qualities and shine qualities I avoided because of all the warnings about the two part fumes.
If your can of paint arrives on Monday... just see if there is one can or two... if there is a second smaller can... that is the accelerant/catalyst for the 'two part' paint system.
Another thought is that the 'two part' paint system may have a different 'working time' once you apply it because the catalyst will be yet another factor in the time the paint stays workable etc.
My last thouoght on this paint... is that the company sounds quite excellent BUT the one thing that gave me a pause was where they mention their 100 year proud history and heritage....
My first thought after reading how long that company has been around is that I have not seen their name come up in any of the discussions on the boater web sites when discussing paint for the upper sections of boats... It just struck me as odd that a company that has been around that long 'would get some folks talking about it'
Instead, all the discussions on the boater boards centers around AWlgrip, Petit and the paints by Interlux ( Brightside & Perfection ).
Dunno... just thought I would pass along those thoughts...
Oh... an as for that 220 grit Triple X ( last three times longer ) sand paper.. I was quite surprised what a decent job it did on my my sanding. I didn't get any scratches or swirls using it. It is agressive - but not so agressive that you can't control the agression by just using lighter pressure on your sander. What I particularly liked about that sand paper was the way if kept relatively clean while sanding. It seems better at evacuating the sandedd particles out from under the sander and it doesn't seem to clog up with the debris. I think the reason why it produces a fairly smooth surface without any artifacts is the abrasive material they are using and the way in which it is applied to the paper. When you look at the sanding surface of the paper you will see the difference in how it has been applied to the paper when compared to 'standard issue' 3M or Norton paper.
.
Posted By: Anonymous
Re: Paint job on a budget!? CONTINUED..page 44........ - 07/15/06 04:26 PM
I just returned from my local marine store with some supplies.
Two quarts of brightside paint $38.99 each
One quart of 333 $14.99
One quart of two part Epoxy primer coat $35.99
total with the goverments cut $147.02
I will need more of both when it comes to the entire paint job {hopefully this Fall}
Also talked to the General Manager for a good half hour.
I was right up front with him telling him it was for a car he was not supprised at all, brightside has been used for painting cars { spray method } but is not cost efective for an automotive paint business because you need 24 hours between coats .
He did recommend I use Interlux perfection { twice the cost per quart}for a guaranteed proven 10 years gloss, Brightside he said was good for 5 to 6 years gloss before it fades
I like to brightside colors though.I am sure he is talking about boats there.
Now in my case my coupe was meadia blasted and PPG epoxy primmed some time ago and I am still doing sheet metal work on it so I needed a primer that can go over the PPG epoxy primer,bare metal,has filling property's and is sandable that is why I went with Interlux two part epoxy primekote ,if was just going to paint over a existing paint job I would use the pre-Kote.
Now I have the stock for my test but it is to dam hot up here now 34 degrees C 40 % humidity.
I will hold off for now.
Note: The General manager also told me you could get away with only two coats of Brightside.
Sorry one more thing before I forget I did talk to him about wet sanding / polishing the final coat he said it is not needed nor has he heard of anyone having to do it with that paint again I and sure he is referring to boats.
I was going to do the Tremclad way and still may if this does not work out ,but I am looking a two tone gray scheme I tryed mixing stock tremclad gray with other mixed grays to get the shades I was looking for.It can be done but could not be reproduced should I need at a later date.The bright side Steel Gray and Kingston Gray matchup almost perfectly at least in the color chart.
Sorry for the long post.
Bryan

Posted By: Anonymous
Re: Paint job on a budget!? CONTINUED..page 44........ - 07/15/06 06:02 PM
I am getting a one-part enamel, but not a urothane. My mistake. As far as I can tell, then paint is similar to rustoleum (which is why it thins with mineral spirits). The guy I spoke to at the company told me the paint isnt quite as durable as the monourothane paint, but I wanted orange. He did say that the paint was very durable, though, and is good for 2-3 years on a boat. If you go to the website, and click on "products", then click on "one-component topside finishes", the paint I ordered was their yacht paint (the green paint in the picture). the monourethane is better paint, but this paint may work also. If not, im only out 20 bucks and a few hours. If so, then great!
Im off to pick up some of that sandpaper, thanks for the tip.
Posted By: kenzo42
Re: Paint job on a budget!? CONTINUED..page 44........ - 07/15/06 06:21 PM
Marq, you mentioned recently that Brightside has their own wax system. Have you learned any more information on this?
Also, did you get a chance to get any more pictures taken? I've been anxiously awaiting Saturday for pictures!
Posted By: Anonymous
Re: Paint job on a budget!? CONTINUED..page 44........ - 07/15/06 07:00 PM
Marq, many thanks for your research on the Brightside paint. I put on a coat of the yellow on a door a few days ago, and the coverage, depth and shine is amazing. Additionally, it's pretty much impossible to scratch at all even after just a couple days. Had a tiny amount of orange peel that was really quick to sand out. I will finish up this door and then compare the the Rustoleum body parts -- it looks like I'll be finishing off the entire car with Brightside though, if it's this good.
Posted By: 78D150CLUB
Re: Paint job on a budget!? CONTINUED..page 44........ - 07/15/06 08:34 PM
Finished up the box of the truck and started on the cab. The metallic is working well.

Posted By: 78D150CLUB
Re: Paint job on a budget!? CONTINUED..page 44........ - 07/15/06 08:35 PM
one more

Posted By: C38coupe
Re: Paint job on a budget!? CONTINUED..page 44........ - 07/15/06 08:58 PM
Tonto, do you know if any 2 part epoxy primer can be rolled with success. I have a 48 Mopar Coupe I am restoring and want to sand her down and prime her for the time being. At some point in the future I may have the entire car media blasted before the actual finishing body work is done. I am doing mechanical, electrical and such right now.
I was even thinking of using Tremclad flat black (rat rod look), for temporary use, I suppose if it doesn't work out I could strip it all off before the real body work is begun..Thanx C38coupe
Posted By: Anonymous
Re: Paint job on a budget!? CONTINUED..page 44........ - 07/15/06 09:29 PM
C38coupe
There are at least three different types of roll on primer that I know of to date,Transtar 6477,Interlux primekote & MP75 Primer Ultra
What I have learned the hard way is that epoxys are very durable but they need to be sealed with filler primer, primer or paint no more than week after application I learned that through another message board.Thats why I need to recover the whole body of my car again before I paint.
I plan on roughing up the old epoxy then recoating{number of coats unknown} and sanding.
The stuff would be hell to remove 100% {sticks great to metal}
I would go for the flat black for sure for a temporary finish.
Posted By: Anonymous
Re: Paint job on a budget!? CONTINUED..page 44........ - 07/16/06 12:13 AM
few pictures..going to take more..

Posted By: Anonymous
Re: Paint job on a budget!? CONTINUED..page 44........ - 07/16/06 12:17 AM
another..

Posted By: 78D150CLUB
Re: Paint job on a budget!? CONTINUED..page 44........ - 07/16/06 12:38 AM
One word, Cal, WOW!! Might wanna add a flash warning to that first one, though.
You were spraying rustoleum, correct? It looks Fantastic.
Posted By: Anonymous
Re: Paint job on a budget!? CONTINUED..page 44........ - 07/16/06 01:16 AM
Cal96--
That looks awesome. If i remember correctly, you're also spraying with a wagner?
I just bought mine on monday and have been working on one panel I have off the car while I do the rest of the body work. I'm having problems with runs. What mixture ratio are you using and what setting are you using on the knob behind the trigger?
And did you wet sand every coat, or wait until the end or what? Every two coats?
Posted By: Anonymous
Re: Paint job on a budget!? CONTINUED..page 44........ - 07/16/06 01:19 AM
78D150CLUB, indeed it was..i also think the roller way can also acheive this shine too..actually im positive
. after buffing i knew it can come out even better than it looks now cause some parts was sanded 800 grit =X and i ran it fast with 1500
...imagine if i thoroughly sanded it 1500 then 2000? lets just say i ran out of time working on this car..i needed it and what killed it for me that make it took so long was the [Edited by Moparts - Keep it clean] heat. my back is so freakin dark! blah. anyhow, im happy with the outcome and can actually lie and say its a brand new paint job and not have to mention rustoleum and get away with it haha. have fun all. its worth it. and thx to everyone that was involved
Posted By: Anonymous
Re: Paint job on a budget!? CONTINUED..page 44........ - 07/16/06 01:30 AM
yup i got the wagner, $70 bucks. dont know the ratio but there should be a small cup with a small hole in the bottom in the box...the paint should finished just over 14 sec when filled...you should have a menu too. also i learned buy one roller so when it happen to drip roll it up!
yah, i used the button on the trigger... i put on full on my last final coat. Gl!
*edit* i wetsanded it after 2 coats..i guess you can call it 2..depending how much you sprayed the first time.. 800grit and some parts scuffed.
Posted By: 78D150CLUB
Re: Paint job on a budget!? CONTINUED..page 44........ - 07/16/06 01:35 AM
I'm experimenting with a metallic layer (very light dust coat) sprayed from about 18 inches away between unsanded coats, so it's taking a bit longer for me. Good thing I have a second vehicle and the truck is an ongoing project.
I hope the shine comes up as nice as your car did.
I'm not worrying about some of the small bumps and bruises, the box isn't the correct one, and I hope to locate a new set of doors and fenders in the future. Right now, it's gonna be a daily driver, cause that's where the fun is
Posted By: Marq
Re: Paint job on a budget!? CONTINUED..page 44........ - 07/16/06 01:56 AM
Quote:
I was going to do the Tremclad way and still may if this does not work out ,but I am looking a two tone gray scheme I tryed mixing stock tremclad gray with other mixed grays to get the shades I was looking for.It can be done but could not be reproduced should I need at a later date.The bright side Steel Gray and Kingston Gray matchup almost perfectly at least in the color chart.
Sorry for the long post.
Bryan
Well I am in the midst of advancing one of my theories into reality and you might be interested in this.
I went over to the Michael's Craft Store ( I believe they have locations in Canada and the States ) and I picked up two can's of KRYLON red metalflake ( sparkles ) paint. Normally you would spray this paint on crafts or candles to give them a sparkling effect. This Krylon 'sparkle' paint should be available in other stores that stock crafting supplies or have a good selection of Krylon spray paints.
So I rushed home and gave a test spray of this sparkle paint on my test piece. The result BLEW ME AWAY. It changed the appearance of my Fire Red to more of a Candy Red ( with zillions of little red sparkles merging beautifully with the red paint.
I could have gone with the gold sparkles or the silver sparkles... but I wanted something 'subtle'...
This experiment might be of interest to you with the gun metal gray. If you were to lay on one coat of gun metal gray, then give it a light sanding, give it a spray of the silver sparkles and then lay on your next coat of gun metal gray I believe you will end up with a gun metal gray with the look of a Ford mineral gray ( with those little silver flecks caught between the layers echoing the sunlight off them...
My plan of action is to do the above steps twice.. basically
a ) fire red Brightside layer
b ) red sparkles layer
c ) fird red Brightside layer
If I like the look of it at this point I will stop... if I want to add a little more sparkle and depth to the paint job I will proceed to another...
d ) red sparkles layer
e ) fire red layer - final coat
I am pretty sure at this point that it should also work with the Tremclad / Rustoleum paint process as well - since the layers that are being put on are fairly translucent.
So this is a viable way ( at $5.99 per spray can ) to get metal flake into your paint job and go a step ahead of the one dimensional single color paint jobs.
Posted By: Marq
Re: Paint job on a budget!? CONTINUED..page 44........ - 07/16/06 02:04 AM
Quote:
Marq, you mentioned recently that Brightside has their own wax system. Have you learned any more information on this?
Also, did you get a chance to get any more pictures taken? I've been anxiously awaiting Saturday for pictures!
I only gave the wax system a 'slight look' over the past week. At the moment I not near a stage where my pocket book needs to make a purchase in that area.... so I am basically concentrating on this 'sparkle paint' ( by Krylon ) sprayed between layers of Brightside experiment.
What I will be doing on Saturday morning is giving my current Brightside paintjob ( the one you last saw in the pictures ) a quick rub down with 1200 grit sand paper... then I am going to spray the 'metalic sparkle' paint onto the upper half of the McLaren ( Mustang )) from the rubber side moldings up ) and then lay a fresh layer of Brightside Fire Red over it ( to trap and protect the little sparkles between the layers.
It should give the upper half of the car a slightly different 'red look' then the lower half - sort of a two-tone effect.
The one thing that I had noticed about Charger's paint job is that the various angles on his cars body were angular enough to reflect different colors of orange by the way the sunlight was hitting the car. In one of his pictures you could almost count five variation in his orange which gave it almost a laser effect. I think that is why his car looks so drop dead good in the pictures... the way the cars body lines are flattered by how the sun reflects off the paint.
I am hoping the subdued sparkles in my Fire Red will achieve a similar effect and echo different shades of red from the various angles on the body.
It might be better for me to plan on shooting some pictures on Sunday to see if I can get some pictures that will reflect how this sparkle paint by Krylon can become another tool in everyones arsenal of weapons to tweak the look of their paint jobs to a higher level...
Wish me luck... but so far the test pieces look like this will be a drop dead knockout.
.
Posted By: 78D150CLUB
Re: Paint job on a budget!? CONTINUED..page 44........ - 07/16/06 02:22 AM
I used the silver metallic for my green, but the red Krylon sounds like it should work great. Can't wait to see pictures of your results. My POC digital camera doesn't pick up the full effect of the sparkle on mine, in person it really glows.
Good luck, and enjoy the heat (yea, right)
Posted By: Marq
Re: Paint job on a budget!? CONTINUED..page 44........ - 07/16/06 02:29 AM
Quote:
I used the silver metallic for my green, but the red Krylon sounds like it should work great. Can't wait to see pictures of your results. My POC digital camera doesn't pick up the full effect of the sparkle on mine, in person it really glows.
Good luck, and enjoy the heat (yea, right)
When you sprayed your silver sparkles.. how many spray cans did you use for the entire vehicle for each layer ?
I bought two cans... and I figure that if I just lightly spray the entire car ( more like a dusting of the spray rather than a saturation ) I should be able to get away with one spray can per trapped layer ?
What type of concentration did you spray between layers ? And what level of density were you trying to achieve 'heavy metalic sparkle' or 'subtle metalic sparkle' etc ?
.
Posted By: 78D150CLUB
Re: Paint job on a budget!? CONTINUED..page 44........ - 07/16/06 02:39 AM
As light as I'm applying it, I think i'll use about 3 cans, tops, but I'm applying between every 2 layers, and going for 10 layers to get the depth.
I think my truck has a lot more surface area than a McClaren, so you will probably be good with 2, but 3 definitely should be sufficient.
Posted By: Anonymous
Re: Paint job on a budget!? CONTINUED..page 44........ - 07/16/06 03:07 AM
another

Posted By: Anonymous
Re: Paint job on a budget!? CONTINUED..page 44........ - 07/16/06 03:08 AM
another...

Posted By: Anonymous
Re: Paint job on a budget!? CONTINUED..page 44........ - 07/16/06 03:10 AM
in the cracks is all the goo, wax, compund from sanding and buffing...what a mess! but this is what i used too...

Posted By: Exit1965
Re: Paint job on a budget!? CONTINUED..page 44........ - 07/16/06 04:33 AM
Quote:
in the cracks is all the goo, wax, compund from sanding and buffing...what a mess! but this is what i used too...
Cal, that looks amazing man. Good job!
I will have to grab some of that thinner you used and use it when mixing up paint for spray in my new refillable spray can I picked up at harbor freight today.
And to think I have a compressor and even a HVLP gun, but pumping up a spray can with a bicycle pump and filling it with paint seems to fit better with applying the paint with a roller. This is a totally hand powered, hippie style paint job.
Posted By: Anonymous
Re: Paint job on a budget!? CONTINUED..page 44........ - 07/16/06 05:02 AM
Quote:
yup i got the wagner, $70 bucks. dont know the ratio but there should be a small cup with a small hole in the bottom in the box...the paint should finished just over 14 sec when filled...you should have a menu too. also i learned buy one roller so when it happen to drip roll it up! yah, i used the button on the trigger... i put on full on my last final coat. Gl!
14 seconds, really? Wow, mine is at like 25.
I will use the rollers next time i have a drip, good tip.
What do you mean "you should have a menu too"?
And how did you figure out how much to turn that button on the trigger?
New pics look awesome.
Posted By: Anonymous
Re: Paint job on a budget!? CONTINUED..page 44........ - 07/16/06 08:22 AM
25? so you would have to use more thinner but i will say i couldnt get it smooth as Exit1965 after he's done rolling...so you would have to adjust according to how hot it is outside...if its hot you might want to add more thinner. so since mines didnt come out as smooth, i had a lot of water sanding to do. i meant manual lol. not menu
on the trigger its not that much of a deal cause the adjustment isnt that wide of a range to be anythign serious. and thx guys on the comments
Posted By: Anonymous
Re: Paint job on a budget!? CONTINUED..page 44........ - 07/16/06 08:53 AM
Hey Marq, how bout some pictures of your progress?
Posted By: Anonymous
Re: Paint job on a budget!? CONTINUED..page 44........ - 07/16/06 09:06 AM
thx man... i bought the thinner at home depo, it contains mineral spirits also. the spray makes alot more of mess then the roller thats for sure.my concret is all green
i think your roller method is fine.lots of shine when you showed your pictures...less wet sanding too. i think it came down to the thinner (maybe) and the buffing. how you appy it is different but how it goes on is the same...one goes on faster then the other...one has to be wetsanded more (maybe) i couldnt adjust it right so it wouldnt get orange peels

but eithe way we both end up wetsanding it...one more then the other...so no more $50 dollar paint job if you buy the gun. take your pick you live and you learn.
now its time to paint the dog house...hehe
Posted By: RebelDart
One question and I'll decide on color.... - 07/16/06 01:25 PM
My only question - since not seeing anything in person - are thes paint jobs show quality ? If so (or darn close)- would you opt for this method OVER traditional (budget not being an issue). I am ready to go either way here at the house.
Posted By: Anonymous
Re: One question and I'll decide on color.... - 07/16/06 01:42 PM
Cal-
Okay thanks man.
RebelDart-
It's good, but it's not show quality. If you really want that you're going to have to go spend a lot of money.
Posted By: Marq
Re: One question and I'll decide on color.... - 07/16/06 02:41 PM
Quote:
My only question - since not seeing anything in person - are thes paint jobs show quality ? If so (or darn close)- would you opt for this method OVER traditional (budget not being an issue). I am ready to go either way here at the house.
Show quality 'might' be achievable... but the 'factor' in arriving at that level of perfection is 'time'
The less time you put into your project the more it is going to look like a hand painted car...
The more time and care you put into your project the better the end result is going to be...
Achieving 'show quality' is going to take more time, care and skill than the average backyard mechanic ( or painter ) can afford to put into a project or have their vehicle off the road while 'working it'.
I think you need to use the 'footage' scale... because that is applicable to these hand jobs and paint jobs done at a professional shop.
For example, I once prepared a Triumph TR6's body and sent it over to a 'professional painter'. When I got the car back it was a drop dead knockout at TWENTY FEET... When I got to within TEN FEET I could see variations in the white paint job... when I got to within THREE FEET I could see almost a haze over the paint. When I got to witin ONE foot I could see just how poor the paint had been applied and it was rough to the touch. So much for a professional spraying.
To get a 'show quality' paint job implies that at all distances... from TWENTY FEET down to close inspection at six inches will reveal nothing except quality...
But in another way to measure this method is to compare against 90% of the other vehicles on the road... The question in your mind should be " Will my paint job blend in with all the other cars on the road or will it stand out like a sore thumb and make me look like a cheap b4st4rd who tried to paint his own car by hand ?
I believe that with a reasonable amount of work you CAN achieve a paint job that is EQUAL to most of the other cars on the road - and in some cases you can achieve a BETTER result.
Having spent the last two months experimenting with both the Tremclad/Rustoleum process and the Brightside process I have found myself paying CLOSE attention to OTHER VEHICLE'S paint jobs.
In fact I would almost recommend to anyone who is about to undertake this painting process to direct some of their attention to looking at other people's cars. It seems that wherever I go I stare at the paint of the car next to me.
And frankly what you see will surprise you. Factory paint jobs that look like they have orange peel... or where the application of the paint has left waves under the coat of paint.
Once you establish just how bad the majority of 'factory paint jobs' are... it will make you a little less finicky or picky about every little burp in your own paint job.
The problem with our 'hand paint jobs' is that we have our noses RIGHT DOWN within one foot of the body work or sanding that we working on. We see minor imperfections that we keep 'working' in order to achieve 'perfection'. In the end that pickiness takes time and materials. But more importantly we achieve surfaces that are actually smoother and less flawed then the factory paint jobs that a driving around.
When I finished the McLaren ( Mustang ) and shot pictures of it... I would say that it was a good 'TWO FOOTER'. A person would have to put their nose closer than two feet to find anything that looked out of the ordinary. If I had gone to the rubbing and polishing stage I probably could have gotten things down to ONE FOOT inspection distance.
So for most people who might read this thread, we all would be happy enough to simply have a paint job that won't give us away as being 'cheap b4st4rds'.. and won't draw any unwarranted or critical attention to our paint. I believe that both the Tremclad/Rustoleum and the Brightside paint system can achieve that result.
But remember that 'time spent' is directly related to the quality of the end product.
.
Posted By: Anonymous
Re: One question and I'll decide on color.... - 07/16/06 04:40 PM
Cal96 what color did you use? Stops rust or professional?
Posted By: Anonymous
Show quality vs. shame quality.... - 07/16/06 06:38 PM
I can honestly say I never went into this with the idea of parking on the concourse. I just wanted an inexpensive way to get my truck to where folks (including my wife) wouldn't turn their nose up as they walked past.
Show quality with a roller would be the mark of a dedicated, practiced hand that had a lot of time to master the skill.
90 percent of us fail in one or more of those categories. But at least people say "That looks nice!" instead of "What happened to your car?" now.
Posted By: Anonymous
Well said, Marq! - 07/16/06 06:44 PM
Getting to the 5-foot "can't tell the difference" is a goal in most everyone's grasp. The McLauren should stand as a monument to what can be accomplished.
And you're right about other cars as well...when we're in a parking lot, I find myself critiquing the paint on other cars. Or I see cars faded out and blotchy and wonder if their owners would be willing to pick up the roller and follow us?
i have 3 things to say:
$50 - i am
$5000 - i am
over the $
i could have done this for $50

why did i do this
$8000 - i am
about the $
over the paint, my car would end up being a garage queen
Quite honestly, the issue is what you want as a end result, and what you'd be happy with... Marq has it nailed perfect, not even a factory job has no flaws, and when your painting your own car, your your worst enemy, your right up to it, looking directly at it all the time as your working, but you don't put yourself in the perspective of just seing the car in a parking lot at the store, if you do you'd be
. that's why i told exit to have a few buddies over, and say i just had my car painted, what you think, i bet $ they would be
too. There are 2 things that make these methods work out good, that is 1. skill, 2. time. you need both.
Posted By: Anonymous
Re: Well said, Marq! - 07/16/06 08:13 PM
Quote:
There are 2 things that make these methods work out good, that is 1. skill, 2. time.
...and no bugs walking into your paint job.
Posted By: Anonymous
Re: One question and I'll decide on color.... - 07/16/06 10:58 PM
cyberbackpacker, i used hunter green gloss mix with black gloss. i used stop rust. i have pictures on my last posts and it shows what i used
Posted By: Anonymous
Re: One question and I'll decide on color.... - 07/17/06 01:16 AM
Cla96 looking good. I really like the color. I started tearing my car down and god everything taken apart friday. I spent the last two days stripping off the paint. Here's a few shots of my progress.

Posted By: Anonymous
Re: One question and I'll decide on color.... - 07/17/06 01:18 AM
another

Posted By: 78D150CLUB
Re: Well said, Marq! - 07/17/06 01:34 AM
Is that how they get there? I was starting to think they arranged a tour bus
Posted By: Anonymous
Re: One question and I'll decide on color.... - 07/17/06 03:35 AM
i also like the color too and at night time the color slightly changes...lol cant explain its not like regular automotive paint...the paint seem to be tinted at night...
that a lot of work FarFire70..but it will look good
i just bought some paint remover...jargon, not for my car of course but for the green concret that i have created...
i was scrubbing it with a metal brush and this thing is hard to come off...so tomorrow jargon and metal brush..lets see what it can do. good luck with yours.
Posted By: C38coupe
Re: One question and I'll decide on color.... - 07/17/06 12:53 PM
Hey , does anyone know what product,is used for rust pits, once the metal is sanded to the point you can't get it all, that is cheap in price and sold in Canada. My car is a 48 Chrys and has 18 gauge sheet metal, but after sanding down panels, especially around drip rails, where surface rust pits were all sanded out, but some pits are still there.................Thanx and keep rolling
Posted By: Anonymous
Re: Well said, Marq! - 07/17/06 02:17 PM
I am fortunate enough to have another car I can drive (my show car) while I do this to my daily driver. The car is sanded down fully with 220 grit, bondo work is done and scratches and dings filled. I'm going to take off a week from work and take this on the first week in Aug.
My test panel (a lawnmower hood) is coming along nicely tho. I'm wetsanding tonight and applying my 3rd two coat. It's going well, mixing the paint and hopeing you have the right consistency is the key. I'll have pics soon.
I asked before biut it got lost in the shuffle, when doing an entire vehicle, is it best to coat the whole thing at one time, or do you coat panel by panel?
Posted By: Anonymous
Re: Paint job on a budget!? CONTINUED..page 44........ - 07/17/06 02:48 PM
Nova1313 how is your brightside paint job looking?
Quote:
Quote:
There are 2 things that make these methods work out good, that is 1. skill, 2. time.
...and no bugs walking into your paint job.
bugs i can understand, walking into your paint is just being a knob!!! but i've done it too
Posted By: Exit1965
Re: Well said, Marq! - 07/17/06 04:18 PM
Quote:
I asked before biut it got lost in the shuffle, when doing an entire vehicle, is it best to coat the whole thing at one time, or do you coat panel by panel?
I think everyone who has tried it has done a whole car at once. This is going panel by panel until all panels are done (can't imagine working on an area larger than a panel at a time). Usually 1-2 hours depending on the size of the car and nooks and crannies.
Posted By: Anonymous
Re: Well said, Marq! - 07/17/06 04:51 PM
Quote:
Quote:
I asked before biut it got lost in the shuffle, when doing an entire vehicle, is it best to coat the whole thing at one time, or do you coat panel by panel?
I think everyone who has tried it has done a whole car at once. This is going panel by panel until all panels are done (can't imagine working on an area larger than a panel at a time). Usually 1-2 hours depending on the size of the car and nooks and crannies.
that's what I figured. I'm still trying to decide if i'm going to spray the jambs and nooks, or if i'll use a foam brush. deciions decisions lol
Posted By: BigTerry
Re: Well said, Marq! - 07/17/06 05:46 PM
A couple of question.. if I get the rustuelom do I get prof or regular paint? second.. can I use a dark or light primer? or do I really need one? third.. which grit sandpaper do I use beside 1500 and 2000? fourth... the powerpainter does it work well compare to the roller? if i use the powerpainter do I sand my truck as often as you do with the roller?.. sorry for all the questions thinking about painting my 78 tk..
Posted By: Marq
Re: Well said, Marq! - 07/17/06 06:02 PM
Quote:
that's what I figured. I'm still trying to decide if i'm going to spray the jambs and nooks, or if i'll use a foam brush. deciions decisions lol
One nice thing if you are going to use the Rustoleum / Tremclad method... is that you can buy spray bombs of your specific color.
When I was originally doing my car with the Tremclad paint I bought six spray bombs of the Fire Red and before putting paint on the body I spray bombed the innner trunk lid, all the sills in the trunk, all the sills in the front fender area and all the nooks and cranny's around the door and door jamb.
My theory was that it was better to get all those 'pain in the a$$" spots out of the way early so that my future painting on the body would not be put at risk from oversprays or paint runs.
When I changed midstream to the Brightside paint, things worked our well because the color of red that I bought from Brightside was also Fire Red.
I can't imagine the time or frustration of trying to use a foam brush to paint those spots. If you take your time and spray in short controlled burst you can get a fairly level coat of paint in those hard to reach areas.
The only use for a foam brush might be to catch any runs in the paint if your get a little trigger happy with your sprarying... OR when the body is completely painted and you want to lay a consistent application of paint in all the rain gutters in the trunk.
I think for most average smucks with average talent ( myself included) that it works out better in the long run spray bombing those hard to reach places before starting in on the body panels.
Just my two cents worth on that topic
.
Posted By: Marq
Re: Well said, Marq! - 07/17/06 06:35 PM
Quote:
A couple of question.. if I get the rustuelom do I get prof or regular paint? second..
Quote:
Both will do the job... but the 'professional' version may have a bit better pigment and solids in it. In theory you might get better 'coverage' with the professional version. As an aside topic, I seem to recall someone once mentioning that the Professional Grade Rustoleum was in fact the Canadian Tremclad paint. Not sure if that is true... but it is conceivable...
Quote:
can I use a dark or light primer? or do I really need one? third.
The choice of primer color is directly related to the color of paint that you are going to apply and the end result color that you want. For example, Fire Red paint laid on a blue-gray primer gives a darker Fire Red color then if you had laid it onto a white primer.
Should you use a primer ? That probably depends more on what you are painting onto. If you already have a uniform color on your car body that you will be painting on to then you might be able to go straight to paint without a primer. If you have a bondo'd body, a white fiberglass hood and a mish mash of colored body parts on your car, then you might want to go with a primer JUST to have one uniform color underneath the paint to start from.
I think the main reason why I decided to put a good quality primer onto my car was to achieve the darker red color with my paint ( because the paint inherits some of the color refraction of the sub-layer ) and because with a good quality primer I was able to sand like a mad man and get one heck of a smooth surface to start laying my paint on. Smoother subsurface EQUALS glossier finish with the paint on it.
Quote:
. which grit sandpaper do I use beside 1500 and 2000?
I guess it all depends at what stage of the bodywork and painting you are at. I made use of a 220 grit to level out my primer and then resanded it with a 400 grit to get it smoother. When 'wet sanding' between every second coat you can use an 800 or 1000. If you need something a little more agressive you can fall back to your 400 and then hit it after with the 800 or 1000. You don't get into the 1500 or 2000 grit until you are at your final coating and that is mostly to prep that final surface for hitting with the polishing etc.
Quote:
.. the powerpainter does it work well compare to the roller? if i use the powerpainter do I sand my truck as often as you do with the roller?..
I think you can achieve excellent results with the sprayer - and I was even tempted at one point to splurge and pick up a sprayer. The results with the sprayer will give you a potentially more uniform application of the paint on to the vehicle. But the price you will pay for this convenience is MESS... the overspray is the one nice thing that the roller totally eliminates. And I guess you won't end up with as many bad things in your lungs and nostrils when you roll instead of spray. But if you develop your ninja paint rolling skills and paint mixing formulations than the roller job can give you a paint job that will be equal in appearance to a sprayed job. The key here is that it will obviously take more time and potential wetsanding between every second layer with the roller - compared to a sprayed on paint job. The sprayed paint will in theory be more level so that when you are wetsanding every second layer it should in theory be a smoother surface and hence less wetsanding required.
The other factor in the spray vs roll debate would be how much more masking off of the car you will need to do with the spray. When rolling you have far more control over where the paint is going - and hence your masking of the vehicle requires less time and tape spent doing that....
.
Posted By: Anonymous
Re: Well said, Marq! - 07/17/06 06:39 PM
the only thing stopping me fron using a rattle can, is the fact that my gallon color (safety yellow) and the spray bomb color (sunshine yellow) didnt have the same name. I think i'll get a can, and see if it matches.
Oh, and i'm a avid rattle can sprayer, only way i've painted for 3 yeras. (see attached pic)
Tha's my show car, rattle can painted in my garage, black primer.

Posted By: Anonymous
Re: Well said, Marq! - 07/17/06 06:41 PM
and one more

Posted By: BigTerry
Re: Well said, Marq! - 07/17/06 07:06 PM
Hey Thank for repling! great info! I have one more question.. how resistion is the paint when done to scratching??
thank for answering marq!!
Posted By: Marq
Re: Well said, Marq! - 07/17/06 08:01 PM
Quote:
Hey Thank for repling! great info! I have one more question.. how resistion is the paint when done to scratching??
thank for answering marq!!
This is one of those questions for which there is no exact answer. From what I have seen with the Brightside paint and the Rustoleum/Tremclad paint your degree of hardness is directly related to the thickness/thiness of the layers you applied, how many layers you had to apply, the curing/evaporating time you permitted between adding layers, the temperature and humidity when you were applying the layers... and how long after you finish your project that you go an try an dig a finger nail into the paint
Another simple factor that might impact on the eventual hardness of your paint job ( or how soon it reaches that maximum level of hardness ) might be whether you do all your painting and curing in the garage.. or whether you put the car out in the sun to bake on alternative days between coatings.
I am pretty confident that either paint system will provide a paint job that is HARD ENOUGH to equal a professionally applied paint job.
You have to remember that even if you had taken your car to MAACO and gotten their top of the line polyeuathane paint job... they would tell you 'don't wax' or 'polish it' for at least a month... maybe up to three months. They might even go so far as to tell you to only bucket wash the car for the next six months and don't even think of taking the car through a car wash with brushes.
So everything is relevant when you consider the level of care you need to take with a professionally applied paint job and this roller job method. I believe the same rules probably apply to both paint jobs in order to let the paint fully cure to its maximum hardness. If treated similarly I believe both paint jobs will reach the same level of hardness and resist standard road threats equally.
The professionally applied paint job may reach its maximum level of hardness sooner... simply because there are less steps and intervening factors that can affect the curing time. But eventually both should reach the same level of hardness.
With the Rustoleum/Tremclad paint method... you are in theory laying on layers that are basically water thick. You are building thin layer after thin layer. And is only when you have layered on a sufficient number of these ultra-thin layers that you eventually have accumulated enough paint on the car body to give 100% coverage. Since each of those layers are so thin ( almost to the point of being translucent ) you can easily imagine that when a superhin layer is allowed to dry or cure befoe adding the next layer that it should be pretty [Edited by Moparts - Keep it clean] hard. Afterall, how much softness can exist in a layer of paint that might only be 1/5th of a mil in thickness. If you eventually reach 10 coats of Tremclad/Rustoleum ( as per the mineral spirit thinning method ) you will only have a skin about 2 mils in depth. The beauty of Charger's method is that by cutting the paint so thin and wet... it applies thin and it evaporates fairly quickly to reach its maximum hardness for each layer.
Now... with the Brightside paint... you are laying on layers that are about 3/10ths of a mil in thickness. And although the layer is somewhat thicker than the Rustoleum/Tremclad layers it is a polyeurathne and it use ketone as the solvent agent... hence it's 3/10th thick layer probably dries at the same rate as the 1/10 thick layer of Rustoleum/Tremclad.
Sorry for this lengthy essay... but hopefully I have covered enough of the 'factors' involving the eventual hardness of your paint job to put your mind at ease and answer your concerns.
,
Posted By: Anonymous
Re: Paint job on a budget!? CONTINUED..page 44........ - 07/17/06 08:07 PM
Cal96:
I'm also using the Wagner (Which is now $45 after rebate @ Home Depot, btw) and I have a couple of questions:
I'm finding that I can't spray properly when I hold it perpendicular to flat surfaces: How did you spray horizontal surfaces like the roof and the hood?
How many coats did you use total? I have about 1.7 coats (I put on a roller coat before I sprayed, but I took it down with some 800) and I'm getting pretty good coverage... I'm thinking 4 coats would be enough? I'm hoping to finish this before the weekend.
-Morwan
Posted By: Anonymous
Re: Paint job on a budget!? CONTINUED..page 44........ - 07/17/06 09:31 PM
Quote:
Cal96:
I'm also using the Wagner (Which is now $45 after rebate @ Home Depot, btw) and I have a couple of questions:
I'm finding that I can't spray properly when I hold it perpendicular to flat surfaces: How did you spray horizontal surfaces like the roof and the hood?
How many coats did you use total? I have about 1.7 coats (I put on a roller coat before I sprayed, but I took it down with some 800) and I'm getting pretty good coverage... I'm thinking 4 coats would be enough? I'm hoping to finish this before the weekend.
-Morwan
$45 bucks? did anyone sign the paper or anything...maybe i can just grab a rebate paper and send it in...lol.
perpendicular spray: the gun has a "L" like shape nosal...when you angle the gun, more paint will lean to that side....th "L" can be moved to pointing back, if you are painting upward..cuz all the paint will be moving downward...you should have less problem if the container was full but we arent spraying that much. i think mines was at 40 not sure, ill check again later. but your car might be diff. mines, i just had it pointing forward , away from me. so when im painting down (perpendicular) most of my paint will be at the front of the container...also i spray the hard part first...i had nothing to hold my fenders, bumper to an higher ground where its easier to spray. so i spray those part first...on the roof, i was standing on a chair. spray one side then go around and spray the other. and make sure you hold the cable with your left hand and spray with your right (if right handed). them cables be touching everywhere! and water the ground so dust dont fly up when spraying. that should cover the hood too..
i used about 6-7 i guess, some day would be thicker then others. i had this problem only cause i was mixing still and wanted to see what color i liked (adding black, then thinner then more black...) so my car isnt one same color of layer...only last 3 where same. sanded it all with 800 grit. try to spray it smooth without orange peels as possible. omg, i cannot tell you if you dont youll be wetsanding the whole car everytime you finish your layer...thats pain in the butt. also do NOT use cheap tape when taping up your car. if you dont listen youll find out later.
yes, 4 coat could be enough. if you dont have sand marks showing or bondo area. just spray slightly thicker and let it bake in the sun. next day if i dont smell paint i know its dry. good luck!
Posted By: Anonymous
Re: Paint job on a budget!? CONTINUED..page 44........ - 07/17/06 10:07 PM
If you bought the sprayer at home depot, all you need is the UPC and the receipt. Here's a link to the rebate form:
FIXED LINK (Thanks Jaco D)
http://www.homedepot.com/cmc_upload/HDUS...oorProducts.pdfJust send it in before the end of the month and you should be fine.
Thanks for the tips! Second/Third coat will be going on in an hour... Then wetsanding tomorrow. I'd like to put more coats on, but I've got to use the car on Saturday. :/
-Morwan
Posted By: C38coupe
Re: Paint job on a budget!? CONTINUED..page 44........ - 07/18/06 12:34 AM
I asked this question earlier in the thread, but here goes again.
What product do I use to treat rust pits in my metal on my 48 Chrysler Coupe, after it's been sanded and before it's primered/painted.
I am bargain hunter so what out there is cheap in price, yet effective, in a perfect world I would have my entire exterior of my car soda blasted, before I got my $5000.00 paint job.
This car is made with 18 gauge high quality sheet metal, but after sanding out some panels, I am not able to get out all the pits left behind by surface rust and rust pits..........Fred PS any automotive primer thats compatible with enamels could anyone recommend, or should I just use Tremclad primer
Posted By: 78D150CLUB
Re: Paint job on a budget!? CONTINUED..page 44........ - 07/18/06 12:35 AM
For those in Canada who might want an interesting color, my choice for the two tone with Hunter turned out a little bright for my taste, but I'll cut in some of the darker green so it's a bit less garish
Anyway, my actual point is that Tremclad #566 in the tintable is almost a match for Mopar's 1970 Limelight on the Charger/Challenger. Really would look good with the black body stripe like Mopar used
Posted By: Marq
Re: Paint job on a budget!? CONTINUED..page 44........ - 07/18/06 01:04 AM
Quote:
What product do I use to treat rust pits in my metal on my 48 Chrysler Coupe, after it's been sanded and before it's primered/painted.
I am bargain hunter so what out there is cheap in price, yet effective, in a perfect world I would have my entire exterior of my car soda blasted, before I got my $5000.00 paint job.
This car is made with 18 gauge high quality sheet metal, but after sanding out some panels, I am not able to get out all the pits left behind by surface rust and rust pits..........Fred PS any automotive primer thats compatible with enamels could anyone recommend, or should I just use Tremclad primer
I do not know what the specific product name is... but there is an interesting chemical that is used by windshield installers... that just might be what you are looking for...
On older cars... when the windshield installer removes the windshield, sometimes there is rust holes found under where the windshield was mounted on the window frame. Half the time there are similar rust throughs on the pillars.
Anyhow, to make a long story short ( as if I could ever do that )... the windshield installers usually grind out the rusted area and then coat the area with a liquid that they apply with a small paint brush. Sometimes the paint brush is build right into the bottle that this stuff comes in.
This 'brown liquid' does two jobs... it KILLS any future rust wherever it is applied AND it builds up a layer that has the appearance of a thick primer. You can sand this 'brown primer' when it dries and it provides a stable surface that you can work further on with additional sanding or priming etc.
If I am correct you could give a call around to a couple of your local windshield installers and ask them what chemical they use to kill rust pits that they find under windshields.
Some of the 'crappy' windshield installers will just put a tar type coating over rust pits... but that doesn't displace water or block oxygen getting through to the rust pits. But then again the crappy installers don't really care because they are going to slap new glass over the area and this defective repair won't be found out until the next time you replace the windshield glass.
There is a similar product in a small bottle ( with a brush built into the cap ) that is sold at Pep Boys ( in the States ) or through auto body and paint jobbers ( the guys that supply shop supplies to the body shops ) and possible even at Canadian Tire ( for the folks in Canada ). The stuff is fairly cheap ( costwise ). Less than $10 a bottle.
If you locate this wonderous rust killing liquid... you just dab it onto any of the rust pits that remain after you rough grind the area.
Since the stuff is fairly thick ( like a thick paint ) it goes on and gives pretty good coverage. You can then lay some bondo over it and they are quite compatible. Bondo sticks amazingly well to this stuff.
I had to use it on my McLaren about three years ago when I first started doing the bodywork on the car. The car then sat outside for two years in Pennsylvania and then in a garage in Ottawa for three years... and all the bodywork that was done on that area HELD TRUE for all that time... no re-occurence of rust and no expansion/contraction of the rust coating against the bondo layer that was placed over it.
I wish I could give you the product name... but hopefully a few quick phone calls to the more reputable windshield replacement companies will lead you in the right direction.
At the time it was a brown glass bottle - with a brush built into the cap.. and the goop inside is also brownish in appearance I believe..
.
.
Posted By: Anonymous
Re: Paint job on a budget!? CONTINUED..page 44........ - 07/18/06 01:53 AM
Well guys, I finally got started on my cheap paint job. I found this thread a couple of weeks ago and stayed up all night reading the entire thread. Here is a picture of the 4th coat of Regal Red on the hood. I am amazed at how well the paint lays down. It would be better if I didn't have to paint in a dirt floor barn.

Posted By: Anonymous
Re: Paint job on a budget!? CONTINUED..page 44........ - 07/18/06 01:56 AM
Here is what I hope the truck will look like when it is finished. Ignore the lack of skill with photoshop. Colors are regal red, canvas white and almond.

Posted By: Anonymous
Re: Paint job on a budget!? CONTINUED..page 44........ - 07/18/06 04:18 AM
I found this thread on coloradok5.com
All i can say is WOW this is very cool. Soon as i close on my house im doing it to my 79 3/4 4x4 Chevy truck! Ive attached a pic also of what the truck looks like as of now.
Can i get pretty much any color? I really like the color blue on the new Monte Carlos. Is that possible. If not im going orange. Also is a satin black available for doing the interior?

Posted By: Exit1965
Re: Paint job on a budget!? CONTINUED..page 44........ - 07/18/06 05:13 AM
Quote:
Here is what I hope the truck will look like when it is finished. Ignore the lack of skill with photoshop. Colors are regal red, canvas white and almond.
Very nice tx4wheeler! Good to see another using canvas white .
The canvas white does seem like it would go well with a dark red.
Posted By: Anonymous
Re: Paint job on a budget!? CONTINUED..page 44........ - 07/18/06 07:38 AM
Quote:
If you bought the sprayer at home depot, all you need is the UPC and the receipt. Here's a link to the rebate form:
[url=http://www.homedepot.com/cmc_upload/HDUS/EN_US/pc/common/pdfs/042706_072606_WagnerPaintProducts.pdf]
Just send it in before the end of the month and you should be fine.
Thanks for the tips! Second/Third coat will be going on in an hour... Then wetsanding tomorrow. I'd like to put more coats on, but I've got to use the car on Saturday. :/
-Morwan
Pardner, here's the right rebate form:
http://www.homedepot.com/cmc_upload/HDUS...oorProducts.pdf
Bought the unit last week to waterproof my folks' deck. Was in the middle of trying this roller method on my daily driver when I thought of using the Wagner on the car. The only thing is it might take a while since I'm completely stripping the car to metal. It's a 92 japanese import, and from what I've heard, finishes on cars of that era weren't that great due to environmental concerns regarding the type of paint that can be applied (don't quote me on this - this is news passed on for the nth time). Anyway, the paint is in bad shape. On top of the car's original paint, sporadic layers of spray bomb paint and a lousy MAACO paint job have been applied so I decided to strip the thing to bare metal and start from there. It took me one and a half weeks of after office time (till the sun went down) just to strip the hood to bare metal using an 18-volt cordless drill and 80-grit 3M sanding pads. Haven't yet decided to strip the car in one shot then do the roller thing or do a "strip/roll/strip/roll,etc." (ok boys, don't let your imaginations run wild ) while doing one panel at a time. Of course, the Wagner is another option.
By the way, to those who bought the Wagner, it has a simple viscosity checker which comes with it to determine whether the paint is thin enought for the HVLP spayer. Anyway, have you tried "rolling" that mixture and what are the results? I'm thinking, if it's thin enough for the sprayer, then it might be thin enough to be rolled with the least amount of problems (orange peel, etc.).
Just trying to come up with a standard or benchmark for an acceptable paint thickness.
Here's what that contraption looks like:
http://www.gleempaint.com/viscosity-cup.html
Refer to page 4 of the Wagner manual on how to use it.
http://lib.store.yahoo.net/lib/gleempaint/control-spray.pdf
Posted By: Anonymous
Re: Paint job on a budget!? CONTINUED..page 44........ - 07/18/06 11:02 AM
Very nice, 4-wheeler! Another truck brought back from the grave.
I swear, it's just about as much fun watching how other folks' projects come out than doing your own...of course ya don't have to clean up after other folks....
The hood looks great! Please keep us up to date. I'm back for my 1000 grit sanding this weekend, then the final exterior coats (weather permitting). Still got a few rough spots to work on.

Posted By: Marq
Re: Paint job on a budget!? CONTINUED..page 44........ - 07/18/06 07:36 PM
Quote:
Here is what I hope the truck will look like when it is finished. Ignore the lack of skill with photoshop. Colors are regal red, canvas white and almond.
Tee hee... I am such a pain in the butt Something struck me as wrong about the slanting backward of the graphic on the truck. So I fired up my photoshop and took a shot at what I think is more sexy on your truck style...

That is normally how they do it when they want to do up a vehicle to make it look like it is in motion ( even when parked ). It gives sort of the look of a highway crossing across your truck..

Posted By: Anonymous
Re: Paint job on a budget!? CONTINUED..page 44........ - 07/18/06 07:53 PM
Quote:
Pardner, here's the right rebate form:
http://www.homedepot.com/cmc_upload/HDUS...oorProducts.pdf
Whoops, I pasted that link at first and I thought I had corrected it.. Didn't bother to check. Original post is fixed now.
Put on the second spray coat, the coverage is excellent (the car is one color now!) It drives me nuts seeing my car covered in white fuzz ten minutes after I lay down the coat, and I think a bird crapped on my car this morning.
If you need to get rid of rust, I'd recommend POR-15. It's pretty expensive (a can of it was $35 at my local body supply store), but it's an all-in one product that works: it converts, seals, and primes rust.. And I've never heard of it failing.
Posted By: slantvaliant
Re: Paint job on a budget!? CONTINUED..page 44........ - 07/18/06 08:31 PM
Quote:
What product do I use to treat rust pits in
I used a rust converter spray to kill the rust. There are several brands, usually somewhere in the paint aisle. Rustoleum even has one.
Then, you can use a sandable primer to fill them, or even a skim coat of filler.
Posted By: slantvaliant
Re: Paint job on a budget!? CONTINUED..page 44........ - 07/18/06 08:34 PM
Watch out, Marq, you're getting close to the Striped Tomato - Starsky and Hutch Torino look there ...
Posted By: Exit1965
Re: Paint job on a budget!? CONTINUED..page 44........ - 07/18/06 08:48 PM
I think the points have to converge somewhere Marq. On yours, they look like if they do converge, they do so up in the air above the truck somewhere.
I prefer the original direction but that's just me..
Posted By: Anonymous
Re: Paint job on a budget!? CONTINUED..page 44........ - 07/18/06 09:36 PM
GUESS WHAT GUYS!
my neighbor saw my car and liked the paint job...He said he need his car painted (he painted it before himself)and it looks decent but its been like 10yrs already (kinda fading) he wants me to paint his car... it looks like a hot rod to me...he knows its rustoleum too. so my question is how much should i charge him?
Posted By: Anonymous
Re: Paint job on a budget!? CONTINUED..page 44........ - 07/18/06 09:46 PM
Quote:
Quote:
Pardner, here's the right rebate form:
http://www.homedepot.com/cmc_upload/HDUS...oorProducts.pdf
Whoops, I pasted that link at first and I thought I had corrected it.. Didn't bother to check. Original post is fixed now.
Put on the second spray coat, the coverage is excellent (the car is one color now!) It drives me nuts seeing my car covered in white fuzz ten minutes after I lay down the coat, and I think a bird crapped on my car this morning.
If you need to get rid of rust, I'd recommend POR-15. It's pretty expensive (a can of it was $35 at my local body supply store), but it's an all-in one product that works: it converts, seals, and primes rust.. And I've never heard of it failing.
So you're using the Wagner to apply correct? Have any pics of the progress so far? I'm seriously considering getting the gun and spraying mine as well. I like the roll on method alot, but it seems the sanding might be lessened by going the sprayer route. Are you also wet sanding between coats as per the roller method?
Posted By: Anonymous
Tell him he has two options.... - 07/18/06 09:54 PM
One: you'll do the job and charge him time and material.
Or....tell him for $50 you'll share with him the secret of how to paint his vehicle for only $50. That way you carry on the brotherhood AND get your investment back.
Posted By: Anonymous
Re: Paint job on a budget!? CONTINUED..page 44........ - 07/18/06 09:59 PM
Yes, I'm using the Wagner HVLP Control Spray.
I'll try to get some pictures tonight, if I can find my camera. I have some I took with a cameraphone, but you can't really tell what's going on.
In comparison to the roller method, I'd say it's easier and faster to do, but it's also easier to screw up. If it's a windy day, plan on wasting a lot of paint. I used about a half-cup of paint for a roller coat, but twice that for a spray coat.
Remember to get a lot of mineral spirits/paint thinner, because you'll need to use some to clean the gun between coats. I bought two quarts, I'll need another before I'm done.
As for wetsanding between coats, I'm planning to wetsand every two coats. The amount of wetsanding you do depends on how much orange peel you're getting. If you've got a cleaner environment than me (most likely) you could probably get away with wetsanding every three coats. Assuming you're getting six coats, I'd go 320 prep, 3 coats, 1500 (or 1000 depending on peel), 3 coats, 2000, then polish.
I have horrible orange peel because of flying dust/leaves/bugs/pollen, so I'm doing 2 coats, 800, 2 coats, 1000, 2 coats, 1500, 2000, polish.
For reference, I'm painting a '90 Toyota Celica.
Posted By: Anonymous
Re: Paint job on a budget!? CONTINUED..page 44........ - 07/18/06 11:02 PM
Are you going to spend the same amount of time on his as you did on your own?
Tell him time plus materials and inform how long a process this is.
If you gave yourself 5 bucks an hour on yours how much would you owe your self?
Unless he is into wet sanding MMMMMM ?????
Posted By: Marq
Re: Paint job on a budget!? CONTINUED..page 44........ - 07/18/06 11:32 PM
Quote:
GUESS WHAT GUYS!
my neighbor saw my car and liked the paint job...He said he need his car painted (he painted it before himself)and it looks decent but its been like 10yrs already (kinda fading) he wants me to paint his car... it looks like a hot rod to me...he knows its rustoleum too. so my question is how much should i charge him?
The painting part of the process is no problem... and its almost fun. The pain in the butt is the sanding...
If I was in a situation where someone wanted me to paint their car... I would charge them for THAT SERVICE ONLY. I would make the 'other person' perform all the sanding chores...
This way you are only responsible for the application of the paint and not responsible for any swirls or things below the paint surface.
By making 'the other guy' do the sanding... you are placing the onus on him to decide 'when it is up to his standards for layering on a coat of paint.
A $100 bucks for the application of the paint might be a good place to start from. And let us assume that covers the services to apply EIGHT layers.
Any layers after eight will be charged at $25 per layer. This way if the guy is a finicky sander or constantly oversanding it doesn't come out of your profit and time spent applying the paint.
The only other factor would be how far you have to go to get to the 'paint site'. Next door, no problem... half-way across town and you have to toss in a few extra bucks to cover your 'fuel charge'.
Naturally the 'customer' will have to provide all materials as per your specifications...
That is about the only way I would consider applying this technique on someone elses vehicle.
.
Posted By: Exit1965
Re: Paint job on a budget!? CONTINUED..page 44........ - 07/19/06 01:11 AM
Good ideas Marq. With as much time as I've spent on mine (granted I've changed colors) I have thought about what I would charge to do it.
#1 is that the paint job (or any other paint job) will look like crap on a car where the body is bad or the prep is bad. So would *I* want to sweat over a car, trying to do a good job on the paint, when the surface isn't prepped right, when dings or dents or waves are apparent. I wouldn't.. then again I wouldn't work at Maaco either.
But if the guy wants it painted, and he's your neighbor who you're friendly with, I can't see setting up all these contingencies about # of coats, who'll do the sanding, etc. That could dissolve or weaken a friendly relationship I think.
If it were me and if the body were in good shape where I would feel good about the result, I would charge a fair price for all the labor (including wetsanding), which would probably be around $4-500.
I'm guessing a typical car takes a total of 20 hours either painting or wetsanding, before any polishing or waxing is done.
It certainly loses the "budget" aspect if you pay someone to do it. The savings comes from doing the hard work yourself (and being able to touch up or fix things yourself in the future). At the price you'd have to pay someone to do it, I would look closely at a budget auto paint place in the area.
Posted By: Anonymous
Re: Paint job on a budget!? CONTINUED..page 44........ - 07/19/06 01:11 AM
factor in how much time u spent on ur car...it should go a lil faster with his cuz its ur second time doing it andu know wat to do and wat to look out for. estimate ur time...i would ask for a good 200-300 maybe more.
Posted By: Marq
Re: Paint job on a budget!? CONTINUED..page 44........ - 07/19/06 02:08 AM
That's the problem when you try to charge even a minimal amount for your labor... the job would end up costing REASONABLY anywhere from $200 to $500 for your time.
Once you break past the $300 mark you might as well send the neighbor off to MAACO and try to catch one of their $399 specials.
The problem with doing 'someone elses' car is that the problems it brings are not worth the money. Life is a pain in the butt as is without the goodwill between you and your neighbor being put at risk when he starts expecting paint shop level service before, during and after the service.
I have seen too many penny pinching folks that can become the biggest nuisances to set foot on your doorstep. They figure they paid you 'good money' and you are on the hook to them to keep them satisfied.
Most of us are pretty decent chaps. We don't mind helping out our neighbors and being 'good intentioned'. But often this can become badly soured and in the end the few bucks you charged for your services lead to frustrating situations where you just want to throw the money back in the dudes face and tell him to take a hike.
All you have to do is take a look at all the anti-MAACO web sites and see the comments posted by all the folks who thought they were going to get a 'custom show car quality paint job' for $399.
Those people are angry and the problem is that there is no way you can convince them there are only certain limits of quality you can achieve by choosing the CHEAPEST FRIGGIN PAINT JOB on the MAACO menu
So although it might be tempting to make a few bucks helping out your neighbor, etc. Sometimes in the long run it works out far better to have just said no or to at least reduce your exposure to a situation that could go sour.
On the legal side of things... once you charge money for your 'service' there is a legal expectation of you that does not happen when you do something for free.
Let's take a worst case scenario. You help a dude paint his car. You charge him $100 for your services. Everything is great and the final job was quite satisfactory. But the crafty neighbor changes his mind about the color.. or has an accident in his garage and a ton of brake fluid lands on the paint ruining it...
The dude then tries to get you to give him a freebie repaint. He claims the problem with the paint job is your fault and how you applied it. He fails to tell the truth about the brake fluid etc. You tell the guy to pi$$ off and the next thing you know you are dragged into court with this guy claiming that you destroyed his paint job.
Judges are basically newbs... and in the end they will look at the fact that you charged money for your services and therefor there is a greater level of care etc expected from you than someone who did the neighborly thing and did it for free.
In the end the Judge would probably find you responsible for replacing the guy's 'defective' paint job... and off he goes to MAACO - with you getting the bill.
I hate to sound down on any opportunity to make a few bucks... but I have seen so many situations where things go south and the 'good guy' ends up getting stuck in the long run.
The beauty of sending the cheapskate off to MAACO is that if he turns out to be a pain in the a$$ then his complaints would soon show up on the anti-MAACO boards... and his problems would be with MAACO and not you...
Posted By: Anonymous
Re: Paint job on a budget!? CONTINUED..page 44........ - 07/19/06 02:10 AM
Marq,
I understand your point about the "backward" stripe but I like it that way. I am trying to duplicate a truck I had in high school that had the stripes going this way. I also see that you arent any better at photoshop than I am.
Constructive critism is always welcome. The wife likes the stripes my way and she has the checkbook that says I can build my 429 Super Cobra Jet for the truck. So she wins.....
Problem I'm having now is that I cant find canvas white anywhere in Colorado Springs......
Posted By: 69chargeryeehaa
Re: Paint job on a budget!? CONTINUED..page 44........ - 07/19/06 02:42 AM
Posted By: C38coupe
Re: Paint job on a budget!? CONTINUED..page 44........ - 07/19/06 03:37 AM
If I decided to just primer the old coupe with Tremclad grey primer for the time being, should this also be thinned or should I use it directly out of the can, or should it be thinned only a little, the primer would be sanded before finishing bodywork and paint anyway. Is Tremclad primer really a primer or is it just an alkyd based flat rust paint.
I did experiment with a couple of panels, I found the primer when thinned, would run easy and if you cleaned a roller and let it dry it was more difficult to work with., So far Ilike the results of this test on my 48 Chrys, will probably be priming the whole car with Tremclad grey primer, this of course after eve
rything is sanded and worked, panel by panel.
Any advice or suggestions welcome..Thanx
Posted By: Anonymous
Re: Paint job on a budget!? CONTINUED..page 44........ - 07/19/06 04:12 AM
Hey a note on the Wagner sprayer.....
I picked up a Remanufactured Wideshot 2000psi at XSCARGO for $29.99 Canadian. Here is the link to check it out.
http://xscargo.com/department.php?dept=ToolsI'm at the stage with my scirocco that I'm going to do another couple coats of paint. I didnt like the way the clear turned out so I'm sanding it down and try this new sprayer out. Might even change colors from Med. Blue to something else. I might go for a Tremclad Tint base custom color at canadian tire.
Cheers
Posted By: Exit1965
Re: Paint job on a budget!? CONTINUED..page 44........ - 07/19/06 04:20 AM
C38- I would thin that the same way you would thin the paint, reason being is that a thick(er) coat of primer probably wont dry as hard and as fast as several thin coats. Same thing with the paint.
Posted By: Anonymous
Re: Paint job on a budget!? CONTINUED..page 44........ - 07/19/06 04:22 AM
For your question on rust pits. I'm sure that there are many diff opinions on this. I used Permatex spray on rust inhibitor\converter over any of the old rusted areas then body filler or glazing putty for the real small pinholes and such.
good luck
Posted By: Anonymous
Re: Paint job on a budget!? CONTINUED..page 44........ - 07/19/06 05:11 AM
Just want to put in a thank you to 69charger for this amazing thread. There are alot of haters around here who think this idea is garbage but ive read from page 1 and its amazing. I came over from 240sxforums.com and have subscribed just to say this. I will be trying this out and spreading this idea to the 240sx community, giving obvious credit where it is deserved. Charger, you should make a website (ill be your webmaaster). Call it something like poboyspaint.com and get some banners, make 5 cents a click and youll be rich by next sunday lol..
Posted By: Anonymous
Re: Paint job on a budget!? CONTINUED..page 44........ - 07/19/06 09:42 AM
I'll have to say this certainly is tempting, but the question that nags away at me while looking at the photographs and reading the testimonials is one asked much further up in the thread. Will the rustoleum be as durable as the tremclad? How many of you have had the rustoleum job on your cars for more than six months?
The method itself is definitely not in question, being time tested from the very beginning (I can do an unbelievable job of wetsanding a old paint that looks chalky, as long as no mechanical damage has occured and the brush/rub/repeat method is as old as paint. Think centuries old chinese lacquer here.)
It's the paint. Really, how many of us have used rustoleum on a variety of metals, just to have it rub off, or peel in six months to a year (With the possible exception of the hammered finish, I've found it to be reasonably durable, though untested in sunlight for long periods)? So this makes me rather skeptical of the operation, as available to those of us south of the Canadian border. Again, I don't doubt at all that an amazingly good shine can be brought forth from even the lowliest of materials. I'm merely wondering if anyone has had one last?
It's not as if there isn't purpose made automotive paint in a comparable
price range (and from many other sources). I LOVE a bargain, hell I can't afford not to. My Oldsmobile's engine has been held together with JB and copper pipe for over a year, as one example. While I'm as willing as then next guy to experiment (well, probably more so) the sheer number of people that post while/before attempting this with enthusiasm seems to dwarf those who have had this in real world conditions and they don't seem to be chiming in very much (the deleted posts?).
I would love to paint my car for 50$, I just don't trust rustoleum to hold up to any abuse whatsoever (much like lacquer, which is meant for garage queens and touch ups).
Posted By: Jerry
Re: Paint job on a budget!? CONTINUED..page 44........ - 07/19/06 11:34 AM
a testimony to the durability of the rustoleum...
i painted a couple of steel shop benches with rustomleum professional about 2 years ago. since then i have dropped, vises on them, steel tool boxes, an assortment of wrenchs and screwdrivers and other tools and not even a scratch. so it holds up well when given the appropriate time to dry. i did put it on full strength and it hasn't peeled yet. there is no reason chemically why the paint when mixed with mineral spirits would react any differently.
now i have a question... probably more of a general paint question, but are any of you doing jambs, as well as trunk and engine bay areas for a complete color change? if so where do you tape off to not get paint transfer from one area to the next.
Posted By: Anonymous
Re: Paint job on a budget!? CONTINUED..page 44........ - 07/19/06 11:57 AM
Quote:
I'll have to say this certainly is tempting, but the question that nags away at me while looking at the photographs and reading the testimonials is one asked much further up in the thread. Will the rustoleum be as durable as the tremclad? How many of you have had the rustoleum job on your cars for more than six months?
Prior to catching on to this thread (about 6 years ago)I painted a 65 Honda CL72 Scrambler frame with spray can Rustoleum Professional Gloss Black over their heavy rusted metal spray primer and then covered in their spray clear coat. I did this in August or so of that year. As I put the bike away for winter I was kicking myself thinking I was going to have to tear it all down to repaint next year because the paint still felt soft. When I got it out the following spring, the paint felt almost like a ceramic coating, hard as rock. It has held up well every since. Granted this bike spends much more time in the garage than running but my experience with it give me confidence in Rusto and Charger's method for painting low budget cars.
Posted By: 69chargeryeehaa
Re: Paint job on a budget!? CONTINUED..page 44........ - 07/19/06 02:09 PM
Quote:
Just want to put in a thank you to 69charger for this amazing thread. There are alot of haters around here who think this idea is garbage but ive read from page 1 and its amazing. I came over from 240sxforums.com and have subscribed just to say this. I will be trying this out and spreading this idea to the 240sx community, giving obvious credit where it is deserved. Charger, you should make a website (ill be your webmaaster). Call it something like poboyspaint.com and get some banners, make 5 cents a click and youll be rich by next sunday lol..
shhhhhh, or someone will steal the idea lol. i'm in the computer/network business (self employeed) and have thought about the idea, but there are so many nay sayers that it's just not worth it, between that and painting cars for other people i think i could make alot of $, but i'm happy with helping out folks get their rides on the road. this method if done right and with patience, WILL turn out very good. it's all about the time you put into it and the prep quality. the issue is most people considering this method have never done body work before let alone paint. so usually the results are crappy, and the method suffers merrit. the paint is rock hard after 6 months, litterelly like a stove, the enamel dries very hard. but people expect the result instantly, and with all auto paints there is a lengthy drying time to reach full hardness. if you take your time and do proper prep, you can have a excellent paint job that not only lasts, but looks great. besides, if you take your time, this method will yeild results better than any macco paint job period. like i said many times before this paint is THE BEST paint i've ever used, as far as it's ease of use, and it's not prone to all the stuff auto paint are prone too, like fish eyes, peeling, fading, cracking, ect...you would really have to try or be retarded to pull off a crappy job!!!! besides painting your car with this method does not wreak the car, you CAN repaint it later, weather you use this method to hold you over for a few years until you can afford to have your car painted, or you take your time to make is the best you can, it will work either way.
c38 coupe, if i were you i'd paint the primer full strength, and dry sand it before paint, with probabally 300-400 grit. as for the pinholes, they are best welded, if you can get behind, you can use a brass or copper (i can't remember right now) block that the welds don't stick to, and then grind that flat, and use spot puddy to just perfect it. any pinholes that go thru the metal will just rust later. don't forget to paint behind the pannels too where ever possible. i allways paint the entire undercarriage, and inner floors with fully rubberized undercoating, not the ashfault crap, canadian tire has their own brand (made by 3M) which is a fully rubberized undercoat/rocker guard, in the professional line (gold and black label). that stuff is awesome, withstands heat, makes your car alot quieter, and is paintable over it.
also just a note for those of you using Wagner ele paint sprayers, i played that game too, and found that the thing is not consistent enough to give good results, you can get a much better result with the roller, and less mess, and fuss. plus that stupid wagner gun will all of a sudden start spitting, and create 10 times more work to fix. they work don't get me wrong, but it still makes a huge mess, and really takes more skill to do over the roller. the good ol' roller is the best method i've found for this paint, and i've done everything, and sprayed alot of single stage acrylic enamel. it really does'nt matter how you get the paint on the car (spray or roller, dip, ect...) just that you apply the right thickness and get a smooth paint application, the method is irrevellant.
Posted By: Anonymous
Re: Paint job on a budget!? CONTINUED..page 44........ - 07/19/06 02:29 PM
Quote:
now i have a question... probably more of a general paint question, but are any of you doing jambs, as well as trunk and engine bay areas for a complete color change? if so where do you tape off to not get paint transfer from one area to the next.
I am doing all jambs and trunk area. I figured whether I roll on or spray, I will do these areas first, that way any heavy overspray of mess ups ion the body part, I can sand down before doing thos areas.
On a side not to an above response to my Wagner question. I figured on more paint being used, I bought a gallon anyway, so I should be okay. I will be painting in my garage with plastic drop cloths on the floor, and a plastic box made around the car to keep paint dust from gtting everywhere. Hopefully this will cut down on most contaminents getting in the paint. I'll also be painting during the day, to cut down on nightime bugs.
Posted By: Anonymous
Re: Paint job on a budget!? CONTINUED..page 44........ - 07/19/06 03:05 PM
course, if I can perfect the roller method (which I'm still attempting) I won't spray it.
Posted By: 69chargeryeehaa
Re: Paint job on a budget!? CONTINUED..page 44........ - 07/19/06 03:20 PM
Quote:
course, if I can perfect the roller method (which I'm still attempting) I won't spray it.
do yourself a favor and use the roller......trust me on this one. you'll thank me later.
basically sand and prep the car outside, then take it around the block and vaccuum and clean the car. hose out your garage, keep it really clean. pull in your car, and use a bucket of water and a shammy, whipe down the whole car a few times, and then clean with the whole car with mineral spirits, a rag soaked well does the job. then let it dry, shammy it again, let that dry, then go to paint, roller the hood and front cowl first, then the front fenders, then the roof and rear quarters, then the trunk, then the doors last, before you do each pannel use a autobody tack cloth to clean each pannel, then when your all done, open the doors and trunk/hood, and with the roller where you can, roller the jambs, and use a foam brush in the tight spots, then follow it by the roller on the flat surfaces, with really little paint loaded in the roller, and squeeze the roller everywhere you can, and paint the bottom of the trunk ect...while the paint on the car dries (you might want to wait a few hours to do the jambs ect...) then repeat the whole process. i used about 3/4 of a gallon to paint the charger, the 71 beetle i sprayed single stage acrylic enamel midnight metalic blue on i used about 1 and 1/2 gallons on that small car, using a HVLP gun/compressor. i was high after 5 mins, and it made a huge mess. no matter how hard you try to keep the garage clean if you spray (regardless of air/wagner) you're battle with dirt/dust/bugs/dog a$$ hairs, will never end, trust me. since with the roller your not disturbing any air, there is minimal dust, if nothing depending on how clean your area is, pretend there is a baby sleeping right next to you, and tip toe around the garage while painting, and open and close doors very slowly, and you'll have virtually no dust/dirt/hair/bugs at all.
Posted By: Anonymous
Re: Paint job on a budget!? CONTINUED..page 44........ - 07/19/06 05:22 PM
Quote:
Quote:
course, if I can perfect the roller method (which I'm still attempting) I won't spray it.
do yourself a favor and use the roller......trust me on this one. you'll thank me later.
basically sand and prep the car outside, then take it around the block and vaccuum and clean the car. hose out your garage, keep it really clean. pull in your car, and use a bucket of water and a shammy, whipe down the whole car a few times, and then clean with the whole car with mineral spirits, a rag soaked well does the job. then let it dry, shammy it again, let that dry, then go to paint, roller the hood and front cowl first, then the front fenders, then the roof and rear quarters, then the trunk, then the doors last, before you do each pannel use a autobody tack cloth to clean each pannel, then when your all done, open the doors and trunk/hood, and with the roller where you can, roller the jambs, and use a foam brush in the tight spots, then follow it by the roller on the flat surfaces, with really little paint loaded in the roller, and squeeze the roller everywhere you can, and paint the bottom of the trunk ect...while the paint on the car dries (you might want to wait a few hours to do the jambs ect...) then repeat the whole process. i used about 3/4 of a gallon to paint the charger, the 71 beetle i sprayed single stage acrylic enamel midnight metalic blue on i used about 1 and 1/2 gallons on that small car, using a HVLP gun/compressor. i was high after 5 mins, and it made a huge mess. no matter how hard you try to keep the garage clean if you spray (regardless of air/wagner) you're battle with dirt/dust/bugs/dog a$$ hairs, will never end, trust me. since with the roller your not disturbing any air, there is minimal dust, if nothing depending on how clean your area is, pretend there is a baby sleeping right next to you, and tip toe around the garage while painting, and open and close doors very slowly, and you'll have virtually no dust/dirt/hair/bugs at all.
i'm all over it dude!!! roller for the win!!!
Posted By: _Scott_
Re: Paint job on a budget!? CONTINUED..page 44........ - 07/19/06 05:49 PM
69charger offered some very good tips. I would like to add that whether you are rolling or spraying, if you have (or have access to) a pressure washer, give the car a thorough blasting with high pressure water and focus on nooks/crannies/jambs and anywhere else that dirt may like to hide. Then blow the car off with a high pressure air nozzle, again paying attention to nooks/crannies/jambs where water will drip from later. Then let the car air dry while you clean your painting area.
Include those steps with charger's tack cloth and sleeping baby tips above, and you should have a dirt free painting experience.
I heard a tip from an old "barn as a spray booth" painter that adding a few drops of pure (not immitation) vanilla extract to your paint will repel bugs. I can't confirm that it works, but maybe someone else here can.
Posted By: Anonymous
Re: Paint job on a budget!? CONTINUED..page 44........ - 07/19/06 08:27 PM
C38coupe
Why not just apply tremclad flat black paint over your coupe it has the rust preventive propertys. I am not sure about the primer.Doesn't primer only attract moisture ?????
Posted By: 78D150CLUB
Re: Paint job on a budget!? CONTINUED..page 44........ - 07/19/06 11:21 PM
Been busy with other things for a couple of days, but I did make some progress. Had to move to a different location for the paint, and I can vouch for the dust control ideas everyone has put forth. I'm now painting in the unused portion of a roof truss plant. Between saws and yard sand, I've got more dust than Death Valley!
A very good wash and then a wipe with thinners, plus wetting the area you are painting in is critical for the best results.
Walk gently, avoid stray breezes or doors left open that can funnel air (read as dust) over and around your paint area.
I must really be putting the paint on thin, bacause I see everyone talking in gallons, and I'm still working on my first quart of Hunter Green. It's working well, though, and I move it outside first thing in the morning. The heat and sun we are getting these days bakes the layer to iron hard through the day.
A few pics of the progress.

Posted By: 78D150CLUB
Re: Paint job on a budget!? CONTINUED..page 44........ - 07/19/06 11:22 PM
second

Posted By: 78D150CLUB
Re: Paint job on a budget!? CONTINUED..page 44........ - 07/19/06 11:23 PM
last

Posted By: 69chargeryeehaa
Re: Paint job on a budget!? CONTINUED..page 44........ - 07/20/06 02:45 PM
Quote:
Quote:
i'm all over it dude!!! roller for the win!!!
speaking of the roller method, a question for everyone I suppose. How did you roll the paint on? What process as far as the roller is concerned.
Did you roll in just one direction? Did you back and forth like you're painting a wall, did you roll fast, slow, heavy, light? I'm just curious if my technique is in line with others
that's a hard one to answer, and it's all based on technique. it's like asking a diamond cutter how to split diamonds!!!! it's hard to describe it but i'll try: lets take for example the hood, i'd start in 1 corner, load up the paint on the roller not dripping but close, and then just spread quickly, going over lets say half of the hood to just glob paint all over, then pressing slightly hard, and working fast, i'd start to roller the paint on the hood, actually working quite fast at first, then once the whole area is covered evenly, i use light pressure and work the paint further to distribute it as good as possible, not surpassing the working window of the paint which is about 5mins, once it's even i use really really light pressure (weight of the roller with no paint in it) and just go over the paint to pop the bubbles if there are any. it's a really tricky thing to describe, the mineral spirits does 2 things, thins the paint to promote the "self leveling" process, and actually increases "pot life" or effectively increases the work time of the paint, but it's a double edged sword, straight paint dries faster, but is thicker in layers, but thinned paint dries slower but is thinner layers, follow me? anyways hope that description helps, changing directions is'nt necessary.
Posted By: Anonymous
Re: Paint job on a budget!? CONTINUED..page 44........ - 07/20/06 03:19 PM
perfectly! TY I have been doing it correctly all along.
Posted By: Anonymous
Re: Paint job on a budget!? CONTINUED..page 44........ - 07/20/06 06:09 PM
for new commers who's questions were not answered due to same repetitive questions... here's a forum on a writeup of the $50 paint job.
it may give you an idea what to do.
http://cars.500megs.info/forum/viewtopic.php?t=13good luck.
Posted By: Anonymous
Re: Paint job on a budget!? CONTINUED..page 44........ - 07/20/06 06:26 PM
This thread is super famous!!! picked it up from clublexus.com
I just pulled the trigger on the Flag Blue Brightside from our 2 color friend on e-bay
http://search.ebay.com/search/search.dll...&category0=$60 shipped for 6 quarts (it sounds like 1 coat on a car takes 1/2 to 2/3 of quart so there should be enough for quite a few coats).
I'll post some pics.
I wanted to mention some advice I have from my experience with spray cans and HVLP gun painting.
I feel that the sanding works best like this:
If the car has BAD orange peel or bad deffects that need to be squared away then:
1)Sand with 180 or 220.
2)Sand with 400 to remove scratches.
3)Roll some primer or spray it.
If you dont want to do the primer. Use the 400 grit more to make sure there are not scratches.
4)Quickly sand with 800 or 1000.
5)Paint one coat and let dry.
6)Sand in between coats with 800 or 1000.
Personally I have 180, 400, 800, 1000 in 6" hook and loop (velcro). I used this with my Hitachi rotary and also with the Porter Cable 7336 random orbit polisher.
The the PC is nice (legendary with car detailers). The Hitachi SPV18VA is a MONSTER (11 AMP) and can make the paint smoke and burn (I tested this on a test panel with an old foam cutting pad and it smoked in 10-15 seconds
so you have to keep this on a low speed and always move it. The PC is very forgiving but for the extra kick the Hitachi cannot be stopped (literally you can press on it hard and it is still spinning).
http://www.coastaltool.com/cgi-bin/SoftC...d036+1153519896
Posted By: Anonymous
Re: Paint job on a budget!? CONTINUED..page 44........ - 07/21/06 03:39 PM
ok, so I gave the epifane paint a shot on the small square area between the tailights of my car (porsche 914). A couple of things. I thinned it just a little bit, and I didn't get any orange peel, but I kept messing with the paint long after I should have and I got lots of brush marks. I used a foam brush for the first coat, and I will try a regular brush for the next coat. the space is kind of small for a roller. I think it will take three coats to cover completely.
interestingly, in a few places the paint went on a bit thicker and I didnt brush over it as much it looks really good. There is no orange peel in that area and I can tell it is going to be really glossy. I will get pics when Im done, but sadly I am going to paint over it. The orange just isnt the right color. Also, I didnt get any bubbles.
I think getting the paint on and not mucking with it is the best thing to do, at least with this boat paint.
I am actually going to use black brightside to paint over that area and in addition the front and rear decks. I like the black hood look, sorry, im 25 years old and certainly not a "ricer", but some "rice" stylings look cool to me.
oh, and the 3x (thanks marq) sandpaper is good, maybe too good!
Posted By: Anonymous
Re: Paint job on a budget!? CONTINUED..page 44........ - 07/21/06 03:59 PM
Quote:
I will have to grab some of that thinner you used and use it when mixing up paint for spray in my new refillable spray can I picked up at harbor freight today.
And to think I have a compressor and even a HVLP gun, but pumping up a spray can with a bicycle pump and filling it with paint seems to fit better with applying the paint with a roller. This is a totally hand powered, hippie style paint job.
Hey Exit, did you get a chance to use that HF refillable pump-spray can yet? I spent hours yesterday applying primer to my engine bay and trunk (lots of uneven surfaces), mostly with a foam brush, and I'm seriously considering spraying those areas instead. How does it work?
Posted By: Anonymous
Re: Paint job on a budget!? CONTINUED..page 44........ - 07/21/06 04:00 PM
Quote:
Personally I have 180, 400, 800, 1000 in 6" hook and loop (velcro). I used this with my Hitachi rotary and also with the Porter Cable 7336 random orbit polisher.
So you're using standard 6" discs with the PC and Hitachi instead of wetsanding? How long does a single disc last?
Posted By: Anonymous
Re: Paint job on a budget!? CONTINUED..page 44........ - 07/21/06 04:58 PM
The key is speed and quality. The discs are wet or dry. Most of the time I wetsand with the rotary on the early coats. I find the rotary a blessing (and the PC)....by hand this would take forever....I have to say for the sanding go with the rotary...I feel it saves a lot of time.
To do the hood on my Camry I use 2 (sometimes 3) discs.
I got the 50 pack 4 boxes of Rhino (non loading) for 65$ shipped. So 1 box is $16. You don't have to buy 4 boxes (I wanted different grit sizes). You can get 2 boxes or even one (say a 180 and 400 or do just 1 180 box and you do the rest by hand) well you get the idea. I know I got enough paper for quite a few cars now.
On the final coat I'm doing the wetsanding by hand the buff with the Hitachy rotary and Diamond Cut 2.0 on the compound pad, then PB SSR 2.5 or 3 with the yellow or orange Lake county foam pad, SSR1 to remove the light swirls and micro maring. From then either AOI or PB EX and Natty Paste wax.
The discs are wet or dry.
PB = Poor Boy good stuff, non abrasive polishes,swirl removers..
Posted By: Exit1965
Re: Paint job on a budget!? CONTINUED..page 44........ - 07/21/06 05:00 PM
Quote:
Quote:
I will have to grab some of that thinner you used and use it when mixing up paint for spray in my new refillable spray can I picked up at harbor freight today.
And to think I have a compressor and even a HVLP gun, but pumping up a spray can with a bicycle pump and filling it with paint seems to fit better with applying the paint with a roller. This is a totally hand powered, hippie style paint job.
Hey Exit, did you get a chance to use that HF refillable pump-spray can yet? I spent hours yesterday applying primer to my engine bay and trunk (lots of uneven surfaces), mostly with a foam brush, and I'm seriously considering spraying those areas instead. How does it work?
Not yet, that's on my to do list this weekend though. I will probably try thinning with "paint thinner" first and see how that works, then if not I'll go with mineral spirits.
Anyone know what is used to thin the paint in the spray cans? That would be a perfect match, and that dries fairly fast and covers well with only a couple coats.
Posted By: Anonymous
Re: Paint job on a budget!? CONTINUED..page 44........ - 07/21/06 05:04 PM
Quote:
The key is speed and quality. The discs are wet or dry. Most of the time I wetsand with the rotary on the early coats. I find the rotary a blessing (and the PC)....by hand this would take forever....I have to say for the sanding go with the rotary...I feel it saves a lot of time.
To do the hood on my Camry I use 2 (sometimes 3) discs.
I got the 50 pack 4 boxes of Rhino (non loading) for 65$ shipped. So 1 box is $16. You don't have to buy 4 boxes (I wanted different grit sizes). You can get 2 boxes or even one (say a 180 and 400 or do just 1 180 box and you do the rest by hand) well you get the idea. I know I got enough paper for quite a few cars now.
On the final coat I'm doing the wetsanding by hand the buff with the Hitachy rotary and Diamond Cut 2.0 on the compound pad, then PB SSR 2.5 or 3 with the yellow or orange Lake county foam pad, SSR1 to remove the light swirls and micro maring. From then either AOI or PB EX and Natty Paste wax.
The discs are wet or dry.
PB = Poor Boy good stuff, non abrasive polishes,swirl removers..
Thanks for your info. I was looking at the Porter Cable earlier today. Do you think that + 600 grit discs would suffice for between-coats sanding--assuming the final coat is hand sanded?
(I currently use 400 and 600 between coats, wetsanding by hand)
Posted By: Anonymous
Re: Paint job on a budget!? CONTINUED..page 44........ - 07/21/06 05:24 PM
I think between coats 400 would be fine. 600 would work as well. You can get the PC from Lowes ($109). Take a look at the Hitachi (you can get it for $110 shipped from CoastalTool.com that is where I got mine). Having both the PC and the Hitachi rotary I can say the following:
1) The PC will bog down if you apply some good pressure on it.
2) The Hitachi can do the work of the PC a lot faster.
3) As long as you keep the Hitachi on lower speeds (1-3) and constantly move it will not burn/damage the paint (this is for polishing and more for a 2 stage paint job base+ clear which is not the case with our system here ...well some people are doing the tremclad and then top it off with clear coat).
4) There are scratches/defects that the Hitachi will get out and the PC will fail (all things being equal both using same pad and polish).
If I had to do it again I would just get the Hitachi (once you use the 11 amp beast you cannot go back to the 3+ amps of the PC).
I don't mean to bash the PC. It is great but its greatest strength is its greatest weakness. The fact that is is random orbit makes it so anybody can use it without fearing of damaging the paint (this also robs the power and makes things take longer). The rotary is not something people should be afraid of. I've learned to use it and everyone can (just start with the lowest speed and always keep it moving). I'm going to do a video and try to post it eventually.
Posted By: Anonymous
Re: Paint job on a budget!? CONTINUED..page 44........ - 07/21/06 07:22 PM
Quote:
Not yet, that's on my to do list this weekend though. I will probably try thinning with "paint thinner" first and see how that works, then if not I'll go with mineral spirits.
Anyone know what is used to thin the paint in the spray cans? That would be a perfect match, and that dries fairly fast and covers well with only a couple coats.
Well today I went over to Harbor Freight and bought a couple of those cans. I will use them to spray primer tonight. I plan to thin the paint with Penetrol as I did when rolling/foam brushing it on yesterday. We'll see how that goes. It is just the engine bay and inside the trunk, so it doesn't have to be perfect.
Posted By: Exit1965
Re: Paint job on a budget!? CONTINUED..page 44........ - 07/21/06 07:56 PM
Quote:
Quote:
Not yet, that's on my to do list this weekend though. I will probably try thinning with "paint thinner" first and see how that works, then if not I'll go with mineral spirits.
Anyone know what is used to thin the paint in the spray cans? That would be a perfect match, and that dries fairly fast and covers well with only a couple coats.
Well today I went over to Harbor Freight and bought a couple of those cans. I will use them to spray primer tonight. I plan to thin the paint with Penetrol as I did when rolling/foam brushing it on yesterday. We'll see how that goes. It is just the engine bay and inside the trunk, so it doesn't have to be perfect.
Cool.. be sure and post what works for it. I think the cans include a few different nozzle tops too, wasn't sure which one to use, maybe medium..
Posted By: Anonymous
Re: Paint job on a budget!? CONTINUED..page 44........ - 07/22/06 12:25 AM
I used the $10 HF rechargeable spray bottle (http://www.harborfreight.com/cpi/ctaf/displayitem.taf?Itemnumber=1102) to put a second coat of Rustoleum clean metal primer on my car's engine bay. The experience was pretty frustrating but the results look decent enough.
The bottle doesn't spray like a spraybomb (which seems like it atomizes the paint), so much, as it shoots lots of little globs of paint onto the surface. As I thinned the paint with around 25% of Penetrol, the paint on the surface of the car tended to level and now that it is somewhat dry there is a fairly uniform coat.
I had to continually pump up the bottle every two or three minutes and tried to get the pressure up to around 70 psi (50 is recommended on the bottle). The bottle would quit "spraying" when it got down to around 20 psi. Also, the instructions recommend filling the can 1/2 way but I had better luck spraying with it around 1/4 full.
After laboring through the engine bay, which was actually much easier than doing it with the foam brush, I went back to the trunk area. I was having trouble spraying any paint with the black nozzle (medium) so I switched to one of the green (fine) nozzles and with 70 psi the thing all of a sudden sprayed like glory, probably as good as an aerosol spraycan from the store. It held up like this long enough to do 1/3 of the trunk, then quit. I pumped it back up and got nothing. Then I switched nozzles again and nothing. I tried again and again (it wouldn't spray) and I guess the can was just finished. So I called it a night. I have another bottle I may try tomorrow or I may just do finish out the trunk with the brush and roller.
You may have better luck with a thinner mixture or by using mineral spirits to thin the paint. I did have some runs and tried to hit them with the foam brush to smooth them out, but there weren't that many.
Posted By: Anonymous
Re: Paint job on a budget!? CONTINUED..page 44........ - 07/22/06 12:41 AM
hows that dart comin along exit. i been keepin up with your project for the LONGEST.
veryyyy interested on your final results, your skill level mirrors mine most closely from what i can tell.
Posted By: Anonymous
Re: Paint job on a budget!? CONTINUED..page 44........ - 07/22/06 06:09 AM
So I finished tonihgt. This was a week long project. I loved how it turned out. Thanks much. It looks great from about 4 feet away. When you get closer you can see the imperfections. But I think thats only because I painted it. Friends don't pick them out so much..
Enjoy. This was 3 coats of brightside, largo blue. Pictures from the painting process are in that gallery. It took me 1 3/4 of a can total. I did the car, hoop spoiler (not pictured), and hard tonnau for the back seats.
All finished:
http://www.novaslp.net/pics/v/newcar2/paint/img_0431.jpg.html
Posted By: 78D150CLUB
Re: Paint job on a budget!? CONTINUED..page 44........ - 07/22/06 05:46 PM
The car looks great, Nova1313! I hope my truck finishes off as well as yours. I'm about 3/4 done on Hunter Green and starting on the John Deere green two tone areas.
I tried a custom tinted Tremclad green #566, but it's a bit too neon for my taste. Great if you want to match the 70 Challenger Limelight paint, though.
Good job on the Eclipse, again. It really looks fantastic.

Posted By: Exit1965
Re: Paint job on a budget!? CONTINUED..page 44........ - 07/22/06 06:09 PM
Quote:
hows that dart comin along exit. i been keepin up with your project for the LONGEST.
veryyyy interested on your final results, your skill level mirrors mine most closely from what i can tell.
It's coming along. I put another coat on the roof, trunk and hood this morning. Also I am adding paint to the edges of the body lines, where I can still see some darkness. That process of rolling paint onto only PART of the surface is going well, it blends in and can't really be seen. Wont be visible at all after the wetsanding to smooth everything together.
Posted By: Exit1965
Re: Paint job on a budget!? CONTINUED..page 44........ - 07/22/06 06:51 PM
Ok I just spent a few minutes with that pump up can. Seems that with a thin or a thick mixture, it doesn't atomize anywhere near an aerosol can for me. It splatters the paint, but eventually the paint lays down OK. There will certainly be runs.
Im not sure how you got it to spray like a spray bomb after switching nozzles. I tried a few times, once with thicker mixture and once pretty thin. I guess I can try it even thinner.
What I worry about then is if the paint will cure properly. A thick coat with a roller doesn't cure as well (or completely?) as with a thin coat, so if I am getting 1 coat coverage with this spray can, that makes me a bit nervous.
The real spray bomb stuff seems to dry nice and hard, fairly fast though and 2 coats should cover fine. If this doesn't work out, spray bombs here I come.
Posted By: Anonymous
Re: Paint job on a budget!? CONTINUED..page 44........ - 07/22/06 08:16 PM
Just dropping in to say hello and that I have read more about rolling on paint than I thought was possible. I have an old truck I want to have painted but I keep getting 4 digit quotes starting with 5 or higher, it's just a truck I plan to drive it, not show it at World of Wheels! So a buddy linked me up to this thread and now I'm like "hmmmm". Dangerous thinking ahead
So I had some old glovebox doors lying around (how in the world did I amass not one but 3 spare glovebox doors for my old truck?) and figured I'd make a small test on one of them to see.
http://faith.dixiesys.com/Paint I figure worst case scenario, I mess it up and still have to get it painted by a "pro" and I can't see anything I'm doing making it MORE expensive...
Posted By: Marq
Re: Paint job on a budget!? CONTINUED..page 44........ - 07/22/06 08:50 PM
It's Saturday and its time to share the final pictures of this painting adventure...
The McLaren is now done and all that awaits is the polishing stage. I will have to wait a couple of weeks to let the polyurathane fully cure ).
But I have put the lights back onto the car and I am pleased with the results.


I have 40 pictures posted on my server that show the car from just about every angle. Please excuse the few water droplets that you might see... on the hood or the spoiler. I had to seriously scrub down the rag top to get all the sanding dust out of the canvas.
So if you want to check out all 40 pics here is the link.
http://www.snpx.com/mclaren/mclarenJuly/index.htmThe car will earn its pin stripes once the car is polished. No point laying pin stripes on unpolished paint ( although I probably could because this paint is smooth and glossy ).
I will probably pop back in a couple of weeks after I get the polishing of this paint job finished. I can't wait
From what I have read so far the polyurathane should shine like a million dollars and the polishing technique is the very same as for shining up the Tremclad/Rustoleum paint jobs.
But for the price of the paint and the time spent on this project I am THRILLED by the results.
And I can't wait to see the jaws drop when I tell them the car was painted by hand with a 4 inch roller
And I think for historical purposes I will post something that I originally did about this car back in September 2002. Because this is where this car started from and remained stalled at PRIOR to learning the secret of the Rustoleum/Tremclad paint by hand paint jobs.
This is where this car began prior to this paint job. It languished for FOUR YEARS waiting to get painted because the bucks weren't there to do it...
http://www.securitynewsportal.com/mclaren/interior.html = The Interior - Seats and Console
http://www.securitynewsportal.com/mclaren/cowlarea.html = The Cowl Area and Hood
http://www.securitynewsportal.com/mclaren/thebum.html = The Rear Bumper and Valance
http://www.securitynewsportal.com/mclaren/thefront.html = The Front Bumper and Hood
http://www.securitynewsportal.com/mclaren/theside.html = The Drivers Side & Moldings
Thanks Charger and the Mopar forum
.
Posted By: Exit1965
Re: Paint job on a budget!? CONTINUED..page 44........ - 07/22/06 09:03 PM
Looking good Marq!
How hard would you say the paint feels? Have you done any scratch testing on any of it?
I'm definately keeping this stuff in mind for my next paint job.
Posted By: Marq
Re: Paint job on a budget!? CONTINUED..page 44........ - 07/22/06 09:38 PM
Quote:
Looking good Marq!
How hard would you say the paint feels? Have you done any scratch testing on any of it?
I'm definately keeping this stuff in mind for my next paint job.
At this moment the paint is quite hard. I believe that if I pressed the back of my fingernail into the paint it would not leave an impression.
But maybe the more important way of describing the current hardness of the paint is to explain a little 'accident' that I had this afternoon while backing the car out of the garage. The wife had placed the barbeque in a bad position. And stupid ME... I backed into it. When I went to examine where the trunk lid had hit the barbeque I found a scratch that went down one or two layers of paint. The scratch looked just like you would have expected on a car with a couple of years old paint job. The scratch was clean and you could clearly see how well that paint had dried.

If you look at the above picture, the 'scratch' is the dark area on the driver's side of the trunk lid, below the spoiler. Yeah I know.. its hard to see. It's about 1 1/2 inches in from the drivers side of the trunk like. Looks more like a fly landed on the car. But it was about a 1 1/2 inch scratch running from below the spoiler to the bottom edge.
If you check out all the other pictures in my little collection you will not be able to see the scratch at all from all the other angles of pictures that I took...
http://www.snpx.com/mclaren/mclarenJuly/index.htm
I quickly grabbed my foam brush and applied one quick swipe of Fire Red over it. It immediately blended into the scratch and self leveled. It will probably take one or two more quick swipes to 100% hide the scratch.
The fact that it is hard to spot at just one brushing of paint is good testimony to how easily it should be to take care of road rocks etc ( which can chip away at the most expensive of professionally applied paint jobs ). Although their 'cure' or 'fix' is nowhere near as cheap or easily done as this was.
So I think this speaks really well to the benefits of the Tremclad/Rustoleum paint jobs and the Brightside paint jobs... in that the 'scratch' resembled a 'keying'. And the repair is no more complicated than reaching for your trusty foam brush and paint can.
.
Posted By: 78D150CLUB
Re: Paint job on a budget!? CONTINUED..page 44........ - 07/22/06 10:13 PM
Nice job, Marq! I don't think it could have looked any better when it was factory fresh and sitting in the showroom. Polishing is just gonna be icing on the cake for it. The color is perfect for it too. I'm not a F.o.r.d. fan, but a classic is a classic, no matter what name it wears. Have fun and enjoy driving it.
Depending on your travels or mine, I may be lucky and get a glimpse of it on the road one day.
Posted By: darenrt
Re: Paint job on a budget!? CONTINUED..page 44........ - 07/22/06 10:21 PM
Marq, That looks AMAZING!!!! I only pray that I can do as well with my Aspen.
Right now I'm still trying to straighten out my door windows, and fenders and fix a little surface rust.
So far I have gotten my hood, scoop and front bumper painted, and I am very pleased.
Posted By: Anonymous
Re: Paint job on a budget!? CONTINUED..page 44........ - 07/23/06 03:39 AM
crazy people . crazy im telling u haha all together over 60 pges here 30 on honda etc paintshoops industry just hired some snipers to take out 69 charger haah and ddos attack this place.
Impressed as hell even got a login here and don't own a mopar.I am wondering why spend 30$ on paint if that boat britewhite is easier and better bang for a buck its only few $$$ more.That lagoon coulor is nice. I realise the metalics isssue here what about pearl, people who got test parts being painted go autosuply get a some pearl mix it in and give it thin layers see how it looks. Keep paint well steered i guess for best resaults.
But shiet overall exelent work considering the cost. I aaume u can shoot normal auto clear over afterwards for max shine rather than trying to roll it. Just give it a good wetsend at 1000 or so and than shoot only another 40$ for a can of clear and that electric pressure gun. U going to prep car for paint anyway so keep masking in tact and shoot. Still under 150$ and at home haha
Paint wise i think "industrial endura" is similar to this "synthetic acrilic part urithane enamels ". No hardeners reducers just gun it or roll brush reduce as any paint out there til good enough to layer without orange peel, self levels on whatever as long as prepped and grips to anything solid. I know wsomeone painting powerboxes for the city haha thtas what they do sand to metal and than roll industrial single stage enamel but since it outside they just use the oilbased /rust protective type rathern than thiker shiner synthetic based , more expensive enamel.So ,more u spend on paint itself much better resaults will be achived. Can't wait to see more cars using the roller , [Edited by Moparts - Keep it clean] so simple so nice.
Sorrie newb here lots of questions for expirienced painters can't u buy "part source" "autozone" type of stores auto paint they sell "general paint" or something synthetic enamel non metalic and just roll away once reduced to proper rollable level. And just tighdy hardener since we can just let dry overnight at home vs bodyshops.
Posted By: Marq
Re: Paint job on a budget!? CONTINUED..page 44........ - 07/23/06 12:33 PM
Quote:
Sorrie newb here lots of questions for expirienced painters can't u buy "part source" "autozone" type of stores auto paint they sell "general paint" or something synthetic enamel non metalic and just roll away once reduced to proper rollable level. And just tighdy hardener since we can just let dry overnight at home vs bodyshops.
The original point of this thread was to create a respectable paint job on a dirt cheap budget. To solve that question Charger put forward the Tremclad/Rustoleum cut with mineral spirits process. And as we can see it works.
I branched off from the Tremclad/Rustoleum method and went to the Brightside marine paint by Interlux... using basically the same painting & sanding process. But by changing over to the Brightside paint the cost of the project increased... and now you were looking at 3 cans of Brightside at $35 per can ( or much cheaper on eBay - but we are still waiting reports on how that eBay Brightside works out ).... as compared to about $10-$15 per can for the Tremclad/Rustoleum.
Trying this method with a highly thinned automotive paint would probably work but cost of the paint products might be taking the project up higher and out of the reach of most folks 'experimental' budgets.
Now... about automotive metalflake type paints... I think it can be done but I don't think the results will be visually satisfactory. With most metal flake paints being sprayed, you get the benefit of 'randomness' of the metalflake as it is sprayed onto the car.
But if you were rolling a metalflake type automotive paint, I beliece you will suffer from 'concentrations of the metalflake at each end of the roller when you apply it to the body. And even when you restroke the paint to even out the wet edges there will still be traces of those concentrations. In effect, when you look at a finished panel you would be able to see the rolling pattern that you used on the panel.
I tried two experiments to get some metal flake into my paint job. Neither were satisfactory.
In the one experiment I taped off the entire horizontal edge of the car.... it was basically a six inch area that runs the full length of the car - from front to back. Before adding each second layer of paint I sprayed the previous layer with Krylon 'red' metal flake. Then I would let it dry and paint over it with the next layer of Brightside paint. Since the paint is fairly translucent you could clearly see the metal flake below. THE PROBLEM was that it was hard with even the metal flake spray bomb to get an even spread of the metal flake. So basically the metalflake looked like crap trapped under the Brightside paint. Now... when I went to revert back to the 'pre-metalflake' stage I found that the Krylon paint ( when wet sanded ) became almost 'flour-glue-paste' like in its consistency. And this left me wondering whether this layer of Krylon metalflake might prove to be the achilles heel of the paint job... I could imagine at some point in the future where the Brightside paint might lose its adhesion to the Krylon layer and peel off in sheets. Or worst yet.. if the Brightside layer was scratched and water was able to leech into the Krylon layer.. weakening the adhesion.
But I am not a quitter and for my next experiment I went to the craft store where you can buy these little mini-baggies filled with just the metalflake only. You pay about $5 and you have your choice of a number of micro-thin sparkle particles. So I dumped two of these packages directly into my can of Brightside and MIXED IT LIKE CRAZY for about 10 minutes to make sure I got an even distribution of the particles with the paint. I then poured the mix into my paint tray and started applying it. It looked good EXCEPT for one problem.. even when you painted over it with the next layer of Brightside it still remained ROUGH to the touch. It was almost like sand had been mixed into the paint. Even with a ton of wetsanding you could not get the surface smooth to the touch. So I put the old 220 grit 3X paper to work and stripped off that entire experiment.
It's possible that if I had visited the local paint shop supplier I might have been able to buy some professional additive that I could have mixed into my paint to give it 'that different look'. And maybe that is where I should have gone instead of to a crafter store to buy sparkles. But based on my two experiments so far I would want to know for a fact that the additive is 100% compatible with the paint I am using. I suspect I would have less of a compatibility problems with the Brightside paint - since it is a polyurathane. But the Tremclad/Rustoleum may not be as receptive to having some of the additives ( metalflakes, pearls, etc )
Just my two cents worth and hopefully it will save some other folks some work or frustration.
Posted By: Anonymous
Re: Paint job on a budget!? CONTINUED..page 44........ - 07/23/06 01:07 PM
DOes anyone have the link to the original thread?
Posted By: 78D150CLUB
Re: Paint job on a budget!? CONTINUED..page 44........ - 07/23/06 01:35 PM
Sorry to hear that your experiments had a disappointing result, Marq. I think the final result on the paint still looks great, though.
From your description, you tried a slightly different method than I used, and the Brightside has fewer layers than I'm applying. I don't spray a whole layer, I just dust the surface with a fog from about 18-24 inches away with Armor Coat silver. At that distance, all I get is a very fine layer of glittering on the surface of the unsanded layer. The next coat goes over that and then gets sanded. I have no extreme roughness, or curing problems. The spray can paint is actually acting more as an adhesive to hold the flake in place until the next coat goes over top.
Pwing to the poor (read as cheap school trip for kids, so it got lost on the bus [Edited by Moparts - Keep it clean] camera) the effect doesn't show up well in the pics, but this one does seem to catch the effect. In person and outdoor light, the flake is very noticable.
Perkaps the Krylon paint has something to do with the curing, I've used their spray at work, and somehow it seems to be plastic when dry, something like a saran wrap layer. I dunno
Sounds a bit like cold fusion, one guy says it works, another one can't. I wish it had been a success for you.
Sorry for the longwinded post
I will try to get a pic that shows the effect better.

Posted By: Marq
Re: Paint job on a budget!? CONTINUED..page 44........ - 07/23/06 02:24 PM
Quote:
DOes anyone have the link to the original thread?
This epic story first began at the following link...
https://board.moparts.org/ubbthreads/show...part=1&vc=1
The above thread was subsequently archived and a new thread was continued from...
https://board.moparts.org/ubbthreads/show...part=1&vc=1
.
Posted By: pdqvsix
Re: Paint job on a budget!? CONTINUED..page 44........ - 07/23/06 04:25 PM
My project continues and it just gets better everytime i work with this technique that 69chargeryeehaa was so kind to explain to everyone.
With any luck i'll get it finished up this week.
This painting method is absolutely fantastic!!
and the results are more than i could ask for or want from a can of gloss black rustoleum paint.
to 69chargeryeehaa
Posted By: Exit1965
Re: Paint job on a budget!? CONTINUED..page 44........ - 07/23/06 05:35 PM
regarding the pump up spray can - I went out to the garage this morning and was surprised to find that the thick layer splattered onto part of my engine bay was "hard as a rock". Of course it did spend about 12 hours at 100+ degrees.
So im either going to use the spray can, or maybe mix up a thick mixture of penetrol and paint and put that on, so I can get coverage in a coat or two.
Posted By: Anonymous
Re: Paint job on a budget!? CONTINUED..page 44........ - 07/23/06 06:22 PM
i know its about budget, but getting a car painted for under even 150$ is still a bargain. Cheapest base and clear i ever gotten was 400$ thats free labor , free prep, and free booth. Suplies only. Budget part here isn't the paint its the idea of how its aplied that majorly reduces cost ,doing it urself and without airgun , paintbooth etc. Paint u end using is up to u.Just like when u spray a car u can get 50$ paint or 500$ paint. As long its singlestage self adheisive synthetic type is all that matters in our case i think. I dunno lots of people here and honda used onther brands besides rustolium with success its not the brand but chemical forumla.I even seen someone use housepaint in a warner gun somewhere .I wanna try a can of automotive endura reduced and rolled , they have it here for 50$CAN a quart and quiet a coulour choices , Maybe even ad a touch of pearl see how that looks. Gotta buy some righ away.
http://www.endura.ca/automotive.htm
Posted By: Anonymous
Re: Paint job on a budget!? CONTINUED..page 44........ - 07/23/06 06:52 PM
Definetley a good price. I'll post the review on the Brightside I got from E-bay (US $60 shipped for 6 quarts). Only 2 colors (flag blue and some really bright red). So I went with the blue (it is navy blue like the colors on the US flag).
Posted By: 78D150CLUB
Re: Paint job on a budget!? CONTINUED..page 44........ - 07/23/06 07:01 PM
This is the best I could get with the camera I have, but it does show the metallic is there.
Finished todays coat of paint, and parked it out in the sun, it should be bulletproof by about 8 pm

Posted By: Anonymous
Re: Paint job on a budget!? CONTINUED..page 44........ - 07/23/06 07:02 PM
Quote:
regarding the pump up spray can - I went out to the garage this morning and was surprised to find that the thick layer splattered onto part of my engine bay was "hard as a rock". Of course it did spend about 12 hours at 100+ degrees.
So im either going to use the spray can, or maybe mix up a thick mixture of penetrol and paint and put that on, so I can get coverage in a coat or two.
I know it's linked somewhere else in this huge thread but got a link handy for this spray can? Is it the one you can "recharge" just using a regular air compressor?
Doofus Edit: bah it's linked further up this page, or at least one is: http://www.harborfreight.com/cpi/ctaf/displayitem.taf?Itemnumber=1102
Posted By: Anonymous
Re: Paint job on a budget!? CONTINUED..page 44........ - 07/23/06 07:22 PM
Quote:
This is the best I could get with the camera I have, but it does show the metallic is there.
Finished todays coat of paint, and parked it out in the sun, it should be bulletproof by about 8 pm
Is it the pic or is there some orange peel? Overall I can see the metal and it looks good.
Posted By: Anonymous
Re: Paint job on a budget!? CONTINUED..page 44........ - 07/23/06 07:24 PM
YOu just pump it by hand. If you have an air comopressor why not get a gun (you can get a cheap prodcution gun for $35). HVLP cheap for $50~. I think the compressor can do some damage to the can.
Posted By: Anonymous
Re: Paint job on a budget!? CONTINUED..page 44........ - 07/23/06 07:36 PM
Well being able to reload/recharge the can and then paint without having to drag a hose across the yard (to get small hard to reach spots for example) sounds kinda handy
I have a paint gun just don't know how to use it
Posted By: 78D150CLUB
Re: Paint job on a budget!? CONTINUED..page 44........ - 07/23/06 07:39 PM
I'm sure it's just the pic, I didn't see any orange peel when I was working on it earlier.
That area needs one more coat before wet sand, so there may be a touch that shows up worse on camera.
I've been very careful and very lucky, no peel or runs at all.
P.S.: Just got back home again, had a chance to do some comparing with factory paint jobs in my travels this afternoon. Amazing how many of them look great from a distance and when you get up close, the peel in the paint looks like Florida's finest. Not pretty at all.
Posted By: Anonymous
Hey Grimster! Another old truck on the way! - 07/23/06 09:18 PM
Just wanted to toss some encouragement to folks trying to bring new life to an old truck. Mine's about 75 percent of the way there (what with work, rain and dead bugs filling the idle hours.)
Please post photos when you get a chance.
Posted By: Anonymous
Re: Hey Grimster! Another old truck on the way! - 07/23/06 10:25 PM
Just testing things out right now on some stuff I have lying around:
http://faith.dixiesys.com/Paint Gotta find the "sand" color and gloss white, that's the color I'm leaning towards painting the truck (2 tone yeah) so I want to experiment with those colors the most.
Going to the river for a few days next week but when I get back I'll probably just start sanding the roof of the truck, take out the windows and start on the roof and interior. The roof is getting rusty and wasn't rusty before so I want to sand/prep and at least prime it a.s.a.p.
90% of what I paint in the interior will get coverd up, by door panels, dash pads, carpet, etc so booboos on the inside won't be near so big a deal, same for the roof, who sees the roof anyway?
Posted By: Anonymous
Re: Hey Grimster! Another old truck on the way! - 07/23/06 10:34 PM
I'm in the same boat. I'm going on vacation but in about 2 weeks I'm goin to get started with the Brightside from e-bay.
Posted By: Exit1965
Re: Paint job on a budget!? CONTINUED..page 44........ - 07/23/06 10:53 PM
Quote:
Well being able to reload/recharge the can and then paint without having to drag a hose across the yard (to get small hard to reach spots for example) sounds kinda handy
I have a paint gun just don't know how to use it
If I could get the rattle cans without having to buy a 6 pack (and wait for them), I would do that.
I can't get this thing to spray a fine mist, but maybe I just need to experiment with it more.
Posted By: Anonymous
Re: Paint job on a budget!? CONTINUED..page 44........ - 07/24/06 01:44 AM
Quote:
If I could get the rattle cans without having to buy a 6 pack (and wait for them), I would do that.
I can't get this thing to spray a fine mist, but maybe I just need to experiment with it more.
Oh so that spray thing sucks then? I can get all the colors in rattle can but finding sand in the quart/gallons is proving annoying. So if that thing ain't all that then bah, buy rattle cans for the hard to reach stuff I say
Posted By: Anonymous
Re: Paint job on a budget!? CONTINUED..page 44........ - 07/24/06 02:17 PM
Why don't you just use some Kraft Kindergarden body glitter. Also sand from the beach will work if you have problems getting it in gallon sizes.
Posted By: Anonymous
Re: Paint job on a budget!? CONTINUED..page 44........ - 07/24/06 10:24 PM
Greetings,
Like many others here, I picked up this thread from a different car site, and have been following with interest for a number of weeks now. I hesitate to give any recommendations, because I have not personally tried this method. However, several of the posts have reminded me of some things I heard a long time ago, and thought they might be of value.
Many years ago (early '70s) I worked as an industrial spray painter. Sometimes the "oldtimers" would talk about how they did things when they were young ('50s). (funny, now I'm the oldtimer) One guy told a story about when he worked in an auto body shop, and a car painter with a British accent came in looking for a job. He had his own tool bag with him. They gave him a car to paint to see how his work was. He pulled it into a spray booth and closed the door. It was quiet, and he was in there for the rest of the day. When he came out, the car was beautifully painted. He had done it with brushes. He claimed to have previously worked for Rolls Royce. The guy telling the story said he was sorry they didn't hire him. It was a great paint job, but a guy with a spray gun could have done 5 cars in the same time as he did one. His point was that it was not the tools, necessarily, that produced a good product, but the technique. FWIW
The next item was in regards to sparkles, or metalflakes, as they used to call them. Again, per the "oldtimers", when they first started to be used in custom paint jobs, they had to develop application techniques using the existing equipment. The flakes were too big to be shot out of the existing spray gun nozzels. This is what they would do. After primer and prep, first an undercoat of either gold or silver. Then, working in sections, a coat of clear with the metalflakes hand cast into it. When this was done, the whole body was gone over with a rolling pin to smooth out the surface. (today I think I would substitute a rubber printer's roller) Then they would cover the flakes with a toner, which was a see-through color (like the "candy" colors). They would build up the toner enough to smooth out the surface, then put on clear. They wouldn't start to sand until they got to the clear. That's how they did metalflakes in the old days, I just thought somebody might want to try the "rolling pin" technique on one of their experiments. (the flakes were pretty big in those days, though, that might make a difference) By the time I came along in the 70s, material and equipment had changed enough that when I painted a friend's motorcycle metalflake orange, I put the flakes right into the gun. They were smaller flakes, but I still had to put a couple big steel balls into the cup and keep the gun in motion to keep the flakes from clumping up. I used a 3-step process: gold undercoat, flake & toner mixed together, and clear. I didn't sand until the clear, and it ended up looking pretty good.
Congratulations to all on developing a great process. I'm going to use it on my next project. I particularly like the "Brightside" paint.
thanks, and sorry for the long ramble,
LanceB
Posted By: Anonymous
Re: Paint job on a budget!? CONTINUED..page 44........ - 07/24/06 10:45 PM
Quote:
Quote:
Well being able to reload/recharge the can and then paint without having to drag a hose across the yard (to get small hard to reach spots for example) sounds kinda handy
I have a paint gun just don't know how to use it
If I could get the rattle cans without having to buy a 6 pack (and wait for them), I would do that.
I can't get this thing to spray a fine mist, but maybe I just need to experiment with it more.
Do you mean for the rustoleum, I know my home depot here in sac sells them (a lot of em in stock last I saw) by the bottle, never seen any 6-packs.
Posted By: Exit1965
Re: Paint job on a budget!? CONTINUED..page 44........ - 07/24/06 11:42 PM
Quote:
Quote:
Quote:
Well being able to reload/recharge the can and then paint without having to drag a hose across the yard (to get small hard to reach spots for example) sounds kinda handy
I have a paint gun just don't know how to use it
If I could get the rattle cans without having to buy a 6 pack (and wait for them), I would do that.
I can't get this thing to spray a fine mist, but maybe I just need to experiment with it more.
Do you mean for the rustoleum, I know my home depot here in sac sells them (a lot of em in stock last I saw) by the bottle, never seen any 6-packs.
Have you seen "canvas white" in spray at your local HD? I believe that I saw some a long time ago, but now I can't find any spray. If you have seen it, let me know...
I said '6 pack' because online, it looks like I can only order a 6 pack, and a special order from home depot would require that I order a whole box, which is a 6 pack..
Posted By: Marq
Re: Paint job on a budget!? CONTINUED..page 44........ - 07/25/06 01:52 AM
I just thought of some more 'secret' hints that I stumbled across while using the Brightside paint and it they are equally applicable for the Tremclad/Rustoleum guys.
Discovery ONE : If your paint on a panel goes to h*ll... try a fluid soaked roller...
While working on the trunk lid things went bad. The paint started drying too quickly and started getting tacky. I tried to work the paint with extra rolling to try to level it out.. but it just got worse. I walked away from the car mad as h*ll because I figured I was going to have sand the trunk down and start it over ( when the rest of the car was already basically finished. I guess you can guess how pizzed off I was.
So I got mad and I figured that since it was screwed up there was nothing I could do that would make it worst. So I had a little light bulb go off in my head. I went to my paint tray and I dumped a ton of brushing fluid in with the remaining little bit of paint that was still in the tray. I would say the mixture was about 70% brushing fluid ( ketone ) and only 30% paint.
I lathered up the roller with a full load of this mixture and I started reworking the trunk lid.
MIRACLE UPON MIRACLE.. the paint on the trunk lid began flattening and spreading beautifully. This saturation of brushing fluid was able to save the day and the trunk lid turned out perfect.
So I mention this story just in case one of the panels you are working on goes to h*ll in a hand cart. Curse at it for a minute and then try a highly saturated roller to try to remedy what might appear to be a lost cause.
I suspect this 'last ditch' suicide effort might also work for the Tremclad/Rustoleum applicators as well. If the paint on the panel you are working on appears to be suddenly welling up and turning to orange peel... or if the roller marks are too visible and not levelling out... or if the surface has gotten too tacky before you had worked the surface with your roller to the point where you were satisfied... this might work for you to save you from having to sand down a pile of your work..
DISCOVERY TWO : If the paint on a panel goes to h*ll - reach for a rag as a last ditch measure
When I was originally applying the Tremclad paint to my car... I had a similar problem occur on the front driver's fender. I had just added a layer of Tremclad. Right before my eyes I could see that everything on that panel was going to h*ll... it looked like an instant case of severe orange peel. I cursed... I swore... I walked away knowing that I would have resand that panel down again and basically restart it.
So I decided to quit for the evening... because I was sooooo pizzed off at myself. I took a fresh cloth and soaked it with mineral spirits and started to clean my hands. Then that little light bulb went off in my head again. I took the mineral soaked cloth over to the panel and began WIPING IT DOWN in long steady swipes. It took the crappy layer off and left me with the previous layer - in perfect shape and ready to just dry out and repaint it.
Sometimes the greatest discoveries are done totally by accident or from sheer frustration...
DISCOVERY THREE : Two rollers work better than a roller and a foam or bristle brush
This probably ranks right up there with my other accidental discovery of using two rollers... one to roll the fresh paint and a fresh one to just roll over the fresh paint to level it, pop bubbles and work out any track marks left by the 'painting' roller.
DISCOVERY FOUR : Don't bother with 6" foam rollers
Ooooh... one last tidbit of info that I thought I would share. My experiment with the six inch high density foam roller was basically a failure. Although it seemed in theory to be better at laying down paint... it turns out that the FOUR inch high density foam roller gives you far better control. The only value you might find with the six inch roller is to use it as the secondary roller ( as described above ) to go over the paint laid down by the FOUR inch roller. But frankly you might as well use the four inch roller for the painting and the secondary rolling. I truly believe that the dual rolling works out better than the roller and brush method...
.
Posted By: Anonymous
Re: Paint job on a budget!? CONTINUED..page 44........ - 07/25/06 02:20 AM
Well I've been away for a few days and the pages sure did pile up. But I made major progress. I used my grinder and twisted wire wheel and got the little roof I have (t-tops take up the rest), doors, rear quarter panels, truck, front fenders, and half the hood stripped to bare metal. The rear quarter panels are straight as glass but the doors and roof need some serious bondo work. that's what went on today and I'll hopefully sand that down and do a final coat of bondo.
A word to the wise, the wire wheel worked great to take everything down but if you use it for at least five hours a day for about a week, you'll piss off your neightbors pretty badly. I found this out the hard way. Also, when using the wire wheel, go prependicular to bodylines and you can use it nearly everywhere. If you try to go parrallel over the lines of the body, you'll tear it up. I'll be sure to post up pictures tomorrow.
Marq, looks great! I remember back when you posted original pictures that looked of terrible orange peel. Seems like you figured that camera out and did an awesome job. Polish that and everyone will be
all over it.
Exit, do you have any progress shots?
Also, is the general consensus that you should spray bomb the doors?
Posted By: Exit1965
Re: Paint job on a budget!? CONTINUED..page 44........ - 07/25/06 04:03 AM
No progress shots lately. I'll post some more once I finish the engine bay and door jambs, then I'll wait a few weeks and wetsand then polish and take more pics. I wish I had done more when the weather wasn't so hot..
Posted By: texczech
Re: Paint job on a budget!? CONTINUED..page 44........ - 07/25/06 01:17 PM
Was the second roller used dry? If it was, when it got loaded up with paint did you clean it? In other words you used a second roller instead of the brushing it after rolling.
Posted By: Anonymous
Re: Paint job on a budget!? CONTINUED..page 44........ - 07/25/06 02:28 PM
Quote:
Well I've been away for a few days and the pages sure did pile up. But I made major progress. I used my grinder and twisted wire wheel and got the little roof I have (t-tops take up the rest), doors, rear quarter panels, truck, front fenders, and half the hood stripped to bare metal. The rear quarter panels are straight as glass but the doors and roof need some serious bondo work. that's what went on today and I'll hopefully sand that down and do a final coat of bondo.
A word to the wise, the wire wheel worked great to take everything down but if you use it for at least five hours a day for about a week, you'll piss off your neightbors pretty badly. I found this out the hard way. Also, when using the wire wheel, go prependicular to bodylines and you can use it nearly everywhere. If you try to go parrallel over the lines of the body, you'll tear it up. I'll be sure to post up pictures tomorrow.
Marq, looks great! I remember back when you posted original pictures that looked of terrible orange peel. Seems like you figured that camera out and did an awesome job. Polish that and everyone will be all over it.
Exit, do you have any progress shots?
Also, is the general consensus that you should spray bomb the doors?
How long did it take you to strip a door with the wire wheel? Are the pics posted of the car after you used the wire wheel or did you sand it?
thanks.
Posted By: Anonymous
Re: Paint job on a budget!? CONTINUED..page 44........ - 07/25/06 03:18 PM
Quote:
I used my grinder and twisted wire wheel
Dude, when I read that it was like fingers on a black board! You don't want to use that setup for removing paint. Sure, fine for hitting rust, but never for paint.
The best way for the DIY'er to strip paint off a car is with a variable speed sander/polisher kept at 1000 rpm with a backing pad and 80 grit paper. You can strip a car clean in 4 to 6 hours. Less noise and no risk of panel distortion.
http://www.autobodystore.com/strip_&_paint.htm
Posted By: Marq
Re: Paint job on a budget!? CONTINUED..page 44........ - 07/25/06 03:26 PM
Quote:
Was the second roller used dry? If it was, when it got loaded up with paint did you clean it? In other words you used a second roller instead of the brushing it after rolling.
The second roller does not get dipped in the paint. So it begins clean and picks paint as it gets rolled over the painted area. The second roller doesn't get as saturated with paint as the 'painting' roller because you are only gently rolling over the freshly painted area.. And the build up of paint on the secondary roller keeps the roller moist but not so overloaded that it leaves paint edge marks.
.
Because I was doing a car with a relatively small surface space... I was able to apply the paint in one hour. So I only needed one secondary roller.
If I was working on a larger vehicle... I would probably use one secondary roller for just the roof, hood and trunk... and then a fresh secondary roller to do all the side panels. This would help you avoid any problems with too much paint being built up on your secondary roller.
.
Posted By: Anonymous
Re: Paint job on a budget!? CONTINUED..page 44........ - 07/25/06 04:19 PM
Quote:
Quote:
I used my grinder and twisted wire wheel
Dude, when I read that it was like fingers on a black board! You don't want to use that setup for removing paint. Sure, fine for hitting rust, but never for paint.
The best way for the DIY'er to strip paint off a car is with a variable speed sander/polisher kept at 1000 rpm with a backing pad and 80 grit paper. You can strip a car clean in 4 to 6 hours. Less noise and no risk of panel distortion.
http://www.autobodystore.com/strip_&_paint.htm
True. I would add that you may want to actually call it rotary since most people will associate variable speed with random orbit (like the PC 7336) which is a much weaker tool (great for detailing cars but does not have the kick of the rotary). I own the PC and also a Hitachi rotary.
Posted By: Anonymous
Re: Paint job on a budget!? CONTINUED..page 44........ - 07/26/06 03:26 AM
Well, my paintjob is on indefinite hold because I need the car. I was planning to finish the paintjob by last Saturday, but a large thunderstorm came through St. Louis as I was putting my fourth coat on and knocked out the power for a couple of days.
I'm attaching a picture I took of my car immediately after the thunderstorm.

Posted By: Anonymous
Re: Paint job on a budget!? CONTINUED..page 44........ - 07/26/06 04:47 AM
Started on my Jeep Cherokee last night... just starting on the psgr rear quarter to refine technique. I have started with Safety Red, as the other rustoleum reds seem too dark. However, as warned by exit, it does have a hint of orange to it. Nevertheless I took it out into natural light today and I am liking it on the small portion I am working on. Orange peel is not noticeabe until I get about 2 inches away and stand at the "right" angle. So... I am definitely happy so far.
Before I move on to the rest of the car I need to finish a few dimples I am repairing, and I am also going to use the spray bomb safety red to get jambs and the like before I hit the large panels.
More info (and pics) when I get further along.
Posted By: roe
Re: Paint job on a budget!? CONTINUED..page 44........ - 07/26/06 06:55 AM
Hey guys, I was planning on picking this up (
http://www.wagnerpaintcrewtv.com/Public/HowItWorks/index.cfm )to paint my moms house. How do you think it would do with the Rustoleum painting a car?
roe
Posted By: 69chargeryeehaa
Re: Paint job on a budget!? CONTINUED..page 44........ - 07/26/06 02:06 PM
Quote:
Hey guys, I was planning on picking this up ( http://www.wagnerpaintcrewtv.com/Public/HowItWorks/index.cfm )to paint my moms house. How do you think it would do with the Rustoleum painting a car?
roe
good for a house, not good for a car!!!
Posted By: Anonymous
Re: Paint job on a budget!? CONTINUED..page 44........ - 07/26/06 02:25 PM
Well kiddies, the owner of my borrowed test piece (the hood on a riding lawnmower) came and reclaimed it two night ago, so I never got to finish it. BUT, I got the technique down I believe. I will be doing my coupe in two weeks when i'm on vacation. Woohoo! pics for sure.
Posted By: Anonymous
Re: Paint job on a budget!? CONTINUED..page 44........ - 07/26/06 03:21 PM
Quote:
Hey guys, I was planning on picking this up ( http://www.wagnerpaintcrewtv.com/Public/HowItWorks/index.cfm )to paint my moms house. How do you think it would do with the Rustoleum painting a car?
roe
That would work. It is made to spray house paint or any kind of liquid with similar viscosity. Experimentation is the greatest power we have and look how far we've gone with the system. We must always keep this in mind otherwise we limit the true potential of the system.
I for one will not knock down any idea.
I would say use some spirits or Ketone to clean the machine once you are done.
Posted By: 69chargeryeehaa
Re: Paint job on a budget!? CONTINUED..page 44........ - 07/26/06 03:33 PM
Quote:
Quote:
Hey guys, I was planning on picking this up ( http://www.wagnerpaintcrewtv.com/Public/HowItWorks/index.cfm )to paint my moms house. How do you think it would do with the Rustoleum painting a car?
roe
That would work. It is made to spray house paint or any kind of liquid with similar viscosity. Experimentation is the greatest power we have and look how far we've gone with the system. We must always keep this in mind otherwise we limit the true potential of the system.
I for one will not knock down any idea.
I would say use some spirits or Ketone to clean the machine once you are done.
i can tell you from expirence that that system won't work, you matters well just pour paint on your car, it will look better!!! ive used that system to paint a fence, the issues are that the roller design won't lay paint thin enough, the paint will dry too fast, and it regulates paint flow too fast, so you end up with too much paint, good for a fence/house, but NOT good for this application. you NEED to use a high density foam roller with the tremclad/rustoleum, maybe with the brightside paint a brush will do, cause the paint behaves differently, and looks as it self-levels better than the rustoleum/tremclad as MARQ has stated.
Posted By: BattleCruiser71
Re: Paint job on a budget!? CONTINUED..page 44........ - 07/26/06 04:27 PM
So I had a friend who does newer little light trucks come up to me and ask me if I knew about the Mopar website with the rustoleum paint jobs. He has no idea I'm a longtime moparts member. I can't believe how this thread just keeps going and going and going. I saw it months ago and it's still active. Must be a record. 69Chargeryeehaa must be up for some sort of automotive sainthood for the interest he's generated across all segments of the automotive hobby. You're like a working class hero, helper of the little guy, friend of the common hobbyist. I think I'll even try it myself. Never thought I'd slather Rustoleum across the quarter panels of a 1972 Dodge Charger, but I think it's on it's way. Even if I don't like the product or get frustrated, I can always go get the expensive paint job I was originally going to have to get anyhow. and now it's off to go find the cliff notes summary of this whole process. I'm not even gonna ask as I'm sure it's been summed up more than a few times. I'm a believer.

Posted By: roe
Re: Paint job on a budget!? CONTINUED..page 44........ - 07/26/06 08:06 PM
Quote:
i can tell you from expirence that that system won't work, you matters well just pour paint on your car, it will look better!!! ive used that system to paint a fence, the issues are that the roller design won't lay paint thin enough, the paint will dry too fast, and it regulates paint flow too fast, so you end up with too much paint, good for a fence/house, but NOT good for this application. you NEED to use a high density foam roller with the tremclad/rustoleum, maybe with the brightside paint a brush will do, cause the paint behaves differently, and looks as it self-levels better than the rustoleum/tremclad as MARQ has stated.
Hey Charger, I would have used the gun, not the roller. It says that it has a professional style sprayer. If you look through the site (not sure exactly what page) it will tell you a little about the spray gun.
Edit: Check out the FAQ page. Does the spraygun change your opinion at all
Posted By: roe
Re: Paint job on a budget!? CONTINUED..page 44........ - 07/26/06 08:31 PM
Heres some of the features:
1. 25ft high pressure hose
2. Sprays everything from thick latex paint to thin liquids like stains. (so should handle thinned rustolem right???)
3. Full size filter in the handle of the gun to prevent tip clogging
4. Reversible tip: in case the tip does clog it can be reversed to "blow" out the clog and keep spraying
5. Pump is the same type of piston pump that professionals use, for reliability. System works at 2750 psi
THose are some of the things that I thought sounded pretty good. But I dont know much about spraying etc...so I thought that I'd ask you guys. I figured it would be at least as good, if not better than the handheld versions that people have been getting great results with. I was planning on getting it anyway to paint the house, but if you guys think it would work with Rustoleum for a car, then it would make my decision to buy it easier by knowing that I could use it for the car as well.
Posted By: Marq
Re: Paint job on a budget!? CONTINUED..page 44........ - 07/26/06 09:18 PM
Quote:
I was planning on getting it anyway to paint the house, but if you guys think it would work with Rustoleum for a car, then it would make my decision to buy it easier by knowing that I could use it for the car as well.
The only thing that I have seen on the topic of sprayers that relates to the topic of car painting with Rustoleum/Tremclad or Brightside is that it needs to be 'HVLP' - high volume low pressure.
I believe that the unit you are looking at would probably work with the paint thinned down to the appropriate level for spraying.
But as noted by one of the other spray testers here, I would keep a supply of handy rollers at your side throughout the spraying to level out all the runs that may ( probably will ) occur.
The key thing to keep in mind when considering spraying is the 'overspray' - where 30% of your paint/thinner mix gets blown into the air and lands just about everywhere except on the car body.
Once the paint is airborne it will mist your entire garage interior with a colorful glow that oddly matches the color you chose for your car body. Lawnmowers, garbage cans, the cats litter, your tool boxes... spare tires, etc all take on this mystic glow.
If you choose to spray 'outside' then expect the overspray to magically appear on anything within airborne radius of your spraying zone... squirrels, cats, grass, the driveway, the neighbors car, etc.
If you are already buying the unit anyhow... then I would say GO AHEAD and experiment with it. You just might get lucky and dial in on a knock out of a paint job. But definitely keep a roller handy to catch those runs or paint splotches that are almost certain to happen.
However, just remember the Charger explanation for the 'roller' paint job.... it was to minimize paint overspray and mess to the minimum.
To paraphrase the old military saying of ' If you got them... smoke them... "... I would say " If you have a sprayer at your disposal... give it a shot'. It can't do anything that a little sandpaper can't remove.
.
Posted By: _Scott_
Re: Paint job on a budget!? CONTINUED..page 44........ - 07/26/06 10:44 PM
I have one of these:

It is similar in features to the Wagner mentioned above. While it is awesome for spraying stain on a cedar fence, or even latex inside a house, I wouldn't spray a car with it. If you are going to deal with the mess of spraying, you might as well use a real paint gun. Even a cheap paint gun is better.
The sprayer pictured above gives minimal control of the spray pattern... only pump pressure and paint viscosity. A real paint gun is more adjustable and will atomize the paint finer.
I haven't experimented with the roller process yet, but it appears much easier to master than spraying. A spray gun will allow you to make a huge mess in a hurry, in much the same way rotary polishers will allow you to do a lot of damage in a hurry. In the right/skilled hands, they are a quick way to get excellent results. In the hands of a beginner... maybe or maybe not.
If you do choose to spray, consider using a faster drying thinner to help avoid runs. Also, spray a few thin coats and allow them to get tacky before spraying the last glossy coat. Also seek out spraying techniques on some of the other forums that deal with more conventional paint and body work, like:
http://www.autobody101.com/forums/
Posted By: darenrt
Re: Paint job on a budget!? CONTINUED..page 44........ - 07/27/06 12:44 AM
I have a sprayer much like the ones you guys are talking about, I love it
painted my house in an hour
(after triming out the windows and such, that took two days) the nozzle it came with is for spraying latex house paint right out of the bucket.
A .017 I think
but you can purchase as low as a.004 nozzle for spraying stain.
Just for fun I shot an old D50 truck bed and it looked real smooth!! truck was junk anyway and full of rust holes.
I really thought about using it years before reading any of this.
BEWARE!! it does shoot ALOT of paint at once. One pass coverage
two passes and run city
Posted By: Anonymous
Re: Paint job on a budget!? CONTINUED..page 44........ - 07/27/06 01:21 AM
Finally got around to taking pictures. didn't get to make much progress with sanding the bondo but I know now that I put it on way too thick. This is definately a learning experience for me. I'll be going through many pages of 100 grit getting down to where I can put my 'skim coat'.

... Here's pictures thus far. This is definately taking much longer than expected but it's been said a million times that the prep work will determine the quality and I'm tired of looking at a s*%#ty paint job.
Bondo work Sorry about the quality of the pictures, the sun was setting so it was starting to get darking out.
Posted By: 69chargeryeehaa
Re: Paint job on a budget!? CONTINUED..page 44........ - 07/27/06 01:25 AM
Quote:
So I had a friend who does newer little light trucks come up to me and ask me if I knew about the Mopar website with the rustoleum paint jobs. He has no idea I'm a longtime moparts member. I can't believe how this thread just keeps going and going and going. I saw it months ago and it's still active. Must be a record. 69Chargeryeehaa must be up for some sort of automotive sainthood for the interest he's generated across all segments of the automotive hobby. You're like a working class hero, helper of the little guy, friend of the common hobbyist. I think I'll even try it myself. Never thought I'd slather Rustoleum across the quarter panels of a 1972 Dodge Charger, but I think it's on it's way. Even if I don't like the product or get frustrated, I can always go get the expensive paint job I was originally going to have to get anyhow. and now it's off to go find the cliff notes summary of this whole process. I'm not even gonna ask as I'm sure it's been summed up more than a few times. I'm a believer.
thanks man i'm just trying to spread the love, help a few buds out.
Posted By: roe
Re: Paint job on a budget!? CONTINUED..page 44........ - 07/27/06 01:28 AM
Thanks for the input guys. I guess it would be wise to test it on a spare door to see how it works. But it seems like the best way will be the roller....Whenever I actually get to the stage of painting my car.
Posted By: 69chargeryeehaa
Re: Paint job on a budget!? CONTINUED..page 44........ - 07/27/06 01:28 AM
Quote:
Quote:
i can tell you from expirence that that system won't work, you matters well just pour paint on your car, it will look better!!! ive used that system to paint a fence, the issues are that the roller design won't lay paint thin enough, the paint will dry too fast, and it regulates paint flow too fast, so you end up with too much paint, good for a fence/house, but NOT good for this application. you NEED to use a high density foam roller with the tremclad/rustoleum, maybe with the brightside paint a brush will do, cause the paint behaves differently, and looks as it self-levels better than the rustoleum/tremclad as MARQ has stated.
Hey Charger, I would have used the gun, not the roller. It says that it has a professional style sprayer. If you look through the site (not sure exactly what page) it will tell you a little about the spray gun.
Edit: Check out the FAQ page. Does the spraygun change your opinion at all
no, it would'nt, infact i played that game too, i just found it worked good for 10 mins, and then started spitting, back to home depot it went, besides the whole point about the roller is the ease, no-mess technique, and once you get the hang of it, it's super easy. inventory of things needed to paint, 1. roller, 2. paint tray, 3. paint, 4. tack cloth, 5. foam brushes, total cost about $20, result = priceless.
honestly, the roller method would be the ONLY way i would ever paint a car again if i were to paint a car myself, keep in mind, i've shot lots of single stage paint in my days, here's a example:

and that car above looks pro. BUT, i was high, batteling dust/dirt/bugs, and it made a huge mess, that's with a compressor and HVLP, duplicolor single stage, midnight metalic blue. my garage floor, walls, tools are a rainbow of colors i've painted over the years, i'm done with shooting paint in my garage, the roller is way too easy, plus i used one and a half gallons to paint that beetle, and 3/4 of a gallon to paint my charger which is 2 times the car!!!!
if your going to spray, use a HVLP gun, much better atomization, keep in mind what these wagner units are ment for, painting a fence, house, ect...not laying a 1 mil thin coat of paint.
here's a more recient pic of my charger, i can't see the difference, can you see the difference? roller it is then

Posted By: Anonymous
Re: Paint job on a budget!? CONTINUED..page 44........ - 07/27/06 02:27 AM
Hello all, this is the blind guy with the knight rider carr... not one reply to the polising question...
anyway, I did anothe coat and left my test piece out in the sun for almost 2 weeks... That should be plenty dry time... I will try the turtle wax polish again and see what happens... if it doesn't work out, then I'll try and find some stinky mineral spirits...
I do have a can of actual gloss black tremclad and clear coat... none of which I wanted to crack open until I had satisfactory results with the rustoleum... painted it was very shiny, but when I polished it with Turtle Wax it got dull...
Does anyone have a pic of tremclad / rustoleum with the brush on clear coat? It may be a couple of weeks before I get to that stage, just curious to see other's work. thanks.
Rafael
Posted By: Exit1965
Re: Paint job on a budget!? CONTINUED..page 44........ - 07/27/06 04:48 AM
Quote:
Hello all, this is the blind guy with the knight rider carr... not one reply to the polising question...
anyway, I did anothe coat and left my test piece out in the sun for almost 2 weeks... That should be plenty dry time... I will try the turtle wax polish again and see what happens... if it doesn't work out, then I'll try and find some stinky mineral spirits...
I do have a can of actual gloss black tremclad and clear coat... none of which I wanted to crack open until I had satisfactory results with the rustoleum... painted it was very shiny, but when I polished it with Turtle Wax it got dull...
Does anyone have a pic of tremclad / rustoleum with the brush on clear coat? It may be a couple of weeks before I get to that stage, just curious to see other's work. thanks.
Rafael
I don't remember the polishing question. If your polishing is not leaving a shine- try letting it cure longer, and do it when the temperature is cooler than hot, as hot seems to make the paint a bit softer. Also you might want to put some dry-time between sanding with 2000 and polishing.
When I polished up part of my red paint job, when I polished immediately after wetsanding the small test area, I got a haze. When I went to another part of the car, sanded with 2000, then came back the next day and polished, it polished really well. The difference could have been that it got to dry longer, AND/OR that I gave it some time to settle/dry after wetsanding it.
But doing both of those things should help, and couldn't hurt. That's my plan for my canvas white paint job too. 3 weeks of curing, wetsand with 2000, wait a day or two, then polish.
edit; another variable just came into mind between the first (hazy) and second (good) polish, so now I have NO IDEA what specifically helped me polish better the 2nd time around. The first time, I remember using the soft pad that came with my cheap coleman 6" random orbital buffer. The second time (successful time), I was using the one that's more like a cloth than a pad and seems to be harsher than the pad.
Hope this helps, sorry if it confuses! They are things to try, anyway.
Posted By: Anonymous
Re: Paint job on a budget!? CONTINUED..page 44........ - 07/27/06 12:44 PM
Thanks Exit. I will try this weekend. I ws really impressed with how glossy it was just after drying, I was really looking forward to it being polished and even better... After I accomplish this succesful polish, I will try some tremclad clear and post pics sometimes. Thanks.
Posted By: Anonymous
Re: Paint job on a budget!? CONTINUED..page 44........ - 07/27/06 01:18 PM
Quote:
Quote:
I was planning on getting it anyway to paint the house, but if you guys think it would work with Rustoleum for a car, then it would make my decision to buy it easier by knowing that I could use it for the car as well.
The only thing that I have seen on the topic of sprayers that relates to the topic of car painting with Rustoleum/Tremclad or Brightside is that it needs to be 'HVLP' - high volume low pressure.
I believe that the unit you are looking at would probably work with the paint thinned down to the appropriate level for spraying.
But as noted by one of the other spray testers here, I would keep a supply of handy rollers at your side throughout the spraying to level out all the runs that may ( probably will ) occur.
The key thing to keep in mind when considering spraying is the 'overspray' - where 30% of your paint/thinner mix gets blown into the air and lands just about everywhere except on the car body.
Once the paint is airborne it will mist your entire garage interior with a colorful glow that oddly matches the color you chose for your car body. Lawnmowers, garbage cans, the cats litter, your tool boxes... spare tires, etc all take on this mystic glow.
If you choose to spray 'outside' then expect the overspray to magically appear on anything within airborne radius of your spraying zone... squirrels, cats, grass, the driveway, the neighbors car, etc.
If you are already buying the unit anyhow... then I would say GO AHEAD and experiment with it. You just might get lucky and dial in on a knock out of a paint job. But definitely keep a roller handy to catch those runs or paint splotches that are almost certain to happen.
However, just remember the Charger explanation for the 'roller' paint job.... it was to minimize paint overspray and mess to the minimum.
To paraphrase the old military saying of ' If you got them... smoke them... "... I would say " If you have a sprayer at your disposal... give it a shot'. It can't do anything that a little sandpaper can't remove.
.
Overspray is one of the main reasons why the HVLP was invented it reduces it to almost nothing compared to a conventional production gun. I have a Devilbiss HVLP gun and I've painted with this and can confirm it has very low overspray. I'll put it this way the HVLP is so effective and has such low overspray that it only takes 3 quarters of a gallon to achieve what a conventional gun can achieve with 1 gallon (so that is a 25% reduction in wasted material).
Posted By: 69chargeryeehaa
Re: Paint job on a budget!? CONTINUED..page 44........ - 07/27/06 01:54 PM
Quote:
Hello all, this is the blind guy with the knight rider carr... not one reply to the polising question...
anyway, I did anothe coat and left my test piece out in the sun for almost 2 weeks... That should be plenty dry time... I will try the turtle wax polish again and see what happens... if it doesn't work out, then I'll try and find some stinky mineral spirits...
I do have a can of actual gloss black tremclad and clear coat... none of which I wanted to crack open until I had satisfactory results with the rustoleum... painted it was very shiny, but when I polished it with Turtle Wax it got dull...
Does anyone have a pic of tremclad / rustoleum with the brush on clear coat? It may be a couple of weeks before I get to that stage, just curious to see other's work. thanks.
Rafael
i polish the day after the last coat, but allow overnight to dry, with fans on the car, that really helps. the fans go on the car about 4 hours after paint, after that it's dry enough to get dust on the paint, but not stick. the other thing i notice is that most people think they should get instant results with the polishing, and buff the hood for 5 mins, and expect a mirror shine. the reality is that the turtle wax polishing compound is about a 3000-3500 grit compound, very very fine compound, that's what allows you to buff on soft paint with no chance of burning, or over buffing, and it would take me about a hour (yes, 1 hour minimum) just to buff the hood. this is after wetsanding with 1000+ after the last coat. Also i ONLY use the bonnets that look like a rag, terry cloth bonnets i believe, using lots of compound and LOTS of water.
Posted By: Anonymous
Re: Paint job on a budget!? CONTINUED..page 44........ - 07/27/06 02:42 PM
Quote:
Quote:
Hello all, this is the blind guy with the knight rider carr... not one reply to the polising question...
anyway, I did anothe coat and left my test piece out in the sun for almost 2 weeks... That should be plenty dry time... I will try the turtle wax polish again and see what happens... if it doesn't work out, then I'll try and find some stinky mineral spirits...
I do have a can of actual gloss black tremclad and clear coat... none of which I wanted to crack open until I had satisfactory results with the rustoleum... painted it was very shiny, but when I polished it with Turtle Wax it got dull...
Does anyone have a pic of tremclad / rustoleum with the brush on clear coat? It may be a couple of weeks before I get to that stage, just curious to see other's work. thanks.
Rafael
i polish the day after the last coat, but allow overnight to dry, with fans on the car, that really helps. the fans go on the car about 4 hours after paint, after that it's dry enough to get dust on the paint, but not stick. the other thing i notice is that most people think they should get instant results with the polishing, and buff the hood for 5 mins, and expect a mirror shine. the reality is that the turtle wax polishing compound is about a 3000-3500 grit compound, very very fine compound, that's what allows you to buff on soft paint with no chance of burning, or over buffing, and it would take me about a hour (yes, 1 hour minimum) just to buff the hood. this is after wetsanding with 1000+ after the last coat. Also i ONLY use the bonnets that look like a rag, terry cloth bonnets i believe, using lots of compound and LOTS of water.
While the Turtle Wax compound is OK may I sugest meguiar's diamond cut 2.0 # 84. This is professional compound to be used after the paint. It needs to be applied with the PC or rotary.
Antoher thing is get a rotary with a compound pad. It will save you hours of hand work.
If you want to go by hand I may I reccomend Meguiar Color X (you can get this from the auto shop).
I understand some are using water and getting good resutls. I've used water in the past and it just kills my compound (jut my experience). Usually if you have a good compound and you are getting haze you did not work the product in all the way. You need to work it with several pases until if is almost dusting.
My polishing/wetsanding steps after the car has been painted are as follows:
Wet sand with 1200 grit on the Hitachi rotary on low speed (1-2).
2000 grit by hand wrapped on a sanding block.
1)Meguiars Diamond Cut 2.0 with Compounding pad (wool).
2)PB(Poor Boy) PB SSR 2.5 or 3 with PC (speed 4-5 or even 6) or rotary at speed 1-2 using Lake County Yellow or Orange foam cutting pad.
3)SSR 1 with PC (speed 4-5 or even 6) or rotary at speed 1-2 using Orange foam cutting pad.
4)SSR Sealer with carnuba with PC (speed 4-5 or even 6) or rotary at speed 1-2 and using the white polishing pad from Lake County.
5)PB Naty Paste wax by hand (and please don't try to take it off with the rotary at speed 6 = 3200RPM like the so call detailers do on new cars at dealerships, that's how you get holograms and marring).
Posted By: 78D150CLUB
Re: Paint job on a budget!? CONTINUED..page 44........ - 07/27/06 11:26 PM
I have to say I'm impressed with the roller results that i'm getting.
This is my truck as it was earlier this spring, and I hadn't planned to paint until next year, at least until I found this thread.
My kids named it Godzilla when I first got it a few years back. Big, green and ugly

Posted By: 78D150CLUB
Re: Paint job on a budget!? CONTINUED..page 44........ - 07/27/06 11:29 PM
This is how it looks as of this afternoon.

Posted By: Exit1965
Re: Paint job on a budget!? CONTINUED..page 44........ - 07/28/06 12:57 AM
Quote:
This is how it looks as of this afternoon.
D150, I think that looks good-- but it's hard to tell with all the grainyness. Is that a cellphone cam or something? Maybe take the paint job savings and get a newer digicam.

Posted By: pdqvsix
Re: Paint job on a budget!? CONTINUED..page 44........ - 07/28/06 12:59 AM
The truck is looking good!
Posted By: pdqvsix
Re: Paint job on a budget!? CONTINUED..page 44........ - 07/28/06 01:10 AM
I changed from gloss black to gloss white and have a few coats on the car now and it looks very good.
I can hardly wait to finish and be able to say i did it with a roller and rustoleum paint, when someone asks who painted it.
I'll never have another car with a bad paint job, this is just too easy.
Thanks again 69chargeryeehaa
Posted By: 78D150CLUB
Re: Paint job on a budget!? CONTINUED..page 44........ - 07/28/06 01:11 AM
Actually, I think a cellphone would be better, maybe a
would help. It's one I picked up cheap years ago so that if it got bumped, bruised or lost on a kid's school trip, it wouldn't be a great loss.
I've never gotten around to getting a good one yet.
Maybe I should think about it one day
sorry for the quality, but even grainy, it looks better than it did
Posted By: 69chargeryeehaa
Re: Paint job on a budget!? CONTINUED..page 44........ - 07/28/06 02:11 AM
Quote:
I changed from gloss black to gloss white and have a few coats on the car now and it looks very good.
I can hardly wait to finish and be able to say i did it with a roller and rustoleum paint, when someone asks who painted it.
I'll never have another car with a bad paint job, this is just too easy.
Thanks again Charger69yeehaa
your welcome
Posted By: 69chargeryeehaa
Re: Paint job on a budget!? CONTINUED..page 44........ - 07/28/06 02:12 AM
Quote:
Actually, I think a cellphone would be better, maybe a would help. It's one I picked up cheap years ago so that if it got bumped, bruised or lost on a kid's school trip, it wouldn't be a great loss.
I've never gotten around to getting a good one yet.
Maybe I should think about it one day
sorry for the quality, but even grainy, it looks better than it did
at least now you won't be ashamed to drive it!!!! i think it looks a million times better, great job.
Posted By: Exit1965
Re: Paint job on a budget!? CONTINUED..page 44........ - 07/28/06 04:08 AM
Quote:
Quote:
Actually, I think a cellphone would be better, maybe a would help. It's one I picked up cheap years ago so that if it got bumped, bruised or lost on a kid's school trip, it wouldn't be a great loss.
I've never gotten around to getting a good one yet.
Maybe I should think about it one day
sorry for the quality, but even grainy, it looks better than it did
at least now you won't be ashamed to drive it!!!! i think it looks a million times better, great job.
There's going to be a painted-with roller convention one of these days. I bet eventually, with more and more people learning about it, Maaco and the like will see a drop off in business from this technique. Not to mention increased sales of rustoleum and more places carrying stinky mineral spirits.
Better  for the Maaco mafia, 69charger
Posted By: Anonymous
Re: Paint job on a budget!? CONTINUED..page 44........ - 07/28/06 12:31 PM
So I painted my car last week (with brightside). It looks great from far away as I said. Eh from up close. I'm trying to fix some of the up close spots now that I have time...
I have a bunch of spots with peel (I'll sand down and redo to take care of that no big deal)..
I also have a problem of some of my panels have roller marks on... I'm not sure how to get rid of them per se. The brush across it (4 inch foam brush) seemed to get rid of most. Any idea's? Should I just put down another coat after a wetsand and see if it goes away?
I also have a few roller lines that the paint is just not glossy.. The rest is however around it. Did I work that section to much? I'm not sure what would produce that...
And finally would polishing take care of any of these problems? I've not done any yet to the car. I've just been driving it because I needed my car.
Posted By: Exit1965
Re: Paint job on a budget!? CONTINUED..page 44........ - 07/28/06 01:00 PM
After I paint, there are some areas that are not glossy. It's almost like not enough paint was put there or something.. but after wetsanding, everything looks the same. So after wetsanding and polishing, everything should look the same shiny way..
Posted By: 69chargeryeehaa
Re: Paint job on a budget!? CONTINUED..page 44........ - 07/28/06 01:41 PM
Quote:
Quote:
Quote:
Actually, I think a cellphone would be better, maybe a would help. It's one I picked up cheap years ago so that if it got bumped, bruised or lost on a kid's school trip, it wouldn't be a great loss.
I've never gotten around to getting a good one yet.
Maybe I should think about it one day
sorry for the quality, but even grainy, it looks better than it did
at least now you won't be ashamed to drive it!!!! i think it looks a million times better, great job.
There's going to be a painted-with roller convention one of these days. I bet eventually, with more and more people learning about it, Maaco and the like will see a drop off in business from this technique. Not to mention increased sales of rustoleum and more places carrying stinky mineral spirits.
Better for the Maaco mafia, 69charger
i'm ready for them i'm sure my roller possi will kick their a$$!!!!
Posted By: Anonymous
Re: Paint job on a budget!? CONTINUED..page 44........ - 07/28/06 03:31 PM
Posted By: Anonymous
Re: Paint job on a budget!? CONTINUED..page 44........ - 07/28/06 04:45 PM
Quote:
So I painted my car last week (with brightside). It looks great from far away as I said. Eh from up close. I'm trying to fix some of the up close spots now that I have time...
I have a bunch of spots with peel (I'll sand down and redo to take care of that no big deal)..
I also have a problem of some of my panels have roller marks on... I'm not sure how to get rid of them per se. The brush across it (4 inch foam brush) seemed to get rid of most. Any idea's? Should I just put down another coat after a wetsand and see if it goes away?
I also have a few roller lines that the paint is just not glossy.. The rest is however around it. Did I work that section to much? I'm not sure what would produce that...
And finally would polishing take care of any of these problems? I've not done any yet to the car. I've just been driving it because I needed my car.
Wetsand and polish will bring the gloss. Wetsanding should be able to remove the roller marks.
Posted By: GoodysGotaCuda
Re: Paint job on a budget!? CONTINUED..page 44........ - 07/28/06 10:29 PM
Hey guys, sorry for chiming in. I was out of the loop when the first part of the thread was moved to the archives. Has there been any improvements in metods since the first thread?
I saw the double roller metod, i was skimming through. Is there any 'ideal' mix between mineral spirits and paint thats been tested/proved to be good?
Just wondering if there have been any discoveries/improvements over things since the first thread
Posted By: Exit1965
Re: Paint job on a budget!? CONTINUED..page 44........ - 07/28/06 10:46 PM
The double roller was with respect to using Brightside (boat) paint, which can be put on without any thinner and seems to shine well.
With the mineral spirits mix, make it close to water and put it on thin. No exact numbers, but maybe I'll measure it out soon just so I know. I think it's [Edited by Moparts - Keep it clean] near 40 percent.
I must be putting it on REAL thin. I have barely used 2 quarts of the canvas white. I still need to do a couple more coats on the roof, and one more on the hood, to completely cover certain spots.
Posted By: Anonymous
Re: Paint job on a budget!? CONTINUED..page 44........ - 07/29/06 03:59 AM
Quote:
The double roller was with respect to using Brightside (boat) paint, which can be put on without any thinner and seems to shine well.
With the mineral spirits mix, make it close to water and put it on thin. No exact numbers, but maybe I'll measure it out soon just so I know. I think it's [Edited by Moparts - Keep it clean] near 40 percent.
I must be putting it on REAL thin. I have barely used 2 quarts of the canvas white. I still need to do a couple more coats on the roof, and one more on the hood, to completely cover certain spots.
40 percent! Wow. I thought I read about 200 pages back someone saying between 10-15 percent. In fact I downloaded an excel sheet that calculated the volume of spirits based on the percent you want and the amount of enamel used.
Oh, Exit... I read about 150 pages back that you are using the quarts instead of the gallons due to VOC in Cali. Can you expand on that? What problems did you have?
By the way.... I to you and 69charger. You guys are DIY saints.
Posted By: Exit1965
Re: Paint job on a budget!? CONTINUED..page 44........ - 07/29/06 04:40 AM
Yes, that was my spreadsheet! Glad to see someone is using it. I do remember the 10-15% numbers, but in my experience (granted I am not measuring, just pouring) I would say it's up around 40% to get to get it thin enough. Very thin.
I will make a measurement soon. I think it also depends on the temperatures you're going to be painting in - in cold weather you might get away with a thicker mixture because it will have more time to lay down on its own because the solvents wont leave as quickly. I have been painting in 85 degree+ weather lately, and it works best for me when really thinned down.
10-15 percent - I can't imagine using anything that thick and not getting orange peel (which I personally try to avoid since I hate the wetsanding part). Then again, my paint job seems to take a few more coats than the "standard" 6..
Oh and about the VOCs.. all I know is that rustoleum told me that they were regulated VOC-wise on gallons, but not on quarts. And I read elsewhere that the lower VOC stuff wasn't as easy to work with, didn't perform as well or something. So I went with the quarts. I think the VOC is mostly related to the solvents in the paint, and since we are adding mineral spirits to it, the VOC of the original mixture might not have much of an effect. I just thought the higher VOC might be better for the paint job, but I really don't know specifically why. Quarts only cost a few more dollars for 4 vs. 1 gallon, so if there is any advantage, it's worth the extra $, if not, you might be able to returb an unused can if you don't end up needing a whole gallon, or you can keep a fresh, unopened quart can for backup. I'm just barely into my 3rd can, and I'm nearly done. I will probably get 1/2 way through the can when I am completely done with the engine bay, doors and such.
Posted By: Anonymous
Re: Paint job on a budget!? CONTINUED..page 44........ - 07/29/06 04:56 AM
Yeah, I live in San Diego...last few days it's been 95, before that over 100 (116.2 one day) This weekend will be around 85...I'm gonna take advantage and start working on my car. I've been so excited for the last few weeks, reading and researching. I spent a bit more than most people have reported, but then I'm going gloss black so prep work needs to be immaculate.
Well...off to get some prep work done
Edit: Thanks for you thoughts on VOC's. I'll return my gallon and get 4 quarts. My charger is a lot smaller than yours and 69charger's, so 3 will be more than enough. Keeping an extra quart handy is a good idea.
Posted By: GoodysGotaCuda
Re: Paint job on a budget!? CONTINUED..page 44........ - 07/29/06 07:53 AM
Thanks for those that have responded.
Can you guys recommend a recipie as far as mixture, sanding method, etc that would go under...
* Hides flaws well
* Covers well - 2-3 coats would do fine
I'm looking to get my Duster all one color, not quite looking to spend many days while its 110* outside rolling and polishing. I'm thinking Pewter Grey as far as color, what mineral spirit/paint mix should go with. I'm new to mixing it to a actual consistancy, I would go with gallon sealable plastic measuring jug, pour the whole quart or however much, and mix the paint in one shot. And do the same for however many other coats are needed, but i'd like it the same coat to coat, not one way on the 1/4 and another on the hood..
6" foam rollers still the weapon of choice?
thanks, i'll be doing this maybe next week if i can find my color. Going for a primer look, just with the protection of paint.

Posted By: Anonymous
Re: Paint job on a budget!? CONTINUED..page 44........ - 07/29/06 09:10 AM
Hi Everyone. My name is Camron ("Hi Camron"), and I'm addicted to reading "Paint job on a budget" on moparts.com!
I've been reading for over two weeks straight through from the beginning, each and every post. I was directed here from the Scirocco.org list, and here's my story:
Summer 2001, bought a beautiful shiny black (new paint) 1986.5 Scirocco 16V from Connecticut, shipped to Portland, OR. Babied the car, but early 2002 I was "sandwiched" when traffic stopped suddenly, and the driver behind me smashed my Scirocco into the car in front of me. The car was borderline totaled, but I decided to get the car fixed. The shop that did the work did an "adequate" job of getting the car back to normal, and looked pretty OK with BC/CC over new primer on 100% of the car for maybe 2+ years. The car then developed a funny spot on the hood, which a year later turned into peeling clearcoat. The paint and body shop was long gone, so I had to live with "ugly peeling hood", which had just gotten worse and spread to the rest of the car. The car looks SO BAD right now that it's an embarrassment to drive. As much as I loved my Scirocco, there was no way I was going to dump thousands in new paint for a totaled/rebuilt car.
Now things have changed! I have decided to try the Brightside paint, gloss Black, as there are at least two marine stores in my area, and finding the paint was easy.
MY QUESTIONS:
I do realize that it is necessary to remove ALL CLEARCOAT from the basecoat - peeling or not... what is the ideal method? Dry sand? Wet sand? Power sand? Grits?
Is it realistic to expect that I would be able to remove the CC without sanding through the BC to primer? Will Brightside apply and bond to this BC if properly prepped, or will I need to re-primer first?
OR is it necessary to also completely remove this basecoat before repriming and then painting?
Since the car had been in the bodyshop just a few years ago, there is very little in the way of bodywork needed... just a small door ding or two, maybe some light stone damage in the factory bodykit, and a couple spots that were "rust fixes" where the bondo swelled over time under the paint.
Thanks everyone, I'm ready to get to work!
Posted By: Marq
Re: Paint job on a budget!? CONTINUED..page 44........ - 07/29/06 12:36 PM
Quote:
I do realize that it is necessary to remove ALL CLEARCOAT from the basecoat - peeling or not... what is the ideal method? Dry sand? Wet sand? Power sand? Grits?
I would look upon this paint job the same as if you were taking it in to MAACO for one of their 'off the menu' paint jobs. Normally... when you bring in a car to MAACO to get a paint freshening... they do a 'scuff sand'. That removes the surface layer, scuffs up the current paint job to provide a substrate that the new paint can adhere to. If it was me and I was faced with your current situation... I would go to Home Depot and pick up some of the 220 Grit Norton's 3X sand paper. You get about 3 sheets of paper in a pack. I would basically aand down the entire surface to the point where everything is level and equally dulled ( scuffed ). Once that task is done I would wipe down the entire car with mineral spirits and a rag to remove all the residue, dust and crap that has been loosened by the sanding stage. The reason I would go with the 220 Grit is that it is fine enough to remove the paint and yet also fine enough to not leave scratches or swirls. If you are beginning with a black paint job... your scuffing should leave you with a black scuffed car. I would try to not take the sanding down to the primer level.
Quote:
Is it realistic to expect that I would be able to remove the CC without sanding through the BC to primer? Will Brightside apply and bond to this BC if properly prepped, or will I need to re-primer first?
From what I have seen with Brightside, it really doesn't care if you are putting it directly on metal, fiberglass, bondo or CC or BC. What is most important is that the surface you are painting on to is structurally sound ( ie don't paint over paint that is flaking off or peeling ) and make sure that the surface is at its smoothest and most level. The quality of your paint job will be directly related to how smooth the surface is that you are painting on to. This is doubly true of any black paint... where the reflection capability of black paint will amplify any flaws in the subsurface. Since you are black and are going black... you don't need a primer... because as we noted before the primer's main value to us is to provide a uniform color on the subsurface so that when the paint is applied it exhibits a uniform color on all the body. But a scuffed black paint job... that is going to have a black laid on it.. can basically use the scuffed black layer as the primer 'uniform' color layer.
Quote:
Since the car had been in the bodyshop just a few years ago, there is very little in the way of bodywork needed... just a small door ding or two, maybe some light stone damage in the factory bodykit, and a couple spots that were "rust fixes" where the bondo swelled over time under the paint.
As noted above... the better the body beneath the better the result when painted. A small door ding can become a real eye catcher when fresh black paint is applied and amplifies the look of the ding. I would try to work out the dings and put a black primer over the repaired area ( to level the 'uniform color' of the body prior to painting. It may take a little more time and work to prep your body... but with black paint being applied you almost need to in order to get a final result that is a one footer... as compared to a ten footer.
.
Posted By: Marq
Re: Paint job on a budget!? CONTINUED..page 44........ - 07/29/06 12:50 PM
Quote:
Can you guys recommend a recipie as far as mixture, sanding method, etc that would go under...
* Hides flaws well
* Covers well - 2-3 coats would do fine
Since you are hoping to end up at a mineral gray type color... I would suggest that you do one uniform PRIMER color on the entire car. In the photo you provided, it appears you have a black hood and a white or light colored body.
If the entire car is going to go to the mineral gray color.. you should decided if you want it to a dark mineral gray or a light mineral gray - because the primer color you apply to the body will impact the end color of the paint job. A white primer with a gray mineral applied over it will eventually give you a lighter looking mineral gray when the job is done - as compared to a car that began with a gray primer beneath.
I really liked the coating ability of the Interlux PRE-Cote primer. You can roll it on... using the same application methods that you will be later applying the paint. It hides just about everything colorwise and is thick enough that it can fill in any minor scratchs or swirls in the subsurface.
You could do two coats of the primer. The first coat would be straight our of the can and for the second coat you can cut the primer with 50% of the paint that you will subsequently be using to paint the body with.
For both primer coats I would follow sand the primered layers using a 400 grit to smooth the surface in preparation for the addition of the next layer.
If you are using the Brightside paint.. I think you will have to be ready to do about FIVE layers... Two for the primer painting layers and three for the actually painting with the color.
If you are planning to paint with the Tremclad/Rustoleum combination... I think you will have to be ready to do about TEN layers.. two for the primer painting layers and eight for the actually painting with the color of your choice.
From what I have read of Charger's comments regarding the Tremclad/Rustoleum... he usually goes directly to paint with the mineral spirt cut paint and doesn't go to a primer level first. But as we have noted with Exit's project car ( when he was using red, it took him up to 10 layers of painting to get a uniform color so that you could not see the ghost of various colors that were on the initial starting layer.
..
Posted By: Anonymous
Re: Paint job on a budget!? CONTINUED..page 44........ - 07/29/06 04:38 PM
Thanks for the input! I'll put it to good use.
Posted By: GoodysGotaCuda
Re: Paint job on a budget!? CONTINUED..page 44........ - 07/29/06 07:07 PM
Quote:
Quote:
Can you guys recommend a recipie as far as mixture, sanding method, etc that would go under...
* Hides flaws well
* Covers well - 2-3 coats would do fine
Since you are hoping to end up at a mineral gray type color... I would suggest that you do one uniform PRIMER color on the entire car. In the photo you provided, it appears you have a black hood and a white or light colored body.
If the entire car is going to go to the mineral gray color.. you should decided if you want it to a dark mineral gray or a light mineral gray - because the primer color you apply to the body will impact the end color of the paint job. A white primer with a gray mineral applied over it will eventually give you a lighter looking mineral gray when the job is done - as compared to a car that began with a gray primer beneath.
I really liked the coating ability of the Interlux PRE-Cote primer. You can roll it on... using the same application methods that you will be later applying the paint. It hides just about everything colorwise and is thick enough that it can fill in any minor scratchs or swirls in the subsurface.
You could do two coats of the primer. The first coat would be straight our of the can and for the second coat you can cut the primer with 50% of the paint that you will subsequently be using to paint the body with.
For both primer coats I would follow sand the primered layers using a 400 grit to smooth the surface in preparation for the addition of the next layer.
If you are using the Brightside paint.. I think you will have to be ready to do about FIVE layers... Two for the primer painting layers and three for the actually painting with the color.
If you are planning to paint with the Tremclad/Rustoleum combination... I think you will have to be ready to do about TEN layers.. two for the primer painting layers and eight for the actually painting with the color of your choice.
From what I have read of Charger's comments regarding the Tremclad/Rustoleum... he usually goes directly to paint with the mineral spirt cut paint and doesn't go to a primer level first. But as we have noted with Exit's project car ( when he was using red, it took him up to 10 layers of painting to get a uniform color so that you could not see the ghost of various colors that were on the initial starting layer.
..
Thanks, actually for now. I do not have any plans to paint the car. I'd just like it uniform color/primer look. Can Rustoleum Primer be rolled on? How would that be thinned?
So with not worrying about future car color, can i roll primer?
Also how are you guys storing things? As far as pre-mixed rustoleum paint? cleaning rollers? cleaning trays?
Thanks
Posted By: Anonymous
Re: Paint job on a budget!? CONTINUED..page 44........ - 07/29/06 11:52 PM
Boy...I spent most of the day preping and priming the driver side fender. It had been repainted, and I'm guessing there was a contaminant on the primer when they shot the base...it had polkadot spots all over the upper third, had to take it down to factory color. I'm also preping the front facia, which has a plethora of nooks and crannies
PITA!
Oh well, prep is the key. Since I'm going with gloss black I'll take my time.
To see what the car looked like before any work
click here
Posted By: 78D150CLUB
Re: Paint job on a budget!? CONTINUED..page 44........ - 07/30/06 12:37 AM
...Submitted for your approval..A man destined by fate to a terrible paint job...until he stumbles onto a miraculous potion to relieve the agony...you are moving through a world of sight and color...there's the signpost up ahead....The TremClad Zone.
(apologies to Rod Serling)
Looks a bit like my truck did early in the year, big difference now. I sort of rushed some of the bodywork on mine, but the nice thing is, I can go back and finish up, recoat and it will blend right in. Plus, if you want to add a coat or two a couple of year down the road, it's no problem.
I hope it turns out well for you, I know I'm really impressed with my results.
Posted By: Marq
Re: Paint job on a budget!? CONTINUED..page 44........ - 07/30/06 02:10 AM
Quote:
Thanks, actually for now. I do not have any plans to paint the car. I'd just like it uniform color/primer look. Can Rustoleum Primer be rolled on? How would that be thinned?
Thanks
Yes... you can do the primer with a roller. In fact further back in this discussion thread, there was a link to a body shop association web site where they were actually lauding the 'rolling' of primer instead of spraying it. It would seem that the auto body industry is calling the 'rolling of primer' the next logical thing for shops to implement. Save application time... cuts down on noxious gases in the air ( enviromentally friendly ) etc.
I think the previous discussion in this thread about the Tremclad/Rustoleum primer was mixed on whether to thin it or use it 'straight'. It would appear that both work and the merits of either way balance out no matter which way you go...
If you thin the primer :
PRO : By thinning it you can get it to lay down smoother and it cures quicker...
CON : By thinning the primer you may affect its adhesion quality. You also will have a thinner primer surface to work with when you sand it prior to painting.
If you apply the Tremclad/Rustoleum primer straight from the can..
PRO : You will get a thicker layer of primer to help cover minor surface glitches and you will have a thicker surface to work with when sanding prior to painting. Adhesion should be at its best since you are using the primer in an untampered state.
CON : The curing time of the primer will be longer because the primer is thicker.
With the Brightside Pre-Cote primer... both of the above things apply.
With the Brightside Pre-Cote primer you can add 50% of your chosen color to the primer to give it a heads start towards the end color.
The same may apply with the Tremclad/Rustoleum primer. In that you would lay down an initial layer of straight primer. Then you would follow up with a second layer that is a blend 50% - 50% of the Tremclad/Rustoleum primer and the end color paint.
.
Posted By: Marq
Re: Paint job on a budget!? CONTINUED..page 44........ - 07/30/06 02:17 AM
Quote:
Since I'm going with gloss black I'll take my time.
To see what the car looked like before any work click here
Yup... I think the difference is going to be night and day for you. As they say... the paint job is 90% prep and 10% painting. But I think you are going to be able to renew your love affair with your can once you get a nice glossy black skin back on that puppy
.
Posted By: Exit1965
Re: Paint job on a budget!? CONTINUED..page 44........ - 07/30/06 02:57 AM
Speaking of mix and technique. I was working with a thicker mixture than usual just now when I painted my roof again, and it occured to me that I never posted the fact that I had not been doing the re-roll with light pressure part after a minute. The 20+ times I've painted now, has been with really thin paint, and not rolling over lightly a minute or so after first putting the paint down. With the thin mixture I normally worked with, there would be no lasting bubbles.
Tonight, it was a thicker mixture, and there were lasting bubbles. Bubbles that would only go away if I rolled over them very lightly. And at the same time, I have put down a thicker coat of paint. So far, it appears to be self leveling very well.
So if everyone else has been using a thicker mixture, but doing the roll-over about a minute after first putting the paint down, that would explain how a thicker mixture could work without much orange peel, since the re-roll seems to promote self leveling by picking up a bit of paint from the surface and spreading it down again. All along I've been doing thin coats, and never re-rolling.
Had I been using thicker mixture (or putting more of the thinner mixture on at a time) and re-rolling, as was the original prescription, I might well be done by now. Live and learn.

Posted By: GoodysGotaCuda
Re: Paint job on a budget!? CONTINUED..page 44........ - 07/30/06 05:58 AM
Quote:
Quote:
Thanks, actually for now. I do not have any plans to paint the car. I'd just like it uniform color/primer look. Can Rustoleum Primer be rolled on? How would that be thinned?
Thanks
Yes... you can do the primer with a roller. In fact further back in this discussion thread, there was a link to a body shop association web site where they were actually lauding the 'rolling' of primer instead of spraying it. It would seem that the auto body industry is calling the 'rolling of primer' the next logical thing for shops to implement. Save application time... cuts down on noxious gases in the air ( enviromentally friendly ) etc.
I think the previous discussion in this thread about the Tremclad/Rustoleum primer was mixed on whether to thin it or use it 'straight'. It would appear that both work and the merits of either way balance out no matter which way you go...
If you thin the primer :
PRO : By thinning it you can get it to lay down smoother and it cures quicker...
CON : By thinning the primer you may affect its adhesion quality. You also will have a thinner primer surface to work with when you sand it prior to painting.
If you apply the Tremclad/Rustoleum primer straight from the can..
PRO : You will get a thicker layer of primer to help cover minor surface glitches and you will have a thicker surface to work with when sanding prior to painting. Adhesion should be at its best since you are using the primer in an untampered state.
CON : The curing time of the primer will be longer because the primer is thicker.
With the Brightside Pre-Cote primer... both of the above things apply.
With the Brightside Pre-Cote primer you can add 50% of your chosen color to the primer to give it a heads start towards the end color.
The same may apply with the Tremclad/Rustoleum primer. In that you would lay down an initial layer of straight primer. Then you would follow up with a second layer that is a blend 50% - 50% of the Tremclad/Rustoleum primer and the end color paint.
.
Thanks. So how would i thin Rustoleum primer? I'd like to stick to that because i can get it locally with no hassle. I wouldnt stray too far from out of the can, just a little thinner is what i would prefer. If i remember right it is laytex based, so how could i thin the primer?
Thanks!
Posted By: Anonymous
Re: Paint job on a budget!? CONTINUED..page 44........ - 07/30/06 09:38 AM
A question to those who might know. Now we've pretty much completed our slacker method (me and my friend did his car). It came out nice but I would say we did prob half as good job of probably most the people on here (hey it looks better then before, thats what counts :P).
My question is though, I will be doing this to my car and since I love my car more I will do a lot more testing before I take it to the car, but I haven't gotten the chance to pick up a panel to test yet.
My main question is, would anyone think it would be easier sanding down to near bare metal, or bare metal itself, with something like >
http://www.vwtrendsweb.com/tech/0401vwt_super15_s.jpg and then laying thin coats. I'm thinking it might help, maybe it's just me, I could see it needing more coats because of the bareness, but has anyone tried this? I'm sort of interested in doing so (since I want to do gloss white on my black car and I think doing that might be somewhat easier).
Let me know. Also, could you use that same tool to just scuff the paint quickly compared to using a block and paper alone? Advice would be a appreciated.
Posted By: Exit1965
Re: Paint job on a budget!? CONTINUED..page 44........ - 07/30/06 01:02 PM
Quote:
A question to those who might know. Now we've pretty much completed our slacker method (me and my friend did his car). It came out nice but I would say we did prob half as good job of probably most the people on here (hey it looks better then before, thats what counts :P).
My question is though, I will be doing this to my car and since I love my car more I will do a lot more testing before I take it to the car, but I haven't gotten the chance to pick up a panel to test yet.
My main question is, would anyone think it would be easier sanding down to near bare metal, or bare metal itself, with something like > http://www.vwtrendsweb.com/tech/0401vwt_super15_s.jpg and then laying thin coats. I'm thinking it might help, maybe it's just me, I could see it needing more coats because of the bareness, but has anyone tried this? I'm sort of interested in doing so (since I want to do gloss white on my black car and I think doing that might be somewhat easier).
Let me know. Also, could you use that same tool to just scuff the paint quickly compared to using a block and paper alone? Advice would be a appreciated.
That tool is way too harsh for scuffing,it eats through paint and rust very quickly (depending on what drill it's attached to) and would be OK for stripping, but I would avoid stripping the whole car. There are scotch brite pads made for scuffing. I havent used them, I used some 320 grit wrapped around one of those soft sanding blocks for the areas of my car that I wanted to just scuff and go.
How is your friend's paint unsatisfactory? It seems like most appearance problems can be fixed by wetsanding with 2000, waiting a bit, then polishing. That would take care of orange peel and crap that landed in the paint.
As a followup to my using a thicker mixture - as of now, the paint is still tacky (after 11 hours at about 75 degrees). The thinner mixture would normally be dry by now.
Posted By: Anonymous
Re: Paint job on a budget!? CONTINUED..page 44........ - 07/30/06 02:23 PM
Quote:
Quote:
A question to those who might know. Now we've pretty much completed our slacker method (me and my friend did his car). It came out nice but I would say we did prob half as good job of probably most the people on here (hey it looks better then before, thats what counts :P).
My question is though, I will be doing this to my car and since I love my car more I will do a lot more testing before I take it to the car, but I haven't gotten the chance to pick up a panel to test yet.
My main question is, would anyone think it would be easier sanding down to near bare metal, or bare metal itself, with something like > http://www.vwtrendsweb.com/tech/0401vwt_super15_s.jpg and then laying thin coats. I'm thinking it might help, maybe it's just me, I could see it needing more coats because of the bareness, but has anyone tried this? I'm sort of interested in doing so (since I want to do gloss white on my black car and I think doing that might be somewhat easier).
Let me know. Also, could you use that same tool to just scuff the paint quickly compared to using a block and paper alone? Advice would be a appreciated.
That tool is way too harsh for scuffing,it eats through paint and rust very quickly (depending on what drill it's attached to) and would be OK for stripping, but I would avoid stripping the whole car. There are scotch brite pads made for scuffing. I havent used them, I used some 320 grit wrapped around one of those soft sanding blocks for the areas of my car that I wanted to just scuff and go.
How is your friend's paint unsatisfactory? It seems like most appearance problems can be fixed by wetsanding with 2000, waiting a bit, then polishing. That would take care of orange peel and crap that landed in the paint.
As a followup to my using a thicker mixture - as of now, the paint is still tacky (after 11 hours at about 75 degrees). The thinner mixture would normally be dry by now.
I have to agree with Exit. I stripped my car down to bare metal and reget it completely. Live and learn but I would have much rather sanded down the rusted sections then scuffed the rest. It would have saved me a LOT of bondo and sanding. If you're worried about the white on black taking an unbearable number of coats, you could look into the light gray primer or even use the light gray rustoleum for a few coats to lessen the shark difference between the white and black then coat overtop that with the white. If you do decide to strip the car to bare metal, look back to page 18 or 19 where I posted I was using the wirewheel and read the replies about using a 80 grit disc. There's a link there that had good information that I could have used before I started. And now, I head back to the garage for more sanding.... JOY!
Posted By: Anonymous
Re: Paint job on a budget!? CONTINUED..page 44........ - 07/30/06 03:20 PM
Quote:
Quote:
A question to those who might know. Now we've pretty much completed our slacker method (me and my friend did his car). It came out nice but I would say we did prob half as good job of probably most the people on here (hey it looks better then before, thats what counts :P).
My question is though, I will be doing this to my car and since I love my car more I will do a lot more testing before I take it to the car, but I haven't gotten the chance to pick up a panel to test yet.
My main question is, would anyone think it would be easier sanding down to near bare metal, or bare metal itself, with something like > http://www.vwtrendsweb.com/tech/0401vwt_super15_s.jpg and then laying thin coats. I'm thinking it might help, maybe it's just me, I could see it needing more coats because of the bareness, but has anyone tried this? I'm sort of interested in doing so (since I want to do gloss white on my black car and I think doing that might be somewhat easier).
Let me know. Also, could you use that same tool to just scuff the paint quickly compared to using a block and paper alone? Advice would be a appreciated.
That tool is way too harsh for scuffing,it eats through paint and rust very quickly (depending on what drill it's attached to) and would be OK for stripping, but I would avoid stripping the whole car. There are scotch brite pads made for scuffing. I havent used them, I used some 320 grit wrapped around one of those soft sanding blocks for the areas of my car that I wanted to just scuff and go.
How is your friend's paint unsatisfactory? It seems like most appearance problems can be fixed by wetsanding with 2000, waiting a bit, then polishing. That would take care of orange peel and crap that landed in the paint.
As a followup to my using a thicker mixture - as of now, the paint is still tacky (after 11 hours at about 75 degrees). The thinner mixture would normally be dry by now.
Alright, thanks for the info. As for the scotch bright pads, are those attachments for the drill? If not no big deal, I sanded one car, can always do another.
The paint on my friends car is unsatisfactory not because the method doesnt work, because we took shortcuts. His car was way rusted (was an east coast NY car) and the paint was near oxidizing and just looked horrid. Both of us wanted to try this method so we did, but we both dont have a lot of time with work and school in the way. So we did it quickly, not putting it on very thin (very much orange peel) doing some semi ok wetsanding, and we will soon polish.
Overall, again it looks probably 100x better then it did before, but it could look a bit better, but no reason to complain, it was there just for the purpose of looking better, and to learn on how to roll on it, wetsand...etc
I dont have any rust on my car other then a single spot so probably can just strip that down and bondo if I do need to. Also I do have a few dents and dings, I will see if there is any way I can get them out without having to do some body repair...but if I do, should I just use bondo on the dents and make it even with the rest of the car?
And Exit, sorry about not replying about the spray, I believe I remember seeing it when I went last time (was near end of june) I'm going to be going by today so I'll let you know if I see any canvas white in spray form.
Posted By: _Scott_
Re: Paint job on a budget!? CONTINUED..page 44........ - 07/30/06 03:45 PM
Quote:
(hey it looks better than before, that's what counts :P).
The difference in the amount of work between a great looking result and one that's "hey it looks better than before", is attention to detail and more time. If you spend more time up front perfecting all the details, you'll be happier in the end, and it will be less total work than going back to fix areas you are not happy with.
Quote:
would anyone think it would be easier sanding down to near bare metal
If the existing paint is sticking well, not cracked or peeling, leave it there and just prep it. I only recommend stripping to bare metal if the car already has three or more paint jobs on it (including the original) or, as noted, the paint is falling apart and cracking/peeling/etc. If it is just cracking/peeling, only strip those areas where it needs to be stripped. It's rarely necessary to strip the whole car.
Quote:
I want to do gloss white on my black car
I'm pretty sure that's a crime. If it isn't, it should be. Maybe it's just me
Posted By: GoodysGotaCuda
Re: Paint job on a budget!? CONTINUED..page 44........ - 07/30/06 04:54 PM
Quote:
Quote:
Quote:
Thanks, actually for now. I do not have any plans to paint the car. I'd just like it uniform color/primer look. Can Rustoleum Primer be rolled on? How would that be thinned?
Thanks
Yes... you can do the primer with a roller. In fact further back in this discussion thread, there was a link to a body shop association web site where they were actually lauding the 'rolling' of primer instead of spraying it. It would seem that the auto body industry is calling the 'rolling of primer' the next logical thing for shops to implement. Save application time... cuts down on noxious gases in the air ( enviromentally friendly ) etc.
I think the previous discussion in this thread about the Tremclad/Rustoleum primer was mixed on whether to thin it or use it 'straight'. It would appear that both work and the merits of either way balance out no matter which way you go...
If you thin the primer :
PRO : By thinning it you can get it to lay down smoother and it cures quicker...
CON : By thinning the primer you may affect its adhesion quality. You also will have a thinner primer surface to work with when you sand it prior to painting.
If you apply the Tremclad/Rustoleum primer straight from the can..
PRO : You will get a thicker layer of primer to help cover minor surface glitches and you will have a thicker surface to work with when sanding prior to painting. Adhesion should be at its best since you are using the primer in an untampered state.
CON : The curing time of the primer will be longer because the primer is thicker.
With the Brightside Pre-Cote primer... both of the above things apply.
With the Brightside Pre-Cote primer you can add 50% of your chosen color to the primer to give it a heads start towards the end color.
The same may apply with the Tremclad/Rustoleum primer. In that you would lay down an initial layer of straight primer. Then you would follow up with a second layer that is a blend 50% - 50% of the Tremclad/Rustoleum primer and the end color paint.
.
Thanks. So how would i thin Rustoleum primer? I'd like to stick to that because i can get it locally with no hassle. I wouldnt stray too far from out of the can, just a little thinner is what i would prefer. If i remember right it is laytex based, so how could i thin the primer?
Thanks!
Posted By: 69chargeryeehaa
Re: Paint job on a budget!? CONTINUED..page 44........ - 07/30/06 05:03 PM
quite honestly primer is just a wast of time with this method and THIS paint, remember what it's called, and what it's original intent is for. primer just adds work, and helps those who are insecure sleep like little babies!!!, if you do prime, it's only adding a extra layer of paint that adds to less structual stability, and allows the paint to chip eaiser than without primer, and a thin layer of paint. this paint is allready formulated to be painted over rusted metal, auto paints are not, that's where the primer comes in (not to be used over rust) but you get my point. i would absoultly never strip a car to bare metal UNLESS: paint is peeling/cracking, or there is allready over 3 layers of previous paint jobs, even in the later case i would only strip down to the last "original" paint, and go over that, you can tell when your fixing rust, where and how many layers of paint there are on the car.
Exit - your method of thinnnnnnn layers helps with peel, and cuts wetsanding, but i would use the 10-20% thinned paint, and only do 5-6 coats, and have more wetsanding, that's why you need 10+ coats to get full coverage, and with thicker paint you get coverage in 4-6 coats, but more wetsanding time, either method works, but i bet now that you got the hang of it you could do a coat on the outside in about a hour or so.
Someone asked before (forgot who) how to clean the trays, rollers, ect...basically i use a new roller every day, and the paint tray i just clean with mineral spirits and towel papaers, if i am painting the same day i put the roller in a plastic bag, load it up before with LOTS of paint, then when you go to use it it is fine, but i find after 1 day and about 2 coats, the rollers don't work as well, and a new one makes a big difference, plus they are cheap if you buy them in a 5pack, which are about $1 a roller, and i'm not THAT cheap!!!
Posted By: GoodysGotaCuda
Re: Paint job on a budget!? CONTINUED..page 44........ - 07/30/06 08:50 PM
Quote:
quite honestly primer is just a wast of time with this method and THIS paint, remember what it's called, and what it's original intent is for. primer just adds work, and helps those who are insecure sleep like little babies!!!, if you do prime, it's only adding a extra layer of paint that adds to less structual stability, and allows the paint to chip eaiser than without primer, and a thin layer of paint. this paint is allready formulated to be painted over rusted metal, auto paints are not, that's where the primer comes in (not to be used over rust) but you get my point. i would absoultly never strip a car to bare metal UNLESS: paint is peeling/cracking, or there is allready over 3 layers of previous paint jobs, even in the later case i would only strip down to the last "original" paint, and go over that, you can tell when your fixing rust, where and how many layers of paint there are on the car.
Well its not really that im 'insecure' over the paint. It is just that i don't actually want to paint a color red/blue/green/etc at the moment, and i dont want to worry about polishing the finish and such. I want the car one color. I'd rather not worry about peel, wetsanding, or polishing. If i can thin the primer, roll it on and not have a care for orange peel or polishing? thats what i'm looking for at the moment.
So how is it thinned?
Thanks.
Posted By: 78D150CLUB
Re: Paint job on a budget!? CONTINUED..page 44........ - 07/30/06 09:45 PM
Regarding the foam rollers, my wife found the very same roller in a 3 pack at the local dollar store. They seem to work as well as the ones from Can. Tire, and they have the one straight edge, not rounded on both. I found a big difference in roller lines with the straight, doesn't leave as much on overlap.
Posted By: Anonymous
Re: Paint job on a budget!? CONTINUED..page 44........ - 07/30/06 11:57 PM
hey guys, i posted some pix couple pages back.
i havent got to finish the car yet cause i was so swamped with work, and its been raining on and off for about 2 weeks now.
on my finished and fully polished parts, the paint has water stains thats really hard to clean off, and alot of other stains (dirt, mud) feels like its attached and trapped to the paint and takes more effort than wetsanding to take them off. i did the final wetsand and polish about 2 weeks after the last coating, so im sure the paint had plenty of time to cure.
how do i go about solving this?
Posted By: Anonymous
Re: Paint job on a budget!? CONTINUED..page 44........ - 07/31/06 01:19 AM
Quote:
how do i go about solving this?
Curious about this, who all has had cars rolled and on the road for more than a few weeks? Is this normal or something just you seem to be experiencing. Maybe a good polish/wax would be the fix?
Posted By: Anonymous
Re: Paint job on a budget!? CONTINUED..page 44........ - 07/31/06 03:33 AM
Posted By: Anonymous
Re: Paint job on a budget!? CONTINUED..page 44........ - 07/31/06 04:54 AM
I love the GN. Can't wait to see it sanded and buffed out.
Posted By: GoodysGotaCuda
Re: Paint job on a budget!? CONTINUED..page 44........ - 07/31/06 07:16 AM
This coming up week, ill be waiting for parts/not getting much done to the car. Anyone just tell me what chemical is used to thin rustoleum primer?
thanks.
Posted By: Anonymous
Very nice work on the GN! - 07/31/06 10:18 AM
That's gonna be a sweet looking ride.
Posted By: Exit1965
Re: Paint job on a budget!? CONTINUED..page 44........ - 07/31/06 12:49 PM
Quote:
This coming up week, ill be waiting for parts/not getting much done to the car. Anyone just tell me what chemical is used to thin rustoleum primer?
thanks.
Mineral spirits. Even the professional rustoleum (safety red) I got that said thin with acetone only worked fine with mineral spirits.
Posted By: BattleCruiser71
Re: Paint job on a budget!? CONTINUED..page 44........ - 07/31/06 01:36 PM
Hey Rollerheads,
I'm contemplating an attempt in either black or white on a 72 Charger. Can anyone post pics of their results with black? I know black is the hardest paint to make look great, but that's only because it shows failures in bodywork and prep more than any other. Still, not being a pro I don't want to set myself up for failure either. Does black respond to polishing and buffing well? I'm a USA buyer, so I guess it's rustoleum for me. thanks fellas.
Posted By: Anonymous
Re: Paint job on a budget!? CONTINUED..page 44........ - 07/31/06 02:27 PM
That looks great. Can't wait to see it back together.
Posted By: Anonymous
Re: Paint job on a budget!? CONTINUED..page 44........ - 07/31/06 03:35 PM
Ok, Thanks to all who have shared...I've decided to go with the Brightside for my project (3 coats vs. 6-10 with Rustolium). For thoes who have rolled Brightside, could you please detail the process.
I watched the video and I understand it doesn't need to be thinned and that after it is rolled following it with a clean roller to smooth it out was effective. My question is how much paint do you load on the initial roller. During my tests with the Rustolium I got great results pushing as much paint as I could out of the roller then rolling it on the car firmly. How would you describe the rolling of Brightside in that regard.
Sorry for the long post, Much thanks.
Also, Planing on doing Door Jambs, Trunk & Hood with Rustolium Spray Bombs (I'm painting the car gloss white) Any problems with that?
Posted By: Exit1965
Re: Paint job on a budget!? CONTINUED..page 44........ - 07/31/06 03:35 PM
Quote:
Hey Rollerheads,
I'm contemplating an attempt in either black or white on a 72 Charger. Can anyone post pics of their results with black? I know black is the hardest paint to make look great, but that's only because it shows failures in bodywork and prep more than any other. Still, not being a pro I don't want to set myself up for failure either. Does black respond to polishing and buffing well? I'm a USA buyer, so I guess it's rustoleum for me. thanks fellas.
There are some great pics of a black miata a few pages back. The good thing about black (or white) is you can get the professional stuff, and the cans of professional, and the color will match just right. From what I've seen, it polishes very well. But that car better be straight for black..
Posted By: pdqvsix
Re: Paint job on a budget!? CONTINUED..page 44........ - 07/31/06 03:41 PM
I have been painting my 83 Buick Regal which was originally burgandy and i started painting it gloss black because i couldn't find anything in rustoleum that was a dark enough red. I had the car painted 90% black when i decided to change to gloss white instead and now it's completely covered and i've only used 1 and 1/3 quarts of paint,i do intend to use the rest of the second quart though before doing the final wet sanding and polishing.I've never done very much roller painting before but this has turned out excellent.All i can say is if you're wanting to try this technique,read and follow as closely to 69charger's procedure as you can and it will come out looking
.
Posted By: 69chargeryeehaa
Re: Paint job on a budget!? CONTINUED..page 44........ - 07/31/06 04:06 PM
Quote:
Regarding the foam rollers, my wife found the very same roller in a 3 pack at the local dollar store. They seem to work as well as the ones from Can. Tire, and they have the one straight edge, not rounded on both. I found a big difference in roller lines with the straight, doesn't leave as much on overlap.
i saw those at the dollar rama too, they look like good rollers, but the only thing i can complain about them is that it looks like there is these tiny peices that are almost ready to come off, so i never used them, but they have awesome shammys at the dollar store (dollar rama) that are the same ones that you see being sold at car shows, ect... the big orange ones, and they're a $1!!! i buy 15 at a time they're so cheap.
Posted By: GoodysGotaCuda
Re: Paint job on a budget!? CONTINUED..page 44........ - 07/31/06 04:09 PM
Quote:
Quote:
This coming up week, ill be waiting for parts/not getting much done to the car. Anyone just tell me what chemical is used to thin rustoleum primer?
thanks.
Mineral spirits. Even the professional rustoleum (safety red) I got that said thin with acetone only worked fine with mineral spirits.
Thanks exit. the rustoleum primer at my lowes goes by latex. the regular paint is oil based. so i figured there would be a difference in thinning method. thanks
Posted By: 69chargeryeehaa
Re: Paint job on a budget!? CONTINUED..page 44........ - 07/31/06 04:12 PM
Quote:
Well its not really that im 'insecure' over the paint. It is just that i don't actually want to paint a color red/blue/green/etc at the moment, and i dont want to worry about polishing the finish and such. I want the car one color. I'd rather not worry about peel, wetsanding, or polishing. If i can thin the primer, roll it on and not have a care for orange peel or polishing? thats what i'm looking for at the moment.
So how is it thinned?
Thanks.
i can't tell you how to thin the primer, because i've never used it, if you just want to cover the body work until you get around to paint, just buy white, or black and do 1-2 coats, good practice too, you would'nt have to buff/polish at all. you could buy like 1 quart and do the whole car. i would not use the primer.
Posted By: GoodysGotaCuda
Re: Paint job on a budget!? CONTINUED..page 44........ - 07/31/06 04:16 PM
Quote:
Quote:
Well its not really that im 'insecure' over the paint. It is just that i don't actually want to paint a color red/blue/green/etc at the moment, and i dont want to worry about polishing the finish and such. I want the car one color. I'd rather not worry about peel, wetsanding, or polishing. If i can thin the primer, roll it on and not have a care for orange peel or polishing? thats what i'm looking for at the moment.
So how is it thinned?
Thanks.
i can't tell you how to thin the primer, because i've never used it, if you just want to cover the body work until you get around to paint, just buy white, or black and do 1-2 coats, good practice too, you would'nt have to buff/polish at all. you could buy like 1 quart and do the whole car. i would not use the primer.
Thanks, always a consideration..i havent decided quite yet. paint would also be better as far as protecting things, correct?
Posted By: 69chargeryeehaa
Re: Paint job on a budget!? CONTINUED..page 44........ - 07/31/06 04:17 PM
Quote:
hey guys, i posted some pix couple pages back.
i havent got to finish the car yet cause i was so swamped with work, and its been raining on and off for about 2 weeks now.
on my finished and fully polished parts, the paint has water stains thats really hard to clean off, and alot of other stains (dirt, mud) feels like its attached and trapped to the paint and takes more effort than wetsanding to take them off. i did the final wetsand and polish about 2 weeks after the last coating, so im sure the paint had plenty of time to cure.
how do i go about solving this?
did you wax it? it really needs waxed right after the wetsand and polish, and then needs at least 1 week sitting in the sun with NO rain, after that rain is fine. or if it does rain shammy it off right after the rain, rain drops are like little magnifying glasses in the sun and can leave marks in fresh paint, and leave mineral deposits on paint that can be hard to get off any fresh paint. wax it good and try to keep it out of the elements for a week or so.
Posted By: 69chargeryeehaa
Re: Paint job on a budget!? CONTINUED..page 44........ - 07/31/06 04:24 PM
Quote:
Thanks, always a consideration..i havent decided quite yet. paint would also be better as far as protecting things, correct?
for sure, i would never use the primer, for this method and paint, it's just adding work, and layers, the beauty of this paint is that it is so tough, the thicker the layers the worst mechanical adhesion there will be, that's why we want THIN layers, all said and done this method if done properlly yeilds a super thin layer(s) of paint totalling probabally 1/4 the thickness of a traditional single stage acrylic enamel auto paint job, that's why it lasts, and after the 3-4 month mark becomes bullit proof, when you add primer to the layers, it becomes much thicker, and the paint will not stick as well to the primer as it would to just the un-primered surface. the only real reason you use primer to paint the rustoleum/tremclad is on galvinized metal, ect....where the paint won't adhere to the surface, in that case, and that case only i WOULD use primer. otherwise, your actually going to have worse adhesion using primer, and thicker layers that won't resist stone chips as well, there is NO advantage to using primer on a car with THIS paint, only dis-advantages.
Posted By: Anonymous
Re: Paint job on a budget!? CONTINUED..page 44........ - 07/31/06 04:26 PM
Hey is Ricklandia of Project Beer Fridge still out there? I have a question concerning the stripes you painted on the fridge. After taping off and painting your stripes, when did you pull the tape? Did you wait for the paint to completely dry or what? Anyone else have an opinion on when to pull tape when painting stripes/graphics? I'll be putting on the final base coat of my "test project" tonight and need to start planing how I'm going to do the stripes. Thanks,
Posted By: Marq
Re: Paint job on a budget!? CONTINUED..page 44........ - 07/31/06 04:43 PM
Quote:
I watched the video and I understand it doesn't need to be thinned and that after it is rolled following it with a clean roller to smooth it out was effective. My question is how much paint do you load on the initial roller.
In the video they tend to lay the paint on thick... almost like they are in a rush to get the boat back into the water. But I think for the purposes of looking good on a car body we need to lay the paint on thinner and build up our layers smoothly.
With the boat guys... they slap on two coats of paint and they are basically done. They rely on the ultra smooth surface of the fiberglass boat and the self leveling qualities od the paint to give their smooth shiny high gloss surface.
But I think their methods mean the boat has to cure much longer to reach maximum hardness.
As well they don't tend wet sand or polish their paintjobs..
When I went to apply a layer using Brightside... I loaded the roller up and then worked the roller in the tray for a moment to remove some of the excess. When you go to lay on your first rolling you will see the level of coverage that is is laying down. You do not want a thick layer ( as if you were painting a wall with a thicker layer )
Instead you are trying to achieve coverage without excess. So... it is okay when you lay down the first layer or subsequent layers to be able to see through the paint. It will almost seem like you are trying to slowly tint the car towards the color you are trying to achieve.
The thinner layer will cure faster and greatly reduce the chances of orange peel later.
In a way the Brightside paint is something like the T/R painting... in that the thinner the layer you lay... the better. But even a thin layer of Brightside is going to equal up to multiple layers of Tremclad/Rustoleum because I think the Brightside has more 'solids' in the paint... ( something in the 45% to 55% rate )
Ideally... you should lay down one thin layer and give it plenty of time to cure... 24 hours would be ideal.
Now... one thing I noticed is that you should have a can of the Interlux Brushing Thinner ( ketone ) which they sell specifically for folks like us who are brushing and rolling. I found that for my car and Fire Red Brightside.. that by adding some of their thinning agent to my paint helped me to lay a thinner layer that alloed me to work it out longer with the 'secondary roller'. In fact if you splash in enough of the thinner... the Brightside will act like the Rustoleum/Tremclad.. in that the bubbles tend to become MORE SELF POPPING.
The easiest answer will ultimately be to do some test rolling with the Brightside ( maybe on the inside of a trunk lid or whatever ) to get a feel for the coverage and amount of paint that you should be laying with each layer.
Quote:
Also, Planing on doing Door Jambs, Trunk & Hood with Rustolium Spray Bombs (I'm painting the car gloss white) Any problems with that?
You will have no compatibility problems using the Tremclad/Rustoleum spray bombs in those areas. That is how I did my car... T/R Fire Red spray bombs on the hard to reach spots and the Brightside Fire Red on the outer body surfaces
.
Posted By: Marq
Re: Paint job on a budget!? CONTINUED..page 44........ - 07/31/06 05:08 PM
Quote:
Hey is Ricklandia of Project Beer Fridge still out there? I have a question concerning the stripes you painted on the fridge. After taping off and painting your stripes, when did you pull the tape? Did you wait for the paint to completely dry or what? Anyone else have an opinion on when to pull tape when painting stripes/graphics? I'll be putting on the final base coat of my "test project" tonight and need to start planing how I'm going to do the stripes. Thanks,
If you are laying on just one coat of paint to make your stripes... I would pull the tape in the middle of the curing. This way the stripe paint will be forgiving enough and allow you to pull it off leaving a clean line.
If you wait til the stripe paint is fully cured then there is the chance that some of the stripe paint will have fully cured and ADHERED to the masking tape - which will lead to a more ragged edge when you pull the tape.
Dunno... if you have to layer a few layers of paint to make your stripe... then try to pull the tape at the earliest opportunity during the curing of your final layer.
.
Posted By: Anonymous
Re: Paint job on a budget!? CONTINUED..page 44........ - 07/31/06 05:45 PM
Quite a while back in the thread, someone mentioned using fishing line under window seal edges to aid in masking... can someone go into more detail on this method? Seems to me this would use pretty heavy test line in order to have any effect... the thicker the line, the more able it would be to lift the overlapping edges of the rubber seal off of the body to allow paint just under the seal edge. Am I understanding this correctly?
Thanks!
Posted By: Exit1965
Re: Paint job on a budget!? CONTINUED..page 44........ - 07/31/06 06:39 PM
Quote:
Quote:
Quote:
This coming up week, ill be waiting for parts/not getting much done to the car. Anyone just tell me what chemical is used to thin rustoleum primer?
thanks.
Mineral spirits. Even the professional rustoleum (safety red) I got that said thin with acetone only worked fine with mineral spirits.
Thanks exit. the rustoleum primer at my lowes goes by latex. the regular paint is oil based. so i figured there would be a difference in thinning method. thanks
Oh! I didn't know it was latex, I thought it would be some kind of oil based enamel. I take it back, dunno what it would be thinned with.
I like charger's idea to just put some rustoleum on it. If you want it primer color just get "smoke gray" which looks exactly like primer despite the label.
Posted By: GoodysGotaCuda
Re: Paint job on a budget!? CONTINUED..page 44........ - 07/31/06 09:36 PM
Quote:
Quote:
Quote:
Quote:
This coming up week, ill be waiting for parts/not getting much done to the car. Anyone just tell me what chemical is used to thin rustoleum primer?
thanks.
Mineral spirits. Even the professional rustoleum (safety red) I got that said thin with acetone only worked fine with mineral spirits.
Thanks exit. the rustoleum primer at my lowes goes by latex. the regular paint is oil based. so i figured there would be a difference in thinning method. thanks
Oh! I didn't know it was latex, I thought it would be some kind of oil based enamel. I take it back, dunno what it would be thinned with.
I like charger's idea to just put some rustoleum on it. If you want it primer color just get "smoke gray" which looks exactly like primer despite the label.
Thats what i ended up going with, i had about a 1/2 quart already and i bought another. poured them into a 1gallon metal can and I will mix the mineral spirits so its the right consistancy...well, ill be guesstimating...
is it better to have it too thick or too thin? What are the side effects of each? Meaning if the first coat i put on i can always thin out the next coat some. I know thicker will cover better, but maybe not lay down as well. But maybe it wont run either. Would i be safer running it a little thick? I really want the car one color, but theres a chance i might get motivated enough to polish it/wetsand it some day. Smoke gray also comes in cans for jambs and such I'll give rolling a shot sometime this week.
I have to figure out how to wipe/wash the car down from the dust while its immobile in the garage.
So i'll be rolling Smoke Gray sometime this week, I'm doing some sanding/prep as of now. Keep ya posted.
Thanks
Posted By: Anonymous
Re: Paint job on a budget!? CONTINUED..page 44........ - 08/01/06 12:31 AM
I wanted to say thanks to 69Charger, Exit, Marq and everyone else for all of the awesome information in this (and the other) thread.
My Cutlass is definately getting the Brightside treatment in the fall. Too frickin hot outside right now for it.
Cheers!
Posted By: Anonymous
Re: Paint job on a budget!? CONTINUED..page 44........ - 08/01/06 01:11 AM
I was cleaning the dust out of my garage from all the sanding I've been doing to get the car ready. I decided I would finally try to polish my test panel that has been sitting for at least two weeks now. I worked the turtle wax compound for about ten minutes but only got a haze that others have reported. I'm going to pull out the polisher tomorrow but can someone tell me which pad to use as well as giving me instructions on what to do. I just bought the polisher for this project and have never worked with one in the past. Appreciate the help.
Also Charger, after the final coat you are saying to let it sit in the sun for a day, then wetsand, polish and wax all the next day or should you wait a week, month, etc before waxing?
Posted By: Exit1965
Re: Paint job on a budget!? CONTINUED..page 44........ - 08/01/06 01:36 AM
Farfire- did you wetsand before you polished? Are you using the rougher, terry cloth pad and not the foam pad?
Posted By: 69chargeryeehaa
Re: Paint job on a budget!? CONTINUED..page 44........ - 08/01/06 01:52 AM
Quote:
I was cleaning the dust out of my garage from all the sanding I've been doing to get the car ready. I decided I would finally try to polish my test panel that has been sitting for at least two weeks now. I worked the turtle wax compound for about ten minutes but only got a haze that others have reported. I'm going to pull out the polisher tomorrow but can someone tell me which pad to use as well as giving me instructions on what to do. I just bought the polisher for this project and have never worked with one in the past. Appreciate the help.
Also Charger, after the final coat you are saying to let it sit in the sun for a day, then wetsand, polish and wax all the next day or should you wait a week, month, etc before waxing?
wetsand final, then wait a day, let it sit in the sun (for that day), final wetsand 1000+ grit, then use the terry cloth bonnet on a random orbit about 3000-4000 rpm polisher (i used a 10" one), turtle wax polishing compound, and lots of water. polishing the hood for example should take you about a hour, if not 1.5 hours.
the longer you wait, the more you have to polish.
Posted By: 78D150CLUB
Re: Paint job on a budget!? CONTINUED..page 44........ - 08/01/06 02:10 AM
The ones I got seem pretty smooth in that regard, no pieces coming off after 3 coats, but I do find they tend to lay the paint down a little heavier, requiring a little extra rolling out. On the plus side of that, I start at one end of the panel, and sweep along it slowly about 1 - 2 inches at a time and I have virtually no roller lines.
Don't know if this helps anyone else out, just passing along my opinion. Not right or wrong, just the only thing I have that's really mine
Everyone seems to be adding some really good points and tips as this thread (thread? more like a rope by now) goes along. Makes for very interesting reading and viewing of the results.
Posted By: Anonymous
Re: Paint job on a budget!? CONTINUED..page 44........ - 08/01/06 04:55 AM
Quote:
wetsand final, then wait a day, let it sit in the sun (for that day), final wetsand 1000+ grit, then use the terry cloth bonnet on a random orbit about 3000-4000 rpm polisher (i used a 10" one), turtle wax polishing compound, and lots of water. polishing the hood for example should take you about a hour, if not 1.5 hours.
the longer you wait, the more you have to polish.
So put on the final coat, next day, wet sand, clean it off (rinse with water and wipe with spirits?) let it sit in the sun, then wet sand again, clean off (water + chamois and spirits?), then polish, while polishing you say "use lots of water" do you mean "keep the bonnet damp" water or "run water over where you're polishing" water and keep everything kinda drippy wet soaked?
Posted By: kenzo42
Re: Paint job on a budget!? CONTINUED..page 44........ - 08/01/06 06:11 AM
I wrote to a guy who's been painting yachts now for ~30 years. He's had some experience w/ Brightside on his own yacht and car. This is what he wrote:
"hey there,
used brightside and it lays well BUT i would not use it on a car as it is soft and stains easily and weathers badly. It is designed to put a gloss on fiberglass for amatures. I would recommend dupont CENTARI for a good one stage paint if you are not experienced. if you want to be cheap rustolium
industrial paints or devoe are good BUT you have to get it at a industrial supply store. everything sold to consumers with the rustolium label is crap!
I am a big belever in 2 part epoxy primers and a 2 part polyurithane topcot
for the best job."
Rustomleum Industrial Paints? This isn't the stuff we're using, right? Maybe Tremclad?
I've also heard Brightside in shades of white which are not exposed to sun will yellow. I believe this has been mentioned before. Any thoughts?
Feedback will be appreciated.
Kenzo
Posted By: 69chargeryeehaa
Re: Paint job on a budget!? CONTINUED..page 44........ - 08/01/06 01:34 PM
Quote:
So put on the final coat, next day, wet sand, clean it off (rinse with water and wipe with spirits?) let it sit in the sun, then wet sand again, clean off (water + chamois and spirits?), then polish, while polishing you say "use lots of water" do you mean "keep the bonnet damp" water or "run water over where you're polishing" water and keep everything kinda drippy wet soaked?
process is after final wetsand, clean the car with a chamois and water while you wetsand, each part at a time so the wetsanding residue does'nt dry, then let it sit in the sun for a day, then polish, keep a spray bottle handy with water in it, load up the polishing compound on the bonnet (about a table spoon)breifly polish to distribute the polish, then spray the bonnet with water, not to dripping but wet, then polish the area, lets' say you polish about a 3' square area at a time. as your polishing, you'll notice it starts to get dry, that's when you spray the bonnet with water again, make sure you use the terry bonnets, not the fluffy ones, and not the foam ones. don't expect mirrior results without LOTS of polishing, like i mentioned before, hood should take you about 1.5hrs. at any time you can clean with spitits, but ususally durring polishing i just use a shamios, mineral spirits is not really used durring polishing, only in between painting, after wetsanding to clean. also right after you polish, hit it with a coat of wax, when your satasified with the polish, wax is very important, after the wax it can be exposed to the elements, but it's better if you can to just keep it in the sun, for about a week, and put it in a garage for when it rains. after the 3 month period, it'll be rock hard. for the first week after painting don't wash the car, just use plain water and a shamios, and whipe the car down.
Posted By: 69chargeryeehaa
Re: Paint job on a budget!? CONTINUED..page 44........ - 08/01/06 01:45 PM
Quote:
I wrote to a guy who's been painting yachts now for ~30 years. He's had some experience w/ Brightside on his own yacht and car. This is what he wrote:
"hey there,
used brightside and it lays well BUT i would not use it on a car as it is soft and stains easily and weathers badly. It is designed to put a gloss on fiberglass for amatures. I would recommend dupont CENTARI for a good one stage paint if you are not experienced. if you want to be cheap rustolium
industrial paints or devoe are good BUT you have to get it at a industrial supply store. everything sold to consumers with the rustolium label is crap!
I am a big belever in 2 part epoxy primers and a 2 part polyurithane topcot
for the best job."
Rustomleum Industrial Paints? This isn't the stuff we're using, right? Maybe Tremclad?
I've also heard Brightside in shades of white which are not exposed to sun will yellow. I believe this has been mentioned before. Any thoughts?
Feedback will be appreciated.
Kenzo
the brightside looks like nice paint, but i've never worked with it and don't know what happens over the years; so i can't reccommend it, the tremclad however i know lasts, holds up very well, and is super easy to apply, the rustoleum i have not used, but it's very simmilar to the tremclad which i think is the same as rustoleum professional. boy i'm glad i'm in canada and tremclad is $25/Gal!!!!
Posted By: Exit1965
Re: Paint job on a budget!? CONTINUED..page 44........ - 08/01/06 01:58 PM
Quote:
I wrote to a guy who's been painting yachts now for ~30 years. He's had some experience w/ Brightside on his own yacht and car. This is what he wrote:
"hey there,
used brightside and it lays well BUT i would not use it on a car as it is soft and stains easily and weathers badly. It is designed to put a gloss on fiberglass for amatures. I would recommend dupont CENTARI for a good one stage paint if you are not experienced. if you want to be cheap rustolium
industrial paints or devoe are good BUT you have to get it at a industrial supply store. everything sold to consumers with the rustolium label is crap!
I am a big belever in 2 part epoxy primers and a 2 part polyurithane topcot
for the best job."
Rustomleum Industrial Paints? This isn't the stuff we're using, right? Maybe Tremclad?
I've also heard Brightside in shades of white which are not exposed to sun will yellow. I believe this has been mentioned before. Any thoughts?
Feedback will be appreciated.
Kenzo
The industrial paints are different from the "professional" or "stops rust" varieties we are using. I thought only oil based enamels were prone to yellowing? That said, when I called Rustoleum about it, they said "Nope, it wont yellow" when I asked about painting my washer with white rustoleum. Don't know about brightside.
Posted By: Anonymous
Re: Paint job on a budget!? CONTINUED..page 44........ - 08/01/06 04:07 PM
Quote:
I wrote to a guy who's been painting yachts now for ~30 years. He's had some experience w/ Brightside on his own yacht and car. This is what he wrote:
"hey there,
used brightside and it lays well BUT i would not use it on a car as it is soft and stains easily and weathers badly.
Well, that's just great, I've already picked up my quarts of Brightside in Black. I guess I'll see firsthand how it holds up over time. Can't be any worse that the paint on there now.
The sanding has begun! Thanks, Marq, for the suggestion of 220 "3X" grit, it's cutting the old clearcoat pretty good. I'm going to try my Porter-Cable DA palm sander on flat panels (unless someone here says "don't do that!"). I've found using a hand block that I am revealing many primer areas in my effort to thoroughly sand off the CC. The hood is going to be my test piece, but after sanding I'm going to end up with a reverse Snow Leopoard (black with white spots) pattern if I keep reaching old primer!
I am concerned about this uneven coloration once I get to painting. When shopping for paint supplies, I did pick up a can of the Pre-Kote Interlux Grey Primer for Brightside "just in case," with the hope that I could return it unopened. I'm not sure now. I may brush over the existing primer spots with black Brightside, sand, evaluate, then do my first full coat of black... unless I'm just making more work for myself.
Posted By: Marq
Re: Paint job on a budget!? CONTINUED..page 44........ - 08/01/06 04:30 PM
Quote:
I wrote to a guy who's been painting yachts now for ~30 years. He's had some experience w/ Brightside on his own yacht and car. This is what he wrote:
"
used brightside and it lays well BUT i would not use it on a car as it is soft and stains easily and weathers badly.
Well so far the Brightside I applied has dried HARD and this is after about two weeks of finishing the project. Now... I notice that your friend prefers to the two part systems. The two part systems are normally sprayed and that may cause a thicker coating on the boat that is being sprayed... hence the thicker coat may lead to his feeling that it is softer ( compared to a two part paint system - which your friend likes more - which has a hardening catalyst in it ).
The two-part polyurathane can also be rolled .. but because it has that hardening catalyst your rolling time for the paint you mix is more limited and begins firming up in the roller tray the minute you mix the two parts. ie what you roll in the first minutes of a batch of mixed paint is going to roll on thinner than what you roll on after 30 minutes of using that batch of mixed paint or even say 45 minutes into using that batch. I believe the setting or working time with the mixed two-part is approximately 4 hours... ( but the hardening begins once the two parts are blended together.. )
But the short answer is that I have found the Brightside to dry hard.
Quote:
Brightside is designed to put a gloss on fiberglass for amateurs.
In a backward complimentary way he sort of confirmed the gloss factor and the ease of use being suitable for 'amateurs'...
But the statement is in error BECAUSE instructions are clearly provided on the paint can, the Interlux web site and in the pamphlets for Brightside that show ALL the different surfaces that Brightside can be applied to... fiberglass, gelcoat, wood, metal - including aluminum, plastics, body fillers, caulking, primers and some others that would require me to go get the can to finish the list of surfaces Brightside can be used on...
Quote:
I would recommend dupont CENTARI for a good one stage paint if you are not experienced. if you want to be cheap rustolium
I can't speak for the one part CENTARI other than to note that is the first time I have heard anyone ( including folks in the marine message boards ) mention that specific brand. But it is nice to see that he confirms the usage of Rustoleum for those who are 'cheap'
Quote:
I am a big belever in 2 part epoxy primers and a 2 part polyurithane topcot
for the best job."
I would agree with him on this one. The two part polyurathanes do produce a harder finish. Possible hard enough to CHIP when rocks bounce off it. But I believe that a one part polyurathane will reach the same level of 'hardness' when it reaches its maximum cured state. The two-part polyurathane has the hardening catalyst.. and so it simply reaches its point of maximum hardness sooner. But it also has a shorter working time when you are applying it and if you want to spray it you need to wear an oxygen tank because the fumes it gives off are hazardous to your health. Lastly... the two part paints cost two, three, four times or more than the one part paints....
Quote:
I've also heard Brightside in shades of white which are not exposed to sun will yellow. I believe this has been mentioned before. Any thoughts?
White in any paint has a tendency to acquire a yellow tinge with age. That is why most professional painters tend to add a spec of blue tint to their 'white' to permanently ward off the yellowing. This is especially true of CHEAP LATEX white paint. But that is also more relevant to 'old' paints from the 'old days' and the chemistry of modern paints have taken steps in the chemical composition of the paints and pigments (solids) to prevent yellowing. But even moderm CHEAPER BY THE GALLON type paints may suffer from not having anti-yellowing technology in them. Heck... even the polyurathane composition of the Brightside paint would help in sealing off the ability of oxygen to get beneath the outer skin of the paint job to discolor the pigment. And even further the solids or pigments are completely encapsulated and surrounded by the polyurathane which prevents oxygen from reaching them... And lastly... Brightside is a polyurathane... ( think of a liquid PLASTIC ). I would really like to know what type of staining substance can penetrate a solid plastic barrier. It just doesn't make sense.
The 'off white' colors are usually pre-dispositioned towards 'yellowing' in that they have a pigment that gives the initial 'off white' color. I don't think that would contribute to further 'yellowing' of that 'offwhite' color because these paints are engineered to hold their initial color without fade or discoloration for as long as it is chemically feasible. As we all know.. ALL paints eventually change color - and the real comparison of good paints and bad paints is 'how long is the paint engineered to hold its initial color. In this regard I think the Brightside and the Tremclad/Rustoleum are both engineered to 'hold their color' longer than many of the other paint products out there.
The only hint of a stain would occur where a substance with a contrasting color is able to enter the microscopic pores of the paint surface. But even there the staining substance can probably be encourage to detach itself from the pore with the right washing or cleansing. And in a worst case scenario the 'pore' could be removed with a wetsanding - since those pores only exist on the outer surface and do not act like passageways through the paint..
The Brightside paints for example do have special anti-UV ingredients to prevent fade or color changes from the ultra-violet rays of the sun.
But you mentioned that 'you had heard of yellowing in areas where there was no direct sun the whites were changing to yellow. My first thought is that it is obviously not a UV problem. Hmmmm... something not exposed to the sun.. like an inside cabin... would be affected by cigarette nicotine... that would yellow a white wall... or cooking in a galley would release things into the air that would yellow the walls inside the boat if they were enclosed and painted white. Just visit my mother's kitchen to see how cooking changes the colors of her kitchens walls etc.
I also remember hearing some comment regarding the ability of Brightside to withstand 'stains'. All I can say about that is that Brightside paint has a number of composites in it to defeat or repel stains. In particular the addition of 'Teflon' in the helps repel stains.
But let's face it... EVERYTHING is stainable. And I don't care if we are talking the most expensive multi-stage custom paint job with multi-ple layers of clear coat or the most expensive single stage paints ( whether rolled on or sprayed on ). It's all like talking about winter boots or wrist watches... where most will claim that they are 'water resistant' and folks assume that means they are 'water proof'. And yet we know in watches you only get 'water proof' in the most expensive brands of watches... and in winter boots ONLY a solid rubber boot can even be 'water proof'. There is no such thing in the world as a 'waterproof' leather boot.
So when talking about 'stains'... and car paint... ultimately the WAX you put on WHATEVER paint job will be the barrier that will prevent a stainable substance from reaching the paint. The porosity of the paint itself and even the porosity of the skin of the paint will also impact the degree to which it might be stainable without a wax barrier helping it out to make it 'stain resistant'.
The last words I will toss into this discussion about 'stains' are those that might occur FROM BENEATH the paint... where a substance below the paint leeches into the freshly applied paint. In a case where Brightside paint is applied to a wooden surface there is the possibility that the natural juices of the wood, which rise to the surface, might affect the paint from below. Even some unstable paints or primers... that are painted over might suffer from this type of 'staining' from below. There is not much you can do if the substrate is causing the staining from below.
Posted By: Marq
Re: Paint job on a budget!? CONTINUED..page 44........ - 08/01/06 04:36 PM
Quote:
I am concerned about this uneven coloration once I get to painting. When shopping for paint supplies, I did pick up a can of the Pre-Kote Interlux Grey Primer for Brightside "just in case," with the hope that I could return it unopened. I'm not sure now. I may brush over the existing primer spots with black Brightside, sand, evaluate, then do my first full coat of black... unless I'm just making more work for myself.
The uneven coloration is something you would face with Tremclad/Rustoleum or the Brightside during the initial build up of layers. You may recall previous messages where we discussed how the paint, when applied with a roller and properly thinned is almost translucent (you can see through the layer of paint your are rolling on )
With all three paints you will find the coloration will even out as the layers of pigment accumulate in the layers.
It's like taking ten pairs of sunglasses. Put one pair on and you can see through the glasses with a tint (this is the stage you are at with the initial paint layer).
Put a pair of sunglasses over the initial pair of sunglasses and things get darker... keep putting a pair of sunglasses over the other sunglasses and at some point you will not be able to see anything ( espedially imagine trying to look through six or ten pairs of sunglasses at the same time ). The effect is the same as the building up of paint layers using either of the paint types.
The value of the Pre-Cote at the start of the painting process would have simply provided you with a uniform colored substrate to begin with.
.
Posted By: Anonymous
Re: Paint job on a budget!? CONTINUED..page 44........ - 08/01/06 05:33 PM
Jax,
RE: Stripes - I was using the Rustoleum multi-coat method, so I did end up waiting until it was cured before removing the tape. If I remember right, I pulled the tape 24 hrs. after the final coat. Was it perfect? No, but not for the reasons you would think. 1-the base coat was not perfectly smooth (had some orange peel), and 2- I used ordinary blue painters tape. I was pleasantly surprised at how well it came off, and just how smooth the line actually was.
The areas that required touch up ended up being where the stripe coat bled under the tape from it not being adhered evenly enough from the orange peel. Had I to do it over again, I would try to find a better tape.
The other thing I did was to wetsand down along the edge where the tape and strip met before peeling the tape off. I can give you no scientific or substanative reason for doing so other than it seemed to make sense at the time. I figured by sanding down the edge seam, it might reduce the chances of the tape wanting to peel up the strip coat. I can't tell you if it made a difference or not, but I was overall satisfied with the results.
Again, I think if I were to do it again, I would make sure the base coat was VERY smooth where I applied the tape, and I would use a tape that gave more uniform adhesion (non-crinkled tape, maybe even a pinstripe like vinyl tape). I would probably take the time to wetsand again as I explained, it didn't appear to hurt anything and may have helped.
Hope this helps, I'm looking forward to seeing your results., BTW, everyone loves the racing stripes on the Beer Fridge! LOL And just to wet your appetite a little more, I found the beer fridge of my dreams - take a look!
http://www.beermachines.com/
Posted By: Anonymous
Re: Paint job on a budget!? CONTINUED..page 44........ - 08/01/06 07:34 PM
To the guy who was thinking of using latex primer ... don't do it man! Using latex (water based) in conjunction with an oil enamel top coat is just asking for trouble. I would also think that you'll see some strange stuff happening when mixing latex primer with mineral spirits.
Posted By: Anonymous
Re: Paint job on a budget!? CONTINUED..page 44........ - 08/01/06 07:44 PM
Now that I got that out of the way, lemme introduce myself. I found this post last Friday via a link on the Oldsmobile mailing list. I've got a big ol' convertible boat that I'm going to try this method with. I was talking it over with my old man, who runs a body shop, and we figured "why not" ... he's always told me that you can get some decent results by lining your garage with plastic and wetting the floor before spraying, why not try it with some rollered on paint that lays down flat (self-levels) nicely?
The car that I'll try this on is a beater ... the engine in it is literally worth 5x what the car is, and I had not planned on getting that car back on the road for years, if ever. You guys have inspired me to go out and buy the 6 quart $50 Interlux Brightside deal on e-bay and give this thing a shot. Can't wait 'till the stuff comes! I've got another Olds that will get the full treatment in the body shop, but that will use up my favors with dad for a while, so this process could be my old convertible's saving grace!
At this point, I plan on doing this the right way. I've got lots of trim to remove, and I need to weld shut some holes where the wide body side molding originally attached ... yuck.
This has been an awesome thread ... I've read the entire thing, and I can't wait to see what comes next with it
Posted By: Anonymous
Re: Paint job on a budget!? CONTINUED..page 44........ - 08/01/06 08:07 PM
"the rustoleum i have not used, but it's very simmilar to the tremclad which i think is the same as rustoleum professional."
I have been testing with the Rustoleum Stops Rust. Has anybody tested with both the Stops Rust and the Professional? If the Tremclad may be more similar to the Professional, maybe I should do some testing with the Professional.....
Any Comments??
Thanks, Mark
Posted By: Anonymous
Re: Paint job on a budget!? CONTINUED..page 44........ - 08/01/06 08:15 PM
Posted By: Exit1965
Re: Paint job on a budget!? CONTINUED..page 44........ - 08/01/06 09:04 PM
Quote:
"the rustoleum i have not used, but it's very simmilar to the tremclad which i think is the same as rustoleum professional."
I have been testing with the Rustoleum Stops Rust. Has anybody tested with both the Stops Rust and the Professional? If the Tremclad may be more similar to the Professional, maybe I should do some testing with the Professional.....
Any Comments??
Thanks, Mark
I would get the professional if you have a choice. Some colors aren't available (or readily available) in the professional type. I've gotten a good shine out of the red professional stuff, and im painting my car white with the stops rust stuff. I hope I can get the white to shine like the red did.
Posted By: Anonymous
Re: Paint job on a budget!? CONTINUED..page 44........ - 08/01/06 09:24 PM
Quote:
hope I can get the white to shine like the red did.
You've been doing great work, very diligent and persistent. I'm sure if you let it harden sufficiently, it'll shine up just as well as the red did or better.
I ordered my Brightside at about 3 PM EST, and E Bay seller "theysoldit" has already shipped my paint ... it's scheduled for drop off at my house tomorrow ... they don't mess around!
Posted By: Anonymous
Re: Paint job on a budget!? CONTINUED..page 44........ - 08/01/06 09:27 PM
Quote:
Quote:
I am concerned about this uneven coloration once I get to painting. When shopping for paint supplies, I did pick up a can of the Pre-Kote Interlux Grey Primer for Brightside "just in case," with the hope that I could return it unopened. I'm not sure now. I may brush over the existing primer spots with black Brightside, sand, evaluate, then do my first full coat of black... unless I'm just making more work for myself.
The uneven coloration is something you would face with Tremclad/Rustoleum or the Brightside during the initial build up of layers. You may recall previous messages where we discussed how the paint, when applied with a roller and properly thinned is almost translucent (you can see through the layer of paint your are rolling on )
The value of the Pre-Cote at the start of the painting process would have simply provided you with a uniform colored substrate to begin with.
So, I now have all of the clearcoat (and a good deal of bascoat as well) sanded off of the hood. ( The Porter-Cable sander worked pretty good on a large flat area such as this.) After that, I went over everything once more with the 220 sanding block by hand, took care of lips, edges, and crannys, then went over every thing once again with the 320 sponge as a final pass before a solvent wipe down.
However... there are many edges that - despite careful sanding - have been sanded down to bare metal, and I am concerned about skipping the Pre-Kote primer. Otherwise, the hood is in good shape, with about only 2 *tiny* nicks that I have found that are too deep to sand out. After all, the paint does say to prime bare metal...
These spots are small, but you know how it is with edges... everything just comes right off!
Posted By: Anonymous
Re: Paint job on a budget!? CONTINUED..page 44........ - 08/01/06 09:48 PM
Get a spray bomb primer and prime the bare metal. Choose a color primer that's closest to what the rest of the car is (i.e. a black primer for a dark colored car). After it fully dries (per label instructions for that particular primer), lightly sand it with a 400 or so to blend the surface to the rest of the substrate. You'll then be good to go with your painting.
Posted By: Anonymous
Re: Paint job on a budget!? CONTINUED..page 44........ - 08/01/06 09:55 PM
Quote:
However... there are many edges that - despite careful sanding - have been sanded down to bare metal, and I am concerned about skipping the Pre-Kote primer. Otherwise, the hood is in good shape, with about only 2 *tiny* nicks that I have found that are too deep to sand out. After all, the paint does say to prime bare metal...
These spots are small, but you know how it is with edges... everything just comes right off!
On my bumpers, I sanded much of it to bare metal. No problems covering. A few coats and it was a uniform color. I did not see any need to primer. My experience, Mark E.
Posted By: Anonymous
Re: Paint job on a budget!? CONTINUED..page 44........ - 08/01/06 09:57 PM
Quote:
Quote:
"the rustoleum i have not used, but it's very simmilar to the tremclad which i think is the same as rustoleum professional."
I have been testing with the Rustoleum Stops Rust. Has anybody tested with both the Stops Rust and the Professional? If the Tremclad may be more similar to the Professional, maybe I should do some testing with the Professional.....
Any Comments??
Thanks, Mark
I would get the professional if you have a choice. Some colors aren't available (or readily available) in the professional type. I've gotten a good shine out of the red professional stuff, and im painting my car white with the stops rust stuff. I hope I can get the white to shine like the red did.
I will get a hold of some Professional and test it out this weekend. I will report what I find. Thanks, Mark E.
Posted By: Anonymous
Re: Paint job on a budget!? CONTINUED..page 44........ - 08/01/06 09:59 PM
Quote:
Get a spray bomb primer and prime the bare metal. Choose a color primer that's closest to what the rest of the car is (i.e. a black primer for a dark colored car). After it fully dries (per label instructions for that particular primer), lightly sand it with a 400 or so to blend the surface to the rest of the substrate. You'll then be good to go with your painting.
I do have a bottle of Picklex 20 rust converter/metal prep which I could brush onto those spots, I might go that route.
Posted By: Anonymous
Re: Paint job on a budget!? CONTINUED..page 44........ - 08/01/06 10:05 PM
Quote:
I do have a bottle of Picklex 20 rust converter/metal prep which I could brush onto those spots, I might go that route.
That's the "right" thing to do. A lot of people here have painted directly over bare metal and it probably looks ok, but that doesn't make it good painting practice, nor does it insulate them from problems a month, a year, or 2 years down the road. Do what the paint mfr. suggests right on the label of the can, and keep Murphy and his family at bay
Posted By: Anonymous
Re: Paint job on a budget!? CONTINUED..page 44........ - 08/01/06 11:49 PM
Ooops, I am using Rustoleum, so my comment may not be applicable. Mark E.
Quote:
Quote:
I do have a bottle of Picklex 20 rust converter/metal prep which I could brush onto those spots, I might go that route.
That's the "right" thing to do. A lot of people here have painted directly over bare metal and it probably looks ok, but that doesn't make it good painting practice, nor does it insulate them from problems a month, a year, or 2 years down the road. Do what the paint mfr. suggests right on the label of the can, and keep Murphy and his family at bay
Posted By: 69chargeryeehaa
Re: Paint job on a budget!? CONTINUED..page 44........ - 08/01/06 11:52 PM
Quote:
Ooops, I am using Rustoleum, so my comment may not be applicable. Mark E.
Quote:
Quote:
I do have a bottle of Picklex 20 rust converter/metal prep which I could brush onto those spots, I might go that route.
That's the "right" thing to do. A lot of people here have painted directly over bare metal and it probably looks ok, but that doesn't make it good painting practice, nor does it insulate them from problems a month, a year, or 2 years down the road. Do what the paint mfr. suggests right on the label of the can, and keep Murphy and his family at bay
remember this is rust paint we're talking about 
Posted By: Anonymous
Re: Paint job on a budget!? CONTINUED..page 44........ - 08/02/06 02:29 AM
HULLO FROM AUSTRALIA
thanks 2 everyone who has put the time and effort into getting this info out. I have started a test using our equivelent called Killrust. I am up to 6th coat. I am sooooo impressed with this technique as i have never been able to paint, not even my nails
here is the link to the forum where i have all my pics from first coat thru sanding up to 5th coat
http://www.gmh-torana.com/forums/index.php?showtopic=7747bye for now
XXXKAZXXX
Posted By: Anonymous
Re: Paint job on a budget!? CONTINUED..page 44........ - 08/02/06 02:52 AM
pics don't work...
Posted By: Anonymous
Re: Paint job on a budget!? CONTINUED..page 44........ - 08/02/06 03:03 AM
Quote:
I would get the professional if you have a choice. Some colors aren't available (or readily available) in the professional type. I've gotten a good shine out of the red professional stuff, and im painting my car white with the stops rust stuff. I hope I can get the white to shine like the red did.
I had to special order my "Sand" professional from Lowes, so just an FYI Lowes will special order any available color for you.
Posted By: Anonymous
Re: Paint job on a budget!? CONTINUED..page 44........ - 08/02/06 03:11 AM
Posted By: Anonymous
Re: Paint job on a budget!? CONTINUED..page 44........ - 08/02/06 03:14 AM
I've started prepping my truck in earnest today, I'm keeping a running library of pictures (as I remember to take them) at
http://faith.dixiesys.com/72GMCToday's work starts at this pic:
http://faith.dixiesys.com/72GMC/IMAGE_00068Right now I'm doing seek and destroy on rust, as I clear a spot of rust I'll just spray can it (with red primer or white whatever's handiest so I don't have to constantly mess up rollers). Then it's bondo time to fill a couple dinks, and one rust thru spot. Then it's paintin time
hopefully before September starts!
This truck is old, and whoever painted it last did a seriously crappy job so my work is cut out for me.
Posted By: DaytonaTurbo
Re: Paint job on a budget!? CONTINUED..page 44........ - 08/02/06 04:15 AM
this may have already been answered, but way too much to read through at this point, but here goes. My brother wants to use this on his dodge rampage, which has the plastic front nose. The truck will be driven year round including canadian winters, so we're wondering if the paint will flex enough for plastic and not develop those stress cracks that the paint on some used plastic body panels have. I know that body shops use some sort of flex additive for plastic body panels and such but not sure of what should be used with tremclad?
Posted By: Marq
Re: Paint job on a budget!? CONTINUED..page 44........ - 08/02/06 07:00 AM
Quote:
this may have already been answered, but way too much to read through at this point, but here goes. My brother wants to use this on his dodge rampage, which has the plastic front nose. The truck will be driven year round including canadian winters, so we're wondering if the paint will flex enough for plastic and not develop those stress cracks that the paint on some used plastic body panels have.
Since I have used both the Tremclad/Rustoleum and the Brightside paint... I will take a shot at this question.
I don't think you have to worry about the flex of these paints when applied as per the Charger 'thinned out' method.
The skin being left on the car parts is very thin. This allows it more flex then say a straight coated paint job which might be up to 5 times thicker when cured.
My first thought when I read the question was this... most factory paint jobs are prone to cracking (spidering type cracks) when the plastic is flexed beyond a 'certain point'.
Normally when a body part reaches that 'certain point' of flex it is the plastic itself that is going to crack.
Overall... I would suggest that either of the paints would provide equal or better ability to withstand 'reasonable' flexing of the plastic body parts when compared against a factory paint job.


My McLaren has a very flexible front bumper/aero effects and rear bumber/aero effects. I have layers of both Tremclad and Brightside paint on them. I have no qualms or fears that this will be an achilles heel or weakpoint of this paint job.
Posted By: Anonymous
Re: Paint job on a budget!? CONTINUED..page 44........ - 08/02/06 02:14 PM
Ok, I started off thinking I was going to use the Restolium Gloss White. Then the Brightside was introduced and I thought I'd use that (less coats/no thinning). Now "yellowing" has been brought up....for a gloss white paint job what do you guys recomend?
Posted By: Marq
Re: Paint job on a budget!? CONTINUED..page 44........ - 08/02/06 02:36 PM
Quote:
Ok, I started off thinking I was going to use the Restolium Gloss White. Then the Brightside was introduced and I thought I'd use that (less coats/no thinning). Now "yellowing" has been brought up....for a gloss white paint job what do you guys recomend?
I think I pretty well covered off that topic in my previous reply...
Quote:
White in any paint has a tendency to acquire a yellow tinge with age. That is why most professional painters tend to add a spec of blue tint to their 'white' to permanently ward off the yellowing. This is especially true of CHEAP LATEX white paint. But that is also more relevant to 'old' paints from the 'old days' and the chemistry of modern paints have taken steps in the chemical composition of the paints and pigments (solids) to prevent yellowing. But even moderm CHEAPER BY THE GALLON type paints may suffer from not having anti-yellowing technology in them. Heck... even the polyurathane composition of the Brightside paint would help in sealing off the ability of oxygen to get beneath the outer skin of the paint job to discolor the pigment. And even further the solids or pigments are completely encapsulated and surrounded by the polyurathane which prevents oxygen from reaching them... And lastly... Brightside is a polyurathane... ( think of a liquid PLASTIC ). I would really like to know what type of staining substance can penetrate a solid plastic barrier. It just doesn't make sense.
The 'off white' colors are usually pre-dispositioned towards 'yellowing' in that they have a pigment that gives the initial 'off white' color. I don't think that would contribute to further 'yellowing' of that 'offwhite' color because these paints are engineered to hold their initial color without fade or discoloration for as long as it is chemically feasible. As we all know.. ALL paints eventually change color - and the real comparison of good paints and bad paints is 'how long is the paint engineered to hold its initial color. In this regard I think the Brightside and the Tremclad/Rustoleum are both engineered to 'hold their color' longer than many of the other paint products out there.
The only hint of a stain would occur where a substance with a contrasting color is able to enter the microscopic pores of the paint surface. But even there the staining substance can probably be encourage to detach itself from the pore with the right washing or cleansing. And in a worst case scenario the 'pore' could be removed with a wetsanding - since those pores only exist on the outer surface and do not act like passageways through the paint..
The Brightside paints for example do have special anti-UV ingredients to prevent fade or color changes from the ultra-violet rays of the sun.
But you mentioned that 'you had heard of yellowing in areas where there was no direct sun the whites were changing to yellow. My first thought is that it is obviously not a UV problem. Hmmmm... something not exposed to the sun.. like an inside cabin... would be affected by cigarette nicotine... that would yellow a white wall... or cooking in a galley would release things into the air that would yellow the walls inside the boat if they were enclosed and painted white. Just visit my mother's kitchen to see how cooking changes the colors of her kitchens walls etc.
So overall I think that concerns about 'yellowing' are a non-starter and shouldn't give you any concern.
Afterall... there is no paint manufacturer in the world that would deliberately allow a white paint that is guaranteed to yellow to go to market. It would be suicide for that paint manufacturer. So logically you know that the paint manufacturers are doing everything possible to minimize any chance of their white's yellowing... or their other colors fading.
The more pure or brighter the white you choose.. the less likely it will yellow. And if you fear a possible yellowing... then just drop one DROP of blue into your white and that will guarantee zero yellowing ever ( although I suspect the paint manufacturers already do that with their brightest whites).
.
Posted By: Anonymous
Dang, that looks familiar, Grimster! - 08/02/06 06:31 PM
Time will fly by while you're working, though! And you'll be doubly proud of the results.
Here's where I started....

Posted By: Anonymous
Re: Paint job on a budget!? CONTINUED..page 44........ - 08/02/06 06:38 PM
I wiped down the hood with Interlux Special Thinner 216... man that stuff evaporates fast... it was tough to use sparingly and yet verify the whole surface was completely wiped down. Next, I went with brushing on Picklex 20 on all edges and ridges, anywhere there is a *risk* of bare metal.
After that was wiped down and dried, I spend some time mixing the Brightside with Interlux 333 Brushing Thinner.. ~5-10%. Brightside directions call for no more than 10% thinning, so I followed these directions for my fist coat. (Sorry, I'm not trying to sound like an Interlux commercial, I'm just using same-brand products as a guarantee of compatability.)
I was in the circumstance of having to leave home for the evening to visit family, so I wanted to ensure that I got my fist coat on the hood so that it would dry while I was away... I had to skip thoroughly cleaning the garage and wetting the floor due to time constraints, and sure enough, there were plenty of bits and fuzzies in the finish by the time I was done rolling... but overall, It layed down pretty darn good!
I was surprised at the excellent coverage that I got, despite my efforts to lay on the thinnest layer possible. The roller seemed to apply with a little bit of tackiness, so I may thin a bit more on the next application. Even so, the paint layed down exceptionally flat after a half hour or so, and every one of the many bubbles that appeared as paint came off the roller popped either on their own, or by 2nd clean roller pass.
I actually did my touch-up cranny brushing *prior* to rolling (rain-tray grill, hood scoop), anticipating that the roller would do a better job of bringing all surfaces to a flatened, even finish if done after brushing - instead of brush marks ruining the rolled-on smoothness.
Posted By: Anonymous
Re: Paint job on a budget!? CONTINUED..page 44........ - 08/02/06 10:56 PM
Quote:
this may have already been answered, but way too much to read through at this point, but here goes. My brother wants to use this on his dodge rampage, which has the plastic front nose. The truck will be driven year round including canadian winters, so we're wondering if the paint will flex enough for plastic and not develop those stress cracks that the paint on some used plastic body panels have. I know that body shops use some sort of flex additive for plastic body panels and such but not sure of what should be used with tremclad?
I have a friend who painted his Daytona, and he said he can twist the rear bumper like a wet rag and the paint doesn't care. Incouraging since my Shelby Charger GLHS has a ton of plastic.
Posted By: GoodysGotaCuda
Re: Paint job on a budget!? CONTINUED..page 44........ - 08/02/06 10:58 PM
Prepping for paint after sanding.
My car is currently immobile inside the garage. You guys have any suggestions as far as trying to wipe it down/prep it for paint. I cant just roll it out and wash it down. Just blow it off with compressed air and wipe it down with mineral spirits?
I'm shooting to get my first coat on Friday. Should there be any sanding after the first coat? how much setup time between coats? Its been 95-100* outside lately, garage stays pretty warm, like above, i cant just roll it own and bake it in the sun. thanks
Posted By: Exit1965
Re: Paint job on a budget!? CONTINUED..page 44........ - 08/03/06 01:03 AM
Wipe down with a plain rag to de-dust then wipe it with mineral spirits. You might want to use papertowels for the mineral spirits so you can see when it's dirty and youre not just spreading dirt and oil around.
What I've been doing is, wiping down with mineral spirits and papertowels (between coats, it might take 3 or 4 papertowlels the whole car, using about 8 surfaces on each paper towel), then let the mineral spirits evap (may take 20 minutes or an hour depending on temp), then before I'm going to paint, I'll go around it with a lint free cloth, slapping it around getting rid of anything that might have landed while the spririts were evaporating. Then ready for paint.
Between coats, the longer the better (to a point), one day would be safe in hot temperatures depending LARGELY on how thick the layer of paint was. It should definately not be tacky whatsoever when you're adding a coat to it.
I put a thick coat on Sunday night (I think), and it was tacky for nearly 24 hours. It dried with very little orange peel. I gave it about 48 hours to dry just to be safe.
Posted By: Marq
Re: Paint job on a budget!? CONTINUED..page 44........ - 08/03/06 01:47 AM
Color-Sanding (wet sanding ) and Buffing
I found a nice article on Color-Sanding and Buffing over at AutoMedia.com...
http://www.automedia.com/ColorSanding/and/Buffing/res20030601cs/1Hopefully some other folks that are into the Color-Sanding and Buffing stage will find it interesting and useful in their quest to rid their paint job of orange peel, flaws and to get the max shine possible.
Nice pictures tooo
.
Posted By: Anonymous
Re: Paint job on a budget!? CONTINUED..page 44........ - 08/03/06 02:01 AM
I just got home after being away for a day. The Brightside paint has been drying for ~24 hours, but is still tacky. Looks like it will be another day before I can wetsand and recoat.
Posted By: Marq
Re: Paint job on a budget!? CONTINUED..page 44........ - 08/03/06 03:11 AM
Quote:
I just got home after being away for a day. The Brightside paint has been drying for ~24 hours, but is still tacky. Looks like it will be another day before I can wetsand and recoat.
What type of temperatures and humidity do you have there... ?
.
Posted By: Anonymous
Re: Paint job on a budget!? CONTINUED..page 44........ - 08/03/06 05:29 AM
Quote:
Quote:
I just got home after being away for a day. The Brightside paint has been drying for ~24 hours, but is still tacky. Looks like it will be another day before I can wetsand and recoat.
What type of temperatures and humidity do you have there... ?
High 70's Fahrenheit during the day, low 60's at night... it's almost 10:30 PM, and humidity in our region is 60% right now. The hood has been in the garage and has not yet had a chance to sit out in the sun to "cook".
The tackiness is really most evident on the edges, but a few spots on the flats as well.
I did bring the hood out into the open late in the day, and was finding some waves from my sanding of the underlayers. I really had a hard time ensuring the clearcoat was removed without going past the basecoat in a lot of spots. I'm thinking of resanding, but I'm not sure that I'd do any better the second time around. Then there's the whole rest of the car to sand...!
Posted By: GoodysGotaCuda
Re: Paint job on a budget!? CONTINUED..page 44........ - 08/03/06 05:34 AM
Quote:
Wipe down with a plain rag to de-dust then wipe it with mineral spirits. You might want to use papertowels for the mineral spirits so you can see when it's dirty and youre not just spreading dirt and oil around.
What I've been doing is, wiping down with mineral spirits and papertowels (between coats, it might take 3 or 4 papertowlels the whole car, using about 8 surfaces on each paper towel), then let the mineral spirits evap (may take 20 minutes or an hour depending on temp), then before I'm going to paint, I'll go around it with a lint free cloth, slapping it around getting rid of anything that might have landed while the spririts were evaporating. Then ready for paint.
Between coats, the longer the better (to a point), one day would be safe in hot temperatures depending LARGELY on how thick the layer of paint was. It should definately not be tacky whatsoever when you're adding a coat to it.
I put a thick coat on Sunday night (I think), and it was tacky for nearly 24 hours. It dried with very little orange peel. I gave it about 48 hours to dry just to be safe.
Thanks Exit
Trying my first full coat on the car tomorrow morning. I know the body isn't awesome right now. but it should be well enough to get decent color out of it. Any last minute, 'dont forgets'?!  Little nervous, hope it turns out ok. That stuff is a PAIN to sand off once it hardens
Question. if after the first coat i notice a good amount of orange peel. whats the best next step. Wetsanding it with say, 600? 1000?
Posted By: Exit1965
Re: Paint job on a budget!? CONTINUED..page 44........ - 08/03/06 01:57 PM
Or 400. I dont know why, but my 1st coats always went on with lots of orange peel on the horizontal surfaces like hood and roof. 400 takes care of that quickly though.
Posted By: 69chargeryeehaa
Re: Paint job on a budget!? CONTINUED..page 44........ - 08/03/06 02:05 PM
Quote:
Quote:
Wipe down with a plain rag to de-dust then wipe it with mineral spirits. You might want to use papertowels for the mineral spirits so you can see when it's dirty and youre not just spreading dirt and oil around.
What I've been doing is, wiping down with mineral spirits and papertowels (between coats, it might take 3 or 4 papertowlels the whole car, using about 8 surfaces on each paper towel), then let the mineral spirits evap (may take 20 minutes or an hour depending on temp), then before I'm going to paint, I'll go around it with a lint free cloth, slapping it around getting rid of anything that might have landed while the spririts were evaporating. Then ready for paint.
Between coats, the longer the better (to a point), one day would be safe in hot temperatures depending LARGELY on how thick the layer of paint was. It should definately not be tacky whatsoever when you're adding a coat to it.
I put a thick coat on Sunday night (I think), and it was tacky for nearly 24 hours. It dried with very little orange peel. I gave it about 48 hours to dry just to be safe.
Thanks Exit
Trying my first full coat on the car tomorrow morning. I know the body isn't awesome right now. but it should be well enough to get decent color out of it. Any last minute, 'dont forgets'?! Little nervous, hope it turns out ok. That stuff is a PAIN to sand off once it hardens
Question. if after the first coat i notice a good amount of orange peel. whats the best next step. Wetsanding it with say, 600? 1000?
if i get lots of peel (which sometimes happens) then i'd hit it with 400 too, the sucsessive layers of paint will "fill" in the scratches left behind. also after whiping the car down with mineral spirits as exit suggested, just before i paint a pannel i use a regular autobody tach cloth (usually about $1) to get all the dust off. also after about 4 hours of drying time it really helps to put a few fans on the car, it really speeds up dry time, but do it after the paint dries until it's not tacky.
Posted By: GoodysGotaCuda
Re: Paint job on a budget!? CONTINUED..page 44........ - 08/03/06 02:48 PM
Thanks guys, but the method is to do away with ANY orange peel before the next coat, correct?
Posted By: Anonymous
Re: Paint job on a budget!? CONTINUED..page 44........ - 08/03/06 03:01 PM
Quote:
Thanks guys, but the method is to do away with ANY orange peel before the next coat, correct?
My understanding is you put on 2 coats rustoleum/tremclad (1 for brightside), let it dry and then remove any blemishes, orange peel, dust, fibers, etc, then 2 more coats, and repeat, with successively finer sand paper grits finishing with something like 1500 or 2000 grit on the final coat (6th+ coat possibly as much as the 10th apparently or 3rd or 4th with brightside). Then polish/buff until it shines like you want, then cure another day or three and wax the shine into place.
Posted By: Anonymous
Re: Paint job on a budget!? CONTINUED..page 44........ - 08/03/06 03:03 PM
Exit where's the link to your pics of your car? Wanted to share them with someone and your sig isn't showing up with the link anymore.
Posted By: Anonymous
Re: Paint job on a budget!? CONTINUED..page 44........ - 08/03/06 03:08 PM
6 quarts of Interlux Brightside Flag Blue arrived yesterday, cost about $60 for all 6 shipped through e-bay seller "theysoldit." I'm now in the process of getting some 333 thinner through pop's body shop .... supposed to be mid 80s and low humidity this weekend .... stay tuned!
Posted By: Anonymous
Re: Paint job on a budget!? CONTINUED..page 44........ - 08/03/06 03:14 PM
BTW, Interlux is owned by Akzo Nobel, who also makes Sikkens automotive paint. Sikkens is some of the best (and most expensive) automotive paint out there. My dad's shop used it exclusively for years until their constantly rising prices got too high to justify. A Spiess-Hecker rep came in and offered them a new state of the art mixing system if he'd give their paints a shot. He made the switch and never looked back ... they've had great luck with the Spiess-Hecker, too. Anyway, point being Akzo Nobel knows a thing or two about paint chemistry. I'm not hesitant at all to try this with the Interlux Brightside.
Posted By: Exit1965
Re: Paint job on a budget!? CONTINUED..page 44........ - 08/03/06 04:56 PM
Posted By: Anonymous
Re: Paint job on a budget!? CONTINUED..page 44........ - 08/03/06 07:00 PM
Quote:
The tackiness is really most evident on the edges, but a few spots on the flats as well.
It could be that the tacky spots are the same spots that I used the Picklex 20, maybe it didn't have sufficient time to dry before paint went on... I think about 2 hours (there was no dry time listed on the bottle).
However, the paint is quite soft over the entire hood after ~36 hrs post-painting, and is easily marred by handling. It is finally "cooking" in the sun today; if the tackiness doesn't harden up, I may very will strip and resand the hood to eliminate those waves and start again.
Posted By: Anonymous
Re: Paint job on a budget!? CONTINUED..page 44........ - 08/03/06 07:53 PM
Posted By: GoodysGotaCuda
Re: Paint job on a budget!? CONTINUED..page 44........ - 08/03/06 08:13 PM
well first coat is on. i wasn't trying to cover up the entire thing in one shot. So you can still see some of the body under it, light/dark spots. Paint went on ok, i did get some bubbles when rolling it. Whats the usual culprit for bubbles? i wasnt rolling very hard.
anyway, i do have a couple lines that i didnt notice/roll out...so im assuming i need to sand those off before i go to the second coat correct?
i think the paint needs to be thinner. For some reason i feel like i should sand it down with like 600 before the next coat, because there is some peel and what not...and i feel the next coat is just going to be a waste if i have to sand through to the first to get the peel out anyway. any suggestions?
thanks
Posted By: Marq
Re: Paint job on a budget!? CONTINUED..page 44........ - 08/03/06 08:23 PM
Quote:
However, the paint is quite soft over the entire hood after ~36 hrs post-painting, and is easily marred by handling. It is finally "cooking" in the sun today; if the tackiness doesn't harden up, I may very will strip and resand the hood to eliminate those waves and start again.
This does not sound normal for the Tremclad/Rustoleum or the Brightside... It sounds like something is wrong with the paint.
If this is the Brightside paint... is it the paint from the eBay 'cheaper by the case' guy ?
Was the can thoroughly mixed or shaken up before using it ? I know that the original can of Tremclad that I bought at Walmart had to be shaken because the paint solids had settled ( separated ) in the can. When you put a paint stick into the can you could feel the solids were all sitting at the bottom of the can like a sludge. Two minutes on the Walmart paint shaking machine remedied that.
If it isn't drying to a sandable stage with in 18 hours... then there is something preventing the carrier from evaporating or there is too much paint pigment (solids) and not enough of the evaporating carrier to thin it out properly.
Posted By: Marq
Re: Paint job on a budget!? CONTINUED..page 44........ - 08/03/06 08:37 PM
Quote:
well first coat is on. i wasn't trying to cover up the entire thing in one shot. So you can still see some of the body under it, light/dark spots.
Perfectly normal... for the first couple of layers.
Quote:
Paint went on ok, i did get some bubbles when rolling it. Whats the usual culprit for bubbles? i wasnt rolling very hard.
I think the bubbles relate to the air pockets in the high density foam roller and in some cases it might be air being trapped as you lay your paint down. So the bubble floats to the top to escape.
It is interesting to note that there are at least two 'densities' of 4 inch foam rollers available in the stores. The one for example that I saw at the 'Dollar Store' ( 3 rolls for 1$ ) looked more spongy and with more air pockets in the foam. The roller I bought at Home Depot and also at a Benjamin Moore paint store were a higher density foam and the air pockets in the foam were much smaller then the cheaper imitation brand.
Quote:
anyway, i do have a couple lines that i didnt notice/roll out...so im assuming i need to sand those off before i go to the second coat correct?
If you can see the paint line... then it probably means there is slightly more paint at that position to form the line so that it is visual. I would very gently sand the surface just to ensure that it is smoothed out and leveled even.
Quote:
i think the paint needs to be thinner. For some reason i feel like i should sand it down with like 600 before the next coat, because there is some peel and what not...and i feel the next coat is just going to be a waste if i have to sand through to the first to get the peel out anyway. any suggestions?
It's best to nail any evidence of orange peel before moving on to the next layer. Possible the paint for that first layer was not thinned out enough.
Posted By: GoodysGotaCuda
Re: Paint job on a budget!? CONTINUED..page 44........ - 08/03/06 09:01 PM
Quote:
Quote:
well first coat is on. i wasn't trying to cover up the entire thing in one shot. So you can still see some of the body under it, light/dark spots.
Perfectly normal... for the first couple of layers.
Quote:
Paint went on ok, i did get some bubbles when rolling it. Whats the usual culprit for bubbles? i wasnt rolling very hard.
I think the bubbles relate to the air pockets in the high density foam roller and in some cases it might be air being trapped as you lay your paint down. So the bubble floats to the top to escape.
It is interesting to note that there are at least two 'densities' of 4 inch foam rollers available in the stores. The one for example that I saw at the 'Dollar Store' ( 3 rolls for 1$ ) looked more spongy and with more air pockets in the foam. The roller I bought at Home Depot and also at a Benjamin Moore paint store were a higher density foam and the air pockets in the foam were much smaller then the cheaper imitation brand.
Quote:
anyway, i do have a couple lines that i didnt notice/roll out...so im assuming i need to sand those off before i go to the second coat correct?
If you can see the paint line... then it probably means there is slightly more paint at that position to form the line so that it is visual. I would very gently sand the surface just to ensure that it is smoothed out and leveled even.
Quote:
i think the paint needs to be thinner. For some reason i feel like i should sand it down with like 600 before the next coat, because there is some peel and what not...and i feel the next coat is just going to be a waste if i have to sand through to the first to get the peel out anyway. any suggestions?
It's best to nail any evidence of orange peel before moving on to the next layer. Possible the paint for that first layer was not thinned out enough.
Thanks So given there are some lines, signs from bubbles and a little orange peel. i should hit it with some sand paper, correct? 600? wet?
Posted By: Anonymous
Re: Paint job on a budget!? CONTINUED..page 44........ - 08/03/06 09:09 PM
Quote:
Quote:
However, the paint is quite soft over the entire hood after ~36 hrs post-painting, and is easily marred by handling. It is finally "cooking" in the sun today; if the tackiness doesn't harden up, I may very will strip and resand the hood to eliminate those waves and start again.
This does not sound normal for the Tremclad/Rustoleum or the Brightside... It sounds like something is wrong with the paint.
If this is the Brightside paint... is it the paint from the eBay 'cheaper by the case' guy ?
Was the can thoroughly mixed or shaken up before using it ? I know that the original can of Tremclad that I bought at Walmart had to be shaken because the paint solids had settled ( separated ) in the can. When you put a paint stick into the can you could feel the solids were all sitting at the bottom of the can like a sludge. Two minutes on the Walmart paint shaking machine remedied that.
If it isn't drying to a sandable stage with in 18 hours... then there is something preventing the carrier from evaporating or there is too much paint pigment (solids) and not enough of the evaporating carrier to thin it out properly.
I was very thorough with the mixing; I used a squirrel mixer on my power drill on the fresh can of Brightside (from the boating supply store), and did again after adding thinner to my second vessel in preparation for paint applicaion... mixing went on for ~2 mins just before paint application.
Posted By: Dart360sav
Re: Paint job on a budget!? CONTINUED..page 44........ - 08/03/06 09:27 PM
Sorry to chime in inthe middle, but im wondering if anyone can point me in the right dirrection as far as getting a buffer. Now i just have a cheapo orbital polisher that my arm power puts to shame. Where can i get a high quality buffer??
Thanks
Posted By: Marq
Re: Paint job on a budget!? CONTINUED..page 44........ - 08/03/06 11:08 PM
Quote:
I was very thorough with the mixing; I used a squirrel mixer on my power drill on the fresh can of Brightside (from the boating supply store), and did again after adding thinner to my second vessel in preparation for paint applicaion... mixing went on for ~2 mins just before paint application.
I may be just grasping at straws to try to explain the slowness of your paint to cure... but when you mentioned " ...after adding thinner to my second vessel... "... Does that mean that you used the Interlux 'thinner' or the Interlux 'Brushing liquid".
The reason I ask is that Interlux does have one of each of those products. The one for adding to the paint is th "Brushing Liquid" - their product number 333
I really don't know what the difference is between their 'thinner' and the 'brushing liquid"... but as I said I am just grasping at straws trying to figure out why yours is taking so long to dry..
Other than that it sounds like you did everything RIGHT...
Posted By: GoodysGotaCuda
Re: Paint job on a budget!? CONTINUED..page 44........ - 08/03/06 11:15 PM
Posted By: Anonymous
Re: Paint job on a budget!? CONTINUED..page 44........ - 08/04/06 01:02 AM
Quote:
The reason I ask is that Interlux does have one of each of those products. The one for adding to the paint is th "Brushing Liquid" - their product number 333
Marq, thanks for your input. We are correct - I used the Special Thinner 216 only as a final wipe down. When it came time to paint, I did use the Brushing Liquid 333 at about 5-10% mixed with the Brightside.
The surfaces that remained tacky are the same surfaces that I treated with Picklex 20 rust preventer/converter, and then I brushed a thin coat of paint onto those same edges with a small foam brush once the rust preventer had sat for a couple hours. It could be the rust preventer... or the fact that it was several minutes from the time of brushed-on paint to the time of rolled-on paint; maybe the brushed-on edges sat for too long, and then were coated by the roller anyway, causing some sort of inability to dry.
Either way, the majority of the panel dried pretty nice and smooth, I'm not giving up. The tacky spots I wiped off with mineral spirits to the best of my ability, and the whole hood is going to be sanded down once again to remove the waves... hope I don't make this problem worse! Should I get a sanding board of some kind? I've already gone way overbudget, and I'm spending too much time going around town for supplies...
Posted By: Anonymous
Re: Paint job on a budget!? CONTINUED..page 44........ - 08/04/06 03:14 AM
First off, I would like to extend major thanks to 69Chargeryeehaa for bringing this idea to the masses.
And I can say, your timing couldn't have been better.
Kudos also to all the people who have tried and tailored this method, and posted your project's progress, and to Moparts for having a thread that truly crosses boundaries and brings people together.
I have read all 67 pages of this awesome thread, and I think it is one of the most inspiring things I've seen on the web in a while. I followed a link to this thread from Grassroots and I have been hooked ever since.
I have recently acquired a project, and among many other things, she needs paint. Once I get the engine pulled and the body work done, she'll be ready. I have already special ordered my paint and bought all the other stuff I need to roller away. Sure, everybody thinks I'm crazy, but hell, they should have figured that out by now.
For anyone having trouble getting your Home Depot to special order a color for you, I had better luck going to the Customer Service counter rather than going to the paint counter. Just take the phone # for Rustoleum, (1-800-323-3585), and the model# of the paint you want. Be prepared to order a minimum of 2 gallons or 6 spray bombs.
I think the hardest part right now is figuring out if I want to go with any stripes or whatnot. I have been playing around with photoshop to see how different things will look. I have attached a pic of the car, not a mopar unfortunately, but a '76 Celica GT.
I have Rustoleum Professional Safety Orange on order(which matches the paint that's on the car now so closely it's weird), and I finally managed to find the weapons grade 100% stinky mineral spirits today at Ace Hardware (but only in quarts, no gallons).
I will keep you posted on the progress with pictures, once I get to that point
I just had to log in and pay respects. Hopefully I will have something to contribute soon!

Posted By: Anonymous
Re: Paint job on a budget!? CONTINUED..page 44........ - 08/04/06 03:28 AM
This is one of the simpler ideas I had, just a nice stripe across the trunk...

Posted By: Anonymous
Re: Paint job on a budget!? CONTINUED..page 44........ - 08/04/06 03:34 AM
Or maybe something kinda wild...

Posted By: Anonymous
Re: Paint job on a budget!? CONTINUED..page 44........ - 08/04/06 05:03 AM
Goody - get some tack rags to pick up the dust between coats. I haven't seen them mentioned, but they are the best to use - unless someone has mentioned something specific about them not working with the paint, but I cannot see that being an issue.
Posted By: Anonymous
Re: Paint job on a budget!? CONTINUED..page 44........ - 08/04/06 05:05 AM
Sorry - I saw where 69 Charger mentioned tack rags, (not tach rags) - cheap and do the best job.
Posted By: Anonymous
Re: Paint job on a budget!? CONTINUED..page 44........ - 08/04/06 07:28 AM
Quote:
Either way, the majority of the panel dried pretty nice and smooth, I'm not giving up. The tacky spots I wiped off with mineral spirits to the best of my ability, and the whole hood is going to be sanded down once again to remove the waves... hope I don't make this problem worse! Should I get a sanding board of some kind? I've already gone way overbudget, and I'm spending too much time going around town for supplies...
Off with the paint! Well, I sanded everything down again, using the DA Porter-Cable with 220 grit, taking special care to try to make the surface more level this time. I had a partial can of generic spray primer in black, so I carefully sprayed all edges and exposed metal.
I skipped the Picklex-20 this time in case it was the culprit in "The Case of the Tacky Paint." I'm hoping to get up early in the AM to do a pass with 320 grit just prior to final wipedown... and then I'll roller some paint!
Posted By: Anonymous
Re: Paint job on a budget!? CONTINUED..page 44........ - 08/04/06 03:19 PM
IIRC you're working on a hood ... if you da'd the paint off, you might want to hit it real quick with the same grit as the DA, but with a long-ish block. The DA takes off material very unevenly on flat surfaces, and is probably the source of your waves. Back when my dad and I were doing his 'vette over in the early 90s, we were doing bodywork, prime, and da'ing the poop out of it, we couldn't get a level surface until an old timer came over and laughed at us ... "da's are for shaping, guys ... you need to put those things down and start blocking the car out!"
(edited for spelling) (twice)
Posted By: Anonymous
Re: Paint job on a budget!? CONTINUED..page 44........ - 08/05/06 12:55 AM
There is TONS of great info in this (and the other) thread. I have learned much and feel that I needed to contribute to the cause. So I was going to do a writeup on mixing greys from black and white Brightside.
What I learned so far:
A syringe will break when drawing Brightside into it.
50%/50% black/white mix is pretty dark and looks nice.

As soon as I figure out a good way to measure out small amounts, I'll post a color chart thing.
Posted By: Marq
Re: Paint job on a budget!? CONTINUED..page 44........ - 08/05/06 01:52 AM
Quote:
There is TONS of great info in this (and the other) thread. I have learned much and feel that I needed to contribute to the cause. So I was going to do a writeup on mixing greys from black and white Brightside.
Brightside has four shades of gray pre-mixed and ready to serve from the can.
1 Seattle Gray = the lightest pre-mixed gray
2 Dusk Gray
3 Kingston Gray and
4 Steel Gray = the darkest pre-mixed gray
when you start cutting black with white... you can probably cover off the gray shades from Steel Gray up to just under a black.
Another way around your experiment is to buy cans of White Brightside and then pick up the black 'tint' that comes in toothpaste type tubes at Home Depot. The black tint in the tubes can be measured out in inches to get a repeatable formula for subsequent mixing. I think I paid about $3.00 for a tube. They are about the size of the hardening catalyst tubes that come with body filler.
.
Posted By: Anonymous
Re: Paint job on a budget!? CONTINUED..page 44........ - 08/05/06 04:57 AM
Hey guys this is my first post. Some1 on my local car forum tamparacing.com, posted a link to this original thread. That was at 9 and now its almost 1am!!! This thread is awesome! lots of information. but...
I was reading all the old replys all the way back to january and it was in trial stages. Now i started reading these newer ones and you are tlking about brightside?
Can some one please recap:
What exact type of enamel-(industrial?pro?anything oilbased?)
What brands work-(rustoleum,brightside?)
Are you guys still using the, 2 coats 400gt, 2 coats 800gt, 2 coats 1000gt, and 2 coats 1500gt then buffering?
Thanks for the help. Love the site.
Posted By: Anonymous
Re: Paint job on a budget!? CONTINUED..page 44........ - 08/05/06 06:20 AM
Quote:
Hey guys this is my first post. Some1 on my local car forum tamparacing.com, posted a link to this original thread. That was at 9 and now its almost 1am!!! This thread is awesome! lots of information. but...
I was reading all the old replys all the way back to january and it was in trial stages. Now i started reading these newer ones and you are tlking about brightside?
Can some one please recap:
What exact type of enamel-(industrial?pro?anything oilbased?)
What brands work-(rustoleum,brightside?)
Are you guys still using the, 2 coats 400gt, 2 coats 800gt, 2 coats 1000gt, and 2 coats 1500gt then buffering?
Thanks for the help. Love the site.
Rustoleum Professional oil based or Interlux Brightside (a marine paint)
As far as the process goes, it really has had varied results, but it seems that 6 to 10+ coats is necessary (depending on underlaying color and thickness of layers) with wet sanding between every other coat.
Posted By: Anonymous
Re: Paint job on a budget!? CONTINUED..page 44........ - 08/05/06 12:50 PM
Quote:
Brightside has four shades of gray pre-mixed and ready to serve from the can.
1 Seattle Gray = the lightest pre-mixed gray
2 Dusk Gray
3 Kingston Gray and
4 Steel Gray = the darkest pre-mixed gray
when you start cutting black with white... you can probably cover off the gray shades from Steel Gray up to just under a black.
Another way around your experiment is to buy cans of White Brightside and then pick up the black 'tint' that comes in toothpaste type tubes at Home Depot. The black tint in the tubes can be measured out in inches to get a repeatable formula for subsequent mixing. I think I paid about $3.00 for a tube. They are about the size of the hardening catalyst tubes that come with body filler.
Unfortunately, Interlux's shades of grey are far too light to match (or even come close) to the factory Medium Gray Metallic paint on my car. I'm hoping to be able to mix up a reasonably close match to that shade, sans metal flake.
On the Interlux website:
Quote:
Can I change the color of paint in the can?
The only way we recommend changing the color of our paints is to mix like paints, ie. Mixing Brightside with Brightside. We do not recommend addition of "universal" tints or pigments into our products. Yacht paint products are formulated to withstand harsh conditions and additions of universal tinters or any such products may affect water resistance, long term durability and may also slow down the drying time of the paint. We would also strongly discourage anyone from adding anything to antifouling paints that is not already mentioned on the label. Apart from affecting performance such additions may be illegal as antifouling paints are registered with a unique formula and addition of unauthorized materials, especially active ones to " improve " performance changes this unique formula.
I dunno if the whole tint statement is true or not, but I'd rather not risk it. The 50/50 mix is already very close to the correct color.
Guess todays project is cleaning out the garage and moving the Cutlass in there to start on it
On a side note:
Anyone know a good way to dye a plush cloth interior? The sun faded parts of the front interior from grey to blue.
Posted By: Exit1965
Re: Paint job on a budget!? CONTINUED..page 44........ - 08/05/06 12:59 PM
Has anyone (Marq?) wetsanded then polished the brightside yet?
I have not yet begun the final wetsand/polish on my car, but I know the paint still scratches (yep, with my fingernail) - not that it scratches all the way off, but it leaves a scratch.
Funny thing I've noticed is that when I've used rustoleum in spray cans, and even when I mixed some spray together in my refillable spray can, the paint has dried VERY hard in a matter of days or a week. I can't leave indentations in it with my fingernails like I can with the rolled on stuff.
Posted By: Anonymous
Re: Paint job on a budget!? CONTINUED..page 44........ - 08/05/06 06:04 PM
Quote:
Quote:
On a side note:
Anyone know a good way to dye a plush cloth interior? The sun faded parts of the front interior from grey to blue.
They have many cloth dye's out there at like autozone... i've herd people say it rubs off but on my local forum people have been doing it and it has standed up to the hot florida weather for 3+years so far
Posted By: Anonymous
Re: Paint job on a budget!? CONTINUED..page 44........ - 08/05/06 07:34 PM
Quote:
...I know the paint still scratches (yep, with my fingernail) - not that it scratches all the way off, but it leaves a scratch...
Exit...get ready for a long wait! I've been in the process of preparing my car for a 'real' paint job. This roll-on stuff will not feather like other auto paint. When I try to sand, the Rustoleum peels!! My paint has been on for months - not dry yet...That sucks...
Another thing i've noticed...this thread has been going on forever...you'd think we'd have a bunch of success stories by now?!? Mine was a bomb...Chuck
Posted By: Anonymous
Re: Paint job on a budget!? CONTINUED..page 44........ - 08/05/06 08:38 PM
Quote:
Has anyone (Marq?) wetsanded then polished the brightside yet?
I have not yet begun the final wetsand/polish on my car, but I know the paint still scratches (yep, with my fingernail) - not that it scratches all the way off, but it leaves a scratch.
Funny thing I've noticed is that when I've used rustoleum in spray cans, and even when I mixed some spray together in my refillable spray can, the paint has dried VERY hard in a matter of days or a week. I can't leave indentations in it with my fingernails like I can with the rolled on stuff.
That seems odd, I would of assumed it shouldn't scratch, me and you are pretty much in the same weather and my friends car was almost fully dry and scratch test proof after a few days. Maybe since we were putting it on a bit thicker, who knows.
Posted By: 69chargeryeehaa
Re: Paint job on a budget!? CONTINUED..page 44........ - 08/05/06 08:58 PM
Quote:
Quote:
...I know the paint still scratches (yep, with my fingernail) - not that it scratches all the way off, but it leaves a scratch...
Exit...get ready for a long wait! I've been in the process of preparing my car for a 'real' paint job. This roll-on stuff will not feather like other auto paint. When I try to sand, the Rustoleum peels!! My paint has been on for months - not dry yet...That sucks...
Another thing i've noticed...this thread has been going on forever...you'd think we'd have a bunch of success stories by now?!? Mine was a bomb...Chuck
sucess storie(s):
(bug pic taken 3 weeks ago with my new wheels, paint is 6+yrs old and counting):

Note to exit - honestly i haven't tried to scratch my paint off with my nail after painting, but i know it would if i tried, i did notice that when re-assembling the car the paint would "dent" like it was still soft. my advice, let a few months go by, it WILL be rock hard, i'd put $ on it, cut and polish the paint when it's fresh, the reason why i advise the turtle wax is because it is such a fine (3000+ grit) compound, it does'nt scratch the paint. This paint takes LONG to fully cure, BUT when dry i'm telling you it's got to be one of the toughest paints around.
Posted By: Anonymous
Re: Paint job on a budget!? CONTINUED..page 44........ - 08/05/06 09:11 PM
Quote:
IIRC you're working on a hood ... if you da'd the paint off, you might want to hit it real quick with the same grit as the DA, but with a long-ish block. The DA takes off material very unevenly on flat surfaces, and is probably the source of your waves. Back when my dad and I were doing his 'vette over in the early 90s, we were doing bodywork, prime, and da'ing the poop out of it, we couldn't get a level surface until an old timer came over and laughed at us ... "da's are for shaping, guys ... you need to put those things down and start blocking the car out!"
A fresh recoat of Brightside Black on the hood last night. No drying problems this time, everything seems to be in order. Yup, I still have some waves, though not quite as bad as before. Since I'm pretty happy with the paint application this time, I think I can live with it, but maybe I'll get a long sanding block once I start stripping the rest of the car. I hope to get my second coat on maybe by tonight.
Posted By: Marq
Re: Paint job on a budget!? CONTINUED..page 44........ - 08/05/06 09:34 PM
Quote:
Has anyone (Marq?) wetsanded then polished the brightside yet?
Nope... the paint job was finished on the 22nd of August and I have been happily putting some mileage on the car... whhhhhhhhheeeeeeeeeee !
I was planning to hold off on the polishhing and waxing stage for at least 30 or more days ( as per the recommendations of the polyurhane shiners.
Quote:
I have not yet begun the final wetsand/polish on my car, but I know the paint still scratches (yep, with my fingernail) - not that it scratches all the way off, but it leaves a scratch.
The longer you can hold off on the polishing and final waxing of the polyurathane the better. But I have noticed in the furniture message boards where they have gone from painting or coating with polyurathane in as short as 72 hours - and gotten mirror smooth finishes.
But the furniture guys are usually working with a much smaller surace area. And I believe they are putting less coats on tha we are.
Quote:
Funny thing I've noticed is that when I've used rustoleum in spray cans, and even when I mixed some spray together in my refillable spray can, the paint has dried VERY hard in a matter of days or a week. I can't leave indentations in it with my fingernails like I can with the rolled on stuff.
The carrier in the spray paint is much more evaporative then the carrier in the paints which we use. So that and the thickness of the layers we 'roll on' go a long way towards the longer curing time needed as compared to the spray bombs.
.
Posted By: Marq
Re: Paint job on a budget!? CONTINUED..page 44........ - 08/05/06 09:42 PM
Quote:
Anyone know a good way to dye a plush cloth interior? The sun faded parts of the front interior from grey to blue.
I know at our Canadian Tire store they sell an aerosol spray bomb for 'textiles' in the automotive section. They have it sittin on the shelves right next to the spray bombs for changing the color or refreshing the color of vinyl.
Another way to do the color change would cost a few bucks but guarantee a more professional look. In Ottawa we have a company that has equipment for changing the color of 'CARPETS'. Visually it just looks like they are steam cleaning the carpet... but they use a dye in their system that changes the color of the carpet. Possibly if you had one of the 'carpet dyers' in your area, they could do a car interior with one of their hand held units.
.
Posted By: 78D150CLUB
Re: Paint job on a budget!? CONTINUED..page 44........ - 08/05/06 10:46 PM
As to success, I'm satisfied that the final result is going to be well worth my time, cost and effort. I started on the final wet sand polish today, on the driver's side box panel. Looked a bit peely indoors, but felt smooth as glass when finished. Out in the sun, the florida grapefruit doesn't even show up, so I can only assume that it's an effect of the metallic dusting coat between layers.
As to the hardness of the paint, I managed to put one scratch in it with a nail head while installing ( test purposes, being impatient again
) my redneck tonneau cover. Wooden frame with a tarp stretched over it.
Other than that, I had the cover on and off twice with no sign of damage or marring.
My cheap (
) camera doesn't catch it the best, but in the sun, the shine is "Holy snowblind, Batman!". Finishing was 2000 wet sand followed by Turtle Wax polishing compound on a Turtle Wax random orbit polisher.
I'm satisfied with the results and would say it's been successful for me.
I hope that others can get the results I have.

Posted By: 78D150CLUB
Re: Paint job on a budget!? CONTINUED..page 44........ - 08/05/06 10:53 PM
What have the temps been for you lately? I notice that when I ran the truck out in the sun for a day, the paint always felt softer, or tackier/grabby to the touch. Next morning, after a night indoors, it felt quite dry and tough again. Perhaps it's an effect of solvent passing up through the surface layer from below?
I know that mine has wetsanded and polished out extremely well and is very difficult to mark or mar without really making an effort, say like dragging a high nail head accross it ( see expalanation in last posting )

Posted By: Pool Fixer
Re: Paint job on a budget!? CONTINUED..page 44........ - 08/05/06 11:42 PM
Quote:
Quote:
Anyone know a good way to dye a plush cloth interior? The sun faded parts of the front interior from grey to blue.
I know at our Canadian Tire store they sell an aerosol spray bomb for 'textiles' in the automotive section. They have it sittin on the shelves right next to the spray bombs for changing the color or refreshing the color of vinyl.
Another way to do the color change would cost a few bucks but guarantee a more professional look. In Ottawa we have a company that has equipment for changing the color of 'CARPETS'. Visually it just looks like they are steam cleaning the carpet... but they use a dye in their system that changes the color of the carpet. Possibly if you had one of the 'carpet dyers' in your area, they could do a car interior with one of their hand held units.
.
just beware that some "stainmaster" type carpets will not take dye. I tried having carpets dyed when I first moved in my house 10 years ago. the guy cut out a piece from under a baseboard and tried it in my sink, no go!!!
maybe whatever they put in the carpet and/or seat cloth to make it stain resistant might make it "dye" resistant.
Posted By: Exit1965
Re: Paint job on a budget!? CONTINUED..page 44........ - 08/06/06 12:49 AM
The temps have been around 93 max in the garage where it's been.
69Charger- yes, exactly, the paint 'dents'. But if you say it gets rock hard eventually, that's what I'm looking for and I hope it comes true.
Posted By: Anonymous
Re: Paint job on a budget!? CONTINUED..page 44........ - 08/06/06 01:20 AM
Quote:
That seems odd, I would of assumed it shouldn't scratch, me and you are pretty much in the same weather and my friends car was almost fully dry and scratch test proof after a few days. Maybe since we were putting it on a bit thicker, who knows.
I know the test glove box door I did, and the roof on my truck are HARD no way in heck will I do much more than MAYBE scuff the paint with my fingernails, maybe enough to roughen the surface of the paint but even that I doubt, that crap is tough and HARD. If I get that all over? I'll be STOKED with the finish I can guarantee that.
The door ain't been outside, the roof ain't been inside so I don't think it's sun, heat (plenty lately) or humidity (way more than plenty lately) keeping paint soft. 90+ lately almost 100, both heat and humidity! I can't work on my truck more than 30 minutes at a pop, then I come inside and drink a quart of water and rest for a while, then do it again.
I'm using Rusto Professional + Low Odor spirits all from Lowes, I believe I am putting on what would be considered "thicker" coats but frankly I can live with a little orange peel, looked at a "new" car lately? Orange peel baby! My wife's new Yukon? Yep see that orange peel, I was walking around a parking lot a couple days ago while my wife was getting some medicine at the drugstore and just scrutinizing paint jobs. I found everyone that I analyzed was quite "substandard".
I know a place that does high dollar restorations ($50,000 is a good start for this place to do a car for you) if I get some time I might go up there and just eyeball a few of their cars to see how the "good ones" look up close. I've been threatening the owner for ages to come up there and chat up his body men for tips and hints.
Posted By: Anonymous
Re: Paint job on a budget!? CONTINUED..page 44........ - 08/06/06 01:22 AM
Quote:
I hope that others can get the results I have.
How do those stripes look close up? What'd you use just blue painter's tape, or regular masking tape or what?
I'm wanting to two-tone my truck and I'm worried I might not be able to pull off the edges properly to make it look good so hints and suggestions are what I'm after
Posted By: 78D150CLUB
Re: Paint job on a budget!? CONTINUED..page 44........ - 08/06/06 02:25 AM
At first, grim, the stripe had an edge where the tape had been, the same way the original paint did.
Original, as in factory shot, hard to believe on a 30 yr old truck, still only one coat of paint.
The wet sanding with 2000 took that right down almost smooth.
I used ordinary masking tape, but with the time the tape has to remain in place, I think I'd try the blue or green painters tape next time.
I had no problems with the edge pulling, but I did have an issue with the tape removing paint from the dark layer in spots.
I found that using a cloth wetted with spirits wiped along the adhesive as the tape comes off worked very well to soften the adhesive and allow the tape to release without pulls.
Also, pull the tape on the bias, ie: 45 deg angle
to the edge of the paint /______ so the pull is into the edge. not lifting straight up on it.
Rub the cloth with spirits back and forth across the edge while applying a gentle pull, and the tape should come off clean and easy.
Bit of a sticky job, cause the softened glue wants to resettle all over your fingers, though
Sorry for rambling, just trying to pass on all I can about what worked for me, same way 69Charger did for us all. Hopefully, it's of some help.
A great big YEeeeeHaaaa for Charger, thanks for sharing your method with the rest of us.
Posted By: 78D150CLUB
Re: Paint job on a budget!? CONTINUED..page 44........ - 08/06/06 02:37 AM
An addition to my reply to grimster re: two tone
This truck is not mine, but the paint and trim are the same package as mine is. The twotone line will be covered by the mounted trim when everything is finished.

Posted By: Marq
Re: Paint job on a budget!? CONTINUED..page 44........ - 08/06/06 02:47 AM
Something that just struck me here.... about this discussion about 'soft' paint and challenges regarding 'hardness' of the paint.
I am starting to believe that there are some people out there that have absolutely NO IDEA about the relative hardness of :
a) a new cars paint job...fresh from the factory or...
b) a freshly painted car from a professional paint shop.
It seems that the folks who are under the impression that automotive paint jobs 'MUST' be rock hard... are basing their opinions on car paint jobs that are 'OLD' - and fully cured.
And the older the car... then obviously the harder that paint will be. It's been curing FOR YEARS for cripes sake..
Let's think about this for a minute... a brand new car from THE FACTORY... Think for a second... how much TIME has passed from the time the car was painted at the factory before it showed up at the car lot or was purchased by its first owner. They don't just slam out the cars and magically have it appear on the car lot two weeks after it was painted.
And what does the world famous wax and polish authority Meguiars have to say about new car paint jobs ?
Quote:
A new car with a factory paint job can be waxed the moment it is rolled out of the manufacturing plant. Cars that have factory paint jobs are cured at much higher temperatures, sometimes as high as 300 degrees in special baking ovens. At a factory level, the car goes through the painting and baking process without any of the rubber, plastic, and cloth components installed. This is why they can expose the car and it's fresh paint to such high temperatures. These high temperatures and special paints used at the factory level insures the paint is fully cured by the time the car is completely assembled.
And even with this ulta-hot baking... the cars are then put in storage... for weeks and months. So it is impossible to compare a 300 degree baked paint job against a paint shop paint job or a 'rolled on' and baked in the sun paint job.
. 
New cars in storage in South Korea heading for the USA. And how long do they sit in the hold of the ship while being transported. And how long do they sit in the US holding compounds before being forwarded to the dealers. That's a lot of curing time I would say...
. 
At the southside of the town of Corby (UK) there are enormous car storage areas with thousands of vahicles. Baking in the sun... waiting... waiting... for when they will be finally sent on to a car dealers lot... where they will continue to sit in the sun until someone buys them...
. 
New cars in storage in Newark New Jersey (USA) waiting to be forwarded to dealers. Fresh from the holding lots at the car manufacturers... where they originally sat and baked in the sun.. and now sitting in this compound where they sit and cure... while waiting... waiting.. to be sent on to the car dealer lots... where they will continue to sit in the sun...
Some of those cars have sat at 'holding compounds' FOR MONTHS prior to being shipped to the dealer lots. Those holding compounds are OUTSIDE in the sun. So these cars have been painted and left to sit for months prior to you getting a chance to dig your finger nails into their paint.... That paint has had time to CURE.
Now.. let's pop the delusional bubble about the paint jobs that have been applied by the professional paint shops - baked or not baked. I do not think there is one body shop in the world that would advise their customer 'that its ok to take the car through a car wash for the first or second month'. They normally advise their customers to NOT take the car through a car wash and to ONLY WASH THE CAR with a bucket of water, very mild auto specific soap, very soft chamois cloth or some other soft cloth. The bottom line is that the freshly painted car from the shop has SOFT PAINT that can be scratched, marred or even have impressions pushed into it because it TAKES TIME FOR IT TO FULLY CURE. Want to be a nasty [Edited by Moparts - Keep it clean]... then go to a paint shop and casually try to scratch the paint on one of their freshly painted cars. If you don't get killed by the shop owner.. you may live to tell exactly how soft the professional paint job really is.
And what does the world authority Meguiars have to say on paint shop paint jobs ???
Quote:
After-market paint finishes however, are cured at a much lower temperature to ensure the method of baking or heating the paint doesn't melt non-metal components such as wiring and vinyl. For this reason, it's best to follow the specific paint manufactures recommendations for care and maintenance of fresh paint. Most paint manufactures that supply paint to the refinish industry recommend that you allow anywhere from 30 to 90 days curing time after the paint is applied before you apply the first application of wax.
When comparing the hardness of the Tremclad/Rustoleum or Brightside paints against 'OTHER' paint jobs... I hope people will be able to keep things in better perspective and compare APPLES TO APPLES - rather than APPLES TO ORANGES.
The reality of these 'roller' paint jobs is that their relative 'HARDNESS' is probably THE VERY SAME when you are comparing the same time space of each of those processes in its curing.
And I don't think it is realistic to compare a paint job that has only cured for one week, one month or even a couple of months... against a car's finish that is six months old or many years old.
Keep things in the proper perspective and I think you can better appreciate that this 'roller process' is at the same level of hardness during its curing as the other paint jobs are AT THE SAME PERIOD OF TIME in their curing.
And if you could BAKE your car at 300 degees without melting all your rubber and plastic.. you might stand a chance at competing and comparing against a factory baked paint job for hardness
But with TIME all paint jobs eventually reach their maximum potential hardness...
Posted By: 78D150CLUB
Re: Paint job on a budget!? CONTINUED..page 44........ - 08/06/06 03:04 AM
with Marq. I've been painting mine one panel at a time for the last month, and allowing it to bake outside on sunny days. The paint is still hardening even now, but it isn't finished, and likely won't be fully cured before late fall, in my opinion.
I'm lucky enough to have a second vehicle and I can work at the truck when I get motivated. Thus, I've been able to stretch it out, and can actually compare different stages of paint on the same vehicle.
BTW, i'm still
over the shine on the buffed areas i did today.
Posted By: Anonymous
Re: Paint job on a budget!? CONTINUED..page 44........ - 08/06/06 03:54 AM
So is rust, or brightside gettin better results? OR does it even matter, i think i read that with brightside you dont need miniral spirits to thing it out, its already good to go?
Posted By: 78D150CLUB
Re: Paint job on a budget!? CONTINUED..page 44........ - 08/06/06 04:28 AM
I know Marq used Brightside, and I think he thinned with their brushing fluid, but I'm not 100% certain on that. His results seemed very glossy in the pics he posted.
I used Tremclad and mineral spirits, and didn't find any problems. I did probably put in more time than a lot of others applying, but I wasn't in a hurry. There are still some obvious bumps and bruises
in the bodywork, but that's because the correct/better parts and a long term facility aren't available right now.
Even with a less than perfect surface, I got impressive results.
Posted By: 78D150CLUB
Re: Paint job on a budget!? CONTINUED..page 44........ - 08/06/06 04:34 AM
Your last post is trying to become a page of it's own, it keeps growing each time I check back.
Just kidding, all your post seem to carry a lot of valid and useful info.
Posted By: Anonymous
Re: Paint job on a budget!? CONTINUED..page 44........ - 08/06/06 04:35 AM
There is SO much information on this thread its hard to catch up with all the things yall have mentioned...
So its seem Brightside can be done with as little as 3 coats and you just aply the paint with no other thiners or anything else? Just open the can and roll. Ive seen the red McLaren(beautiful) who else is using brightside and i will search.
And where can u buy Brightside? I live in florida so finding a marine shop isnt difficult just its no intown.
also when i searhced for brightside i found this site
http://www.pyacht.net/cgi-local/SoftCart.exe/online-store/scstore/h-interlux.htm?E+scstoreWhich one is it?!!?
lol
Posted By: 78D150CLUB
Re: Paint job on a budget!? CONTINUED..page 44........ - 08/06/06 04:49 AM
Marq would have more info on using Brightside, so I'll leave the details for him. I can't say I had any experience with it.
A few pages back, someone posted an Ebay dealer they bought 6 qts of Brightside from for $60, but the only colors available were red and blue. A few calls to local marine shops or boat yards/dealers should find a local source for you, though.
You might even check hardware or farm supply stores, with as many boats as there are in Florida, some may stock or be able to order the paint for you.
On your link, under Topside Paints, Brightside Polyurethane.
Posted By: Marq
Re: Paint job on a budget!? CONTINUED..page 44........ - 08/06/06 02:16 PM
Quote:
So is rust, or brightside gettin better results? OR does it even matter, i think i read that with brightside you dont need miniral spirits to thing it out, its already good to go?
I believe both paint processes will give you equal results in the end. I swithced from the Rustoleum process to the Brightside process simply to cut down on the amount of work needed... it takes less coats and provides a glossy layer at each step of the procedure.
With the Brightside you can paint with it straight out of the can.... HOWEVER... I found it better to cut the paint with their thinning liquid which is specifically sold for the purposes of Brushing & Rolling. They call it a Brushing Liquid and they refer to it as product number 333 ( so as to be not confused with their actual thinning liquid ). On the can they say you can use from 5% to 10% of the brushing liquid with your can of paint. It's whole purpose is to buy you additional working time with the paint when applying it and to allow the paint additional time to self level. I found that when I cut the paint with the brushing liquid it made the bubbles more self-popping. In some ways you could say that the Interlux Brushing Liquid acts very much like how the mineral spirit helps the Tremclad/Rustoleum to self-pop its bubbles.
Naturally and logically whenever you thin a paint it will thin out the solids being applied to each layer that you are painting. So this may require that you complete one extra layer to the paint job in order to have laid down the same amount of pigment or solids... compared to if you had just laid down the paint straight out of the can.
Initially I did try to lay down a layer of paint straight out of the can... but after the first panel I immediately began cutting the paint with their 'Brushing Liquid". It just seemed to lay down better and gave me that extra bit of time to work the layer of paint with the second roller to make things appear visually even ( no roller lines and to pop any bubbles that had not self popped ).
Now... the Brushing Liquid sold by Interlux is basically 'Ketone'... as compared to 'mineral spirits' which are used to cut the Tremclad/Rustoleum. I believe that you might be able to use the smelly 'mineral spirits' to cut the Brightside paint. Basically they are both serving the same purpose - in that they are evaporative carriers. Meaning that although they are making the paint 'wetter' for when you are applying the paint... their key purpose is to evaporate and leave the paint solids behind. I believe that the mineral spirits may be slightly slower at evaporating WHEN COMPARED against the 'ketone'. This would suggest that using mineral spirits to cut Brightside paint might buy you yet more time for the paint to self-level and self-pop the bubbles.
One other thought did strike me during the painting process with Brightside and cutting it with their brushing fluid. We all are aware by now that the amount of gloss and shine of your final layer of paint is DIRECTLY AFFECTED by the amount of humidity and temperature. In fact Brightside clearly identifies humidity as a factor that we should work around. The key being that when you are in position to lay down your final layer... make sure that the temperature is cool and that humidity is LOW !
When I arrived at my final coat of paint I had to delay that painting by FOUR DAYS - because we were in the middle of a h3llish heat spell ( 35 degrees celcius ) with humidity factor that made it feel like 43 degrees celcius ( approx 114 degrees farenheit ). So I held off the final coat of paint until the morning temperature was MUCH COOLER and the humidity had dropped back down to normal levels. I believe this may have helped give the higher level of gloss compared to my earlier coatings.
Sorry that I have to write an essay to answer simple questions. But for folks who are reading these threads, they are on a quest to get as much information as possible to help them decide about the merits of attempting one of these 'roller jobs'.
Posted By: Marq
Re: Paint job on a budget!? CONTINUED..page 44........ - 08/06/06 02:28 PM
On the topic of the toughness of the Brightside paint... I had another minor accident that provided another example of how tough this paint is.
Well... I mentioned in a previous message about how I backed my freshly painted car into a barbeque and scratched the paint. I noted how I was able to easily repair that scratch by dabbing some Brightside paint straight out of the can into the scar.
Well.... LAST NIGHT I pulled another boner. My son had placed a large push broom at the entrance of the garage. This is the type of broom that looks like a capital T shape.
Ok... so as I drove the car into the garage I could not see the bottom of the broom and I drove over it. The tire rolled over the broom brush and caused it to WHACK against the side of the car. The broom shaft struck against the side of my car with enough force to make me yell out loud " What the h3ll !!!! "
If you cannot visualize what happened. Try imagining what would happen when you step on the working end of a rake and the shaft flies up and hits you in the head...
Because the car had not passed fully into the garage I had to drive forward - rather than attempt to get out and investigate what had just whacked the side of my car.
So as I drove the car into the garage I heard a scraping along the side of the car. I was pizzzed because I could not see what was scraping along the side of the car. But you could CLEARLY hear that the 'thing' rubbing against the side of the car was doing so with some force. It was simply resting against the side of the car - it was being wedged against the side of the car.
I parked the car and walked over to the passenger side of the car and I could see that the wood of the broom stick was very evident on my passenger fender. I licked my finger and with that bit of moisture I rubbed the area of the fender where the wood had scraped along the paint. The wood all came off.
The good news - the paint skin did not get damaged and had withstood the scraping by the broom. No scar... no marring... and once the wood chips were removed you could not tell that the fender had been scraped.
I tell this simple story to help give some further insight into the paint jobs ability to withstand simple everyday accidents that can and will happen during the life of the paint job.
This incident could have been a mini disaster if the paintjob was 'soft' or not resistant to scuffs.
.
Posted By: Anonymous
Re: Paint job on a budget!? CONTINUED..page 44........ - 08/06/06 03:54 PM
I have a question regarding mixing this paint. After discussing this paint method with my father-in-law, he was at the local Menards and decided to buy the paint for me. He called and asked me what color, and I told him I wanted a dark midnite blue....a very dark royal blue that was almost black. He said according to their paint chips they had that color in something called 'After-midnite Blue', so I told him to go ahead and get that mixed up. I got it home and am trying out the whole procedure on one fender before committing myself to doing the whole vehicle. However, what was supposed to be a VERY dark blue is more of a medium blue/violet...it's definitely NOT dark enough. I mentioned to someone who knows automotive paint that I was going to pick up a quart of black and mix it in to darken it up, but he said not to, that if I mixed black in it would turn greyish. He said that I'd need to use maroon/violet hues to darken it up.
However, it just seems to me that it's already TOO violet, and I can't see where mixing in more violet is going to make it look less violet. So what can I mix in with this to substantially darken it up?
Here's a picture of the '67 Ford F100 fender I painted. The purplish hue isn't really evident here, though I tried taking pictures from several different angles and differing lighting conditions to try to bring it out for the photos, it wouldn't work. Rest assured that it's much more purplish in appearance than what this pic shows.

So what do I have to do to substantially darken this up, or should I just try to get a remix from scratch?
Posted By: Marq
Re: Paint job on a budget!? CONTINUED..page 44........ - 08/06/06 05:47 PM
I am not sure what paint you are discussing. But I do agree that simply adding black to a color will not always result in the logically intended color. With the Fire Red Brightside paint, if you add Brightside Black you end up with a pottery brown color instead of a very dark red.
So attempting to doctor your current batch of paints is going to require a paintman who really has his mixing down to a science in order to figure out what combination of colors will help take your paint from its current color to where you want to end up.
I would almost think the paint shop should feel somewhat guilty passing that paint off as a midnight anything. It's a medium blue at best.
I went to the chip samples for the Brightside paint and the darkest, blackest blue they have is called : Flag Blue. When looking at the paint sample it almost looks black. The next blue is called Dark Blue which is 'almost' as blackish as the Flag Blue - but there is more of a hint of blue to the color. This could probably be described as a very dark Navy Blue. The next lighter shade is called Sapphire Blue - and it strikes me as being closer to what most people would call a Navy Blue.
I took a look at the present color on your truck and I would probably lean towards the Flag Blue as being the closer color.
The color that I see on the prepared fender is very similar to the Brightside Largo Blue or their Ocean Blue.
Maybe if you could get hold of one of the Interlux paint chip cards/booklet - you could point out the Brightside 'Flag Blue' - id number 4990 as being the color you are trying to match up to.
Or what we did with my GTA when we wanted to match its new paint to its original color was to take the gasoline cover off the car and send that over to the paint shop for them to scan and get a dead on match.
What type of paint was your father-in-law purchasing ?
Other than that your fender looks pretty good
.
Posted By: 69chargeryeehaa
Re: Paint job on a budget!? CONTINUED..page 44........ - 08/06/06 06:32 PM
Quote:
The temps have been around 93 max in the garage where it's been.
69Charger- yes, exactly, the paint 'dents'. But if you say it gets rock hard eventually, that's what I'm looking for and I hope it comes true.
patience grasshopper........patience
trust me it will be like your stove in 4 months, after all the garage "accidents" i've had i can say this paint; when fully cured is much more resistant to scratching/chipping then any auto paint. but like marq said, it takes time, you can't expect results right away. it's like when people buff the paint for 2 mins, and expect a mirror shine, reality is that it takes 1-2 hours to buff just the hood or trunk. i agree with everything marq mentioned in the post regarding hardness and cure times, i challange any auto paint aginst mine with regards to hardness. enamel, when cured it extreemly strong paint, like your kitchen stove, and washer/dryer, compare that paint to any "real" auto paints, your stove will win hands down.
Posted By: Exit1965
Re: Paint job on a budget!? CONTINUED..page 44........ - 08/06/06 10:39 PM
Ok Charger and Marq- all that sounds great and I will keep my fingers crossed and my garage hot to get this stuff to work.
I just sprayed my engine bay with a mixture including about 5-10% mineral spirits, and that resuable spray can from harbor freight. To anyone using that can, or anyone who might, you can go ahead and fill it to near the top (the instructions say 1/2 fill usually). The catch is that the more mixture in there, the less air you can pump in. So if it's near full, about 1.5 pumps of a bike pump will get it to 80 lbs of pressure (which is where I pumped it back to each time) but it will only spray well for about 20 seconds. Then go back, pump up to 80 lbs, it will spray for 45 seconds, keep pumping back to 80, etc. It ended up spraying pretty well and covered most everything with one coat. Also as was said before, use the finest nozzle (which I think is light green in color).
It's a thick coat, but I've done a thick coat this way before and it dried very hard in a day. I will just have to respray over some dark spots. Then do the door and trunk jambs..
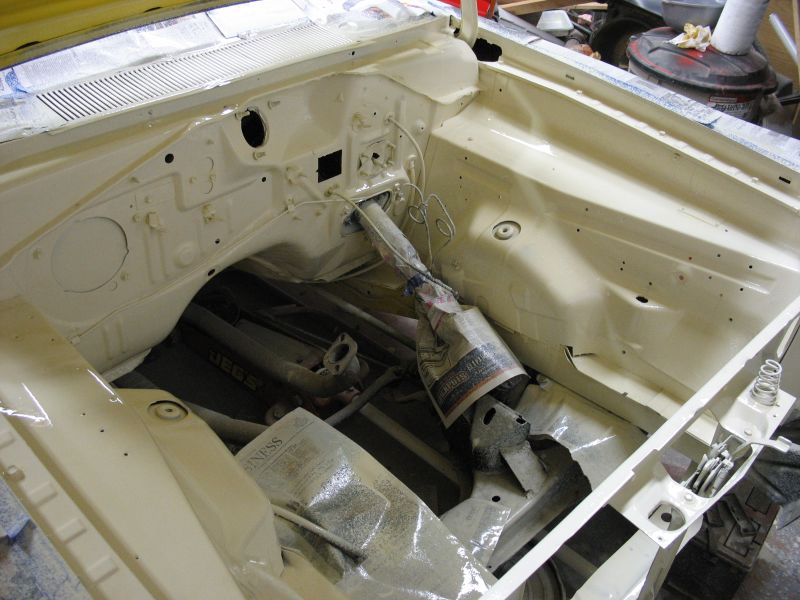
Posted By: Anonymous
Re: Paint job on a budget!? CONTINUED..page 44........ - 08/06/06 10:39 PM
Exit corect me if I am wrong you are waiting for at least 12 coats of paint to harden ?
Your red base coat and your white finish coat.

Posted By: Exit1965
Re: Paint job on a budget!? CONTINUED..page 44........ - 08/06/06 10:40 PM
More like 16 or 17 coats really, 10 of red and 7+ of white.
And for what it's worth, the red paint was pretty hard (hard enough to polish to a nice shine) before I painted white over it, so I dont think there's a problem there.
Posted By: Anonymous
Re: Paint job on a budget!? CONTINUED..page 44........ - 08/06/06 10:58 PM
Then it must be the chemical makeup of the different colors that makes them set up differently
just guessing.

Posted By: Anonymous
Re: Paint job on a budget!? CONTINUED..page 44........ - 08/06/06 11:04 PM
Sorry, guess I should have mentioned it was Rustoleum Professional, I just figured it was a given, considering the thread.
Well, I think I'll just try starting over with new batch at a different store, since my F-i-L thought the yahoos working at this particular Menards were pretty clueless when it came to mixing the Rustoleum. Of course that means there's been two wasted weekends of work applying the current 6 coats on the fender, but at least it's only a fender I have to re-strip.
Posted By: 78D150CLUB
Re: Paint job on a budget!? CONTINUED..page 44........ - 08/06/06 11:15 PM
If you are going to a darker blue, why strip the existing work. Sand it down with 220 - 320 grit and leave it as a base for the next color. Less work, overall.
Just thinking out loud and being lazy here.
Posted By: Marq
Re: Paint job on a budget!? CONTINUED..page 44........ - 08/06/06 11:22 PM
Quote:
Sorry, guess I should have mentioned it was Rustoleum Professional, I just figured it was a given, considering the thread.
Well the main branch of the thread was the :
a ) Charger's / Tremclad / Roller Process.
During the course of the thread we evolved to cover off three other paints that could use the same process of application because the Tremclad Anti-Rust paint is only available in Canada :
b) Rustoleum - US & Canadian market
c) Rustoleum Professional - US & Canadian Market
d) Brightside polyurathane marine paint - Global
And I believe one of our Australian or New Zealand friends also found a paint available in their respective markets that has proven equally suitable to this process.
The paint brands are different but the application process - which is the most important - are basically identical.
.
Posted By: Anonymous
Re: Paint job on a budget!? CONTINUED..page 44........ - 08/07/06 04:48 AM
Rustoleum Professional states to use only acetone to thin.
Also I can only find Professional in gallons, plenty of quarts in stops rust.
So use a gallon of Professional and thin with mineral spirits anyway?
Thanks in advance, Mark (tired from stripping old paint and prepping for new paint all weekend)
Posted By: Anonymous
Re: Paint job on a budget!? CONTINUED..page 44........ - 08/07/06 05:04 AM
I got a question. You guys say get it ready or prep it first hand. What exactly is that
. my car has its oem paint still.
Posted By: Marq
Re: Paint job on a budget!? CONTINUED..page 44........ - 08/07/06 11:33 AM
Quote:
Rustoleum Professional states to use only acetone to thin. Also I can only find Professional in gallons, plenty of quarts in stops rust.
So use a gallon of Professional and thin with mineral spirits anyway?
Yes... for the Rustoleum Pro you can use mineral spirits ( preferably the 'smelly one' ). But just make sure it is 100% mineral spirits and not a thinning liquid that only has a percentage of mineral spirit in it.
Quick lesson on evaporative carriers...
a ) Acetone is extremely quick at evaporating
b ) Ketone is slightly slower at evaporating
c ) pure mineral spirits are even slower...
d ) low odor mineral spirits are even slower...
Hence the reason why the use of the pure mineral spirits give you that little extra bit of working time to lay on your paint and yet it basically does the same job as acetone or ketone.. just a little slower
.
Posted By: Marq
Re: Paint job on a budget!? CONTINUED..page 44........ - 08/07/06 11:43 AM
Quote:
I got a question. You guys say get it ready or prep it first hand. What exactly is that . my car has its oem paint still.
Prep just means to prepare the surface to a level where the paint will be able to look its best AND stick to the body properly.
For example.. if your car just has old OEM paint on it... let's just say its faded badly... you would sand down the entire surface with a 220 grit in order to remove any surfactants that might repel or react badly with the paint ( bugs, wax, road tar, spilled soft drinks, bird poop etc ). Once you have sanded the body down you then would wipe the entire body down with mineral spirits and a clean rag ( again to remove the surfactants - which now would include the paint dust from the sanding ). At this stage your body would be 'PREPared' for application of the first lay of paint. If the condition of your body surface is quite good you might be able to have done the initial sanding by using a 400 grit and wet sanding the body. BUT... if your body is great and only suffers from faded OEM paint.. then I would consider going the route of the $399 paint job at MAACO or Earl Schrives..
Now... if you body has simply faded paint AND chips or minor dents ( door bangs from parking lots etc ).. then you will want to prepare those chips or dents to achieve a smooth surface upon which to later lay your paint job. So the Bondo type bodywork and body sanding would be the PREP you need to do. The cost of all the bodywork to prepare a car for painting are what drive the cost up at the professional paint shops.
Now if your body has rust holes, plus dents, plus road chips... then you will need to remedy all those body problems in order to have a smooth body to paint on.
Just remember that if you put lipstick on a pig... it is still just a pig. So the end paint job will only be as good as the preparation (PREP) of the body that you put your paint on to
.
Posted By: Anonymous
Re: Paint job on a budget!? CONTINUED..page 44........ - 08/07/06 02:25 PM
Thaks all for the info...
A couple of Brightside questions.
1) Shake or Stir to Mix?
2) What percentage of #333 brushing fluid would you recomend? 5%? 10%?
3) Has onyone tried to spray the brightside with one of thoes personal sprayers people talk about on here.
Thanks Again for all the info.
Posted By: Anonymous
Re: Paint job on a budget!? CONTINUED..page 44........ - 08/07/06 04:45 PM
Quote:
Thaks all for the info...
A couple of Brightside questions.
1) Shake or Stir to Mix?
2) What percentage of #333 brushing fluid would you recomend? 5%? 10%?
3) Has onyone tried to spray the brightside with one of thoes personal sprayers people talk about on here.
Thanks Again for all the info.
As mentioned a couple pages back, I used a squirrel mixer on my power drill for mixing; I word of caution - keep the speed under control. Also these mixers will inject bubbles into the paint, but a filter funnel is pretty good about dealing with them when it's time to pour into your roller tray.
I first tried about 5-10% 333 brushing fluid for my first test coat, then added a little bit more for subsequent coats, I'd say up to about 15 % (no accurate measuring performed, just eyeballing it.) If this amount of thinner causes less gloss, I can't tell, it's still "Shiny!"
I played with a Preval (Precision Valve Company) refillable cartridge sprayer. I thinned with Interlux Special Thinner 216 for Spraying, which is a rapidly-evaporating solvent. It was a spray pattern that was not entirely consistent; the droplets were of very differing sizes, so left a mixed bag of coverage. I sprayed some areas on my hood that were hard to get to with brush/roller (PO installed a hood scoop from an 80's-vintage 280 ZX Turbo wich was completely function-less on my NA Scirocco). I was able to get complete coverage in these hard-to-get-to areas, however, despite some slight orange peel. I have added more 216 thinner to my spraying vessel, but have not yet sprayed any more tests to see if the droplet size is more consistent. Remember that the Preval sprayer cannot be tipped more than 45 degrees. One pleasant surprise about the Preval was that i found it just about everwhere - the autobody/paint supply store, Home Depot, Ace Hardware, Miller Paint store... it was not a hard-to-find item.
Posted By: Anonymous
Re: Paint job on a budget!? CONTINUED..page 44........ - 08/07/06 05:18 PM
Quote:
a ) Acetone is extremely quick at evaporating
b ) Ketone is slightly slower at evaporating
c ) pure mineral spirits are even slower...
d ) low odor mineral spirits are even slower...
Quote:
NOW... by accident I decided to try cutting the Brightside paint with some of the 'regular' mineral spirits that I had left from my Tremclad experiment. It works and the paint acts just like it is suppose to with the bubbles, the magic wipe of the first foam brush to pop bubbles and the level assisting wipe with the second foam brush.
So the point of this bit of exploration and discovery may be of assistance to anyone applying Brightside in very hot working conditions. You can cut the paint with about 5% to 10% Ketone OR mineral spirits and you will have a little more 'working time' for applying and perfecting each layer that you are applying.
Marq, I wanted to mention a curiosity I discovered about Brightside VS. Mineral Spirits:
While working on my paint mixing, I have about 5 vessels going; A can of brightside, A tin of 333 brushing fluid, An empty can into which I mix Paint/333, and two Quart-sized plastic mixing cups into which I poured (low-odor) mineral spirits. After mixing the paint/333, I placed the mixer into the first quart cup to solve off excess paint, then next day came back to wipe off and place mixer in second "clean" spirits cup. I was surprised to discover, however, that a large, black puddinglike mass had congealed at the top of the mixer cup! It was really nasty, and the pudding-mass broke apart into icky clumps when I pulled out the mixer to clean it.
Moral of the story - I don't think I'll be mixing mineral spirits into any brightside coats on my car!
Posted By: Marq
Re: Paint job on a budget!? CONTINUED..page 44........ - 08/07/06 07:30 PM
Quote:
I placed the mixer into the first quart cup to solve off excess paint, then next day came back to wipe off and place mixer in second "clean" spirits cup. I was surprised to discover, however, that a large, black puddinglike mass had congealed at the top of the mixer cup! It was really nasty, and the pudding-mass broke apart into icky clumps when I pulled out the mixer to clean it.
I would bet that there was easy access to oxygen.
I have seen how each of these paints can congeal into a pudding like skin if left exposed to oxygen...
Also... when you overdilute the paint... like sticking a paint covered mixer in a 100% solution of mineral spirits... the paint will separate from whatever it is attached to - a brush or a mixer for example - and then recongeal elsewhere in the mineral spirit solution. Because the paint is 'heavier' than the 'mineral spirit' the tendency would be to either all sink to the bottom or all rise to the top. I can't say for sure because I never subjected the Brightside to submersion in a 100% mineral spirit solution.
I forget the scientific name for it... but with Brightside for example the polymer 'chains' are naturally attacted to each others and will attempt to re-congeal with other loosened polymer chains that are floating around in the mineral spirit solution.
Mineral spirits are cheaper than Ketone.. but if you have a higher level of confidence running with just Ketone than follow your instinct.
All I can say is that it did work for me when I was rolling and it did not appear to have any adverse effect.
.
Posted By: Anonymous
Re: Paint job on a budget!? CONTINUED..page 44........ - 08/07/06 08:20 PM
Quote:
Also... when you overdilute the paint... like sticking a paint covered mixer in a 100% solution of mineral spirits... the paint will separate from whatever it is attached to - a brush or a mixer for example - and then recongeal elsewhere in the mineral spirit solution. Because the paint is 'heavier' than the 'mineral spirit' the tendency would be to either all sink to the bottom or all rise to the top. I can't say for sure because I never subjected the Brightside to submersion in a 100% mineral spirit solution.
Yeah, I'd been hoping that the paint in the mineral spirits containers would settle down to the bottom and then I could pour off the clean stuff to reuse. Obviously, I had the one puddinglike experience (the gunk was definitely at the top, all swelled up), but also I had my second cleaner container of slightly black spirits (sounds like D&D or something!) which didn't ever settle, the paint seemed to stay suspended for several days without settling or congealing. I'm not sure if I just needed to wait longer, or if that's as good as it would get. Eventually, the mineral spirits in the second container got filtered through a rag, and those spirits became the first cleaning container. I noticed also that my plastic mixing squirrel became soft and slightly deformed after soaking in spirits for a couple days, so I guess I won't be doing that anymore!
Posted By: Exit1965
Re: Paint job on a budget!? CONTINUED..page 44........ - 08/07/06 09:30 PM
Quote:
Quote:
Funny thing I've noticed is that when I've used rustoleum in spray cans, and even when I mixed some spray together in my refillable spray can, the paint has dried VERY hard in a matter of days or a week. I can't leave indentations in it with my fingernails like I can with the rolled on stuff.
The carrier in the spray paint is much more evaporative then the carrier in the paints which we use. So that and the thickness of the layers we 'roll on' go a long way towards the longer curing time needed as compared to the spray bombs.
.
The strange thing is that I am spraying on THICK layers, and they seem to dry hard much faster than the rolled stuff.
I have used actual rattle can material (safety red in a rustoleum rattlecan), sprayed it on so it colored completely in one coat, and in a few weeks it was as tough as nails.
And the mix that I'm using for the engine bay is simply mineral spirits and rustoleum. That also dries rock hard much faster than the rolled stuff (e.g. 2 or 3 days) does for me. This is with a single thick coat that covers nearly 100% except for the darkest spots.
Spraying my engine bay was easy enough with the pump can. I think if I can't get sufficient hardness out of the rolled kind, I'll just shoot the whole car with a HVLP gun.
Posted By: 78D150CLUB
Re: Paint job on a budget!? CONTINUED..page 44........ - 08/07/06 09:58 PM
On the topic of things not to do, when you reach the buffing stage, Do Not make the mistake of leaving the buffer sitting on any part of the car overnight.
I forgot about leaving mine on the unbuffed half of the hood last night, and found a huge lightened circle on the hood where the wet pad had sat.
Fortunately, mineral spirits seemed to clear the blotch up, and it has since returned to its darker color. Makes me wonder if the white haze after polishing might be water forced into the paint by the buffer. Just for kicks, I'm getting some new terry cloths and I'm going to try buffing using spirits. One kind for the buffer and one kind for the operator
I'll post my results at a later date.
Posted By: Marq
Re: Paint job on a budget!? CONTINUED..page 44........ - 08/07/06 11:16 PM
Quote:
The strange thing is that I am spraying on THICK layers, and they seem to dry hard much faster than the rolled stuff.
I have used actual rattle can material (safety red in a rustoleum rattlecan), sprayed it on so it colored completely in one coat, and in a few weeks it was as tough as nails.
Well... I do know that elsewhere on the Internet there are discussions about spray bombing cars. Basically they follow the same kind of wet sanding procedures that we do after every second layer. I have seen some pictures of their results and the have been some excellent results. But like the roller process, the key to the more successful spray bomb jobs is to begin with an excellent surface, take your time spraying layers and be fanatical and exercise great patience in the multiple wet sandings.
But I think the three biggest reasons for not spray can bombing a car are :
a ) Cost - spray bombs aren't cheap and you need about 4 cans per panel. You could conceivably end up using about 40 spray bombs... at let's say $5 a can = $200 plus tax. Pay more per can and that total goes far beyond the 'budget' concept of this thread.
b ) Your health - those paint fumes are deadly. Imaging a poorly ventilated garage dosed with the vapors from even just ten cans..
c ) More masking of car required and overspray galore...
.
Posted By: Marq
Re: Paint job on a budget!? CONTINUED..page 44........ - 08/07/06 11:20 PM
Quote:
Just for kicks, I'm getting some new terry cloths and I'm going to try buffing using spirits. One kind for the buffer and one kind for the operator
I'll post my results at a later date.
Errrmm... please ensure that your home owner insurance and car insurance are paid up...
I am getting this dark vision of the vapors from your mineral spirit soaked rag igniting from the sparks being generated by your buffer.
You have to remember that the electric engine in a buffer is not specifically designed to be operating around combustible vapors
In fact some of the electric paint sprayers that 'were' on the market had to be re-called, discontinued or re-engineered because they were catching on fire when a highly combustible liquid was used in them...
Just thought I would offer that warning...
.
Posted By: Anonymous
Re: Paint job on a budget!? CONTINUED..page 44........ - 08/08/06 01:10 AM
Quote:
But like the roller process, the key to the more successful spray bomb jobs is to begin with an excellent surface, take your time spraying layers and be fanatical and exercise great patience in the multiple wet sandings.
I "fanatically" wetsanded my hood today, I spent several hours hard at work. It was layer 2 of black Brightside, and the coverage was near-complete at the start of the sanding process. 2 days ago I wetsanded the first coat with 3M 800 grit. Out of curiosity, I wanted to see what the 2000 grit would do, so off I went! I did the entire hood with 2000 except for one section which had some heavy brush marks from one of my screwups; I used 1200 here, followed by the 2000.
Everything now is a dark satiny grey. A few small thin spots are revealing old primer from underneath now, but it is much less so than coat #1. I hope that after coat 3 I have full coverage, but am a little concerned about wetsand getting me thin again.
Marq, do you know what polish product/method you'll be using to shine everything up? I don't think I'll be able to skip wetsand on final coat. I get too many goobers in my paint, despite painstaking measures to keep paint, surface, applicators, floor and air clean.
Posted By: 78D150CLUB
Re: Paint job on a budget!? CONTINUED..page 44........ - 08/08/06 02:28 AM
Quote:
Just remember that if you put lipstick on a pig... it is still just a pig.
HMmmmm... Have you been sneaking out and looking at my truck? LOL
I had the very same thought re: the vapor flash point, and I don't plan to use thinners to wet the buffer, as such. I'll mix the compound with a small amount and apply the paste to the cloth pad.
that should keep things a little less explosive, and I'm going to be working outdoors in an open industrial yard, so any fireworks should be for display purposes only
Thanks for the caution, though, it's something for us all to keep in mind when using the flammable mixtures involved in this process. Sometimes the strangest items can become an ignition source and all paints, thinners, etc. create vapors that can and do explode without any warning.
I wonder if I have time to learn smoke signals?
Posted By: Anonymous
Re: Paint job on a budget!? CONTINUED..page 44........ - 08/08/06 03:11 AM
Thanks for the info.
Posted By: Anonymous
Re: Paint job on a budget!? CONTINUED..page 44........ - 08/08/06 06:26 AM
Just finished rolling coat #3 and it's looking gooood! No big boo boos this time. Still getting linty goobers as I tip, I think it could be the foam brushes as I "tip" the paint. The one-two roller technique didn't seem to work for me; with the lightest pressure (weight of roller only) the second "clean" roller would generate bubbles, not flatten them. But tonight I only used up one foam roller instead of two... cool beans
Posted By: Marq
Re: Paint job on a budget!? CONTINUED..page 44........ - 08/08/06 01:17 PM
Quote:
Marq, do you know what polish product/method you'll be using to shine everything up? I don't think I'll be able to skip wetsand on final coat. I get too many goobers in my paint, despite painstaking measures to keep paint, surface, applicators, floor and air clean.
I still have not made a firm decision on how I will go about the polish and waxing. I have never done it before and I am looking at three alternatives...
a) it turns out that one of my nephews use to work in a detailing shop that serviced a limousine company. He has the tools and the knowledge... But if I let him do it and he screws up I would probably kick myself in the butt
b)I even thought about sending the car over to an excellent detailing shop that is just a few blocks away from here. But the problem with that idea is that unlike a 'normal' car coming in for a polishing and waxing ( which might only take two hours ), this job might take five or six hours. They may charge me up the ying yang...
c) the leading contender at the moment is to buy my own polishing machine and do it myself. From everything that I have read elsewhere regarding the polishing of polyurathane.. the process is the very same as the one being used to polish and wax the Tremclad/Rustoleum paint job. The benefit to doing it myself is that I would be able to keep the polisher and then use it on the Cobra and the Roadmaster after
.
Posted By: Anonymous
Re: Paint job on a budget!? CONTINUED..page 44........ - 08/08/06 09:18 PM
Camron,
I am in the same boat you are.
I am using brightside black (after an attempt with some orange paint I didnt like the color of). I, too, am working outside and there is no way a final coat will look good by itself. Way too much dust and bugs in the air. I have also sanded it, mostly with 1000, down to a pretty uniform dark satiny grey color. I will try polishing it next to see what I can come up with.
When I rinse off the trunk with water after wetsanding, it looks absolutely sick! super shiny and reflective, as good as any factory paint job, a few small ripples but no orange peel. Im just hoping i can get that effect by polishing enough. That is what I should expect if I can polish it absolutely smooth, correct?
Actually, doesnt a clear coat essentially act the same as a layer of water? If I used a clear, should I expect to see what I saw when the trunk was wet?
Posted By: Anonymous
Re: Paint job on a budget!? CONTINUED..page 44........ - 08/08/06 10:46 PM
Quote:
Camron,
I am in the same boat you are.
I am using brightside black (after an attempt with some orange paint I didnt like the color of). I, too, am working outside and there is no way a final coat will look good by itself. Way too much dust and bugs in the air. I have also sanded it, mostly with 1000, down to a pretty uniform dark satiny grey color. I will try polishing it next to see what I can come up with.
I'm actually painting in my garage, I have a household HEPA filter running contantly on high, but I'm pretty sure the goobers are from foam. I start with fresh rollers and foam brushes at each paint application, I even roll them lightly on wide masking tape to pick up any linties, but it's not helping.
Quote:
When I rinse off the trunk with water after wetsanding, it looks absolutely sick! super shiny and reflective, as good as any factory paint job, a few small ripples but no orange peel. Im just hoping i can get that effect by polishing enough.
Yeah, it looks good, huh?! So that I can see best what I'm doing, I'm colorsanding outside in the sun with constantly running water. Even when wet, though, the black is not as deep as right off the rollers...
Quote:
That is what I should expect if I can polish it absolutely smooth, correct?
I hope so! That's what I'm depending on! I've been scoping out autobody101.com for colorsanding/polishing tips, but I may try 69Charger's Turtle Polish method first... I picked up the polish while shopping for project supplies, and I already have a random-orbit el-cheapo buffer (need to get fresh terry bonnets, tho). I'm just not sure how long I should wait for paint to cure before polishing.
I think Marq had considered skipping final wetsand and going straight to polish, but I believe I still have too many faint brush marks to pull this off. I'd like to be able to skip as much wetsanding as possible, but I'm just not going to cut corners with my elbow grease!
Posted By: 78D150CLUB
Re: Paint job on a budget!? CONTINUED..page 44........ - 08/08/06 11:05 PM
This may be a bit of encourgement for those approaching the buffing stage.
This was polished with Turtle Wax compound and an El-Cheapo Turtle Wax random orbit 10" polisher.
I left half the hood unpolished to show the difference between the polished and unpolished sections.
Even with my less than perfect body and prep work, things are looking good.
Sorry about the dark pic, but my camera bites indoors.

Posted By: 78D150CLUB
Re: Paint job on a budget!? CONTINUED..page 44........ - 08/08/06 11:06 PM
different view

Posted By: 78D150CLUB
Re: Paint job on a budget!? CONTINUED..page 44........ - 08/08/06 11:09 PM
Last for now. Oh, Marq, the spirits didn't help at all, so that idea was a bust. I'm still here and unsinged, though.

Posted By: Marq
Re: Paint job on a budget!? CONTINUED..page 44........ - 08/08/06 11:33 PM
Quote:
I think Marq had considered skipping final wetsand and going straight to polish, but I believe I still have too many faint brush marks to pull this off. I'd like to be able to skip as much wetsanding as possible, but I'm just not going to cut corners with my elbow grease!
No. At the moment I am driving the car around with its final coat of paint sitting on it. When I gear up to do the polishing and waxing chore I will probably do a double wet sanding... hit it once with a 1000 grit and the do it all again using a 2000 grit wet sand.
I will then wash the car down completely with a bucket of warm water and a dash of detergent to get any trace of wet sanding slurry of the car.
Then it will be a full rinse down with the hose to hopefully leave the body in a squeeky clean state.
I will then leave the car alone and untouched in the garage for a few days to let any newly exposed paint cure fully ( just in case the wet sanding exposed any uncured paint ).
When I am about ready to commence the polishing stage I will wipe down the entire body with a couple of fresh 'tack' cloths... to pick up any dust, bugs, hair, lint, dandruff etc that may have landed on the car since the washdown.
I'll be using the 'el cheapo' Turtle wax polish. Which we are lead to understand will be the equivalent of doing a 3000 grit wet sanding. The furniture guys oddly enough also recommend the 'el cheapo' Turtle wax polish for the big rub down... for polyurathanes. But I am also leaning strongly to the 3M Finesse It II product as the guys who have been using it on polyurathane have been getting outstanding results. ( More about that in one of the following messages ).
If Charger's calculations are correct I should be polishing for quite a few hours This is also confirmed by the furniture restoration guys who are more familiar with the polyurathane paint finishes and what it takes to creat a mirror finish on furniture.
For the waxing stage... the furniture resto guys all seem pretty sold on using a 'straight' carnuba wax. They also seem pretty much in agreement to not use a combined wax and polish for the final shining effort.
At this point it looks like I will probably be doing the polishing and shining myself. If I end up screwing things up... I will only have my lack of talent to blame But I think things will work out well as long as I take my time and don't try to rush the polishing and wax stage.
So that is the game plan so far... and it will probably go down on Saturday, Aug 19th. Pictures will be available at the end of the process...
.
Posted By: 69chargeryeehaa
Re: Paint job on a budget!? CONTINUED..page 44........ - 08/08/06 11:45 PM
Quote:
This may be a bit of encourgement for those approaching the buffing stage.
This was polished with Turtle Wax compound and an El-Cheapo Turtle Wax random orbit 10" polisher.
I left half the hood unpolished to show the difference between the polished and unpolished sections.
Even with my less than perfect body and prep work, things are looking good.
Sorry about the dark pic, but my camera bites indoors.
that's looking good there shows what a differnece polishing does. polishing with spirits will do squat, there are no abrasives in spirits, in the turtle wax polishing compound is about the equivilent of a 3000+ grit sand paper, and the tutrle wax rubbing coumpound is about a 1000grit, and way too harsh. but you could use the rubbing coumpound first, then go to the polishing coumpound, i just found wetsanding eaiser.
Posted By: Anonymous
Re: Paint job on a budget!? CONTINUED..page 44........ - 08/09/06 12:08 AM
Camron,
I totally agree that the paint doesnt look quite as dark when wet with water as it does straight from the can if not sanded at all. But even still, I like the color, its kind of a really super dark gray, just a shade or two from jet black.
Ive got the turtle polish, and some other expensive stuff too. I also have an orbital sander with a couple of foam pads, so all I need to do now is find some time to go at it. We shall see how it turns out...
Posted By: 78D150CLUB
Re: Paint job on a budget!? CONTINUED..page 44........ - 08/09/06 12:25 AM
Quote:
polishing with spirits will do squat
It really depends on how much you consume
Actually, I was blending the paste compound with mineral spirits to try to alleviate the white haze as mentioned by Exit1965. I had thought that water being forced into the open wetsanded surface might be the cause, because I got the same haze in spots. Didn't make any difference, though.
I did find that polishing in stages seemed to help, buff the entire section, then wash, chamois dry and repeat.
I also found applying water to the surface rather than to the bonnet during polishing easier and faster.
The haze did disappear as polishing progressed, and for the last polish, I let the buffer run almost dry and then rubbed the residue off with paper towel. No haze afterward.
I love this process, even if it is a bit of work. My labor is free, and I can go back over the body and smooth things out in the future, then just blend in new paint or recoat an entire panel as I go.
I'm impressed, especially by anything Free!
Posted By: Anonymous
Re: Paint job on a budget!? CONTINUED..page 44........ - 08/09/06 01:41 AM
Here are a few pics to show how the brightside looks sanded, and then when its wet. I just hope I can somehow get this reflection with polishing.
Dry

Posted By: Anonymous
Re: Paint job on a budget!? CONTINUED..page 44........ - 08/09/06 01:42 AM
wet

Posted By: Anonymous
Re: Paint job on a budget!? CONTINUED..page 44........ - 08/09/06 01:43 AM
last wet one

Posted By: Exit1965
Re: Paint job on a budget!? CONTINUED..page 44........ - 08/09/06 01:56 AM
That was the 1000th reply on this thread. Sweet.
Posted By: Marq
Re: Paint job on a budget!? CONTINUED..page 44........ - 08/09/06 02:43 AM
I think you are definitely on track to working up a great shine. The water layer gives a good indication of how the final result 'should' turn out. That wet black pic is the money shot !
From what I read in the furniture restoration forums, when working with the polyurathane the trick really centers around the 2000 grit wet sanding and then the polishing stage.
Your polishing stage should get you up to the level where there is a reflection. At that point you in theory have gotten the polyurathane finish to its smoothest appearance. When you add the wax, you will reacquire the mirror finish / gloss and depth to the paint job.
It's too bad we can't avoid the polishing stage and go straight to some clear coat of polyurathane. The way polyurathane works, it would be able to blend in and adhere itself to the highly wet sanded paint job. The problem is that the polyurathane clear coat would still end up with the same skin consistency of the last layer of paint prior to it being wet sanded. So that is the reason why you go to the polishing stage to urge a shine out of your last layer of paint. Then the waxing basically provides the seal to all your work and enhances the gloss of the final layer.
I got my fingers crossed for you...
One product that keeps being mentioned in other forums about polishing polyurathane is a 3M product called Finesse-It buffing compound
Generally most of the folks who have discussed this product have had excellent results similar to this snippet of a conversation I'll quote here...
Quote:
....the polyurathane paint was wet sanded with 1200 paper to remove all traces of orange peel, pollen, suicidal bugs and other nasties. This was followed by buffing with an electric buffer and 3M Finesse-It buffing compound. The compound quickly restores the gloss of the paint, and as long as enough paint was applied to prevent cutting through to the primer, the finish can be worked until it is mirror smooth.
And here is the car that he was talking about :


.
And just to round off the topic on polishing and buffing up a polyurathane finish, I will include this chap's advice which also tended to reflect a common agreement on getting this type of a finish up to a mirror quality
Quote:
I started the wet sand process. I found a local auto body shop supplier with a good selection of 3M wet/dry papers. Using a stiff foam block purchased from the same store as the papers, I began with 1000-grit, liberally spraying the surface with water containing a little bit of dish soap (I used Dawn and it worked fine).
This first grit is the most critical as it flattens the orange peel and gets out the major imperfections. You have to let it dry completely before you can really see what you've got. You're looking for a uniform dull finish. Any areas that show up still shiny mean you haven't knocked them down enough and the finer grits will never touch them. Once you're sure you've got a good 1000-grit base to work from, proceed through 1200, 1500, 2000, and 2500 grits.
Keep the paper wet at all times - you're looking for a kind of milky "slurry" indicating material is both being removed and being carried out from under the paper. If your paper gums up with little globs of material, toss it and get another sheet. I found rubbing with the grain was fine, no need to make circles or figure eights. After finishing the 2000 grit pass, rinse off and let dry. The final step is to buff out the 2000-grit scratches with polishing compound. I used 3M "Perfect-It" and my Porter-Cable worm drive random orbit sander.
Both the rubbing compound and the foam pad that velcro�s to my sander came from the auto body supply store. Dribble some compound onto the surface and start up the sander. It's messy, so count on compound slinging around the area. Polish until the compound dries up, then wipe off any excess. You should see a near-mirror finish. Mine came out better than anything I've ever finished before in fifteen years of what I'll call serious hobbyist woodworking. It was much better than any sprayed or brushed finish. The only thing that might be better is a good French polish, but I personally don't have the time or patience for that. Good luck and one last piece of advice: practice on a test piece to get a feel for the papers - 1000-grit doesn't sound very aggressive, but it will eat your lunch if you don't know when to stop.
Now... the last bit of info I will toss into this topic is a further blurb about this 3M Finesse-It II Machine Polish
Quote:
Smoothes tough swirls, scratches, and imperfections to restore old, neglected paint.
Orbital buffers are the best way to restore dull, damaged paint finishes, but they�re only as good as the product you apply to them. 3M Finesse-It II Machine Polish is an easy, effective, affordable solution to your minor paint imperfections.
3M Finesse-It II Machine Polish is formulated to give the best results when used with a buffer. It�s abrasive enough to smooth the edges of swirls and scratches but gentle enough buff your vehicle to a deep, flawless shine. It�s also effective on light oxidation and water spots. 3M Finesse-It II Machine Polish will restore the smooth, perfect finish your vehicle had when it was new.
For the best results, pour a small amount onto your polishing pad. On a speed you are comfortable with, apply the polish with light to medium pressure. Allow it to dry to a haze and then buff away with a clean buffing pad or microfiber towel if buffing by hand.
Though 3M Finesse-It II Machine Polish will leave a deep shine, it offers no protection. Apply a quality wax or paint sealant to preserve your restored finish. We recommend Pinnacle Souveran Wax or Pinnacle Signature Series II Wax for a warm carnauba finish. If you prefer a paint sealant, try Wolfgang Deep Gloss Paint Sealant for a dramatic gloss.
Your vehicle will look as perfect as the day you bought it after using 3M Finesse-It II Machine Polish followed by a great wax.
Hope this info helps
.
Posted By: _Scott_
Re: Paint job on a budget!? CONTINUED..page 44........ - 08/09/06 05:33 AM
Quote:
I think Marq had considered skipping final wetsand and going straight to polish
I strongly discourage people from skipping the final wetsanding step.
It's important to think of every sanding step as a shaping step. When sanding bondo, you are recreating the shape you desire for the body panel. When sanding the old paint, you are not only scuffing it up, you are also removing imperfections like chips/scratches/runs (from a previous paint job) and any other crap you don't want to show up in your finished paint. And, when doing the final sanding, you are still shaping the surface in preparation for buffing. Any dirt specs, hair or bugs that may have ended up in your last coat of paint or any orange peel or roller/brush marks will need to be smoothed out with sand paper, preferably on a sanding block, to create a smooth ripple-free surface. The only texture you want remaining after your final wetsand step is the texture the 1000/1500/2000 grit sandpaper leaves behind.
The sanding creates the shape, the buffing only brings the shine back.
Posted By: Anonymous
Re: Paint job on a budget!? CONTINUED..page 44........ - 08/09/06 06:53 AM
Thanks for all the sanding info, Marq. That helps a ton.
Posted By: Anonymous
Re: Paint job on a budget!? CONTINUED..page 44........ - 08/09/06 10:06 AM
I've been doing a lot of research on a number of detailing forums.
The polisher that every US forum recommends is the Porter Cable 7424. There are a number of places that sell the PC online and there are also some video tutorials available here
PC web videos .
To achieve a mirror reflection from polishing, we first need to use a meduim cut swirl remover such as the Poorboys SSR2.5, then follow it up with a finer cut swirl remover (such as Poorboys SSR1). After the paint is free of all marks we then need to polish the paint to maximize the shine and only then should the paint be sealed with either a carnauba wax or a synthetic polymer sealant.
While many people use the 3M range of swirl removers/polishes, apparently the 3M products contain fillers which will 'hide' problems (such as swirl marks) rather than removing them.
The Poorboys range of swirl removers/polishes are very well regarded and so is the Menzerna range.
I have purchased the Poorboys SSR2.5, SSR1 and Pro-Polish for my polishing and I'm going to use Zaino Z5 and Z3 for paint sealants.
I will have to re-paint my miata as the 'Aussie' version of the Rustoleum (called Tremco Metal Armour) Gloss Black has turned into a Matt Black due to frost damage, so I will be re-doing the whole car with Brightside in a few weeks.
Ironacally my 'polishing' will cost almost twice as much as my 'painting', even with the two different paint applications.....
But my theory is to paint it really well, get it looking immaculate and then keep it looking that way. So for me at least, all of the polish will be worth it.
Posted By: Anonymous
Re: Paint job on a budget!? CONTINUED..page 44........ - 08/09/06 12:20 PM
Quote:
Hey that dude is practically a neighbor, 44 tags are Athens, AL about 8 miles from here. He rolled or sprayed this paint? I'd really like to see that car in person to give it a close up look, if I can get the finish on my truck looking like that I'm liable to literally shake with joy
Posted By: Marq
Re: Paint job on a budget!? CONTINUED..page 44........ - 08/09/06 12:50 PM
Quote:
Hey that dude is practically a neighbor, 44 tags are Athens, AL about 8 miles from here. He rolled or sprayed this paint? I'd really like to see that car in person to give it a close up look, if I can get the finish on my truck looking like that I'm liable to literally shake with joy
That little car is a 'kit car' and basically all the body pieces come off it in a matter of minutes. So what he did was take the body panels and fenders off the car and sprayed them in his garage using a polyurathane. So he cheated a little by not rolling.. but he still encountered many of the same 'surface glitches' that a roll on job would have.
So for our purposes we pick up on his story where he was attempting to resolve the 'suicidal bugs, orange peel and other mysterious things' that had landed on his freshly paint body parts. So we match up to the stage where he does the wet sanding and subsequent polishing to get a mirror finish onto his little Lotus Super Seven look-a-like.
And I guess the finish must be quite acceptable as the car has come 1rst place in a number of car shows.
I think most of us would kill to be able to get the paint on our cars up to a level where we would fearlously enter them in car shows
.
Posted By: Anonymous
Re: Paint job on a budget!? CONTINUED..page 44........ - 08/09/06 02:41 PM
Quote:
I think most of us would kill to be able to get the paint on our cars up to a level where we would fearlously enter them in car shows
Car show? Heck I'll be happy if I can park it at Wal Mart with pride
Posted By: Anonymous
Re: Paint job on a budget!? CONTINUED..page 44........ - 08/09/06 03:39 PM
Quote:
The polisher that every US forum recommends is the Porter Cable 7424. There are a number of places that sell the PC online and there are also some video tutorials available
I did a quick search on the PC 7424, and I came up with a great article here
I should also point out that I had previously described paint removal on my car with a "Porter-Cable DA sander", but in fact it would appear to be an "orbital" (bzzzzzzzzz!!!) sander that I have.
Posted By: Exit1965
Re: Paint job on a budget!? CONTINUED..page 44........ - 08/09/06 04:07 PM
Was the kit car done with an activated/hardened polyurethane? that would make a difference in shineability.
Posted By: Marq
Re: Paint job on a budget!? CONTINUED..page 44........ - 08/09/06 04:48 PM
I believe he had mentioned that it was a single stage polyurathane...
.
Posted By: C38coupe
Re: Paint job on a budget!? CONTINUED..page 44........ - 08/10/06 01:05 AM
Hi all, good to see this thread continuing on, I have been watching on the sidelines, some of you guys are making [Edited by Moparts - Keep it clean] good progress, "keep on rollin brothers".Another car nut, who is a chemist by profession, did tell me that Tremclad paint and the almighty expensive POR-15, are quite similar in there chemical recipe and there smell, as well as the workability of the paint to some extent. Both paints are based with Alphatic Naptha, POR 15 uses Isocyanates, while Tremclad uses Isobutane. This I found very interesting, The Price between the 2 products, is quite different. Just thought some of you guys might find this interesting, I am not saying Tremclad is better, just that it's a similar product, designed to do the same thing at a fraction of the price..........C38 Coupe sorry I meant "DARN GOOD PRODUCT"
Posted By: Anonymous
Re: Paint job on a budget!? CONTINUED..page 44........ - 08/10/06 01:45 AM
ok, so i broke out the buffer and went at it. I used the turtle polishing compound and some sonus polish. the paint did what i wanted it to, but as you can see by the pic. I have a lot of brush marks still visible. the paint is not smooth at all. i also have a lot of scratches that you can see if you look closely at the paint.
suggestions on what to do now? nock it all down with 600 or 400 and then redo the polishing? will more coats of paint help? I know I rushed the process, but I couldnt wait to see if the brightside would shine up, and it seems to have.
What would yall do to get it flat?
thanks again for all the help.

Posted By: Anonymous
Re: Paint job on a budget!? CONTINUED..page 44........ - 08/10/06 01:46 AM
another one...

Posted By: Exit1965
Re: Paint job on a budget!? CONTINUED..page 44........ - 08/10/06 01:48 AM
I'd say hit it with 400 or 800, and be prepared to put another coat on to make up for what you're sandnig off.
Does seem to polish up well though, nice..
Posted By: Anonymous
Re: Paint job on a budget!? CONTINUED..page 44........ - 08/10/06 02:03 AM
Cool, thanks exit.
Also, does anyone know of a place to order sandpaper with grits higher than 1000? The highest I have and can find around here is 1000, and I would like to get 1500 and 2000 for the next go round.
Posted By: Anonymous
Re: Paint job on a budget!? CONTINUED..page 44........ - 08/10/06 02:37 AM
I found 1500 at O'Reilly's Auto Parts but so far no 2000 anywhere, haven't checked the other car places or the name brand paint shops (Sherwin Williams/etc).
Posted By: Anonymous
Re: Paint job on a budget!? CONTINUED..page 44........ - 08/10/06 02:55 AM
try going to a body shop supply store. around here i have a place called "terrace auto supply". they sell to all the local body shops, and the public can buy from them too... they sell in large quantites though... i got the masking paper but i had to buy 3 rools so i can do about 100 cars with this paper but it costs 20.00 for the 3 rolls, and i asked for a sticky wet sand paper and they have a 100 count for 65.00..
Posted By: Marq
Re: Paint job on a budget!? CONTINUED..page 44........ - 08/10/06 03:36 AM
Yeah it looks like it polished up quite nicely.
Now you should knock it level as suggested by Exit and lay another coat on to it.
What I have seen with Brightside is that when we lay it on with a roller it stays fairly translucent. So when you get the gloss up you can see a few layers down ( and this gives it the depth ).
This is where we get caught making choices... if we thin the paint out with too much ketone the layers are more translucent then if we laid a layer straight out of the can.
Although I initially cut the paint with the brushing fluid for the initial layers... I moved to laying two layers of straight paint once I had acquired the knack of rolling Brightside.
The straight from the can layers contain more pigment or color solids and help block the view of the depth from revealing any flaws on the lower layers.
But I am impressed by the shine you were able to get out of the Brightside.
You mentioned using the finishing compound and polish. Is this the shine you were able to achieve without going to the wax ? Or is your polish a combined polish/wax ?
.
.
Posted By: Exit1965
Re: Paint job on a budget!? CONTINUED..page 44........ - 08/10/06 04:11 AM
Quote:
Cool, thanks exit.
Also, does anyone know of a place to order sandpaper with grits higher than 1000? The highest I have and can find around here is 1000, and I would like to get 1500 and 2000 for the next go round.
Tbrown, try walmart. In the automotive section (near the bondo) is where I get my sandpaper, they have lots of wet/dry paper there, 2000 grit and I think even higher, but I got lots of 800, 1500 and 2000 from there.
Posted By: _Scott_
Re: Paint job on a budget!? CONTINUED..page 44........ - 08/10/06 04:26 AM
Quote:
I have a lot of brush marks still visible. the paint is not smooth at all. i also have a lot of scratches that you can see if you look closely at the paint.
You should have been able to feel the ripple while you were wetsanding. That should have been the tip-off that you need to use a sanding block, especially on a large and relatively flat surface like that.
You can smooth that out with a sanding block and I'd probably start with 600 wet to knock the peaks off, then switch to 800 wet to bring the peaks down even with the valleys. Then I'd go back over with 1000 or higher just to remove the 800 grit scratches, and at this point you may get away without the sanding block, or switch to a softer block.
A note about sanding blocks. The hard black rubber ones are usually too hard for anything but bondo. The red ones are more universal, but look for one that is flat on the bottom. Most of them seem to have lumps or are concave or convex or have some other strangeness that makes them junk. I've had to dig through cases of them to find a good one before.
A source for 1000/1500/2000 grit sandpaper is WalMart, strangely enough. You'll find it near the bondo.
Posted By: Anonymous
Re: Paint job on a budget!? CONTINUED..page 44........ - 08/10/06 05:07 AM
Thanks all for the info everyone. I will get to Wal-Mart this weekend. I do have a sanding block (black), but it felt too hard, so i switched to a sponge. But what do I know? I have never done anything like this before. I will try to find a softer block this weekend also.
I really have a hard time feeling the ripples. I know they are there, obviously, but it feels so smooth to me.
Marq, the paint was polished with the turtle stuff (dark reddish brown) and then polished with the sonus sfx-3. That sonus polish made a HUGE difference. I used a yellow no-name pad for the turtle stuff, and a blue one for the polish. took me about an hour and a half. It has no wax on it at all. I figured I would wait on the wax until I get it really smooth.
Also, there are lots of scratches in the paint that I think were left from the 1000 (looks like a car that got a wash with a dirty rag). those should be taken care of by the higher grit sandpaper. the turtle polish helped a lot with lessening the scratches, but they are mostly still there.
Im pleased with the paint, its rock hard, and now I know how to shine it up. I just got to get it smooooth.
Posted By: admactanium
Re: Paint job on a budget!? CONTINUED..page 44........ - 08/10/06 08:05 AM
Quote:
ok, so i broke out the buffer and went at it. I used the turtle polishing compound and some sonus polish. the paint did what i wanted it to, but as you can see by the pic. I have a lot of brush marks still visible. the paint is not smooth at all. i also have a lot of scratches that you can see if you look closely at the paint.
suggestions on what to do now? nock it all down with 600 or 400 and then redo the polishing? will more coats of paint help? I know I rushed the process, but I couldnt wait to see if the brightside would shine up, and it seems to have.
What would yall do to get it flat?
thanks again for all the help.
so what you're seeing that the paint itself is polishing well but you haven't levelled the surface of your paint. go ahead and use a harder rubber sanding block and try to stay off the edges of the block. what you can do while wetsanding is to have a squeegee of some sort and just swipe dry a section every now and then. what you should see with the use of a block is spots of dull (matte) finish and spots of shiny finish. so you're abrading away the bumps and brushmarks and NOT abrading the low spots (valleys) of the bumps.
keep going until you squeegee off a section and it is solidly matte finish. until you get to that stage you will only polish the orange peel or brush marks to a shiny surface rather than really getting that flat finish you like. don't be afraid to start with a lower grit paper to cut down the bumps. you're going to have to remove that paint either way, so using 2000 gt only wastes more of your time. you just have to be careful not to cut through. so use 800 or something until the shiny spots are getting smaller. once the shiny spots are almost done then switch to different less aggresive grades of paper.
go from 800 > 1000/1200 > 1500 > 2000 > even 3000 if you're ambitious. but what you need to do at each stage is make sure you're sanding off the marks from the previous grade of sandpaper. with enough experience you'll start to see what that means.
when you polish, you could use a porter cable but i recently bought a makita ro6040 for detailing which has a forced rotation mode along with it's random orbital action. it cuts faster. you'd want to get at least some decent foam pads from a good detail supply house (properautocare, autogeeks) etc. i'd recommend a yellow cutting pad and then perhaps a medium pad. some manufacturers have them as orange powerpads or whatnot, but each manufacturer uses different color scheme. together with a diminishing abrasive polish like the poorboys, 3m, meguiars or menzerna powergloss/intensive polish and final polish you should get a mirror finish.
i ended up having to delay my motorcycle parts because i got crazy busy with work and then travel. so my parts are just waiting on my kitchen table.
trust me guys, with just a little bit of knowledge you can get these finishes to be glass smooth and reflective. i once polished out a kryon paintjob on an old motorcycle to a perfectly flat mirror finish using a cheap cordless drill and a lame foam pad. it can be done but you just have to know what you're doing.
the stage where you're at now the most important thing is to flatten the paint. if you cut through the paint then you didn't have sufficient coverage to sand down to begin with and the paint would have been too thin anyway. if that happens, i guess you can just paint some more layers on. but don't lose hope on that paint. you've shown that it WILL shine up if you level the surface properly.
on the previous thread i got this surface:
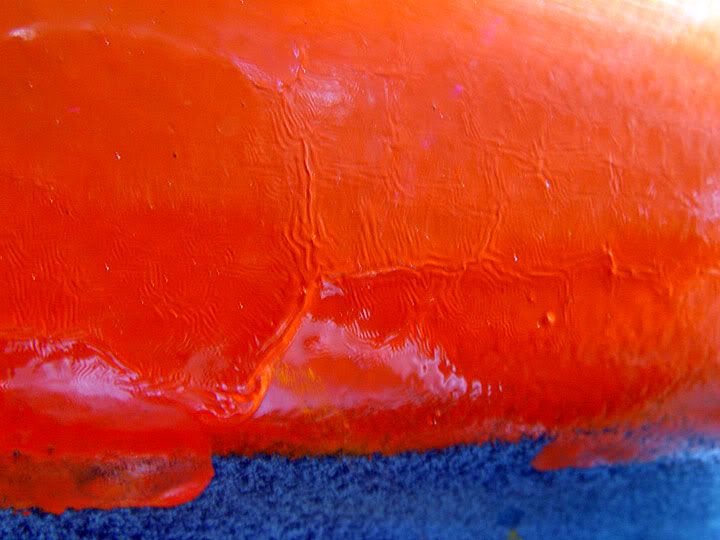
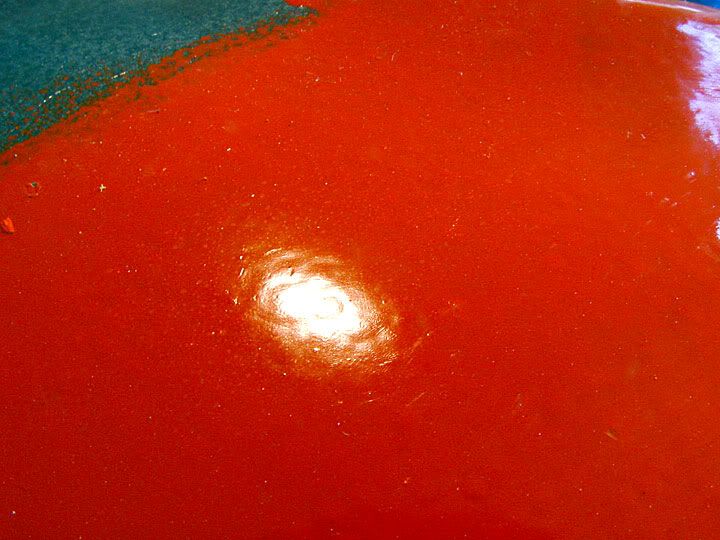
with wetsanding and polishing to look like this:
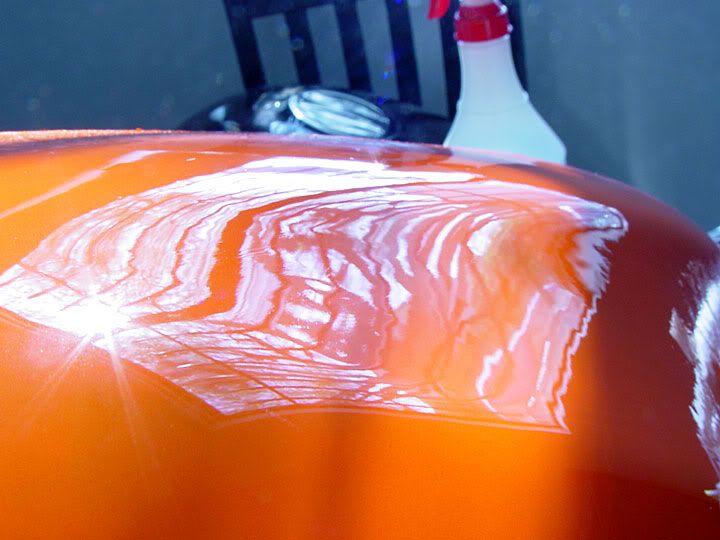
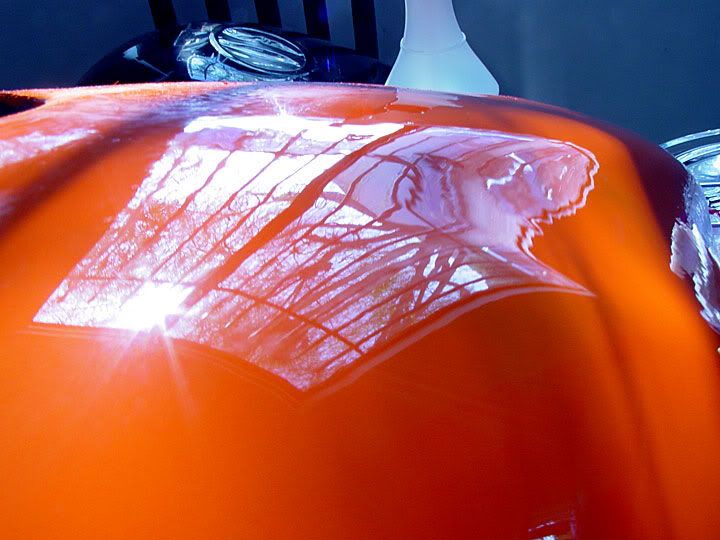
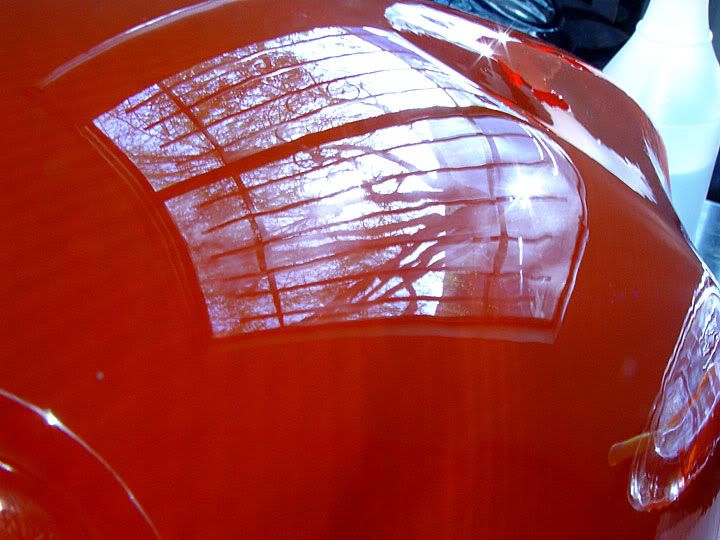
Posted By: Anonymous
Re: Paint job on a budget!? CONTINUED..page 44........ - 08/10/06 08:21 AM
Quote:
so what you're seeing that the paint itself is polishing well but you haven't levelled the surface of your paint. go ahead and use a harder rubber sanding block and try to stay off the edges of the block. what you can do while wetsanding is to have a squeegee of some sort and just swipe dry a section every now and then. what you should see with the use of a block is spots of dull (matte) finish and spots of shiny finish. so you're abrading away the bumps and brushmarks and NOT abrading the low spots (valleys) of the bumps.
Why is it that DA wetsanding is not possible? If this could be engineered, it'd sure take a lot of the elbow grease out of the equation! A soaked spongy backing pad with a high-grit stick-on abrasive paper "seems" like it could handle anything that isn't peaks or edges.
Posted By: Anonymous
Re: Paint job on a budget!? CONTINUED..page 44........ - 08/10/06 02:45 PM
Ok,
As far as Brightside goes....it sounds like 3 coats is the way to go. Is this the process?
Step #1
Coat #1 from the can then wetsand(what grit?)
Step #2
Coat #2 from the can then wetsand(what grit?)
Step #3
Coat #3 Thinned 5-10% with #333 then wetsand? (what grit?)
Step #4 Polish (turtle wax polishing compound?)
Step #5 Wax
My questions would be-
How long between painting and wetsanding?
How long between wetsanding and painting?
How long between wetsanding and polishing?
How long between polishing and waxing?
This will be my son's first car and I want to get it right. If I'm off track at all, please chime in. Thanks for all the help.
Posted By: _Scott_
Re: Paint job on a budget!? CONTINUED..page 44........ - 08/10/06 04:53 PM
Quote:
Why is it that DA wetsanding is not possible?
It's possible, just not advised.
It is extremely rare to find someone who uses a DA sander correctly. Most people (including "professionals") hold the sander at an angle that causes a gouging action and only uses a narrow ring around the outside edge of the sand paper. This causes ripples in the surface. Also, the backing plate in DA sanding pads is easily bent when the DA is dropped, or even stored incorrectly. This causes the sander to want to jump around which also results in ripples in the surface.
On a stage of the process as critical as the final wetsand, it's advised to do it by hand.
Posted By: Anonymous
Re: Paint job on a budget!? CONTINUED..page 44........ - 08/10/06 05:05 PM
thanks admactanium
that orange looks great. that was rustoleum, right?
Posted By: Marq
Re: Paint job on a budget!? CONTINUED..page 44........ - 08/10/06 05:34 PM
I have amended your recipe for using the Brightside paint
At this point I believe that it is better to plan on four coats. For boats the manufactuer says that two coats of paint straight from the can will do the job. But what we have learned through trial and testing is that a boat owners quest for a high gloss shine is different than our quest for a super-high-gloss shine on a car.
Since I am suggesting cutting the paint with 10% product 333 Brushing liquid for the first two coats... I look at that as only equaling one coat. The third coat is cut with 5% Brushing liquid... because hopefully you are more comfortable with the rolling technique at this point and we are laying on a little more color solids. By the time you hit the fourth layer you can go with straight paint or cut with 5%.
The extra bit of paint using this four coat system will leave you with enough paint on the car ( after having gone through a number of wet sandings that removed some of the paint ) so that you still have plenty for when you go at the paint with the polisher and the compounding polish.
The following recipe may require some alteration on the fly depending on
a) whether you encounter problems with any of the layers that needs drastic corrections or repainting.. and
b) the choice of color that you have chosen. It would appear that the percentage of solids ( color pigments ) in the various colors varies. One color may provide better coverage then another. I find that red in both Brightside and the Tremclad/Rustoleum is more translucent then say a white or a dark blue.
At this point the bodywork is all done.
Step #1
a) Wash car down thoroughly with cloth and bucket of water with a little bit of liquid detergent ( dish detergent ). Rinse thoroughly. Let sit and thoroughly dry.
b) using a Tack cloth wipe down entire body of car.
c) Coat #1 thinned 10% with #333. No need to wet sand this step.
d) Let paint cure for 24 hours.
Step #2
a) using a Tack cloth wipe down entire body of car to get any dust, bugs, hair or other contaminents that may have fallen on your first layer of paint while it was curing.
b) Coat #2 thinned 10% with #333.
c) Let dry 24 hours.
d) Wet sand with 400 to 600 grit looking to level the surface so that it is level, with no ripples, bubbles, etc.
e) Wash car down thoroughly with cloth and bucket of water with a little bit of liquid detergent ( dish detergent ). Rinse thoroughly. Let sit and thoroughly dry.
Step #3
a) using a Tack cloth wipe down entire body of car to get any dust, bugs, hair or other contaminents off the paint.
b) Coat #3 thinned 5% with #333. No need to wet sand this step unless there are any visual defects that you want to address. If so...wet sand with 400 to 600 grit looking to level the surface so that it is level, with no ripples, bubbles, etc.
e) Wash car down thoroughly with cloth and bucket of water with a little bit of liquid detergent ( dish detergent ). Rinse thoroughly.
f) Let sit for 24 hours .
Step 4
a) using a Tack cloth wipe down entire body of car to get any dust, bugs, hair or other contaminents off the paint.
b) Coat #4 thinned 5% with #333 or straight from the can ( depending on your confidence level at this point ).
c) Let dry 24 hours.
d) Wet sand with 800 or 1000 grit looking to level the surface so that it is level, with no ripples, bubbles, etc.
e) Wash car down thoroughly with cloth and bucket of water with a little bit of liquid detergent ( dish detergent ). Rinse thoroughly. Let sit and thoroughly dry.
You should at this stage be able to do a 1500 wet sanding and then a 2000 wet sanding - with thorough washings and rinsing at the end of each wet sand session.
The body 'should' have a uniform dull shine at this point with no patches of 'shiny' in the otherwise dulled but somewhat shiney surface.
How long between painting and wetsanding? - Always at least 24 hours... the manufacturer recommends 18 hours... but times will vary due to temperatures, humidity, etc.
How long between wetsanding and painting? The body needs to be thoroughly washed down after the wet sanding. So 24 hours is a good rule of thumb to ensure that no moisture is left in the roughened paint.
How long between wetsanding and polishing? When you get to the final step four.. you will be doing a series of wet sandings, increasing the grit with each sanding. Then you will have to again give the car a thorough wash down. So again it is worthwhile to let the car dry for 24 hours if for no other reason than to give yourself a break and so that you can be 'fresh and wide awake' when you begin the polishing stage.
How long between polishing and waxing? Once you complete your polishing to a level of shine and gloss that is acceptable to you... you can proceed to the wax stage almost immediately to seal up all the work you did.
Hope this info helps...
.
Posted By: Dart360sav
Re: Paint job on a budget!? CONTINUED..page 44........ - 08/10/06 06:31 PM
TBROWN, have you tries kragan? I just picked up 1000, 1500, and 2000 at the one on e18th I think the one on university should carry it.
Posted By: Anonymous
Re: Paint job on a budget!? CONTINUED..page 44........ - 08/10/06 06:40 PM
3m WetSanding paper, single sheets, up to 2500.
I bought some from this guy.
http://mikestools.com/3m-Sandpaper-Single-Sheets_1880.aspxRafael
Posted By: Anonymous
Re: Paint job on a budget!? CONTINUED..page 44........ - 08/10/06 07:03 PM
I tried the one on University, only up to 1000, and the one on broadway same thing. I will try the wal mart in oakland.
Posted By: admactanium
Re: Paint job on a budget!? CONTINUED..page 44........ - 08/10/06 07:17 PM
Quote:
thanks admactanium
that orange looks great. that was rustoleum, right?
yes it was. it's held up well since then too although it is admittedly not exposed to the elements or used in any way. but regardless of the durability you can definitely shine that paint. the steps for final wetsand are:
1. level the paint
2. get the scratches down to a "polishable" level
3. polish with an aggresive diminishing abrasive with an aggresive pad
4. polish with a milder diminishing abrasive with a light cut pad.
5. protect (wax, sealant, etc).
nearly any paint can shine if finished off properly. my previous rattlecan job shined like the dickens but the paint wasn't durable. but for a week it was so shiny i could read a product label's fine print in the reflection.
Posted By: Anonymous
Re: Paint job on a budget!? CONTINUED..page 44........ - 08/10/06 10:38 PM
Quote:
I have amended your recipe for using the Brightside paint
Marq, I think you have just authored the "Brightside Bible." Nicely done!
Quote:
At this point I believe that it is better to plan on four coats.
I'll agree here, too... I was about to stop at three coats (the black is very opaque and provide excellent coverage when evenly applied - even when slightly thinned) but my wetsanding has revealed 2 or 3 of the tiniest thin spots. My last coat will be undiluted for just a little bit heavier top layer.
Posted By: 440charger70
Re: Paint job on a budget!? CONTINUED..page 44........ - 08/10/06 10:51 PM
Has anyone tried the System One color sanding kit on their paint? This stuff produces top quality results.
http://www.chevyhiperformance.com/tech/paint_body/car_care/0403ch_color_sanding_buffing_tech/(sorry for the Chevy...)
Posted By: Anonymous
Re: Paint job on a budget!? CONTINUED..page 44........ - 08/10/06 10:54 PM
Quote:
Has anyone tried the System One color sanding kit on their paint? This stuff produces top quality results.
http://www.chevyhiperformance.com/tech/paint_body/car_care/0403ch_color_sanding_buffing_tech/
I'm glad someone asked because I too am curious about this brand. Seems difficult to find resellers and prices...
Posted By: Anonymous
Re: Paint job on a budget!? CONTINUED..page 44........ - 08/11/06 01:19 AM
That kit contains the same products and uses the same procedures as what the boys are describing above.
One word of advise though, unless you are an expert with an electric polisher, don't use a sheepskin polishing pad. In inexperienced hands those sheepskin pads have the ability to destroy your paint quicker than just about anything short of sandpapert. Stick with a foam pad instead.
Posted By: Anonymous
Re: Paint job on a budget!? CONTINUED..page 44........ - 08/11/06 03:39 AM
i block with these...
http://www.eastwoodco.com/jump.jsp?itemID=1703&itemType=PRODUCTand wrap a piece of 1000 grit for the inbetween coats, and then 2000 for the final sanding.
Posted By: admactanium
Re: Paint job on a budget!? CONTINUED..page 44........ - 08/11/06 04:14 AM
i dunno guys. that kit doesn't look like anything special. it's sandpaper and a block. i'm not sure what part of the kit isn't just available at a store separately.
Posted By: Exit1965
Re: Paint job on a budget!? CONTINUED..page 44........ - 08/11/06 05:09 AM
The engine bay is basically done, just need to grind and repaint one tiny spot.
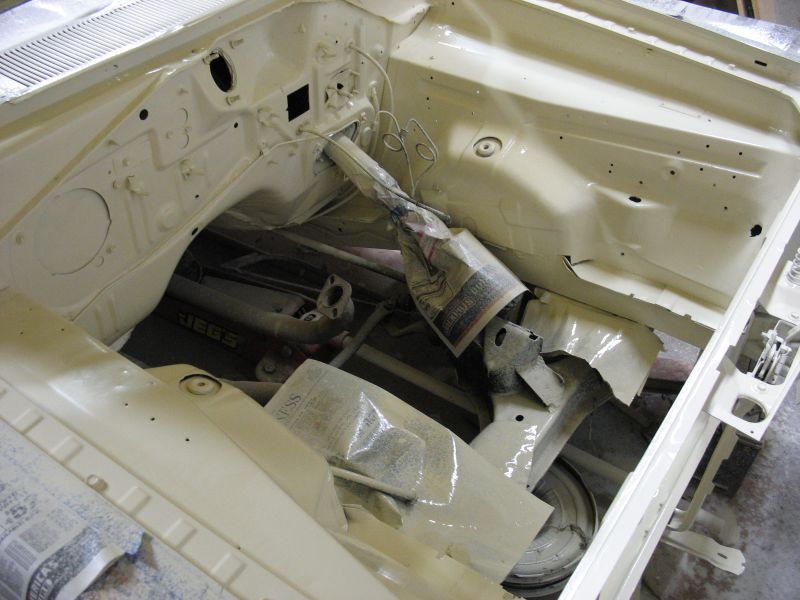
I really dig that pump up spray can. Today, I tried to fit a Krylon nozzle onto it hoping for better atomization, and after filing the Krylon nozzle down a bit, it went on. But it doesn't atomize nearly as well as the nozzle included with the pump up can. (It still does not spray as fine a spray as comes out of a typical rattle can, but maybe that has to do with the mixture as well).
Next is the door jambs..
Posted By: Anonymous
Re: Paint job on a budget!? CONTINUED..page 44........ - 08/11/06 06:08 AM
Quote:
I was about to stop at three coats (the black is very opaque and provide excellent coverage when evenly applied - even when slightly thinned) but my wetsanding has revealed 2 or 3 of the tiniest thin spots. My last coat will be undiluted for just a little bit heavier top layer.
I tried a fourth coat full strength, but I don't think I was laying on heavy enough. By the time eveything was spread and I started tipping, it was a bit too tacky, and not quite thick enough to cover in some spots. I did the thinner-soaked roller trick to level and gloss everything out. Looks better, but I wish I'd layed on more heavily to begin with. One interesting bonus of full-strength application seems to be a distinct lesser number of bubbles.
Posted By: Anonymous
Re: Paint job on a budget!? CONTINUED..page 44........ - 08/11/06 09:07 PM
What's your procedure for keeping the refillable spray can clean? I've have one for about a year, but only used it for solvents. Seems as if the rustoleum would be difficult to remove (I've tried cleaning it off other items with acetone and it's a painful process).
Posted By: GoodysGotaCuda
Re: Paint job on a budget!? CONTINUED..page 44........ - 08/11/06 10:26 PM
Cutting through orange peel?
My very first coat is on my duster. i have a couple roller lines and some peel. I have to sand the entire car, currently i'm looking to get the car decently covered in one color. i'm not aiming for a awesome quality paint job. I'm wondering if i can run dry 400grit to cut down on time, or is wet 600 the way to go?
thanks
Posted By: Exit1965
Re: Paint job on a budget!? CONTINUED..page 44........ - 08/11/06 10:27 PM
Quote:
What's your procedure for keeping the refillable spray can clean? I've have one for about a year, but only used it for solvents. Seems as if the rustoleum would be difficult to remove (I've tried cleaning it off other items with acetone and it's a painful process).
The paint inside seems to keep fine (I've had it in there a week or more in heat), the only thing I do is when I'm done painting, turn it over and spray so it cleans the passage out with air.
Before using, I run some acetone through the nozzle (as best I can) and scrape away any paint I can, then it's good to go.
Posted By: Exit1965
Re: Paint job on a budget!? CONTINUED..page 44........ - 08/11/06 10:29 PM
Try wet 400. Dry seems to load up the paper.. wet is the way to go. I've done a whole car with a single piece of 800 grit paper, as long as you rinse it off every once in awhile it'll be fine.
Posted By: Dart360sav
Re: Paint job on a budget!? CONTINUED..page 44........ - 08/12/06 01:23 AM
Exit is the nossle your speaking of from the krylon can just a regular spray paint nossle? If so you should look into useing the tips made by graffitti art companies, They make from very thin to very wide spraying caps that distribut very evenly for smooth lines
Posted By: Anonymous
Re: Paint job on a budget!? CONTINUED..page 44........ - 08/12/06 12:43 PM
Hi Guys,
I'm new to this forum and I read the previous thread up to page 21 before I decided to go ahead and tackle this.
Lucky I have a some rocker panels to test on..however now I'm having some slight issue.
So I put on the first cost just fine:
http://www.ss14.net/tmp/firstcoat.jpgI let it dry overnight and when I put on the second coat...this happens:
http://www.ss14.net/tmp/wha.jpgAnyone have an idea what I did wrong? It's as if the paint came off when rolling. Did I put too much mineral spirits in the mix?
TIA
P.S. I like the smilies
Posted By: Exit1965
Re: Paint job on a budget!? CONTINUED..page 44........ - 08/12/06 01:57 PM
Quote:
Hi Guys,
I'm new to this forum and I read the previous thread up to page 21 before I decided to go ahead and tackle this.
Lucky I have a some rocker panels to test on..however now I'm having some slight issue.
So I put on the first cost just fine: http://www.ss14.net/tmp/firstcoat.jpg
I let it dry overnight and when I put on the second coat...this happens: http://www.ss14.net/tmp/wha.jpg
Anyone have an idea what I did wrong? It's as if the paint came off when rolling. Did I put too much mineral spirits in the mix?
TIA
P.S. I like the smilies
That adhesion doesn't have anything to do with the % of mineral spirits, there must have been something on the surface that the paint didn't like. Don't know what that is because I haven't run into the problem myself.
As for letting it dry overnight, consider letting it dry longer than that before recoating. The previous layer should be very dry before anything is put over the top of it, so 24 hours is a safe bet but can be longer depending on weather.
Posted By: Anonymous
Re: Paint job on a budget!? CONTINUED..page 44........ - 08/12/06 06:31 PM
Quote:
Quote:
Hi Guys,
I'm new to this forum and I read the previous thread up to page 21 before I decided to go ahead and tackle this.
Lucky I have a some rocker panels to test on..however now I'm having some slight issue.
So I put on the first cost just fine: http://www.ss14.net/tmp/firstcoat.jpg
I let it dry overnight and when I put on the second coat...this happens: http://www.ss14.net/tmp/wha.jpg
Anyone have an idea what I did wrong? It's as if the paint came off when rolling. Did I put too much mineral spirits in the mix?
TIA
P.S. I like the smilies
That adhesion doesn't have anything to do with the % of mineral spirits, there must have been something on the surface that the paint didn't like. Don't know what that is because I haven't run into the problem myself.
As for letting it dry overnight, consider letting it dry longer than that before recoating. The previous layer should be very dry before anything is put over the top of it, so 24 hours is a safe bet but can be longer depending on weather.
Thanks for the reply,
I was hoping I can finish the whole car over three days. But waiting a day for each layer means it will take a week to finish it. :/ Then again...the temperature outside will be 80+ so I think it will dry faster.
Posted By: Marq
Re: Paint job on a budget!? CONTINUED..page 44........ - 08/12/06 10:32 PM
Quote:
Anyone have an idea what I did wrong? It's as if the paint came off when rolling. Did I put too much mineral spirits in the mix?
I agree. I don't think the mineral spirits are to blame. The problem here is that we don't know what steps you went through in preparation for the painting or what the condition of the substrata was when you started laying on the paint.
For example, because that is an aero-effect I assume that it is plastic.
Did you sand all the original paint down to the plastic or possibly just expose that one patch of plastic where the failure occured ?
Did you primer the surface or go straight to paint ?
Was there any previous paint on there that might have been different then the rest of the original paint on that part ? Like say where some scrapes were previously sprayed with and aerosol "color match up" spray bomb ?
Did you wash down the sanded parts with water and a 'touch' of dish detergent ?
Did you give the part a final wipe down with a rag and mineral spirit to get any potential contaminants, grease, oil from your hands or remnants of the sanded paint etc ?
Was the part thoroughly dry before you added the first layer of paint ? ( It's amazing what a hint of water embedded in the previously sanded surface might do to affect adhesion.
Dunno... I would probably sand that part smooth again... even if it meant removing the current coats of paint. Then... starting from scratch lay on a primer layer to begin with to ensure adhesion and a uniform color on to which to lay your paint color.
I can't think of too many other factors that would have cause that paint to separate from the original layer although we did notice earlier in this thread where one of the chaps had problmes with the paint on his front 'plastic' bumper because the mold release agent ( for when the bumber was manufactured ) was able to act as a barrier between the paint and the bumper..
,
.
Posted By: Marq
Re: Paint job on a budget!? CONTINUED..page 44........ - 08/12/06 10:56 PM
In preparation for the 'polishing' and 'waxing' of my Brightside paint job I finally concluded that I want a Porter & Cable 7424....
But I am a cheap b4st4rd and I really couldn't justify paying retail for one of those puppies.
I was surfing over at the Corvette message forums and one of the guys had mentioned how he had picked up a 'refurbished' 7424 at his local Porter & Cable repair depots for $150 CDN ( $130 US$) and it came with a one year replacement guarantee.
So I visited the Porter & Cable web site, located where their local 'repair and warranty' depot was in my area and was pleased to find out from a phone call that they have FIVE refurb units sitting in stock at the moment... for only $145 (CDN $ ) and with the full one year replacement warranty on them.
Now... I have seen some advertisers on eBay listing them for about $119 US$ - and kits loaded up with pads for anywhere from $169 US$ up to $250 US$. Not including their shipping and handling charges.
So I just thought I would mention this to anyone who is considering buying the Porter and Cable 7424 and don't want to pay full retail for the units to check out their nearest repair and warranty depot for that company.
One nice thing about refurbs is that normally they are thoroughly gone over before they attempt to sell them. Whatever went bad has been replaced. Often when they replace a blown part they install a better or more cureent part. And with the one year warranty your butt is covered in case it smokes and dies.
Just thought I would toss this info into our conversation in case anyone else is looking to get one of the most popular random obital sanders for polishing and waxing...
.
Posted By: Anonymous
Re: Paint job on a budget!? CONTINUED..page 44........ - 08/13/06 01:42 AM
Quote:
For example, because that is an aero-effect I assume that it is plastic.
Did you sand all the original paint down to the plastic or possibly just expose that one patch of plastic where the failure occured ?
Yes its plastic and no I did not sand all the way down to the plastic. There are just two spots where that happened..but those are not the areas where I'm having that issue.
Quote:
Did you primer the surface or go straight to paint ?
Went straight to the paint.
Quote:
Was there any previous paint on there that might have been different then the rest of the original paint on that part ? Like say where some scrapes were previously sprayed with and aerosol "color match up" spray bomb ?
No previous paint, everything was original.
Quote:
Did you wash down the sanded parts with water and a 'touch' of dish detergent ?
No, I washed down with mineral spirits, wiped with a lint-free cloth, then used a tack cloth before painting.
Quote:
Did you give the part a final wipe down with a rag and mineral spirit to get any potential contaminants, grease, oil from your hands or remnants of the sanded paint etc ?
I was using latex gloves. I will admit I forgot to change them before painting.
Quote:
Was the part thoroughly dry before you added the first layer of paint ? ( It's amazing what a hint of water embedded in the previously sanded surface might do to affect adhesion.
Completely dry before painting.
Quote:
Dunno... I would probably sand that part smooth again... even if it meant removing the current coats of paint. Then... starting from scratch lay on a primer layer to begin with to ensure adhesion and a uniform color on to which to lay your paint color.
I can't think of too many other factors that would have cause that paint to separate from the original layer although we did notice earlier in this thread where one of the chaps had problmes with the paint on his front 'plastic' bumper because the mold release agent ( for when the bumber was manufactured ) was able to act as a barrier between the paint and the bumper..
Thank you for the reply and questions. It looks like I have to start over again..think goodness this was a test. I did however put on a third coat just to see what would happen. The other areas look fine and now I have a better grasp on how I should mix the paint and roll it on. Also the importance of wetsanding after say..the 2nd coat.
Posted By: Marq
Re: Paint job on a budget!? CONTINUED..page 44........ - 08/13/06 09:04 AM
Quote:
I was using latex gloves. I will admit I forgot to change them before painting.
It sounds like you did everything right and so that makes that one little glitch seem all the more weird..
The only thing different was the use of latex gloves - although I can't really see them being at fault either. However I will talk about the latex gloves simply because it is an element that I have not personally used.
I can think of only two types of latex gloves... the bright yellow dishwashing gloves ( although they are more closely akin to rubber gloves than latex.... or the medical style ( cheaper by the box condomish colored type latex gloves.
I am not sure how either of those gloves would react chemically to mineral spirits or any other solvents. We already know that these solvents have the ability to eat away at certain foams used in the rollers over prolonged periods of exposure to the liquids.
I know I am grasping at straws here... but possibly the exposure to the mineral spirits caused a breakdown in the latex/rubber and released something from the gloves that passed to the car part that you were painting.
The only other thought is that the one difference between the kitchen type dishwashing yellow gloves and the box of 'cheaper by the box' type nurses latex gloves is that the latter type usually are packed in the box with a baby powder type coating to keep them from sticking to each other and to make it easier to slip your hand into the glove. There could be a slim chance that this powder on the gloves could be the type of contaminent that might interfere with the paint adhering properly. I don't really think this is a viable explanation for your problem because you appear to have done everything right and the wipe down with mineral spirits would have hopefully that powder 'if' these were the types of gloves worn.
I do not know what the powder is in the 'cheaper by the box' type latex gloves... but imagine this if you will. Let us say that prior to the final mineral wipe some of this 'powder' transferred to the body part. And let us say that when the mineral swipe happened it simply spread the powder rather than lifted it. That would give the same kind of appearance that we see in your 'damage' picture. It looks like a swipe or movement in a direction. Now I agree that part of the explanation for the directional appearance of the swipe can be attributed to the direction of the roller when the second coat was being applied and lifted that section of the first coat. But... if the latex glove did chemically breakdown and release some contaminating chemical to the body part that was not removed during the mineral spirit breakdown... that might be a potential culprit or explanation...
Dunno... I love a mystery. And since I do my wiping, sanding, painting etc barehanded, the gloves add a new element to the equation that I can't speak definitively from past experience on.
So... what type of latex gloves were they ?
.
Posted By: Anonymous
Re: Paint job on a budget!? CONTINUED..page 44........ - 08/13/06 05:43 PM
Posted By: Anonymous
Re: Paint job on a budget!? CONTINUED..page 44........ - 08/13/06 06:14 PM
I wouldn't let that stop you. I've painted cars in parking lots way back in high school. Drove the car in red and Drive out yellow. Just do a panel at a time anywhere you can.
For anyone interested in Custom Colors..... Home Hardware (canada) had a paint called Armor Coat. Its Alkalyd Enamel. Same Base colors as Tremclad. You can get it mixed from their color chart any color you want 2-3 thousand combinations. I just repainted the scirocco from Med blue to Monaco Blue. This time I used a Wagner and a roller and it went on fast. You need the roller as the Wagner tends to "SPIT" paint at the most in-appropreate times. Going to let it cure for the week and then buff and wax. Or perhaps change the color again who knows

Posted By: Exit1965
Re: Paint job on a budget!? CONTINUED..page 44........ - 08/13/06 06:16 PM
Scirocco - How many coats do you put on with the Wagner?
Posted By: Anonymous
Re: Paint job on a budget!? CONTINUED..page 44........ - 08/13/06 06:25 PM
Two heavy coats. It went on nice for the most part. the only problem was when it ran low and spits paint . I had no issues with peel and it did atomize the paint well. I had that dry roller in hand for any little runs or "spits" found.
Posted By: Anonymous
Re: Paint job on a budget!? CONTINUED..page 44........ - 08/13/06 06:53 PM
I have been following this thread since last May. Over my summer vacation from NC State my brother and I decided to paint his Camaro using this process. We got some of the car painted with a roller and we concluded that we couldn't finish before I left for Raleigh so we borrowed an HVLP spray gun and shot the rest of the paint. We sprayed two coats on the car outside and rolled the car in the garage after we finished spraying. the paint is rustoleum professional Royal blue and gloss white. I polished out the paint with a rotary buffer and a 3M hookit foam pad using the turtle wax polish suggested by 69charger. I'll let the pictures speak for themselves, but I will add that the color is a lot darker in person than it appears in the pics.

Posted By: Anonymous
Re: Paint job on a budget!? CONTINUED..page 44........ - 08/13/06 06:54 PM
another pic...

Posted By: Anonymous
Re: Paint job on a budget!? CONTINUED..page 44........ - 08/13/06 06:56 PM
last pic... that's my lil brother in the background

Posted By: Anonymous
Re: Paint job on a budget!? CONTINUED..page 44........ - 08/13/06 06:58 PM
Quote:
last pic... that's my lil brother in the background
That car don't look bad at all.
Posted By: Anonymous
Re: Paint job on a budget!? CONTINUED..page 44........ - 08/13/06 07:44 PM
Quote:
So... what type of latex gloves were they ?
.
wow...those are some fine analytical skills you have there
I'm using the cheap medical type latex gloves because I thought mineral spirits dry out your hands. I guess I will man up and go bare hands for the test.
Posted By: Exit1965
Re: Paint job on a budget!? CONTINUED..page 44........ - 08/13/06 10:40 PM
Mineral spirits haven't dried up my hands, and I've even been washing them with mineral spirits when I get any paint on my hands.
and to TZ- that looks great. Spraying this paint seems to work real well in terms of gloss and hardness.
Posted By: Marq
Re: Paint job on a budget!? CONTINUED..page 44........ - 08/14/06 01:28 AM
Quote:
.. so we borrowed an HVLP spray gun and shot the rest of the paint. We sprayed two coats on the car outside and rolled the car in the garage after we finished spraying. the paint is rustoleum professional Royal blue and gloss white. I polished out the paint with a rotary buffer and a 3M hookit foam pad using the turtle wax polish suggested by 69charger. I'll let the pictures speak for themselves, but I will add that the color is a lot darker in person than it appears in the pics.
It would be great if you had any 'before' shots to give us an idea of what the car started like... was it simply a uniformly dull original paint job or was the car all primered up etc...
The pics look great... but it is like that television show the swan... where you see the ugly chick transformed into 'the hot chick'... We can see the car turned out 'hot'... and now it would be nice to know where things started from...
.
Posted By: Marq
Re: Paint job on a budget!? CONTINUED..page 44........ - 08/14/06 01:40 AM
Quote:
Quote:
So... what type of latex gloves were they ?
.
wow...those are some fine analytical skills you have there
It's elementary my dear Watson. You simply apply Murphy's Law to any thing that might go wrong and back track to the least suspicious suspect. It was a case of trying to figure out if the gloves had some small role to play in that defect or if your neighbors dog had stupidly licked away at the paint while you were off preparing another batch of paint ( check his tongue color just in case or that it is still alive ).
Quote:
I'm using the cheap medical type latex gloves because I thought mineral spirits dry out your hands. I guess I will man up and go bare hands for the test. :
Yeah... you only have to worry about cancer and having deformed children with three heads if you swim in the stuff
It's no big deal to temporarily expose yourself to the mineral spirits or wiping yourself down after a painting session to remove any paint. The exposure is only short term and this project is short term. It would be a different story if you worked in a 'el cheapo' paint shop and had to expose yourself to contact with mineral spirits five days a week... fifty weeks of the year for the rest of your working career. Heck the 'fumes' in the air would probably blow out your lungs long before your skin starts growing cancerous warts.
My only embarassment during the painting stage was wearing open toed sandals. I have the 'loveliest' Fire Red toe nails in town. Which does nothing for ones macho ego...
Ah the joys of painting at home....
.
Posted By: GTSDave
Re: Paint job on a budget!? CONTINUED..page 44........ - 08/14/06 05:13 AM
Quote:
I'm using the cheap medical type latex gloves because I thought mineral spirits dry out your hands. I guess I will man up and go bare hands for the test.
I always use the medical type. I wipe down with laquer thinner though and it eats the gloves up pretty quick. One thing to keep in mind is that most of these gloves come with some type of a powder on them. I always change out my gloves after wipe down and before painting.
It has been a while since I checked in on this tread. I will have to stop by more often. I have been in such a crunch lately trying to make the October show, that I completely forgot about it LOL.
You folks are doing a great job with it. I see so many pictures have been added it is hard to keep track of who is doing which car LOL.
Exit, your machine is looking great. There is no secret to getting great results. Surface prep, and learning how to wet sand and polish. Once you have those down, the results will follow.
For those still wet sanding, I buy my 1000, and 2000 grit at wal mart in the automotive section. It is pre cut to just the right size for the hard rubber sanding blocks. It is 3M imperial wetordry. The number on the 2000 grit pack is 03003NA. I only use a sponge on round surfaces. The hard rubber block is the only way to go on flat surfaces. Also always go in straight lines in a criss cross pattern. Use dishwashing soap in your water. It will help keep the block moving freely. I also keep a spray bottle handy with some soapy water in it as well.
Good Luck folks and keep working on it.
-Dave
Posted By: 78D150CLUB
Re: Paint job on a budget!? CONTINUED..page 44........ - 08/14/06 05:19 AM
Quote:
I have the 'loveliest' Fire Red toe nails in town.
I didn't go for the toenail look, but I had some lovely green sparkle fingernails till about last Tuesday. BTW, did you polish and wax the toenails, or just go with the two coats of Brightside? I do agree with you on the joys of home painting. LOL
On a more serious note, just a few more trim bits and the bumpers to mount, and Godzilla is back to wreaking havoc on Ontario roads
I gave up on water for the wet sanding, I just constantly on the paper. The paint does have some flaws in spots, but I'm out of time for now, and the change is so amazing, I'm just going to leave well enough alone for now. I'll go back over it again, and really smooth things out when I locate some new and improved body parts.

Posted By: Anonymous
Re: Paint job on a budget!? CONTINUED..page 44........ - 08/14/06 01:54 PM
hi all from australia
i had to join up after seeing you guys produce some AMAZING stuff on a helluva budget.
im sold. although, i want to paint my car (Holden HG Premier) satin black, and depending how thrilled i am afterwards, i might think about adding some gloss black flames or stripes or something.
so i was wondering, is it worth getting the tremclad (tremco over here) in matte/satin black and using the roller technique, or doing something else?
also, if i were to add some form of gloss black ornament later one, could i just lay a coat of gloss straight over the satin, or whould i have to rough it up a bit first?
again, GREAT STUFF from all you guys, and charger for giving us budget-stricken guys this valuable info, and exit for being so patient with his experiments. keep it up!
p.s. 71 pages is alot of reading.
Posted By: Anonymous
Man! Glad you didn't end up with Tar Heel blue! - 08/14/06 07:37 PM
Very nice job!
Posted By: Marq
Re: Paint job on a budget!? CONTINUED..page 44........ - 08/14/06 09:54 PM
Quote:
hi all from australia
im sold. although, i want to paint my car (Holden HG Premier) satin black, and depending how thrilled i am afterwards, i might think about adding some gloss black flames or stripes or something.
I will give the answer for the Brightside marine paint.... Interlux ( the company that sells / makes Brightside ) also sells an 'additive' that can be added to any of the 'glossy-shiny' paints to make them 'flat and satin like'.
Since Interlux is a global company - you would be able to hunt down the Brightside marine polyurathane paints somewhere near you in Australia.
.
Posted By: Anonymous
Re: Paint job on a budget!? CONTINUED..page 44........ - 08/14/06 10:04 PM
I agree, it would have been great if I had felt like taking progress shots along the way but really my attempt at this is pretty much par for the course as far as results. I do have two decent shots of the car before we started painting.
I will say that taping the car to spray this paint is more time consuming than the roller, but I gave both techniques a shot and ill have to say that though the roller produces an equal finish, my time is pretty valuable and I will probably spray the paint and only have to wetsand once. When I paint my mother's Neon this winter I'll be sure to take more pictures and keep you guys posted.
Feel free to ask any questions about the process as I have learned a few "what not to do tips" about painting this way.
Anyway here is a before shot.
Cheers,
Trent

Posted By: Anonymous
Re: Paint job on a budget!? CONTINUED..page 44........ - 08/14/06 10:28 PM
Quote:
It would be great if you had any 'before' shots to give us an idea of what the car started like... was it simply a uniformly dull original paint job or was the car all primered up etc...
The car was like most of the Camaros in our area. Dull paint, faded basecoat, cracked clear coat, painted twice, dents, dings, cracked bumpers (I love plastic cars).
Quote:
The pics look great... but it is like that television show the swan... where you see the ugly chick transformed into 'the hot chick'... We can see the car turned out 'hot'... and now it would be nice to know where things started from...
This is a head on shot of the ugly chick before the new paint unfortunatly I only have these two before pics.
She was a whole lot prettier than my first ride (an 83 escort wagon).
Happy rolling (Or spraying),
Trent

Posted By: Anonymous
Re: Paint job on a budget!? CONTINUED..page 44........ - 08/15/06 04:51 AM
progress on mine.
first two coats on and dry. Very hard paint, can't even scratch it. Will wetsand tomorrow night
this pic is after the first coat

Posted By: Anonymous
Re: Paint job on a budget!? CONTINUED..page 44........ - 08/15/06 04:52 AM
close up at trunklid

Posted By: Anonymous
Re: Paint job on a budget!? CONTINUED..page 44........ - 08/15/06 04:54 AM
seccond coat, applied and dry

Posted By: Anonymous
Re: Paint job on a budget!? CONTINUED..page 44........ - 08/15/06 10:09 AM
If you want to paint your car satin black then you could also use Tremco Metal Armour Gloss Black, and leave it out in the rain for a few weeks to get the 'satin' appearance.....
From this
to this,

just add rain....
Posted By: Anonymous
Re: Paint job on a budget!? CONTINUED..page 44........ - 08/15/06 05:00 PM
Steve (Aussie-MX5),
Have you tried re-buffing? I'm curious to know why the paint went flat on you in such a short period of time? I've had my Rustoleum painted mower out in the rain and sun for about 3 months already and other than looking like it needs a bath, the paint finish looks fine.
Posted By: Anonymous
Re: Paint job on a budget!? CONTINUED..page 44........ - 08/15/06 05:06 PM
Well this is my first post. After buying a 2006 Charger R/T with R/T package, I saw this thread. Great timing since I am restoring a 1970 Porsche and don't want to spend the $$$ on a .... yada yada yada...
I have smoothed out and primed the car; now ready for rollin.
I have purchased Blue Marine 1 Part Poly urethane in Black online. One gallon with one quart of brushing liquid/solvent delivered to my door for $80 total-not bad. has the same qualities as the Brightside. see it here:
Blue Water Marine Ordered the rollers and handles from here:
Ebay Item: 130006642627 Roller frame plus 10 foam rollers for 9 bucks-beat that!
My plan is to do the first coat with 5% thinned this weekend and let it sit for a week. Then block wetsand with 400, then with 800. Do coat 2 at 5% thinned, wetsand with 1000, coat 3 full strength, wetsand with 1500, 2000, 3000 Then polish.
Hope it all works out. Thanks to all here for the research, time and dedication for us CSOBs!

Posted By: Anonymous
Re: Paint job on a budget!? CONTINUED..page 44........ - 08/15/06 05:06 PM
nuther

Posted By: Anonymous
Re: Paint job on a budget!? CONTINUED..page 44........ - 08/15/06 06:00 PM
here's a dumb question.
i guess i should've thought of asking this before reading the thread for like 4 hours lol.
um....my car is metal i think.
can you only use the marine and rust/trem stuff on fiberglass???
i have a 1990 honda accord that i'd like to do myself now, preferabbly with the marine paint.
thanks guys.
Posted By: Anonymous
Re: Paint job on a budget!? CONTINUED..page 44........ - 08/15/06 06:11 PM
your accord is made out of the same stuff as mine, metal and plastic. The rustoleum professional will work just fine. I posted pics a few posts up.
Posted By: Marq
Re: Paint job on a budget!? CONTINUED..page 44........ - 08/15/06 06:27 PM
Quote:
can you only use the marine and rust/trem stuff on fiberglass???
You can use the Brightside ( marine polyurathane paint ) on fiberglass, bondo, over old paint, over an automotive primer, on plastic and rubber etc. etc. ) The same goes for the Tremclad/Rustoleum...
.
.
Posted By: 69chargeryeehaa
Re: Paint job on a budget!? CONTINUED..page 44........ - 08/15/06 06:52 PM
Quote:
Well this is my first post. After buying a 2006 Charger R/T with R/T package, I saw this thread. Great timing since I am restoring a 1970 Porsche and don't want to spend the $$$ on a .... yada yada yada...
I have smoothed out and primed the car; now ready for rollin.
I have purchased Blue Marine 1 Part Poly urethane in Black online. One gallon with one quart of brushing liquid/solvent delivered to my door for $80 total-not bad. has the same qualities as the Brightside. see it here:
Blue Water Marine
Ordered the rollers and handles from here:
Ebay Item: 130006642627
Roller frame plus 10 foam rollers for 9 bucks-beat that!
My plan is to do the first coat with 5% thinned this weekend and let it sit for a week. Then block wetsand with 400, then with 800. Do coat 2 at 5% thinned, wetsand with 1000, coat 3 full strength, wetsand with 1500, 2000, 3000 Then polish.
Hope it all works out. Thanks to all here for the research, time and dedication for us CSOBs!
nice 914, you should really explore the longnitidunals, and the rear suspension console under the famous battery location, and the sail pannels under the vinyl, front trunk, basically anywhere where there's metal 914's rust just looking at them, if your quiet you can watch them rust!!!! take off the lower outer sils NOW, and inspect for rust, replace metal before you go thru the body work. what motor you got>? 1.7, 1.8, 2.0, or 2.7 (914-6)?
Posted By: Anonymous
Re: Paint job on a budget!? CONTINUED..page 44........ - 08/15/06 07:04 PM
Well its confirmed....the gloves did infact have something to do with my slight issue.
I decided to use no gloves when working on the car and have not once come up with that issue.
After applying two thin coats in the past two days, here I am at my third coat....

NOW...the rear bumper is not painted because I need to save it for a friend, plus I have another bumper coming in that I rather paint. Also the mirrors were an absolute last minute decision to just leave them there as that. Once I'm done with the car I will take the mirrors off and paint them black.
Posted By: Anonymous
Re: Paint job on a budget!? CONTINUED..page 44........ - 08/15/06 08:59 PM
It must be the paint that I used. I couldn't get the Tremclad/Rustoleum, so I used the same type of paint but one that is made here in Australia (called Tremco).
This is one of the problems in being a pioneer with using a different paint. Sometimes it works, sometimes it doesn't. No big deal really, I'll just re-paint it again in a few weeks time with Brightside. There is nothing wrong with the technique, just my choice of paint...
I did try buffing it down but the paint is stained with water marks right through to the first layer. I sanded and buffed for so long with a cutting compound that in one area I managed to get all of the way back to the original red without any success at all.
Posted By: Anonymous
Re: Paint job on a budget!? CONTINUED..page 44........ - 08/15/06 11:52 PM
Thanks. Porsche has a 2.0 four. Minimal rust in the "hell holes". Went through it already. Lots of stuff under the primer.

Posted By: 69chargeryeehaa
Re: Paint job on a budget!? CONTINUED..page 44........ - 08/16/06 02:16 AM
Quote:
Thanks. Porsche has a 2.0 four. Minimal rust in the "hell holes". Went through it already. Lots of stuff under the primer.
sweet, i built a 75 914 with a 1.8L that i bought off the original owner with 50K MI. it was a fun car, all the normal 914 rot stuff, they handle like a go-cart. what ever you do, don't lift off the gas when your pushing it really hard thru a turn, if it starts to let or understeer, mash the gas, or you'll be punished. i still have a spare set of guages, and the center cluster, plus steering wheel i plan to put in my 74 beetle.
Posted By: Anonymous
Re: Paint job on a budget!? CONTINUED..page 44........ - 08/16/06 11:34 AM
wow, so theres no hope using metal armour (the tremco stuff)? i priced the brightside over here, its $120 for 4 litres (gallon) while the metal armour is $60.
any ideas why the metal armour didnt work? its essentially the same stuff as tremclad isnt it? its meant to be used on the same sort of thing anyway.
i seem to remember some other aussie pioneers trying wattyl killrust and white knight metal guard, but those two are epoxy enamels, as opposed to the alkyd enamels like tremclad. would using either of the epoxy enamels have any dire effects that i should know about?
Posted By: Marq
Re: Paint job on a budget!? CONTINUED..page 44........ - 08/16/06 12:16 PM
Quote:
wow, so theres no hope using metal armour (the tremco stuff)? i priced the brightside over here, its $120 for 4 litres (gallon) while the metal armour is $60.
With the Brightside marine paint you 'should' be able to put two coats of paint on per QUART can of paint....
If you lay four coats of Brightside on to your car than that would work out to TWO QUART cans of paint... or approximately $60 to $70 bucks.
I prefer to buy the paint by the quart... so that I don't have a pile of paint left over at the end of the job. And if I buy too much... than I can take the unused can back to the store.
With regards to the different types of rust paint out there... I think part of the problem is that some rust paints are deliberately designed to never fully cure to become rock hard. It just happens that Tremclad and Rustoleum can turn rock hard when applied in very thin layers ( and each layer is allowed to cure before moving on to the next layer being added ).
The epoxy enamels are slightly different in that they are designed to have their carrier evaporate fully and to leave a hard paint job. The epoxy in that type of paint provides two excellent traits... superior adhesion and fairly quick hardening ( after full evaporation of the carrier fluid ). The epoxy type enamels have two slight drawbacks... in that they don't have a natural high gloss to them and as a paint they are indeed slightly harder and may require a lot more work during the polishing stage to get the maximum potention shine.
Possibly you may be able to locate some other marine 'top side' type paint in your region that is cheaper than the Brightside product. As you make your enquiries with boat suppliers just make sure that whatever marine paint you are looking at is designed to be 'rolled and tipped' - ie that it can be applied by roller and tipped. You may find another brand at a cheaper price that would allow you to 'roll your own'.
.
Posted By: 78D150CLUB
Re: Paint job on a budget!? CONTINUED..page 44........ - 08/16/06 08:41 PM
Just want to say "Thank's again" to 69chargerYeehaa for sharing this method of painting with all of us.
It's finally official, the neighbours came by and were drooling over the truck today.
I'm off to Moparfest for the weekend, and I'll scan a couple of pics next week, using a decent 35mm camera this time.
Happy rolling!!
Posted By: 69chargeryeehaa
Re: Paint job on a budget!? CONTINUED..page 44........ - 08/17/06 01:03 AM
Quote:
Just want to say "Thank's again" to 69chargerYeehaa for sharing this method of painting with all of us.
It's finally official, the neighbours came by and were drooling over the truck today.
I'm off to Moparfest for the weekend, and I'll scan a couple of pics next week, using a decent 35mm camera this time.
Happy rolling!!
your welcome.
i should be heading up to moparfest too, on sat, plan to hit the swap meet, not sure if i'll drive the charger due to retardrd gas consumption and i'm not looking to get judged, so i could save the $35 entry fee, and buy more parts , plus i'm not a big "show" kind-a guy, but i do like taking a quick peek at all the cars, and espically hitting the swap parts section. maybe i'll see you there, you driving your truck?
Posted By: Anonymous
Re: Paint job on a budget!? CONTINUED..page 44........ - 08/17/06 01:25 AM
Well rolling my truck probably is not gonna happen, I found a local tech school offering night courses in Auto Body, $150, 16 week course, 3 hours once per week, the first thing the instructor asks us?
"What's your project?" meaning "what are you gonna paint while you're here?"
State of the art paintbooth, the best paintguns (apparently they're like $700 each to buy) all the tools, frame machine, gonna learn to weld, all we gotta supply is the materials that are used up (sandpaper/paint/primer/tape/etc).
I'd be a fool not to take this oppurtunity.
One dude, this is his -5th- time taking the class, he's painting his 3rd car hahaha.
Posted By: 78D150CLUB
Re: Paint job on a budget!? CONTINUED..page 44........ - 08/17/06 02:04 AM
Yep, I'll be out on the field somewhere if you care to look it over. I'm only out for the fun of the weekend, and the proceeds go to a good cause.
Maybe I'll see you there, I plan to browse the swap as well, need a couple of hard to find trim bits and a line on the proper box, as well.
Sounds like it's gonna be a good weekend, weatherwise as well.
Posted By: 78D150CLUB
Re: Paint job on a budget!? CONTINUED..page 44........ - 08/17/06 02:08 AM
Sounds like a good deal, maybe you'll wind up in the autobody business thru it all. Be sure and post the results for us when it's all finished.
Have fun, and don't drop one of those high priced paint guns.
Posted By: Anonymous
Re: Paint job on a budget!? CONTINUED..page 44........ - 08/17/06 02:15 AM
Quote:
Sounds like a good deal, maybe you'll wind up in the autobody business thru it all. Be sure and post the results for us when it's all finished.
Have fun, and don't drop one of those high priced paint guns.
Opening a restoration type shop is a dream of mine, I love cars and have all my life, just never had time to learn jack about them since I was always too busy "making a living" but now I'm in a place where I can spend some time learning and if I can find a nice place to paint somewhere it's cheap to rent (out in the county/boonies) I just may open up shop.
EVERY body shop I've visited was busy, up to their eyeballs in work, most won't even LOOK at a restoration project because insurance work is so plentiful and lucrative. So I figure, finish the truck, buy another project, when THAT project is finished and drivable, sell the last project, buy new project, rinse/repeat, try and at least break even on each one as I build the skills. Drive the last project while working on the new project, when there is two completed vehicles, put 'em both up for sale, whichever sells first, keep the other to drive and start a new project.
If people want to pay to have their stuff done while I'm at it, then rock on, if I get enough business, then I can always try and hire some help. I can put my current business's office in the garage too and it'll all be business expenses anyway.
I know a guy who will probably work for me part time who's been doing salvage restorations and the last few years, show restorations and he'd work cheap, but he's just unreliable as hell (don't rely on him to show up, when he does, cool, when he don't, just don't get all bent outta shape).
Posted By: darenrt
Re: Paint job on a budget!? CONTINUED..page 44........ - 08/17/06 02:20 AM
Quote:
wow, so theres no hope using metal armour (the tremco stuff)? i priced the brightside over here, its $120 for 4 litres (gallon) while the metal armour is $60.
any ideas why the metal armour didnt work? its essentially the same stuff as tremclad isnt it? its meant to be used on the same sort of thing anyway.
i seem to remember some other aussie pioneers trying wattyl killrust and white knight metal guard, but those two are epoxy enamels, as opposed to the alkyd enamels like tremclad. would using either of the epoxy enamels have any dire effects that i should know about?
We are using an epoxy coating on our production engine parts. I remember being told by a paint supplier that epoxy paint is very strong, resistant to chemicals but no UV (sun light)protection unless it was some sort of hybread.
Posted By: Exit1965
Re: Paint job on a budget!? CONTINUED..page 44........ - 08/17/06 02:31 AM
Quote:
Opening a restoration type shop is a dream of mine, I love cars and have all my life, just never had time to learn jack about them since I was always too busy "making a living" but now I'm in a place where I can spend some time learning and if I can find a nice place to paint somewhere it's cheap to rent (out in the county/boonies) I just may open up shop.
EVERY body shop I've visited was busy, up to their eyeballs in work, most won't even LOOK at a restoration project because insurance work is so plentiful and lucrative. So I figure, finish the truck, buy another project, when THAT project is finished and drivable, sell the last project, buy new project, rinse/repeat, try and at least break even on each one as I build the skills. Drive the last project while working on the new project, when there is two completed vehicles, put 'em both up for sale, whichever sells first, keep the other to drive and start a new project.
If people want to pay to have their stuff done while I'm at it, then rock on, if I get enough business, then I can always try and hire some help. I can put my current business's office in the garage too and it'll all be business expenses anyway.
I know a guy who will probably work for me part time who's been doing salvage restorations and the last few years, show restorations and he'd work cheap, but he's just unreliable as hell (don't rely on him to show up, when he does, cool, when he don't, just don't get all bent outta shape).
Not to get too far off topic, but from what I have read the margins on body shop work aren't great ( I suppose it depends on where in the country you are), and finding reliable bodymen is apparently no easy task either.
Posted By: Anonymous
Re: Paint job on a budget!? CONTINUED..page 44........ - 08/17/06 09:02 PM
guys i dont mean to ask, but ,y black lincoln has turned out ok, but im thinkin of changing it to red (i like cars that stand out) any pics of what red looks like finished? thanks a ton fellas!
Posted By: Exit1965
Re: Paint job on a budget!? CONTINUED..page 44........ - 08/18/06 03:29 AM
Quote:
guys i dont mean to ask, but ,y black lincoln has turned out ok, but im thinkin of changing it to red (i like cars that stand out) any pics of what red looks like finished? thanks a ton fellas!
Here is a picture of my car when it was safety red. Seems you and I have different taste, I prefer colors that don't stand out (but a snarling big block in the same car, I like). There is also a picture of a buggy somewhere back a ways that someone (sorry forgot the name) painted safety red.
And of course Marq's mustang is red.
Regal red is a color I prefer over the orangey reds though. if i ever went back to a red I'd go with the more subtle regal red.
Hmm, I kind of miss the red now that I see it. I don't think I'll be changing the color anytime soon though.
..
in spray paint news, I got through painting under the hood with the rustoleum mixed into that harbor freight reusable spray can, but for some reason, I can't get that spray can to work well anymore. It just spits out a stream, and I have cleaned everything I can reach with acetone.
So now that the engine bay is out of the way, I'm going to use the Krylon spray can "ivory white" for the door and trunk jambs, since they dont' need to be pretty or shiney or especially durable, just the same color. And the color is darn near a perfect match and it dries within about 15 minutes. I'm going to really try to finish up the painting this weekend.
Posted By: GTSDave
Re: Paint job on a budget!? CONTINUED..page 44........ - 08/18/06 03:37 AM
Exit,
I still love that color LOL.
On your sprayer, if you can take it apart enough to soak it, laquer thinner will soften up anything that might be cloging it up. Just dont leave the plastic parts in too long it will usually soften them up.
Keep posting pics. I love those Darts! I can't wait to see yours when it is finished. Are you going to do a tail stripe? If so what color. I think Red would really look nice on yours.
-Dave
Posted By: Exit1965
Re: Paint job on a budget!? CONTINUED..page 44........ - 08/18/06 04:21 AM
Thanks for the tip Dave. I'll give it a shot with lacquer thinner, but I wont sweat it at all if I can't get that can to work again since the area that needs to be the most durable is already painted with rustoleum when the can was working.
I hadn't thought about a tail stripe.. if I did one it would probably be black because I want to put a flat black fiberglass hood on it too.
Posted By: Anonymous
Re: Paint job on a budget!? CONTINUED..page 44........ - 08/18/06 05:02 PM
Thanks for the pics EXIT, looks good, Im still debating on if I should or not, cause black is just a nice color, and I like chrome and black/chrome combo rocks, but thanks, Im still uindecided,well Ill have all winter to decide since itll be sitting, but as of now here it was the black looks like after wetsnaded and washed/waxed
still needs alot more wetsanding, but orange peel isnt bad, except on the trunk.

Posted By: Anonymous
Re: Paint job on a budget!? CONTINUED..page 44........ - 08/18/06 07:43 PM
something to ad this late in the game, is i sprayed the rear fender and i had a run so i took a rag and wiped the paint off that ran then i re sprayed the spot and it worked fine no more runs.
Posted By: Anonymous
Re: Paint job on a budget!? CONTINUED..page 44........ - 08/19/06 01:49 AM
Why is the Brightside Red and Blue on EBay so cheap compared to normal internet retail? Has anyone used this stuff. I want to get some of the blue, but it is so darn dark, I wonder how I could lighten it up some?
I guess I could buy a Qt. of white.
Posted By: Anonymous
Re: Paint job on a budget!? CONTINUED..page 44........ - 08/19/06 06:38 PM
hey guys ive tried to read all thati can but i know i got the basics down but now people are experamenting with different paints and all...is the marine paint cheaper? and will it stick to just about everything and get good coverage? cause i got my camaro that igot half primered and half the primer is red and the other primer is grey, and i also just put new doors on that are burgandy that i sprayed some high heat paint on certin spots so they wouldnt rust cause when we loaded them into my buddys 2 door cavalier (not my old red one there) they got scratched a bit and a little dented so some bondo work is kinda needed...does it also stick to bondo? or is this gunna be one of those primer first jobs as compared to the tremclad...also whats with the talk of the reusable spray cans? where do u get them from..ne ways heres pretty much the best pic i got right now

might be a little big...

Posted By: Marq
Re: Paint job on a budget!? CONTINUED..page 44........ - 08/19/06 10:11 PM
Quote:
...people are experamenting with different paints and all...is the marine paint cheaper?
No... it cost about $35 a quart at a marine supply place. The Tremclad/Rustoleum method is using an enamel.. the Brightside is a one stage polyurathane. Hence the difference in price.
Quote:
and will it stick to just about everything and get good coverage?
Coverage depends on what color you choose. The light colors in both type of paints tend to hide more than the dark colors. I believe the lighter colors have a high amount of pigment solids.
Quote:
cause i got my camaro that igot half primered and half the primer is red and the other primer is grey, and i also just put new doors on that are burgandy that i sprayed some high heat paint on certin spots so they wouldnt rust cause when we loaded them into my buddys 2 door cavalier (not my old red one there) they got scratched a bit and a little dented so some bondo work is kinda needed...
My car started off as a multi-colored car like yours. The Tremclad/Rustoleum can probably get you up to a uniform color by eight coats of paint. The Brightside may take you 4 or 5 coats to get a uniform color on the entire car. By putting one uniform primer color on to the car you would probably end up not having to do a couple of layers of paint.
Quote:
does it also stick to bondo?
All the paints we discussed adhere over bondo, primer, scuffed paint, plastic, metal, fiberglass.. etc.
When starting off with a car of many colors I think it will make your job easier in the long run and the uniformity of the paint job better, by starting with a primer to give the paint one color to have to cover.
Quote:
also whats with the talk of the reusable spray cans? where do u get them from..
At this point from the discussions it sounds like they work... but not for a long job without a lot of care and maintence between painting..
.
Posted By: Anonymous
Re: Paint job on a budget!? CONTINUED..page 44........ - 08/20/06 12:46 AM
I've been following the saga for about a week...read through ALL the posts! Anyway, I have a couple of questions about this process, both with Rustoleum and Brightside...
1. Since Tremclad said their clear should be thinned with lacquer thinner, has anyone tried thinning the regular Trem/Rusto with lacquer thinner?
2. How do you effectively smooth and level the body without first shooting a filler primer? Lots of bondo everywhere, then sand it all off??
3. Marq, do you think Brightside could be easily sprayed out of a HVLP?
4. Did the Brightside paint require as much wetsanding between coats as the Tremclad did? I'm trying to save myself some wetsanding time...
5. Has anyone tried laying down that Brightside being sold on eBay yet??
I'm looking to paint my beater diesel Olds station wagon and later tackling my '71 Cutlass 'vert if that works out well!
Chris
Posted By: Exit1965
Re: Paint job on a budget!? CONTINUED..page 44........ - 08/20/06 02:13 AM
Filler primer would be a good idea if you have lots of scratches. I didn't do it, but I had a pretty straight body to begin with. The rustoleum will fill in sanding scratches (esp. with 18+ coats) to some extent, but for big scratches or gouges you can use a skim coat with bondo and fiberlgass resin, start the sanding with 180 which is not aggressive, and feather it into the surrounding area.
If you are concerned with perfect straightness, you might also investigate whether you'd be happy with the end result of the paint. It's not a show quality shine. So it would be worth doing some test panel first to see if it's worth all the prep it sounds like you want to do, then put a paint job over it that you might not like.
Posted By: Anonymous
Very important point, Exit... - 08/20/06 10:29 AM
...and glad to see it brought up, since some of the newer folks may have missed the original point of this mammoth thread.
This isn't about show quality or prefection. It's about creating a finish of reasonable quality on a limited budget. It's a campaign, a quest to rid the roads of multi-hued beaters that shame their drivers who can't afford a trip to the paint shop.
Perfection and the concourse are about $10,000 thataway....a sense of satisfaction and pride in doing it yourself are right here.
Posted By: Anonymous
Re: Very important point, Exit... - 08/20/06 12:21 PM
Quote:
...Perfection and the concourse are about $10,000 thataway...
There are other options between Rustoleum and $10,000. A fantastic paint job can be had for less than $1,000 and it goes up from there depending on what you want and how much you plan on doing yourself...
As far as i'm concerned, Rustoleum is not even a viable option. I would roll on 'real' auto paint first. I painted my car with Rustoleum - it will never happen again...Chuck
Posted By: pdqvsix
Re: Very important point, Exit... - 08/20/06 02:29 PM
Quote:
Quote:
As far as i'm concerned, Rustoleum is not even a viable option. I would roll on 'real' auto paint first. I painted my car with Rustoleum - it will never happen again...Chuck
Would you mind giving some more details on what kind of problems you had with the rustoleum paint? I'm just about finished painting my car with rustoleum gloss white but i haven't had the car out of the garage, yet. The paint looks great and seems very tough as far as i can tell anyway.Thanks for any info you would care to share.
Posted By: Anonymous
Re: Paint job on a budget!? CONTINUED..page 44........ - 08/20/06 04:44 PM
I just want to say thank you guys for your help and solving my slight issue. It was infact the gloves...since I didn't have that issue when working on the car. Speaking of which..here is the sixth coat...still need to wetsand and polish..but I love the results.

Posted By: Marq
Re: Paint job on a budget!? CONTINUED..page 44........ - 08/20/06 05:45 PM
Quote:
2. How do you effectively smooth and level the body without first shooting a filler primer? Lots of bondo everywhere, then sand it all off??
[\quote]
My car began life as a car of many colors and bondo work. Initially I used black spray cans of primer to give the car one color ( to keep cops from eyeing it too much when I had it out on the road ). When I was in the midst of doing the 'roller paint job' with Tremclad and made the switch over to Brightside paint, I re-rolled the entire car using Interlux's Pre-Cote primer. It does an excellent job of coverage AND you can cut it with 50% of the paint you are going to use AND it can be sanded smoooth. Yes, that primer comes in a can and can be cut with thinner and rolled just like the paint. I then sanded the primer to as smooth as possible.
Quote:
3. Marq, do you think Brightside could be easily sprayed out of a HVLP?
Yes... Brightside can be applied to a surface in a number of ways. HVLP is a good way to get a smooth application done... just be sure to take all appropriate safety measures from all the 'stuff' that is going to be in the air
Quote:
4. Did the Brightside paint require as much wetsanding between coats as the Tremclad did? I'm trying to save myself some wetsanding time...
With the Brightside you will end up reducing the number of wetsandings BECAUSE it will take less coats of paint. Less coats of paint means less wetsanding when you are wetsanding every second coating... ( Tremclad/Rustoleum roller paint may take up to 8 coatings - Brightside roller paint may take only up to 4 or 5 coats of paint )
Posted By: Marq
Re: Paint job on a budget!? CONTINUED..page 44........ - 08/20/06 05:49 PM
It looks like you have done a great job on your car... Kudos to you !
Posted By: Marq
Re: Paint job on a budget!? CONTINUED..page 44........ - 08/20/06 06:07 PM
On the topic of polishes etc....
So I have begun the task of moving from a straight paint gloss and shine - and I am now working on the POLISHING and waxing stage of my McLaren... So I thought I would share some observations...
3M Perfection III compounding
I had read a lot of good reviews on the 3M Finesse II for compounding the paint. Unfortunately when I went to the local body shop supplier he 'claimed' that they no longer make that product and that they now selll the new improved version as 3M Perfection III. The stuff did a great job with the Brightside paint - and I would suspect it would do an equally excellent job on the Tremclad/Rustoleum - since it is designed for 'all types of paints' according to its packaging. It did an excellent job of getting the paint smooth and glossy.
TURTLE WAX ICE
Well this product turned out to be a MAJOR DISAPPOINTMENT. As far as I am concerned it is no better then spraying Armorall on your paint job. It applies easily and looks GREAT when first applied. Then as it dries out you realize that the CRAP is 99% mineral oil... and that oil is what was giving the great temporary shine. In the end even that trace of a shine disappears. But then again what should we expect from a product where the manufacturer says you can also use it on your vinyl interior and rubber etc. I took this CRAP back to the store and got my money back. I was furious. I felt very let down by the strong brand name of Turtle Was. Frankly they should be embarassed selling ICE - and not float advertising about how this product is going to be their flagship product into the next century.
MEGUIRER pure Carnuba wax.
Everyone said that pure Carnuba was the best for waxing, shine, water repelling etc. And they were RIGHT. Funny thing about this product... it is suppose to be pure carnumba... but you know they are LYING simply because the stuff smells like Bananas...
I am no Carnuba expert but I am pretty sure that natural carnuba doesn't smell like bananas. Pure ? Uh... it can't be. Oh well I digress. The Meguiars product went on nicely with the Cable & Porter polisher. It not only laid on a shine but it was able to give a darker and deeper appearance to the compounded paint.
Meguiars XTech Wax
Now... this is the flagship product of Meguiar and they said that it would give a shine and deep coloring that rivals the carnuba. They were right. Although it is all synthetic, they are right that the end result will rival carnuba. Apparently this synthetic is all based on polymers and nano-technology where the glossing molecules are able to become part of the paint etc. All I know is that this tuff worked great over the compounded paint job. Overall I would give it thumbs up ( and it certainly kicks the a$$ of the Turtle Wax's flagship product ).
One nice thing is that the two Meguiars products are quite complementary and you can use BOTH to reap the benefits of each of the products.
.
Posted By: Anonymous
Re: Paint job on a budget!? CONTINUED..page 44........ - 08/20/06 07:12 PM
yah turtle wax can't wax them selves out of a hole. never was a good product except there rubbing compound. i use mothers 3 step wax on my vehicles.
i have the norton ice product that has 3 pads for polishing a wool, blue foam and a yellow foam. when i worked at dealerships this is what they used and i tried it on the old paint before i started and it came out like glass. so i will use it on the rustolium when i get the car put back together...
Posted By: Exit1965
Re: Paint job on a budget!? CONTINUED..page 44........ - 08/20/06 07:19 PM
Painted the door and trunk jambs with HVLP gun and rustoleum. Wish I had used this for the engine bay, it would have worked much better than that pump up spray can (which seems to not work much anymore).
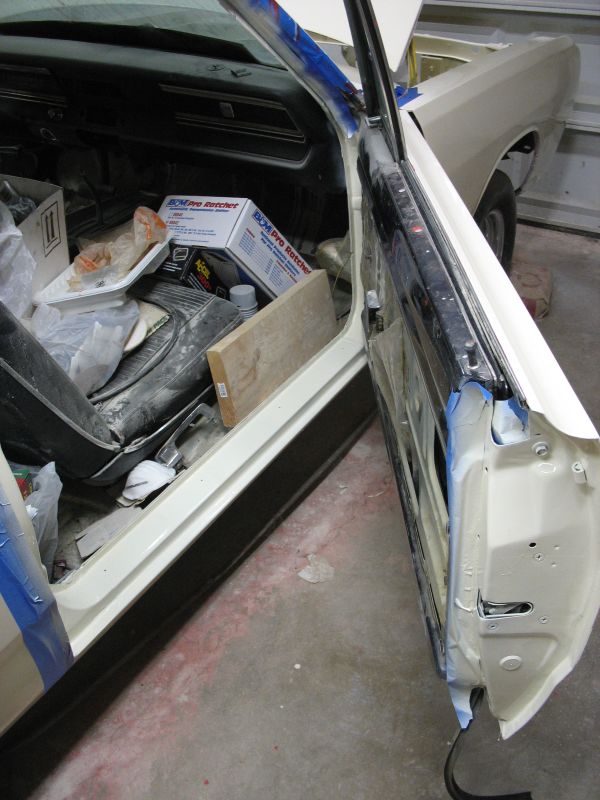
Posted By: Marq
Re: Paint job on a budget!? CONTINUED..page 44........ - 08/20/06 08:30 PM
Quote:
Painted the door and trunk jambs with HVLP gun and rustoleum. Wish I had used this for the engine bay,
Which model HVLP are you using.
.
Posted By: Anonymous
Re: Paint job on a budget!? CONTINUED..page 44........ - 08/20/06 08:39 PM
thats how i did my car all with a hlvp spray gun.
before

after

Posted By: Exit1965
Re: Paint job on a budget!? CONTINUED..page 44........ - 08/20/06 10:31 PM
It's a harbor freight gravity feed gun and 1.4 tip. I barely tuned anything at all.

Posted By: Anonymous
Re: Paint job on a budget!? CONTINUED..page 44........ - 08/20/06 11:40 PM
same one i got but blue from a swap meet $35.00
i set the press at 30 psi for painting.
Posted By: Anonymous
Re: Paint job on a budget!? CONTINUED..page 44........ - 08/21/06 12:53 AM
I have a question. This thread definetly has me wanting to do this, but I wanted to add stripes to the car. Maybe orange body, black stripes or something for my 78 camaro. Anyway, has anyone had success in doing this, and how exactly would it work? If I do the whole car orange in 6-8 coats and then add more coats of black on top of that for the stripes, wont the paint look kind of uneven, since the stripes will be raised?
I dont know what to do, if I should tape off the pattern of stripes I want to do and not paint it or if I can paint all the layers and sand the black stripes down or what to do. I think in automotive spray painting industry they add tons of clear coat on top of the body paint and stripes and then sand the crap out of it until theyre even, but I dont know if I could throw some clear on this or what? Any ideas guys???
Posted By: Anonymous
Re: Paint job on a budget!? CONTINUED..page 44........ - 08/21/06 01:10 AM
Does anyone have any experience with the EBay Brightside red or blue paint? If so, any pics?
Posted By: Anonymous
Re: Paint job on a budget!? CONTINUED..page 44........ - 08/21/06 03:15 AM
Quote:
If you are concerned with perfect straightness, you might also investigate whether you'd be happy with the end result of the paint. It's not a show quality shine. So it would be worth doing some test panel first to see if it's worth all the prep it sounds like you want to do, then put a paint job over it that you might not like.
I want to see if this Brightside can produce as good a finish as the pictures show, so maybe I can paint my '71 Cutlass and leave it for a while until I can afford the $1500 to lay down some good BC/CC. Unfortunately my test car is an old, beat-up station wagon with lots of dents and rust spots. I will want to lay down this Flag Blue off ebay, which I understand is so dark it's almost black, and if the paint isn't going to look decent w/o waves, I might as well slather on some Rustoleum. But the ebay paint is a little more expensive.
I want to avoid Rustoleum right now because of the stories I hear about it not being compatible with automotive finishes (Tremclad may be an exception to this, but it's definitely a different formula); then again, Brightside might be just as bad! I don't want to make myself a huge amount of work when I go to shoot real, expensive auto paint over whatever cheap stuff I paint the '71 just to get it one color this year.
PS - One more question Marq - how would you rate the Brightside shine in comparison to the Tremclad, and to a new car's?
Posted By: Anonymous
Re: Paint job on a budget!? CONTINUED..page 44........ - 08/21/06 03:45 AM
rustolium does make a clear coat.... i would do is paint the stripes and then clear coat.
if you do sand down the stripes you might get a faded line where the stripes begin and the orange stops. make sure you use the green body shop tape to lay out the stripes. they will make a crisp edge.
Posted By: Anonymous
Re: Paint job on a budget!? CONTINUED..page 44........ - 08/21/06 03:45 AM
o well, just means ur gunna have to take the paint down to metal..witch in the end would make a better paint job ne ways right
Posted By: Anonymous
Re: Paint job on a budget!? CONTINUED..page 44........ - 08/21/06 09:18 AM
Quote:
rustolium does make a clear coat.... i would do is paint the stripes and then clear coat.
if you do sand down the stripes you might get a faded line where the stripes begin and the orange stops. make sure you use the green body shop tape to lay out the stripes. they will make a crisp edge.
A clear coat spray only though, right? I guess I can spray on many layers of clear coat after I do the stripes and basically sand it down, but ive never sanded a rattle can before.
Posted By: Marq
Re: Paint job on a budget!? CONTINUED..page 44........ - 08/21/06 11:48 AM
Quote:
...if the Brightside paint isn't going to look decent w/o waves, I might as well slather on some Rustoleum. But the ebay paint is a little more expensive.
If applied smoothly... the Brightside paint will look perfectly shiny WITHOUT going to the polishing and wax stage. I ran my car for almost a month after rolling it with Brightside and it looked like other cars... ( ie. it blended in with other cars and didn't stand out like some kind of side show clown car ).
Quote:
I want to avoid Rustoleum right now because of the stories I hear about it not being compatible with automotive finishes (Tremclad may be an exception to this, but it's definitely a different formula); then again, Brightside might be just as bad!
Completely WRONG. Brightsidee is a single stage polyurathane... Take a look at the top of the line product offering from MAACO - it is a polyurathane. Same stuff. 100% compatible. And you can paint enamel over a prepared polyurathane or you can paint another polyurathane over the Brightside.
The Tremclad and the Rustoleum are both enamels. IF THE PAINT HAS BEEN ALLOWED TO PROPERLY CURE there should be absolutely no problem putting 'real' automotive paint over it. The only problems might occur if a) the substrate was not properly prepared in the first place... or b) you rush to get a 'real' paint job slapped on it before it has fully cured.
Quote:
I don't want to make myself a huge amount of work when I go to shoot real, expensive auto paint over whatever cheap stuff I paint the '71 just to get it one color this year.
Maybe you should just settle for a nice coating of Interlux Pre-Cote primer - mixed 50/50 with the color you want to eventually use. You will get a solid color base with uniform coverage in just one or two coats. When it comes time for a real paint job.. you would just do a final sanding on the Pre-Cote and shoot the 'real' paint.
Quote:
PS - One more question Marq - how would you rate the Brightside shine in comparison to the Tremclad, and to a new car's?
Ok... this is an area where Brightside and the other paints differ. Brightside NATURALLY ends up with a high gloss shine with each coating. Whereas with the Tremclad/Rustoleum only reaches that level of shine ONCE the entire paint job is completed and you have gone through the compounding, polishing and waxing of all those coats.
I drove my car around for four weeks with just the final coating of Brightside on it. I wanted to let the paint fully cure before moving on to the compounding, polishing and wax stage. It looked very acceptable and did not stand out like a sore thumb or look like a crappy paint job. No embarassment factor.
The only thing that might have given me better results would have been if I had sprayed the Brightside rather than roll it. I believe I would have had less work with the wet sanding and I would probably have had an even smoother/shinier/glossier finish.
.
Posted By: Marq
Re: Paint job on a budget!? CONTINUED..page 44........ - 08/21/06 11:56 AM
Quote:
I have a question. This thread definetly has me wanting to do this, but I wanted to add stripes to the car. Maybe orange body, black stripes or something for my 78 camaro. Anyway, has anyone had success in doing this, and how exactly would it work? If I do the whole car orange in 6-8 coats and then add more coats of black on top of that for the stripes, wont the paint look kind of uneven, since the stripes will be raised?
Errrmmm... that is the way it ususally looked when you use the stickly decal type pin stripes and large racing type stripes.
But think about it for a minute. The layers of paint that you are putting on are only about 1 mil thick. If it takes 3 layers of paint to get 100% coverage of the stripe that means you are raising a surface of about only 3 mil ( roughly the thickness of a garbage bag ) Just for comparison sake.. those plastic stick on stripes are about 5 mil to 10 mil thick...
And... if you do your main body painting first... stripes second.... and then do your finishing wet sanding, compounding, polishing and waxing AFTER than you will have control over the feathering of the edges so that they visually blend in... rather than 'rise' above the surface.
Quote:
I dont know what to do, if I should tape off the pattern of stripes I want to do and not paint it or if I can paint all the layers and sand the black stripes down or what to do. I think in automotive spray painting industry they add tons of clear coat on top of the body paint and stripes and then sand the crap out of it until theyre even, but I dont know if I could throw some clear on this or what? Any ideas guys???
The chap here with the Z28 Camaro and the other chap with the Datsun 240Z car that laid large stipes on their cars can probably talk more intelligently on the striping process. Their pictures are somewhere back in this thread.
.
Posted By: Anonymous
Re: Paint job on a budget!? CONTINUED..page 44........ - 08/21/06 12:11 PM
Be careful mixing Brightside. The white brightside is very thick and needs to be thinned alot. The black Brightside is so thin, it's watery.
When you mix the two it's almost impossible to keep them mixed for more than 5 minutes. You get black swirls on top of the grey.
Btw, I used a squirrel mixer on it for about 10 min and it still separates.
Posted By: Anonymous
Re: Paint job on a budget!? CONTINUED..page 44........ - 08/21/06 07:04 PM
I just have to say that my pictures of the wavy black brightside were totally my fault and not the paints. I rushed it, put on too many layers, and didnt get rid of the brush marks inbetween. So it built up and looked that way.
What I did recently (just before my car was put in the shop for the last week) was sand off all the wavy paint (using a block) and put another layer of paint on with just a roller. I put it on pretty thick, though. Anyway, the gloss is there but so is some orange peel (because of the thickness). The previous brush marks are pretty much gone. I dont mind about the orange peel, because I am working outside and the finish has all sorts of dust and bugs in the paint that I have to sand out anyway. And since I sanded, compounded, and polished the paint once before, I know I can do it again with really good results.
So yes, if you can work very cleanly, the brightside will be shiny and smooth (if put on thinly) without sanding, but if you do have to sand (like I will) you can certainly get the gloss back, it just takes a lot more work.
hopefully i will get my car back today, then work on it the rest of the week, and post some more pics when its done.
Posted By: Marq
Re: Paint job on a budget!? CONTINUED..page 44........ - 08/21/06 07:39 PM
What I suspect for the Brightside is that it may be at its best when it is sprayed on. That cuts down on any surface imperfections and reduces the amount of wetsanding that is required.
When rolling Brightside it might be useful to build up some extra layers just to give you some room to play when wetsanding and then compounding.
At this point I have been able to wet sand, compound using 3m Perfection III and then wax it up using Meguirs pure carnuba and the Meguiars High Tech synthetic wax.
So I know you can get a mirror finish onto the Brightside - and to get that result really depends on how smooth the surface is.
I was watching American Hotrod the other night and they were doing one of their 'rush' jobs on a 1956 Chev convertible. What caught my attention was that because they were 'squeezed' for time - they made the paint shop boys work through Christmas - when it came to painting they deliberately laid on SIX layers of bright red over a base coat of yellow. What caught my attention was that they sprayed on all those layers KNOWING that it was going to result in severe orange peeling. BUT... they planned on doing a ton of wetsanding to get the smoothest possible surface to compound, polish and wax. I seem to recall that it was a Dupont automotive paint that they were spraying because they had a problem getting the product due to the holidays and had to have it shipped direct from Dupont via courier.
But the key thing I learned from that episode was that you can be over generous with the paint, ignore any orange peel and remedy that orange peel with the wet sanding. And when you consider the hundred grand $$$$$$ that they are charging for their cars we just have to assume that that reworked orange peel paint job MUST have been amasing or the customer would have been mucho pisst-offo...
.
Posted By: Anonymous
Re: Paint job on a budget!? CONTINUED..page 44........ - 08/21/06 11:14 PM
I started on an 01 Hyundai Accent 3 days ago on a wim. Decided to goto home depot and give this rustoleum a shot with a foam roller. Looked horrid then I started scouring the web for help and ran across this article, same concept only with much more insight and steps.
So far I've been following the steps verbatim and it really is one of those things you have to get a hang of yourself, but thankfully things are just now starting to come togeather after sanding, painting, completely stripping, repainting completely stripping, repainting. and many hours of
So far the biggest tip I've stumbled upon in getting rid of the orange peel effect is how well you smooth out the paint with wetsanding between coats. I'm using 1000 grit and it works really really well, just takes a really long time.
Heres my progress so far. Today is the only day I finally got the show room finish shine to surface and I about pissed myself. Having my luck though, my first last and so far only buffer pad shredded itself right when the shine surfaced so now I gotta run back into town, a 60 mile trip
Never the less I'm anticipating the final result now that I got it down pat. Atleast a hell of alot better than I did before.
BTW: Painting in the sun makes thepaint flatten itself alot faster than inmy garage, or so I've noticed. my
Also I'd like a picture of 69 charger to blow up and make a poster out of so I may place it next to my 6 ft x 4 ft poster of bruce lee to praise every night.
69Charger I SALUTE YOU!
Pics:
From a distance...almost there
http://www.fileupyours.com/files/74/sonigram%20pics%20085.jpg Ugly Orange Peal soon to be laid to waste.
http://www.fileupyours.com/files/74/sonigram%20pics%20083.jpg This is the somewhat purdy shine that I finally buffed out and then my buffer pad decided it had had enough.
http://www.fileupyours.com/files/74/sonigram%20pics%20081.jpg
Posted By: Anonymous
Re: Paint job on a budget!? CONTINUED..page 44........ - 08/22/06 04:06 AM
3 coats so far on my 87 GN.
Edit: I have 3 coats now, but the pic is only 1 or 2 now that I look closer. Mark

Posted By: Anonymous
Re: Paint job on a budget!? CONTINUED..page 44........ - 08/22/06 04:07 AM
Another

Posted By: Anonymous
Re: Paint job on a budget!? CONTINUED..page 44........ - 08/22/06 04:08 AM
Before

Posted By: Dart360sav
Re: Paint job on a budget!? CONTINUED..page 44........ - 08/22/06 05:37 AM
Mark i'm waitin to see your finnished product, black is the color i want to do. Hope it comes out good
Posted By: Anonymous
Re: Paint job on a budget!? CONTINUED..page 44........ - 08/22/06 08:12 PM

Look at this stuff.
Posted By: 78D150CLUB
Re: Paint job on a budget!? CONTINUED..page 44........ - 08/22/06 11:34 PM
Here's a few pics from Moparfest, as promised. Not the sharpest truck there, but still able to stand out in a crowd. The red truck on the left had a very unique body lift, frame welded on top of frame. motor and trans on lower and body on top, simple and easy. Ingenious!!
Had an absolute blast telling people the paint job was Tremcald and foam roller. They just about fell over.

Posted By: 78D150CLUB
Re: Paint job on a budget!? CONTINUED..page 44........ - 08/22/06 11:41 PM
Another set. The truck to the right was almost a mirror image in color for mine, so we decided to park together. That turned a few heads, as well.
His was a 78 D100 SB with a /6 that was pro done as a body shop's truck before he bought it. Looked almost as good as mine did
Great weekend, and actually met a few of the moparts members as well. Saw a car that looked a lot like 69chargeryeehaa's but no one was around, so I couldn't confirm it. Were you on the field Sat. by any chance?

Posted By: pdqvsix
Re: Paint job on a budget!? CONTINUED..page 44........ - 08/23/06 12:01 AM
I applied the first coat of gloss white to the rear chrome bumper today and i just went out to see how it was doing and it looks great. It's going to look really sharp with the black impact strip and bumperettes. The paint went right on over the chrome without any problem and i didn't scuff it before painting because the chrome was still in good condition, i just wanted white bumpers to match the car.
Posted By: 69chargeryeehaa
Re: Paint job on a budget!? CONTINUED..page 44........ - 08/23/06 12:13 AM
Quote:
Saw a car that looked a lot like 69chargeryeehaa's but no one was around, so I couldn't confirm it. Were you on the field Sat. by any chance?
yes, it was my car, i guess it's a good thing you could'nt tell it was my car, otherwise it would have shown the roller paintjob looks obvious actually i had alot of compliments on the paint/body even before i mentioned "ya, this car cost me $50 to paint with tremclad and a foam roller!!!" . the avitar pic is my car with the prostars i had, but i bought the replica VECTOR wheels used in the dukes of hazzard that were on the car at the show, that probabally made it hard to tell if it really is the car!!!. lots of rain that day, it was sunny for about 30 mins, then started raining when i got there, that was fun was'nt it? i was in the parts swap area looking for goodies. i saw your truck, it looked awesome. i'm not big on green, but i have to admit that 2-tone looked really good on your truck. i too had alot of people recognize the car from here, and talked to alot of them about the paint job, and yes.....alot of them did'nt catch the "ya, i painted it with a roller and tremclad"!!! at first, but then i saw that "priceless" look, saw that look alot that day. some people i talked with thought it was a lie, others shared their total amazement, wanting to know everything about it and when i can paint their car!!!!
Posted By: 79_WARLOCK
Re: Paint job on a budget!? CONTINUED..page 44........ - 08/23/06 01:12 AM
Hey everyone
I was also at Moparfest with my 79 Macho Power Wagon, My dad driving my 79 Lil Red Express and my uncle with his Shelby Dakota. I too met some Moparts members including 78D150CLUB, the paint job looks awsome
, and its also cool that its a factory big block truck.
Saturday was kind of a drag due to all the rain but sunday was alright in the afternoon. Even with the rain I had an awsome time as i do every year.
Attached are some pics.
Hope to see you all next year.
Jay

Posted By: 79_WARLOCK
Re: Paint job on a budget!? CONTINUED..page 44........ - 08/23/06 01:14 AM
Posted By: 78D150CLUB
Re: Paint job on a budget!? CONTINUED..page 44........ - 08/23/06 02:15 AM
I was pretty sure it was your car when I spotted the K40 on the back. Wish I had got to shake your hand, or buy you a beer, or at least say thanks in person. Maybe next year
I didn't think the roller job was obvious at all, the paint looked good to me.
Nice to talk to 79Warlock, as well. I spotted his Macho driving in Sat morning, and then bent his ear for a bit on Sunday. A pleasure to meet some of the people from here.
I spent a while in the swap as well, and got the wheel trim for mine for 15 bucks. Not absolutely perfect, but solid enough to clean up well and mount properly.
Rain and all, I had a great weekend, and will definitely be back.
Oh, and they should think about awarding a medal of bravery to the fellow with the F150 parked in a crowd of several hundred rabid Mopar fans
Posted By: Anonymous
Re: Paint job on a budget!? CONTINUED..page 44........ - 08/23/06 05:50 PM
Well I'm ready to dive into the roller paint club. I have been listening to my wife complain about the ugly old beat up green car far to long. I went down and bought several colors of spray bombs and colored here and there on my Dart. The wife really liked the blue, so blue it is. Now I'm starting the body work.
I really appreciate 69chargeryehaa and all who have contributed. And a huge thanks to moparts for allowing this thread to continue.
I have sprayed a few cars but never tryed anything like this, so here is my question. I'm on page 25 of this thread and have read the origional and have not seen this addressed. My spray paint mentor once told me to watch the temp vs. due point when painting. If the temp is falling fast..don't paint. If the due point and the temp are too close together..don't paint. My mentor said when the concrete is sweating they are definitely close together. I see some experienced painters on here and would like to read their comments on this, and whether or not it has any effect on a single stage paint like the tremclad/rustoleum.
And thanks to the moderators for keeping the language a clean enough for my kids to read.
Posted By: Anonymous
Re: Paint job on a budget!? CONTINUED..page 44........ - 08/23/06 08:23 PM
Hi all,
I stumbled across this forum when it just started and saw 69Charger's post. At that time, I thought it was a big joke, but now I've stumbled across this forum again and found that a lot of people are trying this out and it actually works! Incredible. I stayed up late last night till 5AM reading reading through all of the 80 or so pages on this forum.
I am for sure going to try this method, but I have a question about prepping the body. Now I know using a Dual Action sander is best, but I don't have a good enough compressor to support one. Would an electric random orbital sander do? Are there any other types of sanding machines I can use? The car currently has its factory paint and has been repainted before. I'm trying to sand it all off avoiding any chemical strippers.
Thanks.
Posted By: Anonymous
Re: Paint job on a budget!? CONTINUED..page 44........ - 08/23/06 08:56 PM
I used a random orbit electric sander, it worked fine. My crx had a crappy spray job over the factory paint, which I sanded off. The Rustoleum Professional sticks to pretty much anything anyway. Here is a pic after 2 coats!

Posted By: Anonymous
Re: Paint job on a budget!? CONTINUED..page 44........ - 08/24/06 12:09 AM
Quote:
I just want to say thank you guys for your help and solving my slight issue. It was infact the gloves...since I didn't have that issue when working on the car. Speaking of which..here is the sixth coat...still need to wetsand and polish..but I love the results.
I really want to see the finished product after you wetsand and buff. Your car looks very clean.
Did you end going with Tremclad/Restolean/Brightside?
I believe you used gloss white?
Keep up the good work.
Posted By: Marq
Re: Paint job on a budget!? CONTINUED..page 44........ - 08/24/06 01:07 AM
Quote:
... so here is my question. I'm on page 25 of this thread and have read the origional and have not seen this addressed. My spray paint mentor once told me to watch the temp vs. due point when painting. If the temp is falling fast..don't paint. If the due point and the temp are too close together..don't paint. My mentor said when the concrete is sweating they are definitely close together. I see some experienced painters on here and would like to read their comments on this, and whether or not it has any effect on a single stage paint like the tremclad/rustoleum.
When spraying or rolling... the temperature and the humidity both play a factor in how things will go....
The temperature will affect how fast (too hot) or how slow ( too cold ) the paint will cure. If the temperature is too hot then the paint will not 'self-level' itself out properly because it has dried too rapidly. If the paint dries too rapidly the skin will dry quicker than say the paint that is in contact with the body of the car. This can lead to the wrinking effect ( which is worst than dealing with orange peel ).
When it is toooooo cold.... well the problem is that the paint does not cure within the time frames that the manufacturer says the paint will cure. You again may end up in a situation where the surface skin 'appears' to have 'dried' - but in fact the paint below the skin is still attempting to cure. This may result in the 'carrier' of the paint trying to evaporate through a sealed skin surface. I think this tends to give the paint a foggy appearance - which you can't simply compound out.
The thing about humidity is that if it is too humid then the paint will not have as nice a gloss or shine on its skin ( the outer most surface - the one that is visible ). The higher the humidity the less gloss and shine.
If it is too humid you may find that the coat of paint you apply might take on a bit of a foggy appearance, along with the lack of gloss. I am not a chemical engineer... but I think when the paint is drying, and the carrier solvent is evaporating from the paint.. there might be some molecular chemical reaction happening between the evaporant and the moisture in the air. This is something similar to what people have experienced with 'water spots' - where it has rained on their curing paint.
So ideally you want to do the spraying or rolling on days where the temperatures are within specifications of the paint manufacturer. If it is comfortable enough to work without breaking into a sweat then that is probably a good day.
As for humidity... well you can usually tell when there is too much moisture in the air ( after a rain, prior to a rain, first thing in the morning when there is a temperature transition from warm to cold or cold to warm - where condensation might form ).
In my case I had to wait five days to put the final coat of paint on my car because we were in the middle of a heat wave.... up past 100 ferenheit.. Then we got hit by two massive rain days. Rather than take a gamble on the how the weather might affect the final quality of my last coat of paint I waited until the temperature and humidity were optimal.
I should mention that I was quite pleased that I waited it out before laying on the last coat of paint because that final coat had the best appearance of all the previous coats that I had put on... ( it was road worthy shiny ).
.
Posted By: Anonymous
Re: Paint job on a budget!? CONTINUED..page 44........ - 08/24/06 02:47 AM
i figured out if it is to hot and humid the paint ran and had to sand the run and repaint so i got a nub file for the runs.
Posted By: Sazman
Re: Paint job on a budget!? CONTINUED..page 44........ - 08/24/06 04:26 AM
Neat thread, kudos to all who add to the information here. I was wanting to know, Marq or anyone, what rattlecan brand and color is a close match to the Brightsides Fire Red? I got some Brightsides from the guy on Ebay but haven't been able to find a close match in a spray can locally. Thanks, and I will stay tuned.
Posted By: Exit1965
Re: Paint job on a budget!? CONTINUED..page 44........ - 08/24/06 05:12 AM
Quote:
Neat thread, kudos to all who add to the information here. I was wanting to know, Marq or anyone, what rattlecan brand and color is a close match to the Brightsides Fire Red? I got some Brightsides from the guy on Ebay but haven't been able to find a close match in a spray can locally. Thanks, and I will stay tuned.
Have you tried Rustoleum safety red?
Posted By: Marq
Re: Paint job on a budget!? CONTINUED..page 44........ - 08/24/06 12:45 PM
Quote:
I was wanting to know, Marq or anyone, what rattlecan brand and color is a close match to the Brightsides Fire Red? I got some Brightsides from the guy on Ebay but haven't been able to find a close match in a spray can locally.
Yes... the Rustoleum/Tremclad 'Fire Red' is almost identical to the Brightside 'Fire Red'. In fact I used the Tremclad 'Fire Red in the trunk, engine compartment, door jambs etc and you cannot detect any difference against the exterior body part that were painted with Brightside 'Fire Red'.
It seems that this particular shade of red is quite popular among the paint manufacturers. I noticed two of the other marine paint companies, AWLGrip and Petit both have an identical shade of red.
In the spray bombs there are also a number of other manufacturers that produce a similar 'Fire Red' color. The only caution I would throw in is that I would not use a lacquer based 'Fire Red'. There may be a compatibility problem there... because the lacquer based paints tend to cause wrinkling on enamels and polyurathanes.
So if you cannot get some Tremclad/Rustoleum 'Fire Red'.. just be sure to get an enamel based type of paint. The only polyurathane spray bomb that I saw was a Varathane 'Fire Red'....
I did look into one other option.... We have a local body shop supply jobber that makes 'custom cans' of spray paint. They will take any color of paint you want and put it into a spray can. These are the 'tall' size spray cans. The only downfall with getting some cut Brightside put into a spray bomb is that the jobber charges $25 per can.... OUCH... So that is why I went with the Tremclad 'Fire Red' at $7.98 per tall boy...
.
Posted By: Anonymous
Re: Paint job on a budget!? CONTINUED..page 44........ - 08/24/06 06:13 PM
Hey Marq, when you are you going to show us your polished Brightside paint? I know you waiting for it to cure more...
I think we all would like to see the outcome using this type of paint. Right now I'm still deciding wether to use Tremclad with a clear coat ontop or just Brightside. Only thing holding me back from Brightside is that the finish doesn't last long from what I've read in the past posts. How is yours holding up since you layed it down?
Posted By: Anonymous
Re: Paint job on a budget!? CONTINUED..page 44........ - 08/24/06 07:22 PM
since I rolled my car with brightside the finish has been fine. My car sits outside all day in the sun and outside during storms. It takes the abuse of the weather and it's been on a few long trips with rocks on the roads.
A couple things to report:
1) no chips even after the stone road driving and 800 mile highway trip to buffalo, ny
2) No fading in the color
3) No loss of glossy finish (when I wash the dirt off it it's as good as when I painted it)
4) No stains in the paint from bird droppings whatso ever.
It's been on my car since mid july and only been washed once since.
Posted By: Anonymous
Re: Paint job on a budget!? CONTINUED..page 44........ - 08/25/06 12:18 AM
Was your last coat wetsanded then polished ?or just left as is?
thanks
Posted By: Marq
Re: Paint job on a budget!? CONTINUED..page 44........ - 08/25/06 01:25 AM
Quote:
Hey Marq, when you are you going to show us your polished Brightside paint? I know you waiting for it to cure more...
The job is all done and I have been busily driving the car at every opportunity. I will try to snap some pictures this Saturday and post them up. Funniest thing is that I don't really expect anyone to be able to detect much difference in the appearance compared to the other 42 pics that I previously put onto the server.
The most significant difference between the final coat of Brightside and the wet sanded, compounded, polished and wax version is TOUCH. The paint on the car is now SMOOOOOOOOOOOTH to the touch. Slippery smooth... If you put something on the car body it slides off. You can't rest anything on the car or it will slide off and fall to the ground. Even the six pound Cable & Porter polisher went sliding to the ground when I left it lying on the car Many times the tub of Turtle Wax compounding product and bottles of Meguiars went for that slippery ride down the hood or trunk on a slipper ride, But probably the most interesting 'slippery' event was when I placed a fresh polishing rag on the hood of the car and gravity pulled it down the hood - there was no resistance to hold it in place on the hood. I was impressed because I have never been able to get a hood that slippery smooth.
Quote:
I think we all would like to see the outcome using this type of paint. Right now I'm still deciding wether to use Tremclad with a clear coat ontop or just Brightside. Only thing holding me back from Brightside is that the finish doesn't last long from what I've read in the past posts. How is yours holding up since you layed it down?
I have no qualms at all at laughing at anyone who tries to say the Brightside paint doesn't last long. It's made FOR BOATS... it's made to be exposed constantly to the sun. It's made to have the bodies of young ladies scantilly clad in just bikini's lying on it. It is a paint designed specifivally for the TOP PART of boats... where it gets things bounced off it, placed on it, dragged over, chemicals SPILLED on it ( like gas, oil, sun tan lotion etc ) it etc etc.
Bottom line is that this single stage polyurathane is a close and true relative of automotive paint. The main difference is that it is designed for boat owners to 'roll' with 5 inch rollers ON THEIR OWN PERSONAL WATERCRAFT.
Anyhow... I have discussed previously my experiences with the compounding, polishes and waxes that I used.
The only update I can add to that previous posting is that I also made use of the Turrle Wax brand compounding product. The brown muddy stuff in a tub. I liked it. It worked just as well as the more expensive 3M Perfection III compounding product. At some points I was even mixing the two products on the fly while compounding a surface. It seems the Turtle Wax compound product gives you more time to work with the product before it goes dry.
But from what I have seen and experienced there are two ways to go with the Brightside paint job :
a ) if you have successfully laid down a smooth and glossy final coat of paint... you might wish to stop at that point and live with that finish for a month. It will give the paint time to reach maximum hardness... but more importantly you will save yourself all the work of wetsanding, compounding and waxing. But please note that YOU CAN go to wet sanding and compounding within 24 hours of that final coat of paint being applied.
b ) if your final coat of Brightside gives you anything less then what you were hoping for... then breakout out the wet sanding and go from 1000, to 1500 to 2000. Then go for a compounding with the Turtle Wax compound product to rejuvenate the shine that was lost during the wetsanding. Once you have reached that level of shine from the compounding... go to the waxing stage. As previously noted... I had my best luck with Meguiars pure Carnuba and Meguiars High Tech wax. The 'High Tech' wax is a polymer and so it was more successful at giving the paint a deeper and darker look. The Carnuba wax was better at developing a high gloss.
I will take this opportunity to again pizz on the Turtle Wax ICE. It looked amazing for the first 10 seconds that it was applied on the paint - something like how amazing the finish looks when you wet it down with solvent to clean the car. But just like the solvent the paint goes back to its dull look once the Turtle Wax ICe evaporates. I was not impressed with that product.
Ok.... so nuff said for the moment. I will try to snap pics and post them this Saturday
.
Posted By: Anonymous
Re: Paint job on a budget!? CONTINUED..page 44........ - 08/25/06 02:51 AM
Quote:
So is rust, or brightside gettin better results? OR does it even matter, i think i read that with brightside you dont need miniral spirits to thing it out, its already good to go?
I believe both paint processes will give you equal results in the end. I swithced from the Rustoleum process to the Brightside process simply to cut down on the amount of work needed... it takes less coats and provides a glossy layer at each step of the procedure.
With the Brightside you can paint with it straight out of the can.... HOWEVER... I found it better to cut the paint with their thinning liquid which is specifically sold for the purposes of Brushing & Rolling. They call it a Brushing Liquid and they refer to it as product number 333 ( so as to be not confused with their actual thinning liquid ). On the can they say you can use from 5% to 10% of the brushing liquid with your can of paint. It's whole purpose is to buy you additional working time with the paint when applying it and to allow the paint additional time to self level. I found that when I cut the paint with the brushing liquid it made the bubbles more self-popping. In some ways you could say that the Interlux Brushing Liquid acts very much like how the mineral spirit helps the Tremclad/Rustoleum to self-pop its bubbles.
Naturally and logically whenever you thin a paint it will thin out the solids being applied to each layer that you are painting. So this may require that you complete one extra layer to the paint job in order to have laid down the same amount of pigment or solids... compared to if you had just laid down the paint straight out of the can.
Initially I did try to lay down a layer of paint straight out of the can... but after the first panel I immediately began cutting the paint with their 'Brushing Liquid". It just seemed to lay down better and gave me that extra bit of time to work the layer of paint with the second roller to make things appear visually even ( no roller lines and to pop any bubbles that had not self popped ).
Now... the Brushing Liquid sold by Interlux is basically 'Ketone'... as compared to 'mineral spirits' which are used to cut the Tremclad/Rustoleum. I believe that you might be able to use the smelly 'mineral spirits' to cut the Brightside paint. Basically they are both serving the same purpose - in that they are evaporative carriers. Meaning that although they are making the paint 'wetter' for when you are applying the paint... their key purpose is to evaporate and leave the paint solids behind. I believe that the mineral spirits may be slightly slower at evaporating WHEN COMPARED against the 'ketone'. This would suggest that using mineral spirits to cut Brightside paint might buy you yet more time for the paint to self-level and self-pop the bubbles.
One other thought did strike me during the painting process with Brightside and cutting it with their brushing fluid. We all are aware by now that the amount of gloss and shine of your final layer of paint is DIRECTLY AFFECTED by the amount of humidity and temperature. In fact Brightside clearly identifies humidity as a factor that we should work around. The key being that when you are in position to lay down your final layer... make sure that the temperature is cool and that humidity is LOW !
When I arrived at my final coat of paint I had to delay that painting by FOUR DAYS - because we were in the middle of a h3llish heat spell ( 35 degrees celcius ) with humidity factor that made it feel like 43 degrees celcius ( approx 114 degrees farenheit ). So I held off the final coat of paint until the morning temperature was MUCH COOLER and the humidity had dropped back down to normal levels. I believe this may have helped give the higher level of gloss compared to my earlier coatings.
Sorry that I have to write an essay to answer simple questions. But for folks who are reading these threads, they are on a quest to get as much information as possible to help them decide about the merits of attempting one of these 'roller jobs'.
This is confusing me. Interlux makes several paint additives. I have found these, and believe these are the ones that are being discussed in this forum for adding to the Brightside paint: Interlux Brushing Liquid 333: This is advertised as: Interlux 333 Brushing Liquid is a slow drying solvent to ease brushing and facilitate the flow of specified paint coatings. Extends drying in hot weather. Also recommended in various topside systems for removing sanding residue from fiberglass and wood surfaces.
Brushing Liquid 333 improves flow and extends working time of Interlux Schooner, Superspar, and Interior Rubbed Varnishes, especially in warm weather. Also works well with other Interlux paints including Premium Yacht Enamel, and Brightside Polyurethanes.
Now, if you follow Interlux's link to the MSDS, it says it contains two main components: Kerosene and Naptha.
The other talked about item is: Interlux 216 Special Thinner. Interlux 216 Special Thinner is a fast evaporating solvent which when added to specified paint coatings improves drying in cold climates, and facilitates spray application. 216 Thinner is also recommended for removing sanding residue from hull bottoms, wiping down bare aluminum clean, and for the general clean-up of paint equipment. MSDS shows it to contain: Ethyl Benzene and Xylene.
Now one retards drying and the other hastens it. Which to use, and when?
Posted By: Anonymous
Re: Paint job on a budget!? CONTINUED..page 44........ - 08/25/06 12:19 PM
When you get interlux's guide they show what to do with topside paint. The 333 is for brushing they recommend the other if you plan to spray. I suppose so when it atomizes it dries on the surface quickly?
To the person who asked I just went to my final coat and stopped. Mostly because I realized the color blue I did was too light. I want to go with sapphire blue. So I'm waiting to put that on before I'd try to sand and polish.
Posted By: Marq
Re: Paint job on a budget!? CONTINUED..page 44........ - 08/25/06 01:16 PM
Quote:
Now one retards drying and the other hastens it. Which to use, and when?
The one to use is the 333 Brushing liquid. It gives you more time to 'work' with the paint you are applying. It also allows the paint more time to self level ( hence a smoother surface ) then if it cured toooo quickly.
I believe from past experiments that you use the pure smelly mineral spirits ( which are cheaper ) and it will perform equally to the kerosene / naptha mix used in product 333 Brushing liquid.
.
Posted By: Anonymous
Re: Paint job on a budget!? CONTINUED..page 44........ - 08/25/06 01:34 PM
It had been stated here that 333 contains Ketone. I assume you mean MEK. Is MEK a hastener or a retarder for drying? Also as stated in my earlier post, and viewing the MSDS I find no mention of Ketone in either of the two products discussed. Was that reported in error? Or is Naptha and MEK the same thing?
Posted By: Anonymous
Re: Paint job on a budget!? CONTINUED..page 44........ - 08/25/06 04:40 PM
I have seen a lot of reference to MAACO on this thread and would like to comment on them. I had a paint job done on a 73 Challenger that was not bad for the price. Unfortunately they didn't paint the hedder panel, (the piece that wraps around the headlights and grill). I was told to bring it back in a couple of weeks. When I did the hedder panel actually got a glossyer, brighter blue than what was on the rest of the car. My brother-in-law had a paint job done by them and it had areas that had bubbles. It was blamed on the body work and they would not repaint. I bought a Gremlin that had a MAACO paint job that pealed at every body line after a year. I wetsanded the car and some areas pealed of like latex. After sanding I sprayed on a sealer (DAS1980), then painted the car. I should have striped the car because the crap under the sealer caused it to lift in several areas. The first time I washed the car with water it had a few wrinkles that settled down after sitting in the sun a while. If you use them you may want to do a little of your prep before you turn it over to them. Just because it is sprayed on doesn't mean it's better. GO ROLLERS!!
Thanks Marq for the reply on the effects of humidity on paint. My guess is that many people don't realize just how much it effects to outcome of the job.
As to the neighborhood assocations problem a few pages back, Call the person in charge of deed restrictions. Then ask if there is anything reguarding paint and body work on your personal vehicle that would be a problem. If you are allowed to change oil in your driveway. I doubt there is.
Posted By: 69chargeryeehaa
Re: Paint job on a budget!? CONTINUED..page 44........ - 08/25/06 05:13 PM
Quote:
I have seen a lot of reference to MAACO on this thread and would like to comment on them. I had a paint job done on a 73 Challenger that was not bad for the price. Unfortunately they didn't paint the hedder panel, (the piece that wraps around the headlights and grill). I was told to bring it back in a couple of weeks. When I did the hedder panel actually got a glossyer, brighter blue than what was on the rest of the car. My brother-in-law had a paint job done by them and it had areas that had bubbles. It was blamed on the body work and they would not repaint. I bought a Gremlin that had a MAACO paint job that pealed at every body line after a year. I wetsanded the car and some areas pealed of like latex. After sanding I sprayed on a sealer (DAS1980), then painted the car. I should have striped the car because the crap under the sealer caused it to lift in several areas. The first time I washed the car with water it had a few wrinkles that settled down after sitting in the sun a while. If you use them you may want to do a little of your prep before you turn it over to them. Just because it is sprayed on doesn't mean it's better. GO ROLLERS!!
Thanks Marq for the reply on the effects of humidity on paint. My guess is that many people don't realize just how much it effects to outcome of the job.
As to the neighborhood assocations problem a few pages back, Call the person in charge of deed restrictions. Then ask if there is anything reguarding paint and body work on your personal vehicle that would be a problem. If you are allowed to change oil in your driveway. I doubt there is.
macco's usually SUCK for paint, BUT i did build a 68 mustang show car, about 10yrs ago and had it painted at macco, but the guy working on my car was this old biker guy and really new his stuff, and did a awesome job for $1100 they stripped the roof (which was vynil) and put in new door hinges, lined up all the pannels, awesome job, the car was painted viper blue, but that was 10yrs ago, and i was reccommend to go only to that shop cause that painter used to work at a high-end shop and quit, went to macco. but on average 99.99999% of macco's are just concerned with getting them in and out the door as fast as possible, somewhere along the line they throw paint on the car!!!!
as for temperature/humidity, i've rollered tremclad in dead canadian winter (-25*deg C) to middle summer (+30*deg C), and the paint behaved the same in all temperature conditions but took longer to dry when really cold. humidity did'nt effect the paint at all, unless it was foggy (100% rel humidity) then there was a haze in the paint as you would get spraying single stage in high humidity, but if it's less than 85% rel humidity, there is absoultly no effect on the tremclad from my expirence at all.
i painted my bug in middle of winter, it was retarded cold outside, and here is the result (you can see my sled, and the snow ):


Posted By: Marq
Re: Paint job on a budget!? CONTINUED..page 44........ - 08/25/06 06:17 PM
Well... it was a lovely day outside and so I am ahead of schedule for my picture taking...
So here are the final pics of the McLaren after wet sanding, compounding and waxing...


To look at the rest of the pictures you can find it here :
http://www.snpx.com/AugWaxedMcLarenAnd for your amusement and amazement... I have included two small movies demonstrating just how slippery this paint job turned out after waxing...
How slippery is it ? I tried to put the pin stripes on the side of the car and they couldn't stick to the paint. Oh well....
Movie 1 : Meguiars High Tech wax bottle goes for a slide off the trunk
http://www.snpx.com/AugWaxedMcLaren/slideofftrunk.mpgMovie 2 3m's Perfection Compounding product sliding off the hood
http://www.snpx.com/AugWaxedMcLaren/slideofhood.mpg.
Posted By: Anonymous
Re: Paint job on a budget!? CONTINUED..page 44............ - 08/25/06 07:22 PM
Attached was $1600 and the primer and paint alone was nearly $1000 of that. This picture was taken five months after final buff. No wax at this point. Rented a booth and paid someone to remove front and rear window. Three people six weekends sanding, scrubbing and rubbing.
dave
florida

Posted By: 69chargeryeehaa
Re: Paint job on a budget!? CONTINUED..page 44............ - 08/25/06 08:11 PM
Quote:
Attached was $1600 and the primer and paint alone was nearly $1000 of that. This picture was taken five months after final buff. No wax at this point. Rented a booth and paid someone to remove front and rear window. Three people six weekends sanding, scrubbing and rubbing.
dave
florida
attached is a $50 paint job, $30 alone was for paint!!!! did it in my garage, took out my own windows, took me 1 day to scrub, and sand and i rubbed it, not for any reason, just cause it felt good!!!!
sorry, i could'nt resist, very nice job, 3rd Gen charger?
Posted By: ONEBADBIRD
Re: Paint job on a budget!? CONTINUED..page 44............ - 08/26/06 03:42 AM
Hey 69charger, I've been folowing this thread since day one and really like what I've seen. The only thing that concerns me about using rustoleum paint is problems with fading over time. I work on tugboats that see nothing but rustoleum paint. Over the course of a couple years the paint gets a faded or chalky look or more so loses its luster. I know, how can you compare a tugboat to a beautiful classic car but just looking at the characteristics of the paint makes me wonder?
Do you think that the extra steps taken of wet sanding and WAXING with the turtle wax greatly lessen the chances of the paint losing its luster or fading that I have noticed in an industrial environment (or if it were over time to lose its luster just buff it with some wax to bring it back possibly)
. Other than that the rustoleum paint at work holds up well to its surroundings its as someone mentioned before hard as nails. As for the adhesion to the body of a car I wouldn't have any doughts about using it only to be sure proper steps were taken to give it a good surface to lay onto as in no heavy rust, dirt, or oil on the body of the car and if over old paint having the body roughed up to give it something to bite onto. What are ones thoughts on this comment? anyone? Jay
(Keep rolling on fellas your paint jobs are looking great)
Posted By: Anonymous
Re: Paint job on a budget!? CONTINUED..page 44............ - 08/26/06 02:08 PM
Yes, it's a '72 belonging to the kid. His grandfather (maternal) gave him the car on his 16th birthday. One owner. My dad gave me a F&#@&*& Timex.
This paint is 2 years old now and still looks like new. Better in fact, because it's been waxed a few times. It's nearly perfect. A product of an always garaged straight body to begin with and 2 1/2 gallons of sanded primer ($80 a gallon) over bare metal. The paint is PPG Dodge PR4. Dodge truck "Flame Red". PPG clear in copious amounts. Wet sand with 1500 except some small sections of orange peal, with 1200, then 1500. Then the whole car with 2000. 3M compound on an air buffer with coarse foam pad, then again with the same compound and a soft foam pad.
Jr. and I stripped the car but found a guy who would remove and replace front and back glass for $50. It's the glued in type and we were already biting off more than we could chew.
Vinyl top came off, rust under it welded, entire car to bare metal. Doors off, rebuild hinges windows removed. Interior removed (except dash), headliner out, sand blasted roof on inside and floorboards and sprayed with truck bed liner.
Outside was primed, sanded, primed, sanded, primed, sanded...etc. Less than a cup of body filler on whole car.
I got tennis elbow sanding and drank about five cases of beer.
You guys are getting phenominal results with quality enamel and basic application methods. Like the ONEBADBIRD said, how long it will look good is a question. I think up there in Canada you will have better luck than here in Florida where it gets baked every day. Jr. doesn't have a garage and commutes every day (for now). He tries to put the cover on at the apartments, but you know how that goes.
What is your application technique? No primer? I read some of this thread and see brushes and rollers????? Wouldn't a Wagner sprayer work better?
dave
florida
Posted By: Anonymous
Re: Paint job on a budget!? CONTINUED..page 44............ - 08/27/06 12:57 AM
Greetings from an enthusiast of small cheap foreign cars no longer sold in the USA (FIAT)!
Been watching the thread as reposted on various Fiat sites since about May or June and really started to get interested in July when an X-1/9 owner posted pictures of his spot door repair. Dang, the silly idea of rolling on Rustoleum suddenly took hold and I went ahead with a test section on one of my autocross cars, a 124 Spider!
I used Rustoleum "Stops Rust" in white for that first coat and sunrise red for the subsequent 9 coats. Thinned it 2:1 paint:spirits (mostly painting in 80+ F deg weather), and waited at least 12 hours between coats. I also experimented with regular mineral spirits and odorless mineral spirits, but couldn't tell any difference in hardness or curing time. Like exit1965, I can scratch it with my fingernail even after a couple weeks, though sometimes it doesn't and I can't tell why some spot won't scratch and most of it does.
First coat:

The first coat was white so I could see whether there was much difference between a brown base and a white base.
Fourth coat:

Fourth coat was having me worried as there's still a noticeable shade difference between the brown base and the white base.
Final coat:

Not to worry, though, as when you put 10 coats on there, any differences disappear. After my learning session, I'm comfortable saying you can get a color change in as little as 8 coats with red. Lots of texture because I did no-no #1 and reworked the surface outside the working window. Can't remember what compelled me, probably slumping paint or a roller line that I didn't want.
After wetsand, hand polish, and wax on that badly textured spot:

I let it cure for 2 weeks before I lost my patience staring at that goober. Broke out the 1500 grit and wetsanded it for about 5 minutes, which made the texture disappear. Hand polished it for 5 minutes (where have I put my orbital buffer?!?), then waxed it with some cheap crap (contains no wax), but didn't like the lack of gloss. Thought about it for a day or two, reexamined and realized it wasn't polished enough as indicated by fuzzy reflections, so hand polished for another 10 minutes and rewaxed with a better wax (the Meguir's high tech that Marq? posted earlier). Much better, but could use a real mechanical polish.
The top and bottom of the door are still virgin Rustoleum so you can tell how much gloss was lost (not much in my opinion, but I'd also like to see it after a real polish). I'm proceeding with the rest of the car, at my own pace, because I'm pleased with the results. Even if it lasts only a year, it's been a relaxed and pleasureable experience compared to spraying basecoat/clearcoat.
Anyhow, thanks to Charger and thanks to all you experimenters out there who showed me the way!
George
Posted By: Marq
Re: Paint job on a budget!? CONTINUED..page 44............ - 08/27/06 02:13 AM
I found the single GREATEST investment I made in this project was to buy a Cable & Porter 7424 polisher... With it in your arsenal that FIAT could have been maxed out for shine without wearing out the old arms and hands.. I cringed at the thought of attempting all the work I did on my car by hand. I probably would not have gotten anywhere near the optimal results because my arms would have quit long before the work was done.
It made compounding, polishing, waxing and buffing FUN FUN FUN... It almost didn't seem like work.
I didn't mind the wetsanding by hand... because normally that was about a 30 minute exercise that didn't burn out my arms. But when it comes to the tedious task of compounding... and more compounding... the 7424 saved my arms and probably did a better job than I ever could have done by hand.
And I also found that spreading the wax via the 7424 did a better job then I could ever have attempted by hand.
I had read a lot about how guys swear by the 7424 and now I am a devotee as well. It is the best bang for the buck investment at saving your arms and cranking out the maximum shine that you can.
Here is a link that chats about the 7424
http://www.autopia-carcare.com/inf-pc7424.htmlAs I previously noted... I bought my unit at a Porter & Cable Service Depot. It was a 'refurb' unit... that had never been used. It had ended up at the service depot because its box had been damaged at a store and someone had removed the manual. So they shipped it back to the local service depot - where they checked it, slapped a manual with it and put it on their shelves for 50% less then the normal retail cost. Plus it came with a full six month warranty from the service depot.
Nuff said... it makes a great investment because it not only will pay for itself during your 'rolling' project.. but you should be able to put it to good use for years to come waxing and buffing your car
.
Posted By: Anonymous
Re: Paint job on a budget!? CONTINUED..page 44........ - 08/28/06 12:43 AM
I have been following this thread for sometime now and thought i would chime in and ask something that i just noticed recently. The ones doing the stripes/two tone paint jobs how are you doing <pic's would help to see it if possible>. I am savingup for a project and a house so i have nothing to show for it other then alot of time reading
oh by the way
Posted By: sogtx
Re: Paint job on a budget!? CONTINUED..page 44........ - 08/28/06 03:11 AM
Its hard to follow all the posts , can you mix and tint thr rustoleum to ,,,
an autumn bronze metallic, or is that asking too much ??
Posted By: Anonymous
Re: Paint job on a budget!? CONTINUED..page 44........ - 08/28/06 03:35 PM
Quote:
The ones doing the stripes/two tone paint jobs how are you doing <pic's would help to see it if possible>
look toward the bottom of page 27 to see pictures of my little brother's blue Camaro. (they are attachments at the top of the post) I laid out the stripes with plain ol' blue painter's tape and painted the primary color first. After all of the blue was on, I untaped the stripes and retaped them to mask the freshly painted blue. Then I applied the same number of coats of white as I had blue. after the paint cures sand down the ridges formed by the edges of the tape. The result is a stripe that you can't feel by rubbing your hand over it. (this is a technique that was used on show car stripes with lacquer paint jobs before polyurethane bc/cc was popular.
I hope that explaination answered your question.
Posted By: Marq
Re: Paint job on a budget!? CONTINUED..page 44........ - 08/28/06 07:17 PM
Quote:
Its hard to follow all the posts , can you mix and tint thr rustoleum to ,,,
an autumn bronze metallic, or is that asking too much ??
No... the Tremclad/Rustoleum and/or Brightside paints are not mixable to arrive at that sort of color...
.
Posted By: 69chargeryeehaa
Re: Paint job on a budget!? CONTINUED..page 44............ - 08/28/06 09:31 PM
Quote:
Hey 69charger, I've been folowing this thread since day one and really like what I've seen. The only thing that concerns me about using rustoleum paint is problems with fading over time. I work on tugboats that see nothing but rustoleum paint. Over the course of a couple years the paint gets a faded or chalky look or more so loses its luster. I know, how can you compare a tugboat to a beautiful classic car but just looking at the characteristics of the paint makes me wonder? Do you think that the extra steps taken of wet sanding and WAXING with the turtle wax greatly lessen the chances of the paint losing its luster or fading that I have noticed in an industrial environment (or if it were over time to lose its luster just buff it with some wax to bring it back possibly) . Other than that the rustoleum paint at work holds up well to its surroundings its as someone mentioned before hard as nails. As for the adhesion to the body of a car I wouldn't have any doughts about using it only to be sure proper steps were taken to give it a good surface to lay onto as in no heavy rust, dirt, or oil on the body of the car and if over old paint having the body roughed up to give it something to bite onto. What are ones thoughts on this comment? anyone? Jay (Keep rolling on fellas your paint jobs are looking great)
the prep is as any other paint job, BUT the use of primer is not necessary, prep with 400, do all the body work, and go straight to paint. as for the fading issue, think about it, if you take any paint job, paint the car and expose it to the elements, any paint will fade, there is no more maintance to the tremclad/rustoleum paint as compared with auto paints, and the durability is probabally better then an auto paint as far as resisting scratching/chipping because it really is tough paint.
here is a pic that i took about a month ago, the paint was done in 2000, middle of winter, tremclad orange:
that paint job has seen 35,000 MI, and counting, no fade, and it looks like the day i painted it.
Posted By: 69chargeryeehaa
Re: Paint job on a budget!? CONTINUED..page 44............ - 08/28/06 09:34 PM
Posted By: Anonymous
Re: Paint job on a budget!? CONTINUED..page 44........ - 08/28/06 10:59 PM
Quote:
...as for the fading issue, think about it, if you take any paint job, paint the car and expose it to the elements, any paint will fade, there is no more maintance to the tremclad/rustoleum paint as compared with auto paints, and the durability is probabally better then an auto paint as far as resisting scratching/chipping because it really is tough paint...
I painted my car with Rustoleum 'gloss white' in March...althought I repainted the car, the door jambs and inner fenders still have the Rustoleum paint. The funny thing is, it is now canvas/egg shell color. Elements?? the thing hasn't been out of the garage!! I wouldn't recommend this stuff to my worst enemy...
Also remember, if you paint with Rustoleum you can forget about ever using 'real' auto paint without stripping this junk completely off because it will not sand...stuff peels like latex after almost six months drying time...Chuck
Posted By: 69chargeryeehaa
Re: Paint job on a budget!? CONTINUED..page 44........ - 08/28/06 11:19 PM
Quote:
I painted my car with Rustoleum 'gloss white' in March...althought I repainted the car, the door jambs and inner fenders still have the Rustoleum paint. The funny thing is, it is now canvas/egg shell color. Elements?? the thing hasn't been out of the garage!! I wouldn't recommend this stuff to my worst enemy...
Also remember, if you paint with Rustoleum you can forget about ever using 'real' auto paint without stripping this junk completely off because it will not sand...stuff peels like latex after almost six months drying time...Chuck
that's wierd, chuck, i can honestly say i've had nothing but the best results with tremclad, there must have been something either wrong with the paint or the prep, sorry to hear that, but the tremclad at least would absoultly never, ever peel or have adhesion issues, it's the exact opposite from my expirence.
Posted By: ONEBADBIRD
Re: Paint job on a budget!? CONTINUED..page 44........ - 08/29/06 02:16 AM
What happened to Ausie Driver's car is what scares me about using the rusto paint. Whan I saw that I was sad
for you man that stinks. Maybe the brightside paint which is made for using on pleasure boats and surfaces that are always soaking wet might deal with this water issue better. It almost seems to me that a clear coat would be the thing to keep the paint from going dull or changing a color shade all together say from (black to grey) or (red to pinkish) when getting rained on. Like I said maybe the brightside is the way to go I don't know. I have seen this paint have color fade once before. When my dad painted his 14 foot jon boat with (satin)forest green rusto. paint. It rained and the water sat on the boat in spots say overnight and it turned a lighter green where the puddles layed. So maybe a test is in order for me to try rusto with clear coat , brightside with no clear on some sheetmetal. Let them withstand the elements for a while and see which one comes out on top before I tackle my whole car. So when the paint job is all said and done I can rest at night. Knowing if my car sat in the sun for the day or got wet from the rain I won't have wasted my time and can get a couple years out of this paint job. Like I've said before I think this idea is just great. I just want it to work for me 110% like it did for 69charger. Heck maybe he can just paint (roller) my ride for me for say $5,000!!!!!! OUCH so much for "paint job on a budget"
cheers fellas (have fun on your projects I know I am.)JAY
Posted By: Anonymous
Re: Paint job on a budget!? CONTINUED..page 44........ - 08/29/06 03:27 AM
Quote:
Quote:
I painted my car with Rustoleum 'gloss white' in March...althought I repainted the car, the door jambs and inner fenders still have the Rustoleum paint. The funny thing is, it is now canvas/egg shell color. Elements?? the thing hasn't been out of the garage!! I wouldn't recommend this stuff to my worst enemy...
Also remember, if you paint with Rustoleum you can forget about ever using 'real' auto paint without stripping this junk completely off because it will not sand...stuff peels like latex after almost six months drying time...Chuck
that's wierd, chuck, i can honestly say i've had nothing but the best results with tremclad, there must have been something either wrong with the paint or the prep, sorry to hear that, but the tremclad at least would absoultly never, ever peel or have adhesion issues, it's the exact opposite from my expirence.
Yes, Chuck, you've been complaining since the first week about your Rustoleum paint job going sour, yet Ricklandia's mower has done just fine in the Florida sun for 3 months? Can't remember, but did you use Rustoleum's primer which the rest of us didn't bother with?
George
Posted By: Anonymous
Re: Paint job on a budget!? CONTINUED..page 44........ - 08/29/06 03:37 AM
I think the the car you are reffering to is the black miata that Ausie Driver did? If so, he did not use Rustolean paint from what I recall reading from the many posts. He used some other paint that was available locally to him at the time. It wasn't rusto. Someone correct me if I'm wrong.
I think the best way to go about doing this roller job to make it look like a SS is to paint the car WHITE with many thin layers sanding in between and then applying a clear cloat to top it off. I think that's the route I'm going to take. I'm also going to be using the original recipe of Tremclad instead of Bridghtside/Rusto paint. It seems Charger has proven its durability.
The only thing that scares me is that the paint takes a long time to harden and its easy to scratch off. I think applying thin coats and allowing adequate time between each coat to dry is the key to avoid the paint from becoming "scratchable." I think I will allow each layer to dry for 2 days until the next one is applied. This should be sufficient drying time.
Quote:
What happened to Ausie Driver's car is what scares me about using the rusto paint. Whan I saw that I was sad for you man that stinks. Maybe the brightside paint which is made for using on pleasure boats and surfaces that are always soaking wet might deal with this water issue better. It almost seems to me that a clear coat would be the thing to keep the paint from going dull or changing a color shade all together say from (black to grey) or (red to pinkish) when getting rained on. Like I said maybe the brightside is the way to go I don't know. I have seen this paint have color fade once before. When my dad painted his 14 foot jon boat with (satin)forest green rusto. paint. It rained and the water sat on the boat in spots say overnight and it turned a lighter green where the puddles layed. So maybe a test is in order for me to try rusto with clear coat , brightside with no clear on some sheetmetal. Let them withstand the elements for a while and see which one comes out on top before I tackle my whole car. So when the paint job is all said and done I can rest at night. Knowing if my car sat in the sun for the day or got wet from the rain I won't have wasted my time and can get a couple years out of this paint job. Like I've said before I think this idea is just great. I just want it to work for me 110% like it did for 69charger. Heck maybe he can just paint (roller) my ride for me for say $5,000!!!!!! OUCH so much for "paint job on a budget" cheers fellas (have fun on your projects I know I am.)JAY
Posted By: Exit1965
Re: Paint job on a budget!? CONTINUED..page 44........ - 08/29/06 03:48 AM
Welcome back Chuck
It is good to have someone cautioning others, however the technique is evolving and there are already people who have posted good success stories with pics to back them up. I would think that if something did go wrong after a few months or weeks, they wouldn't mind coming back and updating us, saving us all from this most horrendous practice of painting cars with rustoleum.
What you're describing is the yellowing that some oil based enamels get without exposure to sunlight. When I asked rustoleum about it, they said it was not a problem (as I read it was with Glidden paint). Though the Almond color paint I first started experimenting was brownish to begin with, I haven't noticed the test pieces of it being any more yellowed after sitting in the garage for more than 6 months. It's a light enough color that some yellowing might take place if the paint were prone to that.
As horribly as Rustoleum messed up your car, do you have any pics of it to share? Or pics of these yellowing door jambs?
Also, you keep saying that you can't put regular car paint over rustoleum, but 69charger has said that he has first hand experience painting over it (OK, Tremclad) with no problems. Is your experience first hand or hearsay?
Posted By: Exit1965
Re: Paint job on a budget!? CONTINUED..page 44........ - 08/29/06 03:53 AM
Also Chuck,if it peels like latex after 6 months then you have a surface prep issue at the very least.
I can tell you this. I HAVE put this paint over stuff that makes it peel off-- when I was spraying test pattern with my HVLP gun before painting my door jambs, I sprayed over an area that was painted with the rustoleum clear coat in a rattle can. That paint (over the clear coat) I can peel off pretty easily, it does not seem to adhere to that.
Whatever you painted over was not well prepared for adhesion. Though I have stated that the paint is soft/scratchable for some time, I do experience that it gets harder and harder with time, and would never be EASY to scratch off after a month or 2, much less 6 months. Surface prep problem.
Posted By: Anonymous
Re: Paint job on a budget!? CONTINUED..page 44........ - 08/29/06 04:05 AM
Posted By: Anonymous
Re: Paint job on a budget!? CONTINUED..page 44........ - 08/29/06 09:15 AM
Quote:
I think the the car you are reffering to is the black miata that Ausie Driver did? If so, he did not use Rustolean paint from what I recall reading from the many posts. He used some other paint that was available locally to him at the time. It wasn't rusto. Someone correct me if I'm wrong.
You're right on the money mate. I used an Australian paint called Tremco Metal Armour and it just didn't hold up to the elements. I'm not too fussed about it not working out well though. In a few weeks I'm going to re-paint the car again and because the Tremco stuffed up I'm going to get the chance to fix all of the little bits that didn't work out very well the first time.
In the mean time I have been polishing up my detailing skills and when I'm finished with the car it will look immaculate.
Posted By: Marq
Re: Paint job on a budget!? CONTINUED..page 44........ - 08/29/06 11:13 AM
Quote:
Also Chuck,if it peels like latex after 6 months then you have a surface prep issue at the very least.
I had the very same thought. And that might also explain the discoloring that he experienced with his white paint job.
When he mentioned his white paint job 'yellowed' my first thought was that 'something' on the body was 'bleeding' into his fresh paint. The solvents of the fresh paint job were causing 'whatever' was on the lower surface to be released and affect the fresh white paint.
After all, the area of the car where he was experiencing these discolorations were the nooks and crannies like the door jambs etc. These are probably the most UNLIKELY spots on the car where proper surface preparation would happen. People simply don't go in to those nooks and crannies to sand down those surface or wipe them down prior to painting.
I didn't notice him mentioining these discoloration problems appearing on the body - because he apparently removed the body paint and it never got to the discoloration stage.
And the fact that he mentions the paint peeled also backs up the apparent problem with the subsurface not being prepped properly. There obviously had to be something between the subsurface and the fresh layer of paint.
The last thing that I really don't understand about Chucks problem 'paint job' is how he says that the paint can't be removed easily or creates a mess when you attempt to remove it. My experience with the Tremclad - and the Brightside - is that it HARDENS - and that it removes JUST AS EASILY as any other paint job WITH A SANDER. The stuff sands off without any problem.
HOWEVER... if he slathered the paint on thick I can see that it might not have hardened when he attempted to remove it. YES... I can see 'soft paint' being a '[Edited by Moparts - Keep it clean]' to remove. It would be a pain to sand off and it would be a paint to sandblast or beadblast off. But that is a problem with trying to remove the paint prior to it having hardened - and that is the same problem you would encounter if a professional shop had just sprayed the car and you rushed in there and started trying to sand it off - soft paint is a '[Edited by Moparts - Keep it clean]' no matter what type of paint you use.
Chuck likes to challenge how many 'successful' paint jobs there have been. But I think the shoe should be on the other foot... and we should be actually asking 'how many other tales of woe - like Chucks' have there been ? The tales of woe are few and far between here. One would expect that people who have destroyed their car bodies or had horror stories would have been lining up here to share their experiences and problems. YET... instead we hear the success stories.
It all reminds me of the mother who is watching a parade of soldiers marching by and she proudly proclaims that the soldier who is marching 'out of step' with all the other soldiers is her son and she can't understand why he is the only one marching correctly and that all the other soldiers are the ones that are out of step...
Dunno...
.
Posted By: Anonymous
Re: Paint job on a budget!? CONTINUED..page 44........ - 08/29/06 02:23 PM
Marq could you point me in the right direction to the pads you used with what wax.. I've never polished a car before. I read the link you posted and decided and bought a porter cable 7424.
Forgive me for sounding like I havn't done research. I looked around a bit and every site I saw was trying to sell me a different pad and they all had different names for them.
Which pad did you use to apply the compounding and for the wax. Is that all you did?
So after my last coat is wetsanded to 2000ish I just compound the car and then wax?
Posted By: Marq
Re: Paint job on a budget!? CONTINUED..page 44........ - 08/29/06 03:09 PM
Quote:
Marq could you point me in the right direction to the pads you used with what wax.. I've never polished a car before. I read the link you posted and decided and bought a porter cable 7424.
Forgive me for sounding like I havn't done research. I looked around a bit and every site I saw was trying to sell me a different pad and they all had different names for them.
Which pad did you use to apply the compounding and for the wax. Is that all you did?
So after my last coat is wetsanded to 2000ish I just compound the car and then wax?
I am not necessarily the smartest person to ask this question to. Basically I am cheap and I probably was not using the right pads at the right time. And this is the first time I have ever compounded or waxed or buffed a car using a 'machine'.
What I did do was purchase a 2nd Porter & Cable white foam pad plus I went to the local Canadian Tire ( equivalent to a Walmart Automotive section or a Pep Boys ) and bought a little kit of pads that could be placed over the standard issue Porter & Cable white foamie.
My problem was that I could not locate a 'foamie' by another company that could directly screw into the 7424. They mention a fitting that can be bought so that you can use other products, but our local stores didn't have it. So I had to pay a few bucks extra to get a 2nd white foamie ( $24.95 )... but I figured that if it was good enough to be the standard issue product from Porter & Cable, then it should be usable for all of the task I was going to put it through.
To do the compounding I
a) completed the wetsanding
b) washed the surface down
c) wiped the surface down with mineral spirits
d) placed some thumb size blobs of the compounding product on the body surface I was going to work
e) took the 7424 TURNED OFF and smoooshed used the white foamie to smooosh the compounding product around to prime up the foam and spread the compounding stuff around
f) once it was spread around I TURNED ON the 7424 at about a 2 speed and started working the compound into the paint following a regular pattern of travel.. ( ie working it from side to side while going downward and then going from top to bottom while going sideways.
I would say that in my case it took about 20 trips in each of the two patterns to get it about right.
I ran the compound until it reached the point of becoming dry and balling up ( Turtle compound ).
I would then wipe down the surface with a cloth to see what kind of results I had gotten.
The caution is that depending on how thick your layers of paint are... you must keep a close eye on just how much paint the compound product is able to remove.
You must also be a little lighter on the compounding when near edges... since it is easier to micro-grind through that point. Just be light when working the edges.
--------------
When I finally had the car compounded and a relatively even and uniform dull shine on the whole car... I removed the Cable & Porter white foamie and place my extra white foamie onto the 7424.
Following the same routine as above I applied some goobers of wax onto the panel (with the 7424 turned off ) that I was going to work on and then use the fresh white foamie to smoooosh ( spread ) the gobs of wax around, while prime up the surface of the 7424 foamie with wax. I then turned on the 7424 at about a 2 speed ) I did the same pattern of ups and downs and side to sides... Until I had the wax pretty even spread, hazing and thinned out.
I moved on to the next panel and repeated this waxing.
--------------------------
When the car was all waxed... I then took one of the little slip on terry cloth bonnets and put it on to the first white foamie that I had used. I then placed that foamie onto the 7424 and lightly began to use it to buff out the dried wax.
I used 3 of these terrycloth bonnets altogether. One for the left side panels... one for the right side panels... and one for the hood and trunk.
-----
I also had a fresh supply of nice soft painter rags ( cheaper by the pound type ).
What I did next is odd... but it is just me trying to be different. The soft painter rags that I had 'could have been' used for buffing by hand... But what I did was fold them down to 1/4 of their size ( which was just a big larger then the size of the 7424's foam ) and I would place the folded cloth on the car. Then I would press the foam against it and turn on the 7424 at 2 speed. If I was comfortable ( confident) that the loose rag was staying in place I would dial the speed up to a 3. (But always keeping a finger on the on/off switch in case the rag worked its way out from under the foamie. This became my poor mans way of doing a final light buffing of the wax.
The only caution I have to throw in here is that you cannot have the rag too large or the speed of the 7424 too high or it might twirl the rag around the 7424.
And when you wanted to do a side panel you would just place the folded rag on the trunk or the hood, place the 7424 on it... and then drag the rag to the side panel you wanted to work on. You could also hold the folded rag against the side panel and then press the 7424 foamie against it. Once you had it in position you would then turn on the 7424...
Hope this info isn't too confusing...
Hopefully one of our more accomplished and experienced detailers can add to this or provide corrections where needed.
.
.
Posted By: Anonymous
Re: Paint job on a budget!? CONTINUED..page 44........ - 08/29/06 05:23 PM
Well as long as long as we're painting cars with boat paint...how about some aircraft roll on paint. A few colors, primers, and clear coat.
http://www.aircraftfinishing.com/metal-aircraft.htmAnd they also have an EPA friendly rust/corrosion coating that hardens like ceramic.
http://www.aircraftfinishing.com/evershield.htm
Posted By: Anonymous
Re: Paint job on a budget!? CONTINUED..page 44........ - 08/29/06 08:21 PM
Quote:
Welcome back Chuck It is good to have someone cautioning others, however the technique is evolving and there are already people who have posted good success stories with pics to back them up. I would think that if something did go wrong after a few months or weeks, they wouldn't mind coming back and updating us, saving us all from this most horrendous practice of painting cars with rustoleum.
(... removed text...)
As horribly as Rustoleum messed up your car, do you have any pics of it to share? Or pics of these yellowing door jambs?
Also, you keep saying that you can't put regular car paint over rustoleum, but 69charger has said that he has first hand experience painting over it (OK, Tremclad) with no problems. Is your experience first hand or hearsay?
Chuck's complaints were still niggling in the back of my head this morning, so I jumped back to his posts from March (there were even pictures!). I think the biggest clue is that he used Sherwin-Williams paint rather than Rustoleum and thinned at 10:1 rather than closer to 2:1 or 3:1 which seem to be common values for "Rustoleum Professional" or "Stops Rust".
Here's what Chuck wrote back in March:
Quote:
Ok, now a few insights:
1.) The paint suggested very early in these postings was called "acrylic/enamel paint"...this is not exactly what you're looking for. The proper paint type is "aklyd enamel". The "acrylic/enamel" is water based, and that isn't what you want (read about "acrylic/enamel" on this web page). As a matter of fact, you do not necessarily have to buy "rustoleum". I bought mine from the local "Do-It-Center" and it is the house brand made by Sherwin Williams...worked fine. The easiest way to tell if you have the right thing is to look at the directions and see what "clean-up" instructions are...if it says "clean with Mineral Spirits", than you have the right stuff. Many people make compatible brands.
2.) It may also say in the instructions that you do not have to thin...in this case, you have to thin. My ratio was 10:1, worked great. It will bubble and look "orange peely" at first, but relax, the paint self-levels as it drys.
3.) At first, I understood that we could use a $20 orbital buffer/polisher like you buy a Wal-Mart, etc...Although it seems to have worked for others, it did NOT work for me. It would not eliminate the scratches from the final 1500 grit wetsanding. Luckily, I had a 7" ELECTRONIC POLISHER/SANDER just like the one on this web page. It worked wonders!!
Will write more later if I think of anything. If you have questions about my procedure, I will do my best to help...thanks guys
George
Posted By: Anonymous
Re: Paint job on a budget!? CONTINUED..page 44........ - 08/29/06 08:28 PM
Quote:
Well as long as long as we're painting cars with boat paint...how about some aircraft roll on paint. A few colors, primers, and clear coat.
http://www.aircraftfinishing.com/metal-aircraft.htm
And they also have an EPA friendly rust/corrosion coating that hardens like ceramic.
http://www.aircraftfinishing.com/evershield.htm
Nice colors, but prices of $200-400/gallon <cough>. Interlux Brightside, though limited in color pallette, seems a better price choice.
George
Posted By: Anonymous
Re: Paint job on a budget!? CONTINUED..page 44........ - 08/29/06 10:57 PM

Found this on the Price Markdown shelf in Home Depot. It's not poly.
Posted By: Marq
Re: Paint job on a budget!? CONTINUED..page 44........ - 08/29/06 11:10 PM
Quote:
Well as long as long as we're painting cars with boat paint...how about some aircraft roll on paint. A few colors, primers, and clear coat.
http://www.aircraftfinishing.com/metal-aircraft.htm
I had read a number of articles about the aircraft chaps 'rolling' their paint - the same way that we and the boaters are doing it.
The only problem with the aircraft paint is that IT IS MUCHO EXPENSIVE.... and in the same category of cost as some of the more premium automotive paints. Which would sort of defeat our intention of finding a relatively cheap way to lay a reasonably good looking skin on to our cars.
The other downside of aircraft paint is : AVAILABILITY... in that the Tremclad/Rustoleum can be picked up in quite a few local stores... and the marine paint can be picked up at any marine supplier. But aircraft paint almost always needs to be ordered and shipped.
But I do agree that it is an interesting paint - and they do offer a metalic gold that they claim you can see your reflection mirrored in
.
Posted By: Exit1965
Re: Paint job on a budget!? CONTINUED..page 44........ - 08/30/06 12:49 AM
Good detective work George. He forgets to mention in his latest postings that he didn't use Rustoleum at all.
10:1 sounds insane or impossible. At that ratio, the mixture would be so thin it would take 20 coats unless you put it on real thick, but then it's so thin it would probably run right down the side of the car.
Posted By: Anonymous
we - 08/30/06 12:53 AM
for non flat panels instead of using the small roller what should i use?
ps. 69charger = cheap paint GOD
Posted By: Anonymous
Re: we - 08/30/06 12:57 AM
Quote:
for non flat panels instead of using the small roller what should i use?
I think Foam Rollers. Has anyone ever use a Badger Hair Brush?
Posted By: Marq
Re: we - 08/30/06 01:17 AM
Quote:
for non flat panels instead of using the small roller what should i use?
ps. 69charger = cheap paint GOD
... non flat panels ? What does it look like ?
I would imagine that if it consisted of small spaces you would use one of the cheaper by the bag full of 'foam brushes'. Then you would have a selection of 1", 2" and 3 1/2 inch foam brushes to use to get the paint on there...
But it would be lovely if you could provide a picture of what this 'non-flat-panel' looks like.
.
Posted By: 78D150CLUB
Re: Paint job on a budget!? CONTINUED..page 44........ - 08/30/06 01:45 AM
I have to say I'm the other side of the coin in regard to the paint quality. I'm impressed with the finish I was able to achieve with $100 or so in total materials and many patient hours of labour. I'm basking in the glow of 15 minutes of fame, having found my truck in the 2006 Moparfest photos just up on their website.
http://patt.ca/27th%20annual%20Moparfest_files/Moparfest__0070.jpgOk, I admit, the pic is actually of the fire truck next door to mine, but I'm in there like a dirty shirt.
I'm sorry to hear that chuck and Aussie have had less than success with the process. Hopefully others will have as good luck as I did.
Posted By: Anonymous
Re: Paint job on a budget!? CONTINUED..page 44........ - 08/30/06 02:29 AM
Quote:
Also, you keep saying that you can't put regular car paint over rustoleum, but 69charger has said that he has first hand experience painting over it (OK, Tremclad) with no problems. Is your experience first hand or hearsay?
We discussed this very issue tonight in my auto body class, instructor said "scuff it and paint it, no problem". He even mentioned rustoleum as what to use for... something oh yeah for a guide coat under your primer. He said if you wanted to save cost on some primer just spray bomb the car with a guide coat of rustoleum, then primer, then sand it smooth using the off color rusoleum for a cheap guide coat. He mentioned using white rustoleum as a guide coat under the dark grey basic primer color.
Posted By: Marq
Re: Paint job on a budget!? CONTINUED..page 44........ - 08/30/06 02:30 AM

That Fire Truck looks like it could use a couple of coats of Tremclad 'Fire Red'.... seriously...
.
Posted By: 78D150CLUB
Re: Paint job on a budget!? CONTINUED..page 44........ - 08/30/06 03:19 AM
Don't know if it will be restored or if it's being kept in it's original, although faded glory.
It's part of the Baden, ON Fire Dept's collection, apparently they have every piece of motorized pumper equipment purchased by the department since 1927.
That one is a 1940 Fargo/Bickle pumper truck.
Posted By: Anonymous
Re: Paint job on a budget!? CONTINUED..page 44........ - 08/30/06 03:32 AM
Quote:
...a guide coat under your primer...
guide coat goes over the primer not under...
To answer some of what has been brought up so far: yes, I did use Rustoleum Pro. I started a test panel with another brand of enamel, but since I wasn't seeing the results I switched to Rustoleum. That is what I painted the car with.
The discoloration has absolutely nothing to do with the prep. The turning is occuring in several places on several different pieces that were sanded and prepped well enough for the PPG that went on later...It's funny that Exit mentioned in a previous post that Krylon's 'Ivory White' color is a perfect match to Rustoleum's 'Gloss White'...it is but 'Ivory White' is an off white canvas color. That's what my 'Gloss White' now looks like...
As for painting over Rustoleum, if you can scuff it and it powders up, fine. But, if you scuff and the Rustoleum rips and/or pulls you can not just paint over that. The paint must feather or it will show through the upper layers...the Rustoleum will not feather, it tears like latex house paint.
If you guys are happy with what you have, that's fine, but the 'success' storys that I have seen look dull, orange peely, etc. Everyone seems to be just one or two more steps away from that elusive paint job...All i'm reading here are mainly posters talking about what they're gonna do...If someone has an old beater that's ten colors of primer, wants to get it all one color and isn't extremely picky...this is an option if they know what they're getting. If you're looking for a straight, clean paint job at least as good as the average car at the cruise in, this may not be for you...
Exit, you have been working on yours for months...are you happy with it? is it a show car finish? if you include all the hours and material you've put into it, is it still a 50 dollar paint job?
...I just think people reading these postings should hear both sides of the story...Chuck
Posted By: Anonymous
Re: Paint job on a budget!? CONTINUED..page 44........ - 08/30/06 03:37 AM
I have not chimed in for a while. I had 3 coats on and my buddy came by and we did some body work. Funny how I did not see those dents before a few coats of black.
Now I have 3 more coats over the bodywork. I went back to the yellow foam rollers instead of the white ones. I had done my experiments with the yellow ones.
I have it down where I leave a matte type surface. Very small dimples. No peel at all. Press hard and put too much paint at first, then work it around the panel evenly. Then move some to a less painted area until there is just enough. Pass over until it is even.
I am going to lightly sand, mainly for debris and get some more coats on the car.
Mark E.

Posted By: Anonymous
Re: Paint job on a budget!? CONTINUED..page 44........ - 08/30/06 03:38 AM
Posted By: Exit1965
Re: Paint job on a budget!? CONTINUED..page 44........ - 08/30/06 04:35 AM
Quote:
Quote:
...a guide coat under your primer...
guide coat goes over the primer not under...
A guide coat can go anywhere, it's used to find high spots and low spots. You can put a guide coat right over pink bondo if you want, it serves the same purpose when you're doing bodywork as long as you're putting a contrasting color on.
Quote:
To answer some of what has been brought up so far: yes, I did use Rustoleum Pro. I started a test panel with another brand of enamel, but since I wasn't seeing the results I switched to Rustoleum. That is what I painted the car with.
The discoloration has absolutely nothing to do with the prep. The turning is occuring in several places on several different pieces that were sanded and prepped well enough for the PPG that went on later...It's funny that Exit mentioned in a previous post that Krylon's 'Ivory White' color is a perfect match to Rustoleum's 'Gloss White'...it is but 'Ivory White' is an off white canvas color. That's what my 'Gloss White' now looks like...
As for painting over Rustoleum, if you can scuff it and it powders up, fine. But, if you scuff and the Rustoleum rips and/or pulls you can not just paint over that. The paint must feather or it will show through the upper layers...the Rustoleum will not feather, it tears like latex house paint.
If you guys are happy with what you have, that's fine, but the 'success' storys that I have seen look dull, orange peely, etc. Everyone seems to be just one or two more steps away from that elusive paint job...All i'm reading here are mainly posters talking about what they're gonna do...If someone has an old beater that's ten colors of primer, wants to get it all one color and isn't extremely picky...this is an option if they know what they're getting. If you're looking for a straight, clean paint job at least as good as the average car at the cruise in, this may not be for you...
Exit, you have been working on yours for months...are you happy with it? is it a show car finish? if you include all the hours and material you've put into it, is it still a 50 dollar paint job?
...I just think people reading these postings should hear both sides of the story...Chuck
I didn't say that krylon ivory white was a match to gloss white, I said it was a match to canvas white which is the rustoleum I'm using.
Yes, i've been working at a very languid pace on my car for months. Way longer than it should have taken, but I have been both busy and lazy during that time. It's certainly not a $50 paint job anymore, and no there isn't a show car shine, but considering the alternatives I am very glad I did what I did. For one thing, I can see where I goofed up the bodywork that I would have missed if I had just taken it in to be painted with no bodywork, for another, I am not exposing myself to isos that come with auto paint, lastly I know it's easy to repaint or touch up.
The most important thing is, without becoming excited about this technique and trying it, I would probably still be dilly dallying on the bodywork because of the uncertaintly of where I'm going to have it painted and what it's going to cost me. This technique makes it easily doable, and now I can move on to other parts of the car that we all do ourselves like brakes, electrical, engine and stuff.
And now there's even more reason to think that I could paint a single stage over it if I ever wanted to.
I agree Chuck people should see both sides, but they should not be dissuaded from trying it based on ONE PERSON's opinion/experience (you) that it cannot be painted over, and that it peels off like latex. I don't think those are true if the paint is applied as 69charger and others have described the process.
Here's some + and - with respect to the paint from my point of view.
Negatives:
1) Probably no "show quality" shine
2) May be scratchable for some time as it cures
3) can involve many hours of labor
Positives:
1) Would fit right in on an old car
2) Easy to do
3) Cheap
4) Easy to repair
5) Not irreversible - if you don't like it, spray over it
6) Relatively safe compared to spraying isocyanites
7) no paint booth or special tools required
8) can achieve a decent shine
If I had a newer car (95+ maybe), I would probably go with a paint that had more shine since a newer car with a non shiny paint job could look out of place.
I don't however, I have a '67 dodge which rolled out of the factory with less shine than I'll have with this paint. So for me, less shine than a shiny new car is acceptable given the positives.
One more point that I've said before - both the red paint and the white paint do not peel as you are describing, they powder when sanding. I had to do several spots with bondo once I put paint over them and saw the mistakes, and it was VERY easy to sand through the rustoleum in that it powdered up and did not load up the paper. Maybe you got a bad batch of paint or something since your experience seems to differ from a few others here who have tried it.
Posted By: Anonymous
Re: Paint job on a budget!? CONTINUED..page 44........ - 08/30/06 07:01 AM
4 months later I'm still glad I did it. I agree it does look better on an old car (I did my 64 Comet). Like everyone's been saying, it's a matter of personal taste and budget. I didn't get into auto-restoration to drop my car off at a different shop every month, I got into it because I want to learn to do things myself,and I never thought I'd even try a paint job on my own before this 69 charger thing happened.
My 2 cents would be no matter how excited you may get, take your time. The imperfections I have are because I was impatient. Let the coats dry, and don't cheat on the wetsanding.
Also, my white top hasn't faded or yellowed at all, outside all summer in Fla rain and sun. And I've never been able to scratch any paint at any time off with a fingernail. (sorry about photo quality, latest photo I have was showing someone the bumper).
As a weird side note, I live in a very old apartment with a kitchen sink about 75 years old made of pourous material (don't know what kind) that I painted white with this same method. It looks great, cleans back to post-paint gloss white with no stains, and I've tried to scratch it off with a knife but can't.
Did my steering wheel too, paint doesn't rub off, haven't even had to clean it yet.
I'd try to paint my cat royal blue with this stuff if he'd sit still long enough!
Posted By: Anonymous
Re: Paint job on a budget!? CONTINUED..page 44........ - 08/30/06 12:56 PM
So I have been reading this thread for awhile and thought I would chime in. I read the first 30 pages on the first thread, and about 20 from here. Im but one man!
I have a nissan 240sx that came white from the factory. Ive been planning on painting the car white but the roof black. Ive done some painting on my car and thought I would post some findings.
Personally I am not a big fan of the idea of rolling it on, to me it seemed like it would be alot more work so I decided to spray from a gravity fed gun. The amount of time taping is easily comparable to 1 wetsanding run....
Ive done it a few times now. First time I hadnt read the ENTIRE around and went gung ho, I painted with laquor thinner made with mineral spirits, not pure. Paint went on fine, was glossy and I was fairly impressed with the results.... until the paper blew over on top of my job :-(
After it dried I wetsanded it down, The sanding was fine a few hours afterwards, but when I went to complete it a few days later I noticed some of the paint would roll off into little balls since it hadnt dried fully. No its not an adhesion problem because the top was a thick skin, and the bottom layer was fully adhered, there was just softer paint in the middle. I was able to very carefully and lightly sand it down with a less aggressive piece of paper. I shot a second time over that only this time I cut it with acetone. I can tell you cutting it with acetone definitely made a difference in the gloss/clarity. It also seems to be hardening better/quicker. I would dare to say I compare this to a bc/cc job looking at it from the side. It looks virtually unchanged from wet to dry. Perhaps actually cutting with acetone is the way to go? (hell its what they write on the [Edited by Moparts - Keep it clean] can)
Maybe other things can be done for you roller guys to increase workable time? perhaps applying it in a cold environment then heating the garage and cooking it on?
My end results are fairly impressive, I did this in a real autobody shop (father runs one) but I wanted to do it on my own, my own bill, my own materials because it can rack up quick... and Im selling the car. however I did run into 1 problem. When putting some body filler on a small ding... I wetsanded it smooth, then applied a light coat of sealer before painting and I had some seriously screwed up fish eye. Looked like a brain on my roof. I wanna say in retrospect it was stupidity with wetsanding the body filler but it might have been a reaction to the sealer. My surfaces so far have all been cleaned with legit prep solvent, not mineral spirits or anything else. So far so good though!
Posted By: Anonymous
Re: Paint job on a budget!? CONTINUED..page 44........ - 08/30/06 03:12 PM
Quote:
So I have been reading this thread for awhile and thought I would chime in. I read the first 30 pages on the first thread, and about 20 from here. Im but one man!
I have a nissan 240sx that came white from the factory. Ive been planning on painting the car white but the roof black. Ive done some painting on my car and thought I would post some findings.
Personally I am not a big fan of the idea of rolling it on, to me it seemed like it would be alot more work so I decided to spray from a gravity fed gun. The amount of time taping is easily comparable to 1 wetsanding run....
Ive done it a few times now. First time I hadnt read the ENTIRE around and went gung ho, I painted with laquor thinner made with mineral spirits, not pure. Paint went on fine, was glossy and I was fairly impressed with the results.... until the paper blew over on top of my job :-(
After it dried I wetsanded it down, The sanding was fine a few hours afterwards, but when I went to complete it a few days later I noticed some of the paint would roll off into little balls since it hadnt dried fully. No its not an adhesion problem because the top was a thick skin, and the bottom layer was fully adhered, there was just softer paint in the middle. I was able to very carefully and lightly sand it down with a less aggressive piece of paper. I shot a second time over that only this time I cut it with acetone. I can tell you cutting it with acetone definitely made a difference in the gloss/clarity. It also seems to be hardening better/quicker. I would dare to say I compare this to a bc/cc job looking at it from the side. It looks virtually unchanged from wet to dry. Perhaps actually cutting with acetone is the way to go? (hell its what they write on the [Edited by Moparts - Keep it clean] can)
Maybe other things can be done for you roller guys to increase workable time? perhaps applying it in a cold environment then heating the garage and cooking it on?
My end results are fairly impressive, I did this in a real autobody shop (father runs one) but I wanted to do it on my own, my own bill, my own materials because it can rack up quick... and Im selling the car. however I did run into 1 problem. When putting some body filler on a small ding... I wetsanded it smooth, then applied a light coat of sealer before painting and I had some seriously screwed up fish eye. Looked like a brain on my roof. I wanna say in retrospect it was stupidity with wetsanding the body filler but it might have been a reaction to the sealer. My surfaces so far have all been cleaned with legit prep solvent, not mineral spirits or anything else. So far so good though!
Did you use Rustolium/Brightside/Tremclad?
If cutting it with acetone gives it more of a shine, then I'm willing to take that route. Has anyone used acetone without any ill effects?
Posted By: Exit1965
Re: Paint job on a budget!? CONTINUED..page 44........ - 08/30/06 03:33 PM
I thought about using acetone to thin the rustoleum I was spraying. I did a google on it and saw someone was having problems, and someone said that acetone was too "hot" (evap too quick) for it.
I sprayed my door jambs with mineral spirits as a thinner, and though it's not especially shiny, I was able to get full coverage in one session (sprayed, sprayed some other areas, then sprayed the first area again) without runs. It would probably be shinier if I had put down thinner coats, but I wanted to cover quick.
Acetone is worth a shot though, who knows, the thing I read maybe because the guy wasn't using the right ratio of paint to acetone.
Here's the place I read it:
http://hobartwelders.com/mboard/showthread.php?t=9187
Posted By: Marq
Re: Paint job on a budget!? CONTINUED..page 44........ - 08/30/06 04:09 PM
Quote:
If cutting it with acetone gives it more of a shine, then I'm willing to take that route. Has anyone used acetone without any ill effects?
Just remember that Acetone is a 'faster' evaporating carrier than Ketone or Naptha or pure mineral spirits.... Your working time and the time for the paint to self-level will be less...
The only other thing about Acetone is to make sure you are in a WELL VENTILATED working area... and definitely do not strike a match hahahhah...
Tha vapors are volatile and potent.
.
Posted By: Anonymous
Re: Paint job on a budget!? CONTINUED..page 44........ - 08/30/06 04:18 PM
After a quick google search, I don't think I wanna mess around with acetone. I'm concerned about the ill effects from it on my lungs etc and I don't have the proper safety masks.. Mineral spirits FTW.
Posted By: Anonymous
Re: Paint job on a budget!? CONTINUED..page 44........ - 08/30/06 05:27 PM
heh sorry I forgot to mention I used rustoleum. Im not blessed with tremclad over here in the US of A.
Acetone does cut down on workability time to a degree, and the vapors are going to be there, however I would say far more tolerable than using rattlecans for anything. I would say it made more of a difference in the curing than it did in the drying time. Maybe you should try picking up a small can of it and rolling a piece of junk sheetmetal. To increase pot life for leveling perhaps do half acetone half mineral spirits? or add a leveler to it? (of course experimenting on something you dont care about first to test reactivity)
I have read that thread, and even read the can... they tell you to cut with acetone right on the label, im gonna have to say the manufacturer knows best on this one because there would be alot of unhappy people otherwhise im sure. I thinned mine a good amount, I didnt really measure but I checked consistancy... I would say 20% wouldnt be an unreasonable guess.
I have introduced automotive fish eye remover to the mix successfully. Im unsure if that sealer over the bondo reacted or if it was water so that may be something for more testing before anyone uses it. I also shot over it the same night.
I sprayed my roof in a small enclosed area, and it wasnt ventilated at the time. Granted I just did my roof, but I could walk in and around the room without any type of breather on and I was far from choking. If I did that with rattlecans id be dying to get out. I would say its about 50% as unpleasant as the equivalent in rattlecans.
Posted By: Anonymous
Re: Paint job on a budget!? CONTINUED..page 44........ - 08/31/06 01:01 AM
Quote:
Quote:
...a guide coat under your primer...
guide coat goes over the primer not under...
I think this is a matter of preference, the guy teaching the auto body class has mentioned guide coats under primer several times now so I suppose this is his preferred way of doing it.
For the record I scrapped the roller plans, mainly because I got into an auto body class and have access to the facilities to spray it, so spray it shall be.
The parts I have painted looked pretty good and they cured to a hard and very durable finish, I wouldn't hesitate to use this technique on another old car or a beater of any age, no probably wouldn't try it on a show car, but I'm not building show cars here just something to drive
Posted By: Anonymous
Re: Paint job on a budget!? CONTINUED..page 44........ - 08/31/06 01:26 AM
Quote:
Quote:
...the guy teaching the auto body class has mentioned guide coats under primer several times now so I suppose this is his preferred way of doing it...
Guide coats under primer?? I don't really see the purpose...guide coats are usually some type of cheap spray paint sprayed on top of primer, bondo or whatever then sanded off to show high and/or low spots in the body work...that's why it's called 'guide' coat, it's used to guide the rest of the body work. If it's under the primer or bondo or whatever, you wouldn't be able to see it much less sand it off ...
Posted By: Anonymous
Re: Paint job on a budget!? CONTINUED..page 44........ - 08/31/06 02:20 AM
He must mean to find out where to put bondo. Gotta start somewhere. Mark E.
Quote:
Quote:
Quote:
...the guy teaching the auto body class has mentioned guide coats under primer several times now so I suppose this is his preferred way of doing it...
Guide coats under primer?? I don't really see the purpose...guide coats are usually some type of cheap spray paint sprayed on top of primer, bondo or whatever then sanded off to show high and/or low spots in the body work...that's why it's called 'guide' coat, it's used to guide the rest of the body work. If it's under the primer or bondo or whatever, you wouldn't be able to see it much less sand it off ...
Posted By: Anonymous
Re: Paint job on a budget!? CONTINUED..page 44........ - 08/31/06 03:25 AM
yah when i got done with mine i found a few dents left over in the black paint and now i will call dentbusters to have them popped out
Posted By: Anonymous
Re: Paint job on a budget!? CONTINUED..page 44........ - 08/31/06 03:35 AM
I am new here. No mopar, just here for the paint. Did own a Chrysler once though. I have spent my nights this week reading through the 75 pages. I just picked up a small can of Regal Red and quart of Glidden Ultrahide alkyd/enamel, tinted to a goldish color. The gold is to cover a primed door on my Lancia Scorpion. The red is mainly to play with, to see how well I can make it shine. I like the color, but it is darker than I was looking for.
Exit, I have been pulling for you this whole time. What is your current status? I may be a little help when it comes to getting that perfect shine. I have spend many hours wet sanding and buffing crappy bc/cc paint jobs. The key seems to be not skipping grits. If you do your final wet sand with 1500, follow it up with 2000. After the 2000, follow it up with several stages of buffing compounds. I have had good luck with the 3M stuff from NAPA. You also have to match the buffing pad to the grit of buffing compound you are using. I don't remember the details, but each type of pad has its own purpose. I'm sure you can google it. With enough work and the right technique, I am 100% sure you can make this paint look every bit as good as a show quality job.
I have bc/cc's 3 cars to date. It sucks! It stinks, it's messy, and it's hard to get a good paint job without lots of experience. I had to wet sand and buff each of them. Lots of orange peel. Like people have noted several times, try to find a really nice stock paint job. Not many of them out there. The thing about bc/cc paint jobs, is they shine even through moderate orange peel. The metal flake hides it even more.
Chuck, come on man. You OBVIOUSLY didn't follow directions. You're right, its the paints fault. You're just the only one the paint doesn't like. If its soft, you put it on too thick and it couldn't dry before your next coat or it was thin enough but you added more layers before it had dryed enough. And seriously, your body shop guy, do you really think he is going to give you good information when you tell him "Yeah, I just found out that I can paint my car for $50 in my garage and get better results than what you would charge me $3000 for. What do you think?"...
If it ever stops raining (Ernesto), I will show you guys how well that red can shine.
Good Luck
Jason
Posted By: Anonymous
Re: Paint job on a budget!? CONTINUED..page 44........ - 08/31/06 04:24 AM
Greenwood,
Could you outline a good post paint polishing method? How many times do you apply compound, wax, etc? Do you think the Rustoleum or Brightside paints need any special buffing agents or additives?
Thanks!
Posted By: Exit1965
Re: Paint job on a budget!? CONTINUED..page 44........ - 08/31/06 05:13 AM
Welcome Jason. Way to lay the smack down
Current status is it's done, just awaiting polishing. My dog ate my cheap ($12) 6" buffer on Monday, so I'll need to get another.
I am considering skipping wetsanding and going right to polish, unless I find a hair or something that sticks out, then I'll wetsand that area. I have very little orange peel so the wetsanding wouldn't help make the surface much flatter, but it would take out specks and hairs. I'll try a fender straight to polish and see how that goes.
I did manage to get a good shine out of the safety red on the one spot where I wetsanded with 2000, then the next day hit with the polisher. Then I painted the car white.
I'll try to polish at least part of it this weekend and will post pics.
Posted By: Anonymous
Re: Paint job on a budget!? CONTINUED..page 44........ - 08/31/06 07:36 AM
Quote:
Welcome Jason. Way to lay the smack down
Whatever dude...i'm not hear to argue, but I do have a right to include my experience.
To clarify, I didn't say my paint is soft. I actually cut a piece off my old test panel with a razor blade...the piece was about the size of a half-dollar and I could stretch it!!
In the beginning this was presented as a quick and easy alternative to 'over-priced' paint jobs (8 hours between each of three coats, buff with an orgital sander and you have this wonderful paint job in a weekend)...it didn't happen for me. Sorry if I ruffled some feathers...you guys are going to believe what you want anyway...give it a shot.
...people should see both sides, but they should not be 'PERsuaded' to try it based on ONE PERSON's opinion/experience (Charger's)...'cause noone else has really got that kind of finish for some reason...Chuck
Posted By: Exit1965
Re: Paint job on a budget!? CONTINUED..page 44........ - 08/31/06 01:11 PM
Chuck, I know you had a bad experience but please consider that your experience was unique to you, your car surface, your technique, perhaps your batch of paint, etc.
And to say that no one has come up with a great finish (other than charger) is ridiculous. Here's only one personal example where you can see a very shiny surface in a photo taken straight on. You can see where the polishing was done, and where it wasn't. The examples of other people's good work can be found on other pages of the thread.
Unless you have some new input, you wont be getting any more "arguing" from me on the points that have been explained or refuted by myself and others, it really seems to be pointless since you are steadfast in your opinion that the paint is junk.
Posted By: Anonymous
Re: Paint job on a budget!? CONTINUED..page 44........ - 08/31/06 02:40 PM
it is quick and super easy... Once you master it.
You have to learn the craft and get your technique down pretty tight to pull it off in a weekend but once you've done a couple cars it starts to come togeather smooth.
Don't get all bent out of shape and try to speak out cause you weren't willing to take the time to learn and seek advice. We are all here to help one another and many of us have achieved a nice showroom finish on our pieces.
This may sound silly but the reason you didn't master the paint job, wasn't the paint but your attitude and quick willingness to write it off as bunk. Remember, you catch more flys with honey not vinegar even from yourself.


Posted By: Anonymous
Re: Paint job on a budget!? CONTINUED..page 44........ - 08/31/06 02:46 PM
When you do your final wet sand, you have to sand through all the gloss. This gives you visable target, and lets you know when you are through the orange peel. Another thing that helps is to have a hand held fluorescent shop light to check your progress. Pay close attention to the reflection of the bulb itself, you will see your progress very well. If I recall correctly, I did all my wet sanding with 2000 then 3000 paper. A few drops of soap does help, as does a ketchup type squirt bottle or a standard spray bottle. That is in addition to your bucket of water to rinse your paper. When you sand anything out of your paint (dust, dirt, bug, hair) be very carefull when it comes out of your paint. It is very easy to scratch you paint with whatever you just sanded out. Use lots and lots of water, if you get to the point where the paper starts to grap, its not wet enough. The water serves two purposes, it keeps the paper clean and is a lubricant. Your paper is harshest when it is clean and dry, don't let it get dry (lots and lots of water!). I like the idea the someone had brought up earlier, of sanding in different directions with different grits. It will give you a good idea of when you have sanded through the previous grits marks. I have not used that technique personally, but it sounds reasonable. If your underlying body work is even (flat, smooth) I don't use a block. If you watch your orange peel with the light and sand very very lightly, you shouldn't put and waves into the paint. If your orange peel is uneven, you may want to use a block for your first final wetsand. If you have deep orange peel, with this paint method, you will want to sand it all out, than recoat with a layer or two of paint. After that, if you still have deep orange peel, you are putting it on too thick. If you end up with deep orange peel in the cc of a bc/cc job, your are SOL my friend. Rough it up and re-clear the area.
I have to go, will post more on buffing later.
Jason
Posted By: Anonymous
Re: Paint job on a budget!? CONTINUED..page 44........ - 08/31/06 05:10 PM
This is my first post on this subject, but I've been reading along and experimenting with Brightside for about 4 months. The bodywork on my vehicles are not yet done, so actual paint work on them is a few months away. I do have a good bit of paint experience. Mostly amatuer experience, other than some painter's assistant experience years ago, but I have been restoring cars for 30 years.
As to Charles' results...sounds like he used latex based Rustoleum. His results/problems all have the characteristics of latex and are definitely not the results I've ever seen or heard of with "regular" Rustoleum. On two occassions I've picked up the wrong can of Rustoleum off the shelf at the store and had picked up the latex Rustoleum instead of the "regular". Charles, check your can. If the can is labeled as the "regular", then it must have had the wrong paint put in it at the factory. That just has to be a latex paint.
As to Brightside...I love the stuff! Incredible hardness, shine, and flow-out...even using a cheap brush! I've discovered that the Fire Red can be mixed with the Rustic Red (discontinued) to get some fantasic colors. I've been able to mix Ford's Rangoon Red and Ford's Candyapple Red to an exact match (the colors of two of my cars). Out of the can, the Fire Red is actually true vermillion. Vermillion is a base color so it can be easily mixed to get other colors. The bad news is that it is tough to find any of the Rustic Red, though. The good news is that it is usually marked down 50% off the regular price when you do find it. I think that it has been discontinued for over two years, which takes it beyond the recommended shelf life, but I haven't found a can that is not OK, yet.
Posted By: Anonymous
Re: Paint job on a budget!? CONTINUED..page 44........ - 08/31/06 07:25 PM
Been follwoing this thead, and bought enough materials to paint the old white truck cap for my dodge truck over the next weekend. It's a brown truck, and the leather brown paint that Rustoleum has is a pretty close match, so it will at least have a matching color truck cap until I do the rest of the truck, (instead of the usual grandpa jones white!) Cap is a good test case to perfect my technique, at least I think so.
And actually, Chuck didn't even use a rustoleum paint, this is a quote from back in march that someone else found, and I am reposting for for reference:
Quote:
Ok, now a few insights:
1.) The paint suggested very early in these postings was called "acrylic/enamel paint"...this is not exactly what you're looking for. The proper paint type is "aklyd enamel". The "acrylic/enamel" is water based, and that isn't what you want (read about "acrylic/enamel" on this web page). As a matter of fact, you do not necessarily have to buy "rustoleum". I bought mine from the local "Do-It-Center" and it is the house brand made by Sherwin Williams...worked fine. The easiest way to tell if you have the right thing is to look at the directions and see what "clean-up" instructions are...if it says "clean with Mineral Spirits", than you have the right stuff. Many people make compatible brands.
2.) It may also say in the instructions that you do not have to thin...in this case, you have to thin. My ratio was 10:1, worked great. It will bubble and look "orange peely" at first, but relax, the paint self-levels as it drys.
3.) At first, I understood that we could use a $20 orbital buffer/polisher like you buy a Wal-Mart, etc...Although it seems to have worked for others, it did NOT work for me. It would not eliminate the scratches from the final 1500 grit wetsanding. Luckily, I had a 7" ELECTRONIC POLISHER/SANDER just like the one on this web page. It worked wonders!!
Will write more later if I think of anything. If you have questions about my procedure, I will do my best to help...thanks guys
With that in mind, for Chuck to state that Rustoleum can't do the job when applied the way Charger has, is totally innapropriate. Charger used a much different mixture, along with Tremclad/Rustoleum.
I've never messed with Sherwin Williams paint, nor the Do-It-Center house brand etc... but I know from using Rustoleum to paint many tractors, and mowers as a kid, and in high school, the stuff is darn near indestructable. Does fade if you don't take care of it, (IE ya gotta wax the car now and then to keep that good shine, even on the new cars.)
Posted By: 69chargeryeehaa
Re: Paint job on a budget!? CONTINUED..page 44........ - 08/31/06 09:04 PM
well i just did something so stupid last night parking my beetle in my garage, there is a step about 3-4" where the driveway meets the garage floor, and i was reversing really fast into the garage and the wheel just yanked out of my hands and the car hit the garage HARD, put a huge dent in the fender (about 1" deep x 6" long)


. i never do things like this, smash my own car into my own garage, great....so 15 mins later the fender was off the car and i spent about an hour tapping out the dent with a set of autobody dollys and hammers, and then i prepped the fender with 200grit using a small palm sander, and off to paint. cracked a can of paint 6yrs old, and aside for a 1/2" skin that dried on the top the paint was fine. i put on 1 coat last night at about 10pm, then put another coat at 9am this morning, and just did another coat now (about 4pm) and the repair is almost gone, down to metal for where the dent was (which i had to repair) and straight to paint. the paint dried to a touch in about 2-3hr, and i painted about 8-10hrs apart, i might be able to do 1 more coat tonite, and wetsand tommorrow and go and do 2 more coats and final wetsand. here are the results so far:


that's 3 coats of paint, i did'nt bother thinning it down at all just to do a small fender, i used paint straight out of the can. i'm more concerned about coverage, and i'll sand the peel out, but there is practically none after 3 coats. the 2nd coat starts to hide the scratches from prep with the 200, and after the 3rd coat all is gone. i should have the fender back on the car by friday night.
funny thing was that the paint was intact except for some scratching, which was quite deep, but not thru, but the only way to fix it perfect was to tap it out, that way i use no body filler, which is like the whole car. so long story short, don't crash your car into the garage!!!! i hit it about idle with the clutch out in reverse, about 3-5 mi/hr, i feel so stupid.
as for chucks expirence with the paint, i can only say that most of the people trying this method have not ever painted a car, and when things go wrong they blame the process. once you master the tequnique and learn the paint, it's really easy and quick, it takes me all of 2 mins to paint the fender in the pic. at least i can repaint the whole fender for free, and not have to take it to a body shop and get rapped. my paint has served me very well, if someone is to try this method, alot of practice and strict directions followed as to the proceedure is taken, the result is going to be great. also resist the urge to rush the process, it's fast, but is still alot of work, most people trying this method get all gung-ho and just go out to their car roller in hand and then realize it turned out like crap, the reality is it is alot of work, but the $ and bragging rights make it all worth the work, plus you can say "ya, i painted it with tremclad/rustoleum and a roller"....how often do you get to do that?
Posted By: Anonymous
Re: Paint job on a budget!? CONTINUED..page 44........ - 09/01/06 04:51 PM
Hey, I just joined this forum because of this thread. I read all of the original and all of this one. I have been contemplating what to do on my 1978 F-150 for some time and I am 90% sure this is the route I will go. I can't find any place here that will color-match Rustoleum paint, but Ace Hardware does color-match THEIR rust paint which they claim is the same as Rustoleum. I wanted to see if any of you knew if Ace's rust paint is worth a shot and if anyone had any experience with it. I really want to keep my truck the original color, 'Ford Medium Copper' (a dark orange), but my second choice would be Safety Red.
I also wanted to say great job to all of you who are taking the time to do this right, your paint jobs really show the hard work and effort you put into it. I'm willing to take the time to do it right, so I hope I will be able to join the ranks of the elite paint rollers here :-P
Here's my baby:
http://www.thetechlounge.com/forum/showpost.php?p=19033&postcount=82EDIT: Also, I think my original paint is laquer but I'm not 100% sure. Will Rustoleum be fine going over that if any is left after sanding?
Posted By: Anonymous
Re: Paint job on a budget!? CONTINUED..page 44........ - 09/01/06 05:16 PM
Exit, buffing with an agressive enough compound can do all the work wet sanding would. If you have only a little very even orange peel, buffing may very well be the way to go. I once had an insurance company have one of my cars fixed, one that I had bc/cc'd sanded and buffed. The first time they tried to give it back to me "fixed", the orange peel looked terrible (compared to a near perfect paint job, probably was on par with a stock paint job). I told them to fix it right and don't call me again until it was really fixed. When I finally picked it up, they had done a nice job with the finish. They told me that they didn't send it back to the paint shop, they just had it buffed out. I wouldn't use the turtle was buffing compound that charger69 had been talking about. There is nothing wrong with that stuff, but it is intended to be the final buff before wax. Like I said, I have had great experience with 3M compounds from NAPA. It's going to put the paint job over the $50 figure though.
There is one thing I want to clear up, because I'm not sure everyone knows the difference. Generally there are 3 types of pastes we use to finish a paint job. 1st is a rubbing compound, 2nd is a polishing compound, and 3rd is a wax. Rubbing and polishing compounds don't contain any wax, their purpose is to remove material from your finish. The work at different rates, based on how agressive thier abrasives are. Rubbing compound is for removing material quickly (scratches, light orange peel), it has harsh abrasives in it. Polishing compound is for bringing a shine to dull paint, it contains mild abrasives. The rubbing compound (harsh) will leave your paint dull, but not scratched. The polishing compound (mild) will take that dull finish and turn it into a shine. If you skip the rubbing compound after you wet sand, you will spend a very long time buffing (very safe, slow method), otherwise (if you stop early) you will end up with a foggy, scratched, and mildly shiny finish. In the later case you would have a better shine if you didn't wet sand, but your finish would have some orange peel.
Wax is entirely different then rubbing and polishing compounds. Wax leaves a shiny protective film on top of your paint. Although I believe charger69 when he says waxing his paint immediately after finishing didn't hurt the paint, I don't believe it is the BEST way to do it. The best way to do it (my opinion) would be to wait the month or so until the paint is completely hard before you sand and buff. I don't think this is the only way to get an excellent finish (obviously by charger69 and Exits buffed red), but I think it may be the way to get the best possible finish.
There are many different 'grits' of rubbing and polishing compounds. If you stay with a line of products, you can be relatively sure you are going with the right progression. One thing to watch our for, if you seem to be getting a poor results with one step of buffing, it is probably because you stopped the prevoius step too early. You can continue with the current grit for a long time to make up for that, or you can go back and finish the previous step.
Got to run, good luck.
Jason
Posted By: 69chargeryeehaa
Re: Paint job on a budget!? CONTINUED..page 44........ - 09/01/06 05:32 PM
Quote:
Although I believe charger69 when he says waxing his paint immediately after finishing didn't hurt the paint, I don't believe it is the BEST way to do it. The best way to do it (my opinion) would be to wait the month or so until the paint is completely hard before you sand and buff.
the only reason why i reccommend the turtle wax polishing coumpound is because it yeilds a awesome shine without any chance of burning thru the paint, let's face it, most of these people trying this method are painting virgins, and to throw in buffing, it's a bit too much. buffing is a art in itself, and takes years of practice. if someone wants to do a paintjob themselves, and have little expirience, then if they follow my steps they will most likely be able to pull off a nice job. i have alot expirence in buffing, wetsanding and cutting new paint, for the tremclad/rustoleum process, waiting a month does nothing, the paint flashes in 1 day, after that it just gets harder but from my expirence does not "vent" after 1 day. i wax immedieatly after buffing, wait about 1 day for dry time, in the sun preferably, and then straight to wetsand and buff.
However i completely agree with all your statments, you obviously have alot of expirence in the buffing field, but i'm just trying to suggest the best, eaisiest, cheapest, most realiable way to buff tremclad/rustoleum; although your advise is dead on regarding auto paints be it single stage, or BC/CC. It's twice as eaiser to cut the paint after 1 day, if you wait more it would just take alot more time to buff, and i mean alot. Of course this is just advice from my expirence, but rubbing coumpound combined with a ele buffer would just burn the paint really quick, even after a month of drying time, i found waxing the paint right after buffing almost makes the shine permenant, and i do have the longterm results to prove it!!!! otherwise excellent advice on buffing for the more "advanced" users.
Posted By: Marq
Re: Paint job on a budget!? CONTINUED..page 44........ - 09/01/06 06:12 PM
Quote:
I'm willing to take the time to do it right, so I hope I will be able to join the ranks of the elite paint rollers here :-P
Here's my baby:
http://www.thetechlounge.com/forum/showpost.php?p=19033&postcount=82
EDIT: Also, I think my original paint is laquer but I'm not 100% sure. Will Rustoleum be fine going over that if any is left after sanding?
I like that particular shade of red that is on your truck. Unfortunately what you will find is that when you go to 'Fire Red' in the Tremclad/Rustoleum or the Brightside paint... you will have a brighter / lighter shade of red - almost to the hint of orange. It's livable but if we were to stumble over a color mixing formula that would match your current color I would probably repaint my McLaren. I like that deeper red color.
Now... as for the ACE's 'almost as good as Rustoleum' paint... I have no personal experience using it... but I would suggest that although it may be 'just like' Rustoleum.. it isn't Rustoleum. So you may be venturing in a new unexplored territory with that paint.
Hence your risk run a bit higher than if you go with the Tremclad/Rustoleum or Brightside paints. It all reminds me of going to a healthfood store and the yak behind the counter tries to tell me that some natural herb that he is selling 'is just like Viagra' and that it 'works the same'. I think Mr Johnson would have more confidence if he was being fueled by the brand name product than taking a flyer on some herb that is 'just like' the real thing. Hehehheehhe...
As for the original paint... IF you were to proceed to painting... it looks like you would just have to scuff (lightly sand) the original paint and remove its shine... ie leave no shiny areas. Then wipe down the body with mineral spirits to get any surviving debry, paint dust, wax particlars etc that might contaminant the later paint job. Once that is done you should be 'good to go'...
.
Posted By: Anonymous
Re: Paint job on a budget!? CONTINUED..page 44........ - 09/02/06 04:47 AM
Quote:
Exit, buffing with an agressive enough compound can do all the work wet sanding would. If you have only a little very even orange peel, buffing may very well be the way to go.
This may be music to my ears. It's been a few weeks since my last post. My test piece has been a hood, and I'm painting with black Brightside. I've been having a hard time with the wetsanding.... inevitably I end up sanding through to metal on high edges. Another frustration is my sandpaper suctioning down to the panel, inhibiting the sanding motion, or paper sticking to the wet panel instead of the sanding block. It also seems like I'm using up the sandpaper so fast that I spend more time changing paper and loading up the block than I do wetsanding. I think I'm doing something wrong. I've been getting better, but I'm kind of getting burned out on working on the same panel without getting it finished to satisfaction. 1000-1500-2000 or 1200-1500-2000.
I've done what I hope is to be my final coat of paint, and I really didn't have much orange peel. I like the roller process, and each time I screw up my attempt at wetsanding, it gives me a chance to practice rolling. I will have to touch up a couple tiny spots along edges, but I'd prefer not to re-coat the entire panel because I'd be rendering moot (again) all of the wetsanding I've already invested.
So, if the rubbing compound can be done with the cheap buffer in lieu of major wetsanding, I'd like to consider this method. ...Which brings me now to the Turtle Wax (paste) Polish. I tried this on my 2000-wetsanded finish, and I was unable to come up with the "gun finish" gloss that I had before wetsanding. Let me be very clear about this, the Brightside black is ***GLOSSY*** straight out of the can! It really looks awesome. But no matter how long I spent with my cheap 6" random-orbit electric buffer with a brand new terry bonnet, I get a hazy gloss, not that awesome shine I had prior to wetsanding. I know, I know... 69Charger says to spend a LONG time with the buffer and polish... and I really did. About two hours. One spot especially so. Lots of polish. Plenty of water. But dang, I'm not gettin' that GLOSS! So would I be able to utilize *less* wetsanding, add the step of rubbing compound (cheapo Turtle brand? actually I have a little Meguire's in a tube already) with the terry on the cheapie polisher, then go to cheapie polish? And get that GLOSS??
Okay. Cheapie, cheapo, cheap. Let me also be clear that I have no reservations about spending a little more for better results. My time is valuable too... and I am considering investing in a nice DA buffer like Marq has done, and maybe going with a "Pro" compound such as System One (I like the idea of one compound that does everything instead of 2 or 3). I guess any way that I look at it I'm way overbudget, but still thousands less than having it done at a paint shop. The learning curve applies to purchases, too. I don't want to get suckered into buying an expensive product whose advertising makes it sound great only to be disappointed by ultimate results... any System One users out there?
Posted By: Anonymous
Re: Paint job on a budget!? CONTINUED..page 44........ - 09/02/06 05:30 AM
i have a old sears buffer/polisher. and i use the norton ice 3 pad system. woll, blue foam, yelow foam from eastwood.com
http://www.eastwoodco.com/jump.jsp?itemID=15247&itemType=PRODUCT
Posted By: Anonymous
Re: Paint job on a budget!? CONTINUED..page 44........ - 09/02/06 06:10 AM
I am ready to give Brightside a shot, BUT:
Is there an executive summary for the Brightside process available from anybody?
I am looking for the process from a fully prepared car (straight, OEM paint with primer patches) to final polish please!
I got the gist of it from the 80 pages (roflmao), but I would like a single page or post to reference from, including materials needed, thinning process, application techniques, sanding process, amount of coat steps, etc. for the Brightside boat methodology.
Posted By: Anonymous
Re: Paint job on a budget!? CONTINUED..page 44........ - 09/02/06 12:07 PM
Quote:
I've been having a hard time with the wetsanding.... inevitably I end up sanding through to metal on high edges. Another frustration is my sandpaper suctioning down to the panel, inhibiting the sanding motion, or paper sticking to the wet panel instead of the sanding block. It also seems like I'm using up the sandpaper so fast that I spend more time changing paper and loading up the block than I do wetsanding. I think I'm doing something wrong. I've been getting better, but I'm kind of getting burned out on working on the same panel without getting it finished to satisfaction. 1000-1500-2000 or 1200-1500-2000.
More water! If it is sticking to the panel you are too dry. You need lots and lots of water. You should be almost constantly adding water directly to the surface, and rinsing your paper in the bucket.
If you need to use the block, stay away from any raised edge. You will sand through them very quickly. Avoid the edges until you are done with the panel. Then go back with your most worn out finest grit paper, and just lightly hit the edges BY HAND. Most of the time you wont have lots of orange peel on the edges.
I would drop the 1000 and 1200 all together. I started with 2000 to wet sand, but 1500 doesn't sound out of line.
If you skip the wet sanding all together and opt for rubbing compound, you will still need to be very careful of the raised edges. I have seen people cut through their paint at the edges with normal buffing.
Good luck,
Jason
Posted By: Anonymous
Re: Paint job on a budget!? CONTINUED..page 44........ - 09/02/06 05:02 PM
Quote:
Quote:
I've been having a hard time with the wetsanding.... inevitably I end up sanding through to metal on high edges. Another frustration is my sandpaper suctioning down to the panel, inhibiting the sanding motion, or paper sticking to the wet panel instead of the sanding block.
Quote:
More water! If it is sticking to the panel you are too dry. You need lots and lots of water. You should be almost constantly adding water directly to the surface, and rinsing your paper in the bucket.
Believe me, I'm Wet and Wild! Lots of water and a bit of dish soap. Thanks, though for the pointers. My hood is a very flat panel (Scirocco MK 2), and with a wet fine grit paper I often get a vacuum situation that disrupts my sanding motion. I mean it really sucks it down, and then A) the paper flies right out of my fingers if I'm using a foam block, or B) the harder rubber block comes to a dead stop. I'm using short strokes, 3-5 inches, one direction. Maybe I'm pressing down too hard, but it seems if I dont put any pressure, then I don't get any sanding done...
I think I've learned now to stay away from the edges, and do as you say to sand w/o block using only fingers and well-used paper. The front lip has been the trickiest for me. My last wetsand left me pretty good but for a 1/2 inch line on the lower edge that went through. Doh! I touched up my sand-thru's last night with a kiss of paint, and they look good (glossy!). Maybe I'll add a second thin coat on those spots today for extra protection.
Posted By: Marq
Re: Paint job on a budget!? CONTINUED..page 44........ - 09/02/06 07:37 PM
Quote:
I am ready to give Brightside a shot, BUT:
Is there an executive summary for the Brightside process available from anybody?
I did a fairly detailed write up on the Brightside paint somewhere back in this section of the thread. Basically the technique is the same recipe as for using the Tremclad/Rustoleum... with the major difference being that you don't have to cut the Brightside paint with thinner UNLESS you really want to ( in order to get more working time on the paint or to lay down a slightly thinner coat with each application ).
The other main difference is that the Tremclad/Rustoleum paint is applied extremely thin ( because it is heavily cut with mineral spirits. The boost in the mineral spirit juice helps to make the bubbles that appear when you roll your paint self pop ). Whereas with the Brightside you do a two handed application... in that you roll the paint on... level it out and then go over the paint with a brush or a second roller to pop any bubbles that exist.
So check back in this thread any you should be able to find the 'process' steps that I used with Brightside
.
Posted By: Anonymous
Re: Paint job on a budget!? CONTINUED..page 44........ - 09/02/06 08:41 PM
Ok, well I went and picked up a tiny cans of the ACE STOPS RUST paint and primer. The paint has the same uses as Rustoleum and can be thinned with mineral spirits, so I'm going to do some testing on my replacement tailgate that I am doing body work on and see how it turns out. Maybe this will be a good alternative for those who want to use Rustoleum but also want to get it color matched (no one around here color matches Rustoleum). Or it could turn out horrible... we'll see... Wish me luck!
Posted By: Anonymous
Re: Paint job on a budget!? CONTINUED..page 44........ - 09/03/06 05:35 PM
Quote:
Quote:
More water!
Believe me, I'm Wet and Wild! Lots of water and a bit of dish soap. Thanks, though for the pointers. My hood is a very flat panel (Scirocco MK 2), and with a wet fine grit paper I often get a vacuum situation that disrupts my sanding motion. I mean it really sucks it down, and then A) the paper flies right out of my fingers if I'm using a foam block, or B) the harder rubber block comes to a dead stop. I'm using short strokes, 3-5 inches, one direction. Maybe I'm pressing down too hard, but it seems if I dont put any pressure, then I don't get any sanding done...
You got it. You are using too much pressure. The sanding takes time, lots of time. You are squeezing the water out from under the paper and causing in effect that same thing as not using enough water.
Good luck,
Jason
Posted By: Anonymous
Re: Paint job on a budget!? CONTINUED..page 44........ - 09/04/06 11:48 PM
This is my first post, but I've been faithfully following along since March. Told 69Charger that I'd post my results if I ever get registered. So, here it is!
I used "the method" pretty much as re-stated on page 7 of the original thread. No Tremclad here, so used Sherwin Williams industrial enamel (custom tinted, of course).
I am extemely satisfied with the results. Had no problems with adhesion. Each coat set up hard after 4 hours. I used 2 parts paint to 1 part no-stink mineral spirits. It covered the underlying white paint and bare bondo on the 3rd coat.
My camera doesn't do justice to the final gloss, but I'll say that this paint job is far nicer than the Maaco job that was on her when I bought her. I have never done any auto painting, and have no particular artistic talent. In other words, if I can do it - anybody can!
Big time "thanks" to 69Charger for inspiring this adventure!

Posted By: Anonymous
Re: Paint job on a budget!? CONTINUED..page 44........ - 09/05/06 04:59 AM
Quote:
This is my first post, but I've been faithfully following along since March. Told 69Charger that I'd post my results if I ever get registered. So, here it is!
I used "the method" pretty much as re-stated on page 7 of the original thread. No Tremclad here, so used Sherwin Williams industrial enamel (custom tinted, of course).
I am extemely satisfied with the results. Had no problems with adhesion. Each coat set up hard after 4 hours. I used 2 parts paint to 1 part no-stink mineral spirits. It covered the underlying white paint and bare bondo on the 3rd coat.
My camera doesn't do justice to the final gloss, but I'll say that this paint job is far nicer than the Maaco job that was on her when I bought her. I have never done any auto painting, and have no particular artistic talent. In other words, if I can do it - anybody can!
Big time "thanks" to 69Charger for inspiring this adventure!
Pictures!
Posted By: Marq
Re: Paint job on a budget!? CONTINUED..page 44........ - 09/05/06 10:25 AM
That is probably the nicest looking color I have seen on a Corvair. It's really flattering to the lines of the Corvair and gives it more pop and almost deceives the eye as to what that little convertible is. Almost strikes me as a Cuda color...
And if you look at the front and rear fender profile with that color... it almost hints of a 70 Cuda profile. All you need to do is add the 'gills' on the front fender and you could probably leave some people doing doubletakes.
Great contribution to this discussion...
.
Posted By: Anonymous
Re: Paint job on a budget!? CONTINUED..page 44........ - 09/05/06 01:12 PM
Ah, I didn't see the attachment. Nice car!
Learning more about this forum every day :-P
Posted By: 78D150CLUB
Re: Paint job on a budget!? CONTINUED..page 44........ - 09/05/06 08:52 PM
Very nice!! That's a fantastic looking Corvair.
Posted By: Anonymous
Re: Paint job on a budget!? CONTINUED..page 44........ - 09/06/06 06:57 PM
fwiw too I dont know if it means anything. I painted the whole car cut with acetone, and I was able to use the laquor thinner with mineral spirits to remove overspray. Areas where I lacked a bit on taping actually would crinkle and bubble off. My guess is once you go acetone dont go back
Posted By: Anonymous
Re: Paint job on a budget!? CONTINUED..page 44........ - 09/06/06 08:32 PM
Hello there and greetings from Sweden.. Your thread is going worldwide. Speciall thanks to 69chargeryeehaa who bringed this up... (and others to) I been following this thread (and the previous) for a couple of months and boy was that much reading.. I had a heck of spotting the Rustoleum in Sweden, but after a while i found it 10 miles away, it's called Rustoleum Combi color in sweden.. From beginning I didnt know of "mineral spirit" , but it's called white spirit in Europe. So i bought some black Rustoleum (costs a lot moore here) and white spirit of good qality and testpainted my brother in laws 77 olds decklid.
I followed exatly the method 69chargeryeehaa described and the paint is after month glossy and rockhard, as hard as i ever know of car paint..
I have also sprayed some cars through the years with various results..
The reflections on the pics is stuff hanging on our shop wall, you can almost identyfy the pontiac and Buick valve covers...
Posted By: 69chargeryeehaa
Re: Paint job on a budget!? CONTINUED..page 44........ - 09/06/06 10:06 PM
Posted By: Anonymous
Re: Paint job on a budget!? CONTINUED..page 44........ - 09/06/06 10:18 PM
Quote:
He must mean to find out where to put bondo. Gotta start somewhere. Mark E.
He said basically, put down a drastically different color guide coat, then spray how many ever layers of primer you are gonna use, sand, see where you're low/etc, re-bondo, hammer&dolly, etc where necessary, another guide coat, more primer, resand, repeat until it's as smooth as you want it or feel like getting it, then paint it.
When you hit the guidecoat underNEATH the paint, you know to STOP SANDING so you don't hit metal or bondo underneath and build it up more around the spot where you see the guide coat peeping through. If you put the guide coat on top I guess you sand through the coat until it's nearly all gone? But what keeps you from eating through your primer coats?
Posted By: Anonymous
Re: Paint job on a budget!? CONTINUED..page 44............ - 09/07/06 12:17 AM
Hello, all. I'm a Mopar nut too and was linked here from another site. Very interested in a green and black two tone look. I've read the first 44 pages and was linked to another thread. Holy crappy!!?? This is a lot.


Posted By: 78D150CLUB
Re: Paint job on a budget!? CONTINUED..page 44............ - 09/07/06 02:19 AM
We're just a long winded bunch
A lot of pages, but a lot of good people and ideas and a lot of very nice results. BTW, I like the shade of green you used, looks good against the black.
Posted By: Anonymous
Re: Paint job on a budget!? CONTINUED..page 44............ - 09/07/06 09:32 AM
Thanks but that's just a photochop. I want the color of green to be more like what is on my car now, check my Cardomain link in my sig. Hunter green I think. Anyone here ever do a two tone. I think this process could get very difficult and would like some advice on two tones. I've read this whole 100+ thread and there's not much. Also I heard from some paint guys that windex does a fine job at cleaning base metal and plastics. Takes oil and other contaminants right off.
Posted By: Exit1965
Re: Paint job on a budget!? CONTINUED..page 44........ - 09/07/06 01:22 PM
multi color jobs have been covered a few times. Don't ask me where, but up there somewhere. There is D150's truck, and a nice Datsun Z (his name escapes me) that are two tone and 3 tone, maybe others.. both answered questions about how they separated the colors if I recall right.
Posted By: Anonymous
Re: Paint job on a budget!? CONTINUED..page 44............ - 09/07/06 06:29 PM
Dawn dish soap works well too.
Jason
Posted By: 78D150CLUB
Re: Paint job on a budget!? CONTINUED..page 44............ - 09/07/06 08:33 PM
It's not too difficult to accomplish, it just takes longer to finish. I basicly painted the dark green base first, then taped off at the trim mounting line, and did the lighter green. It's a repeat of the entire process, on just a bit smaller scale.
If you look at Marq's post with the old fire truck, mine is the truck beside it in the pic.
If you are not doing body or dent removal, and you like the green you have now, I would suggest that you mask the lower body where you want the tone line and then prep sand the top and apply only the black to the top, leaving the lower body it's original color.
IMO, the Hunter green (same as my dark green) would be too dark with a black top. Of course you could always apply a lighter green by masking the top, and repeating the paint process. The way you show the car, an adhesive trim would separate the levels nicely.
The lighter green is Tremclad John Deere green.
The green and black is definitely a nice combo, but then, I'm partial to green

Posted By: Anonymous
Re: Paint job on a budget!? CONTINUED..page 44............ - 09/07/06 10:55 PM
Got lots of body work in my green so that�ll be new paint too. Not sure on the color though. I like the look of Hunter Green because in certain lights it looks black then it changes to green, I think my pinstripe will help the eye. Dents, chips, scratches, etc. I guess my real question is with the wet sanding. Say I start the top coat first, mask off the bottom portion. 6-8 coats on the top, sanding in between, buff and polish on the final. Then mask the top (black) and repeat. Would this be the way to approach it? I figured this would be best to avoid the black running into the green while wetsanding, it may soak through the paper. Then with the bottom the wetsanding will only run down and I won�t worry. Also can both colors be wetsanded, buffed and waxed together and still keep a good line? Or should I do only each color as separate as possible? Just kind of looking for the errors you two tone guys might have made along the way as this process is a little more involved. Also for the pin stripe I planned on masking the area and rattle canning a silver, shouldn�t need a wetsanding for 3 short light coats. I stink at straight lines though. MOPAR for life!!!
Posted By: 78D150CLUB
Re: Paint job on a budget!? CONTINUED..page 44............ - 09/08/06 12:06 AM
I found it easiest to finish both paint colors, then do the final wet sand and polish. Be ready for some very cautious tape removal, though. On the new paint, with the time the tape is on the surface it gets quite a grip. Use a cloth wetted with mineral spirits to rub the tape as you remove it, and go slow. This will soften the adhesive and prevent the new paint from being stressed and tearing. I found this out the hard way, but my wide trim covered the damage that i had to touch up.
Also, an old body trick is to remove the tape on the bias, _____/ <--- pulling at an angle to the line of the edge.
By wet sanding both colors at the same time for the final it will also help to eliminate edges left hwere the tape met the paint. Then your pinstripe can be applied and smoothed in as well.
Alternatively, if you apply a strip of tape the width of the stripe, then paint up to it in both colors, then remove it and tape the outside, the stripe can be applied like an inlay, almost entirely eliminating any raised edge. Someone else posted this method earlier for hood stripes, but ATM I can't find it for you.
Either way will work, but the most needed item besides tape is patience. Two tone and/or stripes add to the labor and intricacy, but I found the results worth the effort. Took me almost a month of 2-3 hrs a night and all day Sat. to pull mine all together from looking like this first pic.

Posted By: Anonymous
Re: Paint job on a budget!? CONTINUED..page 44............ - 09/08/06 01:07 AM
Thanks man. That inlaid stripe might work better than over the top too. Just wondering if I can lay on a good AAR Cuda stripe now? Hmmmm. Also I've been searching around and found that pros like to use a razorblade with the masking tape where the paint butts up to it just to give a clean edge and to ensure the paint is clear of the tape, from my experience with pulling tape, even at the angle some paint just won't let go. Okay now to practice on the girlfriends car first. LOL!!! Thanks everyone and keep them pics coming. I know I'll post mine up.
Posted By: Anonymous
Re: Paint job on a budget!? CONTINUED..page 44............ - 09/08/06 05:21 AM
Just got back from Sears. Got a gallon of 100% mineral spirits for $1.47 on clearance. I don't know if it is just this Sears or not, but they had at least 2 more gallons. Jacksonville Sears (Regency).
Jason
Posted By: Anonymous
Re: Paint job on a budget!? CONTINUED..page 44........ - 09/08/06 12:51 PM
Posted By: v8mirage
Re: Paint job on a budget!? CONTINUED..page 44........ - 09/08/06 08:16 PM
Well, I'm giving it a try. And I must admit it is starting out quite good. Its way easier than I thought it would be. I'm using the gloss white and hope it turns out as well as the 240 above
Gerbs

Posted By: Anonymous
Re: Paint job on a budget!? CONTINUED..page 44........ - 09/08/06 11:58 PM
Hey neon awsome idea but i would bring the black down just a bit <about the top of the door handle> tis would make it meet up with the hood better, but its hard to tell from the angle of the picture. the reason i think this will look good is your hood curls a bit in the front so the body line of the two tone will look higher on the body if it doesnt match the hood lip...or maybe its just me. the only other idea is to go to the door molding and do some of the bumper but i dunno how that would look
Posted By: Anonymous
Re: Paint job on a budget!? CONTINUED..page 44........ - 09/09/06 12:39 AM
Hey tastyratz, that paint job looks awsome!
I'm gonna do that exact colour to my car soon. I was wondering how you painted the door handles? Did you use a rattle can for those parts?
Thanks.
Posted By: Anonymous
Re: Paint job on a budget!? CONTINUED..page 44........ - 09/09/06 11:04 PM
heres a question??? on my car i have some paint residue from wet sanding on my door jams and the trunk area. and i dont want to wet sand the areas because it will be hard to buff the paint (unless i have to). but how do i get rid of these marks.
here is a pic

Posted By: Marq
Re: Paint job on a budget!? CONTINUED..page 44........ - 09/10/06 01:03 AM
Quote:
heres a question??? on my car i have some paint residue from wet sanding on my door jams and the trunk area. and i dont want to wet sand the areas because it will be hard to buff the paint (unless i have to). but how do i get rid of these marks.
If it is just wetsanding residue... the odds are that you 'should' be able to take a damp cloth wetted with water and rub it off. In theory it is just dried off crap that is sitting on the surface of the original paint. So the cloth will give you the scrubbing capability and the water will help release the dried crap off the surface. In theory it is just de-watered wetsanding residue. And the water in the cloth will rejuvenate it back so that it can be released from the paint surface. And if you used dish soap during your wet sanding, that will also help when you re-wet it and make it more agreeable to release from the original paint.
Ok.. so let say that doesn't quite do the job.. move things up a notch in power for the task and use a cloth wetted but not soaked in mineral spirit and wipe the crap off without harming the dried paint beneath. In theory the paint beneath is fairly hard and cured or else you wouldn't have been able to wetsand...
Then as a potential atom bomb... to take things up yet another notch in power... you can buy a spray can of that laundry 'pre-cleaner' called "Spot Off'. Or maybe you can find a spray can of that stuff under your kitchen sink or in your laundry room. It is extremely potent. You will find it in the laundry cleaning supply section at your foodstore or Walmart etc. I was able to use it to remove paint from my gray leather seats. It also was able to remove some of the wetsanding crap that I thought had stained the leather. I didn't check at what the solvent is in it.. but I was surprised by how effective it was at getting crap off a finished surface without damage the original surface. You spray the "Spot Off' on to a cloth - get the cloth wet - and then rub away. Just keep your eyes open and keep checking the progress of the rubbing to make sure it is not lifting more than you want. I was extremely surprised by how potent that stuff was at getting crap off.
Just don't go too nutzo on your rubbing. If you are lucky the residue is all just sitting on the surface and not engrained into the paint below.
.
.
Posted By: Anonymous
Re: Paint job on a budget!? CONTINUED..page 44........ - 09/10/06 04:42 AM
This is what I worry about too. Especially with a two tone job. I think it's best to paint and wetsand the upper colors first and then the bottom colors. That's how I'll approach it anyway.
Posted By: Anonymous
Re: Paint job on a budget!? CONTINUED..page 44........ - 09/11/06 01:03 AM
yah i remember 10 years ago there was a hose that hooked up to the garden hose, and had small holes in it to have a constant stream of water. it was suction cupped to the paint and it was about 4 feet long, it made a mist of water so stuff like this dont hapen. and i havent found it since then.
Posted By: Anonymous
Re: Paint job on a budget!? CONTINUED..page 44........ - 09/11/06 01:02 PM
Quote:
Hey tastyratz, that paint job looks awsome!
I'm gonna do that exact colour to my car soon. I was wondering how you painted the door handles? Did you use a rattle can for those parts?
Thanks.
actually I sprayed the entire car with an hvlp gun. I didnt roll that bad boy on, thats not even buffed. I cheated :-)
Posted By: Anonymous
Re: Paint job on a budget!? CONTINUED..page 44........ - 09/11/06 03:20 PM
Quote:
Then as a potential atom bomb... to take things up yet another notch in power... you can buy a spray can of that laundry 'pre-cleaner' called "Spot Off'. Or maybe you can find a spray can of that stuff under your kitchen sink or in your laundry room. It is extremely potent. You will find it in the laundry cleaning supply section at your foodstore or Walmart etc. I was able to use it to remove paint from my gray leather seats. It also was able to remove some of the wetsanding crap that I thought had stained the leather. I didn't check at what the solvent is in it.. but I was surprised by how effective it was at getting crap off a finished surface without damage the original surface. You spray the "Spot Off' on to a cloth - get the cloth wet - and then rub away. Just keep your eyes open and keep checking the progress of the rubbing to make sure it is not lifting more than you want. I was extremely surprised by how potent that stuff was at getting crap off.
It's the same thing as brake parts cleaner. Yeah, it's potent stuff.
Jason
Posted By: Anonymous
Re: Paint job on a budget!? CONTINUED..page 44........ - 09/11/06 06:33 PM
Hi everyone,
I came a across this thread on a BMW forum talking about cheap paint jobs. I've got a 1992 BMW 325is that I'm seriously considering painting with this method..It's red and the paint looks alright from a distance, but there's a ton of dings and the clear coat has completely peeled off every part of the car aside from the passenger side rear quarter. I wanted to ask if you guys think my paint would be alright to paint over. The paint itself is just fine and isn't peeling anywhere, but I am gonna have to fill some spots in with bondo. Will those bondo'ed spots come out with a slightly different color or will I be able to put enough of this stuff over it to even the color out? I'm probably going to try this method out on a silver 91 plymouth sundance that I have before trying it on the bimmer.
Posted By: Anonymous
Re: Paint job on a budget!? CONTINUED..page 44........ - 09/11/06 08:28 PM
should be fine. when I bondoed I chose to primer over it after smoothing just to seal it. People say you dont have to but it really sucks up the rustoleum and this seems to make it coat more than soak in. Otherwhise it just takes a few coats before its really sealed. Just sand down your paint so it has a good amount to bite into. If you have paint flaking off then sand off the parts that flake until it stops flaking. The rustoleum will adhere great to a properly prepared surface. If that properly prepared surface is whats coming off then it doesnt really matter. its only going to adhere as strong as its weakest link. if you can pick it off sand it off, if you cant pick it sand it.
Posted By: Anonymous
Re: Paint job on a budget!? CONTINUED..page 44........ - 09/13/06 12:31 AM
Well, I am brand new to this site--came across this thread at a Jeep site when I asked about rattle can spraying my '85 CJ7. The thread is unbelievably long, but extremely helpful.
I have read it in its entirety over the last day or so, with interest and amusement.
Just a little background--I bought my Jeep a few months back
; it is mechanically sound, the body had a few rust spots, and it had been primered probably 5 years ago. I am an avid hunter and outdoorsman, and I bought the Jeep to be used at our farm as a hunting vehicle, basically to get around the fields and timber and haul out deer. I had planned on leaving it as it was when I bought it, that is, until my wife and daughters rode in it and loved it. So, instead of staying at the farm all year, it will be here at home during the non-hunting season, and they wanted it to look a little nicer than it does. I figured it needed a paint job to be respectable, so, I went to Maaco and found out they wanted $300 for a cheapo paint job, but not wanting to put much money in it, I figured I would try to do it myself. I found a cheap auto paint supplier on the web, and borrowed a cheap spray gun from my brother in law. Having never done auto painting (or any auto work at all), I was a little nervous, but figured I could do a good enough job for a "farm Jeep."
I was just about to order my paint, when I stumbled upon this thread yesterday and realized that this is the perfect solution for me. I much prefer the control that rolling on paint affords, compared to spraying (I just finished spraying the entire "tub" interior with Duplicolor truck bedliner material, and that was pretty messy). The low cost and absence of overspray/mess really makes the 69Charger/Rustoleum method attractive.
However, since I want to spend as little time as possible on this (need to get the Jeep to the farm soon), I think I will go for the Brightside option, only needing a few coats. It costs more, but still is less than what I would have spent on "real" (though, cheap) auto paint.
I have a couple questions. The first one is for Stage 5, whom I don't believe has posted since he did his Brightside job--how did it come out? I am considering buying the Brightside red paint from eBay, and I am very interested to know if it worked out well for you. Please post about your experience with it, and pictures would be especially appreciated.
Second, is the Brightside red color similar to the Rustoleum Safety Red? If so, I would plan on using it in spray bomb form for the hard to reach areas.
Finally, how much paint do you think I will need for the Jeep (it has no top or doors, just the hood, sides, and tailgate)? I am thinking I may be able to get by with two quarts, three at the most.
Thanks for all your great info and for bearing with a newbie like myself.
Oh, also, on my way to Home Depot tonight to look at Rustoleum, I was at a stoplight, next to a new, Chevy HR(?)--I looked at the paint, and could easily see "orange peel" from six or seven feet away! At the next light, I was next to a newer Dodge Ram Hemi, and saw the same thing. I checked my Saturn when I got home, and ditto for it. My point is, lots of cars seem to have that, so you all probably don't need to lose so much sleep over that. I certainly won't with my Jeep!
Posted By: Marq
Re: Paint job on a budget!? CONTINUED..page 44........ - 09/13/06 01:43 AM
Quote:
Second, is the Brightside red color similar to the Rustoleum Safety Red? If so, I would plan on using it in spray bomb form for the hard to reach areas.
Yes. The Brightside 'Fire Red' is almost identical to the Tremclad / Rustoleum "Red". They are like twins. In fact there are quite a few other marine and rust type enamels that also used this identical shade of red. I was quite surprised by how many companies had chosen to use almost the identical shade of red.
I used the Tremclad red spray bombs for all my nooks and crannies and the Brightside for all the body exterior panels. You can not spot where one ends and the other begins.
Quote:
Finally, how much paint do you think I will need for the Jeep (it has no top or doors, just the hood, sides, and tailgate)? I am thinking I may be able to get by with two quarts, three at the most.
With that little amount of panel surface I would suspect that you should probably be able to nail down four or five coats with two quarts.
.
Posted By: Anonymous
Re: Paint job on a budget!? CONTINUED..page 44........ - 09/13/06 02:16 AM
Marq--a few more questions:
How many spray coats did you put on the nooks and crannies?
Did you try to wetsand those difficult to reach areas as well?
How many rolled on coats did you end up applying?
What do you estimate your mix ratio was with the Brightside, and would you recommend I use MEK or mineral spirits to dilute with?
Thanks again. By the way, your car looks awesome...
Posted By: Anonymous
Re: Paint job on a budget!? CONTINUED..page 44........ - 09/13/06 12:53 PM
Quote:
Well, I am brand new to this site--came across this thread at a Jeep site when I asked about rattle can spraying my '85 CJ7. The thread is unbelievably long, but extremely helpful. I have read it in its entirety over the last day or so, with interest and amusement.
Just a little background--I bought my Jeep a few months back ; it is mechanically sound, the body had a few rust spots, and it had been primered probably 5 years ago. I am an avid hunter and outdoorsman, and I bought the Jeep to be used at our farm as a hunting vehicle, basically to get around the fields and timber and haul out deer. I had planned on leaving it as it was when I bought it, that is, until my wife and daughters rode in it and loved it. So, instead of staying at the farm all year, it will be here at home during the non-hunting season, and they wanted it to look a little nicer than it does. I figured it needed a paint job to be respectable, so, I went to Maaco and found out they wanted $300 for a cheapo paint job, but not wanting to put much money in it, I figured I would try to do it myself. I found a cheap auto paint supplier on the web, and borrowed a cheap spray gun from my brother in law. Having never done auto painting (or any auto work at all), I was a little nervous, but figured I could do a good enough job for a "farm Jeep."
I was just about to order my paint, when I stumbled upon this thread yesterday and realized that this is the perfect solution for me. I much prefer the control that rolling on paint affords, compared to spraying (I just finished spraying the entire "tub" interior with Duplicolor truck bedliner material, and that was pretty messy). The low cost and absence of overspray/mess really makes the 69Charger/Rustoleum method attractive.
However, since I want to spend as little time as possible on this (need to get the Jeep to the farm soon), I think I will go for the Brightside option, only needing a few coats. It costs more, but still is less than what I would have spent on "real" (though, cheap) auto paint.
I have a couple questions. The first one is for Stage 5, whom I don't believe has posted since he did his Brightside job--how did it come out? I am considering buying the Brightside red paint from eBay, and I am very interested to know if it worked out well for you. Please post about your experience with it, and pictures would be especially appreciated.
Second, is the Brightside red color similar to the Rustoleum Safety Red? If so, I would plan on using it in spray bomb form for the hard to reach areas.
Finally, how much paint do you think I will need for the Jeep (it has no top or doors, just the hood, sides, and tailgate)? I am thinking I may be able to get by with two quarts, three at the most.
Thanks for all your great info and for bearing with a newbie like myself.
Oh, also, on my way to Home Depot tonight to look at Rustoleum, I was at a stoplight, next to a new, Chevy HR(?)--I looked at the paint, and could easily see "orange peel" from six or seven feet away! At the next light, I was next to a newer Dodge Ram Hemi, and saw the same thing. I checked my Saturn when I got home, and ditto for it. My point is, lots of cars seem to have that, so you all probably don't need to lose so much sleep over that. I certainly won't with my Jeep!
Follow this thread link to buy the Red Brightside at a significantly lower price: EBAY BRIGHTSIDE I bought a case of the Dark Blue, and it is the same as you can get anywhere else at 25% of the cost. It works just like everyone is describing in this thread.
Posted By: Anonymous
Re: Paint job on a budget!? CONTINUED..page 44........ - 09/13/06 05:21 PM
Yeah, JL, I was aware of the cheap eBay paint and that is why I wanted to see results of Stage5's efforts, since he used that. You say that paint worked like other Brightside paint--is that based on your personal use of it, and/or is there anyone else that reported results with it? I would like to save money by using it, but if it is old paint or it has problems due to something else, I will spend more and get it elsewhere.
Thanks!
Posted By: Anonymous
Re: Paint job on a budget!? CONTINUED..page 44........ - 09/13/06 06:02 PM
I've seen random posts about people getting this stuff mixed. My car is BRIGHT red (BMW Brilliantrot) and I don't know if the standard rustoleum reds are gonna cut it (I'd like to try and keep it as bright as possible). Can I get it mixed to be really really bright red? I'm sure someone has already asked similar questions so sorry if I'm just wasting space =). I'm going to try this on my sunroof panel to start with, it's badly hail damaged and will probably look better no matter what I screw up .
Posted By: Anonymous
Re: Paint job on a budget!? CONTINUED..page 44........ - 09/13/06 07:39 PM
Bootgras--they are saying that the Brightside "Fire Red" is essentially the same as Rusteoleum "Safety Red." I tested the Safety Red from a spray can on cardboard at Lowe's and it was REALLY bright red, maybe a bit orangeish. That is how it looked in the pics of 1965's car earlier in this thread. You can see the Brightside color on Marq's McLaren, though at least on my computer, his pics seem kind of bluish-green in tint, so the red probably is brighter than how his car looks. I am almost thinking that these colors are too screamy red, but I will put it on a Jeep, which sometimes have funky colors, and mine is just a "farm Jeep," so it does not matter all that much. Hope this helps.
By the way, Marq, if you could address my earlier questions, I'd really appreciate it. Thanks!
Posted By: Marq
Re: Paint job on a budget!? CONTINUED..page 44........ - 09/13/06 07:50 PM
Quote:
Marq--a few more questions:
How many spray coats did you put on the nooks and crannies?
I dumped :
- one full spray bomb to do the underside and edges of the fiberglass hood ( it was white ), It took two complete passes of the underside of the hood to get even coverage.
- one can for EACH of the two door jams, inner door panels, inner rockers, Did it over four spray sessions.
- one can for the underneath side of the trunk lid. It took about two passes to get good coverage.
From what I imagine of your Jeep... I would think you should be able to get away with three spray bombs... one for the underneath of your hood, and one spray bomb for each of the door areas.
Quote:
Did you try to wetsand those difficult to reach areas as well?
No... the spray bomb puts on a fairly decent and level coat of paint. It has sufficient shine to not need any wetsanding. Bottom line is that these nooks and crannies are not as visible to the public as the outer body panels. So perfection is not as necessary in those locations.
Quote:
How many rolled on coats did you end up applying?
For your vehicle it will all depend on how many colors are on the body that you want to cover over. If the body has a uniform color... and if you are painting straight out of the can or cutting it slightly with the brushing liquid, I would suspect it will take four coats minimum. The more coats you can apply the better. Because that will give you more room to play around when wetsanding etc.
Quote:
What do you estimate your mix ratio was with the Brightside, and would you recommend I use MEK or mineral spirits to dilute with?
Brightside is 'designed' to be used straight out of the can. But for rolling I found that it was better to cut it with about 7% to 10% using their recommended 'brushing liquid'. I believe from my experiments that you can probably get the same result using 7% to 10% pure mineral spirits. The mineral spirits are cheaper then the Interlux Brushing Liquid.
Quote:
Thanks again. By the way, your car looks awesome...
I actually took the car out to a 'Cruise Night' and wasn't embarassed at all to be there. One thing that I have particularly enjoyed with this paint job is putting the polisher to it. Waxing and polishing... I have almost become addicted to polishing and waxing it. Each time it gets better and better. But hopefully I will be smart enough to know 'when to quit'... so that I don't polish and wax it back down to metal.
Posted By: Anonymous
Re: Paint job on a budget!? CONTINUED..page 44........ - 09/13/06 09:47 PM
Marq--thanks for the replies.
Did you sand the Brightside after each coat, or every two coats, like Charger did with the Rustoleum? The reason I ask, is, if I will be putting down at least 4 coats of Brightside and I need to wetsand after each coat and I need to thin it, what is the advantage over using Rustoleum, especially since Brightside costs a lot more and Rustoleum is available in more choices and at stores in my area? Don't mean to be a wiseguy, I just want to find out ahead of time what method/product is going to save me the most time (again, in the context that I have a "farm Jeep" that does not need a beautiful finish).
Posted By: Marq
Re: Paint job on a budget!? CONTINUED..page 44........ - 09/13/06 11:22 PM
Quote:
Did you sand the Brightside after each coat, or every two coats, like Charger did with the Rustoleum? The reason I ask, is, if I will be putting down at least 4 coats of Brightside and I need to wetsand after each coat and I need to thin it, what is the advantage over using Rustoleum
You only need to wetsand after every second coat of Brightside. The exception to this rule is if the coat did not come out as smooth as you might have liked. Rather than slapping a second coat onto a bad coat ( and just thickening the problem area ) you might choose to do a fast wet sand on a bad coat just to keep as smooth a surface as you can.
Quote:
... since Brightside costs a lot more and Rustoleum is available in more choices and at stores in my area? Don't mean to be a wiseguy, I just want to find out ahead of time what method/product is going to save me the most time
The first advantage to Brightside is coverage. You 'should' be able to nail your paint job down in FOUR COATS... hence only two wet sanding sessions. But you may want to lay down six coats to further increase the depth of the color. In that case you might have made it to three wet sandings.
With Rustoleum/Tremclad heavily cut with mineral spirits it will take you four to six coats just to get uniform color and then two or four MORE coats to get the even coverage for the color you are using. ... hence you will have wet sanded approximately four or five times.
So there is a time saving component to using Brightside because you have been able to reduce the number of coats being applied and the number of times you have needed to wet sand. Time is money And this in turn also reduces the start to finish length of time for your project by 50% as well. You can get the car or Jeep out on the road that much sooner. Less downtime for the vehicle..
The other reason I don't mind paying a few bucks more to slap Brightside on my car is that :
a ) it was designed and formulated to be applied to the top side of boats. It was designed to do a boat in two coats... WITH A ROLLER... and be self levelling, hopefully leaving a shiny and glossy surface ( which we know is a must for boaters ).
b ) boat owners would never accept a paint product that didn't stand up to the elements, be resistant to chemicals ( like gas, oil etc ), have a proven track record at the marinas for durability and be able to maintain its gloss and shine so that the boater doesn't have to repeat his painting every season. That kind of pedigree makes me feel comfortable with the product and gives me a bit of confidence about the long term viabiity of this paint on a car.
c ) the Brightside paint job will leave you with a 'polyurathane paint job'. The Rustoleum/Tremclad paint job will leave you with an 'enamel' paint job. So... on a menu of choices for paint jobs at a professional paint shop, the polyurathane would be the 'premium' paint job and the 'enamel' would be the 'standard issue' paint job. In a head to head battle - a polyurathane paint job will outperform an enamel paint job - that is the reason it was created - to improve upon the characteristics of an enamel paint job.
d) and most importantly of all... since you are applying only half as many coats of paint with the Brightside, you have just reduced the number of potential coats of paint that might screw something up. I find it easier to do four perfect coats of paint then eight or ten. With each new coat there is always the potential for runs, orange peel, roller lines in the paint and more opportunities of fresh paint being available for bugs, dust bunnys, dog hairs and other assorted crap in the air to land on that fresh wet paint. With Bright side the bugs have four chances to screw things up... with the Tremclad/Rustoleum there is a potential eight or ten opportunities for things to land on the fresh wet paint.
So the bottom line in my mind is that the Brightside paint may cost a little more upfront - but there are time saving advantages during the application stages.. and there are potential long term durability advantages simply due to the chemical nature of the paint that you are applying.
When this thread got started... Charger was providing the answer to the question of how to do a budget paint job. His answer and recipe provided the lowest cost and most effective answer I have ever seen.
By moving things up a notch to the Brightside paint I was merely trying to find a way to hopefully improve on the results, keep the cost still way down from the use of automotive paint and yet still follow his basic methodology for application using the roller.
Those are basically the thoughts that formed the basis for me taking a crack at this with Brightside. So far I have not been disappointed at all with how things turned out. The cost was way cheaper than a MAACO and the results were far superior to their 'enamel' standard issue paint job that they use on their 'bargain value' paint job. In fact MAACO would charge you 'three times' more if they used their polyurathane paint ( which they call their 'premium paint job' on your car or Jeep.
So maybe that is the best way to look at the difference between Charger's Tremclad/Rustoleum 'enamel' paint job and my Brightside 'polyurathane' paint job. Charger found a better and cheaper way to get something better for less than the MAACo 'value enamel' paint job... and my way is better and cheaper for getting something better for less than the MAACO 'premium polyurathane' paint job.
.
Posted By: Anonymous
Re: Paint job on a budget!? CONTINUED..page 44........ - 09/14/06 12:48 AM
Joined up for this thread. Thanks 69charger.
I'm seriouisly considering this for my TransAM. How do decals work out with the tremclad paint are there any adhesion or spontaeous combustion problems?
Thanks again.
Posted By: Anonymous
Re: Paint job on a budget!? CONTINUED..page 44........ - 09/14/06 01:42 AM
Well, after reading more of this thread and getting your guys' feedback, I'm going to go with the brightside fire red. It looks like it would be a close match to my current color, and sounds like it should be a little easier to apply and even out. I'll post some pics after I try it on my sunroof panel =).
Posted By: Anonymous
Re: Paint job on a budget!? CONTINUED..page 44........ - 09/14/06 01:44 AM
Marq--those were the answers I hoped to hear. I just ordered my "eBay Brightside," so I guess I am taking the plunge! Looking forward to getting started; in the meantime, I will be busy re-prepping and getting everything ready. When I get the paint, I think I may try "practicing" on the underside of the hood before I really get going.
Thanks again for your advice and encouragement...
Posted By: Marq
Re: Paint job on a budget!? CONTINUED..page 44........ - 09/14/06 02:04 AM
Quote:
Joined up for this thread. Thanks 69charger.
I'm seriouisly considering this for my TransAM. How do decals work out with the tremclad paint are there any adhesion or spontaeous combustion problems?
Thanks again.
Hehehehhe... I will tell you one dumb mistake I made. I went to add the pin stripe to my car AFTER I had waxed the puppy. The [Edited by Moparts - Keep it clean] thing wouldn't stick at all. I should have known better.
So I rubbed down the area where I planned to put the pin stripe with iso alcohol to remove the wax in that specific area. The pin stripe then adhered absolutely properly. I then rewaxed over the pin striped area and brought back the shine.
I can safely say that IF I had put my pinstripe on BEFORE waxing the car there would have been no problem whatsoever. I am very sure the same applies to the Tremclad/Rustoleum paint job.
HOWEVER... the only advice I would give you on adding decals over a fresh paint job is to wait at least two weeks or so. This will allow WHATEVER traces of the mineral spirit or paint carrier that is still evaporating through the surface of the paint.
I can imagine that these evaporating gases might have 'some' effect on the adhesive that is used to attach the decal. As well... the decal would be putting an almost airtight seal over the fresh paint and that might slow down the overall curing of the paint trapped below the decal.
This would be especially true if you have a 79-81 Trans-Am and were slapping the large screaming eagle on the hood of your car. That thing covers a lot of hood surface...
.
Posted By: Anonymous
Re: Paint job on a budget!? CONTINUED..page 44........ - 09/14/06 11:53 PM
Thanks for the help. It's an '87 but, getting the old school bird anyways.
Posted By: Anonymous
Re: Paint job on a budget!? CONTINUED..page 44........ - 09/15/06 03:49 AM
ya so i took the plunge..i was gunna get sprayed in the booth at school but to much stuff in the shop is gettin ripped of so no way in hell im keeping my car there without my eyes on it for longer than 5 mins...so im just making the surface look decent adn then im rollin so far the trunk and hood have about 3 REALLY heavy coats..i might just sand it all down till im at 2000 grit and call it a day haha theres alot of paint on..
but it rained when the paint was tacking so im screwed there but i just sanded it tdown a bit and called it good also when u say u wan it like water how watery and does ur foam brush ever cause bubbles in the tray? i might mine eventually pop when their on the car but a couple stay and im worried about this when it comes time 2 do the final coat
thx
Posted By: Anonymous
Re: Paint job on a budget!? CONTINUED..page 44........ - 09/15/06 03:55 PM
Hi everyone
I have a question:
when painting with foam rollers and thinning the paint with mineral spirits, should the paint be a little thicker for the vertical surface then the horizontal surfaces?
I remember reading the start of these posts and it was suggested that the paint be almost as thin as water. wouldn't this consistancy just run down the sides of the vertical surface?
will the paint settle flat like on a horizontal surface?
I just did my truck with the same paint and I had to scrap it all off as the paint didn't stick to the duplicolor primer/sealer. I forgot to thin the as well. up here where I live it gets damp at night and I end up with moisture which is not good as you know for painting.(I don't have a dry garage to paint)
sucks spending countless hours to prep for paint and then this happens
it will be to cold soon...
thanks all
Posted By: Exit1965
Re: Paint job on a budget!? CONTINUED..page 44........ - 09/15/06 05:35 PM
When I painted, I use the same mixture. If you put it on reaaaaly thin, it wont run and there wont be much of any orange peel.
I looked at it not that I was "painting" the surface, but that I was "wetting" it consistently with the paint mixture. That would keep me from trying to put too much paint on, then having to deal with runs or orange peel.
Posted By: Marq
Re: Paint job on a budget!? CONTINUED..page 44........ - 09/15/06 06:53 PM
Quote:
Hi everyone
When painting with foam rollers and thinning the paint with mineral spirits, should the paint be a little thicker for the vertical surface then the horizontal surfaces?
Nope... same paint mixture on top surface and side panels. It needs to be applied in 'thin' wet layers...
Quote:
I remember reading the start of these posts and it was suggested that the paint be almost as thin as water. wouldn't this consistancy just run down the sides of the vertical surface?
Yes it would run if you were overloading the roller and trying to put on toooooo much per layer or pressing down on the roller way too much. But as noted in the previous message you are laying on really thin layers... one at a time... and basically just wetting the surface evenly with each coat. No matter what color you are adding.. each layer will almost be translucent.. It is only after you add about 5 or 6 layers ( Tremclad/Rustoleum) that it all starts adding up and giving you a uniform color on the vehicle.
Quote:
will the paint settle flat like on a horizontal surface?
Yes.. the Tremclad/Rustoleum and Brightside will all settle flat to the vertical and horizontal surface. The only risk on the vertical sides is that if you try to lay it on toooo thick ( or too much at one time ) it has the potential to run ( that is simply gravity taking over ). But if you are laying on just thin wetting layers the paint solution is more attracted to clinging to the surface it is on than being pulled downward by gravity.
Quote:
I just did my truck with the same paint and I had to scrap it all off as the paint didn't stick to the duplicolor primer/sealer.
I don't know why the Duplicolor primer/sealer would present any problem with any of the paint mixtures. When you wiped the body down with mineral spirit to clean all the dust and crap off the body prior to painting... did you give the primer/sealer sufficient time to evaporate whatever mineral spirit it might have absorbed ?
Quote:
Up here where I live it gets damp at night and I end up with moisture which is not good as you know for painting.(I don't have a dry garage to paint)
The mositure won't present too much problems at the end of the process. In theory, while you are applying the paint/mineral spirit mixture, it 'should' be displacing moisture on the car.... The main detriment of moisture is that it tends to lessen the gloss or shine of the surface top layer. But that is something you can remedy and put right when you do your final wet sand, compounding, polishing and waxing.
Quote:
..sucks spending countless hours to prep for paint and then this happens it will be to cold soon...
thanks all
In a way it could be a blessing too... Although we all would love to nail it right the first time... stuff can happen and Murphy's Law can intervene in the best of situations. So all we can do is chalk it up to our 'learning curve'. And hopefully when we take the next crack at it... the ninja paint rolling skills will have become almost second nature and more at ease when you attempt it. I found that when I had to take a step backward and sand an area down to correct a problem, it allowed me to keep improving the smoothness of the bodywork. The better and smoother the subsurface, the better the end product.
.
Posted By: Anonymous
Re: Paint job on a budget!? CONTINUED..page 44........ - 09/15/06 10:34 PM
anyone familiar with the duplicolor paint thinner in the cans? I'm trying to open mine, the plastic cap has metal threading in it, the can itself has a metal neck that coems up and is threaded, adn what looks like an inlaid little disc of metal covering the opening. One would think it's an ideal design for poking with a nail but not sure that's what im to do.. Cannot grip it wtih needlenose pliars
Thanks
BK
Posted By: 69DartGT
Re: Paint job on a budget!? CONTINUED..page 44........ - 09/16/06 12:03 AM
I'm reading this thread and it really catches attention.
I have a 71 D-100 pick up that is rough and just want it to look okay say a 50 ft paint job
But how do these paints spray using a conventional gun? Looking at the popular three, rustoleom, tremclad & brightside. Leaning toward brightside as I have a West Marine store close for primer, thinner etc.
Posted By: Anonymous
Re: Paint job on a budget!? CONTINUED..page 44........ - 09/16/06 12:35 AM
I thought I posted but it didn't show up....
I appoligies if this is a repeat post...
I called CIL paints (rustolium in the states) and told them my problem.(my marine aklyd enamil which is the same as rustolium professiona paint)
they said although they didn't know a lot about duplicolor and what it is made with, but the dupli primer, if it is not old based, maybe the problem.
has anyone else come across this?
I e-mailed duplicolor and they have yet to respond... hopefully I won't get the "it was the paint, not our primer story.
on my truck when you peel the paint back, you can see little moisture spots. they are also on the back of the peeled paint. If they are not moisture, then could they be the oil from the paint? I gave the surface a smell and there was no odour to it, so I am thinking it isn't the duplicolor wax and grease remover.
any wild guesses?
also, when you apply paint so thin, when you wet sand, are you not going to easily break through?
or are you just slightly "scuffing" the surface with the sanding paper?
what grit size, start with 1500?
randy
Posted By: Marq
Re: Paint job on a budget!? CONTINUED..page 44........ - 09/16/06 02:07 AM
Quote:
I'm reading this thread and it really catches attention.
I have a 71 D-100 pick up that is rough and just want it to look okay say a 50 ft paint job
But how do these paints spray using a conventional gun? Looking at the popular three, rustoleom, tremclad & brightside. Leaning toward brightside as I have a West Marine store close for primer, thinner etc.
I believe that the three paints would look better if sprayed. I don't know if that is the gist of your question or if you were actually looking for information about how to spray these paints.
But if the question was whether these paints can be sprayed, the answer is yes. However, with the Brightside, since it is a polyurathane, it is a more lung unfriendly paint when sprayed. Then again I don't know if I would want to spray mineral spirits and Tremclad/Rustoleum without an oxygen pack
.
Posted By: Marq
Re: Paint job on a budget!? CONTINUED..page 44........ - 09/16/06 02:11 AM
Quote:
also, when you apply paint so thin, when you wet sand, are you not going to easily break through?
or are you just slightly "scuffing" the surface with the sanding paper?
what grit size, start with 1500?
With both paint processes you are wet sanding every second layer. The wet sanding, using a 600 or 800 or even 1000 shouldn't be removing too much of the applied paint. It is only remove the surface imperfections ( bumps, bugs, dust specs, unpopped bubbles etc ). You are just leveling and smoothing the surface - so don't put too much elbow grease into your wet sanding. You are just lightly wetsanding
.
randy
Posted By: 69DartGT
Re: Paint job on a budget!? CONTINUED..page 44........ - 09/16/06 02:14 AM
Thanks Marq, I was thinking the same thing about spraying as far as breathing protection goes.
Posted By: v8mirage
Re: Paint job on a budget!? CONTINUED..page 44........ - 09/16/06 04:17 AM
BK,
I used the same thing to start with. In order to get that metal cap out I ended up grabbing one edge with a needlenose and making a dent in it that distorted the cap enough to get it out of the neck of the can.
BTW I have 6 coats on the front fenders of my car and all I can say is WOW!!!! It looks fantastic and it sure is easy!! 50 footer?? No way, more like 2 footer paint job!! Thanks 69charger!!!
Gerbs
Posted By: 69chargeryeehaa
Re: Paint job on a budget!? CONTINUED..page 44........ - 09/16/06 09:52 PM
Quote:
BK,
I used the same thing to start with. In order to get that metal cap out I ended up grabbing one edge with a needlenose and making a dent in it that distorted the cap enough to get it out of the neck of the can.
BTW I have 6 coats on the front fenders of my car and all I can say is WOW!!!! It looks fantastic and it sure is easy!! 50 footer?? No way, more like 2 footer paint job!! Thanks 69charger!!!
Gerbs
Posted By: Anonymous
Re: Paint job on a budget!? CONTINUED..page 44........ - 09/17/06 02:02 PM
thanks for wise words, i ended up nailing two holes in the lid :P pours a little slow, but works.
did my first coat yesterday. washed with palmolive dish detergent, rinsed for like 5 minutes, then shammyd and dried fully with a microfiber towel. Then taped off everything (took longest, dang.. a good 30-45 mins)..
Mixing the paint was interesting, it felt really liquidy when stirring it but when pulling mixer out it still gooped and stuck around on mixer a little longer than I wanted. I ended up with a very thin mixture, almost 50% mineral spirits. It was running, but i got the technique down for it (since I started to like the paint at the runny consistancy)... just don't apply to verticle panels until youve either juiced the roller on a flat surface or just mashed it down in the roller pan to remove excess. On the panels where I didn't redip my roller, the paint layer is very very thin but smooth as glass. Infact, even on the roof where its almost 100% opaque (white over light green) from the first coat, its still smooth. I painted yesterday around 10am
mosquitos ate me alive and many bugs landed in the paint. However, come 6:30pm that night, just 7 hours after finishing the last panel on the car with the first coat, it was as hard as a rock and I wet sanded it.
After wetsanding the 7 hour old paintjob, I washed it again with dish detergent and then dried it.
This morning I went out to get another coat on early but the dew rocked the car. Used a shammy and it stretched pretty tight, was worried a huge 1x2' piece of paint would flake off. Didn't budge.
Found a lump (pbb bug or dirt) on the paint, scraped it off with my fingernail. Left a tiny circle (size of a bb) beneath, revealing green original paint. I then took my nail and tried to scratch from the perimeter of this divit in the paint.. couldn't do ANY damage to the rustoleom.
I don't know if my prepwork was really good (20+ hours of sanding), or my mineral spirits (duplicolor smelly) rock, but my paint was rock hard just hours after applying and has already been wetsanded.
Looking forward to applying another wonderful coat. Sadly bugs will happen again, dunno what to do about that. They come out pretty easily once the paint dries but they see to leave a wing or some guts behind
Thanks to charger and anyone who's contributed any information to the thread. I'm only done with my first coat and have determined I won't pay for a paintjob again (unless I find myself with a new nice car).
Will keep everyone posted on progression, pics soon.
BK
Posted By: Anonymous
Re: Paint job on a budget!? CONTINUED..page 44........ - 09/17/06 06:27 PM
Quote:
guys i dont mean to ask, but ,y black lincoln has turned out ok, but im thinkin of changing it to red (i like cars that stand out) any pics of what red looks like finished? thanks a ton fellas!
Regal Red. I am cheating though and using a HVLP gun on the cab.
Bob

Posted By: 69DartGT
Re: Paint job on a budget!? CONTINUED..page 44........ - 09/17/06 07:12 PM
Bob, what gun are you using and how about overspray when you did the cab?
You thinned per mfg. intructions?
Posted By: Anonymous
Re: Paint job on a budget!? CONTINUED..page 44........ - 09/17/06 07:31 PM
Need some help from the Rustoleum users.
I have used the Rustoleum Professional series of paint in doing my fiber glass dune buggy body. I have two coats of paint on with good coverage. Two days between coats for ample drying time. It may be 4 or more days before I do my 3rd coat.
Question I have is in regards to hardness. With my finger nail, I can mar the surface of the paint. Not a deep scratch or even a shallow scratch, but a line in the paint where the surface gloss is marred.
Will the final sanding and polish out of the paint remedy this marring? Will I be able to mar the finish after the polishing process?
The quality of the paint finish is fine for the buggy but I want a finish that will not scratch or mar and right now, I don't think I can achieve that. I was hoping I wouldn't have to do the final finsh sanding and polishing.
Any sugestions.
Posted By: Anonymous
Re: Paint job on a budget!? CONTINUED..page 44........ - 09/17/06 09:19 PM
Quote:
Bob, what gun are you using and how about overspray when you did the cab?
You thinned per mfg. intructions?
It is a cheap-o Vaper HVLP gun ( about $55 ) that I found at some online discount tool place. It was the cheapest gun I could find that came with a regulator on the base of it. Overspray is not bad, I am painting in the yard and laying it on with a fine mist. I am thinning the paint almost as thin as for rolling, using low odor mineral spirits.Still get a little orange peel, but it sands down easily with 1000 grit wet.
I did find out one of the bad things about Rustoleum: It doesent dry when painted on bare seam sealer ( the cheap kind for a caulking gun )
Bob
Posted By: pdqvsix
Re: Paint job on a budget!? CONTINUED..page 44........ - 09/18/06 01:20 AM
I have done enough coats (gloss white) now to drive the car, still need to final wet sand and polish. Went out driving last night and stopped for gas, as i opened the door there was a sign i didn't see and the door hit it pretty hard. I was sure it caused a scratch or nick in the paint but when i looked there was no damage at all.At first, for a split second i was mad about hitting that sign but quickly came to my senses and realized heck all i have to do if it's damaged is get the roller back out and touch it up.
Posted By: Anonymous
Re: Paint job on a budget!? CONTINUED..page 44........ - 09/18/06 03:10 AM
I have read about half the pages on this thread with great interest.
I bought a can of black Rustoleum Professional the other day and it says on the label to thin with Acetone. I seem to recall something about not using acetone as it will dry too fast. I thought I also read the Professional was preferred over the "regular" Rustoleum.
Some guidance please.
Bob
Posted By: Anonymous
Re: Paint job on a budget!? CONTINUED..page 44........ - 09/18/06 12:45 PM
Marq:
Did I understand correctly that you painted the underside of the hood with Brightside? Can that paint take the heat of the engine compartment? Thanks in advance for your advice.
Posted By: Exit1965
Re: Paint job on a budget!? CONTINUED..page 44........ - 09/18/06 01:45 PM
Can Marq or anyone who has used brightside comment on the hardness? I was hoping my rustoleum would be 'rock hard' by now, but I can still put an indentation in it by slicing it with my fingernail. I don't know how this will affect polishability (I guess it would?) but I don't like the fact that it isn't 'rock hard' yet, after 2 months or so..
Posted By: Anonymous
Re: Paint job on a budget!? CONTINUED..page 44........ - 09/18/06 04:18 PM
Quote:
I have read about half the pages on this thread with great interest.
I bought a can of black Rustoleum Professional the other day and it says on the label to thin with Acetone. I seem to recall something about not using acetone as it will dry too fast. I thought I also read the Professional was preferred over the "regular" Rustoleum.
Some guidance please.
Bob
goodluck with the black, i chose white for its ability to hide imperfections and im still getting a bit of the peel, might be worse with black (originally was going to do black, but chose white even though it requires a 100% color change from the original black)..
mineral spirits is the reccomended thinner of choice, I can't recall why acetone wasn't reccomended, but I can vouch for mineral spirits ability to thin and dry fairly fast.
the professional I believe boasts quicker cure times than the original stops rust.
just finished 3rd coat on my car, have 99.9% coverage (just some dark spots here and there). looks incredible, the roof already has a satisfactory amount of shine from 3 feet away. everything glistens but upon examining my own reflection i see the old 'peel. No big deal though, my car already looks 500% better than it did, and I can always buff out the orange peel. Issue is, I'm getting lazy and tired and my extended weekend has come to an end with only 3 coats applied to the car..
I wet sanded this morning. It sucked. I didn't use a sanding block and got a bunch of highs and lows. Miraculously, the coat I just applied saved my tail as it leveled itself. After I apply the fourth coat, hopefully wednesday, I'll sand that evening and finish up friday and saturday with 5th and 6th coats. I really wish I could call it quits after 100% coverage but I know I'd burn through the paint with sandpaper, as I did a bit this morning.
Best of luck, Bob.
BK
Posted By: Anonymous
Re: Paint job on a budget!? CONTINUED..page 44........ - 09/18/06 05:00 PM
read my post... the last page. Acetone comes out better but should only be sprayed.
Posted By: Anonymous
Re: Paint job on a budget!? CONTINUED..page 44........ - 09/18/06 05:23 PM
About what ratio did you use with acetone thinner? I recently got a compressor, and spray gun. Was thinkin about just using a spray on since it seems quite a bit faster.
Also, how many coats did you do to get full coverage?
Posted By: Anonymous
Re: Paint job on a budget!? CONTINUED..page 44........ - 09/18/06 07:20 PM
Hello everyone,
First of all,
A BIG THANK YOU to 69Charger for sharing his idea
I had been following the thread for several weeks and 2 weeks ago I decided to give it a shot and paint my 1993 Ford Probe GT which had awfully faded and oxidated original paint, even some rust. I did 2 coats, wetsanded 600 grit, 2 coats, wetsand 600 and coat #5 which ended up being the last. I was going to do 6 but I did a good job on #5 and didn't want to ruin it.
I don't plan on doing any polishing. The 5th coat is nice, flat and shiny with minimal orange peel.
Will the shine last without doing the polishing and buffing? Here are a few pics (after 5 coats):


And here is one pic after 4 coats (in the rain):

The rear hatch was rusty so I Bondo'd the heck out of it...4th coat fully covered the Bondo.
I only used 1 1/2 quarts of Sunrise Red Rustoleum and about 3/4 of a 1qt mineral spirits can.
Posted By: 69DartGT
Re: Paint job on a budget!? CONTINUED..page 44........ - 09/18/06 09:36 PM
Like the red looks great!!
I just ordered Interlux fire red for my truck!!
Posted By: Anonymous
Re: Paint job on a budget!? CONTINUED..page 44........ - 09/18/06 10:49 PM
ProbeGT
Good looking job. Since you have not polished your last coat, I need to ask a question. Can you take your finger nail and mark the shine or gloss on the paint? That is, leave a small mark in the glossy surface, not a scratch into the paint but a blemish on the surface.
I don't want to polish my last coat either, but all my test pieces will marr when I use a finger nail to test the surface.
I need to know if the polish job is needed to get a hard surface that will not marr the surface shine. I guess if you get any responses to your question, it will help me also.
My paint job is on a fiber glass dune buggy body. With the getting in and out of the buggy and running around in the woods, a shiney paint job will not last long with the the present paint job I have on it now.
Thanks.
Ed
Posted By: Marq
Re: Paint job on a budget!? CONTINUED..page 44........ - 09/18/06 11:43 PM
Quote:
Marq:
Did I understand correctly that you painted the underside of the hood with Brightside? Can that paint take the heat of the engine compartment? Thanks in advance for your advice.
No... the underside of the hood was painted with a spray bomb of Tremclad Red. I did this mostly out of convenience because the hood was still on the car... hence I didn't want to try to roll paint upside
And yes... the Tremclad / Rustoleum spray can take the head under the hood. I don't know if I would use it directly on the engine block or on the headers though... But they do make a 'High Heat' version of the Tremclad/Rustoleum... although I think it has a very limited color range... flat black, high gloss black.. flat gray.. and that is about all I can remember seeing at our Home Depot...
.
Posted By: Marq
Re: Paint job on a budget!? CONTINUED..page 44........ - 09/18/06 11:49 PM
Quote:
Can Marq or anyone who has used brightside comment on the hardness? I was hoping my rustoleum would be 'rock hard' by now, but I can still put an indentation in it by slicing it with my fingernail. I don't know how this will affect polishability (I guess it would?) but I don't like the fact that it isn't 'rock hard' yet, after 2 months or so..
At this time ... approx 40 days since the job was done... the paint is rock hard. In fact it was pretty well rock hard one week after the final coat was applied. I believe at this point if I caught a stone on the nose of the car it would probably chip like any hardened enamel paint job. But so far no chips and I have had the car running at 100 mph ( although I am in Canada, my car is from the US and with a US speedometer )... and no chips from the other traffic in front of me.
.
.
Posted By: darenrt
Re: Paint job on a budget!? CONTINUED..page 44........ - 09/18/06 11:49 PM
quote"
I don't know why the Duplicolor primer/sealer would present any problem with any of the paint mixtures. When you wiped the body down with mineral spirit to clean all the dust and crap off the body prior to painting... did you give the primer/sealer sufficient time to evaporate whatever mineral spirit it might have absorbed ?"
I went uot to the car yesterday and decided to clean the tree poop off I got out the pressure washer and peeled the new Royal Blue right off the hood!!
the paint was real hard, could not scratch it at all!!
But when I was primering I ran out of rusto primer and ran down to the autoz and grabed a can of duplicolor primer sealer to finish.
On that side every bit of paint is comming off
there's primer on the car and on the back of the paint that came off!
I'll have to sand it all down and paint again. This time I will only use the rusto primer.
The lesson here is pick one prodct and STICK TO IT!!
#2 it's only $8.00 a quart no big deal
Posted By: Marq
Re: Paint job on a budget!? CONTINUED..page 44........ - 09/19/06 12:00 AM
Quote:
I don't plan on doing any polishing. The 5th coat is nice, flat and shiny with minimal orange peel. Will the shine last without doing the polishing and buffing?
According to the Charger school of 'roll your own'.. you 'should' be able to start hitting the paint with the compound, polish and wax. It will take time to get the desired level of gloss/shine back. From the gist of what I read, Charger felt that the slightly non-fully-cured paint would be a little easier and softer to work with...
Most schools of thought and recommendations from paint shops is that you should let the fully cure before going after the compounding, polishing and waxing - especially since our paint jobs are not being baked on. So in theory we have to let the paint job fully air dry to get to a reasonable level of hardness before those finishing steps. The theory behind 'waiting' til it cures harder is this.. the wax, when it is finally applied, will be acting like a sealant... water won't get through to the paint and conversely remaining evaporants in the paint job will have a harder time evaporating through the wax seal.
On my car, I waited about 4 weeks after the final coat was applied. This was partly because the weather ( rain and humidity ) were pretty bad. But I waited out the paint job and gave it that extra time to cure so that if anything went wrong I wouldn't be able to blame myself for rushing the final stage of this process.
Your shine 'should' last for a while. Possibly rain 'might' give you the occassional waterspot.. but basically the integrity of the paint will hold up... long enough to get more cured. At that point you are going to have to wet sand it to begin the final compounding, polishing and waxing... so any degradation of the shine or gloss up to that point really won't matter.
If you garage queen the car and keep it not exposed to the heat and uv of the sun... and keep it away from condensation that may occur during the transition from day to night and vice-a-versa, will help you to hold on to the initial unprotected /unfinished shine...
.
.
Posted By: Marq
Re: Paint job on a budget!? CONTINUED..page 44........ - 09/19/06 12:15 AM
Quote:
I went uot to the car yesterday and decided to clean the tree poop off I got out the pressure washer and peeled the new Royal Blue right off the hood!!
Hehhehehhe.... I feel your pain. I took the McLaren over to the foodstore to pick up some groceries. When I came out the car had slobbers of seagull poop dripping all over the hood and the driver side front fender and door. My first thought was that some great fat S.O.B. had horked some monstrous louies on the car. But after a quick look at the paint and the flying rats that were sitting on the parking lot lamps, I knew it was seagulls..
Fortunately none of the poop landed in the car, because I had the top down. Those friggin flying rats with feathers could have picked 500 cars in that parking lot that day... but instead they somehow zero'd in on my car.
When I saw that poop I got a bit concerned about what damage that nasty white guck was going to do to my paint job.
I drove home, unloaded the groceries and went back out to the car with just the garden hose. I was beyond amazement that all the poop washed of with just the lame pressure of the hose - no scrubbing or rubbing. And best of all no chemical damage to the paint from the white gooey stuff that had been on there.
I really don't know if I would have had the guts to put a high pressure hose on my paint, even at this point in its curing. Deep down I believe that it can probably withstand the pressure coming out of the nozzle... but I also known deep down that water at high pressure can cut rocks, clear brake debris that is embedded in rims, etc. So that would scare me from going the high pressure route or even through a brush type car wash. Heck I don't even know what one of those brushless car washes might do.
So for now I am just treating this paintjob like it is a Ferrari factory paint job and handling it with kid gloves at all times.
Then again I would probably have been so cautious if i had just dropped $3500 to the paint shop...
.
Posted By: 78D150CLUB
Re: Paint job on a budget!? CONTINUED..page 44........ - 09/19/06 12:36 AM
Gotta love the Greater Canadian Cr*p Hawk. What a PITA they are.
It's been about a month - six weeks since I finished my truck, and I've had it out to two or three coin spray washes, one just a week after I finished. I haven't had any peels or other problems from the high pressure, and I get real up close and personal with tree sap and bird droppings. About an inch away until the glob gives up and vanishes.
Still have as good a shine as I did after the final polish, as well.
Posted By: 69chargeryeehaa
Re: Paint job on a budget!? CONTINUED..page 44........ - 09/19/06 01:46 AM
probegt - nice job, that looks clean and really nice. just give it a wax or at least hit it with the buffer, then wax it.
out of all the cars i've painted with this method, they were all wetsanded/buffed/polished/waxed the next day after the final coat, or in 2 days, i've never had a issue what so ever with peel, hardness, ect...at all.
Posted By: Anonymous
Re: Paint job on a budget!? CONTINUED..page 44........ - 09/19/06 02:08 AM
What type of compound and wax is recommended?
Posted By: 69DartGT
Re: Paint job on a budget!? CONTINUED..page 44........ - 09/19/06 10:58 PM
Has anyone tried to do a strip or maybe flames over a roller job? Say red then roll on some silver flames?
Posted By: Joshs68
Re: Paint job on a budget!? CONTINUED..page 44........ - 09/19/06 11:06 PM
I have been following this for a while and I dont have a car that needs paint, I did need to paint my toolbox. black truck with a black truckbox. I d/a'd it with 220 and used black paint thinned with a little min. sp. and rolled it on, THICK the the next day I wet sanded and rolled it again, and left it. both times there were lots of little bubbles that flowed out within minutes, but overall I think this is great! I did minimal prep, and was not real careful with it, put the paint thick and only sanded ith 220 both times and I think it looks great, I am not real concerned because its a tool box and going to be beat, but I would not hesitate to do this to a car I can only imagine the results that you could get if you took more time than I did, and also dont drive while the paints wet.
Posted By: Marq
Re: Paint job on a budget!? CONTINUED..page 44........ - 09/19/06 11:24 PM
Quote:
Has anyone tried to do a strip or maybe flames over a roller job? Say red then roll on some silver flames?
I dunno... but flames are such an outrageous thing that you have to do it DEAD RIGHT or it gives people something to pick on....
If I was considering putting painted flames on to my car... I would probably get an airbrush artist to do the job right and make those flames look as professional as can be. It might cost a few bucks ( if hiring a pro ) or a case of beer and some food ( if hiring some buddy who is good at it ), but I think it would be a great investment AND you can afford that luxury with all the money you saved on the paint job
Other than that... I am sure you coulf probably use the roller method to get some nicely detailed flames on to the car. But I can't help but think that an airbrushed job would look more like it is part of the paint job rather than looking like something that was stuck on over the paint...
I noticed that you were referring to just a one color flame... in silver on a red body. But even there you might want to outline the silver flame with a white line or a gray to give it some 3d lift visually off the paint.
For my airbrush idea... it would probably be a three or four color paint job... starting with a base of blue and combining sections of purple, yellow and orange to set the flames off for that natural hot look
Maybe the cheaper answer to just doing a one color flame is to buy pre-manufactured flame decals, which would give you a clean and professional appearance. There are tons of decal manufacturers advertising on the internet that can create just about any look in automotive quality vinyl ( whether it be a one color decal or a multi-color version ).
.
.
Posted By: darenrt
Re: Paint job on a budget!? CONTINUED..page 44........ - 09/19/06 11:59 PM
Marq,
I can't blame anything on the paint. It was totally the idiot that put it on.
The paint right next to it on the fender looks great.
I just neede to sand a little rougher 320 grit and stay with a compatable primer, but I'm a lernin
Posted By: Anonymous
Re: Paint job on a budget!? CONTINUED..page 44........ - 09/20/06 12:45 AM
get mike levallee to do the true flames
Posted By: 69DartGT
Re: Paint job on a budget!? CONTINUED..page 44........ - 09/20/06 01:12 AM
Posted By: Anonymous
Paint Type Summary Request - 09/20/06 03:41 AM
I have been following this thread for some time, but this is my first post.
I have done most of the prep work on some of the panels on my old truck and wanted to start painting. I am about to go buy paint. Can I get any of the stateside people who have done it to comment on the use of the various rustoluem flavors (e.g. �professional� vs. �industrial� vs. standard �stops rust� vs. �farm equipment?)� Is there a general consensus on the board that I have just browsed over (the thread is HUGE)? Round these parts selection is very limited. They only sell the standard and the �farm equipment� flavors here, I�ll likely have to drive to Gulfport or order online if I need the other stuff.
Also any tips on where to get the right mineral spirits?
Thanks for all the great information
Posted By: 69DartGT
Re: Paint Type Summary Request - 09/20/06 04:20 AM
First welcome to the board, you should be able to find minaral spirits at local Home Depot get the non scented without any problems.
Can't help on the other questions.
BTW my youngest lives in Gulfport.
Posted By: v8mirage
Re: Paint Type Summary Request - 09/20/06 11:19 AM
I got both my paint and mineral spirits at Walmart. I used the Stops Rust version and the Oderless Mineral spirits.
Gerbs
Posted By: Exit1965
Re: Paint Type Summary Request - 09/20/06 07:27 PM
I am wondering now if putting the paint on too thin makes it not has hard as it could be? I put thin layers on my car, and can dent/slice the paint with my nail.
Where I sprayed the car (door jambs, under the hood) it is very hard, and very glossy. It was one thick coat. No way can I scratch it with my nail, and it gets to this hardness in a day or so. Also, I mixed up a thick batch of penetrol and rustoleum and touched up an area (1 coat coverage thickness) and that has dried, in about a week, to rock hard and glossy.
So I'm dissatisfied with the hardness of the finish, and I'm considering either spraying the whole car with Rustoleum + mineral spirits, or trying boat paint with a roller. I'm leaning towards spraying rustoleum via HVLP, but I'm going to go to a marine place this weekend and see what they have on tap.
Glad this is just a hobby and not my livelihood, or I'd be bankrupt by now.
Posted By: Marq
Re: Paint Type Summary Request - 09/20/06 08:25 PM
Quote:
I am wondering now if putting the paint on too thin makes it not has hard as it could be? I put thin layers on my car, and can dent/slice the paint with my nail.
I dunno... logic would dictate that the thinner layer build up of paint 'should' be the harder. As it is very much like lacquering... The thin layer 'should be evaporating quicker and leaving the thin layer of pigment behind to harden quicker with the more effective exposure to oxygen.
Now I will try to put my scientist hat on for a second and see if I can think of some abstract reason for why the 'thinner' paint would not dry as hard. The first thought that popped into my head is this ( and this is totally baseless and without any scientific knowledge or understanding of paint molecular theory. POSSIBLY what happens when you over thin the paint.. it causes the paint itself to break up more at the molecular level. MAYBE the paint can only handle a certain amount of thinning before it is no longer able to rejoin all its little molecular components.
For example, let us say a paint molecule is like a string of DNA. And let us say that paint helix looks like this...
A.B.C.D.E.F.G ( note the one dots )
Now when we over thin the paint.. it might affect the spacing between these components of the paint's DNA... and now it looks like
A....B....C....D....E....F....G ( note the 4 dots )
At this point it is not able to rebond itself back together. So when it does dry it is not able to form a hard enough combination of the components to be hard. It's like how one bad or screwed up DNA in a human can result in the children being mongoloids :>
Now... maybe using the Charger mixture of mineral spirits we are stretching the chain or structure of the paint molecules and components... BUT not passing the point where the molecules and components can reform back to a reasonable semblance of what the paint would have done if it hadn't been thinned.
So the Charger paint DNA string might look like :
A...B...C...D...E...F...G... ( note the three dots ).
Ouch... my brain hurts a lot trying to think up a reason... and everyone elses brain is probably hurting trying to figure out that psuedo-scientific razzle dazzle I tried to say...
Maybe we should just go for the short answer - trim your nails real short - end of problem.
Posted By: Anonymous
Re: Paint Type Summary Request - 09/20/06 08:28 PM
Well I rolled a medium coat of Black using Blue Marine Poly Paint. Some panels came out really weell, others have roller ridges and peel. I am blocking the whole car so this coat is acting as a primer.

Posted By: Anonymous
Re: Paint Type Summary Request - 09/20/06 08:29 PM
nuther

Posted By: Anonymous
Re: Paint Type Summary Request - 09/20/06 08:30 PM
lotsa gloss-poster on the wall.

Posted By: Anonymous
Re: Paint Type Summary Request - 09/20/06 08:32 PM
I also am getting fingernail marks after painting a month ago. I am wondering if this will affect polishing or will polishing beef up the finish and make it harder?
Seriously debating spraying the car with proper one part poly car paint. i have access to a gun.
The gun i can use is the "old style"? I guess it is better than the modern day guns. Don't know why. If I have to spray. i will splurge and get decent DuPont paint. Still on the fence.

Posted By: Anonymous
Re: Paint Type Summary Request - 09/20/06 08:43 PM
What did you use to thin your Brightside applications (mineral spirits or someting else)?
Posted By: Anonymous
Another first - 09/20/06 09:25 PM
Hello everyone, I was referred here by a friend and I rolled black Brightside on my '92 Nissan 240SX. Looking good, but I've been taking my sweet time getting it done. I started from white, and I got a solid, uniform color after only two coats. I'm about to apply my 4th right now, and I think I may be done after that, unless someone suggests that I continue further. I've used less than a quart and a half so far.
Oh, I bought some of the Pre-Kote, Interlux's own primer... mistake. It was $27 (vs. $33 for the actual paint), and I only used it in areas where I had rust that I took down to bare metal and/or bondoed. Oh well.
Regarding the advice that you should not expose the final coat to any rain for a week, why is this? Letting it set for 24 hours makes sense, but Brightside dries hard very quickly (IIRC Interlux quotes like 12 hour recoat times, or less). I've also heard that you shouldnt sand or polish the top coat for a week or so as well, is this true of Brightside as well?
Pictures coming soon.
Posted By: 70Cuda383
Re: Another first - 09/20/06 09:34 PM
wow this is still going! awesome!
I haven't tried it yet, but if I get a beater, I will!
when will this get archived?
Posted By: Exit1965
Re: Paint Type Summary Request - 09/20/06 09:48 PM
Marq- that looks good to me. I couldn't explain it for certain, but it also seems that my THIN layers do not have the gloss that a thicker layer has.
The addition of too much of the mineral spirits stretches the paint to a point that the paint cannot form it's hard protective surface (?).
Not sure. It sure makes a hell of a difference if I spray it though.. rock hard and shiny. Thick coat of rustoleum and penetrol, rock hard and shiny.
I could always use a roller and put a thicker mixture on, say one coat, but I think it will be easier and funner to spray it. Plus if all else fails and I end up putting real car paint on it, I'll have some practice shooting.
Is there an automotive paint that doesn't contain isocyanates?
Posted By: admactanium
Re: Paint Type Summary Request - 09/20/06 10:41 PM
Quote:
Is there an automotive paint that doesn't contain isocyanates?
there is a water-based paint system called autoaircolors with some awesome color selections. the main problem with it is that it still has to be cleared with 2k clear. that's why i stopped painting my track bike with AAC paints. i didn't want to shoot the isocyanate clear coat. although there's supposed to be a decent clear coat in a can called lustrecoat. it's iso free and supposedly gasoline resistant. but i doubt you'd want to buy a ton of that to clear your whole car.
Posted By: Anonymous
Re: Paint Type Summary Request - 09/21/06 05:04 AM
Ok, I'm hitting my car with brightside fire red this weekend, and rather than dig through this mountain of posts I figure I'll just ask the following:
1. How much should I thin the paint? Odorless Mineral Spirits?
2. What finishing work should I do between every other coat? Just wetsand or wetsand+rubbing compound? After my final coat, should I wetsand+rubbing+polishing+wax?
3. How many hours should I wait between coats?
I know this stuff has been posted before, but this thread is huge =D. Thanks!
Posted By: Anonymous
Re: Paint Type Summary Request - 09/21/06 12:07 PM
Okay, I am in the same "boat" as bootgras--I got my eBay Brightside Red this week and am fired up about painting my Jeep this weekend (weather permitting, that is; there is a 50% chance of rain here and I know it will be humid, so I am crossing my fingers that I can do it).
Anyway, I cannot find the "regular" mineral spirits--Wally World, Home Depot, Lowe's only have the odorless kind.
So, my question for Marq, or others is, what would be best for me to thin the Brightside with--odorless mineral spirits, paint thinner (which says it is made with mineral spirits, how much though, I don't know), or MEK? I have lacquer thinner and acetone, but if I recall, neither of those is suitable.
Thanks for all the input at this point and in advance for your recommendations!
Posted By: Anonymous
Re: Paint Type Summary Request - 09/21/06 12:36 PM
bootgras and crusader:
I'm not sure you really have to thin the brightside. Some of the colors are thin as they are. I did my car in brightside largo blue without thinning. We also did hype's (see his post above) without thinning black.
My car the paint was the right thickness but it dried to fast in the heat. When I rerolled some sections when it was cooler outside it was fine.
Posted By: Anonymous
Re: Paint Type Summary Request - 09/21/06 02:13 PM
For Hype and Nova--I may just try applying the Brightside (Fire Red) without using any solvent for thinning. But I wanted to ask you guys, did you also do your painting in low humidity conditions? Do you know what the humidity percentages were when you did it? We have a pretty good chance of rain this weekend, so I suppose it will be pretty humid. I really want to get started, though. Could I apply a coat on Saturday and another on Sunday, regardless of the weather conditions, and have no adverse affects, as long as they were not the final coat? Seems to me I had read in the thread that the key is applying the final coat in cool, low humidity conditions. What do you guys think?
Posted By: 69DartGT
Re: Paint Type Summary Request - 09/21/06 02:49 PM
Crusader, don't forget pictures and if you use it straight out of the can let us know..
I wonder since brightside is boat paint how many are rolled while boat is sitting on the water
Posted By: Anonymous
Re: Paint Type Summary Request - 09/21/06 04:53 PM
Crusader:
The humidty was super high when I did it on my car. It was very hot and close to 100% humidity (it mise well have been raining!), I was sweaty. I'm sure there was sweat that dripped into the paint because of it.. The paint dried really fast (it was tacky after being on the car about a minute). At that point it became compeltely unworkable. I think thats why my final coat wasn't as glossy. I actually rolled my final coat outside in the heat (on a less humid day). Then rolled the car back in the garage to dry. My garage is fairly dry. The paint came out fine. It's not horrible or anything. So I think it's really the top most coat that counts.
Hype however (and he can comment himself) had a pretty dirty garage (no offense it was free I understand).. that didn't seal to the outside elements at all... The fist coat I was there when we put it on and it was fairly cool and not too humid. He mentioned painting then taking it out in the rain after a couple times before he put his last coat on. I wasn't around for the other coats, but from what I hear it looks very nice.
Some really crappy pictures from the first coat oh hype's 240:
http://www.novaslp.net/pics/v/NewYorkBuffalo/JonsCar/Finished version of mine (note: not sanded or polished):
http://www.novaslp.net/pics/v/newcar2/paint/img_0440.jpg.html
Posted By: Exit1965
Re: Paint Type Summary Request - 09/21/06 05:06 PM
Quote:
Well I rolled a medium coat of Black using Blue Marine Poly Paint. Some panels came out really weell, others have roller ridges and peel. I am blocking the whole car so this coat is acting as a primer.
How is the hardness of this Blue Water Marine paint? The shine certainly looks good.
Posted By: Anonymous
Re: Paint Type Summary Request - 09/21/06 05:07 PM
Well I find myself at an impasse... I am just about done with refining the body work on my jeep. I had to do quite a bit of sanding because of deteriorated clear coat, and the "ridge" from clear coat to base coat that had to be smoothed out, along with a number of other issues.
The dilemma is that I really wanted to paint it gloss orange, but after some research Rustoleum does not sell the gloss orange in a brush-on, only is aeresol form.
I tried safety red, but it is not a color I am fond of at all.
I just felt the need to vent, as my wife thinks I am crazy for all of the work I have put into this (not to mention that i want to brush rustoleum on top of it now), and now I cannot get the color that I have had my heart set on. :frustrated:
Posted By: v8mirage
Re: Paint Type Summary Request - 09/21/06 05:45 PM
Here are the colors that Rustoleum is available in. There is an orange, is that the one that is available only in spray?
Rustoleum Colors
Posted By: Anonymous
Re: Paint Type Summary Request - 09/21/06 05:58 PM
Nova--your car looks awesome, I love that color.
I think I have decided to thin the Brightside, probably just go with the percentages that Marq suggested in his procedure on p.26. I think I will use paint thinner for cutting it. Reason being, I did some research on various substances (mineral spirits, paint thinner, MEK, Fire Red Brightside, and their 333 Brushing Liquid), primarily focusing on their MSDS to see what chemical constituents they have. I learned that paint thinner and mineral spirits are virtually the same thing, mainly Stoddard Solvent. Interestingly, the paint has no MEK (I was originally going to use that) in it, nor does the Brushing Liquid, which is only kerosene and solvent naptha. The paint does have Stoddard Solvent in it, up to 25%. So, I will probably just use paint thinner, which I have on hand. Seems that the purpose of adding the solvent is to lower the overall volatility of the paint mixture, giving you more time to work it. If I am going to wait a full day between coats, I figure the thinner should work just fine.
If anyone has experience or knowledge that would contrast with what I am planning, please, chime in.
Posted By: Exit1965
Re: Paint Type Summary Request - 09/21/06 06:22 PM
Cyber- I could swear I've seen orange in quarts, and maybe safety orange in gallons. You tried the usual suspects Home depot and lowes?
If not, I bet brightside makes a nice orange you can get. So does Pettit, they have a product called easypoxy which is similar to brightside.
There is a marine store near me that carries brightside and easypoxy.. I'm planning to stop in and see what they have.
Posted By: Anonymous
Re: Paint Type Summary Request - 09/21/06 06:53 PM
Quote:
Here are the colors that Rustoleum is available in. There is an orange, is that the one that is available only in spray?
Rustoleum Colors
Yes, that "gloss orange- 214084" is only available in spray. Orchard Supply Hardware, Home Depot, and the Do It Center all said the same thing.
As last resort I tried a locally owned hardware store where I go, and they called in front of me and were told that they only have it available in spray form.
Quote:
Cyber- I could swear I've seen orange in quarts, and maybe safety orange in gallons. You tried the usual suspects Home depot and lowes?
If not, I bet brightside makes a nice orange you can get. So does Pettit, they have a product called easypoxy which is similar to brightside.
There is a marine store near me that carries brightside and easypoxy.. I'm planning to stop in and see what they have.
Exit, I thought I had seen it too... I thought I had seen safety orange too... I don't know if maybe they discontinued these colors fairly recently? At my home depot they had some tintable stops rust, but only one quart, so maybe we did see orange before, but it was the last of their stock?
I checked brightside and they don't really have an orange that I found. Plus the cheapest marine store around here wanted $37 a quart, and with my Jeep Cherokee I figure I am going to need a good 3 quarts at minimum (doing door jambs, underneath hood, inner hatch, etc.)
So the marine paint kind of eliminates this "budget" paint if they run ~35 a quart.
LMK though if you see any nice orange though when you hit your marine store.
Any Canadian fellows want to ship some orange to me!
Posted By: Marq
Re: Paint Type Summary Request - 09/21/06 07:29 PM
Quote:
What did you use to thin your Brightside applications (mineral spirits or someting else)?
I used the 'official' Interlux paint brushing liquid at just enough ratio to wet the paint so that it was thinner.
However, I also did one coat using Mineral spirits because I had used up the official 'brushing liquid'.. It seemed to work just as well as the official Interlux paint brushing liquid. No difference...
.
Posted By: Anonymous
Re: Paint Type Summary Request - 09/21/06 07:29 PM
Quote:
Nova--your car looks awesome, I love that color.
Thanks. It looks like a good color in the picture. But it's much lighter in real life. The can looked good but it was a small swatch. It's best descibed as smurf blue. As such I bought some cans of brightside sapphire blue to redo the car with (it's supposedly darker). I just havn't gotten around to it yet. That is why I have not sanded and polished the car yet..
Good luck with yours!
Posted By: admactanium
Re: Paint Type Summary Request - 09/21/06 07:32 PM
i bought an orange paint called "xo rust" that is gloss orange. it seems to be basically the same thing as rustoleum. nice shade of orange too.
Posted By: Marq
Re: Another first - 09/21/06 07:40 PM
Quote:
Regarding the advice that you should not expose the final coat to any rain for a week, why is this?
With some of the Rustoleum/Tremclad paint jobs and that Australian equivalent to these anti-rust paints, some of the guys noticed that rain drops which dried on the curing paint left whitish artifacts in or on the paint. The discussion at the time was that the whitish artifacts might have been some kind of reaction between the h20 and gas that was evaporating from the paint as it dried.
On the Brightside paint, I also noticed that fresh paint would also show these whitish artifacts - but not to the degree that the other paints were having. With Brightside they could be rubbed out fairly easily. So it was basically a non-issue with the Brightside.
Quote:
Letting it set for 24 hours makes sense, but Brightside dries hard very quickly (IIRC Interlux quotes like 12 hour recoat times, or less). I've also heard that you shouldnt sand or polish the top coat for a week or so as well, is this true of Brightside as well?
When you are doing the wet sanding, you can proceed with that after 24 hours of the last application of paint. That is sufficient drying time for the Brightside as you are wetsanding.
When you reach the final coat of paint and are satisfied that you have good coverage and appearance, I believe that you should wait one, two, three or four weeks before doing the final wetsand, compounding, polishing and waxing. This ensures the paint is at a very good level of curing and that any gases trying to evaporate will have pretty well vented themselves. If you slap the wax on too soon it seals the surface and may trap some of the evaporating vapors - which may result in the waxing discoloring or losing its shine etc.
Posted By: Marq
Re: Paint Type Summary Request - 09/21/06 08:15 PM
Quote:
I could always use a roller and put a thicker mixture on, say one coat, but I think it will be easier and funner to spray it.
Well that is the conclusion I came to at the end of the project. Although I was pleased with the results from the roller/Brightside, I believe that I might have had even better results if I had sprayed. But I will never know for sure until I get that opportunity...
.
Posted By: Marq
Re: Paint Type Summary Request - 09/21/06 08:24 PM
Quote:
Ok, I'm hitting my car with brightside fire red this weekend, and rather than dig through this mountain of posts I figure I'll just ask the following:
1. How much should I thin the paint? Odorless Mineral Spirits?
They say that 10% is the maximum point of thinning and that you shouldn't go past that. Using odorless mineral spirits will take longer to dry between each coat. The reason it is odorless is that it evaporates sloooower.
Quote:
2. What finishing work should I do between every other coat? Just wetsand or wetsand+rubbing compound? After my final coat, should I wetsand+rubbing+polishing+wax?
Between every second coat just wetsand. At your final coat you do the wetsand+rubbing+polishing+wax. But my suggestion is to live with the final coat for one, two, three or four weeks to get the most curing time for the paint.
Quote:
3. How many hours should I wait between coats?
With the Brighside, cut with odorless mineral spirits, I would give it at least 24 hours between coats. Cooler tempratures or higher humidities may require you to wait up to 36 hours between coats.
.
Posted By: 69DartGT
Re: Paint Type Summary Request - 09/21/06 08:35 PM
Keeping with the lets don't read all 60 plus pages what type/nap roller should I use with Brightside?
Posted By: Marq
Re: Paint Type Summary Request - 09/21/06 08:38 PM
Quote:
Okay, I am in the same "boat" as bootgras--I got my eBay Brightside Red this week and am fired up about painting my Jeep this weekend (weather permitting, that is; there is a 50% chance of rain here and I know it will be humid, so I am crossing my fingers that I can do it).
Be sure to seriously shake up those eBay cans of paint to ensure that they haven't settled. I keep imagining these pallets of cans sitting in a warehouse up to their 'normal shelf life' and the pigment solids in the cans settling. I find a bent coat hanger on the end of my drill makes a great mixer and I don't mind doing it for ten or twelve minutes. If done by hand we tend to get lazy and under stir it.
Quote:
Anyway, I cannot find the "regular" mineral spirits--Wally World, Home Depot, Lowe's only have the odorless kind.
So, my question for Marq, or others is, what would be best for me to thin the Brightside with--odorless mineral spirits, paint thinner (which says it is made with mineral spirits, how much though, I don't know), or MEK? I have lacquer thinner and acetone, but if I recall, neither of those is suitable.
If you are in the enviromentally over-friendly California you might have a problem finding the regular mineral spirits. But in Canada you should be able to hunt down the 'regular' mineral spirits at one of the places you mentioned... even Canadian Tire. If all else fails maybe at a local paint store ( Sherwin Williams, Paint your World, etc ).
In case your best detective efforts fail...make use of the odorless mineral spirits and keep in mind that it is odorless because it evaporates slower. Hence drying times between coats needs to be extended.
Ideally it would be best if you could land your hands on some of the Interlux 'Brushing Liquid'. The reason I say that is this... the eBay paint is a possible variable in the results. By using the Interlux 'Brushing Liquid' you remove another variable in the finished paint job. But I 'believe' from my own experience that either type of the mineral spirits will do the job equally well.
I would not play around with the 'paint thinner' that promises that it has 'some mineral spirits'. The results would be unpredictable and I have not read of anyone here having varied that far away from the 'recipe'.
As for acetone... it would work. It's biggest downside is that it evaporates very rapidly. Hence things dry possibly faster than you really want them. It may start setting up while you are half-way through a panel. And you don't want that. You want enough time with the panel to 'work it'. Since it evaoporates so quickly it gives off a HUGE amount of wicked vapors. You would need superior ventilation... and I might even think an oxygen tank to protect your lungs. But the hallucinations you might experience from getting doped up on acetone fumes might make things fun. Just don't light matches or run any electrical equipment in a room with a high concentraion of acetone fumes.
I don't know enough about lacquer thinner... but I suspect my comments about acetone apply similarly. The only difference is that acetone might work and the lacquer thinner may not work.
.
Posted By: Exit1965
Re: Paint Type Summary Request - 09/21/06 08:52 PM
Quote:
Keeping with the lets don't read all 60 plus pages what type/nap roller should I use with Brightside?
I had the same question, I hope the fine foam ones we are using with rustoleum will work, since I have a few left.
Posted By: Anonymous
Re: Paint Type Summary Request - 09/21/06 10:41 PM
Quote:
i bought an orange paint called "xo rust" that is gloss orange. it seems to be basically the same thing as rustoleum. nice shade of orange too.
Hmmm... where did you pick it up, and is it available in spray as well?
This is my ideal scenario so I can spray bomb the hard to reach places and roll the rest and have a true color match.
I may have found a rustoleum, but would have to order it. It is their Farm and Implement Enamel. It is a "stops rust" too, but designed to be used on farm equipment. They have it in Allis Chalmers orange which isn't too bad.
Only thing is I have not found verifiable evidence it is offered in a spray. A couple places say the industrial orange is the same color... so my quest is ongoing...
Posted By: Anonymous
Re: Paint Type Summary Request - 09/21/06 10:44 PM
Quote:
If you are in the enviromentally over-friendly California you might have a problem finding the regular mineral spirits.
Go to your local Ace hardware in California. I had trouble finding regular mineral spirits until I hit ACE... it is "the Place" afterall.
Posted By: Anonymous
Re: Paint Type Summary Request - 09/21/06 10:51 PM
Rollers with brightside questions:
The Rusto Rollers were the same ones that that hype and I used with our brightside. The white ultra fine ones from Home depot. I bought a contractors pack. I think he did too.
Posted By: Marq
Re: Paint Type Summary Request - 09/21/06 11:30 PM
Quote:
Quote:
Keeping with the lets don't read all 60 plus pages what type/nap roller should I use with Brightside?
I had the same question, I hope the fine foam ones we are using with rustoleum will work, since I have a few left.
You should be using the 4" high density foam rollers... These are different then the 'cheapo' 4" foam rollers from the dollar store.
The high density foam rollers have smaller air holes in them. The cheapo foam rollers problem is that they generate additional bubbles when rolling because of the large air pockets in the foam.
I tried using the 6" high density foam rollers... but found that they didn't apply as evenly or give you as much control when rolling.
.
Posted By: Anonymous
Re: Paint Type Summary Request - 09/21/06 11:37 PM
Rustoleum's web site still shows the Professional Safety Orange in gallon cans.
http://www.rustoleum.com/product.asp?frm_product_id=48&SBL=1Web site for Stops Rust shows the Gloss Orange.
http://www.rustoleum.com/product.asp?frm_product_id=18&SBL=1Might email them to see why you cannot find it in the stores.
I am using the Hunter Green on my fiber glass dune buggy. Still not sure how this paint job will turn out. Plan to put on one more coat next week. Results will be posted one of these days.
Posted By: Anonymous
Re: Paint Type Summary Request - 09/22/06 12:24 AM
Marq, you said that odorless mineral spirits will make for a longer drying time and that I would need to wait about 24 hours between coats. How long would I have to wait if I got the non-odorless mineral spirits, or don't thin it at all? Thanks.
Posted By: 69DartGT
Re: Paint Type Summary Request - 09/22/06 01:36 AM
Thanks Marq, you've been a big help to myself and many other members on this subject
Posted By: darenrt
Re: Paint Type Summary Request - 09/22/06 02:01 AM
Cyber I looked on Grainger Industrial supply and they show 1 gallon cans of safty orange at $50+ bucks though.
Is this the kind of color your looking for?
they can ship anywhere and have many stores in industrial areas.
Posted By: Anonymous
Re: Paint Type Summary Request - 09/22/06 05:38 AM
Quote:
Cyber I looked on Grainger Industrial supply and they show 1 gallon cans of safty orange at $50+ bucks though.
Is this the kind of color your looking for?
they can ship anywhere and have many stores in industrial areas.
Thanks for all the help in trying to track down orange guys, it is really appreciated.
Frontloader, I know that from the Rustoleum website it says the gloss orange is available, but no stores are able to order it in any capacity except spray cans. That stops rust page says it is just available, not that it is specifically available in a brush on.
In regards to safety orange, maybe I can track that down locally. I am not sure on the color however... Thanks for the tip on Grainger though.
Right now I am still in limbo, and will continue to research my "orange".
I would say right now I am leaning towards the Allis Chalmers orange as I know what it looks like, compared to just "safety orange".
We shall see... I will let you know what happens.
Posted By: Marq
Re: Paint Type Summary Request - 09/22/06 10:17 AM
Quote:
Marq, you said that odorless mineral spirits will make for a longer drying time and that I would need to wait about 24 hours between coats. How long would I have to wait if I got the non-odorless mineral spirits, or don't thin it at all? Thanks.
If you used the paint straight out of the can ( which you can do... since it is fairly wet )... the drying time ( under pleasant temperature and non-humid conditions ) is about 8 to 12 hours.
If you use the regular mineral spirits it may take 16 to 18 hours of drying time.
The odorless mineral spirit may take up to 25 hours.
.
Posted By: v8mirage
Re: Paint Type Summary Request - 09/22/06 11:01 AM
I have been using Odorless Mineral spirits and have on a couple occasions done 2 coats in a day, with out any problems. But usually end up only doing 1 coat per day. The trick I think is to NOT get it too thin.
Gerbs

Posted By: v8mirage
Re: Paint Type Summary Request - 09/22/06 11:04 AM
Here is my progress
Gerbs

Posted By: Anonymous
mineral spirits in California - 09/22/06 05:15 PM
I found 100% mineral spirits at Kelley paint. San Jose, Ca.
Also I was pressure washing the other day and blasted my test piece. Close and with the 2400 psi spray as tight as I could get it. After a minute or so I got one small piece off to the side to lift. That was it. I was suprised.
This was Stops Rust with paint thinner labled "with mineral spirits".
Now I am using Professional and 100% mineral spirits.
My car has a great base on it now. I just sanded it smooth and it is ready for the final polish coat.
But, this weekend is getting my Bronco ready for a Rubicon trip next weekend. So no paint work for a few weeks.

Posted By: Anonymous
Re: mineral spirits in California - 09/22/06 05:16 PM
another

Posted By: mopowered
Re: mineral spirits in California - 09/22/06 05:22 PM
Dude - that looks incredible!
Posted By: Exit1965
Re: Paint Type Summary Request - 09/22/06 05:58 PM
Marq- forgive me if you mentioned it before, but have you investigated the 2 part Interlux paint, Perfection? It hardens chemically, and can be rolled and tipped on just like brightside. But is more durable and probably shines up like a hardened single stage car paint. Price isn't much different, and it seems like it could be safe to roll it on, at least according to this which emphasizes that measures need to be taken if spraying.
http://www.pyacht.net/cgi-local/SoftCart...n.htm?E+scstoreBy the way, I took my fingernail to the sprayed on rustoleum in my door jambs, and if I press hard enough it comes off. So I'm looking for something HARD at this point if I am going to repaint it.
The other question is if a hardened 2 part poly would pull up the rustoleum underneath it.
edit: found this on a Sailing forum:
http://daysailer.org/forum/viewtopic.php?p=6287&sid=2a55365ad05516bb8bff5973338e3b6fA discussion of brightside and then rustoleum (of all things!) on boats. Heck, I don't know what to do. I'll probably end up moving onto the much needed mechanical work, and see how tough the rustoleum is in a couple months where I sprayed. If it's hard I can spray the whole car, if not I can revisit the brightside or Perfection idea.
Posted By: Anonymous
Re: Paint Type Summary Request - 09/22/06 08:40 PM
The literature on the brightside stuff mentions using the "rolling and tipping" method for application. Is this something that has been tried with rustoluem on car applications? Is the rustoluem to thick to do that with?
Posted By: Anonymous
Re: Paint Type Summary Request - 09/22/06 08:42 PM
Marq - Quote:
When you reach the final coat of paint and are satisfied that you have good coverage and appearance, I believe that you should wait one, two, three or four weeks before doing the final wetsand, compounding, polishing and waxing.
Wow, that's quite awhile! I finished most of the car, but I have to do some touch up work on the hood. I was going to get out the 2000 and buffing compound this weekend though, a mere 3 days after painting. All the other coats have had a long time in between coats, at least 5 days per overcoat.
Cyberbackpacker -
Quote:
I checked brightside and they don't really have an orange that I found. Plus the cheapest marine store around here wanted $37 a quart, and with my Jeep Cherokee I figure I am going to need a good 3 quarts at minimum (doing door jambs, underneath hood, inner hatch, etc.)
I have put 4 coats on my 240SX (3 door fastback, in case you're unfamiliar) and thus far I've used probably 1 and 1/3 cans. I bought 2, so I've still got some room for touchups and to fix any OOPS oversanding
Remember guys, IMHO the most important thing in a paint job is the prep work. You can get shine from a rattle can, if you work with what's under it beforehand. Brightside just happens to be longer lasting. I personally sanded with 1000 wet after each coat, and you can spend an hour on each panel. It's that kind of attention to detail that really shows at the end. Evvvvvvvvveryone was a skeptic in the beginning, now all my housemates tell me how good my "new car" looks. Great opportunity to cheaply go after a few nagging rust spots, and repaint the whole thing also. Now guys in Audi TT's, WRX STis and Evos look at ME, cause I've got the clean, stock look on a 16 year old daily driven import car in a world of loud mufflers and huge rims (with small brake drums ). It pays to be in the know!
Posted By: Marq
Re: Paint Type Summary Request - 09/22/06 09:59 PM
Quote:
Marq- forgive me if you mentioned it before, but have you investigated the 2 part Interlux paint, Perfection? It hardens chemically, and can be rolled and tipped on just like brightside. But is more durable and probably shines up like a hardened single stage car paint.
The two part Polyurathane is definitely the superior product compared to all the paints that we have discussed. However, the only downside to it is that when you mix the two parts... the clock begins on how long you have to apply and work it. I am guessing that the 2nd part is a catalyst that accelerates chemically the hardening of the paint. My biggest single fear of an inexperience person attempting to 'roll and tip' it is that the paint would not be so forgiving timewise while you are applying it. It will probably 'set up' too fast for most folks to do a good job with. The advantage of the thinned Tremclad/Rustoleum or even Brightside is that you are buying yourself extra working time before the paint locks up and becomes unworkable. IDEALLY the two part polyurathane would be a great candidate for spraying. I believe that is where it would shine and is probably best suited. However, it is particularly NASTY to spray because of the chemicals it releases into the air.
Because YOU have done so many roll ons to your car, you may one of the few people who might be able to successfully pull off a two stage roll on paint job. It is only your experience in doing roll ons that puts you in that exclusive group of folks who 'might and probably would succeed'
Quote:
By the way, I took my fingernail to the sprayed on rustoleum in my door jambs, and if I press hard enough it comes off. So I'm looking for something HARD at this point if I am going to repaint it.
Well... hardness is the key feature of the two stage polyurathane. For hardness it is probably somewhere in between a factory baked paint job and a paint shop 'baked' paint job.
Quote:
The other question is if a hardened 2 part poly would pull up the rustoleum underneath it.
Well... I can not answer that question based on any hands on experience. I can say that the Brightside polyurathane worked extremely well when I paint over the initial layers of Tremclad that I had applied. My brain seems to tell me that with the two part polyurathane... there would be no problem with the paint itself on Tremclad or Rustoleum.. BUT the probably may exist between the catalyzing agent of the 2nd part. I imagine it is like Bondo, where you add the catalyzing creme and this causes a chemical reaction with the Bondo... causing it to harden, while at the same time generating heat. It is during those initial minutes where the catalyzing is occuring that the Tremclad or Rustoleum might take offense at what is happening. If I was to guess at what would happen, I would think that it would be a massive wrinkling or elephant skin type effect... where the lower paint heaves, compresses, stretches etc and the upper coat of the two part polyurathane hardens and freezes the movement of the paint below...
Quote:
found this on a Sailing forum:
http://daysailer.org/forum/viewtopic.php?p=6287&sid=2a55365ad05516bb8bff5973338e3b6f
A discussion of brightside and then rustoleum (of all things!) on boats. Heck, I don't know what to do. I'll probably end up moving onto the much needed mechanical work, and see how tough the rustoleum is in a couple months where I sprayed. If it's hard I can spray the whole car, if not I can revisit the brightside or Perfection idea.
Well.. the boat guys have had the 'roll and tip' method going for them for quite a long time. So I figured there was a lot we could learn from their long collective history of information. That is what eventually lead me to settle on using Brightside in the end.
As I mentioned before in a previous message, I believe that the quality of paint job that you hope to end up with will most likely be best obtained by spraying Brightside. Oddly enough, even in the 'boaters' forums, they too also were fairly unified at declaring a sprayed Brightside paint job was always more professional looking than a 'roll and tip' Brightside paint job.
.
Posted By: Marq
Re: Paint Type Summary Request - 09/22/06 10:11 PM
Quote:
The literature on the brightside stuff mentions using the "rolling and tipping" method for application. Is this something that has been tried with rustoluem on car applications? Is the rustoluem to thick to do that with?
Basically the 'roll and hope for the bubbles to self-pop' is where this thread all began from. As I ventured into playing around with Brightside on the car and playing with the 'tip and roll' method... I noted in this discussion that it was probably applicable as another technique that some folks could use with the Tremclad/Rustoleum where they weren't happy with the number of bubbles that were not-self-popping.
This also evolved into one of my experiments that I called a double roller technique ... using your one roller to put the paint on and a clean roller to go over what you freshly painted to level things and pop any bubbles ( changing the 2nd roller 2 or 3 times during the paint job so that your 'clean' 2nd roller never got too saturated with paint.
You would not want to use the roll and tip on a can of straight Tremclad or Rustoleum. The paint layer would be too thick and that would defeat the original reason for why you add mineral spirits to those paints... to thin it out so that it self-levels and cures quicker.
What you will notice with a can of Brightside paint is that it sloshes around in the can... because it is already 'slightly' thinned in its original state. It has the consistency of maple syrup ( or pancake syrup for those who don't use maple syrup.) Whereas the Tremclad/Rustoleum paint, in its original unthinned state hs the consistency of liquid honey ( or STP for those who don't deal with liquid honey ). With the Charger method of cutting the Tremclad/Rustoleum with mineral spirits... the consistency of that combined minxture is like milk... not as thick as cream but not as wet as water.
So the tip and roll can be done with the Charger recipe of a mixed paint and mineral spirit, because it has the wet consistency that is closer to Brightside paint.
.
Posted By: Anonymous
Re: Paint Type Summary Request - 09/23/06 12:17 AM
Quote:
Can Marq or anyone who has used brightside comment on the hardness? I was hoping my rustoleum would be 'rock hard' by now, but I can still put an indentation in it by slicing it with my fingernail. I don't know how this will affect polishability (I guess it would?) but I don't like the fact that it isn't 'rock hard' yet, after 2 months or so...
Quote:
I am wondering now if putting the paint on too thin makes it not has hard as it could be? I put thin layers on my car, and can dent/slice the paint with my nail...
I'm dissatisfied with the hardness of the finish, and I'm considering either spraying the whole car with Rustoleum + mineral spirits, or trying boat paint with a roller...
Glad this is just a hobby and not my livelihood, or I'd be bankrupt by now...
Quote:
By the way, I took my fingernail to the sprayed on rustoleum in my door jambs, and if I press hard enough it comes off. So I'm looking for something HARD at this point if I am going to repaint it...
Looks like you guys are finally seeing the problems I talked about a few months ago...The info given on this forum goes from guess work to just plain BS!
I painted my car with "real" auto paint and here's a couple of observations for you:
a. You CANNOT paint over soft paint...if you do not remove it, it will have an adverse reaction with the two-part paint.
b. You can roll on auto paint...after adding hardener it will last about 2 hours before hardening beyond use...the upside, you can mix as little as a few ounces at a time so drying before rolling shouldn't be a problem...
Try this web page for good reasonably priced paint. It's where I orderd mine and i'm extremely happy with it...Chuck
Posted By: Marq
Re: Paint Type Summary Request - 09/23/06 01:54 AM
Oh Chuckie... this is going to be a long one...
Quote:
Quote:
By the way, I took my fingernail to the sprayed on rustoleum in my door jambs, and if I press hard enough it comes off. So I'm looking for something HARD at this point if I am going to repaint it.
The other question is if a hardened 2 part poly would pull up the rustoleum underneath it.
Looks like you guys are finally seeing the problems I talked about a few months ago...The info given on this forum goes from guess work to just plain BS!
Oh that is a real appropriate example to quote there Chuck... an area that was SPRAY PAINTED in the door jamb with an aerosol SPRAY BOMB.
I know you are starved for something to critique and use to support your anti-antirust paint bash.. but why pick on a spraybombing in a door jamb.
.
Quote:
I painted my car with "real" auto paint and here's a couple of observations for you:
Rather than a few tainted observations I would rather have you offer to us a FEW PHOTOGRAPHS... preferably a few close ups as well.
A video shot of you attempting to scratch the surface of your fresh automotive paint would also be appreciated to assure us that your paintjob can resist the deliberate digging of a fingernail into it.
.
Quote:
a. You CANNOT paint over soft paint...if you do not remove it, it will have an adverse reaction with the two-part paint.
Now... was that your BS or your GUESS ? You basically just said the same thing that I had. The only difference being that I tried to explain WHY I thought that it would not work.
But I think even a chimp in the trees in Africa could have concluded or guessed or BS's that ANY PAINT put on top of an unstable subsurface is not going to workout.
However it is not a question of whether he is spraying OVER "soft paint'... but how the catalyst and chemical reaction may react with the paint it is applied over. But then again I am only guessing
Quote:
b. You can roll on auto paint...after adding hardener it will last about 2 hours before hardening beyond use...the upside, you can mix as little as a few ounces at a time so drying before rolling shouldn't be a problem...
I don't think anyone has anything negative to say about buying automotive paint and trying to spray or roll it. Heck.. even I went to a marine paint. But let us go back to the original purpose for this thread to find the cheapest way for a home fixer-upper to do it himself at low cost and minimal mess. The Charger method has successfully achieved that for quite a few examples in this thread who posted their photographs of the finished job.
And I truly believe that if enough people were totally screwing up their 'ride' because of information contained in this thread, than they would have joined your solo chorus. It is a simple law in the consumer world that MORE PEOPLE COMPLAIN than THAN THOSE WHO TAKE THE TIME TO GIVE PRAISE. And yet oddly in this thread things are completely inverse with the number of folks that are pleased and proclaiming it far outnumbering the naysayers ( at this point which consist of just you ). Odd.
Quote:
EXIT, i noticed the post on the previous page about going broke doing the auto painting...I guess this budget paint job isn't so budget!!
Come on Chuck. Don't take what EXIT said out of context or try to pretend that you are blind to the fact that most of EXIT's work on his paint job was done to experiment, test out how the colors would look, test the technique and refine his skills and most to share with everyone what he was learning along the way. But most importantly, EXIT said it as a JOKE... an amusing distortion of fact designed to illicit a chuckle in the readers of this thread. I am confident that you have been an avid reader of this thread and so I find that attempt to distort EXIT's comments to be misleading at the least.
I am curious why we only hear from you when you sense you have picked up on something negative being said about the paint or the process. AND yet you remain silent and fail to acknowledge all the pretty darn good looking paint jobs where the proud owners have graced this thread with pictures of their cars.
And to show you that I am a fair and equitable guy... I will say that you are right to some degree. Eventually ALL PAINT JOBS end up looking like crap... and I am including in this list factory paint jobs, pro paint shop paint jobs, home spray jobs and home roller jobs. It's called ENTROPY and this affects not only your cars paint job, but even something like your human body.. in that it is a proven state of physics that there is a tendency for all matter and energy in the universe to evolve toward a state of inert uniformity. Basically put... all things turn to caca at some point.
I am sure everyone will thank you for providing the link to that company selling automotive paint. But I think a more constructive role for your postings in this thread would be to share with us what you learned while painting your car with that automotive paint.... I had no hesitation offering up that Brightside marine paint as a natural evolution of the Tremclad/Rustoleum thread and if you have been able to roller job automotive paint than I am certain there are a lot of people who would like to benefit from your hands on experience.
.
Posted By: Exit1965
Re: Paint Type Summary Request - 09/23/06 02:28 AM
Nice reply Marq. I've stopped trying to reason with Chuck, myself. When I saw that he had the most recent post on the thread, I could predict the content of his message.
One correction though - the door jambs were sprayed with an HVLP gun. As fast as the sprayed rustoleum hardened (compared to rolled), I am going to give it awhile longer, to let it completely 100% cure, before I throw in the towel on Rustoleum. At that point, the rolled on paint may be harder too. I have been dilly dallying with the paint too long, time to dilly dally with mechanical stuff.
By the way Marq, thanks for your help and your ability to analyze things like you do. If people didn't hypothesize (guess!), experiment, analyze and share results, no one would get very far in anything. It's the recipe for progress.
Posted By: Anonymous
Re: Paint Type Summary Request - 09/23/06 03:20 AM
ive sprayed (hvlp) my buick 8 coats now with no problems. i did have a hard time with the june bugs and moths landing on the wet paint..... i did the door and trunk jams with the hvlp and all is well the only thing is after wetsanding the dried sanding dust paint gets in the jams and dries so it will not be wiped off that it so far, ive tried to use mineral sprits and it didnt work so i used a scotch brite pad and rubbed the jams then repaint the jams after all the wet sanding is done... all in all this is a great way to paint a car and my friends think i am using dupont paint and clearing it after the paint has dried......
the only thing that makes this a not so cheap paint job is the prep work. i have total is 200.00 for all supplies because i didnt have any paint tools at all to do the project. but the next vehicle (1989 gmc s15 jimmy 4x4) should be cheaper now i will have sandpaper and tools to do the job. i used 3.4 quarts on my buick so far and i am done painting now all the wetsanding and buffing will be done.
Posted By: Marq
Re: Paint Type Summary Request - 09/23/06 05:36 AM
Quote:
the only thing that makes this a not so cheap paint job is the prep work. i have total is 200.00 for all supplies because i didnt have any paint tools at all to do the project.
I guess the initial expenses when you are starting from scratch do boost up the cost of the initial paint job. In my case I had to pick up a new sander... because my old one died during the prep work... and I went and picked up that Porter & Cable polisher. Well, right there I had spent about $200. But the nice thing about those expenses is that I will continue to get that investment back long into the future. The same could be said for the compound, polish, and wax... in that I have four cars that I can put them to use on..
The same story would apply if I had gone the route of buying an HVLP spray gun. Although it initially would have been used for the car, the nice thing is that once you own it, you have it available for future projects. Good tools are always a safe investment.
The cost of paint, sandpaper, tape etc are an unavoidable cost and that is where the 'budget' part of the paint job applies.
The hours spent on the prep, painting, wetsanding and later compounding/polishing and waxing can easily run up the hours. But that sweat equity is an investment in your learning. Having gone through this entire process from start to finish I have a greater appreciation and understanding of all the stages in painting a car.
The only way I can look at this whole experience is to reflect on the time when I first pulled an engine, stripped it down, changed the rings, honed the walls, changed the bearings and put it all back together. It was scarey even considering delving into the heart of that engine, but once I completed it successfully, there was a great deal of satisfaction hearing that puppy fire up and run smoothly. What price can you put on that self-satisfaction or the knowledge you picked up along the way. The same sense of fear and accomplishment also happened when I ripped apart a manual transmission and rebuilt it.
Its sort of like Star Trek... to boldly go where 'not too many' men have gone before.. and its like "A Team" because I love it when a plan comes together... "
Posted By: Anonymous
Re: Paint Type Summary Request - 09/23/06 07:40 PM
Quote:
Quote:
the only thing that makes this a not so cheap paint job is the prep work. i have total is 200.00 for all supplies because i didnt have any paint tools at all to do the project.
The cost of paint, sandpaper, tape etc are an unavoidable cost and that is where the 'budget' part of the paint job applies.
Chuckie would be like Robbie Robot on the tv show " Lost in Space "... with "WARNING.. WARNING... DANGER... Dr. Smith... WARNING.. "
So if your paying $25-30 a gallon for Rustoleum and you can purchase Acrylic Urethane for $30 a gallon and $15 for the activator, where is the big savings? The boat paint your favoring is actually the highest price...
Posted By: 69DartGT
Re: Paint Type Summary Request - 09/23/06 07:54 PM
Reminder to all lets stay focused and leave the little jabs out
Thanks Tom
Posted By: Marq
Re: Paint Type Summary Request - 09/23/06 08:24 PM
Quote:
So if your paying $25-30 a gallon for Rustoleum and you can purchase Acrylic Urethane for $30 a gallon and $15 for the activator, where is the big savings? The boat paint your favoring is actually the highest price...
...and remember, the robot was always right! Chuck
Actually the polyurathane ( Brightside ) can average $35 a quart... ( or on ebay about $35 for two gallons )...
The Brightside is the one stage polyurathane... and it is cheaper than the two stage polyurathane called Perfection. So no... Brightside is not the more expensive paint.
But what makes it more RELEVANT to this discussion is that it is purposely designed TO BE ROLLED with a 4" roller. The automotive paint that you are buying is PURPOSELY designed to be SPRAYED.
Now that is not to say that your automotive paint could not be rolled... its just that it falls into the same category as saying that honey is purposely designed to be eaten... but that it is possible to roll it too...
Posted By: Anonymous
Re: Paint Type Summary Request - 09/23/06 10:31 PM
yah i see that the pait costs 50.00 thats cool, and for someone like me to paint my first car it is a great experiance. i was going to do a real paint job and saw that it would of cost me 2,000 just for paint and primer etc. etc. etc. (dupont) so i went this route and wow it looks better than a automotive paint job. when i do my 89 s15 jimmy it will cost 50.00.
thanks 69chargeryeehaa and marq
Posted By: darenrt
Re: Paint Type Summary Request - 09/23/06 11:36 PM
I would like to than charger, exit, marq amd all the others who have given their time and efforts to these
oh so long pages
and thanks to you also chuck for offering a different opinion.
Me, I can't see paying anyone $300-$1500 bucks for a paint job on a car that
A)Is worth less than the paint job.
B)I'm going to flip when I see something wrong in the paint or my 7 year old hits it with his bike!!
So far what I've read and done seams that if done CORRECTLY this can work very well.
My fender and hood scoop look great and are hard as a diamond,
the hood has pealed but the paint that came off was hard, I suspect it was bad prep and thats my fault not the paint's.
now I'm gonna throw more fuel on the fire
a buddy of mine said when his boss would paint heavy equipment they mixed rustoeum with..........hold on!!!! gasoline
his claim is they came out looking great!
I wonder what OSHA would say
Posted By: 69DartGT
Re: Paint Type Summary Request - 09/24/06 03:03 AM
Quote:
now I'm gonna throw more fuel on the fire
a buddy of mine said when his boss would paint heavy equipment they mixed rustoeum with..........hold on!!!! gasoline
his claim is they came out looking great!
Edit: Crash truck was wiped down with AVGAS not thinned with it. Paint job still came out good though...
Posted By: Marq
Re: Paint Type Summary Request - 09/24/06 12:53 PM
Quote:
...now I'm gonna throw more fuel on the fire
a buddy of mine said when his boss would paint heavy equipment they mixed rustoeum with..........hold on!!!! gasoline
his claim is they came out looking great!
Gasoline would probably work quite well as the solvent/carrier... In fact some 'cheapo' fly by night paint shops use gasoline to wipe down the car prior to painting. Although such paint jobs usually end up peeling within 6 months...
However, the problem with gasoline mixed as the thinner for paint is that when the gasoline is evaporating off the body... you are releasing one heck of a potential explosive gas vapor.
I remember reading where a 'gasoline' thinned paint job caused a garage to explode. The guy had painted his car in the garage, using gas as the thinner. He closed up the garage and went to bed so that paint could dry overnight. Next morning he goes to the garage and flips on the light in the garage. There was enough of a spark in the light switch to ignite the gasoline vapors that had gone airborne and were in every nook, cranny and rafter of the garage. The roof on the garage lifted off the garage about 20 feet. Fortunately there was no fire... but the garage was destroyed and the car body took a beating from all the flying debris. The 'guy' who threw the light switch was thrown about twenty feet and narrowly missed being landed on by the flying roof. Cool story. The insurance company was refusing to pay for repairing all the damages because they took the position that it was 'self-inflicted' and 'deliberate'.
But just look at the warnings that are posted at your local gas station near the fuel pumps. No CELL-PHONES, watch out for Static, turn off your ENGINE etc, no Smoking... The point being that even in the well ventilate outside location of the pumps there is a risk of one of these sources igniting the fuel vapor....
The other problem with using gasoline as the carrier, especially in an enclosed or poorly ventilated work area is that gasoline has been proven as a souce of carcigens ( cancer... lung cancer and skin carcenomas etc ). Now that information was not available to people twenty years ago...
And nowadays you have one other problem... environmental concerns. Spraying or rolling a gasoline/paint mixture could be putting some nasty chemicals into the ground that would bring the wrath of enviroMENTAL neighbors or government officials.
So those are probably the best reasons I can think of for leaving gasoline for use in cars and lawnmower fuel tanks and not in the painting process.
.
Posted By: QuickDodge
Re: Paint Type Summary Request - 09/24/06 03:28 PM
Some industrial two part urethane paints are advertised as being suitable for rolling in small areas. I've not found a small area defined though. (Is it 1 square foot, 100 sq. ft., or ????)
If anyone actually tries rolling a two part paint PLEASE post the results. I'm pretty sure the base coat / clear coat paints would be almost impossible to apply with a roller due to the recoating time. (as Charger mentioned many pages ago!) An acrylic enamel, the industrial urethanes, or some other two part paint MAY work. I've never heard of anyone trying it though.
Chuck's idea of mixing the paint and hardener as you go MIGHT make this practical. For example, paint a fender and the hood, pitch the remaining paint. Mix up another small batch and do the other fender and a door. And using Marq's idea of changing rollers several times through the paint job, or each time paint is mixed, should increase the odds of success with the faster drying paint.
Exit, on your Dart you may want to use a special primer if you're putting a two part paint over your existing Rustoleum. There are still a few single component auto paints sold. I've read somewhere that a primer is made to go between the one and two parts paints and tie it all together. Don't remember which company sold it though.
Posted By: Anonymous
Re: Paint Type Summary Request - 09/24/06 06:25 PM
Well, I got started on painting my '85 Jeep CJ7 yesterday, and I have some mixed thoughts to offer as well as a question to ask.
I am using the "eBay" Brightside Fire Red paint. Yesterday was rainy here in St. Louis, but figuring it was the first coat and I did not care about gloss or haze, or whatever, I decided to go for it. Oh, Friday night I used Rusteoleum Professional Safety Red spray paint to paint the areas that are hard to get to and not really rollable.
I cut the Brightside w/approx. 10% odorless mineral spirits (could not find the regular variety). It took a while to get comfortable with the rolling technique, and honestly, I am not sure I got it right at all. It did roll right over the borders of the sprayed on areas, no problem. Though I was trying not to, I may have used too much pressure with the foam brush when "tipping" the Brightside, as I got some streaks. However, it did seem to "level" out and today, looks pretty good. Very translucent, though, which I guess is to be expected after only one coat.
But, here is a problem and question for you experienced types. Oh, just for clarification, I have never done any auto painting. But, last night (about 6 hours after rolling on the Brightside), I decided to give the sprayed areas another coat of the spray Rustoleum. While doing that, there was some overlap of the spray onto some of the rolled Brightside. What then happened baffled me--certain of those "overlap" areas got very sort of crinkly, or alligator skin-like; but not all of those areas did this.
So, what may have caused that? I know the Brightside urethane can cover the enamel, but is the Rustoleum enamel not compatible with the urethane? Or, was it maybe that those certain areas where problems occurred were not totally dried or set up yet? They felt dry.
So, now I have to go back and sand those areas. The problem with my Jeep is that there are so many areas on it that the roller really is not usable on, that other than the hood (larger and flat), I probably should just rattle can spray the whole thing.
What I think I will do is go back and sand down the crinkly areas, then spray the sprayed areas one or maybe two more coats, and be all done then with the spray. After that, I will start laying down 3 or 4 more coats of the Brightside and see what happens.
Sorry if this seems disjunct or rambling, but I wanted to report my experience as thoroughly as possible. If any of you auto painting veterans have any thoughts, advice, etc. for me, please throw it out.
Thanks!
Posted By: 69DartGT
Re: Paint Type Summary Request - 09/24/06 06:46 PM
Crusader I'm no expert but I think Rust0leum is an oil based paint and that will cause problems with most normal automotive type paints put over it.
Old days the saying was Enamel over lacquer but not lacquer over enamel the lacquer would curl/ or get the gator look.
BUT old enamel can be shot over with lacquer.
Posted By: Anonymous
Re: Paint Type Summary Request - 09/24/06 07:47 PM
I have had the crinkel thing while painting a phone with Tremclad Spray paint. I sprayed over an area that had been sprayed with a non Tremcald paint (Krylon) and the Krylon started to crinkel up. I think it's because of the etching elements and gasses escaping from the drying Tremclad.
Dont mix paints, and if you do wait a real long time for them to dry.
Posted By: Clair_Davis
Re: Paint Type Summary Request - 09/24/06 07:47 PM
I haven't used any of this stuff, but it looks like another alternative for a durable alkyd enamel. They've also got polyurethanes, etc.
PTI Paints at Aircraft SpruceI got an email last week about this stuff, and it looks pretty promising. Good range of colors, and the prices aren't bad. Can do custom mixing, too.
Clair
Posted By: Marq
Re: Paint Type Summary Request - 09/24/06 09:45 PM
Quote:
But, here is a problem and question for you experienced types. Oh, just for clarification, I have never done any auto painting. But, last night (about 6 hours after rolling on the Brightside), I decided to give the sprayed areas another coat of the spray Rustoleum. While doing that, there was some overlap of the spray onto some of the rolled Brightside. What then happened baffled me--certain of those "overlap" areas got very sort of crinkly, or alligator skin-like; but not all of those areas did this.
So, what may have caused that? !
Ok.. the Brightside was still curing. The skin on the Brightside would appear to be 'dry' but at this point ( 6 hours ) the paint underneath the skin was still evaporating.
When you sprayed the aerosol spray bomb onto some spots of drying Brightside, it would get weaken the Brightside skin and then the paint that went over it would start drying at a faster rate then the still curing Brightside beneath. As the aerosol paint dried and contracted it would pull on the semi dry Brightside skin ( which has a wetter layer between the skin and the body surface ) hence nothing between the Brightside drying skin to hold it in place as the aerosol paint skin dries. In an extreme case, you get the elephant skin... in a mild case you would have probably gotten 'orange peel'.
Thrown into this is the fact that the aerosol uses a different type of solvent as a carrier ( which may also weaken the semi-dried skin of the Brightside.
I don't think the elephant skin would have been so dramatic IF the Brightside had cured for the 18 or 24 hours.
IF you had sprayed even a Brightside or rolled more Brightside over the semi-dried skin of a previous coat of Brightside you would have encountered orange peel probably... with a slight chance of wrinkling.
So the morale of the story... be patient and always be generous in your wait times between coats etc.
Hope this helps explain what happened.
.
Posted By: Anonymous
Re: Paint Type Summary Request - 09/24/06 11:08 PM
Quick question....I've seen several cars that looked great...In your opinion (any of you) is Gloss Black do-able? I mean have any of you seen a Gloss Black roller job that you feel looks good. I tried to search and didn't see any examples, but I could have missed something.
Posted By: Anonymous
Re: Paint Type Summary Request - 09/24/06 11:57 PM
ok i just signed up for this board because i have some questions. ive been following this for some time and just started to paint a hood as a test piece. im using rustoleum gloss black, and am thinning it down with mineral spirits about 30%. it seems to have a slightly more watery milky consitancy. anyways i prepped my hood with 320, then painted, and im doing thin coats. after two coats i sand with 600, and so far i have... coat 1, coat 2, sand 600, coat 3 coat 4, sand 600, coat 5....coat 5 is drying but i can see the 600 grit scratches. am i doing something wrong. im assuming im thinning the paint too much, either that or putting it on too lightly. what do you guys think? although the paint seems to be rock hard after about 7 hours of dry time, in 50 degree weather...
Posted By: dalbers
Re: Paint Type Summary Request - 09/25/06 12:59 AM
Haven't posted for awhile. I did a test hood and let it sit in the kansas summer. I did a quick polish last night. I didn't do a very good prep job and there are some dull spots where I must not have wet sanded properly. It looks good for the amount of effort I put in it. I know with proper prep and making sure to wet sand better you would have a really nice paint job. Here are the pics.

Posted By: dalbers
Re: Paint Type Summary Request - 09/25/06 01:00 AM
Here is pic 2, you can see the dull spots

Posted By: dalbers
Re: Paint Type Summary Request - 09/25/06 01:00 AM
Pic 3

Posted By: dalbers
Re: Paint Type Summary Request - 09/25/06 01:00 AM
pic 4

Posted By: dalbers
Re: Paint Type Summary Request - 09/25/06 01:01 AM
and pic 5

Posted By: Marq
Re: Paint Type Summary Request - 09/25/06 01:31 AM
Quote:
ok i just signed up for this board because i have some questions. ive been following this for some time and just started to paint a hood as a test piece. im using rustoleum gloss black, and am thinning it down with mineral spirits about 30%. it seems to have a slightly more watery milky consitancy. anyways i prepped my hood with 320, then painted, and im doing thin coats. after two coats i sand with 600, and so far i have... coat 1, coat 2, sand 600, coat 3 coat 4, sand 600, coat 5....coat 5 is drying but i can see the 600 grit scratches. am i doing something wrong. im assuming im thinning the paint too much, either that or putting it on too lightly. what do you guys think? although the paint seems to be rock hard after about 7 hours of dry time, in 50 degree weather...
I think you are following the recipe for success properly...
Are you 'sanding' between second coats or 'wet sanding' between second coats ?
From the sounds of the 600 grit scratches it almost sounds like you are dry sanding ? If it is not a dry sanding problem... then maybe you are putting a little too much elbow grease into the 'wet sanding' ?
What type of sandpaper are you using ? In the 600 range I found the Norton's 3X sandpaper to be nicely agressive and long lasting. The 3M 600 grit is fairly decent for wet sanding.
If all else fails you might step things up to the 800 or 1000 grit for wet sanding. It is sufficiently agressive to remove any high spots and is fine enough grit that it should not leave any outrageous scratch marks ( nothing that the later 1500 and 2000 grit can't remove ).
In theory the thin layers you are adding should be able to fill in a 600 grit scratch.
IF at this moment you are looking at a body panel that bears 600 grit scratches you have one of two ways to go about getting things back on an even keel...
a ) take a 1000 grit sand paper and level the entire surface down to where the 600 grit scratches are no longer an issue. Then add your next two layers as usual.... followed by the wet sanding with the 1000 grit... or
b ) You could go ahead and lay three coats onto the 600 scratched surface. Hopefully the first coat would fill in the 600 grit scratches. By the second coat the 600 grit scratches should be history. And with the third coat your 1000 grit wet sanding should be able to level any high points that happened during this 3 coat stage.
My personal preference would be option B - as it takes you ahead three coats... whereas the option A takes you back one or two coats.
Hope this helps.
.
Posted By: Marq
Re: Paint Type Summary Request - 09/25/06 01:38 AM
Quote:
Haven't posted for awhile. I did a test hood and let it sit in the kansas summer. I did a quick polish last night. I didn't do a very good prep job and there are some dull spots where I must not have wet sanded properly. It looks good for the amount of effort I put in it. I know with proper prep and making sure to wet sand better you would have a really nice paint job. Here are the pics.
It looks pretty good from all the shots you provided. Heck if you posted those pics on eBay in an auction you could probably get some bids on it
In fact if that was on some vehicle that I was parked next to at a stop light it would not make me suspicious that it was a roller job ( and that ultimately is what we are all striving for ).
The one nice thing I have found is that the polishing and waxing stage is the most fun ( especially if you get or have an electric polisher - an in particular that Cable and Porter ). The beauty of the paint is that you can keep going at it with the polish and wax and eventually you will hit on the ultimate shine for the paint. You just have to know when to finally be satisfied and don't keep going til you reach the metal or the primer
.
Posted By: Anonymous
hanks - 09/25/06 08:09 AM
hey thanks marq, i think option b sounds better, i might even thicken the paint up a bit because after a few hours its pretty rock hard, i cant put dents in it or nething, so maybe my coats have been a little too thin..? well c, ill be sure to work on it in the morning.
Posted By: Jerry
Re: Paint Type Summary Request - 09/25/06 11:56 AM
dabler,
what color is that paint? is it the rustoleum brand or some other?
Posted By: Anonymous
Re: Paint Type Summary Request - 09/25/06 02:16 PM
i use 1,000 grit inbetween 2 coats and 2,000 for the final wetsanding, and i use gloss black with a hvlp gun.
another thing i found is if you paint the car on the driveway, the paint will dry in 1 hour and then can repaint after that. i wish i found that out 3 months ago.......

Posted By: Anonymous
Re: Paint Type Summary Request - 09/25/06 04:07 PM
for those who are new and/or still have question, you can also visit
http://cars.500megs.info/forum/viewtopic.php?t=13 for more tips.
it should work with most colors.
Posted By: dalbers
Re: Paint Type Summary Request - 09/25/06 04:19 PM
jerry,
i used the rustoleum navy blue, I thought it would come out darker than it did.
Posted By: admactanium
Re: Paint Type Summary Request - 09/25/06 05:31 PM
Quote:
Quote:
i bought an orange paint called "xo rust" that is gloss orange. it seems to be basically the same thing as rustoleum. nice shade of orange too.
Hmmm... where did you pick it up, and is it available in spray as well?
i found it at my local hardware store in venice. but i think venice hardware is a truevalue hardware store. so that might mean they carry it in other hardware stores. i think b&b hardware in culver city had it as well when i was in there a while ago.
Posted By: Anonymous
Re: Paint Type Summary Request - 09/25/06 09:57 PM
Exit... What happened? Last I saw your paint was rock hard and you were getting ready to sand/buff. Now you can slice it with your finger nail? What did I miss?
Jason
Posted By: Exit1965
Re: Paint Type Summary Request - 09/25/06 10:10 PM
Quote:
Exit... What happened? Last I saw your paint was rock hard and you were getting ready to sand/buff. Now you can slice it with your finger nail? What did I miss?
Jason
It depends how hard I push my nail into it as to how rock hard it seems. Not that a car finish will normally have a fingernail slicing against it. My dog ate my last polisher, as soon as I get a new one I'll polish it up and see if the fingernail sliceability is any indicator of shineability.
Posted By: 69DartGT
Re: Paint Type Summary Request - 09/27/06 01:48 AM
Okay my six quarts of red brightside are here, I have a question what is done in those area;s where the roller can't reach do I use a foam brush? and if so are there different grades of those?
Posted By: Marq
Re: Paint Type Summary Request - 09/27/06 02:23 AM
Quote:
Okay my six quarts of red brightside are here, I have a question what is done in those area;s where the roller can't reach do I use a foam brush? and if so are there different grades of those?
Yeah at Walmart they sell a foam brush pack with about 24 brushes in it... of three different sizes... 1" 2" and a 3". I think Home Depot may also sell those foam packs.
.
Posted By: Anonymous
Re: Paint Type Summary Request - 09/27/06 08:55 AM
Hi guys
I've had a go at re-painting my Miata. My first attempt didn't hold up to the weather and the gloss black faded really badly. I was using Tremco Metal Armour (an Australian equivalent to Rustoleum) and the paint just wasn't up to the job.
So I'm now using the Brightside Gloss Black and I'm really impressed with it even after the first coat. I sanded most of the Metal Armour off the front of the car down to the original red. The Brightside covered up 99% of the red with the first coat. I rolled it 'straight' and it looks so much better than the Metal Armour, that I had to post a couple of pics.


As you can see, there is a lot of orange peel in the boot (where I started with the Brightside), but the front of the car came out almost perfectly.
I only used the one roller, instead of the two as Marq suggested. But I found that if I kept going over the panel with the just the weight of the roller in a different direction to the one I painted, then it will still come out nearly perfectly.
Thanks Marq for showing us the Brightside alternative!!!!
p.s. Sorry for the grainy pics, all I had with me was my camera phone.
Posted By: Anonymous
Re: Paint Type Summary Request - 09/27/06 01:09 PM
Quote:
Hi guys
I only used the one roller, instead of the two as Marq suggested. But I found that if I kept going over the panel with the just the weight of the roller in a different direction to the one I painted, then it will still come out nearly perfectly.
You didn't use a foam brush to get rid of your bubbles at all? Just the original, painting roller, only in a different direction? This gets rid of all the bubbles? The thing that plagues me isn't the bubbles, nor the orange peel (minor), it is the brush marks that is left behind from the foam brush dragging. Light, heavy, dosen't seem to matter, I still get the brush strokes.
Posted By: Anonymous
Re: Paint Type Summary Request - 09/27/06 05:13 PM
Hey JL, how many coats have you applied? I put the first coat on my Jeep Saturday, then the second last evening. I did not have any problems with brush stroke lines; I wonder if you had the paint cut/diluted the right amount--did you play with that any? Yesterday during my second coat, I tried applying the paint (Brightside Fire Red) at full strength, to hopefully end up with less coats having to be applied. However, maybe due to the drier conditions (low humidity) compared to those during my first coat, the paint dried much quicker and screwed me up on part of the hood. I went back to the thinned (between 5 and 10%) paint, and it worked fine. If I were you, I would maybe just try rolling and not brushing when getting rid of the bubbles, and not use the paint full strength, if you had been doing that.
I am amazed at the shiny gloss this paint leaves. I do have a few minute bubbles in the finish, and I may wetsand them out tonight. I will try another coat tomorrow evening, cut at 5%. I have learned that I need to be real patient with this, allowing plenty of drying/curing time. In the end, I think it will turn out well and be alright.
Posted By: Anonymous
Re: Paint Type Summary Request - 09/27/06 06:02 PM
Hey, one more thing I learned, and I guess it could be summarized in saying be sure to read the product use directions. I had been using various spray paints and primers for my wheels and fender guards and other Jeep stuff. I bought the spray cans of Rusteolum Safety Red, to use in the areas I could not roll the Brightside. I figured I would use it the same way/frequency I had been using other paints. Anyway, I noticed when I sprayed my third coat that some of the areas have little cracks in them. I knew those areas had been prepped and were smooth prior to painting, and so I wondered what the deal was. I went back and read the paint can and it said to apply a second coat either within one hour of the previous coat application or after 48 hours later. Well, my second and third coats had been probably 24 to 36 hours after the first, so I guess the curing of the first coat was not complete and adding more coats messed it up. So I will have to sand those spots out and repaint. I will definitely adhere to the time guidelines on the can in the future...
Posted By: Cudajon
Re: Paint Type Summary Request - 09/27/06 06:25 PM
This is an absolutely awsome thread. Been following for months. However, there are so many posts just dying for pix. Could someone describe the various ways pix can be posted for those that don't post pix because 1. they don't know how, or 2. they feel intimidated by the process.

Posted By: Anonymous
Re: Paint Type Summary Request - 09/28/06 01:17 AM
Quote:
Quote:
Hi guys
I only used the one roller, instead of the two as Marq suggested. But I found that if I kept going over the panel with the just the weight of the roller in a different direction to the one I painted, then it will still come out nearly perfectly.
You didn't use a foam brush to get rid of your bubbles at all? Just the original, painting roller, only in a different direction? This gets rid of all the bubbles? The thing that plagues me isn't the bubbles, nor the orange peel (minor), it is the brush marks that is left behind from the foam brush dragging. Light, heavy, dosen't seem to matter, I still get the brush strokes.
No brush? I use it undiluted, maybe that is my problem then, what are you cutting yours with? I have like 5 coats on it, I have been wetsanding it pretty far down, to try and get rid of the brush marks, and ended up having to apply more coats than should be neccessary cuz I am not satisfied with the flatness. It is some shiny stuff though, just not as flat as I would like to have it yet. I have diluted it on one of my earlier attempts, and had mixed success with it.
Posted By: Anonymous
Re: Paint Type Summary Request - 09/28/06 01:19 AM
why is this thread so long??? its unbeliveable.
Posted By: Wyl E Coyote
Re: Paint Type Summary Request - 09/28/06 02:14 AM
Why IS This Post SO LONG...... BECAUSE ITS AWESOME!!!!! Just think about what is being accomplished here.... Most of the folks that have posted on this thread is probably no different than myself or yourself in tired of getting the 4000-6000 dollar price quote to paint your car. Until you can afford that luxury, we are stuck with shops that might do a half way job. Just look into all of the websites dedicated to the horrible jobs done by Maaco and other chain shop. Also just check out your locall BBB on the complaints listed there.
I think this thread should go on and on... Thank You to the Founding Fathers of the Thread ... 69Charger and all. I hope that maybe some one would create a website dedicated to this.... I would love to see more posting with pix in progress etc, but promise I will post mine as soon as my project start.
Best Wishes to all and KEEP THE PAINT ROLLING...
Posted By: Wyl E Coyote
Re: Paint Type Summary Request - 09/28/06 02:27 AM
As you can see I have some serious amount of work to do before my painting will start.
My plan - Brightside Largo Blue

Posted By: Wyl E Coyote
Re: Paint Type Summary Request - 09/28/06 02:28 AM
Another

Posted By: Anonymous
Re: Paint Type Summary Request - 09/28/06 12:05 PM
JL--for my first coat, I cut it with odorless mineral spirits, at 10%. That coat rolled on very well on the hood, which is pretty much the only horizontal surface on my Jeep. The sides were a little problematic, as I got a little bit of runs (I may have had too much paint on the roller), so I had to stay with it and keep brushing it until it dried enough not to run. For the second coat, I guess I got a little lazy and impatient and used the Brightside at full strength. That worked well on the sides (it did not run), but not on the hood--it dried too quickly (low humidity probably played a part in that) and I could not do much more than say a one foot square area before it seemed to want to start to orange peel. The bubbles got pretty firm and I had to brush it aggressively. That coat was applied on Tuesday evening; I noticed last night that I have some dried bubbles in the hood surface, so apparently, I did not brush it well. Tonight I will wet sand it.
For my third coat, to be applied Saturday morning, I will change things up a bit. I think I will do the sides (vertical surfaces) first with full strength, still only doing small sections at a time, then cut it 10% with mineral spirits for the hood. That will give me more time to work the hood, and hopefully, not result in any lasting bubbles. Assuming that works, I will probably go with 5% dilution for the succeeding coats. I suspect I will end up doing maybe 6 or 7 coats, as the red color just does not seem to hide or coat real well. It is not a problem, though, as I can do the entire Jeep in 75 or 80 minutes. I will allow at least 24 hours between painting and sanding, then painting again.
Try diluting your paint and see if that helps your situation. Good luck.
Posted By: Anonymous
Re: Paint Type Summary Request - 09/28/06 12:31 PM
Largo blue isn't as light as your car is just wanted to point that out... It's light in the sunlight but not that light. At night it's much darker.
Posted By: Wyl E Coyote
Re: Paint Type Summary Request - 09/28/06 01:21 PM
Thanks Nova, but the actual color of the car is a 1974 B5 Lucerne Blue Poly which is much much darker. The paint is heavily oxidized, like as if the Granny from whom I purchased the car from never washed or waxed it. I am kinda likeing the powedery blue that it morphed into,... if you or anyone has used the Brightside Largo Blue or any of the Blues from Rustoleum/TremClad and or Brightside, I would appreciate a post of its outcome. I read through the entire 2 part thread and I don't recall one being posted other than Dalbers ( but that was just a hood, would like to see if you did the car completely, it might be to dark for though) ....
Posted By: Anonymous
Re: Paint Type Summary Request - 09/28/06 01:23 PM
Quote:
I only used the one roller, instead of the two as Marq suggested. But I found that if I kept going over the panel with the just the weight of the roller in a different direction to the one I painted, then it will still come out nearly perfectly.
Can you plz explain your 'one roller' technique?
Posted By: Anonymous
Re: Paint Type Summary Request - 09/28/06 03:35 PM
haha. I have pictures of my own car in largo blue. I think my pictures were back in the old thread still...
It's lighter then it appears in the pictures though in real life... I wanted darker so I picked up sapphire blue to redo it, but I haven't gotten there yet....
Anyway here is a link drop for you to see:
http://www.novaslp.net/pics/v/newcar2/speedcover/img_0604.jpg.htmlhttp://www.novaslp.net/pics/v/newcar2/speedcover/img_0605.jpg.htmlhttp://www.novaslp.net/pics/v/newcar2/speedcover/img_0603.jpg.htmlhttp://www.novaslp.net/pics/v/newcar2/paint/img_0444.jpg.htmlhttp://www.novaslp.net/pics/v/newcar2/paint/img_0440.jpg.htmlThe second picture down is a good representation of what it really looks like.
All done with 2 cans of largo blue, 4 coats.
Posted By: 69chargeryeehaa
Re: Paint Type Summary Request - 09/28/06 04:44 PM
Quote:
Why IS This Post SO LONG...... BECAUSE ITS AWESOME!!!!! Just think about what is being accomplished here.... Most of the folks that have posted on this thread is probably no different than myself or yourself in tired of getting the 4000-6000 dollar price quote to paint your car. Until you can afford that luxury, we are stuck with shops that might do a half way job. Just look into all of the websites dedicated to the horrible jobs done by Maaco and other chain shop. Also just check out your locall BBB on the complaints listed there.
I think this thread should go on and on... Thank You to the Founding Fathers of the Thread ... 69Charger and all. I hope that maybe some one would create a website dedicated to this.... I would love to see more posting with pix in progress etc, but promise I will post mine as soon as my project start.
Best Wishes to all and KEEP THE PAINT ROLLING...
well put, that's exactly why i thought i'd share this method with you guys
Posted By: Anonymous
Re: Paint Type Summary Request - 09/28/06 07:08 PM
did anyone else have a problem with the gloss black fading due to the weather?
Posted By: Anonymous
Re: Paint Type Summary Request - 09/28/06 07:35 PM
yeah im wondering if the gloss black rustoleum will fade like aussies...could it be because he didnt wax it? hrmmm
Posted By: Wyl E Coyote
Re: Paint Type Summary Request - 09/28/06 08:57 PM
Thanks again Nova.... BTW NICE JOB
!!!!! Well the color is almost like I envision. I am still pretty sure this is the color I will go with, but any if there any others who has done their ride in shades of blue, please let me know. I might have missed it in all of these post as I am attempting to rereading all of the post from the begining at Genesis 1 Verse 1 " In the beginning, there was a car that needed paint job"
One more question Nova - Is THAT 2 GALLONS
? or Quarts?
Posted By: Anonymous
Re: Paint Type Summary Request - 09/28/06 11:56 PM
2 quarts. I still have about 1/3 of a can left... I did all my jambs with a brush, trunk jam area. I had removed all the side skirts and done them seperately. Keep in mind I have no roof....
We did hype's whole car with just 2 quarts also..
Posted By: Wyl E Coyote
Re: Paint Type Summary Request - 09/29/06 12:10 AM
Your AWESOME NOVA
!!!! Thanks for the reply, I got nervous. I know that Brightside sells their stuff by the quart, but my mind got the better of me and thought of a moment in gallons as in the Rustoleum solutions.. Please do let us see the final result to when you get your ride in the final color you pick. Like I said, unfortunately I have a bit of body work ahead of me. I have a few friends that WANT to help in this task. I will have my engine rebuilt by the end of this week. And will have my friend over to my " garage" ( storage unit) next weekend to start the panel straightening. The color I hope to have settled by then........
. I am open to suggestions. My interior is also Blue. Again thank you to all for the inspiration. I wanted to paint my car my self but doubt it could be done... But I have been following this for a COUPLE OF WEEKS AND READING IT LIKE IT WAS THE BIBLE.
Posted By: Anonymous
Re: Paint Type Summary Request - 09/29/06 12:30 AM
The 'one roller' technique for the Brightside is the same as the technique for the Rustoleum. Once the paint has been applied to the panel, I keep moving the roller across the panel in the opposite direction to the way it was painted with just the weight of the roller. I do it for a minute or so and all of the bubbles go away.
The Gloss Black Metal Armour faded badly because of water damage to the paint. The Metal Armour is a different paint to the Rustoleum. It has similar properties but it is made to a different 'recipe' and it is made in a different country. Just because I experienced problems with the Metal Armour Gloss Black, that doesn't mean that the Rustoleum Gloss Black will do the same thing. I'm sure that 69charger has used the Rustoleum Gloss Black on a Honda without any problems at all.
Waxing a freshly applied coat of paint is not a good idea. The paint still needs to breath to allow the solvents in the paint to escape. If I had of waxed the Metal Armour straight away, I would have had more problems with the paint than it just fading.
Posted By: Exit1965
Re: Paint Type Summary Request - 09/29/06 03:48 AM
Aussie, again you have layed down a sweet looking paint job!
When you say you rolled it straight, you mean with no thinner? What was the temperature when you were rolling?
Posted By: Anonymous
Re: Paint Type Summary Request - 09/29/06 06:31 AM
Hi Exit
I rolled the Brightside without any thinners at all. The temp for the first coat was about 18 C. When I did the second coat (yesterday) I did it outside in the sun and the temp was about 22 C. The 'outside' job went really well until a butterfly decided that the passenger's door was a great place to land, and that part of the paint got a little wrecked. Then I tried to fix it an it got a bit more wrecked....
Thank goodness for wet sanding, so I get the chance to fix these problems!!
Posted By: Anonymous
Re: Paint Type Summary Request - 09/29/06 09:14 AM
so how long should u wait after u polish before u wax??
also , whats the verdict on the brightside off ebay?? he has the color i want but am unsure if the paint is too old, or whatever.
does the brightside paint over bare metal or bondo, or is primer needed. that was one of the things that caught my eye about the rustoleum, which makes it just that much easier.
Posted By: 69DartGT
Re: Paint Type Summary Request - 09/29/06 02:05 PM
Quote:
also , whats the verdict on the brightside off ebay?? he has the color i want but am unsure if the paint is too old, or whatever.
I just bought a six pack from them off ebay, but I don't see a date stamp as least one I can read. The paint comes in an Interlux box, all cans are bright and no signs of age.
I haven't got around to using them yet but don't foresee a problem.
BTW 18C-22C is about 65F to 71F
Posted By: 69chargeryeehaa
Re: Paint Type Summary Request - 09/29/06 04:04 PM
aussie is rite, the 85 crx i painted about 13yrs ago was the first car i ever painted with this method when i was young and poor!!!! that paint was great for the next 3.5 yrs and lasted 3 winters while i was going to university in North Bay, Ontario, Canada, then i got rid of the car because it had 550,000 KMS on it
. If you know where North Bay is, you'll know that there is retarded amounts of snow, salt, ect....it's about 4-5 hours north of Toronto, Ontario, Canada, there was times where i did'nt see my car for 2 weeks at a time because it was under 6ft of snow. I painted that car in 2 days at the cottage with stuff that was lying around that my dad was using, foam rollers and all, actually it was my now wife's idea to paint it this way, so really all the credit should go to her, well not all
she actually helped me paint the car, she did all the nooks and crannys while i rollered the rest of the car. That crx was painted with no thinner, no sanding except for a quick "scuff" of the old dull, faded original paint, and it was waxed the next day. it never went dull, faded, or anything like that, but i did wax it twice a year.
here's a pic once again: those are the only pics i have of the car, taken about 2 weeks after it was painted i got the windows tinted and put on some fog lights, the first pic was when i bought the car in the spring, and it was painted in the summer. i scanned the pics from photos. It did look awesome, about a 5 footer, not bad for 2 days work!!!
Posted By: Anonymous
Profesional Results? - 09/29/06 05:25 PM
Hello Mopar guys. I have been reading this board non-stop for several days now, and had to sign up to ask a burning question. Has anyone given the Rustoleum paint a few weeks to cure and then taken it to a profesional detailer? On this and other forums talking about this method, we always come down to the cut and polish stage. Lots of people are reporting decent results with the painting methods listed, but then when they get to the polishing, they are just grasping at straws. It seems to me that a profesional detailer would be able to extract the maximum performance out of this paint, and give us a good sample of what is possible with it. Obviously, we wouldn't even think of doing this to the 67 Camaro or 68 Impala, but would definately think about doing it on the old hunting truck (88 Suburban). I would love to see just what the potential of this method is in the hands of someone that knows how to get the best out of paint. I saw the results that admactanium got, and do wonder just how nice this paint can look. Sorry to jump into your Pentastar forum, but this has been a fascinating read....
Posted By: Wyl E Coyote
Re: Profesional Results? - 09/29/06 05:42 PM
Forgive my intrustion here for I would like to answer that myself. The goal here from the very beginning to provide the best from $50 ( or something real close
.... Now while I truly beieve your request is not beyond any one's thought of possibly doing and may already have been done. But for me its all about me and how it will turn out "me" doing work. Maybe you have a buddy that does this for a living and all it will cost you is a six pack.... of beer that is.... My interest is to what we can do that would not involve professionals.
Now I need to shut up before I am kicked off the boarsd and get back to finishing my engine so I can get to start banging on the sheet metal
get to the painting myself........
Posted By: Anonymous
Re: Profesional Results? - 09/29/06 06:43 PM
Coyote,
No worries. I am just extremely curious about what the potential is. All efforts I have found so far involve a mild polish and wax, and I am wondering what can be had with a good cut and polish. I am not trying to drive the costs up, or take it out of the hands of DIYers. If more of us understood exactly what the max potential was, we would have something to strive for. It is very possible that people like Exit are looking for more than this method can provide, but I am wondering about that. Cars from the 60's did not have the greatest paint jobs from the factory, and duplicating the low gloss and sheen of these paint jobs today is very difficult. I am actually wondering if it is possible to re-create the look and feel of these paint jobs using inexpensive modern paints and techniques. If you can even get close, it will free up a ton of cash for people restoring the low value cars. As someone mentioned earlier, not everyone is restoring a 69 Daytona with a 426. (Forgive me if that isn't a high value Mopar, but it seems pretty rare and unusual to me). As I said before, it isn't a method I would consider on some of our rarer cars, but for a decent driver for my oldest (61 Buick) or my hunting truck, I would love to get reasonable results using an inexpensive method that my kids could do. The roller idea eliminates a lot of the health hazards of painting. I am just curious why no-one has taken one of their test pieces to a pro (or experienced buddy) to find out what is possible with this method. If it turns out you can get results better than a quicky single stage, this would definately put paintwork into the hands of many enthusiasts that lack the funding or opertunity to spray. Also, would like to hear more from Exit on what he is finding with the Canvass. It is strange that he was able to get a hard surface with some of his work, but not with the latest. Could the build-up be effecting this? If I recall, there is around 18 layers on this car now.
Posted By: moparguy
Re: Profesional Results? - 09/29/06 07:48 PM
http://img181.imageshack.us/my.php?image=broncogreenjv7.jpghere's my shot at it, but I did it slightly different than others, I thinned it with acetone and sprayed it out in the paint booth. So far it looks good, I'll know after i get it out of the booth monday, and ill get some more pics.
Posted By: Exit1965
Re: Profesional Results? - 09/29/06 08:01 PM
Basically from what I've noticed, it boils down to this. If I rolled it, I can still dent it with my fingernail but it does not come all the way off.
On the stuff I sprayed with a HVLP gun, it is hard, and glossy, but if I push hard enough I can get it off with my nail, but it comes off so easy once I break the surface, that I think it's an adhesion issue. I did not spend much time prepping my door jambs. I probably should have hit them with 220 to give the paint some teeth, but I didn't. The paint I sprayed seems hard enough (or would probably be very hard given 4+ weeks of curing) but it was my fault I didn't prep the surface well enough for good adhesion.
Under my hood, I did hit with sandpaper (180 maybe) before using the rechargeable spray gun, and that paint is very hard and adhesion seems good.
Alas it's not scientific since many variables changed between application methods (roll, rechargeable spray can, HVLP + compressor), but I would venture a guess that good surface prep + sprayed rustoleum would turn out well and be hard and glossy enough for an old car.
Posted By: Exit1965
Re: Profesional Results? - 09/29/06 08:02 PM
Moparguy, how many coats did you use?
Posted By: Marq
Re: Profesional Results? - 09/29/06 10:24 PM
Quote:
Hello Mopar guys. I have been reading this board non-stop for several days now, and had to sign up to ask a burning question. Has anyone given the Rustoleum paint a few weeks to cure and then taken it to a profesional detailer?
I actually gave consideration to letting a professional detailer do the final work to get the most out of my paint job.... BUT...
In the end I nixed the idea - because pro-detailers don't come cheap. And depending at what stage you are at when you hand him the car, the price can get quite out of hand... especially when they are charging by the hour.
I looked at the potential cost a pro-detailer might want and I figured that I would rather go and take $125 of that money and buy a Cable & Porter professional polisher. With that weapon in my arsenal I could do just about anything the detailer was going to do... with the difference being that my time cost nothing. And the added benefit is that I would learn what there is to learn about compounding, polishing and waxing - WHILE HAVING a lovely new tool in my collection for use on the other cars.
Now... I will agree that the one thing a pro-detailer can bring to the paint job is his EXPERIENCE. And in theory a genuine pro could max out the shine to its max.
But even in that case, I would tend to say that the painter should be the one who tries to max out his own shine. Then, if he should want to pass it along to a detailer once you've done your best... well the detailer might only have one or two hours of work that he can charge you for....
.
Posted By: Marq
Re: Profesional Results? - 09/29/06 10:38 PM
Quote:
My interest is to what we can do that would not involve professionals.
Well... speaking for myself... I can assure you that I am about the most unprofessional body and paint man that you have ever met. Most of my learning has come from the school of hard knocks where I try something, blow it and then strip it down and begin again.
I am probably like most users who first read this thread. I am familiar with Tremclad and Rustoleum and I was a little leery about this. But after looking at the recipe that was given by Charger it did strike me that it was a feasible way to do it...
And do it I did for the first five or six coats. But like the skeptical people here I also was concerned that I did not want to go through a ton of work and subsequently have my paint go bad sometime down the road. The suspicion about the long term expectancy of the Tremclad Rustoleum nagged in the back of my head as I worked away with it. BUT the paint was going on and it was doing EXACTLY what Charger had promised... so I was sold on the TECHNIQUE because even my total lack of experience was not screwing things up.
So with further reading I learned that this TECHNIQUE is tried and true by the marine guys... and this is how most boat owners get fresh paint on their boats. That little bit of knowledge gave me more comfort with the idea of using MARINE paint... since I know that a polyurathane is going to outlive an enamel paint job.
But falling back to your question, I really believe that this TECHNIQUE, no matter which of the paints you use ( Tremclad/Rustoleum or Brightside )will work and give you quite reasonable or excellent results even if you are totally inexperienced. The key thing you need to have in your TOOLBOX IS PATIENCE...
a ) patience while preparing your car body for the paint... getting it as smooth as you can..
b ) patience during the rolling and wet sanding stage...
c ) patience while your friends look over your shoulder and laugh that you are using a roller to paint your car
d ) patience while you wet sand, compound, polish and wax your car.
So in this case patience and lots of time so that you are not rushing the job will be greater assets to a good final product than if you are Joe Professional bodyman.
But I do admit that if you happen to be Joe Professional Bodyman, than the odds are that the results you can tweak out of using this technique will probably be nothing short of amazing.
.
Posted By: Wyl E Coyote
Re: Profesional Results? - 09/29/06 10:48 PM
Hi Marq.... you are singing my tune...
....
Posted By: Anonymous
Re: Profesional Results? - 09/30/06 12:57 AM
Coyote and Marq,
I don't expect anyone to take a full car in, I am just surprised that no one has taken a small test piece in.
Posted By: _Scott_
Re: Profesional Results? - 09/30/06 05:50 AM
If you look far enough back in the thread, one person with a lot of detailing experience did do a test on a motorcycle gas tank. He posted a few pics that showed results every bit as good as I would expect from a very good body shop, and much better than the run-of-the-mill body shop.
Posted By: Anonymous
Re: Paint Type Summary Request - 09/30/06 09:06 AM
Here are the results of two coats of Brightside Gloss Black, both rolled without any thinning of the paint.


I'm going to give the paint a month to fully cure and then I'll start the final wetsanding and polishing. Only thirty days to go......
Oh, and the total cost of this paint job was $39.90 AUD. $37.50 for 1 litre of Brightside and 2 foam rollers @ $1.20 each. I love cheap!!!!!
Posted By: 79asspin
Re: Profesional Results? - 09/30/06 09:46 AM
If you look far enough back in the thread, one person with a lot of detailing experience did do a test on a motorcycle gas tank. He posted a few pics that showed results every bit as good as I would expect from a very good body shop, and much better than the run-of-the-mill body shop.
I was going to say the same thing. Beautiful high gloss orange.
Posted By: Exit1965
Re: Paint Type Summary Request - 09/30/06 04:15 PM
Aussie, again that looks great and will look even better after some wetsanding to smooth out the suface.
How do you find the hardness of the paint when applied straight?
Posted By: Exit1965
Re: Profesional Results? - 09/30/06 04:15 PM
Quote:
If you look far enough back in the thread, one person with a lot of detailing experience did do a test on a motorcycle gas tank. He posted a few pics that showed results every bit as good as I would expect from a very good body shop, and much better than the run-of-the-mill body shop.
That was Admactanium.
Posted By: 69DartGT
Re: Profesional Results? - 09/30/06 06:02 PM
I think this should work Adamctanium is very talented at what he does.
https://board.moparts.org/ubbthreads/show...rue#Post2835014
Posted By: Marq
Re: Paint Type Summary Request - 09/30/06 07:10 PM
Quote:
Here are the results of two coats of Brightside Gloss Black, both rolled without any thinning of the paint.
I'm going to give the paint a month to fully cure and then I'll start the final wetsanding and polishing. Only thirty days to go......
Oh, and the total cost of this paint job was $39.90 AUD. $37.50 for 1 litre of Brightside and 2 foam rollers @ $1.20 each. I love cheap!!!!!
That little Miata looks just as sweet as any of them driving around this town and you seem to have nailed it good enough with the rollers to fool folks into thinking it was sprayed. Sweet !
.
Posted By: Anonymous
Re: Paint Type Summary Request - 09/30/06 09:30 PM
Hello Everybody. I'm new to this forum. It was linked from a Jeep Cherokee forum, and I stayed up all last night reading about this technique. I'm hoping to do my Cherokee next spring.
Marq: have you tried using a clear coat over the Brightside? Also ... do you have some more pics of your completely finished projects?
I tried to search for this, but this thread is humongous
Thanks!!
Posted By: 69DartGT
Re: Paint Type Summary Request - 09/30/06 09:41 PM
Posted By: Anonymous
Re: Paint Type Summary Request - 09/30/06 10:49 PM
Thanks for the compliments Exit and Marq.
The pics show the car to be better than it looks in the metal/plastic, but once it is wetsanded and polished, it should look just like any bc/cc job.
The paint is pretty tough already compared to the original paint. While I was bolting in the roll cage I dropped a half inch drive ratchet fitted with an extension bar onto the paint and it left a tiny mark on the paint.There is a fair bit of weight in that ratchet so I was impressed to see such a small mark afterwards. Years ago I dropped a nut onto the original paint and it chipped the paint right down to the base coat....
This leads my thinking to another aspect of our 'rolled' paint jobs that no-one has really touched upon. The costs of repairing the typical minor dings that many people get in their cars.
This is a pic of some minor rear end damage to a guy's miata in my local club.
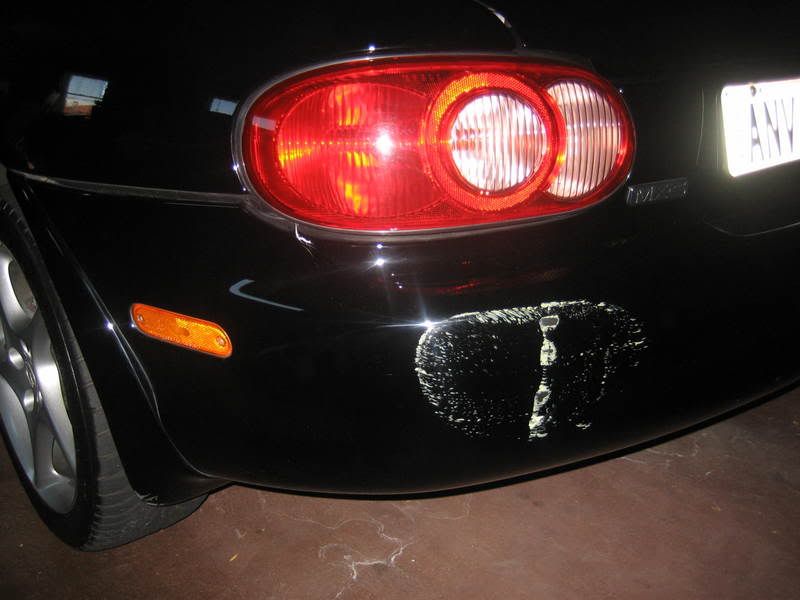
The bumper wasn't damaged apart from the paint and the total bill for his repair job came to $2700 AUD. He claimed it on insurance and only had to pay the $500 AUD excess. People on our local forum were congratulating him on 'dodging the bullet' with his insurance company covering most of the very high bill. They were saying that he was lucky that it only cost him $500.
The same situation for us would cost about nothing. We could get some of our left-over paint, fix it and it wouldn't cost us a cent.
Our paint jobs give us the opportunity to save heaps of money on our repairs as well. 69Charger, you are an automotive DIY God!!!
Posted By: Exit1965
Re: Paint Type Summary Request - 09/30/06 11:49 PM
Hey Brightside guys. I'm giving it a shot, I picked up a quart of Hatteras Off White today. In fact first I picked up regular off white, which on the nice color card I got looked like canvas white, but when I got that home it was closer to regular white. So I returned the off white. Hatteras off white is a better match to canvas white, and since I've already painted the door jambs and engine bay a close enough color, plus the fact that the color is so close, I can problably get away with 2 quarts to do the whole car.
The off white that I ended up returning, I put a foam brush in there and painted a tiny spot under my hood (full coverage) to see the color difference. At this point, it's dried to the touch and is already more scratch resistant than rustoleum would have been in the same amount of time.
I am not sure if I'll try to thin (just to try to avoid orange peel) with mineral spirits since that's an ingredient, or perhaps penetrol.
This is feeling like the neverending (paint) job, but it's something exciting to do which I hope will lead to better gloss and hardness than I got with the rustoleum. Plus, it's just fun to experiment to get the best, safe, inexpensive DIY paintjob. With all that rustoleum under there, I can be sure rust wont be an issue.
Posted By: Anonymous
Re: Paint Type Summary Request - 10/01/06 01:07 AM
Exit ... did your rustoleum ever harden properly? Did you ever find out what the problem was?
I followed your progress for about the first 40 pages or so, but by then it was about 4:00 AM, and I was getting pretty stupid.
But I've been thinking ... all of this effort you are putting in, this isn't just to get the car painted, this is making you an experienced painter. I'm sure this Dodge Dart won't be the only car you fix up, and now you can be increasingly confident of your ability to give it a great skin.
Thanks for posting all of your results and please let us know how the brightside works out. It's a big help to all of us.
Posted By: Marq
Re: Paint Type Summary Request - 10/01/06 01:18 AM
Quote:
Marq: have you tried using a clear coat over the Brightside? Also ... do you have some more pics of your completely finished projects?
I am always pleased to share my last photo-session with the McLaren Mustang...
http://www.snpx.com/AugWaxedMcLaren
Now... on the topic of a 'clear coat'. I believe that it could be done.. BUT I don't think I would recommend it. And I would probably give the very same reason as Charger gives for not suggesting it for the Tremclad/Rustoleum.
It is a question of future repairs. Let us say you have a car that only has a highly polished and waxed paint job. If you get it scratched through some minor accident all you would have to do is lightly sand the area down, wipe it down with mineral spirits and then roll on some new paint over the repaired area. And the beauty of the polyurathane is that it is 'purposely designed' to chemically merge with the previous polyurathane paint.
Now... IF you had clear coated the Brightside paint job the task of doing a less obvious repair is much more difficult. You have to sand down the clear coated area, roll on the paint to the repaired area and then lay on a clear coat to that area. I really think that you would have problems getting the repair to blend in.
The car after compounding, polishing and waxing has 'the wet look'... so I can't see any reason to lay a clear coat skin over it.
But overall, I would say that once you have done a Brightside roll job, I don't think you would see a need for a clear coat. Polyurathane is already a highly glossy and shiny surface... and that is what Brightside is. In fact I could probably have STOPPED after the final layer of paint was put on and the shine from that final layer would have looked 100% acceptable. It had that wet shiny look.... ( as would a polyurathane paint job from a pro-paint shop. )
In all my readings of the marine and boating threads... I never once saw anyone saying that Brightside wasn't shiny or glossy enough OR that it could use a clear coat to boost its shine up.
YET we in the automotive scene do something that the boaters don't do... and that is we can take our paint jobs to a higher level of shine by doing the wet sanding, compounding, polishing and waxing.
.
Posted By: Anonymous
Re: Paint Type Summary Request - 10/01/06 01:42 AM
Ok ... so just to recap: You have found the Brightside is higher gloss than Tremclad? And more durable?
Thanks!!
Posted By: rallyerick
Re: Paint Type Summary Request - 10/01/06 02:20 AM
So what's better: Rustoleum or Brightside?
Anyone tried Automotive grade paint like Nasson or something thinned out applied with a roller?
Posted By: Exit1965
Re: Paint Type Summary Request - 10/01/06 03:13 AM
Montanaman, never found out what the problem was, but "problem" is subjective so it's in the eye of the beholder. My biggest beef was that I couldn't get it to harden enough not to be able to put a slice in it with my fingernail, even after about 2 months, when I rolled it on. I know that fingernails aren't likely to be doing that in the real world, but it just bugged me since it's so unlike a regular car finish.
Spraying the rustoleum seemed to work well if the surface prep is good. I could still rip through the paint with my nail, but it took more effort and probably had to do with surface prep too.
I ran into some weird results the last couple coats of rustoleum i put on the roof, it came out dull looking. And this was put on thicker than my normal coats since I was anxious to get all the red covered up. It came out without orange peel, but really dull.

So I was/am at the point that I want to see if I can get something with better gloss, and with better hardness. Brightside is a better quality paint than rustoleum, with teflon and some UV additives for color retention, so I figured it's worth a shot since the other guys, and plenty of boaters, are having good luck with it.
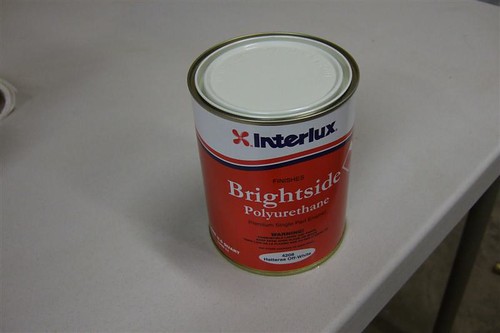
I'll post pics as I go..
Posted By: Anonymous
Re: Paint Type Summary Request - 10/01/06 07:48 AM
Well, I have been doing lots of reading and research trying to find a good "orange" and in so doing have come across some info akin to what I think Marq discovered.
Whereas Marq looked to the marine world, I turned to the world of tractors, because I am after an Allis Chalmers orange.
In so doing they have YEARS of experience painting and restoring tractors.
Here is the skinny, no real surprise just more refinements/things to consider.
First, EXIT it appears that Rustoleum can get rock hard in curing after as much as six months according to some, however it still maintains some softness. Apparently this is intentional to help in instances that have been noted here, including charger, of things falling/banging/hitting the paint and not damaging it. However the soft properties would validate your discoveries of a nail or "slicing" type of motion being able to mar/chip the paint.
Another thing, and I don't remember if this has been discussed, but Rustoleum utilizes fish-oil in its mixture-- this is what they use as a rust-preventitive agent. Found a post as recently as Aug '06 where Rustoleum was called, and even though it is not listed on the cans, fish-oil is still used. Consequently from their experiences they recommend only using rustoleum over rustoleum... some have had short term success but many others have experienced adhesion issues/etc. At this point some of chuckthompsons (?) claims start to appear more plausible as the tractor guys have history with alkyd enamels and rustoleum.
In regards to all alkyd enamels, not all are created equal, and according to research if they are stored outside for long periods of time they will all fade/discolor (I am talking to those, like myself, whose vehicles NEVER see a garage). However, some last quite a long time.
Nevertheless there are some industrial/farm implement enamels that a hardener can be used and definitely increases gloss, fade resistance, and "slicing" resistance. There are also favourable reports of brushing on enamels with hardener.
Most recommend not doing it on sheet metal because of brush marks, although they do note that slow dry times (w/o hardener) allows for quite a bit of self-leveling. This encourages me to think that combined with application methods outlined here that rolling an enamel with hardener is possible.
In regards to hardeners though, most agree to utilize recommended hardeners. There has been some mention of Valspar hardener with Rustoleum with some positive results, but there seems to be a split on whether this is a good thing- those against say if rustoleum could use a hardener they would recommend and/or market one too.
Nevertheless if rustoleum isn't seen as great as an alternative there are a number of industrial/implement/tractor enamels out there with quite a range of colors that have recommended hardeners, and the price per qt/gallon is comparable to rustoleum still, with hardener running an extra $13-$18.
Most recommed staying away from Tractor Supply Company and Quality Farm & Fleet house brand enamels though, as they seem to be on the lower end of the quality scale.
Krylon Iron Guard was recommende often and seems to be a potential paint agent for us.
Lastly there does seem to be an agreed upon pecking-order for glossiness factor- alkyd enamels, acrylic enamels, acrylic urethanes, bc/cc.
However there is some consensus that an enamel with hardener has produced results equal to and superior to urethanes w/o hardener and approaching bc/cc shine characteristics.
Sorry for the long post, and I will probably remember/discover more, but I just wanted to try and contribute the information I have found to this collaborative effort Charger created since I have received so much from it already myself.
Some more food for thought...
Posted By: Anonymous
Re: Paint Type Summary Request - 10/01/06 12:26 PM
Quote:
So what you're seeing that the paint itself is polishing well but you haven't levelled the surface of your paint. go ahead and use a harder rubber sanding block and try to stay off the edges of the block. what you can do while wetsanding is to have a squeegee of some sort and just swipe dry a section every now and then. what you should see with the use of a block is spots of dull (matte) finish and spots of shiny finish. so you're abrading away the bumps and brushmarks and NOT abrading the low spots (valleys) of the bumps.
This has been my problem, and I am going to try this solution. Is it possible to use a random-orbital 1/4-cut type sander to do the wetsanding? It has a hard enough pad on it to do the same thing I bet.
Posted By: Wyl E Coyote
Re: Paint Type Summary Request - 10/01/06 02:15 PM
HEY Folks... I am not sure if some one else had found this web site yet, But here is yet another Marine Paint Specialist - Blue Water. They seem to have some bright colors
including Orange
.... I have seem to found some more blues for myself
...
http://store.nationalpaintsupply.net/blwapoto.html
Posted By: Exit1965
Re: Paint Type Summary Request - 10/01/06 02:29 PM
I just rolled on my first coat of brightside onto the driver's fender. I thinned it very very slightly with mineral spirits. At first, I got millions of bubbles, that could not be blown out. Going over the surface lightly with the roller knocked down most of them, then after I had put paint on the whole fender, I went back over everything semi-firmly to even things out. Dog hair fell into the paint on a few occasions and it was much tougher to get it out than using thin rustoleum.
As the pic shows, there is lots of texture to the paint as it sits now. I'll wetsand it before going any further (if it dries with this texture). I would like to avoid orange peel altogether, but unless the paint is thinned more it seems like a challenge. I can try increasing the mineral spirits on my next run, but I'm afraid that will lead to more bubbles.
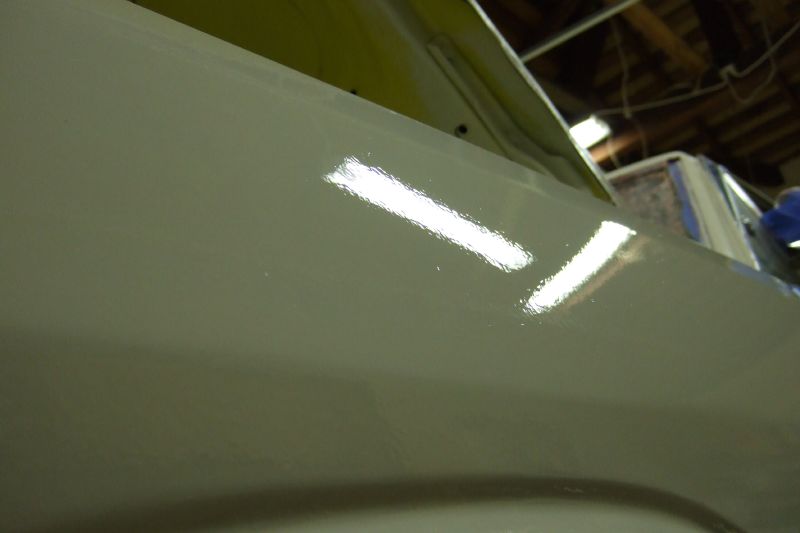
Posted By: Marq
Re: Paint Type Summary Request - 10/01/06 05:20 PM
Quote:
Ok ... so just to recap: You have found the Brightside is higher gloss than Tremclad? And more durable?
Thanks!!
Yes and most likely yes.
Yes. Any polyurathane paint is going to be automatically more glossy and shiny than an enamel That is simply a matter of their chemical characteristics. In order to get the enamel based paint up to a high gloss and shiny appearance you MUST go through the wetsanding, compoundings, polishing and waxing stages. Just remember that you can take any rock off the street and if you polish it enough it can achieve a high state of gloss and shine.
Whereas the polyurathane paint is something like painting with liquid plastic. The carrier for a polyurathane are basically like liquid plastic when painted. Hence the reason it has quite a shine and gloss just by being painted on.
But as I have mentioned, you can take the polyurathane to a higher degree of shine and gloss by going through the wetsanding, compounding, polishing and waxing stages of the process.
As for the question about durability... it is my opinion that a polyurathane is more durable then an enamel. There is a chemical structure reason for this which would support that opinion... but the easiest way to explain it to someone so that they are comfortable with that opinion is this : Enamel based paints are one of the earliest known types of paints. Over the years there has been an evoloution to improve upon the chemical structure of enamel based paints. In the world of enamel based paints you get what you pay for. This means that there are high quality and expensive enamel paints that reflect the latest chemical compounds and there are cheap enamel paints that use the minimum standards in their chemical construction. In something that folks may be more familiar with... there is a wide array of tee shirts made in the world.. or blue jeans for that example. And yet we all know that cheap jeans and cheap tee shirts don't last long. Yet there are more expensive jeans and tee shirts that just can't be killed - they last forever. Then of course we have ultra-high priced jeans and tee- shirts where you are now paying for the name of the product rather than just the quality that went into the manufacture of the product.
Now... back to paint for a second. Polyurathanes were developed by the paint chemist to evolve the old enamels into something better. They were aiming for easier application, longer durability and any other improvements that would make the polyurathane paints a superior product to the enamels. So those chemist would have been comparing their polyurathane products against the best of the enamels. There would be little point trying to develop a new product to be marketed against the cheaper type enamels. So the evolution of the polyurathanes was to produce a superior product where the benefits to using that product could justify charging a little more money for the science and chemicals used to make it.
Sorry for the long explanation, but hopefully I have gotten the point across that polyurathane is just the natural evolution of paint and so you know that it has to have superior properties to the best of the enamels.
And naturally, the polyurathanes are not the be all and end all of the paint world... there are even more superior paints available out there that have been purposely designed to give even greater durability, color lock, temperature resistance, UV resistance etc. etc.
.
Posted By: Anonymous
Re: Paint Type Summary Request - 10/01/06 05:25 PM
To Marq or others who have experience with auto painting--after my first coat of Brightside on my Jeep, it felt real smooth. After the second coat, I felt and saw these little, bitty specks that I figured were bubbles that I just overlooked and did not brush out. So, yesterday I did my third coat, and it seems that those specks are on there again. I am pretty confident that they are not bubbles. So, what are they? My guess would be dust particles, or something else from the ambient conditions? What do you guys think, and what do I do to avoid them? My garage really is not very clean, and wetting the floor is not doable. My guess is that I am stuck with them. If I do not sand until after the final coat (when I would use that ultra fine grit paste or whatever), will I be okay?
Thanks.
Posted By: Marq
Re: Paint Type Summary Request - 10/01/06 05:39 PM
Quote:
As the pic shows, there is lots of texture to the paint as it sits now. I'll wetsand it before going any further (if it dries with this texture). I would like to avoid orange peel altogether, but unless the paint is thinned more it seems like a challenge. I can try increasing the mineral spirits on my next run, but I'm afraid that will lead to more bubbles.
Since that is the first layer of Brightside over your previous Rustoleum coats, I would process this layer as being the base layer that you are now going to lay subsequent layers on. So definitely I would aim for perfecting this layer with your wet sanding so that the next two layers of Brightside will not amplify any visual imperfections. If you nail this initial layer of Brightside correctly it will make the subequent layers visually much better and with less texture.
In a worst case scenario... the cutting of the Brightside with mineral spirit, instead of the Interlux 'brushing liquid' ( product 333 I believe ) may play some role in the texture problem.
On my car I only did one layer cutting with mineral spirit ( because I had run out of the Interlux brushing thinner ). But I don't recall running into a texture problem. Possibly the fact that I was placing that Brightside layer on top of a previous Brightside layer might be the reason I didn't have a problem.
IF you again have a texture problem when you go to add your second Brightside layer over the prepped Brightside layer, I might lean towards suggesting that you lay down an uncut coat of Brightside over a wetsanded Brightside layer. That would rule out any possible interference from the mineral spirit solvent and provide you with a thicker Brightside layer to perfect with wetsanding for the subsequent layers.
.
.
Posted By: Anonymous
Re: Profesional Results? - 10/01/06 05:48 PM
Quote:
Basically from what I've noticed, it boils down to this. If I rolled it, I can still dent it with my fingernail but it does not come all the way off.
My experience echoes Exit's. I did one experiment with less mineral spirits and it dried satisfactorily hard, but the self-leveling is reduced. I'm using the "Stops Rust" variety and I've tried both odorless and stinky mineral spirits (couldn't tell a difference) in 80F deg weather.
The comments about Rustoleum paint having fish oil are false. Only the primer has fish oil.
Posted By: Marq
Re: Paint Type Summary Request - 10/01/06 06:06 PM
Quote:
To Marq or others who have experience with auto painting--after my first coat of Brightside on my Jeep, it felt real smooth. After the second coat, I felt and saw these little, bitty specks that I figured were bubbles that I just overlooked and did not brush out. So, yesterday I did my third coat, and it seems that those specks are on there again. I am pretty confident that they are not bubbles. So, what are they? My guess would be dust particles, or something else from the ambient conditions? What do you guys think, and what do I do to avoid them? My garage really is not very clean, and wetting the floor is not doable. My guess is that I am stuck with them. If I do not sand until after the final coat (when I would use that ultra fine grit paste or whatever), will I be okay?
Ok... I love a good detective mystery... and the case of the mysterious flecks has my brain trying to kick into gear.
I do know... that during the course of my painting I went through a fair number of those high density 4" foam rollers. I was mostly using the ones I had purchased at the Home Depot.
We were buying 4" paint roller trays at the local dollar store ( where they sell them for 2 trays for a bucks ) and I decided to buy two packs of the 'el cheapo' 4" high density foam rollers that they were selling. What I noticed was that the 'el cheapo' white high density foam rollers were slowly...minutely.. disintegrating during the course of the paint job. By the end of the paint job the flecks coming off the disintegrating foam rollers was quite obvious.
At that point I just stopped using those el cheapo 'dollar store' 4" high density foam rollers and from then on I stuck to the slightly more expensive Home Depot ones. Which I did not have any problems of disintergration or chemical degradation of the foam.
Now... as to dust in the air... I also experienced a bit of a problem like that. My garage is located within 30 feet of the street. There is construction going on across the street. Dust is always in the air here. And at first when I was leaving the garage door open while painting the amount of dust creeping into the garage and landing on the paint job was detectable.
So my solution to the dust problem was to CLOSE the garage door ( that was obvious eh? ) and to not begin painting until the car had sat unmolested for almost a full day. This gave whatever dust was in the garage plenty of time to settle and drop out of the air. NEXT and most important.. when I did go into the garage to begin the next coating of paint I would do two things religiously :
a ) take a 'tack cloth' and wipe the entire body of the car down. This removed any dust that may have fallen down on to the car or had been electrostatically attacted to the side panels. Just for clarification for anyone who does not know what a 'tack cloth is'... it is a cheesecloth type thing that has a sticky wax like coating on it. When you rub it over a car, television screen, computer monitor, or furniture etc... it picks up all the dust and small particles on that surface. You can buy 'tack cloths' at Home Depot, Loews, NAPA and just about any place that sells automotive or painting supplies. At NAPA I got my best price... 25 sheets in a box for $25. At Home Depot they were charging about $1.49 per sheet. A TACK CLOTH IS NOT SIMPLY some new rag from one of those cheaper by the pound bag of painter rags.
b ) then I would wipe the car down with a cloth ( LINT FREE ) that was thinly wetted with mineral spirits. It is important that it be a LINT FREE cloth and not simply some new rag from one of those cheaper by the pound bag of painter rags.
At this point the body was about as dust free as it could be in that environment and I could begin painting the next coat.
Now... one thing about flecks of dust or even bug feet that might land on the surface of the wet paint... the good news is that they can only penetrate a microscopic layer into the skin of the drying paint. They just don't have the physical weight to bury themselves too deep into the tension of the wet or drying paint. It's like those water bugs that skim across on top of the water.... where the tension of the water's surface is sufficient that the weight of the water bug can't break that surface tension. That being said... dust flecks should be removal when you hit the wetsanding stage, or the compounding stage or the polishing stage.
Now here is an odd thought. Unfortunately I have dandruff. Don't blame me. Don't blame my shampoos... I just have dry skin on my scalp. At first I was not wearing a hat while painting. But I noticed once per layer a HAIR would land on the paint. So I began wearing my hat to ensure that no more hairs would fall down on the wet paint or while I was rolling the paint. It not only stopped stray hairs from getting in my work.. but it also brought a complete end to dandruff landing on the paint.
It's pretty bad when you think about it... but a hat or one of those nylon mesh hair things used by the food industry might be essential during the course of our paint jobs. It's bad enough to be seen rolling out paint with rollers... but to have to wear a food industry mesh cover over our heads... hahhahha yikes.
But think for a moment about the proessional shop paints when they step into their painting booth. In the classy and higher quality shops the guy walks into the paint booth in a throw-away paper coverall... just to ensure that he is not bringing any contaminnts into the booth with him...
Errrmmmmm... hope these rambling thoughts help somehow. It is hard to diagnose your specific flecks without actually being there and putting the eyeballs on them
.
Posted By: Marq
Re: Paint Type Summary Request - 10/01/06 06:14 PM
Quote:
Quote:
HEY Folks... I am not sure if some one else had found this web site yet, But here is yet another Marine Paint Specialist - Blue Water. They seem to have some bright colors including Orange .... I have seem to found some more blues for myself ...
http://store.nationalpaintsupply.net/blwapoto.html
Excellent find! Not much in the green range, but the red/orange range is MUCH better. Thanks!
I LOVE THEIR RED selection. They have that darker deeper red that I was longing for...
.
Posted By: Wyl E Coyote
Re: Paint Type Summary Request - 10/01/06 06:45 PM
Yes they do have a Real Dark Asian Red
...
But I just put an order in for Continental Blue and their thinner and will try it. They have a 10% off till 10/02/06 and free ground shipping ( 9.95 handling fee though)...
Even though my ride is no where near ready for a complete job.... I just can't wait no more.. I am so jacked up about this
I'll post results on my trunk when I get it done.........
Posted By: Anonymous
Re: Paint Type Summary Request - 10/01/06 07:48 PM
gemery
Quote:
Excellent find! Not much in the green range, but the red/orange range is MUCH better. Thanks!
Check out this product that they offer:
http://www.nationalpaintsupply.com/vsite/vnavsite/page/directory/0,10853,4682-123267-124574-nav-list,00.html
It is an acrylic enamel, so superior to rustoleum's alkyd enamel, and can also use an acrylic hardener with it to enhance shine, color retention, hardness even more. The Bonus... lots of greens for you.
Posted By: Anonymous
Re: Paint Type Summary Request - 10/01/06 09:03 PM
To all you guys with marine brightside experience: Do you recommend thinning the brightside, or rolling straight from the can?
Posted By: Wyl E Coyote
Re: Paint Type Summary Request - 10/01/06 09:09 PM
Yeah... I looked into that one ( have alot of colors) but those are two part system and it requires you to spray and need a respirator....... the one I just purchased is like the Brightside and Rustoleum... into which you can roll on ...........
Posted By: Exit1965
Re: Paint Type Summary Request - 10/01/06 09:42 PM
Marq, you're darn right about the gloss. This brightside has a gloss that really jumps out at you. It looks like a BC/CC job to me (with plenty of orange peel in the CC). It looks WET, and is actually dry. That's NICE! I realize it's not going to keep this gloss forever, but it's already surpassed any rustoleum I've done in terms of gloss. You can see sprayed on (rechargeable can) rustoleum in the engine bay of this pic.
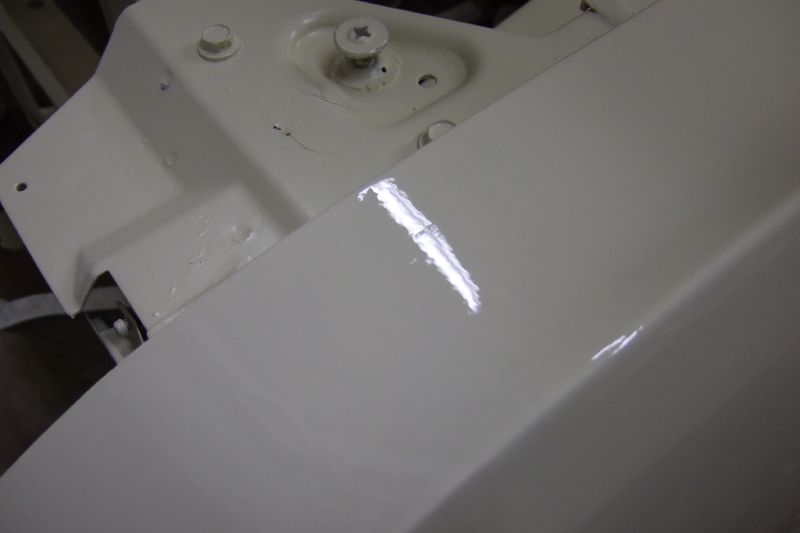
Regarding the texture, it's nothing I have not seen in your paint or Aussiedriver's paint, just typical orange peel that should wetsand out.
As for subsequent paint, I am aiming for 1 more coat. I can go over this with 800 grit to get it smooth, then use a bit more mineral spirits and lay down a hopefully smoother coat my next time. It might take 2 more coats. The color has already seemingly covered 100%, so 2 coats total should be enough, but I want there to be enough extra paint to wetsand it down smooth before polishing.. so maybe 2 more medium/thin coats at most.
Posted By: Anonymous
Re: Paint Type Summary Request - 10/01/06 10:08 PM
Exit: That looks great!! Did you spray that or roll it? Is that pic wet or dry?
Posted By: Exit1965
Re: Paint Type Summary Request - 10/01/06 10:19 PM
That's dry and rolled.. luckily the color is so close I wont have to bother repainting the door jambs or engine bay.
Posted By: Anonymous
Re: Paint Type Summary Request - 10/01/06 10:44 PM
After reading this thread, I get the following impressions about paint selection:
BEST
- Brightside
- Tremclad
- Rustoleum "Professional"
- Rustoleum "Stops Rust"
WORST
Sound about right?
Posted By: Anonymous
Re: Paint Type Summary Request - 10/02/06 12:25 AM
Quote:
Quote:
So what you're seeing that the paint itself is polishing well but you haven't levelled the surface of your paint. go ahead and use a harder rubber sanding block and try to stay off the edges of the block. what you can do while wetsanding is to have a squeegee of some sort and just swipe dry a section every now and then. what you should see with the use of a block is spots of dull (matte) finish and spots of shiny finish. so you're abrading away the bumps and brushmarks and NOT abrading the low spots (valleys) of the bumps.
This has been my problem, and I am going to try this solution. Is it possible to use a random-orbital 1/4-cut type sander to do the wetsanding? It has a hard enough pad on it to do the same thing I bet.
Anyone?
Posted By: Marq
Re: Paint Type Summary Request - 10/02/06 01:14 AM
The problem of putting a sander to the task of 'wetsanding' is that you are bound to screw up the sander. They just aren't built for getting bits of 'wet' in them... not including the potential for electrocuting yourself if you dance around the car with an electrical cord hooked up to your one side and a hose possibly in the other hand... ( Hose = pure ground )
But even if you were using a spritzer bottle to wet the surface, I would feel sorry for your sander. The odds are that its motor will get ruined or require servicing at the least.
If the situation on that last coat of paint is bad enough that you feel you need to put that extra sanding power to work... maybe the better route to go is this :
Take one step backwards in your painting process and redo things. Sometimes it is less frustrating to just take that last layer off and redo it. With the hope that if you prep for that last layer properly you will get a better result than if you just try to overwork a bad layer ? ? ?
Take the sander and using say a 600 grit.. level the sucker out. Not wet sanding it but just straight sanding to get things level again.
Look on that resurfacing as a fresh start and the paint that survives your sanding will become the base coat for better subsequent coats.
You can hit it then with an 800 or 1000 to fine grain any scratches from the 600.
Once you have it visually rectified to something or some level that is acceptable to you... then put away the sander and get out the hose and a sheet of 1000 grit paper.
With the hose going... start gently wet sanding the surface. At this point you are not having to level things... you are just polishing the surface to see if you can improve on where the 1000 with the orbital sander left off.
It really shouldn't take you very long at this point doing the wet sanding. Give yourself a maximum of only 40 minutes to go over the entire body with this wet sanding stage. That should keep you from overworking any one area too long.
Once you finish the wet sanding stage, grab a bucket of water with some dish detergent in it - not much - just a couple of table spoons of detergent - and wash the car down to get any wet sanding slag off the body part.
Let the car dry. When you are ready to roll your next coat of paint... give it all a wipe down with the tack rag to pick up any dust or hair or bugs that settled on the freshly washed body.
Then go over the car with a lint free cloth that is thinly wetted with mineral spirits - to get any final contaminants off the body.
Let it sit for about 10 or 20 minutes while whatever mineral spirits that were rubbed on the body evaporate.
Proceed to rolling on your next layer of paint at this point.
.
Posted By: Marq
Re: Paint Type Summary Request - 10/02/06 01:24 AM
Quote:
After reading this thread, I get the following impressions about paint selection:
BEST
- Brightside
- Tremclad
- Rustoleum "Professional"
- Rustoleum "Stops Rust"
WORST
Sound about right?
That matches up to what I believe a tally of the messages in this thread would total.
There is some potential for some of the other marine polyurathanes to come in close to the Brightside... but from my observations of the marine forums where they discuss painting their boats, the Brightside appears to be the most user friendly for application with a roller ( since it is purposely designed for that task ) and its durability and shine gives it an edge over most of the other one stage polyurathanes.
The new contender brought forward just a few messages earlier also has good potential and would probably also do an equal job to the Brightside - with its hidden Ace up the sleeve being that they are offering a wide selection of colors. That selection of Reds is almost enough to make me consider sanding down one layer of my finished project and redoing one or two final layers with that Asian Red over my previous Fire Red ( which I feel is a more orangy red ).
Somewhere into your selection are the FARM and Industrial version of the Tremclad/Rustoleum which would probaly rank somewhere between the Tremclad and the Rustoleum "Professional on your chart.
.
Posted By: Anonymous
Re: Paint Type Summary Request - 10/02/06 03:18 AM
Just ran across this thread yesterday. I'd just like to say thanks to all those that have been experimenting with this method.
I have a beater cadillac that I've been meaning to fix up for some time but I've been putting it off because I've been afraid of the project turning into a money pit. This thread has given me the courage to get going again. Thanks!
If I could offer a suggestion regarding the problems some folks have in keeping dust off their fresh coats I've read on other sites where they suggest grounding the vehicle to prevent it from attracting dust via static charge. A wire bolted to the frame and run to a copper pipe driven into the ground would probably work nicely for this.
Posted By: Anonymous
Re: Paint Type Summary Request - 10/02/06 03:32 AM
Quote:
If I could offer a suggestion regarding the problems some folks have in keeping dust off their fresh coats I've read on other sites where they suggest grounding the vehicle to prevent it from attracting dust via static charge. A wire bolted to the frame and run to a copper pipe driven into the ground would probably work nicely for this.
That's a great idea!! And if there's no grounded copper pipe nearby, you can run the wire to the third "ground" plug of any outlet. Not quite as direct a connection, but should work.
Posted By: kenzo42
Re: Paint Type Summary Request - 10/02/06 05:32 AM
Exit, is that Brightside white or off-white?
Marq or anyone else that has experience w/ the Interlux Brightside sample color shade guide. Is the paint an exact match as the guide?
Thanks.
Posted By: kenzo42
Re: Paint Type Summary Request - 10/02/06 05:35 AM
I read a painting book today that had suggested using a chain attached to the chassis, dangling onto the concrete floor. Is this enough of a ground?
Posted By: Exit1965
Re: Paint Type Summary Request - 10/02/06 05:59 AM
Quote:
Exit, is that Brightside white or off-white?
Marq or anyone else that has experience w/ the Interlux Brightside sample color shade guide. Is the paint an exact match as the guide?
Thanks.
It's hatteras off white. And to answer your question about the color card. I got a nice booklet called something like 'boat painting guide and color card' by interlux. In the middle is a foldout section with the color card. For the hatteras off white AND the off white, bad match to the actual color. At the store, they had a laminated color card (on legal size paper or longer) and that one had a close match to the off white and hatteras off white.
I trusted the nice, new color card in the booklet for the off white.. when i got it home, it was pretty much stark white. I took it back and got hatteras which appeared in the booklet to be more yellowish, and in fact is not as yellow, even slightly less yellow than the canvas white rustoleum.
Posted By: Anonymous
Re: Paint Type Summary Request - 10/02/06 08:43 AM
ok so im trying to paint my hood with rustoleum stop rust
and i realize i should of prob picked up some marine paint. although i am having no issue with hardness, seems fairly glossy so far, so all is well. but i did my last coat and am unsure as to what i should do now, ive been following and things seem to be changing. should i sand with 1500 then 2000 then polish, can i get away with only 1500 and polish, 2000 and polish? what would you guys recommend?? also how would the brightside red color that marq used compare to the safety red from rustoleum. i like that color but the pics marq had seemed to be a little funky looking in terms of color.
Posted By: Anonymous
Re: Paint Type Summary Request - 10/02/06 12:25 PM
Hey menappi--I am currently in the process of painting my Jeep CJ7 with both of those paints. I am spraying the Rustoleum Professional Safety Red in the hard to roll areas (in the tailgate crevices, door jambs, windshield frame, etc) and rolling the Brightside Fire Red everywhere else. I believe Marq did the same thing. Anyway, I have found the colors to pretty much be identical matches. There is, however, a huge difference in the texture/finish of the paint after it dries. The Brightside is fabulously glossy and shiny, while the Rustoleum is flatter, almost like a satin finish. That difference may narrrow, though, after final polishing and buffing.
I have put down four coats on my Jeep and have taken some pics along the way. If I can figure out how to post pics, I will do so soon, or maybe after I finish (I will probably put down two or three more coats; Marq and others are right--red does not cover real well and seems to require a lot of coats. No big deal, as I can apply a coat in about an hour...).
Posted By: 69DartGT
Re: Paint Type Summary Request - 10/02/06 01:35 PM
Crusader I use these guys for pictures, they used to have a free account as a trail not sure if they still do though. When you up load a pix to them, you click on it then right click for properties, you then copy the http address. Then here on moparts [image]paste the properties here[/image]
http://www.picturetrail.com/
Posted By: mopowered
Re: Paint Type Summary Request - 10/02/06 03:39 PM
Wanted to note a couple of things that I have experienced. 1st is that my gloss black rolled-on rustoleum experiment (whole car) is incredibly hard after only 2 coats (thinned about 20 percent w/odorless mineral spirits). This car is a project car that sits outside in the direct sunlight (South MS = extreme heat & humidity!). Also the color has NOT faded one bit in over 2 months in the elements (rain, dew, direct sunlight, etc). It remains as dark and glossy as the day I put it on only MUCH harder as time goes on. I've even had several people comment that they like the new paint job - I laugh as I tell them it is only being used temporarily to hold down the rusting until I get time to work on this particular project.
I'm wondering if Exit's problem is that his paint never sees the sunlight and therefore never gets the opportunity to fully cure...
Posted By: Wyl E Coyote
Re: Paint Type Summary Request - 10/02/06 04:03 PM
Did you thin it with mineral or their own brand? I placed my order on Friday with the their thinner and Primer..... I hope my results are better
Posted By: Anonymous
Re: Paint Type Summary Request - 10/02/06 04:06 PM
Quote:
If I can figure out how to post pics, I will do so soon,
Hey crusader ... you can also email me your pics and I'll be happy to host them on my server and post them for you.
Posted By: Anonymous
Re: Paint Type Summary Request - 10/02/06 04:55 PM
Quote:
Did you thin it with mineral or their own brand? I placed my order on Friday with the their thinner and Primer..... I hope my results are better
No thinning at all, used the double roller method right out of the can. Not too much peel and lots of gloss. Even the thinner panel (hood) can easily scratch.
i did rub and polish a small section and it did get more resistent to my nail. So maybe if the whole car is done it might toghen up. The stuff really takes some elbow grease to colorsand.
Posted By: Wyl E Coyote
Re: Paint Type Summary Request - 10/02/06 06:08 PM
Quote:
Quote:
Did you thin it with mineral or their own brand? I placed my order on Friday with the their thinner and Primer..... I hope my results are better
No thinning at all, used the double roller method right out of the can. Not too much peel and lots of gloss. Even the thinner panel (hood) can easily scratch.
i did rub and polish a small section and it did get more resistent to my nail. So maybe if the whole car is done it might toghen up. The stuff really takes some elbow grease to colorsand.
Thanks for your input Porsha.. I really hope this does not happen to me, because I think I found a blue that I really like. I am going to follow all this guides to painting this product as the manufactor states... One observation I did notice when i was painting my engine parts. The valve cover that on a clear day (DupliCol0r's Engine Enamel), the finish was hard and shiny. The other one was painted a day later and it was a rainy day, doing it in my "garage" but the finish was dull and not as hard even after 5 days.
Posted By: Marq
Re: Paint Type Summary Request - 10/03/06 12:40 AM
[quoteI did notice when i was painting my engine parts. The valve cover that on a clear day (DupliCol0r's Engine Enamel), the finish was hard and shiny. The other one was painted a day later and it was a rainy day, doing it in my "garage" but the finish was dull and not as hard even after 5 days.
I think this is one of the 'universal truths' for all the paints. If you paint on a very humid or rainy day it will lessen the gloss or shine of any paint. Ideal conditions are very low or no humidity ( and definitely no rain ).
Cool days are good because they don't rush the self-leveling of the paint. But they do add extra time on to that paint stage to make up for the slower rate of evaporation.
Suicidal hot days are a no-no because it speeds up the evaporating of the carrier and does not allow the paint all the time it may need to fully self-level.
So we don't have to just have patience... but we also need to become weathermen when timing when to paint and when to wait for optimum weather conditions.
.
Posted By: Anonymous
Re: Paint Type Summary Request - 10/03/06 12:52 AM
Posted By: Anonymous
Re: Paint Type Summary Request - 10/03/06 02:55 AM
Posted By: Anonymous
Re: Paint Type Summary Request - 10/03/06 11:23 AM
Hi Guys _________ I have seen cars painted this way !
I even bought one painted this way , You would be suprised how it turns out !
( BUT ) Tremclad has little Hardner & NO silicone additive. So Paint reactions & fisheyes are a problem to be delt with. Also tremclad tends to fade & loose its shine due to sun-exposure.
If doing a Tremclad paint job ? Get enamel hardner & silicone additive. The hardener makes dry time quicker & keeps the shine , Even makes it shine more! Also the Tac Cloth is real good idea for removing dust.
Now You could get Spirts / Reducer to thin the paint . Gas will do the job too !
When done sanding , if painting inside? Wash the floor , walls & rafters down with a light mist of water from the garden hose. Let it drip...Go out & was the Car with warm water & dish soap... Even wash it twice. ( Warm day ) let it dry. As it dries You may see spots where the water is laying up. Ring out Your wash cloth & damp wipe it off. This will help with Drying time.
Then Put the Car inside & return the next day.
Pull the car out of the shop & Mask the car.
Wet only the Floor of the shop again. Pull the car back in . Shut the door....... Run over the surface with the Reducer / sprits . Use one cloth for wet & another Dry cloth for a dry wipe.( use lint free cloth ) Now car should be DRY.
Run a Tac cloth over the car. Your ready to paint.!!
NO sponge rollers> Only Fine rollers > Thin some paint , add some hardner & silicone additive & Test Your mix.. Pick a spot down low ( Like the Rocker area )Roll some paint on.
( STOP ) Let it dry for 30min & CHECK YOUR TEST AREA. IF ? all looks good ? Tac cloth the car again & mix the paint the same again & again as close as You can.
You can save the Roller You are using if You put it in a plastic bag & put it in the Freezer. This way the paint will not dry , unless left for days.
Good Luck with all.
An Automotive ( paint , hardener , reducer & silicone additive + tac cloth )can run as cheap as 200.00_get a spray gun for under 30.00 & find a air supply.
Do it yourself & for 300.00 You will be happy & learn a little. LOL
Bill >>>>>>> P.s. Grandmas_Grape cost about 300.00 to paint.


Posted By: Anonymous
Re: Paint Type Summary Request - 10/03/06 11:35 AM
Hey Rob--thanks for posting the pics for me. I took your advice and bought a high quality bristle brush, which I will use tonight when applying coat number five. Marq, I think I may have found the culprit/source for the tiny "flecks" in my paint finish--I believe they are from reusing the foam tipping brush (even though I had it dipped/rinsed in solvent, I think maybe little bits of dried paint may have been loosened in succeeding coats and deposited on the surface) and/or maybe the foam brush itself disintegrating slightly. Really, if those are the causes, my own stupidity is the reason. I should not have been reusing the foam brushes (I hate throwing things away!). Hopefully, through using the bristle brush, putting down a couple more coats, and doing some wet sanding will give me the smooth feel to match the look it has. This is definitely a learning process for me!
Posted By: Anonymous
Re: Paint Type Summary Request - 10/03/06 12:40 PM
Jim: just a thought, but if you wetsand now, before putting on your final coat(s), you might not need to wetsand/polish your final coat if you don't want to.
Posted By: Anonymous
Re: Paint Type Summary Request - 10/03/06 12:41 PM
Has anyone sprayed Brightside yet? How did it work?
Posted By: Anonymous
Re: Paint Type Summary Request - 10/03/06 03:58 PM
Yeah, that's a thought, I could wet sand now. But, I wonder if I put two more coats on, might they in effect, cover up the tiny particles on the paint surface now, or at least, come close to covering them so that if I did have to wet sand later, there would not be as much particle "height" to sand down?
What grit sand paper should I use, whenever I end up doing it--1000, 1200, etc?
Posted By: darenrt
Re: Paint Type Summary Request - 10/03/06 06:41 PM
something for you guys that are having problems with soft paint.
Maybe it could be the foam rollers or brushes that are decomposing into the paint itself?
Causeing the paints compositoin to change and not harden?
I've noticed some of the cheap brushes just fall apart when I used them and I thew them away.
Maybe some brands of rollers are doing the same
hope this is of some help
Posted By: Anonymous
Re: Paint Type Summary Request - 10/03/06 08:10 PM
yeah what grit canwe get away with sanding before we polish? i can only find 1000 grit around me, the guys at the hardware stores told me 2000 is basically a piece of paper. so will 1000 work?
Posted By: Anonymous
Re: Paint Type Summary Request - 10/03/06 08:31 PM
you can find the higher grits at an automotive store like autozone. And I'd go at least 1500 but you really should sand up to 2k then polish. Yes it's a lot of work but this is cheap paint job not easy paint job.... Don't stop at 1000.
Posted By: Anonymous
Re: Paint Type Summary Request - 10/03/06 11:41 PM
Jim: I'm no expert on this, but I've heard that painting on top of imperfections can actually amplify them. I could be wrong tho. Marq and Exit, what do you guys think?
Posted By: Marq
Re: Paint Type Summary Request - 10/03/06 11:58 PM
Quote:
Jim: I'm no expert on this, but I've heard that painting on top of imperfections can actually amplify them. I could be wrong tho. Marq and Exit, what do you guys think?
This is where the patience factor comes in to the formula. The more time and care that you take to get the body prepped, the more superior the finished product.
The same holds true for each layer that you are coating on to the car. A bad layer is not going to magically disappear as you slap more coats of paint on. That is one of the reasons we pause between every second coat to do a little wet sanding. Just to make sure that mistakes don't build upon mistakes.
.
Posted By: 69chargeryeehaa
Re: Paint Type Summary Request - 10/04/06 12:03 AM
Quote:
Jim: I'm no expert on this, but I've heard that painting on top of imperfections can actually amplify them. I could be wrong tho. Marq and Exit, what do you guys think?
yes and no.
yes - to small really fine scratches from sanding will be "filled" by the paint in a few coats.
No - when we're talking about dents, deep scratches, ect.....painting them really makes them jump out, and then your like, OH MY GOD, look at that dent.!!!!
One tip i can give you guys is when prepping a car, use your hands to "feel" the car, they will tell you more than your eyes. you must be at one with the car, feel the car, touch the car....gently, and you will understand.
Posted By: Anonymous
Re: Paint Type Summary Request - 10/04/06 01:20 AM
ok i picked up some random orbital buffer that i saw when i was getting some sandpaper, and it says it spins at 4k rpms, non adjustable i think, will this work for buffing? i was planning onprobably doing it by hand but i figured this would be better then nothing,and it was 20 bucks.
Posted By: Anonymous
Re: Paint Type Summary Request - 10/04/06 03:44 AM
Quote:
ok i picked up some random orbital buffer that i saw when i was getting some sandpaper, and it says it spins at 4k rpms, non adjustable i think, will this work for buffing? i was planning onprobably doing it by hand but i figured this would be better then nothing,and it was 20 bucks.
Is that 4K rpms or 4K opms?
Orbital speed is usually measured in opms and 4000 opm (orbits per minute) is fine for your paint.
Rotary speed is measured in rpms and 4000 rpm (revolutions per minute) will rub your paint straight off unless you know how to handle a rotary.
My orbital polisher will max out at 7000 opm, but the most I have used is 6000 opm. My rotary polisher maxes out at 3000 rpm but the most that I have ever (safely) used is 2000 rpm. Higher speeds are workable with a rotary but I don't have that level of experience yet.
Double check the speed ratings. If it really is 4000 rpm then using that polisher could undo a lot of your work to date.
Posted By: Anonymous
Re: Paint Type Summary Request - 10/04/06 02:19 PM
Rob--I took your advice and wet sanded yesterday after work. Those "particles" disappeared very quickly. I intend to put another coat on tonight, utilizing the China bristle brush for "tipping." Hopefully, that will work well, as expected. A couple more coats and I should be home free, probably done on Monday.
Posted By: Anonymous
Re: Paint Type Summary Request - 10/04/06 03:09 PM
That sounds great, Jim. Keep going. I think I'm going to experiment with the brush when I do my XJ. Instead of spraying rustoleum in the door-jambs and such, I'll try using the brush to get the Brightside in there. I think that's where the bristles will make the biggest difference.
Your neighbors are going to look out their window on Monday and think: "What the h*ll happened to that old jeep?"
Posted By: Anonymous
Re: Paint Type Summary Request - 10/04/06 03:40 PM
Quote:
Rob--I took your advice and wet sanded yesterday after work. Those "particles" disappeared very quickly. I intend to put another coat on tonight, utilizing the China bristle brush for "tipping." Hopefully, that will work well, as expected. A couple more coats and I should be home free, probably done on Monday.
I have tried the $15 China brush technique and still get brush mark ridges. These are harder to sand out than orange peel, in my opinion.
Foam brush leaves the same tracking. I have found that using a dryer roller going in the opposite direction works better. The result is an even finish that has a better chance at self levelling than the brush strokes. The resulting peel can be sanded out more easily; without going deep into the last coats.
For me, (cheap perfectionist), I am now looking for an affordable gun and plan on shooting an exoxy primer, then use my remaining Blue Water Marine.
I am hoping I get a smoother and HARDER finish.

Posted By: Anonymous
Re: Paint Type Summary Request - 10/04/06 06:47 PM
It seems that almost everyone with soft paint problems is in California. I'm wondering if that is the issue? Maybe a different formulation for the paint?
Posted By: Exit1965
Re: Paint Type Summary Request - 10/04/06 08:19 PM
Quote:
It seems that almost everyone with soft paint problems is in California. I'm wondering if that is the issue? Maybe a different formulation for the paint?
According to rustoleum, there's no difference if we buy quarts. In gallons are where VOCs come into play, and we are restricted somewhat, but I think VOC has more to do with solvents that affect application, not the final product.
There are also probably multiple definitions of "rock hard", and some have said that it is hard, but they can slice it with their nail (leaving a dent in it). That's what I get, but no I cannot scrape the paint off with my fingernail.
The gloss on brightside is so nice compared to rustoleum that I don't think I'd use Rustoleum except on parts where shine isn't necessarily important like door jambs or engine bay.
Posted By: kenzo42
Re: Paint Type Summary Request - 10/05/06 07:03 AM
Are you guys using bondo and painting over it, w/ NO primer? If so, how does the surface appear?
Can bondo bond to existing sanded down factory paint that's in good condition? Or does it need epoxy sealer first?
Exit or Marq, would you say Brightside is nearly comparable to a factory paint job in terms or gloss? (assuming excellent body work/polish/paint technique?)
Thanks.
Posted By: Marq
Re: Paint Type Summary Request - 10/05/06 09:26 AM
Quote:
Exit or Marq, would you say Brightside is nearly comparable to a factory paint job in terms or gloss? (assuming excellent body work/polish/paint technique?)
Thanks.
Because Brightside is a polyurathane, it would tend to take the appearance of a clear coat paint job. So yes... it can achieve results that are better than the 'standard issue' factory paint job. As previously noted in this thread, take some time to go to a Ford, Chrysler or GM new car dealership and give a good and critical stare at the paint on the new cars. You will probably be surprised that the reality on the car lots is less perfect than we imagine or believe you would find on a new car paint job. This is especially true with the orange peel effect that you will see in the new car paint factory paint jobs.
But on the topic of polyurathane.. Take a look at the MAACO web site for the four types of paint jobs they offer :
http://www.maaco.com/paint.aspx
What you will notice is that the 'el cheapo' Ambassador MAACO paint job is the enamel
The next 'better' MAACO paint job is the 'Presidential' which is a catalyzed or hardened enamel
The next 'better MAACO paint job is the 'Supreme' which is a single stage polyurathane. Brightside is a single stage polyurathane.
And their 'top of the line' ( errrm.. most expensive ) is the 'Signature' which is a base coat/clear coat polyurathane.
So I think the Brightside can achieve an equal result to the MAACO 'Supreme' paint job - and it may even be close to their 'Signature' paint job for overall gloss and shine.
.
Posted By: Exit1965
Re: Paint Type Summary Request - 10/05/06 12:14 PM
Quote:
Are you guys using bondo and painting over it, w/ NO primer? If so, how does the surface appear?
Can bondo bond to existing sanded down factory paint that's in good condition? Or does it need epoxy sealer first?
Exit or Marq, would you say Brightside is nearly comparable to a factory paint job in terms or gloss? (assuming excellent body work/polish/paint technique?)
Thanks.
Re the bondo, I have the same question, and I'm finding out now. I'm going to repaint the whole car with brightside, and there was one dent that needed some fixing. In the past, I've bondod right over rustoleum after a bit of scuffing, and so far, so good.
This time, I scuffed the area with 80 grit, which took it down to the safety red and a bit beyond, then spread the bondo. When the dent is fixed, I'm going to use an industrial strength rattlecan primer, then wetsand the primer smooth, then I think I'll be ready to paint. In the past when I've painted with rustoleum right over the bondo, the bondo has always soaked in a few coats so was much slower to achieve coverage there, than on unbondoed areas. I am thinking that primering it will put a hard layer that the paint can stick to, rather than the paint being absorbed into the bondo. I should have the dent fixed and primered tonight.
And re the gloss, yes I would compare it to a standard car paint. The gloss with rustoleum was something I had to LOOK for at the right angle, but the gloss with brightside really jumps out at you. It's a huge difference, and easily seems worth the additional money over rustoleum. It should also be a time saver since fewer coats are needed.
Posted By: Anonymous
Re: Paint Type Summary Request - 10/06/06 02:50 AM
I'm definitely going to paint my Jeep next spring when the weather warms up again. I'm in north-west Montana, and the weather is a little too unpredictable this time of year. We're getting down to freezing at night.
I'm going to go with a primer coat of Interlux Pre-Kote, wetsanded, followed by 6 or 7 coats of Brightside off-white, wetsanded between each coat. Total cost of materials should be less than $150, which is still pretty cheap.
I'd like to use a roller and brush for the entire vehicle, but I might have to buy a little detail gun for the door jambs.
The thing that I'm least confident about is the final wetsanding, rubbing out, and polishing. I've had bad luck with that in the past, and I'd hate to ruin that beautiful gloss. Does anybody know of a website with lots of specific info on rubbing out a paint job?
Also, I think I read a while back that Brightside white tends to yellow a bit in the sun. Has anybody heard that?
Any other advice for this project? I want it to look good and last a long time.
Posted By: Exit1965
Re: Paint Type Summary Request - 10/06/06 04:51 AM
I've heard that alkyd enamels can yellow if NOT in sunlight, like they need some UV light on them or they'll yellow. Awhile back I called Rustoleum, and they said "no, it wouldn't". I have read about a person who used Glidden alkyd enamel in white, and it yellowed when applied indoors.
Washing machines and dryers come to mind, these are probably painted with an oil based enamel (cheap, durable) and they do not yellow although it's possible there is some blue in there that keeps the yellow away.
With respect to brightside, since boats are outside, maybe the phenomenon of yellowing is not common. My car is going to be in the garage most of it's life, so I expect mine would yellow if anything since there is some alkyd enamel in the brightside. The hatteras white I'm using is already slightly yellow, so it may be even more prone to yellowing. If it does yellow in a few years, I can always drop another $75 and paint it gray or something.
All in all, I'm not sure if it will or will not yellow, but I do know the possible yellowing is from lack of sun light, not too much..
Posted By: Anonymous
Re: Paint Type Summary Request - 10/06/06 02:51 PM
Exit: Thanks for the response ... makes sense.
The only other thing I'm worried about is the final coat. I'm not sure I can polish it well enough to get the gloss back. Anybody else here have experience polishing Brightside?
Posted By: Marq
Re: Paint Type Summary Request - 10/06/06 03:11 PM
Quote:
The thing that I'm least confident about is the final wetsanding, rubbing out, and polishing. I've had bad luck with that in the past, and I'd hate to ruin that beautiful gloss. Does anybody know of a website with lots of specific info on rubbing out a paint job?
A good article that I read several times is at :
http://www.automedia.com/ColorSanding/and/Buffing/res20030601cs/1
Quote:
Also, I think I read a while back that Brightside white tends to yellow a bit in the sun. Has anybody heard that?
Yellowing is a non-factor. Do not worry about it. It might yellow in 10 or 15 years.. but I suspect you will have either gotten rid of the vehicle by then or undertaken another paint job to refresh the look. IF you are really concerned about any yellow... then buy the smallest 'dark blue' can of Brightside and put one DROP into your quart. That will absolutely guarantee no chance of yellow in the future.
Quote:
The only other thing I'm worried about is the final coat. I'm not sure I can polish it well enough to get the gloss back. Anybody else here have experience polishing Brightside?
Brightside wetsands, compounds and polishes EXCELLENTLY. My biggest advice would be to get a Cable & Porter 7424 polisher. It will make the task of compounding and polishing FUN. If you look back in this thread I gave a blow by blow of my experience compounding and polishing the Brightside. I also passed a few thoughts regarding compounding products, polishes and waxes. It was pretty detailed and there were also answers given to address specific questions at the time. There was too much info to echo again here...
But fall back to the final pictures and the two videos I posted when I finished compounding, polishing and waxing my Brightside paint job ( especially the two videos on that page ). And since I am a complete newbie when it comes to this C, P & W the results I feel are obtainable by any other humanoid or chimp life form that can hold on to a polisher ...
http://www.snpx.com/AugWaxedMcLaren
.
.
Posted By: Anonymous
Buying Interlux Brightside in Canada? - 10/07/06 04:58 AM
Any Canadians know where to buy Interlux Brightside paint? Seeing that everyone is having more glossy results using brightside, I thought I would change over to this method and return my tremclad to home depot.
I found some on Ebay, but I don't think they will ship to Canada.
Thanks.
Posted By: admactanium
Re: Profesional Results? - 10/07/06 07:00 AM
Quote:
If you look far enough back in the thread, one person with a lot of detailing experience did do a test on a motorcycle gas tank. He posted a few pics that showed results every bit as good as I would expect from a very good body shop, and much better than the run-of-the-mill body shop.
I was going to say the same thing. Beautiful high gloss orange.
hi guys. that was me. i've been meaning to get back to that but i've been travelling and been lazy. i do need to finish up a gas tank though. so if i'm not out of town next week i'm going to try to finish it up and give it a nice shine. plus, i got a nice new camera.
Posted By: Exit1965
Re: Buying Interlux Brightside in Canada? - 10/07/06 07:44 AM
Quote:
Any Canadians know where to buy Interlux Brightside paint? Seeing that everyone is having more glossy results using brightside, I thought I would change over to this method and return my tremclad to home depot.
I found some on Ebay, but I don't think they will ship to Canada.
Thanks.
Try West Marine.
http://westmarine.geoserve.com/DLRWMarine/Canada.htm
That's where I got my brightside, but in Sacramento. And they even took back an opened can because I thought the color wasn't right (and it wasn't!). With tax, I paid about $34 USD out the door. When you think about shipping costs, it's probably not much more than buying it online and paying $25 a quart + shipping. Getting it fast and being able to return it is worth the extra money , if you have a West Marine around.
If you don't have one around, call any boating place and they can either order it or tell you where you can get it in town.
In my Dart painting news, I've just about fixed that body line error that I saw after painting. I am planning on shooting the brightside through my HVLP gun. One guy I talked to at a marine place said it sprayed fine, and the gloss was great, and he said use two thin coats or it'll run. So that's the plan, and I'm thinking I'll give the first coat a good week to dry, then wetsand, then do the final coat. Spraying it will be much faster than rolling, and should be less stressful even though rolling isn't all that bad.
Posted By: Marq
Re: Buying Interlux Brightside in Canada? - 10/07/06 12:33 PM
Quote:
Any Canadians know where to buy Interlux Brightside paint? Seeing that everyone is having more glossy results using brightside, I thought I would change over to this method and return my tremclad to home depot.
I found some on Ebay, but I don't think they will ship to Canada.
You should be able to find the paint in any boater's supply store. You will need to dig out your phonebook and see if you can locate a marine supply place near you. If you have water and boats within a reasonable distance from your location, then it is almost guaranteed there is a store within range that is selling all the little doodads that boaters need.
If you are totally landlocked and there are no boater supply joints within a reasonable range, then you can check out "The Chandlery" in Ottawa Ontario at :
http://www.thechandleryonline.com/

They even have a 1 800 number
They have been in business for over 25 years and are possibly one of the biggest online, phone and mail order boating suppliers that will ship ANYWHERE. But most importantly they are in Canada and will ship anywhere in Canada
I suspect they also will ship to the United States because their web site quotes prices in both US and Canadian dollars.
But the single most important reason why I am comfortable recommending them is that I have been in their store, seen their staff in action and I was thoroughly impressed by how professionally their operation is run... serving people in the store and in shipping stuff out to people who have placed orders over the phone and via the Internet.
Many places will not or can not ship paint across borders between Canada and the States. This is normally a problem because the 'shipping companies' don't want to transport 'flamable' goods. So if you are in Canada, then it is best to try to order from a company within our borders. But at least these folks at the Chandlery appear to have their act down pat as to doing cross border shipping and interprovincial shipping ( if you are not in Ontario ).
Here is the exact page on their web site where they list their Brightside paints :
http://www.thechandleryonline.com//product.asp?dept%5Fid=2706&pf%5Fid=BRIGHTSIDE
And here is the page on their web site where they list the Interlux "Brushing Liquid" product 333 ( which you use as the solvent for thinning the Brightside paint :
http://www.thechandleryonline.com//product.asp?dept%5Fid=2717&pf%5Fid=223%5FP19141
But I can't think of too many places in Canada where you won't be able to hunt down a marina or boater supply joint. East Coast, West Coast.. or just about any major population area where boaters will be found you will find some shop selling paint and boating supplies. Yup.. even in the Prairies, I have to assume there are folks with leisure or sporting boats.. and they need the paint, anti-fouling coatings etc.
Hope this info helps
.
Posted By: Anonymous
Re: Buying Interlux Brightside in Canada? - 10/07/06 02:01 PM
Thanks for all the help in hunting down this stuff! I thank you very much. I found a place near Downtown Toronto where I work and will be checking it out. Here's the address for those of you interested in a Downtown Toronto Location:
http://www.gencomarine.com/store/groupdetail.cfm?CatID=6&SubCatID=74&ProdID=0&GroupID=95I have a question regarding the Brightside painting method. It seems that its hard to lay down with a roller without any orange peel or waves. Do you suggest cutting the Brightside more with mineral spirits to get a more even texture/layer? I've read the wikki outlining the steps on how to paint the car:
http://carpainting.wetpaint.com/page/Rollering+Interlux+Brightside+Polyurethane+PaintI noticed you cut it with 5-10% of #333. Do you believe cutting it more would work better in terms of getting a more smooth texture?
Thanks.
Posted By: 69DartGT
Re: Buying Interlux Brightside in Canada? - 10/07/06 02:14 PM
Quote:
In my Dart painting news, I've just about fixed that body line error that I saw after painting. I am planning on shooting the brightside through my HVLP gun. One guy I talked to at a marine place said it sprayed fine, and the gloss was great, and he said use two thin coats or it'll run.
Dave do me a favor when you fix the paint for spray in the old days we would stir the paint in the cup & lift the stir stick and count how long the paint took from a single line off the end to the start of drops that was about right a count of 5 for spraying old way how do the tell now?
Posted By: Anonymous
240sx 91 red gloss tremclad 2 tones - 10/07/06 03:06 PM
Hi there from Quebec, first thank you very much for the one who showed us how to paint a car like that. This is my 91 240sx that needed a paint job and i used a sucion feed spray gun tremclad red gloss (tint) base and black gloss. ps: the paint is at the stage rubbing compound turtle wax, worked really great for me.. still needing polishing compound and wax... looks amazing now. And on these photos the front bumper is now wet sanded and no buffing you can see the difference. Looks better when the sun is shinning... i don't have a digital camera so i just have theses photo.
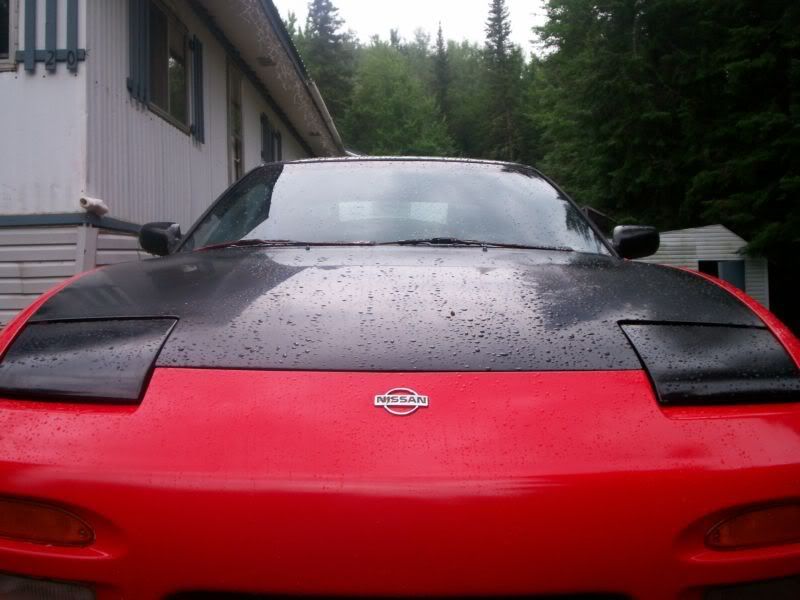
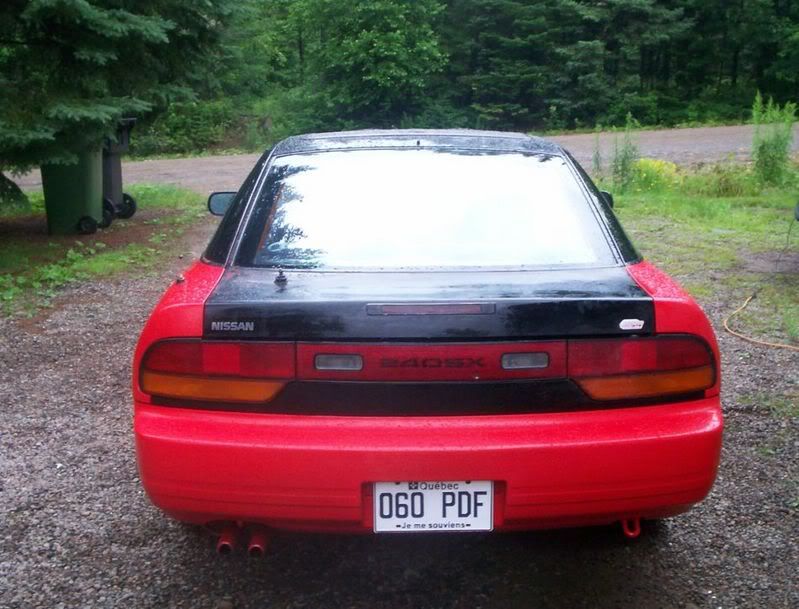
I know the tires and wheels got paint but who care it's easy to remove
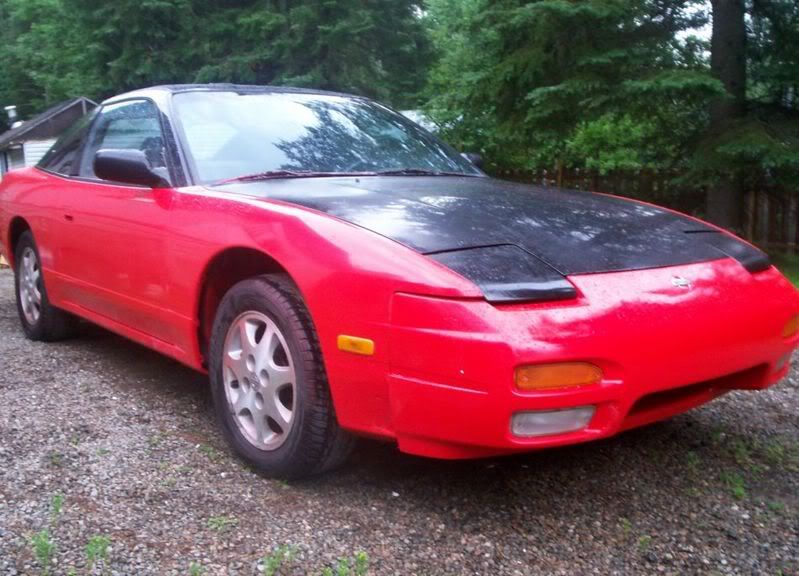
Posted By: Anonymous
Re: Buying Interlux Brightside in Canada? - 10/07/06 03:20 PM
Exit ... what are you going to use for thinning the Brightside before spraying?
Posted By: Marq
Re: Buying Interlux Brightside in Canada? - 10/07/06 03:21 PM
Quote:
I noticed you cut it with 5-10% of #333. Do you believe cutting it more would work better in terms of getting a more smooth texture?
I would not over cut the paint if rolling. Too much thinner may affect the way the paint works. We have had a previous discussion in the thread where the results of an over thinned roll job were not adhering or hardening as the paint normally adheres and hardens. If spraying.. well you have to dilute to the point where it will function properly with the spray gun. But overall I don't think that over thinning will result in a smoother or glossier finish. In fact overthinning may steal a bit of the gloss/shine.
In an extreme case of overthinning I believe that it may 'cloud' the final shine/gloss. This probably holds true for the Tremclad/Rustoleum paint as well.
The votes so far are mixed on Brightside straight from the can or cut 5% to 10% ( the manufacturers recommended limits )
For the most part of my project I was cutting the Brightside with about 5% to 10%... depending what looked good when I mixed it in my roller tray.
Some users have painted it 'straight from the can' and have had good results.
In retrospect, if I were to do it all again using the roller.. I would probably try laying down at least the first layer 'au natural'.. straight from the can with no dilution. My thought behind that is that this would give 'good' color coverage for that initial coat, it would provide me with a slightly thicker first layer to work out any imperfections in the body work and it would probably provide the maximum adhesion to the subsurface because it has not be diluted.
The subsequent layers could be thinned, so that you are building up your coats slowly and giving yourself lots of opportunity to correct any surface imperfections with your wetsanding of every second layer.
Now... when it comes to the final layer of paint, I am of mixed minds on what might work out better.
On one hand the final layer could be the 'thinned' paint. On the other hand I can see using a 'straight from the can' ( no dilution ) for the final layer.
IF you went with the 'straight from the can layer for your last coat, it will give you a thicker surface for doing the final wetsanding and compounding. You end up with a little extra weasle room to 'work' that final layer to its smoothest and shiniest.
BUT in support of a thinned layer for the final coat, I can argue that it will possibly self-level better ( hence be shinier ). This could reduce the amount of wetsanding and compounding that you will need to do to work up the shine of the last coat.
And unfortunately it is kind of hard to say which recipe to follow. That is because only YOU will know how your technique of applying the paint is going.
If things are going super with each additional coat of paint... it might be more advantageous to go with that final layer with a diluted paint.
But if you are having a bit of a problem with your rolling technique and not easily nailing a good result with each layer - or finding that you have to do a little extra wetsanding between every second coat, possibly the non-diluted paint for the final coat will give you that 'weasle room' you might need when you go to the wetsanding and compounding stage.
Funny thing is that for the 'boaters'... they just roll on two coats ( straight from the can ) and that seems to nail it. But I think the boaters have one advantage over our car bodys. The boats usually have an ulta smooth surface to begin with. It is no where near as rough as our car bodies are when we start laying down the paint. So in a way our first coat of Brightside is attempting to give us a self-leveled smooth layer. And our second or third coats is more like the boaters first or second coat of paint. Does that make sense ? I hope you can pick up the concept I was trying to convey.
Ultimately, I think the best results using the Brightside may go to the guys who are spraying it with their HVLP sprayers. This will eliminate the brush or roller marks, cut down on the wet sanding, and possibly give the shiniest end product ( hence requiring less or very little final wetsanding or compounding ).
Now the 'recipe' that I understand so far that works best for spraying the Brightside is to dilute it to the consistency specified by the spraying equipment. Then spray two very light mistings. Followed by two regular sprayings. This seems to have been the best pattern for spraying the car. I believe the idea behind the initial two light mistings is to provide a base that the subsequent sprayings can adhere to. This also cuts down greatly on the chance for runs - if you just went and laid on two regular sprayings. The other thought on the two light sprayings is that they help to give the paint job additional visual 'depth' which enhances the look of the final products gloss.
.
Posted By: Marq
Re: Buying Interlux Brightside in Canada? - 10/07/06 03:42 PM
Quote:
Thanks for all the help in hunting down this stuff! I thank you very much. I found a place near Downtown Toronto where I work and will be checking it out. Here's the address for those of you interested in a Downtown Toronto Location:
You should ask them if they will match the price at the Chandlery.... there is about a $7 difference per can. And with winter around the corner here in Ontario most of these boating marine shops tend to have their 'paint sales'.
Normally they hit their hardest for price in the spring when all the boaters are fixing and prettying up their boats for the summer. But the number of folks buying boat paint at this time of year is pretty slim.. so they try to unload their paint stock.
Ask... it can't hurt.
Naturally dickering on boat paints doesn't apply to our southern brothers who live with lovely warm climates year.
.
Posted By: Anonymous
Re: Profesional Results? - 10/07/06 05:50 PM
admactanium: Seems like you **really** know your stuff when it comes to paint finishes.
Would you mind posting a recipe for a new person rubbing and polishing their first paint job? I want a long-lasting, beautiful job.
- What buffer do you recommend?
- What rubbing compound?
- What polishing compound?
- Which wax?
It would be great if you could give us a step-by-step breakdown on how to get a finish like you got on your motorcycle tank. That was truly amazing.
Posted By: Exit1965
Re: Buying Interlux Brightside in Canada? - 10/07/06 05:55 PM
I plan to thin with mineral spirits,and 69dartGT, yes I'll try that test you mentioned.
When I sprayed rustoleum through my HVLP gun, I thinned with mineral spirits, maybe 5-10% and it sprayed easy and layed down really well with the 1.5 or 1.5mm tip that came with the harbor freight gun. Plus it covered 95% with no runs. Where it didn't cover 100%, I just sprayed some more on top of it after a few minutes. Seemed to work well.
It was not a very thin mixture. I'll aim for similar with brightside which again should be 5-10%, maybe closer to 10% since brightside is thicker on its own than rustoleum and a little more thinner should promote self leveling.
Posted By: Anonymous
Re: Buying Interlux Brightside in Canada? - 10/07/06 05:56 PM
I did a lot of searching and here are the lowest prices I could find for Brightside. Unfortunately, I don't think they carry the Interlux thinners.
http://www.boatersland.com/intpaintfin.html
Posted By: Wyl E Coyote
Re: Paint Type Summary Request - 10/07/06 07:10 PM
Well the paint finally arrived.

The color is almost there... I may experiment to darken it just a tad, but I am pleased. But first I need to verify its up to the task and successfull as a paint to be applied on autos. A previous poster on Blue Water Marine Paint stated it did not pass the nail test and will be retrying it by spraying. As I stated in a previous post, I got the primer and its reducer. I will split the work on my trunk to painting it straight up and to thinning. I'll let you know how this progress and hope it works well because I like their color selection.
Posted By: Anonymous
Re: Paint Type Summary Request - 10/08/06 01:17 AM
Wyle: What kind of tints are you going to use to change the color? I was reading on the Brightside manufacturer's website that they recommended NOT using universal tints in the paint. They recommended mixing different colors of Brightside paint to get the final color.
My Jeep is off-white, with black bumpers. I'm planning to get a gallon of white, and a half-quart of black. I can use the black to tint the white to off-white, and use the rest of it on the bumpers.
Something to consider.
Posted By: Wyl E Coyote
Re: Paint Type Summary Request - 10/08/06 01:39 AM
MontanaMan my neighbor: Well this is not Brightside but Blue Water Marine Paint so I am not sure its subject to the same limitations, but my plan, once I settle the hardness question, is to get a darker blue paint mix and play from there
...........
Posted By: Anonymous
Re: Paint Type Summary Request - 10/08/06 02:17 AM
Yeah ... we're practically neighbors. I had to drive to Spokane to pick up a remanufactured motor for my Jeep. I love montana, but I wish we had the same resources you guys do!!
About the paint, if you plan on mixing paints, you should be fine, as long as they are the same basic chemistry. Let us know how the hardness issue turns out.
Posted By: Anonymous
Re: Paint Type Summary Request - 10/08/06 03:11 AM
hi guys, i have been on top of this since it was started. Well i have sprayed rustolem (thinned with MS) it turned out pretty well (test piece) and i have just tried rolling it on. While the rolling isn't that bad, it deff turns out better sprayed!
Less orange peel, less sanding, but the shine is the same.
Also acetone makes it harder quicker,and i noticed the shine was alittle better, but it doesn't self level as well..
Thanks again for all this info and i fell very confident that this is a perfect paint job. Looks just as good as the single stage that i shot! (of course you can't get metallics in rustolem.)
But you can get pearl powder of ebay has anyone tried it? im really tempeted to try it out! this would make this perfect!
http://cgi.ebay.com/ebaymotors/ws/eBayIS...s_promot_widgetThanks
Steve
Posted By: Anonymous
Re: Paint Type Summary Request - 10/08/06 03:17 AM
well i just bought some..hahaha so ill guess ill try it out for everyone.
Steve
Posted By: Anonymous
Paint guns! - 10/08/06 05:42 AM
Thanks Marq for the in depth information. I haven't tried anything yet, but I plan to do a sample first to test out my technique and all. I know winter is coming, do you think it will be safe to apply the Brightside paint in temps between 10-15 degrees celcius? I'm shooting to do this in next 2 weeks or so.
It seems that I am going away from the original recipe of using Tremclad with rollers to get a better finish.
Now I'm interested in a spray gun, BUT I don't have a nice fancy compressor. I got one that pumps out 4.3Scfm @ 40psi and 3.7Scfm @ 90psi. It seems I'm stuck to using the very low grade general purpose spray guns such as this one:
http://www.campbellhausfeld.net/webapp/w...9&langId=-1A question for anyone using a spray gun:
Is using any type of spray gun be any better than rolling it on. A HLVP gun would be nice, but my dinky compressor cannot support them
I believe I read on earliar of people using spray guns for fencing, but I don't recall if they worked well or not.
Thanks.
Posted By: admactanium
Re: Profesional Results? - 10/08/06 10:35 AM
Quote:
admactanium: Seems like you **really** know your stuff when it comes to paint finishes.
Would you mind posting a recipe for a new person rubbing and polishing their first paint job? I want a long-lasting, beautiful job.
- What buffer do you recommend?
- What rubbing compound?
- What polishing compound?
- Which wax?
It would be great if you could give us a step-by-step breakdown on how to get a finish like you got on your motorcycle tank. That was truly amazing.
yeah. let me try to write something up tomorrow night.
Posted By: Anonymous
Re: Paint guns! - 10/08/06 11:33 AM
I belive that any gun would turn out better if not atleast the same as rolling. It will be awhole bunch faster.
Steve
Posted By: Marq
Re: Paint guns! - 10/08/06 12:36 PM
Quote:
Thanks Marq for the in depth information. I haven't tried anything yet, but I plan to do a sample first to test out my technique and all. I know winter is coming, do you think it will be safe to apply the Brightside paint in temps between 10-15 degrees celcius? I'm shooting to do this in next 2 weeks or so.
The paint manufacturer does give some 'recommended' enviromental temperature ranges for their product and recommended temperature range for the object that is being painted.
The recommended temperature ranges are based on two factors... what is the best temperature range for the paint to cure or harden ( the evaporant or carrier in the paint to evaporate at ) and the best temperature range to ensure adhesion of the paint to the object being painted.
The cooler the temperatures will result in slower curing and evaporation of the carrier. This is going to mean that you will have to wait longer between coats. What might have been 15 hours might go to waiting 48 hours or maybe even longer between coats.
The only positive thing about working in the cooler temperatures is that the paint will have a lot more time to self level as it is not rushing due to heat to cure. And maybe there will be a lot less BUGS to deal with in the cooler temperatures.
The adhesion factor is the one that would concern me the most. However, if you fall back to one of the messages that was posted by Charger... where he provided pictures on this site of his little Volks sitting in a SNOW BOUND garage, he mentioned that paint job had been rolled in the winter in his unheated garage. So if the Tremclad can be rolled in freezing temperatures than I assume the Brightside can also. The 10 to 18 degree range might almost be luxurious compared to working in snow type temperatures.
I am not so sure about spraying in the colder temperatures. As it strikes me that rolling on a wet liquid as compared to some vapor travelling through the air might have different reactions to the cooler temps.
The only thing I can say with any degree of absolute certainty is that you will have to wait longer between re-coats.
.
Posted By: Anonymous
Rustoleum hardness - 10/08/06 04:49 PM
I used Rustoleum Professional and mineral spirits.
I tried the nail test and it would indent the paint as others have reported. The car sat outside for 3 weeks with no activity. The weather has been mostly mild and sunny. San Jose, Ca.
The paint is much harder now. I am doing some final sanding and it just barely is giving off a faint ms odor when in the sun. None when cool. I am confident this paint will harden just fine.
My previous test pieces were done over the heat wave we had this summer. They baked in the sun and the paint is very hard. Passes the nail test easily.
I am sanding it in preparation for one last coat and then polish.
Posted By: Anonymous
Re: Paint job on a budget!? CONTINUED..page 44........ - 10/08/06 09:16 PM
I'm just looking for some advice on how to get started . I've never done any painting or body work. All I want to do is fix this dent on my Ranger Truck and paint the area I don't care if its perfect anything looks better then that ? Should i try and pull the dent out then bondo it ? whats the best way to pull it ? and how can i make the grove in the body ?
any advice


Posted By: Anonymous
Re: Paint job on a budget!? CONTINUED..page 44........ - 10/08/06 09:48 PM
I'm taking a night class in autobody at the local tech school, for that dent, I'd start off on Ebay or other source to see if i could just find a replacement panel cheap.
On my own truck I had lotsa rust thru (1972 GMC) on the bed bottom and sides here and there, and lotsa bad bondo repair on at least one of the front fenders, I found a very nice bed and pair of fenders for $300 online, so I bought them instead of wasting a lotta time fixing on the ones I had. The new bed is about ready to paint and already primed (it has a couple storage dinks I'll have to smooth but that's it) same for the fenders, I'll spend a few hours fixing the ones I bought rather than a few days and many man hours fixing the originals.
If you can't find a replacement panel or it proves too expensive, use either a stud welder and weld a line of studs about 1 inch apart right down the deepest creases of the dent and pull it out, or drill holes and use an old school dent puller (stud welder is better, leaves no holes behind).
Then hammer/dolly if possible the dent further back onto the path to straightness, or do what you can with the dent puller, then sand(60-80 grit)/bondo/sand(120-180 grit)/primer/sand(220-320 grit) then spray or roll the new paint on, perhaps repeating the primer/sand portion if the panel isn't quite perfect yet also perhaps having to bondo multiple times too, in order to get it back smooth.
Posted By: Anonymous
Re: Paint job on a budget!? CONTINUED..page 44........ - 10/08/06 11:54 PM
ok im having a problem, i just polished a section of my hood (test piece) and its nice and glossy, minimal orange peel, about the same as a oem paint job, but if i look really close at the paint, there are all these spots. it looks like your windows do after you wash your car and dont dry your windows, with water spots, but its in the paint. im using black rustoleum stop rust, and im not sure what it is. im thinking maybe i sanded through to the lower paint which was also a black, but oem black. =\ not sure. any ideas?
Posted By: Anonymous
Re: Paint job on a budget!? CONTINUED..page 44........ - 10/09/06 12:52 AM
Quote:
ok im having a problem, i just polished a section of my hood (test piece) and its nice and glossy, minimal orange peel, about the same as a oem paint job, but if i look really close at the paint, there are all these spots. it looks like your windows do after you wash your car and dont dry your windows, with water spots, but its in the paint. im using black rustoleum stop rust, and im not sure what it is. im thinking maybe i sanded through to the lower paint which was also a black, but oem black. =\ not sure. any ideas?
i believe what your seeing is not a complete wet sand to make sure all of the orange peel is gone.
Steve
Posted By: Anonymous
Re: Paint job on a budget!? CONTINUED..page 44........ - 10/09/06 03:12 AM
r u guys wetsanding with a block or using bare hand?
Posted By: kenzo42
Re: Paint job on a budget!? CONTINUED..page 44........ - 10/09/06 05:32 AM
I wonder if a 80lb suction cup would work?
Quote:
I'm just looking for some advice on how to get started . I've never done any painting or body work. All I want to do is fix this dent on my Ranger Truck and paint the area I don't care if its perfect anything looks better then that ? Should i try and pull the dent out then bondo it ? whats the best way to pull it ? and how can i make the grove in the body ?
any advice
Posted By: Exit1965
Re: Rustoleum hardness - 10/09/06 05:46 AM
Here is good info on how to setup the Harbor Freight HVLP guns if anyone is interested.
http://purplesagetradingpost.com/sumner/techinfo/HVLPspraygun.htmlThe next page shows a guy's comments about spraying thinned rustoleum through the #43430 gun (which I have also), and he's bananas over it.
I wetsanded the whole car, the bondoed area is done and primered, and tomorrow I'll mask, clean with mineral spirits, let dry, and shoot..
Posted By: kenzo42
Re: Rustoleum hardness - 10/09/06 06:41 AM
Exit, what compressor are you running for this gun? Is it 220v? I can't find a 110v compressor that has enough cfm to run this gun.
Btw, I've also heard great things about this gun on thesamba and autobody101.
Quote:
Here is good info on how to setup the Harbor Freight HVLP guns if anyone is interested.
http://purplesagetradingpost.com/sumner/techinfo/HVLPspraygun.html
The next page shows a guy's comments about spraying thinned rustoleum through the #43430 gun (which I have also), and he's bananas over it.
I wetsanded the whole car, the bondoed area is done and primered, and tomorrow I'll mask, clean with mineral spirits, let dry, and shoot..
Posted By: kenzo42
Re: Rustoleum hardness - 10/09/06 06:48 AM
Exit, how do you think the rattle can primer will hold up? I understand bondo is very porous and requires primer, but I've heard quite a few adhesion problems w/ the rattle type primer. I wonder if the industrial type is different?
I've had personal experience w/ it chipping, as well, but it was on a front bumper. Whereas I believe yours is on a less stressful area.
Quote:
Here is good info on how to setup the Harbor Freight HVLP guns if anyone is interested.
http://purplesagetradingpost.com/sumner/techinfo/HVLPspraygun.html
The next page shows a guy's comments about spraying thinned rustoleum through the #43430 gun (which I have also), and he's bananas over it.
I wetsanded the whole car, the bondoed area is done and primered, and tomorrow I'll mask, clean with mineral spirits, let dry, and shoot..
Posted By: Exit1965
Re: Rustoleum hardness - 10/09/06 04:24 PM
Quote:
Exit, how do you think the rattle can primer will hold up? I understand bondo is very porous and requires primer, but I've heard quite a few adhesion problems w/ the rattle type primer. I wonder if the industrial type is different?
I've had personal experience w/ it chipping, as well, but it was on a front bumper. Whereas I believe yours is on a less stressful area.
Before I started my first coat of rustoleum, I had rattle can primer here and there. I don't know how this industrial rattlecan stuff is different except it says "high solids" and, for what it's worth, a guy who does bodywork for a living gave it to me after helping me fix a dent that he then primered with it. Though I don't know for sure, I don't think he would have used it if it would have to be removed to paint the car.
The issues people have with rattlecan primers are probably from using two part catalyzed paint which can be rough on the undercoating. The rustoleum seemed to work fine over rattlecan primer, in fact I think I used cheap gray plastikote primer in places as well, and there's no problems so far. I wouldn't worry about the primer adhesion as long as it has some dry time, and you're using a non catalyzed paint like rustoleum or brightside.
Here's a pic of my compressor, on loan from my dad. It was about $430 maybe 8 years ago at Home Depot, and it's still working great.
Posted By: Exit1965
Re: Rustoleum hardness - 10/09/06 04:27 PM
Also, for anyone wanting to spray on the cheap, that gun is on sale at Harbor Freight website for 39. If you print out the page, they'll match the price at the local store (at least that has been their practice when I've done that, many times in the past).
http://www.harborfreight.com/cpi/ctaf/displayitem.taf?Itemnumber=43430
Posted By: Anonymous
Re: Profesional Results? - 10/09/06 04:54 PM
Quote:
Quote:
admactanium: Seems like you **really** know your stuff when it comes to paint finishes.
Would you mind posting a recipe for a new person rubbing and polishing their first paint job? I want a long-lasting, beautiful job.
- What buffer do you recommend?
- What rubbing compound?
- What polishing compound?
- Which wax?
It would be great if you could give us a step-by-step breakdown on how to get a finish like you got on your motorcycle tank. That was truly amazing.
yeah. let me try to write something up tomorrow night.
Plz Admactanium, I am at this stage also and would really appreciate your input on this. I am trying the Turtle Wax Rubbing then Polishing compound, and I am getting a hazy, but flat dull look. Not sure if Turtle Wax can give me back the shine that the paint has after it is laid down or not.
Posted By: admactanium
Re: Profesional Results? - 10/09/06 07:47 PM
Quote:
Quote:
Quote:
admactanium: Seems like you **really** know your stuff when it comes to paint finishes.
Would you mind posting a recipe for a new person rubbing and polishing their first paint job? I want a long-lasting, beautiful job.
- What buffer do you recommend?
- What rubbing compound?
- What polishing compound?
- Which wax?
It would be great if you could give us a step-by-step breakdown on how to get a finish like you got on your motorcycle tank. That was truly amazing.
yeah. let me try to write something up tomorrow night.
Plz Admactanium, I am at this stage also and would really appreciate your input on this. I am trying the Turtle Wax Rubbing then Polishing compound, and I am getting a hazy, but flat dull look. Not sure if Turtle Wax can give me back the shine that the paint has after it is laid down or not.
well, the first place to start reading information is here:
http://autopia.org/forum/forumdisplay.php?f=105
great stuff. but i'll give you a basic rundown of how i did it.
materials
this is just what i use. all this stuff adds up so it's not exactly in-keeping with the cheapness of the paint job. but here it is:
porter cable 7424
makita bo6040
lake county polishing pads: yellow cutting, orange power pad, white polishing.
menzera polishes: intensive polish, final polish II.
3m wetsanding paper. grits: 800, 1000, 1500, 2000 (although i hear that meguiars unigrit papers are better).
sanding
� prep your wetsand papers by soaking them in a bucket of water with some dish soap in it for lubrication. an hour or so. you want to soften up the backing paper so you don't get any stiff corners that can lead to deeper scratches.
� start with a fairly high (low number) grit wetsanding paper. 1000 or 800 if you have a lot of orangepeel and imperfections.
� use a sanding block of some sort on the flats. you can use some flexible backer for sanding any curvy spots. like a brillo pad or something of that nature. be VERY careful around edges because the paint naturally is thinner in that area so you can easily sand through.
� get a cheap plastic squeegee from the hardware store. you can use this to clear off the water in sections to check your progress. what you'll start to see is a matte surface with shiny spots. what you're doing is levelling the high spots (peaks) down to the level of the valleys.
� when the shiny spots start to get smaller and are nearly gone. move to lower grit papers (higher numbers). 1200 or 1500. the goal when progressing through the papers is to completely eliminate the sanding marks from the previous grit. you'll learn to see that happen.
- you can sand in a perpendicular direction and it'll help you see when you're finishing up on one level.
� by now the shiny spots should be disappearing and you should be left with only a matte surface. you can�t really finish it up properly until you�ve completely leveled the peaks to the same level as the valleys.
� i usually go to about 2000 grit since it makes polishing that much easier. you can go up to 3000 grit i think but i haven�t usually done that.
on to the polishing
� there are a few different types of machines you can use. or you can go by hand if you don�t mind doing a lot of hard work on it. polishers usually have foam pads that attach to a backing plate by velcro. there are other attachment methods but velcro is the most common.
the three common types of polishing machines are these:
- random orbital: the most commonly used one of these is the porter cable 7424. basically these machines just jiggle the pad very quickly in a random fashion. the benefit of these is that they are very safe when it comes to burning through the paint. they don�t generate much heat. the downside is that it takes longer to polish out imperfections and there are limits to what it can do.
- a dual action forced rotation: these aren�t very common. i have one model from makita, the bo6040. the other popular model of this is the festool rotex. these machines have dual mode. one that works the same way as the PC. in another mode, they work both like a PC and a Rotary. it forces the pad to rotate while also jiggling. this is a nice machine. i like mine. they can be used in ultimate safety mode like a random orbital but it also cuts more strongly with the rotary action.
- rotary: this is the fastest cutting machine but also the most dangerous. they�re also a bit more difficult to control. these machines only spin the pads. as you can imagine, the outer edges of the pads can get moving pretty quickly and they have a lot of cut and power. however, it�s much easier to cut through with one of these and they also tend to leave buffer trails in most users hands. you see this commonly on cars detailed by bad detailers. they look like holograms. circular swirling holograms.
the pads:
� there are a lot of different brands of pads to use with these machines. for the most part the same pads can be used on all the different types of polishers. the pads will be color coded based on their cut or aggressiveness. it�s hard to say definitively which pads do what because different manufacturers use different color codes. most often though yellow will be a �cutting� pad and white will be a �polishing� pad. cutting being more aggressive than polishing.
the polishes:
again, there are plenty of different brands of polishes. i personally use menzerna polishes. and again, there are different levels of aggressiveness in each product line. menzerna has 3 main products (in order of INCREASING aggressiveness):
final polish II, intensive polish, and power gloss.
there�s another line called poorboys that gets good reviews and of course there�s meguiars stuff that�s available at most locations. all of them are good. it usually just comes down to personal preference.
all of these modern polishes (not the tin can stuff you get at the auto parts store) use diminishing abrasives. what that means is that the grit of the polishes break down over time the longer they�re worked. the benefit of this is that it basically does the �step down� grit process we were doing with the sandpapers on its own. that�s why it�s important to make sure you�re breaking down the polishes well and letting them fully work otherwise you�ll have a hazy surface.
the process:
i only have the first two. so i�ll start with the yellow pad on my dual action and use some intensive polish. you should spritz the pad with some water to moisten it to begin.
� i use the yellow pad and apply some intensive polish directly to the pad in an x pattern. then, with the machine off, i dab the pad against the surface to spread the polish around evenly. i�ll even smear the area with the machine off.
� then i start the machine on a low speed. use that slow speed to distribute the product over a small area: maybe 2� x 2�. when the machine is slow really take your time moving it around and apply a bit of pressure.
� you�ll start to notice the polish working in and the surface should be changing a bit already. keep going while increasing the machine�s speed. that will help the polish break down further. with the menzerna polishes you keep going until they�re nearly completely transparent.
� then change the pads on the machine and use a lower grit polish. so in my case it would be a white pad with menzerna final polish II. go through the same process with the white pad and lower grit polish. until it�s nearly all hazed out and gone.
� i�d personally finish with the pc or the random orbit mode and the lighter polish just to make sure i�ve taken out all the previous polishing marks.
you have to check your progress on this as you go. if you�re still seeing sanding marks, it�s not likely that you�ll get them out with polishing. you need to get those out in sanding. that�s why it�s important to constantly check in the sanding process to see that you�ve removed the previous level�s sanding marks.
that's basically it. from there i use a cleaner wax and then a sealant to finish it up. but i wouldn't use a sealant on a newly painted surface for at least a couple months. it has to have time to completely dry and outgas.
i'd say the most important step in the whole process from these types of paintjobs is the sanding process. you need to get all the orange peel and waves/brushmarks out of the paint before you polish. and you REALLY need to step down in grit on the papers. most polishes will not polish out much more than 1500 grit sanding marks. if you don't step down you can get a shiny surface but you'll have shiny looking sanding marks. most of the polishing attempts i've seen on this thread so far fail from not enough time and care taken in wetsanding and getting a perfectly flat surface with a low enough grit.
Posted By: 69DartGT
Re: Rustoleum hardness - 10/09/06 08:54 PM
Dave thanks I went and picked one up today..
Posted By: Anonymous
Re: Profesional Results? - 10/09/06 10:17 PM
What happens if you don't do the final sanding and polish? What will happen if I leave the paint as it comes out of its final application?
I am doing my fiberglass dune buggy body. Using Rustoleum Professional. I have 4 coats on it at this time. Been applying the paint for over a month now.
The orange peel does not bother me on the buggy as long as it has a glossy finish and comes out hard and doesn't mar when something rubs the paint.
Right now, the paint appears to be hard but if I rub a fingernail across the paint, it mars the glossy finish.
Is the final sanding and polishing needed to keep the glossy finish from marring?
I was hoping I could eliminate the final step in this process but it seems I have an issue with it right now as it stands.
Any suggestions/thoughts?
Posted By: Anonymous
Re: Profesional Results? - 10/09/06 10:25 PM
Posted By: admactanium
Re: Profesional Results? - 10/09/06 10:33 PM
Quote:
What happens if you don't do the final sanding and polish? What will happen if I leave the paint as it comes out of its final application?
I am doing my fiberglass dune buggy body. Using Rustoleum Professional. I have 4 coats on it at this time. Been applying the paint for over a month now.
The orange peel does not bother me on the buggy as long as it has a glossy finish and comes out hard and doesn't mar when something rubs the paint.
Right now, the paint appears to be hard but if I rub a fingernail across the paint, it mars the glossy finish.
Is the final sanding and polishing needed to keep the glossy finish from marring?
I was hoping I could eliminate the final step in this process but it seems I have an issue with it right now as it stands.
Any suggestions/thoughts?
you don't have to color sand it out. it'll just stay as it is. it won't lose any more gloss left alone than if you were to sand it.
Posted By: Exit1965
sprayed - 10/09/06 11:51 PM
I just sprayed the brightside. summary: next time i'll roll. I think in retrospect I had the fan turned almost all the way up, which I discovered when cleaning the gun.
After I took off my respirator I see my nose hairs are hatteras white and I feel slightly lightheaded
The coat went on too thin in places. It'll serve as a base coat for the next coat or two which I'll do with a roller.
Spraying sucks compared to rolling because when crap falls into the paint, you don't really have anything to run over the paint to take the fingerprint away, so you can just watch.
It was my first spraying of an entire car, and I bet with the gun setup correct, a better respirator, and something to keep junk from falling in the paint, it would be OK. But it's back to the roller for me.
Pics as soon as the smoke clears..
Posted By: 69DartGT
Re: sprayed - 10/10/06 12:10 AM
Dave what did you thin with? My plan is to shot all the hard to reach area's with a hvlp gun and roll the rest, depends on how well the sprayed area's come out.
Posted By: Wyl E Coyote
Re: Paint job on a budget!? CONTINUED..page 44........ *DELETED* - 10/10/06 12:40 AM
Post deleted by Wyl E Coyote
Posted By: Exit1965
Re: sprayed - 10/10/06 01:05 AM
Quote:
Dave what did you thin with? My plan is to shot all the hard to reach area's with a hvlp gun and roll the rest, depends on how well the sprayed area's come out.
Thinned with good old mineral spirits, and I measured the dosage, it was about 8-10%. Still a pretty thick mixture, and it took 5 seconds to go from a stream to a drip.
That sounds like a great plan you have, for spraying small areas it's bearable. Like I said with the right spray and breathing setup it would be OK but in my opinion it's not worth all that work when you could just roll.
Here are some pics. There's a lot of orange peel in this paint job also, so I will becoming friends with my sanding block again.
Here's the area I fixed up before repaint..
BEFORE...
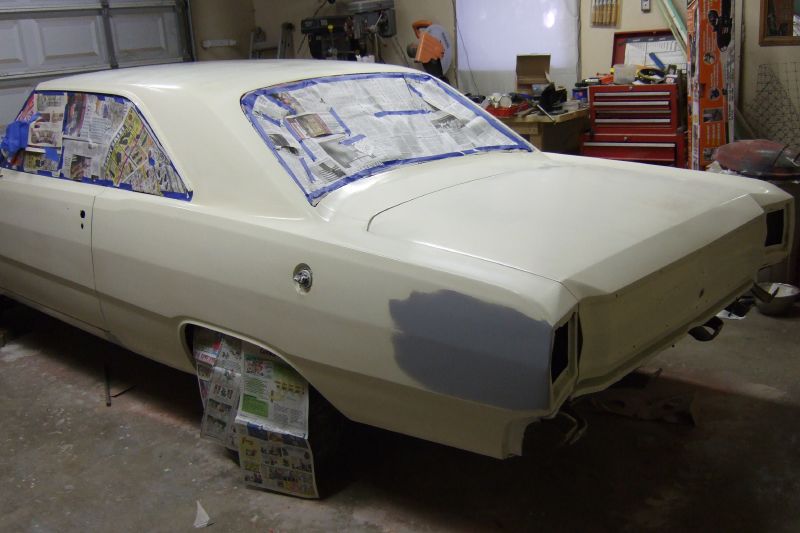
Which was almost completely covered by the single sprayed coat.
AFTER...
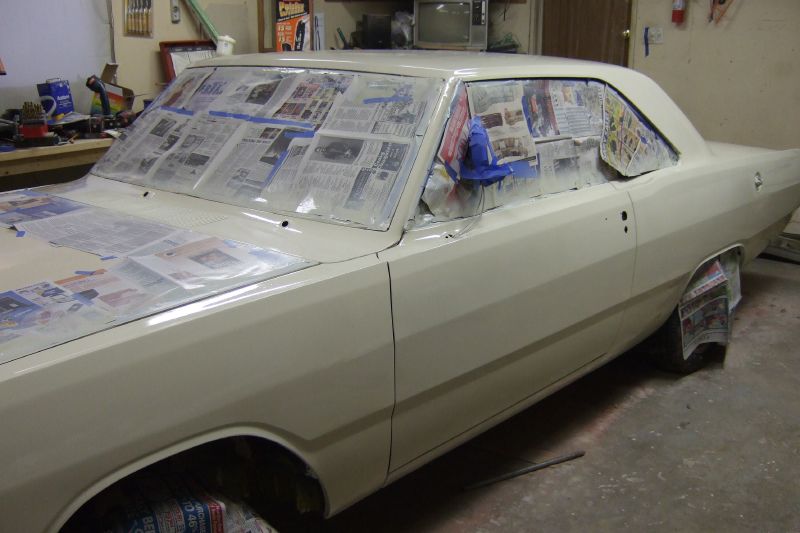
some other after pics. by the way I didn't paint the hood since I'm not planning to use it but it's already a uniform canvas white.
Some orange peel
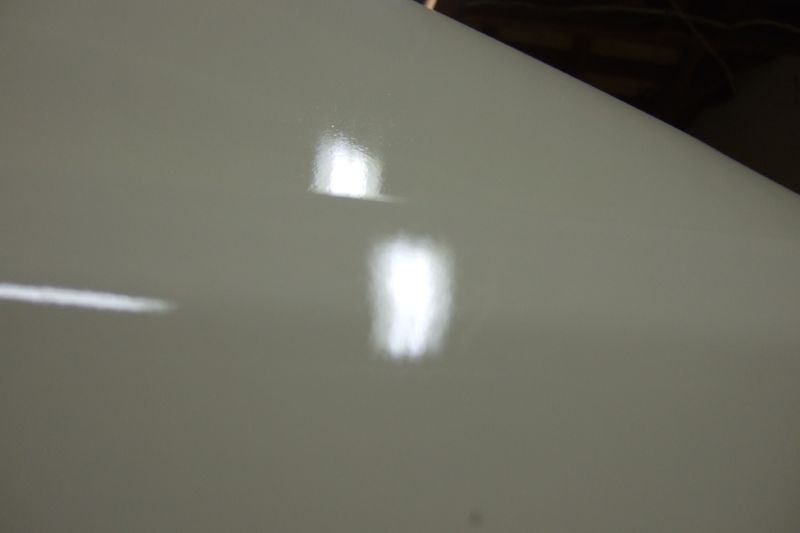
and some orange peel combined with not laying down enough material
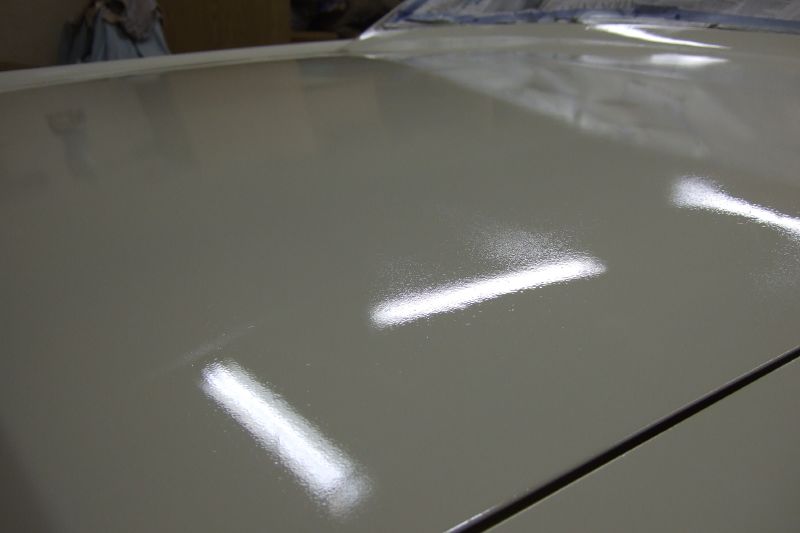
A single roll coat should take care of it now, after a few hours with a spray bottle and 800 grit.
Posted By: Exit1965
Re: Paint job on a budget!? CONTINUED..page 44........ - 10/10/06 01:09 AM
Coyote - probably any non-catalyzed metallic paint can be rolled on, the problem is when wetsanding it it will probably go all wacky on you. If you could roll it on and not worry about sanding it down to get rid of orange peel or imperfections, it would be OK. In fact I have some rustoleum aluminum color that I'm going to put/roll on an engine block, where I dont really care about smoothness.
I think someone in the past rolled on some metallic flakes, then did a coat over that, and the flakes were still visible but were not affected by the wetsand. Not sure who it was..
Posted By: Wyl E Coyote
Re: Paint job on a budget!? CONTINUED..page 44........ *DELETED* *DELETED* - 10/10/06 01:40 AM
Post deleted by Wyl E Coyote
Posted By: Anonymous
Re: Paint job on a budget!? CONTINUED..page 44........ - 10/10/06 01:58 AM
why hasn't anyone tried to roll on single stage auto paint? It shouldn't be any differnt, yes more expensive..but you get the mettallic look and b5 blue im sure.
Steve
Posted By: Anonymous
Re: Paint job on a budget!? CONTINUED..page 44........ - 10/10/06 02:05 AM
Quote:
why hasn't anyone tried to roll on single stage auto paint? It shouldn't be any differnt, yes more expensive..but you get the mettallic look and b5 blue im sure.
Steve
More expensive? $39. a gallon.
http://stores.ebay.com/Auto-Paint_acrylic-enamel-auto-paint_W0QQcolZ2QQdirZ1QQfsubZ2QQftidZ2QQtZkm
or $65. for a kit.
http://stores.ebay.com/Auto-Paint_acryli...9QQftidZ2QQtZkm
Posted By: admactanium
Re: Paint job on a budget!? CONTINUED..page 44........ - 10/10/06 08:16 AM
Quote:
why hasn't anyone tried to roll on single stage auto paint? It shouldn't be any differnt, yes more expensive..but you get the mettallic look and b5 blue im sure.
Steve
i don't think the issue is the type of metallic paints. i think it's just an issue that metallic paints can't be rolled by their very nature. they require fine atomization in order to distribute the flake evenly. when you open a can of metallic paint it really swirls and sticks together. i'd think that if you rolled on metallic paint it would leave streaks of metallic paint and streaks of non-metallic (or low density metallic) paints.
hell, when i was in high school my friend's dad restored and painted his beetle with metallic blue. the paint job looked pretty good from ten feet away but when you got closer you could see how swirly and splotchy the flake distribution was. and that was from spraying. maybe they sprayed too thick a coat or didn't mix the product well enough.
Posted By: Anonymous
Re: Paint job on a budget!? CONTINUED..page 44........ - 10/10/06 01:03 PM
TY for your detailed post Admactanium. It motivated me to go out and purchase one of the Random Orbital Polishers. After a few hours with Harbor Freight Orbital Sander/Polisher, I am starting to see the gloss come out of the haze. I suspect, even with Turtle Wax products mind you, with a proper Polisher, and proper attachments/bonnets, I will get satisfactory results in less time. THANKS again all posters that have developed techniques that idiots like myself can follow.
Posted By: 69DartGT
Re: Paint job on a budget!? CONTINUED..page 44........ - 10/10/06 01:36 PM
I've sprayed metallic lacquer years ago and we used to drop a couple of clean marbles or even 1/2 nuts in the cup and you would continue to shake these every so often to keep it mixed properly.
Posted By: admactanium
Re: Paint job on a budget!? CONTINUED..page 44........ - 10/10/06 05:47 PM
Quote:
TY for your detailed post Admactanium. It motivated me to go out and purchase one of the Random Orbital Polishers. After a few hours with Harbor Freight Orbital Sander/Polisher, I am starting to see the gloss come out of the haze. I suspect, even with Turtle Wax products mind you, with a proper Polisher, and proper attachments/bonnets, I will get satisfactory results in less time. THANKS again all posters that have developed techniques that idiots like myself can follow.
post some pics of the results. i think you could get good results using turtle wax. but if you have a pep boys nearby you could pick up some meguiars or 3m polishes that are really good. i've seen both of those lines pretty extensively at my local pep boys.
Is there a page were everything needed to get started and basic instructions are listed? 40 Pages is a lot of reading to get caught up on this process... Can someone give a quick lesson from the beginning or refer me to a page where this is (Supplies, mixing ratio, application)?
Posted By: Exit1965
Re: Paint Job - 10/11/06 02:14 AM
Rustoleum or brightside?
Either way, they are similar in application. Thin brightside with either their thinner, or mineral spirits. The ratio I'm going to use next is 15% thinned, since 10% sprayed levels out OK when sprayed in correct amounts. Then roll on.
Wetsand after each coat to get rid of orange peel and imperfections, with 800 grit. Last coat, let it set for a few weeks, then hit with 2000 grit wet, then polish and wax.
That's the basic recipe. The best thing to do is to buy the materials (fine foam rollers from home depot or lowes, in a 5 pack for about $6) and do a test piece. It's a pretty easy thing to do with a roller.
The worst thing you can do is waste paint. If anything goes terribly wrong you can just wetsand it down and paint again. Unless you're slathering the paint on too thick, you shouldn't get any runs or anything that would require the whole thing to be sanded off.
Posted By: 69DartGT
Re: Paint Job - 10/11/06 02:28 AM
Posted By: Marq
Re: Paint Job - 10/11/06 12:35 PM
Quote:
Is there a page were everything needed to get started and basic instructions are listed? 40 Pages is a lot of reading to get caught up on this process... Can someone give a quick lesson from the beginning or refer me to a page where this is (Supplies, mixing ratio, application)?
In a way... I think every user who is thinking about doing this type of paint job on their car SHOULD be reading all the messages.
The problem with just reading a recipe is that you are not fully prepared for all the variables and 'Murphy Law' type events that 'might' happen.
By walking into this project fully informed, you will be in a better position to deal with any curves that might get thrown at you during the process.
I know that like many folks here, I began by reading the original thread and it kept me up for almost four hours as I read every tidbit of information in the thread.
Now that this topic is covering two complete threads, ( the original thread now being archived for posterity and non-deletion ) and ( the current thread which at this moment is touching on 40 pages )... It might be useful for new readers to this thread to at least start their studying at the beginning of this thread.
Not only will the new readers have a better understanding of this painting process, but as well MANY OF THE SIMPLE QUESTIONS will have already been answered and it will cut down on people re-asking questions that have already been fully responded to.
.
Posted By: Anonymous
Re: Paint Job - 10/11/06 07:40 PM
Really interested in how your White Brightside paint job turns out Exit. I was going through another forum where members were painting their Honda civics/Integras. One complaint they all had was the dull finish that Tremclad/Rustolean gave. Another thing I noticed was that the majority of people painting their cars chose the colour white since it hides defects well. My car is currently white, but going to black wouldn't be a bad idea if it turns out alright. Really interested in how well Aussie's paint turns out.
Is there anyone here painting their car Brightside Black using the roller technique and is complete? I've only seen the black sprayed.
Posted By: Anonymous
Re: Paint Job - 10/11/06 08:48 PM
On my car the gloss black Brightside has withstood the elements much better than the paint from my first attempt.
One of my collegues here at school (I'm a teacher) has a black VW Bora and she occasionally parks next to my car. The Brightside certainly doesn't look bad next to a factory paint job, and I'm still a couple of weeks away from my final wetsand and polishing.
So far my impressions of the Brightside are fantastic.
Posted By: Exit1965
Re: Paint Job - 10/11/06 09:42 PM
My impressions are the same. The wet-look gloss is something else.
I plan to wetsand later this week then roll my 'final' coat of brightside on Saturday. It should end up being a smooth surface compared to how it is after the spray attempt.
It's a very cool site looking at my car now though, with a clean white shiny coat, and it's not even applied right. After I had rolled a coat on the fender, it looked great, but orange peely. With more thinner I hope to do away with most of that orange peel on my next roll.
Posted By: 69DartGT
Re: Paint Job - 10/11/06 10:13 PM
Dave don't want to second guess you or anyone else I but I don't think I'll use the any thinner except what Interlux's brand either the 216 or 333 if I'm remembering right, but if its working for you can't knock that..
Mineral Spirits just doesn't in my mind seem right for polyurethane paint..
Posted By: Anonymous
Re: Paint job on a budget!? CONTINUED..page 44........ - 10/11/06 11:05 PM
Quote:
post some pics of the results. i think you could get good results using turtle wax. but if you have a pep boys nearby you could pick up some meguiars or 3m polishes that are really good. i've seen both of those lines pretty extensively at my local pep boys.
I'm off to Pep Boys then, anything, within reason, to make the job easier. I would like to continue the project into the cold winter months, however wetsanding outside in the cold isn't my idea of a fun time. I guess I could heat the garage and do it in there, but I don't want the mess in there, since if I do this I will be painting in there. /shrug
Posted By: Marq
Re: Paint Job - 10/11/06 11:29 PM
Quote:
Dave don't want to second guess you or anyone else I but I don't think I'll use the any thinner except what Interlux's brand either the 216 or 333 if I'm remembering right, but if its working for you can't knock that..
Mineral Spirits just doesn't in my mind seem right for polyurethane paint..
I am sort of with you on that. I believe you can get away with mineral spirits. BUT for the final coat I would prefer it to either be pure untainted Brightside OR cut with the 'officially recommended' Interlux brushing liquid.
My reason for this is simple : I want the final coat of paint to have no excuse whatsoever for clouding ( fogging ) or for losing some of its gloss. I believe from the one layer that I did paint while cutting with smelly mineral spirits that the paint 'accepted' the mineral spirits, but that it did result in a hint of fogging and a loss of some gloss.
I note on the Interlux site they do sell a chemical additive that INTENTIONALLY will flatten the paint so that it has NO GLOSS. Since I have not examined a can of that flattening thinner, I don't know which solvent has the ability to kill the gloss. So that is why I stuck with the product 333 for all subsequent coats of paint.
.
Posted By: Exit1965
Re: Paint Job - 10/12/06 01:07 AM
Quote:
Quote:
Dave don't want to second guess you or anyone else I but I don't think I'll use the any thinner except what Interlux's brand either the 216 or 333 if I'm remembering right, but if its working for you can't knock that..
Mineral Spirits just doesn't in my mind seem right for polyurethane paint..
I am sort of with you on that. I believe you can get away with mineral spirits. BUT for the final coat I would prefer it to either be pure untainted Brightside OR cut with the 'officially recommended' Interlux brushing liquid.
My reason for this is simple : I want the final coat of paint to have no excuse whatsoever for clouding ( fogging ) or for losing some of its gloss. I believe from the one layer that I did paint while cutting with smelly mineral spirits that the paint 'accepted' the mineral spirits, but that it did result in a hint of fogging and a loss of some gloss.
I note on the Interlux site they do sell a chemical additive that INTENTIONALLY will flatten the paint so that it has NO GLOSS. Since I have not examined a can of that flattening thinner, I don't know which solvent has the ability to kill the gloss. So that is why I stuck with the product 333 for all subsequent coats of paint.
.
If you have your can of 333 with you, can you see what it contains? In a previous post, I think you mentioned MEK?
On my can of brightside, under the NJ/PA "right to know" information, the only solvent listed there is mineral spirits. Along with some other ingredients, polyurethane alkyd and some other alkyd. I'm no paint expert, but it says right on the can "premium enamel" and since mineral spirits appears to be the solvent the paint uses, I don't see a big reason not to use it.
I got plenty of gloss when using it with a roller, and still have plenty of gloss with the sprayed on version, especially where I sprayed enough material for there to be some decent self leveling.
More evidence on mineral spirits side would be nice (anyone??), but an extra $10 for the actual brushing liquid might not be a bad investment at this point.
I have read on boating forums about using penetrol, but one person mentioned they thought it decreased gloss, so that's out.
Marq, when you noticed haziness was that after application but before any sanding or polishing? The fender I painted with mineral spirits and a roller sat for a week and looked as wet as it did when I first painted it.
Posted By: Exit1965
Re: Paint Job - 10/12/06 01:12 AM
Hmm... looks like 333 contains kerosene and naptha, at least that's all I get from the safety sheet..
https://secure.international-coatings.com/yacht_msds/msds.asp?SalesCode=Y333&Region=US#
Posted By: 69DartGT
Re: Paint Job - 10/12/06 01:36 AM
Now that surprises me, but read the data sheet on the product 216 stuff for spraying nasty!!
I'd have to think for roller or brushing the mineral sprits aren't bad..
Funny two different thinners one to spray one to brush?
Posted By: Anonymous
Re: Paint Job - 10/12/06 05:38 PM
Hey guys, I wanted to chime in here. On Sunday I put the final (6th) coat of Brightside "eBay" (meaning, cheap!) Fire Red on my Jeep. Throughout the process, I used odorless mineral spirits, since I could not find the stinky stuff. Prior to deciding to use mineral spirits, I researched the MSDS sheets on the various solvents and the Brightside products (see page 34 for my post about that), and concluded that the odorless MS should work fine. And apparently, it did, as I think the Jeep looks awesome. Oh, I used about one and 2/3 quarts of paint for the six coats.
I am headed out of town after work today, but if I get a chance over the weekend and we get some sunshine, I will take pics of the "final product" and have MontanaMan post them for me. The Jeep is extremely shiny/glossy, and the process worked fine. I only wet sanded between coats 2 and 3, mainly to remove the "particles" I talked about previously. I guess I got lucky or do not know what I am looking at/for, because I don't think I had any "orange peel" at all. I will probably wait until springtime to do polishing and buffing, since I am about to take the Jeep to the farm for its intended function--to use as a hunting vehicle and I will not have the facilities to do those things on it after waiting a month. That being said, I may end up not doing anything more on it, since it probably is not needed for my purposes.
Thanks to everyone for their suggestions and input through all of this, especially to Charger 69 for starting it off and to Marq for keeping the ball rolling.
Posted By: 69DartGT
Re: Paint Job - 10/12/06 09:29 PM
That does it for me anything I roll on with the Brightside will be thinned with mineral spirts
But if I spray I think I'll use the product 216 thinner.
Posted By: Exit1965
Re: Paint Job - 10/12/06 09:53 PM
Cool. Sounds like I'm back to using mineral spirits too.
Crusader - what percentage did you thin the brightside with? Did it take 6 coats to get coverage? It seems like 2 medium-thick coats is/will do the job on my car, but with the thicker coats seems to come orange peel. If you thinned it out more, it makes sense there would be less orange peel but it would take more coats.
Posted By: Anonymous
Re: Paint Job - 10/13/06 12:56 AM
i might have a delima... when i wet sanded i went through a layer of paint and made a circle from the paint layer underneith and i buffed the paint and the spot is still there do i have to put a coat of paint on or can i do something else?
Posted By: Marq
Re: Paint Job - 10/13/06 03:55 AM
Quote:
i might have a delima... when i wet sanded i went through a layer of paint and made a circle from the paint layer underneith and i buffed the paint and the spot is still there do i have to put a coat of paint on or can i do something else?
Sounds like you will need to re-coat. And it may take a few coats to get the color uniform across the entire panel.
But fortunately you can probably limit your work to just fixing up that one panel or section that you oversanded.
Been there.... done that... had to repaint a section myself because of overly ambitious sanding
Don't feel bad. I am sure that 'we' are not alone...
.
Posted By: v8mirage
Re: Paint Job - 10/13/06 05:55 PM
Oh, you guys aren't alone by any means, I have sanded thru quite a few times. I usually do it on the edges or body lines or something like that. As a result I have learned to tape those spaces when wet sanding and then only very lightly sand after removing the tape.
Gerbs
Posted By: Anonymous
Re: Porter Cable 7424 knockoff? - 10/13/06 06:50 PM
Hey ... anybody know of a cheap imitation of the Porter Cable 7424? Something that gives the same action, but perhaps less bulletproof? It's hard for me to justify paying for professional-quality when I only use it maybe once a year.
If you do know of one, do you have a link to it?
Thanks!!
Posted By: Wyl E Coyote
Re: Porter Cable 7424 knockoff? - 10/13/06 07:08 PM
Posted By: Anonymous
Re: Porter Cable 7424 knockoff? - 10/13/06 09:00 PM
Quote:
This is the one I got -
http://cgi.ebay.com/ebaymotors/ws/eBayIS...s_promot_widget
That polisher is a rotary, whereas the PC is a random orbital (RO) polisher. Be careful with it as a rotary is a lot more agressive than a RO so the chances of damaging the paint will be much greater.
If anyone is looking for a PC type of polisher, look for an orbital sander that has a variable speed control, and a 5" to 6" circular base.
This one as an example would be great for polishing.
Posted By: Marq
Re: Porter Cable 7424 knockoff? - 10/13/06 10:47 PM
Quote:
Hey ... anybody know of a cheap imitation of the Porter Cable 7424? Something that gives the same action, but perhaps less bulletproof? It's hard for me to justify paying for professional-quality when I only use it maybe once a year.
A few fast thoughts ( as if I am ever fast... )
a ) You might be surprised how often you will actually use it once you get it. It makes polishing, waxing and buffing a breeze and fun. I actually look forward to putting it to work
And don't forget that the more you polish and wax it, the shinier and glossier it is going to get.
b ) I also went into sticker shock when I first found out what they retail for. But if you recall my past message, what I found was that at the 'service and repair' depots they have re-boxed units, refurbs and even brand new units ( which are plastic wrapped instead of boxed ) for as little as $115 Canadian.... which in US dollars is about $100 bucks... I am sure that you should be able to locate a service depot near you where you might be able to pick up one of these units.
So I agree with you about avoiding the high cost. But once you get one of these puppies you will wonder how you lived without it... and you are going to be seriously looking for things to put it to work on. My son put it to work on our riding mower hahahhahhhha...
Here is the search for eBay...
http://search.ebay.com/search/search.dll...ntrypage=search
Posted By: Anonymous
OK round one and orange peel galore... *DELETED* - 10/14/06 11:32 PM
Post deleted by 69DartGT
Posted By: Anonymous
Re: OK round one and orange peel galore... - 10/14/06 11:36 PM
I notified moderator in an attempt for help but i think ur only suppose to do that if something is wrong on a page...sorry if i screwed up haha
Posted By: Exit1965
Re: OK round one and orange peel galore... - 10/14/06 11:56 PM
Two things come to mind - 10-15% is too low for rolling rustoleum (spray might work OK that low), and secondly, I've owned a lot of computers and never owned one with a smooth case. The case has always had some texture to it. Not unlike orange peel or some very fine dot texture.
Unless your case has no texture (what kind of case is that?), you'd need to mix up a skim coat of bondo and fiberglass resin, put it lightly over the surface, then sand the surface down with 180, then 220 then 400 if you like. As long as you see a bondo colored smooth surface and have sanded reasonably well, it will be a smooth surface like that of a car.
Also - if you haven't read most of this thread or the original, it would be a good idea to do that. You'll see it's very much still alive (though focus has mostly turned to marine paint), and I think at this point we should not be emailing answers since other people can benefit from reading about this process from the many people who have tried it.
one more thing - the coat looks way too thick. Thick coat + not enough thinning is a recipe for orange peel no matter what texture the surface.
Posted By: Anonymous
Re: OK round one and orange peel galore... - 10/15/06 12:06 AM
The case is 100% flat. No texture 100% aluminum.That is why i chose it. It had a thin layer of silver paint that i scuffed with 400grit. As for the thinning of the paing 10% is not enough huh? what would you suggest? 20%? I kno there are 500 factors blah blah blah but spit me out a number if 10 isnt doing it for me. Maybe its just to thick of a coat
Posted By: Anonymous
Re: OK round one and orange peel galore... - 10/15/06 12:08 AM
Thses day highend cases dont have much texture because there all aluminum or composites. cheaper cases will have a any texture.
Posted By: Anonymous
How to remove orange peel amazingly - 10/15/06 12:10 AM
sO to remove orange peel should i sand it with how much grit Wet OR dry. Ill do it tommrow when it dries completely.
Posted By: 69DartGT
Paint job on a budget!? CONTINUED..page 44............ - 10/15/06 12:25 AM
As a mod let me make a suggestion DO NOT change the subject. We (the mods) sometimes get a notify mod email and based on the subject may move or delete the thread, So just stick to the original title and leave the creative juices at home.
Posted By: 69DartGT
Re: OK round one and orange peel galore... - 10/15/06 12:29 AM
Quote:
I notified moderator in an attempt for help but i think ur only suppose to do that if something is wrong on a page...sorry if i screwed up haha
See my post on subject changes that's post is gone.
Posted By: Anonymous
Re: How to remove orange peel amazingly - 10/15/06 02:38 AM
The wisdom seems to be, roll 2 thin coats (20% spirits or even 25%) then wet sand with 600 grit, 2 more coats then 800 grit wet sand smooth, 2 more then 1000 or 1500 grit and maybe 2 more if necessary and then 1500 or 2000 or even do the polish and buff then.
I painted a glove box and got a really nice shine and minor peel, I was quickly able to block wet sand it down to smooth.
Sadly, or not so sadly, I dropped the roll on method for my truck since I'm learning auto body at the tech school and have access to an amazing paint booth and all the tools to do it the "right" way so I'm gonna bc/cc the truck. But I'm not giving up on the roller I still think it's viable.
Posted By: Anonymous
Re: How to remove orange peel amazingly - 10/15/06 03:03 AM
If you have all seen the Nissan S13 (white) i talk to him over email and through AOL and he says he used a 2:1 ratio of mineral spirits to paint. That is how thing he rolled his and it took him 8 coats. Im going to test the method tommorow. And his car looks amazing.
As for the moderator he may or may not of been talking to me but i dont know what ur talkin about i never changed the subject.
Posted By: Exit1965
Re: Paint job on a budget!? CONTINUED..page 44........ - 10/15/06 06:09 PM
Quote:
sO to remove orange peel should i sand it with how much grit Wet OR dry. Ill do it tommrow when it dries completely.
Don't need to change the subject, as suggested. When you're making a post, don't change what's under the SUBJECT heading (e.g. don't need to type in "how to remove orange peel amazingly").
I'll say it again, go and read the thread rather than asking for someone to "spit out a number". In fact if you go back to the original thread you can read 69charger's original description which will work as good as any.
Orange peel issues have been done to death in this thread, yes it's big but there are good answers to nearly every question including prep, application, sanding, polishing, longevity, waxing, etc etc etc.
Posted By: Anonymous
Re: Paint job on a budget!? CONTINUED..page 44........ - 10/16/06 12:04 AM
i know ive asked a question that was answered long ago but i couldnt find it. can someone make a search in this complete thread so other people can find answers to q's already asked. then this wouldnt happen. i think it would be a great thing as it takes a month to read all the replys so far.
keep up the grerat work everybody!!!!!!!!!!!!!!!!!
Posted By: Anonymous
Re: Paint Job - 10/16/06 12:56 AM
Im in the sauga aswell. Charger I think I've seen you at a gas station in PortCredit?
Posted By: Anonymous
From some other car forum using West Marine Sea Gloss - 10/16/06 01:25 AM
There seems to be quite a few people from sauga in this forum
I was browsing the Honda Tech forums and they too have a mile long thread with rustoleam etc. One guy is currently painting his entire civic white with some paint called West Marine Sea Gloss Pro. If you follow this link:
http://www.honda-tech.com/zerothread?id=1555133&page=63The gloss on his car is pretty [Edited by Moparts - Keep it clean] good. I'm not sure if he's finished his car or not, but his latest post closely resembles a BC/CC job to me. From my readings, he's been using quite a bit of coats to get full coverage (somewhere b/w 6-8) straight from the can. For the door jams etc, he's been using a brush. The price of that paint is on the high side too, ~$99 US he quoted.
Exit/Marq, how does your brightside glossyness compare to that guy's White civic in that link above?
Posted By: Anonymous
Re: Paint job on a budget!? CONTINUED..page 44........ - 10/16/06 01:30 AM
if i remember right, there was a wiki somewhere with the basic rundown on these methods.
anyways i finished my test piece, my hood using rustoleum stop rust gloss black. i regret not sanding using a block because i can see some rippling and wavyness (not noticable in the pics) but am pretty suprised with the paint and the gloss (and i rushed it, i stopped sanding at 1500 and said the hell with it ill try to polish).
ive never done any polishing so it was kinda an expiriement. i also used some 20 dollar buffer that i saw at schucks.

sorry there was dust on the lense...


next time i am going to lay teh coats heavir also. i think i must have done 10 coats or more, but i had the paint thinned to about 30%, then realized it was way too thin to be putting on. i think when i was sanding i sanded through to the original faded black paint, cause i can see weird little spots when i look close, what looks like water spots but its in the paint...
Posted By: Anonymous
Re: From some other car forum using West Marine Sea Gloss - 10/16/06 02:04 AM
Quote:
I was browsing the Honda Tech forums and they too have a mile long thread with rustoleam etc. One guy is currently painting his entire civic white with some paint called West Marine Sea Gloss Pro. If you follow this link:
http://www.honda-tech.com/zerothread?id=1555133&page=63
Hey menappi... are you talking about fventura03? His paint looks great. But I thought he was spraying the interior?
Also ... about your $20 Schucks buffer, can you tell us more about that? Is it a random orbital or rotary buffer? What's the brand (so I can look it up on the net)? What size is the buffing pad?
Thanks.
Posted By: Exit1965
Re: From some other car forum using West Marine Sea Glo - 10/16/06 04:48 AM
Quote:
There seems to be quite a few people from sauga in this forum
I was browsing the Honda Tech forums and they too have a mile long thread with rustoleam etc. One guy is currently painting his entire civic white with some paint called West Marine Sea Gloss Pro. If you follow this link:
http://www.honda-tech.com/zerothread?id=1555133&page=63
The gloss on his car is pretty [Edited by Moparts - Keep it clean] good. I'm not sure if he's finished his car or not, but his latest post closely resembles a BC/CC job to me. From my readings, he's been using quite a bit of coats to get full coverage (somewhere b/w 6-8) straight from the can. For the door jams etc, he's been using a brush. The price of that paint is on the high side too, ~$99 US he quoted.
Exit/Marq, how does your brightside glossyness compare to that guy's White civic in that link above?
Looks like that guy is doing a nice job. I can see on some of his pics orange peel, which is expected when using straight from the can.
The west marine paint looks good, it is a few dollars cheaper per quart (I think it was about 26 as opposed to 34 for brighside or easypoxy) and they only have very basic colors. I think it said it had UV protection. They did have an off white, but I didn't feel like experimenting for the $20 savings. Nice to know someone else has tried it though. I also nearly bought Petit Easypoxy, which was the same price as brightside. I am sure these paints are VERY similar. They (like rustoleum and brightside) probably all smell like potato when wetsanding
The gloss looks about the same (which is good), but I am not sure why it has taken him 6 coats when applying it full strength. From my one rolling experience, and one spraying experience, brightside covers well even when thinned. The gray of the primer under the single sprayed coat on my car is barely visible.
I had some natural light on the car today and found a funny area in the driver's door, so I fixed that and primered it, so I'll probably have to put another 2-3 coats on that door but only 1 more on the whole car, thinned around 15% with mineral spirits.
Posted By: Exit1965
Re: From some other car forum using West Marine Sea Glo - 10/16/06 04:54 AM
Montanaman, in the honda-tech link menappi posted, there's a pic of his buffer. It's a coleman with a 6" pad. It's the exact same one I had, which my dog ate the pad and chewed off the power cord.
Before that, it worked well! I bought mine at walmart for I think $12, so it's worth checking there first before kragen to save some $. Mine came with a terry cloth cover as well as the cover pictured in menappi's photo. Is a random orbital job, single speed.
Posted By: Anonymous
Re: From some other car forum using West Marine Sea Glo - 10/16/06 05:43 AM
yeah its a coleman single speed, random orbital. it came with two 6" pads. in the honda-tech post, the guy with the white marine paint rattlecanned the interior (not sure why, its all going to be covered anyways) and is rollin onthe outside. seems to be looking pretty nice though.
Posted By: Anonymous
Re: From some other car forum using West Marine Sea Glo - 10/16/06 12:15 PM
Quote:
Looks like that guy is doing a nice job. I can see on some of his pics orange peel, which is expected when using straight from the can.
...
The gloss looks about the same (which is good), but I am not sure why it has taken him 6 coats when applying it full strength. From my one rolling experience, and one spraying experience, brightside covers well even when thinned. The gray of the primer under the single sprayed coat on my car is barely visible.
I had some natural light on the car today and found a funny area in the driver's door, so I fixed that and primered it, so I'll probably have to put another 2-3 coats on that door but only 1 more on the whole car, thinned around 15% with mineral spirits.
He mentioned that with more wetsanding, he may have eliminated almost all the orange peel.
I am also not sure why he did over 6 coats... I was thinking the paint was too thin straight from the can or perhaps he was wetsanding too much.
Can't wait to see the finished brightside exit.
Posted By: Marq
Re: From some other car forum using West Marine Sea Gloss - 10/16/06 12:18 PM
Quote:
Exit/Marq, how does your brightside glossyness compare to that guy's White civic in that link above?
I think my gloss and shine matches up to any clearcoat...

.
Quote:
Im in the sauga aswell. Charger I think I've seen you at a gas station in PortCredit?
that would have been me yes.
Posted By: Anonymous
Re: From some other car forum using West Marine Sea Glo - 10/17/06 01:43 AM
Exit and Menappi:
Thanks for the answers. Have either of you been able to use the Porter Cable unit? I'm hoping for a direct comparison as kind of a cost/benefit analysis. The question being, is the PC worth the extra cost?
Quote:
Montanaman, in the honda-tech link menappi posted, there's a pic of his buffer. It's a coleman with a 6" pad. It's the exact same one I had, which my dog ate the pad and chewed off the power cord.
Before that, it worked well! I bought mine at walmart for I think $12, so it's worth checking there first before kragen to save some $. Mine came with a terry cloth cover as well as the cover pictured in menappi's photo. Is a random orbital job, single speed.
Posted By: Exit1965
Re: From some other car forum using West Marine Sea Glo - 10/17/06 02:01 AM
I haven't used a PC.
With the 6" orbital, I only polished a small area when I was doing safety red. It was easy enough, but not what I would call a fast process but it was not labor intensive really. That 6" polisher is lightweight and quiet and the PC would have to save quite a lot of time to justify the cost $12 vs. $100.
For me, it's not very important that my daily driver is shiny-- a simple wash of that is good enough for me. So I don't see myself polishing things regularly, only after doing a paint job, and I dont have any in mind once the Dart is done. Which is why I am OK with a cheap polisher..
Posted By: Anonymous
Re: From some other car forum using West Marine Sea Glo - 10/17/06 02:18 AM
why spend 100+ dollars on a 50 dollar paint job. the whole concept of this is more work, less money. that 20 dollar buffer thing i have seem sto work fine. ive never used a machine like that, so i would rather use a cheap on and screw up then an expensive one and screw up more.
Posted By: Anonymous
Re: Paint Job - 10/17/06 04:27 AM
i have the civic hatch with the red paint...milano red or w/e would the brightside paint match the color? anyone konw?
thanks
also how many qrts did u guys use to paint the whole car?
Posted By: Anonymous
Re: Paint job on a budget!? CONTINUED..page 44......... - 10/17/06 01:49 PM
Hey all, I'm late to the party, but....
Has anyone tried adding some hardener to the Rustoleum or Brightside? I'm not very knowledgeable about paint, so this may not be a good idea. It sounds like a solution to the soft paint that some of us have experienced.
I'm considering the Brightside Flag Blue. Does anyone have a pic of this color. I'm looking for a very dark blue.
I've read all the posts from the beginning, took about a week. If this was covered, I misssed it.
thanks, Mark
Posted By: Exit1965
Re: Paint job on a budget!? CONTINUED..page 44......... - 10/17/06 05:42 PM
There are enamel hardeners that should work with rustoleum (and maybe brightside). Valspar makes some. The problem is they are quite unhealthy.
To me, the logical next step from these single part paints, is to use a 2 part hardened urethane enamel such as Interlux Perfection. It can be rolled on, and should get as hard as any paint. It's a bit more expensive though, and the surface prep is more particular because I take it it's harsher and can pull up what's under it. I've painted brightside over rustoleum, as has Marq and maybe others, and it works fine. I've also put it over rattlecan primer with no issues (at least yet, but there's no sign of any problem).
Posted By: kenzo42
Re: Paint job on a budget!? CONTINUED..page 44......... - 10/17/06 07:45 PM
As Exit said, hardeners/catalyst is what contains the isocyanates...one of the reasons we are not using automotive paint.
Posted By: kenzo42
Re: Paint job on a budget!? CONTINUED..page 44......... - 10/17/06 07:53 PM
Exit,
Previously, you mentioned that the Off White color from the Interlux Color Card didn't match your actual paint. Does your current Hatteras Off White match the Color Card?
Thanks.
Posted By: Exit1965
Re: Paint job on a budget!? CONTINUED..page 44......... - 10/17/06 10:01 PM
Quote:
Exit,
Previously, you mentioned that the Off White color from the Interlux Color Card didn't match your actual paint. Does your current Hatteras Off White match the Color Card?
Thanks.
Depends on the color card. The shiny new color card I got to take with me, was not a match. The one they had laminated in the store, which looked to be a few years old, was a match.
In the case of Hatteras Off White, the top of the can is painted, supposedly with the same paint and the color seems to be a match to what's in the can. The regular off white to me looked just plain white (as did the top of the can, but I went off the color card and figured it was more accurate than the salesman telling me the top of the can was the same color), the hatteras off white to me looks like it should be the only thing called off white. It's a bit creamy, but not quite yellowish.
Posted By: Anonymous
Exit Brightside paint - 10/18/06 12:01 AM
Any updates on how well the painting process w/ brightside is going Exit? Postive/negative?
Posted By: Exit1965
Re: Exit Brightside paint - 10/18/06 01:12 AM
I should have an update this weekend, I am going to sand on Thursday and Friday and roll on Saturday.
Posted By: Anonymous
Re: Exit Brightside paint - 10/18/06 03:07 PM
There was a guy on here a couple of months ago, "RollinOlds"? who was about lay down Brightside Flag Blue. I am about to order some but wanted to see it on a car first as the color chips on Interlux's site arent much help. Anybody done this that can post a few pics ???? HELP
Posted By: Anonymous
Re: Profesional Results? - 10/19/06 04:46 AM
im in ajax =) i beat ya'll
Posted By: Anonymous
Re: From some other car forum using West Marine Sea Glo - 10/19/06 11:15 AM
Quote:
I haven't used a PC.
With the 6" orbital, I only polished a small area when I was doing safety red. It was easy enough, but not what I would call a fast process but it was not labor intensive really. That 6" polisher is lightweight and quiet and the PC would have to save quite a lot of time to justify the cost $12 vs. $100.
I wasn't really thinking of the time savings ... mostly I'm just concerned about the final result. I just wanted to make sure that the coleman unit can get the same shine as the PC unit. If it takes more time to do that, no problem.
Posted By: Anonymous
My results using Safety Orange Rustoleum - 10/19/06 01:49 PM
Long time listener, first time caller here. I started reading about this method earlier this summer and I decided to try it out on the fender of my '72 Super Beetle. I was so pleased with the results and ease of application that I jumped in head first and did my whole car about a month ago.
I've been posting progress pics on my
Flikr account and writing about the whole thing up on my blog if anyone is interested. You can read it
here.And now for the pictures:
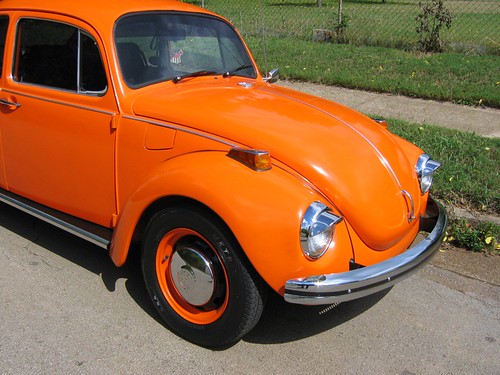

Good times... lot of work, though. If you read my postings on my blog, you'll find that I skipped a couple of steps in the Rustoleum recipe, namely the wetsanding�-I saved that for last. All of my friends are blown away that I used a roller to paint my car. Personally, I'm blown away that I was able to find close-matching orange in Rustoleum (Safety Orange). It's almost an homage to charger's orange beetle (mine was originally orange anyway).
Here's what I used:
-Professional Rustoleum: Safety Orange
-Cut with Odorless Mineral Spirits
-Wet-sanded once before a final glaze coat
-Polished with Turtle Wax polishing compound
-Polished with 3M Swirl Mark Remover
-Soon to be waxed with Turtle Wax High Gloss Wax
Posted By: 69chargeryeehaa
Re: My results using Safety Orange Rustoleum - 10/19/06 01:57 PM
Gumby Mac - very nice job, my car was originally orange too (74 beetle) so i decided to go back to the original color, i think your car looks awesome, very nice work.
i really like orange on a bug.
Posted By: Anonymous
Re: My results using Safety Orange Rustoleum - 10/19/06 06:18 PM
I'm feeling the weight of the expensive paint job coming off my shoulders. In 1985 I painted my 260z with lacquer. The process with painting, wet sanding,painting ,wet sanding, etc,etc, and then polishing is very much the same. I got a very nice paint job that way. Our garage conditions were pretty rough. But it worked. And at the time it probably cost me about 200 bucks in materials.
Now I have a 240z that hasn't been completed since the modern paint system is deadly and I'm not going to spray it in my home garage. So the car has just sat. Now because of the roller process the car is finally on the way to be completed. I didn't want a "show" car finish. And being a 70's car it didn't have a high gloss finish to begin with. My biggest issue was to get a paint that would be a close match to the "Burnt Orange" factory color. I practiced with Rustoleum to see how easy the roller would lay down paint. Which it does well. But, I had to find a paint to use that could be matched to my color. I went to Sherwin Williams since they had an Industrial/Marine Alkyd enamel paint that seemed to fit the bill ($38 per gallon) and could be custom mixed to match color. So far thinning the S/W paint with Xylene has given the best results. The Mineral spirits didn't seem to mix well. Also, the S/W gloss is not as good right out of the can as Rustoleum. So that will have to come with polishing. I do remember lacquer paint seemed to be the same way. Lastly, I contacted my Benj. Moore rep to see about one of their paints. M22 enamel($68 per gal). It is a Urethane reinforced Alkyd. And it can be color matched. So as an experiment I might try it since I believe it can be thinned with Mineral spirits. I think Gumby Mac process is a time saver. Although, I notice my orange peel getting less and less as I went up thru the stages of sandpaper when I would lay down each new coat. So waiting then end to wet sand may only work if you have minimal orange peel from the start.
P.S. I have a Porter Cable Orbital palm sander and 4 inch grinder that I believe can be adapted to use a buffer pad. The 4 inch grinder gets a orbital attachment to make it a buffer. So no need to buy a buffer tool if you have either a palm sander or a 4 inch grinder.
Posted By: Anonymous
Re: My results using Safety Orange Rustoleum - 10/20/06 01:02 AM
k, i tried the pearl just mixing it in a thin batch..Wow..you can acutally see it and its non affected by sanding. I still may mix it with a clear coat,but you can get the base coat down and wet sanded, then mix in a jar of pearl with a quart of paint...thin it, then paint....you will be amazed!!!
Steve
Posted By: Anonymous
Re: My results using Safety Orange Rustoleum - 10/20/06 02:10 AM
What "pearl" do you speak of? More info please. got pics of how it looks? really interested... i think marq tried this out and it didn't out that well...
Quote:
k, i tried the pearl just mixing it in a thin batch..Wow..you can acutally see it and its non affected by sanding. I still may mix it with a clear coat,but you can get the base coat down and wet sanded, then mix in a jar of pearl with a quart of paint...thin it, then paint....you will be amazed!!!
Steve
Posted By: Anonymous
Re: My results using Safety Orange Rustoleum - 10/20/06 06:05 PM
www.paintwithpearl.comthey also are on ebay....more choices.
Steve
Posted By: Anonymous
Re: My results using Safety Orange Rustoleum - 10/20/06 06:16 PM
Quote:
www.paintwithpearl.com
they also are on ebay....more choices.
Steve
So your saying you just mixed a quart of rustolean/brightside with it and rolled it on? It doesn't have to be sprayed on?
Posted By: Anonymous
Re: My results using Safety Orange Rustoleum - 10/20/06 08:40 PM
I am in a similar situation. I have read through all of this and did this to my son's 1988 Honda Accord. I will include some images, but first the story.
We purchase the car for $1000 and had the windshield replaced (was cracked) for $150. I looked into Maaco options and was going to just prep the car and then take it there. I called a friend who restores and paints cars. Well it started out that if I would prep the car and prime it then he would spray it for me. This was just going to cost me materials (about $120) at that time. Well that quickly increased to $300 in material then I did not have the right size compressor and my body work was wrong and on and on. Then I was ready to have it sprayed and then after 3-4 weeks of either it not being a good time or the weather turning to cold or raining I was very frustrated. I then ran across this post and read through the entire thing.
What a GREAT way to paint a car and without the mess and COST of the spray on material. It takes a lot of elbow grease to make this work especially with black, but the results are great. Once we decided to got at this ourselves (myself and my son) it took about 5 days to paint, wetsand (two coats of paint and then wetsand) three times and then polish to get our finished product. I did need to upgrade from a $20 orbital waxer to a $30 (on sale at Harbor Freight) polisher/sander. You MUST be carful with this machine!! Anyway thanks to all - now the pics!

Posted By: Anonymous
Re: My results using Safety Orange Rustoleum - 10/20/06 08:42 PM
Here is another!

Posted By: Anonymous
Re: My results using Safety Orange Rustoleum - 10/20/06 08:43 PM
This is a before shot of the same car.

Posted By: Anonymous
Re: Paint job on a budget!? CONTINUED..page 44......... - 10/20/06 10:00 PM
Posted By: 69chargeryeehaa
Re: Paint job on a budget!? CONTINUED..page 44......... - 10/20/06 11:54 PM
oly - your welcome. it's 69chargeryeehaa by the way, the yeehaa part comes in when i drive by the body shops with my charger!!!!
i really wonder how many sucess stories are really out there and not posting pics!!!!!
what a monster i've created muhahahahahah!!! (where's that Dr. evil emoticon when you need it!!!!)
i totally agree, people view the roller method as more work than spraying, and i see it as the total opposite, no mess, mixing reducer with a measuring cup, hope it does'nt rain, kill your family, overspray on everything you own, ect.....on and on it goes. Spraying paint on only accomplishes applying paint onto a surface in a thin uniform layer....rollering on thin paint with less "flash" time in thin uniform coats accomplishes the same end result, the tremclad/rustoleum paint in my book is the perfect paint for this process, it's durrable, cheap, easy to work with, and it's cheap, plus not to mention the fact that it does'nt cost alot!!!!
Actually i really think that the roller method yeilds a thinner overall thickness of paint compared to single stage or BC/CC paints since there is no primer, primer sealer, topcoat.....or....primer, base, clear. overall at least my paintjobs are much thinner than any conventional auto painting technique, plus even with a HVLP setup which i too have and have done alot of, i used less paint on the charger than the 71 bug (midnight blue)!!!! it really doesn't matter
how you apply the paint (spray/roller) it just matters that you apply it thin and uniform, that is accomplished using the roller technique, with the added benifits of being able to do it at home and not battle dust/dirt/hair/bugs, ect.....everything about this technique is eaiser, less stressful, cheaper, ect....than spraying paint. i painted my charger in 3 days, from just after prep to done, if i had sprayed that car, it would have taken me longer, i'd have to tape up the car, prime the car, sand the car, tape up the car, primer sealer, then paint, clean up the huge mess, ect....opposed to no taping, no overspray, work at a leisurely pace, wetsand (which to me is a walk in the park compared to taping up a car!!!!) then polish....ummmm, i'll roll-on.
Posted By: Anonymous
Re: Paint job on a budget!? CONTINUED..page 44......... - 10/21/06 01:17 AM
69chargeryeehaa, please forgive my faux pas. I have made the proper adjustments.-LOL
I have somehow become a tad confused on which rollers to use. I have found the 4 inch 'white foam' roller that is about one inch in diameter, but I have also found some that are two inches in diameter with the white foam. Which roller is the proper one?
On a side note- My 45 GMC COE was getting some bad rust and rust through in some places and my wife knew it would be some time before we could get to restoring it, so she and my daughter decided to paint it with a 'rust paint' call Zero Rust. They painted it by brush completly, over rust and paint with just wire brushing it before hand painting it. Within a short while (six months or so) I could not even get the paint off from the rust area with a knife, but on nearly all of the rest of the truck the paint formed large bubbles (over six inches across) and just peeled the orignal paint off right down to the orignal shiny sheet metal. Is there certain types of paint that these 'rust paints' can react with to cause this? Or, was it just that it happens to be a wierd paint that they used at the factory because of it being a war time truck? (The paint on the truck had no bubbles before putting on the Zero Rust.) Do I need to take these old rigs all the way to solid bare metal? Or, is Rustoleum different then Zero Rust?
Posted By: Anonymous
Re: Paint job on a budget!? CONTINUED..page 44......... - 10/21/06 04:58 AM
Well, after following some 80-odd pages of this thread, I decided to do the deed and paint my chocolate brown metallic 82 280zx turbo Rustoleum Professional Gloss White. Though the weather this past week has sucked down here in Southeast Texas, the job came out better than I could ask for. Easy, you bet. And my total cost for the job was 126.00, but had to buy a new orbital sander included in the price. Two quarts of paint, a gallon of mineral spirits, 6 4" foam rollers,a quart of Bondo, and miscellaneous other items produced one nice looking paint job.Heres a couple of pics...5 days start to finish.
Primered with Spray-on Rustoleum primer
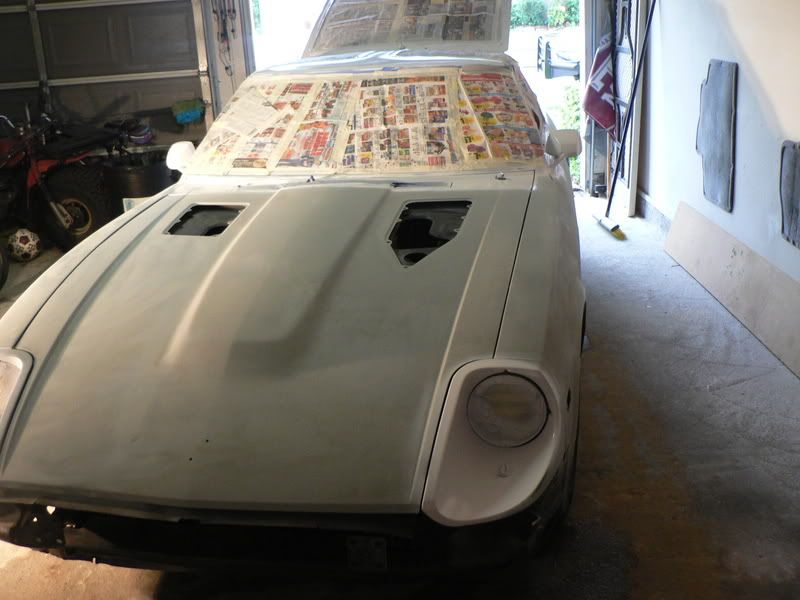
First Coat on hood while still wet
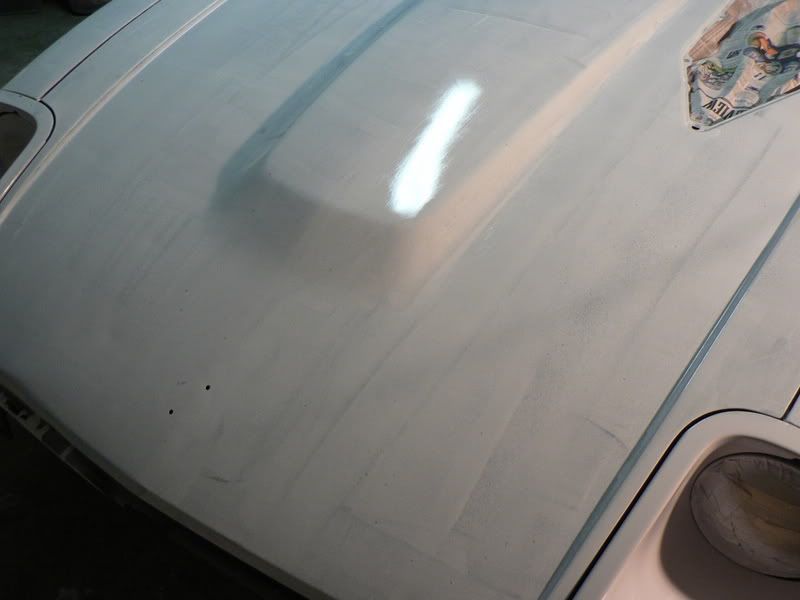
Final, just need to add bumpers. Rocker panels and bumpers are Spray-on Duplicolor Bedliner.
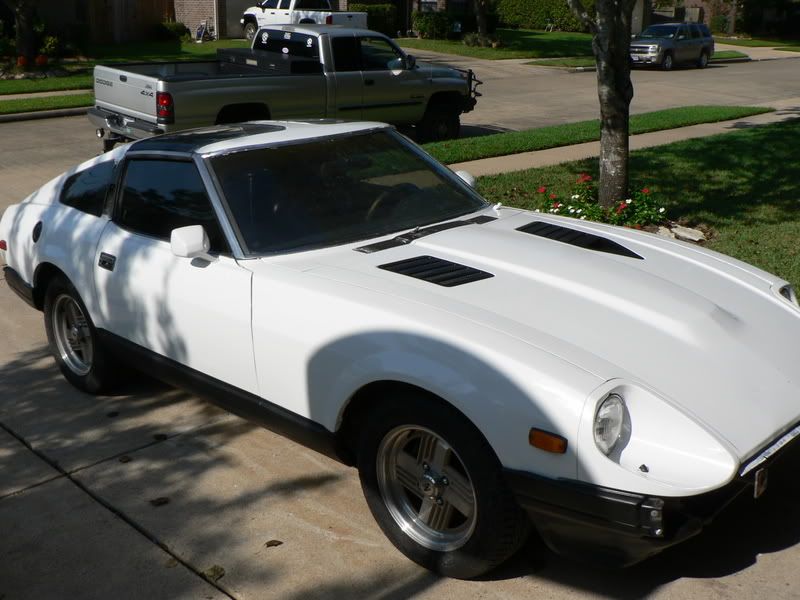
Thanks for all the info!
Mike
Posted By: 69DartGT
Re: Paint job on a budget!? CONTINUED..page 44......... - 10/21/06 02:55 PM
Mike, looks great how many coats?
Posted By: Anonymous
Re: Paint job on a budget!? CONTINUED..page 44......... - 10/21/06 10:35 PM
Ended up being 7 coats, but most of that was due to my inate ability to sand through while wet-sanding, especially on the hood. Gonna wait about a month and wet sand with 2000 grit, and polish it out after that. I couldn't believe how easy it was. Again, many thanks to all those who contributed any input, shortcuts and tips.
Mike
Posted By: Anonymous
Re: Paint job on a budget!? CONTINUED..page 44......... - 10/22/06 12:21 AM
More to come. Bumpers and grille are on now.

Posted By: Anonymous
Re: Paint job on a budget!? CONTINUED..page 44......... - 10/22/06 12:21 AM
2

Posted By: Anonymous
Re: Paint job on a budget!? CONTINUED..page 44......... - 10/22/06 01:02 AM
heres how mine turned out. not buffed out at the moment but 12 coats of paint later and its verry good. lots of wet sanding and buffing to come...

Posted By: Anonymous
Re: Paint job on a budget!? CONTINUED..page 44......... - 10/22/06 03:27 PM
So you shot 12 coats of paint or did you go to a roller?
How much paint did you use?
Posted By: Anonymous
Re: Paint job on a budget!? CONTINUED..page 44......... - 10/22/06 05:47 PM
i cant believe this post is still going
lots of reading to do here
Posted By: Anonymous
Re: Paint job on a budget!? CONTINUED..page 44......... - 10/22/06 06:48 PM
hvlp gun
3 quarts of gloss black rustolium
i am also taking the masking tape you see on the windshield and frontmount, and making stencils for the fender and the hood emblems with pinstripe paint from eastwood the masking tape is the mickey's from eastwood too.
Posted By: kenzo42
Re: Paint job on a budget!? CONTINUED..page 44......... - 10/22/06 09:58 PM
Marq, Exit, or anyone using Brightside,
What was the price per quart you guys payed for Brightside? I thought it was mentioned before.
Over here in Redondo Beach, it's $46/quart for Hatteras White.
Thanks.
Posted By: Anonymous
Re: Paint job on a budget!? CONTINUED..page 44......... - 10/23/06 01:43 AM
Hi All,
Back in March of this year I started reading the original post and since I needed a paint job by April I jumped in quick. Well it's been nearly6 months and I can't count the compliments I've gotten or how much I like the results. Paint has withstood weather, washing, waxing, and being non-garaged. If you are thinking about it ...Don't hesitate. Paint paint paint!!!.

Ron 1969 Datsun Roadster
Posted By: Marq
Re: Paint job on a budget!? CONTINUED..page 44......... - 10/23/06 02:13 AM
Quote:
Marq, Exit, or anyone using Brightside,
What was the price per quart you guys payed for Brightside? I thought it was mentioned before.
Over here in Redondo Beach, it's $46/quart for Hatteras White.
Thanks.
In Ottawa I was paying about $35 CDN$ per quart... which is like $30 US$...
Me thinks your supplier is gouging and not very competitive... I have seen more competitive prices in the States...
.
Posted By: Anonymous
Re: Paint job on a budget!? CONTINUED..page 44......... - 10/23/06 02:18 AM
Polished and assembled for the most part. Still need to work on the door weather strip. Shines enough for me.

Posted By: 69DartGT
Re: Paint job on a budget!? CONTINUED..page 44......... - 10/23/06 02:18 AM
Quote:
Marq, Exit, or anyone using Brightside,
What was the price per quart you guys payed for Brightside? I thought it was mentioned before.
Over here in Redondo Beach, it's $46/quart for Hatteras White.
Thanks.
See if you have a West Marine close buy I think they are about $24.99 a quart..
Posted By: Anonymous
Re: Paint job on a budget!? CONTINUED..page 44......... - 10/23/06 02:21 AM
#2

Posted By: Anonymous
Re: Paint job on a budget!? CONTINUED..page 44......... - 10/23/06 02:22 AM
#3

Posted By: Anonymous
Re: Paint job on a budget!? CONTINUED..page 44......... - 10/23/06 02:23 AM
Posted By: 69DartGT
Re: Paint job on a budget!? CONTINUED..page 44......... - 10/23/06 02:29 AM
Mark, looks great, one thing is your prep work was really good especially since you went with black
Posted By: Anonymous
Re: Paint job on a budget!? CONTINUED..page 44......... - 10/23/06 02:45 AM
Mark,
The paint job does look awesome. If I had known the painting was this easy, and the results would be soooo good, I'd have spent a little more time on prep work and went with black myself on my 280 instead of white. The car didn't really need much. It just sounded too good to be true, so I was skeptical. Now everyone that sees the car don't believe it was a roll on job. Come on everyone, let's see some more...
Posted By: 69DartGT
Re: Paint job on a budget!? CONTINUED..page 44......... - 10/24/06 01:51 PM
Since this is viewed so often I've made it a sticky for awhile
Posted By: 69chargeryeehaa
Re: Paint job on a budget!? CONTINUED..page 44......... - 10/24/06 02:50 PM
Quote:
Since this is viewed so often I've made it a sticky for awhile
that's why i love this board, the MODS ARE AWESOME!!!!
I posted this same post on thesamba.com, and it was deleted, when a mod said it's the stupidest thing you could do to your car. then here on moparts the thread goes way beyond where i thought it would go. At first i was just looking to share an idea with you guys, one that helped me drive my car without shame, and with good paint without breaking the bank. it's just awesome to see all the sucess stories, all the before and after pictures, i love it. i wonder how many people painted their cars and haven't posted up a pic yet???
it blows me away the quality of work that i'm seeing from people that really have'nt painted any cars before, and with a little elbow grease have a awesome driver, i think all the cars i've seen the the pics look awesome.
Posted By: Anonymous
Re: Paint job on a budget!? CONTINUED..page 44......... - 10/24/06 02:52 PM
We wanna see Exits work! lol...
Hurry up Exit, we are all waiting
Posted By: 69chargeryeehaa
Re: Paint job on a budget!? CONTINUED..page 44......... - 10/24/06 03:17 PM
Quote:
We wanna see Exits work! lol...
Hurry up Exit, we are all waiting
his cars probabally painted a different color by now lol.
Posted By: 69chargeryeehaa
Re: Paint job on a budget!? CONTINUED..page 44......... - 10/24/06 03:55 PM
Quote:
LOL... you are probably right!
usually when he goes missing for a day or 2 he comes back with the car a totally different color!!!!
Posted By: Anonymous
Re: Paint job on a budget!? CONTINUED..page 44......... - 10/25/06 12:46 AM
mark e that gn looks great
Posted By: Anonymous
Re: Paint job on a budget!? CONTINUED..page 44......... - 10/25/06 03:31 AM
Posted By: Anonymous
Re: Paint job on a budget!? CONTINUED..page 44......... - 10/25/06 09:34 PM
I also did black on a 88 Honda Accord. Do you have any roller lines in the large areas (hood, roof etc.)? I can see them when I look straight down on mine. Also, I am happy with what I have as I wet sanded and polished, but need to go back and do more wet sanding as I still have more orange peel than I would like and black shows EVERYTHING!
I am also using this car to practice on and I am ordering a Porter Cable 7424 (or from Meguiar's the G100 - same machine) to do the final polishing with as once I have this down I will go to work on my car. This one is my son's! Here is a picture of the finished product.

I will try to get some tomorrow of the side and the hood. Thanks for any help.
Mike
Posted By: Anonymous
Re: Paint job on a budget!? CONTINUED..page 44......... - 10/25/06 11:24 PM
Here are some shots during the painting process.
The first two are after 5 and 6 coats of paint.


The last one is when finished with wet sanding and polishing.

Posted By: Anonymous
Re: Paint job on a budget!? CONTINUED..page 44......... - 10/26/06 02:35 AM
Wow that Honda looks great!!! Hi guys im new to the forums and i really joined because of this thread... i come from
www.shoforum.com im a muscle car guy but i like 4doors!! Okay currently i went and bought a pontiac lemans fender from the junk yard just so i can try out this method!
so far i have collected the items bellow
Aircraft stripper- removes paint without having to sanding it down.
Miniral spirts-oderless!!!
Bondo- for any sneeky dents i might run in to..
wet/dry sand paper- grit 330-2500
and rustoleum Gloss Black.
and the paint brush/rollers.
Here is how i plan on tackleing the frontier!
Use aircraft stripper and strip the paint off the lemans fender paint.
then fix and dents with bondo and sand down the bondoed areas.
I havent decided if i should use primer or not but i mostlikely wont.
then put my first coat on and wetsand with 330 and each coat i put i will go all the way up to 2500 then i will put another coat over the 2500 grit and polish or should i do 2500 grit then polish without putting a coat over the 2500 grit sanded area??
after that im going to polish with a rotary buffer ( im a semi-pro detailer) and use coats of abrasivep polish/non-abrasive polish and then last end with a high end glaze wax....
what do you think???!
Posted By: Anonymous
Re: Paint job on a budget!? CONTINUED..page 44......... - 10/26/06 04:21 AM
Another member, all because of this wonderful thread!!! I have questions, could be mostly for 69chargeryeehaa and Marq.
I have a red 1990 240sx. I want to repaint it red. I like painting, always wanted to paint cars, nows my chance. (I don;t count the spray bomb I did on my first 240sx)
I�ve followed the marathon thread of painting a car with a roller. I was set on the tremclad and then I noticed the success with seemingly less work with Brightside.
The reason I was thinking of going with Brightside is because my car is already red. I know its much more involved going from another color to red, more coats etc etc. But since my car is already red and I�m going to go back to the same color I figured this is the way to go. (basically it�s a 1990 that had its rear quarter panels and bumper cover redone from a fender 12 years ago, that aftermarket paint is faded very bad � past the point of saving.)
Unfortunately I won�t be starting this till the next year when I finish my garage, but I may start gathering the supplies now. How many coats would you think I would need to do? I would scuff the whole car obviously, and let the car cure in a hot garage after each coat� or out on the side of the road for the later stages of curing (to make sure no dust gets embedded initially). What are your thoughts on this job, red over red? (my door jambs and crevices are still perfect)
I truly appreciate any feedback, it seems the Brightside way is the way to go for my particular application.
Being in Canada I can get the tremclad easily, has anyone found out after about the Ebay low priced Brightside after???? I've seen people asking but no replies. I might end up painting the car sooner weather depending since I've got my 26x28 pad poured
Sorry for the novel.
Posted By: Exit1965
Re: Paint job on a budget!? CONTINUED..page 44......... - 10/26/06 07:45 PM
Quote:
Quote:
LOL... you are probably right!
usually when he goes missing for a day or 2 he comes back with the car a totally different color!!!!
Yep you guys nailed it. It's my first coat of plutonium green, what do you think?

Really though, I've been in Atlanta since Sunday. I did most of the wetsanding last Friday but I quit halfway through from fatigue and I think I still need to re-sand the areas I did. The orange peel has been tough to get out, and it's everywhere after that spray job.
Posted By: 69chargeryeehaa
Re: Paint job on a budget!? CONTINUED..page 44......... - 10/27/06 12:28 AM
Quote:
Quote:
Quote:
LOL... you are probably right!
usually when he goes missing for a day or 2 he comes back with the car a totally different color!!!!
Yep you guys nailed it. It's my first coat of plutonium green, what do you think?
Really though, I've been in Atlanta since Sunday. I did most of the wetsanding last Friday but I quit halfway through from fatigue and I think I still need to re-sand the areas I did. The orange peel has been tough to get out, and it's everywhere after that spray job.
can you scratch it with your fingernail?
Posted By: Anonymous
Re: Paint job on a budget!? CONTINUED..page 44......... - 10/27/06 02:39 AM
Man I cant beleive this is still alive and well. I've been busy working lately and havent been on for a while. Good to see the posts still keep coming.
Ive got my newest project, an 84 F150. I'll post a picture of the before any bodywork this weekend. I also just finished a 85 F150 4x4 and it turned out great I'll get a pic up of it as well. Painted it Raspberry red (tremclad)
For now here is a pic of the scirocco.
Cheers

Posted By: kenzo42
Re: Paint job on a budget!? CONTINUED..page 44......... - 10/27/06 03:07 AM
This thread is almost at it's limit again of 43 pages.
Posted By: Marq
Re: Paint job on a budget!? CONTINUED..page 44......... - 10/27/06 03:25 AM
Quote:
Unfortunately I won�t be starting this till the next year when I finish my garage, but I may start gathering the supplies now. How many coats would you think I would need to do?
If you are going red on red... I would think that three coats or four might be all it takes....
Quote:
What are your thoughts on this job, red over red? (my door jambs and crevices are still perfect)
It makes life easier when you are painting the same color as the original car. But it isn't that difficult to jump between colors. On my McLaren... it was initially done as red, the second owner painted it black.... and I returned it back to red. The change back from black to red just meant that I had to spray bomb the inner hood and inner trunk.. and the door jambs..
The only thing I might suggest is that you take a look at some of the polyurathane marine paints that were brought to our attention within the past 10 pages of this thread. It did offer an equivalent polyurathane marine paint... that had the benefit of a number more shades of red to choose from.
The Brightside polyurathane 'fire red' is a fairly light, bright and tilting almost to the orangie red color. Whereas that other polyurathane marine paint had the deeper shades of red.
But if you like the look of the brighter 'fire red' you will be able to use the Brightside on the outer body and Tremclad 'fire red' spray bombs to match up the door jambs, and inner trunk and hood.
I don't know if I would stock pile the goodies for this project this early. Pretty well everything that we had discussed in this thread will still be in production and readily available next year and probably for many years into the future.
The other benefit of delaying your purchases, is that for the paint, the Interlux company might expand the color selection of their polyurathanes...
As well you can use the time to keep an eye on your local 'Pennysaver' or other classified ads to catch a bargain on the Porter & Cable polisher. Just have the money waiting to snap one up quickly when someone is trying to unload one.
As for that Brightside paint that was on eBay, some folks have used it without any problem. However, you mentioned that you are in Canada, and that supplier is in the States. So there could be some cross border and shipping problmes if ou try to buy it and bring it into Canada.
.
Posted By: Anonymous
Re: Paint job on a budget!? CONTINUED..page 44......... - 10/27/06 01:34 PM
Quote:
can you scratch it with your fingernail?
Man, the jokes don't stop lol. Good thing you didn't change colour Exit.
Where has Aussie been? I want to see his black miata... I'm on the fence of whether I should go black or white. Black seems too hard to do, but I wanna see how Aussie car turns out!
Posted By: 69DartGT
Re: Paint job on a budget!? CONTINUED..page 44......... - 10/27/06 02:31 PM
Marq you are singing the praises of the Porter-Cable 7424 correct?
Oops typo
Posted By: admactanium
Re: Paint job on a budget!? CONTINUED..page 44......... - 10/28/06 07:02 AM
Quote:
Marq you are singing the praises of the Porter-Cable 7924 correct?
69dart, the porter cable polisher is a mainstay for pretty much all detailers. there are literally thousands of them out there with hardly any complaints. i have one and it's a trooper. makes your hands numb after a while though.
Posted By: 69DartGT
Re: Paint job on a budget!? CONTINUED..page 44......... - 10/28/06 02:51 PM
Jeff had a typo should have been 7424 I just bought one off the bag thought it was a good price.
http://cgi.ebay.com/Porter-Cable-7424-Ca...1QQcmdZViewItem
Posted By: Marq
Re: Paint job on a budget!? CONTINUED..page 44......... - 10/28/06 06:38 PM
Quote:
Marq you are singing the praises of the Porter-Cable 7424 correct?
Oops typo
Absolutely. You can buy 'cheaper' but in life sometimes it pays to buy "the best'. And I believe the 7424 is one of the best bangs for the buck.
It is the kind of quality tool that you should have around for a long time and be able to pass down to the kids
The only downside to the 7424 are the Porter & Cable 'add ons'... the extra accessories that you can buy for it. P & C tend to charge a premium price for their add ons.
BUT the good thing is that because the P & C is the McDonald's of random orbital polishers, there are a lot of third party companies that are producing all those 'add ons' and making them available at bargain prices.
This is an advantage over some of the cheaper polishers which don't have the benefit of 'third party' companies building 'add ons' for their products. In those cases you have to buy that specific company's 'add ons'...
So yes... I joined the global chorus of people who are singing the praises of the 7424... and they were right.
.
Posted By: Anonymous
Re: Paint job on a budget!? CONTINUED..page 44......... - 10/29/06 08:43 AM
I'm still around. My final wetsand and detailing will happen next weekend, and I'll post some pics of the results. Only six more sleeps to go!!
Posted By: Anonymous
Re: Paint job on a budget!? CONTINUED..page 44......... - 10/29/06 01:09 PM
Quote:
The only downside to the 7424 are the Porter & Cable 'add ons'... the extra accessories that you can buy for it. P & C tend to charge a premium price for their add ons.
BUT the good thing is that because the P & C is the McDonald's of random orbital polishers, there are a lot of third party companies that are producing all those 'add ons' and making them available at bargain prices.
This is an advantage over some of the cheaper polishers which don't have the benefit of 'third party' companies building 'add ons' for their products. In those cases you have to buy that specific company's 'add ons'...
What 'add ons' from what manufacturers are recommended?
Posted By: Anonymous
Re: Paint job on a budget!? CONTINUED..page 44......... - 10/29/06 07:54 PM
Quote:
What 'add ons' from what manufacturers are recommended?
For starters either Edge, Lake Country , or Wolfgang buffing pads are all excellent and recommended by professional detailers.
Posted By: Anonymous
Re: Paint job on a budget!? CONTINUED..page 44......... - 10/29/06 08:47 PM
Marq,
I am about to order the G100 (aka the Porter Cable 7424) it is just rebranded via Meguiar's, but they also throw in a life time warranty. I think I am going to order it from Auto Detailing Solutions. I was also looking into the pads an Meguiar's product.
I am having a hazing problem with my paint. I painted, wet sanding and then used just cheap turtle wax polishing compond. It looked OK, but seems to be getting worse (hazing/oxidizing). I also have a rotary (not a pro, just did not want to spend a lot of time). I have since tried using some Meguiar's #7 just to make it shine a bit more (waiting on wax for a while). This seems to work for a while. My next plan is to buy the 7424 and pads and product and work from a more aggresive to less agressive polish and then glaze. If you know Meguiar's product that would be #83, #80, #21 and maybe #7.
If anyone has any other ideas I am open. Here are a few shots showing the hazing.


And here is one close up to show the swirls:

Mike
Posted By: Anonymous
Re: Paint job on a budget!? CONTINUED..page 44......... - 10/29/06 09:23 PM
Using just one polish won't get you a decent/long lasting finish. That paint needs to be hit with a dedicated swirl remover, then polished, then sealed.
Personally I'm a big fan of the Poorboy's range of polishes. From the Poorboy's range I would start on your paint with a couple of passes of SSR2.5 with a light cutting pad, then another pass of the SSR2.5 with a polishing pad. Then I would use SSR1 with a polishing pad, then another pass with the SSR1 with a finishing pad. That should remove most if not all of your swirls. Then I would polish the car with two or three passes of polish (I like the Poorboy's Pro polish) and then seal the paint (again using two or three coats) with either a Carnauba Wax (for excellent depth of shine but it won't last very long) or with a synthetic sealant (for excellent protection but not as much depth as a wax).
That should fix all of your problems. It is a long and frustrating job, but if you polish properly you can make a decent paint job look extraordinary.
Posted By: Anonymous
Re: Paint job on a budget!? CONTINUED..page 44......... - 10/29/06 10:39 PM
Thanks Aussie Driver, I am going to get the G100 (aka the Porter Cable 7424) and get going. Do you use the PC 7424 to put this on.
Mike
Posted By: Anonymous
Re: Paint job on a budget!? CONTINUED..page 44......... - 10/29/06 11:17 PM
I don't use a PC myself (we have 240V instead of 110V and PC don't make a 240V version of the 7424), but I use a random orbital sander/polisher that has similar specs.
I use my RO to apply everything, but I have discovered that it is really important to match the correct pad to the required polish. I will use a swirl remover with a light cutting pad or a polishing pad. A polish with a polishing pad or a finishing pad and I use a finessing pad for the sealant (wax or synthetic). I also use a microfiber towel for removing the residue.
Another really important step with any polish is to keep working it in until it breaks down properly. That is basically when there is only a slight film of residue on the paint. Then wipe it off and start the next pass.
Download the free
Guide to Detailing from Autopia and have a read through that. It is one of the best guides around.
Posted By: Anonymous
Re: Paint job on a budget!? CONTINUED..page 44......... - 10/29/06 11:25 PM
Aussie Driver,
Thanks for the quick response. Any update on your pics. Also any info on the stages that you are taking on your paint, wet sanding paper, polish etc. Also, you repainted with the Brightside correct? Thanks!
Mike
Posted By: Anonymous
Re: Paint job on a budget!? CONTINUED..page 44......... - 10/30/06 12:02 AM
Just one question for you guys with the plastic bumpers and such. How is the paint adhesion after a time driving it? My friend is having a hard time getting the Rustoleum to stay on the plastic. Seems to adhere to metal fine though. Input on the plastic guys.
Posted By: Anonymous
Re: Paint job on a budget!? CONTINUED..page 44......... - 10/30/06 01:50 AM
I just lightly sanded the plastic bumpers and the paint seems to stick just fine? I did not do anything different than the rest of the car.
Mike
Posted By: Anonymous
Re: Paint job on a budget!? CONTINUED..page 44......... - 10/30/06 05:02 PM
So, I understand that 69chargeryeehaa sprayed some Tremclad at some point. I saw this site, I think from this thread, about the Harbor Freight spray gun, and he said he had some good results:
http://purplesagetradingpost.com/sumner/techinfo/HVLPspraygun.htmlThis spray gun is only $39.
It seems to me that it would save a ton of time and elbow grease if the Rustoleum or Brightside could be sprayed. Is this true?
Can you spray Brightside?
I think it would probably save me quite a bit of money if I didn't go with the automotive grade paints. But i haven't really looked into pricing yet.
Posted By: 69chargeryeehaa
Re: Paint job on a budget!? CONTINUED..page 44......... - 10/30/06 05:13 PM
Quote:
So, I understand that 69chargeryeehaa sprayed some Tremclad at some point. I saw this site, I think from this thread, about the Harbor Freight spray gun, and he said he had some good results:
http://purplesagetradingpost.com/sumner/techinfo/HVLPspraygun.html
This spray gun is only $39.
It seems to me that it would save a ton of time and elbow grease if the Rustoleum or Brightside could be sprayed. Is this true?
Can you spray Brightside?
I think it would probably save me quite a bit of money if I didn't go with the automotive grade paints. But i haven't really looked into pricing yet.
trust me on this one, roll it, if your going to go thru all the trouble of spraying, then use auto paint, like a single stage enamel, but that goes backwards to the whole roll-painting method, cheap, easy, no mess, ect....plus anytime you spray a car with no booth your just asking for dust/dirt/bugs/hair, ect....in your paint, it's a big problem for the "do-it-yourselfer"!!!
you can spray small sections, hard to reach places like grills, door jambs, ect...but i just use the spray bombs, or if you have a custom color use a compressor and a small touch up gun, spraying a whole car in your garage will be a real pain, mess, and probabally not turn out as nice as a roller job, simply due to the fact that with no booth, dirt/hair ect....will be a major battle, compared to rollering the paint on, where your not disturbing the air, you can stop on each pannel and use a tack cloth just before you paint, you virtually get no dirt in your paint.
plus that cheapo gun will suck, you get what you pay for !!!!
yes i have sprayed the tremclad, but after discovering the roller method, that's history!!!!
Posted By: Anonymous
Re: Paint job on a budget!? CONTINUED..page 44......... - 10/31/06 08:38 AM
Go to this
web page and do a search for the term "43430" or "purple gun" ...this is a great gun! I've used it to paint my cars several times and it works great. You can get dust and hair in your car when rollering just as much as spraying and you are right, this gun saves a bunch of trouble. Use the single stage auto paint like you find on this
web page ...
Posted By: Exit1965
Re: Paint job on a budget!? CONTINUED..page 44......... - 10/31/06 01:12 PM
Quote:
Go to this web page and do a search for the term "43430" or "purple gun" ...this is a great gun! I've used it to paint my cars several times and it works great. You can get dust and hair in your car when rollering just as much as spraying and you are right, this gun saves a bunch of trouble. Use the single stage auto paint like you find on this web page ...
To spray it requires a lot more prep with masking and dust control, and be prepared to sniff in more than your fair share of paint. I would only use the spray for areas that can't be rolled, otherwise rolling is a more relaxing and healthy process than spraying.
Posted By: 69DartGT
Re: Paint job on a budget!? CONTINUED..page 44......... - 10/31/06 02:33 PM
Have to
here, unless you are shooting lacquer assuming we are talking driveway paint job, the oversrpay may cause you a large headache depending on where it lands.
I bought the 43430 spraygun and just found out they have a neat holder for it under $10
Posted By: Anonymous
Re: Paint job on a budget!? CONTINUED..page 44......... - 10/31/06 06:09 PM
It's definitely a trade-off between rollering and spraying, depending on your resources available. I was originally planning on rollering because I did not have a good place to do any spraying, but a friend just offered me use of his barn for the entire winter which could be converted into a very nice paint booth.
There's also that concern how much more its' going to cost for spraying because there is more waste.
Posted By: Anonymous
Re: Paint job on a budget!? CONTINUED..page 44......... - 10/31/06 06:35 PM
Quote:
It's definitely a trade-off between rollering and spraying, depending on your resources available. I was originally planning on rollering because I did not have a good place to do any spraying, but a friend just offered me use of his barn for the entire winter which could be converted into a very nice paint booth.
There's also that concern how much more its' going to cost for spraying because there is more waste.
Yes rolling has some inherent benefits, no overspray, can be done anywhere by just about anyone, total lack of any special equipment required, you can buy everything you need at any Lowes/Home Depot even Wal-Mart. Those are some pretty compelling pros in favor of rolling it on. Granted the actual act of painting requires much more effort, 6+ coats seems to be the norm, LOTS of sanding, whereas with spraying it seems to be spray and go.
Posted By: Anonymous
Re: Paint job on a budget!? CONTINUED..page 44......... - 10/31/06 06:44 PM
If you guys are going through the hassle of spraying... why not just spray using the proper automotive paints like Charger suggested. Doesn't make sense to go through all the trouble to spray and then use the "wrong" paint. Sure it may be cheaper.. but spend an extra few bucks to get the real stuff. If I had a compressor and gun on hand I would definetely be spray the car instead of rolling brighside...
Posted By: 69chargeryeehaa
Re: Paint job on a budget!? CONTINUED..page 44......... - 10/31/06 07:40 PM
Quote:
If you guys are going through the hassle of spraying... why not just spray using the proper automotive paints like Charger suggested. Doesn't make sense to go through all the trouble to spray and then use the "wrong" paint. Sure it may be cheaper.. but spend an extra few bucks to get the real stuff. If I had a compressor and gun on hand I would definetely be spray the car instead of rolling brighside...
i agree. BUT i can say that spraying tremclad/rustoleum can still be much eaiser than spraying auto paint. auto paints need reducers, primer, primer sealer, and color coats, all within "windows" and is hard to do for a novice. if you sprayed tremclad/rustoleum it's just spray and go, not that i'm reccommending it just to compare with the eaisest single stage paint job, it's still more work and you kinda have to know what your doing. plus that auto paint really stinks alot more than tremclad/rustoleum. but having painted alot of cars with auto paint, i can say it's the way to go if your allready spraying, use the right stuff.
another thing that i don't get is that people think it's so much work to roller paint, and wetsand, then roller paint, wetsand again and so on. but i can say the process is WAY eaiser, faster, and less stressful. when i rollered my charger in 3 days, you picture 3 days of painting......not true. I would paint 1 coat in the am (1-2 hours), one coat in the pm (1-2 hours) and the next morning wetsand (lets just say 2 hours), then repeat. it's not like you out there all day painting, plus you have the option of just stopping when ever you finish a pannel, then putting your roller in a bag, and call it a day, try that with spraying, most paints i used (single stage auto paints and BC/CC) have very specific windows in which you MUST paint. for example, primer you can perty much do whatever you want, but after you shoot the primer sealer, you have 30 mins in which you have to spray the color coat, if you miss that window you have to wait 5 days!!!!!.
i've sprayed, let's see.....oh about ........maybe 20-30 cars over the years, and i've rollered, about....5. i can say for the amount of time involved, no taping up the whole car, cleaning the gun, mixing paint, ect....all the stuff with spray painting auto paints; it's about to me at least 10 times eaiser to roll paint. besides, a good home auto paintjob using auto paints needs wetsanded/buffed/polished anyways, so it's really not that different. also the inbetween coats wetsanding is not done as good as the last wetsand before polish, it's just a quick wetsand of the whole car to cut down peel, that's all, it does'nt have to be perfect, it's the last wetsand that does.
Posted By: Anonymous
Re: Paint job on a budget!? CONTINUED..page 44......... - 10/31/06 08:15 PM
Anybody got a picture of a car done with the Brightside Flag Blue yet ?
Posted By: Anonymous
Re: Paint job on a budget!? CONTINUED..page 44......... - 10/31/06 09:43 PM
Charger....
("besides, a good home auto paintjob using auto paints needs wetsanded/buffed/polished anyways, so it's really not that different. also the inbetween coats wetsanding is not done as good as the last wetsand before polish, it's just a quick wetsand of the whole car to cut down peel, that's all, it does'nt have to be perfect, it's the last wetsand that does.")
Are you saying the roller job doesn't need a real good wet sand just a quick- one between every other coat to cut down on orange peel???
I've definitely noticed it makes preceeding coats come out much smoother with less and less pronouced orange peel and more gloss. But, I might be spending much more time sanding between coats trying to eliminate all traces of orange peel when it isn't necessary.....and risking cutting into the underlying layers
Posted By: 69chargeryeehaa
Re: Paint job on a budget!? CONTINUED..page 44......... - 10/31/06 09:57 PM
Quote:
Are you saying the roller job doesn't need a real good wet sand just a quick- one between every other coat to cut down on orange peel???
I've definitely noticed it makes preceeding coats come out much smoother with less and less pronouced orange peel and more gloss. But, I might be spending much more time sanding between coats trying to eliminate all traces of orange peel when it isn't necessary.....and risking cutting into the underlying layers
yes!!!
it is a fine balance between applying thin enough coats to avoid peel, and thick enough to not sand thru and actually get good coverage. the first 3-4 coats don't really matter, you just want coverage, and cut down the sanding time at final sand. you could just do 3 heavey coats and sand at the end, but it will be alot more work. if you can work the roller fast and good, then you could get away with 2 full strength coats, wetsand, then 1 more non thinned coat, then wetsand, then 1 coat thinned down and a final wetsand. i could do any, but i've used the paint ALOT. i'd bet i could paint a car in the dark and it would look great, but that's just because i've had alot of practice.....well maybe too much!!!
Posted By: Anonymous
Re: Paint job on a budget!? CONTINUED..page 44......... - 10/31/06 10:33 PM
After rolling a fender....im spraying. I have used some single stage paint, but buying everything and mixing and primer is to much of a pain..i have a nice clean garage a nice 60 gallon compressor and a cheap $100 spray gun with another detail gun.
Spraying i can get two nice coats on (black on top of yellow) and it have a nice coverage, plus the time in wet sanding...it will be quicker for me.
This car is a datsun roadster,not top and everything is off and taped up..so no problem
also ill get some pics of the pearl mixed in and spraying.
Steve
Posted By: Anonymous
Re: Paint job on a budget!? CONTINUED..page 44......... - 11/01/06 04:12 AM
well i am done with the wetsanding and bufing and the paint came out great.... but i have some haze in the paint. how do i get that out?????
Posted By: Anonymous
Re: Paint job on a budget!? CONTINUED..page 44......... - 11/01/06 04:45 AM
Quote:
well i am done with the wetsanding and bufing and the paint came out great.... but i have some haze in the paint. how do i get that out?????
Post some pics up.
What product did you polish with? If you have used a low-end polish then you won't be able to achieve high-end results, no matter how long you polish with it.
Did you do your polishing by hand or did you use a RO or a rotary?
Posted By: Exit1965
Re: Paint job on a budget!? CONTINUED..page 44......... - 11/01/06 04:56 AM
I've got some more brightside work. I started with a thicker mixture on the roof, and ended up using thinner mixture later on the sides, but I believe the thinner mixture (15%+) makes it much more prone to running.
There seems to be a sweet spot where you can roll this stuff on thick (thinned maybe 10%), wait a few minutes, then roll-out any bubbles or runs and leave the surface nice and smooth. On the roof, where the thin % was about 10%, I went back to address bubbles after about 40 minutes- and though the bubbles came out, there are now some roller marks. 15-20 minutes would have been about right, but at the temperature I'm working (about 55 degrees F and dropping) it still has a few hours to level out on its own.
Here are some pics of the roof. The orange peel isn't bad (plus it will still level out some) but there were/are some bubble and bubble artifacts, like pinholes almost. They are visible as dots in the 2nd picture.
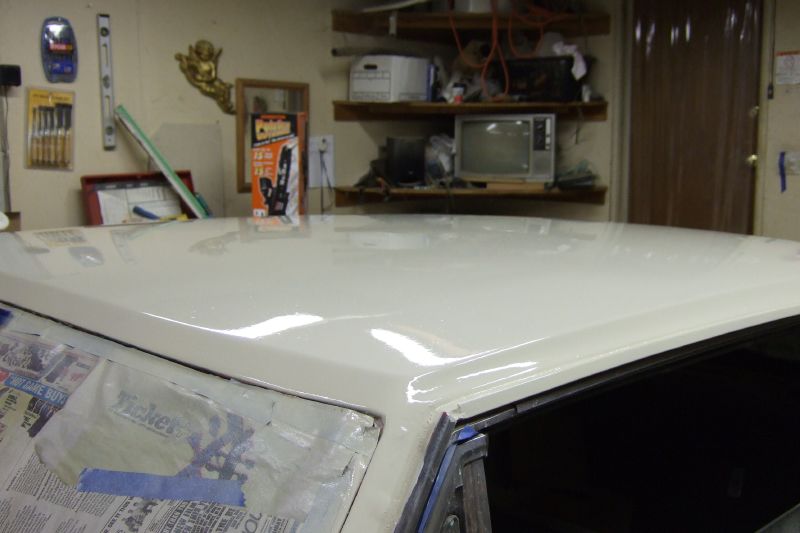
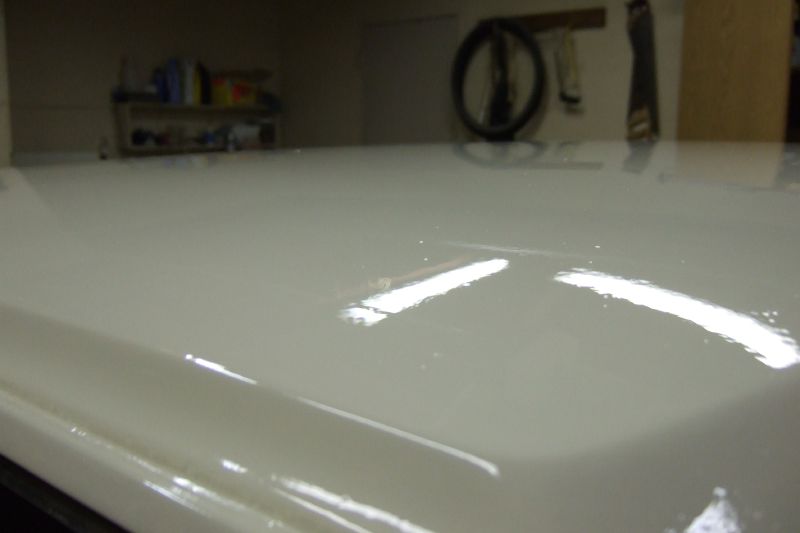
So tonight I painted from the back of the car and stopped at the doors. When I start on the doors and fenders, I'll use a thicker mixture, wait about 20 minutes, then roll out any bubbles or runs. I think I will have some runs to wetsand out from my work tonight though
Posted By: Anonymous
Re: Paint job on a budget!? CONTINUED..page 44......... - 11/01/06 02:02 PM
Hurray for an update Exit! lol.
About the bubbles you are experiencing, do you forsee that as a problem on the final coat? When you wetsand the bubbles (if you get them on the final coat) won't it leave pin holes in the paint?
Posted By: Anonymous
Re: Paint job on a budget!? CONTINUED..page 44......... - 11/01/06 02:50 PM
Hello,
I just joined this forum to post the results of my rustoleum paint job. I am more into performance rather than slick paint jobs, so my M.O. is to spray bomb my project cars with semi flat black paint. After reading both long threads here I decided to give it a try on my semi flat black 81 corolla.

On my hood,I tried 69charger's suggestions first and then I developed my on method. BTW I used rustoleum royal blue.

I only use the ingredients as per 69charger. My method was to prep the car, then roll the paint on only thinning the paint 10-20% to get good coverage. Of course this resulted in lots of orange peel but the coverage was excellent . I then wet sanded all the orange peel out with 400 grit until smooth. I then rerolled the car with the paint thinned out 50/50. I was then left with a much smoother surface.


I know the pics are not very good but they were taken in my poorly lit garage. I will post better pics outside after some detailing.
I am very happy with the results, enough to say that I will never ride in a flat black car again. This is too easy. I plan to do the same to my 81 corolla wagon.


I will paint it rustoleum gloss almond. I then will paint the center of the starion wheel bronze and tint the windows light bronze. I will leave the side skirts satin black. I am still undecided on wether to paint the front lip almond or satin black.
Anyway thanks for the support 69charger!!!
Posted By: Anonymous
Re: Paint job on a budget!? CONTINUED..page 44......... - 11/01/06 03:05 PM
Hi All,
I'm yet another lurker of this thread...
Have been in the process of painting a project vespa using Brightside...
The info on here has been most helpful....
Sadly it seems I haven't been as methodical as I should have been....
I'm experiencing a load of orange peel.... I have managed to sand the surface smooth...I see a dull surface with no shiny bits head on... but when I tilt the panel in the light I can still see what I think is orange peel, there are bits of shiny...
So, my question is, if I go and roll another layer of paint, will this ever-so-faint orange peel disappear?
Cheers.
Posted By: 69chargeryeehaa
Re: Paint job on a budget!? CONTINUED..page 44......... - 11/01/06 03:20 PM
Quote:
Hi All,
I'm yet another lurker of this thread...
Have been in the process of painting a project vespa using Brightside...
The info on here has been most helpful....
Sadly it seems I haven't been as methodical as I should have been....
I'm experiencing a load of orange peel.... I have managed to sand the surface smooth...I see a dull surface with no shiny bits head on... but when I tilt the panel in the light I can still see what I think is orange peel, there are bits of shiny...
So, my question is, if I go and roll another layer of paint, will this ever-so-faint orange peel disappear?
Cheers.
the answer is no
sand all the peel out now, or you'll just take 1 step forward and 2 back. peel will never go away, even if it's slight, as soon as you put that next shiny layer or paint it will act like a magnifying glass and peel will be alot more evident. try to apply thinner coats until you cut the peel down to just a tiny bit, that you can sand out really quickly, remember each coat adds more peel. try expirementing with your thinned mixture, and only proceed on the hood for example until you find that "sweet spot", then do the whole car so you don't do double the work.
Posted By: 69chargeryeehaa
Re: Paint job on a budget!? CONTINUED..page 44......... - 11/01/06 03:20 PM
looking good YOTARIP
i like that blue.
Posted By: Exit1965
Re: Paint job on a budget!? CONTINUED..page 44......... - 11/01/06 04:49 PM
Quote:
Hurray for an update Exit! lol.
About the bubbles you are experiencing, do you forsee that as a problem on the final coat? When you wetsand the bubbles (if you get them on the final coat) won't it leave pin holes in the paint?
Actually this WAS supposed to be the final coat, but I realize I need a bit more practice which is why I stopped short of doing the doors and fenders last night. I will just have to lay it on then roll over it a few times until all the bubbles are gone or yes it probably will leave pinholes.
Posted By: Anonymous
Re: Paint job on a budget!? CONTINUED..page 44........ - 11/02/06 04:37 AM
Oh Bum!
And I thought I could get away with it.... Darn...
Ok, one more question... seeing as I'm likely going to sand through 90% of my work... will I need to use another layer of the interlux pre-coat? Is it really necessary?
Cheers.
Posted By: Exit1965
Re: Paint job on a budget!? CONTINUED..page 44........ - 11/02/06 05:00 AM
Quote:
Oh Bum!
And I thought I could get away with it.... Darn...
Ok, one more question... seeing as I'm likely going to sand through 90% of my work... will I need to use another layer of the interlux pre-coat? Is it really necessary?
Cheers.
Though I don't have any long term results, brightside seems to go well over 2 types of rattlecan primer I've used, as well as rustoleum. I am not sure what you have under the brightside but this non-catalyzed paint is not very hard (i.e. rough on) on painted surface underneath the way a catalyzed one is.
Posted By: Exit1965
Re: Paint job on a budget!? CONTINUED..page 44......... - 11/02/06 05:07 AM
I painted the doors and fenders tonight, and about 5-10 minutes after the first roll, I rolled back over them to get rid of any remaining bubbles and to smooth out the runs that were developing where the bubbles popped.
Now that the part I painted last night has dried, I realize it looks very nice! The orange peel is only a tad worse than the modern American car. It's too bad for the little imperfections though, or I wouldn't wetsand it at all. Here are some pictures of how the back half dried. If I can get away with it, I'll do only 'spot' wetsanding on the sides of the car. The trunk lid and roof might take more work though.
the color is a bit off in this picture, had the wrong exposure setting on the camera.
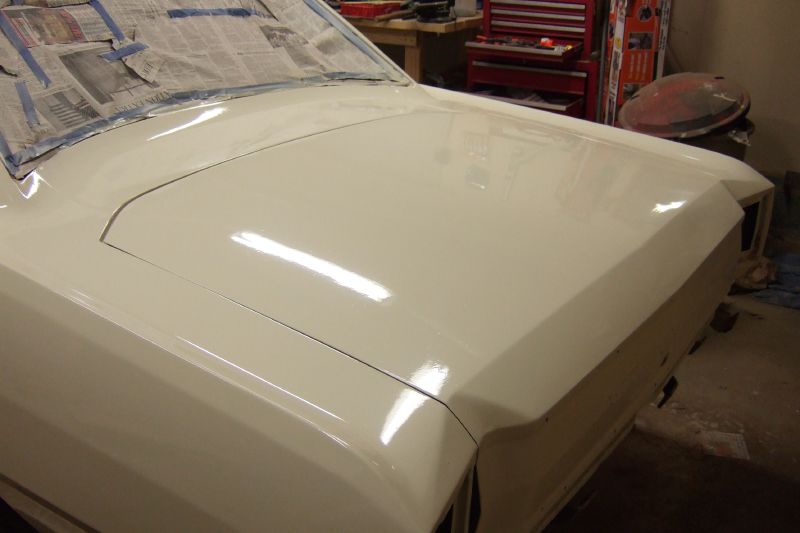
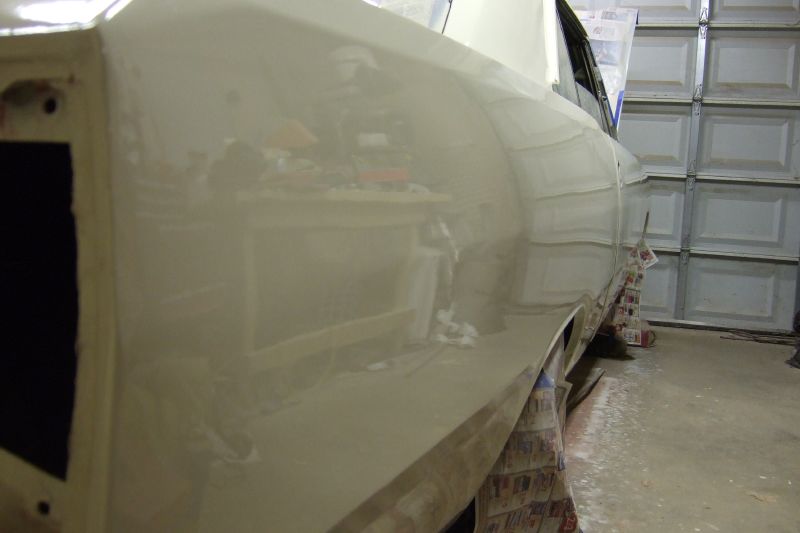
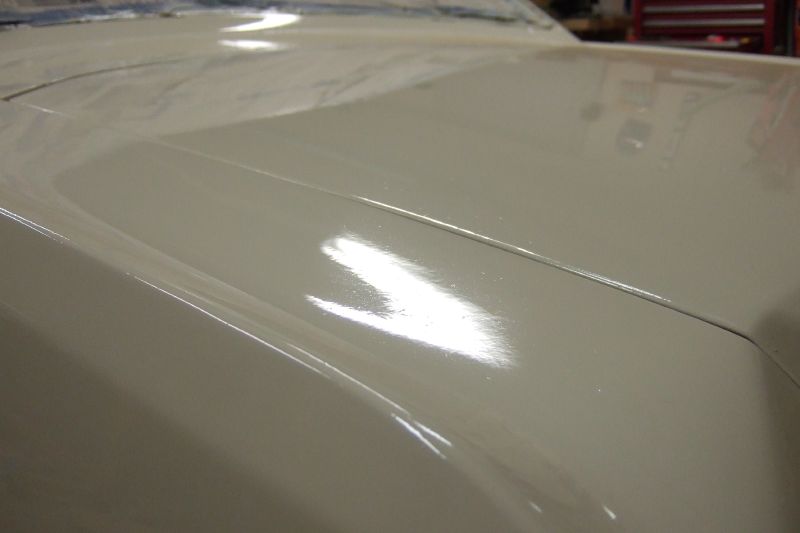
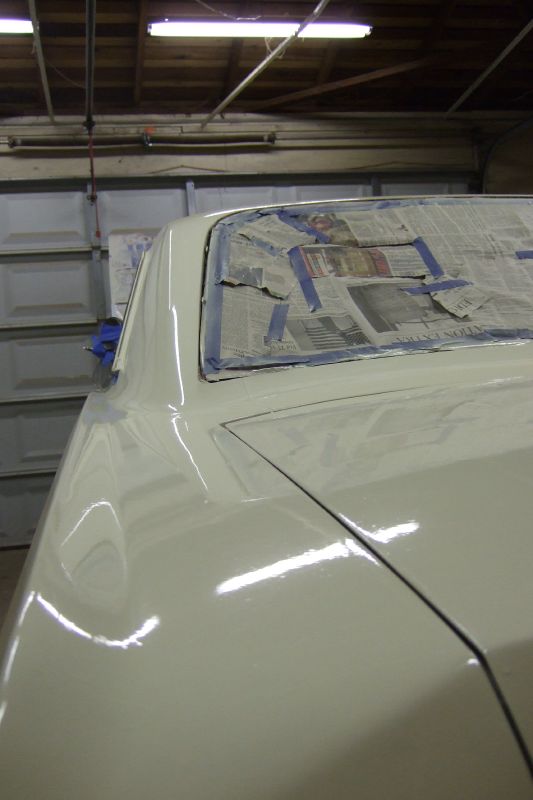
The pics do not quite do the shine justice.. compared to rustoleum it's much more of a wet shine; with the rustoleum I used to have to find the right angle to see a shine, with this stuff it just looks wet from any angle. Hopefully with good waxing it'll stay that way.
Posted By: Anonymous
Re: Paint job on a budget!? CONTINUED..page 44......... - 11/02/06 05:50 PM
here is my pics and i am using the 3m fperfect-it 3000 rubbing compound


heres a part i havent done yet

Posted By: Anonymous
Re: Paint job on a budget!? CONTINUED..page 44......... - 11/02/06 06:27 PM
MyBuick - Those pics are the final finish? They look great, but it does seem a bit flat in the first picture. I'm not sure if its the colour black or something, but it doesn't seem to have much depth in the paint. There's shine, but barely any depth. You used brightside right?
How many coats did you do?
Posted By: Anonymous
Re: Paint job on a budget!? CONTINUED..page 44......... - 11/02/06 07:25 PM
Well there has been a lot of success stories using this process, but mine is not one of them. And I am begining to wonder if it is because I am rolling paint on my fiberglass dune buggy body.
With over a month and a half of painting, drying, wet sanding, and now buffing, I still do not have a hard, car like finish. I can take the edge of my finger nail and rub it over the finish and leave a marred surface behind. I am not scratching the paint but marring the surface.
Just about any type of rough touch will leave lines on the glossy surface. Something as soft as a finger nail will do this. Even the end of a match stick. A slight buffing will then remove the marred surface.
If anyone has experienced this before and knows a solution to stop this, please pass it on. Only thing I know to do is sand and repaint with something else. Maybe an epoxy finish this time. However, I am concerned with a possible reaction between the paint on the buggy now and a different paint. Or will I need to sand down again to the gel coat.
This $50 paint job is costing me hundereds of dollars in agony and painting time in trying to solve the problem.
Posted By: Anonymous
Re: Paint job on a budget!? CONTINUED..page 44......... - 11/02/06 07:46 PM
Quote:
here is my pics and i am using the 3m fperfect-it 3000 rubbing compound
If you have only used a rubbing compound, then you will get a lot of hazing on your paint. Your process should be something like;
- Rubbing compound using a light cutting pad,
- A swirl remover using a light cutting pad then a second pass with a polishing pad,
- A polish with a polishing pad and then a second pass with a finishing pad,
- Then a sealant (either a wax or a synthetic sealant) with a finessing pad. {And do at least 2 passes with your chosen sealant}.
Work in each polish until it has almost disappeared, then wipe off any remaining residue from each stage with a microfiber cloth.
If you do the steps carefully and in order then there is no reason why you can't get a finish as good as Marq's.
Posted By: Anonymous
Re: Paint job on a budget!? CONTINUED..page 44......... - 11/02/06 09:54 PM
Quote:
MyBuick - Those pics are the final finish? They look great, but it does seem a bit flat in the first picture. I'm not sure if its the colour black or something, but it doesn't seem to have much depth in the paint. There's shine, but barely any depth. You used brightside right?
How many coats did you do?
i used 12 coats of rustolium gloss black.
Posted By: Anonymous
Re: Paint job on a budget!? CONTINUED..page 44......... - 11/02/06 10:06 PM
Quote:
Quote:
here is my pics and i am using the 3m fperfect-it 3000 rubbing compound
If you have only used a rubbing compound, then you will get a lot of hazing on your paint. Your process should be something like;
- Rubbing compound using a light cutting pad,
- A swirl remover using a light cutting pad then a second pass with a polishing pad,
- A polish with a polishing pad and then a second pass with a finishing pad,
- Then a sealant (either a wax or a synthetic sealant) with a finessing pad. {And do at least 2 passes with your chosen sealant}.
Work in each polish until it has almost disappeared, then wipe off any remaining residue from each stage with a microfiber cloth.
If you do the steps carefully and in order then there is no reason why you can't get a finish as good as Marq's.
great for helping me i ordered the swirl and polish from http://macsalesco.com/index.php and getting it shipped for next week then i will finish this.
thanks again
Posted By: Anonymous
Re: Paint job on a budget!? CONTINUED..page 44......... - 11/02/06 11:05 PM
Quote:
i used 12 coats of rustolium gloss black.
So it appears rustolium does not give as much depth as Brightside... Excellent job nonetheless.
Posted By: Anonymous
Re: Paint job on a budget!? CONTINUED..page 44........ - 11/03/06 12:38 AM
Hello, I am trying this method on my 65 mustang. I am using the rustoleum stops rust and pure mineral spirits mixture. What looks wrong in the picture? I know there was some hair in the paint so I have to prepare the surface better when I will try again tomorrow


Posted By: Anonymous
Re: Paint job on a budget!? CONTINUED..page 44......... - 11/03/06 02:54 AM
Quote:
Well there has been a lot of success stories using this process, but mine is not one of them. And I am begining to wonder if it is because I am rolling paint on my fiberglass dune buggy body.
With over a month and a half of painting, drying, wet sanding, and now buffing, I still do not have a hard, car like finish. I can take the edge of my finger nail and rub it over the finish and leave a marred surface behind. I am not scratching the paint but marring the surface.
Just about any type of rough touch will leave lines on the glossy surface. Something as soft as a finger nail will do this. Even the end of a match stick. A slight buffing will then remove the marred surface.
If anyone has experienced this before and knows a solution to stop this, please pass it on. Only thing I know to do is sand and repaint with something else. Maybe an epoxy finish this time. However, I am concerned with a possible reaction between the paint on the buggy now and a different paint. Or will I need to sand down again to the gel coat.
This $50 paint job is costing me hundereds of dollars in agony and painting time in trying to solve the problem.
You using brightside or rustolium?
Posted By: Anonymous
Re: Paint job on a budget!? CONTINUED..page 44......... - 11/03/06 04:07 AM
Mage33
Rustoleum Professional.
Posted By: Exit1965
Re: Paint job on a budget!? CONTINUED..page 44........ - 11/03/06 04:51 AM
Tyler, ya got to take a better picture man. Who knows what that is. My guess is it's running; don't put it on so thick or don't thin it so much before putting it on that thick.
Buick - if you can't get it to shine as much as you like, pick up a quart of brightside which should be enough to do your car 2x. One coat of brightside would do it but two would be extra in case you wanted to sand it down smooth and polish. Compared to rustoleum, the brightside is quicker to apply also. I've had good luck spreading it on then rolling over it 10 minutes later to get any remaining bubbles and smooth out runs.
Come back in 4-5 hours when it's totally level, and the shine will ride your wig off.
Just another option to consider if you can't get the rustoleum to shine to your satisfaction.
I'm anxious to see aussie driver's results after the sanding and polishing..
Posted By: Anonymous
Re: Paint job on a budget!? CONTINUED..page 44......... - 11/03/06 02:29 PM
Frontloader:
If you read several posts back, Exit was experiencing the same paint problems you are. He wasn't able to get a solid layer of paint on his car in which he couldn't scratch. Then he converted to Brightside lol. He said much more shine with less work
Exit:
I'm waiting too! Aussie hurry up man. lol..
Posted By: Anonymous
Re: Paint job on a budget!? CONTINUED..page 44......... - 11/03/06 02:52 PM
So with the brightside you guys dont have to thin it at all? just pour into a pan and go? today I will prep the area better and make sure i use a clean rag to wipe the dust off.
[image]http://img513.imageshack.us/my.php?image=ebay021bd1.jpg[/image]
Posted By: Anonymous
Re: Paint job on a budget!? CONTINUED..page 44......... - 11/03/06 03:54 PM
MyBuick, That looks similar to mine after polish. 2 coats of Meguiars #7 show car glaze and 2 coats Hi-tech yellow wax and it now shines very nice.
Posted By: 69DartGT
Re: Paint job on a budget!? CONTINUED..page 44......... - 11/03/06 04:02 PM
Quote:
So with the brightside you guys dont have to thin it at all? just pour into a pan and go?
tylerdru Read back a little I think the people roller brightside are thinning with mineral spirits..
check this link:http://carpainting.wetpaint.com/page/Rollering+Interlux+Brightside+Polyurethane+Paint
Posted By: Anonymous
Re: Paint job on a budget!? CONTINUED..page 44......... - 11/03/06 04:53 PM
Frontloader,
How long since the last coat?
Has it baked in the sun?
Does it still smell?
I think it has just not fully dried.
My test piece was done last summer and left in the sun during a heat wave. It is very hard.
My last coat was about a month ago. I can still smell the paint when it is in the sun. Not in the garage. I have no doubt my paint will harden just fine.
Posted By: Anonymous
Re: Paint job on a budget!? CONTINUED..page 44......... - 11/04/06 04:11 AM
Mark E
I started painting about the middle of Sept. Have 5 or 6 coats of paint on during this time. I think the last coat was put on almost two weeks ago. No more then one coat in a 5 day period. Wet sanding and then a day or two before the next coat.
The buggy has been out in the sun for several days since the last coat. There is a slight aroma when out in the sun but not strong at all. You have to get close and smell it to pick up the aroma.
I am going to wet sand it next week and let it continue to cure. Will also leave it outdoors when it will not be raining. If in another two weeks it is still not hard, I may start looking for another paint solution unless I get a clue to harden this paint.
Posted By: Exit1965
Re: Paint job on a budget!? CONTINUED..page 44......... - 11/04/06 04:23 PM
Frontloader - don't forget some people have said rustoleum can take weeks or months to fully cure. A long ways back in this thread, someone was having the same concerns on something they'd painted; when they came back to look at it several months later it was rock hard.
in other news, I took some natural light pictures this morning with the garage open.
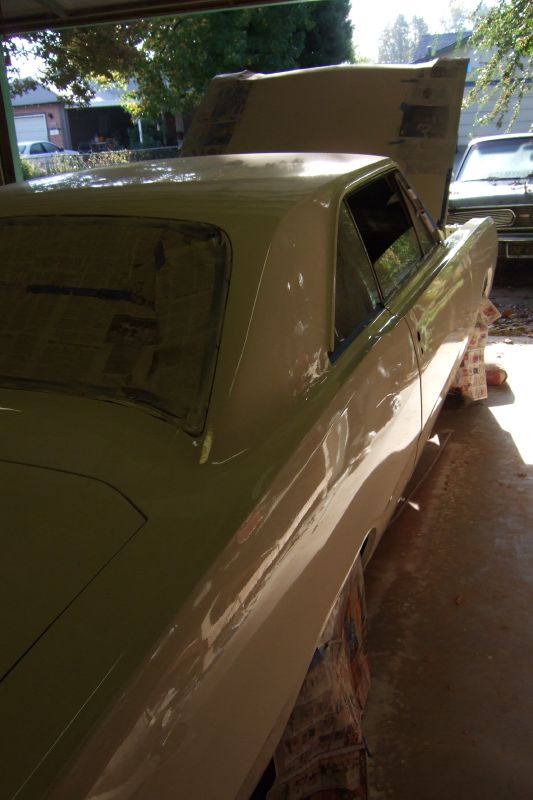
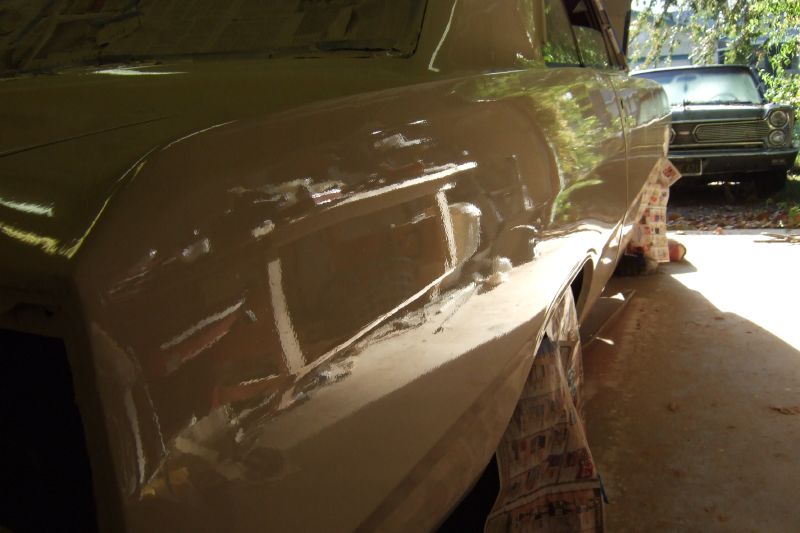
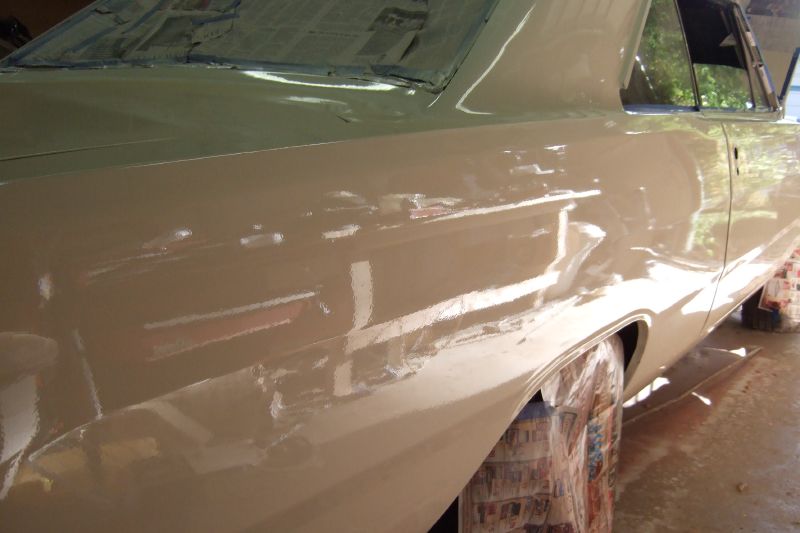
there is orange peel but it's nothing to go wild over. still im anxious to see aussiedrivers results since I think he started out with as much or more orange peel than I have..
Posted By: 69chargeryeehaa
Re: Paint job on a budget!? CONTINUED..page 44......... - 11/04/06 06:11 PM
looks nice exit, actually all the cars look great. i like the GN black, that looks great.
exit, what does your car need to be driveable? you should get that car on the road!!! do some
As for the buggy, you have to wait, you can assemble the buggy, but it really takes about 3 months to fully dry, then it will be rock hard. the colder it is the longer it takes to dry. i remember with my 74 beetle which was painted in the dead of winter, about a week after paint i noticed it would "dent" eaisly, but it was cold. you just have to be careful putting the car together, but normal handling should'nt do anything to the paint, like washing/waxing, ect...by the spring my paint was rock hard, just like any auto paint even it takes time to dry, auto paints take 3-6 months to fully dry too.
I like the paint exit, it certainly is shiny, but it looks like a endless battle with peel, sand peel out, all the paint is gone, repaint, sand, repaint sand. i think you should get the car on the road and enjoy it.
I personally am to the point where i might paint my charger again, this time try the clear coat of which i have a case curtosy of tremclad. i was thinking, it would be so easy to do, paint the orange, wetsand to velvet and perfectly smooth, then 2-3 coats of the clear, buff and polish. the clear coat i have by tremclad is actually really thin out of the can, and almost ready to use without thinning, and i think after talking to tremclad that the shine would be just as good as BC/CC dare i say. but when i tried it, i thinned it with mineral spirits, which they said is a
it should be thinned with laquir thinner, and when properlly thinned it has a reflectivity of 90% at 60*deg, meaning really really shiny. I looked at my odometer last night, and i have 92000mi on the car allready and it's been just a year!!!! i bought the car with 68000mi. Going sideways on dirt roads, driving the crap out of the car, and all the garage dooooooooohs i've had took a toll on my paint. it actually looks ok, but i can make it look better. This clear coat really got me thinking, maybe i'll try it on something else first, i have a old beetle deck lid i'll try it on.
Posted By: Anonymous
Re: Paint job on a budget!? CONTINUED..page 44......... - 11/05/06 12:48 AM
Quote:
there is orange peel but it's nothing to go wild over. still im anxious to see aussiedrivers results since I think he started out with as much or more orange peel than I have..
Well, after spending 10 hours wet sanding most of the orange peel out of my car, let me be the first to admit that I stuffed it up.
Lessons learned;
1. Next time I'll roll the Brightside with it thinned a bit. The non-thinned Brightside wasn't the best coat that I've ever done and it had too much peel to easily deal with.
2. If I ever end up with a lot of orange peel again, I won't be shelving the P1500 sandpaper and dropping back to P280 sandpaper for a "light" sand..... (Really dumb idea that was...)
3. Don't ever, ever, EVER try and wet sand a black car in direct sunlight on a warm day. It's amazing how quickly the water evaporates, leaving you with enough scratches to make you .
4. Crying doesn't help. A bucket of water and a spray bottle with detergent in it makes a much better wetting agent for the sanding, and there is more of it. (Specially if you don't get Lesson 2)
5. When all of the sanding turns to . Get over it and hurry up and re-paint the car. But this time pay attention to Lesson 1.
So, that's where I'm at. Although I am starting to be tempted by Perfection. Mmmmmm 2-part paint.....
Posted By: 69chargeryeehaa
Re: Paint job on a budget!? CONTINUED..page 44......... - 11/05/06 01:16 AM
Quote:
So, that's where I'm at. Although I am starting to be tempted by Perfection. Mmmmmm 2-part paint.....
That's the problem, when your looking at your own work so closely, your your own worst enemy. Like if you have a small mistake, you see it from a mile away, but nobody else can!!!
Posted By: Anonymous
Re: Paint job on a budget!? CONTINUED..page 44......... - 11/05/06 02:00 AM
In regards to my buggy, I am going to wet sand it and get rid of the orange peel and let it continue to cure. It may have to much paint and that may be the problem. It has been hot and I thought that would help the drying process but I guess it will take more time.
Upon close examination in some areas, I am seeing some fine line cracking in the paint surface. Really have to look to see it. I am hoping that wet sands out. What could be causing that? Maybe too much heat from the sun?
I will give it more time and see what happens. Also continue to give it some sun each day also.
Posted By: ONEBADBIRD
Re: Paint job on a budget!? CONTINUED..page 44......... - 11/05/06 03:45 AM
Hey Exit, The paint job is looking awesome man. Now is this just after wet sanding and no polishing done to it? Either way its looking really sharp. Since reading this post from day one I have been checking out peoples cars on the road and I'm finding even top end cars ($40,000 and probably more)coming from the factories having terrible orange peel underneath the clear coat. I have been seeing this on lots of newer cars including my own and makes me go
WOW!!! So I wouldnt worry to much about the little bit of orange peel your getting. Although I will probably be the same way (picking my own work apart like charger said) when I start to get paint on my car after the sheetmetal work is all finished. Looking good man wish I was to the painting point on my ride but "good thing come to those who are patient????
". Good luck with getting it on the road. Jay
Posted By: Anonymous
Re: Paint job on a budget!? CONTINUED..page 44......... - 11/05/06 06:54 AM
Ok, so here is the new coat of Brightside.
This time I thinned the paint by a 12:1 ratio of paint to thinners, and I used a second roller to go over the paint after I had covered each panel.
These are the results,


The 'proper' Brightside technique gave me much better results than my previous efforts (and my photography skills are improving as well). There is still more orange peel in that paint than I would ideally like, but I have decided that I'll need to learn to live with it. I certainly don't plan on wrecking another coat of paint by over sanding it again.
I'm going to leave it dry overnight, then follow Charger's recipe and leave it out in the sun for a day to help cure. If that goes well then I might try a gentle wet sand with P2000 and then give it a polish on Tuesday. Thank goodness I have an extra long weekend because of a horse race....
Posted By: Pool Fixer
Re: Paint job on a budget!? CONTINUED..page 44......... - 11/05/06 03:10 PM
Quote:
I'm finding even top end cars ($40,000 and probably more)coming from the factories having terrible orange peel underneath the clear coat. I have been seeing this on lots of newer cars including my own and makes me go WOW!!! So I wouldnt worry to much about the little bit of orange peel your getting.
You said it. I have followed this thread (actually the first 80+ page job before they killed it, and this one too)
A while back I really started looking a new cars, and it does not matter what the owner spent, tons of peel! whether it's a 8K Kia or a 50K+ Escalade, don't matter.
I had my charger painted by a guy (not a pro, did it in his garage as a side job) He used chromaclear [think that's what he called it] I got it back and wanted to shoot myself. I then took it to a professional detailer and he wetsanded it/compunded it and it's amazing how good it looks. It's the lack of peel that makes it look the way it does. paint has fisheyes in it and dirt too, but unless you are 1 foot from the car, you don't see them.
Posted By: Exit1965
Re: Paint job on a budget!? CONTINUED..page 44......... - 11/05/06 05:13 PM
Quote:
Hey Exit, The paint job is looking awesome man. Now is this just after wet sanding and no polishing done to it? Either way its looking really sharp. Since reading this post from day one I have been checking out peoples cars on the road and I'm finding even top end cars ($40,000 and probably more)coming from the factories having terrible orange peel underneath the clear coat. I have been seeing this on lots of newer cars including my own and makes me go WOW!!! So I wouldnt worry to much about the little bit of orange peel your getting. Although I will probably be the same way (picking my own work apart like charger said) when I start to get paint on my car after the sheetmetal work is all finished. Looking good man wish I was to the painting point on my ride but "good thing come to those who are patient???? ". Good luck with getting it on the road. Jay
That's with just the paint, no wetsanding or polishing done yet. And like I said I'm going to try to avoid wetsanding if I can help it.
It's pretty hard for me to tell how "bad" the orange peel is compared to cars out on the road, since I haven't had this thing outside. One thing I realize though is that it's time to move on to other things like the engine and tranny.. the paint really is EASY to do , so once the thing is running and I can see it in more angles and in more light, I might decide to sand it all down, then put 2 more thin coats on to get the orange peel down. But that could easily be done in a few days time.
So for the current paint job, all I've got to do is put another coat on the driver's door where I fixed something before the last coat, then I'll consider myself "done" until it's running and I can see how good/bad it looks out on the road. Then I have a feeling I'll be putting more work into the paint, whether it's another few coats, or just wetsanding the orange peel down then polishing. Maybe, maybe not.
ANother thought i had regarding the gloss retention, it's so easy to put another coat on, that even if the gloss only lasted 2 years, it's a matter of a couple hours prep and a couple hours to paint, then you've got great gloss again. You could even change the color at that point
Posted By: Anonymous
Re: Paint job on a budget!? CONTINUED..page 44......... - 11/05/06 06:45 PM
Posted By: Anonymous
Re: Paint job on a budget!? CONTINUED..page 44......... - 11/05/06 07:18 PM
That looks sexy, how about some closeups especially of the problem areas (hinges/body lines/etc)?
How "tough" is the finish so far?
Posted By: Anonymous
Re: Paint job on a budget!? CONTINUED..page 44......... - 11/05/06 08:20 PM
I don't know ... those 3 pics were all he sent to me. He's up at the family farm hunting right now, so I'm not too sure when he'll be back. I'll send him an email to get him to answer everyone's questions.
He used Brightside paint, so I would imagine it's pretty hard and durable.
Posted By: kenzo42
Re: Paint job on a budget!? CONTINUED..page 44......... - 11/06/06 07:43 AM
Has anyone spilled gas on their paint? I know this happens to me all the time at the pump. I've heard that it will eat/soften the paint right up. Is there any truth to this?
Posted By: 69DartGT
Re: Paint job on a budget!? CONTINUED..page 44......... - 11/06/06 02:30 PM
Quote:
Has anyone spilled gas on their paint? I know this happens to me all the time at the pump. I've heard that it will eat/soften the paint right up. Is there any truth to this?
Not sure about the rustoleum but brightside is marine paint that probably see a lot of use around gas fillers on boats, seems like to ought to be okay?
Posted By: 69chargeryeehaa
Re: Paint job on a budget!? CONTINUED..page 44......... - 11/06/06 03:08 PM
Quote:
Has anyone spilled gas on their paint? I know this happens to me all the time at the pump. I've heard that it will eat/soften the paint right up. Is there any truth to this?
oh, trust me i have, spilt gas all over the front of my bug, and i mean all over, remember the gas filler is in the front of a beetle, and it was a really really hot 100*deg day, right in the sun, and the gas pump was deffective, where it should go off automatically, and it just kept going and would'nt shut off even after i let go of the handle. gas everywhere, hood, fender, running board, wheels, ect....it did stain the rubber on my running board, but my paint was totally fine, infact it acted like oil mixed with water, it just repelled off it, the paint is oil based remember. not only that but i've spilt just about everything on the paint, brake fluid left a little mark that came off with some wax, other than that nothing so far has sofetened/blemished the paint.
Posted By: Marq
Re: Paint job on a budget!? CONTINUED..page 44......... - 11/06/06 07:11 PM
Quote:
Has anyone spilled gas on their paint? I know this happens to me all the time at the pump. I've heard that it will eat/soften the paint right up. Is there any truth to this?
Gas is a NON-FACTOR once the paint has dried and cured. I have spilled gas on the Brightside and it did absolutely NOTHING to the paint.
It did remove some of the wax... but twelve seconds with some fresh wax and the shine was right back up to 100%.
I can also confirm that ANTI-FREEZE, brake fluid AND transmission fluid have had NO EFFECT whatsoever on the paint job
.
Posted By: kenzo42
Re: Paint job on a budget!? CONTINUED..page 44......... - 11/06/06 08:59 PM
Two more questions:
1) Since no one is likely using epoxy primer to seal the metal off, what is actually protecting the metal underneath the paint from rusting? The paint itself?
2) What type of Primer was used after placing filler? Is there a quality primer that will protect against rock chips? I've seen DIY painted bumpers/metal fenders that have chipped to hell b/c of bad rattle can primer.
Thanks again.
Posted By: Anonymous
Re: Paint job on a budget!? CONTINUED..page 44......... - 11/06/06 10:13 PM
Has anyone laid down any of the bluewater marine paint yet? I believe wyle e coyote was using a blue of theirs I believe?
I am waiting to see results/impressions of that before I plunk down $70 for a gallon.
Bluewater is at the top of my list because of the "orange" color they carry, and I am antsy to put some paint down after working so hard prepping the rig.
Posted By: texczech
Re: Paint job on a budget!? CONTINUED..page 44......... - 11/07/06 12:16 AM
I used the e-bay paint & had a dotted finish like there was dirt on the paint or all the bubbles didn't pop. Do I buff the final finish or what? I don't have bad orange peel at all. I thinned with mineral spirits & tried it straight. I didn't use the reccommended brushing liquid. Maybe I should have.
Posted By: Anonymous
Re: Paint job on a budget!? CONTINUED..page 44......... - 11/07/06 02:07 AM
I read the entire thread and bought the ebay Fire Red Brightside.
I preped a test panel (Fiero rear deck lid - fiberglass).
DAed with 180 grit, washed and rolled on 10% dilute Brtsde.(Thinned w/Brushing fluid) Tremendous amount of bubbles. Tried rolling opposite direction - still many bubbles that took 15 - 20 minutes to pop - lots of peel. Temperature in shop 60 degrees.
2nd coat 10% - same bad bubbles so I tried the foam brush "tipping" trick. Much improved.
Wet sanded 400 grit 'til the o'peel gone.
5% dilute 3rd coat - tipped.
Straight 4th coat - tipped.
(At least 24 hrs between all coats.)
Wetsanded 800 grit to remove ridges left from tipping. WS 1500, then 2000.
Compounded and polished.
I have a very mottled gloss. I'm sure what I see are sanded through layers of paint.
Attached is a pic of the finish. (Taken without flash as flash washes it out.)
Ideas on what's wrong?

Posted By: Anonymous
Re: Paint job on a budget!? CONTINUED..page 44......... - 11/07/06 02:08 AM
Pic with flash.

Posted By: Anonymous
Re: Paint job on a budget!? CONTINUED..page 44......... - 11/07/06 02:46 AM
All,
I purchased a G100 (Porter Cable 7424 rebranded by Meguiar's and give me a lifetime warranty, backing plate and one foam pad). If you look back a page or two I had asked about hazing and swirls. I have that handled now. I used Meguiar's #83, then #80 then #21 and have these results: (This is where I did half of my trunk lid and taped off the other have to compare).

This is what black should look like!!! It doesn't matter how you apply paint, if you are going to wet sand, it is how well you polish and buff!!!!
Mike
Posted By: texczech
Re: Paint job on a budget!? CONTINUED..page 44......... - 11/07/06 02:48 AM
I saw the mottled paint on my project on my first very diluted coat with m spirits. I did not h ave that problem when I covered that first thin coat with an undiluted coat. It seems when painting with a brush or roller in general, the first coat looks bad, and later coats makes it better. I even tried to blow on the bubbly paint with an air blower & a spray gun, but it seemed that some bubbles just stayed around. I tried a cheap foam brush for the fun of it, and it seemed that it had the least of the bad stuff(bubbles) that I got with the roller- I was surprised at that. I do like the gloss of the paint and the coverage. Since I like old pickups, an absolutely perfect job is not really needed, but something better than what I got would be very nice.
Posted By: 69chargeryeehaa
Re: Paint job on a budget!? CONTINUED..page 44......... - 11/07/06 03:54 AM
Quote:
This is what black should look like!!! It doesn't matter how you apply paint, if you are going to wet sand, it is how well you polish and buff!!!!
Mike
AMEN!!!!
Posted By: 69chargeryeehaa
Re: Paint job on a budget!? CONTINUED..page 44......... - 11/07/06 04:01 AM
Quote:
I read the entire thread and bought the ebay Fire Red Brightside.
I preped a test panel (Fiero rear deck lid - fiberglass).
DAed with 180 grit, washed and rolled on 10% dilute Brtsde.(Thinned w/Brushing fluid) Tremendous amount of bubbles. Tried rolling opposite direction - still many bubbles that took 15 - 20 minutes to pop - lots of peel. Temperature in shop 60 degrees.
2nd coat 10% - same bad bubbles so I tried the foam brush "tipping" trick. Much improved.
Wet sanded 400 grit 'til the o'peel gone.
5% dilute 3rd coat - tipped.
Straight 4th coat - tipped.
(At least 24 hrs between all coats.)
Wetsanded 800 grit to remove ridges left from tipping. WS 1500, then 2000.
Compounded and polished.
I have a very mottled gloss. I'm sure what I see are sanded through layers of paint.
Attached is a pic of the finish. (Taken without flash as flash washes it out.)
Ideas on what's wrong?
allthough i've never painted with the brightside, what you describe looks to me like over sanding/polishing. as for the bubbles, with tremclad at least it occurs from 2 things, 1. not mixing paint well, 2. rollering the paint on too fast.
There is a sweet spot you have to find with the paint, what works for me is to quickly spread the paint with the roller, then slowly with less pressure roll over and over the area until it's perfectly even, then by now the roller has almost no paint in it, and just using the weight of the roller, going over the paint just to pop bubbles, but quite honestly i've never really had a problem with bubbles after i discovered that i was'nt mixing the paint enough, that solved my problem, litterelly i mixed the paint 10 times longer then i "thought" i really needed to and the bubbles were a thing of the past. Also when using the roller with just it's own weight, you can tell when your ready when you glide the roller over the paint and it just goes over it without it feeling like theres wet paint, like silent gliding over the paint without marking or gripping into the paint, right when that happens, you have this 5 min window about 5 min after painting where bubbles can be elliminated, i also found that if you roll really fast, bubbles tend to be more of a problem, the key being work quick but don't rush.
Posted By: Jolly_Raj_R
Re: Paint job on a budget!? CONTINUED..page 44......... - 11/07/06 04:04 AM
Quote:
Has anyone spilled gas on their paint? I know this happens to me all the time at the pump. I've heard that it will eat/soften the paint right up. Is there any truth to this?
I'm STILL trying to find a reason for why this happens... My car has a krylon ultra-flat black paintjob (don't ask...) and there's a streak of earl scheib blue (see, I told you.. previous owner) where the old krylon has been disolved.. I gotta find a solution to this before I slap paint on my car..
On a side not, a paper towel does wonders for keeping the splash of gas contained.. I'd like to figure out how to avoid the gas splash altogether, though.. I'll modify my gas filled tube if need be..
raj
67 beatercuda coupe
Posted By: admactanium
Re: Paint job on a budget!? CONTINUED..page 44......... - 11/07/06 06:55 AM
Quote:
Quote:
Has anyone spilled gas on their paint? I know this happens to me all the time at the pump. I've heard that it will eat/soften the paint right up. Is there any truth to this?
I'm STILL trying to find a reason for why this happens... My car has a krylon ultra-flat black paintjob (don't ask...) and there's a streak of earl scheib blue (see, I told you.. previous owner) where the old krylon has been disolved.. I gotta find a solution to this before I slap paint on my car..
On a side not, a paper towel does wonders for keeping the splash of gas contained.. I'd like to figure out how to avoid the gas splash altogether, though.. I'll modify my gas filled tube if need be..
raj
67 beatercuda coupe
yes krylon will dissolve when in contact with gasoline. that's a problem i had with an old motorcycle i painted. evidently it's not a problem with rustoleum or brightside.
Posted By: Exit1965
Re: Paint job on a budget!? CONTINUED..page 44......... - 11/07/06 05:02 PM
Hey all - I have a few runs in my brightside. I am not sure whether it's best to sand them down then put paint over them, or can they just be sanded down and polished..?
Posted By: Anonymous
Re: Paint job on a budget!? CONTINUED..page 44......... - 11/07/06 07:28 PM
Sanding and polishing will be fine provided you don't go through the layer of paint around the runs and based on my recent experience, don't use a very agressive sand paper.
Posted By: Anonymous
Re: Paint job on a budget!? CONTINUED..page 44......... - 11/07/06 10:30 PM
All,
Here are some shots after I have the entire car polished and buffed out.
Here it is with one proud young man behind the wheel!

Here is a shot straight down on the hood - nice and black!

One last shot for the other side

Thanks for all your help and I would HIGHLY recommend a Porter Cable 7424 or the Meguiar's equivalent - G100 for polishing!
Posted By: Anonymous
Re: Paint job on a budget!? CONTINUED..page 44......... - 11/08/06 01:25 AM
I'm quite sure the problem is sanding/polishing thru paint layers. One spot had a deep dot - probably a bubble that dried. I tried to sand it out w/800 and by the time it was gone I could see edges of paint layers.
So the question is - how do you take care of scratches or bubbles or other flaws short of a total recoat? I can't imagine ever being able to paint a whole panel without some sort of flaws. Are touch-ups possible?
Bob
Posted By: Anonymous
Re: Paint job on a budget!? CONTINUED..page 44......... - 11/08/06 02:16 AM
what i found at the local body shop supply store is a nub file it gets rid of runs and bubbles with out going through the paint layers. it is a 1 inch by 1 inch square and it costs around 15.00 but its worh it.
Posted By: kenzo42
Re: Paint job on a budget!? CONTINUED..page 44......... - 11/08/06 02:44 AM
Will Brightside cover up a multi-colored panel, to make it one uniform color? I have spots of filler all over my door.
Posted By: Exit1965
Re: Paint job on a budget!? CONTINUED..page 44......... - 11/08/06 04:40 AM
Quote:
Will Brightside cover up a multi-colored panel, to make it one uniform color? I have spots of filler all over my door.
You should put some primer on that filler, or it will suck up a significant amount of paint until it's 'sealed'. Primer will make the sealed surface so the brightside will go on like it will go on over an already painted surface. I've used rattlecan primer with no problems (granted, it hasn't been that long, but I see nothing at all different about the primered areas than the rustoleum coated areas). Primer it, wait a bit, put another primer coat, then wetsand it down so it's smooth then you're ready to paint.
Posted By: admactanium
Re: Paint job on a budget!? CONTINUED..page 44......... - 11/08/06 10:46 AM
Quote:
I'm quite sure the problem is sanding/polishing thru paint layers. One spot had a deep dot - probably a bubble that dried. I tried to sand it out w/800 and by the time it was gone I could see edges of paint layers.
So the question is - how do you take care of scratches or bubbles or other flaws short of a total recoat? I can't imagine ever being able to paint a whole panel without some sort of flaws. Are touch-ups possible?
Bob
i think this is why the suggested method is to wetsand between every two coats. an alternative might be to wetsand after heavy coats and then do two thin layers on the top to cover the sandthroughs. what seems to be happening with a lot of you is that you're not actually wetsanding to a smooth surface. if you were, you shouldn't be sanding straight through your topcoats to get a smooth surface. it should take minimal sanding with 1500 or 2000grit to just take off the orange peel. if you're trying to sand down ruts and very high brush marks in order to polish as your final finish, that's not going to work too well because you're exposing different layers of paint.
in your case, what i'd recommend, if you can (and you're basically time committed now) is to follow the directions on wetsanding to a truly smooth finish such that there are no shiny spots, only matte spots. use a block to make sure you're not introducing your own waves or sanding in an orangepeel shape. when it's all done, then do two more thinned coats and let them self level. then do a wetsand of 2000gt to a matte finish and polish.
basically, treat your previous paintwork as a filling primer and your next two as your topcoat. once you have the metal protected, you're good. now it's just a matter of getting the best surface possible for your topcoats and then polishing those out.
Posted By: texczech
Re: Paint job on a budget!? CONTINUED..page 44......... - 11/09/06 12:13 AM
The Black looks great!Questions... What paint did you use? Rustoleum, or what. What did you sand it with... grits etc... what style pad & maybe part number did you use with the Meguiars 83,80 & 21? Just curious & Thanks!
Posted By: Anonymous
Re: Paint job on a budget!? CONTINUED..page 44......... - 11/09/06 01:34 AM
Quote:
The Black looks great!Questions... What paint did you use? Rustoleum, or what. What did you sand it with... grits etc... what style pad & maybe part number did you use with the Meguiars 83,80 & 21? Just curious & Thanks!
First of all Thanks!
I used Rustoleum Professional Gloss Black (1 gallon for about $25) and Odorless Mineral Spirits. I mixed it about 15-20%. The Meguiar's product I used a G100 (Porter Cable 7424) to put on the product as follows:
#83 with a W8006 Pad - work it in a 2x2 area for about 3-4 passes, then wipe off wet.
#80 with a W8006 Pad - work it in a 2x2 area for about 3-4 passes, then wipe off wet.
#21 with a W7006 Pad - spread it in a 2x2 area for about 1-2 passes, let dry, then I used a W9006 pad with a microfiber bonnet to take off the dryed product.
This made the polishing MUCH easier and this tool does a great job.
For alot of info on use of this tool and Meguiar's product check out meguiars.com forum area. Of course other similar products are out there and do a great job. I know that Aussie Driver mentioned the Poorboys product line and there are others (Sonus, Mothers, Klasse etc.). I have only used the Meguiar's and have had such great results I am hooked. Hope this helps. By the way a great place to get Meguiars product is autodetailingsolutions.com.
Mike
Posted By: Anonymous
Re: Paint job on a budget!? CONTINUED..page 44......... - 11/09/06 08:01 PM
Any of you guys have experience with Mini Spray HVLP guns (touch-up guns)? I was thinking that if I try and spray this stuff on, is it possible to use one of those touch up spray guns? I don't have a compressor to drive a larger gun, so I have to settle for the smaller one
Posted By: 69DartGT
Re: Paint job on a budget!? CONTINUED..page 44......... - 11/09/06 08:22 PM
I don't have a HVLP detailgun but there is no wy I could use my conventional touch up gun andd paint a very large part even.
Not sure that would work.
Posted By: Anonymous
Re: Paint job on a budget!? CONTINUED..page 44......... - 11/09/06 09:04 PM
Quote:
I don't have a HVLP detailgun but there is no wy I could use my conventional touch up gun andd paint a very large part even.
Not sure that would work.
Good to know. I guess that rules that out.
Posted By: kenzo42
Re: Paint job on a budget!? CONTINUED..page 44......... - 11/10/06 02:11 AM
Quote:
I don't have a HVLP detailgun but there is no wy I could use my conventional touch up gun andd paint a very large part even.
Not sure that would work.
I've heard it's too small of a spray. There would be alot of overlapping of wet lines = more potential for error. But I have seen a book where they did a whole bumper w/ it. Do you ask this b/c the CFM requirements are less?
If so, maybe an Astro LVLP or conventional gun if you're looking to spray w/ a small compressor.
Posted By: 69DartGT
Re: Paint job on a budget!? CONTINUED..page 44......... - 11/10/06 02:28 AM
Quote:
I've heard it's too small of a spray.
Exactly what the problem is with my coventional gun, years ago I was going to spray my Darts under hood area wityh my touch up gun the pattern is plain to small e.i. narrow, I switched to my old conventional gun.
Posted By: Anonymous
Re: Paint job on a budget!? CONTINUED..page 44......... - 11/10/06 02:29 AM
Quote:
I've heard it's too small of a spray. There would be alot of overlapping of wet lines = more potential for error. But I have seen a book where they did a whole bumper w/ it. Do you ask this b/c the CFM requirements are less?
If so, maybe an Astro LVLP or conventional gun if you're looking to spray w/ a small compressor.
You got it! I was looking at a Gravity Feed gun from harbour freight for only 15 bucks. Even that gun is pushing the limits of my compressor requiring 5cfm@40psi if I recall correctly. I was thinking of just using regular car paint. My compressor only spits out 4.5SCFM@40psi and its like a 1.3HP one too lol...
Maybe next summer i'll buy a decent HVLP gun and rent the compressor...
Posted By: Exit1965
Re: Paint job on a budget!? CONTINUED..page 44......... - 11/10/06 05:13 AM
Quote:
Quote:
I've heard it's too small of a spray. There would be alot of overlapping of wet lines = more potential for error. But I have seen a book where they did a whole bumper w/ it. Do you ask this b/c the CFM requirements are less?
If so, maybe an Astro LVLP or conventional gun if you're looking to spray w/ a small compressor.
You got it! I was looking at a Gravity Feed gun from harbour freight for only 15 bucks. Even that gun is pushing the limits of my compressor requiring [Email]5cfm@40psi[/Email] if I recall correctly. I was thinking of just using regular car paint. My compressor only spits out [Email]4.5SCFM@40psi[/Email] and its like a 1.3HP one too lol...
Maybe next summer i'll buy a decent HVLP gun and rent the compressor...
Or spend $6 on a 5 pack of rollers
Posted By: kenzo42
Re: Paint job on a budget!? CONTINUED..page 44......... - 11/10/06 06:50 AM
Quote:
Quote:
I've heard it's too small of a spray. There would be alot of overlapping of wet lines = more potential for error. But I have seen a book where they did a whole bumper w/ it. Do you ask this b/c the CFM requirements are less?
If so, maybe an Astro LVLP or conventional gun if you're looking to spray w/ a small compressor.
You got it! I was looking at a Gravity Feed gun from harbour freight for only 15 bucks. Even that gun is pushing the limits of my compressor requiring [Email]5cfm@40psi[/Email] if I recall correctly. I was thinking of just using regular car paint. My compressor only spits out [Email]4.5SCFM@40psi[/Email] and its like a 1.3HP one too lol...
Maybe next summer i'll buy a decent HVLP gun and rent the compressor...
I too seriously considered automotive paint, but for a couple reasons, I decided not to:
1)Exposure to ISO. Who knows if I'm actually sensitive to it after 1 exposure, but my lungs are worth more to me than my car.I would have bought a fresh air respirator (not charcoal filter, won't work!) but that led me to my next reason.
2)Neighbors. I wouldn't want my neightbors to expose me to ISO, so I won't do it to them. If you did it in your garage (heater needs to be turned off), you would need to exhaust it into your neighborhood. Also, BIG fine if you get caught (at least here in CA). Epoxy really smells and I'd hate to get overspray onto my neighbors cars.
3)I have yet to see a 110v compressor that could handle HVLP. Moisture will be created when compressor is refilling, if doing panel by panel. 230v prices really jump.
5)Brightside/Tremclad seems at least up to par w/ oem BC/CC paint.
6)It needs to be at least 65-70 degrees.
7)I'm doing white. If it were any other color, I would probably do BC/CC.
I'm doing Brightside on a car door later this week. I'll see how it looks. If I don't like the results, I'll do the body work and have someone else spray it.
Posted By: Anonymous
Re: Paint job on a budget!? CONTINUED..page 44......... - 11/10/06 01:18 PM
Kenzo,
I started down the route to spray a car myself. I borrowed one compressor and it was not enough then another and it was still on the edge. Trying to setup a garage to paint (without being turned in to the police) and then wait on the weather and then pull the trigger all at once and if any problems then WAIT and do it all over again - is a pain.
I also called around my area and tried to rent a booth, and then went as far as to see if Maaco would just spray my paint ($250 worth of paint and reducer that I had purchased originally for this car.) and they refused. Plus in doing in my garage, the prep work for getting it ready to spray is A LOT (wet and dry floor, full masking of car, masking of areas of my garage I did not want painted etc.) Plus the cost of a good gun is about $100-$150 and then the air compressor. Now lets say that I have all the equipment and my garage is set to go, now I STILL need to purchase lacquer thinner to clean out my gun, charcoal respirator (disposable), and the paint cost as mentioned above.
I was 90% there and then found this thread. I had borrowed two air compressors, had a friend with a nice gun that was going to spray it and had purchased the paint. Then the weather turned (rain, lower temps.) and we waited for 2-3 weeks and could not get the right combination of weather and my friends time. In the mean time I read all of this thread and went at it. I returned the air compressors, am sending back the paint.
In the end even if I had sprayed the car - if I was going to wet sand I would be in the same position that I am now - polishing.
This method is first of all CHEAP!!!! Secondly you can do it any time at your own pace (just a fender etc.). This is not a flame, just telling everyone my experience and why I chose this method. Hope this helps!
Mike
Posted By: Anonymous
Re: Paint job on a budget!? CONTINUED..page 44......... - 11/10/06 02:05 PM
Mike or anyone that has done this type of painting... Has anyone let the cars sit outside exposed to the sun/heat/rain? I've been reading boating forums and most have complained that Brightside loses its lust after a season. As Charger mentioned long ago, this type of paint requires a lot more care and maintenance.
Posted By: v8mirage
Re: Paint job on a budget!? CONTINUED..page 44......... - 11/10/06 02:20 PM
Quote:
This method is first of all CHEAP!!!! Secondly you can do it any time at your own pace (just a fender etc.). This is not a flame, just telling everyone my experience and why I chose this method. Hope this helps!
Mike
Mike and all that is exactly my perspective on this. I started with just a fender, then both front fenders, then the hood, now the body of the car. This method is fantastic!!!
Let me tell ya tho, it has a lot of my friends and neighbors scratching their heads. Anyone that has sprayed a car or worked in a bodyshop is VERY skeptical. However I have never been one to follow the crowd, just because that is the way its always been done, and this just continues in that tradition. Thanks 69Charger!!!
Gerbs

Posted By: 69chargeryeehaa
Re: Paint job on a budget!? CONTINUED..page 44......... - 11/10/06 03:57 PM
Quote:
Mike or anyone that has done this type of painting... Has anyone let the cars sit outside exposed to the sun/heat/rain? I've been reading boating forums and most have complained that Brightside loses its lust after a season. As Charger mentioned long ago, this type of paint requires a lot more care and maintenance.
Here's what my routine maintance is: 1. drive car, 2. wash car, 3. wax once a year.
no more maintance than a reagular paintjob.
Although my cars are garaged, they see very heavy use in the summer, and sit outside in the rain, ect when i go to the cottage, and i've had no issues. if it does get dull (which has not happened to me) just crack out the buffer, and 1 hour later all shiny again.
Posted By: 69chargeryeehaa
Re: Paint job on a budget!? CONTINUED..page 44......... - 11/10/06 04:03 PM
Quote:
Quote:
This method is first of all CHEAP!!!! Secondly you can do it any time at your own pace (just a fender etc.). This is not a flame, just telling everyone my experience and why I chose this method. Hope this helps!
Mike
Mike and all that is exactly my perspective on this. I started with just a fender, then both front fenders, then the hood, now the body of the car. This method is fantastic!!!
Let me tell ya tho, it has a lot of my friends and neighbors scratching their heads. Anyone that has sprayed a car or worked in a bodyshop is VERY skeptical. However I have never been one to follow the crowd, just because that is the way its always been done, and this just continues in that tradition. Thanks 69Charger!!!
Gerbs
People who have'nt sprayed in their garage have no idea how much work and mess it makes. it's a major PITA. This painting method is so easy it hurts, for the time/effort vs the result there is nothing eaiser/cheaper/better.
Posted By: Anonymous
Re: Paint job on a budget!? CONTINUED..page 44......... - 11/11/06 12:09 AM
Quote:
Mike or anyone that has done this type of painting... Has anyone let the cars sit outside exposed to the sun/heat/rain? I've been reading boating forums and most have complained that Brightside loses its lust after a season. As Charger mentioned long ago, this type of paint requires a lot more care and maintenance.
Mage33,
My son's car that we did does sit outside. Now we have just completed the process with the polishing in the past week, so I do not have any time test? 69Charger has done this for some time and had multiple cars that look great after years.
Mike
Posted By: Anonymous
Re: Paint job on a budget!? CONTINUED..page 44......... - 11/11/06 12:24 AM
Quote:
People who have'nt sprayed in their garage have no idea how much work and mess it makes. it's a major PITA. This painting method is so easy it hurts, for the time/effort vs the result there is nothing eaiser/cheaper/better.
I sprayed primer to get ready for the paint job and what a mess of spraying and cleanup. I can say if you think that you may mess this up then I can only imagine what you may do with a spray gun - runs, overspray from one pass to the other, uneven etc. To spray a car you need to have a gun that will lay it on fast and even, a compressor that can keep up (if not you are hosed waiting) and then skill to put on the paint in the right layers and timing. The auto paint will flash quickly and if you do not lay down your adjoining layer in the right time and amount you will have some paint dry and other just going on, resulting in overspray on your new paint. Just putting on the primer I did a lot of sanding to "fix" my spraying - and that was just primer. This is why I was going to have someone that knew what they were doing spray the car. All that to say it is a pain to spray in your garage. Once I found this method I was thrilled!
Mike
Posted By: Anonymous
Re: Paint job on a budget!? CONTINUED..page 44......... - 11/11/06 02:05 AM
i painted my car in the garage and there was a little smell, but no cops and the neibors didnt care about the painting. i always has a comercial fan in the window blowing out the fumes/dust. never once did the cops come. i did have some dirt in the paint after it dried, but i got a nub file and it was gone. now i buffed the car i can see the rest of the bubbles that didnt pop, so i will use the nub file to get rid of them. then re polish then do a final glaze then wax then finish the interior then go to the world of wheels...
Posted By: kenzo42
Re: Paint job on a budget!? CONTINUED..page 44......... - 11/11/06 02:43 AM
Quote:
Quote:
People who have'nt sprayed in their garage have no idea how much work and mess it makes. it's a major PITA. This painting method is so easy it hurts, for the time/effort vs the result there is nothing eaiser/cheaper/better.
I sprayed primer to get ready for the paint job and what a mess of spraying and cleanup. I can say if you think that you may mess this up then I can only imagine what you may do with a spray gun - runs, overspray from one pass to the other, uneven etc. To spray a car you need to have a gun that will lay it on fast and even, a compressor that can keep up (if not you are hosed waiting) and then skill to put on the paint in the right layers and timing. The auto paint will flash quickly and if you do not lay down your adjoining layer in the right time and amount you will have some paint dry and other just going on, resulting in overspray on your new paint. Just putting on the primer I did a lot of sanding to "fix" my spraying - and that was just primer. This is why I was going to have someone that knew what they were doing spray the car. All that to say it is a pain to spray in your garage. Once I found this method I was thrilled!
Mike
Did you spray w/ 2k? Or rattle can? I'm curious if 2k is compatible w/ Brightside/ Tremclad? I don't see why it wouldn't be.
Posted By: Anonymous
Re: Paint job on a budget!? CONTINUED..page 44......... - 11/11/06 04:32 AM
I sprayed with 2K Primer. According to 69Charger this is not necessary, but I had originally started down another path. The Rustoleum went over it just fine.
Actually I was talked into complete chemical strip of the car (long process), body work, prime and paint. If I knew then what I know now. I would have sanded the existing paint, done body work and then painted the Rustoleum directly on it.
Mike
Posted By: kenzo42
Re: Paint job on a budget!? CONTINUED..page 44......... - 11/11/06 06:18 AM
I understand body filler to be very porous. Exit mentioned that he had filler w/ NO primer and it sucked up the paint and made a little patch that differed from the rest of the car.
I don't know about glaze, but from my understanding, filler needs to be top coated w/ primer. I've heard it mentioned before that Evercoat glaze doesn't necessarily need a primer, but scratches might swell. A sealer is another alternative.
I've used rattle can primer over scuffed paint on a perfect panel in the past, and it failed miserably. If it isn't 2k, I feel confident the paint will knick off when a rock hits it regardless of how hard the paint is, since it's an adhesion issue. It might have worked better if I didn't use rattle can primer at all and just painted straight over scuffed paint.
Hope this made sense.
Posted By: v8mirage
Re: Paint job on a budget!? CONTINUED..page 44......... - 11/13/06 02:22 AM
I painted right over the filler and glaze with my Rustoleum. By about the 3rd or 4th coat it was covered like the rest of the car. You couldn't tell any difference in the surface after that time. Even after wet sanding it was no longer visible.
Gerbs
Posted By: noisydart
Re: Paint job on a budget!? CONTINUED..page 44......... - 11/13/06 02:44 AM
Chargeryeehaw, I've got to commend you for this post. I was one of the original responders in it's infancy. It just keeps on tickin- you've helped many. And if moparts had an award for the
most influential and long lasting p
ost,
obviously this would be it. And it was started by someone else- did anyone ever hear from him?
Posted By: Anonymous
Re: Paint job on a budget!? CONTINUED..page 44......... - 11/13/06 06:11 AM
ok so can the brightside/marine paint be painted over bare metal and filler?? if not, what brands/type of primer can one use besides the recomended primer from the company of paint u use?? lets say i use some autoprimer and decide to paint my car with brightside, will they be compatible? also what if i use autoprimer and paint rustoleum, would that work, cause right now im not sure if ima do marine paint or rustoleum but i need to primer some spots up so they dont rust.
Posted By: Exit1965
Re: Paint job on a budget!? CONTINUED..page 44......... - 11/13/06 01:30 PM
Quote:
ok so can the brightside/marine paint be painted over bare metal and filler?? if not, what brands/type of primer can one use besides the recomended primer from the company of paint u use?? lets say i use some autoprimer and decide to paint my car with brightside, will they be compatible? also what if i use autoprimer and paint rustoleum, would that work, cause right now im not sure if ima do marine paint or rustoleum but i need to primer some spots up so they dont rust.
i do not know anyone who's painted brightside over bare metal. but it does go over filler, primer, or rustoleum.
I think either rustoleum or brightside would do fine over any primer (hope I'm not sticking my neck out here) since these two paints are not harsh on what's underneath them. if you were to use a 2 part hardened paint then you would probably have issues with the paint pulling up what's under it, but rustoleum and brightside seem to not be very tough on it.
Posted By: Marq
Re: Paint job on a budget!? CONTINUED..page 44......... - 11/13/06 07:03 PM
Quote:
I think either rustoleum or brightside would do fine over any primer (hope I'm not sticking my neck out here) since these two paints are not harsh on what's underneath them. if you were to use a 2 part hardened paint then you would probably have issues with the paint pulling up what's under it, but rustoleum and brightside seem to not be very tough on it.
I don't think Brightside is too concerned with the type of primer that it is painted over. Originally my car started off with a number of different types of spray bomb primers over the bodywork that I had done.
With Brightside, it normally is rolled over fiberglass or aluminum boat bodies. Surface preparation is no different than if you were going to slap a paint on top of a regular paint job. Sand the surface to get it smooth and remove any gloss and then wipe down with mineral spirits to get all the debris off the part to be painted.
Now... regarding questions about the longevity of a Brightside paint job... I have only ever found a few folks who had anything bad to say about the Brightside paint...
a ) a number of them used Brightsise on their decks and they found it treacherously slippery. ( They did not add the recommended grit component for walking surfaces ).
b ) a number of them gripes that it did not stand up to constant wear and tear... Again, these are people who used this paint on horizontal surfaces where people WALK on the paint or possiblly sunbath on...
c ) a number of them griped about having used Brightside INSIDE the boat and it discolored. Well.. let's go and check their kitchens at home and see how well their kitchen paint held up to the cooking oils and steams that discolor that paint. It's the same problem. But I would suspect they can't take a bottle of Fantastic cleaner to their kitchen walls without removing a few layers of paint.
d ) and the last group of gripers all seemed to have NOT prepared their surfaces properly prior to painting. It's sad when they do a slam bam quickie paint job and then wonder why the paint didn't perform miracles to counter the lack of surface preparation. Paint over wax... and the paint will peel. Paint over a surface that is covered with surfactants and the paint will not adhere. Paint over an unprepared glossy surface and than blame the paint for not adhering to it ?
Questions of water or chemical exposure never seem to point a finger at the Brightside having any shortcomings... And the same applies to questions about UV or sun/heat exposure... there just aren't too many negative associations between the paint and those elements.
But ultimately... like any painted surface that is exposed to the elements it does pay to polish and wax the surface at least once per season.
If you go to any marina supplier, you will find shelves stocked with waxes and polishes for boats. Yet... there are probably 50% of the boaters who have never polished or waxed their boats. This is no different than the majority of car owners that never apply wax or polish to their cars. And when the paint on those boats or cars ages, the lazy owner is left stumped wondering why the other guy's boat or car is shinier...
I did think it was worthwhile to share two quick stories here about my Brightside paint job... For some odd reason it is looking 'better today' than it did when I originally finished it back in August.
Now... part of that I chalk up to the fact that I have been using my other three cars and I was sitting on top of the convertible looking for flaws. My eyes were looking at the car in the same way that a stranger would, who was seeing the car for the first time.
I thought my mind and eyes were playing some kind of self delusional trick on me UNTIL I had a friend over who is the proud owner of one of those sparkling new top end Corvettes. The guy has bucks and this Vette was his gift to himself. Anyhow, to make a long story short when he saw my car he could not believe that it was a 'rolled' paint job. He thought it was the original factory paint job.
Now... I know how picky this guy is with his own car... and I know that he does not give false compliments just to be nice... So it sort of confirmed to me that this paint job did turn out as good as I could have wished or paid for at a pro paint shop.
Posted By: Anonymous
Re: Paint job on a budget!? CONTINUED..page 44......... - 11/13/06 10:44 PM
I spend about an hour and a half reading the original posts for this topic, and am quite impressed! A few questions I either didnt have time to find, or just plain didn't see are:
What if you want to paint over a car that already has bc/cc on it? Should I just sand off the clear down to the base,and then roll the Tremclad on it? If this is possible, then Im guessing that not as many coats (depending on the new color) would be needed. Im guessing wet sanding between coats would still be necessary.
Also, does anyone have pics of a '69 Fury that isn't just plain jane? Any stripes or anything that breaks the monotony of the body?
Posted By: Anonymous
Re: Paint job on a budget!? CONTINUED..page 44......... - 11/14/06 11:12 AM
thanks for the info marq, i actually found some info on the website that said it could be painted over bare metal. i remember reading this post from the beginning but im trying to remember if you polished ur mclaren after u painted. i saw the pics of it but was it ever polished. im trying to achieve a oem bc.cc job , i know most oem jobs have a decent amount of orange peel btu i am not looking for a mirro rfinish but i want something fairly decent, would u say the brightside rolled w/o sanding/polishing compares? because it is hard to tell from your original pics.
Posted By: texczech
Re: Paint job on a budget!? CONTINUED..page 44......... - 11/15/06 12:21 AM
Hey marq: I have been following and tried the brightside flag blue on a test hood- 66 chevy pu. wjile rolling (diluted & full strength) there were bubbles-an uncomfortable amount- but they did pop nearly all of them I guess. But after the paint dried I noticed that it looked like there were dust particles in the dried paint. I then strained the paint, but it didn't really help a lot. I noticed that someone earlier said he had "goobers" in the paint. I'm wondering what would lessen these imperfections. Maybe the type of roller, or what? I don't think it is an issue of my shop cleanliness.I have a little orange peel, but I really like the shine. The dirt specks issue bothers me more than anything. I tried to call the brightside manufacturer, but I really hit a dead end trying to get technical help from these guys.
Posted By: 69chargeryeehaa
Re: Paint job on a budget!? CONTINUED..page 44......... - 11/15/06 12:41 AM
Quote:
Hey marq: I have been following and tried the brightside flag blue on a test hood- 66 chevy pu. wjile rolling (diluted & full strength) there were bubbles-an uncomfortable amount- but they did pop nearly all of them I guess. But after the paint dried I noticed that it looked like there were dust particles in the dried paint. I then strained the paint, but it didn't really help a lot. I noticed that someone earlier said he had "goobers" in the paint. I'm wondering what would lessen these imperfections. Maybe the type of roller, or what? I don't think it is an issue of my shop cleanliness.I have a little orange peel, but I really like the shine. The dirt specks issue bothers me more than anything. I tried to call the brightside manufacturer, but I really hit a dead end trying to get technical help from these guys.
how did you clean the surface before painting? i highly reccommend using a autobody "tack cloth"; it's like a sticky cheese cloth, about $1 at any auto parts store. if you just clean the car with a rag there will be alot of dirt on the surface.
Posted By: Anonymous
Re: Paint job on a budget!? CONTINUED..page 44......... - 11/15/06 12:51 AM
hey texczech, can u post a pic of how ur blue looks so i can see how the orange peel is using the brightside str8 outta the can?
Posted By: kenzo42
Re: Paint job on a budget!? CONTINUED..page 44......... - 11/15/06 05:58 AM
I found something called Klean Strip "Paint Stripper WITH Mineral Spirits" at Home Depot. Does this mean PURE mineral spirits? It didn't mention anything on the can.
Posted By: Anonymous
Re: Paint job on a budget!? CONTINUED..page 44......... - 11/15/06 12:20 PM
I found the real stuff at Kelley Moore paints here in San Jose.
Posted By: texczech
Re: Paint job on a budget!? CONTINUED..page 44......... - 11/15/06 01:15 PM
It seems like I can't get a good picture that would describe the orange peel. I would very HIGHLY suggest that you kind of do what I did. Get some brightside-from ebay,get a roller & try it! I think you will learn a ton about how this stuff works.Try some straight & some thinned maybe with 10 percent or so.(I used mineral spirits). I think that the type of roller, technique,etc... will make a difference. I must say that ther is some orange peel, but it is very acceptable to me. I could only really tell how much it was when I sanded it down. Ihave only been practicing on an old hood. I don't think you would want to try out this rollering technique until you have practiced on something first. I have been practicing and have probably sanded the straight brightside out and tried other dilutions and techniques.I found out that my body work imperfections showed up much worse than the orange peel concern-low spots,sanding scratches etc. . If I do get a decent picture I will try to get it on, but I haven't got a good one that would do justice to an evaluation.PS don't forget to get some foam brushes,good bristle brushes and try the tricky spots. You will be surprised how good a cheap foam brush applies this stuff around the curves and places hard to get with the roller.
Posted By: Anonymous
Re: Paint job on a budget!? CONTINUED..page 44......... - 11/15/06 06:09 PM
Does anybody know if Engine Enamel paint is any good to paint the car? There is a store that have them a close out price with the colour that I really need. The brand is Plasti-kote, and it is a High-heat engine enamel paint.
Posted By: 69chargeryeehaa
Re: Paint job on a budget!? CONTINUED..page 44......... - 11/15/06 06:18 PM
Quote:
Chargeryeehaw, I've got to commend you for this post. I was one of the original responders in it's infancy. It just keeps on tickin- you've helped many. And if moparts had an award for the
most influential and long lasting p ost,
obviously this would be it. And it was started by someone else- did anyone ever hear from him?
thanks i still haven't recieved my award,
i haven't seen a post of the original poster
Posted By: Anonymous
Re: Paint job on a budget!? CONTINUED..page 44......... - 11/16/06 08:10 AM
hey i read something on the hondatech board that caught my eye, what do you guys think....
so you paint your car, etc and you get to the final wetsanding. so lets say you sand 1500-2000 or whatever. then instead of polishing, you do one final realllly thin coat of maybe 50% thinned paint or more, and let it level nicely, filling the micro sand marks, and leave a nice surface with very minimal orangepeel..anyone have any thoughts on that idea?
Posted By: Anonymous
Re: Paint job on a budget!? CONTINUED..page 44......... - 11/16/06 01:11 PM
Menappi
Seems like going to a higher ratio of mineral spirits is going to allow the paint level out better. But obivously coverage is not going to be as good. But, it's not a concern at that the point you are describing BTW, I tried a short cut method for the lower parts of my car (ie removal parts like a valance, chin spoiler etc.) Basically, I applied 4 to 6 coats color to get good coverage with 20% thinned paint. Lightly sanding between ever other coat 400 then 600. Then I sprayed a light coat of clear spar urethane. I got orange peel but it is minimal. But, this is ok since it's way low on the car. More peel than what I want for upper parts of the car. The point is I do't have to buff those parts and I sanded my color coat to 600 and got good gloss without the work. But this was just an experiment. I believe in the roller method. I love that I can make a repair to my car without sending back to a bodyshop. I wanted to experiment to see if there is a way to get good gloss without so many levels of sanding for some parts of the car. Way back I did a lacquer job to a car in 1986 and I'm pretty sure I never went above 400. But we were spraying so that could be why. We polished the car and it was a great looking job. Gloss was good but I had to keep it waxed. So if by applying higher ratios of thinned paint to get less peel. Might be a way to improve the roller method.
Posted By: Exit1965
Re: Paint job on a budget!? CONTINUED..page 44......... - 11/16/06 01:46 PM
Quote:
So if by applying higher ratios of thinned paint to get less peel. Might be a way to improve the roller method.
It definately is. I was doing this back when I used rustoleum. Got virtually no orange peel- but it took me 10+ coats for full coverage. With brightside, I still notice that more thinner = less orange peel.
So one option is to put on 3 medium-thick coats, sand out all the orange peel, then do a thin or medium thin coat to finalize. I hate sanding orange peel, so if i were going to do it all over again I'd probably do 5-6 medium thin coats and not have much sanding to do inbetween.
Regarding the honda guy's idea about applying a final coat - to me that doesnt make much sense because one of the points of wetsanding at that stage is to remove the dust and other particles that are in the paint. Rolling another coat would result in more dust and crap falling on the paint, so that would have to be wetsanded out too. Then there doesn't seem to be a point to sanding with 1500 or 2000 before applying that final thin coat- might as well use 800 and save yourself some time. I have painted over 800 grit sanding and not had any visible scratches.
Posted By: Java
Re: Paint job on a budget!? CONTINUED..page 44......... - 11/16/06 05:03 PM
Hi all,
I have been following this thread for a while and am ready to get to work on my test piece. I have a question about humidity. I preped my test piece last weekend, but since then the humidity has been +80% so I haven't had a chance to roll any paint. Would it be bad to paint with such high humidity? If I just wait for longer drying time, would the results turn out the same? I am really anxious to to get started, but I want to make sure I get it right.
Posted By: v8mirage
Re: Paint job on a budget!? CONTINUED..page 44......... - 11/16/06 11:24 PM
I just painted my car today and here in Maryland its been raining on and off. I don't notice any difference. But if you're not comfortable doing that, you should probably wait for dryer weather.
Gerbs

Posted By: Anonymous
Re: Paint job on a budget!? CONTINUED..page 44......... - 11/16/06 11:51 PM
so i have 12 coats of paint and some orange peel... and when i wet sand the paint i go through a coat. then i get dark spots. if i put another coat of paint then use the clear and then wet sand will i see the orange peel through the clear when i wet sand the clear. i use 2000 grit sand paper. other than that this paint is great!!!!!!!
Posted By: Anonymous
Re: Paint job on a budget!? CONTINUED..page 44......... - 11/17/06 04:06 AM
do you think rubbing or polishign compound could get rid fo the little dust flakes that accumulate as part of the final finish?
Posted By: Exit1965
Re: Paint job on a budget!? CONTINUED..page 44......... - 11/17/06 04:18 AM
Quote:
do you think rubbing or polishign compound could get rid fo the little dust flakes that accumulate as part of the final finish?
I haven't done much buffing or polishing, but probably. The 2000 grit paper would seem to get rid of those pretty quick too. My plan was to use 2000 grit on the dust specs that stand out, then polish that tiny area, rather than sanding the whole car and then polishing it.
If you look at it real close (which we all tend to do) you'd probably see where the spec was, e.g. a tiny pit. I'm trying not to look at my paint so close anymore
Posted By: admactanium
Re: Paint job on a budget!? CONTINUED..page 44......... - 11/17/06 08:40 AM
Quote:
do you think rubbing or polishign compound could get rid fo the little dust flakes that accumulate as part of the final finish?
it might get rid of the actual particulate, but the small hill of paint won't go away. using polishing compound by itself won't flatted out orange peel. otherwise nobody would bother sanding. it only polishes the peel itself. it all comes down to what level you're looking to achieve. completely flat paint with straight reflections and no peel? you're going to have to sand. some orange peel and small dust/dirt nubs? just polish. seems like a proper top-coat rolled onto a flat surface probably gives a finish similar to a factor paintjob.
Posted By: Anonymous
Re: Paint job on a budget!? CONTINUED..page 44......... - 11/17/06 04:46 PM
We need some picture updates from Aussie and Exit !!!
Posted By: Anonymous
Re: Paint job on a budget!? CONTINUED..page 44......... - 11/17/06 08:17 PM
Could you guys post pics of FIRST coats using rustoleum. I want to know how thin it looks.. thanks.
Posted By: Exit1965
Re: Paint job on a budget!? CONTINUED..page 44......... - 11/17/06 09:52 PM
Quote:
We need some picture updates from Aussie and Exit !!!
Hmm no update pictures, but it's as shiny as ever (of course it's been garaged in decent weather).
I've moved past the paint for now until she's running. next week we pull the engine and tranny out of the donor car.
Once it's moving under its own power, I can take it out in the sun and evaluate it. If the orange peel is too bad, I can always spend an afternoon flattening it out, then put 2 more thin coats on it then park it in the sun where it can harden. by that time the weather should be more suitable for painting too.
I'd like to see Aussiedriver's update pics though
Posted By: Exit1965
Re: Paint job on a budget!? CONTINUED..page 44......... - 11/17/06 09:54 PM
Quote:
Could you guys post pics of FIRST coats using rustoleum. I want to know how thin it looks.. thanks.
As has been said here before, first coats look terrible. I don't know what it is. Perhaps trying to color too much at once. My first coats are either uneven (with brightside) or too thick and orange peeley with rustoleum. I'd do the first coat, wetsand it flat, then do your 2 coats.
At this stage you should really try brightside or another marine poly. The shine is worth it.
Posted By: v8mirage
Re: Paint job on a budget!? CONTINUED..page 44......... - 11/17/06 10:02 PM
Here is what my first coat of rustoleum looked like.

Posted By: Anonymous
Re: Paint job on a budget!? CONTINUED..page 44......... - 11/18/06 12:05 AM
Here is my car just prior to the first coat of Black Metal Armour (an Aussie equivalent to Rustoleum)

And here is a pic of the first coat

As you can see, it's really thin and nothing like total coverage of the red underneath.
If I can get a couple of free hours this weekend, I'm hoping to be able to do a final sand and polish of the bonnet of my car. Here's hoping that I can do it without wrecking the paint this time....
Posted By: Anonymous
Re: Paint job on a budget!? CONTINUED..page 44......... - 11/18/06 02:28 AM
Aussie, didn't realize your car was red before. What did you do for the jams, trunk jams, under the hood/bonnet? Did you end up spraying them or use a soft brush?
Posted By: Anonymous
Re: Paint job on a budget!? CONTINUED..page 44......... - 11/18/06 09:22 AM
I took the hood, the bootlid and the doors off to do everything properly when I used the Brightside. I sprayed the underside of the hood and bootlid, and I used the flat end of the roller to do the door/engine bay/boot jams. I later went over them with a small foam brush to flatten them out a bit.
Here are some shots of my dodgy hood detail from today.

My first polish was done with Poorboys SSR2.5 and a cutting pad. This shot was taken after I had used the SSR 2.5 with a light cutting pad. I'm using a random orbital polisher similar to a PC. Just in case anyone wants to know what polish looks like once it has broken down, this is it. When polishing you should always work the polish until it looks like this.

This is the swirl remover that I used. Because I'm not happy with the amount of orange peel in the paint I'm going to sand everything back down again and try and get the paint flatter. If I was going to continue the polishing process, I would next use a very mild swirl remover such as the Poorboys SSR1, and I would do two passes with it, the first with a light cutting pad, the second with a polishing pad.
Then I would use a proper polish on the paint with a polishing pad, then a second pass with a finishing pad. I would then seal the paint with a finessing pad and probably do about three or four passes with the sealant.

As you can see from the last shot, the paint still has a lot of orange peel in it, and there is still a little bit of swirling in the paint. If I had continued with the polishing I probably could have removed some more of the minor marks and been able to get a better reflection from the light. Using these type of halogens is a great help when polishing as a 'properly' polished car will have a crystal clear reflection of the light where you can see the halogen bulb. My car still has too much orange peel to get a reflection that good.
Posted By: Anonymous
Re: Paint job on a budget!? CONTINUED..page 44......... - 11/18/06 10:37 PM
another newby here
1st things charger dude your awesome for showing this method. I myself am new to body work/paint however my mother and grandfather(who used to work for gm in the assembly plant) have repainted numerous cars. My grandfather would kill me if he found out im doing this to my formy yet my mom is exited about the outcome.
iv read and reread this thread numerous times getting tips the technique and everything else i could from here. then dove head on into the project. started a test panel well 2 of em on being my blue fender and the 2nd being my headlight cover. i put maybe 4 coats on my headlight panel and about 6-7 on the fender and polished them up...not the greatest mind you just to get an idea and wowza.
heres what im starting with


just finished striping the car and sanding the drivers side a little bit ago when i decided i should sign up. went with sunset red from rusto on this so red to red minus the blue fender should be fun.
couple questions for everyone
i tend to sand all the way through the paint to the original color when wetsanding whats a good way to prevent this.
also with body lines same problem with the formy theres alot of sharp edges any ideas?
the other thing is i havent been painting long but from what i remeber with enamel paints your not supposed to wet sand the final coat just buff the hell outa it. i tried this with my headlight panel and the shine is amazing at an agle however head on its hazy
anywho rollers unite
Posted By: Anonymous
Re: Paint job on a budget!? CONTINUED..page 44......... - 11/19/06 12:04 AM
what do you guys think will happen if i spray rustoleum on some tha ti rolled. im doing my top black and the rest red, but its small areas so ifigured i could just spray it to save time...but i already have like two light coats of rustoleum on there rolled on.
Posted By: Anonymous
Re: Paint job on a budget!? CONTINUED..page 44......... - 11/19/06 12:15 AM
OK here are a few more shots after I did a second wet sand to try and remove some more of the orange peel.
This first shot is after polishing the hood with a fixed speed random orbital polisher, a generic pad that came with the polisher and the TurtleWax swirl remover that Charger used.

You can see how little the polish and polisher has achieved, specially in the bottom left of the picture. I spent about 20 mins polishing that bit.
The next pic is after polishing a different section of the hood with a variable speed random orbital, with a cutting pad and with the SSR2.5.

You can see a huge difference to the first pic and the orange peel has almost completely gone. When I did this section of the hood, I had the polisher going flat out. Using a high speed on the polisher is a really important step because the good swirl removers need a fair amount of heat for the polish to start breaking down and do it's job properly.
This last pic is sort of a progression pic.

The top of the pic is of the sanded hood, before any polish has been applied. The reflection of the garage and the good cloud reflections are from the bit that I used the SSR2.5 on and the bit to the left of that where the cloud reflections get fuzzy is where I used the TurtleWax.
As you can see, there is a huge difference between using a high end polish and good equipment compared to the generic stuff. This is the area where you can turn a roller job into something that looks a little more like a showroom finish.
Posted By: Anonymous
Re: Paint job on a budget!? CONTINUED..page 44......... - 11/19/06 12:52 AM
thats why i have all 3m products.
rubbing compound 06063
swirl remover 06064
finesse-it finishing material 05928
Posted By: Anonymous
Re: Paint job on a budget!? CONTINUED..page 44......... - 11/19/06 01:26 AM
Quote:
thats why i have all 3m products.
rubbing compound 06063
swirl remover 06064
finesse-it finishing material 05928
Yep, any of the high-end polishes will work wonders on our paint jobs. Most of us have our favourites, but in reality any of the progressive polishing lines from a high-end brand will all produce excellent results.
Posted By: Anonymous
Re: Paint job on a budget!? CONTINUED..page 44......... - 11/19/06 03:32 AM
dang aussie! how much is that poorboy stuff and where could i find it? also, what was ur final wetsand, and did you immedietly use the swirl remover after the final wetsand or did u use some rubbing compound? what exactly were your steps..? i wonder how well the ssr stuff would work with a fixed speed orbital buffer, since thats all i have cause it looks so nice but i dont want to go spend 100+ on one.
Posted By: 69chargeryeehaa
Re: Paint job on a budget!? CONTINUED..page 44......... - 11/19/06 09:32 PM
Aussie Driver -- awesome job man.
you've for sure taken it to the next level, that looks awesome, i know it's possible to achieve a "factory" paintjob with this method, to be honest i'm just lazy, and i had this huge desire to
my charger, i painted my car start to finish in 3 days, kinda rushed it, but i just HAD to drive my car!!!! it's really not HOW you put the paint on (spray, or roll on) but what you do after
the only reason i suggested using the turtle wax polishing compound is because alot if not all the people trying this method have never painted a car at all, and i just tried to put together a recipe to achieve good results for the beginner, but if you have more "advanced" skills there is nothing from stopping you from getting a awesome paintjob using a roller!!! the BEST part is doing it yourself, for very little $ to boot!!!
It all pays off in the end when you step back and look at the finished product, that's when you realize that you painted a car with a roller, and let's say $50!!!! You get about 1 million times (give or take!!!) more satisifaction painting your car yourself than having someone else doing it for you, not to mention you have the know-how to fix any future damage to the paint if something happens down the road like it has to me many times.
Posted By: Anonymous
Re: Paint job on a budget!? CONTINUED..page 44......... - 11/19/06 10:49 PM
I wouldn't say that I have done anything special or added anything to the process. My prep work still needs a fair amount of improvement, my painting is ok, and my wet sanding skills could be better as well. But as you said, once you get the paint on the car, with a little extra effort in polishing (and some high-end products and equipment certainly help) it is possible to achieve some really impressive results.
And the best part with the polishing is that every time the car gets a re-polish, the paint will get a little bit flatter and look that little bit better.
Posted By: pdqvsix
Re: Paint job on a budget!? CONTINUED..page 44......... - 11/20/06 01:22 AM
I've been lazy since finishing the painting process and that's all that's on the car is rolled-on Rustoleum gloss white paint and i get complements on the car just about everywhere i go. I have told some that i did it with a roller and they are surprised how nice it looks.One of these days i'll do the final wet sanding and polishing and waxing.
I just can't give enough thanks to 69Chargeryeehaa for sharing this technique with all of us.
Posted By: 69chargeryeehaa
Re: Paint job on a budget!? CONTINUED..page 44......... - 11/20/06 04:13 PM
Aussie Driver - well you are doing a mazda!!!, it's like a go-cart, when you do a 19' charger, it takes alot of time. i started doing the roof, that's polished nicely, but then i fugured this would add about 2 days of work extra before i could
, and i've been looking for a 69 charger for about 10yrs, finally got one and could'nt wait until i could drive it, i built that whole car in 3 weeks, including mechanical and paint/interior, that's what alot of 16hr days, and me doing the pee-pee dance everytime i saw the car just dying to drive it!!!
but your paint looks really good, i'd say my car looks in between your 2 pics, not super glossy, but not dull at all, plus your painting black, and i'm painting orange, the lighter the color, the more forgiving it is.
here's a close up pic:

i did all the polishing i could in 1 day, then i started putting the car back together, bumpers, front end, mouldings, trim, handles, mirriors, ect.... that took me a solid day, next day i was
Posted By: 69chargeryeehaa
Re: Paint job on a budget!? CONTINUED..page 44......... - 11/20/06 04:15 PM
Quote:
I've been lazy since finishing the painting process and that's all that's on the car is rolled-on Rustoleum gloss white paint and i get complements on the car just about everywhere i go. I have told some that i did it with a roller and they are surprised how nice it looks.One of these days i'll do the final wet sanding and polishing and waxing.
I just can't give enough thanks to 69Chargeryeehaa for sharing this technique with all of us.
your welcome
how about a pic?
Posted By: Anonymous
Re: Paint job on a budget!? CONTINUED..page 44......... - 11/20/06 04:28 PM
Wow Aussie, that is insane! That does look as good, if not better than a factory BC/CC job! I was at the Honda/Acura dealer here in Canada and the orange peel in the paint was evident, big bockly orange peel. Even though there is some orange peel on yours, it isn't as big/blocky as
the ones I saw at the dealer!
Definitely show us the final paint.
Posted By: texczech
Re: Paint job on a budget!? CONTINUED..page 44......... - 11/20/06 06:25 PM
I would like a few more details on your final work. Did you sand with 1000 or 1500 or something like that? Or did you just start compounding? then what pads did you use with the 06063, 06064 and 05928? I need some guidance on what to try when the painting is done and the sanding buffing/polishing begins.
Posted By: Anonymous
Re: Paint job on a budget!? CONTINUED..page 44......... - 11/20/06 07:56 PM
My process was to wetsand with 1200 and then with 1500 to remove the orange peel and to get the paint nice and flat as well as smooth as possible.
I used the Poorboys SSR2.5 for the cutting along with a Wolfgang 6.5" yellow cutting pad. I then experimented with the SSR2.5 on a Wolfgang 6.5" orange light cutting pad for a second pass and this gave the paint a more glass like finish.
I use a random orbital polisher which has similar specs to a Porter Cable 7424. I spread the polish onto the panel with the polisher turned off, then I turned it on to the lowest speed setting to even the polish out for a minute or so, then I cranked up the speed on the polisher to max and worked in the polish until almost all of the residue had disappeared.
When I did this I only had the single cutting pad and this really slowed up the polishing as the pad became so clogged that I had to wash it and then rinse it after completing each section of the hood. I was working on fairly small areas of the hood, basically I polished about a quarter of the hood each time, then I'd wash/rinse the cutting pad and then do the next area.
I have ordered a second cutting pad and some Poorboys SSR3 which is described as a "heavy duty compound" compared to the SSR2.5 which is a "medium abrasive". Theoretically the SSR3 should produce a slightly flatter finish and do it faster than the SSR2.5. It should arrive in the next day or so, and once I have had a chance to play with it I'll post up some more pics of those results.
I'm still experimenting on my exact polishing sequence, but at the moment I'm leaning towards using either the SSR3 or SSR2.5 with a Wolfgang yellow cutting pad, then the SSR2.5 with a Wolfgang orange light cutting pad, followed by a couple of passes of SSR1 with a Wolfgang white polishing pad to improve the clarity of the reflection.
Then I'm not sure if I will seal it with the Poorboys EX-P sealant or the Nattys Blue wax or if I'll go 'Zaino' on the paint and use Z5Pro (2 layers) followed by Z3 (three or four layers). Decisions, decisions...
Posted By: Anonymous
Re: Paint job on a budget!? CONTINUED..page 44......... - 11/20/06 08:09 PM
Charger, I would love to be able to work on your paint with my polishing stuff. I reckon we could get it looking like glass.
I sure understand the desire to get everything finished though and just drive the thing. After two days of stuffing around on the hood of the Miata, the amount of time someone could spend polishing a car the size of your Charger is just a little intimidating. After all the hood on my Miata isn't that much bigger than the glovebox on the Charger. The prospect of driving the Charger would be so much more appealing!!!
Posted By: Anonymous
Re: Paint job on a budget!? CONTINUED..page 44......... - 11/20/06 10:05 PM
Quote:
dang aussie! how much is that poorboy stuff and where could i find it? also, what was ur final wetsand, and did you immedietly use the swirl remover after the final wetsand or did u use some rubbing compound? what exactly were your steps..? i wonder how well the ssr stuff would work with a fixed speed orbital buffer, since thats all i have cause it looks so nice but i dont want to go spend 100+ on one.
A quick google search yielded these results:
For Canadian's: http://www.eshine.ca/products.php?cat=12
For USA: http://www.poorboysworld.net/board/viewtopic.php?t=281
Posted By: Anonymous
Re: Paint job on a budget!? CONTINUED..page 44......... - 11/20/06 10:09 PM
Aussie, how many bottles of that poorboy super swirl remover you gonna use to cover the entire vehicle? I see they come in different sizes all the way up to a Gallon!
I have a car that's probably the same size as yours but with a roof on it.
Thanks
Posted By: Anonymous
Re: Paint job on a budget!? CONTINUED..page 44......... - 11/20/06 11:25 PM
I doubt that I'd even use one bottle. When I apply the polish to the pad, I do four thumbnail size 'blobs' at the N/S/E/W positions. That is enough to do a panel the size of a door.
Posted By: Anonymous
Re: Paint job on a budget!? CONTINUED..page 44......... - 11/21/06 06:48 AM
hey EXIT, when you originally painted ur car red rustoleum, what red did you use? i thought i remember it being SAFETY red, so i picked some up cause i like the weay it looked on your car. so i put the first coat on my car and its looking kinda orange to me, idunno if thats just the light (pitch black outside, only have a garage light and a shop flourescent light)...but im kinda scared i mighta got the wrong color =X!
Posted By: Exit1965
Re: Paint job on a budget!? CONTINUED..page 44......... - 11/21/06 01:54 PM
Quote:
hey EXIT, when you originally painted ur car red rustoleum, what red did you use? i thought i remember it being SAFETY red, so i picked some up cause i like the weay it looked on your car. so i put the first coat on my car and its looking kinda orange to me, idunno if thats just the light (pitch black outside, only have a garage light and a shop flourescent light)...but im kinda scared i mighta got the wrong color =X!
Yep that's safety red. It's an orangeish red. My mom saw it and used the word "tomato".
There was a buy who painted a fiberglass buggy body, who took pics of it outside and it looks pretty much the same there.
If it looks too orange, maybe it is just too light because its still see through. A few more coats will probably show you the real color on your car.
I didn't dislike the color, I just didn't think it would make the right combo for the car which I want to look somewhat mild but sound and move like a monster. So I went with a more plain Jane color ..
Posted By: Anonymous
Re: Paint job on a budget!? CONTINUED..page 44......... - 11/21/06 04:13 PM
What happened to that guy who added some sprinkly dust to his paint to give it a "pearl" effect? He said he would post pics, but I haven't seen any yet.
I guess that method failed? I could imagine getting a lot of small pinholes from wetsanding it because of the small sprinkly particles. You'd probably have to seal the final layer with a clear coat.
Posted By: Anonymous
Re: Paint job on a budget!? CONTINUED..page 44......... - 11/21/06 09:22 PM
Menappi--I did my Jeep in Brightside Fire Red (roller method), along with Rustoleum spray Safety Red for the hard to roll areas (tailgate, door jambs, etc). The two colors are basically identical, and yes, they are an "orangeish red." Based on my observations, the brighter the conditions (sunlight), the more orange it looks. At dusk or on a cloudy, sunless day, it looks more red. Pics of my Jeep are on page 38 of this thread; compare the pics after the 3rd coat vs. the 4th coat pics to see the difference in the colors under different light conditions.
Hope this helps...
https://board.moparts.org/ubbthreads/show...rue#Post2965063
Posted By: Anonymous
Re: Paint job on a budget!? CONTINUED..page 44......... - 11/22/06 03:54 AM
i buy quart size bottles on ebay and use maby 3/4 of the bottle. you will find out body shop supply stors sell them for 70.00 ea and on ebay it is not even 30.00 for the same stuff...
Posted By: Anonymous
Re: Paint job on a budget!? CONTINUED..page 44......... - 11/22/06 11:19 AM
Don't you just love irony.....
My order of the SSR3 cutting compound and the new cutting pad are due to arrive tomorrow, so of course my car just has to get hit by a 4WD (and a Ford Expolder at that!!!) on the way home from work this evening. Cue one passenger's door probably too badly damaged to open (and then be able to close again), and one wrecked rear quarter panel.
I sent one of my mates a pic of the damage via my phone and he sent back a message that at least I could now get my car resprayed. My response was "[Edited by Moparts - Keep it clean] a respray, I roll my paint jobs....."
Posted By: texczech
Re: Paint job on a budget!? CONTINUED..page 44......... - 11/22/06 01:22 PM
There seems to be 2 pc orbital buffers- 7424 & 7336... Wonder what is the difference? Now these use 6" pads. I have seen the 3M foam pads that seem to be 8" pads (3M # 05725 & 05723) Would using these larger pads affect the way the Porter Cable machine works? I assume you are using 3M pads with the 3M compounds & polishes.
Posted By: Exit1965
Re: Paint job on a budget!? CONTINUED..page 44......... - 11/22/06 01:24 PM
Quote:
Don't you just love irony.....
My order of the SSR3 cutting compound and the new cutting pad are due to arrive tomorrow, so of course my car just has to get hit by a 4WD (and a Ford Expolder at that!!!) on the way home from work this evening. Que one passenger's door probably too badly damaged to open (and then be able to close again), and one wrecked rear quarter panel.
I sent one of my mates a pic of the damage via my phone and he sent back a message that at least I could now get my car resprayed. My response was "[Edited by Moparts - Keep it clean] a respray, I roll my paint jobs....."
Sorry to hear that man.
Your sanding and polishing work has been top notch, and now I know I don't have to live with those dust specs and orange peel I have and can still have a killer shine with brightside. Thanks and hope your car turns out OK. Hopefully no one was hurt.
Posted By: Anonymous
Re: Paint job on a budget!? CONTINUED..page 44......... - 11/22/06 01:59 PM
Quote:
Don't you just love irony.....
My order of the SSR3 cutting compound and the new cutting pad are due to arrive tomorrow, so of course my car just has to get hit by a 4WD (and a Ford Expolder at that!!!) on the way home from work this evening. Que one passenger's door probably too badly damaged to open (and then be able to close again), and one wrecked rear quarter panel.
Look on the brightside, the 2wd Explorer is at fault, so his insurance company will cough up the cash for you to get a proper paint job! No more rolling! You just sit there and wait for the car to be repaired... Maybe it was a sign to say, "No more rolling, you've had enough, just respray me dammit" lol...
I sent one of my mates a pic of the damage via my phone and he sent back a message that at least I could now get my car resprayed. My response was "[Edited by Moparts - Keep it clean] a respray, I roll my paint jobs....."
Posted By: 69chargeryeehaa
Re: Paint job on a budget!? CONTINUED..page 44......... - 11/22/06 03:26 PM
Quote:
Look on the brightside, the 2wd Explorer is at fault,
How's that for irony? look on the Brightside.......what a classic!!!!
Sorry to hear that Aussie, take the car to get a estimate, for all the body work/parts/paint, then get the cheque and do it yourself.
Posted By: Anonymous
Re: Paint job on a budget!? CONTINUED..page 44......... - 11/22/06 07:14 PM
i have norton pads from eastwood.
woll cuting pad
blue swirl pad
white polishing pad
iam going ot do a quick polish on the paint then clear the car then do a good polish then it should look great!!!!!!!!!!!!!!!!
its just getting cold now and it takes longer for the paint to dry. o well
Posted By: Anonymous
Re: Paint job on a budget!? CONTINUED..page 44........ - 11/24/06 01:30 AM
Hi y'all,
I'm new here, but have a page dedicated to car painting- I have a lot of free info (yeah, I have a book too, but lots of free info even if you buy zero)
So, visit if interested-- guess it's the #1 site on Google for "how to paint a car"-- I'm amazed it is, actually.
I learned how to paint from a guy who does Lambos, and Lotuses, and Ferraris, etc... but its all the same paint now- urethane. I recognize many of the issues you're talking about here...
Later- Neil
www.EasyPaintYourCar.com
Posted By: Anonymous
Re: Paint job on a budget!? CONTINUED..page 44........ - 11/24/06 12:18 PM
Hi Exit, I was wondering how many quarts you think it will take to do your whole car. I have a 73 Super Beetle that I'm thinking of trying this on. I have a compressor and gun to shot the jams and under the trunk and hood with. I also have a HVLP turbine system that I was thinking of trying. I read on the samba that evil box has had good results with these systems.
Charger thanks for this method.
Barry
Posted By: Exit1965
Re: Paint job on a budget!? CONTINUED..page 44........ - 11/24/06 01:56 PM
I think charger would know something about how much paint a beetle uses.
Probably 2-3 quarts, depending on what color you're painting it and what's underneath it. Going to use rustoleum or marine paint?
Posted By: 69chargeryeehaa
Re: Paint job on a budget!? CONTINUED..page 44........ - 11/24/06 03:06 PM
Quote:
Hi Exit, I was wondering how many quarts you think it will take to do your whole car. I have a 73 Super Beetle that I'm thinking of trying this on. I have a compressor and gun to shot the jams and under the trunk and hood with. I also have a HVLP turbine system that I was thinking of trying. I read on the samba that evil box has had good results with these systems.
Charger thanks for this method.
Barry
it's funny how you have to come to moparts to discuss this when i posted it at the samba and the mods deleted it, let's just say they're not openminded as are the moparts mods, they are by far, the best moderators i have ever seen. That's one of the reasons i really am almost ashamed to have a beetle, the vw fourms are so mis-behaved, unlike moparts. sorry about the rant, i just had to share that with you guys.
as for painting the bug, i used about 1/2 a gal, the big can of paint, it's a gallon right? that does'nt include what i had mixed that i threw out, i'd say just a little over 2 quarts should do it, but buy the big can, it's cheaper, plus you have a endless supply of touch up paint, or if what happens to me happens to you; you need to paint a fender due to a little booboo then you have the exact paint match!!! Allthough i can say that i've used another can of the same color about 2 yrs apart and the color was an exact match, what ever you do, don't leave your left over paint outside to freeze, that ruins the paint, don't ask me how i know.
as far as spraying on the paint using one of those turbine systems, i'd say run away grasshopper, my expirence with them is that they work great for 5 mins, then start to spit, splatter paint unlike a traditional compressor/HVLP gun (which i have used ALOT), and that is a much better, more consistent system by far. But if you are going to spray, go thru the extra steps and use auto paint, the huge advantage to the "roller" method is that it's almost too easy, clean, easy, and of course easy and clean!!!! I've sprayed alot of cars in the past (over 20 for sure),and yes, it works great, looks good, but it's a huge mess and now i have no where to do it where i could get away with it, in the house i'm in now i would for sure have a complaint. The last car i sprayed was my dads 71 beetle back in 2001, using duplicolor single stage enamel, here's a pic:
71 beetle (car above) before paint:

and of course my 74 beetle which was rollered in 2000, here's a recient pic of that:
74 beetle (car above) before paint:

you can see a slight differnece in shine, one thing i can say is that bright colors are very good to use this method, dark colors are harder to pull off, and need alot more work in both prep and final polish, if you have the skills like aussie, then do black if you dare.
Posted By: Anonymous
Re: Paint job on a budget!? CONTINUED..page 44........ - 11/24/06 06:50 PM
HI Exit
Im thinking of using brightside.
Thanks Charger for the reply. Yep, I seen the mods ridicule and finally the deletion of your posts. I too think its stupid as crap. If its your vehicle, I don't see why its any of their business what a person does to his vehicle. Oh well rant over.
I have already replaced the floor pans,with the body on. Now I have a couple dents to fix before I start the paint. Did you have any rust bubbles under the rear window? Mine was bad on both sides. I had to cut out them out, then weld in replacement pieces on both sides. This old car was the first car I ever had, so I'm gonna try to fix it up pretty good. [bought it back in 1980].Did you spray under the trunk and door jams? I think that would be the easiest way. The car is not orange but a red orange kind of a color. Im hoping to find a color close to the original color. I wonder if the red, exit used is what I'm looking for. Guess the only way to know is purchase a quart to see if it is.
I guess I will quit rambling on.
L8r Barry

Posted By: 69chargeryeehaa
Re: Paint job on a budget!? CONTINUED..page 44........ - 11/24/06 11:42 PM
that saftey orange i think is a little bright compared to the burnt orange your car was originally, i know the color, my dad's bug was that color originally, my bug was the brighter later orange, the paint i used was really close to the original color of my car, the color of your car if it is the darker red color is not the same orange of my car.
my bug (74) was a arizona car, and completely rust free. but looking at your pic, you really should pull that back window, and cut/weld in new metal.
Posted By: Anonymous
Re: Paint job on a budget!? CONTINUED..page 44........ - 11/25/06 12:13 AM
Hi Charger. That rust hole has been cut out and a donor piece has been welded in. Do you think a burnt orange is close to the color? Im not sure if its actually a red or a orange color. I found some marine paint that is burnt orange, but its a 2 part urethane enamel. I was reading this paint is really bad for you,but it can be sprayed or rolled on. I wonder if I do it outside with a respirator if this paint would work? I have a url to the paint but im not sure if I can post a url here. Not sure if its allowed
Posted By: 69chargeryeehaa
Re: Paint job on a budget!? CONTINUED..page 44........ - 11/25/06 12:52 AM
Posted By: Anonymous
Re: Paint job on a budget!? CONTINUED..page 44........ - 11/26/06 09:28 PM
The last post that shows on my computer is from Friday, the 24th. Has nobody posted since then?
Posted By: kenzo42
Re: Paint job on a budget!? CONTINUED..page 44........ - 11/26/06 10:52 PM
I was wondering the same thing. It must be turkey coma.
Posted By: Anonymous
Re: Paint job on a budget!? CONTINUED..page 44........ - 11/27/06 12:57 AM
hey EXIt, how many coats of the red did u put on to completely cover the color underneath? jw cause im on my 4th coat and i can still see where i sanded down parts, etc, maybe im putting them on too thin? not sure but im mixing the paint 20% spirits, 80% paint. does that seem right?
Posted By: Exit1965
Re: Paint job on a budget!? CONTINUED..page 44........ - 11/27/06 01:35 AM
Quote:
hey EXIt, how many coats of the red did u put on to completely cover the color underneath? jw cause im on my 4th coat and i can still see where i sanded down parts, etc, maybe im putting them on too thin? not sure but im mixing the paint 20% spirits, 80% paint. does that seem right?
Well, I think I covered most of the car with about 10 coats. For some reason I could never get the dark spots on the roof to be covered. Even after 12 coats I think I could still see the dark areas.
The sides LOOKED ok to me, but only the roof had light on it, so maybe the sides were still showing dark spots too, but I just couldn't see it. not sure.
I think the mixture you're using is much thicker than the one I was using (reason for my having to use so many coats), but I found the thinner it went on, the less orange peel there was. It's a tradeoff - more coats vs. more wetsanding between coats to get rid of orange peel.
Posted By: Anonymous
Re: Paint job on a budget!? CONTINUED..page 44........ - 11/27/06 02:43 AM
yah i have 12 coats and i wetsanded and buffed. i too went through a coat and had dark spots so iam going to try to put another coat to cover the spots and then 4 coats of clear then wetsand and buff and see what happends.
Posted By: Anonymous
Re: Paint job on a budget!? CONTINUED..page 44........ - 11/27/06 02:56 AM
MENAPPI & MYBUICK: What kinds of paint are you using?
Posted By: kenzo42
Re: Paint job on a budget!? CONTINUED..page 44........ - 11/27/06 03:03 AM
Exit, were those dark spots from where you primered? Thanks.
Quote:
Quote:
hey EXIt, how many coats of the red did u put on to completely cover the color underneath? jw cause im on my 4th coat and i can still see where i sanded down parts, etc, maybe im putting them on too thin? not sure but im mixing the paint 20% spirits, 80% paint. does that seem right?
Well, I think I covered most of the car with about 10 coats. For some reason I could never get the dark spots on the roof to be covered. Even after 12 coats I think I could still see the dark areas.
The sides LOOKED ok to me, but only the roof had light on it, so maybe the sides were still showing dark spots too, but I just couldn't see it. not sure.
I think the mixture you're using is much thicker than the one I was using (reason for my having to use so many coats), but I found the thinner it went on, the less orange peel there was. It's a tradeoff - more coats vs. more wetsanding between coats to get rid of orange peel.
Posted By: Anonymous
Re: Paint job on a budget!? CONTINUED..page 44........ - 11/27/06 04:18 AM
rustolium gloss black
Posted By: Exit1965
Re: Paint job on a budget!? CONTINUED..page 44........ - 11/27/06 12:43 PM
Quote:
Exit, were those dark spots from where you primered? Thanks.
It was primer, but I'm pretty sure it was original dark brown primer. There were spots on the side of the car where it was dark brown primer also, yet those seemed to get covered OK.
Posted By: 69DartGT
Re: Paint job on a budget!? CONTINUED..page 44........ - 11/27/06 05:19 PM
You gotta figure here I am with maybe a few more hours of sanding and prep work and then let the rolling begin. Oh and it is supposed to rain today and this is southern Cal
Fire Red Brightside
any reason I should be concerned because I used brown primer? I could use gray primer over it I do have some.
Posted By: Anonymous
Re: Paint job on a budget!? CONTINUED..page 44........ - 11/28/06 03:44 AM
im confused, why wetsand inbetween coats to get rid of orange peel when u can wetsand at the end? i thought the wetsanding in between coats was to get rid of dust? seems kinda pointless to me to wetsand the peel out and then have to redo it after 2 coats...
Posted By: Jolly_Raj_R
Re: Paint job on a budget!? CONTINUED..page 44......... - 11/28/06 04:05 AM
did we ever find out about the guy that used the do-it-yerself pearl for his paint? I'm interesting in something more than just solid-color shiny, but I'm not willing to drop $2500-$4500 (recent estimates) just to get decent paint when I can roll it myself for under $1k (with bodywork, mind you)
http://www.paintwithpearl.com/ is the website if I rememebr correctly..
Raj
67 beatercuda
Posted By: Exit1965
Re: Paint job on a budget!? CONTINUED..page 44........ - 11/28/06 04:30 AM
Quote:
You gotta figure here I am with maybe a few more hours of sanding and prep work and then let the rolling begin. Oh and it is supposed to rain today and this is southern Cal
Fire Red Brightside any reason I should be concerned because I used brown primer? I could use gray primer over it I do have some.
In my experience the brightside covered much better. It only took a couple (albeit thick) coats to cover dark spots when I started using brightside.
What car are you painting? Be sure and post pics..
Posted By: 69DartGT
Re: Paint job on a budget!? CONTINUED..page 44........ - 11/28/06 02:24 PM
Exit1965 heres the project before sanding/primer etc.

Posted By: Anonymous
Re: Paint job on a budget!? CONTINUED..page 44........ - 11/28/06 02:45 PM
You can barely notice the pearl, but that was with white..i can try some with black to see how it turns out. This looks nothing like clear with pearl tho'. looks just metalliac. A better idea would to just shoot clear with pearl.
Steve
Posted By: Java
Re: Paint job on a budget!? CONTINUED..page 44........ - 11/28/06 07:37 PM
Here is my test piece. This was the first time I have ever really tried to paint/wetsand anything, and the results show.


There are a lot of marks and variations in the paint where I did not wetsand enough. I am not sure if you can see it in these pictures or not, but the scratches from sanding are evident. I used 600 after the first two coats, 800 after the second two, and 1000 after the final two. Any suggestions on how to wetsand better? How do you wetsand the corners and edges? Even though my wetsanding was subpar, I still hit it with some 3M rubbing compound, some polish I had in the garage, and my cheapo single-speed polisher. I was surprised with the shine and smoothness I got. I had very little orange peel. It looks great from 5 feet away.

My camera isn't very good and it was late in the day when I took the pics. The color is Rustoleum Navy Blue.
Posted By: Anonymous
Re: Paint job on a budget!? CONTINUED..page 44........ - 11/28/06 07:53 PM
im trying to spray, i have a $100 IR gun and a big compressor, i can't get it to lay flat at all. it comes out of the gun in spirts it seems, it just looks speckled after its layed down, any ideas on why? it looks decent after drying, but not how its supposed to
Steve
Posted By: Anonymous
Re: Paint job on a budget!? CONTINUED..page 44........ - 11/28/06 07:58 PM
Try adjusting pressure, and make sure it's thin enough.
In my very limited experience, this sounds like either not enough pressure, or too thick paint, or a combination of both.
Posted By: 69chargeryeehaa
Re: Paint job on a budget!? CONTINUED..page 44........ - 11/28/06 08:25 PM
Quote:
Try adjusting pressure, and make sure it's thin enough.
In my very limited experience, this sounds like either not enough pressure, or too thick paint, or a combination of both.
right on the money i'd bet it's too thick, if your spraying, try 30-40% spirits to paint, play with pressure, i find for all paints, gravity fed HVLP guns solve that issue, and paint the best.
i painted this car with a $25 HVLP gun :


Posted By: Jolly_Raj_R
Re: Paint job on a budget!? CONTINUED..page 44........ - 11/29/06 05:42 AM
Quote:
You can barely notice the pearl, but that was with white..i can try some with black to see how it turns out. This looks nothing like clear with pearl tho'. looks just metalliac. A better idea would to just shoot clear with pearl.
Steve
If you could, that'd be awesome.. I'm looking for that little bit of flash to replicate some of the metallic that my paint should have.. but that I'm too cheap to paint on..
Posted By: Anonymous
Re: Paint job on a budget!? CONTINUED..page 44........ - 11/29/06 01:40 PM
Hello From England!!!
I've been coming back to this thread for a few days now and trying to find a solution to my problem...there are a fair few pages so I'm sorry If I'm repeating what others have asked.
I want to paint my van Flat Black, and I don't want to spray it. What would be the best way to do this? I can get Rustoleum over here, is this the best thing to use?
can I roll on Flat Black? is it easier or harder?
Do I have to thin the paint or can I just bang it right on? (I'm quite lazy)
I don't really want an amazing finish, I just want like an army finish, something that isnt gonna fall off my van: flat black quick and easy.
Cheers Chaps!
Adam.
Posted By: 69DartGT
Re: Paint job on a budget!? CONTINUED..page 44........ - 11/29/06 02:53 PM
First welcome to the board we have a few member from England.
I used Rustoleums rusty metal primer in the bed of my truck straight out of the can and the coverage was great, don't see a problem using flat but make sure its for metal and outdoors usage. I'd try a test piece to see if it needs much thinning.
BTW I used the foam rollers.
Good luck
Posted By: Anonymous
Re: Paint job on a budget!? CONTINUED..page 44........ - 11/29/06 03:51 PM
Hello, thanks for the welcome.
That's good to hear, people are always like "what you want to paint your van Matt Black?"
I'm looking for the rough and ready look, the army do everything matt and mad max got away with it didn't he?
I'm just going to scuff up the bodywork and go to work, I'm having a bit of a problem figuring out which paint is which between the Professional stuff and the combi colour. and which thinners to use with which, Ill post you pictures when I finally get round to figuring what I'm supposed to be doing.
Posted By: Anonymous
Re: Paint job on a budget!? CONTINUED..page 44........ - 11/29/06 08:05 PM
First thanks guys i thinned it about 50% and it works alot better. I sprayed single stage that came out glass smooth also, but that has a chart.
Second i painted my scamp with flat black regular rustoleum. I thinned with minerial spirits. It doesn't come off on your hands or anything, and it was dry with in minutes.
Steve
Posted By: Anonymous
Re: Paint job on a budget!? CONTINUED..page 44........ - 11/30/06 01:24 AM
Nice work guys !
Posted By: C38coupe
Re: Paint job on a budget!? CONTINUED..page 44........ - 12/01/06 03:04 AM
Hi all, it's been a while since I have posted on this thread. I have not painted my car yet, as I am still doing body work. It's a 1948 Chrys Coupe, and believe me it needed lots of bodywork and it still does at this point. But as I soon as I finish, I plan on painting it Tremclad Colonial Blue as per Chargers Method.
About a year ago I did some test pieces, one was a rusty old mopar metal dash, I just sanded and scuffed it up and proceeded to paint it with Tremclad Wild Raspberry, using the roller method as per this thread. The results were very good, I ended up rolling on 7 coats of thinnned Tremclad with the wet sanding between every second coat, with 1000 and finally with 2000. I then used Turtle Wax polishing compound, just with a cloth and my bare hands , the results were very good once again with a decent shine, no orange peel, just a little swirl in the paint. The paint dried hard and was very resistant to scratching, I definately could not scratch it with my finger nails and I have big hands.
Fast forward one year, this test piece has been in my shed for almost one year, it has been knocked around and collecting dust. I polished it today by hand with Turtle Wax polishing compound,it shined up very nicely. So this enamel can be re-worked as Charger has documented. The interesting thing is I did a scratch test, no way could I get my finger nails to dig in, the test piece was as hard as rock, I used plastic and wood to try and scrape it, it only marred the surface slightly as I was pushing very hard on the test piece, I used a sharp metal object and of course it would lay a scratch into the paint, but it would have on any painted surface.
The other thing I have been doing is a test piece with Tremclad Colonial Blue, in a rattle can. This is for my door jambs and other hard to reach areas, and I wanted to paint a test piece and see what I think of the color on my car. I sprayed the back of a piece of laminate flooring , " not sure why, it was handy when I walked in with the paint". Less than 24 hours later this paint is rock hard, I tired but was not successful in digging my finger nails into the paint, it was rock hard already, I am not saying it's fully cured but rock hard. This paint is fantastic and it has other good uses where you would use POR 15 paint the Tremclad is very similar in it's chemical composition.I can hardly wait to do the Coupe.
As Charger and Marq, have both mentioned , a lot of us guys on this forum have little or no autobody and paint experience, so doing body work and using fillers and a hammer and dlly is a brand new challenge, not sure what to expect, will try my best and hopefully it works out, cause I am defintately a candida
te for a "Paint Job On A Budget guy"

Posted By: C38coupe
Re: Paint job on a budget!? CONTINUED..page 44........ - 12/01/06 04:25 AM
Posted By: 69DartGT
Re: Paint job on a budget!? CONTINUED..page 44........ - 12/01/06 02:55 PM
Quote:
Heres a pic of my beast I want paint tremclad Colonial Blue, as soon as I finish the body work.
I like it great project that will soon become a great ride
Thanks foe sharing I'm jealous
Posted By: Anonymous
Re: Paint job on a budget!? CONTINUED..page 44........ - 12/01/06 06:29 PM
I am also thinking about the Colonial blue colour. Have you already bought the paint, could you post a picture of what it looks like under natural light?
Posted By: C38coupe
Re: Paint job on a budget!? CONTINUED..page 44........ - 12/02/06 12:47 AM
I will have some pics of my test piece using tremclad colonial blue real soon.
I have just finished the 6th coat, it looks good so far...................the coupe
Posted By: C38coupe
Re: Paint job on a budget!? CONTINUED..page 44........ - 12/02/06 01:53 AM
Here is pic of Colonial Blue Tremclad on a small piece of sheet metal, no prep was done as it was a bare piece of 18 g tin. This is with 6 coats of paint, it was sanded after the 2nd and forth coats with 1000 wet/dry, I will wet sand it with 2000 next, then polish with Turtle Wax Polish, it will be like glass after that. There is minimal orange peel, but there is some dust, I did this in the basement at home, rather than heating up my shop just for a test piece, so there is dust in the air in the house. But I do like the color, I think it will suit my 48 Chyrs Coupe, I think this is a good color for a less than perfect body, ie waves, amateur bodywork,imperfections etc.. Funny thing this paint is as hard as a rock already, but I did not test it yet for hardness and adhesion, but it does not scratch right off and is sticking to the test piece real well..................
The Coupe

Posted By: Anonymous
Re: Paint job on a budget!? CONTINUED..page 44........ - 12/02/06 02:17 AM
so i am done with the paint and i do have some dirt in the paint. so i took a paint planer and got the dirt out and it left spots in the paint from the dirt. i use the finishing material and buffed most of it out. so i want to clear the paint and want to know if the spots will show throught the paint.
Posted By: Anonymous
Re: Paint job on a budget!? CONTINUED..page 44............ - 12/02/06 12:39 PM
Last night I was watching "Classic Car Restoration" on DIY network; they were restoring a 1962 T-Bird. Anyway, they were planning to colorsand and polish the original paint. Before they did so they did some tests on a couple of fenders that had been painted more recently.
Kevin Tetz did a demonstration to ascertain whether the paint on the fenders had hardened sufficiently to polish. His simple test was to put some solvent on a clean white cloth and lightly rub it across the surface of the paint. If the rag came up with color on it that indicated that the paint had not hardened, if it came up clean (i.e. the solvent wasn't able to cause the paint to get wet again).
This technique may be useful for determining when our roller jobs using Rustoleum are ready for polishing. I guess we'd use mineral spirits as a solvent.
Anyone else ever heard of this?
Posted By: Anonymous
Re: Paint job on a budget!? CONTINUED..page 44........ - 12/02/06 11:10 PM
I think I have read this post from the beginning over the last few months. Its perhaps the greatest thread on DIY I have ever seen, and for sure its the longest. I haven't tried it yet, but I am planning on posting my pics when I do.
A lot of guys seem to be worried about getting a little orange peel, which has to be polished out. I know charger has told everyone that it will polish and wet sand out, and it seems to be part of the process. That said, I found this link interesting. This is a spray painted fender before color sanding (wet sanding and polishing). It doesn't look any better to me in the raw state than what many of you are achieving.
Orange Peel
Posted By: Sasquatch4406
Re: Paint job on a budget!? CONTINUED..page 44........ - 12/03/06 03:25 AM
anyone make f4 green paint?
Posted By: Anonymous
Real world testing - 12/03/06 04:31 PM
Well, I had to give up the garage to let the wife drive her GN. Mine is now parked out in the weather. I still need to finish trim installation and the new interior in. Probably in a few months when I get laid off
This car is a driver like Charger's, but I do not have enough room to keep it inside after
My brother brought his friend over who could not believe it was the same car.
Now my wife wants me to paint her GN and the Vista Cruiser. Maybe the Bronco will be next.
Posted By: Anonymous
Re: Paint job on a budget!? CONTINUED..page 44........ - 12/04/06 01:48 AM
Got a question for you guys: Is it normal for the paintjob to feel smoother but look worse in areas after wetsanding? Is this supposed to change in the polishing stage? Thinking of polishing with Poorboy's or Meguires like Aussie.
This is what I'm working on, 1 coat of Brightside, no wetsanding.
Thanks for any advice
-- Johnny
Posted By: Anonymous
Re: Paint job on a budget!? CONTINUED..page 44........ - 12/04/06 03:47 AM
YES! Wetsanding is supposed to take away all the gloss.
The purpose of wetsanding is to remove all of the orange peel and other imperfections. You want a uniformly dull surface with no gloss by the time you are finished sanding. Some people even use a squee-gee to remove the water and check for gloss on the sanded surface.
When you get into the polishing phase, you get your gloss back and, if you did your wetsanding properly, you will get a mirror-smooth finish.
Hope this helps.
Posted By: Anonymous
Re: Paint job on a budget!? CONTINUED..page 44........ - 12/04/06 03:48 AM
My car looked like total crap after wet-sanding it. You can see how the hood looked in the pic on pg 47. That surface wasn't particularly well sanded either.
After a 'good' wet-sanding the paint should be totally matt and as smooth as a babies butt. Then it will polish up to a mirror reflection provided you polish it properly.
Posted By: kenzo42
Re: Paint job on a budget!? CONTINUED..page 44............ - 12/04/06 04:15 AM
Wouldn't that only work w/ single stage paint?
I didn't know that solvents could affect paints that have a catalyst/hardener. Was it laquer? You said 1962 original paint?
Quote:
Last night I was watching "Classic Car Restoration" on DIY network; they were restoring a 1962 T-Bird. Anyway, they were planning to colorsand and polish the original paint. Before they did so they did some tests on a couple of fenders that had been painted more recently.
Kevin Tetz did a demonstration to ascertain whether the paint on the fenders had hardened sufficiently to polish. His simple test was to put some solvent on a clean white cloth and lightly rub it across the surface of the paint. If the rag came up with color on it that indicated that the paint had not hardened, if it came up clean (i.e. the solvent wasn't able to cause the paint to get wet again).
This technique may be useful for determining when our roller jobs using Rustoleum are ready for polishing. I guess we'd use mineral spirits as a solvent.
Anyone else ever heard of this?
Posted By: Anonymous
Re: Paint job on a budget!? CONTINUED..page 44............ - 12/05/06 05:03 PM
Quote:
Last night I was watching "Classic Car Restoration" on DIY network; they were restoring a 1962 T-Bird. Anyway, they were planning to colorsand and polish the original paint. Before they did so they did some tests on a couple of fenders that had been painted more recently.
Kevin Tetz did a demonstration to ascertain whether the paint on the fenders had hardened sufficiently to polish. His simple test was to put some solvent on a clean white cloth and lightly rub it across the surface of the paint. If the rag came up with color on it that indicated that the paint had not hardened, if it came up clean (i.e. the solvent wasn't able to cause the paint to get wet again).
This technique may be useful for determining when our roller jobs using Rustoleum are ready for polishing. I guess we'd use mineral spirits as a solvent.
Anyone else ever heard of this?
I saw this too but that's not what I gathered. I understood them to be testing for the type of paint and whether or not it was clear coated. This determined whether they could color sand and polish. If I remember right they were checking for:
1. Clear coat
2. Enamel paint
3. Laquer paint
Posted By: Anonymous
Re: Paint job on a budget!? CONTINUED..page 44........ - 12/08/06 06:31 AM
Since painting/detailing my car has stopped for a while, I decided to play with my track bootlid and rear wing. They used to be white. I have given the thing two coats of the Brightside and that pic was taken just after the second coat had finished drying.

Posted By: 69DartGT
Re: Paint job on a budget!? CONTINUED..page 44........ - 12/08/06 02:20 PM
Quote:
Since painting/detailing my car has stopped for a while, I decided to play with my track bootlid and rear wing. They used to be white. I have given the thing two coats of the Brightside and that pic was taken just after the second coat had finished drying.
Steve looks great you used Mineral Spirits to thin right, what ratio approx and this is before sanding. I'm doing the final sanding on my truck and could start rolling late today or tomorrow.
Interior finished up yesterday. looks better in person then the picture.
Tom

Posted By: Anonymous
Re: Paint job on a budget!? CONTINUED..page 44........ - 12/08/06 03:57 PM
^^ Nice work, but I thought your just gonna get everything resprayed?
Posted By: 69DartGT
Re: Paint job on a budget!? CONTINUED..page 44........ - 12/08/06 06:37 PM
Ready for paint, looks like heck but smooth to the hand. I'll give it a mineral spirits wipe down and tack rag just before I put the first coat on.

Posted By: Anonymous
Re: Paint job on a budget!? CONTINUED..page 44........ - 12/08/06 09:30 PM
Quote:
^^ Nice work, but I thought your just gonna get everything resprayed?
Nope, I'm probably the only guy on the planet dumb enough to say no to a free re-spray.
I have put so much work into learning and practicing my roller painting that I feel like I'm being cheated because of that accident.
I know that it's not rational but most of my pride in my car has come from me doing work on it myself. I have built/installed/tuned a Megasquirt ECU and I was the fourth person on the planet getting the Megasquirt working for fuel and spark on a Miata. I want to be the first person on the planet who has the perfect roller paint job on a Miata.
Half of the fun of this for me is achieving something that no-one else thought could be possible. So there is no way that I'll re-spray.
Tom, I used a 10:1 mixture of paint to mineral spirits on the bootlid. That lid does have a few minor dents in it and the area near the wing supports isn't very flat either, but since this thing is only for the track, I haven't been as anal as I have been with the rest of my car.
Posted By: kenzo42
Re: Paint job on a budget!? CONTINUED..page 44........ - 12/09/06 06:16 AM
Quote:
Quote:
^^ Nice work, but I thought your just gonna get everything resprayed?
Nope, I'm probably the only guy on the planet dumb enough to say no to a free re-spray.
I have put so much work into learning and practicing my roller painting that I feel like I'm being cheated because of that accident.
I know that it's not rational but most of my pride in my car has come from me doing work on it myself. I have built/installed/tuned a Megasquirt ECU and I was the fourth person on the planet getting the Megasquirt working for fuel and spark on a Miata. I want to be the first person on the planet who has the perfect roller paint job on a Miata.
Half of the fun of this for me is achieving something that no-one else thought could be possible. So there is no way that I'll re-spray.
Tom, I used a 10:1 mixture of paint to mineral spirits on the bootlid. That lid does have a few minor dents in it and the area near the wing supports isn't very flat either, but since this thing is only for the track, I haven't been as anal as I have been with the rest of my car.
Posted By: 69DartGT
Re: Paint job on a budget!? CONTINUED..page 44........ - 12/09/06 08:47 PM
Well took just under a quart to do the truck, I thinned using mineral spirits paint is Interlux Brightside. I used a 4" foam roller and used a 3" foam brush to knock down the air bubbles, but when I did the hood the bubbles were going away by their selves so I stopped with the foam brish tipping BIG mistake so I'll need to down some wet sanding before the second coat. One thing I'll say is the gloss is there
I'm told don't panic during the first coat :thinking I'll let this sit until Monday then I'll sand and apply the second coat.


Posted By: 69DartGT
Re: Paint job on a budget!? CONTINUED..page 44........ - 12/09/06 09:18 PM
BTW speaking of air bubbles what works best to minimize them?
Posted By: Anonymous
Re: Paint job on a budget!? CONTINUED..page 44........ - 12/09/06 09:55 PM
Your truck is looking awesome already. I can't believe the difference from your 'preped' photos to your first coat photos. The coverage with the Brightside is fantastic.
When I do my painting I have a clean second 4" roller that I run over each 'finished' panel to remove all of the air bubbles. I don't use any weight with the second roller, I just gently and slowly move it across the panel and it ends up looking really good (at least until all of the dust and dog hairs etc start landing on the paint).
Posted By: 69DartGT
Re: Paint job on a budget!? CONTINUED..page 44........ - 12/09/06 10:12 PM
Steve thanks I do have a spare foam roller I'll give that a try on coat two.
I may have put the paint on to heavy in a couple of places and that didn't help the bubble problem either.
Posted By: Anonymous
Re: Paint job on a budget!? CONTINUED..page 44........ - 12/09/06 10:29 PM
Yeah Tom, I found the same thing with the Brightside. It seems to get to a point where there can be too much paint on a panel and then it just doesn't settle properly at all.
Then to fix it, I've had to sand most of it back off to get it smooth again...
Posted By: 69chargeryeehaa
Re: Paint job on a budget!? CONTINUED..page 44........ - 12/09/06 11:46 PM
Quote:
BTW speaking of air bubbles what works best to minimize them?
best thing to get rid of bubbles for me was to either blow on them (careful you don't spit on the car!!!! lol) or just before you load up your roller for more paint just use the weight of the roller only, and really really gently roll over the surface, you can feel when the time is right; when the roller glides over the surface without sounding like the paint is still wet, mind you this is when using the tremclad/rustoleum paint not the stuff your using so i dunno, try it? 
awesome job by the way, please tell me your doing that inside????
Posted By: C38coupe
Re: Paint job on a budget!? CONTINUED..page 44........ - 12/10/06 12:17 AM
That looks great, and the Red suits the truck. Now I am jealous, the first coat looks great, the 2nd and polishing will really make the paint.Plus I see Fan Palm trees in the background and green grass in December, that makes me jealous too....Fred
Posted By: 69DartGT
Re: Paint job on a budget!? CONTINUED..page 44........ - 12/10/06 12:41 AM
Yeah I'm just a few miles north of Mexico and 5 miles off the Pacific ocean, it was really nice when I painted right at 70 I was surprised how fast the paint dried to touch. Could be some of the reason for the air bubbles.
And it was painted right where it sits..
Posted By: Exit1965
Re: Paint job on a budget!? CONTINUED..page 44........ - 12/10/06 02:43 PM
Quote:
Yeah I'm just a few miles north of Mexico and 5 miles off the Pacific ocean, it was really nice when I painted right at 70 I was surprised how fast the paint dried to touch. Could be some of the reason for the air bubbles.
And it was painted right where it sits..
When I was rolling brightside, I would go over it once with the loaded roller, then come back in 5-10 minutes (when it was convenient) and roll over it again without adding any paint. Most of the bubbles were gone on their own at that point, but if not, that would get them and would also highlight any runs that needed to be rolled out.
The trucks looking great!

Posted By: 69DartGT
Re: Paint job on a budget!? CONTINUED..page 44........ - 12/10/06 08:01 PM
I'm using the foam rollers from home depot but it was suggested that a short nap roller works better then the foam but to be sure you buy the good ones so the hair doesn't come off.
Any comments?
Posted By: dalbers
Re: Paint job on a budget!? CONTINUED..page 44........ - 12/11/06 05:08 AM
I ordered my brightside tonight and will probably start painting over christmas break. I'll be painting my 69 chevy truck red.

Posted By: Anonymous
Re: Paint job on a budget!? CONTINUED..page 44........ - 12/11/06 06:07 AM
Quote:
I ordered my brightside tonight and will probably start painting over christmas break. I'll be painting my 69 chevy truck red.
Where did you order from?
Posted By: dalbers
Re: Paint job on a budget!? CONTINUED..page 44........ - 12/11/06 06:38 AM
I found some on ebay
Posted By: Anonymous
Re: Paint job on a budget!? CONTINUED..page 44........ - 12/11/06 09:34 AM
Hello Ive got a Land Rover Defender (sorry I know its not a mopar) but think this is the best way to paint it, a few questions if I may:
1) Brightside vs Tremclad: Which one is better, personally Im leaning towards Brightside.
2) Anyone know where I can get either in Spain or what I should look for on the tin.
Posted By: 69DartGT
Re: Paint job on a budget!? CONTINUED..page 44........ - 12/11/06 02:46 PM
Quote:
I found some on ebay
I bought here but they only have red & blue.
http://cgi.ebay.com/6Qt-Red-Interlux-Bri...VQQcmdZViewItem
Posted By: dalbers
Re: Paint job on a budget!? CONTINUED..page 44........ - 12/11/06 05:16 PM
That's where I ordered mine from, were you happy with them?
Posted By: Anonymous
Re: Paint job on a budget!? CONTINUED..page 44........ - 12/11/06 05:26 PM
Thanks through your link I found many more colours on ebay even the black im after, I also found it locally where I live through the interlux website. I guess they have dealers all over the world.
My only question now is whats better tremclad or brightside?
Posted By: Anonymous
Re: Paint job on a budget!? CONTINUED..page 44........ - 12/11/06 06:54 PM
Hello all. Been here a while reading this thread and just wanted to say thanks to all the folks that have posted on here for all the information. I currently have a '92 eagle talon that I'm hoping to start painting on here soon. Just have a couple of questions for ya'll. I plan on using the brightside paint to do mine with. But I plan on doing a two tone paint job with mine. Red on the lower half and black on top. What would be the best route to go with on doing this? First paint one color, then the other? Or do both of them at the same time? Thanks for the time and all the info on here, folks. I'm also posting a pic of the above stated car.

Posted By: 69DartGT
Re: Paint job on a budget!? CONTINUED..page 44........ - 12/11/06 07:17 PM
Quote:
That's where I ordered mine from, were you happy with them?
No problem at all came in a sturdy cardboard box and the cans have two safety clips to keep them from leaking.
Posted By: 69DartGT
Re: Paint job on a budget!? CONTINUED..page 44........ - 12/11/06 07:20 PM
Just an observation I got lazy and stopped doing the tipping trick, bad mistake had to do a lot more sanding before doing the second coat, the bubbles looked like fish scales the ones that finally popped next time I'll slow down and do the double roller trick
Posted By: Anonymous
Re: Paint job on a budget!? CONTINUED..page 44........ - 12/12/06 09:24 PM
Hey guys, I am posting here for my first time, and the first thing I had to say was ALL HAIL 69!
For real man, if this works, you will need to come down here to Washington for some pizza and root beer. (Im 16, so a trip to the bar isn't legal)
Any way, I got a 1972 Datsun 620 pickup that my parents got me for a first car. I want to poke the previous owner in the eye with an EXTREMELY hot French fry. This guy just rattle canned over rust spots AND MUD. Thats right, he didn't even wash the truck first.
Alot of body work awaits me on this project, cuzz the old bondo is starting to crack and fall out. I get to re-bondo, fix rust holes, and then paint it all on my first project. Ya, I got my work cut out for me.
Like I mentioned, the truck has serious rust issues. I am not sure weather to Rustolium the entire thing, like Charger did, or to Brightside it. The most important thing is that I don't want the rust to seep through the paint again.
The truck is on the third color. It started its life as a baby crap yellow on some parts, and it seems to have had baby poo green pieces frankensteined on. After that they painted red with a gray primer, and it looks like they did a good job. I assume the person that painted it red also did the body work. Judging by the state of the bondo, I think that was prolly a good 15 years ago.
Since then the truck has been passed around from one 16 year old to another. The last owner went and painted it primer gray, but they did such a bad job I'm going to have to take all that off. I figure I will be taking the truck back to its stock colors.
This is really all just for practice, I want to learn on a car I dont care about messing up too badly (the truck cant LOOSE any value) before I buy a camaro and try this same method on it.
I have body work to learn, and a painting method to try, the big question on my mind:
Does brightside protect against RUST?
Oh ya, Im all the way to page 44 of this thread, I will finish the read tomorrow.
Posted By: Anonymous
Re: Paint job on a budget!? CONTINUED..page 44........ - 12/13/06 05:58 AM
RIGBENDER- I did one of my cars two-tone, some may disagree, but my opinion is as long as the two colors are seperated by trim of some kind, I'd do both at the same time. Would suggest painting the top color first though, if you drip any on the lower section while bringing your roller up (and it's likely you will), it's easier to wipe off with mineral spirits as opposed to dripping on the freshly painted lower.
QUESTION FOR ALL- Searched thread for but could not find definitive answer: What causes severe roller marks? Having trouble with horizontal surfaces (roof, hood, trunk) while verticals have no marks. Opening hood and trunk helped some, but still there. Thanks for any help.
Posted By: Anonymous
Re: Paint job on a budget!? CONTINUED..page 44........ - 12/13/06 10:10 AM
From what Ive read severe roller marks are usually caused by a too thick mixture or by pressing too hard.
It seems everyone is leaning toward Brightside rather than Rustoleum, anyone got anything to say about this? Anyone know of any problems with Brightside & Aluminium?
Posted By: 69DartGT
Re: Paint job on a budget!? CONTINUED..page 44........ - 12/13/06 02:31 PM
Quote:
QUESTION FOR ALL- Searched thread for but could not find definitive answer: What causes severe roller marks? Having trouble with horizontal surfaces (roof, hood, trunk) while verticals have no marks. Opening hood and trunk helped some, but still there. Thanks for any help.Quote:
I just went through this on my truck, I agree I'm postive my paint was to thick, I'm going to try again today but will thin down to milk consistity (sp) When I went over mine with a foam brush it looked like fish scales.
Posted By: 69DartGT
Re: Paint job on a budget!? CONTINUED..page 44........ - 12/13/06 07:54 PM
Quote:
QUESTION FOR ALL- Searched thread for but could not find definitive answer: What causes severe roller marks? Having trouble with horizontal surfaces (roof, hood, trunk) while verticals have no marks. Opening hood and trunk helped some, but still there. Thanks for any help.
I just finished the second coat on my truck after sanding most of the first coat off. I thinned this almost 50-50 the paint rolled on almost clear, I used a second unlaoded foam roller to go over the first coat and zero runs or bubbles, I'm very happy with it and wished I'd done this the first time but I'm a slow learner. Second coat tomorrow after golf
Posted By: Anonymous
Re: Paint job on a budget!? CONTINUED..page 44........ - 12/14/06 02:52 AM
http://en.wikipedia.org/wiki/Rustoleum_as_an_automobile_paintWhy no one did this sooner I don't know. I had to join this forum to tell you I joined wikipedia to put that up there. I encourage all of you who have contributed to register at wikipedia and fix the article. I am about to start the process but I'm sure I made some errors as I used the first 3 pages and my memory as reference. I did not upload any images because none of them are mine but I encourage all of you to upload your results (good and bad) and put them on the page.
Another note, the reason tug boats fade is probably because of the harsh conditions. I am assuming they are sea going tugs which means that not only do they have water, oxygen, and sunlight to contend with there is also the sodium. This leads to an oxidation of the surface layer of paint perceived as a fading or a clouding. So unless you park on the beach or commute from Hawaii to San Francisco in your road runner I don't think the paint will ever fade that bad. Also, how often do they wax those tugs?
I really hope everyone can summarize everything here on that article and I want to thank 69 for sharing the info and standing up to the initial adversity he encountered over this awesome technique.
Posted By: Exit1965
Re: Paint job on a budget!? CONTINUED..page 44........ - 12/14/06 03:31 AM
That's a cool idea Empty01, but I don't think charger was the first person to paint a car with a roller and rustoleum. There were lots of hippies painting VWs in the 60s with paint brushes and i'm sure some of them used a roller. Before that, in the 40s and 50s, certainly someone painted an old hot rod or farm vehicle with a roller and enamel.
that point aside; there isn't a whole lot of difference from an application standpoint between rustoleum and brightside. And brightside gives better initial gloss (and has better gloss after wetsanding and polishing). for the cost difference ($50-100), go ahead and use brightside.
Not sure if it qualifies as an encylopedia entry either. Maybe as a subheading under "auto paint", if there is such an entry?
Posted By: Anonymous
Re: Paint job on a budget!? CONTINUED..page 44........ - 12/14/06 05:48 AM
Beauty of wikipedia is the ability to edit. For now that's the best place to put it as far as collabrative information projects go. Feel free to go in correct and elaborate. That's the point.
I will go brightside if I can find it. Rustoleum black is still better than black under failed clear coat.
Posted By: Anonymous
Re: Paint job on a budget!? CONTINUED..page 44........ - 12/14/06 03:12 PM
Exit1965,
Are you sure that brightside "has better gloss after wetsanding and polishing"?
The reason I ask is because I spoke to the Tech Rep at Interlux and he said that the gloss in brightside rises to the top and that the paint is not meant to be wetsanded and then polished. (Hence the high level of intitial gloss.)
Conversly, the Tech Rep at Rustoleum said that their paint can be polished because of the resins present throughout paint.
I am not a paint expert and I don't play one on T.V., I just thought I'd share what the company reps relayed to me. I'm sure there's someone here that can expalin the difference in the paints' composition - if a difference even exists.
Posted By: Pool Fixer
Re: Paint job on a budget!? CONTINUED..page 44........ - 12/14/06 06:55 PM
Quote:
I am not a paint expert and I don't play one on T.V.,
But did you stay at a holiday inn express last night?
Posted By: Anonymous
Re: Paint job on a budget!? CONTINUED..page 44........ - 12/14/06 07:05 PM
I have stayed at a HIE before, but not last night.
Posted By: Anonymous
Re: Paint job on a budget!? CONTINUED..page 44........ - 12/14/06 07:46 PM
Quote:
Exit1965,
Are you sure that brightside "has better gloss after wetsanding and polishing"?
I'm not sure brightside "has better gloss after wetsanding and polishing".
I'm certain brightside "has better gloss after wetsanding and polishing".
Posted By: Anonymous
Re: Paint job on a budget!? CONTINUED..page 44........ - 12/14/06 09:23 PM
I am certainly not an expert on paint, but I am about to play one on the internet:) The representative's statement makes only half-sense to me. While there may be parts of the paint formulation that are clear and rise to the top of the Brightside paint when it dries, gloss as I know it is more than a layer of clear paint (sort of an internal clear coat if you will). Gloss to me is how efficiently AND how uniformly a surface reflects the light that shines on it.
A "clear" surface can be perfectly efficient in the sense that it allows the layer below it to reflect back all the light that shines on it, but if it has minor imperfections, it will not relect the light back in parallel rays. We will perceive such a surface as wavy or even dull, if the surface is uneven enough. I believe that is what we are seeing with the orange peel in the raw coats of paint - yeah, they are shiny (glossy), but they dont look like mirrors because a roller and the self-leveling process cannot put down a perfectly flat surface.
When we wet sand and then polish the surface, we are making it more uniform (more parallel) and giving the paint a chance to reflect the light in more parallel waves. Due to the minor scratches that even the finest polish leaves, the surface may not be as "shiny" as before, but it sure looks better because its reflecting most of the light, in a more uniform manner. In other words, polishing puts in many more minor imperfections than were there, but removes the major ones. Our eyes perceive this as a nicer looking surface because we can see ourselves in it without much distortion, as in the above photo.
Whew! I hope that makes sense.
Posted By: 69DartGT
Re: Paint job on a budget!? CONTINUED..page 44........ - 12/14/06 09:41 PM
Here's the 3rd coat after thinning the paint a bunch. I could spray this stuff I'm sure. I'll wet sand before the next coat.

Posted By: Anonymous
Re: Paint job on a budget!? CONTINUED..page 44........ - 12/14/06 09:50 PM
69DartGT - is that paint as bright as it appears on my computer moniter? It almost looks like a cross between orange and red.
I have been following this thread with interest and want to paint my 1988 Volvo, which is a maroon sort of color. Looking at the color chips in the hard copy of the color chart I got at the boat store, it sometimes looks to me like it almost matches, but your truck is much brighter looking.

Posted By: Exit1965
Re: Paint job on a budget!? CONTINUED..page 44........ - 12/14/06 10:02 PM
Smyrna- watch out for that color card. Back many pages ago, when I first bought my brightside, I relayed the fact that (at least with the whites I was looking at), that particular color card-- if you have the one inside the nice booklet on painting boats-- was not very accurate.
The accurate color card I saw was laminated, at the boat store. It was a legal size sheet of colors. But its colors (again with the whites) were much closer to reality.
Posted By: 69chargeryeehaa
Re: Paint job on a budget!? CONTINUED..page 44........ - 12/14/06 10:03 PM
Quote:
Quote:
Exit1965,
Are you sure that brightside "has better gloss after wetsanding and polishing"?
I'm not sure brightside "has better gloss after wetsanding and polishing".
I'm certain brightside "has better gloss after wetsanding and polishing".
WOW, nobody will believe you used a roller to apply that paint, damm, you got it down pat, awesome job. I wonder if you'll ever consider spraying a car again??
Posted By: 69DartGT
Re: Paint job on a budget!? CONTINUED..page 44........ - 12/14/06 10:40 PM
Quote:
69DartGT - is that paint as bright as it appears on my computer moniter? It almost looks like a cross between orange and red.
I have been following this thread with interest and want to paint my 1988 Volvo, which is a maroon sort of color. Looking at the color chips in the hard copy of the color chart I got at the boat store, it sometimes looks to me like it almost matches, but your truck is much brighter looking.
I noticed today the color leaned more torward orange then red but that may be because of the sun. The can top is red and the first coat was red, I think it leans a little to the orange depending on the sun angle.
Posted By: Anonymous
Re: Paint job on a budget!? CONTINUED..page 44........ - 12/14/06 10:43 PM
Quote:
I wonder if you'll ever consider spraying a car again??
I know I never will. I have always wanted to paint a car, but never wanted to mess with all the mess of spraying one in my garage, not to mention spending a fortune on a compressor good enough to do a professional job.
When I was a kid building plastic models almost 5 decades ago, I couldn't afford the fancy spray paints, so I used to paint them with a brush, then wet sand to get the brush strokes out. I would do that for as many coats as it took to get it decent looking. If I had only had some 1500 grit wet sand paper, and knew about polish then, I would have been the envy of my model building friends. I still can't believe that almost 50 years later, you have reminded us all of this age-old method for painting, charger.
Posted By: Anonymous
Re: Paint job on a budget!? CONTINUED..page 44........ - 12/14/06 10:53 PM
Any problems with doing this in the outdoors?
Surely dust wont cause problems like with spraying? Im going to start mine soon as soon as I get my new body panels. As others have said can we see some more results pictures, has anyone considered making a website of this?
Ive sprayed once before and I hated it, mess, preparation, fumes and crappy results.
Posted By: 69DartGT
Re: Paint job on a budget!? CONTINUED..page 44........ - 12/15/06 04:56 PM
Question about HVLP spray guns:
I understand you set the pressure on these guns depending on make/model to 40-60 psi that said do these guns then cut that down to around 10 psi and if so what kind of overspray do they generate?
I'm thinking of using it to get in those hard to reach area's between the cab and the bed.
Posted By: 69chargeryeehaa
Re: Paint job on a budget!? CONTINUED..page 44........ - 12/15/06 05:10 PM
Quote:
Question about HVLP spray guns:
I understand you set the pressure on these guns depending on make/model to 40-60 psi that said do these guns then cut that down to around 10 psi and if so what kind of overspray do they generate?
I'm thinking of using it to get in those hard to reach area's between the cab and the bed.
just use spray bombs, it's much eaiser. HVLP guns put out alot of overspray, and when you cut down the pressure they put out a crappy fan. it would be better if you use one of those "touchup" guns, often you can find them for $20 or so, they do alot better job for just small areas.
Posted By: 69DartGT
Re: Paint job on a budget!? CONTINUED..page 44........ - 12/15/06 05:22 PM
thanks Martin that's what I wanted to hear I do have a touch up gun, I tried using the foam brush but the area is just to tight.
Posted By: 69DartGT
Re: Paint job on a budget!? CONTINUED..page 44........ - 12/15/06 05:45 PM
Quote:
69DartGT - is that paint as bright as it appears on my computer moniter? It almost looks like a cross between orange and red.
I have been following this thread with interest and want to paint my 1988 Volvo, which is a maroon sort of color. Looking at the color chips in the hard copy of the color chart I got at the boat store, it sometimes looks to me like it almost matches, but your truck is much brighter looking.
This was taken this morning not much sun yet. Hope it helps but this paint is nowhere maroon.
Posted By: Anonymous
Re: Paint job on a budget!? CONTINUED..page 44........ - 12/15/06 07:41 PM
Thanks Dart.
I was hoping to avoid having to do a lot of coats with Rustoleum, and use Brightside instead. I may just pick up a can of Rustoleum Regal Red, which looks to be a close match. Either that, or change the color to one of the easily available Brightside colors and paint the door jambs, trunk and underhood stuff. Although they only imported less than 6,000 of my Volvo 780s into the country, they aren't worth much anyway, so I am not too worried about keeping its original color.

By the way I am the webmeister for a site in Atlanta that sells mostly #1 and #2 grade classic muscle cars, including mopars. If you ever want to come and take a look we are at:
Atlanta Muscle Car Site Or, if you need a few good pictures of a particular type muscle car, I probably still have it somewhere in my backup files. We have a full time paint and body man (retired) who mostly does buffing and polishing and general repairs,but I haven't told him I am dabbling in this heretical business of trying to paint cars with a roller.
Posted By: 69DartGT
Re: Paint job on a budget!? CONTINUED..page 44........ - 12/15/06 08:26 PM
Gerry mine says Fire Red on the cans so its yet another shade of red.
I do like the way it goes on though if you can find brightside in the right color that's what I'd use.
Tom
Posted By: toplescuda
Re: Paint job on a budget!? CONTINUED..page 44........ - 12/15/06 08:44 PM
how much is that sunburst yellow(quart or a gallon) where can i get some of it would like to test on daughters 73 sattelite road runner clone ralph
Posted By: 69DartGT
Re: Paint job on a budget!? CONTINUED..page 44........ - 12/15/06 09:17 PM
Quote:
how much is that sunburst yellow(quart or a gallon) where can i get some of it would like to test on daughters 73 sattelite road runner clone ralph
Do you have a West Marine close by? Keep in mind when thinned probably a little paint goes a long way.
http://www.westmarine.com/webapp/wcs/sto...hallpartial/0/0
Posted By: Anonymous
Re: Paint job on a budget!? CONTINUED..page 44........ - 12/15/06 10:27 PM
The Sunburst Yellow I showed is a Rustoleum color. About $9 a quart at Home Depot, and $30 a gallon almost anywhere. The full color card is here:
RustOleum Gloss Colors
Posted By: 69DartGT
Re: Paint job on a budget!? CONTINUED..page 44........ - 12/15/06 11:31 PM
Quote:
The Sunburst Yellow I showed is a Rustoleum color. About $9 a quart at Home Depot, and $30 a gallon almost anywhere. The full color card is here:
RustOleum Gloss Colors
If this works its Interlux Brightside color chart
they do have a bright yellow.
While Rustoleum is a lot cheaper then Brightside I felt the ease of coverage over road the cost differance.
http://www.yachtpaint.com/USA/general/colorcard_topsides.asp
Posted By: kenzo42
Re: Paint job on a budget!? CONTINUED..page 44........ - 12/16/06 04:56 AM
For some reason, the Color Guide by Interlux was an exact match for off-white.
I tried matching it off the can, but it was completely off. Even the lid was way off. I ended up taking some paint and painting it right over the Yacht Guide color sample and it was a perfect match.
Again, this was only for off-white. I don't know about the others.
Posted By: Anonymous
Re: Paint job on a budget!? CONTINUED..page 44........ - 12/16/06 01:38 PM
I used Rustoleum Stops Rust (non-Professional) Sunburst Yellow when I did my test on a hood. Here is a picture that may give you a sense of how the color comes out:

This picture is after four coats on top of white primer. It is pretty bright but would look nice on a sports car.
Posted By: dalbers
Re: Paint job on a budget!? CONTINUED..page 44........ - 12/17/06 05:33 AM
I put my first coat of fire red brightside on today and it is looking much better than the rustoleum I tried earlier. I'll attach a couple pictures. It doesn't have full coverage yet, but I can tell that when it does, it will look awesome. I think it is a lot easier to apply then the rustoleum too.

Posted By: dalbers
Re: Paint job on a budget!? CONTINUED..page 44........ - 12/17/06 05:34 AM
Hood with the rustoleum one in the background

Posted By: dalbers
Re: Paint job on a budget!? CONTINUED..page 44........ - 12/17/06 05:37 AM
bed

Posted By: dalbers
Re: Paint job on a budget!? CONTINUED..page 44........ - 12/17/06 07:47 AM
Quick question about wetsanding. Do you have to get all the orange peel out before putting the next coat on? I ask because when I was testing with the rustoleum, it looks like I can see dull spots from the previous coat, or maybe I sanded too much and got into the coat under that? I have no idea. I'm asking because with the brightside, there is little orange peel, so I don't want to sand very much at all but I'm worried that if I paint over the sanded part, I'll see dull areas? Don't know if I'm making any sense or not. Sorry and thanks.
Posted By: Anonymous
Re: Paint job on a budget!? CONTINUED..page 44........ - 12/17/06 04:28 PM
Since I stumbled onto this post I've been jumping out of my pants with excitement about being able to get a "maaco" quality or even better paint job on my own for less than $100.
I've seen the consensus change from rustoleum to brightside paint and have come to understand the importance of good prep work, skilled wet sanding and proper buffing and polishing.
I have a couple questions about painting my big ol '62 galaxie. How much paint would be needed to cover a car of such proportions?
Also, I notice that interluxe makes a 2 part poly paint, actually a couple of them. These 2 part poly paints are supposed to be a step above the brightside paint that they make. Sooo...has anyone used this paint? Is it worth tying or is there little improvement over brightside. The interluxe site says more gloss retention over time and more protection over time than brightside.
Any thoughts?
Posted By: Anonymous
Re: Paint job on a budget!? CONTINUED..page 44........ - 12/17/06 07:32 PM
Quote:
Also, I notice that interluxe makes a 2 part poly paint, actually a couple of them. These 2 part poly paints are supposed to be a step above the brightside paint that they make. Sooo...has anyone used this paint? Is it worth tying or is there little improvement over brightside. The interluxe site says more gloss retention over time and more protection over time than brightside.
Any thoughts?
I'm hoping to be able to get some 'painting money' out of the insurance company when they repair my car. If they will go for it then I'm going to try the Interlux Perfection 2-pack paint.
Posted By: Anonymous
Cliff Notes/Summary?? - 12/18/06 01:27 PM
I have read all the 100 pages but I was wondering if someone could take the time to edit out all the garbage and make this a 10 page review with pics of the colors painted on the cars and also a simple summary of the items used.
Posted By: Exit1965
Re: Cliff Notes/Summary?? - 12/18/06 01:36 PM
Edit out all the garbage huh?

More than one person has summarized it before. And as has been said before, you can get by with Charger's original instructions and just vary the amount of mineral spirits you mix in (and/or use Brightside).
Do a test piece first. That'll teach you all you need to know.
Posted By: Anonymous
Re: Cliff Notes/Summary?? - 12/18/06 01:49 PM
The best thing to do would be to make a website, Id be happy to put it together if someone would give me the material. The summaries guides are good but miss out on a few points like which grit sandpaper to use and when.
Quote:
The best thing to do would be to make a website, Id be happy to put it together if someone would give me the material. The summaries guides are good but miss out on a few points like which grit sandpaper to use and when.
This should be a good starting point, the rest like exit said is to learn by doing!!!!
https://board.moparts.org/ubbthreads/show...&PHPSESSID=
Posted By: toplescuda
Re: Cliff Notes/Summary?? - 12/18/06 06:43 PM
we have a home depot here but there is no marine place around here that would be selling paint....i would like to have a bright yellow that i dont have to thin down to put on if possible place? price? how much do i need to do a color change on a road runner??
Posted By: Anonymous
Re: Cliff Notes/Summary?? - 12/18/06 07:18 PM
I'm still working through the middle of this thread and I guess that bightside is in and both types of rustoleum are out?
And an estimate on how much is needed to cover a big ol 1962 Galaxie 500?
Thanks
Posted By: Java
Re: Paint job on a budget!? CONTINUED..page 44........ - 12/18/06 07:32 PM
If you can't get Brightside locally and don't want Blue or red from ebay, you can find them at boatbandit.com. But it's $24.95 a quart, Good/bad price????
Also, the other night I was at my local Home Depot and I saw this:

That was the first I have heard of it. If I remember correctly, it was around $12 a quart. Just throwing it out there.........
Posted By: Anonymous
Re: Cliff Notes/Summary?? - 12/18/06 08:35 PM
Quote:
I'm still working through the middle of this thread and I guess that bightside is in and both types of rustoleum are out?
And an estimate on how much is needed to cover a big ol 1962 Galaxie 500?
Thanks
I'm sure the Brightside is a good option. There's no doubt that Aussie's work looks amazing. I however am leaning towards the Rustoleum Professional in Gloss black for my project. I did my test panel and I'm pleased with the results. It's not that I can't be swayed into using the Brightside, I'm just not convinced that it will perform better over time than the Rusteleoum. Chargers' projects look great and have held up in the real world under some pretty harsh conditions. At this point there are no long term results of the Brightside option - and that's what is keeping me away from the Brightside option for now.
Posted By: 69DartGT
Re: Cliff Notes/Summary?? - 12/19/06 12:28 AM
I put a coat on just the front fenders and the hood today, and all I can say is the differance is great, I've been wondering when the paint job would start to look like a paint job and now it does. Tomorrow I will do the rest of the car, then I'll need to do the wet sanding stuff which is my least favorite part of the project.
Posted By: Anonymous
Re: Paint job on a budget!? CONTINUED..page 44........ - 12/19/06 05:17 AM
Quote:
If you can't get Brightside locally and don't want Blue or red from ebay, you can find them at boatbandit.com. But it's $24.95 a quart, Good/bad price????
That's a good price. I work at a boat dealership and our cost for the Brightside stuff is around $21 a quart.
Also, I got ahold of some of this to put onto an old 240SX:

We'll see what happens.
Posted By: 69DartGT
Re: Paint job on a budget!? CONTINUED..page 44........ - 12/19/06 08:15 PM
Three coats and just before the first wetsand.
The 3rd coat actually seemed to give me some good coverage. I hoping only two more to go.

Posted By: Anonymous
Re: Paint job on a budget!? CONTINUED..page 44........ - 12/19/06 09:49 PM
Quote:
That's a good price. I work at a boat dealership and our cost for the Brightside stuff is around $21 a quart.
Also, I got ahold of some of this to put onto an old 240SX:
We'll see what happens.
Please post pics up as soon as you try this, thats the same color i want to try on my Suby!!!
BTW everybody, iv been a long time follower of this thread, like almost a year or so, but decided it was time to join up. pretty much plan on painting my track/summer beater (teg) and the winter beater (legacy) using one of these methods.
Posted By: Anonymous
Re: Paint job on a budget!? CONTINUED..page 44........ - 12/20/06 01:11 AM
2000 wow
Posted By: texczech
Re: Paint job on a budget!? CONTINUED..page 44........ - 12/20/06 01:02 PM
Quote:
Three coats and just before the first wetsand.
The 3rd coat actually seemed to give me some good coverage. I hoping only two more to go.
I am using red like you on test piece- (hood). Do you have some imperfections in the final paint job? I seem to have more small foreign objects in the paint job than I would like. I also seem to have some very,very small "dots" in the finish. I do beleive that fine wetsanding & buffing will get it real nice. By the way what are you thinning with? Thanks!
Posted By: 69DartGT
Re: Paint job on a budget!? CONTINUED..page 44........ - 12/20/06 04:41 PM
Quote:
I am using red like you on test piece- (hood). Do you have some imperfections in the final paint job? I seem to have more small foreign objects in the paint job than I would like. I also seem to have some very,very small "dots" in the finish. I do beleive that fine wetsanding & buffing will get it real nice. By the way what are you thinning with? Thanks!
I'm using mineral spirts to thin, the small dots are maybe air bubbles that didn't pop, my first attempt I didn't thin enough and had lots of bubbles it was so bad I sanded most of the first coat off. All the rest of the coats I use two roller one with paint follwed in a few minutes with a dry roller. Some defects but I think the wet sanding will help, I'm told don't get carried away with the wet sanding inbetween coats.
Good Luck
Posted By: Anonymous
Re: Paint job on a budget!? CONTINUED..page 44........ - 12/20/06 08:37 PM
Early on there was some talk about a clear coat that Tremclad offered in Canada. I was diappointed to learn that nothing was offered in the US by Rustoleum.
I may have found a substitute:
http://everbrite.net/coating_properties.htmlAnyone ever heard of this stuff? I called and they said that it can be applied over new paint like Rustoleum after 30 days of drying. This looks like it may have great potential for enhancing the final results of the roll-on paint method. Says it's self leveling too.
Posted By: Anonymous
Re: Paint job on a budget!? CONTINUED..page 44........ - 12/20/06 09:15 PM
As has been said in the post before I personally wouldnt apply a clear coat as it cancels the possibility of touching up the paint after chips, scratches and other...
Posted By: Anonymous
Re: Paint job on a budget!? CONTINUED..page 44........ - 12/21/06 03:11 AM
Posted By: Anonymous
Re: Paint job on a budget!? CONTINUED..page 44........ - 12/21/06 04:52 AM
there is a rustolium clear coat, though it is only in a spray bomb can. i use it on my buick with the gloss black and it works great. pn is 7701 cost 3.54 a can. it self levels and it fills in small scratches or pits.
Posted By: Anonymous
Re: Paint job on a budget!? CONTINUED..page 44........ - 12/21/06 01:48 PM
So are the folks using Brightside cutting it with mineral spirits or the interlux product they recommend?
From reading the thread, it seems that they thinning and application of the paint is fairly easy to learn. It seems that it is the wet sanding and polishing that is the toughest thing to do right a pays the most benefits. My question is for a non painter how tough is this to learn? Is it simply following the prgression of finer grit paper each time and the same with the polishing. How hard is it to get a scratch free swirl free, glossy finish?
I don't want my $50 paint job to look like, well, a $50 paint. Job.
Posted By: Anonymous
Re: Paint job on a budget!? CONTINUED..page 44............ - 12/21/06 07:40 PM
You don't need to use oil based paint to get an inexpensive paint job with good results. The on sale $12.99 Harbor Freight gravity feed gun will put on paint with excellent results. You can also buy automotive grade paint for not much more than you are paying for the oil based paint.
www.smartshopperinc.com
Posted By: Exit1965
Re: Paint job on a budget!? CONTINUED..page 44........ - 12/21/06 08:23 PM
This has already been beaten to death. Benefits of rolling: no special tools, no overspray, no inhaling poison, very short learning curve, and also it's fairly relaxing.
Posted By: C38coupe
Re: Paint job on a budget!? CONTINUED..page 44........ - 12/21/06 09:33 PM
Yes I have to agree with you Exit, we all know if we choose we could use a HVLP and go to town with single stage, with the mess, extra masking, dust and doghair. Thats why if you have the desire you can paint your ride with a sponge roller, by executing the techniques outlined on this thread, you can achieve a really decent paint job for a lot less money that it would cost you to have it professionally done. The good news is, if you don't like the results, you can get it painted, you are only out a small amount of money and your own time.To date I have seen some very good paint jobs on this thread. Price, less

mess, do it myself and learn, heck it doesn't get much better. Have a Merry Christmas yall who have visited this thread, I hope you have found it very informative, I know I have.......C38 Coupe
Posted By: 69chargeryeehaa
Re: Paint job on a budget!? CONTINUED..page 44........ - 12/21/06 10:07 PM
Quote:
This has already been beaten to death. Benefits of rolling: no special tools, no overspray, no inhaling poison, very short learning curve, and also it's fairly relaxing.
AMEN. 
Posted By: C38coupe
Re: Paint job on a budget!? CONTINUED..page 44........ - 12/21/06 11:58 PM
Posted By: _Scott_
Re: Paint job on a budget!? CONTINUED..page 44........ - 12/22/06 12:45 AM
Quote:
The good news is, if you don't like the results, you can get it painted, you are only out a small amount of money and your own time.
This should be qualified a little. If you don't like your results and you take the car to a professional shop to have it repainted, expect that cost to be higher than if you hadn't messed with it to begin with. You may even find that some shops won't even work on it.
Posted By: Anonymous
Re: Paint job on a budget!? CONTINUED..page 44........ - 12/22/06 03:00 AM
Hey 69Dart--your truck is looking like my Jeep now. And the progression from coat to coat looks just like what I experienced. I ended up with 7 coats of the Brightside. Also, I experienced the little "dots" or bumps in my paint, too. Originally, I thought they were bubbles that I did not pop, but in the succeeding coats I made sure to remove all the bubbles (I found that using a foam brush or a China bristle brush [good suggestion by Montana Man] was a lot better than another roller, which when rolled over wet paint just got wet and made more bubbles for me). I just kept on painting though, and did not do any wet sanding or polishing yet (I did not have enough time to let it cure before taking it to the farm). When I bring it back to the city in the springtime I will then try the polishing and stuff, just to get it a little smoother--hopefully the bumps will smooth out. You really cannot see them unless you get right on top of it, but I still would like to see if I can get them off.
Also, Brentville, I see you are in St. Louis, as I am. If you have any questions about the process or just want to talk about it, let me know.
Merry Christmas everyone!
Posted By: 69DartGT
Re: Paint job on a budget!? CONTINUED..page 44........ - 12/22/06 05:09 AM
Crusader did I read you right? You have seven coats and have not wet sanded yet? Your paint job looks just great to me
Posted By: 69chargeryeehaa
Re: Paint job on a budget!? CONTINUED..page 44........ - 12/22/06 04:57 PM
Quote:
Quote:
The good news is, if you don't like the results, you can get it painted, you are only out a small amount of money and your own time.
This should be qualified a little. If you don't like your results and you take the car to a professional shop to have it repainted, expect that cost to be higher than if you hadn't messed with it to begin with. You may even find that some shops won't even work on it.
That's why you expirement with it on a old hood, see if you like it, then go from there. If it works and you like it, then you paint your own car and your .
besides, nothing a few hours and a palm sander won't take off. Where people run into problems is they get all excited, paint their car having never painted before, and and upset with the results. I've painted over this paint with BC/CC, and single stage enamel, and never had any problems.
Posted By: Anonymous
Re: Paint job on a budget!? CONTINUED..page 44........ - 12/22/06 05:09 PM
Yep, Dart, you read me right. Well, I guess technically I did wetsand; I made a half-hearted attempt between coats 2 and 3 on the hood to try and remove those little specks/bumps I mentioned. I thought they were bubbles I missed, but then on successive coats I made sure to visually verify that all bubbles were removed, which they were. I don't know what the bumps are, but I will try to get 'em off next spring. Anyway, I only did the hood that one time. Remember, my Jeep was acquired to be a "farm Jeep," so I was not all that concerned about a perfect finish. I would rate it maybe a "2 foot paint job" because when you get that close and look from certain angles, you can see those bumps. However, now my wife and daughters think the Jeep is really cool, so it will come back to the city here and get driven frequently in nice weather. Hence, my reason to go ahead and try the polishing and stuff next spring.
Sorry for the long-winded explanation; hope it made sense.
Posted By: 69DartGT
Re: Paint job on a budget!? CONTINUED..page 44........ - 12/22/06 05:47 PM
Quote:
Remember, my Jeep was acquired to be a "farm Jeep," so I was not all that concerned about a perfect finish. I would rate it maybe a "2 foot paint job" because when you get that close and look from certain angles, you can see those bumps.
I'm doing my truck as a driver work truck to haul stuff for the house, trips to the Jyard etc no intent to come up with a show finish just something I'm happy with and from what I see already I'm well on the way to that finish, I may follow your lead and later on use my new for Christmas Porter Cable polisher after the first of the year.
Posted By: Anonymous
Re: Paint job on a budget!? CONTINUED..page 44........ - 12/22/06 06:06 PM
Well lets beat it to death some more.
You obviously don't have much experiance painting cars or what will happen to them in real world conditions. First it was stated the reason was a cheap way to paint a car, now it's relaxing. How many hours do you have in that cheap paint job? If you don't like it and decide to take it to a body shop for a repaint, you will have serious problems not to mention a seriously high bill when the new paint is not compatable with the Walmart paint. It may look good parked in the garage. Put that out the the Arizona sun for a few months and see what happens to it.
Posted By: 69DartGT
Re: Paint job on a budget!? CONTINUED..page 44........ - 12/22/06 06:40 PM
Nib Files any idea other then on line where to find these tools? I have a couple of runs around the drip rails I missed.
Posted By: 69DartGT
Re: Paint job on a budget!? CONTINUED..page 44........ - 12/22/06 06:43 PM
Quote:
Well lets beat it to death some more. You obviously don't have much experiance painting cars or what will happen to them in real world conditions.
Perhaps you've missed the point this thread is about painting with a roller not a pro job using a spraygun. The people looking for that kind of paint job are IMHO going to farm it out to a shop.
Just my
Posted By: Anonymous
Re: Paint job on a budget!? CONTINUED..page 44........ - 12/22/06 07:03 PM
Since when did you have to be a pro to use a $12.99 HF gun? You can paint a car outside with good results. You can buy paint at a John Deere dealer for less than $30.00 a gallon. How long does the paint on tractors last?
Posted By: 69DartGT
Re: Paint job on a budget!? CONTINUED..page 44........ - 12/22/06 07:24 PM
Quote:
Since when did you have to be a pro to use a $12.99 HF gun? You can paint a car outside with good results. You can buy paint at a John Deere dealer for less than $30.00 a gallon. How long does the paint on tractors last?
Quote:
Well lets beat it to death some more. You obviously don't have much experiance painting cars or what will happen to them in real world conditions. First it was stated the reason was a cheap way to paint a car, now it's relaxing. How many hours do you have in that cheap paint job? If you don't like it and decide to take it to a body shop for a repaint, you will have serious problems not to mention a seriously high bill when the new paint is not compatable with the Walmart paint. It may look good parked in the garage. Put that out the the Arizona sun for a few months and see what happens to it.
I was refering to your earlier post, quoted above and don't see where your $12.99 paintgun and yuor earlier post come together? The Interlux Brightside paint is a marine grade single stage paint that at $28 a quart isn't cheap paint and most boats see a lot of sun and that paint does last. Sorry didn't mean to get
Lets direct this back to rolling and Fireball can start a economy spary paint thread
Posted By: C38coupe
Re: Paint job on a budget!? CONTINUED..page 44........ - 12/22/06 10:15 PM
Hey Fireball, why not paint anyway you want if you get the results you are looking for, I say great go for it. As far as the paint fading I am sure it could be polished a couple of times per year and still look good. Even Chargers VW has Tremclad paint on it for over 7 years, mind you I know it's garaged in winter. Southern Ontario, is the same latitude as Northern California, so the summer sun is strong there, to date his paint still looks great.All the best
Posted By: Anonymous
Re: Paint job on a budget!? CONTINUED..page 44........ - 12/22/06 10:32 PM
Nothing wrong with using with what you believe in. You don't get the same amount of sunlight in Canada as you do in AZ. That paint may work well where you are at. What I want to know is what happens to it in the desert. Someone might stumble on to this thread like I did and run out think they are getting a killer paint job cheap only to find out it it looks fine in some places after a while and others it just won't hold up. I posted a link, I don't care if you rip on my cheap paint job.
Posted By: 69chargeryeehaa
Re: Paint job on a budget!? CONTINUED..page 44........ - 12/22/06 11:26 PM
fireball, i understand what your saying, and i can accept your view. I have sprayed over 10 cars, both single stage and BC/CC. When i was poor i rollerd my first car 15yrs ago, and drove the car for 3 years and 400,000km, while i went thru university in North Bay, Ontario, Canada. Let me tell you about North bay, it snows like CRAZY up there, there were weeks where there was 10ft of snow on my car and they did'nt plow the parking lot. The paint holds up very well, and that's under the hardest conditions, just 2 waxes a year is all i did to maintain the car, here's a pic of my 1985 Honda CRX:
I've personally painted over the tremclad with single stage enamel on a old 1986 mustang gt, and had no issues with the paint another 4yrs later when i sold the car. I've also had a car painted by a shop that i also rollered and that was using BC/CC, no issues.
Not everyone has a huge garage and tonns of $ to give to a body shop to paint their car, the result is that these projects sit in the garage until "one day" when they have enough $ to get it painted.
My 74 beetle as c38coupe stated was painted in 1999, and i've seriously driven that car all summer, for the first 5 yrs i had that car painted with the tremclad it was almost my daily driver, it's seen hundereds of trips to my cottage over 500kms round trip. In those first 5yrs also i put on 35000MI on the car. The paint looks just like the day i painted it, only maintance was waxing 2 times a year, no fading, nothing.
This paint after all is enamel based paint, completely compatable with single stage paints.
Posted By: Anonymous
Re: Paint job on a budget!? CONTINUED..page 44........ - 12/23/06 01:39 AM
I have been following this thread since it was e-mailed to me, and have read every page.
I don't know what I find more fascinating; the number of people who have duplicated 69chargers' efforts with amazing results, or the number of people who haven't tried the roller process and proclaim it a colossal waste of time - or worse.
One even claimed that no reputable body shop would touch it after a roller job - we should all be so lucky.
Thanks to all who have shared their expertise and experience here including; 69Chargeryeehaa, Exit1965, Marq, c38coupe, 69dartgt, aussie driver, and all the others.
Posted By: Anonymous
Re: Paint job on a budget!? CONTINUED..page 44........ - 12/23/06 02:27 AM
I didn't say I wouldn't try it. If they sell that brand here, I will try it out on something first. In fact, I will be more scientific about it. I have a hood that I can paint different samples of paint on and leave it out in the sun. I will take pictures once a month. You name the base you want on the hood first, epoxy or urethane primer. I have samples of Dupont, PPG, HOK, Valspar, Kirker, Rustoleum, and John Deere. Oil base, lacquer, acrylic enamel, acrylic urethane.
Posted By: Exit1965
Re: Paint job on a budget!? CONTINUED..page 44........ - 12/23/06 02:34 AM
Well said, Mike.
The next step seems to be catalyzed/hardened rollable paint, like Interlux Perfection.
Any takers?
Posted By: Anonymous
Re: Paint job on a budget!? CONTINUED..page 44........ - 12/23/06 02:46 AM
I thought the next step might be the media blaster.
Posted By: 69chargeryeehaa
Re: Paint job on a budget!? CONTINUED..page 44........ - 12/23/06 03:14 AM
fireball, ok, you got us, we're all just out to ruffle your feathers, april fools.....
All of us at moparts have been plotting this for years, and thru our collective cooperation, we've had over 2000 replies on this thread alone, with almost what.....50000 views, and finally we all give up, it was all just a joke........hahahaha,.....painting with a roller.......who on earth would be so stupid as to try such a thing???
shhhhh....is he gone?
Seriously, we are not trying to compete with you, your either with us or aginst us, there's no inbetween........now where's all my roller buddies?
we're not here to
, we understand you don't like it, but that's why it's a free country, let's just move on and stop
please don't make me get out the
Posted By: Anonymous
Re: Paint job on a budget!? CONTINUED..page 44........ - 12/23/06 03:20 AM
If there is no in between then I must be against you roller boy.
Posted By: 69chargeryeehaa
Re: Paint job on a budget!? CONTINUED..page 44........ - 12/23/06 03:28 AM
Quote:
If there is no in between then I must be against you roller boy.
i see by your profile that you just joined, and only have what, 7 posts, all only in this thread. If you have some critisism, why not post real info, besides bashing the process. We know it looks good, holds up to the elements, and we(being the ones who paint our OWN cars) are happy with the results. If you have something to HELP members paint their rides with less $, less learning curve, and give better end results, then by all means share them with us. It's been said over and over that if you have a numbers matching, 1 of 1 car, with a build sheet you found under the seat made from gold, then spray your car with BC/CC, single stage or whatever. If you have a booth, compressor, and the SKILLS and $ then by all means spray your car. If your broke, have no compressor, expirence and no $, using a roller starts to look better then a rattle can primer paint job. Besides i think the results for a home job with a roller look better than you think, best of all we're out our cars and not and on them.
Posted By: Anonymous
Re: Paint job on a budget!? CONTINUED..page 44........ - 12/23/06 03:32 AM
Your in trouble if I figure out how to post pictures on this BB.
Posted By: 69chargeryeehaa
Re: Paint job on a budget!? CONTINUED..page 44........ - 12/23/06 03:34 AM
Quote:
Your in trouble if I figure out how to post pictures on this BB.
ohhhhhhhh, so scary, that really contributes to the thread.
here ye, here ye, i motion to cast a vote....to tell fireball to go away, you may vote ya, or na.
I'll start.....NA
go away fireball
Posted By: Anonymous
Re: Paint job on a budget!? CONTINUED..page 44........ - 12/23/06 03:42 AM
Ok I'm outta here Cooter.
Posted By: Anonymous
Re: Paint job on a budget!? CONTINUED..page 44........ - 12/23/06 03:42 AM
Quote:
One even claimed that no reputable body shop would touch it after a roller job - we should all be so lucky.
Well while I have, at least for now, abandoned the roller method, only because I found a $150 per semester auto body class with all the latest in paint booth goodies. My teacher did say that rusto is an awesome guide coat and when we're done bondoing or priming something we are told the perfect guide coat is a light misting with some drastically "different" color rusto spray bomb. When I mentioned the roller bomb job to him he said "hey if it looks like crap, scuff it and paint it, rusto is an awesome guide coat if all else fails". He seemed to be quite willing to paint over rustoleum with bc/cc.
Posted By: 69chargeryeehaa
Re: Paint job on a budget!? CONTINUED..page 44........ - 12/23/06 03:58 AM
Quote:
Ok I'm outta here Cooter.
Edited by Fireball (Fri Dec 22 2006 10:43 PM)
Thankyou, i feel the healing process has begun, i'm glad you restrained yourself and edited out the junk
seriously, try to contribute to the method improving it, we all know in a perfect world that traditional auto paint is better, just that not all of us have the means to do it, or can afford $ to.
I would be interested with your test pannel, with all the other brands of paint, that would be a really good test as to the testimonial of the paint's durability. Prep the pannel bare metal, and with the tremclad/rustoleum painted surface go over it bare metal, no primer, nothing else but the paint, expose to elements, and i think you'll be supprised with the results. I saw another identical test on another board using most of the paints you mentioned, and the 2 paints that came out the best, over time, both submerged underwater in a old swiming pool, and exposed to the elements were POR-15, and rustoleum.
Merry christmas Fireball.
Posted By: Anonymous
Re: Paint job on a budget!? CONTINUED..page 44........ - 12/23/06 03:59 AM
I was going to try the two part marine topside
urethane enamel:http://store.nationalpaintsupply.net/urma2uren.html , but decide to go with the ebay brightside. If its doesn't look the way I want, I can always sand it back down and start over. The 73SB isn't my main drivers so, I have time to work on it at "my" pace. Thats one good thing about the roller method. If I can do a good job on it, I will do my 73 Karman Ghia next.
Thanks to all the people sharing their experience so we all can learn what work and how to fix unexpected problems.
Thanks
Posted By: Anonymous
Re: Paint job on a budget!? CONTINUED..page 44........ - 12/23/06 04:18 AM
I look at this way. I want to get my car painted as soon as reasonably possible. It's not reasonable for me to wait to accumulate $3-$4 thousand dollars to get a pro paint job. I could get the $300-$800 Earl Schieb paint job. I could go to the site fireball refers to and buy some of that cheap $30 a gallon ureathane and a $12.99 spayer and a $100 compressor, and a $40 mask. But is my $200 spray job with all the prep and time going to be that much better than the ol Maaco job?
If I thought I could do a good job spraying paint, I'd probably give it a go. But I can't believe that spraying a car is that easy. And that cheap equipment has to be harder for a beginner to use.
I know that I can thin paint and handle a roller. I am pretty sure that I can wet sand and polish the finish to make it shine. I think that I've seen some paint jobs that far outshine the Maaco's of the world. And I think that I have a good chance to repeat that success. And in the process save a few hundred dollars.
I guarantee you that on some other site, some other Fireball is telling guys to save money and by cheap paint, a $12 sprayer and spray their cars outside and is getting blasted by those who think it's impossible or crazy to do that.
Roll on boys.
.
Posted By: 69chargeryeehaa
Re: Paint job on a budget!? CONTINUED..page 44........ - 12/23/06 04:41 AM
Brentville - I totally agree with your thought process, and i think your on the right track.
Speaking from what i consider to be a good amount of expirence under my belt, i've sprayed over 10 cars, and helped buddies do many more. I can say i screwed up the first 2, the next one passed for a basic macco el-crapo paint job, and my work did'nt really get "professional" until the 4th or 5th paintjob. The learning curve of spraying paint is really hard, and ALOT of things can go wrong really quick, like over/under reducing the paint (been there done that, took me weeks of sanding/stripping paint), and even to the point of selecting the right temp range reducer for the paint your using. You really have to know what your doing to spray paint, and the typical "home" setup is almost destined to turn out bad, everything is working aginst you, dirt/dust, hair, and the lack of ventalation really hurt your outcome. Painting outside of a booth in your garage is dangerous, and hazzardous to your health. The whole concept of a booth is to remove your overspray, the paint that is atomized in the air and just floating around getting on everything you own, and then some, and that paint falls out onto your fresh paint. A booth constantly pulls filtered air down and away from the car, removing this fallout problem, which asside from dirt/dust was my biggest problem to overcome in my "home" garage booth. No matter how seasoned you are it's difficult to pull off a nice paintjob in your garage.
Wheeeew, ok, now lets look at the roller, no mess, no expensive equipment, clean process, no complicated mixing ingreedients, just thin and paint, wetsand and buff, wax and
For ME, it's a no brainer, then with all the $ i saved doing it myself for next to nothing, i buy the wife a present, take her out to dinner, and i got a nice shiny all one color car in the garage, and i'm one lucky guy for like a month!!!
Posted By: 69DartGT
Re: Paint job on a budget!? CONTINUED..page 44........ - 12/23/06 05:24 AM
I look back and I'm sprayed everything from airplanes, cars and trucks over the last 47 years and have no doubt I could shoot this old truck but its about all the work with overspray etc you need to be concerned with.
Me I'm going to follow Crusaders lead and roll a easy paint job.
Posted By: Anonymous
Re: Paint job on a budget!? CONTINUED..page 44........ - 12/23/06 01:12 PM
Quote:
I saw another identical test on another board using most of the paints you mentioned, and the 2 paints that came out the best, over time, both submerged underwater in a old swiming pool, and exposed to the elements were POR-15, and rustoleum.
Glad you brought that up. I'd really like to seal my heap from the tin worm, and I like the way POR-15 performs, but have been told for years that regular shops won't paint over it for adhesion problems.
My plan was to coat a panel with Por-15 and then test various topcoats. This roller method makes this process an order of magnitude easier to accomplish in the home garage.
Not to hijack the thread, but has anyone had experience topcoating por-15? Any tips for the newbie?
Posted By: 69DartGT
Re: Paint job on a budget!? CONTINUED..page 44........ - 12/23/06 03:28 PM
Quote:
Not to hijack the thread, but has anyone had experience topcoating por-15? Any tips for the newbie?
Mike try this link lots of good info but not POR 15. I plan to do my truck bed inside with this stuff after the rest is done.
http://www.rustbullet.com/Products/Automotive/Automotive.htm
Posted By: Anonymous
Re: Paint job on a budget!? CONTINUED..page 44........ - 12/23/06 05:26 PM
Maybe that was Chucky coming back as Fireball?
I have no regrets with my rollered Rustoleum paint job.
I always wanted to spray a car, but never got around to it. Mainly focused on their performance.
One other benefit is my car was never held hostage, apart in a body shop like they can do.
Also, with over 400 rear wheel hp, you do not just throw the keys to anyone. I am not saying all shops will beat your car, but I know of at least one where they took turns test driving some exotic cars.
My car never left my house, and even though total time down was around 2 months, it may have been done quicker than a body shop.
But that is me and I am a very do it myself kind of person.
Merry Christmas Everyone.

Posted By: Anonymous
Re: Paint job on a budget!? CONTINUED..page 44........ - 12/23/06 06:14 PM
Quote:
Mike try this link lots of good info but not POR 15. I plan to do my truck bed inside with this stuff after the rest is done.
http://www.rustbullet.com/Products/Automotive/Automotive.htm
Thanks for the tip.
Of course, I would have to find out about this stuff only after buying a 4 qts of por-15... 
Posted By: Anonymous
Re: Paint job on a budget!? CONTINUED..page 44........ - 12/23/06 07:27 PM
I used Rust Bullet on my roof and on other sensitive parts of my Challenger. It's very easy to work with. If the Rustoleum goes on as easy as the Rust Bullet, there is no doubt in my mind that this is the way to go when painting a car.
Posted By: Anonymous
Re: Paint job on a budget!? CONTINUED..page 44........ - 12/23/06 07:32 PM
Quote:
Quote:
I saw another identical test on another board using most of the paints you mentioned, and the 2 paints that came out the best, over time, both submerged underwater in a old swiming pool, and exposed to the elements were POR-15, and rustoleum.
Glad you brought that up. I'd really like to seal my heap from the tin worm, and I like the way POR-15 performs, but have been told for years that regular shops won't paint over it for adhesion problems.
My plan was to coat a panel with Por-15 and then test various topcoats. This roller method makes this process an order of magnitude easier to accomplish in the home garage.
Not to hijack the thread, but has anyone had experience topcoating por-15? Any tips for the newbie?
I have been away from this forum for a while, but thought I would pop in and see what is up. The only ways I have heard to top coat POR15 was to use their primer first, or to top coat it with the finish paint while the POR15 was still tacky.
Bob
Posted By: Anonymous
Re: Paint job on a budget!? CONTINUED..page 44........ - 12/23/06 07:55 PM
Quote:
I put my first coat of fire red brightside on today and it is looking much better than the rustoleum I tried earlier. I'll attach a couple pictures. It doesn't have full coverage yet, but I can tell that when it does, it will look awesome. I think it is a lot easier to apply then the rustoleum too.
Dalbers, good to still see another GM truck on the Mopar forum I am still slowly assembling mine. Due to space problems I have to paint a body part in the basement and then carry it outside and bolt it on.Body panels like on our trucks are especially difficult with the roller methoud because of the sharp creases in the body lines like to repel the thinned paint. The door in the pic ended up having 10 coats on it before I was satisfied, with wetsanding between every coat with 2000 grit.
Bob

Posted By: 69DartGT
Re: Paint job on a budget!? CONTINUED..page 44........ - 12/23/06 08:04 PM
Bob, looks good how often did you wet sand? after how many coats or did you just wait until you were happy with the color?
Posted By: Anonymous
Re: Paint job on a budget!? CONTINUED..page 44........ - 12/23/06 10:08 PM
I started the project following the original methoud of coating and sanding.I found that it doesent work with Regal Red, and every coat has to have the glossy surface sanded in case I sand thru to the next coat. Sanding thru left splotches that resembled the grain of plywood and would not buff out. So now it is sand after each coat with 1000 for 2 coats and then 2000 after the rest.
Bob
Posted By: Anonymous
Re: Paint job on a budget!? CONTINUED..page 44........ - 12/24/06 12:03 AM
Anybody have a pic of the brightside sapphire blue on their car?
Posted By: Marq
Re: Paint job on a budget!? CONTINUED..page 44........ - 12/24/06 03:08 AM
Tee hee... I pop in here after a few days and a Fireball starts a pointless firestorm in an effort to be the Grinch that urinated on rollers.
I say that his effort here are totally POINTLESS because his negatism stands sadly ALONE among all the positive results and feedbacks and information exchanges that have happened in this thread.
Now the question begs as to why he is so down on rollers ? Is it a threat to his line of employment... or is he simply a message troll that likes to stir up people by declaring it night time, when everyone else is saying it is day time.
This is what makes Fireballs 'comments' so pointless in this thread. He wants to talk theory and the number of cars that have been able to achieve decent paint jobs using this method can simply sit back and laugh at his negatism.
And at this point most of the folks who have read the majority of this thread also can see how Fireballs negativity is completely laughable.
The time for skeptics is long past. Many of us have used this method and posted our results.
And personally I don't think trying to deflect this discussion to " oh.. I don't think it will hold up in Arizona... " qualifies as a valid argument UNTIL YOU HAVE DONE IT AND FAILED - or someone else has done it in an extreme heat and sun ( UV ) area and failed. Oddly... we have had NOT ONE REPORT OF PAINT FAILURE due to extreme heat or sun.
Anyhow, I find it all quite laughable and I almost had to agree that Fireball may indeed be the son of Chucky...
.
Posted By: Anonymous
Re: Paint job on a budget!? CONTINUED..page 44........ - 12/24/06 03:10 AM
Exit1965; Can you remind me what color you used on your car? Is it Brightside's Grand Banks Beige? Anyone have any pics of a car done in that color? I think it's a good match for my original color and I like original color scheme (white over beige).
Thanks
Posted By: Marq
Re: Paint job on a budget!? CONTINUED..page 44........ - 12/24/06 03:58 AM
Quote:
Glad you brought that up. I'd really like to seal my heap from the tin worm, and I like the way POR-15 performs, but have been told for years that regular shops won't paint over it for adhesion problems.
My plan was to coat a panel with Por-15 and then test various topcoats. This roller method makes this process an order of magnitude easier to accomplish in the home garage.
Not to hijack the thread, but has anyone had experience topcoating por-15? Any tips for the newbie?
From everything I read about POR15, it is a superior painting system. BUT... and the big BUT is that applying a single stage polyurathane requires far less surface preparation and is more compatible to the average skills of most do-it-yourselfers.
In the same vain... folks were comparing the qualities of POR versus the two stage polyurathane and both were more expensive than the Rustoleum/Tremclad/Brightside paints.
And although most folks admitted that the POR was quite 'durable'... they also conceded that it was more prone to chipping. I guess this is because POR is probably the hardest of these four paints when full cured. Hence it isn't as forgiving when something hits it.
So even though people were giving roses to POR15 for its durability etc, they always tended to conclude that it was best left to professionals for applying.
Now... if you happen to already be familiar with POR than it might be the better route to go. But if you are just an average Joe... than you would be better to fall back one step and go for the single stage polyurathane.
Overall, I had looked at the positive and negative attributes of POR and went with the single stage polyurathane.
To get some more independent thoughts on the merits of POR, you might want to snoop around on some of the boater forums where you can almost always find some postings about it.
Hope this info helps.
Marq
.
Posted By: dalbers
Re: Paint job on a budget!? CONTINUED..page 44........ - 12/24/06 04:06 AM
BobD, your truck is looking great. I sprained my mcl and tore some cartilage in my knee a couple days ago, so sadly I am on hold with my truck. I have also seen your truck on the 67-72 chevy truck board. Once we get ours done, we'll have to post the results there, they won't believe how good they look. Have a merry christmas everyone.
Posted By: Anonymous
Re: Paint job on a budget!? CONTINUED..page 44........ - 12/24/06 06:54 AM
Marq, how is the red holding up on your car? I'm fixing to start on mine here soon once I get out the final dent out of the quarter panel. I'm going with the brightside red with a black top, but I'm just curious on how the red is holding up to the weather.
Posted By: Marq
Re: Paint job on a budget!? CONTINUED..page 44........ - 12/24/06 02:56 PM
Quote:
Marq, how is the red holding up on your car? I'm fixing to start on mine here soon once I get out the final dent out of the quarter panel. I'm going with the brightside red with a black top, but I'm just curious on how the red is holding up to the weather.
I put a couple of thousand kilometers on the car since it's paint job. I have left it outside and not 'garage queened' it. It has been hit with rain, hail, superhot days... egg cooking sun. It has suffered the standard indignities suffered by any car driving down the highway....
And to tell you the truth... the car looks better today then when I first finished it. And there have been no paint failures or loss of shine etc.
The one thing I have concluded is that when we are in close working contact with our paint jobs we acquire almost 'Superman' type vision. Any little imperfection jumps out at us like craters on the moon. We get to a point in our quest for perfection that we lose sight of how our car really looks compared to 99% of the other cars on the road.
This really struck home the other day. With winter arriving I put the little sportscar into the garage to sleep the winter away. It had been in there... out of my sight for about 3 weeks. I had to go in the garage the other day to store the boxes that our Christmas tree came in. I was struck by just how d4mn good looking the little sportscar was looking.
There is an old saying that probably best explains this phenomena... " Distance makes the heart grow fonder "... That doesn't mean that if you are far enough away it looks good - but that if you keep it out of your sight for a while, you can look upon it with completely different eyes and better appreciate exactly what you have.
Basically I was looking at the car, not with the critical eye of the microscoping perfectionist, but instead with the eye of someone who was seeing the car for the first time. I was looking at the 'big picture' instead of getting microscopic with each square inch of the paint job. And I gotta admit I was impressed with how the car looked...
I am looking forward EXCITEDLY for next spring to arrive... because I will be able to drive it out of the garage and ENJOY it from the moment the weather again gets drivable for a ragtop
The car looks like a gift from Santa, but we all know that I saved like SCROOGE
.
Posted By: chessman90
Re: Paint job on a budget!? CONTINUED..page 44........ - 12/25/06 05:53 AM
Like many i have been following allong on this thread and am planning on doing this.
I havent read all the post because its so long but i am wondering if rustoleum is still the top pick in paint for this method. Also witch mineral stuff odorless or regular. What is the best wetsanding technique. Charger said 600-600-1500 i think and ive read of others also. Also what is the prefered buffing technique. What about number of coats i want to get a really nice paint job. How do you get in the door jambs, under decklid, drip rails, and around other odd places.
Thanks a lot.
Posted By: Anonymous
Re: Paint job on a budget!? CONTINUED..page 44........ - 12/25/06 03:31 PM
[quote
From everything I read about POR15, it is a superior painting system. BUT... and the big BUT is that applying a single stage polyurathane requires far less surface preparation and is more compatible to the average skills of most do-it-yourselfers...
...Marq
.
Thanks Marq.
I have a real issue with rust because my car already has it and I have heard that once it is there, it has to be cut and replaced with fresh meat, er metal. Since none of the rust is structural, and the car isn't likely to be worth much in the future, I was looking for a DIY solution in the spirit of the $50 paint job.
I have used por on a variety of small rust repair jobs where finish quality wasn't important, and it works. I was under the impression that its sucess was due to its ability to lock out air and moisture from the surface of the metal.
Are you saying that a smooth finish on a large scale with por is perhaps beyond the skillset of a beginning roller? I did not understand the single stage urethane reference.
On another note, with proper surface preparation, Do you think por-15 (or silver bullet)is unnecessary with the rustoleum paint?
I'm not so sure that some of POr's legendary results aren't due to the use of phosphoric acid (metal ready) during prep. I have some spots that I hit only with the metal ready and never topcoated, and they have not re-rusted in 5 years of outside exposure.
In fact, Whatever I end up using to ward off rust (POR-15, silver bullet, small animal sacrifice...), I will be prepping the bare metal with a liberal wash of metal ready.
Posted By: Marq
Re: Paint job on a budget!? CONTINUED..page 44........ - 12/25/06 04:54 PM
Quote:
I have a real issue with rust because my car already has it and I have heard that once it is there, it has to be cut and replaced with fresh meat, er metal.
Rust is indeed the cancer that slowly eats away at our cars until the day they finally go to that great smelter in the sky.
In my book there are really two types of rust. There is surface rust and there is 'advanced rust'.
Surface rust is the easiest to deal with. The intergrity of the metal itself has not yet been compromised. So to deal with it you just have to sand off the surface particles and apply 'something' over the formerly rusty surface that will cheat it from having access to OXYGEN and moisture ( don't forget that H20 is one part hydrogen and two parts oxygen ). IF you can starve that rust area of oxygen and moisture, it is darn near impossible for the rust to rally again.
This is the difference between a car that has lived in a super dry and hot climate and one that lives near the ocean or in any of the moderate temperature climates.
So just keep that principle in mind when looking at surface rust. You simply want to starve it.
The more difficult rust to deal with is the advanced rust that has eaten its way through the sheet metal - or that has begun or completed the conversion of the formerly flexible metal into the more shale or rock like rust. This is the stuff that has to be cut out and replaced with new metal. Because once the metal hits this advanced stage of rust there is NO CHEMICAL known to mankind that can return the shale or rock like rust back to the flexible metal that once existed there.
Now... there are some chemicals out there that promise to kill in its tracks any of this advanced rusting and freeze it so that there is no further advancing of the rust. This is absolutely true. BUT you are still left with an area that has the flexibility of shale or a rock. You would be able to do surface preparation over such a chemically treated area and get primed and painted. But nonetheless that area will have zero flesibility and would be destined to crack the paint if that area is flexed ( because it would stay rigid while the surrounding area would flex ).
Another factor would be the rate of expansion during temperature changes of the metal area versus the chemically treat shale and rock rust area. Different rates of expansion gurantee future cracks in the paint. A crack in the paint gives oxygen and moisture a pathway back to the chemically treated area. Eventually it will reach the surrounding areas that do not have the chemical treatment through a process called papillary action - where it seeps and travels between the subsurface of the body and the paint skin.
The key principle to remember here is that if you have holes that are all the way through.. or the rust has converted the former flexible metal to shale or rock... you have to remove it and replace it.
Quote:
Since none of the rust is structural, and the car isn't likely to be worth much in the future, I was looking for a DIY solution in the spirit of the $50 paint job.
The best place for most of these 'freezes rust in its tracks' compounds is the undercarriage of the car. These are ideal spots to be using that type of chemical because undercarriage and subframe rust is ultimately what will send your car to the wrecker ( barring an accident or fire first ).
Quote:
I have used por on a variety of small rust repair jobs where finish quality wasn't important, and it works. I was under the impression that its sucess was due to its ability to lock out air and moisture from the surface of the metal.
Exactly right. It chokes off the access of oxygen and moisture from the metal surface.
Quote:
Are you saying that a smooth finish on a large scale with por is perhaps beyond the skillset of a beginning roller?
I believe anyone can get the stuff on to a cars body. But some problems arise. To do the roller method properly you need to thin the paint. This helps with the self-spreading / self-leveling. By adding thinner to POR you are chemically changing it or altering the way it was designed by the manufacturer to be used. You also may be altering its effectiveness at doing what it was designed to do. The other difference will rest on how the subsequent surface sanding or adhesion of the later paint layers may turn out.
Quote:
I did not understand the single stage urethane reference.
Think of a polyurathane as simply being a liquid plastic type paint. A single stage polyurathane is a self-contained paint... in that its ability to dry and harden is all in that ONE can. You slap that one stage paint on and it dries on its own merits based on the evaporation of the 'carrier' that the paint comes with.
But as in everything in the world, people always want faster and quicker... So the paint industry came up with a TWO stage paint... where you basically get one can with paint and one can with the catalyst or drying/hardening agent. Prior to using the TWO stage polyurathane, you have to blend the two cans together.
In body work, this would be like saying that glazing putty is a one stage chemical ( since you usually just squirt it out of the tube to appy it ) and comparing it against Bondo as being a two stage chemical ( since you have to combine the Bondo with its hardening creme to get it to harden and dry ).
All this having been said... Rustoleum painted over a prepared surface rust area will do the job of choking off the oxygen and moisture to that metal surface. This is what it was chemically designed to do in the first place. So it is a safe bet for achieving what you want for surface rust.
Brightside on the other hand was originally designed to be use on boats - the majority of which are fiberglass. But to Brightside's advantage it is basically a liquid plastic. And as such its polymers do provide an excellent seal against penetration from oxygen and moisture from reaching the subsurface. Combined with the polyurathane's better adhesion qualities I think you can safely consider it as a safe bet for painting over prepared surface rust areas.
Quote:
On another note, with proper surface preparation, Do you think por-15 (or silver bullet)is unnecessary with the rustoleum paint?
I believe you can go either way on this. You can either treat the POR as the surface primer and than lay Rustoleum/Tremclad or Brightside over it... OR you can bypass the POR stage and go straight to the Rustoleum/Tremclad or Brightside painting. The deciding factor will be your confidence leval at which way will ultimately give you the longest lasting effect.
Tee hee... I must sleep at Best Western Hotels and Motels quite a bit to be writing so much on Christmas day.
.
Posted By: Anonymous
Re: Paint job on a budget!? CONTINUED..page 44........ - 12/25/06 08:16 PM
I had initially intended on painting my frame with POR15, but decided against it once I realized what it would cost. I instead chose to treat it to the portable sandblaster and twisted wire cup brush to remove most rust. Then an application of "Metal Ready" and 2 coats of Rustoleum Hammered paint with a brush. I had a couple of rattle cans of the same for the hard to reach areas. I had some very bad scale in places but managed to get most down to bare metal.
Bob

Posted By: Anonymous
Re: Paint job on a budget!? CONTINUED..page 44........ - 12/25/06 08:18 PM
Another frame picture.
Bob

Posted By: Anonymous
Re: Paint job on a budget!? CONTINUED..page 44........ - 12/26/06 05:53 AM
Quote:
Tee hee...Anyhow, I find it all quite laughable and I almost had to agree that Fireball may indeed be the son of Chucky...
I have no reason to hide behind a fictional login. You supposedly encourage a free exchange of ideas and improvements and I have just offered my personal observations of MY 'hands-on' experience.
Any paint and/or paint 'techniques' that I have commented on, I have personally tried/used. Just because I prefer one technique over another doesn't make me any different than you, and just like you, I try to post the facts as I experience them.
I ended up painting my car with a single stage Kirker paint with an HVLP gun and am very happy with the results. It is neither as costly or difficult as some posters would lead you to believe.
In closing, you'll notice I haven't attempted any personal attacks on any particular person or any particular painting technique so please if you really do 'encourage the free exchange of ideas/techniques' than take my postings as just that...Chuck
Posted By: Anonymous
Re: Paint job on a budget!? CONTINUED..page 44........ - 12/26/06 01:01 PM
Thanks Marq, Bobd, Challenger, and 69dartgt.
Bobd, that hammered finish looks awesome.
I will be testing different metal treatments and posting the results when I can get my car into the garage.
It seems that the beauty of this system is that if the rust ever does come back, it would be no big deal to spot repair and re-paint.
Happy Holidays.
Posted By: Anonymous
Re: Paint job on a budget!? CONTINUED..page 44........ - 12/26/06 01:23 PM
Quote:
Then an application of "Metal Ready" and 2 coats of Rustoleum Hammered paint with a brush. I had a couple of rattle cans of the same for the hard to reach areas.
Bob
Well, that is a big plus for the rustoleum in that if you can stick with stock colors, you can get rattle cans for the places a brush or roller just won't go.
This thread has forced me to rethink my whole strategy. With the expense of commercial re-spraying, a couple of hundred bucks on POR was a small price to pay to insure that respray wouldn't be ruined with rust bubbles in a few years.
With the ability to do that topcoat for less than what I would pay for the POR alone, there is no financial reason to get paranoid about the rust.
If the rust pops back, fix it immediately and re-seal the area with the roller...
This thread has been cheaper than a therapist - and with quicker results
Posted By: Anonymous
Re: Paint job on a budget!? CONTINUED..page 44........ - 12/26/06 01:53 PM
Lets see how well the noob has studied...
Quote:
I havent read all the post because its so long but i am wondering if rustoleum is still the top pick in paint for this method.
Rustoleum has to be thinned for rolling with mineral spirits and takes at least 6 coats. The finish is best topped off by buffing with a real buffer and progressive buffing compounds to receive the best finish. The advantage is the ability to paint right on bare metal.
Brightside, a yacht paint, is pre-thinned and has been rolled straight out of the can, but has been thinned further with a proprietary thinner from interlux or regular mineral spirits. Brightside goes on glossier and has covered in less coats, but still can be polished up like the Rustoleum. The advantage is a shinier finish before polish, and the ability to cover with less coats.
Quote:
Also witch mineral stuff odorless or regular.
Regular.
Quote:
What is the best wetsanding technique. Charger said 600-600-1500 i think and ive read of others also.
I think that depends on: how thick you lay the paint down, how smooth the finish is, how long you want to sand and how often you want to re-paint where you sanded off what you just painted.
Seriously, as was mentioned above, if you are unfamiliar with the cutting power of the various grits, maybe starting with 1000 and evaluating is the best method. Go one step higher if you are removing too much, one step lower if you aren't removing enough. The point is to sand to remove imperfections in the ultrathin layer you just put on. So go lightly and use lots of water.
Quote:
How do you get in the door jambs, under decklid, drip rails, and around other odd places.
Foam brush, spraycan, hvlp gun have all been used.
Quote:
Thanks a lot.
You're welcome.
How'd I do guys?
Posted By: Exit1965
Re: Paint job on a budget!? CONTINUED..page 44........ - 12/26/06 03:52 PM
Nice work, Mike
Posted By: 69DartGT
Re: Paint job on a budget!? CONTINUED..page 44........ - 12/26/06 08:44 PM
No pictures but I wetsanded today started with 400 and switched to 800 right away, followed by a good wash dry and another coat of paint. The paint does seem to go on better then the first couple of coats. I plan on two/three more coats then I'll either wetsand 1500/200 followed by a buff/polish or
Posted By: Anonymous
Re: Paint job on a budget!? CONTINUED..page 44........ - 12/26/06 10:04 PM
Brightside or rustoleum?
Posted By: 69DartGT
Re: Paint job on a budget!? CONTINUED..page 44........ - 12/27/06 12:04 AM
Mike Brightside Fire Red
Posted By: chessman90
Re: Paint job on a budget!? CONTINUED..page 44........ - 12/27/06 04:15 AM
Quote:
How do you get in the door jambs, under decklid, drip rails, and around other odd places.
Foam brush, spraycan, hvlp gun have all been used.
After spraycan has been used do they shine well because wetsanding seems like it would be hard to do in all the crevices. Also where can i find brightsides?
Posted By: Anonymous
Re: Paint job on a budget!? CONTINUED..page 44........ - 12/27/06 04:59 AM
can you spray clear coat urathane over the rustoleum paint
Posted By: 69DartGT
Re: Paint job on a budget!? CONTINUED..page 44........ - 12/27/06 05:26 AM
Quote:
Also where can i find brightsides?
Ebay has a great price on either Fire Red or Flag Blue but any good marine supply store has it. Do you have a West Marine close by? They carry it.
Posted By: Anonymous
Re: Paint job on a budget!? CONTINUED..page 44........ - 12/27/06 08:38 AM
Wow, this thread is still going! I have a question that hopefully anyone on here familiar with painting Nissans via this thread can help. I hear that there is a tremclad red that is [Edited by Moparts - Keep it clean] near exact to the red on my 1990 240sx.
The reason I'm wondering is because for the most part my entire car is great for paint except for the rear 1/4s and rear bumper cover. If I could just do those to make her presentable....then later down the road the full meal deal.
I think its Sunset red?
Posted By: Anonymous
Re: Paint job on a budget!? CONTINUED..page 44........ - 12/27/06 03:17 PM
Posted By: Anonymous
Re: Paint job on a budget!? CONTINUED..page 44........ - 12/27/06 07:27 PM
Greetings all,
Long time reader, first time poster.
I've spent the better part of 4 months reading, and re-reading, posts in this thread and have come to the conclusion that THE top dog, number 1, question that a person NEEDS to ask, and answer themselves - honestly - it seems BEFORE even starting to think proceeding with this project today while thinking only about tomorrow seems to be...
"Do I really have the patience, along with the desire and drive to do what it actually takes to see this project through from start to finish?"
Once this answer has been reached, the next question before starting this project goes back to asking yet again...
"Do I really have the patience this kind of project demands?"
If a person can't be up front and honest with themselves from the start in answering these questions, it seems (from reading a number of the "undesired results" postings by a number of people) they wont get the end result they're seeking.
Maybe it's just my warped observations, but when reading back through posts where this system seems to be failing people, then placing the posts up against a time line laying the paint, number of coats, and cure times allowed before polishing... patience (IMHO) seems to be the biggest downfall each time.
Be that a lack of patience in proper surface prep, laying the paint on too thick or too soon before a prior coat, enough drying time before a wetsanding, or long enough cure time before starting the polishing steps.
I've read posts where a cure time has been put in a number of weeks, then being unhappy because the paint was too soft. Only to back-track postings and see that the time marks between the final coat applied, last wetsanding and the start of polish to wax were only a few days as apposed to a number of weeks needed for paint to cure by these same posting persons.
Yes, I have started this project process on a trunk and have been quite surprised (if not extremly impressed as well) by the results of this process. But, I would add that since I'm in no hurry, I have allowed in upwards of 3 days to pass between coats.
I've been using a cheap dollar store cup with a lid on it to mix the rustoleum in 1 cup at a time batches with 2/3 cup rustoleum to 1/3 cup 100% mineral spirits. I've layed down 4 coats over the course of a week and a half (at the very least) and will probably do the first wetsanding this weekend, there is some very minor orange peel, but the paint seems to lay on so thin that 95% of it all self levels out after a few hours.
Also about 2-4 minutes after laying a wet coat, I've been going back to "very gently" blow out any air bubbles that hadn't popped in the wet paint yet with a small can of compressed air only close enough to the wet paint to pop the bubbles without pushing the wet paint so those areas can level out with the rest of the area.
Now I've read time and again that paint used for professional spraying that it's not recommended that these paints be polished/waxed for at least a minimum of 6 weeks. Key words being "at least" in all of that. Given that rustoleum isn't exactly pre-designed as an automotive paint, I will be pushing this to be (for myself that is) to be 'at least' 12 weeks cure time, if not longer, before I attempt any polishing/waxing of any sort after what I deem to be the final coat (with at least 16-20 coats planned for).

Posted By: Anonymous
Re: Paint job on a budget!? CONTINUED..page 44........ - 12/28/06 12:12 AM
Preach it Brotha, Preach it!
Wiser words have not been spoken. You are saving money by spending time.
I read somewhere that the current rage of reality fix-it shows, where a home is renovated in 30 minutes, has led to an increase in builders and handymen being called to bail out homeowners that started a project and couldn't finish. Unrealistic expectations of the time and effort involved to finish were the #1 reason cited.
Pic looks good. Keep us posted on your progress.
Posted By: Anonymous
Re: Paint job on a budget!? CONTINUED..page 44........ - 12/28/06 06:25 AM
Quote:
...I've spent the better part of 4 months reading, and re-reading, posts in this thread and have come to the conclusion that THE top dog, number 1, question that a person NEEDS to ask, and answer themselves - honestly - it seems BEFORE even starting to think proceeding with this project today while thinking only about tomorrow seems to be...
"Do I really have the patience, along with the desire and drive to do what it actually takes to see this project through from start to finish?"
Once this answer has been reached, the next question before starting this project goes back to asking yet again...
"Do I really have the patience this kind of project demands?"
If a person can't be up front and honest with themselves from the start in answering these questions, it seems (from reading a number of the "undesired results" postings by a number of people) they wont get the end result they're seeking.
Maybe it's just my warped observations, but when reading back through posts where this system seems to be failing people, then placing the posts up against a time line laying the paint, number of coats, and cure times allowed before polishing... patience (IMHO) seems to be the biggest downfall each time.
Be that a lack of patience in proper surface prep, laying the paint on too thick or too soon before a prior coat, enough drying time before a wetsanding, or long enough cure time before starting the polishing steps.
I've read posts where a cure time has been put in a number of weeks, then being unhappy because the paint was too soft. Only to back-track postings and see that the time marks between the final coat applied, last wetsanding and the start of polish to wax were only a few days as apposed to a number of weeks needed for paint to cure by these same posting persons...
You may find this quote from page #1 interesting...
Quote:
...I find that after thinning the paint with mineral spirits the paint "flashes" or dries really quickly, and after a overnight period it is completely dry, unlike automotive paint which takes up to 6 months to fully "cure" so litterally the next day you can sand, buff, polish, and wax the paint.
You may want to go back to this web page and refresh your memory on the originally suggested technique...
Posted By: Anonymous
Re: Paint job on a budget!? CONTINUED..page 44........ - 12/28/06 03:02 PM
Quote:
You may want to go back to this web page and refresh your memory on the originally suggested technique...
I guess what didn't get posted back then is "Your results may vary."
I also recall reading that everyone has been encouraged to first do a test panel, and not rush into doing the whole car. Perfect the technique. I'm not saying that you rushed it Chuck...I really don't remember everything you went through. I have more pressing things than the paint to worry about on my ride right now...but the idea and process have me interested. I do need to stop the rust...so I may just spray bomb those areas till I find a color I like.
Posted By: Anonymous
Re: Paint job on a budget!? CONTINUED..page 44........ - 12/28/06 04:40 PM
Hey Thorn,
Try phosphoric acid as a quick treatment on active rust. I have used POR's Metal Ready, but other brands ( Ospho ) will do as long as the active ingredient is the same.
I have open rust wounds I treated as long as 5 years ago that have remained non-active.
The benefit to this over paint is that the phosphoric acid does not cover up anything (so it doesn't seal moisture in where it can do more harm) and allows you to monitor the status of the wound so you can promptly re-treat if necessary.
Posted By: Anonymous
Re: Paint job on a budget!? CONTINUED..page 44........ - 12/28/06 05:08 PM
I found this out about using it for rust removal: I love Wikipedia!
Quote:
Phosphoric acid may be used by direct application to rusted iron or steel tools or surfaces to convert iron(III) oxide (rust) to a water soluble phosphate compound. It is usually available as a greenish liquid, suitable for dipping (acid bath), but is more generally used as a component in a gel, commonly called Naval jelly. As a thick gel, it may be applied to sloping, vertical, or even overhead surfaces. Care must be taken to avoid acid burns of the skin and especially the eyes, but the residue is easily diluted with water. When sufficiently diluted it can even be nutritious to plant life, containing the essential nutrients phosphorus and iron. It is sometimes sold under other names, such as "rust remover" or "rust killer". It should not be directly introduced into surface water such as creeks or into drains, however. After treatment, the reddish-brown iron oxide will be converted to a black iron phosphate compound coating that may be scrubbed off. Multiple applications may be required to remove all rust. The resultant black compound can provide further corrosion resistance (such protection is somewhat provided by the superficially similar Parkerizing and blued electrochemical conversion coating processes.) After application and removal of rust using phosphoric acid compounds, the metal should be oiled (if to be used bare, as in a tool) or appropriately painted, most durably by using a multiple coat process of primer, intermediate, and finish coats.
I like the idea of sealing out the moisture.
Posted By: Anonymous
Re: Paint job on a budget!? CONTINUED..page 44........ - 12/28/06 06:43 PM
I stand corrected then, -6 months- for automotive paints to properly cure.
So I'll delay the polishing and waxing steps for a minimum of 12-18 months instead of the originally planned minimum of 12-18 weeks.
Final results photos should be ready around Summer - Fall 2008. Which in turn, will work out perfectly against my scheduled restoration completion
Works for me.
Posted By: Ledman_70
Re: Paint job on a budget!? CONTINUED..page 44........ - 12/28/06 07:53 PM
I have read a lot, but not all of the posts on roller painting, but I have a question...since you can't paint metallic with this method, has anyone ever tried to shoot a little metallic in some clear over top a roller job? Seems to me that would be possible, but maybe it would look like it just layed on top the paint. What do you guys think???
Posted By: Anonymous
Re: Paint job on a budget!? CONTINUED..page 44........ - 12/28/06 09:00 PM
Quote:
I have read a lot, but not all of the posts on roller painting, but I have a question...since you can't paint metallic with this method, has anyone ever tried to shoot a little metallic in some clear over top a roller job? Seems to me that would be possible, but maybe it would look like it just layed on top the paint. What do you guys think???
A couple of guys have tried to layer metallic spray bomb between rolled layers. It started to get muted and you could hardly tell there was any metallic there. As far as putting it over the paint in a clear spray bomb? If you're just doing a stripe you might be able to get away with it. If you're trying to do the whole car it might be a challenge, not to mention lots of spray bombs!
Posted By: Anonymous
Re: Paint job on a budget!? CONTINUED..page 44........ - 12/29/06 03:21 AM
I have a lot of surface rust on my Galaxie which is possibly a new variable in all this stuff. I would expect to sand the surface rust down to bare metal and smooth sand the rest with 320 grit. I was planning to use brightside for it's possibly glossier finish and probable ease of use. Now I am thinking that I should maybe go with Rustoleum for it's certain ability to seal the rust despite it's being a little tougher to use and maybe not being as easy to buff glossy? Or do I use a phosphoric acid base rust sealer and prime any bare metal and go with the brightside anyway?
I agree that patience is the best way to approach this process and it begins with thoroughly reading this thread and learning what previous rollers have experienced. But man I want to get my car in paint!
Posted By: Exit1965
Re: Paint job on a budget!? CONTINUED..page 44........ - 12/29/06 05:35 AM
Don't forget you can use primer under the brightside. Mine has 20 coats of rustoleum under it hee hee
Posted By: Marq
Re: Paint job on a budget!? CONTINUED..page 44........ - 12/29/06 07:51 AM
Quote:
Don't forget you can use primer under the brightside. Mine has 20 coats of rustoleum under it hee hee
He is right.. My car has about 4 layers of Tremclad on it AND then I switched to Brightside in mid job with no compatibility or adhesion problems..
.
Posted By: v8mirage
Re: Paint job on a budget!? CONTINUED..page 44........ - 12/29/06 01:53 PM
I used Rust-bullet on my car on the panels that had surface rust. Apply it as directed, maybe with an extra coat, using a roller, then sand to give it a little tooth, and smooth it out, for the other paint to bite into and go. Its in one of the adds at the top and/or bottom of this page. I like it better than POR-15 cuz I can paint over it easier and doesn't have all the other steps that you need to do before applying. Plus I couldn't get the POR-15 to look right, I'm not sure why.
Gerbs
Posted By: Anonymous
Re: Paint job on a budget!? CONTINUED..page 44........ - 12/29/06 03:11 PM
Quote:
I used Rust-bullet on my car on the panels that had surface rust. Apply it as directed, maybe with an extra coat, using a roller, then sand to give it a little tooth, and smooth it out, for the other paint to bite into and go. Its in one of the adds at the top and/or bottom of this page. I like it better than POR-15 cuz I can paint over it easier and doesn't have all the other steps that you need to do before applying. Plus I couldn't get the POR-15 to look right, I'm not sure why.
Gerbs
I had to turn off my add blocker and I found an add for RestoRick selling Zero Rust. It doesn't sound like the same stuff you used. I've heard that POR-15 is used best on the frame.
Quote:
� The full cure can take from only a couple days to a couple weeks depending how wet the coats are applied. It will get tougher and harder with time.
� Zero Rust accepts recoating easily and only needs a light scuff, if after a week. Zero Rust can be topcoated with urethane ONLY with extreme caution as lifting or wrinkling can occur because of their strong solvents. The film must be fully cured and hard enough to not be penetrated with a fingernail before recoating. Apply a light first coat to prevent shocking the finish. Allow this first coat to dry to the touch and then proceed with a normal coat.
� Zero Rust is NOT recommended for use on exterior areas where a finish system will be used. It is best suited to coating underbody areas, inside body panels, floor pans, etc.
Posted By: Anonymous
Re: Paint job on a budget!? CONTINUED..page 44........ - 12/29/06 03:38 PM
This is kinda a neat feature!
Quote:
� Zero Rust can be used in hidden areas such as inside doors, deck lids, etc. by thinning from 40 to 50% and pouring it into the cavities. Coat the inner surfaces by rotating the part. Excess can be drained back into a container for future use. Be sure to "mop" up any overflow drips.
Posted By: Ledman_70
Re: Paint job on a budget!? CONTINUED..page 44........ - 12/29/06 05:24 PM
Actually, I was talking about throwing some metallic in the clear and shooting it with an HVLP gun. Yea, I know, if I have the gun why not just shoot the paint, right? Well, I will if I can't find a way to roll metallic.
Posted By: Anonymous
Re: Paint job on a budget!? CONTINUED..page 44........ - 12/29/06 05:38 PM
Website I stumbled across. Thought I would share if there was any interest.
http://www.rickwrench.com/50dollarpaint.html
Posted By: Anonymous
Re: Paint job on a budget!? CONTINUED..page 44........ - 12/29/06 06:40 PM
Quote:
Website I stumbled across. Thought I would share if there was any interest.
http://www.rickwrench.com/50dollarpaint.html
And now I have come full circle! This is the site I originally found referring to the $50 paint job. His paint job looked so good I began to follow through with this site. And he has a lot of other little tips and tricks he mentions on his site that work well too.
Posted By: Anonymous
Re: Paint job on a budget!? CONTINUED..page 44........ - 12/29/06 06:44 PM
that corvair looks great
Posted By: Anonymous
Re: Paint job on a budget!? CONTINUED..page 44........ - 12/30/06 12:45 AM
Thats a sweet looking Falcon wagon on the street also.
Posted By: patrick
Re: Paint job on a budget!? CONTINUED..page 44........ - 12/30/06 01:34 PM
Don't use POR15 under....it's real picky. if you use it, you need to put your top coat on while it is still slightly tacky, otherwise nothing will stick to it. and if you use it as a topcoat, UV rays will make it dull and chalky in about 5 months.
Posted By: Anonymous
Re: Paint job on a budget!? CONTINUED..page 44........ - 12/30/06 11:16 PM
Hey all! I have been lurking here for a few months and just got to the point where I could try this on my 82 Z28. I am using Rustoleum Navy Blue marine paint. All I can say is wow. It laid down real smooth and flat for my first coat with very little orange peel. I am doing the read deck lid as a test piece to see if I like the color. So far it looks very promising. I attached a pic of the first coat. I will take some better ones in the morning when the sun comes out. I would like to say thank you to all who have spent so much time documenting their progress and a special thanks to charger for bringing this method to the main stream. Let me know how this looks for a first coat. I will post pics of coat 2 tomorrow. Take care all.
Bill

Posted By: Exit1965
Re: Paint job on a budget!? CONTINUED..page 44........ - 12/31/06 12:50 AM
Looks normal for a first coat, which usually doesn't look very good.
The rustoleum marine paint does look interesting.
linkHow much does the stuff cost and where do you get it? Is it a urethane like brightside?
Posted By: Anonymous
Re: Paint job on a budget!? CONTINUED..page 44........ - 12/31/06 02:03 AM
I got it for 11 bucks a quart at Lowes. They have a small display of it at the end of one of their paint isles. I honestly couldnt tell you if its a urethane. The can is less than helpful. It goes on smooth though.
Posted By: Anonymous
Re: Paint job on a budget!? CONTINUED..page 44........ - 12/31/06 03:51 PM
Ok, I must have done something wrong. I had to sand all of the blue paint off this morning. I waited 24 hours and tried to wet sand before the second coat and it was just peeling off in spots and gummy in others where there was SEM self etching primer. On the flip side it was dry and hard on the other half of the decklid. I am thinking either I did not clean the surface as good as I should have or I did not wait long enough. So I just resurfaced the decklid and laid down more etching primer as I cut back down to the metal in spots. Do you think the rustoleum is not compatible with SEM etching primer? They sell a marine primer I am going to try if it does it again. Your thoughts??
Posted By: Anonymous
Re: Paint job on a budget!? CONTINUED..page 44........ - 12/31/06 08:17 PM
Quote:
it was just peeling off in spots and gummy in others where there was SEM self etching primer.
Sounds like it has to do with the primer or your surface prep.
You know you don't have to prime if you are using the Rustoleum, right? Just paint right on the bare metal.
Posted By: Anonymous
Re: Paint job on a budget!? CONTINUED..page 44........ - 12/31/06 08:23 PM
I primed all bare metal with several brands of rattle-can self etching primers with no drying or adhesion problems with regular Rustoleum. Maybe the primer absorbed your prep wipe with solvent and you didnt give it enough time to evaporate.
Bob
Posted By: Anonymous
Re: Paint job on a budget!? CONTINUED..page 44........ - 12/31/06 08:52 PM
I am definitely going to point the finger at my prep work. I just re sanded the whole panel and re primed it. After giving it the recommended drying time I scuffed it and re applied the paint with no thinning this time. ( the can says you don't have to. I will check it again tomorrow to see if I did any better.

Posted By: kenzo42
Re: Paint job on a budget!? CONTINUED..page 44........ - 01/01/07 02:30 AM
Quote:
Ok, I must have done something wrong. I had to sand all of the blue paint off this morning. I waited 24 hours and tried to wet sand before the second coat and it was just peeling off in spots and gummy in others where there was SEM self etching primer. On the flip side it was dry and hard on the other half of the decklid. I am thinking either I did not clean the surface as good as I should have or I did not wait long enough. So I just resurfaced the decklid and laid down more etching primer as I cut back down to the metal in spots. Do you think the rustoleum is not compatible with SEM etching primer? They sell a marine primer I am going to try if it does it again. Your thoughts??
I'm pretty sure you're not suppose to paint directly over self etch. I'm assuming this was placed directly over metal?
You're suppose to seal it after self etch, if memory serves me.
SEM makes top of the line 1k stuff.
Posted By: Anonymous
Re: Paint job on a budget!? CONTINUED..page 44........ - 01/01/07 04:40 AM
Exit,
Did you use rustoleum professional, or stops rust, first?
Who used Professional?
I can get easily get either here, and I am taking the car down to bare metal.
I'll go to brightside for the topcoat later
Posted By: Anonymous
Re: Paint job on a budget!? CONTINUED..page 44........ - 01/01/07 04:59 PM
I've been considering brightside or blue water myself taking into consideration the UV protection and "snow birding" in salty air and beach conditions.
I've been using Rust-oleum Professional. I can't recall what exactly Exit was using off the top of my head, or if it was posted.
As a primer, rust-oleum professional seems to sand down smoother, seal (bondo), and hold up better than primers I've used in the past such as Dui-color and another automotive primer whos name escapes me at the moment.
Posted By: Anonymous
Re: Paint job on a budget!? CONTINUED..page 44........ - 01/01/07 09:46 PM
I used Black Professional with no primer. Sanded plenty of it also during the learning curve.
Exit used Professional when he went through his white era. The red was Stops rust. IIRC.
Posted By: Exit1965
Re: Paint job on a budget!? CONTINUED..page 44........ - 01/01/07 11:33 PM
Actually started with red professional, then canvas white standard stops rust, then brightside hatteras white.
Posted By: Anonymous
Re: Paint job on a budget!? CONTINUED..page 44........ - 01/02/07 05:01 PM
Ive had a bit of experience in the past with painting and after buying the kit, and then spending 1000� (around 1800$ or so) on metallic land rover paint, clear coat, primer and mixing agents. I painted my land rover with a paintgun and the results werent very good, as the gun didnt have a filter it started shooting lumps of paint at the car which messed things up, then the clear coat wouldnt land on the car well and exhausted and frustrated I decided that was it and Id pay someone to do a pro job. Note I did it outside. Now Im going to try brightside and am very hopeful, if not ill resort to having it done professionally.
Here are some pics of it painted with a compressor and paint gun:


more pictures here:
http://www.marbellamist.com/defender/index.html
Posted By: Anonymous
Re: Paint job on a budget!? CONTINUED..page 44........ - 01/03/07 12:50 AM
Hi guys,
It's been about three months since I've done this paint job and the paint is holding well.
I honestly forgot to give everyone an update and show you the writeup I made.
http://www.ss14.net/writeup_rollerpj.htmlUnfortunately I'm going to eventually cease my website altogether....so someone read up while you can...or save it on your computer.
Also...feel free to let me know what you think.
Posted By: Anonymous
Re: Paint job on a budget!? CONTINUED..page 44........ - 01/03/07 02:38 AM
Ok, so i'm not real impressed with Rustoleums boat paint. Heres what I did:
Sanded the panel with 220 then 400
Washed with mild soap and water
Dried
Wiped down with mineral spirits and let dry for 2 hours
Wiped down with tack cloth
Applied paint
Waited 48 hours
The paint started flaking right off. I guess I will try the professional series unless anyone can point out a step I did to cause poor adhesion.
Posted By: Exit1965
Re: Paint job on a budget!? CONTINUED..page 44........ - 01/03/07 02:53 AM
Is it very humid over there? That can have an effect, but I'm not sure it would make it peel off like that.
Instead of going to rustoleum professional, you might consider a switch to brightside.
Posted By: kenzo42
Re: Paint job on a budget!? CONTINUED..page 44........ - 01/03/07 03:41 AM
How did you wipe w/ tack cloth? They can leave a residue if pressed hard.
Someone mentioned the powder from latex gloves causes adhesion issues too.
What kind of soap did you use?
Quote:
Ok, so i'm not real impressed with Rustoleums boat paint. Heres what I did:
Sanded the panel with 220 then 400
Washed with mild soap and water
Dried
Wiped down with mineral spirits and let dry for 2 hours
Wiped down with tack cloth
Applied paint
Waited 48 hours
The paint started flaking right off. I guess I will try the professional series unless anyone can point out a step I did to cause poor adhesion.
Posted By: Anonymous
Re: Paint job on a budget!? CONTINUED..page 44........ - 01/03/07 11:00 AM
Hey all, I was following this thread a while back, and recently painted my crx (actually did it like a month ago). I was in a hurry and kinda on a tight budget, so..
Used rustoleum stop rust gloss black for the top portions, and rustoleum professional safety red for the red parts.
Only used a quart to paint the whole car! I dunno how that happened but it did.
Thinned the paint about 30%.
NO WETSANDING between coats, but ONE final wetsand of 1500 to get out orange peel. Had no issues with dust particles causing pits, etc. All the dust came out and it was smooth.
Then did a quick (by quick I mean quick!) hand polish using 3m rubbing compound then turtle wax polish.
Was only trying to get an OEM quality job, so I am pleased with teh results, especially the cost, although it was quite a bit of work.
Sorry I only have two snaps as of now it's been really rainy and they arent very good pics, but the paint is comparable to any oem job out, probably better then some (after doing this I notice many oem jobs with LOTS of orange peel).

*Hood had peeling clear coat, and needs to be resanded, hard to tell in the pics though, but its wavy.

Posted By: Anonymous
Re: Paint job on a budget!? CONTINUED..page 44........ - 01/03/07 12:58 PM
Quote:
Ok, so i'm not real impressed with Rustoleums boat paint. Heres what I did:
Sanded the panel with 220 then 400
Washed with mild soap and water
Dried
Wiped down with mineral spirits and let dry for 2 hours
Wiped down with tack cloth
Applied paint
Waited 48 hours
The paint started flaking right off. I guess I will try the professional series unless anyone can point out a step I did to cause poor adhesion.
You didn't mention whether you primed or not. Does the boat paint require a primed surface?
I thought that was another difference between the brightside and the regular rustoleum; The Rustoleum adhered to bare metal but the brightside required a primed surface.
Posted By: Anonymous
Re: Paint job on a budget!? CONTINUED..page 44........ - 01/03/07 02:48 PM
Nice Job! How many coats did you do in total?
Posted By: C38coupe
Re: Paint job on a budget!? CONTINUED..page 44........ - 01/03/07 05:02 PM
Very nice job, you did it yourself, you saved money, and your satisfied, what else can you say. I have a 2005 Dodge Caravan, magnesium green, it's got orange peel too. I will painting my 48 Chrys Coupe using this method with Tremclad Colonial Blue, I have done many test pieces all with good results, it's work, but so what, it's a learning experience and you get a sense of accomplishment, I love the look on people's faces when you tell them you did the paint with a roller and rust paint, Its classic..C38coupe
Posted By: Anonymous
Re: Paint job on a budget!? CONTINUED..page 44........ - 01/03/07 05:51 PM
I plan on doing it JUST to be able to tell folks I used a roller
Posted By: Anonymous
Re: Paint job on a budget!? CONTINUED..page 44........ - 01/03/07 09:15 PM
Just a quick aside on the issue of painting over rust. I replaced most of the rusted out areas on my car with new metal, but I needed something to coat the remaining areas (surface rust). I considered POR-15 because all the reports seemed very positive. However, I was put off by the need to overcoat it to prevent UV damage (this from the mfg instructions). I decided to try the Rust Bullet that I saw advertised on THIS FORUM. I gave it 2 coats (per mfg instructions). I put them on back-to-back, with about an hour drying time in between, using a very cheap brush (on the undercarriage), which I then threw away. The next day it was the hardest painted surface I've ever seen. I could hit it with a hammer (which I did to take out some dents) and it hardly showed. I recommend it. Wear gloves and old clothes, because if you get it on you (which I did), it takes DAYS to wear off -- it is REALLY tough stuff.
LanceB
Posted By: Anonymous
Re: Paint job on a budget!? CONTINUED..page 44........ - 01/05/07 05:38 PM
Quote:
Website I stumbled across. Thought I would share if there was any interest.
http://www.rickwrench.com/50dollarpaint.html
That is the site that directed me here. I've been reading this for a couple months now and am hooked. I'm likely within half an hour of 69chargeryeehaa and am hoping to catch a glimpse of that car at either a gas station or a cruise night next summer.
I have a question with respect to buffing tools. I had been shopping for a good deal on a PC7424 when I was given a Waxmaster W6000 for Christmas. I realize this is not a tool of the same calibre as the PC stuff, but can I get away with something like this over a Tremclad job?
I've been looking at the Tremclad Wild Raspberry as it is a pretty good match for the original maroon of my car.
Mopar content. The vehicle on the left is my dad's '74 Tradesman, which we got in '75. The Corvair has been in that primer since 1971 or so.

Posted By: 69chargeryeehaa
Re: Paint job on a budget!? CONTINUED..page 44........ - 01/05/07 09:31 PM
Posted By: batjac
Re: Paint job on a budget!? CONTINUED..page 44........ - 01/06/07 12:58 AM
Sold it? SOLD IT?!?!? Doesn't that mean this tread will implode and tear a rift in the space-time continuum or something?
Posted By: C38coupe
Re: Paint job on a budget!? CONTINUED..page 44........ - 01/06/07 02:30 AM
I have seen a pic of the new toy of Charger's, let me just say it's very
"Awesome". The Charger is and will continue to be an Icon and Legend on this thread. And thanks to him, this very informative thread has and continues to be fantastic and has helped a lot of people,inluding yours truly..............C38coupe
Posted By: Anonymous
Re: Paint job on a budget!? CONTINUED..page 44........ - 01/06/07 03:26 AM
out of curiosity did you tell them how the charger had been painted?? do you think this affected its resale value at all? show us some pics of your new toy!
Posted By: Pool Fixer
Re: Paint job on a budget!? CONTINUED..page 44........ - 01/06/07 02:59 PM
Quote:
i buffed my car with a $15 buffer i bought at princess auto
i sold the charger by the way, about 3 weeks ago. but i got a new toy
did you sell it to that guy overseas? I remember him asking about your car on the charger board.
and don't think your getting away with getting a new toy and not posting a pic!!!
Posted By: 69chargeryeehaa
Re: Paint job on a budget!? CONTINUED..page 44........ - 01/06/07 06:05 PM
i sold the car to a guy i know that is a friend of mine that also has another 69 charger. He knew everything about the car and how it was painted, he loves the car. I really liked the car alot, but there were things that i did'nt like, mostly the gas consumption, and the brut size of the car made it a real pain to work on since i had about 6" to spare in my garage. I have a double garage, but that charger was HUGE, and since i like to work on my cars durring the winter it really made that hard and a pain. i got really good $ for the car, it is local, and i can go see it whenever i want and even drive it. All my cars are not garage queens, i drive my cars alot, in the time i had the charger (1yr 3 months) i put 30000mi on the car. The 1mpg gas mialage really got old fast!!!! I actually bought my "new" toy before i sold the charger, i got a deal on my new toy i just could'nt pass up, and it is my other "dream car".
Heres a pic, 1957 Porsche Speedster:


i stole the porsche, and made good $ on the charger, so i have no regrets. I'm really confortable with the VW/Porsche cars, they are so easy to work on, and they're quick and still get 30+mpg.
Quote:
Sold it? SOLD IT?!?!? Doesn't that mean this tread will implode and tear a rift in the space-time continuum or something?
Yes, yes it does, it was my long term plan muhahahahahahahaha
Posted By: Anonymous
Re: Paint job on a budget!? CONTINUED..page 44........ - 01/06/07 06:09 PM
Gut gemacht, vorshprung durch technic!
Well done,
Thats a beautiful speedster, thought about painting it black or preferably silver?
Posted By: 69chargeryeehaa
Re: Paint job on a budget!? CONTINUED..page 44........ - 01/06/07 06:26 PM
Quote:
Gut gemacht, vorshprung durch technic!
Well done,
Thats a beautiful speedster, thought about painting it black or preferably silver?
actually i was thinking that too!!!! but this car warrents a "real" paint job, i was thinking a dark silver/gun metal grey metalic, they look sweet in that color. If i were doing a non-metalic color i'd for sure roller it to perfection, but since i really want a metalic paint job i'm forced to spray. The interior is tan leather, too bad the paintjob is flawless, i'm not crazy about red, but at least this color is Porsche "guards red" and it's a nice red for being red. The car is so small, i could eaisly spray this car in my garage, there's no roof, it's actually a really small car, you can see in the pic, my lowered beetle dwarf's that car!!!, and a geo metro dwarf's my beetle!!!!
Posted By: 4mulaS
Re: Paint job on a budget!? CONTINUED..page 44............ - 01/06/07 06:29 PM
when is this post going to end or be transfered to at least general?
Posted By: Anonymous
Re: Paint job on a budget!? CONTINUED..page 44............ - 01/06/07 06:35 PM
Its the nicest porsche ever, 2nd being the original 911.
But I must insist silver is the nicest colour, have a search on google images. You arent tempted to try and use brightside silver and really buff it for hours with some 3m rubbing compound??
Oh and I dont think this post will ever end, it may deserve its own dedicated forum but im sure the mopar board is thankful for all the hits it gets as a result of this post.
Posted By: 69chargeryeehaa
Re: Paint job on a budget!? CONTINUED..page 44............ - 01/06/07 06:44 PM
i think if anything, this thread shows a huge interest in the method, and all the people it's helped get their rides on the road without being primer specials makes me all warm and fuzzy inside.
i agree, silver is a really nice color, the wetsanding and polishing is nothing, the only reason i would spray the car is because of wanting metalic paint, but if it were any other solid color i'd roller the paint, buff/polish.
Posted By: 69DartGT
Re: Paint job on a budget!? CONTINUED..page 44............ - 01/06/07 08:53 PM
I haven't been able to touch the truck since just before Christmas been RVing etc but we are susposed have great weather in the 70's starting tomorrow so back at it, I'm hoping for full coverage with the next two coats
Posted By: Anonymous
Re: Paint job on a budget!? CONTINUED..page 44........ - 01/07/07 01:21 AM
Can anyone try to make a quick video and put it on youtube or so what that way I can see how to do it. Please try to use rusto pro black. For some reason i'm getting alot of runs or to thick. When i sand it down you can see the under coat. Please let me know that way I can learn how to paint a section on my bumper.
Posted By: 69DartGT
Re: Paint job on a budget!? CONTINUED..page 44........ - 01/07/07 01:28 AM
How much are you thinning? I had to thin until the paint was almost water, I stirred then lifting the stirrer could count to about ten then the paint went on just fine, but before that I had it to thick and nothing but problems.
Posted By: Anonymous
Re: Paint job on a budget!? CONTINUED..page 44........ - 01/07/07 01:40 AM
Well i have it so thin that it ran down my bumper. My bumper is sill on my car. This is gonna be my last coat then i'm gonna try to buff see how it turns out. IF it's almost thin like water wouldn't it run pretty bad?
Posted By: 69DartGT
Re: Paint job on a budget!? CONTINUED..page 44........ - 01/07/07 02:03 AM
Quote:
if it was thin like water wouldn't it run?
Mine didn't I actually had to use another roller to knock down the bubbles but other then that it went on well.. But I had to use little to no pressure on the rollers just enough to have the paint flow.
Posted By: Anonymous
Re: Paint job on a budget!? CONTINUED..page 44........ - 01/07/07 02:08 AM
Are you saying using another roller that does not have any paint on it?
Posted By: 69DartGT
Re: Paint job on a budget!? CONTINUED..page 44........ - 01/07/07 02:42 AM
Quote:
Are you saying using another roller that does not have any paint on it?
yes I use two one to apply the paint and the other to smooth it out & remove defects bubbles etc. After a little practice it really gets easy.
Posted By: Anonymous
Re: Paint job on a budget!? CONTINUED..page 44........ - 01/07/07 03:21 AM
Quote:
Well i have it so thin that it ran down my bumper. My bumper is sill on my car. This is gonna be my last coat then i'm gonna try to buff see how it turns out. IF it's almost thin like water wouldn't it run pretty bad?
Sounds like too much paint. Verrrry thin coats.
Posted By: Anonymous
Re: Paint job on a budget!? CONTINUED..page 44........ - 01/07/07 03:27 AM
I just tried this again with rusto pro gloss black. I thinned it about 30% ish. One coat completely covered the base color. Is that normal. I put it on a thin as I could. It laid down pretty well with few bubbles. I will get a pic in the AM.
Posted By: Anonymous
Re: Paint job on a budget!? CONTINUED..page 44........ - 01/07/07 03:32 AM
yeah with black it's not really transparent coats. It covers almost in one coat. Is that right?
Posted By: Anonymous
Re: Paint job on a budget!? CONTINUED..page 44........ - 01/07/07 08:04 AM
Quote:
So you had to get another bug.....
You VW guys.......
j/k Looks very cool. I bet it is a fun ride.
Well, You are still 69ChargerYeeHaa in my book.
Thanks again.
I dont mean to nitpick but chargers new car isnt a VW or a bug its a Porsche Speedster, same country different manufacturer and type of car
Posted By: Exit1965
Re: Paint job on a budget!? CONTINUED..page 44........ - 01/07/07 01:44 PM
Quote:
yeah with black it's not really transparent coats. It covers almost in one coat. Is that right?
That's what I remember too. With Rustoleum, as a few have said, it's best to keep the amount of paint thin and don't put much on at a time. I did one coat with black once, and yes it did cover very well with only one coat with no runs and little orange peel.
Posted By: Anonymous
Re: Paint job on a budget!? CONTINUED..page 44........ - 01/07/07 02:21 PM
[quoteI dont mean to nitpick but chargers new car isnt a VW or a bug its a Porsche Speedster, same country different manufacturer and type of car
Well, yes and no. Different manufacturer like Chevy and Opel, or Ford and Lincoln.
The VW beetle was designed by Ferdinand Porsche, and the two cars are very similar under the skin.
And, being a vwbus guy, thats not a slam on the speedster, its a complement to the beetle...
It is an old joke to needle Porsche owners on the similarities, now that Porsche is so far removed from being "the people's car".
So to say 69Chargeryeehaa "has got another vw" is to needle him a bit.
Posted By: Anonymous
Re: Paint job on a budget!? CONTINUED..page 44........ - 01/07/07 05:59 PM
Posted By: Anonymous
Re: Paint job on a budget!? CONTINUED..page 44........ - 01/07/07 06:09 PM
Quote:
Nice Job! How many coats did you do in total?
i hear A LOT of talk about how many coats everyone did. IMO - it doesn't really matter, when you wetsand, you're pretty much sanding down most of the coat, when you've finished, you think you have around 8coats but you've pretty much wetsanded most of those coats - in the end, you pretty have 3-4 coats on there total.
everyone will do a different amount of coats, everyone has their own technique. when i was rolling, i did about 7coats on my rear bumper (wetsanding in between each coat) - when i did my final coat, i accidentally chipped a piece of the paint off and it was really thin - nothing like 7 coats.
after doing this, i recommend you do about 3 layers with no wetsanding, then wetsand on your 4th coat, if there's not full coverage, do a couple more layers and try again. all of the orange peel is taken care of on your final wetsand of 1000/1500/2000.
Posted By: Exit1965
Re: Paint job on a budget!? CONTINUED..page 44........ - 01/08/07 01:13 AM
Looks nice! What kind of marine paint is this?
Posted By: Anonymous
Re: Paint job on a budget!? CONTINUED..page 44........ - 01/08/07 01:28 AM
Quote:
Looks nice! What kind of marine paint is this?
west marine topside paint - i believe its the same as interlux brightside paint, except its rebadged and cheaper.
Posted By: Anonymous
Re: Paint job on a budget!? CONTINUED..page 44........ - 01/08/07 06:56 AM
Posted By: Anonymous
Re: Paint job on a budget!? CONTINUED..page 44............ - 01/08/07 08:45 AM
so what are the EXACT steps to paint a car? first of all i would believe to strip it all the way down to the metal? then mix the paint propperly with the mineral spirit, and then apply one coat? then another and sand it over night? and do this process about 4 times? i can supply a picture of my car and i KNOW it will be a tedious project but i have time and i can be a paitent person most of the time
my car:(1979 subaru btw)

Posted By: 69DartGT
Re: Paint job on a budget!? CONTINUED..page 44............ - 01/08/07 02:40 PM
Quote:
so what are the EXACT steps to paint a car? first of all i would believe to strip it all the way down to the metal? then mix the paint propperly with the mineral spirit, and then apply one coat? then another and sand it over night? and do this process about 4 times? i can supply a picture of my car and i KNOW it will be a tedious project but i have time and i can be a paitent person most of the time
my car:(1979 subaru btw)
http://carpainting.wetpaint.com/page/Rollering+Interlux+Brightside+Polyurethane+Paint
Posted By: Anonymous
Re: Paint job on a budget!? CONTINUED..page 44........ - 01/08/07 04:03 PM
Quote:
1957 Porsche Speedster:
i stole the porsche, and made good $ on the charger, so i have no regrets. I'm really confortable with the VW/Porsche cars, they are so easy to work on, and they're quick and still get 30+mpg.
Air-cooled, rear-engined cars. Gotta love 'em!
Gorgeous vehicle, BTW.
Posted By: 69chargeryeehaa
Re: Paint job on a budget!? CONTINUED..page 44........ - 01/08/07 04:23 PM
Quote:
Quote:
1957 Porsche Speedster:
i stole the porsche, and made good $ on the charger, so i have no regrets. I'm really confortable with the VW/Porsche cars, they are so easy to work on, and they're quick and still get 30+mpg.
Air-cooled, rear-engined cars. Gotta love 'em!
Gorgeous vehicle, BTW.
thanks
i currently have the motor out, mostly just to inspect, winter anyways, now i have the space in my garage!!!! it took me 1 hour, 2 beers to get the motor out with a skateboard and a floor jack!!! ok it took me 20 mins, but i had to have the 2 beers, sit back and laugh; it's too easy, think about all the $ i'll save on coolant!!! lol
Posted By: 69DartGT
Re: Paint job on a budget!? CONTINUED..page 44........ - 01/08/07 06:21 PM
Just finished another coat 4th I think have 99% full coverage if this great weather holds I'll do that tomorrow. Looks like the Porter Cable 7424 I got for Christmas will get a lot of use soon
What may look like darklines aren't really there must be camera or me?

Posted By: Anonymous
Re: Paint job on a budget!? CONTINUED..page 44............ - 01/08/07 07:14 PM
still a little bit confused on that website but i can say one of the funniest things i read was when you mess up on a pannel, curse at it and then saturate the heck out of the remaining paint and it will work
Posted By: Anonymous
Re: Paint job on a budget!? CONTINUED..page 44............ - 01/08/07 11:00 PM
ok so using a freaking sponge sand pad is NOT the way to go, i been sanding different parts of the rear driver side 1/4 pannel on my car and ive only got to the bare mettal on certain parts. and on other certain parts its just the copper coating or what ever it is and then its the original color, then tho bondo and primer.
Posted By: 69DartGT
Re: Paint job on a budget!? CONTINUED..page 44............ - 01/08/07 11:07 PM
I bought a sears craftsman orbital sander they use a 5" hook and loop sanding pad, the one I got is varible speed and really made the sanding part easier.
Posted By: Anonymous
Re: Paint job on a budget!? CONTINUED..page 44............ - 01/08/07 11:14 PM
Quote:
I bought a sears craftsman orbital sander they use a 5" hook and loop sanding pad, the one I got is varible speed and really made the sanding part easier.
HA!...what kind of sand paper did you use to get to the bare metal? and did you have to frequently to stop to clean off the sand paper?
Posted By: 69DartGT
Re: Paint job on a budget!? CONTINUED..page 44............ - 01/08/07 11:19 PM
Why go to bare metal? If needed use a stripper of some sort. The paper was craftsman on the really bad area's I used 80 grit and the other areas I used 320. I was surprised at how little paper I used, bought a box of 12 in 220 & 320 but box of 5 in the heavier grits.
Some pic's of progress the last one is pretty close to what I had when I started rolling but hindsite being 20-20 I wish I'd primered the whole truck first.


Posted By: 69DartGT
Re: Paint job on a budget!? CONTINUED..page 44............ - 01/08/07 11:29 PM
Speaking of primer the bed of the truck showed 30+ years of use and since this isn't a show truck I used Rustoleum rusty metal primer straight out of the can and rollered it on, came out so smooth it looked like it had been sprayed.
I did sand and used a heavy rotary wire brush to remove any loose rust or scale first.
Posted By: 69chargeryeehaa
Re: Paint job on a budget!? CONTINUED..page 44........ - 01/09/07 12:23 AM
Quote:
That's the beauty of these things - the Corvair trick is an engine cradle made up from some two-by-fours, but it's the same basic principle. And no rad to replace!
Did you have a preference for whose polishing compounds you were using?
i used turtle wax polishing compound (white paste) and that new turtlw wax ice wax, which i must say is the best wax i've ever used, it takes me less than 30 min to wax a car with that stuff.
Posted By: Anonymous
Re: Paint job on a budget!? CONTINUED..page 44........ - 01/09/07 01:54 AM
ok so i just got back from orilleys with a few new things for the project, i bought some aircraft stripper for the paint to be removed(awaiting the results on it), some bondo filler(any idea how long that stuff takes to dry and what can i use for a mixing board?) some cardboard and a piece of plastic to slap it on to the areas that need attention? also bought a tack cloth(read that one was needed somewhere in the project) and a paint and rust stripper.(the black circular disk looking thing.) what else should i purchase next time im out at the store? i know i need to make a color selection as well as get the mineral spirit mixer and the roller brush, and some touch up brushes and a mixing pan. is it possible to use the mineral spirits as a cleaner for the brush when i am not using it? or should i try to get it as air tight as possible in a plastic zip-loc bag?
ps- is it possible to get a high gloss silver or a VERY shinny gloss white? i know that i will not need to get any gloss since the paint allready is shiny enough due to proper wet-sanding and buffing.
Posted By: 69DartGT
Re: Paint job on a budget!? CONTINUED..page 44........ - 01/09/07 03:04 AM
If you have a Dollar store near by of Kmart/WalMart buy a cheap plastic cutting board makes a great mixing platform. Plastic speaders are at O'Rielys and such.
The bondo will dry depending on how much hardener you add plus the temp outside.
Gloss white is available with Brightside & rustoleum but I think you are out of luck with the silver.
I do the same with mineral spirits as you are planning no problem just be careful where you store it no flames etc.
Posted By: Anonymous
Re: Paint job on a budget!? CONTINUED..page 44........ - 01/09/07 03:17 AM
Looking Good.
Quote:
Just finished another coat 4th I think have 99% full coverage if this great weather holds I'll do that tomorrow. Looks like the Porter Cable 7424 I got for Christmas will get a lot of use soon What may look like darklines aren't really there must be camera or me?
Posted By: 69DartGT
Re: Paint job on a budget!? CONTINUED..page 44........ - 01/09/07 03:46 AM
Quote:
Looking Good.
Quote:
Just finished another coat 4th I think have 99% full coverage if this great weather holds I'll do that tomorrow. Looks like the Porter Cable 7424 I got for Christmas will get a lot of use soon What may look like darklines aren't really there must be camera or me?
Thanks much I know I'm on my side but I'm really happy how this truck came out, maybe I should have spent more time on body work but the truck is meant to be driven and used as a truck I did fix a bunch of rusted spots but left some dings and dents I missed before the first coat. I think had I primered the whole truck I would have seen these and maybe done more bosy work, IMHO that was a blessing
Posted By: _Scott_
Re: Paint job on a budget!? CONTINUED..page 44........ - 01/09/07 04:08 AM
Quote:
so what are the EXACT steps to paint a car? first of all i would believe to strip it all the way down to the metal?
It is rarely necessary to strip an entire car down to bare metal. You make a lot of work for yourself unnecessarily, and using a chemical stripper is no less work in most cases.
You are getting ahead of yourself. Go back and do some reading. You are asking questions that have been covererd several times.
I've said it before, but I'll repeat it here. A great looking paint job depends on the prep work under the paint. Don't rush to start applying paint until you have learned how to do the prep work.
Posted By: Anonymous
Re: Paint job on a budget!? CONTINUED..page 44........ - 01/09/07 05:17 AM
Well finally went and started on my Talon. I'm starting with the hood (which is already off the car), and I must say it's looking better already, even with only one coat. I'm going with the Brightside Fire Red for the body on this one. Just thought I would post some pics of the progress.
BTW, Marq or 69DartGT; IS this what you guys ended up with after your first coat? Not sure if I got the mixture quite right. It still has quite a few bubbles that didn't roll out or pop when blown on. I will probably have to wetsand it down before the next coat, but I'm really not looking forward to it.

Posted By: Anonymous
Re: Paint job on a budget!? CONTINUED..page 44........ - 01/09/07 05:19 AM
Another pic from a different angle. You can see some of the leftover bubbles in this one.

Posted By: Anonymous
Re: Paint job on a budget!? CONTINUED..page 44........ - 01/09/07 05:21 AM
One more pic to share. This is a before shot after sanding and fixing of some bad spots.

Posted By: Marq
Re: Paint job on a budget!? CONTINUED..page 44........ - 01/09/07 05:51 AM
Quote:
BTW, Marq or 69DartGT; IS this what you guys ended up with after your first coat? Not sure if I got the mixture quite right. It still has quite a few bubbles that didn't roll out or pop when blown on. I will probably have to wetsand it down before the next coat, but I'm really not looking forward to it.
The first coats will be relatively translucent... in that your thin layer of paint will show all the different colors underneath the layer. As the layers of paint are added... you will be building up the skins and less and less of the underlayer will be visible.
By about 4 coats of Brightside or 8 coats of Tremclad/Rustoleum you will have 100% coverage and no longer be able to see the undersurface.
If there are a substantial number of bubble artifacts on a coating... you can do a wetsand to ensure that the surface is completely level before moving on to the next layer of paint.
If there are just a ffew bubble or bug artifacts you can slap on another coat of paint and you should be able to bring everything level with wetsanding on the second coat.
Normally you should be able to get two coats on before wetsanding.
.
Posted By: Anonymous
Re: Paint job on a budget!? CONTINUED..page 44........ - 01/09/07 06:16 AM
Heres how mine turned out. I did it in gloss sunburst yellow. I just followed the steps 69charger gave. I still need to wax. The car is wet, its been raining here. Ill get some daytime shots when the rain goes away. Heres the link
http://www.cardomain.com/ride/2541873

Posted By: Anonymous
Re: Paint job on a budget!? CONTINUED..page 44........ - 01/09/07 07:20 AM
all i can say whew im finally done. i have read every post from the begining. all 97 pages.
wow. couple of things to say
1. 69chargeryeehaw: kudos along to everyone else who has done this. also, very nice porsche. its not fiberglass junk is it? nice beetles too. im a vdub freak. owned a whole bunch of em. got 2 now. also owned my fair share of mopars. a couple furys and newports as well as d50s and 150s.
2. i have went to school via vocational as well as wyo tech for painting. its in my blood. i paint for CAT now. and i can say i have always sprayed but you have opened a new light for me. i am in the process of restoring a 53 right hand drive and they didnt have bc/cc back then so it would look more period correct to use enamel. plus no mess will be super nice.
3. this is perfect if you have no paint experience and no garage, comp, gun etc and at a fraction of the cost. me, i live in an apt with no garage so this will work out real nice.
4. ill probably use brightside. urethane is the way to go. very very durable and a much higher gloss. plus im used to urethane where i work. we use a 2 part single stage. so maybe i can "borrow" some stuff from work.
5. im also going to experiment with some metallics and clear. as seen here
web pagehttp://www.rustoleum.com/product.asp?frm_product_id=22&SBL=1[/url] web pagehttp://www.rustoleum.com/product.asp?frm_product_id=18&SBL=1[/url] will let you know how things go with that.
anyways, just lettin you know whats goin on and good luck to all. i will post pics when i can of my progress also. keep on rollin
Posted By: Anonymous
Re: Paint job on a budget!? CONTINUED..page 44........ - 01/09/07 08:50 AM
Great now I dont know whether to go with Rustoleum Metallic or Brightside, did I read in this thread that you cant roll metallic?
Ill be painting in black.
Posted By: Anonymous
Re: Paint job on a budget!? CONTINUED..page 44........ - 01/09/07 09:23 AM
Quote:
Great now I dont know whether to go with Rustoleum Metallic or Brightside, did I read in this thread that you cant roll metallic?
Ill be painting in black.
i heard black is the hardest to do because it shows all the imperferctions???
Posted By: Anonymous
Re: Paint job on a budget!? CONTINUED..page 44........ - 01/09/07 09:25 AM
Quote:
If you have a Dollar store near by of Kmart/WalMart buy a cheap plastic cutting board makes a great mixing platform. Plastic speaders are at O'Rielys and such.
The bondo will dry depending on how much hardener you add plus the temp outside.
Gloss white is available with Brightside & rustoleum but I think you are out of luck with the silver.
I do the same with mineral spirits as you are planning no problem just be careful where you store it no flames etc.
when you painted the truck, how did you do the ratio of paint to mixer(in ammounts of tea spoons or glasses)
Posted By: Anonymous
Re: Paint job on a budget!? CONTINUED..page 44........ - 01/09/07 10:33 AM
Quote:
i heard black is the hardest to do because it shows all the imperferctions???
True, but its a land rover its not meant to be perfect. It has to be black or silver and silver would have to be metallic.
What do you all think?
Posted By: Anonymous
Re: Paint job on a budget!? CONTINUED..page 44........ - 01/09/07 11:15 AM
Black is do-able but your prep work has to be really really good and then your final wet sanding has to be pretty much perfect otherwise the paint will be covered with deep scratches. And then you need to be able to polish the living daylights out of it afterwards to get any decent depth of shine back up.
Like I said, it's do-able but it's also an awful lot of very precise and mistake free work.
Posted By: 69DartGT
Re: Paint job on a budget!? CONTINUED..page 44........ - 01/09/07 02:41 PM
Quote:
when you painted the truck, how did you do the ratio of paint to mixer(in ammounts of tea spoons or glasses)
I used a paint stick to stir and added mineral spirits a little at a time, I would stir to mix good then lift the stick and count when the run off the stick went from a stream to dripping it was right for me. Ratio was about 60% paint 40% thinner I'd guess.
Posted By: 69chargeryeehaa
Re: Paint job on a budget!? CONTINUED..page 44........ - 01/09/07 03:14 PM
Quote:
1. 69chargeryeehaw: kudos along to everyone else who has done this. also, very nice porsche. its not fiberglass junk is it? nice beetles too. im a vdub freak. owned a whole bunch of em. got 2 now. also owned my fair share of mopars. a couple furys and newports as well as d50s and 150s.
Yes it is a fiberglass kit car!!! I could never afford a real one, my car is a CMC car built professionally with 2000mi original, built in 1997. It's built off a 66vw, converted to IRS, all the good VDub stuff, sways front/rear, 1835CC motor with dual Dellortos, leather interior, very well put together, no expense spared, and it's perfect. I actually would'nt want a original one, parts are expensive, and to me the kit car is the best of both worlds, cheap VW parts, porsche body, like a sheep in wolf's clothing!!!
I really like seeing all the before/after pics, a big to all the guys that have pulled it off.
Posted By: 69DartGT
Re: Paint job on a budget!? CONTINUED..page 44........ - 01/09/07 04:11 PM
Martin, when I was doing VW's that Speedster was real high on my list of cars I wanted to build
I did have a 74 Karmen Ghia with a 2074 on NOS was a real spotlight surprise.. Engine later ended up in our dune buggy.
Posted By: Anonymous
Re: Paint job on a budget!? CONTINUED..page 44........ - 01/09/07 05:50 PM
i just missed the speedster widebody by 3 days. a friend had one in his back yard and i didnt even know it. we had a party and he brought it up cuz he seen all my vdub stuff. then he proceeded to tell me yeah i just took one to the dump 3 days ago cuz it was rotting away. so i hightailed it to the dump and it had been smashed by a crane. what a nut lolol
right now im looking for a double cab or nice lookin bus.
anyways, a lil off topic there, the metallic and clear are sprays. but they are still enamel. the thing with the metallic if you use it is keep the panels like they sit on the car. this can be a little difficult with the horizontal surfaces since paint cans dont like to be sprayed sideways.
Posted By: Anonymous
Re: Paint job on a budget!? CONTINUED..page 44........ - 01/09/07 06:54 PM
Quote:
paint cans dont like to be sprayed sideways.
werd to that stuff!!!
Posted By: 69DartGT
Re: Paint job on a budget!? CONTINUED..page 44........ - 01/09/07 09:36 PM
Well last coat is done, tomorrow I will start to install the interior of the truck along with a new radio/speakers. I figure by the time I get that done I'll be ready for the buffer compound thing.
Any thoughts in the Pinnacle products? or Turtle wax compounds?
Posted By: Anonymous
Re: Paint job on a budget!? CONTINUED..page 44........ - 01/09/07 10:53 PM
Quote:
Any thoughts in the Pinnacle products? or Turtle wax compounds?
This is what TurtleWax is capable of achieving
And this is what a 'good' swirl remover (which is an equivalent to the Pinnacle swirl remover) can get you.
Personally I think that the choice is a no-brainer.
Posted By: Anonymous
Re: Paint job on a budget!? CONTINUED..page 44........ - 01/10/07 01:10 AM
Quote:
Well last coat is done, tomorrow I will start to install the interior of the truck along with a new radio/speakers. I figure by the time I get that done I'll be ready for the buffer compound thing.
Any thoughts in the Pinnacle products? or Turtle wax compounds?
get what ever that guy above me with the pictures has!
Posted By: 69DartGT
Re: Paint job on a budget!? CONTINUED..page 44........ - 01/10/07 01:27 AM
Quote:
Quote:
Any thoughts in the Pinnacle products? or Turtle wax compounds?
This is what TurtleWax is capable of achieving
And this is what a 'good' swirl remover (which is an equivalent to the Pinnacle swirl remover) can get you.
Personally I think that the choice is a no-brainer.
I know I could read back but what in the world did you use to do that
Posted By: Anonymous
Re: Paint job on a budget!? CONTINUED..page 44........ - 01/10/07 01:48 AM
Quote:
I know I could read back but what in the world did you use to do that
I used Poorboy's SSR2.5 with a cutting pad for that panel.
If you like Pinnacle then use the Pinnacle XMT Intermediate Swirl Remover 3.0 (as a cutting compound) which will do the same job.
Make sure that you also use a cutting pad with the Pinnacle XMT Intermediate Swirl Remover 3.0 and you will probably need to use something like Pinnacle XMT Intermediate Swirl Remover 1.0 with a polishing pad to get a perfect finish.
Posted By: 69DartGT
Re: Paint job on a budget!? CONTINUED..page 44........ - 01/10/07 01:59 AM
Haven't tried anything yet but I bought a foam pad kit and it came with a couple of Pinnacle products, I see Poorboys is sold more oversea's from here and not sure I want to pay to have it shipped in but your results are outstanding
Did you wetsand first or just go straight to the swirl remover?
Posted By: Anonymous
Re: Paint job on a budget!? CONTINUED..page 44........ - 01/10/07 02:25 AM
Those two shots were both taken of the hood of my car. I did a dodgy wetsand using 1500 and then hit it with the different swirl removers to see which would be the best method.
Although I was really impressed with the SSR2.5, there are still some small scratches in the paint where I didn't sand the hood properly.
The final wet sanding is a lot more important than the polishing. I'm practising with my 'race' bootlid (with a wing on it) and even though an abrasive cutting compound like Poorboy's SSR3.0 will easily remove sanding marks from 1200 grit paper, it is the little scratches caused by the bits of dust etc in the paint that cause the real headaches.
It is just so important to do a second wet sand with 2000 grit paper to remove these little scratches so that the finished panel can look like a bc/cc job.
Posted By: Anonymous
Re: Paint job on a budget!? CONTINUED..page 44........ - 01/10/07 04:58 AM
ok so, WHEN attempting to wet sand, should you use a hose or a spray bottle? im not sure how to use the spray bottle method
Posted By: Anonymous
Re: Paint job on a budget!? CONTINUED..page 44........ - 01/10/07 07:06 AM
ok im goin to be lazy here and i really dont want to look all the way back through cuz i dont know where its at. what was that other site with the 2 part urethane that was brought up. they had a 1 part orange and thats what i want. and im goin to try some pearl in it.
Posted By: Anonymous
Re: Paint job on a budget!? CONTINUED..page 44........ - 01/10/07 07:34 AM
ok nevermind i found it. it was in text. not a clickable link. you guys might wanna check them out. they have a single stage and clear. but the clear is very pricey and doesnt add up. $90 a quart or $125 a gallon. hmmmmm i would deffinitely buy a gallon. that could be later down the road. prices on 1 part isnt too bad at $21 a qt or $77 a gal.anyways nuff jabbering heres the link
other urethane
Posted By: Anonymous
Re: Paint job on a budget!? CONTINUED..page 44........ - 01/10/07 02:17 PM
After reading for a few months, I finally took the plunge yesterday. I decided to start with my old GMC van's hood, which had a bad case of clear coat peeling, especially on the hood, which was also severely crushed by a falling limb a while back. A few days of polishing up my hammer, dolly and bondo skills (still neds a lot of work)I put the first coat on her yesterday.
My car is a 1993 GMC teal factory color. The Rustoleum 7527 Royal Blue is close, but its not teal, so I decided to try a color match. The original paint is a metallic paint, so I don't expect an exact match. The pictures of the paint can held up to the body make it seem closer than it really is. So, since teal is blue and green, I also bought a can of Rustoleum Hunter Green and proceeded to try small amounts of mixture with blue and green mixed. I finally settled on 2 parts blue and 1 part green, but I may go bluer in the end. The picture with the masking paper makes the paint look a lot lighter than it really is and the last picture makes it look darker. The amount of color variation in these pictures just goes to show how much the camera can fool you, depending on the light quality when the picture was taken. These are all of the first coat of paint!
I mixed 25% mineral spirits, 50% blue and 25% green and got out the rollers. I think the first coat was too thick as it seemed to cover too well. Millions of bubbles showed up, but about 2 minutes later I stroked it with a dry foam brush, and like magic they mostly disappeared. I could see the brush strokes fairly prominently (see the last picture taken as it was getting dark and I was quiting. I was sure I had it too thick, but this morning I can see a color variation where the stokes are, but cant feel any surface lines. I don't see much orange peel yet. I am going to put on the second coat today, unless I decide to wet sand a bit first.
By the way - I bought an empty paint can with a lid at Home Depot because I was mixing colors. When I am done at the end of the day I just pour what is left in that can and put the top on it. I think the metal quart size can costs something like $1 or so.


Posted By: 69chargeryeehaa
Re: Paint job on a budget!? CONTINUED..page 44........ - 01/10/07 04:55 PM
smyrna5 - are you using a brush? looks like it from the pics, also looks like your applying too thick coats, resist the urge to apply thick coats, you want them to go on really really thin, if your getting lots of bubbles, mix the paint more, like alot, and expirement with your thinning mixture until you get the hang of it, keep working on only the hood until you perfect the technique and your happy.
Posted By: Anonymous
Re: Paint job on a budget!? CONTINUED..page 44........ - 01/10/07 05:00 PM
Laid down the 2nd coat. I only waited about 18 hours, but hey this is a daily driver and I need it in about 5 hours. The bugs and dirt will have to be sanded out tomorrow if I gather any driving it.
I used more mineral spirits and less green this time. I mixed it 50% blue, 27.5% mineral spirits, and 12.5% green. Its still too thick I think. I will increase the mineral spirits for the next coat. I think I may also be pushing down to much on the foam brush, since I keep getting those brush lines, but they seem to level out as it dries. Its still very wet in these pictures.


I am getting the idea that the only way to learn to paint this way is to paint! Of course, that is true of most things.
Posted By: Anonymous
Re: Paint job on a budget!? CONTINUED..page 44........ - 01/10/07 05:07 PM
Charger - I am using the high density rollers, but brushing over it once with a foam brush to get the bubbles out. It is definitely way too thick, but I will get it down. Its about 50 degrees today, so that isn't helping, but I need to use more mineral spirits. I got a little confused mixing two colors and can see that my mineral spirits was still too low.
I will get it down pat this week. I am getting excited about it now that I am actually laying down paint, instead of just reading about it. Thanks again for a great method. I will post more pictures as I get closer.
Posted By: Anonymous
Re: Paint job on a budget!? CONTINUED..page 44........ - 01/10/07 06:44 PM
well all i can say is, i have been up since, 8:30 am and have been working on prepping my car since 9:00. i had a friend come over so we coule re-bleed my brakes because i bought a new master cylinder. its now almost 1 and its my first time taking a break! ive only got the front passenger quarter pannel done from what was left yesterday and the rear drivers side quarter pannel done today. as well as part of the hatch, man i need a new disk sander tho mines allready gettin wore out!!
Posted By: Anonymous
Re: Paint job on a budget!? CONTINUED..page 44........ - 01/10/07 08:52 PM
"I am getting the idea that the only way to learn to paint this way is to paint!"
This is VERY true (at least in my case), although I'm still making adjustments to my technique on the trunk lid, I'm pretty comfortable now with laying down the paint and wetsanding with this method. I liked the initial test results, so the rear spoiler was also removed to do the job right from that point onward.
I've noticed that at times during the process, I've gone through the same phases EXIT was over the orange peel, and have laughed at myself about it when I've stepped away from working on the panel for a few days.
Currently I've been doing 2 wetsands, mostly because of my overly critical eye, between coats since I'm not using a whole lot of pressure while doing it. I've been using just enough pressure on the wetsanding until the paper "glides" (for lack of a better term) over the surface.
Then I've been letting it dry completely to see where I may have missed spots. After that phase, I pretty much do a quick run over on the spots that look like I've missed what look like missed, allow it all to dry another day after a good wipe down. Tack cloth the entire panel the following day and lay another coat.
As for wetsanding, I use a half gallon bucket of water with a few drops of dawn dish soap in it. A soft block (well, actually it's a cut up gardening knee pad I got for a buck from the dollar store) wrapped with the wetsand paper after the paper has soaked in one hand, and a large automotive sponge in my free hand to keep the surface wet, and also to wipe off the residue as I wetsand.
All in all it's coming along fantasically though. I've started using the factory paint job done on my Wrangler as a reference point to keep my critical eye in check when I start getting anal about the orange peel on the trunk panel.
Which for "useless information purposes" I chose the trunk lid because it has nearly every paint angle I'll be faced with when I start getting serious on painting the car... after everything else on it has been repaired, cut out, welded, and tuned-up.
Posted By: 1BAD68
Re: Paint job on a budget!? CONTINUED..page 44........ - 01/10/07 10:07 PM
very cool thread, I'm going to try this on my Charger but I really want to stick with the factory color, tremclad has "wild rasberry" thats really close and rustoleum has a burgundy that seems similar but I am wondering if I got regular automotive (PPG, Ditzler) paint in my factory color minus the metal flake, would this same method work?

Posted By: Anonymous
Re: Paint job on a budget!? CONTINUED..page 44........ - 01/11/07 12:13 AM
lol y not just drive to canada and get some termclad? if im correct isnt canada right next door to wisc.?
Posted By: Anonymous
Re: Paint job on a budget!? CONTINUED..page 44........ - 01/11/07 12:29 AM
IBad - the factory paint will probably not work, from what I have learned here. The problem is that it is designed to be shot from a gun, and not rolled on. The advantage of Tremclad/Rustoleum/Brightside is that they are "self-leveling," and designed to be rolled or brushed on.
Posted By: Anonymous
Re: Paint job on a budget!? CONTINUED..page 44........ - 01/11/07 12:35 AM
Quote:
Charger - I am using the high density rollers, but brushing over it once with a foam brush to get the bubbles out.
Mate, your foam brushing is wrecking your painting. Those lines in the paint from the brush will take forever to sand back out and once they have been sanded out you will have [Edited by Moparts - Keep it clean] all paint left on the panel.
Dump the foam brush in the bin.
Once you have painted the panel try going back over the panel very lightly with a clean roller (ie just with the weight of the roller) to help remove any bubbles and to help flatten the paint.
Posted By: 69DartGT
Re: Paint job on a budget!? CONTINUED..page 44........ - 01/11/07 01:05 AM
Quote:
Once you have painted the panel try going back over the panel very lightly with a clean roller (ie just with the weight of the roller) to help remove any bubbles and to help flatten the paint
Have to agree 100% I used the foam brush for the first coat and went to the clean roller for everything else, that and along with proper thinning made the job easier.
Posted By: Anonymous
Re: Paint job on a budget!? CONTINUED..page 44........ - 01/11/07 01:18 AM
Thanks Aussie and Dart. I probably got the idea for that foam brush implanted too firmly in my mind from watching that video on the Brightside site, where the guy rolls on a coat and then happily brushes it in another direction.
OK - I probably won't trash the foam brushes, but will banish them to the "only to be used for the parts I can't reach with a roller" bin. I will thin and mix the paint more and not press so hard in rolling it (as Charger has suggested in the past to lesson bubbles), then roll over it lightly with a clean roller.
Posted By: 1BAD68
Re: Paint job on a budget!? CONTINUED..page 44........ - 01/11/07 03:33 AM
Quote:
IBad - the factory paint will probably not work, from what I have learned here. The problem is that it is designed to be shot from a gun, and not rolled on. The advantage of Tremclad/Rustoleum/Brightside is that they are "self-leveling," and designed to be rolled or brushed on.
yeah, that makes sense.
anyone here from canada want to ship some tremclad to Wisconsin? Wild rasberry looks alot like my cars color.
Posted By: 69DartGT
Re: Paint job on a budget!? CONTINUED..page 44........ - 01/11/07 03:16 PM
Much to my surprise I found Poorboys products at Autogeek, So I ordered the swirl remover #3 & 2.5 plus their carnuba polish. Be a few days before it gets here which will just give the paint more time to harden.
Posted By: Anonymous
Re: Paint job on a budget!? CONTINUED..page 44........ - 01/11/07 04:34 PM
This cloud turned out to have a silver lining. This morming I wet sanded most of the hood to remove those striations that the foam brush left. Since the paint isn't really cured yet, it was pretty easy going with 400 wet. I used a rubber sanding pad, since I wanted to make sure any ridges left by the brush got removed.
I really like this blue color a lot better as a primer. I could not really see all the places where the hood wasn't flat enough before because I had sprayed some grey primer on it a while back. Since paint dust and scuffed paint are both grey, good luck finding any imperfections on that. The blue shows it all up nicely, and I know exactly where I have to do some more sanding. I even decided to fix the few remaining spots where I knew I didn't do a good enough job with the bondo. In the picture, you can see the high (dark blue) areas that need to come down some more to get a uniform dull finish.
In the end, no real harm done with the first few coats. I might even advise using a first coat of Rusto sanded this way to find your imperfections before you really start painting in earnest.

Posted By: Anonymous
Re: Paint job on a budget!? CONTINUED..page 44........ - 01/11/07 05:02 PM
Quote:
This cloud turned out to have a silver lining. This morming I wet sanded most of the hood to remove those striations that the foam brush left. Since the paint isn't really cured yet, it was pretty easy going with 400 wet. I used a rubber sanding pad, since I wanted to make sure any ridges left by the brush got removed.
I really like this blue color a lot better as a primer. I could not really see all the places where the hood wasn't flat enough before because I had sprayed some grey primer on it a while back. Since paint dust and scuffed paint are both grey, good luck finding any imperfections on that. The blue shows it all up nicely, and I know exactly where I have to do some more sanding. I even decided to fix the few remaining spots where I knew I didn't do a good enough job with the bondo. In the picture, you can see the high (dark blue) areas that need to come down some more to get a uniform dull finish.
In the end, no real harm done with the first few coats. I might even advise using a first coat of Rusto sanded this way to find your imperfections before you really start painting in earnest.
still looks like you need to sand down a few spots. sis you sand too hard in a few areas? looks like you sanded down to the primer/bondo
Posted By: Anonymous
Re: Paint job on a budget!? CONTINUED..page 44........ - 01/11/07 05:05 PM
I'd prop that hood up in my shed and spray it with a quick and heavy coat of high fill primer, then spray a mist of "other colored" (black maybe) rusto on it for a guide coat, then start block sanding. When it's baby smooth start rolling!
Posted By: Anonymous
Re: Paint job on a budget!? CONTINUED..page 44........ - 01/11/07 05:38 PM
You are right about it needing more sanding in that picture. It was taken before I finished sanding, just to show how the spots I needed to sand some more showed up. The paint that is on it now is probably akin to what Grimster just called a "guide coat," rolled on, instead of sprayed.
As far as the areas where the bondo is showing, those are areas were the bondo was still a bit too high. I even found a few spots where there as a metal peak that needed to be knocked down and filled. As I said, it really needed more work before it was read to paint, but with that dull grey primer on it, I couldn't tell diddly, or more truthfully just got in too much of a hurry
This hood was really a mess because after it got crushed by a tree limb, a few body work entrpreneurs in a super market parking lot asked me if I would like the dents taken out for $20. I thought they might be itinerant paintless dent removers, but when they pulled out a huge slide hammer and proceeded to punch holes in my hood, I was too flabergasted to say anything until they got half way done and I told them to stop. Can you spell, "Let's see how far we can stretch this metal?"
There was some disagreement when I refused to pay for the harm they had already done, but when I offered to call the police to settle the matter, they declined. I gave them $10 because I am a patsy, but I am pretty sure their green cards were not up to date, and I sure as hell know they didnt have permission or a license to operate in that parking lot.
I could have picked up a good hood from my local pull-a-part for less than the cost of the bondo, but this is supposed to be a fun learning experience right?
Posted By: C38coupe
Re: Paint job on a budget!? CONTINUED..page 44........ - 01/12/07 01:22 AM
Hi, send me a PM 1BAD68, and I will see if I can help you get a gallon of Tremclad Wild Raspberry. I al
so have used this color on a test piece, I will try and include in this post C38coupe

Posted By: Anonymous
Re: Paint job on a budget!? CONTINUED..page 44........ - 01/12/07 01:38 AM
i have a question, i have gone through a disk grinder attachment, and a wire brush and some of the paint is EXTREMELY hard to get off. some parts of the car is down to the metal, but a good portion of it stil needs to be sanded down to bare metal. do i really need to go all the way down to the metal in order to paint it?
Posted By: 69DartGT
Re: Paint job on a budget!? CONTINUED..page 44........ - 01/12/07 02:41 AM
Quote:
do i really need to go all the way down to the metal in order to paint it?
No just get everything smooth.
Posted By: Anonymous
Re: Paint job on a budget!? CONTINUED..page 44........ - 01/12/07 02:43 AM
Quote:
i have a question, i have gone through a disk grinder attachment, and a wire brush and some of the paint is EXTREMELY hard to get off. some parts of the car is down to the metal, but a good portion of it stil needs to be sanded down to bare metal. do i really need to go all the way down to the metal in order to paint it?
Nope, but since you are down to bare metal in some spots then you really should continue until it is all down to the bare metal. Instead of sanding the hell out of it, you could also use some really strong paint stripper. Just don't use it in an enclosed area with a heater going.
Posted By: Anonymous
Re: Paint job on a budget!? CONTINUED..page 44........ - 01/12/07 03:49 AM
Quote:
Quote:
i have a question, i have gone through a disk grinder attachment, and a wire brush and some of the paint is EXTREMELY hard to get off. some parts of the car is down to the metal, but a good portion of it stil needs to be sanded down to bare metal. do i really need to go all the way down to the metal in order to paint it?
Nope, but since you are down to bare metal in some spots then you really should continue until it is all down to the bare metal. Instead of sanding the hell out of it, you could also use some really strong paint stripper. Just don't use it in an enclosed area with a heater going.
like what kind of stripper? the aircraft kind? i bought this one kind in a spray can but ionno.
Posted By: Anonymous
Re: Paint job on a budget!? CONTINUED..page 44........ - 01/12/07 06:09 AM
to all paint pros and old skool people with painting experience:
i made the mistake of not wearing a mask for the reason that i did not know that i had to when SANDING down my car. the problem is that i have a 79 subaru and i dont know if they did or did not stop putting lead in the paint back then. i also need to know what will happen to me now that the fact that did not wear a mask while sanding for the past few days. i believe i did inhale some of the particles while sanding because i was at a constant 10 inches or less away from my car aginst the wind at most times. i am thinking i should go and see a doctor about it because it feels like i swallowed something and its stuck in my throat and it hurts when ever i swallow or breathe in real deep. any suggestions?
Posted By: Anonymous
Re: Paint job on a budget!? CONTINUED..page 44........ - 01/12/07 11:25 AM
By 1979, lead-based paint was banned in the US.
More likely is that you have irritated the snot out of your sinuses (pun intended). You will feel like crap for a few days. Your sinuses will remove the foreign material eventually.
Next time wear a mask, eh?
Posted By: Anonymous
Re: Paint job on a budget!? CONTINUED..page 44........ - 01/12/07 01:12 PM
A quick update. After finishing the sanding on that bad too-thick first 2 coats, I thinned my paint way down, and laid down a coat with very little roller pressure. Very few initial bubbles this time. I then wiped over it with the weight of a clean roller (no foam brush this time) and they came out leaving a very smooth and shiny surface. It looked great as night fell on it. This morning I gave it a very light wet sand to get out any surface dirt I could feel and its now smooth as a baby's bottom. I will get a few pictures after the second coat today.
Thanks for the help guys. I am getting there.
Posted By: Anonymous
Re: Paint job on a budget!? CONTINUED..page 44........ - 01/12/07 02:34 PM
Are those of you using Brightisde,also using the Interlux Primer as well? Can other primers such as rattle can primers be used? Or is it better to stick with just one product?
Thanks for anny input.
Posted By: 69DartGT
Re: Paint job on a budget!? CONTINUED..page 44........ - 01/12/07 02:41 PM
bowerbird I used both of Rustoleums rusty metal primer and thier automotive primers. Haven't had any problems.
But if I had it to do over again, I would have primed the wholes truck if possible just because it would have made the roller job easier to see the coverage. No required by any means but for me it would have been easier.
Posted By: Anonymous
Re: Paint job on a budget!? CONTINUED..page 44........ - 01/12/07 04:18 PM
I would agree Dart, in terms of being able to see the coverage on the first few coats. Now that I have solved my thinning and pressure on the roller problems I can see that my bondo work is still sub-par. While it is now "smooth as a baby's bottom," it ain't flat, and the shinier it gets the more you can tell.
I think maybe with the severe body damage I had, I don't have a large enough block. I am using one of those 6 inch ones and a small electric sander. Are any of you guys using these big sanding blocks like the ones shown here?
Dura BlocksWhile I am just working on a daily driver/work type van, and not a rotisserie restored trailer queen, I would really like to perfect both the body work and the painting before moving on to something else.
By the way, that mineral spirits sure evaporated out of that sealed can quickly. I had to add quite a bit more this morning to get it thin enough.
Regards,
Posted By: 69DartGT
Re: Paint job on a budget!? CONTINUED..page 44........ - 01/12/07 05:36 PM
I bought a long wood one from my local Harbor Freight store and they do have paper to fit it. Must be 17-18 inches long.
Posted By: Exit1965
Re: Paint job on a budget!? CONTINUED..page 44........ - 01/12/07 08:17 PM
I have a long board (about 17.5") and one of those dura board things, around 12". Something at least that long is a must..
Posted By: Anonymous
Re: Paint job on a budget!? CONTINUED..page 44........ - 01/12/07 10:31 PM
smyrna5, I like the color you mixed. Do the pics look close to the real thing? I was thinking of doing the same thing to try and match the color on my F100. Too cold and damp for me to play in the shop right now...planning on doing it this spring. I think I'll just paint the darn thing and go back later and fix the hail dents and such.
Posted By: Anonymous
Re: Paint job on a budget!? CONTINUED..page 44........ - 01/12/07 11:15 PM
Quote:
smyrna5, I like the color you mixed. Do the pics look close to the real thing?
Uhmm. Yes and No. As I said in one of the posts, a lot depends on the lighting when you take the picture, and computer monitors are infamous for not rendering colors accurately. Publishing guys go through all sorts of hoops to get colors looking right in print and on the web. Perhaps since 69Charger has boosted Rusto's sales so much, he can get them to either start mixing again, or put an interactive mixer on the net like this one:
http://painting.about.com/library/blpaint/blcolormixingpalette1.htm
My advice is to get a color as close as you can, then figure out what needs to be added, and do a small test with various combinations in small amounts.
My color is now darker than it was for two reasons. First, I have more paint on the car, and second because I added some black to darken it. Now, its probably a bit too dark, but I will keep adjusting until I like the match. The problem is trying to keep track of what you did, which is why I think you need the tests where you write down the proportions. The amount of mineral spirits and what you paint it over will also affect it.
If you are not trying to match a factory color, and like one of the standard colors, or just want to mix one up you like its a lot easier. White paint lightens it and black paint darkens it, just as you would expect. Yellow and blue make green. Red and Yellow makes orange etc.
Walmart carries the pint cans of Rustoleum ($3.37 US) in basic colors, such as black and white, so you probably don't need to buy a whole palette of rustoleum quart cans in all the colors. The guy at Home Depot said they didn't order Rustoleum colors and the guy at Ace Hardware told me they would order anything the warehouse had. I wanted Teal, but no one had it so I decided to mix my own.
I found a painters color mixing wheel on the net that I thought was useful, but I can't seem to find it now.
I love those old Ford trucks.
Posted By: Anonymous
Re: Paint job on a budget!? CONTINUED..page 44........ - 01/13/07 01:22 AM
i have that kit and i would like to know if there is a sticky wet sanding paper and where to get it my car is black and i have alot of orange peel and want to use the long flat piece.
Posted By: kenzo42
Re: Paint job on a budget!? CONTINUED..page 44........ - 01/13/07 02:36 AM
Exit/Marq, would you recommend using Rustoleum as the inital base coat to make everything 1 even color and then paint over it w/ a couple coats of Brightside for the final glossy coat? BTW, this is going from red ---> white.
I believe you could save some $$$ doing it this way? Can you guys think of any drawbacks by doing it this way?
Posted By: Anonymous
Re: Paint job on a budget!? CONTINUED..page 44........ - 01/13/07 03:41 AM
mybuick - I know I live fairly close to an auto paint supplies shop that also will sell to the public. They carry self-stick paper for those long blocks and I think I even saw some of it on rolls. Someone else who has the long blocks may have a better source.
AutoColor These guys also have it online. I don't think it comes in many fine grits, since the "longboards" are intended for roughing in the shape, not final wet sanding.
Hope that gives you an idea where to look.
LongBoard Paper
Posted By: Marq
Re: Paint job on a budget!? CONTINUED..page 44........ - 01/13/07 05:10 PM
Quote:
Exit/Marq, would you recommend using Rustoleum as the inital base coat to make everything 1 even color and then paint over it w/ a couple coats of Brightside for the final glossy coat? BTW, this is going from red ---> white.
I believe you could save some $$$ doing it this way? Can you guys think of any drawbacks by doing it this way?
I would say that IF you are going from red to white AND you intend to have Brightside as your final skin you should start with Brightside.
My reason for this is as follows : Brightside has better coverage. In 'most' cases you should have 100% coverage by 4 coats... and 6 at a maximum. BUT if you use the Tremclad/Rustoleum and cut it with the mineral spirits ( as per the Charger recipee ) than it may take you 4 coats just to hide the red undersurface.
My other thought on this is that if I were now attempting to take my red car and turn it white, I would probably do my first coat of Brightside at 100% with no cutting with their thinner. I would let that coat thoroughly dry and harden... and hit it with a wet sanding to smooth it all out. I would then hit it again at 100% Brightside and no cutting with thinners. Again let it dry and harden thoroughly and do a very careful wet sanding to get that surface as smooth as I could.
At this point any evidence of the past red color should be pretty well gone..
At this point you would then lay down the next TWO coats of Brightside THINNED with the recommended thinner.
The trick to following this recipe for your particular circumstances ( going from a dark subsurface to a light colored surface ) is to nail down those first two layers as smooth as you can get it.
Otherwise you can instead fall back to the potentially safer route of just going at it from the start with the thinned down Brightside and just be prepared to do an extra coating or two before you get to the 100% coverage or masking of the red from being visible through the white.
Although there are no compatibility problems between the Tremclad/Rustoleum and Brightside, I would not go that route IF I had the chance to start with Brightside and end up with the final layer being Brightside.
The 'theory' behind my logic on that is this :
Brightside paint on Brightside paint results in the newest layer forming bonds between the polymers of the old layer of Brightside and the new layer of Brightside..... THIS results in the strongest possible bond between the two layers of paint.
WHEREAS if you put Brightside on topic of Tremclad/Rustoleum there is no polymer bonding - because Tremclad/Rustoleum doesn't have any in it. Instead you are relying solely on the adhesion qualities of Brightside to find pores or sufficient rough surfaces on the Tremclad/Rustoleum layer to grab hold of with its adhesion agents.
Fortunately Brightside has superb adhesion agents and it can stick to just about anything. But I hope you can appreciate that if you can get the polymers of the old layer of paint and the new layer of paint to bond, than you will have an even more solid adhesion. They basically become one layer and are not just two surfaces 'glued' togethers, but in fact have now become one intertwined layer.
Hope this helps without getting too confusing...
Marq
.
Posted By: Anonymous
Re: Paint job on a budget!? CONTINUED..page 44........ - 01/13/07 05:59 PM
I spent an hour in Harbour Freight this morning, and barely escaped with my wallet. That place is like a candy store for surburban men on Saturday mornings. Anyway, I got the 17" long board and several rolls of paper to fit it. Does all this body work stuff count against my $50?
Long Board $9.99 (HF)
25' Sandpaper Rolls 80 grit $3.99
25' Sandpaper Roll 120 grit $3.99
25' Sandpaper Roll 240 grit $3.99
I didn't see any wet sanding rolls there.
For those of you who don't know what they look like, here is a picure of them sitting on the 2nd re-coat, and one of my reflection. All taken before any sanding. Its getting kind of dirty from me driving it around. You can see that I have darkened the color a bit too much with the small amount of black I mixed in.


Posted By: kenzo42
Re: Paint job on a budget!? CONTINUED..page 44........ - 01/13/07 09:06 PM
Thanks Marq. I'll stick w/ your recommendations
.
Quote:
Quote:
Exit/Marq, would you recommend using Rustoleum as the inital base coat to make everything 1 even color and then paint over it w/ a couple coats of Brightside for the final glossy coat? BTW, this is going from red ---> white.
I believe you could save some $$$ doing it this way? Can you guys think of any drawbacks by doing it this way?
I would say that IF you are going from red to white AND you intend to have Brightside as your final skin you should start with Brightside.
My reason for this is as follows : Brightside has better coverage. In 'most' cases you should have 100% coverage by 4 coats... and 6 at a maximum. BUT if you use the Tremclad/Rustoleum and cut it with the mineral spirits ( as per the Charger recipee ) than it may take you 4 coats just to hide the red undersurface.
My other thought on this is that if I were now attempting to take my red car and turn it white, I would probably do my first coat of Brightside at 100% with no cutting with their thinner. I would let that coat thoroughly dry and harden... and hit it with a wet sanding to smooth it all out. I would then hit it again at 100% Brightside and no cutting with thinners. Again let it dry and harden thoroughly and do a very careful wet sanding to get that surface as smooth as I could.
At this point any evidence of the past red color should be pretty well gone..
At this point you would then lay down the next TWO coats of Brightside THINNED with the recommended thinner.
The trick to following this recipe for your particular circumstances ( going from a dark subsurface to a light colored surface ) is to nail down those first two layers as smooth as you can get it.
Otherwise you can instead fall back to the potentially safer route of just going at it from the start with the thinned down Brightside and just be prepared to do an extra coating or two before you get to the 100% coverage or masking of the red from being visible through the white.
Although there are no compatibility problems between the Tremclad/Rustoleum and Brightside, I would not go that route IF I had the chance to start with Brightside and end up with the final layer being Brightside.
The 'theory' behind my logic on that is this :
Brightside paint on Brightside paint results in the newest layer forming bonds between the polymers of the old layer of Brightside and the new layer of Brightside..... THIS results in the strongest possible bond between the two layers of paint.
WHEREAS if you put Brightside on topic of Tremclad/Rustoleum there is no polymer bonding - because Tremclad/Rustoleum doesn't have any in it. Instead you are relying solely on the adhesion qualities of Brightside to find pores or sufficient rough surfaces on the Tremclad/Rustoleum layer to grab hold of with its adhesion agents.
Fortunately Brightside has superb adhesion agents and it can stick to just about anything. But I hope you can appreciate that if you can get the polymers of the old layer of paint and the new layer of paint to bond, than you will have an even more solid adhesion. They basically become one layer and are not just two surfaces 'glued' togethers, but in fact have now become one intertwined layer.
Hope this helps without getting too confusing...
Marq
.
Posted By: Anonymous
Re: Paint job on a budget!? CONTINUED..page 44........ - 01/14/07 04:40 AM
well i have 800 grit da paper and will that work to flatten the clear coat then wet sand with 2000 grit?
Posted By: Anonymous
Re: Paint job on a budget!? CONTINUED..page 44........ - 01/14/07 02:04 PM
mybuick - I haven't touched my hood with anything finer than 400 grit yet, and the first coat covers any scratches made by the 400.
On another note, I figured out a way to make a poor man's rustoleum paint mixer. I downloaded and opened a picture of the rustoleum color chart from the web. Then, I opened it in Photoshop. If you put the eye dropper tool over any color and left click, it will tell you the exact Red Green Blue (RGB) content of that color. If you don't have Photoshop just download Gimp, which is free and will do the same thing.
Now comes the mixing part. Since I knew what color various mixtures of Hunter Green and Royal Blue gave me in my real paint tests, I just added the individual RGB values of the two paints and divided the result by 2. I then painted a small rectangle on the card with that color, which I set by hand in the RGB control box. Wa-La! - it was a match.
Next, I opened a picture of my van and sampled an area with the eye dropper. Then, I mixed colors from the chart by adding their RGB values to get the numbers as close as I could with stock rustoleum and painted a small area. To lighten a color with white or black just add or subtract a constant number from each RGB value. Strangely, I found that my van isn't teal at all, at least not rustoleum teal. The closest match I got with rusto colors was Royal Blue with 10% black.
Unfortunately, Rustoleum doesn't give us a pure Red, Green and Blue, or we could mix any color we want with this method. About the best you can do is to play with the colors they give you and a picure of your car to get as close as you can. Its way less messy than real paint.
Hopefully, that is clear.
Posted By: Ledman_70
Re: Paint job on a budget!? CONTINUED..page 44........ - 01/14/07 08:20 PM
Do you guys know of any program that you can copy a pic of your car into then manipulate the colors?
Posted By: Anonymous
Re: Paint job on a budget!? CONTINUED..page 44........ - 01/15/07 03:53 AM
Photoshop CS or CS2 will let you do that.
Posted By: chris1970
Re: Paint job on a budget!? CONTINUED..page 44........ - 01/15/07 04:13 AM
He's right, you can use Photoshop. However, since Photoshop is raster based it's not as simple as selecting you car and changing the color. you will have to use a seperate layer or cut out the section of the the car you want to change the color of and adjust that channel. Photoshop is a fairly complicated program that can do almost anything you want it to do. As long as you know how to do it. I use it alot and definitly would recommend it. A cheaper solution to the $699 photoshop program is build a model, more fun too!!!
Posted By: Anonymous
Re: Paint job on a budget!? CONTINUED..page 44........ - 01/15/07 08:30 AM
so i am new to this forum, i was linked along time ago through the pirate4X4. I have read the entire first thread and am about halfway through this one.
I have been experimenting on an old mustang body i have lying around in preperation for a second mustang that i will restoring in the near future.
I have been using rustoleum profesional gloss black, and have been following the recomended procedures. I have a couple of questions though (keep in mind this is my first experience doing any paint on a car)
when i wetsand, even with 600 grit, it takes me forever. To sand half a hood took me over an hour to do with a sanding block. My paint comes out very smooth and uniform with very little or no orange peel, and i wetsand until the water no longer beads up on the surface and the paper slides smoothly over the surface. When i do this i still have lots of tiny glossy spots left, so i sand the rest of those out too until the surface is completely smooth and flat (looks kinda like primer) Any ideas why its taking me so long? Am i wetsanding too much? I read that it takes people 20 minutes to do a panel, so i think im not doing something correctly.
also i did about 8 thin coats and finished with 1500 grit paper on my final wetsand, and when i went to polish (10 inch random orbit and no. 7 polishing compound) i got ZERO gloss. I spent about 30 minutes in a small area about 1'X 2' area with no success at getting any shine. It came out looking no different than it does when i wetsand it. Any thoughts on what i might be doing wrong here?
I have been reading online articles and books about wetsanding and polishing and havent found any answers, im just poor broke college student trying to get some respectable new paint on my car so any advice is greatly appreciated .
on a side note i have been working outdoors and it as been an average of about 20F to 45F during the entire time ive been experimenting with the paint, if it makes a difference.
thanks again
gaven
Posted By: Anonymous
Re: Paint job on a budget!? CONTINUED..page 44........ - 01/16/07 12:10 AM
Mate, if you want to paint your car black then your wet sanding needs to be pretty close to perfect. And that certainly sounds like what you are doing.
Forget what the other people are doing with their 30 mins of wet sanding. If they can do an entire panel in that time then the quality of their work won't even come close to what you are achieving.
If you just want a quick paint job then go for the 30 mins of wet sanding per panel. If you want a really good black paint job that looks like glass then keep doing what you're doing.
As for your polishing, what type of 10" buffer are you using? If it is a 'cheap and nasty' polisher then you will probably have to polish it all year to get it looking ok. Go back a few pages and have a look at the two pics that I posted on my polishing experiment. The first pic shows what a $150 fixed speed RO polisher could do and the second one shows what a variable speed RO (with similar specs to a PC 7424) can do. If you want to get a really good final finish then you will need to use either a PC 7424 or a rotary polisher, with the correct cutting/polishing pads.
Posted By: Anonymous
Re: Paint job on a budget!? CONTINUED..page 44........ - 01/16/07 01:06 AM
thanks for the reply, the polisher i have is just a fixed speed random oribit. I will look into getting a porter cable soon, but for now what compounds should i be using, and in what order to acheive a shine on my paint, because right now it looks flat like primer. i rattle canned some clear rustoleum over my first test peice and it looks great. i have a hood im working on now though and would like to get a decent shine out of it without using the clear.
thanks again for the advice aussie
Posted By: Anonymous
Re: Paint job on a budget!? CONTINUED..page 44........ - 01/16/07 01:32 AM
Quote:
thanks for the reply, the polisher i have is just a fixed speed random oribit. I will look into getting a porter cable soon, but for now what compounds should i be using, and in what order to acheive a shine on my paint, because right now it looks flat like primer. i rattle canned some clear rustoleum over my first test peice and it looks great. i have a hood im working on now though and would like to get a decent shine out of it without using the clear.
Have a look here . That page shows you most of the tasks that a professional detailer does.
The "How to Polish Paint" section should answer most of your polishing questions.
Posted By: Anonymous
Re: Paint job on a budget!? CONTINUED..page 44........ - 01/16/07 12:46 PM
The great thing about wet sanding, is that it is one of the few things you can do to your car outside in the rain
Posted By: Anonymous
Re: Paint job on a budget!? CONTINUED..page 44........ - 01/16/07 10:55 PM
K, i moving to brightside, in red. I want to clearcoat it just because i want to add some pearl that i have.
Will this do?
web page Any thoughts?
Steve
Posted By: Anonymous
Re: Paint job on a budget!? CONTINUED..page 44........ - 01/17/07 06:06 AM
"To sand half a hood took me over an hour to do with a sanding block."
I've been using 600 grit for wetsanding my test panel ('88 Monte Carlo SS trunk lid) and it does take me a good hour and some change to just do that, plus whatever additional time after the first pass dries enough to see what I missed.
So don't worry, you're not alone in by any means in that department. But it certainly makes the next coat go on smooth as a babies... well there isn't as much orange peel to sand down at any rate when the orange peel from the previous coat was good and taken care of.
Posted By: Anonymous
Re: Paint job on a budget!? CONTINUED..page 44........ - 01/17/07 09:44 AM
Can anyone explain why one needs to wetsand between coats?
Surely you only need to wetsand the final coat and polish it? Since layers will build up and its only the final layer that counts?
I do want the best finish possible but it just sounds like a waste of time if its going to be covered by another layer of paint.
Posted By: Anonymous
Re: Paint job on a budget!? CONTINUED..page 44........ - 01/17/07 10:22 AM
Quote:
Can anyone explain why one needs to wetsand between coats?
Surely you only need to wetsand the final coat and polish it? Since layers will build up and its only the final layer that counts?
I do want the best finish possible but it just sounds like a waste of time if its going to be covered by another layer of paint.
You don't need to wet sand at all if you don't want to.
If you don't wet sand between coats you will end up with a huge amount of orange peel in your paint and you will end up with really rough paint because of the debris caught between the layers.
If you do wet sand carefully between each coat of paint then you can end up with a near perfect paint job that has a mirror finish.
You can choose either option or anything in between. It is your paint job and as long as you're happy with the final result then that's all that matters.
Posted By: 79asspin
Re: Paint job on a budget!? CONTINUED..page 44........ - 01/17/07 01:05 PM
I think wet sanding also helps it to cure faster. You break the surface and allow the solvents another chance to dry. Like if you had a big bowl of pudding in the refrigerator and it forms that skin that you have to remove to get to the wet stuff.
Posted By: Anonymous
Re: Paint job on a budget!? CONTINUED..page 44........ - 01/17/07 08:22 PM
mmmmmm....pudding
Posted By: Marq
Re: Paint job on a budget!? CONTINUED..page 44........ - 01/17/07 10:49 PM
Quote:
I think wet sanding also helps it to cure faster. You break the surface and allow the solvents another chance to dry. Like if you had a big bowl of pudding in the refrigerator and it forms that skin that you have to remove to get to the wet stuff.
The other point to doing the wet sanding between alternative coats of paint is that it allows you the chance to bring the entire surface LEVEL.
If you don't wetsand, any imperfections will just get amplified with each coat of paint you add. So by knocking all the surface back down to one level it gives each subsequent coat of paint 'as level a surface as you can provide it' so that when it 'self levels' while drying you will get as close to a smooth surface as you can get.
Ultimately the bottom line is that the smoother the subsurfaces and final coating, the 'shinier' and 'glossier' the end product will be.
.
Posted By: Anonymous
Re: Paint job on a budget!? CONTINUED..page 44........ - 01/18/07 12:04 AM
Long time listener, first time caller.
I've been reading this thread with great interest and would love to start rollering one of my vehicles ('95 Caprice, ex-cop car). The problem is I know that I won't have the dedicated stretch of time the project requires. Yeah, I know I can do it panel by panel -- but doing it right will mean things like removing the windshield and rear side-quarter glass which will make the car un-driveable for a while.
So, I've been wondering about a Modified-Maaco approach. That is, would it be possible to get the cheap, single stage spray at Maaco (assuming that I identify a shop which does decent prep) AND THEN follow up with a fine grit color sand and polish?
Questions which arise are:
1. Is the Maaco prep work still going to suck?
2. Would the color sand have to be really aggressive to get rid of their orangepeel and imperfections?
3. If going this route, what type of paint would be suggested from Maaco (or any other body shop)? Part of this question is that I don't understand how the final sand/polish on a BC/CC finish really works. (I mean, if the problem is in the color coat, how can smoothing out the clear coat help?).
Worst case, if I have to get real aggressive with the Maaco paint, I might end up still rollering 1 or 2 coats of Brightside to achieve the end results -- as opposed to many. I could see doing this panel by panel, but not doing the complete ground up work panel by panel. (I'm starting a new job and I can't be driving a half painted car...)
I guess the other reason I'm thinking along these lines is that the car is Black -- and I'm doubtful on my time, skill, patience to get the prep right. Figure a body shop will have better results than I will first time.
If choosing to do a color change to avoid the perfect prep which Black requires, them I'm looking at even more coats to cover the Black decently.
I supposed the other choice would be to pay a body shop for initial prep and primer -- and then go about rollering and finishing from there. Not sure about this approach. Willing to hear opinions on this, as well.
I guess the one thing to add is: Yep, I'm sure that it might be easier given the params I've outlined to get a good shop to do it all. Problem is I really, really want to do this to achieve a better than normal result at a less than expected amount of $$. Looking for a reasonable way to compress the project time so that I still can have a hand in the result -- and not end up with a stalled project!
This was a long post, but hope to hear what you guys think.

Posted By: Anonymous
Re: Paint job on a budget!? CONTINUED..page 44........ - 01/18/07 03:41 AM
I'm sure this has been answered somewhere is this massive thread....but can someone tell me how long I need to wait to wet sand after painting the light coats? I thought I read that for enamel, it had a recoat time of between 1-2 hours or then 5 days! So what is the sequence and times between steps of multiple coats, sand, multiple coats.
Thanks.
keith
Posted By: 69DartGT
Re: Paint job on a budget!? CONTINUED..page 44........ - 01/18/07 04:01 AM
Quote:
I'm sure this has been answered somewhere is this massive thread....but can someone tell me how long I need to wait to wet sand after painting the light coats? I thought I read that for enamel, it had a recoat time of between 1-2 hours or then 5 days! So what is the sequence and times between steps of multiple coats, sand, multiple coats.
Thanks.
keith
keith I think they are doing the wetsand the next day after paint.
Posted By: v8mirage
Re: Paint job on a budget!? CONTINUED..page 44........ - 01/18/07 03:47 PM
If the weather is not too cool you should be able to wet sand after letting it sit overnight. I have been able to apply a coat in the morning, and another coat after supper and then wet sand in the morning on a couple occasions. That was the recipe that 69charger gave us at the beginning of all of this.
Gerbs
Posted By: Anonymous
Re: Paint job on a budget!? CONTINUED..page 44........ - 01/18/07 10:05 PM
BlackMariah - The problem with the MAACO approach is what happens if you sand a bit too much to level out the MAACO orange peel? I have only been working on a hood to perfect my technique, but I have gone through several coats trying to get it level on occasion. The easiest part of this technique is the painting! Let me repeat that - The easiest part of this technique is the painting.
It is the initial preparation and subsequent wet sanding that is work. I can't see farming out the easiest part of the job.
Posted By: Anonymous
Re: Paint job on a budget!? CONTINUED..page 44........ - 01/19/07 06:15 PM
BTW - I have pretty much finished with my van hood for now. I was never able to get an exact color match, but hey its an old knock-about van so...
I decided to try my hand at another car and color while I am waiting for the van hood to cure enough to polish. This one had a severe case of clear coat peel on the trunk lid. I dreaded having to sand all that clear coat off, so the thought struck me to use a 98 cent plastic scraper from Home Depot to get off as much as I could. In 20 minutes I stripped half the trunk lid that way. In places you have to sort of bend the scraper a bit to give it enough bite, but that clear coat has almost no bond to the base coat at all. Here are a few before and after pictures (half way done). Notice the large flakes of clear coat on the scraper.
With a new coat of Rustoleum that old base coat should be fine. I am hoping for a better color match here. I am also wondering if maybe I should just do a bit of wetsanding with 600 and put on a new clear coat.


Have fun.
Posted By: Anonymous
Re: Paint job on a budget!? CONTINUED..page 44........ - 01/19/07 06:37 PM
If you're happy with the old paint and just the clear is coming off...sure, just clean it up(read sand) and re-clear it. Just remember...that factory paint job is thin! So don't sand to much.
Posted By: Anonymous
Re: Paint job on a budget!? CONTINUED..page 44........ - 01/19/07 08:35 PM
By the way thorn - that Rustoleum Royal Red isn't even close to the color on the can. I opened some up and painted a small piece under the trunk lid. You definitely have to try these paints out to know what color they really are on a car.
Posted By: Anonymous
Re: Paint job on a budget!? CONTINUED..page 44........ - 01/20/07 11:42 AM
i've been following this for awhile, not sure when, was put onto it by people over at hybridz.org and slowly got more and more interested.
anyway, after asking aussie driver some questions regarding where he's managed to buy all his stuff from i am now more than happy with the finish i'm getting from the brightside paint. i'd tried killrust, which is another australian rustoleum equavilant, however with the dodgy cut and polish i was using i couldn't get it to shine, i'm going to try using the good poorboys stuff although i dont want to waste it. so now all i have to do is choose a colour, and commit to cover up my 90% good condition orginal coloured paint
here are my results so far, basically did the same thing aussie driver did with his bonnet, just a small test patch and the rest of it at various stages. the colour is Largo blue, although the first time i used it i didn't stir it well so i think the tin i use on my car will be slightly darker
http://www.yachtpaint.com/Images/22_18542.gifwas contemplating rescue orange but it looks really fluro on the tin lid!


in my rush to try out the cut and polish i didn't bother putting many coats ontop of my previous layer of anti rust black (dropped the door and dented it so had to repair it etc) so shouldnt have that problem when it comes to doing my car
Posted By: Anonymous
Re: Paint job on a budget!? CONTINUED..page 44........ - 01/21/07 03:29 PM
Has anyone found Rustoleum Clear in a brush on can? I tried some of the clear coat in a spay can, but it has a lot more orange peel than the roller method. I would like to try rollering it on.
Posted By: plymouthfan
Re: Paint job on a budget!? CONTINUED..page 44........ - 01/21/07 04:12 PM
Quote:
Has anyone found Rustoleum Clear in a brush on can? I tried some of the clear coat in a spay can, but it has a lot more orange peel than the roller method. I would like to try rollering it on.
I went on Rustoleums site, and they only sell the Canadian Tremclad in a brush on clear
Posted By: Anonymous
Re: Paint job on a budget!? CONTINUED..page 44........ - 01/21/07 05:05 PM
it sands quite fast and easy and has very little metallic in it but not bad and it buffs to a high gloss. very good product. if it warms up i am going to finish wetsanding the car.
Posted By: Anonymous
Re: Paint job on a budget!? CONTINUED..page 44........ - 01/21/07 06:07 PM
Quote:
I went on Rustoleums site, and they only sell the Canadian Tremclad in a brush on clear
Darn. I knew I didn't see any at Home Depot or Walmart. The can stuff definitely goes on better.
I sprayed a test coat Rusto Clear on the trunk lid that I scraped all the clear coat off of (after buffing with Turtle Wax Polish) and it worked pretty well, but doesn't level as nicely as the roll on. If it ever stops raining and we get some more of that global warming I will see how it wet sands and polishes. By the way that big blob to the right of the 780 badge is where the previous owner did some touch-up with some kind of paint that doesn't peel off nicely like the clear coat. I hesitated to sand the original base coat, but that has to come off, and polishing compound won't do it.
I will be in Canada for a few days next month. Maybe I will drop into a Canadian Tire Store. I wonder if I can transport that stuff on a plane in my suitcase?

Posted By: Anonymous
Re: Paint job on a budget!? CONTINUED..page 44........ - 01/21/07 07:00 PM
the way the airports are now a days i would ship it with the rest of your luggage.
Posted By: Anonymous
Re: Paint job on a budget!? CONTINUED..page 44........ - 01/21/07 09:19 PM
I've been reading this thread, and what a long yet super read it is, and I was thinking about the problem with metallics or metal flakes with roller painting the auto. I'm restoring a 74 Sleeper Satellite and am definitely on a budget, so I can empathize with everyone here.
I was looking at a website that sold micro flakes for clearcoats
http://www.paintwithpearl.com/PWPinstructions.pdfand for airbrushing. These flakes are substantially smaller than the ones used in the seventies. Their instructions are to apply them in a clear coat then cover them with two to three coats of clear coat without sanding in between the coats. Now, how would you do this without compressors and still keep it viable without a budget. Couldn't you apply your basecoat, get the auto painted the color you wanted, then apply the clearcoat that Rustoleum manufactures, then while it's wet, have a small baby powder bottle filled with the micro flakes and cast them with a simple squeeze of the bottle onto the still wet clearcoat? It's a variation of the hand cast method used in the fifties, but I would think that the dispersal would be a bit more controlled with the squeeze bottle. Either that, or mix a tablespoon of the microflake into a clearcoat and use a hand spray pump bottle to mist the clear coat onto the basecoat. Wouldn't this work and still give you a metallic paint job with a roller?
I have a roadrunner bulge hood for the Satellite. I'll post the before pictures and the after pics on this idea. Heck, I'll use both methods, one on the rr hood, and the other on the stock satellite hood to see which is more effective.
Posted By: Anonymous
Re: Paint job on a budget!? CONTINUED..page 44........ - 01/22/07 12:07 AM
well the rustolium spray bomb has a micro flake in it thats why its called chrystal clear i guess. i didnt want little flakes in my paint but i have them now... o well it looks like a expensive paint job now he he...
Posted By: Anonymous
Re: Paint job on a budget!? CONTINUED..page 44........ - 01/22/07 06:15 AM
New question. I've been reading this and I've gone bug eyed and a bit punch drunk since it's almost 1:30 a.m. Does Sherwin Williams have a Rustoleum equivalent product? If so, couldn't you get a bit more color choice than with Rustoleum? I'm a big fan of the coppers and bronze paints, and nothing I've seen with any of the aforementioned products come close. I'd love to do this to my sleeper satellite, heck, I'm on a budget that's controlled very closely by my wife!
Posted By: Anonymous
Re: Paint job on a budget!? CONTINUED..page 44........ - 01/22/07 10:10 AM
Quote:
well the rustolium spray bomb has a micro flake in it thats why its called chrystal clear i guess. i didnt want little flakes in my paint but i have them now... o well it looks like a expensive paint job now he he...
Have you already posted pics? Why not post them again anyway to show us?
Posted By: Anonymous
Re: Paint job on a budget!? CONTINUED..page 44........ - 01/22/07 02:00 PM
I saw this on Speed TV's Truck universe show this weekend:
http://www.truckuniversetv.com/home/It's called Dupli-color Paint Shop Finish System.
(Description Taken from the Truck Universe website.)
"Body Shop is a high-quality lacquer system designed for automotive application. Body Shop is easy to apply, dries quickly, and can be buffed to a brilliant smooth surface.
Body Shop is a ready-to-spray system - no mixing or reducing is required. There is no re-coat window for any of the products in the system - allowing for additional coats to be applied anytime.
Available in 8 colors plus primer and clear."
This sounds very promising. Unfortunately, there is not much information on the product. In fact, there is nothing on Dupli-color's site yet. I just hung up the phone with their tech group and they are going to send a brochure to me. What they did tell me was that it is thinned with acetone and that it is ready for recoating in 5-10 minutes. He said that he thinks that it could be brushed on. Since it dries so quickly, I wonder if it would level out properly�
Any thoughts?
Posted By: Anonymous
Re: Paint job on a budget!? CONTINUED..page 44........ - 01/22/07 03:39 PM

you do have to look this close (about a foot away) to see the flakes or it will look like regular paint.
Posted By: 69chargeryeehaa
Re: Paint job on a budget!? CONTINUED..page 44........ - 01/22/07 07:42 PM
Quote:
I saw this on Speed TV's Truck universe show this weekend:
http://www.truckuniversetv.com/home/
It's called Dupli-color Paint Shop Finish System.
(Description Taken from the Truck Universe website.)
"Body Shop is a high-quality lacquer system designed for automotive application. Body Shop is easy to apply, dries quickly, and can be buffed to a brilliant smooth surface.
Body Shop is a ready-to-spray system - no mixing or reducing is required. There is no re-coat window for any of the products in the system - allowing for additional coats to be applied anytime.
Available in 8 colors plus primer and clear."
This sounds very promising. Unfortunately, there is not much information on the product. In fact, there is nothing on Dupli-color's site yet. I just hung up the phone with their tech group and they are going to send a brochure to me. What they did tell me was that it is thinned with acetone and that it is ready for recoating in 5-10 minutes. He said that he thinks that it could be brushed on. Since it dries so quickly, I wonder if it would level out properly�
Any thoughts?
the only thoughts i have is that you still have to spray, spray = mess, and that's the only reason i'm avoiding it, but duplicolors products are extreemly good quality paints/systems.
I painted this car (71 beetle, midnight blue metalic) with duplicolor single stage system (uses all duplicolors primer, primer sealer, paint, and reducers):
And i've used duplicolors vinyl/fabric paint, and engine enamel. All of their products were great, so i think anything else that they produce would be just as good. Their engine enamel is really awesome, that stuff is the BEST paint i've ever used as far as engine enamels.
Here's my 74 beetle engine painted 7yrs ago, and it still looks perfect, and that's in a air-cooled VW which typically run ALOT hotter than water cooled cars.

Posted By: Anonymous
Re: Paint job on a budget!? CONTINUED..page 44........ - 01/22/07 08:50 PM
Quote:
Has anyone found Rustoleum Clear in a brush on can? I tried some of the clear coat in a spay can, but it has a lot more orange peel than the roller method. I would like to try rollering it on.
http://www.grainger.com/Grainger/wwg/itemDetailsRender.shtml?ItemId=1611571738
http://www.grainger.com/Grainger/wwg/itemDetailsRender.shtml?ItemId=1611618427

Posted By: Anonymous
Re: Paint job on a budget!? CONTINUED..page 44........ - 01/22/07 09:04 PM
69chargeryeehaa,
I apologize for my ignorance...
Why couldn�t this the Duplicolor Paint Shop Finish Sysytem be applied using the roller method? Is it simply a case where it would dry too quickly?
Posted By: 69chargeryeehaa
Re: Paint job on a budget!? CONTINUED..page 44........ - 01/22/07 11:51 PM
Quote:
69chargeryeehaa,
I apologize for my ignorance...
Why couldn�t this the Duplicolor Paint Shop Finish Sysytem be applied using the roller method? Is it simply a case where it would dry too quickly?
paints that are designed to be sprayed, flash too fast, you'd just end up with a huge mess and a roller that will just ball up. It's not possible.
Posted By: ONEBADBIRD
Re: Paint job on a budget!? CONTINUED..page 44........ - 01/23/07 01:41 AM
Hey Mybuick, First off your try at that metallic paint job with the old roller trick looks really good. Second you mention that you can only really see the metallic when you get within a foot away, Well it seems to me that a majority of factory paint jobs that are 99% metallic paint jobs now a days you can only tell when your a foot away as well. Are you personally happy with how it turned out or no? So how did you do it exactly? I can't wait till I get to the point to paint my ride maybe I'll get started this summer. Looks great man
Jay
Posted By: Anonymous
Re: Paint job on a budget!? CONTINUED..page 44........ - 01/23/07 03:45 AM
this is a lot better than going to macco and it takes the same time and alot cheaper. this is my first paint job ever and it is comming out great. though i am painting my car black (1984 buick grand national), there is bearly any stink from the paint!!!!!!! all i have is a comercial 20 inch fan and crack the garage door about 4 inches for ventalation. i have a 1989 gmc s15 jimmy that is very rusty and when i get done with the buick thats next.... i like this paint very much!!!!!! i would like to find a color chart for this company so i can see if i can paint alot of cars with this paint. all my friends want me to apint their cars too....
all i did is strip the paint to bare metal fixed some dents slapped a little bondo and painted the black (12 coats), wetsanded the paint, bufed the paint, cleared the paint (4 coats). now i am in the process of wetsanding the clear for the mirror shine like the cars at barrett-jackson. the cars that are black is what i want out of my paint job and i think i am going to get that!!!!!!
for pics of my resto click here
http://s72.photobucket.com/albums/i177/grandnational_2006/
Posted By: Anonymous
Re: Paint job on a budget!? CONTINUED..page 44........ - 01/23/07 04:47 AM
Ok guys so I've read every page of this thread. I've been following for over a week now and this is VERY interesting. I want to paint my 94 dodge grand caravan in Brightside Fire Red off of the ebay seller. One question. We all know about Chrysler paint and it's terrible adhesion back in the late 80s/early 90s problem. Some of the paint has just flaked right off. So my question is what should I do to prep the car for this paint job? Just rough it up like any other job? I really don't want to go down to the bare metal on the whole car but I don't want to rusk further adhesion problems. I know rusto/brightside will go over bare metal and any other paints but i don't think anyone has painted an old chrysler yet with their(chrysler's) crappy paints. Advice?
Also, I have a second question. I've been practing with some rusto gloss black on an old white civic trunk lid I acquired. two coats, 600 grit wet sand, two coats, 600 grit wetsand, two coats 1500 grit wetsand vertical followed by 2000 grit wetsand horizontal. I am ready to polish. It's nice and flat and all particles/orange peel is gone. It looks AWESOME when I rinse it with mineral spirits, I can really see my reflection, but when the spirits dry, it looks not as black as it was before, more grayish. The color really faded with the wetsand. Is this normal and will the polish bring it back? I have never painted or polished before so this is why I don't know really. Maybve aussie will now because he painted his car really nice in black, but i just dont know what the car should look like after the final wetsand. maybe i could have sanded too much.
Thank you in advance guys, and I'd like to thank Charger for the original method, and Marq for discovering the brightside, and everyone else who has contributed to this thread with insight and pictures.
Posted By: v8mirage
Re: Paint job on a budget!? CONTINUED..page 44........ - 01/23/07 12:36 PM
I would say, Yes, it is normal for the black to look grayish after wetsanding. What you are seeing is all the scratches. Polishing should remove all of those scratches and get you back to the glossy black that you are just waiting to see.
Gerbs
Posted By: Anonymous
Re: Paint job on a budget!? CONTINUED..page 44........ - 01/23/07 05:58 PM
Thank you v8, I was a little worried. Now anyone have any ideas on Chrysler's poor paint job?
Posted By: Anonymous
Re: Paint job on a budget!? CONTINUED..page 44........ - 01/23/07 07:58 PM
All right, I have been watching this thread for quite a while now, and I'll be diving in soon, resurrecting a 1960 Fury, gloss white over gloss black.
Good lord, like I don't have enough projects already.
Posted By: Anonymous
Re: Paint job on a budget!? CONTINUED..page 44........ - 01/23/07 09:14 PM
gm has the same problem in the late 80's early 90's with bad primer. blue, black, white, red and grey paints is what peeled. so to do it right you have to strip to bare metal and start from scratch or if you paint over the old paint it will continue to peel... gm did have a recall on the paint in 1990 but nobody new about it until a few years ago
Posted By: Anonymous
Re: Paint job on a budget!? CONTINUED..page 44........ - 01/23/07 09:30 PM
Great thread. Will be painting my 57 speedster replica black using BPS paint from TSC over the next couple of weeks. Will post pics as I go along.
Scott
Posted By: 69DartGT
Re: Paint job on a budget!? CONTINUED..page 44........ - 01/23/07 09:35 PM
Just finished the interior install, now need to clean and install and paint bumpers & install and it will be road worthy again.
Next week is the Poor Boys and buffer routine!!!

Posted By: Anonymous
Re: Paint job on a budget!? CONTINUED..page 44........ - 01/23/07 09:37 PM
Posted By: Anonymous
Re: Paint job on a budget!? CONTINUED..page 44........ - 01/24/07 01:04 AM
I really enjoyed the posts and pics detailing this painting method.
I am about to paint a classic Schwinn bicycle. I can buy the paint from
http://www.hyper-formance.com/paints.htm , but the website states that "Pints must be used with a compressor and paint spray gun."
Does this rule out my use of this technique with this paint? I have never done a project like this before, but I really want to make this bike presentable, even if not original, but I have limited funds for the project.
Posted By: Anonymous
Re: Paint job on a budget!? CONTINUED..page 44........ - 01/24/07 01:08 AM
"They all believe I am quite mad... "
As a hatter, yo.
They know...
Posted By: Exit1965
Re: Paint job on a budget!? CONTINUED..page 44........ - 01/24/07 02:25 AM
Quote:
I really enjoyed the posts and pics detailing this painting method.
I am about to paint a classic Schwinn bicycle. I can buy the paint from
http://www.hyper-formance.com/paints.htm , but the website states that "Pints must be used with a compressor and paint spray gun."
Does this rule out my use of this technique with this paint? I have never done a project like this before, but I really want to make this bike presentable, even if not original, but I have limited funds for the project.
If you read the page it states that the 1oz cans must be sprayed, but it's also available in spray cans. The touch up basecoat/clearcoat its talking about can't be rolled on.
To paint a car as small as a Schwinn bike and have it be presentable, just go with their spray can, or a spray can of rustoleum.
Posted By: Marq
Re: Paint job on a budget!? CONTINUED..page 44........ - 01/24/07 03:20 AM
Quote:
Thank you v8, I was a little worried. Now anyone have any ideas on Chrysler's poor paint job?
I think each of the car manufacturers have had their share of bad runs over the years. Fords for example had particularly bad runs with their silver paint jobs in the late 70's. Heck some of those paint jobs committed harikari within their first year.
I seem to recall this problem really became epidemic during the North American transition from factory paint jobs using solvent based carrier over to the more enviromentally friendly water based carriers. As a side note : the Asian and Euro cars didn't suffer this problem because they continued painting their cars with solvent based carrieers.
I happened to have had a 78 T-Bird and an 81 Grand Marquis that both suffered from the poorly adhering paint. And yes it would come off in large flakes. So I know the problem you are speaking about.
IF I were to prepare that 78 T-Bird for painting using the roller method, I would take a sander to the original paint... probably using something in about the 120 grit and just do a few light passes over the original paint. Hopefully that would be sufficient to trigger the final separation of any flimsy paint from the subsurface.
I would then move the sanding up to 200 grit to try to lessen some of the deeper scratches caused by the 120 grit. This might also reveal any other flimsy paint that somehow escaped the 120 pass.
Now... the key thing at this point would be to lay down a layer of thicker primer. A light sprary primer isn't really going to do the job propeerly at this point. Because the spray primer can't fill in the scratches left by the 120 and 200 grit.
I would give the body a complete rub down with alcohol or spirit at this point. This will remove the sanding debris AND more importantly any enviromental crap, waxes or oils that may have penetrated the original exposed primer surface.
So this might be a perfect job for the Brightside primer. It goes on thick and will give you enough depth so that you can sand it down nicely with a 600 grit and get it pretty smooth - plus fill in any difference between patches where there is no longer any paint and the paint layer.
Once the Brightside primer layer is sanded down and as smooth as you can get it... you will then be able to start going to the actual painting of the body.
One other nice benefit of throwing the Brightside primer into this task is :
a) its thick enough to give you some surface to sand and smooth
b) it can fill in most scratches or gaps where it goes from paint to the original primer ( like where the original paint had flaked off and exposed the original primer ).
c ) structurally the Brightside primer can provide a solid adhesion to the subsurface AND bonds well to itself. The latter being important so that if there are any points on the subsurface that didn't adhere properly, the Brightside primer layer will hold its skin together and cut down on the chance for a potential adhesion failure.
Don't know if this helps... but it's how I imagine I would have tackled the old T-Bird..
.
Posted By: Anonymous
Re: Paint job on a budget!? CONTINUED..page 44........ - 01/24/07 06:11 AM
Thank you Marq for contributing to this thread once again. You have helped me out bigtime, hah. I dreaded the though of going down to the complete bare metal on every panel of a caravan hah.
Anyways, what you're saying is, use an electric sander to rough it up with some low grit sand paper to remove any poor adhering paint currently, then smooth it out with a little higher grit. Correct? Couldn't I just use same grits of sand paper on a block (Like that long 18 inch one i think it was that i saw earlier in the thread)and wetsand it? Or would it be that the car being wet while sanding not properly let the paint flake off? In either case, I wouldn't be going down to the metal at all so I should see that some of the old paint would still be on there, just roughed up?
Now what color primer(over original white paint) to paint a brightside fire red car? Also how many layers of primer? Like I said I am a painting noob, and new to this. Should I thin it like I do with the paint to the same consistency as the paint, or will it do well straight from the can? (Should I worry about orange peel when sanding the primer, or sand just to remove dust, hairs, etc?)
Sorry for all the questions, but I feel right now this is the best place to get them answered. You guys are the ones who have used this method so far, and your cars have come out wonderful might I add. So thank you again, in advance.
__________________________________________________
P.S. I polished and waxed that trunk lid I painted with gloss black rusto and it game out shiny as HELL. I didn't even spend long polishing either. Probably would have came out better if I took my time. And it was a very deep color black too. I loved it. It was great for a first test piece.
Posted By: Anonymous
Re: Paint job on a budget!? CONTINUED..page 44........ - 01/24/07 07:18 AM
I was thinking....some of you chrysler/dodge owners may have seen this website.
http://www.geocities.com/motorcity/flats/6183/stories.htmlWell what If I got Chrysler to pay for a sand/primer of my car...Could I then paint over that primer? And also, would I have to sand that primer to get the new brightside paint to stick?
Posted By: Anonymous
Re: Paint job on a budget!? CONTINUED..page 44........ - 01/24/07 11:41 AM
Quote:
I was thinking....some of you chrysler/dodge owners may have seen this website.
http://www.geocities.com/motorcity/flats/6183/stories.html
Well what If I got Chrysler to pay for a sand/primer of my car...
I don't know what you current line of work is, but if you can get Chrysler to pony up for paint repairs on a 13 yr old vehicle, you have a bright future in litigation ahead of you.
Good luck.
Posted By: Marq
Re: Paint job on a budget!? CONTINUED..page 44........ - 01/24/07 02:17 PM
Quote:
Anyways, what you're saying is, use an electric sander to rough it up with some low grit sand paper to remove any poor adhering paint currently, then smooth it out with a little higher grit. Correct? Couldn't I just use same grits of sand paper on a block (Like that long 18 inch one i think it was that i saw earlier in the thread)and wetsand it?
No.. I like the idea of using a power sander better for two reasons...
a ) the vibrations transmitted from the sander to the body surface will loosen any semi-loose up patches of bad paint better than a hand sanding.
b ) I am a lazy kind of guy and I would prefer letting the sander do all the work...
The sander could work longer and hopefully it can produce better results in the long run..
Quote:
In either case, I wouldn't be going down to the metal at all so I should see that some of the old paint would still be on there, just roughed up?
I believe that if you plan to follow up the sanding with a 'thicker' version of primer, you will have a combination of metal surface, original primer and sanded original paint after that two stage of sanding is completed. The thicker primer will then be used to level up those three surfaces so that there is a smoother transition between those three layers.
Quote:
Now what color primer(over original white paint) to paint a brightside fire red car? Also how many layers of primer? Like I said I am a painting noob, and new to this. Should I thin it like I do with the paint to the same consistency as the paint, or will it do well straight from the can?
The Brightside primer you should use is the GRAY. You may get away with just one coating of that primer because it is fairly thick. ( I would guess that one layer of rolled on Brightside primer is probably equal to the thickness of 5 spray can layers of primer ). The Brightside primer can be applied straight out of the can and rolled. You could thin it... but at that point you are trying to level the three subsurfaces and so thinning it would not provide as thick of coverage.
Quote:
(Should I worry about orange peel when sanding the primer, or sand just to remove dust, hairs, etc?)
I don't think I have ever seen primer do an orange peel. Primer might wig out if it is put onto a contaminated surface ( wax, oil, dusty etc ). But otherwise, assuming the surface has been sanded and wiped down with a solvent to remove contaminants, the primer should go on smoothly and with no orange peel. That is probably because the outer skin of the primer layer remains fairly porous and not glossy. When sanding the primer layer, you will be aiming to smooth out the rough surface and get it as smooth as you can. You should be able to sand the primer layer to a point where it will make the body panel look like it is made out of smoothened clay. The smoother the primer layer, the better results you will have with the painted layers.
So the key here is to really spend the time and patience on getting your primered layer looking the best you can. If you could get that primered layer to the point where you wouldn't mind or be embarassed driving it with just that primer layer of paint, then you have probably reached the best possible surface condition for moving on to the color painting stages.
.
Posted By: Anonymous
Re: Paint job on a budget!? CONTINUED..page 44........ - 01/24/07 07:17 PM
Thank again Marq! I'm going to get started within the next 3-4 weeks and I'll start posting progress.
And Mike, I don't think I'll be asking Chrysler to pay for any of my vehicles work, hah. I would do it if my paint peel was severe enough, but the way my car looks is drivable, it's not peeling nearly as bad as some other ones I have seen, just in a few places.
Posted By: Anonymous
Re: Paint job on a budget!? CONTINUED..page 44........ - 01/24/07 07:27 PM
Quote:
So the key here is to really spend the time and patience on getting your primered layer looking the best you can. If you could get that primered layer to the point where you wouldn't mind or be embarassed driving it with just that primer layer of paint, then you have probably reached the best possible surface condition for moving on to the color painting stages.
.
Marq - A lot of places where I have lived in the Southern US we would consider that a finished paint job.
Posted By: Anonymous
Re: Paint job on a budget!? CONTINUED..page 44........ - 01/25/07 12:19 AM
New guy here,
I too am cross-eyed from reading the entire thread and would like opinions on using the Rustoleum satin brand. Going on a 1950 Chevy 1/2 ton...kinda old school look. I don't want to take off the paint all the way to the metal, just sand to give aome bite, do a few body repairs and then have at it. I like the idea of using the heavy Brightside primer to level things up too.
Never done any painting before so I am curious how the satin paint will hold up. This is not a trailer queen or a daily driver, but used mainly on weekends for work around the house.
So any opinions or real worl experiences?
Posted By: Anonymous
Re: Paint job on a budget!? CONTINUED..page 44........ - 01/25/07 12:57 AM
Great thread, guys. I've been reading the replies for a month now. I have been doing a test piece on a spare fender I had with Rustoleum Professional. I decided to go with the Rustoleum because they had the brown color I was looking for.
I would post pictures of my fender, but it looks like pretty much everyone elses, in other words, I am shocked at how good it looks.
Charger69 is right in that the only way to learn this is to do it. I have been experimenting with different numbers of coats, how much mineral spirits to mix in, and different ways to wet sand. I think I am ready to take on my 1971 Ford Galaxie, but I am just going to wait until the weather gets better.
I am sure this thread will still be going strong then so I will post pics of it when I am done. Thanks also to everyone who has posted their experiences.
Posted By: RebelDart
Re: Paint job on a budget!? CONTINUED..page 44........ - 01/25/07 04:02 AM
I'm assuming with my car in primer and completely blocked and ready to spray - I should move on to the body shop. I want to use this technique, but I don't see how I can paint engine bay, underside of hood/deck, cowl with vents, etc and get the finish I wan't, unless I can spray these areas w/o orange peel? Would these paint jobs be considered 10 footers or are they equivalent to any good solid-colored (I'm thinking white) high-gloss paint job say, under shopping center lights at the evening cruise-in ?
Posted By: Marq
Re: Paint job on a budget!? CONTINUED..page 44........ - 01/25/07 04:33 AM
Quote:
Never done any painting before so I am curious how the satin paint will hold up. This is not a trailer queen or a daily driver, but used mainly on weekends for work around the house.
So any opinions or real worl experiences?
My initial thought is that 'over time' the satin type finish would eventually go shiny in spots...
For example, if you hang your elbow out the window when driving... then the body part your arm comes in contact with would eventually go shiny.
When washing the satin finish.. eventually where you rubbed will go shinier than other areas...
I think of it as being something like a suede jacket... where they look great when you buy them... but eventually where the suede is rubbed will go shiny.
I have seen cars driving around with almost shiny 'primer' paint... and they explained to me that originally their primer had a somewhat satiny type look... but with time it lost that satin look and went shiny.
Another thought about the satiny look is that to achieve it, the paint would not have a glossy or closed surface. Therefor the surface was somewhat porous... and tended to had dirt adhere to the pores in the paint. When bugs splotted against the paint job it was harder to remove them etc.
I know with the Brightside paint, they do sell an 'additive' that will reduce the high gloss shine and give a satiny finish. In that case, I can see the polymer paint holding its satiny look for a longer time than say an enamel based paint.
Don't know... just thought I would toss in those rambling thoughts...
.
Posted By: v8mirage
Re: Paint job on a budget!? CONTINUED..page 44........ - 01/25/07 12:16 PM
Quote:
I like the idea of using the heavy Brightside primer to level things up too.
....
So any opinions or real worl experiences?
I have done a fair amount of leveling up just using Rustoleum "Stops Rust". If you don't mind putting a couple extra coats of paint on and you use a sanding block, (I use the 3M hard rubber one) you can level it out quite nicely.
Gerbs
Posted By: v8mirage
Re: Paint job on a budget!? CONTINUED..page 44........ - 01/25/07 12:27 PM
Quote:
Would these paint jobs be considered 10 footers or are they equivalent to any good solid-colored (I'm thinking white) high-gloss paint job say, under shopping center lights at the evening cruise-in ?
I am only about half done with my car, I have my front fenders done except for the final wet sanding and polishing, and it has less orange peel the way it is now than my 97 Blazer. My car is a white and even with only 4 coats on it, it needs to be out in BRIGHT sunlight to see any issues, and these will come out with the next sanding or 2. As long as you use a sanding block while wet sanding you can smooth out ALOT of imperfections with the number of coats that are put on. I would say that with the flaws that I have right now you have to get within 5 feet to see them.
Gerbs

Posted By: Anonymous
Re: Paint job on a budget!? CONTINUED..page 44........ - 01/25/07 12:50 PM
Tomarse
I am impressed. Looks really good
Posted By: Pool Fixer
Re: Paint job on a budget!? CONTINUED..page 44........ - 01/25/07 12:53 PM
sort of on topic, but, like everyone else, I have noted to myself that factory paint on new cars looks pretty bad....recently I have seen that there are even varying degrees of that. most cars look ok, but I was sitting next to a new Jeep Commander in traffic and all it needed was the aforementioned "Tropicana" label to complete the look. I could not believe how bad it was. it looked worse than most of the results in this thread. and this thing was pretty new, a couple of weeks, the bottom was not even dirty yet.
Posted By: 69chargeryeehaa
Re: Paint job on a budget!? CONTINUED..page 44........ - 01/25/07 04:29 PM
Quote:
I'm assuming with my car in primer and completely blocked and ready to spray - I should move on to the body shop. I want to use this technique, but I don't see how I can paint engine bay, underside of hood/deck, cowl with vents, etc and get the finish I wan't, unless I can spray these areas w/o orange peel? Would these paint jobs be considered 10 footers or are they equivalent to any good solid-colored (I'm thinking white) high-gloss paint job say, under shopping center lights at the evening cruise-in ?
Actually i can show you some pics of a cruise in, at night under shopping center lights (keep in mind i used my cell phone camera which is perty crappy but you can see what it looks like):


that's my charger next to a challenger vert.
Actually the 2 best conditions for this paintjob where they look killer is in full sun, or night. Overcast days make any car paint look crappy, you can see every flaw and dent/scratch. Your end result should you choose to accept this mission is going to be as good as you make it, my charger is a good 1-footer, maybe even better, and for the period of car it is, the paint is just as good if not better than it came from the factory. Aussiedriver proved that you can surpass OEM paint quality, and i'm sure his paint would be "show" quality, the moral is it will be as good in the end as your prep/paint/polishing skills.
Posted By: Anonymous
Re: Paint job on a budget!? CONTINUED..page 44........ - 01/25/07 07:59 PM
Quote:
Tomarse
I am impressed. Looks really good
Cheers dood. Glad someone noticed! I guess it's becoming old to see this working.
Posted By: 69chargeryeehaa
Re: Paint job on a budget!? CONTINUED..page 44........ - 01/25/07 08:05 PM
Quote:
Quote:
Tomarse
I am impressed. Looks really good
Cheers dood. Glad someone noticed! I guess it's becoming old to see this working.
i noticed, looks kinda like mine lol:
i like that color, what bug you have?
Posted By: kenzo42
Re: Paint job on a budget!? CONTINUED..page 44........ - 01/25/07 08:52 PM
I too was surprised that no one commented on your paint. Looks great.
Tomarse, what kind of paint is that?
Quote:
Quote:
Tomarse
I am impressed. Looks really good
Cheers dood. Glad someone noticed! I guess it's becoming old to see this working.
Posted By: Anonymous
Re: Paint job on a budget!? CONTINUED..page 44........ - 01/25/07 09:11 PM
Thanks people, I feel a lot more welcomed around this place now.
Here's my bug how it looks at the moment, well last night technically:
Ordered some new tyres for it today too.
I'm using Brightside for the paint. I should take a few pics now that it's waxed. It looks great! Worryingly great, I'll have to look after it when it's done.
Posted By: 69DartGT
Re: Paint job on a budget!? CONTINUED..page 44........ - 01/25/07 10:14 PM
Finally got the truck back on the road, I did use the buffer on the doors where the mirrors mount, used Poorboys SR3 and SR2.5 then some wax. Very satisfied with it
Remember just a driver.

Posted By: 69chargeryeehaa
Re: Paint job on a budget!? CONTINUED..page 44........ - 01/26/07 12:27 AM
Quote:
Finally got the truck back on the road, I did use the buffer on the doors where the mirrors mount, used Poorboys SR3 and SR2.5 then some wax. Very satisfied with it Remember just a driver.
that looks awesome
you need a before and after pic side by side lol.
Posted By: 69DartGT
Re: Paint job on a budget!? CONTINUED..page 44........ - 01/26/07 12:46 AM
Quote:
Quote:
Finally got the truck back on the road, I did use the buffer on the doors where the mirrors mount, used Poorboys SR3 and SR2.5 then some wax. Very satisfied with it Remember just a driver.
that looks awesome
you need a before and after pic side by side lol.
How's this 
Posted By: 69chargeryeehaa
Re: Paint job on a budget!? CONTINUED..page 44........ - 01/26/07 01:07 AM
huge difference, loos awesome, nice color.
Posted By: Anonymous
Re: Paint job on a budget!? CONTINUED..page 44........ - 01/26/07 01:45 AM
Quote:
Quote:
Tomarse
I am impressed. Looks really good
Cheers dood. Glad someone noticed! I guess it's becoming old to see this working.
It does look great tomarse. We have become jaded here now that it seems we can all do it. I haven't ventured into AussieDriver's realm yet to polish it, but the painting is as easy as Charger said it was.
Posted By: RebelDart
Re: Paint job on a budget!? CONTINUED..page 44........ - 01/26/07 03:12 AM
Quote:
I'm assuming with my car in primer and completely blocked and ready to spray - I should move on to the body shop. I want to use this technique, but I don't see how I can paint engine bay, underside of hood/deck, cowl with vents, etc and get the finish I wan't, unless I can spray these areas w/o orange peel? Would these paint jobs be considered 10 footers or are they equivalent to any good solid-colored (I'm thinking white) high-gloss paint job say, under shopping center lights at the evening cruise-in ?
I ain't skeered (you Brits probably haven't heard that one!) Anyway I'm confident (I got skills, as Napolean would say)I can sand, I can buff and best of all, I'm not in a rush. As stated above, my concern is engine bay, under hood, cowl with vents - how best to approached these areas and get the results ? Should I spray ? Am I asking too much if using this method ? Body is prepped (blocked/guide coat/blocked, you guys know the drill)and it's time to make the decision. I really want to do this myself if possible.
Posted By: Anonymous
Re: Paint job on a budget!? CONTINUED..page 44........ - 01/26/07 03:13 AM
Well, like many others, I've signed up for this forum mostly for this thread. I started out thinking I'd read through the whole thing, but then I realized how freakin' long it is!
Is there a summary written up anywhere? From some of the later threads, it looks like preference may have moved towards the Brightside marine paint vs. the various flavors of Rust-Oleum/Tremclad - yes, no, maybe?
Where do I get the Cliff notes!?
Posted By: Anonymous
Re: Paint job on a budget!? CONTINUED..page 44........ - 01/26/07 04:29 AM
Seriously man, just read all 101 pages. It will be worth it because you'll have something valuable to read every day and will share int he hardships and mistakes every person who has posted on this thread has had. It's like a novel, seriously.
But you'll learn alot more by reading every page rather than just a brief summary and from getting everyones different opinions you can pretty much form your own choice on what you want to do and how you want to do it, because there are different ways. And it's been summarized many times in many different peoples posts...so just start reading!
Posted By: Pool Fixer
Re: Paint job on a budget!? CONTINUED..page 44........ - 01/26/07 04:45 AM
Quote:
Seriously man, just read all 101 pages.
Not so fast grasshopper, you ain't getting off that easy. theres a whole other thread that's somewhere on here that's probably another 80 pages.
Posted By: Anonymous
Re: Paint job on a budget!? CONTINUED..page 44........ - 01/26/07 01:25 PM
Wellll. This one is 58 and the other one is 43...so theres also an 80 page thread? haha. Once you get to the end of the 43 page one it says it's continued and gives a link to this thread, so thats how I followed along.
Posted By: Anonymous
Re: Paint job on a budget!? CONTINUED..page 44........ - 01/26/07 01:41 PM
Quote:
Seriously man, just read all 101 pages. It will be worth it because you'll have something valuable to read every day and will share int he hardships and mistakes every person who has posted on this thread has had. It's like a novel, seriously.
But you'll learn alot more by reading every page rather than just a brief summary and from getting everyones different opinions you can pretty much form your own choice on what you want to do and how you want to do it, because there are different ways. And it's been summarized many times in many different peoples posts...so just start reading!
There was a pretty good summary about 8 pages in based on Chargers original instructions. Then Aussiedriver came up with all that stuff on polishing to a show car finish. Then there was stuff on Brightside, sanding ,body work, other paints, paint color matching, clear coating, and on and on. I even tried my hand at putting together my own summary for my own use, but stuff just keeps getting added because I keep running into new stuff. If I ever finish my summary it will be a pharking eBook posted here in PDF format. I feel your pain though. I have read the entire thing more than once, and each time I usually find that someone answered my question long ago. Oh yeah, then people started posting their results, and I love looking at what everyone has done with this.
I think Charger gave some of the best advice (as usual) early on when he said to just practice on a hood or door or old piece you might have. I can't remember that exact quote about nothing sharpening the senses like a hanging at dawn, but its the same here. Once you start laying down paint, your searching becomes more focused.
Posted By: Anonymous
Re: Paint job on a budget!? CONTINUED..page 44........ - 01/26/07 04:41 PM
Son of a Seadog! This puppy just keeps on growing! Well, here's my story. I lived in Guadalajara, Mexico back in the mid-nineties and bought a mint 1979 Fairmont Squire (woodie). My wife is Mexican; I'm a Canuck. We moved back to Canada in 1999 with the car and a new 1.5 ton commercially-built steel Utility trailer (Lots of Panels to test on).
I blew the engine (5.0L with AC) and decided to drop a fresh 200 ci, Inline 6 cyl. I got a Canadian 1978 Fairmont 2 door, rusted with a professionally rebuilt engine and trans, new exhaust, written off because some drunk backed into it in a Parking lot! Go figure?!
Anyway, the engine is in, after changing the from K-Member, steering, brakes, struts, etc. And! I have to change all the wiring in mine to use the Electronic Distributor, Cruise Control, and eliminate the AC. Well, my car is still, as Rust Free as most southern, mid-west cars. My floor boards still have the original primer under the carpets, and there's no structural rust anywhere.
Even my carpets are like new, but faded. I'm restoring the woodie panels and trim, after I do the paint job, via this method. I hang out at the FordSix.com forum site, and got here, from there, where the topic is lovingly, but dubiously called the '50 dollar paint job'.
I downloaded all of 69Charger's and Exit1965's and RickLandia's comments and photos, and many of the comments and critiques of other members that offered alternate materials, tips, and Serpent Warrior's hilarious tale of painting in an HD parkade. That's the most hilarious story I've ever read. I've done road side and parking lot fixes, but he told it so 'straight faced' that my ribs still hurt, two days later!
Now, I'm not a noobie to Chryco rides. My dad and I built 392- Hemi-powered fuellers in the late 60's, and when our funny-car bread-wagon wasn't allowed in the last NHRA races (they can blow into the next lane or the fans with a 3 mph cross-wind at 160 mph), we put the 700 hp beast into a 1965 Monaco (red with a new white top) - we had to trim the A-frames by 3/8" to get it in.
But this Fairmont wagon is so sweet and served so well, that I figured at 40 mpg (CDN Gallons), I can justify giving her a full refresher.
We started a new small business and I wasn't going to drop the $7,000 the shops wanted to do what I can with this method.
Thanks to all of the skeptics and willing champions for their perseverance and continuity. You guys rule!
I sold my Monaco in the Ottawa Valley, so it may still be around. Anyway, the engine was from a 1966 Imperial, and we drove all the way down to Florida, and searched the yards in Alabama and Mississpi and even around New Orleans for the D300 Heads and Dual Carb setup (Solid Lifters) and cam. It was hot in the Imperial, but it was a screamer in the Monaco. My dad got $1,800 worth of tickets in two weeks after we finished it, and he knew all of the police, as a Junk Yard owner. He didn't know they were training new rookies.
He sold me his half of the car to pay the fines! I sold it, to buy a new Valiant 2 door.
The effort in this post, by the key players and the skeptics is what convinced me, along with the results.
Well done!

Posted By: Anonymous
Re: Paint job on a budget!? CONTINUED..page 44........ - 01/26/07 05:23 PM
I should add that we're in the coldest, snowiest part of our Prairie winter. It's also the driest time of year, for us. So I'll be tweaking the paint/spirits mixture to get it right. We also have more average daily sunlight than Miami, FL. Heck we even have a Miami, Manitoba! But no where as warm. I won't get to the body paint until April, but we can still get snow and cold even through early June.
I don't figure anybody on this Mopar site is fixing up any Town And Country Chrysler wagons,(I had a 1975 440 Chrysler wagon - 6 mpg on the Canadian Gallon
) but there is a Ford member who did redo his Wood Trim and panels with his wife at this link:
http://www.rickwrench.com/wood.htmlAnd 3M or J.C. Whitney have the right panel stock. 3M's seems to have a better range of colours. It's in their Signage product line.
http://solutions.3m.com/wps/portal/3M/en_US/Graphics/Scotchprint/Solutions/Di-NocFilmSomebody on the first 43 pages was asking about adding metal flakes to the Tremclad/Rustoleum, and I recall that we used to add actual fish scales to do some Mother Of Pearl finishes on our cars. Some show cars would add brass or bronze flakes just to get a different 'metallic' finish. I think you have to visit a machine shop to get some and sift it for the fine stuff. My car has a Ford Mexico finish which is close to the GM Tiger Eye metallic, but I think a Solid Dark Brown or a medium Gray is what we'll do. The car has a Gold/Tan Interior and there aren't many paint colours that would show well with that.

Posted By: Anonymous
Re: Paint job on a budget!? CONTINUED..page 44........ - 01/26/07 05:40 PM
Great story Norman. I guess I should fess up and tell ya that when I was a young lad, my dad owned a 1955 Ford Wagon with the fake wood on the sides. One day he decided to paint it and since we couldn't afford a fancy spray paint job, he painted it with a brush and some light blue paint. He painted over the fake wood and all. Not having the benefit of the internet to guide him, it may have been a "30 foot paint job," but no less lol.
Posted By: Anonymous
Re: Paint job on a budget!? CONTINUED..page 44........ - 01/26/07 05:52 PM
Correction, it was a 1958 Imperial, not a 1966. We had a 1966 that we drove down in. The 1958 had a factory "Porcelan" finish. You did not chip that car or there'd be hell to pay. It was a Toronto car, 69Charger, too.
Here's a picture of the floor pan from the 1978 Fairmont. The whole floorpan perimeter shows daylight. The carpets were holding the car together! The owner was a retired Political groupie of 65 years of age, and he was pouring in money into it with new exhaust, new motor and trans, new battery, electrics, but never paid attention to the weakest link - the Flintstone floor!

Posted By: Anonymous
Re: Paint job on a budget!? CONTINUED..page 44........ - 01/26/07 06:42 PM
Smyrna, my dad had a new 55 4 door and then a 58 ranch wagon with a 390. The funny thing was that dad was the Shipping Manager for GM at the Oshawa plant. We picked up both cars at the Oakville, Ontario Ford Plant. Two weeks after dad got the 1958, GM asked him to sell it or he was fired. He quit and started his own business. Never looked back either.
It seems that the Ford production line made a mistake with his car, because he ordered a 289 V8 and got this T-Bird 390. The shipper at Ford told him to keep mum. It was too much trouble to do the paperwork.
We were lucky back then, because our little town of 8,000 only had one Policeman, who was also the Chief, and a member of my dad's rifle club. Otherwise, my old man would still be paying traffic fines and he passed 4 years ago. He just couldn't resist fast cars and hitting the hammer down.
He really got the bug, when a junkyard customer took him out in his new Hemi-Charger. It scared the hell out of him so much, that he decided to 'confront his fear' with something as fast or better. Before, he was just lead-footed, after that, he was wired for FASTER! We graduated together in University as Engineers, and did everything except ... together. I'm sure he's still looking for a competitor, wherever he is.
I mentioned earlier that I downloaded what I considered the key comments and pictures. I put them into Word 2000 format on the first file of nearly 80 megs. Part 2 is only 8 megs.
I went scouring the major Polisher manufactures and found a lot of comments on tool forums. 69Charger is right. The 10" is the right tool. Noisy and everything, the pricier ones, except the really expensive Cyclo unit or one from England at a whopping 16 pounds, all have issues for this Painting technique. When I think of dropping $200 or $300 for a polisher or even a Sander/Polisher for this rough, dusty task, it doesn't make sense.
We have both Princess Auto and ToolTown Canada (The US ToolTown is not related and sells namebrands) who sell the cheaper, Asian ones. The nice thing about these big hulks of 6 pounds or more is that they do the pressure work, not you. And if they burn out the bearings, so what! The Cyclo is way out of my league for a polisher. If I owned a Porsche, well ok, but they were made for Aircraft:
The English Pro machine (circa $600):
http://www.orbitalpolisher.com/index.htmlThe Cyclo twin head the Beemer guys buy:
http://www.cyclotoolmakers.com/products/prodcomp.htmlOr this Antique aircraft guy:
http://www.russellw.com/planes/ryan/polishing.htmThe 90 degree ones (look like grinders) mean you're doing all the weight bearing, pressing down. As Danny Glover used to say, "I'm getting to old for this sh*t!". I can see me trying to reach to the centre of my wagon's roof or hood and watch the machine, press down and direct it for even 20 minutes. Let the noisy fatboy do it. If it dies, you can always get another without using the diaper money.
Some tool forums argued about the Porter Cable units. MeGuiars gives a Lifetime guarantee, but PC doesn't. Others argued about how they couldn't reach small crevices and dips in body contours, but this paint job isn't the same. We aren't working around the ornaments - they should be off, for the most part.
Even the Chinese Ryobi 10" polisher is better for this job. I make fine furniture as a hobby and I use specialized European high-end tools and I even have some no-namers for the real crud tasks. When its all done, I may blow my brains out on a Cyclo to keep the Mirror Finish, but the cheapies are good grunt-work machines. How much dust is there from polishing the family Porsches?
Posted By: Anonymous
Re: Paint job on a budget!? CONTINUED..page 44........ - 01/26/07 07:11 PM
Norman - I have this guy but its not random orbital, although its variable speed. I am not to the polishing stage yet with my paint (only a few more weeks). It came with a sort of synthetic wool bonnet and one that is terry cloth. I am not sure if I should buy some better ones for it. I tried it out on my trunk with the Turtle Wax polishing compound, but it doesn't break down nicely like the stuff they show on the mguires demo of the PC, so I am not sure when to stop.
I also noticed that my local walmart has both a small ryobi (6"0 for $14.95) and the 10" ($22) you refer to at give-away prices. It sounds like you would recommend the 10". Both are random orbitals.
HF polisher/sander
Posted By: Anonymous
Re: Paint job on a budget!? CONTINUED..page 44........ - 01/26/07 08:09 PM
Yeah, I saw that one too, on their site. I've used that type before, and I found it can run away on you. One distraction, and you're back to square one. I saw one guy in a Tool Forum saying that he bought a 7" Makita Vertical ($180 USD) and put a 9" buffer pad on it, but that would stress the machine.
The Ryobi 10" is about $40 here, so your US price sounds about right. The only variable speed machines (10-inchers like 69Charger recommended) are the expensive ones or the 7" units. I'm a Bosch Tools freak, and they don't make anything past a 7" unit, even in Germany. I like their tools because you can get them repaired fairly quickly, here in the Prairies. We like to buy once, just like everyone else, but tool repairs can be a bear, here.
Do you have to press down a lot? When I was a kid, we had an old Navy Sawfiler board with us. He helped us refinish drywall and the old fart used to be on my case with "Put the Stuff to It!" when I was sanding the walls. We had wooden blocks then. Well, now that I build furniture, I always thank the old guy for telling me that. I saw some of the types like you have where they can put the screw-in handle on top, as well as either side. These big round 10" guys just do it. I suppose a guy could get a couple pounds of lead and weight them down, but they don't enough amps to take extra weight. 6 pounds, bearing straight down or maybe 2 pounds of the type you have, since you're holding the motor and most of the tool's weight in your hand. I'd think the big guy would get the orange peel down faster.
Variable speed units would be nice, but then we're back into frills again that cost bigger dollars. And then what do you do with it when you're done? Another paint job? The wife nagging about the $200 you spent on a machine you'll never use again.
Even Sears doesn't offer their own brand of 10", probably because they're just too simple (nice feature for this task) and the imports compete well. At least you know that you can get the bonnets in all the different qualities (finer) and you're not limited as to who you can buy from. There's some that have made it so you have to get replacement bonnets from them, nobody else makes them. I went on 3M's abrasives page, and saw that they only go to 9-3/4" bonnets. They make 8" and 8-3/4" as well as 3, 4, 5 and 6. No 7" except in sanding discs.
I'd say get a polisher that does the heavy job, like these 10" units, and save your money, get supplies anywhere for a lot less, and save your arm muscles. You might even save a few scratches, if the wife or the kids run in with a panic or you get caught in the cord.
Posted By: Anonymous
Re: Paint job on a budget!? CONTINUED..page 44........ - 01/26/07 08:17 PM
Here's a post from Aussie Driver. Follow that down to about a third of the page. My bathroom mirror should be so lucky!
https://board.moparts.org/ubbthreads/show...rue#Post3071064I think he's using a smaller diameter machine, because he mentions that he needs more heat for the Anti-Swirl treatment. But to get the Orange Peel and initial sags and scratches out, you don't want heat, you want weight.
Posted By: Anonymous
Re: Paint job on a budget!? CONTINUED..page 44........ - 01/26/07 08:53 PM
Smyrna, I found another Aussie Driver comment on this polisher machine issue. About 5 posts down. His results from the first link I posted speak louder than words about the potential we can achieve, but this one addresses the machines.
https://board.moparts.org/ubbthreads/show...art=39&vc=1
Posted By: Marq
Re: Paint job on a budget!? CONTINUED..page 44........ - 01/27/07 12:09 AM
The one thing that I have personally enjoyed about this thread is when folks share their pictures. A picture is worth a thousand words and I believe those pictures help inspire people to at least consider the 'roller paint' as a viable and cheap way to go about getting a decent paint job.
Everytime I return here I love reading the new stories... but the new pics are what I really enjoy.
Nuff said. Just thought I would take the opportunity to thank everyone who has taken the time to share their pics with us.
And I really think that everyone who is going to consider the 'roller paint' method for their car SHOULD read the entire thread.
A synopsis of this thread will not prepare you for all the variables that might enter into a 'roller job'. But if you have read the entire thread you will be better equipped to adapt to those variable and be confident that you are not the first person who has had a glitch while doing it. The answers are here.
But probably the best reason to read this entire thread from start to finish... is that it is almost like some act of initiation into a fraternal order of paint rollers. Only by going through the entire thread will you know and appreciate your fellow members of this brotherhood of cheap paint job artist
Ciao
Marq
.
Posted By: Anonymous
Re: Paint job on a budget!? CONTINUED..page 44........ - 01/27/07 01:21 AM
Quote:
The one thing that I have personally
But probably the best reason to read this entire thread from start to finish... is that it is almost like some act of initiation into a fraternal order of paint rollers. Only by going through the entire thread will you know and appreciate your fellow members of this brotherhood of cheap paint job artist
Ciao
Marq
.
Maybe I will have a decal made up to put on the back of my car when I am done

Posted By: Anonymous
Re: Paint job on a budget!? CONTINUED..page 44........ - 01/27/07 03:09 AM
Yeah! I'm sure we'd wear it with pride.
Posted By: kenzo42
Re: Paint job on a budget!? CONTINUED..page 44........ - 01/27/07 04:48 AM
Marq or anyone else w/ a 7424, does your 7424 make a crunching sound when on?
Mine is pretty noisy, like if the counter weights are bouncing against the inside wall of it.
Is this how it's suppose to sound? Thanks.
Posted By: Anonymous
Re: Paint job on a budget!? CONTINUED..page 44........ - 01/27/07 05:33 AM
So has anyone used this stuff?
http://www.paintforcars.com/Interesting that the catalyst is optional, so it sorta sounds like it's half-way to being a more typical single-stage auto paint. I'm sorta assuming that it would do well rolled, but maybe I shouldn't assume.
Posted By: 69DartGT
Re: Paint job on a budget!? CONTINUED..page 44........ - 01/27/07 02:15 PM
Quote:
Marq or anyone else w/ a 7424, does your 7424 make a crunching sound when on?
Mine is pretty noisy, like if the counter weights are bouncing against the inside wall of it.
Is this how it's suppose to sound? Thanks.
Check this link and see it its helps. I used mine for the forst time and while it sounded different then my other cheapie polisher I did sound out of the ordinary.
http://www.autopia-carcare.com/inf-porter-cable-7424-car-polisher.html
Posted By: Anonymous
Re: Paint job on a budget!? CONTINUED..page 44........ - 01/27/07 08:05 PM
Quote:
So has anyone used this stuff?
http://www.paintforcars.com/
Interesting that the catalyst is optional, so it sorta sounds like it's half-way to being a more typical single-stage auto paint. I'm sorta assuming that it would do well rolled, but maybe I shouldn't assume.
I found the same web site and I e-mailed them the same question. Haven't heard a darn thing from them yet. The paint is reasonably priced, about the same as the others mentioned here, and I think worth the try.
Posted By: C38coupe
Re: Paint job on a budget!? CONTINUED..page 44........ - 01/28/07 12:02 AM
Welcome to the thread Stormin Norman, I am also right near you in St Andrews Manitoba and have posted on here and follow this thread , have spoken to Charger and have done a bit of experimenting with this method of painting. It still amazes me the results some of you guys are getting...........C38coupe ps years ago in Winnipeg my family knew a guy named Stormin Norm M. from St Boniface would that be you
Posted By: Anonymous
Re: Paint job on a budget!? CONTINUED..page 44........ - 01/28/07 02:20 AM
Hi C38Coupe! Yeah, I saw your posts and figured I'd look you up, when I made more progress (AKA When it gets warmer than -30C
I just remembered that I picked up an old dual head hoover polisher a couple of years ago, and I'm gonna try tweaking that beast into a buffer/polisher for this job!
I'm not convinced that the lighter ones can do the job well, and the big guys typically don't have many amps or variable speed controls.
I've got a nice Bosch EVS 2 HP router, but its not Random Orbital, now is it!
But the hoover twin-head has a big enough base (The handle comes off) that I could wire a VS switch and then return it to its normal state.
Its either that or convert a paint mixer shaft into a swizzle-stick and attack a buffer wheel to it!
Posted By: Anonymous
Re: Paint job on a budget!? CONTINUED..page 44........ - 01/28/07 02:31 AM
C38Coupe! No, I'm up in the North End. Its good to know there are folks from all over adding ideas and differing climates in which this process is being proven out. As for Stormin Norm M., well, the name Norman is the anglo-saxon morphing of Norseman, and heaven knows, we're in the North! Man! Its cold, this month! Luckily, I've got most of my car's interior inside my workshop where I can refinish it while I wait for the cold to come back down to -6C. My fingers freeze when I'm fiddling with wiring and small bolts.
Posted By: Anonymous
Re: Paint job on a budget!? CONTINUED..page 44........ - 01/28/07 07:40 PM
I got a picture of the Floor Polisher. It's not a Hoover, it's a GE. The discs are made of 5/8" G2S (Good 2 Sides) plywood, and the holder snap on bracket is mounted with wood screws. That means a person could cut out a new pair of discs to mount foam or wool pads. They're 5" diameter.

Posted By: Anonymous
Re: Paint job on a budget!? CONTINUED..page 44........ - 01/29/07 02:57 AM
I am new and didnt intend on making a account but just reading but now I want to ask a question that I forget if I have seen the answer to or not because I have been reading this topic in chunks and not all at once I have forgotten some little details.
Anyways my question is:
Can you get the rustoleum tinted to any color you need when you buy it at a home depot or such? I want to do this way of painting but I am definitly doing an aquaish green paint job.
Posted By: 1BAD68
Re: Paint job on a budget!? CONTINUED..page 44........ - 01/29/07 04:01 AM
I went to Home Depot and asked them, they said they're not mixing Rustoleum anymore but maybe Lowes or Menards would.
Posted By: Anonymous
Re: Paint job on a budget!? CONTINUED..page 44........ - 01/29/07 12:01 PM
Quote:
I am new and didnt intend on making a account but just reading but now I want to ask a question that I forget if I have seen the answer to or not because I have been reading this topic in chunks and not all at once I have forgotten some little details.
Anyways my question is:
Can you get the rustoleum tinted to any color you need when you buy it at a home depot or such? I want to do this way of painting but I am definitly doing an aquaish green paint job.
Weldome Aboard!
My Home Depot doesn't mix it anymore, nor does my Lowes. I think charger mentioned early on that they used to mix the Professional stuff in Canada, but quit doing it. I suspect it is more related to the Rustoleum company not providing the primary colors necessary to mix it anymore. I even tried mixing my own and posted some pictures, but since we can't primary colors, the results were less than satisfactory if you are trying to match a factory color.
This is the one area where I am not as happy as I could be with this method. Of course you can always paint the whole car.
Posted By: Marq
Re: Paint job on a budget!? CONTINUED..page 44........ - 01/29/07 03:11 PM
Quote:
Marq or anyone else w/ a 7424, does your 7424 make a crunching sound when on?
Nope... no crunching sound at all. Mine basically purrs. I would suggest that if the unit is still under warranty coverage that you get it in to the shop for repairs....
.
Posted By: Anonymous
Re: Paint job on a budget!? CONTINUED..page 44........ - 01/29/07 07:33 PM
Well this sucks because I am not painting my car any other color than what I entended.
BUT
I could use any kind of paint to paint my car if it is acrylic/enamel right?
Posted By: Anonymous
Re: Paint job on a budget!? CONTINUED..page 44........ - 01/29/07 07:37 PM
Hi All,
Another newbie here who used to live in Mississauga and found out about this thread via a British car forum. I have a 1962 Triumph TR4 that has spent the last 28 years in a barn. I have finished the mechanicals and needed to do something about the paint. I was following this for about 6 months before getting up the courage to do it.
Before starting, I have read most of this since the thread started and I do remember something about my problem, but the thought of re-reading it all is off-putting.
I am using US Rustoleum Professional Safety Red and as the fenders unbolt I am working on them in my basement. The fenders are too small for a roller, so I have been using foam brushes. I will use the rollers on the larger hood, trunk and door panels. I took the fenders back to bare metal and after rust removal I used Eastwood Rust Converter just to be sure. I applied 2 coats of un-thinned Rustoleum, then wet sanded it with 400. I then did another 2 un-thinned coats and wet sanded with 600. After drying the Rustoleum looked very wet with only marginal stroke marks. After the 600, I then thinned it with about 12% odorless mineral spirits. At first it went on like glass as 69chargeryeehaa described, but by the time I was into the second fender it was noticeably thickening back to normal.
I finished up and left it overnight. Today, the first fender looks a bit foggy and has a very light stickyness to it; the same feel as a very weak tack cloth. The second fender has heavier brush marks than if I applied the paint neat.
The pic shows the foggy fender, visible in the flash reflection.
Any recommendations.

Posted By: v8mirage
Re: Paint job on a budget!? CONTINUED..page 44........ - 01/29/07 07:48 PM
I know a lot of people have painted cars that have rubber bumpers or flexible body part. Has anyone experienced cracking and peeling on these flexible body parts as a result of not using a Flexing agent? I am using Rustoleum Stops Rust and was wondering if I need to find a flexing agent to put in the paint.
Gerbs
Posted By: 69chargeryeehaa
Re: Paint job on a budget!? CONTINUED..page 44........ - 01/30/07 12:13 AM
smeg - i live in mississauga!!! where you live now? as for the brush, DON'T USE IT!!!, trust me and use the rollers, even if you think it's too small it would be a much better finish in the end, the only time i use a brush is in a tight spot, i start with the brush and finish as much as i can with the roller, and you'd be supprised how well you get get virtually anywhere with a roller if you use both ends (rounded and flat). The way you describe the paint after it's dry is perfect, that's how it should feel, try to wetsand it, wet the pannel and paper(good to also soak the paper in water for at least 10 minutes before using it so it softens up. When you start wetsanding you'll see the water just wants to bead up, wetsand lightly at first until the water stops beading up, and until you get a smooth-flat surface. hope that helps.
v8mirage - the paint remains very flexable, case in point - i was driving my charger down a country road at night, and out jumped a deer, there was nothing i could do, i hit it at about 40mph, right on the front pass fender (which is fiberglass) and i watched it buckle up (flex) about 1 foot up as the deer came to a stop at about 9g's and died. Deer = dead, fender = perfect.
Posted By: Anonymous
Re: Paint job on a budget!? CONTINUED..page 44........ - 01/30/07 12:32 AM
First post but I've been reading this thread for awhile. Painted my 83 Isuzu Imark this way & very happy with the results. My first coats were too heavy & the paint was too thick so it had runs & orange peel. I wetsanded it back & fixed some newly discovered dings that weren't evident before as the original paint was dead & flat as primer.
I found the white roller pads worked better than the yellow. White 1's are denser & therefor heavier/ less compressable. Haven't done a 1500 colorsand & buff yet and there is orange peel but total cost is less than $75. I have lots of detail/buffing exp & will borrow a buffer from the last dealership I worked at when I do. (It's nice to stay friends with them). I used Rustoleum Stops Rust Smoke Gray & did the jambs, hood/trunk edges with a rattle can.
What is the latest mindset on clear over Rustoleum after buffing? I'm hoping to buff up an acceptable shine without using it in case future fixes are ever needed.

Here's a look after 2 properly thinned coats before wetsanding. Shine is evident but bondo spots still show thru. Also shows the 2 kinds of pads I tried. The white ones are Shur-Line brand I got at Sears.

Here she is reassembled -


Posted By: Anonymous
Re: Paint job on a budget!? CONTINUED..page 44........ - 01/30/07 12:44 AM
The indicated part between the bumper/body is rubber and so far no problems.

Posted By: Anonymous
Re: Paint job on a budget!? CONTINUED..page 44........ - 01/30/07 01:13 AM
Quote:
I got a picture of the Floor Polisher. It's not a Hoover, it's a GE. The discs are made of 5/8" G2S (Good 2 Sides) plywood, and the holder snap on bracket is mounted with wood screws. That means a person could cut out a new pair of discs to mount foam or wool pads. They're 5" diameter.
For those of us who can't afford the PC 7424 right now (my wallet is still hurting from my welder purchase last week, and all the stuff I need with it), Harbour Freight just sent out their Preferred Customer coupons with a random orbital 10" buffer that regularly sells for $30, and is now $14.99 with the coupon. Its worth signing up for if you want one.
Posted By: Anonymous
Re: Paint job on a budget!? CONTINUED..page 44........ - 01/30/07 01:25 AM
Quote:
smeg - i live in mississauga!!! where you live now? as for the brush, DON'T USE IT!!!, trust me and use the rollers, even if you think it's too small it would be a much better finish in the end, the only time i use a brush is in a tight spot, i start with the brush and finish as much as i can with the roller, and you'd be supprised how well you get get virtually anywhere with a roller if you use both ends (rounded and flat). The way you describe the paint after it's dry is perfect, that's how it should feel, try to wetsand it, wet the pannel and paper(good to also soak the paper in water for at least 10 minutes before using it so it softens up. When you start wetsanding you'll see the water just wants to bead up, wetsand lightly at first until the water stops beading up, and until you get a smooth-flat surface. hope that helps.
v8mirage - the paint remains very flexable, case in point - i was driving my charger down a country road at night, and out jumped a deer, there was nothing i could do, i hit it at about 40mph, right on the front pass fender (which is fiberglass) and i watched it buckle up (flex) about 1 foot up as the deer came to a stop at about 9g's and died. Deer = dead, fender = perfect.
I don't yet have all the experience with this method you do charger, but I have to agree on that last bit being a roller. I found with my car it didn't seem to much matter what I put on the first application with as long as it was thin enough and I went over it with the roller as the last step.
Posted By: Anonymous
Re: Paint job on a budget!? CONTINUED..page 44........ - 01/30/07 01:26 AM
Good Job - SoYank.
Posted By: Anonymous
Re: Paint job on a budget!? CONTINUED..page 44........ - 01/30/07 02:43 AM
Hey Charger, firstly thanks to you and the others for sharing your experiences. I live near Philadelphia now, but had a good few years in Mississauga. I will go with the roller.
Any comments about the speed that the mineral spirits seem to be evaporating? 10 minutes and the consistency thickened noticeably. It means that I should hardly mix any volume up, which isn't very practical. I wanted to mix up a batch and keep it in a sealed container. Also, can you add more mineral spirits to a paint batch that has had them evaporate?
Posted By: Anonymous
Re: Paint job on a budget!? CONTINUED..page 44........ - 01/30/07 11:51 AM
I recall people had problems with the odorless mineral spirits.
Try to get some regular mineral spirits.
Posted By: Marq
Re: Paint job on a budget!? CONTINUED..page 44........ - 01/30/07 01:23 PM
Quote:
Hi All,
Another newbie here who used to live in Mississauga and found out about this thread via a British car forum. I have a 1962 Triumph TR4 that has spent the last 28 years in a barn.
Yummmmm... TR 4 I had a total of 5 TR4A's all with the IRS ( Independent Rear Suspension - not the Internal Revenue Service ).
My first advice on restoring an older TR4 is to go over that frame with a screwdriver and check it out from the front to the rear - paying particular attention to the spot in the box frame where it crosses in an X pattern, just in front of the differential. The fatal flaw of the TR4's and TR6's is that the box or channel frame usually blocked up the drainage holes in the bottom of the frame and the drainage holes on the side of the box/channel was too high up for water to drain out. So the box/channel frame would RUST OUT big time.
I only mention that... because of the first TR4A that I rebuilt. Foolishly I went for the body restoration first... and after putting in a couple hundred hours on the body... the frame cracked while I was driving it. I think back to all the work I put into that puppy, only to get screwed by the frame splitting arrrghhhh...
So double check the frame before going too deep into the cosmetic aspects of your TR4.
That having been said... the tackiness of the paint problem sounds like the initial thicker layers ABSORBED the mineral spirits that you later added to the lateer coats. At this point you can either let it sit and hope that it will evaporate out over time and harden. If it stays soft... I would be tempted to take a heavily soaked towel ( with mineral spirits ) and try to rub off as much of the paint as you can ( in order to try to remove as much of those thicker layers as you can ( basically to start over on that panel ).
And I would definitely stick with the 4" white high density foam rollers and leave the foam brushes only for popping bubbles. I know those panels like the back of my hand and I know it can be done.
Good luck on your TR4.
.
Posted By: Anonymous
Re: Paint job on a budget!? CONTINUED..page 44........ - 01/30/07 04:02 PM
Thanks Marq,
Unlike the TR4 I had back in the 70's (showing my age here), the frame on this one is solid and I have already cleaned up the small amount of surface rust it had. It has a solid rear axle, so there are no issues with the rear IRS mounts like on the 4A. I also had a TR5 when I lived in the UK; wish I still had that one.
I did a wet sand on it and it came up good, so I will continue on. What I found was that the thinned paint was thickening up in the container. Is the list consensus that this is because I have used odorless mineral spirits as "Mike Da Wrench" has suggested - no offense Mike, I appreciate the feedback and I am just polling a larger sample size.
Posted By: Anonymous
Re: Paint job on a budget!? CONTINUED..page 44........ - 01/30/07 04:10 PM
Another question. I always thought that you should knock the shine off paint before applying another coat over it. The instructions here are to do 2 coats before wet sanding, but do you knock the shine off in between the 2? I have been, and I am wondering if it is unnecessary with the Rustoleum Pro; I have a lot of car left to do.
Posted By: Anonymous
Re: Paint job on a budget!? CONTINUED..page 44........ - 01/30/07 04:17 PM
Okay, one question for the roller boys.
My Satellite I bought last year was painted black by the previous owner with a brush. It's pretty bad. You can still see the brush streaks, orange peel everywhere, more runs than a Reds game, and the original sherwood green metallic can be seen in a lot of spots.
I'm thinking that since I don't know what kind of paint this is and it's such a bad job that I should just go ahead and sand down to the original paint and start from that point. I think that it's a bit more work, but it should vastly improve the quality of the new roller paint job. What would you guys do?

Posted By: Anonymous
Re: Paint job on a budget!? CONTINUED..page 44........ - 01/30/07 04:31 PM
Hoosier. I would do exactly as you said, unless you have major dings or body work to correct. If you do, you are going to have to go to bare metal to get the bondo to stick and I found leveling it after a guide coat was a bit harder than if I had completely stripped the whole surface to metal in the first place.
If the old paint is well bonded and you trust it and don't go the bare metal route, I would only worry about gettting it smooth by wetsanding. Rustoleum sticks to almost anything. I would be cautious, however about getting too much cumulative paint thickness on the car. That will make it easier to chip.
Posted By: Anonymous
Re: Paint job on a budget!? CONTINUED..page 44........ - 01/30/07 05:12 PM
Thanks Smyrna. Come to think of it, I may have to wait and see what I find underneath this black attack of the whacked out paint brush. I just found painted over duct tape on the right rear wheel hiding a bad rust hole. I know duct tape is used for everything, but this stretches the imagination!
It looks like I just may have to go to bare metal and see what's left of the original steel. Well, if you're gonna do it, do it right.
Posted By: Marq
Re: Paint job on a budget!? CONTINUED..page 44........ - 01/31/07 05:38 AM
Quote:
I did a wet sand on it and it came up good, so I will continue on. What I found was that the thinned paint was thickening up in the container. Is the list consensus that this is because I have used odorless mineral spirits as "Mike Da Wrench" has suggested - no offense Mike, I appreciate the feedback and I am just polling a larger sample size.
The main difference between the odorless mineral spirit and the 'regular smelly' mineral spirits is the evaporating time.
The reason the odorless mineral spirit is odorless is that it evaporates more slowly. Hence less smell gets into the air in a short time.
The regular mineral spirit evaporates more quickly and hence it evaporates a denser concentration of smell into the air during the same period of time.
With regards to how this all impacts your roller job... the quicker the spirit evaporates the quicker you will have a dry and hardened surface to work on.
The odorless mineral spirit does the same job as the regular mineral spirit - BUT you have to allow a lot longer for the drying time between coats of paint.
IF you apply 'another' coat before the previous coat has adequately dried, you will find orange peel occuring.
The last FAQ to the mineral spirit topic is to make sure that it is 100% mineral spirit that you are using. There are a number of products in the stores that 'mention' mineral spirits on the container - BUT - the mineral spirit is only a component of the thinner. So just make sure it is 100% mineral spirit.
In the case of the Brightside paint... you are better off using the genuine thinner that is sold by Interlux for the thinning of Brightside paint. However, you can get away with the 100% pure mineral spirit with the Brightside IF you can't get your hands on the thinner by Interlux for their Brightside paints.
.
Posted By: Marq
Re: Paint job on a budget!? CONTINUED..page 44........ - 01/31/07 05:47 AM
Quote:
Another question. I always thought that you should knock the shine off paint before applying another coat over it. The instructions here are to do 2 coats before wet sanding, but do you knock the shine off in between the 2? I have been, and I am wondering if it is unnecessary with the Rustoleum Pro; I have a lot of car left to do.
This is one of those yes and no type answers...
Yes.. you could knock the shine off EACH layer IF you wish. That would ensure better adhesion of each of the layers of paint. However, you would have to knock the shine off, wipe the surface down with a cloth dampened in mineral spirit, let it dry, wipe it down with a tack cloth after it is thoroughly dried and then add your next layer of paint.
BUT NO you don't have to knock the shine off each coating. Since you are applying the next coat onto a fairly fresh and dry coat of paint, there is no problem with adhesion. The new coat is able to bond well enough with the previous coating.
I think the rule of always knocking the shine off before painting applies more to when you are painting on to an OLD LAYER of paint or an older shiny surface. In that case the sanding of the shiny surface serves to provide adhesion AND to rid the shiny surface of any contaminants that may have embedded in the original layer.
.
Posted By: Anonymous
Re: Paint job on a budget!? CONTINUED..page 44........ - 01/31/07 06:11 AM
well I have read every page of this thread so I feel I can now get into the conversation without rehashing old details. by the way this thread is amazing and 69 charger (or is it Mr. Porsche now) you're the man.
I am interested in the roll on primers, has anyone used them yet. These products were mentioned early in the thread. I have prepped many cars for paint (worked at a body shop as sanding/primer dummy to cover my bill for all my wrecked cars) and painted a few so I am pretty particular about my prep work even on a beater. Im wanting the body to be right before using the roll on method instead of discovering flaws later and having to repaint as some members here have had to do. any info on the roll on primers would be appreciated.
Ill be doing some test panels this summer to get the method down most likely with briteside and different primers.
I am surprised that none of our members across the border have set up an way to ship tremclad to the states. briteside seems to give the best results but the ability to mix colors leads to using rustoleum. the results with rustoleum that ive seen here have been good but the tremclad seem superior to it and gives the ability to mix colors. Id be interested in any info on briteside color mixing that has been done.
im intersted to see if a black basecoat/primer would darken up the red briteside some compared to a white base coat.
Posted By: Anonymous
Re: Paint job on a budget!? CONTINUED..page 44........ - 01/31/07 11:41 AM
Quote:
well I have read every page of this thread so I feel I can now get into the conversation without rehashing old details. by the way this thread is amazing and 69 charger (or is it Mr. Porsche now) you're the man.
I am interested in the roll on primers, has anyone used them yet. These products were mentioned early in the thread. I have prepped many cars for paint (worked at a body shop as sanding/primer dummy to cover my bill for all my wrecked cars) and painted a few so I am pretty particular about my prep work even on a beater. Im wanting the body to be right before using the roll on method instead of discovering flaws later and having to repaint as some members here have had to do. any info on the roll on primers would be appreciated.
Ill be doing some test panels this summer to get the method down most likely with briteside and different primers.
I am surprised that none of our members across the border have set up an way to ship tremclad to the states. briteside seems to give the best results but the ability to mix colors leads to using rustoleum. the results with rustoleum that ive seen here have been good but the tremclad seem superior to it and gives the ability to mix colors. Id be interested in any info on briteside color mixing that has been done.
im intersted to see if a black basecoat/primer would darken up the red briteside some compared to a white base coat.
Maybe I missed something somewhere, but my understanding from reading the thread multiple times is that Rustoleum and Tremclad are basically the same paint. Any difference in the quality of the paint jobs is probably due to the rollee. It is also my understanding that the Company no longer mixes colors for either Rustoleum or Tremclad. If I am wrong about that, someone please correct me, as I make frequent trips to Canada and don't mind stopping in a Canadian Tire store and a Canadian Post Office.
I agree that Brightside seems to give a superior finish at a higher but still low price and less hassle than a regular sprayed on finish.
Regards.
Posted By: 69DartGT
Re: Paint job on a budget!? CONTINUED..page 44........ - 01/31/07 02:50 PM
Quote:
I am interested in the roll on primers, has anyone used them yet
indyjps
I used rustoleums brown rusty metal primer in the bed of my truck, I used a foam brush for the tailgate it was off at the time and foam roller on the inside of the bed. Both went on easy and laid down flat without runs orangepeel etc. I used it straight out of the can no thinning.
Not sure thats what you had in mind but it is primer
Posted By: Marq
Re: Paint job on a budget!? CONTINUED..page 44........ - 01/31/07 06:45 PM
Quote:
Id be interested in any info on briteside color mixing that has been done.
im intersted to see if a black basecoat/primer would darken up the red briteside some compared to a white base coat.
IF you use the Interlux primer for Brightside, it comes in blue/gray or white. So yes, the blue/gray color will help give a darker overall look to the Brightside Red paint that is coated on it. BUT one nice feature of the Brightside primer is that you can ADD up to 25% of the Brightside paint to give the primer color a push towards the color you will subsequently be painting over the primer.
In my case, I supplemented the blue/gray primer with the 25% Brightside fire red. The main advantage to this initial push is that it gives the final paint job more depth.
As I was typing this... I realized that what I COULD HAVE DONE is use a 25% Brightside Black paint with 75% Brightside primer. That would have laid an even darker sub-surface for the subsequent Fire Red paint layers that would be painted.
BUT please note that you can only toss the Brightside Black paint in with the 'blue/gray' primer. DO NOT try later to put black or any other color PAINT in with the Fire Red PAINT as it will end up resulting in a pottery or poo poo brown color.
IF you use a 'white' Brightside primer coat, the end result will be that your Fire Red paint layers will end up with a more 'Firey Orange' appearance when the sun is beating down on it.
.
Posted By: Anonymous
Re: Paint job on a budget!? CONTINUED..page 44........ - 01/31/07 10:51 PM
"The last FAQ to the mineral spirit topic is to make sure that it is 100% mineral spirit that you are using. There are a number of products in the stores that 'mention' mineral spirits on the container - BUT - the mineral spirit is only a component of the thinner. So just make sure it is 100% mineral spirit."
Good info, thanks. Any comment on using VM&P Naptha with the Rustoleum Pro? I understand that it flashes faster. I ask because I went looking for 100% mineral spirits and could only find the odorless version that I have.
.
Posted By: Anonymous
Re: Paint job on a budget!? CONTINUED..page 44........ - 02/01/07 05:39 AM
Can I get a quick refresher on wet sanding? After reading the entire thread I am of the belief that this may be the most critical aspect of the process in order to get a smooth glosssy final finish.
So, two coats and wet sand with 400 or 600; 2 more coats and wet sand with 600, 2 more and wet sand with 1200-1500. But how do you sand? in one direction? circular? And how do you know when you are getting close to going through the most recent coat? When do you stop?
I bet these are basic questions but it would help to know.
Posted By: Anonymous
Re: Paint job on a budget!? CONTINUED..page 44........ - 02/01/07 05:57 AM
thanks for the hlep guys. The primer I was wondering about was the roll on that was marketed to body shops to be used instead of spray on primer/surfacer. it seems like a lot of the color sanding being done with the roller method is actually sanding that levels the paint and helps smooth the body. I want my primer to be perfectly flat prior to roller paint. I am thinking of using this paint on a 63 impala and I think the briteside red is going to be too bright for this car, i was looking more for a maroon/dark red so I guess ill have to experiment with the briteside mixing and see how it goes.
Posted By: Anonymous
Re: Paint job on a budget!? CONTINUED..page 44........ - 02/01/07 07:48 PM
Ok so I want this color exactly:

With the brightside paint tinted to this color. Do I need a primer? And if so what color should I do?
Posted By: Anonymous
Re: Paint job on a budget!? CONTINUED..page 44........ - 02/01/07 11:51 PM
it seems to be trial and error to get a color match with briteside. so get a few quarts and start mixing. Marq should chime in on the best method of mixing.
Posted By: Marq
Re: Paint job on a budget!? CONTINUED..page 44........ - 02/02/07 01:36 AM
Quote:
Ok so I want this color exactly:
With the brightside paint tinted to this color. Do I need a primer? And if so what color should I do?
Sadly there isn't a sea foam green in the can for Brightside. The ONLY green color that Brightside offers is : Sea Green Y4247. But to my eyes it is a dark jade green.
The good news is that you want a light and lofty green color... and so you should be able to use a blend of the Sea Green Y4247 and White Y4359.
The current color on your car leans more heavily towards the white... and so I would suspect that you will probably need a 1, 2 or 3 parts green to 10 parts white ( something in the range of 10% to 25% green to white ).
So the experiment you would have to do is this : Get about 20 Q Tip swabs, a bright white chunk of card board, one can of white and one can of green.
Take one Q Tip and dip it in the green paint. Now go and place ONE DROP of the GREEN paint in NINE different spots on your white cardboard.
For this mixing experiment you can think of the cardboard as being like a painter's pallete.
Ok... now take a fresh Q Tip cotton swab and dip it into the WHITE paint.
Next to the first Green drop, place ONE drop of the White paint. ( this is a 50/50 mix )
Next to the next Green drop, place TWO drops of the White paint. ( this is a 33% green to 66% white mix )
Next to the next Green drop, place THREE drops of the White paint. ( this is a 25% green to 75% white mix )
Next to the next Green drop, place FOUR drops of the White paint. ( this is a 20% green to 80% white mix )
Next to the next Green drop, place FIVE drops of the White paint. ( this is a 16% green to 84% white mix )
Next to the next Green drop, place SIX drops of the White paint. ( this is a 14% green to 86% white mix ).
Next to the next Green drop, place SEVEN drops of the White paint. ( this is a 12.5 green to a 87.5% white mix )
Next to the next Green drop, place EIGHT drops of White paint. ( this is an 11% green to an 89% white mix )
And lastly.. next to the last Green drop, place NINE drops of White paint. ( this is your 10% green to a 90% white mix ).
NOW... take a CLEAN Q Tip cotton swab and blend the first two color samples together. Take another clean cotton swab and blend the next two color samples together. Keep grabbing a new cotton swab for each of the remaining color samples.
Hopefully by the time you reach the last blended sample, you will have a rainbow of different shades of Green, going from a darker blend to a lighter blend.
That paint pallete will give you your first visual representation of what the blend ratios will give you.
And you should now also have NINE cotton swabs with each of them having the different blends on them. IF you happen to see a few of your samples that look somewhat 'close' you can take the 'closest' swaps and rub them onto your car's paint job. After all, you are going to be sanding it later, so it doesn't matter about the three or four small splotches of blended paint that you will dab onto the car's paint.
This will give you your second visual confirmation about how close the blended mix is.
My last tidbit of advice on this color mixing experiment is to leave your paint samples out to dry for several days before you make a final decision on what percentage mix is going to be closest to the end result that you want. My reason for suggesting this is that when the paint has dried it may shift a shade or two in color. This is normal for most paints that go on in one color and yet dry in a slightly different color. So by delaying your decision about which color sample best matches your desired end result, you will probably end up with something that will ultimately dry closer to what you are hoping to achieve.
NOW.... as for your car... I would probably lean towards using the WHITE Brightside primer. This will provide a bright and light undersurface for whatever Brightside paint you will later apply over it.
And remember that you can also add some of the Green paint to the white primer. Brightside says to not put more than 20% Brightside paint in with the Brightside primer. BUT based on the paint pallete you will have created already, you will have a pretty accurate idea of what percentage of Brightside paint that you can add to the Brightside primer and still fall within range of the end color that you are hoping to end up with.
Sorry for the essay... but I wanted to clearly explain this process all the way through so that you can envision the process and understand the logic for these steps.
.
Posted By: Anonymous
Re: Paint job on a budget!? CONTINUED..page 44........ - 02/02/07 03:13 AM
Having tried to do my mixing experiments with both q-tips and an eye dropper and even a calibrated plastic beaker, I would suggest a more accurate and more satisfactory method.
Get yourself a small (1/4-1/2 tsp size) stainless steel measuring spoon. It is both more accurate than drops off a q-tip and easier to clean than plastic. After each dip of paint swish it around in some mineral spirits and wipe it off with a paper towel. I used my wifes stainless steel measuring spoon set from the kitchen, but mums the word on that.
Posted By: _Scott_
Re: Paint job on a budget!? CONTINUED..page 44........ - 02/02/07 05:16 AM
Quote:
this may be the most critical aspect of the process in order to get a smooth glosssy final finish.
Assuming all the prep work under the paint is up to par, then yes, the wetsanding is critical to a good end result.
Quote:
So, two coats and wet sand with 400 or 600; 2 more coats and wet sand with 600, 2 more and wet sand with 1200-1500.
That should work.
Quote:
But how do you sand? in one direction? circular?
The direction is not that important. What is important is that you are sanding uniformly and not allowing anything to dig into the paint. If you use a sanding block, it's possible for the edges of the block to cut faster than the center area and if you are sanding parallel to those edges, they will dig in. I don't mean to discourage the use of a block, but be very conscious of where the pressure is and how much paint you are removing at all points of contact.
Quote:
And how do you know when you are getting close to going through the most recent coat? When do you stop?
At first you'll find that with a light sanding the surface will look like the area in yellow. Keep sanding until it is uniformly smooth like the area in red. No more and no less.
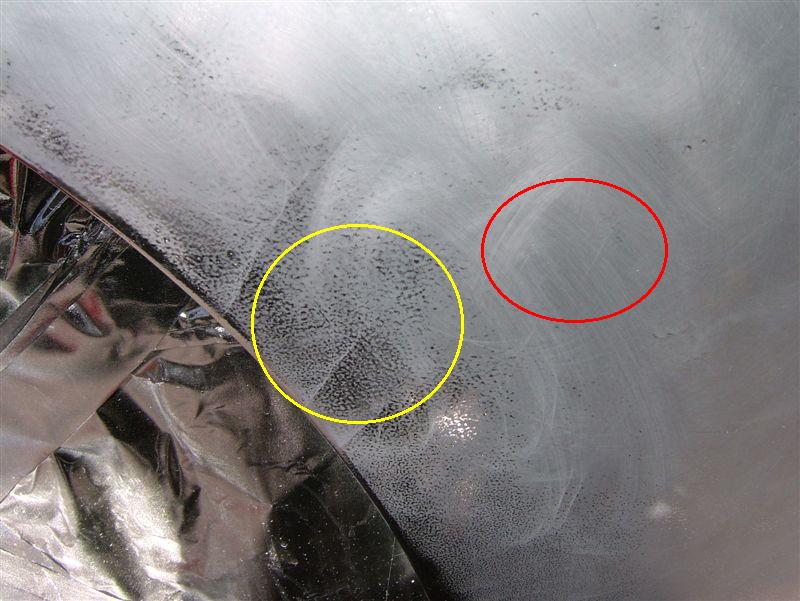
And... regarding the mixing of paint, precise ratios are usually achieved by weighing the additive colors as they are added to the main color on a very precise scale.
Posted By: Anonymous
Re: Paint job on a budget!? CONTINUED..page 44........ - 02/02/07 06:26 AM
The orange peel on the hood, roof, & trunk is getting more pronounced with time.
I haven't done a final colorsand/buff with 1500 yet but it's to the point that I wonder if 1500 will be enough to knock it down.
It's shiny
I don't want to lose that trying to get it flat.
Do I need to sand it flat & paint another THIN coat or will wetsand/compound/buff/wax bring it back to this level?

Posted By: Anonymous
Re: Paint job on a budget!? CONTINUED..page 44........ - 02/02/07 01:27 PM
Quote:
The orange peel on the hood, roof, & trunk is getting more pronounced with time.
I haven't done a final colorsand/buff with 1500 yet but it's to the point that I wonder if 1500 will be enough to knock it down.
It's shiny
I don't want to lose that trying to get it flat.
Do I need to sand it flat & paint another THIN coat or will wetsand/compound/buff/wax bring it back to this level?
You have a choice to make. If you keep putting paint on it without sanding it smooth the orange peel and those waves and ripples you see in the picture are going to keep getting more pronounced, as you have noticed. It is possible to get a very wavy and orange peely surface that is shiny. If that is what you want just keep painting. If you are happy with it now, just stop.
I know it is tempting to want to hold on to the shine, even when the surface is clearly not flat enough for a really nice job. At least it was for me, as well. However, the shine will come back each time you add a new coat to a smoothed surface, or after you wet sand then polish.
With my my tests I think 2-4 coats of Rustoleum without sanding the final coat look almost as good as a cheap Maaco paint job, if not better. They don't however look like a mirror until you do the proper sanding work.
Are you thinning your paint enough? I found that when I put my on too thick I ended up with the ripples you are seeing. I think I agree with you that you are probably not ready for 1500 until you get those ripples out, but I am only judging from the picture.
Posted By: Anonymous
Re: Paint job on a budget!? CONTINUED..page 44........ - 02/02/07 05:46 PM
Quote:
Quote:
Sadly there isn't a sea foam green in the can for Brightside. The ONLY green color that Brightside offers is : Sea Green Y4247. But to my eyes it is a dark jade green.
The Brightside I have is called Norfolk Green and it looks quite a lot like this.
Posted By: Anonymous
Re: Paint job on a budget!? CONTINUED..page 44........ - 02/02/07 06:49 PM
Fantastic thread guys.
Has anyone attempted to paint brightside onto aluminum yet? Any compatibility problems? Is primer required?
Posted By: Anonymous
Re: Paint job on a budget!? CONTINUED..page 44........ - 02/04/07 04:51 AM
anyone use a air powered sander to color sand ?
I know they talk about it on the autobodyshop site,
I would like to do my Chevy panel van tow beast,
but there is an acre or 2 of sheet metal on it and I do not look forward to color sanding it 4 or 5 times by hand !
anyone have a "Power" option ?
Thanks
Beaulieu
Posted By: Marq
Re: Paint job on a budget!? CONTINUED..page 44........ - 02/04/07 03:58 PM
Quote:
anyone use a air powered sander to color sand ? anyone have a "Power" option ?
I didn't try an air powered sander... but I did try it with an ultra cheap Black & Decker. Sadly wet sanding ends up killing the electrical motor - and hence you use some cheapo model.
Make sure that the cheapo model does not have those air uptake vents in it that are designed ( under normal circumstances ) to draw the dust up from the sanding surface and vent it into a bag. Instead you want the cheapest model where debris from the sanding surface is not being vented up.
The next thing to keep in mind if you go with the 'electrical' solution...is that electricity and water don't mix . So it doesn't pay to have a hose going in one hand and the electrical sander in the other hand. In a worse case scenario the water and hose provide an electrical ground... and you really don't want 120 volts going in one arm ( from the sander ) - through your chest - and then out your other arm ( to the water hose ).
I found that a nice spritzer bottle bottle provided me with enough water on the fly to do my wet sanding. Then when I had reach a point in the sanding that I was comfortable with, I would put the sander away - a safe distance away - and then take a hose and cloth and do a final washdown of all the debris on the car.
This works best on cooler days or in the shade, because you really don't want any of the debris drying out on the 'worked' area.
One funny thing.... I killed the cheapo sander during the course of this wet sanding. Fortunately I had bought it just 14 days earlier at Walmart. So I packed the unit up and trotted back to Walmart with it. I explained to the customer service clerk that the thing had just died. She gave me an exchange for a brand new unit. I took it home and successfully killed it after 10 days ( but I was able to finish all my web sanding ). The clerk again gleefully exchanged the dead sander for a new one. That unit now sits on my shelf untouched.
Tee hee... yeah I know... I am a stinker and the reason why Walmart's profits are so low and their prices are so high hehhehheh...
But in reality... I only resorted to the 'electrical' solution... because my orange peel was noticable and I wanted to QUICKLY reduce it.
Normally a good 'hand sanding' is all you need during the wet sanding stage...
.
Posted By: Marq
Re: Paint job on a budget!? CONTINUED..page 44........ - 02/04/07 04:50 PM
Quote:
Fantastic thread guys.
Has anyone attempted to paint brightside onto aluminum yet? Any compatibility problems? Is primer required?
Well... my first thought is that Brightside 'should' be quite compatible with aluminum - because Brightside is a marine paint and it normally is put on aluminum, fiberglass and wood.
BUT as for surface preparation... I would suspect you would have to go to the Interlux web site and see what 'their' recommendations are for surface preparation.
You also might want to scout out some of the message forums for the fly boys.. and see what the airplane owners have to say about painting aluminum... as there are quite a few do it yourselfers who are painting their own planes. They might have an even better insight into surface preparation.
.
Posted By: batjac
Re: Paint job on a budget!? CONTINUED..page 44........ - 02/04/07 06:33 PM
Naw. You don't want to go the aircraft aluminum prep route. I'm an airplane builder, and *I* don't even want to go there. On airplanes you do an acid etch process, followed by a REALLY good rinse to get the acid out, followed by an Alodyne process. Lots of nasty chemicals and hazardous waste. Also, lots of time involved. And the chemicals don't come cheap. Doesn't fit in with the inexpensive paint job scenario.
But, on the plus side, the aluminum comes out a nice gold color...
Mark
edit: I cut this from an aircraft kit supplier site -
PREPARATION OF SURFACES
Aluminum
Aluminum surfaces are treated differently depending upon whether the metal is new or used. Paint must be able to "grip" or adhere to the surface onto which it is applied. Most aluminum surfaces have a layer of pure aluminum on the surface called alclad that protects the metal from corrosion. It is very smooth and not favorable to paint adhesion. Therefore the surface must be adequately prepared by cleaning and slightly roughening to guarantee primer adhesion. This is accomplished by using a conversion coating such as alodine. This chemical process creates a ceramic layer over the aluminum that coats the surface and provides tooth adhesion. Used aluminum must have any primers, paints, or corrosion removed. Paint strippers are used to remove old paint. After stripping old paint the corrosion should be completely eliminated. Use fine sandpaper, Scotch Brite pads, or aluminum wool. Never use steel wool or a steel brush. After the corrosion is removed the old aluminum should be acid etched. This is simply a process of washing the aluminum with a product such as Poly Fiber�s E-2310 Acid Etch diluted with water. An acid etch removes oil and light corrosion while etching or roughening the surface to provide a firm primer bond. The part is then thoroughly rinsed. Next wash the surface with E-2300 Conversion Coating that inhibits corrosion and further enhances primer adhesion. After this step the part is rinsed and allowed to completely dry. Once again, new aluminum surfaces need only be treated with a conversion coating.
After the aluminum (new or old) has been properly cleaned and treated, it is then primed. I would recommend using a two-part epoxy primer. An epoxy primer will insure corrosion protection and also provide a bonding surface for most topcoat paints. Very often, polyurethane topcoats will lift or wrinkle primers other than epoxies much as a paint stripper would do. A primer is necessary to provide a bond between the metal and the final topcoat paint. The primer coat should be applied according to the manufacturers directions. Usually, two light coats will be applied. Heavy coats should be avoided.
Posted By: Anonymous
Re: Paint job on a budget!? CONTINUED..page 44........ - 02/04/07 06:37 PM
what i used is a 3m 6 in da pad #05286 and p800 finishing discs #00970 p800 grit dry. then i will do p1500 grit #00907 wet then i will compound to make it shine.
this is how my car looks now it is -3* for the last 2 days and for many more to come so the project is on hold for now...


Posted By: andyBEE
Radiator id numbers - 02/04/07 07:12 PM
I was wondering if anyone had any information on where you could find the identification for mopar radiators. I have three big block radiators and was hoping to find what they actually came from or if they are correct for my car. Any info would be greatly appreciated.
atbrandel@hotmail.comThank you
Andy
Posted By: Anonymous
Re: Paint job on a budget!? CONTINUED..page 44........ - 02/04/07 09:12 PM
So Marq...
I'm leaning more towards the Brightside, but it's got me wondering.
If it covers with less coats... and it doesn't have to be "cut" to make it pliable. Why is everyone still going with the Rust-oleum? Why not just use the Brightside instead?
Is it cost only or stubborness maybe?
It doesn't make sense to me. If the Brightside is the better quality.
Oh and BTW... I have a '65 mustang with 3 quarter panel edges with paint burn from the previous owners buffer happy son that I may brightside later.
But as of now... my old man said he didn't car if I practiced on his '52 Grain Truck... his '79 Chevy Pickup and his '95 Dodge Dakota. He said he'd even foot the paint! Ha!

Posted By: Anonymous
Re: Paint job on a budget!? CONTINUED..page 44........ - 02/04/07 10:18 PM
Quote:
Quote:
The orange peel on the hood, roof, & trunk is getting more pronounced with time.
I haven't done a final colorsand/buff with 1500 yet but it's to the point that I wonder if 1500 will be enough to knock it down.
It's shiny
I don't want to lose that trying to get it flat.
Do I need to sand it flat & paint another THIN coat or will wetsand/compound/buff/wax bring it back to this level?
You have a choice to make. If you keep putting paint on it without sanding it smooth the orange peel and those waves and ripples you see in the picture are going to keep getting more pronounced, as you have noticed. It is possible to get a very wavy and orange peely surface that is shiny. If that is what you want just keep painting. If you are happy with it now, just stop.
I know it is tempting to want to hold on to the shine, even when the surface is clearly not flat enough for a really nice job. At least it was for me, as well. However, the shine will come back each time you add a new coat to a smoothed surface, or after you wet sand then polish.
With my my tests I think 2-4 coats of Rustoleum without sanding the final coat look almost as good as a cheap Maaco paint job, if not better. They don't however look like a mirror until you do the proper sanding work.
Are you thinning your paint enough? I found that when I put my on too thick I ended up with the ripples you are seeing. I think I agree with you that you are probably not ready for 1500 until you get those ripples out, but I am only judging from the picture.
I may have pinpointed the cause
Smyrna previously posted Quote:
IF you apply 'another' coat before the previous coat has adequately dried, you will find orange peel occuring.
I was hoping to be done with the rollers but in my haste I believe I may have applied the last coat prematurely. 8 coats with wetsanding between every other, sometimes thru the previous paint around the bondo/fill patch edges, so really more like 6?.
The last applied coat aggravated the lower level imperfections & even tho the flaws were minor they multiplied the problem. If I understand it, the topcoat lifted the previous layer that was not completely set thereby magnifying underlying minor imperfections. Like those Russian nesting dolls each additional level increases differences by an order of magnitude, "times 2", not just by "+ 1 more". If that makes any semblance of sanity & I'm not totally out to lunch (about THIS anyway)
So..
I'll wetsand it down & try to rub out a test space/wax on/wax off & see if I'm not yet a retired painter but still just a tired 1. I will post more pictures of my progress later. I will also gladly accept & listen to any thoughts &/or advice.
But not now, there's some expensive commercials about to come on the idiotbox interrupted now & then by some football.
Posted By: Anonymous
Re: Paint job on a budget!? CONTINUED..page 44........ - 02/04/07 11:34 PM
Quote:
Well... my first thought is that Brightside 'should' be quite compatible with aluminum - because Brightside is a marine paint and it normally is put on aluminum, fiberglass and wood.
BUT as for surface preparation... I would suspect you would have to go to the Interlux web site and see what 'their' recommendations are for surface preparation.
You also might want to scout out some of the message forums for the fly boys.. and see what the airplane owners have to say about painting aluminum... as there are quite a few do it yourselfers who are painting their own planes. They might have an even better insight into surface preparation.
.
Interlux's website didn't say anything specific to aluminum. The hood is already painted, just needs some bondo work, primer, etc. I guess I'll give them a call when I get around to it. Thanks
Posted By: Anonymous
Re: Paint job on a budget!? CONTINUED..page 44........ - 02/05/07 03:33 AM
SoYank - Sorry to hear about that. It does sound like a plausable explanation. I know in my case if I played with the paint too long with the roller after it started to get tacky, it would really mess things up. I can imagine if you laid on a new coat too soon the mineral spirits might lift the old coat as the roller came by. I also know however that some have put on several coats a day. One thing is for sure, if you can see ripples and orange peel fairly prominanently in a coat, its probably best to sand, rather than put another coat on top of that.
Posted By: Marq
Re: Paint job on a budget!? CONTINUED..page 44........ - 02/05/07 05:44 AM
Quote:
So Marq...
I'm leaning more towards the Brightside, but it's got me wondering.
If it covers with less coats... and it doesn't have to be "cut" to make it pliable. Why is everyone still going with the Rust-oleum? Why not just use the Brightside instead?
Is it cost only or stubborness maybe?
This thread began with Tremclad... because that is what Charger had experience working with.
We branched to include the Rustoleum paint because Tremclad was a Canadian based product and Rustoleum was the equivalent product in the United States ( 'almost the same' product ) as the company that produces both products is the same one.
I branched over to the Brightside because like a lot of people, I had my concerns about the long term viability of Tremclad/Rustoleum. Since they were basically an enamel paint, I thought that a polyurathane would give a slightly higher quality level of paint. After all... even in the automotive pro painting trade, the polyurathane paint jobs are the 'next level' up or more expensive type paint jobs you can get at the shop.
People may prefer to go with the Tremclad/Rustoleum route simply because of cost. Most of us walk into this whole 'roller painting' proposition with a bit of skeptism. And if we have a candidate that we might consider this route to go for painting, some folks might want to keep the bucks invested low - so that if the experiment blows up... there won't be a big financial cost to giving it a shot.
As well though, Charger and many other examples contributed here have proven that the Tremclad/Rustoleum paint jobs are viable. So folks are more than willing to give it a shot.
Those who take a shot using the Brightside paint have understood that there is a quality difference between an enamel paint job and a polyurthane paint job. They may also share a concern about the long term viability of the enamel paint job compared to the more hearty polyurathane. Like myself, they may have concluded that 'if' the marine or boat painters have been successfully doing these roller jobs on their boats - and the environmental concerns are similar for the boat owners, then they don't mind paying a few bucks more for the paint that they will be using.
So in some ways it boils down to a question of how much money some folks want to invest in their project... and in other cases it boils down to the psychological comfort level of the painter with the product they are going to use and the long term end result they are hoping for.
One other 'decision factor' might be the color range offered by the two groups of products. Someone might swing to Rustoleum simply because it is a better color match for what they want. They might have wanted to go with Brighside for the benefits of a polyurathane paint job... but if the color they want only is offered by the one manufacturer... then they will swing to that product.
Another decision factor that might come to play is simply a question of availability. Rustoleum/Tremclad can be found at a HUGE range and type of stores... whereas not everyone has easy local access to a Brightside dealer OR they may not wish to order it and have it shipped to them. I know for myself that I tend to prefer going to the store and grabbing the cans in my hot little hands rather than waiting for it to be shipped to me.
Dunno... those are some fast thoughts on the reason why some folks swing towards one product over another...
.
Posted By: Marq
Re: Paint job on a budget!? CONTINUED..page 44........ - 02/05/07 06:06 AM
Quote:
Interlux's website didn't say anything specific to aluminum. The hood is already painted, just needs some bondo work, primer, etc. I guess I'll give them a call when I get around to it. Thanks
As the other contributor noted... aluminum is more of a pain for surface preparation - and probably double so for aluminum aircraft surfaces.
And in the aircraft world, I would assume that surface preparation for a high speed - high altitude aircraft is more complicated than that for the slower, lower altitude personal aircrafts. So even in avionics there are differences. As a funny aside to this topic, I remember that the US P51 Mustang aircraft was sent to battle during the Second World War without camoflauge paint - and with its aluminum body in its natural shiny metallic look. They claimed they didn't need to paint the P51 because it was so faaaaaaaaassssssssssst that it didn't need to rely on stealth or camoflauge in battle. But maybe they also were encountering paint adhesion problems back then
My only experience with paint on aluminum is with a Jaguar XK140 C-Type roadster. The C-Type was the racing version and they used aluminum on the doors to light the car. When paint got chipped on that door... I was quite surprised by how shiny the underlying aluminum was. We would dab a little paint to mask the chipped paint... but it seemed that it just couldn't adhere securely to it for any length of time.
As you will have noted from that article contributed by the other user, the aircraft boys have to etch the aluminum surface in order for the paint or primer to adhere properly. As the article notes, they are using an acid to etch the surface.
I don't think the aircraft painter's route is the most appropriate for an automotive body. Paint on an airplane is subjected to a far more stressful environment then a car's paint job is.
So maybe the right answer on painting aluminum successfully would be found in the boater / marine forum discussions. The boaters have a pretty long history of 'do it yourself' painting of their aluminum bass boats etc. So you could probably pick up there how they are able to successfully get marine paint to adhere securely.
IF I had an aluminum bass boat sitting in my garage and I wanted to paint it red... I would probably remove the paint that was on there.. and then score the aluminum surface with something like a 160 grit sand paper. My theory or train of logic would be that that scoring by the sand paper would provide a more than adequate surface for the primer to adhere to. And I am pretty sure that I would tend to lean towards laying a primer layer and smooth sanding it, prior to moving on to the paint stages. The primer would have the ability to fill in the scoring or the aluminum, while giving me an initial surface to work smooth - to give a good subsurface for the paint to build on.
One thought that just struck me... is a warning about sanding aluminum... and that is to be sure to wear a mask when sanding that metal. There is a proven link between aluminum and Alzheimers... and so you really don't aluminum particles being sucked into your lungs.
I am not sure about the differences between automotive aluminum, marine aluminum and aviation aluminum. My gut instinct is that the aviation aluminum is probably the highest quality. And so it probably does have different attibutes for when you are doing a surface preparation prior to painting. The automotive and marine aluminum probably share a closer similarity to each other and probably do not need as complicated preparation as the aviation aluminum.
.
Posted By: Anonymous
Re: Paint job on a budget!? CONTINUED..page 44........ - 02/05/07 12:02 PM
i am now at a stage where i am happy with the paint (brightside), and the finish that can be gotten from it, although i have some patches were i've obvoiusly sanded through what looks to be two layers of paint, as there ends up wtih a dark "ring" with another colour ring in the center, and have noticed the paint get slightly lighter when i sand it. so my question is, is there a chance that the paint dries darker on the top? any suggestions on how to stop this problem?
also i'm interested in painting my car this kind of colour (it looks a fair bit lighter in pictures of the car at events, or even the light yellow colour on citreon c2's is nice)

but dont belive i could mix up any colours to look like it from the pallet of colours avaible in australia, which for bright side are

any suggestions marq or anyone else? if only this stuff came in sample tins...
Posted By: 69DartGT
Re: Paint job on a budget!? CONTINUED..page 44........ - 02/05/07 06:20 PM
Little buff and polish. Got to warm so I quit but so far so good I think.


Posted By: Anonymous
Re: Paint job on a budget!? CONTINUED..page 44........ - 02/05/07 06:40 PM
That thing is beautiful dude! No way I would have believed you did it yourself with a roller before I came here and watched you do it.
Posted By: C38coupe
Re: Paint job on a budget!? CONTINUED..page 44........ - 02/05/07 07:59 PM
Hey that looks great, anyway you could take a few close up shots so we can see the paint shine. As mentioned you would never know it's a roller job, but it looks great nice truck by the way. Can hardly wait to do my coupe. You know it went down to -35 here last night, so no outdoor work yet.............C38coupe
Posted By: Marq
Re: Paint job on a budget!? CONTINUED..page 44........ - 02/05/07 08:31 PM
Quote:
i'm interested in painting my car this kind of colour (it looks a fair bit lighter in pictures of the car at events, or even the light yellow colour on citreon c2's is nice)
but dont belive i could mix up any colours to look like it from the pallet of colours avaible in australia, which for bright side are
any suggestions marq or anyone else? if only this stuff came in sample tins...
The picture of that car did not display properly here.. but I was able to follow its link and check out the picture at :
http://www.cartype.com/images/page/lamborghini-miura_s1.jpg
I don't know what the Citroen color is, but from the picture you identified, my eyes tend to tell me that that is a YELLOW mixed with a lesser percentage of BROWN and a couple of drops of black to raise or lower the brightness or darkness of the mixture
The primary colors are red, blue and yellow. They combine to make green, orange and purple. All three primary colors together combine to make brown.
Ok... so to land on a color close to the one you identified in the Lamborghini picture, you could come at it from two angles...
a ) First make a 'brown' color using Brightside Black and Brightside Red. The two of them combined will give you a brownish color. The greater the percentage of black compared to the red will give you a darker brown ( which is what we would need for the second part of the mixing ).
Once you have created a fairly dark brown paint, you would make your leopard green/yellow color by using the Brightside Yellow mixed with a small amount of your custom mixed brown paint solution.
b ) the other way would be to create a custom Green color using Brightside Yellow with a lesser amount of blue. This would give you lime green color. Once you have created this 'green' color you would make your leopard green/yellow color by using the Brightside Yellow mixed with a small amount of your custom mixed green paint solution. You would be able to add drops of black to tint the combined solution up to the level of darkness that best rings your chimes
I had read somewhere that the folks at Interlux will do custom blends of paint for their customers. But the problem is that I don't know what the minimum number of cans you must order... or whether they charge an additional premium for the custom mixing.
But I think you should be able to hit on that color of the Lambo with a bit of patience and good natural light to examine the paint as you blend it ( ie don't try to judge this color when mixing under a florescent or normal type lighting ).
.
Posted By: Anonymous
Re: Paint job on a budget!? CONTINUED..page 44........ - 02/05/07 10:07 PM
Quote:
I'm not sure brightside "has better gloss after wetsanding and polishing".
I'm certain brightside "has better gloss after wetsanding and polishing".
Approximately how much paint did you end up using? I am also planning on test painting a few things black. There isn't much of a roof on my car so I'm hoping to get away with 1 quart. It's already black now...
Best price I can find locally is 34.99. I may end up just buying it online as it's significantly cheaper.
Posted By: Anonymous
Re: Paint job on a budget!? CONTINUED..page 44........ - 02/05/07 11:52 PM
Quote:
So Marq...
I'm leaning more towards the Brightside, but it's got me wondering.
If it covers with less coats... and it doesn't have to be "cut" to make it pliable. Why is everyone still going with the Rust-oleum? Why not just use the Brightside instead?
Is it cost only or stubborness maybe?
It doesn't make sense to me. If the Brightside is the better quality.
Well, I'd like to use something better than the Rustoleum Pro, but here's where I am.
4 Reasons for Rustoleum:
1) Charger has a proven process, he's painted several cars that have held up in some very difficult conditions over a very long period of time. This thread is just not that old, I'd like to see how Brightside holds up over time.
2) I'm not a painter but from what I understand is that if you want to repaint the car using the traditional spray method, there will not be a compatibility issue with the Rustoleum Pro.
3) I called Interlux and they said that the Brightside product was not meant to be color sanded and polished to a gloss. Appartently, the Teflon additive and other components in the mix rise to the surface and those parts are not supposed to be removed. (I wonder if this a function of the earlier post about the darker color ring from painting through different layers.)
4) If I ever move to Canada, I might be able to clear coat the Rustoleum Pro with the Tremclad product.
I bought and tested the Rustoleum. Since my car is a daily driver, I do not mind spending a little extra to get better and faster results.
Also, about 10 years ago, I built a sailboat and when it came time to paint it, I did mounds of research, my impression was that Brightside was just a cheap option, not a durable one.
I guess I am going to have to try the Brightside on a test piece...
Posted By: Anonymous
Re: Paint job on a budget!? CONTINUED..page 44........ - 02/06/07 12:06 AM
http://www.rickwrench.com/50dollarpaint.htmlHere's a guy's website showing him painting with this process from start to finish
I think his results were awsome!!
Sorry if this is a repeat post but I don't think I remember seeing this car in here before.
Posted By: Anonymous
Re: Paint job on a budget!? CONTINUED..page 44........ - 02/06/07 02:36 AM
Quote:
Approximately how much paint did you end up using? I am also planning on test painting a few things black. There isn't much of a roof on my car so I'm hoping to get away with 1 quart. It's already black now...
Best price I can find locally is 34.99. I may end up just buying it online as it's significantly cheaper.
The 'hood polishing experiment' was done after three coats of paint. I could do the whole car with about half a litre of paint per coat.
Posted By: Anonymous
Re: Paint job on a budget!? CONTINUED..page 44........ - 02/06/07 03:07 PM
Posted By: 69chargeryeehaa
Re: Paint job on a budget!? CONTINUED..page 44........ - 02/06/07 03:36 PM
Posted By: Anonymous
Re: Paint job on a budget!? CONTINUED..page 44........ - 02/06/07 04:17 PM
Thanks Charger... your orange Charger and Beetle were the inspiration for me giving this CRAZY process a whirl. I was too ashamed to tell anyone what I was doing when I was painting it (kept it pretty secret). It's made believers out of many people. I enjoy telling people that I rolled it for around fifty bucks.
I'm helping a buddy paint his buggy yellow now...
BTW, Congrats on your recent acquisition... Porsche is my first love.
Posted By: Anonymous
Re: Paint job on a budget!? CONTINUED..page 44........ - 02/06/07 05:27 PM
Hey guys im new here but i have been watching this for a while and this is great.My dads a retired body man and he was shocked to see some of the results you guys were getting from this method ...more than one way to skin a cat i supose. Anyway i have a 69 nova that i intend to paint this way and what i was wondering is will vinyl graphics stick to rustoleum paint ...
isnt oil based?
The reason i ask is im making a yenko clone and well they have vinyl graphics.
On another note Hey Charger you rock your methods rock and your Porsche rocks too
later
Posted By: Anonymous
Re: Paint job on a budget!? CONTINUED..page 44........ - 02/07/07 02:02 AM
thanks for the mixing tips marq! now to decide if i want to buy $200 worth of paint to try mixing it up! i had some blue but just used it all up, so thats annoying, and i convinced a mate to paint the frame of his ute tray with black with brightside, which he's very happy with, and he has some of that left over.

is the citroen colour i'm refering to, i really like the light yellows on 70's cars, so hard to decide...
so has anyone else had problems with the top of each coat drying a different colour to the bottom of the same coat? mayb i just need to be more careful when sanding
oh and i'd say that vynil would stick, not sure about how well it would long term though as i havn't tried sorry
Posted By: Marq
Re: Paint job on a budget!? CONTINUED..page 44........ - 02/07/07 07:04 AM
Quote:
Anyway i have a 69 nova that i intend to paint this way and what i was wondering is will vinyl graphics stick to rustoleum paint ...
isnt oil based?
The reason i ask is im making a yenko clone and well they have vinyl graphics.
I don't think you will have any problems getting the graphics to stick. BUT you will have to apply the decals BEFORE you get too far along with your waxing
On my daughter's bike, I painted her bike frame using the Tremclad method... and then applied 'flame decals' to the bike and they have adhered beautifully.
On the other hand, after polishing and waxing the McLaren I went an applied the side pin stripes and they couldn't get a good adhesion. I ended up having to go and get some isopronol ( pure alcohol ) and wipe down the area where the stripes were to be applied ( in order to remove the wax ). That removed the wax and shine from that area. Then I laid the stripes on. Once they were in place I then rewaxed and polished that area. The pin stripes stuck beautifully. And I was able to bring that area up to the same level of shine as the rest of the panels.
.
Posted By: Anonymous
Re: Paint job on a budget!? CONTINUED..page 44........ - 02/07/07 05:52 PM
yea i thought i would have to put the stipes on before waxing
thanks guys
Posted By: Anonymous
Re: Paint job on a budget!? CONTINUED..page 44........ - 02/07/07 09:00 PM
Has any one tried Toplac by Interlux?
Interlux tech rep said that is formulated more for use on the sides of boats as opposed to the decks. (This, I think, would be a better choice for cars as well, since I haven't walked on mine lately.) It's supposed to have better gloss retention and better flow characteristis.
The color selection is not as good compared to Brightside.
BTW, the tech rep stated again that neither the Brightside or the Toplac was supposed to color sanded and polished...
Posted By: Anonymous
Re: Paint job on a budget!? CONTINUED..page 44........ - 02/07/07 09:17 PM
okay, i registered to this messageboard just for this thread, which i found on honda-tech.com.
a very interesting thread, it is. so much so, that i decided to attempt tha method with my own vehicle. (this has been a great informative and interesting thread, btw.)
i will first be doing just my orginal bumper covers (plastic). i have some non-painted aftermarket (OEM) bumpers on tha vehicle right now.
i will be getting some dents on my rear quarter panels and my roof fixed by some paintless dent repairman. i'll be using filler on my doors, since i can always easily replace them. i'll be buying another pair of dentless fenders, to paint.
so, for now.. just tha bumper covers. i sanded them down with 80 grit sandpaper. then i wetsanded them down with 200 grit wet/dry sandpaper.
i'm hoping the bondo brand (w/polyester) filler will work to smooth tha imperfections on tha bumper covers.
okay, my question is with primer. what can i use? i'm going with marine paint, btw. and i really want to primer everything, first. tha color i want to paint my car is a very dark green. Interlux's Brightside has this Sea Green that's too green for me. Blue Water's Marine Paint has this Dark Green that was just what i wanted. so, i went with a quart of it. Marine Paint seemed to be an equivalent to Brightside, minus tha Teflon. see here: http://nationalpaintsupply.net/blwapoto.html
Blue Water carries a primer that is well out of range in regards to a $50 paint job. It was probably like around $70. Interlux carries a quart for $27.00. see here: http://www.shipstore.com/SS/HTML/INT/INT4280Q.html
if Marine Paint is indeed an equivalent to Brightside, could i possibly use Interlux's primer with Blue Water's Marine Paint (topside paint)?
i appreciate all positive feedback.
_taF
Posted By: C38coupe
Re: Paint job on a budget!? CONTINUED..page 44........ - 02/08/07 03:30 AM
Home Hardware Rust Coat Paint, this is in Canada. This paint is a Urethane enhanced alkyd enamel. Is meant to paint directly over metal, has a super corrosion resistant finish.
The gloss is 85+ at 60 degree. I have used this paint, it's great but i forgot about it, this is another product to be thinned and rolled like Tremclad/rustleum. It thins with mineral spirits, is actually cheaper than Tremclad.
Have any of you Canadians tried it before..................C38coupe
Posted By: Marq
Re: Paint job on a budget!? CONTINUED..page 44........ - 02/08/07 07:21 AM
Quote:
if Marine Paint is indeed an equivalent to Brightside, could i possibly use Interlux's primer with Blue Water's Marine Paint (topside paint)?
_taF
I don't think there will be any compatibility problems putting the one brand of paint over the Brightside primer.
The only thing that I do not know for sure is if you will be able to do that trick with the Brightside primer where you can add up to 20% Brightside paint to give the primer a slight initial color tint.
.
Posted By: Anonymous
Re: Paint job on a budget!? CONTINUED..page 44........ - 02/08/07 04:14 PM
has anyone used alkyd enamel from other companies
Sherman Williams , Benjamin Moore , Martin Senour etc
can any of the other companies color match alkyd enamel ,
that seems to be the one drawback of using the Rustoleum products,
Beaulieu
Posted By: Anonymous
Re: Paint job on a budget!? CONTINUED..page 44........ - 02/08/07 05:13 PM
Quote:
Quote:
if Marine Paint is indeed an equivalent to Brightside, could i possibly use Interlux's primer with Blue Water's Marine Paint (topside paint)?
_taF
I don't think there will be any compatibility problems putting the one brand of paint over the Brightside primer.
The only thing that I do not know for sure is if you will be able to do that trick with the Brightside primer where you can add up to 20% Brightside paint to give the primer a slight initial color tint.
.
i'll go for it. i'll try that trick of mixing up to 20% of tha topside paint in with tha primer of that initial layer, as well, on some test piece and see what happens with it.
i appreciate tha input.
_taF
Posted By: Anonymous
Re: Paint job on a budget!? CONTINUED..page 44........ - 02/08/07 05:40 PM
Quote:
has anyone used alkyd enamel from other companies
Sherman Williams , Benjamin Moore , Martin Senour etc
can any of the other companies color match alkyd enamel ,
that seems to be the one drawback of using the Rustoleum products,
We had some members that tested other paints, but I don't remember anyone getting good results with anything but brightside and rustoleum. Of course experimentation is how we find new things.
Beaulieu
Posted By: Anonymous
Re: Paint job on a budget!? CONTINUED..page 44........ - 02/08/07 05:55 PM
I saw two things way back in the posts I can't readily find now by just point/clicking random pages!
A) Exit1965's video of how he's thinned his paint
B) Someone had put together instructions for the complete process of Rustoleum after reading most of the posts. Did anyone save that?
IF I can get a link for either of those without manually having to search the 100+ pages of posts I'd be much appreciative!
Posted By: 69DartGT
Re: Paint job on a budget!? CONTINUED..page 44........ - 02/08/07 08:01 PM
Posted By: Anonymous
Re: Paint job on a budget!? CONTINUED..page 44........ - 02/08/07 08:02 PM
Quote:
I saw two things way back in the posts I can't readily find now by just point/clicking random pages!
A) Exit1965's video of how he's thinned his paint
B) Someone had put together instructions for the complete process of Rustoleum after reading most of the posts. Did anyone save that?
IF I can get a link for either of those without manually having to search the 100+ pages of posts I'd be much appreciative!
a) https://board.moparts.org/ubbthreads/show...art=13&vc=1
b) https://board.moparts.org/ubbthreads/show...art=35&vc=1
and...
http://carpainting.wetpaint.com/page/Roller%20Method
and...
https://board.moparts.org/ubbthreads/download.php?Number=2745445
and tha one you've already posted...
http://www.rickwrench.com/50dollarpaint.html
_taF
Posted By: Anonymous
Re: Paint job on a budget!? CONTINUED..page 44........ - 02/08/07 08:40 PM
Peeerrrfect!! Thanks guys! Exactly the ones I was looking for!
Posted By: Anonymous
Re: Paint job on a budget!? CONTINUED..page 44........ - 02/08/07 10:25 PM
I've seen most of the thread. one question, for the brightside what is the best to thin with? Mineral spirits, Methyl Ethyl Keytone, 333? It seems I've seen each of them as a thinner in the tread at some point.
Posted By: Anonymous
Re: Paint job on a budget!? CONTINUED..page 44........ - 02/09/07 12:28 AM
Quote:
I've seen most of the thread. one question, for the brightside what is the best to thin with? Mineral spirits, Methyl Ethyl Keytone, 333? It seems I've seen each of them as a thinner in the tread at some point.
well, nothing should go wrong if you use Interlux's 333 Brushing Liquid (recommended for use with Interlux's Brightside).
however, i, myself, would like to know if Mineral Spirits would be okay to use for thinning with Brightside (or my Marine Paint), and if it would also be okay to use for cleaning a surface area just before laying down a layer of Brightside (or my Marine Paint).
_taF
Posted By: 69DartGT
Re: Paint job on a budget!? CONTINUED..page 44........ - 02/09/07 03:33 AM
Quote:
however, i, myself, would like to know if Mineral Spirits would be okay to use for thinning with Brightside (or my Marine Paint), and if it would also be okay to use for cleaning a surface area just before laying down a layer of Brightside (or my Marine Paint).
I just did my truck in Brightside used mineral spirits to thin and wipe odwn.
Posted By: Anonymous
Re: Paint job on a budget!? CONTINUED..page 44........ - 02/09/07 02:42 PM
another one I thought of... for body filler, can I do it over rustoleum primer or should I do it on bare metal?
Posted By: Anonymous
Re: Paint job on a budget!? CONTINUED..page 44........ - 02/09/07 04:44 PM
Quote:
Quote:
however, i, myself, would like to know if Mineral Spirits would be okay to use for thinning with Brightside (or my Marine Paint), and if it would also be okay to use for cleaning a surface area just before laying down a layer of Brightside (or my Marine Paint).
I just did my truck in Brightside used mineral spirits to thin and wipe odwn.
and everything is going well; holding up, i hope?
Quote:
another one I thought of... for body filler, can I do it over rustoleum primer or should I do it on bare metal?
i'm a newb at this whole painting & body work stuff. but i think you may want tha body filler to attach to tha bare metal (harden and sanded/feathered), and then sealed with primer just before laying on a layer of paint.
on tha directions of my Bondo body filler (w/polyester), it says:
1) Clean surface with warm, soapy water or with Mar-Hyde TOTAL PREP to remove all wax, grease and dirt. Allow to dry.
2) Sand the damaged area with coarse 80 grit sandpaper to remove all paint, primer and rust down to bare metal. Sand 1-2 inches beyond damaged area. Remove sanding dust.
3) Mixing: blah, blah; blah...
_taF
Posted By: Anonymous
Re: Paint job on a budget!? CONTINUED..page 44........ - 02/09/07 05:11 PM
Quote:
another one I thought of... for body filler, can I do it over rustoleum primer or should I do it on bare metal?
I think you should be alright if you sand with 80 before you apply the bondo.
Posted By: Anonymous
Re: Paint job on a budget!? CONTINUED..page 44........ - 02/09/07 05:51 PM
anybody know right off if this primer is any good, especially under marine (topside) paint? it says it's a universal primer. see here: http://nationalpaintsupply.net/runomoqu.html
_taF
ps: for you guys using Interlux Brightside, what is tha Recommended Reducer(s) and tha Recommended Primer(s) said on tha back label?
here are some quick notes i took off tha back label of my Blue Water Marine Paint, that i just received today...
Suggested Uses: Topsides, Decks, Cabin, Masts, Bilge, Waterline, Boottop Striping, Industrial and Offshore Structures.
Limitations: Do not apply if material, substrate or ambient temperature is below 50*F or above 95*F.
Colors: Available in over 30 factory packaged colors, as well as 1000 mixed colors.
Finish: Gloss
Vehicle Type: Polyurethane Alkyd Resin
Solvent Type: High Flash Naptha
VOC: 3.76 lbs. / gal (450 grams / liter)
Solids by Weight: 50%
Weight per Gallon: 10 lbs. per gallon (varies by color)
Recommended Dry Film: 4.0 mils
Coverage: Theoretical coverage at two mils dry is 400 square feet per gallon, and recommended thickness of 4 mils dry would require 2 full coats. Material losses during mixing and application will vary and must be taken into consideration. Expect 50% less coverage on bare, rough or sandblasted surfaces.
Viscosity at 75*F (24*C): 70-80 KU
Average Dry Time 75*F: Dries to touch in 4 hours. Lower temperature & higher humidity will slow down dry times.
Recommended Reducer: Xylene for spray application, Hi Flash Naptha for brushing or rolling.
Resistance to: Chemical Resistance, Abrasion, Oils, Grease, Rust, Corrosion, Mildew, Chipping and Fading.
Recommended Primers: Mega Gloss Primers 8735 White, 8736 Black, 8737 Red, 8738 Grey.
Application: Brush, Spray or Roller
Roll: 3/8" - 1/2" nap mohair metal, lambskin, phenolic core roller. Keep roller wet. Roll in one direction, rewet, then cross roll. Product can be reduced as needed with Hi Flash Naptha to allow proper flow out and performance.
Spray: Conventional Air Gravity Feed 59-70 psi, Tip Size .055 - .070, Airless 2200 - 2500 psi, Tip Size .013 - .017. Product can be reduced with Xylene as needed for proper flow out and performance. For Air Spray reduce 25% with enamel reducer (Xylene).
Surface Preparation: Water blast surface to remove all loose paint, dirt, oils and grease. Abrade with 240 grit dry sandpaper or equivalent. Solvent wipe down to remove all sanding residue. Prime with Mega Gloss Primer for best results.
Pot Life: Not Applicable
Shelf Life: Maximum 12 months
Mixing: Mechanically mix for 10 minutes, making sure that all solid material is mixed thoroughly.
Package: 1 gallon cans, 5 gallon cans, quarts.
Cleanup: Xylene for Equipment.
Posted By: Anonymous
Re: Paint job on a budget!? CONTINUED..page 44........ - 02/10/07 03:24 PM
Okay I've been picking through this post for months now and am ready to get going on paint. It's still in the 20's here so I'm not able to do a thing yet, for months probably.
I'm going with rustoleum professional because I have a two tone car and it gets expensive to buy that brightside stuff. Looks like with care the rustoleum pro works well. I'll thin it to the consitency of milk (whole,? 2% skim?) and roll it on with a foam roller and knock down any bubbles with the light touch of a dry roller.
It's glossy white over glossy almond and the original is a beige so it should be close with 8 coats.
Are you guys doing one body panel at a time? Do you recommend doing one body panel to completion and seeing how it looks and then doing the others all at once or one at a time? Obviously can't sand and paint at the same time.
Comments?
Posted By: 69DartGT
Re: Paint job on a budget!? CONTINUED..page 44........ - 02/10/07 04:18 PM
Quote:
Are you guys doing one body panel at a time? Do you recommend doing one body panel to completion and seeing how it looks and then doing the others all at once or one at a time? Obviously can't sand and paint at the same time.
I did the whole truck for each coat.
But I do recommend doing a sample panel before starting, I didn't and ended up with to thick of paint on first coat which I sanded off and started over.
The learning curve is very fast and easy though.
Posted By: v8mirage
Re: Paint job on a budget!? CONTINUED..page 44........ - 02/10/07 04:27 PM
I started out doing just the front fenders on my car. Then I did the hood, then the body of the car. Now in the winter, I am working on doing other body parts. I am using Rustoleum, and I don't see any issues doing it however it makes sense for you. I am however going to wait until I have the whole car put back together to do the final wet sanding, that seemed to make the most sense for me, so that I get everything looking the same when it is done.
Hope this helps.
Gerbs
Posted By: Anonymous
Re: Paint job on a budget!? CONTINUED..page 44........ - 02/10/07 11:03 PM
question about overnight moisture ,
I live close to the beach ,
we normally get overnight moisture nightly,
Problem is I am doing my Dodge van roof so it will not fit in the garage ,
So if I do it in the evening it will likely get wet overnight,
if I do it first thing in the morning the roof will be wet still,
where I need to park there is no sun till 9am or later because the sun is behing the 3 story buildings
any ideas ?
thanks for your help
Beaulieu
Posted By: C38coupe
Re: Paint job on a budget!? CONTINUED..page 44........ - 02/10/07 11:16 PM
Beaulieu, are you originally from Canada, there are a lot of folks with that last name here in Manitoba Canada, mostly of French Canadian background. BTW good luck on your roll project, I have done a few test pieces with this method, using Tremclad. It has always been very good results, I am still working on my 48 Mopar coupe, when the body work is done I will give a roll,
literally..........C38coupe
Posted By: 69DartGT
Re: Paint job on a budget!? CONTINUED..page 44........ - 02/11/07 05:02 AM
Quote:
question about overnight moisture ,
I live close to the beach ,
we normally get overnight moisture nightly,
Problem is I am doing my Dodge van roof so it will not fit in the garage ,
So if I do it in the evening it will likely get wet overnight,
if I do it first thing in the morning the roof will be wet still,
where I need to park there is no sun till 9am or later because the sun is behing the 3 story buildings
any ideas ?
thanks for your help
Beaulieu
I can see the ocean from my kitchen window are you any closer? I've had zero problems. I think its because we are warm enough.
Posted By: cudaman1969
Re: Paint job on a budget!? CONTINUED..page 44........ - 02/11/07 03:47 PM
ok i'v been reading this post for awile and would like to add my two cents. i painted my race car in one hour. never painted a car before. i use dupont paint, 1995 stealth pearl yellow, yellow base coat pearle coat then clear coat all in one hour cleaning the gun between each coating, i used a hvlp type system. it was so easy, no runs because it dries fast,10 minutes tops,did this in my garage and had no over spray with this gun and uses 1/3 the paint they recomend. i wet sanded with 1500 two hours later and it was beautiful. i just can't see why you guys would go to all that trouble to paint that way. total cost(with too much paint i can paint two more cars with what i got left) was 650 dollars,all paint, it is so easy, real hard to make a mistake. if u can use a rattle can you can do this.
Posted By: Anonymous
Re: Paint job on a budget!? CONTINUED..page 44........ - 02/11/07 06:57 PM
Cudaman,
Which HVLP setup did you use?
Thanks,
Luis
Posted By: cudaman1969
Re: Paint job on a budget!? CONTINUED..page 44........ - 02/11/07 07:08 PM
Luis, i have the Croixe,hope i spelled that right, had it about 16 17 years. this has the varible pressure at the gun on the hose, just an on off valve where as the newer ones don't have these. you can turn it down to nothing. has .07 .10 .14 mm nozzle with .10 .14 caps. it will spray anything from mud to thinner
Posted By: v8mirage
Re: Paint job on a budget!? CONTINUED..page 44........ - 02/11/07 07:41 PM
Cudaman,
I know I could do it with a gun BUT, I chose the roller method for a lot of reasons:
1) I don't have an HVLP gun
2) I don't have an air compressor that can support an HVLP gun
3) I don't have any respirator equipment
4) I don't have anyplace big enough move around free enough to spray a car, and then $650 is way more than I can afford for paint at this time. Not to mention about another $1000 for all the other equipment, listed above, I don't have.
These are the same reasons that most everyone else doesn't spray their cars as well. At this point for me, that $1000 or more listed about what it will take to get my car on the road, if I spend it on just paint, I might have a conventionally painted car, but it still won't be roadworthy. If I roller it I can get it roadworthy, AND have a decent looking car.
Gerbs
Posted By: Anonymous
Re: Paint job on a budget!? CONTINUED..page 44........ - 02/12/07 12:07 AM
Quote:
Cudaman,
I know I could do it with a gun BUT, I chose the roller method for a lot of reasons:
1) I don't have an HVLP gun
2) I don't have an air compressor that can support an HVLP gun
3) I don't have any respirator equipment
4) I don't have anyplace big enough move around free enough to spray a car, and then $650 is way more than I can afford for paint at this time. Not to mention about another $1000 for all the other equipment, listed above, I don't have.
These are the same reasons that most everyone else doesn't spray their cars as well. At this point for me, that $1000 or more listed about what it will take to get my car on the road, if I spend it on just paint, I might have a conventionally painted car, but it still won't be roadworthy. If I roller it I can get it roadworthy, AND have a decent looking car.
Gerbs
Mega dittos! I could afford the $1600 for the stuff, but I would rather spend it on other stuff right now. I am semi-retired and I got more time than money, so I put in the time instead.
Posted By: Marq
Re: Paint job on a budget!? CONTINUED..page 44........ - 02/12/07 02:33 AM
Quote:
Quote:
Are you guys doing one body panel at a time? Do you recommend doing one body panel to completion and seeing how it looks and then doing the others all at once or one at a time? Obviously can't sand and paint at the same time.
I did the whole truck for each coat.
But I do recommend doing a sample panel before starting, I didn't and ended up with to thick of paint on first coat which I sanded off and started over.
The learning curve is very fast and easy though.
I agree completely also... I did the whole McLaren with each coat.
But I also agree that it is worthwhile to get a scrap door or trunk or whatever and practice your technique and your concoctions ( mixes ). This will help you get it worked out on some unimportant piece. When you move on to the full body per coat it will be a breeze.
Probably the best 'logic' for why you should do an entire vehicle in one coating session... is to ensure an eveness of the color for all the panels.
For example, lets say you do a panel at a time... you might have variances in your paint mixture. You might end up where you will see variances in the color between panels. But if the same paint is laid on an entire vehicle coating... then the whole car will have the same color.
Always remember that between 'lots' of paint there are variances in the color. I know when I was buying my Brightside paint, I deliberately picked and chose the cans with almost similar 'lot' numbers. You will find a fine print on the bottom of each can that identifies when that dye lot was prepared.
This is similar to balls of wool used for knitting. There are sometimes significant variances between the 'lot' or 'dye' numbers. And if you were knitting a sweater it is better to buy all your wool in one shot.. rather than get halfway though knitting that sweater and then having to go back to a store to buy additional wool to complete it. The odds are that the later purchased 'lot' of wool will not be identical to your initial lot.
Another variance in the paint can happen simply by the way you mix it up prior to using it. The paint pigments tend to settle. In the case of the Brightside Firered and the Tremclad Fire Red, a can of paint that has sat too long will show a slip of black floating around at the top when you first open the can. At the bottom of the can you will find a denser layer of 'solids' then say at the middle or top of the can. If you only do a half-a$$ stirring of one can and a thorough stirring of a second can, then you will inadvertently cause a variance in the end color.
.
.
Posted By: Marq
Re: Paint job on a budget!? CONTINUED..page 44........ - 02/12/07 02:48 AM
Quote:
ok i'v been reading this post for awile and would like to add my two cents. i painted my race car in one hour. never painted a car before. i use dupont paint, 1995 stealth pearl yellow, yellow base coat pearle coat then clear coat all in one hour cleaning the gun between each coating, i used a hvlp type system. it was so easy, no runs because it dries fast,10 minutes tops,did this in my garage and had no over spray with this gun and uses 1/3 the paint they recomend. i wet sanded with 1500 two hours later and it was beautiful. i just can't see why you guys would go to all that trouble to paint that way. total cost(with too much paint i can paint two more cars with what i got left) was 650 dollars,all paint, it is so easy, real hard to make a mistake. if u can use a rattle can you can do this.
If I had the equipment I too might have considered doing a spray job. But unfortunately those are not items that I have sittiing idly available to me. The roller method does not require a big buck investment in that part of the paint job...
The question that struck me... is that almost all of the cars being rolled in this discussion are 'street' cars... 'daily drivers'... and two recreation vehicles.. a dune buggy and a mudder.
I am not sure how finicky you are with a 'race car' concerning the final look of your paint job. If it was a 'show and go' street rod.. you might be finicky about how the paint looks... but if the 'race car' is a Saturday night special for doing drags at the strip, your needs for appearance might only be a 20 or 50 footer. ( ie so that the car looks good to the fans in the stands ) but would not bear up to close scrutiny at 5 or 10 feet.
I have seen some 'race prepared' strip cars, done by local garages that were 'sprayed' and their primary concern was to just get a uniform color onto the body panels. Whereas gloss, shine and minimal orange peel were not a big concern to them.
So it might help to see some pics of the race car ane a clarification of what level of finish you wanted from that sprayed on paint job.
As for me... IF I had the bucks to buy the right equipment, I too might be very tempted to go the spray route. But I don't... so I can't...
.
Posted By: cudaman1969
Re: Paint job on a budget!? CONTINUED..page 44........ - 02/12/07 03:51 AM
you can rent every piece of the equipment to paint with or buy a gun(99.00 eastwood) and rent a compressor.you could buy the whole rig paint yours then charge to paint your buddys to recoupe some money
air resperator 25.0
no room, paint it outside, drys fast
enamal or lacquers are under 100.00 , paint whole car with 1/2 gallon or less
the race car paint was as good or better than my twin turbo stealth. hope the photo comes out good
Posted By: Anonymous
Re: Paint job on a budget!? CONTINUED..page 44........ - 02/12/07 03:56 AM
well I guess you could spray Rustoleum at $25 a gallon.
Just wonder how long it takes to dry all the way thru since there is no hardener added.
Beaulieu
Posted By: Anonymous
Re: Paint job on a budget!? CONTINUED..page 44........ - 02/12/07 01:33 PM
What does everyone do to paint the door handles? I'm thinking about just removing them to paint them, then reassembling afterwords.
Posted By: Anonymous
Re: Paint job on a budget!? CONTINUED..page 44........ - 02/12/07 04:09 PM
Quote:
What does everyone do to paint the door handles? I'm thinking about just removing them to paint them, then reassembling afterwords.
If you picked a color that comes in spray bombs I would use that. Same with the door jambs.
Posted By: Anonymous
Re: Paint job on a budget!? CONTINUED..page 44........ - 02/12/07 06:39 PM
Quote:
you can rent every piece of the equipment to paint with or buy a gun(99.00 eastwood) and rent a compressor.you could buy the whole rig paint yours then charge to paint your buddys to recoupe some money
air resperator 25.0
no room, paint it outside, drys fast
enamal or lacquers are under 100.00 , paint whole car with 1/2 gallon or less
the race car paint was as good or better than my twin turbo stealth. hope the photo comes out good
how much does that add up to?
tha motivation of a paint job that's only $50 (with room for mistakes) is quite convincing, and tastes good to ppl of all budgets.
my uncle who used to be a paint & body repair man (retired), still gets his discount at this one paint store here. even with that discount, they still wanted well over $100 (was told price went up) just for a quart of Sherwin Williams paint. just for that, i haven't gotten to tha point where i even want to make an effort to paint my car anymore. that was a couple years ago.
after coming across this $50 paint job discussion, i've been well-motivated to "get 'er done!" i'm now just waiting for after valentines day to go by.
_taF
Posted By: Anonymous
Re: Paint job on a budget!? CONTINUED..page 44........ - 02/12/07 07:38 PM
So what about under the hood? My Galaxie was originally painted the body color under the hood. I could keep it the body color again but will rustoleum hold up the heat under the hood? Should I just go with the heat resistant black spray paint?
What's every one else done?
Posted By: Anonymous
Re: Paint job on a budget!? CONTINUED..page 44........ - 02/13/07 01:06 AM
Quote:
If you picked a color that comes in spray bombs I would use that. Same with the door jambs.
I was thinking that, but I'm using the bright side paint. I'd hate for the spray bomb to stick out like a sore thumb
Posted By: 69DartGT
Re: Paint job on a budget!? CONTINUED..page 44........ - 02/13/07 01:30 AM
I used Brightside Fire Red and found Rustoleum Saftey Red is pretty much of a exact match.
Posted By: Anonymous
Re: Paint job on a budget!? CONTINUED..page 44........ - 02/13/07 02:03 PM
I'll give it a shot
Posted By: Anonymous
Re: Paint job on a budget!? CONTINUED..page 44........ - 02/13/07 02:31 PM
So, after testing a spray can on the door jams I realize it's going to go better if I use a smaller roller and foam brushes. The reason is of course because of the over spray and wide pattern of the spray can nozzle.
Then I got to thinking about graffiti artists. They all use special tips on the spay cans. They can get a variety of patterns and spray just like you would with ajusting the nozzle on an hvlp gun.
I'm going to a graffiti web site and order a few of these (pretty cheap, in keeping with the $50 paint job theme) and see if I can't get less over spray and better direction on these hard to roll areas like jams and trunk drip channels.
It may be spring til I know, so if anyone else has done this or does it, let us know.
Posted By: Anonymous
Re: Paint job on a budget!? CONTINUED..page 44........ - 02/13/07 04:37 PM
Quote:
I used Brightside Fire Red and found Rustoleum Saftey Red is pretty much of a exact match.
Crusader did the same thing with his jeep and had the same exact match.
Posted By: 69DartGT
Re: Paint job on a budget!? CONTINUED..page 44........ - 02/13/07 04:44 PM
Quote:
Quote:
I used Brightside Fire Red and found Rustoleum Saftey Red is pretty much of a exact match.
Crusader did the same thing with his jeep and had the same exact match.
Yep Crusader is where the tip came from.
Posted By: Anonymous
Re: Paint job on a budget!? CONTINUED..page 44........ - 02/13/07 04:53 PM
69DartGT ... Have you polished your truck yet? Let us know how it goes.
Posted By: 69DartGT
Re: Paint job on a budget!? CONTINUED..page 44........ - 02/13/07 05:10 PM
Quote:
69DartGT ... Have you polished your truck yet? Let us know how it goes.
About half way there I bought the who;e set of Poor Boys swirl removers and wax I'm up to SR 2 all over and have finished some area's completely.
I think it will get better as I polish on it but I'm very happy right now, I did not wet sand nor do I intend to.
Posted By: Jolly_Raj_R
Re: Paint job on a budget!? CONTINUED..page 44........ - 02/14/07 02:19 AM
Quote:
I'm going to a graffiti web site and order a few of these (pretty cheap, in keeping with the $50 paint job theme) and see if I can't get less over spray and better direction on these hard to roll areas like jams and trunk drip channels.
Dude, that's a RAD idea!! That's totally what this paint thread is about.. ingenuity and thinking outside of the box.. unless of course you have a 67-76 dart.. then you're driving the box
Raj
67 Beatercuda
slated for paint Summer 2007. Now if I can mix brightside into a high impact color I'm set. I don't want yellow, or white, or any boring colors. And, of course, I love the factory color (881 bright blue.. one year only) and copper and silver but they're all metallics..
Posted By: Anonymous
Re: Paint job on a budget!? CONTINUED..page 44........ - 02/14/07 09:09 AM
About to start painting my land rover, although Ive read all the posts there are a few things I cant remember.
How much brightside should I buy?
It does need primer right, is it better to buy a brightside primer or shall I use an auto primer?
What does brightside need to be thinned with?
What spec of electric polisher do I need?
Posted By: Anonymous
Re: Paint job on a budget!? CONTINUED..page 44........ - 02/14/07 10:54 AM
Quote:
About to start painting my land rover, although Ive read all the posts there are a few things I cant remember.
How much brightside should I buy?
It does need primer right, is it better to buy a brightside primer or shall I use an auto primer?
What does brightside need to be thinned with?
What spec of electric polisher do I need?
Please don't take this the wrong way but a boat that is 6.1 m long, 1.5 m wide and 1 m high should require 2.6 litres of paint for 2 coats. So land rover should need a max of 2 litres for 2 coats, and probably less than that in reality.
The International Boat Painting and Product guide also recommends the PREKOTE primer before using Brightside. Personally though I have found that well sanded factory paint also works well under Brightside.
According to the paint tin, Enamel Thinners #1 should be used (if needed) at temps typically below 18 C and Brushing Thinners #6 at higher temps. But since the paint contains Mineral Spirits/Turpentine and White Spirits at 300g/litre, you could also use the Mineral Spirit/turpentine as a thinner which is what I used.
There are two main types of electric auto polishers available. The first is a Rotary polisher and the specs for a decent rotary are something like 600 rpm to 3000 rpm and around 1200 watts. The second type of polisher (although it is usually sold as a sander) is a Random Orbital polisher. A good RO should have specs similar to the following, 3000 opm to 7000 opm and around 750 watts.
But the important thing about a polisher isn't the polisher so much as the type/grade of polishing pad that is used. For instance a Rotary Polisher with a lambswool polishing pad at full speed will attack your paint about as fast as sandpaper (especially in inexperienced hands). But the same polisher at say 2000 rpm with a light cutting pad or even a polishing pad will flatten the paint out really nicely. Basically a Random Orbital polisher is a much safer (but slower) option than a Rotary polisher.
Posted By: Anonymous
Re: Paint job on a budget!? CONTINUED..page 44........ - 02/14/07 03:55 PM
Would brightside also work well as a chassis and underbody paint?
The car has aluminium body panels will that be a problem with brightside?
Im having trouble finding a 750w polisher all I can find are the crappy ones that are 100w or so and then the ones that look like angle grinders that are 1300w.
1300 w

crappy 100w

Posted By: Anonymous
Re: Paint job on a budget!? CONTINUED..page 44........ - 02/14/07 05:32 PM
Hi guys , great reading here.
I have read thru both segments and had a couple questions.
Are there any updates on the Bluewater paint? I saw one awile back on a Porsche? and it didn't work so well. Any more results or pics, I like the color selection better with the Bluewater over the Brightside.
I'm considering spraying with a hvlp, but how much of a compressor does it take for a gun rated for 9-15 cfm? I think my compressor is 6 Ga volume and can go up to 110 psi.
I also saw this electric pump/hvlp assembly from HP and wondering how well it would work? I don't remember this being brought up before?
Thanks, chieftain.
http://www.harborfreight.com/cpi/ctaf/displayitem.taf?Itemnumber=91772
Posted By: Marq
Re: Paint job on a budget!? CONTINUED..page 44........ - 02/14/07 08:12 PM
Quote:
Would brightside also work well as a chassis and underbody paint?
I don't think that Brightside would be the best candidate for a chassis and underbody paint...
This would be especially true if we were talking about an 'everyday driver'. First off... it would be a pain to roll on and get 100% coverage of all the nooks and crannys. A spray would be much better for doing the underside of the car.
And as well, I can imagine road chips cutting into the paint, allowing moisture to reach the undercarriage metal, blistering the paint with rust from underneath.. and ultimately patched of paint being separated from their adhesion to the undercarriage.
A paint like Tremclad or Rustoleum - when applied in its original format - not thinned - would probably do a better long term job at adhering and withstanding any incursions in the paint by road chips etc. It may lose its initial shine over time... but the anti-rust and adhesion qualities would hang tuff to protect the undercarriage metal.
IF... you were preparing a 'trailer queen' that would not expose the undercarriage to a daily bombardment of road chipping rocks and crud - then I would say that Brightside would be able to do the job and give you an amazingly shiny under-carriagge...
Quote:
The car has aluminium body panels will that be a problem with brightside?
There should be no problems... as long as the aluminum is prepped to allow good adhesion by the Brightside. Now whether this means acid etching or a fine sanding of the aluminum surface is something you may have to test out for yourself to find which one is better and easier to achieve..
.
Posted By: Anonymous
Re: Paint job on a budget!? CONTINUED..page 44........ - 02/14/07 09:33 PM
are there other foam brushes to use ?
are they all the same density foam ?
do you clean them after each painting coat ?
or throw them out ?
if you mix up too much paint and mineral spirts can you store the extra mixed paint in a sealed container till the next coat ?
How do you get the paint to stick to a reverse curve , say the the bottom of the rain gutters ?
I guess thats all the questions for now ,
I am getting close to doing my vans roof as a test in white , over the original white
thanks for keeping this thread alive
Beaulieu
Posted By: Anonymous
Re: Paint job on a budget!? CONTINUED..page 44........ - 02/15/07 01:02 AM
for a polisher I think the Makita BO6040 is great. Kind of a mix of rotary & random orbit. Not as fast as normal rotary, but probably one of the most powerful random orbit.
Posted By: Anonymous
Re: Paint job on a budget!? CONTINUED..page 44........ - 02/15/07 06:55 AM
I found 2 roller pads of different density(cheap yellow & thicker/better black - shurline brand) but I only remember 1 foam brush(dark gray/black).
I bought a quart tupperware thing for mixing & storing.It sealed airtight but still might need to add a LITTLE thinner when you reopen it. My thinking was by mixing larger batches & adding more before it was all gone I was more likely to have a consistent thinness & therefor consistent color shade.
If you're repainting soon you can reuse the brushes but they're cheap so just buy several.
underside of raingutter - either brush on or use a stock color so you can spray. I sprayed my doorjambs & hood edges, worked great. Did them after 2 rollon coats on the surface then wetsand to eliminate any transition change.
Posted By: Anonymous
Re: Paint job on a budget!? CONTINUED..page 44........ - 02/15/07 06:48 PM
If you want to store the roller brush and paint. You can keep it in the freezer for overnite or even a couple of days. You can put everything in a small roller tray and wrap with alum.foil. Or use a tupperware container.
Posted By: 70blackfish
Re: Paint job on a budget!? CONTINUED..page 44........ - 02/15/07 07:25 PM
I need a paint job.....
Posted By: Anonymous
Re: Paint job on a budget!? CONTINUED..page 44........ - 02/15/07 08:17 PM
Ok....well I guess I will look and see whats at Home Depot,
I doubt I will put anything in the freezer , just seems like it will get my food smelling funny
Posted By: ONEBADBIRD
Re: Paint job on a budget!? CONTINUED..page 44........ - 02/15/07 08:28 PM
Putting your rollers in the freezer is a great method for preserving them, I have used this method myself. The only thing is like you mentioned is that your food will smell and maybe even taste like paint. The choice is yours. Jay. Keep on rolling!
Posted By: v8mirage
Re: Paint job on a budget!? CONTINUED..page 44........ - 02/16/07 12:09 AM
I put the roller in a zip-lock baggy everytime I was done using it, kept it reusable for days. In fact it was usuable until I didn't use it for a few days, then it started to dry up. I think the longest I used one was 10 days or so. Yeah, I'm taking a long time to do it but with family and work and now winter, I'm doing it a piece at a time, which for white, shouldn't be an issue.
I have also just poured unused paint right back into the can, it didn't seem to cause any problems.
Gerbs
Posted By: Anonymous
Re: Paint job on a budget!? CONTINUED..page 44........ - 02/16/07 03:38 AM
SO, I am still a little uncertain about what to do with the underneath side of the hood. What's everyone doing to paint the underneath side of the hood? Does rustoleum or brightside hold up well to the heat of the engine? Should I just use the high heat black engine paint or can the rustoleum or brightside handle the heat of the engine compartment?
Posted By: Anonymous
Re: Paint job on a budget!? CONTINUED..page 44........ - 02/16/07 03:59 AM
I'm painting white on top of white, so I probably won't even paint the underside of the hood ... there is no rust or anything there, so it should be fine.
If you are changing colors, people have been using spray can, touch-up gun with air compressor, or a paint brush.
If you are using Rustoleum standard colors, you can get a matching spray can. If you are using Brightside, you can thin the paint, then take it to any auto paint supply store, and they will put it in a pressurized rattle can for you. That is also a good option if you want to mix up some Rustoleum colors.
If you have an air compressor, you can get a little touch-up gun for as low as $10.00.
And finally, people have reported good results using a brush to get into the nooks and crannies. Some use a foam brush, but I think a good chinese-bristle brush yeilds better results.
Quote:
SO, I am still a little uncertain about what to do with the underneath side of the hood. What's everyone doing to paint the underneath side of the hood? Does rustoleum or brightside hold up well to the heat of the engine? Should I just use the high heat black engine paint or can the rustoleum or brightside handle the heat of the engine compartment?
Posted By: Anonymous
Re: Paint job on a budget!? CONTINUED..page 44........ - 02/16/07 05:23 AM
It's amazing how far this has gone. I've been reading this thread as lurker since Post #1--- admittedly I've skipped the last 30 pages --
but anyway I found something online while doing research that I might share.
Quote:
I'm a retired PPG and Sherwin Williams auto paint jobber, and I have these thoughts after 25 years in the business:
1. Never wipe down with lacquer thinner. Use wax and grease remover, lots of it, one wet rag, one dry to wipe it up before it dries. Lacquer thinner dries too quick and will not float the contaminants off the surface as well.
2. 95% of paint problems are caused by too much too quick. Often alkyd enamels will skin over on top of the surface before it is dry underneath. Especially true in high temps or humidity conditions or if spraying in wind or sun. Weeks later this will cause wrinkling, or at best a soft finish. Trapped solvents underneath are trying to get out.
3. The cheaper the paint the greater the likelihood itwill have poor color hold outin the sun. Ultraviolet screeners are expensive ingredients. Generally speaking you get what you pay for.
4. Use hardeners when you can. You get a cure all the way through, and resistance to gas is greater.
5. Use compatible products. Get your paint from the same place you get your primer. Match reducers to weather conditions. Ask questions and follow directions.
6. Most products using a catalyst do not function well when applied at 60 degrees or less.
Good luck
Dick
Posted By: Anonymous
Re: Paint job on a budget!? CONTINUED..page 44........ - 02/16/07 06:34 AM
Hey guys, my name's Phil and I'm from Hamilton in New Zealand. I'm a long-time lurker of this thread but a first time poster.
I've been watching this thread for the last year and have only finally got around to starting to paint my Corolla with this method - it's an '81 TE71 2 door liftback model which is just my project car so I'm not so worried if I stuff it up.
I just finished applying the first two coats of the paint on the bonnet and just toying around with the paint/spirits mix rate and ways to apply it with the roller. Think I'm getting the hang of it already.
No doubt I will be posting again when I start running into problems.
I've tried re-reading the thread again but I gave up after the first 10 pages and can't be bothered reading through 100+ pages, so I'm wondering if anyone who has painted their car could give a short run down/summary of the process.
Cheers,
Phil
Posted By: kenzo42
Re: Paint job on a budget!? CONTINUED..page 44........ - 02/16/07 06:48 AM
Does anyone have experience or insight on multiple colored panels on a car? Would each panel come out a different color if I were to use this method w/ Brightside? Thanks.
Posted By: v8mirage
Re: Paint job on a budget!? CONTINUED..page 44........ - 02/16/07 01:35 PM
Quote:
SO, I am still a little uncertain about what to do with the underneath side of the hood. What's everyone doing to paint the underneath side of the hood? Does rustoleum or brightside hold up well to the heat of the engine? Should I just use the high heat black engine paint or can the rustoleum or brightside handle the heat of the engine compartment?
When I was younger, and didn't necessarily have a "SHOW" car, my buddies and I would use Rustoleum or Krylon paint under the hood. It was usually for cars with a black engine compartment. But even in a car with headers and that ran real warm on occasion, the heat didn't seem to be an issue. I am going to use rustoleum under the hood of my car again as I haven't seen an issue with reliability in the past.
I don't think that the manufacturers use anything different under the hood even when it is the same as the body color.
Posted By: Anonymous
Re: Paint job on a budget!? CONTINUED..page 44........ - 02/16/07 01:36 PM
Quote:
SO, I am still a little uncertain about what to do with the underneath side of the hood. What's everyone doing to paint the underneath side of the hood? Does rustoleum or brightside hold up well to the heat of the engine? Should I just use the high heat black engine paint or can the rustoleum or brightside handle the heat of the engine compartment?
When 69charger originally started talking about the Rustoleum method, he specifically mentioned the high heat areas on his VW Beetle (engine compartment and deck lid). He said that the paint has held up well despite the high temps of an air cooled motor. His orange Beetle was a good test case and I think that you'd probably be fine w/the underside of your hood.
Posted By: Anonymous
Re: Paint job on a budget!? CONTINUED..page 44........ - 02/16/07 01:37 PM
V8Mirage, you beat me to the punch by one minute
Posted By: Anonymous
Re: Paint job on a budget!? CONTINUED..page 44........ - 02/16/07 01:51 PM
Phil, this is a common question on this board, but not the easiest to answer as many of us have slight variations on the common theme. We've done what works for each of us. I would definitely recommend reading as much of these threads as possible, as you can likely learn from the trials and errors of others.
For me w/Rustoleum:
>Mix to milk like consistency and roll on uber thin
>Roll two coats
>Wetsand (600-800 grit)
>Roll two coats
>Wetsand (800 grit)
>Roll two coats
>Wetsand (1000 grit)
>Roll two coats (I let mine cook in the sun for a couple of weeks)
>Wetsand (1500 grit) and Polish
I had to do more coats because I used red and I didn't have a uniform color underneath. Allow each coat to fully dry (12-24hrs depending on temp and humidity). As I said, each of us probably has done this slightly different, and you will likely, too. Good luck!
Posted By: Anonymous
Re: Paint job on a budget!? CONTINUED..page 44........ - 02/17/07 01:09 AM
Hi
has anyone put up a video on YouTube etc
showing how thin the paint needs to be and how it goes on and sets up ?
Also has anyone seen the orange Rustoleum paint at Home Depot ?
thanks
Beaulieu
Posted By: Anonymous
Re: Paint job on a budget!? CONTINUED..page 44........ - 02/17/07 09:41 PM
Quote:
Hi
has anyone put up a video on YouTube etc
showing how thin the paint needs to be and how it goes on and sets up ?
Also has anyone seen the orange Rustoleum paint at Home Depot ?
thanks
Beaulieu
yes, yes
does that help :-P
Posted By: Anonymous
Re: Paint job on a budget!? CONTINUED..page 44........ - 02/18/07 02:28 AM
Quote:
Quote:
Hi
has anyone put up a video on YouTube etc
showing how thin the paint needs to be and how it goes on and sets up ?
Also has anyone seen the orange Rustoleum paint at Home Depot ?
thanks
Beaulieu
yes, yes
does that help :-P
ok......AND WHERE ???????
Posted By: Anonymous
Re: Paint job on a budget!? CONTINUED..page 44........ - 02/18/07 05:19 AM
Just a quick photo drop. The image is highly compressed so it may be fuzzy. Just wanted to show the kind of coverage I've gotten so far with 8 layers of rolled on paint with a dual light wetsanding after every other layer was applied.
I'm still planning on using Briteside for the final paint job, but at this stage of things my only goal was to get all of the bare metal covered and get the car uniform in color.

Posted By: Exit1965
Re: Paint job on a budget!? CONTINUED..page 44........ - 02/18/07 06:07 AM
I'm not sure why people are still using Rustoleum. Brightside has a better shine. Yes, Brightside or other marine poly is more expensive but you can most likely buy all the paint you'll need, with some leftover, for under $100 (3 quarts at $30 each).
Posted By: Exit1965
Re: Paint job on a budget!? CONTINUED..page 44........ - 02/18/07 06:10 AM
Phantasm - that's a good idea. That's what I ended up doing, but not by plan. Using rustoleum as a base layer will have benefits including needing to buy less Brightside (as long as you're using brightside of a similar color as the rustoleum of course), and getting to practice, sand down messed up spots, and practice some more. And perhaps better rust resistance. Plus rustoleum can be sprayed into engine compartments and door jambs where shine isn't a priority.
Posted By: Anonymous
Re: Paint job on a budget!? CONTINUED..page 44........ - 02/18/07 07:14 AM
I'm finding when I'm rolling it on it will instantly look like orange peel and wont go on uniformly. Even after leaving it sit for a few minutes it doesn't seem to self-level fully. I've tried mixing it thinner and thicker and have found it doesn't roll on easily when thin, but creates more orange peel when thicker.
I've just applied my forth coat after wet sanding after the second coat, and I reckon another two coats and the cover will be even.
Does anyone have pictures of each stage? Like after the very first coat then after the 2nd coat etc.
I will take pics after I'm done paining the bonnet (hood to you guys) and fenders.
Posted By: Exit1965
Re: Paint job on a budget!? CONTINUED..page 44........ - 02/18/07 02:38 PM
It should roll on easy when thin-- but you have to apply a thin coat of it. When I was painting with the Rustoleum, I would make medium thin mixture, but when wetting the roller I would push most of it out. Id push down hard on the tray to get most of the paint out. Then Id push down firmly on the car, and it would leave a thin coat and there was little if any orange peel.
Posted By: Anonymous
Re: Paint job on a budget!? CONTINUED..page 44........ - 02/18/07 04:24 PM
How good does Rustoleum work over rust ?
mostly asking about spraying it on the underside ,
the frame rails , underside of the floors and inside of wheelwells ,
the metal is not rusted thru , just has some light surface rust , I will knock down the flacky stuff,
do I need to rough up the surface or does Rustoleum have some "bite" when its put on ?
I just think that covering the bottom will make the car look better and hopefully keep it from rusting further....
I planned on using a dark grey primer color Rustoleum.
Beaulieu
In Southern California
Posted By: 69DartGT
Re: Paint job on a budget!? CONTINUED..page 44........ - 02/18/07 07:06 PM
I did the insdie of my trucks bed with Rustoleum's rusty metal primer the brown color stuff, used it straight out of the can no thinning, goes on flat and level, I used both a roller and a foam brush can't tell which was done with one or the other.
I'd guess all primers would do the same thing.
I spent a hour or better with a wire wheel brushing the entire bed area, blew it out with air then wiped it down good before primer, I still want to roll on something like Herculiner and see how it holds up.
Posted By: Exit1965
Re: Paint job on a budget!? CONTINUED..page 44........ - 02/19/07 01:17 AM
I painted an engine pulley which had some surface rust. The rusty areas took more paint to cover. I am not too worried about the pulley rusting through, but I am not sure what rust does underneath paint. Hopefully nothing
but if I could I'd take off all the rust I reasonably could.
Posted By: Anonymous
Re: Paint job on a budget!? CONTINUED..page 44........ - 02/19/07 01:59 AM
Quote:
I'm not sure why people are still using Rustoleum. Brightside has a better shine. Yes, Brightside or other marine poly is more expensive but you can most likely buy all the paint you'll need, with some leftover, for under $100 (3 quarts at $30 each).
I thought about Brightside and looked at it, but it didn't have the color I wanted (brown), which Rustoleum does.
Posted By: Exit1965
Re: Paint job on a budget!? CONTINUED..page 44........ - 02/19/07 03:03 AM
There are other marine polyurethanes out there, petit easypoxy for example. they list some browns, but youd have to check out a color card.
http://www.pettitpaint.com/catalog_browse.asp?ictNbr=45
Posted By: Anonymous
Re: Paint job on a budget!? CONTINUED..page 44........ - 02/19/07 03:22 AM
Can anyone recommend a hardner of some type that would be compatable with Rustoleum?
I am ready to apply my last coat and want it to have maximum hardness. The prior coats did not provide the ability to keep from marring with a simple rub of my fingernail. And the prior coats have had ample time to dry since the last coat was put on in September.
Any suggestions/help would be appreciated.
Posted By: Marq
Re: Paint job on a budget!? CONTINUED..page 44........ - 02/19/07 02:21 PM
Quote:
Does anyone have experience or insight on multiple colored panels on a car? Would each panel come out a different color if I were to use this method w/ Brightside? Thanks.
Just remember that each coating of Brightside ( or even Tremclad/Rustoleum) are almost translucent when you paint them on. It takes multiple layers to eventually build up a solid uniform color. So if you start with a car of many colors... you will be able to see those variations for at least four to six coatings.
So there are two ways to nail down a uniform paint job on a car of many colors....
a ) Yes... as you build up your layers of Brightside paint eventually all panels will end up at the same color and with little difference between them...
OR
b ) a smarter move would be to lay on one layer of the Brightside primer... to give yourself one uniform base color on which to start laying your Brightside paint. The Brightside primer has the highest concentrations of 'solids' and hence it can lay down a uniform color in less coats ( 1 or 2 at the most ).
In the long run I would say that giving the car a uniform primer color to begin with, will save you time and money when laying on the color coat of Brightside.
.
Posted By: Marq
Re: Paint job on a budget!? CONTINUED..page 44........ - 02/19/07 02:36 PM
Quote:
I thought about Brightside and looked at it, but it didn't have the color I wanted (brown), which Rustoleum does.
Well... as per my failed experiment to create a blood red... it turned out that Brightside Fire Red PLUS Brightside Black EQUALS brown....
Depending on the amount of red you add to a majority of black... your color range can go from clay pottery brown to a fairly deep mahogany brown....
.
Posted By: Exit1965
Re: Paint job on a budget!? CONTINUED..page 44........ - 02/19/07 08:08 PM

I am not sure how that would work with a roller though. And its as toxic as any other paint hardener.
Posted By: kenzo42
Re: Paint job on a budget!? CONTINUED..page 44........ - 02/19/07 09:16 PM
My buddy has a new Porter Cable 7336 (not refurbished and box still wrapped in plastic wire ties) for sale if anyone is interested. He said $95 shipped from Vacaville, CA.
Please delete if not appropriate for this forum. I didn't see a for sell section, and I thought this would benefit some of us rollers since Marq got such good results w/ this.
PM me if interested!
Posted By: Anonymous
Re: Paint job on a budget!? CONTINUED..page 44........ - 02/20/07 02:08 AM
Exit1965
Thanks for the recommendation. That gives me something to look for.
Posted By: Anonymous
Re: Paint job on a budget!? CONTINUED..page 44........ - 02/20/07 03:29 PM
Exit, thanks for the headsup on the hardener.
I got the spec sheet and it states:
"INSTRUCTIONS FOR USE:
Add full contents of this package to 1 gallon of oil-based enamel... Mix well initially and occasionally for the next 30 minutes to fully activate. Begin using after the 30 minute activation period has passed. Shelf life is 8 hours after which mixture should be discarded."
Their tech group says that it does not effect the durability of the paint, and they could not say how long the drying time would be reduced.
I wonder how the self-leveling characteristics of the Rustoleum Professional mixture would be affected. Has anyone ever used the Valspar Hardener (18-4625)?
Posted By: Anonymous
Re: Paint job on a budget!? CONTINUED..page 44........ - 02/20/07 03:59 PM
Quote:
"INSTRUCTIONS FOR USE:
Add full contents of this package to 1 gallon of oil-based enamel... Mix well initially and occasionally for the next 30 minutes to fully activate. Begin using after the 30 minute activation period has passed. Shelf life is 8 hours after which mixture should be discarded."
that pretty much blows the idea of doing the thin coats , also will stirring it so much put air bubbles in it ?
Beaulieu
Posted By: Anonymous
Re: Paint job on a budget!? CONTINUED..page 44........ - 02/20/07 07:25 PM
Hello!
First - 69chargeryeehaa - thank you. This is the most compelling thread (because of your input) that I have ever read.
I know someone - family member - inside Sherwin Williams (a higher up) and I asked him specific questions about their paint. He does not know about this thread or why I asked about paint.
Q: Doing some research, like to know about Sherwin Williams paint - what do they make equivalent to "Rustoleum Pro" ?
A: Best product is called Rust Tough. Direct to Metal, excellent gloss level, impact resistance & rust protection. You can buy this from Wal-Mart. This is the same product we sell to our industrial customers. The aerosol uses a patented Krylon nozzle - called a FanSpray - that is fantastic!!
http://www.krylon.com/main/product_templ...product_detailsQ: So it is equivalent to Rustoleum Pro or Rustoleum "Stops Rust" ?
A: Yes. Similar but better. Spray cans should match bulk (gallon cans).
Q: So Rust Tough is better than Rustoleum Pro ?
A: Yes. We compete against Rustoleum every day. I am very confident that Rust Tough will out-perform Rustoleum.
I thought this info might be of interest to reader's of this thread.
To see colors for Rust Tough Enamel click on Can this page:
http://www.krylon.com/main/product_templ...product_details
Posted By: Anonymous
Re: Paint job on a budget!? CONTINUED..page 44........ - 02/20/07 07:28 PM
I went by the local auto paint supplier today and picked up a pint of Synthetic Enamel Hardner - E297. Labeled under Duragloss Refinish Products.
This was what he had on the shelf at this time. Says he sells whatever his supplier sends him. They all work the same he said.
The ratio of hardner to paint is 1 to 8 also. Not much in the way of instructions. Just stir in slowly. I think he mentioned a working time of around 4 hours.
I have several coats of Rustoleum Professional on my fiberglass dune buggy. However, I could not achieve the hardness others have reported.
So I decided to give it one last coat with the hardner included. Hopefully this will work or I will be the one in one million who did not have success with this paint process.
Looking for any last tips before the final coat is applied and depending on the outcome, the cheering or crying begins.
Posted By: Anonymous
Re: Paint job on a budget!? CONTINUED..page 44........ - 02/20/07 11:30 PM
How much was the hardener ? and how many ounces ?
if the base coats are not hard , I wonder how the harder top coat will react ?
also would be interesting to note if there is any color differnce when you add the hardener.
please get back to us with the results
Beaulieu
Posted By: 69chargeryeehaa
Re: Paint job on a budget!? CONTINUED..page 44........ - 02/21/07 12:34 AM
why would you need a hardner? Even if you sprayed it, it's dry to a touch in 2-3 hours, and can be wetsanded overnight.
Posted By: Exit1965
Re: Paint job on a budget!? CONTINUED..page 44........ - 02/21/07 12:39 AM
I don't know about that hardener. When I went to my local auto paint shop to buy hardener, they said the stuff they had (enamel hardener) would turn my enamel (rustoleum) into cottage cheese garbage. so I didn't buy any.
Posted By: Anonymous
Re: Paint job on a budget!? CONTINUED..page 44........ - 02/21/07 12:46 AM
Quote:
There are other marine polyurethanes out there, petit easypoxy for example. they list some browns, but youd have to check out a color card.
http://www.pettitpaint.com/catalog_browse.asp?ictNbr=45
Thanks, I hadn't found the Pettit site. That might work.
Posted By: C38coupe
Re: Paint job on a budget!? CONTINUED..page 44........ - 02/21/07 01:36 AM
Quote:
Quote:
why would you need a hardner? Even if you sprayed it, it's dry to a touch in 2-3 hours, and can be wetsanded overnight.
So that it's new and improved.
Seriously, my car is a daily driver. So I was thinking that if I could sand the paint in and hour or so, I might be able to squeeze the paint process into a weekend project. My goal would be to paint 4 or 6 coats in a day as opposed to 2 per day.
I know you can use enamel hardner in Tremclad or Rustoleum alkyd enamel paints, it won't turn to cottage cheese. The inclusion rate is 10 %, they are a urethane enhanced hardner, designed to dry the paint harder and faster, and to give the paint more overall durability. It is used when spraying these paints in a 1 or 2 or even a 3 coat application. I am not sure if they will work with the roller method, and if it would cause problems as the paint will flash a lot quicker. I have recently seen a picture of a car, that was spray painted with XO Rust paint and hardner was added. This car is a 40 Studebaker Streetrod, it was wet sanded after 2or 3 coats and polished, it looks killer, as does Chargers and the other s vehicles that were done with Tremclad, Rustoleum or Brightside. The easiest, cheapest, simplest is to follow the recipe prescribed in this thread, you won't go wrong, hope it works out for you.
Posted By: Anonymous
Re: Paint job on a budget!? CONTINUED..page 44........ - 02/21/07 03:46 AM
Quote:
Can anyone recommend a hardner of some type that would be compatable with Rustoleum?
I am ready to apply my last coat and want it to have maximum hardness. The prior coats did not provide the ability to keep from marring with a simple rub of my fingernail. And the prior coats have had ample time to dry since the last coat was put on in September.
Any suggestions/help would be appreciated.
69charger
As stated above, I am looking out of despiration for a solution. Maybe the hardener will do the job of a mar free finish. Just don't know if I can roll the paint on without problems this time around.
I am tired of wet sanding!
Posted By: 69chargeryeehaa
Re: Paint job on a budget!? CONTINUED..page 44........ - 02/21/07 02:24 PM
Quote:
69charger
As stated above, I am looking out of despiration for a solution. Maybe the hardener will do the job of a mar free finish. Just don't know if I can roll the paint on without problems this time around.
I am tired of wet sanding!
you really should'nt be wetsanding that much. My charger has about a realistic >10 hours of wetsanding total when you add all the time spent wetsanding and cleaning the car to accept the next coat. The final wetsand taking about 3-4 hours, and then the buffing/polishing stage taking about 6 hours, but that's really easy work, the buffer is doing all the work for you.
Posted By: Anonymous
Re: Paint job on a budget!? CONTINUED..page 44........ - 02/21/07 04:17 PM
This is a prep question. I have a couple small creases in door panels. So I pulled them out a little and am trying to smooth and straighten the panel with bondo. It's pretty straight and smooth to the touch but even with using 400 grit paper there are scratch marks and minor pitting the size of a pin head.
Do I try to eliminate these with a lite skim coat, with spot putty or are these sanding marks something the paint will cover and fill?
It really seems that I could do this minor filling and sanding forever and still have the scratches and swirls so I wonder if this is normal and filled in with paint?
Posted By: Exit1965
Re: Paint job on a budget!? CONTINUED..page 44........ - 02/21/07 04:27 PM
I would use a skim coat with bondo + some fiberglass resin to make it thin and smooth. Let it dry for awhile. Then hit it with 180, then finish with 400.
Regular non hardened glazing putty tends to shrink, and paint I do not think will fill in pinholes with the amount being put on.
Posted By: Anonymous
Re: Paint job on a budget!? CONTINUED..page 44........ - 02/21/07 08:31 PM
Quote:
As stated above, I am looking out of despiration for a solution. Maybe the hardener will do the job of a mar free finish. Just don't know if I can roll the paint on without problems this time around.
I am tired of wet sanding!
If you use the hardner, PLEASE WEAR A RESPIRATOR. Enamel hardner has isocyonates, and it's really, really nasty stuff. You can do permanent damage to your lungs breathing this stuff. Wear heavy rubber gloves too...I'm pretty sure you can absorb this stuff through your skin.
If you do use it though, let us know how it turns out...I've been wondering what a hardner would do with this process.
Posted By: Anonymous
Re: Paint job on a budget!? CONTINUED..page 44........ - 02/22/07 02:58 AM
Toolbox
Thanks for the heads up. Will observe your cautions.
I am anxious as to what will happen. I can see myself having to take the finish back to the gel coat if things go haywire. Six months of work down the drain.
Posted By: Anonymous
Re: Paint job on a budget!? CONTINUED..page 44........ - 02/22/07 03:16 AM
I've been searching a lot of home and hardware shops in town and wound up at the local Ace Hardware store. It turns out that they have an acrylic enamel paint, Rust Stop, that comes in a wide range of premixed colors as well as the ability to custom tint.
Direct quote from the brochure reads as: "Ace Rust Stop Enamel is ideal for use on metal. . . This card presents a palette of ready mix colors, complemented with a select sampling of custom tinted colors. See our Ace Paint color display for hundreds of additional choices."
The sales brochure features over fifty different colors and it only runs a little over twenty bucks a gallon.
Just an FYI, since so many people feel limited by Rustoleum and Brightsides color restrictions.
Posted By: Exit1965
Re: Paint job on a budget!? CONTINUED..page 44........ - 02/22/07 04:59 AM
I feel your pain frontloader. for a buggy I can see a real need to be more scratch resistant than a weekend cruiser.
I tried some more scratch test on my car (with brightside). Since i've painted it, it hasn't seen temperatures above 70ish. Some areas I can not scratch at all, but in some places I can still dent the paint a bit with my nail. Hopefully after baking in my garage this summer, and finally going outside later this spring, it will all be rock hard.
don't know how many other people can comment on the hardness of brightside at this point, anyone? you may want to give brightside a shot before trying a hardener though, or at least do some brightside testing of your own and hold off on making a move on your buggy.
Posted By: 69DartGT
Re: Paint job on a budget!? CONTINUED..page 44........ - 02/22/07 02:55 PM
I had some really nice weather when I did my truck plus a few days of rain off and on.
I find the Brightside very hard and even prone to chipping if hit with something hard (don't ask) I did find a good small artist brush and brightside makes for a good touch up combo.
Posted By: 69chargeryeehaa
Re: Paint job on a budget!? CONTINUED..page 44........ - 02/22/07 04:51 PM
exit, it must be that your in california, and the voc issue, because every car i painted with tremclad, it remained soft (as when you could dent it with your nail) for about 2 weeks, then get really hard, settling in at about 3 months it was rock hard, don't ask me either how i know!!!
lets just say when i pulled into my garage with the charger, the 250ft/pd torque wrench and 6 oil filters carefully balanced on the wrench did'nt want to stay put on the top shelf 4 ft above the hood, it got ugly, i don't wanna talk about it
i did'nt even look until hours later and there was not a mark, and let me tell you it hit HARD.
But the same is true with regular auto paint, thats why they even tell you not to wash your car for at least 2 weeks. I've sprayed over 10 cars (with traditional auto paints, both BC/CC and single stage) and they too remained "soft" for over a month, allthough the BC/CC seemed to reach it's total hardness after about 3 weeks to a month.
Posted By: Anonymous
Re: Paint job on a budget!? CONTINUED..page 44........ - 02/22/07 08:27 PM
Posted By: Anonymous
Re: Paint job on a budget!? CONTINUED..page 44........ - 02/22/07 10:32 PM
Quote:
SO, I am still a little uncertain about what to do with the underneath side of the hood. What's everyone doing to paint the underneath side of the hood? Does rustoleum or brightside hold up well to the heat of the engine? Should I just use the high heat black engine paint or can the rustoleum or brightside handle the heat of the engine compartment?
i used rustoleum in an aerosol can. i didn't even prep my engine bay properly. i had tha engine out and removed every line, wiring, and almost every bolt. i used engine degreaser to clean tha engine bay and gave it overnight to dry. i used a total of 2 cans and 1 can of clearcoat. tha garage was very dusty and sandy. it still looks about tha same as tha week i did it. this was done about 2nd quarter of 2006. and since it's in tha engine bay, i think tha heat baked tha paint, helping it hold better.
engine bay
tha pic doesn't give it much justice, but it does look better in sunlight and after a quick wipe down with detailing wipes that i use from either megquiers or armor all.
_taF
Posted By: C38coupe
Re: Paint job on a budget!? CONTINUED..page 44........ - 02/23/07 01:30 AM
Quote from another forum!
LOL, that just reminded me of a friend of mine back when i was a teenager, when he got done and the paint dried, he had brush strokes--this was back when i was first getting involved in auto body(he told another friend of mine that he could do a better paintjob than me).now if i can quit rolling,(laughing that is) i might can read some more post.......
Hi all, here is a comment on another forum, it's an autobody forum. I initially thought these guys were open minded, as this thread, "Paint Job ON A Budget" was mentioned and some readers were impressed. Even after I posted a link to this forum and thread, I got comments like this, not even sure if this dude had enough guts to have a look at some of the results you fellas are getting with this method and the paints you have chosen. This guy even went further to say a Maaco paint job would be superior. Some people just can't think out of the box, oh well makes for some interesting banter.
My point is, I have been cruisin that forum, but I guess they are too professional to have guys like me suggesting new ideas.I had responded to someone asking for an inexpensive paint job idea or method to be done on there car at home..................
C38coupe
Posted By: 69chargeryeehaa
Re: Paint job on a budget!? CONTINUED..page 44........ - 02/23/07 02:11 PM
You know c38coupe, i've been a "out of the box" thinker all my life, and have allways had resistance with my ideas, until they saw my idea work. The "professionals" will tell you that this is the stupidest idea, it won't work, all this while they have no clue what type of paint this really is, and then come up with the argument that the paint will fade and go to chalk. Meanwhile they are comparing it with their expirences, like painting a mail box with the paint, and 2 years later the paint was all faded. But they never consider what would happen if you painted that same mailbox with single stage or BC/CC and let it sit in the elements with no maintanence like waxing and washing, what do you think would happen to that paint????, i give it 6 months!!!!
My advice is not to try and convert them, WE know it works, and that the results speak for them selves. Funny how on some forums if you say how you painted you car it's automatically "crap", but if you just posted a picture of your car first without saying HOW it was painted, they all say, WOW man, AWESOME car; until they know it's done with a roller!!!! then they're like
Posted By: C38coupe
Re: Paint job on a budget!? CONTINUED..page 44........ - 02/23/07 02:35 PM
Quote:
You know c38coupe, i've been a "out of the box" thinker all my life, and have allways had resistance with my ideas, until they saw my idea work. The "professionals" will tell you that this is the stupidest idea, it won't work, all this while they have no clue what type of paint this really is, and then come up with the argument that the paint will fade and go to chalk. Meanwhile they are comparing it with their expirences, like painting a mail box with the paint, and 2 years later the paint was all faded. But they never consider what would happen if you painted that same mailbox with single stage or BC/CC and let it sit in the elements with no maintanence like waxing and washing, what do you think would happen to that paint????, i give it 6 months!!!!
My advice is not to try and convert them, WE know it works, and that the results speak for them selves. Funny how on some forums if you say how you painted you car it's automatically "crap", but if you just posted a picture of your car first without saying HOW it was painted, they all say, WOW man, AWESOME car; until they know it's done with a roller!!!! then they're like
I hear you, I have a friend in the Milwaukee area, he has painted a couple of antique auto rims and used them in his flower garden, they were painted in 1995, they still look like he just painted them, he washes them once in a while, and they are in the elements year round. A couple of years ago I painted an old rim with Tremclad, didn't even clean them all that well, left the rust on in fact. I forgot about it, it has been outside in the rain, under the snow, and when I wiped it off it was shiny, a tiny bit of rust popped through, where it got nicked. It is tough paint no doubt...The coupe
Posted By: StevesBug
Re: Paint job on a budget!? CONTINUED..page 44........ - 02/23/07 06:38 PM
Here�s a heads up for other noobs to painting.
I�ve been painting my 69 Bug and
have about 8 coats. I�m rolling Rustoleum Pro Regal Red. As I tried to set up for the final coat, I�d be using 1500 paper and still sand through the top coat which left what I�ll call leopard spots.
When the wailing and gnashing was over, I decided to learn something about my new HF rotary polisher since I would need to paint another coat anyway. Well..how happy was I when the leopard spots completely disappeared !
I did an initial run with Turtle Wax polishing paste, and then a run with Meguiars #2 ( Fine Cut Cleaner ) and holy smokes...this thing is awesome!
Bottom line is that now I know that I can sand all the orange peal off and get a finish that will be everything I�d hoped for. Huge thanks to 69chargeryeehaa and all the posters who have helped me understand this process. I�ll try to get some pics up next week.
Posted By: Anonymous
Re: Paint job on a budget!? CONTINUED..page 44........ - 02/24/07 02:51 AM
yah i know... ive been telling everybody that i am using ppg paint and they think its cool how its comming out. but there is no smell
then in the spring ill say its rustolium!!!!!!
i did have a few spots that sanded through the clear and i hope i can buff them out???? i will try this weekend and see what happends...
Posted By: Anonymous
Re: Paint job on a budget!? CONTINUED..page 44........ - 02/24/07 05:30 AM
Quote:
I decided to learn something about my new HF rotary polisher since ...
Which HF polisher are you using? Is it random action? Can you link to it?
Thanks!
Posted By: StevesBug
Re: Paint job on a budget!? CONTINUED..page 44........ - 02/24/07 04:34 PM
Don't know how to link, but it's a 7" variable speed polisher/sander, part 92623. This is a rotary, which is not as forgiving as the orbitals.
When I started looking for a machine, HF had this on sale for $25 and I'd read that some folks were getting good results with it. ( Others were not, so it's up to you ).
I did a lot of web searching and the main issue with rotary is speed of the pad edges. If you use a 7 or 8" pad at high speed, that edge will cut right through all your hard work.
So I got a new backing plate and good 6" pad, and am using that with the least aggressive polish that will do my job. I have an old hood that I've been painting along with the car, and when something needs to be tested, the hood comes first.
The trick to using the rotary is to use the slowest speed that will do the job. When I had the Turtle Wax Polishing paste on there, I ran it over the roof area around the drip rail, thinking that if it were going to do harm, I'd see it there. It just made it very shiny.
Posted By: StevesBug
Re: Paint job on a budget!? CONTINUED..page 44........ - 02/25/07 01:13 AM
Here's an update on the leopard spots, with some before and after pics attached. The spots are still there, and will no doubt show in direct sun, but they are still very acceptable for my purposes.
( edit: sorry...I'm a computer putz)


They are pretty clear in the first two pictures where I had sanded with 2000, used the polishing paste, but hadn't yet used the Fine Cut cleaner. The next two are after, and the spots are only apparent in the second shot.
The body is on a dolly, and I'd roll it out of the garage but it's been raining all day.
Has anyone else run into these spots ? Any suggestions ?

Posted By: Anonymous
Re: Paint job on a budget!? CONTINUED..page 44........ - 02/25/07 01:44 AM
Only one pic was attached ...
BTW ... I used to have a '67 red vee-dub when I was 16. I used to dream of being able to do a dolly-type restoration on it.
Posted By: Anonymous
Re: Paint job on a budget!? CONTINUED..page 44........ - 02/25/07 02:23 AM
Another quick question: I was in walmart and ace hardware last night, and I noticed Ace has 4" white rollers (Ace Brand), and Walmart has 4" yellow rollers (RubberMaid).
Anybody have any experience with these brands? Which is best?
Posted By: Exit1965
Re: Paint job on a budget!? CONTINUED..page 44........ - 02/25/07 05:28 AM
I don't know if anyone has tried one of the yellow ones yet and reported on it. The yellow one, and cheap white ones, are less dense foam than the ones that many here have used. I have not seen a walmart that carries the dense ones that I and others have used with success.
I havent compared the performance of dense vs. non dense, but I imagine the denser one leaves a smoother finish and for that reason would only use the dense one from home depot/lowes.
Posted By: Anonymous
Re: Paint job on a budget!? CONTINUED..page 44........ - 02/25/07 06:05 AM
Ok ... what brand & color were you using?
Posted By: StevesBug
Re: Paint job on a budget!? CONTINUED..page 44........ - 02/25/07 02:09 PM
The brand at our Lowes is "Whizz" roller system, comes in a 5 pack.
Posted By: Anonymous
Re: Paint job on a budget!? CONTINUED..page 44........ - 02/26/07 03:32 AM
Tried enamel hardener on some paint work I was doing today. Not Rustoleum, but another alkyd ename...the results should be the same I would expect. The weather here was a high of about 36* F, so it's not exactly ideal painting conditions. I mixed the hardener about 8-1 with the paint. The can recommends adding the hardener first, then the reducer...but I wasn't thinning it at all so I just added the hardener. The paint seems thinner with it in there. Definetly easier to apply. I used both a foam roller, and a regular bristle brush for areas I couldn't get a roller (I was painting the inside of the trunk of my car). One of the first things I noticed was waaaay more bubbles in the paint when I rolled it compared to using the paint straight out of the can. Brushing it on wasn't much different from the straight paint, but it was a little easier since it seems thinner. It seems to flow out ok...probably no better or worse than plain paint.
But here's the big difference--in this weather (even with a small heater running in there) my drying times have been measured in DAYS. It was taking about two days just to get where it wasn't tacky any more. With the hardener in it, after about 3 hours it was pretty well set up. I'm going to go check it again here in a minute, but the difference in drying time is pretty dramatic. I would think this would be a benefit for anyone working on this... My paint layers are also a *lot* thicker than what you guys are aiming for. I want coverage in one or two coats (it's just the trunk, it doesn't need to be mirror perfect). A thinner coat should dry hard very fast this way.
I'm still going to try this on a spare fender I have and see how it turns out. So far I'm pretty impressed. This might be the answer to getting the paint to harden without waiting 4 months
Posted By: Anonymous
Re: Paint job on a budget!? CONTINUED..page 44........ - 02/26/07 05:47 AM
Just to add insult to injury when it comes to professional painters attitude towards roller painting as a crap finish to doom.
My neighbors brother claims that he's been painting cars for over 20 years now, and he couldn't tell by touch even that the paint on my car had been rolled on.
Granted my car is all white, sitting in a garage, and hasn't yet been wetsanded since the photo I posted, so this 'might' make it somewhat difficult to notice a difference right off.
But even after I showed him the tray, mixing can, the paint I;ve been using, AND the paint roller in the trunk, he still refused to believe that what I had done was a roller job.
So the old saying seems to remain true that you can show someone to a door of truth, but only that person can make the choice to open the door and walk through it.
Professional paint jobs are great, who wouldn't want one if money wasn't the decisive choice on the matter? But if I'm satified with a paint job that I've personally done, on a car that I've wrenching on from the ground up-- I could care less what the professional painters opinions are-- especially if one can't even tell the difference after touching a rolled on paint/base primer job.
Posted By: Anonymous
Re: Paint job on a budget!? CONTINUED..page 44........ - 02/26/07 01:49 PM
So I attempted to roll my test door the other day and I've quickly learned the following things.
1) Surface prep is ridiculously important and my skills need a lot of improving
2) Brightside paint is amazing.
Aside from the sanding scratches and poor prep job, I can see my reflection in the deep dark black brightside. Amazingly a single coat gave me almost 100% coverage. I was so excited that I started preping the rest of the car. Many thanks to this forum and charger
Posted By: Anonymous
Re: Paint job on a budget!? CONTINUED..page 44........ - 02/26/07 02:45 PM
So, what brand of hardner did you use? And you say it mixed 8 parts paint to 1 part hardner with no thinning?
Is this the hardner that will kill you if you breath it, cause that would be a drawback for me. But otherwise it would be sweet to get more coverage and shorter drying times and a harder finish. Sounds like you could manage 2 applications in a day.
Posted By: Anonymous
Re: Paint job on a budget!? CONTINUED..page 44........ - 02/26/07 06:51 PM
Stevesbug,
Quote:
Has anyone else run into these spots ? Any suggestions ?
Yes, I had the same problem with the black Rustoleum Pro on my test fender, I attributed it to not wetsanding all of the orange peel out of the underlying layers.
I've only done the test panel so far...
Posted By: Anonymous
Re: Paint job on a budget!? CONTINUED..page 44........ - 02/26/07 11:43 PM
After you are finished , the car has been fully polished the best it can be....
Does it keep a shine just being left outside ?
or do you need to keep it polished and buffede ,
I am lazy and do not want to do much more them wash it off with a garden hose !
Beaulieu
Posted By: Anonymous
Re: Paint job on a budget!? CONTINUED..page 44........ - 02/27/07 03:08 AM
Montana & Exit - See my post on pg 59 concerning the yellow roller covers from Walmart. I was happier with the results from the Shur-Line brand after a trial run.
Posted By: Anonymous
Re: Paint job on a budget!? CONTINUED..page 44........ - 02/27/07 03:36 AM
Quote:
Montana & Exit - See my post on pg 59 concerning the yellow roller covers from Walmart. I was happier with the results from the Shur-Line brand after a trial run.
So is that the forum consensus? Black Shurline rollers? Can you get those at HD & Lowes?
Any other brands give good results?
Thanks SoYank!!
.
Quote:
The brand at our Lowes is "Whizz" roller system, comes in a 5 pack.
Are you talking about the Whizz "Premium Sponge" black rollers in the 5 pack?
Thanks for your help.
Posted By: Exit1965
Re: Paint job on a budget!? CONTINUED..page 44........ - 02/27/07 05:12 AM
Never heard of/seen black rollers - I might have missed any mention of it on page 59.
Both Lowes and HD have high density foam rollers, they are the "best" (most expensive) they carry as far as i've seen. It's either the cheap yellow ones or the dense white ones.. not too many options.
Posted By: StevesBug
Re: Paint job on a budget!? CONTINUED..page 44........ - 02/27/07 02:20 PM
This is what I've used.

Posted By: 69chargeryeehaa
Re: Paint job on a budget!? CONTINUED..page 44........ - 02/27/07 03:30 PM
Posted By: Anonymous
Re: Paint job on a budget!? CONTINUED..page 44........ - 02/27/07 06:14 PM
Do you see any advantage to using a 6 inch wide one compared to Chargers 4 inch wide one ?
Beaulieu
Posted By: StevesBug
Re: Paint job on a budget!? CONTINUED..page 44........ - 02/27/07 08:13 PM
"Do you see any advantage to using a 6 inch wide one compared to Chargers 4 inch wide one ?"
No...in fact the smaller size would make the job easier in the fender/body joints and some areas around the windshield. The larger goes quicker on the roof etc.
My lack of experience was a much bigger issue.
Posted By: Marq
Re: Paint job on a budget!? CONTINUED..page 44........ - 02/27/07 10:23 PM
Quote:
Do you see any advantage to using a 6 inch wide one compared to Chargers 4 inch wide one ?
Beaulieu
I had experimented with the 6" high density and I found myself liking the 4" high density better.
You are able to apply a more even pressure to the 4 inch compared to the 6"... I also found that the 4 inch was better at maneuvering around ALL the surfaces on a car.
The 6" tends to be harder to get an even amount of paint on to the roller. So you find yourself having to roll over the same surface repeatedly to get one even layer laid down.
So stick with the 4"... because my experiments indicated that in this case 'smaller' is 'better'
And that was while experimenting with both Tremclad/Rustoleum and Brightside.
Marq
.
Posted By: 69DartGT
Re: Paint job on a budget!? CONTINUED..page 44........ - 02/27/07 10:52 PM
4" work just fine for me
Posted By: Anonymous
Re: Paint job on a budget!? CONTINUED..page 44........ - 02/27/07 11:21 PM
Quote:
Stevesbug,
Quote:
Has anyone else run into these spots ? Any suggestions ?
Yes, I had the same problem with the black Rustoleum Pro on my test fender, I attributed it to not wetsanding all of the orange peel out of the underlying layers.
I've only done the test panel so far...
That is the result of sanding thru the top coat of paint into the ones beneath it. The splotches are definitely more pronounced if you didnt sand the underlying coat. I have avoided getting these by wet sanding the last 4 coats with 2000 grit.
Bob
Posted By: Anonymous
Re: Paint job on a budget!? CONTINUED..page 44........ - 02/27/07 11:29 PM
Thought I would pop in to post some progress pics. I have been roller painting body panels one at a time in my basement over the winter. I have started to reassemble the truck and the front clip is almost done. Had some troubles with the hood where I accidentally sanded to primer on some sharp edges so I am starting over on it
Bob
Posted By: Anonymous
Re: Paint job on a budget!? CONTINUED..page 44........ - 02/27/07 11:31 PM
oops, forgot the picture.
Bob

Posted By: Anonymous
Re: Paint job on a budget!? CONTINUED..page 44........ - 02/27/07 11:33 PM
Another.
Bob

Posted By: Exit1965
Re: Paint job on a budget!? CONTINUED..page 44........ - 02/28/07 12:22 AM
What kind/color paint is that Bob? Looks sweet.
Posted By: 69DartGT
Re: Paint job on a budget!? CONTINUED..page 44........ - 02/28/07 12:45 AM
Bob looks great did you end up using the Regal Red?
Now if only it was a mopar
Posted By: Anonymous
Re: Paint job on a budget!? CONTINUED..page 44........ - 02/28/07 01:59 AM
Yep, It's Regal Red Rustoleum. About 8-10 coats per panel, final wet sand with 2000 grit and buffed with 3M Perfect it Foam Polishing Pad Glaze on a wool pad. The paint is still pretty soft and prone to damage when a wrench slips, probably because it hasent seen a temperature above 55 deg yet between the basement and outside here.
Here is a link to the project with more paint pics:
Truck Project You know, if I take off my glasses and squint my eyes that Dodge P/U looks just like a GMC
Bob
Posted By: Anonymous
Re: Paint job on a budget!? CONTINUED..page 44........ - 02/28/07 05:45 AM
the "leopard" spots you are getting is burn through from the looks of it. you sanded the top coat too much and the bottom is showing through.
Posted By: 69DartGT
Re: Paint job on a budget!? CONTINUED..page 44........ - 02/28/07 02:29 PM
Bob, my hat is off to you guys that take a car or truck down that far then bring it back, nice job
Posted By: StevesBug
Re: Paint job on a budget!? CONTINUED..page 44........ - 02/28/07 05:31 PM
Bob,
The finish on your door is what I'm after, it's beautiful !
I know I can get the shine, so I guess another coat or 2 and sand only with 2000.
Thanks
Posted By: Anonymous
Re: Paint job on a budget!? CONTINUED..page 44........ - 03/01/07 05:15 AM
i have a few of those also from buffing and how do i get rid of them?
Posted By: dalbers
Re: Paint job on a budget!? CONTINUED..page 44........ - 03/01/07 05:48 PM
Hey Bob, have you posted your progress on the 67-72 truck forum yet? I'm getting ready to start on my 69 long bed used the brightside. Yours is looking great.
Posted By: Anonymous
Re: Paint job on a budget!? CONTINUED..page 44........ - 03/02/07 07:07 AM
OK, I've read most all of the pages on this second section and came to the conclusion using Brightside was the way to go for more reasons than 1.
My truck used to be army green (spray painted, pain in the crapper) and the green paint was fading pretty bad on the hood and roof. Had to look for another option so I just went back to black since that's what color the truck used to be.
I got so excited to paint the truck that I just went over everything right off the bat. I kind of regret doing that but it had to be wet sanded anyway since I didn't thin the paint out. After 3 coats I decided to try my hand at wet sanding. At first I used 1500 grit on my sanding block but that didn't take the orange peel out as fast as I had liked so I switched to 1000. Worked much better and the paint still had a pretty good shine to it (I could see it shine in my side mirrors driving down the freeway at night).
After wet sanding all of the orange peel out, I actually decided to put on another coat but thin it out this time with mineral spirits. Let me tell you something, I'm GLAD I thinned the paint out. Orange peel is much less than it was before and some spots actually have no orange peel.
At this point, I'm about 75% happy with how the paint looks. It looks good now but I know how good it can be with a little more work. I think I just decided to wet sand again and polish it up. The reason why I didn't just polish after the 3rd coat is because in some spots, the green was showing through. Anyway, onto some pictars
And some getting it dirty
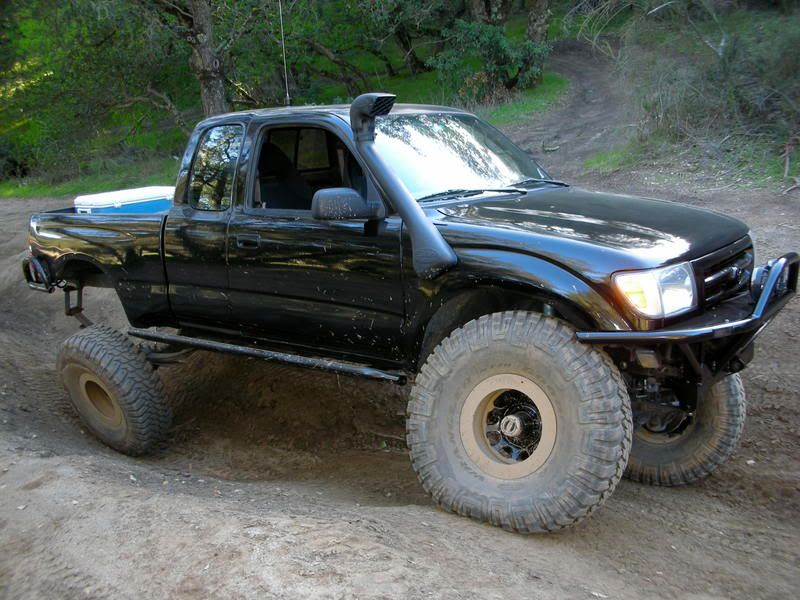
Posted By: Anonymous
Re: Paint job on a budget!? CONTINUED..page 44........ - 03/02/07 06:39 PM
Quote:
Hey Bob, have you posted your progress on the 67-72 truck forum yet? I'm getting ready to start on my 69 long bed used the brightside. Yours is looking great.
Not yet, I am going to wait a while until the cab is done and I start the bed restoration. I am still having trouble with the center ridge of the hood. I once again got too aggressive with the wet sanding and cut thru to the primer. To make things worse I thought I would touch-up that area with a spray can of Regal Red. DONT DO THIS! The spray paint will soften the rolled on paint and even made it blister. Back to square one.
Bob
Posted By: Anonymous
Re: Paint job on a budget!? CONTINUED..page 44........ - 03/02/07 08:34 PM
Sanding tip: put masking tape on the edges and ridges of panels before sanding them. Saves much grief.
LanceB
Posted By: dalbers
Re: Paint job on a budget!? CONTINUED..page 44........ - 03/03/07 06:58 AM
don't tell them how you painted it until you get all the compliments bob
Posted By: Anonymous
Re: Paint job on a budget!? CONTINUED..page 44........ - 03/03/07 03:21 PM
Bob D,
Gotta tell ya, loved your website. Seeing all the work you put into that old truck is inspirational. My hat's off to ya. You almost had me wanting one too, until you reminded me of the 9 mpg! LOL
Posted By: 69DartGT
Re: Paint job on a budget!? CONTINUED..page 44........ - 03/03/07 03:25 PM
I'm going to unstickie this we have so many replie I don't think it needs to be a stickie. I doubt it will fall by the side anytime soon.
Oh took the wife for her first ride in the truck, went to a local recycle place, the workers could not believe I rolled the paint job on.
Posted By: 69chargeryeehaa
Re: Paint job on a budget!? CONTINUED..page 44........ - 03/03/07 05:15 PM
If the thread dies due to not being a sticky, then it will be a good death
, i thought it would die along time ago.
Every time i look at it i'm amazed and really glad i shared this with all you guys, and the results i'm seeing make it all worth it. This has to be the longest thread i've ever seen on any board, i never thought it would go this far and survive the haters.
Posted By: Anonymous
Re: Paint job on a budget!? CONTINUED..page 44........ - 03/04/07 02:58 AM
I sprayed my speedster black today. I used duplicolor in the gallon can. It isn't rustoleum but is almost as cheap at $33 a gallon. It went on really nice with minimal orange peel. I could live with the slight orange peel in places but I did get some runs that I am going to have to color sand and buff. This was my first real paint job and was surprised how well it came out. The gloss and reflection is unreal. I used the hardener and recommend it if you spray but make sure you wear appropriate protection. I will try to post some pics tomorrow. Thanks charger for the advice.
Scott
Posted By: Anonymous
Re: Paint job on a budget!? CONTINUED..page 44........ - 03/04/07 03:28 AM
Brightside gurus, what am I doing wrong here? I thinned out the paint at roughly 10%. This was the first coat. Basicall I'm getting tons of orange peal...perhaps it was just way too think of a coat?
I also tried marq's trick of running a spirts soaked roller over it, but it didn't seem to help much
pic 1 pic 2 pic 3
Posted By: s4dustin
Re: Paint job on a budget!? CONTINUED..page 44........ - 03/04/07 06:10 AM
ok, tried the first 2 coats on a fender piece i had laying around. cleaned it, cut the rustoleum with mineral spirits, 50-50, rolled on, let stand for 15 min, then rolled it again to get off the bubbles...did the blowing on it trick (yea yea yea) let it dry. An hour later, put on second coat. Stopped there. It sat for about 6 hours and it wont rub off or scratch off with finger nail. Tomorrow, will do the first wet sand and 2 more coats. If it works, i am going to do my 68 camaro this way. I also spoke with a friend who says i should use the marine paint he used on his boat. This guy has painted a couple of hundred cars and says "yeah, you can use a roller, there is no overspray and prep is a lot less"....... here are some pics
panel

lst coat
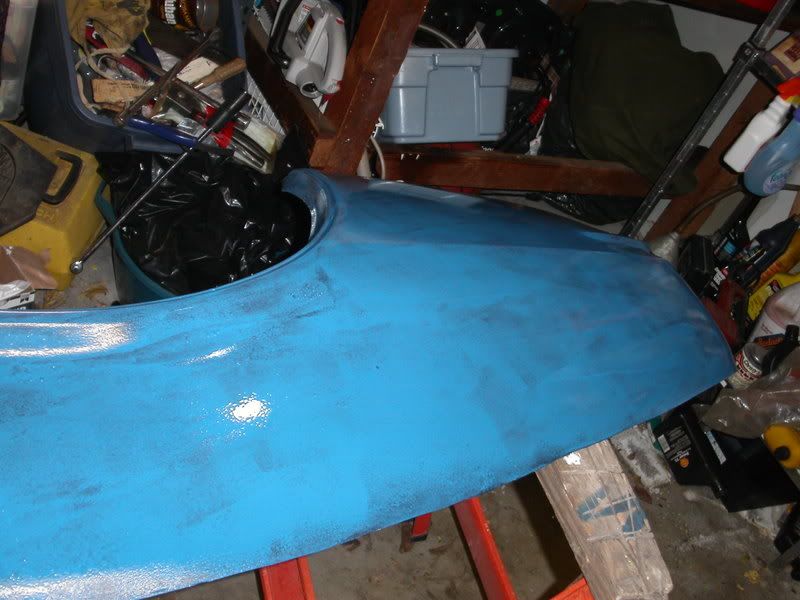
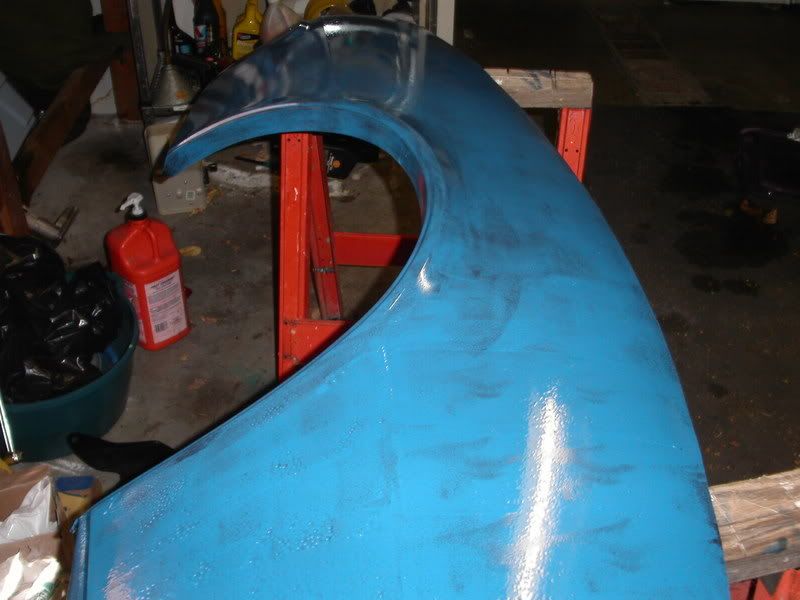
second coat

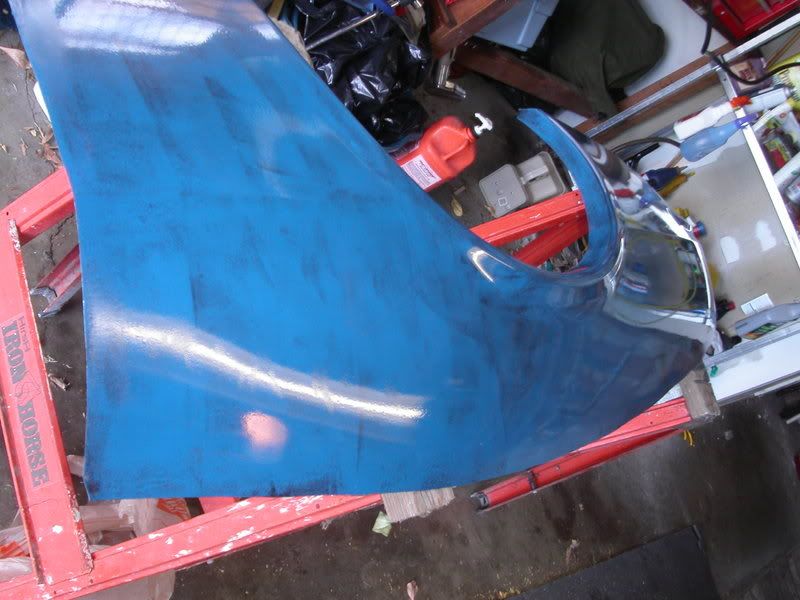
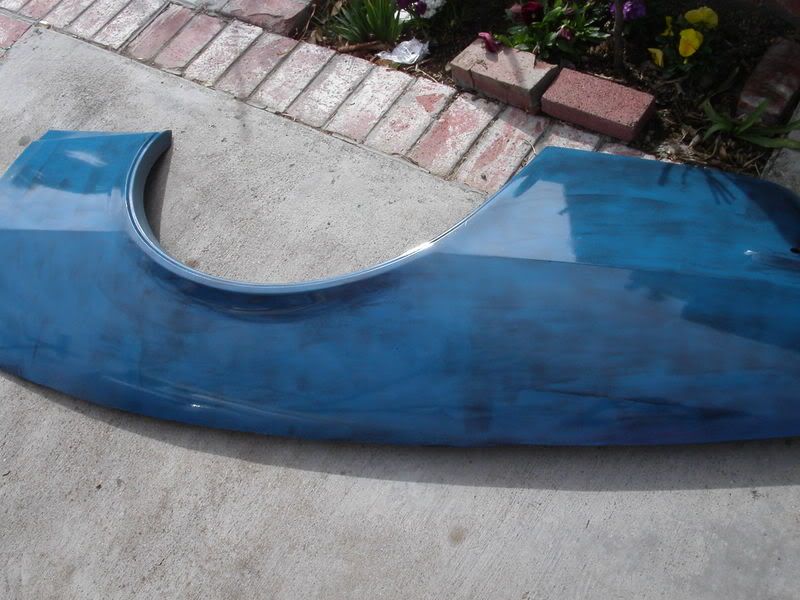
it has a nice gloss to it, you can see your reflection in the paint. still need to wet sand and then do coats 3-6
Posted By: Exit1965
Re: Paint job on a budget!? CONTINUED..page 44........ - 03/04/07 01:14 PM
Spyhunter- yes, that is way too thick. Back about 123190283 pages ago I suggested people doing test panels should use a surface that is vertical rather than horizontal like a hood. I think if you tried to put paint that thick on a vertical surface like a door, you would see that it's too thick because it would run like crazy.
Dustin that looks good. I would suggest using some marine paint too..
Posted By: Anonymous
Re: Paint job on a budget!? CONTINUED..page 44........ - 03/04/07 03:11 PM
So do you think it was simply my application technique or it wasn't thinned enough? I did have a few runs on it
Posted By: Exit1965
Re: Paint job on a budget!? CONTINUED..page 44........ - 03/04/07 03:42 PM
I think its the application technique, there shouldn't be any runs when thinned 10%.
Im not sure what others are doing, but what I would do is push most of the paint out of the roller into the tray, and when I was rolling the car I would put a pretty firm pressure. That seemed to work for me to put thin coats on.
Posted By: dalbers
Re: Paint job on a budget!? CONTINUED..page 44........ - 03/04/07 07:39 PM
Here are some of the hood using brightside after two coats.

Posted By: dalbers
Re: Paint job on a budget!? CONTINUED..page 44........ - 03/04/07 07:39 PM
another

Posted By: dalbers
Re: Paint job on a budget!? CONTINUED..page 44........ - 03/04/07 07:40 PM
another one

Posted By: dalbers
Re: Paint job on a budget!? CONTINUED..page 44........ - 03/04/07 07:40 PM
last hood one

Posted By: dalbers
Re: Paint job on a budget!? CONTINUED..page 44........ - 03/04/07 07:41 PM
and one of the fender

Posted By: 69DartGT
Re: Paint job on a budget!? CONTINUED..page 44........ - 03/04/07 09:21 PM
Kind of looks like my first coat, I only thinned to 10% the second and later coats I thinned until after I stirred and picked the stir stick up out of the panit I could count to about 10 then the paint would go from a stream to drops if that makes sense. The paint seemed to lay down better much less orangepeel and no rolls, I had to do a lot of sanding after my forst coat to get it to were I could paint again.
Posted By: C38coupe
Re: Paint job on a budget!? CONTINUED..page 44........ - 03/04/07 09:33 PM
Quote:
If the thread dies due to not being a sticky, then it will be a good death , i thought it would die along time ago.
Every time i look at it i'm amazed and really glad i shared this with all you guys, and the results i'm seeing make it all worth it. This has to be the longest thread i've ever seen on any board, i never thought it would go this far and survive the haters.
Hi all, here is another use for Tremclad and Rustoleum an old body man told me about. Instead of using epoxy primer he has and continues to use Rustoleum primer with automotive enamel reducer to thin it before spraying his work. He now does this before any other work is done, he does it before filler, primer surfacers, top coats etc. He has been doing this for many years, and thinks Tremclad and Rustoleum paints are both great products. He is a professional aircraft painter by trade, he laughs when paint suppliers tell him you can't use "that Rustoleum house paint", on a car. They always tell him it's going to peel off or fall off if you go over it with Automotive enamel or urethane products, of course this is not true, I am not sure about lacquer based products, but I have sprayed rubberized rockerguard coating right over tremclad with no ill effects. I am not sure what rockerguard is based with.
Yesterday I was playing with a HVLP gun and Tremclad paint thinned with just mineral spirits, wow did it ever paint nice, and I could not believe the lack of overspray, the gun is a Princess Auto $50.00 special, worked very nice with Tremclad and it's 1.4 tip.......All the best to everyone keep on rollin
Posted By: s4dustin
Re: Paint job on a budget!? CONTINUED..page 44........ - 03/04/07 09:53 PM
so when i wet sand, how much do i sand it? alot of paint came off. it was pretty smooth, applied coat 3, a little too thin, but coat four will be thicker....
i am going to get marine paint and try it too, hopefully they have deeper, richer blues
Posted By: Anonymous
Re: Paint job on a budget!? CONTINUED..page 44........ - 03/05/07 12:50 AM
Posted By: Marq
Re: Paint job on a budget!? CONTINUED..page 44........ - 03/05/07 01:57 AM
Quote:
Brightside gurus, what am I doing wrong here? I thinned out the paint at roughly 10%. This was the first coat. Basicall I'm getting tons of orange peal...perhaps it was just way too think of a coat?
I also tried marq's trick of running a spirts soaked roller over it, but it didn't seem to help much
It is a bit hard to tell from the pics due to black color.. but I can see the 'reaction' that the paint has had on your car.
My first thought was to ask if you thoroughly wiped down that surface with mineral spirits and let it dry completely before painting.
What my eyes are telling me is that it isn't orange peel in the true sense of the word. It is more like the surface the paint went on to was repelling the paint or not allowing it to adhere properly. For example, if the surface had not been wiped down with mineral spirits, there might be remnants of wax or paint particles or maybe even road oil there.
If you did not begin with the thorugh wipe down with mineral spirits, you will have to let the current surface dry to the point where you can sand it back down to a smooth starting point again. When you go to put on your first layer the second time - do not cut it with thinner. Just paint it on as thin and smooth as you can. Don't go for visual coverage... just go to get a thin layer down - even if you can see through it to the subsurface. ( You can built upon that one good surface later - with the emphasis at this point being to have one good smooth base to start building upon ).
Ok... assuming that you did do a thorough wipe down originally, than I suspect the layer of paint that was applied was still too thick or layered on. The top surface of the paint coat dried quicker than the lower surface... basically trapping a dried layer on top of a liquidy layer. So as the top surface dried it would move unto itself causing the elephant skin type effect. Basically you have to follow the recipe noted above to get yourself back to square one and to take another run at it.
Marq
.
Posted By: Anonymous
Re: Paint job on a budget!? CONTINUED..page 44........ - 03/05/07 02:50 AM
The hood is actually fiberglass and it was well wiped down with mineral spirits. The next panel I paint I'll go for as thin a coat as possible. thanks for the feedback
Posted By: Marq
Re: Paint job on a budget!? CONTINUED..page 44........ - 03/05/07 09:28 AM
Quote:
The hood is actually fiberglass and it was well wiped down with mineral spirits. The next panel I paint I'll go for as thin a coat as possible. thanks for the feedback
Hmmmm... the hood on my McLaren is all fiberglass also... Now that raises some additional questions..
a ) was your hood primered or unprimered plain gelcoat ?
If the fiberglass wa primered... than we can rule that out as a suspect for the orange peel effect.
BUT if the hood was in its native gelcoat, I don't think a simple wipe down with mineral spirits would be able to remove the chemicals that the manufacturers use to keep the part from sticking to the mold. And also... if the hood was in its native gelcoat format... it is possible that a wipedown of mineral spirits would need extra time to evaporate the 'carrier' in the mineral spirit.
In my case, the fiberglass ( although incredibly well finished from the factory ) was primered and allowed to thoroughly dry out. I then did a light sanding to smooth out the primer, blew off the dust, wiped it down with mineral spirits and then let it sit for a couple of days. Prior to laying down the first coat of paint I gave it a quick wipe with a TACK cloth to pick up any crap that might have landed on the hood.
.
Posted By: Anonymous
Re: Paint job on a budget!? CONTINUED..page 44........ - 03/05/07 12:30 PM
Quote:
Hmmmm... the hood on my McLaren is all fiberglass also... Now that raises some additional questions..
a ) was your hood primered or unprimered plain gelcoat ?
If the fiberglass wa primered... than we can rule that out as a suspect for the orange peel effect.
BUT if the hood was in its native gelcoat, I don't think a simple wipe down with mineral spirits would be able to remove the chemicals that the manufacturers use to keep the part from sticking to the mold. And also... if the hood was in its native gelcoat format... it is possible that a wipedown of mineral spirits would need extra time to evaporate the 'carrier' in the mineral spirit.
In my case, the fiberglass ( although incredibly well finished from the factory ) was primered and allowed to thoroughly dry out. I then did a light sanding to smooth out the primer, blew off the dust, wiped it down with mineral spirits and then let it sit for a couple of days. Prior to laying down the first coat of paint I gave it a quick wipe with a TACK cloth to pick up any crap that might have landed on the hood.
.
Well since it is a new hood, I first did some light sanding to rough up the gel coat, did a guide coat to see what needed to be fixed, sanded off the guide coat and go out all the small scratches on the gelcoat surface. Then I wiped cleaned with water and soap, dried it with a heat gun and a dry towel, cleaned with spirits and dried in the same fashion, tack clothed then painted.
But honestly I just think it was too heavy of a coat. I need to get it out of mind that I have to have full coverage in one coat.
Posted By: s4dustin
Re: Paint job on a budget!? CONTINUED..page 44........ - 03/06/07 12:12 AM
so i rolled on the 3rd and 4th coat super heavy, came out like
. It was still wet the next day, sanded a bit, then i threw it up on the roof to be in direct sunlight...a nice 80 degree california day......
i think if you put on a nice thin coat and let it dry and keep it thin each time, the process will work well, but if you get a little excited and go big early...you are going to blow it...
Posted By: Anonymous
Re: Paint job on a budget!? CONTINUED..page 44........ - 03/06/07 09:53 AM
Hey guys... not sure if you guys remember but I started painting my TE71 Corolla.
Here is the result after painting six coats on the hood and cowl, and four coats on the fenders and front.
I like this method as I can just do a panel at a time when I wish. I still have yet to fix some rust on the C pillar and I have more work to do on the doors yet.
Posted By: s4dustin
Re: Paint job on a budget!? CONTINUED..page 44........ - 03/07/07 04:15 AM
so the paint mostly dried and i wetsanded it. the peel came out, but now i have high and low spots. i am not using a block, just my hands, some places the paint looks good, others i burned down to the metal. i will post pics tomorrow
d
Posted By: Anonymous
Re: Paint job on a budget!? CONTINUED..page 44........ - 03/07/07 04:20 PM
go to eastwood.com or your nearest body shop supply stotre and gre a set of sanding blocks.
something like this

you dont have to get all the orange peel out just leave a very little hint of them and after you buff the paint then they will disaper.
Posted By: 69DartGT
Re: Paint job on a budget!? CONTINUED..page 44........ - 03/08/07 02:42 PM
Quote:
go to eastwood.com or your nearest body shop supply stotre and gre a set of sanding blocks.
something like this
you dont have to get all the orange peel out just leave a very little hint of them and after you buff the paint then they will disaper.
That figures I get my truck all back together and now you post this tip. I may have done a final sanding on the truck
Posted By: Anonymous
Rustoleum stress test and nail test - 03/09/07 12:37 AM
Well the car has been sitting for a while again. I was waiting for the paint to get harder before putting the trim back on.
Final coat was early October.
I washed all the dirt and pollen off the car and it cleaned up fine. The sun dried dog slobber did leave a faint stain. I am sure it will clear up with a light buff.
I had 2 coats of Meguairs Show car glaze and 2 coats of the yellow high tech wax.
We have had a few nice days lately and when I walked by the car I smelled solvent again. I did the nail test today and it passed. No problem at all. The paint is rock hard. Just like 69Chargeryeeha said it would get.

Posted By: Anonymous
Re: Rustoleum stress test and nail test - 03/09/07 05:42 AM
Guys, you might hate me. I may have finally cracked the secret to the $50 paint job. No joke. A few pages back, I told you about how I was painting the interior of my '60 Oldsmobile with New Holland Red tractor paint by Van Sickle. It's another Alkyd enamel, like Rustoleum. Well, I used the urethane hardener when I painted the trunk, mostly to improve the cure time because I've been painting in 40* and colder weather.
Well, at the same time I did the trunk, I had a little leftover paint...so I decided to put some on a fender I pulled off my old truck when I did the body work on it. This fender is going to the scrap heap, so what the heck. I didn't do any prep work at all...didn't even wash it
. The top half I used a roller on (same 4" high density you guys have been using), the bottom half I used a 2 1/2" brush that cost me $1.25.
Now, with the paint I didn't thin it at all...it was straight from the can, mixed about 8 to 1 with the hardener. The hardener seems to make it thinner all by itself. This was about 2 1/2 weeks ago. I let it sit in the garage for a week, but then it was just getting in my way while I was working on welding a floor board in my Olds, so I put it back out behind my garage. We finally had some sun this week, so it got to cure out there.
The section painted with the roller had some pretty good orange peel...could have been because the paint was too thick, or it could have been the ancient primer under it, or maybe my rolling technique. Who knows. The brushed section was actually pretty smooth...it had some waves from the bristles, but it really was'nt bad.
So tonight I decided to see what I could do with it. I only had about half an hour to play with it, so tried to wet sand out the imperfections with some 400 grit, wet. Sanded through in a couple of spots, but it went through the orange peel plenty fast. Once it was smooth, I used what has to be the cheapest polish made. I paid less than $3 at the grocery store for it. I hit it with my Craftsman 10" polisher. Finished with some Meguiars carnauba paste.
The result? I just about crapped. You guys won't believe how good it looks for the work I put into it. I'm dead serious. Aside from the fact that the fender itself looks like ***, it's amazing since I only sanded with 400 grit and polished. I know, I know, this is all meaningless without pics, but it's pitch black outside and my camera batteries are dead. I was doing all this with a halogen work light. I'll try to shoot it at lunch tomorrow and post them in the afternoon. I've been doing body work for 15 years, and I gotta say...if this thing had maybe one more coat of paint and a real wet sand, it would look as good as any other enamel paint job on the road. It's that good. I've still got some more experimenting to do, but if this pans out it could make this whole "cheap paint job" a lot easier. Right now that paint is rock hard...no fingernail business. And I painted it a couple of weeks ago. One of the other nice things about using the hardener is that it actually "cures"...it's an anaerobic process. It's not like drying by evaporation where thin layers are important. You can have the paint thicker than the micro layers you guys have been using, and will still dry.
Anyway, like I said I'll try and get some pics up tommorow. I was just too stoked not to post something tonight. I won't have much time to experiment with this process for a couple of weeks...I've got too much going on, but if anyone else out there wants to take a stab at it, please post your results.
Posted By: Exit1965
Re: Rustoleum stress test and nail test - 03/09/07 01:20 PM
Can you provide details/link to the hardener you used?

Posted By: Anonymous
Re: Rustoleum stress test and nail test - 03/09/07 03:22 PM
Quote:
Can you provide details/link to the hardener you used?
Here is a link to the paint manufacturer:
http://www.vansicklepaint.com/mntvsinden.html
I got a gallon of their primer, paint, and two cans of hardener at the local farm and ranch supply for about $60 IIRC. Maybe a little more. A gallon of this stuff goes a looooong way . From talking to other people about this, it's the same paint sold under the TSC label, if you've got a TSC store locally. I got mine at Quality Supply. They have a whole wall of this stuff, in gallons, quarts, and spray cans. Pretty good variety of colors...here's the stock color card:
http://www.vansicklepaint.com/VSclrcrd.jpg
I have New Holland Red, and it's a lot "brighter" than what that card looks like...maybe it's just my monitor, but it looks like all thoes colors are a lot more subdued than they are in real life. NH red in that card almost looks maroon, but in real life it's almost a dead ringer for the Target Red on my Olds here
They also have a "custom color" section they say is available on request...although it doens't have a direct link to order it. Here's the big list:
http://www.vansicklepaint.com/mntcstmclrs.htm
I want to see someone do their car in Kubota Orange .
I've also read of people using this brand of hardener with other brands of paint...you'd want to do a test panel to check compatability, but I think the important thing is that they're the same type of paint (alkyd enamel). If you're set on using a Rustoleum color, I'd give it a try and see what happens.
If you want to know more about this type of hardener in general, just search for "urathane enamel hardener" or "enamel catalyist". They all work basically the same.
Posted By: Anonymous
Re: Paint job on a budget!? CONTINUED..page 44........ - 03/09/07 03:42 PM
- What is the brand name of the hardener you used?
- Does it have isocyanates?
- What kind of filter did you use in your respirator?
- Do you think this will allow you to paint on maybe 2 thick coats, then sand/polish?
Thanks for sharing your info. And by the way ... I'm in Potomac, north of Missoula.
Posted By: Anonymous
Re: Paint job on a budget!? CONTINUED..page 44........ - 03/09/07 06:23 PM
Posted By: Marq
Re: Paint job on a budget!? CONTINUED..page 44........ - 03/09/07 08:48 PM
Hehehhe... that enamel hardener sounds like an interesting addition to the roller job... although a careful look at the label of the can mentions things like 'LUNG DISEASE", throat problems.. dizziness... etc.
So I don't think anyone thinking of spraying should do anything until they read the product sheets on that stuff. It sounds like a respirator ( or oxygen tank ) might be needed to avoid killing yourself.
Possibly a roller or brush job might be able to make use of it.... but I suspect a 'well ventilated' work area is definitely needed.
I do like how it mentions that it not only hardens.. but also gives an enhanced GLOSS
On the topic of the Tractor paints at :
http://www.mytscstore.com/detail.asp?pcI...;productID=9169It was interesting to note the various "red" colors that they offer. I would have to do a little more research to see if any of the tractor reds match up with something that is 'deeper and darker" then the Fire Red offered by Brightside and Rustoleum/Tremclad. Too bad they don't have a color card available. I did notice that they were offering a Coca Cola red and a Chevy Red. I suppose some of those other colors might appeal to the folks looking for more variations in the blue, gray, greens, oranges, yellows, etc
.
Posted By: Anonymous
Re: Paint job on a budget!? CONTINUED..page 44........ - 03/09/07 08:51 PM
Quote:
- What is the brand name of the hardener you used?
- Does it have isocyanates?
- What kind of filter did you use in your respirator?
- Do you think this will allow you to paint on maybe 2 thick coats, then sand/polish?
Thanks for sharing your info. And by the way ... I'm in Potomac, north of Missoula.
I've been through Potomac quite a few times...I used to be a service tech for the Axmen, and I fixed a few gas fireplaces out that way. Went up Bear Creek a few times. Pretty area. I lived in Missoula from 1993 until a couple of years ago...went to school at the U and stayed until work brought me down here.
To answer your questions:
It's Van Sickel hardener. Same brand as the paint. Should be the same stuff as in the post above.
Yes, it contains isocyonates.
I used 2 brand new organic vapor rated filters in my respirator. Also wore disposable Nitrile gloves, heavy coat, safety glasses, etc.
The big danger from isocyonates comes from them being airborn. Spraying paint/bedliner/anything urethane with iso's is so dangerous because you're blowing a big cloud of it into the air. Now, after a lot of looking I did find quite a bit of safety information on using paint products that contain them...but NOTHING about safety precautions when brushing or rolling them. Only spraying. NIOSH does say that an air purifying respirator is ok to use even when spraying the stuff, as long as you change the filters on a schedule. See this for an example:
http://www.lni.wa.gov/wisha/hazalerts/March2003HazardAlert_Final_.pdf
The ammount of airborne material from rolling or brushing has got to be just about zero. As far as I'm concered, the precautions I took are overkill. But, it is of course up to the individual painter to do what you're comfortable with.
Posted By: Anonymous
Re: Paint job on a budget!? CONTINUED..page 44........ - 03/09/07 09:05 PM
Ok, here it is...the fender I did the test on:
You can see all the crap I painted over...cracking bondo, 5 year old primer that's flaking off, rust, dirt... I did exactly ZERO surface prep before I painted this thing.
Here's the result:
Do you think anyone would believe me if I told them I painted it with a brush?
And keep in mind that this is after a single wet sand with
400 grit paper, and a polish with the cheapest paste I could find. To be honest, the 400 grit was too agressive, and I did go through in a few spots (you can see them in the full length pic). 600 would have been better, but I only had a half hour to dink with it and I know 400 will wipe out orange peel in a big hurry. Doing it the way I did, you get full coverage on the first coat. A second or third coat may be needed if you have to take too much off to clean up any impecfections. Other than that...piece of cake! Waiting a week or more to wet sand may help...it'll be cured nice and hard by then. OTOH, you might be able to do it the next day...someone with more time than me can experiment
.
Anyway, there it is. I couldn't be more impressed with it given the fact I have a 1/2 hour into the whole process.
Posted By: Anonymous
Re: Paint job on a budget!? CONTINUED..page 44........ - 03/10/07 12:12 AM
Quote:
I've been through Potomac quite a few times...
Maybe next time I'm down in Hamilton, I can stop by and see your project. The pics look great.
Quote:
The ammount of airborne material from rolling or brushing has got to be just about zero. As far as I'm concered, the precautions I took are overkill. But, it is of course up to the individual painter to do what you're comfortable with.
Interlux Paint (maker of Brightside) has a video of a guy painting their two-part "Perfection" paint with a simple paper dust mask:
http://links.streamingwizard.com/yachtpaint/9-04/WMV/perfection-usa4-bb-wmv.asx
And another video with NO protection: http://links.streamingwizard.com/yachtpaint/11-06/US_Perfection-3-paint.asx
Here is the MSDS for Interlux Perfection: http://www.yachtpaint.com/msds_pdf/YGB001_usa_ENG_E1.pdf
It contains "hexamethylene di-isocyanates." I looked up the info on that chemical and found this: http://www.atsdr.cdc.gov/tfacts120.html
Apparently it doesn't evaporate well into the air.
I also found the MSDS for the Van Sickle enamel hardener: http://www.vansicklepaint.com/7019X.PDF
The number one ingredient by weight is the Isocyanate. They don't say exactly what kind of isocyanates they are using ... it's listed as a "trade secret." But ... they do give its vapor pressure as 5.2 mm Hg, which is much lower than atmospheric pressure. That means it's not likely to evaporate into the atmosphere.
I also called the local OSHA office, and they said that the primary danger of isocyanates is in spraying -- breathing the fine droplets. They recommended good ventilation and wearing a respirator.
So ... I'm thinking maybe you are right about this. Perhaps the primary danger for isocyanates is for spraying. Rolling should be fine IF YOU USE A PROPER ORGANIC VAPOR RESPIRATOR. Make sure the respirator fits tightly around your mouth and nose. If you have a beard, that creates special problems. Some old pro painters use vaseline to help seal around the edges of the respirator. Also, using goggles and gloves is a good idea. That's what I intend to do anyway.
Posted By: Anonymous
Re: Paint job on a budget!? CONTINUED..page 44........ - 03/10/07 12:20 AM
Our TSC doesn't carry the Van Sickle anymore. They have a Valspar paint under BPS (Best Paint Sold).
I scanned the card for the colors available but the light from my scanner brightened them up some.
Per ga was $23 and hardener was $9 at least here.
The hardener said paint dry/handle time was 24-36 hours without and 2-4 hours with. With the very thin coats are being rolled here I would think even less time than that. That # might be for a heavier brushed on coat. That also means with the hardener less time to apply your paint and it couldn't be mixed back in with the rest of the paint.

Posted By: Anonymous
Re: Paint job on a budget!? - 03/10/07 11:14 AM
I've read 22 full pages of this discussion and I'm so pumped up now!
I'm going to try this on a 1990 Chevy pickup. The body has held up very well because it was not driven much at all in winter, but the paint is pretty oxidized on the top panels and there is surface rust along the bottoms. Before I attempt this, I do have a few questions (hopefully I'm not repeating here...)
-If I'm reading it correctly, Rustoleum can be painted directly over rust. Is this true even though it's being thinned a lot with mineral spirits? Will the rust return or bubble up the paint? Am I better off "converting" the rust first with Rust Bullet or an equivalent before topcoating with this method?
- It seems that one of the advantages of this method is the paint's ability to "self level". There is surface rust along the bottoms of the panels, but it's not rotted through. Will the paint fill in pit marks/imperfections from the surface rust?
-Some people it seems, have had some adhesion problems that appear to be from the prep stage. Am I better off cleaning the panels with an industrial steam cleaner like this
http://www.harborfreight.com/cpi/ctaf/displayitem.taf?Itemnumber=8823as opposed to just wiping them down with mineral spirits?
- Is there an advantage to using this formula...
http://www.rustoleum.com/product.asp?frm_product_id=36&SBL=1as opposed to this one...
http://www.rustoleum.com/Product.asp?frm_product_id=18&SBL=1&dds=16Does the first deal with surface rust better? Do both formulas give the desired high gloss shine?
-My original color is a dark metallic blue. Does that mean I'm stuck using a dark color because it will bleed through anything lighter? If so, is it unrealistic to go with black due to the fact that this is my first time trying this and black is very unforgiving about imperfections showing up?
Just a footnote here...
Next to google itself, this is the most useful thing I've ever stumbled onto on the internet. I found this by accident doing a search to see if anyone had painted an entire car with Rust Bullet using rollers, and all I can say is "wow"! This would probably look much better, but I'm still considering going that route depending on how much I have to do with regard to dealing with the surface rust I have.
Thank you all so much!
Posted By: Exit1965
Re: Paint job on a budget!? - 03/10/07 02:34 PM
The paint will self level in that it will take the shape of the surface underneath it-- it will not cover up any boo-boos so take the time to smooth things out now.
I dont recall too many people having adhesion problems recently. I had some a long time ago, but that was just carelessness on my part because I didn't clean the surface much if at all.
If you're looking for a high gloss shine, don't forget about the marine polyurethanes. Though recently, I've seen some people post some polished up Rustoleum and I have to say it looks great.
Aussie driver has done both marine paint and rustoleum and says the marine paint polishes up better. Pics of both his results look very good.
There could be long-term differences with how well those paints hold a shine - hopefully people will soon be able to report on how paint is holding up after 6 mo, 12 mo and beyond.
I'm still working on getting my car on the road. I cant wait to see how it looks out there, and will probably tape it up and do another wetsand and 2 more coats once I get it drivable and where I can park it in the sun for awhile.
The engine and trans should be installed next weekend, then wiring + exhaust + fuel system.
Posted By: v8mirage
Re: Paint job on a budget!? - 03/10/07 03:03 PM
Quadrajet,
If you have rust, I would first sand it to remove as much as you can and smooth it out. My car had surface rust on the roof and hatch. I used an angle grinder with a cup brush to get as much of the rust out as I could. That unfortunately left pits where the rust had dug in. Then I used Rust bullet with a roller to convert the rust and fill in the pits. The rust bullet didn't level all that well and had a good amount of orange peel to it so I sanded it so that it was a bit smoother. Then I went ahead and painted using rustoleum.
It is VERY important to start with as clean a surface as you can when painting. I used Super Clean to wash my car to make sure it was Clean before I started the painting the first time. After that I have just been wiping it down with MS before I start.
Bottom line is, if you have rust you should treat it with something, (sandblasting, rustbullet, navel jelly, etc) before you paint it for the best results.
Glad to have you aboard!!! Good luck and post pics, we love to see other roller jobs!!!
gerbs
Posted By: v8mirage
Re: Paint job on a budget!? - 03/10/07 03:05 PM
Here is where I started.

Posted By: v8mirage
Re: Paint job on a budget!? - 03/10/07 03:06 PM
With Rustbullet applied.

Posted By: v8mirage
Re: Paint job on a budget!? - 03/10/07 03:06 PM
And where I am now, the car is in hibernation for the winter.
Gerbs

Posted By: Anonymous
Re: Paint job on a budget!? - 03/10/07 06:53 PM
Thanks for the welcome guys....
V8 Mirage, it looks like you basically used the Rustbullet as a primer of sorts and then topcoated using this method to get the color you want. Looks good! Sounds like the best route to go for someone like me who has some surface rust on the panels. I'll probably use the rust bullet, then fill in the tiny pits with some glazing putty, then go from there.
I found an answer for my farm equipment paint question on the rustoleum site, it says:
"What is the difference between the Stops Rust paints and the Farm Equipment paints? Both products offer the same rust preventive and weather resistant qualities. The Farm Equipment colors are designed to offer visual color matches to popular equipment colors...so now that leaves me with another question. Exit1965 mentioned marine coatings. I assume you mean these -
http://www.rustoleum.com/product.asp?frm_product_id=305&SBL=1Is this a better choice than the standard rustoleum for durability? Also, is the method for applying it the same?
Thanks again.
Posted By: v8mirage
Re: Paint job on a budget!? - 03/10/07 07:46 PM
Quad,
Some of the marine paints that have been used have been Brightside by Interlux, I can't remember the others.
Yes I did use the RustBullet as a primer, on the roof at least. Places on the car where the old paint was in good shape, I didn't add any primer, I just sanded well, and painted.
Gerbs
Posted By: 1BAD68
Re: Paint job on a budget!? - 03/10/07 08:30 PM
ok here is my attempt at it.
Rustoelum gloss black 50/50 mix w/mineral spirits. It went on good but with zillions of little bubbles, then it ran in some places but I just kept going. When I got done with the 1/4 panel I noticed the bubbles were pretty much dissapearing and the runs were self leveling, so I went and rolled the whole car, hopefully I can get a second coat on before the end of the day.

Posted By: Anonymous
Re: Paint job on a budget!? - 03/10/07 09:10 PM
68, if that is only 1 coat my opinion would be that you're applying it too thick. Forget about trying to get full color coverage in 1 coat. If it's running you're not going to have a flat surface for the next layer. I did the same thing & wound up wetsanding most of it back after it dried. Actually it worked out OK as it was kind of a combo guide coat to show imperfections in flatness & a primer base to get a uniform color underneath everything. This is a great method but for me (& evidently a few others
) the hardest part is patience. Thin coats. Several thin coats. I was dying to drive it & show off my results after a few coats began to hint at the wetlook glossy outcome that is possible. Take your time. PS - I LOVE your car!! 383? 440?
Posted By: 1BAD68
Re: Paint job on a budget!? - 03/10/07 10:40 PM
no I'm not trying to cover it all at once, 50/50 mix is pretty thin so its going to run here and there but like I said, the runs level out nicely and the it ends up pretty flat.
After a few hours the paint was just a little tacky but I rolled a second coat anyway, 50/50 mix, this time I still had zillions of bubbles but found out that they were actually pretty usefull when rolling black over black its hard to tell where you just rolled but the bubbles told me where (bubbles are our friends here). This time I had virtually no runs, I think because the first coat was still just a little tacky so the second coat must have stuck better. All in all this is turning out decent but I can see that there will be many hours of wet sanding between every two coats.

Posted By: pdqvsix
Re: Paint job on a budget!? - 03/11/07 04:38 AM
I've started to do some buffing and waxing since it's warmed up enough to do it. I painted the car with the rustoleum gloss white last summer using the roller method that 69Chargeryeehaa was so kind to provide. It has turned out better then i could have ever thought possible. I am only using a cheap $20 buffer and no special pads but the finish is very good for what i'm using,i know if it was buffed out by a professional it would turn out even better. For those who are still thinking of doing this just take your time and apply the paint very thin "and i do mean thin" and you will save a lot of time wet sanding. The thinner you apply it the better off you will be and wait at least 8 hours before doing the second coat.
Posted By: Anonymous
Re: Paint job on a budget!? CONTINUED..page 44........ - 03/11/07 05:26 AM
Quote:
Quote:
I've been through Potomac quite a few times...
Maybe next time I'm down in Hamilton, I can stop by and see your project. The pics look great.
Quote:
The ammount of airborne material from rolling or brushing has got to be just about zero. As far as I'm concered, the precautions I took are overkill. But, it is of course up to the individual painter to do what you're comfortable with.
Interlux Paint (maker of Brightside) has a video of a guy painting their two-part "Perfection" paint with a simple paper dust mask:
http://links.streamingwizard.com/yachtpaint/9-04/WMV/perfection-usa4-bb-wmv.asx
And another video with NO protection: http://links.streamingwizard.com/yachtpaint/11-06/US_Perfection-3-paint.asx
Here is the MSDS for Interlux Perfection: http://www.yachtpaint.com/msds_pdf/YGB001_usa_ENG_E1.pdf
It contains "hexamethylene di-isocyanates." I looked up the info on that chemical and found this: http://www.atsdr.cdc.gov/tfacts120.html
Apparently it doesn't evaporate well into the air.
I also found the MSDS for the Van Sickle enamel hardener: http://www.vansicklepaint.com/7019X.PDF
The number one ingredient by weight is the Isocyanate. They don't say exactly what kind of isocyanates they are using ... it's listed as a "trade secret." But ... they do give its vapor pressure as 5.2 mm Hg, which is much lower than atmospheric pressure. That means it's not likely to evaporate into the atmosphere.
I also called the local OSHA office, and they said that the primary danger of isocyanates is in spraying -- breathing the fine droplets. They recommended good ventilation and wearing a respirator.
So ... I'm thinking maybe you are right about this. Perhaps the primary danger for isocyanates is for spraying. Rolling should be fine IF YOU USE A PROPER ORGANIC VAPOR RESPIRATOR. Make sure the respirator fits tightly around your mouth and nose. If you have a beard, that creates special problems. Some old pro painters use vaseline to help seal around the edges of the respirator. Also, using goggles and gloves is a good idea. That's what I intend to do anyway.
Man...looking at that MSDS, that stuff is pretty toxic. I can't believe they apply it without some sort of protection...talk about a lawsuit waiting to happen!
After the results I've had with the hardener, I'm convinced it's the way to make this process work. When I do have more time (whenever that is) I'm going to do some more work with it. I've got another spare fender (the other one off the truck) and I'm going to try and paint a bigger area and see what happens. Safety shouldn't be an issue, as long as (like you said) you wear the proper respirator.
And yea, let me know when you'll be in town. My schedule is...pretty busy, but I can see if I'll be around.
Posted By: Anonymous
Re: Paint job on a budget!? - 03/11/07 05:43 AM
Quote:
Thanks for the welcome guys....
V8 Mirage, it looks like you basically used the Rustbullet as a primer of sorts and then topcoated using this method to get the color you want. Looks good! Sounds like the best route to go for someone like me who has some surface rust on the panels. I'll probably use the rust bullet, then fill in the tiny pits with some glazing putty, then go from there.
If the rust doesn't go through the panel, I'd just hit it with an 80 grit sanding disk and get it all out. Finish it with some filler, sand it and paint it. I usually use rust stopping products on things like car frames, or areas that are too hard to get at with a sander or grinder. Ospho is my preference, but most (if not all) work the same. They use phosphoric acid to chemically convert iron oxide to (inert) iron phosphate.
If the pits are too deep for a sander, an angle grinder (or dremmel tool for small ones) will buzz them right out. Put a skim coat of a filler like "Half-Time" on there and you'll be done pretty quick.
Posted By: Anonymous
Re: Paint job on a budget!? - 03/11/07 11:57 AM
Quote:
... For those who are still thinking of doing this just take your time and apply the paint very thin "and i do mean thin" and you will save a lot of time wet sanding. The thinner you apply it the better off you will be and wait at least 8 hours before doing the second coat.
I do see how the thin-ness of each application is a key point. As 69Charger originally pointed out, you don't begin to actually see your paint take color until about the 4th coat. Being a first timer at this, am I better off not trying to repaint the vehicle the same color it already is? Will doing this make it harder to see and "read" the paint?
The truck is currently a navy blue color. If I change colors, I'd really prefer to go lighter with something like Solar Yellow or Orange for two reasons - 1.I like those colors, they get attention, and 2.Lighter colors tend to be more forgiving as far as bodywork showing through. If I'm better off with a color change, can I go that light or is the blue base going to bleed through too much?
Posted By: pdqvsix
Re: Paint job on a budget!? - 03/11/07 01:50 PM
The truck is currently a
navy blue color. If I change colors, I'd really prefer to go lighter with something like
Solar Yellow or
Orange for two reasons - 1.I like those colors, they get attention, and 2.Lighter colors tend to be more forgiving as far as bodywork showing through. If I'm better off with a color change, can I go that light or is the blue base going to bleed through too much?
My car was red when i started doing this roller painting and i painted it rustoleum gloss black at first then switched to the rustoleum gloss white and haven't seen any bleed through. This method is just too easy. I may paint the car black again before the end of summer.
Posted By: Anonymous
Re: Paint job on a budget!? - 03/11/07 05:39 PM
Thin to win! I started painting my 62 galaxie. Started with the roof as it's a two tone car. Using rustoleum professional gloss white. I cut it about 30% with mineral spirits and rung the roller out pretty well per 69dart's (?) advice.
This worked pretty well as long as I kept the roller fairly dry. I think a light touch works well as you don't ring out the ends of the roller in streaks that are thicker. I went back over it with the roller to knock down the bubbles.
Verrrry tempting to try to get more coverage out the roller than you should. It only leads to more high spots and orange peel, I think.
I jsut don't think you can put thin the paint too much or put it on in too thin a coat.
Now back to wet sanding my high spots and going back with coat three a even a little thinner.
Posted By: 1BAD68
Re: Paint job on a budget!? - 03/11/07 06:17 PM
I woke up this morning planning on just wet sanding and found that the paint had little thick dots all over the horizontal surfaces. It was way to much to wet sand out so I spent all morning taking it down just about all the way. Lesson learned... putting it on thin means "thin coats" not "thin paint". The good part is that I could see all the imperfections in the body while it was glossy that I missed when in primer.
So, I think I will spend more time on the body now before I try this again.

Posted By: 69DartGT
Re: Paint job on a budget!? - 03/11/07 07:11 PM
When I did my truck we were having some nice warm days, the paint felt dry in about two hours but I waited for at least 24 hours before the next coat.
Its easy to do but IMHO don't get in a hurry and try to do the job in a day regardless of what type of paint you are using, you took all this time for prep, now do the same for paint.
Just my
Posted By: Anonymous
Re: Paint job on a budget!? - 03/12/07 12:28 AM
Hello-
I too have been spending a lot of time in the last few days reading this whole post. I was convinced from the first time I saw charger's car pic. Some of you guys have really done a fantastic job.
Here's my question- My son is away on spring break this week, and I was thinking of trying to paint his 91 f-150 before he gets back. I don;t think I have enough time given what I've read so far, but I was trying to see if there is a way to speed up the process without serious consequences to the final outcome. Understand that right now the paint is pretty much full coverage in a very dull navy blue, and peeling in a few spots.
I would only have the evenings after work to accomplish anything. Could I spray bomb the first few coats and then go with a roll on, or ?
Anyway, i know the established process works, I'd just like to see if there is a way to speed it up. Thoughts??
Posted By: Anonymous
Re: Paint job on a budget!? - 03/12/07 12:53 AM
A couple of thoughts....Thin means thin. Yeah, thin paint and thin coats. My first coat I measure by feel and thinned till I thought I had the consistency of milk. When I did 2 and 3 I actually poured the paint into a marked can and added 30% mineral spirits, not milky yet. Added a dash more to about 40% by volume it was milky.
The tendency I think is to thin the paint too little unless you really measure it as you thin it. Then still apply in thin coats.
If you just have a week in the evenings, I don't think you'd have time to do this right. It does take some time mostly due to the drying process.
Posted By: Anonymous
Re: Paint job on a budget!? - 03/12/07 01:05 AM
Kinda what I thought, too. Those results look so good that it makes you want to jump right in. But...I also have a 66 Mustang waiting in the wings, so the truck would be good practice for it. Better to do it right. Plus, i just checked the weather and it's supposed to rain all week...go figure. Practically never rains in Dallas- but now it's going to!
I bought some supplies ( no brightside yet, just rustoleum), so maybe I'll practice on an old hood I've got while I'm waiting.
Posted By: Anonymous
Re: Paint job on a budget!? - 03/12/07 01:15 AM
I did the exact same thing. My old paint was so dead & flat that the shine of the first coat revealed dings I had missed. Back on pg 59 is a picture of my hood after I put on 1 coat too thick, sanded it back, did some more bondo work, & did 2 THINLY APPLIED coats. The bondo is still visible but you can see the shine coming on. It's easy to get all excited & try to rush it. I had to learn the hard way myself & 69charger gives good advice when he suggests doing a test/learning experience on a scrap panel or whatever is available.
So BAD68, whatcha got under the hood of that thing?
Posted By: pdqvsix
Re: Paint job on a budget!? - 03/12/07 03:05 AM
Quote:
A couple of thoughts....Thin means thin. Yeah, thin paint and thin coats. My first coat I measure by feel and thinned till I thought I had the consistency of milk. When I did 2 and 3 I actually poured the paint into a marked can and added 30% mineral spirits, not milky yet. Added a dash more to about 40% by volume it was milky.
That's what i did also, i went to Biglots and bought one of those clear plastic measuring cups to get close to the same mixture of paint and MS everytime i was ready to roll. There is no bad results from rolling the paint on to thin but will be if you do it to thick,less is better and you won't have to wet sand as much. Thin paint and thin coats.
Posted By: Anonymous
Re: Paint job on a budget!? - 03/12/07 04:28 AM
Quote:
I am only using a cheap $20 buffer and no special pads but the finish is very good for what i'm using,
Where did you get the $20 buffer? Is it a random action orbital or simple orbital? What's the brand name? Can you link to it online?
Thanks!
Posted By: pdqvsix
Re: Paint job on a budget!? - 03/12/07 05:13 AM
Quote:
Quote:
I am only using a cheap $20 buffer and no special pads but the finish is very good for what i'm using,
Where did you get the $20 buffer? Is it a random action orbital or simple orbital? What's the brand name? Can you link to it online?
Thanks!
I bought it on ebay. It's a Motorist brand and it is a simple orbital 2500 rpm
Posted By: Anonymous
Re: Paint job on a budget!? CONTINUED..page 44........ - 03/12/07 09:15 PM
It contains "hexamethylene di-isocyanates." I looked up the info on that chemical and found this:
http://www.atsdr.cdc.gov/tfacts120.htmlI also found the MSDS for the Van Sickle enamel hardener:
http://www.vansicklepaint.com/7019X.PDFThe number one ingredient by weight is the Isocyanate. I also called the local OSHA office, and they said that the primary danger of isocyanates is in spraying -- breathing the fine droplets. They recommended good ventilation and wearing a respirator.
So ... I'm thinking maybe you are right about this. Perhaps the primary danger for isocyanates is for spraying. Rolling should be fine IF YOU USE A PROPER ORGANIC VAPOR RESPIRATOR.
After the results I've had with the hardener, I'm convinced it's the way to make this process work. When I do have more time (whenever that is) I'm going to do some more work with it. Safety shouldn't be an issue, as long as (like you said) you wear the proper respirator.
The hardeners look kinda scary, especially with "cyanide" part of isocyanates. Boat sites mention the use of Japan Dryers to speed up the drying time. Although not completely safe, wouldn't the use of a Japan Dryer be less scary?
http://www.clcboats.com/forum/bbs.pl/cart_id=/?read=76556
http://www.go2marine.com/product.do?no=32695F
http://www.wmbarr.com/msds/QJD40.pdf
http://www.packserv.com/Data/Products/Data-Sheets/1585826406.pdf
Posted By: Anonymous
Re: Paint job on a budget!? CONTINUED..page 44........ - 03/12/07 09:55 PM
Posted By: Anonymous
Re: Paint job on a budget!? CONTINUED..page 44........ - 03/12/07 09:58 PM
Posted By: Anonymous
Re: Paint job on a budget!? CONTINUED..page 44........ - 03/12/07 11:03 PM
That's looking good Tomarse! Bugs are great way to learn how to paint with this method. In addition to flat areas, bugs have so many other frustrating surfaces to deal with(sharp edges and corners, convex and concave curves.) After painting a bug with this method, you'll find painting modern cars a breeze.
Posted By: 69chargeryeehaa
Re: Paint job on a budget!? CONTINUED..page 44........ - 03/12/07 11:24 PM
Quote:
That's looking good Tomarse! Bugs are great way to learn how to paint with this method. In addition to flat areas, bugs have so many other frustrating surfaces to deal with(sharp edges and corners, convex and concave curves.) After painting a bug with this method, you'll find painting modern cars a breeze.
true and not true, lots of curves and crevices to deal with, but looooong straight pannels show way more flaws!!! i guess it's a trade-off, deal with the curves or the long straight pannels!!!. But at least bugs are small!!.
awesome job on the bug!!
Posted By: Anonymous
Re: Paint job on a budget!? CONTINUED..page 44........ - 03/13/07 01:01 AM
Where are you finding more colors of Rustoleum ?
Home depot only seems to have a couple colors in gallons,
my local Walmart did not have any gallons.
Also none of the places I went to today had the Sureline rollers,
I got something similiar at Lowes.
I would rather buy a gallon , even if I do not use it all so its the same color if I need to redo something later.
Dave
Posted By: ONEBADBIRD
Re: Paint job on a budget!? CONTINUED..page 44........ - 03/13/07 01:18 AM
You know what the problem is as far as not being able to find paint or rollers your looking for? This idea has caught on to so many people thru the internet, Now stores are running out of supplies.
WOW what a hot topic, I have been watching it since day one when the question was first asked looking for a cheap paint job. Now people around the world are joining the roller club. I plan on using this method myself soon as the metal work is done. Hey 69charger you have created one heck of an AWESOME epidemic
. Jay(spring is on the way fellas)
Posted By: Anonymous
Re: Paint job on a budget!? CONTINUED..page 44........ - 03/13/07 02:15 AM
Agreed- I was back on my mustang forum today after spending time over here reading this thread, and lo and behold, what do I see but a thread about the famous "$50 paint job"....it is definitely catching on, although it is a new post over there with some nay-sayers. I found myself defending the process, and I haven't even done it yet!!
Posted By: Anonymous
Re: Paint job on a budget!? CONTINUED..page 44........ - 03/13/07 02:21 AM
Quote:
The hardeners look kinda scary, especially with "cyanide" part of isocyanates. Boat sites mention the use of Japan Dryers to speed up the drying time. Although not completely safe, wouldn't the use of a Japan Dryer be less scary?
Looking at the MSDS for the Japan dryer, they mention "convulsions and death" . Actually, it looks like they're just 80-95% solvent, and like any VOC help speed drying time by evaporation. It probably would help it dry faster, but then you wouldn't get the other benefits of using a hardener. It's probably no more harmful than a can of carb cleaner. Isocyonates on the other hand really are nasty, but no more dangerous than other things we do with cars working on them if you take the proper safety precautions. I wouldn't crawl under my car if it was only supported by a jack (no stands) and I wouldn't try welding without my helmet...and I wouldn't paint with this stuff without a respirator.
NIOSH and OSHA say it's fine...just use organic vapor carts and keep them fresh. If don't want to go out and spend $40 for a respirator, don't even think about using this stuff. I actually use mine all the time when working on my rigs...anytime I have to spray something high in VOCs, or generate a lot of dust (sanding/grinding). Be nice to your lungs, and they'll be nice to you  .
.
Posted By: Anonymous
Re: Paint job on a budget!? CONTINUED..page 44........ - 03/13/07 03:07 AM
Ok I am 5 coats in on the Galaxie roof and I don't know.... I painted 2x sanded with 800, 2 more and wet sanded with 800 and one more tonight.
I am measuring and have a milky consistency and squeeze the roller good before applying. I get lots of bubble and what sure looks like too much orange peel for my taste. I don't yet begin to see that smooth unbroken glossy paint coat you get with a spray?
I am putting it on thin....maybe so thin that it's not putting enough paint on? When the bubbles are blown or rolled out it seems to me that the paint isn't really covering the surface uniformly. It's almost like a stippling effect.
Am I too few coats in to still be getting the coverage and surface I'll see on the final coat or two? It's white on white.
Sheesh
Posted By: Anonymous
Re: Paint job on a budget!? CONTINUED..page 44........ - 03/13/07 05:00 AM
Quote:
The hardeners look kinda scary, especially with "cyanide" part of isocyanates. Boat sites mention the use of Japan Dryers to speed up the drying time. Although not completely safe, wouldn't the use of a Japan Dryer be less scary?
http://www.wmbarr.com/msds/QJD40.pdf
The MSDS says that Japan dryers are 85% Stoddard Solvents. "Stoddard solvents" is just another name for mineral spirits. In addition to that, the # 3, 5, and 6 ingredients are salts, which we used in O-chem lab to absorb atmospheric water from a compound. The other two ingredients are solvents. So ... these japan dryers might dry the paint a little faster than mineral spirits, but not a whole lot. I think if you are looking simply for speed, you should use Acetone as a reducer. It will dry quite fast.
The primary benefit for the hardener is that it promotes a chemical reaction that makes the paint dry "harder," faster, and with better gloss.
Yes, the isocyanates can be scary if you don't understand them, but once you realize they don't evaporate into the air, you can see it is safe for rolling/brushing with a proper respirator and hand/body/eye protection.
Posted By: Exit1965
Re: Paint job on a budget!? CONTINUED..page 44........ - 03/13/07 12:38 PM
Even after 2 coats the surface should be nice and smooth. If you are pressing the paint out of the roller before rolling, then I would try an even thinner mixture of paint (try nonfat or 1% milk instead of 2%) and see how that works for you.
Posted By: Anonymous
Re: Paint job on a budget!? CONTINUED..page 44........ - 03/13/07 01:11 PM
Well something is definitely not right because what I have looks almost like a vinyl roof. It's glossy enough but nowhere near smooth. I really think I am using thin enough paint and thin applications but it doesn't want to lay right. Could this be a wrong roller issue? When I squeeze out the roller and press hard I get more bubbles than Lawrence Welk.
Do I need to go back with 150 and take all or most of this off to start over?
Posted By: 69DartGT
Re: Paint job on a budget!? CONTINUED..page 44........ - 03/13/07 01:40 PM
When I did mine I used a very minimum of pressure both when picking paint up on the roller and when appling it. Too much pressure may be part of your problem, I also used two rollers one with paint and the other with out, when I went over it wuth the second roller almost zero pressure seem to help removing air bubbles and level the coat.
Posted By: Anonymous
Re: Paint job on a budget!? CONTINUED..page 44........ - 03/13/07 09:54 PM
I've found (with the Brightside) that you can apply a lot of pressure (like A LOT) to get the paint to come off the roller nicely.
I also found that you should work the paint out with like 10 passes over the same spot before you move on. I guess it's 'cos even the high density foam doesn't mean that the entire area will get paint on it.
Both of these methods seemed to work well after the first coat or two. Before that and it comes out like a load of dots.
Posted By: Anonymous
Re: Paint job on a budget!? CONTINUED..page 44........ - 03/14/07 01:19 AM
Rollering upside down ?
Has anyone used this method to do the underside floorpan of your car ?
or I guess any underside of a front hood , rocker panel etc.
How did it work out ?
I just do not see how it will "self level" when you are doing this upside down,
Posted By: s4dustin
Re: Paint job on a budget!? CONTINUED..page 44........ - 03/14/07 02:01 AM
I am going to do a 67 belvedere that i was going to sell, i am going to paint it and then sell it, i sanded down the paint that was on it, have to do some bondo work, and then the paint....the car is currently yellow.....i figure i want a light color, what is the most forgiving (hides blems).....white?
here is a pick of the car
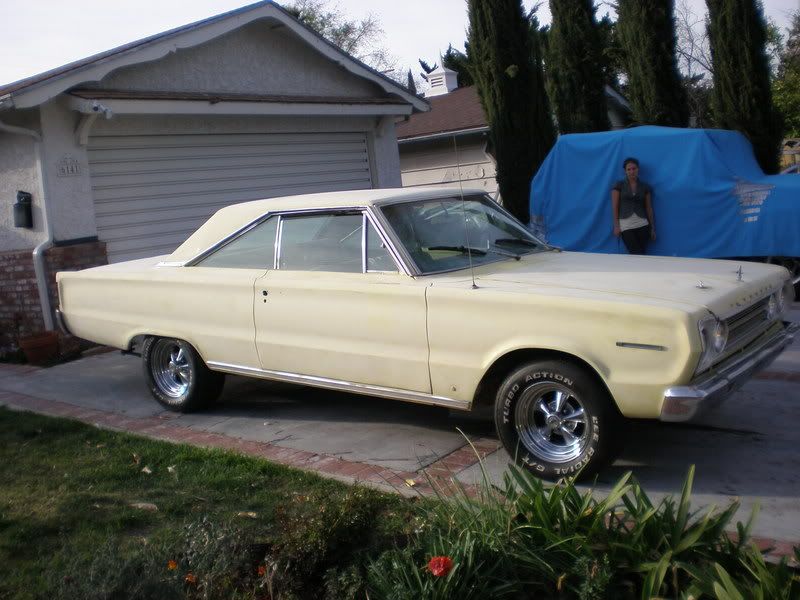
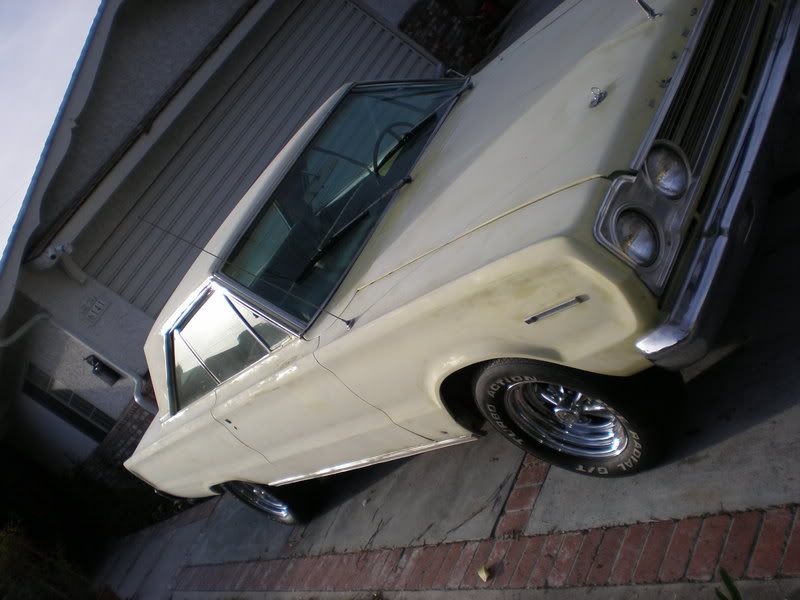
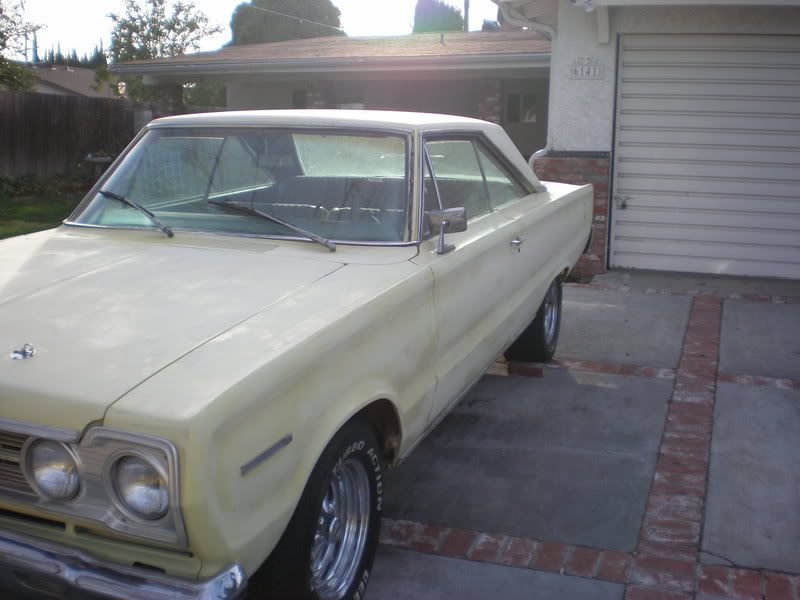
any suggestions...also, i am going to primer first....should i use a light colored primer?
Posted By: Exit1965
Re: Paint job on a budget!? CONTINUED..page 44........ - 03/14/07 03:33 AM
Man thats a nice car. Yeah white is most forgiving of blems, you could use an off white though so it doesn't look too much like a fleet white paint job IMO, but any white would look good on that car.
Posted By: s4dustin
Re: Paint job on a budget!? CONTINUED..page 44........ - 03/14/07 03:51 AM
Quote:
Man thats a nice car. Yeah white is most forgiving of blems, you could use an off white though so it doesn't look too much like a fleet white paint job IMO, but any white would look good on that car.
thanks, it needs some work, but i have to get rid of it...my other project is a 68 rs/ss camaro i am setting up for protouring....wasnt wise for me to pick this one up....i have advertised it a bit, but i figure if i paint it, it will sell faster. plus, i have to try the technique out, if it works, i will do my camaro too.
Posted By: Anonymous
Re: Paint job on a budget!? CONTINUED..page 44........ - 03/14/07 03:55 AM
Well, I think I am getting this down... I sanded the roof way down. Wet sanded with 150 and got all the orange peel out.
I got it down to a real smooth flat surface that looks much more like the intended results. probably the equivalent of 3-4 good coats. It took a lot of wet sanding to get it flat and smooth though.
I don't know how I got it on too thick. I measured to the right ratio and it looked right. I think the foam roller might have been an issue. I used a very dense one and I think maybe it didn't spread the paint real well. I also guess that the mineral spirits are evaporating as the paint sits in the tray. So maybe it gets thicker from evaporation as time passes? Needing re-thinning?
I'll try again tomorrow and measure to get the right consistency. Trying a less dense roller too.
I think if I can get a couple more smooth flat coats, I'll have it. Then can let harden and color sand.
There are definitely a lot of variables to control for.
Posted By: Anonymous
Re: Paint job on a budget!? CONTINUED..page 44........ - 03/14/07 09:32 AM
With the rustoleum, about how many passes do you make over the same spot with the roller per coat? Do you overlap your passes as you go or not?
Also, are you guys mixing the paint in a regular metal roller tray, like you would for painting a room in a house or do these cause bubbles? If not, are you using something else?
Posted By: Exit1965
Re: Paint job on a budget!? CONTINUED..page 44........ - 03/14/07 01:01 PM
I used a small roller pan that goes with the smaller rollers, probably 6" wide.
Thinking back I believe I went in about 4" rolls, each time backing up and going forward a few inches, overlapping the roll before and slightly overlapping the roll above. Then when about a 18" area was done, I'd roll over the entire 18" inches once or twice to even things out.
Posted By: Anonymous
Re: Paint job on a budget!? CONTINUED..page 44........ - 03/15/07 05:45 AM
Hi guys,
I posted on this thread a real long time ago. I'm painting a '92 BMW 325is with fire red brightside paint and I have a few questions about technique. I started on a replacement bumper and nose panel that are not on the car before winter came, and haven't had much time to do anything because of the cold. Now that it seems to be warming up wet again I'm trying to get this project finished.
Do you suggest thinning the brightside paint? I've been using it straight out of the can and it seems to have worked fairly well, but when it was cold it definitely built up a lot of brushing lines and whatnot. I'm also have a lot of trouble figuring out how to wetsand properly.
I put 2 coats on both the bumper and nose panel, sanded with 320 grit, but that made it so I could see the primer through the paint in a lot of spots. After that I decided to try and do 3 more coats before the next sand. Even with that I could still see a little bit of the coating that came on the bumper and nose panel =\. After wet sanding the nose panel today with 1000 grit, little bits of black are showing through again. I don't know if I'm sanding too much or what. I just try to sand until the surface of the paint seems very smooth to the touch and I don't see much glossy bits left.
Basically, is there a better suggestion for applying and sanding brightside paint? How much should I be sanding down, until it's perfectly smooth or what? I need to get this thing going
Here are some pics of my nosepanel, this was wetsanded today with 1000 grit but I didn't really finish since it got dark outside:


This is the bumper. It had 2 coats, 1 320grit sand, then 3 more coats. The pics don't really show the detail, it is very rough.


Posted By: Anonymous
Re: Paint job on a budget!? CONTINUED..page 44........ - 03/15/07 12:59 PM
It's hard to convey how thin this paint has to be laid down IMHO. It ain't like painting a wall with latex or anything remotely like rolling other paint. To get a really flat smooth surface I had to ring the roller out pretty good in the pan and press very hard to flatten the paint out across the surface. I went from getting big 1/4" dia bubbles to pressing them hard to about pin head size bubbles then a light pass with the roller again and they're gone.
Thin coat on top of thin coat seems to be working and the results look encouraging. I'm still working on eliminating the roller lines.
Posted By: Anonymous
Re: Paint job on a budget!? CONTINUED..page 44........ - 03/15/07 02:16 PM
It seems like the key to this is not worrying *too* much about how smooth the paint goes on but making sure that the paint is going on thick enough so that it can be easily sanded without any issues. You obviously still want to make it as smooth as possible since that makes sanding a lot easier. Am I right in thinking of it this way? That just makes the most sense to me. I'm going to try a couple of new techniques while rolling my next coat. I'll let you guys know how it goes.
PS - What kind of rollers are you guys using? I'm using little white 'roller foam' brand 4-6 inch rollers, and they leave behind a billion little bubbles (even if I use the double roller method).
Posted By: Anonymous
Re: Paint job on a budget!? CONTINUED..page 44........ - 03/15/07 09:25 PM
I did a little experiment here at work...we painted one side of a steel door with a brush and the other side with a roller. Both sides painted full strength Rustoleum one coat. The brush side had slightly better gloss than the roller side. The brush side went on a little thicker, probably why it has more gloss. After 24hrs the roller side was mostly dry, the brush side was a bit tacky in places. After 2 weeks the roller side is hard as nails, the brush side can still be dented with a finger nail in places. Otherwise we didn't have any problems with adhesion. We did minimal prep, washed with a grease cutter, and didn't sand. Looks pretty good for a 20 minute job. I'm looking forward to hitting a test panel at home now that the weather is warming up.
Posted By: Anonymous
Re: Paint job on a budget!? CONTINUED..page 44........ - 03/15/07 11:10 PM
It doesn't seem to take much paint before you start getting orange peel pretty good. That is why I think a thin application is a must. You recall how hard the guys are saying this paint drys? Yeah, it takes a lot of sanding to get back to a smooth flat surface.
I really think a thin coat and minimal sanding is the way to go.
I use both the firm white rollers and the yellow ones and don't see a difference. I have been getting a little paint on the roller and pressing in out on the car. I take the semi dry roller and press pretty hard to spread the paint. Then finally very lightly with just the weight of the roller to finish the bubbles off. I find that by looking at a very low angle across the surface I can see pretty easily if the bubbles are pressed out or not.
This leaves me with a pretty flat surface, but...
I am having trouble getting the roller marks out. I have some lines where I overlap the roller and have a hell of a time getting rid of these. Any ideas? Will they wet sand out? Could this be because the roof is so [Edited by Moparts - Keep it clean] big I can't get all the way across it in one arm's length?
Posted By: Exit1965
Re: Paint job on a budget!? CONTINUED..page 44........ - 03/16/07 01:18 AM
You could try thinning the paint down some more, that will allow it to level out better.
Posted By: Anonymous
Re: Paint job on a budget!? CONTINUED..page 44........ - 03/16/07 05:15 AM
Quote:
I did a little experiment here at work...we painted one side of a steel door with a brush and the other side with a roller. Both sides painted full strength Rustoleum one coat. The brush side had slightly better gloss than the roller side. The brush side went on a little thicker, probably why it has more gloss. After 24hrs the roller side was mostly dry, the brush side was a bit tacky in places. After 2 weeks the roller side is hard as nails, the brush side can still be dented with a finger nail in places. Otherwise we didn't have any problems with adhesion. We did minimal prep, washed with a grease cutter, and didn't sand. Looks pretty good for a 20 minute job. I'm looking forward to hitting a test panel at home now that the weather is warming up.
So far the results of my tests have shown that the brush actually comes out smoother than the roller . I used a semi-expensive Purdy 2" brush, and when it settled down I didn't have any brush strokes in the paint. My big problem was I put it on too thick, and got a couple of sags that were a major pain to sand out. The section I've used a roller on had orange peel pretty bad. So far, I like the brush better. I wet sanded the last fender I used the hardener on tonight. I painted it Monday, and it's about as hard as it's going to get. It wet sanded pretty well but like I said...the sags were a pain to knock down. I guess if I had some wet/dry 220 around it would have been easier. I was using 400 grit. I think it will be done after only two coats. Maybe 3 if I have to sand too much off again.
Posted By: Anonymous
Re: Paint job on a budget!? CONTINUED..page 44........ - 03/16/07 02:47 PM
Interlux recommends applying their paint with a roller, then smoothing out with a high-quality brush.
Posted By: Anonymous
Re: Paint job on a budget!? CONTINUED..page 44........ - 03/16/07 03:06 PM
Quote:
So far the results of my tests have shown that the brush actually comes out smoother than the roller . I used a semi-expensive Purdy 2" brush, and when it settled down I didn't have any brush strokes in the paint.
I just used a cheepie nylon bristol brush...lots of brush marks, but it's shinny!
Posted By: Anonymous
Re: Paint job on a budget!? CONTINUED..page 44........ - 03/16/07 05:57 PM
Quote:
It seems like the key to this is not worrying *too* much about how smooth the paint goes on but making sure that the paint is going on thick enough so that it can be easily sanded without any issues. You obviously still want to make it as smooth as possible since that makes sanding a lot easier. Am I right in thinking of it this way? That just makes the most sense to me. I'm going to try a couple of new techniques while rolling my next coat. I'll let you guys know how it goes.
PS - What kind of rollers are you guys using? I'm using little white 'roller foam' brand 4-6 inch rollers, and they leave behind a billion little bubbles (even if I use the double roller method).
Hint:
I've known people who've done the roller job for years back home on thier beaters... What they would do for bubbles is wrap the roller in a piece of their moms pantyhose and apply the paint like that...
Posted By: texczech
Re: Paint job on a budget!? CONTINUED..page 44........ - 03/16/07 05:59 PM
I have experimented with interlux and have found that rolling then smoothing with a foam brush works very well. I have even just used the foam brush with good success. There doesn't seem to be any top quality foam brushes, they all are the same I think. They are cheap to buy. Anyone try using foam brushes?
Posted By: Anonymous
Re: Paint job on a budget!? CONTINUED..page 44........ - 03/16/07 09:17 PM
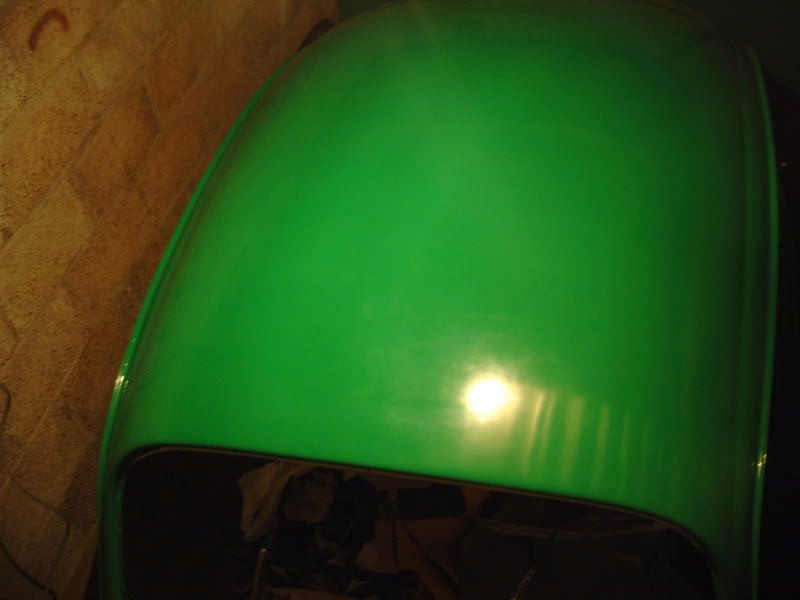
Getting there though I think I need a better polish. It seems as though I have a good shine, but I can't get the polish off again.
Posted By: Anonymous
Re: Paint job on a budget!? CONTINUED..page 44........ - 03/17/07 04:01 AM
I can't believe I ate THE WHOLE THING.
I started at the VERY beginning (post #1) of this thread 4 days ago - my father-in-law emailed me the link he picked up from a Corvette forum.
43 pages of the original thread, 67 pages of this continued thread... 40 posts per page...
Approximately 4400 individual posts! My brain hurts, and when I close my eyes I can still see my computer screen - but I'm finally here! I've had 1000 questions along the way, but I resolved that I would finish the entire thread before I skipped to the end and started asking questions. This has saved me (and you guys!) a lot of time and hassle - I noticed a LOT of folks didn't do the same - pretty annoying, but you all have been pretty helpful to those types anyway.
I want to thank 3 people in particular for their incredible contributions to this...
First of all, ***
69ChargerYeeHa *** (should change his name to OldPorscheYeeHa) - the godfather who started this whole thing and has continued to be a great and patient contributor despite some undeserved derision (from chuck and others).
Secondly, ***
Exit1965 *** - who happily became the first real bona-fide guinea pig and has probably been through more experimentation and physical labor than anyone involved - 2 full Rustoleum paintjobs and 1 full Brightside paintjob - ALL of which came out very well, despite his bionic fingernails.
His willingness to continually forge on and keep us apprised of his progress, and post lots of very helpful photos has helped keep life in this thread for a very long time now.
Finally, ***
Marq *** - the guy who broke the HUGE Interlux Brightside/marine urethane story in the first place, and has brought the idea along to where it's at least an equivalent partner in this thread to the original Tremclad/Rustoleum technique.
Also an honorable mention to the Moparts moderators who have been great at maintaining this thread and weeding out some of the garbage so the rest of us who came later didn't have to wade through it.
Kudos to all (even the Canadians and Californians).
I'm not a Mopar guy myself (although seeing the photos of some of these sweet cars certainly gets me interested) - I'm a GM guy. Mainly Pontiacs, which I'm sure Mopar fans consider much less a sin than being a Chevy guy, right?
I have a 69 GTO that's going to be going back together over the next year or so. Once we get the interior work done, body and paint will be next. Like most everyone in this thread, I am really excited about a paint job that I can reasonably do myself and don't have to budget $3-4K for.
I'm going to give the Brightsides technique a shot. My biggest problem with it is the color selection - I had been leaning towards a dark burgundy, and they offer nothing of the sort. However I am also intrigued by the idea of a deep, dark blue.
Does anyone have any decent pics of Interlux Brightsides Flag Blue on a car (or actually painted on any surface, for that matter?)
Thanks!
Chris
Posted By: Anonymous
Re: Paint job on a budget!? CONTINUED..page 44........ - 03/17/07 04:52 AM
I'm going to re-post my final question in case some folks ended up skimming my lengthy post above and missed it...
Does anyone have any decent pics of Interlux Brightsides Flag Blue on a car (or actually painted on any surface, for that matter?)
Thanks!
Chris
Posted By: Marq
Re: Paint job on a budget!? CONTINUED..page 44........ - 03/17/07 01:04 PM
Quote:
I'm going to give the Brightsides technique a shot. My biggest problem with it is the color selection - I had been leaning towards a dark burgundy, and they offer nothing of the sort. However I am also intrigued by the idea of a deep, dark blue.
Chris
Hi Chris...
Thanks for the kind words. It is most appreciated.
Now... on the topic of getting a deep burgundy... you are right that Brightside doesn't seem to have that color ( nor the deep dark red that I would have preferred ).
In your case, your original wish was burgundy, with the Flag Blue being your second or alternative choice. I will try to address the burgundy aspect of your e-mail because I truly believe that if you are going to go to the effort of attempting this painting procedure, you should work towards what you really want. Otherwise, you will end up like me, where I have a quite satisfactory 'Fire Red' paintjob, but nagging in the back of my head is my true desire to have a deep dark red. I don't think you can end up with 100% satisfaction unless you end up with what you really wanted in the first place...
And the solution to completing your wishes may rest in the contributions by some of the other posters who have explored some of the other marine paint manufacturers. You may yet have the opportunity to enjoy a color that is closer to your real desire.
I do recall looking at some of those other paint samples and there were burgundies that ranged from 'Plum Crazy Purple' to 'Deep Burgundy Wine'. So there is a possibility you may find the right color that you initially envisioned.
As long as you can hunt down a single stage polyurathane marine paint, than I suspect the application and results will match up pretty closely to the Brightside results.
I believe that a deep burgundy is one of those next to impossible colors to blend yourself. So it mostly will boil down to doing a bit of Google reasearch to identify some of the other marine paint suppliers and checking out their color offerings. I know I was quite surprised by the broad range of reds offered by one of those companies. Heck... even that latest suggestion from one of the users lead to me finding them offering ' COCA COLA ' red. Hehehheh... I could have painted up my car to look like a Coke truck ahhaahah.
So before resorting to your 'second choice' in colors, try exploring some of the other marine paint manufacturers and their color offerings. As long as it says that it is a polyurathane and that it can be rolled, you will know that it is an approximate equivalent to the Brightside.
ON THE TOPIC OF THE FLAG BLUE.... the color is 'suppose to be a dead ringer for the dark blue used on the US Flag...
I could not find a car with that paint job... but I did find a lovely boat done with Flag Blue.
http://www.discover-marlago.com/images/imagecache/gallery/hard%20top%20t-top%20on%20lift.JPG
Good luck and again, thanks for the kind words.
Marq
.
Posted By: Anonymous
Re: Paint job on a budget!? CONTINUED..page 44........ - 03/18/07 02:36 AM
Hi
I mixed up some Rustoleum gloss white at 50 / 50 with mineral spirits ,
This seems way too thin , I used a foam brush on some places I needed to touch up on a white work van ,
It just ran off.... with no coverage
So what percentage paint to thinner do I need on a 70 degree day ?
thanks
Beaulieu
Posted By: Anonymous
Re: Paint job on a budget!? CONTINUED..page 44........ - 03/18/07 06:19 AM
Marq:
Thanks for the advice - I am taking that under consideration. I've definitely had burgundy tops in my mind for quite some time now - but the dark blue is growing on me. I think a deep blue is the very best color to go with flashy chrome brightwork and aftermarket wheels - always very sharp. I do still love burgundy though, and like you said, I will probably always wonder about it if I go with blue...
After a fair amount of research, however, I've only found a single one-part marine urethane offered in a burgundy color - the Pettit Easypoxy. And even that I can't seem to find an accurate paint sample for (I've emailed the company and one dealer with paint chip requests - there are no dealers in my state). It seems I can get AWLGrip in a custom color . . . for almost $100/quart!!!
Other than that, no luck finding anything like burgundy. Any other specific recommendations in your searching?
Also, I recall that you had spent some time perusing boat-painting forums to help form your opinion on which product was best to try for our application (that's how you settled on Brightsides, with AWLGrip coming in 2nd place overall if I recall). Any recollections about the reputation of Pettit Easypoxy or any other specific brands? Or anything to specifically stay away from?
Chris
Posted By: Anonymous
Re: Paint job on a budget!? CONTINUED..page 44........ - 03/18/07 06:50 AM
Beaulieu:
Although I have no specific experience with Rustoleum method, it seems from reading the length of this thread that the most commonly used mineral spirits concentration is around 15-20% - some guys have certainly gone higher (and lower) depending on the conditions, but 50% is undoubtedly far too thin.
Chris
Posted By: Anonymous
Re: Paint job on a budget!? CONTINUED..page 44........ - 03/18/07 03:43 PM
ok....than maybe I need to add more paint....
Beaulieu
Posted By: Anonymous
Re: Paint job on a budget!? CONTINUED..page 44........ - 03/18/07 09:10 PM
The original idea was to thin the rustoleum to the consistency of milk. That requires about a 40% thinning. It is thin but the idea, I believe, is to apply a thin coat of thin paint. So if it runs, it's not necessarily to thin but it may be that you are putting on too much paint at one time.
I think that thinning to about 40% is required and then wring out roller and apply a thin coat.
Posted By: Anonymous
Re: Paint job on a budget!? CONTINUED..page 44........ - 03/18/07 10:33 PM
I'll get the formalities out of the way:
I came here from another board (chevy trucks).
I have a 65 C10 that is in dire need of a paint job, and I've read the entire 2 threads on this. I think this is the way to go for me.
I've enjoyed the reading this past week, several times I lost track of time, and crawled into bed REALLY late.
I decided to do some leg work yesterday.
Sherwin Williams has a rust paint that they can tint to any color. Ace hardware has one that they can tint to about 40 colors. Ace also has 100% mineral spirits.
But after reading about the marine poly paints, my next trip was to have been to west marine to see what they had in stock, until my googling turned up this paint:
Top Secret 1-Part Epoxy (TS-100) Excepts from the website:
Quote:
Looking for something more durable than Gel-Coat, easier to use than a two-component epoxy and less hazardous than an aliphatic urethane? Is a single component Direct To Metal coating (DTM) on your wish list? Have you been praying for a durable environmentally friendly marine coating? Does a bargain sound good? If you answered yes to any of these questions you came to the right place because this innovative approach rewrites the book on epoxy. That�s right, TS-100 1 Part Epoxy won�t chalk, fade or yellow like two component epoxy and it won�t spider-web like Gel-Coat making it a favorite in rust preventative paint and marine restoration applications. Now you can use our exclusive 1 Part Epoxy in your direct to metal paint applications safely and economically without the need* for primer in many instances...
... Available in 200 stock marine paint colors. Custom colors available on request for an additional $5.00 per gallon. Available in quart, gallon and five gallon containers
$29/Qt, $84/Gal
The amazing thing is the stock color selection. the website shows 100+ but the text says 200.. geez!
Color Chart
What do you guys think?
edit- added lnk to color chart, and found some fine print:
Stock colors are limited to white, light gray, dark gray, sand, moss green, tile red and norse blue. All other colors are considered "custom colors".
Posted By: StevesBug
Re: Paint job on a budget!? CONTINUED..page 44........ - 03/18/07 11:38 PM
Done with the paint for a while. Time to finish the chassis and assemble the engine ! Hope to be driving by May.
The paint has been sanded and compounded, but I won't do the final polish until the body is on and I'm done swinging tools around.


Steve
Rustoleum Pro, rolled.
Posted By: Anonymous
Re: Paint job on a budget!? CONTINUED..page 44........ - 03/18/07 11:55 PM
That product looks to have great potential, if their propaganda holds any water.
Can anyone explain the difference between a one-part Epoxy and a one-part Urethane? I noticed it specifically states the two aren't compatible, so obviously there is some significant difference...
Compatible topside coatings include TS-4 Urethane Reinforced Alkyd Marine Paints. Not recommended for use with TS-2 Urethane Marine Coating, TS-2 Urethane Marine Clear Coating, TS-6433 Ever-Last Epoxy Paint, TS-6433 Ever-Last Epoxy Clear Marine Coating or TS 527 Camo-Coat Camouflage Boat Paints.
Chris
Posted By: admactanium
Re: Paint job on a budget!? CONTINUED..page 44........ - 03/19/07 12:49 AM
Quote:
... Available in 200 stock marine paint colors. Custom colors available on request for an additional $5.00 per gallon. Available in quart, gallon and five gallon containers
$29/Qt, $84/Gal
The amazing thing is the stock color selection. the website shows 100+ but the text says 200.. geez!
Color Chart
interesting that there is a brushable clearcoat on there too. hmmm...
Posted By: Anonymous
Re: Paint job on a budget!? CONTINUED..page 44........ - 03/19/07 12:58 AM
Quote:
Done with the paint for a while. Time to finish the chassis and assemble the engine ! Hope to be driving by May.
The paint has been sanded and compounded, but I won't do the final polish until the body is on and I'm done swinging tools around.
Steve
Rustoleum Pro, rolled.
You going to put new fender beading on that?
Posted By: Anonymous
Re: Paint job on a budget!? CONTINUED..page 44........ - 03/19/07 02:03 AM
hmmm, They also have a poly thats about $44/gal
With similar color choices... and they say you can spray, brush, or roll.
TS-4 Urethane Reinforced Alkyd Gloss
Posted By: Anonymous
Re: Paint job on a budget!? CONTINUED..page 44........ - 03/19/07 02:19 AM
thanks for your help with the colour mixing Marq, i've mixed 10 parts yellow with 1part largo blue and i've got very close to the colour i was after! so thanks for the tips, it needs another coat to be the solid colour still, so will post some pics once thats done,and i plan to mix in some offwhite to give it a more creamy look hopefully, instead of being fluro
its definately true, you may as well get the colour you really want if you can, as while its cheap, its a fair bit of effort, and the feeling you get when it mixes up right is great
i photoshoped the colours up with gradients before going and buying the paint first, as buying 3 colours isn't really that cheap, specially to throw them in the bin...anyone want some orange paint? lol
Posted By: Anonymous
Re: Paint job on a budget!? CONTINUED..page 44........ - 03/19/07 02:32 AM
Yeah, AND the Top Secret TS-4 urethane is only $15/quart! (I assume that's a stock color price, more for custom - but still in the spirit of the $50 paint job!).
And although they recommend using their proprietary thinner (don't they ALL?), it appears it could probably be safely thinned w/ 100% mineral spirits (read: el cheapo). They state:
"Thin & clean up: Use only with factory recommended thinner, TS 101 Thinner. Clean all equipment thoroughly with TS 101 Thinner or TS 602 Mineral Spirits."
Nice work. Wonder where I can score some color samples? Not many US dealers listed, and none near me.
Chris
Posted By: Exit1965
Re: Paint job on a budget!? CONTINUED..page 44........ - 03/19/07 02:37 AM
Quote:
hmmm, They also have a poly thats about $44/gal
With similar color choices... and they say you can spray, brush, or roll.
TS-4 Urethane Reinforced Alkyd Gloss
Wow.. nice find. Even says it would be good for automobiles. Someone needs to order a quart and give it a test .(not me!!)
Posted By: Exit1965
Re: Paint job on a budget!? CONTINUED..page 44........ - 03/19/07 02:46 AM
Maybe a gold mine here with the top secret stuff???
http://www.topsecretcoatings.com/automotivepaint.aspMan this has me itching to 'experiment' again. Must resist, at least till after the car is running!
also the site says basically if you want it to harden, you need to add the hardener..
Posted By: Anonymous
Re: Paint job on a budget!? CONTINUED..page 44........ - 03/19/07 04:12 AM
I'd personally be more tempted to use the one-part urethane, because it would presumably be very similar to the already-proven Brightsides method. However, when you read about their one-part epoxy and they say things like:
"This is our signature product, and we guarantee it to out perform all other epoxies, alkyds and urethanes-bar none!"
...that sounds kind of interesting. It's not that much more $$$ ($26/quart stock color).
Anyone have any idea what differences might be expect applying this epoxy coating vs. a urethane product???
Chris
Posted By: Anonymous
Re: Paint job on a budget!? CONTINUED..page 44........ - 03/19/07 04:22 AM
BTW, I sent Top Secret Coatings an email with some questions, and I included the following comments....
"You should know that there's a HUGE market out there for an easily applied (roll- or brush-on) automotive paint - the car restoration market is quite large, and currently the only well-known option for auto repainting are spray-on paint jobs which are typically a minimum of $3000-4000 for a quality job and are very difficult for the do-it-yourselfer to perform, due to the need for expensive specialized equipment such as high-end air compressors, paint guns, paint booth access, respirators/fresh air systems, etc and the impracticality of spraying toxic isocyanate-containing products anywhere around a human environment (i.e. not something you can safely do in your home garage). A recent thread on the topic of a roll-on automative painting technique on a popular automotive resto forum (found at
www.moparts.com) has exceeded 4400 different individual postings (and who knows how many hundreds of thousands of viewings?) and has attracted enthusiasts from all over the world including Canada, U.S., Australia, the U.K. and other countries. This thread has just recently turned to the topic of your products, when one of the forum members apparently stumbled across you guys and referred the rest of us to your site. Because of this huge potential market, any effort your company can make to educate and accomodate car enthusiasts can only be a win-win situation for all involved.
This is a direct link to the very recent page in the thread where we started discussing Top Secret products....
https://board.moparts.org/ubbthreads/show...art=67&vc=1Please note that this thread is only the second part - the initial thread on this topic went to 43 pages before it locked up and the board moderators archived it and started a second (continued) thread. I frequent a number of online forums, and I've never seen a thread anywhere NEAR the length and extent of this topic.... not even close! This single topic has been going on for over a full year now!"
Hopefully that will pique their interest and we can get some good feedback from them... I'll share any useful replies that I get....
Chris
Posted By: dalbers
Re: Paint job on a budget!? CONTINUED..page 44........ - 03/19/07 06:47 AM
went to home depot to get some rollers about a month ago and they were sold out. went again yesterday and still sold out. don't know if it is just a coincidence or not, but I think there are a lot more people trying this then we can imagine. also, not to get off track, but I "made" these wide white wall tires and then painted my rims with red rustoleum.

Posted By: Anonymous
Re: Paint job on a budget!? CONTINUED..page 44........ - 03/19/07 11:47 AM
just thought i'd share my colour mixing results. i applied another coat tonight with some white in it also, but at this stage it looks like i put in to much blue...
here's some of the previous coat, and the aim, well something similar anyway, mayb a bit more green, but then the miura colour looks very yellow in some pics...


sorry, just realised how large that last pic is, and also sorry for the dodgy phone quality pics
Posted By: Anonymous
Re: Paint job on a budget!? CONTINUED..page 44........ - 03/19/07 12:08 PM
Marq:
I've been looking around at some of the "burgundy" offered by different paint manufacturers, and it's occured to me that I'm really looking for a burgundy that's much more on the red end of the spectrum than the purple. Then it occured to me with your repeated comments about a "deep, dark red", that you and I may be searching for the exact same color! I've attached a photo of the car that I consider my absolute ideal. Does the "deep, dark red" in the back of your mind look anything like this?
Chris

Posted By: Anonymous
Re: Paint job on a budget!? CONTINUED..page 44........ - 03/19/07 03:49 PM
I'm new to this forum, have been reading this thing for a while now. After reading and a little practice decided to attempt the process on my 1979 Chevy Luv 4x4.
Spent almost my entire Spring break doing it, very pleased and amazed how well it turned out.
This shot is a couple days before buffing.
Here's a buncha pics, they are in a bit of reverse order.
http://s120.photobucket.com/albums/o192/LUV4x4/During/Can also see more over at Luvtruck.com forums, my nic there is 79-luv'r
Thanks again to Martin for getting this whole thing started!
[image]
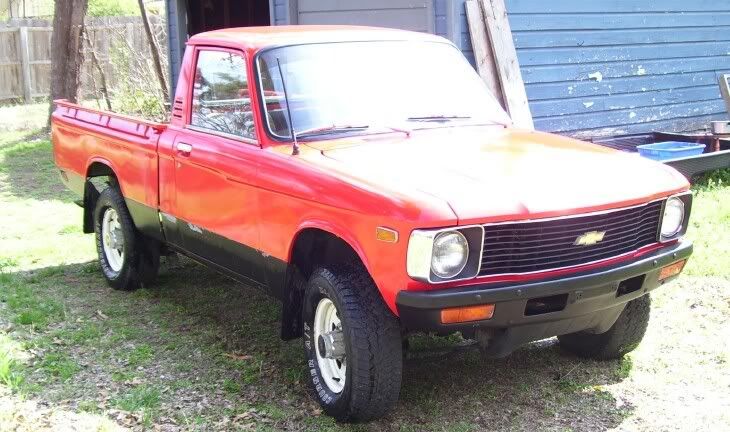
[/image]

Posted By: Anonymous
Re: Paint job on a budget!? CONTINUED..page 44........ - 03/19/07 06:01 PM
Luv4x4: is that rustoleum or brightside?
Posted By: Anonymous
Re: Paint job on a budget!? CONTINUED..page 44........ - 03/19/07 06:03 PM
Rustoleum. Couldn't find Brightside around here.
Posted By: Anonymous
Re: Paint job on a budget!? CONTINUED..page 44........ - 03/19/07 06:06 PM
Looks good ... Let us know how the buffing/polishing goes.
Posted By: Anonymous
Re: Paint job on a budget!? CONTINUED..page 44........ - 03/19/07 09:07 PM
Hey Chris! That's the color I'd like to do my Mustang.
Any luck getting any more info from the Top Secret guys? Maybe we can split the cost as a gallon should more than cover 2 cars.
Posted By: Anonymous
Re: Paint job on a budget!? CONTINUED..page 44........ - 03/19/07 09:43 PM
Quote:
Maybe a gold mine here with the top secret stuff???
http://www.topsecretcoatings.com/automotivepaint.asp
Man this has me itching to 'experiment' again. Must resist, at least till after the car is running!
also the site says basically if you want it to harden, you need to add the hardener..
Now I know I'm new here exit, but I've read through the entire thread. I thought it was about time for you to change colors/paints again. Then we could all just se how well yours turned out (Again).
Actually I'm curious about the pros/cons of epoxy vs. poly.
Top secret sells a brush on clear coat for the epoxy, so I would assume that the main product would not be as shiny as the standard poly. Would that be safe assumption? In that case, I'd want to stick to the poly, so that it would be easy to touch up later.
But if you wanted a multicoat, or even to experiment with metallics, maybe the epoxy is a valid choice.
Posted By: Exit1965
Re: Paint job on a budget!? CONTINUED..page 44........ - 03/19/07 10:15 PM
well, there is a bit of orange peel in the paint i have now. after my car is running im thinknig of sanding it flat and laying on 2 more coats to it, then put it in the sun to bake. im going to experiment with hardeners at that time too.
My hood still needs to be painted hatteras white too, its still canvas white..
Posted By: Anonymous
Re: Paint job on a budget!? CONTINUED..page 44........ - 03/20/07 12:16 AM
Man this is a long read! I have been up the last two nights reading, and ive had dreams about painting my car! lol. Exit... How's the brightside holding up? Do you think you have had any changes in the color since you have painted it? Also did you thin the Brightside at all? Im contemplating using the Brightside or trying the secret coatings like the TS-4 Urethane Reinforced Alkyd Gloss or the TS-100 1-Part Epoxy. I have some testing to do soon. Oh and hi im new to the thread! lol
Posted By: Marq
Re: Paint job on a budget!? CONTINUED..page 44........ - 03/20/07 12:21 AM
Quote:
Marq:
Also, I recall that you had spent some time perusing boat-painting forums to help form your opinion on which product was best to try for our application (that's how you settled on Brightsides, with AWLGrip coming in 2nd place overall if I recall). Any recollections about the reputation of Pettit Easypoxy or any other specific brands? Or anything to specifically stay away from?
Chris
The Pettit Easypoxy is a fantastic paint BUT... it has a more complicated surface preparation procedure than any of the other polyurathane paints. Most boaters would probably rank the Pettit as longer lasting and more durable ( since it is an epoxy ) But the surface preparation take it out of the hobbyist realm and a lot of them agreed that it was better to pay a pro to do the Pettit paint job on a boat rather than do-it-yourself.
Now on the topic of 'creating' a burgundy... you might want to play a game of midnight chemist with the Brightside Flag Blue and the Brightside Fire Red. Under 'normal' color blending situations, a Blue cut with a percentage of Red 'should' get you to a deep burgundy.
I played a little game on an online color blender and it looked like if you played with some sample blending of 10% up to 30% red against the blue, you 'should' land on a deep burgundy somewhere in that range.
If you fall back to one of my previous messages, where I spelled out how to set up a little paint palette and did some percentage combinations of colors to work out what the blending results would look like, you might get lucky.
The only proviso is that we know from experience that Fire Red combined with Black always got us a murky muddy or pottery brown color ( instead of the deeper and darker red that we would have anticipated ).
So there is no guarantee that the Fire Red combined with the Flag Blue will work out 'as it should in theory'. But it will give you something to test out. If it doesn't work... at least you will have satisfied yourself about going that route. If it does work... you should be able to land on the exact color of your dreams just by figuring out the right percentages for blending.
Marq.
Posted By: kenzo42
Re: Paint job on a budget!? CONTINUED..page 44........ - 03/20/07 12:29 AM
Aussie, any updates w/ the Miata?
Posted By: Marq
Re: Paint job on a budget!? CONTINUED..page 44........ - 03/20/07 12:40 AM
Quote:
Marq:
I've been looking around at some of the "burgundy" offered by different paint manufacturers, and it's occured to me that I'm really looking for a burgundy that's much more on the red end of the spectrum than the purple. Then it occured to me with your repeated comments about a "deep, dark red", that you and I may be searching for the exact same color! I've attached a photo of the car that I consider my absolute ideal. Does the "deep, dark red" in the back of your mind look anything like this?
Chris
Hi Chris
I just saw the picture of your 'dream' color and I was mistaken... I was envisioning the more deep purple that is almost bordering into the blue range. That color you have in the picture strikes me as something of a blood red wine type color.
https://board.moparts.org/ubbthreads/upload2/3374543-69h_00211_2.jpg
After seeing that picture, I have to admit that it is a a gorgeous color and looks spectacular on that car body. I really think you have to work to land on that color, rather than submit to a simple Flag Blue. No offense meant to the blue car owners in the viewership here... but that blood red wine color would be the one that drops the jaws if a Flag Bue was parked next to it.
The 'good news' is that if you follow that recipe I gave you with the Fire Red and the Flag Blue, you 'should be able to land on that color - it will just require you to start from a 30% to 60% Fire Red to the Flag Blue.
Try this to see for yourself.. how it should work in theory...
Go to the web page at :
http://meyerweb.com/eric/tools/color-blend/
For the "Color 1" insert : #000099
For the "Color 2" insert : #FF0000
Set the selector to give you 10 midpoints...
Then hit the BLEND button.
You should get a palette of 12 colors show up in a gradient. With Flag Blue at the top and Fire Red at the bottom - with the theoretical color blendings in between.
Since it is set up a 10 gradients, you can almost take that to be 'percentages' of colors to arrive at each of the results.
I love that color you envision... stick with your dream... it's gorgeous.
Marq
.
Posted By: Marq
Re: Paint job on a budget!? CONTINUED..page 44........ - 03/20/07 01:01 AM
Two questions have been raised that I will attempt to address...
a ) Epoxy paints... and
b ) Top Secret brand paints.
a ) With epoxy paints there is usually more surface preparation required than say a polyurathane or a Tremclad/Rustoleum Enamel. With the Pettit brand the surface preparation was enough to scare off most boating 'do-it-yourselfers'. IF you were to give consideration to an epoxy base paint you DEFINITELY should research what surface preparation or base coats you will HAVE TO DO according to that paint manufacturer. In some cases the surface preparation may be minimal and ideal for a 'do-it-yourselfer'... OR in some cases it may be a nightmare scenario with a lot of pre-painting work that will make it not seem like the right route to take. An epoxy paint should have superior adhesion and hardness... BUT that very hardness may be the downfall in the automotive situation where the 'skin' has zero flexibility. Put it on a rubber bumper and it 'may' crack off when the bumper is bumped for example. Even a road chip may be sufficient to chip a chunk of it when hit hard enough - rather than flexing with the impact. Again, you need to see what the particular paint manufacturer has to say about the flexibility of the paint on a specific type of surface...
b ) Believe it or not I had read about the Top Secret brand of paint - and if I was living in the States I would probably have given them strong consideration as a potential paint. YES, they have an incredible color range... and YES I had read about a number of people who were thrilled by the results of their paint. Shiny, ease of application and overall great results. So the Top Secret brand may be another resource that the folks on the US side of the border can add to our paint type arsenal. I believe they will ship beyond the US borders. So I would have no qualms about giving their paint a try based on what I read about the company, their quality of customer service AND the quality of their paints.
That having been said... I would restrict my search of colors and product with Top Secret to their TS-4 paint - which is a ONE PART POLYURATHANE... ( notice that I am deliberately choosing their one-part polyurathane over their epoxy paint... )
If you go directly to the TS 4 page, you can check out their color selection and their product bio...
http://www.topsecretcoatings.com/ts-4_urethane_reinforced_alkyd_gloss_4849821.htmI will post their product bio here as well since it says the very things that we WANT to see in a possible paint candidate :
Quote:
Our advanced 1 Part Urethane Reinforced Alkyd provides a waterproof enamel like finish that is so tough, so durable you will want to use it in a wide variety of applications. Provides excellent service on automobiles, parts, heavy equipment, off road vehicles, trailers, machines, interior and exterior trim or anywhere protection from exposure to challenging weather conditions requires the toughest alkyd on the market today.
Like our TS 100 1 Part epoxy it is a blend making it an unusual and exceptional product to use. TS 4 can be used almost anywhere and in almost any application where you want a hard, tough, long-lasting finish inside or out.
Use it with confidence in any exterior application where exposure to water, hot sun, and extreme wear conditions are typically a problem. Great for interior or exterior uses where protection from heavy foot traffic, abrasion, or typical wear and tear is a concern.
TS 4 offers the ultimate in a tough, highly durable, protective finish that excels in a wide variety of automotive, mechanical and industrial applications.
It comes in 36 stock colors, plus 13 camouflage colors, however, we can provide you with any custom color by special order.
It dries quickly and self levels to a hard gloss finish that is excellent for wood, metal, concrete, ceramics and most any surface conceivable.
Not available in clear.
Spray, brush or roll it on! It is self-leveling, lead-free, non-toxic and resists chipping, cracking peeling and chalking when properly applied.
Economical to use because coverage is approx 400-450 square feet per gallon however, actual coverage area depends on the color, texture and porosity of the surface being coated. For best results reduce and clean equipment with TS 101 Thinner.
Usually only one coat is required. Apply by brush, roller or spray. Available in quart, gallon or five gallon cans.
Marq
.
Posted By: Marq
Re: Paint job on a budget!? CONTINUED..page 44........ - 03/20/07 01:14 AM
Quote:
just thought i'd share my colour mixing results. i applied another coat tonight with some white in it also, but at this stage it looks like i put in to much blue...
here's some of the previous coat, and the aim, well something similar anyway, mayb a bit more green, but then the miura colour looks very yellow in some pics...
sorry, just realised how large that last pic is, and also sorry for the dodgy phone quality pics
I think you did a quite fabulous job at landing close to the color you wanted. Kudos !
.
Posted By: Anonymous
Re: Paint job on a budget!? CONTINUED..page 44........ - 03/20/07 01:15 AM
Ok ... I talked to a technical guy at Top Secret Coatings:
http://www.topsecretcoatings.com/automotive_paint.htmI'm going to be trying the TS-100 1-part epoxy.
He raves about the TS-100 1-part epoxy ... he says it has an "85-90%" gloss rating. Whereas most automotive paints have a 75% gloss rating. He says it will last a very very long time. Doesn't need a primer coat -- gan go right onto bare metal. Very good self-leveling. $84.00 per gallon. This is a new formula, and they are thrilled with it. He reeled off a long list of many industries using it -- military, etc. The one that stuck in my head is the fishing lure industry ... he says they can't get enough of it.
One thing to keep in mind, tho ... if you try to paint on top of TS-100, you might have compatibility problems, depending how the new paint is thinned. If it uses mineral spirits-type of thinner, it will be fine. But their TS-2 2-part polyurethane would have a bad reaction.
Their TS-2 (2-part polyurethane) is tougher. Costs $103.00 per gallon. Contains Isocyanates. But has slightly lower gloss than the TS-100 epoxy and doesn't self-level as well.
Their TS-4 urethane reinforced alkyd seems to be similar to Interlux Brightside ... he says it's much better than Rustoleum ... "A very good value for the money." He said this was a precursor to the TS-100.
Basically, every time I asked about any of their products, he ended up going back to TS-100 1-part epoxy. They are obviously very proud and excited about this product. It wasn't a sales pitch, it was obvious he believed in it.
I've got a quart of glossy white TS-100 coming, and I'll post results on this forum when I've had a chance to try it out.
Posted By: Anonymous
Re: Paint job on a budget!? CONTINUED..page 44........ - 03/20/07 02:01 AM
I know nothing about "Top Secret"
But from their website and what you have posted they sound like used car salesmen
Whatever you want we can fill your order, I always question things that sound "too good"
and better than anyone else....
Beaulieu
Posted By: Exit1965
Re: Paint job on a budget!? CONTINUED..page 44........ - 03/20/07 02:05 AM
Montanaman, good info and I look forward to the results. At $28 a quart it's cheaper than brightside and the color selection looks better.
Did the TSC guy mention anything about the hardness? On the site, it says
Quote:
Speed up dry times or harden with TS 160 Accelerator / Hardener.
I wonder if the results people are ranting and raving about (according to the guy you talked to) are straight applied from the can, or if they are hardened with the additive.
Posted By: Anonymous
Re: Paint job on a budget!? CONTINUED..page 44........ - 03/20/07 02:52 AM
Quote:
I wonder if the results people are ranting and raving about (according to the guy you talked to) are straight applied from the can, or if they are hardened with the additive.
You know, I forgot to ask him about the hardener, but I sent him an email with that question after our phone conversation. I'll let you all know as soon as I get more info on that.
Beaulieu: I've dealt with a lot of salesmen, and I can smell them from a mile away. The guy I talked to really didn't sound like a salesman at all. He sounded more like a techie. This is not a large company like Rustoleum, and I get the impression he doesn't do sales. I asked for someone who could answer technical questions, and I got him.
Nevertheless, the proof will be in the test results. We'll see what happens when the paint arrives. Unfortunately, I've never brushed or rolled Rusto or Brightside, so I won't be able to give you a direct comparison any time soon.
Remember: There were a lot of people who said Charger's rolling method sounded too good to be true.
Posted By: 69DartGT
Re: Paint job on a budget!? CONTINUED..page 44........ - 03/20/07 03:11 AM
My old truck has maybe 6 coats of thinned Fire Red Brightside and zero hardeners, I can't believe just how hard this paint is, I thinned it about 40%, foam roller followed by a dry foam roller. I did not wet sand and in retro speck may be I should have, but is a work truck that looked really bad before I started so I'm happy with the paint.
Posted By: Anonymous
Re: Paint job on a budget!? CONTINUED..page 44........ - 03/20/07 03:14 AM
Quote:
a ) With epoxy paints there is usually more surface preparation required than say a polyurathane or a Tremclad/Rustoleum Enamel. With the Pettit brand the surface preparation was enough to scare off most boating 'do-it-yourselfers'. IF you were to give consideration to an epoxy base paint you DEFINITELY should research what surface preparation or base coats you will HAVE TO DO according to that paint manufacturer. In some cases the surface preparation may be minimal and ideal for a 'do-it-yourselfer'... OR in some cases it may be a nightmare scenario with a lot of pre-painting work that will make it not seem like the right route to take. An epoxy paint should have superior adhesion and hardness... BUT that very hardness may be the downfall in the automotive situation where the 'skin' has zero flexibility. Put it on a rubber bumper and it 'may' crack off when the bumper is bumped for example. Even a road chip may be sufficient to chip a chunk of it when hit hard enough - rather than flexing with the impact. Again, you need to see what the particular paint manufacturer has to say about the flexibility of the paint on a specific type of surface...
b )That having been said... I would restrict my search of colors and product with Top Secret to their TS-4 paint - which is a ONE PART POLYURATHANE... ( notice that I am deliberately choosing their one-part polyurathane over their epoxy paint... )
Marq: Everything you said about epoxies seems to be true. But I would add that the TS-100 1-part epoxy isn't a true epoxy at all. It's actually a silicon-based product with some epoxy as well as urethane resins. I'm not trying to be a cheerleader for Top Secret ... just wanted to make sure everybody got the whole story on TS-100. You shouldn't compare the Pettit Epoxy to TS-100. It can be painted on bare metal ... even works on vinyl, apparently is very flexible.
But again, we can't really know anything until we test it, and I'll let you guys know as soon as I can.
Posted By: Anonymous
Re: Paint job on a budget!? CONTINUED..page 44........ - 03/20/07 05:34 AM
Quote:
Aussie, any updates w/ the Miata?
We're suffering through a pretty bad drought in AUS at the moment and we aren't allowed to wash a car at home unless it is with tank water, so I have only washed my car once since the new year. So if the Brightside will stand up to 3 months of zero upkeep and still look like this, then it should be pretty good once I'm able to polish it all properly.
So here is an evening shot of the car after I washed it last weekend.

Posted By: Anonymous
Re: Paint job on a budget!? CONTINUED..page 44........ - 03/20/07 06:25 AM
>Marq: Everything you said about epoxies seems to be true. But I would add that the TS-100 1-part epoxy isn't a true epoxy at all. It's actually a silicon-based product with some epoxy as well as urethane resins. *******************
I think this is the same story as the Pettit Easypoxy - the name sure sounds like an epoxy, but check the description:
"Highest Gloss Topside Enamel
Tough, Weather Resistant Finish
Easy to Apply, Excellent Brushability"
"Easypoxy is a highly rated, one-part polyurethane topside paint improved by the addition of silicone for a brilliant shine and easy brushability. It also contains ultraviolet filters which enhance the already superior gloss retention and durability of polyurethane. This results in a topside finish that is exceptionally easy to apply and produces a lasting gelcoat-like brilliance, with a minimum of effort. Easypoxy is available in white and twenty-five popular topside colors." It sounds like the Pettit Easypoxy and TS-100 are very similar products - neither of which seems to have the difficult/complicated preparation steps of a true epoxy like Marq has described - actually largely the same as Brightsides - in fact it sounds like one or both of them may even be superior for a DTM application. Maybe they are sort of the "next generation" of modified urethane for the roll/brush-on application?
>But again, we can't really know anything until we test it, and I'll let you guys know as soon as I can. *****************
That's EXACTLY what I wanted to hear!!! Keep us posted, I'll be checking back daily until you give us the goods! Hey, any chance that (as a paying customer) you can get them to send you some color chips for their colors in the dark red/burgundy range - or better yet get them to send them to ME???
BTW apparently a phone call works much better than an email - I still haven't heard a thing back from Top Secret.
Marq: I appreciate the color-mixing pointers and your shared admiration for the "
deep wine red " color - I refer to it as burgundy only because it's very close to the original "Flambeau Burgundy" Pontiac factory color. Of course this is the same company that decided to use the name "Carousel Red" (commonly seen on the '69 Judge) to describe the Chevy "Hugger Orange". Most will agree, there's absolutely nothing red about it.
As for my "burgundy", I've never seen a color so striking on a '69 GTO, and I do think anything else would be 2nd best. You have strengthened my resolve to find a way to get it.
Still hoping to find a way to get ahold of some Top Secret paint chips.
Thorn: I see you're just down in F-ville. I work in Springdale, and live in Rogers near the lake. Glad to hear you like the color, too - even if it's going on a FORD.
Stay tuned into this thread and I'll let you know what I find out about trying to get it in rollable urethane (or otherwise) form.
Chris
Posted By: Anonymous
Re: Paint job on a budget!? CONTINUED..page 44........ - 03/20/07 04:40 PM
Here's a preview of the buffing taken with my cell.
Notice the overhead light reflection in the first shot, the second shows a little of the surface before buffing in the lower section of the frame.
Hope to be finished this week.
Posted By: Anonymous
Re: Paint job on a budget!? CONTINUED..page 44........ - 03/20/07 05:32 PM
Quote:
Ok ... I talked to a technical guy at Top Secret Coatings:
http://www.topsecretcoatings.com/automotive_paint.htm
I'm going to be trying the TS-100 1-part epoxy.
He raves about the TS-100 1-part epoxy ... he says it has an "85-90%" gloss rating. Whereas most automotive paints have a 75% gloss rating. He says it will last a very very long time. Doesn't need a primer coat -- gan go right onto bare metal. Very good self-leveling. $84.00 per gallon. This is a new formula, and they are thrilled with it. He reeled off a long list of many industries using it -- military, etc. The one that stuck in my head is the fishing lure industry ... he says they can't get enough of it.
One thing to keep in mind, tho ... if you try to paint on top of TS-100, you might have compatibility problems, depending how the new paint is thinned. If it uses mineral spirits-type of thinner, it will be fine. But their TS-2 2-part polyurethane would have a bad reaction.
Their TS-2 (2-part polyurethane) is tougher. Costs $103.00 per gallon. Contains Isocyanates. But has slightly lower gloss than the TS-100 epoxy and doesn't self-level as well.
Their TS-4 urethane reinforced alkyd seems to be similar to Interlux Brightside ... he says it's much better than Rustoleum ... "A very good value for the money." He said this was a precursor to the TS-100.
Basically, every time I asked about any of their products, he ended up going back to TS-100 1-part epoxy. They are obviously very proud and excited about this product. It wasn't a sales pitch, it was obvious he believed in it.
I've got a quart of glossy white TS-100 coming, and I'll post results on this forum when I've had a chance to try it out.
Wow, Looks like I have stirred up a bee's nest with the top secret stuff. I'm glad you guys know enough about paint to ask the right questions to the tech people. I can hold my own when it comes to electronics and computers, but this fixing up cars thing is a new hobby for me. It still looks like I'm few weeks/months away from laying down any paint myself, so I'm just gonna continue reading and learning. I'll probably try one of the top secret paints when I finally get to that point, so I'll be really interested in any results you have before I start my experiments.
Posted By: Anonymous
Re: Paint job on a budget!? CONTINUED..page 44........ - 03/20/07 08:02 PM
Quote:
Here's a preview of the buffing taken with my cell.
Notice the overhead light reflection in the first shot, the second shows a little of the surface before buffing in the lower section of the frame.
Hope to be finished this week.
If you use a good cutting compound and a cutting pad on your polisher, you should be able to get rid of pretty much all of the orange peel in the second shot. The shine is really good but with a little more polishing you could have it looking perfect.
Posted By: Anonymous
Re: Paint job on a budget!? CONTINUED..page 44........ - 03/20/07 08:35 PM
Im sure this question has been asked before but... What kind of compound and pad do you recommend Ausie Driver? Im getting all my supplies and Im interested to find out what people are using.
Posted By: Anonymous
Re: Paint job on a budget!? CONTINUED..page 44........ - 03/20/07 09:27 PM
Quote:
Im sure this question has been asked before but... What kind of compound and pad do you recommend Ausie Driver? Im getting all my supplies and Im interested to find out what people are using.
I have most of the Poorboy's range of polishes etc and I use Wolfgang Buffing Pads (I have 2 of each of their pads) and I prefer to use my Random Orbital polisher which has similar specs to a PC 7424.
But I'm not saying that these products are the only ones that will get the job done. Basically any of the high-end product lines that have cutting compounds/swirl removers/polishes/waxes/synthetic sealants will potentially produce a perfect finish.
Check out http://autopia.org/forum/guide-detailing/ for a lot more detailed information.
Posted By: Anonymous
Re: Paint job on a budget!? CONTINUED..page 44........ - 03/21/07 12:42 AM
Posted By: Anonymous
Re: Paint job on a budget!? CONTINUED..page 44........ - 03/21/07 01:23 AM
Luv4x4 ... that looks really good. I have a few questions:
- Did you use a primer coat?
- How much did you thin the rustoleum?
- How many coats?
- Did you wetsand every two coats? (what grits?)
- What kind of polishing compound did you use?
- Which polisher machine?
- Which pads?
- As shown in the pics, do you have some wax on the truck, or is it just the paint giving that gloss?
Can you give a step-by-step account of what you did? Thanks for sharing your experience with this method.
Posted By: Anonymous
Re: Paint job on a budget!? CONTINUED..page 44........ - 03/21/07 02:38 AM
Thanks
Would like to say first off, for the easily threatened paint and or body guys out there who feel it necessary to send negative, accusing emails to me to the tune of, "what a waste of time and materials", " taking food out my kids mouths", "hope that paint job falls off in the parking lott, we're professionals for a reason" blah blah blah etc, etc... spare me, don't know if it has originated from here or the other thread I have posted to regarding this process... nor do I give a rat's behind. You won't hear me raggin on someone for fixing their own computer, it is YOURS after all.
Allrighty then, now that I got that off my chest.
I certainly don't mind contributing to what has been an awesome subject, and frankly one of the most useful topics I have found on what has become of the Internet.
But honestly, I applied what I learned from reading this thread and putting in the practice time on a few pieces of metal just to become familiar with how the paint and rollers react from loading to near the end of the final roll-over. I found several methods of minimizing the tiny bubbles, but found they were mostly unavoidable... but with a little work and attention to detail they can be conquered.
Except for the spots I had to repair in the prep stages, I did not primer coat the truck, once again I took my time feather sanding the deeper scratches and filling some with bond filler epoxy. Tig welded,& applied rust converter to the worst spots, filled, sanded and spot primed. Will stress again, I took my time.
Thinning: The first batch, about a pint, I thinned about 40%, not wanting to stand around and stir, I came up with something I feel worked better. I had 2 plastic mixing cups and would simply pour the mix from one into the other, slowly, several times. I did notice for my climate and conditions it seemed a little thin and tended to run easier, BUT...the good thing about this was it gives allot more time to work the paint. Which was in fact a huge factor in the final outcome, not being in a hurry to move on to the next panel until I was satisfied I had the bubbles gone, settled and I hadn�t missed any runs.
I used the small foam detail brushes where needed and those spots turned out just a good, some better...I actually wondered what it would look like to do a whole car with the solid foam stick brushes, the paint leveled just the same.
I did wetsand after each even coat, starting with 800 and ending with 2000(color sanding), I put on 10 coats total...very thin coats. Toward the end, I found it better to apply as if I were pressing and forcing the paint out of the roller, changing directions, using shorts strokes while the paint was still fresh off the roller, then as it began to "flash" I would pay attention to rolling over and out the edge marks left by the roller. Timed right, they disappear into the paint.
I had originaly planned to wait 3 weeks or so to let the paint "harden", but I had emailed the original author of this thread and he advised to buff it after an overnight drying, as it was much easier to buff while the paint was still "soft" I totaly agree there, I had actually waited 2 days.
I used 3M PerfectII compound and polish glaze #'s 5995,5973 and their buffing wheel # 5711 on a Makita car polisher similar to the 9227 @ about 1800-2500 rpm. Taking care not to burn the edges etc. Be sure to wash with a good mitt afterward to remove any leftover compound, was told it sticks like crazy if left to harden.
Finally, those pics are just after polishing, wash and dry. Just after those pictures I waxed with good ole Turtle wax hard shell. In comparison the shine looked pretty much the same, couldn't tell much difference from a cell phone picture or in person.
I have some other notes etc, for those interested here
http://forums.luvtruck.com/viewtopic.php?t=12850Thanks also to 'bighappy' from Luvtruck.com, for pointing me in this threads direction to start with.
I hope any of this helps someone to get the results and satisfaction I achieved. Best of luck...& Take your time
Posted By: kenzo42
Re: Paint job on a budget!? CONTINUED..page 44........ - 03/21/07 06:22 AM
Looks awesome Aussie. Too bad about the drought.
Miata + hardtop = HAWTNESS!
In your opinion, do you think the Brightside will keep it's shine?
Quote:
Quote:
Aussie, any updates w/ the Miata?
We're suffering through a pretty bad drought in AUS at the moment and we aren't allowed to wash a car at home unless it is with tank water, so I have only washed my car once since the new year. So if the Brightside will stand up to 3 months of zero upkeep and still look like this, then it should be pretty good once I'm able to polish it all properly.
So here is an evening shot of the car after I washed it last weekend.
Posted By: Anonymous
Re: Paint job on a budget!? CONTINUED..page 44........ - 03/21/07 08:18 AM
Quote:
Looks awesome Aussie. Too bad about the drought.
Miata + hardtop = HAWTNESS!
In your opinion, do you think the Brightside will keep it's shine?
Brightside is like any other paint as it will fade over time unless it is maintained/cared for. But if it is cared for in a reasonable manner, I don't see any reason why it won't perform as well as any single stage automotive paints.
Posted By: 69chargeryeehaa
Re: Paint job on a budget!? CONTINUED..page 44........ - 03/21/07 01:31 PM
LUV4X4 - awesome job on the truck!!
I read the whole thread on your link, no wonder my photobucket bandwidth is exceeded every week!!! I was trying to figure out why!!!
I'm glad it worked out for you, it just goes to show that anyone can do a really good paintjob without killing the wallet, and then have the priceless moments saying you painted you car with a roller!!! Overall the process is very easy, especially when compared to spraying paint, and the biggest factor of not making a huge mess and not needing expensive tools/equipment to pull off a respectable paintjob. Now that you've gone thru the learning expirence, i'm sure your next time around will be much eaiser since you know what to expect. If your paitient thru the whole process, don't rush thru prep and paint, you will have an excellent paint job just like all the members here.!!!
And as for the paint not lasting, ect...it's all bull crap, like i mentioned before everyone is thinking about this rust paint as paint that fades, and it will, but most of the expirences people have is with mail boxes, and wheel barrows, that never see any maintance at all. I'd love to see how even the highest quality paint (either single stage or BC/CC) would hold up to the elements with NO maintance, i would'nt be suppriesd to find that auto paint would most likely not even be as durrable as rust paint. If you take care of your paint with average maintance, the paint DOES hold up extreemly well; my car has for 7yrs now; i'm not only the president, but i'm also a client!!!
Posted By: Anonymous
Re: Paint job on a budget!? CONTINUED..page 44........ - 03/21/07 07:35 PM
Thanks Martin
Props mean alot coming from the 'president'
Looks like I will have another project in a few weeks. My son in the process of buying himself an 89 Chevy truck, and has already hinted at the old man to help him paint it.
Looking forward to it, my project was alot of fun and very rewarding. In fact, since Saturday, even before I had polished it, had 3 drive up or honk at the stop light offers to buy my LUV... I of course replied "no way". Will be open to offers to paint others rides tho, have them do the main prep and I'll do the paint and finish work for some parts money.....hmmmm
Thanks again!
Posted By: Anonymous
Re: Paint job on a budget!? CONTINUED..page 44........ - 03/21/07 07:37 PM
Just had a thought...
Most people don't know this, but all these Rustoleum type paints are Alkyd enamels...this type of paint has been around since the 1920s when Du Pont invented it as a (more expensive) alternative to nitrocellulose laquer. The new paint was called Dulux, and was a "synthetic" paint because the alkyd resin base was...well, synthetic. Dulux was used as OEM paint on a lot of cars in the 50's and 60's...the Du Pont paint chips for my '60 Olds list numbers for both Duco laquer and Dulux synthetic enamel.
You can still buy synthetic enamel at most auto body supply stores. It's slowly being phased out...they sell a lot more acryllic enamel, but it's still sold by many manufacturers as a "budget" line.
If there is a color you just HAVE to have, you could probably just go to the nearest auto paint supplier and have them mix up a gallon of whatever it is you want. Price is proabably around $50 a gallon...more than Rustoleum, but you have a much wider choice of colors. The exact forumula will differ from Rustoleum, but the basic chemistry is the same. I honestly don't see why it would go down any different than all the other alkyd enamels we've been using. Everone says not to even try this with a metallic color, but I'm half tempted to get a quart of something metallic just to see what would happen. Might look horrible...who knows. If I ever have an extra $20 and some spare time I'll try it
.
Anyway, just a thought. And if anyone makes fun of your paint, just tell them it's a synthetic
.
Posted By: Anonymous
Re: Paint job on a budget!? CONTINUED..page 44........ - 03/21/07 08:58 PM
Chris...my first car was a Pontiac Catalina...it's little brother was the Tempist. I've always wanted to get back behind the wheel of a Pontiac. One thing lead to another and I ended up with a '68 Mustang the summer of '87. 20 years later my wife bought me '69 F-100. They both need paint and some restoration work. I haven't done any body work since '86. I'm really looking forward to working on something.
Posted By: pdqvsix
Re: Paint job on a budget!? CONTINUED..page 44........ - 03/22/07 01:28 PM
I started my 2nd roller paint job yesterday on my ford tempo it's just a runabout daily driver but i still want it to look good since it's very dependable and easy on gas.
I'm painting it rustoleum gloss black professional and this time around it is definately much easier to do the roller painting then the first time.
The 1st car i did in gloss white rustoleum professional is still just like when i painted it last summer as far as any issue with fading goes,haven't noticed any. My thoughts about if it does fade, i won't really care it will just mean i will have a new roller rustoleum paint job in a very short time. I said it before and i'll say it again this roller painting is just to easy.
Posted By: ONEBADBIRD
Re: Paint job on a budget!? CONTINUED..page 44........ - 03/22/07 02:26 PM
Hey toolbox, So what your saying is rolling on automotive paint that is actually made to be sprayed. Sounds like you know your stuff when it comes to paint like some of the other fellas on this thread. I'd be willing to try that method out on a test piece and see what happens couldn't hurt. Hopefully this summer I'll be to the paint experimenting process. Thanks for sharing your knowledge of paint with the rest of us and good luck with your project. Jay
Posted By: Anonymous
Re: Paint job on a budget!? CONTINUED..page 44........ - 03/22/07 02:33 PM
Well, I have the roof of the galaxie pretty well under control. I have about 8 coats (had to really sand out some early mistake coats so its about 8 coats. There is definitely a learning curve. The front clip is going much easier.
I found that when the temp gets up to 80* and the roof maybe 10 degrees hotter in the sun, the paint seems to get tacky really quick. It seems most of my roller lines were when the dry roller was actually picking up drying paint and sort of raising or roughing the surface in some areas. It's hard to even see this happening paint gloss white on a roof but the roller lines are there. In cooler weather I haven't had this problem.
Anyone else found this to be the case?
Posted By: Exit1965
Re: Paint job on a budget!? CONTINUED..page 44........ - 03/22/07 03:02 PM
PDQ - I think about it the same way. It's kind of novel to be able to change your car's color over the course of a week (or two, or a few days) and for under $100.
Posted By: 69stanger
Re: Paint job on a budget!? CONTINUED..page 44........ - 03/22/07 05:38 PM
HI everyone. I've been reading the entire thread over the past month. I came here from a thread on stangnet. I want to do this on my 69 mustang coupe once I finish all the body work and modifications. My car has been sitting in primer for more than a decade (I hate to admit it). I've wondered before about using industrial enamel from tractor supply or similar to paint my car. I've painted a car with a spray gun, my 81 2wd LUV custom truck and helped a friend spray his 72 chevelle so I'm familiar with painting cars. I had macco repair and paint my 79 mustang and was pretty ticked about the entire result to put it mildly. I could have done better blindfolded. More recently my DD, an 00 ZX2, was repaired and painted twice from two seperate accidents by ford dealers. The quality was less than some of the results seen on this thread. All that said, my 69 will be my DD when its finished and I will not hesitate to drive it when and where I want knowing I won't be spazzing over damaging a 5K paint job. Hats off to all you pioneers who dare to defy the critics!
I'm looking for the same color as Chris on that GTO or the dark red on the new mustangs. I did check out Rustolem's High performance line industrial enamel (7400 system). They have a dark red (Fire Hydrant Red #1210402) and a clear (717402) for those who are interested. They come in gallons and are available through a couple of vendors at work. I'm on the fence about the clear.
Rustoleum 7400 System Enamel I wanted to comment on a couple of things. 1 POR 15, I've used it on my son's jeep after welding up the floors. I sprayed over it with primer before it cured which is what they recommend. 2 Aluminum, remember to use zinc chromate primer over aluminum and you shouldn't have any adhesion issues with paint. Cobra and kit car forums may be helpful in that area.
Posted By: Anonymous
Re: Paint job on a budget!? CONTINUED..page 44........ - 03/22/07 08:56 PM
Quote:
I've wondered before about using industrial enamel from tractor supply or similar to paint my car.
I'm experimenting with this right now...go back a few pages to see my initial results. I'm pretty impressed so far. I finished welding the floor board in my car last night and put a coat of Van Sickle primer over it...I'll be putting a coat of paint on it soon, and I'm going to paint another "test fender" with the left over paint. I'll be using the hardener again. I'll post pics when I do.
Posted By: QuickDodge
Re: Paint job on a budget!? CONTINUED..page 44........ - 03/23/07 12:05 AM
69stanger
The industrial section of Rustoleum's website has technical data sheets for each product. The link to the data sheets is normally found near the bottom of each product description page.
The technical data sheets give a LOT of infomation on the paint. One section describes the paints performance when tested to ASTM standards. It's easy to compare their various industrial paints. They have the hardness, flexability, abrasion resistance, impact resistance, and weathering characteristics. There's a BUNCH of good information on those sheets! (read the data sheet on the 3400 system
)
Posted By: QuickDodge
Re: Paint job on a budget!? CONTINUED..page 44........ - 03/23/07 12:12 AM
ToolBox
Keep us posted on your results. I'm definitely interested.
Does the hardner require a faster rate of application?
Posted By: 69stanger
Re: Paint job on a budget!? CONTINUED..page 44........ - 03/23/07 02:23 AM
Quote:
I'm experimenting with this right now...go back a few pages to see my initial results. I'm pretty impressed so far. I finished welding the floor board in my car last night and put a coat of Van Sickle primer over it...I'll be putting a coat of paint on it soon, and I'm going to paint another "test fender" with the left over paint. I'll be using the hardener again. I'll post pics when I do.
I've been following everyone's progress and am interested in all the results. I probably won't have time to paint miine till the end of summer or into the fall. I have to paint the house first. Priorities
Posted By: 69stanger
Re: Paint job on a budget!? CONTINUED..page 44........ - 03/23/07 02:35 AM
Quote:
69stanger
The industrial section of Rustoleum's website has technical data sheets for each product. The link to the data sheets is normally found near the bottom of each product description page.
The technical data sheets give a LOT of infomation on the paint. One section describes the paints performance when tested to ASTM standards. It's easy to compare their various industrial paints. They have the hardness, flexability, abrasion resistance, impact resistance, and weathering characteristics. There's a BUNCH of good information on those sheets! (read the data sheet on the 3400 system )
I checked the data sheet for both the 3400 & the 7400 system. I like the color choices of the 7400 system better than the 3400 system. I know it runs around $35 a gallon retail at Grainger and probably the same at Fastenal and a couple other vendors. I can get it through one of them with the company discount and right now we have a very good relationship with Fastenal. I'm going to ask the rep to see if she can get me a color sample for the Fire Hydrant red.
Posted By: Anonymous
Re: Paint job on a budget!? CONTINUED..page 44........ - 03/23/07 03:59 AM
Alright, I'm completely new here, but I've read over the first 43 pages and 20 odd pages from this section. I am tired of reading, so I ask this question. Could we put all of the necessary procedures for painting with both Rustoleum/Trem. and Brightside into a seperate locked thread and sticky it? I'd like to know the process of painting with Brightside.
Is painting with Brightside like this?
1. Prep car
2. Thin Brightside to whatever viscosity.
3. Paint 2 coats
4. Wetsand with 1500 grit
5. Paint 2 more coats
6. Wetsand with 2k grit
7. Cut and polish
8.
9. Profit
Posted By: Marq
Re: Paint job on a budget!? CONTINUED..page 44........ - 03/23/07 04:02 AM
Quote:
I probably won't have time to paint miine till the end of summer or into the fall. I have to paint the house first. Priorities
Oh... then you should refer to Charger's message thread on $50 house paint jobs... Yup... he did the whole house for less than $50 with just Tremclad, some thinner and a couple of Mexican's with 4" rollers...
.
Posted By: Marq
Re: Paint job on a budget!? CONTINUED..page 44........ - 03/23/07 04:12 AM
Quote:
Alright, I'm completely new here, but I've read over the first 43 pages and 20 odd pages from this section. I am tired of reading, so I ask this question. Could we put all of the necessary procedures for painting with both Rustoleum/Trem. and Brightside into a seperate locked thread and sticky it? I'd like to know the process of painting with Brightside.
Is painting with Brightside like this?
1. Prep car
2. Thin Brightside to whatever viscosity.
3. Paint 2 coats
4. Wetsand with 1500 grit
5. Paint 2 more coats
6. Wetsand with 2k grit
7. Cut and polish
8.
9. Profit
That is basically the procedure. With the Brightside you don't have to cut it too much because it is fairly liguidy from the can. But by adding thinner you will increase your time to work with it and for it to self-level. We are only talking about a 10% cut of their recommended thinner at the most ( as compared to the higher amount of thinner needed to cut Tremclad/Rustoleum to get it to the same viscosity.
What you might find works with the Brightside is to try to lay the first two layers on 'straight from the can'. This will give you the best shot at getting maximum coverage. However, if you find that you just can't get your rolling technique down pat for a smooth surface or coating, then fall back to cutting the paint for subsequent layers.
Part of the game with Brightside will be your gut instinct. As you lay down your layers, you may get lucky and lay down two perfect layers... and you might go to a third layer prior to doing an initial surface sanding.
Just keep in mind that the whole point of those alternative layer sandings is to provide you with as smooth a subsurface as possible prior to adding the next layer/coat on.
The smoother the subsurface, the glossier and shinier the final product...
.
Posted By: Anonymous
Re: Paint job on a budget!? CONTINUED..page 44........ - 03/23/07 04:25 AM
Quote:
Quote:
Alright, I'm completely new here, but I've read over the first 43 pages and 20 odd pages from this section. I am tired of reading, so I ask this question. Could we put all of the necessary procedures for painting with both Rustoleum/Trem. and Brightside into a seperate locked thread and sticky it? I'd like to know the process of painting with Brightside.
Is painting with Brightside like this?
1. Prep car
2. Thin Brightside to whatever viscosity.
3. Paint 2 coats
4. Wetsand with 1500 grit
5. Paint 2 more coats
6. Wetsand with 2k grit
7. Cut and polish
8.
9. Profit
That is basically the procedure. With the Brightside you don't have to cut it too much because it is fairly liguidy from the can. But by adding thinner you will increase your time to work with it and for it to self-level. We are only talking about a 10% cut of their recommended thinner at the most ( as compared to the higher amount of thinner needed to cut Tremclad/Rustoleum to get it to the same viscosity.
What you might find works with the Brightside is to try to lay the first two layers on 'straight from the can'. This will give you the best shot at getting maximum coverage. However, if you find that you just can't get your rolling technique down pat for a smooth surface or coating, then fall back to cutting the paint for subsequent layers.
Part of the game with Brightside will be your gut instinct. As you lay down your layers, you may get lucky and lay down two perfect layers... and you might go to a third layer prior to doing an initial surface sanding.
Just keep in mind that the whole point of those alternative layer sandings is to provide you with as smooth a subsurface as possible prior to adding the next layer/coat on.
The smoother the subsurface, the glossier and shinier the final product...
.
Would also be nice to see some side by side pics comparing results from Rustoleum to Brightside.
Posted By: 69chargeryeehaa
Re: Paint job on a budget!? CONTINUED..page 44........ - 03/23/07 01:21 PM
Quote:
Quote:
I probably won't have time to paint miine till the end of summer or into the fall. I have to paint the house first. Priorities
Oh... then you should refer to Charger's message thread on $50 house paint jobs... Yup... he did the whole house for less than $50 with just Tremclad, some thinner and a couple of Mexican's with 4" rollers...
.
You missed one thing, they used 12" rollers, it went much faster.
Posted By: 69stanger
Re: Paint job on a budget!? CONTINUED..page 44........ - 03/23/07 01:29 PM
Quote:
Oh... then you should refer to Charger's message thread on $50 house paint jobs... Yup... he did the whole house for less than $50 with just Tremclad, some thinner and a couple of Mexican's with 4" rollers...
LOL! I think I missed that. I've watched mexicans reroof the neighbors house. I'm scared of what my house would look like after painting.
Posted By: Anonymous
Re: Paint job on a budget!? CONTINUED..page 44........ - 03/23/07 05:36 PM
Quote:
69stanger
...
The technical data sheets give a LOT of infomation on the paint. One section describes the paints performance when tested to ASTM standards. It's easy to compare their various industrial paints. They have the hardness, flexability, abrasion resistance, impact resistance, and weathering characteristics. There's a BUNCH of good information on those sheets! (read the data sheet on the 3400 system )
Can anyone who's familiar with these standards and tests give a short primer (pun intended) on what they mean?
For example:
What is the "pencil hardness" test? Is this like the fingernail scratch test folks write about here?
Any idea what the test conditions of accelerated weathering of 450 hours equates to in the real world?
Rustoleum 3400
System Tested
Primer: n/a
Topcoat: Rust-Oleum� Industrail Low VOC Enamel
CONICAL FLEXIBILITY
METHOD: ASTM D522
RESULT: >33%
CYCLICAL PROHESION
Rating 1-10, 10=best
METHOD: ASTM D5894, 3 cycles, 1,008 hours
RESULT: 10 per ASTM D714 for blistering
RESULT: 9 per ASTM D610 for rusting
IMPACT RESISTANCE (direct/reverse)
METHOD: ASTM D2794
RESULT: >160/>160 in.�lbs.
TABER ABRASION
METHOD: ASTM D4060, CS-17 wheels, 500 g. load, 1000 cycles
RESULT: 40 mg. loss
GLOSS (60�)
METHOD: ASTM D4587
RESULT: 89% (color�black)
ACCELERATED WEATHERING (% gloss retention)
METHOD: ASTM D4587, QUV type A bulb, 450 hours
RESULT: 97% (color-black)
For chemical and corrosion resistance, see the Rust-Oleum Industrial Brands Catalog (Form #206275).
Rustoleum 7400
PENCIL HARDNESS
METHOD: ASTM D3363
RESULT: 5B
CONICAL FLEXIBILITY
METHOD: ASTM D522
RESULT: 5B
GLOSS AT 60�
METHOD: ASTM D4587 (450 hours)
RESULT: 98 (color�black)
CYCLIC PROHESION
Rating 1-10, 10=best
METHOD: ASTM D5894 3 cycles, 1008 hours
RESULT: 10 ASTM D714 for blistering
RESULT: 9 ASTM D2610 for rusting
IMPACT RESISTANCE (direct)
METHOD: ASTM D-2794
RESULT: >160
ACCELERATED WEATHERING (% gloss retention)
METHOD:ASTM D4587, QUV Type A bulb, 450 hours
RESULT: 84% Gloss Retention (color-black)
TABER ABRASION
METHOD: ASTM D4060 CS17 wheels 500g load/1000 cycles
RESULT: 61.6 mg loss
For chemical and corrosion resistance see page 4 of the Rust-Oleum Industrial Brands Catalog Form #206275.
Posted By: shawge
Re: Paint job on a budget!? CONTINUED..page 44........ - 03/23/07 06:07 PM
This site has a good explanation of the ASTM tests
http://www.paintlab.com/corrosion.htmlEdit: looks like not all of the tests are on that page, sorry about that. Here's the pencil test from a google search, it appears to be similar to the fingernail test.
Film Hardness-Pencil Test � ASTM D3363
Test method ASTM D3363 covers a procedure for rapid, inexpensive determination of the film hardness of an organic coating on a substrate in terms of drawing leads or pencil leads of known hardness.
A coated panel is placed on a firm, horizontal surface. The pencil is held firmly against the film at a 45� angle (point away from the operator) and pushed away from the operator in a 0.256-in. (6.5-mm) stroke. The process is started with the hardest pencil and continued down the scale of hardness to either of two end points; one, the pencil that will not cut into or gouge the film (pencil hardness), or two, the pencil that will not scratch the film (scratch hardness).
Posted By: Anonymous
Re: Paint job on a budget!? CONTINUED..page 44........ - 03/23/07 09:02 PM
Quote:
ToolBox
Keep us posted on your results. I'm definitely interested.
Does the hardner require a faster rate of application?
Not really. They suggest letting it "set up" for 1/2 an hour before you use it (I've always been in too big of a hurry to actually wait that long...it's more like 10 minutes for me). Pot time is supposed to be at least an hour IIRC. If you can't get it down in that amount of time, make smaller batches, and make more than one. After it's applied, it will dry to where it's not tacky after a few hours. I left some in a plastic tray that I had left over, and it turned into a solid 1/4" thick chunk in about a week and a half LOL. I peeled it out of the pan...it was solid, but still very flexible. Good qualities for paint . I can't imagine leaving just straight paint that thick and having it dry in a month...I'll bet it would just form a skin, and still be liquid inside. That's one nice thing about the hardener...it cures the paint anaerobically.
Posted By: 69stanger
Re: Paint job on a budget!? CONTINUED..page 44........ - 03/24/07 07:51 PM
I wanted to comment on a couple of things. There's been some concern on paint curing and hardness. I was out in the garage a little while ago and I had a thought. I rebuilt my bicycle a year and a half ago. I painted it with rustolem spray bomb. I started reassembling it about a week after painting. When bolting on the front derailer and the seat tube clamp the paint was still soft enough to scrunch up a little. I'm not sure when the paint fully cured but now it is very hard and durable.
Earlier today I went to the Dayton auto show. As I was looking around at all the new cars & trucks I was paying particular attention to paint and finish. Even these new high dollar vehicles have orange peel, enough that I pointed out to my wife on a new H2 Hummer and she commented how she could feel it. So I'm of the opinion the quality of finish achieved with this method is, at a minimum, equal to a factory finish.
Posted By: Anonymous
Re: Paint job on a budget!? CONTINUED..page 44........ - 03/25/07 12:29 AM
I've been following this thread off and on for about a year now. I'd like to try this method, but a bad experience with Krylon (with polyurethane added) is causing me to hesitate. The Krylon sprayed on quite well and looked nice for a short time, but after just a few months it began to peel and yellow. I used Rustoleum primer,(couldn't find Krylon primer) which may have been part of my problem. I also think maybe the polyurethane may have added to my woes.
Somebody please tell me that I screwed up on the Krylon and that this Rustoleum route will work.
Posted By: admactanium
Re: Paint job on a budget!? CONTINUED..page 44........ - 03/25/07 01:21 AM
Quote:
I've been following this thread off and on for about a year now. I'd like to try this method, but a bad experience with Krylon (with polyurethane added) is causing me to hesitate. The Krylon sprayed on quite well and looked nice for a short time, but after just a few months it began to peel and yellow. I used Rustoleum primer,(couldn't find Krylon primer) which may have been part of my problem. I also think maybe the polyurethane may have added to my woes.
Somebody please tell me that I screwed up on the Krylon and that this Rustoleum route will work.
krylon doesn't work great for vehicles because it doesn't stand up to gasoline well at all. i use krylon on a gas tank of a motorcycle and the first time it got gas on it there was a huge streak of milky white clear coat. i haven't really gotten too far into the rustoleum thing but i'm assuming after all of this that rustoleum and brightside are at least resistant to gasoline.
Posted By: Anonymous
Re: Paint job on a budget!? CONTINUED..page 44........ - 03/25/07 05:58 AM
Hello
I just wanted to share the results from my initial experiment with 69chargers method. I used Brightside to paint the hood of my Fiat 124 Spider. I'm currently in the process of converting it to an electric car and I'm on a tight budget so a big thanks to 69charger for showing us this great method.
I blended my own color using white and yellow brightside, the ratio is 4 parts yellow and 3 parts white.
Here's some pictures of my result.

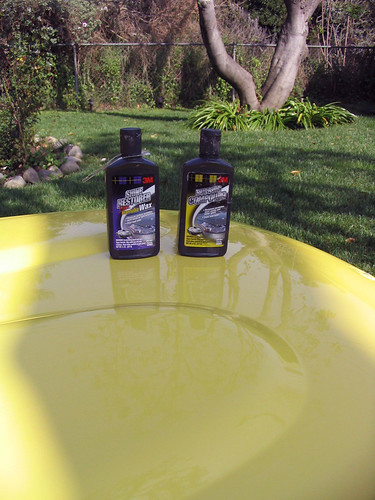
As you can see I used 3M rubbing compound and polish/wax. It worked really well and fast. I didn't have to spend a whole lot of time rubbing.
Overall I'm happy with the end result and will proceed with the rest of the car.
More pictures as well as a detailed writeup can be found on my website.
www.electric-lemon.comThanks
-Peter
Posted By: Anonymous
Re: Paint job on a budget!? CONTINUED..page 44........ - 03/25/07 02:15 PM
peggus that looks awesome! i'm currently playing around with mixing up yellow with blue (currently in various amounts <5%) and also have bought some white to mix in so it looks more oldschool, if it turns out like yours i will be a happy man
but judging by ur ratios i may need to go and buy alot more white.
I have currently bought some offwhite, my thoughts being to take the bright edge off it at the same time. did you just use white white? i've only mixed it in one time, and then decided to get the blue mix right first, and am still going with that ever so slowly, as i dont plan to paint my car for 6 months
Posted By: Anonymous
Re: Paint job on a budget!? CONTINUED..page 44........ - 03/25/07 04:03 PM
Quote:
peggus that looks awesome! i'm currently playing around with mixing up yellow with blue (currently in various amounts <5%) and also have bought some white to mix in so it looks more oldschool, if it turns out like yours i will be a happy man but judging by ur ratios i may need to go and buy alot more white.
I have currently bought some offwhite, my thoughts being to take the bright edge off it at the same time. did you just use white white? i've only mixed it in one time, and then decided to get the blue mix right first, and am still going with that ever so slowly, as i dont plan to paint my car for 6 months
Thank you.
I used just plain white and yellow. I made several small paint samples of different proportions. At first I used 2 to 1 but seeing it on the hood I thought it was too yellow so I upped the white.
The color is a nice creamy pale yellow. the picture with the wax is a pretty accurate depiction of the real life color, at least on my monitor.
I also considered using off white for that retro look but opted against it, I didn't want to complicate things too much.
Let us know how your paint comes out.
-Peter
www.electric-lemon.com
Posted By: Anonymous
Re: Paint job on a budget!? CONTINUED..page 44........ - 03/25/07 05:08 PM
Posted By: Anonymous
Re: Paint job on a budget!? CONTINUED..page 44........ - 03/25/07 06:14 PM
Had pretty similar results about 6-8 coats into my hood and cab, chalked it up to the fact that it's just more dificult doing a larger piece of metal. Wouldn't worry too much about it yet, just try to sand out the orange peel, the rest of mine came out in buffing. Hood looks great now.
Posted By: Anonymous
Re: Paint job on a budget!? CONTINUED..page 44........ - 03/26/07 03:17 AM
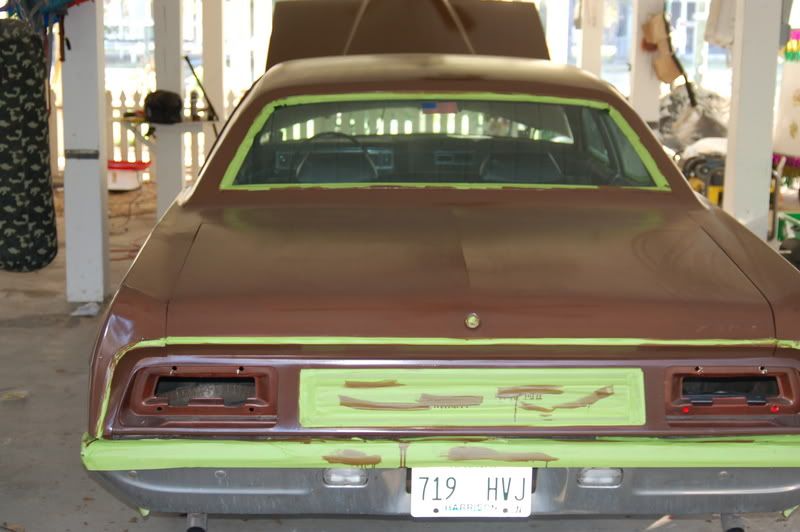
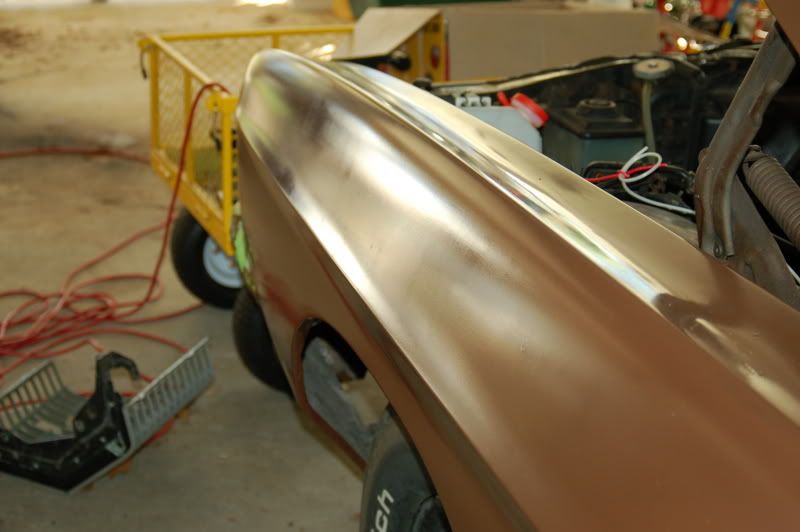
Here are a couple from mine after two coats, but before wetsanding. I'm trying the original method with Rustoleum Pro and I am pretty happy so far. I have a feeling that I am going to wish I was just starting, about the time I finish, because the more I do it, the more I get the hang of how to roll on the paint smoothly.
I kind of learned by accident that it worked better when I thought I had put too much thinner in. I was using the the brush at first to get rid of the bubbles, but I have just about got the hang of doing it with just the roller, now.
I just got my third and fourth coat on, and I will try to post some more pictures of before and after I wet sand again. I do have a couple of runs, where I just didn't notice them until it was too late.
(The finger marks on the trunk are from the pollen, which is horrible here right now, and had settled before I took the pictures the next day after painting.)
Posted By: Anonymous
Re: Paint job on a budget!? CONTINUED..page 44........ - 03/26/07 08:19 PM
JDM96specCTR, the majority of my car looks like that. I opted to go with super thin goes of brightside for the first 3-4 coats, then a wetsand, then possiblity another coat afterwords. I hope it turns out ok. I ordered Poorboys last night.
Posted By: Anonymous
Re: Paint job on a budget!? CONTINUED..page 44........ - 03/27/07 01:25 AM
same here with my grand national... i got done with the final buff and the paint looks wavy and there is a glitter in the paint in some spots?? (must of got the wrong color or it was labeled wrong????) o well and i started in june and i am almost done i did waste alot of paint but now i know i can get it done in 2 weeks max so i might redo the car all over again and use alot less material as i found better buffing pads from 3m and polishing compound also. now it is warmer out and the paint will dry alot faster than in the winter. bit this pait is great and don't smell like real paint does. the paint is hard to strip as i stripped the hood so far and it was thick too. then when i get the black buick done i will start on my white gmc jimmy....
Posted By: Anonymous
Re: Paint job on a budget!? CONTINUED..page 44........ - 03/27/07 04:13 AM
Just a thought
Has anyone tried putting the paint in a plastic squirt bottle to get at places the roller or brush would not get to .....
Beaulieu
Posted By: Marq
Re: Paint job on a budget!? CONTINUED..page 44........ - 03/27/07 01:00 PM
Quote:
Just a thought
Has anyone tried putting the paint in a plastic squirt bottle to get at places the roller or brush would not get to .....
Beaulieu
The biggest problem would be finding the 'ideal' spritzer' bottle. You might end up having to go through quite a few test bottles to find one that has the right capability to handle the viscosity of the paint. I imagine the problem will be runs where you spritz because those things don't really atomize evenly.
Further back in the thread, some of the lads played with those self-pressurized spritzers... where you buy areosol cans that slap on to a contraption holding the paint. I seem to recall that clogged up spouts and splots of paint were the problem there...
So if a presurrize can of your paint mixture can't do it... I don't know how a spritzer bottle is going to hold up.
The one thing about going with some of the 'basic' colors... is that the 'stuff in the can' usually has a matching 'spray can' of the same color.
For example, I did my car in Fire Red by Brightside. BUT I bought the Fire Red spraybombs from Tremclad/Rustoleum. I used the spray bombs on the inner door jams, inner trunk, trunk drain troughs, inner front fender lips, underside of the hood and any nooks and crannies where I needed to lay down some paint.
I did the spray bombing at the start of the job... and did the roller painting after. Since the colors are virtually identical ( even though different manufacturers, you can not detect where one painting ends and the other begins.
I guess the same strategy would probably work well with black, white and any other colors where you can buy the matching color in both aerosol and liquid form.
.
I had thought about this at one point and I was curious about
Posted By: Exit1965
Re: Paint job on a budget!? CONTINUED..page 44........ - 03/27/07 02:05 PM
Yah I've used the pump up can from harbor freight. it actually worked great for awhile (I was painting my engine bay), then started sputtering-- but I dont remember doing much of any cleaning of it after i used it. If you mix the paint thicker than you would to roll, use a pump up spray bottle, and empty it out and spray some mineral spirits or acetone through it at the end it would probably work fine.
Posted By: Anonymous
Re: Paint job on a budget!? CONTINUED..page 44........ - 03/28/07 03:39 AM
Hey, it's been a while but I am continuing on with my project. I am using Rustoleum Pro thinned with 100% mineral spirits, not low odor. I have had some good results, but lately I have had a couple of instances where I wet sand and the paint starts to ball up in some areas. It is as though I have gone through to the previous layer and it is possible to peel some of the top coat up. Presumably this is an adhesion problem. I thought that this was due to using paint left over from the previous coat (in a sealed container) which I then re-thinned, but it has also happened recently when using fresh mix. I have been using the roller to apply thin layers and let it go 18 to 24 hours between coats. I wet sand after every other coat.
Anyone else had this or got any ideas?
Thanks
Posted By: Anonymous
Re: Paint job on a budget!? CONTINUED..page 44........ - 03/28/07 03:52 AM
if its balling up its not dry
Posted By: Anonymous
Re: Paint job on a budget!? CONTINUED..page 44........ - 03/28/07 04:50 AM
yea if its balling up, its not dry.. maybe you are going too thick with the paint. try the thumbnail test.. see if u can dent the paint with your nail.. if u can then its not completely dry.
also, are u wiping down with mineral spirits b4 each coat? if not, that could be part of the peeling problem
Posted By: Anonymous
Re: Paint job on a budget!? CONTINUED..page 44........ - 03/28/07 08:31 PM
I had tried the nail test before, but it seemed OK. This time I pushed very hard and got a very small indentation. I have been wiping with mineral spirits before applying the next coat. Today I put an oil heater under it and I will check again tomorrow.
Posted By: Anonymous
Re: Paint job on a budget!? CONTINUED..page 44........ - 03/28/07 10:40 PM
Latest test results...
Finished my floor repair, and put some of the left over paint on my test fender (I always end up mixing too much paint). Paint is Van Sickle tractor paint, straight from the can mixed about 8:1 with the urethane hardener. Here's the results:
Sorry the pictures aren't very good...I only have time to do this stuff at night, and it's hard to show a paint surface with a flash. This was painted with a Purdy 2" pro brush. The test area was ground to bare metal, and primed with SEM self-etching primer. This is the first coat of paint on the primer. It looks pretty good...not perfect, but pretty good. As-is, it would make a decent 10/10 paint job (10 feet/10 MPH)
I managed to avoid any sags this time...the paint is too thick to really run. I had one forming, but I used to brush to sort of squeegee it and spread the paint back out. After a wet sand, it should be in pretty good shape. I'm pretty hopeful this could be a two coat paint job. There are some minor brush strokes to sand out. Personally, I'm liking the brush better than the roller...you can put the paint on a lot thicker without any orange peel.
There was also one spot on the upper half of the fender I did that was actually just about perfect. It looked like it was sprayed on
. This stuff flows out really well, so I guess if you get just the right paint thickness, it will come out perfectly flat. The brush does take some practice to get the technique down, but so far I'm pretty impressed. I don't know if I'll have any time to sand it this weekend, but maybe. I'll post the results if I do.
Posted By: pdqvsix
Re: Paint job on a budget!? CONTINUED..page 44........ - 03/29/07 03:18 AM
Hi all,
I'm just about finished painting my ford tempo that i started on doing on the 21st of this month.
I took it out driving today and had alot of people giving the car a long stare and tonight as i was driving had some riding on my bumper, i guess it must look ok.I haven't done the final wet sanding,polishing,waxing yet.This paint job was easier and cheaper than the first one i did since i had everything i needed to do this one and didn't have to buy anything at all,and only used 1 quart of rustoleum gloss black paint.I can drive it and continue with the process without it looking like anything is being done to it.That gives to a very big grin.
Posted By: Anonymous
Re: Paint job on a budget!? CONTINUED..page 44........ - 03/29/07 03:25 PM
Hi everyone! I've come over from the CAFORDS board in northern California. I found this post on google a couple weeks ago while like everyone else searching for a way to get a paint job for under 10k. I've been to 10 shops in the bay area and no quote has been less than $8k. Forget that, I'll do it myself.
First off, a big THANK YOU to 69charger for pointing out this technique. Even before I read all the posts, which I have done twice now because I like to do thorough research, I knew this technique works because my neighbor painted his vintage truck this way and it came out great.
I've jumped in and started painting my Mustang.

So far I have only finished the primer (needed because the car's surface needed a lot of work) and I'm in sanding mode now.
I signed up here in order to show you my results. But first, I want to let you know what happened during the primer application. I had a spot that wrinkled and lifted. Mind you, this is rattle can filler primer. The area was soft so I peeled it off. Guess what I found? A thin sheen of oil and dirt that I missed during the early cleanup.
I thought I should let everyone know, since during the early discussions a year ago some people had this problem and thought it might be the fault of the paint. It's not, the fault is with the surface prep. So anybody coming along later who is worried about what they saw in the original thread, don't worry. Just make sure the surface is clean and scuffed.
I'll be filling in my bad spot and resuming sanding tonight. I hope to have the car painted in a couple weeks. I'll post pix of the results when it's done. I have high hopes for this project!
Oh yeah, by the way, this is going to be an Eleanor coupe using dark grey with black stripes in the Rustoleum professional line.
No Mustang or Eleanor haters please!
Hope this is helpful.
Posted By: Anonymous
Re: Paint job on a budget!? CONTINUED..page 44........ - 03/30/07 03:06 PM
Primered and prepped! Tomorrow is paint day.


Posted By: 69chargeryeehaa
Re: Paint job on a budget!? CONTINUED..page 44........ - 03/30/07 03:47 PM
bcinguu - just a little advice, practice on the hood or trunk first, and get the technique down pat before you do the rest of the car. If it's the first time your doing this, you'll make mistakes, and it's easy to fix just the test peice rather than the whole car if you know what i meen. looks like a awesome ride, i had a 68 mustang that i took 2 years to restore to show, then i was too scarred to drive it!!!! It had a straight 6, that i stroked and it put out 230hp/260tq on the dyno at the wheels!!!, and it had 3spd std on the floor, it was a fun car, that straight 6 pulled hard, and i'd easily take a stock 289/302, nobody believed me that it had a 6, until i opened the hood!!!! it was a 225, borred and stroked to a 260, cam, and i spend weeks porting that stupid intergral head/manifold!!!!, it had gobbs of torque.
Posted By: 69stanger
Re: Paint job on a budget!? CONTINUED..page 44........ - 03/30/07 03:54 PM
BCINGUU,
That's going to look awesome when your done!
Posted By: s4dustin
Re: Paint job on a budget!? CONTINUED..page 44........ - 03/31/07 02:16 AM
where can you find roll on primer, or is it better out of a rattle can???????
Posted By: Anonymous
Re: Paint job on a budget!? CONTINUED..page 44........ - 03/31/07 03:30 AM
BCINGUU:
Why did you choose Rustoleum over Brightside?
That stang looks awesome!! I had a friend who dated a girl with a 68 mustang convertible. Tons of fun.
Posted By: Anonymous
Re: Paint job on a budget!? CONTINUED..page 44........ - 03/31/07 07:42 AM
Quote:
where can you find roll on primer, or is it better out of a rattle can???????
I have the same question, I'll have to prime my car too. I figured it would be much easier out of a can but ton;t want to blow the whole project because of bad primer.
Rustoleum makes some:
http://rustoleum.com/product.asp?frm_product_id=389&SBL=1
Does anyone have experience with this paint?
Posted By: Exit1965
Re: Paint job on a budget!? CONTINUED..page 44........ - 03/31/07 01:11 PM
I used a few different types of spray primers, a couple brands of grey and another brand of black primer. no issues in those areas. primer is a must-use for over bondo, otherwise the bondo will suck in the first few layers of good paint you roll onto that area.
Another idea - rather than using primer, you could use a similar color rustoleum as the paint you are putting on. This might be better because the gloss will be increased and you can see if the bondo is straight or not.
So for me I'd get a can of white rustoleum gloss spray, put a couple coats of that over the bondo.. then smooth it out, feather it in and then roll over everything with the brightside.
Posted By: Anonymous
Re: Paint job on a budget!? CONTINUED..page 44........ - 03/31/07 02:41 PM
I learned a few things about bright side last night that I'd like to share.
When I first rolled brightside, I wasn't quite sure what I was doing and just winged it. THe result was a coat that was way too heavy and had wavy lines and rolled marks everywhere and had to sand most of it off.
The second attempt I was afraid of going too thick and rolled everything way too thin and it looked like the hood on the red intgra on the last page. I did the whole car like that for 4 coats or so. When I went to wetsand, I easily burned through all the layers. It was a big disappointment.
My third attempt was last night and it came out amazing. Here's the procedure I came up with. I did not use a foam brush as I found it only made matters worse, leaving behind brush strokes. I started off with a medium level coat, concentrating on getting even coverage with no runs and ignoring any bubbles (as there were tons at this point). I didn't apply much pressure on the roller at all, maybe a light pressure, but definitely more than none at all.
Then I would put the same medium coat on the next panel. When that was done, I went back to the first panel and with no pressure on the roller, went back over the bubbles. If more bubbles appeared, then that section isn't ready for the second roll over (hasn't dried enough yet) or that particular area was thicker or applied after the rest of the panel was. If more show up, wait a few more minutes, then try again. Keep working it until all the bubbles disappear with the roller, they eventually will as the stuff evaporates. Make sure you get all the runs and roller marks out (in case you pressed too hard on the roller).
For the first time in this whole experiment, I can see my reflection almost perfectly in every panel I painted last night. There is noticeable orange peal, but at this stage, it's a 5 footer paint job. Not bad at all for a roller job.
Needless to say, I was starting to get worried that I wasted all this time and money on this project. Things are finally turning around after dealing with runs, adheshion problems, sanding scratches, dust and hair.
Dumping a gallon or two of water on the floor the day before painting helped the dust considerably. Good luck to everyone else and keep at it! You'll get the method down eventually. Hopefully this post will make newbies like me understand the concept and methods a bit easier.
Posted By: 69DartGT
Re: Paint job on a budget!? CONTINUED..page 44........ - 03/31/07 03:08 PM
Quote:
where can you find roll on primer, or is it better out of a rattle can???????
I used Rustoeums rusty metal primer on the inside of my truck bed, rolled it straight out of the can, it went on just great zero, runs, drips etc. I haven't painted the bed inside yet but expect good results.
Posted By: Anonymous
Re: Paint job on a budget!? CONTINUED..page 44........ - 03/31/07 07:29 PM
@montanaman - Because I got all excited and only read the first 50 pages before I ran out and bought my paint and supplies! Then I read further and discovered the results people were getting with Brightside, so I bought some of that. I guess the Rustoleum will go up on the shelf.
@spyhunter - I had the same experience as you. The first coat went on way too thick and I had runs, even though I thinned with 5% of the 333 fluid.
@69charger - thanks for the words of sanity, I decided to do my black stripes first because that's a much smaller surface area. Good thing I did.
Here's one thing I learned - don't be afraid to keep running the dry roller over the paint after it's tacked up, and you can press it HARD. I went over my runs and high spots several times. and was able to push it down. Now it's very smooth. It worked a lot better when I went side to side. At first I rolled everything in the stripe direction because that's easier, but when I went side to side the Brightside layed down flat.
I'll post up pix next week. I'm doing Steel Grey with Black stripes and I'm planning to make this car Show Quality. I think I can do it. I only have 1 coat so far and it covered so well I am only going to do one more thin coat after wet sanding! Already it looks just as good as my 2 other show winning mustangs.
Posted By: Anonymous
Re: Paint job on a budget!? CONTINUED..page 44........ - 03/31/07 07:48 PM
Okay, I'm all excited and nothing to do while the paint is drying. Here are pix of my first coat of Brightside. I'm going to wetsand it tomorrow and put on a final thin coat, and that's it for the stripes. Next weekend I'll do the rest of the car.
I got so excited about this project, I skipped my son's open house! I'm a bad father!
Taped for stripes:

Painting:

Lots of bubbles:

Laying down and smoothing out:

Notice the left side is where I started dry rolling after the paint had tacked up pretty solid. I was nervous that I had blown it, but hard rollering took care of the bubbles. It's actually quite flat already but I haven't gone out for more pix yet.
Posted By: Anonymous
Re: Paint job on a budget!? CONTINUED..page 44........ - 03/31/07 07:55 PM
Oh yeah, one more thing. 69charger, YOU ROCK!!!
Posted By: Anonymous
Re: Paint job on a budget!? CONTINUED..page 44........ - 03/31/07 11:13 PM
As far as thinning goes with Brightside, is everyone using the minieral spirits as done with rustoleum or is it smarter to use the brightside thinner? I see if anyone had tried the Brightside thinner but it seems logical that this would work better.
Posted By: Anonymous
Re: Paint job on a budget!? CONTINUED..page 44........ - 04/01/07 02:51 AM
honestly if ur rolling the brightside, u dont need to thin it. a few people have said they sued it straight from the can with good results, and thats what i am doing also.. its much thinner than the rustoleum
Posted By: Anonymous
Re: Paint job on a budget!? CONTINUED..page 44........ - 04/01/07 03:52 AM
Quote:
As far as thinning goes with Brightside, is everyone using the minieral spirits as done with rustoleum or is it smarter to use the brightside thinner? I see if anyone had tried the Brightside thinner but it seems logical that this would work better.
The only real reason for thinning brightside is to increase the amount of working time...the time from when you first lay down the paint to when you go to knock down the bubbles. More thinner means the time increases. You may want to add thinner if you're in a warm climate area. I choose to use the 333 and I've thinned every coat, however it's probably not necessary.
Posted By: Anonymous
Re: Paint job on a budget!? CONTINUED..page 44........ - 04/01/07 04:38 AM
Thanks. What is 333?
Posted By: Anonymous
Re: Paint job on a budget!? CONTINUED..page 44........ - 04/01/07 04:42 AM
Quote:
where can you find roll on primer, or is it better out of a rattle can???????
I've used the Van Sickle primer...I've gone through most of a gallon of it. Rustoleum makes something similar I think. It works great, but you'll face the same challenges getting it flat as you do with the paint if you roll it on. If you spray the primer, you won't have that trouble.
Posted By: Exit1965
Re: Paint job on a budget!? CONTINUED..page 44........ - 04/01/07 04:59 AM
I guess you don't NEED to thin it but if you put it on thick, be prepared to get a real workout sanding out all the orange peel. Mineral spirits works fine..
Posted By: td325ic
Re: Paint job on a budget!? CONTINUED..page 44........ - 04/01/07 05:44 AM
Does anyone know if Brightside Black is a true jet black? Or in the sun does it appear to be more of a grayish black?
Basically, I'm wondering how well Brightside Black will match the factory BMW black (schwarz) or if I'm better off trying Interlux's Perfection Jet Black.
Thanks
Posted By: Anonymous
Re: Paint job on a budget!? CONTINUED..page 44........ - 04/01/07 08:19 AM
Hi
where do you get the hardener ?
can you get hardener for Rustoleum ?
can you use another companies hardener with rustoleum ?
I want to use Rustolium with the hardener to do the bottom of my old pick-up, its too much trouble to do 7-8 coats and wetsand it while on your back !
And no one will really see it anyway , its both for covering it all in one color and protection from rusting later.
Thanks for keeping this thread alive !
Beaulieu
Posted By: Anonymous
Re: Paint job on a budget!? CONTINUED..page 44........ - 04/01/07 12:06 PM
Hey 69DartGT,
Your truck turned out great...and did I understand that you have not wetsanded the Brightside?
I have started the body work on my 50 1/2 ton Chevy and then will move on to paint. Since our trucks are similar in size, how much Brightside did you buy and use?
I think that I will use Brightside "Ocean Blue" color....anyone got a picture of theirs in that color or "Largo Blue" ?
old blue
Posted By: Anonymous
Re: Paint job on a budget!? CONTINUED..page 44........ - 04/01/07 01:03 PM
Quote:
Thanks. What is 333?
it's the official thinner for brightside
Posted By: Anonymous
Re: Paint job on a budget!? CONTINUED..page 44........ - 04/01/07 01:04 PM
Quote:
Does anyone know if Brightside Black is a true jet black? Or in the sun does it appear to be More of a grayish black?
It's as black and black can be, maybe a bit more black.
Posted By: Anonymous
Re: Paint job on a budget!? CONTINUED..page 44........ - 04/01/07 02:20 PM
I'm using the brightside black and like spyhunter said it's way black.
I'm going to thin mine even more today because I got more orange peel than I wanted yesterday. Time to sand...
Posted By: Anonymous
Re: Paint job on a budget!? CONTINUED..page 44........ - 04/01/07 06:22 PM
Quote:
Hi
where do you get the hardener ?
can you get hardener for Rustoleum ?
can you use another companies hardener with rustoleum ?
I want to use Rustolium with the hardener to do the bottom of my old pick-up, its too much trouble to do 7-8 coats and wetsand it while on your back !
And no one will really see it anyway , its both for covering it all in one color and protection from rusting later.
Thanks for keeping this thread alive !
Beaulieu
You can get the hardener from most tractor supply outfits...you could also try the hardener used for Synthetic car paint, since they are both alkyd enamels. I've heard of people using different brand hardeners with rustoleum, but I've never tried it so I can't say for sure how well it works. I can't see why it wouldn't though.
For the underside of your truck, you shouldn't have to do more than a couple of coats, and I wouldn't bother wet sanding. Here's some pics of the floor of my '60 Olds after I welded in a new panel:
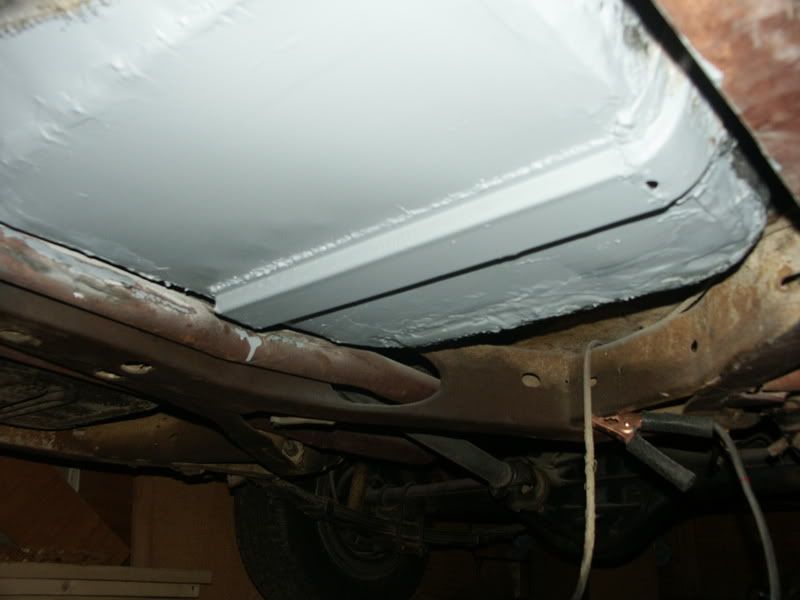
You can see the primer flowed out well enough...I just painted it on straight out of the can with a brush. Here's what it looks like painted:
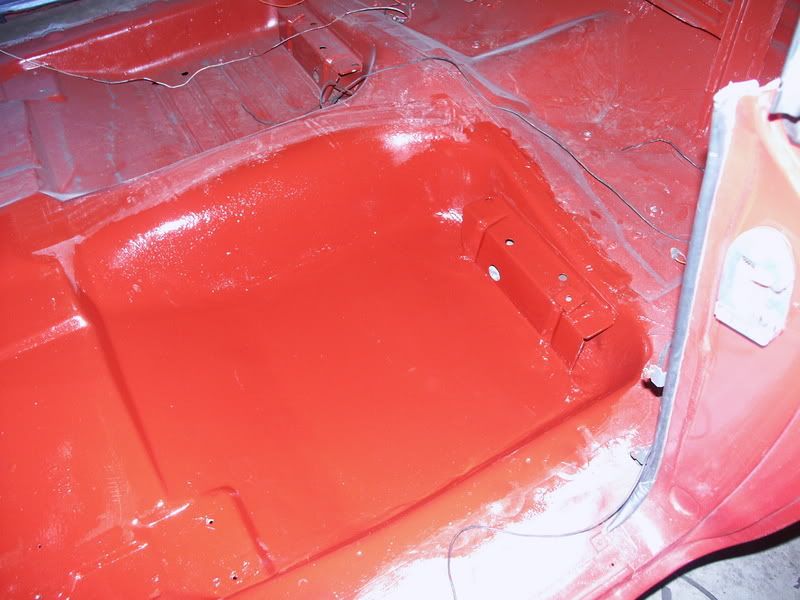
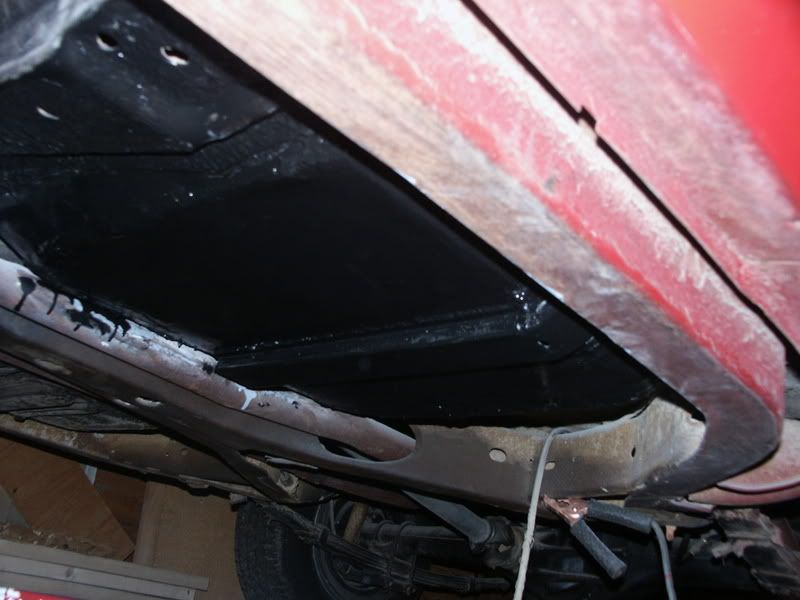
The bottom I did with two coats of flat black mixed about 6:1 with hardener, brushed on. The red was applied the same way. As long as what you're painting under there is reasonably flat, the paint will look fine without any sanding. I put in a lot of work on that floor, doing it right. Here's how it started:
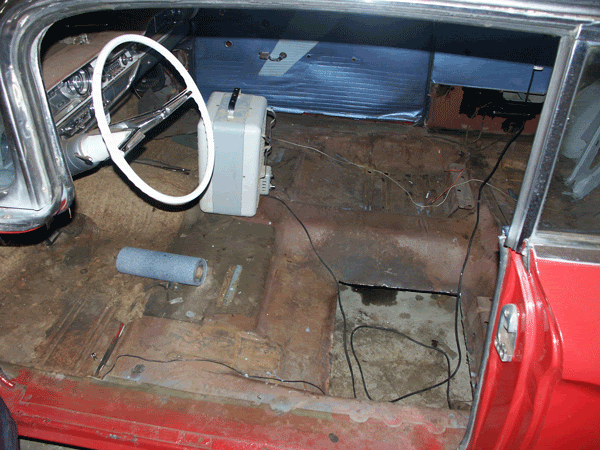
I may be the only person who ever sees it, but at least I know it's done right. If you do decide to use the hardener, please read some of our past posts on it, and using it safely.
Posted By: Anonymous
Re: Paint job on a budget!? CONTINUED..page 44........ - 04/02/07 01:51 AM
This is about how black is gets. This was taken without a flash, the with flash pic doesn't show the shine. THe wierd spots were where i sanded down some small runs.

Posted By: ramman16248
Re: Paint job on a budget!? CONTINUED..page 44........ - 04/02/07 03:09 AM
Well, after about 2 months worth of reading and finally a nice week, I decided to try this. I have a 1992 Dodge 250 2 wheel drive , that had the paint peel problem. I work my butt off for a couple of days trying to get all that old paint off so the new wouldn't fall off with the old paint. I am using the Implement Enamel from Tractor Supply Co.( The industrial version sold under BPS name on top.) It is in a can with a brownish-gold label. I also am using the odorless mineral spirits and the hardener sold by TSC. I mixed my first batch of blue by using 4 0z. of paint, 4 oz. min. spirits, and 1/2 oz of hardener. (Might I add that I am painting it two tone as it was from the factory.) The dark blue went on a little too thin. It got alot of the bubbles in it. By the time I got the silver painted, (the middle section), the bubbles weren't disappearing yet. To my horror, they were dried anough that they marked. Oh well, I needed to sand a little more. No big deal. I adjusted my mixture to 4 oz paint, 3 oz min spirits, and still used 1/2 oz of hardener. This seems to work the best on my truck with my current weather. I got through my first 2 coats, wetsanded it with 600 grit, dried it and gave it the 3rd coat. Wow !! I know I am not nearly done yet, but I think it is going to look awesome. I did try the paint in the refridgerator and it does keep the paint ok with hardener in it, but only for about 18-24 hours. I discovered something about the wetsanding. Now this may be co-incidence, but I had my truck out in the driveway with a garden hose. While wet sanding, I kept squirtong the truck off as I went. I could see where I sanded and where I didn't. One Guide that I found works is, fresh paint will make the water bead up like a wax job. I just wet sanded it until the water didn't bead anymore, it flowed right off of the truck. After I dried it, I was worried about how the next coat would show up. It looked like glass. This "Bead Method" my or may not work for you, maybe I lucked into it and my next sanding set will be a disaster, but I am doing it again anyways. I can't wait to PATIENTLY finish the truck and get some pictures of it here. I didn't really doubt this roller deal, I was just a little skeptical on gloss and prep. I can unofficially say that I like it!!! I will officially admit it when the truck is finished. A guy at our dealership offered to spray it for me , since I did all of the sanding work. I said," Anyone can spray it, but it takes BALLS ot roll that paint on!!! Jason
Posted By: Anonymous
Re: Paint job on a budget!? CONTINUED..page 44........ - 04/02/07 08:28 AM
Ok, I've finally had some time to start finishing everything off. First up is the race boot. I've decided to thin the Brightside out more than I have in the past (I'm thinning it with mineral spirits) and I'm really happy with the results.
And for the first time for ages, I didn't get any roller marks in the paint.

The reflections from the boot are really good. This shot shows some of the neighbour's trees.

Thinning the paint more than usual (plus wet sanding the living hell out of everything before I started painting) has reduced the orange peel considerably. The next shot shows just how little orange peel there is now, (look how easy it is to see what brand my new camera is). Please remember that this picture was taken about 10 mins after painting. It hasn't been polished or anything.

I'm planning on sanding the whole car tomorrow (400 - 600 - 800 - 1200) and depending on the weather I will hopefully be able to paint it the day after. I'm finally getting close to finishing this thing off once and for all.
I just had to include this pic I bought a tripod along with the new camera, so of course I had to take some more pics of the boot once it got dark. The area around the lights shows the usual dust/crap/etc that gets on the fresh paint. I can't wait to see what this will look like once it has been wet sanded and polished properly. As one of my students mentioned to me the other day "I'm bringin sexy back".....

Posted By: Anonymous
Re: Paint job on a budget!? CONTINUED..page 44........ - 04/02/07 12:24 PM
great work again aussie driver! what % of thinner are you roughly using? while i've been playing around with it i've found it to change how fine the orange peel is, but coudlnt work out which way was better so left it lol, but that looks very smooth
has ur technique changed much due to it being thinner? or just roll it on, then roll again lightly after a bit?
Posted By: Anonymous
Re: Paint job on a budget!? CONTINUED..page 44........ - 04/02/07 04:07 PM
Here are some more pix of my progres over the weekend.
The stripes are completed! I used one unthinned coat of Brightside followed by one thinned about 20%.

First coat of Brightside on the sides:

Posted By: Anonymous
Re: Paint job on a budget!? CONTINUED..page 44........ - 04/02/07 04:14 PM
I stumbled across a technique that really cut way down on orange peel, runs, and sags on the sides of my car. I decided that I really hate sanding so I tried everything to get the paint to lay down, and this is how I ended up.
First, I applied an unthinned coat of brightside working in all directions with the roller. I just kept rollering until it was evenly distributed with no edge marks.
Next, I immediately knocked down the bubbles with a foam brush. As spyhunter pointed out, this left brush marks. So I rollered over it with my unloaded roller, which made a few smaller bubbles.
I knocked down the resulting bubbles with the brush again, then the roller. Back and forth until there were no more bubbles and the orange peel was very small.
This was all immediately upon application, and the amount of time spent was actually pretty small.
After completing the section, I went back and found my various sags and drips and agressively rollered them out, followed by the above technique of alternating brushing and rolling.
The end result was very small orange peel, and the next day (today) that was mostly gone. You can sort of see that in the above pix.
Posted By: Anonymous
Re: Paint job on a budget!? CONTINUED..page 44........ - 04/02/07 07:05 PM
Hi all, I found this site a couple of weeks ago and been reading it the WHOLE day lol. Decided im gonna give it a go. Ive got a '59 Ford Custom, and was just wondering how much paint most people have had to use to cover their cars. The Home Depot said they can custom mix a color, but can't guarentee they can ever mix the exact color again
...anyone had to use more than a gallon?
Also, in terms of prep work (im new to this whole painting thing), I want to change the color over from red to green, so do I have to sand EVERYTHING down to bare metal, or can I just give it a light sanding where the paint is good, and a thorough sanding on the poor panels?
I hope to start a test piece this week
Great site! Can't say how glad I am to have found it

Posted By: Anonymous
Re: Paint job on a budget!? CONTINUED..page 44........ - 04/02/07 08:19 PM
OK, If these pics don't make a believer out of people, NOTHING will. I would take that paint quality ANY day....awesome job!
Posted By: td325ic
Re: Paint job on a budget!? CONTINUED..page 44........ - 04/03/07 02:14 AM
Thanks spyhunter and BCINGUU for the replies. I'll definitely try out the Brightside black.
I really like seeing everyone's photos so please keep them coming!
AussieDriver, nice job. The gloss you're getting is amazing. Quick question, is there any reason you're using mineral spirits over Interlux's 333 brushing liquid?
Posted By: Anonymous
Re: Paint job on a budget!? CONTINUED..page 44........ - 04/03/07 02:26 AM
I've got a '62 Galaxie and I am in the process of painting it right now. It's a two tone so the amount of paint may vary but it looks like I'll be using about 2/3rds of a gallon to cover the body and about 1/2 a quart (a pint?) to do the roof. The roof took over ten coats due to some early missteps. The body is probably going to go 8-10 coats...
This is using rustoleum professional.
Posted By: Anonymous
Re: Paint job on a budget!? CONTINUED..page 44........ - 04/03/07 02:49 AM
Quote:
AussieDriver, nice job. The gloss you're getting is amazing. Quick question, is there any reason you're using mineral spirits over Interlux's 333 brushing liquid?
Thanks for the compliment mate.
I'm using mineral spirits mainly because I have heaps of it and it says on my paint can that the Brightside contains mineral spirits already. So I just thought that a little more won't hurt the paint too much.
Not to forget though that the closest marine supply shop isn't exactly local (I almost need to take a packed lunch with me when I go there) but the local hardware shop is only a couple of minutes away.
Posted By: ramman16248
Re: Paint job on a budget!? CONTINUED..page 44........ - 04/03/07 02:53 AM
Ok, here are a couple of shots of my truck. This is after the first 600 grit wet sand and the next coat. I have a few more coats to go, but here is the 2 tone attempt.

Posted By: ramman16248
Re: Paint job on a budget!? CONTINUED..page 44........ - 04/03/07 02:54 AM
another shot of truck

Posted By: ramman16248
Re: Paint job on a budget!? CONTINUED..page 44........ - 04/03/07 02:55 AM
yet another

Posted By: ramman16248
Re: Paint job on a budget!? CONTINUED..page 44........ - 04/03/07 02:58 AM
by the way, i am only doing the top 2/3rds and the blue gets darker with each coat. It actually matches closer to the orig. color on the bottom in the day light. Yes, those are cat prints on the top of the fender. (Luckily the paint was already hardened when that happened.) I'll post more pics as I go.
Posted By: Jolly_Raj_R
Re: Paint job on a budget!? CONTINUED..page 44........ - 04/03/07 05:07 AM
Quote:
by the way, i am only doing the top 2/3rds and the blue gets darker with each coat. It actually matches closer to the orig. color on the bottom in the day light. Yes, those are cat prints on the top of the fender. (Luckily the paint was already hardened when that happened.) I'll post more pics as I go.
Bah!! More proof that cats were invented just to get in your way and harass you. (My cat deliberately does his imitation of a Highway Patrol traffic break any time I'm walking down the hallway.. He just HAS to try to trip me.. grr.)..
That's a real sharp looking blue.. Which one did that end up being? I'd love to see pics when its polished out.. I worry that my car will look best only with a metallic.. But, that blue looks nice and sharp..
Raj
67 Beatercuda
Posted By: ramman16248
Re: Paint job on a budget!? CONTINUED..page 44........ - 04/03/07 12:02 PM
The blue color is just "Dark Blue" by BPS Industrial sold at Tractor Supply. The silver is by the same company. I believe it was about $9 per quart. Bps has 2 kind of paint/ One has a green label and one has a brown. I used the brown label because it offered this blue color. I have used the green in the past on other things and it is a good paint as well. The green is normal implement paint and the brown label is industrial implement paint.
Posted By: Anonymous
Re: Paint job on a budget!? CONTINUED..page 44........ - 04/03/07 02:55 PM
thanks Brentville, I'm going out to the HD now... can't wait to get this thing started. btw the '62 Galaxie's a sweet car
Posted By: Radio Joe
Re: Paint job on a budget!? CONTINUED..page 44........ - 04/03/07 04:50 PM
maybe this has been answered before but has anyone used spot putty ON TOP of the rustoleum? I am painting my Corvair- Black on top, Red on the sides. I have 5 layers of black on the car and have noticed some small spots that I missed. Can I apply some spot putty over the paint after wetsanding and then continue to paint over top of it?
Thanks!!!! The black paint, even with the blemishes still looks AWESOME!
Posted By: v8mirage
Re: Paint job on a budget!? CONTINUED..page 44........ - 04/03/07 05:36 PM
I wouldn't want to try to get the filler to stick to the paint. My prep isn't what it could be, I guess that comes with experience, so when I have gotten to this point where I find a blemish that needs to be fixed I just strip the area back down to bare metal, fix it, and go back to painting. I usually find these spots in the first coat or 2 so it hasn't be too big of an issue.
Gerbs
Posted By: Anonymous
Re: Paint job on a budget!? CONTINUED..page 44........ - 04/03/07 05:39 PM
Quote:
maybe this has been answered before but has anyone used spot putty ON TOP of the rustoleum? I am painting my Corvair- Black on top, Red on the sides. I have 5 layers of black on the car and have noticed some small spots that I missed. Can I apply some spot putty over the paint after wetsanding and then continue to paint over top of it?
Thanks!!!! The black paint, even with the blemishes still looks AWESOME!
I just joined after reading both of the threads and have already started this on a daily driver. Glad to see most of issues I am having are being had by others, but this question has been plaguing me also. As it is my first paintjob, my prep working left a lot to be desired and now that I have a good feel for the process want to get it right too. Thanks for all the info!
Posted By: Anonymous
Re: Paint job on a budget!? CONTINUED..page 44........ - 04/03/07 06:19 PM
i have found the topcoat boat paint (top side)as a clear coat that i can spray on. so will it work if i paint the car with rustolium then clear it with the top side?
Posted By: Exit1965
Re: Paint job on a budget!? CONTINUED..page 44........ - 04/03/07 06:47 PM
Quote:
maybe this has been answered before but has anyone used spot putty ON TOP of the rustoleum? I am painting my Corvair- Black on top, Red on the sides. I have 5 layers of black on the car and have noticed some small spots that I missed. Can I apply some spot putty over the paint after wetsanding and then continue to paint over top of it?
Spot putty isn't good unless it's catalyzed/hardenred.. it'll shrink on you. I have put skim coat (bondo mix + fiberglass resin) and full bondo mix over rustoleum, with no problems.
Posted By: v8mirage
Re: Paint job on a budget!? CONTINUED..page 44........ - 04/03/07 07:08 PM
Quote:
Quote:
Spot putty isn't good unless it's catalyzed/hardenred.. it'll shrink on you. I have put skim coat (bondo mix + fiberglass resin) and full bondo mix over rustoleum, with no problems.
That's a good point too. I haven't used spot putty since I found that out.
Posted By: Radio Joe
Re: Paint job on a budget!? CONTINUED..page 44........ - 04/03/07 08:01 PM
Thanks Exit- I figured you would know the answer with all the work you put into your car. I'll fix it with some regular mixed Bondo and be happy!
Thanks
Posted By: Exit1965
Re: Paint job on a budget!? CONTINUED..page 44........ - 04/03/07 09:03 PM
Yep and when done with the bondo, you might consider spraying some similar color (to your final color) rustoleum (or primer) over the bondo so that the first few coats of final paint mix you're putting on doesn't soak into the bondo and the final color will cover quicker.
Posted By: Marq
Re: Paint job on a budget!? CONTINUED..page 44........ - 04/04/07 04:11 AM
Quote:
i have found the topcoat boat paint (top side)as a clear coat that i can spray on. so will it work if i paint the car with rustolium then clear it with the top side?
My initial thought is that you should not do it.
I don't think there would be a problem with a polyurathane on top of an enamel... BUT I don't think it would get the maximum adhesion. The way polyurathane on top of polyurathane bonds or adheres is that the polymers actually form chains between the old polymer and the new polymer. Think of something like a DNA molecule or chain, that helical thing. The polymer chains are designed to interlock and that is how the polymer forms a strong bond or a unified bond between the layers.
The polymer on top of the enamel cannot form a direct chemical bond between the two layers. So on that count along the adhesion or bonding is not as good.
IF you are laying a polymer clear top coat on to a fully wetsanded enamel surface, you should be able to get a 'pretty good' bonding between the two chemicals. This is mainly because the wetsanding of of the enamel surface will provide a sufficiently rough surface for the polymer carrier to penetrate and grab a good grip.
IF you are trying to lay a polymer clear top coat on to an non-wetsanded enamel surface, the enamel layer will not be so porous and accordingly the polymer coating on the surface will not get a solid grip.
As you know... it takes the layers of paint a fair bit of time to fully dry out and reach maximum hardness. The carrier needs to fully evaporate from each layer or the trap layer will slow down its drying time and remain somewhat less than hard. I am not sure if a polymer coating on top of an enamel coating might trap some of the carrier that is still evaporating from the sublayers of enamel paint.
The ugliest mess I have ever seen on the road was a car where the guy put acrylic floor polish on top of his faded enamel 'factory' paint job. It looked AMAZING when it was first done. BUT after 30 days the acrylic layer started peeling off the body like skin on a burn victim....
As you know or may know... my car was initially painted in Tremclad/Rustoleum 'Fire Red'. After six coats I switched over to Brightside 'Fire Red' and finished the car using the Brightside. In my case, there was about a 30 day delay between the switch from Tremclad/Rustoleum over to Brightside. I believe this allowed my six layers to fully cure and reach maximum hardness. SO... when I started putting the polymer paint on to the enamel paint, the question of carrier evaporation wasn't really a concern.
SO... it is possible that a clear coat polymer might work on an enamel based paint job..... BUT I would follow this sequence :
a ) finish the enamel paint job to a level that is acceptable to you.
b ) do not do a final wet sand or waxing to that final enamel paint job.
c ) wait 30 to 60 days
d ) wetsand the enamel paintjob
e ) apply the polymer clear coat.
The idea here being to let the enamel fully harden, but not to contaminate it with a polishing and waxing. Wait the 30 to 60 days to let it fully harden and then do the wetsanding to prepare the surface for maximum adhesion between the original enamel paint and the new polymer coating.
Dunno if this helps...
BUT you should fall back to the original reason for NOT wanting to put a clear coat of paint over your enamel or polymer paint job. That being that you will not be able to REPAIR nicks and scratches as easily. With JUST a paint on the body, you will be able to repair scratches and nics, by just rubbing some alchohol on the area to be repaired ( to remove the waxing compounds that you use to get a shine ) and then just touch it up with your chosen paint color. Then you just re-compound the worked surface and polish it up again. Thereby getting an almost 100% color match where the repair was done.
BUT if you have a clear coat sitting on top of your enamel or polymer paint... then I suspect you can figure out the increased difficulty of making an invisible repair that won't be so obvious to casual observers...
.
.
Posted By: Anonymous
Re: Paint job on a budget!? CONTINUED..page 44........ - 04/04/07 04:46 AM
that is what i thought and i didnt buy it right a way. because the rustolium clear coat here is only sold in spray bombs and i want to buy quarts so i can spray it on...
Posted By: Anonymous
Re: Paint job on a budget!? CONTINUED..page 44........ - 04/04/07 09:16 AM
Time for another update.
First of all I've discovered something wonderful about wet sanding, 240 grit wet and dry sandpaper!!!! This stuff absolutley tears through orange peel and gives a nice flat surface in no time at all. And the best part is that if you sand carefully, it will give a finish that's good enough to paint straight over.
I don't know how many hours of sanding the 240 has saved me/will save me but it's pretty close to being the best $1.60 that I've ever spent.
Anyways, onto the painting. I've prepped my hardtop, the 'road' boot and the rear spoiler (not the same ones as I've posted about above) and today I painted the hardtop and the spoiler. The front of the spolier came out perfectly but the back has some runs in the paint that I didn't notice until it was too late.
I am also pretty happy with how the hardtop turned out...

I've also discovered that it's a lot more effective to take the pictures with some background light and no flash.

There is still a bit more orange peel in the paint than I would ideally like but once it has recieved its final sanding and a good polish......
Posted By: Anonymous
Re: Paint job on a budget!? CONTINUED..page 44........ - 04/04/07 10:56 AM
looks good enough to me, although not as good as the other shots, or are they just closer?
the roughest paper i've previously gone to is 400 so mayb i should head out and get some 240 lol
sorry if i missed it but how thin are you doing it? just as thin as you can before it runs to much or only a bit?
i'd love to see ur car in person some time, if there's a good event ur going to let me know
Posted By: Anonymous
Re: Paint job on a budget!? CONTINUED..page 44........ - 04/04/07 12:54 PM
The paint is thinned out with about 40% mineral spirits and even though it didn't come out as well as the race boot did, I'm still pretty happy with it.
Looking at the first photo, there is a pretty obvious roller mark going from the front of the roof to the back which is about level with the bush in the background. Oh well, so much for no more roller marks....
I should be able to minimise it though with the final wetsanding and a good polish. I hope...
Posted By: Exit1965
Re: Paint job on a budget!? CONTINUED..page 44........ - 04/04/07 04:09 PM
Thanks for the tip on the sandpaper. The roughest I ever used on a coat was 600. I might get some 400 and some 240 to knock down my orange peel then roll on a couple thin layers.
Posted By: Radio Joe
Re: Paint job on a budget!? CONTINUED..page 44........ - 04/04/07 04:32 PM
Quote:
Yep and when done with the bondo, you might consider spraying some similar color (to your final color) rustoleum (or primer) over the bondo so that the first few coats of final paint mix you're putting on doesn't soak into the bondo and the final color will cover quicker.
A little update. As I posted above, my car had 5 layers on it already of Gloss black- thinned about 35-40%. I wetsanded the whole car with 600 grit and it took quite a while but I got it all smooth. After that I wiped it down with Mineral Spirits and looked for the blemishes.... After the wetsanding most were gone. I must've sanded off quite a bit of paint. There are a few spots left that are small chips- my plan, instead of the bondo is to use the paint as they arent that deep. I am waiting for the 6th coat to harden then I will "drip" a little paint only into the chips. once the drips harden, I will wetsand the whole car again with 1000 grit. that should take care of them.
I thought the 5th layer looked good, but after the serious wetsanding and the 6th coat it looks REALLY good! even with some roller marks in it. I think I both under-estimated and over-etimated how this paint would work... I overestimated how much the paint would fill scratches and such but I under-estimated how shiny and smooth it would look on the car. Im really happy!
About the roller marks- I have been rolling the paint on in one direction, pulling the roller back over the same strip, then moving onto the next strip- then when the panel is done, I go back over the entire panel using only the weight of the roller to smooth it out. It usually looks good when wet but after it dries I can see the roller "strips". Is this normal or am I using too much/ not enough paint?
I'll post pics as soon as I find my Camera- its MIA again.
Posted By: Radio Joe
Re: Paint job on a budget!? CONTINUED..page 44........ - 04/04/07 05:43 PM
One more question while I am here.
Im painting the car 2 tone- Black up top, red on the bottom, separated on a body ridge. currently I am using the Green 3M tape (Thats stuff is awesome- I dont trust anything else for painting) and am wondering, has anyone tried this tape on their car? My worry is if I take the tape off when I am done with the black and then tape directly onto the black so I can paint the red, when I remove the tape it will pull off or mark the black paint. I planned to let it harden in the sun for about a week before retaping for the second color- Does anyone think I will have a problem or am I worrying over nothing?
Thanks again-Joe-
Posted By: Anonymous
Re: Paint job on a budget!? CONTINUED - 04/04/07 06:26 PM
how are you guys preparing a primered surface for paint? should i just use a tack cloth to remove any loose particles and dust from the primered surface, or should i also use acetone or maybe mineral spirits to wipe it down with? should i sand the primered surface smooth beforehand, as well?
thanks for any input.
_taF
Posted By: 69DartGT
Re: Paint job on a budget!? CONTINUED - 04/04/07 06:48 PM
I used mineral spirits followed by a tack cloth.
If I had still had some grease and wax remover I would have used that.
After sanding I used my shop air to blow most of the dust off.
Posted By: Anonymous
Re: Paint job on a budget!? CONTINUED - 04/04/07 08:34 PM
Quote:
I used mineral spirits followed by a tack cloth.
If I had still had some grease and wax remover I would have used that.
After sanding I used my shop air to blow most of the dust off.
should i bother even sanding tha primered surface at all?
also, i was using another brand marine paint. i ended up switching to Brightside (since tha other place i ordered tha other brand from raised tha shipping another $10. i didn't want to pay $20 for s&h).
click tha link to see what i have...
grey primer vs wetsanded green
i'm going with Brightside's Sea Green. should i primer my wetsanded green (previous brand) fender or should i primer it like i did with my a-pillar?
thanks,
_taF
Posted By: Anonymous
Re: Paint job on a budget!? CONTINUED - 04/05/07 01:29 AM
OK, I am obviously doing something wrong. I am using Rustoleum Pro thinned about 20% with 100% mineral spirits. I am applying using the roller, which I load up and then roll out on the tray so that I only put on a thin coat. After about 5 minutes when most of the bubbles have gone I drag a dry foam brush across the surface using only its weight as pressure. The surface looks very good, not a mirror but quite close. I leave it about 2 days, clean the surface with the mineral spirits, let them evaporate and repeat again.
Then I do a wet sand. I use 1500 grit to try and remove the faint brush marks that are left as well as any dust that has settled during drying (not much as I'm doing this in the basement). Every time I seem to go through to the previous paint layer in a few places, which then means that I am stuck with those ridges.
Everyone says to do thin coats, but that's no good if I keep having this problem. What am I doing wrong?
Thanks
Posted By: 69DartGT
Re: Paint job on a budget!? CONTINUED - 04/05/07 02:10 AM
this is what I started with, but hind sight being 20-20 I wish I'd primered the whole truck if only because it would have been easier to see the coats go on. I did sand everything before I started painting.
Posted By: 78D150CLUB
Re: Paint job on a budget!? CONTINUED..page 44........ - 04/05/07 02:11 AM
Haven't said much lately, but I have been lurking in the background. Seeing some amazing results. Very good work from a lot of good people.
I did my truck in a green/green two tone, and I found out the hard way about over adhesion and paint removal. The cure I found was to pull the tape on a 45* bias while wiping the end with a spirit soaked rag. This softens the adhesive and lets the tape loose. Work slowly and the tape should come off with no trouble.
Hope this helps out. It just takes patience, but it's worth it.
This is the end result before trim was installed.

Posted By: 78D150CLUB
Re: Paint job on a budget!? CONTINUED..page 44........ - 04/05/07 02:22 AM
These are from Moparfest 2006 after everything was finished and installed.

Posted By: Anonymous
Re: Paint job on a budget!? CONTINUED..page 44........ - 04/05/07 04:39 AM
FYI, I found a store selling Rustoleum "Top Side" marine paint. This is NOT a polyurethane paint...it's a modified alkyd. I'm not sure what (if any) difference there is between regular Rustoleum and Top Side, other than the price. Just something to be aware of...it's not a polyurethane like Brightside.
Posted By: Anonymous
Re: Paint job on a budget!? CONTINUED..page 44........ - 04/05/07 04:57 AM
Here are the latest progress pix. The stripes are done, and this is the first coat of Brightside on the rest of the car. Next step, wetsanding and final coat of paint (I'm using 2 coats). Followed by final sand and polish.
These pix are ginormous so you can see all the detail, with apologies to any dialup users out there.
1 2 3
Posted By: Marq
Re: Paint job on a budget!? CONTINUED - 04/05/07 05:44 AM
Quote:
Then I do a wet sand. I use 1500 grit to try and remove the faint brush marks that are left as well as any dust that has settled during drying (not much as I'm doing this in the basement). Every time I seem to go through to the previous paint layer in a few places, which then means that I am stuck with those ridges.
Everyone says to do thin coats, but that's no good if I keep having this problem. What am I doing wrong?
It sounds like you are following the recipe correctly. The big variable here is the amount of pressure you are applying while doing the wetsanding.
Wetsanding in the basement is not as much fun as doing it in the garage or out in the driveway.
When I was doing my car, I was outside and I had a hose in one hand and a wetsanding block in the other. I was basically soaking the surface and lightly skimming the sanding block over the wet surface like a hovercraft. I was really not laying much pressure down on the wetsanding pad.
Working out of the basement, I would guess that you are not able to wet the surface enough to cut down on the sanding abrasion.
You may want to try laying down 3 layers of paint prior to wet sanding... to compensate for the more abrasive wetsanding you are experiencing.
.
Posted By: Exit1965
Re: Paint job on a budget!? CONTINUED - 04/05/07 12:41 PM
One thing I dont hear people mentioning is what they are using to wetsand, hand etc. I used a foam sanding block and wrapped the sandpaper around that. The foam in the block wont let you put too much pressure in one area unless you REALLY try..
Posted By: Anonymous
Re: Paint job on a budget!? CONTINUED - 04/05/07 01:29 PM
Marq, newbie comment coming here, I thought that the thin coats would bond together to become one thicker layer, but that obviously isn't the case here. Would adding an extra coat between wet sanding do anything for me if I am still going to break down into the previous coat?
I am trying to get a completely matt flat surface each time; do I really need to be that anal about it?
Or, should I apply a thicker coat and wet sand it matt flat, then go with the thin coats?
Exit, I am using hand pressure as I can easily feel when an area (with thicker paint layer) goes smooth. I see where you are going, but if there is an imperfection (orange peel / brush or roller mark) then you have to go as deep as is needed to get rid of it. That said, I will try a foam block; never used one, so any recommendations?

Posted By: v8mirage
Re: Paint job on a budget!? CONTINUED - 04/05/07 01:39 PM
When I do my wet sanding I am using one of those 3M rubber sanding blocks. I think it helps keep it all nice and flat.
Gerbs
Posted By: Radio Joe
Re: Paint job on a budget!? CONTINUED - 04/05/07 01:48 PM
Thank for the tip on the tape, I will definitely use it. Nice work on yours!!!
When I painted mine, I did 3 layers of black then wetsanded with 600 grit and my hand to take out all the small blemishes. Then I added 2 more coats and again wetsanded with 600 grit and my hand. I went all the way through the paint in some spots but that was because I needed to even the surface. Im now on the 6th coat and I will be sanding the next 3 using 1500 grit and a foam block.
I think this was the best way to do my car because it wasnt the smoothest right off the bat and I knew i would have alot of sanding to do.
Posted By: Anonymous
Re: Paint job on a budget!? CONTINUED - 04/05/07 05:16 PM
Attension Brightside users!!
Do not use Dupicolor's Filler Primer! Today after, I started polishing and all of a sudden I'm having some serious adhesion issues with areas where I used this primer. Unfortunately, I've since had to repaint a number of spots because brightside just pealed right off from the buffer and it definitely comes off with my finder nail.
and things were going so smooth too. Poorboys + Wolfgang + 7424 = one really nice shine.
![Attached picture 3416021-IMG_0173[1].jpg](https://board.moparts.org/ubbthreads/upload2/3416021-IMG_0173[1].jpg "3416021-IMG_0173[1].jpg")
Posted By: Anonymous
Re: Paint job on a budget!? CONTINUED - 04/05/07 05:42 PM
Quote:
Attension Brightside users!!
Do not use Dupicolor's Filler Primer!
That is the primer I'm using, and I haven't had any issues with it. Hmmm...
I sanded mine seriously with 600 grit before painting.
Posted By: Anonymous
Re: Paint job on a budget!? CONTINUED - 04/05/07 07:53 PM
who knows, i did 400 for everything. It's rather disappointing to have to repaint polished areas
Posted By: Marq
Re: Paint job on a budget!? CONTINUED - 04/05/07 08:12 PM
Quote:
Marq, newbie comment coming here, I thought that the thin coats would bond together to become one thicker layer, but that obviously isn't the case here. Would adding an extra coat between wet sanding do anything for me if I am still going to break down into the previous coat?
Polymer paints always try to form 'chemical chains' with the polymers of the sub-layer. So whether you are doing a thin coat or a thick coat, the chemical reaction will be the same for both - they want to form polymer chains.
The variable here is whether the subsurface is matted flat or unsanded. The websanded surface should give an increased adhesion simply because the paint's carrier is able to more quickly penetrate all the roughened pores of the surface to get a grip.
Quote:
I am trying to get a completely matt flat surface each time; do I really need to be that anal about it?
The main reason to be anal about the surface preparation is because the 'more perfected' the subsurface is, the 'more perfect' the paint job will work out in the end. All the meticulous surface work will pay off with a glossier paint job with no imperfections to detract from the look.
Quote:
Or, should I apply a thicker coat and wet sand it matt flat, then go with the thin coats?
The Brightside paint can be used straight out of the can. As noted the thinning of Brightside is mostly to buy yourself extra working time or to slow down the curing process in a hot work environment.
In some cases I would tend to lean towards one or two thick ( straight from the can ) coats to start off. Then use a wetsanding to bring it all level... then continue with thin layers ( cut with mineral spirits ) to build up some glossier layers and slowly fill in any surface imperfections that may occur during the wetsandings.
But that is not to say that you might want to build up your layers slowly ( using a thinned Brightside ). The main benefit of going all the way with just thin layers is that it allows you to develop your paint application skills from one coating to the next ( with the hope that by the final coating you have the application method perfected ). The other advantage of 'thin layers' is that you shouldn't encounter any 'big mistakes'.
By the time you have done one or two layers ( either thinned or straight from the can ) you will know whether you should continue following that mixture for subsequent layers - or if you should try the other paint mixture
.
Posted By: DaytonaTurbo
Re: Paint job on a budget!? CONTINUED - 04/06/07 12:09 AM
Hey marq, I saw a couple pics of your mustang, looks real good.
I read what you wrote about laying down some paint with a roller, then going over it with a different roller or foam brush to get rid of the bubbles, then going over it again with a different brush to smoothen it out. Sounds like a good idea. I have yet to start painting using the rollering method but I have been watching this thread on and off since the beginning.
About how large of an area should I paint before stopping and going over it again with the other two brushes? As in like, do a whole door, then go over it again go get rid of the bubbles, or should it be after every swipe of the roller? Or after every time the roller is out of paint??
Posted By: Anonymous
Re: Paint job on a budget!? CONTINUED - 04/06/07 12:17 AM
Quote:
Quote:
Attension Brightside users!!
Do not use Dupicolor's Filler Primer!
That is the primer I'm using, and I haven't had any issues with it. Hmmm...
Hey spyhunter, maybe I spoke too soon... When I peeled off my masking tape today for the striping, there were a few areas where the paint came right off with the tape.
D'oh!
Still, I blame my surface prep, which was hasty and reckless. I hate sanding. Perhaps I missed a couple spots.
Posted By: Anonymous
Re: Paint job on a budget!? CONTINUED..page 44........ - 04/06/07 01:24 AM
The paint application is now completed. I'm going to let it cure for a while before wetsanding and polishing. The work was easy and only took a few days. Total cost for this paint job was $100 for paint and $50 for supplies. Not too shabby! It should polish up nicely.
Mods, I'm taking the hint and posting smaller pix this time.
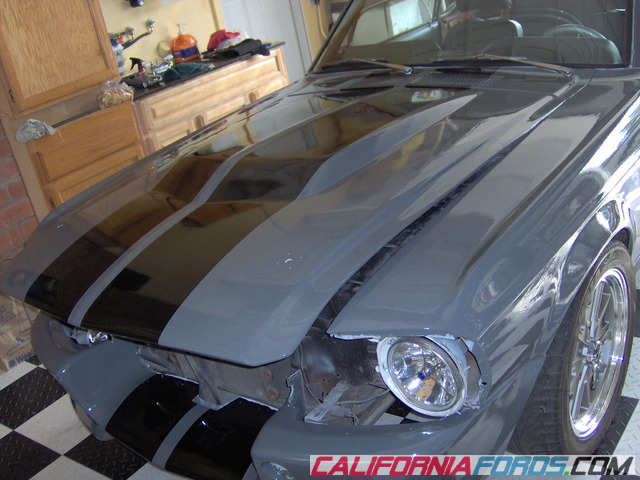
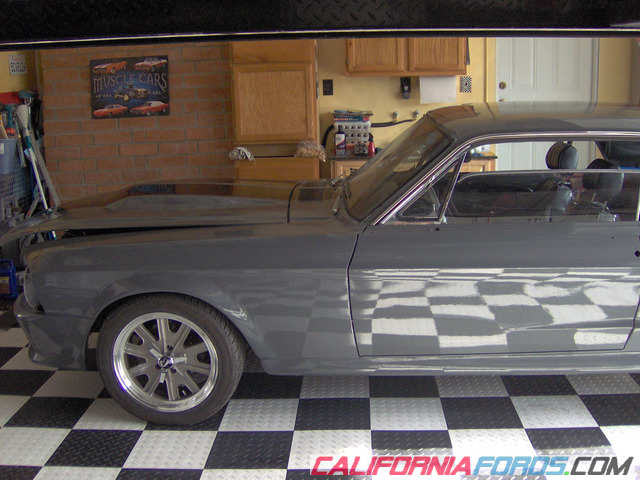
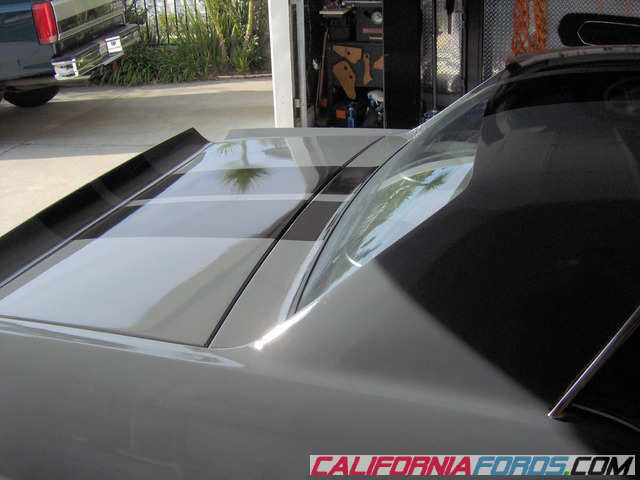
Posted By: Exit1965
Re: Paint job on a budget!? CONTINUED..page 44........ - 04/06/07 03:59 AM
Hey BC, nice looking ride. I like the color combo.. be sure and take some outside pics when you can.
Posted By: Anonymous
Re: Paint job on a budget!? CONTINUED - 04/06/07 04:46 AM
Quote:
Attension Brightside users!!
Do not use Dupicolor's Filler Primer! Today after, I started polishing and all of a sudden I'm having some serious adhesion issues with areas where I used this primer. Unfortunately, I've since had to repaint a number of spots because brightside just pealed right off from the buffer and it definitely comes off with my finder nail.
and things were going so smooth too. Poorboys + Wolfgang + 7424 = one really nice shine.
crap, i think thats what i used
Posted By: Anonymous
Re: Paint job on a budget!? CONTINUED - 04/06/07 04:56 AM
Anyone use a primer that did work?
Posted By: Anonymous
Re: Paint job on a budget!? CONTINUED - 04/06/07 06:42 AM
i'm finally going with Brightside.
i've been using some primer especially for another branded marine paint for my panels, but have been using Rustoleum's automotive primer for my jambs.
anybody having issues with Rustoleum's automotive primer?
_taF
Posted By: Anonymous
Re: Paint job on a budget!? CONTINUED - 04/06/07 10:54 AM
Time for another Aussie update.
I spent two days sanding down all of my other painting efforts on the car and prepped it for it's final paint (yeah I know, I've said that before....)
In an effort to constantly improve the results I made a big change to my painting. Previously I had thinned the paint with mineral spirits, but for this coat I thinned the paint with something called Penetrol (and I know that it's not a real thinner). I'll let the results speak for themselves.

I can't believe how those big white marks got on the paint...

And lastly a subtle one

I get bored pretty easliy, so instead of watching paint dry I started the final wet sand and polishing of the hard top that I posted about last time. Here is a little teaser as how my polishing is going so far

And that was after two passes of Poorboy's SSR3 (cutting compound) with a cutting pad. I'm not at the actual polishing stage yet. I'll post some pics of the hard top once I'm finished polishing it.
Posted By: Anonymous
Re: Paint job on a budget!? CONTINUED - 04/06/07 12:45 PM
Quote:
Time for another Aussie update.
And that was after two passes of Poorboy's SSR3 (cutting compound) with a cutting pad. I'm not at the actual polishing stage yet. I'll post some pics of the hard top once I'm finished polishing it.
I don't see how this is possible. Every panel I've done with SSR 3 and the yellow cutting pad, it's had a hazy shine to it, just like the bottle said it would have. Am I not running the buffer on for long enough, or fast enough? Are you suppose to wipe off the left over material off the panel and what with?
I've gotten pretty decent results one most of the panels accept for the hood, I can't get it to shine worth a darn.
I've been using the following proceedure
ssr3 yellow wolfgange
ssr2.5 orange
ssr1 white
exp
Posted By: Marq
Re: Paint job on a budget!? CONTINUED - 04/06/07 01:08 PM
Quote:
Hey marq, I saw a couple pics of your mustang, looks real good.
About how large of an area should I paint before stopping and going over it again with the other two brushes? As in like, do a whole door, then go over it again go get rid of the bubbles, or should it be after every swipe of the roller? Or after every time the roller is out of paint??
I worked one panel or area at a time. I would lay down a coat on a fender and by the time I got the surface coated I would then be able to go back over the freshly painted surface to work out any bubbles or to catch any runs or to just level out any roller stripes where the paint went on a little thicker at the outer edges of the roller.
The theory behind getting a coat on before going back over it was to allow the bubbles ( if any ) to have a little time to pop on their own without my assistance.
Then I would move on to the door and follow a similar routine. Panel by panel. The hood equals one panel and the trunk area represented a panel for the purposes of this application routine.
For the boats.... they recommend that it should be a two person paint job. Person A lays down the paint while Person B follows closely behind doing the bubble popping. But I think we can all agree that 'recommended' procedure is just unworkable. The biggest problem being having someone on call and readily available to 'be there' when you want to lay on coats. The other problem being that 'we' as the painter, are relying on 'someone' else to be meticulous in their popping the bubble chore.
So by having 'one person' doing one panel at a time, you can maintain the 'quality control' - while not overextending the working time to pop the bubbles successfully.
.
Posted By: Marq
Re: Paint job on a budget!? CONTINUED - 04/06/07 01:39 PM
Quote:
Anyone use a primer that did work?
It's kind of funny. On my 'car of many primers' I literally used a number of primers... The initial camoflauge primer was a six pack of black spray primers I bought at an 'automotive paint jobber'. This was done to give the car one unified color.
This is the 'primer' the poor little Mustang sat in for almost three years because I couldn't afford to shell out the $3500 that the body shops wanted to smooth my primer and lay down some real paint.
When I found this message thread and chose to go this 'roller route' I sanded down all the wooly primer to a smooth surface and resprayed another brand of aerosol primer over any spots where I had oversanded. But again, this spray primer came from an automotive 'paint jobber'.
When I made the decision in midstream to go from Tremclad/Rustoleum over to Brightside - I bought the official 'roll on' primer sold by Interlux that goes with the Brightside paint.
I have a few thoughts about the problem some people may experience with the 'DupliColor' aerosol primer. First off I don't trust the Duplicolor paint and so I would probably have never taken a can of their primer.
I think the problem with Duplicolor is the 'carrier' they use in their paint and probably in their primer as well.
I remember in the past where I would have a road chip on one of my cars, where I wanted to just 'touch up' the road chip. I would spray the aerosol into the cap, swish it around in the cap to evaporate and thicken the paint - and then use a cotton swab to dip into the paint and drop just a drop of the paint into the road chip.
Most folks who have done that will know exactly what I am about to say. WHEN the drop of paint was placed in the road chip, it would literally eat and WRINKLE the old paint on the edges of the road chip. It never would smoothly blend in.
So I guess I learned from practical experience a long time ago that DupliColor can have adverse effects on the original paint - or even on other brands of primer.
The problems some people may experience with Duplicolor may also relate somehow to the surface preparation they did prior to spraying on the Duplicolor primer. If the Duplicolor primer is separating from the subsurface then either :
a) there was an adverse reaction between the Duplicolor and the subsurface paint or primer.. OR
b ) the subsurface was not properly prepared to receive that primer coat.
For my money... if I was to paint another car tomorow.... I would go exclusively with the Interlux roll on Primer. The stuff goes on THICK ( which helps to cut down on a lot of the little pinhole or scratches ) and helps gives you a better shot at achieving a SMOOTH surface. Most areosol primers are THIN AS H3LL and cannot do that.
There are more solids in the Brightside primer and so it gives the car body one unified surface color upon which to start laying your paint on.
In the case of the Tremclad/Rustoleum painters, much has been said about the merits of avoiding the primer stage and going straight to the paint stage. Afterall, the Tremclad/Rustoleum is designed to be painted directly on to metal etc. So if you skip the primer stage, the initial coats of Tremclad/Rustoleum can serve as the 'primer' coat.
In some cases the same can be said for the Brightside paint... where you can bypass the primer stage and go straight to the paint stage.
I think you have to weigh your decision about whether you do a primer stage, based on just how much patching and work was done on the body panel.
- Lots of bondo... then primer will probably be needed.
- If you are just scuffing an otherwise decent paint job ( albeit flat or simply doing a color change ) ... you should be able to bypass the primer stage and go straight to paint.
- If you have a car with multiple colored panels ( a Frankenstein car like my McLaren was ) then a primer is a worthwhile investment just to unify the color of the sub-surface that you will be painting on.
.
Posted By: Radio Joe
Re: Paint job on a budget!? CONTINUED - 04/06/07 02:43 PM
Uh-Oh!!! Im still reading through the old posts on this. Not supposed to be on message boards at work so I gotta read a little at a time.
Anyway I just got to the comments on how the RED colors fade really quickly. My car is gonna be Black and Red and the door jambs and such are already done. Im using "Sunrise Red" rustoleum.
They mentioned using a clear over the paint to resist fading. Has anyone found Quarts of good clear anywhere? I can only find Spray cans and defintiely would prefer to stick to rolling.
BTW, I attached a pic of my car before I started the rolling- Also I put the tunk, hood and doors back on before I started rolling.

Posted By: DaytonaTurbo
Re: Paint job on a budget!? CONTINUED - 04/06/07 03:33 PM
So with using interlux's primer, did you find your car just needed one coat of it and a sanding to smooth it out?
Posted By: Anonymous
Re: Paint job on a budget!? CONTINUED - 04/06/07 04:17 PM
Unfortunately I found more spots where my brightside peeled right off when I removed masking tape that was on it. But I touched them up and am hoping for the best. Maybe more curing time will help.
Posted By: Anonymous
Re: Paint job on a budget!? CONTINUED - 04/06/07 04:32 PM
Marq,
Thanks for your input on this.
I think I have all the variables squared away. The comments about the heavy bodiedness of the interlux primer make a lit of sense. I�m going to use all interlux products exclusively. Primer, thinner, and paint. I really wanted to spray on the primer to avoid bubbles, but, I the extra work will be worth it for a better surface. I would kick myself If I got everything done and the paint started falling off the car.
Posted By: Anonymous
Re: Paint job on a budget!? CONTINUED - 04/06/07 10:18 PM
Quote:
I don't see how this is possible. Every panel I've done with SSR 3 and the yellow cutting pad, it's had a hazy shine to it, just like the bottle said it would have. Am I not running the buffer on for long enough, or fast enough? Are you suppose to wipe off the left over material off the panel and what with?
I've gotten pretty decent results one most of the panels accept for the hood, I can't get it to shine worth a darn.
I've been using the following proceedure
ssr3 yellow wolfgange
ssr2.5 orange
ssr1 white
exp
Yep, that pic was after 2 passes of the SSR3 with a yellow cutting pad.
Are you using a rotary or an orbital buffer?
Here is a pic of the RO that I'm using,

When I use the SSR3, I spritz the pad, apply three coin sized dobs of polish and start it out on the slowest speed setting to work the polish in. Then once the polish has full coverage, I crank up the speed to max and keep polishing away until there is hardly any polish residue left. Then I wipe it down with a microfiber cloth and start on the next bit.
I'm planning on using a similar approach to yours but I'm going to try;
2 x SSR3 - yellow pad
2 x SSR2.5 - orange pad
1 x SSR2.5 - white pad
2 x SSR1 - white pad
2 x Pro-Polish - grey pad
3+ x EX-P - blue pad
I know that it's a lot of polishing, but I think of it as some quality time with power tools when I can't hear my wife....
Posted By: Anonymous
Re: Paint job on a budget!? CONTINUED - 04/06/07 11:02 PM
i am trying to find clear myself all i can find is spray bombs here.
Posted By: Anonymous
Re: Paint job on a budget!? CONTINUED - 04/06/07 11:03 PM
Quote:
Uh-Oh!!! Im still reading through the old posts on this. Not supposed to be on message boards at work so I gotta read a little at a time.
Anyway I just got to the comments on how the RED colors fade really quickly. My car is gonna be Black and Red and the door jambs and such are already done. Im using "Sunrise Red" rustoleum.
They mentioned using a clear over the paint to resist fading. Has anyone found Quarts of good clear anywhere? I can only find Spray cans and defintiely would prefer to stick to rolling.
BTW, I attached a pic of my car before I started the rolling- Also I put the tunk, hood and doors back on before I started rolling.
i am trying to find clear myself all i can find is spray bombs here.
marq did reply to what i said in the las page about that i fount the rustolium topside boat paint in quarts and that the paint had to dry for 30 days before you can put on the top side clear.
Posted By: Marq
Re: Paint job on a budget!? CONTINUED - 04/07/07 12:06 AM
Quote:
So with using interlux's primer, did you find your car just needed one coat of it and a sanding to smooth it out?
Yes... the stuff went on with amazing coverage.
It is thick enough to hide a lot of the surface imperfections and it self-levels...
One coat should be all you need... I would say that 1 coat of the Interlux primer is equal to at least four spray coats in thickness
.
Posted By: Marq
Re: Paint job on a budget!? CONTINUED - 04/07/07 12:11 AM
Quote:
Quote:
They mentioned using a clear over the paint to resist fading. Has anyone found Quarts of good clear anywhere? I can only find Spray cans and defintiely would prefer to stick to rolling.
No... I think the summary 'should be' that most paints when exposed to the sun will 'eventually' fade. I don't think the Tremclad/Rustoleum will fade any soon than any other paint.
And you must remember that Tremclad/Rustoleum is designed for use outdoors and exposed to the elements. So I suspect that it does have UV protectants or UV resistance built into it.
A clear coat is not going to resist fading UNLESS the clear coat contains Ultra Violet filtering ( which most of them do not ).
HOWEVER... you can lay a car polish on to your painted surface that does contain UV protection.
In the case of the Brightside paint, it DOES contain UV protection within the paint itself. So it should resist fading straight out of the can. HOWEVER even with the Brightside you can us a polish / wax that will contain UV protectants to double up your anti-fade protection.
.
Posted By: DaytonaTurbo
Re: Paint job on a budget!? CONTINUED - 04/07/07 12:50 AM
Any paint can fade, but some colors, like red, will fade quicker than others. If you're sure to keep up with regular waxing/polishing, especially in the months of the year when the sun is at it's strongest, your color should stay looking good for a long time. Eventually a good buffing is a good idea to take off the dull oxidized paint, or just roll on another layer.
Posted By: Anonymous
Re: Paint job on a budget!? CONTINUED - 04/07/07 04:39 AM
Quote:
Any paint can fade, but some colors, like red, will fade quicker than others. If you're sure to keep up with regular waxing/polishing, especially in the months of the year when the sun is at it's strongest, your color should stay looking good for a long time. Eventually a good buffing is a good idea to take off the dull oxidized paint, or just roll on another layer.
It's true...Rustoleum or any other Alkyd paint will fade eventually if you don't do any up keep on it. Modern OEM finishes can sit outside for years untouched and still look good. These can't. Eventually it will oxidize. This paint technology dates back to the 1920s, and was used as a factory finish at least into the 1960s. Same thing happened to cars back then . If you keep a coat of wax on it, everything will be fine. Even if it does get oxidized really bad, it's still no big deal. Just polish it with a cleaner and wax it. I've brought back several OEM paint jobs from the dead that were oxidized so bad you could use them for a chalkboard, but they came out pretty nice. Just wax it several times a year and don't worry about it . Or, park it in the shade
Posted By: dalbers
Re: Paint job on a budget!? CONTINUED - 04/08/07 05:24 AM
Here is satin white rustoleum, still want to do a couple more coats.

Posted By: Anonymous
Re: Paint job on a budget!? CONTINUED - 04/08/07 04:56 PM
Your truck is looking good. This is as far as I have gotten so far. It is Easter and 34 deg outside.
Bob


Posted By: Anonymous
Re: Paint job on a budget!? CONTINUED - 04/08/07 06:10 PM
bob what color is that? im using brightside fire red and its a very bright red, yours seems to be a lil darker like i had wanted..
Posted By: dalbers
Re: Paint job on a budget!? CONTINUED - 04/08/07 06:13 PM
Thanks Bob, yours is looking great. Can't wait to see it all done. Cold here for Easter too.
Posted By: Anonymous
Re: Paint job on a budget!? CONTINUED - 04/08/07 06:20 PM
Some pics of my 62 Galaxie. The roof has about 10 passes with rustoleum pro and a 1500 wet sand, no polish. The front clip is 6 coats and the drivers side 4. Been to cold and wet to do anything but take pictures. Oh yeah, the passenger "before" side pic.

Posted By: Anonymous
Re: Paint job on a budget!? CONTINUED - 04/08/07 06:23 PM
Need a class in remedial picture posting.
Front clip

Posted By: Anonymous
Re: Paint job on a budget!? CONTINUED - 04/08/07 06:25 PM
Drivers side

Posted By: Anonymous
Re: Paint job on a budget!? CONTINUED - 04/08/07 07:36 PM
Quote:
Need a class in remedial picture posting.
Front clip
lol host the pics online and use the [img][/img] tags to post them here
Posted By: Anonymous
Re: Paint job on a budget!? CONTINUED - 04/08/07 07:41 PM
Quote:
bob what color is that? im using brightside fire red and its a very bright red, yours seems to be a lil darker like i had wanted..
Rustoleum Regal Red. I wanted a darker red, so I went with this one.
Bob
Posted By: andyoucankeepit
Re: Paint job on a budget!? CONTINUED - 04/08/07 10:49 PM
has anyone used this method with striping or any graphics? i want to mask some stuff off but im worried that having to do so many layers will have the paint harden over the masking and peel up the paint when im done. does this sound right, or any way around this?
Posted By: Radio Joe
Re: Paint job on a budget!? CONTINUED - 04/09/07 12:32 PM
Quote:
Quote:
Any paint can fade, but some colors, like red, will fade quicker than others. If you're sure to keep up with regular waxing/polishing, especially in the months of the year when the sun is at it's strongest, your color should stay looking good for a long time. Eventually a good buffing is a good idea to take off the dull oxidized paint, or just roll on another layer.
It's true...Rustoleum or any other Alkyd paint will fade eventually if you don't do any up keep on it. Modern OEM finishes can sit outside for years untouched and still look good. These can't. Eventually it will oxidize. This paint technology dates back to the 1920s, and was used as a factory finish at least into the 1960s. Same thing happened to cars back then . If you keep a coat of wax on it, everything will be fine. Even if it does get oxidized really bad, it's still no big deal. Just polish it with a cleaner and wax it. I've brought back several OEM paint jobs from the dead that were oxidized so bad you could use them for a chalkboard, but they came out pretty nice. Just wax it several times a year and don't worry about it . Or, park it in the shade
Thanks for everyone's answers- Im glad to hear I can keep it looking good. I dont mind having to polish it a couple times a year and most times it will be under my carport.
I didnt get to work on the car over the easter weekend but did test a little something- Clay bar. I had one I bought to try on my truck and it was basically wasted money for that but I never threw it out. I took it to the car after a new layer of paint had hardened and rubbed it for a few minutes and it took alot of the settled garbage off the paint and left it much smoother. still some stuff that needed to be sanded but I am out under a carport doing my paint. If you are painting a car in a garage and dont have a problem with dust/dirt or orange peel, I could see the clay bar being helpful. Anyone else tried one?
Posted By: Radio Joe
Re: Paint job on a budget!? CONTINUED..page 44........ - 04/09/07 12:36 PM
Andyyoucankeepit- I asked a similar question on page 71 and here is the response i got- Hope it helps
Quote:
I did my truck in a green/green two tone, and I found out the hard way about over adhesion and paint removal. The cure I found was to pull the tape on a 45* bias while wiping the end with a spirit soaked rag. This softens the adhesive and lets the tape loose. Work slowly and the tape should come off with no trouble.
Hope this helps out. It just takes patience, but it's worth it.
Posted By: Anonymous
Re: Paint job on a budget!? CONTINUED..page 44........ - 04/09/07 02:53 PM
The miata and the red truck look great!
I'm almost done with the body work on my project, where is the best place to get some black interlux brightside online? I've read all the threads; ebay and marine shops seem to be the norm right?
Anyone buy from this ebay guy? All of the marine shops around here(atlanta) don't seem to have any black.
Thanks.
Posted By: texczech
Re: Paint job on a budget!? CONTINUED - 04/09/07 04:18 PM
Man, I have the same problem! It looks like there is something in the paint causing little dirt specks to show up in the paint when it is dried. I guessthe dirtin the air must settle. Anyone have this same problem? I guess so. Does the clay bar help this? I am almost satisfied with my red Brightside coat( without sanding/polishing) except for the apparent dirt specks. Any good articles on sanding? I have a ton of questions on wet vs dry sanding when using this roller method.
Posted By: blue195
Re: Paint job on a budget!? CONTINUED - 04/09/07 04:54 PM
I've sprayed cars in a booth and gotten those specks. I even wet the floor down with water, used an elaborate filter system in a downdraft paint booth and wore a spacesuit looking paint uniform and washed my airhose to keep as much trash out of the air as possible, and still got those dirt specks in there. You may be able to buff them out, and maybe not.
Try wet sanding and see if they go away. The trick to wet sanding is to realize you're only trying to take off a miniscule amount of paint in order to make the surface flatter. If you hear a squeak, you've got dirt in there and it's time to rinse your paper. It takes a few times to master it. A squeegie is a valuable tool also.
Posted By: Anonymous
Re: Paint job on a budget!? CONTINUED..page 44........ - 04/09/07 05:05 PM
Posted By: Anonymous
Re: Paint job on a budget!? CONTINUED..page 44........ - 04/09/07 07:25 PM
Wow guys,
These results are amazing. Have read the thread all the way through and it looks like there is only one question I have-
Is there any way at all to do metallics? I realize the concerns over the particles settling properly and everything but I would still like to try.
Is there any place that sells metallic additives? I would really like to experiment by seeing if an additive could make the lighter grey into a silver.
Anyone have any ideas?
Thanks
Nathan
Posted By: 78D150CLUB
Re: Paint job on a budget!? CONTINUED..page 44........ - 04/09/07 07:56 PM
I'd post a pic, but the results are hard to see in them.
I used a metallic rattle can from about 2 ft back between every second layer, working with the original TremClad method of 2 coats, wetsand, 2 coats.
I applied 1 coat, sprayed lightly from a distance, not enough to add the silver color, just heavy enough to let the metallic show, then applied the second coat. I admit it's a bit uneven in spots, but overall I was happy with the results.
Try to find an enamel metallic spray rather than a lacquer base. I used a silver metallic with green.
I did post a couple of pics on pg 71 in reply to Radio Joe's question about two tone work.
Posted By: 78D150CLUB
Re: Paint job on a budget!? CONTINUED..page 44........ - 04/09/07 07:58 PM
Nice stripe work. I like the grey/black combo.
Posted By: Anonymous
Re: Paint job on a budget!? CONTINUED..page 44........ - 04/09/07 10:22 PM
Beautiful Mustang. How much paint did it take in total?
Posted By: Anonymous
Re: Paint job on a budget!? CONTINUED..page 44........ - 04/09/07 11:48 PM
Quote:
Beautiful Mustang. How much paint did it take in total?
About a half a quart of black for the stripes.
About a quart of the grey - but I decided the steel grey, which is the darkest available grey from Interlux, was way too light. so I mixed about half a quart of black with about a quart and a quarter of grey.
Three quarts total with about half a quart of dark grey mixture left over.
That was only 2 coats with the second coat thinned. It covered up all my scratches from my lazy machine sanding.
Posted By: Anonymous
Re: Paint job on a budget!? CONTINUED..page 44........ - 04/10/07 01:38 AM
I tried to do a metallic spray can job but I found impossible to keep a wet edge so the job was still mottled.
Anyway, went to the home depot and found that they had the Rustoleum paint in aluminum- just what I wanted.
I'll post pictures when I get results.
-Nathan
Posted By: 78D150CLUB
Re: Paint job on a budget!? CONTINUED..page 44........ - 04/10/07 02:19 AM
I didn't do a spray can job as such, I just applied enough between layers of TremClad to add the sparkle without adding any color, then applied the next layer over and wetsanded.
Beware of aluminium paint, it's mentioned in earlier posts as being totally different to work with and it doesn't sand or polish like regular TremClad does. IIRC, it's not a good base to paint over, either.
Posted By: andyoucankeepit
Re: Paint job on a budget!? CONTINUED..page 44........ - 04/10/07 04:17 AM
i ended up buying the aluminum but havent had time to experiment with it yet. are any of the other colors of silvers working for anyone? there is a stainless steel, and i think a pewter. i wanted to go with a lighter silver, so i picked aluminum.
maybe the mixxing of spray can metallics between coats comes out good....i might attempt that.
Posted By: Anonymous
Re: Paint job on a budget!? CONTINUED..page 44........ - 04/10/07 01:31 PM
Hmm,
I could not find the post on the aluminum paint. Does anyone have experience with it? I wonder if you could mix the alumninum with a light grey and get silver.
The other option I have found is to use some pearl additive to get at metallic effect. Something like this
http://www.paintwithpearl.com/Pearls/silver/silverpics.htmbut I think you would need to add the pearl material to a base color and cut the base and pearl mixture with some clear.
Anyone been able to find or use the rustoleum clear? I have been to the local Lowes and Home Depot and they don't have clear.
Thanks,
Nathan
Posted By: Anonymous
Re: Paint job on a budget!? CONTINUED..page 44........ - 04/10/07 06:05 PM
Very nice.... although, I wouldn't wait too long before polishing, it's actualy a little easier while the paint is still 'soft'. I did my truck after about 48 hours, looks like a red mirror.
Posted By: Anonymous
Re: Paint job on a budget!? CONTINUED..page 44........ - 04/10/07 10:30 PM
Aussie- Have been following Brightside posts with great interest. Last weekend I switched to Brightside dark blue after failing at perfection with Rustoleum. I added penetrol only in first couple of coats and was stunned how it flowed out. Last night, I unscientifically added more, maybe 50% and it came out like crap. Very mottled/orange peely. What percentage have you determined to be the best ? Are you also adding Mineral Spirits ? Also, has anyone found a good way of toning down the Brightside Fire Red with out making it look like a muddy mess ?
Thanks,
AL
Posted By: Anonymous
Re: Paint job on a budget!? CONTINUED..page 44........ - 04/10/07 10:32 PM
Quote:
I didn't do a spray can job as such, I just applied enough between layers of TremClad to add the sparkle without adding any color, then applied the next layer over and wetsanded.
Beware of aluminium paint, it's mentioned in earlier posts as being totally different to work with and it doesn't sand or polish like regular TremClad does. IIRC, it's not a good base to paint over, either.
id really like to see some pics of your progress if u could
Posted By: Anonymous
Re: Paint job on a budget!? CONTINUED..page 44........ - 04/11/07 12:16 AM
Quote:
Aussie- Have been following Brightside posts with great interest. Last weekend I switched to Brightside dark blue after failing at perfection with Rustoleum. I added penetrol only in first couple of coats and was stunned how it flowed out. Last night, I unscientifically added more, maybe 50% and it came out like crap. Very mottled/orange peely. What percentage have you determined to be the best ? Are you also adding Mineral Spirits ? Also, has anyone found a good way of toning down the Brightside Fire Red with out making it look like a muddy mess ?
Thanks,
AL
I use a slightly different method to most people when it comes to thinning the paint. A couple of years ago I bought a piece-of-crap electric sprayer which came with a little cup with a hole in the bottom of it. The cup is dipped into the paint and you then time how long it takes for the cup to empty.
I have been using this method. I usually add about 400ml of paint, then about 100ml of Penetrol and then I add mineral spirits until I get a total cup flow time of 30 seconds. Once I'm at the 30 second mark, I'm ready to paint.
And I'm really happy that the plastic cup is more useful than the piece-of-crap electric sprayer.....
Posted By: 78D150CLUB
Re: Paint job on a budget!? CONTINUED..page 44........ - 04/11/07 12:29 AM
My truck has been done for about 6-8 months, but if you do a username search, you'll be able to see the pics I took during the process. Not the best quality, but I took Exit1965's advice and bought a better camera with the cash saved on the paint job
The metallic doesn't show too well in a pic, but it's quite noticeable in sunlight. If we ever get any here, I'll wash the winter glop off and take a few new ones.
This is during finishing stages last July\August.

Posted By: Anonymous
Re: Paint job on a budget!? CONTINUED..page 44........ - 04/11/07 03:52 PM
Quote:
Quote:
Aussie- Have been following Brightside posts with great interest. Last weekend I switched to Brightside dark blue after failing at perfection with Rustoleum. I added penetrol only in first couple of coats and was stunned how it flowed out. Last night, I unscientifically added more, maybe 50% and it came out like crap. Very mottled/orange peely. What percentage have you determined to be the best ? Are you also adding Mineral Spirits ?
Thanks,
AL
I use a slightly different method to most people when it comes to thinning the paint. A couple of years ago I bought a piece-of-crap electric sprayer which came with a little cup with a hole in the bottom of it. The cup is dipped into the paint and you then time how long it takes for the cup to empty.
I have been using this method. I usually add about 400ml of paint, then about 100ml of Penetrol and then I add mineral spirits until I get a total cup flow time of 30 seconds. Once I'm at the 30 second mark, I'm ready to paint.
And I'm really happy that the plastic cup is more useful than the piece-of-crap electric sprayer.....
I think that viscosity cup would be a great tool for our purposes. I can't seem to find one though. I had to use the method 69DartGt used:
"... the second and later coats I thinned until after I stirred and picked the stir stick up out of the paint I could count to about 10 then the paint would go from a stream to drops if that makes sense. The paint seemed to lay down better much less orangepeel and no rolls, I had to do a lot of sanding after my first coat to get it to were I could paint again."
Posted By: Jolly_Raj_R
Re: Paint job on a budget!? CONTINUED..page 44........ - 04/11/07 06:23 PM
Quote:
I think that viscosity cup would be a great tool for our purposes. I can't seem to find one though. I had to use the method 69DartGt used:
"... the second and later coats I thinned until after I stirred and picked the stir stick up out of the paint I could count to about 10 then the paint would go from a stream to drops if that makes sense. The paint seemed to lay down better much less orangepeel and no rolls, I had to do a lot of sanding after my first coat to get it to were I could paint again."
I did some poking around on the web and apparently the proper name for the viscosity cup you're talking about is a "Zahn Cup"... You measure the time it takes to empty the cup.. It's worth a search with the official name to see if they sell them outright.. According to Wikipedia its a common enough thing in the painting industry..
hope that helps
Raj
...maybe pulling an Exit1965 and painting his car white this summer..
Posted By: Anonymous
Re: Paint job on a budget!? CONTINUED..page 44........ - 04/12/07 05:58 PM
Ok, so I am going to try this again now that the weather has stabilized. I am going with the Brightside and I have a couple questions.
1. has anyone laid Brightside over SEM self etching primer or any other self etching primer?
2. If so were there any adhesion issues?
3. Do I thin the Bright side or let it roll full strength?
Thanks!!!!!
Posted By: Anonymous
Re: Paint job on a budget!? CONTINUED..page 44........ - 04/12/07 09:34 PM
Posted By: Anonymous
Re: Paint job on a budget!? CONTINUED..page 44........ - 04/12/07 11:23 PM
someone used it with his Van Sickle paint. actually had some nice results.
_taF
Posted By: texczech
Re: Paint job on a budget!? CONTINUED - 04/13/07 02:24 AM
I always seemed to have the dirt specks, but it was only a minor detail because I was concerned with thinning,smooth application,roller type etc...Now I am convinced that this is for real. I am using brightside and I have tried straight, thinned,with the reccommended thinner and other stuff- still pleased with the shine.The specks are my main problem now. I got a medium clay bar and it did take the specks out- you could feel them before, and after the clay bar you couldn't feel them , but see the spots where they were.I am now trying to lessen the speck effect. I think that since the brightside dries so slow, dirt has a chance to settle and affect the paint more so than if the paint dried faster. IF I could lessen the "dirt" speck problem, I would be fairly well satisfied with the final finsh, even with some orange peel.I'm thinking that on my earlier coats I didn't give the dirt specks enough attention and kept rolling over them and maginfying their effect. I would really like to hear from others who may have had to deal with this, if they had this.
Posted By: Anonymous
Re: Paint job on a budget!? CONTINUED - 04/13/07 03:55 AM
I've been painting with Rustoleum pro outside and have also had some issues with dirt specks and pollen in the paint.
I've noticed that if the paint is just the least bit tacky when the dirt hits it, it sort of sits up on top of the paint and doesn't really get "in" the paint. When the paint sets up the dirt and muck is pretty easily removed without any flaws in the paint. Usually don't need sandpaper to do it, just wet it all down and run my hand over it or a fingernail to remove it. It hasn't been a real problem.
Posted By: Exit1965
Re: Paint job on a budget!? CONTINUED - 04/13/07 01:00 PM
I dealt with some dirt specks, but mostly dog hair. As soon as I saw the dog hair settle on (I was only looking at the area I was painting) I would stick my finger in there and take it out then roll over to cover the smudge.
I think dust specks come out pretty easy with wetsanding. You may want to just wetsand/polish where the specs are if you're satisfied with the rest of the finish.
Posted By: Anonymous
Re: Paint job on a budget!? CONTINUED - 04/13/07 03:16 PM
A clean garage helps (if you have one available.) I took a leaf blower to mine; blew out all the dust one day, did it again the next day. I then took a hose and sprayed water on the floor. Someone in a previous post recommended attaching a chain to the car to ground it and keep it from attracting dust. I got a kick out of the coach painting site: (http://www.stephen.hull.btinternet.co.uk/paint.html.) He said,"It's not unknown for the coach painter to go to extreme lengths in order to obtain the cleanest possible finish by wearing lint free overalls or simply just shorts and covering the human body with Linseed oil, this will stop human body fallout elliminating skin dust, hair, fluff etc from falling and contaminating freshly painted panels."
I don't think we wanna go that far...I'm trying to erase this image of us all oiled up, wearing nothing but German lederhosen shorts and carrying a roller!
Posted By: 69DartGT
Re: Paint job on a budget!? CONTINUED - 04/13/07 03:27 PM
I rolled mine in the driveway, but each morning I would wet down everything close and get to rolling, it helped a bunch.
Posted By: 78D150CLUB
Re: Paint job on a budget!? CONTINUED - 04/13/07 11:04 PM
Posted By: Anonymous
Re: Paint job on a budget!? CONTINUED - 04/14/07 04:01 PM
yeah, i've read on here how some ppl did it in some public parking lot or even in the parking lot of their apartment residence, even next to other cars. idk how they can do that. i wonder if they were ever complained on. i'm still in the process of painting mine, but there is so much mess and paint marks i can't remove.
_taF
Posted By: Anonymous
Re: Paint job on a budget!? CONTINUED - 04/15/07 12:05 AM
Roller painting tubing ?
anyone done it ?
I need to paint black gloss on the tubes of a dragster
I did half of it today with spray cans ,
sanded down the old flacking paint /rust and then spray bombing it so that it would not rust again,
But I need it to be a better finish on the areas you see that is not covered by the aluminum panels.
I am afraid it I really thin it out that the paint will go around the tube and start dripping,
Any ideas or is iot better to get out the compressor
thanks
Beaulieu
Posted By: Anonymous
Re: Paint job on a budget!? CONTINUED - 04/15/07 07:32 AM
Hey guys. I am going to be doing this to my car...very soon. I just spent the past 2 hours reading this thread form the beggining. I got to about page 15. lol. I just want to double check to make sure I am doing every thing right. I drive a 1988 honda accord 4 dr btw...just for reference.
The beggining is what I am most unsure of. I don't know what I should remove, and what or even if I am supposed to tape anything off. I know I am going to sand from 80 grit finishing at 150 grit. But what type of sander should i use, or should i do it by hand? After I figure that out, i know mostly what to do.
1- mix mineral spirits with TremClad until just over the consistancy of water.
2- apply 2 coats, no less than 8 hours apart
3- wetsand with 600 grit- no less than 10 hours after last coat
4- apply 2 more coats
5. wetsand with 800 grit
6. two more coats
7. wetsand with 1000-1500 grit, then polish.
I guess that is it. I know that I am supposed to go over painted areas 1 min after lightly with the roller to remove bubbles. but thats it. please give me suggestions, and the proper procedure if this is wrong. I will be happy to post all pics...before, during, and after each coat, but i need to know for sure if i am doing this properly. Also, I looked on the canadian tire website, and they have Tremclad Rust Paint, and Tremclad Alkyd Tint Base, Masstone Gloss. I'm thinking the first one, but who knows. Link
here, just search tremclad. Thanks alot people.
Posted By: Exit1965
Re: Paint job on a budget!? CONTINUED - 04/15/07 01:29 PM
One of the problems with a thread this long is that the same questions come up over and over. Kind of like an entire forum contained within a thread..
150 is not a good grit to end prep. with, I wouldn't go under 220-240 for a final sand.
Posted By: Anonymous
Re: Paint job on a budget!? CONTINUED - 04/15/07 03:31 PM
Exit, I see exactly what your saying. Is it possible to place a stickied at the top of each page that says something like "First time visitors read this first it will save you alot of reading.!" Outline the entire painting process to minimize repeat questions.
Even a FAQ might help.
Example
Q: does this process work with metal flake paint?
A: Definetly an experimental paint job that may not yield satisfactory results.
Q: Can I get a "show car" paint job with the roller process?
A: Great results are achievable with a huge, huge investment in time. Satisfactory "factory paint" results that will bring new life to a old beater are worth the effort.
But, on the upside what this forum has possibly created the largest amount of DIY auto painters in the history of the automobile.
Posted By: Anonymous
Re: Paint job on a budget!? CONTINUED - 04/15/07 06:30 PM

that is wet sanded at an angle. but if i polish it this is as far as i can get it

ive used turtle and 3m products
Posted By: Anonymous
Re: Paint job on a budget!? CONTINUED - 04/15/07 08:56 PM
Which Turtle and 3M products did you use?
Did you use either a cutting compound or a swirl remover from either brand?
How did you apply the products?
By hand? With a rotary/RO (and if you did then what buffing pad did you use)?
Posted By: Anonymous
Re: Paint job on a budget!? CONTINUED - 04/16/07 06:28 AM
for me, 220 grit leaves a lot of lines underneath a virgin layer of brightside. what i'm doing now is using 220g to get rid of orange peel and driplines, then i'll follow with at least a 600g (what i already have).
i'm trying to wetsand 2nd to final layer smooth, so when i finally add that last layer, it will lay so smooth, that i won't have to wetsand it. i'll just let it dry for a month and buff it.
_taF
Posted By: Radio Joe
Re: Paint job on a budget!? CONTINUED - 04/16/07 02:10 PM
Thought I would show some progress. here is my corvair with the top half in black. Im on about the 9th coat with alot of sanding in between so probably as thick as 6 layers. The sanding isnt because of the paint, its because the car wasnt as flat as I thought when I started- My Fault. I plan on 2 more layers, final sand with 2000 grit and then lay the last coat on. then use the clay bar and polish it.... then in a few months, polish it a little better. In the picture, the car is dry and I just went over it with a clay bar to remove the garbage sitting on top of the paint..
The paint is layign down VERY smooth. Im very happy with it.

Posted By: Anonymous
Re: Paint job on a budget!? CONTINUED - 04/16/07 03:42 PM
3m i used a rubbing compound on orange foam pad spritzed with water. this is what we use at work. then i tried turtles rubbing and polish compounds. i think i didnt let it dry long enough. im used to 2 part urethanes and bc/cc's
Posted By: admactanium
Re: Paint job on a budget!? CONTINUED - 04/16/07 04:49 PM
Quote:
3m i used a rubbing compound on orange foam pad spritzed with water. this is what we use at work. then i tried turtles rubbing and polish compounds. i think i didnt let it dry long enough. im used to 2 part urethanes and bc/cc's
? you don't let compounds and polishes "dry" on your car. that's not the point of them. the point is to work them while they're wet until they're nearly gone. i'd say looking at your picture that you're not working the material long enough or you just didn't use a low enough grit sandpaper as your final wetsand.
Posted By: 78D150CLUB
Re: Paint job on a budget!? CONTINUED - 04/16/07 08:55 PM
Looking really good.
Posted By: Anonymous
Re: Paint job on a budget!? CONTINUED - 04/16/07 09:29 PM
Radio Joe,
What ratio of spirits to paint are you using?
Can you detail your process-
Your paint is looking really good. I am working with some of the safety red but it does not quite look that good.
Thanks,
Nathan
Posted By: texczech
Re: Paint job on a budget!? CONTINUED..page 44........ - 04/17/07 02:04 AM
I have used penetrol & mineral spirits as a thinner. When I got the paint too thin, I got a duller shine, I applied it the next day as a second coat & got the good shine back. Too much thinning looks bad in a single coat. the second thin coat looked good to me.
Posted By: Anonymous
Re: Paint job on a budget!? CONTINUED..page 44........ - 04/17/07 06:30 AM
this is my first 2 coats...i have alot of orange peel...should i can't seem to find any sand paper that is finer than 600 grit..is 600 good enough?


Posted By: Anonymous
Re: Paint job on a budget!? CONTINUED - 04/17/07 06:34 AM
Posted By: Radio Joe
Re: Paint job on a budget!? CONTINUED - 04/17/07 01:11 PM
Quote:
Radio Joe,
What ratio of spirits to paint are you using?
Can you detail your process-
Your paint is looking really good. I am working with some of the safety red but it does not quite look that good.
Thanks,
Nathan
Thanks! I am really happy with it so far. I am using the regular rustomleum "Stops Rust" Gloss Black. I used low odor mineral spirits. I dont really have a ratio, basically just mixed it by feel. The first couple of coats were too thick so I have been thinning it to almost water. Its really quite thin! But it lays down really flat. The layer I put on last before the picture was taken was too thick too, it actually has a VERY fine orange peel in spots.... so I have to thin the next couple of layers a little better.
hers some things I found during my work... most have already been posted:
**PREP PREP PREP!!!! I didnt spend alot of time on the prep as far as removing small marks and such- And black wasnt the best choice on my car (But it just looks so good!). Make sure the car is absolutely flat with no blemishes BEFORE you start. it makes life easier and you will have a better finished product.
** THIN THIN THIN the paint. I use it almost like water and it lays down very smooth- usually with NO orange peel.
**Apply the first 3 layers and then start the wetsanding with 600 grit. this will give you a very flat surface and make the paint look that much better- 3 layers help to keep you from sanding through right away
**CLAY BAR!!! I usually hate these things but I picked on up at WALMART for $5.00 on clearance (MOTHERS BRAND). I use it in between coats I dont plan to sand to remove any specs that settled on top of the paint. The plan is to ge tthe last coat to lay down flat and use the clay bar instead of final sanding to eliminate some HAZE.
**NEW ROLLERS AND TRAYS- It makes it cost alittle more to keep changing the roller and tray but they are only a few dollars and you get better results
**********PUT THE CAR IN THE SUN!!!!! I am working in my carport. I put on a layer of paint in the morning, wait about an hour or 2 until it is almost hard and then push the car out into the sun. the sun really bakes the paint on hard. It seems if I just leave it in the car port- even for a few days, it doesnt quite harden completely, If I push it out in the sun it hardens in a few hours. SOmetimes I put on a coat of paint at night before bed, and in the mornign it is still tacky. I will push the car out of the carport before i leave for work and let it bake in the sun all day while i am at work. I am hoping when I am doen with all the paint, it should be nice and sunny and hot here in South Carolina so I can leave it to bake in the sun for a week or 2 before putting everything back together.
So far I have 1 quart of paint on the car, when I am done I think I will have used just over 1 quart of black and 1 and a half of SUNRISE RED. I think the total cost I will have in the paint job including the rollers, paint, tape, spirits etc will be $100.00.
As for sandpaper- I could only find little packages of 1000, 1500 and 2000 grit in the auto department of WALMART or the local pepboys/autozone etc.
What I am most happy about is the renewed interest this has goven me in my stalled project.
Posted By: Exit1965
Re: Paint job on a budget!? CONTINUED..page 44........ - 04/17/07 01:22 PM
85, you're in So Cal. you should be able to find higher grits somewhere, pep boys, kragen, walmart, etc.
Posted By: texczech
Re: Paint job on a budget!? CONTINUED - 04/17/07 01:22 PM
Great tips. I use a liner in mypaint tray- just get some heavy duty aluminum foil to line your paint tray! Very easy to clean up. Has anyone tried the scotchbright type pads to sand? The different colors represent different grits and they seem to follow coutours real nice. The dirt specks are a real pain for me right now.
Posted By: Anonymous
Re: Paint job on a budget!? CONTINUED - 04/17/07 04:49 PM
i dont think the paint was dry enough. thats wet sanded w/ 2000. i said screw it and got me a $2 can of orange high gloss spray paint. looks good. its only a speaker box. i was testing on that before i go and mess with my car.
Posted By: _Scott_
Re: Paint job on a budget!? CONTINUED - 04/18/07 03:47 AM
Quote:
just get some heavy duty aluminum foil to line your paint tray!
Excellent tip!
Quote:
Has anyone tried the scotchbright type pads to sand?
Scotchbrite pads will not remove orange peel, but for someone who has waited too long between coats of paint, it's a good idea to scuff over the previous coat to avoid adhesion problems. Red Scotchbrite would be good for that.
Posted By: Anonymous
Re: Paint job on a budget!? CONTINUED - 04/18/07 04:09 AM
I'm going to buy paint tomorrow. I have read about 50 pages of this thread, but I am still unsure about the paint to buy. I have 2 links from Canadian Tire.
This One Or This One Which one??? Please help me out as I need to buy it tomorrow and that will be my only chance to go all week. I will be testing on a hood tomorrow, and if it works out, I will be doing my whole car. I am completly willing to post all pictures as I progress, but I really need to know which paint to go for before I start. Thanks alot people!
Posted By: Anonymous
Re: Paint job on a budget!? CONTINUED - 04/18/07 12:49 PM
Great topic!
Marq, charger, exit, What do you think of Epifanes? 30$ half gallon
Check this test:(Compares Interlux with Epifanes)
http://youtube.com/watch?v=wGCgZfuPb1ADrys slow but doesn't scratch.
thanks
Posted By: Anonymous
Re: Paint job on a budget!? CONTINUED - 04/18/07 01:55 PM
anybody know in the states where to get a quart of rustolium clear coat all i got around here is spray bombs and they leave waves in the paint...
Posted By: Anonymous
Re: Paint job on a budget!? CONTINUED - 04/18/07 03:36 PM
Quote:
Or This One
You want this one (above).
I found Rona had much better selection in terms of colour. Everyone should stock the red, though.
Posted By: 69chargeryeehaa
Re: Paint job on a budget!? CONTINUED - 04/18/07 04:53 PM
Quote:
Quote:
Or This One
You want this one (above).
I found Rona had much better selection in terms of colour. Everyone should stock the red, though.
Posted By: Anonymous
Re: Paint job on a budget!? CONTINUED - 04/18/07 07:52 PM
I had a chat with Jamestown Distributors support.[Visitor] hi
[Jamestown Distributors] Hello, how may I help you?
[Visitor] I am looking to buy some paint.
[Visitor] have you ever painted a car with interlux?
[Visitor] I see a lot of people online are doing this with good results.
[Jamestown Distributors] I personally have not but i wouldn't want to use a one part marine paint on a car.
[Jamestown Distributors] It would be too thick
[Jamestown Distributors] and its not very durable
[Visitor] they add 5% thinner, would this make a difference?
[Visitor] what about Epifanes?
[Jamestown Distributors] That wouldn't be enough.
[Jamestown Distributors] The same with any one part marine paint wouldn't be nearly as durable, it would chip.
[Jamestown Distributors] The only marine paint that would do it would be the Awlcraft paint by Awlgrip.
[Jamestown Distributors] Its the most closely related to a car paint.
[Visitor] how would rust o leum compare to your interlux paint?
[Jamestown Distributors] There not really comparable, since they are very different application.
Any thoughts???
Thanks
Posted By: Anonymous
Re: Paint job on a budget!? CONTINUED - 04/18/07 08:25 PM
I seem to recall previous posts where Rustoleum, Temclad and I believe Brightside technical reps made the same comment. I think it's a legal issue. These companies can't state in writing that their paints were DESIGNED for automotive application without thorough research and proof. They need their own paid scientists and researchers to go through numerous tests first. But since WE'RE doing their tests on our own and for FREE, I bet they're watching
this site with keen interest.
Posted By: Anonymous
Re: Paint job on a budget!? CONTINUED - 04/19/07 12:54 AM
Hello all I have been following this post for some time now and working every weekend to get my project ready for paint .I plan on doing it the brightside way two tone gray ,one part brightside steel grey the other darker mixed with black {formula TBD}
I have a 1936 chevy 5 window master coupe that was media blasted and PPG primmed a long time ago I intend to rough up the PPG primmer and apply the interlux two part epoxy primmer it will act as a filler and is sandable and I dont expect any bonding problems with the paint afterwords.I know it will cost more but I can say I did it myself.
The coupe totally apart works out to approx 26 separate pieces to be painted most can lay flat on a table .
Should be at it some time in May I will post progress pics.

Posted By: Anonymous
Re: Paint job on a budget!? CONTINUED - 04/19/07 01:21 AM
the coupe

Posted By: Anonymous
Re: Paint job on a budget!? CONTINUED - 04/19/07 01:22 AM
another

Posted By: Anonymous
Re: Paint job on a budget!? - 04/19/07 01:50 AM
 how should i go about removing this run?
this is the 2nd layer. the run started on the first layer. i thought i had wetsanded (220g) enough. it felt flat and smooth, but above the run was paint and below it was the orignal surface color.
i have a final 3rd layer i want to add on. will buffing/polishing (2600rpm) remove a run like this, or should i just go ahead and wetsand it now before i lay a final layer?
thanks,
_taF
Posted By: Anonymous
Re: Paint job on a budget!? - 04/19/07 03:29 AM
Hey guys. Alright, I just did my first coat on a hood I got off my mom's old van. And I have to say, I'm worried. My main problem is the bubbles. When I roll the paint on, I get a huge amount of bubbles on the surface. I tried running the roller lightly over the bubbles, but that just made even more bubbles. I don't know what I am doing wrong. One thing I noticed was that when I thinned the paint in a jar I was using, it was almost the consistency of water. But after pouring it in the tray and then painting for a bit, it seemed to thicken up. It is kinda chilly outside, so maybe the temperature of the paint changed. But I need someone to tell me if that's what it should look like at this point. I think it is going on too thick, but that doesn't explain the stupid bubbles. Blowing on the bubbles worked, but I got lightheaded and it's annoying. Should I be pushing hard on the roller when I paint? And when I look at the hood now, some parts are completly white, whereas others you can still tell there is another colour underneath. I need advice!!!


Posted By: Anonymous
Re: Paint job on a budget!? - 04/19/07 04:16 AM
Quote:
how should i go about removing this run?
this is the 2nd layer. the run started on the first layer. i thought i had wetsanded (220g) enough. it felt flat and smooth, but above the run was paint and below it was the orignal surface color.
i have a final 3rd layer i want to add on. will buffing/polishing (2600rpm) remove a run like this, or should i just go ahead and wetsand it now before i lay a final layer?
thanks,
_taF
If you have any runs you will need to sand them flat before you polish.
Posted By: Anonymous
Re: Paint job on a budget!? - 04/19/07 04:29 AM
Quote:
Hey guys. Alright, I just did my first coat on a hood I got off my mom's old van. And I have to say, I'm worried. My main problem is the bubbles. When I roll the paint on, I get a huge amount of bubbles on the surface. I tried running the roller lightly over the bubbles, but that just made even more bubbles. I don't know what I am doing wrong. One thing I noticed was that when I thinned the paint in a jar I was using, it was almost the consistency of water. But after pouring it in the tray and then painting for a bit, it seemed to thicken up. It is kinda chilly outside, so maybe the temperature of the paint changed. But I need someone to tell me if that's what it should look like at this point. I think it is going on too thick, but that doesn't explain the stupid bubbles. Blowing on the bubbles worked, but I got lightheaded and it's annoying. Should I be pushing hard on the roller when I paint? And when I look at the hood now, some parts are completly white, whereas others you can still tell there is another colour underneath. I need advice!!!
Your paint is thinner than I have ever gone with Brightside but is should be ok with Rustoleum.
When I roll, I use very little pressure on the roller and after I have painted a panel I then go over it again with a clean roller to remove the bubbles. When I use the second (clean) roller I roll it with just the weight of the roller.
Posted By: Anonymous
Re: Paint job on a budget!? CONTINUED - 04/19/07 04:41 AM
Dose anyone know how close the tremclad fire red is to the bright side fire red? I want to find tremclad in approximately the same shade as the brightside, but i cant find any pictures of what the tremclad fire red looks like
Posted By: Marq
Re: Paint job on a budget!? CONTINUED - 04/19/07 06:10 PM
Quote:
Great topic!
Marq, charger, exit, What do you think of Epifanes? 30$ half gallon
Check this test:(Compares Interlux with Epifanes)
http://youtube.com/watch?v=wGCgZfuPb1A
Drys slow but doesn't scratch.
thanks
I think that was an excellent video to hunt down. In a way, doing a 'board' is like doing a micro-version of a car.
I think the results they came up with were pretty indecisive. There wasn't a clear outright winner. Each product and a plus and a minus.
Overall, I think the most negative thing might have been the fact that Epiphanes was the slowest at curing - followed by Petit. The Interlux Brightside had the fastest curing time - and for most of our impatient painters, that is probably the biggest selling point that gives it a strong advantage over the other two candidates.
Epiphanes won the scratch test... with Petit in second and Brightside in last place. I was surprised at two things... that Petit didn't win that contest and that Brightside wasn't #2.
But everyone who is considering painting their car can get a quick snipet on just how easy the roller painting is... and how it is commonly used in marine applications other than boats.
Some folks will learn more in the few minutes it takes to watch that video than if they read messages for the same amount of time.
Overall... I am still satisfied with the Brightside paint job. TODAY I drove my car out of the garage ( for the first time since it was put into winter hibernation ). Other than garage dust and some odd things that a mouse may have left on the hood, the car is looking GREAT.
I took it out to get a fresh tank of gas and I was pleasantly flattered by the envious looks being given to the car.
.
Posted By: Marq
Re: Paint job on a budget!? CONTINUED - 04/19/07 06:20 PM
Quote:
Dose anyone know how close the tremclad fire red is to the bright side fire red? I want to find tremclad in approximately the same shade as the brightside, but i cant find any pictures of what the tremclad fire red looks like
I have used both on my McLaren and they are identical shades/tints of red.
However... just to be safe I will note that even manufacturers cannot guarantee one batch of their paint will be identical to a different batch.
Your wives, girlfriends and mothers who knit can confirm that different 'lots' of knitting wool can have variances in the shade or tint.
So I did like my wife does... when I was buying the Brightside I had the luxury of looking at every Fire Red can on the shelf and taking three cans that were 'numbered' almost identically on the bottom ( their lot number ).
Anyhow back to your original question... if you were to Brightside the body and Tremclad/Rustoleum spray the harder to reach areas, you would not detect a visible difference in their colors. They are that close.
.
Posted By: Anonymous
Re: Paint job on a budget!? - 04/20/07 12:23 AM
Quote:
If you have any runs you will need to sand them flat before you polish.
Just wondering, how long do I have to wait after painting before the paint will be hard enough to sand? I completly screwed up on the hood, and spent 2 hours pouring mineral spirits and scrubbing to get back down to the original colour so I could start again. And about preping, should I have sanded completly to bare metal? Because all i did was scuff the surface with 150 then 400 grit. Thanks.
Posted By: Anonymous
Re: Paint job on a budget!? - 04/20/07 12:49 AM
Flat(ish) paint will be ok to sand after a day or so. Paint with runs in it shouldn't be sanded that quickly as the paint under the surface of the run wouldn't have had time to harden properly.
I didn't bother sanding my car back to bare metal. I just tried to get it flat and remove all of the major imperfections in the paint before I started to paint it. I have painted straight over 240 grit sanding without any problems (but I did sand very carefully).
Posted By: Anonymous
Re: Paint job on a budget!? - 04/20/07 02:28 AM
Dammit. All that time wasted scrubbing with spirits when I could've just waited. O well, I will probably just restart my painting on the weekend.
One more question tho. When I am rolling the paint on, should I be able to see differences in the amount of paint after each roll. I mean, when I am rolling on paint, i can see vertical lines all down the surface where I am painting. This is cuz the paint is going on thinner in some places and thicker in others. That was the first coat though, so I'm not sure if it is a problem. Lol, that sounds confusing. Basically...should the first coat be one solid colour, or should you be able to tell that you rolled it on. Thanks
Posted By: Anonymous
Re: Paint job on a budget!? - 04/20/07 03:31 AM
I tried this out on a fender today today. Im using tremclad fire red
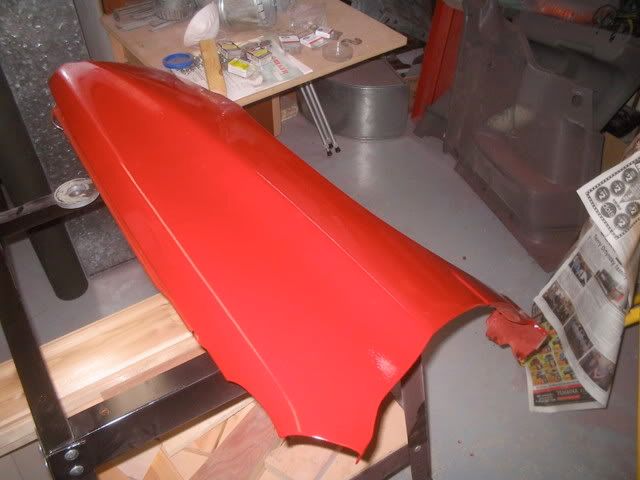
Did OK for the first try
only problem was i was getting TONS of bubbles
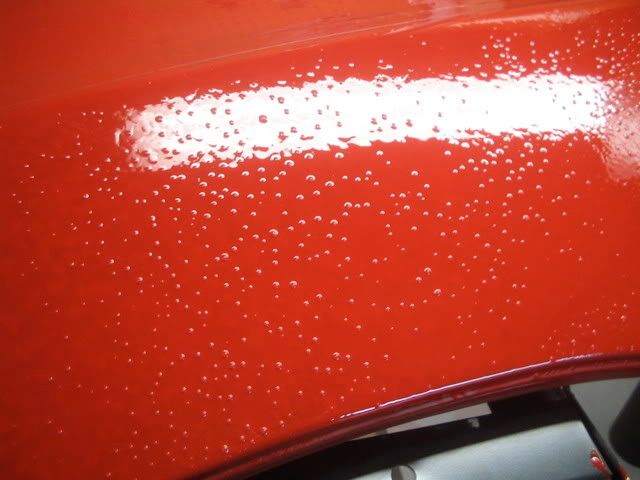
I dont think i thinned the paint enough. How thin are you supposed to go? I thought i read 10-20% but i went all the way to 50-50 and the paint still seemed thick
Posted By: Anonymous
Re: Paint job on a budget!? - 04/20/07 04:15 AM
those were the worst. i hated them more than runs. and those bubbles seem to be pretty huge. you should have taken a 2nd (clean) roller and rolled them to flatten out.
you'll have to sand them down flat before your next layer.
gl,
_taF
Posted By: Exit1965
Re: Paint job on a budget!? - 04/20/07 04:31 AM
Is that a first coat? It's probably not the mixture that is too thick but the fact that you're putting way too much on. First coat looks splotchy usually. Also the fact that the fender is laying on its side will not give you the appreciation for the runs that would probably have occurred if the fender was mounted on a car.
Posted By: Anonymous
Re: Paint job on a budget!? - 04/20/07 04:41 AM
thats the 2nd coat
although the first coat did completely cover it.
i think its both too much paint and the mixture because even when i tried putting on tiny amounts i got lots of bubbles (smaller ones) so i kept going over it
Posted By: Anonymous
Re: Paint job on a budget!? CONTINUED - 04/20/07 05:38 AM
Pretty interesting...I would like to know more too.
Posted By: Anonymous
Re: Paint job on a budget!? CONTINUED - 04/20/07 11:11 AM
Stefan
Those bubbles wouldn't bother me, just blow lightly over them and they should just pop. The paint should level out on it's own after that. You paint should be thinned enough it should almost run. When it's thinned this much it's very transparent but that the secret to this paint job. Every color requires a different percent of thinner to paint. I tried Red and it didn't need to be thinned as much as the Orange that I ended up using. If you start with a nice flat,clean, smooth surface. And apply thin coats the paint will have much less orange peel.
Another way to get the bubbles out is to lightly roll a dry roller over it a few times. The paint dries so slowly most roller marks will start to go away
Posted By: Anonymous
Re: Paint job on a budget!? CONTINUED - 04/20/07 04:09 PM
i would flatten them out before they dry. wetsanding my top layers always uncovered the bubbles (volcano looking things) underneath. it was a [Edited by Moparts - Keep it clean].
_taF
Posted By: Anonymous
Re: Paint job on a budget!? CONTINUED - 04/20/07 05:03 PM
Anyone know where I can get orange brightside in California?
THANKS!
Posted By: ramman16248
Re: Paint job on a budget!? CONTINUED - 04/20/07 07:26 PM
Ok, this is coat seven of my 2 tone truck. I figure about 3 more, I should be ready to buff. I missed a couple of spots here because I ran out of daylight, but I will go over it good next coat.

Posted By: ramman16248
Re: Paint job on a budget!? CONTINUED - 04/20/07 07:27 PM
one more pict. The blue is nice and glossy, but the silver is a little satin looking yet. I put the silver on striaght and the blue is 50/50 mix.

Posted By: Anonymous
Re: Paint job on a budget!? CONTINUED - 04/20/07 08:12 PM
After experimenting with the roller method, I wasn't happy with the orange peel.
So I decided to try the NEXT Cheapest solution, Spraying Rustoleum with my $50 HVLP gun, and little jinky compressor.
It turned out AWESOME! This is one med coat, RustOleum thinned 4 to 1 with mineral spririts and sprayed with a 1.0 needle in my hvlp touch up gun.

Posted By: Anonymous
Re: Paint job on a budget!? CONTINUED - 04/20/07 10:44 PM
question about spraying instead of rolling... would u have to still do many coats like u do with rolling? if u spray the rustoleum on thick wouldnt that lead to complete-drying issues?
Posted By: Anonymous
Re: Paint job on a budget!? CONTINUED - 04/21/07 12:30 AM
Quote:
question about spraying instead of rolling... would u have to still do many coats like u do with rolling? if u spray the rustoleum on thick wouldnt that lead to complete-drying issues?
I have tried both ways of using this type of paint while painting my brother's Camaro. The front clip was sprayed while the main body of the car was rolled on. It only took two coats for the blue and white that I sprayed, as opposed to the 7 or 8 coats with a roller. The sprayed portion was completley hard in a day or two while the rolled on parts took about two months to reach full hardness. Of course , I will agree that application of the paint is easier with the roller but you can save a lot of sanding time by spraying.
- Trent
Posted By: Anonymous
Re: Paint job on a budget!? CONTINUED - 04/21/07 12:41 AM
just need to find a quart of clear coat in the states
Posted By: Exit1965
Re: Paint job on a budget!? CONTINUED - 04/21/07 12:44 AM
tzyoung - I experience the same thing. For me the sprayed stuff went on thick but still cured faster.
Posted By: Marq
Re: Paint job on a budget!? - 04/21/07 01:16 AM
Quote:
thats the 2nd coat
although the first coat did completely cover it.
i think its both too much paint and the mixture because even when i tried putting on tiny amounts i got lots of bubbles (smaller ones) so i kept going over it
My first thought about your bubble problem is that you 'might' not be using the right type of high density foam roller.
Tons of bubbles will happen if you use the less dense 4" roller. They are usually yellow foam. Because they are less dense and have more air space in them ( spongy ) they tend to transfer the air pockets of the roller over to the paint.
The high density foam rollers are usually white and the air pockets in the roller are like 1/10 the size of the air pockets in the cheaper rollers.
Dunno... but if the 4" rollers you are using can be easily pinched between your fingers... then they are probably the low density 'cheap' ones.
.
Posted By: Marq
Re: Paint job on a budget!? CONTINUED - 04/21/07 01:18 AM
Quote:
i would flatten them out before they dry. wetsanding my top layers always uncovered the bubbles (volcano looking things) underneath. it was a [Edited by Moparts - Keep it clean].
_taF
Being in California... I would tend to think you are swimming in Marine supply places all over that State... No ?
.
Posted By: Anonymous
Re: Paint job on a budget!? CONTINUED - 04/21/07 01:20 AM
I'll just have to wait and see how it turns out. I used a 1.0 nozzle, so the paint was very highly atomized, so it flashed pretty good as it went down.
Actually I left my 2 rolled layers, sanded out the peel, and then sprayed this thin to med thick layer. Might be a good overall approach, so that I get some color depth, and then get one final gloss coat with the gun.
I found it hard to get that "final" layer to get really smooth, the sprayed version was much smoother. I'll see how it looks tomorrow and maybe hit it with some 2000 grit.
Posted By: Anonymous
Re: Paint job on a budget!? - 04/21/07 02:36 AM
Quote:
My first thought about your bubble problem is that you 'might' not be using the right type of high density foam roller.
Tons of bubbles will happen if you use the less dense 4" roller. They are usually yellow foam. Because they are less dense and have more air space in them ( spongy ) they tend to transfer the air pockets of the roller over to the paint.
The high density foam rollers are usually white and the air pockets in the roller are like 1/10 the size of the air pockets in the cheaper rollers.
Dunno... but if the 4" rollers you are using can be easily pinched between your fingers... then they are probably the low density 'cheap' ones.
.
humm its possible. the roller i used came form Canadian tire. I bought a pack that came with a tray, handle, and two rollers for $5. They are white foam with a yellow plastic core. There also rounded on both ends. The package did say High density though. I noticed when i was loading the roller up with paint in the tray that it was making tons of bubbles in the paint. Ill try get some different rollers. I know home depot has some quality ones.
Posted By: Anonymous
Re: Paint job on a budget!? CONTINUED - 04/21/07 05:04 AM
Quote:
Anyone know where I can get orange brightside in California?
THANKS!
Quote:
Being in California... I would tend to think you are swimming in Marine supply places all over that State.. No ?
yes. sorry, i just got home from Newport Beach.
well, there was one place by Redondo Beach pier where i picked up my Sea Green. it was $45 USD. quite expensive compared to (cheapest place i found online) boatersland.com, where i picked up my black for $22.73 USD + $11.32 USD handling. i actually need to pick up another quart of each color and i'll be ordering it from BoatersLand again.
was orange a specific color you couldn't find at your local/nearest marine supply store?
_taF
Posted By: Anonymous
Re: Paint job on a budget!? CONTINUED - 04/21/07 09:44 PM
Posted By: Anonymous
Re: Paint job on a budget!? CONTINUED - 04/22/07 01:02 AM
Posted By: pdqvsix
Re: Paint job on a budget!? CONTINUED - 04/22/07 02:30 AM
Looks like you did a good job to me. Now if you want to have it shine you will have to buy a professional buffer / pads like the Porter cable and some poor boys swirl remover,polish,wax. These items are a little expensive but with the money saved by doing the inexpensive paint job it will be money well spent. I just bought a new Porter cable buffer for $106.00 shipped from the company.
If you haven't seen Aussie Drivers updates i urge you to take a look at his results and see for yourself what a shine that can be had with the right materials and some quality time with the buffer.
Posted By: Anonymous
Re: Paint job on a budget!? CONTINUED - 04/22/07 04:05 AM
So can I get a primer on buffing and polishing?
I have the roof finished and have the 2 part Meguiar's buffing and polishing goo. What type of pad do I use for each? And how much buffing time before wiping off the excess as it says don't let the compound dry?
Any advice would be a help.
Posted By: Anonymous
Re: Paint job on a budget!? CONTINUED - 04/22/07 04:12 AM
Posted By: Anonymous
Re: Paint job on a budget!? CONTINUED - 04/22/07 04:34 AM
Quote:
So can I get a primer on buffing and polishing?
I have the roof finished and have the 2 part Meguiar's buffing and polishing goo. What type of pad do I use for each? And how much buffing time before wiping off the excess as it says don't let the compound dry?
Any advice would be a help.
I don't know exactly what that Meguiar's stuff is, but the usual buffing system is to use a cutting pad (usually the harder/firmer pad) with the swirl remover/cutting compound and then to use a softer pad for the polishing.
You should use the cutting compound/swirl remover at a higher speed than for the polish. When I use the Poorboy's SSR3 with my cutting pad, I have my random orbital going flat out. For a polish I have my ro going about 2/3's of max speed.
When you buff/polish you should keep going until there is hardly any residue left. Then wipe the area down with a microfiber cloth and start on the next area.
You will probably need at least 2 passes of each product/pad combo to get a good finish.
Posted By: Anonymous
Re: Paint job on a budget!? CONTINUED - 04/22/07 11:52 AM
for the guys that used interlux's roll on primer, what kind did you get?
Posted By: Anonymous
Re: Paint job on a budget!? CONTINUED - 04/22/07 05:32 PM
A couple pages back someone put a link to a youtube movie comparing the difference between a couple marine paints. Brighside came in last.
This seems like it could be an important development in paint choice. I watched the movie showing the comparison of yacht paints and am now pretty much convinced that brightside may not be the best choice.
Posted By: Exit1965
Re: Paint job on a budget!? CONTINUED - 04/22/07 10:05 PM
True, brightside may not be the best choice. Perhaps the best choice is the Epifanes stuff-- though the guys who did the tests tried to make it somewhat scientific, it was suggestive of Epifanes being better for durability but to be conclusive more tests would need to be done. Their scratch test did NOT look well controlled at all, so I would take that with a grain of salt.
They did get a nice shiny result with 2 medium coats from the can plus some wetsanding and polishing though.
Posted By: Anonymous
Re: Paint job on a budget!? CONTINUED - 04/23/07 12:13 AM
Hey guys. I was just wondering if anyone has some advice on how to paint the trim I have outlined in the picture.

It's just metal, so I was thinking of sanding to make it adhere better, and then getting a can of tremclad black gloss spray and just spraying away. Has anyone tried this?
Posted By: Anonymous
Re: Paint job on a budget!? CONTINUED - 04/23/07 12:58 AM
Posted By: Anonymous
Re: Paint job on a budget!? CONTINUED - 04/23/07 01:54 AM
yah you can and sem makes a trim black that works well in those metal parts go to
http://www.levineautoparts.com/semvinandpla.html and they sell it there. also a great place to get interior paint in factory colors...
though next time you remove emblems use some kite string, not a screwdriver... keeps from gouging the metal.
Posted By: DaytonaTurbo
Re: Paint job on a budget!? CONTINUED - 04/23/07 03:04 AM
Quote:
but you can save a lot of sanding time by spraying
Why even bother to use rustoleum then? There are some cheap single stage paints you can buy. Maybe not as cheap as rustoleum but if you're going to spray it, why not just use real car paint?
Posted By: Anonymous
Re: Paint job on a budget!? CONTINUED - 04/23/07 04:44 AM
Quote:
Quote:
but you can save a lot of sanding time by spraying
Why even bother to use rustoleum then? There are some cheap single stage paints you can buy. Maybe not as cheap as rustoleum but if you're going to spray it, why not just use real car paint?
yeah, Napa had some low-end single-stage acrylic paint for $90+ USD.
they also had some low-end two-stage paint for $21 USD a quart. then you'd have to get the reducer for $20+ USD, hardener for $20+ USD, and clear coat for $20+ USD.
i was about to do this since i have a gravity feed HVLP gun but the motor in the darn compressor is bad.
_taF
Posted By: Anonymous
Re: Paint job on a budget!? CONTINUED - 04/23/07 06:18 AM
Quote:
True, brightside may not be the best choice. Perhaps the best choice is the Epifanes stuff-- though the guys who did the tests tried to make it somewhat scientific, it was suggestive of Epifanes being better for durability but to be conclusive more tests would need to be done. Their scratch test did NOT look well controlled at all, so I would take that with a grain of salt.
They did get a nice shiny result with 2 medium coats from the can plus some wetsanding and polishing though.
I agree with you on the lack of control on the scratch test. There is no way fully cured paint of this kind would scratch that easily. The test may have been done too early, or perhaps the substrate was not suited to brightside but worked better with the epifanes. Still, with the results they did get and the lower cost of epifanes, plus the better color variety of epifanes has perked my curiosity.
Posted By: Anonymous
Re: Paint job on a budget!? CONTINUED - 04/23/07 05:04 PM
Hardcore thread!
Folks, has anyone used the matt finish Rustoleum? I'm going to use it for my old Audi, but I'm unsure as to the last step.
No polishing I guess, but would the final coat require treating in any way?
Posted By: Anonymous
Re: Paint job on a budget!? CONTINUED - 04/23/07 05:16 PM
brownj218:
The guys over at the ImpalaSS forum -- where I hang out a lot -- swear by using 3M trim tape (blackout tape) instead of painting the trim. It comes in flat, satin, and gloss -- so you can choose the look you want.
You can buy it online at Auto Body Depot or locally at an auto paint supply house:
AutoBodyDepot sells the proper 3M 1/2" trim tape online (been searching forever!). Just plug in the item number (Low Gloss Black > #72793, Gloss Black > #72702) and run a search. Here's a link with a picture of a finished product:
http://impalassforum.com/cgi-bin/ultimatebb.cgi?ubb=get_topic;f=2;t=006091#000000And a link with both Before and After pics:
http://impalassforum.com/cgi-bin/ultimatebb.cgi?ubb=get_topic;f=2;t=004881#000017-- Dan
Posted By: Anonymous
Re: Paint job on a budget!? CONTINUED - 04/23/07 11:42 PM
I have taped and painted trim.
Tape gets tricky, especially with compound curves and right angles.
Paint chips. There is always one freaking spot that doesn't get enough sanding or enough cleaning. Usually dead center at the top of the windshield, where it is most visible (and hardest to touch-up).
That said, the last time I blacked out chrome trim I used a flexible finish - figuring it would be less prone to chipping. I think it is marketed as tool handle coating. Comes in dip cans and rattlecan. That was two years ago. Hasn't chipped, cracked, peeled, rusted or faded yet.
I figured I could confess that here without being mocked or scorned...
Attached is a pic of the car. The hassle that went into trying to get a decent paint job done on that car is the reason I'm reading this forum today for the others in the stable. Never again.
Roll on, bruthas....

Posted By: Anonymous
Re: Paint job on a budget!? CONTINUED - 04/24/07 12:02 AM
are there gunmetal colors for chrome trims (or even emblems)?
i have some chrome on a Subaru i want gunmetal.
_taF
Posted By: Anonymous
Re: Paint job on a budget!? CONTINUED..page 44........ - 04/24/07 03:19 AM
First off I really want to thank 69chargeryeehaa for this awesome post. I had gone to a little body shop down the road and they quoted me $2000 to paint and do the body work on my 96 Tacoma.
I found this post over at
www.customtacos.com and like many places they were talking down to the idea but I came over here to check it out anyway. Good thing I did. It has inspired me to attempt to do my own body work (which is almost done) and to paint my truck myslef. I took a week of leave in May and plan to paint her up then.
I have a question though. Can you mix the mineral spirits and the all the rustoleum in another container and just use that or does it have to be mixed before use everytime? I would go with the brightside but I havent found a place online with a reasonable price and no place around here carries it (I am in South Dakota afterall....not many boats).
Thanks again to 69chargeryeehaa and all the people who have risked alot by trying this.
Posted By: Exit1965
Re: Paint job on a budget!? CONTINUED..page 44........ - 04/24/07 04:20 AM
You can premix it, but in my experience it seems to still need a splash of mineral spirits.
When I was using the brightside, I had one mason jar that I mixed the paint/spirits in and one of pure paint. before painting i'd just make sure I had enough of the mixed stuff in there, then what I didn't use I'd put back, adding mineral spirits when it needed it.
Posted By: Anonymous
Re: Paint job on a budget!? CONTINUED - 04/24/07 06:22 AM
Quote:
has anyone used the matt finish Rustoleum?
I'd like to know too. I plan on rolling my almost paintless '96 Jetta this summer with flat black Rustoleum. I'm hoping it's easier because the idea is for it to not be shiny. But I guess you gota get it flat from the get go because you can't wetsand it...does wetsanding flat paint put a shine in it?
PS: My first post!
Posted By: Anonymous
Re: Paint job on a budget!? CONTINUED..page 44........ - 04/24/07 12:36 PM
thats what I was hoping to hear....the week of may 14th is already scheduled as leave....got 9 days all scheduled to repaint the truck black....I will post pics when done.
Posted By: 69chargeryeehaa
Re: Paint job on a budget!? CONTINUED - 04/24/07 02:24 PM
Quote:
Nice find thanks!!! 30 bucks!!!
On ebay you can get them for 20$ but they only have 2 color choice
I heard that the orange only is available in Canada
I can't make my mind up for the color.
What colors do you guys think look good on a VW bug?
thanks
When i got my bug it was silver, and my dad's was white. Light colors on a bug in my opinion don't look that great. The white was actually horrible, and i repainted my bug silver using single stage auto paint. That lasted a year, when a old lady hit my rear fender in a parking lot i tried to buff it out and went thru the paint. So within 30 mins i decided to paint it orange as the silver just was'nt doing it for me, my wife did'nt even know i left, i went to home depot, got the orange, quickly prepped the pannel and painted it ornage. And i liked it alot, (the original color of the car), so i stripped the car that day, all the glass, rubber, handles, chrome, were taken out of the car and i was prepping the rest of the car that night. The silver was a perfect paintjob, but i did'nt like it on a beelte. The one thing about beetles is that they are practically the only cars that can get away with crazy colors and actually look good, bright colors in my opinion allways look great on bugs, like yellow, red, orange, lime green, blue, ect....black, white, silver, don't suit a bug at all. Also different colors like sand/creme, dark hunter green, and other odd colors like that really look good on bugs. I just went with orange because it was the original color, and i can tell you it will forever be orange!!!
You can get the rustoleum orange in the USA; called #7555 Safety Orange, that is the same color i used, here's a pic:
Posted By: Anonymous
Re: Paint job on a budget!? CONTINUED - 04/24/07 05:20 PM
Been said before, I'll say it again. WOW. Can't wait to get started painting my K5 Blazer. I've been following it as a guest for about 8 months now as I finish up the mechanical phase of my build.
One question that I don't think has been asked.
Has anyone found a rattle can equivalent of Brightside Flag Blue? I absolutely love that color. Or should I go to Harbor Freight and pick up a cheapie HVLP gun and just shoot thinned brightside in the jambs and whatnot?
Many thanks to all the great contributions in this thread, particularly to 69Charger for starting it all, Marq & Exit for their early work and AussieDriver for his fine example of what a little patience and buff job can do. If I get half the results Aussie got, I will consider myself a very happy man.
Posted By: Anonymous
Re: Paint job on a budget!? CONTINUED - 04/24/07 08:04 PM
Quote:
Quote:
has anyone used the matt finish Rustoleum?
I'd like to know too. I plan on rolling my almost paintless '96 Jetta this summer with flat black Rustoleum. I'm hoping it's easier because the idea is for it to not be shiny. But I guess you gota get it flat from the get go because you can't wetsand it...does wetsanding flat paint put a shine in it?
PS: My first post!
Should be no problem wetsanding during coat application. It's the final finish that I'm not sure about.
Should be ok to wetsand, but polishing may make it more satin than matt.
I've already ordered the paint, going to practice on some new Golf wings I need to paint, before stepping up to the other car.
Posted By: Anonymous
Re: Paint job on a budget!? CONTINUED - 04/24/07 08:48 PM
Here's a suggestion for the guys who want a flat finish. A guy on another forum who does a lot of "rat rod" work (and is very knowlegeable)uses John Deere Blitz Black tractor paint and swears by it. Goes on looking like black primer, but won't weather and fade the way primer will. Very durable and inexpensive. Not sure how it responds to rolling, but it seems like it's in the same arena as the others. Worth a try!
Just my
FWIW.
LanceB
Posted By: Anonymous
Re: Paint job on a budget!? CONTINUED - 04/24/07 09:38 PM
Quote:
have you ever considered going with Van Sickle paint? they have a wide variety of colors. i called them up and they gave me a distributor's number. however, i've forgotten and lost the contact info. you can get it from them. but this distributor was also able to mix up some colors for you. idk.. just a suggestion.
I'm a huge fan of Van Sickle. The local farm/ranch supply outfit sells it, but they don't carry all the colors. I'm considering using green Van Sickle for my '55 Jeep when I finish the body work, but I want to see all the shades they have. All I can get locally is John Deer green and Oliver green. JD looks ok, but I want something close to the original Julep green it was painted.
Here's the inside of my car painted with Van Sickle New Holland Red.
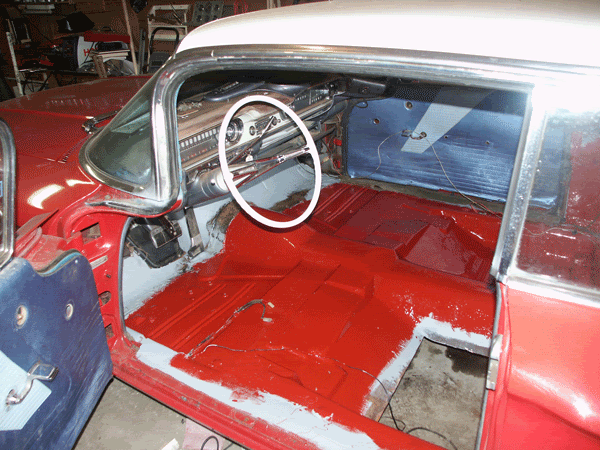
I did the entire interior and trunk. All of the interior paint will be covered with carpet and headliner, but at least I know it won't rust again.
Here's a shot of my original fender test with Van Sickle painted with a brush. It was wet sanded only with 400 grit, and then buffed with some cheapo polish. Came out pretty good for being a 30 minute job.
Posted By: Marq
Re: Paint job on a budget!? CONTINUED - 04/25/07 11:20 AM
I just realized that the pictures I posted of the McLaren Mustang, painted in Brightside Fire Red, was no longer accessible to people. (The domain I posted it to moved IP's and so you have to access the old server directly using its IP address instead of its domain name )
So here is a link that will get you temporarily to the pics and videos of the car. This is a finished paint job ( as of August 2006 ) polished and waxed )
http://209.40.128.48/AugWaxedMcLaren 
.


.
Posted By: Marq
Re: Paint job on a budget!? CONTINUED - 04/25/07 11:40 AM
ON THE TOPIC OF FLAT PAINT...
I was listening to an amazing set of interviews with the paint gurus at GM, Ford, Porsche and Nissan... and look for FLAT PAINT to be making a splash on new cars starting in 2009-2011 models.
The story goes that this is the next 'big thing' in the evolution for paint jobs on new car models.
The interviews were mentioning that currently in this coming model year, they are expecting burnt orange ( a blackish copper color like when a shiny copper penny starts blackening ) to be the hot color for 2008. ( that is a shiny paint )
BUT what is taking up the most of their time right now is developing FLAT PAINT JOBS for the 2009-2011 model years.
From what I gathered from the interviews... even these paint gurus are having a problem nailing down the flat paint jobs to a point where it can maintain 'good looks' and durability over the years.
They are having to develop not only new flat paints... but also new procedures for the customers to be able to properly maintain and clean these flat paint jobs. For example, you would have to take the car to a 'brushless' car wash - as the brush type eventually turn patches of the paint job shiny.
And you obviously can't just polish or wax a flat paint job because the more porous surface traps stuff in it. Similarly, it is harder to remove traces of bird poop and other road grime that gets embedded into the pores.
But there my friends is the future in automotive paint jobs in the next few years. Flat paint.
They also mentioned that they were putting a fair bit of effort into 'color shifting' paint jobs... and so you will probably see those becoming more mainstream ONCE they figure out a way to do it cheaply on the assembly line.
Once last thought about this 'flat paint job' topic... is that the folks at Interlux sell an ADDITIVE that can be mixed in with the Brightside paint to make it FLAT. You gotta remember that not all surfaces on a boat are ultra shiny and slippery. They also have flat paint on spots where you need some surface traction. So that might be a way to get a Flat Brightside finish with a bit more range in colors than just a flat black. And at least we know that Interlux has been doing 'flat paint' on boats for many years - so I figure it must be fairly easy to maintain and keep clean without losing its flatness over the years...
They also sell an additive that gives Brightside a 'gritty' finish (sort of like embedding sand in the paint ). But I don't think there is much need in the automotive scene for a paint job that is capable of sanding your pants off when you lean against the gritty finish...
Nuff said. Hope this info gives some folks some insights...
.
Posted By: Anonymous
Re: Paint job on a budget!? CONTINUED - 04/25/07 02:55 PM
First time poster, long time lurker. Everyone's cars look great, I actually just received a quart of Brightside Fire Red in the mail yesterday so I can do some experimenting with it. I have an old VW decklid I'm going to paint and then leave out in the elements for the summer while I do some bodywork on the project vehicle.
McLaren looks great, Marq! Funny, I spent a good amount of time yesterday trying to find pics of it again and there it is now! Curious, do you have any recent pics of it?
Thanks
Posted By: Anonymous
Re: Paint job on a budget!? CONTINUED - 04/25/07 07:19 PM
Marq, thanks for the info ref flat paint.
I'm actually wondering whether or not this is going to make my car look completely rubbish.
Maybe I should consider a gloss finish.
Posted By: Marq
Re: Paint job on a budget!? CONTINUED - 04/25/07 10:05 PM
Quote:
Marq, thanks for the info ref flat paint.
I'm actually wondering whether or not this is going to make my car look completely rubbish.
Maybe I should consider a gloss finish.
Paint jobs are usually just a reflection of our times... At this moment the shiner and glossier the better. But like any fashion statement, the designers are always trying to jump to an opposite extreme just to be fashionably 'avant garde'.
I guess this is the logic behind the designers rush to get some vehicles into the showrooms with factory 'flat' paint jobs.
At this particular point in time... a flat paint job on a modern car might look rubbish - only because the media haven't pumped the public's psyche up yet on 'just how cool it is and how you just gotta have it to be hip'
So if you do a 'flat' paint job on a modern car today... then you are running ahead of the fashion curb. And that puts you into the same adventurous and carefree group of people who wore mini skirts while everyone else was wearing knee length... or bikini's or thongs while the mainstream public were wearing one piece swim suit.
So I guess the real answer is to do what makes YOU comfortable.
Now on this topic of 'flat' paint jobs... I think that the real question is whether all colors will become 'fair game' for flattening or whether the designers will try to slowly change the public's perception by introducing just a limited range of colors that will be easily accepted by the public and not draw ridicule.
I like to think that 'flat' colors would work best initially in 'suede' or 'natural rock' type colors. If it looks good in suede then it would probably look good on a car.
You gotta remember that during the Second World War, the German Afrika Corp ( armored and wheeled divisions ) and the Allied desert forces all used 'flat paint jobs' on their vehicles. And those paint jobs held up to just about everything except shell burst from an opposing tank or bazooka. So right there you had some lovely
a ) flat tan suede colors
b ) flat gray rock colors
c ) flat cream colors
d ) flat green color variants
On the aircrafts, they used :
a ) flat black
b ) flat light blue
c ) flat green color variants
and in desert air craft they also used the
d ) flat tan/creme color variants.
I know that if you go to your local leather jacket store... and poke around at the suede jackets, you will get a pretty good idea what colors look good in flat, with no shine. The most popular as per what the people buy are the tan, creme, black and brown variants for MEN.
And for the ladies choice in suede it seems that more bold colors are used along with the more traditional male colors.
So if you did a car in flat purple or flat orange or flat pink... it would probably be perceived in the public's eye as a feminine paint job...
I will say that one usage of flat that I saw used was on a Lotus Esprit. They had used actual tan suede on the interior trim and in particular on the dashboard. It looked lush, expensive and fabulous. However I could easily see that it would be a beeeetchhh... if it ever got dirty or needed cleaning.
Oh well.. there's some rambling thoughts on the topic of flat paint jobs on modern cars.
Naturally I am exempting the pre-50's cars from this. Their body shapes look sexy in flat or high gloss...
.
Posted By: Marq
Re: Paint job on a budget!? CONTINUED - 04/25/07 10:09 PM
Quote:
McLaren looks great, Marq! Funny, I spent a good amount of time yesterday trying to find pics of it again and there it is now! Curious, do you have any recent pics of it?
Thanks
It is sitting outside now... and I have been driving it around for the last couple of weeks ( since the snow finally disappeared ).
There is no difference in the appearance of the car between those August 2006 pics and how it looks at this minute in my driveway.
I will try to charge up the camera to snap a few fresh shots of it. But overall you won't be able to detect any difference...
.
Posted By: Anonymous
Re: Paint job on a budget!? CONTINUED - 04/25/07 10:12 PM
Hi All, NooB here I've read both parts of this massive thread over the last month, like several others I came over here from the guys page with white corvair. when I saw that car I was instantly hooked and knew I needed to try this method on my 90 Probe. I also knew I needed more info, which I have most certainly aquired from all of you. I have been anxiously awaiting this day when I could join the discussion with you guys since after a month of reading I feel like I know some of you. Thanks to Charger for this awesome idea!! Like others, I had resigned myself to driving the car with it's crappy paint. because of you guys, I feel I have the power to make her shiny once again. Although I have not started my project(probably in June on vacation)I have scouted out the local stores to make sure I can obtain all the needed materials. I may be the first here to attempt this method with the Ace "Rust Stop" paint that was mentioned earlier. Since this car is my daily driver and I commute 84 miles round trip each day I think the "Rustoleum" type paint will be sufficient since the paint will most likely outlast the engine and trans. Not to mention there isn't anything remotely resembling a "Marine" store for at least 150 miles. Anyway, for now I will continue to follow the thread and I will post my progress pics when I do get started on the Probe. But I wanted to jump in here now that I'm caught up and say Hello to all, and my Tremendous Thanks to those of you who are such huge contributors(I think you guys all know who you are). I'll be lurkin and posting soon!!
Posted By: Anonymous
Re: Paint job on a budget!? CONTINUED - 04/25/07 10:58 PM
Quote:
Paint jobs are usually just a reflection of our times... At this moment the shiner and glossier the better. But like any fashion statement, the designers are always trying to jump to an opposite extreme just to be fashionably 'avant garde'.
I guess this is the logic behind the designers rush to get some vehicles into the showrooms with factory 'flat' paint jobs.
You hit the nail on the head. Some colors are always popular...red, black, white. Some come and go. During the "off" years for a color, people will look at an old car with it and think "People actually bought cars this color?" During the "on" years, it's "Man, that is cool!!". Think pea green, gold, copper, teal. Flat paint (if it becomes reality) will be the same I'm sure...
It's all a matter of personal taste anyway. But that's what makes picking out your own color fun...
Posted By: Anonymous
Re: Paint job on a budget!? CONTINUED - 04/25/07 11:24 PM
On the subject of color: Maybe you guys can help me out. So far I have been quite indecisive as to what color to paint the Probe. I have gone so far as to Photoshop 20 different colors onto the car to try and help me decide. I posted those twenty images in a set at Flickr. If anyone wants to take a look and give me their
I would certainly welcome the input. Here's were you can find those images:
Probe Colors
Posted By: Marq
Re: Paint job on a budget!? CONTINUED - 04/26/07 12:21 AM
Quote:
I posted those twenty images in a set at Flickr. If anyone wants to take a look and give me their I would certainly welcome the input. Here's were you can find those images:
Probe Colors
Tee hee... me bad... I like the two tone look on the Probe... unicolor just doesn't give a Probe's body enough pop... Sooooo I did one myself in the two tone effect to give you a visual on what I mean...
Here is what I mean..

You might look back to the Mustang a few pages back for some further inspiration on the two toning color scheme.
If you went for the black with the dark gray color scheme... I would even consider tinted windows to tie in the dark effect and maybe even the Cobra style ( Mustang ) racing strip in matching gray going across the hood and on to the roof... possibly carrying it down the rear bumper. For pin striping I would go with a strong bright red...
Other than that... the florescent bright colors in your same gave the Probe a nice 'new car' kind of pop. I tried using your bright yellow in a two tone with black ( sort of a bumblebee/wasp kind of effect ). But it didn't have as stealth a look as the black and gray on that body style.
.
Posted By: Anonymous
Re: Paint job on a budget!? CONTINUED - 04/26/07 01:42 AM
Hey Marq, Man the Black really does look good on that car
and until you Mocked that up I never really thought about a two-tone job, but you're right it certainly adds something to the body style. I hadn't really realized until your mock up how much that black molding really cuts the body in half all the way around the car. Not to mention it has a red stripe molded into it on the the sides, I'll have to restripe the sections on the bumpers. My only concern with black is how good my prep will be since this is my first venture into body work, but the car is pretty straight except for a few dings here and there. I attached the original pic I used for those photoshops to this post. were you thinking yellow upper and black lower on that bumble-bee look?

Posted By: ramman16248
Re: Paint job on a budget!? CONTINUED - 04/26/07 02:33 AM
Hey Probe, Good luck with anything sliver. I was using it to 2 tone my dodge truck and the blue I used came out nice. The silver SUCKED literally. I couldn't get a good even coat on it even after coat # 10. I am now converting the truck to all blue.

Posted By: ramman16248
Re: Paint job on a budget!? CONTINUED - 04/26/07 02:34 AM
here is another shot of it.

Posted By: Anonymous
Re: Paint job on a budget!? CONTINUED - 04/26/07 12:16 PM
regarding modern flat paint jobs, this car came to mind
http://files.conceptcarz.com/img/Porsche/EDAG_Porsche_SUV_DV_06_DAS_03.jpg the EDAG porsche, in what really looked like a flat anozided finish, i saw it in a person and it looked pretty cool
Posted By: Anonymous
Re: Paint job on a budget!? CONTINUED - 04/26/07 01:18 PM
The rustoleum aluminum dries totally flat- no gloss whatsoever. It does look good with clear over it though. Unfortunately as others have found out you can't get rustoleum clear in anything other than aerosols. I called customer service (3 times, you never know who you will get) and they all had the same story- not available in quarts or gallons.
Might have to try an acrylic lacquer like this
Acrylic Lacquer clear coat but it would have to be sprayed on.
In my quest to find or make a silver rustoleum rollable paint I have tried to add silver pearl to grey rustoluem. Looks amazing until the paint dries at which point most of the pearl sinks to the bottom due I think to the extended dry time.
If anyone wants to experiment with the pearl try this link
Pearl additive - great price The guy ships really fast and one 150 gram bag is enough for a couple gallons.
One last thing, this place seems to have metallic enamels
Metallic Enamels But some of the solid colors seem to contain LEAD!? kind of scary.
I will keep experimenting for a metallic enamel and post if I get any results.
Nathan
Posted By: 69chargeryeehaa
Re: Paint job on a budget!? CONTINUED - 04/26/07 01:59 PM
Quote:
The rustoleum aluminum dries totally flat- no gloss whatsoever. It does look good with clear over it though. Unfortunately as others have found out you can't get rustoleum clear in anything other than aerosols. I called customer service (3 times, you never know who you will get) and they all had the same story- not available in quarts or gallons.
Might have to try an acrylic lacquer like this
Acrylic Lacquer clear coat
but it would have to be sprayed on.
In my quest to find or make a silver rustoleum rollable paint I have tried to add silver pearl to grey rustoluem. Looks amazing until the paint dries at which point most of the pearl sinks to the bottom due I think to the extended dry time.
If anyone wants to experiment with the pearl try this link
Pearl additive - great price
The guy ships really fast and one 150 gram bag is enough for a couple gallons.
One last thing, this place seems to have metallic enamels Metallic Enamels
But some of the solid colors seem to contain LEAD!? kind of scary.
I will keep experimenting for a metallic enamel and post if I get any results.
Nathan
Too bad you don't live in canada!!!! tremclad makes clear in a aresol, and quarts/liquid/brush on!!!
Posted By: Anonymous
Re: Paint job on a budget!? CONTINUED - 04/26/07 02:42 PM
If I do a two-tone like Marq suggested it will be with a grey not a silver. I've read to many horror stories on here about that aluminum color to even consider attempting that. Since I'll only have a little more than a week to do this I dont think I'll be doing anything that resembles "experimentation"
I had thought of going with a white base and a dark(Ford) blue old school stripe(like the beer fridge) toward the passenger side. But then again it requires that much more prep to tape off and paint the stripe. Although I don't have a lot of time to do this, I don't want to be in a position where I have to "rush" the actual paintjob just to include something fancy.
Posted By: 1BAD68
Re: Paint job on a budget!? CONTINUED - 04/26/07 02:54 PM
after trying the roller method with gloss black and driving myself nuts trying to get rid of the little swirly marks, I sanded it all off and sprayed it flat black and I'm really glad I did. I love the look of the flat and it seems like wherever I take my car now, people stop and ask me about it and comment on the cool paint job, so I think the public is ready for flat paints.

Posted By: Marq
Re: Paint job on a budget!? CONTINUED - 04/26/07 03:05 PM
One trick you can do with the two tone paint job is that with the dark gray on the bottom you can AVOID doing the final 'perfecting' it stage and just get it to a final wet sand stage.... THEN you go and buy a can of that clear plastic gravel guard coating AND paint the entire lower gray area with the Gravel Guard stuff. This will give you both protection for the paint from road chips AND a shiny clear pliable no maintenance plastic coating protecting the gray.
As for your comment about fearing the 'extra' work that you black area would require... well think of it this way :
a ) you just saved work on how 'perfect' you will have to make the gray area because of the gravel guard coating... and
b ) the black areas are probably not as subject to chips and dents as the lower gray area. The roof should be very easy to to get prepped for black painting ( and after all - who really takes a microscope to check out people's roofs.
The hood would probably be the main area where you would spend the maximum time seeking perfection in the surface... and if the hood is such a disaster that the work inspires fear... well you can probably buy a used hood or a replacement hood that will cut the prep work down quite a bit and not end up costing you an arm or a leg.
OR as another option... DO THE HOOD only in FLAT BLACK. This would give the hood that currently hot 'carbon fiber' type look that you see on many of the 'rice car' racers. The flat paint on the hood would not visually amplify any imperfections.
The other upper areas are probably easy to get up to a 'black prepped' stage... since they are in the most easily accessible areas of the car to work on.
On the topic of that bumblebee yellow & black paint job... I would think that the black should go on the bottom and the flaming yellow go on the upper sections. The lower section in black will lower the appearance of the car and the brilliant yellow on the upper section will stealth the appearance of the car so that when it drives by people, they will not be able to instantly identify it as a Probe. Instead they will say " What the heck was that ? ! ? "...
And just to annoy people, remove all traces of Ford badging off the car just to keep them guessing
.
Posted By: Anonymous
Re: Paint job on a budget!? CONTINUED - 04/26/07 03:38 PM
There are alkyd oil based clears such as Rustoleum's "Varathane" spar varnish that are available in quarts and gallons in the USA. Might even improve UV protection of the paint. Also, wouldn't a lacquer clear cause lifting the the rustoleum???
Posted By: Anonymous
Re: Paint job on a budget!? CONTINUED - 04/26/07 03:55 PM
All of the "clear" oil based varnishes are yellow to very yellow in color.
I don't see why an acrylic lacquer would lift the enamel.
Any one have any opinions as to whether this is possible?
Nathan
Posted By: Anonymous
Re: Paint job on a budget!? CONTINUED - 04/26/07 03:57 PM
Yeah I know you guys in Canada can get the tremclad in clear.
Have you tried it? How clear is it?
Wonder if it would be possible to get some shipped here.
Nathan
Posted By: shawge
Re: Paint job on a budget!? CONTINUED - 04/26/07 04:21 PM
That 68 Charger in flat black looks sweet. I'm thinking of doing the same with my 70 Challenger.
Posted By: 69stanger
Re: Paint job on a budget!? CONTINUED - 04/26/07 06:25 PM
Quote:
Unfortunately as others have found out you can't get rustoleum clear in anything other than aerosols. I called customer service (3 times, you never know who you will get) and they all had the same story- not available in quarts or gallons.
Rustolem has a clear in gallons in the Industrial line 7400 system. It's available through industrial vendors like Grainger & Fastenal.
Posted By: Anonymous
Re: Paint job on a budget!? CONTINUED - 04/26/07 08:05 PM
I looked on graingers site and I don't see anything in clear in the 7400 system-
Would you happen to have a part number?
Thanks,
Nathan
Rustolem has a clear in gallons in the Industrial line 7400 system. It's available through industrial vendors like Grainger & Fastenal.
Posted By: Anonymous
Re: Paint job on a budget!? CONTINUED - 04/26/07 08:10 PM
Quote:
after trying the roller method with gloss black and driving myself nuts trying to get rid of the little swirly marks, I sanded it all off and sprayed it flat black and I'm really glad I did. I love the look of the flat and it seems like wherever I take my car now, people stop and ask me about it and comment on the cool paint job, so I think the public is ready for flat paints.
Can you tell me what paint you used to spray with? How did you finish it, or did you just spray and go?
Posted By: Gusteve
Re: Paint job on a budget!? CONTINUED - 04/26/07 08:18 PM
Quote:
after trying the roller method with gloss black and driving myself nuts trying to get rid of the little swirly marks, I sanded it all off and sprayed it flat black and I'm really glad I did. I love the look of the flat and it seems like wherever I take my car now, people stop and ask me about it and comment on the cool paint job, so I think the public is ready for flat paints.
Dude! First Quentin Tarantino steals my flat black paint idea for the Death Proof Charger, and now YOU TOO!
I have a '68 that I was planning on doing in flat/matt/satin black. Thanks for the pic.
I'll be practicing rolling the hood of my lawnmower next weekend to see how the Rustolem turns out. I was going to try both semi-gloss and flat to see which looks better.
I'm wondering if I can get away with no sanding between coats. I would think that a flat or semi-gloss wouldn't need any surface roughing for adhesion from one coat to the next.
Steve C.
Posted By: 1BAD68
Re: Paint job on a budget!? CONTINUED - 04/26/07 08:21 PM
Quote:
Can you tell me what paint you used to spray with? How did you finish it, or did you just spray and go?
Out of frustration I just went to Autozone and bought DupliColor automotive flat black in the spray cans (about $5 per can) I think I used 8 cans. It probably isn't a good long term paint but its good for the summer. I like it so much that I'm going to find out what flat black auto paint would work as more of a permanent finish and repaint it next winter.

Posted By: 69stanger
Re: Paint job on a budget!? CONTINUED - 04/26/07 08:49 PM
Rustoleum part number 717402
http://www.rustoleum.com/product.asp?frm_product_id=219&SBL=2You know, I looked in our grainger catalog and I didn't see a part number listed. hmmm
Posted By: Anonymous
Re: Paint job on a budget!? CONTINUED - 04/26/07 09:11 PM
Quote:
Rustoleum part number 717402
http://www.rustoleum.com/product.asp?frm_product_id=219&SBL=2
You know, I looked in our grainger catalog and I didn't see a part number listed. hmmm
They have it here Rustoleum clear
Just ordered a gallon, We'll see how it goes!
Thanks,
Nathan
Posted By: Anonymous
Re: Paint job on a budget!? CONTINUED - 04/26/07 10:29 PM
hey has anyone went directly from a final coat straight to polishing? after i wetsanded the crap outta the car i wound up doing a final thinner coat of paint because i didnt like how many small scratches were left over, and i have very little time to work on the car... im not really TOO concerned about orange peel, i just want this done already lol
Posted By: Anonymous
Re: Paint job on a budget!? - 04/27/07 12:34 AM
Mohair roller??
I've been searching around the web for other sources of information (automotive and/or other industries) on painting a smooth, glossy finish with rollers.
I've seen several mentions of Mohair Rollers instead of high density foam for achieving the smoothest and glossiest finish.
The latest reference I found was interesting -- from a Sign Painting forum. One responder to the thread says:
PS... I have found that 1/4" nap mohair rollers cause less bubbles than the foam rollers! He even talks about the technique of re-rollering to pop bubbles.
http://www.letterhead.com/ubb-cgi/ultimatebb.cgi?ubb=get_topic;f=1;t=030384;p=0 I'm curious if anyone here has heard of or tried a Mohair roller. I've searched around a little bit and it seems there are both natural and synthetic ones these days. Most mentions of them specifically call out that they are intended for "glosses, enamels, and industrial finishes..." They also say these are least likely to shed.
-- Dan
Posted By: Anonymous
Re: HELP! - 04/27/07 02:45 AM
okay, i tried to avoid wetsanding the final layer because of how the last layer leveled out pretty nicely.
i purchased some cheap polishing compound from Turtle. i used a cheap 4200rpm random orbital to apply, buff & polish. now i'm so upset. it has left the paint all hazy. and i can't buff the polishing compound out completely. my paint is all hazy. i've tried washing the area with carwash soap/wax twice and nothing. is there still a chance?
idk what to do. i'm thinking i should wetsand it now, or at add on another layer of paint, then wetsand with my 1500g or 2000g sandpaper, and then buff.
is the wetsanding part even necessary if the final layer levels out nicely? it's just that when i wetsand, it's so dull that i can't see how i can buff any shine out of it. maybe i need a more stronger/quality compound?
maybe i need a faster buffer/sander? i returned the [Edited by Moparts - Keep it clean] wal*mart buffer/sander and will be getting something along the lines of what Aussie Driver is using.
thanks for any help,
_taF
Posted By: Anonymous
Re: HELP! - 04/27/07 03:22 AM
Quote:
okay, i tried to avoid wetsanding the final layer because of how the last layer leveled out pretty nicely.
i purchased some cheap polishing compound from Turtle. i used a cheap 4200rpm random orbital to apply, buff & polish. now i'm so upset. it has left the paint all hazy....
_taF
How long after the last coat did you wait till you started polishing? sounds like the paint was still a little soft
Posted By: Anonymous
Re: HELP! - 04/27/07 03:36 AM
you need to find a good foam pad to polish not a wool string pad. and dont use rubbing compound use swirl remover compound.
i had the same problem as you and back in the thread i finally read where not to use the wool pad. wetsand the car with 800 grit to get the orange peel out then with 100 grit to get rid of the 800 grit marks then 2000 grit paper to finish then polish, you will be amazed on the outcome. also go to walmart and get the blue microfiber towels, they are blue and are in a 3 pack rolled up they feel thick these won't put scratches in the paint. there are others and when you buy them you can wipe the paint dry and if they do scratch you can take it back and get the right ones.
use 3m 05725 foam polishing pad i got mine on ebay for 30.00 for 2 of them.
then get 3m 06064 swirl remover in a quart for 40.00 from the local bodyshop supply store or on ebay.
then a buffer like the porter cable or any 7 in buffer that has 2 speeds. i have a old sears buffer that is still kickin and ive buffed my car twice so far with great results but i keep finding waves in the paint so i strip and repaint 3 times already now i will sand and buff again and see what happends....
Posted By: Marq
Re: Paint job on a budget!? - 04/27/07 12:06 PM
Quote:
I'm curious if anyone here has heard of or tried a Mohair roller. I've searched around a little bit and it seems there are both natural and synthetic ones these days. Most mentions of them specifically call out that they are intended for "glosses, enamels, and industrial finishes..." They also say these are least likely to shed.
-- Dan
I think the keyword is that they are 'the least likely to shed'. Compared to 'what' is the first question that leaps to mind...
That is like going to a store where the sign says ' savings UP TO 70% '... and when you go in you find that most of the stuff only has saving of 10% and that only one crappy item that they are trying desperately to get rid of was at 70% off.
Least likely to shed... probably is a true statement when compared to all the other wooly, furry and fuzzy rollers. It is less likely to shed in comparison with that category of rollers.
But a high density foam roller is NOT LIKELY to shed at all... since there is nothing on an all foam roller to shed.
The only shedding I have seen with a foam roller - is when I tested a cheap foam roller and the paint chemically reacted with the foam and cause it to disintergrate. It left little tidbits of foam while rolling.
Now... as for the 'mohair' roller... I will bet dollars to donuts that it will leave little itty bitty strands of mohair in your paint job. I would put forward that it is impossible in the world of manufacturing to sufficiently root every strand of mohair so that it can withstand being pulled out of the roller.
As well... with the high content of mineral spirit in our paint solutions, it would take one amazing adhesive bond of the mohair to the roller to withstand that paint mix disolving the adhesive.
Last thought is 'what kind of roller' is the mohair adhered to ? Is it glued to a cardboard or a plastic core. A cardboard core would quickly get saturated by the high density of mineral spirits in our paint mix - quickly making it fall apart. At least a plastic core to the roller would be able to withstand the mineral spirit bath you would be putting it through.
At least with 'straight paint' without mineral spirits it might stand up a little longer before the adhesive or the roller disintegrated and started separating.
Dunno... I could be totally wrong... but I think my donuts to dollars bet would put a few bucks into my pocket.
But you can always try doing an experiment with a high quality mohair roller just to be certain whether the high density foam or the mohair does the better job.
In the end... even if the results are a 'draw'... the foam would win just because they are cheap like Bic lighters... you just use and toss em away because they are so cheap - you can afford to use a new one each time you start a coating. The cost of the mohair could ultimately be the reason why most folks wouldn't go that route...
.
Posted By: Radio Joe
Re: oops - 04/27/07 03:12 PM
A little update on my project... its turned from good to bad.
I switched to 100% mineral spirits as opposed to the low odor I was using. Well the last 2 coats I put down were kinda dull after they dried. The surface actually looked like I sprayed solvent all over it- little dull circles.
Anyway, I wetsanded the whole car and then, thinking the above problem was due to the paint being too thin (as some others have mentioned) so I thickened it up a little. This was supposed to be my last coat... NOPE
I applied the paint at around noon in my carport where as I am usually painting at night when its cool.... well the paint was drying too quick so now I have alot of orange peel and roller marks in it. [Edited by Moparts - Keep it clean]! so I let it sot out in the sun for a few days to harden up- Still able to dent the paint with my nail but thats nothing new.
So now I am going to wetsand the car tonight, make up a new batch o paint using the low odor spirits like I was using before and hopefully this will be the last layer.
Then onto the red paint.
Posted By: Anonymous
Hello All - 04/27/07 03:18 PM
Well this topic has made it to at least one watercraft bum, me. I'm not 100% sure but I think I'm the first person to paint a Jetski with this method. The ski is a Yamaha Superjet, stand up craft that my daughter wanted me to build for her and paint red. I've read every post from both threads and thought this method was worth a shot and save me some cash. If anyone is worried about flexing the Rustoleum paint they can rest easy. A few of my parts bend 3" to 4" both directions, by hand with no cracking at all! The paint works just fine on this very flexible project. I have completed most parts of the ski and I'm working on the hull, above the waterline at this point. I tried this over primer on some parts and direct over others and I think the direct applied might be a little more deep scratch resistant. The bottom of the hull will be beached and draged in sand very often so I expect it to wear very fast. For this reason I kept the bottom of the hull the origional white color. I used the professional White on the bottom and professional Safety Red for the rest of the ski. I also used clear on all the parts below the waterline. The clear was very hard for me to get down smooth and I'm not sold on using it at all. The other parts that I completed (hood, nose piece and handlepole) were just buffed and waxed per the instructions and look way better IMO. A jetski like this gets knocked around pretty hard it will be launched off of waves, submerged, etc... This is one reason I wanted a cheap paint job. Another is I've paid for pro paint jobs and they also get trashed, it hurts more knowing how much cash I paid for that pro paint job. I will post some pics if any of you want to see my project.
Many thanks to all of you who have helped me along and didn't even know it
. This board is full of the best bunch of folks and I'm glad that I stumbled across it. FYI, I'm proably the worst painter on the planet and have no patience for painting. I'm the type of guy who would spray more paint on the first coat because it didn't look good yet
Thanks again all!! (BIG THANKS TO 69CHARGERYEEHAA)
Mike
Posted By: Anonymous
Hello All - 04/27/07 04:51 PM
Hello folks!
Gretings from Croatia!
Im a owner of white suzuki swift gti and after seeing this DIY painting i decide to take a tour with my car.I started just with one part and after 1 coat im more than hapy with the results specialy couse now i wont throw 1000 eur for "profesional" painting. After I complete everything Ill post images couse now I know it would be ok. Insted of Tremclad I use Hammerite(rust paint). Sry for my english and thank u all for this lovely paint idea!
Posted By: Anonymous
Re: HELP! - 04/27/07 05:36 PM
Quote:
Quote:
okay, i tried to avoid wetsanding the final layer because of how the last layer leveled out pretty nicely.
i purchased some cheap polishing compound from Turtle. i used a cheap 4200rpm random orbital to apply, buff & polish. now i'm so upset. it has left the paint all hazy....
_taF
How long after the last coat did you wait till you started polishing? sounds like the paint was still a little soft
over 2 weeks.
Quote:
you need to find a good foam pad to polish not a wool string pad. and dont use rubbing compound use swirl remover compound.
i had the same problem as you and back in the thread i finally read where not to use the wool pad. wetsand the car with 800 grit to get the orange peel out then with 100 grit to get rid of the 800 grit marks then 2000 grit paper to finish then polish, you will be amazed on the outcome. also go to walmart and get the blue microfiber towels, they are blue and are in a 3 pack rolled up they feel thick these won't put scratches in the paint. there are others and when you buy them you can wipe the paint dry and if they do scratch you can take it back and get the right ones.
use 3m 05725 foam polishing pad i got mine on ebay for 30.00 for 2 of them.
then get 3m 06064 swirl remover in a quart for 40.00 from the local bodyshop supply store or on ebay.
then a buffer like the porter cable or any 7 in buffer that has 2 speeds. i have a old sears buffer that is still kickin and ive buffed my car twice so far with great results but i keep finding waves in the paint so i strip and repaint 3 times already now i will sand and buff again and see what happends....
i stayed away from any buffing compound. i picked up a polishing compound.
i looked it up online and i guess you really do have to be a "professional" to get good results from it. here's one guy opinion.
Opinion on Turtle Polish
i'm going to pick up a better buffer/polisher off eBay.
how did you apply the polishing cream?
_taF
Quote:
Quote:
Quote:
okay, i tried to avoid wetsanding the final layer because of how the last layer leveled out pretty nicely.
i purchased some cheap polishing compound from Turtle. i used a cheap 4200rpm random orbital to apply, buff & polish. now i'm so upset. it has left the paint all hazy....
_taF
How long after the last coat did you wait till you started polishing? sounds like the paint was still a little soft
over 2 weeks.
Quote:
you need to find a good foam pad to polish not a wool string pad. and dont use rubbing compound use swirl remover compound.
i had the same problem as you and back in the thread i finally read where not to use the wool pad. wetsand the car with 800 grit to get the orange peel out then with 100 grit to get rid of the 800 grit marks then 2000 grit paper to finish then polish, you will be amazed on the outcome. also go to walmart and get the blue microfiber towels, they are blue and are in a 3 pack rolled up they feel thick these won't put scratches in the paint. there are others and when you buy them you can wipe the paint dry and if they do scratch you can take it back and get the right ones.
use 3m 05725 foam polishing pad i got mine on ebay for 30.00 for 2 of them.
then get 3m 06064 swirl remover in a quart for 40.00 from the local bodyshop supply store or on ebay.
then a buffer like the porter cable or any 7 in buffer that has 2 speeds. i have a old sears buffer that is still kickin and ive buffed my car twice so far with great results but i keep finding waves in the paint so i strip and repaint 3 times already now i will sand and buff again and see what happends....
i stayed away from any buffing compound. i picked up a polishing compound.
i looked it up online and i guess you really do have to be a "professional" to get good results from it. here's one guy opinion.
Opinion on Turtle Polish
i'm going to pick up a better buffer/polisher off eBay.
how did you apply the polishing cream?
_taF
i LOVE that turtle waxd polishing coumpound, it's almost idiot proof, you could buff for hours with no chance of going too far. What that guys says, if it's regarding the same stuff is very far away from what i expirenced. Actually just last week someone hit my wifes car in the back, kinda like a scuff mark from pulling out on a angle and just scraping the car not enough to go thru the paint but bad enough, it was about 6" wide and over 12" long, i saw it from a mile away. I got out the trusty $15 buffer, and some turtle wax polishing coumpound and my spray bottle with water in it and did the same proceedure on the charger, mind you this is a 2001 car with BC/CC. SO i put a bunch of coumpound on the terry cloth bonnet, rubbed it in with my finger, and gave it a few sprays of water from my spray bottle; the scuff mark was right by a body line too, on the back bumper cover. buffed it for 10 mins, and right when i'm done buffing i use a wet shammy and whipe off the polish. I was ready to have the rear bumper painted it looked that bad. after buffing it was about 99.9% gone, and actually that spot on the car was more shiny than the rest of the car!!!! i was left with only a few hairline scratches that you can't even see unless your litterelly 2" away from the paint. that's my expirence with the turtle wax polishing coumpound, i LOVE the stuff (and no i don't work for them)!!! plus have you tried their new turtle wax ICE??? don't even get me started on that stuff, let's just say i donated all my mothers/mequires to my mom!!!!
ANTWON - lets see some pics.
Posted By: Anonymous
Re: HELP! - 04/27/07 09:46 PM
Quote:
Quote:
Quote:
Quote:
okay, i tried to avoid wetsanding the final layer because of how the last layer leveled out pretty nicely.
i purchased some cheap polishing compound from Turtle. i used a cheap 4200rpm random orbital to apply, buff & polish. now i'm so upset. it has left the paint all hazy....
_taF
How long after the last coat did you wait till you started polishing? sounds like the paint was still a little soft
over 2 weeks.
Quote:
you need to find a good foam pad to polish not a wool string pad. and dont use rubbing compound use swirl remover compound.
i had the same problem as you and back in the thread i finally read where not to use the wool pad. wetsand the car with 800 grit to get the orange peel out then with 100 grit to get rid of the 800 grit marks then 2000 grit paper to finish then polish, you will be amazed on the outcome. also go to walmart and get the blue microfiber towels, they are blue and are in a 3 pack rolled up they feel thick these won't put scratches in the paint. there are others and when you buy them you can wipe the paint dry and if they do scratch you can take it back and get the right ones.
use 3m 05725 foam polishing pad i got mine on ebay for 30.00 for 2 of them.
then get 3m 06064 swirl remover in a quart for 40.00 from the local bodyshop supply store or on ebay.
then a buffer like the porter cable or any 7 in buffer that has 2 speeds. i have a old sears buffer that is still kickin and ive buffed my car twice so far with great results but i keep finding waves in the paint so i strip and repaint 3 times already now i will sand and buff again and see what happends....
i stayed away from any buffing compound. i picked up a polishing compound.
i looked it up online and i guess you really do have to be a "professional" to get good results from it. here's one guy opinion.
Opinion on Turtle Polish
i'm going to pick up a better buffer/polisher off eBay.
how did you apply the polishing cream?
_taF
i LOVE that turtle waxd polishing coumpound, it's almost idiot proof, you could buff for hours with no chance of going too far. What that guys says, if it's regarding the same stuff is very far away from what i expirenced. Actually just last week someone hit my wifes car in the back, kinda like a scuff mark from pulling out on a angle and just scraping the car not enough to go thru the paint but bad enough, it was about 6" wide and over 12" long, i saw it from a mile away. I got out the trusty $15 buffer, and some turtle wax polishing coumpound and my spray bottle with water in it and did the same proceedure on the charger, mind you this is a 2001 car with BC/CC. SO i put a bunch of coumpound on the terry cloth bonnet, rubbed it in with my finger, and gave it a few sprays of water from my spray bottle; the scuff mark was right by a body line too, on the back bumper cover. buffed it for 10 mins, and right when i'm done buffing i use a wet shammy and whipe off the polish. I was ready to have the rear bumper painted it looked that bad. after buffing it was about 99.9% gone, and actually that spot on the car was more shiny than the rest of the car!!!! i was left with only a few hairline scratches that you can't even see unless your litterelly 2" away from the paint. that's my expirence with the turtle wax polishing coumpound, i LOVE the stuff (and no i don't work for them)!!! plus have you tried their new turtle wax ICE??? don't even get me started on that stuff, let's just say i donated all my mothers/mequires to my mom!!!!
ANTWON - lets see some pics.
idk what i was doing wrong. i washed the car first, then i rubbed the polishing compound in with a foam applicator. seriously, after a few secons, it dried up and became chalky.
i used a microfiber buffer thing to buf it out. it wouldn't come out. i was there for 10 minutes on one spot. i didn't know what to do.
i re-read the instructions and it said to apply with a wet cloth and to buff out before it dries. i damped my foam applicator and applied some of the polishing cream that way and tried it over again. same thing. within a few seconds of applying the polishing cream, it dried up very chalky. i couldn't buff it out.
this time, i applied the compound with the wet foam applicator from one hand and had the microfiber bonnet on the buffer and buffed it out within a split second after applying it. it was the only way to get it out.
even after doing that, it has left the paint all hazy. i washed that area twice with car soap and still can't get rid of the haziness. the wool polishing bonnet didn't work either.
should i wetsand that panel and buff again? or should i wetsand that panel, add another layer of paint, then wetsand and buff?
either way, i'm picking up a stronger buffer/polisher. the other piece of junk i had would always stop or drastically slow down as soon as it touched the body.
thanks,
_taF
Posted By: Anonymous
Re: Paint job on a budget!? CONTINUED - 04/27/07 10:07 PM
Quote:
hey has anyone went directly from a final coat straight to polishing? after i wetsanded the crap outta the car i wound up doing a final thinner coat of paint because i didnt like how many small scratches were left over, and i have very little time to work on the car... im not really TOO concerned about orange peel, i just want this done already lol
Posted By: Anonymous
Re: HELP! - 04/27/07 10:38 PM
Quote:
idk what i was doing wrong. i washed the car first, then i rubbed the polishing compound in with a foam applicator. seriously, after a few secons, it dried up and became chalky.
Were you doing this in the sun? If so, move to a shady spot or a garage...you never want to do this stuff in direct (hot) sun. I had a friend in high school that put Turtle Wax all over his (black) car under an August sun. He had to use steel wool to get it off .
Posted By: Anonymous
Re: Paint job on a budget!? CONTINUED - 04/28/07 08:26 AM
Quote:
Quote:
hey has anyone went directly from a final coat straight to polishing? after i wetsanded the crap outta the car i wound up doing a final thinner coat of paint because i didnt like how many small scratches were left over, and i have very little time to work on the car... im not really TOO concerned about orange peel, i just want this done already lol
I did. Some areas I lightly hit with 2000 grit paper then polished, but most of it I just hit with polish. I�m ok with orange peel too. Heck, if a $40,000 Mercedes can have orange peel, then by God, so can my $2000 bug! I painted the top with Black Brightside. Originally the bottom half was painted with Rustoleum Regal Red and then Brightside Fire Red. Both reds were a little too much in the orange range for me so I switched to Pettit Burgundy Eastpoxy which offered a deeper red. I didn�t have any adhesion problems either. I just followed what the manufacturer recommended. (�For Painted Surfaces: If the old paint is in good, sound condition, sand it thoroughly smooth�; solvent clean to remove residue, then proceed with the first coat of Easypoxy.�)
The first four coats were diluted 10% with mineral spirits from Fine Paints of Europe (a concentrated formula; I believe it�s similar to Brightside thinner.) The initial coats were also painted with just a foam brush.
After smoothing down and preparing the surface for the final coats, I used the decades old technique shown by Stephen Hull in his coach painting site. I determined that coach paint is applied in thicker layers than we�re use to. Stephen mentions loading the brush by dipping it an inch into the paint. If it�s a 3� or 4� brush, that�s a LOT of paint! I also figured coach paint must have a slower drying time then our paints. It�s worked over a lot more we would do. I was able to slow down the drying time by diluting with mineral spirits (5%) and with FRESH Penetrol (30% for the Brightside and 40% with the Pettit.) Following Stephen�s instructions, I dipped my brush an inch into the paint. I covered a panel by painting left to right, then up and down, then left to right and then up and down again. What I like about this technique is that it spreads the material more evenly than a roller would (IMHO.) What I don�t like is that you wind up with fine brush streaks. Now brush marks are ok on furniture or boats, but seeing it on cars is just freaky. To be honest, I�d rather have orange peel�that I�m use to. Since I didn�t want the brush lines, I did a �reverse� tipping by using a clean roller. After the 2nd up/down application with a brush, I did an up/down application with the roller; I first pushed down a little harder then usual, to �squish� any remaining brush lines. I then rollered with increasingly lighter pressure to eliminate bubbles. If a small section still had bubbles, I�d lightly roller just that section.
I was also fortunate enough to have colder than normal weather (low 50s) when I painted. That helped slow down the drying time considerably. The thick application, slowed drying time and reverse tipping left me with a smooth surface and a HUGE amount of gloss. The orange peel was no more and even LESS than what I�ve seen on spray painted production cars. In some sections it was non-existent. I had a few dust bunnies. I just hit them with rubbing and polishing compound. Some areas also had a sand paper �like surface, but a light touch with 2000 grit, then rubbing compound and polish took care of this. I was happy with the results. I didn�t go the glass-smooth/ Porter-Cable polished route. I had neither the time nor the money to do so. As one poster put it, �I just want to be able to show off my car with pride at Wal-Mart.� In fact, most of my equipment was supplied by Wal-mart: Brushes, polishes, Coleman polisher, plastic cups to hold paint mixtures and vinyl gloves. The really beautiful thing about this technique is that after each paint application, you just THROW YER EQUIPMENT AWAY! What I didn�t throw away is hundreds and even thousands of dollars a paint shop would�ve charged me to apply their �REAL� paint job. Thanks to all you guys for making this possible!

Posted By: Anonymous
Re: Paint job on a budget!? CONTINUED - 04/28/07 08:34 AM
Here's a few more shots. She's still a work in progress. I have more dust bunnies, runs and missed spots to get to. But at least she's off to a good start. She use to be 8 different shades of red. Now I'm not ashamed to take her to Wal-Mart. Once again, thanks to all of you!

Posted By: Marq
Re: Paint job on a budget!? CONTINUED - 04/28/07 08:40 PM
Nice two-tone combination... and unique. It gave me the impression of a European Bug... something like you would see zipping around the streets of Paris chasing a Citroen..
And that is a gorgeous shade of red. Much sexier than the orangy Fire Reds...
Kewl..
.
Posted By: Exit1965
Re: Paint job on a budget!? CONTINUED - 04/28/07 09:33 PM
100k+ views
Posted By: 78D150CLUB
Re: Paint job on a budget!? CONTINUED - 04/28/07 11:22 PM
Nice clean look with the centerline wheels. Always liked the old beetles, and the two tone works really well on that setup. Great job!
Posted By: 69chargeryeehaa
Re: Paint job on a budget!? CONTINUED - 04/28/07 11:46 PM
Quote:
100k+ views
WOW i should have setup some sort of royality program with moparts!!!
Posted By: 78D150CLUB
Re: Paint job on a budget!? CONTINUED - 04/29/07 12:31 AM
or some sort of per mile charge on the distances covered by the rollers.
Posted By: Anonymous
Re: Paint job on a budget!? CONTINUED - 04/29/07 06:08 AM
Hi, and greetings from jeepforum.com this post made its way over to us. Im going to apply the rusto technique to my 94 Jeep Wrangler in the next couple of weeks, I have some scratches and dints that will need to be banged out and the paint on my hood has just faded the PO did not take good care of her but im hoping to bring her back to a good ole shine! Just wanted to say my thanks to 69charger for sharing the 6000$ paint job secret that only costs 60$ the charger looks awesome! I'll post pics of my job after I get it completed and im going to spread the word of the rusto job.
Posted By: Anonymous
Re: Paint job on a budget!? CONTINUED - 04/29/07 06:23 AM
Thanks 78D150! And THANK YOU Marq! Coming from one of the major contributors of the "Worldwide Fraternal Order of Paint Rollers" that means a lot to me! Speaking of worldwide, I'm amazed at how this thread has caught on around the world. Take a bow Charger! It would be great if one day we could all find a way to get together to compare notes and show off our work. If you guys ever consider San Diego, the fish tacos are on me...er...up to a $50 limit though
Posted By: Anonymous
Re: Paint job on a budget!? CONTINUED - 04/29/07 12:00 PM
Did a hood in black, it looked ok, wet sanded, and then used a polisher and polish.
The paint is really cloudy (greyish), I feel like the polish is making it even more hazy. any ideas on how to eliminate haze?
Is this something that typically shows up?
Posted By: Anonymous
Re: Paint job on a budget!? CONTINUED - 04/29/07 05:44 PM
do you stil have to thin that with sprits?? i just ordered my gallon too...
Posted By: Anonymous
Re: Paint job on a budget!? CONTINUED - 04/29/07 08:51 PM
Quote:
Did a hood in black, it looked ok, wet sanded, and then used a polisher and polish.
The paint is really cloudy (greyish), I feel like the polish is making it even more hazy. any ideas on how to eliminate haze?
Is this something that typically shows up?
Try using a swirl remover instead of a polish. I have used the Poorboy's SSR3 and SSR2.5 with great results. A decent polisher like the PC 7424 with a cutting pad will also do you a world of good.
Posted By: 69stanger
Re: Paint job on a budget!? CONTINUED - 04/30/07 01:20 AM
mybuick,
I haven't used it yet, still doing bodywork. In fact I'm still throwing around the idea of using the clear. All I can say is get a feel for the paint's consistency and check the label.
Posted By: Anonymous
Re: Paint job on a budget!? CONTINUED - 04/30/07 04:26 AM
Well Guys I decided it wasn't very cool of me to be on here talking the talk but not having done anything to my car yet. So today I started on the body work. I got a few of the lighter dings filled and primed no problem but I worked on a couple of bigger dings and had a problem with oversanding, So I ended up with a partially filled dent. Can someone tell me the trick to knowing when its level and not over doing the sanding?
Also, for those who are interested I have finally decided that it is going to be painted Black. Marq, I gave a lot of thought to your Two-tone mockup but in the end I want to just use one color and use spray bombs for my jambs and under the hood. The beauty of this method is that I can always add the grey in the future if I get gung-ho again.
I also did and experiment reblacking one of my window trims that was peeling. I removed all the loose blacking with a razor blade and sanded it smooth with 80 grit then 320 and painted it with the Plasti-dip spray(rubberized coating) that someone mentioned here a few pages back. I've worked with this stuff before and the consistency of it is a lot like the backout film that was originally on those trims. Unfortunately, I am going to have to paint the car with these trims in place since they are installed under the windows and I'm not removing the windows to paint the car. Sorry for the long winded post, I have attached a pic with some of my Bondo work. If anyone wants to see that blacked out trim peice let me know and I'll put up a pic of that too.
I spoke to my boss who used to be a body man and he answered my sanding question, he said to load it up with primer and block sand it with 180 grit slowly and recoat with primer back and forth this way until I have a smooth finish. I'm gonna try this unless someone has a better idea.

Posted By: Radio Joe
Re: Paint job on a budget!? CONTINUED - 04/30/07 04:47 PM
I thought I would post more results-
I switched back to low odor spirits and painted it at about 10PM and the pain looks pretty good today. I have one or 2 small spots that may need to be wetsanded but i am going to try to polish the last layer without wetsanding the whole thing. I will know in a few days how it turns out. I pushed it out in the sun this morning to bake for a while and im guessing Thursday I will try buffing it.
I'll post pics after I buff it.
Posted By: Anonymous
Re: Paint job on a budget!? CONTINUED - 04/30/07 08:09 PM
Posted: Mon Apr 30, 2007 1:08 am Post subject: Update
--------------------------------------------------------------------------------
Had a situation yesterday, that I think can attest for the toughness of the Rustoleum roller job I did a couple months ago...
A friend ad I were out at his deer lease clearing some more mesquite trees. We're winding out way slowly through the pasture and coming up is a group of trees that I have pre determined which route I'm gonna take through them, plan was to take this one particular low hanging branch a little wider. Well a few deer caught our attention, and naturaly I looked and watched em bound away into the brush... all of a sudden there's this horrible scraping, screeching noise filling the cab, I had drifted right up under that branch. My first thought is "holy [Edited by Moparts - Keep it clean]!!!, way to go meat-head!!"
I stop, we get out expecting to find it gouged down to bare metal. In case yall didn't know, mesquite is a very hard wood covered in equally hard 1,2, & 3" thorns.
I hopped into the bed to inspect the cab damage, neither one of use could find so much as a scratch... just few spindly leaves and twigs in the bed.
Try that with a CC job
Posted By: Anonymous
Re: Paint job on a budget!? CONTINUED - 04/30/07 09:24 PM
Thanks to 1Bad68, I'm rockin a new SATIN black roller paint job.


Posted By: shawge
Re: Paint job on a budget!? CONTINUED - 04/30/07 09:41 PM
Looks good!
Posted By: Anonymous
Re: Paint job on a budget!? CONTINUED - 05/01/07 12:21 AM
CALLING ALL PEOPLE USING A REGULAR CRAPPY BUFFER!! LOL
im using a 6" craftsman random orbit 3600rpm buffer.. ive tried microfiber bonnets, wool, terry.. was having trouble gettin a shine, and tried a number of different polishes/cutting compounds.. i finally got some good results today, but it was after a combination of like 4 different products.. used the cheap turtle wax polishing compound, then meguiars diamond cut, then some cheap scratch/swirl remover, then wax.. and it came out pretty good... BUT for those of you using a pretty crappy buffer like me (not the baller PC7424 lol), what exactly are u using to get good results??
Posted By: Anonymous
Re: Paint job on a budget!? CONTINUED - 05/01/07 12:52 AM
I'm using this
Harbor Freight Polisher with 3m Finesse It polish and It works great. My process was 1000 grit, then 2000 then 3m with a foam pad and it comes out like a mirror (safety red paint). I will have to get pictures to post.
Harbor Freight had the polisher on sale for $39. The 3m compound is expensive but I have used it before and it is about the best stuff out there. Takes about a minute to do a 2x2 section to a mirror shine.
Posted By: Anonymous
Re: Paint job on a budget!? CONTINUED - 05/01/07 01:20 AM
Quote:
I'm using this
Harbor Freight Polisher
with 3m Finesse It polish and It works great. My process was 1000 grit, then 2000 then 3m with a foam pad and it comes out like a mirror (safety red paint). I will have to get pictures to post.
Harbor Freight had the polisher on sale for $39. The 3m compound is expensive but I have used it before and it is about the best stuff out there. Takes about a minute to do a 2x2 section to a mirror shine.
dam 9.8 amps i think mine is like 1 amp lol matter fact it is http://www.sears.com/sr/javasr/product.d...UseBVCookie=Yes
i knew i shoulda went wit the $60 craftsman one right off the bat
Posted By: 1BAD68
Re: Paint job on a budget!? CONTINUED - 05/01/07 02:11 AM
Quote:
Thanks to 1Bad68, I'm rockin a new SATIN black roller paint job.
That looks
Flat Black is where its at!
Posted By: Anonymous
Re: Paint job on a budget!? CONTINUED - 05/01/07 02:36 AM
Great Job.
What paint, what method?
Rustoleum, Brightside, ...Venezuelan Beaver Cheese?
Enquiring minds want to know...
Posted By: Anonymous
Re: Paint job on a budget!? CONTINUED - 05/01/07 03:24 AM
sanded my white primer with 220, then 400. Then rolled 2 coats of satin black rustoleum, thinned about 20% with low-odor mineral spirits. I experimented with Acetone (flashes too fast), and gloss black (doesnt get hard very fast).
The Satin has gotten VERY hard in just 2 days, and the roller marks are not very visible at all. If you have ever bought a Repo part, like a fender, the paint looks alot like that satin black primer that comes on repo parts.
The Satin covers very well, I actually think it looks better in person then in the photo. Saving my money for all new chrome. When I hit the lotto I'll get a shiny paint job.
Roll on!
Posted By: 78D150CLUB
Re: Paint job on a budget!? CONTINUED - 05/01/07 03:37 AM
Just remember, Venezualan Beaver Cheese needs to be thinned with 50% Pure Canuck Caribou Milk
Nice work with the Satin Black, looks good!
Posted By: Anonymous
Re: Paint job on a budget!? CONTINUED - 05/01/07 12:44 PM
Quote:
sanded my white primer with 220, then 400. Then rolled 2 coats of satin black rustoleum, thinned about 20% with low-odor mineral spirits. I experimented with Acetone (flashes too fast), and gloss black (doesnt get hard very fast).
The Satin has gotten VERY hard in just 2 days, and the roller marks are not very visible at all. If you have ever bought a Repo part, like a fender, the paint looks alot like that satin black primer that comes on repo parts.
The Satin covers very well, I actually think it looks better in person then in the photo. Saving my money for all new chrome. When I hit the lotto I'll get a shiny paint job.
Roll on!
Oh yea, and no wet sanding required. Woo hoo!
Posted By: Anonymous
Re: Paint job on a budget!? CONTINUED - 05/01/07 01:33 PM
Quote:
Oh yea, and no wet sanding required. Woo hoo!
Wait wait, what? No wet sanding? Oh cause it's satin you're not looking for that glossy paint finish?
Hmm this is an interesting turn of events. What about care? Can you or rather SHOULD you wax the satin or what?
Posted By: 1BAD68
Re: Paint job on a budget!? CONTINUED - 05/01/07 05:15 PM
I've been searching the web for flat paint maintenance/care and so far it looks like you just wash it like normal but no polish or wax to protect it, which is fine on a collector car because its not sitting outside all year and I wash mine every time I take it out, so I cant see it being a problem for at least a couple years.
Posted By: Anonymous
Re: Paint job on a budget!? CONTINUED - 05/01/07 08:44 PM
I ended up having to go into Denver(340 miles round trip) yesterday for a doctor's appt. for my wife so I took the opportunity to visit Wal-Mart and Lowe's. I picked up a gallon of Gloss Black Professional Rustoleum and six spray bombs for the Jambs. At Lowe's I picked up some roller handles and a six pack of rollers. By shopping in Denver I ended up saving about $40 on what that stuff would have cost me out here in the sticks. I asked my local Carquest guy the get me some Meguier's products I read about on here but he's been dragging his feet. I went to Poorboy's World and saw that I can order products from them direct and pay via Paypal and their prices look pretty reasonable. I know a few of you guys have achieved awesome results with those products so I was wondering if someone could give me a list of which products they used and in what order. It would be greatly appreciated. Thanks.
Posted By: Anonymous
Re: Paint job on a budget!? CONTINUED - 05/01/07 09:27 PM
Quote:
I ended up having to go into Denver(340 miles round trip) yesterday for a doctor's appt. for my wife so I took the opportunity to visit Wal-Mart and Lowe's. I picked up a gallon of Gloss Black Professional Rustoleum and six spray bombs for the Jambs. At Lowe's I picked up some roller handles and a six pack of rollers. By shopping in Denver I ended up saving about $40 on what that stuff would have cost me out here in the sticks. I asked my local Carquest guy the get me some Meguier's products I read about on here but he's been dragging his feet. I went to Poorboy's World and saw that I can order products from them direct and pay via Paypal and their prices look pretty reasonable. I know a few of you guys have achieved awesome results with those products so I was wondering if someone could give me a list of which products they used and in what order. It would be greatly appreciated. Thanks.
I have achieved a near mirror finish just with the Poorboy's SSR2.5 If you want you could also use some SSR1 after that and then some EX-P sealant and your car should look great and the finish will last for months.
Posted By: Anonymous
Re: Paint job on a budget!? CONTINUED - 05/01/07 09:45 PM
Quote:
I have achieved a near mirror finish just with the Poorboy's SSR2.5 If you want you could also use some SSR1 after that and then some EX-P sealant and your car should look great and the finish will last for months.
Thanks Aussie and Good On Ya, Mate!!(BTW my Dad lived in Canberra for several years) Anyway, was that SSR2.5 after a wetsand with 2000 grit or did you polish a final smooth coat, as I recall you used brightside on your car though, so I may have to wetsand my Rusto first.
Posted By: Anonymous
Re: Paint job on a budget!? CONTINUED - 05/01/07 10:42 PM
That shot was taken after a dodgy 1500/2000 wetsand and the SSR2.5 with a cutting pad.
Posted By: Anonymous
Re: Paint job on a budget!? CONTINUED - 05/01/07 10:50 PM
Quote:
That shot was taken after a dodgy 1500/2000 wetsand and the SSR2.5 with a cutting pad.
Was that the first job with the "rusto paint" or was that with Brightside? And excuse my ignorance but what does a cutting pad look like? I know the polishing pads are foam and the buffing pads are wool.
Either way that shine is Amazing!!
Posted By: Anonymous
Re: Paint job on a budget!? CONTINUED - 05/01/07 10:54 PM
Just wanted to add my 0.02 here..
The post is so long that some of these points may have been covered, but bear with me please�
I�ve got a �68 Newport 2dr Hardtop. It was a grisly dark green, but was/is solid. I fancied a satin blue finish, and decided on PPG�s Hot Rod Flatz paint.
I did all the bodywork � some metal, some spot putty, and some very minor Bondo.
As I went along, I prepped and rattle-canned the repaired areas with any grey primer. Sometimes Tremclad, sometimes Rustoleum, and sometimes Dupli-Color. I wasn�t worried about the mixtures, as they were just to cover bare metal. Anyway, after reading about this roller method, I decided that it might not be such an issue after all, and I figured I�d just shoot sealer over the top, before my Flatz paint.
Anyway, long story short � the Hot Rod Flatz paint proved difficult to get up here in BC, and when I costed it all out, I was into around $800 + for materials.
So, I stopped by Home Depot, took a deep breath and bought a gallon of Tremclad Flat white, a quart of Tremclad Gloss dark blue, and a gallon of mineral spirits. Total cost - $63 Canadian�
With such an outlay, I reasoned I could live with the cost if it didn�t work.
Anyway, I mixed the cans together and got a beautiful sky blue�.thinned it by 25%, put it in my gun, and started under the trunk lid. Half hour later, the whole car was coated.
Next day it had dried spotty (first coat), but a nice flat finish.
I tested various wetsand grades on a fender skirt � 600 was scratchy of course. 1000 was better. 1500 was good, and then 2000 and a polish made it way too glossy. In fact, at that point it was just a gloss finish.
So, another coat went on. And the next day another. And the next day another. I�d lost the patches after the 3rd coat, and it was a uniform finish.
Between each coat (this was all done in my garage, with the door open) I wetsanded with 600 to take off any sags (very few actually�), and now it sits with its final, flat coat on. No orange peel. No sags, no runs�just a nice, flat blue finish. Exactly what I�d have got with the PPG paint, but at less than a tenth of the cost.
Additionally, I was astonished during the painting process a number of times � once I touched the bottom of the gun on the wet hood, and the stuff really does self-level. Within a minute, the dig had flattened itself. I also had a run on a door which I wiped off with my finger mid-spray, and again � it disappeared before the coat dried.
It has dried rock hard and smooth, and has stuck to everything I wanted it to.
Even chrome. I had some dings on the bumpers, so I scuffed them, hammered and filled them, masked off the bits I wanted to remain chrome, and then Tremclad primed and painted them. Again � rock hard, and full adhesion.
I got a few dust nibs on the paint of course, and these just knocked off with some 1500 grit.
So answering some of the questions I�ve read here :
You definitely CAN spray it.
You definitely CAN custom-mix it
You can use flat or gloss finish � and can mix flat and gloss in the same can
It adheres to chrome
It adheres to plastic
It adheres to any finish (Dupli-Color, OEM scuffed paint, Rustoleum, bare metal, Bondo, etc)
It is NOT soft
It can be sanded as easy as any other paint
It thins with mineral spirits (cheaper and kinder to the air)
It dries hard in a day
I painted a full-size C-body and used about 2/3 of a gallon (bear in mind I didn�t paint the roof � that was, and still is white) and that includes doorjambs, and under the hood & trunk.
I�ve used lacquers in the past � they�re no better, but they are smellier. I�ve used 2 stage urethanes � they�re no better � just more effort.
OK, I sprayed instead of rolling, but the point is that the paint works. But then, why wouldn�t it? Forget it�s not a fancy auto paint � all paint is just pigment and solvent�.
If I can work out a way to post pictures, I�ll post them (I�ve gotta get all the trim and stuff back on yet), but if you are thinking of painting and you can get the color you want from the Tremclad range mixed or not � do it.
Posted By: Anonymous
Re: Paint job on a budget!? CONTINUED..page 44........ - 05/01/07 11:24 PM
I was linked this thread because I'm in the market for a paint job for my '87 Camaro, and I need to say I'm impressed with the results of this, I was up all night looking at the 200someodd pages on this and I havent seen many people using black, my camaro is black and I really want to give it a fresh paint job, I know black is a hard color to do but if I prepped good it should go fine. Dose anyone have any tips on using black? (im going with
rustoleum not brightside)
http://img134.imageshack.us/img134/3124/02mz9.jpghttp://img159.imageshack.us/img159/3871/03cf4.jpg^my project
also I was thinking, what do you guys think of gloss black finish and matte black ground effects ex:
http://img181.imageshack.us/img181/7716/02mz9rr1.jpgThanks for possibly saving me a few $1000 on a decent paint job guys
Posted By: Anonymous
Re: Paint job on a budget!? CONTINUED - 05/02/07 12:13 AM
Thanks for the compliment. That paint was the Brightside but there is no reason why the Rustoleum can't polish up just as well.
Here is a bit of info on the pads that I use. About half way down the page they describe the cutting pad and the light cutting pad. From my experience these buffing pads are brilliant.
Posted By: ramman16248
Re: Paint job on a budget!? CONTINUED - 05/02/07 01:21 AM
Just a tip........Don't use masking tape to mask off the car!!!!!!! I used it like a retard and now 3 weeks later, the tape has become one with the moldings. Use the blue tape , it will be much better. I was all fired up over the final coat being done, and then the tape problem deflated my bubble. Oh well, I will get a few more rags, razor blades, and goo-b-gone.
I will post pistures by the way, it just got too dark to do it. I am amazed at the outcome. I can't wait for 2 weeks to go by and do the final wetsand and buff. (it will take me half of that time to get the old masking tape off. LOL)
Posted By: 78D150CLUB
Re: Paint job on a budget!? CONTINUED - 05/02/07 01:56 AM
Wipe the tape with a rag soaked in paint thinner.
Once the end lifts, pull the tape while wiping the adhesive with the rag. Worked well on my two tone work.
Posted By: Anonymous
Re: Paint job on a budget!? CONTINUED - 05/02/07 02:48 AM
Quote:
Thanks for the compliment. That paint was the Brightside but there is no reason why the Rustoleum can't polish up just as well.
Here is a bit of info on the pads that I use. About half way down the page they describe the cutting pad and the light cutting pad. From my experience these buffing pads are brilliant.
is there anything like these foam pads out there for a regular cheap buffer? like as a bonnet? all i can find are microfiber, wool, terry, and the blue wax applicator
Posted By: ramman16248
Re: Paint job on a budget!? CONTINUED - 05/02/07 02:57 AM
Quote:
Wipe the tape with a rag soaked in paint thinner.
Once the end lifts, pull the tape while wiping the adhesive with the rag. Worked well on my two tone work.
Ok, Thanks, I'll give it a try!!
Posted By: Anonymous
Re: Paint job on a budget!? CONTINUED - 05/02/07 03:25 AM
hey guys just thought id tell u about my rattle can experiment
so i got sidetracked for a few mins today lol.. i recently bought a car that has a spray painted front end on it.. the car is black and the fenders and stuff were replaced and just sprayed black (aerosol).. real CRAP job too.. the paint was not glossy at all.. so i decided to test it.. hit an area with a quick 1500 and 2000 wetsand, then buffed with turtle wax polishing compound, then some swirl remover.. results were AMAZING. came out to a mirror finish. i have no clue what kind of paint it was or what brand, but it was black and looked like crap at first. from that i definetly think a great job can be done by rattle can. i painted a car flat black before, and i still get comments to this day about how good it came out, so i think i may try it out. just puttin this out there cuz i dunno if anyone had tried the rattle can method with full polishing
Posted By: Anonymous
Re: Paint job on a budget!? CONTINUED - 05/02/07 03:43 AM
Quote:
is there anything like these foam pads out there for a regular cheap buffer? like as a bonnet? all i can find are microfiber, wool, terry, and the blue wax applicator
I bought one of these at my local Ace Hardware it was inexpensive and actually comes with a foam polishing pad so I figured I'd try it out. I haven't used it yet but it looked like a better unit than some of those 10" flying saucers I've seen. Right now I can't afford a 7424 and if this one doesnt work I can always borrow a rotary from work if needed.
http://www.acehardwaresuperstore.com/tur...4a62535095c245d
Posted By: Anonymous
Re: Paint job on a budget!? CONTINUED - 05/02/07 09:32 AM
Can anyone show me what type of polisher I should buy?
What about this krauss polisher on ebay?
http://cgi.ebay.es/KRAUSS-SZ-81803-Polie...1QQcmdZViewItem
Posted By: Anonymous
Re: Paint job on a budget!? CONTINUED - 05/02/07 01:47 PM
Quote:
Can anyone show me what type of polisher I should buy?
What about this krauss polisher on ebay? http://cgi.ebay.es/KRAUSS-SZ-81803-Polie...1QQcmdZViewItem
I'm not sure how much that is in Dollars but here in the states Harbor Freight sells a Chicago Electric model that looks exactly like that for $49.99(American)Like this:
http://www.harborfreight.com/cpi/ctaf/displayitem.taf?Itemnumber=92623
Posted By: Gusteve
Re: Paint job on a budget!? CONTINUED - 05/02/07 01:56 PM
Quote:
The Satin has gotten VERY hard in just 2 days, and the roller marks are not very visible at all. If you have ever bought a Repo part, like a fender, the paint looks alot like that satin black primer that comes on repo parts.
Roll on!
Do you think if you had wetsanded a coat and tried again that you could have eliminated the roller marks?
I had just bought cans of rustoleum satin and rustoleum flat black last weekend and I was going to experiment between the two shades, but your satin looks good so maybe I don't need to even try the flat.
Also - how did you handle the large section of the rear quarters and the roof? I expect everyone has the same issue - that's a huge section to do all at one time. Do people do the quarters individually, and then the roof and try to blend it in somehow on the C-piller / sail panel? Or is it done as one giant section?
I'm curious how you did it since the method for blending the Satin, which does not require sanding, might be different from the guys that are using gloss.
BTW - nice car. '69 was the BEST year for 'stangs.
Posted By: Anonymous
Re: Paint job on a budget!? CONTINUED - 05/02/07 02:57 PM
Has anyone tried Epifanes paint yet? Much more color variety than Brightside.
Another question....
I have not read anything about anyone doing the rolling and tipping technique. This seems to bee the standard technique used in boat painting with topside paint. Just wondering if I missed this somewhere on the board.
Posted By: v8mirage
Re: Paint job on a budget!? CONTINUED - 05/02/07 05:00 PM
Rolling and tipping is used on the Brightside applications, I suspect it would be used on all of the urethane paint jobs. I know I have seen it being talked about every now and then. So I would say it is there, you probably overlooked it somehow.
Posted By: Anonymous
Re: Paint job on a budget!? CONTINUED - 05/02/07 09:24 PM
My rattle can experience. I've tried getting a color match for my 73 datsun 240z #918 burnt orange. I spotted a car being done in a similar color on Duplicolor's website. It's Duplicolor's High temp engine enamel, Chevrolet orange. I bought a 12 oz can an gave it a try. Color was a real close match and coverage was great. Gloss was good and it leveled out nicely. The paint dried real fast but I waited til the next day to try to wet sand. I wet sanded 400 then 600 and polished the test area.
For the small amount of effort I considered the finish better and easier to get than using a roller. Granted the rattle can paint will end up costing more. But, until now I haven't had an acceptable color match. Not sure why the rattle can enamel dried so fast. Als, the finish was much harder after one day than what I was getting with a roller.
Posted By: Anonymous
Re: Paint job on a budget!? CONTINUED - 05/02/07 11:12 PM
Let's see if I can upload a picture...albeit without trim, and unfortunately with me beside it...
This is Tremclad Flat White and Tremclad dark blue mixed, and sprayed on.

Posted By: Anonymous
Re: Paint job on a budget!? CONTINUED - 05/02/07 11:41 PM
actually I thinned a bit more on the hood, and got almost no roller marks. Im goin to try wet sanding a little section, i'll let u know how it goes.
for the large sections, i used low odor min. spirits, which stays workable alot longer, blending worked good.
i experimented w/ Flat, and it had more texture when you rub your hand across it, felt "dirty", the satin was more like DPLF primer, or something, hard and smooth.
Posted By: kenzo42
Re: Paint job on a budget!? CONTINUED - 05/03/07 01:16 AM
Aussie,
Did you start your yellow cutting pad w/ SSR3 or SSR2.5?
Posted By: Anonymous
Re: Paint job on a budget!? CONTINUED - 05/03/07 02:04 AM
Quote:
Aussie,
Did you start your yellow cutting pad w/ SSR3 or SSR2.5?
Kenzo, I don't mean to rain on Aussie's parade but I figured I'd get you a quick answer here since I basically just asked him the same question. Aussie posted a pic on page 77 where he went from a wet sand with 2000 to SSR2.5 and got a nearly mirror finish. This morning I went to poorboysworld.com and ordered what he recommended which was SSR2.5, SSR1, and EX-P. I got all three in the 32oz. size for $76 including shipping. My other option was going to be the Meguiar's products which are considerably more expensive IMHO.
Posted By: Anonymous
Re: Paint job on a budget!? CONTINUED - 05/03/07 02:12 AM
New Guy here, I have been following/playing around with this for a a couple of years now.
Coming from an autobody background I figured I had to give it a try.
I will post up more when I have time, but I did want to let all of you know that Menards (and maybe other places) are back to Mixing Rustoleum pro.They have a Color chart you can pick up of what they can mix, and I think there was about 30 colors.
So more options!!!!
Posted By: Anonymous
Re: Paint job on a budget!? CONTINUED - 05/03/07 02:34 AM
There is a whole lot more than 30 colors on these 2 color charts between the masstone and pastel bases. But also I was at Ace and the one guy said that Rustoleum made their paint and they had hundreds of colors available. I missed the edge of the one a little because of the size of the chart anyway.

Posted By: Anonymous
Re: Paint job on a budget!? CONTINUED - 05/03/07 02:35 AM
Quote:
I did want to let all of you know that Menards (and maybe other places) are back to Mixing Rustoleum pro.They have a Color chart you can pick up of what they can mix, and I think there was about 30 colors.
So more options!!!!
You don't suppose that we all had anything to do with that do you??? HUUUUMMM?????
Posted By: Anonymous
Re: Paint job on a budget!? CONTINUED - 05/03/07 02:35 AM
Masstone base chart(Rustoleum)

Posted By: Anonymous
Re: Paint job on a budget!? CONTINUED - 05/03/07 02:47 AM
Here's a paint chart for the Ace Rust Stop Paint that I was given at my local Ace. I'm actually going with Gloss Black Rustoleum Professional because it was about $10 cheaper per gallon than the Ace paint but I thought you guys might like to see this. It does say that there are "Hundreds" of additional choices.

Posted By: Gusteve
Re: Paint job on a budget!? CONTINUED - 05/03/07 12:18 PM
Quote:
actually I thinned a bit more on the hood, and got almost no roller marks. Im goin to try wet sanding a little section, i'll let u know how it goes.
for the large sections, i used low odor min. spirits, which stays workable alot longer, blending worked good.
i experimented w/ Flat, and it had more texture when you rub your hand across it, felt "dirty", the satin was more like DPLF primer, or something, hard and smooth.
Please let us know what happens when you sand it. I would expect that it wouldn't take too much sanding to turn the satin into semi-gloss, and then you'd have to redo the entire panel.
Also, just to clarify, it sounds like you did the rear quarters and the roof all at the same time using the longer work time of the low-oder spirits. So you didn't have to worry about blending a previously completed quarter panel with a newly rolled c-piller section from the roof - Is that correct?
At this point - I think that you are only person on the thread that has rolled on a flat, IIRC. (There might have been one guy way back in the original thread, but that was a long time ago.)
For those of us that are cheap AND impatient - the satin finish is the way to go. I would also think that rolling a gloss over the satin at some time down the road (in the same color) would be less work than starting from scratch to do gloss.
Posted By: Anonymous
Re: Paint job on a budget!? CONTINUED - 05/03/07 01:31 PM
Quote:
Also, just to clarify, it sounds like you did the rear quarters and the roof all at the same time using the longer work time of the low-oder spirits. So you didn't have to worry about blending a previously completed quarter panel with a newly rolled c-piller section from the roof - Is that correct?
At this point - I think that you are only person on the thread that has rolled on a flat, IIRC. (There might have been one guy way back in the original thread, but that was a long time ago.)
Correct, the longer work time made blending no problem. I tried to stop at the natural line created by the edge of the top of the fender too, so that the roller blend would be on that line.
I agree that satin would be a fine base coat for black, so I say spend the 8 bucks for the Satin Rusololem, do a coat, and if you don't like it, just go on with the Gloss plans the rest of the thread laid out. Or do a test panel.
One thing I did learn, I did a touch up with a paint brush, it turned out Flatter than the rolled sections, so I rolled over it to get the same level of sheen. Also Rustoleum sells Semi-Gloss black spray cans, but I haven't seen Satin spray cans, so if you want to do some nook or cranny or something, you'll have to pick (probably go with the Flat).
heres a few more pics


Posted By: Anonymous
Galvanized Bodies - 05/03/07 01:38 PM
I've been following this for a while and am finally willing to take the plunge! I have a Chevy truck (I know... Mopar forum) with the peeling paint syndrome due to the galvanized body. I was re-reading some posts when I found that the oil-based paints are not compatible with galvanized steel!
The rustoleum site recommends painter's touch (water based). Anyone tried this and had luck? Anyone paint galvanized? Any help is greatly appreciated!!! I want a one-color truck again!
Posted By: Anonymous
Re: Galvanized Bodies - 05/03/07 01:45 PM
Quote:
I've been following this for a while and am finally willing to take the plunge! I have a Chevy truck (I know... Mopar forum) with the peeling paint syndrome due to the galvanized body. I was re-reading some posts when I found that the oil-based paints are not compatible with galvanized steel!
The rustoleum site recommends painter's touch (water based). Anyone tried this and had luck? Anyone paint galvanized? Any help is greatly appreciated!!! I want a one-color truck again!
When I was at Ace the other day I saw that Rustoleum makes a special primer specifically for Galvanized Metal. Maybe if you covered your bare metal areas with this primer first you would have no problem with regular Rustoleum, guess you'd have to research this first though. Just figured I'd throw in my
Posted By: Gusteve
Re: Paint job on a budget!? CONTINUED - 05/03/07 02:20 PM
Quote:
Also Rustoleum sells Semi-Gloss black spray cans, but I haven't seen Satin spray cans, so if you want to do some nook or cranny or something, you'll have to pick (probably go with the Flat).
Funny you should mention that. I only saw satin spray in the Rustoleum "Painter's Touch Lacquer" line at Home Depot, but I happened to look at Rustoleum's web site earlier today and they do have Satin Black listed as a color for the standard enamel spray bomb line.
Although I was actually considering doing the "hard to reach" places like the doorjams and behind the bumpers, etc in spray Gloss, so if I moved to Gloss later I wouldn't have to remove as many major trim pieces.
I have to test that to see if its going to look weird or not......
Posted By: Anonymous
Re: Paint job on a budget!? CONTINUED - 05/03/07 03:23 PM
So is the ACE brand just re-labeled Rustoleum????
If so this is good news, they are the only place with gallons and quarts of Safety orange around here.
Posted By: Anonymous
Re: Galvanized Bodies - 05/03/07 03:46 PM
Called up Rustoleum tech support and they recommended just that - the 8781 aluminum primer.
Off to the store (after work). I'll be prepping tonight and tomorrow and will hopefully have a coat of primer on before the end of the day!
WOO HOO!
Posted By: Anonymous
Re: Paint job on a budget!? CONTINUED - 05/03/07 04:55 PM
Quote:
So is the ACE brand just re-labeled Rustoleum????
If so this is good news, they are the only place with gallons and quarts of Safety orange around here.
I don't know, but the guy at Ace said it's basically the same stuff. There was another guy on here a while ago that said he was going to use the Ace paint but he has since disappeared
I was kinda bummed because I was looking forward to seeing how his turned out. I think he was gonna do a Ford truck with it.
Posted By: Anonymous
Re: Galvanized Bodies - 05/03/07 05:00 PM
Quote:
Called up Rustoleum tech support and they recommended just that - the 8781 aluminum primer.
Off to the store (after work). I'll be prepping tonight and tomorrow and will hopefully have a coat of primer on before the end of the day!
WOO HOO!
Glad to be of assistance, make sure to get us all some pics as you progress.
Posted By: Anonymous
Re: Paint job on a budget!? CONTINUED - 05/03/07 05:19 PM
Hey, I have a quick question for the seasoned veteran rollers out there...
About how much thinned paint mixture are you guys using for each coat of paint? I'd like each coat to be somewhat uniform and I worried that if I mix by cosistency then I might run out mid-coat if I don't mix up enough.
Posted By: Anonymous
Re: Paint job on a budget!? CONTINUED - 05/03/07 06:38 PM
I said made by them, maybe not exactly like but should have the same results being the same type of paint.
Posted By: texczech
Re: Paint job on a budget!? CONTINUED - 05/03/07 07:03 PM
What brand of Swirl Mark Remover did you use & what type of bonnet did you use with each product?
Posted By: Exit1965
Re: Paint job on a budget!? CONTINUED - 05/03/07 11:15 PM
Quote:
Hey, I have a quick question for the seasoned veteran rollers out there...
About how much thinned paint mixture are you guys using for each coat of paint? I'd like each coat to be somewhat uniform and I worried that if I mix by cosistency then I might run out mid-coat if I don't mix up enough.
I would get a good jar like a mason jar and mix it up in there.. that way you will not run out of mixed stuff. Just add a bit of the mineral spirits before painting to get the consistency right (in the jar) then pour it into the tray. I'd say 1/8th of a regular mason jar would be used each full coat, that's a very rough guess though..
Posted By: Anonymous
Re: Paint job on a budget!? CONTINUED - 05/03/07 11:46 PM
Quote:
What brand of Swirl Mark Remover did you use & what type of bonnet did you use with each product?
i forgot the brand of swirl remover but its a yellow bottle and was like $3.. i used a microfiber bonnet for everything
Posted By: kenzo42
Re: Paint job on a budget!? CONTINUED - 05/04/07 01:24 AM
How does satin hold up to the elements? Does it end up looking bad after a couple months/years?
Do you maintain it the same as regular paint?
Posted By: Anonymous
Re: Paint job on a budget!? CONTINUED - 05/04/07 01:25 AM
Another dumb question - I searched and searched but couldn't find the answer. Can I use my orbital palm sander (like this:
http://www.mytoolstore.com/dewalt/dew06-08.html) to do the scuffing before primer? After primer I won't as it is electric and that's not a good idea wet sanding.
First step complete... spent like $20 at the quarter wash knocking off the loose paint. First bath that truck has had in YEARS!
Thanks for all the help!
Posted By: Anonymous
Re: Paint job on a budget!? CONTINUED - 05/04/07 01:31 AM
I'm guessing it holds up about the same as the gloss, but only time will tell. I never let my car get wet, since i spent 2 years replacing all the rusted out metal, so I'll keep it in the garage when it gets wet out.
Posted By: Anonymous
Re: Paint job on a budget!? CONTINUED - 05/04/07 01:33 AM
Quote:
How does satin hold up to the elements? Does it end up looking bad after a couple months/years?
Do you maintain it the same as regular paint?
it stood up fine for me, but i only had it for less than a year b4 i sold it
Posted By: Anonymous
Re: Paint job on a budget!? CONTINUED - 05/04/07 01:35 AM
Quote:
Another dumb question - I searched and searched but couldn't find the answer. Can I use my orbital palm sander (like this: http://www.mytoolstore.com/dewalt/dew06-08.html) to do the scuffing before primer? After primer I won't as it is electric and that's not a good idea wet sanding.
First step complete... spent like $20 at the quarter wash knocking off the loose paint. First bath that truck has had in YEARS!
Thanks for all the help!
its fine to do the scuffing.. today i got tired of wetsanding and decided to use my electric sander.. worked out pretty good but u just gotta be very careful on the edges, i burned thru a few spots on the edges.. that can happen very easily by hand too tho
Posted By: Anonymous
Re: Paint job on a budget!? CONTINUED - 05/04/07 01:53 AM
Quote:
I would get a good jar like a mason jar and mix it up in there.. that way you will not run out of mixed stuff. Just add a bit of the mineral spirits before painting to get the consistency right (in the jar) then pour it into the tray. I'd say 1/8th of a regular mason jar would be used each full coat, that's a very rough guess though..
Thanks Exit, I 'm thinking I will do about half a mason jars worth at the 2% milk consistency and go from there to the roller tray as needed then add mineral spirits at each coat to the jar if it appears to have thickened between coats.
On another note, has anyone considered using the Ace Rust Stop since our conversation yesterday? I was asked about painting my daughters car today and I might try that stuff on hers after I've done the Probe.
Posted By: Anonymous
Re: Paint job on a budget!? CONTINUED - 05/04/07 02:09 AM
I will give it (the Ace brand) a whirl, But I may not have time for the next couple of weeks.
So far I have played with a few different rustoleum colors, and the Van Sickle Tractor paint from Thiesens.
My test fender that has been outside the shop for about a year now (has a bit of rustoleum, and a bit of vansickle on it) is faring pretty well. Both area were color sanded, and were only a few coats, and I must say all of the guys at the shop are amazed.
Posted By: Anonymous
Re: Paint job on a budget!? CONTINUED - 05/04/07 02:11 AM
Oh and for colorsanding if you have experience, you can use a fine stroke D/A with the Norton Pads for color sanding. Makes quick work of it, but you need to be careful!
Posted By: Anonymous
Re: Paint job on a budget!? CONTINUED - 05/04/07 12:17 PM
Thanks again for the help... and another noob question. A friend has graciously offered up his garage (mine is too small) and I want to make sure I don't leave it a mess. How much paint comes off during wet sanding? Do I have to be careful of staining his driveway? Killing the grass? Anything else I should be aware of?
Thanks again. I'll be following the prep instructions for the peeling caravan by marq back on pg. 58, knocking off the paint in my driveway so I don't leave at least that mess at my friend's. Thanks Marq!
Posted By: Anonymous
Re: Paint job on a budget!? CONTINUED - 05/04/07 01:48 PM
Quote:
Thanks again for the help... and another noob question. A friend has graciously offered up his garage (mine is too small) and I want to make sure I don't leave it a mess. How much paint comes off during wet sanding? Do I have to be careful of staining his driveway? Killing the grass? Anything else I should be aware of?
I don't think you have to worry about killing his grass unless you are going to be stomping around on it alot when it's soaked. As for staining his driveway, just dont let the dust from your wetsanding dry on the concrete. as long as you keep it wet you should be able to just rinse it away with a hose. If it does dry you can probably scrub it off with a good stiff bristled brush if needed. 69DartGT painted his truck in his driveway and if you look back at his pics his driveway is still clean.
2.3Turbo: If you do try out the Ace paint for sure let us know how it comes out. I'm very interested to see it since they appear to offer a large range of available colors. Thanx.
Posted By: Anonymous
Re: Paint job on a budget!? CONTINUED - 05/04/07 02:57 PM
for the rustolium clear it takes 3 weeks from time of order to get the clear. thats not good
Posted By: Anonymous
Re: Paint job on a budget!? CONTINUED - 05/04/07 03:45 PM
Yeah,
Thats what I found out too. I ordered some and it should be here in a week. Clear is not needed for the solid colors, but it has the advantage on solid colors of not making a huge colored mess when you wetsand/polish and buff or wax. Plus it's really easy to put on with a roller.
What source were you ordering from?
-Nathan.
Posted By: Anonymous
Re: Paint job on a budget!? CONTINUED - 05/04/07 03:55 PM
kelly supply. they dont stock the paint there, they send a purchase order to vernon hills, il. and then ship it back to kelly then to you.. that sucks...
Posted By: Anonymous
Re: Paint job on a budget!? CONTINUED - 05/04/07 05:22 PM
is it possible to get rustoleum or brightside tinted to "sublime green" like on new dytona r/t chargers?
Posted By: Anonymous
Re: Paint job on a budget!? CONTINUED - 05/04/07 06:45 PM
About a year ago I stumbled upon this site, my cars clear coat gave up. I went ahead and read the first 40 pages before taking the task on myself. I don�t know why I didn�t join back than to post pictures of my results, but needless to say I was more than pleased. For those questioning the durability of rustoleum paint I have proof that it will pass the thumb nail test. I got into an accident a few days ago and unfortunately the paint looks better than my control arm. Now I�m waiting to get the car back before I reroll, thinking about changing the color to a blue. This time around I�ll keep a running log of my progress.

Posted By: Anonymous
Re: Paint job on a budget!? CONTINUED - 05/04/07 09:06 PM
There may be a color close, but you would want to get the chart or have a quart mixed to see if you need to "customize" it.
Posted By: Anonymous
Metallics - 05/04/07 09:07 PM
I have some very interesting results for creating metallics w/rustoleum paint. Basically off-the-shelf rustoleum with pearl additive. I have been working mainly with grey to make silver and gun-grey metallics. I will post some pictures this weekend.
Only bad part is that you will need to clearcoat, the rustoleum with the pearl will only polish to semi-gloss at best. With a clearcoat however you can get some beautiful custom metallic colors. And it will have to be sprayed. I am using a $10 touch up gun and it works great.
Will have even better pictures when my clear rustoleum arrives.
-Nathan
does anyone make a paint close to the color of my car in my sig?
Posted By: Anonymous
Re: Metallics - 05/05/07 12:51 AM
today i was lookin at a 2005 lincoln navigator up close.. it had a tremendous amt of orange peel.. more than my car, which i think i did kinda a half [Edited by Moparts - Keep it clean] job on the wetsanding and smoothing.. pretty funny
Posted By: Anonymous
Re: Paint job on a budget!? CONTINUED..page 44........ - 05/05/07 01:54 AM
well, im about to dig into my camaro project tomorrow.. I was just wondering what process you guys used....
I'm thinking I'll do the following:
1) Body Work (ofcourse)
2) 500 grit to prepair for paint?
3) 1 Coat/Fix any visible mess-ups I missed
4) Wetsend 500 grit
5) 2x Coats
6) Wetsand 500 grit/3rd and 4th coat
7) Wetsand 500 grit/5th and 6th coat
8) more if needed
9) final coat, wetsand with 500 then move to 1500 then to polishing compound?
That sound about right? also how long did you guys want between the coats (before wetsanding) I think I rememeber reading about that but Id reallly not rather go through all 300some pages again.
Posted By: Anonymous
Re: Paint job on a budget!? CONTINUED..page 44........ - 05/05/07 02:05 AM
this topic is long as hell, i read through 50 of the original pages over the course of 2 weeks, only to find out that that thread got locked and a new one was created, and found 79 more pages here! there is no way in hell i can read this much, so if any of the guys from the origin thread can sum up any MAJOR changes to the process for me i would greatly appreciate it. i still have copied down 69chargers preferred steps. is anything different now? i was quickly browsing through these post and found that swirl remover looked to give the best finish when all done, any tips like that are greatly appreciated.
Posted By: Anonymous
Re: Paint job on a budget!? CONTINUED..page 44........ - 05/05/07 04:37 AM
Quote:
well, im about to dig into my camaro project tomorrow.. I was just wondering what process you guys used....
I'm thinking I'll do the following:
1) Body Work (ofcourse)
2) 500 grit to prepair for paint?
3) 1 Coat/Fix any visible mess-ups I missed
4) Wetsend 500 grit
5) 2x Coats
6) Wetsand 500 grit/3rd and 4th coat
7) Wetsand 500 grit/5th and 6th coat
8) more if needed
9) final coat, wetsand with 500 then move to 1500 then to polishing compound?
That sound about right? also how long did you guys want between the coats (before wetsanding) I think I rememeber reading about that but Id reallly not rather go through all 300some pages again.
well i dont think ive ever seen 500 grit paper lol but id use 400 for the prep work, 600 or 800 after every 2-3 coats, and for the final coat 1000, 1500, and 2000. u can usually do coats 6-8 hours apart, and u probly should wait at least 24 hrs before wetsanding.. but it all depends if the car is baking in the sun or sitting in a garage, if its cold or hot, etc etc
Posted By: Anonymous
Re: Paint job on a budget!? CONTINUED..page 44........ - 05/05/07 04:44 AM
Quote:
well i dont think ive ever seen 500 grit paper lol
apparently it dose exist at homedepot since I just bought some, but yeah I think I have the basic idea down... I hope to get started with the paint by sunday will post some pictures then.
Posted By: Anonymous
Re: Paint job on a budget!? CONTINUED..page 44........ - 05/05/07 09:53 AM
I did a crash read on this thread and am going to try it. I have no experience painting a car so it will be a real learning experience.
I just found and bought a 1971 VW Safari ("Thing" in the U.S.). Good body except for some Cancer at the front fenders and had the floorplate replaced.
Thinking auto body and paint was cheap in Mexico (where I live), I got a couple of estimates. Clean up the body (Bondo City) and standard paint job was US$1,200 and I was quoted ONE-MONTH for the job, and I know this is Mexican time.
My concern is getting the proper items. I have a Home Depot in Guadalajara, about a 40-minute drive) and hope they have what I need, especially the rollers and high number sandpaper, if not, will have to order it. My cost will be well over the original $50 quote because everything imported into Mexico carries a high duty passed to the customer. But still, it's worth the try.
If I remember and can, I'll make an album and post it down the line.
I have one question now that I did not see answered (or I missed it). What type of container is used to dip the roller? I see the paint has about a ten-minute window of use so don't want to pour too much and have it try out. Suggestions from your experiences appreciated.
Thanks.
Posted By: Marq
Re: Paint job on a budget!? CONTINUED..page 44........ - 05/05/07 01:52 PM
Quote:
I have one question now that I did not see answered (or I missed it). What type of container is used to dip the roller? I see the paint has about a ten-minute window of use so don't want to pour too much and have it try out. Suggestions from your experiences appreciated.
Thanks.
Believe it or not... they do sell a 4 1/2 inch wide paint roller tray...
It looks like the larger paint roller trays that you normally see or are familiar with. These smaller roller trays are usually available just in cheap disposable black plastic.
Here in Canada, I am able to find the 4 1/2 inch wide paint tray at Home Depot and at our local 'Dollar Stores'.
The 'Dollar Stores' operate under different names, but its these stores where they load their shelves with just about every kind of crap that they can sell for under a dollar.
IF you can find a 'Dollar' type store.. you will be able to pick up the cheap plastic 4 1/2 inch trays for the laughingly low price of 2 for $1
I used about 10 of them altogether when I did my car for a grand total of $5 plus tax.
I usually started with a brand new tray EACH time I began a new coat on the car. I could probably washed them down after each use with mineral spirits, but I preferred to always start with a fresh roller tray to ensure that there was no contamination or foreign matter.
But I don't see any problem using a regular size paint tray AND using the cheap plastic liners they sell for those. This way you can still enjoy the benefit of simply tossing out the cheap plastic liner when you start each new coat.
In an el cheapo manner... you can simply use a regular size paint tray and just wash it down after each painting session and just keep re-using it.
NOW... on the topic of the VW Thing... I saw a VW Thing get 'Overhauled' on either that 'Overhauling' television show or maybe it was 'Pimp My Ride'...
IF I had a VW Thing... I would be really tempted to strip it down and do it with a cheap SPRAYER rather than a roller. Which would mean you would have to read a few of the messages posted in this forum from the guys who pumped Rustoleum/Tremclad through their el cheapo paint sprayers.
The reason why you might want to give consideration to the 'el cheapo sprayer' method is because of all the irregular surfaces on a Thing that may push your patience while trying to achieve a professional look...

With cars or trucks with large flat surfaces, the roller paint job works out well and we can easily wet sand ( color sand ) them to get them smooth for glossiness. But those irregular body shapes on 'The Thing' may give you a bit of estra work.
As you will have read in this thread.. the one spot a lot of folks encounter problems is over sanding near edges - to the point where they have to exercise extra care and time at the edges.
On the television show... when they overhauled their 'Thing'... they stripped it of its interior and all exterior stuff and just sprayed EVERYTHING. It came our pretty good...
.
Posted By: Anonymous
Re: Paint job on a budget!? CONTINUED..page 44........ - 05/05/07 02:16 PM
I started on a test piece last night, I found a body part for an old riding mower out in our scrap pile here at work. I sanded it with 100 then 220 then 320, wiped it down with a wet chamois and then mineral spirits, I mixed up some paint at about 40% mineral spirits and started rolling. I now think a test peice is a must before starting on your car because I had a gazillion little bubbles. But, like our wise leaders have said, a small puff on them and they all popped. I waited a few minutes and went over it again with no pressure on the roller as indicated in "the method" and it came out fairly smooth but looked awefully peely. I decided to leave it(it was 11:00pm) When I checked on it this morning I was amazed to see how much it levels out
, except for some very light runs in one of the vertical sides it is actually very smooth. I posted a few pics of the prepped peice and the first coat wet over at flicker. I'll add more as I progress.
http://www.flickr.com/photos/90567084@N00/sets/72157600179335943/rt13 and Talosian: I know it sure seems like a lot of work to read this whole 2 part thread, but I have found that the repititious info drilled the process into my head and except for actual hands on experience I felt very confident last night that I knew what I was doing. I had a very minor "what the &%$# am I doing moment"
and that was it. I had the answers to all the problems I encountered because of this thread and all the guys who have gone before us(Thanks again to all of you). I highly recommend taking the time to read it through completely.
Posted By: Anonymous
Re: Paint job on a budget!? CONTINUED..page 44........ - 05/05/07 03:53 PM
I hear you about spraying but my thinking right now is since I have the time, I will give the roller a try. For me, part of the project is the challenge. Also, I have many removable parts (all doors for one thing) that will allow me to lay them out.
I will be happy with what I think is called a 10-20 foot job, meaning up to that distance it looks pretty good. And remember, I'm in Mexico and if I have a kick-[Edited by Moparts - Keep it clean] show finish, I would be afraid to take the car out, not for theft, but damage. I had a truck back into my daily-driver (1993 Ford Escort Wagon) and took out a mirror and two windows. I simply kept going as is the custom here, but that's another story.
And also cost is a factor, if I can get a decent looking paint job for under US$500 including some body work, I'll be a happy camper. Plus, if it's a total disaster, I can then consider buying a cheap spray outfit and giving it a shot.
So now, I'll just muddle along and see how it goes.
Thanks for the input.
Posted By: Anonymous
Re: Paint job on a budget!? CONTINUED..page 44........ - 05/06/07 02:48 AM
hey guys, how has rustoleum been holding up on bumpers.. like plastic/fiberglass bumpers?
ps, heres my progress so far... i havent rolled anything on yet but I did slightly thin some rustoleum primer and brush two coats on with a foam brush.. came out pretty good, ill wetsand and fill any messups tomorrow and by monday I should be laying color down.
http://img182.imageshack.us/img182/5500/p1010287ir0.jpg
Posted By: Anonymous
Re: Paint job on a budget!? CONTINUED - 05/06/07 11:09 AM
Quote:
Thanks for the compliment. That paint was the Brightside but there is no reason why the Rustoleum can't polish up just as well.
Here is a bit of info on the pads that I use. About half way down the page they describe the cutting pad and the light cutting pad. From my experience these buffing pads are brilliant.
I'm a long time lurker, and avid detailer, who is fascinated by this thread. I never really planned on posting but then I noticed that they had those pads on close-out. I just wanted to say that you won't find a better pad for that price. If you are looking for PC pads that is a great deal.
Best wishes to all. Roll on!

Posted By: 71valiant
Re: Paint job on a budget!? CONTINUED - 05/06/07 02:38 PM
Is the rustolem satin with the lawn chairs and stuff on the front of it the same as the normal rustolem. The chestnut brown and satin black both have different cans. I wondering if it is the same paint? thanks!
Posted By: Anonymous
Re: Paint job on a budget!? CONTINUED - 05/06/07 06:02 PM
Is the Tremclad oil or water based? I see Rust-Oleum has a water base. I think Tremclad is a Canadaian product.
Thanks.
Posted By: Anonymous
Re: Paint job on a budget!? CONTINUED - 05/06/07 07:28 PM
Quote:
Is the Tremclad oil or water based?
Oil-based alkyd enamel. Some of yacht paints mentioned are monourethanes.
Quote:
I see Rust-Oleum has a water base.
Yes, but I don't think anyone here has tried the water based stuff on a car,... yet.
Quote:
I think Tremclad is a Canadian product.
Thanks to the wonderful world of high finance and global consolidations, It is now part of the Rustoleum family. Though it likely lost some of its mystique in the merger, as near as we can figure on this thread its mostly the same stuff.
Posted By: Anonymous
Re: Paint job on a budget!? CONTINUED - 05/07/07 02:16 AM
OK so I went back to Tractor Supply again and did some more checking while I was there to buy some other stuff, they have a gallon of sandable primer to go along with their tractor enamel, are you guys rolling the primer straight on or thinning it down with mineral spirits ? 10-20%?
Posted By: Anonymous
Re: Paint job on a budget!? CONTINUED - 05/07/07 02:22 AM
for the people that are spraying the paint. how do you clean out the gun???
Posted By: Anonymous
Re: Paint job on a budget!? CONTINUED - 05/07/07 12:45 PM
Just spray some mineral spirits through it when you are done, and wash out the cup with mineral spirits as well.
Posted By: Anonymous
Re: Paint job on a budget!? CONTINUED - 05/07/07 03:41 PM
I wanted to take quick second to send out a Thank You to Exit1965
. Your in depth description of "wringing" out the roller and "wetting" the surface solved the running problem I had with my test piece. My second and third coats have gone on almost glassy. I will wetsand it with 600 tonight and apply my 4th coat. So far it's lookin' good. There is no way I could have figured out the correct method to do this without all of the help given in this thread!!
Posted By: Radio Joe
Re: Paint job on a budget!? CONTINUED - 05/07/07 05:16 PM
I wanted to post some additional info- I read a few pages back to put down an aluminum foil liner in the paint tray so you can just throw away the foil and have a clean tray- THIS WORKS GREAT! so i have been using the same tray for quite a few coats now.
I also found that if I wrap my roller up in aluminum foil it doesnt dry out at all (It dried out slowly in the plastic bag I stored it in before)and you can go right back to using it. I have started rolling the red on my car and put on one coat, waited 2 days then went to add a second coat and the roller was still nice and wet and soft. give it a try
As far as 2 tone jobs and tape- I have switched to the BLUE "easy Release" tape as suggested and I hope it works better than the green tape. The green tape did an excellent job of masking the areas I didnt want paint on and gave a nice crisp line but when I peeled it off it left ashesive on the car. It took a bit of work to get it off- Some adhesive remover, mineral spirits, then let it dry a little, then more mineral spirits. I got it all off but was too worried about damagign the black paint when I taped onto it so I switched. I'll let you know how it turns out- With any luck I will be done painting sometime next weekend.
Pictures soon- The car is looking really good with both colors on t, even though the red is still splotchy.
Posted By: Anonymous
Re: Paint job on a budget!? CONTINUED - 05/08/07 06:46 PM
how can i get this color mixing rustoleum paint

could i get it mixing green and white or yellow and blue?
Posted By: Anonymous
Re: Paint job on a budget!? CONTINUED - 05/08/07 08:23 PM
I'd go with white, green, and yellow. Start with a white base and add a tiny amount of green, then slightly more yellow. Then adjust it from there.
Posted By: Anonymous
Re: Paint job on a budget!? CONTINUED - 05/08/07 10:37 PM
That is a cool color.
Posted By: Anonymous
Re: Paint job on a budget!? CONTINUED..page 44........ - 05/09/07 01:14 AM
http://img158.imageshack.us/img158/6718/p1010287pn1.jpghttp://img338.imageshack.us/img338/2479/p1010288dm1.jpgThats coat #1, I should have thinned it a TINY bit more bit its good enough... I plain to hit it with another coat tomorrow and wetsand it... looks pretty good as is though.
Posted By: Anonymous
Re: Paint job on a budget!? CONTINUED - 05/09/07 04:02 AM
Posted By: trikar
Re: Paint job on a budget!? CONTINUED..page 44........ - 05/09/07 06:34 AM
Here is my 1973 Ranchero Squire with Factory 351 Cobra Jet. Body is painted with a Mix of 2 parts Rustolium Gloss Hunter Green two parts Mineral spirits and one part Rustolium Gloss black.
The wood grain is a base of Rustolium Summer Squash bushed over with Minwax Poly stain. When I got the car all of the trim was painted blue.
Here is what it looked like before.
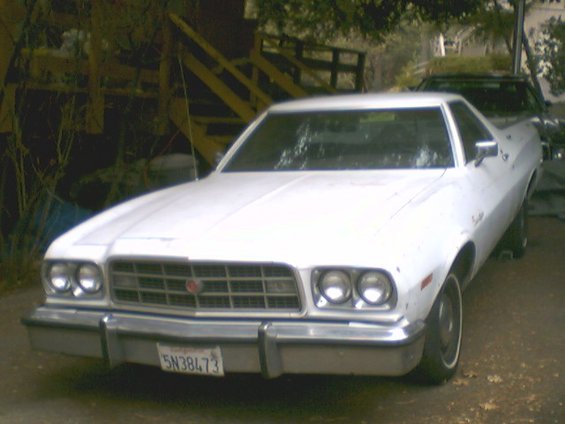
after

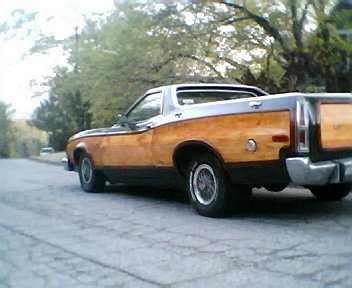
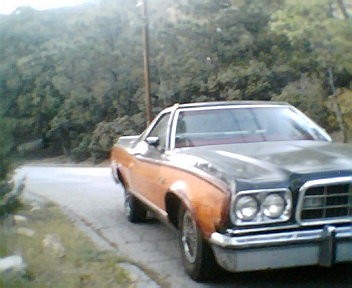


I would like to thank everyone here for all the detailed information that allowed me to do this.
Posted By: Anonymous
Re: Paint job on a budget!? CONTINUED - 05/09/07 11:34 AM
Quote:
Is the Tremclad oil or water based? I see Rust-Oleum has a water base. I think Tremclad is a Canadaian product.
Thanks.
Got a lot of the VW Thing/Safari disassembled and had some welding done on the fenders. Pretty nice when it comes apart easily. I'm cheating a little right now and let a body shop finish and prime the two fenders and hood, but for about US$112, it's not worth my time.
My real problem is finding the Rust-Oleum in quarts. My Home Depot in Guadalajara has only the spray cans so I'm going to see if I can special order it tomorrow. I won't get get near the US$50 cost range because everything imported into Mexico costs much more then in the U.S. (other than labor).
I will try to take and post some pics as I progress. One nice thing is that I can get someone here to do the grunt work (elbow grease) here for US$2.30 per hour.
Posted By: Radio Joe
Re: Paint job on a budget!? CONTINUED - 05/09/07 01:51 PM
here is a couple pics of the car with 2 colors on it... the red is still kind of splotchy. This is 4 coats of red, I will wetsand it now and then move on to more coats. Im getting excited to get it done!

Posted By: Radio Joe
Re: Paint job on a budget!? CONTINUED - 05/09/07 01:52 PM
oops- only one attachment per post- here is the second pic.

Posted By: Anonymous
Re: Paint job on a budget!? CONTINUED - 05/09/07 03:01 PM
Hey Radio, TeHMike, and Big BS, those cars are looking great and the pics couldn't be more timely for me since I'm doing black on my car next month.I'm still playing with my test piece right now, Just put coats 4 and 5 on after a 600 grit wetsand, I think I'll put on one more coat before my 800 wetsand since I burned through a couple of spots with the 600. I'm sure most here would be bored with more pics of my Mower part so I'll wait and post a finished pic when its all done, I think after 8 coats. I recieved my Poorboys SSR2.5, SSR1, and EX-P via FedEx yesterday so as soon as i've got the painting done I'll polish her out and attach some pics. Keep on Rollin'!
Posted By: Anonymous
Re: Paint job on a budget!? CONTINUED - 05/09/07 05:00 PM
Joe, That looks awesome.
Posted By: Marq
Re: Paint job on a budget!? CONTINUED..page 44........ - 05/09/07 05:04 PM
Quote:
Here is my 1973 Ranchero Squire with Factory 351 Cobra Jet. Body is painted with a Mix of 2 parts Rustolium Gloss Hunter Green two parts Mineral spirits and one part Rustolium Gloss black.
The wood grain is a base of Rustolium Summer Squash bushed over with Minwax Poly stain. When I got the car all of the trim was painted blue.
Here is what it looked like before.
Awesome job and quite the extreme makeover compared to the original paint.
In particular I was very interested in your use of Minwax Poly Stain. There are some magnificent dark cherry and mahogany colors available from MinWax and its nice to see how you were able to get a respectable wood grain effect on your car with it.
So naturally this leads to some totally new questions about your experience using the MinWax...
a ) did you cut the MinWax or use it straight from the can ? If you cut it ... with what ?
b ) how many coats of the MinWax did you use ?
c ) did you wet sand the MinWax during its application or use the ulta-fine steel wool that MinWax recommends ?
d ) did the final version of your Minwx layer come out glossy or were their surface imperfections ?
The reason I ask is that my wife once did two chest of drawers and an armoire using the dark cherry wood MinWax and it was fabulous. But she was steelwooling each layer ( coating ) to maximize the smoothness and gloss. Just wondering if you took your application that far.
Kudos it looks great.
.
Posted By: Anonymous
Re: Paint job on a budget!? CONTINUED..page 44........ - 05/09/07 08:02 PM
I'm amazed at how good mine hood is looking after 2 coats and its not even wetsanded yet...

Before ANY WORK

2 Coats, Not Wet Sanded
Posted By: Anonymous
Re: Paint job on a budget!? CONTINUED..page 44........ - 05/10/07 01:30 AM
oh man, Im having a slight problem. When I was prepping for paint I went over my hood with 400 to prep it for paint and I did that over bare metal. I was just out side wetsanding it with 600 and where the bare metal was the paint was coming off... What should I do now?
What I'm thinking will suck but I think I need to go crazy and remove all my paint and get everything level again and scuff up the bare metal with like 120.
Posted By: trikar
Re: Paint job on a budget!? CONTINUED..page 44........ - 05/10/07 05:56 AM
Quote:
Trikar that is one SWEEEEETTTT lookin' Ranchero! Could you go more into detail as to how you did that wood grain effect? (Show some closeups too!)
The outer trim was painted blue when I got the car, so if you have painted squire trim and think that you need to replace it to make the trim look like wood again, well you don't, you can easily make it look like stock again, which is what I did at first and it was so easy to do that I decided to do the trim how I thought it should look and if I did not like it I could always change it back to a stock looking wood finish. I first painted the entire body of the car with the Dark Green that I created by mixing 2 parts Rustolium Gloss Hunter Green, 2 parts mineral spirits, and one part Rustolium gloss black which was applied with a 4 inch roller. I then painted the inset area where the vinyl wood grain use to be, with Rustolium Summer Squash yellow. It is a light yellow color.
next I applied Minwax Polyshade Old Maple gloss with a nylon bristle bush. doing one panel at a time. Don't buy the cheap nylon brushes, they shed way too much when applying stain! I then did the trim in much the same way as the body grain, I applied the Summer Squash first and then I brushed on Minwax polyshade Bombay Mahogany gloss. All the trim was painted and stained while removed from the car and then re installed after all painting and staining was completed. I'm sorry the pictures are not any better. My good camera is not working so I bought a $10.00 digital from Rite-Aid drug store just so I could at least have some pictures until I get my other camera working again. Every time I tried to get a good close up of the grain the pictures just would not show it. I think the car looks much better than what shows in these pictures. Everything I did paintwise to this Ranchero I learned from this thread, which I have been following since it was only three pages. The only other thing I painted using this technique before painting the Squire was a shell to another Ranchero of mine that I did as a tester. There is also a very good link for Squire trim restoration that I obtained from this thread and used.
http://www.rickwrench.com/wood.html
Thank you everyone that contributes to this thread, you have been a great source of information for me!
Posted By: Anonymous
Re: Paint job on a budget!? CONTINUED..page 44........ - 05/10/07 08:12 AM
I found this through mustangforums.com where some people had some good results with this method. This has been such an interesting read, and I want to thank everyone for their contributions. I was going to get my car painted at Earl's or Maaco, but while searching for feedback on their services, I found this page. I've spent the past week reading and decided to finally start last Saturday with my 2001 v6 Mustang. I bought it a month ago for a great price, mostly due to the fact that it had been repainted, and very poorly at that. It had tons of orange peel, a ton of scratches and chips, almost no shine at all, and even had paint drip marks all over.
I chose to use Brightside paint, and went with the medium blue. Didn't know how it would turn out on a modern car, but I'm happy with it although it stands out quite a bit and some people have had negative opinions on it. I knew that if the paint job turned out bad, drawing attention to it with this color would just make things worse, but I gave it a shot. It is on the third coat, and I plan on wetsanding again, laying on a fourth coat, wetsanding, and then polishing.
I spent about $100 on supplies, and worked about 20 hours so far in my campus parking lot. I'm lucky it hasn't been too windy or wet lately. I actually have to drive this baby 400 miles on Friday, so I won't work on it any more until Saturday at the earliest. I'll update when I finish it up. It still has some way to go in the little details, and I really want to try to get a great shine out of it.
The paint it came with.

After sanding down and filling up a dent.

The first coat of paint.

Waited 24 hours for the second coat of paint.

Waited 24 hours, then wetsanded with 600grit, and washed down.

Waited about 5 hours, layed down the third coat.


Posted By: Anonymous
Re: Paint job on a budget!? CONTINUED..page 44........ - 05/10/07 02:12 PM
Quote:
oh man, Im having a slight problem. When I was prepping for paint I went over my hood with 400 to prep it for paint and I did that over bare metal. I was just out side wetsanding it with 600 and where the bare metal was the paint was coming off... What should I do now?
What I'm thinking will suck but I think I need to go crazy and remove all my paint and get everything level again and scuff up the bare metal with like 120.
TehMike, what kind of vehicle are you painting? there was a mention on here earlier about the 80's Chevys(and others) that had Galvanized metal. You may have to apply some rustoleum Galvanized metal primer over the bare metal areas to get the paint to adhere properly. Just my though. Good luck.
Posted By: Radio Joe
Re: Paint job on a budget!? CONTINUED..page 44........ - 05/10/07 03:32 PM
tehMike- I had the same problem on one spot of my hood on the corvair. Turned out to be contamination before I painted. Let the paint harden longer- in direct sunlight if you can and then wetsand the area with 600 grit. When you sand, you will probably get little paint flakes coming off in that area- keep sanding until no more flakes come off and it is sanding normal. Then wipe it down with mineral spirits a couple times. The paint over it. as long as all the contamination is gone, it will stick. If the paint continues to peel, you may need to sand down and redo the whole panel.
Good Luck
Posted By: 69DartGT
Re: Paint job on a budget!? CONTINUED..page 44........ - 05/10/07 08:33 PM
To all we are thinking of locking this thread again and keeping it in the tech archives.
I will start another which based on the size of this would probably be a great idea.
I don't want the discussion here to much in the thread but feel free to PM me with comments.
Thanks Tom
Posted By: 69DartGT
Re: Paint job on a budget!? CONTINUED..page 44........ - 05/13/07 04:08 AM
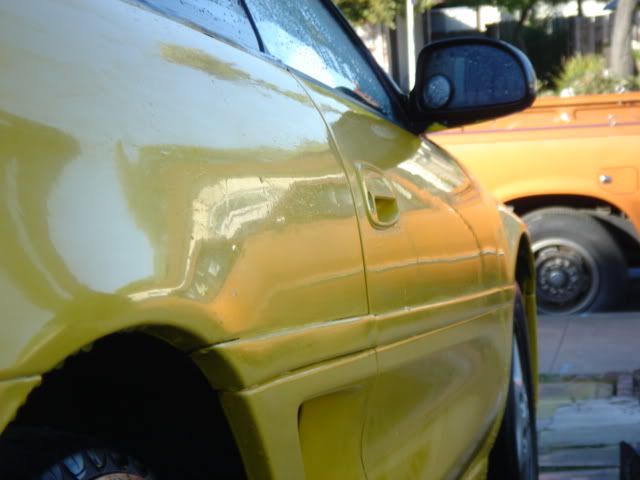
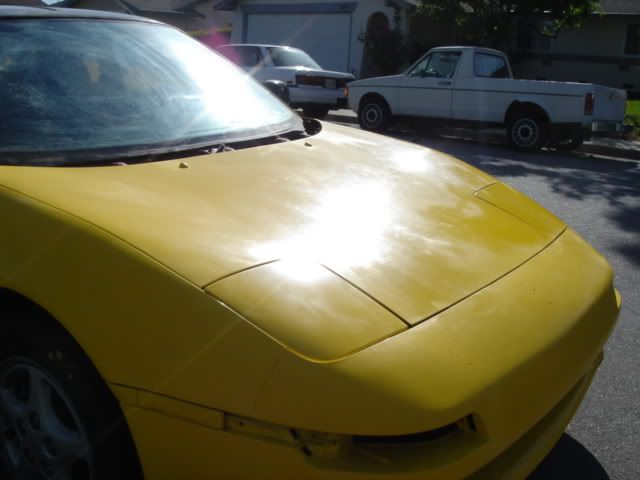
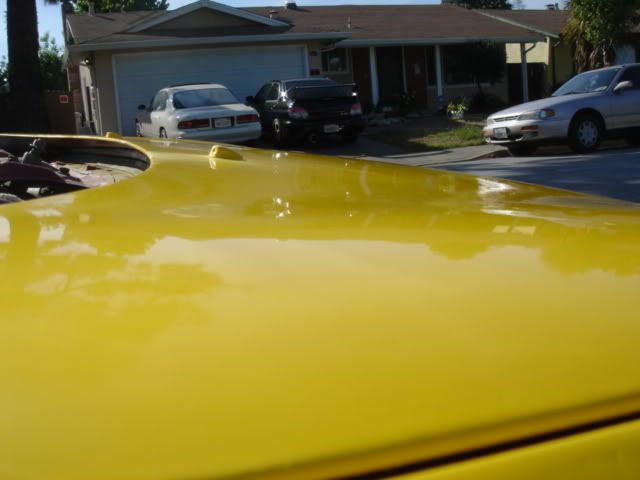
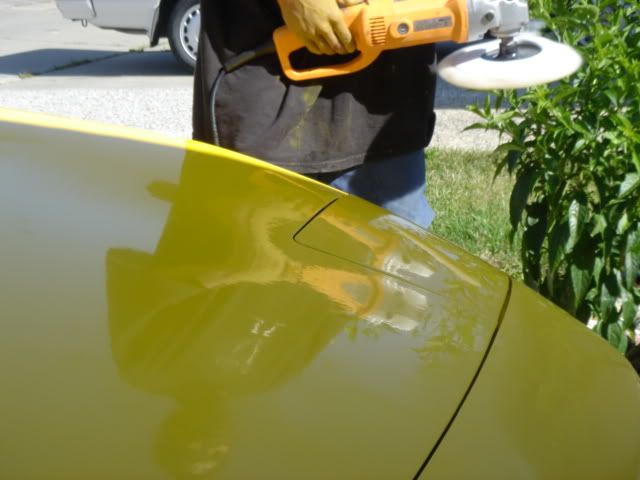
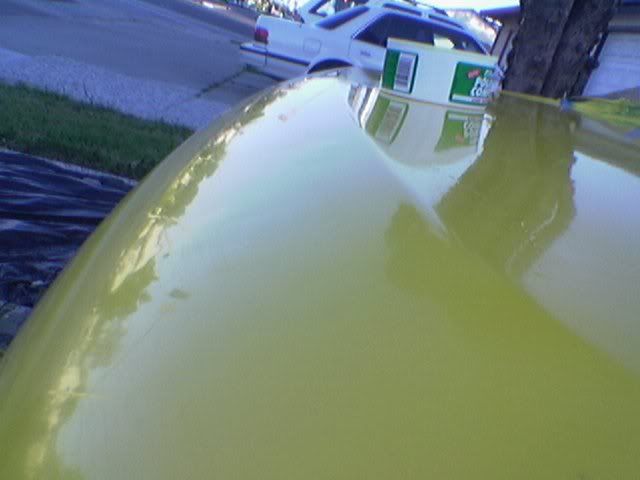


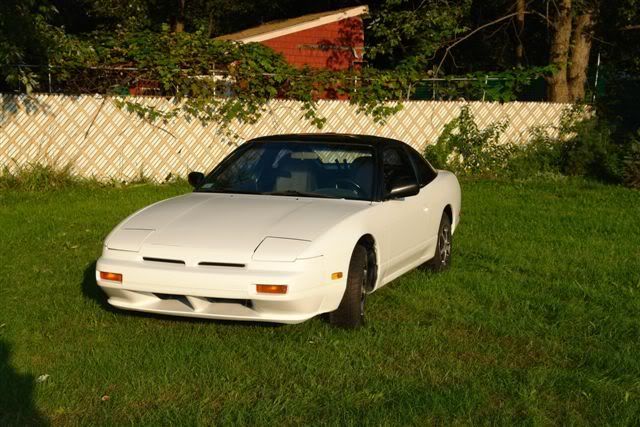
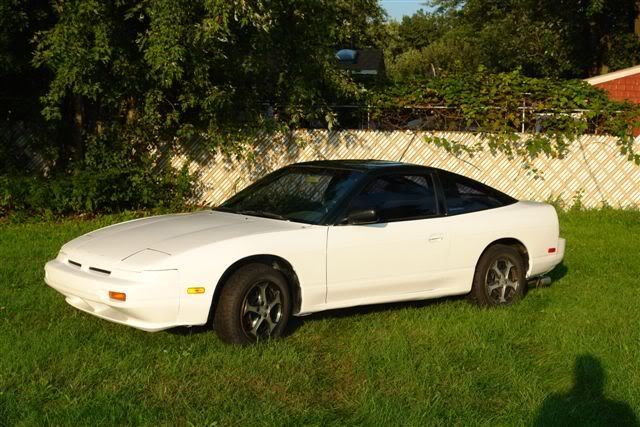
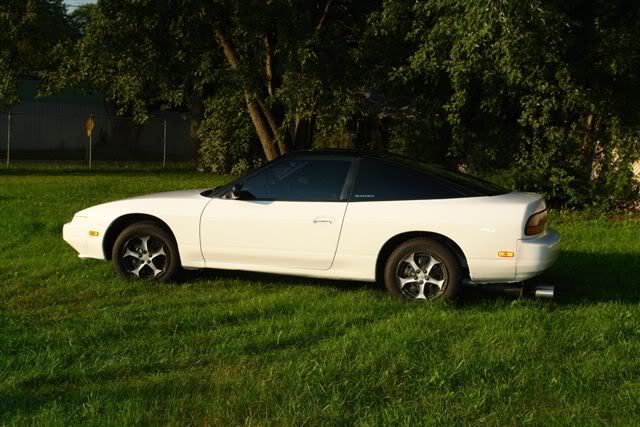
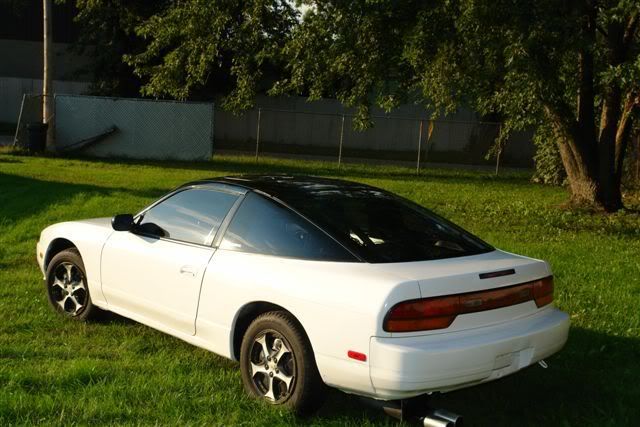
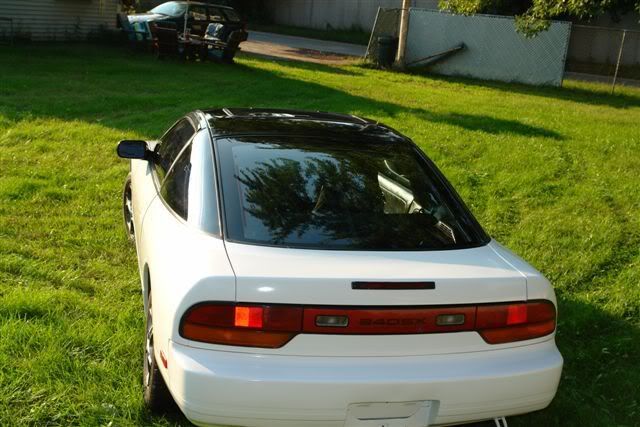
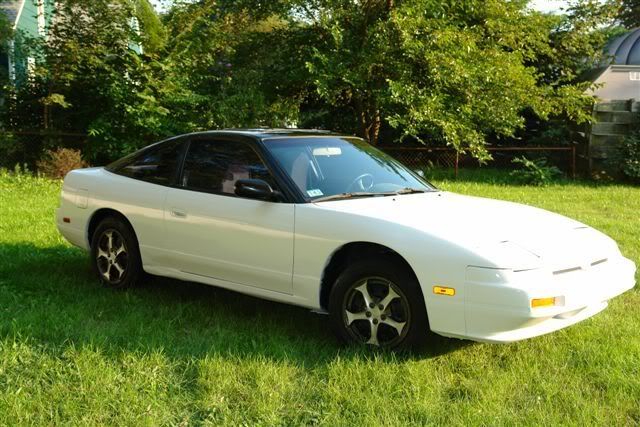


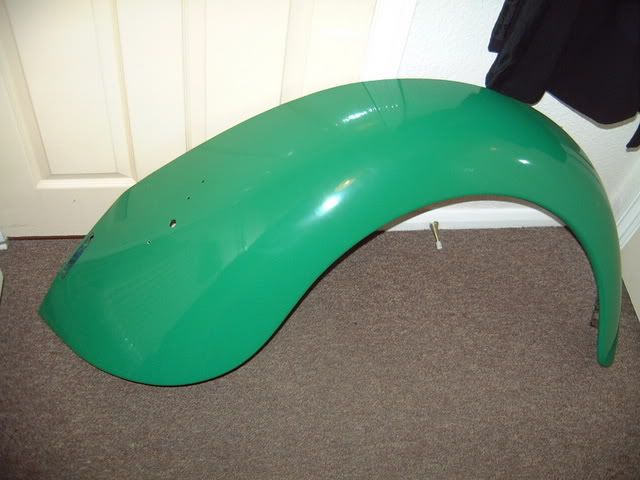
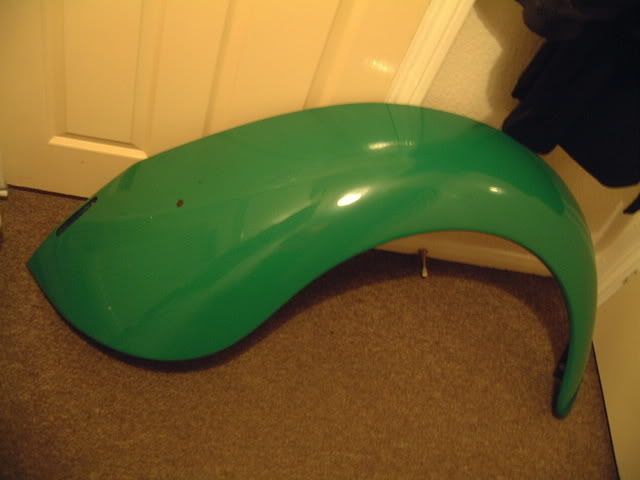
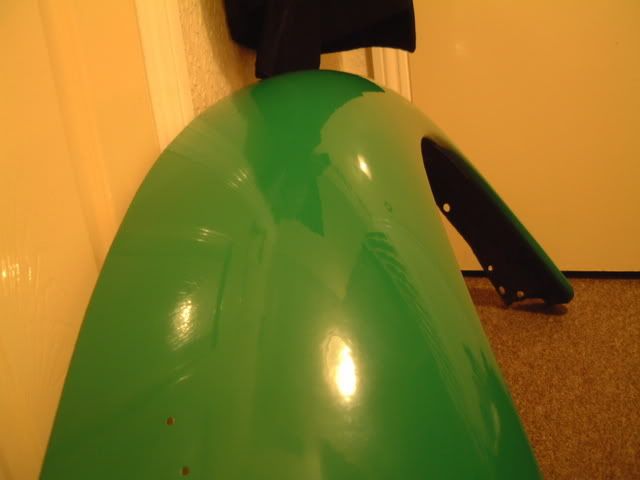
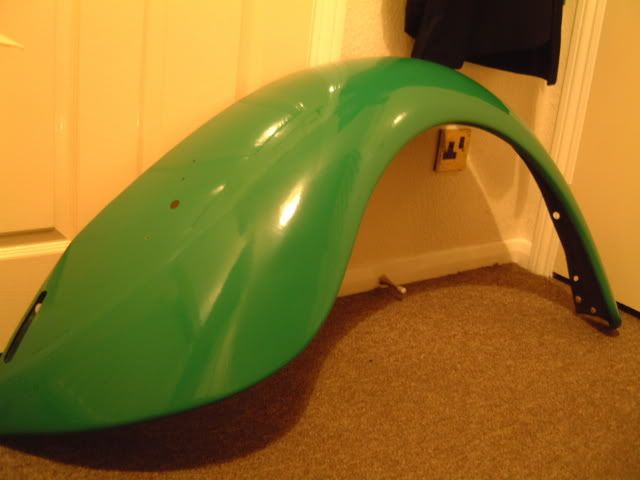
.jpg)


.JPG)