|
 Re: paint job on a budget!?
#22590
Re: paint job on a budget!?
#22590
04/15/06 03:47 AM
04/15/06 03:47 AM
|
Joined: Mar 2006
Posts: 55
Kansas
dalbers

member
|
member
Joined: Mar 2006
Posts: 55
Kansas
|
Would grey or silver be a color that would cover imperfections pretty well? Also, I was looking at the rustoleum site and listed with all the stops rust paint colors was clear. Could this be the equivalent to what tremclad sent 69charger? Top row Far right http://www.rustoleum.com/Product.asp?frm_product_id=18&SBL=1&dds=16
Last edited by dalbers; 04/15/06 03:55 AM.
|
|
|
Re: paint job on a budget!?
[Re: GoDartGo]
#22594
04/15/06 03:19 PM
04/15/06 03:19 PM
|
Anonymous
OP
Unregistered
|
Anonymous
OP
Unregistered
|
Ok I'm trying this method on a VW Bus door. I've got a ton of bubbles. I done the other half with a foam brush and it looks good so far. Any suggestions on what to try to keep the bubbles out?
|
|
|
Re: paint job on a budget!?
#22595
04/15/06 04:46 PM
04/15/06 04:46 PM
|
Anonymous
OP
Unregistered
|
Anonymous
OP
Unregistered
|
I have only tried a few tests, but found out that applying too much pressure on the roller forces bubbles out of the foam. Keep the pressure as light as possible, and paint as thin as possible. I may try a test at some time with a 4" short nap roller to see if the nap comes out in the paint.They are so much more forgiving than foamies.
Bob
|
|
|
Re: paint job on a budget!?
#22596
04/15/06 05:37 PM
04/15/06 05:37 PM
|
Anonymous
OP
Unregistered
|
Anonymous
OP
Unregistered
|
I think I came up with a good bubble test to see if your paint is thin enough. It might need some refining. I made a video. Uploading everything but should be up by sunday.
-Serpent
|
|
|
Re: paint job on a budget!?
#22597
04/15/06 07:15 PM
04/15/06 07:15 PM
|
Anonymous
OP
Unregistered
|
Anonymous
OP
Unregistered
|
Allllllrighty then.. So I did my first paint test today. I sanded down my rear spoiler with 80/100/220/400 to get the majority of the imperfections out. I spent more than an hour sanding it and it still wasn't finished. I am not to worried about it because I am getting a highrise or FatBoy soon. This will also help me guage how imperfect I can leave the surface and have the paint fill in the rest. For my car I sanded until it was smooth as glass. That was a lot of work  Here is a picture of the spoiler before I started.  Here is a full resolution link. It is a close up of the damage. File size is about 2MB. http://camaro.liquidfaith.com/Gallery/displayimage.php?pid=84&fullsize=1Sanded:   The sanding is the biggest annoyance for me. I was considering taking the car to Maacos and letting the prep it but then rememebered they suck at preping, haha. Blah. So I followed the instructions about thining the paint. The first thing that I did was to open my pastel tint base and stirred it about a bit for 5mins or so. I figured it wouldn't hurt anything, right? It did create bubbles. Oh, and I did the "fridge methode" to get the bubbles out the first night I came home from HD with it. Well, after stirring that around I transferred my quart of tinted paint to an empty gallon paint tin that I bought at HD. I figured it'd be a good way to mix, seal, and keep the paint am working with. Once I was comfortable with the amount of paint transferred (didn't want to leave any behind and waste money- every drop counts  ) I stirred it for a second and the DUMPED in the Odderless Mineral Spirits! Man, it was an accident but that stuff came out so fast and furious and it probably didn't help that I was squeezing the can while pouring. I thought for sure I probably screwed the formula and would need to let it sit and evaporate a bit. Well, stirred it and it seemed ok. Not super thin at all. So I added a little more. Then I remembered I had a camcorder that records little digital files so I ran to get that. Here is the first video showing my paint. http://camaro.liquidfaith.com/media/video/20060415aPaintThinning.avi (21.5MB) Also there is a short spot with my spoiler and then my car at the end ^_^ Well, the paint didn't really look thin enough so after the video I added a bit more. Then I was remembering some of the discussions in this thread about blowing out the bubbles and that they should pop by them selves, mostly, etc. Well, why wait until you paint your test subject to find out if your paint is thick enough? I noticed I had little bubbles on my mixing stick so I just pulled it out and blew on it to see if the bubbles would pop. The didn't... so I added some more mineral spirits. Tried again and it worked! I made a little video that shows some of the paints consistency and blowing out the bubbles. The camera takes blurry videos. I don't like it but it is all I have Oh, and it sounds like I was blowing pretty hard but I wasn't. It was just that my mouth was pretty close to the mics. http://camaro.liquidfaith.com/media/video/20060415bBubbleTest.avi (7MB) This method probably needs a little refining by an experienced roller. Before I started painting I figured I'd check the humidity one more time. Seemed ok to paint @41%. http://camaro.liquidfaith.com/media/video/20060415cWeather.avi (6.5MB) So, on went the first coat. I noticed a lot of little bubbles but they all pretty much popped by themselves in a few seconds! It was wierd. It was like 80% of the surface was bubbles and then they all popped and there was maybe one or two left on the surface that I just blew on. I didn't load up on the paint like crazy because I wanted to avoid running. It seemed like I got a nice even coat. I did notice some slight orange peel. I am not sure if it is normal or not and maybe I just needed to give it time to lay down. Maybe thinning the paint a little more will help it lay a little better. My paint seemed to dry pretty quick. Here is a shot of the first coat about 1min after.  Here is a close up of the orange peel. Not very noticable until I am right on top of it. Maybe needed a little more time to lay. http://camaro.liquidfaith.com/Gallery/displayimage.php?pid=89&fullsize=1 (2MB) Here is a little video of the first coat. http://camaro.liquidfaith.com/media/video/20060415d1stCoat.avi (3.6MB) So that is the only coat I will do today since it is late. I am getting some dust and debris on my painted surface. It is slightly tacky last time I checked. I used a soft face cloth and kind of just swung it at the surface and it knocked loose the debris without affecting the painted surface. For now I will keep working on my website for this project and then reread the posts in this topic to see if I am missing anything. You can access all of my images at http://camaro.liquidfaith.com/Gallery I am still tweaking it. Full rez images are about 2MB. Ok, I hope this little contribution was helpful  Cheers, -Serpent
|
|
|
Re: paint job on a budget!?
#22600
04/15/06 08:19 PM
04/15/06 08:19 PM
|
Anonymous
OP
Unregistered
|
Anonymous
OP
Unregistered
|
Quote:
Allllllrighty then..
So I did my first paint test today. I sanded down my rear spoiler with 80/100/220/400 to get the majority of the imperfections out. I spent more than an hour sanding it and it still wasn't finished. I am not to worried about it because I am getting a highrise or FatBoy soon. This will also help me guage how imperfect I can leave the surface and have the paint fill in the rest. For my car I sanded until it was smooth as glass. That was a lot of work
Here is a picture of the spoiler before I started.
Here is a full resolution link. It is a close up of the damage. File size is about 2MB.
http://camaro.liquidfaith.com/Gallery/displayimage.php?pid=84&fullsize=1
Sanded:
The sanding is the biggest annoyance for me. I was considering taking the car to Maacos and letting the prep it but then rememebered they suck at preping, haha. Blah.
So I followed the instructions about thining the paint. The first thing that I did was to open my pastel tint base and stirred it about a bit for 5mins or so. I figured it wouldn't hurt anything, right? It did create bubbles. Oh, and I did the "fridge methode" to get the bubbles out the first night I came home from HD with it. Well, after stirring that around I transferred my quart of tinted paint to an empty gallon paint tin that I bought at HD. I figured it'd be a good way to mix, seal, and keep the paint am working with. Once I was comfortable with the amount of paint transferred (didn't want to leave any behind and waste money- every drop counts ) I stirred it for a second and the DUMPED in the Odderless Mineral Spirits! Man, it was an accident but that stuff came out so fast and furious and it probably didn't help that I was squeezing the can while pouring. I thought for sure I probably screwed the formula and would need to let it sit and evaporate a bit. Well, stirred it and it seemed ok. Not super thin at all. So I added a little more. Then I remembered I had a camcorder that records little digital files so I ran to get that. Here is the first video showing my paint.
http://camaro.liquidfaith.com/media/video/20060415aPaintThinning.avi (21.5MB)
Also there is a short spot with my spoiler and then my car at the end ^_^
Well, the paint didn't really look thin enough so after the video I added a bit more. Then I was remembering some of the discussions in this thread about blowing out the bubbles and that they should pop by them selves, mostly, etc. Well, why wait until you paint your test subject to find out if your paint is thick enough? I noticed I had little bubbles on my mixing stick so I just pulled it out and blew on it to see if the bubbles would pop. The didn't... so I added some more mineral spirits. Tried again and it worked! I made a little video that shows some of the paints consistency and blowing out the bubbles. The camera takes blurry videos. I don't like it but it is all I have Oh, and it sounds like I was blowing pretty hard but I wasn't. It was just that my mouth was pretty close to the mics.
http://camaro.liquidfaith.com/media/video/20060415bBubbleTest.avi (7MB)
This method probably needs a little refining by an experienced roller.
Before I started painting I figured I'd check the humidity one more time. Seemed ok to paint @41%.
http://camaro.liquidfaith.com/media/video/20060415cWeather.avi (6.5MB)
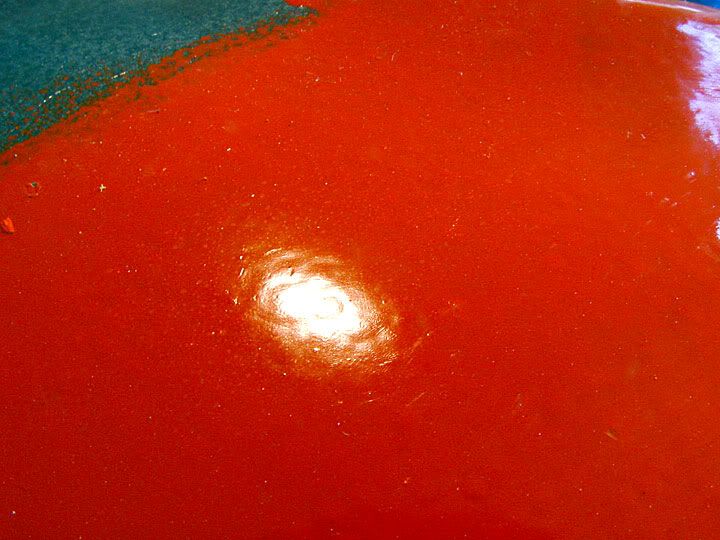
So, on went the first coat. I noticed a lot of little bubbles but they all pretty much popped by themselves in a few seconds! It was wierd. It was like 80% of the surface was bubbles and then they all popped and there was maybe one or two left on the surface that I just blew on. I didn't load up on the paint like crazy because I wanted to avoid running. It seemed like I got a nice even coat. I did notice some slight orange peel. I am not sure if it is normal or not and maybe I just needed to give it time to lay down. Maybe thinning the paint a little more will help it lay a little better. My paint seemed to dry pretty quick.
Here is a shot of the first coat about 1min after.
Here is a close up of the orange peel. Not very noticable until I am right on top of it. Maybe needed a little more time to lay.
http://camaro.liquidfaith.com/Gallery/displayimage.php?pid=89&fullsize=1 (2MB)
Here is a little video of the first coat.
http://camaro.liquidfaith.com/media/video/20060415d1stCoat.avi (3.6MB)
So that is the only coat I will do today since it is late. I am getting some dust and debris on my painted surface. It is slightly tacky last time I checked. I used a soft face cloth and kind of just swung it at the surface and it knocked loose the debris without affecting the painted surface.
For now I will keep working on my website for this project and then reread the posts in this topic to see if I am missing anything.
You can access all of my images at http://camaro.liquidfaith.com/Gallery
I am still tweaking it. Full rez images are about 2MB.
Ok, I hope this little contribution was helpful
Cheers,
-Serpent
You are doing everything according to order except for ONE! big thing....ODORLESS MINERAL SPIRITS DO NOT USE IT! STEP AWAY FROM IT. Get 100% MINERAL SPIRIT, odorless takes forever to dry and bubbles wont go away.
|
|
|
Re: paint job on a budget!?
[Re: Exit1965]
#22602
04/15/06 09:14 PM
04/15/06 09:14 PM
|
Joined: Apr 2006
Posts: 37
venice, ca
admactanium
member
|
member
Joined: Apr 2006
Posts: 37
venice, ca
|
Quote:
adam, what kind of paint did you use? Im wondering what else works because of the limited color selection of rustoleum..
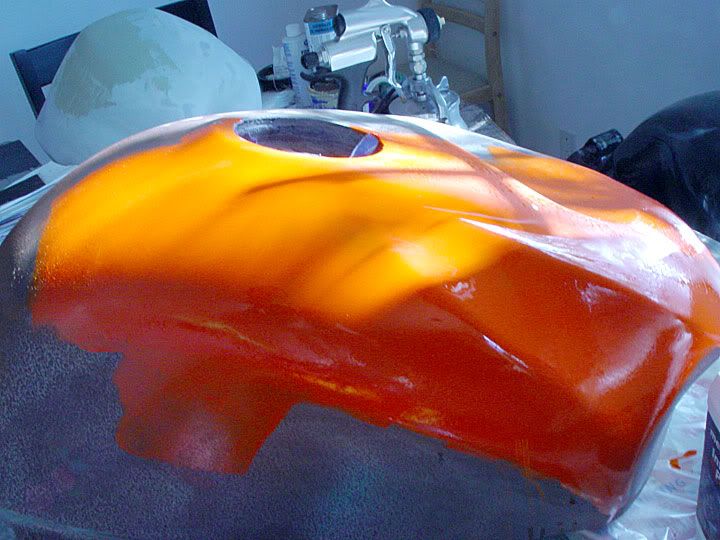
i used a paint called xo rust. i picked it up at my local hardware store (venice hardware). it seems to be about the same as rustoleum and there was a better selection of colors. i painted this section probably around 3 weeks ago or so and then i got busy with a bunch of personal and work stuff, so i let it sit since then. the paint is pretty hard and it seems to hold up well to scratches. i CAN scratch it with my fingernail but it's nothing i wouldn't expect from any 2k paint after only 3 weeks of curing (plus, as you know, it's been raining in our area and kinda humid and chilly.)
it's pretty positive so far, i think my only concern for it is its resistance to gasoline. krylon looks like absolute hell when gas gets on it. so for the tank i might end up buying a clear coat product called "lustrekote" that's used for model planes. it's supposedly very gas resistent and comes in a rattle can. if it works well and doesn't react strangely to this paint, i might paint all the bike in it. but it doesn't seem to be necessary right now since the paint is getting enough shine just on its own. if i can paint the whole bike without exposure to isocyanites because i can paint straight over body filler without having to use a 2k primer, then i'll be very happy. plus, it's a track bike and will likely need a repaint before i suffer any ill effects of the elements. haha.
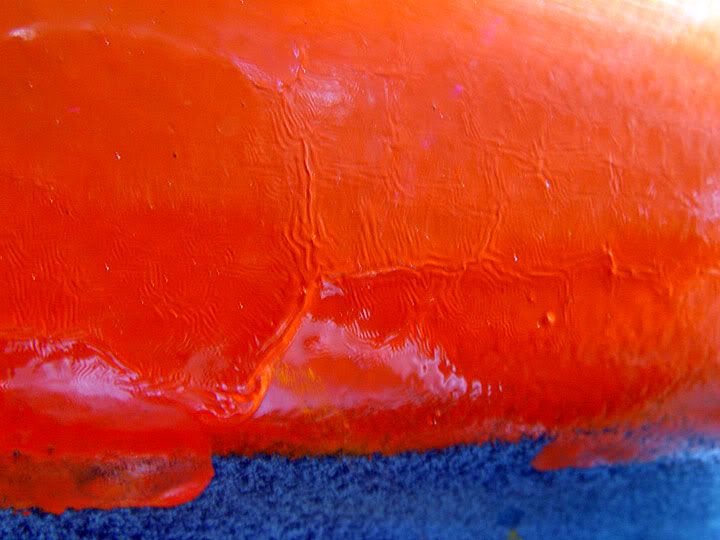
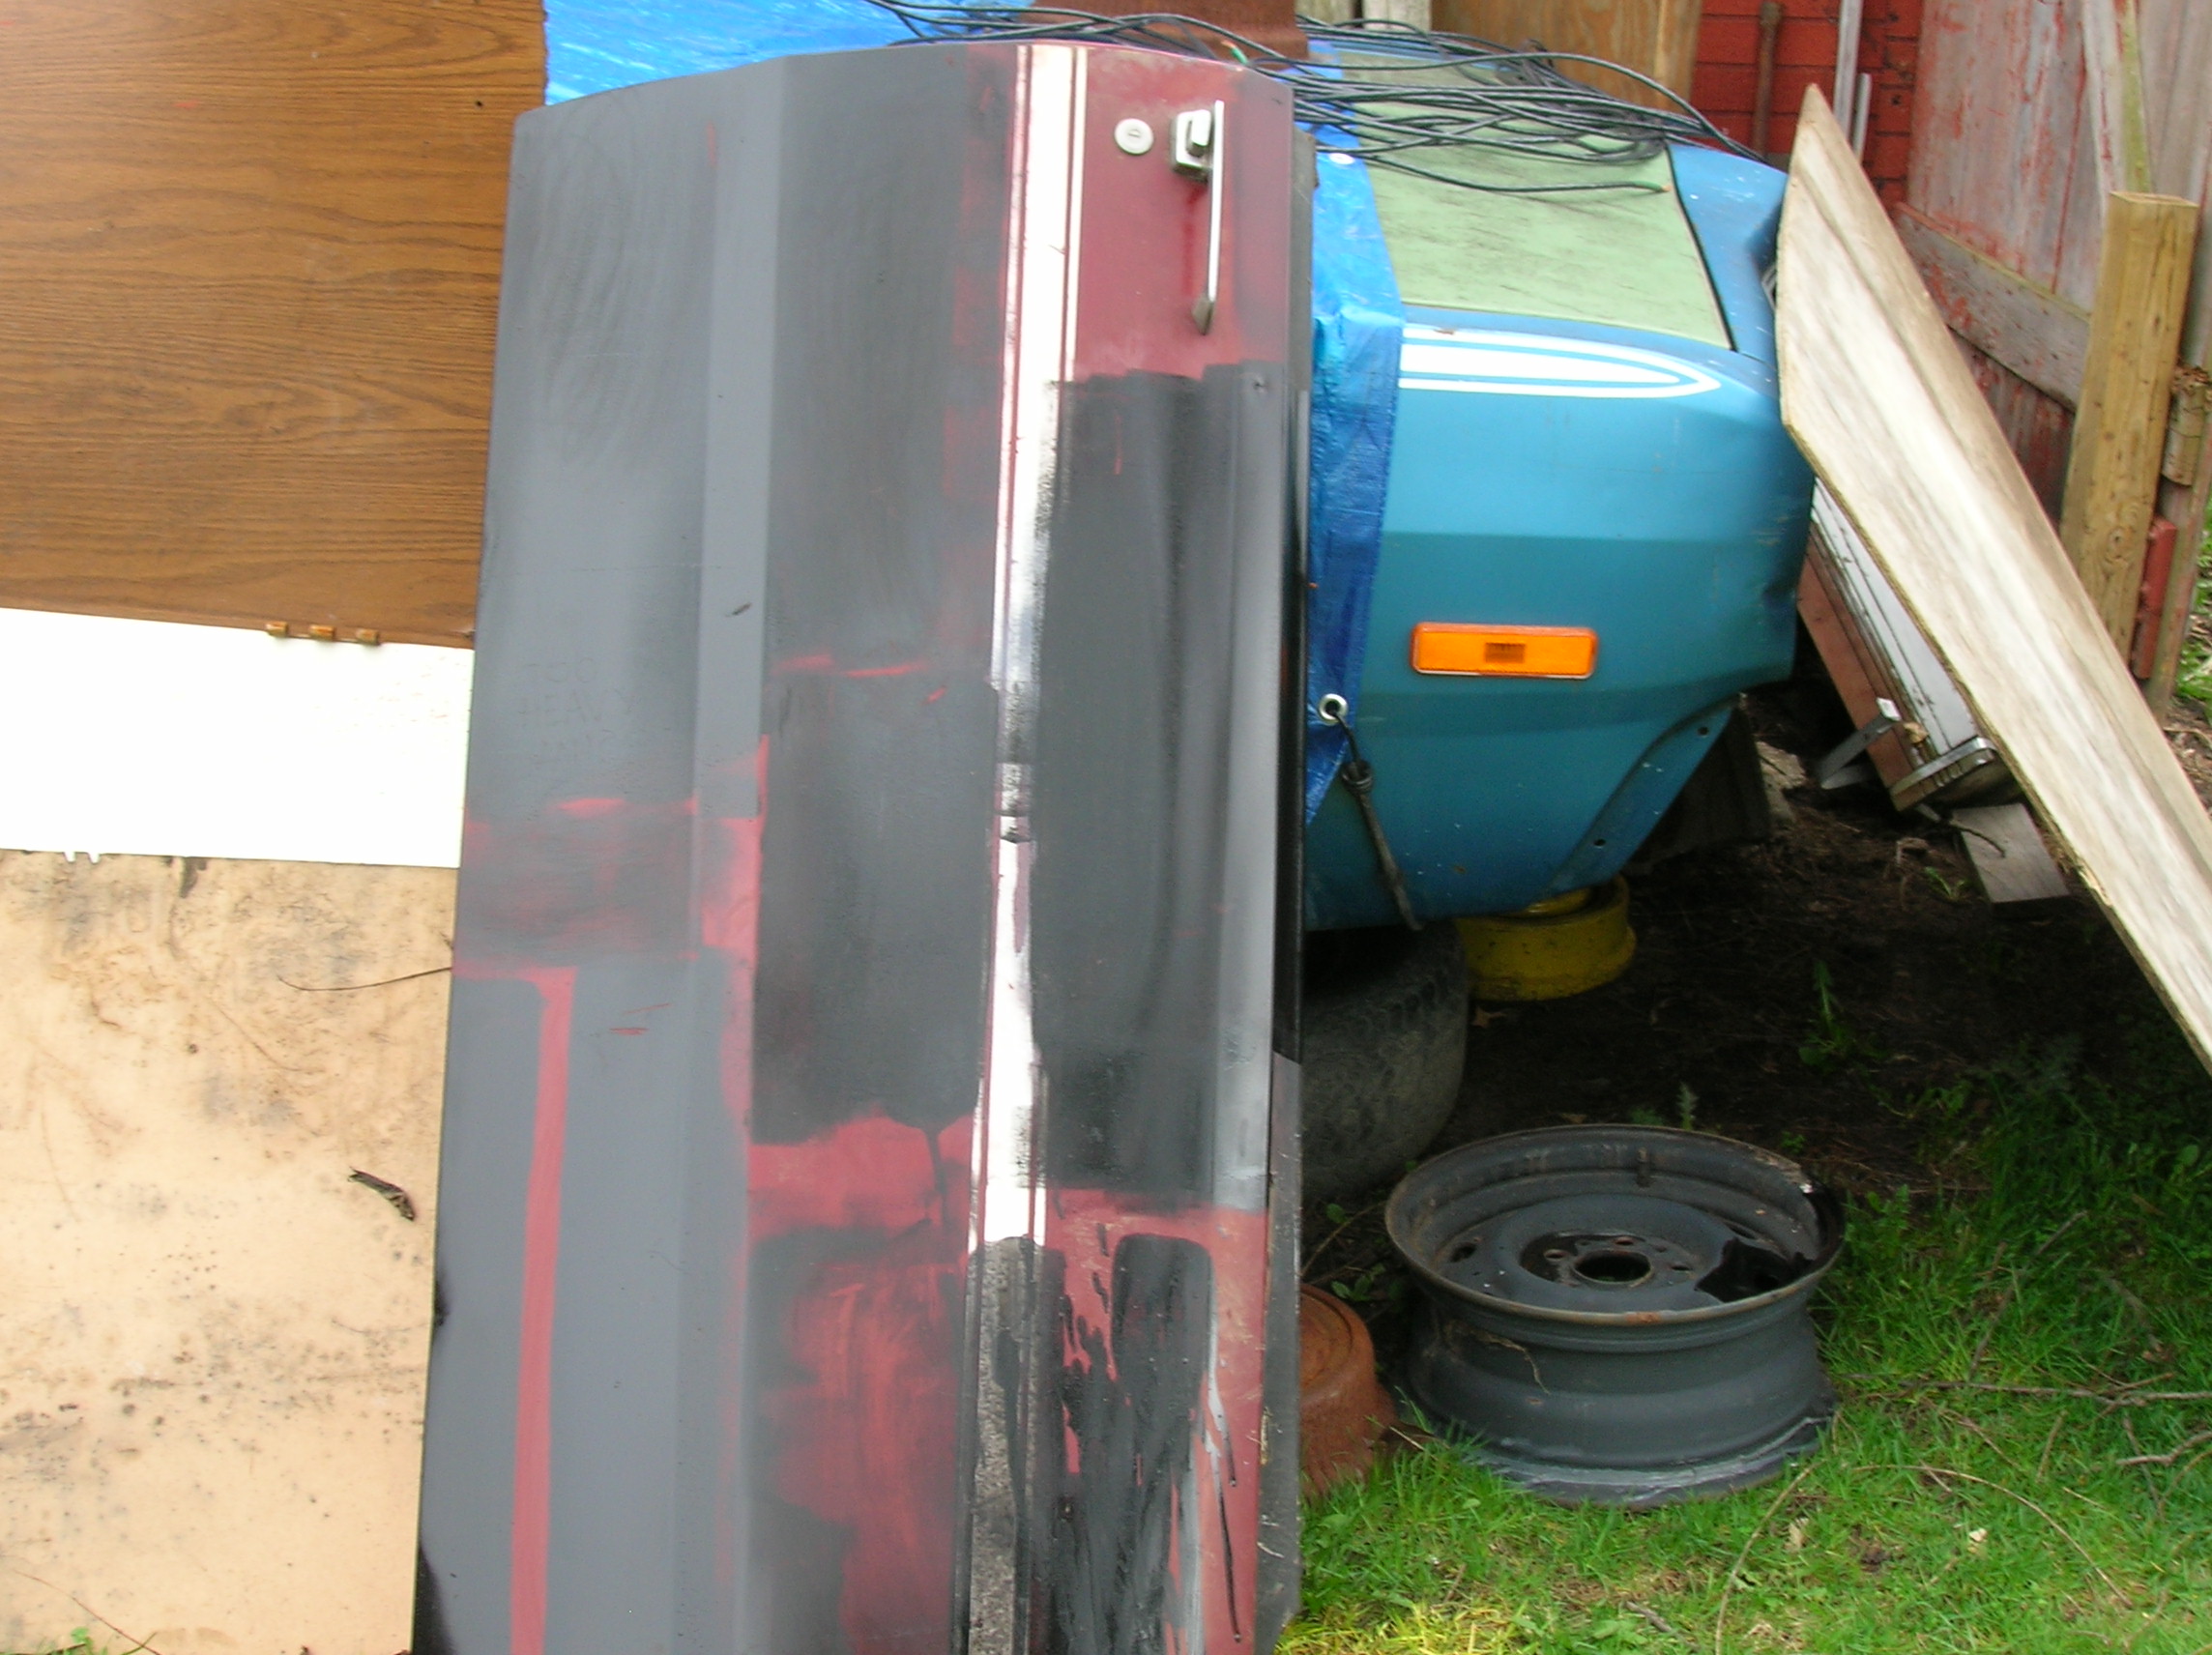
what's interesting is that my paint looked awful after a few coats because i was really rushing and not sanding well between coats. so i got bad orange peel:
and some weird "checking" where veins of paint would crumple up. this is likely due to not sanding the previous coats and giving the new coats any "tooth".
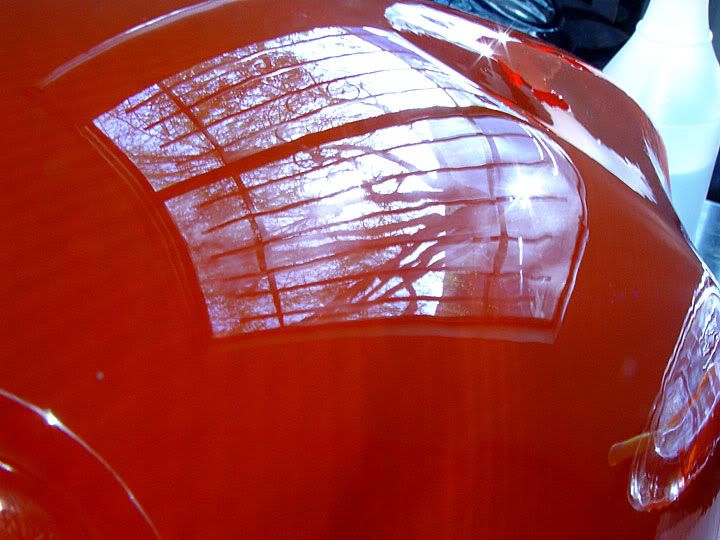
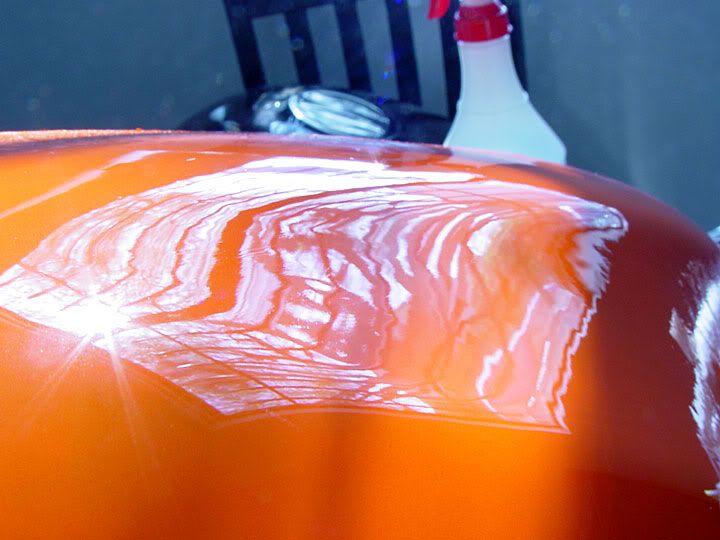
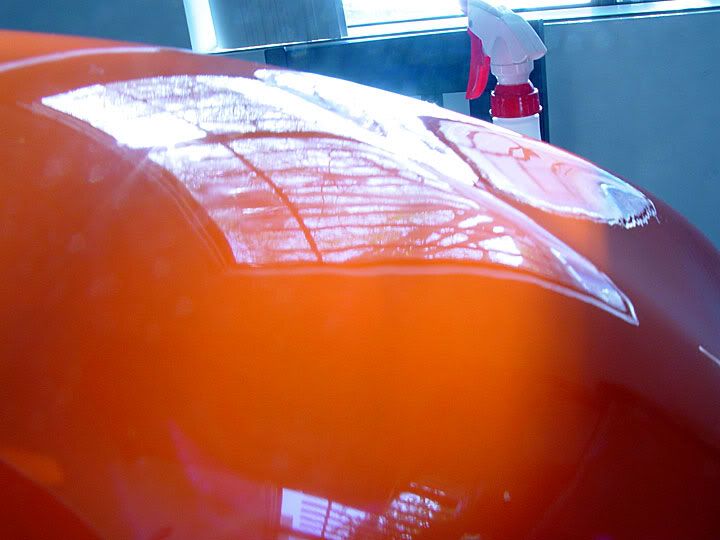
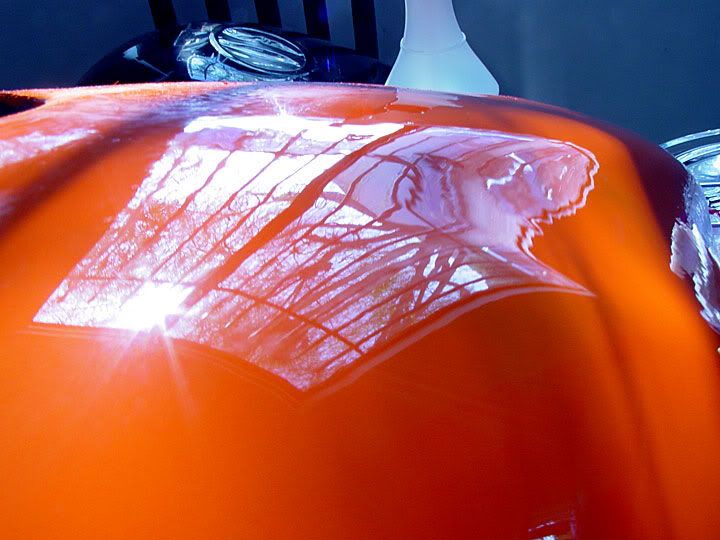
however, after wetsanding these areas smooth with 800, 1000, and 1500 grit it comes out nice and smooth. here's that same section with a bit of waxy goodness on it. it's important to notice the sharpness of the reflections. that's a sure sign that this paint is "shiny". i think the haziness in this picture is because the window is dirty. the window bars are pretty distinct.
it's very slick to the touch now and the polymer sealant i use on it (as opposed to straight carnauba wax) should offer some uv protection so hopefully it won't fade as badly. tomorrow i'm going to pick up all the colors i need for the track plastics and start on it.
i did paint a bike tank with krylon years ago and it looked great for a while after i colorsanded it. but i also rushed all the painting steps and laid too heavy coats on. plus, as soon as the krylon got hit by gas it turned milky. i'm hoping that this stuff doesn't suffer from that.
|
|
|
Re: paint job on a budget!?
[Re: Exit1965]
#22604
04/15/06 09:43 PM
04/15/06 09:43 PM
|
Joined: Apr 2006
Posts: 37
venice, ca
admactanium
member
|
member
Joined: Apr 2006
Posts: 37
venice, ca
|
Quote:
Adam, that sure is a very nice shine. So if I understand, you didn't sand between coats, but put all the coats on and then sanded at the very end only? How many coats did you do total?
I would be worried that a dog hair or dust speck would get trapped on there during coat 1, and there would be several coats over it, then I'm not sure if it would wetsand out or if it would be stuck under there.. did you have any stuff falling in it throughout the coats?
hi exit, sorry, my name's not adam. although i see why you're confused. i think i only did 5 coats overall and i didn't get full coverage on the metal. there are spots that are showing through. but for me, the test panel was more to see how much shine i could get out of that paint and how hard it would be. i know when i do it for real i'll do enough to get full coverage of the surface. i didn't get too much debris in the paint but after sanding i didn't uncover some specks.
but again, this wasn't meant to be a test of coverage. i'd follow the steps properly as laid out earlier just to save myself the trouble of sanding out crap in the end. i really just wanted to see how this paint surface would stand color sanding and see how much gloss could be had. i know some people were concerned about gloss and my logic was that most paints can have the same amount of gloss as others as long as the color sanding step is done properly.
when i painted my previous tank with krylon it looks like complete crap but i knew i could wetsand and polish out the imperfections. where i messed up was laying on too many coats too fast so the paint didn't have time to cure properly before i put on other layers. i'm naturally impatient that way. when i finished polishing out that krylon tank and fenders (painted black) it was a mirror.
so i was just curious to see if regular ole rustoleum (or xo rust or whatever) could be polished to a nice shine. i'm convinced that i can be and if the surface prep and the color sanding steps are done properly a paint job using this method would be virtually indistinguishable from a pro-shot paintjob. and in many cases, if you do those steps effectively, it could look much better than 95% of the professionally shot paintjob out there. it just seemed like there were people dismissing this technique wholesale because they couldn't get enough shine out of the paintjob in the end when in all likelihood it was their colorsanding and buffing technique that caused the problem. they would likely have just about as flat a paintjob from a professional gun with 2k paints as they would with rustoleum because they were not finishing the job correctly.
of course, this doesn't answer any of the questions of durability in regards to the elements, sun, gasoline, grit and other crap that cars get put through, but at least this is encouraging enough to let me know that the paint can look awesome given that the proper care is taken that you would use for ANY paint job.
|
|
|
Re: paint job on a budget!?
[Re: admactanium]
#22605
04/15/06 10:00 PM
04/15/06 10:00 PM
|
Anonymous
OP
Unregistered
|
Anonymous
OP
Unregistered
|
admactanium, what swirl remover, polish and wax would you recommend? I was going to go with the Zaino swirl remover but it is more of a filler. Not sure if that'd be good for this application. It seems that the Menzerna would be a good chioce though then followed by the Zaino Z-3 polisher maybe.. thoughts?
|
|
|
Re: paint job on a budget!?
[Re: 69chargeryeehaa]
#22609
04/16/06 05:07 PM
04/16/06 05:07 PM
|
Anonymous
OP
Unregistered
|
Anonymous
OP
Unregistered
|
Quote:
and another 
? Your attachement doesnt work.
|
|
|
|
|


 this was more of a "proof of concept" test than a test of how i'd want to paint to finally look.
