And the winner is:
DR DIFF!!
It was almost immediately obvious that the bearing lock ring had made contact with the seal. In this pic, you can see the ring scraped in the coating on the seal:
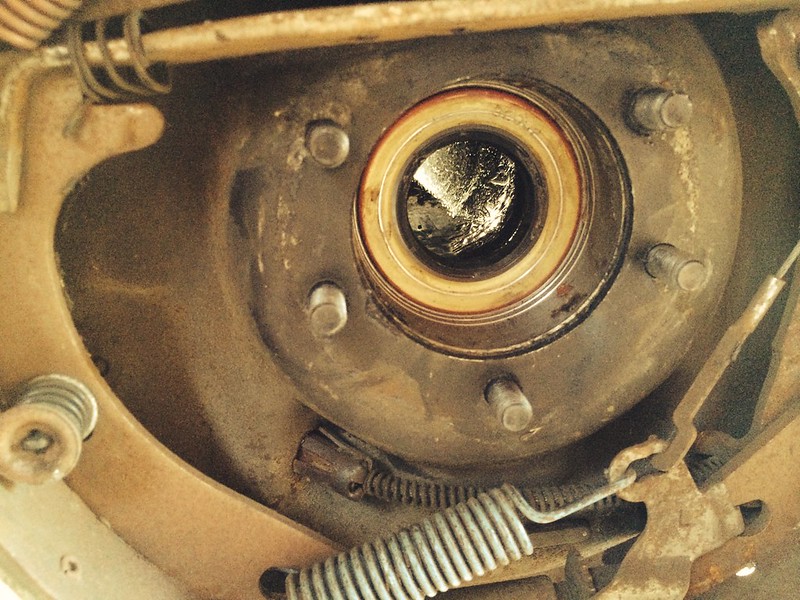 68_Fury_Axle_Seals-01
 by
clair_davis, on Flickr
Here's how deep the seal is SUPPOSED to be installed:
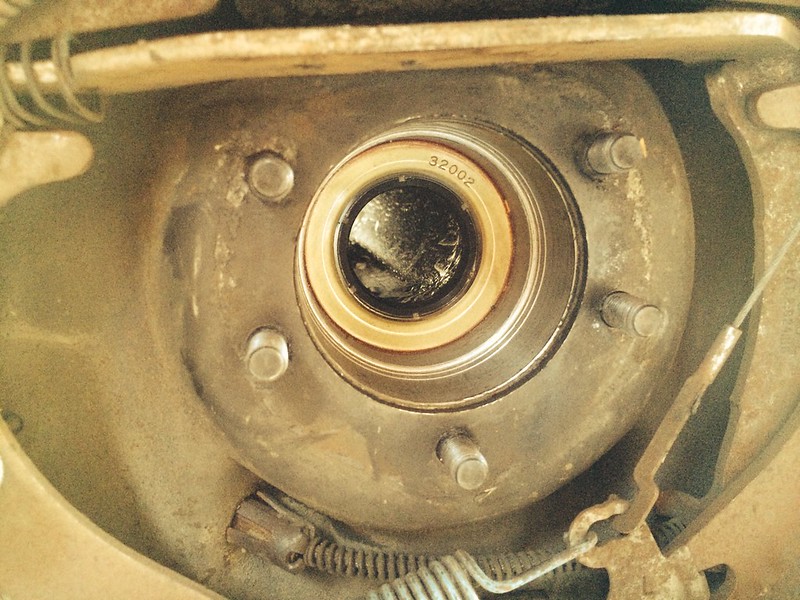 68_Fury_Axle_Seals-03
 by
clair_davis, on Flickr
I think my "proper" seal driver was just as big, or perhaps slightly larger than the seal, so when I heard it bottom out, it was the seal DRIVER that had bottomed out, not the seal itself. Fooey. About 10 seconds after I saw the ring on the seal, it occurred to me that I did NOT bring my seal driver kit with me (the car is 70 miles from my home, so I have to pack everything I need for the job). Fooey isn't exactly the word I used here. Fortunately, I had plenty of brake parts cleaner cans sitting around, and those are nearly perfect drivers based on my cheap ba$tard experiences in the past. These seals were TIGHT, and this is what the thin can looked like after the operation:
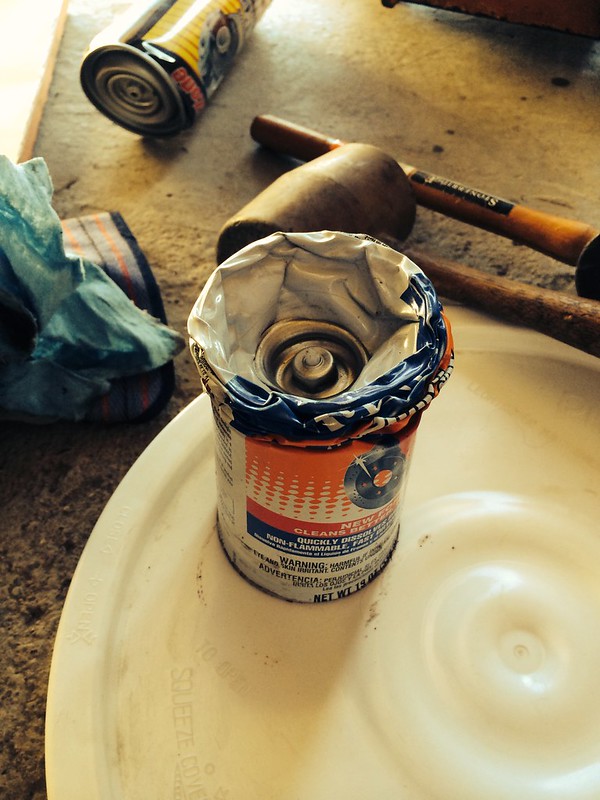 68_Fury_Axle_Seals-02
 by
clair_davis, on Flickr
After the seals were fixed, a quick test of the axle showed that it dropped right in and the flanges mated up properly... next to test with the diff in place, too. With the diff held in loosely - just enough wiggle to help if I needed it - the axles were next. Absolutely NO drama this time. Clunk. Clunk. Axle shafts in. Tighten the diff nuts, tighten the axle flange nuts, set the end play, lock it down, fill with gear oil and SG additive, bolt up the driveshaft, done.
 68_Fury_Axle_Seals-04
 by
clair_davis, on Flickr
And then it was time to round up the kids and head home... Driving will have to wait until next time I visit my folks, probalby over Thanksgiving.
Thanks again for all the help!
Clair


