|
 Re: Look what followed me home... 89 Shelby Dakota build
[Re: Golden-Arm]
#824019
Re: Look what followed me home... 89 Shelby Dakota build
[Re: Golden-Arm]
#824019
09/02/12 12:17 AM
09/02/12 12:17 AM
|
Joined: Apr 2010
Posts: 10,570
Sunny South Florida
Golden-Arm
 OP
OP
I Live Here
|
OP
I Live Here
Joined: Apr 2010
Posts: 10,570
Sunny South Florida
|
been slow going for a while. worked in new mexico, iowa, new mexico again and last time georgia. got my 5803 hooker supercomps and began the work again. as i've posted before, i always cut off the bars on the flange, between the tubes. this allows more room for working them, allows you some flexibility to make wrapping them easier, and makes installing easier, since you can work on a port at a time. here's headers during removal of excess flange material and using a sanding wheel to smooth out the port faces: 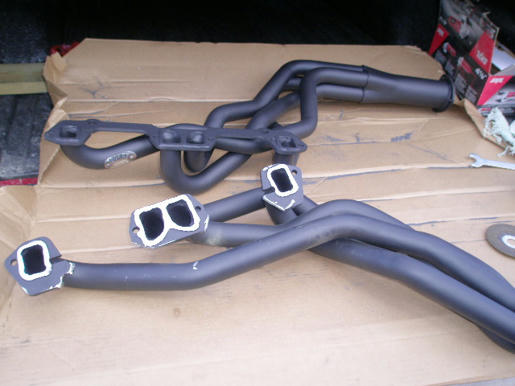 beginning to wrap the tubes with header wrap:  mufflers will be purple hornies, once the headers get sorted and installed: 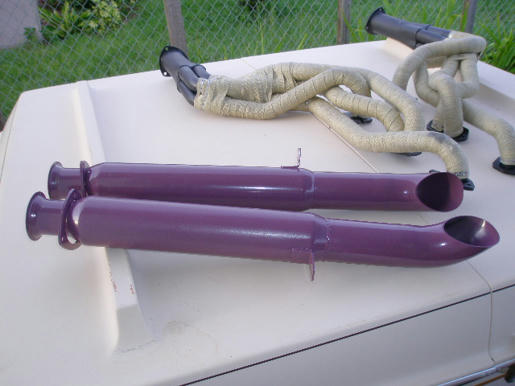 headers finished wrapping, and coated with silicone high temp paint. helps seal the wrap to keep out oil and water, and also helps reduce temps:  getting ready for transplant: 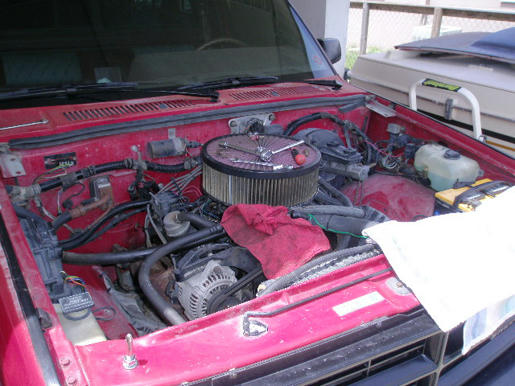
"When Tyranny Becomes Law, Rebellion Becomes Duty"
|
|
|
Re: Look what followed me home... 89 Shelby Dakota build
[Re: Golden-Arm]
#824020
09/02/12 12:54 AM
09/02/12 12:54 AM
|
Joined: Apr 2010
Posts: 10,570
Sunny South Florida
Golden-Arm
OP
I Live Here
|
OP
I Live Here
Joined: Apr 2010
Posts: 10,570
Sunny South Florida
|
slight dilemma with hooker supercomps. the directions call for raising the truck 36 inches to gain access. i didnt have 3 foot jackstands, and even if i did i wouldnt want to work that high off the ground. drivers side, i decided i can install from above. a pulled the manifolds, and got the sawzall and sectioned the exhaust and pulled it out in pieces. the manifolds came off easily, with no stubborn or frozen bolts at all. YAY!!! i separated the steering shaft, and folded the two halves out of the way. i pulled the starter, and lowered it to the ground. (i disconnected battery before starting) dropped the header in from above, and bolted it in. took longer getting the steering shaft apart, than it did to install the header. why anyone would jack a truck 3 feet into the air to try to work a header in from below is a mystery...  factory stuff removed:  drivers side, getting ready: 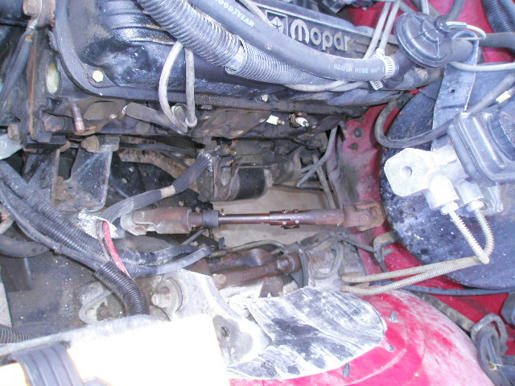 out with the old. the manifolds are supposed to be shelby only items, so not sure if i will scrap them or not? anyone need them? 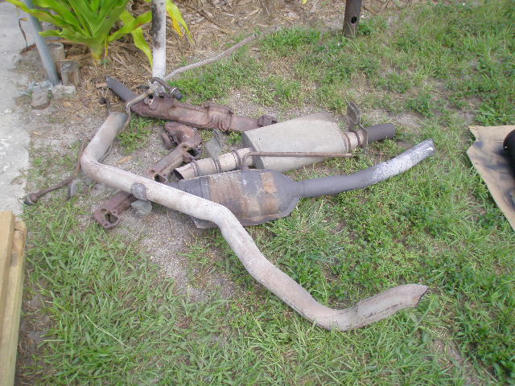 drivers side in. note split steering shaft, and i pulled starter up out of the way: 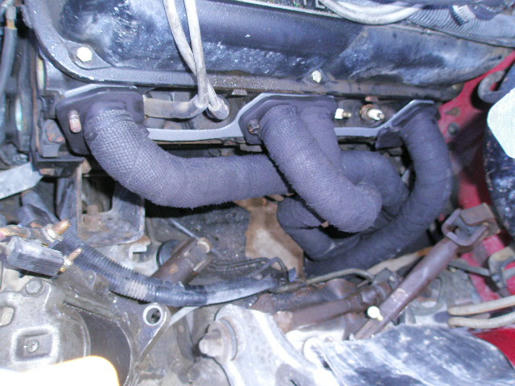 passenger side was a bit more problematic. there was no way the header was going in from below, and even from above, it was a no go. pulled the studs from the head, removed valve cover and removed a/c line from firewall and removed oil filter. header was getting closer, but still wouldnt fit. the old v6 motor mount pedestal was in the way. (why shelby didnt remove them, is another mystery) took the sawzall, and removed the corner of it. headers went a little more in, but now hit the bottom of the firewall. going under truck,. i see the firewall is 2 stamped pieces of metal, with a pronounced lip/flange at the bottom. working between the frame and the edge of the trans pan, i made 3 cuts in the flange up to the point where it becomes actual firewall. using the BFH, i hammered the lip backwards until the two pieces were flush against the floor. tried headers again. so close, but still just a half in or so of interference to get them in. took the top and bottom motor mount nuts off, and jacked the motor up on the pass side, until the bellhousing bottomed on the firewall. dropped header into place, and put a couple of bolts in to hold it. dropped motor and redid mount, then worked the header mounting it fully. 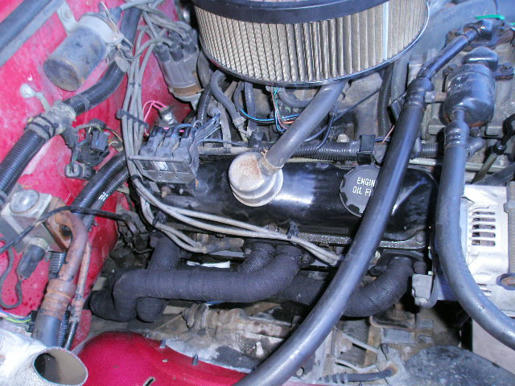 drivers side, all assembled ready to fire: 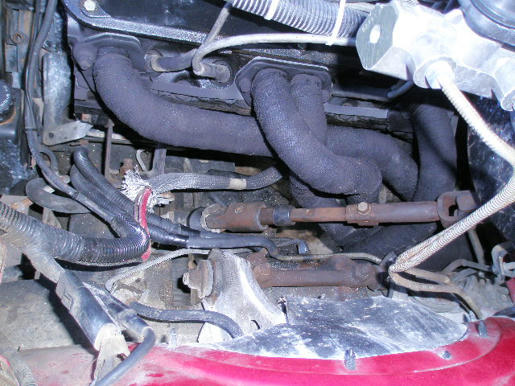 went fairly easily from above. i dont believe it would be possible to install in a shelby dakota from below. after putting it all back together, fired it up, and looked for any fluid leaks. none found, and no exhaust leaks either. sweet! ran the engine a bit, then shut it off and let it cool a bit. did this several times to help cure the headers. they smoked like a mother  next step is to get the mufflers installed. the crossmember will have to be modified, as the supercomps exit right in line with the mount. once i get the fab finished, will post some pics. also added A12 hoodpins up front, in place of the factory hood support pieces. going to paint the hood and cowl this week, in flat or matte black. next will be the install of the hughes whiplash cam, and removing the tbi for some carb action. ups/fedex is here almost everyday, as the parts pile starts growing. i picked up a NOS "Mopar Express" kit from another member here, and will most likely use it on this truck. it's a stripe kit, with a shelby lightbar, and a tonneau cover made for first gen dakotas. if i dont use it on this one, will use it on the next. been looking at/test driving shelby trucks around florida, but will likely get my old one back, or one from the ozarks. (my old one is currently an 11 second drag truck in indiana)  stay tuned.......
"When Tyranny Becomes Law, Rebellion Becomes Duty"
|
|
|
Re: Look what followed me home... 89 Shelby Dakota build
[Re: rickstershemi]
#824024
09/07/12 03:24 AM
09/07/12 03:24 AM
|
Joined: Apr 2010
Posts: 10,570
Sunny South Florida
Golden-Arm
OP
I Live Here
|
OP
I Live Here
Joined: Apr 2010
Posts: 10,570
Sunny South Florida
|
fabbed exhaust at a buddies shop. turned the left side tube to the right, and ran the pair back and dumps in front of the axle. welded it all up, and used the muffler mounting point to hang both hornies together. havent decided if i want to wrap the pipes back past the muffs or not. found a guy in s.c that rolled his shelby, and have been buying all his parts off ebay. got his seat, dash, wheelwell trims, underbody trims, a/c parts, etc. going to send his seat to the upholstery shop (once i find a decent one in the area) and have all the maroon stuff removed and replaced with black. hood is painted, and the A12 hoodpin kit from dales cuda shop looks pretty sweet. going to do a 2 stage metallic black finish, and will start jamming and cutting in the hidden parts. got a guy with a shop that will work with me, and let me use his booth for paint and bake. sweet!! looking for some decent wheels now, probably black, or charcoal color. going to use the "mopar express" kit i got from member 85shelbycharger, and add a bit of color to the black. trying to find a "deep" pulley so i can remove the power steering pump. the waterpump runs off the ps belt.  if i can get the deep pulley, i can run it off the a/c belt. pics in a bit. 
"When Tyranny Becomes Law, Rebellion Becomes Duty"
|
|
|
Re: Look what followed me home... 89 Shelby Dakota build
[Re: NITROUSN]
#824026
09/08/12 02:55 PM
09/08/12 02:55 PM
|
Joined: Apr 2010
Posts: 10,570
Sunny South Florida
Golden-Arm
OP
I Live Here
|
OP
I Live Here
Joined: Apr 2010
Posts: 10,570
Sunny South Florida
|
dales cuda shop dodge A12 hoodpin set. got a half set from dale, and the pins are mounted into the spots where the hood adjustable bumpers went. put some clay on top of the bumpers, and pushed the hood tight against the bumpers. the clay got squished out except for the spot in the middle where the hole in the bumper was. used that for a guide to drill through the hood. used a 1/2" bit to open the hole, and mounted the pins. 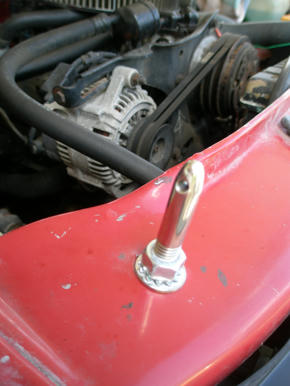 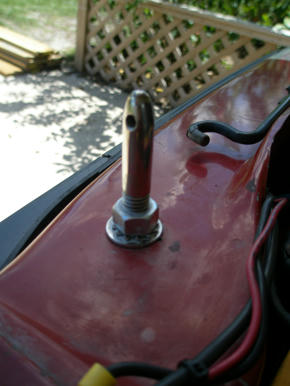 painted cowl and inside of cowl/vent box, hood hinges, etc. *nothing wrong with the seat, it's the dobies seat cover so they dont get the seat dirty  finished sanding hood, used a base coat and then some high fill primer, sanding then will do top coat. 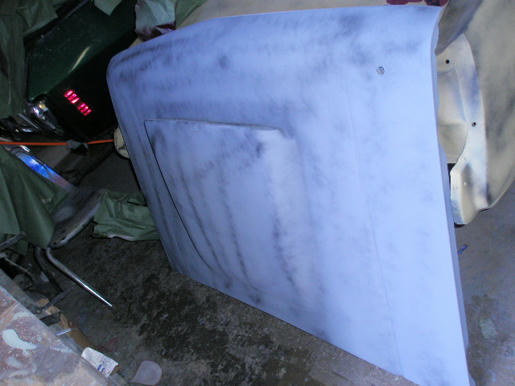 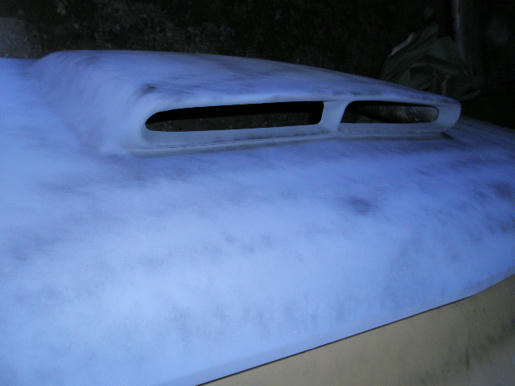 coming along nicely i guess. will be done in another day. (splitting work between the truck and redoing a small fishing boat i have, to make it more "flats friendly" to suit my own needs. )
"When Tyranny Becomes Law, Rebellion Becomes Duty"
|
|
|
Re: Look what followed me home... 89 Shelby Dakota build
[Re: Golden-Arm]
#824027
09/12/12 09:31 PM
09/12/12 09:31 PM
|
Joined: Apr 2010
Posts: 10,570
Sunny South Florida
Golden-Arm
OP
I Live Here
|
OP
I Live Here
Joined: Apr 2010
Posts: 10,570
Sunny South Florida
|
5 coats of organosol black later (with hardener added) and it's done. you cannot tell the scoop is added to the hood. the sanding took about a half a day, but it was worth it. added the rest of the A12 stuff, and calling it done. 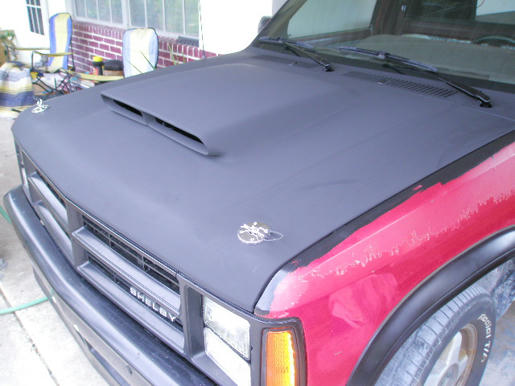 sweat from the hands and arms is leaving marks, but they'll wash off. 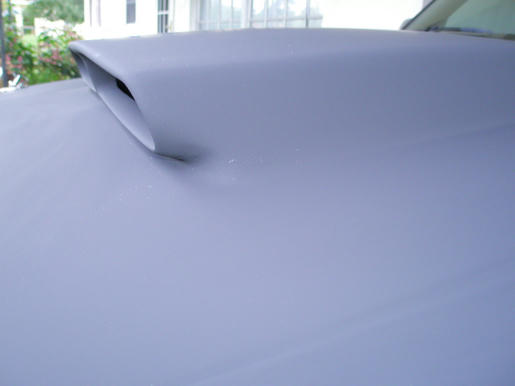 always in the way, but i wouldnt trade them for the world. nice and shiny hoodpin plates, with correct lanyards and rivets. (if it was an a12) 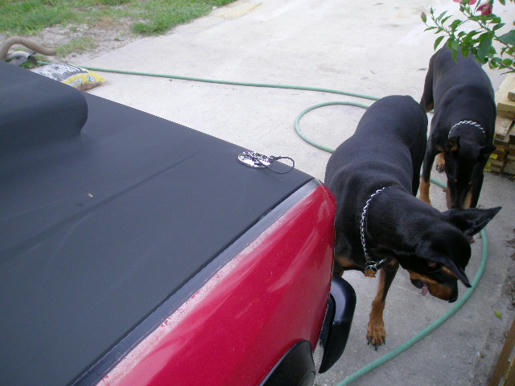 full frontal dakota porn.  next is the metallic black body, and i'll probably do the hughes whiplash before paint. once it's all sorted out, the 390 stroker kit will be done, and i'll paint the engine bay when the motors pulled for stroking. slowly, but slowly. still looking for a non ps pulley for the waterpump, and i need a smaller compressor to clear a six pack. 
"When Tyranny Becomes Law, Rebellion Becomes Duty"
|
|
|
Re: Look what followed me home... 89 Shelby Dakota build
[Re: dobie]
#824033
09/13/12 09:49 AM
09/13/12 09:49 AM
|
Joined: Sep 2003
Posts: 7,831
east side of Ohio
basketcase
master
|
master
Joined: Sep 2003
Posts: 7,831
east side of Ohio
|
nice build. I spotted one of those trucks looking abanded near my Dad's place.
Dave
1981 Dodge D150 360 auto
|
|
|
Re: Look what followed me home... 89 Shelby Dakota build
[Re: basketcase]
#824034
10/24/12 05:21 PM
10/24/12 05:21 PM
|
Joined: Apr 2010
Posts: 10,570
Sunny South Florida
Golden-Arm
OP
I Live Here
|
OP
I Live Here
Joined: Apr 2010
Posts: 10,570
Sunny South Florida
|
guys, i posted this in the wanted section, but i'll add it here too. i need a waterpump pulley for the smallblock, on a NON P/S SETUP. the p/s setup has a pulley with 2 belts, thats about 2 inches tall, from snout to backside of pulley. the manual steering pulley is about 3.75 inches tall, from snout to backside of pulley. (pulley measured removed from motor, sitting flat on a table) i dont want to go the serpentine route if i can help it. (why waste 1500 bucks, if i dont have to?) anyone have one, or know of one in a yard somewheres?
"When Tyranny Becomes Law, Rebellion Becomes Duty"
|
|
|
Re: Look what followed me home... 89 Shelby Dakota build
[Re: Shelby Truck Guy]
#824036
10/26/12 01:41 AM
10/26/12 01:41 AM
|
Joined: Apr 2010
Posts: 10,570
Sunny South Florida
Golden-Arm
OP
I Live Here
|
OP
I Live Here
Joined: Apr 2010
Posts: 10,570
Sunny South Florida
|
hey, welcome to the forum, and so forth. i'm on the east coast, near vero. used to live in tampa, over in sweetwater cove, off memorial. thanks for looking, getting ready to leave new mexico right now, and head back home. hope to have it painted before november hits. more pics shortly.
"When Tyranny Becomes Law, Rebellion Becomes Duty"
|
|
|
|
|


 Couple of years and they are usually junk with the wrap on them.


