|
 Re: New Paint job on a budget thread.
#37954
Re: New Paint job on a budget thread.
#37954
02/15/08 05:21 PM
02/15/08 05:21 PM
|
Anonymous
Unregistered
|
Anonymous
Unregistered
|
Looking great so far!!
Can't wait to see the finished job...
Thanks for sharing - good luck with the rest of the project!
Regards,
|
|
|
Re: New Paint job on a budget thread.
#37955
02/15/08 06:48 PM
02/15/08 06:48 PM
|
Anonymous
Unregistered
|
Anonymous
Unregistered
|
Ok. Im back. I was out thanks to this super cold I had. It was so bad, that one ear went deaf! But i feel much better and went back outside to check up on my project. I wish i took pictures because there was a coat of pollen on my car. So I left of on a wetsanded 6th coat. After readings Marcs wetsanding info, i went out to wetsand the surface to a dull. perhaps i might of sanded too much in some parts because the original paint is showing. especially the edges of the hood. This is where i had left off before i got sick. 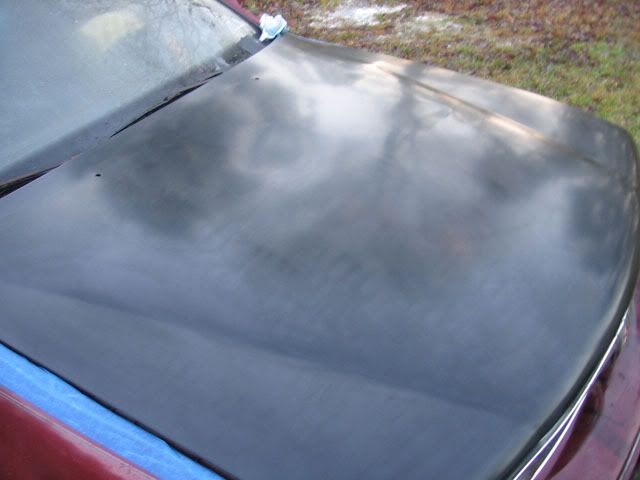 --------------------------- After reading Marc's wetsanding info, i went out and did this. Dull and flat. with some original paint showing. 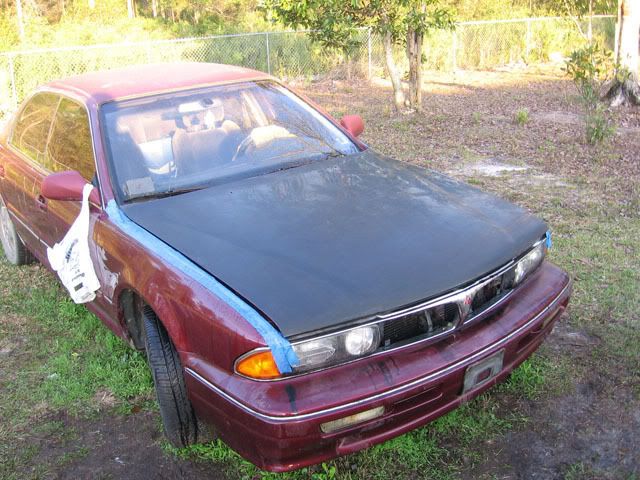 --------------------------- I like how you have to look at a certain angle to see the shine  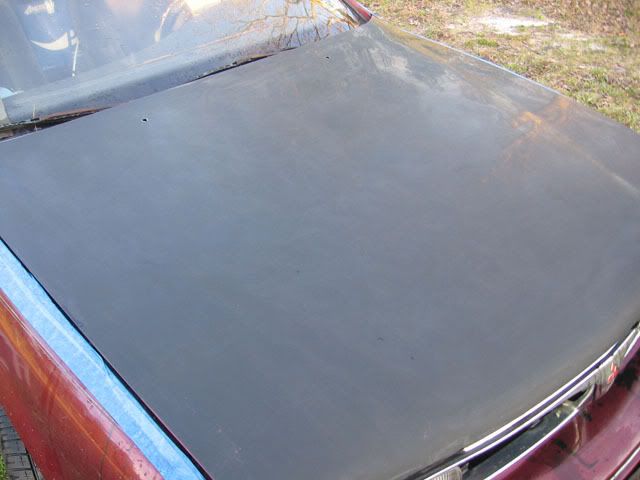 --------------------------- And here are the spots where the paint I guess refused to cure.  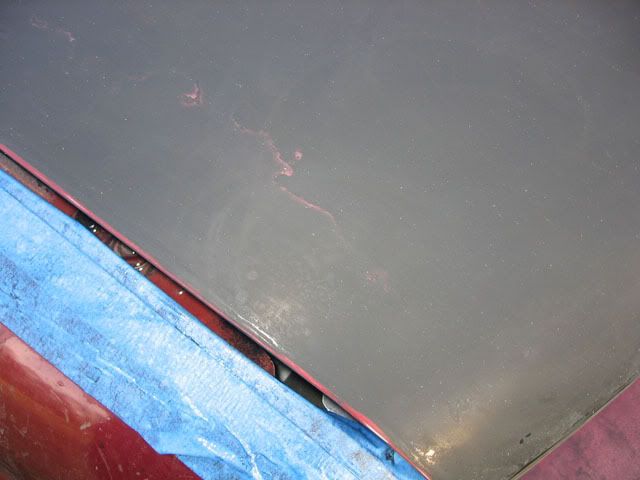 So its obvious my mixture is still off. Ill eventually get it. Im going to do 2 more coats and sand with 1200g.
Last edited by M2001; 02/15/08 06:51 PM.
|
|
|
Re: New Paint job on a budget thread.
[Re: 69DartGT]
#37957
02/15/08 08:34 PM
02/15/08 08:34 PM
|
Anonymous
Unregistered
|
Anonymous
Unregistered
|
Quote:
First off welcome to the board :  Sounds like your ready to go don't forget progress pictures as you go Sounds like your ready to go don't forget progress pictures as you go 
Thanks dude.
I've well and truly started, progress pics are on my web page which I usually update every 2 days.
|
|
|
Re: New Paint job on a budget thread.
#37958
02/16/08 12:23 AM
02/16/08 12:23 AM
|
Anonymous
Unregistered
|
Anonymous
Unregistered
|
M2001 you've really gotta' stop doing this outside and letting it get rained on...
And you want to stay away from ridges and and edges while wet sanding so you don't burn through them (you already have).
|
|
|
Re: New Paint job on a budget thread.
#37959
02/16/08 01:23 AM
02/16/08 01:23 AM
|
Anonymous
Unregistered
|
Anonymous
Unregistered
|
Quote:
M2001 you've really gotta' stop doing this outside and letting it get rained on...
And you want to stay away from ridges and and edges while wet sanding so you don't burn through them (you already have).
Believe me, I wish I had a garage to do this project. I dont even have a carport(too poor, lol)
I wasnt aware to keep away from the edges. ill be more careful next time. remember this is all a whole new learning experience for me. regardless of all the errors i create, ill eventually get it down.
|
|
|
Re: New Paint job on a budget thread.
#37960
02/17/08 12:59 AM
02/17/08 12:59 AM
|
Anonymous
Unregistered
|
Anonymous
Unregistered
|
Quote:
Quote:
M2001 you've really gotta' stop doing this outside and letting it get rained on...
And you want to stay away from ridges and and edges while wet sanding so you don't burn through them (you already have).
Believe me, I wish I had a garage to do this project. I dont even have a carport(too poor, lol)
I wasnt aware to keep away from the edges. ill be more careful next time. remember this is all a whole new learning experience for me. regardless of all the errors i create, ill eventually get it down.
You're surely not to poor to buy yourself a tarp and some 2x4s and at least try to keep some of the rain off of it.
|
|
|
Re: New Paint job on a budget thread.
#37961
02/17/08 05:43 PM
02/17/08 05:43 PM
|
Anonymous
Unregistered
|
Anonymous
Unregistered
|
Well I started over..again. I pretty much ruined the paint job after burning the edges. Doing so made me REALLY understand the concept of wetsanding and leveling the surface and what marc was trying to explain. Before I started to paint, I prepped the surface by sanding most of the hood with 220g. The edge still had clearcoat on it. I painted over it. big mistake. the clear coat served as a layer so it looked a little something like this.(side ways view) xxxxxxx -------xxxxxxxxxxxxxxxx ======================= xxxxx - rustoleum paint ----- - clear coat ===== - hood\factory paint So after I sanded down the rustoleum a bit, the clear coat started to show. So I sanded that clear coat down.  --------------------------------- This is how the hood looked like when i first painted it.  --------------------------------- no clear coat (im not to worried about original paint acting as another layer. waaay too thin 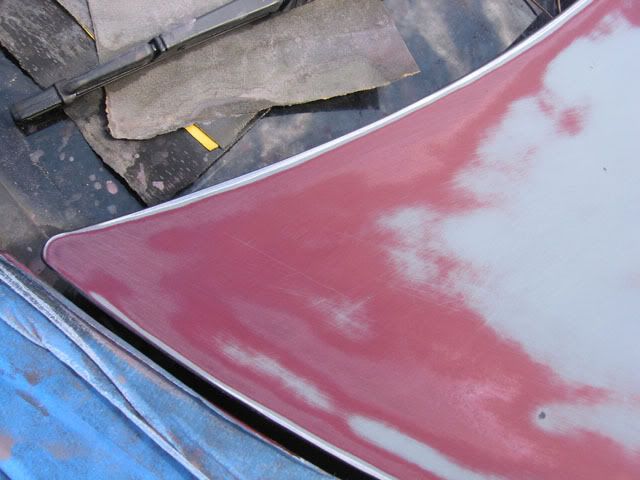 ---------------------------------- First coat. thin thin thin (still kinda wet\dry) 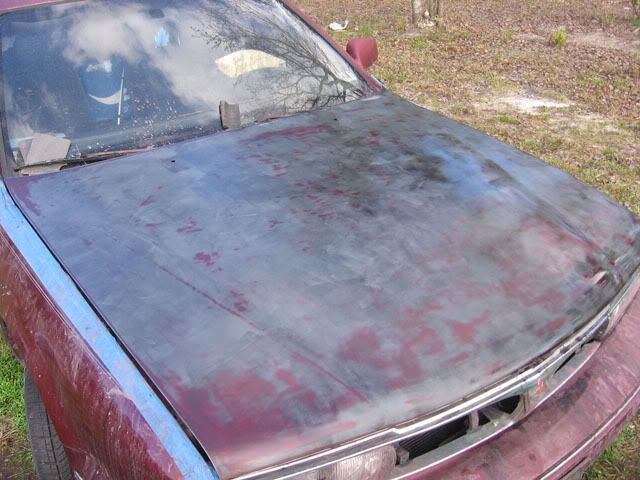 ---------------------------------- look who came to pay a visit, mr.green fangs  (good thing he didnt get stuck in the wetpaint) 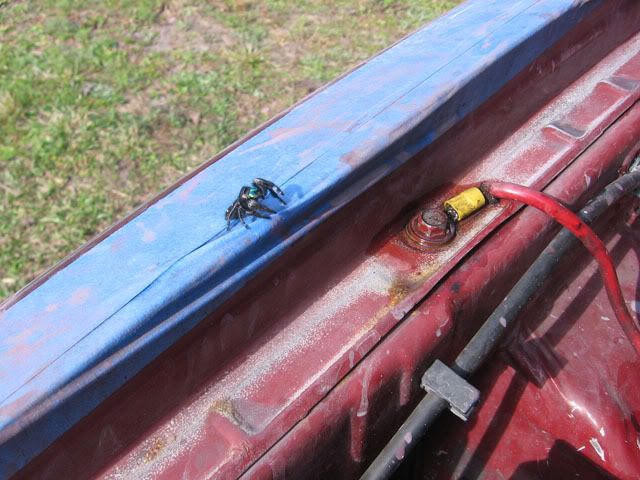 ----------------------------------
|
|
|
Re: New Paint job on a budget thread.
[Re: Marq]
#37963
02/18/08 02:11 AM
02/18/08 02:11 AM
|
Anonymous
Unregistered
|
Anonymous
Unregistered
|
Hi everyone,
I love the forum..
I am planning on doing the paint to my motorcycle.
ANy tips? Has anyone done it?
I have read all three threads for about 5 hours. There is so much info. I am almost confused.
I want to get the glossiest black I can get..
Any Suggestions?
Brian
|
|
|
Re: New Paint job on a budget thread.
#37964
02/18/08 03:15 AM
02/18/08 03:15 AM
|
Anonymous
Unregistered
|
Anonymous
Unregistered
|
Hey all, This is by far the most informative thread I have ever read. Thanks to all. I'm about to paint my '79 280zx gloss black and wanted to double check all the steps I compiled from this thread: (sure it's not mopar but it was $800 ) Materials- Rollers: 4" wide and about 1 1/2" thick - Tack cloths - Mix --> 66% Rustoleum --> 33% Mineral Spirits --> (use drip test: 3 secs until drip) - Wet-use sandpaper: 80/100/200/400/600/800/1000/1500 Steps1. Wetsand: 80g 2. Wetsand: 100g 3. Wetsand: 200g 4. Wetsand: 400g 5. Rinse: mineral spirits 6. Dry surface 7. Wipe: tack cloth 8. Body work (bondo) 9. Apply: coat #1 10. Wait... 11. Rinse: mineral spirits 12. Dry surface 13. Wipe: tack cloth 14. Apply: coat #2 15. Wait... 16. Rinse: mineral spirits 17. Dry surface 18. Wipe: tack cloth 19. Wetsand: 600g 20. Apply: coat #3 21. Wait... 22. Rinse: mineral spirits 23. Dry surface 24. Wipe: tack cloth 25. Apply: coat #4 26. Wait... 27. Rinse: mineral spirits 28. Dry surface 29. Wipe: tack cloth 30. Wetsand: 800g 31. Apply: coat #5 32. Wait... 33. Rinse: mineral spirits 34. Dry surface 35. Wipe: tack cloth 36. Apply: coat #6 37. Wait... 38. Wetsand: 1000g 39. Wetsand: 1500g 40. Polish 41. Wax Sound about right? If so, would pics be appreciated? (being a datsun and all heh) Thanks.
|
|
|
Re: New Paint job on a budget thread.
#37965
02/18/08 03:20 AM
02/18/08 03:20 AM
|
Anonymous
Unregistered
|
Anonymous
Unregistered
|
Quote:
Hi everyone,
I love the forum..
I am planning on doing the paint to my motorcycle.
ANy tips? Has anyone done it?
I have read all three threads for about 5 hours. There is so much info. I am almost confused.
I want to get the glossiest black I can get..
Any Suggestions?
Brian
Yea I got a tip for ya. If your paint has "sunburn", KNOCK IT DOWN! haha. Sand it down and get rid of it.
EDIT - just noticed you have a motorcycle. 
|
|
|
Re: New Paint job on a budget thread.
#37966
02/18/08 05:04 AM
02/18/08 05:04 AM
|
Joined: Nov 2006
Posts: 32
Edgerton WI
Donny O.

member
|
member
Joined: Nov 2006
Posts: 32
Edgerton WI
|
Quote:
----------------------------------
look who came to pay a visit, mr.green fangs
(good thing he didnt get stuck in the wetpaint)
----------------------------------
what the 'beep' is that?? other than the visitor I think you are on the right track....keep up the good work.
|
|
|
Re: New Paint job on a budget thread.
#37967
02/18/08 11:12 AM
02/18/08 11:12 AM
|
Joined: May 2006
Posts: 575
Canada
Marq
mopar addict
|
mopar addict
Joined: May 2006
Posts: 575
Canada
|
Quote:
Hey all,
This is by far the most informative thread I have ever read. Thanks to all.
I'm about to paint my '79 280zx gloss black and wanted to double check all the steps I compiled from this thread:
(sure it's not mopar but it was $800 )
Materials
- Rollers: 4" wide and about 1 1/2" thick
Not just 'rollers' BUT high density FOAM rollers.
You probably meant to say that, but I thought I would just enforce that point so that some late reader doesn't make an assumption that we are talking about those fluffy or nappy type painting rollers 
.
|
|
|
Re: New Paint job on a budget thread.
[Re: Marq]
#37968
02/18/08 04:55 PM
02/18/08 04:55 PM
|
Anonymous
Unregistered
|
Anonymous
Unregistered
|
I am looking for the proper prep and paint for plastic bumpers both previously painted TPO and also for a new urethane bumper lip that has never been painted. Both are on front bumper of the car.I will be finish painting in gloss black. Will the Rustoleum or Brightside paints hold up without spiderwebbing or cracking? Do I use an adhesion promoter for prep? Primer over that? I would like to use a simple to touch up finish paint without clear coat for easy maintennance for parts that will surely get stone chips. Any advice will be appreciated.
|
|
|
Re: New Paint job on a budget thread.
#37969
02/18/08 07:28 PM
02/18/08 07:28 PM
|
Joined: May 2006
Posts: 575
Canada
Marq
mopar addict
|
mopar addict
Joined: May 2006
Posts: 575
Canada
|
Quote:
I am looking for the proper prep and paint for plastic bumpers both previously painted TPO and also for a new urethane bumper lip that has never been painted. Both are on front bumper of the car.I will be finish painting in gloss black. Will the Rustoleum or Brightside paints hold up without spiderwebbing or cracking? Do I use an adhesion promoter for prep? Primer over that? I would like to use a simple to touch up finish paint without clear coat for easy maintennance for parts that will surely get stone chips. Any advice will be appreciated.
The front bumper on my Mustang was 'factory fresh', unpainted and in its original black flexible plastic. I used both Brightside and Tremclad on it... plus I also used a spray bomb on it.
The first and most important thing you have to do with a 'fresh' plastic molded part is to seriously wipe it down with mineral spirits. What happens is that these molded plastic things, use a 'release compound' in the mold, so that the item ( a front bumper for example ) will easily release from the mold when it is ready to be released from the mold.
This 'release agent' is normally not too visible to the eye or to the touch. But it lurks in the pores of the formed plastic. Since it is designed to enable and assist in the release of the plastic from the form mold, you can be assured that it will work to also repel paint or primers in an equally effective manner. So seriously wipe it down a couple of times with mineral spirit to wipe and wash away that 'release chemical' off the plastic part.
On my car... I went to a primer instead of going straight to painting on to the plastic. I seriously believe I could have gone straight to painting on the the plastic front bumper without any problem.
However, I used a primer on the entire car to start the entire paint job off from one uniform color starting point. You may recall that my car began as a car of 'many colors'. ( white hood, black plastic front bumper, red body panels ). So I brought them all to a uniform dark gray primer color...
Now.. as to questions of spidering or cracking on flexible body parts : The Tremclad/Rustoleum or Brightside fair no better or worse then a regular paint job. But the roller paint job does have some advantages over a 'real' paint job.
The Tremclad/Rustoleum or Brightside paint job tend to have a little more flex or forgiveness to them. Whereas the sprayed on 'real' paint job tends to be just a bit harder.
When a TR or B paint job on a flexible bumper is flexed, the paint tends to flex with it. The 'real' paint job tends to have less flex to it and it will crack sooner when flexed.
Now... I will tell a quick story that reinforces how a TR or B paint job is better. When I initially finished painting my car and polishing it into a shiny little jewel, I STUPIDLY backed the car out of the garage and caught the rear bumper on the barbeque. It placed a 5 inch SCRAPE along my beautifully finished rear bumper. I cursed, I swore and I cried.
Now the first thing to note is that it 'scratched' off the paint where the barbeque had scraped against it. It was a clean scraping right down to the plastic. But it did not affect the paint beyond the actual point of where the barbeque scraped along it. As you know, if the same thing had happened to a 'real' paint job, the odds are that the extent of the damage to the paint would have extended beyond the point of contact of the scrape. So that was a good thing.
Ok... so here is the good news. I simply drove the car back into the garage... sanded down the area of the scrape to make it all level ( feathering the edges of the scrape and the paint ). Then over the next couple of days I simply re-rolled that area where the scrape had occured. Once it was up to par I did the wetsanding, polishing and waxing and the scrape was totally gone and invisible. No one would be able to find that 5 inch scar unless I pointed directly at it. So the beauty of this is that the 'roller paint' job puts the task of 'touch ups' completely within your control. No need to live with a scrape or tie up the car at the body shop while they do a pro-paint job to repair that scratch ( which could cost you $500 to have done ).
Now... on the topic of the front bumper... the Treclad/Rustoleum are pretty resistant against road chips etc. But i would have to say that Brightside is probably better at withstanding road chips. The reason : Tremclad/Rustoleum are just enamels, whereas Brightside is a polyurathane.. ( think plastic ).
Now... one other fast thought about front bumpers. What you might want to consider is to paint a clear 'gravel gaurd' coating over the lower sections of your front bumper. This is something that will work for some people and not for others. It will really depend on the style of your specific front bumper. On some front bumpers you will be able to apply the clear gravel guard coating over all the areas below the bumper line... on other styles you may only be able to apply the gravel guard coating on the lower four or five inches of the front bumper. It will depend on your specific front bumper style. But the advantage of putting the clear gravel guard coating on there is that it is designed to withstand the impact of rocks and porupines etc. And so it will help to protect the paint job beneath it.
Dunno... those are a few fast thoughts on the topic.
Marq
.
|
|
|
Re: New Paint job on a budget thread.
[Re: Marq]
#37970
02/19/08 04:29 AM
02/19/08 04:29 AM
|
Anonymous
Unregistered
|
Anonymous
Unregistered
|
Howdy, I'm a noob and Ive been reading quite a bit, but have not gotten though all of the threads (that's A LOT of bloody reading!) so i apologize if i ask something that has already been covered.
I'm interested in painting my '64 Riviera, but i wanted to maybe try the "aluminum" rustoleum color OR the "platinum" Interlux color..
I was wondering if anyone has tried these colors and what their results were.
thanks,
wes
|
|
|
Re: New Paint job on a budget thread.
#37971
02/19/08 09:05 AM
02/19/08 09:05 AM
|
Joined: May 2006
Posts: 575
Canada
Marq
mopar addict
|
mopar addict
Joined: May 2006
Posts: 575
Canada
|
Quote:
Howdy, I'm a noob and Ive been reading quite a bit, but have not gotten though all of the threads (that's A LOT of bloody reading!) so i apologize if i ask something that has already been covered.
I'm interested in painting my '64 Riviera, but i wanted to maybe try the "aluminum" rustoleum color OR the "platinum" Interlux color..
I was wondering if anyone has tried these colors and what their results were.
thanks,
wes
Short answer : The topic has been thoroughly discussed. Don't use aluminized paint.
.
|
|
|
Re: New Paint job on a budget thread.
[Re: Marq]
#37972
02/19/08 03:58 PM
02/19/08 03:58 PM
|
Anonymous
Unregistered
|
Anonymous
Unregistered
|
Applied 2nd coat. I applied the paint to a hot surface. It was so hot, steam was rising from the paint, lol. Not to sure if this was a smart thing to do. but the paint was still workable. Before I started over, i was painting my car around 7-8am. The sun was barely out and the surface was cool. I switched it up a bit and started these new coats around 1pm-2pm. There are virtually no bugs at this time of the day to ruin the paint job. Im hoping that im really on the right track this time. im also prepping the whole car now. so far, ever since Ive started this project, ive only mixed enough ms\paint to cover the hood. What I have been using to mix the paint is a measuring paint cup. it has measuring indicators printed on the side. I first pour in a inch of paint followed by 1/4 of an inch of MS. Well enough talk. here are some pics. These are 2nd coat. 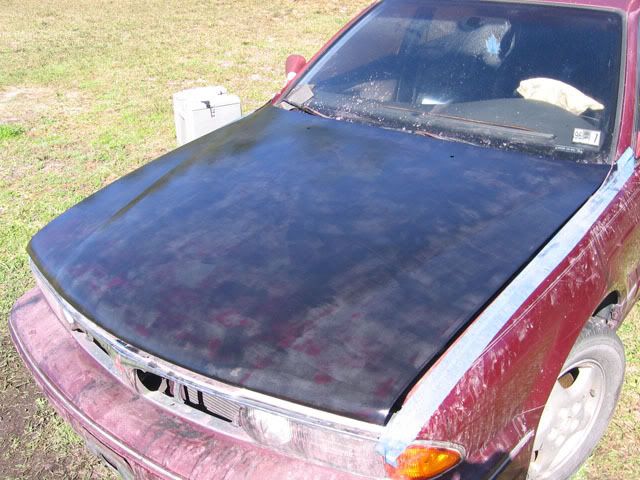 ---------------------------- 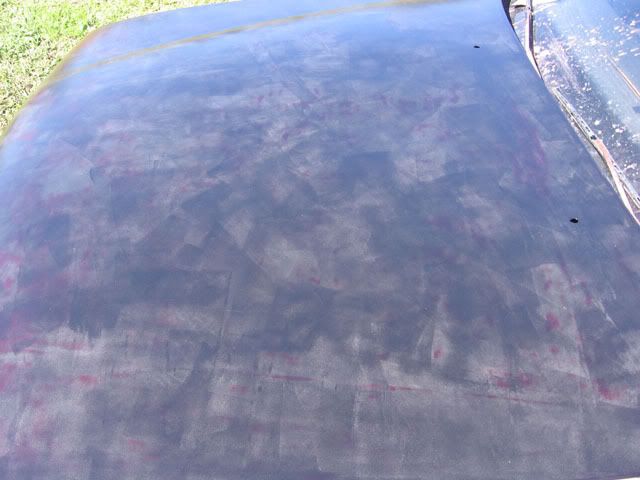
|
|
|
Re: New Paint job on a budget thread.
#37973
02/19/08 04:12 PM
02/19/08 04:12 PM
|
Joined: Mar 2007
Posts: 5,660
Flint, MI
Gusteve
I Love the Unicorn Song!!
|
I Love the Unicorn Song!!
Joined: Mar 2007
Posts: 5,660
Flint, MI
|
Quote:
Applied 2nd coat. I applied the paint to a hot surface. It was so hot, steam was rising from the paint, lol. Not to sure if this was a smart thing to do. but the paint was still workable.
Dude - If the surface temp of your hood is that hot you are just asking for more problems. It would be a shame to start all over and then have a completely different set of new issues.
I can't imaging you'll get consistent leveling if its that hot. That may not show up on the coat you just did - but it probably will by the time you are on a 3rd or 4th coat.
If you really can't do this indoors somewhere (and I know you said before that you can't) you should really think about that other guy's suggestion about a tarp and some 2x4's or aluminum poles or something.
Buy a 15x15 tarp, and maybe four or six 2" PVC pipes and some rope, and make a tent.
|
|
|
|
|


