Re: rotisserie help
[Re: cudaman1969]
#1615694
Re: rotisserie help
[Re: cudaman1969]
#1615694
05/04/14 12:41 PM
05/04/14 12:41 PM
|
Joined: Jan 2003
Posts: 12,144
Benton, IL.
DaveRS23

Special needs idiot
|
Special needs idiot
Joined: Jan 2003
Posts: 12,144
Benton, IL.
|
When set up properly, you will not need anything to help with the car's movement. It takes very little effort.
If this is your first time setting a car up, it really would be best to get the instructions. Each end is often mounted to a different line on the body so that the axis is centered. Sometimes difficult to wrap your mind around without some examples and tips.
Besides controlling the effort to move the car, you also want to make sure that the set-up is not twisting the body as it turns.
Master, again and still
|
|
|
Re: rotisserie help
[Re: cudaman1969]
#1615699
05/05/14 12:11 AM
05/05/14 12:11 AM
|
Joined: Oct 2005
Posts: 8,879
Ontario, Canada
Stanton

Don't question me!
|
Don't question me!
Joined: Oct 2005
Posts: 8,879
Ontario, Canada
|
Quote:
There are no instructions when you buy a new one because each vehicle is different.
I've been building and selling rotisseries for eight years and mine come with instructions! The last thing I need is some bozo blaming me 'cause his car fell on top of his wife or something like that !!
Anyhow, the pivot point will vary depending on the weight of car. The the balance point will vary if, for example you remove the truck lid and doors. I recommend you start with the pivot just below the cowl. Give the body a push and if it wants to rock back then raise it up. Keep doing that till it wants to stay put when you push it and that will be pretty close to the neutral balance point.
Make sure the actual pivots at each end are at the same height. Also, you want to keep the car pretty close to level at all time so you`re not putting any strain on any mounts or the rotisserie.
|
|
|
Re: rotisserie help
[Re: Stanton]
#1615702
05/05/14 09:37 PM
05/05/14 09:37 PM
|
Joined: Jan 2004
Posts: 8,285
fredericksburg,va
cudaman1969
OP
master
|
OP
master
Joined: Jan 2004
Posts: 8,285
fredericksburg,va
|
Quote:
sent you an email with full instructions
I will respond to you with an e-mail but i wanted to let everyone know on Moparts what a great person you are to send me that info, i feel this site is all about helping your fellow Mopar owners. Thanks to all who answered.
|
|
|
Re: rotisserie help
[Re: rvw]
#1615704
05/08/14 12:37 AM
05/08/14 12:37 AM
|
Joined: Oct 2005
Posts: 8,879
Ontario, Canada
Stanton
Don't question me!
|
Don't question me!
Joined: Oct 2005
Posts: 8,879
Ontario, Canada
|
For your viewing pleasure ...
AUTO ROTISSERIE
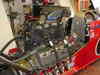
This Auto Rotisserie is designed to be used to do bodywork and paint and chassis work. It is designed to support approximately 3000 pounds i.e. a vehicle with the engine and transmission REMOVED. The whole point of the rotisserie is so you don�t have to get under the car - for your own safety, avoid working under the car while it is on the rotisserie.
The Auto Rotisserie consists of two units consisting of the following parts each:
1) base
2) upright
3) telescoping centre post
4) pivot head (one with locking sprocket)
5) T-member
6) 2 T-member sliders (or body mounts if ordered)
7) automotive bumper jack (1), or hydraulic cylinders
8) pivot head locking collar
9) threaded T-member adjuster
10) 2 wheels
11) misc. lock bolts and nuts
Optional:
� two longitudinal cross members, which are required to keep the bases parallel � these can be sourced locally from any steel supplier and can be 2� square tubing or 2� pipe.
NOTE: These are ABSOLUTELY NECESSARY to maintain the integrity of the vehicle, to keep the rotisserie rigid AND MOST IMPORTANTLY, for your safety!
� brackets to attach the car frame to the T-member sliders - these can be made from 2� square tubing or 2� angle and should have a minimum wall thickness of 1/8�.
These must be welded to the T-member sliders.
IMPORTANT POINTS
There are two key points to the smooth and safe operation of the rotisserie.
The first is to keep everything PARALLEL and/or perpendicular (level and/or square) to the end units. The brackets should be made so that when they are attached to the car they are level when looking at them from the side. Use spacers or whatever is necessary to get these level (front and rear brackets can be at different heights but they must be level). This ensures that when you attach the T-posts they will be parallel and when attached to the end units everything will be properly aligned.
The second key to the smooth operation of the rotisserie is BALANCE. When the car is not properly balanced on the rotisserie it will not only take a lot of effort to rotate, it will be unsafe � the car will flop over potentially causing injury to anyone in its way and damage to the car if it isn�t high enough off the ground!
Proper set up is simple but take your time. Once properly done it will work hassle-free. Set up is best accomplished with two people.
Read through these instructions and plan your work. The same end result can be accomplished in different ways � just plan and think things through before you start.
� It is absolutely essential that both pivot heads be at the same height once the desired height is achieved.
� Both pivot heads should be lubricated before use (Don�t use grease if you�re planning on blasting the car as it will hold the media)
� Both threaded T-member adjusters should be oiled.
� Once set up is complete re-check that all bolts are tight.
� For your own safety, avoid working under the car while it is on the rotisserie � the whole point of the rotisserie is so you don�t have to get under it!
ROTISSERIE ASSEMBLY
NOTE: Some parts of the units are built together to ensure proper fit. Each end unit will have drill marks at the mating points to ensure proper fit when re-assembled. They will be on the base, the corresponding upright, another at the top of the upright and on the corresponding pivot post.
1) Lay a base unit on the floor with the bolts up. Legs will be oriented inwards.
2) Attach an upright with the lower plate towards the back. Use 3 5/8 x 3-1/2� bolts, lockwashers and nuts. The lower two bolts must come up from the bottom. Tighten until the lockwashers flatten.
3) Slide a pivot post into the upright with the long portion of the pivot tube inwards. Align the bolt holes in the sides and install 2 5/8 x 3� bolts and nuts. Install the bolts through the side with the large holes. Snug the bolts down.
4) Install the jack using 1 5/8 x 3� bolt and nut through the holes in the gussets on the pivot tube and through the jack shaft.. Attach the jack base using 2 3/8� bolts and nuts.
5) Install the wheels.
6) Repeat the process for the other end unit.
7) The T-members will be installed when you mount the car.
PREPARING THE CAR TO MOUNT ON THE ROTISSERIE
1) Strip the car of all desired parts or unnecessary weight. The car will be quite high off the ground so removing interior components, etc. prior to mounting the car will be much easier.
2) Raise the car as high as possible on jack stands. Try to keep the car level with the floor.
3) Remove the front and rear bumpers and brackets.
4) IF MAKING YOUR OWN BRACKETS: Determine the design of the brackets required to attach to the T-member sliders using the bumper bracket or body mounting holes. Drill these to match the mounting holes on the car. Weld these brackets to the T-member sliders.
NOTE:
� ensure the brackets are welded to the sliders in the proper orientation � slider bolts to the outside � not on top or bottom.
� ensure the brackets are welded at the proper angles so that the sliders will slip onto the T-members and the t-members will be 90 degrees to the car.
� ensure the brackets are long enough to provide adequate clearance between the T-member and the car once they�re attached.
MOUNTING THE CAR ON THE ROTISSERIE
1) Install ONE bracket onto one end of the car.
2) Slide one end of the T-member into the bracket slider.
3) Slide the other bracket over the T-member and bolt it to the car. Center the T between the two brackets and snug it down. NOTE: with all the bolts snugged down the T-member should be at a 90 degree angle to the car � if not, make appropriate adjustments to make it 90 degrees.
4) Follow this same procedure at the other end of the car.
5) Remove the T-member straps from the pivot heads.
6) Position one end of the rotisserie at either end of the car. Slide the rotisserie in towards the car so that the T-members engage the pivot heads.
7) Install and snug the locking straps to hold the T-members. Snug down all bolts (T-member straps, centre post) to put proper tensions on the rotisserie. NOTE: The rotisserie uprights should be at a 90 degree angle to the car and the base legs should be close to level with the floor.
Tighten all mounting brackets to the car. Ensure the sliders are equally spaced from either end of each T-member. Tighten all slider bolts. If the brackets were made properly the T-members should now be 90 degrees to the centreline of the car.
8) Slide the long connector rails in to join the two ends of the rotisserie. Measure the distances between the rotisserie ends on both sides � these lengths should be pretty darn close. Tighten the retaining bolts on the base legs.
NOTE: At this point everything has been slipped together and tightened and there should be no stress on any components. If there is a problem it is usually the result of a misaligned mount on the car.
BALANCING THE CAR
At this point the car should still be on jack stands but the rotisserie should be in position to support the weight of the car. The car must now be balanced. The centre of gravity should be just below the cowl but this point will vary depending on whether the car has a full frame, is a convertible, how many components have been removed, etc. but the process is the same.
1) Ensure the pivot lock bolts are tight so the car cannot spin.
2) Install the threaded adjuster �T� into the hole at the top of the T-member. Ensure the pin goes through the hole on both sides. Adjust the rod so the end goes into the socket on the pivot head. Snug it down into the cup.
3) Loosen the T-member straps on the pivot heads only enough that the T�s will be able to slide in the channel. Turn the threaded adjusters to raise the car enough to remove your jack stands. These threaded rods are now supporting the full weight of the car.
4) With the adjusters, raise or lower the car evenly front and back till the pivots are just below the cowl. This should be a good starting point to adjust balance.
5) Loosen the pivot locking bolts. Pull the pivot locking pin and test the balance of the car by pushing on the side. If it tends to rock back when you push then it is bottom heavy. If it seems to want to keep turning then it is top heavy.
To adjust bottom heavy:
Loosen T-member straps and turn threaded adjusters clockwise to raise the car. Turn the adjusters equally to keep the car level.
To adjust top heavy:
Loosen T-member straps and turn threaded adjusters counter-clockwise to lower the car. Turn the adjusters equally to keep the car level.
NOTE: Keep the car level with the floor. DO NOT measure T-member lengths and assume these should be the same � front and rear bracket heights may not be the same!
6) Test the balance of the car again and adjust as necessary until you achieve a neutral balance.
7) Tighten the T-member straps.
8) Tighten the pivot head locking bolts.
The balance of the car may change slightly as parts are added or removed. If it changes significantly it should be adjusted for safety reasons following the above steps. If the car becomes hard to spin then balance needs to be adjusted.
ADJUSTING WORKING HEIGHT
Now that the car is balanced it has to be raised to the desired working height. You can roughly estimate the height you�ll need by measuring from the pivot centre point to the furthest point out (radially) on the car i.e. the outer roof edge. Add anything over 6� to this and this is the height you need to jack the pivot heads to.
NOTE: If you�re doing this alone, raise one end at a time only 3� at a time to minimize stress on both the car and the rotisserie.
1) Jack up until there is slight tension on the jack. Remove the centre post bolts. Jack the centre posts up evenly to the desired height and replace the bolts. There are eight adjustment holes that should be sufficient to achieve the necessary height. Ensure the centre post lock bolts go through two holes at all times.
2) Check that both pivot heads are at the same height. Check that the car is level. Make any necessary adjustments.
3) Tighten the centre post bolts. These will pull the centre posts tight within the base upright to eliminate any wobble.
4) Check that all bracket bolts, slider bolts, etc. are tight.
5) Loosen the pivot head lock bolts and check the rotation of the car. If you�ve done everything right the vehicle should turn with only slight effort and should clear the floor by a minimum of 6� at the outermost point of the vehicle.
For safety reasons use the jacks only to adjust the working height. DO NOT use the jacks as the only means of maintaining height.
SAGGING
The rotisserie should show no sagging whatsoever. If it does it must be corrected.
Possible reasons for sagging:
- mounts incorrectly attached to the car - not level or straight
- mounts are loose
- convertible car with inadequate interior support
- rotten attachment points
- bases not pushed close enough together or tightened to bottom rails before transferring the weight of the car to the rotisserie
-
Think of the rotisserie as a bridge � the lower rails are one span, the car is another. Both become structural members and will work together. If you have a solid vehicle there should be absolutely no sag. If the bracket mounting points are rotted out they will present a hazard � repair them before mounting the vehicle or find alternate mounting points. Convertibles with doors removed WILL sag. There are 2 alternatives: 1) insert braces between the door posts OR 2) run a centre beam between the 2 end T-posts (usually through the windshield opening) Optional brackets are available for this purpose.
USING THE BUMPER JACK (if you did not buy the hydraulic jacks)
This may seem foolish but it needs explanation before you start cursing the jack for not releasing. Bumper jacks were designed to release by jacking UP one notch before they would come down. However, the centre post locking bolts prevent the jack from raising that additional notch and of course the bolts can�t be removed or the post will drop. Therein is the dilemma. Here is the solution. Flick the lever on the side of the jack to the unlock position. Put a screwdriver or similar instrument up inside the jack mechanism from the bottom and release the jack jaw. It will now come down properly. It may take one or two times to get the hang of this.
MOVING THE ROTISSERIE / VEHICLE
To manoeuvre the assembly sideways, place a floor jack under the short horizontal post on either base. Move only one end at a time in this manner or the unit will be unstable.
If you�re going to transport the vehicle on the rotisserie I highly recommend lowering it to the lowest possible position for stability. Readjust as necessary when you reach your destination.
REMOVING THE VEHICLE
Reverse all the above steps.
|
|
|
|
|