|
|
 Re: How to remove pick up coil from MP distributor
[Re: Challenger 1]
#1284094
Re: How to remove pick up coil from MP distributor
[Re: Challenger 1]
#1284094
08/12/12 06:56 PM
08/12/12 06:56 PM
|
Joined: Jan 2003
Posts: 2,402
Wichita,KS
Blakcharger440
 OP
OP
top fuel
|
OP
top fuel
Joined: Jan 2003
Posts: 2,402
Wichita,KS
|
Quote:
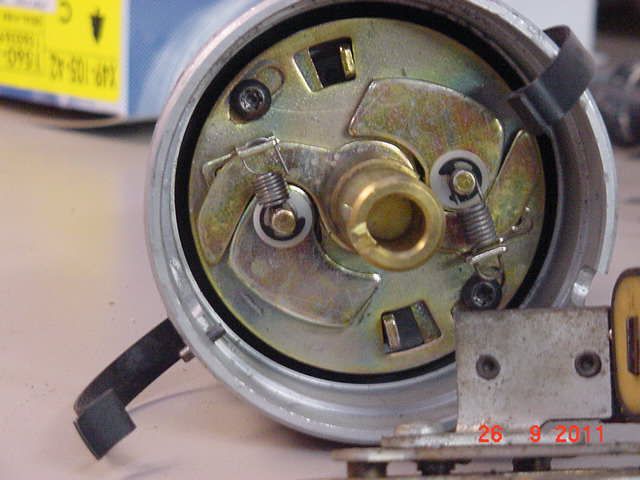
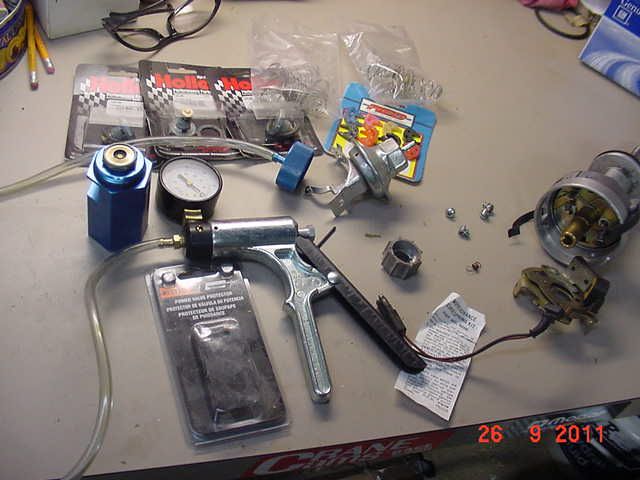
There's 4 screws around the outside that must be removed. Slide the vacuum advance out. Then the pickup will come out, it's attached to the lower mounting plate with a spring clip on the bottem.
Then how does the pick up coil assembly come off that plate that it is attached to in the pic? The new one in the box is not attached to one.
|
|
|
Re: How to remove pick up coil from MP distributor
[Re: Challenger 1]
#1284096
08/12/12 07:42 PM
08/12/12 07:42 PM
|
Joined: Jan 2003
Posts: 2,402
Wichita,KS
Blakcharger440
OP
top fuel
|
OP
top fuel
Joined: Jan 2003
Posts: 2,402
Wichita,KS
|
Quote:
A little triangle clip on the back of the mounting plate.
That clip cant be removed until you take the 4 screws out and the vacuum pod?
|
|
|
Re: How to remove pick up coil from MP distributor
[Re: Blakcharger440]
#1284097
08/12/12 07:47 PM
08/12/12 07:47 PM
|
Joined: Feb 2005
Posts: 28,312
Cincinnati, Ohio
Challenger 1
Too Many Posts
|
Too Many Posts
Joined: Feb 2005
Posts: 28,312
Cincinnati, Ohio
|
Quote:
Quote:
A little triangle clip on the back of the mounting plate.
That clip cant be removed until you take the 4 screws out and the vacuum pod?
No.
|
|
|
Re: How to remove pick up coil from MP distributor
[Re: Challenger 1]
#1284098
08/12/12 08:34 PM
08/12/12 08:34 PM
|
Joined: Nov 2003
Posts: 36,040
Lincoln Nebraska
RapidRobert
Circle Track
|
Circle Track
Joined: Nov 2003
Posts: 36,040
Lincoln Nebraska
|
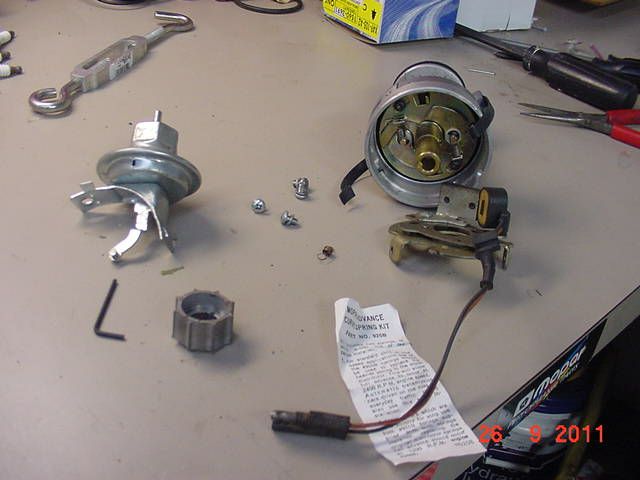
You've removed the center clip and the reluctor and lifted up the top flat plate slightly so the nub on the end of the vac can arm comes out of its hole in the flat plate and the 2 screws for the vac can & removed the can. Take out the 2 addition'l screws on the side of the housing & carefully without tilting it severely lift both of the flat plates up & out evenly together. Once out flip the assy over & remove the triangle clip so you can seperate the 2 flat plates. Unless the new pickup coil comes with the top flat plate as an assy (never bought one) you'll need to drill out the rivet so you can R&R it. I make a magic marker mark on the top plate and the housing so I can quickly orient their clocking when going back together. You can figure it out but it saves time & is easy to do
live every 24 hour block of time like it's your last day on earth
|
|
|
Re: How to remove pick up coil from MP distributor
[Re: Challenger 1]
#1284099
08/16/12 09:07 PM
08/16/12 09:07 PM
|
Joined: Jan 2003
Posts: 2,402
Wichita,KS
Blakcharger440
OP
top fuel
|
OP
top fuel
Joined: Jan 2003
Posts: 2,402
Wichita,KS
|
Quote:
A little triangle clip on the back of the mounting plate.
I figured it out.
|
|
|
Re: How to remove pick up coil from MP distributor
[Re: Blakcharger440]
#1284101
08/16/12 09:46 PM
08/16/12 09:46 PM
|
Joined: Feb 2005
Posts: 28,312
Cincinnati, Ohio
Challenger 1
Too Many Posts
|
Too Many Posts
Joined: Feb 2005
Posts: 28,312
Cincinnati, Ohio
|
Quote:
Okay...
The new PU coil tested 310 ohms
The old PU coil tested 282 ohms
What does that mean? Both are good most likely?
My factory service manuals for both my 71 and 74 cars says 350-550 ohms. I have been using 2 PUs that check at 332 ohms and the car runs great.
282 I think I would be concerned?? But if you got a new one at 310, the old one is still probably still good. Only one way to find out to run them both when you get your car running.
|
|
|
|
|
|
|