Previous Thread
Next Thread
Print Thread
Page 1 of 6 1 2 3 4 5 6
Tav Challenger T/A Clone #446155
08/22/09 03:38 PM
08/22/09 03:38 PM
Joined: Oct 2006
Posts: 4,165
Florida
C
cataclysm80 Offline OP
master
cataclysm80  Offline OP
master
C

Joined: Oct 2006
Posts: 4,165
Florida
Hello All,... I've finally decided to post a thread here on my ongoing T/A Clone project. Hopefully it will contain lots of info that will be useful to others, but before I get started, first a little info about me. Here goes...

I graduated high school in 1998 in Kansas. Fresh out of high school, I knew I'd need a job, a place to live, and a vehicle. About a month after graduating, I found a job halfway across the nation in Florida with an empty house on the work property. Solved all my immediate problems, job, place to live, walk to work. I worked hard, and after two years I bought the property along with the one next door. Now I run & manage the business for the owner who is semi-retired. It's an alligator taxidermy business. Alligators are farm raised for the meat & leather. It's similar to cows, but a % of gators get released back into the wild, which doesn't happen with cows. This is the main reason why gators are no longer an endangered species. (As I type this, another endangered species, the Florida Sandhill Crane is making a lot of racket in my front yard. 5 foot tall mated pair of birds with baby) We get the heads off the farm raised gators that are killed and taxidermy them to sell as souvenirs primarily in the southeast US. There are about 4 companies in the world that do this, and of the four we have the highest quality of product. Chances are, if you've ever been to a souvenir store in Florida, you've seen some of my products.

And now for something completely different...
Cars.

Re: Tav Challenger T/A Clone [Re: cataclysm80] #446156
08/22/09 04:32 PM
08/22/09 04:32 PM
Joined: Oct 2006
Posts: 4,165
Florida
C
cataclysm80 Offline OP
master
cataclysm80  Offline OP
master
C

Joined: Oct 2006
Posts: 4,165
Florida
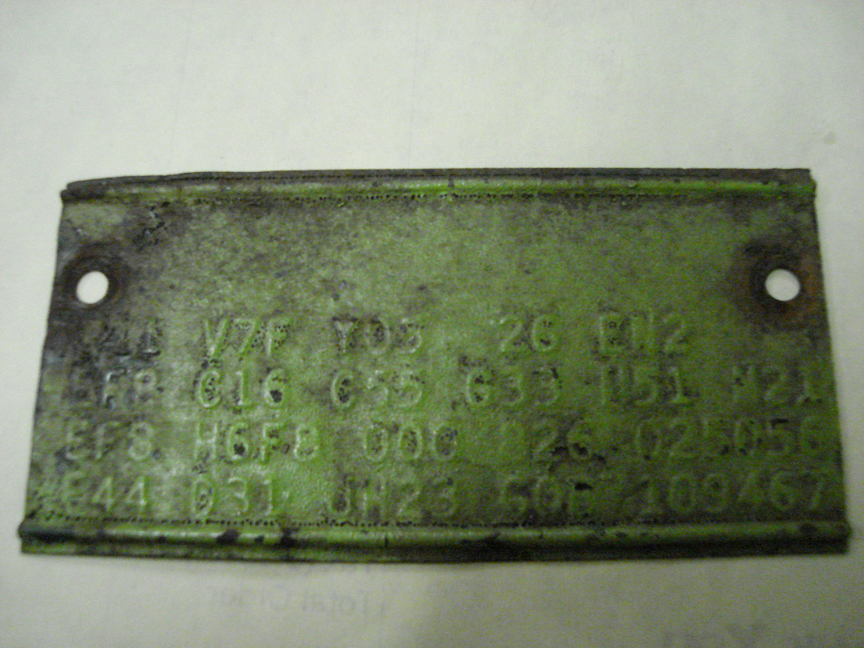
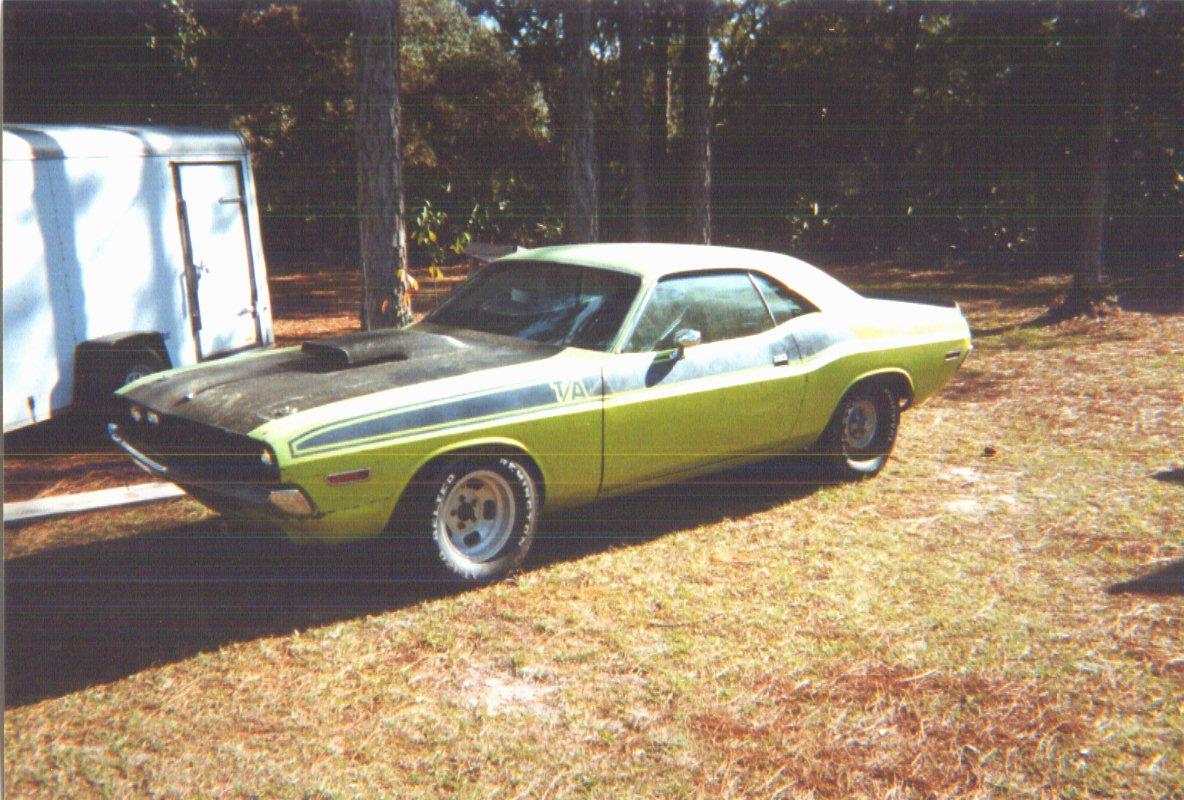
I didn't really know much of anything about cars, but I did know that I could teach myself to do just about anything I wanted to do. I'm not bashful about trying new things.

Traditionally, my mothers side of the family has always liked Fords, while my fathers side of the family leans towards Chevrolets, but just regular vehicles, and I never really hung out much with anyone that worked on them, they just drove them. In high school my cousin had a 1969 Mercury Cougar. We had a lot of fun with that! Boys will be Boys. Then one night he flipped it end over end! After going without a car for a while, he replaced it with a 1966 Mustang. Still a classic car, but a 289 instead of a 351. By the time I finished school, I figured cars were alright, and thought that if I could pick any vehicles in the world that I wanted, I'd have a muscle car, a truck, and any vehicle from the 1930's. (love those curvy bodies) Like I said, I didn't know much at all about vehicles, but after moving to Florida, I'd been to the Don Garlits museum of Drag Racing, and after seeing that, I figured a 426 Hemi was the engine to have! I hadn't yet realized that it only came in Mopars. So I was thinking maybe I'd like a muscle car like a 70 Chevelle, perhaps white with black stripes, and a Hemi under the hood.

In December of 1998 after moving to Florida, my Great Grandmother passed away. I went back north for the funeral and while I was there, since I'd saved a little money, I looked around for my first car. I found a 1948 Chevy truck with straight six, and a 1970 Challenger with a V8. I guessed I could drop a 350 into the Chevy truck. Neither of the vehicles ran, but I figured that was alright since I could walk to work, I'd have time to fix it up like I want. Tough choice on which one to get, but it turned out that the 48 truck had an enclosed drive shaft which would require a full trailer instead of a car dolly to get back home to Florida. I didn't have the money for a full trailer, so I brought the Challenger home. $500.

It looked a little rough. Someone had tried to make it look like a T/A. Screwed a metal scoop onto the flat hood with thick bondo around the edges, MAS racing fiberglass universal cuda/challenger trans am spoiler screwed on the decklid, woven boat fiberglass added to the rockers and lower quarters as some kind of rust preventative, and a backyard sublime paint job with flat black painted on T/A stripes, and flat black hood, tailpanel, grill. Real poor prep work and masking on the paint, even had a little sublime on the end of the dashpad. Also put in a mopar electric ignition conversion, headers with glass pack mufflers, rear air shocks, and removed the AC compressor and lines. Missing the passenger bucket seat, drivers door panel, and egg crate from the grill, mismatched wheels, no battery, and the wiring had been chopped on a lot. It came with a wiring diagram, Year One catalog stuffed with receipts and an old speeding ticket. The car had been owned by a guy named Brian. Brian had the drivers front floor pan and trunk floor replaced by a shop, but couldn't pay the shop. The shop stopped work. The panels were welded in, but left unpainted bare metal. The shop took the car from Brian with a mechanics lien and sold it at auction. A local guy named Bob bought it. Bob likes cars a lot, especially mopars. He buys them up whenever he finds a good deal and stores them at friends houses, etc. anywhere he can find a space. He's like a car pack rat, he's got cars hidden all over the place. Unfortunately he never seems to have the money to fix any of them up because he's always buying another car. Bob stored this Challenger at Pedro's shop. After 5 years Pedro was planning on moving to a new shop and kept telling Bob to come get the car or he was going to sell it or leave it for the new owners. Bob never came. Pedro took some parts off of it for his sisters Charger, sold me the car for $500 and promised me he'd get me a title through a mechanics lien. Being a first time car buyer, I didn't know any better, so the car came with me to Florida.

Re: Tav Challenger T/A Clone [Re: cataclysm80] #446157
08/22/09 05:30 PM
08/22/09 05:30 PM
Joined: Oct 2006
Posts: 4,165
Florida
C
cataclysm80 Offline OP
master
cataclysm80  Offline OP
master
C

Joined: Oct 2006
Posts: 4,165
Florida
Well, it was time to learn something about cars. I picked up a few mopar magazines, a Chiltons 65-72 Barracuda Challenger book, bought a battery, starter relay, and someone gave me an old test light. I cleaned the car up, looked over what I had, and studied the wiring diagram. Starting at the battery, I went over every wire in the car. That took a lot of long nights and some electrical tape. In the end, I cut off a lot of extra wires that had been added on for who knows what, spliced on a new tail light socket, reconnected the horn relay, jumped across the fried ammeter, shorted the neutral safety pole of the starter relay to ground so that the engine would turn over, and connected the green wire on the electronic ignition as shown in the Chiltons wiring diagram.

I got a new air filter, put some gas in the car, and changed the oil. I found some of those old cardboard oil cans with the metal top and bottom. Different brands, and maybe viscosities, but I used them anyway cause that's what I had. (wish I would've sold them as collectibles now, but oh well.)

Well, I needed and got a new starter, and replaced the neutral safety switch so that I could hook up the starter relay correctly. The neutral safety wiring plug was fried, so I spliced one on from a Plymouth minivan in a junkyard. The guy at the parts counter will tell you it won't interchange because the wires are different colored, but I tried and it fits & functions fine. Now I could get the car to turn over, but it just wouldn't start. I put in a new distributor, cap, rotor, and plugs, but no difference. I fiddled with the dual vs. single ballast resistor quite a bit, and replaced the ECU, no difference. Thoroughly discouraged, it was after 10:00 at night when I got through to year one tech support. The guy there told me to cut the green wire to the ECU and tape it out of the way. I still don't quite understand why you'd have to do something different from what the wiring diagram says, or how he knew what my problem was, but it worked. Finally the car was running.

After a few days looking over the car, checking the trans fluid, tire air, etc., I took it over to the neighbors house about a mile up the road, and up to the local corner store. The key got stuck in the ignition. You could start the car and turn it off, but the key wouldn't come out of the switch. The next night I took the steering column apart to see what was going on. When I got it apart I saw that the spring on the steering column lock was out of place. I put it back together properly and tried it out a few times. When everything looked OK, I put the column back together. It worked for a couple days, then the key got stuck in the switch again. Next I took the column apart again and saw that the spring had come off the steering wheel lock again. Fed up with taking the column apart, I removed the steering wheel lock, bagged and tagged it, and put the column back together. Luckily I didn't have the problem again after that. It wasn't until a couple years later that I learned the problem was actually caused by the missing 70 only column lockout linkage. My problem had nothing to do with the steering wheel lock, that was just coincidence.

Keep in mind that all my car work was done late at night after dark parked in the grass with a trouble light in one hand.

At work we were clearing the property line to build a fence and had piled a lot of brush up to light on fire. The brush pile was behind a building, but a good distance from the building. We started the fire, and it wasn't too long before two firetrucks showed up. A neighbor had seen the smoke above the building and called in that the building was on fire. (The neighbor didn't bother to come tell us about the fire, or they would have seen us standing around it.) So the fireman came back next to the fire with us and helped me push the Challenger out from behind the shed where I kept it so that it would be a little further from the fire. The firemen liked old cars, so we talked cars for a while, then we talked hunting dogs, then they told us that next time we have a fire make sure we're drinking beer. That would make the fire recreational and then they wouldn't be able to fine us or anything like that. They let us off with a warning this time. Good thing, I wasn't old enough to drink beer yet.

The next morning, there was a female peacock in the tree above my car. Someone tried to take a picture of it, but you can't really see her because she's brown, so they gave the picture to me. Here it is. This is the first picture I have of my first car. You can see the charred ground over behind the shed. The car doesn't look to shabby from this far away, but up close it looked like someone washed it with a wire brush.

Tav

5433892-1.JPG (258 downloads)
Re: Tav Challenger T/A Clone [Re: cataclysm80] #446158
08/22/09 05:33 PM
08/22/09 05:33 PM
Joined: Oct 2008
Posts: 1,894
Mira Loma, CA
69B3GT Offline
top fuel
69B3GT  Offline
top fuel

Joined: Oct 2008
Posts: 1,894
Mira Loma, CA
I like reading stories like these, and i look forward to reading more of this. Got any pics of the car?

Re: Tav Challenger T/A Clone [Re: cataclysm80] #446159
08/22/09 06:26 PM
08/22/09 06:26 PM
Joined: Oct 2006
Posts: 4,165
Florida
C
cataclysm80 Offline OP
master
cataclysm80  Offline OP
master
C

Joined: Oct 2006
Posts: 4,165
Florida
It was at this point I realized taking pictures was a good thing...

Here's a shot of under the hood.

Tav

5433981-3.JPG (272 downloads)
Re: Tav Challenger T/A Clone [Re: cataclysm80] #446160
08/22/09 06:47 PM
08/22/09 06:47 PM
Joined: Oct 2008
Posts: 1,894
Mira Loma, CA
69B3GT Offline
top fuel
69B3GT  Offline
top fuel

Joined: Oct 2008
Posts: 1,894
Mira Loma, CA
Looks good from far and i like unrestored cars more anyways. Keep the pics coming

Re: Tav Challenger T/A Clone [Re: cataclysm80] #446161
08/22/09 06:50 PM
08/22/09 06:50 PM
Joined: Oct 2006
Posts: 4,165
Florida
C
cataclysm80 Offline OP
master
cataclysm80  Offline OP
master
C

Joined: Oct 2006
Posts: 4,165
Florida
The next thing I learned how to do was decode the fender tag.

318 2 barrel engine
A904 auto trans
base model Challenger hardtop
318 2 barrel engine
1970
built in Hamtramck Michigan
EF8 Dark Green Metallic top & bottom
Green Vinyl Bucket Seats
Scheduled Production Date August 26 1969
console
bucket seats
drivers chrome remote control racing mirror
air conditioning
drip rail moldings
AM radio
V7F pinstripe
built for USA
26 inch radiator
EN2 (many years later I found out EN1 = built on assembly line 1 at Hamtramck, EN2 = built on assembly line 2 at Hamtramck, END = built at LA plant. This # corresponds with the first digit of line 1 on the broadcast sheet. Some people claim it indicates working shift car was built during and not assembly line #. I guess those people think the LA plant only worked one shift? LA build sheets start with a "0". The LA plant had 1 assembly line, and the Hamtramck plant had 2 assembly lines.)

Tav

5434028-fendertagedit.jpg (238 downloads)
Re: Tav Challenger T/A Clone [Re: cataclysm80] #446162
08/22/09 07:36 PM
08/22/09 07:36 PM
Joined: Oct 2006
Posts: 4,165
Florida
C
cataclysm80 Offline OP
master
cataclysm80  Offline OP
master
C

Joined: Oct 2006
Posts: 4,165
Florida
By then it was November of 1999. Being as I was walking to work, it was a bit difficult to get around. I still hadn't received a title for the Challenger from Pedro, so it wasn't registered with plates or insured, hence not exactly driveable.

Up to this point in my life I'd only ever seen one other Challenger besides mine. It was back in middle school. I used to pass by it walking home from school. It was a dark green car, sort of plain but in pretty good shape, nice paint etc. It just sat in a driveway up by a house that I walked by. I only noticed it because it was an old car, not newer like all the others. I went up the driveway and walked all the way around it once, but that's it.

There's a BIG car show down here in Daytona Beach every November called the Turkey Rod Run. It's 4 days Thanksgiving weekend at the International Speedway. 5,000 + cars in attendance every year. I had never been before, but was really looking forward to going, hoping to get a good look at another Challenger. I had a lot of questions, and it seemed like the only good way to answer them was to have a thorough look at another Challenger. There's a big swap meet too, and I had some money saved up for parts if I got lucky enough to find any.

I went to that show all 4 days and still didn't see all the cars. Sensory overload. I had to learn to scan down the rows and only walk down one if it had something I wanted to look at. E bodies have unique flush mounted door handles. That helped to look for those. Of the approximately 5,000 cars, I think I saw about 20 E bodies. (These days there's usually only about 5-10.)

At the swap meet I met some guys that specialized in Mopar parts, which was a great find. One of them has an old Mopar specific junk yard about 3 1/2 hours away. If I could find a way to get up there, I could go look at another Challenger anytime I needed to. While I was there, I managed to buy...
a smashed up grill that I could scavenge the egg crate out of,
right & Left black door panels (one of mine was missing and the other one was green),
both kick panels (mine were missing),
a repaired taillight lens (mine was missing a corner),
a door lock tab,
the passenger inside door handle (both my handles were missing),
the 70 Challenger only curved plastic trim that goes around the bottom left corner of the dash (mine was missing)
and a power disc brake setup which included no spindles, no rotors, old used brake hoses & pads, only 1 caliper (it turned out to be stuck), and a brake booster.

Later, while putting the door panels on the car, one of the little square white plastic sliders in the horizontal window track broke. Well, I couldn't leave the window down with it parked outside, so I made my first parts order. Using the catalog that came with the car, I called Year One and ordered the window slider listed (but not pictured) in their catalog. When it showed up, it was a large green rectangle slider for the vertical track. It was the only type of window slider available. I still have it uninstalled in its little Year One bag. Perhaps one of these days I'll try out their no questions asked return policy, tear off the little return label on the invoice, and send it back. I went down to the local junkyard, rummaged through cars until I found the slider I was looking for, broke it prying it off, found another, got it, took it home and put it all back together with fresh grease. The new slider was round instead of square, but the inner & outer diameters were the same, and it worked well.

I also removed the rear interior panels at this point. They were green, but had been painted black. The black paint was flaking off, so I cleaned them up and re-sprayed them black again.

Next I wanted power brakes. It seemed simple enough, just add a power brake booster and a vacuum line right? I unbolted my four wheel drum brake master cylinder. I had to get a new master cylinder because the manual drum brake master cylinder has 4 studs instead of 4 holes, so it won't mount to the booster. When I tried to put the swap meet power brake booster on the car, it wouldn't go because the car had two studs coming Out of the car where the brake booster studs were supposed to go Into the car. I looked it all over, cut off the studs with a hack saw, drilled through what was left, and used a chainsaw sharpener to finish it off because I didn't have a round file. That was way more work than I had intended on doing, but it would have been easier with the proper tools. Using the swap meet parts, I was able to get everything bolted up ok, and went for a test drive around the lake the next day. (not far, total trip about 1 mile.) Not much of an improvement, the brake booster had a vacuum leak.
Similar to manual brakes, but once you started pushing the pedal, you got a slight hissing sound.
Oh Well, guess I won't have power brakes just yet.

still, I couldn't wait any longer. It was time for the first real test drive. Not just a mile around the neighborhood lake, but something a little more significant. I checked all the fluids (except the differential fluid because I didn't know there was such a thing), made sure the tires and rear shocks had air, and away I went. I had my route planned out, about a 12 mile loop on two little used highways connected by one country road ending up back here at home. When I left the oil level was just a little above the full mark. It felt great to finally be out driving my car with the windows down. I was also very nervous though. Everything went OK. When I got back home I checked all the fluids & pressures etc. to see if I had any problems. Left air shock leaked a little, oil level under the add mark halfway between add and the end of the stick. The oil didn't leak out, it burned it. I needed a new engine or a rebuild if I planned on driving this car regularly.

Someone gave me an their old auto CD player. My original radio was long gone, and a couple others since then I think. The CD player fit nicely in the hole in the dash, regular DIN size, so I installed it. The CD part didn't work, but the radio did. I picked up a universal antenna from Autozone on one of my few trips into town. I used an old 4x10 speaker from an S-10 truck. It wouldn't have fit under the speaker grill, but since my speaker grill was missing anyway, it was better than a hole in the dash. The green dash pad was cracked and was covered with carpety cloth thing that just laid across the top, so you couldn't see the speaker anyway. Maybe I couldn't Drive the car anywhere, but sometimes I'd sit in it at night and listen to the radio. Without a passenger seat it was fairly comfortable to lay down over there. Someday I'd be able to leave home/work.

Tav

Re: Tav Challenger T/A Clone [Re: cataclysm80] #446163
08/22/09 08:15 PM
08/22/09 08:15 PM
Joined: Oct 2006
Posts: 4,165
Florida
C
cataclysm80 Offline OP
master
cataclysm80  Offline OP
master
C

Joined: Oct 2006
Posts: 4,165
Florida
December of 1999, It had been a year since I bought the Challenger. I had gotten it running, but didn't want to put much more money into it unless I could get a title and actually drive it around. Turns out Pedro couldn't get the mechanics lien for the title. As an apology he offered me a 318 engine. It had been rebuilt nicely and was supposedly the hottest 318 around. It was in a 1973 four wheel drive Dodge truck that was rolled about 5,000 miles after the engine was put in. Turns out I needed an engine, so...

I took a trip back north to get the engine and track down the Challengers previous owner Bob, and offer him $1000 for the title. He would've rather had the car back, but he didn't have a place to put it, had plenty of other cars around to work on, and couldn't come to Florida to get it. He accepted but said he would need a few days to get the title from his mothers lock box where he kept all his important papers. I spent the time looking around for another vehicle just in case the deal with Bob didn't go through.

What I found was a 1970 'Cuda. FY1 Lemon Twist with black interior, 340 with 727 trans. In 1980 a guy my dad went to school with had bought an AAR without an engine. Then he bought this 'Cuda for the 340. This 'Cuda had been sold to another racer without the engine as a parts car and stored inside for 11 years before the AAR was totaled in a wreck racing. When the AAR was totaled, the 340 engine came back home to this 'Cuda that it had come out of, along with some other AAR parts (trim, spare wheels, etc.). With the engine & car reunited, the car was sold to a chevy guy that wanted to restore it. He had rebuilt the rear end, had the heads done, and cleaned the engine block up and set it out to dry. When he came back the next morning, the engine block had been stolen. He thinks he knows who took it, and that it's racing around circle tracks now, but the police couldn't help much and in the end he found another 1970 340 engine for the car, but had lost interest because it wasn't the matching engine. Car was for sale, $2,500. So I bought it. If the deal with Bob didn't go through, at least I'd have something else cool to work on, and most importantly, the car knowledge I'd already learned would still be applicable.

The deal with Bob went through just fine. I bought the Challenger again that year, for $1,000 this time. And for the second year in a row found myself hauling home a cool Mopar.

Here's the 'Cuda the day I found it...
Nice to find a building full of cars. I was told there was an old Chrysler back there with an early Hemi, but I only had eyes for the 'Cuda.
The 'Cuda is done being restored now. Maybe I'll have another thread for its story someday, but for now I'm going to keep this thread about the Challenger.

Tav

5434177-cudadustyedit.jpg (409 downloads)
Re: Tav Challenger T/A Clone [Re: cataclysm80] #446164
08/22/09 09:29 PM
08/22/09 09:29 PM
Joined: Oct 2006
Posts: 4,165
Florida
C
cataclysm80 Offline OP
master
cataclysm80  Offline OP
master
C

Joined: Oct 2006
Posts: 4,165
Florida
After I got them both home...
Yes, this is January in Florida. It's Chilly, but with a Flannel shirt I got some of the best working time about 1 AM in Januaries. No one interrupts you outside at 1 AM in January.

Tav

5434311-6.JPG (225 downloads)
Re: Tav Challenger T/A Clone [Re: cataclysm80] #446165
08/22/09 09:30 PM
08/22/09 09:30 PM
Joined: Oct 2006
Posts: 4,165
Florida
C
cataclysm80 Offline OP
master
cataclysm80  Offline OP
master
C

Joined: Oct 2006
Posts: 4,165
Florida
The same day...
That front tire was too big. It bent the fender lip a little.

Tav

5434313-7.JPG (232 downloads)
Re: Tav Challenger T/A Clone [Re: cataclysm80] #446166
08/22/09 10:10 PM
08/22/09 10:10 PM
Joined: Oct 2006
Posts: 4,165
Florida
C
cataclysm80 Offline OP
master
cataclysm80  Offline OP
master
C

Joined: Oct 2006
Posts: 4,165
Florida
With a title, I set about getting the car registered and insured, etc. (The insurance guy was surprised when I listed my driving distance to work as 10 feet.)

The 'Cuda was in decent shape, but wasn't anywhere near being driveable.
I promptly borrowed off the 'Cuda...
4 14" rallye wheels,
a passenger seat,
drivers seat back (mine was missing)
the dash ashtray (mine was missing),
the female ends of the front seat belts (mine were missing,
fuel tank ground strap (mine was broken),
woodgrain console plate (mine was cut on).

That was a big improvement.

I managed to scrounge up 3 of the 72-74 style rallye wheel center caps. I went up to the mopar junkyard and bought another center cap so I'd have four of them. Also picked up a set of gauges to replace my fried ammeter, and the 70 Challenger only curved plastic trim that goes around the edge of the dash by the radio. It was fun looking around the junkyard. My favorite car he had was a 70 Challenger RT/SE dealer demo car from Jacksonville. 383, AC, power windows, cruise control, just loaded, but rusted very badly. He wanted $2,000 for it, but I thought it was too rusty. Now I wish I would have got it. Oh well. Several years later an 18 year old girl from Jacksonville bought it. Her father owns a body shop and they're going to fix it up together. Maybe I'll see it again some day.

I went out and had four matching brand used tires put on the rallye wheels and came home to put them on the car with the 72-74 center caps. With all the parts the 'Cuda came with I was able to round up 19 lug nuts, which was a big improvement over the 12 I had before. (I suggest running 20 lug nuts at all times if possible. )

At the end of February 2000 with spring in the air, it was time to get that new 318 from Pedro into the engine bay so that I could go drive my car. The new engine was a little stuck from sitting. I could turn it a little by hand, but not all the way around. I decided to open it up and have a look, hone the cylinders, and install new gaskets. I ordered up a gasket set, some new hooker super competition headers (my old headers were rusted through), new plug wires, some kerosene to clean parts with, the honing tool that is used with a hand held drill, upper & lower radiator hoses, bypass hose, heater hose block off caps, oil, transmission fluid, and whatever other odds and ends I thought I might need. It took a while for the headers to get in. Upon disassembling the stuck 318 from Pedro, I found it was actually a 360 with a Mopar Performance purple camshaft!

Mid March I was at the spring Daytona Beach car show (which is about half the size of the Turkey Rod Run) and picked up a new copy of the 1970 Challenger / Dart Factory Service Manual. I Highly recommend the Factory Service Manual to anyone who plans on working on their own car! It is an essential book, and I think I would recommend it over any other publication.

I took the 360 apart, honed it and put it back together. Learned all about the inside of an engine, and overall it went pretty well. I painted the engine Chrysler Blue like the 318 that came out of the car. That's what was in the car, it must be the right color.

Next, how to get the old engine out of my car, and get the new one in? I found 2 pine trees in the yard that were barely far enough apart that I could get the fenders in between them. Using a ladder, I knocked the bark off the trees & wedged a landscaping timber between them so that they couldn't get pulled together. Then I strung a log chain between the two trees up by the landscaping timber and secured it firmly to each tree. Then I hung a come-along in the middle of the log chain.

I got the car up between the trees and lifted the old engine/trans out. With them out of the car, it was easy to verify that they were the numbers matching engine and trans for the car.

Tav

5434379-11.JPG (216 downloads)
Re: Tav Challenger T/A Clone [Re: cataclysm80] #446167
08/22/09 11:57 PM
08/22/09 11:57 PM
Joined: Oct 2006
Posts: 4,165
Florida
C
cataclysm80 Offline OP
master
cataclysm80  Offline OP
master
C

Joined: Oct 2006
Posts: 4,165
Florida
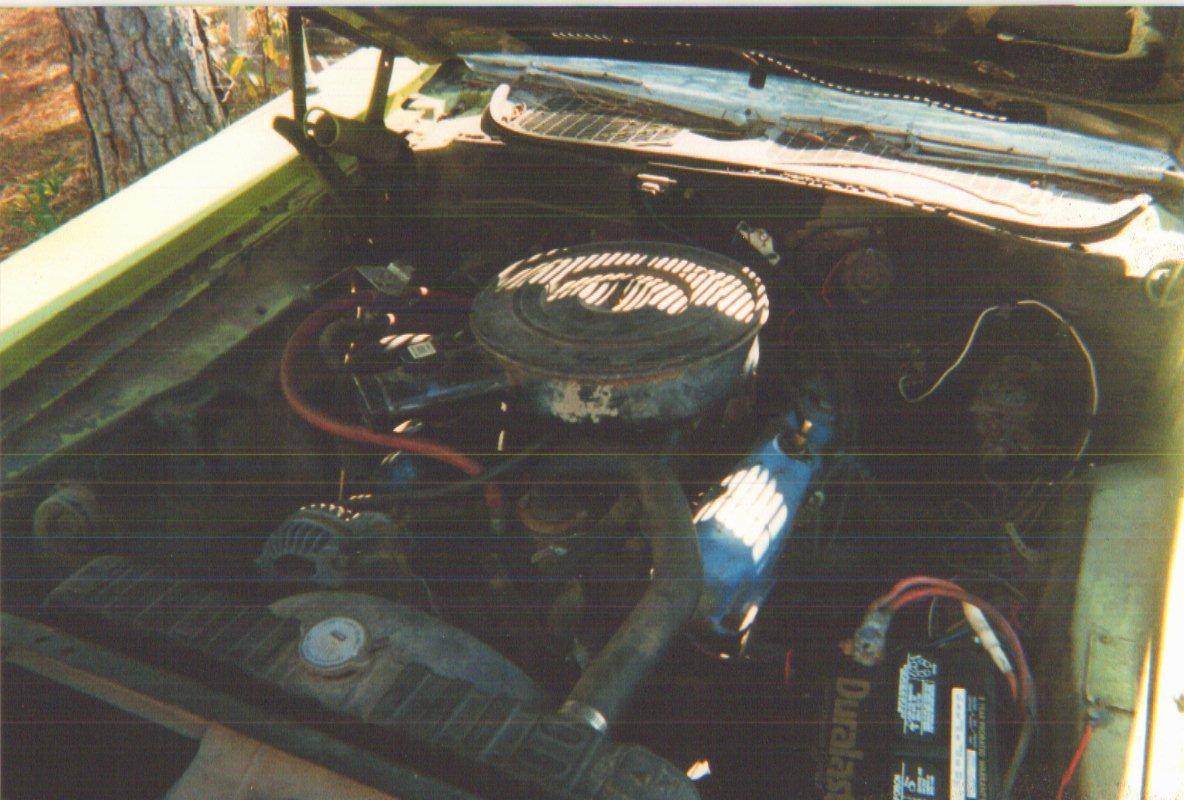
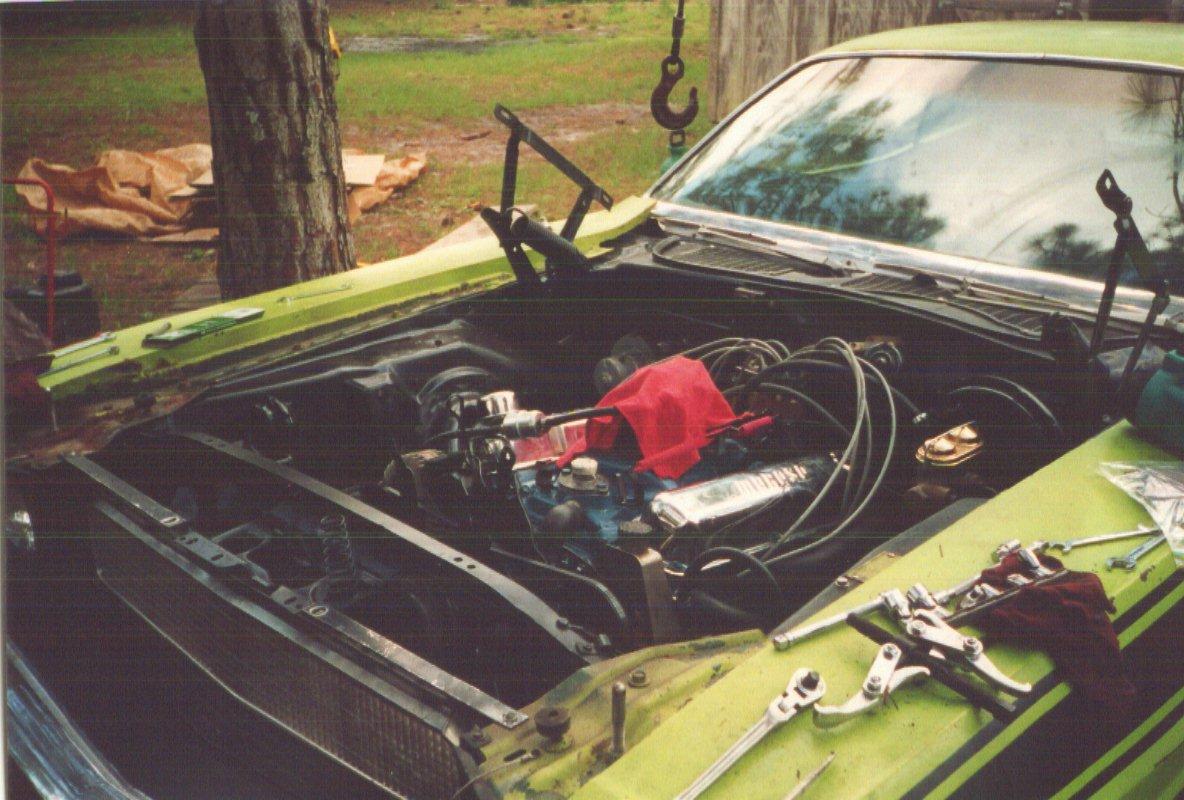
Next I decided to clean up the engine compartment while I had the engine out. Looking back, I think that's how restorations get started. First you take off one part, then you have to take something else off to make it look good next to the first part, etc...

I cleaned all the grease and everything off with kerosene. It didn't look very nice, EF8 with sublime overspray everywhere. I cleaned it up, taped it off, and went over it with the best rattle can I could find. The parts store didn't sell sublime in a rattle can, so I used black. (sometimes I wish I wouldn't have painted it black, so I don't recommend doing that.)

I had been having some problems with the power steering box feeling sloppy and loose and couldn't seem to adjust it properly, so I ordered a new box and put it in after cleaning up the engine compartment. I also tried out a different used power brake booster.

Then it was time to put the new engine in. Wait a minute,...
the 318 drivers motor mount bracket is wider than a 360. I added some washers to take up the slack.
I wonder if I can use the 727 trans from the 'Cuda in place of the 904? Nope, the 727 is about 4 inches longer than a 904, which would make my driveshaft the wrong length. ('Cuda was missing its driveshaft)
The Hooker Super Competition Headers won't go in unless the steering center link is threaded through them. I used the puller that took the pitman arm off the steering box to separate a tie rod end from the center link, threaded it through the header and reassembled. (pickle forks will ruin your tie rod dust seal. Only use the pickle fork if you plan on replacing the tie rod end.)
Now the rear sump truck oil pan is hitting the center link. (Sigh) Had to search the local junkyards and pay $50 for a center sump 360 oil pan with oil pickup tube. Changed out the oil pan with the engine dangling half installed. Removing the oil pump to install the new pickup tube, I took all the bolts out, tried to pull on it, wiggle it, even tapped on it with a rubber hammer, but it wouldn't budge. It was 3 AM and I laid my hands down by my sides exhausted. BAM the oil pump came down on my head! Please be careful.
Got the new used oil pan all buttoned up, and the engine sitting in place finally. Now the new headers are in the way of installing the driver motor mount bolt. I ended up buying a die to thread the bolt all the way up to the head, and installing it from the front.
I got a new parts store transmission mount that didn't want to go on. The 727 mount fit just fine, so I slotted the holes in the new mount to match the 727 holes.
Autozone had their rear transmission seals mixed up in the computer. I asked for the 904 unit and they gave me the 727 one. I took it back and had them give me the one they had listed for 727 and it fit the 904 perfectly. Installed with an old jelly jar, piece of wood, and a hammer. Hopefully Autozone has that straightened out by now.
I had a kinked transmission line and couldn't find the correct fittings to replace it with a new line in any local parts store, so I used some rubber hose and clamps as a band-aid.

After all that was through, I figured I should rebuild the carburetor. I got a carb kit and installed it. Maybe it was my own doing, or maybe it was just plum worn out, but that carb never did seem to run right. It didn't take long for me to decide I wanted nice reliable fuel injection as soon as I could figure out how to do it.

Before starting it up I took out the distributor and primed the oil pump with a drill. I primed and primed, but never got any oil pressure reading on my aftermarket gauge. Finally, I unscrewed the oil sending unit and tried to prime it with the drill again. Oil shot up out of the sending unit hole over the windshield and landed on the roof and trunk lid. I had plenty of pressure, just a faulty aftermarket gauge.

Only working at night, it took me quite a while to accomplish all of this. I kept a rag and a clean empty butter tub over the carb, with the whole compartment covered by a piece of an old tarp when I wasn't working on it. Well, one night it rained HARD. Water puddled on top of the intake manifold and went sideways into the engine through the carburetor shaft, filling up cylinder #8. When it was time to start it up, the engine wouldn't turn over. It was hydro locked. liquid won't compress like air. I took the spark plugs out and cranked the engine to blow the water out the spark plug holes.

I didn't reinstall the old rusty exhaust with glass packs. I just left it with open headers. I never did like those headers much and wouldn't recommend them for any street driven vehicle. It's next to impossible to get out plugs #5 & #7 plus the wires are always getting burned. Also with a tube running under the steering center link, ground clearance is very low. It was about 2 inches on this car, and I kept hitting (and dented them with) a tree root going out of the driveway.

If the engine looks like the front is tilted upward, that's because it is. I hadn't yet realized at this point that the transmission crossmember was bent causing the transmission to sit low and the seats to lean inward.

Tav

5434544-13.JPG (197 downloads)
Re: Tav Challenger T/A Clone [Re: cataclysm80] #446168
08/23/09 01:12 AM
08/23/09 01:12 AM
Joined: Oct 2006
Posts: 4,165
Florida
C
cataclysm80 Offline OP
master
cataclysm80  Offline OP
master
C

Joined: Oct 2006
Posts: 4,165
Florida
With open headers, it was LLOOUUDD, and had a resonating quality inside the passenger compartment. It was a little finicky, sometimes it would take a while to start, and other times it would start right up. The open headers would cackle and pop now and then until it got warmed up. In the cool winter nights of 2000 I'd start it up at night in the yard and lay on the hood watching the stars until I felt the hood warm up beneath me. I drove it a little, a couple miles at a time around the neighborhood fairly regularly. Once I took it about 9 miles round trip to fill up the gas tank. That's about it. It just never really felt reliable and I wasn't sure what to do to improve the situation.

I spent most of the next year learning everything I could about all the different Challengers & Barracudas. Differences between models & differences between years. Having one of each in front of me to study and compare helped immensely! I also read numerous books on engine building, both generic & mopar specific, automotive math formulas and the concepts of horsepower & torque, etc. Generally educating myself on things automotive, why they work, and how to choose what is best for your application, why you don't use race parts on the street, etc, how individual parts affect the system as a whole, and on and on... I managed to build up a small library of car info. Bodywork seems to be the area where my knowledge is most lacking.

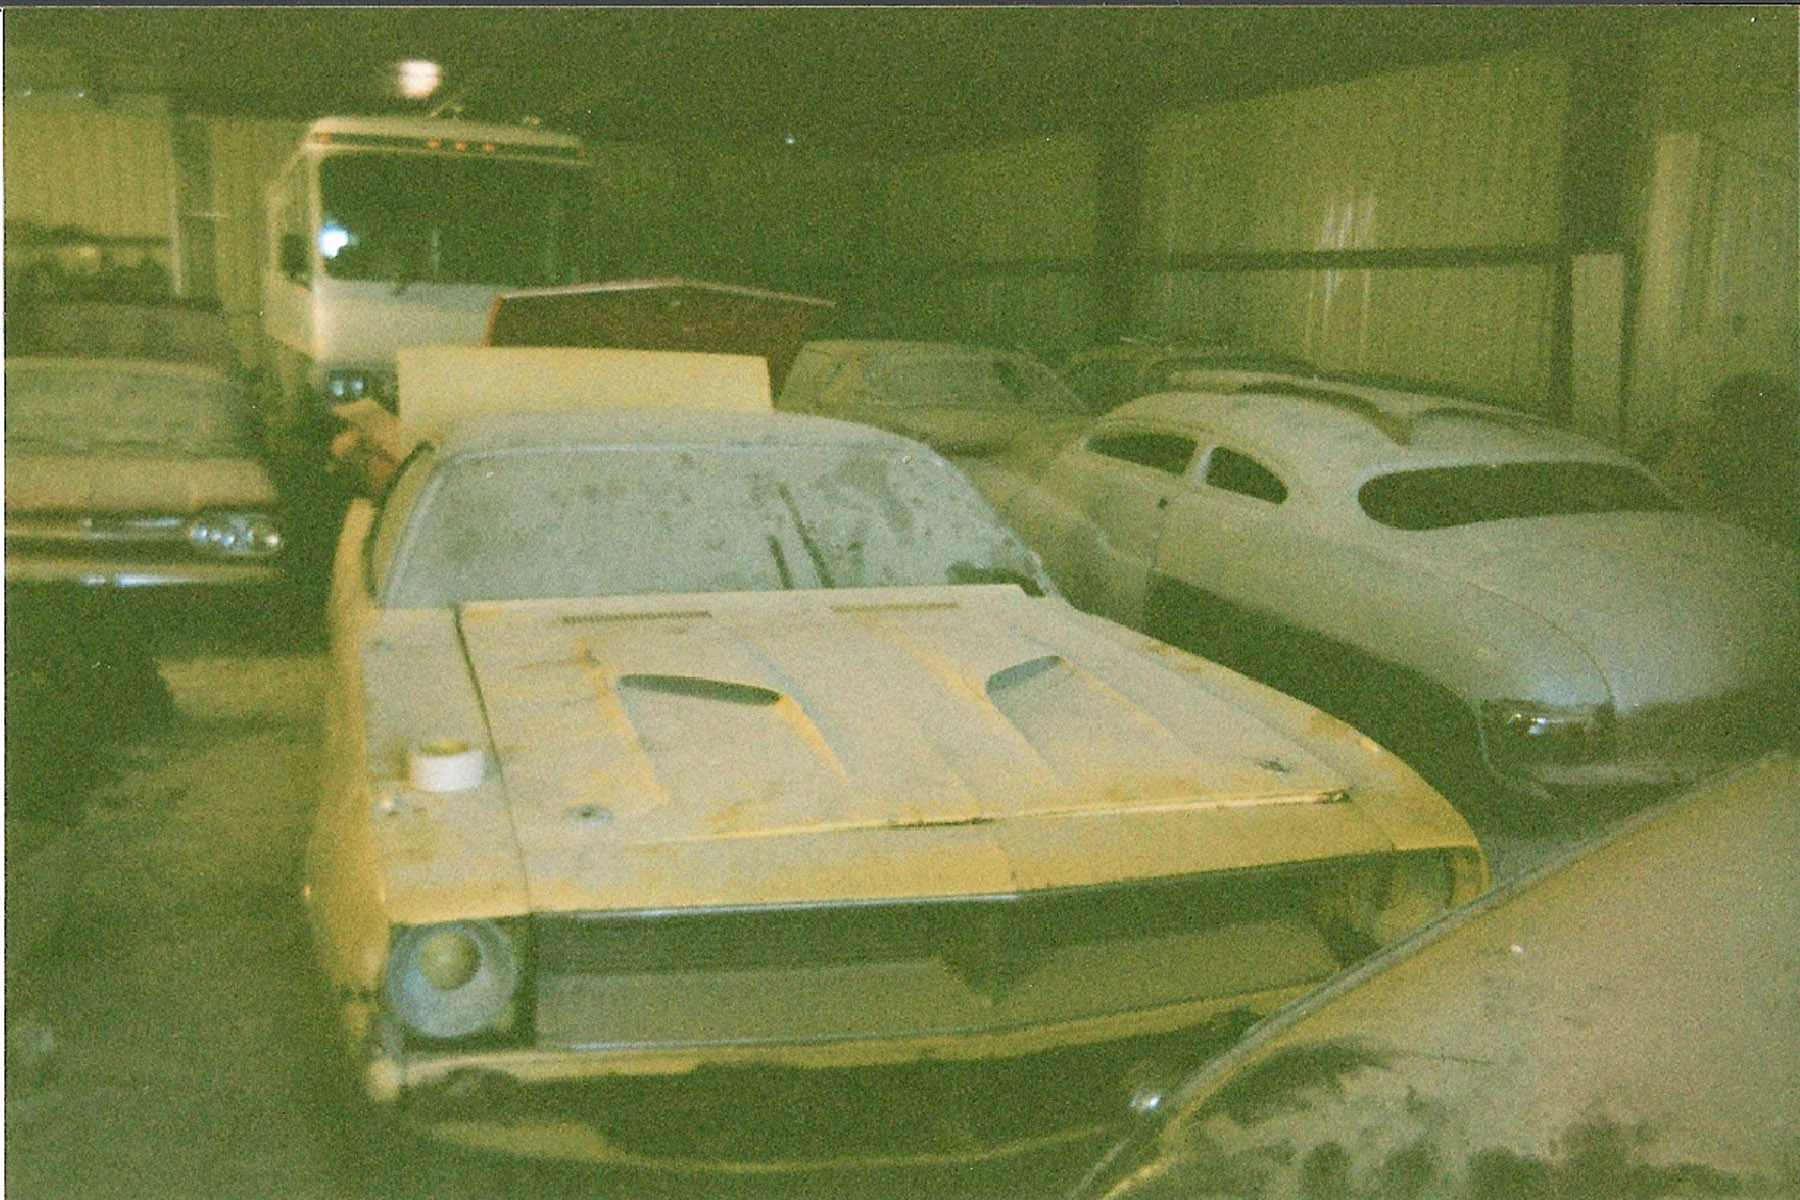
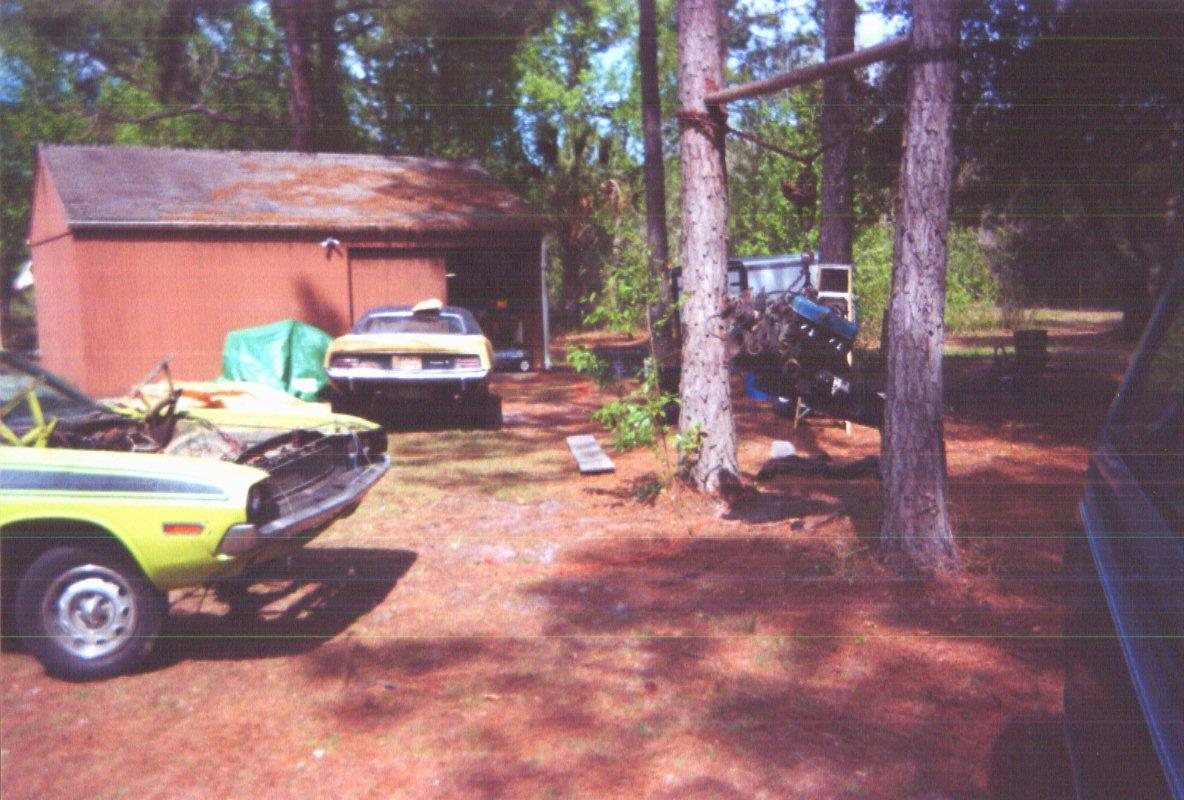
I also built an overhang around 3 of the 4 walls of the shop seen in the previous pictures. The overhangs have concrete floors and are large enough to get the cars under. It makes for a much better work space, and regular lighting instead of a trouble light.

In 2001 I hired a bodyman to come over 5 days a week and work on my cars. 'Cuda first. I was hoping I'd be able to follow along and learn a few things. He disassembled and worked on the 'Cuda while I disassembled the Challenger. (looking back, I think I would have learned more disassembling the 'Cuda myself. I also would have ended up with more pictures of it that way.)

Also in 2001, I got a 1989 Chevy 1500 long bed extended cab with 375,000 miles on it. I had known the truck since 1994 when the previous owner got it. Finally, Freedom. I could go to the grocery store whenever I wanted. (It currently has about 480,000 miles on it and is being turned into a custom truck. Chevy contacted me a couple years ago because they were considering putting it in a TV commercial because it had lasted so long, but they seem to have lost interest when they found out it didn't have an old beat up original paint job.)

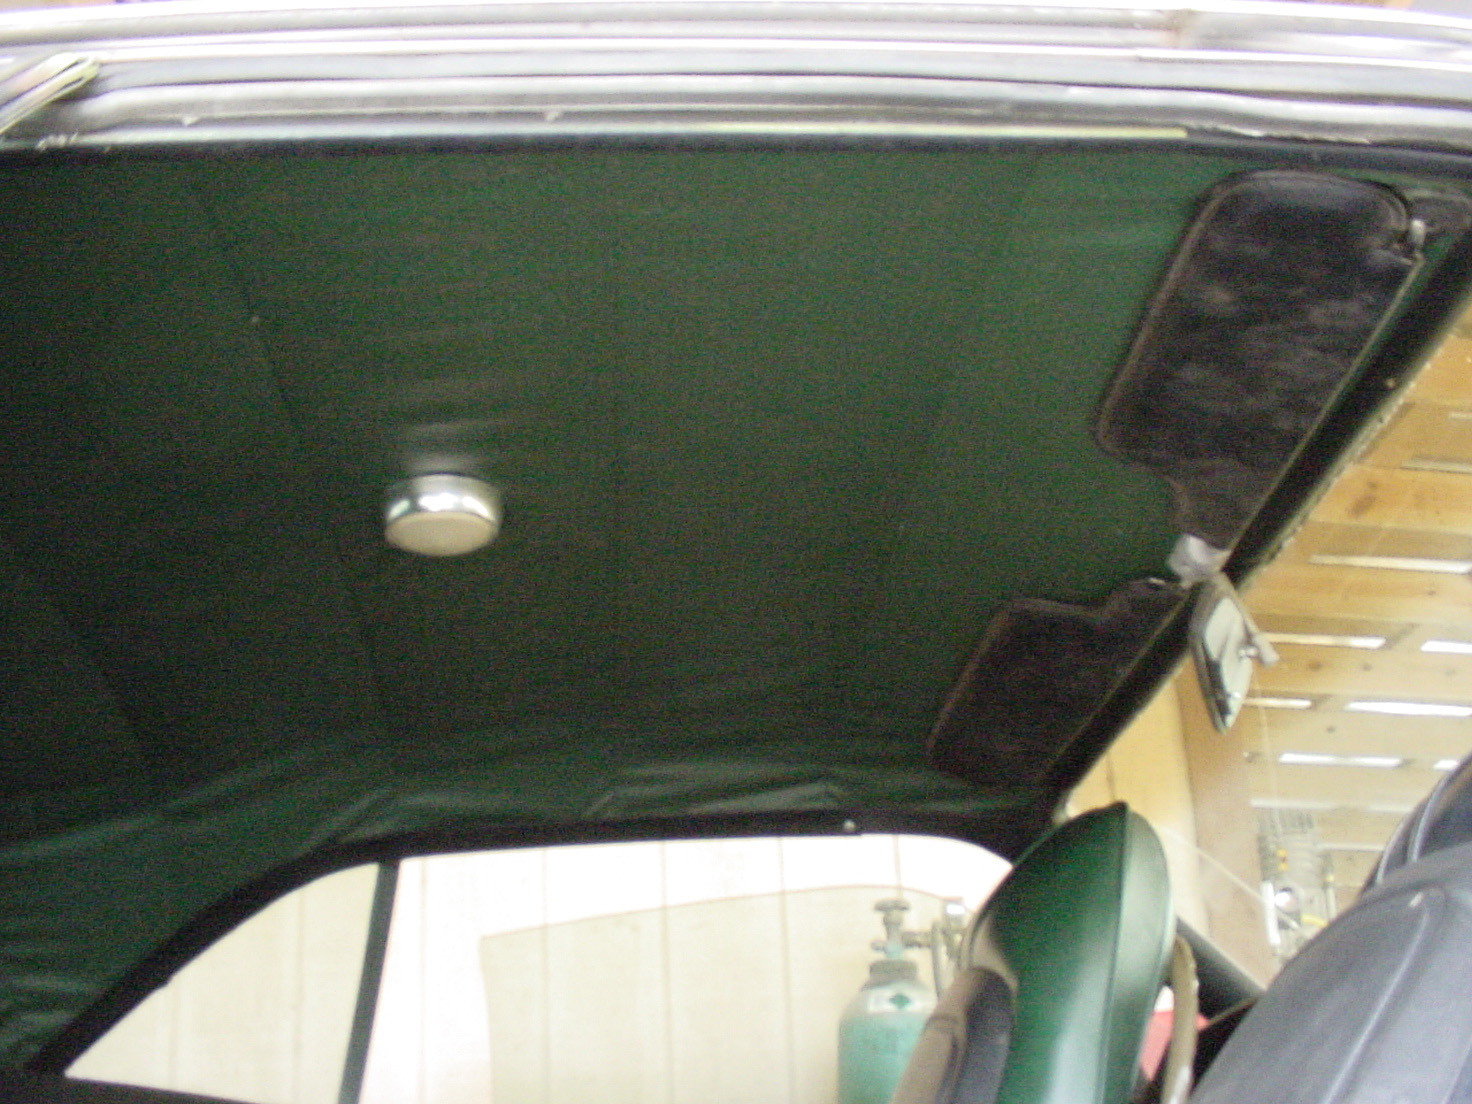
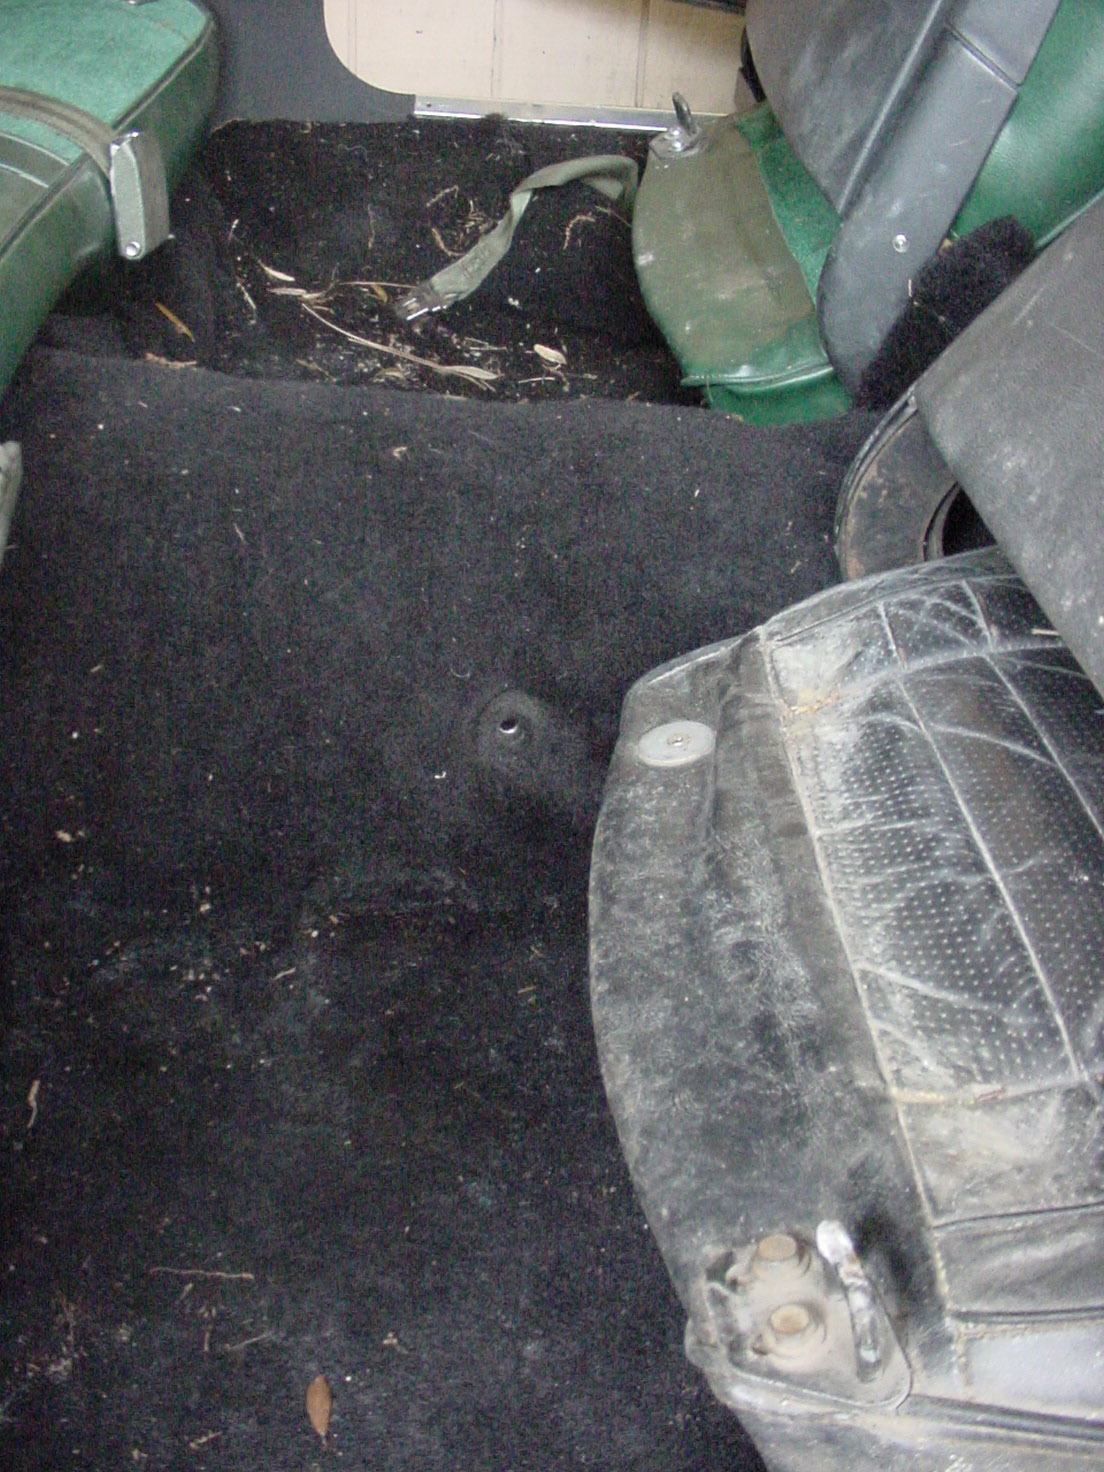
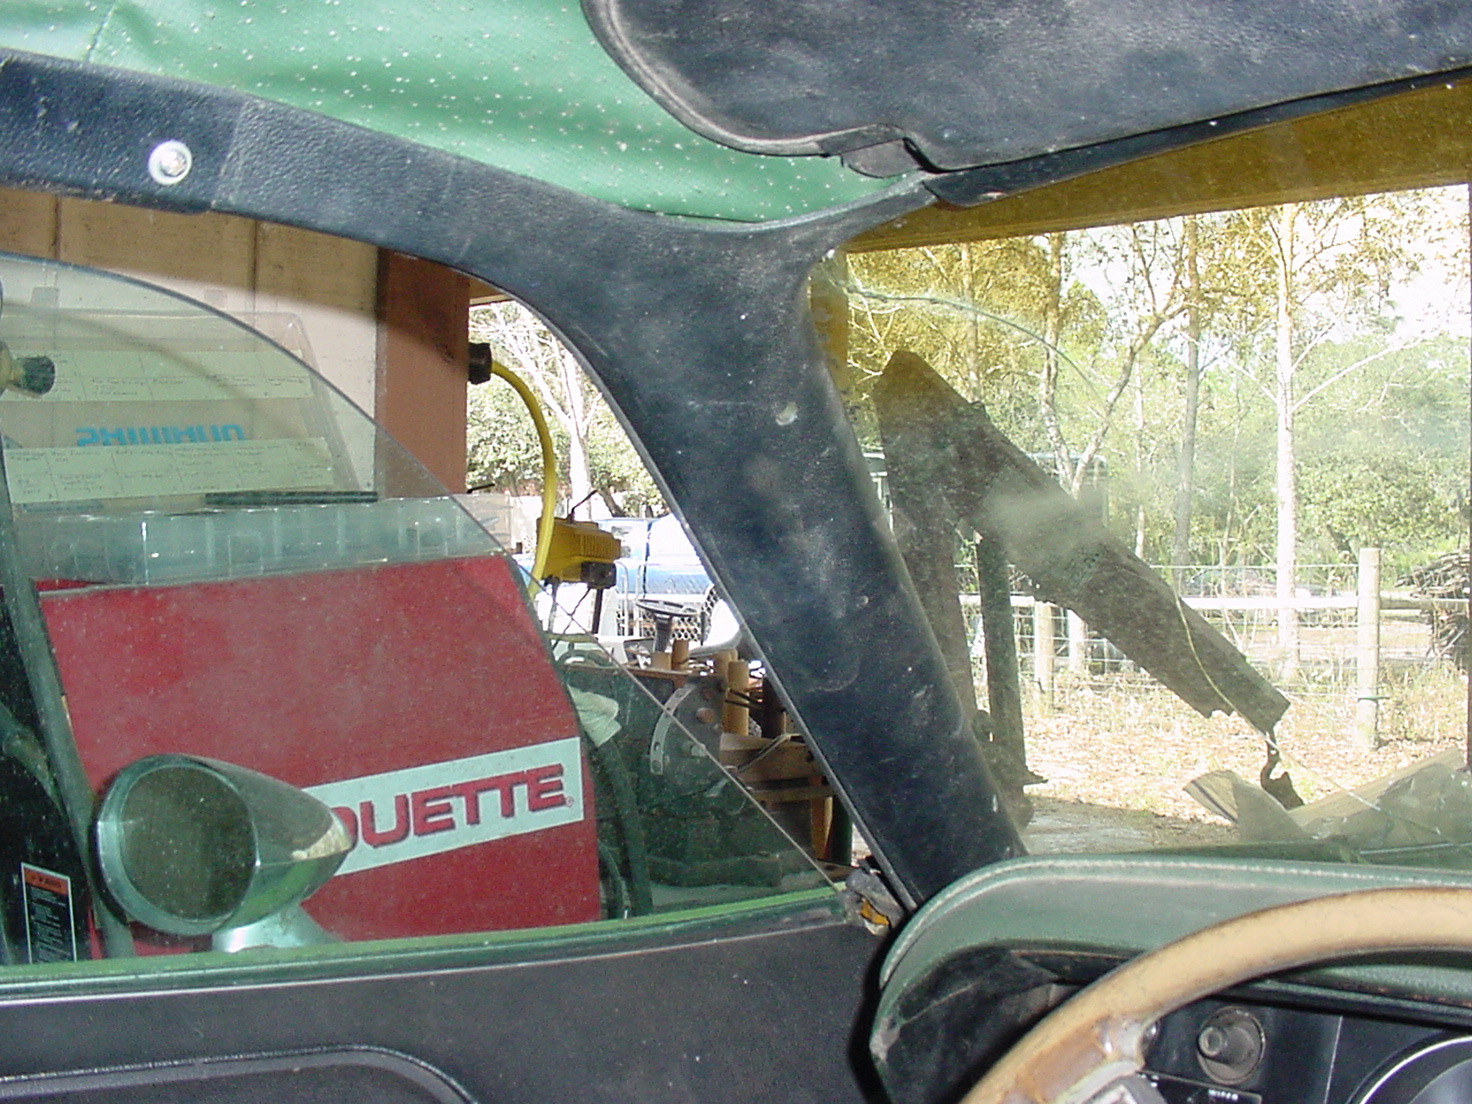
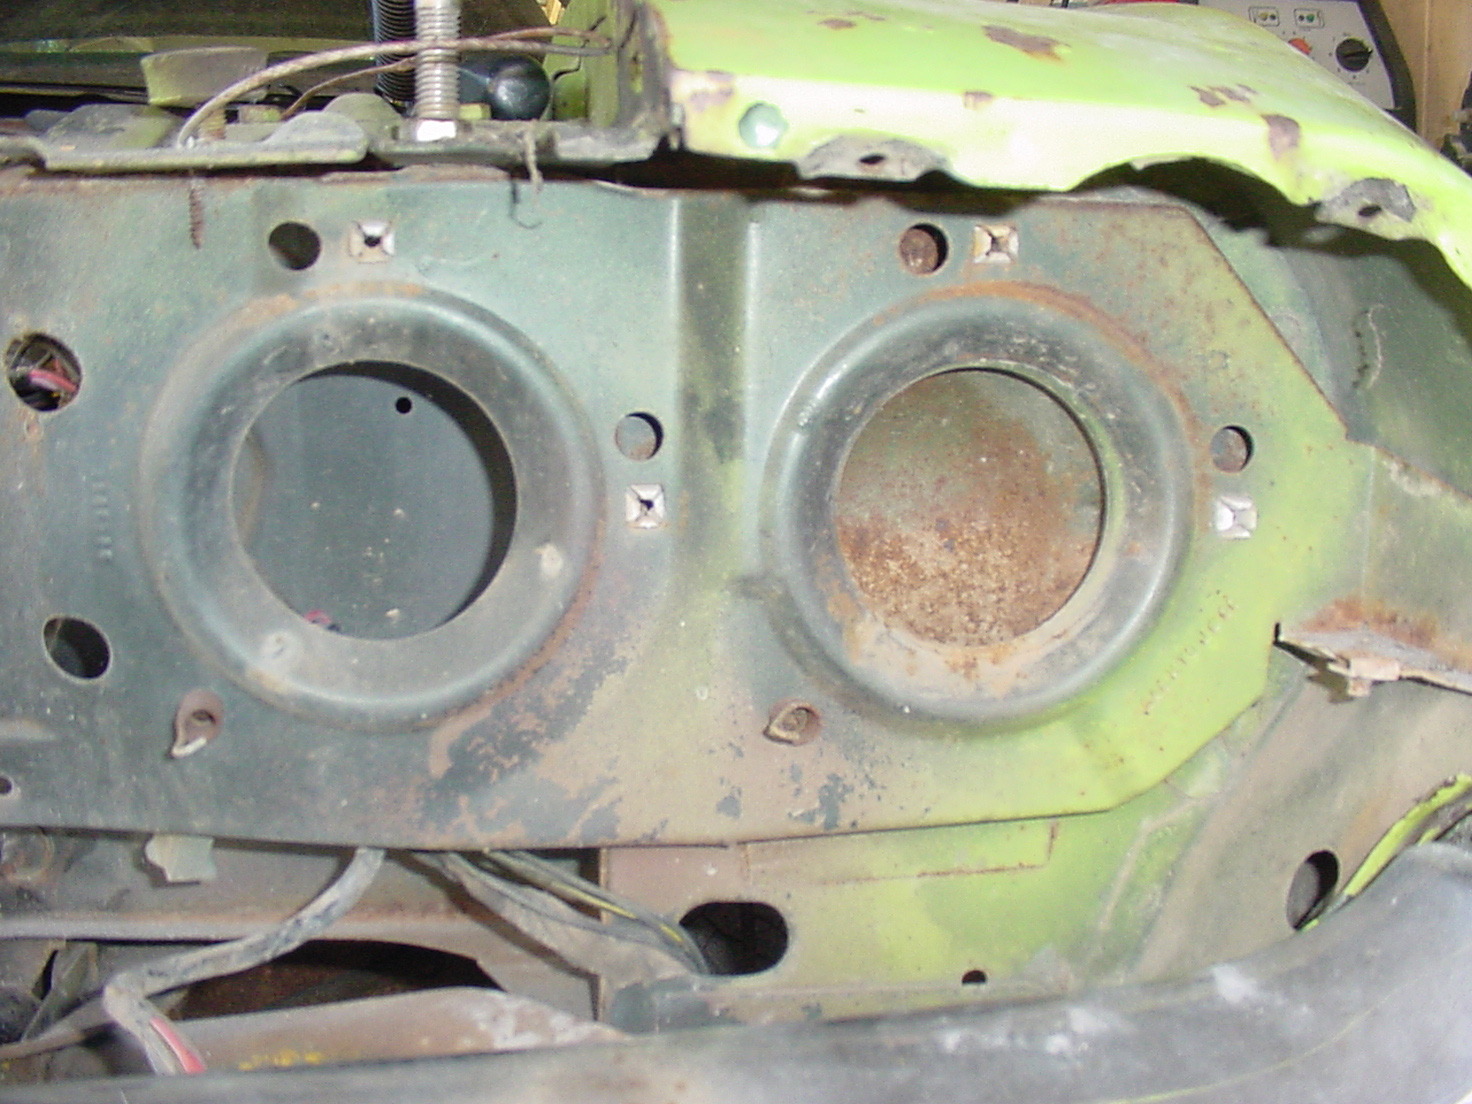
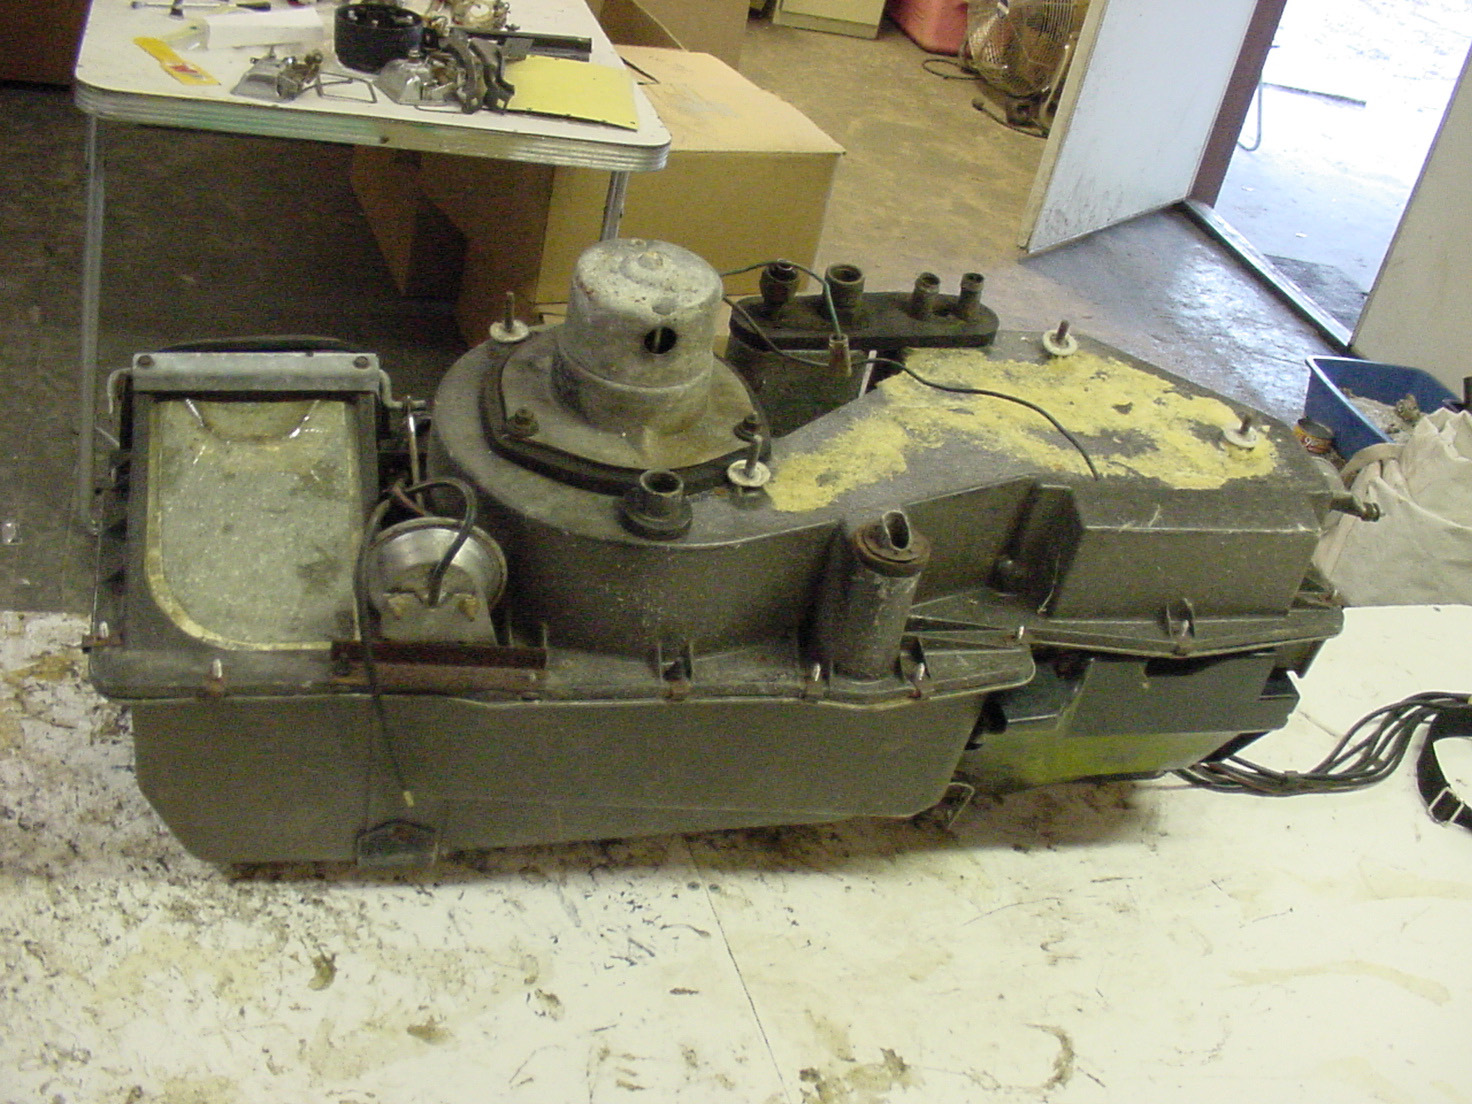
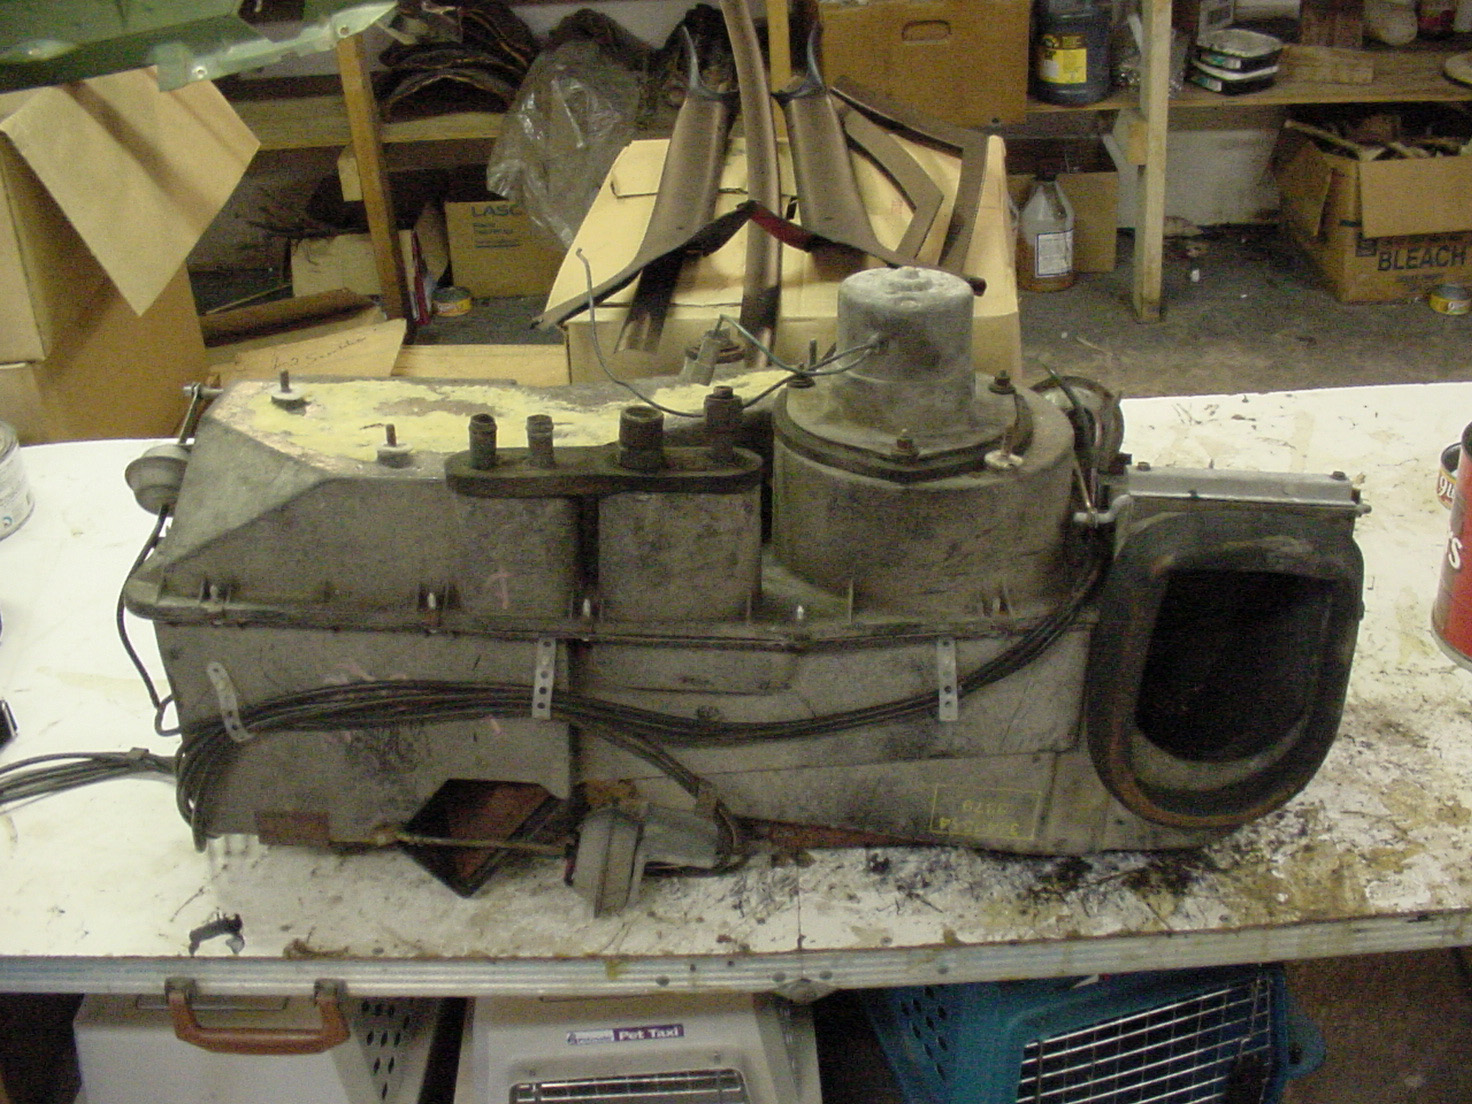
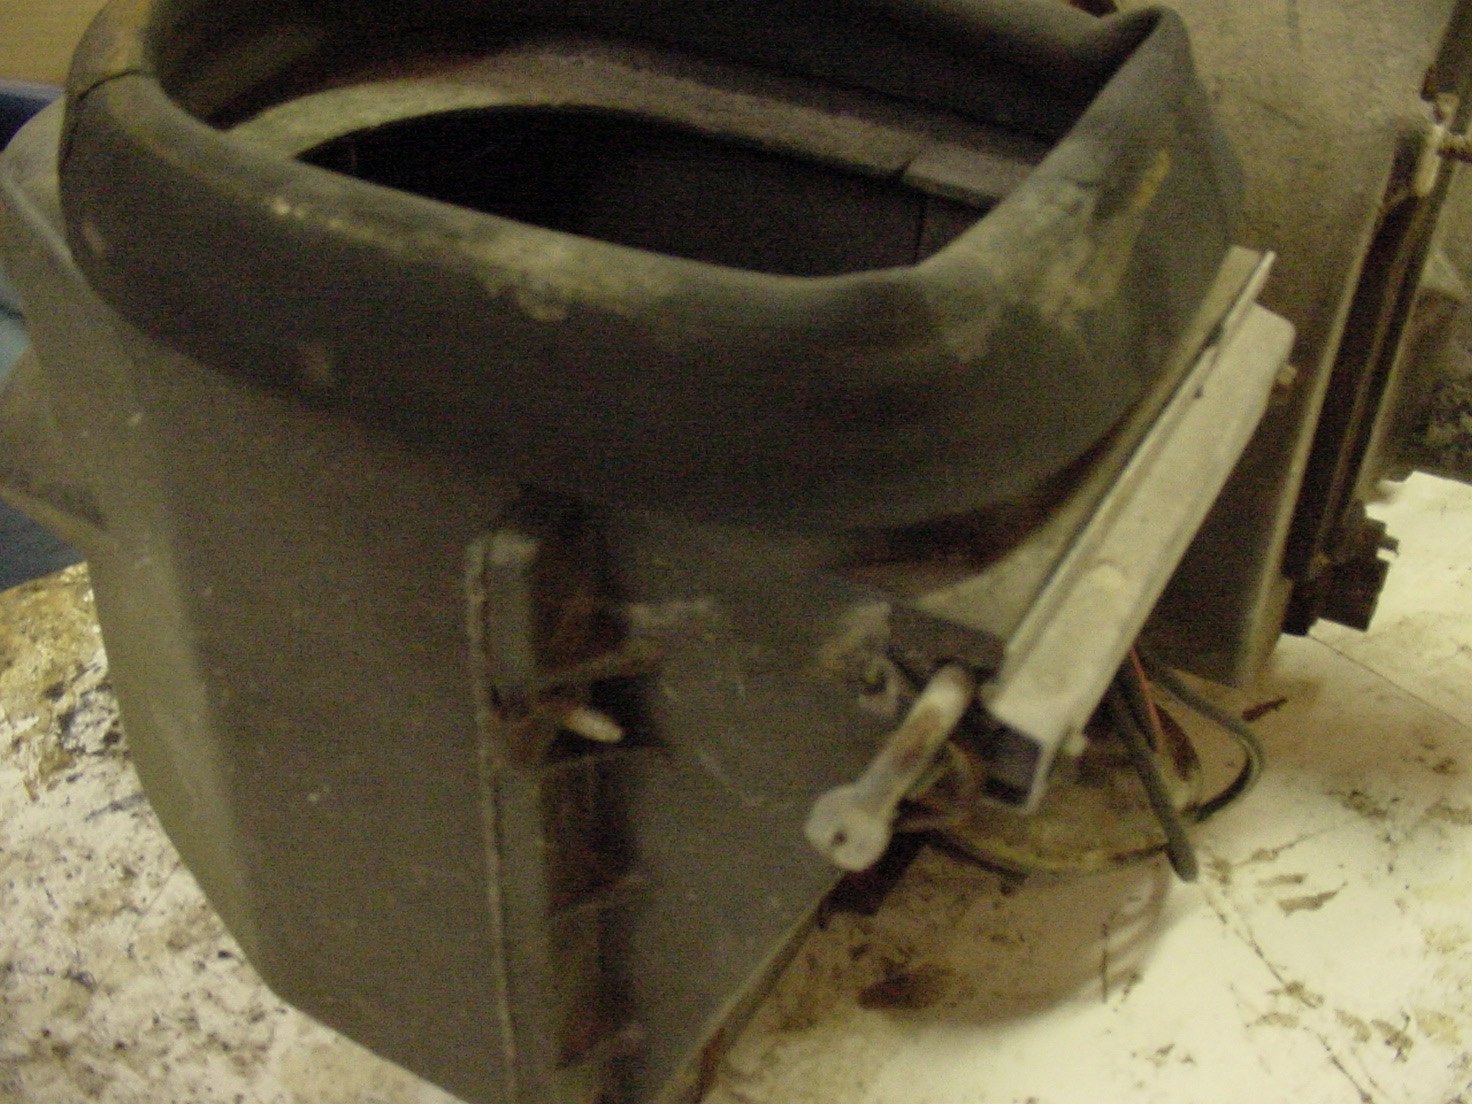
Here's several pics of what the Challenger looked like taking it apart.

Tav

5434649-23edit.jpg (199 downloads)
Re: Tav Challenger T/A Clone [Re: cataclysm80] #446169
08/23/09 01:49 AM
08/23/09 01:49 AM
Joined: Oct 2006
Posts: 4,165
Florida
C
cataclysm80 Offline OP
master
cataclysm80  Offline OP
master
C

Joined: Oct 2006
Posts: 4,165
Florida
I kind of dig the green & black interior. It's cloth & vinyl, but I think it's done using the factory leather pattern. I guess you'd call it custom or modified. It looked alright with the Sublime & Black paint too. The seats were recovered like this in the 90's. The passenger seat was never finished and that's why it wasn't with the car when I bought it. I found someone in Kansas once who had seen my passenger seat in the corner of a shop with the material sitting on top of it, but when they went back to look for me, the seat was gone. Not sure where it ended up. They brought me back a quarter window weatherstrip, but that's all they could find.

Tav

5434697-24edit.jpg (208 downloads)
Re: Tav Challenger T/A Clone [Re: cataclysm80] #446170
08/23/09 01:52 AM
08/23/09 01:52 AM
Joined: Oct 2006
Posts: 4,165
Florida
C
cataclysm80 Offline OP
master
cataclysm80  Offline OP
master
C

Joined: Oct 2006
Posts: 4,165
Florida
Headliner...

Tav

5434698-25edit.jpg (220 downloads)
Re: Tav Challenger T/A Clone [Re: cataclysm80] #446171
08/23/09 02:06 AM
08/23/09 02:06 AM
Joined: Oct 2006
Posts: 4,165
Florida
C
cataclysm80 Offline OP
master
cataclysm80  Offline OP
master
C

Joined: Oct 2006
Posts: 4,165
Florida
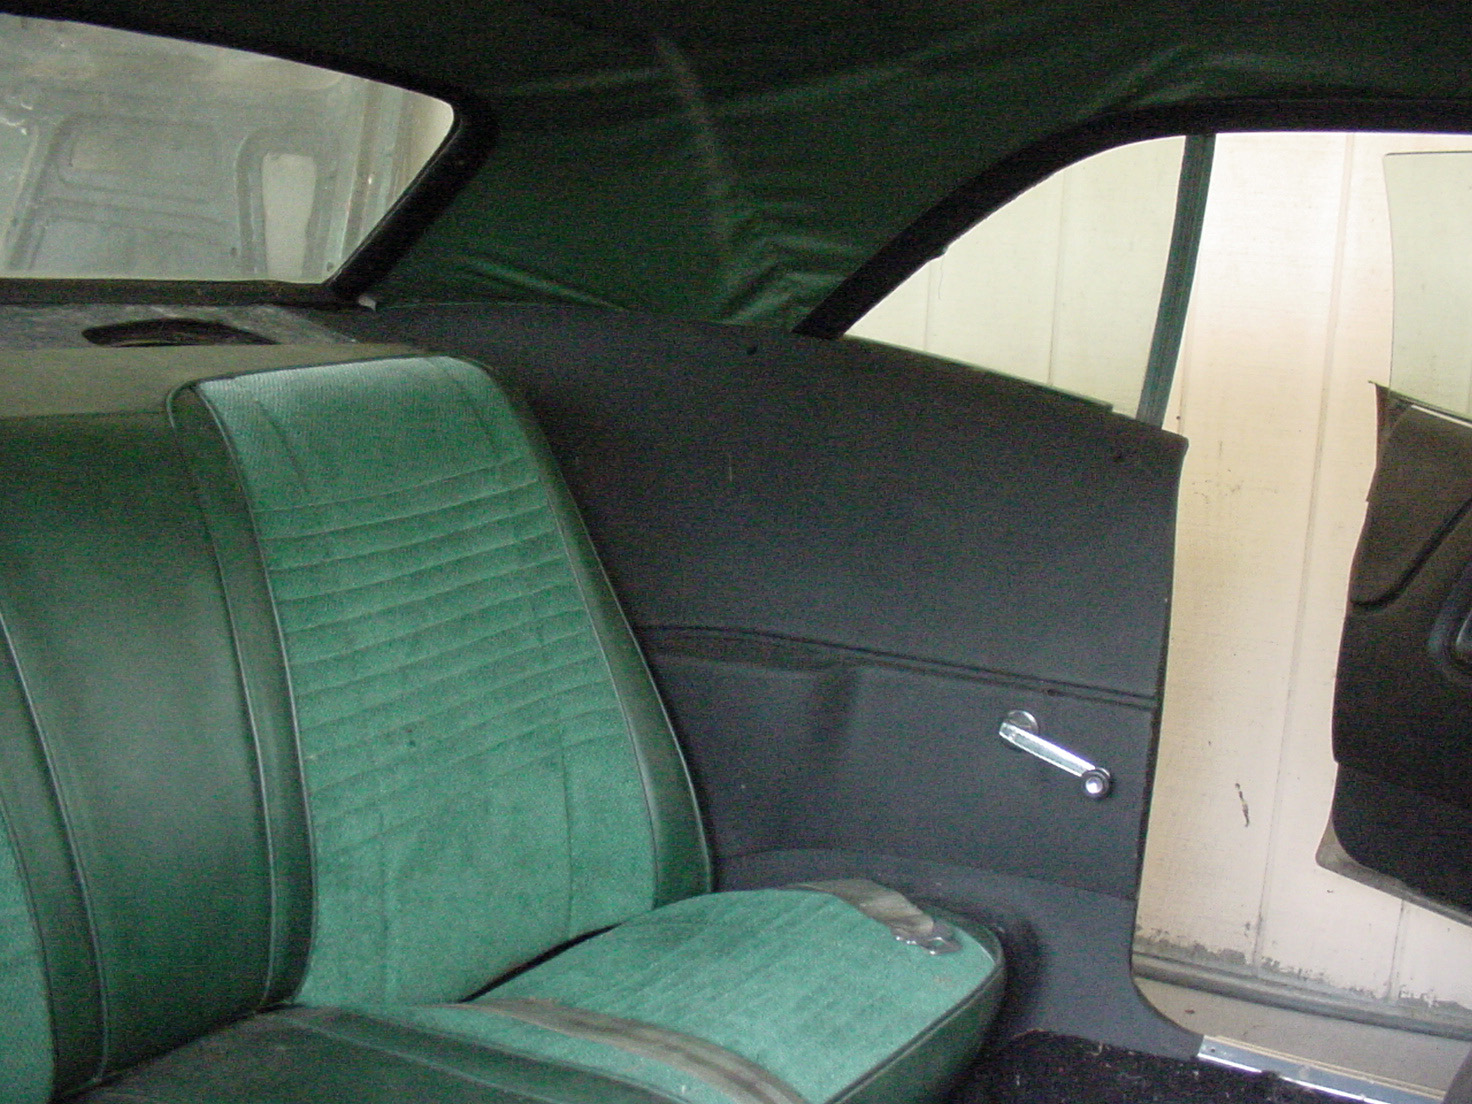
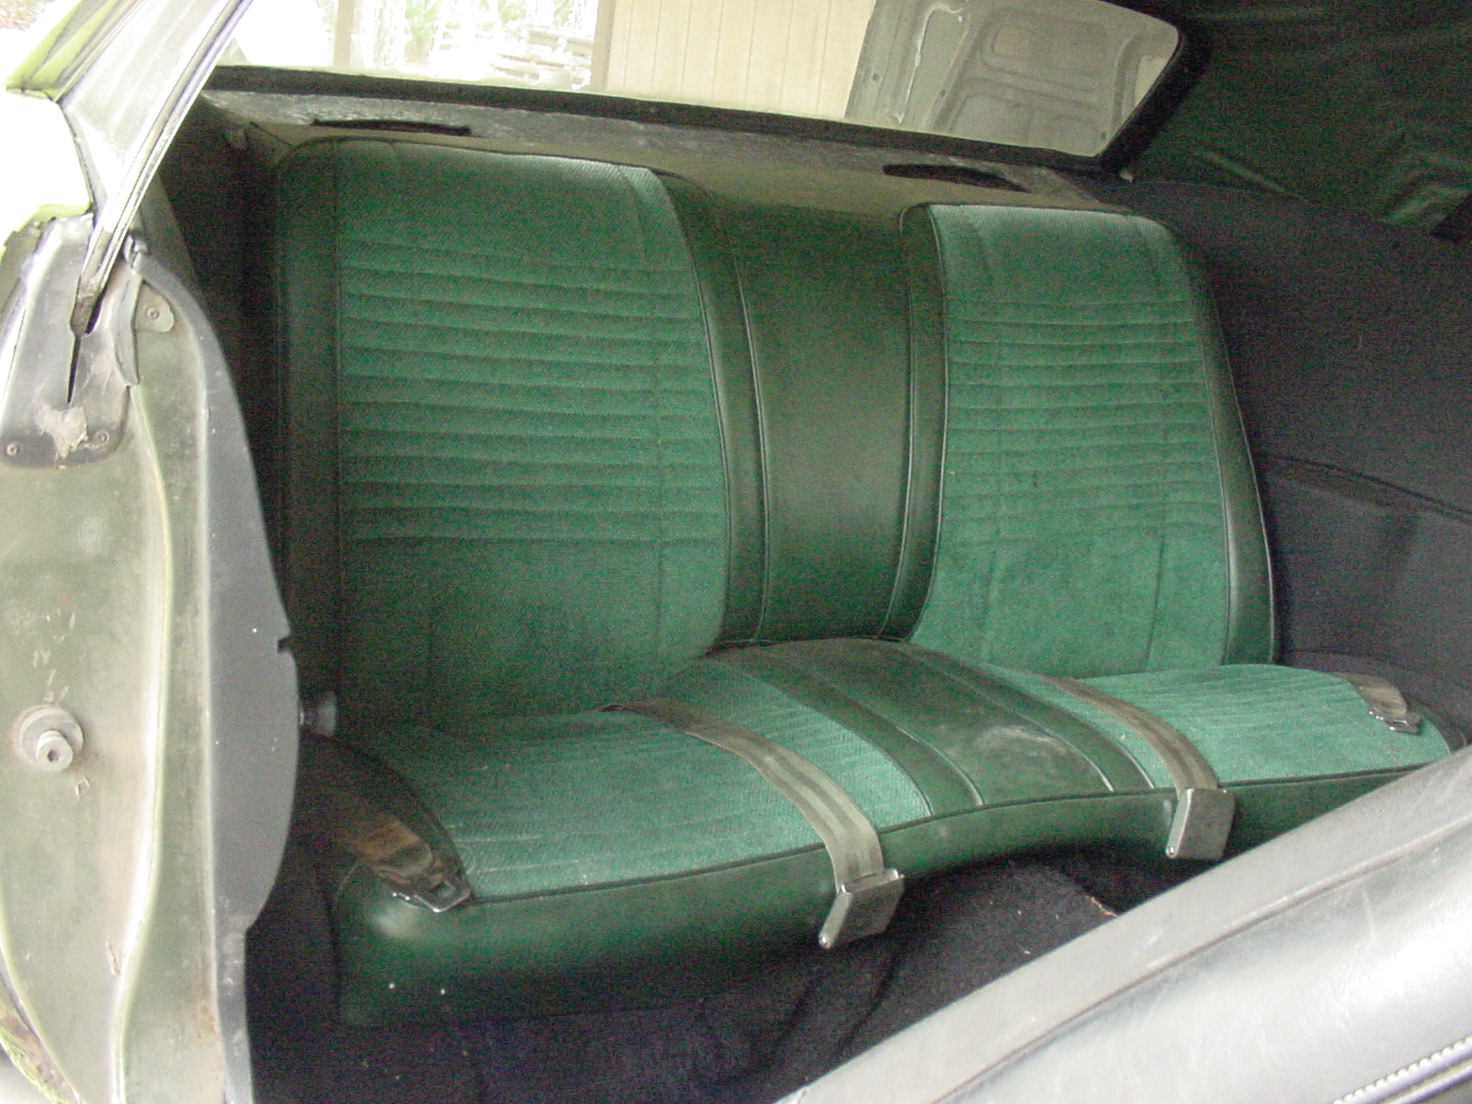
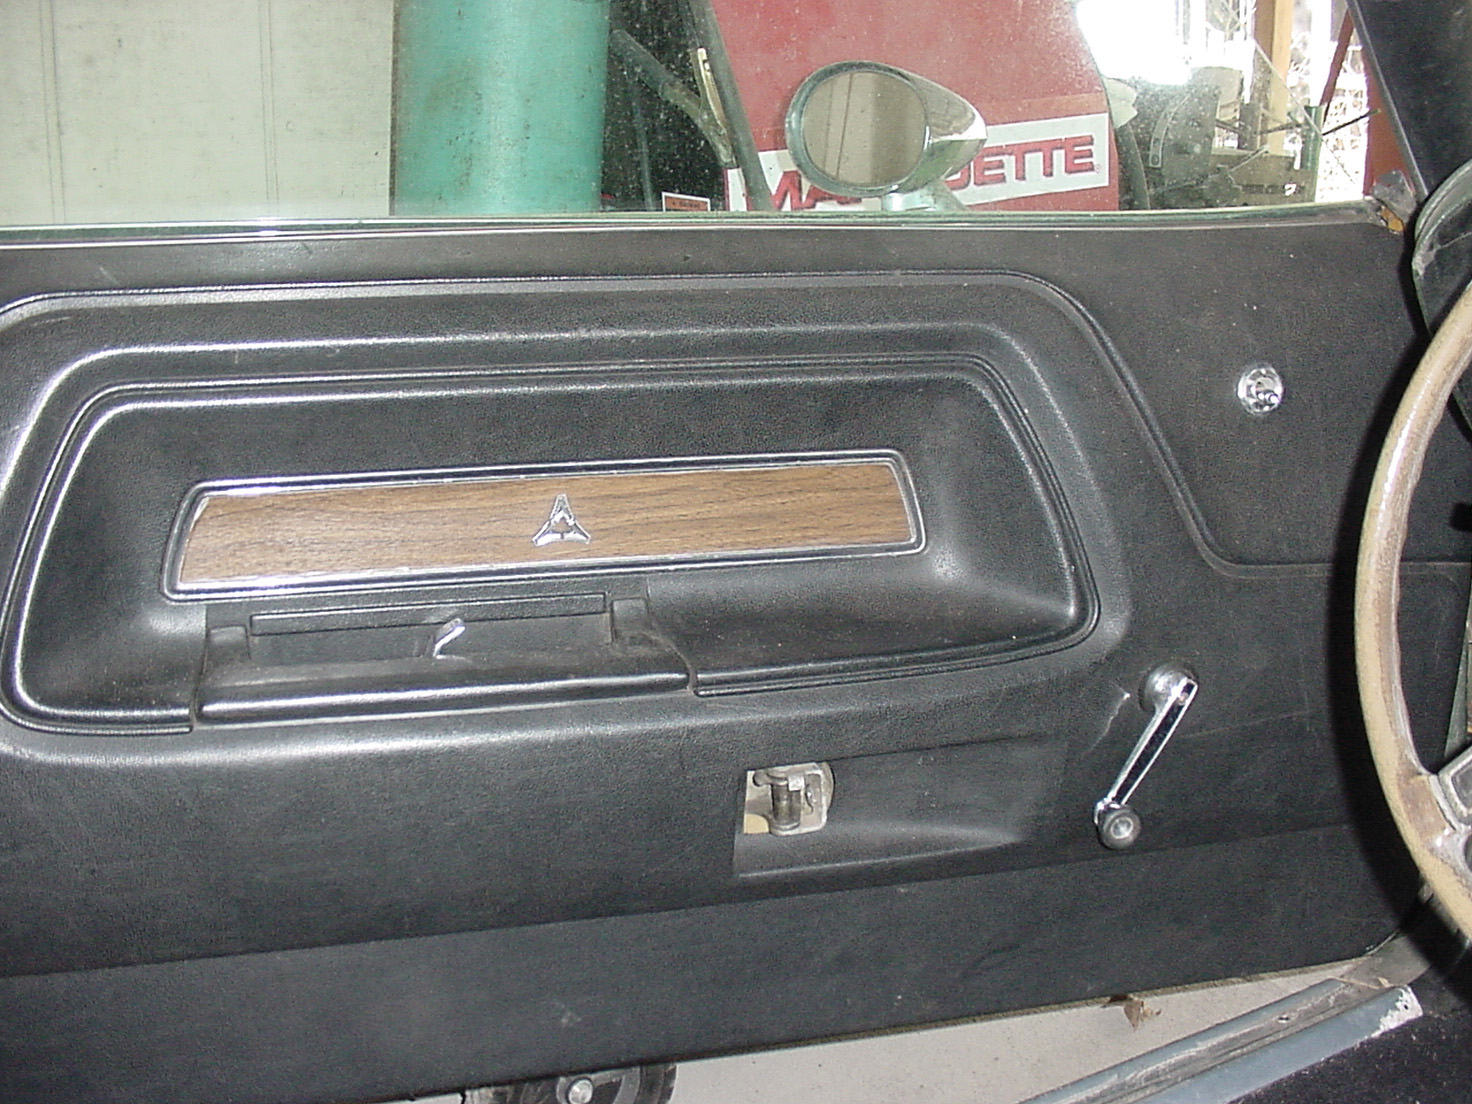
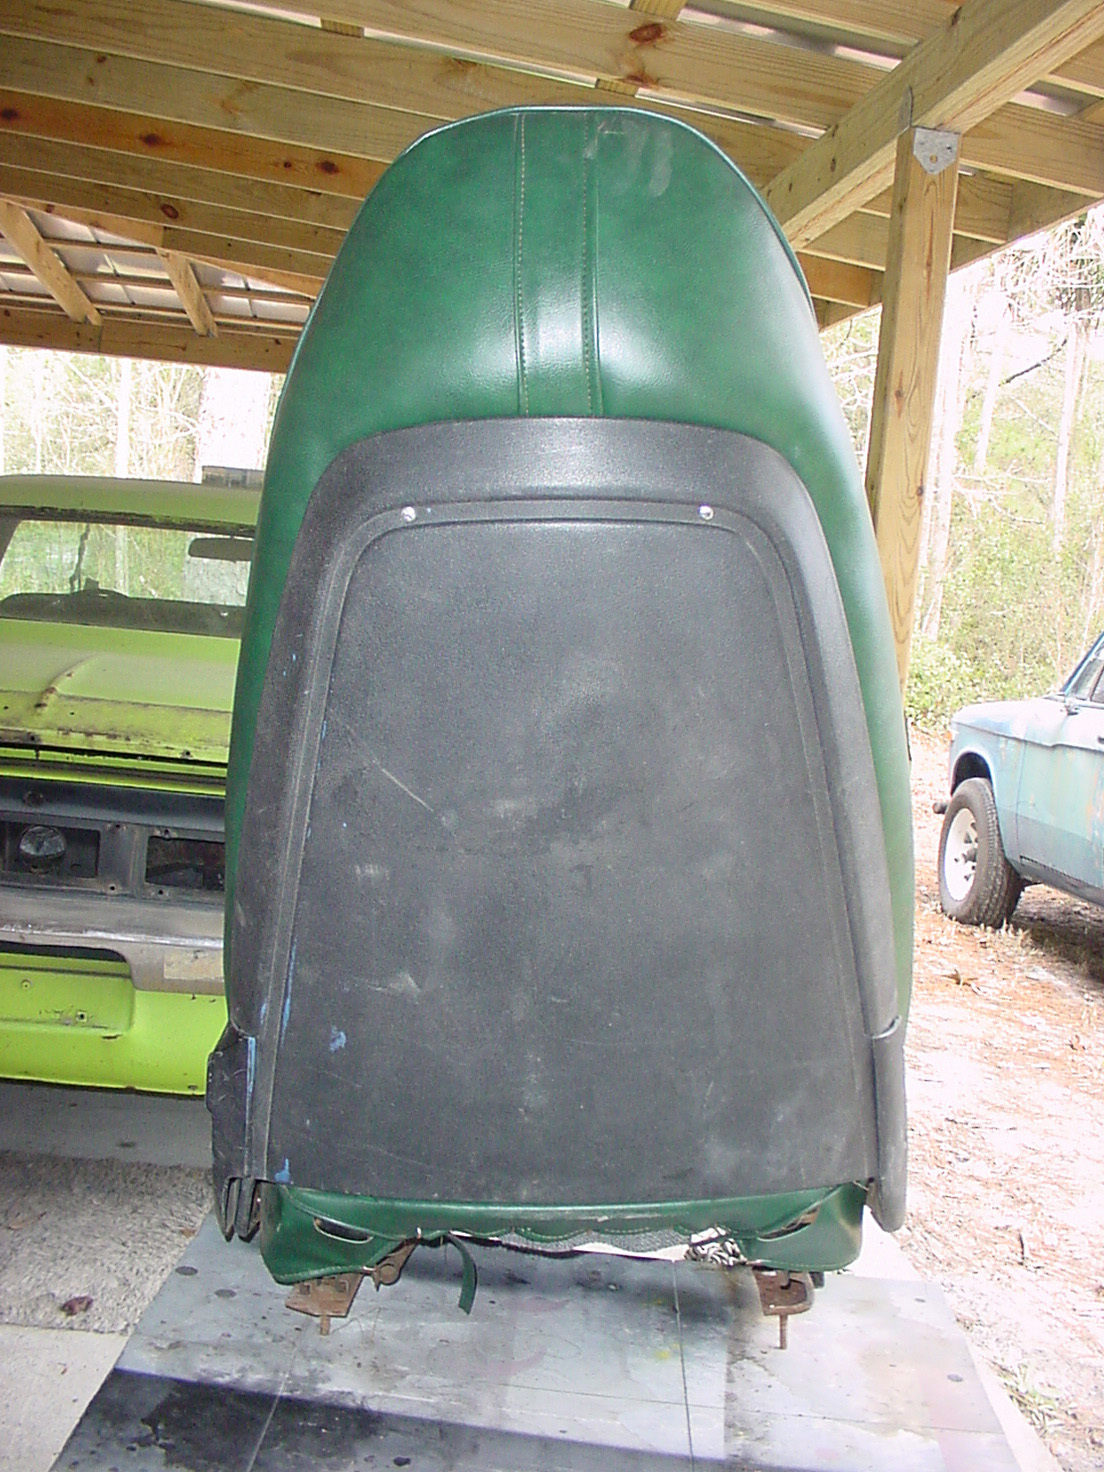
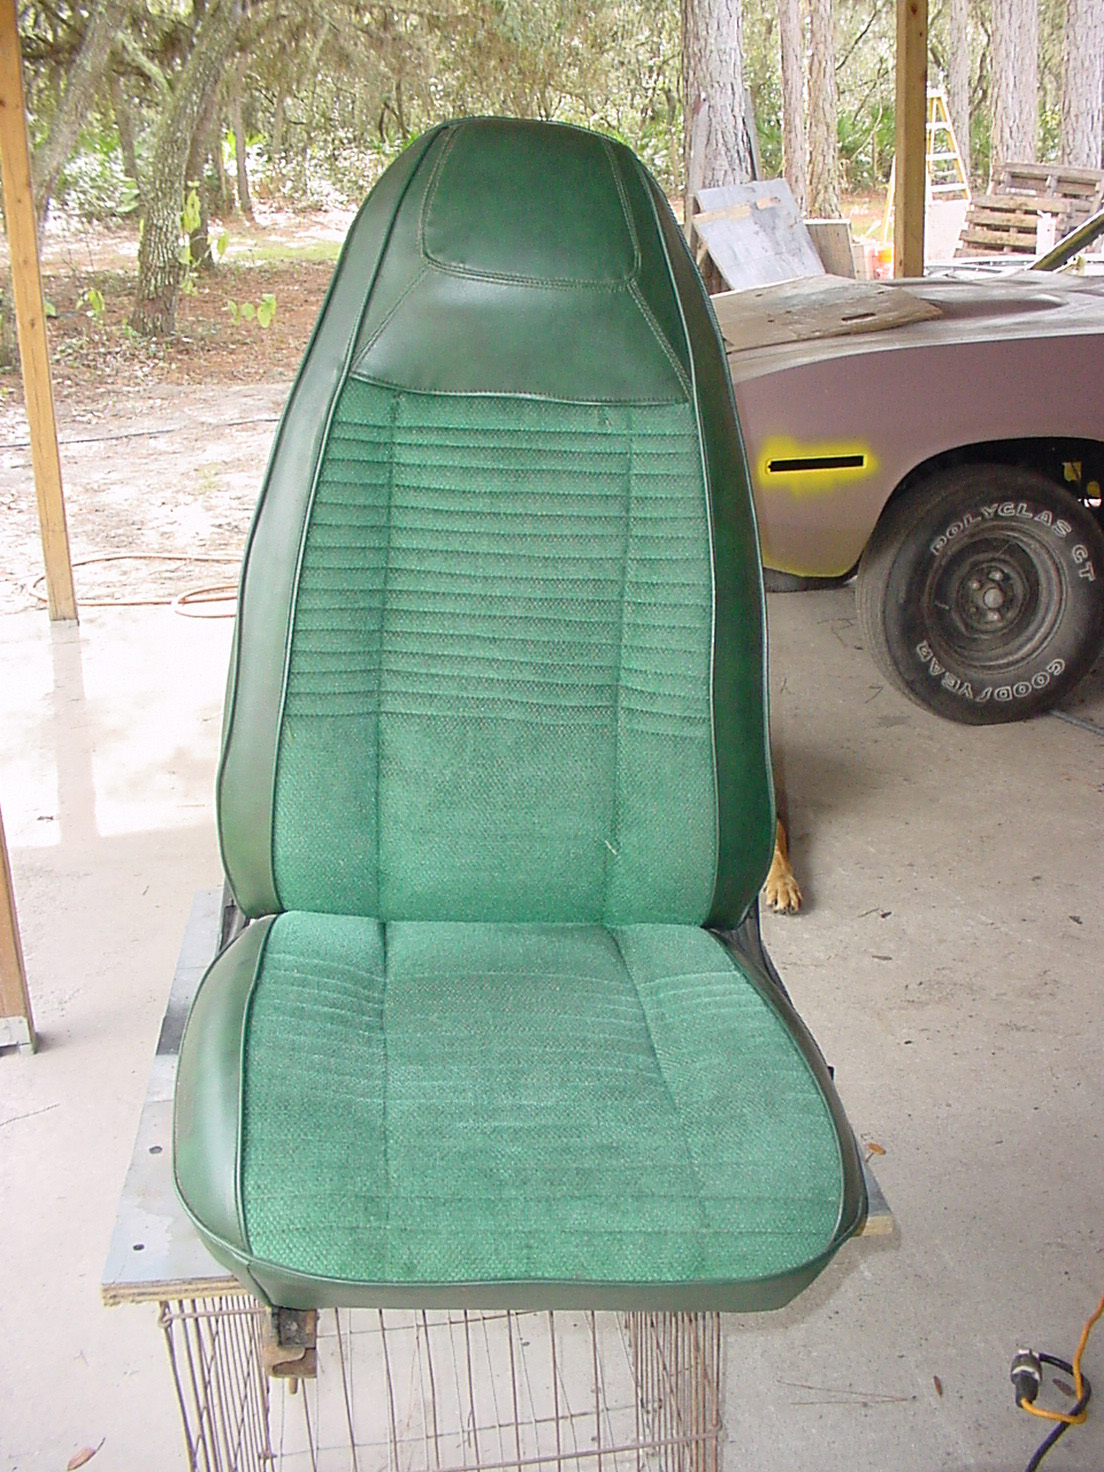
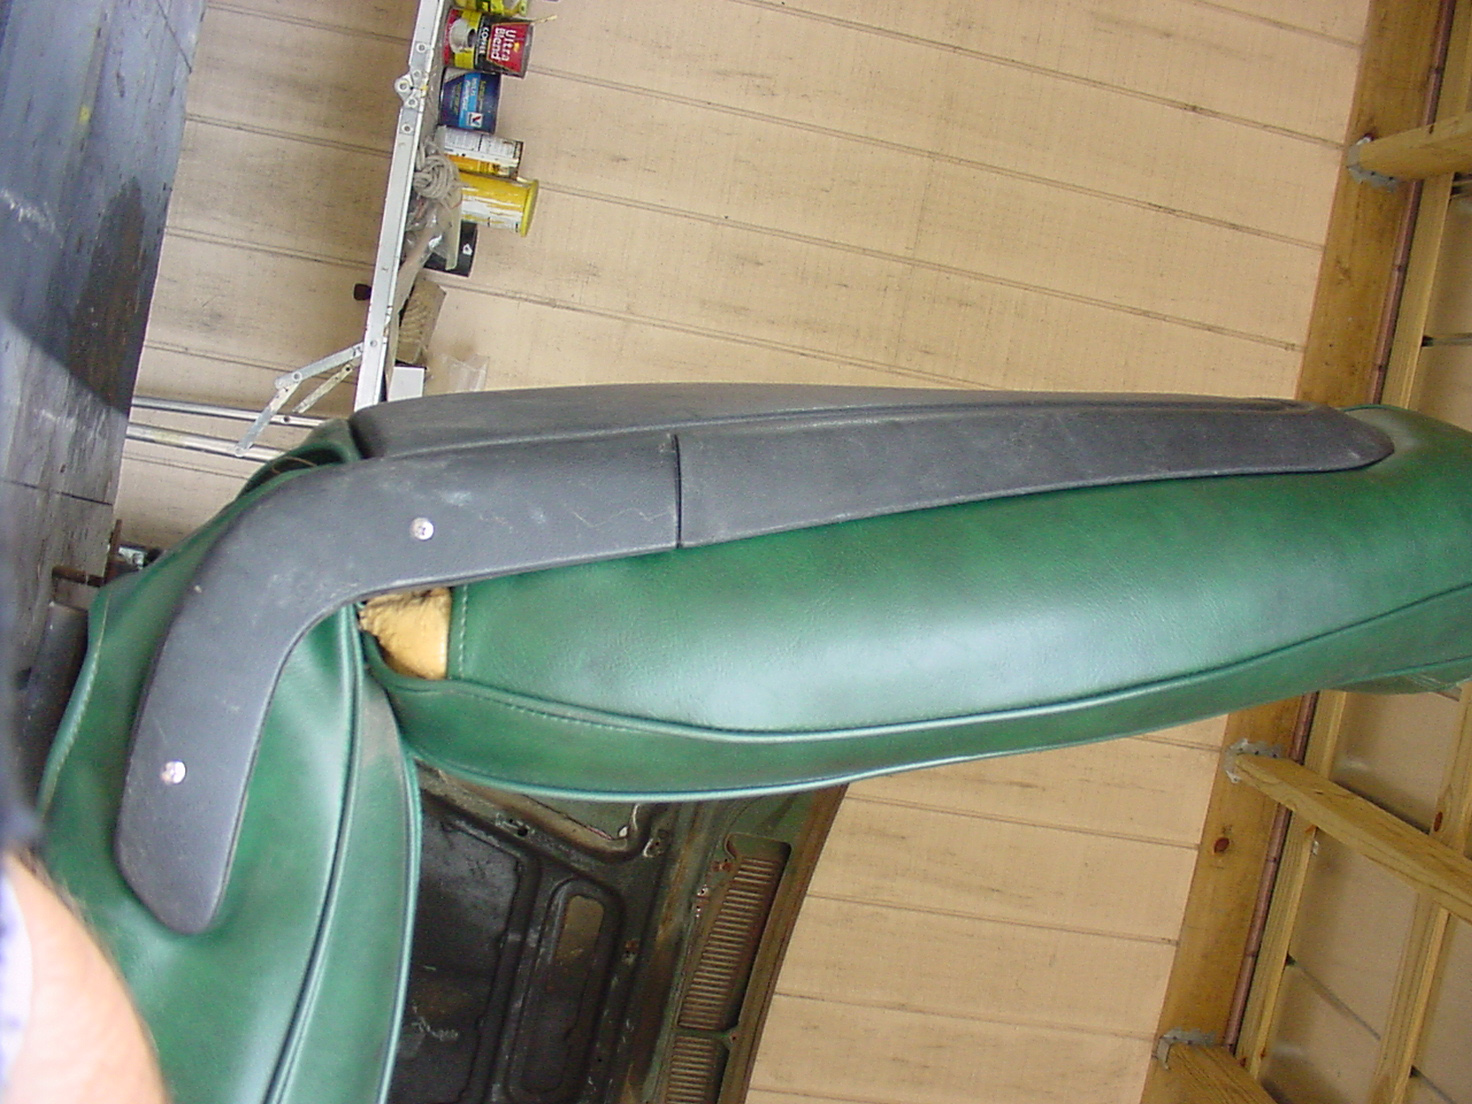
If I wasn't missing the passenger seat, I'd consider keeping them covered like this. Except for a little sun fading on top of the rear seat, they're in good shape.

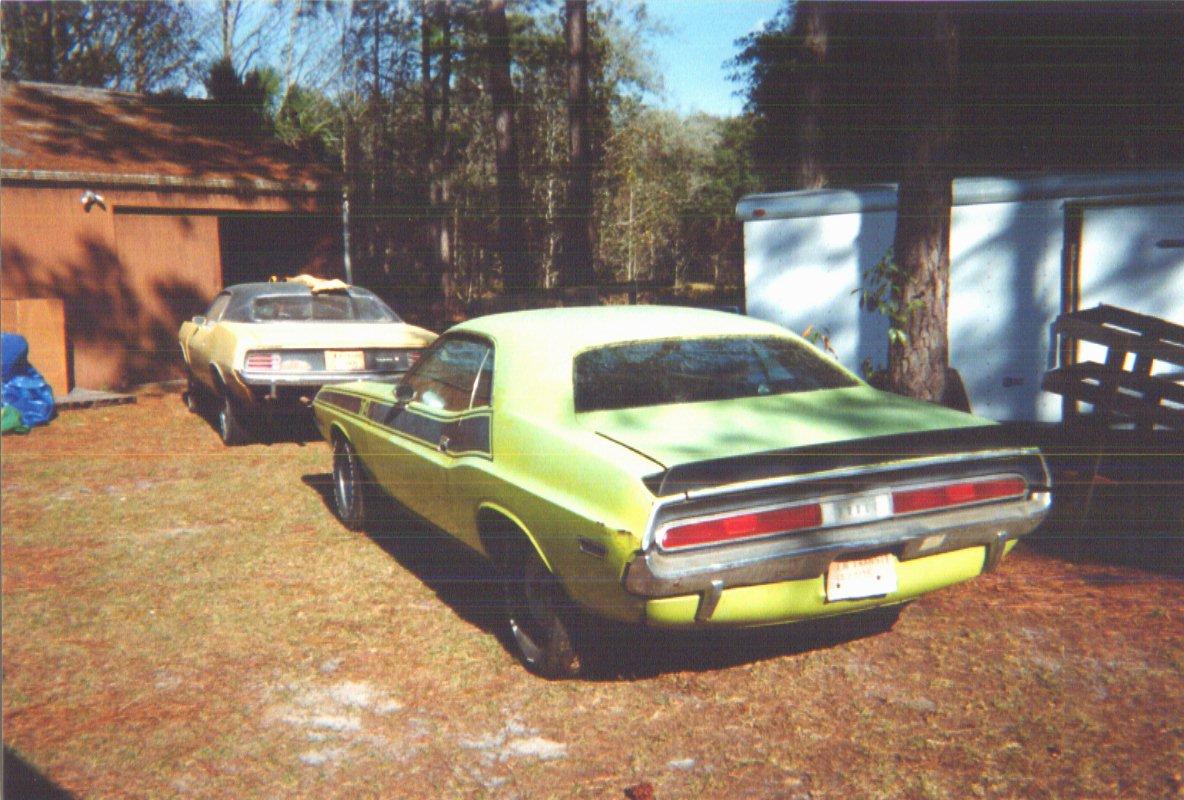
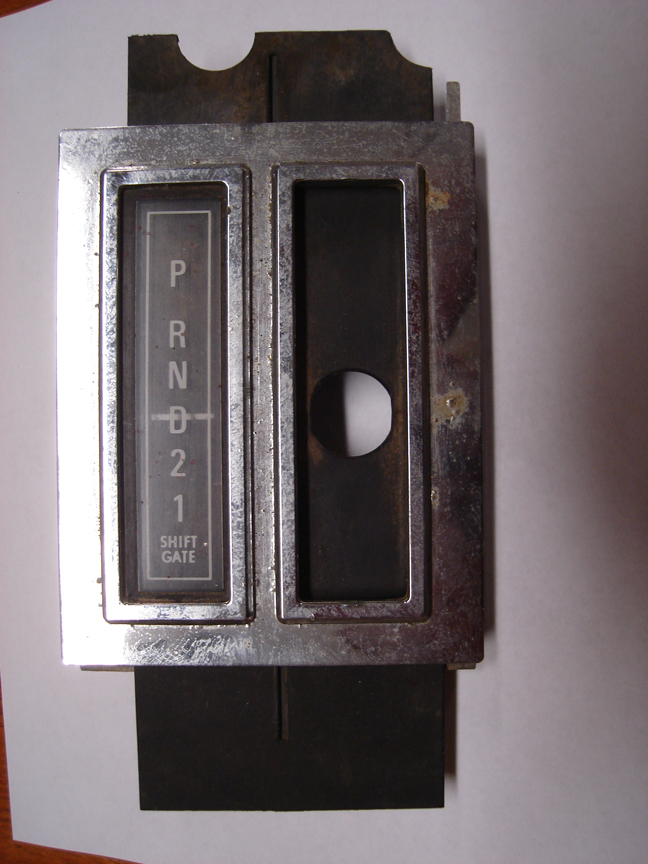
I like the T/A look and have decided to continue with a previous owners idea of cloning the car into a T/A. I'm not horribly fond of the original EF8 color though. It looks OK when freshly applied, but since this is a clone anyway, I figure I can pick whatever color I want. For a while I was thinking of making it white with black like a T/A, but the Sublime paint grew on me, and I decided to stick with it, so the new paint will be Sublime with black like a T/A.

I'll need all my seat covers to match. I've considered trying to get a new matching cover custom made for my missing seat, but will probably just buy a pre-made set of something that was originally available. With Sublime paint you could get either black or white interior. White sounds a little hard to keep clean, so I'm going with Black Leather.

Tav

5434718-26edit.jpg (205 downloads)
Re: Tav Challenger T/A Clone [Re: cataclysm80] #446172
08/23/09 02:09 AM
08/23/09 02:09 AM
Joined: Oct 2006
Posts: 4,165
Florida
C
cataclysm80 Offline OP
master
cataclysm80  Offline OP
master
C

Joined: Oct 2006
Posts: 4,165
Florida
rear floor...

Tav

5434723-27edit.jpg (200 downloads)
Re: Tav Challenger T/A Clone [Re: cataclysm80] #446173
08/23/09 02:10 AM
08/23/09 02:10 AM
Joined: Oct 2006
Posts: 4,165
Florida
C
cataclysm80 Offline OP
master
cataclysm80  Offline OP
master
C

Joined: Oct 2006
Posts: 4,165
Florida
A Pillar...

Tav

5434726-28edit.jpg (200 downloads)
Re: Tav Challenger T/A Clone [Re: cataclysm80] #446174
08/23/09 02:11 AM
08/23/09 02:11 AM
Joined: Oct 2006
Posts: 4,165
Florida
C
cataclysm80 Offline OP
master
cataclysm80  Offline OP
master
C

Joined: Oct 2006
Posts: 4,165
Florida
Drivers Door Panel...

Tav

5434728-29edit.jpg (197 downloads)
Re: Tav Challenger T/A Clone [Re: cataclysm80] #446175
08/23/09 02:13 AM
08/23/09 02:13 AM
Joined: Oct 2006
Posts: 4,165
Florida
C
cataclysm80 Offline OP
master
cataclysm80  Offline OP
master
C

Joined: Oct 2006
Posts: 4,165
Florida
Passenger Door Panel...

a little rust at the bottom front corner

Tav

5434731-30edit.jpg (187 downloads)
Re: Tav Challenger T/A Clone [Re: cataclysm80] #446176
08/23/09 02:17 AM
08/23/09 02:17 AM
Joined: Oct 2006
Posts: 4,165
Florida
C
cataclysm80 Offline OP
master
cataclysm80  Offline OP
master
C

Joined: Oct 2006
Posts: 4,165
Florida
Here's what the drivers seat looked like...

The bumper sticker on the Challenger is a 1976 Americas Bicentennial sticker.

Tav

5434737-DSC00103edit.jpg (183 downloads)
Re: Tav Challenger T/A Clone [Re: cataclysm80] #446177
08/23/09 02:24 AM
08/23/09 02:24 AM
Joined: Oct 2006
Posts: 4,165
Florida
C
cataclysm80 Offline OP
master
cataclysm80  Offline OP
master
C

Joined: Oct 2006
Posts: 4,165
Florida
You can see how far the 'Cuda's came in the back of this pic.

Tav

5434745-DSC00104edit.jpg (215 downloads)
Re: Tav Challenger T/A Clone [Re: cataclysm80] #446178
08/23/09 03:59 PM
08/23/09 03:59 PM
Joined: Oct 2006
Posts: 4,165
Florida
C
cataclysm80 Offline OP
master
cataclysm80  Offline OP
master
C

Joined: Oct 2006
Posts: 4,165
Florida
1970 only seat latch...

Tav

5435672-DSC00102edit.jpg (200 downloads)
Re: Tav Challenger T/A Clone [Re: cataclysm80] #446179
08/23/09 04:00 PM
08/23/09 04:00 PM
Joined: Oct 2006
Posts: 4,165
Florida
C
cataclysm80 Offline OP
master
cataclysm80  Offline OP
master
C

Joined: Oct 2006
Posts: 4,165
Florida
The other side of the 70 only seat hinge...

Tav

5435675-DSC00099edit.jpg (188 downloads)
Re: Tav Challenger T/A Clone [Re: cataclysm80] #446180
08/23/09 04:04 PM
08/23/09 04:04 PM
Joined: Oct 2006
Posts: 4,165
Florida
C
cataclysm80 Offline OP
master
cataclysm80  Offline OP
master
C

Joined: Oct 2006
Posts: 4,165
Florida
Hood to radiator support seal. This is installed correctly, but I've seen several of them wrong at car shows. The seal should be positioned so that it catches the air and presses downward to seal.

Tav

5435680-DSC00083edit.jpg (186 downloads)
Re: Tav Challenger T/A Clone [Re: cataclysm80] #446181
08/23/09 04:05 PM
08/23/09 04:05 PM
Joined: Oct 2006
Posts: 4,165
Florida
C
cataclysm80 Offline OP
master
cataclysm80  Offline OP
master
C

Joined: Oct 2006
Posts: 4,165
Florida
70 only hood catch...

Tav

5435682-DSC00081edit.jpg (177 downloads)
Re: Tav Challenger T/A Clone [Re: cataclysm80] #446182
08/23/09 04:09 PM
08/23/09 04:09 PM
Joined: Oct 2006
Posts: 4,165
Florida
C
cataclysm80 Offline OP
master
cataclysm80  Offline OP
master
C

Joined: Oct 2006
Posts: 4,165
Florida
This shows where the hood pad used to be on the underside of the hood. The pad is long gone, but the clips are still here. This along with the bottom of the car being covered in factory appearing undercoating lead me to believe that this car came with the J55 option. J55 is only coded on the broadcast sheet, not the fender tag. Unfortunately I don't have a broadcast sheet for my car.

Tav

5435692-DSC00082edit.jpg (177 downloads)
Re: Tav Challenger T/A Clone [Re: cataclysm80] #446183
08/23/09 04:11 PM
08/23/09 04:11 PM
Joined: Oct 2006
Posts: 4,165
Florida
C
cataclysm80 Offline OP
master
cataclysm80  Offline OP
master
C

Joined: Oct 2006
Posts: 4,165
Florida
here's the windshield squirters. I think the squirter hose from the hood T should come down through this round hole in the cowl.

Can anyone confirm that for me?

Tav

5435697-DSC00080edit.jpg (429 downloads)
Re: Tav Challenger T/A Clone [Re: cataclysm80] #446184
08/23/09 04:14 PM
08/23/09 04:14 PM
Joined: Oct 2006
Posts: 4,165
Florida
C
cataclysm80 Offline OP
master
cataclysm80  Offline OP
master
C

Joined: Oct 2006
Posts: 4,165
Florida
Note that this is the early 70 hood without any crumple zones.

Tav

5435701-DSC00119edit.jpg (173 downloads)
Re: Tav Challenger T/A Clone [Re: cataclysm80] #446185
08/23/09 04:15 PM
08/23/09 04:15 PM
Joined: Oct 2006
Posts: 4,165
Florida
C
cataclysm80 Offline OP
master
cataclysm80  Offline OP
master
C

Joined: Oct 2006
Posts: 4,165
Florida
Hood...

I plan on getting a fiberglass T/A style hood

Tav

5435703-31edit.jpg (200 downloads)
Re: Tav Challenger T/A Clone [Re: cataclysm80] #446186
08/23/09 04:17 PM
08/23/09 04:17 PM
Joined: Oct 2006
Posts: 4,165
Florida
C
cataclysm80 Offline OP
master
cataclysm80  Offline OP
master
C

Joined: Oct 2006
Posts: 4,165
Florida
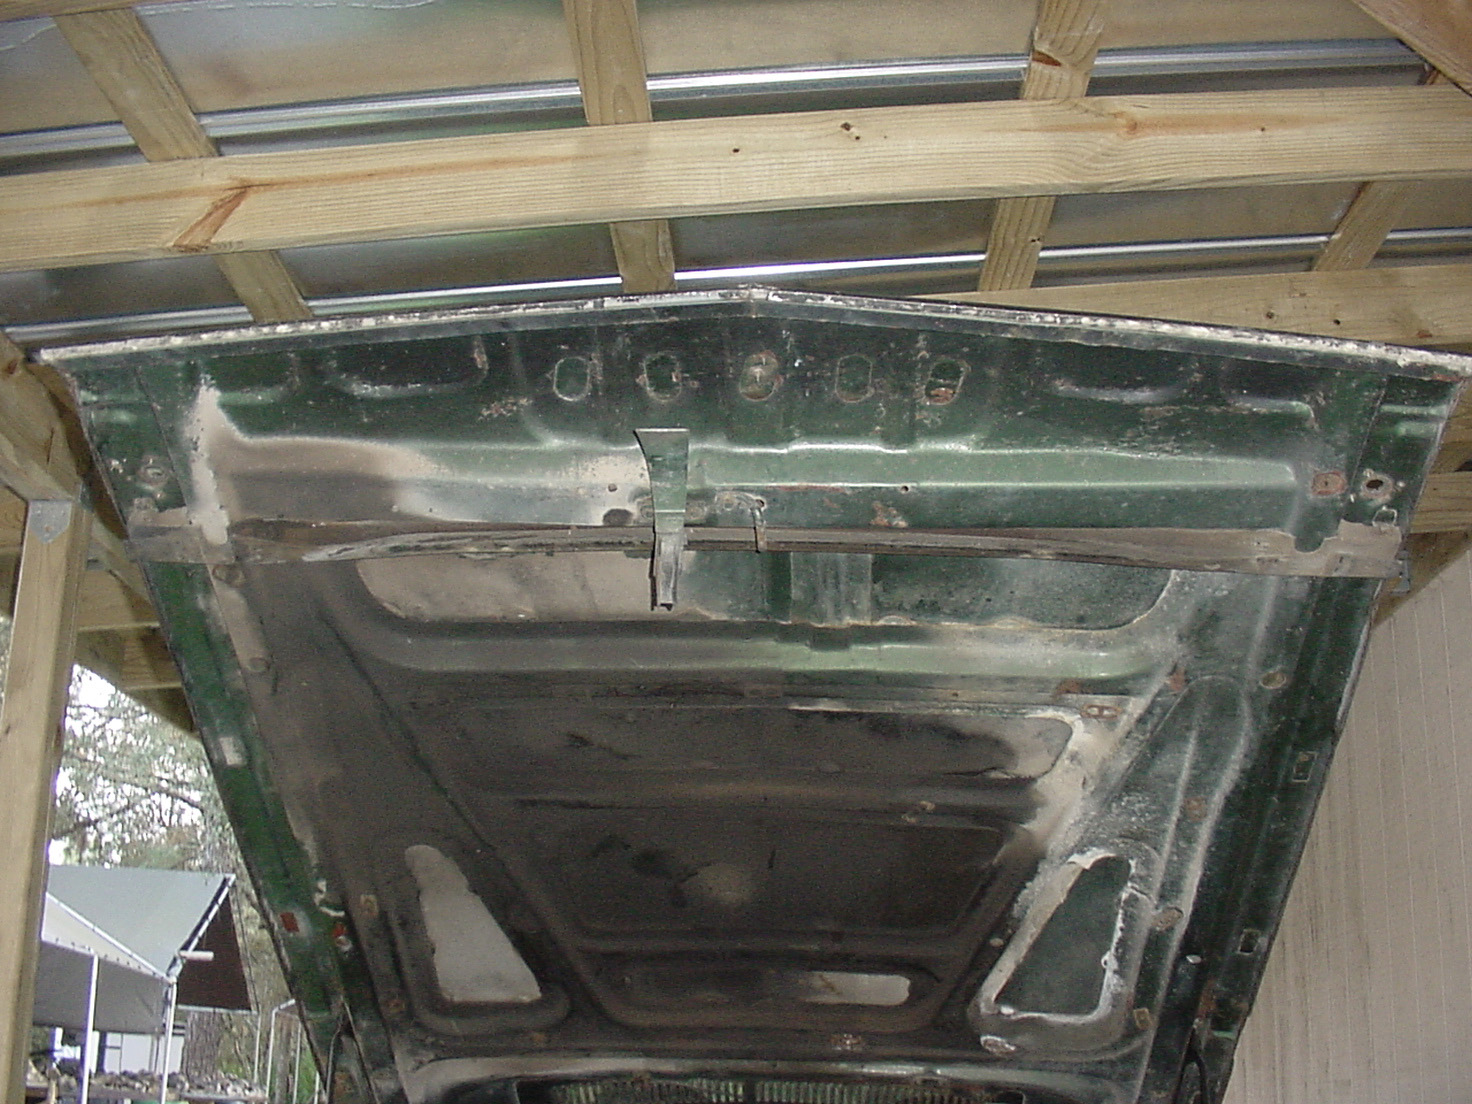
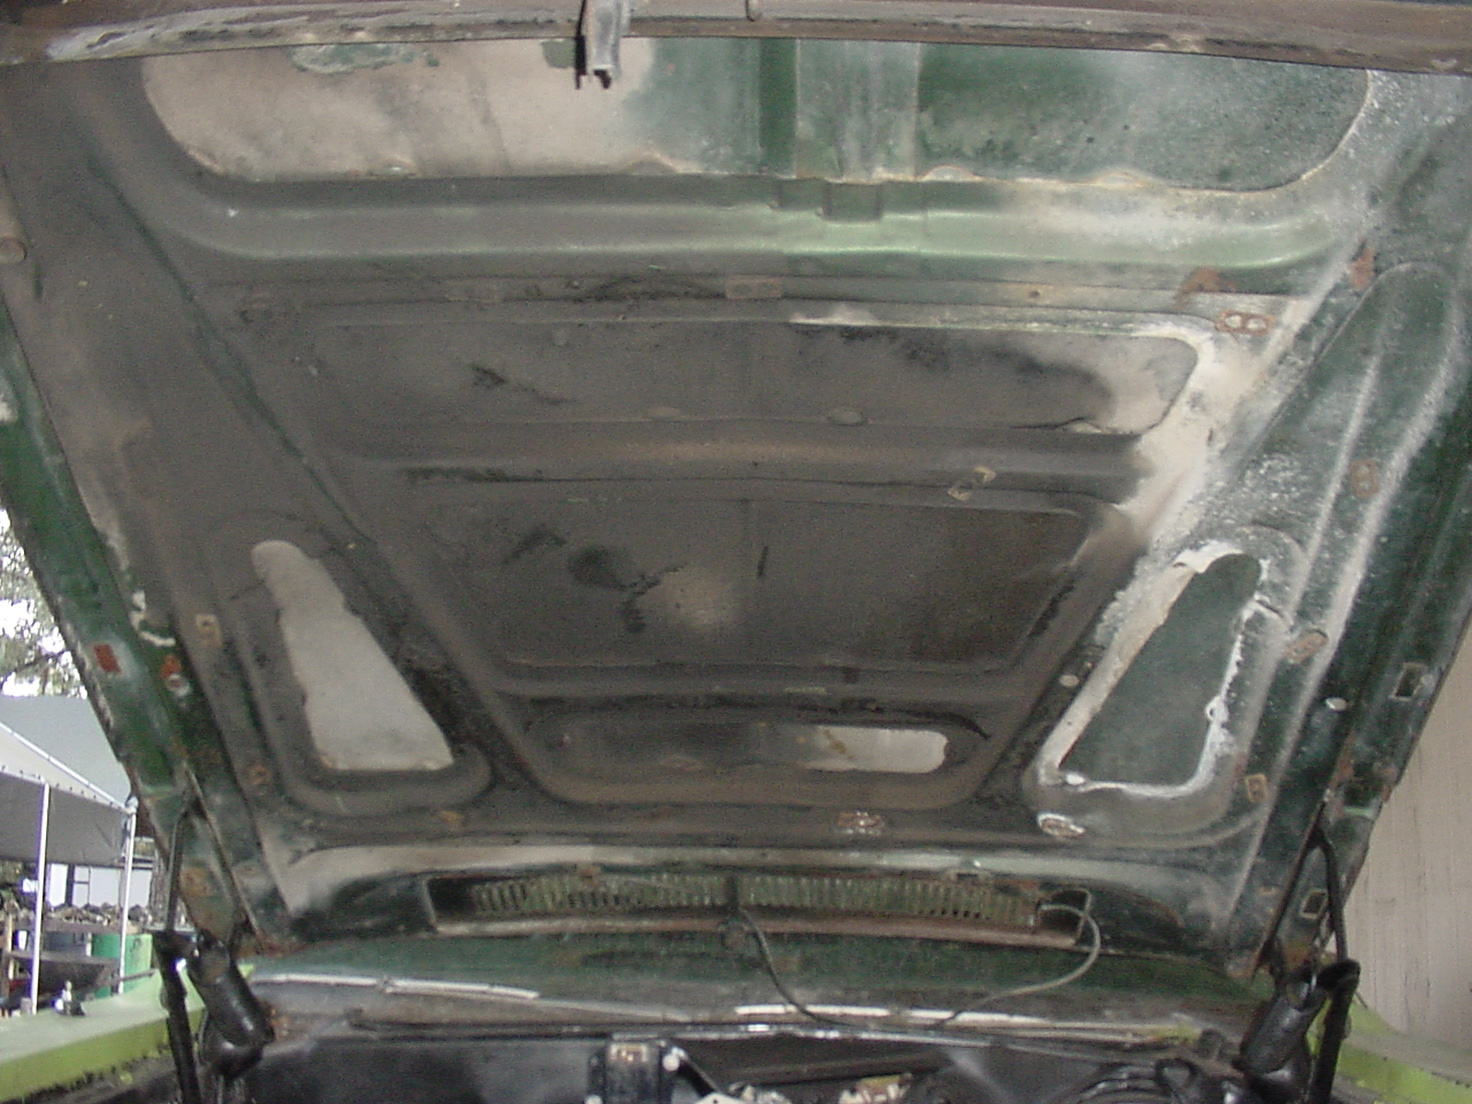
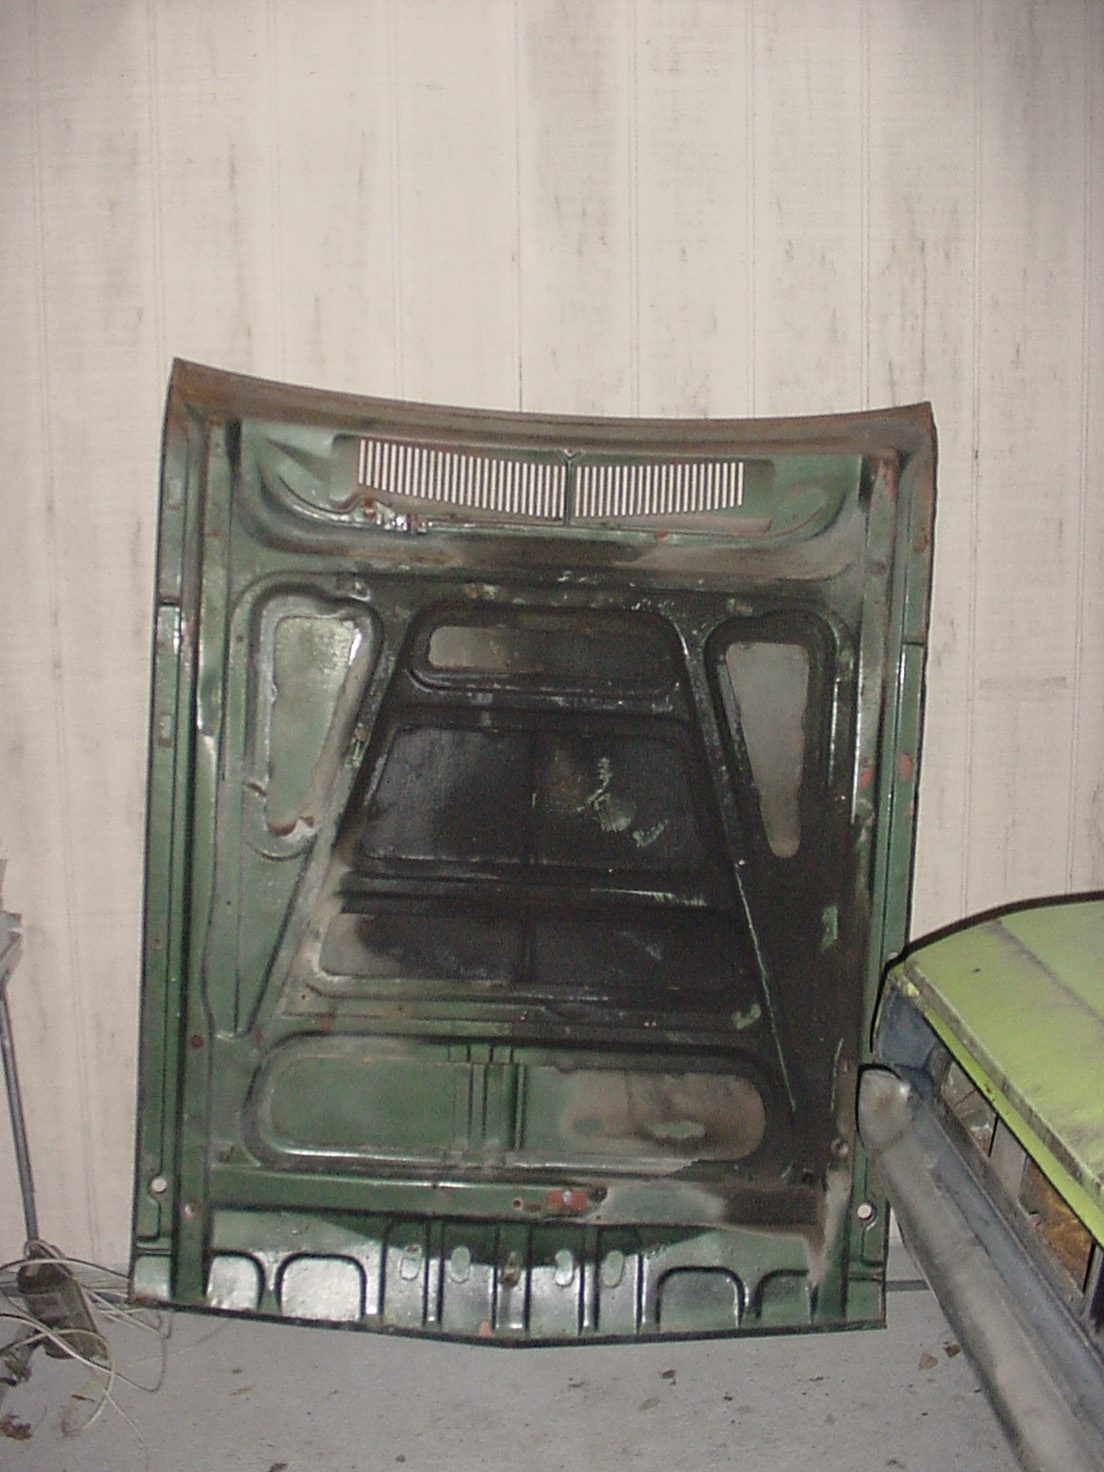
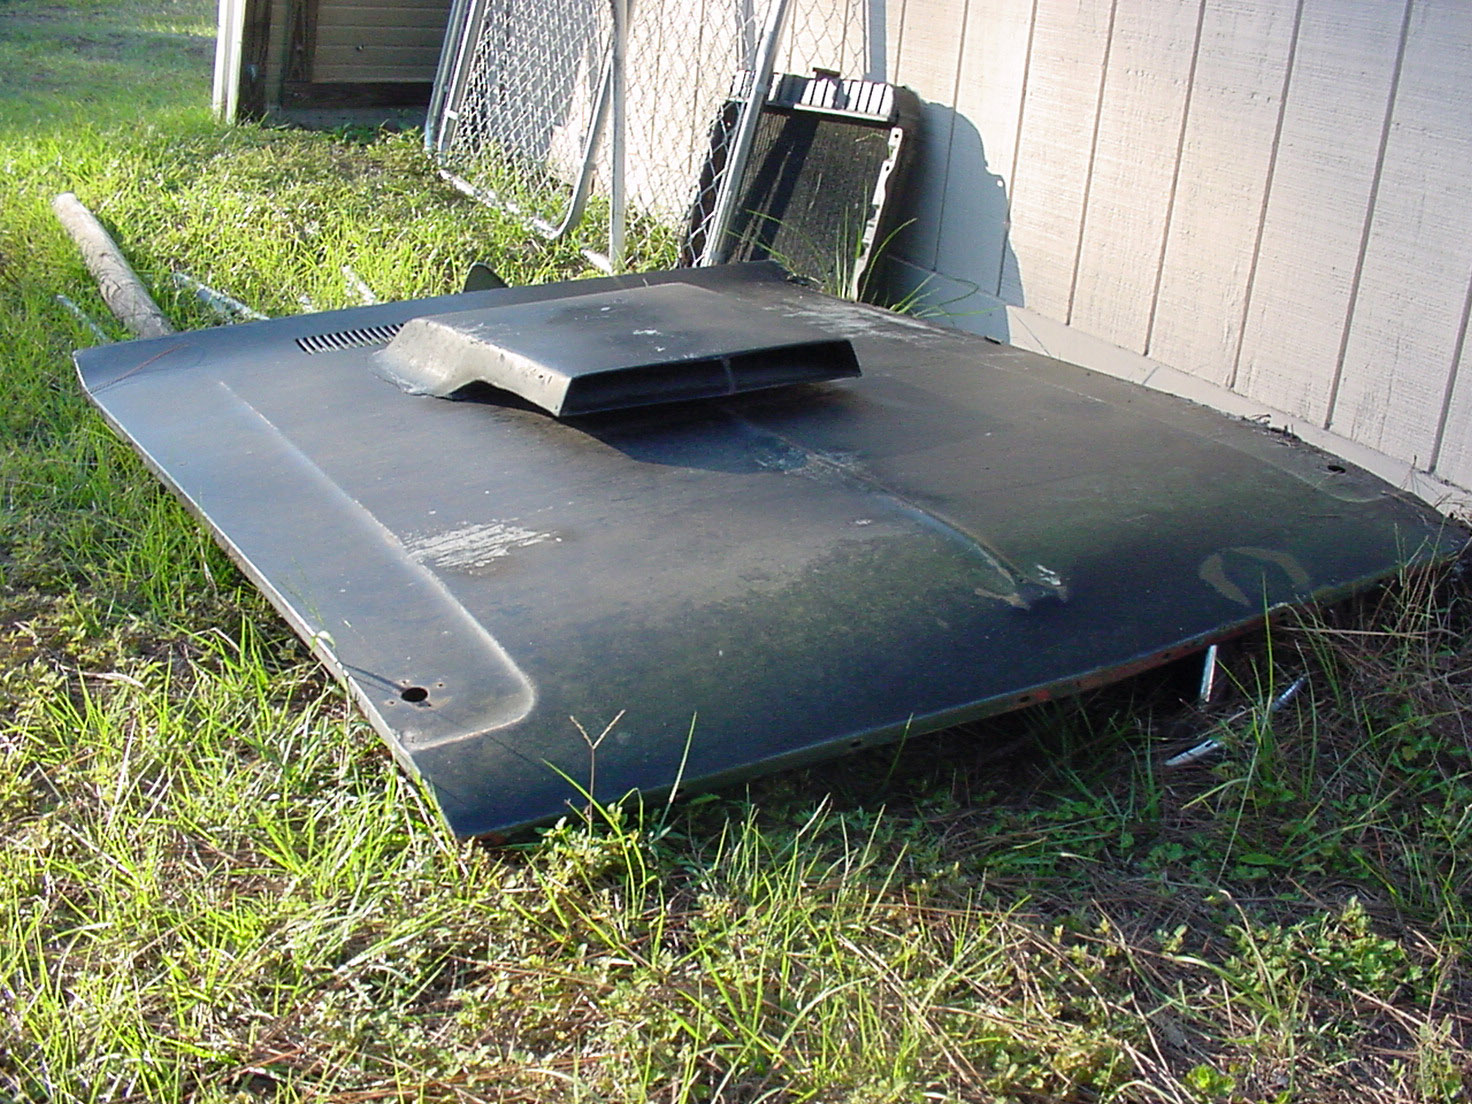
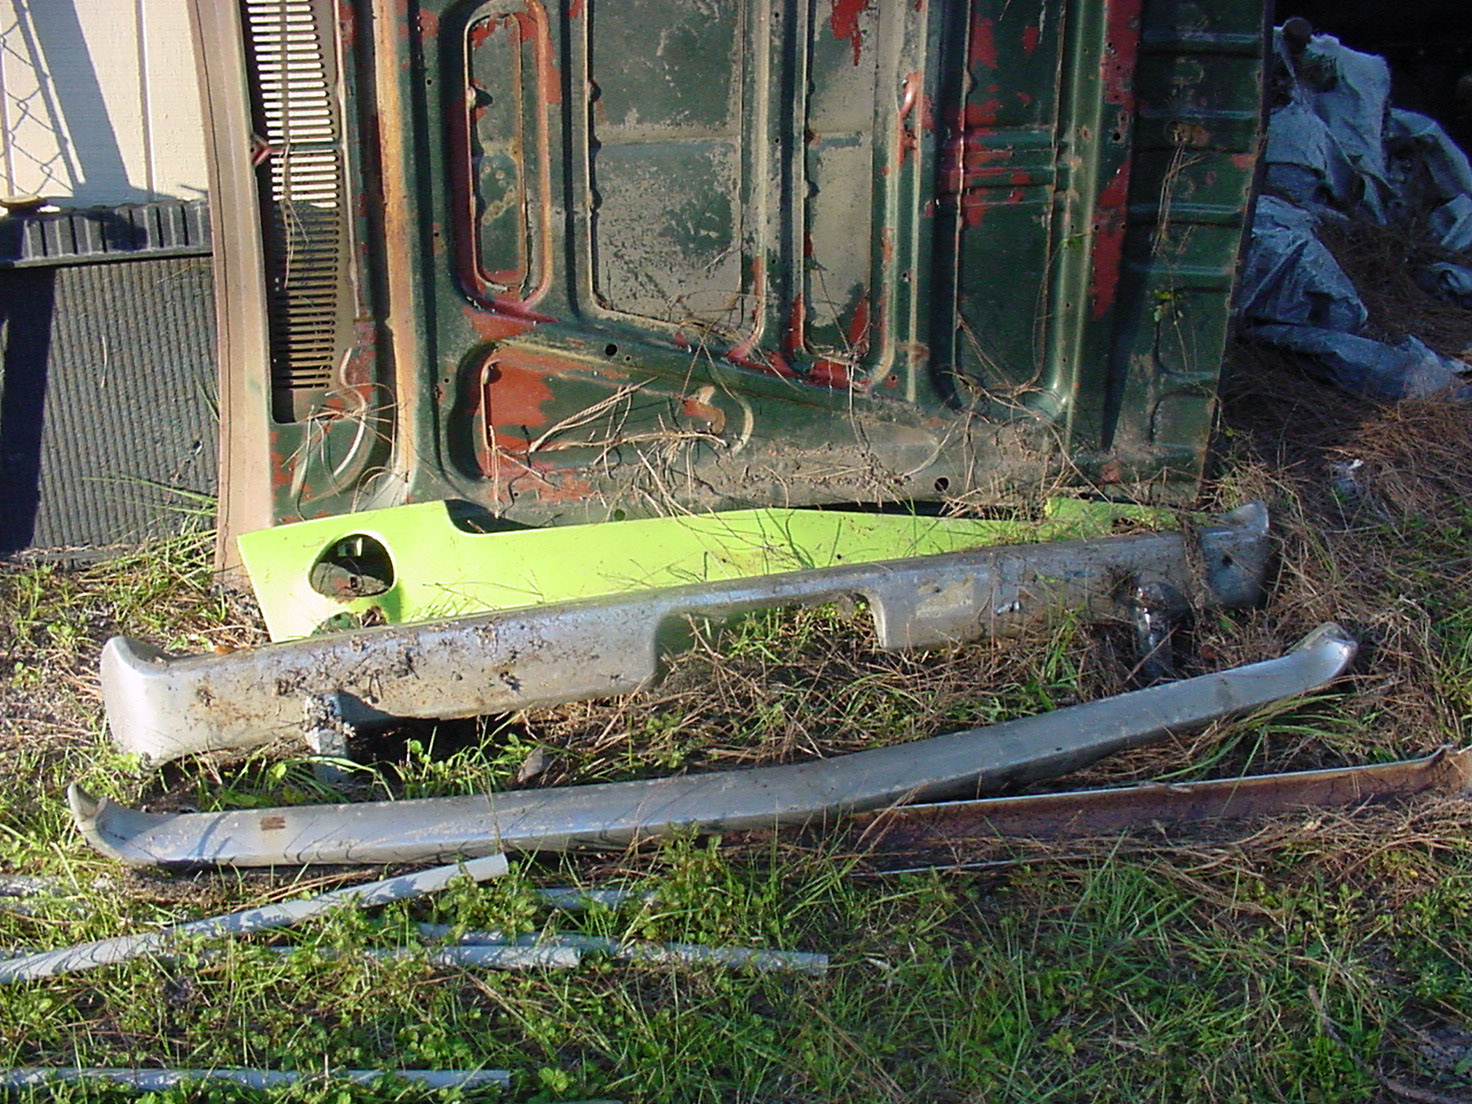
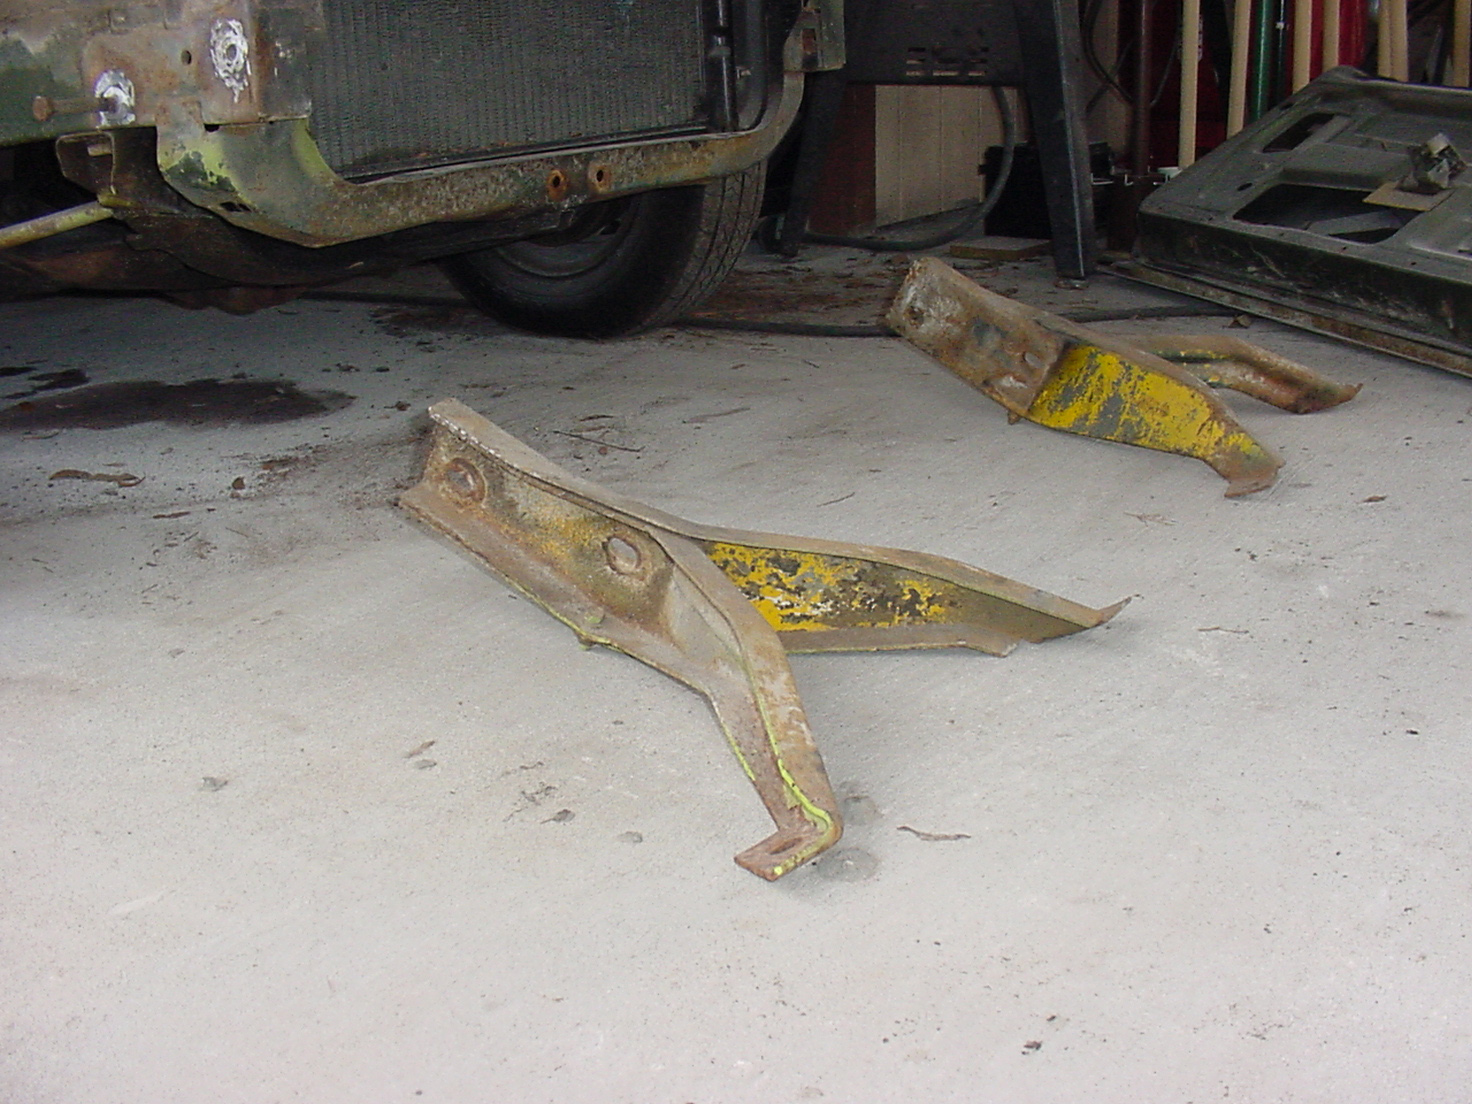
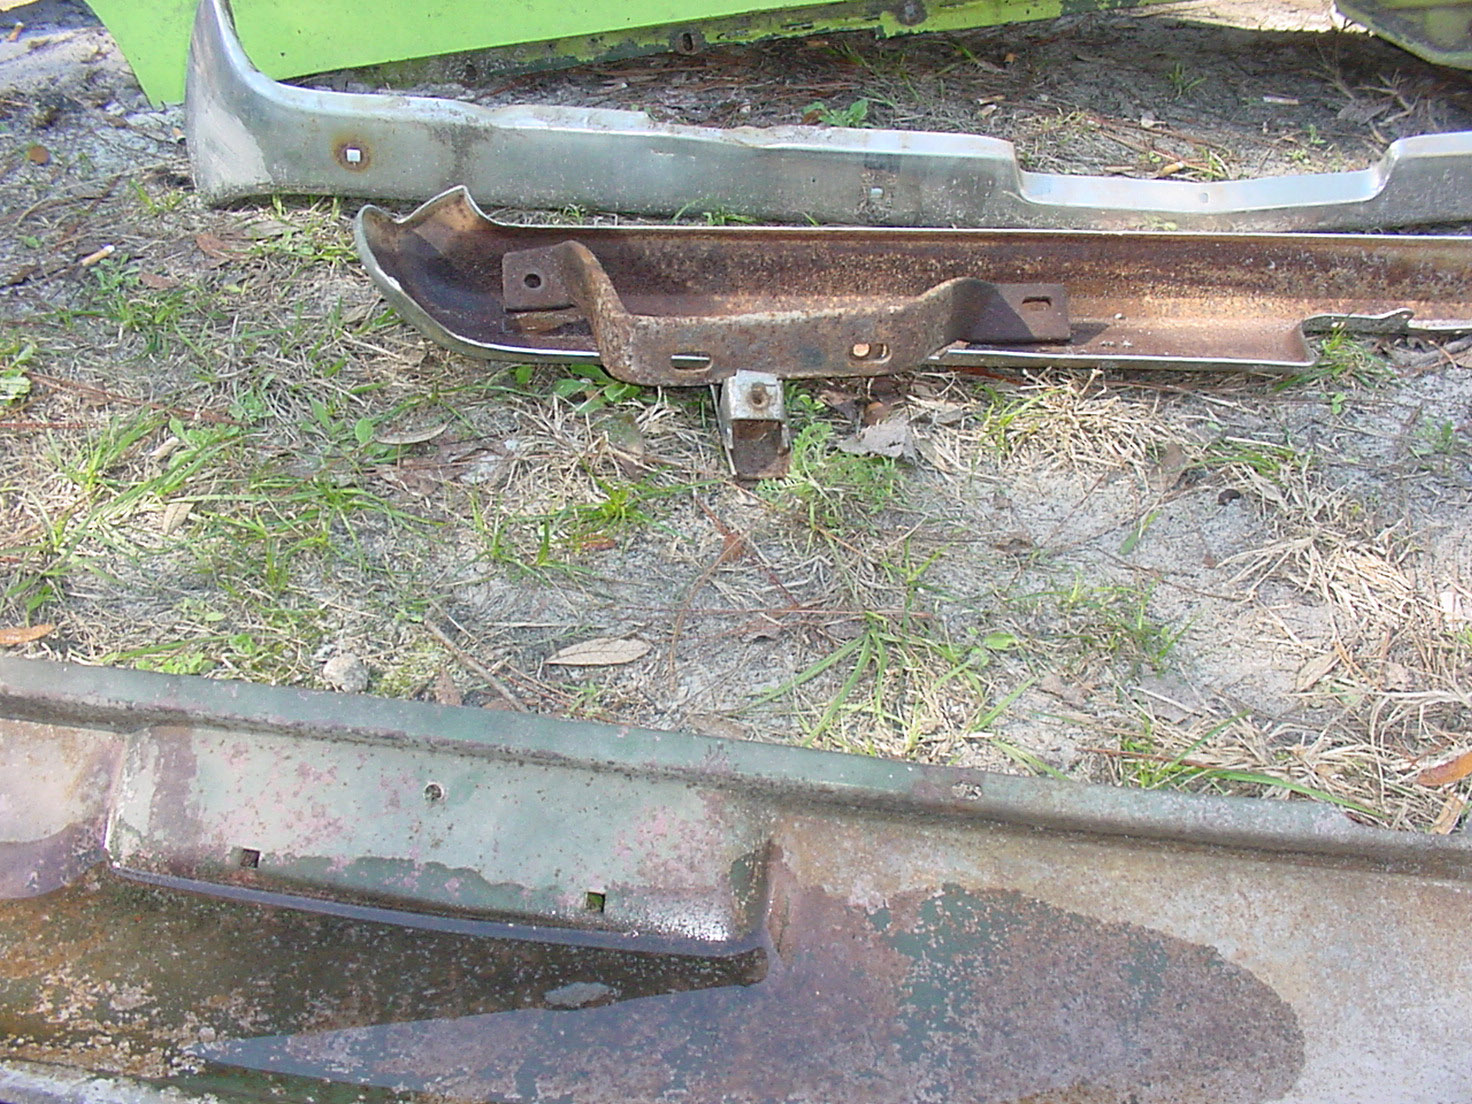
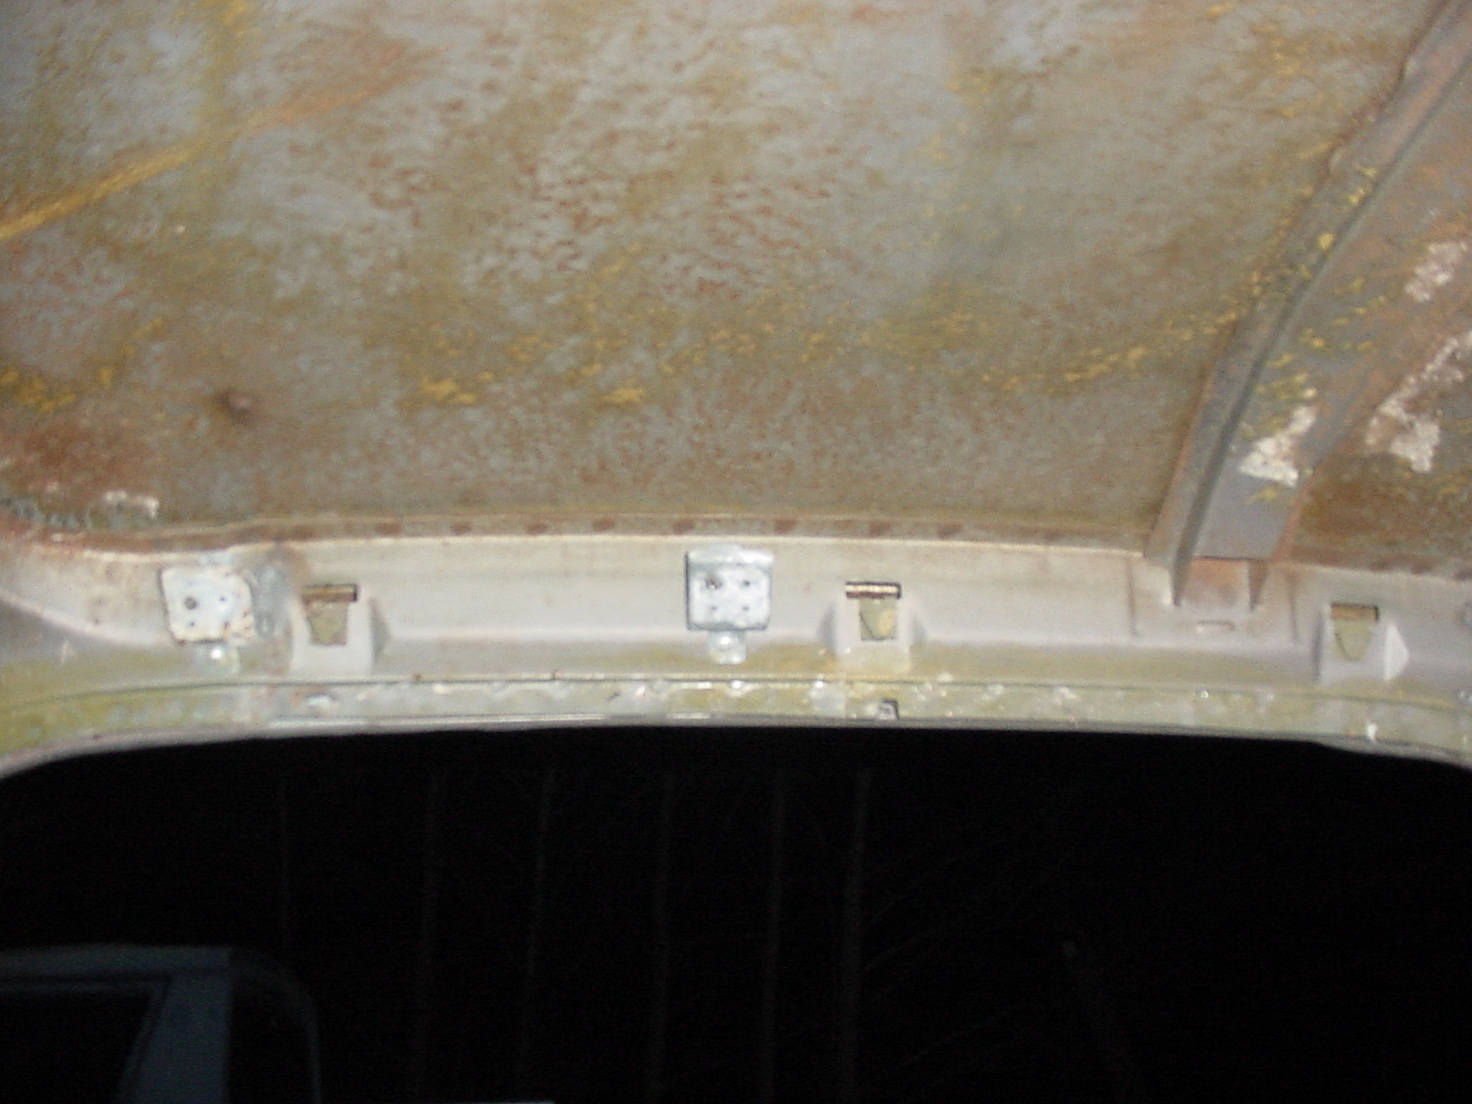
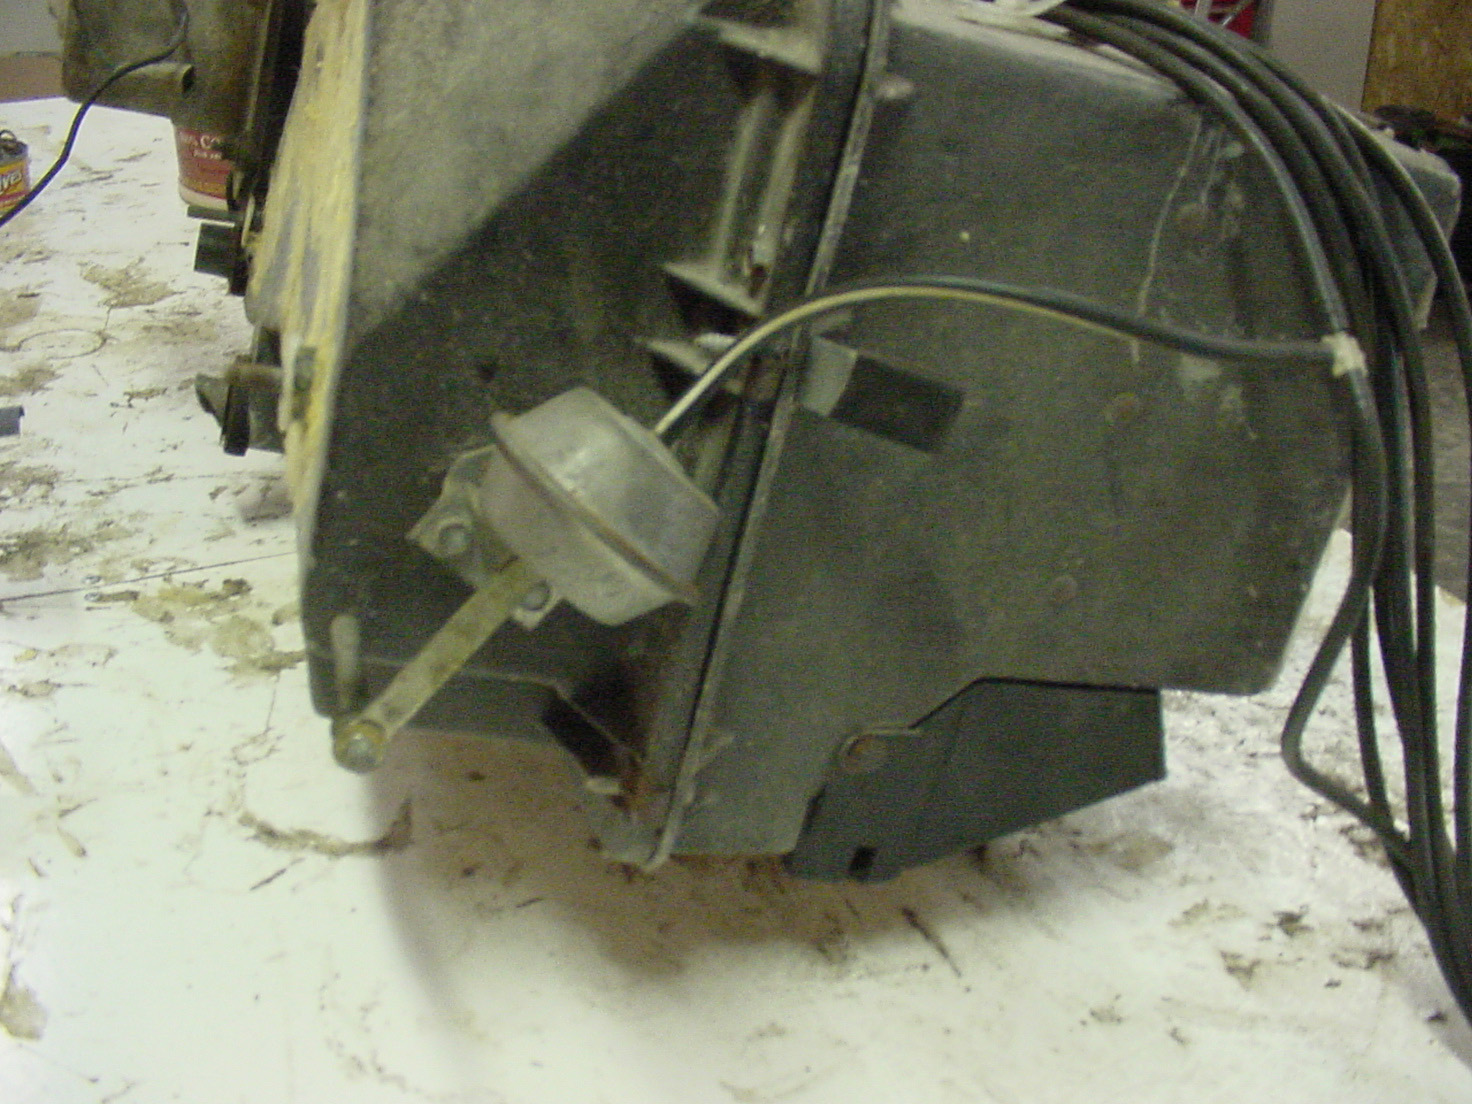
Underside of the same hood, front valance, both bumpers, and the 'Cuda rear bumper. ('Cuda was missing its front bumper) Under the tarp to the right is my original 318 #'s matching engine. Yeah, it's still sitting there 9 years later, but the tarp is long gone now. The idea is the take it apart, grease everything up, and store it in a couple plastic bins inside that building it's next to. Then I'll keep it forever, because it goes with this car that I never intend to get rid of. Same thing for the 904 Transmission, but maybe I won't take that apart.

Tav

5435708-32edit.jpg (185 downloads)
Re: Tav Challenger T/A Clone [Re: cataclysm80] #446187
08/23/09 04:30 PM
08/23/09 04:30 PM
Joined: Oct 2006
Posts: 4,165
Florida
C
cataclysm80 Offline OP
master
cataclysm80  Offline OP
master
C

Joined: Oct 2006
Posts: 4,165
Florida
Here's how I had the battery grounds hooked up. I put that wire there myself because the car didn't have a battery when I got it and I wasn't sure where the ground should go. There was already a hole there, and it was convenient. I just found a bolt that would fit the hole, and away I went. Many years later I learned that hole was for the AC line clip. The AC lines, compressor, and condenser had already been removed from my car when I got it.

Tav

5435730-DSC00078edit.jpg (209 downloads)
Re: Tav Challenger T/A Clone [Re: cataclysm80] #446188
08/23/09 04:33 PM
08/23/09 04:33 PM
Joined: Oct 2006
Posts: 4,165
Florida
C
cataclysm80 Offline OP
master
cataclysm80  Offline OP
master
C

Joined: Oct 2006
Posts: 4,165
Florida
Today I finally found out where the ground is supposed to go. Most 70 & later cars have a square welded in nut on the radiator support above the rectangle hole the headlight wiring passes through. The battery ground & headlight ground would both ground to this square nut with a bolt. However very early build cars from the first couple months of production like this one did Not have the square nut welded on. Instead, they used the round hole with a nut & bolt just to the right of where the square nut would be. That is why all the E bodies have a round hole in the radiator support here. It was originally intended for a ground location and then abandoned a couple months into production.

Here is a pic of the correct ground location for such an early car. The car in this pic is an early September 1969 build Challenger.

Tav

Re: Tav Challenger T/A Clone [Re: cataclysm80] #446189
08/23/09 04:51 PM
08/23/09 04:51 PM
Joined: Oct 2006
Posts: 4,165
Florida
C
cataclysm80 Offline OP
master
cataclysm80  Offline OP
master
C

Joined: Oct 2006
Posts: 4,165
Florida
Here's how the wiring on the starer relay hooked up. Just a reference picture. The white wire is the one that goes to the ammeter to replace my fried wire.

Tav

5435773-DSC00135edit.jpg (167 downloads)
Re: Tav Challenger T/A Clone [Re: cataclysm80] #446190
08/23/09 04:54 PM
08/23/09 04:54 PM
Joined: Oct 2006
Posts: 4,165
Florida
C
cataclysm80 Offline OP
master
cataclysm80  Offline OP
master
C

Joined: Oct 2006
Posts: 4,165
Florida
This shows where the green & blue field wires were on the alternator. I'm not sure if it makes a difference if you mix them up, but I know the wiring diagram doesn't specify which one goes where, (it only says they both go to the alternator) so I took a picture.

Tav

5435779-DSC00152edit.jpg (153 downloads)
Re: Tav Challenger T/A Clone [Re: cataclysm80] #446191
08/23/09 04:55 PM
08/23/09 04:55 PM
Joined: Oct 2006
Posts: 4,165
Florida
C
cataclysm80 Offline OP
master
cataclysm80  Offline OP
master
C

Joined: Oct 2006
Posts: 4,165
Florida
Here's how the wiring hooked up on the two speed wiper motor. Just a reference picture...

Tav

5435783-DSC00153edit.jpg (160 downloads)
Re: Tav Challenger T/A Clone [Re: cataclysm80] #446192
08/23/09 04:59 PM
08/23/09 04:59 PM
Joined: Oct 2006
Posts: 4,165
Florida
C
cataclysm80 Offline OP
master
cataclysm80  Offline OP
master
C

Joined: Oct 2006
Posts: 4,165
Florida
There is a broken wiring clip in the center of this picture. I took this pic so that I'd know what went in that hole. 1970 uses a D shaped clip, while later E bodies use an O shaped clip. If you don't care about that sort of thing, either clip will function fine.

Tav

5435788-DSC00158edit.jpg (159 downloads)
Re: Tav Challenger T/A Clone [Re: cataclysm80] #446193
08/23/09 05:04 PM
08/23/09 05:04 PM
Joined: Oct 2006
Posts: 4,165
Florida
C
cataclysm80 Offline OP
master
cataclysm80  Offline OP
master
C

Joined: Oct 2006
Posts: 4,165
Florida
This shows how the brake lines were routed, but more importantly, it shows that fuel line clip on the frame rail.

Tav

5435794-DSC00161edit.jpg (226 downloads)
Re: Tav Challenger T/A Clone [Re: cataclysm80] #446194
08/23/09 05:05 PM
08/23/09 05:05 PM
Joined: Oct 2006
Posts: 4,165
Florida
C
cataclysm80 Offline OP
master
cataclysm80  Offline OP
master
C

Joined: Oct 2006
Posts: 4,165
Florida
At the time I didn't know what it was for because my AC lines were missing, but this is an AC line clip.

It might also be used on cars with a factory automatic transmission fluid cooler.

(You can't have both the AC condenser & the auto tranny fluid cooler. They mount in the same location.)

Tav

5435795-DSC00160edit.jpg (154 downloads)
Re: Tav Challenger T/A Clone [Re: cataclysm80] #446195
08/23/09 05:10 PM
08/23/09 05:10 PM
Joined: Oct 2006
Posts: 4,165
Florida
C
cataclysm80 Offline OP
master
cataclysm80  Offline OP
master
C

Joined: Oct 2006
Posts: 4,165
Florida
This shows which way the bracket between the radiator support and the K frame went. Over the K frame, under the radiator support, big end towards the K frame.

Tav

5435803-DSC00159edit.jpg (169 downloads)
Re: Tav Challenger T/A Clone [Re: cataclysm80] #446196
08/23/09 05:16 PM
08/23/09 05:16 PM
Joined: Oct 2006
Posts: 4,165
Florida
C
cataclysm80 Offline OP
master
cataclysm80  Offline OP
master
C

Joined: Oct 2006
Posts: 4,165
Florida
This is the power brake setup I was running at the time.

Tav

5435811-DSC00155edit.jpg (181 downloads)
Re: Tav Challenger T/A Clone [Re: cataclysm80] #446197
08/23/09 05:18 PM
08/23/09 05:18 PM
Joined: Oct 2006
Posts: 4,165
Florida
C
cataclysm80 Offline OP
master
cataclysm80  Offline OP
master
C

Joined: Oct 2006
Posts: 4,165
Florida
Here's how it looked from inside the car. There's lot's of little reference type stuff in this pic if you're looking for something in this area.

Tav

5435815-DSC00157edit.jpg (177 downloads)
Re: Tav Challenger T/A Clone [Re: cataclysm80] #446198
08/23/09 05:19 PM
08/23/09 05:19 PM
Joined: Oct 2006
Posts: 4,165
Florida
C
cataclysm80 Offline OP
master
cataclysm80  Offline OP
master
C

Joined: Oct 2006
Posts: 4,165
Florida
Same thing, different angle

Tav

5435818-DSC00156edit.jpg (142 downloads)
Re: Tav Challenger T/A Clone [Re: cataclysm80] #446199
08/23/09 05:26 PM
08/23/09 05:26 PM
Joined: Oct 2006
Posts: 4,165
Florida
C
cataclysm80 Offline OP
master
cataclysm80  Offline OP
master
C

Joined: Oct 2006
Posts: 4,165
Florida
This is the brake T and line routing. I bent the lines a little when installing the brake booster and new master cylinder, but this should be correct for a four wheel drum brake car before Jan 1 1970. I couldn't be positive on cars built after that because the brake T's/metering valves/proportioning valves changed at that point.

You can also see the battery cable wiring tab in this pic. It screws onto the frame rail and is often missing on cars I see at shows.

Tav

5435828-DSC00162edit.jpg (182 downloads)
Re: Tav Challenger T/A Clone [Re: cataclysm80] #446200
08/23/09 05:31 PM
08/23/09 05:31 PM
Joined: Oct 2006
Posts: 4,165
Florida
C
cataclysm80 Offline OP
master
cataclysm80  Offline OP
master
C

Joined: Oct 2006
Posts: 4,165
Florida
Here's how these brackets to the fender headlight bucket were mounted. They're marked R & L. I think they should be on 70 & 71 Challengers, but 72-74 used a different headlight bucket setup that was sort of built into the grill.

Tav

5435844-DSC00136edit.jpg (176 downloads)
Re: Tav Challenger T/A Clone [Re: cataclysm80] #446201
08/23/09 05:35 PM
08/23/09 05:35 PM
Joined: Oct 2006
Posts: 4,165
Florida
C
cataclysm80 Offline OP
master
cataclysm80  Offline OP
master
C

Joined: Oct 2006
Posts: 4,165
Florida
Headlight Adjuster & Headlight Bucket Spring locations

(note the extra holes in this fender. It's a late 71 fender.)

Tav

Re: Tav Challenger T/A Clone [Re: cataclysm80] #446202
08/23/09 05:38 PM
08/23/09 05:38 PM
Joined: Oct 2006
Posts: 4,165
Florida
C
cataclysm80 Offline OP
master
cataclysm80  Offline OP
master
C

Joined: Oct 2006
Posts: 4,165
Florida
This is the correct location & orientation of the front valance clips on the fender.

Tav

Re: Tav Challenger T/A Clone [Re: cataclysm80] #446203
08/23/09 05:40 PM
08/23/09 05:40 PM
Joined: Oct 2006
Posts: 4,165
Florida
C
cataclysm80 Offline OP
master
cataclysm80  Offline OP
master
C

Joined: Oct 2006
Posts: 4,165
Florida
This is the correct location & orientation of the grill top & end clips on the fender.

Tav

Re: Tav Challenger T/A Clone [Re: cataclysm80] #446204
08/23/09 05:42 PM
08/23/09 05:42 PM
Joined: Oct 2006
Posts: 4,165
Florida
C
cataclysm80 Offline OP
master
cataclysm80  Offline OP
master
C

Joined: Oct 2006
Posts: 4,165
Florida
This is the correct location of the fender clips that hold it onto radiator support, but they're on backwards in this picture. They should be facing the other direction. Ooops!

Tav

Re: Tav Challenger T/A Clone [Re: cataclysm80] #446205
08/23/09 05:43 PM
08/23/09 05:43 PM
Joined: Oct 2006
Posts: 4,165
Florida
C
cataclysm80 Offline OP
master
cataclysm80  Offline OP
master
C

Joined: Oct 2006
Posts: 4,165
Florida
The front bumper brackets come apart into four pieces, so here is how they're supposed to go onto the car.

Note that mine are very yellow. Is this the correct color, or are these over the counter parts or something?

Tav

5435867-DSC00147edit.jpg (215 downloads)
Re: Tav Challenger T/A Clone [Re: cataclysm80] #446206
08/23/09 05:46 PM
08/23/09 05:46 PM
Joined: Oct 2006
Posts: 4,165
Florida
C
cataclysm80 Offline OP
master
cataclysm80  Offline OP
master
C

Joined: Oct 2006
Posts: 4,165
Florida
Here's how the door hinges and rear upper fender bracket go onto the car.

You can also see where some seam sealer was applied from the factory.

Tav

5435875-DSC00163edit.jpg (142 downloads)
Re: Tav Challenger T/A Clone [Re: cataclysm80] #446207
08/23/09 05:50 PM
08/23/09 05:50 PM
Joined: Oct 2006
Posts: 4,165
Florida
C
cataclysm80 Offline OP
master
cataclysm80  Offline OP
master
C

Joined: Oct 2006
Posts: 4,165
Florida
Here's where the rear window centering clip mounts. This centers the rear window vertically in the opening. A trim clip is not used in this location.

Tav

5435886-DSC00149edit.jpg (152 downloads)
Re: Tav Challenger T/A Clone [Re: cataclysm80] #446208
08/23/09 05:52 PM
08/23/09 05:52 PM
Joined: Oct 2006
Posts: 4,165
Florida
C
cataclysm80 Offline OP
master
cataclysm80  Offline OP
master
C

Joined: Oct 2006
Posts: 4,165
Florida
Here's how the 1970 Challenger only rear valance brackets mount to the car.

Tav

5435889-DSC00142edit.jpg (146 downloads)
Re: Tav Challenger T/A Clone [Re: cataclysm80] #446209
08/23/09 05:55 PM
08/23/09 05:55 PM
Joined: Oct 2006
Posts: 4,165
Florida
C
cataclysm80 Offline OP
master
cataclysm80  Offline OP
master
C

Joined: Oct 2006
Posts: 4,165
Florida
Here are the outboard rear valance brackets for the same 70 Challenger only setup. The angled corners faced outward on each side of the car.

Tav

5435895-DSC00141edit.jpg (148 downloads)
Re: Tav Challenger T/A Clone [Re: cataclysm80] #446210
08/23/09 05:56 PM
08/23/09 05:56 PM
Joined: Oct 2006
Posts: 4,165
Florida
C
cataclysm80 Offline OP
master
cataclysm80  Offline OP
master
C

Joined: Oct 2006
Posts: 4,165
Florida
Here is how the rear bumper brackets go onto the car. You wouldn't want those on upside down.

Tav

5435901-DSC00150edit.jpg (154 downloads)
Re: Tav Challenger T/A Clone [Re: cataclysm80] #446211
08/23/09 06:00 PM
08/23/09 06:00 PM
Joined: Oct 2006
Posts: 4,165
Florida
C
cataclysm80 Offline OP
master
cataclysm80  Offline OP
master
C

Joined: Oct 2006
Posts: 4,165
Florida
This shows the remains of the jacking instruction sticker.

Tav

5435912-DSC00086edit.jpg (141 downloads)
Re: Tav Challenger T/A Clone [Re: cataclysm80] #446212
08/23/09 06:02 PM
08/23/09 06:02 PM
Joined: Oct 2006
Posts: 4,165
Florida
C
cataclysm80 Offline OP
master
cataclysm80  Offline OP
master
C

Joined: Oct 2006
Posts: 4,165
Florida
The trunk latch bar has one edge curved up and one edge curved down. Here's how it was installed on this car.

Tav

5435918-DSC00085edit.jpg (137 downloads)
Re: Tav Challenger T/A Clone [Re: cataclysm80] #446213
08/23/09 06:06 PM
08/23/09 06:06 PM
Joined: Oct 2006
Posts: 4,165
Florida
C
cataclysm80 Offline OP
master
cataclysm80  Offline OP
master
C

Joined: Oct 2006
Posts: 4,165
Florida
This shows the hinge backing plate inside the trunk lid. It is held on with a screw.

You can also see one of the two trunk lid body plugs. These seem to often be either missing or painted body color at shows. They should be plain black plastic.

Tav

5435931-DSC00132edit.jpg (120 downloads)
Re: Tav Challenger T/A Clone [Re: cataclysm80] #446214
08/23/09 06:09 PM
08/23/09 06:09 PM
Joined: Oct 2006
Posts: 4,165
Florida
C
cataclysm80 Offline OP
master
cataclysm80  Offline OP
master
C

Joined: Oct 2006
Posts: 4,165
Florida
This shows the factory sound deadener that was applied to the quarter panels before they were installed on the car.

It also show some wire routing.

Tav

5435941-DSC00091edit.jpg (151 downloads)
Re: Tav Challenger T/A Clone [Re: cataclysm80] #446215
08/23/09 06:14 PM
08/23/09 06:14 PM
Joined: Oct 2006
Posts: 4,165
Florida
C
cataclysm80 Offline OP
master
cataclysm80  Offline OP
master
C

Joined: Oct 2006
Posts: 4,165
Florida
This shows more wire routing and sound deadener. You can also see the tail light socket I had to install, and the trunk floor that was replaced in the 90's but never painted. It just had the trunk mat put over it.

Tav

5435950-DSC00090edit.jpg (232 downloads)
Re: Tav Challenger T/A Clone [Re: cataclysm80] #446216
08/23/09 06:25 PM
08/23/09 06:25 PM
Joined: Oct 2006
Posts: 4,165
Florida
C
cataclysm80 Offline OP
master
cataclysm80  Offline OP
master
C

Joined: Oct 2006
Posts: 4,165
Florida
Here's more sound deadener and the 1970 Federal style 49 state fuel tank vent. This vent line is bent quite a bit. It's supposed to route in front of the fuel filler tube. It goes down through the floor into the frame rail and stops there. Only these 1970 Challenger filler tubes have the vent tube nipple. There are still 2 grommets in the floor even though only 1 is used. The unused grommet looks just like the other one, only the hole is not punched out of the center. it acts like a plug.

This unpunched version is not available reproduction. A reproduction kit will get you 2 grommets with holes in them. I suggest re-using your original grommets. however, the holes in the reproduction grommet plate are often too large to accept original grommets. Since original grommets plates are usually to rusty to use, you'll need to cut a new one out of some flat sheetmetal using your original as a pattern. Original finish seems to be bare steel, because originals are usually very rusty. This one doesn't look too bad in the pic, but it fell apart when I took it off the car.

Tav

5435982-DSC00089edit.jpg (231 downloads)
Re: Tav Challenger T/A Clone [Re: cataclysm80] #446217
08/23/09 06:54 PM
08/23/09 06:54 PM
Joined: Oct 2006
Posts: 4,165
Florida
C
cataclysm80 Offline OP
master
cataclysm80  Offline OP
master
C

Joined: Oct 2006
Posts: 4,165
Florida
Here's a better picture of the grommets. Original on Left, 2 versions of the reproduction on right. You could get either version, depending which kit you buy.

Original forward #'s 2216552 FK3-74
Original rear (unpunched) #'s 3445939 FK-50

Repro version 1 #'s 2216552 3 FK 44
Repro version 2 (big print) #'s 2216 552 74679 83


The oval shaped metal plate that the grommets go in mounts with 3 screws. One side has 2 screws, and the other side has 1 screw. The side with 2 screws should go on the inside towards the trunk, and the side with 1 screw should go on the outside towards the quarter panel.

Tav

5436040-DSC02212.JPG (147 downloads)
Re: Tav Challenger T/A Clone [Re: cataclysm80] #446218
08/23/09 06:59 PM
08/23/09 06:59 PM
Joined: Oct 2006
Posts: 4,165
Florida
C
cataclysm80 Offline OP
master
cataclysm80  Offline OP
master
C

Joined: Oct 2006
Posts: 4,165
Florida
This shows how my air shocks were routed. You can also see one of the package tray retaining clips, and other odds and ends.

Tav

5436053-DSC00088edit.jpg (189 downloads)
Re: Tav Challenger T/A Clone [Re: cataclysm80] #446219
08/23/09 07:06 PM
08/23/09 07:06 PM
Joined: Oct 2006
Posts: 4,165
Florida
C
cataclysm80 Offline OP
master
cataclysm80  Offline OP
master
C

Joined: Oct 2006
Posts: 4,165
Florida
The blue fuel sending unit wire is routed incorrectly in this picture. When the trunk floor was replaced, the correct hole for the blue fuel sending unit wire was never cut out, so it was routed with the air shocks instead.

The holes the air shock lines go through are meant for access to the upper shock bolt. I've seen car with replaced trunk floor that didn't have this hole cut out. If your new trunk floor doesn't come with these holes cut out, make sure you cut them out or it will be very difficult to change your shocks in the future. These holes are supposed to be filled with a special body plug.

You can see the yellow and pink dome light connector in this pic. That is where the trunk light would plug in if you had one. This car didn't come with a trunk light originally, but it will have one when I'm done.

Tav

5436075-DSC00087edit.jpg (170 downloads)
Re: Tav Challenger T/A Clone [Re: cataclysm80] #446220
08/23/09 07:23 PM
08/23/09 07:23 PM
Joined: Oct 2006
Posts: 4,165
Florida
C
cataclysm80 Offline OP
master
cataclysm80  Offline OP
master
C

Joined: Oct 2006
Posts: 4,165
Florida
Here is the manual foot pump windshield squirter, Emergency brake, etc. It is correct for this car to not have a grommet around the dimmer switch. The carpet however had been changed. It was originally a green carpet. Original carpeting had loops in the back by the rear panels. A screw was put through the loop to help hold the carpet during assembly. Under this black carpet, I found one of my original carpet loops still screwed to the floor with some green carpet threads still attached to the loop. Even the best reproduction carpets don't come with the loops, and they would not be visible once installed anyway. If you're replacing your carpet make sure to look for the screw holes from your original carpet loops and fill the hole with seam sealer or something so that you don't have a leak.

The kick panel & door panel in this pic are not original. I got them at a swap meet because mine were missing. The sill plates are also not original. They came with the car when I got it, but still have a clear protective plastic sheeting on them.

Tav

5436123-DSC00108edit.jpg (155 downloads)
Re: Tav Challenger T/A Clone [Re: cataclysm80] #446221
08/23/09 07:26 PM
08/23/09 07:26 PM
Joined: Oct 2006
Posts: 4,165
Florida
C
cataclysm80 Offline OP
master
cataclysm80  Offline OP
master
C

Joined: Oct 2006
Posts: 4,165
Florida
Here's the passenger side kick panel. Kind of rusty over here.

Tav

5436130-DSC00109edit.jpg (137 downloads)
Re: Tav Challenger T/A Clone [Re: cataclysm80] #446222
08/23/09 07:30 PM
08/23/09 07:30 PM
Joined: Oct 2006
Posts: 4,165
Florida
C
cataclysm80 Offline OP
master
cataclysm80  Offline OP
master
C

Joined: Oct 2006
Posts: 4,165
Florida
You can see where they got some sublime on the dash pad and tried to wipe it off. It flaked off later.

You can also see where the cars been hit and welded on between the door hinges. I hadn't yet realized the extent of the damage. It looked like they'd fixed it.

I ran my antenna cable around the kick panel like that because it the time I couldn't find the antenna lead hole.

Tav

5436143-DSC00110edit.jpg (108 downloads)
Re: Tav Challenger T/A Clone [Re: cataclysm80] #446223
08/23/09 07:35 PM
08/23/09 07:35 PM
Joined: Oct 2006
Posts: 4,165
Florida
C
cataclysm80 Offline OP
master
cataclysm80  Offline OP
master
C

Joined: Oct 2006
Posts: 4,165
Florida
This shows the correct orientation of the white & pink wires on the brake light switch. The wiring diagram isn't exactly clear which one goes where on the switch, but if you get them backwards your lights won't work right.

If I remember correctly, having them backwards makes your lights nice and bright most of the time, but they get dim when you step on the brake or flip on the turn signal.

Tav

5436155-DSC00144edit.jpg (88 downloads)
Re: Tav Challenger T/A Clone [Re: cataclysm80] #446224
08/23/09 07:39 PM
08/23/09 07:39 PM
Joined: Oct 2006
Posts: 4,165
Florida
C
cataclysm80 Offline OP
master
cataclysm80  Offline OP
master
C

Joined: Oct 2006
Posts: 4,165
Florida
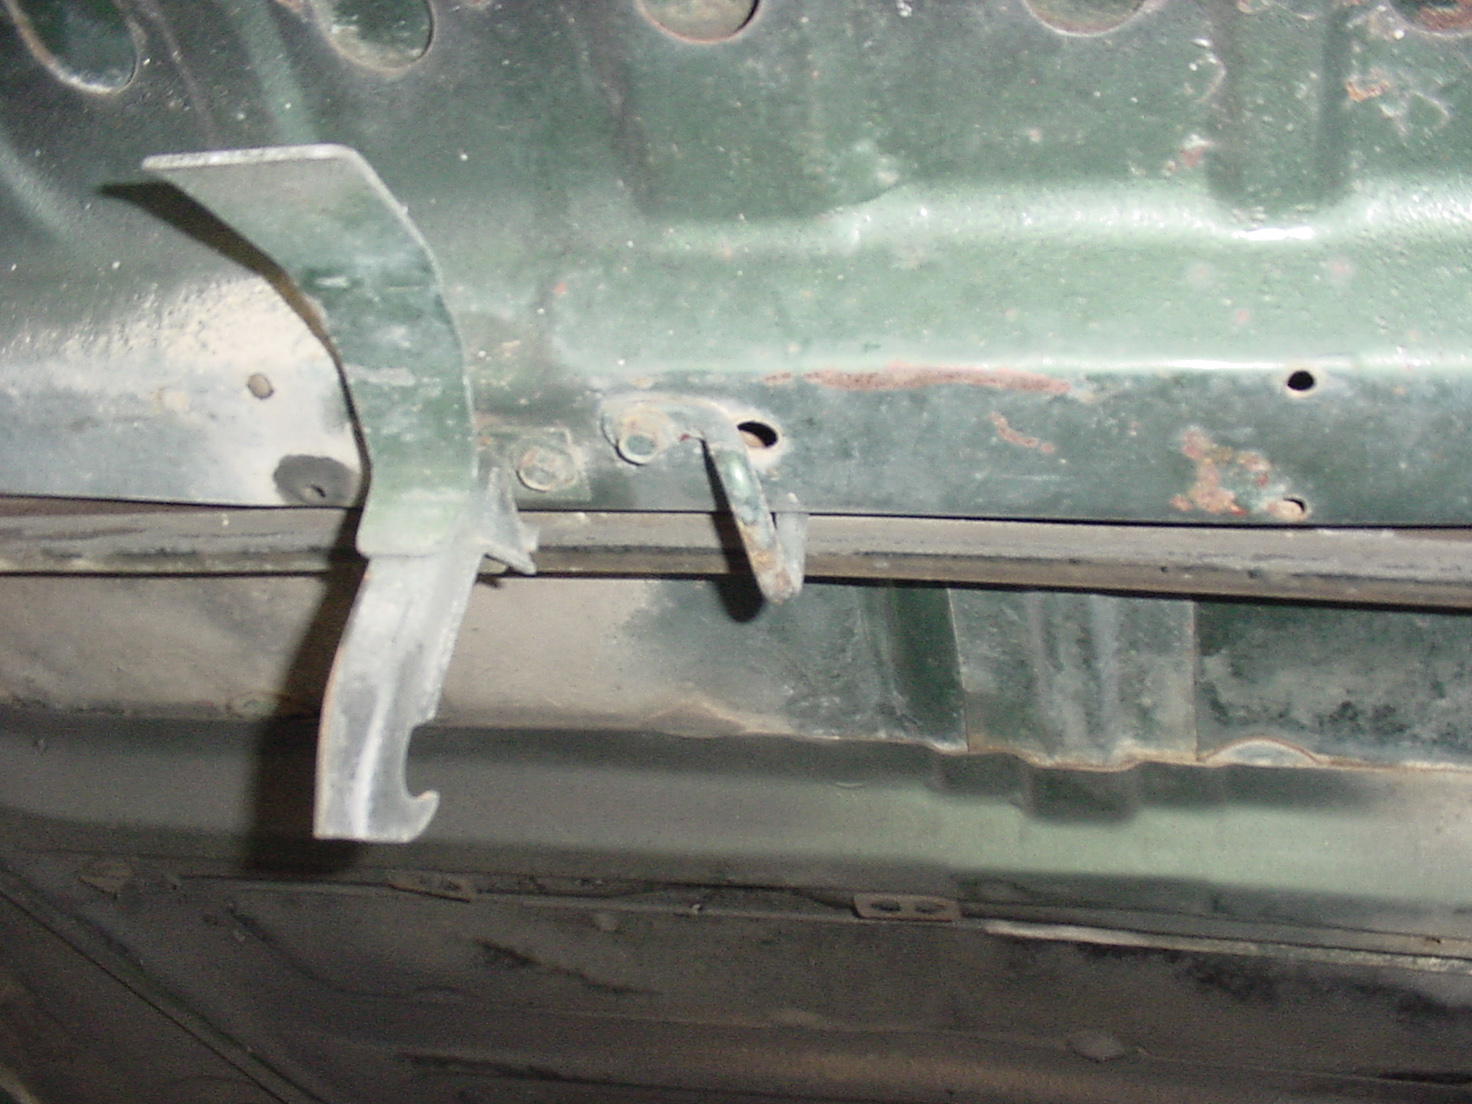
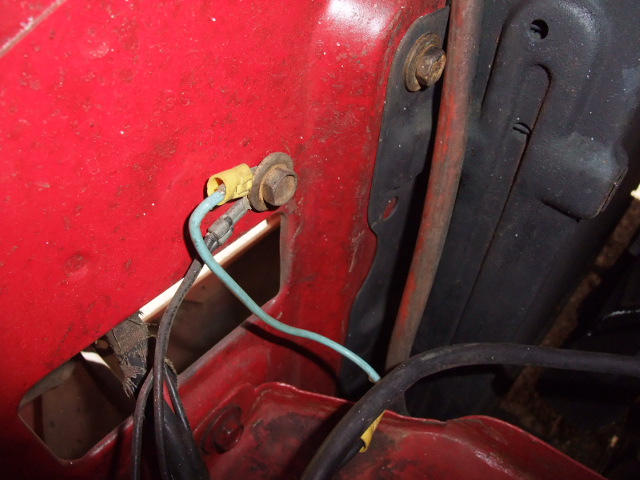
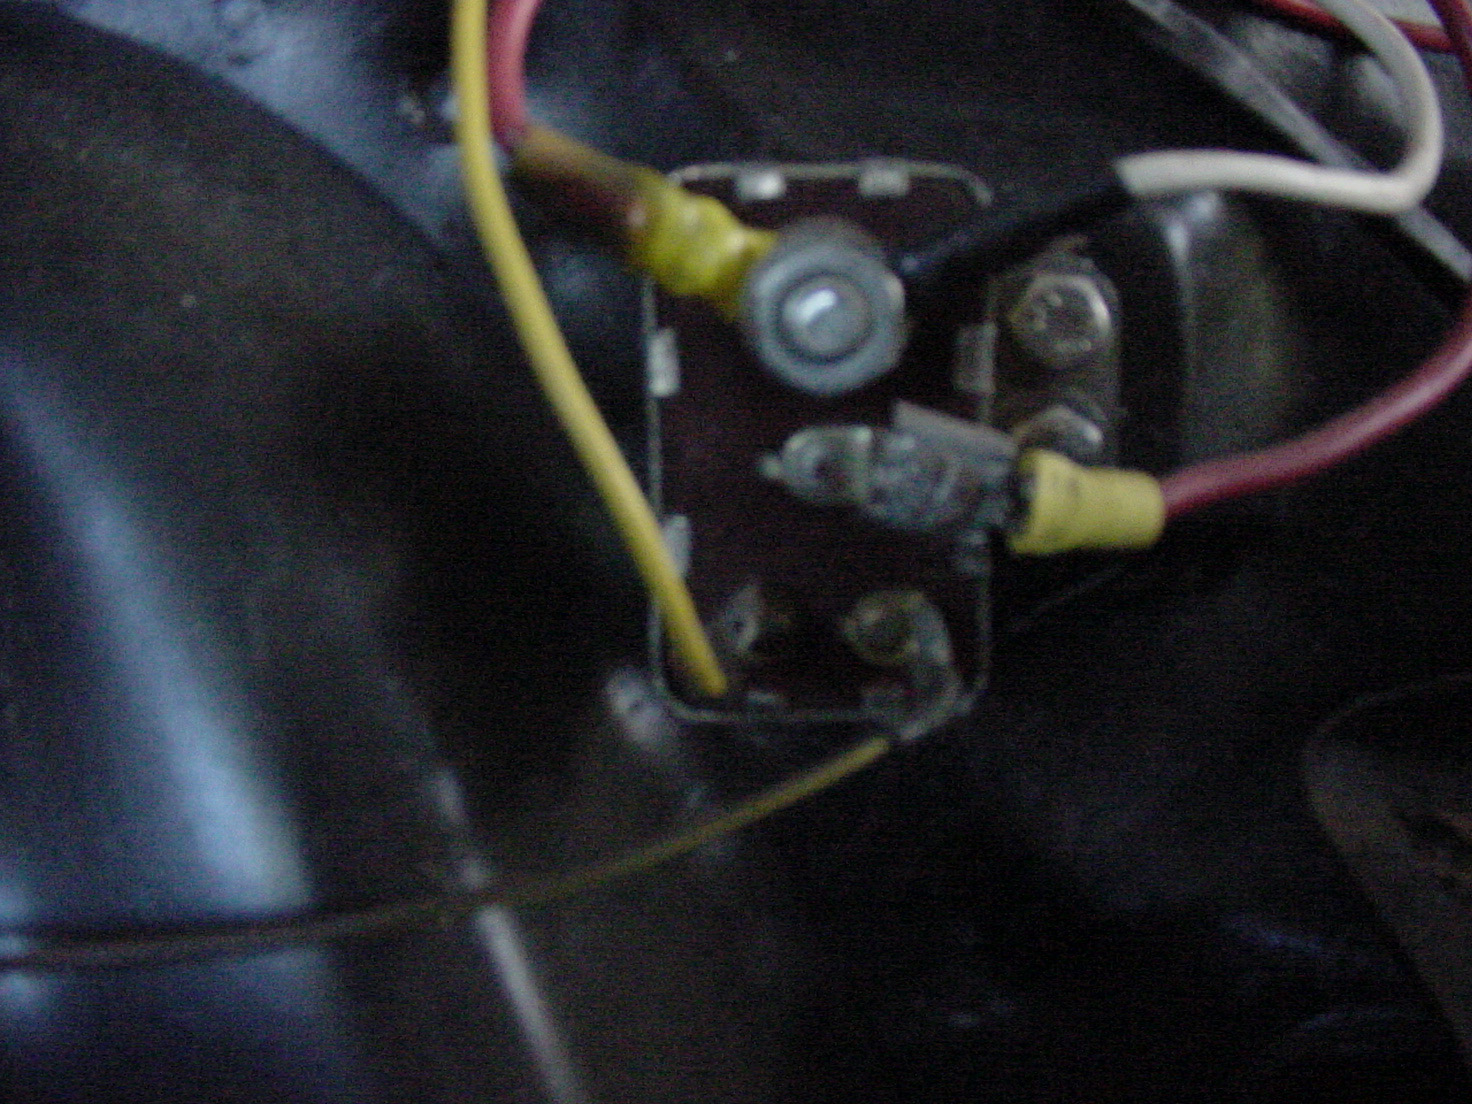
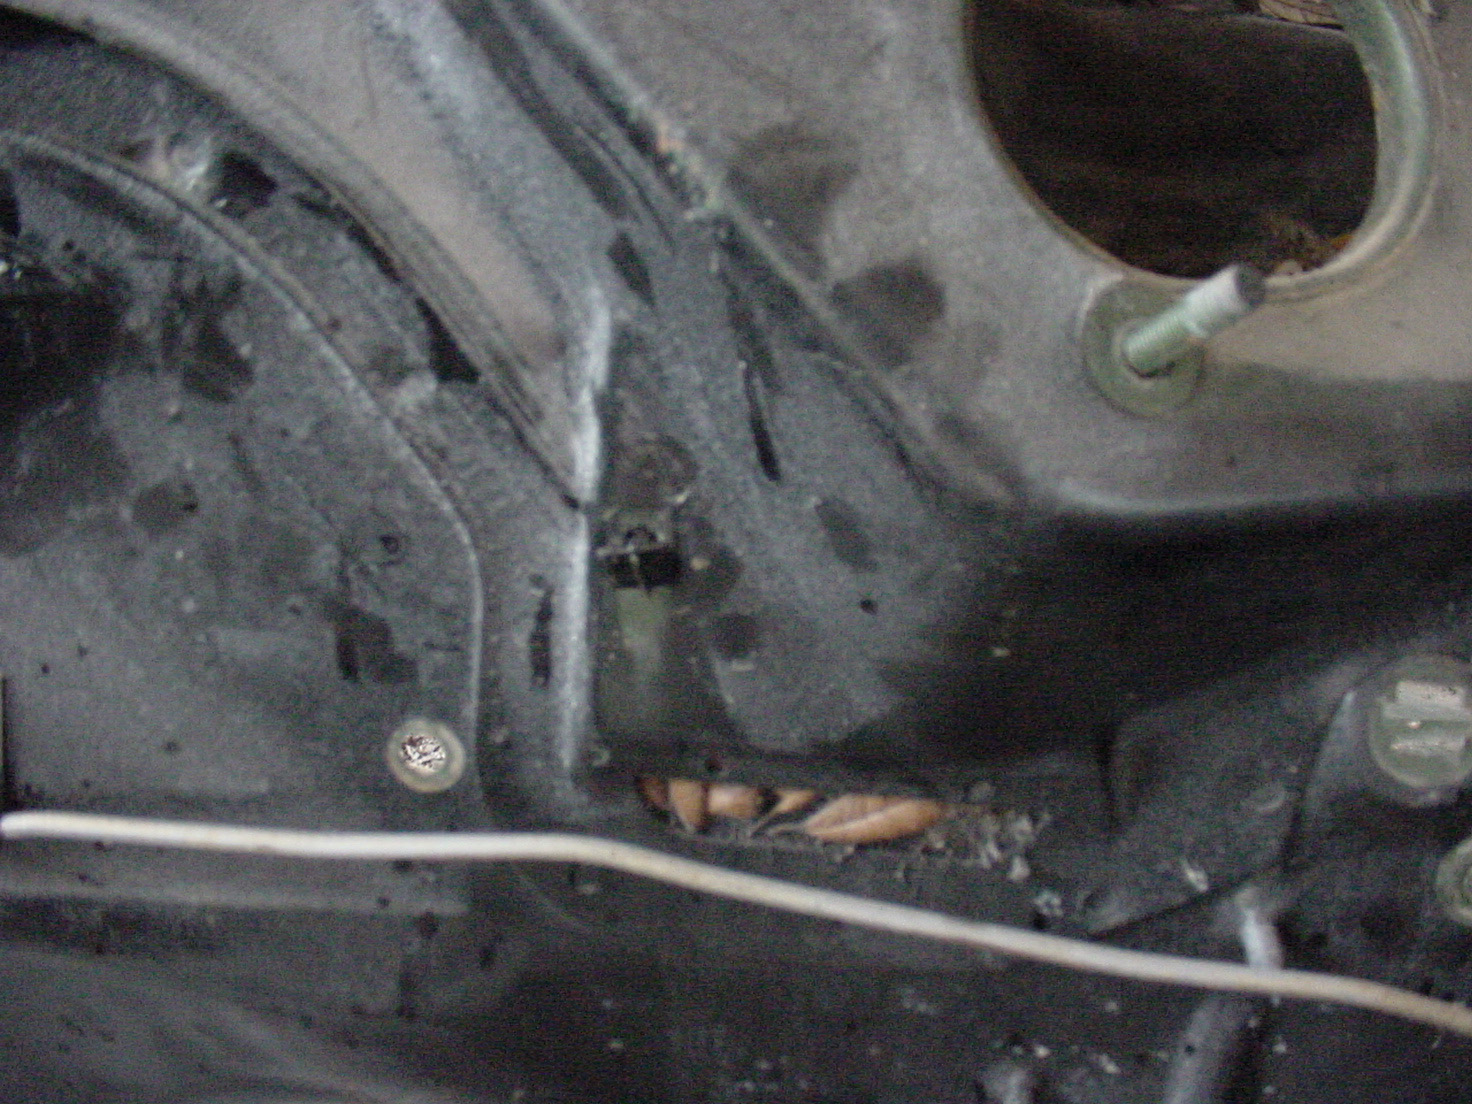
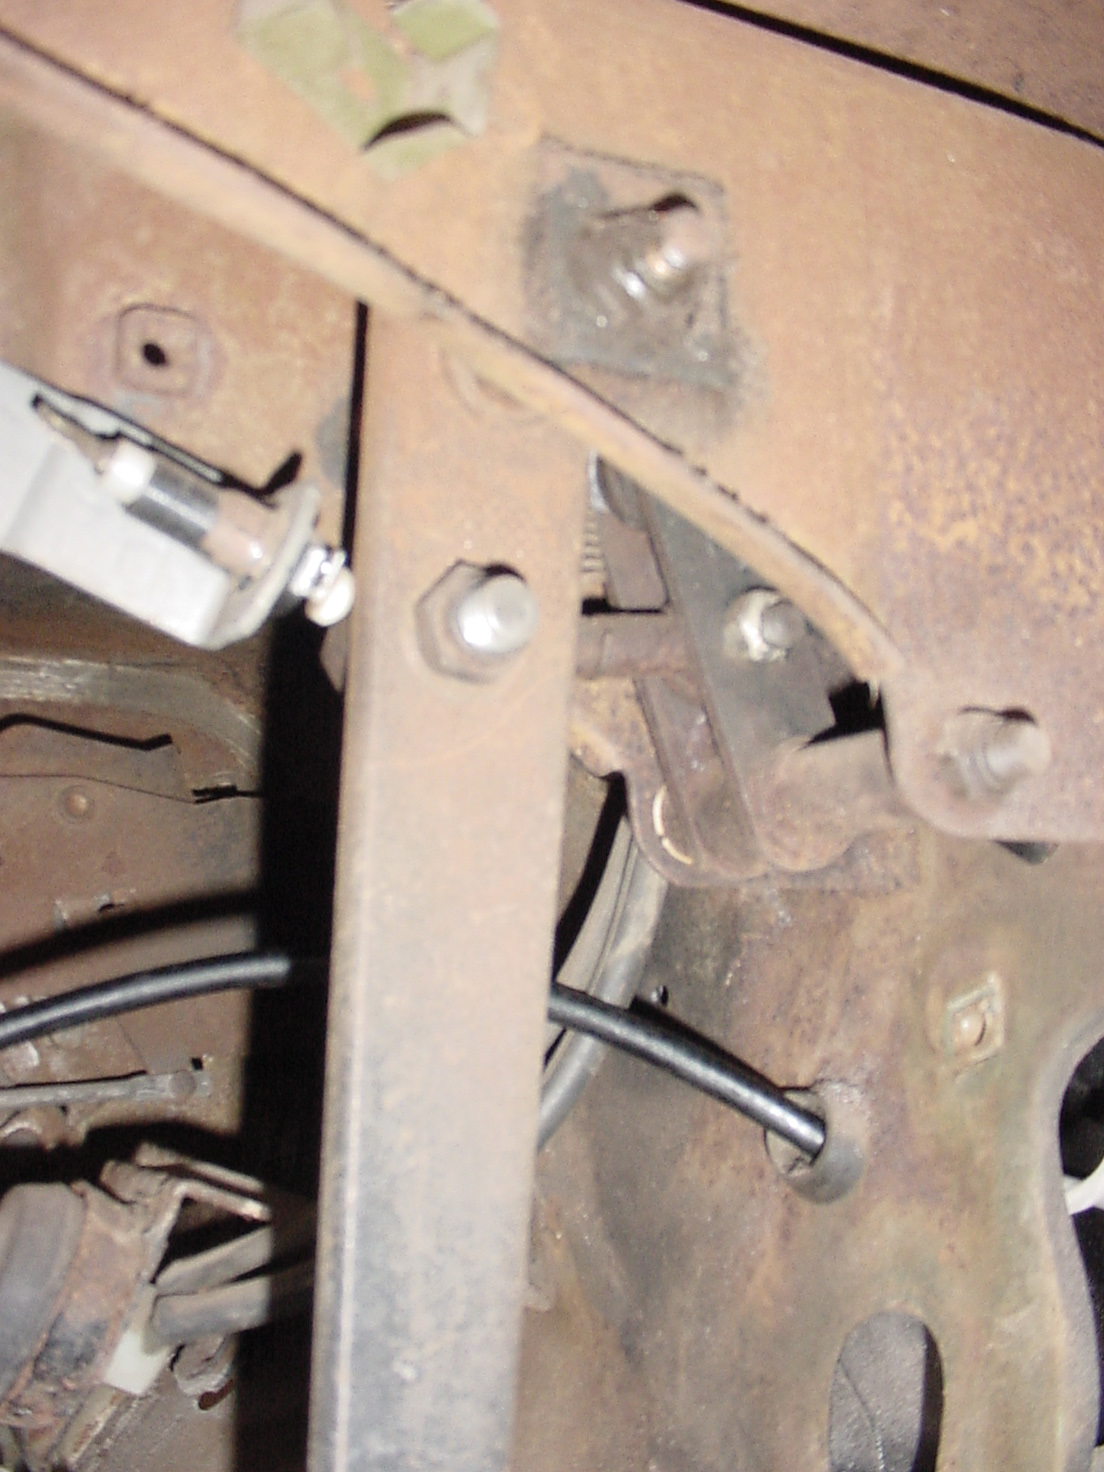
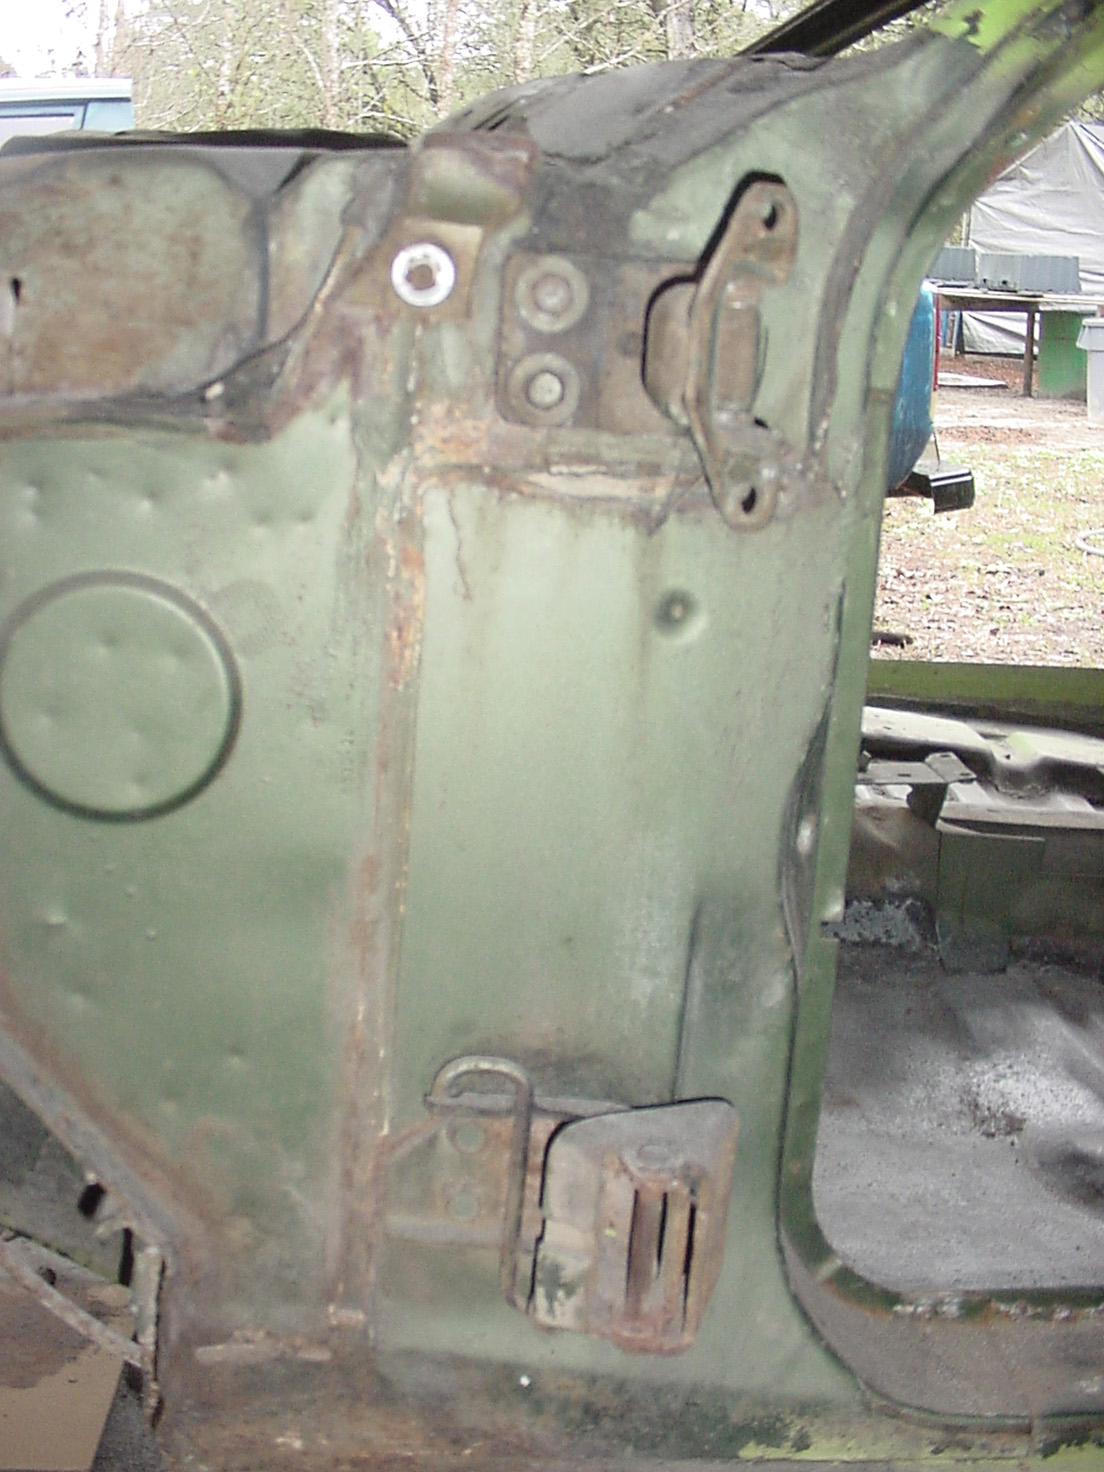
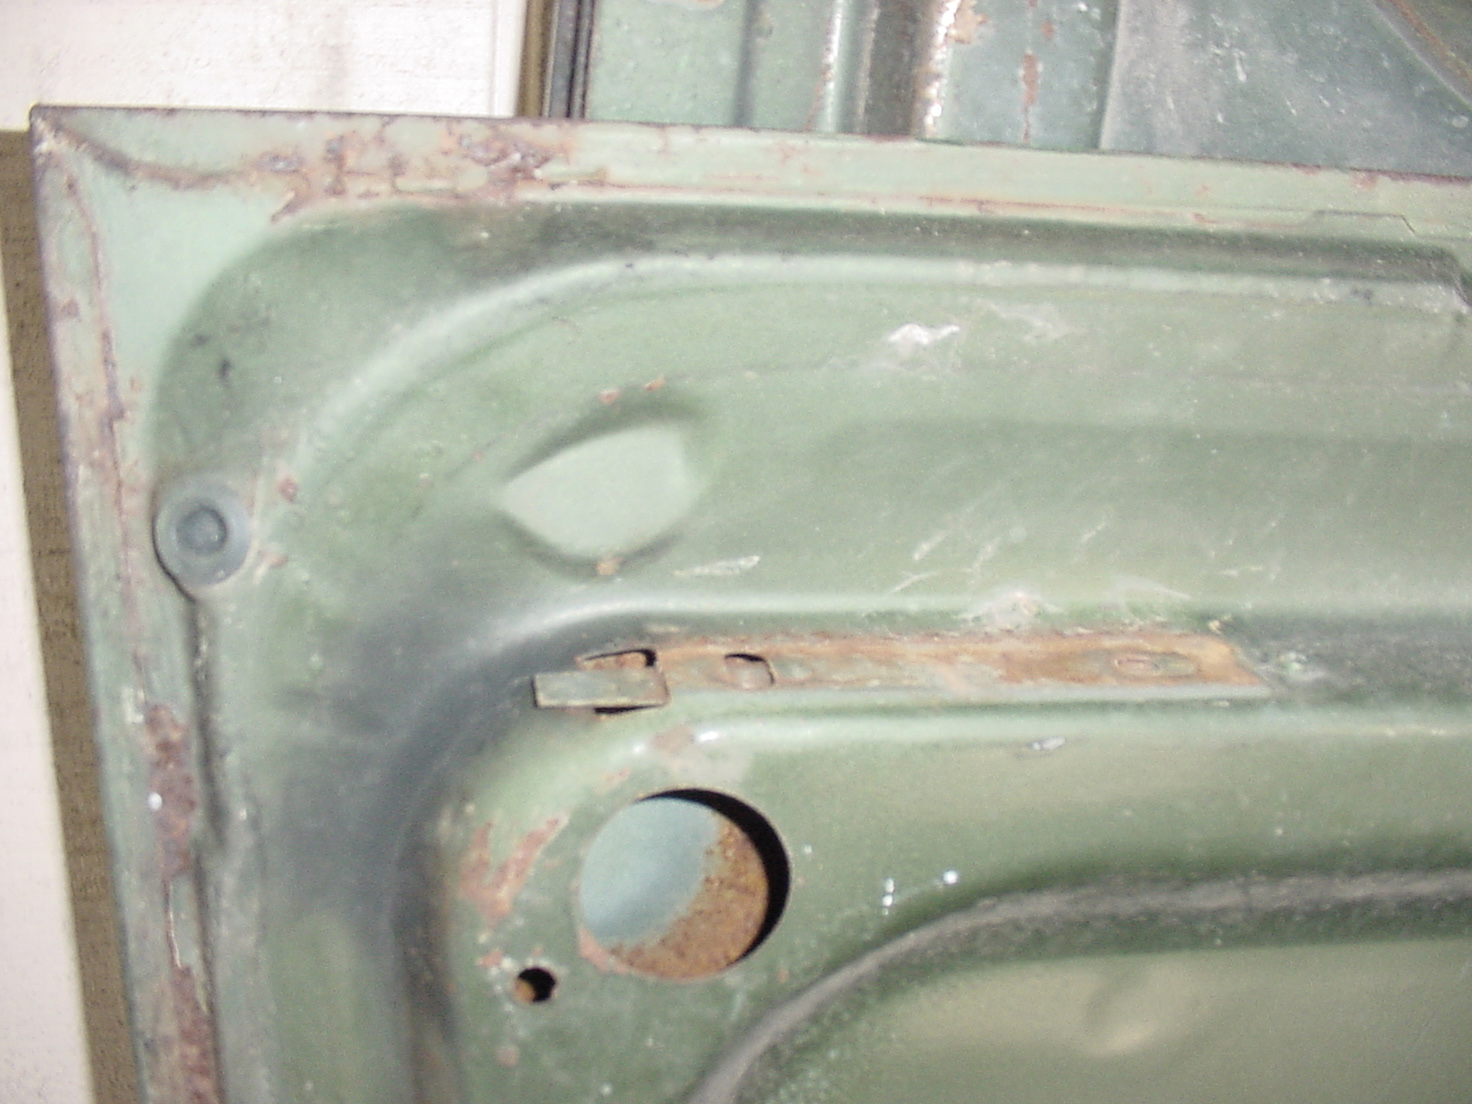
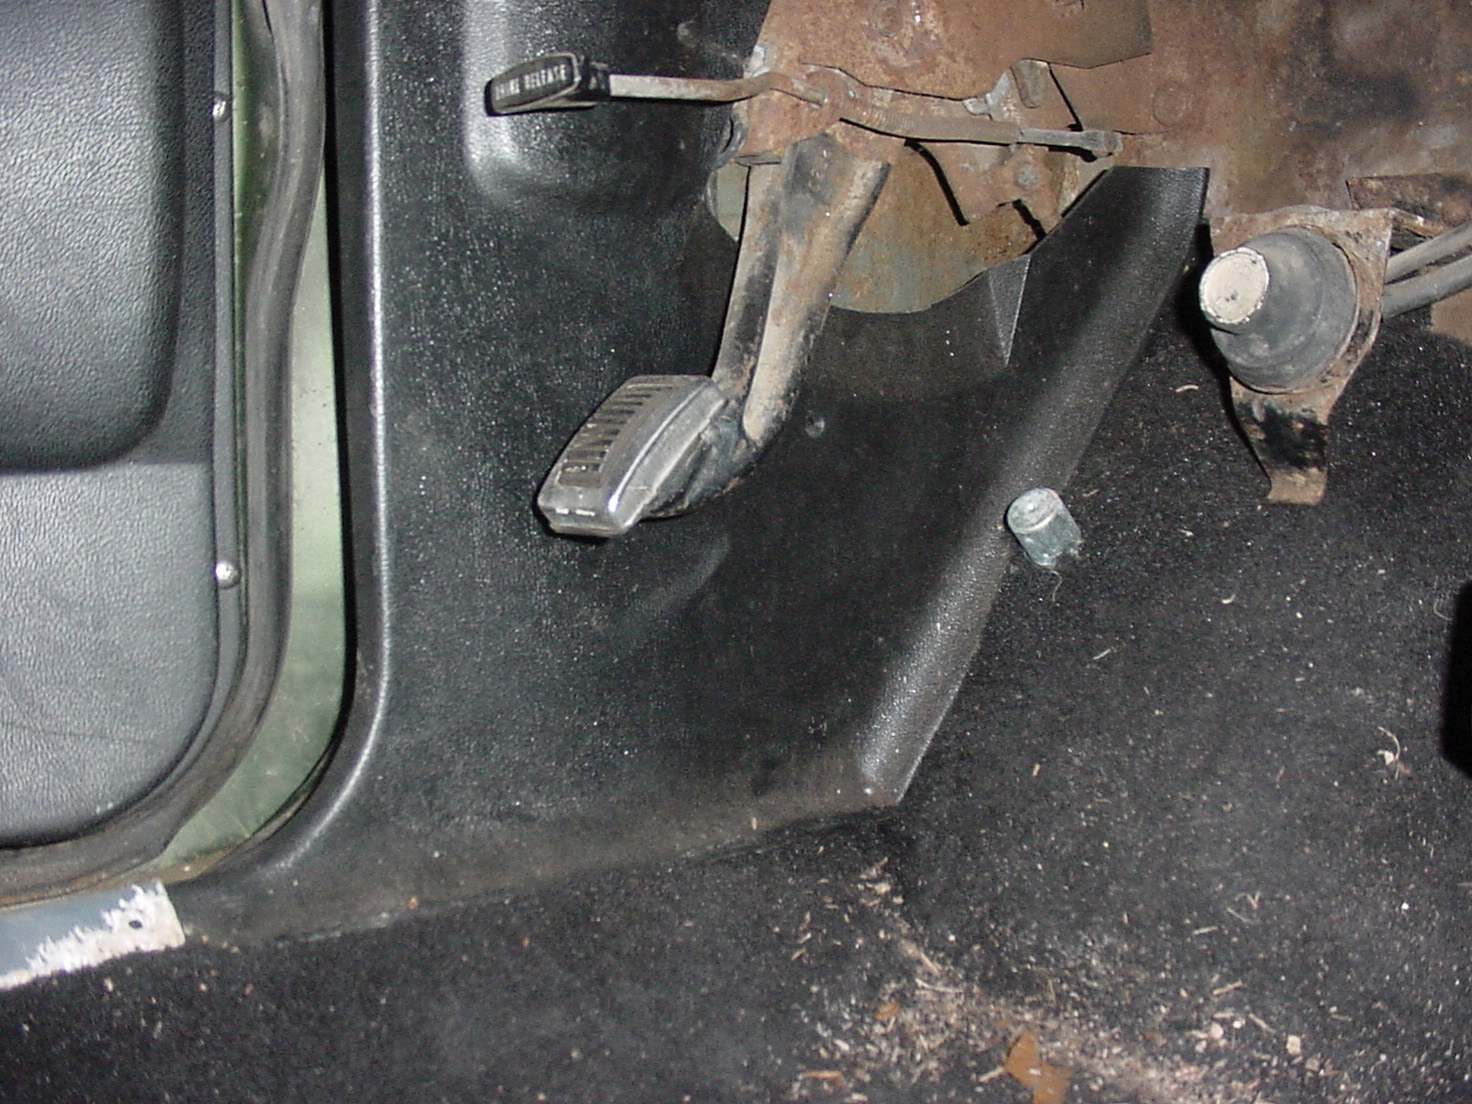
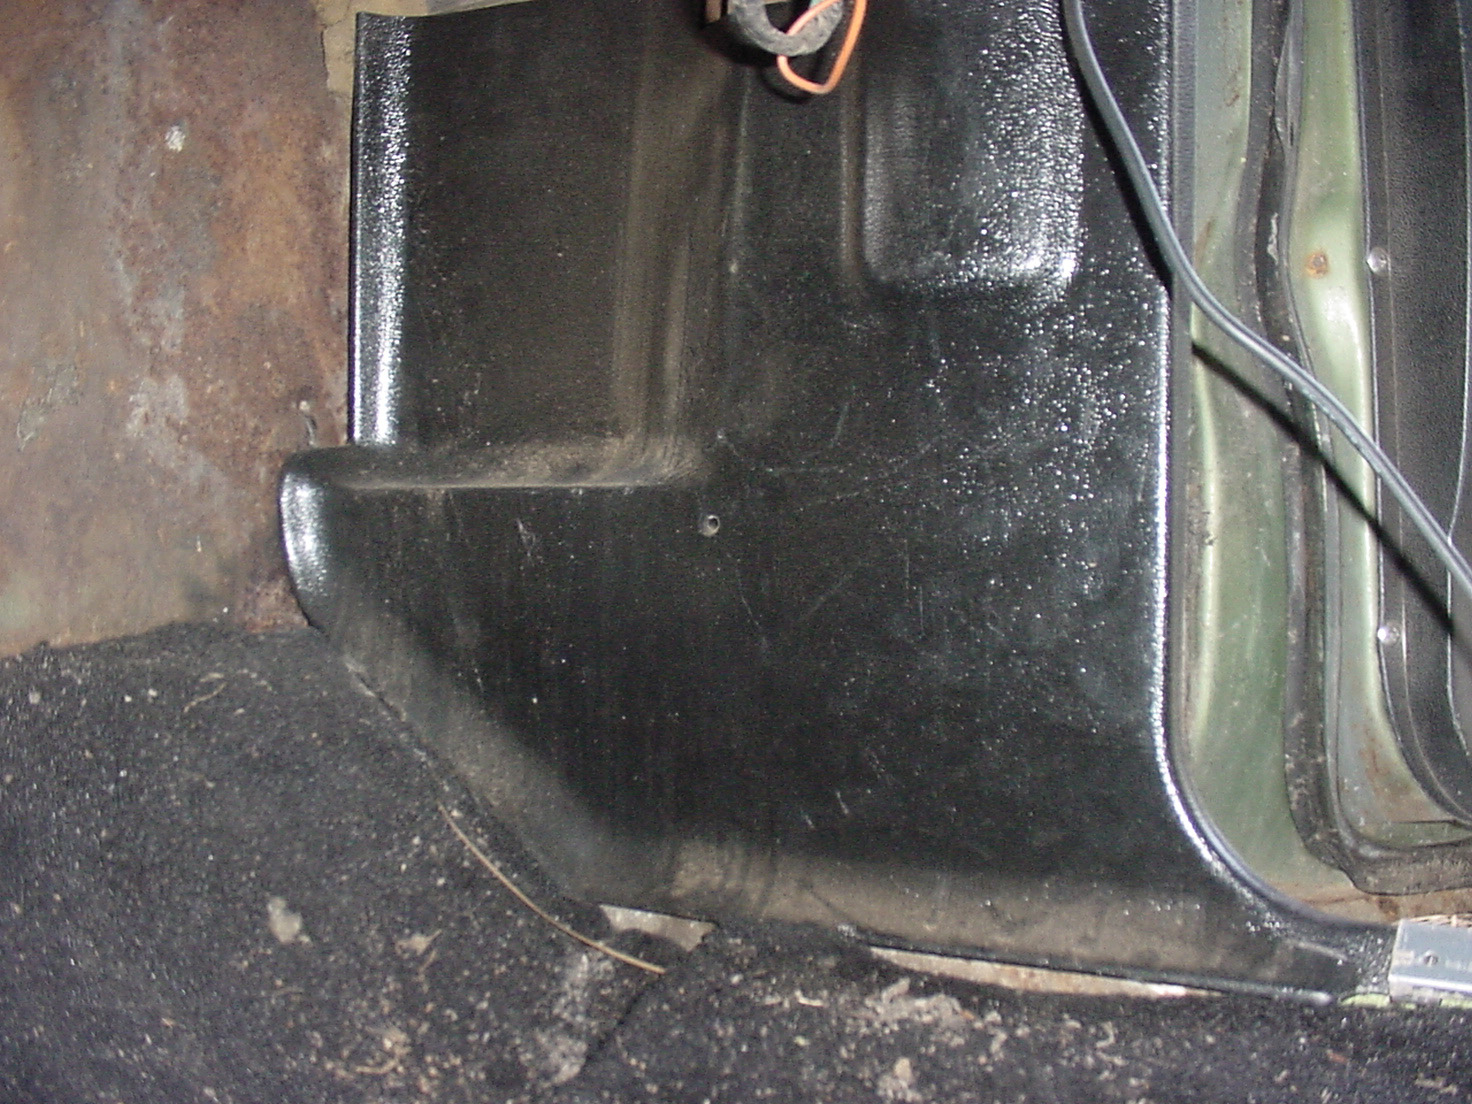
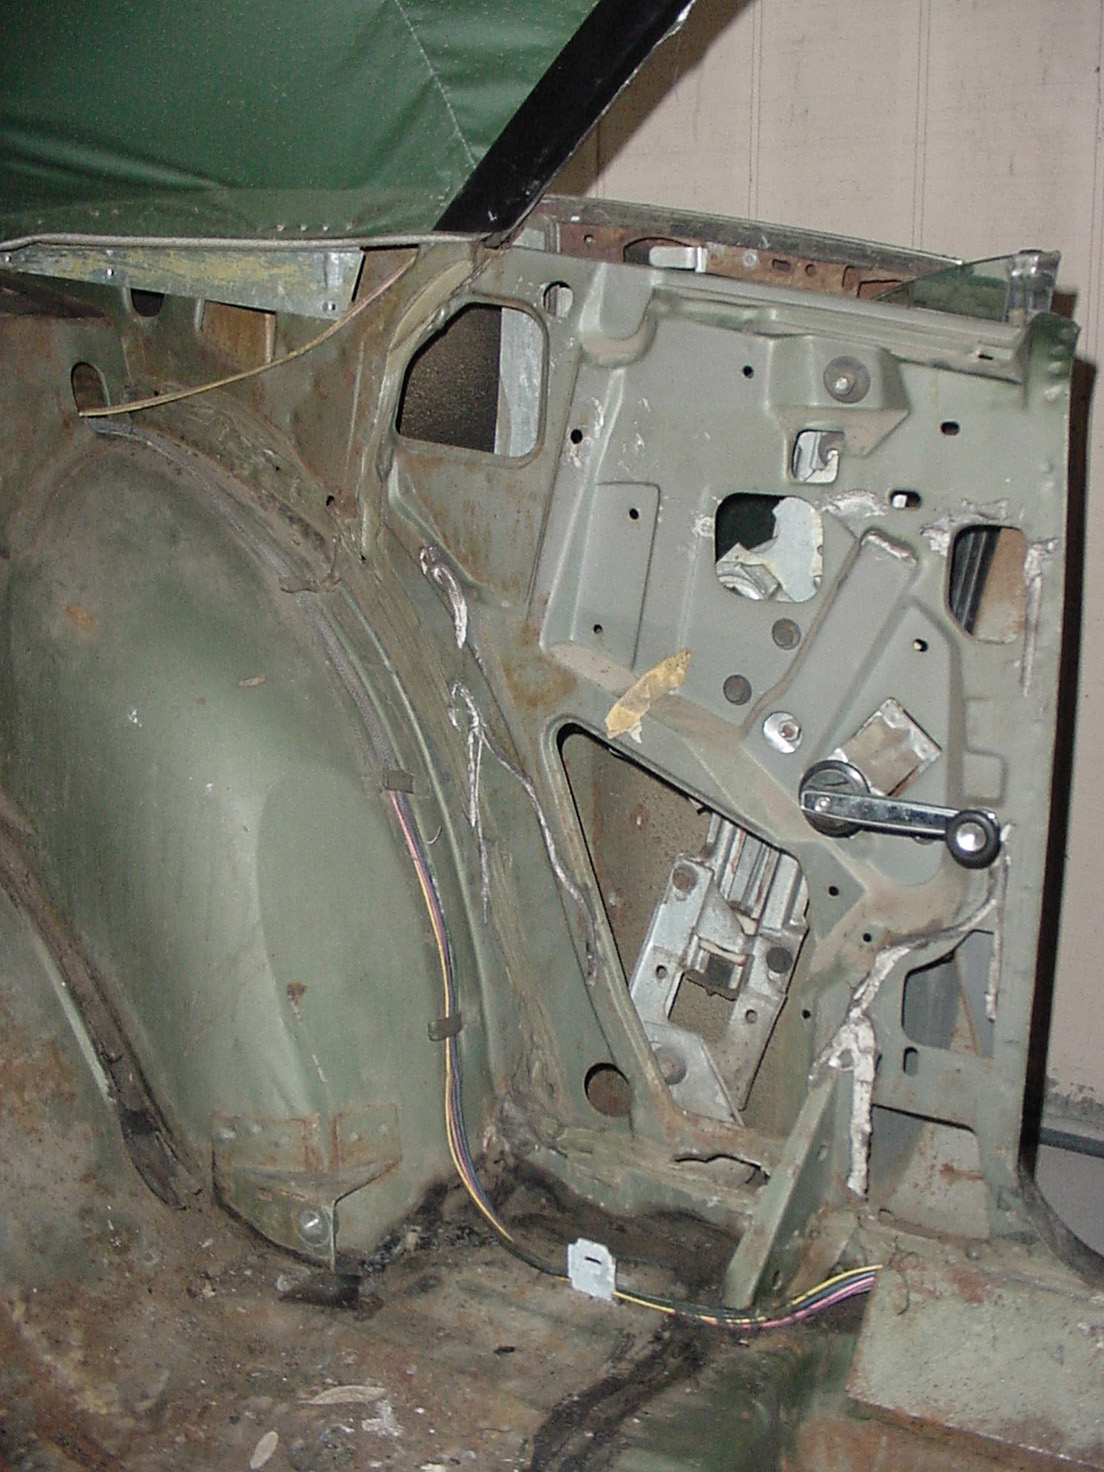
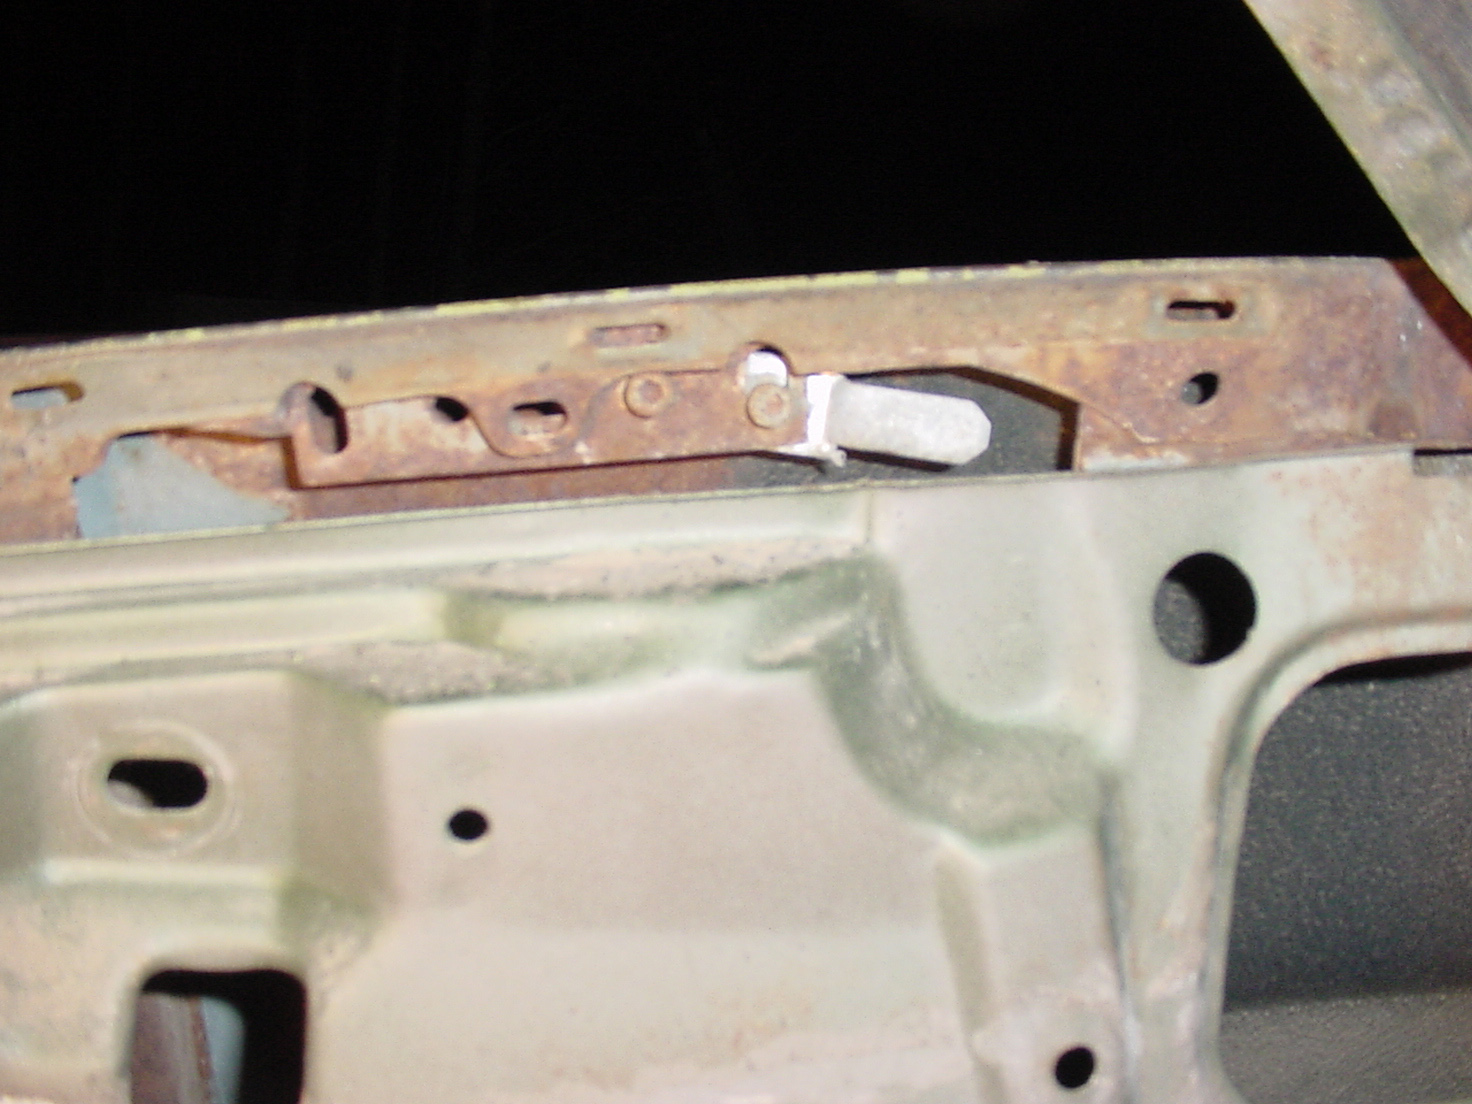
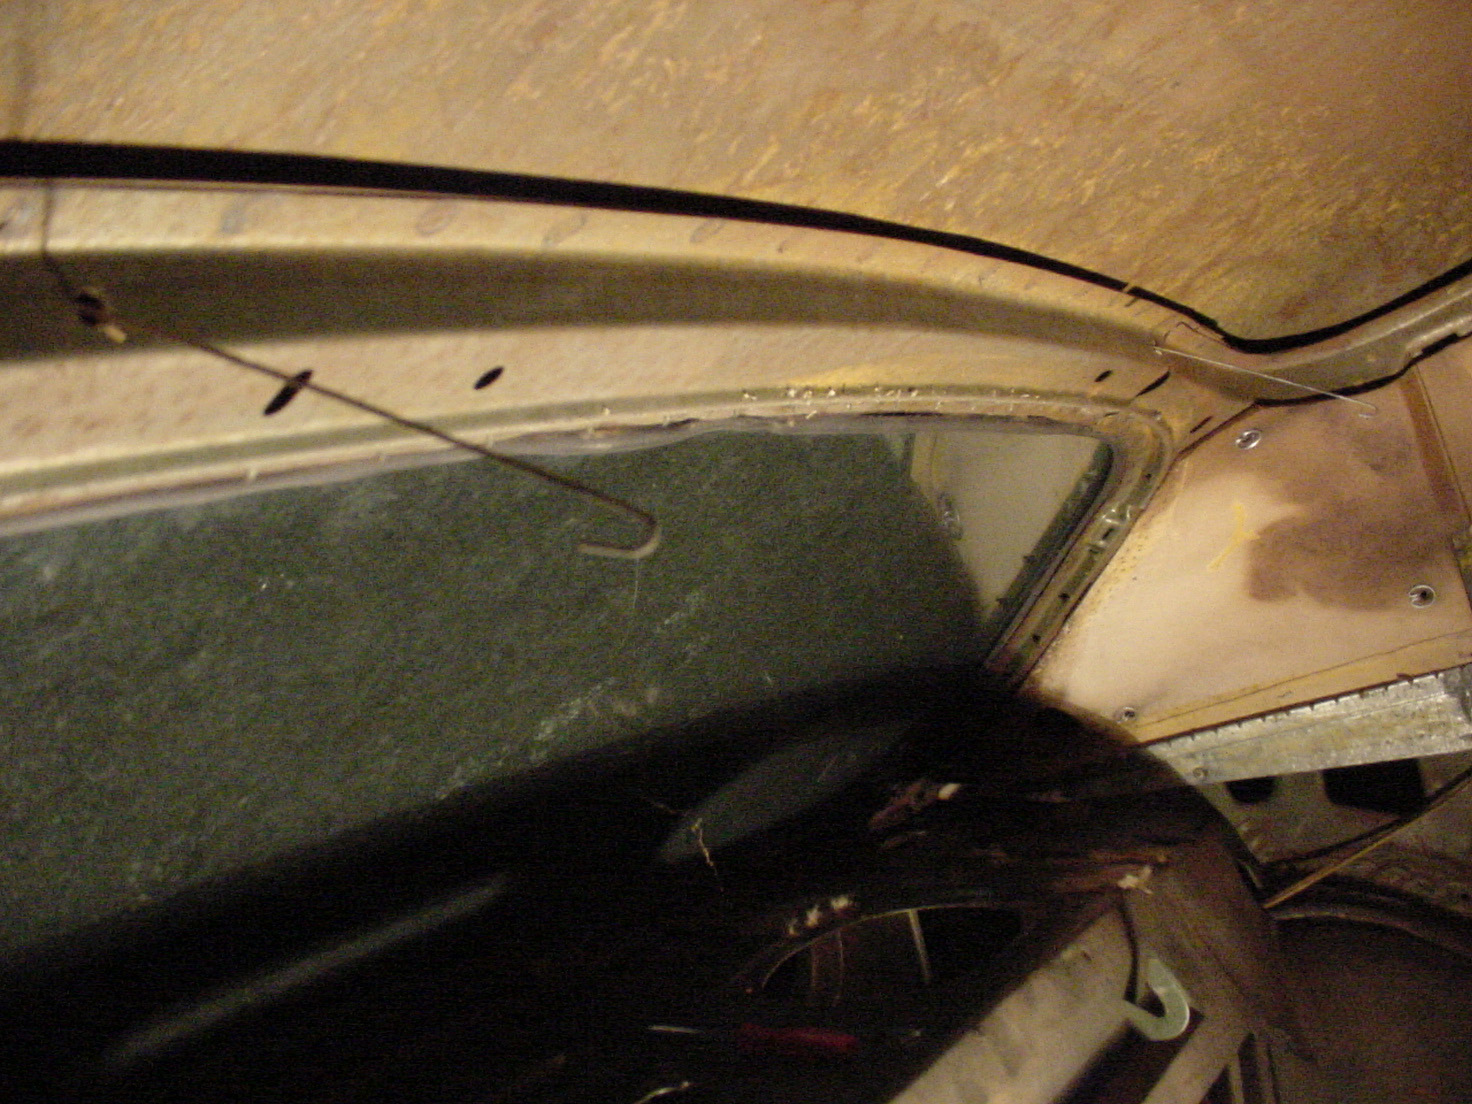
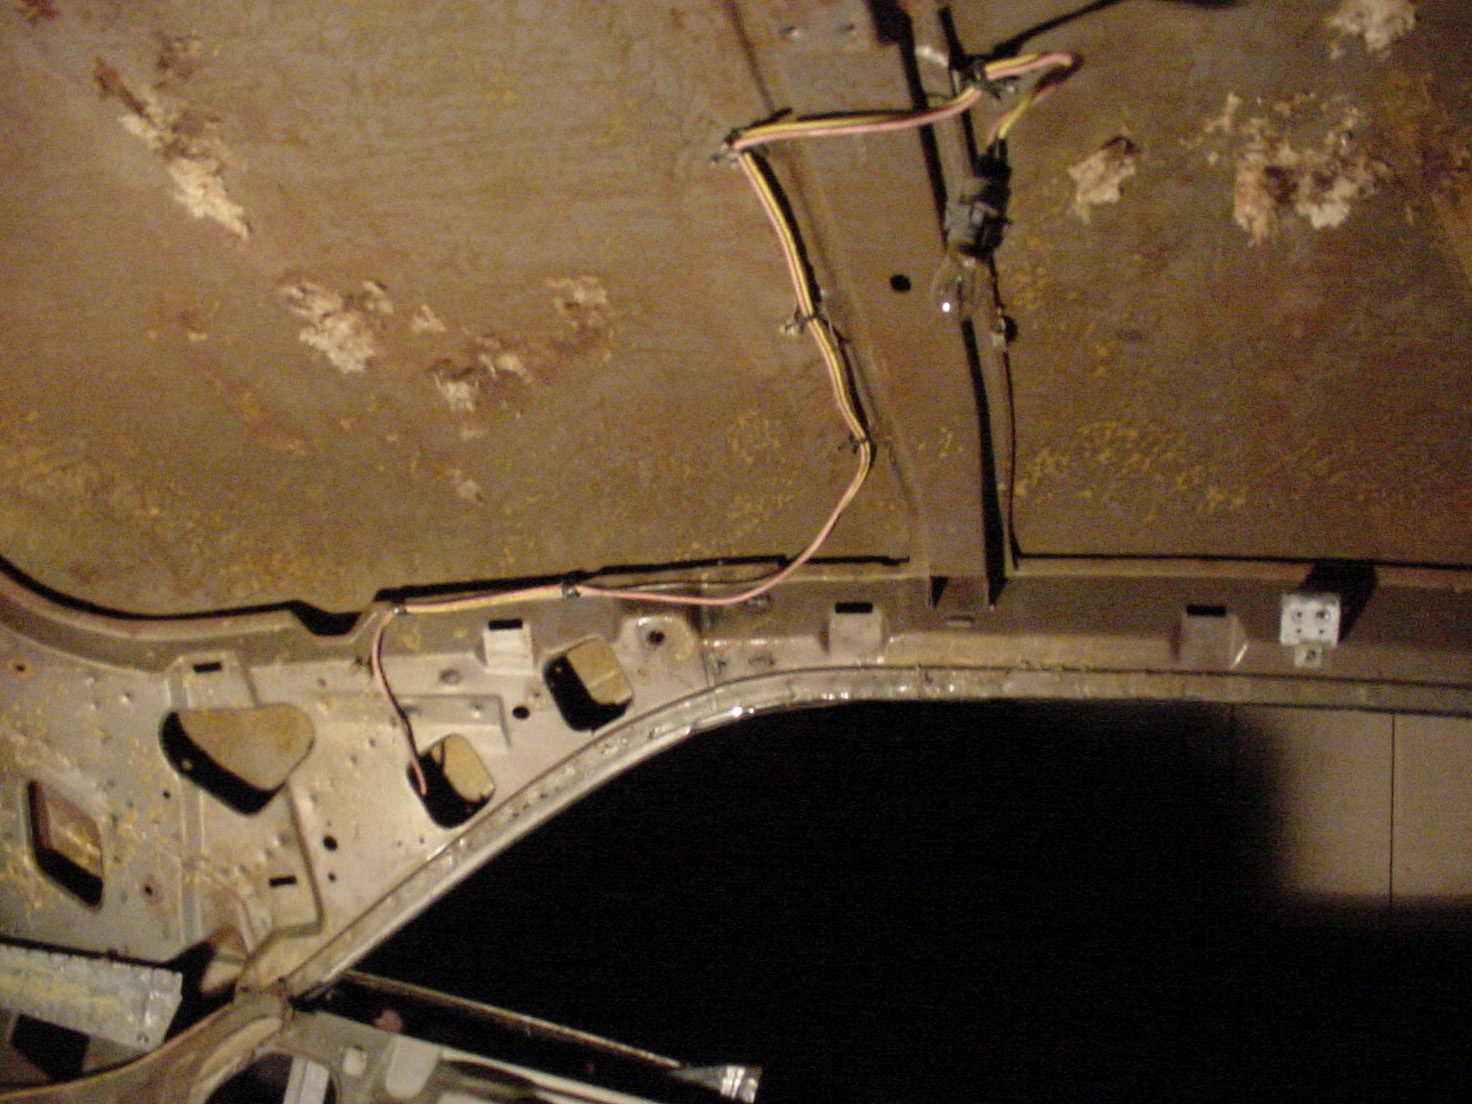
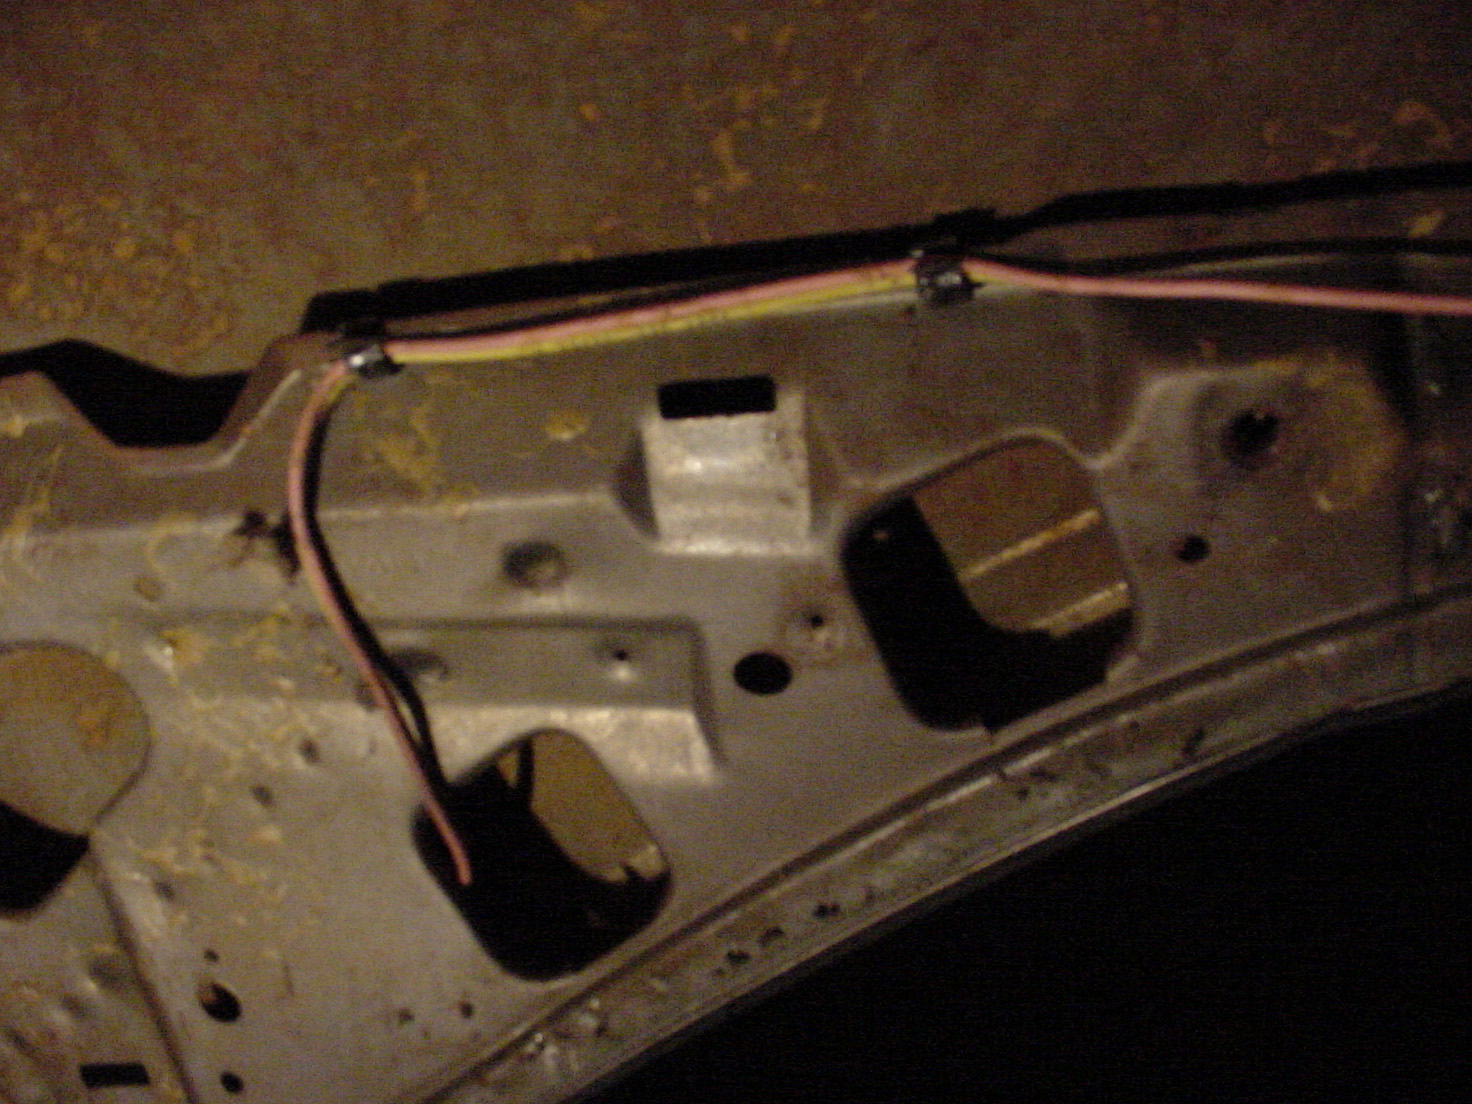
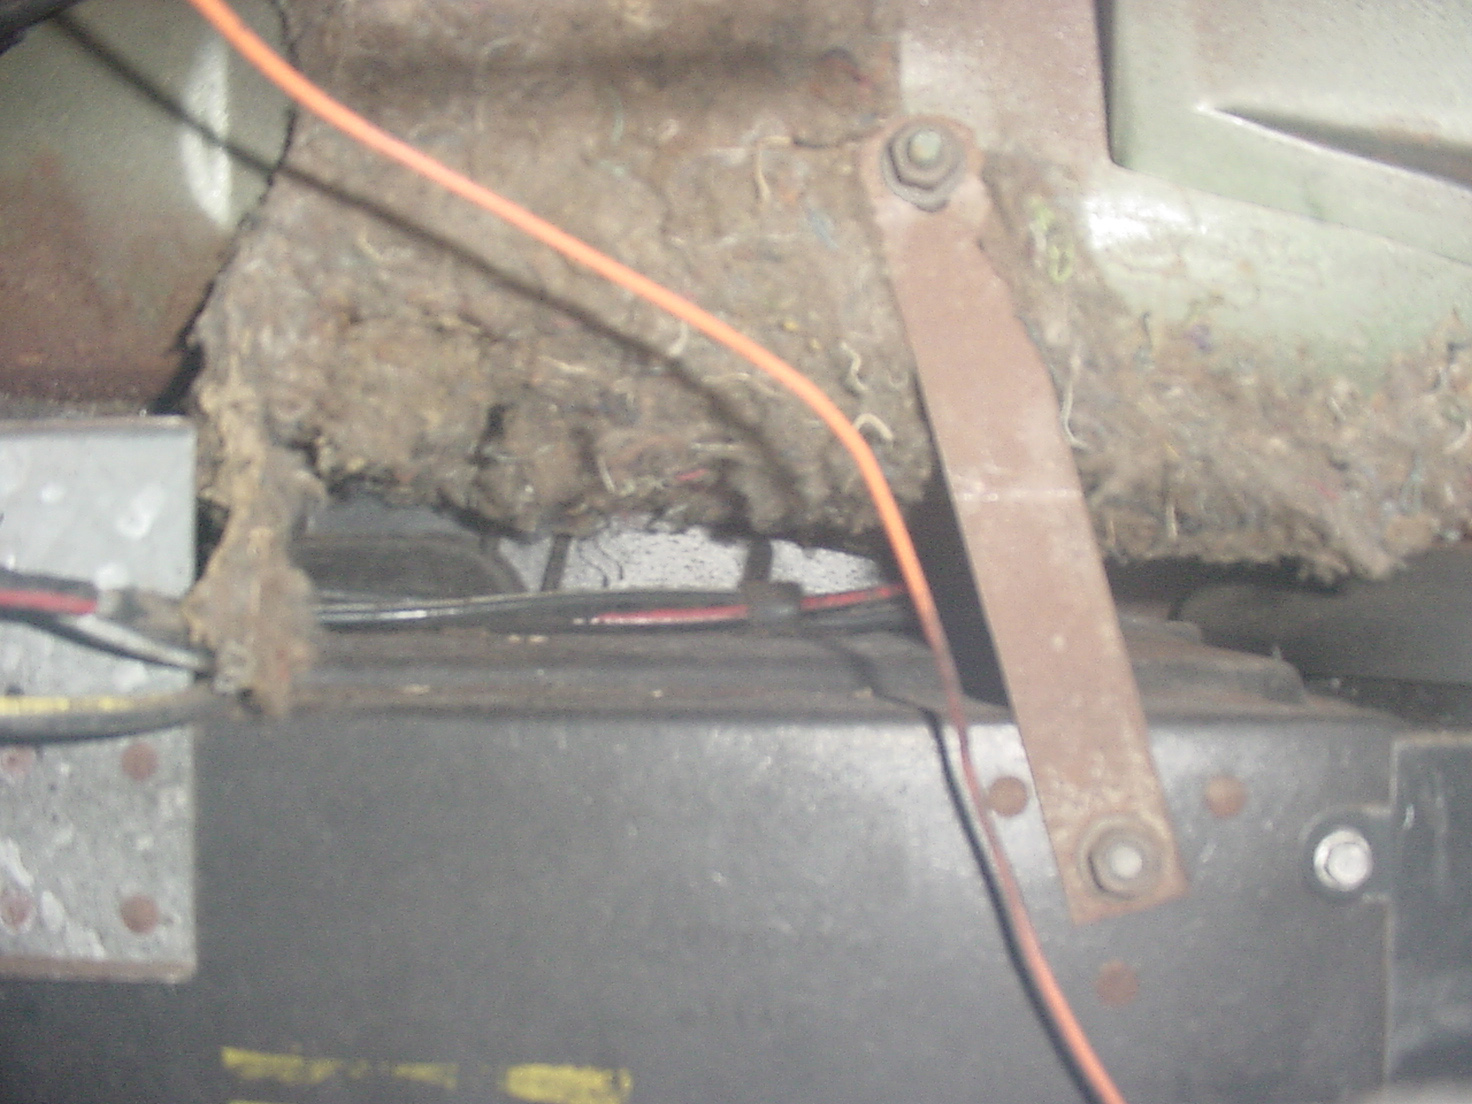
This shows the wiring shields by the drivers door.

Anyone have a spare set of these they could part with? That body guy I hired bent these back and forth till they broke off to get them out of his way. I'm not sure where they are now, and would like to put a set back on the car.

Tav

5436168-DSC00130edit.jpg (111 downloads)
Re: Tav Challenger T/A Clone [Re: cataclysm80] #446225
08/23/09 07:48 PM
08/23/09 07:48 PM
Joined: Oct 2006
Posts: 4,165
Florida
C
cataclysm80 Offline OP
master
cataclysm80  Offline OP
master
C

Joined: Oct 2006
Posts: 4,165
Florida
Here's the slapstick shifter setup with the 1970 style handle. Most 70 auto console shift indicator lenses are blank at the bottom, with later versions having Slap Stick printed at the bottom. Mine is one of the rarer versions that says Shift Gate.

In the background you can see more of the repair work from when the car was hit.

In the foreground you can see where the drivers floor was replaced in the mid 90's and never painted.

Tav

5436183-DSC00116edit.jpg (138 downloads)
Re: Tav Challenger T/A Clone [Re: cataclysm80] #446226
08/23/09 08:10 PM
08/23/09 08:10 PM
Joined: Oct 2006
Posts: 4,165
Florida
C
cataclysm80 Offline OP
master
cataclysm80  Offline OP
master
C

Joined: Oct 2006
Posts: 4,165
Florida
Here is the shift gate lens.

The lens cannot be removed without disassembling the unit.

The black plastic sliding piece also cannot be removed without disassembling the unit.

The unit is bradded together, and the only was to disassemble it would be to grind the brads off, which would require replacing them with screws or something for reassembly. This unit has not been tampered with like that.

The black sliding piece has a round hole indicating this is correct for the 1970 style shifter. 71-73 cars have a rectangular hole for the T handle shifter. 74 cars have been reported with both the T handle & the 70 style round handle.

It might be possible that the factory installed some Shift Gate lenses into T handle shifter units, but I haven't seen any yet.

Dave Walden has told me that he tried to look into this when he was doing his Challenger, and couldn't find any pattern to the use of the shift gate lens. It doesn't seem to be related to build date.

If anyone has more info about the shift gate lenses, please post it. I'm all ears.

Tav

5436248-DSC02215edit.JPG (80 downloads)
Re: Tav Challenger T/A Clone [Re: cataclysm80] #446227
08/23/09 08:20 PM
08/23/09 08:20 PM
Joined: Oct 2006
Posts: 4,165
Florida
C
cataclysm80 Offline OP
master
cataclysm80  Offline OP
master
C

Joined: Oct 2006
Posts: 4,165
Florida
This shows wire routing, headliner teeth, black seam sealer, white sealer where the vapor barrier was stuck on, quarter window stuff, and the rear interior panel bracket that screws to the floor.

This little L shaped bracket screws to the floor and then the rear panel screws to the bracket to keep the bottom of the panel from moving around.

If you don't use this little bracket, make sure to fill up the screw hole in the floor with a little seam sealer or something to keep it from leaking.

The vapor barrier is made of clear plastic sheeting glued on with that white sealer. It doesn't seem like much, but it does make a noticeable difference in road noise & insulation. Vapor barriers should be installed behind each rear panel and each door panel.

Tav

5436269-DSC00115edit.jpg (173 downloads)
Re: Tav Challenger T/A Clone [Re: cataclysm80] #446228
08/23/09 08:23 PM
08/23/09 08:23 PM
Joined: Oct 2006
Posts: 4,165
Florida
C
cataclysm80 Offline OP
master
cataclysm80  Offline OP
master
C

Joined: Oct 2006
Posts: 4,165
Florida
Same thing, passenger side.

I found a piece of newspaper under the carpet, but it didn't have a date on it or anything interesting. Probably from when they put the black carpet in anyway.

Tav

5436281-DSC00126edit.jpg (117 downloads)
Re: Tav Challenger T/A Clone [Re: cataclysm80] #446229
08/23/09 08:26 PM
08/23/09 08:26 PM
Joined: Oct 2006
Posts: 4,165
Florida
C
cataclysm80 Offline OP
master
cataclysm80  Offline OP
master
C

Joined: Oct 2006
Posts: 4,165
Florida
Here's how the quarter window up stops are installed.

If you replace your quarter panels, make sure to cut these off your old panel and put them on the new one. They're not included on the new panels.

Tav

5436289-DSC00164edit.jpg (120 downloads)
Re: Tav Challenger T/A Clone [Re: cataclysm80] #446230
08/23/09 08:27 PM
08/23/09 08:27 PM
Joined: Oct 2006
Posts: 4,165
Florida
C
cataclysm80 Offline OP
master
cataclysm80  Offline OP
master
C

Joined: Oct 2006
Posts: 4,165
Florida
The passenger side headliner teeth screw on like this.

Tav

5436292-DSC00127edit.jpg (107 downloads)
Re: Tav Challenger T/A Clone [Re: cataclysm80] #446231
08/23/09 08:28 PM
08/23/09 08:28 PM
Joined: Oct 2006
Posts: 4,165
Florida
C
cataclysm80 Offline OP
master
cataclysm80  Offline OP
master
C

Joined: Oct 2006
Posts: 4,165
Florida
The driver side headliner teeth screw on like this.

Tav

5436294-DSC00128edit.jpg (108 downloads)
Re: Tav Challenger T/A Clone [Re: cataclysm80] #446232
08/23/09 08:32 PM
08/23/09 08:32 PM
Joined: Oct 2006
Posts: 4,165
Florida
C
cataclysm80 Offline OP
master
cataclysm80  Offline OP
master
C

Joined: Oct 2006
Posts: 4,165
Florida
These brackets are used for holding the shoulder belt up out of the way.

Tav

5436302-DSC00125edit.jpg (113 downloads)
Re: Tav Challenger T/A Clone [Re: cataclysm80] #446233
08/23/09 08:35 PM
08/23/09 08:35 PM
Joined: Oct 2006
Posts: 4,165
Florida
C
cataclysm80 Offline OP
master
cataclysm80  Offline OP
master
C

Joined: Oct 2006
Posts: 4,165
Florida
here's the clips that hold the end of the headliner bows. This car has 5 headliner bows. Not all Challengers do.

later a change was made and the headliner bows had bent ends that no longer required these clips.

Tav

5436312-DSC00123edit.jpg (127 downloads)
Re: Tav Challenger T/A Clone [Re: cataclysm80] #446234
08/23/09 08:38 PM
08/23/09 08:38 PM
Joined: Oct 2006
Posts: 4,165
Florida
C
cataclysm80 Offline OP
master
cataclysm80  Offline OP
master
C

Joined: Oct 2006
Posts: 4,165
Florida
This shows how & where the headliner bow hooks are installed. They're meant to help in the installation of the headliner.

These hooks go in the car and the rear bow goes in first. The hooks hook the rear bow to keep it from falling forward as you work your way towards the front of the car.

Tav

5436325-DSC00121edit.jpg (97 downloads)
Re: Tav Challenger T/A Clone [Re: cataclysm80] #446235
08/23/09 08:43 PM
08/23/09 08:43 PM
Joined: Oct 2006
Posts: 4,165
Florida
C
cataclysm80 Offline OP
master
cataclysm80  Offline OP
master
C

Joined: Oct 2006
Posts: 4,165
Florida
Challengers should have a cardboard sail panel behind the headliner. It goes on like this and is held with spring clips. You can also see where the dome light wiring enters & exits the C pillar, along with a little remaining roof insulation up top.

Tav

5436337-DSC00122edit.jpg (128 downloads)
Re: Tav Challenger T/A Clone [Re: cataclysm80] #446236
08/23/09 08:46 PM
08/23/09 08:46 PM
Joined: Oct 2006
Posts: 4,165
Florida
C
cataclysm80 Offline OP
master
cataclysm80  Offline OP
master
C

Joined: Oct 2006
Posts: 4,165
Florida
You can see one of the spring clips pretty good in this picture of the other side.

The round hole in the cardboard is where the coat hook is supposed to go. One on each side of the car.

Tav

5436347-DSC00124edit.jpg (121 downloads)
Re: Tav Challenger T/A Clone [Re: cataclysm80] #446237
08/23/09 08:51 PM
08/23/09 08:51 PM
Joined: Oct 2006
Posts: 4,165
Florida
C
cataclysm80 Offline OP
master
cataclysm80  Offline OP
master
C

Joined: Oct 2006
Posts: 4,165
Florida
This shows the routing for the dome light wiring. The dome light bulb enters the dome light housing from the front of the car. The dome light housing attaches to the roof beam with 2 screws in the 2 forward holes of the roof beam. The rear holes of the roof beam are not used.

Tav

5436360-DSC00129edit.jpg (120 downloads)
Re: Tav Challenger T/A Clone [Re: cataclysm80] #446238
08/23/09 08:52 PM
08/23/09 08:52 PM
Joined: Oct 2006
Posts: 4,165
Florida
C
cataclysm80 Offline OP
master
cataclysm80  Offline OP
master
C

Joined: Oct 2006
Posts: 4,165
Florida
Here's a close up of where the clips for the dome light wiring go on the C pillar.

Tav

5436366-DSC00131edit.jpg (135 downloads)
Re: Tav Challenger T/A Clone [Re: cataclysm80] #446239
08/23/09 08:57 PM
08/23/09 08:57 PM
Joined: Oct 2006
Posts: 4,165
Florida
C
cataclysm80 Offline OP
master
cataclysm80  Offline OP
master
C

Joined: Oct 2006
Posts: 4,165
Florida
This is the driver side molding that goes over the edge of the headliner. You can see that it was originally green, but a previous owner had painted it black. This shows the location of the clips that hold this molding in place. I slid the clips off to restore the molding, and will use this picture to put them back on in the correct spot when I'm done.

Tav

5436377-DSC00118edit.jpg (100 downloads)
Re: Tav Challenger T/A Clone [Re: cataclysm80] #446240
08/23/09 08:58 PM
08/23/09 08:58 PM
Joined: Oct 2006
Posts: 4,165
Florida
C
cataclysm80 Offline OP
master
cataclysm80  Offline OP
master
C

Joined: Oct 2006
Posts: 4,165
Florida
This is the passenger side molding that goes over the edge of the headliner. You can see that it was originally green, but a previous owner had painted it black. This shows the location of the clips that hold this molding in place. I slid the clips off to restore the molding, and will use this picture to put them back on in the correct spot when I'm done.

Tav

5436383-DSC00117edit.jpg (88 downloads)
Re: Tav Challenger T/A Clone [Re: cataclysm80] #446241
08/23/09 09:01 PM
08/23/09 09:01 PM
Joined: Oct 2006
Posts: 4,165
Florida
C
cataclysm80 Offline OP
master
cataclysm80  Offline OP
master
C

Joined: Oct 2006
Posts: 4,165
Florida
As you can see, all of the metal trim around my headliner was once green, but someone had painted it black.

Tav

5436390-DSC00114edit.jpg (108 downloads)
Re: Tav Challenger T/A Clone [Re: cataclysm80] #446242
08/23/09 09:06 PM
08/23/09 09:06 PM
Joined: Oct 2006
Posts: 4,165
Florida
C
cataclysm80 Offline OP
master
cataclysm80  Offline OP
master
C

Joined: Oct 2006
Posts: 4,165
Florida
My rear panels and door panels were originally green also. I'm not sure about the kick panels as they were missing. (Were kick panels available in green?)

Someone had painted my rear panels black, and I cleaned them up and recoated them. Only 1 green door panel came with the car, so I swapped in 2 black panels.

Tav

5436403-DSC00112edit.jpg (112 downloads)
Re: Tav Challenger T/A Clone [Re: cataclysm80] #446243
08/23/09 09:11 PM
08/23/09 09:11 PM
Joined: Oct 2006
Posts: 4,165
Florida
C
cataclysm80 Offline OP
master
cataclysm80  Offline OP
master
C

Joined: Oct 2006
Posts: 4,165
Florida
Here's some disassembly pictures of the AC box.

This first one shows the metal strap that holds the box installed with the round end up and the square end down.

You can see some of the cowl insulation there too. The factory glues that stuff on, just like on the roof.

Tav

5436414-DSC00062edit.jpg (102 downloads)
Re: Tav Challenger T/A Clone [Re: cataclysm80] #446244
08/23/09 09:22 PM
08/23/09 09:22 PM
Joined: Oct 2006
Posts: 4,165
Florida
C
cataclysm80 Offline OP
master
cataclysm80  Offline OP
master
C

Joined: Oct 2006
Posts: 4,165
Florida
Here it is fresh out of the car. First time out as far as I could tell. (lots of crud inside) you can see where the fiberglass insulation was glued on. My drain is missing a chunk.

Tav

5436432-DSC00056edit.jpg (119 downloads)
Re: Tav Challenger T/A Clone [Re: cataclysm80] #446245
08/23/09 09:28 PM
08/23/09 09:28 PM
Joined: Oct 2006
Posts: 4,165
Florida
C
cataclysm80 Offline OP
master
cataclysm80  Offline OP
master
C

Joined: Oct 2006
Posts: 4,165
Florida
This AC box uses the square ended studs with screws to hold the two halves together.

Not all AC boxes are that way. Some have pointy studs, and some use big spring clips to hold the halves together. Of the ones that use spring clips, some are marked like the boxes with screws, and some have a completely smooth lip. Maybe I'll go into this more in depth later if anyone is interested.

As you can see in the background, my dash frame was originally green like the rest of the interior and not black.

Tav

5436449-DSC00057edit.jpg (144 downloads)
Re: Tav Challenger T/A Clone [Re: cataclysm80] #446246
08/23/09 09:31 PM
08/23/09 09:31 PM
Joined: Oct 2006
Posts: 4,165
Florida
C
cataclysm80 Offline OP
master
cataclysm80  Offline OP
master
C

Joined: Oct 2006
Posts: 4,165
Florida
Blower motor resistor. Take it out and have a look. As long as the wire isn't corroded or broken anywhere, it's just fine. Usually there's nothing wrong with them.

Tav

5436458-DSC00060edit.jpg (116 downloads)
Re: Tav Challenger T/A Clone [Re: cataclysm80] #446247
08/23/09 09:34 PM
08/23/09 09:34 PM
Joined: Oct 2006
Posts: 4,165
Florida
C
cataclysm80 Offline OP
master
cataclysm80  Offline OP
master
C

Joined: Oct 2006
Posts: 4,165
Florida
It's hard to see, but theirs a spring here that helps this door to function. This is a common problem area on the boxes I've seen. The spring could be missing, or bent, or the box is damaged around the spring hole so that it doesn't function properly.

Tav

5436466-DSC00061edit.jpg (94 downloads)
Re: Tav Challenger T/A Clone [Re: cataclysm80] #446248
08/23/09 09:37 PM
08/23/09 09:37 PM
Joined: Oct 2006
Posts: 4,165
Florida
C
cataclysm80 Offline OP
master
cataclysm80  Offline OP
master
C

Joined: Oct 2006
Posts: 4,165
Florida
Now for some pics of the vacuum pods & hoses. The hoses are color coded, here's where they should go.

Tav

5436467-DSC00059edit.jpg (143 downloads)
Re: Tav Challenger T/A Clone [Re: cataclysm80] #446249
08/23/09 09:41 PM
08/23/09 09:41 PM
Joined: Oct 2006
Posts: 4,165
Florida
C
cataclysm80 Offline OP
master
cataclysm80  Offline OP
master
C

Joined: Oct 2006
Posts: 4,165
Florida
More hoses...

I know T/As weren't available with air conditioning, but living in Florida, I just don't want to get rid of the air conditioning, especially if I'm going to have a black leather interior. Follow along to see how I do it.

Tav

5436480-DSC00054edit.jpg (113 downloads)
Re: Tav Challenger T/A Clone [Re: cataclysm80] #446250
08/23/09 09:44 PM
08/23/09 09:44 PM
Joined: Oct 2006
Posts: 4,165
Florida
C
cataclysm80 Offline OP
master
cataclysm80  Offline OP
master
C

Joined: Oct 2006
Posts: 4,165
Florida
more hoses...

I like modern conveniences like air conditioning. Another thing I plan to add to the car that wasn't available on T/As is cruise control (automatic speed control). I'm going to install it factory style with original parts. In fact, I really like options and plan on adding a lot of them to this car.

Tav

5436487-DSC00055edit.jpg (87 downloads)
Re: Tav Challenger T/A Clone [Re: cataclysm80] #446251
08/23/09 09:47 PM
08/23/09 09:47 PM
Joined: Oct 2006
Posts: 4,165
Florida
C
cataclysm80 Offline OP
master
cataclysm80  Offline OP
master
C

Joined: Oct 2006
Posts: 4,165
Florida
Here's how this vacuum pod is supposed to go...

Tav

5436496-DSC00058edit.jpg (118 downloads)
Re: Tav Challenger T/A Clone [Re: cataclysm80] #446252
08/23/09 09:55 PM
08/23/09 09:55 PM
Joined: Oct 2006
Posts: 4,165
Florida
C
cataclysm80 Offline OP
master
cataclysm80  Offline OP
master
C

Joined: Oct 2006
Posts: 4,165
Florida
Here's how this door is supposed to go inside the box. Wouldn't want to put it on backwards, that wouldn't work right.

I'm looking forward to getting a full AC box gasket set from Jim at Detroit Muscle Technologies so that I can finish up this AC box.

It's important to note that in order to avoid extreme difficulty, it's easiest by far to install the AC or heater box before the Dash, and install the Dash before the windshield.

Tav

5436524-DSC00071edit.jpg (116 downloads)
Re: Tav Challenger T/A Clone [Re: cataclysm80] #446253
08/23/09 10:05 PM
08/23/09 10:05 PM
Joined: Oct 2006
Posts: 4,165
Florida
C
cataclysm80 Offline OP
master
cataclysm80  Offline OP
master
C

Joined: Oct 2006
Posts: 4,165
Florida
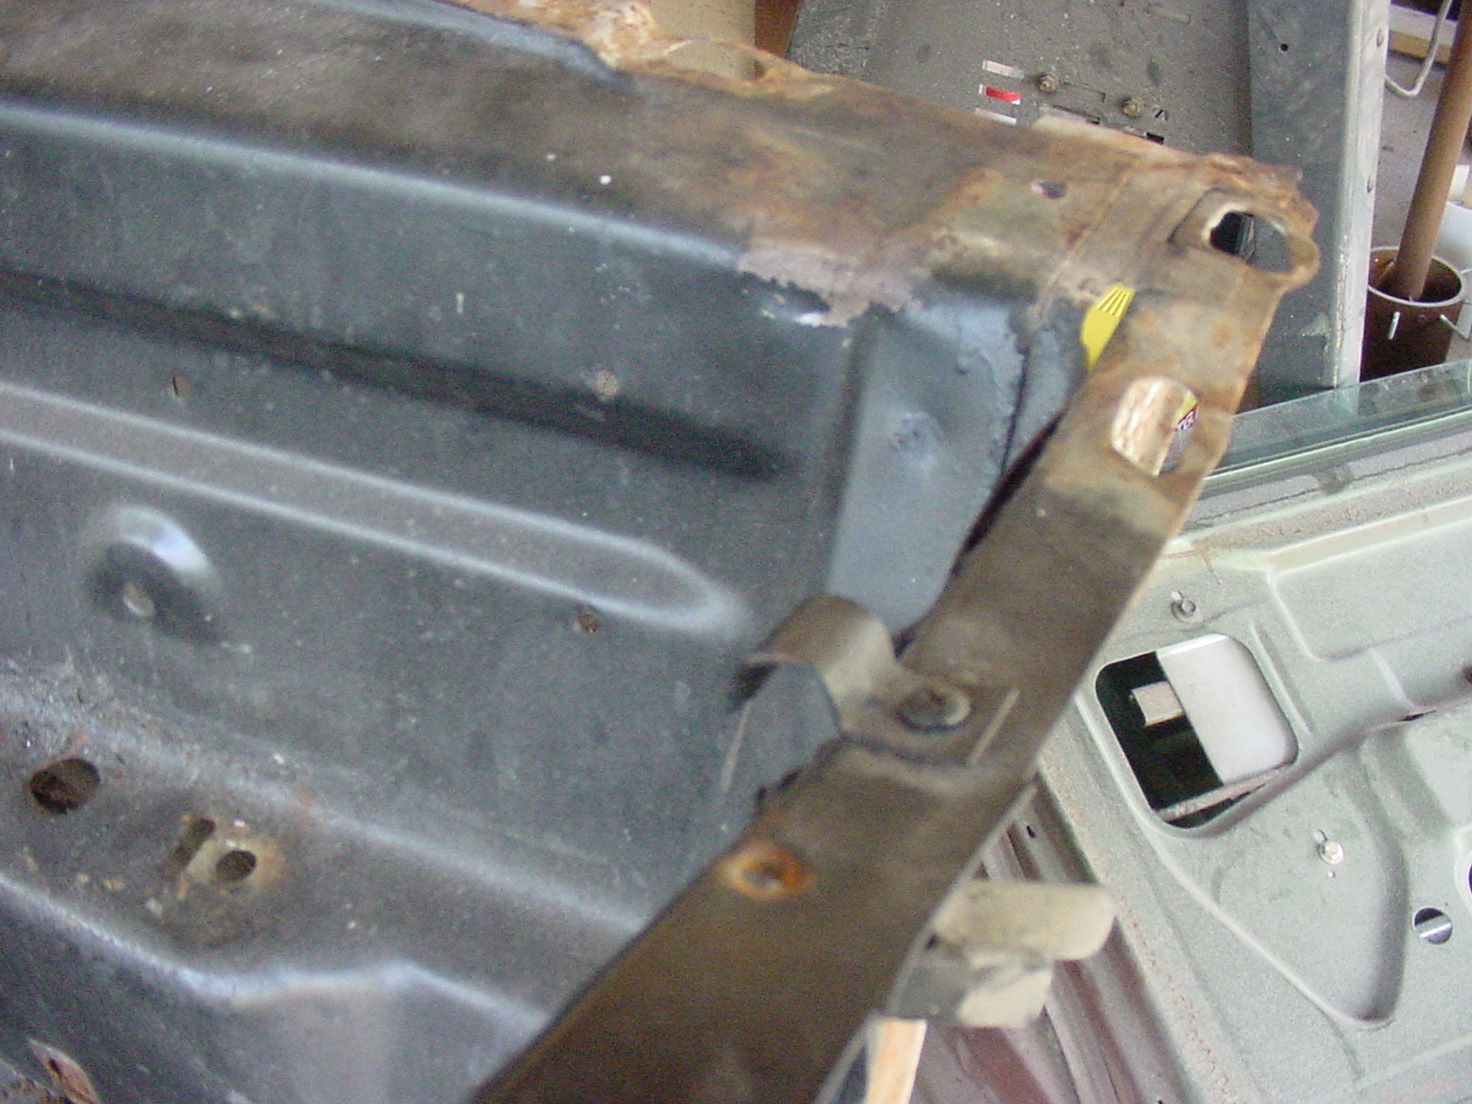
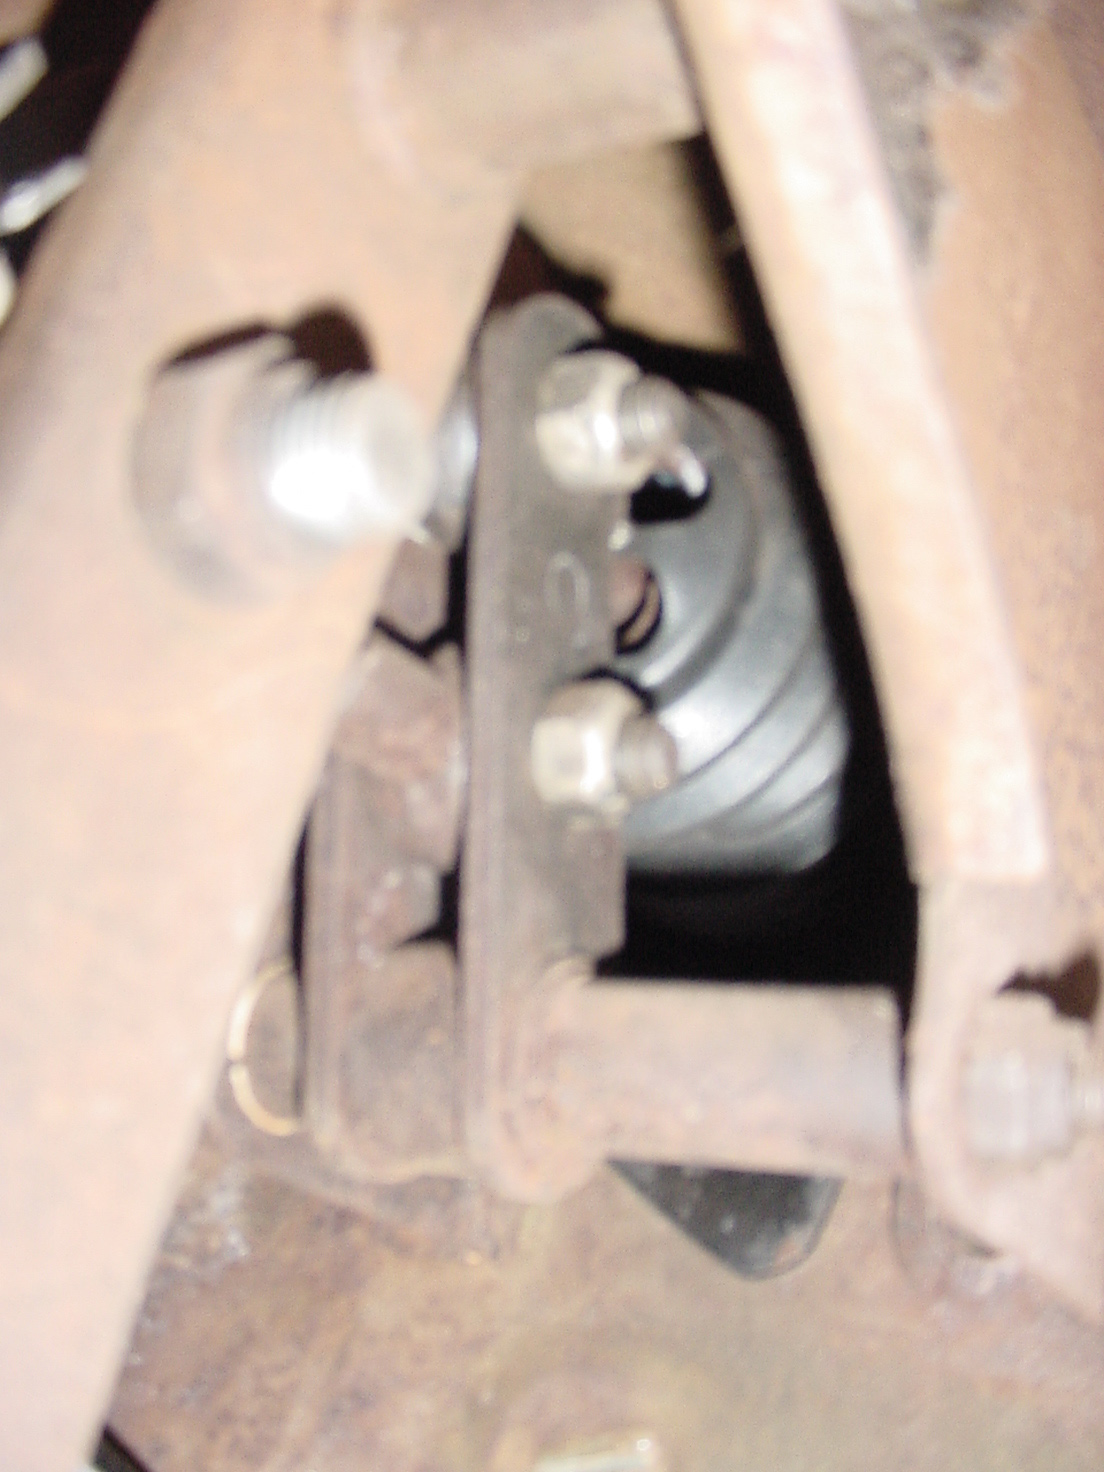
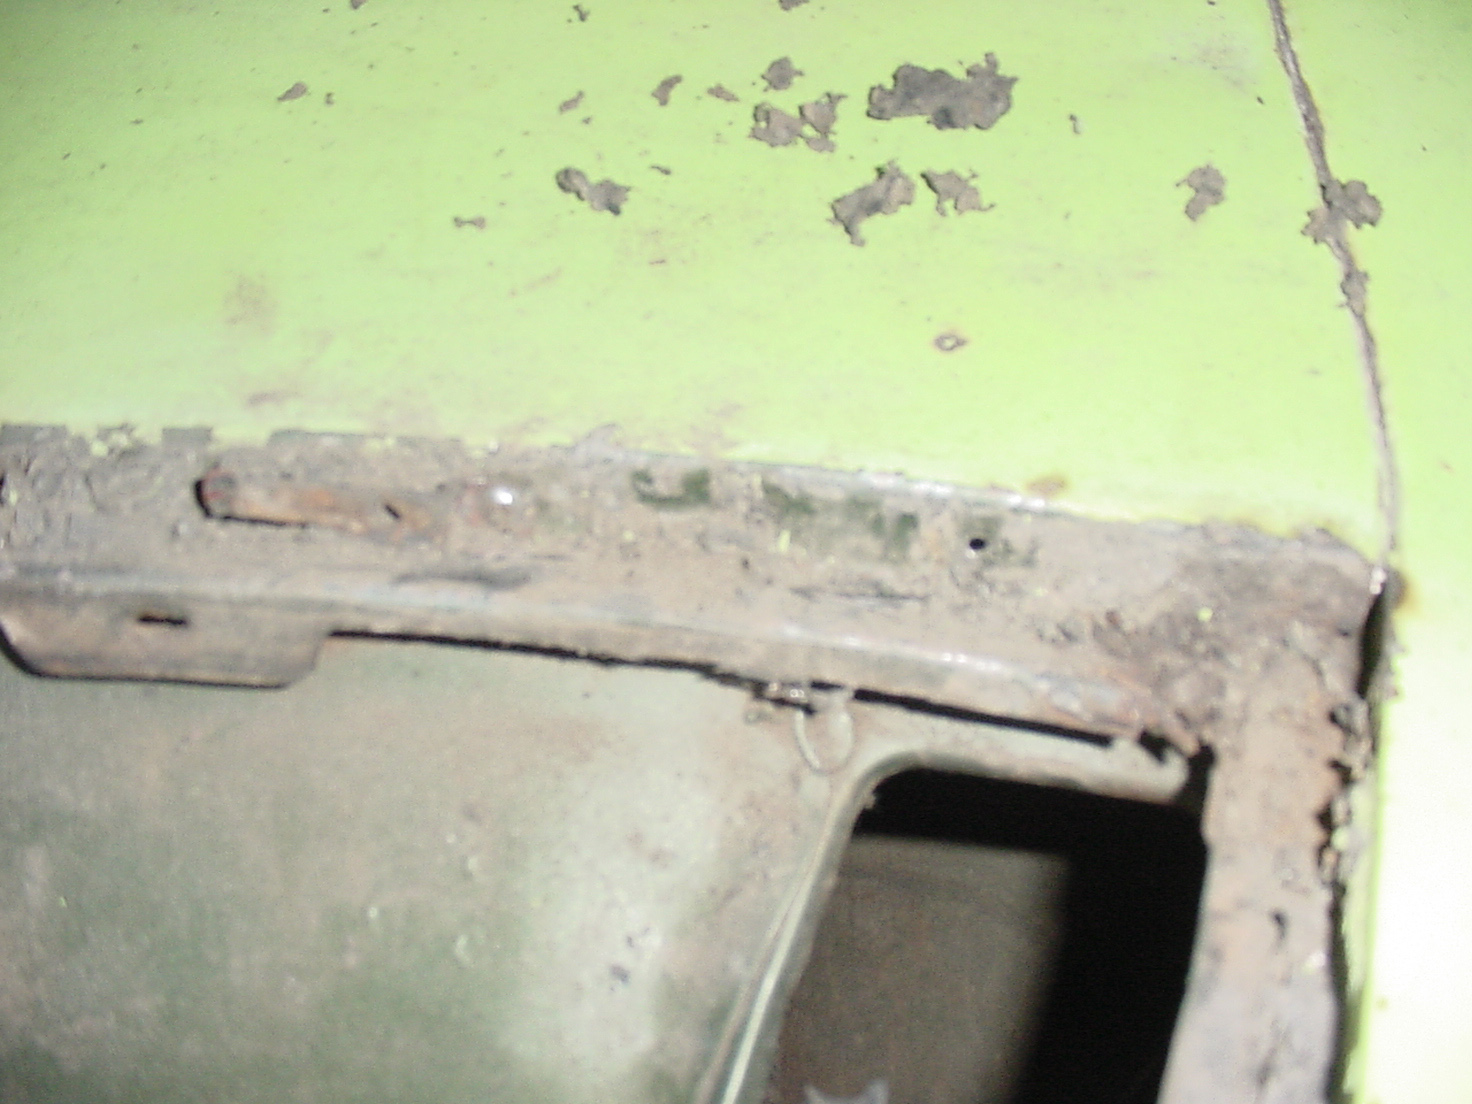
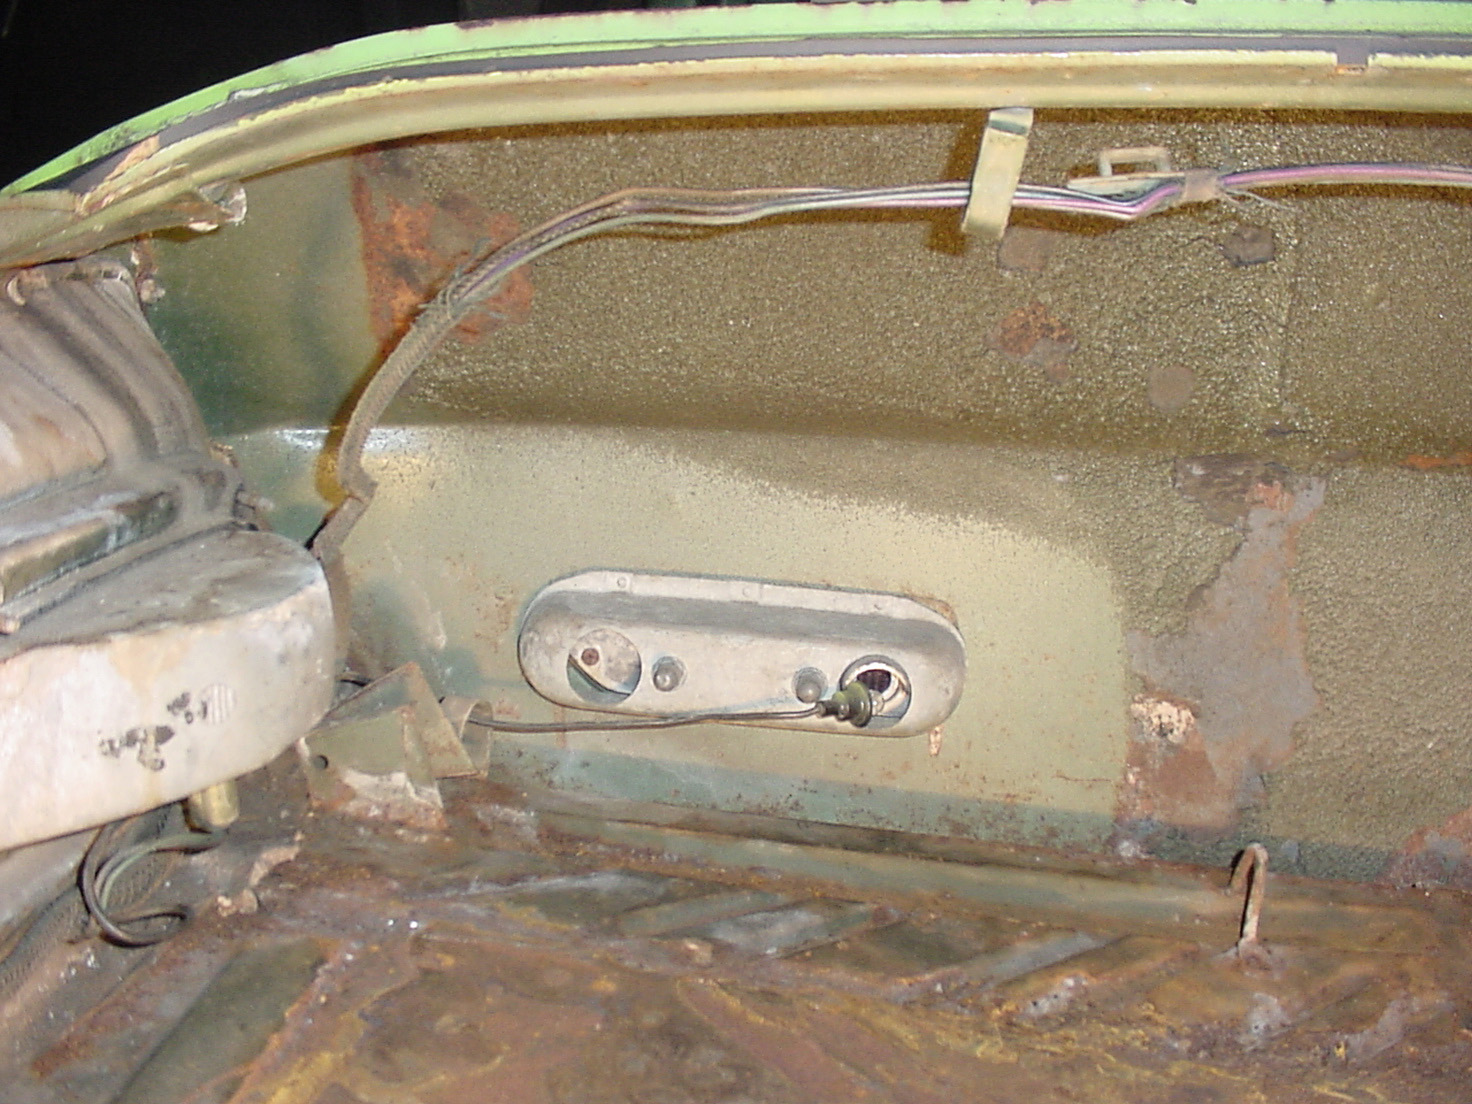
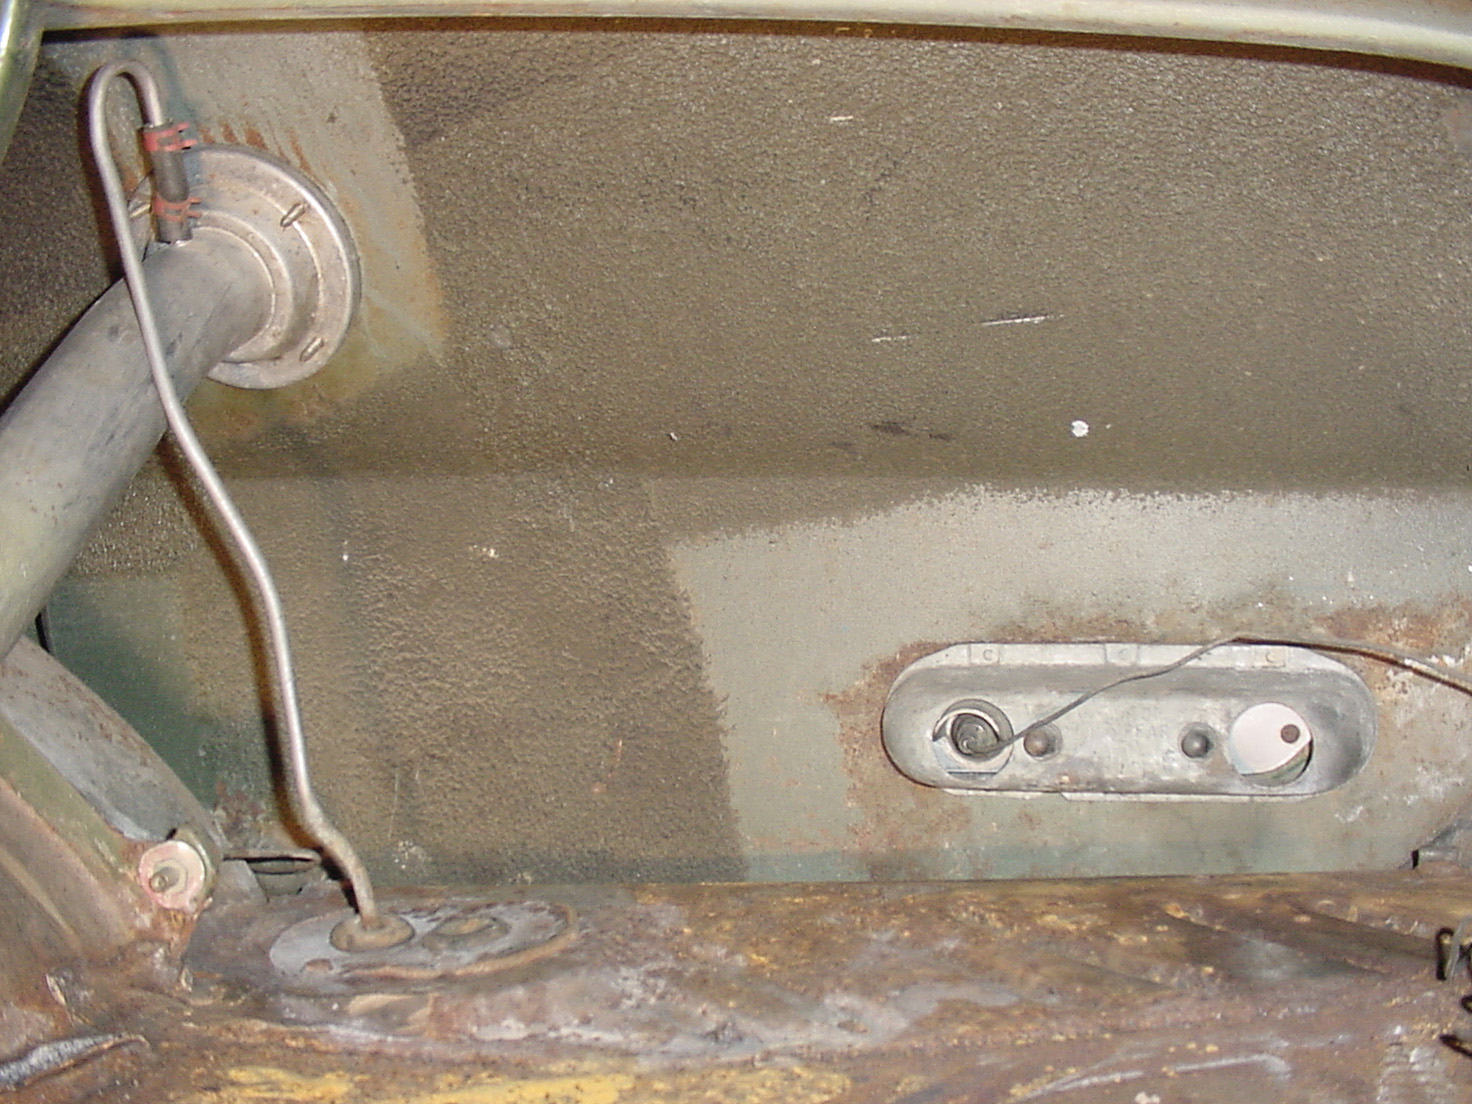
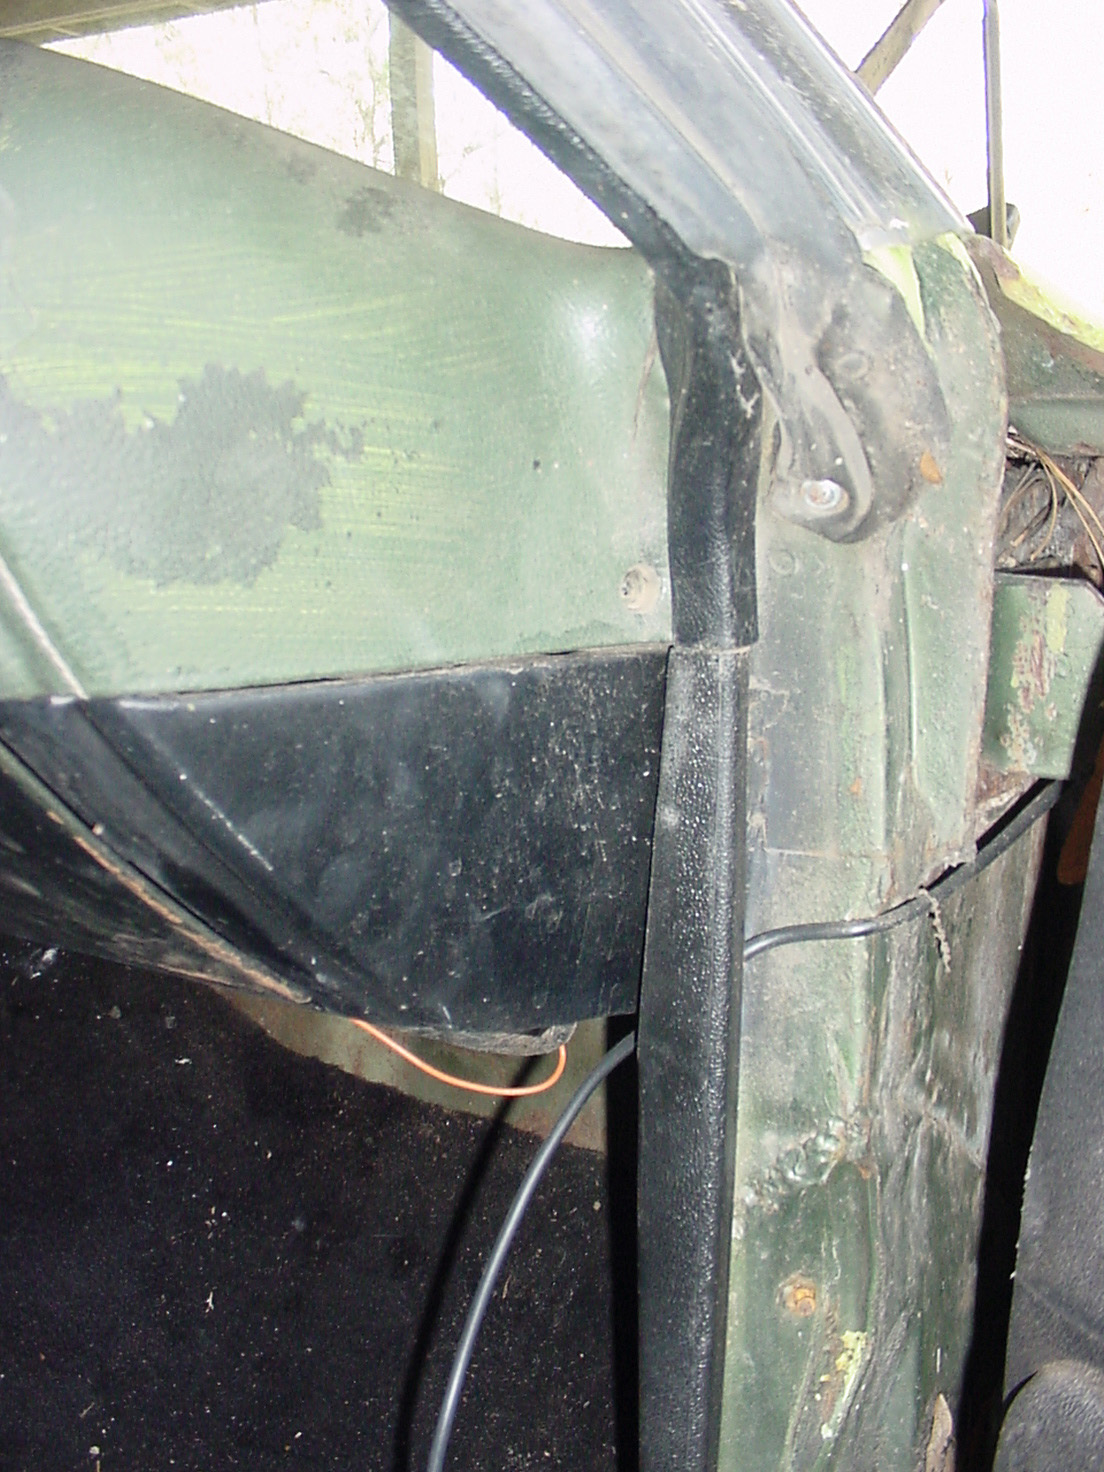
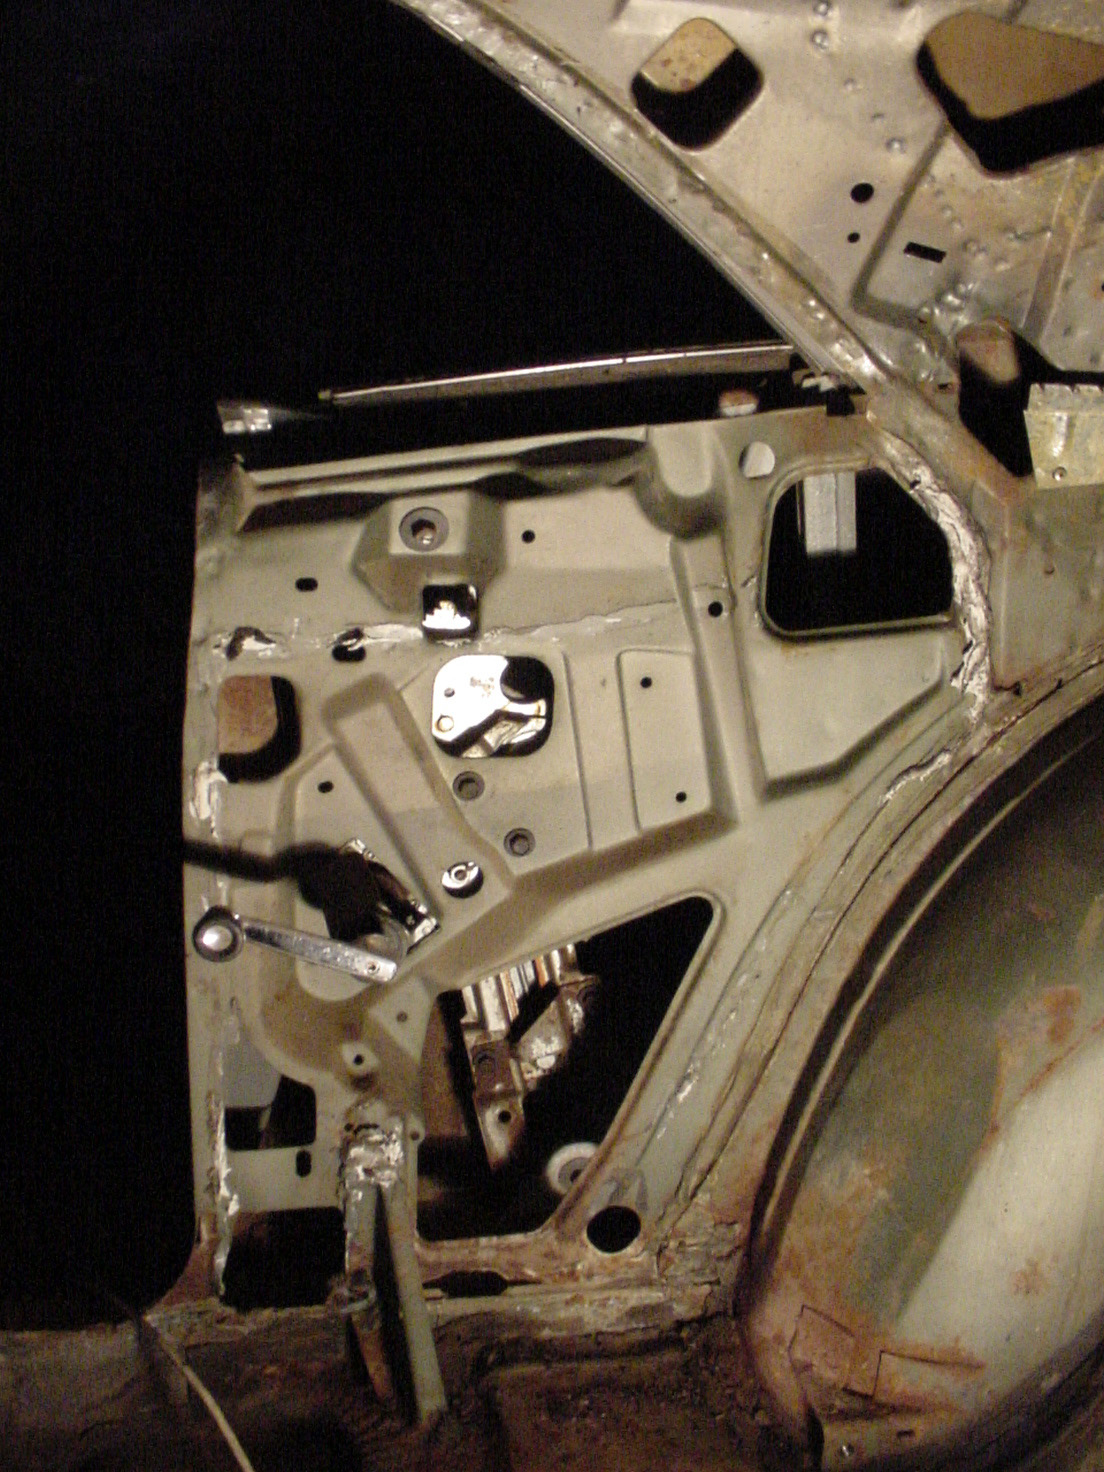
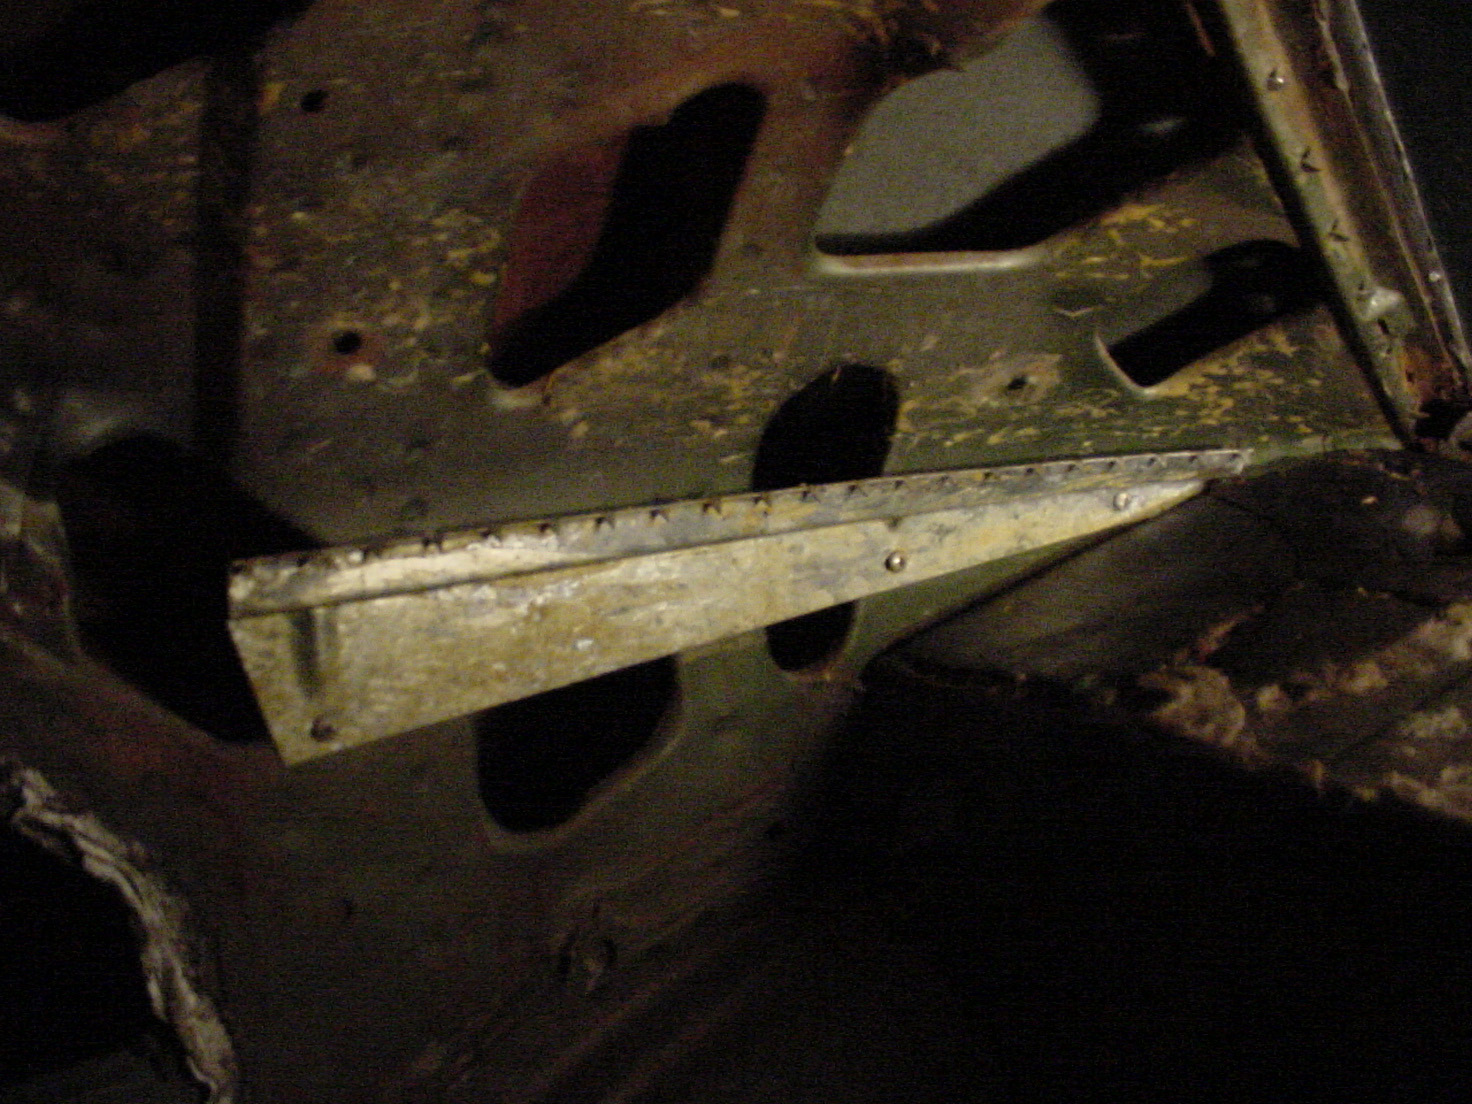
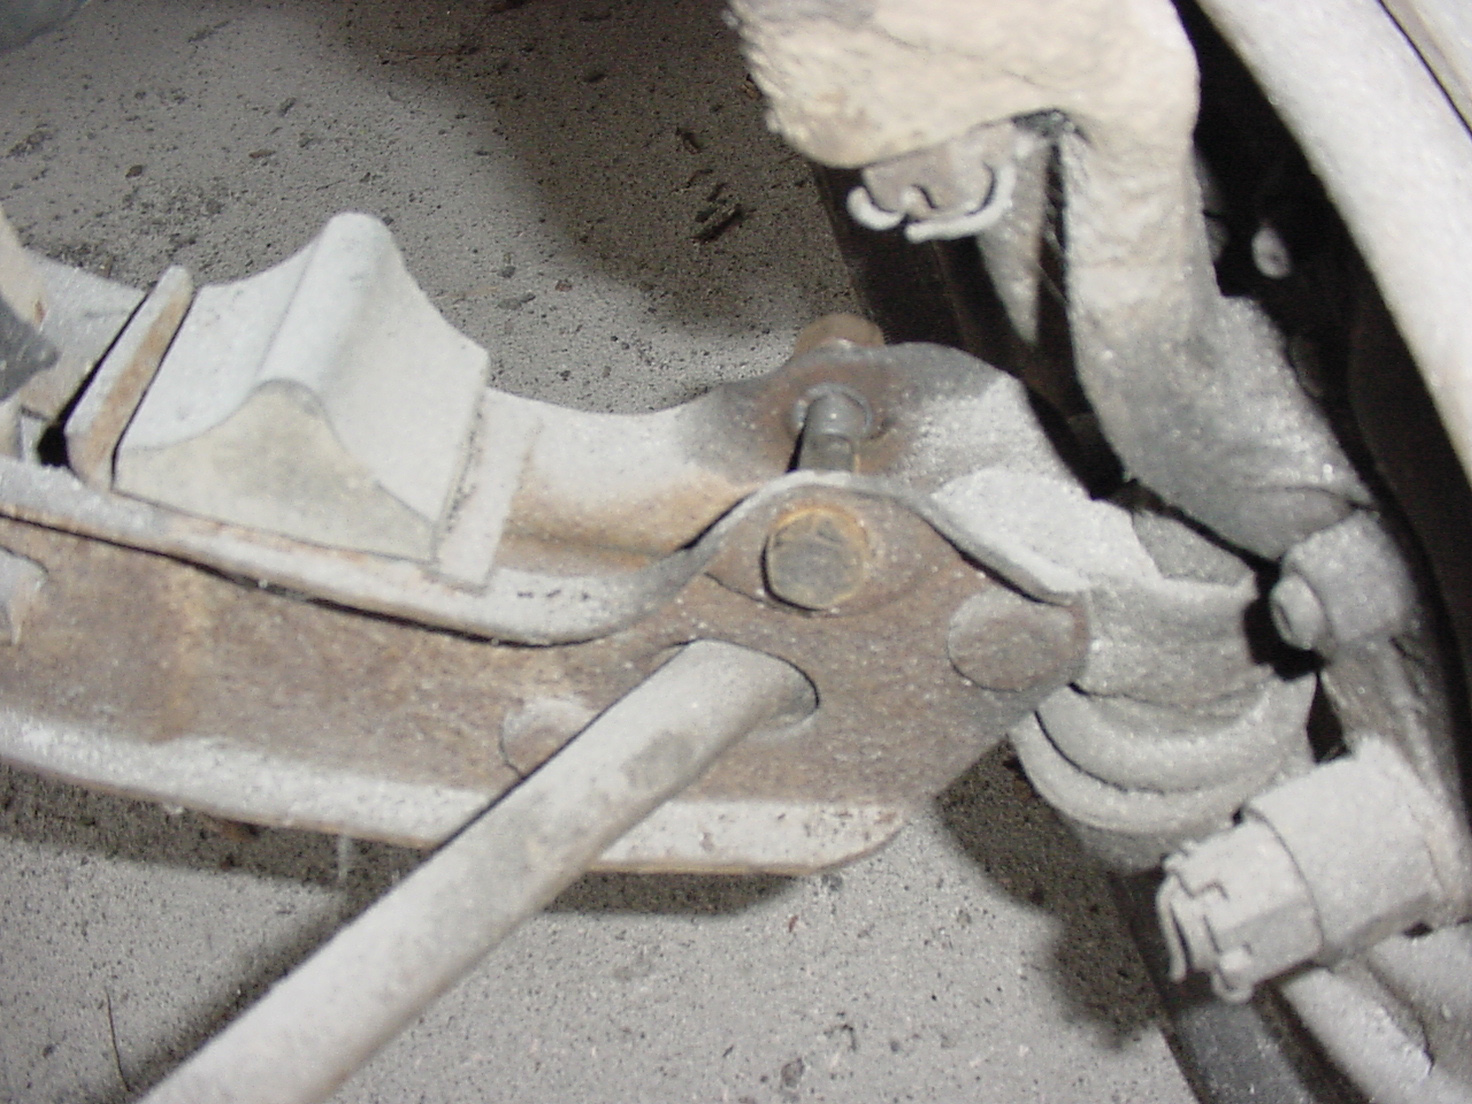
Back to the car,

This pic shows the lower shock bolt was installed from the front toward the rear with the nut on the back. (I took the shock out of the way so you could see it better. )

Tav

5436557-DSC00165edit.jpg (110 downloads)
Re: Tav Challenger T/A Clone [Re: cataclysm80] #446254
08/23/09 10:15 PM
08/23/09 10:15 PM
Joined: Oct 2006
Posts: 4,165
Florida
C
cataclysm80 Offline OP
master
cataclysm80  Offline OP
master
C

Joined: Oct 2006
Posts: 4,165
Florida
This is the bodyman I hired taking a break in his denim jacket.

You can also see one of the shipping brackets still attached to the rear frame rail. They are mirror images of each other, and this one was on this (passenger) side of the car.

Each car used two of these brackets (one on each rear frame rail) to tie it down to the semi for delivery to the dealership from the factory. The correct finish is bare metal. The dealership was supposed to remove them from the car before selling it, but this didn't always happen. Both of mine were still on the car. I like the idea of having them just in case I ever break down and need to haul the car home on a trailer. It will provide a convenient (and factory correct) location for tying down the car.

I think these brackets may be available reproduction somewhere.

Tav

5436595-DSC00166edit.jpg (161 downloads)
Re: Tav Challenger T/A Clone [Re: cataclysm80] #446255
08/23/09 10:22 PM
08/23/09 10:22 PM
Joined: Oct 2006
Posts: 4,165
Florida
C
cataclysm80 Offline OP
master
cataclysm80  Offline OP
master
C

Joined: Oct 2006
Posts: 4,165
Florida
I needed a nice out of the way place to store stuff. Someplace I could leave things for a while and no one would mess with them. I chose the attic. It's hot, cramped, and inconvenient. I could leave stuff up there for years and no one would bother it. (and I have) I spread out some carpet remnants and deer skin rugs in the high traffic areas, and up it came. (There's more behind me that isn't in the picture.)

My car is in the attic.

Tav

5436614-33edit.jpg (152 downloads)
Re: Tav Challenger T/A Clone [Re: cataclysm80] #446256
08/23/09 10:31 PM
08/23/09 10:31 PM
Joined: Oct 2006
Posts: 4,165
Florida
C
cataclysm80 Offline OP
master
cataclysm80  Offline OP
master
C

Joined: Oct 2006
Posts: 4,165
Florida
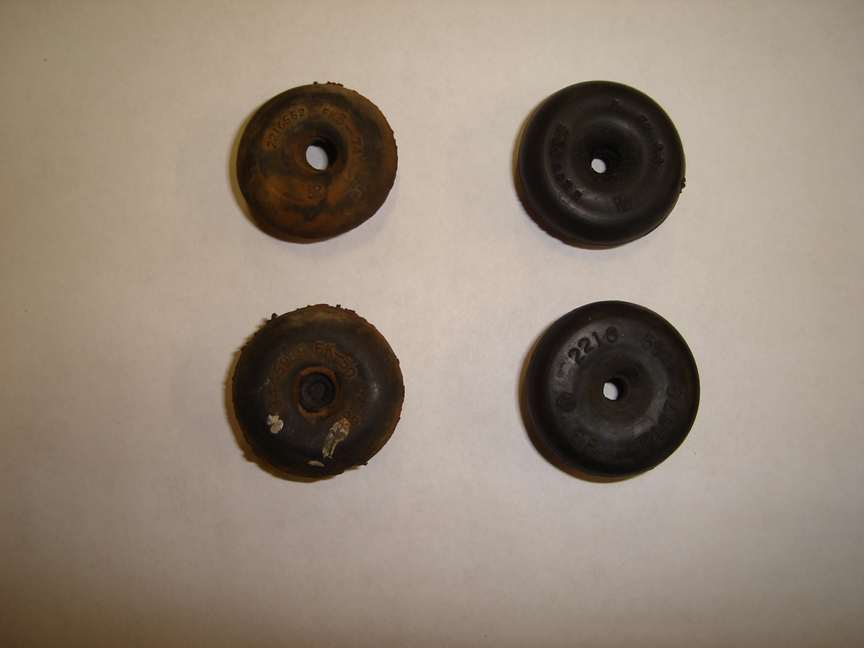
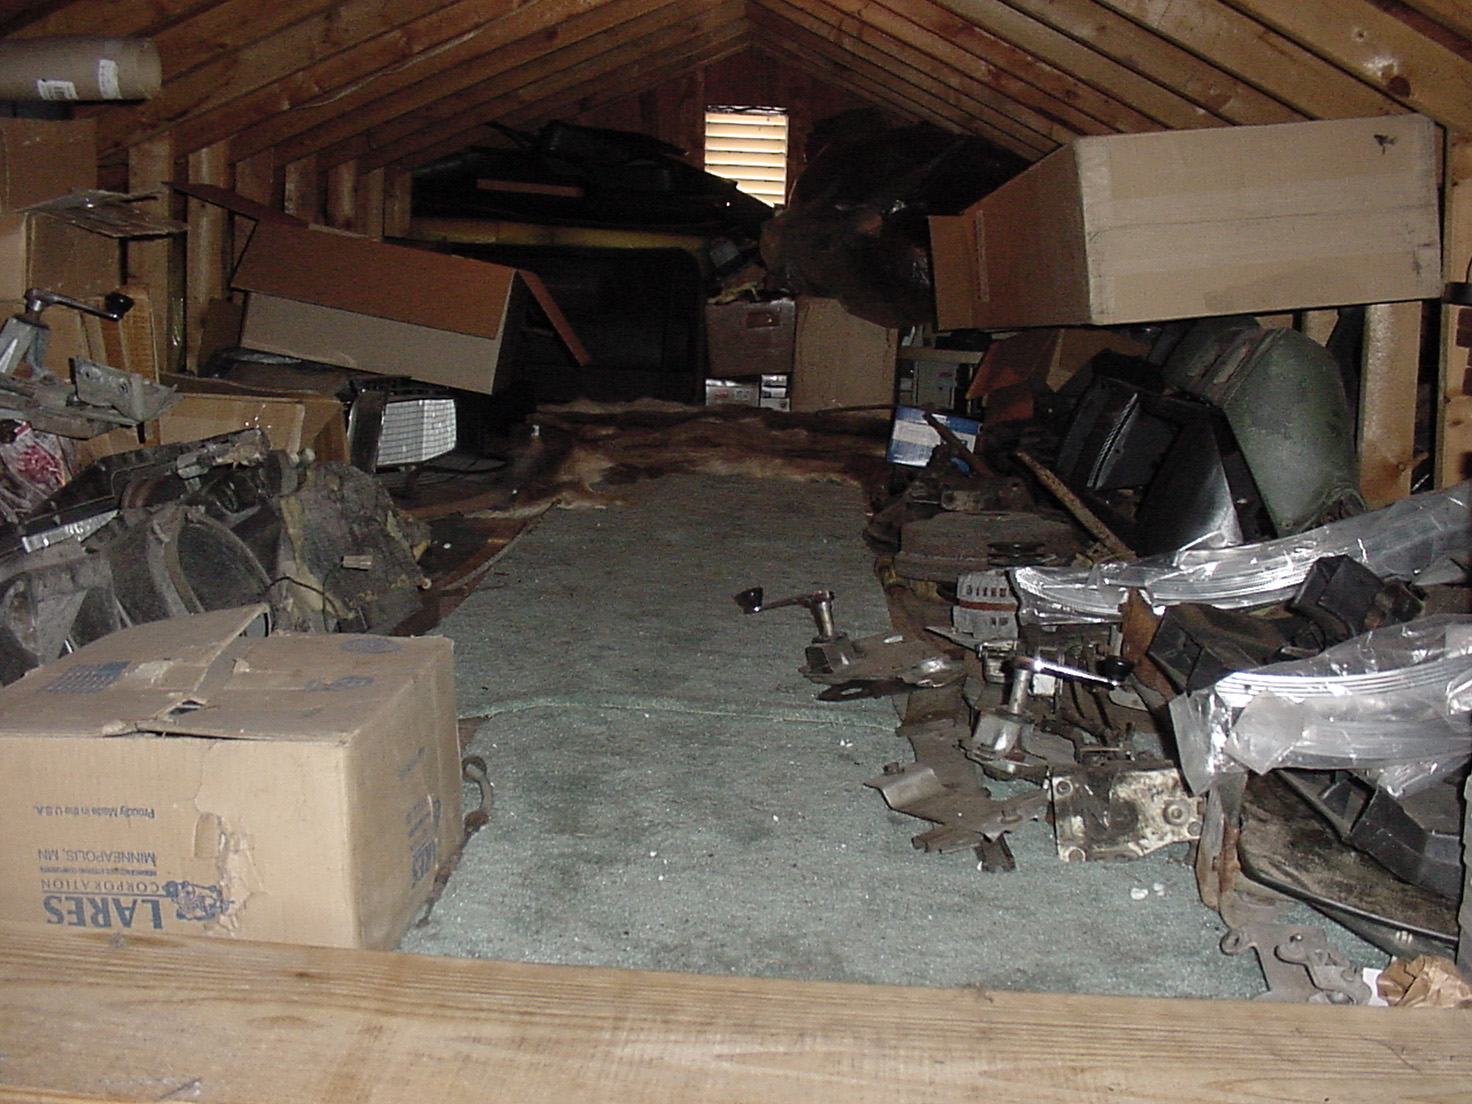
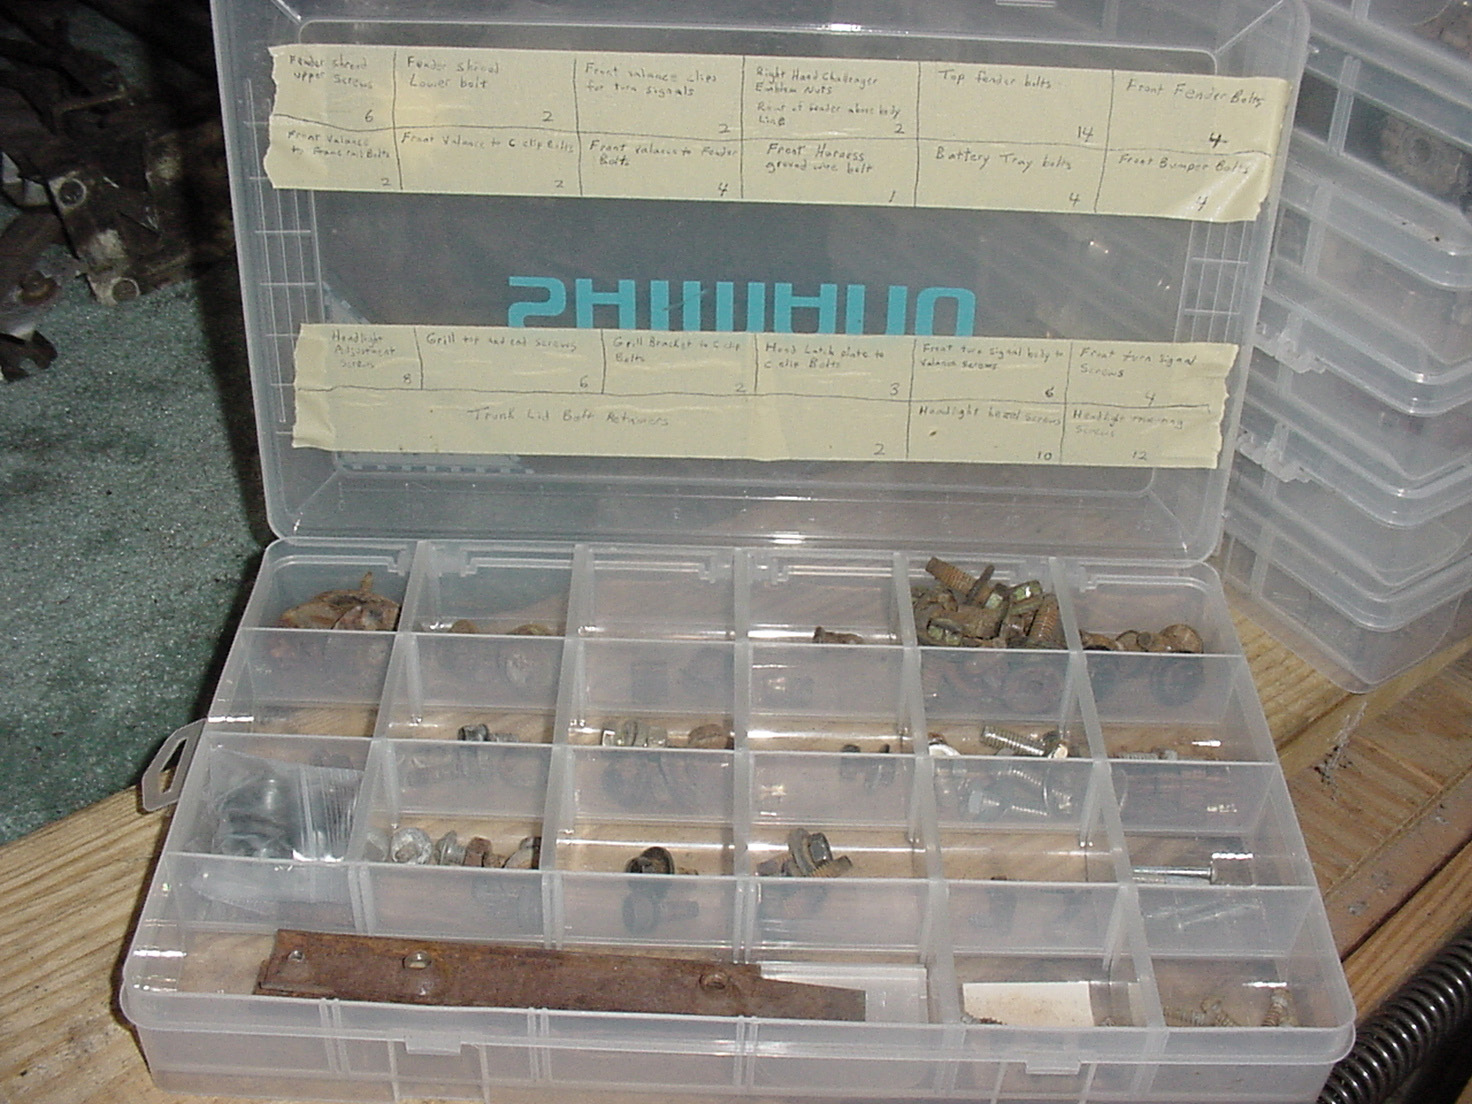
During the disassembly, to keep everything straight, I picked up a lot of cheap tackle boxes from Wal-Mart. Every bolt, nut, screw, clip, etc. is cataloged in these along with how many of them I'm supposed to have. (often I was missing some of my fasteners) I knew this would be a big help later when it was time to put this thing back together. (Meanwhile, the bodyman was throwing all the 'Cuda hardware into a bucket. Needless to say, I referred to these Challenger boxes often while assembling the 'Cuda.)

Tav

5436645-34edit.jpg (132 downloads)
Re: Tav Challenger T/A Clone [Re: cataclysm80] #446257
08/23/09 10:41 PM
08/23/09 10:41 PM
Joined: Oct 2006
Posts: 4,165
Florida
C
cataclysm80 Offline OP
master
cataclysm80  Offline OP
master
C

Joined: Oct 2006
Posts: 4,165
Florida
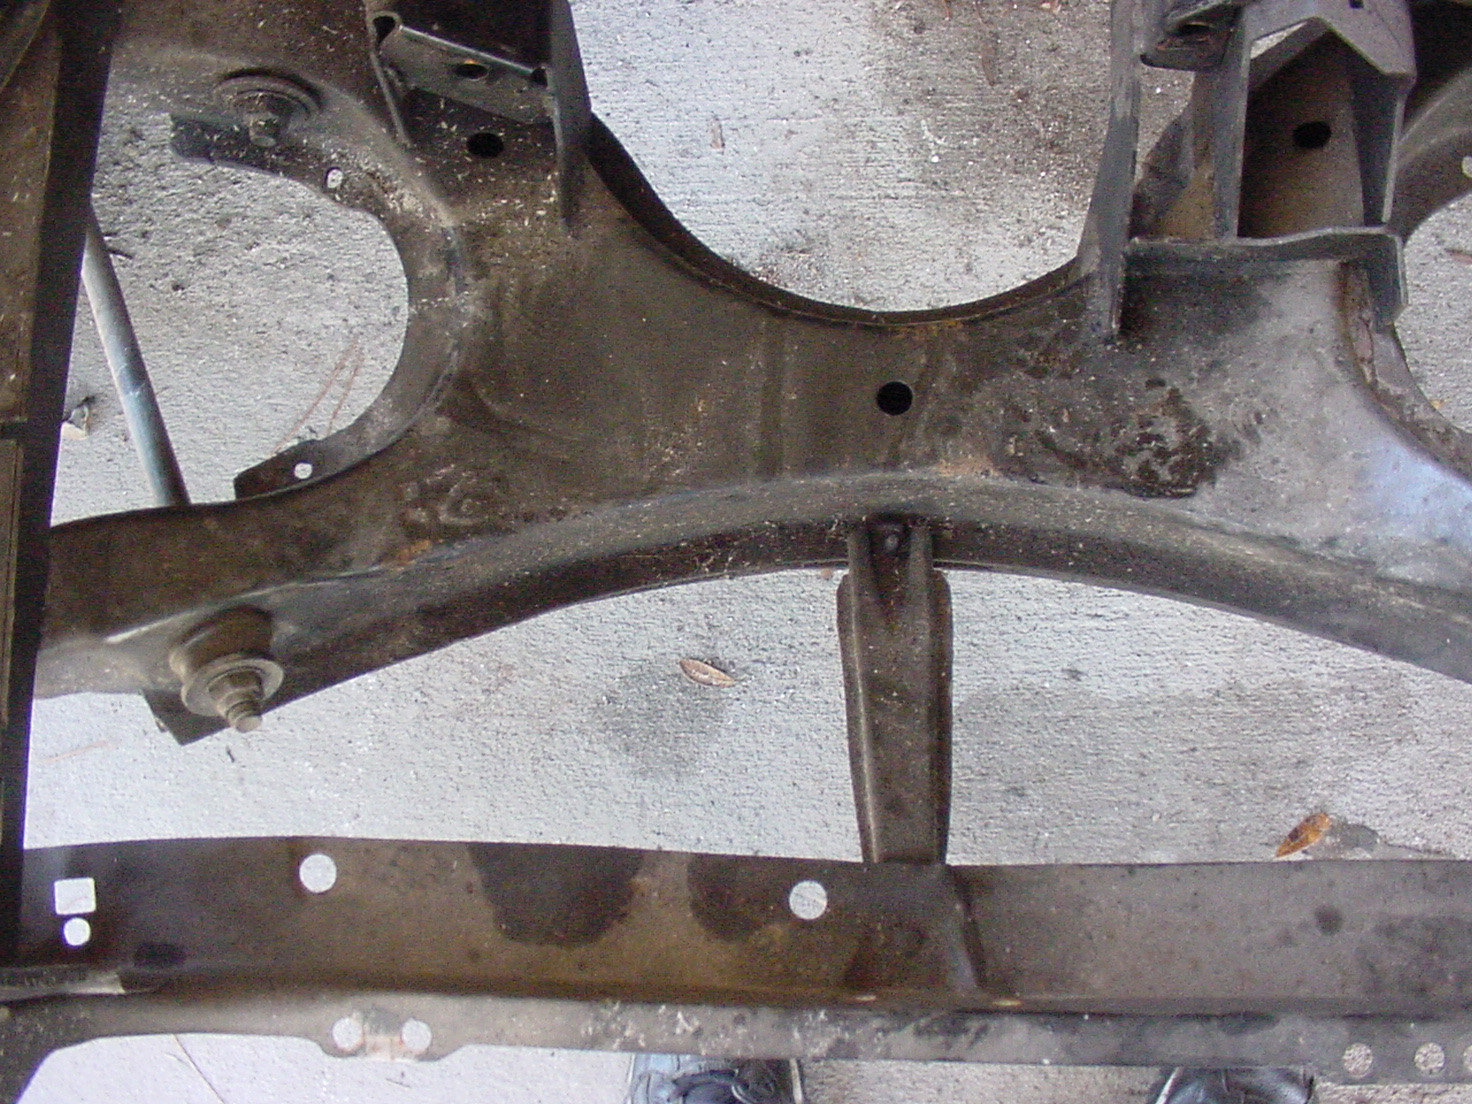
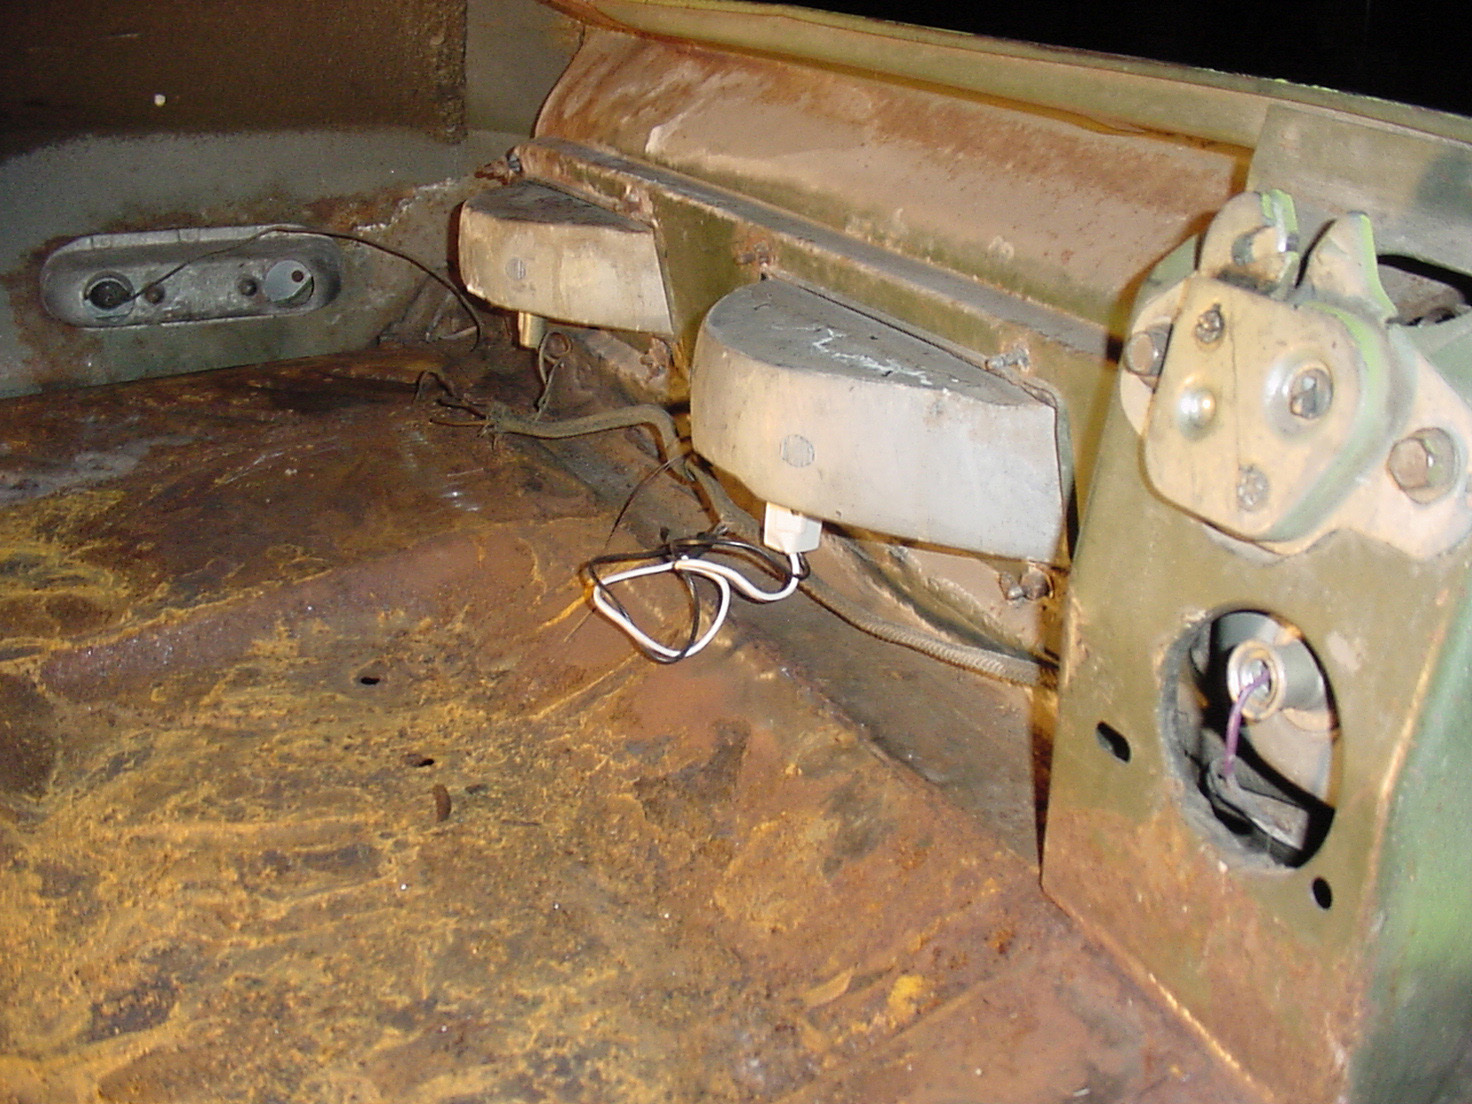
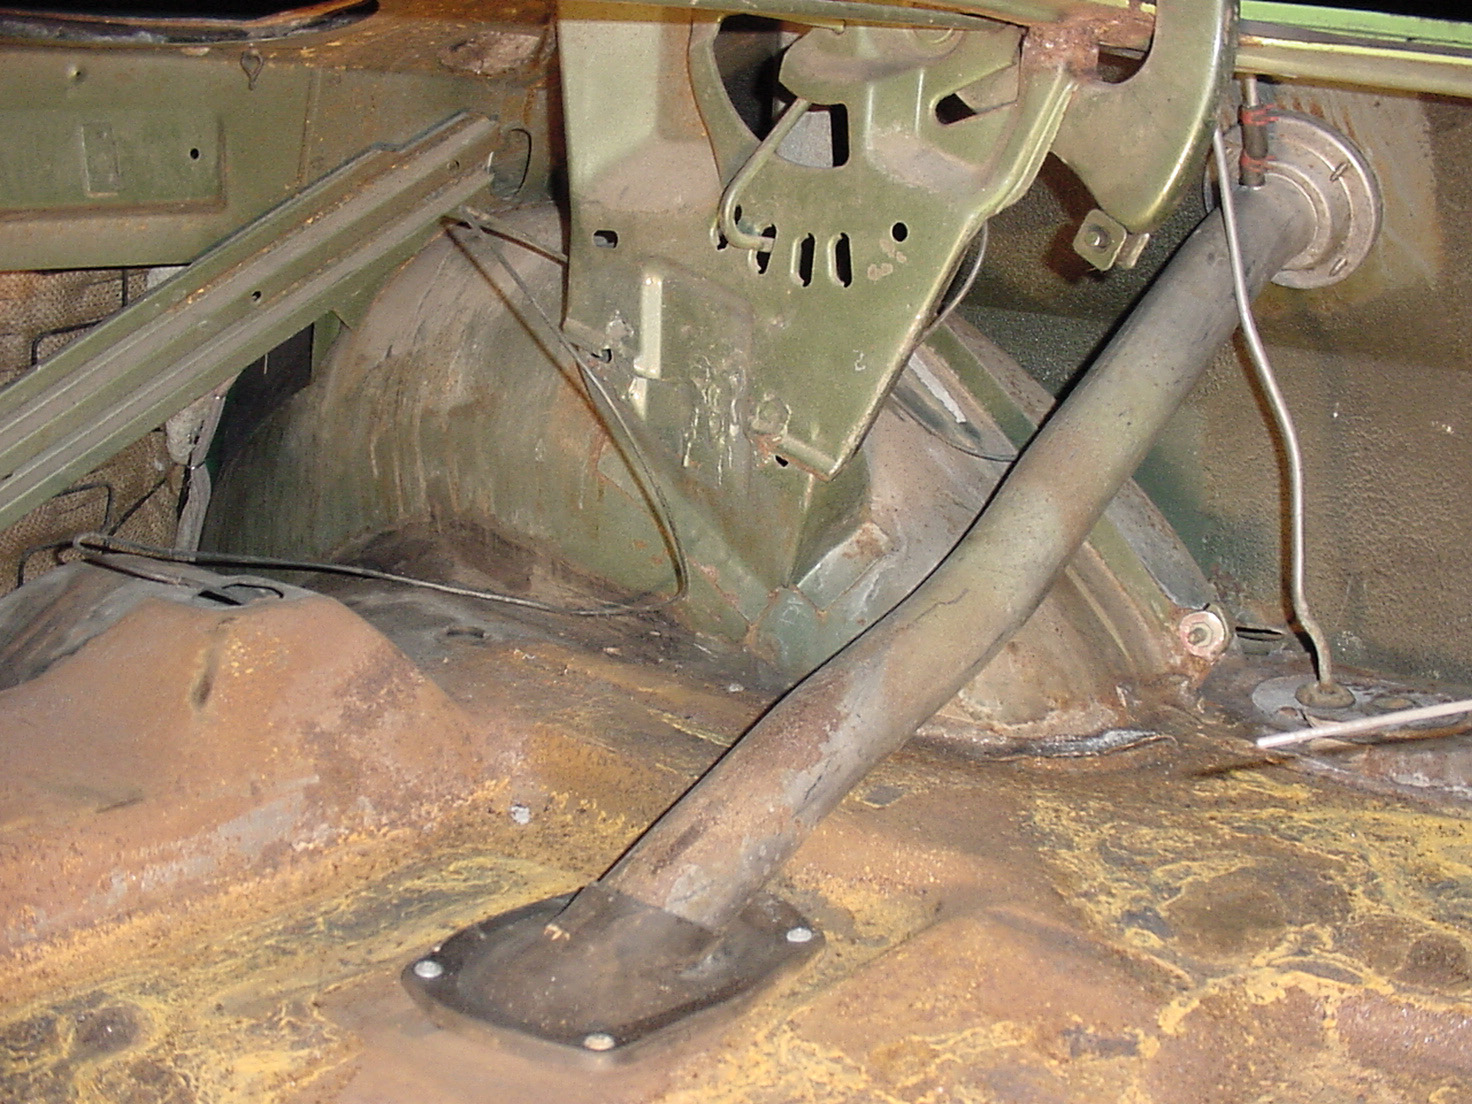
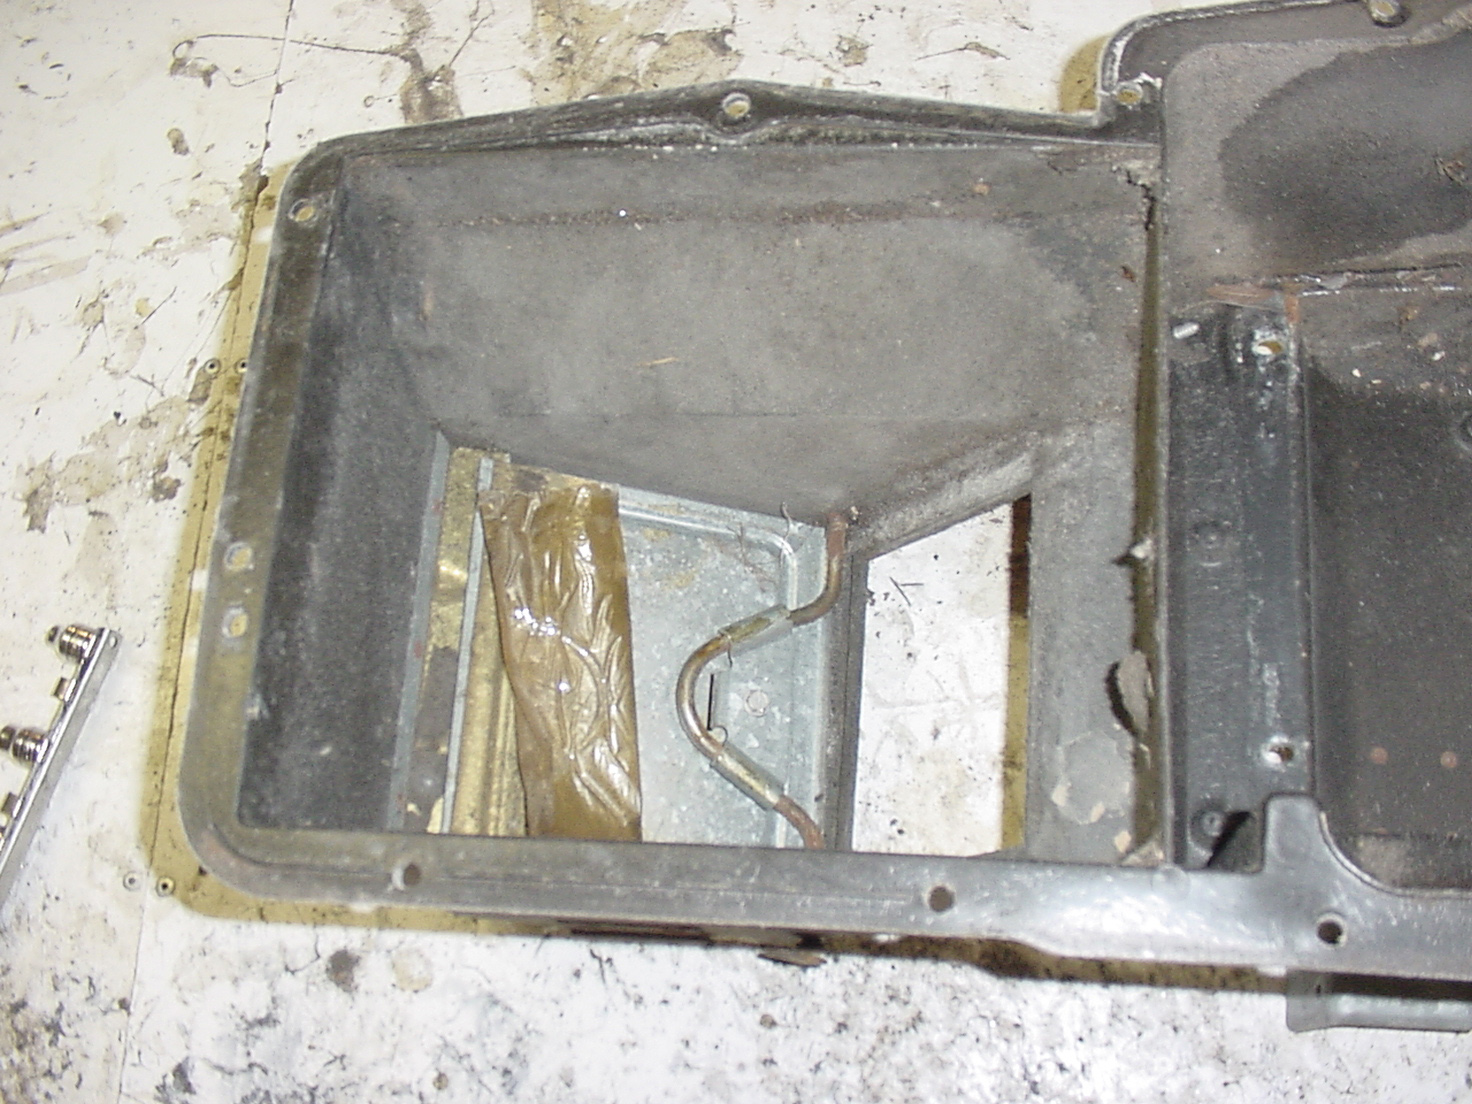
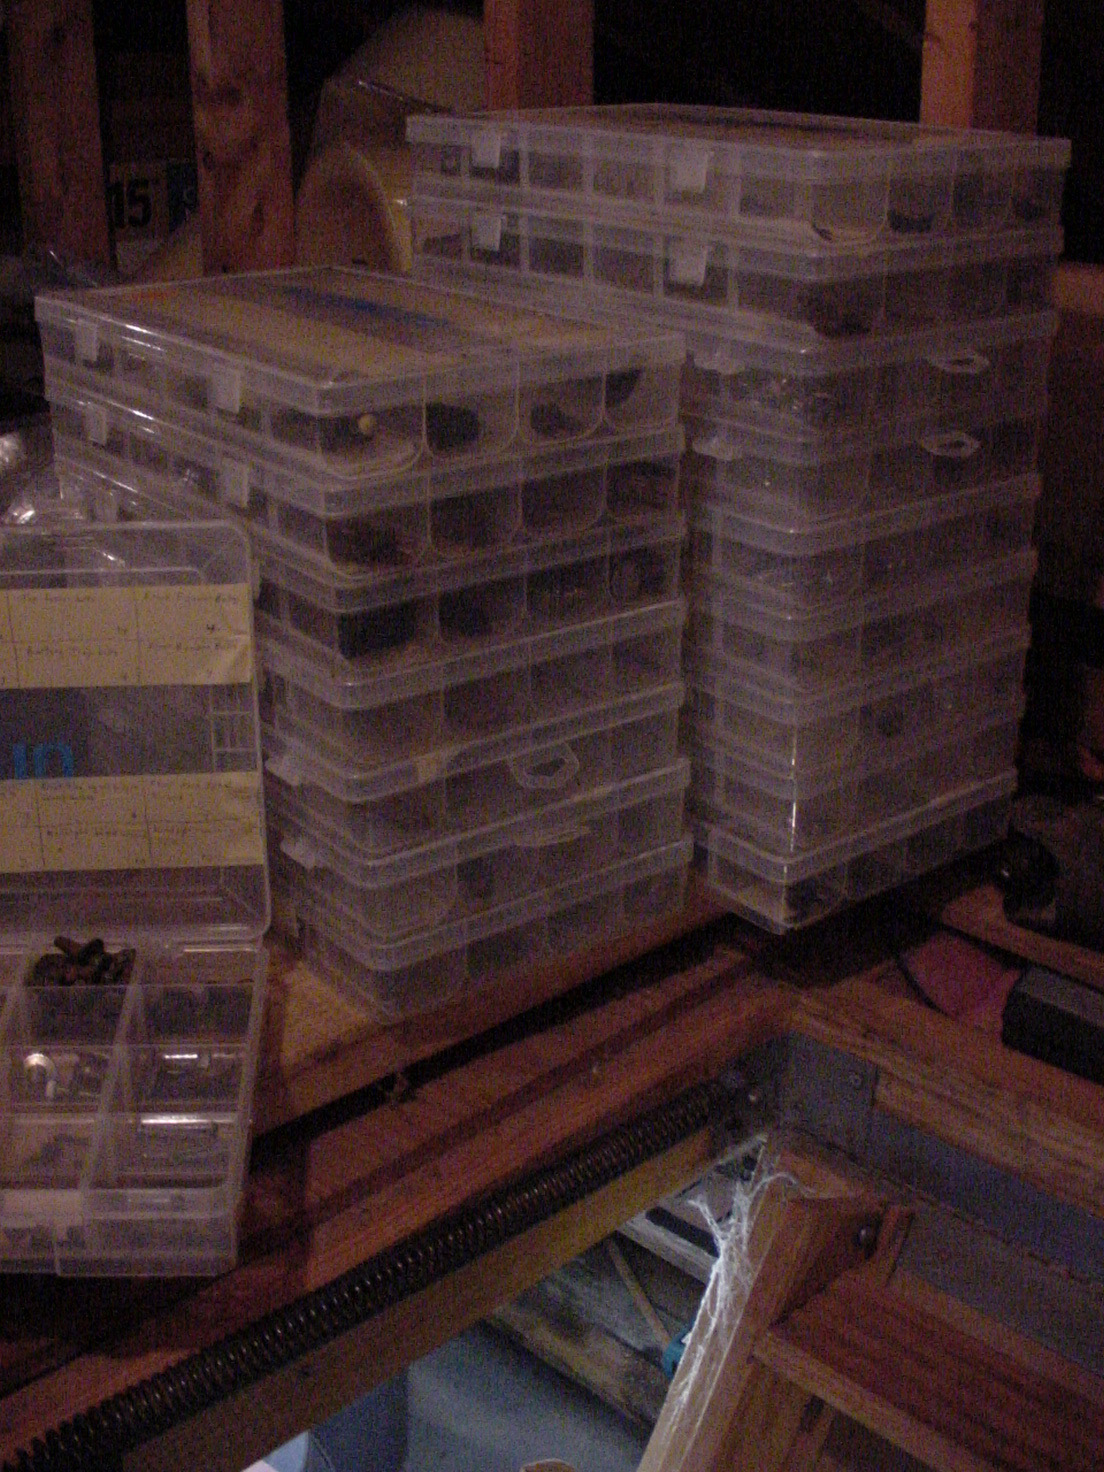
All the bolt boxes (up to this point)

Well, that's about it for disassembly (for now). The only parts left on the car at all were the ones required to roll it around. leaf springs, rear axle, wheels, tires, K frame, torsion bars, strut rods, lower control arms, & upper control arms. Shocks were gone, brakes were gone, the doors were removed from the car and gutted to a shell. I would have liked to take more parts off the car, but it would have been too impractical to work on jack stands.

This brings me up to February of 2002. The 'Cuda had come a long ways, and it was time to start working on the Challenger.

Tav

5436668-37edit.jpg (153 downloads)
Re: Tav Challenger T/A Clone [Re: cataclysm80] #446258
08/23/09 11:10 PM
08/23/09 11:10 PM
Joined: Jan 2003
Posts: 8,483
Candler,NC / Myrtle Beach, SC
J
JDMopar Offline
master
JDMopar  Offline
master
J

Joined: Jan 2003
Posts: 8,483
Candler,NC / Myrtle Beach, SC
HELLO ! Can I get a word in edgewise here? You've done a great job with this post, and I would love to see one or both of your cars someday. Get back at it....you've only got 7 more years of typing to do

Re: Tav Challenger T/A Clone [Re: JDMopar] #446259
08/23/09 11:18 PM
08/23/09 11:18 PM
Joined: Oct 2006
Posts: 4,165
Florida
C
cataclysm80 Offline OP
master
cataclysm80  Offline OP
master
C

Joined: Oct 2006
Posts: 4,165
Florida
LOL!

Thank You!

Everyone feel free to comment or question.

I'll get back to posting when I have more time, but that's about it for tonight, I've gotta go out and work on the car...

Tav

Re: Tav Challenger T/A Clone [Re: cataclysm80] #446260
08/24/09 11:12 AM
08/24/09 11:12 AM
Joined: Jan 2003
Posts: 549
ohio
70shaker6pk Offline
super gas
70shaker6pk  Offline
super gas

Joined: Jan 2003
Posts: 549
ohio
Great post!! Great info!!

Re: Tav Challenger T/A Clone [Re: 70shaker6pk] #446261
08/24/09 02:25 PM
08/24/09 02:25 PM
Joined: Oct 2006
Posts: 4,165
Florida
C
cataclysm80 Offline OP
master
cataclysm80  Offline OP
master
C

Joined: Oct 2006
Posts: 4,165
Florida
Thanks!

I should probably add that when I disassembled the car, every part I took off was flipped around every which way to see if It could possibly be installed incorrectly. Most parts were engineered in a way that they could only go onto the car one possible way without having obvious fitment issues. The parts that could go on different ways without having an obvious fitment problem are the ones I took pictures of, which is what you see above. You'll notice that a lot of those parts only have 2 mounting holes, which is why they could possibly be put on in the wrong way.

Tav

Re: Tav Challenger T/A Clone [Re: cataclysm80] #446262
08/26/09 03:55 AM
08/26/09 03:55 AM
Joined: Jan 2004
Posts: 709
Henderson Kentucky
0791challenger Offline
super stock
0791challenger  Offline
super stock

Joined: Jan 2004
Posts: 709
Henderson Kentucky
You love your cars, that much is obvious. This was a good read and good motivation to go out to the building and play with my challenger. Keep up the good work Tav!

Josh

Re: Tav Challenger T/A Clone [Re: 0791challenger] #446263
08/26/09 01:20 PM
08/26/09 01:20 PM
Joined: Oct 2006
Posts: 4,165
Florida
C
cataclysm80 Offline OP
master
cataclysm80  Offline OP
master
C

Joined: Oct 2006
Posts: 4,165
Florida
It's my Challengers 40th Birthday today!
"Happy Birthday!"


Tav

Re: Tav Challenger T/A Clone [Re: cataclysm80] #446264
01/07/12 11:19 AM
01/07/12 11:19 AM
Joined: Jul 2005
Posts: 1,169
Richmond, VA
R
rayztoy Offline
super stock
rayztoy  Offline
super stock
R

Joined: Jul 2005
Posts: 1,169
Richmond, VA
Tav,
You inspire me! Keep up the good work and the posts coming. Thanks for the detailed pics and info.

Ray

Re: Tav Challenger T/A Clone [Re: rayztoy] #446265
01/07/12 01:19 PM
01/07/12 01:19 PM
Joined: Oct 2006
Posts: 4,165
Florida
C
cataclysm80 Offline OP
master
cataclysm80  Offline OP
master
C

Joined: Oct 2006
Posts: 4,165
Florida
Thanks for the kind words Ray! It's been a while since I posted on this thread, but I WILL get back to it again.

Tav

Re: Tav Challenger T/A Clone [Re: cataclysm80] #446266
02/03/13 11:53 PM
02/03/13 11:53 PM
Joined: Dec 2005
Posts: 885
alberta
Publicbottle Offline
super stock
Publicbottle  Offline
super stock

Joined: Dec 2005
Posts: 885
alberta
Hey! Great thread! Nice reference pics! Helped me out a few times!! keep up the good work!!

Page 1 of 6 1 2 3 4 5 6


Powered by UBB.threads™ PHP Forum Software 7.7.1