|
 Re: New Paint job on a budget thread Part III
[Re: Peckinpah]
#38957
Re: New Paint job on a budget thread Part III
[Re: Peckinpah]
#38957
08/31/09 04:22 PM
08/31/09 04:22 PM
|
Joined: May 2006
Posts: 575
Canada
Marq

mopar addict
|
mopar addict
Joined: May 2006
Posts: 575
Canada
|
Quote:
Nope, no contaminants, AFAIK.
Maybe I should try try a different brand of mineral spirits. I currently use the odor-free kind that Home Depot sells.
That is really weird. As most folks have said... that is what things look like if there is a foreign contaminant on the surface. Where the paint is attract unto itself... rather then leveling out.
Could that possible contaminant be too much soap in the water you are using when wet sanding ? Normally you are suppose to use only 1 or 2 drops of liquid dish detergent in the bucket of water that you are wetting your 'wet sanding block' in.
That kind of mottling is what I would expect to see if the surface was soapy and you added an oily liquid on to it. Same effect as how a drop of soap in a sink of dirty dishes will spread across the surface of the sink water.
Another thought, regarding the soap used in the wetsanding is to make sure it is just a pure liquid soap and not one of these dishwashing soaps that has all kinds of additives in it to : make hands softer, put an aroma in the air, etc.
Ok... lets pretend that it is none of the above...
So what I would do with that bad puppy is this :
a ) sand that surface down with an agressive sandpaper and get everything LEVEL again. Yes.. even if you have to get things back down to the primer level.
b ) take an absolutely clean COTTON cloth, dampen with 100% pure mineral spirits, and wipe this area down. Walk away and let it fully dry for several hours.
c ) use the Rustoleum/Tremclad full strength to repaint this surface. Put the undiluted paint in your roller tray and roll your roller through it... using the upper part of the tray to really squeegee out any excess paint. Basically trying to minimize the amount of paint that is on the roller.
d ) Ok... roll this barely wet paint roller on to the surface we are going to try to cover. Roll it thin and work it around to get as much coverage as you can with this barely loaded roller. Walk away from the job for a day... let it dry and see if what you laid down on that spot stays flush or whether it tries to mottle up like you have previously seen.
e ) IF the paint doesn't mottle, then repeat step C again. Hopefully the initial layer will serve as a good foundation on which to lay down another thin layer. Get it on, get it on thin, get it on even... then walk away for another day. Hopefully by giving it plenty of time to dry, this will eliminate the curing process as being the reason for the mottling.
f ) IF the paint did mottle... I would be personally pizzzzzzed off. I would probably sand it all off again... and then break out my handy dandy propane torch. I would out of frustration BURN that surface ( carefully ) with the crazy hope that 'whatever is causing the problems' would probabbly not survive a burnoff. The I would go back to step A and see if the burnoff got rid of whatever the mysterious mottling is being caused by. ( tee hee.. I bet you thought the use of the torch was without a legitimate reason ). NOTE : If it comes to using the torch... clear the work area and keep a running hose of water handy...
Marq
Last edited by Marq; 08/31/09 04:26 PM.
|
|
|
Re: New Paint job on a budget thread Part III
[Re: Marq]
#38958
08/31/09 04:40 PM
08/31/09 04:40 PM
|
Joined: Aug 2009
Posts: 51
CA
Peckinpah
member
|
member
Joined: Aug 2009
Posts: 51
CA
|
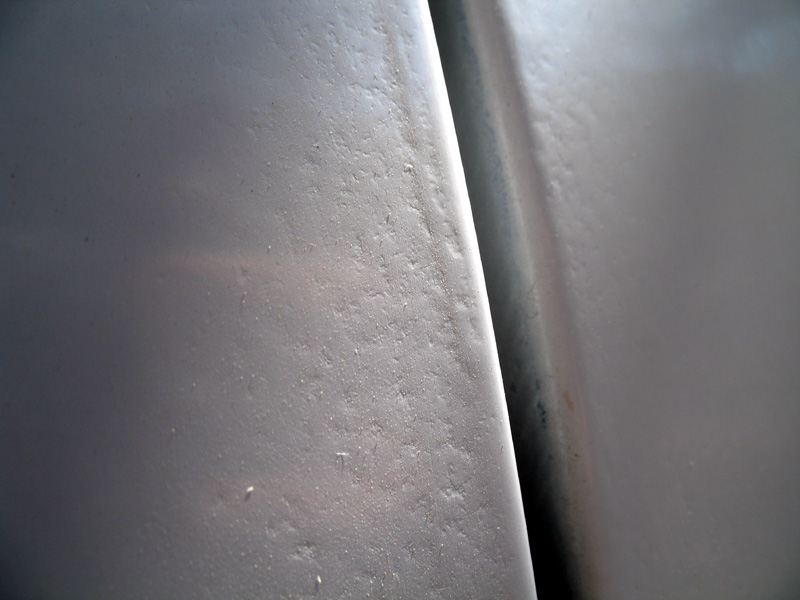
Hey Marq, thanks for the extensive reply. First off, I didn't use any soap at all while wet sanding. Also, spray-on Gloss White Rustoleum does the exact same thing. The patch in the picture already was sanded down to the factory paint, and wiped with mineral spirits, so I don't see how there could possibly be any contaminants.I have also tried wiping the surface down with water and letting it dry and the same thing happens. I have learned to expect this to happen, and so I have been dealing with it. But I can't tell you how frustrating it is to spend two days wet sanding the previous coat down to glass-like finish and then having the next coat mottle up on me again. I buffed out and waxed my hood and roof today, and they look very nice, but I see a lot of rough and uneven areas and a few roller marks I didn't sand out. But what's most noticeable is the places where I sanded down to either the primer or the factory paint while trying to get rid of that stupid orange peel. 
|
|
|
Re: New Paint job on a budget thread Part III
[Re: _Scott_]
#38960
09/01/09 07:49 AM
09/01/09 07:49 AM
|
Joined: Aug 2009
Posts: 51
CA
Peckinpah
member
|
member
Joined: Aug 2009
Posts: 51
CA
|
Apparently there is a name for this, it's called "fisheyes": "FISH-EYES (Crawling, poor wetting) - This paint failure occurs when paint fails to flow in an even and continuous film over its undercoat. it separates or breaks, leaving exposed areas of the undercoat."  The article I found says it's caused by contaminants found in oils and wax. All I can tell you is that it's been a nightmare, and has turned my first painting attempt into a six weeks of extreme frustration. And I had no way of knowing that things were not going right since it was my first attempt. However, what I can't figure out is, why is this still happening when I try to paint over surfaces that already have 2, 4, 6, or even 8 coats of Rustoleum laid down? You can see in my picture that there is a reflection and the paint is doing the same thing over the already painted area (just not quite as bad). The smoothest I have ever been able to get this paint to lay down with a roller, even over previously painted areas, is about the texture of an eggshell. No matter how smooth the previous coats of Rustoleum are sanded down. So this is why I was saying earlier, why not lay down all six coats first and then wet sand at that point. For me, this would have made much more sense.
Last edited by Peckinpah; 09/01/09 08:57 AM.
|
|
|
Re: New Paint job on a budget thread Part III
[Re: Peckinpah]
#38961
09/01/09 11:26 AM
09/01/09 11:26 AM
|
Anonymous
Unregistered
|
Anonymous
Unregistered
|
The brownish tan stuff at the top of the picture. Is that headliner/carpet adhesive?
|
|
|
Re: New Paint job on a budget thread Part III
#38963
09/01/09 03:27 PM
09/01/09 03:27 PM
|
Joined: Aug 2009
Posts: 51
CA
Peckinpah
member
|
member
Joined: Aug 2009
Posts: 51
CA
|
Quote:
The brownish tan stuff at the top of the picture. Is that headliner/carpet adhesive?
Ha ha, no that's some masking tape over my door handle. I had a heck of a time painting around those, I strongly suggest removing them before you start to paint. Trying to paint around them is extremely frustrating, and will inevitably end up looking very bad.
I got paint on my door handles when laying down my initial 8 coats, even though they were covered up with tape. Then I found gaps between the door handle and the body that got no paint at all. Plus I got drips trying to paint around them.
So I finally took them off, sanded the body all around the handles down to the factory paint. But the Rustoleum I applied beaded up and would not stick to the factory paint, and dripped right off. So I sanded that off and tried once more, and finally got semi-decent coverage by using very thin coats and being extremely careful. I think I spent about 4 days messing with those dumb door handles, where if I had just taken them off initially, it would have been a breeze.
|
|
|
Re: New Paint job on a budget thread Part III
[Re: Davemutt]
#38964
09/01/09 03:39 PM
09/01/09 03:39 PM
|
Joined: Aug 2009
Posts: 51
CA
Peckinpah
member
|
member
Joined: Aug 2009
Posts: 51
CA
|
Quote:
Quick question. I'm using Brightside white thinned about 40% - 50% with their 333 thinner and I'm nearly done. Its working great, but my only concern is that its fairly transluscent and I don't want sanding scratches visible under the paint. Is there any danger to not sanding between coats? This paint seems pretty sticky to me.
Don't sand sticky paint, wait until you can rub your hand over it and you don't feel any drag. If the paint is still wet you'll feel a slight drag.
You can also tell its dry when you try to score it with your fingernail and it doesn't leave a mark. And when you tap on it with your nail it makes a sharp sound rather than a dull thud.
If you try to sand wet paint it'll rub right off and and clog up your sandpaper like crazy. But dry paint will rinse right out of the sandpaper.
I know the OP of this thread said you could wet sand the next day, but I have found my paint can take as long as 5-7 days to dry enough to wet sand, depending on how many coats I apply. A single coat takes me about two days to dry, FWIW.
Re scratches, you shouldn't get any with 800 grit paper, provided the paint is dry and you use plenty of water to wet sand. I like starting with 800 grit for wet sanding.
|
|
|
Re: New Paint job on a budget thread Part III
[Re: Peckinpah]
#38967
09/01/09 10:28 PM
09/01/09 10:28 PM
|
Joined: May 2006
Posts: 575
Canada
Marq
mopar addict
|
mopar addict
Joined: May 2006
Posts: 575
Canada
|
Quote:
I always thought that wet sanding between coats was more to smooth out slight imperfections in the previous coat than for purposes of improving adhesion. After all, when paint is sprayed on in many layers, nobody ever wet sands between coats, as far as I'm aware.
The wet sanding does two jobs at various points during the paint job... you have to break the paint job in to two different phases when talking about wet sanding :
BUILD UP PHASE WET SANDING - this wet sanding happens after every second or third coat of paint as you are building up your color coverage. It smooths out the surface to which the next layers of paint are going to be put on. It also removes some of the gloss off the previous coats so that the next addition of layers of paint have something to grip on to.
FINAL POLISHING AND SHINE WET SANDING - this wet sanding happens to your very last FINAL coat of paint. It is going for the maximum smoothness of the outer layer of the final coat of paint. Because you are using your highest grit of sand paper... you are actually polishing the surface.
Hopefully that explains the difference in purpose between the two different phases of wet sanding that happen during the rolling process.
.
|
|
|
Re: New Paint job on a budget thread Part III
[Re: Marq]
#38968
09/02/09 04:46 PM
09/02/09 04:46 PM
|
Joined: Aug 2009
Posts: 51
CA
Peckinpah
member
|
member
Joined: Aug 2009
Posts: 51
CA
|
Final results, using approximately 10 coats of Rustoluem Gloss White and wet sanding every two coats (see below). The picture is a spot between my driver side door and the back of the cab of my truck. I have a few areas where I was able to get a fairly smooth finish, but they were kinda random. My roof and hood have both smooth and rough areas. This picture though is typical of the problems I experienced with every single coat I applied. I would get deep pits that looked similar to acne scars, that went almost all the way down to the factory paint. Sanding them down smooth would reveal the factory coat in many spots. Then trying to fill in these spot where I sanded through would start the whole process all over again, Very frustrating.So I just left many rough areas alone, for fear of burning through to the factory paint once again. So I'm glad some people had success using this method. I was not one of them. I'm somewhat happy with my results after buffing and waxing, but the process did not go anywhere near as "smooth" as I had hoped. I wound up with a "10 foot paint job". It looks good as long as you stay at least 10feet away. 
Last edited by Peckinpah; 09/02/09 04:55 PM.
|
|
|
Re: New Paint job on a budget thread Part III
[Re: Peckinpah]
#38969
09/02/09 07:40 PM
09/02/09 07:40 PM
|
Anonymous
Unregistered
|
Anonymous
Unregistered
|
Is it possible you simply have some bad paint or mineral spirits? It looks like you have something like water or other contaminates in one of them.
|
|
|
Re: New Paint job on a budget thread Part III
[Re: THEYOUNGGUN53]
#38972
09/02/09 09:39 PM
09/02/09 09:39 PM
|
Anonymous
Unregistered
|
Anonymous
Unregistered
|
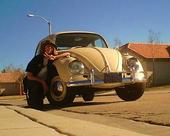
Very nice!! Is that Rustoleoum canvas white? I will be rolling my '64 beetle(was L87 Pearl White) soon with canvas white.
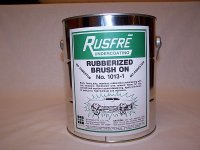
What are your plans for under the fenders and the wheel wells? I'm thinking about rolling a product called Rustfre Rubberized under coating on mine.
|
|
|
|
|


