|
 Re: New Paint job on a budget thread.
[Re: CudaPete]
#37134
Re: New Paint job on a budget thread.
[Re: CudaPete]
#37134
07/19/07 02:45 PM
07/19/07 02:45 PM
|
Anonymous
Unregistered
|
Anonymous
Unregistered
|
hey guys, I'm getting close to the finish line for my car. Here is a link I posted on sr20forum with pics of my car: roller painted b13 I'm already driving it just to get it on in the sun. I used rustoleum marine black on the sides, and brightside black on top. also sprayed acrylic enamel in various places that were hard to roll. I think my car has about 30 dents, and I only fixed 4 or 5 of them before painting lol. I suck at body work.
|
|
|
Re: New Paint job on a budget thread.
#37135
07/19/07 04:46 PM
07/19/07 04:46 PM
|
Anonymous
Unregistered
|
Anonymous
Unregistered
|
Just a question. Im planning to hit the car with some Rusto clear coat at the very end. It seems that when I hit the paint with spirits, it shines like all get out, but when it dries, it seems like its almost faded or something. Im just wondering if after I get that final coat on, should I sand it, hit it with spirits, let it dry, then use the clear coat? How should I go about doing the clear coat?
|
|
|
Re: New Paint job on a budget thread.
#37136
07/19/07 07:09 PM
07/19/07 07:09 PM
|
Joined: May 2006
Posts: 575
Canada
Marq

mopar addict
|
mopar addict
Joined: May 2006
Posts: 575
Canada
|
Quote:
Just a question. Im planning to hit the car with some Rusto clear coat at the very end. It seems that when I hit the paint with spirits, it shines like all get out, but when it dries, it seems like its almost faded or something. Im just wondering if after I get that final coat on, should I sand it, hit it with spirits, let it dry, then use the clear coat? How should I go about doing the clear coat?
If you like the look of it when you do the wipe down with the cloth dampened in spirits THEN you should not go to the 'clear coat' stage. INSTEAD you should start hitting that paint with the rubbing compound - followed by the polish - followed by wax. AND you will end up with the same shine as when you passed a dampened cloth over it.
The clear coat strategy is not a 'proven' thing at this point. And the odds are that you will end up with a coating that is going to yellow over the next year. IF your body gets scratched or bumped once the clear coat is on... you will have to repair the entire panel to keep it looking good. WHEREAS if you just polish and wax your paint layers - then any scratch can be repaired and not require the entire panel be redone to fix the scratches or bumps etc.
But I think the key here is that you like the look of the wettened paint job... and that is the result you 'should' end up with if you go with the compounding, polishing and waxing 
But to answer your specific question.... IF I was going to go the route of slapping on a clear coat ... I would :
a ) wet sand the final layer... going from 1000 to 1500 to 2000.
b ) wash the car down using a bucket of water and just a drop or two of liquid dish detergent. RINSE IT OFF THOROUGHLY. Let it dry fully.
c ) take a cloth dampened with mineral spirits and give the body a thorough wipe down. Let it dry fully.
At this point your top surface will be about as good as it is going to get for laying a clear coat down on it.
The reason you still have to go through the 1000, 1500 and 2000 grit wet sanding is to get the surface as smooth and defect free as you can. IF NOT the clear coat will act like a magnifying glass and make every little imperfection standout and look doubly bad.
The clear coat will be able to gain sufficient adhesion with the ultra smooth wet sanded surface because it will try to chemically bond with the exposed top layer of the paint. This is where you have to be applying a clear coat that is designed to go with the specific brand of paint you used.
IF you use one brand of clear coat with 'some other brand' of paint there might be adhesion failure a few months down the road. It would look something like a sunburn on the paint where the skin is peeling away from the paint. The only remedy for that if it happens is to sand off the remaining clear coat, lay on a new layer of paint and refinish that paint layer. So that is why you need to match brands of clear coats to the paint you chose.
.
Last edited by Marq; 07/19/07 07:19 PM.
|
|
|
Re: New Paint job on a budget thread.
[Re: Marq]
#37137
07/19/07 08:14 PM
07/19/07 08:14 PM
|
Anonymous
Unregistered
|
Anonymous
Unregistered
|
Fabulous Thread going here. I am anxious to try this method on my 1998 Black F-150. The roof really needs it. A buddy of mine is going to do this on his jeep. Anyhoo, I got some Rustoleum Professional Gloss Black enamal, low-oder mineral spirits and some rustoleum automobile spray primer. I also got some wet sand paper, a piece of scrap aluminum and(please don't laugh) the metal cone thing that keeps the squirrels from going up the bird feeder to practice on.
I sprayed a couple coats of primer on the cone, and only on half the aluminum bar to see if primer is really needed for bare metal spots. Wet sanded with 400 and it came out pretty smooth. I guesstimate my mineral spirits to paint mix was about 25-30%. I rollered it on with a high density foam roller and it looked awfully splotchy and bad coverage. Maybe I thinned it too much? It was pretty watery. I went over it with a 3" wide foam brush and it made it look much better. Should I have done that with the 3" brush?
|
|
|
Re: New Paint job on a budget thread.
#37139
07/20/07 01:33 AM
07/20/07 01:33 AM
|
Joined: Jun 2007
Posts: 40
WA State
Roadster_wa
member
|
member
Joined: Jun 2007
Posts: 40
WA State
|
Quote:
I sprayed a couple coats of primer on the cone, and only on half the aluminum bar to see if primer is really needed for bare metal spots. Wet sanded with 400 and it came out pretty smooth. I guesstimate my mineral spirits to paint mix was about 25-30%. I rollered it on with a high density foam roller and it looked awfully splotchy and bad coverage. Maybe I thinned it too much? It was pretty watery. I went over it with a 3" wide foam brush and it made it look much better. Should I have done that with the 3" brush?
It doesn't look like you worked it long enough. I keep rolling it just before it gets tacky and most of the bubbles are out. Very light rolling will get most of the bubbles out. Almost no pressure, with only the weight of the roller pushing down. If you are getting runs, keep rolling until the paint won't run anymore. It does look pretty thin too.
It is almost an art.
|
|
|
Re: New Paint job on a budget thread.
[Re: pittbulldog]
#37141
07/20/07 08:42 AM
07/20/07 08:42 AM
|
Anonymous
Unregistered
|
Anonymous
Unregistered
|
blue195-I ended up working it by dragging the foam brush across. This popped the bubbles and gave it more coverage. I think it gave it too much coverage, as I ended up with classic orange peel.
Sounds like I need to just work the roller more next time instead, and I also need to not make it so thin perhaps?
I guess I am just surprised at how thin it goes on and need to realize that many coats are needed to achieve the final product.
Here is my orange peel. Oh, on my test piece of aluminum(didn't bother to take picture) no orange peel. On it, I just rolled it a couple times and left it.
I guess I will wet sand with like 400 grit and then go at it again.
Last edited by MrMHz; 07/20/07 08:43 AM.
|
|
|
Re: New Paint job on a budget thread.
#37142
07/20/07 09:46 AM
07/20/07 09:46 AM
|
Joined: May 2006
Posts: 575
Canada
Marq
mopar addict
|
mopar addict
Joined: May 2006
Posts: 575
Canada
|
I don't know if what you had there was truly an 'orange peel' type effect. To my eyes it looked more like a 'repel' type effect where the sub surface was not thoroughly preped or given a final wipe down with a clean cloth dampened with mineral spirits. As you may know ( but I will repeat it for everyones sake ) the key purpose of the mineral spirit dampened cloth wipe down is to remove any foreign debris or residue that might still be on the surface prior to applying the coat of paint.
In particular we are hoping to remove any oil or wax molecules that may somehow be clinging to the prepared surface.
Some folks aren't aware that sanding of a surface containing wax or oil residue will not necessarily remove it. It may break it down a bit and make it into smaller bits... but the sanding process may embed those oil or wax particlues into the sanded surface. That is why we want that wipe down with the mineral spirit dampened cloth to remove that potential problem source.
Imagine someone went and took a spritzer and sprayed a mist of oil or wax on to your prepared surface. You then apply a thin layer of paint. What will happen is that the wax or oil on the subsurface has a 'higher tension' value then the paint. So the paint attracts itself to the other paint surface ( to maintain its surface tension ) and would repel from the wax or oil spots.
That is what my eyes are seeing in your picture. The paint surface tension has not been able to hold its surface tension on those spots and has left what appear like little moon craters or vacancies in the paint surface.
To remedy that situation ( if that is what it is ) I would hit the entire surface with a quick 320 or 400 grit wet sanding. Wash it down with water and a drop or two of dish detergent. Rinse it thoroughly. Let it dry. Then give the entire surface a wipe down with a clean cloth dampened with mineral spirits. Let it dry. Then apply the next layer of paint. Let that layer dry thoroughly ( 24 hours ). Then use a tack cloth to wipe down the entire surface ( to remove any dust or bugs that may have landed on it overnight ). Then add a second coat of paint.
At that point the moon craters should be on their way to disappearing and you should be starting to noticing how each layer of paint adds more coverage and the overall paint color is starting to take hold.
.
Last edited by Marq; 07/20/07 09:50 AM.
|
|
|
Re: New Paint job on a budget thread.
[Re: Marq]
#37143
07/20/07 10:16 AM
07/20/07 10:16 AM
|
Anonymous
Unregistered
|
Anonymous
Unregistered
|
My bad, I forgot to mention that I did wipe it with mineral spirits prior to painting. It did kind of appear to not be adhering as you are suspecting, but I have little experience in this. I will do the wet sanding and continue as you counseled.
Wet sand with water or mineral spirits, since it is oil based paint? See my lack of experience!
Last edited by MrMHz; 07/20/07 10:21 AM.
|
|
|
Re: New Paint job on a budget thread.
#37144
07/20/07 11:18 AM
07/20/07 11:18 AM
|
Anonymous
Unregistered
|
Anonymous
Unregistered
|
Never mind, saw you said water and drop or two of soap. Will do!
|
|
|
Re: New Paint job on a budget thread.
[Re: Marq]
#37145
07/20/07 12:36 PM
07/20/07 12:36 PM
|
Joined: Jun 2007
Posts: 40
WA State
Roadster_wa
member
|
member
Joined: Jun 2007
Posts: 40
WA State
|
Quote:
To remedy that situation ( if that is what it is ) I would hit the entire surface with a quick 320 or 400 grit wet sanding. Wash it down with water and a drop or two of dish detergent. Rinse it thoroughly. Let it dry. Then give the entire surface a wipe down with a clean cloth dampened with mineral spirits. Let it dry. Then apply the next layer of paint. Let that layer dry thoroughly ( 24 hours ). Then use a tack cloth to wipe down the entire surface ( to remove any dust or bugs that may have landed on it overnight ). Then add a second coat of paint.
.
I'm no expert, and I agree with everything you said, but when I painted the vette, I washed the car, let it dry for about 2 hours (100 degree heat), wiped it down with a soaked mineral spirits rag several times like I was scrubbing it again, then after about an hour of drying and prepping for the paint, I painted. I didn't wait for the 24 hour dry time. I see that many like to let the 24 rule apply with the mineral spirits, but I have actually wiped a bad roll/mixture off of the whole hood while it was still wet and re-started. After the 10 hour dry time with the paint, the mineral spirits didn't pull any paint off when I wiped it down for a quick next coat.
To sum it all up, I didn't find any signs that the 24 hour dry time was critical in this paint process. The Rustoleum is pretty hard stuff, so far.
On a side note, the insurance guy looked at the vette and let me raise the policy $3,000 more. Not a bad return for $26.
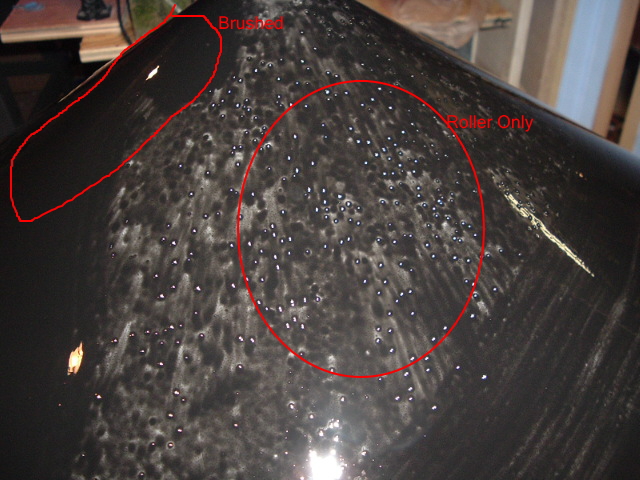
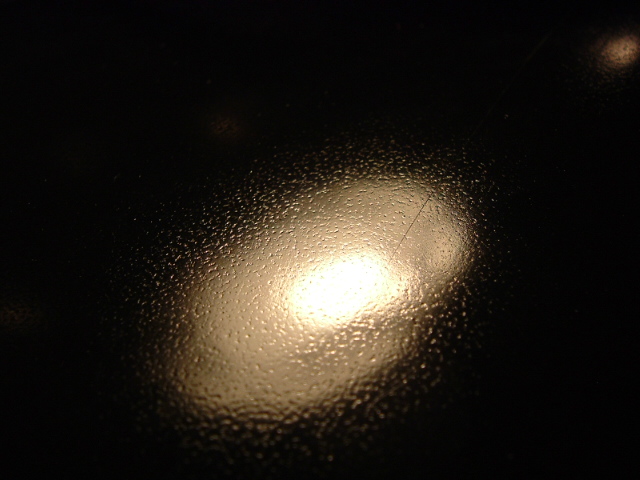
The picture shows my 1st pass with coat #1. Notice the bubbles and the coverage of the paint compared to the section on the right. I still had to "work" the bubbles out by rolling several times (various directions)until the bubbles get real small or none at all. The persistent very tiny bubbles, I used my mouth to blow and pop them.
|
|
|
Re: New Paint job on a budget thread.
[Re: Roadster_wa]
#37146
07/20/07 02:11 PM
07/20/07 02:11 PM
|
Joined: May 2006
Posts: 575
Canada
Marq
mopar addict
|
mopar addict
Joined: May 2006
Posts: 575
Canada
|
Quote:
I'm no expert, and I agree with everything you said, but when I painted the vette, I washed the car, let it dry for about 2 hours (100 degree heat), wiped it down with a soaked mineral spirits rag several times like I was scrubbing it again, then after about an hour of drying and prepping for the paint, I painted. I didn't wait for the 24 hour dry time. I see that many like to let the 24 rule apply with the mineral spirits, but I have actually wiped a bad roll/mixture off of the whole hood while it was still wet and re-started. After the 10 hour dry time with the paint, the mineral spirits didn't pull any paint off when I wiped it down for a quick next coat.
To sum it all up, I didn't find any signs that the 24 hour dry time was critical in this paint process. The Rustoleum is pretty hard stuff, so far.
The benefit you enjoyed that many don't is the hot dry climate. I think you mentioned 100 degree temperatures. As such your drying times are going to be much shorter than some of the folks in the more moderate climates. And of course the humidity in the air is also going to play into the factoring on just how long to wait before moving to each stage.
So that is where the suggested extended drying periods enter into the recipe... as a longer set period of time will ultimately prove to work best for the majority of rollers. But even then... the extra wait time for folks in excellent climates such as yours can't hurt.
What can hurt the process is when someone tries to leapfrog through the steps too quickly. That is why one of the key principles that Charger tried to get us to understand and put into practice is to exercise patience during the process.
In the end... variations on the 'drying times' will vary between users as each has to fine tune their timing based on their local climatic conditions at the time of the paint job
.
Last edited by Marq; 07/20/07 02:16 PM.
|
|
|
Re: New Paint job on a budget thread.
[Re: Marq]
#37147
07/20/07 03:29 PM
07/20/07 03:29 PM
|
Joined: Feb 2003
Posts: 18,582
Rust Belt, SW PA
Silver70
I Live Here
|
I Live Here
Joined: Feb 2003
Posts: 18,582
Rust Belt, SW PA
|
I gotta say this sure sounds like alot of work to save some money! I still say buy a gun and be done with it!!!
68 Road Runner, 69 Belvedere, 71 Challenger Vert
340 barracuda, 01 Ram CTD, 95 Ram, 04 Ram, 85 Daytona turbo Z
66 GTO, 06 Magnum RT AWD. 07 Ram CTD, 07 Ram
|
|
|
Re: New Paint job on a budget thread.
[Re: Silver70]
#37148
07/20/07 06:38 PM
07/20/07 06:38 PM
|
Anonymous
Unregistered
|
Anonymous
Unregistered
|
Quote:
I gotta say this sure sounds like alot of work to save some money! I still say buy a gun and be done with it!!!
It looks like a ton of work and I can't wait to try it!
|
|
|
Re: New Paint job on a budget thread.
#37149
07/21/07 01:03 AM
07/21/07 01:03 AM
|
Joined: Jun 2007
Posts: 40
WA State
Roadster_wa
member
|
member
Joined: Jun 2007
Posts: 40
WA State
|
Quote:
Quote:
I gotta say this sure sounds like a lot of work to save some money! I still say buy a gun and be done with it!!!
It looks like a ton of work and I can't wait to try it!
It's also hard to climb Mt Hood, but some people just got to do it. The way I think about this process is like building a rat rod. (The 29 roadster is up in the loft) Sure you could build the perfect roadster, spend lots of money on it and it'll look like everyone else's - or - you can build a rat rod and have fun doing it, save money for other things, and sit around and BS with everyone who can't believe you built it. I have had 30-40 people (6 today) that have looked at the vette in disbelief that it was painted for $26 and with a roller. That makes it unique, and fun to talk about. Say you painted a vette with a roller and they ALL have to look.
Why did I paint it... A challenge and I knew it would make people cringe to even think of doing it. (Just like building a rat rod)
The real 29 roadster is after the Mustang...
|
|
|
Re: New Paint job on a budget thread.
[Re: Roadster_wa]
#37150
07/21/07 12:51 PM
07/21/07 12:51 PM
|
Joined: May 2006
Posts: 575
Canada
Marq
mopar addict
|
mopar addict
Joined: May 2006
Posts: 575
Canada
|
|
|
|
Re: New Paint job on a budget thread.
[Re: Marq]
#37151
07/21/07 03:35 PM
07/21/07 03:35 PM
|
Anonymous
Unregistered
|
Anonymous
Unregistered
|
hey guy's, long time reader, first time poster..
anyways I am experimenting with this on a test pannel, at first I started out with the ALUMINUM SILVER and all I have to say is that Dont use it. it's a totally different paint.. I don't know why, it is not glossy and any attempt at wet sanding just rips it all off.
So I cleaned off the test panel and started over testing with Gloss black, and eventhough it's my first coat, it's looking really good and glossy. I cant wait to throw on the 2nd and then wetsand!
|
|
|
Re: New Paint job on a budget thread.
#37152
07/22/07 01:32 AM
07/22/07 01:32 AM
|
Anonymous
Unregistered
|
Anonymous
Unregistered
|
I've been reading up on this paint process for a long time so I finally decided to get my hands dirty and see whats what. My little black BMW's black paint is in terrible shape. Not only that but I hate black. I want to paint it white. The sunroof especially is almost completely rusted out so I picked up a 'new' sunroof panel at the JY and and used it for practice. I tried to integrate everything I've learned here in a step by step process. Sanded the blue sunroof down with 400 grit at first but I found that too be too mild so I moved on to 320 wet. Once I had it down almost completely to the primer I cleaned it off with mineral spirits. I used Interlux Brightside WHITE. 2 table spoons of paint mixed with one table spoon of mineral spirits. I found the paint process very straight forward using the "roll and tip method". I was amazed how well this paint evens itself out when give a day to cure. Other than some light ridges from the brush, there is no orange peel at all with a light coat. I could still see some of the scratches left by the sanding through the paint. I wet sanded the first coat with 1000 grit, cleaned with mineral spirits and put down another coat this morning in the same proportion of 2 parts paint, one part mineral spirits. Its hard to tell from the pics but I still don't have 100% coverage. I'll do a third light coat tomorrow and that should be it. The pics that follow were taken after the second coat and before any sort of sanding or polishing. I tried to catch as many of the flaws as possible. Hard to tell anything from this pic 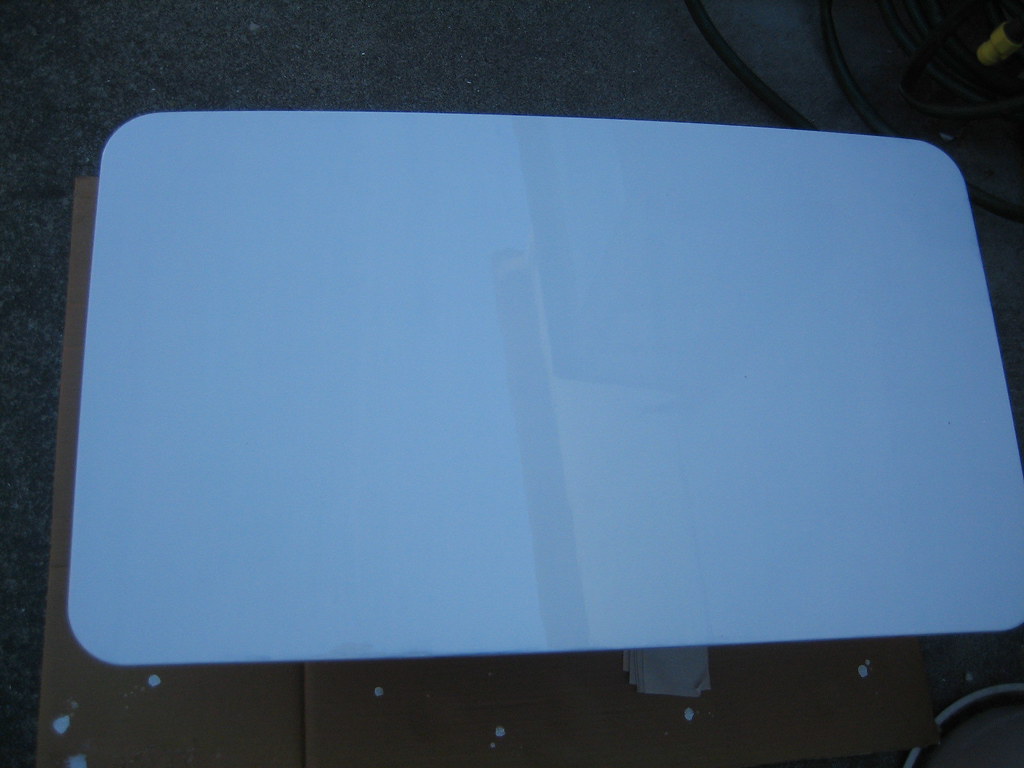 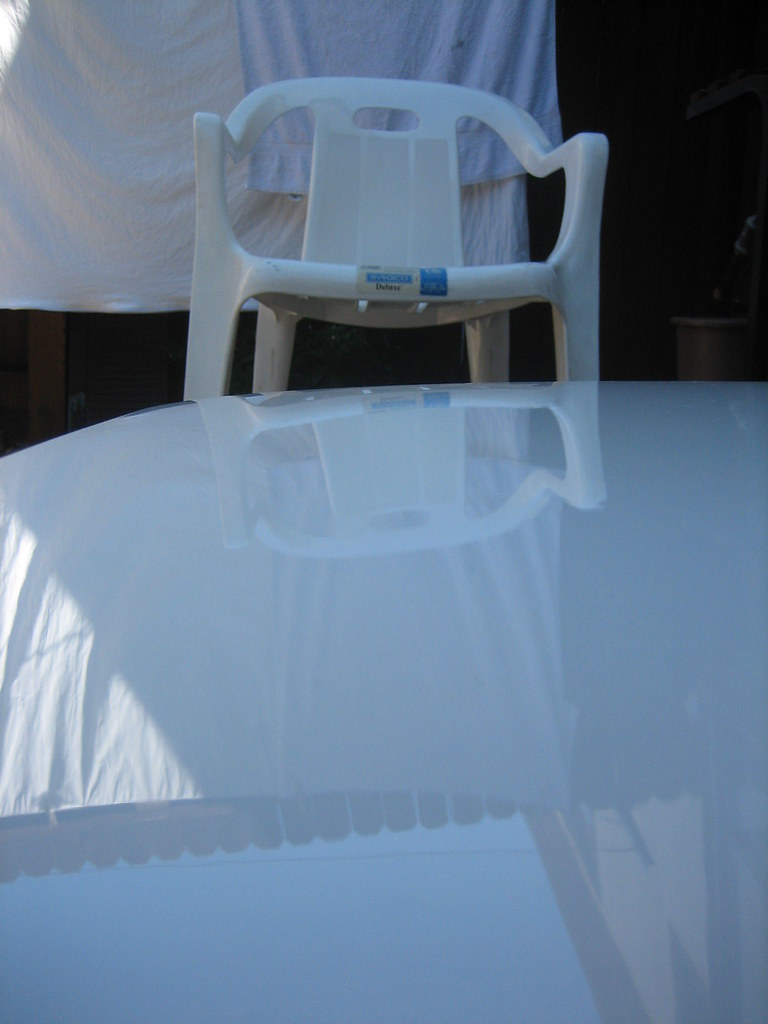 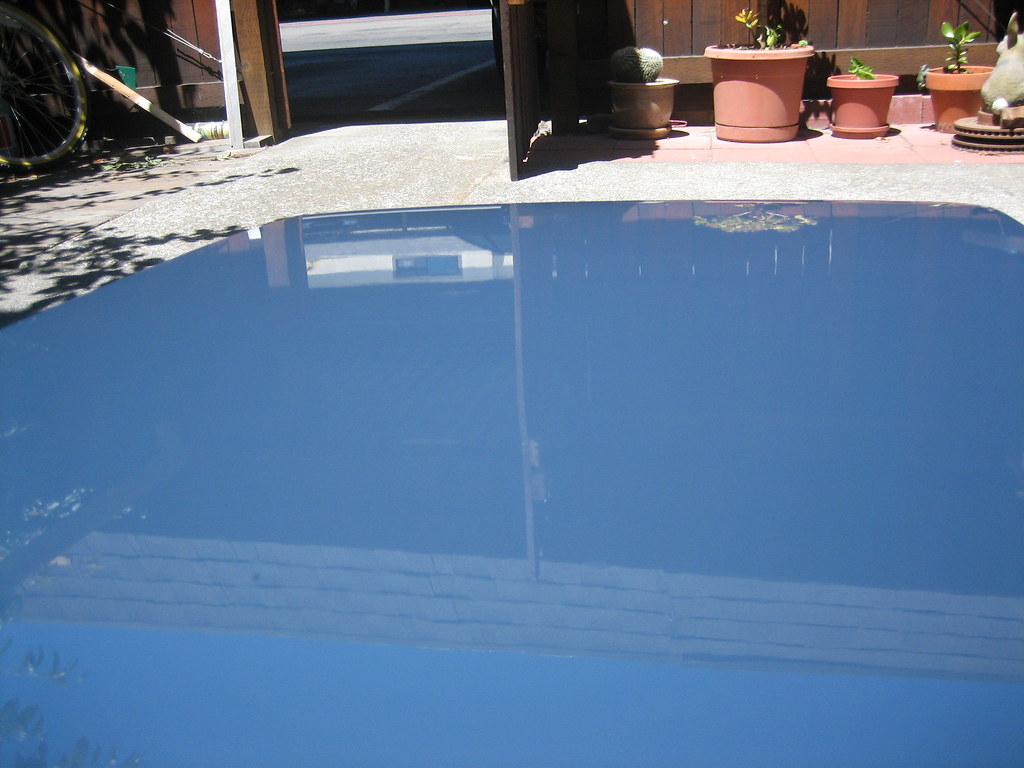 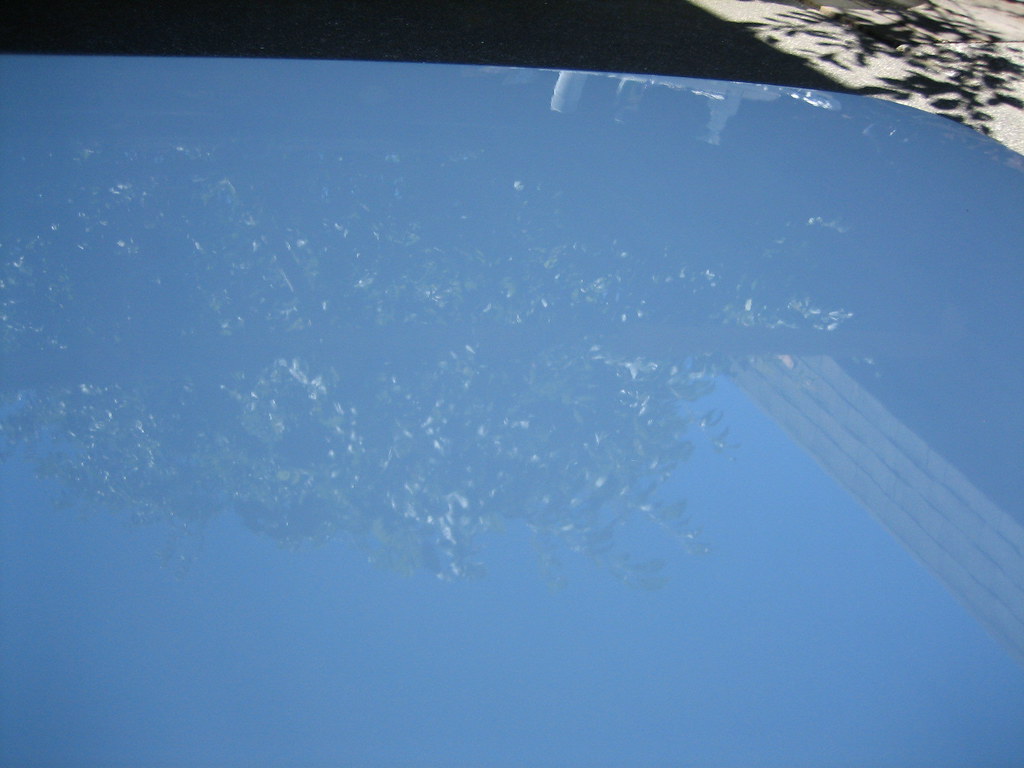 Close up reflection at night with fluorescent light. 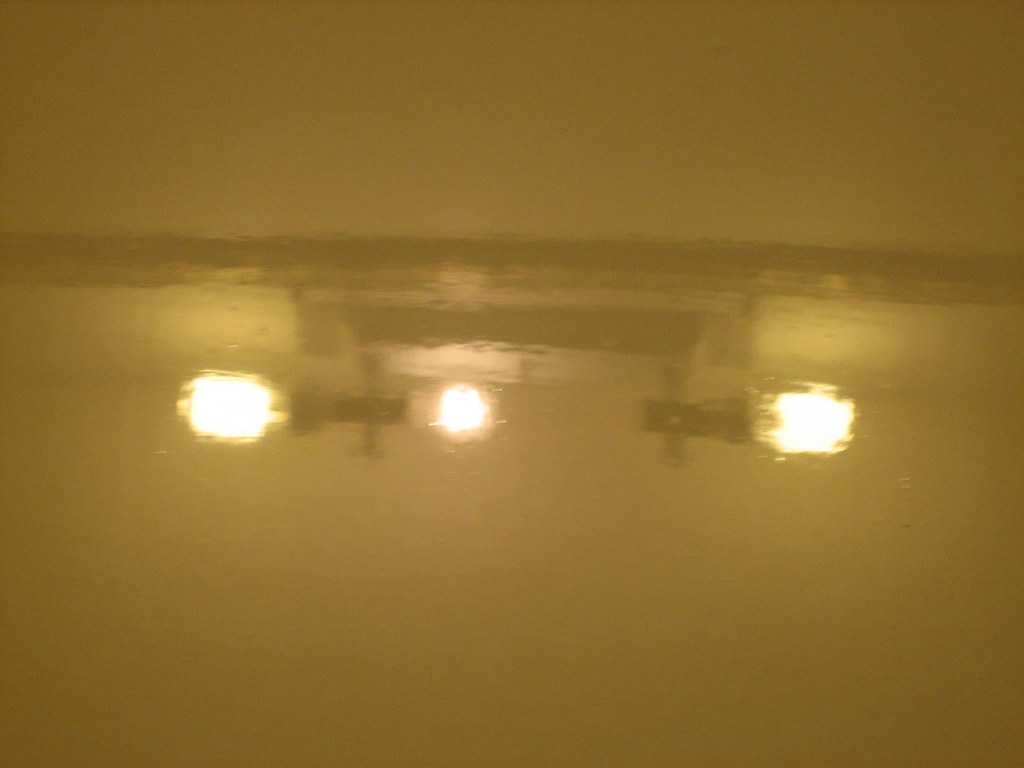 Doesn't look that great under extreme close up and the right light but I think the right amount of sanding and polishing should take care of it. Bright white seems to hide flaws very well.  So the plan from here is sand the second coat down with 1000 grit, third coat of 2 to 1 paint, sand with 1000 grit, polish and wax. Thanks to everyone who contributed to this forum and this paint process. I would have never thought to try something like this before seeing it here. This is the car in question. Let me know what I could change or improve. The Brightside paint is way beyond my expectations and it goes fast. I'm glad I won't have to do 8 to 10 coats as some people have suggested. 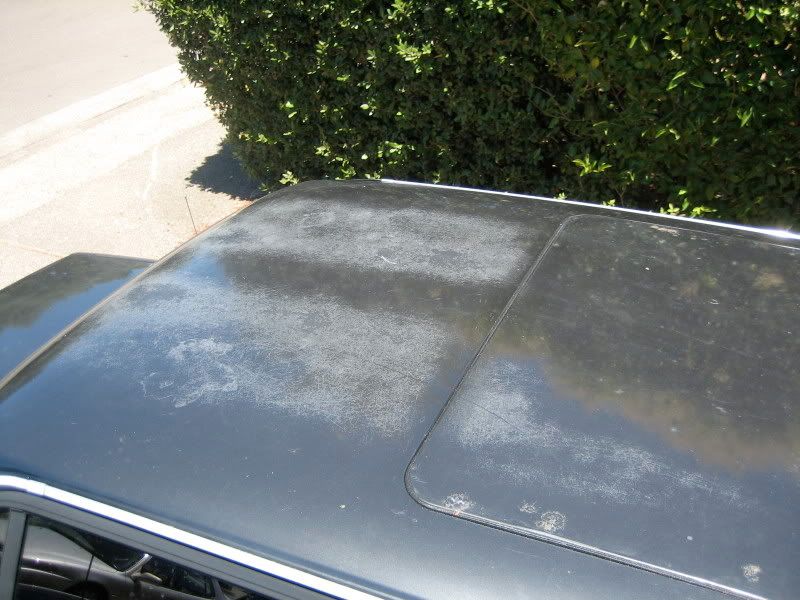
Last edited by tjts1; 07/23/07 10:11 PM.
|
|
|
Re: New Paint job on a budget thread.
[Re: Marq]
#37153
07/22/07 02:11 AM
07/22/07 02:11 AM
|
Joined: Jun 2007
Posts: 40
WA State
Roadster_wa
member
|
member
Joined: Jun 2007
Posts: 40
WA State
|
Quote:
Have you figured out what color the rat rod will be ?
I havn't really been thinking about it. I like the flat/satin black with old school 50's flames. I also have a brother that air brushes pretty much anything. I told hime I wanted a rat flipping off people on the door. He said it shouldn't be too hard...
I'm trying to do the mustang first....I've really been eyeballing that safety orange. I think it would really make that mustang stand out.
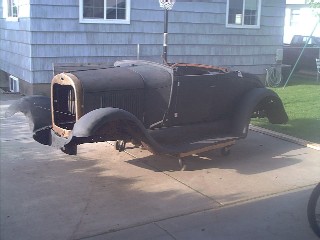
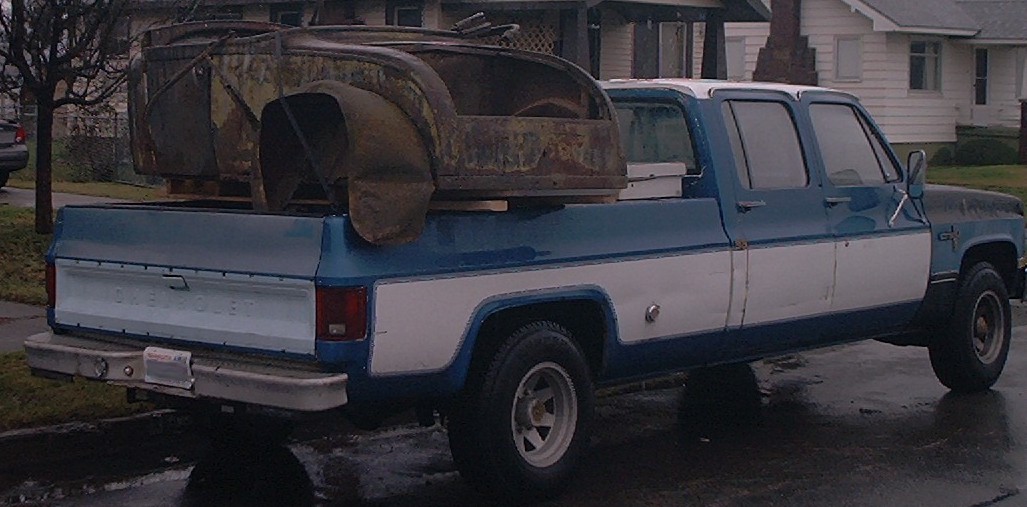
On an different note, the wife wants me to paint my truck. I put it together from 3 different trucks and it shows. I use it for a work truck, so if I did paint it, I wouldn't even bother with bondo... Been thinking of two tone white/blue to test the two tone for the mustang.
Here is the truck hauling home roadster #2 for parts. How much paint would it take for this long thing?
|
|
|
|
|


