|
 Re: New Paint job on a budget thread.
[Re: Marq]
#36894
Re: New Paint job on a budget thread.
[Re: Marq]
#36894
06/24/07 09:23 PM
06/24/07 09:23 PM
|
Joined: Jun 2007
Posts: 40
WA State
Roadster_wa

member
|
member
Joined: Jun 2007
Posts: 40
WA State
|
Quote:
That would have been the absolutely ideal body to have done the Brightside on... since the Vette body is so similar to the fiberglass and gel coat used on boats ( for which Brightside is normally applied to ).
It will be interesting to see how the Rustoleum holds up on the Vette body. All I can recall from my past is that bodywork and painting on Vettes usually required slightly different prepping and painting than regular cars at the Pro paint shops. And usually the pro-paints charge more to do them.... and half of the shops wouldn't even try to do them.
If you do encounter adhesion problems with the Rustoleum/Tremclad... at least you will know that you can safely fall back to the Brightside.
.
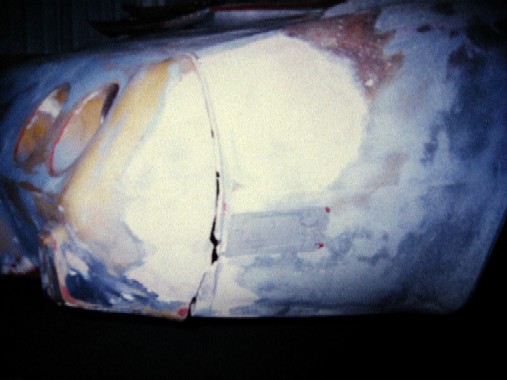
This vette was a huge basket case befor I got it. They used bondo on a bunch of places and already painted it with whoknows what. They re-sanded it (sort of)and all the fiberglass was covered and the gelcoat was covered with a primer and paint. Not sure if the Brightside would have had the chance to even touch the car to stick to it in the first place. I'm only slapping this together for a driver until I get the 69 Fastback or the 29 roadster on the road. (why waste the money on paint when it is needed elsewhere)
I'm going out to sand coat #2 now...
- Roadster
|
|
|
Re: New Paint job on a budget thread.
[Re: v8mirage]
#36896
06/25/07 01:35 AM
06/25/07 01:35 AM
|
Joined: Jun 2007
Posts: 40
WA State
Roadster_wa
member
|
member
Joined: Jun 2007
Posts: 40
WA State
|
Quote:
Amen Roadster!!! Do a paint job that will look good enough to fool all but the most discrimating eye on it and drive it!!! Vette or not it was meant to be driven!! And truth be told you are probably using a paint very similar to the OEM paint that was on the car. Roll on Brother!!
Gerbs
Hell, from where this beast started, 2 coats with a few dust bunnies is way more than anyone would have guessed it would get 2 years ago. When I say "backyard vette", I really mean backyard vette. Here is a picture of the back end almost ripped off. From the ugly brown/brown duck to a black/white swan.
I decided to wait another day to sand it. The paint was pretty hard, but just in case.
Few questions: With putting a bunch of coats on it, does it help with all the sanding / buffing? Do you worry about going through the top coat, or worry about the paint as a whole?
-Roadster
|
|
|
Re: New Paint job on a budget thread.
[Re: Marq]
#36897
06/25/07 03:43 AM
06/25/07 03:43 AM
|
Joined: Apr 2006
Posts: 37
venice, ca
admactanium
member
|
member
Joined: Apr 2006
Posts: 37
venice, ca
|
Quote:
Quote:
I couldnt wait any longer to see how it looks polished so i did a quick 2000wetsand/polish/wax... 5 minutes tops for all that and i got this... in the last picture you can see some tiny scratches what would that be from? i did wetsand with 800 before the 2000 so it might just be left over 800 that wasnt sanded out.. (this was just a test to see how it cames out buy the way)
Tiny scratches... odd that they would not have been worked out during the polishing stage.
My thought would be to ask what brand of wax did you use ? ( It might be something as simple as trying a different brand ). For myself, I tried the Turtle Ice originally.. and the standard Turtle Wax... but in the end I fell in love with the McGuiars Pure Carnuba ( with the lovely banana scent ).
The other factor might be something as simple as the type of polishing rag you were using to apply and get the initial buffing up of the wax. I was using one of those 'Bag-O-Rags' that have something like 10 different types of cloth rags in them. I would use the more tee-shirtish type rages for applying the wax ( or a sponge - which isn't always the wisest )... but for the buffing of shining I would use the cloths that were more like pjama flannel or fleece. The key being that I was using my softer cloths for the final shining up of the wax.
At one point I got lazy and I would simply fold the flannel cloth in two, with the softer side face down on the wax - and then I would using my Porter Cable with the sponge on it to spin the flannel rag... to sort of simulate a 'bionic man' buffing the wax ( a couple hundred spins a minute compared to a manual 20 or 30 spins by hand ).
I know that some of those 'woolish' type polishing mitts or cloths can scar up the paint or wax.... and give the kind of markings you see in your pictures. If you have 'woolie' type polishing mitt.... ditch it 
I haven't personally used a microfiber cloth to buff and shine - but some of the lads have reported surprisingly good results using them.
.
as aussie says a few posts up, you can't just arbitrarily jump from 800grit to 2000grit and expect it to work. you have to take all the steps along the way to level out the scratches from the grit before (i wouldn't start with 800 for a final polish anyway. start with 1000 or 1200). 2000 grit will have a hard time taking out sanding marks from anything gritter than 1500 grit. if you go from 800 to 2000 straight away you're likely just knocking the edge off the scratches from 800 grit instead of leveling them out. so instead of a smooth surface, you get scratches with dulled edges.
if you have to start at 800, then to 800 -> 1000 -> 1500 -> 2000.
|
|
|
Re: New Paint job on a budget thread.
#36898
06/25/07 04:42 AM
06/25/07 04:42 AM
|
Joined: Dec 2005
Posts: 133
Orange County, CA
Jolly_Raj_R
member
|
member
Joined: Dec 2005
Posts: 133
Orange County, CA
|
Quote:
Well I started on my practice piece and I must say that #566 is one bright green. The first coat i put on had a tiny bit of orange peel but not enuf to worry about till the second coat when I wet sand it
Hey JP, can we get a photo of that color by chance? I don't see 566 on the tremclad/rusto website but I do see Keylime.. If its truly a stand-in for Sublime Green I'd be able to potentially skip the mixing stage if I went that color for my car.. still undecided..
Thanks,
Raj
|
|
|
Re: New Paint job on a budget thread.
[Re: Marq]
#36900
06/25/07 09:53 AM
06/25/07 09:53 AM
|
Joined: Jun 2007
Posts: 40
WA State
Roadster_wa
member
|
member
Joined: Jun 2007
Posts: 40
WA State
|
Quote:
The key thing about the wetsanding between ever 2nd layer is that you are trying to achieve the smoothest possible surface for the next layer of paint to be applied to ( or in the case of the final wetsanding, for the final polishing and waxing ) to maximize the end shine and gloss.
.
Marq, thanks for the answer. After going out there this morning, I really think this paint will work. It is as hard as the original stuff on my truck. I'll make sure to do the steps. Everyone is shocked that it is a roller...
- Roadster
|
|
|
Re: New Paint job on a budget thread.
[Re: Roadster_wa]
#36901
06/25/07 10:50 AM
06/25/07 10:50 AM
|
Joined: Jan 2006
Posts: 1,220
toronto canada
69chargeryeehaa
pro stock
|
pro stock
Joined: Jan 2006
Posts: 1,220
toronto canada
|
Quote:
Quote:
That would have been the absolutely ideal body to have done the Brightside on... since the Vette body is so similar to the fiberglass and gel coat used on boats ( for which Brightside is normally applied to ).
It will be interesting to see how the Rustoleum holds up on the Vette body. All I can recall from my past is that bodywork and painting on Vettes usually required slightly different prepping and painting than regular cars at the Pro paint shops. And usually the pro-paints charge more to do them.... and half of the shops wouldn't even try to do them.
If you do encounter adhesion problems with the Rustoleum/Tremclad... at least you will know that you can safely fall back to the Brightside.
.
This vette was a huge basket case befor I got it. They used bondo on a bunch of places and already painted it with whoknows what. They re-sanded it (sort of)and all the fiberglass was covered and the gelcoat was covered with a primer and paint. Not sure if the Brightside would have had the chance to even touch the car to stick to it in the first place. I'm only slapping this together for a driver until I get the 69 Fastback or the 29 roadster on the road. (why waste the money on paint when it is needed elsewhere)
I'm going out to sand coat #2 now...
- Roadster
The front fenders on my 69 charger were fiberglass, i had no problems at all, i even hit a deer on a country twisty road at about 50mi/hr, and i watched as the fender popped up about 10" and back down, paint was intact, i had to straighten the front valance, and had to actually remove the bumper bolts to get the deer a$$ hairs out from under them!!!!! So after seeing that, i'm sure the paint would hold up perfectly on a vette, plus there's been lots of guys painting fiberglass buggies ect....with no issues. 
|
|
|
Re: New Paint job on a budget thread.
[Re: 69chargeryeehaa]
#36902
06/25/07 11:48 AM
06/25/07 11:48 AM
|
Joined: May 2006
Posts: 575
Canada
Marq
mopar addict
|
mopar addict
Joined: May 2006
Posts: 575
Canada
|
Quote:
i'm sure the Rustoleum paint would hold up perfectly on a Vette, plus there's been lots of guys painting fiberglass buggies ect....with no issues.
You are absolutely correct... I forgot about our buggy buddies that have done their roller on an all glass body.
Actually, once I saw the extent or the body condition with its primers and varying colors, I could see that it might not have mattered whether the Tremclad/Rustoleum or Brightside would have probably worked out equally well.
The hood on my McLaren is all fiberglass... and originally it was done in Tremclad ( until I switched later to the Brightside ). There have been no adhesion problems with that initial Tremclad layer.
.
|
|
|
Re: New Paint job on a budget thread.
#36903
06/25/07 12:03 PM
06/25/07 12:03 PM
|
Anonymous
Unregistered
|
Anonymous
Unregistered
|
Quote:
Quote:
2.) Windshield or other windows' rubber trim: If not removing the glass and surround, for spraying I've heard of wedging a cord or rope underneath the rubber trim to keep it way from the metal surface. When spraying, this allows some spray to shoot underneath the rubber trim -- so as not to create a hard paint line.
I just seen this post.. (Yeah, I'm like a week late) dose anyone care to enlighten me on how to do this? - Ive been just taping off my trim and Ive had slight lines that I figured I'd just pinstrip to blend in next to the trim.
Go back a couple pages. Blue195 answered my questions -- on June 21 I think.
On this one it's basically "Yes do the same rope trick". If the paint is thinned enough it will spread out under the trim that is held away from the metal surface by the rope or cord.
|
|
|
Re: New Paint job on a budget thread.
[Re: Jolly_Raj_R]
#36904
06/25/07 05:50 PM
06/25/07 05:50 PM
|
Anonymous
Unregistered
|
Anonymous
Unregistered
|
Quote:
Quote:
Well I started on my practice piece and I must say that #566 is one bright green. The first coat i put on had a tiny bit of orange peel but not enuf to worry about till the second coat when I wet sand it
Hey JP, can we get a photo of that color by chance? I don't see 566 on the tremclad/rusto website but I do see Keylime.. If its truly a stand-in for Sublime Green I'd be able to potentially skip the mixing stage if I went that color for my car.. still undecided..
Thanks,
Raj
seems i left my camera in the truck to long and the batteries exploded so I'm waiting for my replacement to come in, by that time I'll have it finished and you will be able to see it with polish on it.
I think i know why noone has commented on my question on the textured plastic pieces, the paint will make it smooth by the 3rd coat, so would i be better off putting a thick coat on for the first 2 or just keep them thin?
|
|
|
Re: New Paint job on a budget thread.
[Re: 69DartGT]
#36906
06/25/07 10:43 PM
06/25/07 10:43 PM
|
Joined: May 2006
Posts: 575
Canada
Marq
mopar addict
|
mopar addict
Joined: May 2006
Posts: 575
Canada
|
Quote:
Just an observation, I finished the paint on my truck late last Jan, I noticed the paint on the top on the hood, fenders etc was looking a liitle drab, a quick polish with a paste wax brought all the nice shine right back. IMHO this paint will hold up great 
Plus job was easy with the Porter-Cable 7424 
That is a confirmation of what I reported a week or so ago. And the fix was the very same... a quick pass of the Porter-Cable 7424 and some carnuba wax and everything was right back to where it was when freshly painted...
And the best part is that the 7424 makes things almost 'fun'... I really can't imagine how I got along with 4 cars without it.
.
|
|
|
Re: New Paint job on a budget thread.
[Re: Marq]
#36907
06/26/07 12:46 AM
06/26/07 12:46 AM
|
Anonymous
Unregistered
|
Anonymous
Unregistered
|
Greetings everyone I'm a noob here, read through the entire original thread of this, and I'm impressed and will be joining the roller paint club with this:  1994 Jeep Cherokee, with lots of peeling clear and some rattle can repairs that came out pretty bad. I'd like to go bright orange on it, and I feel like I'm pretty equipped to do this except for one thing. I don't have a decent buffer/polisher so I was wondering what you guys reccomend. In keeping with the theme, I'd like to get a cheap one. Any reccomendations would be much appreciated. Thanks
|
|
|
Re: New Paint job on a budget thread.
#36908
06/26/07 01:13 AM
06/26/07 01:13 AM
|
Joined: Jun 2007
Posts: 40
WA State
Roadster_wa
member
|
member
Joined: Jun 2007
Posts: 40
WA State
|
Ok, holy crap, I now have spaghetti arms from 4 1/2 hours of sanding. I tried to go over the whole car and only got a haff rough sand with 800 on most of it. I know I could do more, but how much am I supposed to take off with the 800? I think I could spend another 8-10 more hours on the thing, only to re-do it again in 2 more coats!
I think I'll make sure to thin it out a bit more next time to make sure the hint of any orange peel is gone.
I can't even think how little the 1600 grit would do. I'll be out there tomorrow at 9 am washing it, finish the bad spots, then go for coat #3 and #4 by dark.
- Roadster
Last edited by Roadster_wa; 06/26/07 01:18 AM.
|
|
|
Re: New Paint job on a budget thread.
[Re: Roadster_wa]
#36909
06/26/07 03:07 AM
06/26/07 03:07 AM
|
Joined: Apr 2006
Posts: 37
venice, ca
admactanium
member
|
member
Joined: Apr 2006
Posts: 37
venice, ca
|
Quote:
Ok, holy crap, I now have spaghetti arms from 4 1/2 hours of sanding. I tried to go over the whole car and only got a haff rough sand with 800 on most of it. I know I could do more, but how much am I supposed to take off with the 800? I think I could spend another 8-10 more hours on the thing, only to re-do it again in 2 more coats!
I think I'll make sure to thin it out a bit more next time to make sure the hint of any orange peel is gone.
I can't even think how little the 1600 grit would do. I'll be out there tomorrow at 9 am washing it, finish the bad spots, then go for coat #3 and #4 by dark.
- Roadster
you take off as much as you need to until the orange peel is gone. you can frequently wipe off a spot dry where you're sanding. if it is uniformly matte finish, then you've leveled the paint. if it's matte with shiny spots/dots, then you've not leveled the paint. you're essentially trying to abrade the peaks down to the same level as the valleys. if you need to use 600 grit or something to cut faster, that's fine, as long as it's not your final coat. check the surface frequently and only continue sanding until the surface is uniform, when you reach that point, move on.
if you need to use 600 or 800 grit on your final coat, in all likelihood you will sand through the last coat and into the coat under it before it's perfectly smooth.
personally, i think you could lay it on fairly thickly until the 3rd to last coat. let that set and then sand it smooth with a fairly gritty paper (600 -> 800 -> 1000) then thin the paint more and do your final 2 or 3 coats and let it flow out. then you can wetsand that last step with 1500 or 2000 grit. because in reality, you shouldn't be seeing the 3rd or 4th coat down and spending a ton of time smoothing out the base coats doesn't make that much sense to me. you'd get the same effect as laying it on heavy and sanding at the 80% point of painting.
|
|
|
Re: New Paint job on a budget thread.
[Re: admactanium]
#36910
06/26/07 10:43 AM
06/26/07 10:43 AM
|
Joined: Dec 2005
Posts: 1,156
Cruising!
QuickDodge
super stock
|
super stock
Joined: Dec 2005
Posts: 1,156
Cruising!
|
Marq or 69 DartGT. Any idea on how long it took to repolish the paint?
Last edited by QuickDodge; 06/26/07 10:44 AM.
|
|
|
Re: New Paint job on a budget thread.
[Re: 69chargeryeehaa]
#36911
06/26/07 12:17 PM
06/26/07 12:17 PM
|
Joined: Nov 2006
Posts: 32
Edgerton WI
Donny O.
member
|
member
Joined: Nov 2006
Posts: 32
Edgerton WI
|
Quote:
The front fenders on my 69 charger were fiberglass, i had no problems at all, i even hit a deer on a country twisty road at about 50mi/hr, and i watched as the fender popped up about 10" and back down, paint was intact, i had to straighten the front valance, and had to actually remove the bumper bolts to get the deer a$$ hairs out from under them!!!!! So after seeing that, i'm sure the paint would hold up perfectly on a vette, plus there's been lots of guys painting fiberglass buggies ect....with no issues.
i'm painting on fiberglass as well with good ole rustoleum. spent a lot fo time sanding this weekend and finaly last night about 10pm I got around to painting my first coat and jsut came in from painting my 2nd coat and so far so good....other than crappy lighting in my garage. I uploadec pictures of before, sanded, coat1 and coat 2 on my webshots page.
SIDECAR PAINT PICTURES!!
|
|
|
Re: New Paint job on a budget thread.
#36912
06/26/07 03:43 PM
06/26/07 03:43 PM
|
Anonymous
Unregistered
|
Anonymous
Unregistered
|
Quote:
I don't mean any disrespect but those scratches were caused by you rushing and not using the proper products.
You should never ever ever do any quick sanding. The wet sanding of our paint jobs is critical to getting a perfect finish. You should never need to use 800 on your top coat. Use 1500 at an absolute minimum (although you really would be better off using 2000) and wet sand slowly and carefully. You should also do all of your pre-detailing wet sanding in short straight strokes.
Proper detailing is very different to just polishing. Polish is designed to give a painted surface a depth of shine. After wet sanding you should be trying to remove all of the sanding marks on the paint surface. To do this you will need a cutting compound or a swirl remover. You should also follow a proper 'polishing' technique whereby you apply the product at low speed with a polisher and once it has been worked into the paint, then increasing the polishers speed and working in the product until most of the residue has been buffed away. Then you wipe away the remenants with a cloth.
you can actually sand the surface with grits lower than 1500, depending on the compound you use. I have 1Z intensive paste, which actually removes sanding marks as low as 1200 grit. I sanded an area starting with 1000 grit, and worked my way up to 1500 grit, and the intensive paste worked the scratches off no problem. Compounds are normally used with rotary polishers to break down the abrasives in the product, but the instructions on my bottle of intensive paste said it was usable by hand, so I used the product with my porter cable with a yellow cutting pad, and the results came out great--no visible scratch marks after the product was worked in and broken down.
BTW---if anyone wants a really good rotary polisher for a cheap price, Harbor Freight currently has one of their polishers on sale for $29.99:
http://www.harborfreight.com/cpi/ctaf/displayitem.taf?Itemnumber=92623
I have one of these, and just bought another one because it's such a great tool. I actually learned to polish cars with this rotary, before purchasing/learning to use a Porter Cable 7336 heh... That's kind of bass backwards though: I would recommend any polishing newcomers to learn to polish with a PC first, since it is a polisher that is very easy to learn/master, and cannot burn through paint like a rotary can.
Here are some of the products I've used on my car so far:

following 1Z intensive paste with Optimum polish (with a white LC CCS pad, not shown) results in a great shine on Brightside black. I'd post some updated pics of my car but I noticed the bandwidth on my Godaddy account was getting sucked up by this website heh. Maybe when I'm just about done, I'll post more pics.
Last edited by 69DartGT; 06/26/07 04:56 PM.
|
|
|
Re: New Paint job on a budget thread.
#36913
06/26/07 04:09 PM
06/26/07 04:09 PM
|
Joined: Jun 2007
Posts: 6
Toronto, Canada
DavidP
member
|
member
Joined: Jun 2007
Posts: 6
Toronto, Canada
|
For some of the Canadian members ... The best price I've seen is the Canadian Tire Simoniz 7-in. Sander & Waxer, at $99.00, with the 'Porter Cable'polishers going for $199.99 & $219.99 http://www.canadiantire.ca/browse/subcat...D=1182888256756Has a lot more power than I'll ever use ... 
Last edited by DavidP; 06/26/07 05:51 PM.
|
|
|
|
|


