|
 Re: Paint job on a budget!? CONTINUED..page 44........
[Re: 69chargeryeehaa]
#27198
Re: Paint job on a budget!? CONTINUED..page 44........
[Re: 69chargeryeehaa]
#27198
03/25/07 01:58 AM
03/25/07 01:58 AM
|
Anonymous
Unregistered
|
Anonymous
Unregistered
|
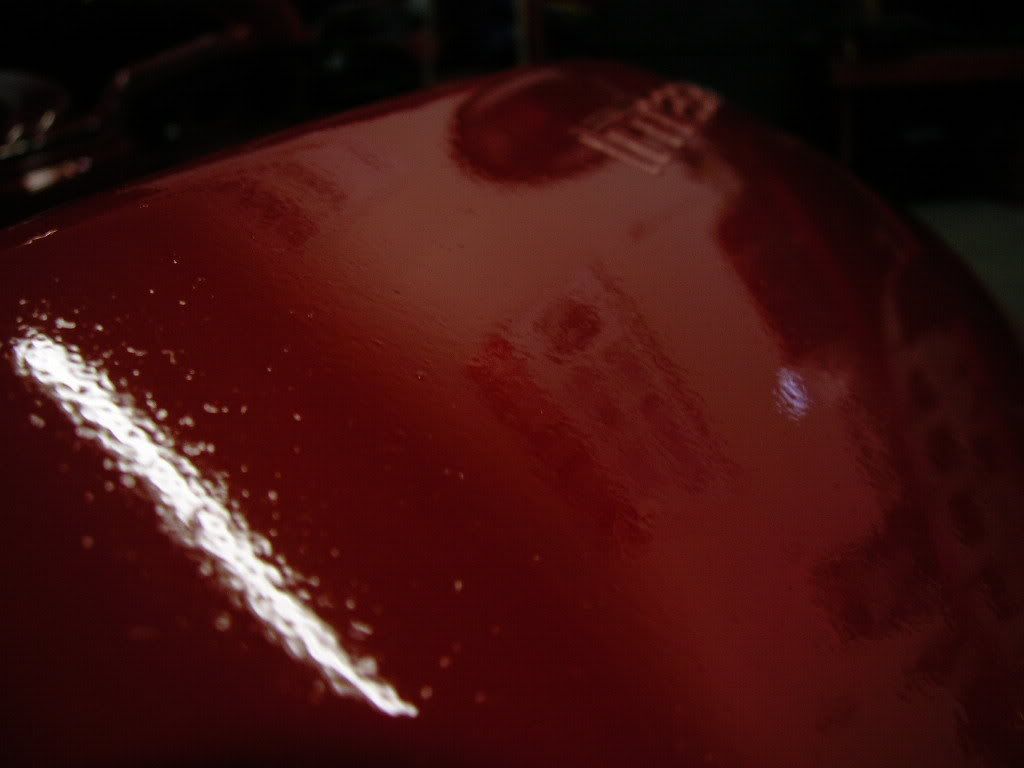
Hello I just wanted to share the results from my initial experiment with 69chargers method. I used Brightside to paint the hood of my Fiat 124 Spider. I'm currently in the process of converting it to an electric car and I'm on a tight budget so a big thanks to 69charger for showing us this great method. I blended my own color using white and yellow brightside, the ratio is 4 parts yellow and 3 parts white. Here's some pictures of my result.  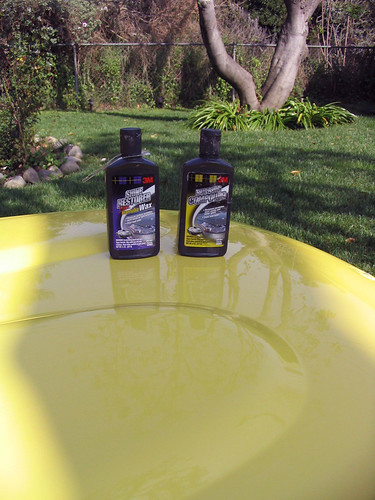 As you can see I used 3M rubbing compound and polish/wax. It worked really well and fast. I didn't have to spend a whole lot of time rubbing. Overall I'm happy with the end result and will proceed with the rest of the car. More pictures as well as a detailed writeup can be found on my website. www.electric-lemon.comThanks -Peter
|
|
|
Re: Paint job on a budget!? CONTINUED..page 44........
#27199
03/25/07 10:15 AM
03/25/07 10:15 AM
|
Anonymous
Unregistered
|
Anonymous
Unregistered
|
peggus that looks awesome! i'm currently playing around with mixing up yellow with blue (currently in various amounts <5%) and also have bought some white to mix in so it looks more oldschool, if it turns out like yours i will be a happy man  but judging by ur ratios i may need to go and buy alot more white. I have currently bought some offwhite, my thoughts being to take the bright edge off it at the same time. did you just use white white? i've only mixed it in one time, and then decided to get the blue mix right first, and am still going with that ever so slowly, as i dont plan to paint my car for 6 months
|
|
|
Re: Paint job on a budget!? CONTINUED..page 44........
#27200
03/25/07 12:03 PM
03/25/07 12:03 PM
|
Anonymous
Unregistered
|
Anonymous
Unregistered
|
Quote:
peggus that looks awesome! i'm currently playing around with mixing up yellow with blue (currently in various amounts <5%) and also have bought some white to mix in so it looks more oldschool, if it turns out like yours i will be a happy man but judging by ur ratios i may need to go and buy alot more white.
I have currently bought some offwhite, my thoughts being to take the bright edge off it at the same time. did you just use white white? i've only mixed it in one time, and then decided to get the blue mix right first, and am still going with that ever so slowly, as i dont plan to paint my car for 6 months
Thank you.
I used just plain white and yellow. I made several small paint samples of different proportions. At first I used 2 to 1 but seeing it on the hood I thought it was too yellow so I upped the white.
The color is a nice creamy pale yellow. the picture with the wax is a pretty accurate depiction of the real life color, at least on my monitor.
I also considered using off white for that retro look but opted against it, I didn't want to complicate things too much.
Let us know how your paint comes out.
-Peter
www.electric-lemon.com
|
|
|
 Re: Paint job on a budget!? CONTINUED..page 44........
#27201
Re: Paint job on a budget!? CONTINUED..page 44........
#27201
03/25/07 01:08 PM
03/25/07 01:08 PM
|
Anonymous
Unregistered
|
Anonymous
Unregistered
|
|
|
|
Re: Paint job on a budget!? CONTINUED..page 44........
#27202
03/25/07 02:14 PM
03/25/07 02:14 PM
|
Anonymous
Unregistered
|
Anonymous
Unregistered
|
Had pretty similar results about 6-8 coats into my hood and cab, chalked it up to the fact that it's just more dificult doing a larger piece of metal. Wouldn't worry too much about it yet, just try to sand out the orange peel, the rest of mine came out in buffing. Hood looks great now.
|
|
|
Re: Paint job on a budget!? CONTINUED..page 44........
#27203
03/25/07 11:17 PM
03/25/07 11:17 PM
|
Anonymous
Unregistered
|
Anonymous
Unregistered
|
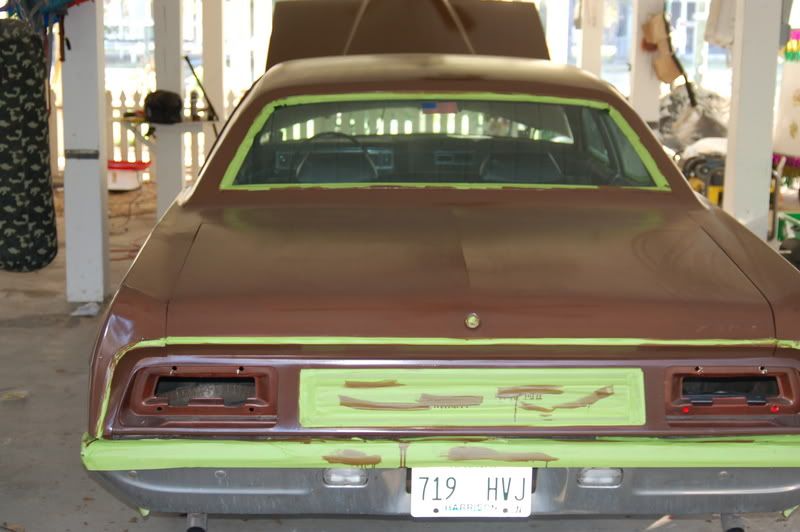  Here are a couple from mine after two coats, but before wetsanding. I'm trying the original method with Rustoleum Pro and I am pretty happy so far. I have a feeling that I am going to wish I was just starting, about the time I finish, because the more I do it, the more I get the hang of how to roll on the paint smoothly. I kind of learned by accident that it worked better when I thought I had put too much thinner in. I was using the the brush at first to get rid of the bubbles, but I have just about got the hang of doing it with just the roller, now. I just got my third and fourth coat on, and I will try to post some more pictures of before and after I wet sand again. I do have a couple of runs, where I just didn't notice them until it was too late. (The finger marks on the trunk are from the pollen, which is horrible here right now, and had settled before I took the pictures the next day after painting.)
Last edited by Group9; 03/25/07 11:21 PM.
|
|
|
Re: Paint job on a budget!? CONTINUED..page 44........
#27204
03/26/07 04:19 PM
03/26/07 04:19 PM
|
Anonymous
Unregistered
|
Anonymous
Unregistered
|
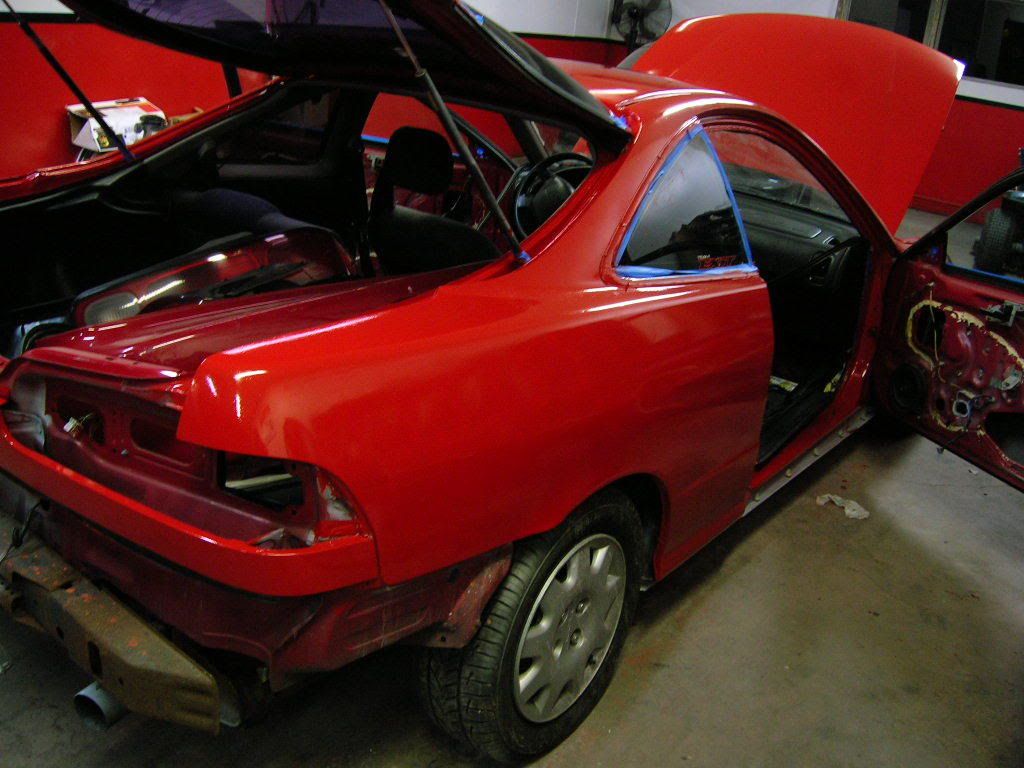
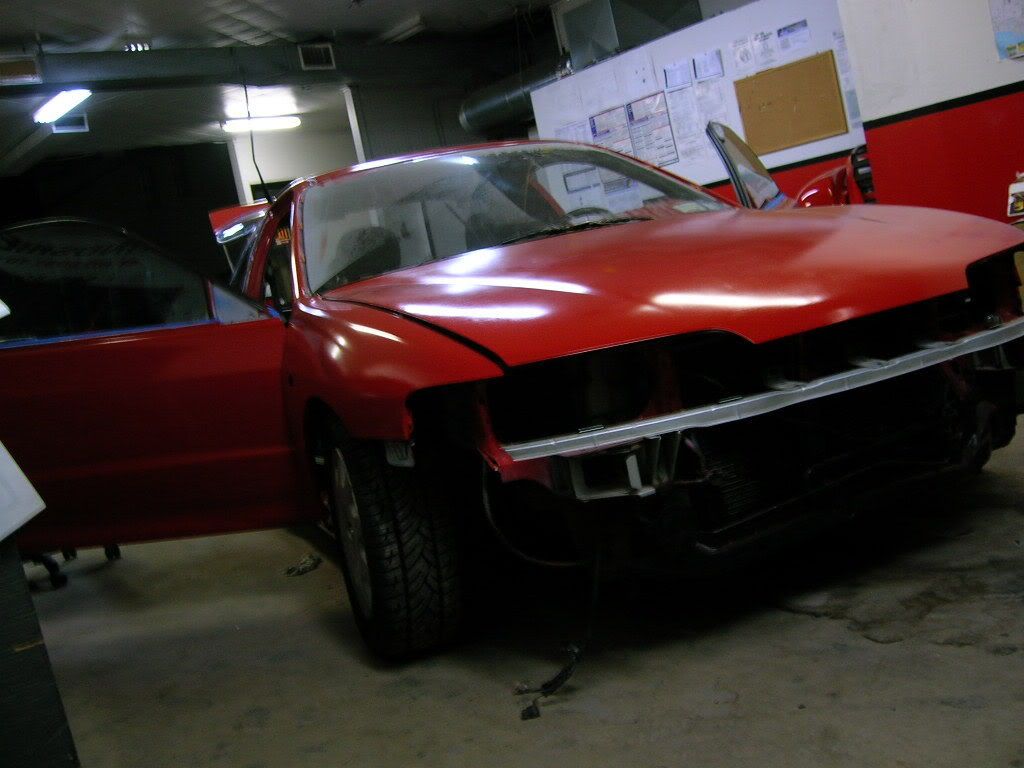
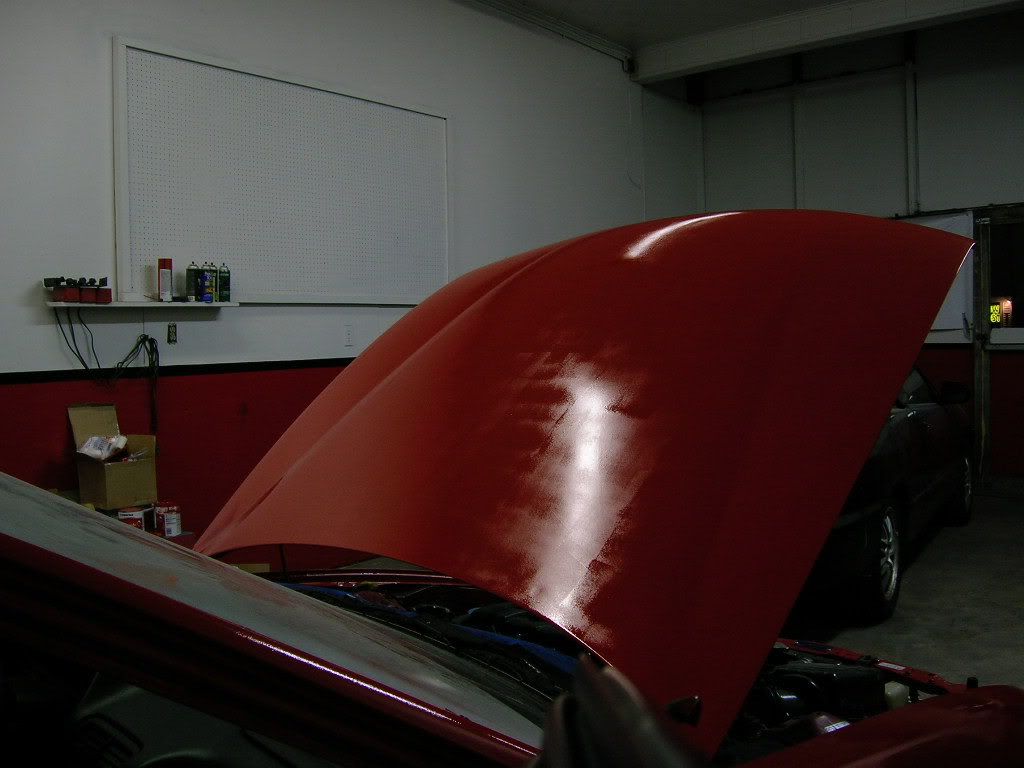
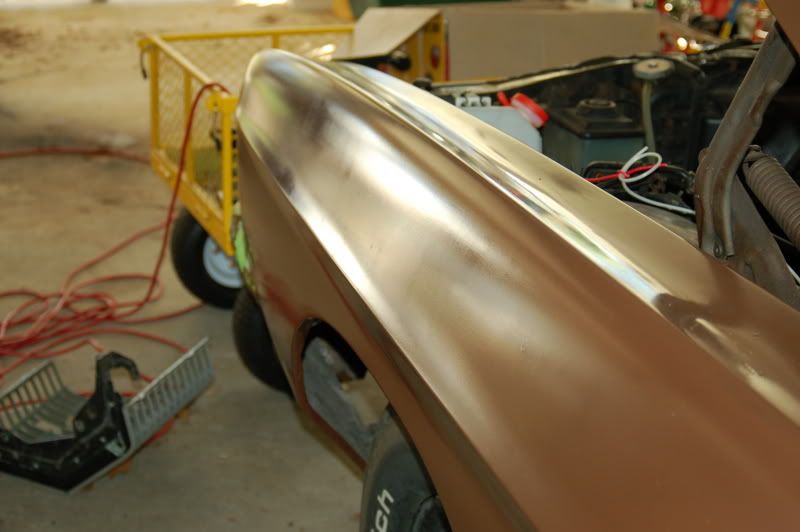
JDM96specCTR, the majority of my car looks like that. I opted to go with super thin goes of brightside for the first 3-4 coats, then a wetsand, then possiblity another coat afterwords. I hope it turns out ok. I ordered Poorboys last night.
|
|
|
Re: Paint job on a budget!? CONTINUED..page 44........
#27205
03/26/07 09:25 PM
03/26/07 09:25 PM
|
Anonymous
Unregistered
|
Anonymous
Unregistered
|
same here with my grand national... i got done with the final buff and the paint looks wavy and there is a glitter in the paint in some spots?? (must of got the wrong color or it was labeled wrong????) o well and i started in june and i am almost done i did waste alot of paint but now i know i can get it done in 2 weeks max so i might redo the car all over again and use alot less material as i found better buffing pads from 3m and polishing compound also. now it is warmer out and the paint will dry alot faster than in the winter. bit this pait is great and don't smell like real paint does. the paint is hard to strip as i stripped the hood so far and it was thick too. then when i get the black buick done i will start on my white gmc jimmy....
|
|
|
Re: Paint job on a budget!? CONTINUED..page 44........
#27206
03/27/07 12:13 AM
03/27/07 12:13 AM
|
Anonymous
Unregistered
|
Anonymous
Unregistered
|
Just a thought
Has anyone tried putting the paint in a plastic squirt bottle to get at places the roller or brush would not get to .....
Beaulieu
|
|
|
Re: Paint job on a budget!? CONTINUED..page 44........
#27207
03/27/07 09:00 AM
03/27/07 09:00 AM
|
Joined: May 2006
Posts: 575
Canada
Marq

mopar addict
|
mopar addict
Joined: May 2006
Posts: 575
Canada
|
Quote:
Just a thought
Has anyone tried putting the paint in a plastic squirt bottle to get at places the roller or brush would not get to .....
Beaulieu
The biggest problem would be finding the 'ideal' spritzer' bottle. You might end up having to go through quite a few test bottles to find one that has the right capability to handle the viscosity of the paint. I imagine the problem will be runs where you spritz because those things don't really atomize evenly.
Further back in the thread, some of the lads played with those self-pressurized spritzers... where you buy areosol cans that slap on to a contraption holding the paint. I seem to recall that clogged up spouts and splots of paint were the problem there...
So if a presurrize can of your paint mixture can't do it... I don't know how a spritzer bottle is going to hold up.
The one thing about going with some of the 'basic' colors... is that the 'stuff in the can' usually has a matching 'spray can' of the same color.
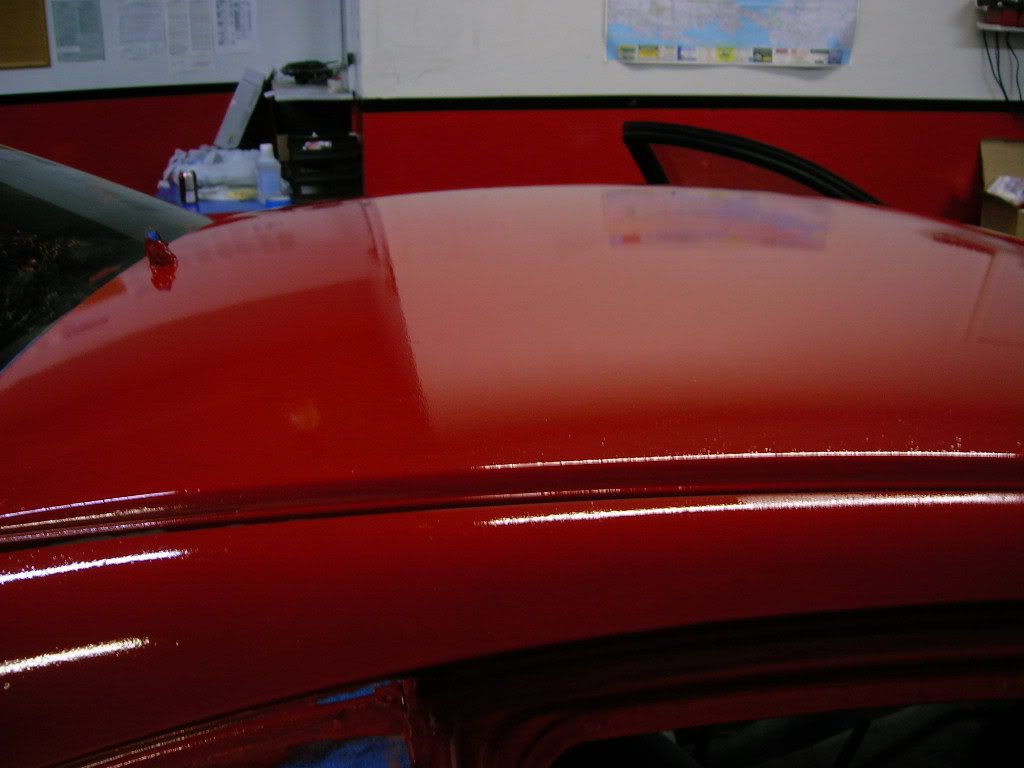
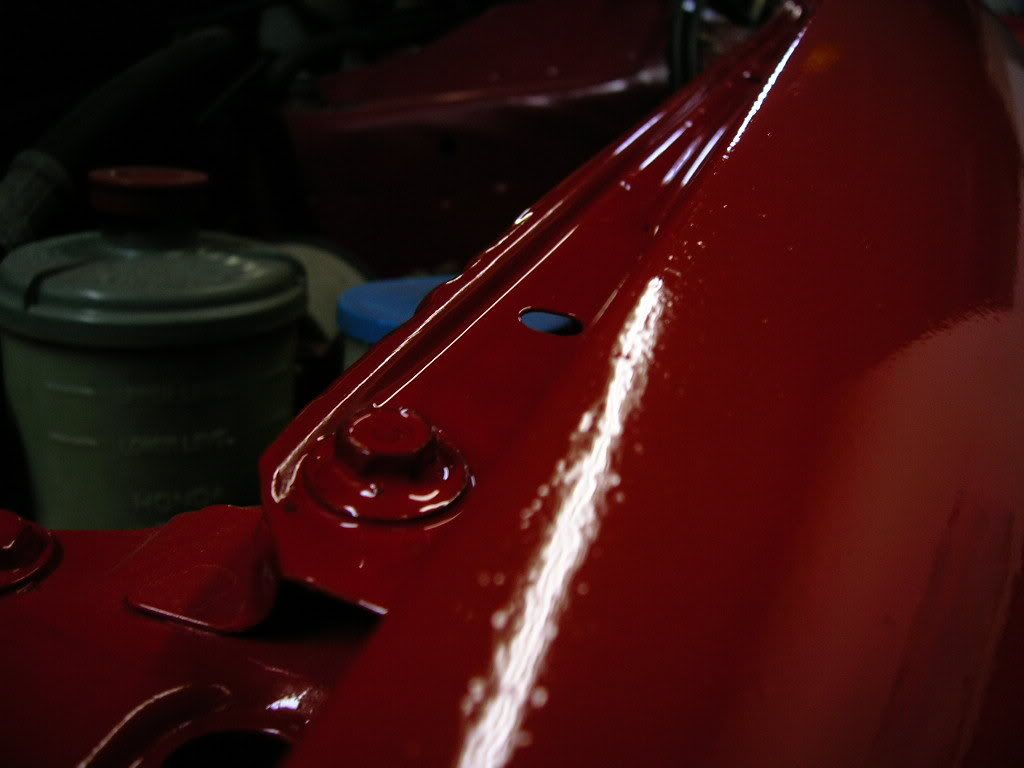
For example, I did my car in Fire Red by Brightside. BUT I bought the Fire Red spraybombs from Tremclad/Rustoleum. I used the spray bombs on the inner door jams, inner trunk, trunk drain troughs, inner front fender lips, underside of the hood and any nooks and crannies where I needed to lay down some paint.
I did the spray bombing at the start of the job... and did the roller painting after. Since the colors are virtually identical ( even though different manufacturers, you can not detect where one painting ends and the other begins.
I guess the same strategy would probably work well with black, white and any other colors where you can buy the matching color in both aerosol and liquid form.
.
I had thought about this at one point and I was curious about
|
|
|
Re: Paint job on a budget!? CONTINUED..page 44........
[Re: Exit1965]
#27209
03/27/07 11:39 PM
03/27/07 11:39 PM
|
Anonymous
Unregistered
|
Anonymous
Unregistered
|
Hey, it's been a while but I am continuing on with my project. I am using Rustoleum Pro thinned with 100% mineral spirits, not low odor. I have had some good results, but lately I have had a couple of instances where I wet sand and the paint starts to ball up in some areas. It is as though I have gone through to the previous layer and it is possible to peel some of the top coat up. Presumably this is an adhesion problem. I thought that this was due to using paint left over from the previous coat (in a sealed container) which I then re-thinned, but it has also happened recently when using fresh mix. I have been using the roller to apply thin layers and let it go 18 to 24 hours between coats. I wet sand after every other coat.
Anyone else had this or got any ideas?
Thanks
|
|
|
Re: Paint job on a budget!? CONTINUED..page 44........
#27210
03/27/07 11:52 PM
03/27/07 11:52 PM
|
Anonymous
Unregistered
|
Anonymous
Unregistered
|
if its balling up its not dry
|
|
|
Re: Paint job on a budget!? CONTINUED..page 44........
#27211
03/28/07 12:50 AM
03/28/07 12:50 AM
|
Anonymous
Unregistered
|
Anonymous
Unregistered
|
yea if its balling up, its not dry.. maybe you are going too thick with the paint. try the thumbnail test.. see if u can dent the paint with your nail.. if u can then its not completely dry.
also, are u wiping down with mineral spirits b4 each coat? if not, that could be part of the peeling problem
|
|
|
Re: Paint job on a budget!? CONTINUED..page 44........
#27212
03/28/07 04:31 PM
03/28/07 04:31 PM
|
Anonymous
Unregistered
|
Anonymous
Unregistered
|
I had tried the nail test before, but it seemed OK. This time I pushed very hard and got a very small indentation. I have been wiping with mineral spirits before applying the next coat. Today I put an oil heater under it and I will check again tomorrow.
|
|
|
Re: Paint job on a budget!? CONTINUED..page 44........
#27213
03/28/07 06:40 PM
03/28/07 06:40 PM
|
Anonymous
Unregistered
|
Anonymous
Unregistered
|
Latest test results... Finished my floor repair, and put some of the left over paint on my test fender (I always end up mixing too much paint). Paint is Van Sickle tractor paint, straight from the can mixed about 8:1 with the urethane hardener. Here's the results: 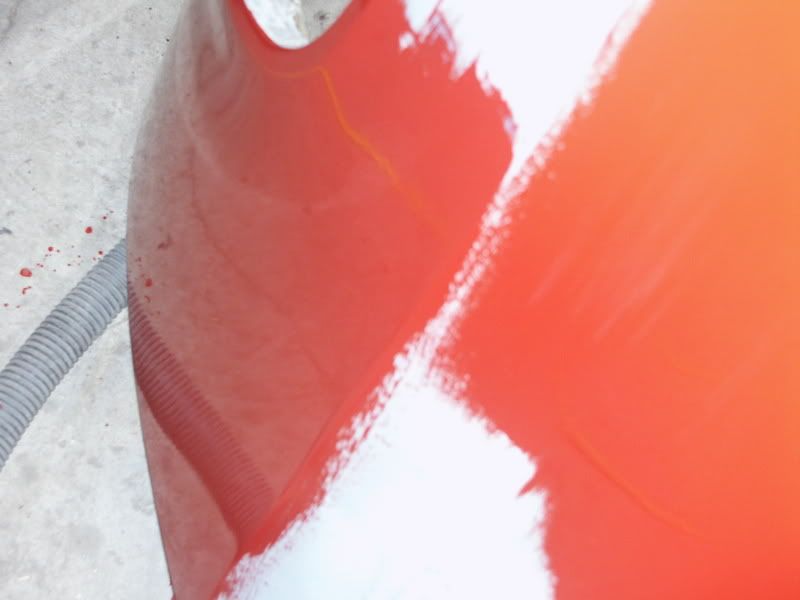 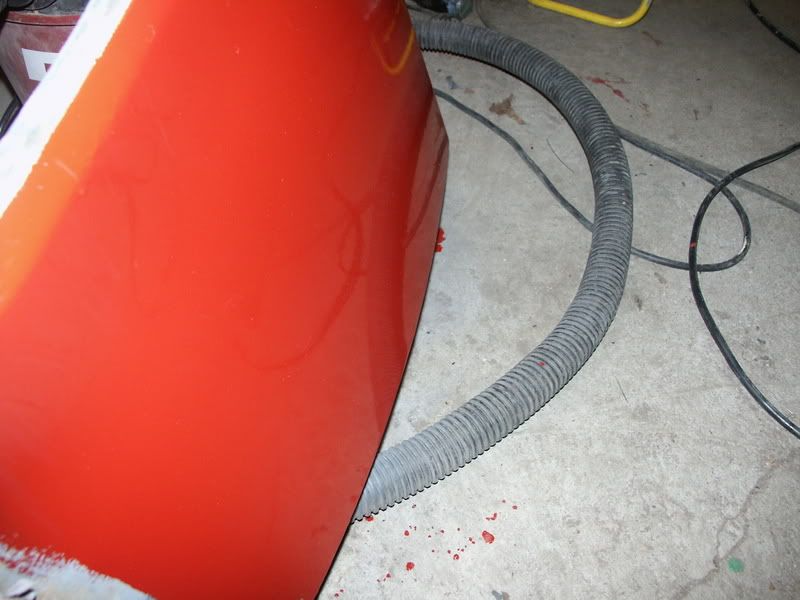 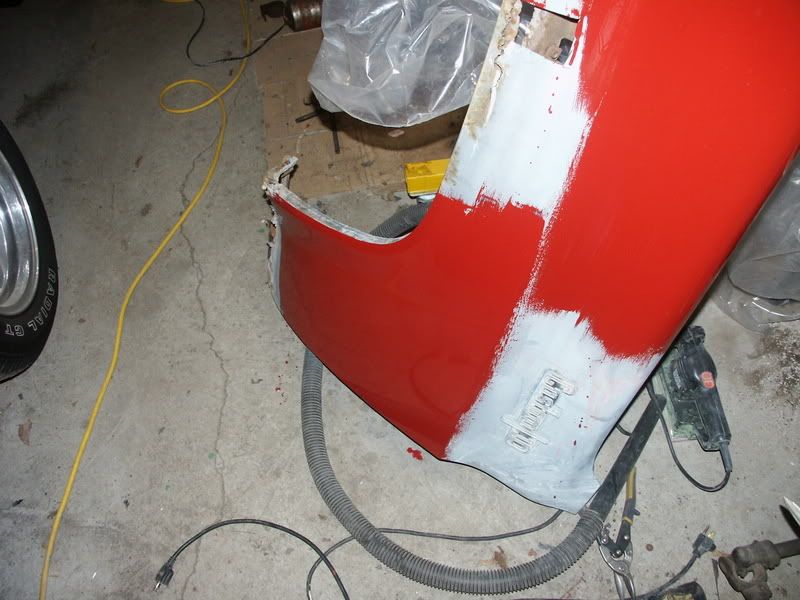 Sorry the pictures aren't very good...I only have time to do this stuff at night, and it's hard to show a paint surface with a flash. This was painted with a Purdy 2" pro brush. The test area was ground to bare metal, and primed with SEM self-etching primer. This is the first coat of paint on the primer. It looks pretty good...not perfect, but pretty good. As-is, it would make a decent 10/10 paint job (10 feet/10 MPH)  I managed to avoid any sags this time...the paint is too thick to really run. I had one forming, but I used to brush to sort of squeegee it and spread the paint back out. After a wet sand, it should be in pretty good shape. I'm pretty hopeful this could be a two coat paint job. There are some minor brush strokes to sand out. Personally, I'm liking the brush better than the roller...you can put the paint on a lot thicker without any orange peel. There was also one spot on the upper half of the fender I did that was actually just about perfect. It looked like it was sprayed on  . This stuff flows out really well, so I guess if you get just the right paint thickness, it will come out perfectly flat. The brush does take some practice to get the technique down, but so far I'm pretty impressed. I don't know if I'll have any time to sand it this weekend, but maybe. I'll post the results if I do.
|
|
|
Re: Paint job on a budget!? CONTINUED..page 44........
#27214
03/28/07 11:18 PM
03/28/07 11:18 PM
|
Joined: Jun 2006
Posts: 30
Ohio
pdqvsix
member
|
member
Joined: Jun 2006
Posts: 30
Ohio
|
Hi all, I'm just about finished painting my ford tempo that i started on doing on the 21st of this month. I took it out driving today and had alot of people giving the car a long stare and tonight as i was driving had some riding on my bumper, i guess it must look ok.I haven't done the final wet sanding,polishing,waxing yet.This paint job was easier and cheaper than the first one i did since i had everything i needed to do this one and didn't have to buy anything at all,and only used 1 quart of rustoleum gloss black paint.I can drive it and continue with the process without it looking like anything is being done to it.That gives to a very big grin. 
|
|
|
Re: Paint job on a budget!? CONTINUED..page 44........
[Re: 69chargeryeehaa]
#27215
03/29/07 11:25 AM
03/29/07 11:25 AM
|
Anonymous
Unregistered
|
Anonymous
Unregistered
|
Hi everyone! I've come over from the CAFORDS board in northern California. I found this post on google a couple weeks ago while like everyone else searching for a way to get a paint job for under 10k. I've been to 10 shops in the bay area and no quote has been less than $8k. Forget that, I'll do it myself. First off, a big THANK YOU to 69charger for pointing out this technique. Even before I read all the posts, which I have done twice now because I like to do thorough research, I knew this technique works because my neighbor painted his vintage truck this way and it came out great. I've jumped in and started painting my Mustang.  So far I have only finished the primer (needed because the car's surface needed a lot of work) and I'm in sanding mode now. I signed up here in order to show you my results. But first, I want to let you know what happened during the primer application. I had a spot that wrinkled and lifted. Mind you, this is rattle can filler primer. The area was soft so I peeled it off. Guess what I found? A thin sheen of oil and dirt that I missed during the early cleanup. I thought I should let everyone know, since during the early discussions a year ago some people had this problem and thought it might be the fault of the paint. It's not, the fault is with the surface prep. So anybody coming along later who is worried about what they saw in the original thread, don't worry. Just make sure the surface is clean and scuffed. I'll be filling in my bad spot and resuming sanding tonight. I hope to have the car painted in a couple weeks. I'll post pix of the results when it's done. I have high hopes for this project! Oh yeah, by the way, this is going to be an Eleanor coupe using dark grey with black stripes in the Rustoleum professional line. No Mustang or Eleanor haters please! Hope this is helpful.
|
|
|
Re: Paint job on a budget!? CONTINUED..page 44........
#27217
03/30/07 11:47 AM
03/30/07 11:47 AM
|
Joined: Jan 2006
Posts: 1,220
toronto canada
69chargeryeehaa
OP
pro stock
|
OP
pro stock
Joined: Jan 2006
Posts: 1,220
toronto canada
|
bcinguu - just a little advice, practice on the hood or trunk first, and get the technique down pat before you do the rest of the car. If it's the first time your doing this, you'll make mistakes, and it's easy to fix just the test peice rather than the whole car if you know what i meen. looks like a awesome ride, i had a 68 mustang that i took 2 years to restore to show, then i was too scarred to drive it!!!! It had a straight 6, that i stroked and it put out 230hp/260tq on the dyno at the wheels!!!, and it had 3spd std on the floor, it was a fun car, that straight 6 pulled hard, and i'd easily take a stock 289/302, nobody believed me that it had a 6, until i opened the hood!!!! it was a 225, borred and stroked to a 260, cam, and i spend weeks porting that stupid intergral head/manifold!!!!, it had gobbs of torque.  
|
|
|
|
|