|
 Re: Paint job on a budget!? CONTINUED..page 44........
#27038
Re: Paint job on a budget!? CONTINUED..page 44........
#27038
03/04/07 09:57 PM
03/04/07 09:57 PM
|
Joined: May 2006
Posts: 575
Canada
Marq

mopar addict
|
mopar addict
Joined: May 2006
Posts: 575
Canada
|
Quote:
Brightside gurus, what am I doing wrong here? I thinned out the paint at roughly 10%. This was the first coat. Basicall I'm getting tons of orange peal...perhaps it was just way too think of a coat?
I also tried marq's trick of running a spirts soaked roller over it, but it didn't seem to help much
It is a bit hard to tell from the pics due to black color.. but I can see the 'reaction' that the paint has had on your car.
My first thought was to ask if you thoroughly wiped down that surface with mineral spirits and let it dry completely before painting.
What my eyes are telling me is that it isn't orange peel in the true sense of the word. It is more like the surface the paint went on to was repelling the paint or not allowing it to adhere properly. For example, if the surface had not been wiped down with mineral spirits, there might be remnants of wax or paint particles or maybe even road oil there.
If you did not begin with the thorugh wipe down with mineral spirits, you will have to let the current surface dry to the point where you can sand it back down to a smooth starting point again. When you go to put on your first layer the second time - do not cut it with thinner. Just paint it on as thin and smooth as you can. Don't go for visual coverage... just go to get a thin layer down - even if you can see through it to the subsurface. ( You can built upon that one good surface later - with the emphasis at this point being to have one good smooth base to start building upon ).
Ok... assuming that you did do a thorough wipe down originally, than I suspect the layer of paint that was applied was still too thick or layered on. The top surface of the paint coat dried quicker than the lower surface... basically trapping a dried layer on top of a liquidy layer. So as the top surface dried it would move unto itself causing the elephant skin type effect. Basically you have to follow the recipe noted above to get yourself back to square one and to take another run at it.
Marq
.
|
|
|
Re: Paint job on a budget!? CONTINUED..page 44........
[Re: Marq]
#27039
03/04/07 10:50 PM
03/04/07 10:50 PM
|
Anonymous
Unregistered
|
Anonymous
Unregistered
|
The hood is actually fiberglass and it was well wiped down with mineral spirits. The next panel I paint I'll go for as thin a coat as possible. thanks for the feedback
|
|
|
Re: Paint job on a budget!? CONTINUED..page 44........
#27040
03/05/07 05:28 AM
03/05/07 05:28 AM
|
Joined: May 2006
Posts: 575
Canada
Marq
mopar addict
|
mopar addict
Joined: May 2006
Posts: 575
Canada
|
Quote:
The hood is actually fiberglass and it was well wiped down with mineral spirits. The next panel I paint I'll go for as thin a coat as possible. thanks for the feedback
Hmmmm... the hood on my McLaren is all fiberglass also... Now that raises some additional questions..
a ) was your hood primered or unprimered plain gelcoat ?
If the fiberglass wa primered... than we can rule that out as a suspect for the orange peel effect.
BUT if the hood was in its native gelcoat, I don't think a simple wipe down with mineral spirits would be able to remove the chemicals that the manufacturers use to keep the part from sticking to the mold. And also... if the hood was in its native gelcoat format... it is possible that a wipedown of mineral spirits would need extra time to evaporate the 'carrier' in the mineral spirit.
In my case, the fiberglass ( although incredibly well finished from the factory ) was primered and allowed to thoroughly dry out. I then did a light sanding to smooth out the primer, blew off the dust, wiped it down with mineral spirits and then let it sit for a couple of days. Prior to laying down the first coat of paint I gave it a quick wipe with a TACK cloth to pick up any crap that might have landed on the hood.
.
|
|
|
Re: Paint job on a budget!? CONTINUED..page 44........
[Re: Marq]
#27041
03/05/07 08:30 AM
03/05/07 08:30 AM
|
Anonymous
Unregistered
|
Anonymous
Unregistered
|
Quote:
Hmmmm... the hood on my McLaren is all fiberglass also... Now that raises some additional questions..
a ) was your hood primered or unprimered plain gelcoat ?
If the fiberglass wa primered... than we can rule that out as a suspect for the orange peel effect.
BUT if the hood was in its native gelcoat, I don't think a simple wipe down with mineral spirits would be able to remove the chemicals that the manufacturers use to keep the part from sticking to the mold. And also... if the hood was in its native gelcoat format... it is possible that a wipedown of mineral spirits would need extra time to evaporate the 'carrier' in the mineral spirit.
In my case, the fiberglass ( although incredibly well finished from the factory ) was primered and allowed to thoroughly dry out. I then did a light sanding to smooth out the primer, blew off the dust, wiped it down with mineral spirits and then let it sit for a couple of days. Prior to laying down the first coat of paint I gave it a quick wipe with a TACK cloth to pick up any crap that might have landed on the hood.
.
Well since it is a new hood, I first did some light sanding to rough up the gel coat, did a guide coat to see what needed to be fixed, sanded off the guide coat and go out all the small scratches on the gelcoat surface. Then I wiped cleaned with water and soap, dried it with a heat gun and a dry towel, cleaned with spirits and dried in the same fashion, tack clothed then painted.
But honestly I just think it was too heavy of a coat. I need to get it out of mind that I have to have full coverage in one coat.
|
|
|
Re: Paint job on a budget!? CONTINUED..page 44........
#27042
03/05/07 08:12 PM
03/05/07 08:12 PM
|
Joined: Feb 2007
Posts: 34
socal
s4dustin
member
|
member
Joined: Feb 2007
Posts: 34
socal
|
so i rolled on the 3rd and 4th coat super heavy, came out like  . It was still wet the next day, sanded a bit, then i threw it up on the roof to be in direct sunlight...a nice 80 degree california day...... i think if you put on a nice thin coat and let it dry and keep it thin each time, the process will work well, but if you get a little excited and go big early...you are going to blow it...
Last edited by 69DartGT; 03/05/07 08:56 PM.
|
|
|
Re: Paint job on a budget!? CONTINUED..page 44........
[Re: s4dustin]
#27043
03/06/07 05:53 AM
03/06/07 05:53 AM
|
Anonymous
Unregistered
|
Anonymous
Unregistered
|
Hey guys... not sure if you guys remember but I started painting my TE71 Corolla. Here is the result after painting six coats on the hood and cowl, and four coats on the fenders and front. 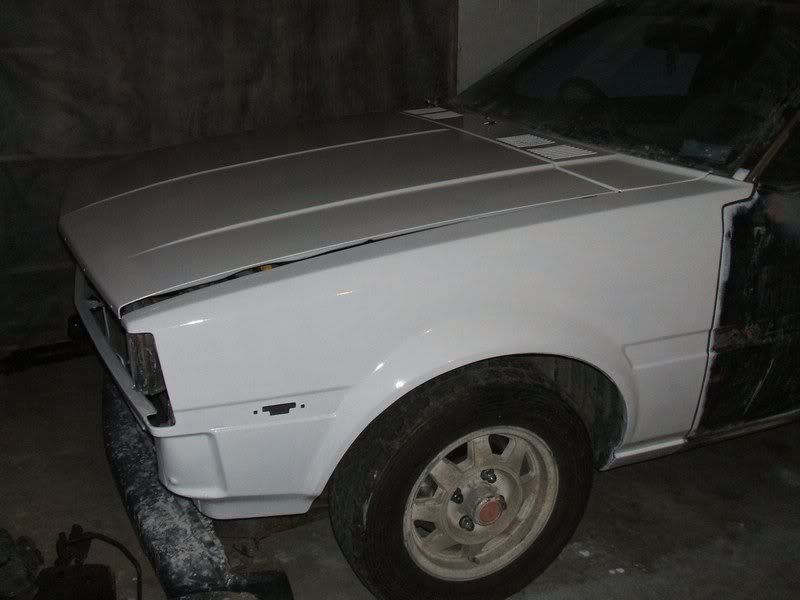 I like this method as I can just do a panel at a time when I wish. I still have yet to fix some rust on the C pillar and I have more work to do on the doors yet.
|
|
|
Re: Paint job on a budget!? CONTINUED..page 44........
[Re: s4dustin]
#27045
03/07/07 12:20 PM
03/07/07 12:20 PM
|
Anonymous
Unregistered
|
Anonymous
Unregistered
|
go to eastwood.com or your nearest body shop supply stotre and gre a set of sanding blocks. something like this  you dont have to get all the orange peel out just leave a very little hint of them and after you buff the paint then they will disaper.
|
|
|
Re: Paint job on a budget!? CONTINUED..page 44........
#27046
03/08/07 10:42 AM
03/08/07 10:42 AM
|
Joined: Jan 2003
Posts: 12,405
Southern, Ca.
69DartGT
moparts member
|
moparts member
Joined: Jan 2003
Posts: 12,405
Southern, Ca.
|
Quote:
go to eastwood.com or your nearest body shop supply stotre and gre a set of sanding blocks.
something like this
you dont have to get all the orange peel out just leave a very little hint of them and after you buff the paint then they will disaper.
That figures I get my truck all back together and now you post this tip. I may have done a final sanding on the truck 
|
|
|
Rustoleum stress test and nail test
[Re: 69DartGT]
#27047
03/08/07 08:37 PM
03/08/07 08:37 PM
|
Anonymous
Unregistered
|
Anonymous
Unregistered
|
Well the car has been sitting for a while again. I was waiting for the paint to get harder before putting the trim back on. Final coat was early October. I washed all the dirt and pollen off the car and it cleaned up fine. The sun dried dog slobber did leave a faint stain. I am sure it will clear up with a light buff. I had 2 coats of Meguairs Show car glaze and 2 coats of the yellow high tech wax. We have had a few nice days lately and when I walked by the car I smelled solvent again. I did the nail test today and it passed. No problem at all. The paint is rock hard. Just like 69Chargeryeeha said it would get. 
Last edited by Mark E; 03/08/07 08:57 PM.
|
|
|
Re: Rustoleum stress test and nail test
#27048
03/09/07 01:42 AM
03/09/07 01:42 AM
|
Anonymous
Unregistered
|
Anonymous
Unregistered
|
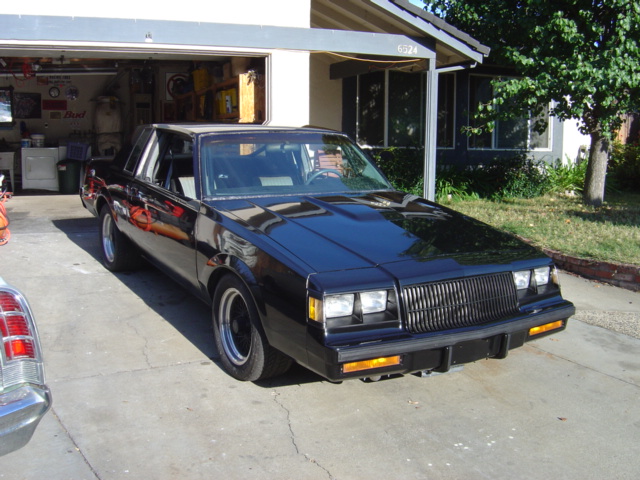
Guys, you might hate me. I may have finally cracked the secret to the $50 paint job. No joke. A few pages back, I told you about how I was painting the interior of my '60 Oldsmobile with New Holland Red tractor paint by Van Sickle. It's another Alkyd enamel, like Rustoleum. Well, I used the urethane hardener when I painted the trunk, mostly to improve the cure time because I've been painting in 40* and colder weather. Well, at the same time I did the trunk, I had a little leftover paint...so I decided to put some on a fender I pulled off my old truck when I did the body work on it. This fender is going to the scrap heap, so what the heck. I didn't do any prep work at all...didn't even wash it  . The top half I used a roller on (same 4" high density you guys have been using), the bottom half I used a 2 1/2" brush that cost me $1.25. Now, with the paint I didn't thin it at all...it was straight from the can, mixed about 8 to 1 with the hardener. The hardener seems to make it thinner all by itself. This was about 2 1/2 weeks ago. I let it sit in the garage for a week, but then it was just getting in my way while I was working on welding a floor board in my Olds, so I put it back out behind my garage. We finally had some sun this week, so it got to cure out there. The section painted with the roller had some pretty good orange peel...could have been because the paint was too thick, or it could have been the ancient primer under it, or maybe my rolling technique. Who knows. The brushed section was actually pretty smooth...it had some waves from the bristles, but it really was'nt bad. So tonight I decided to see what I could do with it. I only had about half an hour to play with it, so tried to wet sand out the imperfections with some 400 grit, wet. Sanded through in a couple of spots, but it went through the orange peel plenty fast. Once it was smooth, I used what has to be the cheapest polish made. I paid less than $3 at the grocery store for it. I hit it with my Craftsman 10" polisher. Finished with some Meguiars carnauba paste. The result? I just about crapped. You guys won't believe how good it looks for the work I put into it. I'm dead serious. Aside from the fact that the fender itself looks like ***, it's amazing since I only sanded with 400 grit and polished. I know, I know, this is all meaningless without pics, but it's pitch black outside and my camera batteries are dead. I was doing all this with a halogen work light. I'll try to shoot it at lunch tomorrow and post them in the afternoon. I've been doing body work for 15 years, and I gotta say...if this thing had maybe one more coat of paint and a real wet sand, it would look as good as any other enamel paint job on the road. It's that good. I've still got some more experimenting to do, but if this pans out it could make this whole "cheap paint job" a lot easier. Right now that paint is rock hard...no fingernail business. And I painted it a couple of weeks ago. One of the other nice things about using the hardener is that it actually "cures"...it's an anaerobic process. It's not like drying by evaporation where thin layers are important. You can have the paint thicker than the micro layers you guys have been using, and will still dry. Anyway, like I said I'll try and get some pics up tommorow. I was just too stoked not to post something tonight. I won't have much time to experiment with this process for a couple of weeks...I've got too much going on, but if anyone else out there wants to take a stab at it, please post your results.
Last edited by 69DartGT; 03/09/07 12:58 PM.
|
|
|
Re: Rustoleum stress test and nail test
[Re: Exit1965]
#27050
03/09/07 11:22 AM
03/09/07 11:22 AM
|
Anonymous
Unregistered
|
Anonymous
Unregistered
|
Quote:
Can you provide details/link to the hardener you used?

Here is a link to the paint manufacturer:
http://www.vansicklepaint.com/mntvsinden.html
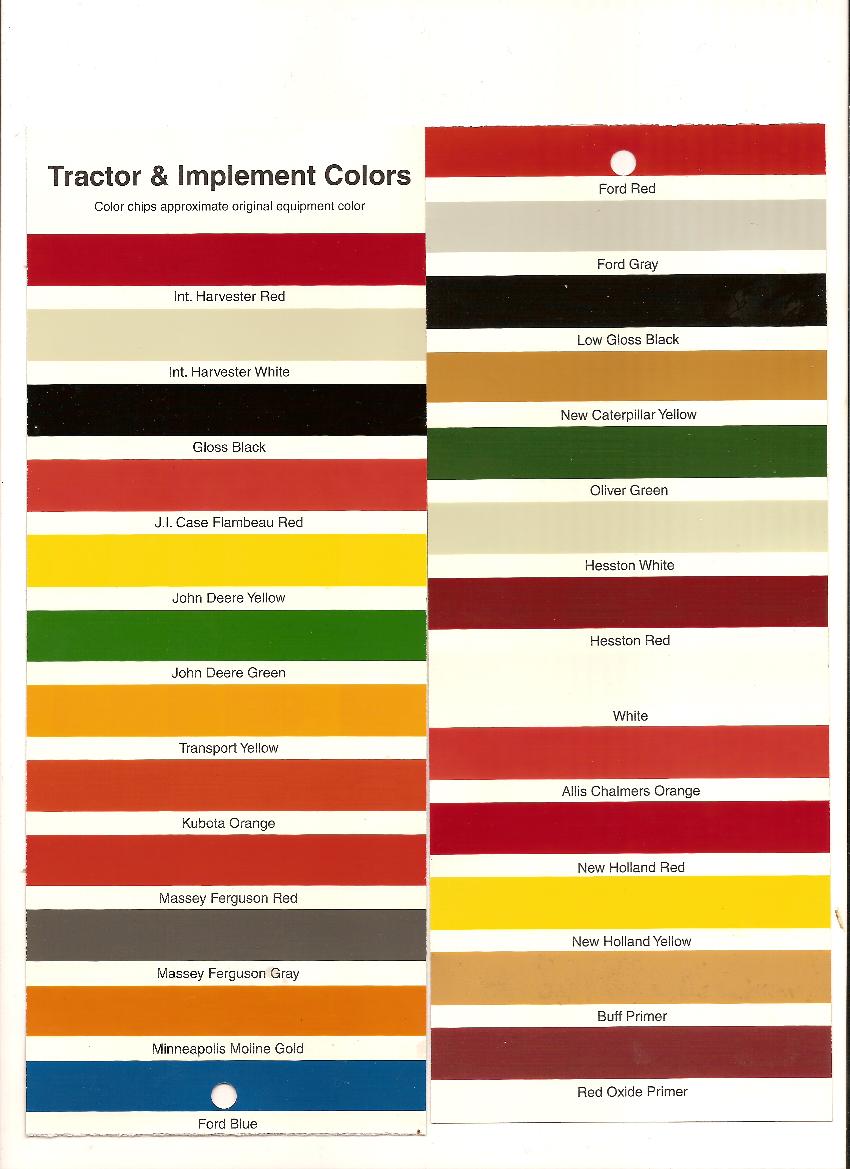
I got a gallon of their primer, paint, and two cans of hardener at the local farm and ranch supply for about $60 IIRC. Maybe a little more. A gallon of this stuff goes a looooong way  . From talking to other people about this, it's the same paint sold under the TSC label, if you've got a TSC store locally. I got mine at Quality Supply. They have a whole wall of this stuff, in gallons, quarts, and spray cans. Pretty good variety of colors...here's the stock color card: . From talking to other people about this, it's the same paint sold under the TSC label, if you've got a TSC store locally. I got mine at Quality Supply. They have a whole wall of this stuff, in gallons, quarts, and spray cans. Pretty good variety of colors...here's the stock color card:
http://www.vansicklepaint.com/VSclrcrd.jpg
I have New Holland Red, and it's a lot "brighter" than what that card looks like...maybe it's just my monitor, but it looks like all thoes colors are a lot more subdued than they are in real life. NH red in that card almost looks maroon, but in real life it's almost a dead ringer for the Target Red on my Olds here
They also have a "custom color" section they say is available on request...although it doens't have a direct link to order it. Here's the big list:
http://www.vansicklepaint.com/mntcstmclrs.htm
I want to see someone do their car in Kubota Orange .
I've also read of people using this brand of hardener with other brands of paint...you'd want to do a test panel to check compatability, but I think the important thing is that they're the same type of paint (alkyd enamel). If you're set on using a Rustoleum color, I'd give it a try and see what happens.
If you want to know more about this type of hardener in general, just search for "urathane enamel hardener" or "enamel catalyist". They all work basically the same.
|
|
|
Re: Paint job on a budget!? CONTINUED..page 44........
#27051
03/09/07 11:42 AM
03/09/07 11:42 AM
|
Anonymous
Unregistered
|
Anonymous
Unregistered
|
- What is the brand name of the hardener you used?
- Does it have isocyanates?
- What kind of filter did you use in your respirator?
- Do you think this will allow you to paint on maybe 2 thick coats, then sand/polish?
Thanks for sharing your info. And by the way ... I'm in Potomac, north of Missoula.
|
|
|
Re: Paint job on a budget!? CONTINUED..page 44........
#27052
03/09/07 02:23 PM
03/09/07 02:23 PM
|
Anonymous
Unregistered
|
Anonymous
Unregistered
|
|
|
|
Re: Paint job on a budget!? CONTINUED..page 44........
#27053
03/09/07 04:48 PM
03/09/07 04:48 PM
|
Joined: May 2006
Posts: 575
Canada
Marq
mopar addict
|
mopar addict
Joined: May 2006
Posts: 575
Canada
|
Hehehhe... that enamel hardener sounds like an interesting addition to the roller job... although a careful look at the label of the can mentions things like 'LUNG DISEASE", throat problems.. dizziness... etc. So I don't think anyone thinking of spraying should do anything until they read the product sheets on that stuff. It sounds like a respirator ( or oxygen tank ) might be needed to avoid killing yourself. Possibly a roller or brush job might be able to make use of it.... but I suspect a 'well ventilated' work area is definitely needed. I do like how it mentions that it not only hardens.. but also gives an enhanced GLOSS  On the topic of the Tractor paints at : http://www.mytscstore.com/detail.asp?pcI...;productID=9169It was interesting to note the various "red" colors that they offer. I would have to do a little more research to see if any of the tractor reds match up with something that is 'deeper and darker" then the Fire Red offered by Brightside and Rustoleum/Tremclad. Too bad they don't have a color card available. I did notice that they were offering a Coca Cola red and a Chevy Red. I suppose some of those other colors might appeal to the folks looking for more variations in the blue, gray, greens, oranges, yellows, etc .
Last edited by Marq; 03/09/07 05:02 PM.
|
|
|
Re: Paint job on a budget!? CONTINUED..page 44........
#27054
03/09/07 04:51 PM
03/09/07 04:51 PM
|
Anonymous
Unregistered
|
Anonymous
Unregistered
|
Quote:
- What is the brand name of the hardener you used?
- Does it have isocyanates?
- What kind of filter did you use in your respirator?
- Do you think this will allow you to paint on maybe 2 thick coats, then sand/polish?
Thanks for sharing your info. And by the way ... I'm in Potomac, north of Missoula.
I've been through Potomac quite a few times...I used to be a service tech for the Axmen, and I fixed a few gas fireplaces out that way. Went up Bear Creek a few times. Pretty area. I lived in Missoula from 1993 until a couple of years ago...went to school at the U and stayed until work brought me down here.
To answer your questions:
It's Van Sickel hardener. Same brand as the paint. Should be the same stuff as in the post above.
Yes, it contains isocyonates.
I used 2 brand new organic vapor rated filters in my respirator. Also wore disposable Nitrile gloves, heavy coat, safety glasses, etc.
The big danger from isocyonates comes from them being airborn. Spraying paint/bedliner/anything urethane with iso's is so dangerous because you're blowing a big cloud of it into the air. Now, after a lot of looking I did find quite a bit of safety information on using paint products that contain them...but NOTHING about safety precautions when brushing or rolling them. Only spraying. NIOSH does say that an air purifying respirator is ok to use even when spraying the stuff, as long as you change the filters on a schedule. See this for an example:
http://www.lni.wa.gov/wisha/hazalerts/March2003HazardAlert_Final_.pdf
The ammount of airborne material from rolling or brushing has got to be just about zero. As far as I'm concered, the precautions I took are overkill. But, it is of course up to the individual painter to do what you're comfortable with.
|
|
|
Re: Paint job on a budget!? CONTINUED..page 44........
#27055
03/09/07 05:05 PM
03/09/07 05:05 PM
|
Anonymous
Unregistered
|
Anonymous
Unregistered
|
Ok, here it is...the fender I did the test on: 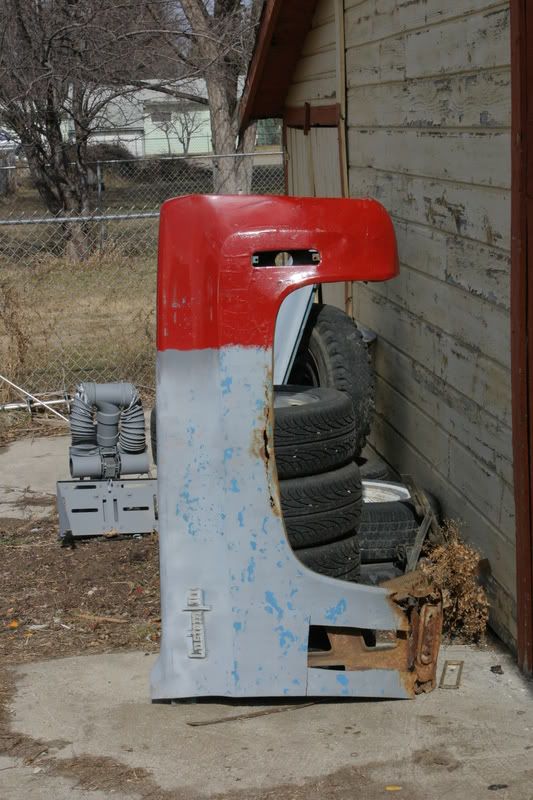 You can see all the crap I painted over...cracking bondo, 5 year old primer that's flaking off, rust, dirt... I did exactly ZERO surface prep before I painted this thing. Here's the result: 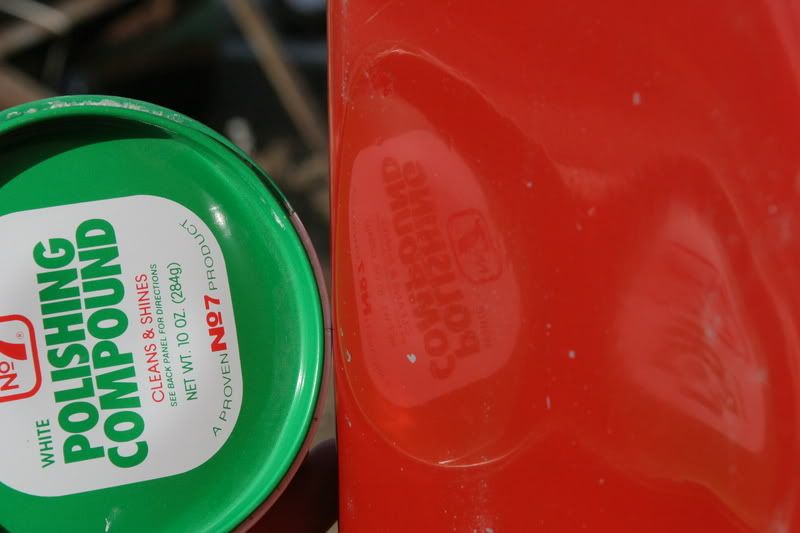 Do you think anyone would believe me if I told them I painted it with a brush? And keep in mind that this is after a single wet sand with 400 grit paper, and a polish with the cheapest paste I could find. To be honest, the 400 grit was too agressive, and I did go through in a few spots (you can see them in the full length pic). 600 would have been better, but I only had a half hour to dink with it and I know 400 will wipe out orange peel in a big hurry. Doing it the way I did, you get full coverage on the first coat. A second or third coat may be needed if you have to take too much off to clean up any impecfections. Other than that...piece of cake! Waiting a week or more to wet sand may help...it'll be cured nice and hard by then. OTOH, you might be able to do it the next day...someone with more time than me can experiment  . Anyway, there it is. I couldn't be more impressed with it given the fact I have a 1/2 hour into the whole process.
|
|
|
Re: Paint job on a budget!? CONTINUED..page 44........
#27056
03/09/07 08:12 PM
03/09/07 08:12 PM
|
Anonymous
Unregistered
|
Anonymous
Unregistered
|
Quote:
I've been through Potomac quite a few times...
Maybe next time I'm down in Hamilton, I can stop by and see your project. The pics look great.
Quote:
The ammount of airborne material from rolling or brushing has got to be just about zero. As far as I'm concered, the precautions I took are overkill. But, it is of course up to the individual painter to do what you're comfortable with.
Interlux Paint (maker of Brightside) has a video of a guy painting their two-part "Perfection" paint with a simple paper dust mask:
http://links.streamingwizard.com/yachtpaint/9-04/WMV/perfection-usa4-bb-wmv.asx
And another video with NO protection: http://links.streamingwizard.com/yachtpaint/11-06/US_Perfection-3-paint.asx
Here is the MSDS for Interlux Perfection: http://www.yachtpaint.com/msds_pdf/YGB001_usa_ENG_E1.pdf
It contains "hexamethylene di-isocyanates." I looked up the info on that chemical and found this: http://www.atsdr.cdc.gov/tfacts120.html
Apparently it doesn't evaporate well into the air.
I also found the MSDS for the Van Sickle enamel hardener: http://www.vansicklepaint.com/7019X.PDF
The number one ingredient by weight is the Isocyanate. They don't say exactly what kind of isocyanates they are using ... it's listed as a "trade secret." But ... they do give its vapor pressure as 5.2 mm Hg, which is much lower than atmospheric pressure. That means it's not likely to evaporate into the atmosphere.
I also called the local OSHA office, and they said that the primary danger of isocyanates is in spraying -- breathing the fine droplets. They recommended good ventilation and wearing a respirator.
So ... I'm thinking maybe you are right about this. Perhaps the primary danger for isocyanates is for spraying. Rolling should be fine IF YOU USE A PROPER ORGANIC VAPOR RESPIRATOR. Make sure the respirator fits tightly around your mouth and nose. If you have a beard, that creates special problems. Some old pro painters use vaseline to help seal around the edges of the respirator. Also, using goggles and gloves is a good idea. That's what I intend to do anyway.
|
|
|
Re: Paint job on a budget!? CONTINUED..page 44........
#27057
03/09/07 08:20 PM
03/09/07 08:20 PM
|
Anonymous
Unregistered
|
Anonymous
Unregistered
|
Our TSC doesn't carry the Van Sickle anymore. They have a Valspar paint under BPS (Best Paint Sold).
I scanned the card for the colors available but the light from my scanner brightened them up some.
Per ga was $23 and hardener was $9 at least here.
The hardener said paint dry/handle time was 24-36 hours without and 2-4 hours with. With the very thin coats are being rolled here I would think even less time than that. That # might be for a heavier brushed on coat. That also means with the hardener less time to apply your paint and it couldn't be mixed back in with the rest of the paint.
|
|
|
|
|


