|
 Re: Paint job on a budget!? CONTINUED..page 44........
[Re: 69chargeryeehaa]
#26659
Re: Paint job on a budget!? CONTINUED..page 44........
[Re: 69chargeryeehaa]
#26659
01/10/07 01:07 PM
01/10/07 01:07 PM
|
Anonymous
Unregistered
|
Anonymous
Unregistered
|
Charger - I am using the high density rollers, but brushing over it once with a foam brush to get the bubbles out. It is definitely way too thick, but I will get it down. Its about 50 degrees today, so that isn't helping, but I need to use more mineral spirits. I got a little confused mixing two colors and can see that my mineral spirits was still too low.
I will get it down pat this week. I am getting excited about it now that I am actually laying down paint, instead of just reading about it. Thanks again for a great method. I will post more pictures as I get closer.
|
|
|
Re: Paint job on a budget!? CONTINUED..page 44........
#26660
01/10/07 02:44 PM
01/10/07 02:44 PM
|
Anonymous
Unregistered
|
Anonymous
Unregistered
|
well all i can say is, i have been up since, 8:30 am and have been working on prepping my car since 9:00. i had a friend come over so we coule re-bleed my brakes because i bought a new master cylinder. its now almost 1 and its my first time taking a break! ive only got the front passenger quarter pannel done from what was left yesterday and the rear drivers side quarter pannel done today. as well as part of the hatch, man i need a new disk sander tho mines allready gettin wore out!!
|
|
|
Re: Paint job on a budget!? CONTINUED..page 44........
#26661
01/10/07 04:52 PM
01/10/07 04:52 PM
|
Anonymous
Unregistered
|
Anonymous
Unregistered
|
"I am getting the idea that the only way to learn to paint this way is to paint!"
This is VERY true (at least in my case), although I'm still making adjustments to my technique on the trunk lid, I'm pretty comfortable now with laying down the paint and wetsanding with this method. I liked the initial test results, so the rear spoiler was also removed to do the job right from that point onward.
I've noticed that at times during the process, I've gone through the same phases EXIT was over the orange peel, and have laughed at myself about it when I've stepped away from working on the panel for a few days.
Currently I've been doing 2 wetsands, mostly because of my overly critical eye, between coats since I'm not using a whole lot of pressure while doing it. I've been using just enough pressure on the wetsanding until the paper "glides" (for lack of a better term) over the surface.
Then I've been letting it dry completely to see where I may have missed spots. After that phase, I pretty much do a quick run over on the spots that look like I've missed what look like missed, allow it all to dry another day after a good wipe down. Tack cloth the entire panel the following day and lay another coat.
As for wetsanding, I use a half gallon bucket of water with a few drops of dawn dish soap in it. A soft block (well, actually it's a cut up gardening knee pad I got for a buck from the dollar store) wrapped with the wetsand paper after the paper has soaked in one hand, and a large automotive sponge in my free hand to keep the surface wet, and also to wipe off the residue as I wetsand.
All in all it's coming along fantasically though. I've started using the factory paint job done on my Wrangler as a reference point to keep my critical eye in check when I start getting anal about the orange peel on the trunk panel.
Which for "useless information purposes" I chose the trunk lid because it has nearly every paint angle I'll be faced with when I start getting serious on painting the car... after everything else on it has been repaired, cut out, welded, and tuned-up.
|
|
|
Re: Paint job on a budget!? CONTINUED..page 44........
[Re: 1BAD68]
#26663
01/10/07 08:13 PM
01/10/07 08:13 PM
|
Anonymous
Unregistered
|
Anonymous
Unregistered
|
lol y not just drive to canada and get some termclad? if im correct isnt canada right next door to wisc.?
|
|
|
Re: Paint job on a budget!? CONTINUED..page 44........
[Re: 1BAD68]
#26664
01/10/07 08:29 PM
01/10/07 08:29 PM
|
Anonymous
Unregistered
|
Anonymous
Unregistered
|
IBad - the factory paint will probably not work, from what I have learned here. The problem is that it is designed to be shot from a gun, and not rolled on. The advantage of Tremclad/Rustoleum/Brightside is that they are "self-leveling," and designed to be rolled or brushed on.
|
|
|
Re: Paint job on a budget!? CONTINUED..page 44........
#26665
01/10/07 08:35 PM
01/10/07 08:35 PM
|
Anonymous
Unregistered
|
Anonymous
Unregistered
|
Quote:
Charger - I am using the high density rollers, but brushing over it once with a foam brush to get the bubbles out.
Mate, your foam brushing is wrecking your painting. Those lines in the paint from the brush will take forever to sand back out and once they have been sanded out you will have [Edited by Moparts - Keep it clean] all paint left on the panel.
Dump the foam brush in the bin.
Once you have painted the panel try going back over the panel very lightly with a clean roller (ie just with the weight of the roller) to help remove any bubbles and to help flatten the paint.
|
|
|
Re: Paint job on a budget!? CONTINUED..page 44........
#26666
01/10/07 09:05 PM
01/10/07 09:05 PM
|
Joined: Jan 2003
Posts: 12,405
Southern, Ca.
69DartGT

moparts member
|
moparts member
Joined: Jan 2003
Posts: 12,405
Southern, Ca.
|
Quote:
Once you have painted the panel try going back over the panel very lightly with a clean roller (ie just with the weight of the roller) to help remove any bubbles and to help flatten the paint
Have to agree 100% I used the foam brush for the first coat and went to the clean roller for everything else, that and along with proper thinning made the job easier.
|
|
|
Re: Paint job on a budget!? CONTINUED..page 44........
#26667
01/10/07 09:18 PM
01/10/07 09:18 PM
|
Anonymous
Unregistered
|
Anonymous
Unregistered
|
Thanks Aussie and Dart. I probably got the idea for that foam brush implanted too firmly in my mind from watching that video on the Brightside site, where the guy rolls on a coat and then happily brushes it in another direction.
OK - I probably won't trash the foam brushes, but will banish them to the "only to be used for the parts I can't reach with a roller" bin. I will thin and mix the paint more and not press so hard in rolling it (as Charger has suggested in the past to lesson bubbles), then roll over it lightly with a clean roller.
Last edited by smyrna5; 01/10/07 09:30 PM.
|
|
|
Re: Paint job on a budget!? CONTINUED..page 44........
#26668
01/10/07 11:33 PM
01/10/07 11:33 PM
|
Joined: Jan 2007
Posts: 891
wisconsin
1BAD68
super stock
|
super stock
Joined: Jan 2007
Posts: 891
wisconsin
|
Quote:
IBad - the factory paint will probably not work, from what I have learned here. The problem is that it is designed to be shot from a gun, and not rolled on. The advantage of Tremclad/Rustoleum/Brightside is that they are "self-leveling," and designed to be rolled or brushed on.
yeah, that makes sense.
anyone here from canada want to ship some tremclad to Wisconsin? Wild rasberry looks alot like my cars color.
|
|
|
Re: Paint job on a budget!? CONTINUED..page 44........
#26670
01/11/07 12:34 PM
01/11/07 12:34 PM
|
Anonymous
Unregistered
|
Anonymous
Unregistered
|
This cloud turned out to have a silver lining. This morming I wet sanded most of the hood to remove those striations that the foam brush left. Since the paint isn't really cured yet, it was pretty easy going with 400 wet. I used a rubber sanding pad, since I wanted to make sure any ridges left by the brush got removed. I really like this blue color a lot better as a primer. I could not really see all the places where the hood wasn't flat enough before because I had sprayed some grey primer on it a while back. Since paint dust and scuffed paint are both grey, good luck finding any imperfections on that. The blue shows it all up nicely, and I know exactly where I have to do some more sanding. I even decided to fix the few remaining spots where I knew I didn't do a good enough job with the bondo. In the picture, you can see the high (dark blue) areas that need to come down some more to get a uniform dull finish. In the end, no real harm done with the first few coats. I might even advise using a first coat of Rusto sanded this way to find your imperfections before you really start painting in earnest. 
|
|
|
Re: Paint job on a budget!? CONTINUED..page 44........
#26671
01/11/07 01:02 PM
01/11/07 01:02 PM
|
Anonymous
Unregistered
|
Anonymous
Unregistered
|
Quote:
This cloud turned out to have a silver lining. This morming I wet sanded most of the hood to remove those striations that the foam brush left. Since the paint isn't really cured yet, it was pretty easy going with 400 wet. I used a rubber sanding pad, since I wanted to make sure any ridges left by the brush got removed.
I really like this blue color a lot better as a primer. I could not really see all the places where the hood wasn't flat enough before because I had sprayed some grey primer on it a while back. Since paint dust and scuffed paint are both grey, good luck finding any imperfections on that. The blue shows it all up nicely, and I know exactly where I have to do some more sanding. I even decided to fix the few remaining spots where I knew I didn't do a good enough job with the bondo. In the picture, you can see the high (dark blue) areas that need to come down some more to get a uniform dull finish.
In the end, no real harm done with the first few coats. I might even advise using a first coat of Rusto sanded this way to find your imperfections before you really start painting in earnest.
still looks like you need to sand down a few spots. sis you sand too hard in a few areas? looks like you sanded down to the primer/bondo
|
|
|
Re: Paint job on a budget!? CONTINUED..page 44........
#26672
01/11/07 01:05 PM
01/11/07 01:05 PM
|
Anonymous
Unregistered
|
Anonymous
Unregistered
|
I'd prop that hood up in my shed and spray it with a quick and heavy coat of high fill primer, then spray a mist of "other colored" (black maybe) rusto on it for a guide coat, then start block sanding. When it's baby smooth start rolling!
|
|
|
Re: Paint job on a budget!? CONTINUED..page 44........
#26673
01/11/07 01:38 PM
01/11/07 01:38 PM
|
Anonymous
Unregistered
|
Anonymous
Unregistered
|
You are right about it needing more sanding in that picture. It was taken before I finished sanding, just to show how the spots I needed to sand some more showed up. The paint that is on it now is probably akin to what Grimster just called a "guide coat," rolled on, instead of sprayed. As far as the areas where the bondo is showing, those are areas were the bondo was still a bit too high. I even found a few spots where there as a metal peak that needed to be knocked down and filled. As I said, it really needed more work before it was read to paint, but with that dull grey primer on it, I couldn't tell diddly, or more truthfully just got in too much of a hurry  This hood was really a mess because after it got crushed by a tree limb, a few body work entrpreneurs in a super market parking lot asked me if I would like the dents taken out for $20. I thought they might be itinerant paintless dent removers, but when they pulled out a huge slide hammer and proceeded to punch holes in my hood, I was too flabergasted to say anything until they got half way done and I told them to stop. Can you spell, "Let's see how far we can stretch this metal?" There was some disagreement when I refused to pay for the harm they had already done, but when I offered to call the police to settle the matter, they declined. I gave them $10 because I am a patsy, but I am pretty sure their green cards were not up to date, and I sure as hell know they didnt have permission or a license to operate in that parking lot. I could have picked up a good hood from my local pull-a-part for less than the cost of the bondo, but this is supposed to be a fun learning experience right?
|
|
|
Re: Paint job on a budget!? CONTINUED..page 44........
[Re: C38coupe]
#26675
01/11/07 09:38 PM
01/11/07 09:38 PM
|
Anonymous
Unregistered
|
Anonymous
Unregistered
|
i have a question, i have gone through a disk grinder attachment, and a wire brush and some of the paint is EXTREMELY hard to get off. some parts of the car is down to the metal, but a good portion of it stil needs to be sanded down to bare metal. do i really need to go all the way down to the metal in order to paint it?
Last edited by SHIFT; 01/11/07 09:38 PM.
|
|
|
Re: Paint job on a budget!? CONTINUED..page 44........
#26676
01/11/07 10:41 PM
01/11/07 10:41 PM
|
Joined: Jan 2003
Posts: 12,405
Southern, Ca.
69DartGT
moparts member
|
moparts member
Joined: Jan 2003
Posts: 12,405
Southern, Ca.
|
Quote:
do i really need to go all the way down to the metal in order to paint it?
No just get everything smooth.
|
|
|
Re: Paint job on a budget!? CONTINUED..page 44........
#26677
01/11/07 10:43 PM
01/11/07 10:43 PM
|
Anonymous
Unregistered
|
Anonymous
Unregistered
|
Quote:
i have a question, i have gone through a disk grinder attachment, and a wire brush and some of the paint is EXTREMELY hard to get off. some parts of the car is down to the metal, but a good portion of it stil needs to be sanded down to bare metal. do i really need to go all the way down to the metal in order to paint it?
Nope, but since you are down to bare metal in some spots then you really should continue until it is all down to the bare metal. Instead of sanding the hell out of it, you could also use some really strong paint stripper. Just don't use it in an enclosed area with a heater going.
|
|
|
|
|


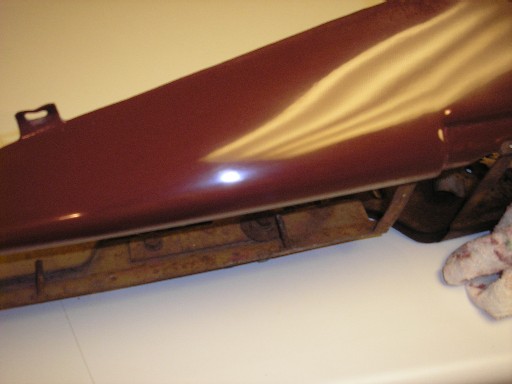
 so have used this color on a test piece, I will try and include in this post C38coupe