|
 Last update....., she's done.
#243630
Last update....., she's done.
#243630
03/05/09 12:58 AM
03/05/09 12:58 AM
|
Joined: Jan 2003
Posts: 3,616
Riverside, Ca
G_bob
 OP
OP
master
|
OP
master
Joined: Jan 2003
Posts: 3,616
Riverside, Ca
|
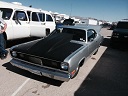
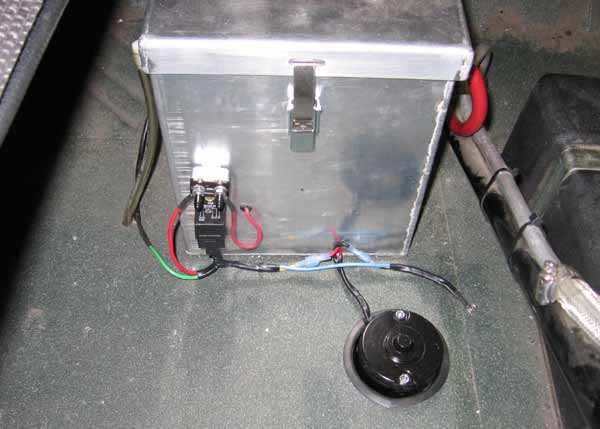
Gradually getting this thing ready to drop in the new bullet. Been re-doing plumbing, wiring, etc. As a point of reference, here is what it looked like before.  So I posted pics before of the new down bars, paint, brake lines, etc. Now we're getting to the wiring. We basically made new harnesses and used the stock bulkhead connecters. MSD and two-step is mounted behind the glovebox door. New harness that is connected through the bulkhead connecter is mounted on the inner firewall. It has junction blocks for power, the MSD, and the linelock/transbrake wires.  Here is the brake and line lock junction block. That switch above the junction block is a starter switch for bumping over the motor when adjusting valves. The thing going through the grommet is the tube for the mechanical water temp sensor.  Here is the MSD junction block. The wire to the right going through the grommet is the alternator wire going back to the battery.  Here is the firewall and passenger innerfender. Idea was to tuck all the wires away and keep the engine bay as clear and uncluttered as possible. That thing in the middle of the firewall below the starter button is the temp gauge sending unit. I'll adding a -3 an bulkhead connecter next to it to hook up the oil pressure capillary tube.  Engine harness follows underneath the down bar along with the alt wire and will bridge to the motor behind the motorplate.  Last one, light and electic cooling fan harness runs along inner fender in stock location.  Just have to do the oil pressure line, install the new fuel pump, make new brackets for mounting the alt with the new motor plate and we'll be ready to put in the motor. Hopefully its in by end of day on Saturday. 
|
|
|
 Re: Latest progress update...
[Re: G_bob]
#243631
Re: Latest progress update...
[Re: G_bob]
#243631
03/05/09 01:08 AM
03/05/09 01:08 AM
|
Joined: Jan 2003
Posts: 19,375
Las Vegas
Al_Alguire
I Live Here
|
I Live Here
Joined: Jan 2003
Posts: 19,375
Las Vegas
|
Looking good. Cant wait to see and hear it in Vegas. Lots of work but I am sure it will all be worth it when you get it done.
We will be tearing mine a part for the umpteenth time tomorrow to get the new tranny in. Hopefully all will go well. This is the 4th year in a row I have had a failure a couple of weeks before the MATS. Beginning to think maybe I need to just not plan on going anymore. Maybe I can trick the car that way.
"I am not ashamed to confess I am ignorant of what I do not know."
"It's never wrong to do the right thing"
|
|
|
Re: Latest progress update...
[Re: Cab_Burge]
#243634
03/05/09 03:37 AM
03/05/09 03:37 AM
|
Joined: Feb 2005
Posts: 5,207
Menomonee Falls
DemonDust
master
|
master
Joined: Feb 2005
Posts: 5,207
Menomonee Falls
|
Quote:
Now would be the perfect time to move the brake line above the flywheel to the front of the car, I ran mine to the back side of the K member and didn't have to cut or lengthen it   I have seen several NHRA tech that will bounce you on that in tech, not any of the local track techs I have seen several NHRA tech that will bounce you on that in tech, not any of the local track techs 
So they don't like the brake line running above the bellhousing?
Where in the front did you route your line?
|
|
|
Re: Latest progress update...
[Re: DemonDust]
#243635
03/05/09 06:33 AM
03/05/09 06:33 AM
|
Joined: Dec 2006
Posts: 3,667
Arizona
Chris'sBarracuda
master
|
master
Joined: Dec 2006
Posts: 3,667
Arizona
|
Brakes: 3:1 General Regulations.. NHRA rulebook. Brake lines must be steel, steel braided, or DOT approved flexible and routed outside framerail, or enclosed in a 16" length of 1/8" minimum wall thickness tubing securely mounted where line(s) pass the flywheel bellhousing area and not routed in the driveline tunnel. All brake lines must be attached to chassis as per OEM style; hoses must have mounting brackets; no tie wraps, tape, etc. So now that you are totally confused..  Since my car lost its brakes during the wreck, I made myself aware of the rules.. Chris.. 
|
|
|
Re: Latest progress update... (UPDATED)
[Re: G_bob]
#243639
03/08/09 02:16 AM
03/08/09 02:16 AM
|
Joined: Jan 2003
Posts: 19,375
Las Vegas
Al_Alguire
I Live Here
|
I Live Here
Joined: Jan 2003
Posts: 19,375
Las Vegas
|
Looking good. Cant wait to see and hear it at the MATS. I think we are actually ready as well, other than a good cleaning. I think I am gonna put some new shoes on her before we go. Actually made some progress today myself, 164 MPH 
"I am not ashamed to confess I am ignorant of what I do not know."
"It's never wrong to do the right thing"
|
|
|
Re: Latest progress update... (UPDATED)
[Re: 68Fastback]
#243641
03/10/09 09:22 AM
03/10/09 09:22 AM
|
Joined: Jan 2003
Posts: 3,616
Riverside, Ca
G_bob
OP
master
|
OP
master
Joined: Jan 2003
Posts: 3,616
Riverside, Ca
|
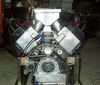
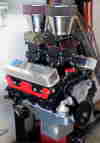
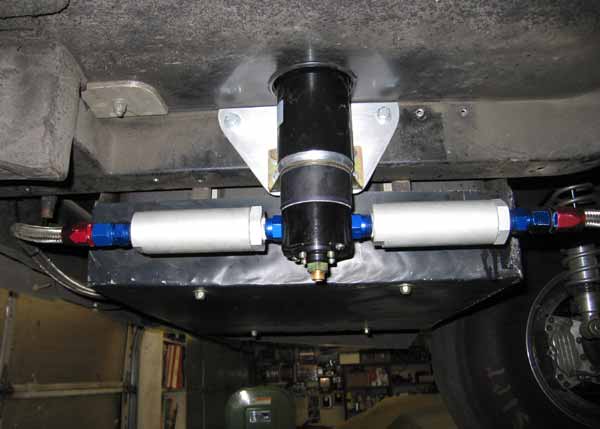
Another late night last night and STILL didn't get it done. Got close though. Here is the unit bolted together with the new sheild on the trans.  And hanging, ready to go in.  It took a little coaxing. And we had to pull the starter back off, drop the drag link and slide back the torsion bars to slide the headers in from underneath, but the headers did go in with the motor bolted in place. Had to clearance them a little around the passenger side torsion bar, and they're basically touching the frame on both sides, but at least they still fit in there with the raised exhaust ports on the Victors. I was a little worried. Got a few minor things to do, top-side wires, carb fuel lines, move some new wiring that ended up too close to the headers, etc. But at least it is in there, and all things considered, went in pretty smooth. The bottom-side is buttoned up, drive shaft is back in, trans linkage connected, etc. Don't know if my exhaust will fit back on there though. Anyway, here's a couple pics at the end of the night last night. If I can get away from work at mid-day today, I may get it done and running this afternoon.     At least it LOOKS good. 
|
|
|
Re: Latest progress update... (UPDATED)
[Re: Diego_Ted]
#243644
03/10/09 10:56 AM
03/10/09 10:56 AM
|
Joined: Jan 2003
Posts: 3,616
Riverside, Ca
G_bob
OP
master
|
OP
master
Joined: Jan 2003
Posts: 3,616
Riverside, Ca
|
Quote:
LOoks good Glenn, did you have to clearance the tunnel for the sheild?
Ted
Just bent the pinch-weld back and hammered it flat, that was it.
It's tight though.
|
|
|
Re: Well, the motor is in, but no fire yet...
[Re: DemonDust]
#243650
03/13/09 02:43 AM
03/13/09 02:43 AM
|
Joined: Jan 2003
Posts: 5,486
SoCal
Brian Hafliger
master
|
master
Joined: Jan 2003
Posts: 5,486
SoCal
|
I was wondering if you had driven it yet...let us know how it feels!!
Brian
Brian Hafliger
|
|
|
Re: Well, the motor is in, but no fire yet...
[Re: Brian Hafliger]
#243651
03/13/09 03:25 AM
03/13/09 03:25 AM
|
Joined: Jan 2003
Posts: 2,697
Renton Wa
topfueldart
master
|
master
Joined: Jan 2003
Posts: 2,697
Renton Wa
|
Sweet!! Cant wait to see it run...
11.48 @ 120 with a 1.80 60' 318, stock 1.88 heads, stock 904, Pump Gas, 13 lbs of boost.
9.94 @ 134, 318 on pump gas, 14 lbs w/ Eddies, transbrake 727, 3600 lbs, 3.54 gear and 28's.
|
|
|
Re: Well, the motor is in, but no fire yet...
[Re: dirtybee]
#243656
03/13/09 10:12 AM
03/13/09 10:12 AM
|
Joined: Jan 2003
Posts: 19,375
Las Vegas
Al_Alguire
I Live Here
|
I Live Here
Joined: Jan 2003
Posts: 19,375
Las Vegas
|
Glen,Looking pretty racey there. Cant wait to see your response after the first pass in the car. Seeya in a few days.
"I am not ashamed to confess I am ignorant of what I do not know."
"It's never wrong to do the right thing"
|
|
|
|
|


 nice job. i like that top hose, those can be hard to find.

