|
 Re: more progress...
[Re: burdar]
#165852
Re: more progress...
[Re: burdar]
#165852
07/07/12 10:08 AM
07/07/12 10:08 AM
|
Joined: Oct 2006
Posts: 7,365
Iowa
burdar
 OP
OP
Owen's Dad
|
OP
Owen's Dad
Joined: Oct 2006
Posts: 7,365
Iowa
|
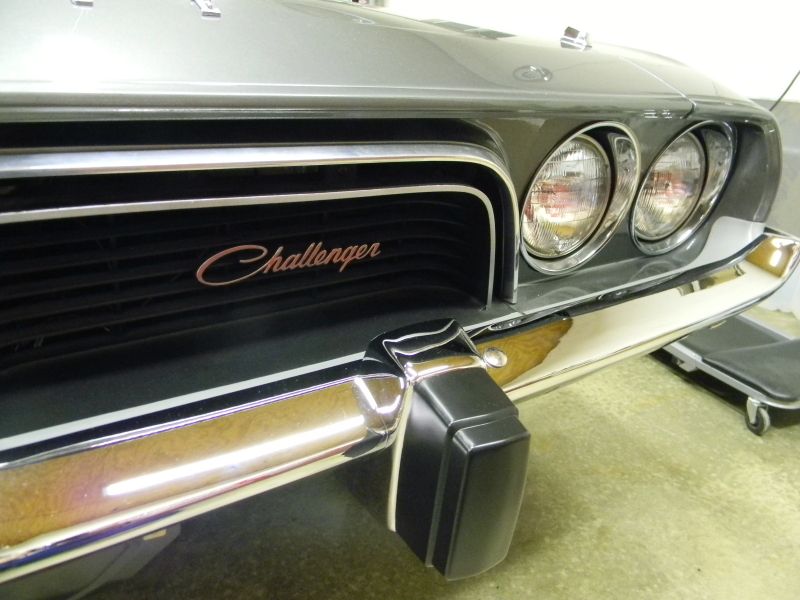
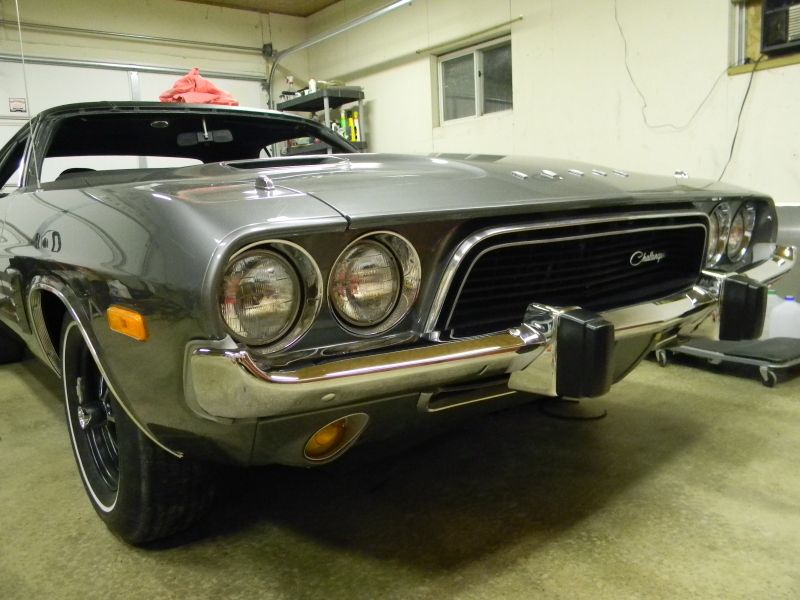
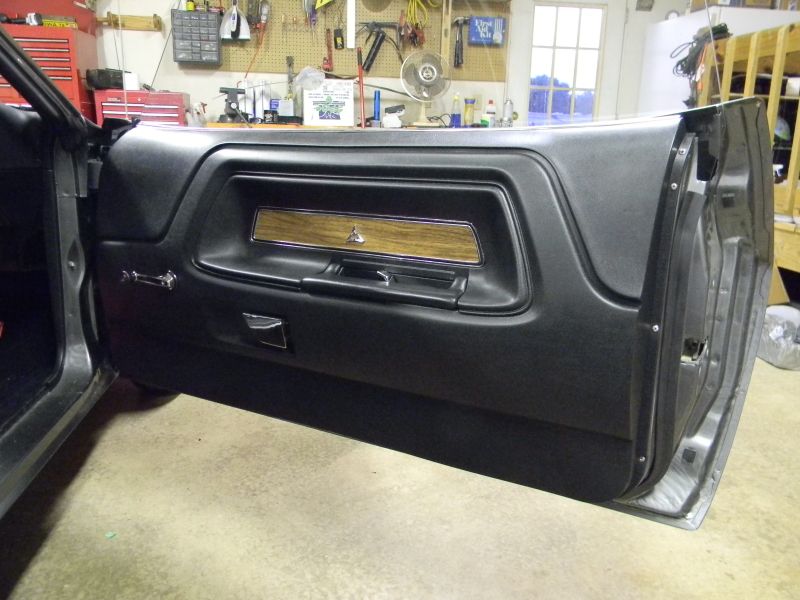
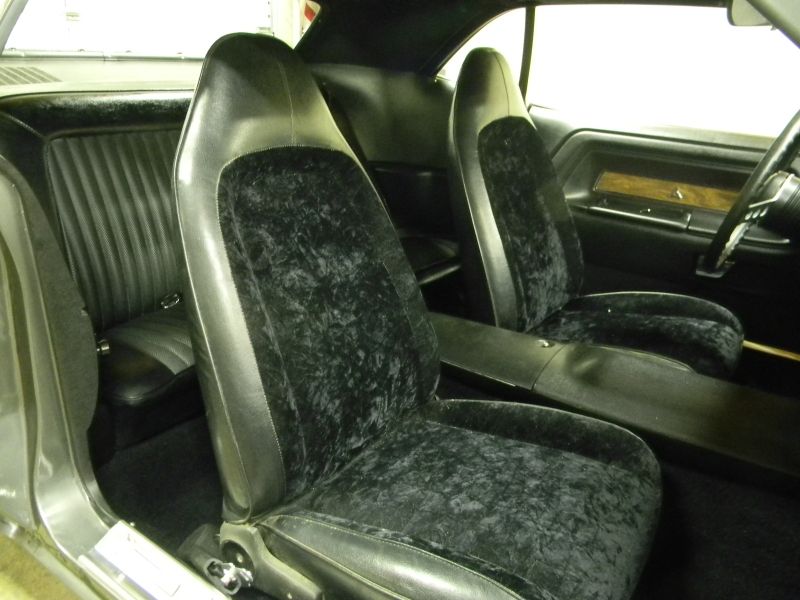
Time for a small update on what I worked on this week. Like a lot of times, I was just bored so I grabbed something and started working on it. The door panel woodgrain was in OK shape but the corners were starting to curl. I've had new woodgrain for years but never got around to installing it. The new woodgrain was from Year One. 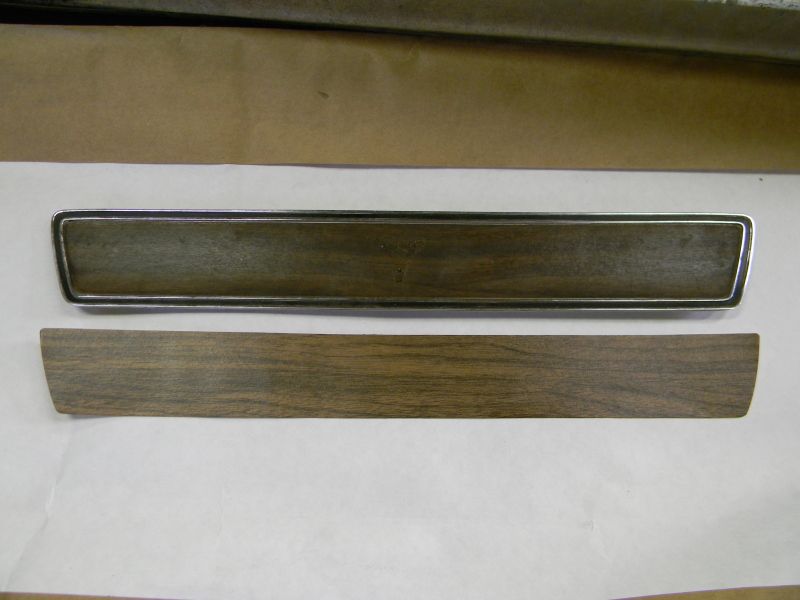 The original woodgrain was darker but it could have darkened up over the years. The new woodgrain matches the color of the dash so I'm happy with it. 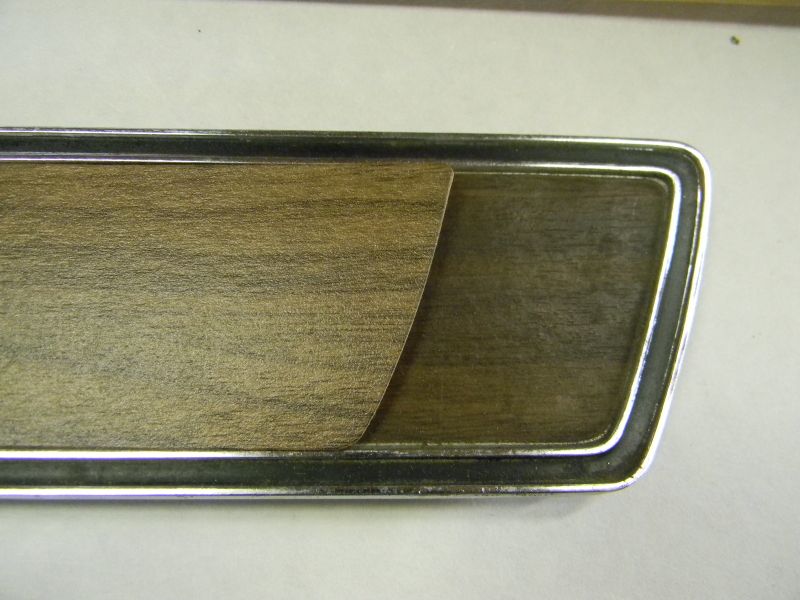 I read online that WD-40 works good at removing the old woodgrain so I saturated one piece with it. I checked it after about 15 minutes and nothing was happening. I got online and did another search. I read where someone used paint stripper with good results. So, I got out the paint stripper and after about 15 minutes, had a look at the decal. It had started to loosen up but it wasn't working very fast. That's when I had an idea. I bought the wife one of those Shark hand held steem cleaners. I dug it out of the closet, added water and plugged it in. The woodgrain decals peeled right off with very little glue left behind. I couldn't believe how great it worked. For the small spots of glue left on the bezels, I used Un-Du.(Scrapper's Solution) It's for removing stickers and tape from scrapbooking projects. It took the glue right off. The bezels were in pretty good shape. One of them didn't need any work. The black paint around the edge was still like new. The other side had a few little areas where the paint was scratched. On that bezel, I just misted some SEM Trim Black onto it and wiped the access off the chrome sections. After attaching the new woodgrain decals I turned my attention to the Fratzog emblems. To remove them from the bezels I just used my angle grinder with a flap disc to grind down the pins in the back. I still had a good amount of the pins left for reattachment. I ended up used a very small amount of clear silicone to reattach the emblems. I just put a small amount on a screwdriver and put a daub around each pin. Once the emblems were pushed into place, some silicone pushed out the sides which I figured would happen. I let the silicone dry completely...it would have just smeared if I had tried to clean it up while it was wet. Once it was dry I took a new razor blade and trimmed the excess off the edges. It worked perfectly.
|
|
|
Re: more progress...
[Re: burdar]
#165853
07/07/12 10:10 AM
07/07/12 10:10 AM
|
Joined: Oct 2006
Posts: 7,365
Iowa
burdar
OP
Owen's Dad
|
OP
Owen's Dad
Joined: Oct 2006
Posts: 7,365
Iowa
|
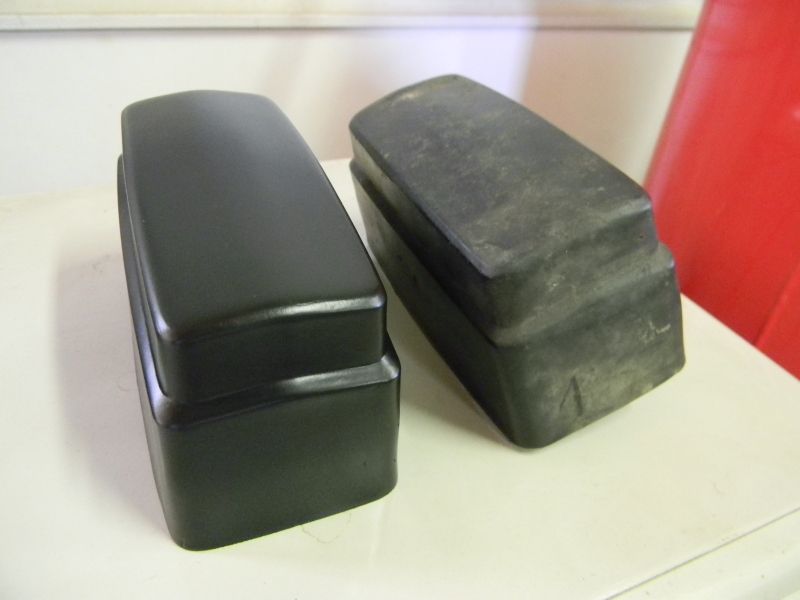
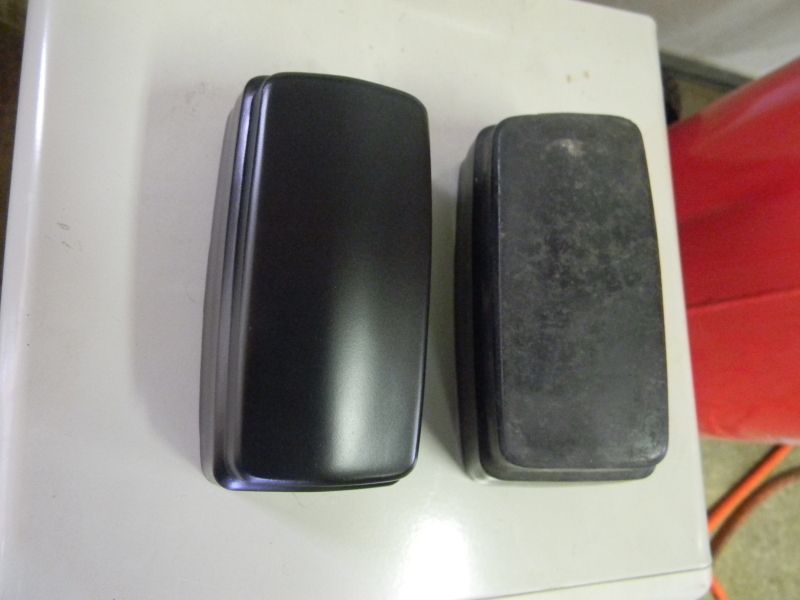
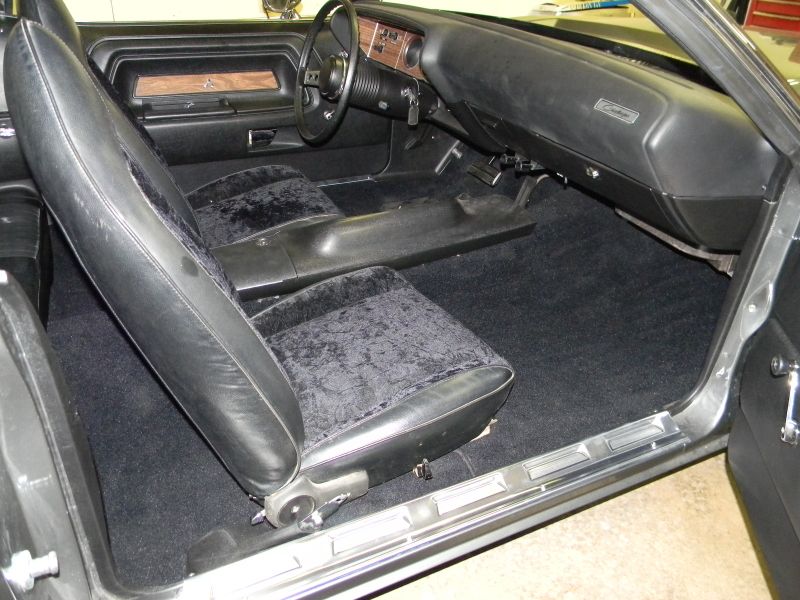
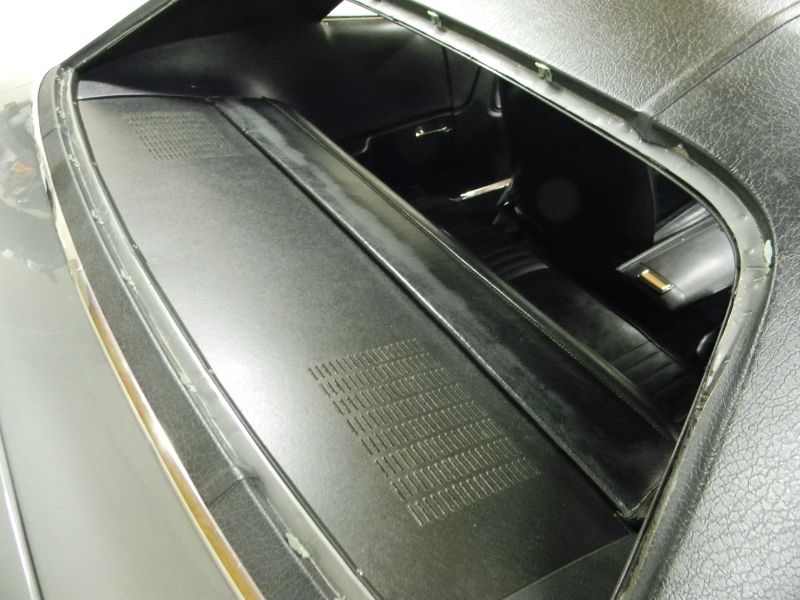
Then it was time to work on the door panels and rear interior panels. The original panels were a little rough. The drivers door panel and passengers rear panel were in the worst shape. Although they will never look perfect, painting them with SEM paints really makes them look a lot better. Since they end up being a uniform color, your eye isn't drawn to any lighter colored scratches. New panels are on my list but that won't happen until the car is on the road. I cleaned everything four times, used the SEM Adhesion Promotor per the instructions and finally sprayed them with SEM Landau Black. 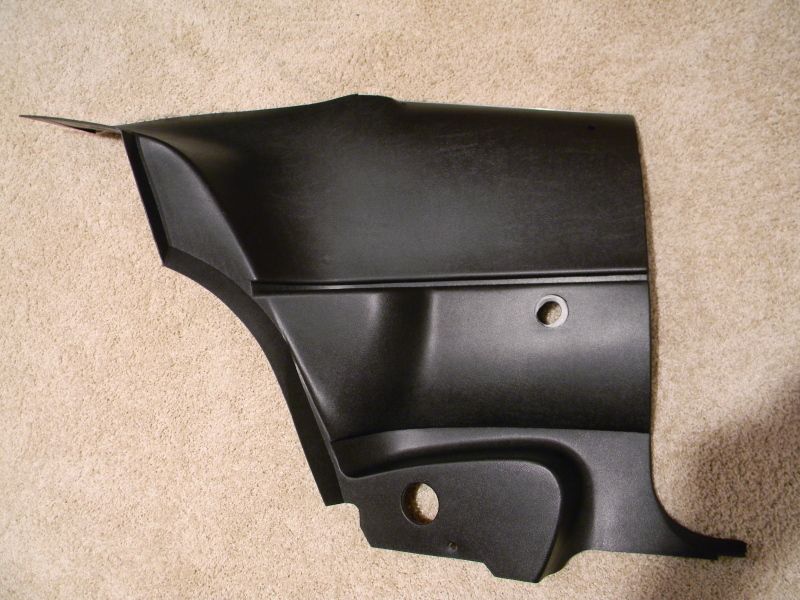 The referbished door panel woodgrain looks great in the panels but the new arm rest pads look awful. The new pads are from Legendary. I can't remember the brand though. There were two options...one was from Palco. I bought the other brand. They are just a block of wood wrapped in vynal. The original ones use a metal core. The vynal isn't close to being the correct grain and the contour of the pad is not right. I'll definately be cleaning up the original ones in the future. One of the original ones is in great shape. The other one is all torn underneith the inner lip. I think I can glue it back together and it won't be seen once installed. The new window fuzzies don't stay on the panels either. I squeezed the "U" channel together a little more and that helped. I'll probably have to use some weatherstrip adhesive to hold them tight though. 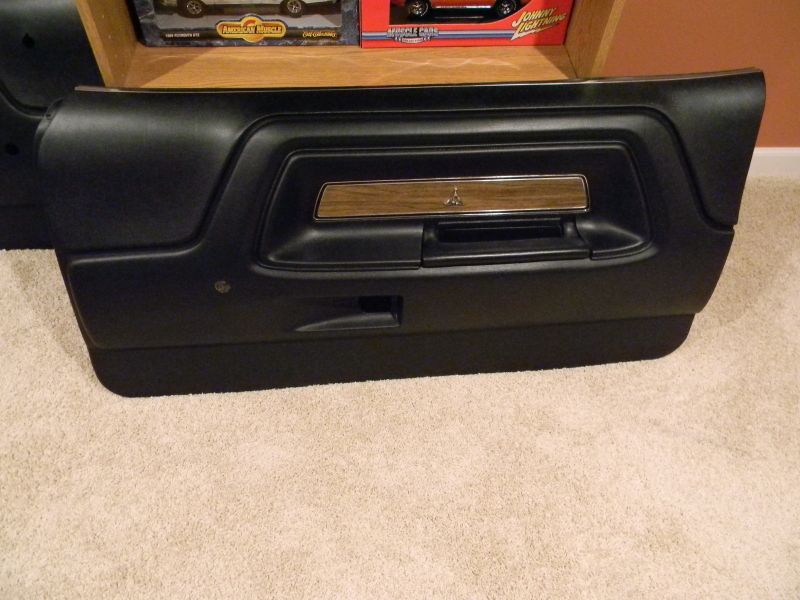
|
|
|
bad two months...
[Re: burdar]
#165854
08/05/12 04:14 PM
08/05/12 04:14 PM
|
Joined: Oct 2006
Posts: 7,365
Iowa
burdar
OP
Owen's Dad
|
OP
Owen's Dad
Joined: Oct 2006
Posts: 7,365
Iowa
|
The past two months have not gone well. I didn't want to post any updates until I got things sorted out. For those of you that saw my posts in the Question/Answer forum, this won't be anything new. Back on June 9th I picked up the radiator from being re-cored. I spent the rest of the day installing it and adding fluids. I also put an initial adjustment on the torsion bars and set the wheels on the ground. The car was now on all four tires for the first time in years. 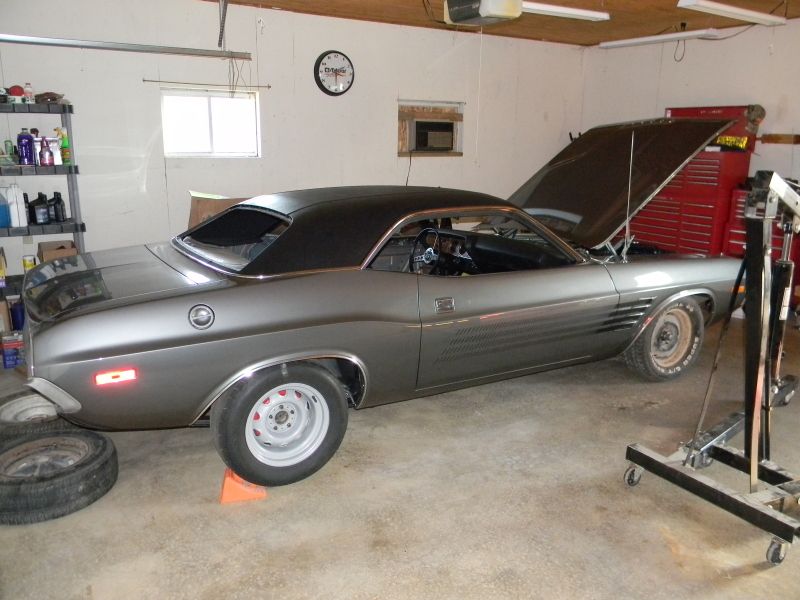 I pulled the battery out of my Durango and set it in the Challenger since I didn't have a battery for it at the time. Everything checked out good. I've got a couple bad bulbs but everything else works like it should. All the harnesses are M&H. At this point the engine compartment was basically done. I just had to start the engine and break it in. A member over on CC.com posted the vacuume diagram from the FSM. It showed that the EGR lines were color coded originally. I went to a craft store and bought some paint pens. I layed the hoses out on my work bench and nailed the ends down so they wouldn't move. Using my finger as a guide, I put the colored stripes back on the hoses. In this picture you can see the red, green, white and yellow hoses. 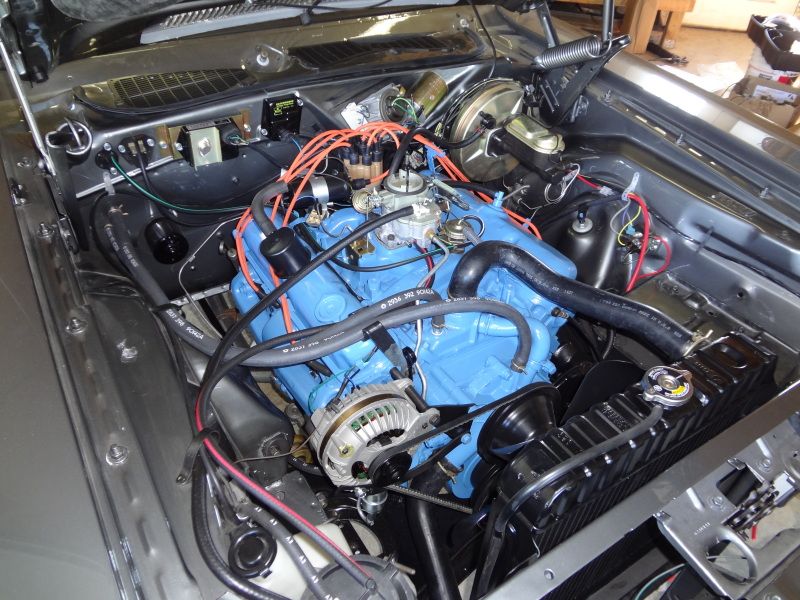
|
|
|
Re: bad two months...
[Re: burdar]
#165855
08/05/12 04:29 PM
08/05/12 04:29 PM
|
Joined: Oct 2006
Posts: 7,365
Iowa
burdar
OP
Owen's Dad
|
OP
Owen's Dad
Joined: Oct 2006
Posts: 7,365
Iowa
|
This is where things started going wrong. Dad came over that night to help me get the engine running. We had a hard time getting the fuel pump to prime. I had to take the fuel line loose at the carb and squirt fuel into the line using an oil can. I filled the line up with as much gas as it would take. I also squirted some into the bowl vent. Once it finally took off and stayed running, I brought it up to 2500 RPM to break in the cam. The cam was a used MP purpleshaft 340 cam. I had it in a 360 for a couple hundred miles before putting a 484 cam in it. I still wanted to do a break-in to be on the safe side. As soon as the engine fired I knew something wasn't right. It was missing badly and shaking the entire car. Since the oil pressure was very good and since I didn't hear any strange noises, I went ahead with the break-in. After 20 min I let off the gas. The engine backfired through the carb and died. I started it up again. As soon as I let off the gas, it popped and died. I called a friend of mine who had a compression tester and he came over the next weekend. We took some readings and cylinders 3 and 7 had 0 compression.  The engine was going to have to come back out.  Of coarse this is when the weather turned very hot. I couldn't work out in the garage very long before having to come back inside. I think I worked in the garage a little each night for three days getting the engine ready to pull. The engine went to the machine shop towards the end of June. They were busy so they wouldn't be able to look at it for 3 or 4 weeks. 
|
|
|
Re: bad two months...
[Re: burdar]
#165856
08/05/12 04:50 PM
08/05/12 04:50 PM
|
Joined: Oct 2006
Posts: 7,365
Iowa
burdar
OP
Owen's Dad
|
OP
Owen's Dad
Joined: Oct 2006
Posts: 7,365
Iowa
|
The machine shop finally got to the engine after about 5 weeks. They called and told me to come in so they could show me what was found. The cylinder head on that side was the one I had issues with before. Aerohead didn't drill out the oil feed hole for the rockers. It turns out the rest of the head was junk too. They did a leakdown test and found cylinders 3 and 7 were leaking 90%. There were two sticking exhaust valves and all the seats were cut excessively.(1.88in-1.60ex valves in the 318 heads) That head needed a couple valves, all new seats and all new guides. The other head was working OK at the time but would have had the same work done to it. I ended up bringing in the original heads to have them gone through. A couple days went by and I went back in to see what the original heads looked like. That's when I was told the original intake manifold was cracked. The crack extended all the way from the choke thermostat to the EGR opening. The manager said, "Now is the time to put a 4-barrel on it."  I had a spare 2-barrel intake that I brought in. The casting is a little different then the original one but I doubt anyone will notice. The original intake had the casting date in the front. This intake has it in the back so you won't see it anyway. I picked up the engine on Tuesday. 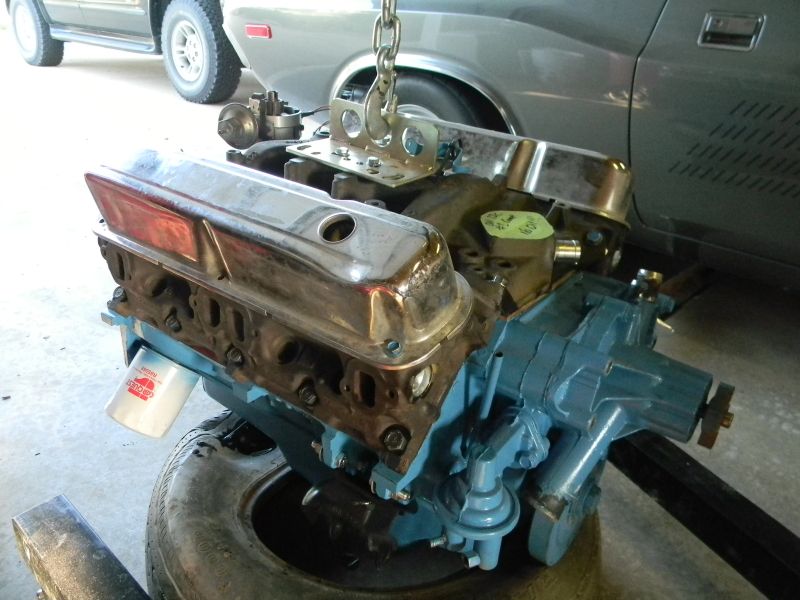 Cleaned and painted it on Wedesday. 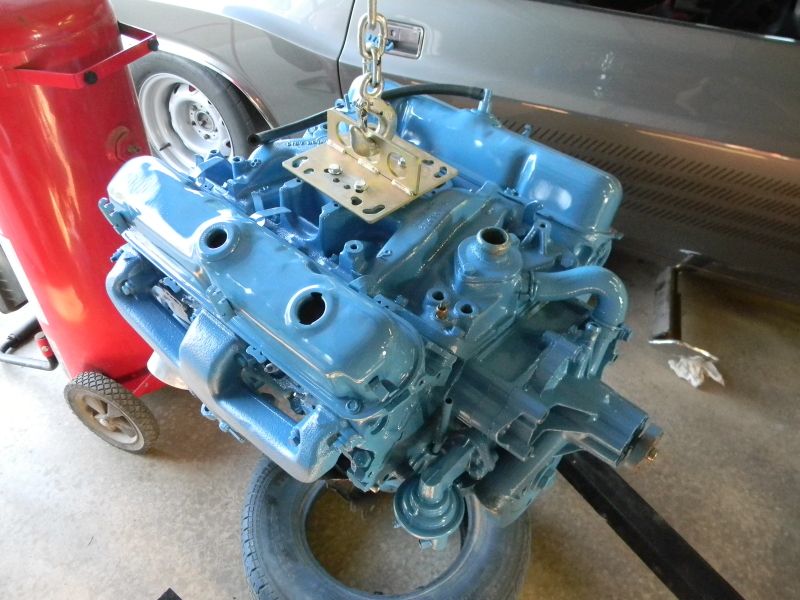 Installed it on Thursday. 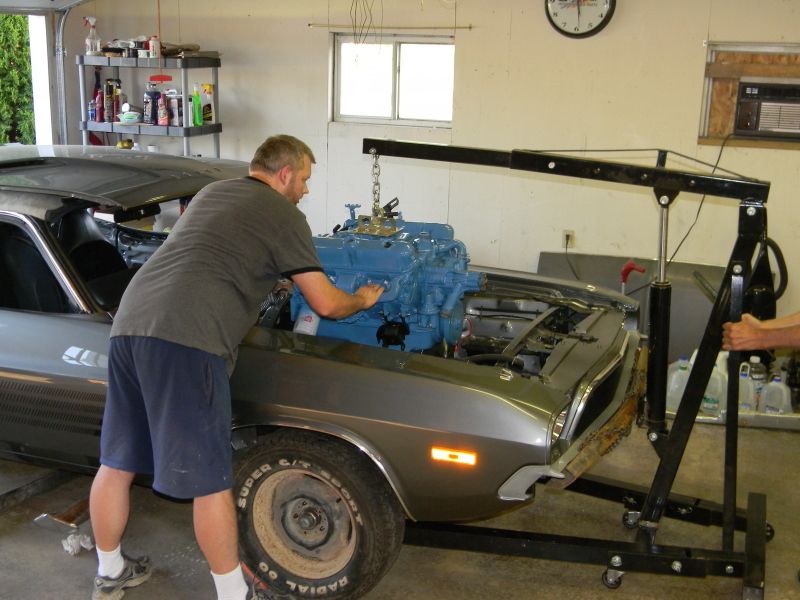 I worked on it Friday night and all day yesterday. I installed the new reproduction battery I got from Fred Gilmore and filled up the fuel line again with gas. It fired right off and sound decent. I was tired so I havn't thrown a light on it yet but at least it runs. Here's a short video I took of it. My wife did a little editing today and added a little production value. http://www.youtube.com/watch?v=tGKhYa6QDfc
|
|
|
Re: progress
[Re: burdar]
#165864
09/20/12 01:19 PM
09/20/12 01:19 PM
|
Joined: Oct 2006
Posts: 7,365
Iowa
burdar
OP
Owen's Dad
|
OP
Owen's Dad
Joined: Oct 2006
Posts: 7,365
Iowa
|
|
|
|
Re: more progress...
[Re: burdar]
#165865
09/20/12 04:24 PM
09/20/12 04:24 PM
|
Joined: Jan 2003
Posts: 8,131
New Mexico
UCUDANT
Troll Hunter
|
Troll Hunter
Joined: Jan 2003
Posts: 8,131
New Mexico
|
Quote:
The new window fuzzies don't stay on the panels either. I squeezed the "U" channel together a little more and that helped. I'll probably have to use some weatherstrip adhesive to hold them tight though.
Well that figures.. what brand are you using? I think mine are "top cat"
I'm just about to open mine and if their crap their going back
Your car looks amazing 
|
|
|
Re: more progress...
[Re: 69Cuda340S]
#165870
09/23/12 01:13 AM
09/23/12 01:13 AM
|
Joined: Jan 2008
Posts: 1,300
Washington
19cuda73
pro stock
|
pro stock
Joined: Jan 2008
Posts: 1,300
Washington
|
Darren Car looks sweet congrats you got it on the road... keep it going your rides ready for the show soon.....
1966 Charger 383 4 speed (Black with Red interior)
1973 Cuda 340 4 speed (Lemontwist)
1972 Corvette
|
|
|
|
|


 Note to self- "Never use heads from Aerohead for anything other than a wheel chock!"