|
 Wow!
[Re: 67446DART]
#1209337
Wow!
[Re: 67446DART]
#1209337
11/17/12 12:21 AM
11/17/12 12:21 AM
|
Joined: Apr 2004
Posts: 323
Raleigh, NC
Meangreen68

enthusiast
|
enthusiast
Joined: Apr 2004
Posts: 323
Raleigh, NC
|
There needs to be a trophy for such work! ...and to think, some folks are content with laying on the couch all day. Carry on 
|
|
|
 Re: Project Rust Bucket: 1971 Challenger R/T
[Re: HemiChallenger]
#1209339
Re: Project Rust Bucket: 1971 Challenger R/T
[Re: HemiChallenger]
#1209339
11/18/12 08:05 PM
11/18/12 08:05 PM
|
Joined: Aug 2003
Posts: 8,000
Millersville, PA
HemiChallenger
OP
master
|
OP
master
Joined: Aug 2003
Posts: 8,000
Millersville, PA
|
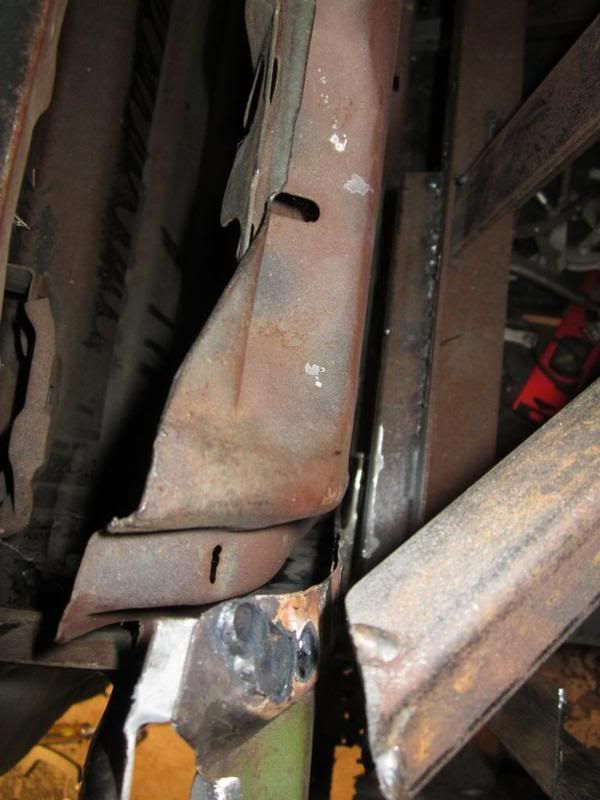
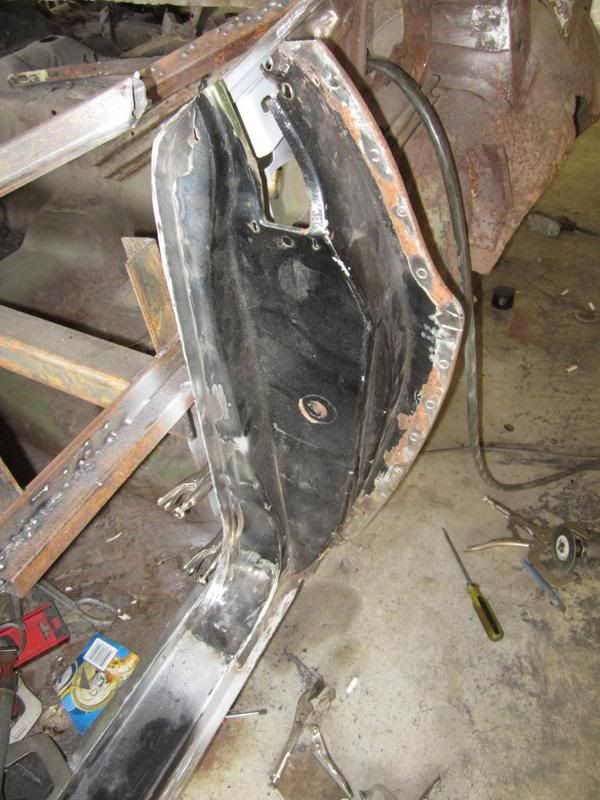
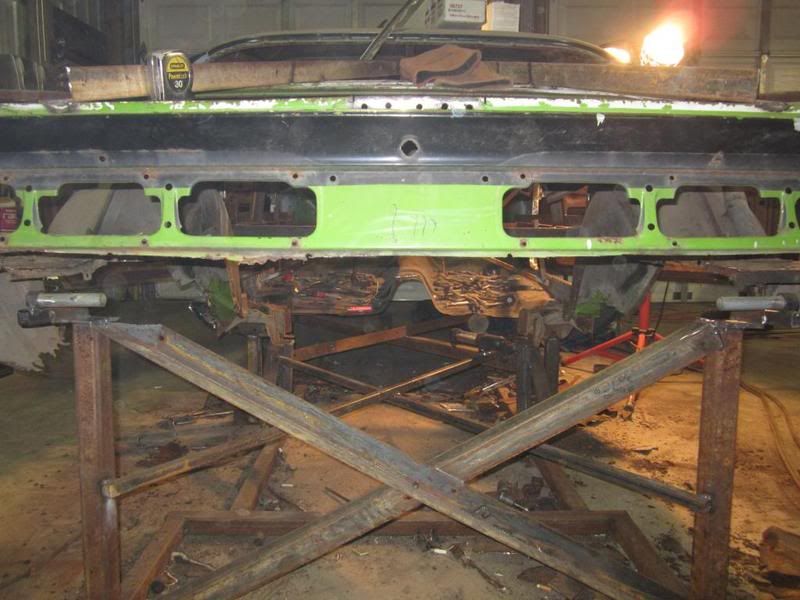
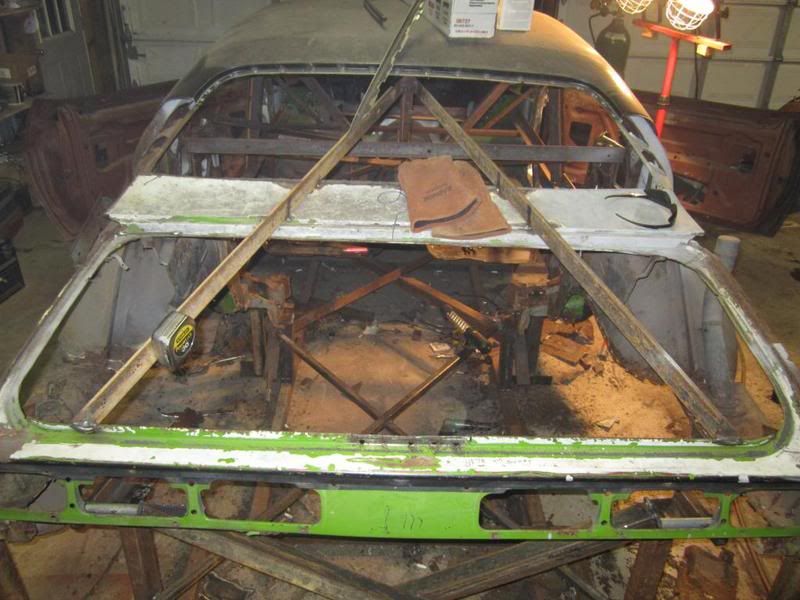
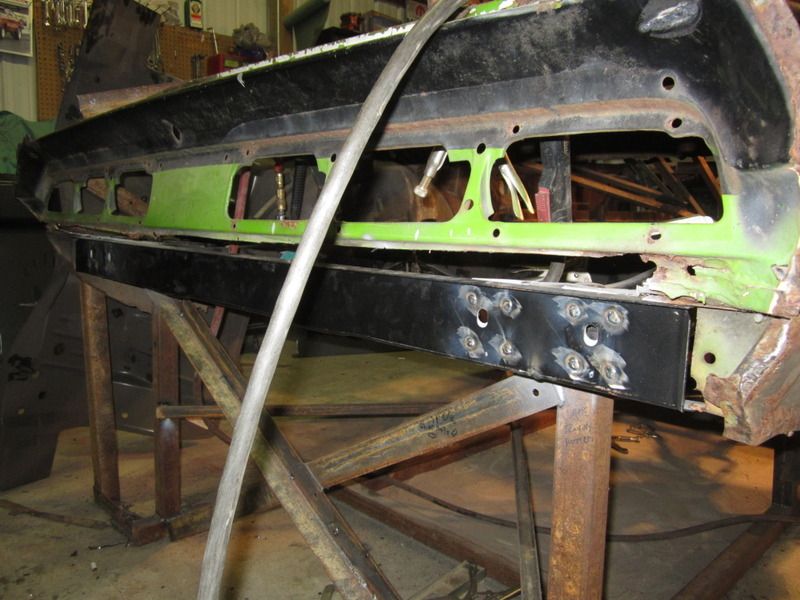
Thanks Guys! Yes i do enjoy doing this, there is many highs and lows though. Things are good and then there is more rust, and that pattern continues. When its all done its the ultimate achievement, to be able to look at the pictures from before, during, and then to look at the car, well its satisfying. Anyways, back to some pics... I have to make extensive repairs to front end door jamb. As you can see much of the panel is missing... 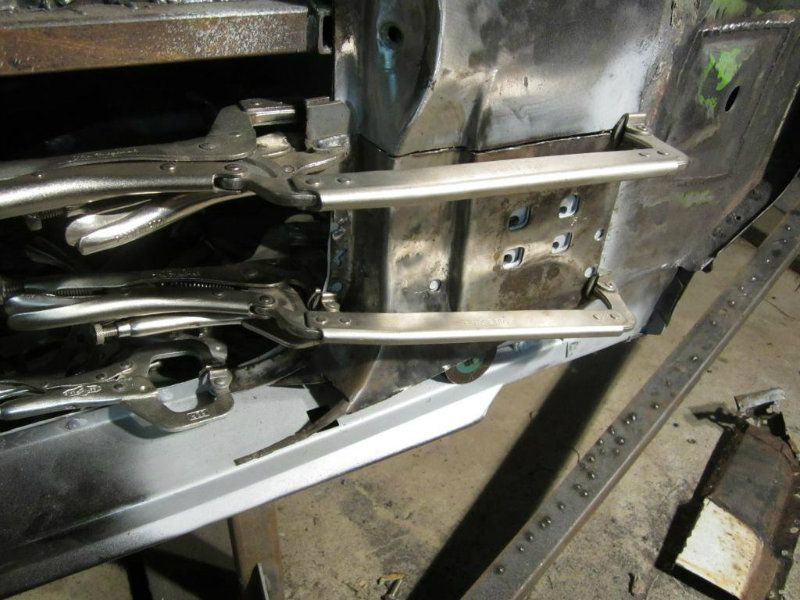 After repairs...  Now since the car was wrecked we had many issues with the inside webbing on the drivers side. The webbing was mangled and pushed in from wreck. The door jamb was really hacked up to make the door fit originally. This shows the issue...  Before I also had to modify to rocker, the bend where slightly off and not level...  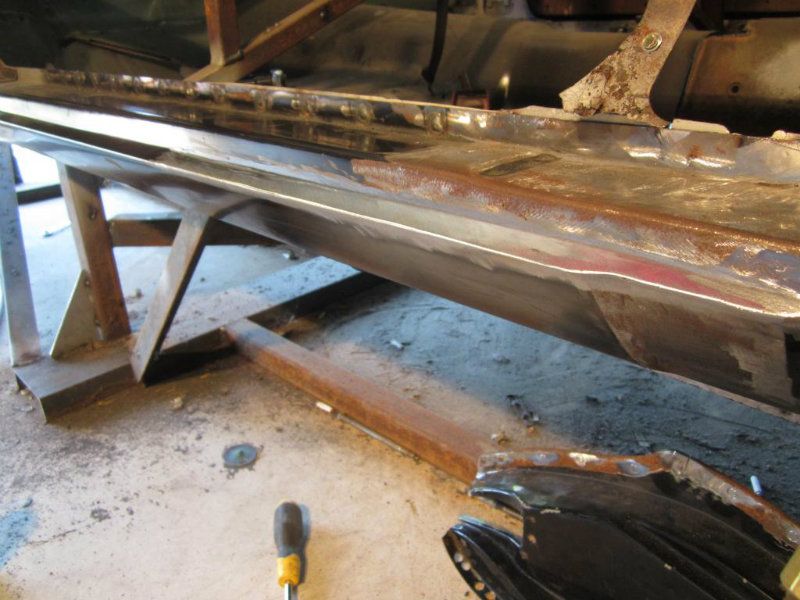 Then i started the webbing repair by making some repair panels... Before... 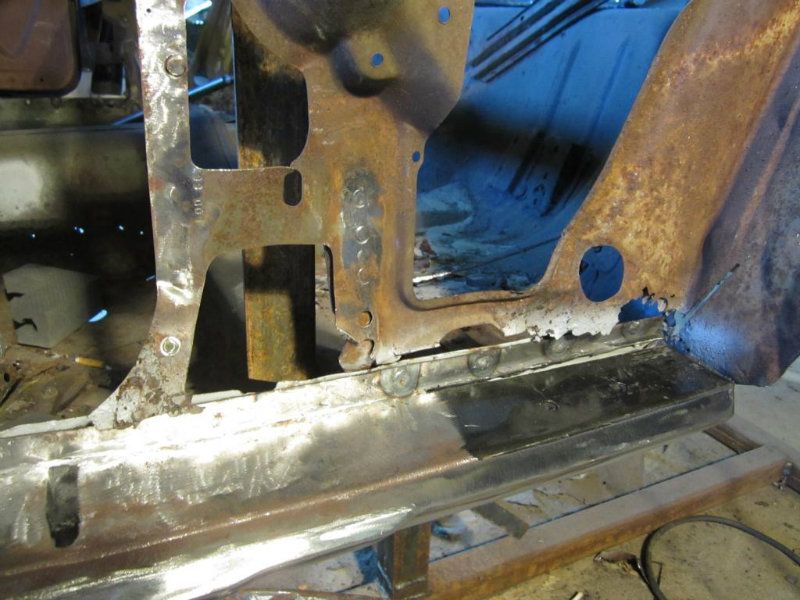 Part made... 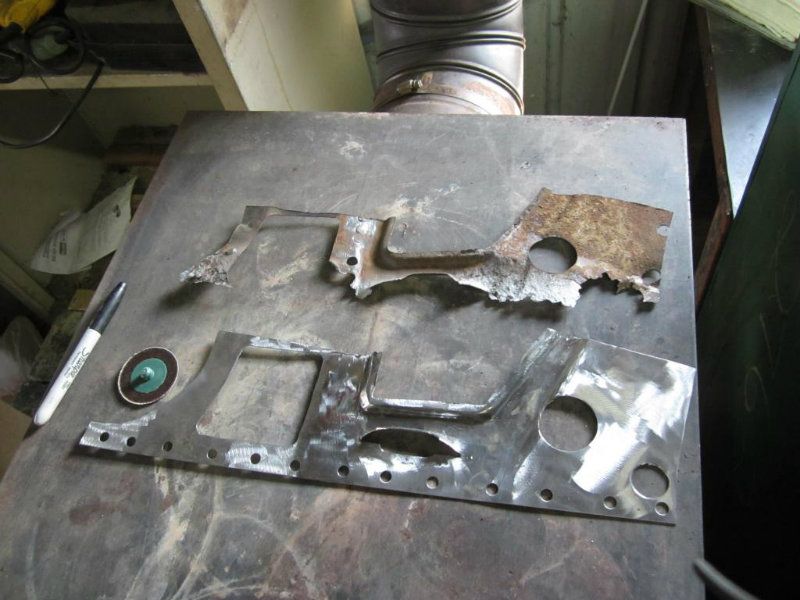 Installed... 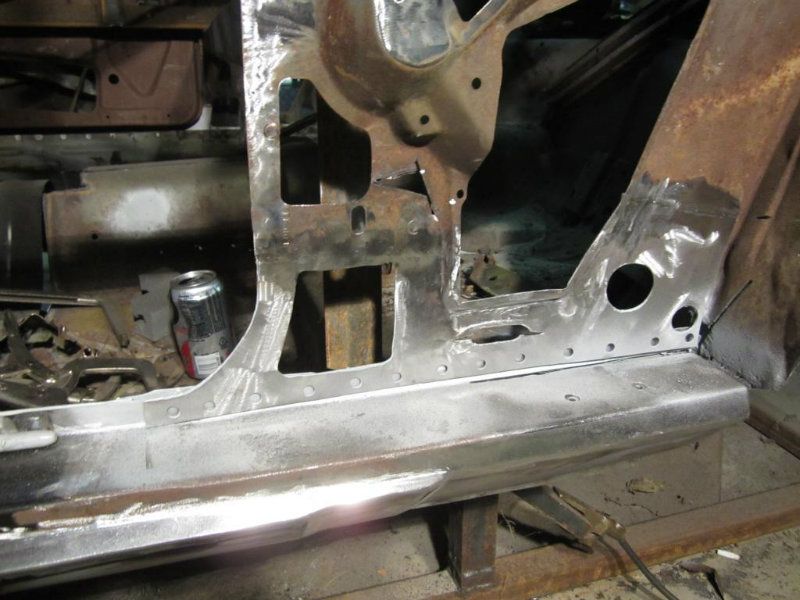 Thats all for now... 
|
|
|
Re: Project Rust Bucket: 1971 Challenger R/T
[Re: HemiChallenger]
#1209340
11/19/12 07:20 PM
11/19/12 07:20 PM
|
Anonymous
Unregistered
|
Anonymous
Unregistered
|
Nice work, keep it up. I agree it is very satisfying after the work is complete.
|
|
|
Re: Project Rust Bucket: 1971 Challenger R/T
[Re: HemiChallenger]
#1209343
11/25/12 01:53 PM
11/25/12 01:53 PM
|
Joined: Oct 2011
Posts: 768
Dry Heat AZ
AAR#2
super stock
|
super stock
Joined: Oct 2011
Posts: 768
Dry Heat AZ
|
Wow, I've been watching along in silence for some time . . . . incredible !
Now for some questions . . .
1) Please tell me your dad is a body shop guy who couldn't afford daycare for you in the early days, forced you to learn a trade at the age of 5 and you have 15 years experience at the start of this project (it would help me to feel better about my capabilities and ambition)
2) Does anyone help you think through your repairs at this point in your work (refer to Q1 above perhaps, or another mentor?)
3) It appears the start car was more of a rolling Jig for you to get pickup points and a roadmap, how many pieces are really going to be the original car when your done? (maybe guess a percentage, and please dont read into this, it's really just a curiosity question)
4) Whoever your mentor is should be commended and thanked, not many your age have the knowledge, ambition, facilities, or financial backing to do what your doing.
I have a good friend thats been a mentor to me, reading through your posts has reminded me to express my appreciation for all he has done.
Take care, and good luck wiith the rest of your project.
|
|
|
Re: Project Rust Bucket: 1971 Challenger R/T
[Re: AAR#2]
#1209345
11/25/12 07:17 PM
11/25/12 07:17 PM
|
Joined: Aug 2003
Posts: 8,000
Millersville, PA
HemiChallenger
OP
master
|
OP
master
Joined: Aug 2003
Posts: 8,000
Millersville, PA
|
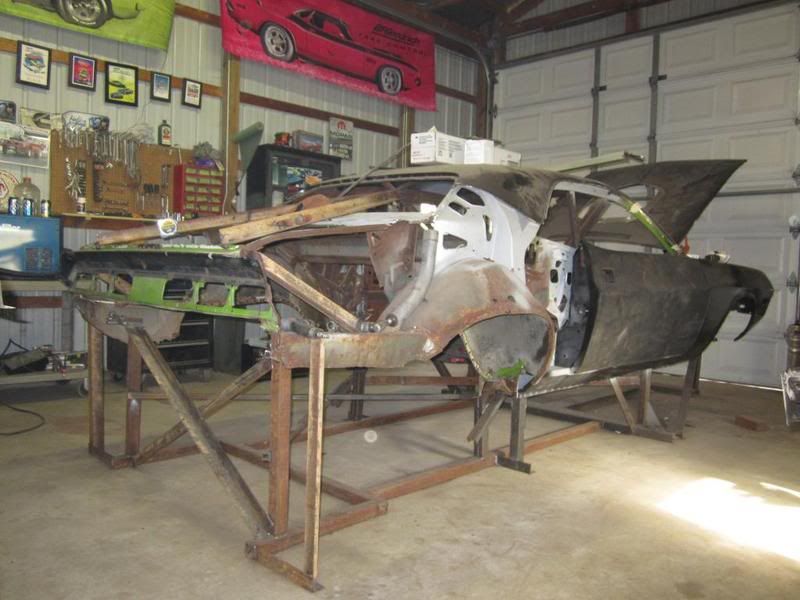
AAR#2 1) Please tell me your dad is a body shop guy who couldn't afford daycare for you in the early days, forced you to learn a trade at the age of 5 and you have 15 years experience at the start of this project (it would help me to feel better about my capabilities and ambition)  I really wish that was the case here. The truth is i taught myself how to do things by browsing the web, buying the right tools, making mistakes and learning from them. I then landed a welding job which enhanced my skills with metal and welding. When it comes to body work and painting, i owe all of that to a local old timer who i would go to his place after high school and work on projects of his for free in exchange for knowledge. 2) Does anyone help you think through your repairs at this point in your work (refer to Q1 above perhaps, or another mentor?) No, I honestly spend countless hours thinking of the best and easiest approach to everything. A lot of thinking comes before cutting and then welding. I know the body of these cars inside and out which helps as well. 3) It appears the start car was more of a rolling Jig for you to get pickup points and a roadmap, how many pieces are really going to be the original car when your done? (maybe guess a percentage, and please dont read into this, it's really just a curiosity question) This is very true, and no offense is taken. When the car is done, i would guess your looking at 10% of the original metal being present. In other words its going to be 90% new metal will last longer. I salvaged the original cowl and rad support, since it had the numbers on it, and the inner webbing of the vehicle. Stevo427 The Primer that i use in the welding and structural areas that will be covered is 3M weld-thru 2. Its the best product that i have found. Easily welds, unlike others that are galvanizing compound, this does not spit and spatter and blow holes in the clean metal. Its also a corrosion resistant coating that is great in areas that are covered. You can get them in aerosals, but its not cheap about $20 a can.
|
|
|
Re: Project Rust Bucket: 1971 Challenger R/T
[Re: HemiChallenger]
#1209346
11/26/12 11:07 PM
11/26/12 11:07 PM
|
Joined: May 2012
Posts: 223
Oreland Pa
clonedshaker+6
enthusiast
|
enthusiast
Joined: May 2012
Posts: 223
Oreland Pa
|
so how many spot welds do 71 challenger have hahaha you have seemed to cut them all out im in the process of restoring a 71 challenger as well (my HS graduation present 440sixpack shaker CLONE)  keep up the good work, cant wait to see it done
71 challenger 440 sixpack shaker *CLONE* (71challenger 440+6 shaker clone FAST/my HS grad present)
03 mustang Mach 1 (daily driver)
11.35 @ 121.5 4 SPEED on F60-15s w/ 6/32 tread
|
|
|
Re: Project Rust Bucket: 1971 Challenger R/T
[Re: HemiChallenger]
#1209348
11/27/12 10:47 PM
11/27/12 10:47 PM
|
Joined: Aug 2003
Posts: 8,779
Mt.Gilead, Ohio
OhioMopar
master
|
master
Joined: Aug 2003
Posts: 8,779
Mt.Gilead, Ohio
|
Very impressive. You are really coming along.
1969 Dart GTS 340
1969 Super Bee X9 N-96
1969 Coronet R/T X9 N-96
2015 Dodge Dart GT
2019 Ram 2500 Big Horn.
Looking for the original block for my Bee. The last 4 are 7449
|
|
|
Re: Project Rust Bucket: 1971 Challenger R/T
[Re: OhioMopar]
#1209349
11/28/12 12:55 AM
11/28/12 12:55 AM
|
Joined: Jan 2010
Posts: 1,992
midwest
68427vette
top fuel
|
top fuel
Joined: Jan 2010
Posts: 1,992
midwest
|
i had to re-breeze through the thread,, when i saw the first photos on page one and NOTICED your shaker firewall hole!! then later you stated it is a "71 challenger R/T 383 shaker car in FJ6" Did Tai get you on the N96 list? and FT? BS? my EL5 71 N96 is about this bad also! but will be saved, love this thread!! make sure you drill that hole right...  and yes, ive had many who think i'm crazy for saving my 71 EL5 car...
|
|
|
Re: Project Rust Bucket: 1971 Challenger R/T
[Re: cudaman440_1]
#1209354
12/03/12 11:40 PM
12/03/12 11:40 PM
|
Joined: Aug 2003
Posts: 8,000
Millersville, PA
HemiChallenger
OP
master
|
OP
master
Joined: Aug 2003
Posts: 8,000
Millersville, PA
|
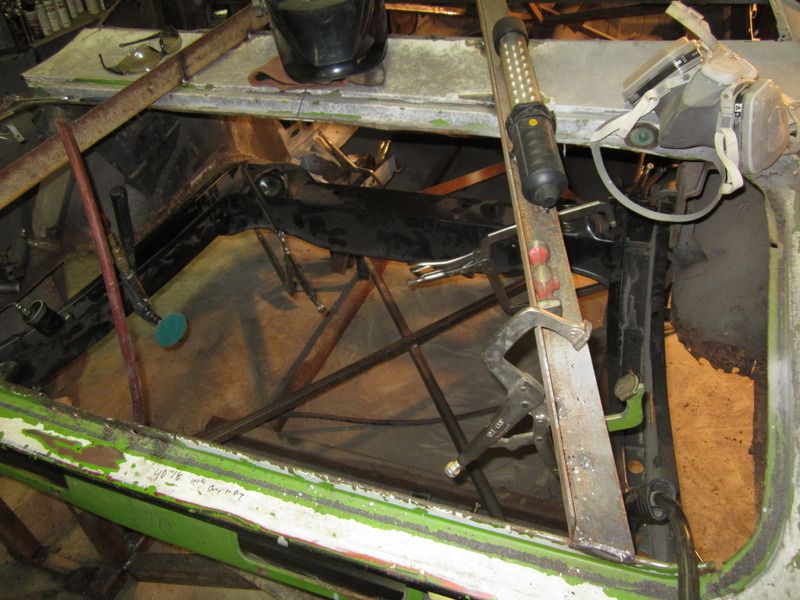
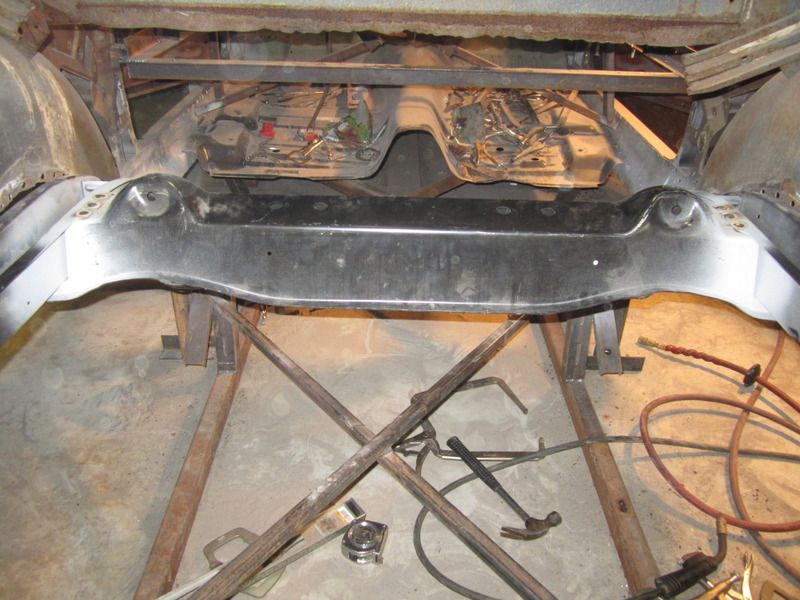
cudaman440_1 Check your PM's I sent you some basic info... I did some more work, first had to repair the rail/rocker part...  Repaired... 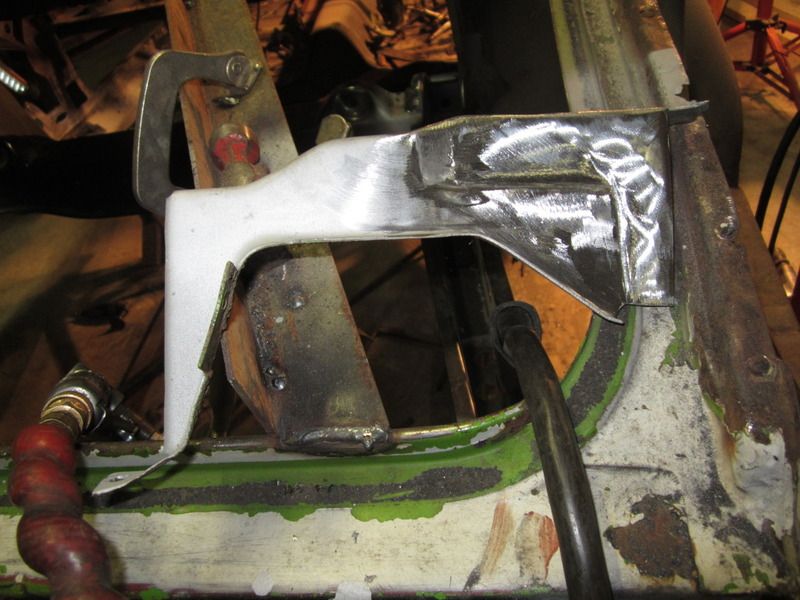 Rear Butt Pan Drilled and Ready to go in... 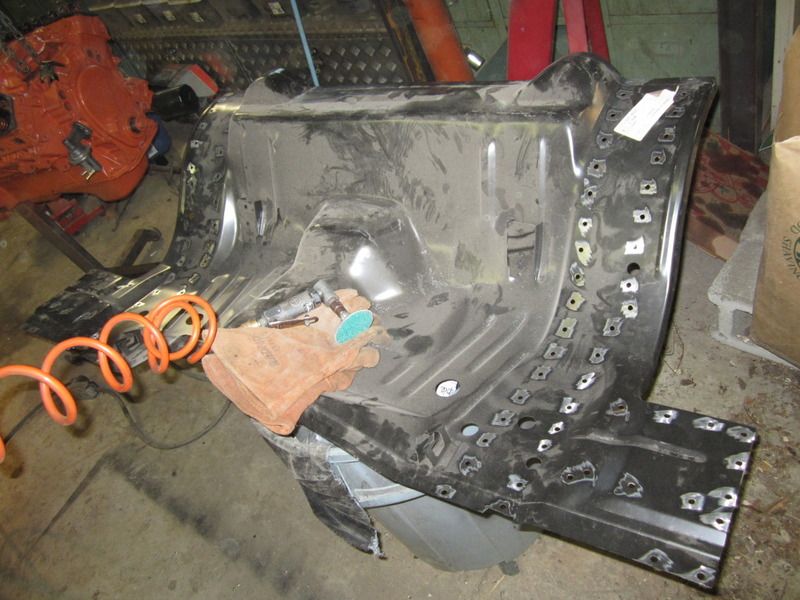 Installed... 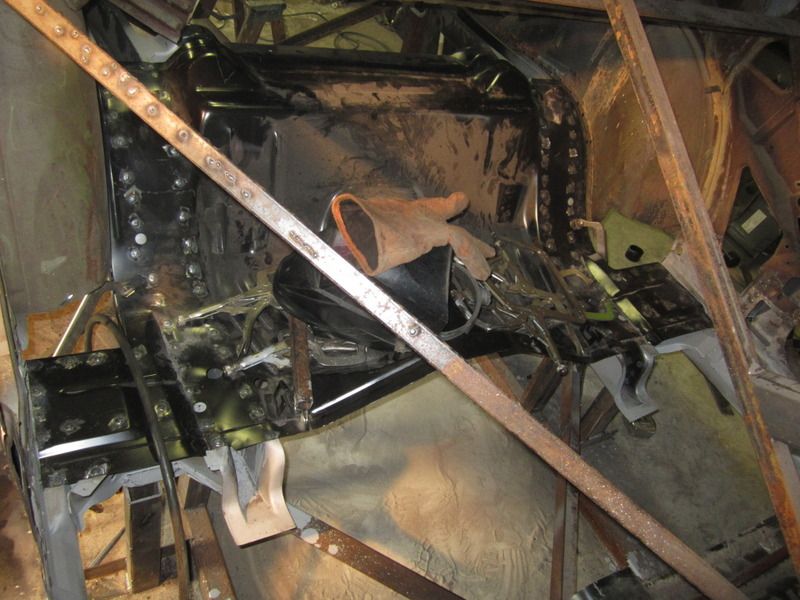 Rear Floor Pans Installed...  Trunk Braced Installed on new trunk Pan...  Trunk Floor Laid in Ready to be welded... 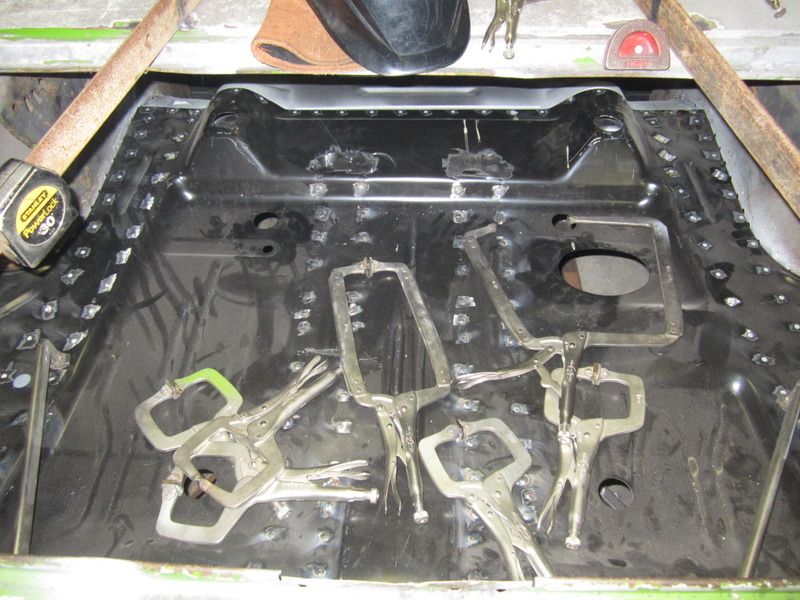 Thats All for now!
|
|
|
|
|