Previous Thread
Next Thread
Print Thread
Installing challenger quarters and trunk pan #1197763
03/15/12 09:53 PM
03/15/12 09:53 PM
Joined: Mar 2012
Posts: 5
Mi
M
mklott Offline OP
member
mklott  Offline OP
member
M

Joined: Mar 2012
Posts: 5
Mi
So here's my question I recently bought a project challenger. It needed a roof skin so I drilled out all the spot welds and removed the old roof skin. As I got deeper into the project I decided the trunk pan , Dutchman panel and quarters should be replaced also. My question is how should I brace the car since the roof is off and I'm going to have to remove basically the whole back of the car?

Re: Installing challenger quarters and trunk pan [Re: mklott] #1197764
03/16/12 03:04 AM
03/16/12 03:04 AM
Joined: Feb 2003
Posts: 18,582
Rust Belt, SW PA
Silver70 Offline
I Live Here
Silver70  Offline
I Live Here

Joined: Feb 2003
Posts: 18,582
Rust Belt, SW PA
I'd do the roof first. Not remove it all at once or you'll have more parts to have to adjust to make it all fit.


68 Road Runner, 69 Belvedere, 71 Challenger Vert
340 barracuda, 01 Ram CTD, 95 Ram, 04 Ram, 85 Daytona turbo Z
66 GTO, 06 Magnum RT AWD. 07 Ram CTD, 07 Ram
Re: Installing challenger quarters and trunk pan [Re: Silver70] #1197765
03/16/12 09:20 PM
03/16/12 09:20 PM
Joined: Jan 2003
Posts: 8,489
Candler,NC / Myrtle Beach, SC
J
JDMopar Offline
master
JDMopar  Offline
master
J

Joined: Jan 2003
Posts: 8,489
Candler,NC / Myrtle Beach, SC
Do the roof skin before you remove anything else. Then do one quarter at a time. You should be able to get the full trunk floor installed in one piece while you have one quarter, trunk gutter on that side,and the dutcman panel removed.

Re: Installing challenger quarters and trunk pan [Re: JDMopar] #1197766
03/17/12 03:21 AM
03/17/12 03:21 AM
Joined: Feb 2006
Posts: 1,179
Canada
D
demon Offline
super stock
demon  Offline
super stock
D

Joined: Feb 2006
Posts: 1,179
Canada
Roof goes on last. It overlaps the 1/4's. These cars are a lot stronger than most people think. No real need for bracing but you can weld a brace across the door jambs.
Always leave doors on when changing the 1/4's and make sure you align them to the old 1/4 before taking the 1/4's off.

Re: Installing challenger quarters and trunk pan [Re: demon] #1197767
03/17/12 06:24 AM
03/17/12 06:24 AM
Joined: Apr 2008
Posts: 230
Georgia
M
magiccuda Offline
enthusiast
magiccuda  Offline
enthusiast
M

Joined: Apr 2008
Posts: 230
Georgia
If your just doing the roof skin then dont worry about it. the roof interstructur is were the strength is.

Re: Installing challenger quarters and trunk pan [Re: magiccuda] #1197768
03/17/12 12:04 PM
03/17/12 12:04 PM
Joined: Mar 2012
Posts: 5
Mi
M
mklott Offline OP
member
mklott  Offline OP
member
M

Joined: Mar 2012
Posts: 5
Mi
So you are saying the best ways since I have the roof off is remove one quarter and dutchman panel install the trunk pan and then remove the other quarter and finish it up that way? I might as well replace the taillight panel since it has to come off also

Re: Installing challenger quarters and trunk pan [Re: mklott] #1197769
03/17/12 01:27 PM
03/17/12 01:27 PM
Joined: Jan 2003
Posts: 5,138
East Aurora (Buffalo) NY
RoadRunner Offline
master
RoadRunner  Offline
master

Joined: Jan 2003
Posts: 5,138
East Aurora (Buffalo) NY
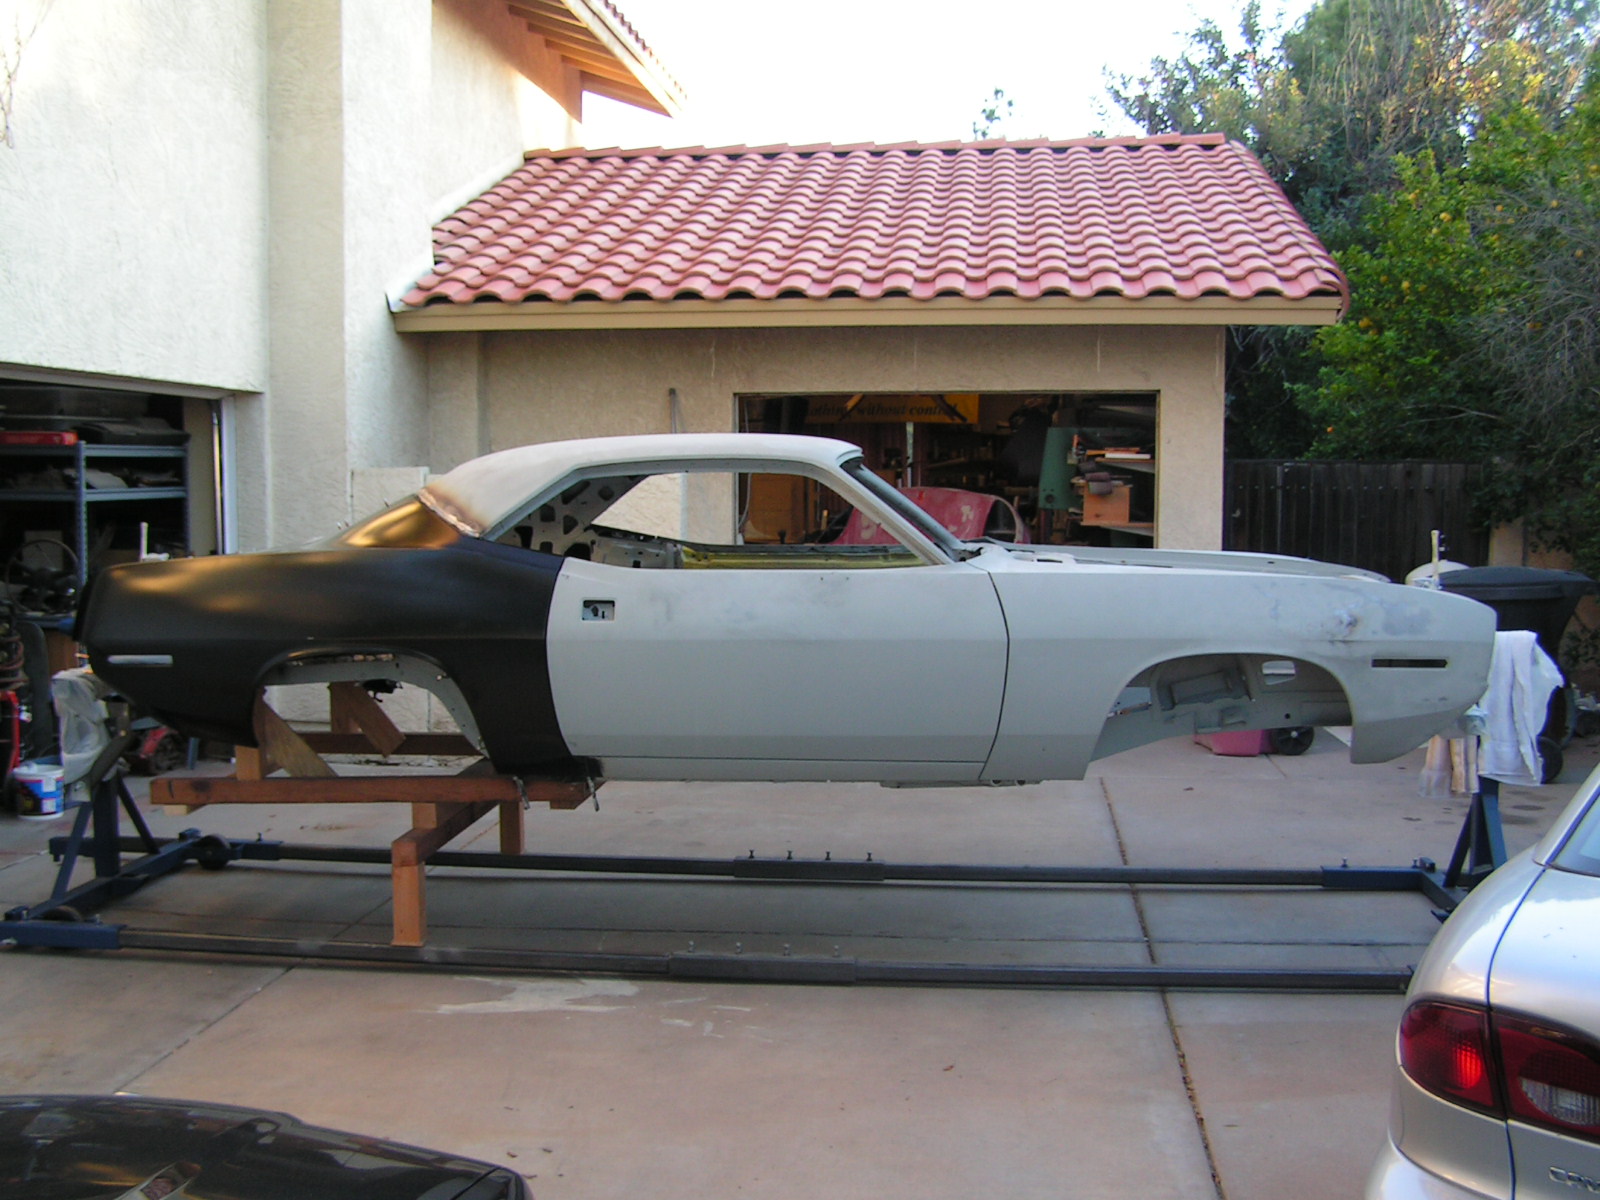
Go buy a bunch of harbor frieght jack stands and get some 4" x 4" blocks of wood for additional hight. You can use 3 pair to support the car. A pair at the front cross member, a pair near the front spring hanger area on the frame and a pair at the back of the frame rails (you will need the blocks to get the additional height here. Level it all out with shims or what ever. I would tackle the dutchman panel first, but don't weld it along the flanges to the quarters. This will give you a good reference to attach the quarters to.

All of this assumes you have the car stripped down to the shell. Once you start adding the weight of the various components, you may need to add additional bracing before cutting anything off.

Then take off the quarters and tail panel. You can get full access to the trunk floor from there. Take lots of measurements. If you know someone with the same car take measurements off theirs too. I measured three different challenger bodies and the measurements from the same points varied as much as 3/8".

If you are doing quarters and trunk extensions, get you rear valence out before you weld it all in so you can make sure you have the right fit. As mentioned before, the roof goes on last.


68 Road Runner (383/4speed, post car w/decor pkg) - Major Project
69 Road Runner w/472 Hemi & 4 speed.
70 Challenger R/T SE EF8 w/ V9J, U - A32 - Major Project
2023 Ford Mach 1
Re: Installing challenger quarters and trunk pan [Re: RoadRunner] #1197770
03/18/12 02:21 PM
03/18/12 02:21 PM
Joined: Oct 2011
Posts: 768
Dry Heat AZ
A
AAR#2 Offline
super stock
AAR#2  Offline
super stock
A

Joined: Oct 2011
Posts: 768
Dry Heat AZ
Right on RoadRunner,agree with your position, and hope this picture helps.

In my case the Jig was already supporting the cars weight at the front and back ends. Before I cut a single spot weld loose a wooden support system was built that picked up locations identical to where the springs would normally support the car, I used a central support in the axle location tied into the lower jig supports, this allowed me to move the car during work and further mimics the loading seen with weight on wheels. As already stated, take lots of dimensions (and pictures), even things you cant imagine needing since once its cut loose its to late when you find you need an additional measurement.

Only variation I have is I cut all panels off at once and found it much easier working in an open area than trying to work around existing panels that were going to be replaced. I must warn you, this is not for the faint of heart.

Take your time and cleco or clamp everything together and you'll be fine.

7124271-PICT0370.JPG (64 downloads)
Re: Installing challenger quarters and trunk pan [Re: AAR#2] #1197771
03/18/12 11:48 PM
03/18/12 11:48 PM
Joined: Feb 2003
Posts: 18,582
Rust Belt, SW PA
Silver70 Offline
I Live Here
Silver70  Offline
I Live Here

Joined: Feb 2003
Posts: 18,582
Rust Belt, SW PA
I'm not saying the way listed above is wrong. I just choose to do it my way because I have less things to try and adjust all together verse just one parts at a time. So myself, the roofs off already, I'm doing it first. And when I do full quarters I support them as close to where the spring would be as I can.


Powered by UBB.threads™ PHP Forum Software 7.7.1