|
 Nine years in the making......Getting closer to done
#833372
Nine years in the making......Getting closer to done
#833372
10/19/10 12:45 AM
10/19/10 12:45 AM
|
Joined: Jul 2006
Posts: 488
Chilly Northern, Minn.
71 Charger R/T
 OP
OP
mopar
|
OP
mopar
Joined: Jul 2006
Posts: 488
Chilly Northern, Minn.
|
In the process of redoing the post with pictures after "photobucket" screwed everyone up with their attempted extortion! (please bear with me....) re-creating at the end of this string of missing pictures. Go down and you will start to see pictures. Well...... This isn't working at all! pictures can't be added without exceeding data limits per post. Perhaps I will start all over again and delete this thread. And here it is after hauling it up from Indiana to Minnesota (I was pumped!) Original owner wanted the "Landau" vinyl roof but was told he couldn't get it on an R/T so he ordered it without a vinyl and had the dealer install one. 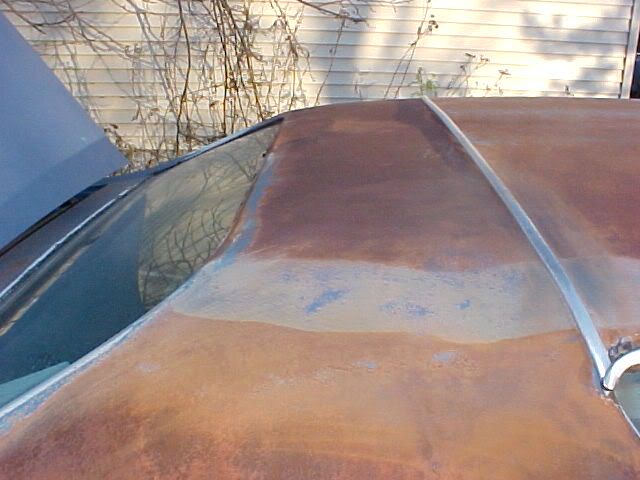 The hood had been stolen and the roof had some rust holes from the saltwater air exposure while the original owner was stationed at Patrick AFB in Cocoa Beach Fla. So one of the first things I did was replace the roof skin with a nice one off a 1974 parts car I bought, Then I was able to find a hood up in Canada. I also restored the correct date coded 15" rally wheels. 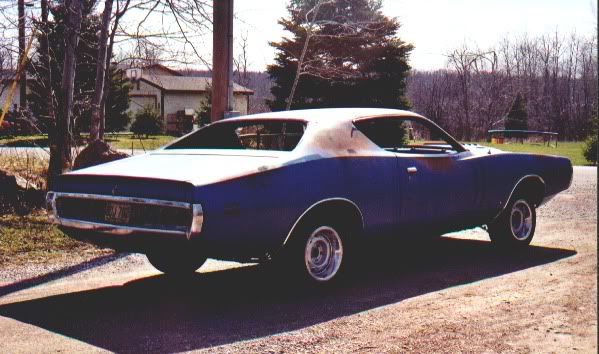 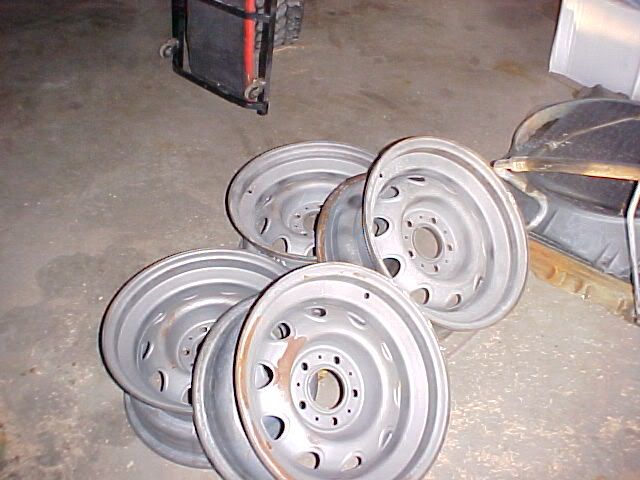 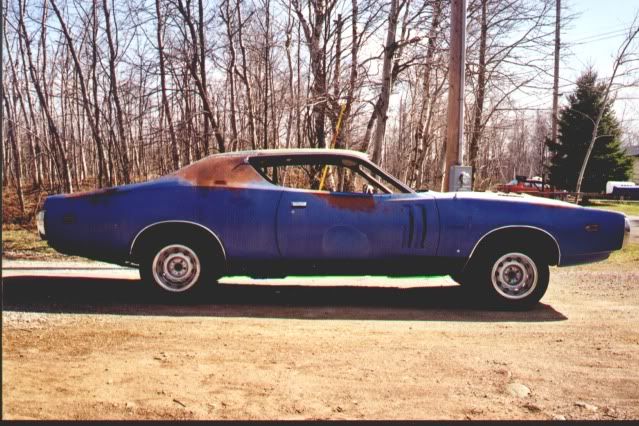 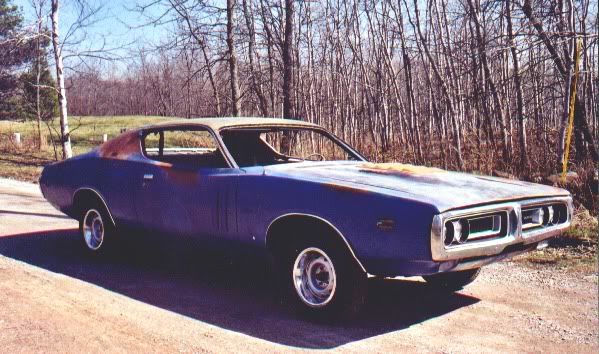 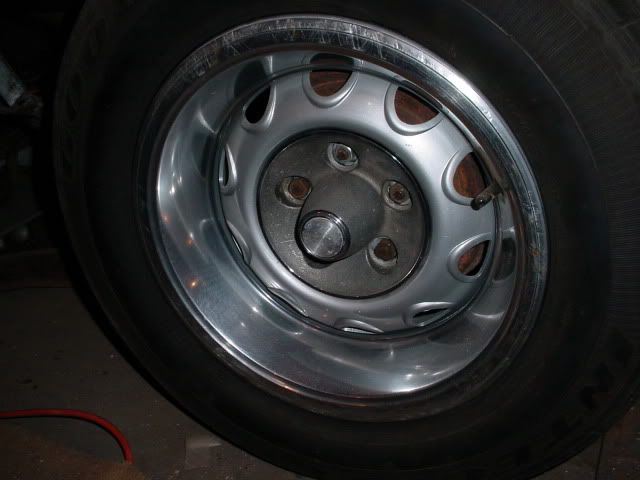 The car didn't look too bad from a distance as far as rust went.... but, it was rusty in some odd spots (again, I assume from the saltwater air) much different from the Minnesota rust I'm used to. 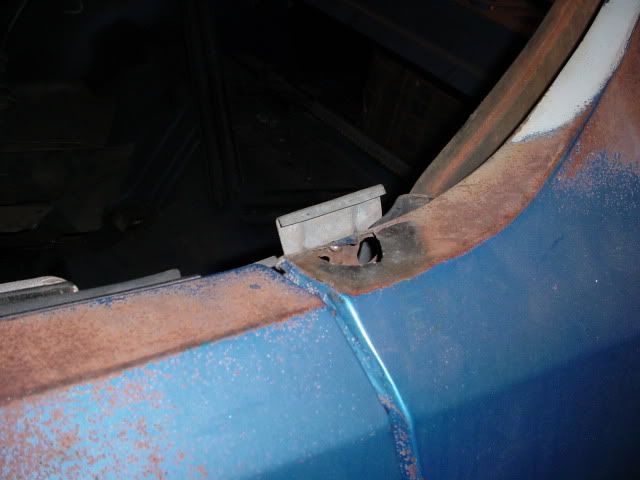 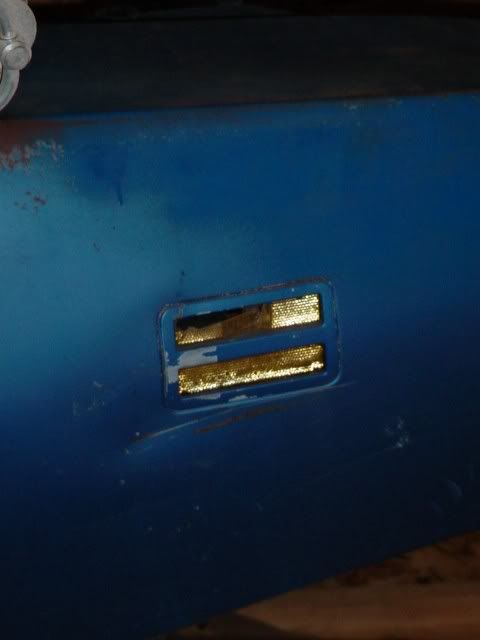 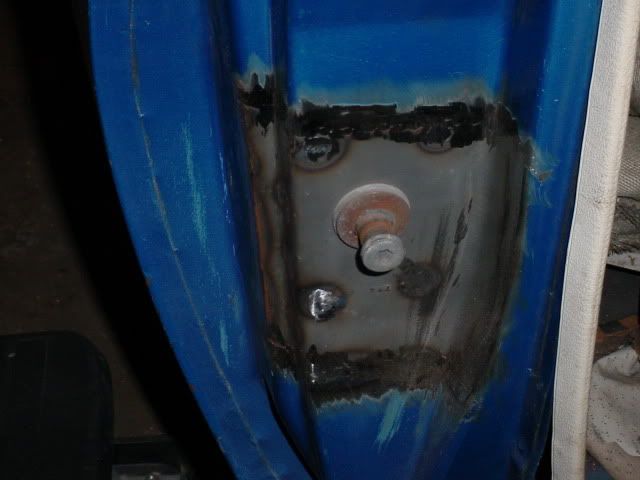  [img] http://i228.photobucket.com/albums/ee187/71chargerRapidTransit/My%2071%20R%20T/5u.jpg[/img] Using pieces off the '74 donor car. [img] http://i228.photobucket.com/albums/ee187/71chargerRapidTransit/My%2071%20R%20T/bfgt.jpg[/img] Replaced the driver's side floor pan. [img] http://i228.photobucket.com/albums/ee187/71chargerRapidTransit/My%2071%20R%20T/chgrbtm2-1.jpg[/img] Had some normal rust in the corner of the doors. [img] http://i228.photobucket.com/albums/ee187/71chargerRapidTransit/My%2071%20R%20T/DSC00080.jpg[/img] [img] http://i228.photobucket.com/albums/ee187/71chargerRapidTransit/My%2071%20R%20T/DSC00110.jpg[/img] [img] http://i228.photobucket.com/albums/ee187/71chargerRapidTransit/My%2071%20R%20T/DSC00111.jpg[/img] [img] http://i228.photobucket.com/albums/ee187/71chargerRapidTransit/My%2071%20R%20T/DSC00112.jpg[/img] [img] http://i228.photobucket.com/albums/ee187/71chargerRapidTransit/My%2071%20R%20T/DSC00114-1.jpg[/img] Fabbed up a new piece. [img] http://i228.photobucket.com/albums/ee187/71chargerRapidTransit/My%2071%20R%20T/DSC00121.jpg[/img] Test fit. [img] http://i228.photobucket.com/albums/ee187/71chargerRapidTransit/My%2071%20R%20T/DSC00122.jpg[/img] Welded in from the inside. [img] http://i228.photobucket.com/albums/ee187/71chargerRapidTransit/My%2071%20R%20T/DSC00123.jpg[/img] [img] http://i228.photobucket.com/albums/ee187/71chargerRapidTransit/My%2071%20R%20T/DSC00124.jpg[/img] I left the original edge all the way around and filleted the rust out. Then made a patch for the outer skin. [img] http://i228.photobucket.com/albums/ee187/71chargerRapidTransit/My%2071%20R%20T/DSC00138.jpg[/img] [img] http://i228.photobucket.com/albums/ee187/71chargerRapidTransit/My%2071%20R%20T/DSC00140.jpg[/img] [img] http://i228.photobucket.com/albums/ee187/71chargerRapidTransit/My%2071%20R%20T/DSC00143.jpg[/img] [img] http://i228.photobucket.com/albums/ee187/71chargerRapidTransit/My%2071%20R%20T/DSC00144.jpg[/img] more rust removal and metal fabrication. [img] http://i228.photobucket.com/albums/ee187/71chargerRapidTransit/My%2071%20R%20T/DSC00089.jpg[/img] [img] http://i228.photobucket.com/albums/ee187/71chargerRapidTransit/My%2071%20R%20T/DSC00090.jpg[/img] [img] http://i228.photobucket.com/albums/ee187/71chargerRapidTransit/My%2071%20R%20T/DSC00092.jpg[/img] [img] http://i228.photobucket.com/albums/ee187/71chargerRapidTransit/My%2071%20R%20T/DSC00091.jpg[/img] [img] http://i228.photobucket.com/albums/ee187/71chargerRapidTransit/My%2071%20R%20T/DSC00094.jpg[/img] [img] http://i228.photobucket.com/albums/ee187/71chargerRapidTransit/My%2071%20R%20T/DSC00093.jpg[/img] Wheel tub. [img] http://i228.photobucket.com/albums/ee187/71chargerRapidTransit/My%2071%20R%20T/DSC00108-1.jpg[/img] [img] http://i228.photobucket.com/albums/ee187/71chargerRapidTransit/My%2071%20R%20T/DSC00109-1.jpg[/img] [img] http://i228.photobucket.com/albums/ee187/71chargerRapidTransit/My%2071%20R%20T/DSC00162.jpg[/img] [img] http://i228.photobucket.com/albums/ee187/71chargerRapidTransit/My%2071%20R%20T/DSC00163.jpg[/img] Lower quarter. [img] http://i228.photobucket.com/albums/ee187/71chargerRapidTransit/My%2071%20R%20T/DSC00160.jpg[/img] [img] http://i228.photobucket.com/albums/ee187/71chargerRapidTransit/My%2071%20R%20T/DSC00165.jpg[/img] [img] http://i228.photobucket.com/albums/ee187/71chargerRapidTransit/My%2071%20R%20T/DSsC00110.jpg[/img] [img] http://i228.photobucket.com/albums/ee187/71chargerRapidTransit/My%2071%20R%20T/DSsC00111.jpg[/img] [img] http://i228.photobucket.com/albums/ee187/71chargerRapidTransit/My%2071%20R%20T/DSsC00111.jpg[/img] While spraying the jambs, shot the driver's floor pan. [img] http://i228.photobucket.com/albums/ee187/71chargerRapidTransit/My%2071%20R%20T/DSsC00126.jpg[/img] Some interior going back in. [img] http://i228.photobucket.com/albums/ee187/71chargerRapidTransit/My%2071%20R%20T/DSC00191.jpg[/img] In goes the motor. [img] http://i228.photobucket.com/albums/ee187/71chargerRapidTransit/My%2071%20R%20T/DSC00203.jpg[/img] [img] http://i228.photobucket.com/albums/ee187/71chargerRapidTransit/My%2071%20R%20T/DSC00194.jpg[/img] [img] http://i228.photobucket.com/albums/ee187/71chargerRapidTransit/My%2071%20R%20T/DSC00196.jpg[/img] [img] http://i228.photobucket.com/albums/ee187/71chargerRapidTransit/My%2071%20R%20T/DSC00012-2.jpg[/img] [img] http://i228.photobucket.com/albums/ee187/71chargerRapidTransit/My%2071%20R%20T/DSC00211.jpg[/img] [img] http://i228.photobucket.com/albums/ee187/71chargerRapidTransit/My%2071%20R%20T/DSC00212.jpg[/img] [img] http://i228.photobucket.com/albums/ee187/71chargerRapidTransit/My%2071%20R%20T/DSC00213.jpg[/img] Had to grind off the molding clip studs on the roof from the '74 position and weld on new studs in the '71 position. [img] http://i228.photobucket.com/albums/ee187/71chargerRapidTransit/My%2071%20R%20T/DSCN0144.jpg[/img] [img] http://i228.photobucket.com/albums/ee187/71chargerRapidTransit/DSC00338.jpg[/img] Engine in, hood on, sheet metal fitted and it's starting to look more like a car again. [img] http://i228.photobucket.com/albums/ee187/71chargerRapidTransit/My%2071%20R%20T/DSCN0142.jpg[/img] [img] http://i228.photobucket.com/albums/ee187/71chargerRapidTransit/My%2071%20R%20T/DSCN0153.jpg[/img] Seats recovered and new door panels temporarily installed to keep them out of the way. [img] http://i228.photobucket.com/albums/ee187/71chargerRapidTransit/My%2071%20R%20T/DSCN0161.jpg[/img] [img] http://i228.photobucket.com/albums/ee187/71chargerRapidTransit/My%2071%20R%20T/DSCN0163.jpg[/img] Underside of the hood jambed and radiator saddle detailed. [img] http://i228.photobucket.com/albums/ee187/71chargerRapidTransit/My%2071%20R%20T/DSCN0160.jpg[/img] [img] http://i228.photobucket.com/albums/ee187/71chargerRapidTransit/My%2071%20R%20T/DSCN0159.jpg[/img] Tail lights restored and 1971 plate installed in cleaned up bumper. [img] http://i228.photobucket.com/albums/ee187/71chargerRapidTransit/My%2071%20R%20T/DSCN0265.jpg[/img] I waited a long time for this stage..... Garage cleaned up, more lighting, car disassembled again, masked off and ready to spray. [img] http://i228.photobucket.com/albums/ee187/71chargerRapidTransit/My%2071%20R%20T/DSCN0276.jpg[/img] [img] http://i228.photobucket.com/albums/ee187/71chargerRapidTransit/My%2071%20R%20T/DSCN0274.jpg[/img] [img] http://i228.photobucket.com/albums/ee187/71chargerRapidTransit/My%2071%20R%20T/DSCN0273.jpg[/img] [img] http://i228.photobucket.com/albums/ee187/71chargerRapidTransit/My%2071%20R%20T/DSCN0269.jpg[/img] [img] http://i228.photobucket.com/albums/ee187/71chargerRapidTransit/My%2071%20R%20T/DSCN0267.jpg[/img] [img] http://i228.photobucket.com/albums/ee187/71chargerRapidTransit/My%2071%20R%20T/DSCN0278.jpg[/img] Base coat. [img] http://i228.photobucket.com/albums/ee187/71chargerRapidTransit/My%2071%20R%20T/DSCN0279.jpg[/img] Clear flash coat. [img] http://i228.photobucket.com/albums/ee187/71chargerRapidTransit/My%2071%20R%20T/DSCN0282.jpg[/img] After three more coats of clear. [img] http://i228.photobucket.com/albums/ee187/71chargerRapidTransit/My%2071%20R%20T/DSCN0283.jpg[/img] [img] http://i228.photobucket.com/albums/ee187/71chargerRapidTransit/My%2071%20R%20T/DSCN0285.jpg[/img] [img] http://i228.photobucket.com/albums/ee187/71chargerRapidTransit/My%2071%20R%20T/DSCN0293.jpg[/img] [img] http://i228.photobucket.com/albums/ee187/71chargerRapidTransit/My%2071%20R%20T/DSCN0294.jpg[/img] [img] http://i228.photobucket.com/albums/ee187/71chargerRapidTransit/My%2071%20R%20T/DSCN0287.jpg[/img] [img] http://i228.photobucket.com/albums/ee187/71chargerRapidTransit/My%2071%20R%20T/DSCN0290.jpg[/img] Unmasked and ready for reassembly.(after a little blocking and buffing). [img] http://i228.photobucket.com/albums/ee187/71chargerRapidTransit/My%2071%20R%20T/DSCN0301.jpg[/img] [img] http://i228.photobucket.com/albums/ee187/71chargerRapidTransit/My%2071%20R%20T/DSCN0299.jpg[/img] [img] http://i228.photobucket.com/albums/ee187/71chargerRapidTransit/My%2071%20R%20T/DSCN0302.jpg[/img] [img] http://i228.photobucket.com/albums/ee187/71chargerRapidTransit/My%2071%20R%20T/DSCN0305.jpg[/img] [img] http://i228.photobucket.com/albums/ee187/71chargerRapidTransit/My%2071%20R%20T/DSCN0309.jpg[/img] Preparation and installation of vinyl top. [img] http://i228.photobucket.com/albums/ee187/71chargerRapidTransit/My%2071%20R%20T/DSCN0316.jpg[/img] [img] http://i228.photobucket.com/albums/ee187/71chargerRapidTransit/My%2071%20R%20T/DSCN0318.jpg[/img] [img] http://i228.photobucket.com/albums/ee187/71chargerRapidTransit/My%2071%20R%20T/DSCN0319.jpg[/img] [img] http://i228.photobucket.com/albums/ee187/71chargerRapidTransit/My%2071%20R%20T/DSCN0320.jpg[/img] [img] http://i228.photobucket.com/albums/ee187/71chargerRapidTransit/My%2071%20R%20T/DSCN0321.jpg[/img] [img] http://i228.photobucket.com/albums/ee187/71chargerRapidTransit/My%2071%20R%20T/DSCN0334.jpg[/img] [img] http://i228.photobucket.com/albums/ee187/71chargerRapidTransit/My%2071%20R%20T/DSCN0340.jpg[/img] First outing. [img] http://i228.photobucket.com/albums/ee187/71chargerRapidTransit/My%2071%20R%20T/DSCN0359.jpg[/img] [img] http://i228.photobucket.com/albums/ee187/71chargerRapidTransit/My%2071%20R%20T/DSCN0373.jpg[/img] [img] http://i228.photobucket.com/albums/ee187/71chargerRapidTransit/My%2071%20R%20T/DSCN0368.jpg[/img] [img] http://i228.photobucket.com/albums/ee187/71chargerRapidTransit/My%2071%20R%20T/DSCN0376.jpg[/img] [img] http://i228.photobucket.com/albums/ee187/71chargerRapidTransit/My%2071%20R%20T/DSCN0358.jpg[/img] [img] http://i228.photobucket.com/albums/ee187/71chargerRapidTransit/My%2071%20R%20T/DSCN0352.jpg[/img] And that's where I'm at for now. Hopefully my headliner will come in the next couple of days, then maybe some POLYGLAS G 60 15"s someday,but then no more of this! [img] http://i228.photobucket.com/albums/ee187/71chargerRapidTransit/My%2071%20R%20T/DSC02783.jpg[/img] [img] http://i228.photobucket.com/albums/ee187/71chargerRapidTransit/My%2071%20R%20T/DSC02784.jpg[/img] [img] http://i228.photobucket.com/albums/ee187/71chargerRapidTransit/My%2071%20R%20T/DSC02785.jpg[/img] [img] http://i228.photobucket.com/albums/ee187/71chargerRapidTransit/My%2071%20R%20T/DSC02786.jpg[/img] [img] http://i228.photobucket.com/albums/ee187/71chargerRapidTransit/My%2071%20R%20T/DSC02787.jpg[/img] [img] http://i228.photobucket.com/albums/ee187/71chargerRapidTransit/My%2071%20R%20T/DSC02788.jpg[/img] [img] http://i228.photobucket.com/albums/ee187/71chargerRapidTransit/My%2071%20R%20T/DSC02789.jpg[/img] [img] http://i228.photobucket.com/albums/ee187/71chargerRapidTransit/My%2071%20R%20T/DSC02790.jpg[/img] that'll make it pretty complete and I'll have to look for another project. I've followed the "Young guns project" in this area of the forum. I've enjoyed seeing Steve's progress so much over the years, I thought I would post some pics of my project as it's come along up to now so maybe someone could be encouraged by seeing the fruits of my labor like I've been encouraged by Steve's hard work and ambition..... So here's the story. I purchased my car in November of 2001 after the world trade center mess and was unsure if it was a wise decision not knowing how the economy was going to go with a threat of more attacks. The car is opted with 440 4bbl, slap stick auto, cruise, A/C, power windows, AM/FM, cassette player/recorder, power brakes (front disc), pedal dress up,15" road wheels, six-way seat and it is a stripe delete car. Original owner tells me he checked off "HEMI" as well as air on the order sheet but was informed he had to choose one or the other, being Oklahoma, A/C was more important to him and he "didn't like the cheesy pop-up scoop anyway" Well, I certainly am glad I got it now. It's been a long haul, on and off, but it's nearing completion (or at least I can enjoy taking it out for a ride anyway). Here is what it looked like from the Ebay pictures
Last edited by 71 Charger R/T; 04/22/18 02:58 PM.
|
|
|
Re: Nine years in the making......Getting closer to done
[Re: Fab64]
#833376
10/19/10 08:39 PM
10/19/10 08:39 PM
|
Joined: Mar 2007
Posts: 3,285
West Coast, USA
jbc426
master
|
master
Joined: Mar 2007
Posts: 3,285
West Coast, USA
|
Great craftsmanship! Looks amazing. How did you link multiple pictures in one post?
1970 Plymouth 'Cuda #'s 440-6(block in storage)currently 493" 6 pack, Shaker, 5 speed Passon, 4.10's
1968 Plymouth Barracuda Convertible 408 Magnum EFI with 4 speed automatic overdrive, 3800 stall lock-up converter and 4.30's (closest thing to an automatic 5 speed going)
|
|
|
Re: Nine years in the making......Getting closer to done
[Re: jbc426]
#833377
10/19/10 09:25 PM
10/19/10 09:25 PM
|
Joined: Jul 2006
Posts: 488
Chilly Northern, Minn.
71 Charger R/T
OP
mopar
|
OP
mopar
Joined: Jul 2006
Posts: 488
Chilly Northern, Minn.
|
Quote:
Great craftsmanship! Looks amazing. How did you link multiple pictures in one post?
Thanks, I used "photobucket" and linked the photos to the post as I went along. Write a little then copy & paste the photo link, then write a little more. Just paste the image link in wherever you want it to go.
|
|
|
Re: Nine years in the making......Getting closer to done
[Re: SGTFURY62]
#833379
10/19/10 11:05 PM
10/19/10 11:05 PM
|
Joined: Jan 2005
Posts: 1,647
IL
71383beep
top fuel
|
top fuel
Joined: Jan 2005
Posts: 1,647
IL
|
WoW!!!  Very cool!
'73 GK6 Challenger Rallye - 340 4-Speed
|
|
|
Re: Nine years in the making......Getting closer to don
[Re: SGTFURY62]
#833383
10/23/10 08:20 AM
10/23/10 08:20 AM
|
Joined: Aug 2004
Posts: 8,526
Tenn.
jrwoodjoe
master
|
master
Joined: Aug 2004
Posts: 8,526
Tenn.
|
 That's one of the sharpest car's I have seen in a while. Color combo really makes it stand out. I think it's cool that you left the landau top on and that you did such nice work yourself. I also liked the photos where you painted it in the garage with the haze still in the air. Joe
65 Barracuda
70 Challenger
|
|
|
Re: Nine years in the making......Getting closer to don
[Re: jrwoodjoe]
#833384
10/23/10 01:55 PM
10/23/10 01:55 PM
|
Anonymous
Unregistered
|
Anonymous
Unregistered
|
|
|
|
Re: Nine years in the making......Getting closer to don
[Re: ]
#833385
10/23/10 03:43 PM
10/23/10 03:43 PM
|
Joined: Jul 2006
Posts: 488
Chilly Northern, Minn.
71 Charger R/T
OP
mopar
|
OP
mopar
Joined: Jul 2006
Posts: 488
Chilly Northern, Minn.
|
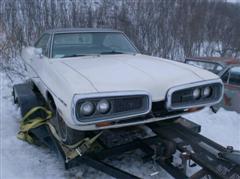
Thanks Cody, I'm sure you DO have the skills.... I've seen the progress of your Duster and it's looking good! Yes, you can use the pictures for your website!  Thanks MRVCODE, I like the looks too but want to get Goodyear Polyglas tires to really give it that "mean" look. GSS340, I'd like to see pictures of the car you found if you would care to share them. JRWOODJOE, BIG thanks for the compliments, it really makes it worth it when others appreciate the workmanship put into a project.... HAZE...yeah, I had to wait til it cleared out just to be able to see the car for a picture!  SUPERFREAK, Thanks for the "props", I'd like to see some pics of your project....'69 BEE? My first car in high school was a 69 Super Bee B5 blue with blue interior, white top and white rump stripe.  Here is what it looks like today 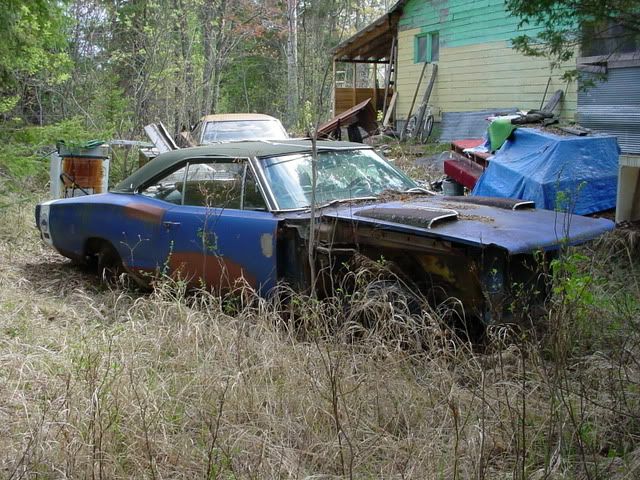 I'm Thinking of seeing if I could buy it back and make it my next project.
|
|
|
Re: Nine years in the making......Getting closer to don
[Re: 71 Charger R/T]
#833386
10/23/10 08:34 PM
10/23/10 08:34 PM
|
Anonymous
Unregistered
|
Anonymous
Unregistered
|
What is that other B-body in the back ground? You can see my project in this forum, it's called Carpenters Special.
|
|
|
Re: Nine years in the making......Getting closer to don
[Re: ]
#833387
10/23/10 10:19 PM
10/23/10 10:19 PM
|
Joined: Mar 2007
Posts: 4,130
Halifax, N.S. Canada
Edison62
master
|
master
Joined: Mar 2007
Posts: 4,130
Halifax, N.S. Canada
|
Lyndon... your car looks fantastic. I can only with mine come's out as good. I really like the color combo and think it was wish to keep the canopy vinyl roof...... enjoy!
Bryan
Don't be stupid.... it's not smart!
1970 Super Bee. Big blk 4 speed car.
1973 Dodge Dart Sport 340 4 speed car.
1985 Dodge Ram D-100 /6 auto. Original paint
1990 Dodge Ram D-150 V-6 5 Speed. Original paint
1995 Chrysler LHS V-6 auto. Original paint
2014 Ram 1500 R/T 5.7 Hemi...!
|
|
|
Re: Nine years in the making......Getting closer to don
[Re: ]
#833390
11/13/10 05:36 PM
11/13/10 05:36 PM
|
Joined: Jul 2006
Posts: 488
Chilly Northern, Minn.
71 Charger R/T
OP
mopar
|
OP
mopar
Joined: Jul 2006
Posts: 488
Chilly Northern, Minn.
|
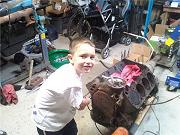
Superfreak, sorry for the slow reply... (been very busy lately) First off,Thanks! It's HUGE getting a compliment from somebody that does work of your caliber, I'm impressed with the work you've done! The B-body in the background is a 69 Road Runner 383 4 speed post car that has at least been put inside recently (probably too late) The car is very rough and has the left rear quarter cut off of it. I just went up north yesterday and saw my old car (VERY rough, very sad) and all the other cars this gentleman has. Here's a picture of the Road Runner inside. 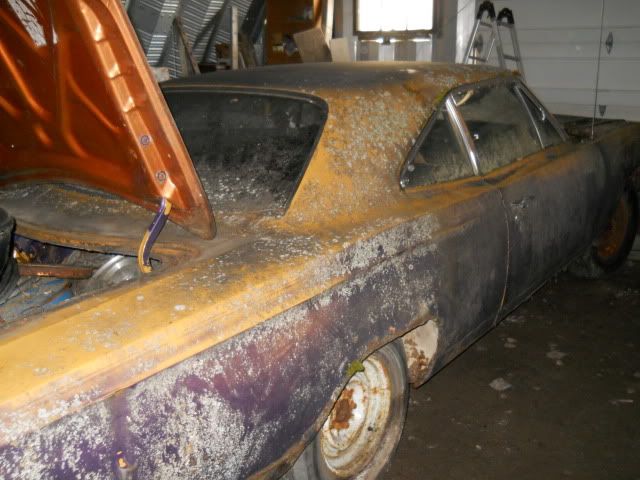 The car still has the # matching motor and trans. Edison (Bryan), Thanks for the compliments, your car looks interesting. My nephew has a FC7 '70 Bee with a 440 4 speed in it now (originally 383 4 speed car). GSS340 WOW! Did you score big time or what!!!? congratulations on that, and your Son deserves a reward for spotting that, good eyes and GOOD JOB!! KID, Thank you too, Your car looks KILLER!("so mean it scares me") Red lines, black wheels and 5 chrome lug nuts.... VERY COOL! Very nice "simple engine rebuild"!
|
|
|
|
|


 Great job on the metal fabrication and painting. Absolutely beautiful car.