|
 Re: Paint job on a budget!? CONTINUED..page 44........
[Re: td325ic]
#27238
Re: Paint job on a budget!? CONTINUED..page 44........
[Re: td325ic]
#27238
04/01/07 09:04 AM
04/01/07 09:04 AM
|
Anonymous
Unregistered
|
Anonymous
Unregistered
|
Quote:
Does anyone know if Brightside Black is a true jet black? Or in the sun does it appear to be More of a grayish black?
It's as black and black can be, maybe a bit more black.
|
|
|
Re: Paint job on a budget!? CONTINUED..page 44........
#27239
04/01/07 10:20 AM
04/01/07 10:20 AM
|
Anonymous
Unregistered
|
Anonymous
Unregistered
|
I'm using the brightside black and like spyhunter said it's way black.
I'm going to thin mine even more today because I got more orange peel than I wanted yesterday. Time to sand...
|
|
|
Re: Paint job on a budget!? CONTINUED..page 44........
#27240
04/01/07 02:22 PM
04/01/07 02:22 PM
|
Anonymous
Unregistered
|
Anonymous
Unregistered
|
Quote:
Hi
where do you get the hardener ?
can you get hardener for Rustoleum ?
can you use another companies hardener with rustoleum ?
I want to use Rustolium with the hardener to do the bottom of my old pick-up, its too much trouble to do 7-8 coats and wetsand it while on your back !
And no one will really see it anyway , its both for covering it all in one color and protection from rusting later.
Thanks for keeping this thread alive !
Beaulieu
You can get the hardener from most tractor supply outfits...you could also try the hardener used for Synthetic car paint, since they are both alkyd enamels. I've heard of people using different brand hardeners with rustoleum, but I've never tried it so I can't say for sure how well it works. I can't see why it wouldn't though.
For the underside of your truck, you shouldn't have to do more than a couple of coats, and I wouldn't bother wet sanding. Here's some pics of the floor of my '60 Olds after I welded in a new panel:
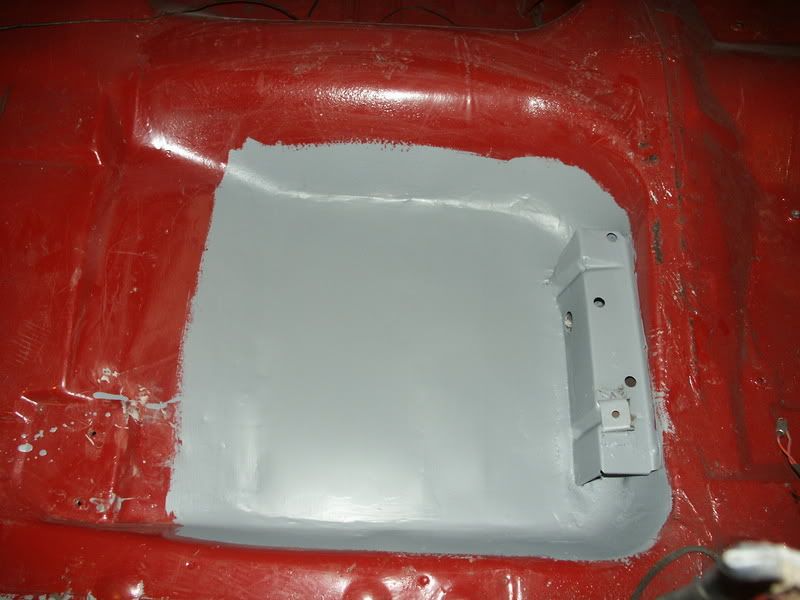
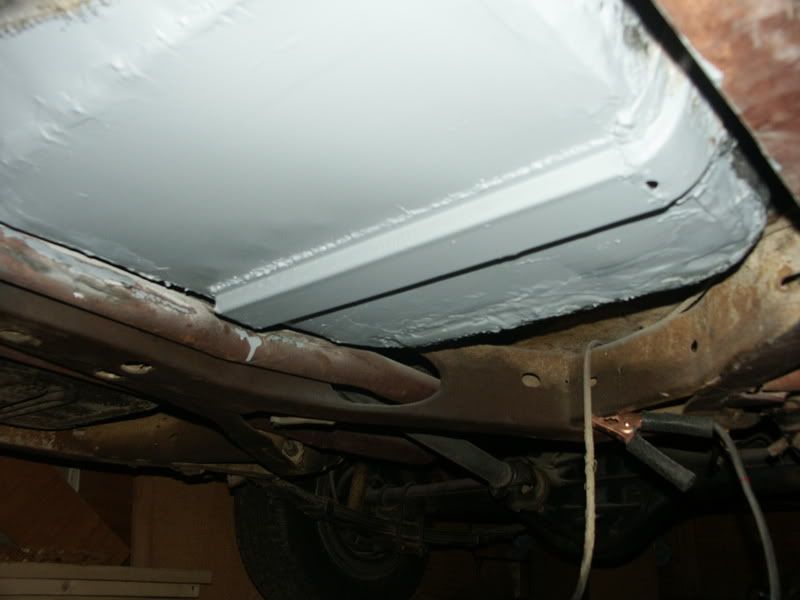
You can see the primer flowed out well enough...I just painted it on straight out of the can with a brush. Here's what it looks like painted:
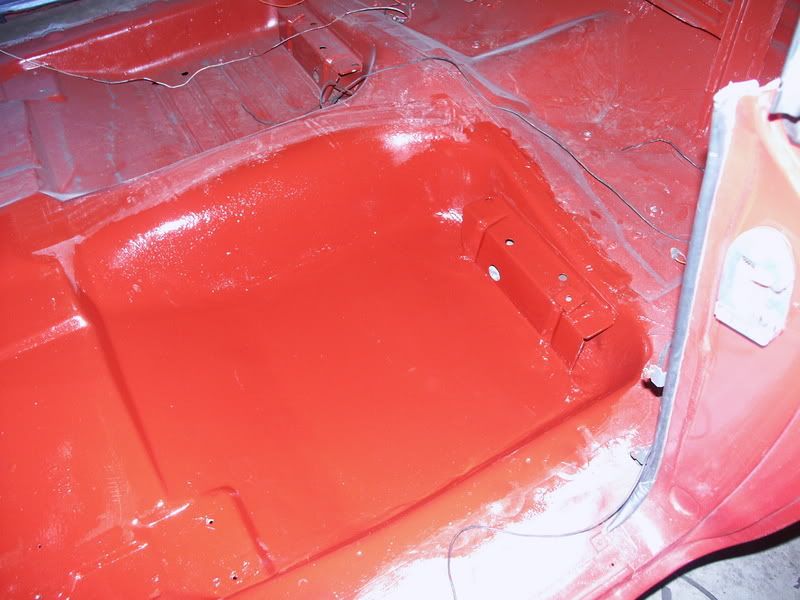
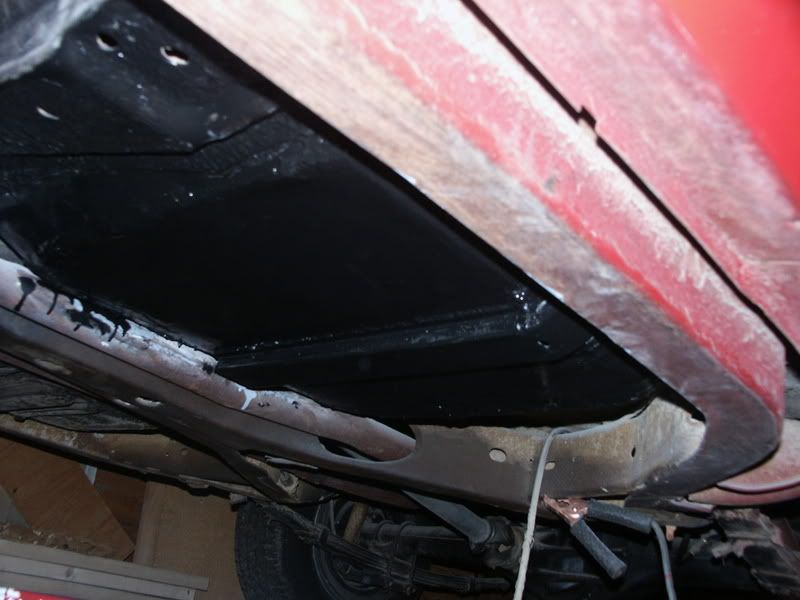
The bottom I did with two coats of flat black mixed about 6:1 with hardener, brushed on. The red was applied the same way. As long as what you're painting under there is reasonably flat, the paint will look fine without any sanding. I put in a lot of work on that floor, doing it right. Here's how it started:
I may be the only person who ever sees it, but at least I know it's done right. If you do decide to use the hardener, please read some of our past posts on it, and using it safely.
|
|
|
Re: Paint job on a budget!? CONTINUED..page 44........
#27241
04/01/07 09:51 PM
04/01/07 09:51 PM
|
Anonymous
Unregistered
|
Anonymous
Unregistered
|
This is about how black is gets. This was taken without a flash, the with flash pic doesn't show the shine. THe wierd spots were where i sanded down some small runs.
|
|
|
Re: Paint job on a budget!? CONTINUED..page 44........
#27242
04/01/07 11:09 PM
04/01/07 11:09 PM
|
Joined: Sep 2006
Posts: 692
pa
ramman16248

mopar
|
mopar
Joined: Sep 2006
Posts: 692
pa
|
Well, after about 2 months worth of reading and finally a nice week, I decided to try this. I have a 1992 Dodge 250 2 wheel drive , that had the paint peel problem. I work my butt off for a couple of days trying to get all that old paint off so the new wouldn't fall off with the old paint. I am using the Implement Enamel from Tractor Supply Co.( The industrial version sold under BPS name on top.) It is in a can with a brownish-gold label. I also am using the odorless mineral spirits and the hardener sold by TSC. I mixed my first batch of blue by using 4 0z. of paint, 4 oz. min. spirits, and 1/2 oz of hardener. (Might I add that I am painting it two tone as it was from the factory.) The dark blue went on a little too thin. It got alot of the bubbles in it. By the time I got the silver painted, (the middle section), the bubbles weren't disappearing yet. To my horror, they were dried anough that they marked. Oh well, I needed to sand a little more. No big deal. I adjusted my mixture to 4 oz paint, 3 oz min spirits, and still used 1/2 oz of hardener. This seems to work the best on my truck with my current weather. I got through my first 2 coats, wetsanded it with 600 grit, dried it and gave it the 3rd coat. Wow !! I know I am not nearly done yet, but I think it is going to look awesome. I did try the paint in the refridgerator and it does keep the paint ok with hardener in it, but only for about 18-24 hours. I discovered something about the wetsanding. Now this may be co-incidence, but I had my truck out in the driveway with a garden hose. While wet sanding, I kept squirtong the truck off as I went. I could see where I sanded and where I didn't. One Guide that I found works is, fresh paint will make the water bead up like a wax job. I just wet sanded it until the water didn't bead anymore, it flowed right off of the truck. After I dried it, I was worried about how the next coat would show up. It looked like glass. This "Bead Method" my or may not work for you, maybe I lucked into it and my next sanding set will be a disaster, but I am doing it again anyways. I can't wait to PATIENTLY finish the truck and get some pictures of it here. I didn't really doubt this roller deal, I was just a little skeptical on gloss and prep. I can unofficially say that I like it!!! I will officially admit it when the truck is finished. A guy at our dealership offered to spray it for me , since I did all of the sanding work. I said," Anyone can spray it, but it takes BALLS ot roll that paint on!!! Jason
|
|
|
Re: Paint job on a budget!? CONTINUED..page 44........
[Re: ramman16248]
#27243
04/02/07 04:28 AM
04/02/07 04:28 AM
|
Anonymous
Unregistered
|
Anonymous
Unregistered
|
Ok, I've finally had some time to start finishing everything off. First up is the race boot. I've decided to thin the Brightside out more than I have in the past (I'm thinning it with mineral spirits) and I'm really happy with the results. And for the first time for ages, I didn't get any roller marks in the paint.  The reflections from the boot are really good. This shot shows some of the neighbour's trees.  Thinning the paint more than usual (plus wet sanding the living hell out of everything before I started painting) has reduced the orange peel considerably. The next shot shows just how little orange peel there is now, (look how easy it is to see what brand my new camera is). Please remember that this picture was taken about 10 mins after painting. It hasn't been polished or anything.  I'm planning on sanding the whole car tomorrow (400 - 600 - 800 - 1200) and depending on the weather I will hopefully be able to paint it the day after. I'm finally getting close to finishing this thing off once and for all. I just had to include this pic I bought a tripod along with the new camera, so of course I had to take some more pics of the boot once it got dark. The area around the lights shows the usual dust/crap/etc that gets on the fresh paint. I can't wait to see what this will look like once it has been wet sanded and polished properly. As one of my students mentioned to me the other day "I'm bringin sexy back"..... 
Last edited by Aussie Driver; 04/02/07 05:17 AM.
|
|
|
Re: Paint job on a budget!? CONTINUED..page 44........
#27244
04/02/07 08:24 AM
04/02/07 08:24 AM
|
Anonymous
Unregistered
|
Anonymous
Unregistered
|
great work again aussie driver! what % of thinner are you roughly using? while i've been playing around with it i've found it to change how fine the orange peel is, but coudlnt work out which way was better so left it lol, but that looks very smooth
has ur technique changed much due to it being thinner? or just roll it on, then roll again lightly after a bit?
|
|
|
Re: Paint job on a budget!? CONTINUED..page 44........
#27245
04/02/07 12:07 PM
04/02/07 12:07 PM
|
Anonymous
Unregistered
|
Anonymous
Unregistered
|
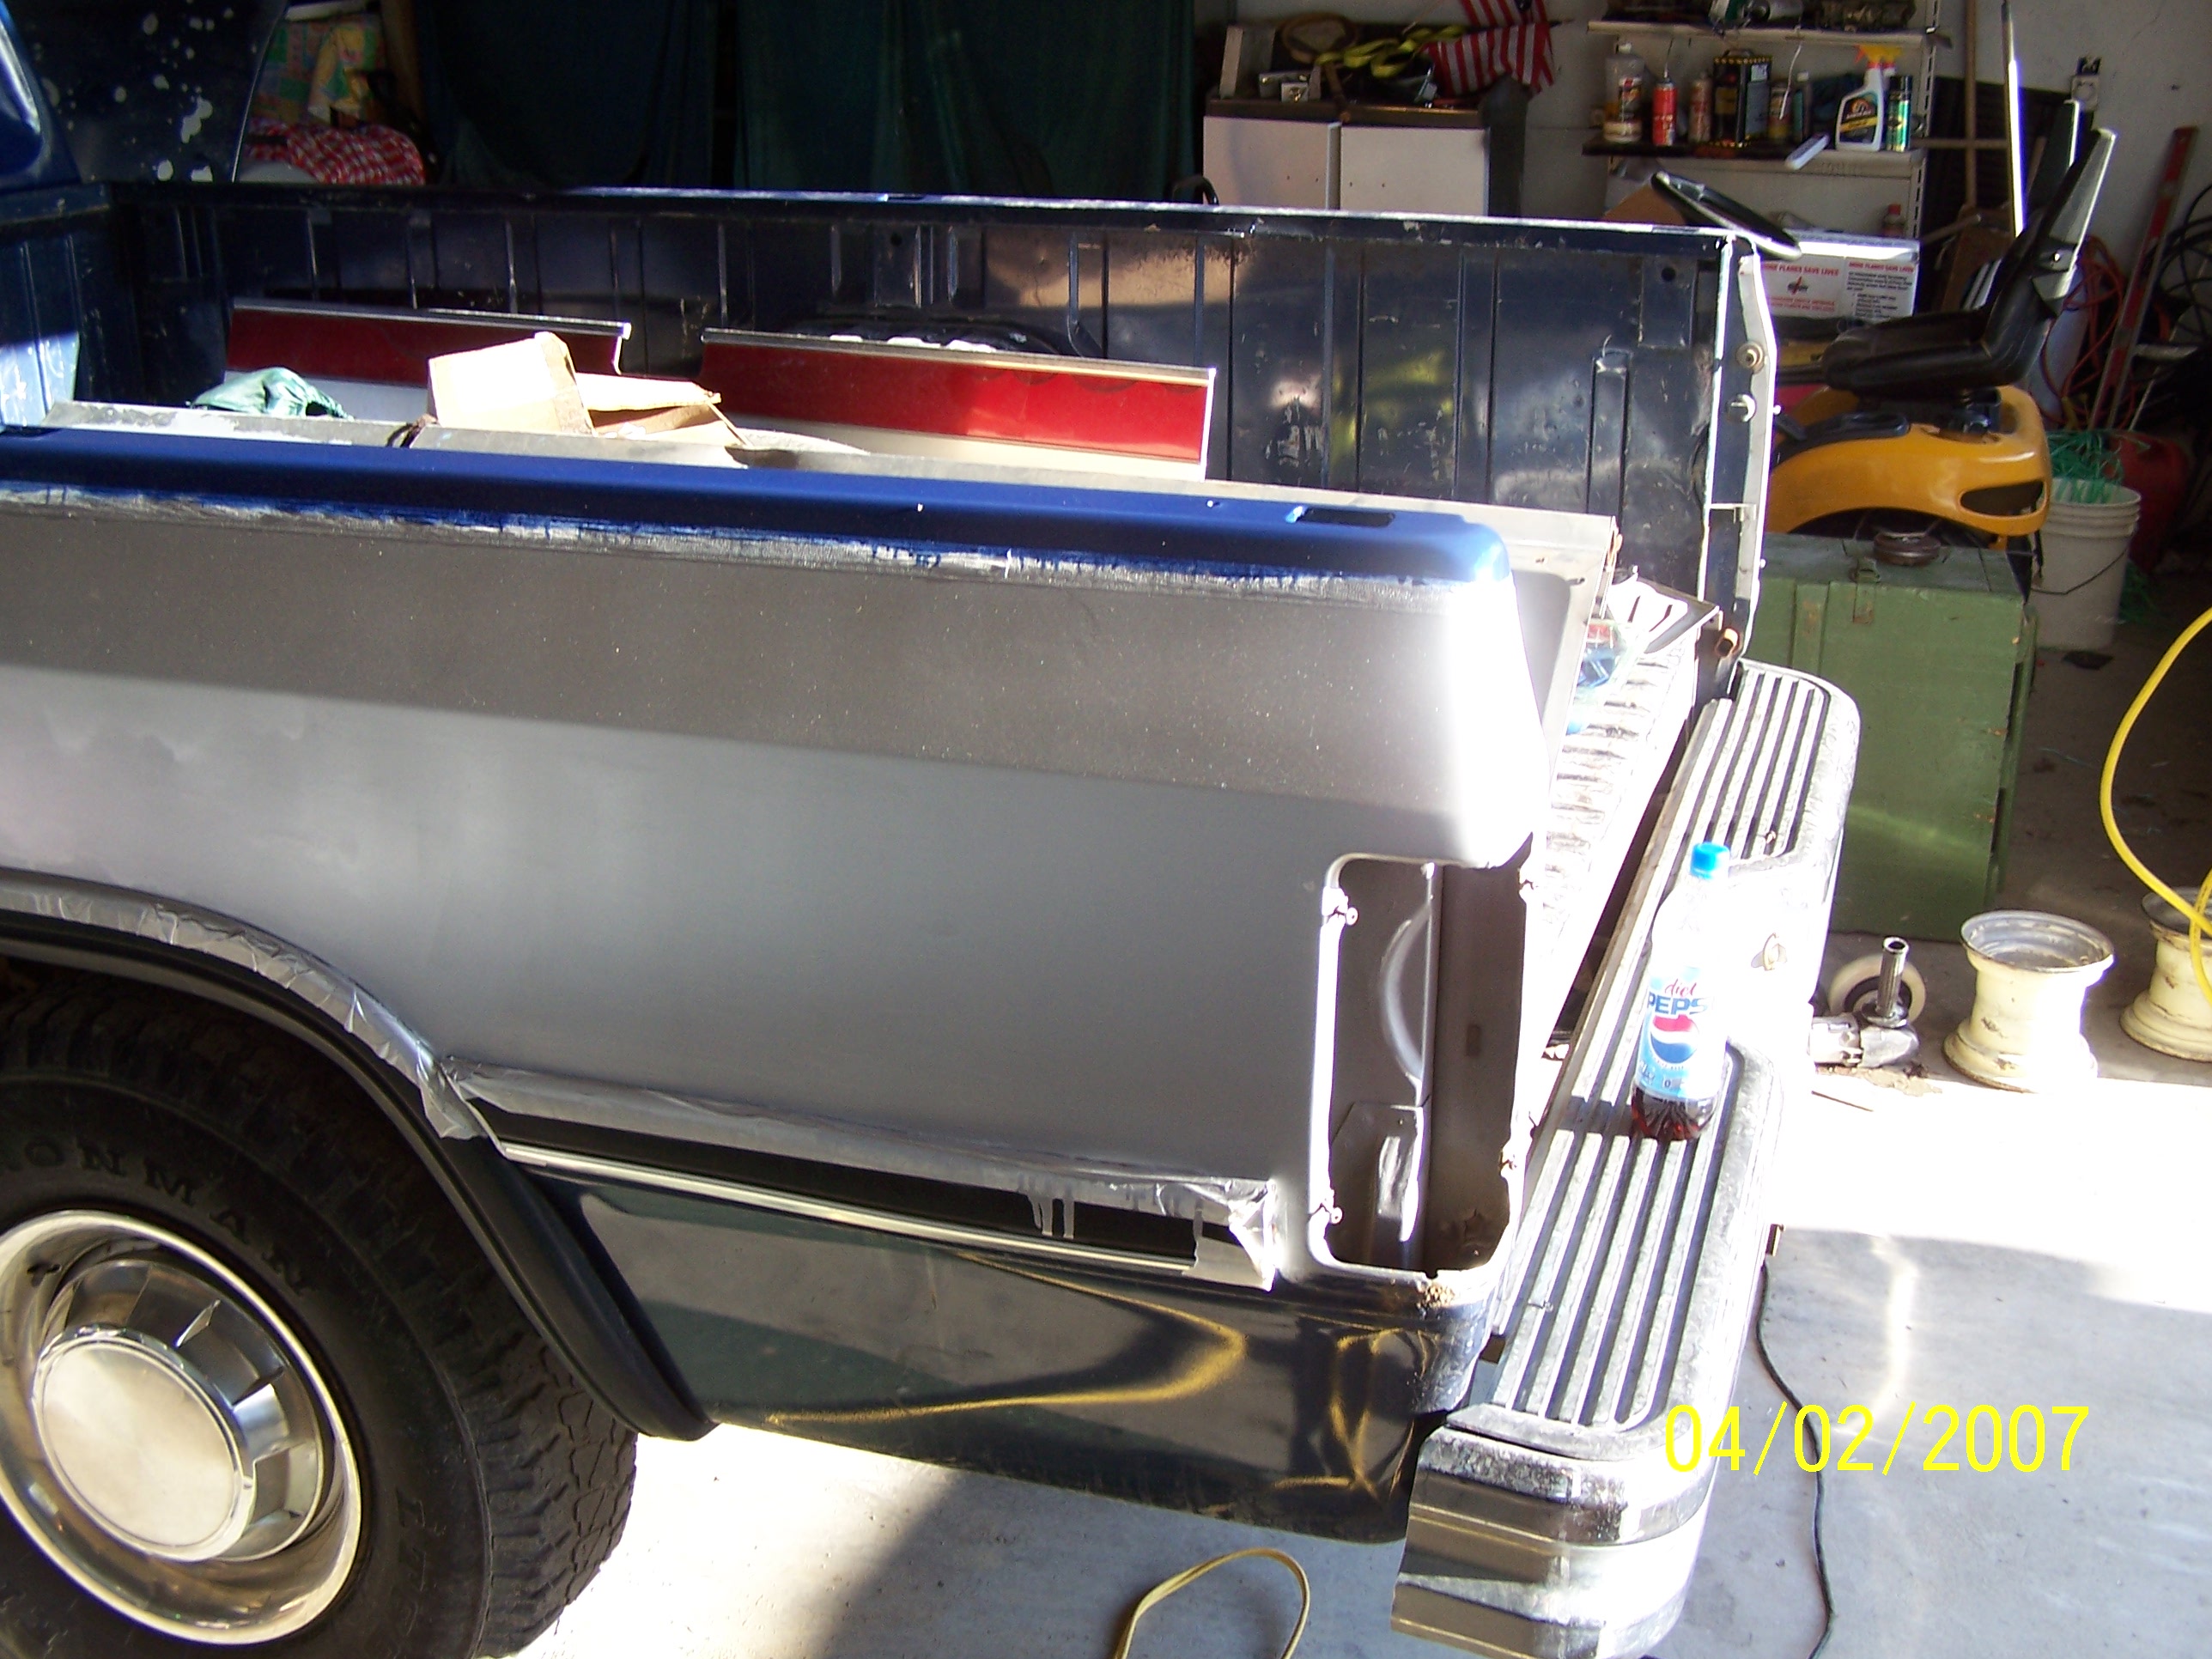
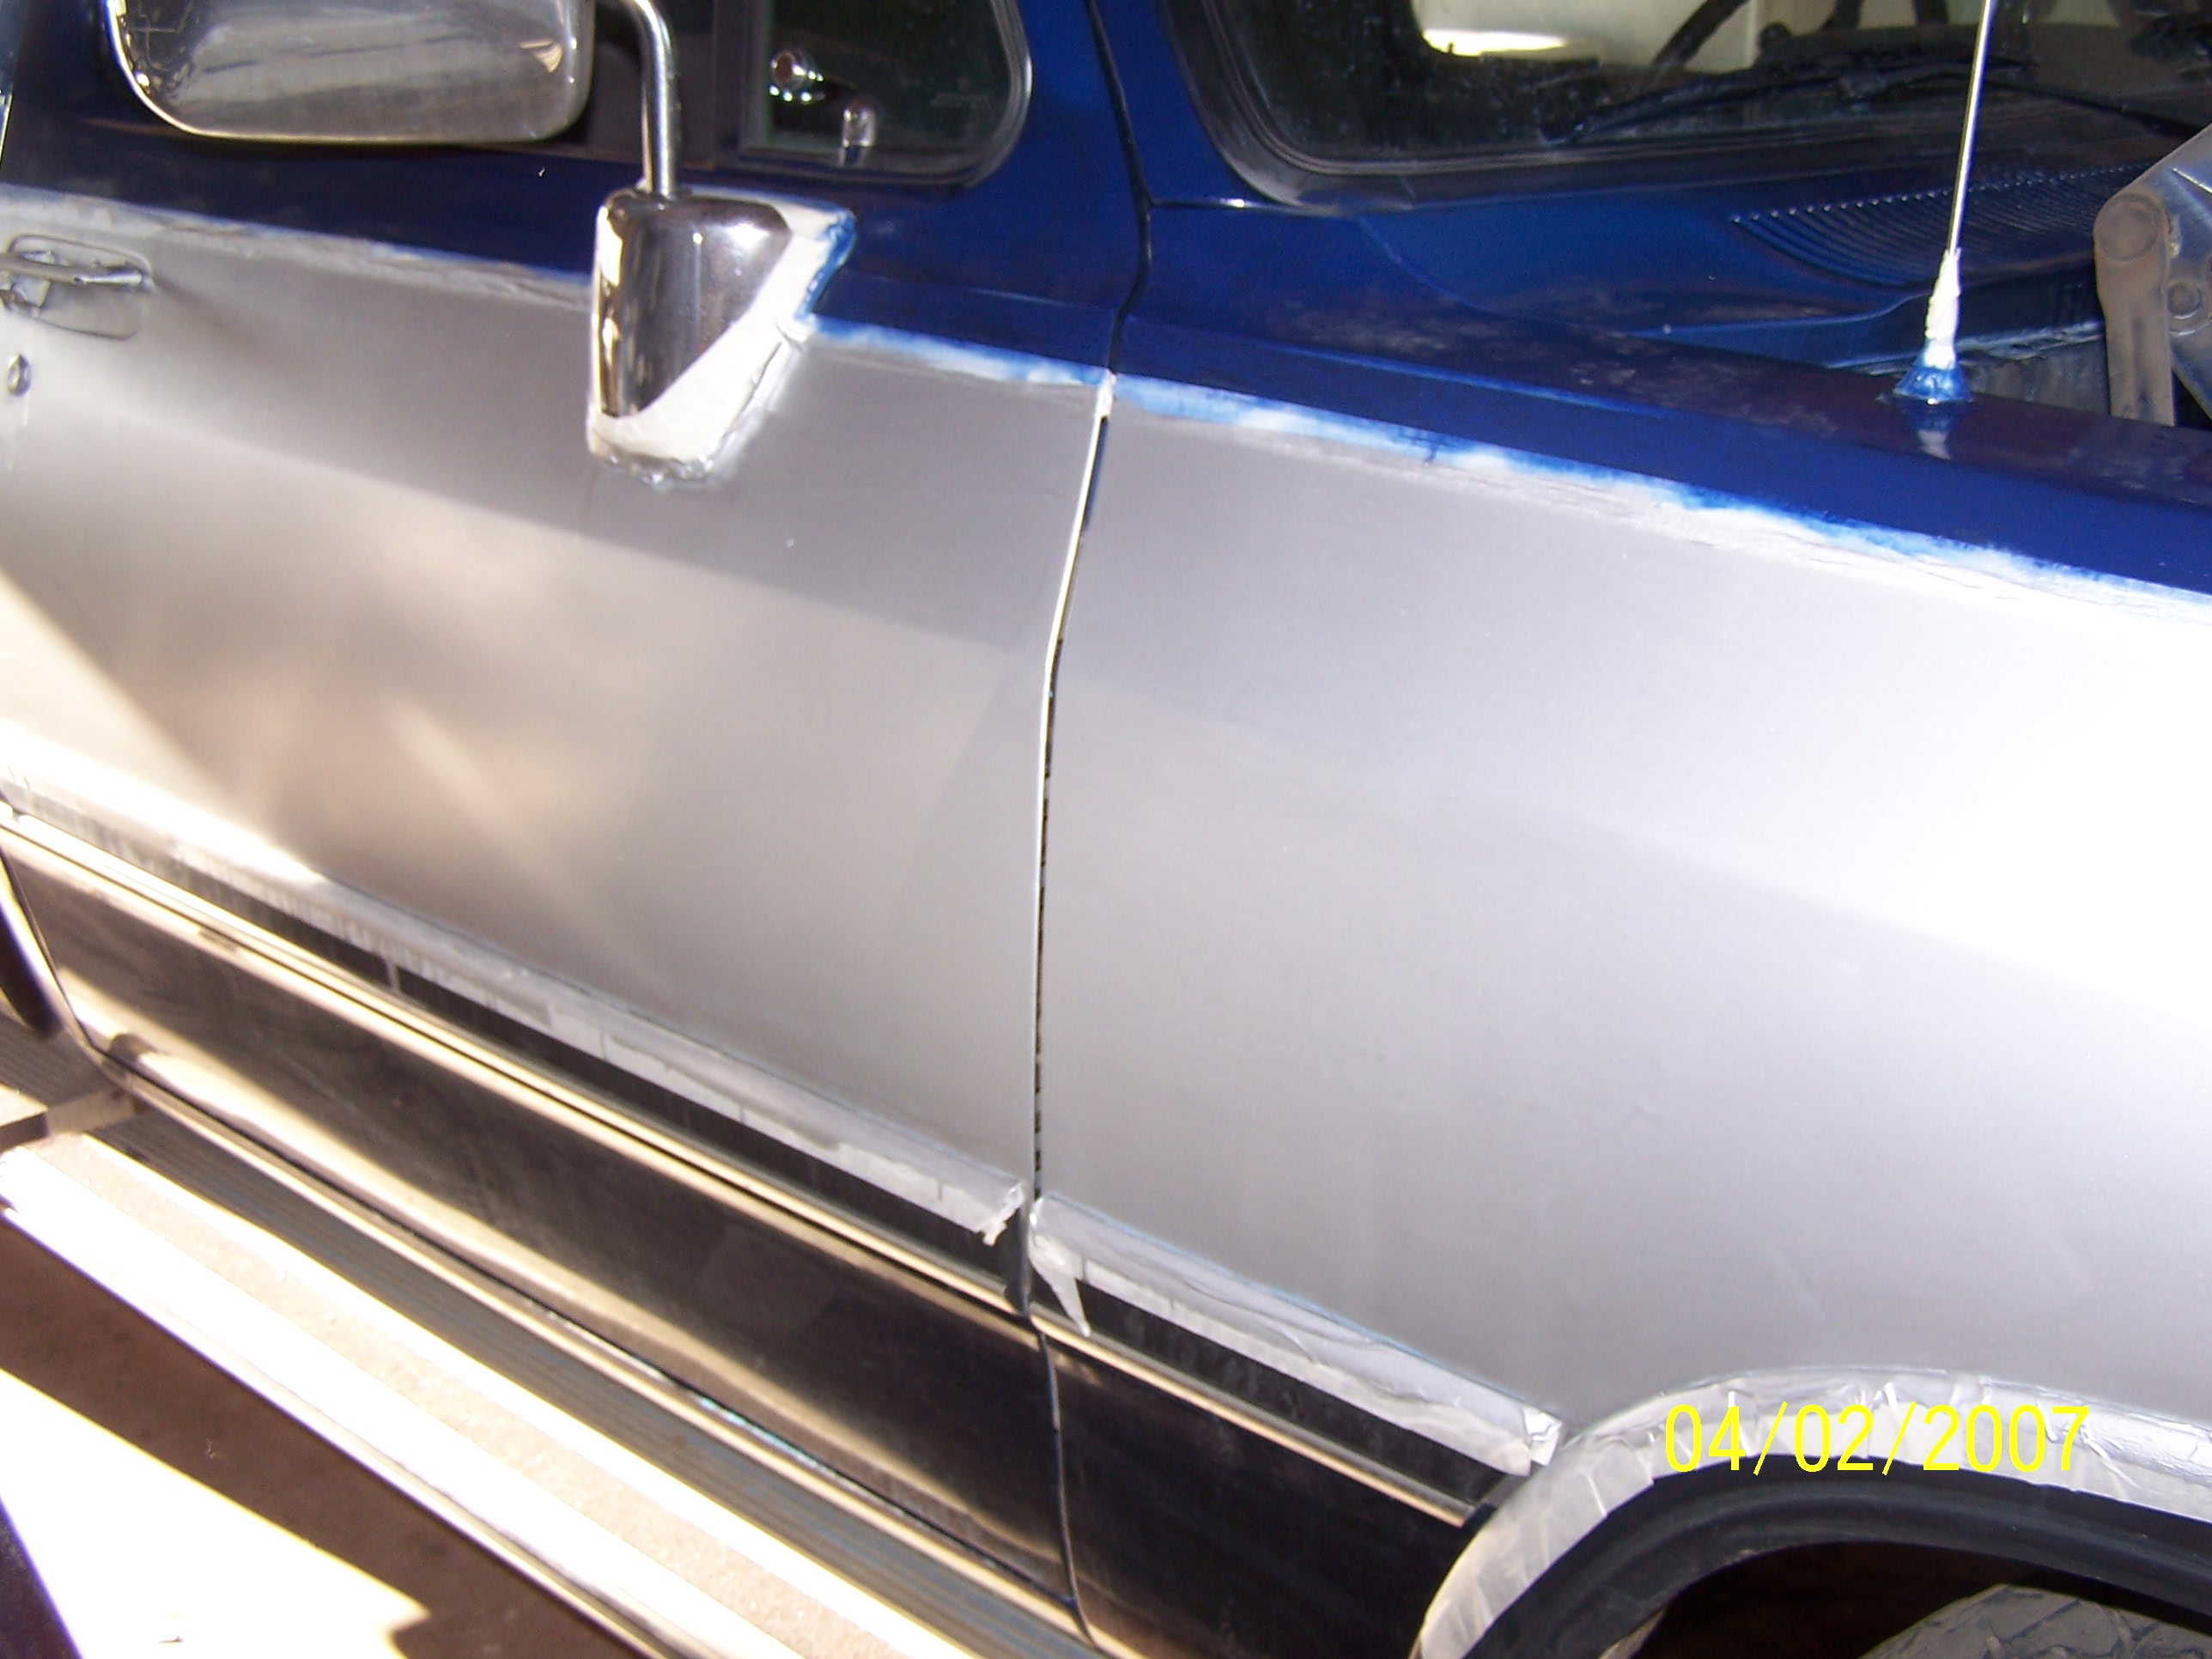
Here are some more pix of my progres over the weekend. The stripes are completed! I used one unthinned coat of Brightside followed by one thinned about 20%.  First coat of Brightside on the sides: 
|
|
|
Re: Paint job on a budget!? CONTINUED..page 44........
#27246
04/02/07 12:14 PM
04/02/07 12:14 PM
|
Anonymous
Unregistered
|
Anonymous
Unregistered
|
I stumbled across a technique that really cut way down on orange peel, runs, and sags on the sides of my car. I decided that I really hate sanding so I tried everything to get the paint to lay down, and this is how I ended up.
First, I applied an unthinned coat of brightside working in all directions with the roller. I just kept rollering until it was evenly distributed with no edge marks.
Next, I immediately knocked down the bubbles with a foam brush. As spyhunter pointed out, this left brush marks. So I rollered over it with my unloaded roller, which made a few smaller bubbles.
I knocked down the resulting bubbles with the brush again, then the roller. Back and forth until there were no more bubbles and the orange peel was very small.
This was all immediately upon application, and the amount of time spent was actually pretty small.
After completing the section, I went back and found my various sags and drips and agressively rollered them out, followed by the above technique of alternating brushing and rolling.
The end result was very small orange peel, and the next day (today) that was mostly gone. You can sort of see that in the above pix.
|
|
|
Re: Paint job on a budget!? CONTINUED..page 44........
#27247
04/02/07 03:05 PM
04/02/07 03:05 PM
|
Anonymous
Unregistered
|
Anonymous
Unregistered
|
Hi all, I found this site a couple of weeks ago and been reading it the WHOLE day lol. Decided im gonna give it a go. Ive got a '59 Ford Custom, and was just wondering how much paint most people have had to use to cover their cars. The Home Depot said they can custom mix a color, but can't guarentee they can ever mix the exact color again  ...anyone had to use more than a gallon? Also, in terms of prep work (im new to this whole painting thing), I want to change the color over from red to green, so do I have to sand EVERYTHING down to bare metal, or can I just give it a light sanding where the paint is good, and a thorough sanding on the poor panels? I hope to start a test piece this week  Great site! Can't say how glad I am to have found it 
|
|
|
Re: Paint job on a budget!? CONTINUED..page 44........
#27248
04/02/07 04:19 PM
04/02/07 04:19 PM
|
Anonymous
Unregistered
|
Anonymous
Unregistered
|
OK, If these pics don't make a believer out of people, NOTHING will. I would take that paint quality ANY day....awesome job!
|
|
|
Re: Paint job on a budget!? CONTINUED..page 44........
#27250
04/02/07 10:26 PM
04/02/07 10:26 PM
|
Anonymous
Unregistered
|
Anonymous
Unregistered
|
I've got a '62 Galaxie and I am in the process of painting it right now. It's a two tone so the amount of paint may vary but it looks like I'll be using about 2/3rds of a gallon to cover the body and about 1/2 a quart (a pint?) to do the roof. The roof took over ten coats due to some early missteps. The body is probably going to go 8-10 coats...
This is using rustoleum professional.
|
|
|
Re: Paint job on a budget!? CONTINUED..page 44........
[Re: td325ic]
#27251
04/02/07 10:49 PM
04/02/07 10:49 PM
|
Anonymous
Unregistered
|
Anonymous
Unregistered
|
Quote:
AussieDriver, nice job. The gloss you're getting is amazing. Quick question, is there any reason you're using mineral spirits over Interlux's 333 brushing liquid?
Thanks for the compliment mate.
I'm using mineral spirits mainly because I have heaps of it and it says on my paint can that the Brightside contains mineral spirits already. So I just thought that a little more won't hurt the paint too much.
Not to forget though that the closest marine supply shop isn't exactly local (I almost need to take a packed lunch with me when I go there) but the local hardware shop is only a couple of minutes away.
|
|
|
Re: Paint job on a budget!? CONTINUED..page 44........
[Re: ramman16248]
#27253
04/02/07 10:54 PM
04/02/07 10:54 PM
|
Joined: Sep 2006
Posts: 692
pa
ramman16248
mopar
|
mopar
Joined: Sep 2006
Posts: 692
pa
|
|
|
|
Re: Paint job on a budget!? CONTINUED..page 44........
[Re: ramman16248]
#27254
04/02/07 10:55 PM
04/02/07 10:55 PM
|
Joined: Sep 2006
Posts: 692
pa
ramman16248
mopar
|
mopar
Joined: Sep 2006
Posts: 692
pa
|
|
|
|
Re: Paint job on a budget!? CONTINUED..page 44........
[Re: ramman16248]
#27256
04/03/07 01:07 AM
04/03/07 01:07 AM
|
Joined: Dec 2005
Posts: 133
Orange County, CA
Jolly_Raj_R
member
|
member
Joined: Dec 2005
Posts: 133
Orange County, CA
|
Quote:
by the way, i am only doing the top 2/3rds and the blue gets darker with each coat. It actually matches closer to the orig. color on the bottom in the day light. Yes, those are cat prints on the top of the fender. (Luckily the paint was already hardened when that happened.) I'll post more pics as I go.
Bah!! More proof that cats were invented just to get in your way and harass you. (My cat deliberately does his imitation of a Highway Patrol traffic break any time I'm walking down the hallway.. He just HAS to try to trip me.. grr.)..
That's a real sharp looking blue.. Which one did that end up being? I'd love to see pics when its polished out.. I worry that my car will look best only with a metallic.. But, that blue looks nice and sharp..
Raj
67 Beatercuda
|
|
|
|
|
