|
 Re: Paint job on a budget!? CONTINUED..page 44........
#26738
Re: Paint job on a budget!? CONTINUED..page 44........
#26738
01/23/07 12:47 AM
01/23/07 12:47 AM
|
Anonymous
Unregistered
|
Anonymous
Unregistered
|
Ok guys so I've read every page of this thread. I've been following for over a week now and this is VERY interesting. I want to paint my 94 dodge grand caravan in Brightside Fire Red off of the ebay seller. One question. We all know about Chrysler paint and it's terrible adhesion back in the late 80s/early 90s problem. Some of the paint has just flaked right off. So my question is what should I do to prep the car for this paint job? Just rough it up like any other job? I really don't want to go down to the bare metal on the whole car but I don't want to rusk further adhesion problems. I know rusto/brightside will go over bare metal and any other paints but i don't think anyone has painted an old chrysler yet with their(chrysler's) crappy paints. Advice?
Also, I have a second question. I've been practing with some rusto gloss black on an old white civic trunk lid I acquired. two coats, 600 grit wet sand, two coats, 600 grit wetsand, two coats 1500 grit wetsand vertical followed by 2000 grit wetsand horizontal. I am ready to polish. It's nice and flat and all particles/orange peel is gone. It looks AWESOME when I rinse it with mineral spirits, I can really see my reflection, but when the spirits dry, it looks not as black as it was before, more grayish. The color really faded with the wetsand. Is this normal and will the polish bring it back? I have never painted or polished before so this is why I don't know really. Maybve aussie will now because he painted his car really nice in black, but i just dont know what the car should look like after the final wetsand. maybe i could have sanded too much.
Thank you in advance guys, and I'd like to thank Charger for the original method, and Marq for discovering the brightside, and everyone else who has contributed to this thread with insight and pictures.
|
|
|
Re: Paint job on a budget!? CONTINUED..page 44........
[Re: v8mirage]
#26740
01/23/07 01:58 PM
01/23/07 01:58 PM
|
Anonymous
Unregistered
|
Anonymous
Unregistered
|
Thank you v8, I was a little worried. Now anyone have any ideas on Chrysler's poor paint job?
|
|
|
Re: Paint job on a budget!? CONTINUED..page 44........
#26741
01/23/07 03:58 PM
01/23/07 03:58 PM
|
Anonymous
Unregistered
|
Anonymous
Unregistered
|
All right, I have been watching this thread for quite a while now, and I'll be diving in soon, resurrecting a 1960 Fury, gloss white over gloss black.
Good lord, like I don't have enough projects already.
|
|
|
Re: Paint job on a budget!? CONTINUED..page 44........
#26742
01/23/07 05:14 PM
01/23/07 05:14 PM
|
Anonymous
Unregistered
|
Anonymous
Unregistered
|
gm has the same problem in the late 80's early 90's with bad primer. blue, black, white, red and grey paints is what peeled. so to do it right you have to strip to bare metal and start from scratch or if you paint over the old paint it will continue to peel... gm did have a recall on the paint in 1990 but nobody new about it until a few years ago
|
|
|
Re: Paint job on a budget!? CONTINUED..page 44........
#26743
01/23/07 05:30 PM
01/23/07 05:30 PM
|
Anonymous
Unregistered
|
Anonymous
Unregistered
|
Great thread. Will be painting my 57 speedster replica black using BPS paint from TSC over the next couple of weeks. Will post pics as I go along.
Scott
|
|
|
 Re: Paint job on a budget!? CONTINUED..page 44........
#26745
Re: Paint job on a budget!? CONTINUED..page 44........
#26745
01/23/07 05:37 PM
01/23/07 05:37 PM
|
Anonymous
Unregistered
|
Anonymous
Unregistered
|
|
|
|
Re: Paint job on a budget!? CONTINUED..page 44........
[Re: 69DartGT]
#26746
01/23/07 09:04 PM
01/23/07 09:04 PM
|
Anonymous
Unregistered
|
Anonymous
Unregistered
|
I really enjoyed the posts and pics detailing this painting method. I am about to paint a classic Schwinn bicycle. I can buy the paint from http://www.hyper-formance.com/paints.htm , but the website states that "Pints must be used with a compressor and paint spray gun." Does this rule out my use of this technique with this paint? I have never done a project like this before, but I really want to make this bike presentable, even if not original, but I have limited funds for the project.
|
|
|
Re: Paint job on a budget!? CONTINUED..page 44........
#26747
01/23/07 09:08 PM
01/23/07 09:08 PM
|
Anonymous
Unregistered
|
Anonymous
Unregistered
|
"They all believe I am quite mad... " As a hatter, yo. They know... 
|
|
|
Re: Paint job on a budget!? CONTINUED..page 44........
#26748
01/23/07 10:25 PM
01/23/07 10:25 PM
|
Joined: Jul 2003
Posts: 3,378
Rancho Cordova, CA
Exit1965

master
|
master
Joined: Jul 2003
Posts: 3,378
Rancho Cordova, CA
|
Quote:
I really enjoyed the posts and pics detailing this painting method.
I am about to paint a classic Schwinn bicycle. I can buy the paint from
http://www.hyper-formance.com/paints.htm , but the website states that "Pints must be used with a compressor and paint spray gun."
Does this rule out my use of this technique with this paint? I have never done a project like this before, but I really want to make this bike presentable, even if not original, but I have limited funds for the project.
If you read the page it states that the 1oz cans must be sprayed, but it's also available in spray cans. The touch up basecoat/clearcoat its talking about can't be rolled on.
To paint a car as small as a Schwinn bike and have it be presentable, just go with their spray can, or a spray can of rustoleum.
|
|
|
Re: Paint job on a budget!? CONTINUED..page 44........
[Re: Marq]
#26750
01/24/07 02:11 AM
01/24/07 02:11 AM
|
Anonymous
Unregistered
|
Anonymous
Unregistered
|
Thank you Marq for contributing to this thread once again. You have helped me out bigtime, hah. I dreaded the though of going down to the complete bare metal on every panel of a caravan hah.
Anyways, what you're saying is, use an electric sander to rough it up with some low grit sand paper to remove any poor adhering paint currently, then smooth it out with a little higher grit. Correct? Couldn't I just use same grits of sand paper on a block (Like that long 18 inch one i think it was that i saw earlier in the thread)and wetsand it? Or would it be that the car being wet while sanding not properly let the paint flake off? In either case, I wouldn't be going down to the metal at all so I should see that some of the old paint would still be on there, just roughed up?
Now what color primer(over original white paint) to paint a brightside fire red car? Also how many layers of primer? Like I said I am a painting noob, and new to this. Should I thin it like I do with the paint to the same consistency as the paint, or will it do well straight from the can? (Should I worry about orange peel when sanding the primer, or sand just to remove dust, hairs, etc?)
Sorry for all the questions, but I feel right now this is the best place to get them answered. You guys are the ones who have used this method so far, and your cars have come out wonderful might I add. So thank you again, in advance.
__________________________________________________
P.S. I polished and waxed that trunk lid I painted with gloss black rusto and it game out shiny as HELL. I didn't even spend long polishing either. Probably would have came out better if I took my time. And it was a very deep color black too. I loved it. It was great for a first test piece.
|
|
|
Re: Paint job on a budget!? CONTINUED..page 44........
#26751
01/24/07 03:18 AM
01/24/07 03:18 AM
|
Anonymous
Unregistered
|
Anonymous
Unregistered
|
I was thinking....some of you chrysler/dodge owners may have seen this website. http://www.geocities.com/motorcity/flats/6183/stories.htmlWell what If I got Chrysler to pay for a sand/primer of my car...Could I then paint over that primer? And also, would I have to sand that primer to get the new brightside paint to stick?
|
|
|
Re: Paint job on a budget!? CONTINUED..page 44........
#26752
01/24/07 07:41 AM
01/24/07 07:41 AM
|
Anonymous
Unregistered
|
Anonymous
Unregistered
|
Quote:
I was thinking....some of you chrysler/dodge owners may have seen this website.
http://www.geocities.com/motorcity/flats/6183/stories.html
Well what If I got Chrysler to pay for a sand/primer of my car...
I don't know what you current line of work is, but if you can get Chrysler to pony up for paint repairs on a 13 yr old vehicle, you have a bright future in litigation ahead of you. 
Good luck.
|
|
|
Re: Paint job on a budget!? CONTINUED..page 44........
#26753
01/24/07 10:17 AM
01/24/07 10:17 AM
|
Joined: May 2006
Posts: 575
Canada
Marq
mopar addict
|
mopar addict
Joined: May 2006
Posts: 575
Canada
|
Quote:
Anyways, what you're saying is, use an electric sander to rough it up with some low grit sand paper to remove any poor adhering paint currently, then smooth it out with a little higher grit. Correct? Couldn't I just use same grits of sand paper on a block (Like that long 18 inch one i think it was that i saw earlier in the thread)and wetsand it?
No.. I like the idea of using a power sander better for two reasons...
a ) the vibrations transmitted from the sander to the body surface will loosen any semi-loose up patches of bad paint better than a hand sanding.
b ) I am a lazy kind of guy and I would prefer letting the sander do all the work...
The sander could work longer and hopefully it can produce better results in the long run..
Quote:
In either case, I wouldn't be going down to the metal at all so I should see that some of the old paint would still be on there, just roughed up?
I believe that if you plan to follow up the sanding with a 'thicker' version of primer, you will have a combination of metal surface, original primer and sanded original paint after that two stage of sanding is completed. The thicker primer will then be used to level up those three surfaces so that there is a smoother transition between those three layers.
Quote:
Now what color primer(over original white paint) to paint a brightside fire red car? Also how many layers of primer? Like I said I am a painting noob, and new to this. Should I thin it like I do with the paint to the same consistency as the paint, or will it do well straight from the can?
The Brightside primer you should use is the GRAY. You may get away with just one coating of that primer because it is fairly thick. ( I would guess that one layer of rolled on Brightside primer is probably equal to the thickness of 5 spray can layers of primer ). The Brightside primer can be applied straight out of the can and rolled. You could thin it... but at that point you are trying to level the three subsurfaces and so thinning it would not provide as thick of coverage.
Quote:
(Should I worry about orange peel when sanding the primer, or sand just to remove dust, hairs, etc?)
I don't think I have ever seen primer do an orange peel. Primer might wig out if it is put onto a contaminated surface ( wax, oil, dusty etc ). But otherwise, assuming the surface has been sanded and wiped down with a solvent to remove contaminants, the primer should go on smoothly and with no orange peel. That is probably because the outer skin of the primer layer remains fairly porous and not glossy. When sanding the primer layer, you will be aiming to smooth out the rough surface and get it as smooth as you can. You should be able to sand the primer layer to a point where it will make the body panel look like it is made out of smoothened clay. The smoother the primer layer, the better results you will have with the painted layers.
So the key here is to really spend the time and patience on getting your primered layer looking the best you can. If you could get that primered layer to the point where you wouldn't mind or be embarassed driving it with just that primer layer of paint, then you have probably reached the best possible surface condition for moving on to the color painting stages.
.
Last edited by Marq; 01/24/07 10:21 AM.
|
|
|
Re: Paint job on a budget!? CONTINUED..page 44........
[Re: Marq]
#26754
01/24/07 03:17 PM
01/24/07 03:17 PM
|
Anonymous
Unregistered
|
Anonymous
Unregistered
|
Thank again Marq! I'm going to get started within the next 3-4 weeks and I'll start posting progress.
And Mike, I don't think I'll be asking Chrysler to pay for any of my vehicles work, hah. I would do it if my paint peel was severe enough, but the way my car looks is drivable, it's not peeling nearly as bad as some other ones I have seen, just in a few places.
|
|
|
Re: Paint job on a budget!? CONTINUED..page 44........
[Re: Marq]
#26755
01/24/07 03:27 PM
01/24/07 03:27 PM
|
Anonymous
Unregistered
|
Anonymous
Unregistered
|
Quote:
So the key here is to really spend the time and patience on getting your primered layer looking the best you can. If you could get that primered layer to the point where you wouldn't mind or be embarassed driving it with just that primer layer of paint, then you have probably reached the best possible surface condition for moving on to the color painting stages.
.
Marq - A lot of places where I have lived in the Southern US we would consider that a finished paint job.
|
|
|
Re: Paint job on a budget!? CONTINUED..page 44........
#26756
01/24/07 08:19 PM
01/24/07 08:19 PM
|
Anonymous
Unregistered
|
Anonymous
Unregistered
|
New guy here,
I too am cross-eyed from reading the entire thread and would like opinions on using the Rustoleum satin brand. Going on a 1950 Chevy 1/2 ton...kinda old school look. I don't want to take off the paint all the way to the metal, just sand to give aome bite, do a few body repairs and then have at it. I like the idea of using the heavy Brightside primer to level things up too.
Never done any painting before so I am curious how the satin paint will hold up. This is not a trailer queen or a daily driver, but used mainly on weekends for work around the house.
So any opinions or real worl experiences?
|
|
|
Re: Paint job on a budget!? CONTINUED..page 44........
#26757
01/24/07 08:57 PM
01/24/07 08:57 PM
|
Anonymous
Unregistered
|
Anonymous
Unregistered
|
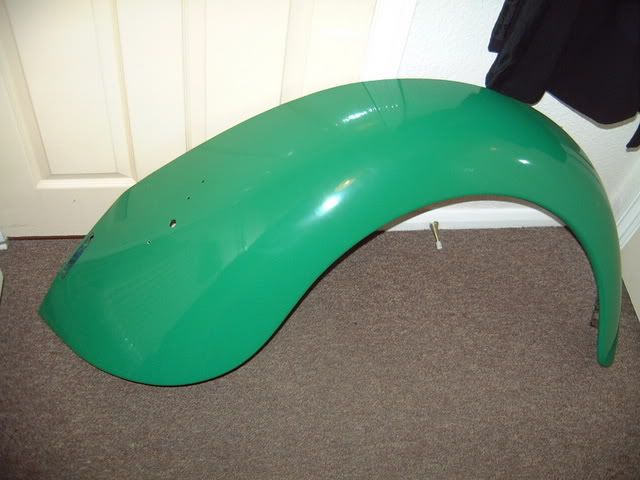
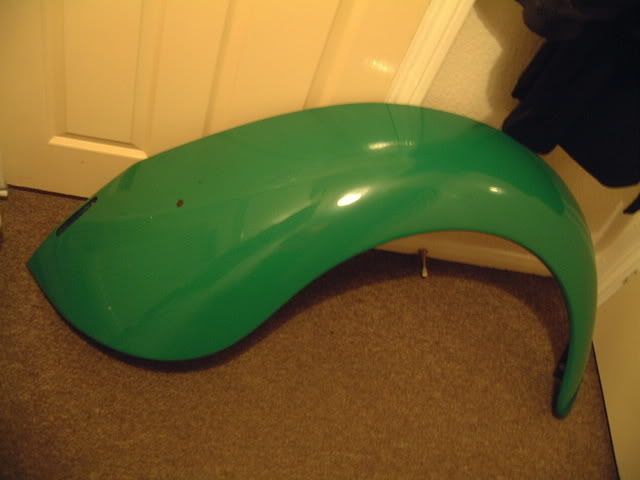
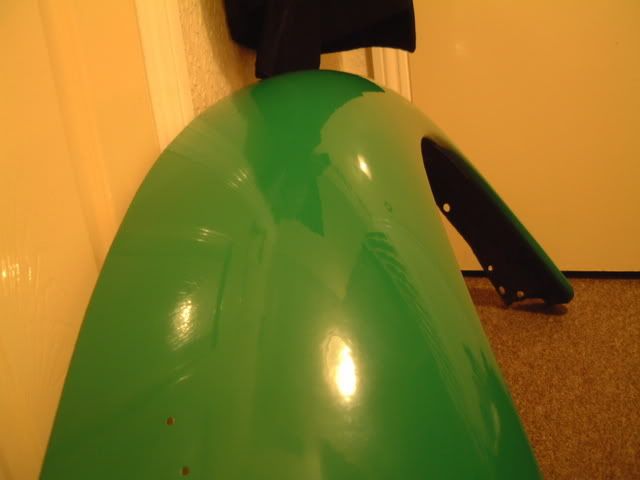
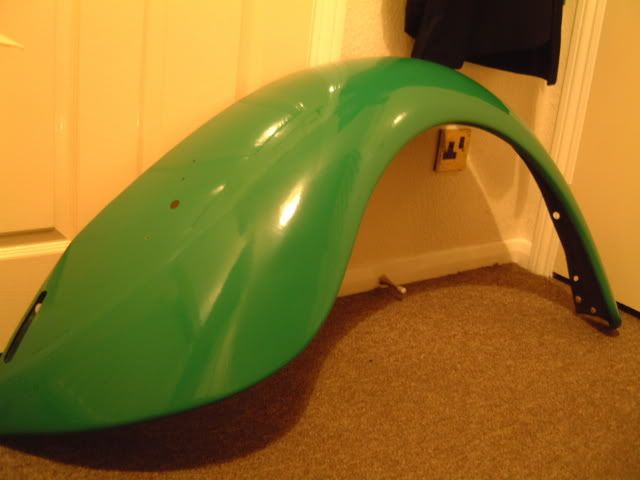
Great thread, guys. I've been reading the replies for a month now. I have been doing a test piece on a spare fender I had with Rustoleum Professional. I decided to go with the Rustoleum because they had the brown color I was looking for.
I would post pictures of my fender, but it looks like pretty much everyone elses, in other words, I am shocked at how good it looks.
Charger69 is right in that the only way to learn this is to do it. I have been experimenting with different numbers of coats, how much mineral spirits to mix in, and different ways to wet sand. I think I am ready to take on my 1971 Ford Galaxie, but I am just going to wait until the weather gets better.
I am sure this thread will still be going strong then so I will post pics of it when I am done. Thanks also to everyone who has posted their experiences.
Last edited by Group9; 01/24/07 08:59 PM.
|
|
|
|
|


 ) and bit the bullet.