|
 Re: Paint job on a budget!? CONTINUED..page 44........
#24538
Re: Paint job on a budget!? CONTINUED..page 44........
#24538
06/03/06 10:45 PM
06/03/06 10:45 PM
|
Joined: May 2006
Posts: 575
Canada
Marq

mopar addict
|
mopar addict
Joined: May 2006
Posts: 575
Canada
|
Ok... from what I have read so far... it is not possible to use the aluminum Tremclad paint because when you sand it the aluminum elements in the paint go blackish...
So that got me to wondering if anyone had tried the following method :
a ) lay down a coat of aluminum paint... then
b ) lay down a Tremclad clearcoat ... then
c ) wetsand
d ) repeat a to c three more times.
The trick here would be that the sanding would never be directly on the aluminum... it would be on the clearcoat layer. Hence you would never be turning the aluminum layer black and losing the shiny metalic look ?
I notice one of the other posters mentioned that you 'cannot' put a Tremclad clearcoat over aluminum Tremclad. But I didn't read anything to that effect on the Tremclad aluminum paint can. Anyone got any first hand experience on whether there is a compatibility problem between these two Tremclad products ?
If there is no compatibility problem, I would guess that this method would give a nice depth to the aluminum while maintaining the full reflectiveness of the metalic look ?
Anyone try this out yet to get the aluminum look ?
--------------------------
On another color trick... I was wondering about how you might go about and get a black-cherry red color effect.
I notice that when you combine the Tremclad Fire Red with the Tremclad Black... the result seems to come out almost in a shade of brown.
The problem with the Tremclad color range is that it is fairly limited to the most basic colors. And unfortunately a simple combining of black into the red can't seem to make a dark red that is bordering on the black.
Now I was wondering if anyone had tried this Budget paint job trick using two colors - one color for each layer... for example :
a ) lay a thin layer of high gloss black... then
b ) lay a thin layer of Fire Red... then
c ) wetsand
d ) repeat steps a to c three more times.
My theory is that because each layer is super thin and almost translucent, the color by the third repeat of this color recipe would be red with a hint of black ( hopefully giving a cherry black effect ?
Last edited by Marq; 06/03/06 11:19 PM.
|
|
|
Re: Paint job on a budget!? CONTINUED..page 44........
#24539
06/03/06 10:46 PM
06/03/06 10:46 PM
|
Joined: Jul 2003
Posts: 3,382
Rancho Cordova, CA
Exit1965
master
|
master
Joined: Jul 2003
Posts: 3,382
Rancho Cordova, CA
|
Quote:
For a Canoe it came out great. we used a bristle brush and the paint self leveled great. The problem here is that we are now leaving the $50 zone. I suppose a person's time sanding peel is worth something too.
If the stuff is applied right, there shouldn't be any peel to sand off. If there is any peel, it's much less than is found on factory paint jobs. I'm usually guity of putting the first 2 coats on too thick, but after I sand the peel out of those, the rest go on smooth as long as you put on a little bit of paint and the paint is thinned right.
|
|
|
Re: Paint job on a budget!? CONTINUED..page 44........
[Re: Exit1965]
#24540
06/04/06 01:52 AM
06/04/06 01:52 AM
|
Anonymous
Unregistered
|
Anonymous
Unregistered
|
|
|
|
Re: Paint job on a budget!? CONTINUED..page 44........
#24541
06/04/06 01:55 AM
06/04/06 01:55 AM
|
Anonymous
Unregistered
|
Anonymous
Unregistered
|
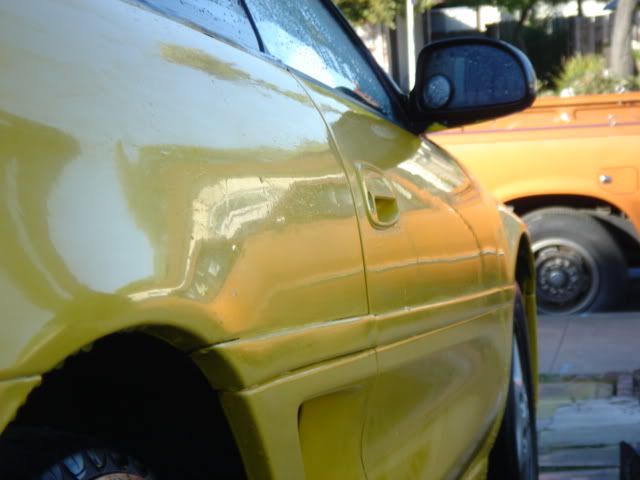
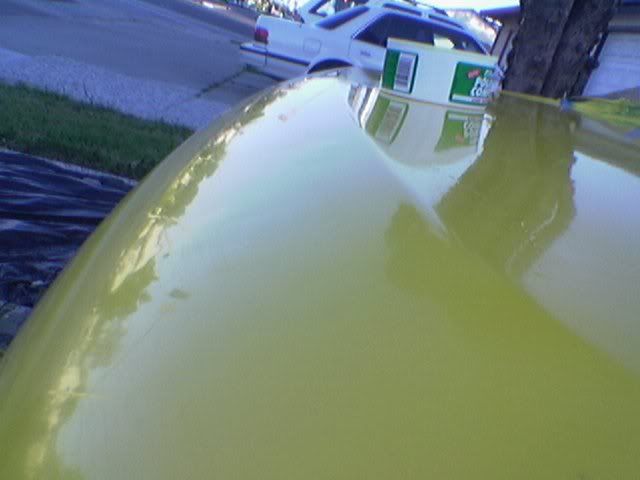
and this is how it looks before 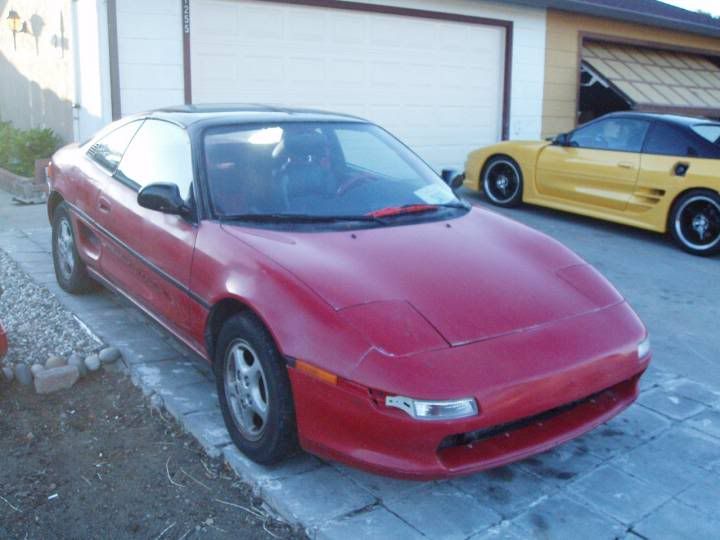 not the yellow one, the yellow one is mine 
|
|
|
Re: Paint job on a budget!? CONTINUED..page 44........
[Re: Marq]
#24542
06/04/06 09:06 AM
06/04/06 09:06 AM
|
Anonymous
Unregistered
|
Anonymous
Unregistered
|
Quote:
Now I was wondering if anyone had tried this Budget paint job trick using two colors - one color for each layer... for example :
a ) lay a thin layer of high gloss black... then
b ) lay a thin layer of Fire Red... then
c ) wetsand
d ) repeat steps a to c three more times.
My theory is that because each layer is super thin and almost translucent, the color by the third repeat of this color recipe would be red with a hint of black ( hopefully giving a cherry black effect ?
I have kept up with this thread and no one has posted about alternating color coats as you suggest. Why don't you experiment on a spare hood or something and let us know if it works? Could be an interesting idea.
|
|
|
Re: Paint job on a budget!? CONTINUED..page 44........
[Re: Marq]
#24544
06/04/06 12:09 PM
06/04/06 12:09 PM
|
Anonymous
Unregistered
|
Anonymous
Unregistered
|
Maybe we can get a poll together on methods and results?
I'll start.
Paint used: Rustoleum non-professional Sunburst Yellow
Thinner: 100% Mineral Spirits, odor free
Coats required for complete coverage: Approx 8-10
Applicator: ultra high density foam roller
Orange peel: Some. A fair amount of wetsanding with 600 definitely required every other coat.
|
|
|
Re: Paint job on a budget!? CONTINUED..page 44........
[Re: Marq]
#24545
06/04/06 12:21 PM
06/04/06 12:21 PM
|
Joined: Jul 2003
Posts: 3,382
Rancho Cordova, CA
Exit1965
master
|
master
Joined: Jul 2003
Posts: 3,382
Rancho Cordova, CA
|
Marq, you may want to try a base coat of the bottom color, then do final coats with the primary color you want. I'm painting red and I can still see dark (on the surface before I started any painting) through 8 very thin coats. I could have painted my whole car black with say 4 coats to get it all one color, then do 5-6 coats of red and I bet it would achieve what you're describing.
In fact it would probably have been a good idea to paint the car black with 4 coats just to see where the dings were, then fix them, get it totally black again, and do 5-6 coats of the primary top color.
|
|
|
Re: Paint job on a budget!? CONTINUED..page 44........
[Re: Exit1965]
#24546
06/04/06 12:27 PM
06/04/06 12:27 PM
|
Anonymous
Unregistered
|
Anonymous
Unregistered
|
Quote:
Marq, you may want to try a base coat of the bottom color, then do final coats with the primary color you want. I'm painting red and I can still see dark (on the surface before I started any painting) through 8 very thin coats. I could have painted my whole car black with say 4 coats to get it all one color, then do 5-6 coats of red and I bet it would achieve what you're describing.
In fact it would probably have been a good idea to paint the car black with 4 coats just to see where the dings were, then fix them, get it totally black again, and do 5-6 coats of the primary top color.
Seems like it would be awfully hard to get even though. Looking at the yellow after 5-6 coats it was just darker patches, not a uniform color.
|
|
|
Re: Paint job on a budget!? CONTINUED..page 44........
#24547
06/04/06 06:46 PM
06/04/06 06:46 PM
|
Anonymous
Unregistered
|
Anonymous
Unregistered
|
LOL!! Compairing my old photos with the new semi-final ones right now.. WOW what a difference! I can not believe I was actually driving my car like how it used to look  I got my new emblems on and it looks hot and clean.. very streamlined looking. I would have posted pictures today BUT I cant get my new rims on. The 2" spacers dont fit on the car right. There is like a 1/16th little lip about a 1/4inch long around the base of the rotor hub preventing the spacer to slip on completly. Anyone know what I can do? Can I get the spacer bored to fit? Where would I go for something like that? I was thinking to grease it up and bolt it on  but I think that would just create more problems for me!  Quick thoughts anyone? Thanks, -Serp
|
|
|
Re: Paint job on a budget!? CONTINUED..page 44........
#24548
06/04/06 06:48 PM
06/04/06 06:48 PM
|
Anonymous
Unregistered
|
Anonymous
Unregistered
|
here is a picture. As you can see, that lip is about 1/16th high at the base and about a 1/4inch in width.  Full Size (5MBish) Full Size (5MBish)
|
|
|
Re: Paint job on a budget!? CONTINUED..page 44........
#24549
06/04/06 08:19 PM
06/04/06 08:19 PM
|
Joined: Jul 2003
Posts: 3,382
Rancho Cordova, CA
Exit1965
master
|
master
Joined: Jul 2003
Posts: 3,382
Rancho Cordova, CA
|
Maybe you can get a machine shop to open it up for you a tad. But back to paint. Last week when I was reconsidering the canvas white, I took some with no thinner and slopped it onto a piece of sheet metal I had so I could see the color. It was put on way too thick (to make sure I could see the color), and 6 days later I could easily scrape it off with my fingernail. Today I put it out on my deck in the sun. it was in the sun probably 8 hours or so, at between 80-90 degrees of ambient temperature. Now, it's unscratchable.. So anyone who has a running driving car, consider setting it out in the blazing sun, turn it every 5-6 hours, and that should help the hardness. I'll be holding off on any polishing until after my car's running and I can sun bake it for a day or two. I know 69charger mentioned this before, just thought I'd remind people of it. It even works with unthinned paint that was globbed on way too thick as my little test demonstrates. 
|
|
|
Re: Paint job on a budget!? CONTINUED..page 44........
[Re: Exit1965]
#24550
06/04/06 09:45 PM
06/04/06 09:45 PM
|
Joined: May 2006
Posts: 575
Canada
Marq
mopar addict
|
mopar addict
Joined: May 2006
Posts: 575
Canada
|
One bit of clarification I uncovered today while visiting the Rustoleum / Tremclad web site, on their Q & A page... is that according to the folks at Tremclad / Rustoleum YOU CAN PUT THEIR CLEARCOAT OVER THE ALUMINUM PAINT.
I assume that this works only when you use TremClad's clearcoat over a Tremclad color or metalic paint. Non-Tremclad clearcoats might not work ( although they don't specifically say that )
The other chap in an earlier message had posted that it had been his experience that the clearcoat separated from the aluminum paint. So either a different brand of clearcoat might have been used in his situation... or maybe the preparation procedure was not followed as per Tremclad's recommendations.
Just thought I would add this bit of info for anyone who wants to experiment with the clearcoats on the aluminum Tremclad.
Last edited by Marq; 06/04/06 09:47 PM.
|
|
|
Re: Paint job on a budget!? CONTINUED..page 44........
[Re: Marq]
#24551
06/04/06 10:49 PM
06/04/06 10:49 PM
|
Anonymous
Unregistered
|
Anonymous
Unregistered
|
yar, you just need to make sure you get a nice, clean, smooth coat with the aluminum. I am curious if it would be better to just do one perfect thick coat with the hardener and that smoother additive. I dunno, seems a bit tricky..
|
|
|
Re: Paint job on a budget!? CONTINUED..page 44........
#24552
06/05/06 09:53 AM
06/05/06 09:53 AM
|
Joined: Jan 2006
Posts: 1,220
toronto canada
69chargeryeehaa
OP
pro stock
|
OP
pro stock
Joined: Jan 2006
Posts: 1,220
toronto canada
|
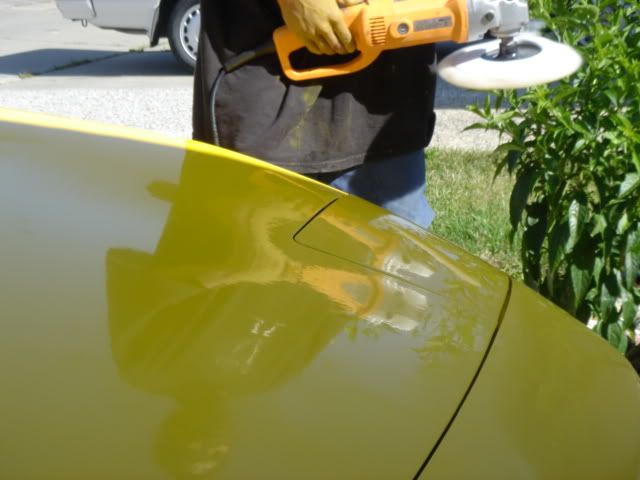
Nice job widebody mr2, looks really nice, alot nicer then it did before. exit1965 - i think your applying so many coats to fix your repair issues, dents you noticed after painting. the key to doing body work, and prep to paint is to listen to your hands, and not your eyes, you can "feel" dents alot better with your hands rather than just looking at it. Your saving sanding work by applying really thin coats with less peel. my charger has 6 medium/thin coats on it with wetsanding every 2 coats, and i got full coverage after the 4th coat, but i was painting orange over orange. so if your changing colors, it does take more coats to cover solid. but i'm sure you got the tequnique where it takes about 1 hour to do 1 coat on the car like it took me. i found it relaxing, and easy to apply, but i took a break after every pannel to admire my work  .!!!! as for the buffing, i used the terry cloth bonnets, white, they are the best that i've used. as for the drying of the paint, sitting in the sun really really helps the paint harden, all my painting was done inside my garage, but after 3-4hrs of drying time with fans in the garage, i would open the door and let it dry for another 5 hours or so, and then after it was all done, i rolled the car outside and let it sit for 1 day in the sun, then polished/buffed it in the garage. also one more thing, i did use those 1500W work lights in the garage so it was like daylight when i was painting in my garage, funny that i noticed that there is a sticker on the worklight warning of uv rays emmitted from the light, and that you should be a minimum of 6' from the light or you could get a sun burn!!! maybe those lights actually cure the paint inside?  i had about 5 of them going while painting so i had perfect lighting. Marq - that allum paint is really tricky, i used it on the wheels of the 2 old vw beetles, and it's really prone to fish eyes, and very uneven in the way it lays out where the metalics in the paint almost settle out unevenly. it's ok for a wheel, but i'd never do my car with it. and i did spray it on using their rattle cans. i found that it needed about 2 mist coats first to avoid all the funky stuff that paint does, then do a few med coats, but like i said that was using the spray can version, i would immagine the liquid stuff is really difficult to apply. As for the clear coat tremclad stuff in brush grade (liquid), remember you have to use LAQUIRE THINNER, not mineral spirits. when i did my testing with clear coat a long time ago, i found it to shine the same as the paint, so i did'nt bother to do the whole car with it, but it would certainly make the process eaiser, because the flaws in the layers could be non visible, and like in exit's case where there was a repair done after paint, you could just feather the repair area, then clear the whole pannel after wetsanding. after talking to the tremclad guys, and they sent me like 2 cases of paint and clear coat for free  , i did test a small peice of the clear on a peice with the paint and used mineral spirits to thin the paint and laquir thinner on the clear coat, and the clear shines like crazy, the clear coat really does look like a BC/CC paintjob on my test peice, and i did'nt wetsand it at all. but the bad news is all the people in the US that don't have tremclad clear coat in a brush grade. tremclad told me that the clear coat should be thinned with laquir thinner, and if you use mineral spirits you kill the shine, and they're right.  had i would have known that the clear coat would look so nice i would have done my car with it, but for now i'm driving the crap out of it so i'm happy, maybe in a few years i will repaint the charger from all the stone chips, stuff i drop on the car ect.... 
|
|
|
Re: Paint job on a budget!? CONTINUED..page 44........
[Re: GTSDave]
#24554
06/05/06 10:20 AM
06/05/06 10:20 AM
|
Joined: Jan 2006
Posts: 1,220
toronto canada
69chargeryeehaa
OP
pro stock
|
OP
pro stock
Joined: Jan 2006
Posts: 1,220
toronto canada
|
Quote:
Also keep in mind that lacquer thinner will turn foam brushes into mush in a matter of seconds.
-Dave
depends on the foam brush, the 4" white professional high density ones i used to paint the car say right on the package safe for use with lacquer paints, and your only thinning the clear coat no more than 5% since it is allready the consistancy of water to begin with, but good point, read the package. 
|
|
|
Problem with Penetrol mixture....
[Re: 69chargeryeehaa]
#24555
06/05/06 12:26 PM
06/05/06 12:26 PM
|
Anonymous
Unregistered
|
Anonymous
Unregistered
|
Sorry it took me so long to start up, but plumbing problems in the home trumped fun in the garage:
Finally had the time to experiment with Rostoleum and Penetrol, rather than mineral spirits.
1st test: 3 parts paint to 1 part Penetrol. It never really got thin enough. After mixing and mixing, I decided to see how it would work (since I was testing on an old piece of sheet metal). Went on very nicely, covered very well (like 75 percent of the gray beneath it) and the bubbles y'all mentioned popped with a little encouragement.
BUT: came back after 2 hours in the semi-sun...still wet. Since it was all for science, I laid another coat on top of half if it, leaving the other untouched. Almost immediately the brush began grabbing the first coat, creating a gawdawful mess. I let it sit overnight. The next day, the untouched side was still tacky, and the two-coat side was a pure mess...totally covered, but a pure mess.
Upped the mixture to two parts paint to one Penetrol. Paint was much runniers, but still thicker than the "water" grade. Flipped the metal over and tried again. Much smoother, more bubbles and less coverage, so I'm guessing it's more what we're looking for.
Let it sit all day. At the end, it was still tacky, but very few ridges. However, it still would chip off using the fingernail test.
That was yesterday. I'll check it again this evening. Anyone got an idea? I figured a 2-1 ration would really be too thin, but it seems to still be a touch thick. Maybe I should add some mineral spirits just to make the mix proper?
But the orange looks great...once you get past my miserable rolling. I'll scan y'all some art this evening.
|
|
|
Re: Problem with Penetrol mixture....
#24556
06/05/06 04:03 PM
06/05/06 04:03 PM
|
Joined: Jan 2006
Posts: 1,220
toronto canada
69chargeryeehaa
OP
pro stock
|
OP
pro stock
Joined: Jan 2006
Posts: 1,220
toronto canada
|
Quote:
Sorry it took me so long to start up, but plumbing problems in the home trumped fun in the garage:
Finally had the time to experiment with Rostoleum and Penetrol, rather than mineral spirits.
1st test: 3 parts paint to 1 part Penetrol. It never really got thin enough. After mixing and mixing, I decided to see how it would work (since I was testing on an old piece of sheet metal). Went on very nicely, covered very well (like 75 percent of the gray beneath it) and the bubbles y'all mentioned popped with a little encouragement.
BUT: came back after 2 hours in the semi-sun...still wet. Since it was all for science, I laid another coat on top of half if it, leaving the other untouched. Almost immediately the brush began grabbing the first coat, creating a gawdawful mess. I let it sit overnight. The next day, the untouched side was still tacky, and the two-coat side was a pure mess...totally covered, but a pure mess.
Upped the mixture to two parts paint to one Penetrol. Paint was much runniers, but still thicker than the "water" grade. Flipped the metal over and tried again. Much smoother, more bubbles and less coverage, so I'm guessing it's more what we're looking for.
Let it sit all day. At the end, it was still tacky, but very few ridges. However, it still would chip off using the fingernail test.
That was yesterday. I'll check it again this evening. Anyone got an idea? I figured a 2-1 ration would really be too thin, but it seems to still be a touch thick. Maybe I should add some mineral spirits just to make the mix proper?
But the orange looks great...once you get past my miserable rolling. I'll scan y'all some art this evening.
use the mineral spirits? 
|
|
|
Re: Problem with Penetrol mixture....
[Re: 69chargeryeehaa]
#24557
06/05/06 04:28 PM
06/05/06 04:28 PM
|
Anonymous
Unregistered
|
Anonymous
Unregistered
|
Where did you find ORANGE? Rustoleum told me they don't make orange in gallons so I switched to yellow. Which is fine, I'm perfectly happy with yellow....
but...w t f?
|
|
|
|
|