|
 Re: My On-Going 727 Rebuild Questions Post
[Re: cudadon]
#1673449
Re: My On-Going 727 Rebuild Questions Post
[Re: cudadon]
#1673449
09/22/14 12:38 PM
09/22/14 12:38 PM
|
Joined: Jan 2003
Posts: 75,087
A Banana Republic near you.
JohnRR

I Win
|
I Win
Joined: Jan 2003
Posts: 75,087
A Banana Republic near you.
|
Quote:
Mike how should one do a burnout @ the track with a stock (shift kit) VB so as not to overspeed the drum?
You are only going to over speed the drum if the sprag has failed and you bring it up over 6k in the burnout box.
|
|
|
Re: My On-Going 727 Rebuild Questions Post
[Re: JohnRR]
#1673450
09/23/14 01:27 AM
09/23/14 01:27 AM
|
Joined: Dec 2003
Posts: 10,938
Spokane Valley, WA
Big Bad Bee
OP
I Live Here
|
OP
I Live Here
Joined: Dec 2003
Posts: 10,938
Spokane Valley, WA
|
After the cracked bushing yesterday, I contacted a local mopar race transmission builder who gave me a tip on how to split and remove bushings. I also purchased a bolt in sprag. Pix to follow. Tomorrow.
I’m listening.
|
|
|
Re: My On-Going 727 Rebuild Questions Post
[Re: Big Bad Bee]
#1673451
09/25/14 03:59 AM
09/25/14 03:59 AM
|
Joined: Dec 2003
Posts: 10,938
Spokane Valley, WA
Big Bad Bee
OP
I Live Here
|
OP
I Live Here
Joined: Dec 2003
Posts: 10,938
Spokane Valley, WA
|
Ok I'm back. I bought another complete bushing set for $15 from Transtar and elicited the advice of new friend Randy Ray of Randy's Racing Transmissions in Spokane Valley, WA. Randy is a Mopar guy and has hundreds of transmission rebuilds and quarter mile runs under his belt. Please note that while Randy is helping me with advice I welcome your ideas and thoughts. Once Randy explained how to remove a bushing it was pretty simple. You look for the seam in the bushing and then get a very small screw driver and tap at the edge right behind it on either side of the seam, splitting it and then pushing it inward. then you get a cold chisel and just start whacking the bearing inward and splitting the seam all the way down. Sorry no picture, but it looks a bit like unzipping your pants.  This go round I lubricated both the drum and bearing with plenty of lube...  (Okay, I didn't use that, but I if it were good for lubing a trans, it would be the ONLY thing that crap is good for) ...And started it with a small 3/8" thick piece of plywood. 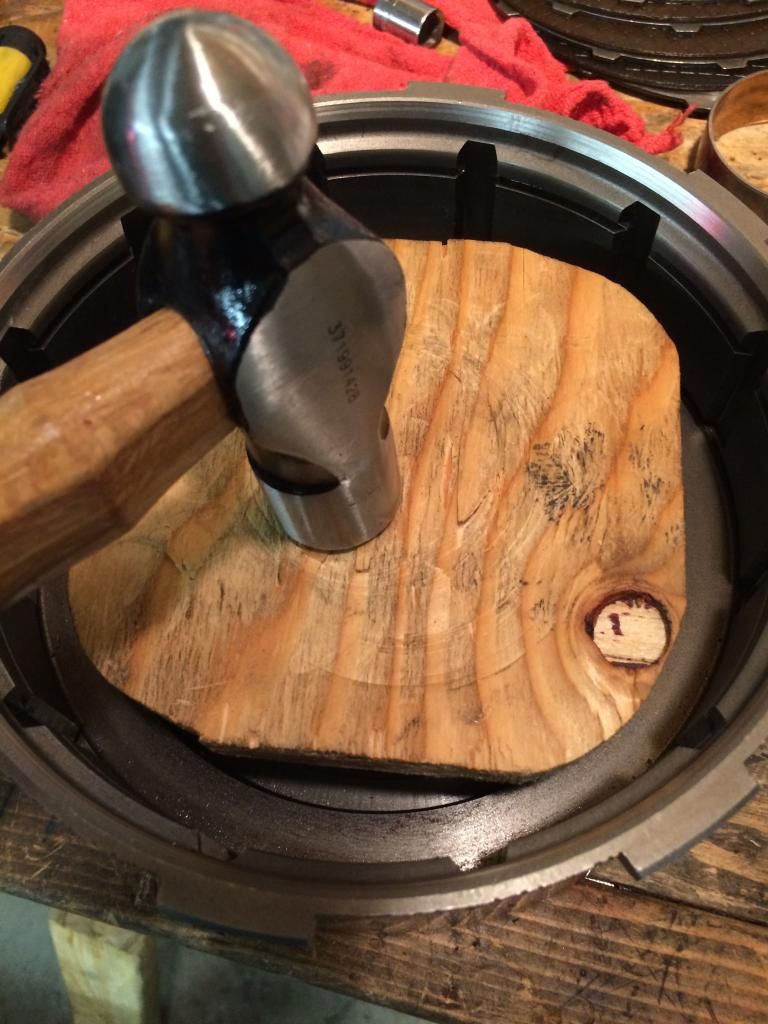 I set the correct depth just below the bevel in the steel race by tapping it in the rest of the way with the edge of a fir 2x4. VICTORY!!!  Next I tried to do the same the tail housing bushing. Um No.  It's too thick. There is an oil channel that runs the length or the bushing in the tail housing. Taking a suggestion from Mike (mr P Body) I got a fresh hacksaw blade and went about sawing through the bushing. It took about a half hour but when I got through it, it literally fell out. 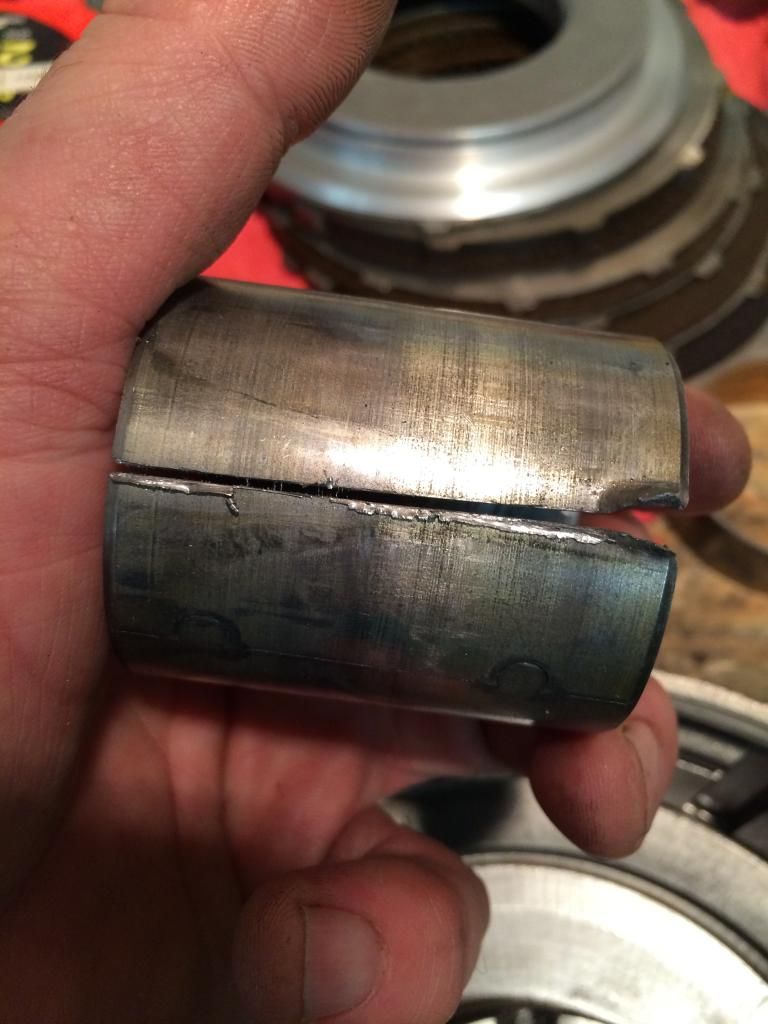 I lubed up the bushing, Made sure to orient it so the hole in it lined up with the correct oil duct and rammed it home with the side of a 2x4. 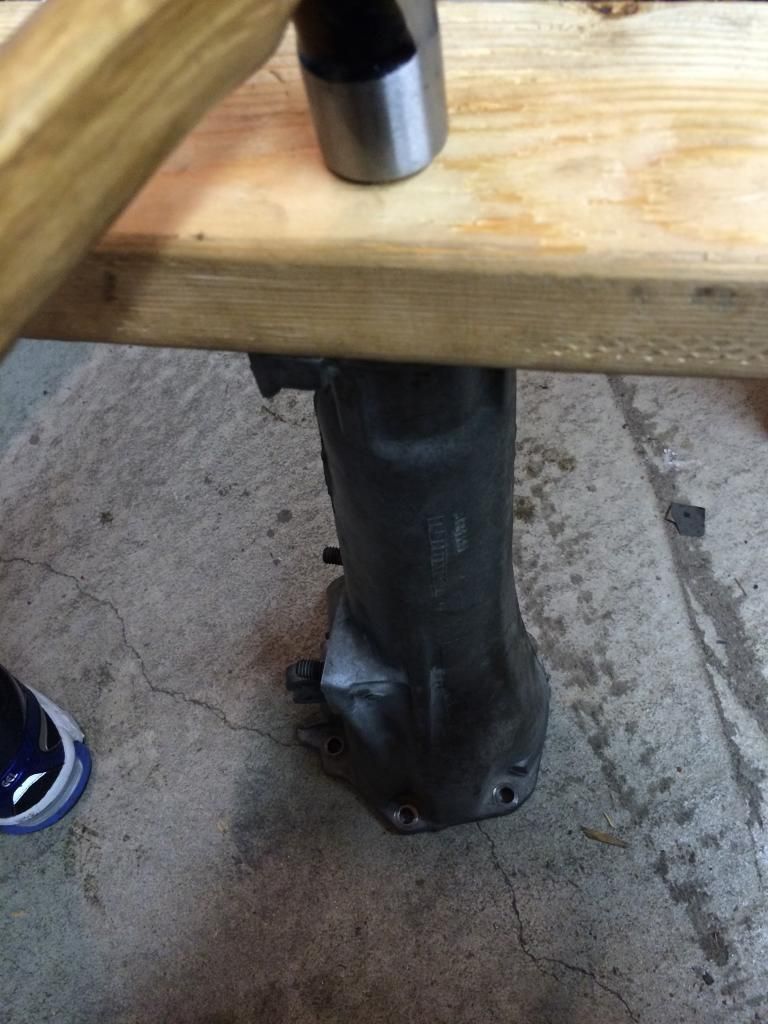 I tapped it the rest of the way in with a fender washer. 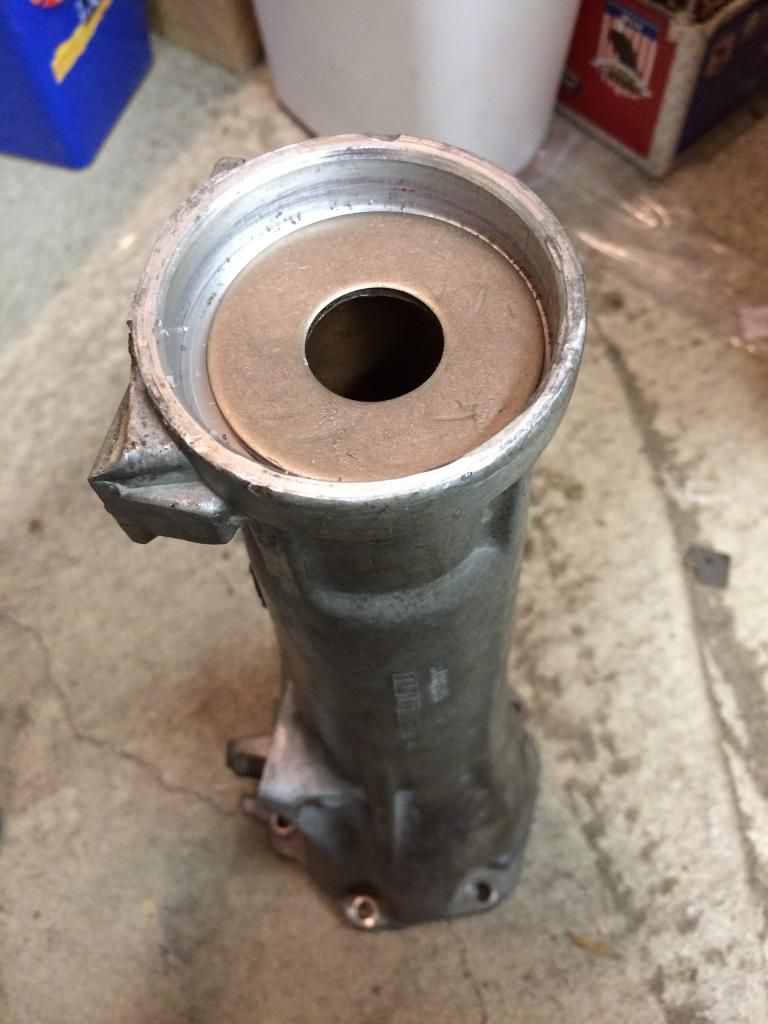 Note. Without the shoulder that a bushing driver has, the bushing tends to pucker inward when you hit it. I test fit the driveshaft and the bushing had swelled on the end too much. I took a knife and ran it around the lip of the bushing a few times, beveling the lip and removing a little material. Now the driveshaft fits great. I think I have the bushing issue conquered so I moved to my next pitfall, the sprag. After talking to you guys here and Randy and consulting Munroe's manual, I went with a new TCI bolt-in sprag. Yes, the Super Sprag is cool and adds an extra measure of safety but the majority say it's overkill for my application. JohnRR, I really respect you. You've taught me a lot about the best way to go about building my car. I hope you keep giving your opinion here even though this time around I didn't take your advice. I prepped the case by taking a die grinder and beveling the teeth that the sprag meshes with. The original sprag is peened in around the edge with a small chisel. If you don't grind each of those spots where the peen is, the new sprag can possibly stick and you could crack the case. I drilled out the threads in the case ever so slightly to give the sprag bolts a wee bit more tolerance. 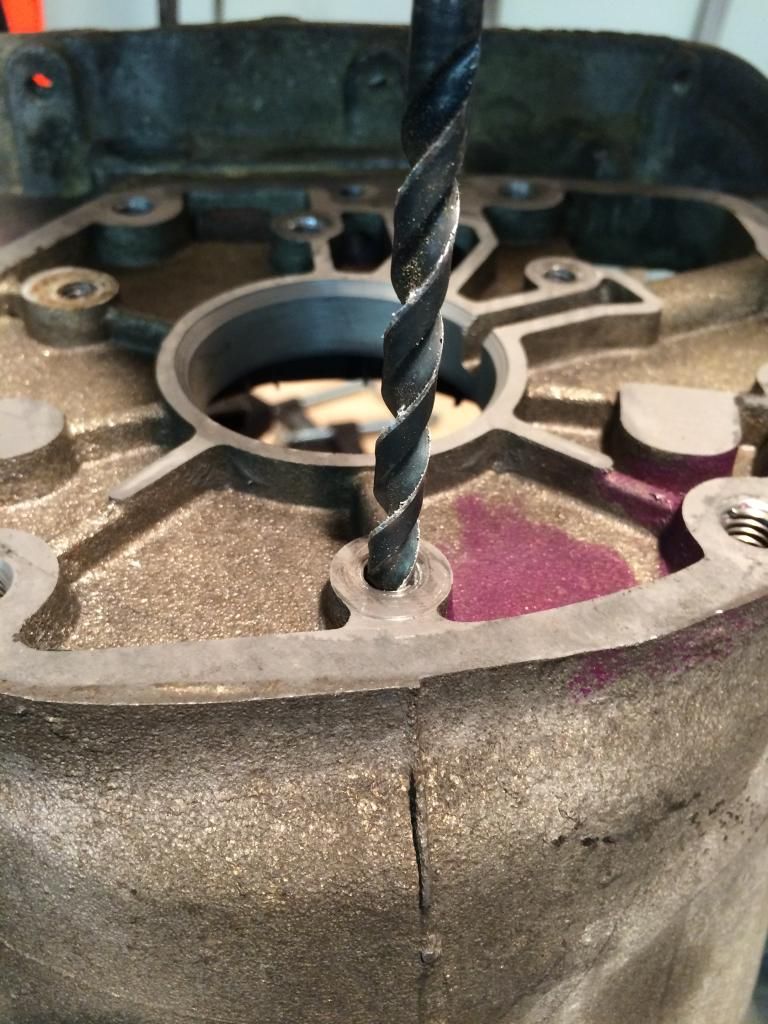 Then I bent in the retaining prongs of the backing plate slightly so that they would grip the sprag during installation.  Then I put washers on the supplied allen head bolts and sucked it up to the housing turning each bolt one full revolution at a time working in a criss-cross pattern like changing a tire.  here it's sucked about 2/3 of the way in.  Done 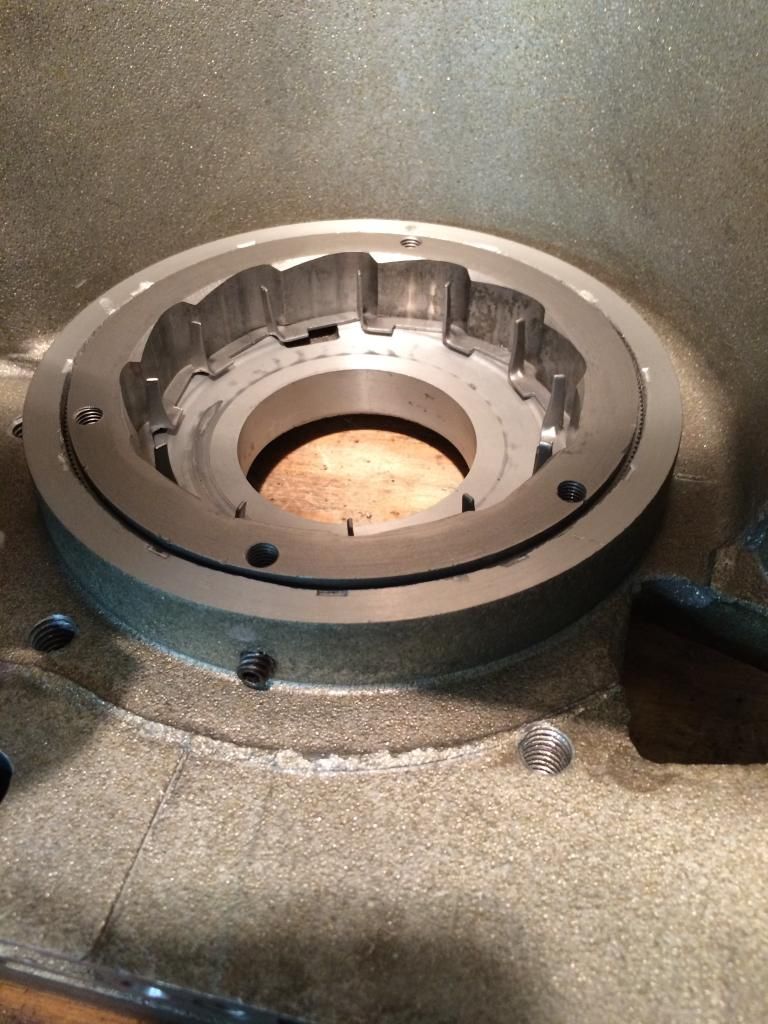 Now that I know I can do this without destroying the case, I'll go back to disassembling each subassembly, inspecting and cleaning, and then follow Munroe's step by step reassembly and calibration. 
I’m listening.
|
|
|
Re: My On-Going 727 Rebuild Questions Post
[Re: PC-CHARGER]
#1673455
09/25/14 09:31 PM
09/25/14 09:31 PM
|
Joined: Jan 2003
Posts: 4,616
Kissimmee Fl.
dusturbd340W5
master
|
master
Joined: Jan 2003
Posts: 4,616
Kissimmee Fl.
|
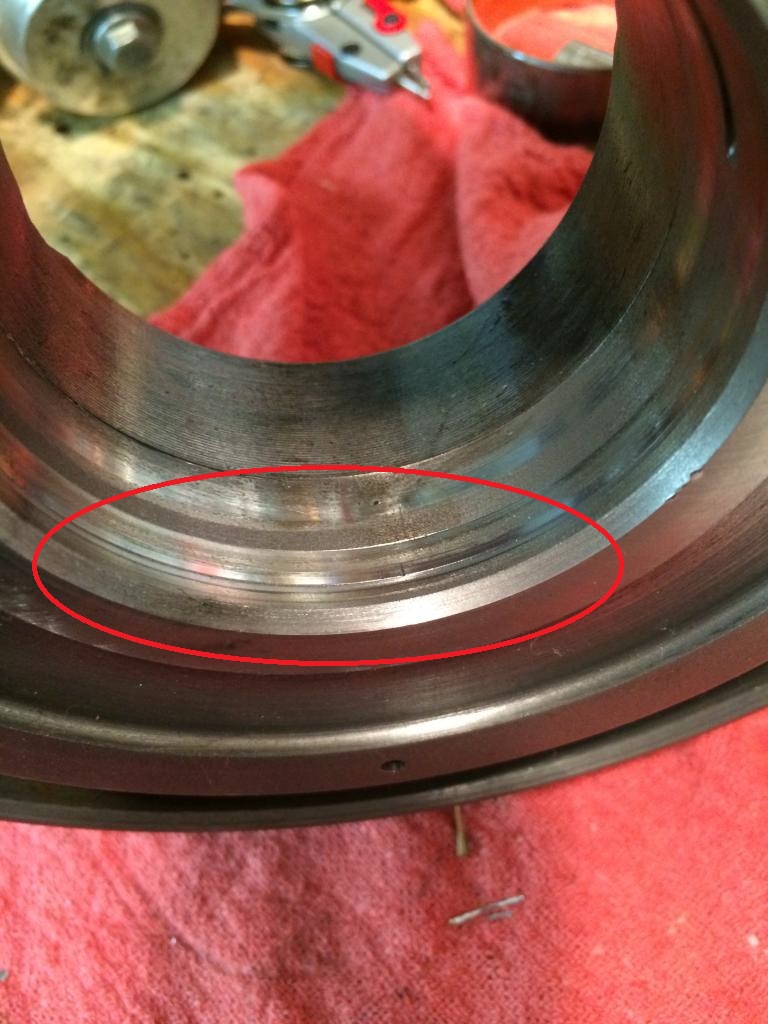
yeah that sure looks like a groove
70 duster full chassis super pro 416 CNC Indybrock heads 727 w/brake
best so far 1.212 60 6.219 in 1/8 at 110.88 9.768 at 137.81 1/4
|
|
|
Re: My On-Going 727 Rebuild Questions Post
[Re: dusturbd340W5]
#1673456
09/26/14 06:30 PM
09/26/14 06:30 PM
|
Joined: Dec 2003
Posts: 10,938
Spokane Valley, WA
Big Bad Bee
OP
I Live Here
|
OP
I Live Here
Joined: Dec 2003
Posts: 10,938
Spokane Valley, WA
|
That bore is definitely grooved. I will be rolling out to Transtar to plop down more money for another drum this afternoon. The fun never stops...
I’m listening.
|
|
|
Re: My On-Going 727 Rebuild Questions Post
[Re: Big Bad Bee]
#1673461
09/28/14 01:30 AM
09/28/14 01:30 AM
|
Joined: Dec 2003
Posts: 10,938
Spokane Valley, WA
Big Bad Bee
OP
I Live Here
|
OP
I Live Here
Joined: Dec 2003
Posts: 10,938
Spokane Valley, WA
|
Today was a short one but a productive one with the tranny. I worked on the front clutch retainer/input shaft assembly and carefully inspected all the splines, sealing surfaces, guide channels, lip seal groves and and the bushing for wear, resurfaced the pressure plates with 120 grit and cleaned everything up real good in the mineral spirit bathtub. Happy to say, that the whole thing looked great and I don't foresee any replacement other than the seals. I realized after it was pointed out by a moparts member that my high drum was scored, that as I tear down each assembly, I need to see how all the bearing, bushing, guide and ring surfaces work together and look at them all with care. It's fun! Next I tore down the pump pulling all the seals. This too made me smile. the pump gear and ring look to be in good shape and I measured them with a feeler gauge. Gear gap is okay. So is the space between the ring and the race it sits in, and the height of the ring and center gears.  The pump looks really nice in the bore. 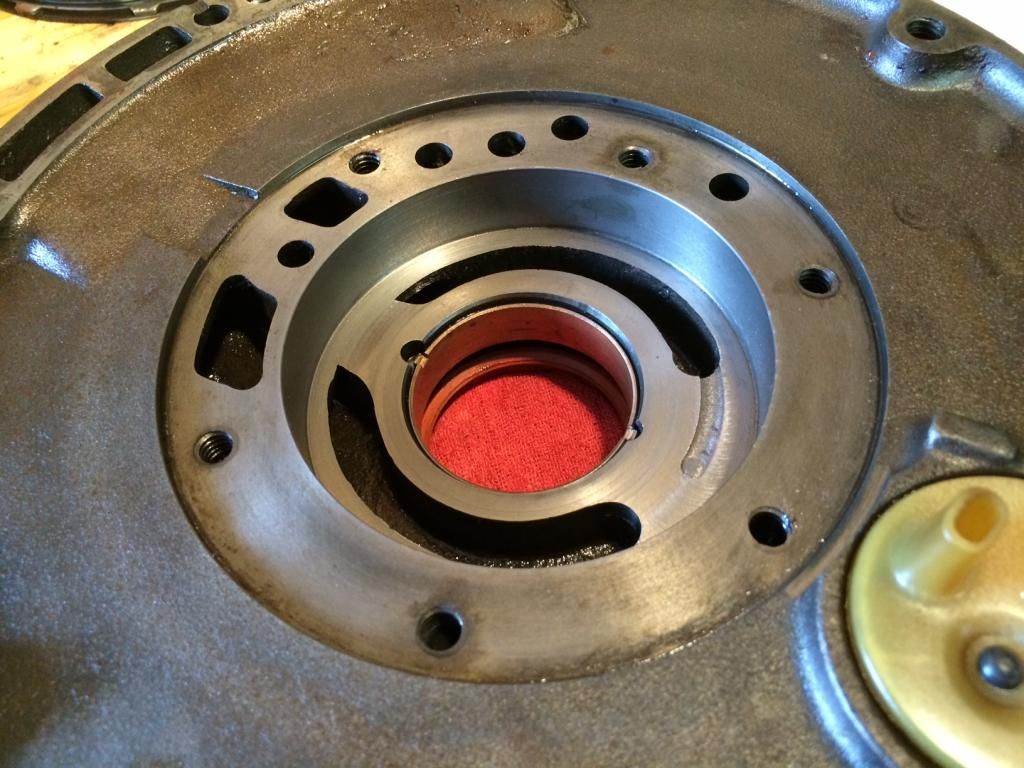 Try as I might, I couldn't figure out where the seam in the pump bushing was. Gave it several whacks with the corner of a sharp little cold chisel. I was tapping around the edge trying to be patient and I couldn't get it to budge. Then I got an idea. The old tail piece bushing is almost the same size. I lined the edge of the tail bushing with the edge on one side of the pump bushing and gave it a whack. BINGO! Easy peazy. I just moved around the lip of the pump bushing whacking the tail bushing and it was out in a flash. I'll load the new bushing tomorrow, clean it all up and move on to the reverse drum. My pile of clean parts is growing.   after making about 10 grooves in this bearing and not budging it, I smacked it with the tail bushing. Happy day... after making about 10 grooves in this bearing and not budging it, I smacked it with the tail bushing. Happy day...  I was wondering what one of the guys posting here was talking about on peening this bearing over. Here you can see that there are two C shaped notches where the bearing should be peened outword. I am assuming that this helps it from failing and spinning with the torque converter
I’m listening.
|
|
|
Re: My On-Going 727 Rebuild Questions Post
[Re: Big Bad Bee]
#1673464
10/14/14 10:02 PM
10/14/14 10:02 PM
|
Joined: Dec 2003
Posts: 10,938
Spokane Valley, WA
Big Bad Bee
OP
I Live Here
|
OP
I Live Here
Joined: Dec 2003
Posts: 10,938
Spokane Valley, WA
|
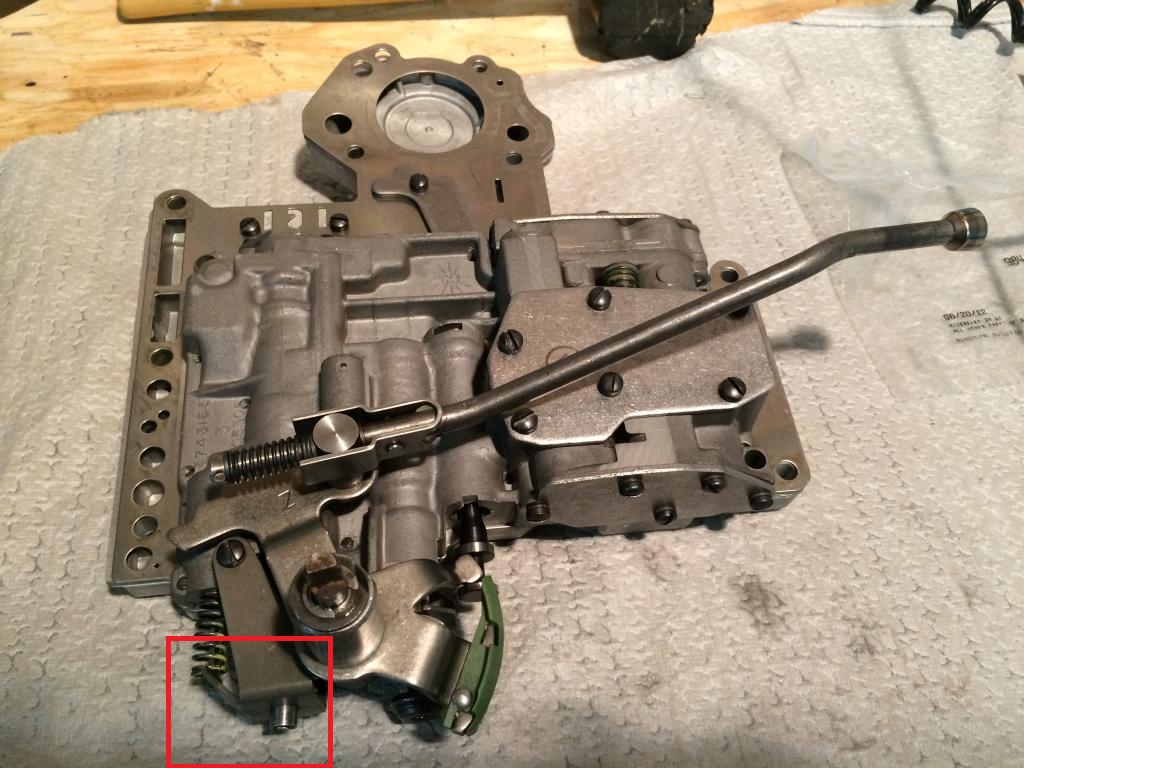
I'm back with a few more updates. My one week project has turned into a fall project... I've got a question. What is this thing? Munroe says zip about it.  I noticed what looked like foam or something on the inside. After I cleaned the pump plate with solvent, I was drying it with compressed air. In an attempt to blow this unit out, whatever was blocking the side that faces the engine blew apart and fell inside it. You can see a little remaining. I am assuming that the part pops out and you snap in a new unit. Help me out here.  With the case and all it's components checked and bushings replaced, every part cleaned with mineral spirits and blown dry with compressed air, I moved to the valve body. I split the halves and placed all the parts in labelled bags. as I did this, I videotaped each section to show how the valves came out and how their springs were arranged. 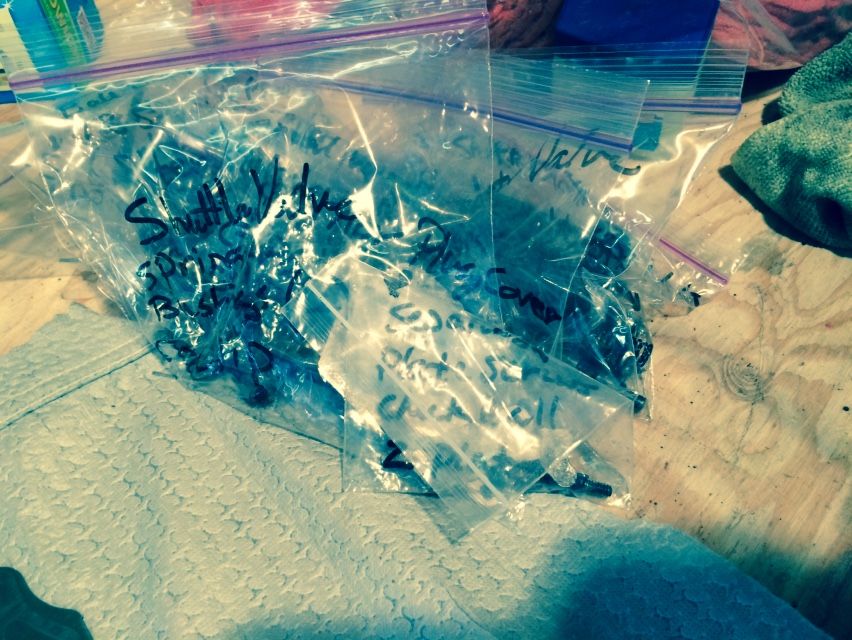 after cleaning all the parts and drying, I laid them all out on a clean surface under their baggies as assemblies and cleaned up the large pieces, really working at all the passageways. Here they are all ready to reassemble.  Previous to cleaning the separator plate and halves, I drilled passages in the plate and worked the valve body as per the instructions in my TransGo shift kit. The guy that sells this kit has a sense of humor. 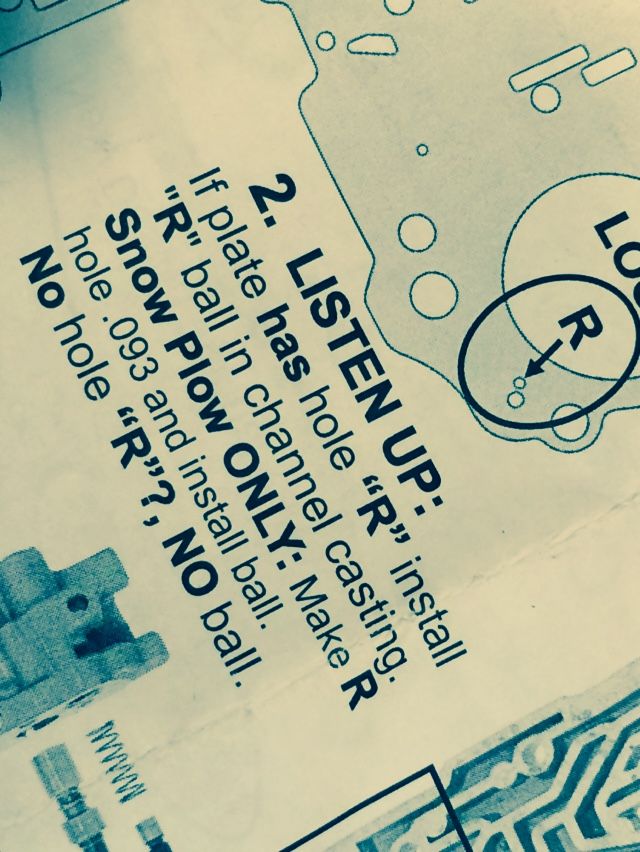 I tried to listen up but heard nothing... I got out my TransGo shift kit and went over the instructions, figuring out where in the reassembly process the parts would go.  Watching the videos in reverse order, I reassembled the valve body. great news. No left over parts. it was fun and pretty simple.  Just a couple minor details and she's going back together. Don't forget to tell me what that plastic thingy-mo-bob is and if I have to replace it.
I’m listening.
|
|
|
|
|


