|
 70 Challenger Seat Tracks?
#1394281
02/27/13 05:06 AM
02/27/13 05:06 AM
|
Joined: Feb 2013
Posts: 401
California, USA
filmsurgeon
 OP
OP
mopar
|
 OP
OP
mopar
Joined: Feb 2013
Posts: 401
California, USA
|
Is it true that the factory used the same inboard seat track for both the driver and passenger side by just flipping one to work on the other side with the outboard track. I realize this is a topic that has been posted about many times in the past, but I wanted to share some observations about the seat tracks in my '70 Challenger. After I removed the interior about 2 weeks ago, I disassembled the seats to improve on some poor decisions that were made by the previous owner. When I turned over the seat bottoms, I observed that the "inboard" seat tracks were the same on both driver and passenger sides, but that one was just flipped 180 degrees. I suspected that the prior owner didn't have a correct driver/passenger set, so they improvised and used either 2 driver, or 2 passenger inboard seat tracks. I also saw that they had drilled multiple holes in the floor pan for the inboard track. In addition, they had cut the track studs (that go through the floor pan) shorter because they were too long. Too long because they didn't install the "spacers" between the seat track and the floor pan. Also, they didn't use the correct hardware to mount the seat tracks to the floor pan. I decided that I would buy new repro tracks, but after further research, I realized that maybe I was wrong about the inboards. After looking at a photo of another member's '71 Challenger front bucket seats, and talking to a well informed individual, I was settled into believing that the factory did use the same inboard track on both sides. I decided to dismiss my idea to get a new repros, and would just replace the cut studs with proper length carriage style bolts. Thanks in advance for your feedback. The following two photos are of my driver side (1st) and passenger side (2nd) floor pans (lighted from underneath, with no flash to better show the holes).   This next photo is the other member's seats from a '71 Challenger. 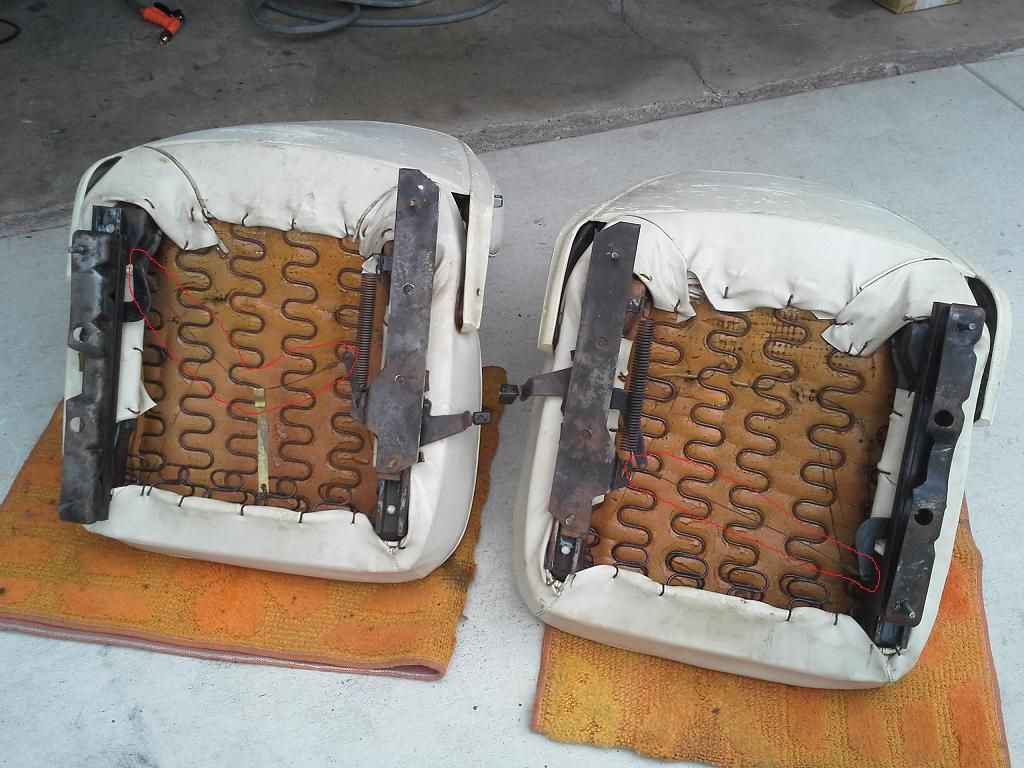 My seat bottoms (passenger left, driver right). 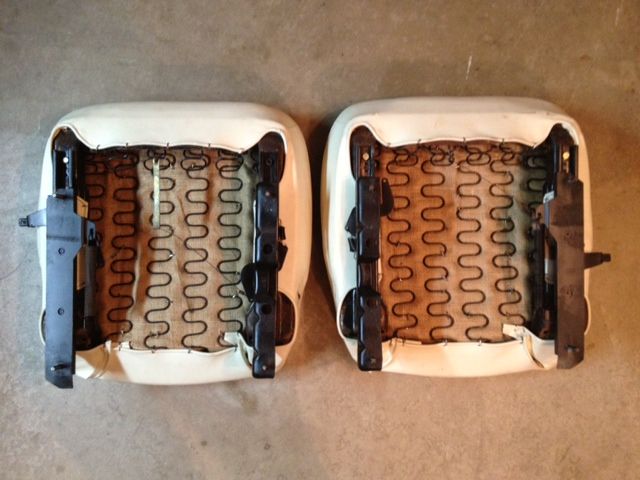 My passenger seat bottom. 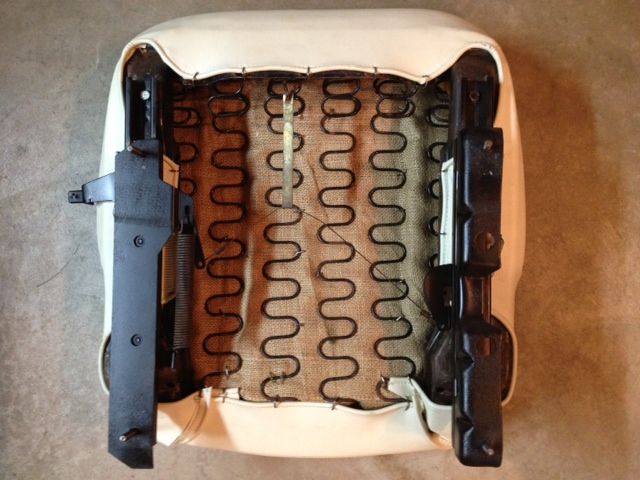 My driver seat bottom. 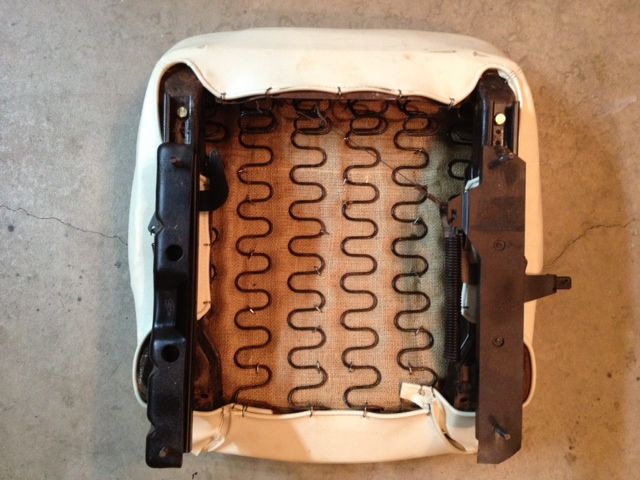 Repop Seat Tracks (that everyone sells for ~ $350.00 for the complete set) 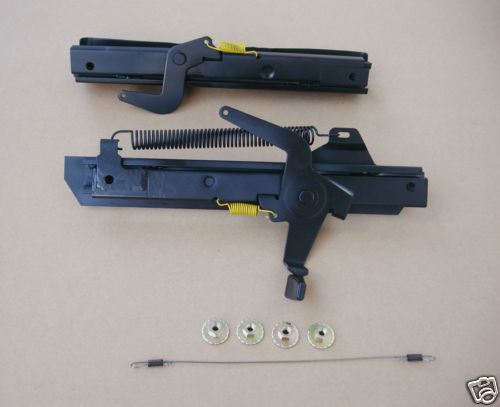 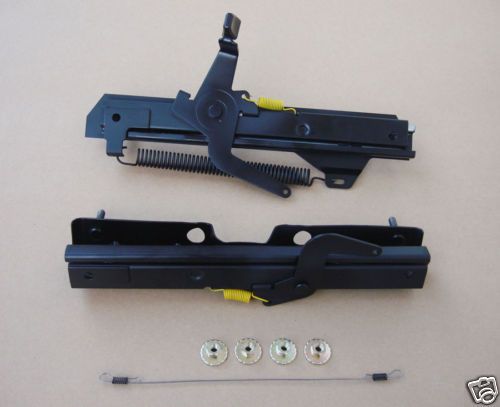
|
|
|
 Re: 70 Challenger Seat Tracks?
[Re: Gavin]
#1394284
02/27/13 10:36 PM
02/27/13 10:36 PM
|
Joined: Feb 2013
Posts: 401
California, USA
filmsurgeon
 OP
OP
mopar
|
 OP
OP
mopar
Joined: Feb 2013
Posts: 401
California, USA
|
Quote:
OK, checked mine and no they are not the same - RH & LH are different (mirror image)
Thanks for checking. That's very curiously interesting. Any chance of you posting a photo of the two inboard tracks as they would be oriented/mounted on the seat bottom frames?
|
|
|
 Re: 70 Challenger Seat Tracks?
[Re: Gavin]
#1394288
03/02/13 06:16 PM
03/02/13 06:16 PM
|
Joined: Feb 2013
Posts: 401
California, USA
filmsurgeon
 OP
OP
mopar
|
 OP
OP
mopar
Joined: Feb 2013
Posts: 401
California, USA
|
Quote:
OK, had another look and did take pics though run out of time to post tonight.....but the bottom line is as I said they definitely different parts. They are not actually true mirror image, I think they do probably use the same components but they are riveted the other way on the pass side to the drivers due to the taper front to back....
The part numbers are 70268 on one side and 70355on the other. In all cases I'm talking just about the inner tracks (closest to the trans tunnel).
Thanks for checking into this. With your info and my further investigation, I feel now that my concerns/questions have been resolved. I took both inboard tracks off the seat frames and compared closely. First off, I'm fairly convinced these are not originals (can't find any original part numbers; see attached close-up photo of manufacturer stamp). However, I believe they are manufactured/assembled the same as the originals. The individual components look the same for the inboard tracks, and the difference appears to be in the way they are assembled (see attached photos). Assembly would have been done differently in order to facilitate use on the driver or passenger seat frame.
Regarding the bolts that attach the tracks to the seat frame: I believe I have (4) correct bolts (out of eight needed). They have a 7/16" head (with an integrated star lock washer); 5/16-18x3/4. Would these be readily available at the typical hardware stores, and should they be grade 5, like the track mounting studs?
Regarding cleaning/lubing the tracks: What's the easiest/best way to get these clean for re-lubing? I'd rather not have to disassemble them if I don't have to. What's the recommended lube to use, and best method for lubing? Thanks for your help.

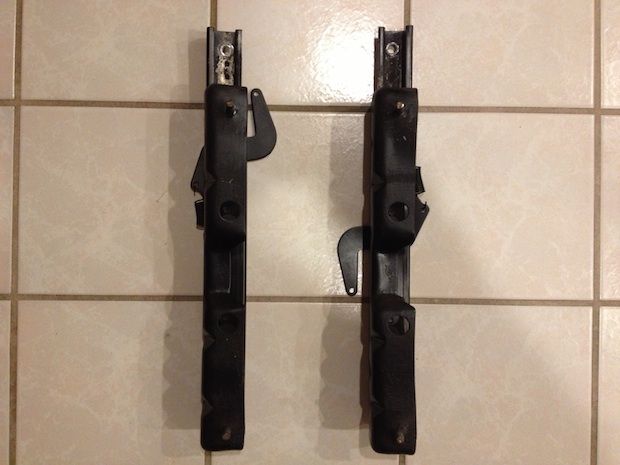
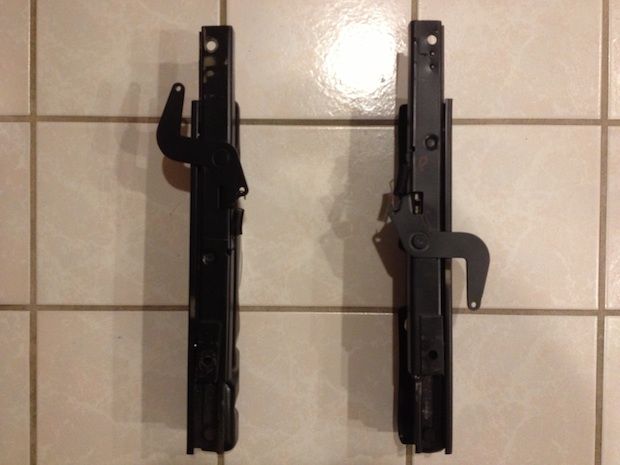
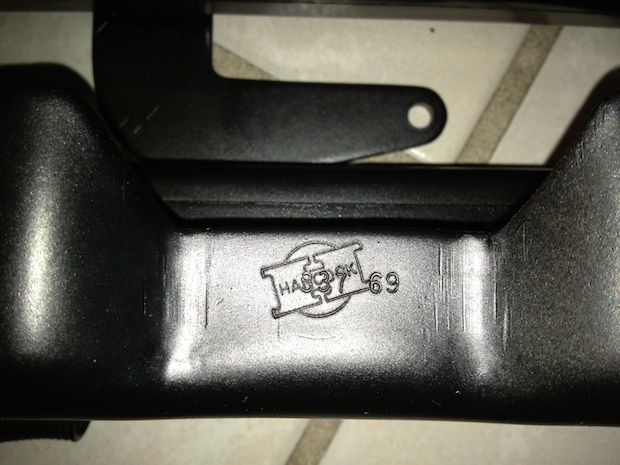
|
|
|
 Re: 70 Challenger Seat Tracks?
[Re: Gavin]
#1394291
03/03/13 02:08 PM
03/03/13 02:08 PM
|
Joined: Jan 2004
Posts: 27,347
Today? Who Knows?
1_WILD_RT

Management Trainee
|

Management Trainee
Joined: Jan 2004
Posts: 27,347
Today? Who Knows?
|
As far as cleaning, get some Castrol Super Clean & soak them good, then soak them again... Then release the lock & slide them back & forth while soaking them some more... Wear rubber gloves cause the Super Clean will eat your flesh.... Not really but it sure does many it feel weird.. Finally flush the tracks with water & see if they are done or if you want to do some more cleaning.. After getting all the grease of a trip to the blast cabinet then blow them off with air & another water flush & more air.. Finally paint & then some lube....
"The Armies of our ancestors were lucky, in that they were not trailed by a second army of pencil pushers."
|
|
|
 Re: 70 Challenger Seat Tracks?
[Re: Gavin]
#1394292
03/03/13 05:34 PM
03/03/13 05:34 PM
|
Joined: Feb 2013
Posts: 401
California, USA
filmsurgeon
 OP
OP
mopar
|
 OP
OP
mopar
Joined: Feb 2013
Posts: 401
California, USA
|
Quote:
Just to document what I said earlier (and what it sounds like you have also found) here is the definitive pic showing the difference between the two sides...they both use the same bracket with the studs (the bottom piece out of three, though upside down in this pic) but the bottom rail (middle piece) is oriented the other way.
Re cleaning an assembled track - I disassembled mine so can't help you on that.
How do you disassemble them. When I slide the track back and forth, it will only go so far each way. There is a "stop" inside (I think) that prevents the 2 sections from separating. Is there a "tab" or something that must be depressed in order to separate the sections? I don't see any hardware either to loosen/remove to separate the sections. Thanks.
|
|
|
 Re: 70 Challenger Seat Tracks?
[Re: filmsurgeon]
#1394293
03/04/13 12:50 AM
03/04/13 12:50 AM
|
Joined: Feb 2013
Posts: 401
California, USA
filmsurgeon
 OP
OP
mopar
|
 OP
OP
mopar
Joined: Feb 2013
Posts: 401
California, USA
|
I thought I'd post about my procedure for removing the studs on my inboard seat tracks (they had been cut by the previous owner, and I need/want to replace them with proper lengths). With the track clamped to the workbench, I used a rotary tool for: (1) cutting off the remainder of the stud as flush as I could; (2) for grinding down the remaining swaged square neck; (3) for cutting across the flat head of the stud. Next, I drilled through the center of the stud with a 1/4" bit. Then I used a center punch and hammer at each of the 4 corners. It took a few mild-medium strength poundings at each corner to get them out, but at least I didn't have pound the crap out of it (risking damage, or distorting the track). Finding something that will be close enough to the original studs is proving to be challenging. Certainly, nothing close is available at the typical hardware stores. I have found some possibilities online (links attached). http://www.fmwfasteners.com/products/Gra...=1#.UTQc7esjppHhttp://www.ereplacementparts.com/bolt-51...CFad_QgodkWcA_ghttp://www.fastenal.com/web/products/detail.ex?sku=0155067I don't think I'll find something with the correct size square neck. I would need something with a neck that is ~ 0.360wide x 0.090 high. Standard carriage bolts have a much higher neck, but there are some available with a "short" neck. Although even the short neck options are not as short as the original stud's neck. I plan on using "push-on" retainer nuts to hold the carriage bolts in place. Of couse, once the seat mounting nuts are tightened, the carriage bolts won't budge I am also searching online for the bolts that are used to attach the tracks to the seat frames (5/16-18x3/4 with a 7/16" hex head). These are also not readily found at hardware stores because of the fact that a 5/16" bolt with a 7/16" hex head is not common. Commonly, a hex bolt with a 5/16" thread shaft has a 1/2" head. A 1/2" socket is very difficult to get inside the track's channel to install/remove this size bolt. I have found something online that I could use (link attached). They are Grade 5 header bolts. http://www.carshopinc.com/product_info.php/products_id/39943/976?gclid=CJXJo8Cg4LUCFSHZQgodzBIAuwThat's about it for now. I'll post again once I receive the hardware. For now, I just need advice on cleaning/lubing the tracks (i.e. What's the easiest/best way to get these clean for re-lubing?) I don't need to bead blast them or anything like that. I just need to get the gunk out and re-lube. I'd rather not have to disassemble them if I don't have to. Also, what's the best lube to use, and best method for lubing? Thanks for your help. 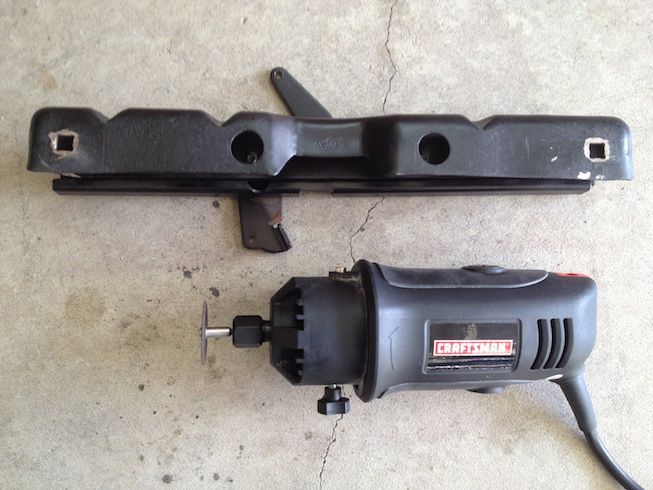 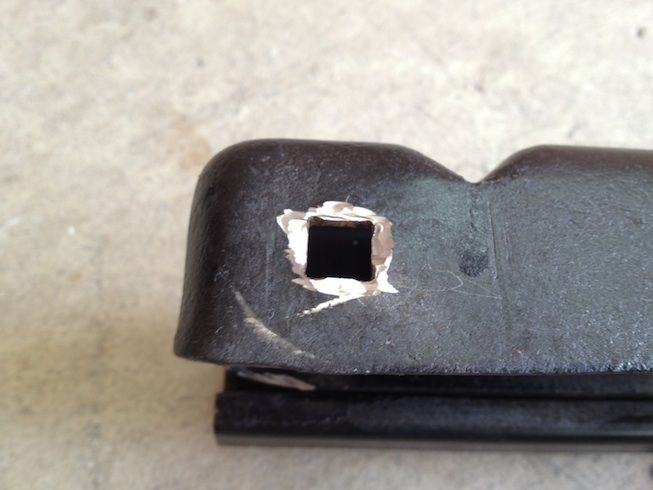 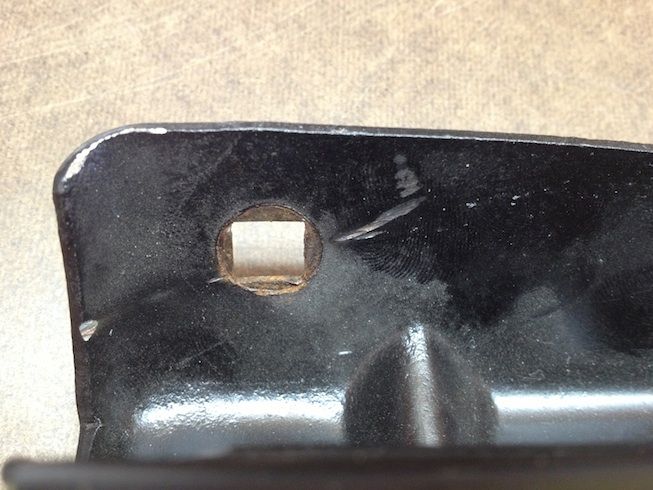 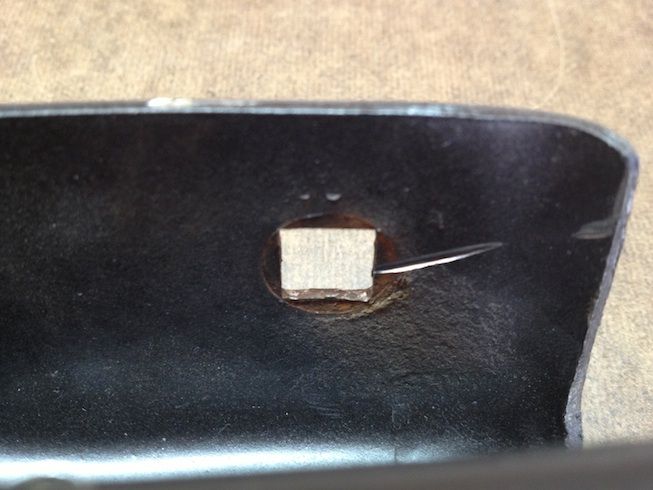 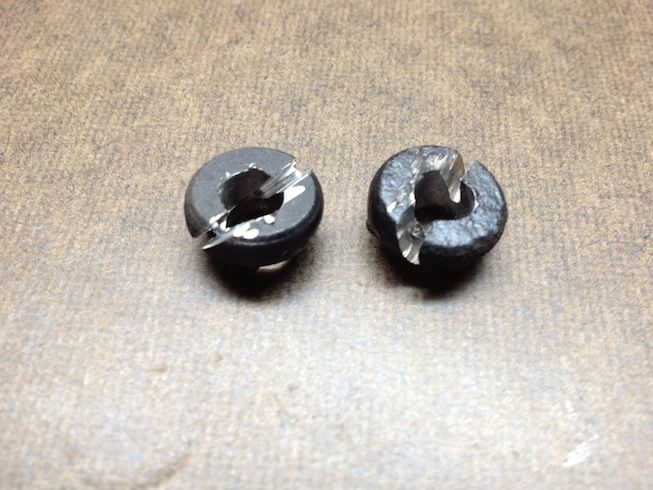 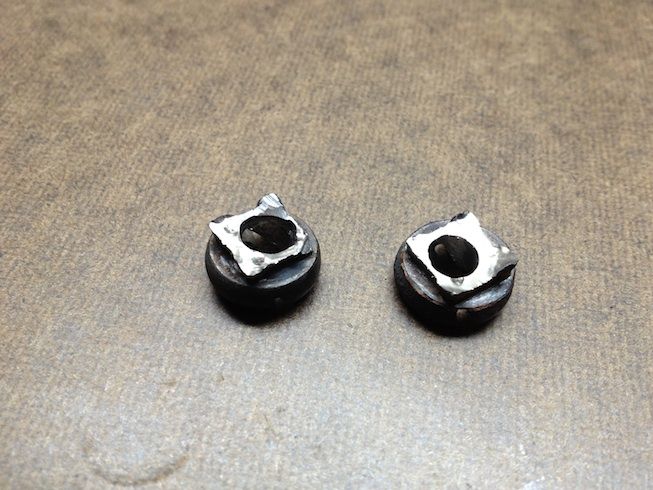
|
|
|
 Re: 70 Challenger Seat Tracks?
[Re: filmsurgeon]
#1394294
03/04/13 01:01 AM
03/04/13 01:01 AM
|
Joined: Jan 2004
Posts: 27,347
Today? Who Knows?
1_WILD_RT

Management Trainee
|

Management Trainee
Joined: Jan 2004
Posts: 27,347
Today? Who Knows?
|
I've been known to salvage bolts off other seat tracks...
"The Armies of our ancestors were lucky, in that they were not trailed by a second army of pencil pushers."
|
|
|
 Re: 70 Challenger Seat Tracks?
[Re: filmsurgeon]
#1394297
03/15/13 04:37 PM
03/15/13 04:37 PM
|
Joined: Jan 2003
Posts: 1,756
London, England
Gavin

top fuel
|

top fuel
Joined: Jan 2003
Posts: 1,756
London, England
|
It is a while since I disassembled mine but when I did I was about ready to start knocking mounting studs out as someone had suggested, and someone else said that they just pretty much pull apart. To my surprise that is exactly what they did. I just had to hold the bottom track in the vice and then extend them fully and apart they came. The 30 year old hardened grease needed a little persuading but not much.
The factory did bend up the corner on some of the tracks (they did on mine) and surprisingly to reassemble mine the other week I had to bend (or file) that bit to let the cage back out. So it's possible you would have to do that to disassemble them.
But it's not difficult.
I have heard others say not to bother disassembling as they have a way of cleaning them. I can't speak to that so maybe they will chime in. Since mine needed repainting anyway I went ahead and took 'em apart. I also replaced the ball bearings.
Here is what the insides look like. The trick is to get the track to the limit of extension, then hold the cage to keep it at that end and slide the track back exposing the cage. Then you can take the cage out with roller and bearings, and then the track will right slide off. I think depending on the tolerances this may not even be necessary.
The bent corner I mentioned may stop the track sliding back past the cage assembly, in which case you need to straighten or file it. But again mine disassembled without that being necessary
Last edited by Gavin; 03/15/13 04:42 PM.
|
|
|
 Re: 70 Challenger Seat Tracks?
[Re: Gavin]
#1394299
03/16/13 01:20 AM
03/16/13 01:20 AM
|
Joined: Feb 2013
Posts: 401
California, USA
filmsurgeon
 OP
OP
mopar
|
 OP
OP
mopar
Joined: Feb 2013
Posts: 401
California, USA
|
Quote:
Here is an example of which corner they turned up (this is after I straightened it back out...)
YOU ARE AWESOME DUDE! That's the exact "mystery tip" I needed. I did not know about (or see) that little bend in the corner, which I now understand keeps the track from moving beyond the carriage that hold the bearings and roller. Once I straightened the bend on both ends, I could then remove the carriages, and "BOOM", I could separate the track halves. Now I can do a thorough cleaning and lubing. Thanks so much for providing your thoughtful and detailed explanation, and very helpful photos. I LOVE this message board!
|
|
|
|
|

