|
 Re: New Paint job on a budget thread Part III
[Re: THEYOUNGGUN53]
#38935
Re: New Paint job on a budget thread Part III
[Re: THEYOUNGGUN53]
#38935
08/20/09 02:55 PM
08/20/09 02:55 PM
|
Joined: Jan 2007
Posts: 13
toronto, ohio
andyoucankeepit

member
|
member
Joined: Jan 2007
Posts: 13
toronto, ohio
|
KIRKER!
that is the brand that someone posted a link, but i can't remember if it was acrylic enamel clearcoat...
does that sound right?
i planned on having it sprayed
also, i didn't want to risk not sanding between coats, and having the paint wasted...i would really like to get a few coats on first then d.a. it down and get a smoother coat...
thanks for the help.
03 cobra, 85 mustang, 59 galaxie, 68 sportster
|
|
|
Re: New Paint job on a budget thread Part III
[Re: andyoucankeepit]
#38936
08/20/09 11:58 PM
08/20/09 11:58 PM
|
Joined: Aug 2009
Posts: 51
CA
Peckinpah
member
|
member
Joined: Aug 2009
Posts: 51
CA
|
Quote:
KIRKER!
that is the brand that someone posted a link, but i can't remember if it was acrylic enamel clearcoat...
does that sound right?
i planned on having it sprayed
also, i didn't want to risk not sanding between coats, and having the paint wasted...i would really like to get a few coats on first then d.a. it down and get a smoother coat...
thanks for the help.
There's nothing more frustrating than getting to like your 4th coat of paint and accidentally sanding all the way through to the undercoat. Except maybe having this happen on your 8th or 10th coat. Then you gotta try to build the paint back up to the same thickness as the surrounding areas, let it dry for a week or so, and then try to make it blend in.
I think I have spent half my time trying to fix areas where I sanded through, and then having the paint not stick or go on really rough. If I could have just avoided that one problem, I'd have been done two weeks ago.
As it is, I have easily 100 hours into this project, and I still have to wet sand the areas I repainted (and hope I don't burn through again) and then use the polisher and hope I don't burn through with that either.
|
|
|
Re: New Paint job on a budget thread Part III
[Re: Peckinpah]
#38937
08/21/09 12:16 AM
08/21/09 12:16 AM
|
Joined: Jul 2006
Posts: 44
USA
_Scott_
member
|
member
Joined: Jul 2006
Posts: 44
USA
|
Peckinpah: Don't worry about burning through a few edges, everyone does it a few times when they are learning. Edges require a delicate touch. andyoucankeepit: Regarding clear, I remember someone posting this link: http://www.paintforcars.com/clearcoats_aecc2.html and thinking it looked like a good option, so I bookmarked it. Also, you are smart to not apply paint over unsanded previous coats. If you really don't want to wetsand, at least go over it with a red ScotchBrite pad to knock the shine off.
|
|
|
Re: New Paint job on a budget thread Part III
[Re: _Scott_]
#38938
08/21/09 10:23 AM
08/21/09 10:23 AM
|
Joined: Dec 2005
Posts: 1,159
Cruising!
QuickDodge
super stock
|
super stock
Joined: Dec 2005
Posts: 1,159
Cruising!
|
Here is a link to Kirker's website: http://www.kirkerautomotive.com/html/our_products.htmlThere was a guy who posted on another web board that he sprayed some Omni 2.1 VOC clear over some rattle can enamel. He applied 6 coats of enamel and baked it prior to spraying the clear. He reported that it turned out perfect. When planning to apply any automotive clear coat, it would be a REAL good idea to mix some hardener into the rustoleum. Hardener will increase the chemical resistance of the paint significantly. Of course the hardener contains the isocyanates which means it must be done in a safe location and with the proper safety gear and equipment. Hardener smells real bad!! Neighbors, the little woman, and even your dog will be mad if subjected to the smell of it! One exposure to isocyanates can injure a person for life. These chemicals can cause all kinds of health problems. Asthma is one of the more common problems caused by isocyanate exposure. But there have been some deaths attributed to these chemicals as well. To achieve adequate personal protection the correct gloves, painters suit, respiratory and eye protection is a minimum. Don't assume just any respirator will do the job. Read the fine print and make SURE it's rated for isocyanates, not just paint. Many "painting respirators" are NOT rated for isocyantes. The eye protection must protect against paint splashes, fumes and overspray. Sufficient ventilation is essentail when dealing with isocyantes. The worse the ventilation, the higher the potential concentration of isocyanates. Some respirators will only last 15 minutes in an environment with a high concentration of spray mist. The same respirator may last 6+ hous in a low concentration environment. The problem is that isocyanates have no smell so it's impossible to know when the respirator has ceased to filter them out of the air. A supplied air respirator is safer. To achieve sufficient ventilation a BIG fan(s) is required. Paint booths in automotive body shops often have fans driven by 5 hp electric motors. A home painter may or may not need that large of a fan. It will depend on the size of the booth, etc. The previous paragraphs are only an outline of the necessary safety precautions. (This off the topic of rolling paint on one's car at home) So do some additional research on how to safely apply paint with isocyanates. There is a LOT of info on the internet, in books, from paint manufacturers, etc. Just remember, there is not a car on this planet that's worth destroying a person's health over, so be safe!!
|
|
|
Re: New Paint job on a budget thread Part III
[Re: QuickDodge]
#38939
08/22/09 05:35 PM
08/22/09 05:35 PM
|
Anonymous
Unregistered
|
Anonymous
Unregistered
|
Duplicolor makes a nice engine enamel clear that comes in a rattle can, and it's only about six bucks a can. It's advertised to have superior gloss retention and protection, and it's still an enamel. I bought a few cans for the bumper I'm restoring. . . http://www.duplicolor.com/products/engine.htmlscroll down that page linked above and find DE 1636. . .I love the Duplicolor engine enamel line. ..stuff dries on like it's a powder coat. .
|
|
|
Re: New Paint job on a budget thread Part III
#38940
08/24/09 10:03 AM
08/24/09 10:03 AM
|
Anonymous
Unregistered
|
Anonymous
Unregistered
|
Question about rolling on primer
Okay, small question about rolling on primer:
I diluted the primer (Valspar's Oil Based Sandable Primer) until it was pretty much like greay skim milk. I roll it on, tip it with a clean roller (high density foam roller), keep a watchful eye out for runs, let it dry, then sand it down with an inbetween coat hand sanding, wipe it down, shop vacuum the garage for any dust sniglets running around, then wipe it down with a clean cloth with mineral spirits, let dry, and inspect.
I'm still finding areas of orange peel. Since this is a primer (I'm on my second coat) will the primer eventually fill in the orange peel or do I continue sanding that down?
|
|
|
Re: New Paint job on a budget thread Part III
#38941
08/24/09 10:42 AM
08/24/09 10:42 AM
|
Joined: Aug 2009
Posts: 51
CA
Peckinpah
member
|
member
Joined: Aug 2009
Posts: 51
CA
|
So you're just now getting ready to apply your second coat of primer? If so, I'm not really sure you really need two coats of primer, just one coat with full coverage. Though some say you don't actually need any primer at all with this paint.
To answer the orange peel question, no, successive coats will not "fill in" the orange peel finish. And since your primer is gonna be a different color than your main coat, you wanna get that primer as smooth as possible, to avoid sanding through to it later on while wet sanding your main coat and having it show through. If this happens, you'll have to repaint these areas and this is a huge hassle best avoided.
Also, how much time are you allowing the paint to dry? Are you sure it's completely dry? I like to wait until the paint is completely hard to the touch, and not the slightest bit rubbery at all, to where my hand slides smoothly over it and does not "drag" even the slightest bit. And also, the areas of thickest coverage won't leave score mark when I press in with my fingernail.
For me, this can take as long as a week, but some people have said that I'm putting on too much paint and / or not thinning it out enough. I get orange peel no matter what I do, so they may be correct.
Good luck and it sounds like you're being very cautious, which is a good attitude to have since mistakes made early on can come back to haunt you, like when I allowed my primer to drip, and some of these drips are still visible, even though I'm done painting now and waiting for my last coats to dry completely prior to buffing.
|
|
|
Re: New Paint job on a budget thread Part III
[Re: Peckinpah]
#38942
08/24/09 11:29 AM
08/24/09 11:29 AM
|
Anonymous
Unregistered
|
Anonymous
Unregistered
|
Quote:
So you're just now getting ready to apply your second coat of primer? If so, I'm not really sure you really need two coats of primer, just one coat with full coverage. Though some say you don't actually need any primer at all with this paint.
To answer the orange peel question, no, successive coats will not "fill in" the orange peel finish. And since your primer is gonna be a different color than your main coat, you wanna get that primer as smooth as possible, to avoid sanding through to it later on while wet sanding your main coat and having it show through. If this happens, you'll have to repaint these areas and this is a huge hassle best avoided.
Also, how much time are you allowing the paint to dry? Are you sure it's completely dry? I like to wait until the paint is completely hard to the touch, and not the slightest bit rubbery at all, to where my hand slides smoothly over it and does not "drag" even the slightest bit. And also, the areas of thickest coverage won't leave score mark when I press in with my fingernail.
For me, this can take as long as a week, but some people have said that I'm putting on too much paint and / or not thinning it out enough. I get orange peel no matter what I do, so they may be correct.
Good luck and it sounds like you're being very cautious, which is a good attitude to have since mistakes made early on can come back to haunt you, like when I allowed my primer to drip, and some of these drips are still visible, even though I'm done painting now and waiting for my last coats to dry completely prior to buffing.
Two coats of primer. ..I had to sand down black orange peel paint from the original owner of the project, and do some major sheet metal/bondo work. So, I thought a nice thick coat of primer couldn't do anything but help.
I may not be allowing it time to dry between coats, and that could be the problem. I was only allowing about two days between coats.
I have the hood of the car looking like grey glass--which is a feat unto itself since it was a factory vinyl top car with a huge rust hole on the passenger side pillar--and the roadrunner bulge hood is perfect. I'm just having a little problem with orange peel on the fenders and rear quarters. 
Yes, I'm still working on the car. Between my challenges with my stupid disease and the effects of the summer heat on that disease; and two daughters who continually need more money than they can earn, I'm a bit. . .behind. Years behind. Kinda hard to make any headway restoring a car when your budget is less than a hundred bucks a month. 
AND I'm definitely gonna need to get some body glaze. . .it's a thirty-six year old car and I can see some pin holes in the body filler I used on the rear quarter and passenger fender. . . 
Last edited by Serious Sat; 08/24/09 11:38 AM.
|
|
|
 Re: New Paint job on a budget thread Part III
[Re: Peckinpah]
#38944
Re: New Paint job on a budget thread Part III
[Re: Peckinpah]
#38944
08/27/09 05:41 AM
08/27/09 05:41 AM
|
Anonymous
Unregistered
|
Anonymous
Unregistered
|
Hi. As soon as I shelled out all that money for compressor, guns, air fed mask, chemicals, 2K paints and all those consumables and not to mention a couple of �How to Spray Your Car� DVDs, it was obvious I would eventually end up on this thread on this forum � so hello!
My story starts with my metallic red Peugeot 206 which I bought with a few scratches on the driver�s door and the hood which I wanted to fix myself. The door jobs were fine, but the hood has never come out perfect, I guess because the panel faces up and catches any crud in the air.
A number of points bring me to rolling the paint. Many of them will be familiar to you.
In Cornwall, UK we are surrounded on three sides by sea. There is hardly ever a dry day. This means any electric compressor has to be in the workplace with the paint vapours and a car with a tank load of fuel � not good if the compressor sparks when it kicks in.
No mobile compressor is big enough to cope with a spray gun without running all the time and this leads to warm vapour loaded air going through the gun, leading to cratering in the finish.
Every time the compressor kicks in, the roar of the machine and the smell of 2K clearcoat makes the neighbour two doors down jump up to try to see what�s going on, and quite rightly so as the 2K paints are bad news and I wouldn�t want a neighbour spraying that stuff in my air space.
When it rains I can�t have my electric air fed mask (Hobbyair) outside the work area, so this means if it is raining I can�t work and it rains most days (see above).
The spray jobs I have done I have always had to sand out orange peel anyway so all these factors have led me to consider rolling/brushing as a real alternative and one that may give me better results than spraying in my garage.
My compressor was collected this morning as I sold it on eBay for 60% of the price I paid and it is two years and four jobs old so I�m OK with that. My guns went the same way a few weeks ago. At present I am keeping my air fed Hobbyair as I don�t know where my rolling will take me.
My projects will be slightly different to many on here as they won�t be complete repaints. My work would be to repair scratches or whatever needs doing, blend the basecoat and then clear the entire panel. I cannot use Rustoleum or the like as I am painting to match the existing other panels, not painting a complete. Sure I could paint the hood in a different colour (black?), but not a side wing or door as this would be odd.
The experimenting I am doing on scrap panels is to lay a blending coat of 1K base coat (in the UK we don�t seem to have 2K basecoats not even in professional booths) and then I aim to roll or brush enough 2K clearcoat layers to be able to wetsand out any brush marks or defects to a high gloss. So far small patches have given good results. My local supplier is able to prepare exact basecoat to match my own car in a rattle can with a high end nozzle which gives as good a spray as a spraygun in my opinion and blends well. Expensive this way but I am only doing spot blends.
Then I will be brushing or rolling out 2K clear. Someone said I would not be able to roll or brush the clear over a new base as it would move the paint underneath, but this seems to depend on how good the basecoat paint is; cheaper paints run under the clear whereas the refinishing one I use stays sharp so long as you don not press on the first coat of clear.
Sorry this is a long story, but it tells you how I came to be here.
I would welcome any feedback from anyone who has tried rolling or brushing 2K urethane paints and what results you got, good or bad. I figure my spray jobs were so high in orange peel, brushing can�t be worse and may turn out better.
I will be using my Hobby air mask when hand painting the 2K paints even though I am not spraying them. That�s how dangerous I consider them to be. UK regulations do say that it is safe to roll or brush 2K without a mask so long as there is a continuous through draft of fresh air to the user. I�m not sure about this � surely if you can smell the paint you are also breathing isos which do not smell.
Any comments welcome.
|
|
|
Re: New Paint job on a budget thread Part III
#38945
08/27/09 11:53 AM
08/27/09 11:53 AM
|
Joined: Dec 2005
Posts: 1,159
Cruising!
QuickDodge
super stock
|
super stock
Joined: Dec 2005
Posts: 1,159
Cruising!
|
Zippy, Welcome to Moparts! For painting small areas consider using a Prevail sprayer. It's almost as convient as a spray can, yet the paint can be mixed to your exact requirements. http://www.prevalspraygun.com/Most 2K paint is formulated for spray application. Brushing or rolling a paint intended for spray application may have a negative effect on the finish. (durability, appearance, etc.) The reason is that paint intended for spray application will have different solvents than a paint intended for a brush / roller application. I've never heard of anyone testing the idea of brushing a paint intended for spray application. It may work, but it should work best when sprayed. Some industrial 2K paints are formulated for brush / roller application or spray application. I have no experience using these paints. If using isocyanates, be very cautious. Personally, I put on all the safety gear prior to opening the can of paint and wear all the safety gear until I'm finished and leave the area. One time I rolled a little alkyd enamel with hardener on a small project without any eye protection. My eyes hurt for several days afterwards!
|
|
|
Re: New Paint job on a budget thread Part III
#38946
08/27/09 12:07 PM
08/27/09 12:07 PM
|
Joined: Jan 2003
Posts: 17,860
S.E. Michigan
ZIPPY
I Live Here
|
I Live Here
Joined: Jan 2003
Posts: 17,860
S.E. Michigan
|
Quote:
Any comments welcome.
OK, here is a comment. Nice username there 
|
|
|
Re: New Paint job on a budget thread Part III
[Re: ZIPPY]
#38947
08/27/09 02:08 PM
08/27/09 02:08 PM
|
Joined: Aug 2005
Posts: 1,043
Motown, Mi
PAULS_340
super stock
|
super stock
Joined: Aug 2005
Posts: 1,043
Motown, Mi
|
FYI..in S.E. Michigan you can get those Prevail sprayers at ACO Hardware.
Still looking for LM29H1B415501, '71 Demon 340
|
|
|
 Re: New Paint job on a budget thread Part III
[Re: PAULS_340]
#38948
Re: New Paint job on a budget thread Part III
[Re: PAULS_340]
#38948
08/28/09 05:22 AM
08/28/09 05:22 AM
|
Anonymous
Unregistered
|
Anonymous
Unregistered
|
Hi � thanks for the info on the Prevail sprayer. I have contacted the company for a UK stockist or USA outlet. It would certainly be cheaper than having an aerosol made up as I could buy the �ready to spray� basecoat and use the Prevail instead. Hi Quickdodge: Re your comments about brushing or rolling a paint intended for spray application possibly having a negative effect on the finish. (durability, appearance, etc.). I hear what you are saying, but my understanding is that the solvent in 2K car paints is designed to atomise and carry the paint to the panel and then evaporate out by flashing and curing, then the paint cures as it catalyses with the isocyanate hardener. I am hoping that delivering the paint to the panel by brush and roller will have no different effect as the chemical and curing reaction will be the same. In fact the brushed or rolled finish should be easier to wetsand smooth as my spray set up was never powerful enough to avoid the dreaded OP. I would need to watch that I did not load too much paint on at any time to give enough time for solvents to flash, to avoid solvent pop. The fact that you have never heard of anyone testing the idea of brushing a paint intended for spray application is enough to get me to have a go as that is what started this thread and the roller concept in the first place. Nothing to lose and loads to gain - if only experience! I have got as far as applying primer and blocking a scrap panel and will soon be applying base and 2K clear and will post the results here at some point soon. In the UK there is an official safety spec sheet that deals with application of 2K clear with rollers or brushes so it must be something that is practiced in some professional booths as we amateurs are not allowed to use the stuff are we.   I agree with your caution on using isocyanates, which is another strong reason for me discontinuing the practice of spraying 2K in my garage. The isos in my garage could give me asthma. The isos that escape wouldn�t do my neighbours much good either! Strangely it is not 2K that affects me, but 1K primers which give me a tight chest for a couple of days after, but that is probably because I am so scared of isos that I use all protective gear so I am not exposing myself to them whereas I have been more relaxed using primer so I have breathed this stuff in using only a respirator. For painting 2K I use an air fed mask (Hobbyair) even if I am using roller or brush � not worth the risk relying on the draft from an open door for clean air. Oh and Hi ZIPPY, from Z1PPY!
Last edited by Z1PPY; 08/28/09 05:24 AM.
|
|
|
Re: New Paint job on a budget thread Part III
[Re: Marq]
#38949
08/28/09 05:31 AM
08/28/09 05:31 AM
|
Anonymous
Unregistered
|
Anonymous
Unregistered
|
QUOTE: "I can see the 'edge' being an achilles heel. In fact... even if you spray painted your entire car in automotive paint... and later went back to touch up some paint chips with - the odds are high that the edges of the paint chip would curl up and wrinkle. I have had that happen to me 'back in the old days' when I used automotive spray paint to do touch ups on road chips in my paint." END QUOTE.
Definitely had this one with 2K paints. Went to touch up a 2mm chip in the bonnet with rattle primer the edges wrinkled and I had a 6cm patch to deal with as I had to apply the primer so thinly as not to unsettle the edge of the repair.
Another way around this would be to seal the chip first with some 2K clear but as you say this can eat the edges away as well.
One other way would be to seal the repair edge with water based clear as I understand this does not react with 2K solvent paints. Just a thought.
|
|
|
Re: New Paint job on a budget thread Part III
#38950
08/29/09 05:32 PM
08/29/09 05:32 PM
|
Joined: Dec 2005
Posts: 1,159
Cruising!
QuickDodge
super stock
|
super stock
Joined: Dec 2005
Posts: 1,159
Cruising!
|
While 2K paints are good, I'd not recommend 2K paints for most home painters for several reasons.
1. Low priced paint jobs should generally be done on low priced vehicles. Low priced vehicles usually won't last more than a few years. (Why put a 10+ year paint job on a car which will only last 3-5 years?)
2. 2K paints are much more expensive, dangerous, and difficult to apply.
3. Older cars originally painted with synthetic or acrylic enamel will look period correct with an enamel paint.
If anyone still decides to apply 2K paints at home, be aware that if the garage is attached to a home, isocyanates could get into the home through any cracks, openings, etc. between the garage and house.
Z1ppy, My limited understanding of paint chemisty is that paint formulated for spray application will often contain different solvents. There are solvent(s) which help to atomise the paint when it's sprayed. These solvents often separate from the paint betweeen the paint gun and the painted surface. Then other solvents in the paint allow the paint to level and flow out on the painted surface.
When Brushing or rolling paint formulated for spray application, the solvents which atomize the paint will be in the paint film applied to the painted surface. These solvents may affect how the paint cures or performs long term. (What kind of effect, whether the effect is significant or measureable is unknown)
I'd be very, very grateful if you can share the results of your experiments!! I have a little painting project in a few weeks. It's one of those deals where masking the areas which are not be be painted will take many times longer than the actual painting process. Brushing the paint would be SO MUCH easier!!!!
Incidently, the company which makes the brightside marine paint also makes a 2K brushable paint. It was mentioned a long time ago in this, or one of the previous, threads. Seems like someone posted that it's not a whole lot better than the brightside paint. It is more expensive, more dangerous, and I believe harder to apply. Maybe someone who knows more about this can post some details.
|
|
|
Re: New Paint job on a budget thread Part III
[Re: THEYOUNGGUN53]
#38951
08/30/09 05:24 PM
08/30/09 05:24 PM
|
Anonymous
Unregistered
|
Anonymous
Unregistered
|
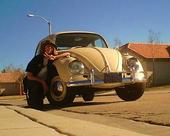
I'm getting ready to roll my '64 beetle. I'm slowly getting the body ready and hope to have it perfect in a few months. I have sanded down the rusty areas in some places to bare metal. I treated these areas with a product called phosphate and etch. The phosphate and etch inhibits further rusting and also (according to the product info)makes an excellent sub-surface for any paint.
My next step is to prime the entire car by rolling Rustoleum Clean Metal primer.
My question: Should I thin the primer also before rolling or can I roll it straight out of the can?
The reason I want to prime is because I have a lot of filler work that I want to cover before painting. I think the primer will give a good foundation for the paint.
|
|
|
Re: New Paint job on a budget thread Part III
#38952
08/30/09 06:23 PM
08/30/09 06:23 PM
|
Joined: Aug 2009
Posts: 51
CA
Peckinpah
member
|
member
Joined: Aug 2009
Posts: 51
CA
|
If I had it to do again, I would not use primer. My reason is that when I'm wet sanding, if I sand down too far, I'll have primer showing. I would rather have my first coat of paint showing through than primer (which is a different color). It's like you're wasting your time with those first one or two coats of primer, because they'll show through the same as bare metal would.
Anyway, I took a picture of the problem I have been having with my Rustoleum Gloss White beading up on me (see below). Yu can see the factory paint showing through, it's a metallic light blue. And yes, I sanded off the factory clearcoat before painting. Paint is thinned out to about 50-50 paint to mineral spirits.
It goes on smooth enough, but rather than "leveling out" as it's supposed to do, it does the exact opposite and beads up, resulting in terrible orange peel, no matter how smooth the surface is that the paint is applied to. It's especially bad in areas I need it most, namely places where I sanded through to the factory paint.
So I would really like to see this "leveling out" phenomenon, but have yet to experience it. Needless to say, I have had to do a ton of wet sanding after every two coats, due to the orange peel, and over and over again wind up sanding all the way through to the factory paint, especially in rough areas and on drips (which I have learned to avoid at all costs).
So has anyone else experienced this beading up behavior on every single coat like I have? It's extremely frustrating. BTW, the area shown is a close-up taken near my door handle, and the patch that's showing through is about 2 inches long by about 3/4th's of an inch wide.
Last edited by Peckinpah; 09/07/09 02:17 PM.
|
|
|
Re: New Paint job on a budget thread Part III
[Re: Peckinpah]
#38953
08/30/09 07:00 PM
08/30/09 07:00 PM
|
Anonymous
Unregistered
|
Anonymous
Unregistered
|
How did you clean the surface prior to rolling? Is it possible you could have contaminates such as oil or wax causing this?
|
|
|
|
|


