|
 Re: New Paint job on a budget thread Part III
#38494
Re: New Paint job on a budget thread Part III
#38494
10/16/08 10:24 AM
10/16/08 10:24 AM
|
Anonymous
Unregistered
|
Anonymous
Unregistered
|
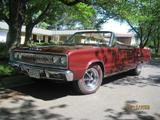
Sorry, not a mopar but proof the technique does work. I used brightside marine paint and it really,really looks great!!!
|
|
|
Re: New Paint job on a budget thread Part III
#38495
10/16/08 10:31 AM
10/16/08 10:31 AM
|
Anonymous
Unregistered
|
Anonymous
Unregistered
|
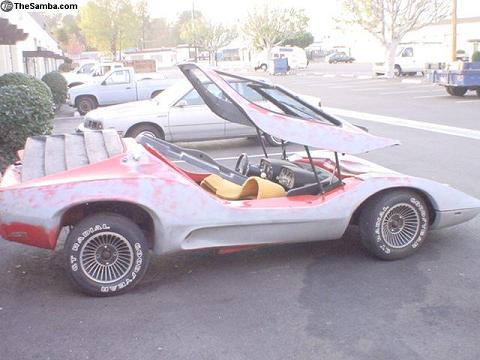
one more pic (resized, looks better full size)
|
|
|
Re: New Paint job on a budget thread Part III
[Re: aussie]
#38497
10/18/08 04:33 AM
10/18/08 04:33 AM
|
Joined: Nov 2006
Posts: 32
Edgerton WI
Donny O.

member
|
member
Joined: Nov 2006
Posts: 32
Edgerton WI
|
Quote:
Just one word "WOW"
Can you give us a close up pic
I agree it looks great.
is that a Sterling? I havne't seen one of those in years....specialy one that wasn't half tore apart in a field somewhere.
|
|
|
Re: New Paint job on a budget thread Part III
[Re: Donny O.]
#38498
10/18/08 07:51 PM
10/18/08 07:51 PM
|
Anonymous
Unregistered
|
Anonymous
Unregistered
|
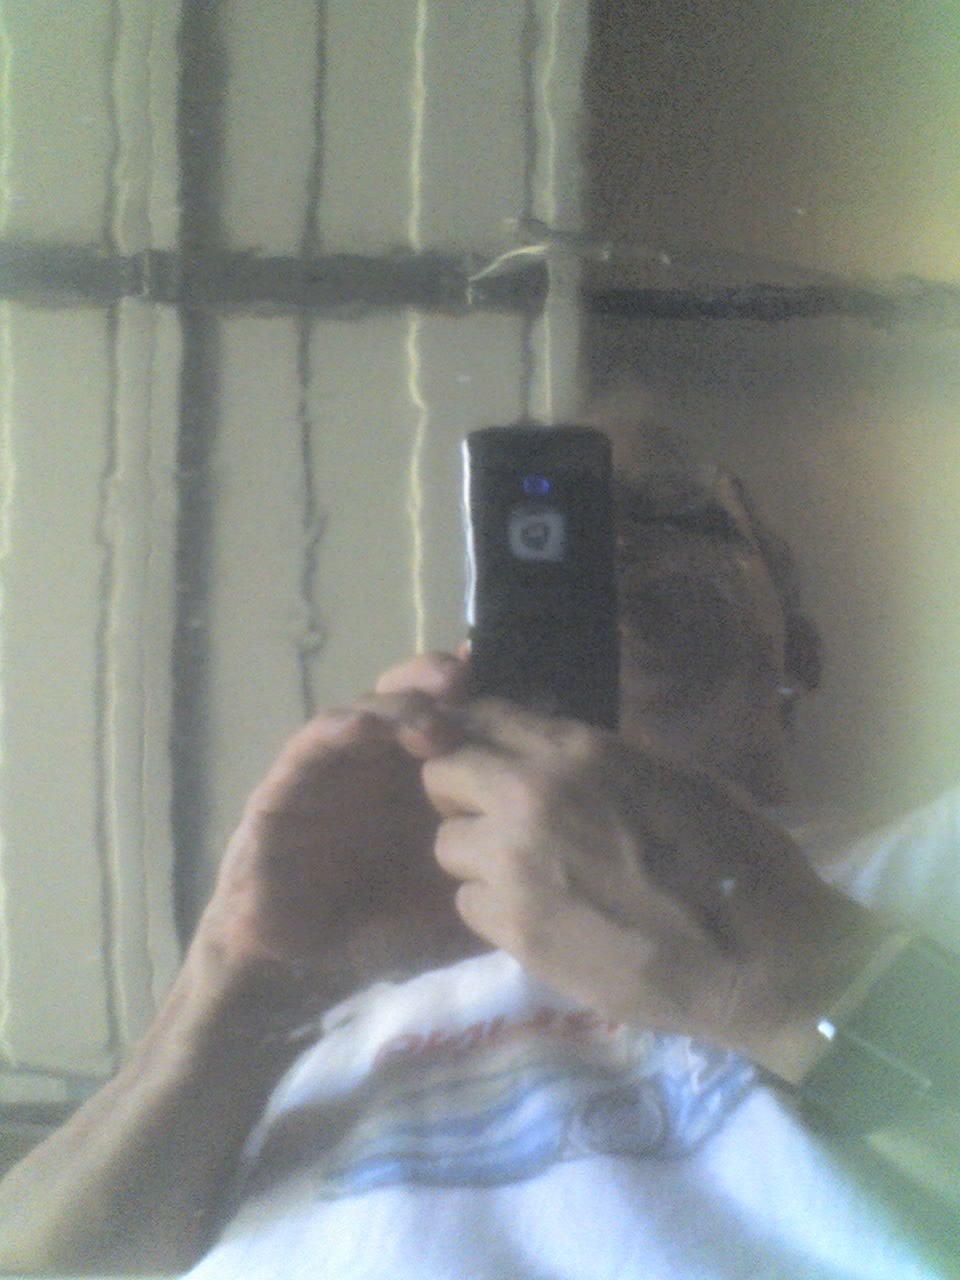
yea, its a sterling. here's a bad closeup taken with a razr phone. it's in the grage looking down at the top.
|
|
|
Re: New Paint job on a budget thread Part III
[Re: aussie]
#38501
10/22/08 08:25 AM
10/22/08 08:25 AM
|
Anonymous
Unregistered
|
Anonymous
Unregistered
|
no, it was red. pretty rough condition.
Last edited by chazz; 10/22/08 08:27 AM.
|
|
|
Re: New Paint job on a budget thread Part III
#38502
10/22/08 08:36 AM
10/22/08 08:36 AM
|
Joined: May 2006
Posts: 575
Canada
Marq
mopar addict
|
mopar addict
Joined: May 2006
Posts: 575
Canada
|
Quote:
no, it was red. pretty rough condition.
Now the big question. Like a lot of us... you probably wanted to go the 'pro paint job' route... Did you ever get any quotes on what it would have cost you to have it painted professionally ?
I am just curious if you have any numbers to indicate how much money remained in YOUR POCKET ( to spend for further work or goodies for the car ) by 'rolling your own' 
.
|
|
|
Fixing up the new Toy
[Re: Marq]
#38504
10/22/08 12:57 PM
10/22/08 12:57 PM
|
Anonymous
Unregistered
|
Anonymous
Unregistered
|
I purchased a little toy, a 65 mustang, a couple of months ago. The previous owner put in quite of bit new sheet metal, however, he did not prime or scuff the surface of this new metal. Now the once nice paint job is chipping and flaking all over the place.  So I plan on stripping her down to the bare metal, fix or replace any rusted areas and change colour from white with blue shelby stripes to blue with white shelby stripes using Brightside. What is the best way to paint the underside of hood and trunk lid? I was thinking of removing the hood and trunk lid, buying a cheap hvlp sprayer for these areas and spraying Brightside undiluted. Is this what you would do? How may sprayed coat would be sufficient for these areas?
|
|
|
Re: New Paint job on a budget thread Part III
[Re: Marq]
#38505
10/22/08 08:13 PM
10/22/08 08:13 PM
|
Anonymous
Unregistered
|
Anonymous
Unregistered
|
Quote:
Quote:
no, it was red. pretty rough condition.
Now the big question. Like a lot of us... you probably wanted to go the 'pro paint job' route... Did you ever get any quotes on what it would have cost you to have it painted professionally ?
I am just curious if you have any numbers to indicate how much money remained in YOUR POCKET ( to spend for further work or goodies for the car ) by 'rolling your own'
.
I didn't get any quotes (car wasn't running) but I know of another sterling owner that paid $5,000 for a black paint job, so I did save quite a bit.
|
|
|
Re: Fixing up the new Toy
#38506
10/23/08 01:04 AM
10/23/08 01:04 AM
|
Joined: May 2006
Posts: 575
Canada
Marq
mopar addict
|
mopar addict
Joined: May 2006
Posts: 575
Canada
|
Quote:
What is the best way to paint the underside of hood and trunk lid?
It will depend on the color and paint you choose to use.... I know for my Mustang I used a spray bomb to do the underside of the hood and trunk. With all the frame and strengthening structures in some hoods and trunks, it was the easiest way to get color coverage in to all the nooks and crannies.
Now... you can go about it one of two ways... with them on the car and with them taken off. If you are doing the spraying with them on the car... then it pays to cover up as much of the rest of the car to avoid the overspray landing all over.
Ideally, you will take both of them off the car... and that will make the painting task a lot easier. With them placed on a work bench, or between two work horses or even placed on a bunch of plastic milk carriers ( you know those plastic things that milk comes in to the stores and that we use to steal to put our record albums in ). With the hood or trunk lying horizontally... you can easily spray bomb it or even do a combination of rolling and foam paint brushing of them. You would hit the harder to hit nooks with the foam brush and then follow up with the roller to level things out and get the more flat areas.
But I found the spray bomb gave me the easiest application, best coverage and a pretty smooth ( and shiny finish ).
In my case, I was using Brightside Red to paint the cars body. And fortunately the Rustoleum/Tremclad red spray paint is the very same color. The same story probably works out for the blacks and some of the other colors.
JUST BE SURE to thorougly scrub the hood down with mineral spirits, followed up by a thorough rinse down with a bit of soap and water to removed all the engine compartment splatterings that have found themselves attached to the underside of the hood. The trunks normally don't need as extensive a cleaning prior to painting.
I did not have to sand the underside of the trunk or hood. The above referenced cleaning was sufficient surface preparation to get things ready for painting.
And before you ask... YES... both Brightside or the Rustoleum/Tremclad work well in the engine compartment and are not affected by the heat in the engine compartment
Quote:
I was thinking of removing the hood and trunk lid, buying a cheap hvlp sprayer for these areas and spraying Brightside undiluted.
I can't speak to the spraying of the Brightside... but I would think that you will probably have to thin it using the 'brushing thinner' that Interlux sells for the Brightside paints. Out of the can, the Brightside might be too thick to properly atomize through most cheap sprayers.
But as I mentioned... depending on the color you are choosing, you might be able to use aerosol spray bomb paint instead of using an HVAC.
Quote:
Is this what you would do? How may sprayed coat would be sufficient for these areas?
Using the spray bombs... I ended up using 4 spray bombs for the underside of the hood and 2 spray bombs for the underside of the trunk.
For the hood... I would take one bomb... and spray it all over.. trying to get as much coverage as possible. Then walk away from it for 24 hours before emptying the next spray bomb on it. Then take another 24 hour break before laying a third bomb on to it. Then... yup.. another 24 hours to hit the final coat on it. This will ensure that you don't get any orange peel forming on the paint.
With the trunk lid... you follow the above pattern of allowing 24 hours drying time between coats. And although you only have 2 spray bombs for the trunk lid, only dump half a can on to it per session. This way it will take 4 days to complete four coats ( using just the two spray bombs ) on the innner trunk lid.
.
|
|
|
Re: Fixing up the new Toy
[Re: Marq]
#38507
10/23/08 07:03 PM
10/23/08 07:03 PM
|
Anonymous
Unregistered
|
Anonymous
Unregistered
|
Marq, I want to thank you for the detailed answer and for your willingness to help everybody out. 
|
|
|
Re: Fixing up the new Toy
#38508
10/23/08 08:17 PM
10/23/08 08:17 PM
|
Joined: Sep 2006
Posts: 58
MD, USA
v8mirage
member
|
member
Joined: Sep 2006
Posts: 58
MD, USA
|
I did the bottom of my hood basically the same way Marq described, and you DO need to let it set in between coats, I tried to rush it once and spent a bunch of time fixing up a mess of orange peal.
Last edited by v8mirage; 10/25/08 10:13 AM.
|
|
|
Satin/Flat finish
[Re: v8mirage]
#38509
10/24/08 01:11 AM
10/24/08 01:11 AM
|
Anonymous
Unregistered
|
Anonymous
Unregistered
|
Hello all. I'm Peter. A few months ago, my car was struck by a girl going through an intersection. Needless to say, my car is in the 'rebuild' stage. I have spent most of my $$ on go fast goodies - Kenne Bell S/C along with supporting mods - and I don't have much left for paint.
I have spent the better part of two months reading, looking at pictures, etc, on this site, amongst others - btw, this is definitely the best site in terms of DIY paint - especially using the rolling method.
I have decided to roll paint on my 89 Mustang LX. I plan on doing a two tone - satin black bottom, and a charcol grey (debating a flat/satin grey) on top.
I have driven everyone who will listen crazy with this, especially the wife as I'm sure the majority of you have first hand experience.
Anyhooo...why I'm here. I've been to about 5 outlets (home depot, canadian tire, rona) and can not find Satin black in quarts. I emailed Tremclad/Rustoleum and they said mixing Flat and Semi-gloss will give me the Satin that I am looking for. Does this make sense?
Also, I have seen a few guys do the satin finish, but I am confused on the final stage...if I am correct, once the final layer is applied, I should not be wetsanding. Is this correct?
Most of the guys using gloss polish their paint afterwards, is this NOT necessary with Satin/flat?
I appreciate your help with this...I have been trying find it on my own, but as you can imagine, three different threads, with over 200 combined pages makes finding this info a little tedious.
Thanks again.
peter
|
|
|
Re: Satin/Flat finish
[Re: p d'ro]
#38511
10/24/08 12:35 PM
10/24/08 12:35 PM
|
Joined: May 2006
Posts: 575
Canada
Marq
mopar addict
|
mopar addict
Joined: May 2006
Posts: 575
Canada
|
Quote:
Also, if you had your car etched, primed etc ready for a commercial job and you decided to roll, however didn't like the results, how far yould you have to take it down to get ready for a good spray job again?
Thanks, Pete
Hi Pete...
Let us say that you did a roller job and didn't like the end result.. or maybe you won some money at the local casino and could afford to take the car to a 'real' paint shop. The amount of surface prep that you would have to do prior to getting it professionally sprayed depends on a number of factors...
a ) are you planning to spray it yourself or take it to a paint shop...
b ) IF you are taking it to a commercial paint shop... is it the el-cheapo paint shop or the 'we take pride in every paint job we do type paint shop'
If you are planning to spray it yourself, you would scuff the surface just as you would if you were going to send it to MAACO ( or similar type shops ). The amount of surface scuffing would entirely depend on just how much 'scuffing it takes to remove the outer gloss and end up with as smooth a surface as you can...
If you are planning to take it to a 'real' paint shop that beats their chest about the pride they take in every paint job... the odds are that they would want to do the surface preparation prior to painting. They always like to proclaim " it's the only way we can be absolutely sure that if the paint fails it is our fault'. These are usually the same shops that will spray your car ( with your surface preparation ) and warn you before hand that ' you don't get a guarantee with that paint job ( again echoing how their surface preparation work is the only true one that they can guarantee the coating of paint on ( and for which they charge you an extra 10 hours of labor on your bill ).
Back to the paint for a moment... Tremclad/Rustoleum is an enamel. Brightside is a polyurathane. As such... they are the same types of paints as used for commercial automotive painting. So that is mentioned just to confirm to you that there should not be any compatability problems with your base coat of Tremclad/Rustoleum or Brightside, with a commercially sprayed paint job on either of them.
I mention that because some shops might try to lie and say... ohh... there is a compatibility problem with that 'rolled on paint'.... and we have to strip your car back down to metal and reprime it. Which basically is their way of outright lying and saying that '... we want to charge you 20 hours of surface preparation...".
Now I don't want to be too harsh on some automotive paint shops... that might want to strip a rolled on paint job to bear metal and re-prime. After all, some shops do take really great pride in every car that rolls out of their shop with a fresh coat of paint. And be taking things back to square one is the only way they can assure themselves that their end result will live up to their 'standards'. That's a cool corporate attitude... but unfortunately their 'pride in their work' means mucho more money out of your pocket. And assuming you went the roller route in the first place, it is not likely you would even be stepping foot in that paint shops doorway ( unless of course the lottery win or day at the horsetrack suddenly plumped up your wallet ).
Bottom line... either the Rustoleum/Tremclad or Brightside rolled on paint job can serve as an excellent basecoat for subsequent spraying. Surface prep 'should' be no different then if you had a car with a normal but worn out paint out that was going in to be sprayed.
.
|
|
|
Re: Satin/Flat finish
[Re: p d'ro]
#38512
10/24/08 07:59 PM
10/24/08 07:59 PM
|
Anonymous
Unregistered
|
Anonymous
Unregistered
|
Quote:
I want to know how you polished all of those tight areas on the Sterling like the headlights, etc. and what do you do w/ areas that you can't get teh buffer to. That car looks great.
I pretty much just used a 6" super cheapo buffer, which worked fine. Really the only place I had to hand buff was in the rear scoops.
|
|
|
Re: Fixing up the new Toy
#38513
10/26/08 01:42 PM
10/26/08 01:42 PM
|
Joined: Sep 2008
Posts: 33
San Francisco
Mercurymarc
member
|
member
Joined: Sep 2008
Posts: 33
San Francisco
|
Hey 65 Pony- Love the White/Blue paint job! That's what I have planned for my 63 Comet. So when you repaint yours from blue on white to white on blue, mine will fill the void...  To see my progress I've started a web page: The Blue Comet Good luck with your Mustang!
Marc in SF
63 Blue Comet 260 Sedan- White w/blue stripes
Done using the "$50 Paint Job" method!
|
|
|
|
|

