|
 Re: RE: New Paint job on a budget thread Part III
#38274
Re: RE: New Paint job on a budget thread Part III
#38274
05/23/08 09:31 PM
05/23/08 09:31 PM
|
Anonymous
Unregistered
|
Anonymous
Unregistered
|
Hello, new member here. I just wanted to thank everyone who has contributed to this thread and gone through the trial and error in order to make this process work. I've read every page of all 3 sections of this budget paint job and Im ready to do it myself, i'll be using black brightside on my 79 camaro Z28.
I remember reading a while back in this thread that someone applied brightside over duplicolor primer and it fell off?? Did you guys ever figure out of it was due to poor surface prep or was it a compatability problem between he two products???
Right now my car is in black duplicolor primer(rattlecan). I just wanna make sure the brightside will stick to it since i've already put in countless hours doing the body work to get the serface straight as an arrow and ready for paint. Any elp would be appreciated
thanks
Last edited by 79camaro; 05/23/08 09:39 PM.
|
|
|
Re: RE: New Paint job on a budget thread Part III
[Re: 69DartGT]
#38276
05/24/08 12:24 AM
05/24/08 12:24 AM
|
Joined: Feb 2006
Posts: 2,590
Piqua, Ohio
dodgeram440

master
|
master
Joined: Feb 2006
Posts: 2,590
Piqua, Ohio
|
Quote:
I rolled mine on over dupilcoloe primer and had zero problems. Could be he had a prep problem?
I agree. I would wet sand the primer with no less than 400 grit and roll with confidence. Like Marq has said in numerous posts about spray bombing, the areosol paints and primers don't lay on very even. However, after a good wet sanding, all the loose paint or primer will be sanded away and what is left will be a solid base to paint on.
BTW...69dartgt, what did you do about the area between you cab and the bed? Did you pull the bed off to paint the area or just leave it alone? Just curious for when I paint my truck.
|
|
|
Re: RE: New Paint job on a budget thread Part III
[Re: dodgeram440]
#38277
05/24/08 03:37 AM
05/24/08 03:37 AM
|
Anonymous
Unregistered
|
Anonymous
Unregistered
|
little update...just to get a feel for the brightside i painted an empty 2 liter of pop, after about 24hrs though it was still slightly tacky. Has any one els experienced that?? so i put it next you one of those small cheap space heaters and the tack went away and got nice and hard, it's been another 24hrs since then (at normal temp, was only by the heater for an hour or so) and its hard like glass! To test it's polishability i scuffed part of the surface with a 3M scuffing pad, and used 3M rubbing compound and then 3M swirl remover and it had a beautiful shine equal to its natural gloss. Looks like the paints still wet....and it was so easy to polish too, almost like this piant wants to shine  lol, i can honestly say i've never been this impressed with any hand applied paint as much as i've been with brightside, it shines like glass and is rock hard. Can't want to get this stuff on my car
Last edited by 79camaro; 05/24/08 04:03 AM.
|
|
|
Re: RE: New Paint job on a budget thread Part III
#38278
05/24/08 03:52 AM
05/24/08 03:52 AM
|
Anonymous
Unregistered
|
Anonymous
Unregistered
|
Something else i'd like to add, several weeks ago i did another practice piece. I used .96 cents a can cheapo enamel spray paint, and covered an empty 2liter pop bottle with a few coats. I gave it the better part of a week to harden up and then i wet sanded, rubbed, polished and waxed it. Now, it certainly wasn't as easy to polish as brightside, but when i had a few coats of wax on it it looks almost as good as the brightside. Examined it under indoor phlorescent light as well and outside in the sun and it is a deep black swirl free (dare i say show car) shine. So, it just really goes to show that if you're patient and go through the surface finishing process you can make even really cheap paint have a damn near show car shine. It really pays to practice polishing, especially on cheap paints to develope the patience, a carefull eye and hand, and a feel for the technique needed to do a profesional job. If you can make cheapo paint shine you'll have no problem whatsoever with brightside 
|
|
|
Re: RE: New Paint job on a budget thread Part III
[Re: 69DartGT]
#38279
05/24/08 04:10 AM
05/24/08 04:10 AM
|
Anonymous
Unregistered
|
Anonymous
Unregistered
|
Quote:
I rolled mine on over dupilcoloe primer and had zero problems. Could be he had a prep problem?
awesome, that makes me feel a lot better since your truck turned out awesome; how long has it been since you painted it?
|
|
|
Re: RE: New Paint job on a budget thread Part III
#38280
05/24/08 11:02 AM
05/24/08 11:02 AM
|
Joined: Jan 2003
Posts: 12,405
Southern, Ca.
69DartGT
OP
moparts member
|
OP
moparts member
Joined: Jan 2003
Posts: 12,405
Southern, Ca.
|
Quote:
Quote:
I rolled mine on over dupilcoloe primer and had zero problems. Could be he had a prep problem?
awesome, that makes me feel a lot better since your truck turned out awesome; how long has it been since you painted it?
Early Dec 2006 could use a little wax right now.
|
|
|
Re: RE: New Paint job on a budget thread Part III
[Re: dodgeram440]
#38282
05/24/08 11:35 PM
05/24/08 11:35 PM
|
Joined: Jan 2003
Posts: 12,405
Southern, Ca.
69DartGT
OP
moparts member
|
OP
moparts member
Joined: Jan 2003
Posts: 12,405
Southern, Ca.
|
Quote:
69DARTGT, what did you do about the space between your cab and the bed? Did you just leave it unpainted or find someway to get the paint in there? Or maybe remove the bed. Just curious. Want to know what I should expect when I paint my truck. Thanks
I used rustoleum's safety red & sprayed it down as far as I could also along the sides pretty hard to tell the bed wasn't off.
|
|
|
Re: RE: New Paint job on a budget thread Part III
[Re: Marq]
#38285
05/27/08 09:45 AM
05/27/08 09:45 AM
|
Joined: Apr 2005
Posts: 42
plum500
member
|
member
Joined: Apr 2005
Posts: 42
|
Quote:
Quote:
Question about satin. I want to do this on my probe but I have to do a little body work first. Ive read that the satin rustoleum rolls on just as well as it sprays from rattle cans. I was wondering if I should just spray bomb it. If I'm going to roll it i think i would have to take the entire car apart (bumpers, mirrors, fenders, etc) the only reason is because i would want to get all the little cracks and everything painted. so which method would yield the best results?
You will get a better overall effect by rolling on your satin paint.
I gave this speech previously... but it does explain the benefits of rolling on a paint compared to using a spray bomb...
When you are rolling on a paint.... it self levels. This is because you are directly rolling the paint and its carrier ( the mineral spirit ) on to the target part. You lose none of the paint in to the air during the transfer and 100% of what goes on the roller ends up on the target part.
When you are spraying with an aerosol or spray bomb, the paint particles are propelled out of the can and the particles fly through the air until they land on the car. While the paint particles are in flight... they are losing some of their adhesiveness. So some particles of the spray hit the target part with 100% of their adhesion quality intact... whereas other particles have underwent a various percentages of adhesion loss during the flight. SOOOOOOOooo.. when the particles hit the target surface they tend to build on top of each other. These paint molecules do not all land in an orderly fashion as they build up their coat of paint. There will be air gaps created between some particles AND in other instances you will have these 100% adhesion molecules landing on paint molecules that had lesser percentages of adhesion. That makes them very unstable and easily rubbed off.
Ok... so the roller paint goes on the car and it fills in all the air gaps and creates a uniform adhesion between all the paint molecules and the subsurface that is being painted. As the paint dries and the carrier ( mineral spirit evaporates ) the paint molecules fill in all the air gaps with the paint molecules and create a strong bond amongst itself while it self-levels. You cannot take your thumb or brush against the paint with your leg or sleeve and dislodge the paint once it has self leveled and cured.
Whereas the spray bomb job leaves a paint on the surface of the vehicle that on looking at it under a microscope would make you think that it looks kind of fuzzy. That fuzziness when rubbed with your thumb, pant leg or sleeve will rub off.
Satin paint jobs are a big enough pain in the butt to keep looking good and flat. The roll on method gives you that chance to keep that 'flat' look longer because of what I explained earlier.
Hope this helps
Marq
.
I disagree. The whole problem with thr roller/brush method vs spraying is that it introduces the very real (probable) imperfections/inconsistencies that are a direct result of the roller/brush. As much the reason why you need to sand the hell out of it as the peel. I'm not poo pooing the roller, I'm just saying that thinning the hell out of the paint (at least 50%) reduces those inconsistencies as much as any peel.
This stuff sprays *really* nicely I find - however, it is nice to have it thicker than a 50/50 mix to spray. The right ratio - and there is very little, if any, peel at all, and you avoid the (sometimes overwhelming) task of rolling or brushing while avoiding the natural characteristics of... rolling or brushing paint. However, you still have the issue of one of the biggest drawbacks of this paint - the drying time.
Anyhoo... just my 2 cents.
But, in anycase, for satin black - hands down, my favourite paint - period - is Dupli-Color Low Gloss Black Engine Enamel. The stuff sprays (rattle can) to an awesome satin finish. It blends effortlessly. It dries (to the touch) in minutes. And, it will be durable - and resist all the nasty stuff that an engine enamel is going to resist. Trust me. If you want a quick and cheap and dare I say, wicked satin black finish - buy a few cans of this stuff.
|
|
|
Re: RE: New Paint job on a budget thread Part III
[Re: plum500]
#38286
05/27/08 06:42 PM
05/27/08 06:42 PM
|
Anonymous
Unregistered
|
Anonymous
Unregistered
|
Well its been a while. Finally got some time to get back on this project. For those who dont know, I started with rusty paint on my hood a couple pages\months back (pg 45?) and I eventually got the process down and started using brightside paint for the whole vehicle. I said to hell with the molding and decided that i will scrap, sand or brush it off later on. I know, stupid move. I applied 1 coat to my car and here are the pics. Actually let me get a before and after shot. BEFORE 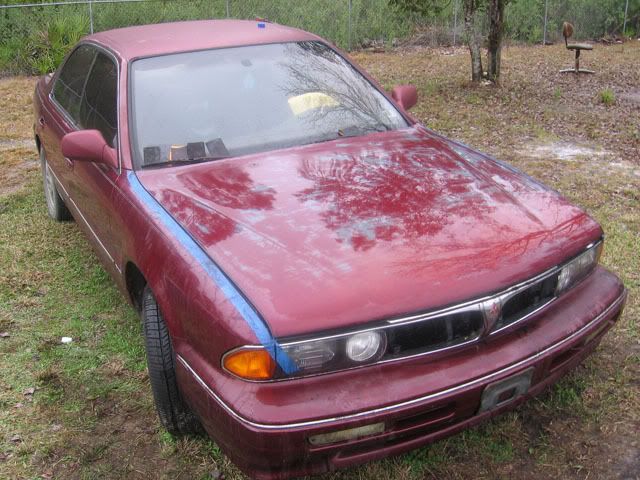 AFTER 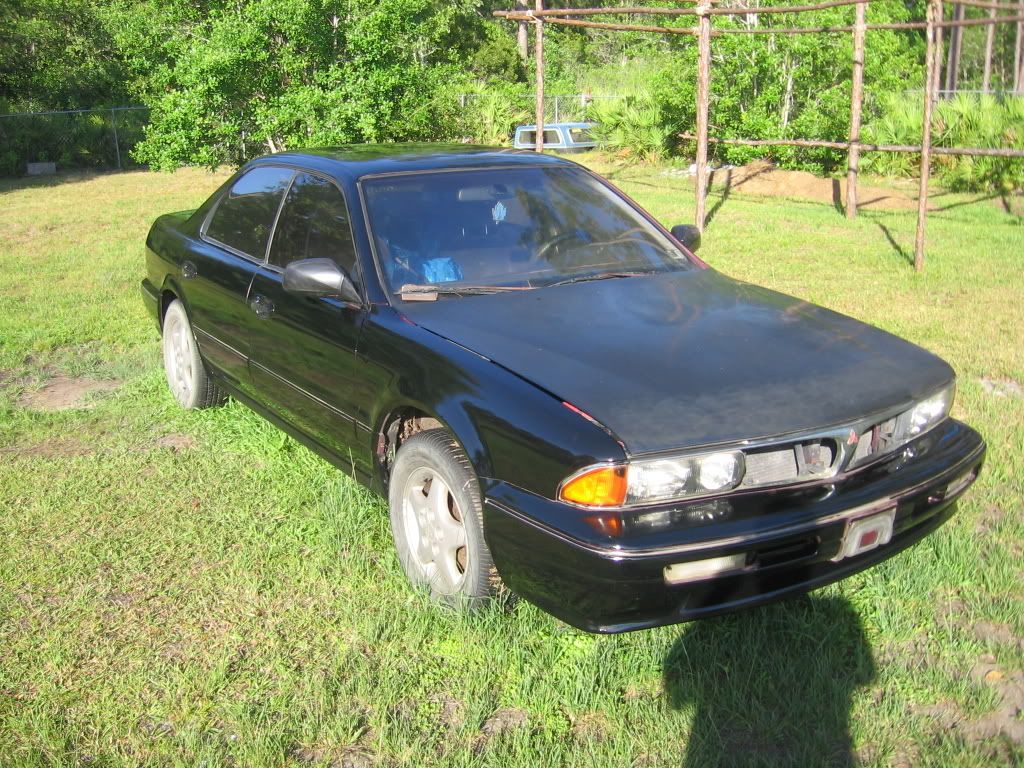 I kind of got ahead of myself. The after shot has only 1 coat and isnt finalized. more pics 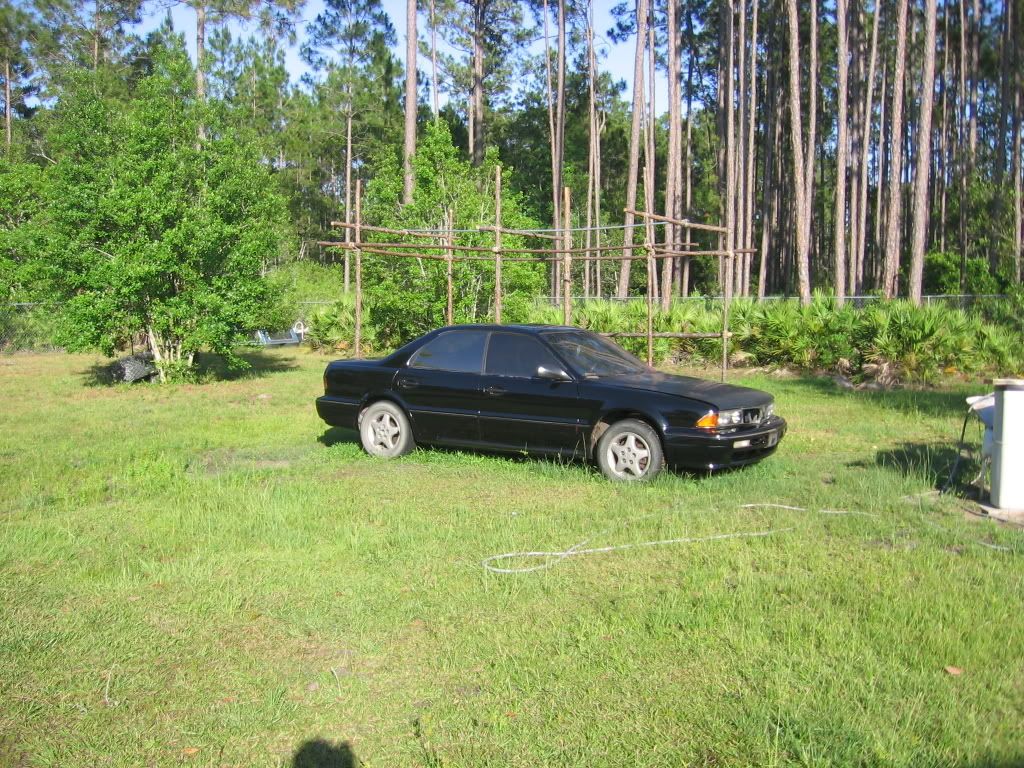 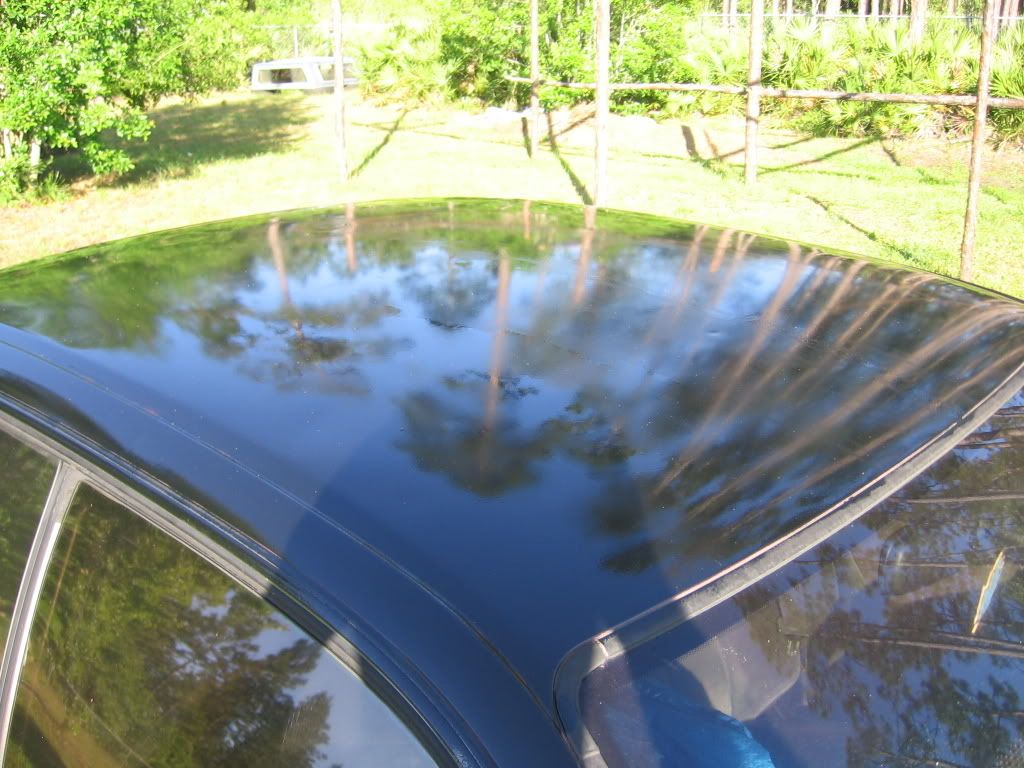 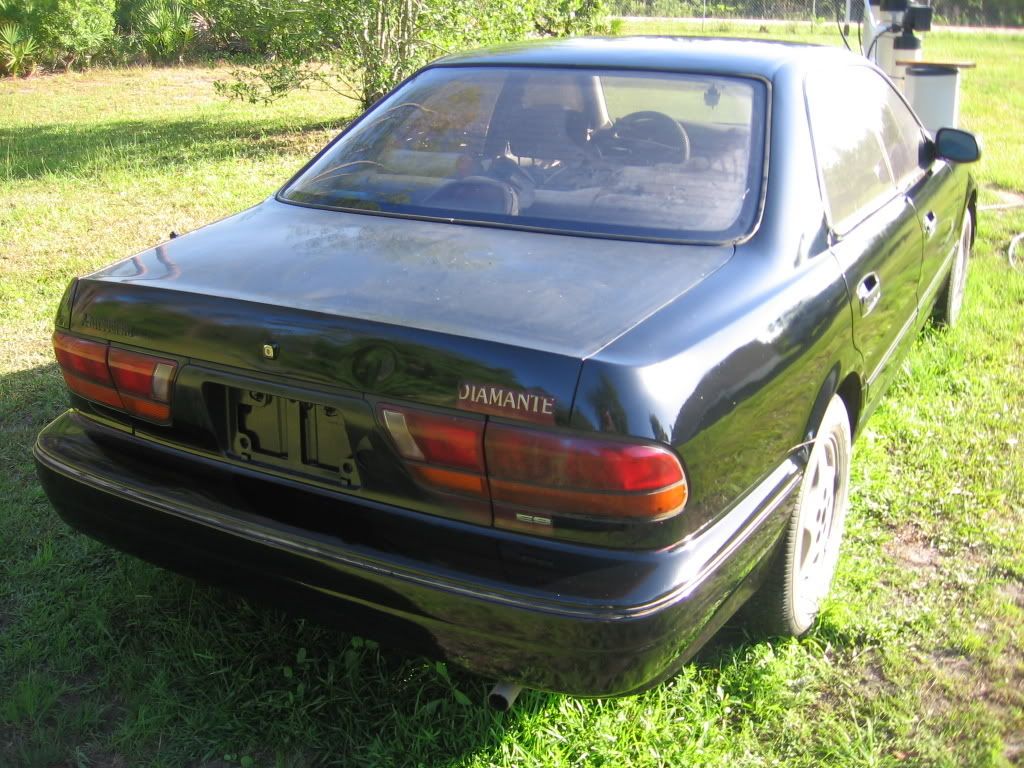
|
|
|
Re: RE: New Paint job on a budget thread Part III
[Re: ace250xr84]
#38288
05/28/08 07:48 PM
05/28/08 07:48 PM
|
Anonymous
Unregistered
|
Anonymous
Unregistered
|
Today is NOT my day.  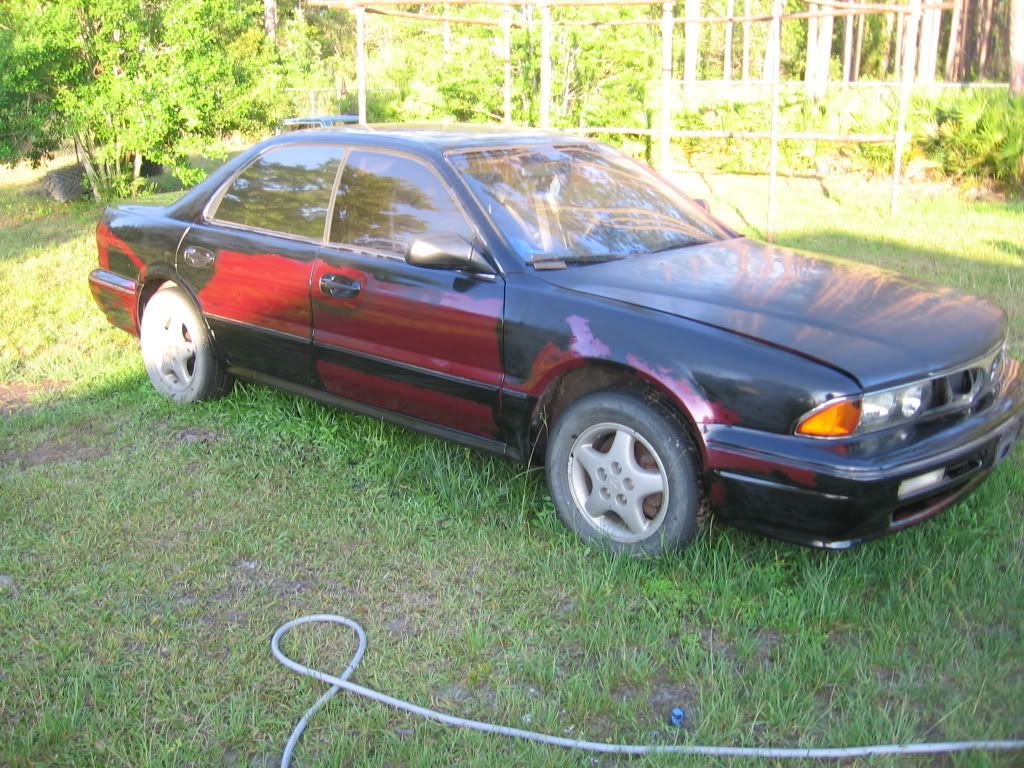 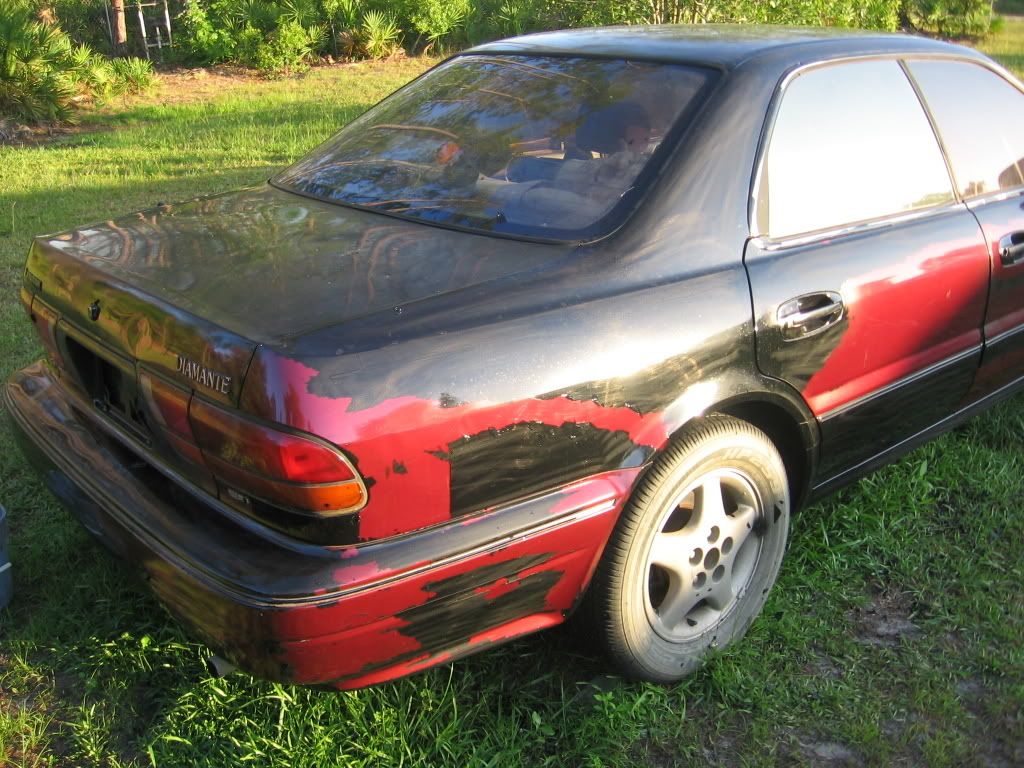 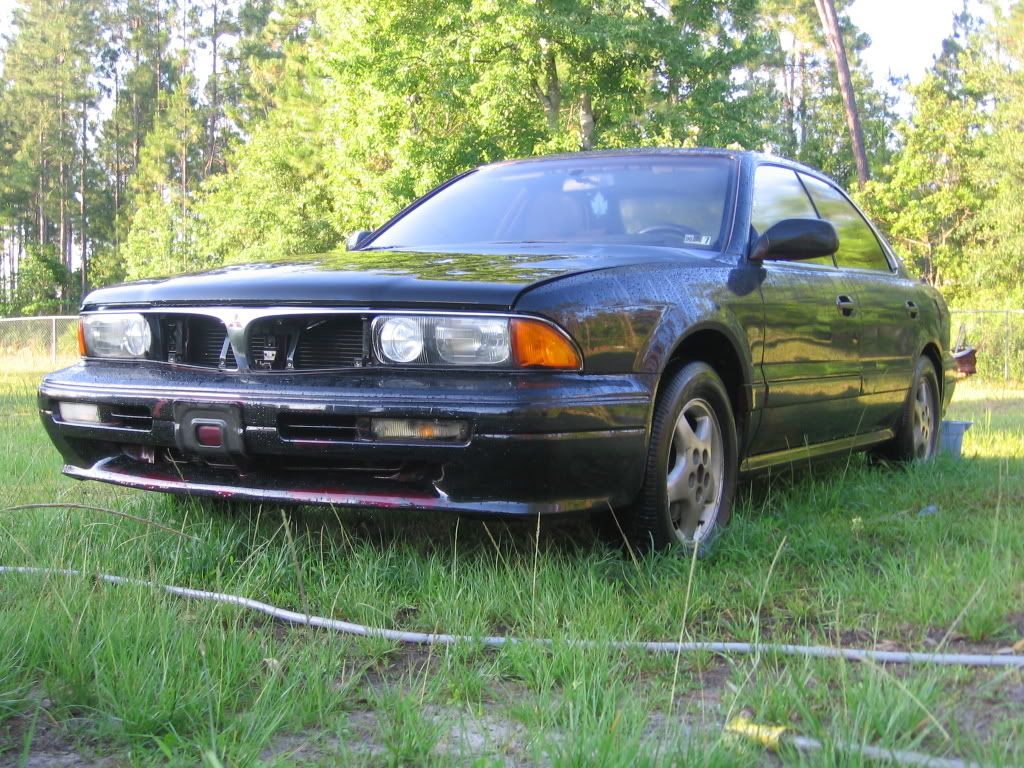 This is my first time having issues with adhesion. I havent done anything different. EXCEPT for being to hasty. prior to laying down the 1st coat, i prepped the surface as usual, BUT after I let the mineral spirits evaporate, I was quick to lay down a coat. usually this the route I go. but this time the surface was still "moist". not from mineral spirits but condensation. youd think id learn my lesson from the past winter about painting earlier in the morning. but again, I got hasty. Either that or I didnt leave it to cure enough, but I doubt this. ALTHOUGH, after another 12 hours, I went back outside and hosed it down to find the paint does not come off at all. so I dont know if it hasnt had enough time to dry off or the surface had contaminants. well, tomorrow is another day. Heres a picture of what the car might of looked like CAR IS SOAKING WET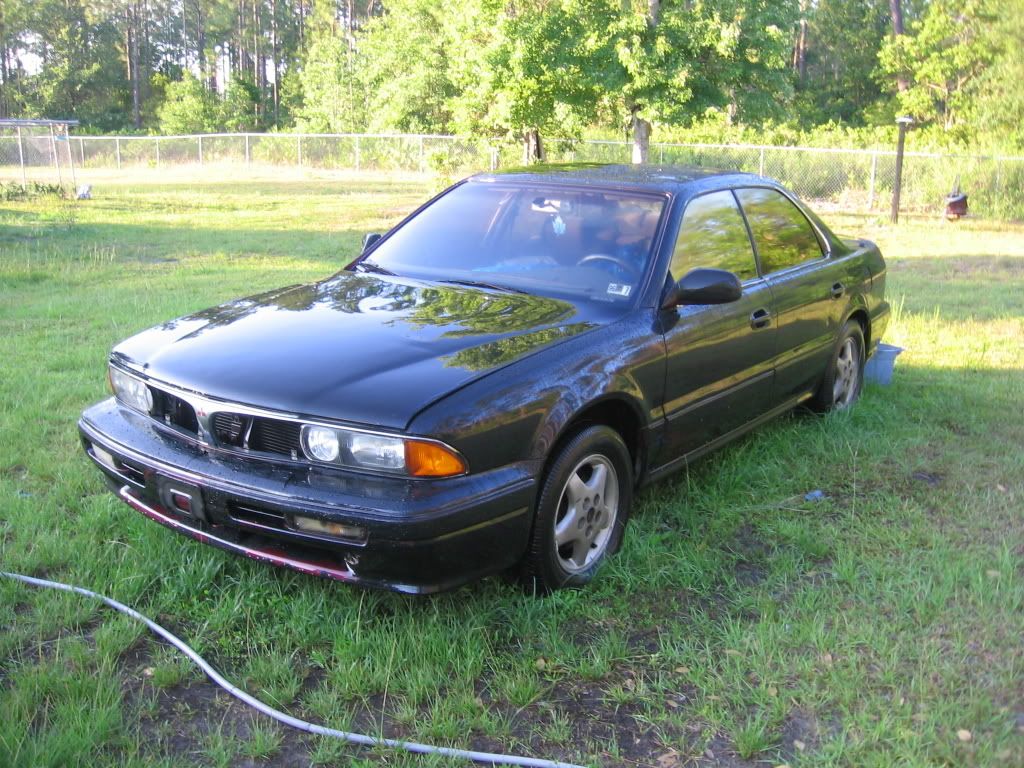 Oh and for reference this shot here, shows what your surface should look like after wetsanding. Notice that the left side of the hood, the water is flat. while the un-wetsand side is collecting the water. 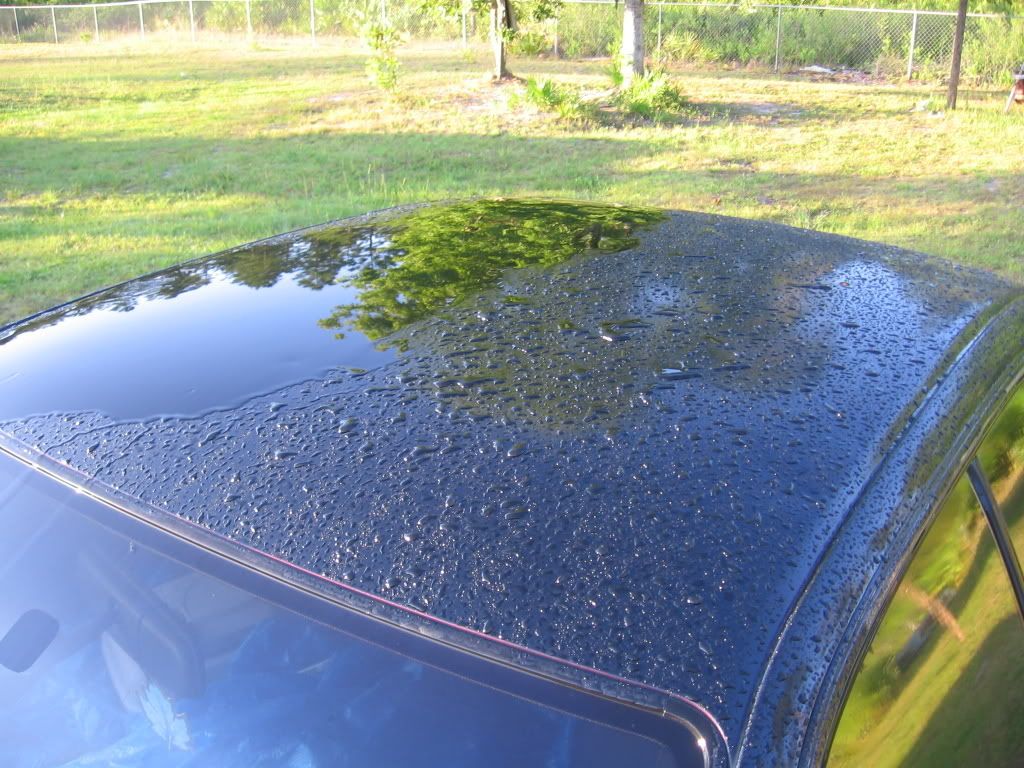
|
|
|
Re: RE: New Paint job on a budget thread Part III
[Re: 69chargeryeehaa]
#38290
05/29/08 11:19 AM
05/29/08 11:19 AM
|
Joined: Jan 2003
Posts: 12,405
Southern, Ca.
69DartGT
OP
moparts member
|
OP
moparts member
Joined: Jan 2003
Posts: 12,405
Southern, Ca.
|
Quote:
Mx2001 - your adhesion issues are not from mineral spirits being on the surface. You problem is you did'nt prep the original paint correctly, IT'S STILL SHINY!!!!! you should have completely sanded the original paint and prepped with 400 UNTIL THERE WAS NO SHINE IN THE PAINT>>>>> THERE"S YOUR PROBLEM!!  
 Also wipe it down with a good grease/wax remover before you sand. Also wipe it down with a good grease/wax remover before you sand.
This will work just be patienct
|
|
|
Re: RE: New Paint job on a budget thread Part III
[Re: 69chargeryeehaa]
#38292
05/30/08 02:14 AM
05/30/08 02:14 AM
|
Anonymous
Unregistered
|
Anonymous
Unregistered
|
Quote:
Mx2001 - your adhesion issues are not from mineral spirits being on the surface. You problem is you did'nt prep the original paint correctly, IT'S STILL SHINY!!!!! you should have completely sanded the original paint and prepped with 400 UNTIL THERE WAS NO SHINE IN THE PAINT>>>>> THERE"S YOUR PROBLEM!!
Long time no see!
That would explain why I never had any adhesion issues since I started, I was always having to sand back down to original paint, lol.
|
|
|
Re: RE: New Paint job on a budget thread Part III
#38293
05/31/08 10:37 AM
05/31/08 10:37 AM
|
Anonymous
Unregistered
|
Anonymous
Unregistered
|
Thanks to the 3hrs of intense sanding, I now have Popeye arms  While sanding, I came to the conclusion that there are 3 factors that contributed to the peeling of my first coat. - Didn't sand the original paint.(chargeryeehaa) all the years of the elements probably acted as another layer on top of the clear coat . -Not washing the car. bit embarrassed to say, i just acted like the mineral spirits was going to eliminate all contaminants. -painting to early in the morning. condensation builds in the morning. although I did dry surface. it was still somewhat moist. I was REALLY REALLY close to giving up the whole project to tell you the truth. but I made it too far to just quit. besides this keeps me busy and away from the xbox,wife and kid enough jibba jabba, here are some pics. 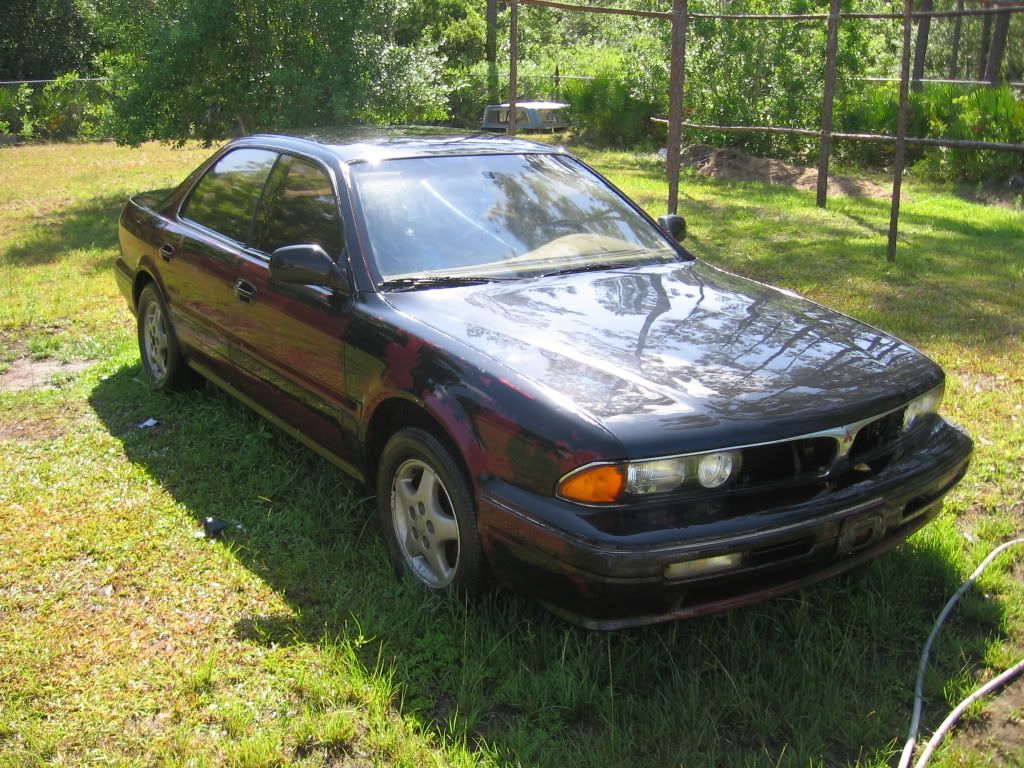 Heres a WET SHOT 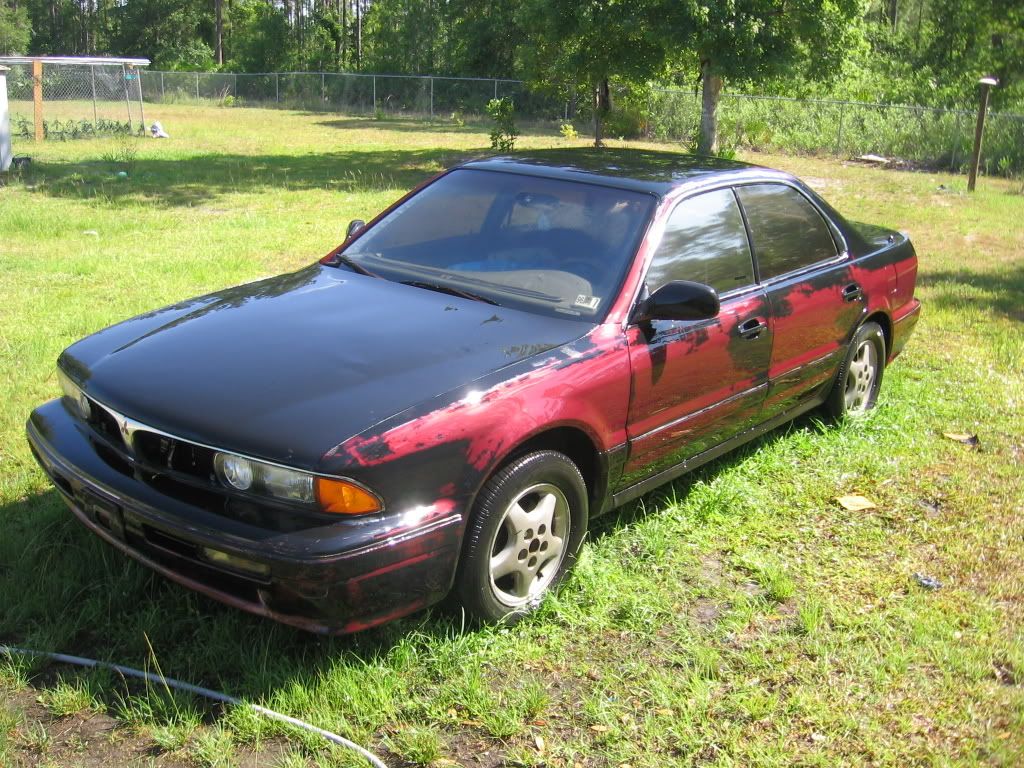 Heres a DRY SHOT 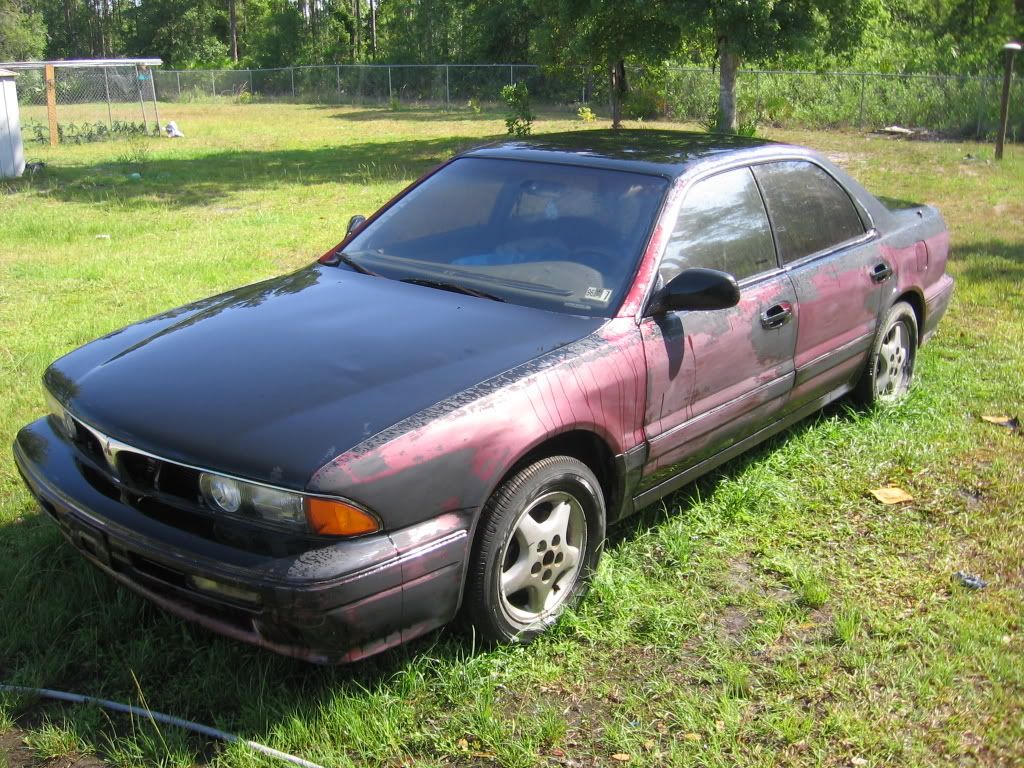 Random shot 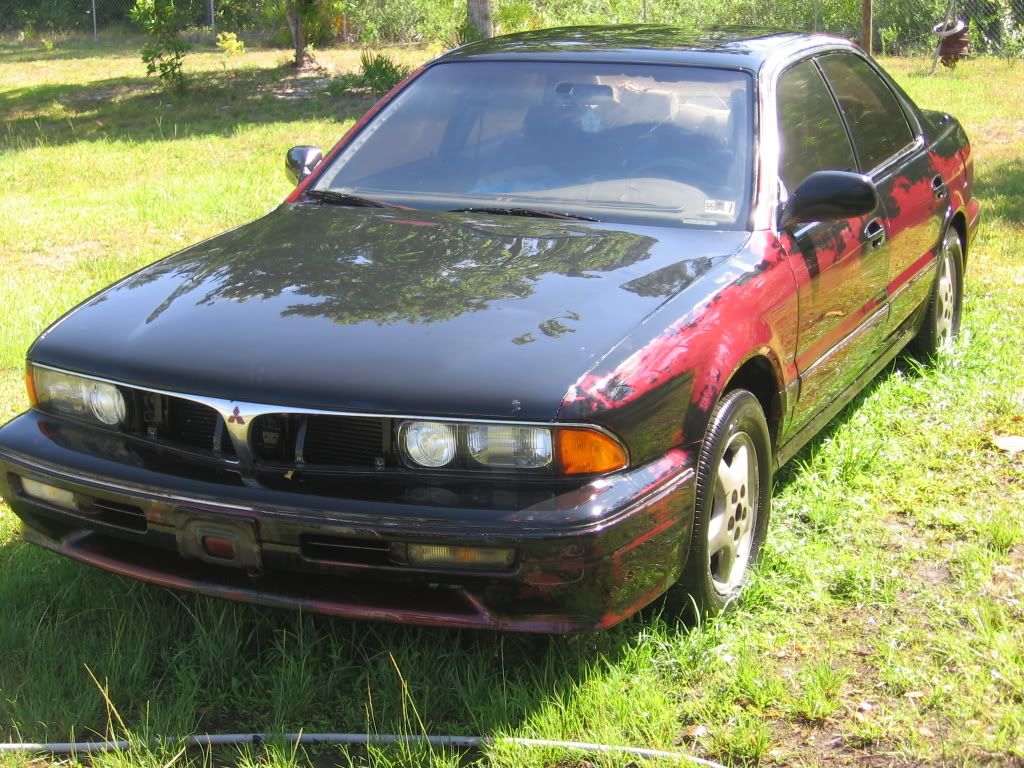 Just finished washing the car! most are WET SHOTS Just finished washing the car! most are WET SHOTSTomorrow morning Ill start painting again.
|
|
|
|
|


 had a good idea but blue harbour freight tarp could not handle the tension, plus inadequate engineering, and I could not get it to shed water so in short order I took it down before the elements did. I could of just started the body work. Trim I hate it, my Olds has layers and layers of the stuff. I got most of it off and most of is not fit to go back on. but unfortunatly it is held on with plastic clips that mount onto metal "studs" all down the car and some parts were mounted using " bolts ". So now I have lots of studs to grind down and holes to fill in or put that gawdy trim back on. and I still have the trim on the bumbers that " matches " the side trim, decisions decisions. I think a cleaner look, will better? Oh one more thing on trim, the rear quarters had side markers recessed in the trim
  I need to add a aftermarket side marker to the list.