|
 Re: New how to paint your car on a budget with a roller
#37854
Re: New how to paint your car on a budget with a roller
#37854
01/19/08 03:02 PM
01/19/08 03:02 PM
|
Anonymous
Unregistered
|
Anonymous
Unregistered
|
Ok, finally i got a break from the weather. I used 220 grit and wet sanded it down to this: 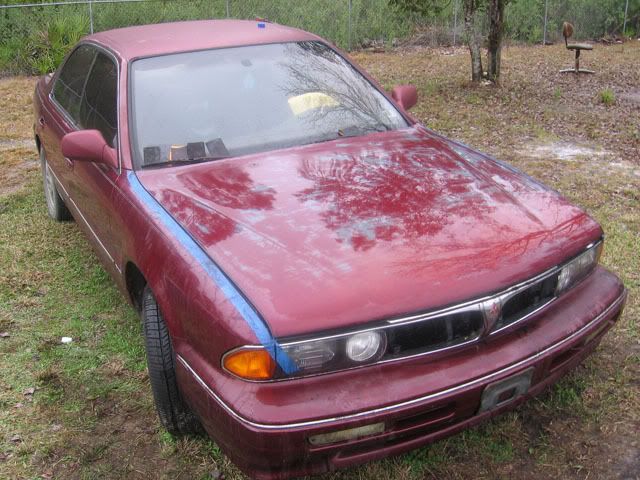 ----------- A little closer  ----------- 600grit wasnt doing nothing, so i used 220 and wetsanded. much faster process. although i passed factory paint to bare metal. It was a little hard to sand the edges. I still factory paint, some black paint and "sunburn" Before i start painting, do i have to sand to bare metal?because i think i got arthritis, lol( i sanded by hand, took less than an hour)  ----------- another edge shot 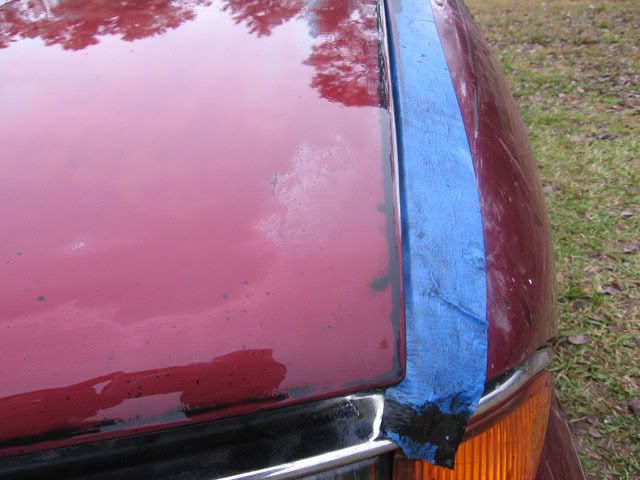
|
|
|
Re: New how to paint your car on a budget with a roller
#37855
01/19/08 09:08 PM
01/19/08 09:08 PM
|
Anonymous
Unregistered
|
Anonymous
Unregistered
|
Quote:
do i have to sand to bare metal?
No, just down to smooth or past whatever is causing your paint rejection. Looks like you are pretty much there. Run your fingers over the surface where the color changes. If you can feel a difference, sand some more, it needs to be smooth. Your sense of touch can be sharper than your eyes when it comes to this. Also, 220 can be quite aggressive so look out for sanding marks. Use the 600 grit to smooth out any.
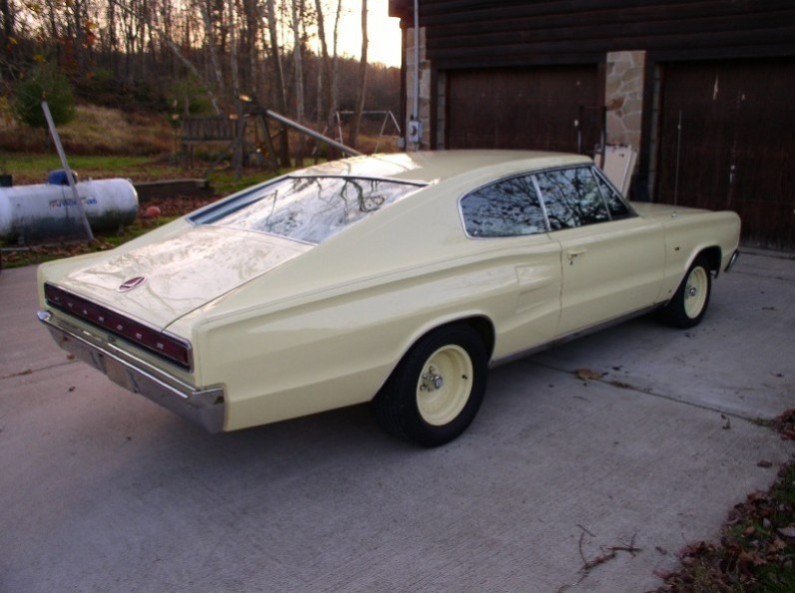
When you lay down the first coat, remember, thin coats. Not just in the paint consistency but the amount applied to the surface. Squeeze out the roller in the pan and just moisten the surface with the paint. It will look like crap, the magic happens with multiple coats. Use the picture gus posted earlier of the charger fender as your guide.
If it beads up or shows any other signs of rejection, stop painting and try to find out what the problem is. No sense putting good paint on a bad surface.
If you do have to backtrack, a layer you just put down is relatively easy to remove with MS and a rag if you can get it before it sets, and it beats sanding.
Keep us posted.
|
|
|
Re: New how to paint your car on a budget with a roller
#37856
01/20/08 10:14 AM
01/20/08 10:14 AM
|
Anonymous
Unregistered
|
Anonymous
Unregistered
|
When I went to pick up the materials for this project, i went to Shermin Williams for a gallon of MS. I went in, asked the guy where are the MS, he took me to the aisle and gave me a gallon of paint thinner that had %100 MS. ive been mixing this with the rustoleum. is that ok if i use that paint thinner\MS? because my local home depot and lowes do not carry anything thats simply %100 MS, except for that odor-less MS.
|
|
|
Re: New how to paint your car on a budget with a roller
#37857
01/20/08 11:00 AM
01/20/08 11:00 AM
|
Joined: May 2006
Posts: 575
Canada
Marq

mopar addict
|
mopar addict
Joined: May 2006
Posts: 575
Canada
|
Quote:
When I went to pick up the materials for this project, i went to Shermin Williams for a gallon of MS. I went in, asked the guy where are the MS, he took me to the aisle and gave me a gallon of paint thinner that had %100 MS. ive been mixing this with the rustoleum. is that ok if i use that paint thinner\MS? because my local home depot and lowes do not carry anything thats simply %100 MS, except for that odor-less MS.
The 100% mineral spirit is the preferred thinner, but the 'odorless' mineral spirit will also do the job.
The 'odorless' mineral spirit simply takes longer to dry. Here is why : As you know, when you leave a tray of either mineral spirit out it will evaporate. After a while there will be no mineral spirit left as it has all gone into the air. The pure 100% mineral spirit evaporates quicker - thereby releasing its 'smell' or 'odor' into the air quicker and in a greater concentration - because it is evaporating into the air quicker and in a higher density. Therefor it smells.
The odorless mineral spirit isn't really odorless. What it does have is a slower evaporation rate. Therefor it takes longer for it to get into the air. Because it takes longer to evaporate into the air, the concentration or density of the mineral spirit evaporants in the air are lower. There just aren't as many 'smell' molecules being released into the air. Hench the reason it doesn't appear to 'smell' as much.
So... the key thing to take away from this... is that if you are using the odorless mineral spirit, just understand that it will take each coat of paint a little longer to dry or cure - because it is chemically designed to evaporate slower.
OK... so let's tie this into our painting.. and the key thing to remember is that if you are working in a very hot and dry environment, you might prefer to go with the 'odorless' mineral spirit to give you additional time to work with the paint before it starts drying - and it would allow the paint additional time to self level.
If you are working in a very cool environment, you might prefer to go with the 100% mineral spirit ( non-odorless ) to give the mineral spirit a little help evaporating in the cooler temperatures. ( as you know evaporation occurs slower in cooler temperatures ).
You could use the 'odorless' mineral spirit in a cooler environment, but just accept the fact that it will take longer for the paint to dry.
In general this is the theory you have to keep in mind regarding mineral spirits 
.
|
|
|
Re: New how to paint your car on a budget with a roller
[Re: Marq]
#37858
01/20/08 12:48 PM
01/20/08 12:48 PM
|
Anonymous
Unregistered
|
Anonymous
Unregistered
|
Thanks for the heads up on odor-less MS, Marq. I went ahead and made up another mixture of MS and paint. To get it the consistancy of milk, I had to add a crap load of MS. Much more than the amount of paint itself. I went ahead prepped the hood and started rolling. It self leveled. I can see still see the paint.. BUT well see for yourself.. 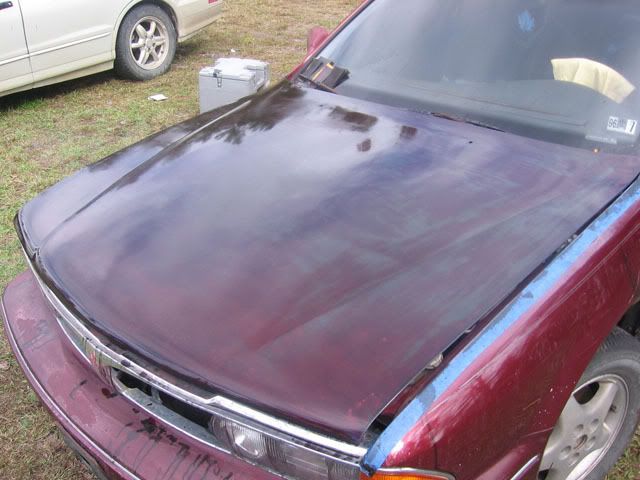 ------------------ overkill on MS? some spots did not want to self-level and became "runny" 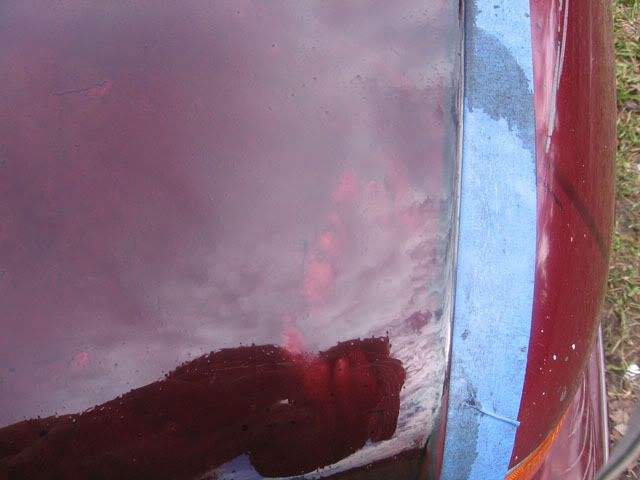 ------------------ Drying up pretty fast 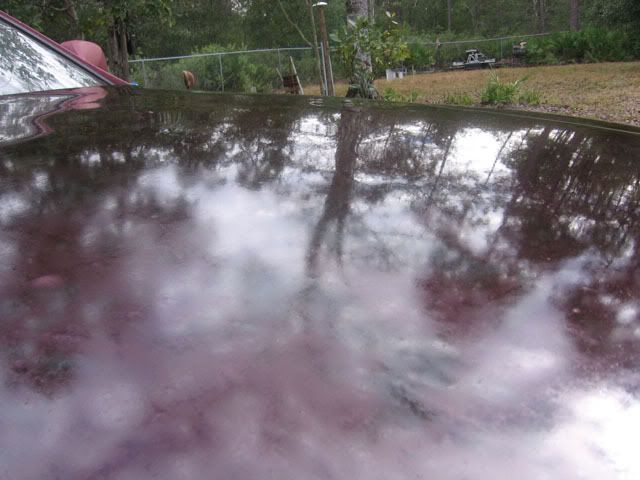 ------------------ Here are my MS and rusty paint.  
|
|
|
Re: New how to paint your car on a budget with a roller
[Re: Gusteve]
#37860
01/21/08 01:42 AM
01/21/08 01:42 AM
|
Anonymous
Unregistered
|
Anonymous
Unregistered
|
Call me crazy but now that i look at the latest pictures i posted, If it werent for bare metal showing, the maroone with black tint doesnt look bad. And No im not 
|
|
|
Re: New how to paint your car on a budget with a roller
#37861
01/21/08 01:07 PM
01/21/08 01:07 PM
|
Joined: May 2006
Posts: 575
Canada
Marq
mopar addict
|
mopar addict
Joined: May 2006
Posts: 575
Canada
|
Quote:
Thanks for the heads up on odor-less MS, Marq. I went ahead and made up another mixture of MS and paint. To get it the consistancy of milk, I had to add a crap load of MS. Much more than the amount of paint itself. I went ahead prepped the hood and started rolling. It self leveled. I can see still see the paint.. BUT well see for yourself..
That is the way it will look if you are doing it correctly. Just remember that what we are doing is adding THIN layer after THIN layer....
As you add enough THIN layers it will begin to get darker and darker. Each layer is adding on to the previous layers and laying a little more color pigment each time. At some point you will achieve 100% pigment coverage...
The biggest mistake people make is going at this like they are painting a wall in their house and trying to get 50% or 100% color coverage on the first coat or two...
It will take 5 to 8 THIN coats to start nearing the 100% color pigment coverage. But in the process of this addition of thin coats, you are getting a more level paint job.
Another advantage to this is the 'depth' of the shine or color that you end up with in the end. If you just slap on one coat of thick paint... the refraction of the light bounces just off the outer skin of the paint and does not appear to have any 'depth'. But by laying on the thin layers, and depositing just a little pigment with each layer, you basically are giving your finished paint job 'depth'. When the light reflects and refracts off the finished paint job it will echo those various layers.
Imagine a diamond... in the rough a diamond looks like crap. To make a diamond sparkle, they cut facets into the rough stone which allows light to enter the diamond and ricochet around in it. That gives the diamond its sparkle. The final polishing of the diamond simply helps take it to the next level of sparkle. Each layer of thin paint you are laying is like cutting a facet in the diamond.
For trivia sake... let me tell you about my father's Jaguar XK 140 C type. When the car arrived at the dealership, my father did not like the Red. He wanted Black. So they took this brand new Jaguar to the local Rolls Royce dealership and they did a Rolls Royce Black paint job on it. That paint job consisted of 32 coats of paint... with wet sanding happening every 3 or 4 coat. The end result was a black paint job that you would have killed for...
Do you know that red colored, almost translucent plastic that comes with easter eggs ? You know.. it has a hint of red color on it, but you can hold it to you face and look through it to see the world tinted red ?
Ok.. imagine this paint job is like that. Put one sheet of that red color wrapping paper in front of you and the world is slightly red. Now... put two sheets of the red colored wrapping paper in front of you and what you will see through it becomes a darker shade of red.
Each time you add an additional sheet of that red colored wrapping paper in front of you, what you see through it will become even darker red.
At some point, if you put enough of those red sheets of wrapping paper in front of you, you will not be able to see through them. You will just see RED only...
This is the same story for how this paint job happens. Thin layer after thin layer...
One benefit of this 'layer upon layer' process is that at any point you can stop, let it harden fully... and do a quick wet sand to fix any imperfections that might turn up or catch your eye. Then you just go back and add 'yet another' thin layer and keep going.
One frustration that can happen is when you find that you have to wet sand to the point where you might fall back one or two layers.
So it isn't always going to go in a continuous addition of thin layers. At some point you will make corrections to a previous layer and it will have to be re-painted with a new thin layer.
But in the end.... if you take your time and give it the patience that is required, all the layers you lay down will add up to 100% color cover and a nice smooth finish.
Personally, I like to get to 120% coverage... ( ie. get to the point where it is looking like 100% coverage and then add one or two extra thin layers ). This will give you some working room for when you move on to the compounding, polishing and waxing stage.
.
Last edited by Marq; 01/21/08 01:20 PM.
|
|
|
Re: New how to paint your car on a budget with a roller
[Re: Gusteve]
#37863
01/22/08 09:15 AM
01/22/08 09:15 AM
|
Anonymous
Unregistered
|
Anonymous
Unregistered
|
I went ahead and reapplied the 1st coat couple days ago. this morning I went ahead and added the 2nd coat. laid out pretty good but I got this "grains" of something in the paint. Before I start to paint, I prep the surface by using a leather shammy (sp?)to soak up the morning dew, then finish with a paper towel. then after it dries, i go ahead and give a final wipe down using a tack cloth. apply paint and the surface is kind of grainy. I havent touched the grainy to see if it was dirt yet but it disapears after it dries. so i dont know whats going on there. Here are some pics. 2nd coat 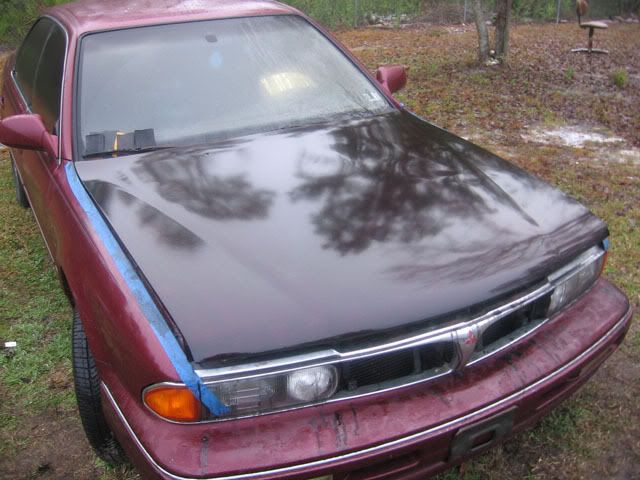 ------------- 2nd coat- notice grains on surface and still no full coverage (thats a good thing) 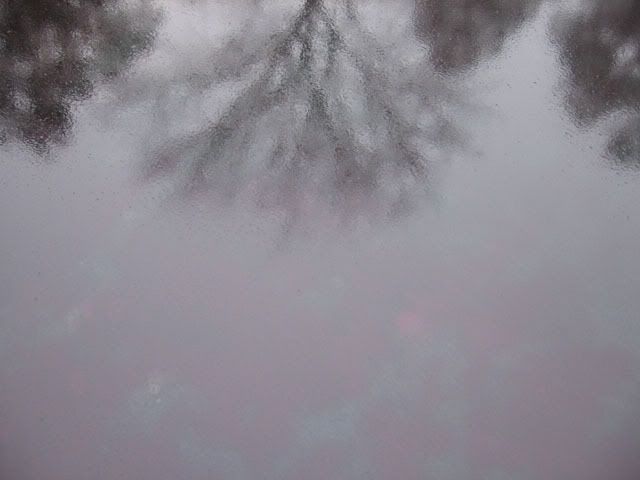 ------------- different angle 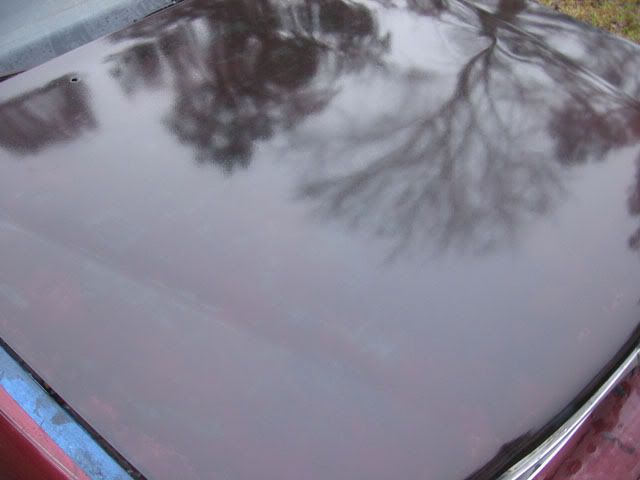 ------------- random dog from the streets 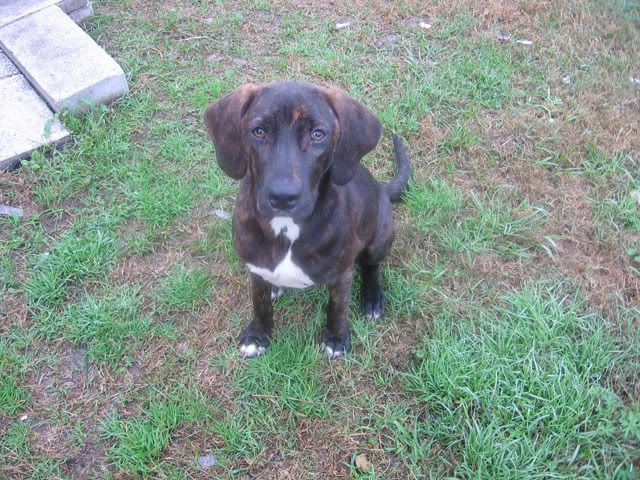 ------------- my daily driver (hey this is car forum, right?)  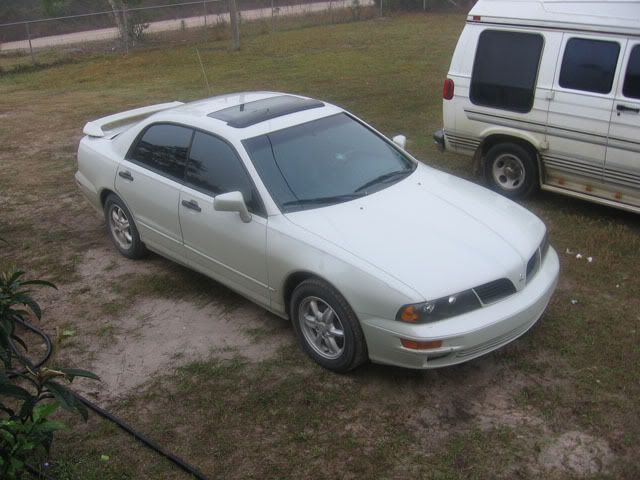
Last edited by M2001; 01/22/08 09:16 AM.
|
|
|
Re: New how to paint your car on a budget with a roller
#37864
01/23/08 09:36 AM
01/23/08 09:36 AM
|
Anonymous
Unregistered
|
Anonymous
Unregistered
|
Sanded with 400grit (lightly) and applied 3rd coat. So far so good? I hope. I didnt get a picture after sanding but, it seemed i took off 1 coat by sanding and looked like the factory red but with a black tint, a very light tint to it. Call me crazy but to see if there was a coat, i sprinkled a couple grains of salt on the hood to see if it was sitting on a coat or the original paint. sure enough it seemed like it was hovering over the hood. so after sanding, i prepped the hood and rolled on another coat. EDIT - holy crap, i just compared the shine compared to my previous post. the reflection of the tree is a lot sharper on the 3rd coat! QUESTIONThe "scratch/nail test". Is this being done with your finger nail? or an actual nail? I remember reading about it a while ago.. 3rd coat 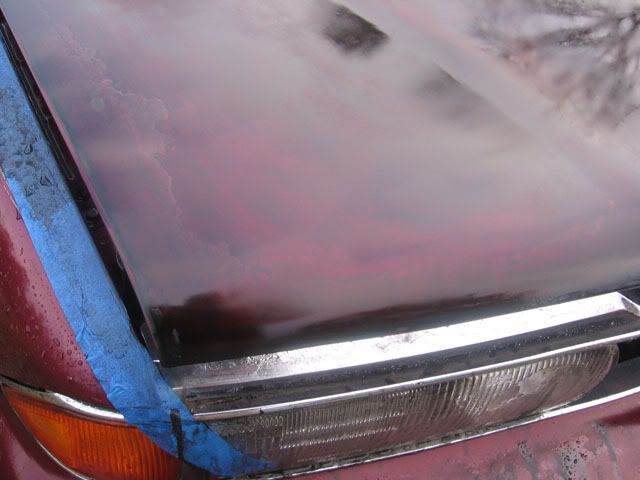 ------------- another shot 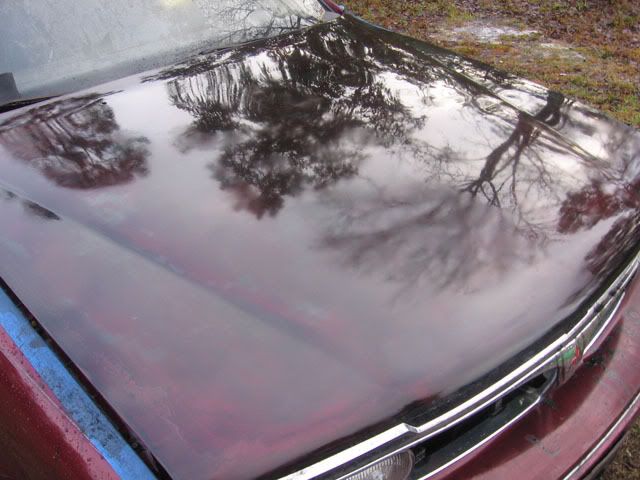 
Last edited by M2001; 01/23/08 09:40 AM.
|
|
|
Re: New how to paint your car on a budget with a roller
[Re: Marq]
#37866
01/23/08 08:21 PM
01/23/08 08:21 PM
|
Anonymous
Unregistered
|
Anonymous
Unregistered
|
Hi Marq,
I'm taking my time on this project and just completed removing all the trim and taped off the trim I can't remove. Now I want to sand down the car to smooth level before I paint.
I started using 150 grit sand paper. I didn't wet sand. I just went over the entire car with the 150 grit to smooth out small imperfections in the paint. My question is how perfect do I have to do this initial sanding? There are some sand paper marks on the paint now; I intend to wipe down the entire car with mineral spirits and just roll paint over the sand paper marks.
Will the paint level out those small marks? Or do I have to wet sand it down real smooth with 400 grit paper first before I paint?
|
|
|
Re: New how to paint your car on a budget with a roller
#37867
01/23/08 08:41 PM
01/23/08 08:41 PM
|
Joined: Mar 2007
Posts: 5,660
Flint, MI
Gusteve
I Love the Unicorn Song!!
|
I Love the Unicorn Song!!
Joined: Mar 2007
Posts: 5,660
Flint, MI
|
Quote:
Sanded with 400grit (lightly) and applied 3rd coat. So far so good? I hope.
If the surface is now smooth, and you've lost all that weird "pooling up" of the paint from the previous coats you had, you should move up to 800 grit after coat #4. ([edit] - maybe hit it with 600 first, and then with 800 before you moved on to coat 5.)
If it were me, I'd do 800 grit wet sand after coat 4, and then also after coat 6 (but a little lighter) and THEN I'd stop and move onto another body panel. My thinking is that after practicing on the hood and then doing other panels, you'll probably want to do the hood again once last time. By then your technique will be really good, and that last coat on the hood will be the best one.
I'd also recommend that you do the rear decklid next. If you were having trouble with consistency and flow, it'll be easier to tackle a flat surface again with your new-found skills. Fenders and doors can be a lot harder if you don't have the technique and the mix down well. (Because of gravity induced runs, obviously)
Last edited by Gus; 01/23/08 09:00 PM.
|
|
|
Re: New how to paint your car on a budget with a roller
#37869
01/23/08 09:22 PM
01/23/08 09:22 PM
|
Joined: Nov 2006
Posts: 32
Edgerton WI
Donny O.
member
|
member
Joined: Nov 2006
Posts: 32
Edgerton WI
|
Quote:
I prep the surface by using a leather shammy (sp?)to soak up the morning dew, then finish with a paper towel. then after it dries, i go ahead and give a final wipe down using a tack cloth. apply paint and the surface is kind of grainy.
you didn't mention it is your list here but after you get the surface dry you should be wiping it down with a cloth damp with mineral spirits to clean it, then let it dry for a few, then go over it with a tack cloth. cant forget the MS wipe down!!
|
|
|
Re: New how to paint your car on a budget with a roller
#37871
01/24/08 12:49 AM
01/24/08 12:49 AM
|
Joined: May 2006
Posts: 575
Canada
Marq
mopar addict
|
mopar addict
Joined: May 2006
Posts: 575
Canada
|
Quote:
Hi Marq,
I'm taking my time on this project and just completed removing all the trim and taped off the trim I can't remove. Now I want to sand down the car to smooth level before I paint.
I started using 150 grit sand paper. I didn't wet sand. I just went over the entire car with the 150 grit to smooth out small imperfections in the paint. My question is how perfect do I have to do this initial sanding? There are some sand paper marks on the paint now; I intend to wipe down the entire car with mineral spirits and just roll paint over the sand paper marks.
Will the paint level out those small marks? Or do I have to wet sand it down real smooth with 400 grit paper first before I paint?
I would sand down to at least the 400 grit... to remove the scratches from the coarser grit that you initially used.
The paint will attempt to fill in some of the 'valleys' from the initial scratchier sand paper... but the layer of paint is THIN and so it won't be able to fill it in. At the same time the paint will be accumulating to the peak of each of those scratches. So the valley and the peak are both rising at almost the same rate with each coat.
So by using a 400 to try to cut down the scratches even more, you will be able to get a smoother and shinier paint job in the end.
Take the extra time and effort at the start of the project and it will pay big dividends during the project and at the end of the project.
.
|
|
|
Re: New how to paint your car on a budget with a roller
[Re: Marq]
#37872
01/24/08 12:58 AM
01/24/08 12:58 AM
|
Anonymous
Unregistered
|
Anonymous
Unregistered
|
Should I be wet sanding with 400 grit or dry sand with 400?
|
|
|
Re: New how to paint your car on a budget with a roller
#37873
01/24/08 08:03 AM
01/24/08 08:03 AM
|
Anonymous
Unregistered
|
Anonymous
Unregistered
|
When I messed up the first time by applying to thick of a coat, i tried to dry sand it back down but took forever. wet sanding made it faster. but I dont know if its the proper method, but it worked out for me!
|
|
|
|
|


