|
 Re: New how to paint your car on a budget with a roller
#37834
Re: New how to paint your car on a budget with a roller
#37834
01/14/08 01:20 AM
01/14/08 01:20 AM
|
Anonymous
Unregistered
|
Anonymous
Unregistered
|
just incase your wondering was it painted.
|
|
|
Re: New how to paint your car on a budget with a roller
#37835
01/14/08 09:51 AM
01/14/08 09:51 AM
|
Anonymous
Unregistered
|
Anonymous
Unregistered
|
Ok these shots are 1st and 2nd coats. I think i did not add enough mineral spirits. I had bubbles, but they disappeared. using rustoleum gloss black. Heres my progress. Is this how the first coat sopposed to look like? 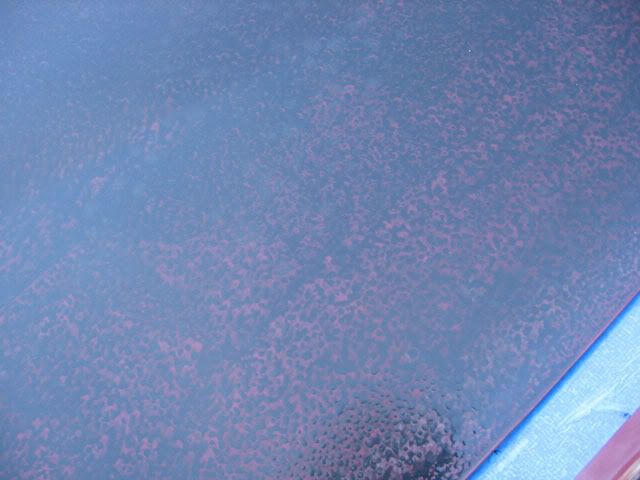 ------------ Different angle on my 1st coat (dry) 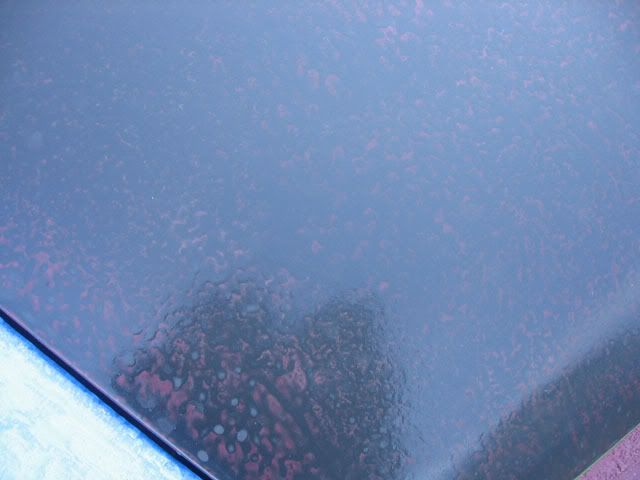 ------------ 2nd coat 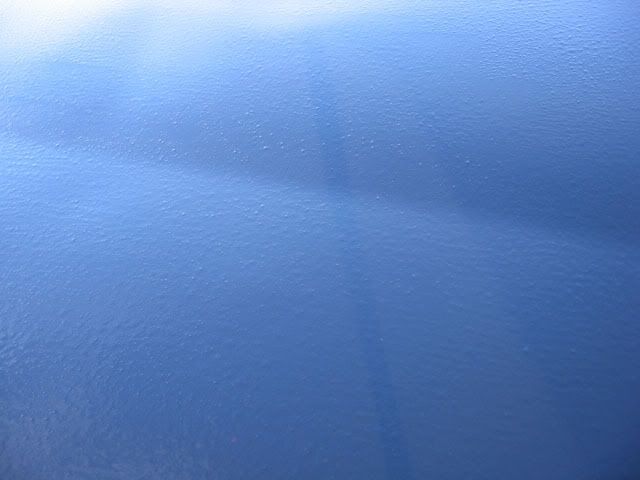 ------------ 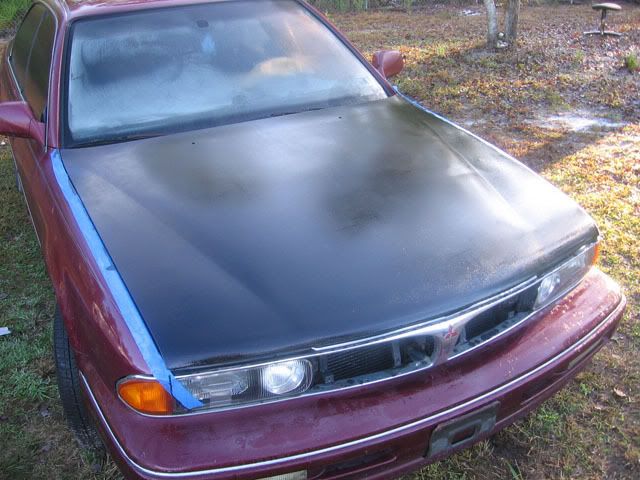 
|
|
|
Re: New how to paint your car on a budget with a roller
#37836
01/14/08 01:17 PM
01/14/08 01:17 PM
|
Anonymous
Unregistered
|
Anonymous
Unregistered
|
it will look like this until you wet sand and reapply the paint. dont worry. the more coats you lay and the better you wet sand the better it will come out. keep at it.
|
|
|
Re: New how to paint your car on a budget with a roller
#37837
01/14/08 04:12 PM
01/14/08 04:12 PM
|
Joined: May 2006
Posts: 575
Canada
Marq

mopar addict
|
mopar addict
Joined: May 2006
Posts: 575
Canada
|
Quote:
it will look like this until you wet sand and reapply the paint. dont worry. the more coats you lay and the better you wet sand the better it will come out. keep at it.
Agreed. Do a good wet sand to reduce the peaks to the valleys of that first layer. The trick at this point ( to save work later and to get a smoother, slicker and shinier final job ) is to get that leveled down as much as possible.
The paint will not magically fill in the low area and bring them up to match the high points in that initial layer of paint. So spend a little extra time now nailing that initial layer flat.
One benefit, even if you end up taking it almost back to the original subsurface is that when you repaint it it will go on even smoother and more level the 2nd time.
That first layer will serve as the bond to the subsurface and you won't see the repulsion that might occur on the first coating. The first layer of paint will act like a primer so that the recoating will have solid and unaffected adhesion to the entire surface with no repulsion occuring.
.
|
|
|
Re: New how to paint your car on a budget with a roller
#37838
01/14/08 08:02 PM
01/14/08 08:02 PM
|
Joined: Nov 2007
Posts: 20
Michigan, USA
mopar jason
member
|
member
Joined: Nov 2007
Posts: 20
Michigan, USA
|
Quote:
and it's finished
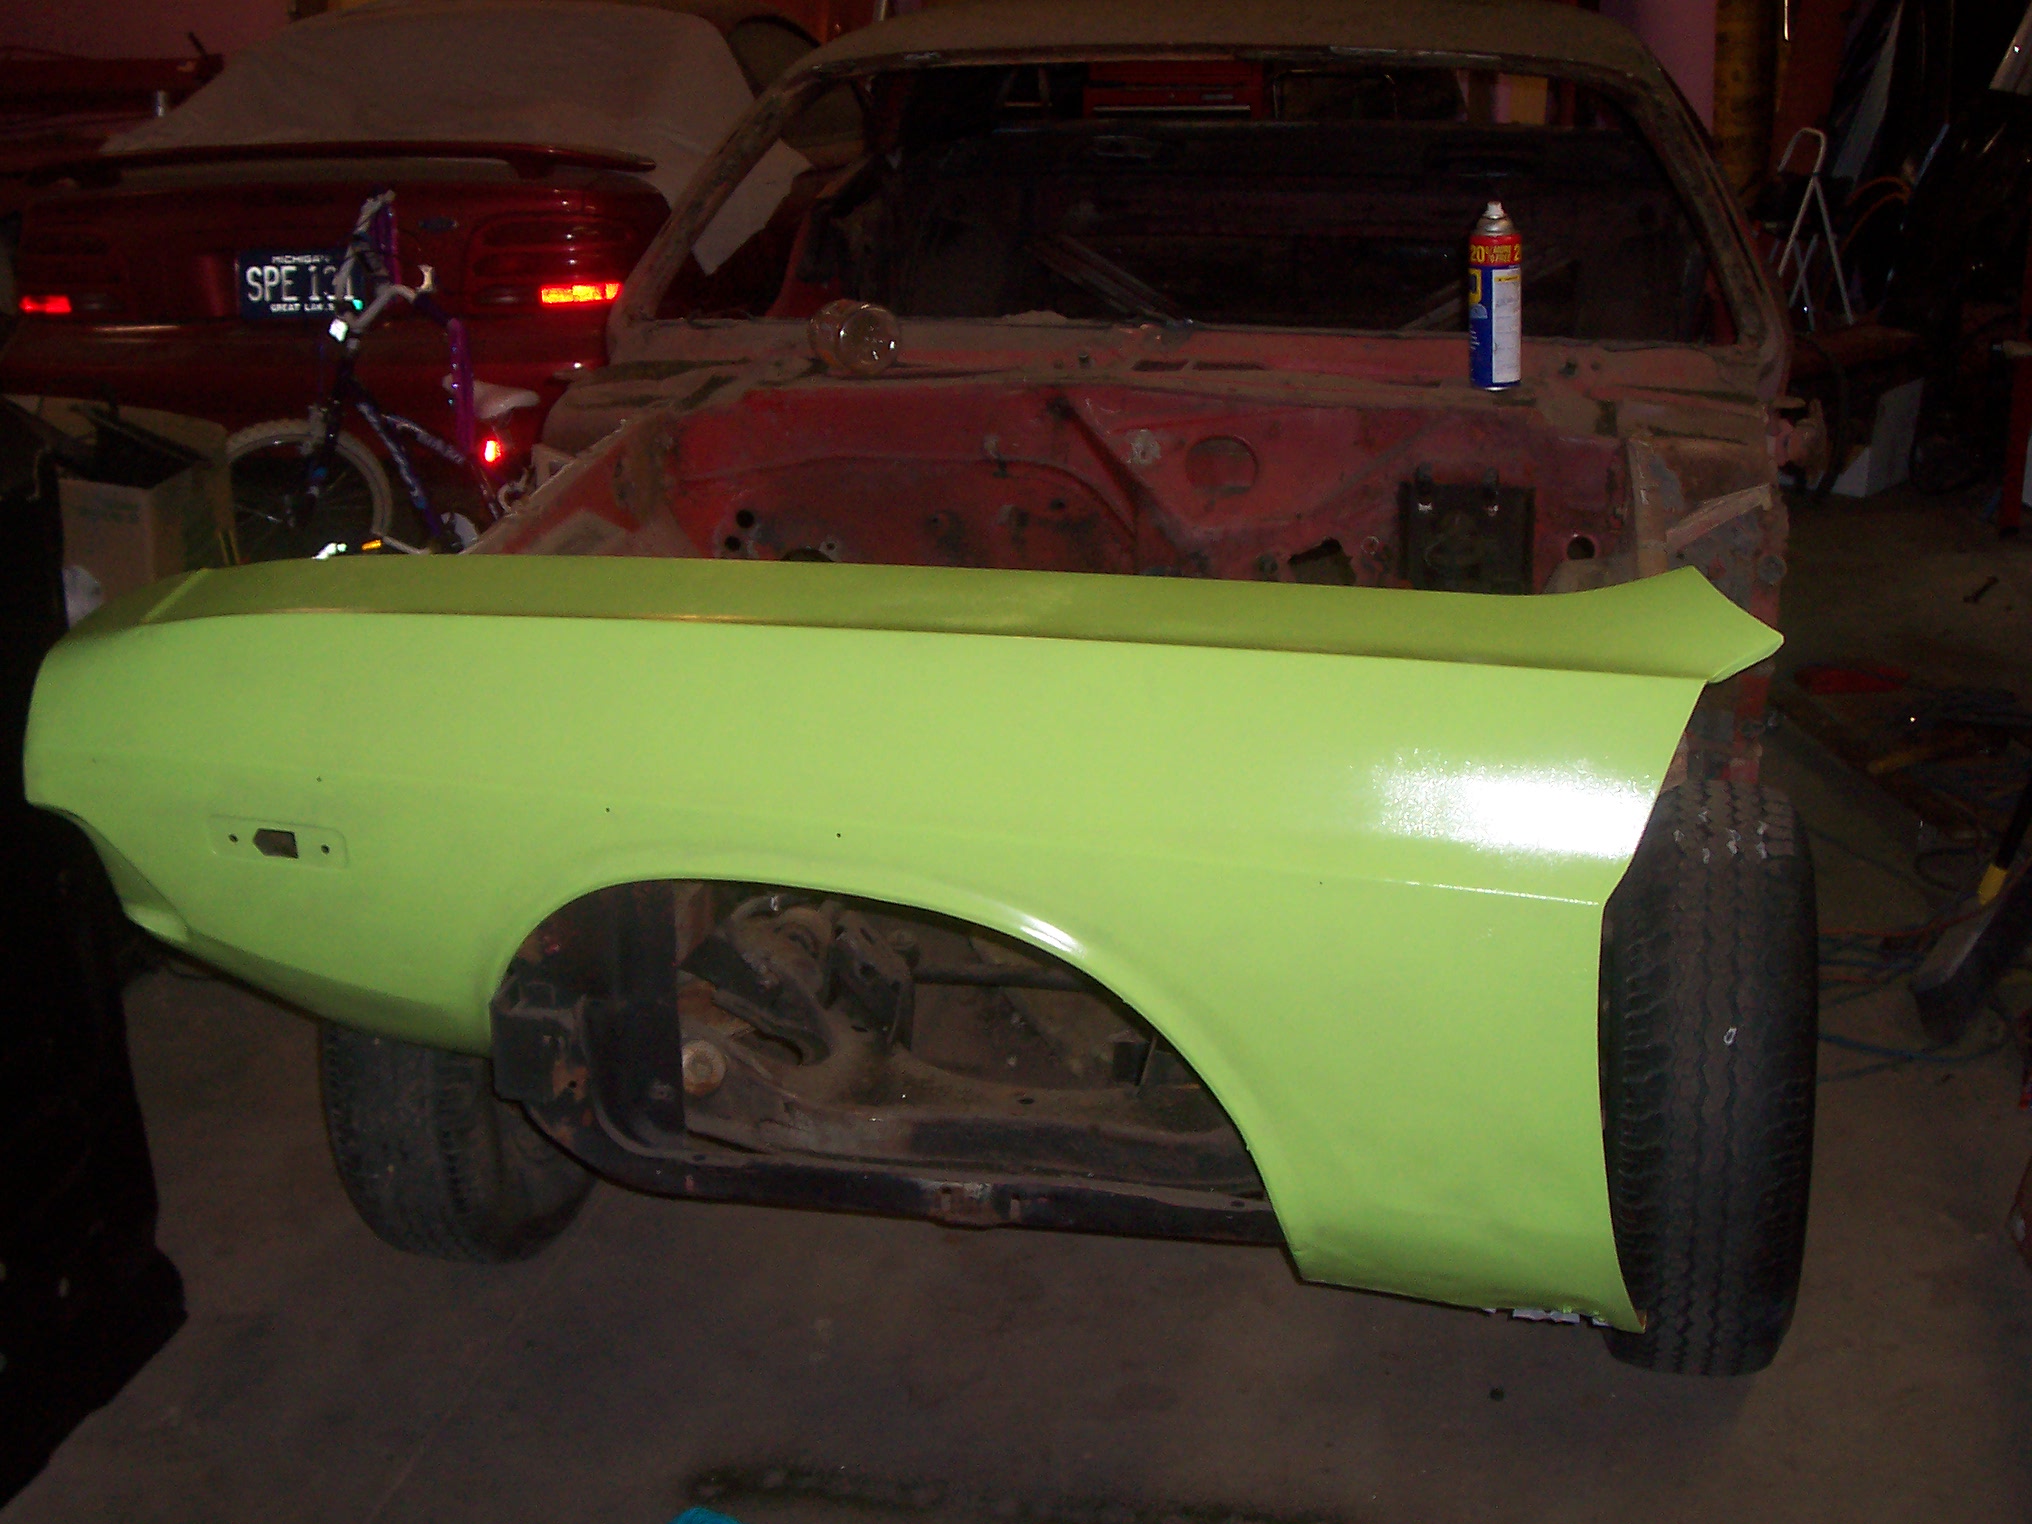
73 Challenger 440 what type of paint did you use? I have been looking for the sublime color. I had ace hardware mix some paint that I thought was close but after painting a fender it looks to yellow to me. Can you help me out?
|
|
|
Re: New how to paint your car on a budget with a roller
[Re: mopar jason]
#37839
01/14/08 09:56 PM
01/14/08 09:56 PM
|
Anonymous
Unregistered
|
Anonymous
Unregistered
|
it's standox.. it's not a roll on. I am new here, so I posted mine.. I dont know the standox code for it, but ppg is J5.. my Dad took that number and gave it to his friend who works at a body shop that uses standox..
|
|
|
Re: New how to paint your car on a budget with a roller
#37840
01/15/08 12:44 PM
01/15/08 12:44 PM
|
Anonymous
Unregistered
|
Anonymous
Unregistered
|
STAGE II Wow, this paint is WEIRD. I thought I messed up for a sec. I accidentally grabbed a 220grit and started wet sanding. few strokes in and i realize that i have the wrong grit. damage isn't too bad. I was impressed how i got a real good reflection on my 2nd stage of coating (3rd and 4th coat). but i got real bad orange peel. Before i started 2nd stage of coating, i went ahead and did a scratch test. unfortunately, my 1st stage failed and scratched. Heres the 2nd stage (3rd and 4th coat) This is where i accidentally used 220grit  --------------- I think i sanded too much. (using 800grit) 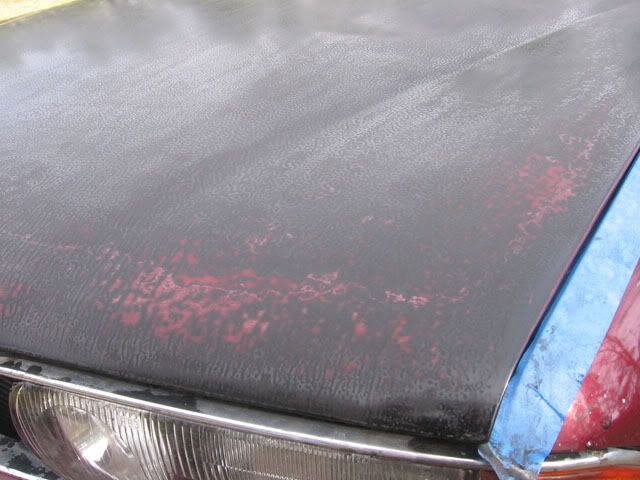 --------------- Paint coming off too easy 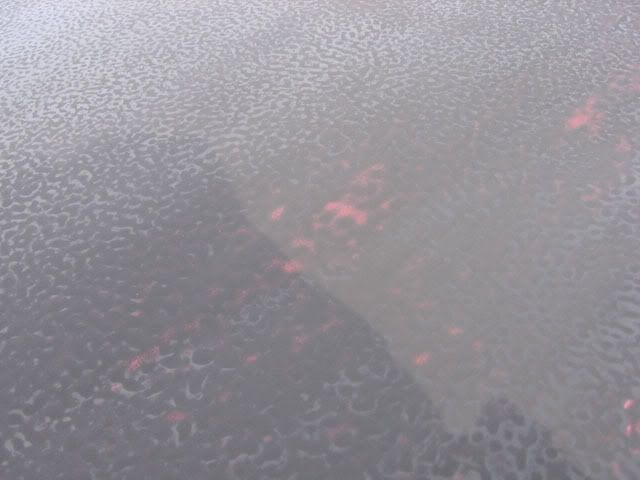 --------------- Phase 1 of 2nd stage (3rd coat) 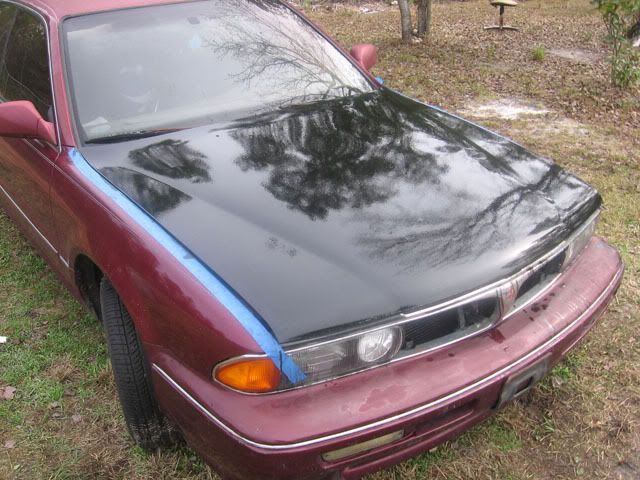 --------------- 3rd coat - still wet 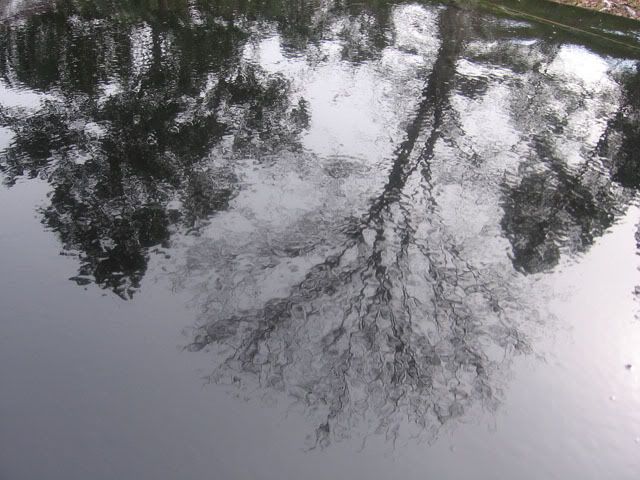 --------------- ME -- notice orange peel  -After 3rd and 4th coat, what grit should i use? 1000g? -When your applying the paint, do you spread the paint out until roller becomes dry and move to another section? or do you roll the paint over the same spot for better coverage? -My 1st stage of paint can be scratched off with a nail. Does this mean I have to stop and start over?
|
|
|
Re: New how to paint your car on a budget with a roller
#37841
01/15/08 01:15 PM
01/15/08 01:15 PM
|
Anonymous
Unregistered
|
Anonymous
Unregistered
|
So was it painted with a roller?
|
|
|
Re: New how to paint your car on a budget with a roller
[Re: 69chargeryeehaa]
#37843
01/15/08 03:06 PM
01/15/08 03:06 PM
|
Joined: Mar 2007
Posts: 5,660
Flint, MI
Gusteve
I Love the Unicorn Song!!
|
I Love the Unicorn Song!!
Joined: Mar 2007
Posts: 5,660
Flint, MI
|
M2001 - it looks like your problems started with the very first coat. It didn't lay flat at all. Did you pre-sand the hood to prep it? It seems like something on the original surface was rejecting the paint causing it to glom together instead of laying flat. If it was me, and you've only done the hood, I would sand the crap out of back down to a smooth base coat, and start over. I'd go back to 800 or even 600 grit to make the work go faster. You'll probably have to let it dry for a day or two before you can sand it, if you put it on that thick. Like was mentioned above, if you sand way back down (even to the point where you see a lot of red showing through), the next few coats will go on easier so its not as bad as you might think. 
Last edited by Gus; 01/15/08 03:10 PM.
|
|
|
Re: New how to paint your car on a budget with a roller
[Re: Gusteve]
#37845
01/15/08 09:18 PM
01/15/08 09:18 PM
|
Anonymous
Unregistered
|
Anonymous
Unregistered
|
Quote:
M2001 - it looks like your problems started with the very first coat. It didn't lay flat at all.
Did you pre-sand the hood to prep it? It seems like something on the original surface was rejecting the paint causing it to glom together instead of laying flat.
If it was me, and you've only done the hood, I would sand the crap out of back down to a smooth base coat, and start over. I'd go back to 800 or even 600 grit to make the work go faster. You'll probably have to let it dry for a day or two before you can sand it, if you put it on that thick.
Like was mentioned above, if you sand way back down (even to the point where you see a lot of red showing through), the next few coats will go on easier so its not as bad as you might think.
Quote:
M2001 - your laying that paint on WAY TOO THICK. Going from red to black, you should still be able to see the red thru the black coats until about the 3rd coat. From your pics you have full coverage after 1 coat, which tells me your painting very thick layers. You have to resist the urge to paint thick layers, thin layers are your friend. The thick layers are causing your excessive orange peel....
keep trying, less paint, continue with just the hood until you get the process down pat...
I thought I didnt add enough MS to the paint. There was an urge to not add so much MS to the paint...Im going to try a 50\50 and work from there.
Im going to use 800 then go down to 600...will this be enough to get back to the original paint?
I did sand the hood down before the first coat. although I forgot to wipe MS prior to the first coat.
major question: when i go back to sanding down to original paint, do I dry or wet sand?
|
|
|
Re: New how to paint your car on a budget with a roller
#37846
01/16/08 09:55 AM
01/16/08 09:55 AM
|
Anonymous
Unregistered
|
Anonymous
Unregistered
|
Quote:
Im going to use 800 then go down to 600...
Always sand with lower numbers first. Lower number paper is rougher and cuts deeper than higher number paper.
The trick is to reduce the visible scratches by making them smaller and smaller untill you cant see them.
Quote:
will this be enough to get back to the original paint?
If you sand long enough, you could get down to original paint with 2000 grit.  It would just take a hell of a lot longer than 600 grit. It would just take a hell of a lot longer than 600 grit.
Quote:
I did sand the hood down before the first coat. although I forgot to wipe MS prior to the first coat.
Here is the thing: old paint can have just about anything embedded in it from normal exposure. Wax, bird droppings, oil, teflon... eventhough many of those items may not be visible - rest asured they can still be in the paint surface. Any contaminant in the surface you are trying to paint can be a problem. Lots of these new wipe-and-shine "wonder waxes" can be a bear to remove from the surface. Even if you haved owned the car from new, it is hard to know what has been applied. The dealer could have trated the paint with something that is no longer shiny, but still there.
To ensure that your new paint adheres properly, you want that surface to be as clean and virgin as is practical for you to get it. Washing with a mild degreaser, and then a thorough rinse, before sanding would be a good start.
Once you have sanded it down to where you want it you want to wash (or just rinse) it down to get the sanding residue (old paint)off. Let it dry.
Hit it with MS and let dry. Then hit it with a tack cloth before painting.
Your first coat should lay down smooth and uniform. It will look like absolute crap color and coverage-wise.
As mentioned by another poster it looks as if your first coat was reacting to something on the surface.
If you have orangepeel or runs, you are using too thick a mixture, or too thick a coat.
The picture of when you sanded after your first coat shows shiny spots in the valleys of the paint and dull spots on the tops of the peel. Ideally when knocking down peel, there should be no shiny spots left. You want the surface to be absolutely flat.
Just relax and don't rush the process. Take your time and you can have stunning results. That is the beauty of this method. 
|
|
|
Re: New how to paint your car on a budget with a roller
#37847
01/16/08 10:05 AM
01/16/08 10:05 AM
|
Joined: Mar 2007
Posts: 5,660
Flint, MI
Gusteve
I Love the Unicorn Song!!
|
I Love the Unicorn Song!!
Joined: Mar 2007
Posts: 5,660
Flint, MI
|
Good answer!
+1 on the tack cloth after you do the MS wipedown. They only cost a couple bucks.
Re: your planned 50/50 MS mix - that might be a little too thin. I used around 35%, give or take, but it also depends on temperature and humidity, so its not the same ratio for everyone every time.
Remember you are going for a consistency like low-fat milk.
Here's a pic of what a first coat should look like when its done (this is rustoleum gloss black) - notice that there's hardly any coverage at all. The second coat didn't look much better. As Charger said, you won't even start to get coverage until the 3rd cost.
Also - you really want to squish out most of the paint off the roller by rolling it in the tray before you start to apply it to the car. Thin, Thin, Thin.....
|
|
|
Re: New how to paint your car on a budget with a roller
#37848
01/16/08 11:26 AM
01/16/08 11:26 AM
|
Anonymous
Unregistered
|
Anonymous
Unregistered
|
OK got it. thin is the key. i kinda knew that, but everytime i added MS to the paint, i kept thinking i added too much...i had it had the paint at a 10w-30 oil consistency. (I gotta go back to the fridge and double check low fat milk thickness, lol)
So let me get this straight. In order to go back to original paint, i start with a lower grit, 600 and work my way up to 800? and if 800 isnt enough, take the next step and use 1000? what would be the way to sand, wet or dry?
btw - thnx for the help. normally i would of sanded it down and posted pics, but i came out of work late and im DEAD tired. besides, its cold and raining outside.
|
|
|
Re: New how to paint your car on a budget with a roller
#37849
01/16/08 03:17 PM
01/16/08 03:17 PM
|
Joined: Mar 2007
Posts: 5,660
Flint, MI
Gusteve
I Love the Unicorn Song!!
|
I Love the Unicorn Song!!
Joined: Mar 2007
Posts: 5,660
Flint, MI
|
Quote:
OK got it. thin is the key. i kinda knew that, but everytime i added MS to the paint, i kept thinking i added too much...i had it had the paint at a 10w-30 oil consistency. (I gotta go back to the fridge and double check low fat milk thickness, lol)
If you've read a lot of the threads, you might recall the "drip test". Put a stick in the mixed paint (like a popsicle stick or something) pull it out, and the paint should run freely for about 3 seconds before it starts to drip.
Also - its helps to mix the paint in a container, not in the try. Take like an empty peanut butter jar, put in two inches of paint, add one inch of MS, stir (not shake) well. That's a good starting point, and you can adjust it by adding small amounts of paint or MS after the drip test.
Quote:
So let me get this straight. In order to go back to original paint, i start with a lower grit, 600 and work my way up to 800? and if 800 isnt enough, take the next step and use 1000? what would be the way to sand, wet or dry?
Right now, you're just trying to get back down to a nice flat (smooth) base coat. You can use 600 grit (dry, btw) to sand everything flat smooth. You could very likely end up sanding off nearly all the black paint you previously applied. Once you have it smooth, then go over it once with the 800 grit to take out the major scratches. You won't need to use 1000 grit before you start the first coat.
I think I actually used 800 grit for my wet sanding the first couple times (between coats 2 and 3, and coats 4 and 5. Two coats, then wet sand, two more coats, then wet sand). Then I finally switched to 1000 grit after coat 6, and 2000 after coat 7.
Last edited by Gus; 01/16/08 03:20 PM.
|
|
|
Re: New Paint job on a budget thread Part III
[Re: 69DartGT]
#37850
01/16/08 03:42 PM
01/16/08 03:42 PM
|
Anonymous
Unregistered
|
Anonymous
Unregistered
|
I am trying this painting method on my car hood, which I have removed from the car and am painting in my garage. (I want to get the technique right before I start on the rest of the car.) Anyway, I sanded off the old paint down to the metal then applied a layer of rustoleum primer spray paint. I then applied a layer of rustoleum enamel (exactly what you used except black) mixed 50/50 with mineral spirits. The first coat went on beautifully, I sanded it 24 hours later and prepped it for the next coat. When I applied the 2nd coat however, I guess the mineral spirits began reacting with the first coat and started removing the paint. What is the cause of this? Is my mixture too thin? Not mixed well enough? Did you have any problems with your extra coats removing previous coats? I would greatly appreciate any help anybody could give me. I'll upload pictures if needed.
|
|
|
Re: New Paint job on a budget thread Part III
#37851
01/16/08 07:41 PM
01/16/08 07:41 PM
|
Anonymous
Unregistered
|
Anonymous
Unregistered
|
Quote:
I am trying this painting method on my car hood, which I have removed from the car and am painting in my garage. (I want to get the technique right before I start on the rest of the car.) Anyway, I sanded off the old paint down to the metal then applied a layer of rustoleum primer spray paint. I then applied a layer of rustoleum enamel (exactly what you used except black) mixed 50/50 with mineral spirits. The first coat went on beautifully, I sanded it 24 hours later and prepped it for the next coat. When I applied the 2nd coat however, I guess the mineral spirits began reacting with the first coat and started removing the paint. What is the cause of this?
Without pics, I'd say not enough time to dry. Dry time will vary with temp, humidity and MS mixture. Or, if it was lifting off in sheets, not dry enough and an adhesion problem with your surface.
50/50 MS mixture coupled with low temps will extend your dry time considerably. You are adding MS to extend workability, allowing the paint to self-level. Low temps extend dry time as well, so you are doubling down.
Back off on the MS, add some more dry time, or add some temp - whichever is easier to accomplish.
Last edited by Mike Da Wrench; 01/17/08 07:13 PM.
|
|
|
Re: New how to paint your car on a budget with a roller
[Re: Gusteve]
#37852
01/16/08 08:11 PM
01/16/08 08:11 PM
|
Anonymous
Unregistered
|
Anonymous
Unregistered
|
Quote:
+1 on the tack cloth after you do the MS wipedown. They only cost a couple bucks.
Heh. For years I did not use one out of ignorance. Madness, sheer madness. Years of living with crappy results because the surface had unseen trash of one sort or another, all for lack of a dirt cheap tack cloth.
Cheapest, best ingredient for a good paint job, IMHO.
|
|
|
Re: New how to paint your car on a budget with a roller
#37853
01/19/08 11:32 AM
01/19/08 11:32 AM
|
Anonymous
Unregistered
|
Anonymous
Unregistered
|
Gus, mike da wrench. you guys pics of your projects?
|
|
|
|
|


