|
 Re: New Paint job on a budget thread.
#37314
Re: New Paint job on a budget thread.
#37314
08/12/07 07:31 PM
08/12/07 07:31 PM
|
Anonymous
Unregistered
|
Anonymous
Unregistered
|
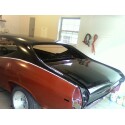
I started my paint job but have to relocate to finish it { it is easier for me to put the car back together to move it} I have attached a PIC, you are looking at two coats using foam brush only method . I am very happy with that process if you can have the parts sitting flat on a table .I am sure I will be using the roller method to finish the remainder of the cab. The only thing I am not happy with is my body work skills you need a perfectly flat panel or every imperfection will show. Cheers  The great thing about this is I dont have a huge amount of $ tied up in the paint just sand it down and do it agian http://i207.photobucket.com/albums/bb126/tonto4807/DSC01990.jpg
|
|
|
Re: New Paint job on a budget thread.
[Re: Down Under]
#37315
08/12/07 09:04 PM
08/12/07 09:04 PM
|
Joined: Jun 2006
Posts: 5,163
CT
GTX MATT

master
|
master
Joined: Jun 2006
Posts: 5,163
CT
|
Quote:
GTX Matt, I am painting my 83 Toyota a shade of blue called Ultra Blue from a local Australian paint company called Wattyl. Dunno how this can help you, but I am attaching a picture for you to check the finish. I have done 9 coats so far, and I have just finished wet sanding with 2000 grit in preparation for cutting and compounding, hopefully next week end.
FYI, the blue started looking like a smurf blue after the first couple of coats, but it has darkened a fair bit since, and I am very happy with the way it has turned out and especially how smooth the finish is. 
Hoping to have all finished in a couple of weeks, and then relaxing with a cold one!  
I think that actually looks very close to B5 Blue
Now I need to pin those needles, got to feel that heat
Hear my motor screamin while I'm tearin up the street
|
|
|
Re: New Paint job on a budget thread.
#37316
08/12/07 10:00 PM
08/12/07 10:00 PM
|
Anonymous
Unregistered
|
Anonymous
Unregistered
|
There was some orange peel, I would consider normal. I used regular mineral spirits. My test panal was 8 coats and I didn't spend too much time prepping the panal either.
I would think the spraying would involve mixing even thinner than just rolling. If your getting too much orange peel, I would thin the paint even more. The sooner the better to sand out the orange peel.
|
|
|
Re: New Paint job on a budget thread.
#37317
08/12/07 11:28 PM
08/12/07 11:28 PM
|
Anonymous
Unregistered
|
Anonymous
Unregistered
|
Tonto ... that is looking really good for only 2 coats ... and foam brush only. Is that brightside?
On the subject of Orange Peel ... been noticing it everywhere, a chevy fairly new S-10 today with a repaint, could see some red paint on some of the rubber, nice shine, but the whole door panel had peal. On a lady at works new car .... 3 week old black Vette ... brand new ... all over the place. So even the expensive new cars can't get better than a 5 footer.
Last edited by SilverSport; 08/12/07 11:29 PM.
|
|
|
Re: New Paint job on a budget thread.
#37318
08/13/07 07:11 AM
08/13/07 07:11 AM
|
Anonymous
Unregistered
|
Anonymous
Unregistered
|
Thanks Chieftain, I got to work 2 more days this week then will be off again for 4 day. {4x4 schedule}. Gonna thin the crap out of it. The oliver green is kinda like an old army green not bad. Guess the first day off will be wet sanding day. 
|
|
|
Re: New Paint job on a budget thread.
#37319
08/13/07 11:29 AM
08/13/07 11:29 AM
|
Joined: May 2006
Posts: 575
Canada
Marq
mopar addict
|
mopar addict
Joined: May 2006
Posts: 575
Canada
|
Quote:
I started my paint job but have to relocate to finish it { it is easier for me to put the car back together to move it} I have attached a PIC, you are looking at two coats using foam brush only method . I am very happy with that process if you can have the parts sitting flat on a table .I am sure I will be using the roller method to finish the remainder of the cab.
Hehehhe.. that car is so cool looking in that inadvertent two tone. I can imagine it finished with white used where the primer was showing and the black where the black presently is. Like an old school cop car 
.
|
|
|
Re: New Paint job on a budget thread Part III
[Re: 69DartGT]
#37321
08/14/07 12:46 PM
08/14/07 12:46 PM
|
Anonymous
Unregistered
|
Anonymous
Unregistered
|
Thanks to everyone who has shared on these threads. I've read this thread up to page 60 of part II.
I'm running into a problem that I could use help with. I'm painting my motorcycle's gas tank and two side covers using this method with real mineral spirits & regular rustoleom.
I ran into the same issues others had with the paint being blotchy, too many bubbles etc. I fixed that by thinning out the mixture more.
I spent a great deal of time prepping all three pieces. I worked up to 500 grit before painting my first coat and everything was smooth using the finger touch test.
The last two times I've tried a first coat. The paint doesn't want to adhere to one of the side panels. On the 2nd one, it will mostly adhere and dry properly but there are some spots where it won't.
The places that it won't feel very tacky and will easily wipe off with mineral spirits while the gas tank and other side cover do not.
I went through this process before painting last time: used mineral spirits to clean off the old paint, sanded with 500 grit paper, washed the panel with some soap and water, let dry, wiped it down with mineral spirits, let dry, gently wiped with a tack cloth and then applied the paint.
Any ideas guys? This is the 2nd first coat I've had this problem with.
|
|
|
Re: New Paint job on a budget thread.
#37323
08/14/07 09:04 PM
08/14/07 09:04 PM
|
Anonymous
Unregistered
|
Anonymous
Unregistered
|
|
|
|
Re: New Paint job on a budget thread.
#37324
08/14/07 09:05 PM
08/14/07 09:05 PM
|
Anonymous
Unregistered
|
Anonymous
Unregistered
|
|
|
|
Re: New Paint job on a budget thread Part III
[Re: admactanium]
#37325
08/14/07 09:19 PM
08/14/07 09:19 PM
|
Anonymous
Unregistered
|
Anonymous
Unregistered
|
Quote:
depends on the bike. the sidepanels on my old cb750 cover the oil tank. it sounds like your side panels have some sort of surface contamination in them that's preventing the paint from sticking. sanding it won't necessarily work. you'd have to wipe them down with some sort of prep-sol or other solvent to get rid of the surface contamination. moto parts get all kinds of crap on them and most of them are abs plastic, so i think they tend to absorb things.
Thanks for letting me know. As an experiment today I put the panel in the direct sunlight to see if it would make a difference. By this evening, no more tackiness!
Looking back on it, in between doing that panel and the rest of the painting I added more spirits to it. So maybe that was it...
Thanks again.
|
|
|
Re: New Paint job on a budget thread.
#37326
08/14/07 10:47 PM
08/14/07 10:47 PM
|
Anonymous
Unregistered
|
Anonymous
Unregistered
|
Quote:
here is the chevelle
Would like to see it a bit better ... kinda postage stamp size the pictures are.
|
|
|
Re: New Paint job on a budget thread.
#37327
08/15/07 03:38 PM
08/15/07 03:38 PM
|
Anonymous
Unregistered
|
Anonymous
Unregistered
|
It has been discussed here that cars were painted with brushes in the old days (Model T's and Rolls Royces -- supposedly as late as the 1970's). I've looked for information all over the web on these processes, but didn't find any information. Then it occurred to me to try to find some old books on the subject. I searched with sellers of antique books. Today I received a copy of Automobile Painting by F.N. Vanderwalker, published in 1919. It looks like an interesting read. It's all about brush painting automobile finishes. So far, no big surprises. Looks like everyone here has successfully re-invented the wheel. Doesn't look like they had rollers in 1919 -- but everything else applies. I'll be reading with interest and posting a summary of any interesting findings here. Until then -- a couple pages to whet your appetites:   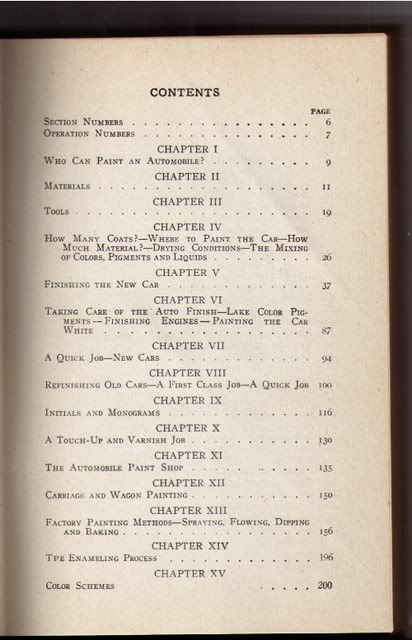 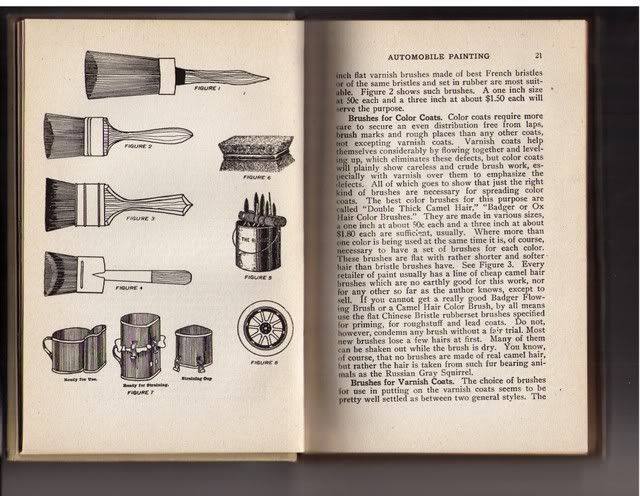
|
|
|
Re: New Paint job on a budget thread.
#37328
08/15/07 06:47 PM
08/15/07 06:47 PM
|
Anonymous
Unregistered
|
Anonymous
Unregistered
|
Anyone done a two tone yet? My concern is that where the top meets the bottom, see pic. Sanding I'm afraid of the two colors meshing and losing that line, although it would be covered with a small silver pin stripe. Wetsanding and the top runing into the bottom, staining the green, etc. 
|
|
|
Re: New Paint job on a budget thread.
#37329
08/15/07 10:19 PM
08/15/07 10:19 PM
|
Anonymous
Unregistered
|
Anonymous
Unregistered
|
i am in the process of a 2 tone paint job and when you sand just sand enough to make the line where the colors join smooth mine is coming out fine
|
|
|
Re: New Paint job on a budget thread.
#37330
08/17/07 03:21 PM
08/17/07 03:21 PM
|
Anonymous
Unregistered
|
Anonymous
Unregistered
|
I have been thinking about painting the top of my suburban with Rustoleum paint using a brush. I would be doing the job in a carport.
I would thin the paint with mineral spirits to get a longer wet edge and use a natural bristle brush.
Have you read anything in your old books that would be of interest?
The top is not that visible if it does not work out.
Are their any other threads here that discuss use of a brush?
Thanks
|
|
|
Re: New Paint job on a budget thread.
#37331
08/17/07 06:32 PM
08/17/07 06:32 PM
|
Anonymous
Unregistered
|
Anonymous
Unregistered
|
Quote:
I have been thinking about painting the top of my suburban with Rustoleum paint using a brush. I would be doing the job in a carport.
I would thin the paint with mineral spirits to get a longer wet edge and use a natural bristle brush.
Have you read anything in your old books that would be of interest?
The top is not that visible if it does not work out.
Are their any other threads here that discuss use of a brush?
Thanks
I've painted a bunch of the inside of my car with a brush, and also tried testing on a couple of fenders. It actually works pretty well. I didn't thin it at all, but you might want to experiment with it. Use a good brush...I was using a Purdy professional 2.5", with fine bristles. After brushing the paint on, I went over the spots with a lot of lines again (very lightly) with the brush and got most of the lines out. Without wet sanding, it's a good 10 footer. Any lines that are left can be wet sanded out just like any other paint defect. Just use a block to keep it flat. FWIW, I found that I could get complete coverage in just one or two coats of paint, instead of 8 or 9 rolling. The downside is you'll probably spend a lot of time sanding out the lines unless you can get them out when painting. The paint film is a lot thicker when brushing, so it might take longer to dry. That wasn't a problem for me since I was using hardener though.
It works fine...just haven't been that many people who've experimented with it here.
|
|
|
Re: New Paint job on a budget thread.
#37332
08/17/07 09:53 PM
08/17/07 09:53 PM
|
Anonymous
Unregistered
|
Anonymous
Unregistered
|
sorry it took me a minute but you really dont have to primer it because it is a self priming product but i would sand it a little to give it some adhesion and priming is your choice because if ur using rust. pro you dont need a primer
|
|
|
Re: New Paint job on a budget thread.
#37333
08/18/07 12:31 AM
08/18/07 12:31 AM
|
Anonymous
Unregistered
|
Anonymous
Unregistered
|
Henre,
I'll answer your question about brushing here quickly (from what I've read in the book so far) and follow up with more detailed information when I can put together a detailed summary.
The book in question (Automobile Painting, published in 1919) first talks about the most common finishes on cars of the day. Apparently, the tried and true method of the time was a "rough coat" and/or "color coat" (actual terms from the book). This was a lead based pigment / paint which provided color, but not gloss. After the color coat was applied, then a varnish coat(s) were applied. Interestingly, this was the early 1900's version of Base Coat / Clear Coat (I guess everything new is old...). When they speak of the action of painting they are referring to laying down this type of color coat (without gloss). The technique for brushing paint is to use as little paint as possible and spread it as thin as possible.
When they get to the Varnish (clear coat) stage, they say that the technique for brushing this is different. (This is important because later they discuss ENAMEL -- which is what Rustoleum is -- and they say that Enamel for color is the same in technique as applying the clear varnish). They say that you want to put on a lot more material and "flow" it for varnish and enamel, brushing in single directions from the starting point on the panel, and then "tipping" in one cross direction then the other to help it self-level. Do this quickly and then leave it the hell alone. Tipping should not cause the brush to drag or bind in the varnish / enamel at all. If so, you have overworked the material or have waited to long to come back for tipping. They reference the fact that after the varnish / enamel is flowed up and tipped, brush strokes will still be visible, but that they should be left alone because they will self level.
Most of the description of technique is for varnish -- but the final chapter discusses enamel paint (at the time it was the modern, production material for painting -- but was typically done with spraying and baking). The chapter basically says 1) enamel is color and "varnish" as one and 2) follow all the techniques for varnish for application. They suggest that a car may only need 2 coats when brushing (not rollering!) enamel because the coats are fairly thick. They recommend thinning the first coat of enamel (30% -- with turpentine -- but I think we all know to use mineral spirits). Let dry 48 hours. Wet sand, then apply the final enamel coat without thinning. They seem to suggest that after the final coat no more sanding / polishing is required.
For runs in enamel / vanish they say to attack immediately and try to flow out with the brush. If brush drags, then a smaller brush with some additional enamel / varnish to help dissolve the local run / sag then flow out with brush into surrounding area. For a more stubborn or more dried run/sag, often times a "heating iron" held close to the surface (but not touching) the panel will cause the run to flow out on its own.
Proper brushes for enamel / varnish:
(I'm sure these are out-dated terms, but with a little thought we can probably translate to the modern day).
One basic style, but two different bristle varieties.
-- In my picture in the previous post, the type of brush for enamel / varnish is Figure 4 -- which is the bottom most brush in the diagram. ---
1)"Extra Fitch Hair Flowing Brush, Double Thick" also known as "Badger Hair Flowing Brush, Double Thick". Has long handle and fairly short bristles. Best ones have the bristles set in rubber. According to the book "Once these are broken in, they are a joy to work with".
2)Same style and shape as #1, but bristles are made of "selected Chinese Bristles" or "finest French White Bristles". They say that this type of brush is stiffer than #1 (requiring more effort in application) and it has longer and thicker bristles. This means it carries more enamel / varnish. Because of carrying more enamel / varnish -- it lays down faster and causes better flowing and self-leveling.
Hope this helps.
-- Dan
|
|
|
|
|


