|
 Re: 48 Plymouth business coupe, Dakota frame, low bucks
[Re: poorboy]
#1116538
Re: 48 Plymouth business coupe, Dakota frame, low bucks
[Re: poorboy]
#1116538
12/12/11 08:22 AM
12/12/11 08:22 AM
|
Joined: Aug 2007
Posts: 1,513
AZ
Mike P

pro stock
|
pro stock
Joined: Aug 2007
Posts: 1,513
AZ
|
Some very nice work, especially with what you started with. Originally being from the midwest myself I know first hand about missing and rotted sheetmetal......and am first to admit that I have been spoiled living in AZ the last 25 years. The stuff some of you guys back there start with amazes me.
I'm wondering about the difference in body weight between the car and truck are you going to have to do any spring changes because of weight differences?
1957 Plymouth (Hemi, Dual Quads, A833 4 Speed 9 1/4 w 4.10) Sold
1937 Dodge Pickup (Hemi, 6X2 intake, 46RH, Dana 60 w 4.56) Sold
1968 Plymouth Valiant 2dr sedan (354 HEMI, 46RH w/4.30 gears)
|
|
|
Re: 48 Plymouth business coupe, Dakota frame, low bucks
[Re: moparx]
#1116540
12/13/11 01:41 AM
12/13/11 01:41 AM
|
Joined: Jan 2003
Posts: 10,590
Freeport IL USA
poorboy
OP
I Live Here
|
OP
I Live Here
Joined: Jan 2003
Posts: 10,590
Freeport IL USA
|
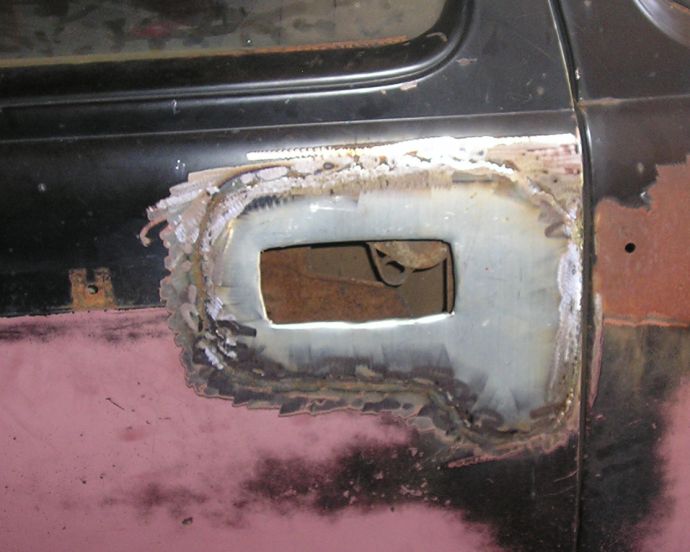
Mikep, I had an AZ car once, the body was great, but everything I did to it was a battle. It was as though it didn't like me messing with it  and was very uncooperative. I find it easier to work with this rusty junk, I'm a long ways from being a perfectionist, so I like going at it with the attitude that it was junk before, so I can't hurt it. Fits my life style better. Moparx, the 1st rod I did I used K car door handles, I think I still have a set around here someplace with keys for the locks yet! Probably still have the matching steering column for the K car door handles too. Finding them may be a different story.  I have never done a suicide door before, I suspect that brings a whole new set of issues with it. I seen to be having a real problem figuring out how I need to do hood hinges. One of the few things that must have gotten collected with a pile of scrap from the Dakota since I can't find them around here. They probably would have worked out well too.  Something will come to me, I just hate sitting for hours staring at something without coming up with a plan of some sort. Gene
|
|
|
Re: 48 Plymouth business coupe, Dakota frame, low bucks
[Re: Paneleer]
#1116542
12/19/11 12:41 AM
12/19/11 12:41 AM
|
Joined: Jan 2003
Posts: 10,590
Freeport IL USA
poorboy
OP
I Live Here
|
OP
I Live Here
Joined: Jan 2003
Posts: 10,590
Freeport IL USA
|
Quote:
Quote:
Gene
Your build has me highly intrigued. I have acquired a 1948 Dodge panel truck, and also a 1989 Dodge Dakota, I am hoping the two merge as well as your project has.
You have truly set me rolling on my path to soon having a cool service truck, an 89 Dakota, but it will look like a 48 Panel.
Is your Dakota the short box standard cab? That panel will fit on that short Dakota frame great and the long Dakota frame with a little frame shortening. Using the Dakota floor pan (if its still good) and firewall make the build work nice, then you can use most of the Dakota stuff in its original position. I will give you words of wisdom and support as you go through the process any place I can. Gene
|
|
|
Re: 48 Plymouth business coupe, Dakota frame, low bucks
[Re: poorboy]
#1116543
12/21/11 11:33 PM
12/21/11 11:33 PM
|
Joined: Jan 2003
Posts: 10,590
Freeport IL USA
poorboy
OP
I Live Here
|
OP
I Live Here
Joined: Jan 2003
Posts: 10,590
Freeport IL USA
|
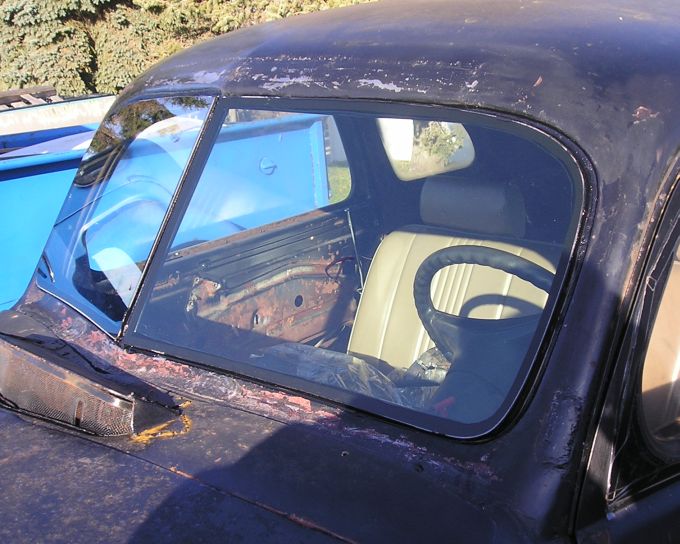
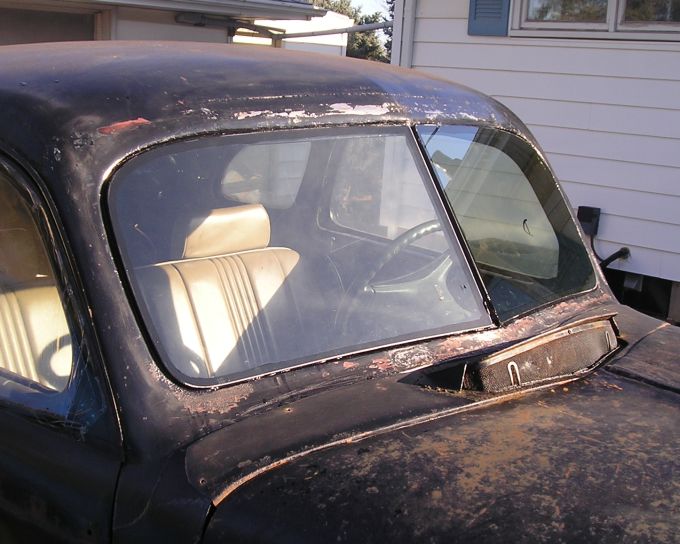
Still plugging away. The coupe had a lot of issues with the structural integrity around The windshield frame. The top of the windshield header was rotted away, and the rubber gasket was pretty much hanging in the breeze. I ended up replacing a 44" wide section of metal above the windshield, and a large section of the inside lower pinch weld as well. As such, I had to reform the peak of the windshield, on both the top and the bottom of the "V" and much of the inner body structure at the top and the bottom of the windshield. Having had to deal with windshield gasket leaks in my 50 4x4 for years, (new glass and new rubber 2 times, made little difference, still leaked around the rubber) I was determined I was not going to have rubber gaskets in this car.
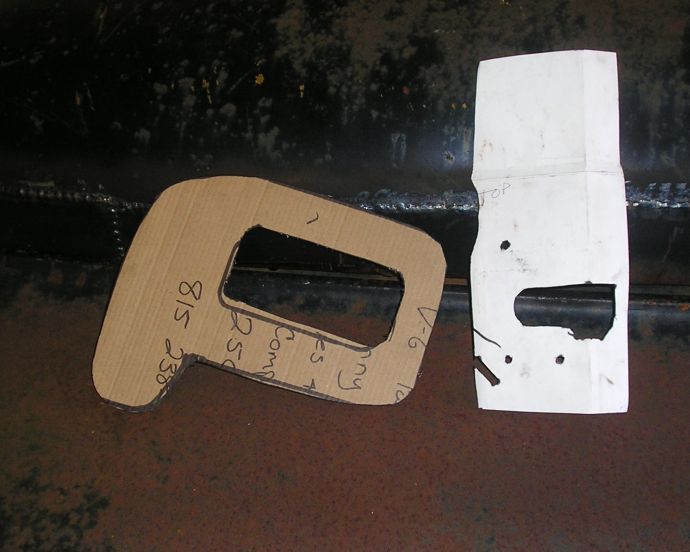
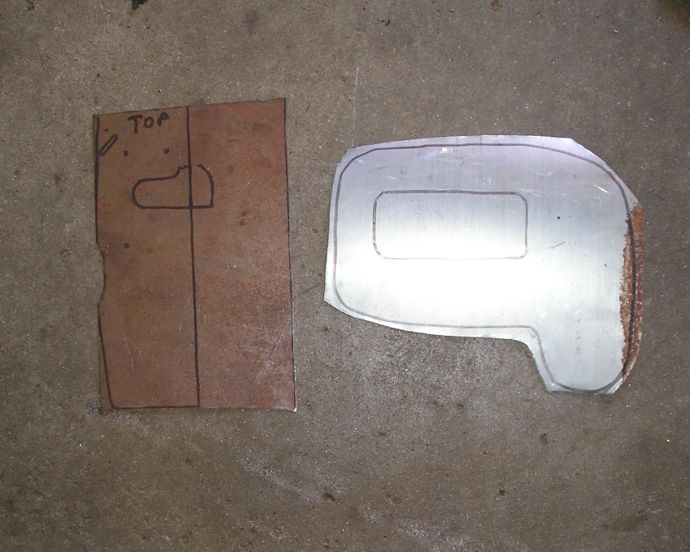
Since I had already done extensive work on the windshield frame, I contacted the local glass guy I've used for years, to see what I needed to bond in new glass. He told me I needed at least a 3/8" lip all the way around the windshield for the Buteen (or whatever that windshield black glue stuff is called) to sit on, and I would have to make a center support. I'm using a split 2 piece windshield with a center post that is bonded in. The center post had to be 1" wide, and at the correct angle for both pieces of glass to sit on and not touch. I added another piece all the way around the outside of the frame to give me a 1/2" flat surface lip for each 1/2 of the windshield, with the center post finishing up the glass mounting surface. A hard board pattern was made from the still intact 1/2 section of the windshield. The 1/2 section I had was in bad condition, it was separating and was scratched up real bad, there was also a crack in one corner. I was concerned it would break while I was trying to get all my surfaces flat. I figured a hard pattern wasn't a bad idea anyway.
While I was doing the surface pieces, I sent the glass out to have a couple pieces made. The windshield fits on the lip where the rubber gasket originally sat. The glass guy put a 1/4" thick piece of bonding agent on the surface and the glass sat on top of that, the finished product is about 3/8" above the body surface at the top and sides. He has a nice seam of bonding agent all the way around both pieces of glass to assure the seal and to protect the edges of the glass. At some point, I may fill the small gap between the glass and the body, but at this point, I'm leaving it alone. I'll see what pictures I have I can post of the process, but much of it was done in a hurry, so pictures are limited. Lets start with the finished product.
|
|
|
|
|


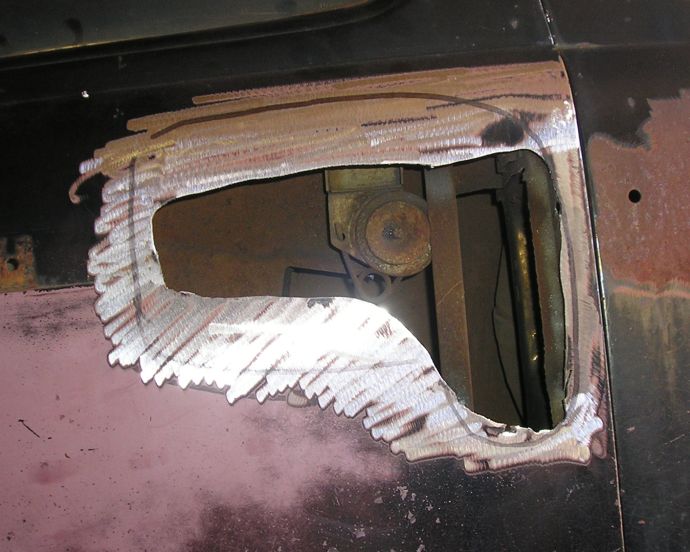
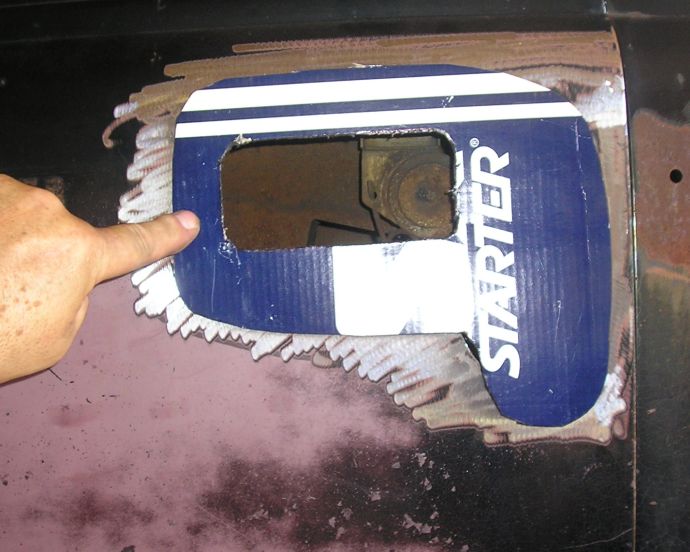
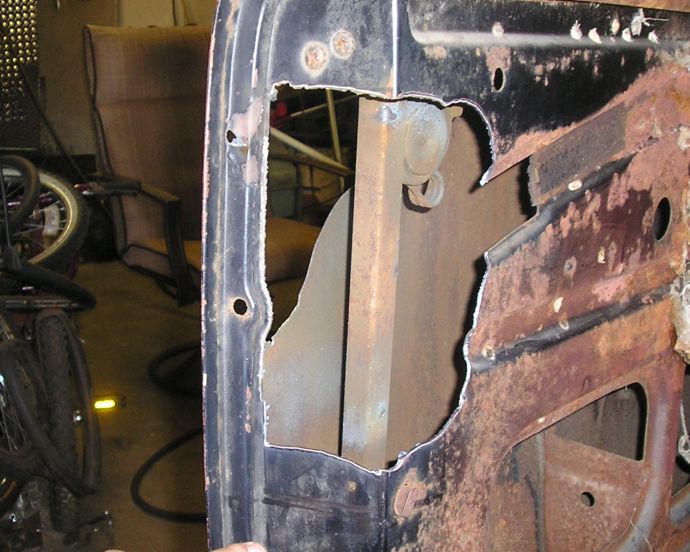
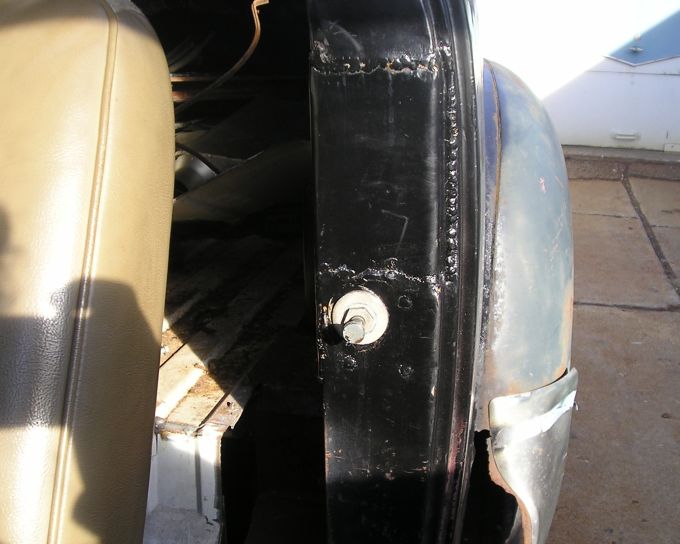
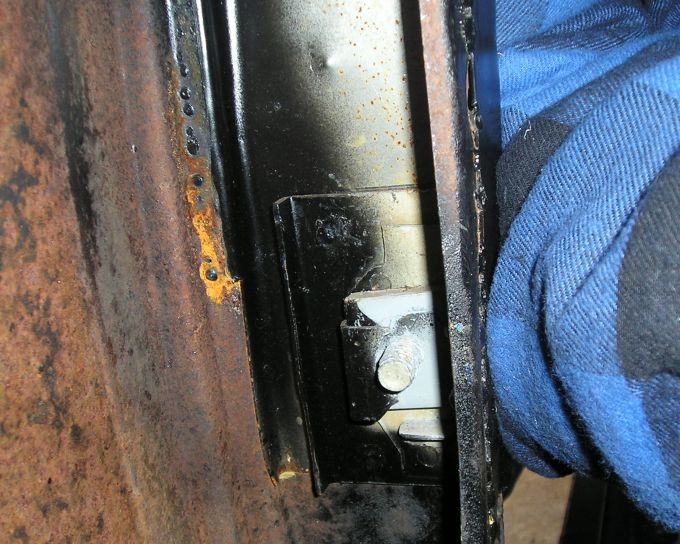
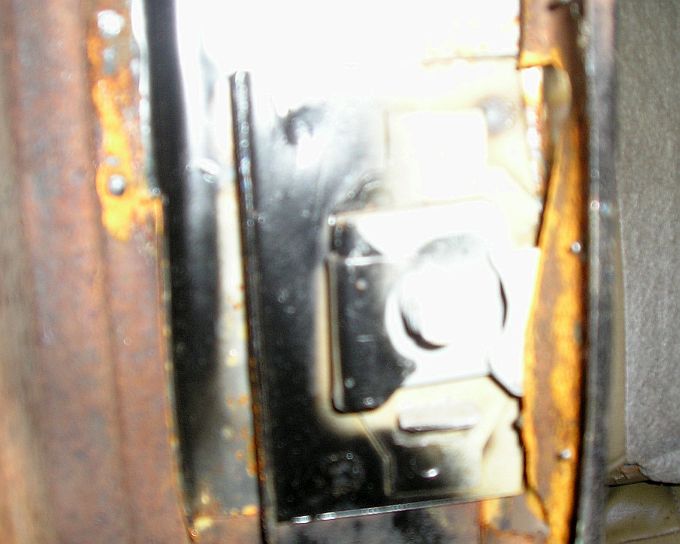
 i'm using k car handles on my humpback and they will fit nicely below the belt line bead. the inner latch structure will be installed similar to how you did yours, but at the front of the door instead, as the doors are suicide style. keep up the good work !