Moparts

'72 Challenger Project

Posted By: rhamson

'72 Challenger Project - 07/06/10 12:38 PM

Here is the latest from last weekend. I had become lazy and some rust tried to come back. I sanded it all off and went to work on leading in the tail panel where a former owner had fiberglassed it together. It really is ashame that you can't get the tail panels for these years yet.

Attached picture 6071244-TrunkFloorPrimed.JPG
Posted By: rhamson

Re: '72 Challenger Project - 07/06/10 12:39 PM

Here is the before.

Attached picture 6071245-TrunkBeforePrimer50%Reduction.jpg
Posted By: rhamson

Re: '72 Challenger Project - 07/06/10 12:40 PM

Here is the after.

Attached picture 6071246-TrunkFloorPrimed50%Reduction.jpg
Posted By: rhamson

Re: '72 Challenger Project - 07/06/10 12:43 PM

What a difference this made!

Attached picture 6071249-TailPanel50%Reduction.jpg
Posted By: 70shaker6pk

Re: '72 Challenger Project - 07/07/10 02:18 AM

Looking good
Posted By: ctRT

Re: '72 Challenger Project - 07/08/10 05:28 PM

I'll say it looks good. Keep up the good work it'll be done in no time, and you'll have one (or another) beautiful piece.
Posted By: rhamson

Re: '72 Challenger Project - 07/09/10 12:32 PM

Thanks. This is what is next on the plate. The rockers under both quarter panels where both cancered out.

Attached picture 6076573-PassengersRearSub-RockerBefore50%Reduction.jpg
Posted By: rhamson

Re: '72 Challenger Project - 07/12/10 05:42 PM

There is a big change in the project.
One of the former owners of the car who had it as his first car in high school got a hold of me and asked if I would sell him the car. I agreed to trade him for an acceptable substitute that I could continue working on.
We found one at Carlisle this past Saturday and hauled it back to Maryland where he took possesion of his old car. I made out really well on the deal as the new car is the same year but originally came from Arizona. The car is virtually rust free and the two major spots have already been repaired. While the car has many peices missing the important parts are still on the car.
I am very pleased with the way this turned out and am much further along with the body work but will need to kick out more greenbacks for the peices missing. All in all an even trade as I see it.

Attached picture 6081542-DSC_000650%reduction.jpg
Posted By: rhamson

Re: '72 Challenger Project - 07/12/10 05:44 PM

More pictures.

Attached picture 6081548-DSC_001650%reduction.jpg
Posted By: rhamson

Re: '72 Challenger Project - 07/12/10 05:46 PM

Rust repairs already done.

Attached picture 6081549-DSC_000750%reduction.jpg
Posted By: rhamson

Re: '72 Challenger Project - 07/12/10 05:47 PM

More rust repairs.

Attached picture 6081551-DSC_000950%reduction.jpg
Posted By: rhamson

Re: '72 Challenger Project - 07/12/10 05:49 PM

Real nice sheet metal to work with.

Attached picture 6081554-DSC_000350%reduction.jpg
Posted By: burdar

Re: '72 Challenger Project - 07/12/10 05:53 PM

It's alway nice to here of a car going back to a previous owner.

Your new car looks pretty clean. Looks like the trunk floor was fixed at one time. Are you going to install a new trunk floor or work with what you have?
Posted By: rhamson

Re: '72 Challenger Project - 07/12/10 06:03 PM

The major spot has been fixed but there are a few very small places I will need to touch up. There is very little bondo on the car but I will strip the whole car to be sure.

This is such a clean car. The car was bought from a guy who said he was overwhelmed by the project and wanted out. He bought it from a guy in Arizona. That is why the dashpad is toast.

Attached picture 6081578-DSC_003150%reduction.jpg
Posted By: rhamson

Re: '72 Challenger Project - 07/12/10 10:16 PM

Here is another shot of the toasted dash.

Attached picture 6082031-DashboardFromTopBefore50%Reduction.jpg
Posted By: FuryUs

Re: '72 Challenger Project - 07/16/10 08:39 PM

At least the instructions are on the windshield!
Posted By: rhamson

Re: '72 Challenger Project - 07/17/10 11:28 AM

It is an understatement on that windshield. You don't think about all the parts missing like the filler neck and gas tank straps. Or the horn and mounting brackets. Battery tray or gas pedal when you take on something like this.

At least the sheet metal looks good right now under the finish paint on the car. I've got some plans for a rottiserie and soda blasting is in the plan right now. I also have a line on a rust bucket donor car for many of the things missing that you just assume are there from a complete car.

I dusted off a '70 440 I have in the shed for intended transplant in the car.

Attached picture 6090310-DashBefore50%reduction.jpg
Posted By: Anonymous

Re: '72 Challenger Project - 07/17/10 02:16 PM

Nice, I would say that you are a lot further a head with the new car. Interior work is minor compared to doing major sheet metal replacement.
Posted By: rhamson

Re: '72 Challenger Project - 07/17/10 07:19 PM

I absolutely agree. I am eons ahead of the game here but I still will have to strip it down to metal before I finish paint the car. It is a real 50 footer but when you get up close to it a few sins of rust have been covered up with bondo. I will put it up on the rottiserie as soon as I can to give a good look at the floors and undercoat the entire bottom before I cover anything with paint. The next couple of pictures show a little of what may be lurking beneath this 38 year old car.

Attached picture 6090812-RearWindowPaintBubbleDriversSideBefore50%reduction.jpg
Posted By: rhamson

Re: '72 Challenger Project - 07/17/10 07:20 PM

Another usual suspect.

Attached picture 6090813-DriversSideSailPanelJointBefore50%reduction.jpg
Posted By: rhamson

Re: '72 Challenger Project - 07/17/10 07:21 PM

What is going on under this paint? I wonder.

Attached picture 6090817-PassengersSideFenderPaintBubblesBefore50%reduction.jpg
Posted By: rhamson

Re: '72 Challenger Project - 07/23/10 01:12 PM

There is a problem with closing the hood with my '72 Challenger where the hood stays up on on the right side and needs to be pressed down to make it sit right. I know the hood should get adjusted to a certain extent but upon closer look there is a difference between the two hinges where they don't mirror each other.

The right hinge has a longer plate connecting the upper and lower arms that mesh together with teeth. The left plate measures about 3-1/8" long while the right one measures 4". Why the difference and is there an explanation.

Attached picture 6100486-LeftHoodHinge50%Reduction.jpg
Posted By: rhamson

Re: '72 Challenger Project - 07/23/10 01:13 PM

Here is the right.

Attached picture 6100488-RightHoodHinge50%Reduction.jpg
Posted By: rhamson

Re: '72 Challenger Project - 07/23/10 01:15 PM

You can also see that the bars do not even face the same direction when the hinge is extended.
Posted By: DusterKrazy

Re: '72 Challenger Project - 07/24/10 01:51 AM

Nice to see more '72 up Mopars being done! I'd love to see even more!!

I love the WHEELS!!
Posted By: Anonymous

Re: '72 Challenger Project - 07/24/10 02:18 AM

Quote:

You can also see that the bars do not even face the same direction when the hinge is extended.


Could be that one of the hinges is not the correct one, just a guess since I am not familure with challys. The rust issues seem to be minor which is good. Keep us posted with the progress and lots of pics.
Posted By: rhamson

Re: '72 Challenger Project - 09/20/10 01:58 PM

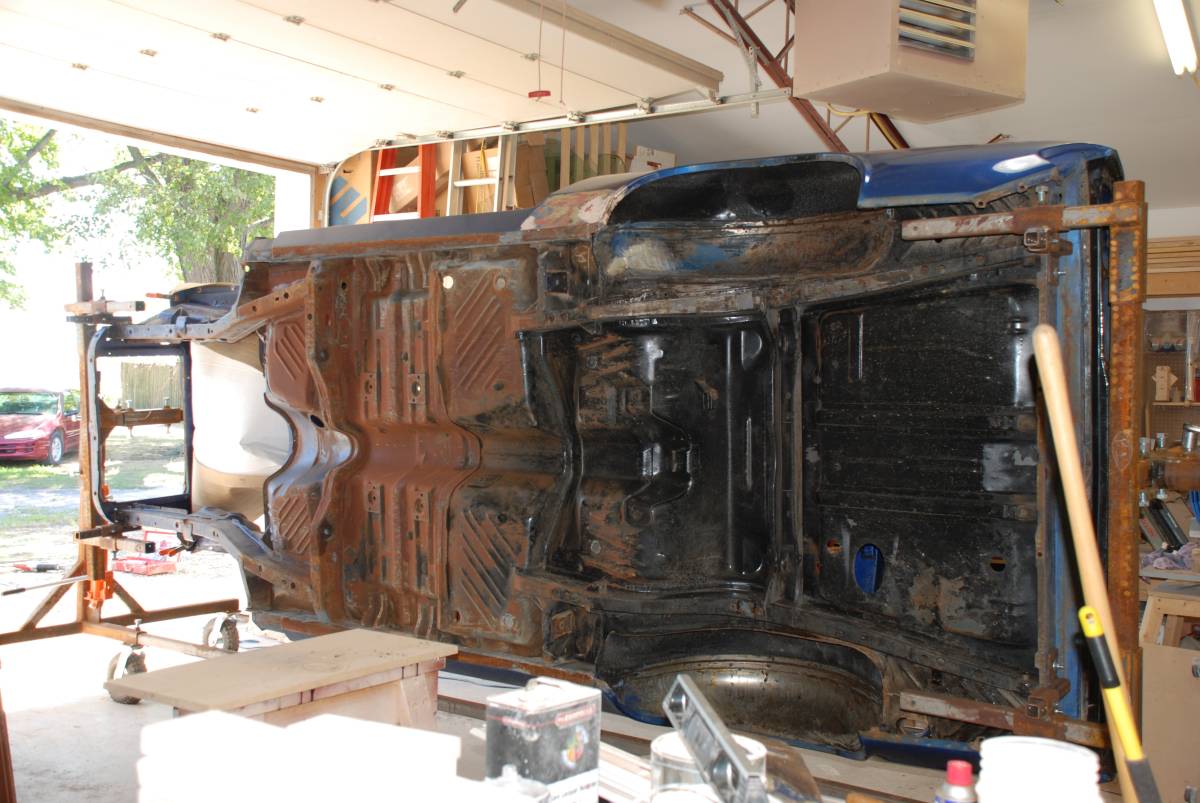
Finally able to work on the car since building and getting the car on the rotisserie. Just stripping paint and undercoating. Since this was an Arizona car there is only undercoating in the wheelwells. This car is going to be a driver but I want to get all the rust out first so it won't bite me in the a#* later on. Beginning to think about an undercoating for the car. I thought I would prime it with a good gripping primer and then use Rust-olem before I apply an undercoater. Any suggestions as to what is a good undercoater I could apply over the Rust-oleum?

Attached picture 6206328-Rotisserie151200x803.jpg
Posted By: rhamson

Re: '72 Challenger Project - 09/20/10 02:01 PM

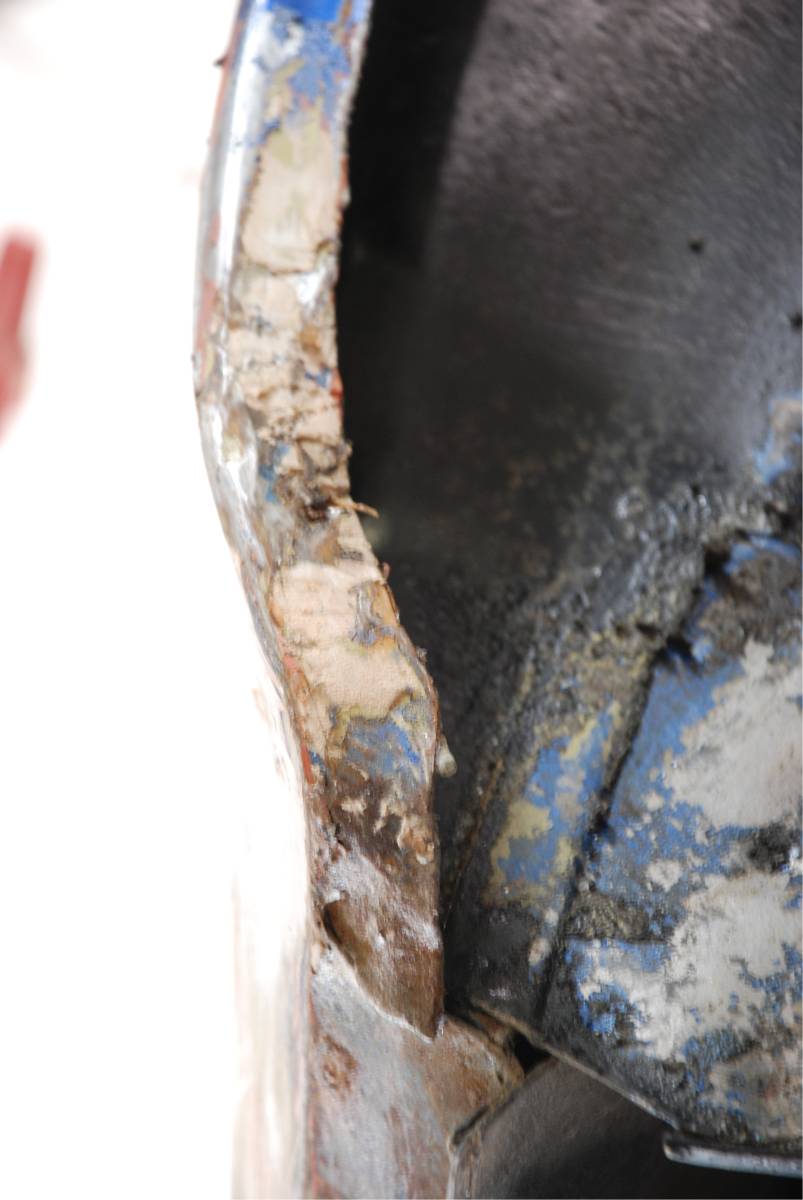
Here is one of those things that burns my butt. The whole car was finish painted with rust bubbles and holes. This was done by a professional shop. This is why I don't trust the bodywork to continue the build when this kind of stuff lurks under the paint.

If you buy a car make sure you invest in one of the paint thickness gauges. It will alert you to exsessive body filler and repaints when considering a project. I did and knew I would find stuff like this on the rear wheelwell lip. Even knowing it still burns my butt.

Attached picture 6206332-Rotisserie18803x1200.jpg
Posted By: varlo

Re: '72 Challenger Project - 10/05/10 02:32 AM

Great work! I to have a 72 and cannot wait to start on it. Keep the pictures coming
Posted By: rhamson

Re: '72 Challenger Project - 10/05/10 09:45 PM

Thanks, I really wish I had more time to work on it and post the results as so many others have in here. It really gives me a kick in my butt to quit making excuses and get busy.
I have decided to strip the bottom down to bare metal and spray POR15 to the entire bottom. The car is going to be black and this will just make the whole thing come together and match the bottom to the top.
Keep going with your project!!
Posted By: rhamson

Re: '72 Challenger Project - 03/30/11 06:50 PM

Got to work on some of the problem areas before I committed to the four speed hump and then onto the frame stifening.

Attached picture 6557979-PassengerQuarterPatch150%Reduction.jpg
Posted By: rhamson

Re: '72 Challenger Project - 03/30/11 07:41 PM

Rough patch from quarter panel skin I had.

Attached picture 6558052-PassengerQuarterPatchFix50%Reduction.jpg
Posted By: rhamson

Re: '72 Challenger Project - 03/30/11 07:43 PM

Drivers side rear lip rust.

Attached picture 6558057-DriverSideRearWheelLip150%Reduction.jpg
Posted By: rhamson

Re: '72 Challenger Project - 03/30/11 07:47 PM

Another quarter panel skin patch fix.

Attached picture 6558061-DriversRearWheelLipFix50%Reduction.jpg
Posted By: rhamson

Re: '72 Challenger Project - 03/30/11 07:52 PM

This is the overlap trunk patch that the former owner fixed.

Attached picture 6558067-TrunkPatchBefore50%reduction.jpg
Posted By: rhamson

Re: '72 Challenger Project - 03/30/11 07:53 PM

I cut it between the seam and butt welded and leaded it in place.

Attached picture 6558071-TrunkFix50%Reduction.jpg
Posted By: rhamson

Re: '72 Challenger Project - 03/30/11 07:56 PM

There was a rust hole under the drivers side rear window so I cut a patch panel from the quarter panel skin I had and welded it in at the body lines.

Attached picture 6558075-DriverSideRearWheelFront150%Reduction.jpg
Posted By: rhamson

Re: '72 Challenger Project - 03/30/11 07:58 PM

Sorry, I had only a picture of the hole cut out and where I used POR15 on the inner rocker. Here is the patch.

Attached picture 6558078-DriversForwardQuarterPatchFix50%Reduction.jpg
Posted By: rhamson

Re: '72 Challenger Project - 03/30/11 08:03 PM

The former owner had done another lip patch on the drivers floor which I felt is a no no when a panel is exposed to the elements the same as the trunk. I cut out between the seams and butt welded the two pieces together. At the front of the patch the new piece he had welded in was so thin and blown apart from the welding I went ahead and welded a new piece in while I was at it. I also made the plunge and installed a four speed hump so I am committed to the manual transmission now. Here is the before.

Attached picture 6558084-DriversSidePanBefore50%reduction.jpg
Posted By: rhamson

Re: '72 Challenger Project - 03/30/11 08:05 PM

Here is the results.

Attached picture 6558088-4SpeedHumpAndFloorFix50%Reduction.jpg
Posted By: 70shaker6pk

Re: '72 Challenger Project - 03/31/11 03:41 PM

Looking good, nice work!
Posted By: rhamson

Re: '72 Challenger Project - 04/27/11 08:56 PM

Started working on the frame strengthening kit I got from US Cartool. The kit is a good one but could have used some instructions and measurements. I first blasted the areas where the parts would be installed.

Attached picture 6605897-SandBlastingForFrameConnectors50%Reduction.jpg
Posted By: rhamson

Re: '72 Challenger Project - 04/27/11 08:57 PM

Next I painted POR15 under the areas I would not be able to get to once I installed the parts. Then I began welding in the frame connectors.

Attached picture 6605898-FrameConnectors50%Reduction.jpg
Posted By: rhamson

Re: '72 Challenger Project - 04/27/11 08:59 PM

Front and rear torque boxes.

Attached picture 6605903-FrontTorqueBox50%Reduction.jpg
Posted By: rhamson

Re: '72 Challenger Project - 04/27/11 09:00 PM

Rear torque box.

Attached picture 6605905-RearTorqueBox50%Reduction.jpg
Posted By: rhamson

Re: '72 Challenger Project - 04/27/11 09:02 PM

Front shock tower supports.

Attached picture 6605909-UpperTowerSupport50%Reduction.jpg
Posted By: rhamson

Re: '72 Challenger Project - 04/27/11 09:04 PM

Front frame core support.

Attached picture 6605910-CoreSupport50%Reduction.jpg
Posted By: rhamson

Re: '72 Challenger Project - 04/27/11 09:05 PM

Full frame strengthening kit installed. There was a lot of welding and filling but I had only a few burn throughs which is good considering the kit is 1/8" thick metal being welded to 22 gauge floor pan material.

Attached picture 6605912-FrameStrengthening50%Reduction.jpg
Posted By: rhamson

Re: '72 Challenger Project - 04/27/11 09:06 PM

There is a lot of half a##ed repairs from the body shop I am going back and fixing. The upper cowl over the passenger side had been crushed in an earlier accident. The frame is fine and measures out correctly but the repair which is hidden by the fender is horrible. Here is what it looked like and what I cut out.

Attached picture 6605918-UpperCowl150%Reduction.jpg
Posted By: rhamson

Re: '72 Challenger Project - 04/27/11 09:08 PM

Nasty piece that was mucked up by body shop.

Attached picture 6605921-UpperCowl550%Reduction.jpg
Posted By: rhamson

Re: '72 Challenger Project - 04/27/11 09:09 PM

I stitched in two new pieces and ground it down. A little bondo and you won't know it was there.

Attached picture 6605924-UpperCowl350%Reduction.jpg
Posted By: rhamson

Re: '72 Challenger Project - 04/27/11 09:11 PM

Ground down and ready for bondo.

Attached picture 6605925-UpperCowl450%Reduction.jpg
Posted By: jpilone

Re: '72 Challenger Project - 04/27/11 09:11 PM

Looks like she's coming into shape!
© 2024 Moparts Forums