Moparts

My Daughter's 69 Charger R/T

Posted By: 70runner

My Daughter's 69 Charger R/T - 10/06/18 11:35 PM

My daughter became the 3rd owner of an all matching numbers, fully documented 69 Charger R/T in Nov15. The car was produced in Dec69 and shipped to Crenshaw Dodge (now defunct) in LA. It was purchased by the original owner (a long time friend) in Aug69. He remembers the salesman trying to interest him in a car from a group of 69 Charger R/Ts with discounted prices. However, none of them had A/C (a requirement) as they were all hemi engines. The salesman even offered to add A/C to one of the hemi R/Ts. He ended up with a factory A/C 440.

He was (and still is) an avid camper and took the R/T on off road camping trips. I've asked him if he had any pictures of these trips. He has plenty but never thought to include the R/T in any of them. It was garaged at his Riverside CA home when not on the road.

In early 2010, my friend decided he was ready to sell the Charger. Since he knew I was into mopars he asked me to help sell it. My next door neighbor, a local fire chief, had always been interested in my mopar resto projects and been looking for a classic car himself. So I brought them together and my neighbor became the 2nd owner of the Charger in Aug2010. The Charger hadn't been run for a couple years, so I trailered it. Here are some pix of loading and arrival to it's new home.

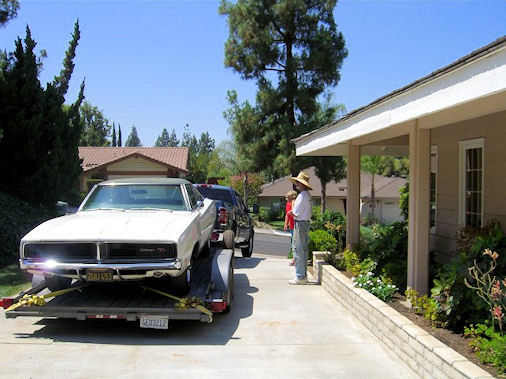
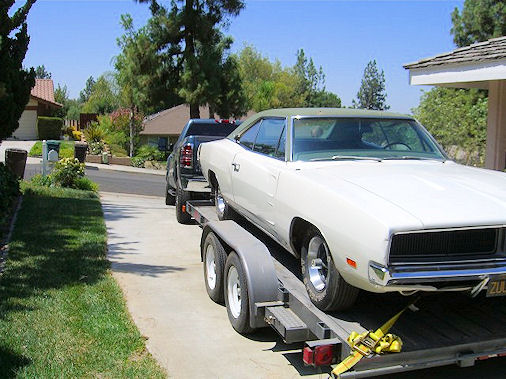
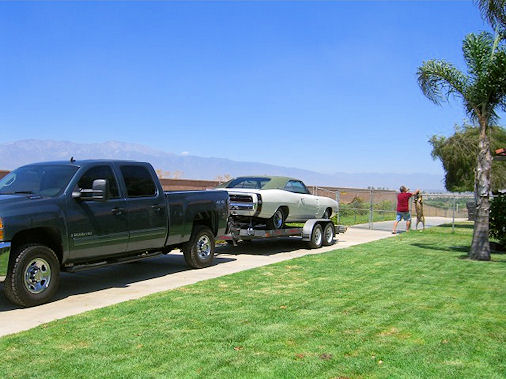
Attached picture image3.jpeg
Attached picture Loading.jpg
Attached picture Loading3.jpg
Attached picture Arrival1_29Aug2010.jpg
Posted By: 70runner

Re: My Daughter's 69 Charger R/T - 10/07/18 12:22 AM

My neighbor and I quickly set about getting the Charger ready to run. We decided to replace the gas tank with a new repro, clean out the gas lines, plugs, oil, et al. I mounted the orig carb on my 70RR 383 and it checked out fine. So we got it running and my neighbor enjoyed it.

The only rust on the car was the trunk floor (of course), and minor issues behind the rear window near the moldings. The front valance was pretty beat up from the camping trips, along with the usual dings. He decided to have the rear window shelf area, valance, and dings repaired, with a repaint. I went with him to the body shop to discuss the work. He decided not to have the engine bay repainted. While this work was going on, he managed to find some NOS green vinyl material to replace the orig vinyl top. This all occurred during 2012. Later my neighbor retired, and moved to northern California.

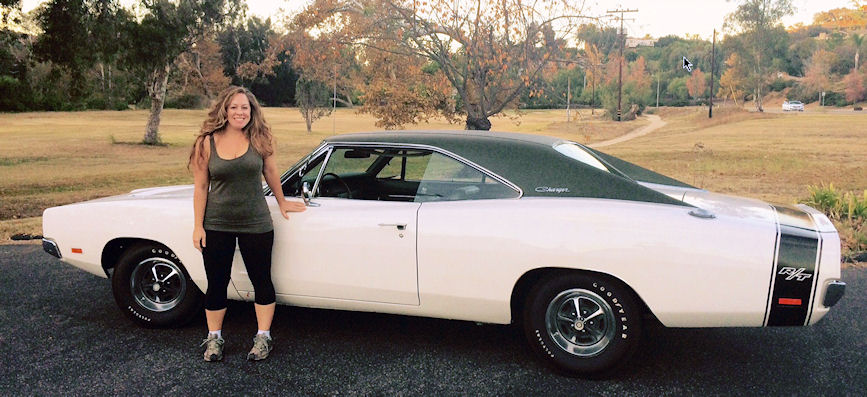
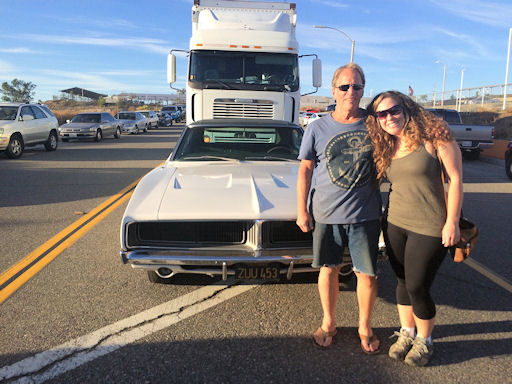
On 30Oct15 I received an email from him, giving me first shot at the Charger as he was going to sell it. My daughter wanted it, so we made the deal and had it shipped to Temecula CA. We picked it up on 22Nov15 and drove it to my place for inspection. We stopped enroute and took picture of Charger and new owner.


Attached picture wKa.jpg
Attached picture Unload_Temecula.jpg
Posted By: 70runner

Re: My Daughter's 69 Charger R/T - 10/07/18 12:24 AM

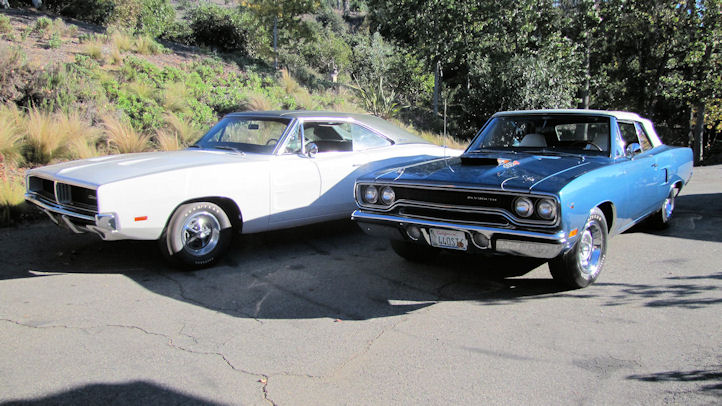
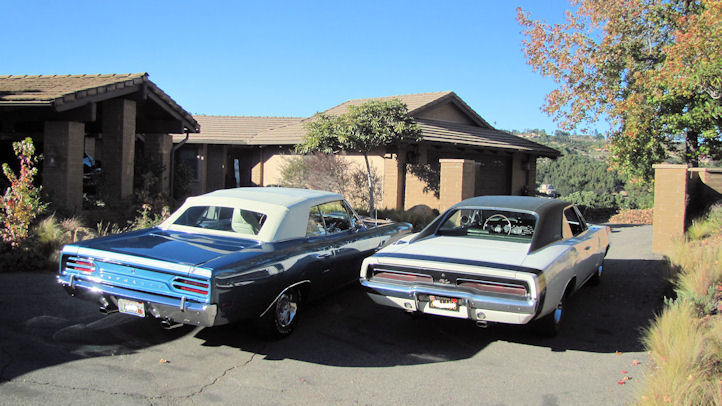
A few more pix at arrival, being introduced to my runner.

Attached picture wRR_1r.jpg
Attached picture wRR_4r.jpg
Posted By: 70runner

Re: My Daughter's 69 Charger R/T - 10/07/18 12:39 AM

After checking it out, fixing a few nits, daughter begins driving it regularly. We go to car shows together and such.

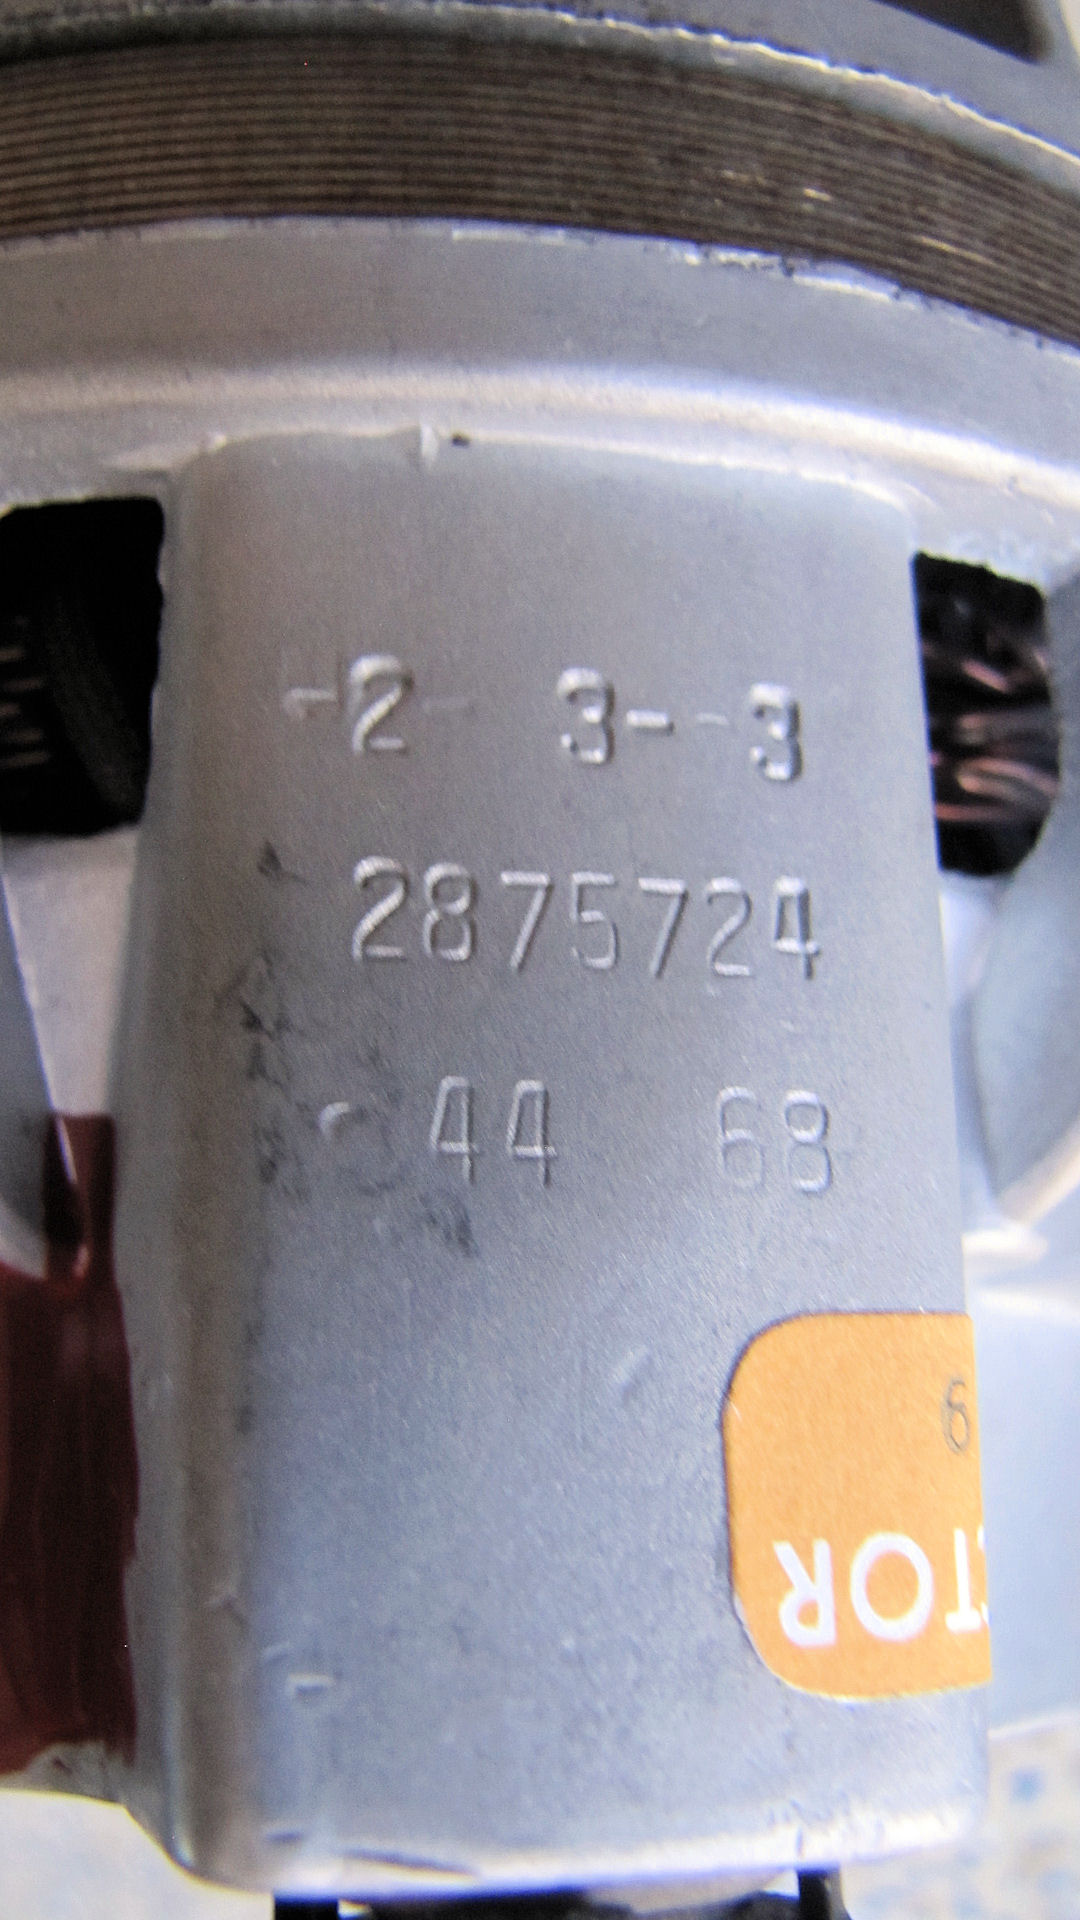
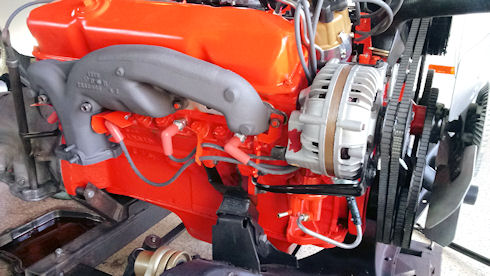
Nov16: alternator fails. Original alternator had been replaced in 1992 with functional but incorrect style (squareback). We have the paperwork for this and all maintenance/repairs done on the car from both owners. Since the Charger build date was the 50th week of 1968, began searching for cases approx 2 months before. I found a pair of cases dated 44th week of 1968 with correct PN 2875724. Rebuilt the alternator using an NOS stator and internals from a remanufactured unit, along with a correct dual pulley.


Attached picture 44_68 date code.jpg
Attached picture rear.jpg
Posted By: 70runner

Re: My Daughter's 69 Charger R/T - 10/07/18 12:58 AM

Aug 17: heater core failed with the typical soaking of the passenger carpet. Daughter and I set about to remove the original AC/heater core box. Unfortunately, the copper tube extension from the box to the firewall would not separate from the tubes internal to the box. The copper extension tube assembly enters the box on the passenger front, upper portion of the box, attaching with 4 exterior screws. The tube mates with internal tubes from the heater core/water valve and seals with o-rings between the tubes. We could not separate the tubes, they were basically fused together, likely from age. The box was damaged in our attempt to remove the extension tube, which was eventually cut so the box could be removed.

Fortunately, I had kept a complete 70B body AC/heater box core as a backup for a 70RR hardtop I once owned which had A/C. We decided to rebuild that and install in Charger as they are virtually identical.

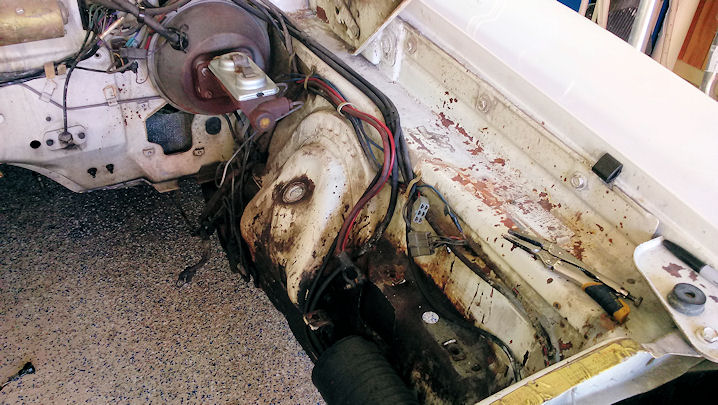
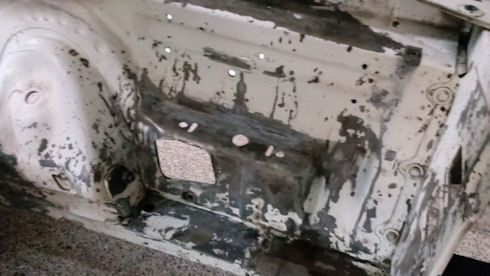
It was at about this point that my daughter decided she wanted to pull the engine and repaint the engine bay. Given that the car had been repainted, with a new vinyl top, the original engine/bay was a bit of an eyesore, made more so by etching damage from battery acid. Original owner said this occurred while parked at an airport as someone attempted to steal the car. The engine had 50yrs of grime which, along with a few oil and trans leaks, made for puddles under the car when parked. So she decided to have the engine rebuilt while removed.

PS...should mention the engine had never been out of the car.

Orig:


Attached picture full.jpg
Posted By: 70runner

Re: My Daughter's 69 Charger R/T - 10/07/18 01:10 AM

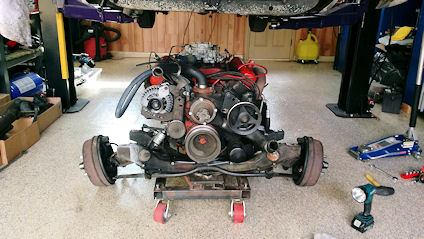
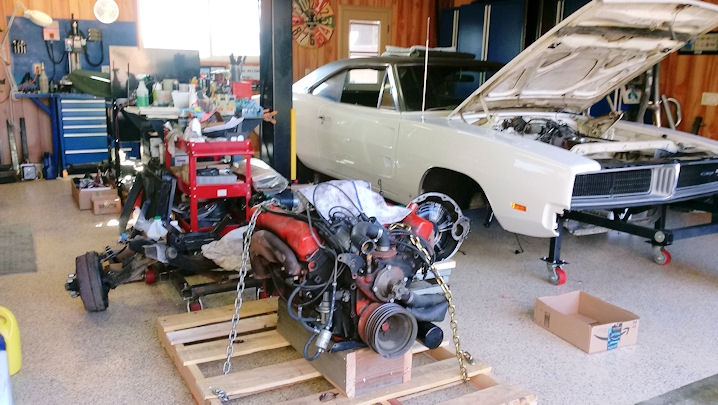
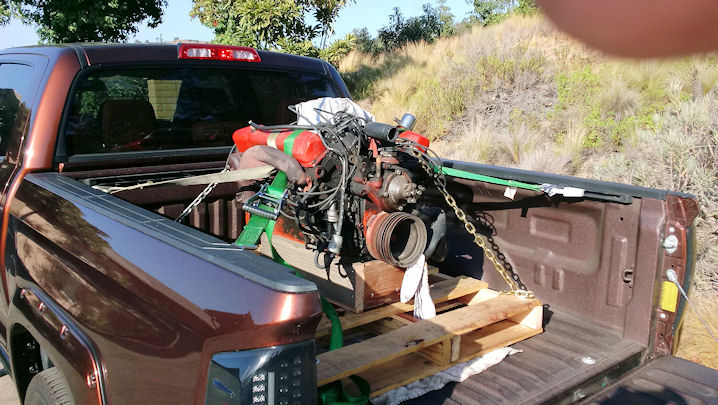
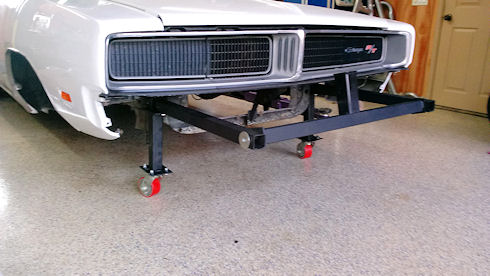
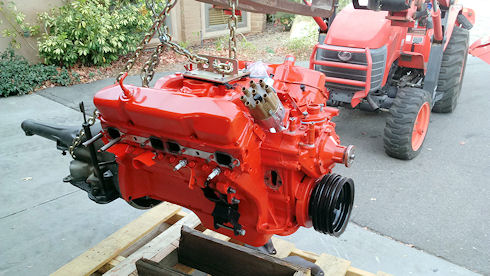
Sep17: Prior to removal fabricated a front dolly using some pieces left over from previous restos, seen in pic2 and pic4. The receiver attachment (pic4) is used so I can move the Charger around using my Kubota. Removed the engine/trans as unit from bottom using dolly I had fabbed for previous restos along with my 2 post 7K lift. Separated trans and mounted engine on custom pallet so could use my Kubota to lift into pickup bed, to then deliver to engine rebuilder.


Attached picture outofcar.jpg
Attached picture Onpallet.jpg
Attached picture InTruck_GoingToIndio.jpg
Attached picture FrDolly.jpg
Posted By: 70runner

Re: My Daughter's 69 Charger R/T - 10/07/18 01:16 AM

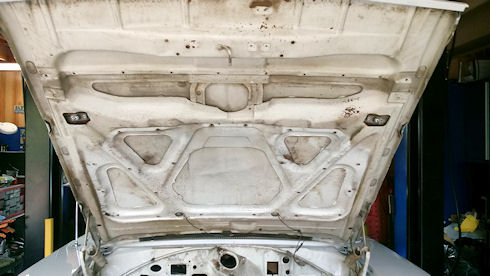
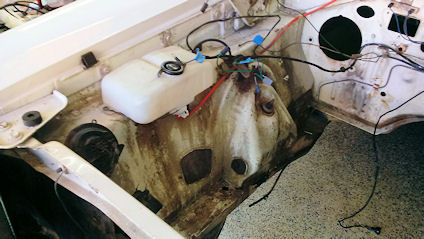
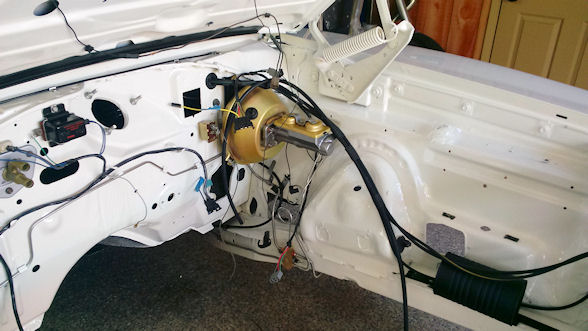
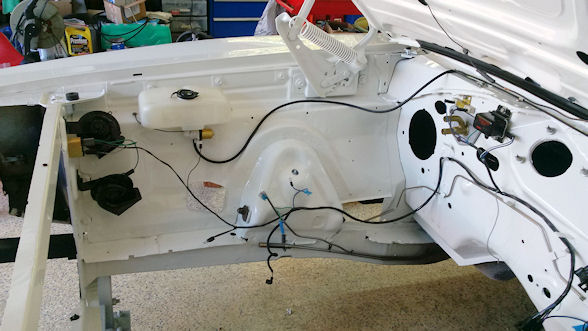
Oct17: Delivered engine to machine shop, they estimated 8 weeks. In the meantime began removing engine bay components to restore and prep bay for paint. Some pix of the orig engine bay after engine removal. Most of this is vintage 1969.


Attached picture before.jpg
Attached picture 1Nov17hood.jpg
Attached picture firewall_b4.jpg
Attached picture rtinsfender2_b4.jpg
Posted By: 70runner

Re: My Daughter's 69 Charger R/T - 10/07/18 01:18 AM

Area damaged by battery acid

Attached picture ltinsfender_b4.jpg
Posted By: 70runner

Re: My Daughter's 69 Charger R/T - 10/07/18 01:20 AM

Another pic of the damaged area after cleanup

Attached picture LtInner.jpg
Posted By: 70runner

Re: My Daughter's 69 Charger R/T - 10/07/18 02:01 AM

The heater control valve was seized, to the point where the dash temperature cable had broken from trying to force the seized valve. We sent the valve to Jim Tucker (heatercontrolvalve.com) for resto.

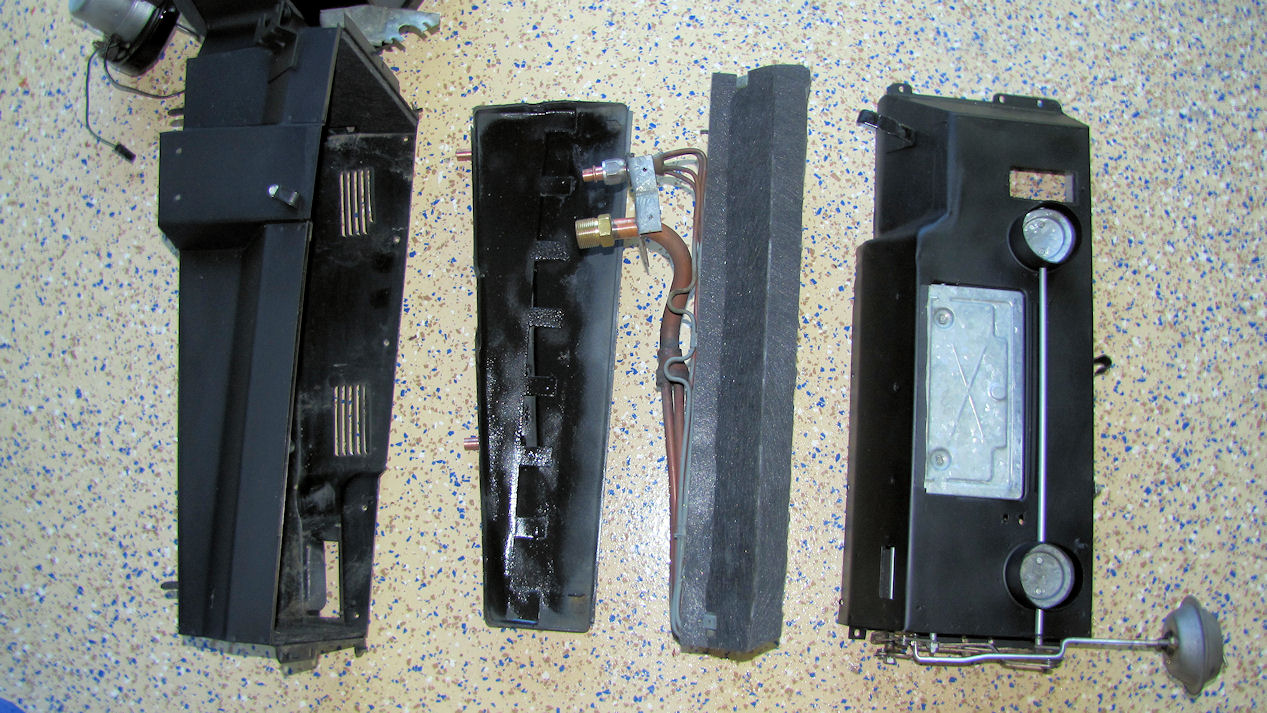
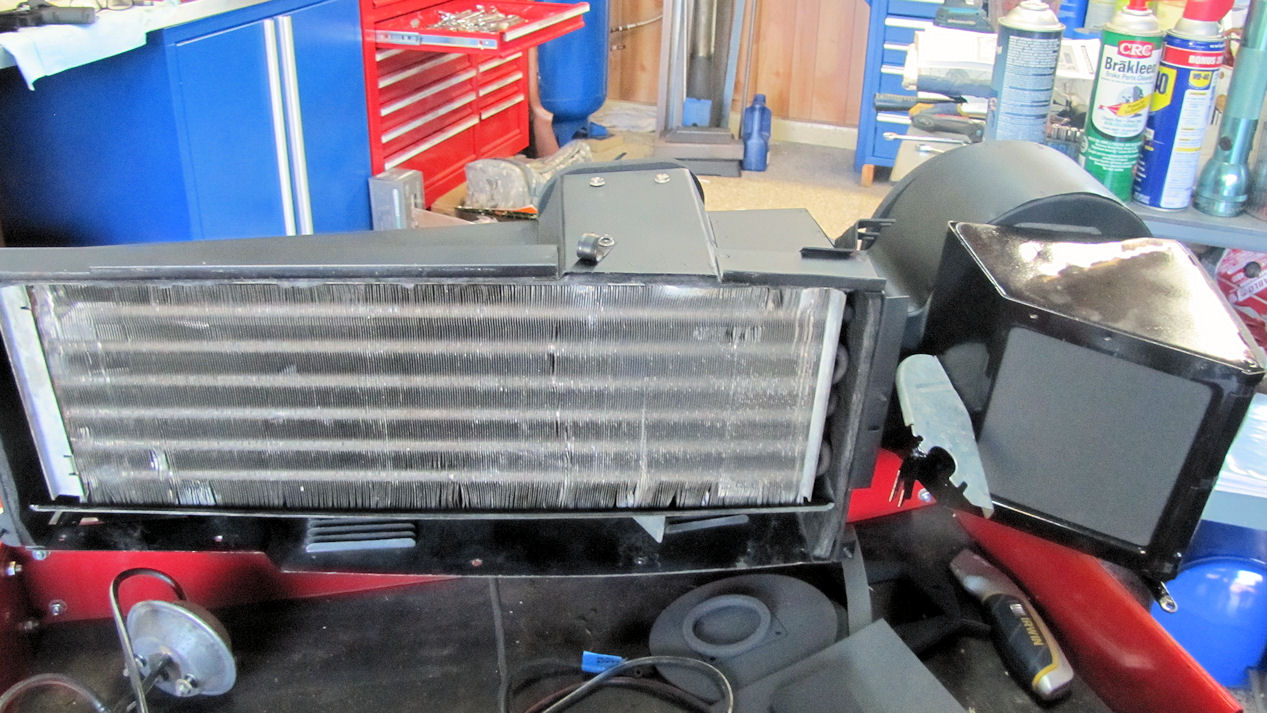
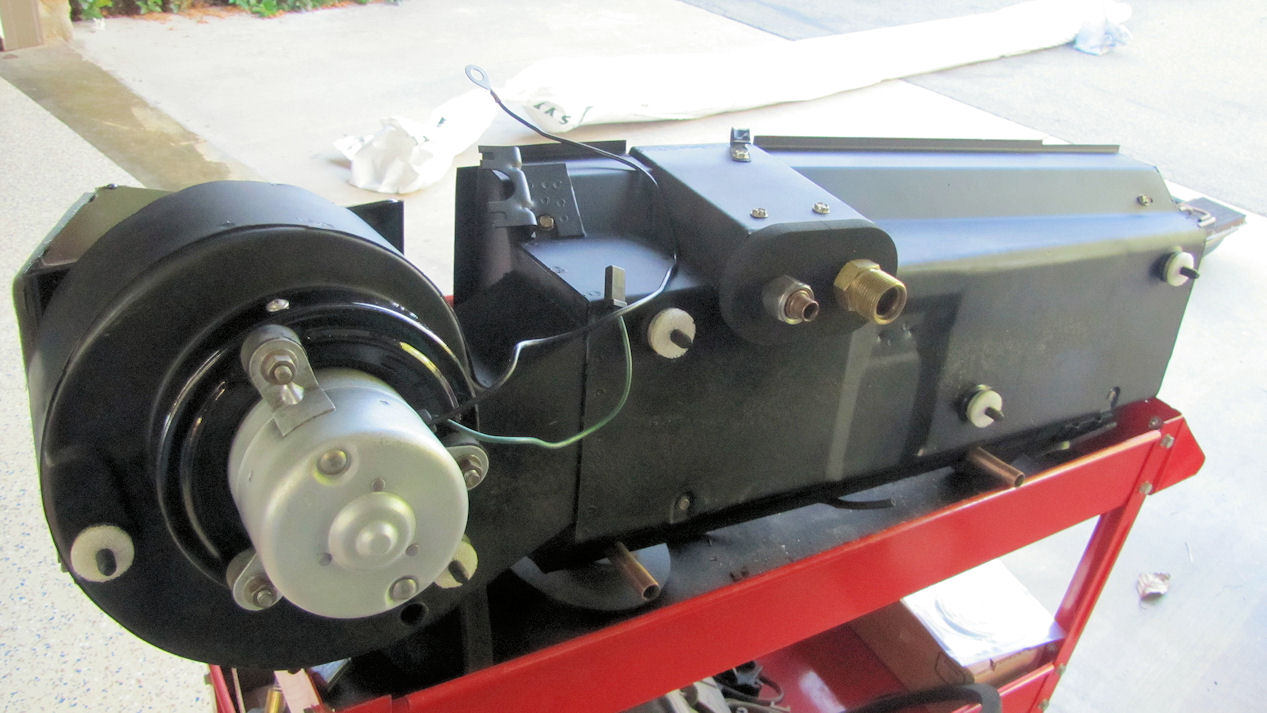
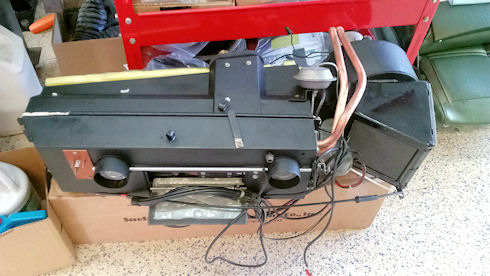
We set about rebuilding the 70 AC/htr box. Removed the heater core, along with the bypass valve and checked for leaks. Did a pressure test and it leaked from the core, so we ordered a commonly advertised aftermarket unit. It was a nice piece and physically fit, however the tubes did not line up properly with the bypass valve and the copper fitting to the firewall.

We returned the aftermarket unit and shipped the OE core/bypass to Glen-ray. They discovered the bypass valve was also leaking. This presented a problem because they indicated there was really no one around rebuilding the bypass valves. They did supply a contact but he said he stopped rebuilding them several years back. After a few weeks of interweb research, located an A/C company in Texas who was selling what looked to be an identical, new bypass valve. After comparing dimensions with them, I had it shipped directly to Glen-ray so they could test the whole unit. They said it was identical to the OE piece (and asked for the source so they could use them in the future).

When the core arrived, we began the box rebuild using one of the resto kits which supplies weatherstrip and such. The evaporator section was cleaned and pressure tested. The evaporator drain tray was a bit eroded from the years so that was cleaned and coated with POR15.

Attached picture Evap.jpg
Attached picture Fr_EvapSection.jpg
Attached picture Full_rr.jpg
Attached picture Full.jpg
Posted By: 70runner

Re: My Daughter's 69 Charger R/T - 10/07/18 02:22 AM

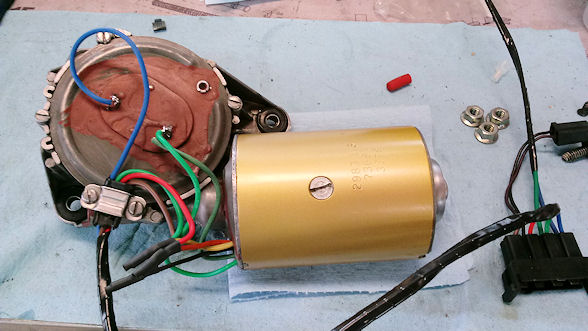
Next up was a non-working 3 speed wiper motor. Since the Charger had rarely been out in the rain over the past 20yrs, no one knew when it broke. Took it apart and spotted nothing obvious. Choices now were to send it to someone for full resto or DIY. Being a retired electronics engr and infamous DIYer, I selected DIY. Ran the service manual troubleshooting checks, nada. Everything looked good but would not run.

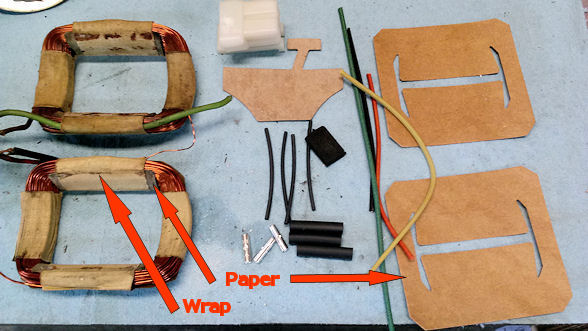
Ordered a "resto" kit from Kim (passion4mopars.com) which allowed me to <carefully> replace all the wire/winding insulation with new stuff. Put it back together and no run. Swapped the armature with one from a working 3 speed motor. Still no run. Replaced the 4 stator windings and, presto, now working! Weird problem with one of the windings that didn't show up during testing. Finished off with a spray paint process to simulate the yellow zinc barrel appearance.


Attached picture Kit.jpg
Attached picture Wiper Motor.jpg
Posted By: biggE

Re: My Daughter's 69 Charger R/T - 10/07/18 04:50 PM

Nice looking work!
Posted By: basketcase

Re: My Daughter's 69 Charger R/T - 10/07/18 07:01 PM

great story, fantastic Charger, and refreshing to see a beautiful young Lady without graffiti.
Posted By: 70runner

Re: My Daughter's 69 Charger R/T - 10/07/18 08:11 PM

Thx, she takes after her dad grin

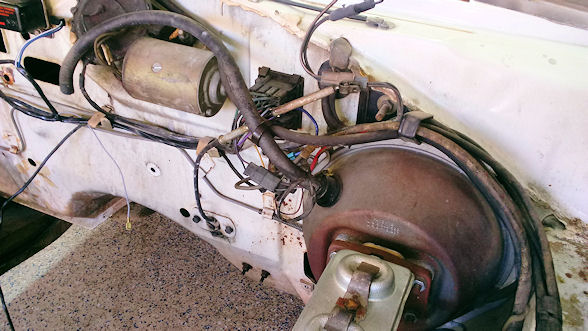
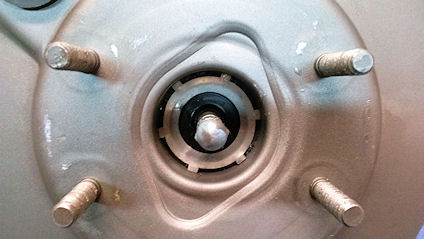
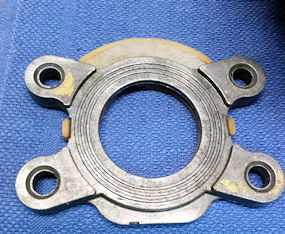
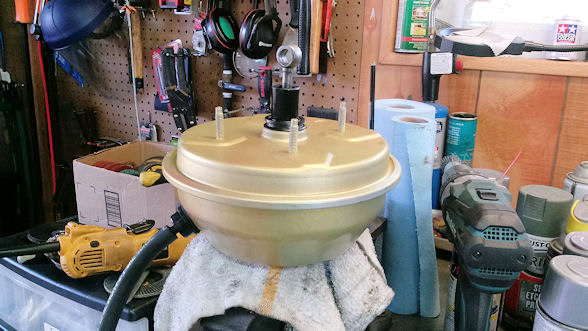
The brakes had been one of the 'nits', they worked ok but needed a pump or two when stopping. Bench tested the orig MC and it seemed to check OK. Put it back on, same issue. Bought the Cardone reman booster (54-73501). Although the bolt patterns line up OK (both front and rear), the Cardone oval case opening in the front (pic1) was different than the OE round opening (pic2) and wouldn't work with the OE hub filter (pic3). So decided to take the OE booster apart, clean, and check the diaphragm, etc., then reuse with similar paint treatment as wiper motor barrel. Booster bench test was good, so bought an aftermarket MC. That solved the brake problem. The aftermarket MC is a different style than the OE unit, but we'll leave it for now. At some point the daughter may have someone rebuild the OE MC to regain the stock appearance.

Attached picture 54-73501close.jpg
Attached picture orig.jpg
Attached picture hub_filter.jpg
Attached picture Booster.jpg
Posted By: 70runner

Re: My Daughter's 69 Charger R/T - 10/07/18 08:27 PM

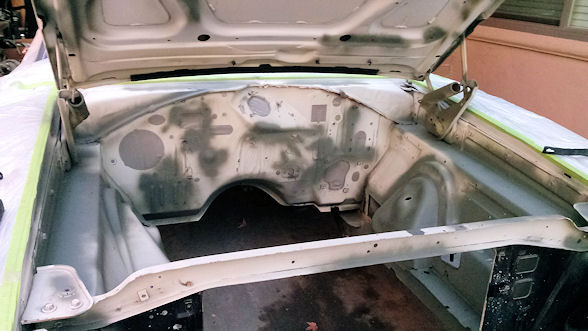
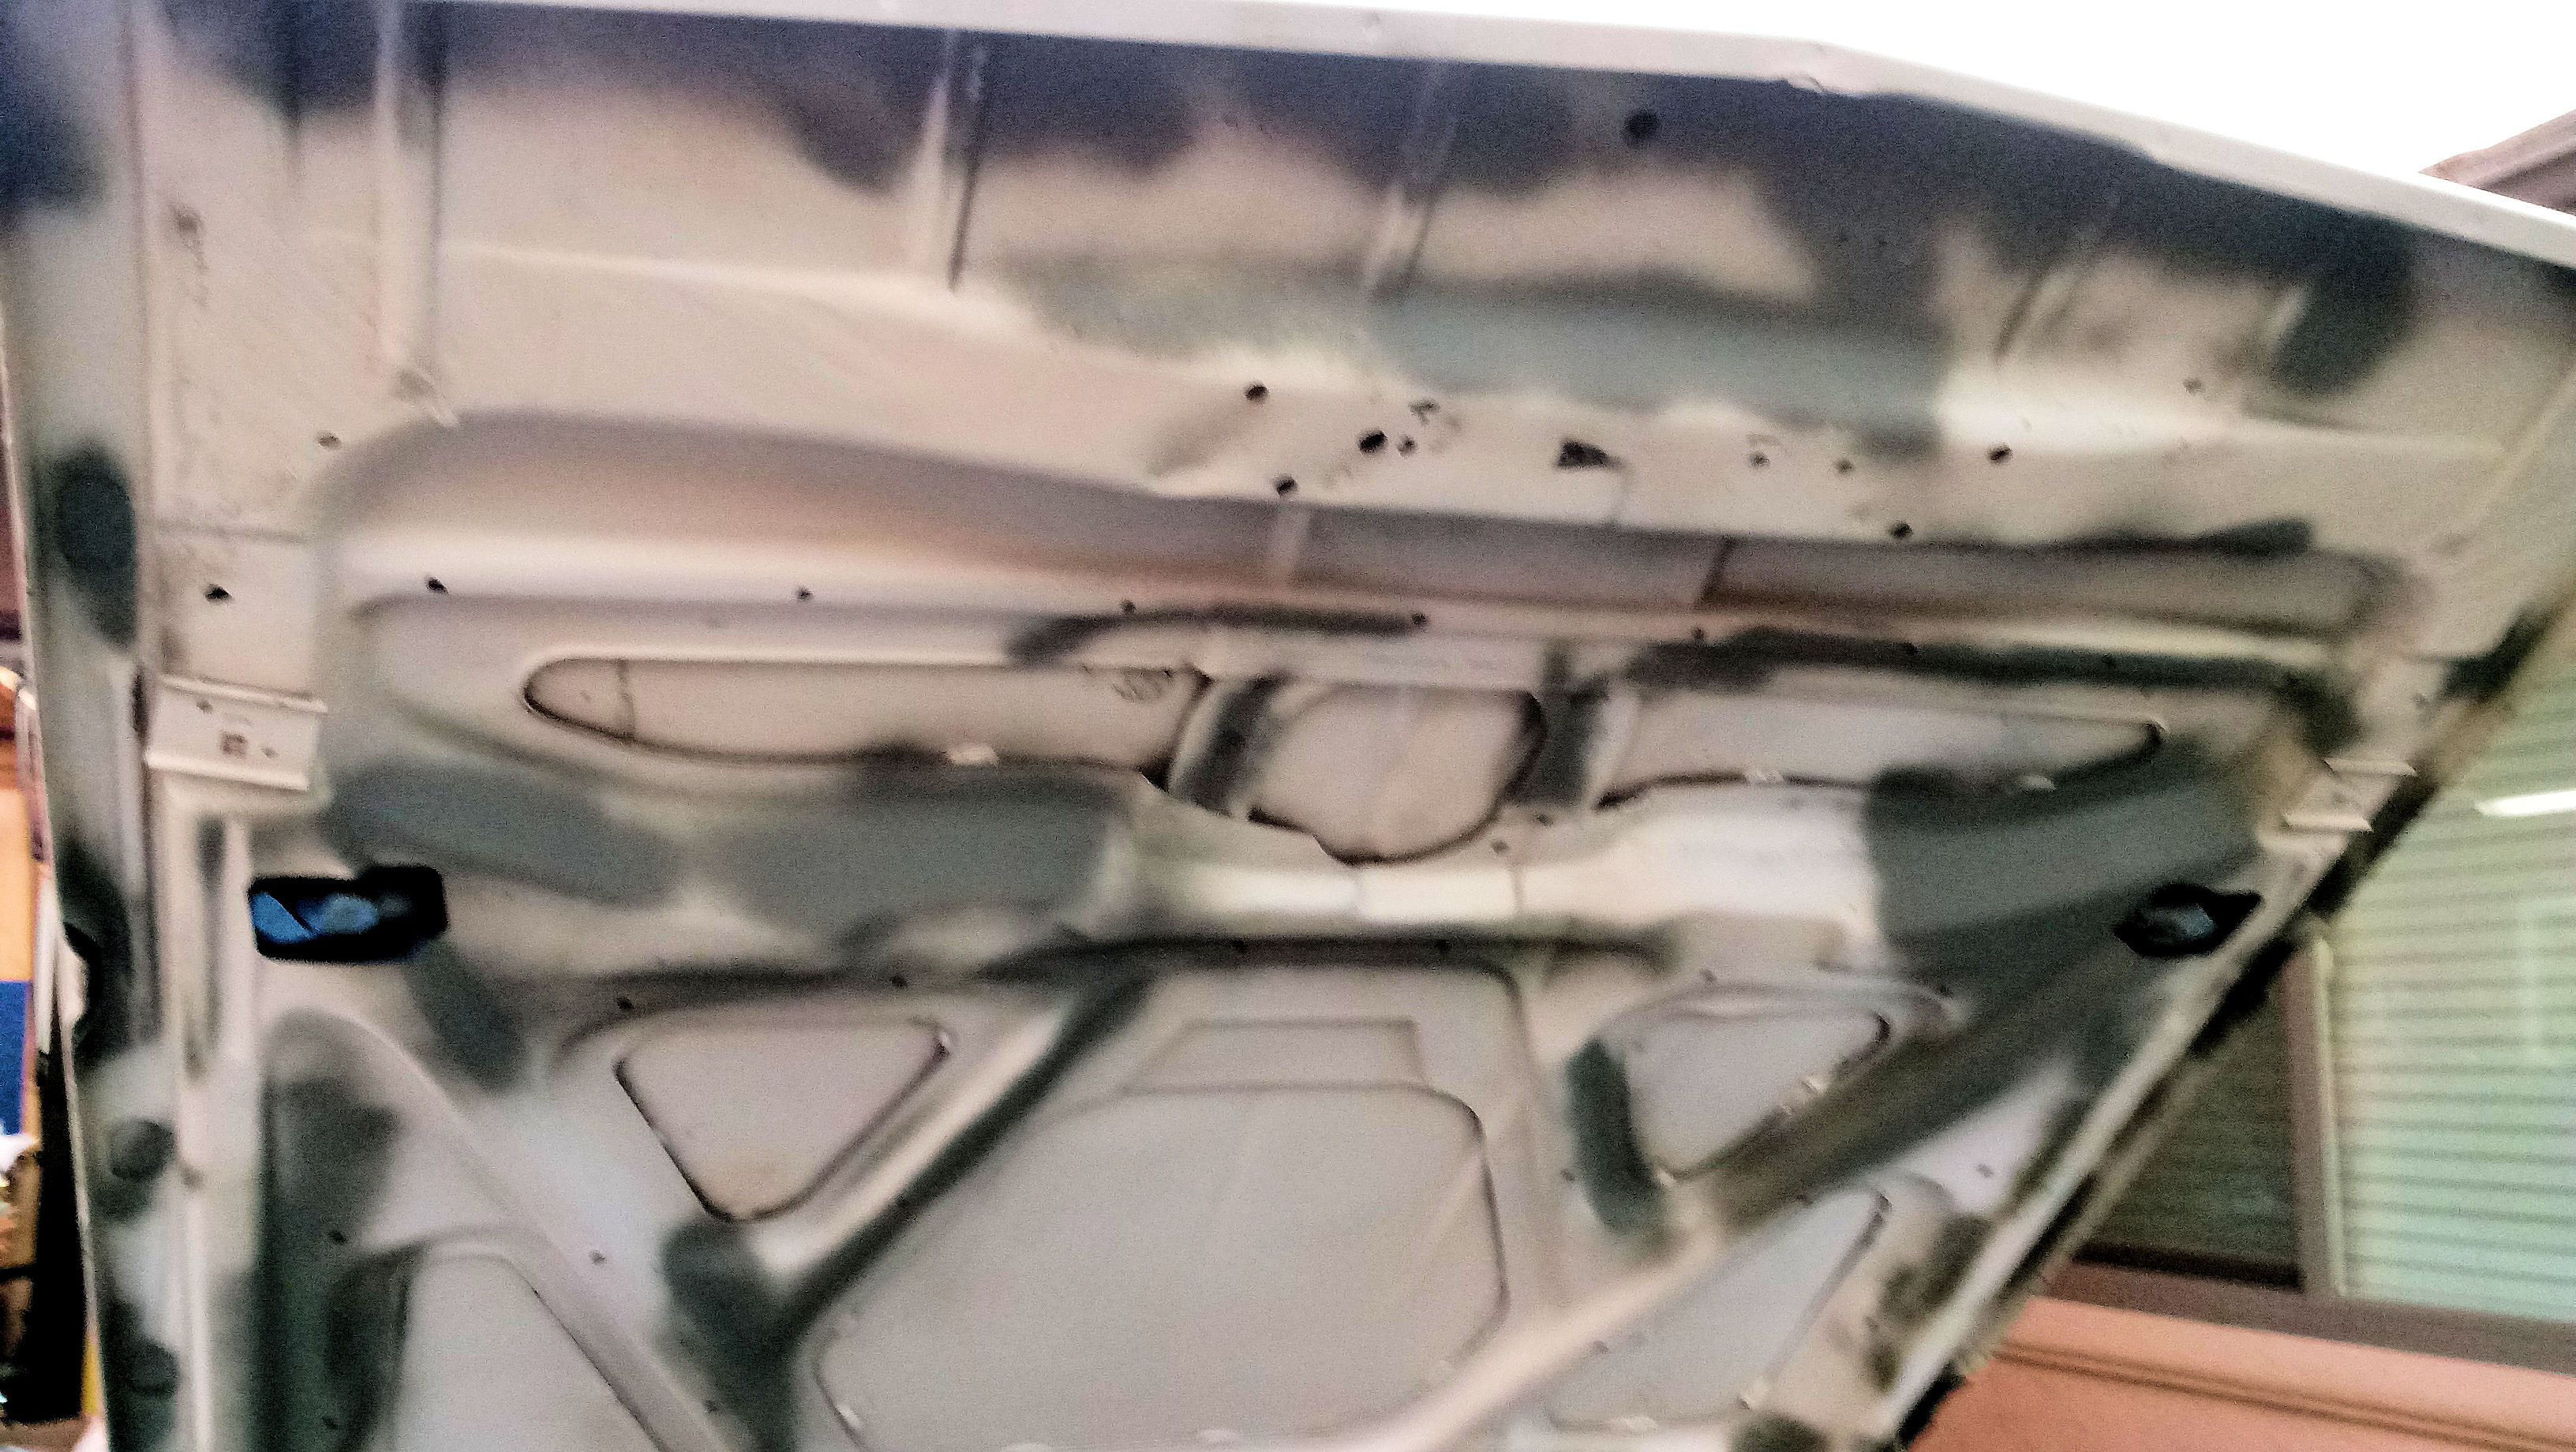
With the engine bay components finished, it was time to tackle the engine bay itself. As previously noted, the damage from the battery acid spill needed special attention. Using a Simple Green solution, we cleaned, cleaned some more, cleaned even more, to remove the nearly 50yrs of memories from the engine bay and underside of the hood.

It's noteworthy that, at this point, I realized how MASSIVE the hood is on these Chargers. Decided to leave the hood in place and carefully tape the already painted top/sides of the hood and fenders.

For the acid damaged area, both on the fender and hood, and surface rust areas I used some rustoleum self etching primer.

Attached picture Etch Prime_11Nov17.jpg
Attached picture Etch_Hood.jpg
Posted By: 70runner

Re: My Daughter's 69 Charger R/T - 10/07/18 08:43 PM

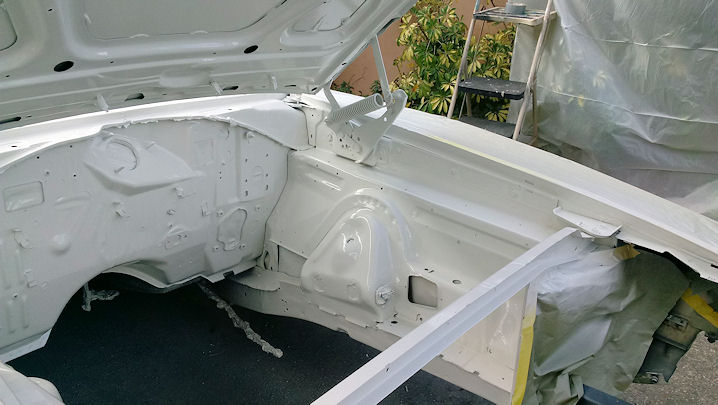
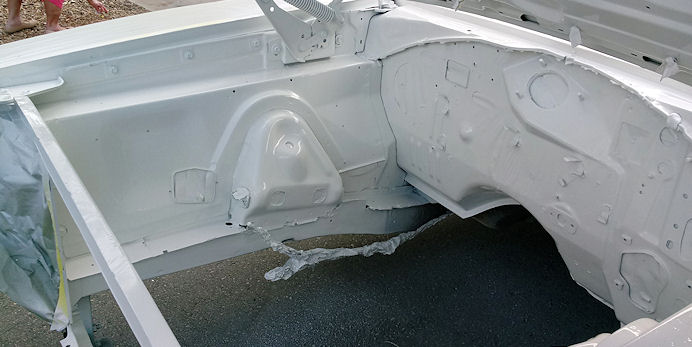
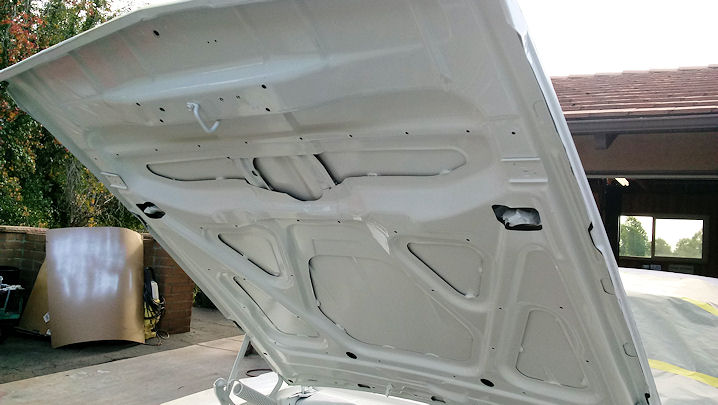
We had the paperwork from the repaint done by the previous owner. There was no paint code/type listed, so we contacted the body shop. Unfortunately they had changed management and the records for this work were not available. There was no way to know if they used the OE formula or even what brand was used. So it was paint match time.
I used a side marker light housing as the sample and a local paint shop who specialized in classic cars matched it for me, a single stage urethane. It turned out really well in the end, but much anxiety was involved.


Attached picture Bay_lt.jpg
Attached picture Bay_rt.jpg
Attached picture Hood.jpg
Posted By: 70runner

Re: My Daughter's 69 Charger R/T - 10/07/18 09:21 PM

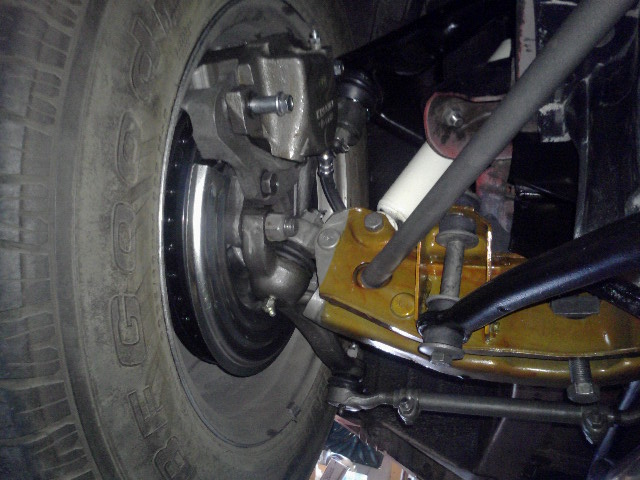
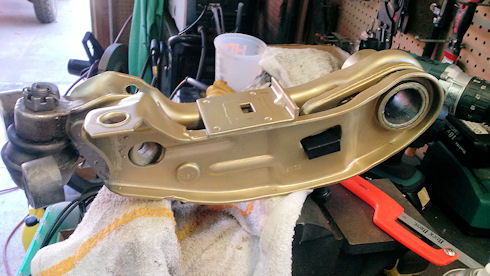
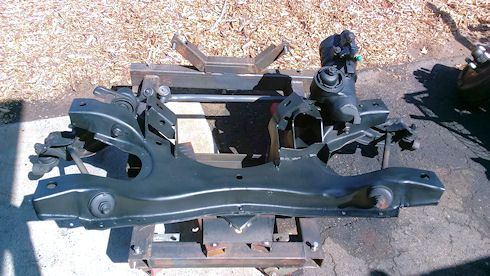
Suspension. As the K member, steering box, and LCAs were sitting on the engine dolly it was time to clean and inspect everything. Records from the 2nd owner indicated the front suspension was "rebuilt" in 2015. There were polyurethane bushings on the stabilizer links and new grease cups on the tie rod ends, otherwise it didn't appear to me that anything else was done.

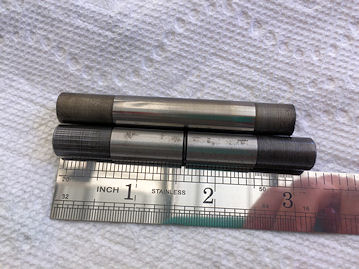
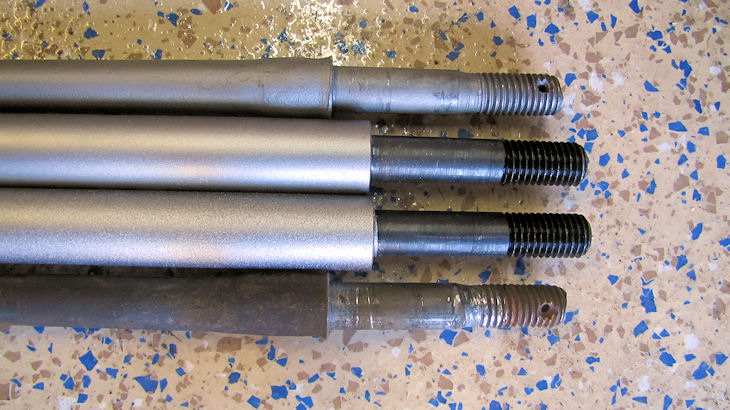
This was confirmed when I began to disassemble the front suspension. The left side strut rod front threads were badly damaged (camping trip encounter?), to the point where it was impossible to remove the nut. So I had to cut the rod to remove it. So now I needed a strut rod. Why not buy some news ones?...so we ordered some HD ones from Mancini. They arrived and did not fit. They are longer than OE and the shoulder at the LCA end is too wide to fit into the LCA slot (pic1). Fortunately the parts bin came through again as I had a couple extra B body strut rods laying about. The bushings on neither strut rod had been changed, ever.

When I began removing the LCAs, the left side pivot shaft nut and pivot shaft spun in the LCA housing, suggesting the bushing was toast. At this point we decided to order Moog parts (my preferred) to do a proper front suspension rebuild. Cleaned up and did my simulated cosmoline paint job on the LCAs.


Attached picture mancinistrutrods2.jpg
Attached picture LCA.jpg
Attached picture Kmember.jpg
Posted By: 70runner

Re: My Daughter's 69 Charger R/T - 10/07/18 10:38 PM

Front grille was removed as part of the engine extraction. Took the opportunity to disassemble, clean, paint some of the internal metal supports. Then reassemble using a repro vacuum harness and front lights electrical harness.

In pic1 below note the blue wires running adjacent to the light harness. Interesting story about these. The original owner was on a return trip at night from Disneyland in late 70s with his date and suddenly lost the headlights. He pulled over and found the front light harness melted a bit, apparently a short condition. He had the blue wires in the trunk, so used them to bypass the headlight harness. They remained on duty until I replaced them with the repro harness.

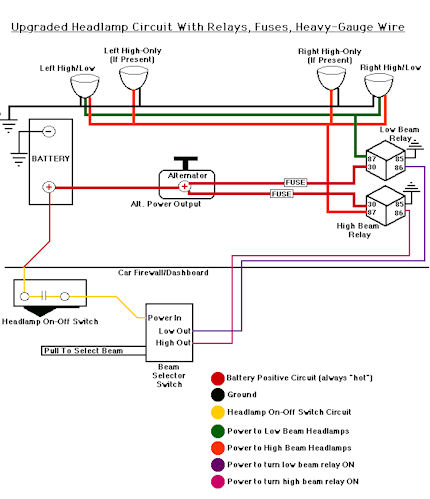
As I've done with all my mopars, I took this opportunity to do the ISO relay upgrade for the headlights, essentially channeling power directly from the battery to the headlight circuit via high power relay controlled by the OE dash headlight switch. This avoids running headlight current through the firewall 50yr old bulkhead connector.


Attached picture ltinsfender_b4.jpg
Attached picture Circuit.jpg
Posted By: 70runner

Re: My Daughter's 69 Charger R/T - 10/07/18 10:47 PM

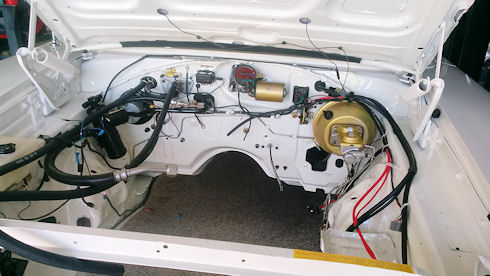
Getting engine bay ready to receive engine. Used new brakes lines and new engine harness, along with rebuilt water valve.

Attached picture after.jpg
Attached picture LtInnerFender.jpg
Attached picture RtInnerFender.jpg
Attached picture Hood.jpg
Posted By: 70runner

Re: My Daughter's 69 Charger R/T - 10/07/18 10:58 PM

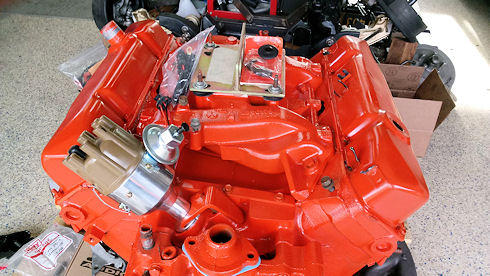
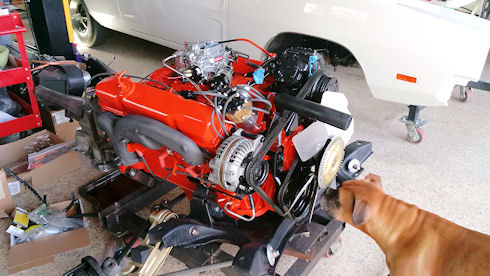
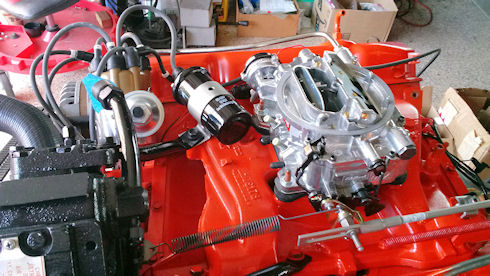
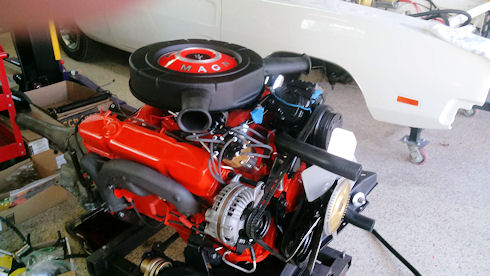
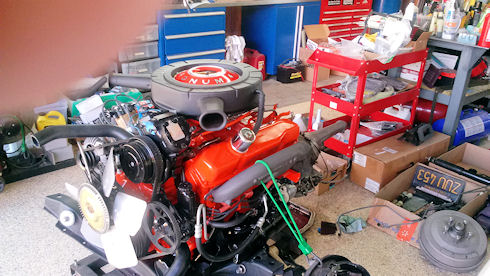
Engine finished in 3rd week of Dec17. Pic1 shows engine as received from shop. They had dyno'd the engine for break-in. You probably noticed the valve covers are switched. Seems a bit odd from a mopar racer/rebuilder.?. Also note the Firecore RTR (Ready to Run) dizzy (story about this in a later episode). Mate it with 727, back on K member/dolly, to reinstall in Charger.

3rd pic shows inspection in process.


Attached picture ValveCvrs.jpg
Attached picture OffPallet2.jpg
Attached picture NearlyComplete_19Jan18.jpg
Attached picture NearlyComplete_Close.jpg
Posted By: 70runner

Re: My Daughter's 69 Charger R/T - 10/07/18 11:07 PM

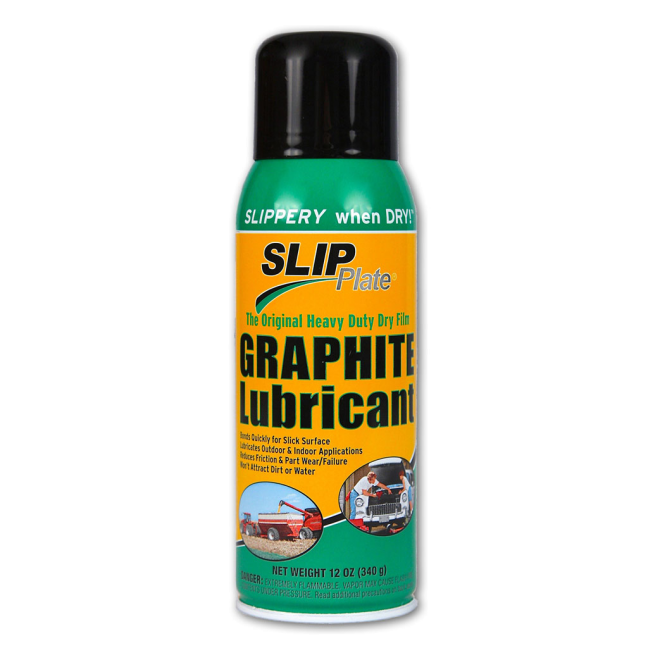
For the exhaust manifolds I used a product called Slip Plate - Graphite Lubricant. Came highly recommended from a pro mopar restorer. Just clean, wirebrush the manifolds, then spray this stuff on. It still looks perfect like the day it was applied. Much better than the Eastwood stuff I used on the RR.

Attached picture NearlyComplete_Rt.jpg
Attached picture slip-plate-aerosol-product-image-648x648.png
Posted By: 70runner

Re: My Daughter's 69 Charger R/T - 10/07/18 11:13 PM

View of finished engine/trans/K assembly just prior to re-install.

Attached picture RtVu.jpg
Attached picture LtVu.jpg
Posted By: 70runner

Re: My Daughter's 69 Charger R/T - 10/07/18 11:20 PM

With daughter/owner as spotter, moved engine assembly underneath Charger and lowered car (very slowly) onto assembly. A couple of the 4 K member bolts needed some "encouragement" to lineup, but all went well. Pic1 just before install, with some of the A/C lines in place.

Attached picture Firewall.jpg
Attached picture after_fr.jpg
Attached picture full_woac.jpg
Posted By: 70runner

Re: My Daughter's 69 Charger R/T - 10/07/18 11:23 PM

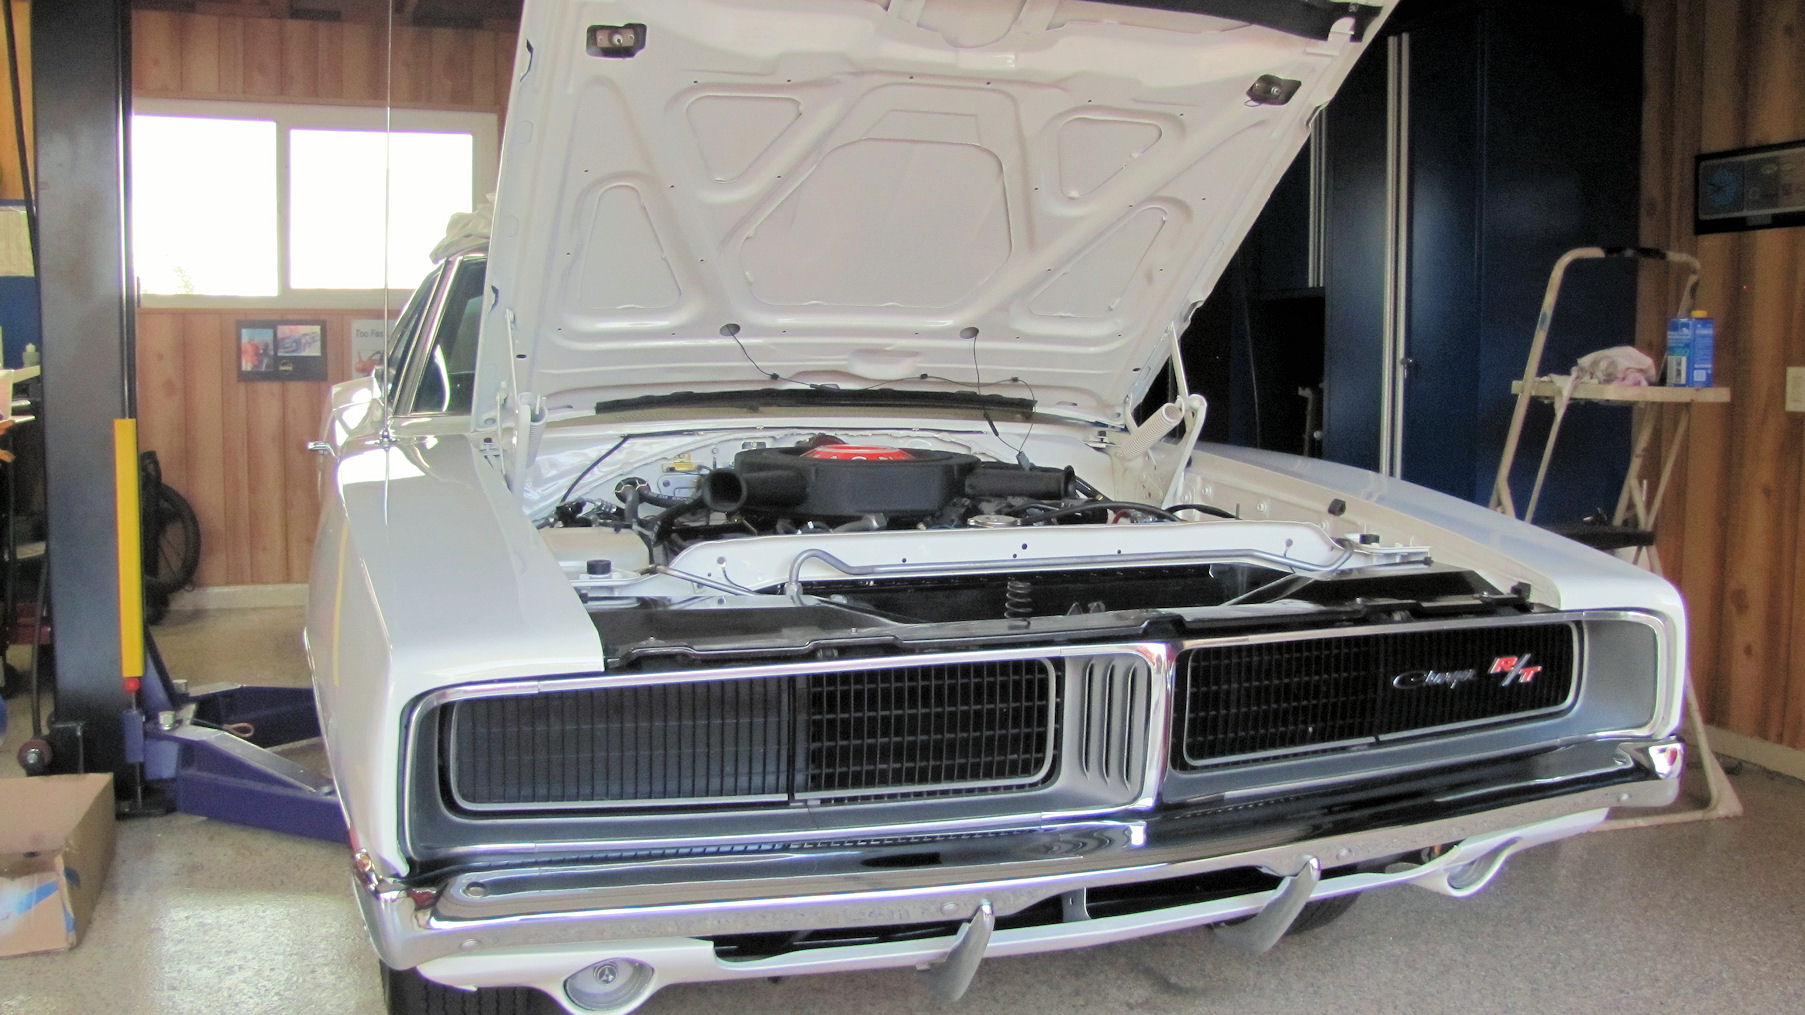
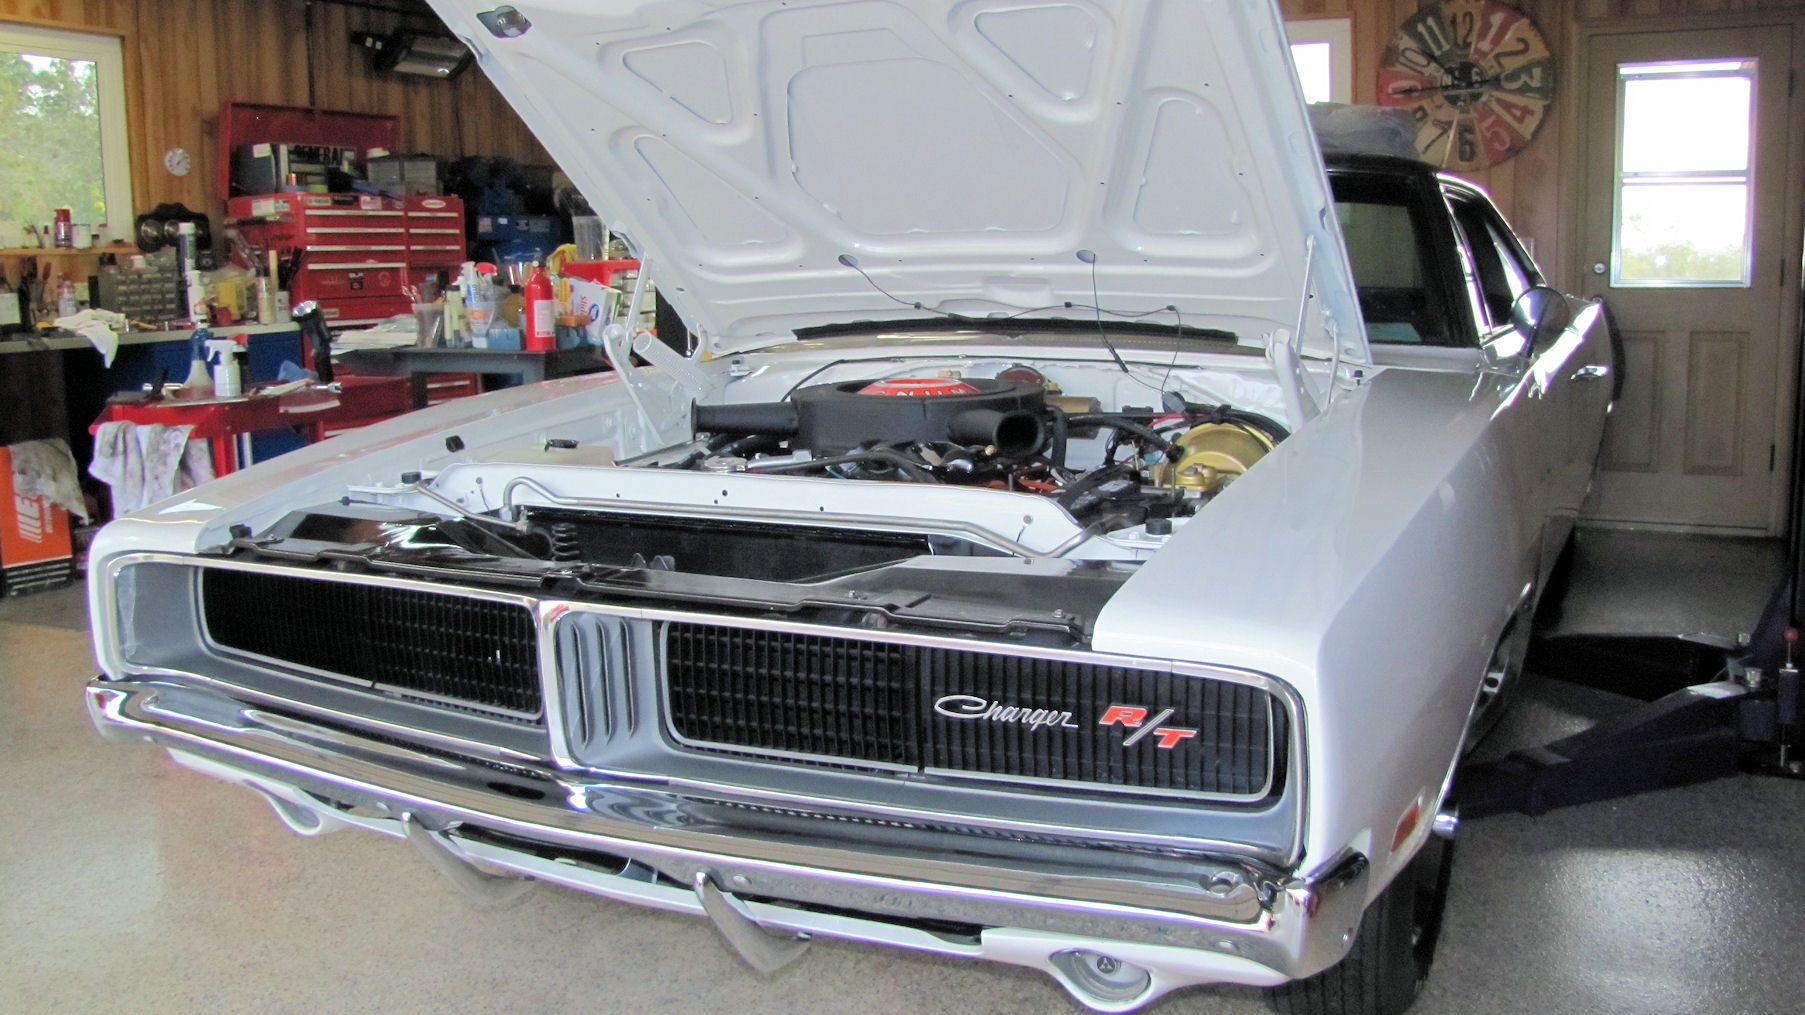
Ready to rumble...


Attached picture after_full_fr.jpg
Attached picture after_full_fr1.jpg
Posted By: 70runner

Re: My Daughter's 69 Charger R/T - 10/07/18 11:55 PM

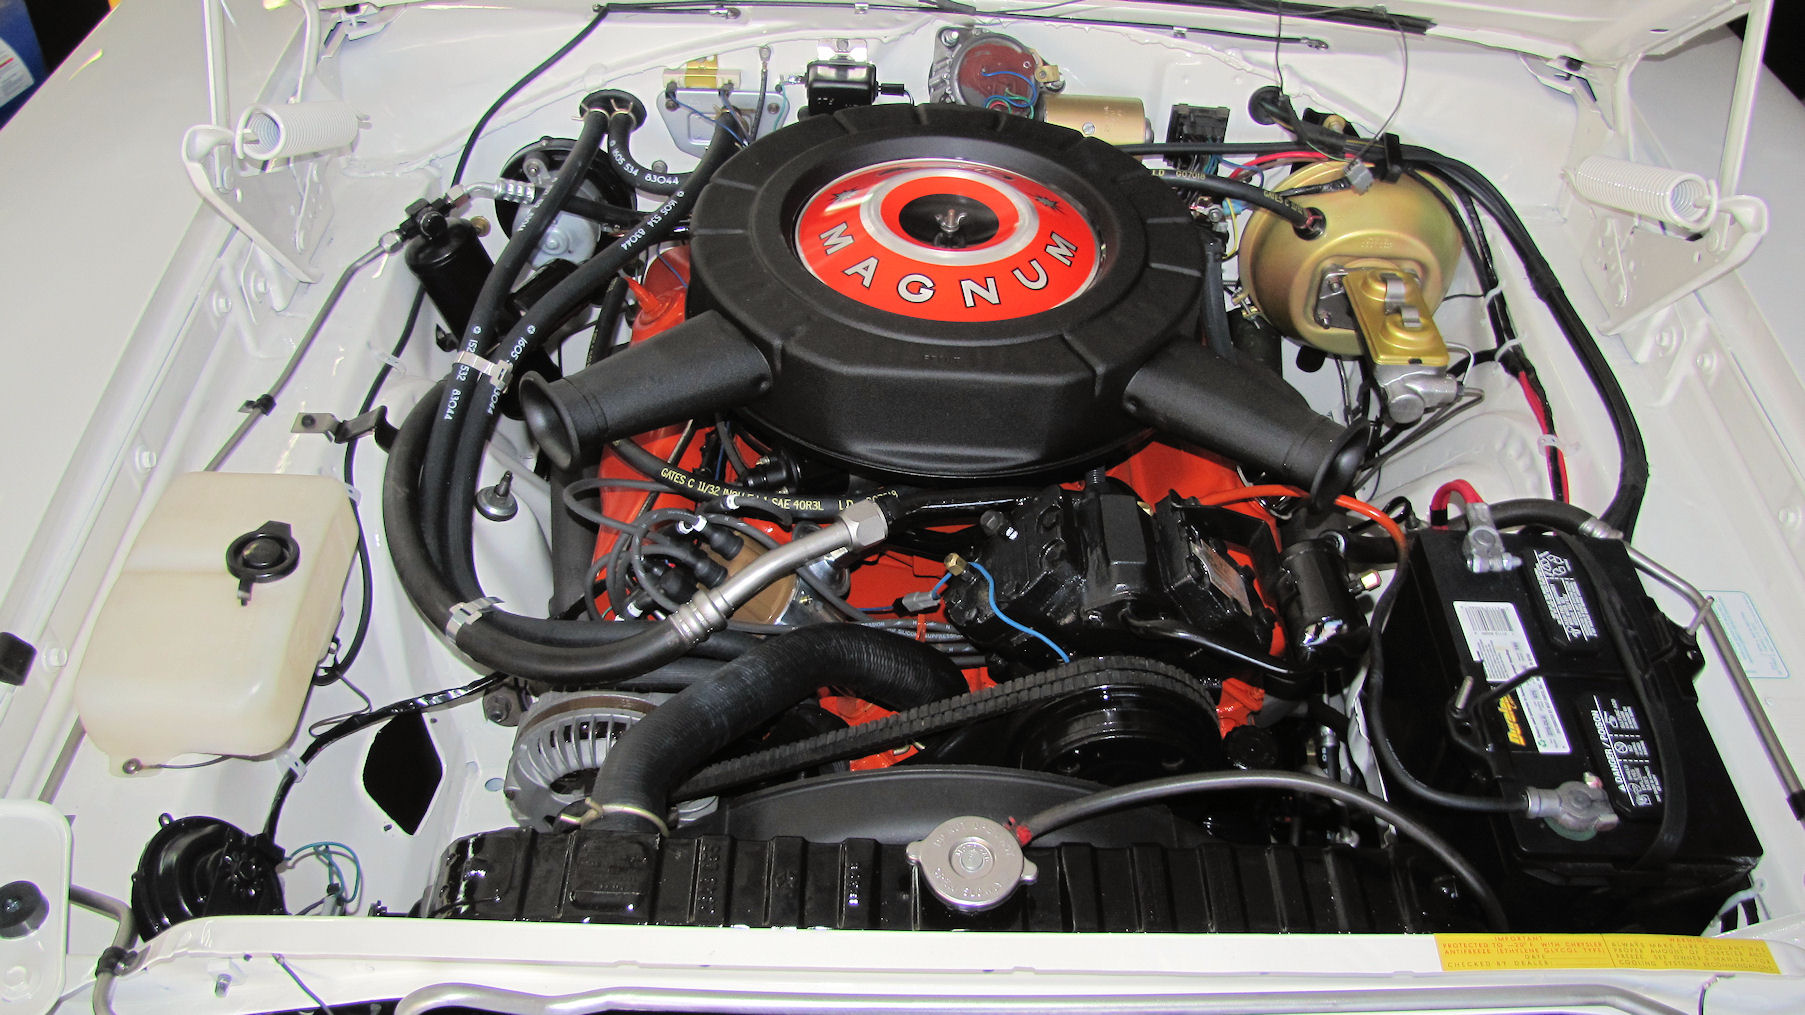
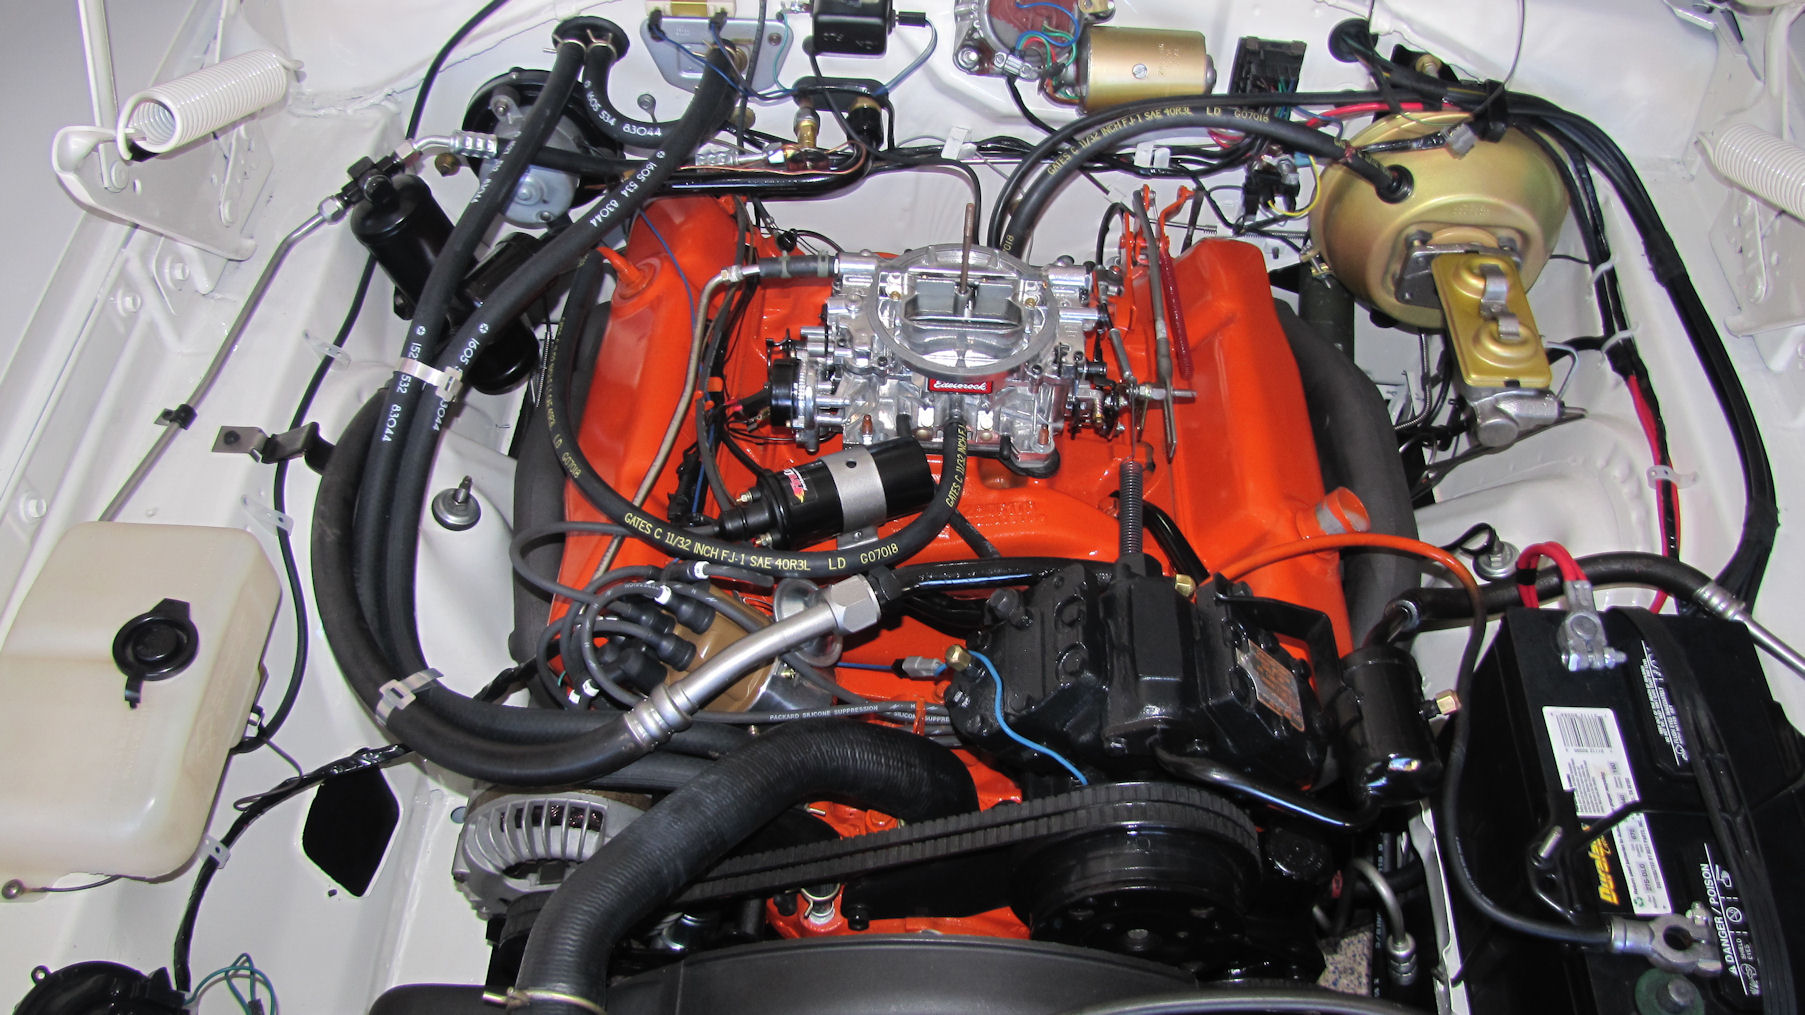
A before/after...

Note the aftermarket Edelbrock 1813 AVS carb, an 800cfm rig. This was recommended by the engine builder instead of restoring the original AVS. Although physically very similar to the orig AVS, the Edelbrock required some electrical adaptation as the Edelbrock choke is electrically controlled while the orig AVS is heat controlled. We kept the orig AVS and may, in the future, bring it back to life to restore originality.


Attached picture full.jpg
Attached picture full_woac.jpg
Posted By: 70runner

Re: My Daughter's 69 Charger R/T - 10/08/18 12:20 AM

So daughter is enjoying her ride...until a fateful day in Apr18 when the engine decides to take a siesta while traveling down a local freeway. So dad dusts off the (nice to have it when you need it) car hauler and arrives to meet with a frustrated daughter on the roadside. We haul it to dad's place and discover a fuel supply issue.

The output side of the relatively new mechanical fuel pump was marginal, so we track down a new fuel pump and, walla, same problem. This time dad inspects the fuel pump pushrod, which has lost about 1/4" of it's length in a couple months (shown below compared with a new one). So those pushrod shavings are now in the oil pan, hopefully captured by the oil filter.

A little research discovers that some brands of pushrods are infamous for wearing out prematurely and, further, that the best option is to locate some NOS versions...which I did thx to a fellow moparts member.

So we do two oil and oil filter changes in close proximity to hopefully remove the shavings. And daughter resumes her Charger activities, until...

Attached picture pushrodissue.jpg
Posted By: 70runner

Re: My Daughter's 69 Charger R/T - 10/08/18 01:00 AM

...a few weeks later (early May) when the Charger decided to take another siesta while briskly moving with freeway traffic. This time she had it towed by her insurance.

Checks revealed good fuel pump pressure and flow, but no spark. Commenced troubleshooting the ignition system now built around a Firecore Ready to Run (RTR) distributor and special coil, shorted (no) ballast, Firecore spark plug wires, and electronic voltage regulator. All evidence pointed to distributor, so contacted Firecore. Went through their troubleshooting process, and everything seemed to check out. But Charger would not start, still no spark.

In consult with the owner, I decided to reinstall the original points distributor, stock coil and ballast resistor. Engine started right up and ran perfectly.

I again contacted Rick at Firecore. He asked me to ship the RTR to him with the coil for a "factory check", which I did. Heard nothing for a month, so called him. He said the RTR would have to be returned to the purchaser (engine shop) so they could initiate a refund with the seller (Summit Racing).

I asked him to ship it directly to the engine shop. About 2 weeks later received a box with the RTR. I guess Rick was confused. So I send it to the engine shop. Long story short I finally got the refund about 3 months after initially contacting Firecore. Apparently they were in the middle of shedding their sales/support operation to major retailers like Summit. Even so, I am quite unimpressed with their product and service.


Posted By: 70runner

Re: My Daughter's 69 Charger R/T - 10/08/18 01:04 AM

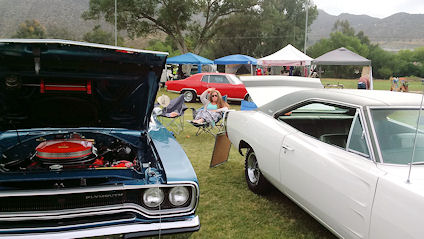
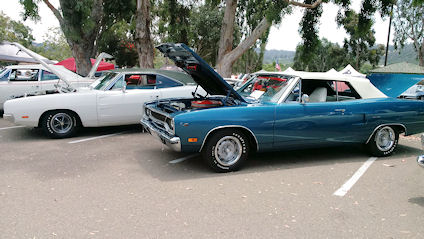
So the Charger is back on the road, and we're back to caravanning to local car shows and such. In the final pic, my daughter is the one who has the siesta this time up

Attached picture Kate.jpg
Attached picture both.jpg
Attached picture Both.jpg
Attached picture Kate.jpg
Posted By: basketcase

Re: My Daughter's 69 Charger R/T - 10/08/18 01:28 AM

looks great!
Posted By: Anonymous

Re: My Daughter's 69 Charger R/T - 10/08/18 05:43 PM

Your daughter is lucky to have a great dad. Car looks awesome!
Posted By: Matt M

Re: My Daughter's 69 Charger R/T - 10/09/18 01:54 AM

That is so cool in so many ways
Posted By: 70runner

Re: My Daughter's 69 Charger R/T - 10/09/18 09:03 AM

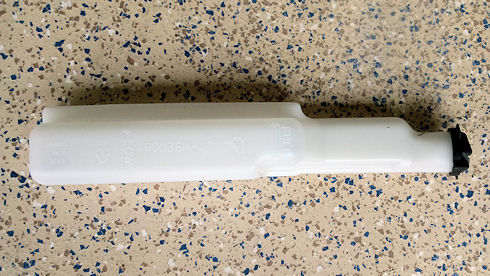
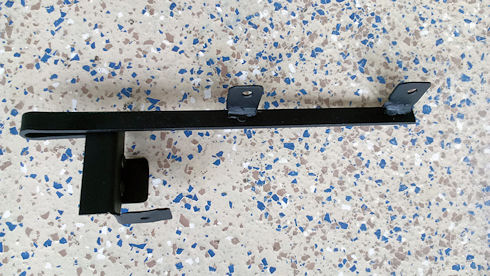
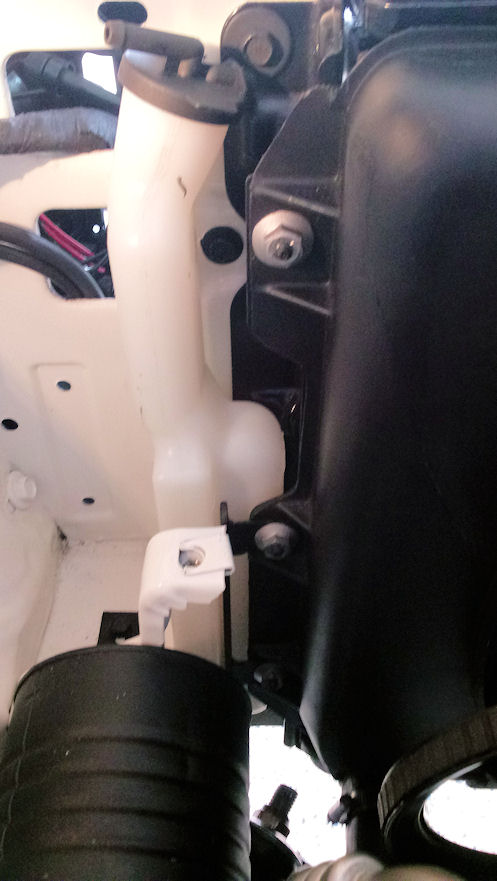
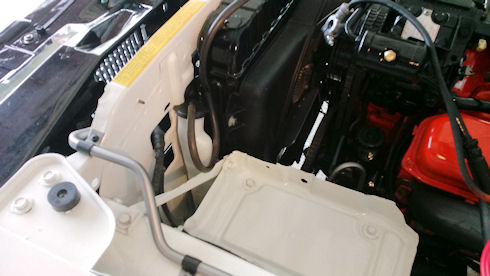
I forgot to add one of the other little projects. The original owner had added a radiator overflow container because the radiator would vomit a bit when hot. The overflow container was kind of an eyesore, but the current owner wanted something similar to avoid coolant spills. Another bit of research turned up an option to use an overflow bottle from a 97-02 Mitsubishi Mirage (pic1). This design fits nicely into the cavity between the radiator and battery tray. Just needed to fab a bracket (pic2) that would secure it in place.

Attached picture om_bottle.jpg
Attached picture om_bracket.jpg
Attached picture om_mount1.jpg
Attached picture om_final.jpg
Posted By: OhioMopar

Re: My Daughter's 69 Charger R/T - 10/22/18 04:28 AM

Cool car and cool story! Nice work.
Posted By: BigMoneyLewis

Re: My Daughter's 69 Charger R/T - 10/26/18 10:46 AM

VERY nice !

Greg
Posted By: UCUDANT

Re: My Daughter's 69 Charger R/T - 11/01/18 01:56 AM

What a great car, and the work you've done is beautiful.... nice work folks
Posted By: pullandrag

Re: My Daughter's 69 Charger R/T - 11/02/18 02:22 PM

Nice work,is that the Gibson paint on engine?Looks right enjoyed the pictures!
Posted By: BloFish

Re: My Daughter's 69 Charger R/T - 11/06/18 05:23 AM

Enjoyed every bit of the story, congrats!
Posted By: JB400

Re: My Daughter's 69 Charger R/T - 11/07/18 08:31 PM

That's some beautiful work. Your daughter got a great car
Posted By: UCUDANT

Re: My Daughter's 69 Charger R/T - 11/08/18 01:40 PM

Originally Posted By 70runner
For the exhaust manifolds I used a product called Slip Plate - Graphite Lubricant. Came highly recommended from a pro mopar restorer. Just clean, wirebrush the manifolds, then spray this stuff on. It still looks perfect like the day it was applied. Much better than the Eastwood stuff I used on the RR.


Do you mean Eastwood's Exo Armor? It say's it's
"Tested to 2000F degree for temperature resistance" It can leave a shinier appearance when laid on heavy. I'm curious how it holds up on exhaust manifolds

Attached picture front end done.png
Posted By: fc7freak

Re: My Daughter's 69 Charger R/T - 11/11/18 12:52 PM

In reference to the Slip Plate, I have also used it. I will never use anything else. Tried a lot of products but this one is the cheapest and the best product I have found. It is a graphite aerosol spray. Slip Plate sells a lot of different products. It wasn't designed for that application but works great!
Posted By: 70runner

Re: My Daughter's 69 Charger R/T - 11/14/18 11:18 PM

Originally Posted By UCUDANT
Originally Posted By 70runner
For the exhaust manifolds I used a product called Slip Plate - Graphite Lubricant. Came highly recommended from a pro mopar restorer. Just clean, wirebrush the manifolds, then spray this stuff on. It still looks perfect like the day it was applied. Much better than the Eastwood stuff I used on the RR.


Do you mean Eastwood's Exo Armor? It say's it's
"Tested to 2000F degree for temperature resistance" It can leave a shinier appearance when laid on heavy. I'm curious how it holds up on exhaust manifolds


Don't think so. This was back in 2010. It was Eastwood's exhaust manifold spray paint. It didn't hold up very well. The Slip Plate is awesome stuff.
Posted By: hemi68charger

Re: My Daughter's 69 Charger R/T - 11/21/18 06:21 PM

Awesome thread !!!! Love the father/daughter aspect of it being a father of a young lady ( 12 now )... up
Posted By: 70runner

Re: My Daughter's 69 Charger R/T - 12/15/19 01:05 AM

Just a followup, info for anyone using the newer Edelbrock 800cfm carbs. For the first few months, the 440 started fine, but would hesitate on acceleration. Played around with timing and tune, but couldn't seem to shake the hesitation. The Edelbrock 1813 carb came with the accelerator pump linkage in the top (biggest squirt) position which Edelbrock recommends for a large cu in engine. One day on a hunch, I reset the linkage to the middle hole. This solved the hesitation.

She's still enjoying the Charger, here at recent USS MIDWAY car show with her bo, recently retired USMC.

[Linked Image]
Posted By: Challegator

Re: My Daughter's 69 Charger R/T - 12/15/19 03:04 PM

Thanks for that tip. Struggled myself for a month or two this past summer with a hesitation off the line and considered swapping the 1813 with a Holley. Will give it a try in 4 months or so... up
© 2024 Moparts Forums