Moparts
T/A Challenger Replica Project
Posted By: jrwoodjoe
T/A Challenger Replica Project - 02/09/09 09:47 PM
Hope everyone is well, since most of you guys know my car I'm going to pick-up with most recent updates. As some of you know, my youngest has had health problems so I am unable to work on the car at a pace I would like to but it is moving fwd. She has had 2 Surgeries since the beginning of the year and is hopefully on the right track now. She is doing much better and thanks to everyone for the prayers. Special thanks to JDMOPAR and BARRYBUM..I appreciate you guys!

The car is still in teardown mode and parts being restored as I go. The drivetrain, brake system and driver door are all that is left on the car. I pulled the steering wheel column a few weeks ago and loosened the torsion bars but have not removed them completely. It was a great day yesterday, so I asked my neighbor to lend a hand so that I could reassemble the restored grille pieces. Here are pics of before and after. Thanks to everyone on the grille thread for the advice. It's not perfect but I'm pleased with the results.
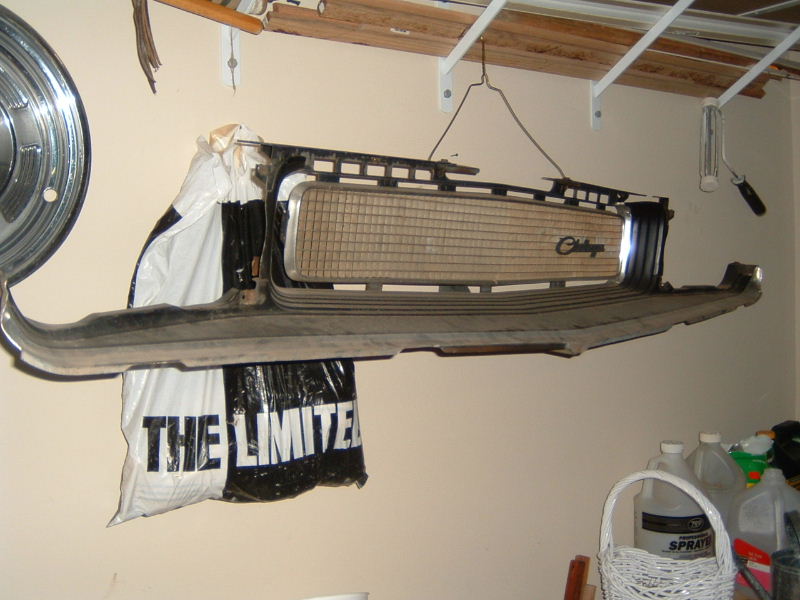
Posted By: jrwoodjoe
Re: T/A Challenger Replica Project - 02/09/09 09:48 PM
after
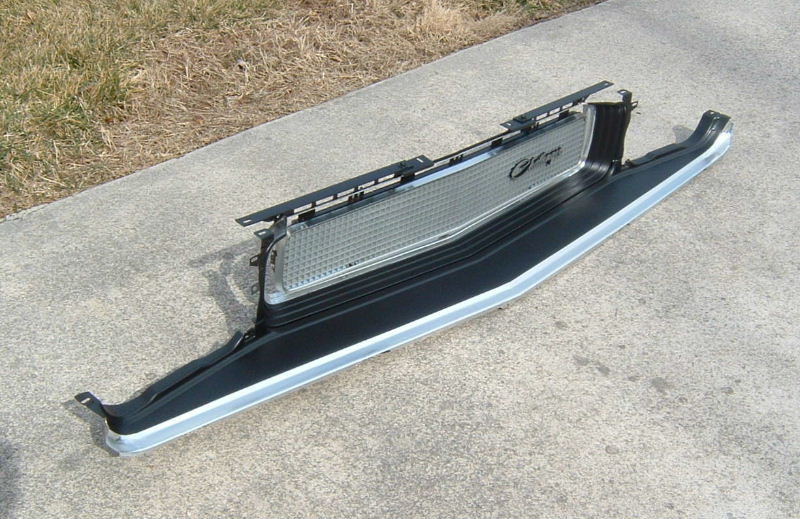
Posted By: jrwoodjoe
Re: T/A Challenger Replica Project - 02/09/09 09:49 PM
another
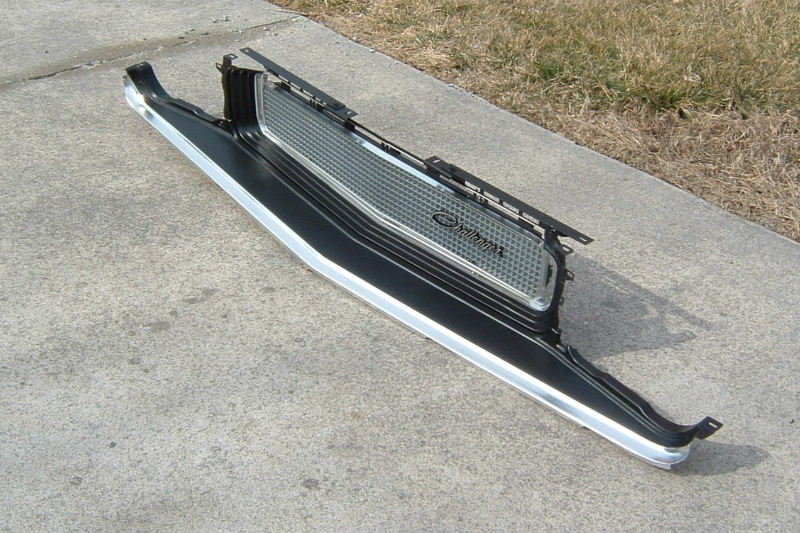
Posted By: jrwoodjoe
Re: T/A Challenger Replica Project - 02/11/09 05:27 PM
Jules D'Addio came to the rescue and helped me out with the EBrake assembly. He had a restored one that he called driver quality but looks much better than that to me. It came today and will save me some time.
Thanks Jules.
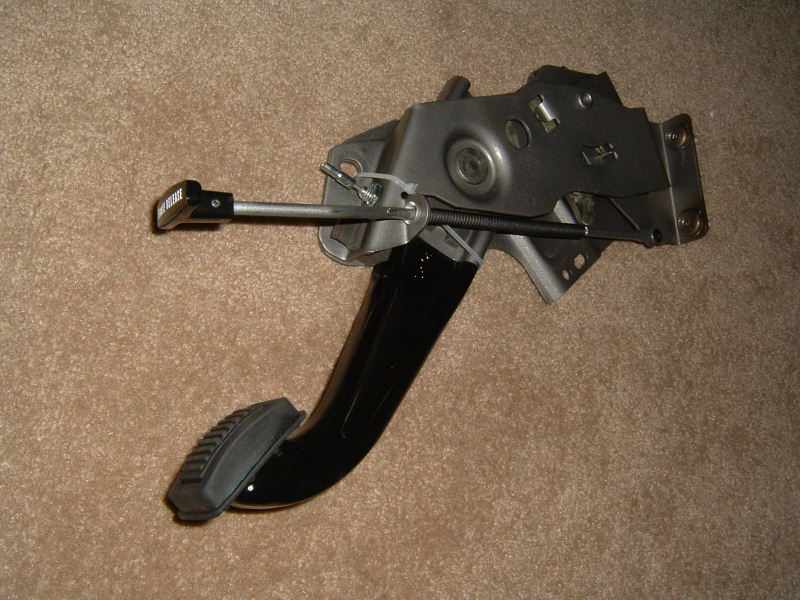
Posted By: jrwoodjoe
Re: T/A Challenger Replica Project - 05/20/09 05:54 PM
Update...progress starting to be made again!

Since my daughter's situation has been improving a little, it has given me a some free time to work on the car again. Here are some pics of recent progress.
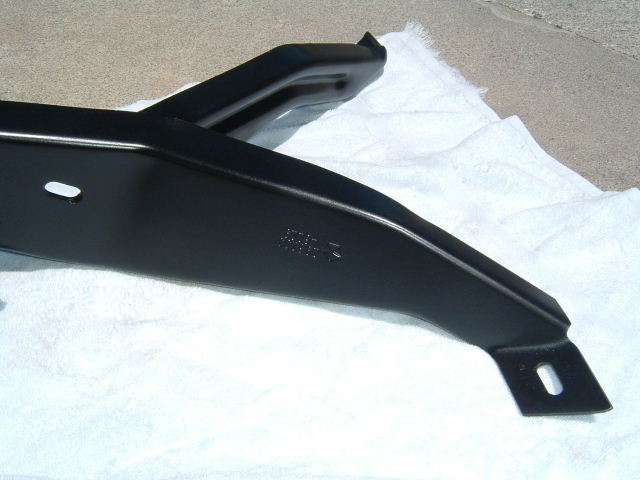
Took a bunch of parts to my media blaster and then refinished them. Front bumper brackets were disassembled, blasted, painted and reassembled. Here's a close-up.
Posted By: jrwoodjoe
Re: T/A Challenger Replica Project - 05/20/09 05:56 PM
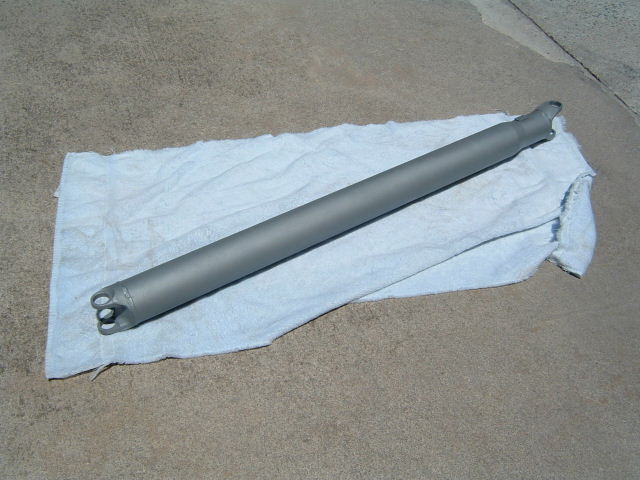
Driveshaft blasted, painted and cleared for durability. The car will be driven occasionally so forgive me if somethings aren't 100 percent correct.

Posted By: jrwoodjoe
Re: T/A Challenger Replica Project - 05/20/09 05:57 PM
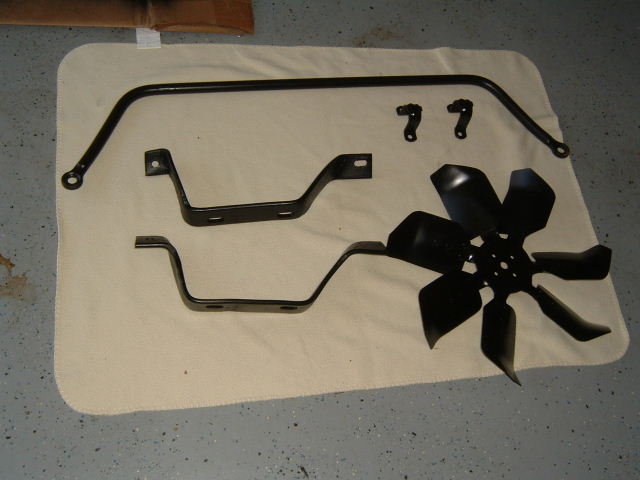
And a few more parts. Looks like I may need to redo the front sway bar brackets based on another post.

Posted By: cataclysm80
Re: T/A Challenger Replica Project - 05/20/09 11:54 PM
Hello again Joe.

Glad I stumbled across this thread. Your grill looks terrific! Keep up the good work, I'll be watching here.

Might even post my own.
Tav
Posted By: JDMopar
Re: T/A Challenger Replica Project - 05/25/09 02:55 AM
Looking good Joe.

I'm glad to hear that the little one is doing better


Posted By: jrwoodjoe
Re: T/A Challenger Replica Project - 06/08/09 05:38 PM
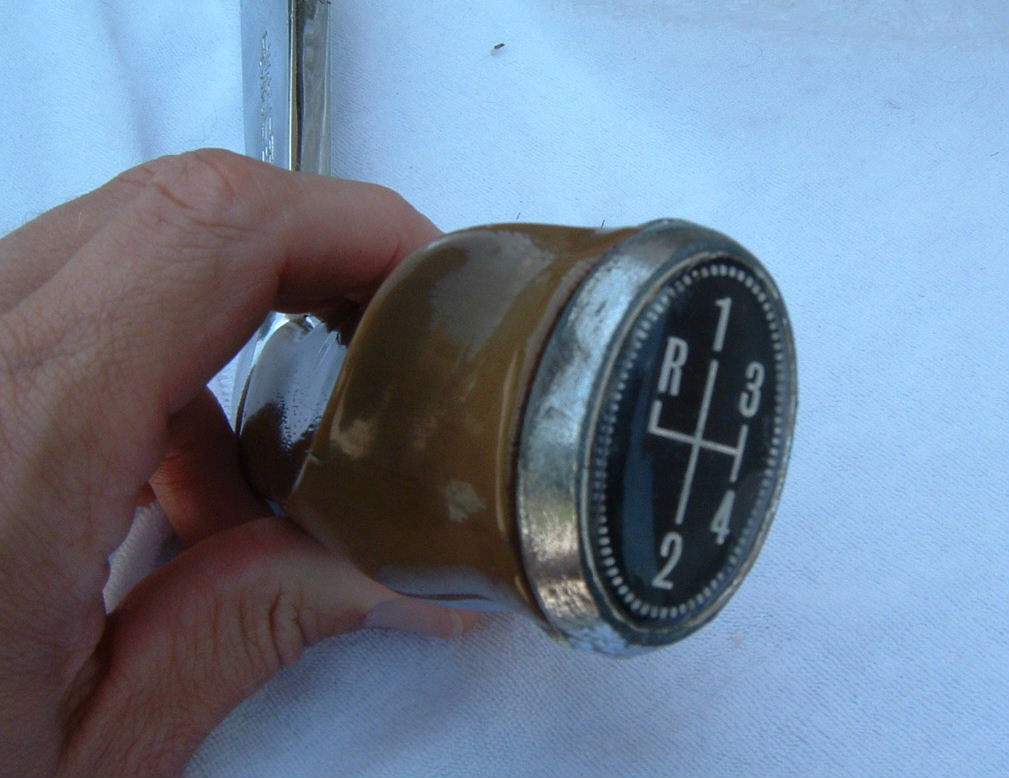
Worked on the shifter some at lunch today here is a before photo.
Posted By: jrwoodjoe
Re: T/A Challenger Replica Project - 06/08/09 05:41 PM
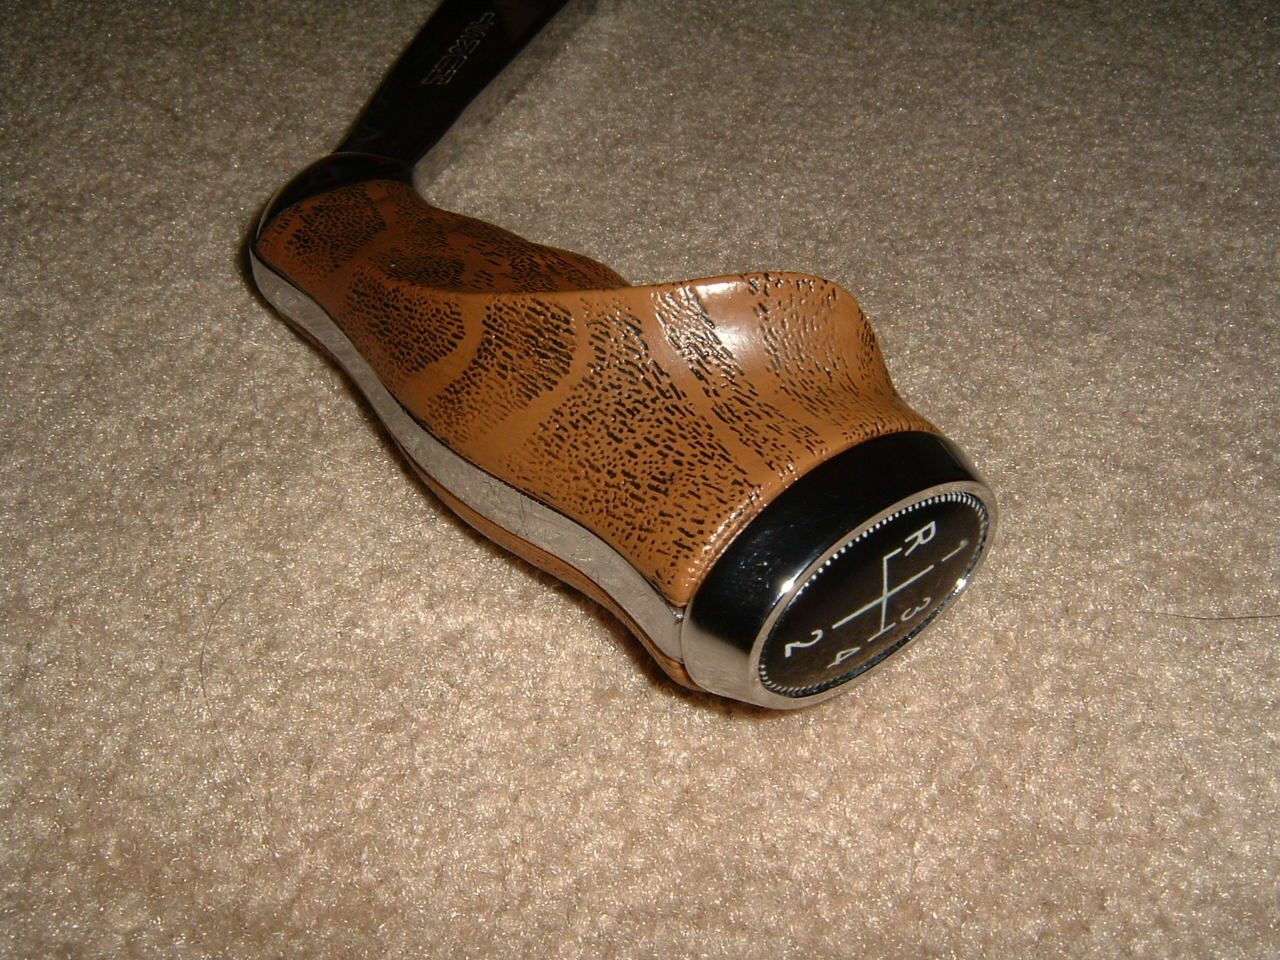
Here's the after. I was able to clean the shifter chrome since it wasn't pitted. just a few light scratches that weren't bad. I added new grips from Mike at BE&A and new upper and lower bezel with shift pattern from Gunslingers.
I'm real happy with the way it turned out.
Posted By: larry4406
Re: T/A Challenger Replica Project - 06/09/09 12:09 AM
how are the bezels and shift pattern replaced?
Posted By: jrwoodjoe
Re: T/A Challenger Replica Project - 06/09/09 03:02 AM
It was pretty easy and I used the instructions from the Gunslinger website which is who I bought the bezel pieces from...
Upper Bezel instructions:
http://www.pistolgrip727.com/index.php?id=upperbezel Lower Bezel Instructions:
http://www.pistolgrip727.com/index.php?id=lowerbezel Shift pattern instructions:
http://www.pistolgrip727.com/index.php?id=shiftpatternJoe
Posted By: PAINT IT BLACK
Re: T/A Challenger Replica Project - 06/10/09 09:46 PM
Looking good man. I didn't know about your daughter. I'm glad to hear she is doing better. I look forward to more pics. I don't make it to this forum enough. I will start wandering over here more often. In fact, I am going to start a couple of threads myself. Keep up the good work.

Posted By: jrwoodjoe
Re: T/A Challenger Replica Project - 06/12/09 05:40 PM
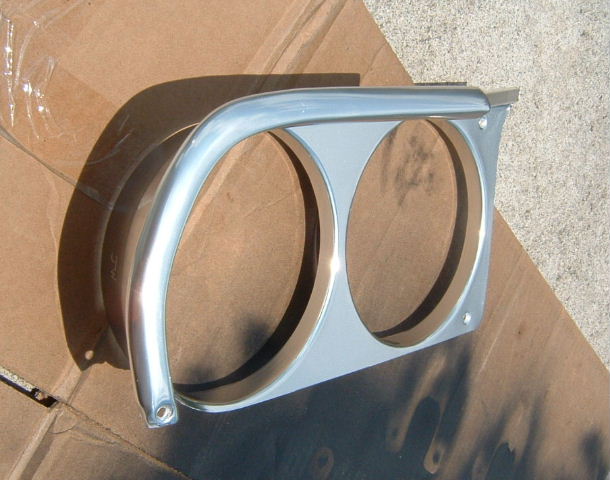
When I evaluated the front area of the car, I decided to restore the grille myself but send the original T/A hood trim and the headlamp bezels out for refinishing. I chose Matt at MCB to do the work and am glad I did. He polished and anodized them for me and they came back looking AWESOME! Here is a pic of one of the bezels he redid. I asked him to not paint the black areas since I restored the grille myself and wanted the black finishes to match.
Posted By: jrwoodjoe
Re: T/A Challenger Replica Project - 06/12/09 05:41 PM
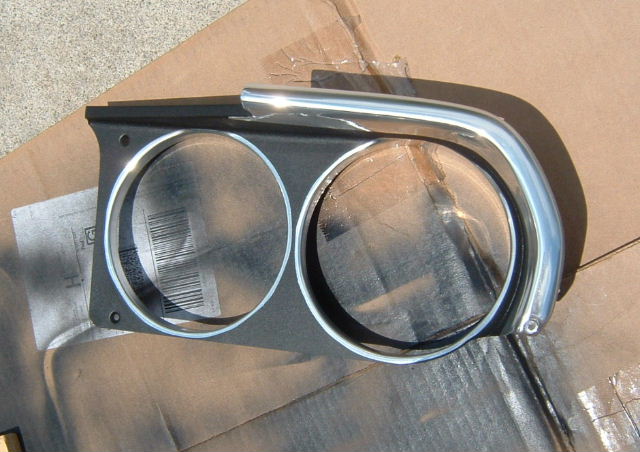
And here is the other one after I painted in the black areas.
Posted By: jrwoodjoe
Re: T/A Challenger Replica Project - 06/19/09 03:42 PM
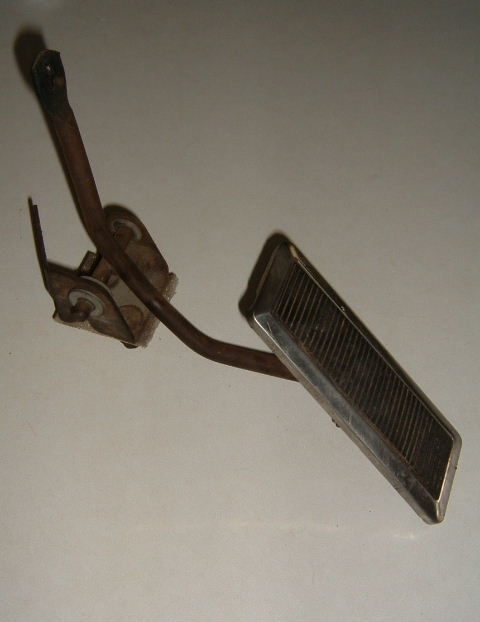
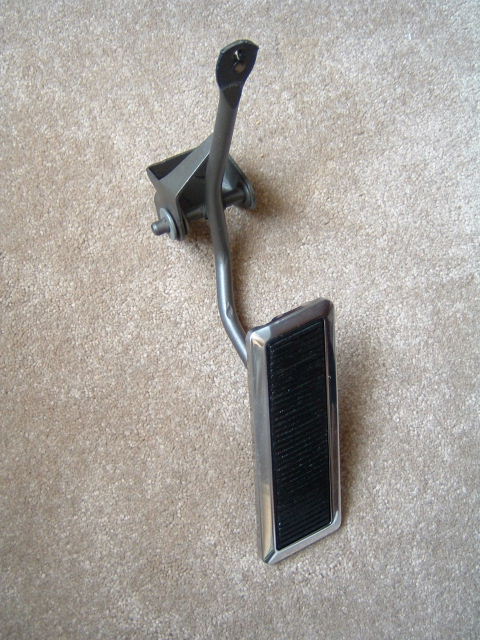
Today I worked on the gas pedal assembly. I would love to buy a new pedal but not in the budget right now. So I disassembled everything, cleaned it all and then freshened everything up. Here's a before shot.
Posted By: jrwoodjoe
Re: T/A Challenger Replica Project - 06/19/09 03:43 PM
Here's after.
Posted By: Anonymous
Re: T/A Challenger Replica Project - 06/19/09 05:35 PM
No need to buy a new one when you are doing nice work like that.

Posted By: cataclysm80
Re: T/A Challenger Replica Project - 06/19/09 11:49 PM

Tav
Posted By: jrwoodjoe
Re: T/A Challenger Replica Project - 06/27/09 07:46 PM
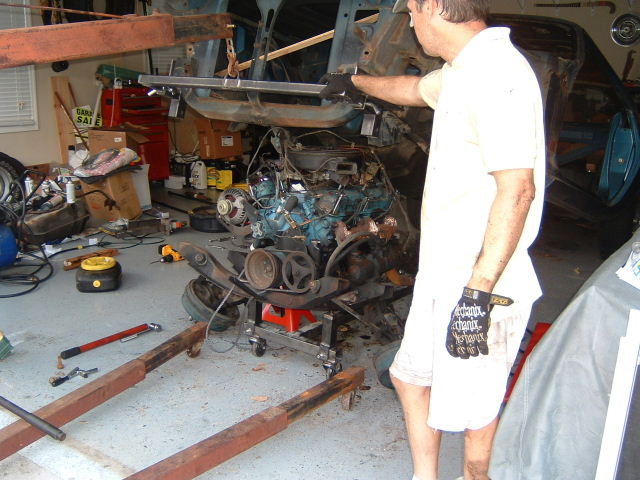
This was a long time coming. I had wanted to do this about a year ago but was finally able to get it done today. 2 Stuck Torsion Bars gave me a fit but after I got them out today I decided to keep on going.

A short while later, I lifted the car away from the drivetrain. BTW, That's me all dirty.

Posted By: jrwoodjoe
Re: T/A Challenger Replica Project - 06/27/09 07:47 PM
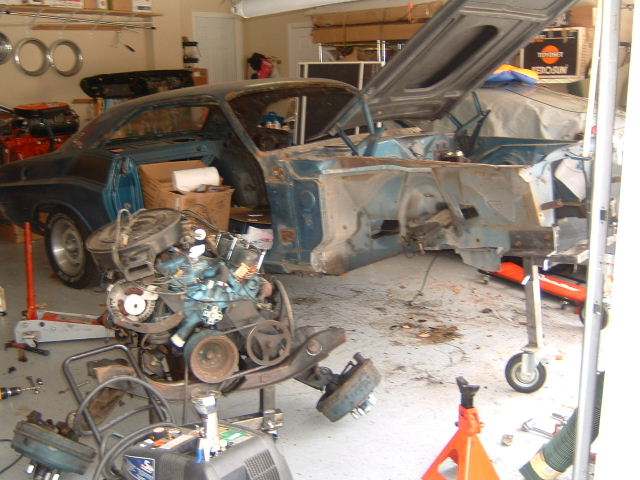
And fully out with the front of the car on casters.
Posted By: jrwoodjoe
Re: T/A Challenger Replica Project - 07/04/09 12:36 AM
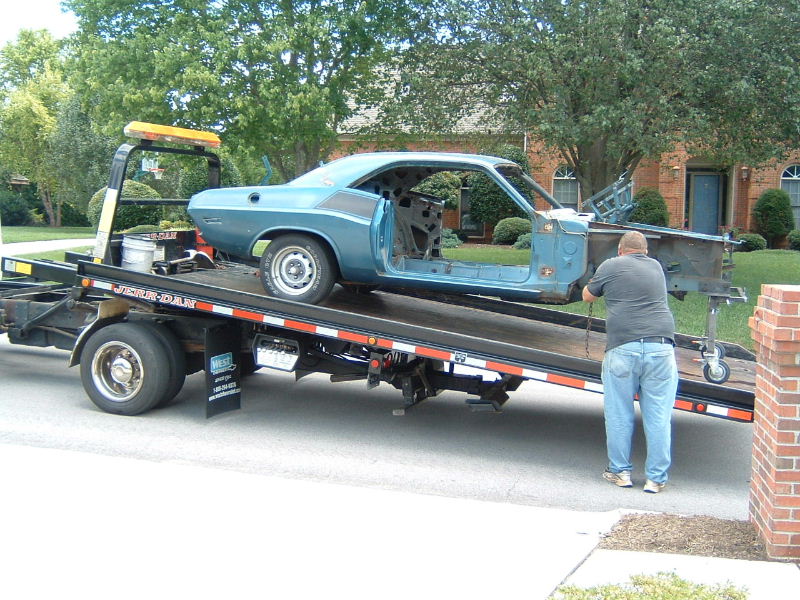
I got a call this week from the media blaster that he had finished blasting the driver door of the Challenger. When I went to pick it up and started talking to him, he said he had an opening next week and could blast the car for me. So we loaded it up today and moved it to his shop. They will start working on it on Monday and the car will go on a rotisserie.
Joe
Posted By: moparmojo
Re: T/A Challenger Replica Project - 07/05/09 03:50 PM
Posted By: jrwoodjoe
Re: T/A Challenger Replica Project - 07/08/09 06:55 PM
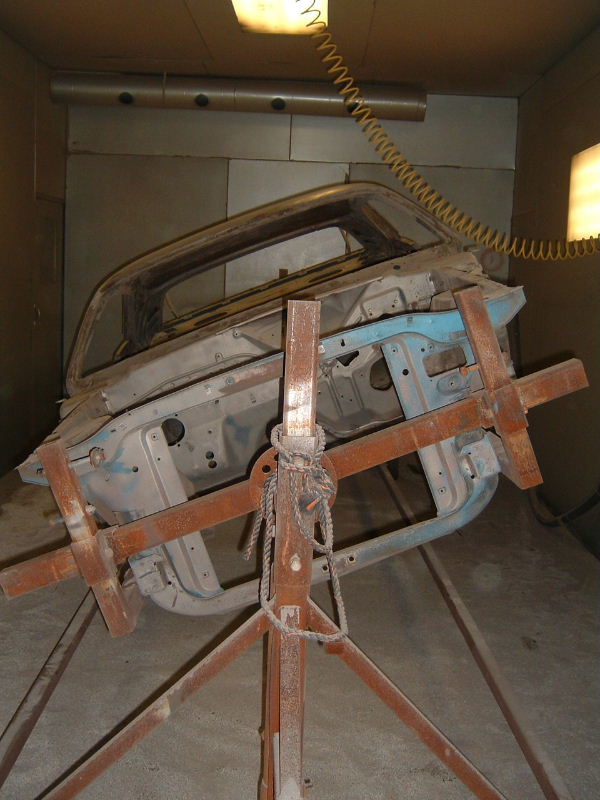
Checked on the car today and it was still being blasted. He will continue blasting on it today and more tomorrow.
Posted By: jrwoodjoe
Re: T/A Challenger Replica Project - 07/08/09 07:00 PM
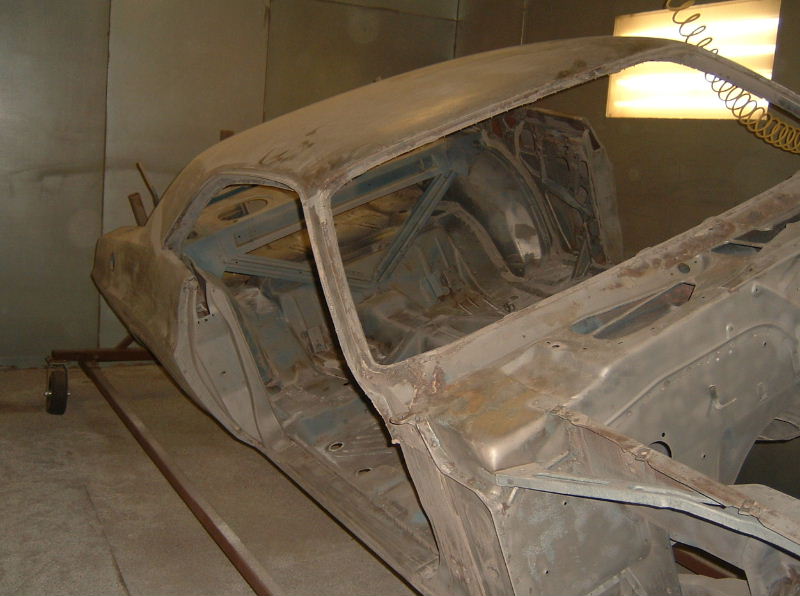
As expected, more rust was uncovered than could be seen. In fact some areas that looked really good had a bit of rust. Like the area near the window channel on top of the cowl.
Also, it's taken him longer to do because of the super thick undercoating that seems to have been added by the dealer. All the usual methods of removing the undercoating have not worked this time and it is just slow going. The good news is that the undercoat really protected the floors well and they are super nice. The guy blasting said it's the nicest E-body he's seen.
Joe
Posted By: jrwoodjoe
Re: T/A Challenger Replica Project - 07/09/09 07:08 PM
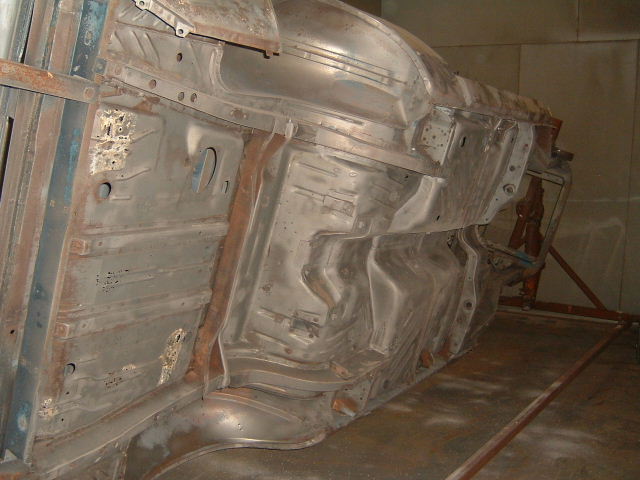
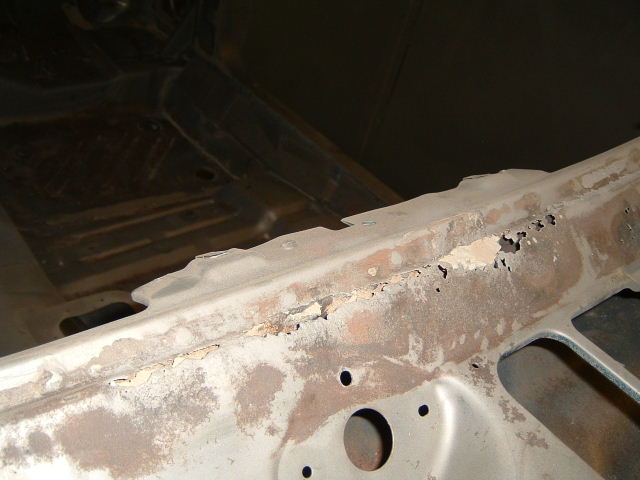
Met with a body guy today at the Media blaster to go over the car. All the undercoat is now off the car and blasting continues. Here are a few pics from today and rust areas found.
Posted By: jrwoodjoe
Re: T/A Challenger Replica Project - 07/09/09 07:09 PM
I knew there was rust at the cowl, but this was a little more than I thought would be there.
Posted By: jrwoodjoe
Re: T/A Challenger Replica Project - 07/09/09 07:10 PM
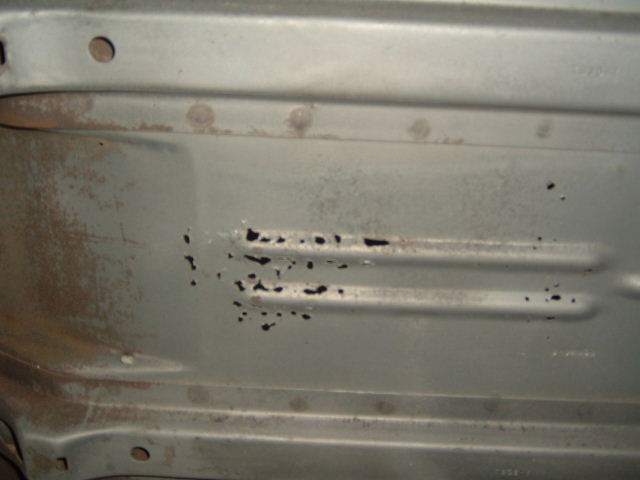
Trunk floor had more holes than originally thought also. This is about 1 of 4 spots we found so we plan on welding in a new 1 piece floor.
Posted By: jrwoodjoe
Re: T/A Challenger Replica Project - 07/09/09 07:15 PM
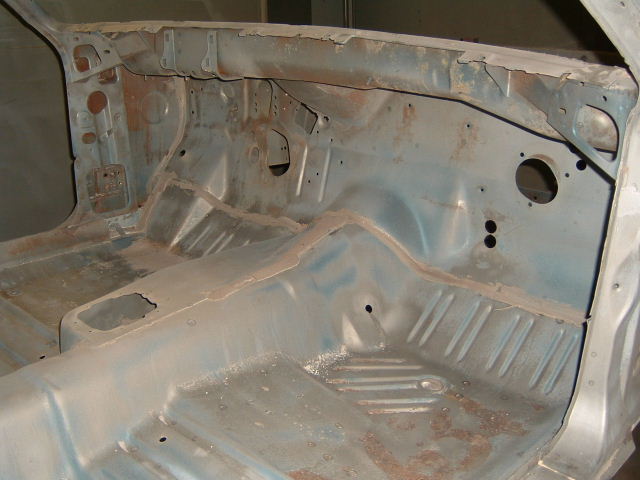
Car will also need new trunk gutters which I have already and lower rear patch panels on both sides. Everything else will get fabricated patches. Frame was solid also. Good floors thanks to all the undercoat.
Posted By: burdar
Re: T/A Challenger Replica Project - 07/09/09 08:08 PM
It's looking really good. The car is really very solid. I wish I could have started with a body that good.
Your front bumper brackets look great. What paint did you use on them? Did you have to fill in any pitted areas?
Posted By: PAINT IT BLACK
Re: T/A Challenger Replica Project - 07/09/09 11:08 PM
Car looks great. Isn't it nice to be able to quantify exactly what you are looking at with all that paint gone? No secrets!
Posted By: JDMopar
Re: T/A Challenger Replica Project - 07/10/09 01:52 AM
Posted By: jrwoodjoe
Re: T/A Challenger Replica Project - 07/10/09 02:35 AM
Thanks guys.
BURBAR, I'll have to look and see what paint I used. Can't recall at the moment but I'll let you know. The brackets were painted nicely in the 80s by the previous owner and that kept them pretty nice. The only pitting that existed was where it bolts to the frame of the car and they were small and would be hidden once bolted up.
Yes Jackie...I'm very stoked to have gotten the car this far. Once the car is completely blasted and primed, I'll bring the car home to do some mock up stuff for the power brake conversion and a few other things. I'm interested in having the bodyguy/painter that I spoke with today do the car. My gut tells me he's the guy. He said he could take it in this fall and the car would be done late spring or early summer of next year. That would be an ideal time frame for me. Hopefully it will work out.

The body guy said he would make the patch for the cowl area so I believe that is exactly what he had in mind.
Joe
Posted By: jrwoodjoe
Re: T/A Challenger Replica Project - 07/12/09 08:24 PM
Here are some pics of the car taken yesterday.
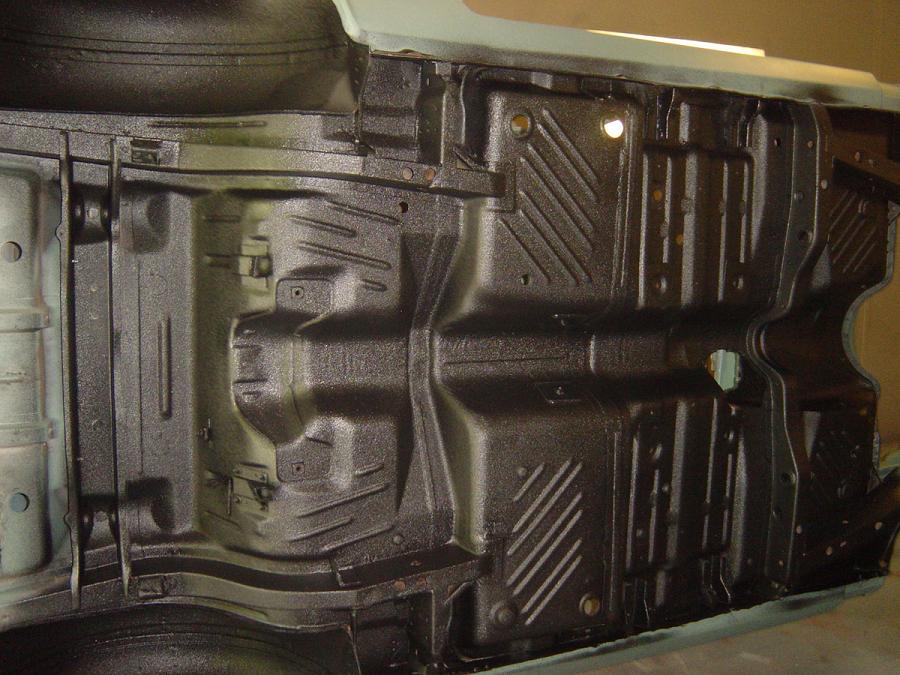
I really thought long and hard about how I was going to use the car. The car was a factory undercotated car and then appeared to have extra undercoating put on at the dealership. After much consideration, I deviated from factory specs and decided to apply Raptor Liner to the bottom and to the interior floorboard. It will provide good protection form the elements and will make the car more quite. Not to mention that the underside will be easier to keep clean. I really love painted bottoms and cars restored to factory specs with primer and overspray, but I felt if I did that to the car I would be reluctant to drive it. Since the car has had an undercoat finish since new, I felt it was good to treat it in a similar manner.
Posted By: 69B3GT
Re: T/A Challenger Replica Project - 07/12/09 08:29 PM
Good choice on the liner. Glad to hear it WILL be driven. Cant wait for more pics

Posted By: jrwoodjoe
Re: T/A Challenger Replica Project - 07/12/09 08:39 PM
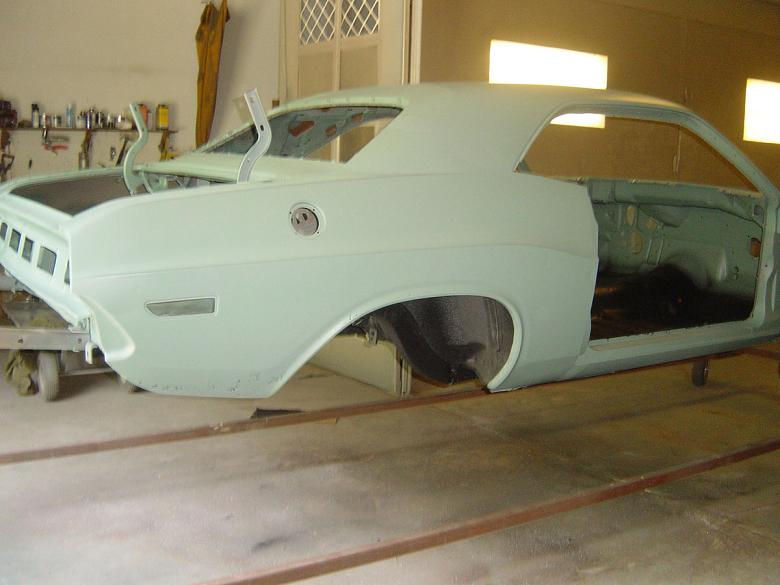
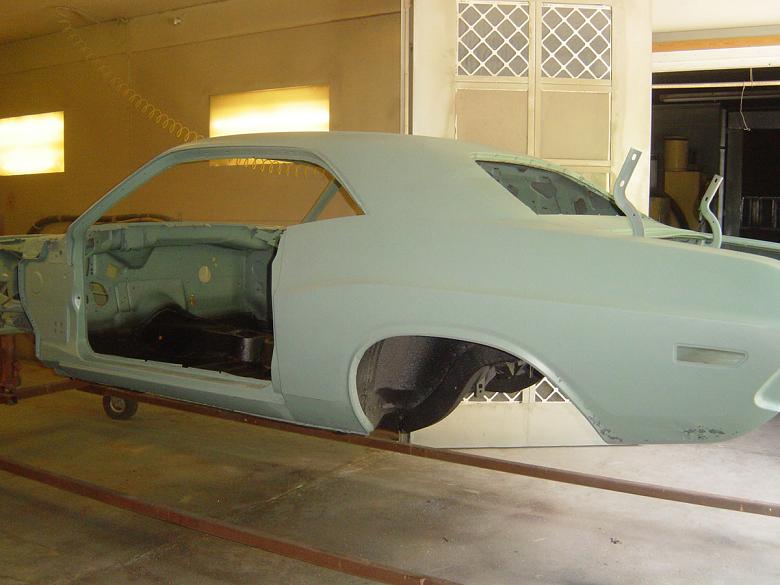
Here's a pic of the passenger side. You can see rust spots in the lower rear quarters that will get cut out and replaced with new metal.
Posted By: jrwoodjoe
Re: T/A Challenger Replica Project - 07/12/09 08:40 PM
Driver side shot. Again, rust in the lower rear quarters that will be cut out and repaired with new sheet metal.
Posted By: jrwoodjoe
Re: T/A Challenger Replica Project - 07/12/09 08:43 PM
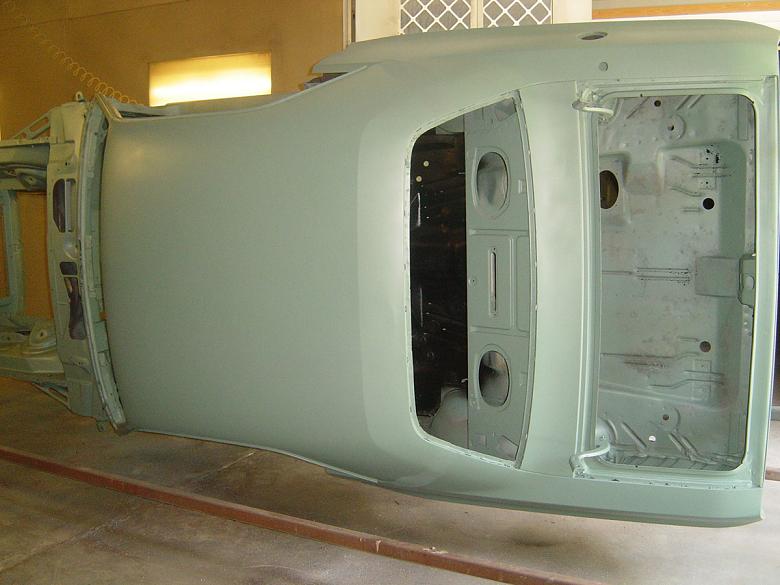
In this topside photo. You can see rust holes in the trunk channel and rust in the floor. As mentioned earlier, those will all be cut out with new a trunk floor installed along with rust free gutter sections from a donor car. If you look towards the rear of the roofline just above rear window you can see a dent that will need to be removed.
Posted By: jrwoodjoe
Re: T/A Challenger Replica Project - 07/12/09 08:45 PM
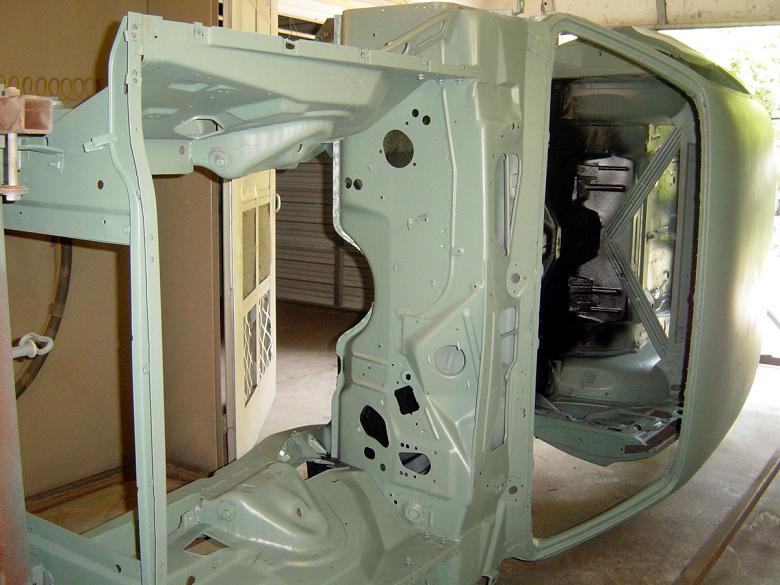
Last one, front side of the car. Pretty solid with the exception of rust holes on top of the cowl area and a few rust holes in the roof just above the windshield area.
If you look on the passenger side firewall, you will notice 2 extra holes. That was for a dealer installed air unit. New metal will be welded in to fill those areas since the car does not have air. I also need to cut the hole for the reverse light wire into the firewall and will do that when the car is back at the house. Thanks to TAV, I have those specs.
Joe
Posted By: cataclysm80
Re: T/A Challenger Replica Project - 07/12/09 11:52 PM
Looks Great Joe!!

Do you already have your 4 speed hump and console brackets installed on the floor? I think the 4 speed bracketry is different from the auto somehow.
Tav
Posted By: jrwoodjoe
Re: T/A Challenger Replica Project - 07/13/09 02:56 AM
Car was a 3 spd car not auto so hump was already there. Also, car was a non console car and I don't want to add one so I should be good there too. But thanks for the heads up. That's the kind of stuff that can come back and make you go..

Joe
Posted By: JDMopar
Re: T/A Challenger Replica Project - 07/13/09 03:04 AM

Wow! It's movin along

Have you decided on a color yet?
Posted By: jrwoodjoe
Re: T/A Challenger Replica Project - 07/13/09 10:17 PM
I chose the color about a month ago after agonizing about it ever since I got the car. Should have a sprayout sample this week and then the cat will be out of the bag regarding the color. The painter usually paints with Dupont and I told him I wanted to go with PPG mainly because I think the PPG color will be closer to what I want. He and I talked and he mixes his own color so I told him to give it a go in the Dupont and I'd look at the sprayout and let him know what I thought.
Posted By: Publicbottle
Re: T/A Challenger Replica Project - 07/18/09 05:18 PM
Hey man, Nice work so far!

I too am doin a T/A replica.
What paint did you use on the grill/bezels? Also how did you make the silver trim lining the headlights on the bezels?

Posted By: jrwoodjoe
Re: T/A Challenger Replica Project - 07/19/09 01:02 AM
Thanks Public,
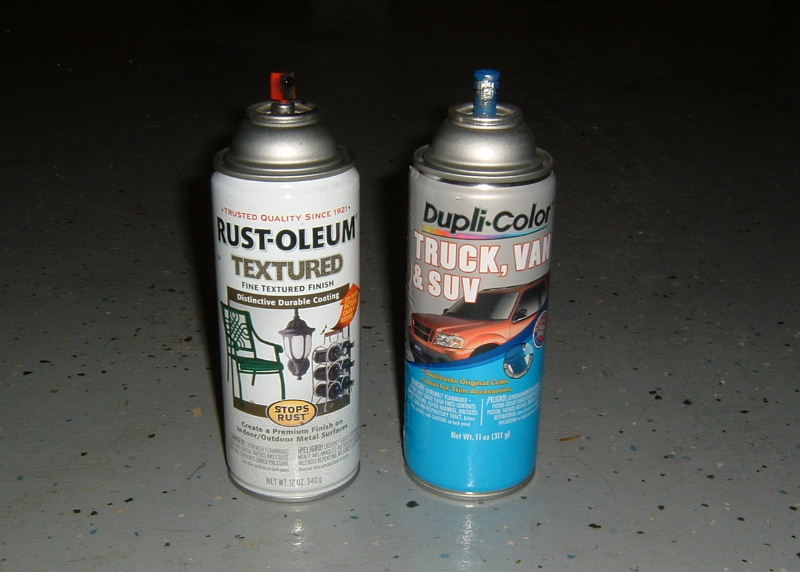
Here's a pic. of what I used to paint the grille. The Silver Truck paint was used to lightly dust or fog the grate portion of the grille. I took the whole grille apart so that I could get the best job possible.
For the bezel masking I used the blue painters tape like you would use for the inside of your house and slowly/carefully masked it off by hand. There is a ring that you can see that I guess the factory stampings left and I used that as my guide.
Burbar asked about the bumper bracket paint, I've looked for what I used but did not find it yet. I'm almost certain it was Semi Gloss Engine paint.
Joe
Posted By: JDMopar
Re: T/A Challenger Replica Project - 07/19/09 02:43 PM
Joe, I checked the sound deadener on the inside of my quarters on the A66 car. They are painted body color, and have never been repainted or messed with. If you need them, I can make pics of both sides for you when you get to the point of needing them. Thanks again for the dog & drink.

Posted By: cataclysm80
Re: T/A Challenger Replica Project - 07/19/09 05:27 PM
I agree, the sound deadener inside the quarters in the trunk is applied before paint. I think resto rick sells it if you need some. He sent me pics of untouched cars before.
(not only was the deadener applied before paint, it was actually applied before the quarter was welded onto the car.)
Tav
Posted By: Finoke
Re: T/A Challenger Replica Project - 09/12/09 09:29 PM
Darn Joe, You caught up to me! The car is looking great. Not a lot of rust either.
We should meet up at carlisle one year when our cars are done. Have you been there, or is it to far from you???
Posted By: jrwoodjoe
Re: T/A Challenger Replica Project - 09/14/09 04:37 PM
Tom, I have not been to Carlisle yet but my old RR was taken up by a friend many years ago and sold there. I do plan on going to one of the big events when the car is closer to being done.
Here's an update everyone. I've been wrapped up with life and have not been able to work on the car for a few weeks now. Built a dolly to hold the glass so that I wouldn't break it last week. You can see it here:
https://board.moparts.org/ubbthreads/show...e=2#Post5474493Had planned on doing a good bit this past weekend but threw my back out on Friday

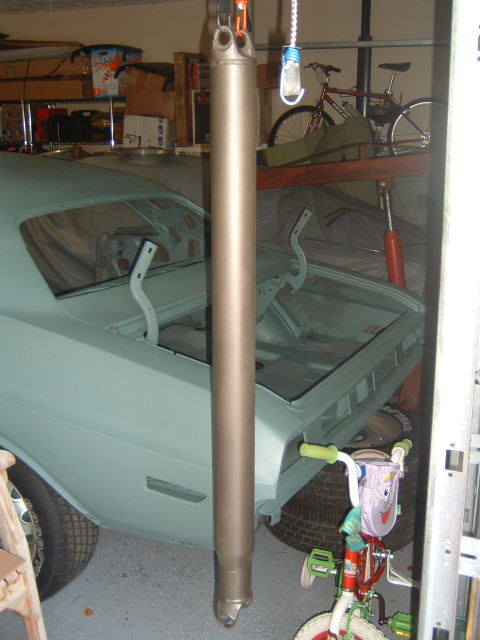
Still feeling pain but did get a little bit done today. I wasn't totally happy with the way the driveshaft turned out and the more I looked at it, the more it bothered me. So, had a little time today and redid it. Much happier with the finish now. It looks a little gold looking in the photo but it isn't in person. Hope to get some done on the car this weekend if the back will cooperate.
Posted By: JDMopar
Re: T/A Challenger Replica Project - 09/15/09 01:30 AM
Wait till I tell Katie you got paint on her bike! It'll be like an old Challenger commercial...."You in a HEAP o' trouble boy!"


Looks good. If your back trouble is a pulled muscle right above your butt cheek, a massage therapist will do more good than anything. I've pulled those muscles a few times myself

Posted By: jrwoodjoe
Re: T/A Challenger Replica Project - 09/17/09 12:56 AM
C'mon...give me some credit. The bike is safe...trust me.

Went to MT and he worked on me last weekend. Just now getting to where I can move around a bit better. May go back for one more round though.
Joe
Posted By: cataclysm80
Re: T/A Challenger Replica Project - 09/17/09 02:38 AM
I think that drive shaft looks real nice. I think I saw that Allen Auto dusted some tranparent blue paint around the welds to simulate the blueing from weld heat.
Just an idea.
Get Well Soon Joe.
Tav
Posted By: anlauto
Re: T/A Challenger Replica Project - 09/19/09 11:02 PM
Posted By: jrwoodjoe
Re: T/A Challenger Replica Project - 09/20/09 08:38 PM
Quote:
Allen Auto? Who is this guy 

There's actually 5 different spray bombs used here....
Rattle-can Restoration 

 Now, that's a nice finish. Mine looks really gold in the photo (could be the camera) but looks closer to AA's in person (still not THAT nice). I may try the blue (welded look) treatment and see how it goes.
Update-wise, my back is still tweaked I'm hoping it will be better by next weekend. 
Posted By: cataclysm80
Re: T/A Challenger Replica Project - 09/21/09 01:26 PM
Quote:
Allen Auto? Who is this guy 

Oops! Sorry Alan, I spelled it wrong. 
Tav
Posted By: jrwoodjoe
Re: T/A Challenger Replica Project - 09/22/09 05:42 PM
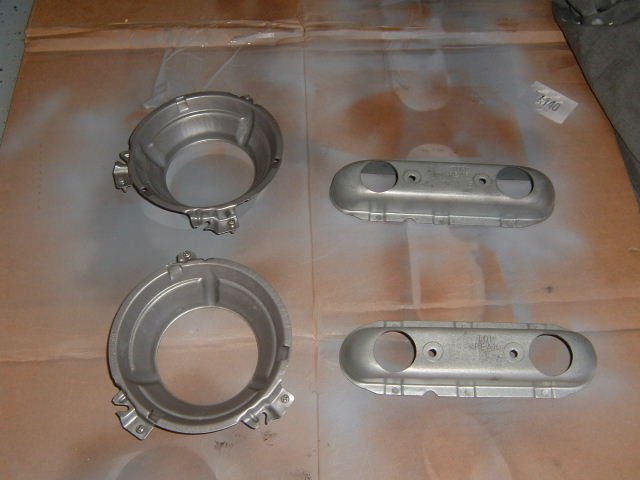
Had some free time this morning so I was able to get the headlamp buckets and side marker retainers lightly bead blasted. I would love to have them replated but it's not in the budget right now. So I lightly cleared them so they would not look too shiny.
Joe
Posted By: Finoke
Re: T/A Challenger Replica Project - 11/03/09 04:05 PM
Hey Joe,
Looking good!
I ran across a picture this morning when relaxing with some coffee.....
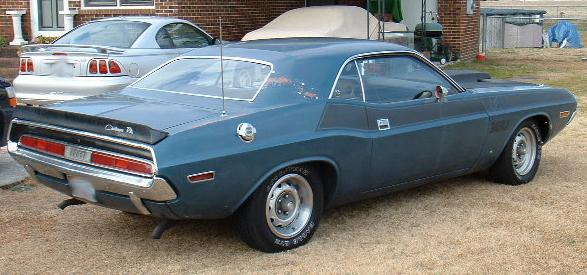
Would this be yours???
Tom
Posted By: jrwoodjoe
Re: T/A Challenger Replica Project - 11/03/09 09:42 PM
Hey Tom! Yes, that is what it looked like when I bought it. The previous owner took the photo in his yard and emailed it to me with some others before I bought it from him.
Posted By: Finoke
Re: T/A Challenger Replica Project - 11/03/09 10:39 PM
Quote:
Hey Tom! Yes, that is what it looked like when I bought it. The previous owner took the photo in his yard and emailed it to me with some others before I bought it from him.
I remembered it because its B7 with that weird pink primer coming through. My car had the same thing!
Posted By: jrwoodjoe
Re: T/A Challenger Replica Project - 04/27/10 05:01 PM
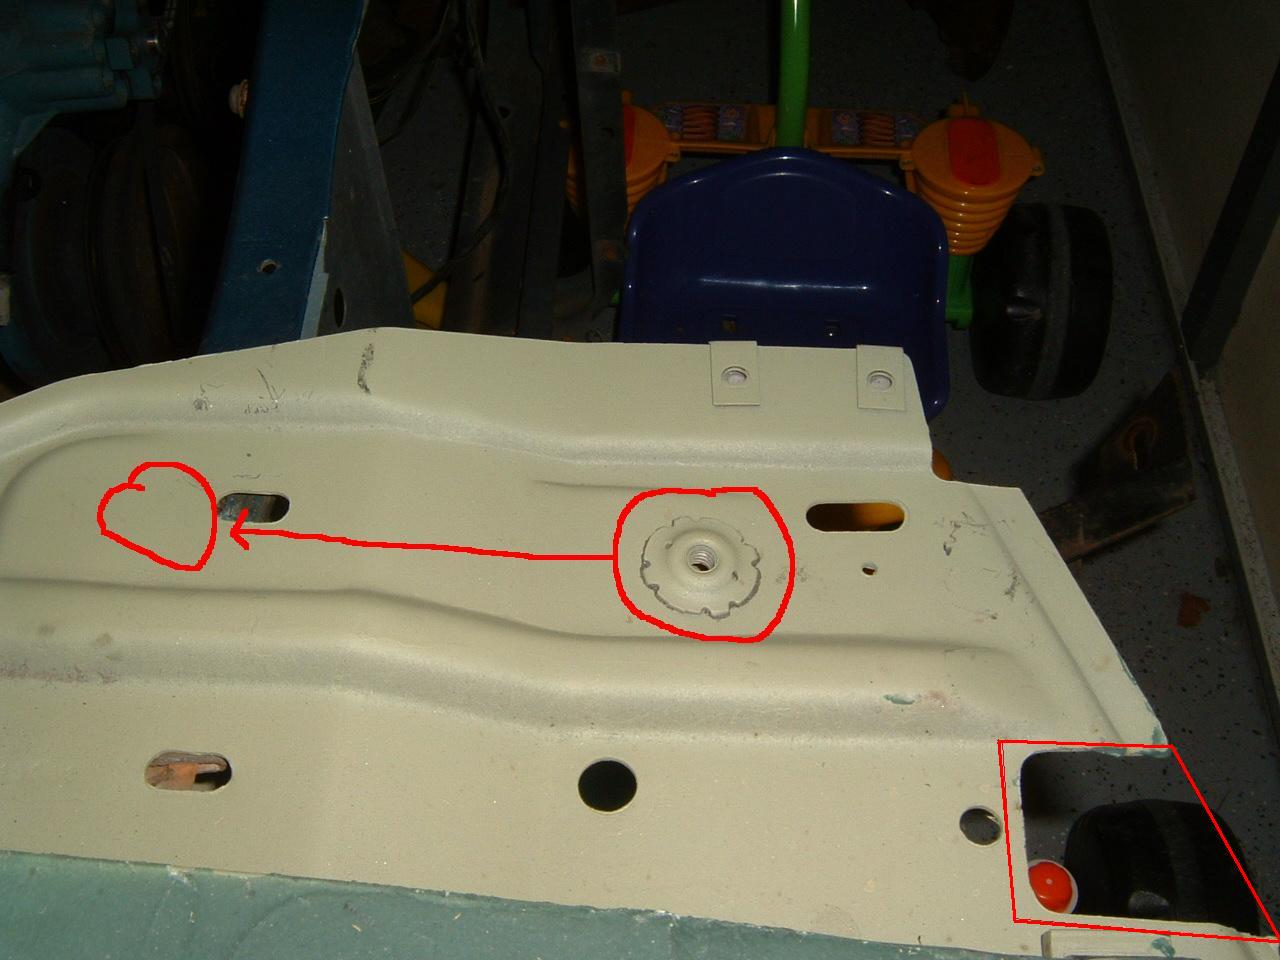
Now that spring is here, things are moving on the project again. Unfortunately, it is not where I hoped it would be. It was supposed to have gone to the painter/bodyguy last fall but (in short) he hosed me. Since he flaked out, I had to find another guy/team that would do the work the way I wanted. After talking with several shops, I ended up talking to a local guy. I saw some of his work several years ago and felt that I would not be able to afford him. Well, I was wrong. He is in my budget and turns out is building a 70 Charger R/T 440 car for himself. Things do happen for a reason. I know this guy will do a good job and he should begin working on it around July. Meanwhile, we decided to have some sheetmetal work completed (original body guy was going to do fab stuff too) to keep things on schedule. So all rust repair is being handled by another capable guy as I type this.
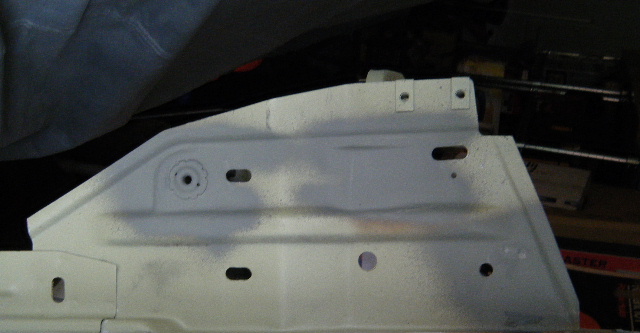
I Picked up the passenger fender today. At some point the original 70 fender had been replaced with a 71 fender. In this "before" pic., you can see the cut-out and arrows showing where the hood bumper needed to be relocated.
Posted By: jrwoodjoe
Re: T/A Challenger Replica Project - 04/27/10 05:02 PM
And here's the "after". Hope to have more progress pics coming in the days and weeks to follow.

Posted By: cataclysm80
Re: T/A Challenger Replica Project - 04/28/10 12:30 PM
Good to see you working on this again Joe. That 71 to 70 fender conversion looks great! I think the screw hole for the hood pin lanyard also moved just a little 70 to 71. You could compare your fenders. most people would never notice, but it is visible if you're paying really close attention.
Tav
Posted By: jrwoodjoe
Re: T/A Challenger Replica Project - 04/30/10 05:14 PM
Thanks for the heads up TAV. He needs to do one more thing to the fender that I had found and I will make sure to double check that hole as well.

Posted By: Finoke
Re: T/A Challenger Replica Project - 04/30/10 05:37 PM
Looking good Joe! I love making them modifications from year to year. Your doing a nice job on that car!
I'm working on a 70 road runner that came with a 68/69 door. Same thing, did some modifications to make it work.
Posted By: jrwoodjoe
Re: T/A Challenger Replica Project - 05/02/10 01:12 PM
Thanks Tom. I'm hoping to make some real progress over the next 3 months. Other than the paint and bodywork, I still have a few major tasks. I need to rebuild the rear axle, steering column, and suspension. Also need to polish the bright trim.
Posted By: Finoke
Re: T/A Challenger Replica Project - 05/02/10 01:20 PM
Quote:
Thanks Tom. I'm hoping to make some real progress over the next 3 months. Other than the paint and bodywork, I still have a few major tasks. I need to rebuild the rear axle, steering column, and suspension. Also need to polish the bright trim.
Will you be rebuilding the rear yourself? I've always been afraid to try that.
Posted By: jrwoodjoe
Re: T/A Challenger Replica Project - 05/04/10 06:54 PM
I can do everything except rebuilding and setting up the pumpkin. I bought a used sure-grip unit and have a new set of 3:55 gears. I'll probably pull the axles and take the pumpkin with the sure-grip to someone local. I'll have them install the new gears, put in new bearings and set the backlash. I'll pull the axles, put in new bearings and reassemble everything. Once it's back together, I'll paint and detail the whole assembly.
Joe
Posted By: Finoke
Re: T/A Challenger Replica Project - 05/07/10 10:56 AM
Quote:
I can do everything except rebuilding and setting up the pumpkin. I bought a used sure-grip unit and have a new set of 3:55 gears. I'll probably pull the axles and take the pumpkin with the sure-grip to someone local. I'll have them install the new gears, put in new bearings and set the backlash. I'll pull the axles, put in new bearings and reassemble everything. Once it's back together, I'll paint and detail the whole assembly.
Joe
I like that. I might do that next time. Doing it this way gets your feet wet on how things work back there 
Posted By: jrwoodjoe
Re: T/A Challenger Replica Project - 06/04/10 05:05 PM
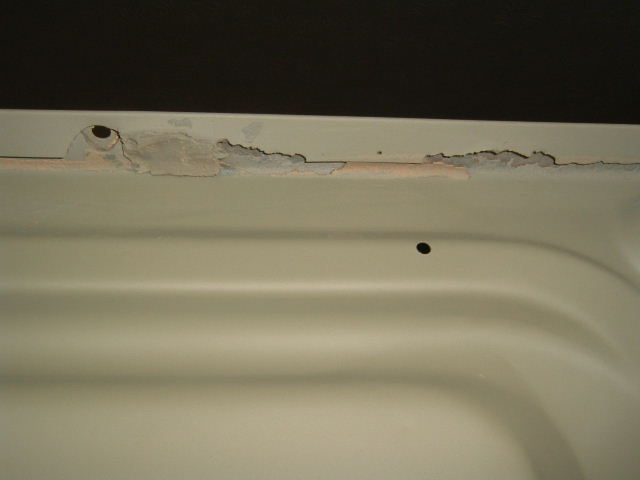
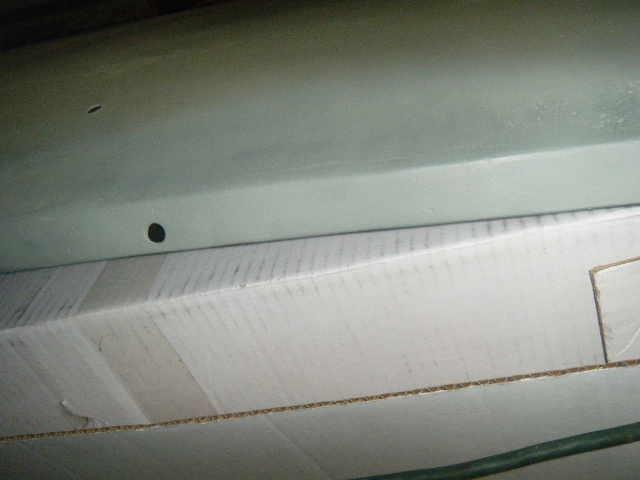
Few more progress pics. The trunk lid on the car is pretty nice but had breakthrough rust in one area of the lip. Here is a shot of rust after blasting on the inside of the trunk lid.
Posted By: jrwoodjoe
Re: T/A Challenger Replica Project - 06/04/10 05:07 PM
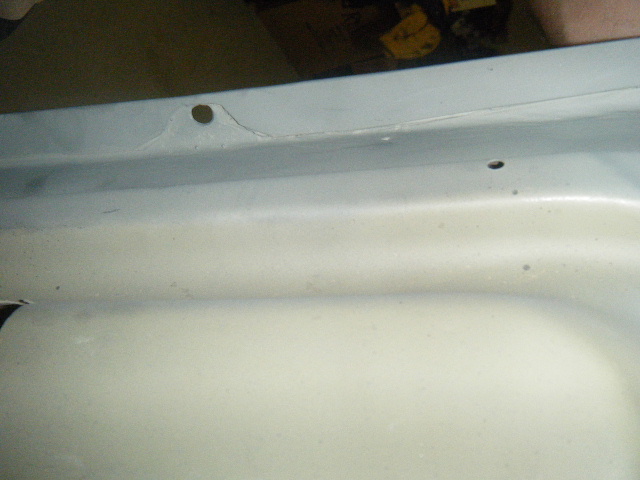
And and after shot of the repair done with new sheet metal welded in. The cutout shape around the hole is not perfect but is pretty close.
Posted By: jrwoodjoe
Re: T/A Challenger Replica Project - 06/04/10 05:08 PM
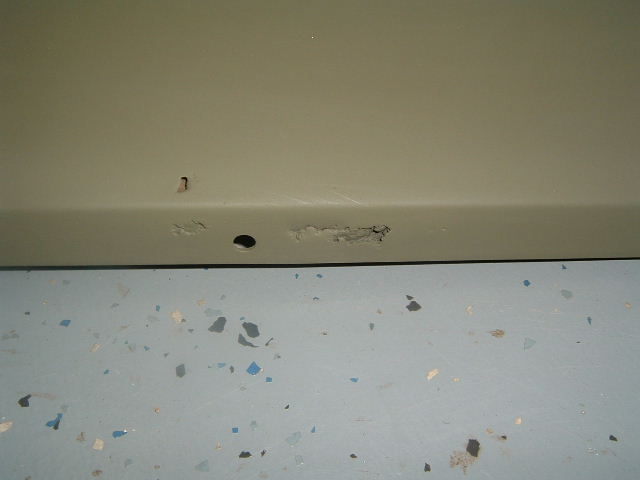
Here's what the rust looked liked on the outside lip of the same area.
Posted By: jrwoodjoe
Re: T/A Challenger Replica Project - 06/04/10 05:09 PM
And here's the after.
Posted By: JDMopar
Re: T/A Challenger Replica Project - 06/06/10 12:54 AM
Looks good Joe. It matches your description perfectly.

Posted By: jrwoodjoe
Re: T/A Challenger Replica Project - 06/06/10 01:02 PM
Thanks Jackie. It was great meeting Mrs. JDMOPAR and hanging out with you guys.
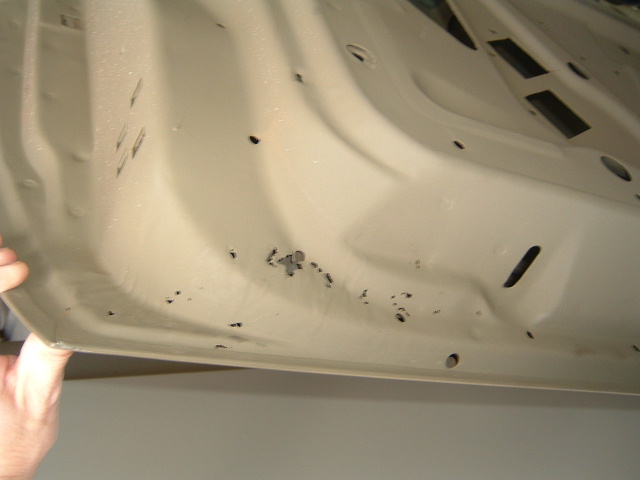
Here's a photo of the rust that was in the bottom of the passenger door after blasting.
Posted By: jrwoodjoe
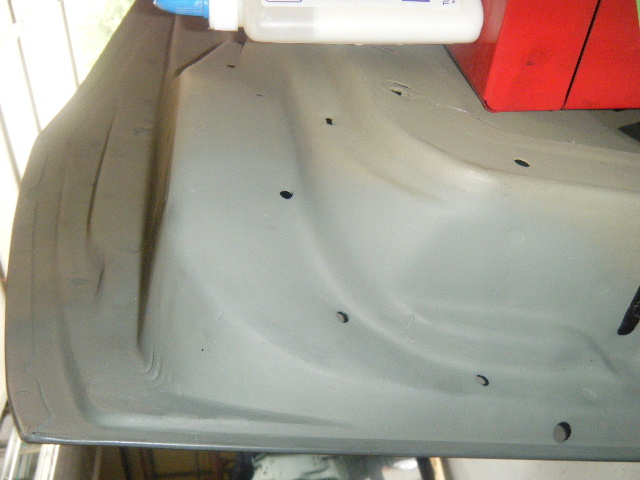
Re: T/A Challenger Replica Project - 06/06/10 01:04 PM
And a photo after being repaired by my Metal Guy.
Posted By: jrwoodjoe
Re: T/A Challenger Replica Project - 06/08/10 03:09 PM
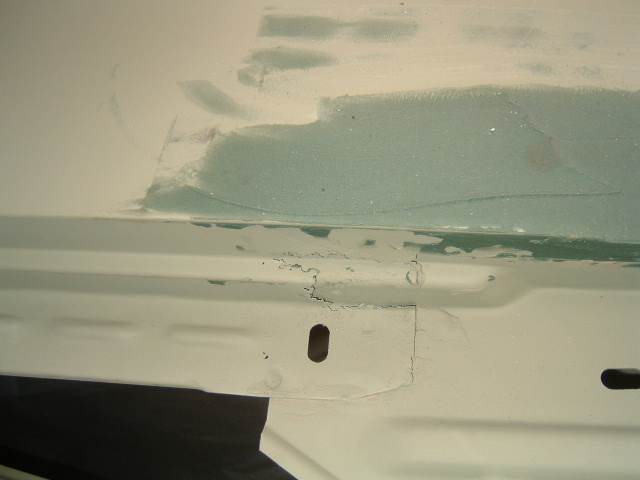
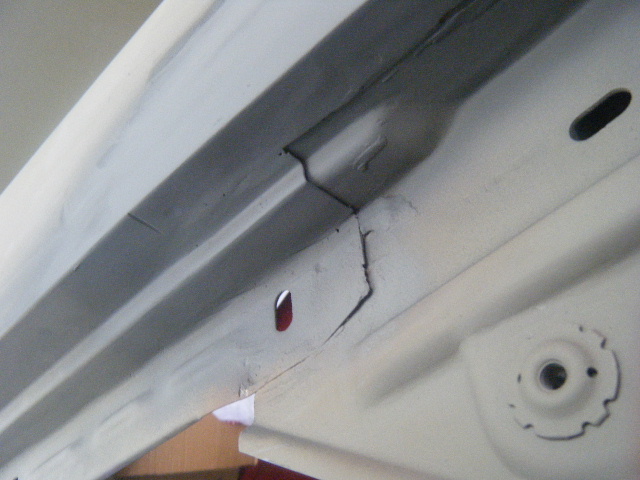
Here's a shot of the driverside front fender. You can also see some "kittyhair" filler on the top of the fender. I had some other rust repaired when I first started this project. For some reason they slapped that on instead of skimming it. I had my new guy sand it down to make sure something wasn't hiding there. Turns out it was fine. My goal is to have minimal filler on the car.
You can see some "jagged" rust where the metal overlaps at the fender mounting flange. This was not repaired before and I had the new guy fix it. This is the before shot.
Posted By: jrwoodjoe
Re: T/A Challenger Replica Project - 06/08/10 03:11 PM
Here's the after repair. It will get seam sealer on the edge as came from the factory.
Posted By: jrwoodjoe
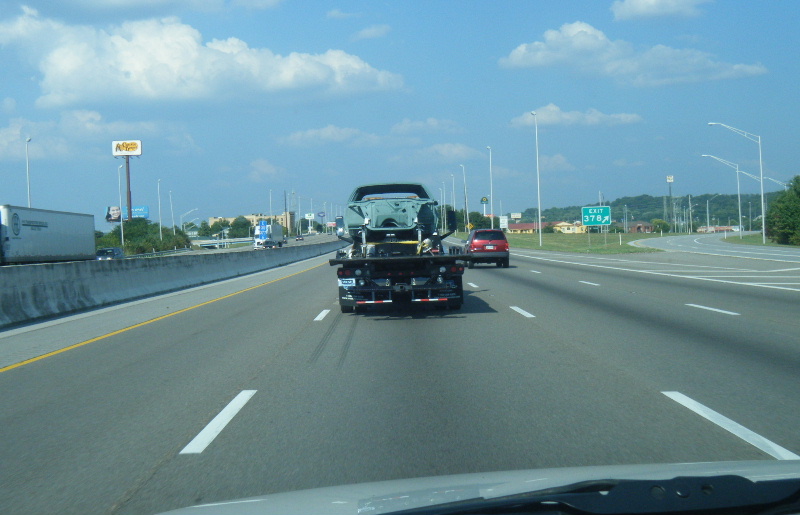
Re: T/A Challenger Replica Project - 07/16/10 01:09 PM
Now that all the removable panel rust repair has been competed, it is time to do the body shell. It left yesterday for rust repair and I'll update with those pics as I can. With the car gone, the garage can get reorganized and I'll have room to work on some of the other resto. tasks that need to be done.
Joe
Posted By: jrwoodjoe
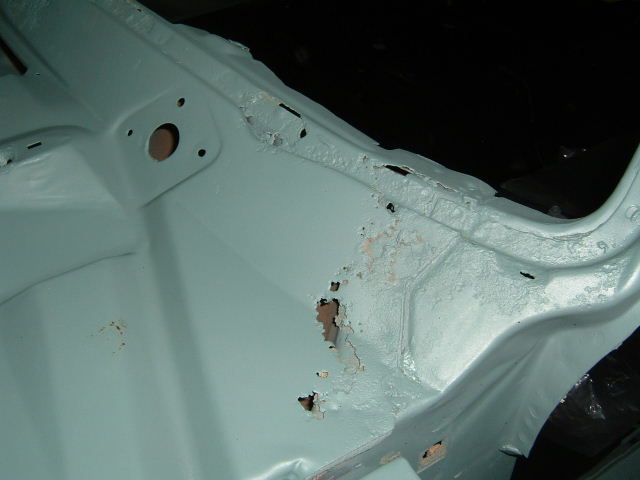
Re: T/A Challenger Replica Project - 07/31/10 02:50 AM
Thought I'd post a couple of progress pics taken today along with the "before" shots. Here is the before shot of the right driverside cowl area.
Posted By: jrwoodjoe
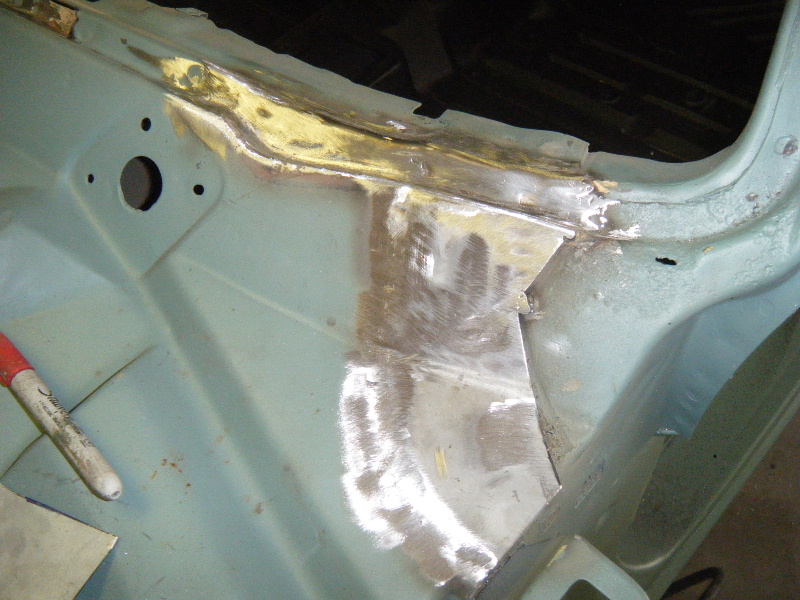
Re: T/A Challenger Replica Project - 07/31/10 02:51 AM
Here's the repair.
Posted By: jrwoodjoe
Re: T/A Challenger Replica Project - 07/31/10 02:53 AM
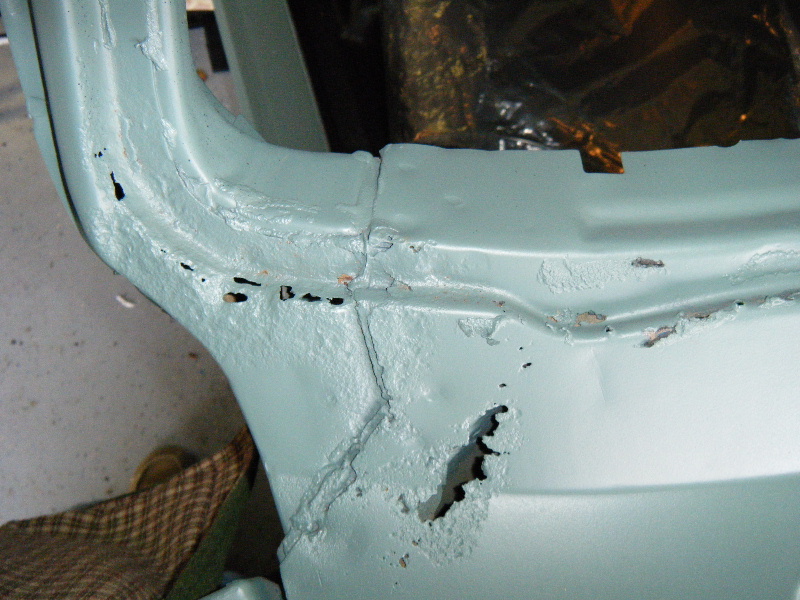
Now the before shot of the passenger side.
Posted By: jrwoodjoe
Re: T/A Challenger Replica Project - 07/31/10 02:54 AM
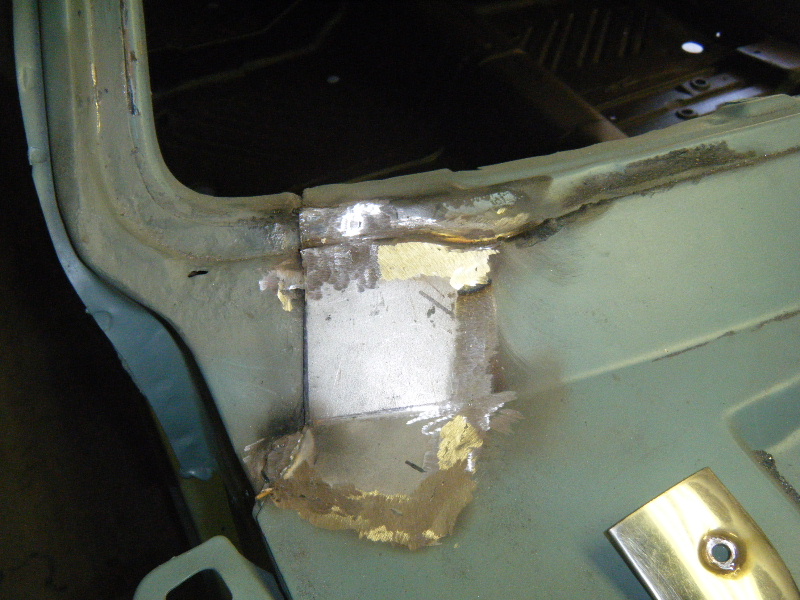
And the almost completed repair.
Posted By: JDMopar
Re: T/A Challenger Replica Project - 07/31/10 03:42 PM
Lookin good Joe. Hopefully, it will be
home soon!

Posted By: Finoke
Re: T/A Challenger Replica Project - 08/03/10 12:39 PM
Looks good Joe, its really getting there!

Posted By: hemibill
Re: T/A Challenger Replica Project - 08/09/10 08:28 PM
I work on mostly California cars and they have more rust than yours!
Keep the pics coming!
BILL
Posted By: jrwoodjoe
Re: T/A Challenger Replica Project - 08/13/10 03:13 AM
Thanks Guys! Bill, you do some really nice work. I enjoyed looking at some of the projects you have done.

Joe
Posted By: jrwoodjoe
Re: T/A Challenger Replica Project - 08/27/10 06:00 PM
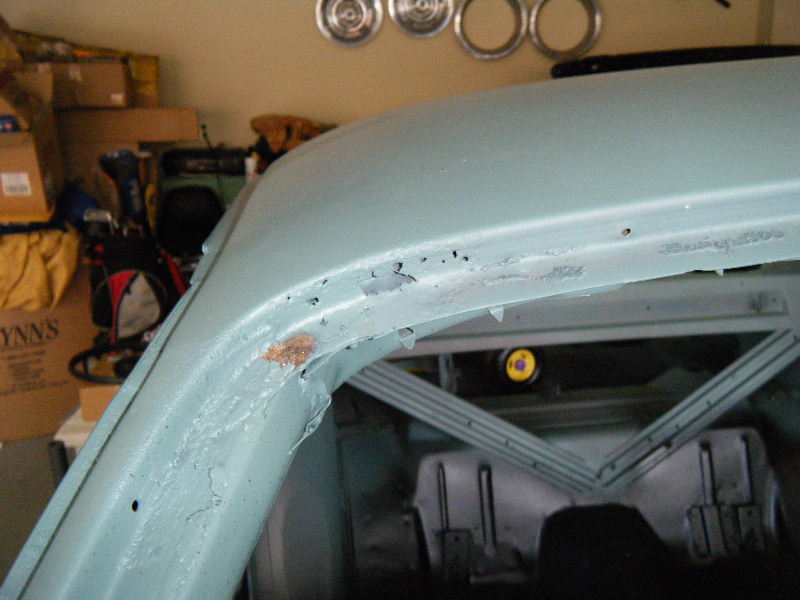
Few are a few more progress pics on bodywork. This is a before shot of upper corner right front windshield channel.
Posted By: jrwoodjoe
Re: T/A Challenger Replica Project - 08/27/10 06:01 PM
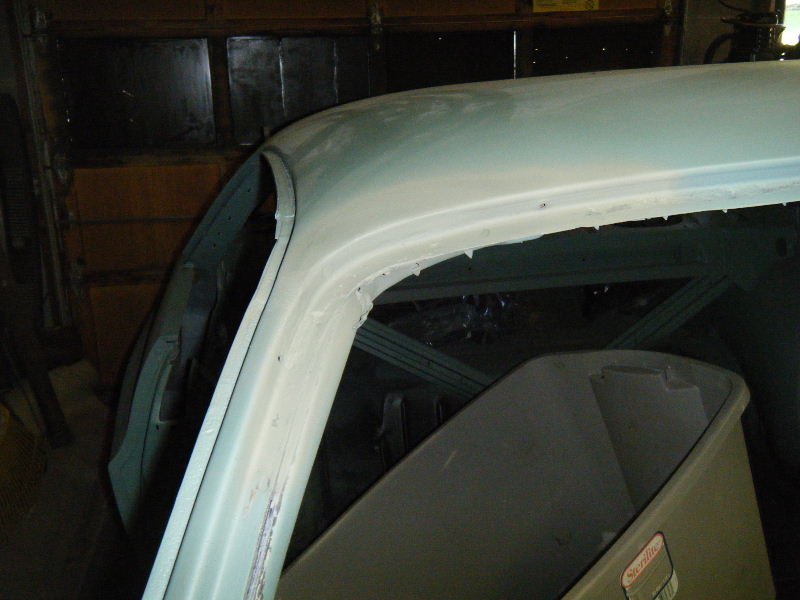
After the repair.
Posted By: jrwoodjoe
Re: T/A Challenger Replica Project - 08/27/10 06:02 PM
Before shot of lower front windshield channel and upper cowl area.
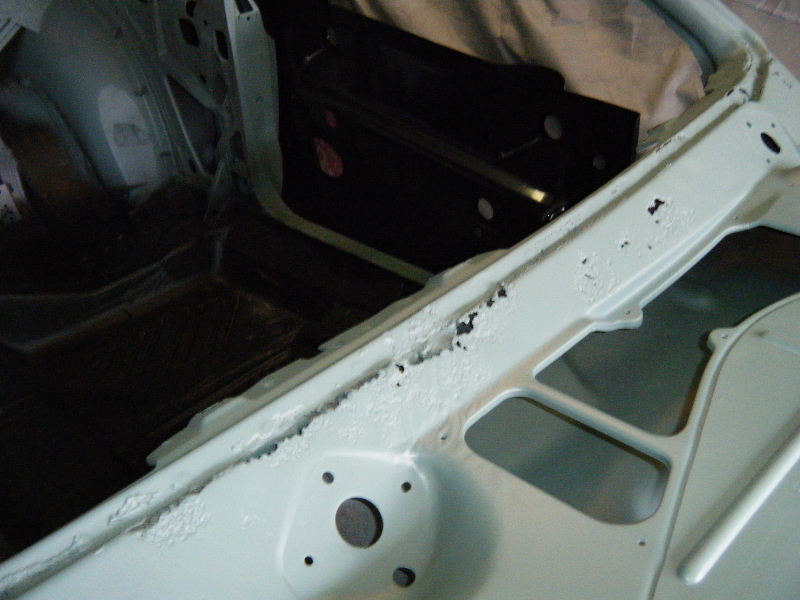
Posted By: jrwoodjoe
Re: T/A Challenger Replica Project - 08/27/10 06:04 PM
After the repair (photo is reverse angle).
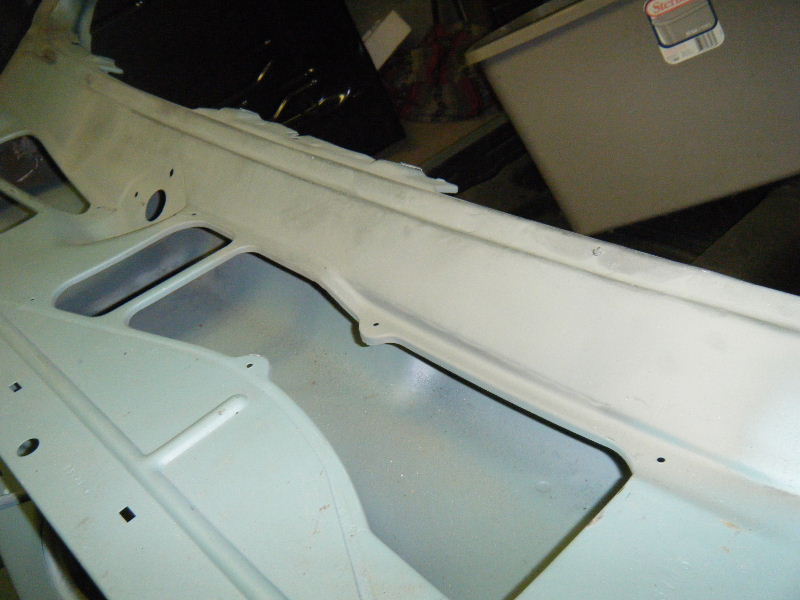
Posted By: jrwoodjoe
Re: T/A Challenger Replica Project - 09/10/10 03:14 PM
Been pretty busy lately working on a lot of small things. Blasted a couple of boxes of items this week and began refinishing them. Here is a photo of just one of the boxes after blasting. All of the items were pretty rusty before blasting.
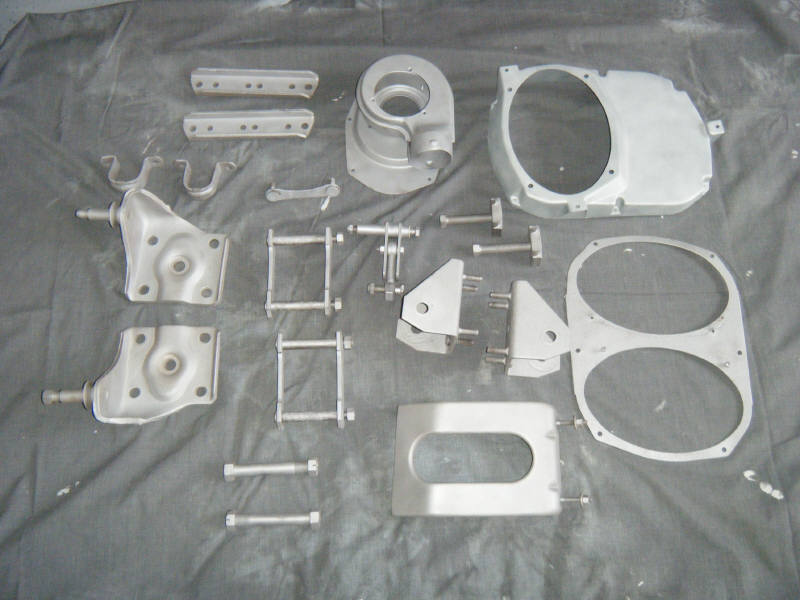
Posted By: jrwoodjoe
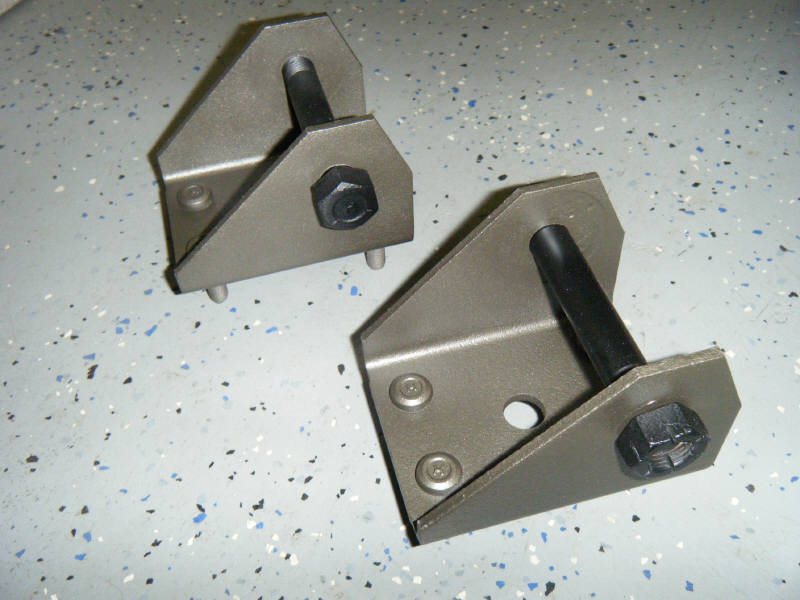
Re: T/A Challenger Replica Project - 09/10/10 03:23 PM
Here's a shot of the Leaf Spring Front Mounting Brackets after some refreshing.
Posted By: burdar
Re: T/A Challenger Replica Project - 09/10/10 03:27 PM
Things are looking really good so far. When it comes time to refinish some fasteners, look into a black oxide kit from Caswell Plating. I just refinished a batch of fasteners Wednesday night. That kit works really well.
Keep the pics coming.

Posted By: jrwoodjoe
Re: T/A Challenger Replica Project - 09/13/10 09:26 PM
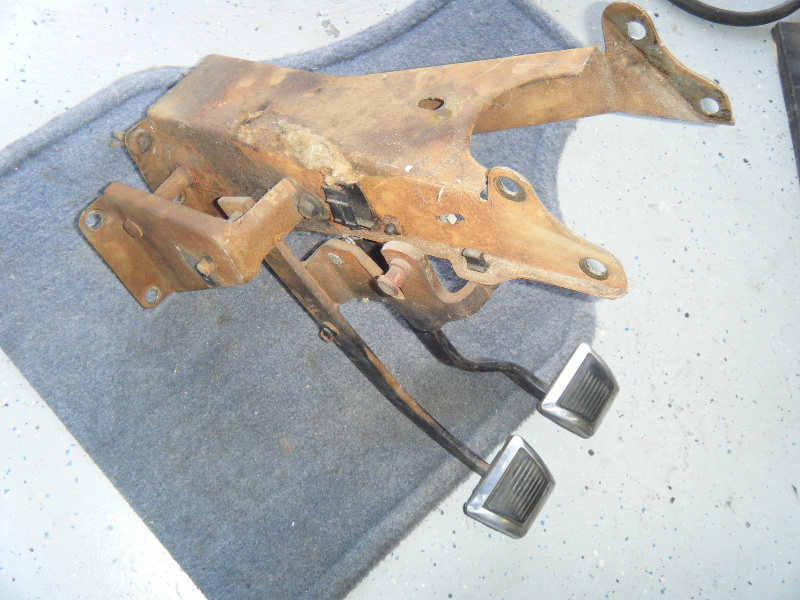
Finally finished up reassembling the Clutch/Brake Pedal assembly today. They say that imitation is the best form of flattery. I hope Jules the Wiperman feels flattered. This the best component resto. that I have done thus far. I think it turned out great but it's only because of all the help and advice Jules gave me. Thanks Jules!

Hope he and you guys like it as much as I do.
So here's some before and after photos.
Joe
Posted By: jrwoodjoe
Re: T/A Challenger Replica Project - 09/13/10 09:28 PM
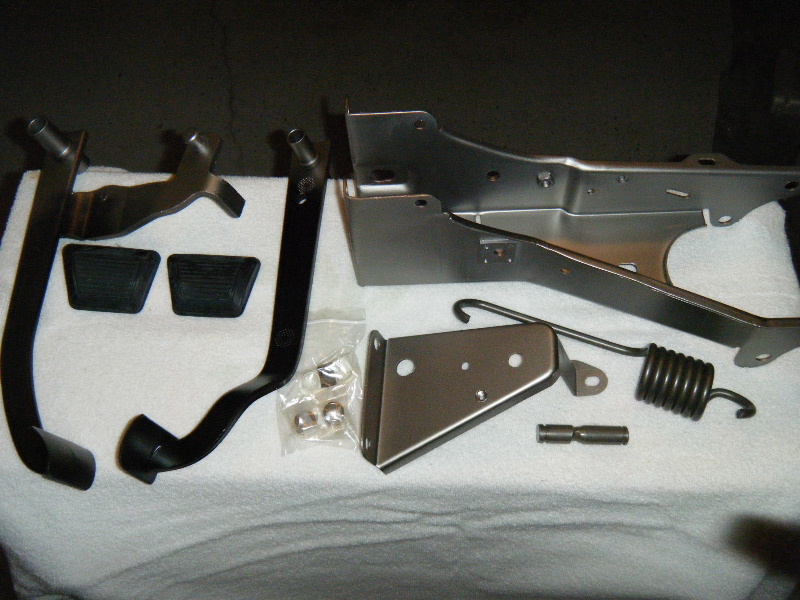
Post clean-up and pre assembly. Rebuild parts came from Brewer's.
Posted By: jrwoodjoe
Re: T/A Challenger Replica Project - 09/13/10 09:29 PM
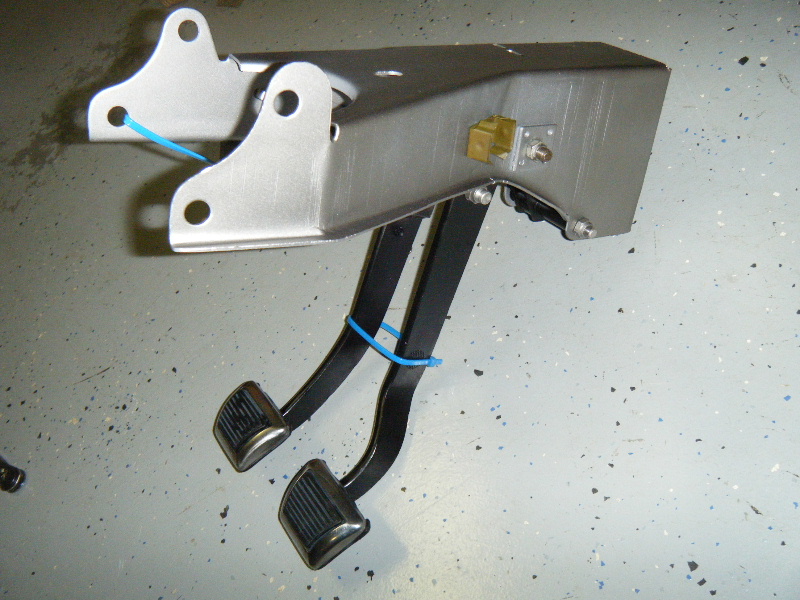
After shot 1
Posted By: jrwoodjoe
Re: T/A Challenger Replica Project - 09/13/10 09:30 PM
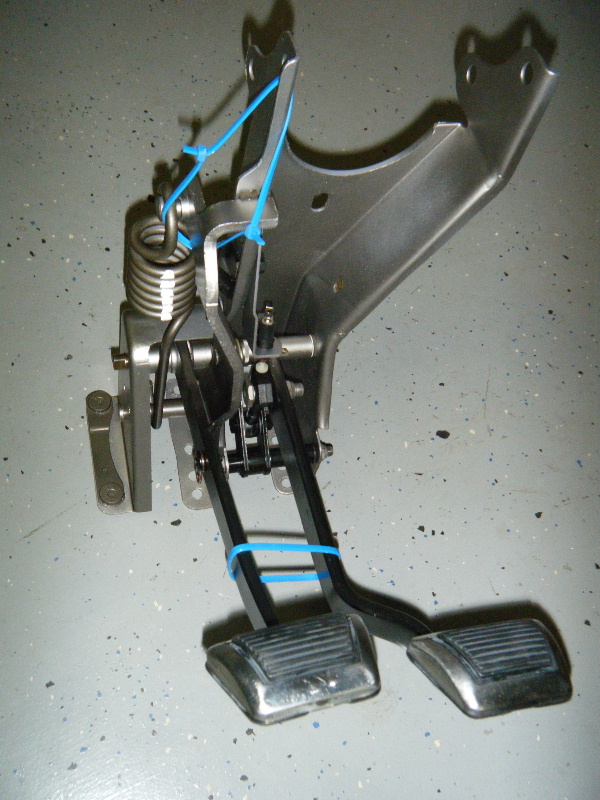
After shot 2. I even tried my hand at an inspection mark for kicks.

Posted By: 79machocharger
Re: T/A Challenger Replica Project - 09/13/10 09:57 PM
looks great, what did you use for a paint for the bare steel look on the bracket.
Posted By: burdar
Re: T/A Challenger Replica Project - 09/13/10 10:02 PM


Great work.
Posted By: JDMopar
Re: T/A Challenger Replica Project - 09/14/10 02:21 AM
Posted By: jrwoodjoe
Re: T/A Challenger Replica Project - 09/16/10 01:36 AM
Quote:
looks great, what did you use for a paint for the bare steel look on the bracket.
Ancient Chinese Secret, or was it Canadian? 


Thanks, for the kind words guys. Started on the steering column yesterday. Have it torn down and I will try to start cleaning some of the stuff up tomorrow is weather and time permit.
Joe
Posted By: ricomondo
Re: T/A Challenger Replica Project - 09/18/10 06:56 PM
Looks gr8!!!
That finish almost looks like one of the cast finishes from Eastwood?
Posted By: jrwoodjoe
Re: T/A Challenger Replica Project - 10/10/10 02:48 AM
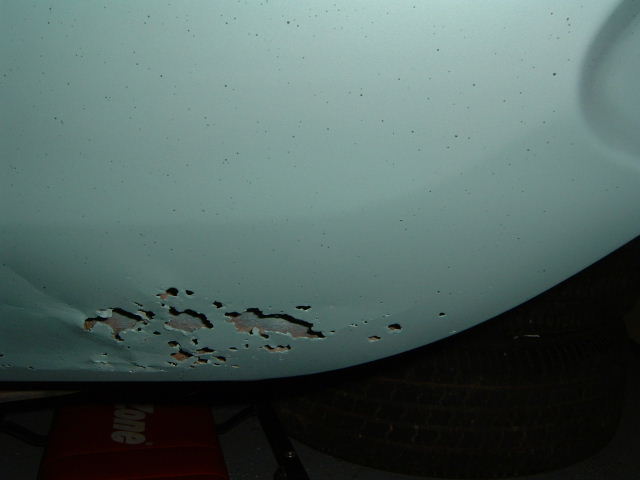
Update time. I've been busy working on the steering column restoration and hope to have photos of that soon. Meanwhile, I stopped in to check on rust repair progress. It's going really well and there are not too many rust spots left to cut out and repair.
So here are a few more before and after shots. Here is a before photo of the driverside lower rear quarter panel showing rust towards the rear.
Posted By: jrwoodjoe
Re: T/A Challenger Replica Project - 10/10/10 02:49 AM
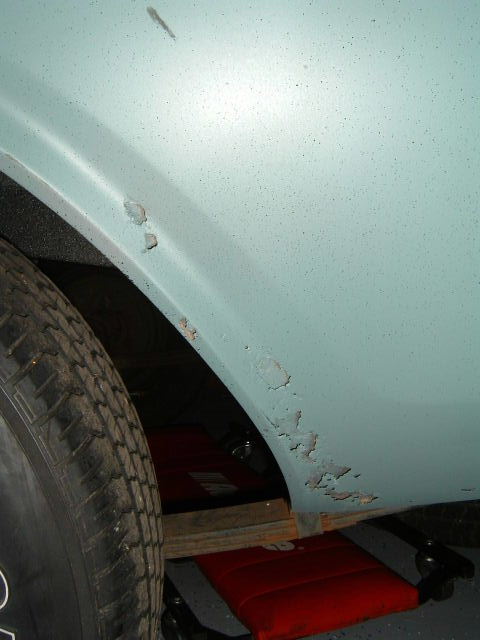
And another before shot of the same lower rear quarter showing the rust behind the wheelwell. NOTE: the "specks" you see are over spray from the undercoating and will be sanded off when the car is closer to being painted.
Posted By: jrwoodjoe
Re: T/A Challenger Replica Project - 10/10/10 02:53 AM
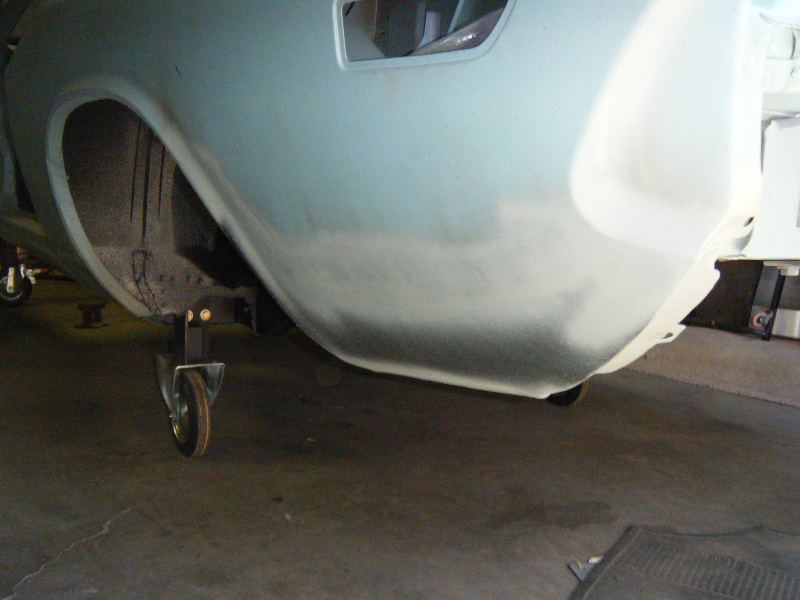
Here's the after with new AMD lower patch panel. It fit pretty well overall. We did find that one of the valance mounting tabs did not align perfectly with the hole on the trunk extension. However, it's an easy fix.
Posted By: jrwoodjoe
Re: T/A Challenger Replica Project - 10/10/10 02:59 AM
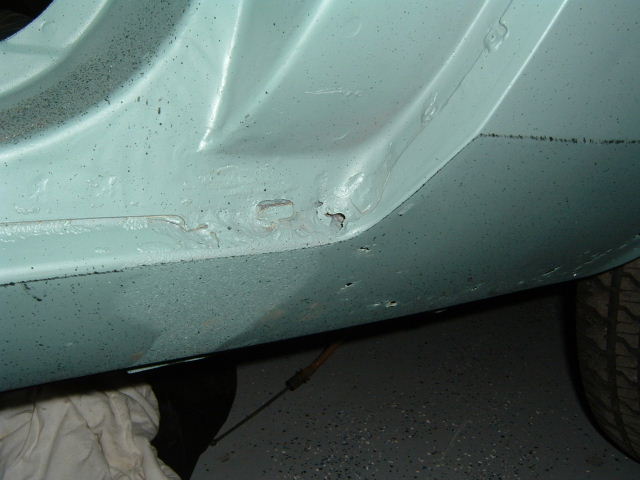
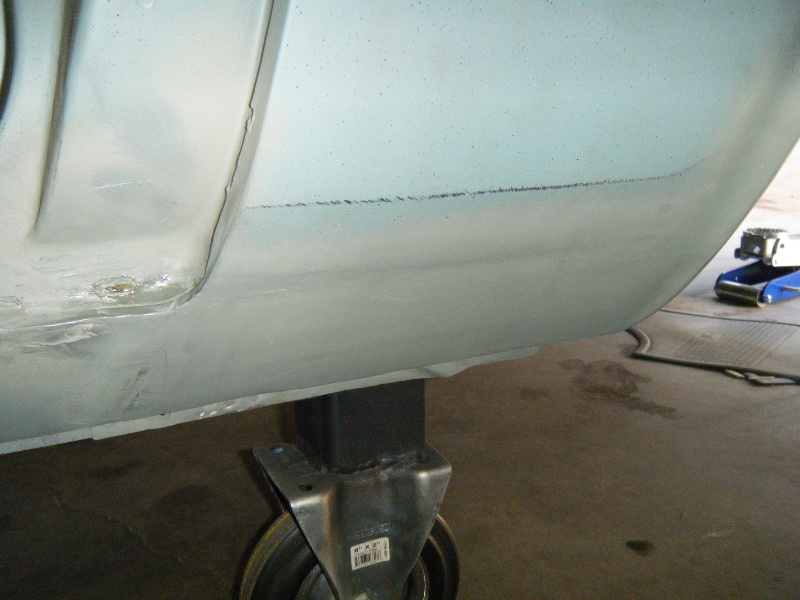
Here's rust in the corner where the rocker meets the rear quarter and rust on the lower rear quarter area.
Posted By: jrwoodjoe
Re: T/A Challenger Replica Project - 10/10/10 03:00 AM
And the repair.
Posted By: jrwoodjoe
Re: T/A Challenger Replica Project - 10/10/10 03:08 AM
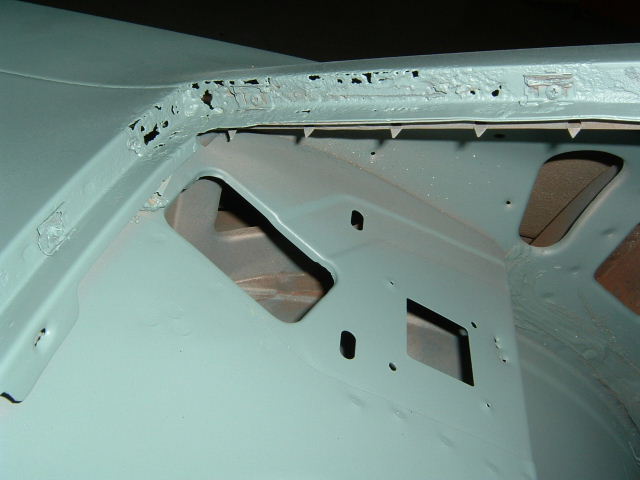
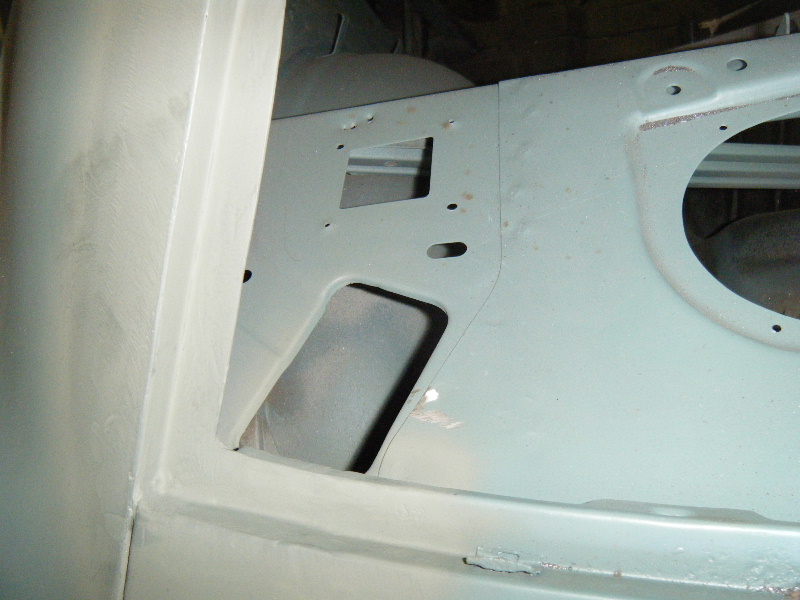
Rear window channel had rust in several places, this shows the rust on the lower driverside.
Posted By: jrwoodjoe
Re: T/A Challenger Replica Project - 10/10/10 03:09 AM
I took the after photo from a different angle but you can see it's now solid.

Posted By: jrwoodjoe
Re: T/A Challenger Replica Project - 10/10/10 03:18 AM
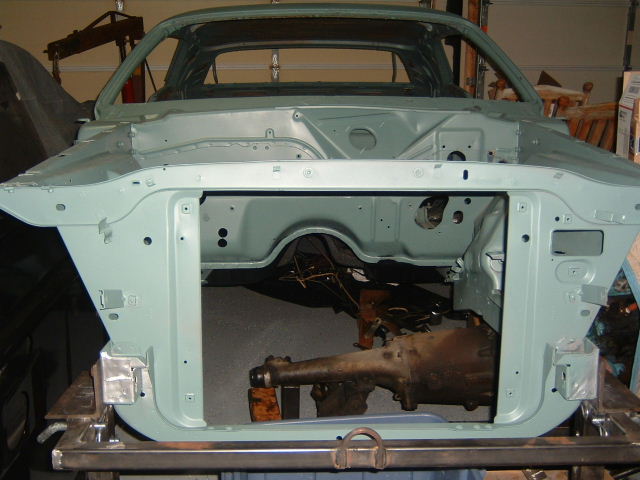
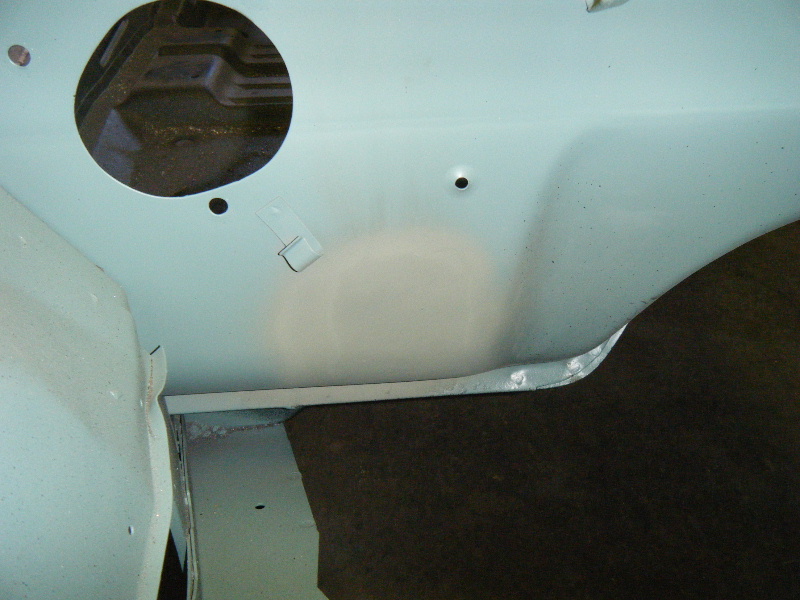
About a week ago, I made contact with the original owner of the car who ordered it new. He and I are going to talk soon and I can find out first hand about the car. One thing I was told is that he wanted A/C and had ordered it. However, when the car came it had all the options he wanted except the A/C was not present. So, the dealer installed A/C on the car. They drilled holes in the firewall which you can see in this shot. If you look through the radiator cut out to the upper left you can see the 2 holes.
Posted By: jrwoodjoe
Re: T/A Challenger Replica Project - 10/10/10 03:20 AM
They have now been welded up.
Posted By: JDMopar
Re: T/A Challenger Replica Project - 10/10/10 04:09 AM
Looking better all the time

Will you be able to take it to the painter when it leaves the metal dudes shop? It's sure gonna look
GOOD when it's done!

Posted By: jrwoodjoe
Re: T/A Challenger Replica Project - 10/10/10 07:41 PM
As it stands right now, everything will time out perfectly to go to the painters straight from his shop.

Both the metal guy and painter are running about 2 weeks later than we'd hoped but I can't complain. Good communication with both of them and no reservations about the work so I'm a happy camper at this point.

Posted By: jrwoodjoe
Re: T/A Challenger Replica Project - 10/22/10 02:57 PM
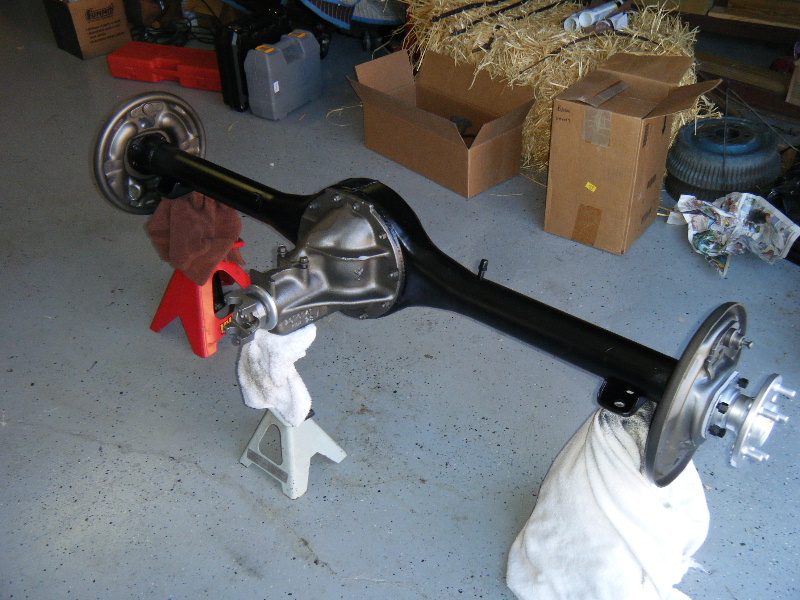
New gaskets and seals arrived from Dr. Diff early this week. And I made some decent progress on making the rear axle more "spiffy". Still need to torque down the axle flange bolts and adjust end play. Also need to check my rear drums and see if they need/can be turned. If they can be turned then I'll get those painted too. I ordered new brake shoes and wheel cylinders so I'm waiting for those to show.
The axle was an open 2.94. I switched it over to a suregip.. Originally, I was going to install 3.55 gears but then I decided to go with 3.91s. Since this is supposed to be a fun car, I thought the 3.91s might be a little more fun.
Joe
Posted By: jrwoodjoe
Re: T/A Challenger Replica Project - 10/31/10 01:58 AM
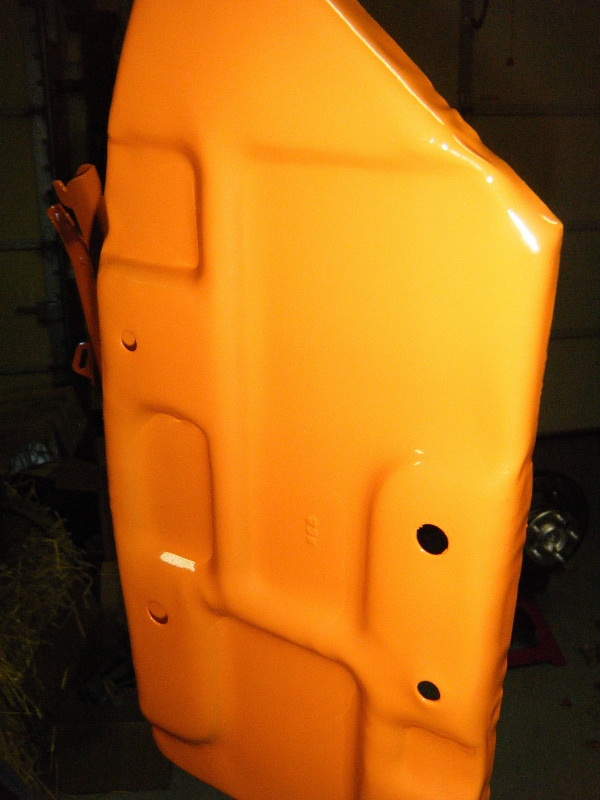
It was a very busy week this week. My goal was to finish up the rear axle but things changed pretty quickly when my painter body guy called and asked me to bring over the hood, doors, fenders and other components that need bodywork and paint. He worked on the battery tray and hood hinges and after a spray out we shot some color to make sure we were happy with the mix and to decide once and for all what color to paint the car. After changing my mind a gazillion times over the last 5 year. EK2 finally won out. I'm stoked, and think it looks pretty awesome.
Posted By: jrwoodjoe
Re: T/A Challenger Replica Project - 10/31/10 02:09 AM
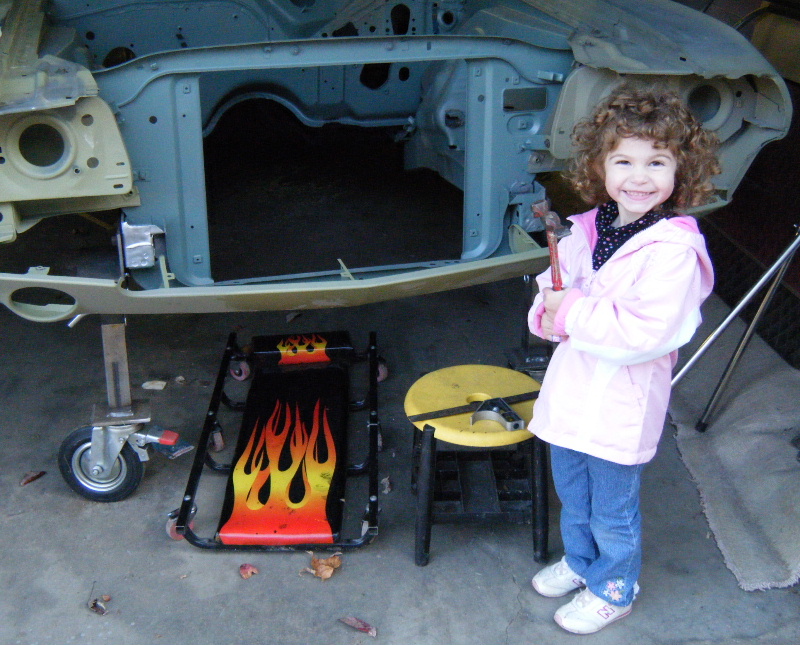
In the last 5 years, I took all the removable body panels off the car and had them media blasted and all the rust cut out with new sheet metal patches welded back in. So it's been a while since the panels were bolted on the car. After the panels were bolted up, we went over any potential problems and solutions with body fitment. My youngest daughter thought a hammer could solve all our problems and was ready to help out.

Posted By: burdar
Re: T/A Challenger Replica Project - 11/01/10 03:36 PM
That's a great picture. My son(he'll turn 2 in February) wanted to help dad install the e-brake cable on the Challenger last month. I've got a really cute pic of him helping me under the car.
Your doing great work so far. Keep it up.

Posted By: Finoke
Re: T/A Challenger Replica Project - 11/01/10 06:33 PM
EK2 is looking good!!!
You gotta be stoked to finally get some paint on!!!
Posted By: jrwoodjoe
Re: T/A Challenger Replica Project - 11/02/10 12:48 AM
Thanks Darren. That is my daughter who has had all of the health problems. She still has a long way to go but she is a little better this year than she was last year this time. I'm hoping next year she'll be doing even better. She is handful, it was all I could do to keep her from using the hammer on the car.

Thanks Tom. It is exciting to finally see some color, even if it is on small parts. I'm glad I went with Go Mango now. I have those pieces hanging in my garage along with some black parts I painted. Everytime I walk by, I get an idea of what the car might look like with the stripes on it. Puts a little fire in me to get stuff done. Going to be working in the garage tonight cleaning the transmission and some other parts. I have one more good painting day tomorrow then all goes to crap. Calling for 44 degrees and mixed precip. by Saturday.

Posted By: JDMopar
Re: T/A Challenger Replica Project - 11/02/10 03:01 AM
Posted By: Alaskan_TA
Re: T/A Challenger Replica Project - 11/02/10 04:40 AM
What a cutie!
She looks a lot like my niece did at that age, I fell asleep on the couch one day & woke up to her doodling all over my arm with a green magic marker.
Priceless!

Posted By: jrwoodjoe
Re: T/A Challenger Replica Project - 11/03/10 01:16 AM
Quote:
......and those two cute little girls of yours must take after their Mama!


Quote:
I fell asleep on the couch one day & woke up to her doodling all over my arm with a green magic marker.
Priceless! 
 Hope it was the washable markers.
Joe
Posted By: Alaskan_TA
Re: T/A Challenger Replica Project - 11/03/10 02:02 AM
Nope.
It is fun to kid her about it, she is 15 now.
Posted By: jrwoodjoe
Re: T/A Challenger Replica Project - 11/05/10 03:27 AM
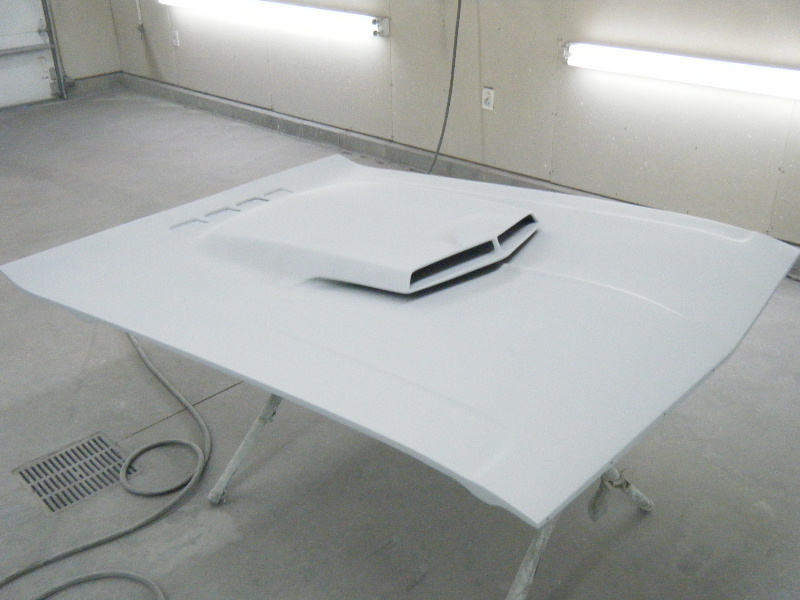
The hood is getting close to paint. We drilled the holes for the windshield squirters but this photo was taken just before that.
Posted By: JDMopar
Re: T/A Challenger Replica Project - 11/06/10 01:26 AM

I never thought of it till I just looked at the hood pic....but I bet it's a pain in the butt to paint one of those hoods. It would be hard to get coverage up under the scoop without running the snot out of the edges!

Posted By: jrwoodjoe
Re: T/A Challenger Replica Project - 11/07/10 05:16 AM
I know what you mean Jackie. I have looked at TONS of pics of T/As while working on this thing and I have seen quite a few that looked like they only got "dusted".

Joe
Posted By: JDMopar
Re: T/A Challenger Replica Project - 11/07/10 05:07 PM
I would think the best way to do it would be to tape off the rest of the hood, about even with the scoop....and then scuff as far as you can reach under the scoop, and then paint under the scoop. Then you could feather the edge where you painted, rescuff the black and then shoot the rest of the hood. The sure enough painters that read what I just wrote are probably

and think I'm

! It just looks hard to make that area of the hood look good if you don't do that kind of work everyday.

Posted By: jrwoodjoe
Re: T/A Challenger Replica Project - 11/07/10 07:33 PM
I'm no "painter" but I was thinking that maybe you tape the edge of the scoop, blast some paint underneath then remove the tape and finish the painting. Not sure how my guy is doing it.

Thinking he may have it painted this week and we'll see how it turns out.
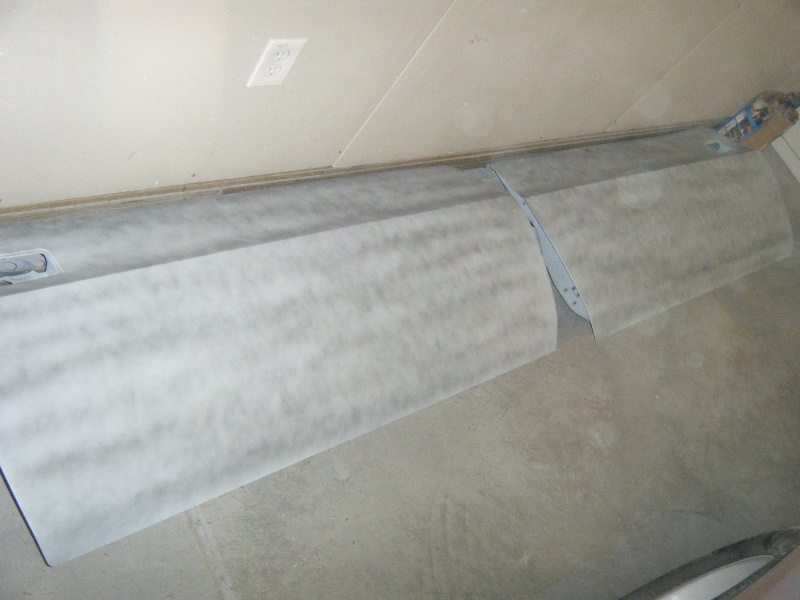
Here's a photo of the doors with a guide coat shot on them, I think he is on his 2nd round of block sanding.

Joe
Posted By: JDMopar
Re: T/A Challenger Replica Project - 11/08/10 03:18 AM
If he keeps up at this rate....you might get an orange Christmas present!

Posted By: cataclysm80
Re: T/A Challenger Replica Project - 11/10/10 02:51 AM
Looking GREAT Joe! Those door & hood look an awful lot like mine. I'm falling behind though, been working on other things. Look like you'll get done first. Nice pic with the Orange paint.
Tav
Posted By: jrwoodjoe
Re: T/A Challenger Replica Project - 11/11/10 10:49 PM
Thanks Guys!
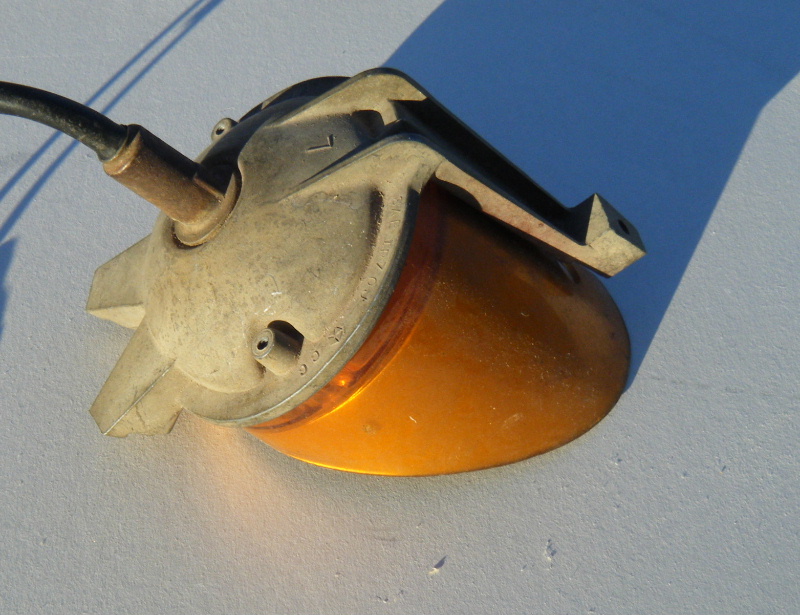
Today I dropped off the K-member to get blasted. Afterwards, I decided to tackle the parking lamp assemblies. So here is a before photo of how it looked.
Posted By: jrwoodjoe
Re: T/A Challenger Replica Project - 11/11/10 10:50 PM
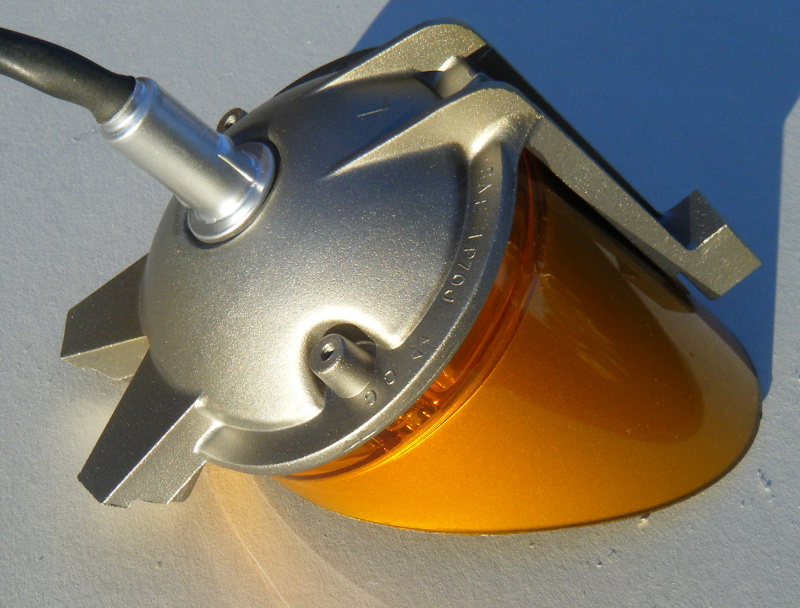
The after photo with new lenses from Mike at BE&A.
Joe
Posted By: burdar
Re: T/A Challenger Replica Project - 11/11/10 11:12 PM
That looks nice. If you wanted to, you could hit the socket with a couple light coats of Krylon Battery Protectant spray to give it a yellow/gold plated look.
Posted By: jrwoodjoe
Re: T/A Challenger Replica Project - 11/12/10 03:20 PM
You know Darren, I had looked at some a while back and thought the sockets were supposed to be bright sliver but after looking at other sockets I see where you are coming from.
They look really good in person (actually better than in the photos) and I almost hate to fiddle with them.

Getting ready to take my flywheel to get resurfaced. I'll think on it some while driving there and back.

Posted By: jrwoodjoe
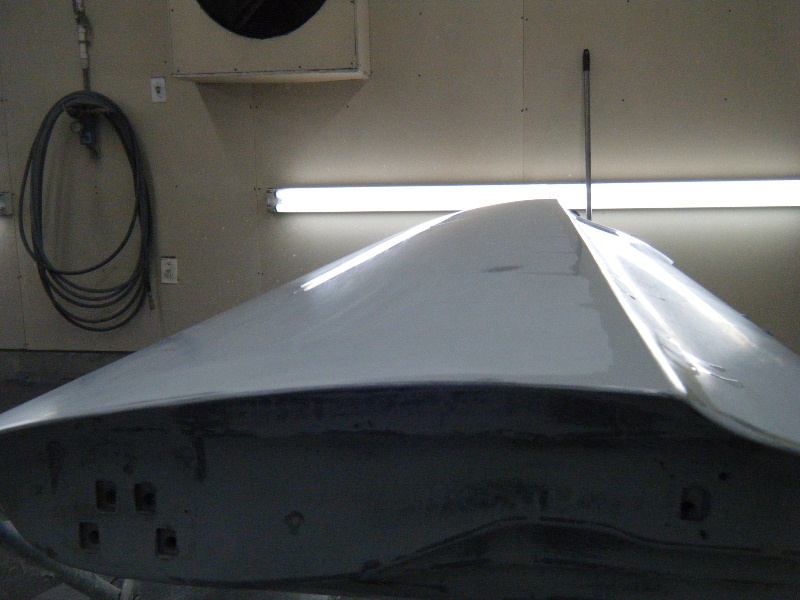
Re: T/A Challenger Replica Project - 11/15/10 10:38 PM
Flywheel has now been resurfaced. The warm weather over the weekend allowed me to get a few more odds and ends painted also. I was at the Painter's place today to review a few things. He was busy wet sanding the passenger door. It looked really straight and I can't wait to see it with some paint.
Posted By: jrwoodjoe
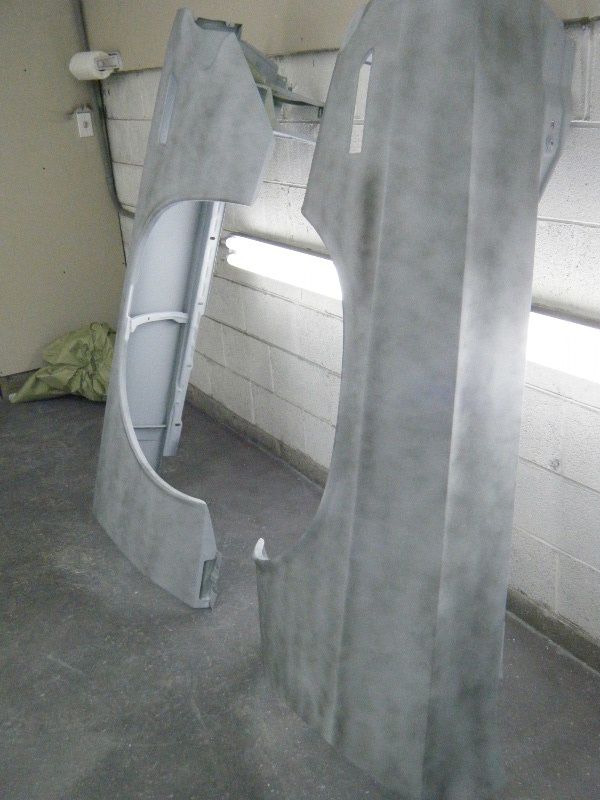
Re: T/A Challenger Replica Project - 11/15/10 10:41 PM
He also had done quite a bit of work on the fenders and had them ready for another round of block sanding with guide coat on them.
Posted By: jrwoodjoe
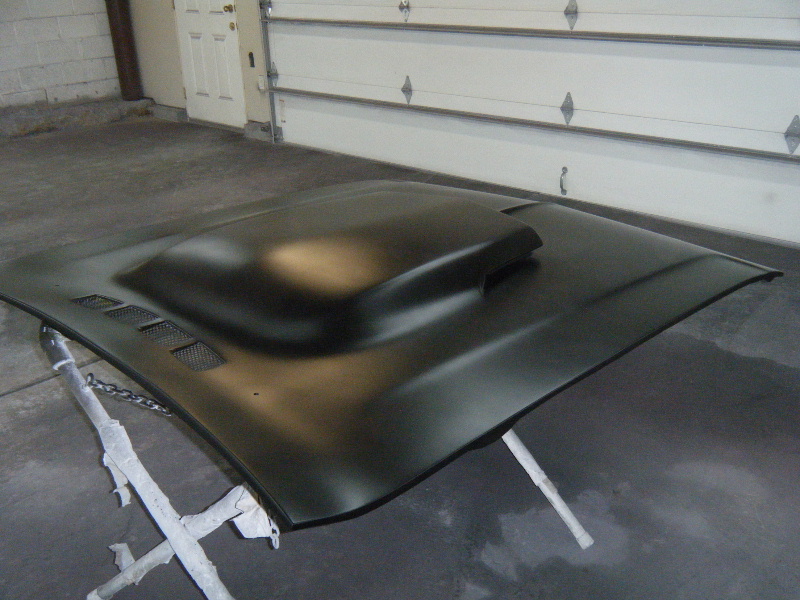
Re: T/A Challenger Replica Project - 11/17/10 02:15 AM
Painted Hood
Posted By: Anonymous
Re: T/A Challenger Replica Project - 11/17/10 02:36 AM
Quote:
He also had done quite a bit of work on the fenders and had them ready for another round of block sanding with guide coat on them.
Not to criticize, but blocking the panels when they're not bolted to the car (especially the front fenders) is a futile effort... 
Posted By: jrwoodjoe
Re: T/A Challenger Replica Project - 11/17/10 05:54 AM
Quote:
Quote:
He also had done quite a bit of work on the fenders and had them ready for another round of block sanding with guide coat on them.
Not to criticize, but blocking the panels when they're not bolted to the car (especially the front fenders) is a futile effort... 
No problem with your comment Mark. In fact, I said flat out to him, I don't know how you are going to get it straight without blocking the car with the panels attached. However in the days following that, I have read where some people prefer doing it the way he is provided the panels align good. The car was pretty straight from panel to panel to begin with. There was one area that that needed more addressing than usual but that was done when the panels were bolted on the car.
I've been following your build and you do great work. I wish I could perform some of the things you have done and had your skill set. But I don't. I can do a lot of the work on my cars myself but painting and bodywork are not areas that I do very well. So, I have to find someone that will do a nice job that I can afford. Not to mention someone that I can trust to prevent the car from winding up in Bodyshop Jail. Having seen this guy's work, I felt he could get me the job I wanted (or pretty darn close to it) for the amount of money I budgeted. I hope I am right. 
Joe
Posted By: rhamson
Re: T/A Challenger Replica Project - 11/17/10 02:57 PM
I agree with gy3. If you block sand the panels separate from the car the joints have a tendency to curve away from the panel joint. This is because the block is not guided across the joint and the edge of the panel gets sanded more than the rest of the flat or curved body lines.
You especially see this when the car is painted and reassembled where a sweeping bulge appears away form the joints. I have seen it many times where the panels meet the doors. I agree that it is easier to do the work with the car disassembled but the results should be the first concern.
I would insist on getting this done right from the start as after the car is painted and paid the bodyman gets amnesia about your car very quickly.
I kind of wonder if your affordable bodyman is worth it.
Posted By: Anonymous
Re: T/A Challenger Replica Project - 11/17/10 10:07 PM
Quote:
I wish I could perform some of the things you have done and had your skill set.
My bodywork is far from perfect and the pictures make it look better than it is! 
That being said I have many hours of blocking down both sides of my car ahead of me but it will be with it totally assembled!
Posted By: jrwoodjoe
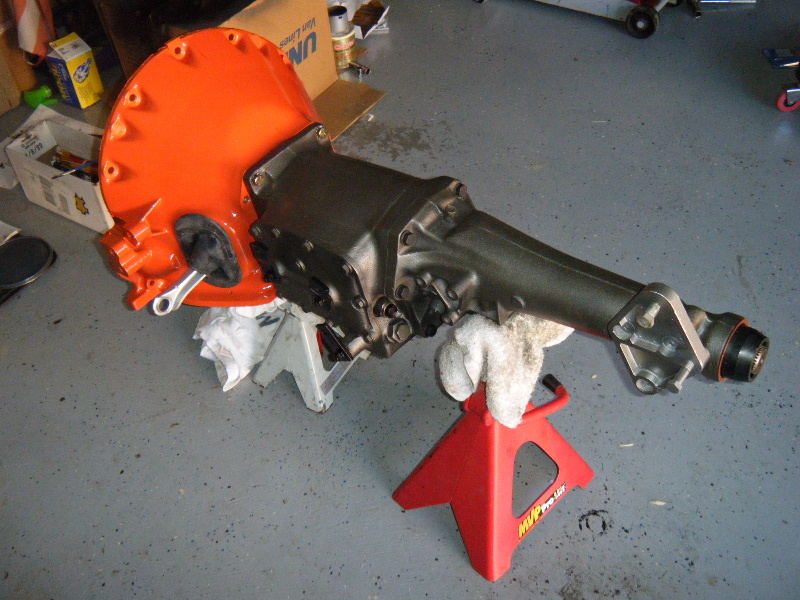
Re: T/A Challenger Replica Project - 11/19/10 08:10 PM
Got the transmission finished up today. As soon as I locate a driver side 340 Motor Mount, I'll get this joined up with the engine. The bad thing is that I had a motor mount on another 340 engine and forgot about the driverside being different. I sold the engine with the motor mount on it. DOOHH!

Posted By: jrwoodjoe
Re: T/A Challenger Replica Project - 11/19/10 08:12 PM
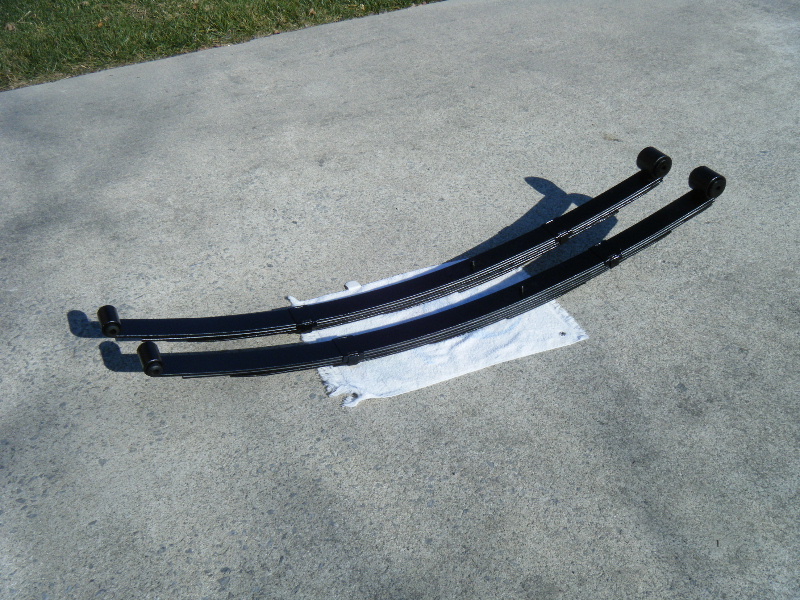
Also picked up the springs today after being Re-done to T/A specs. They painted them for me and they are OK, but I think I may work on them a little and try to make them look a little nicer.
Posted By: cataclysm80
Re: T/A Challenger Replica Project - 11/22/10 03:11 PM
Hi Joe, Where'd you end up getting your springs done at?
Tav
Posted By: jrwoodjoe
Re: T/A Challenger Replica Project - 11/22/10 11:55 PM
Hey Tav,
Ended up getting them done at American Spring Distributors in Knoxville. I told them that I wanted them T/A Spec and they re-arched them and added a leaf. They also installed the front and rear bushings and painted them. Their service includes one free "adjustment". If the car does not sit the way I expect or want it to sit, I can take the springs back to them and they will adjust them at no charge.
How is your car coming along? Looking for some updates..

Posted By: JDMopar
Re: T/A Challenger Replica Project - 11/23/10 04:58 AM
The hood looks good in the pic. Did it come out to suit you?
Posted By: jrwoodjoe
Re: T/A Challenger Replica Project - 11/23/10 02:27 PM
Because I like for things to be absolutely perfect, I can be a hard person to please.

That being said, It turned out pretty well. It looks nice.
Right now, my biggest problem is that the garage is a wreck. With the unseasonally warm weather, I have bee cleaning and painting things like crazy. They are spread out all over the garage and I have to get them put back together and put away before the car gets back. Right now, there is no place for the car to go.

Posted By: JDMopar
Re: T/A Challenger Replica Project - 11/23/10 03:25 PM
Sounds like a good problem to have!

When it gets back....if you'd like a hand getting it back to rolling on its own 4 wheels, just holler at me and I'll run down and help you one day. I think we could easily do it on a Saturday. Heck....Alan does it by himself in about 30 minutes!


Posted By: Finoke
Re: T/A Challenger Replica Project - 11/23/10 11:02 PM
Joe,
Looking just awesome! I sent you a PM
Tom
Posted By: jrwoodjoe
Re: T/A Challenger Replica Project - 11/24/10 02:32 AM
Thanks Tom and JD, both of you guys ROCK...

I may take you up on the offer JD. You and the MRS. can come down and spend the night. I'll cook some good food for you guys. Of course, our guest room and bed may be filled with car parts but we can boot one of the kids out of their room for ya.

Posted By: cataclysm80
Re: T/A Challenger Replica Project - 11/26/10 10:24 PM
Quote:
Hey Tav,
How is your car coming along? Looking for some updates.. 
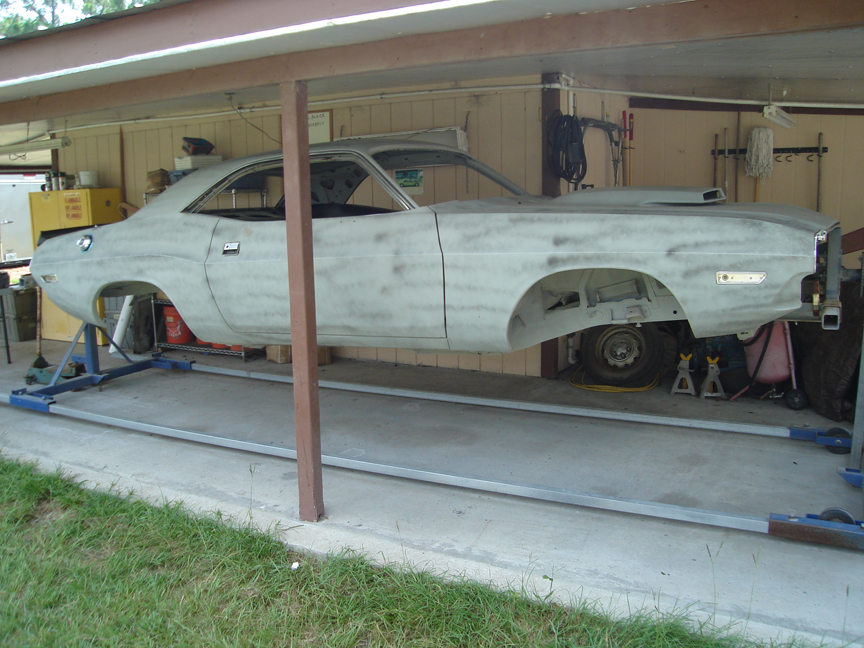
I haven't done much with my Challenger at all this year. I got engaged in January, and married in June. I've been working on my daily driver instead, new paint, interior, and some upgrades. I'm planning on buying a bigger house in December. I'm looking forward to having some extra garage space and a garage with at least 4 walls. here's where I'm at now. I have a project thread, but haven't updated it in a LONG time.
Tav
Posted By: jrwoodjoe
Re: T/A Challenger Replica Project - 12/13/10 05:16 AM
CONGRATULATIONS TAV on the engagement.

Looks like you're making some great progress on the car. It may be hard to get anything done with all the wedding arrangements...

.. But hang in there.

Just a quick update on my project. I had posted that I was needing a 340 Motor mount bracket and Moparts member FINOKE was kind of enough to send me one from his personal stash. He's a good guy and that was an awesome thing to do. Thanks again Tom.

I cleaned up the mount bracket he sent and some other brackets and engine pieces and painted them this week. It was really cold so I brought the parts in the house to warm them up as well as paint. Then I suspended them from wire and ran outside and shot them really quick. I opened the cabinet doors in the kitchen and hung them from the handles to dry and cure some. Good thing the wife was out of town or there might have been some

Also, checked on the car on Saturday and it's going well. Painter was hoping to be done by New Years but he told me Saturday that it will probably be after the first before he can get it wrapped up. Before sending him the car, I noticed a problem with the spoiler not fitting the trunk lid well. There was a gap on the right side between the bottom of the spoiler and the top of the trunklid. When I got there, he was bolting the spoiler on to test fit it after some metal work was done on the trunklid. The spoiler now fits flush as it should and looks great.

Posted By: JDMopar
Re: T/A Challenger Replica Project - 12/14/10 03:04 AM
Posted By: jrwoodjoe
Re: T/A Challenger Replica Project - 12/14/10 02:10 PM
Posted By: jrwoodjoe
Re: T/A Challenger Replica Project - 12/24/10 04:33 PM
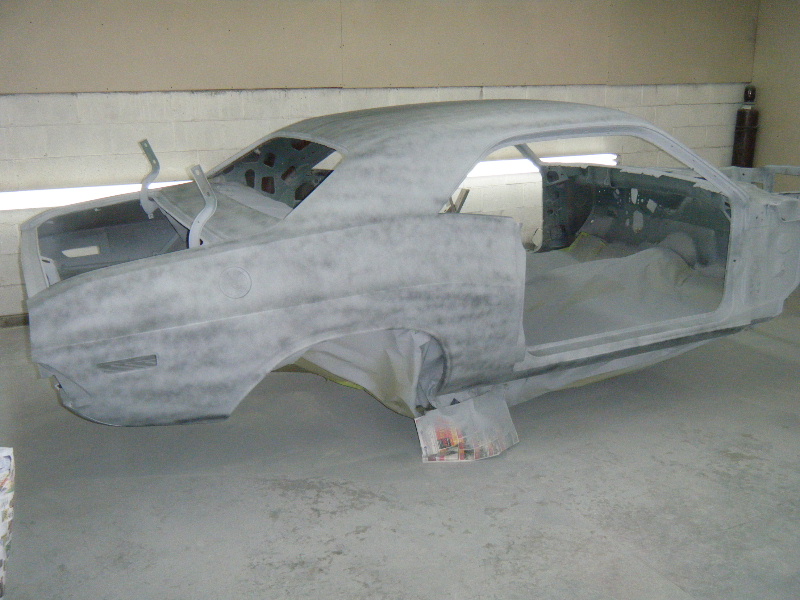
I stopped by to check on the progress of the car. He had the body, rear valance and trunklid straight and in primer w/ guide coat. Here are some pics.
Hope everyone has a great Christmas.
Posted By: jrwoodjoe
Re: T/A Challenger Replica Project - 12/24/10 04:34 PM
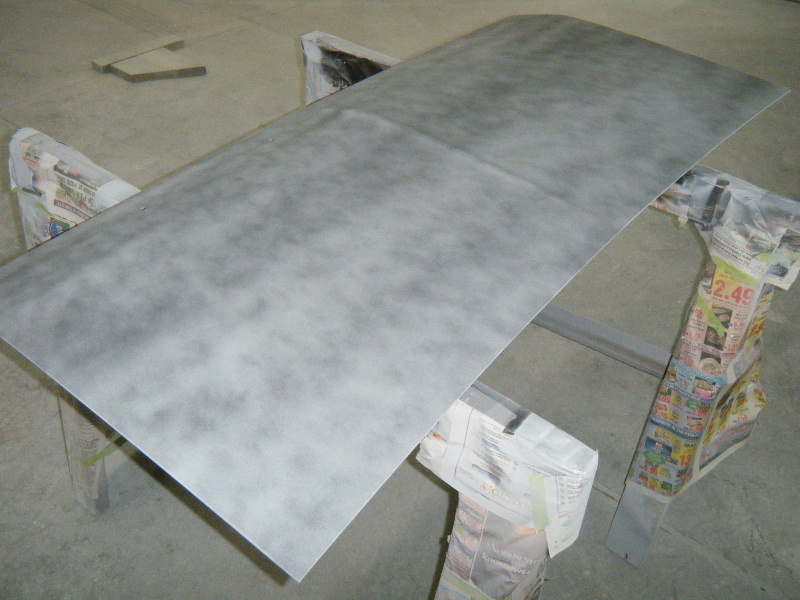
Trunk Lid
Posted By: jrwoodjoe
Re: T/A Challenger Replica Project - 12/24/10 04:35 PM
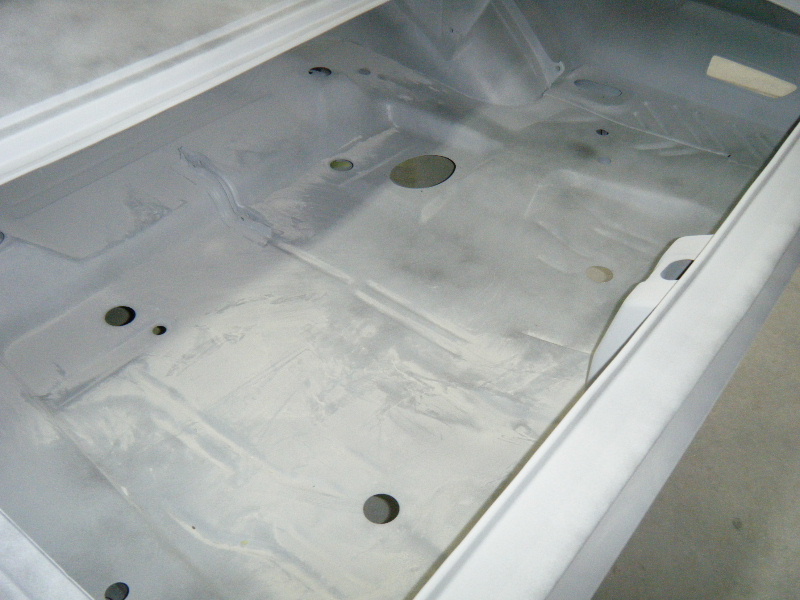
New AMD Trunk floor.
Posted By: Finoke
Re: T/A Challenger Replica Project - 01/03/11 07:39 PM
I need an update! We're both racing to the EK2 finish line

Posted By: jrwoodjoe
Re: T/A Challenger Replica Project - 01/04/11 01:59 AM
I'll give you an update if you give me one.

I spoke to my painter last night. He said that he would probably be ready to paint next week. Meanwhile, I have been trying to get the garage ready for when it gets back. I still had the old MCyl and brake lines sitting on some plastic. I was going to buy new brake lines but mine were in good shape other than being nasty. So, I decided to try and clean them and see how they would turn out. I did a little test and was happy with the results so I'm going to re-use them. I'll try to finish cleaning them this week and finish organizing the garage.
Posted By: JDMopar
Re: T/A Challenger Replica Project - 01/04/11 04:44 AM
Nuh uh! You ain't foolin me

That line on the right is a brand new one!

Just kidding....looks great!


Posted By: demon1515
Re: T/A Challenger Replica Project - 01/05/11 10:46 PM
Quote:
I'll give you an update if you give me one. 
I spoke to my painter last night. He said that he would probably be ready to paint next week. Meanwhile, I have been trying to get the garage ready for when it gets back. I still had the old MCyl and brake lines sitting on some plastic. I was going to buy new brake lines but mine were in good shape other than being nasty. So, I decided to try and clean them and see how they would turn out. I did a little test and was happy with the results so I'm going to re-use them. I'll try to finish cleaning them this week and finish organizing the garage.
So what did you do to get em brake lines that clean? i need to do the same with mine!
Posted By: jrwoodjoe
Re: T/A Challenger Replica Project - 01/06/11 01:42 AM
Quote:
Quote:
I'll give you an update if you give me one. 
I spoke to my painter last night. He said that he would probably be ready to paint next week. Meanwhile, I have been trying to get the garage ready for when it gets back. I still had the old MCyl and brake lines sitting on some plastic. I was going to buy new brake lines but mine were in good shape other than being nasty. So, I decided to try and clean them and see how they would turn out. I did a little test and was happy with the results so I'm going to re-use them. I'll try to finish cleaning them this week and finish organizing the garage.
So what did you do to get em brake lines that clean? i need to do the same with mine!
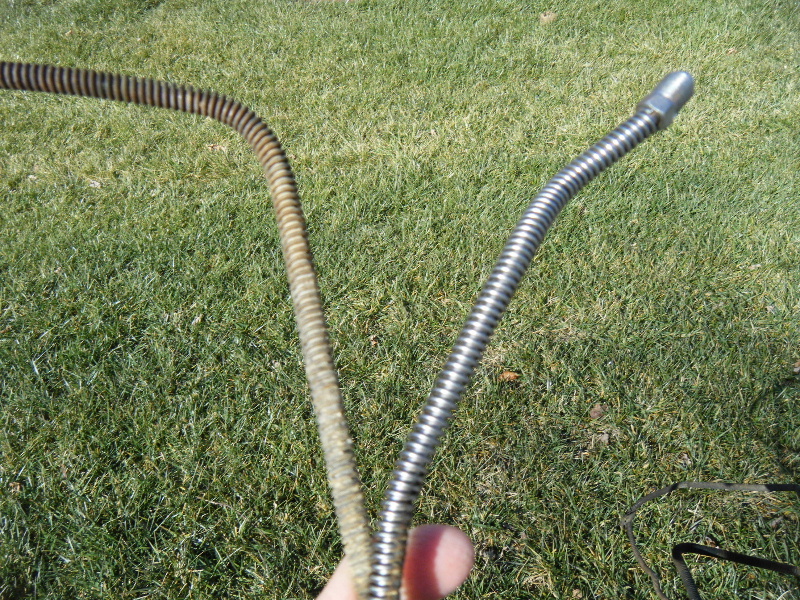
Wire wheel mounted to one of these.

Posted By: jrwoodjoe
Re: T/A Challenger Replica Project - 01/28/11 01:53 AM
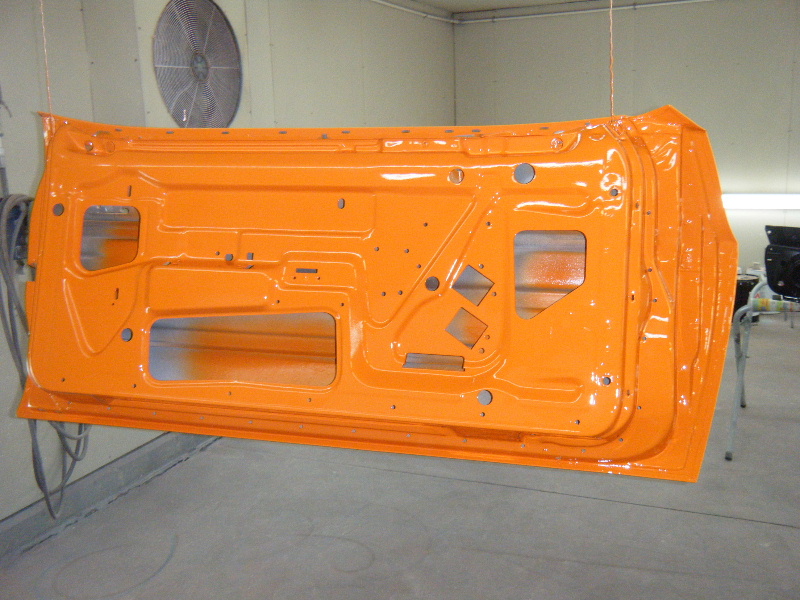
Sorry about not updating in a while. We are currently going through another round of trying to wean our daughter from her feeding tube and I have been pretty busy with that. BUT, the car is finally painted so here goes some pics.
Inside of door...
Posted By: jrwoodjoe
Re: T/A Challenger Replica Project - 01/28/11 01:55 AM
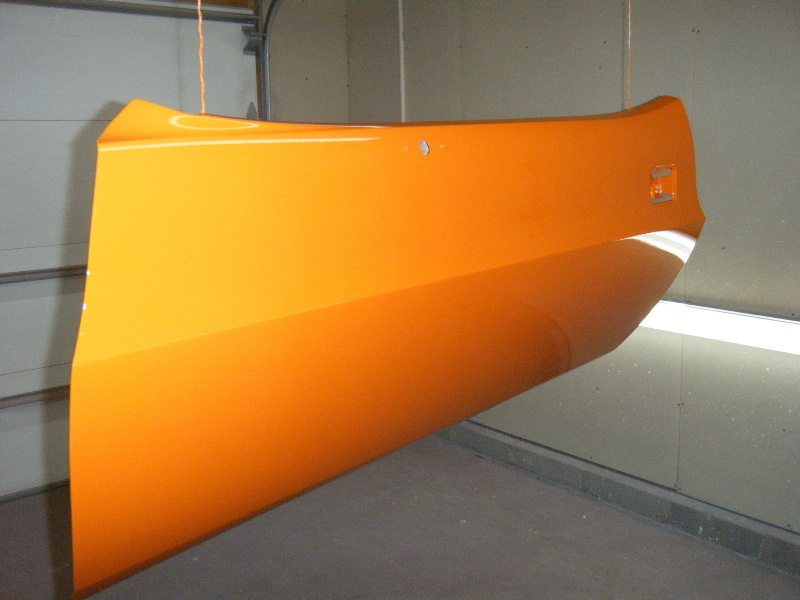
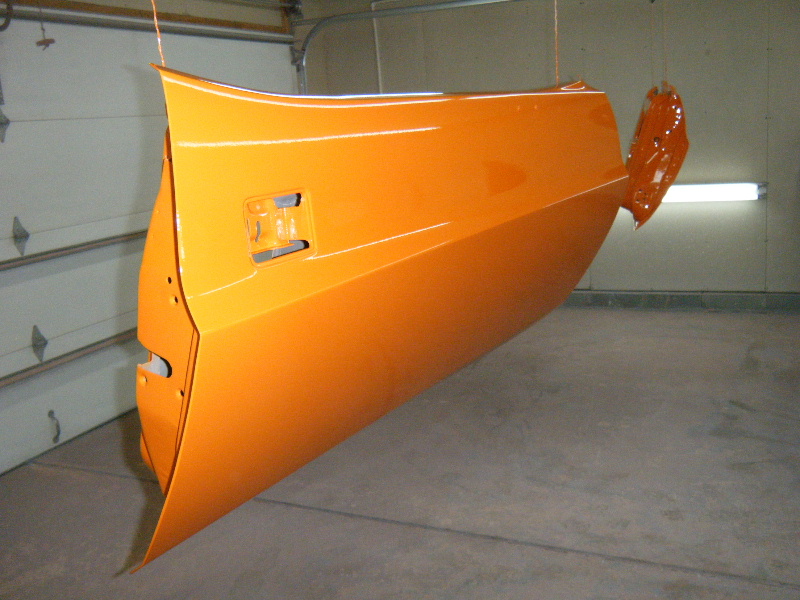
Shot of door exterior BEFORE final wetsand and buff.
Posted By: jrwoodjoe
Re: T/A Challenger Replica Project - 01/28/11 01:56 AM
Other door BEFORE wetsand and final buff.
Posted By: jrwoodjoe
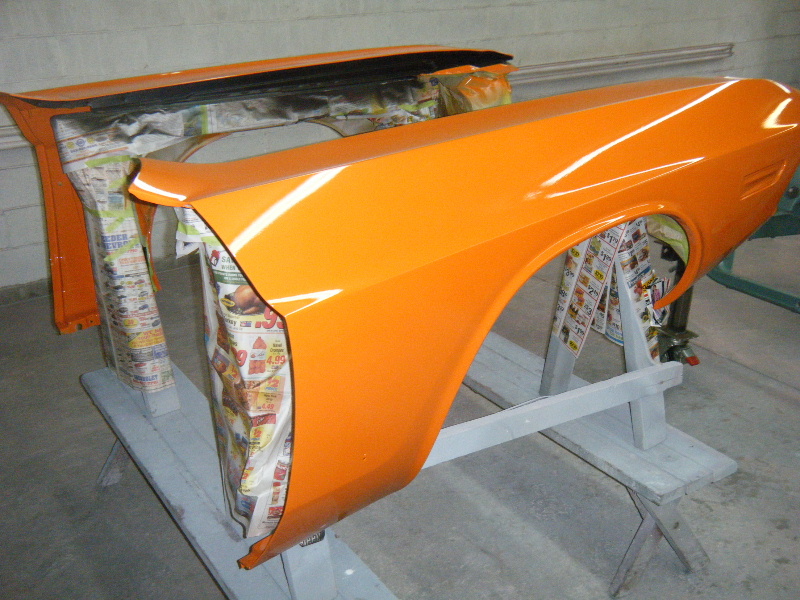
Re: T/A Challenger Replica Project - 01/28/11 01:59 AM
Right Fender BEFORE wetsand and final buff.
Posted By: jrwoodjoe
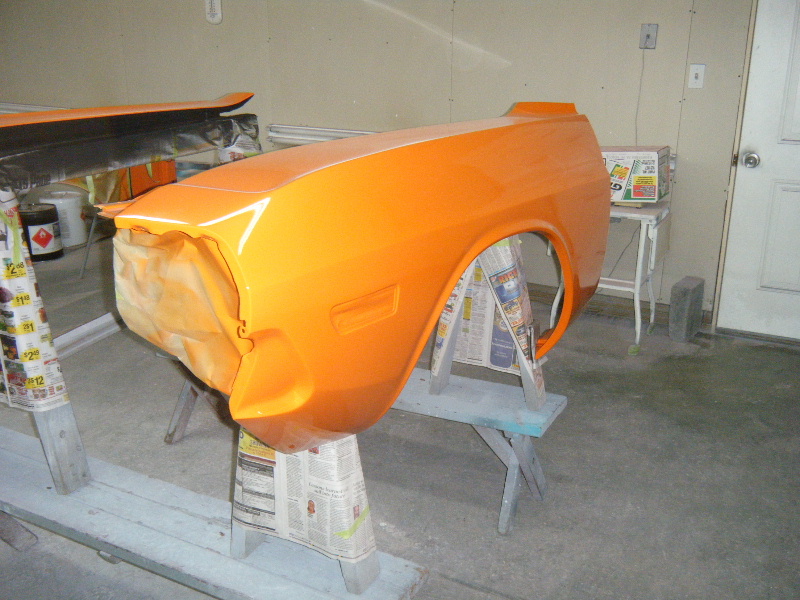
Re: T/A Challenger Replica Project - 01/28/11 02:00 AM
Left fender BEFORE wetsand and final buff.
Posted By: jrwoodjoe
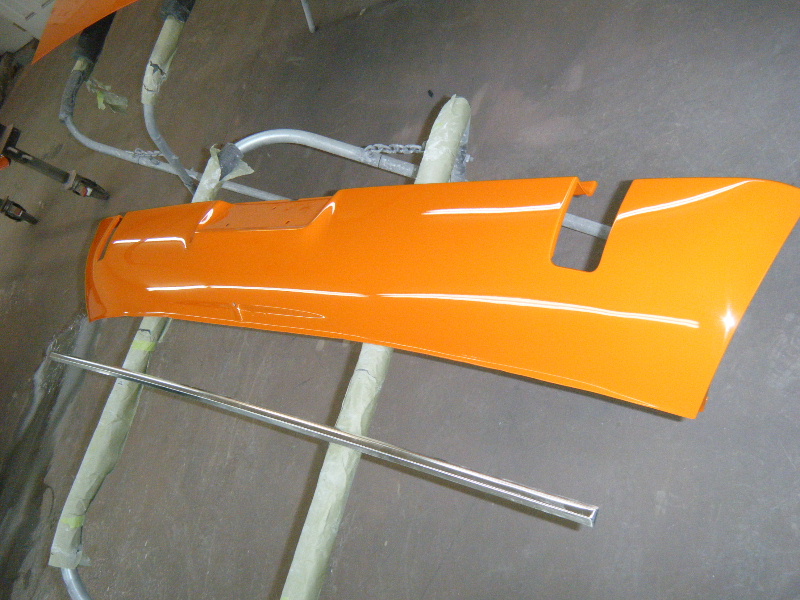
Re: T/A Challenger Replica Project - 01/28/11 02:01 AM
Rear valance AFTER wetsand and final buff.
Posted By: jrwoodjoe
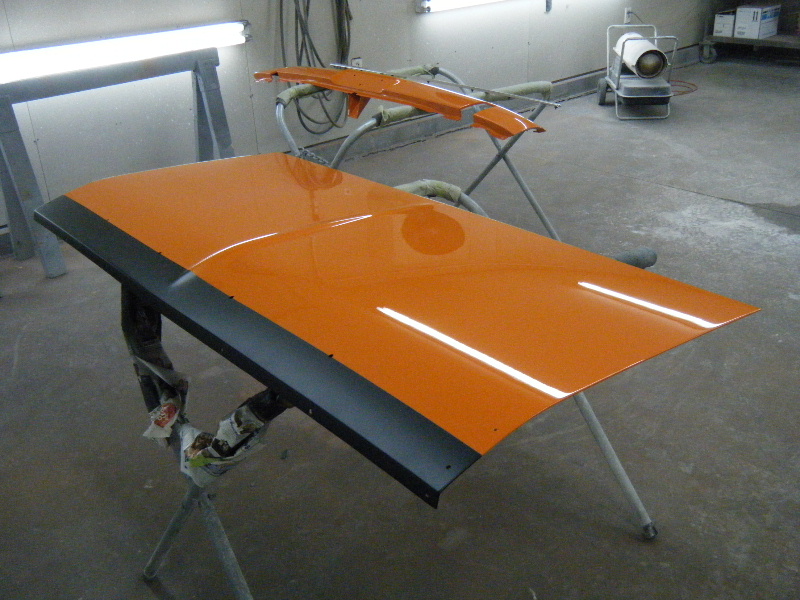
Re: T/A Challenger Replica Project - 01/28/11 02:02 AM
Trunklid AFTER wetsand and final buff.
Posted By: jrwoodjoe
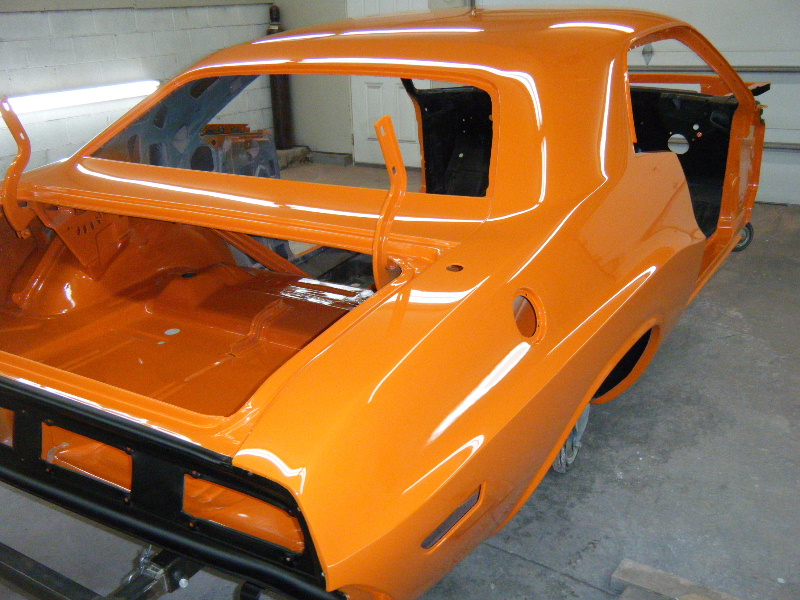
Re: T/A Challenger Replica Project - 01/28/11 02:04 AM
Car Shell AFTER wetsand and final buff.
Posted By: jrwoodjoe
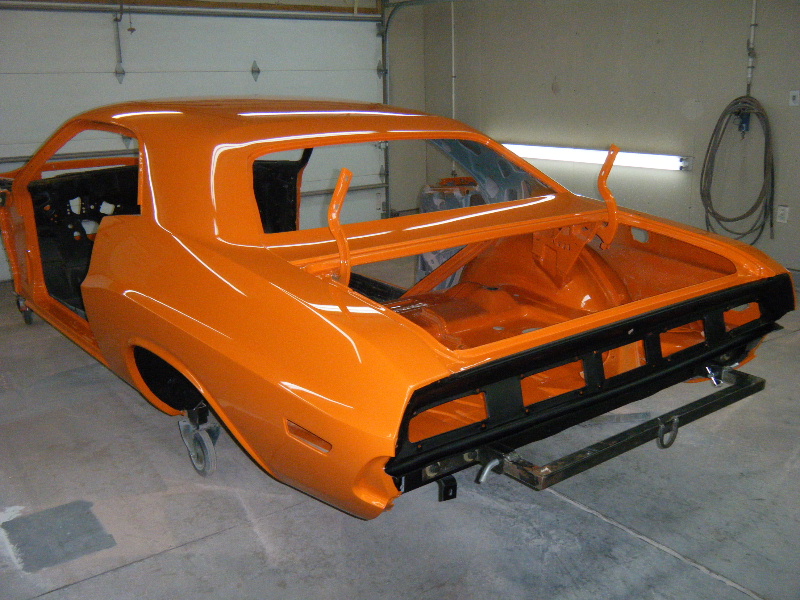
Re: T/A Challenger Replica Project - 01/28/11 02:07 AM
Another.
Also, for those that are curious about the black inner firewall. I know that it is not correct but I have always HATED seeing color show under the dash above the carpet. Call me crazy, just a little quirk of mine. If the car was a real T/A, I'd do it like factory. Since it isn't, I did it myway.

Posted By: jrwoodjoe
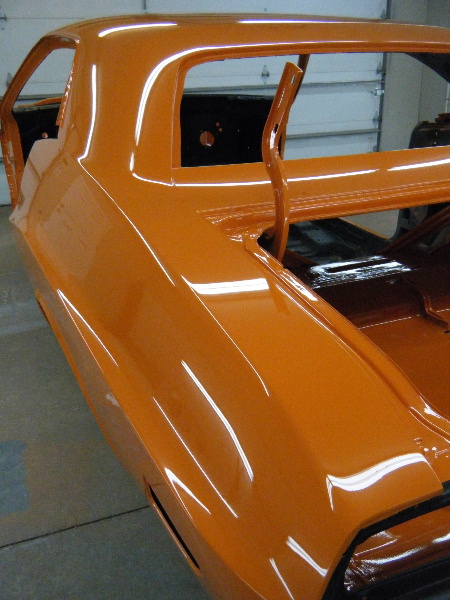
Re: T/A Challenger Replica Project - 01/28/11 02:11 AM
Another shot
Posted By: jrwoodjoe
Re: T/A Challenger Replica Project - 01/28/11 02:12 AM
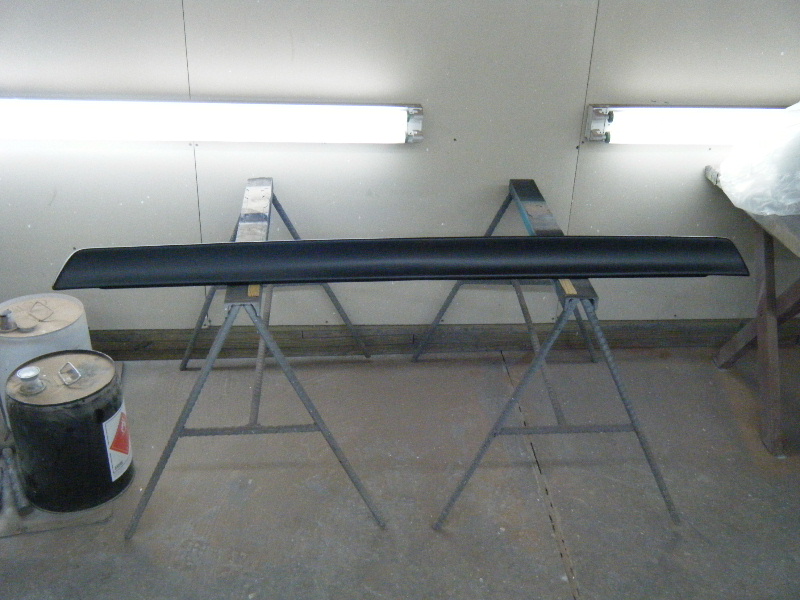
Spoiler
Posted By: jrwoodjoe
Re: T/A Challenger Replica Project - 01/28/11 02:13 AM
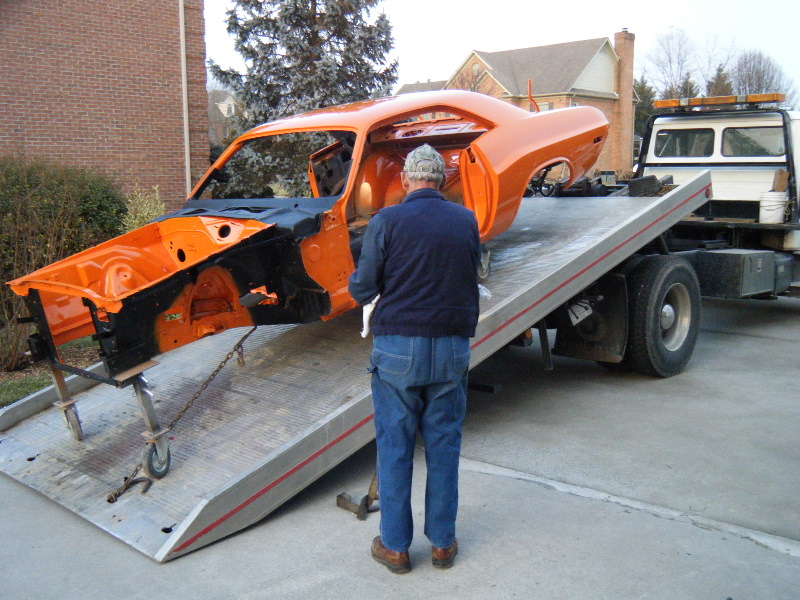
And finally being delivered to the house.

Posted By: jrwoodjoe
Re: T/A Challenger Replica Project - 01/28/11 02:14 AM
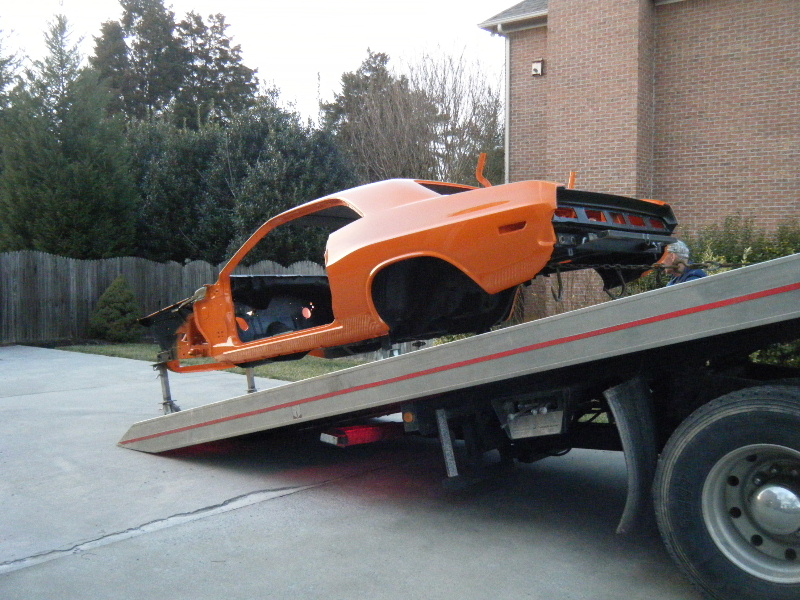
Rear shot
Posted By: jrwoodjoe
Re: T/A Challenger Replica Project - 01/28/11 02:16 AM
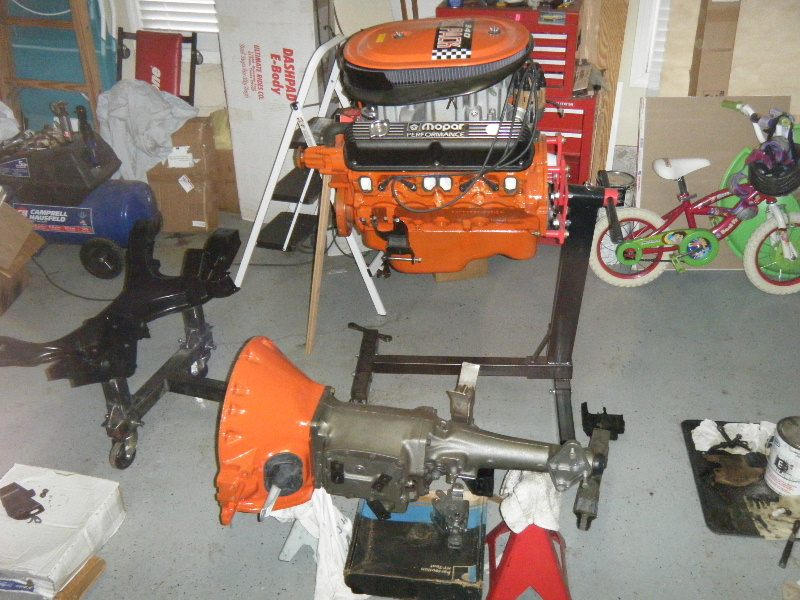
I finally got the K-frame on the dolly and started staging the engine and drivetrain for reassembly. Thanks again to Finoke for the Motor Mount Bracket so I begin getting it together.

Posted By: 68KillerBee
Re: T/A Challenger Replica Project - 01/28/11 02:20 AM
Looks good man! Gonna have it going by summer?
Posted By: RUNCHARGER
Re: T/A Challenger Replica Project - 01/28/11 03:07 AM
Looks good and I agree with you on the inner firewall. It bugs me seeing bright coloured paint there.
Sheldon
Posted By: jrwoodjoe
Re: T/A Challenger Replica Project - 01/28/11 04:06 AM
Thank you guys.
Devin, I would love to have it going by end of summer at least. The nice thing is that I restored most of the pieces as I took them off or during downtime. There is very little that is not restored. I'm going to do as much as I can on it in my spare time and see how it goes. I have tried to develop more patience with this project than I have in the past. I'm anxious to start putting it together but want to make sure that I don't mess something up in the process because of rushing.
Posted By: demon440
Re: T/A Challenger Replica Project - 01/28/11 06:57 AM
car looks great.
Is this the same car (blue one) thats in
your avatar?
The blue one looks like a real T/A.
Posted By: Finoke
Re: T/A Challenger Replica Project - 01/28/11 10:51 AM
Joe,
It looks awesome! You get the win for getting her home first.

I would have had mine home last week but I had them install the windshield.
Now it snowed 16" in the last two days. So the return has been delayed.

Do you have a favorite late summer show???? Maybe that could be the goal for final assembly

Posted By: burdar
Re: T/A Challenger Replica Project - 01/28/11 03:58 PM
Posted By: 79machocharger
Re: T/A Challenger Replica Project - 01/28/11 04:45 PM
Wow the car looks really awesome.

Posted By: 19cuda73
Re: T/A Challenger Replica Project - 01/28/11 05:47 PM
That really does look nice. I love an orange car. Youve got a real gem there looking forward to seeing progress pics as it goes together. Dennis
Posted By: jrwoodjoe
Re: T/A Challenger Replica Project - 01/29/11 12:21 AM
Thank you guys!
Tom, I don't know about a show. There are several in July time frame. I want to keep it moving along but don't want to set a deadline that would cause me to rush it too much. I'm going to try to work on it a little each night and get at least one or two things done on it if I can.
Demon 440, the car is the same as the avatar. The pervious owner had several Mopars but liked the Challenger T/As. So in the mid 80s, he took his daily driver 318, spd car and using original and repop AAR/TA parts redid the car to look like a T/A. Since the 318 was still running good, he never did the drivetrain like a T/A though he had the parts to do it. When I got the car, I decided to take it full blown clone. Here's a pic of the car before I bought it. You can see it has rear downturn exhaust. The previous owner had a complete new T/A exhaust system in storage but never put it on since he kept the 318 in the car.

Posted By: JDMopar
Re: T/A Challenger Replica Project - 01/29/11 04:21 AM
Posted By: jrwoodjoe
Re: T/A Challenger Replica Project - 01/30/11 02:16 AM
No, girls still sleeping in the house.

Let me get a little further along and I might give you a

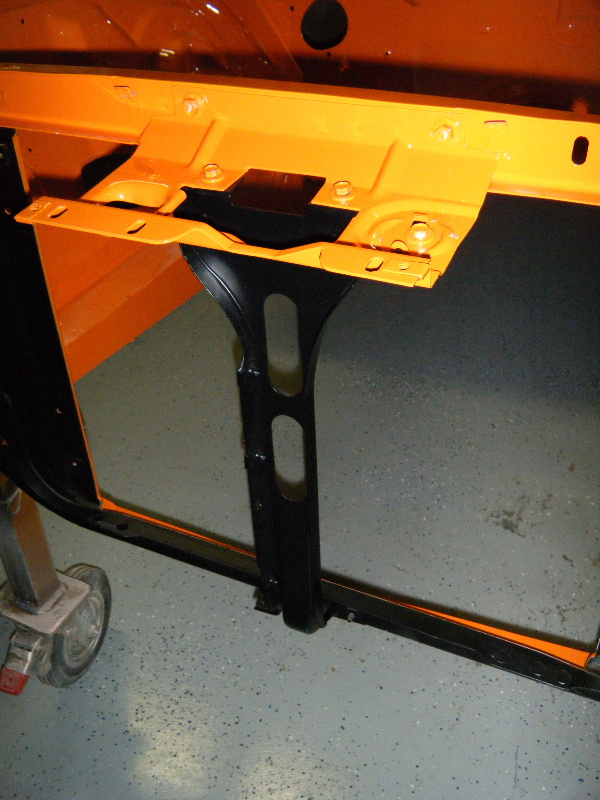
It was a gorgeous day today, sunny and in the 60s but I ended up spending time with the kids instead of working on the car. The laughs and giggles were worth it. I did however get one thing done to move it forward a little. I reassembled the Hood Latch Bracket and installed it on the car. I put a little piece of paper towel over the nut and bolt heads to keep them from scratching and it worked pretty well.
Posted By: 451 D*O*D*G*E
Re: T/A Challenger Replica Project - 01/30/11 03:33 AM
I always thought your avatar pic was a old unrestored orig now i know its this car..you are doing great work and keeping the family in front it sha'll be superb!
Posted By: cataclysm80
Re: T/A Challenger Replica Project - 01/30/11 04:04 AM
Quote:
I put a little piece of paper towel over the nut and bolt heads to keep them from scratching and it worked pretty well.
Good tip, I'll have to try that sometime.
Car looks GREAT Joe! Congratulations on getting it this far. You're doing terrific work.
I like the valve covers, they're the same ones I used on my AAR clone. I'll probably get another set for my T/A clone when I get to that step. Do you have some sort of breather or PCV valve on them? (with a baffle underneath so oil doesn't splash up from the bottom) Crankcase Ventilation is important. If the crankcase is sealed tight you'll have internal air pressure as the pistons go up and down. Best to keep the compression on the top side of the piston or you might push out an oil seal or gasket somewhere.
I painted the intake on my AAR clone orange. Originally they were orange right?
I prefer the T/A style air cleaner myself, but that's just personal preference, and it's easy to change later.
Are you using headers or exhaust manifolds? Any thoughts about how to route/secure you spark plug wires?
Keep up the good work!  I'm also looking forward to some assembly pics.
Tav
Posted By: jrwoodjoe
Re: T/A Challenger Replica Project - 01/30/11 03:22 PM
Thanks 451 D*O*D*G*E and TAV
Quote:
I like the valve covers, they're the same ones I used on my AAR clone.
Thanks, since car was Orange and the engine was Orange I wanted something to break it up a little. I considered going with some Old School Chrome Direct Connection Valve Covers but decided to go with these for now.
Quote:
Do you have some sort of breather or PCV valve on them? (with a baffle underneath so oil doesn't splash up from the bottom) Crankcase Ventilation is important. If the crankcase is sealed tight you'll have internal air pressure as the pistons go up and down. Best to keep the compression on the top side of the piston or you might push out an oil seal or gasket somewhere.
I found a breather a while back on ebay that had an extra nipple and the on it that could be run to the Brake Booster and would allow me to have the PCV also. I had it figured out at the time but hadn't thought about it since I'd been busy on other stuff. I do need to revisit that and make a decision.
Quote:
I painted the intake on my AAR clone orange. Originally they were orange right?
Yes, you are right. They should be Orange but I like the aluminum look and thought it broke up all the orange also. So, decided to leave it bare. Since the car is a clone, I'm doing a a few things to my liking as opposed to factory look. Most of what I am doing can be changed pretty easily if one wanted to make it look more factory.
Quote:
I prefer the T/A style air cleaner myself, but that's just personal preference, and it's easy to change later.
When I bought the car, an original T/A air cleaner was included. However, the previous owner had it stored in a friend's barn with a bunch of other really nice Mopar stuff. Unfortunately, the barn caught on fire and burned down along with all the stuff in it. The previous owner felt bad since he told me one would come with the car and bought a repop fiberglass bottom and new metal lid for me. The air cleaner assembly that is on it in the photo is an extra that I'm using until I get the engine in the car. Then I'll put the repop base and all on it.
Quote:
Are you using headers or exhaust manifolds?
A set of HP stock exhaust manifolds and an entire T/A exhaust system came with the car. I blasted and refinished the manifolds and will use them.
Quote:
Any thoughts about how to route/secure you spark plug wires?
Great question. No, I haven't thought about it yet. My game plan was to get the engine married to the trans. on the dolly and then install all the accessories and odds/ends on the engine before I put it in the car. If you have any suggestions, I'm open to them. I haven't looked at what my options are yet.
Joe
Posted By: jrwoodjoe
Re: T/A Challenger Replica Project - 02/01/11 02:32 AM
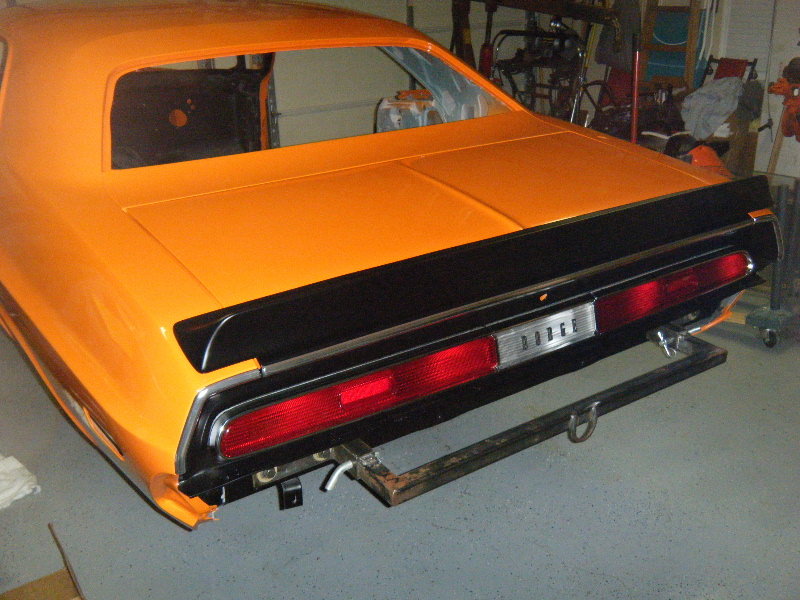
Was able to get a little done yesterday, I bolted the trunk lid on. Then today, I installed the rear spoiler. The old spoiler was fiberglass so I sold it and bought one made like the originals. The rear trim was in excellent condition. The previous owner replaced it at some point and it just needed a little cleaning. Rear lenses and bezels were bought from Mike at BE&A.
Joe
Posted By: 19cuda73
Re: T/A Challenger Replica Project - 02/01/11 06:11 AM
Joe The car looks great. This is the first time Ive read through your entire thread. Its always interesting to see what happens after the blast media takes it path. Youv'e done some great work on this car. I looks Awesome Good choice on the Paint!! Love that color.
I was looking at the picture when you took the motor out. How high did you need to pick up the front end? Did you have any blocks under the rear wheels? It looks like the best way to go.
Keep up the good work bring on more pictures.
Dennis
Posted By: jrwoodjoe
Re: T/A Challenger Replica Project - 02/01/11 04:07 PM
Thanks a lot Dennis for you kind words, I appreciate that. I'm no expert at this and I haven't done things the "BEST" way but I have tried to do them in a way that would keep the project from totally stalling and as I could afford to do them.
I'm not sure about how the actual height I lifted the car. I'm 5'10" so the photo can give you some idea of how high I had to lift it. The rear wheels were still on the garage floor and I did it with the whole car still in my garage. I think I had the gas tank and rear valance out though but don't remember if that made a difference or not. I do not have extra high ceilings in my garage and you will also notice that the garage door is up. So I as able to do it without hitting the open garage door above the car too. So, the non percise answer would be....Not very high.


Posted By: rayztoy
Re: T/A Challenger Replica Project - 02/02/11 11:55 PM
Joe,
Very nice work! Absolutely outstanding! Keep the pics coming.
Ray


Posted By: jrwoodjoe
Re: T/A Challenger Replica Project - 02/10/11 03:02 AM
Thanks Ray. I was able to get a few more things done. I installed the trunk weatherstrip and I installed the trunk lock cylinder as well. Next, the front to back fuel line and brake lines were installed. The rear tow hooks were also put into place.
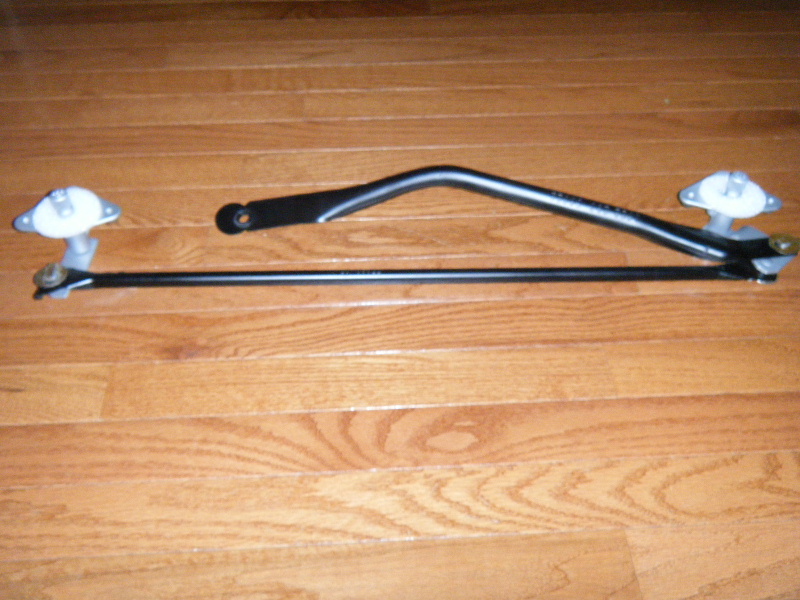
Then, I turned toward the front of the car and installed the firewall insualation. I was having trouble figuring out how to install the undercowl insulation pad but with the help of burdar and 19cuda73 was able to correctly install it. I found the box with my wiper parts but found that I had not completed restoring some of the pieces of the wiper arm mechanism. So, finished that the other night. Not the best pic, but gives you a little idea of how it came out.
Posted By: jrwoodjoe
Re: T/A Challenger Replica Project - 02/10/11 03:05 AM
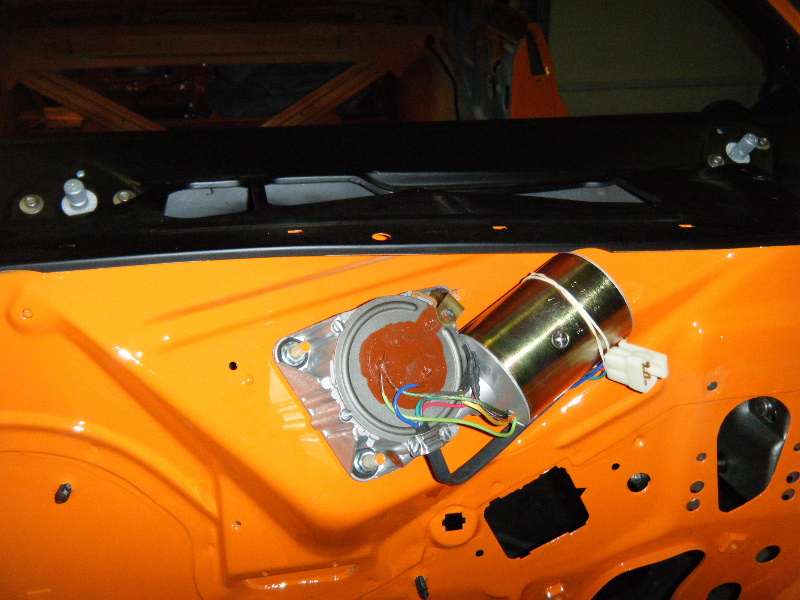
Then today, I installed wiper mechanism along with the wiper motor and battery tray. In the photo, it looks like no paint is in the cowl cavity but it's just a reflection of the flash and is black in reality.
Posted By: jrwoodjoe
Re: T/A Challenger Replica Project - 02/17/11 04:35 AM
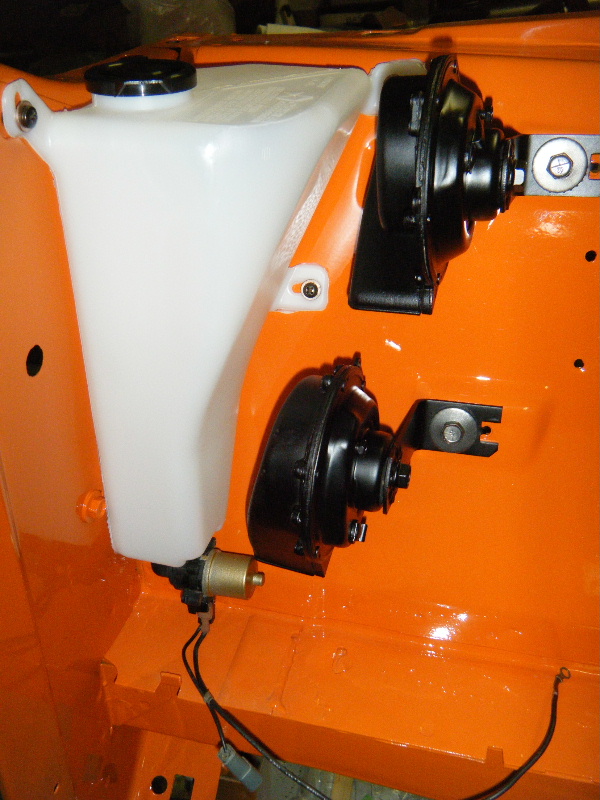
Media blasted and painted the horns this week, cleaned up the mounting bolts and installed them. Tonight, I pulled out the reservoir I bought from the local Dodge Dealership several years ago. Realized it had a nipple on the bottom instead of a hole to mount the pump. After making a post in the resto. section of Moparts, I learned that it must be a manual pump style reservoir. So, I cut the nipple off and drilled the correct size hole for the pump. Pump was in good working order so I cleaned it up and detailed it. The Reservoir came with new screws w/ washers but they were different from the originals. Decided to clean the original screws and use them.
Posted By: 19cuda73
Re: T/A Challenger Replica Project - 02/17/11 04:58 AM
Joe Everything looks great your rolling along. The car looks Awesome!!!
Dennis
Posted By: Finoke
Re: T/A Challenger Replica Project - 02/17/11 12:17 PM
Looks awesome Joe! This is the fun part!

Posted By: gtx6970
Re: T/A Challenger Replica Project - 02/17/11 12:28 PM
Joe, keep pushing forward.
Looks great so far

Posted By: jrwoodjoe
Re: T/A Challenger Replica Project - 02/17/11 08:28 PM
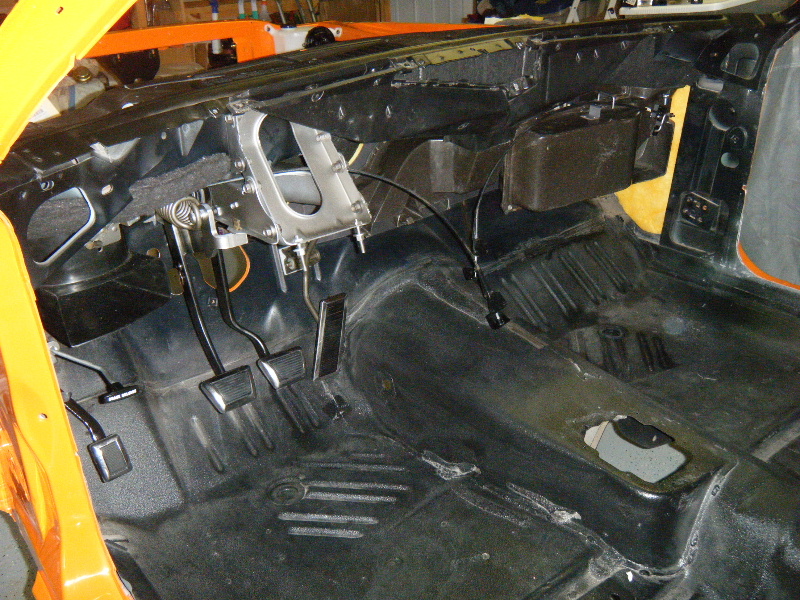
Thanks everyone. I realized I didn't attach the ground wire for the washer pump so I did that this morning. Then, the ebrake went in and I cleaned up the vent cables and installed those. I plan on trying to put the dash in later today but here is a photo of all the firewall stuff installed.
Posted By: jrwoodjoe
Re: T/A Challenger Replica Project - 02/18/11 12:17 AM
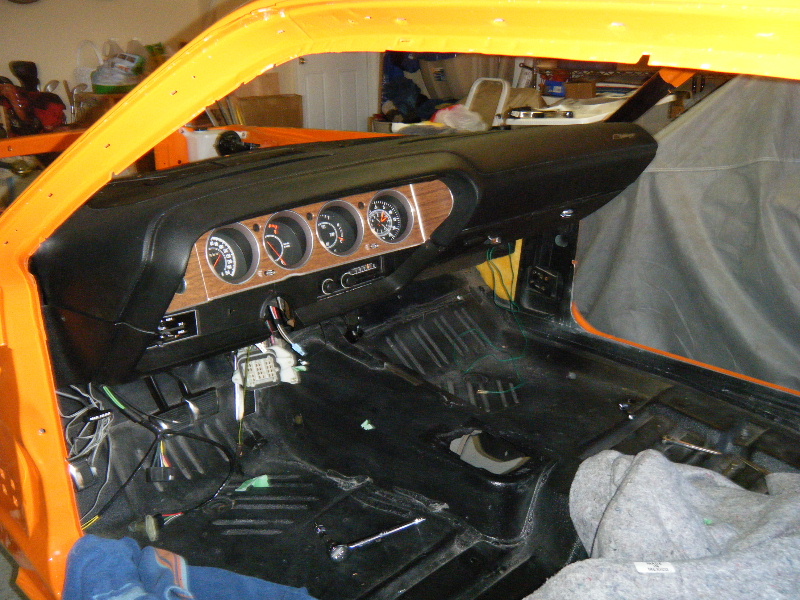
Was able to bolt the dash into place but ran out of time to do anything else. Once I get any loose ends taken care of, I may try to bolt the doors and fenders on next. The wife will be happy since they are currently under lock and key in the living room.

Posted By: PlumCrazy73Dodge
Re: T/A Challenger Replica Project - 02/18/11 01:16 AM
Looks Awesome man!!!! Keep it up and get er dun
Posted By: cataclysm80
Re: T/A Challenger Replica Project - 02/18/11 03:27 AM
Simply Beautiful!


Posted By: 19cuda73
Re: T/A Challenger Replica Project - 02/18/11 05:09 AM
Joe that is a work of art!!! Your Cruisin, Have fun!!!
Dennis
Posted By: rayztoy
Re: T/A Challenger Replica Project - 02/19/11 01:25 AM
Quote:
Simply Beautiful! 


Ray
Posted By: jrwoodjoe
Re: T/A Challenger Replica Project - 03/01/11 10:21 PM
Got around to installing the side exhaust hangers. The car did not have dimples or holes drilled since it was an early car so I had to do them myself. There was very little room to work in and I did a lot of this...

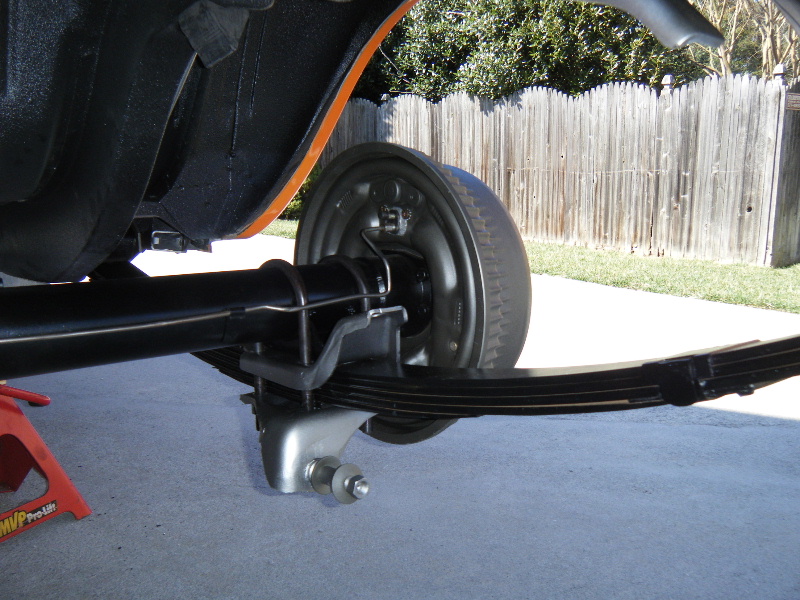
However, I was able to get them installed using photos and information from Barry Washington and TAV. Then the leaf springs and rear axle went in. I've got the rear shocks for the car but they need to be painted black. I may try to do that tomorrow. I was only able to take one photo before my camera battery died. I'll try to take some more with the car on the ground. It looks like the stance is going to be about right from what I can tell.
Posted By: Finoke
Re: T/A Challenger Replica Project - 03/02/11 01:09 AM
Looking good Joe, Real Good!

Posted By: jrwoodjoe
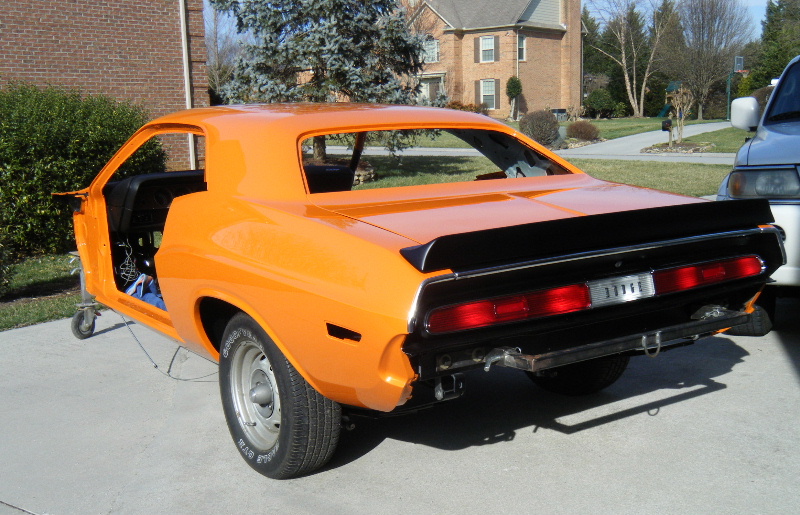
Re: T/A Challenger Replica Project - 03/03/11 02:22 AM
Spent the day cleaning and reorganizing the garage for the next round of stuff. Here's an on the ground photo. I haven't refinished the wheels yet. Going to wait and get a little more of the car together before I do them and buy new tires.
Posted By: Finoke
Re: T/A Challenger Replica Project - 03/16/11 11:56 AM
Looking good Joe! Any new updates???

Posted By: jrwoodjoe
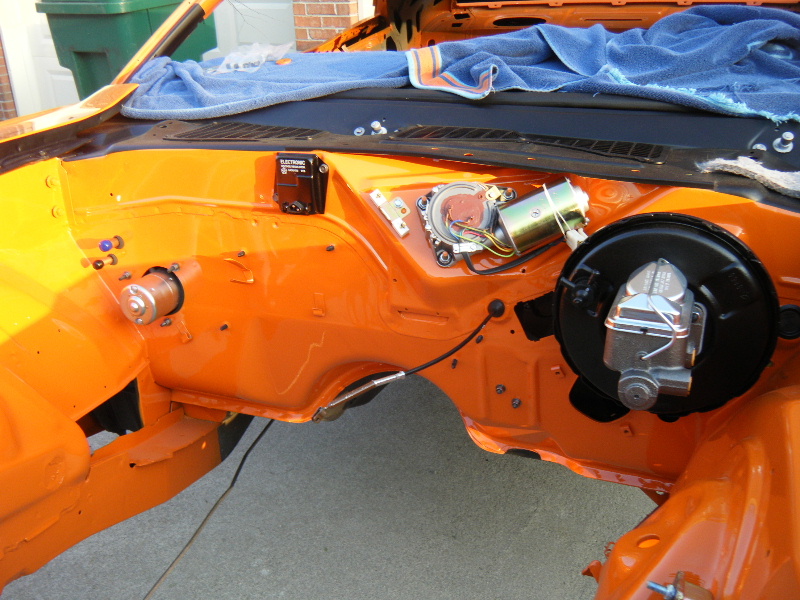
Re: T/A Challenger Replica Project - 04/10/11 05:40 AM
Sorry for not posting updates but I have been pretty slammed. Here's a cowl shot to give you an idea of what has been done in the engine bay area.
Posted By: jrwoodjoe
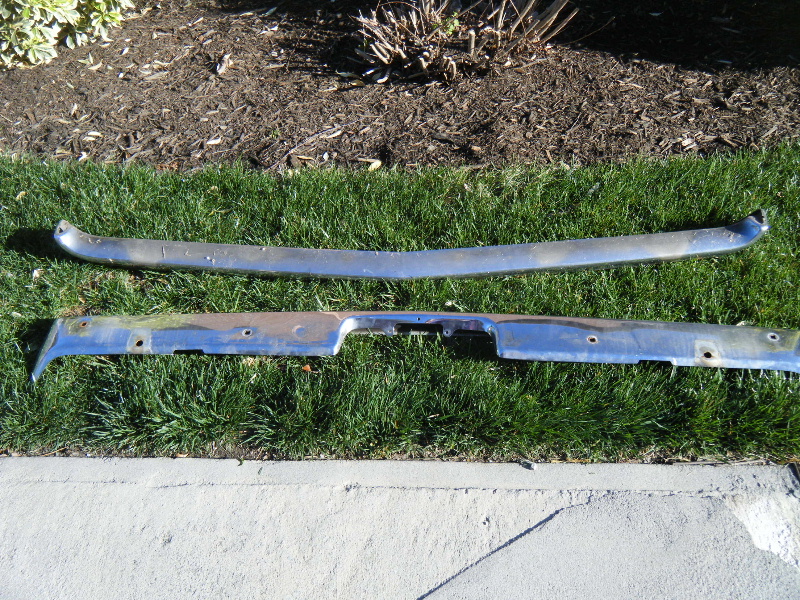
Re: T/A Challenger Replica Project - 04/10/11 05:46 AM
Earlier this week, I loaded up the old bumpers and made a road trip to Tri-City plating. I can not begin to tell you how helpful and great the customer service was. Originally, I was going to get them to replate my bumpers but since my bumpers were not original to the car I decided to swap them out. When I called, they said they thought all the Challenger bumpers had just gone to Charlotte for that car show but he said he would see what he had. I told them I was headed to see them with my bumpers regardless. When I got there, they had found a rear one and they rushed a front one through for me and it I was able to take them both home.
Here's a pic of what they old ones looked like.
Posted By: jrwoodjoe
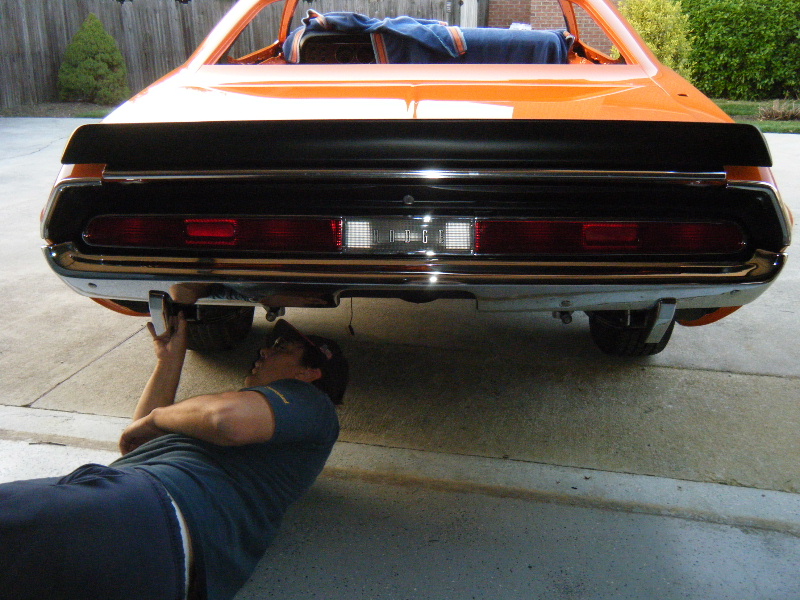
Re: T/A Challenger Replica Project - 04/10/11 05:47 AM
And here is a pic of a good friend of mine and former owner of my car helping install the TRI-CITY rear bumper. Sorry the pic is not great. While I was out running errands, he also installed the rear shocks and headlight buckets. Man that guys is a good helper.

Posted By: jrwoodjoe
Re: T/A Challenger Replica Project - 04/10/11 05:49 AM
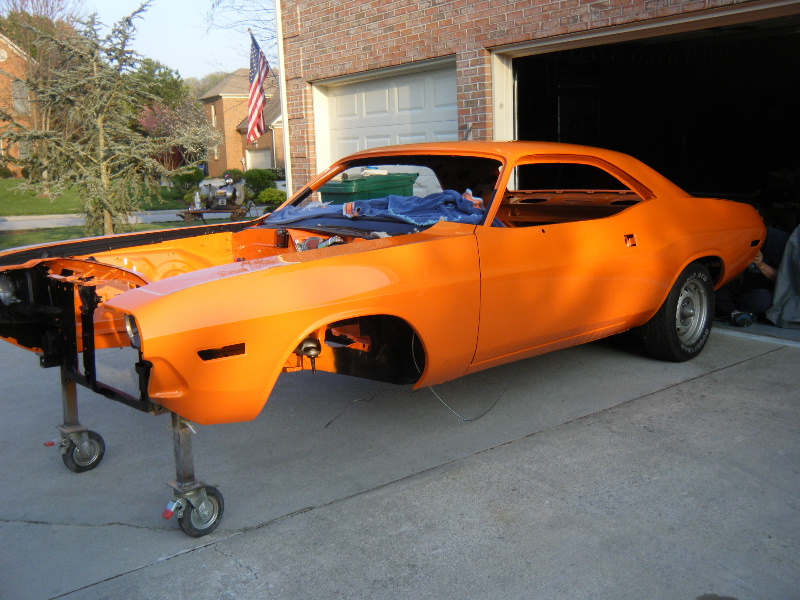
While he was visiting, he was nice enough to lend me a hand in CAREFULLY installing the fenders and doors. Finally starting to look like a car again.
Posted By: Finoke
Re: T/A Challenger Replica Project - 04/10/11 03:25 PM
Quote:
While he was visiting, he was nice enough to lend me a hand in CAREFULLY installing the fenders and doors. Finally starting to look like a car again.
Looking really good Joe, whens the K frame/engine/trans going in????
Posted By: 70plymA34
Re: T/A Challenger Replica Project - 04/10/11 03:51 PM
Joe, is that the voltage regulator you got from me or did that end up on another car?
Posted By: 19cuda73
Re: T/A Challenger Replica Project - 04/10/11 05:13 PM
Joe, We all should be so fortunate to have helpers like that. The rear bumper looks great. keep up the good work. That is going to be a great looking car. Dennis
Posted By: jrwoodjoe
Re: T/A Challenger Replica Project - 04/10/11 07:39 PM
Quote:
whens the K frame/engine/trans going in????


Posted By: jrwoodjoe
Re: T/A Challenger Replica Project - 04/10/11 07:42 PM
Quote:
Joe, is that the voltage regulator you got from me or did that end up on another car?
That would be yours. Looks much better than the one I had.  Thanks again.
Joe
Posted By: jrwoodjoe
Re: T/A Challenger Replica Project - 04/10/11 07:47 PM
Quote:
Joe, We all should be so fortunate to have helpers like that. The rear bumper looks great. keep up the good work. That is going to be a great looking car. Dennis
I agree Dennis. That guy has a heart of Gold. He drove over 6 hrs just to come turn wrenches with me for a few days. Thanks for the kinds words regarding the car. In about 4 days I will be back on the car full blast again and will hopefully get the drivetrain in so that FINOKE guy will get off my back. 
Posted By: Finoke
Re: T/A Challenger Replica Project - 04/14/11 12:33 PM
Quote:
In about 4 days I will be back on the car full blast again and will hopefully get the drivetrain in so that FINOKE guy will get off my back. 


Posted By: JDMopar
Re: T/A Challenger Replica Project - 04/17/11 01:42 AM
Posted By: jrwoodjoe
Re: T/A Challenger Replica Project - 04/19/11 01:44 AM
Quote:

 I thought the wheelie bars went in the back?
 :
:
Et tu Jackie? 
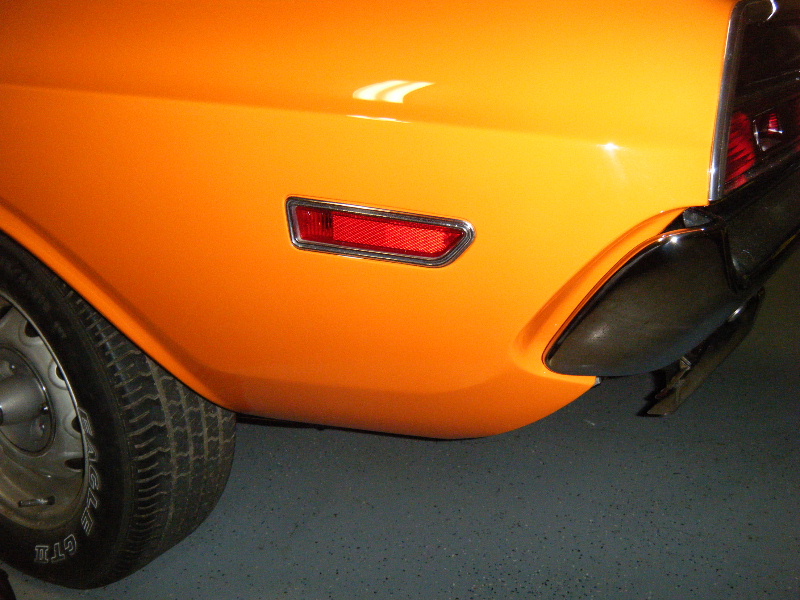
So, getting things moving again. Was going through a box today and came across some more body gaskets. I went ahead and installed the rear side marker lights.
Posted By: jrwoodjoe
Re: T/A Challenger Replica Project - 05/25/11 03:13 AM
A small update. Things have not gone as planned and progress has been minimal. Good news is that that my Daughter is doing really well and got orders to end all pump feedings last week. She is sustaining her wait on what she is eating/drinking. This has been a long time coming. If she continues doing well for the next 6 mos. they will remove her feeding tube and hopefully all her health problems will be history.

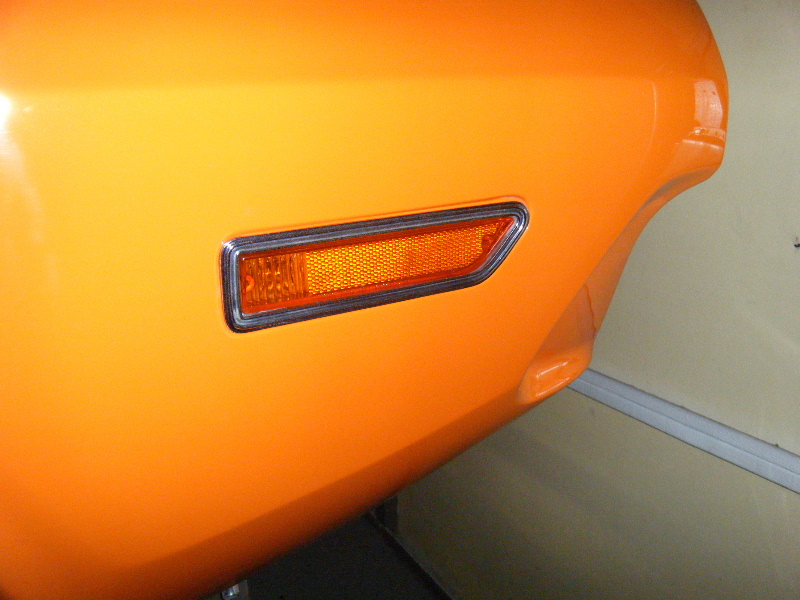
Now the bad news, my knee started giving me trouble and I have been to several Dr.s and will have to have knee surgery. Needless to say I haven't felt like doing too much...but I have got a little done. I installed the front side marker lights.
Posted By: jrwoodjoe
Re: T/A Challenger Replica Project - 05/25/11 03:14 AM
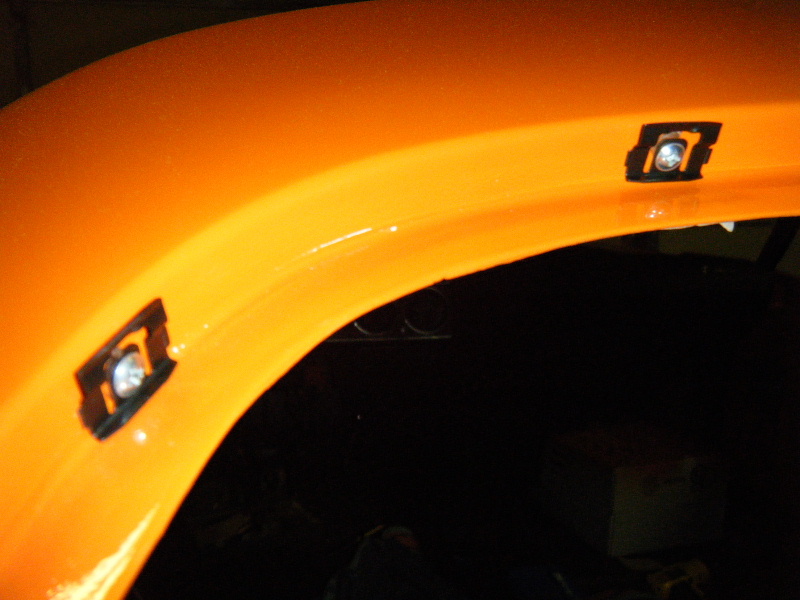
I also installed the front and rear window trim clips.
Posted By: jrwoodjoe
Re: T/A Challenger Replica Project - 05/25/11 03:19 AM
I started working on getting the steering gear rebuilt and while I was attempting to remove the pitman arm, I accidentally broke off the PS Fluid return line nipple fitting.


After looking at the rebuilt units, I realized that they don't come with them. I called JDMOPAR and told him of my woes and he was nice enough to raid his stash and sent one of his spare fittings to me.

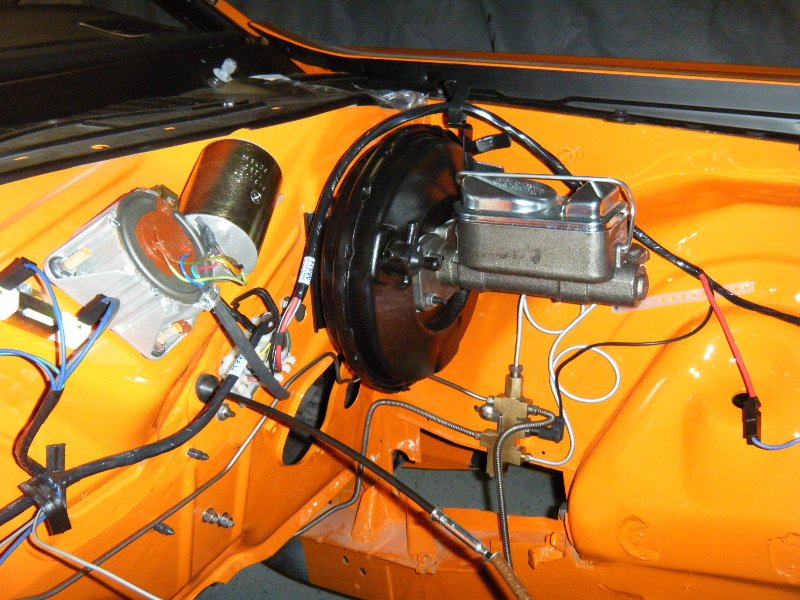
I then had to wait for the gear to be rebuilt. It came back and I got it installed on the k-frame. While waiting on that stuff. I got the brake lines run, prop valve installed and began running all the engine bay wiring.
Posted By: Keith Black®
Re: T/A Challenger Replica Project - 05/25/11 03:43 AM
wow. awesome car! great work


Posted By: Finoke
Re: T/A Challenger Replica Project - 05/25/11 03:00 PM
Posted By: jrwoodjoe
Re: T/A Challenger Replica Project - 06/01/11 02:13 AM
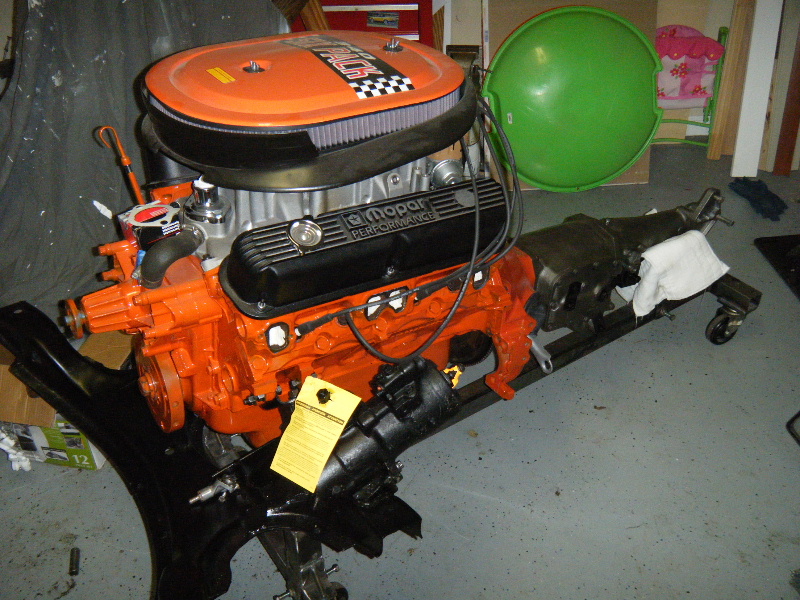
Finally! Next brackets, and accessories get bolted on.
Posted By: 19cuda73
Re: T/A Challenger Replica Project - 06/01/11 03:59 AM
Looking sharp Joe. First class build..
Dennis
Posted By: anlauto
Re: T/A Challenger Replica Project - 06/01/11 11:44 AM
Quote:
Finally! Next brackets, and accessories get bolted on.
Joe, you should put as much as possible on the engine/transmission/suspension assembly before it goes in.
Get the LCA's, headers or manifolds, etc...
Posted By: jrwoodjoe
Re: T/A Challenger Replica Project - 06/01/11 08:13 PM
I will Alan. There are several things I need to add or change on the engine itself and then I will put on the manifolds, and suspension stuff as you suggested. For example, I'm going to replace the thermostat housing with a stock one and install the thermostat. I also am replacing the distributor with a stock unit. I have a new MP 6 Pack Installation kit to put on it...etc.

Posted By: DAYLEYCHALLENGER
Re: T/A Challenger Replica Project - 06/12/11 03:35 AM
You are doing some really nice work. Looking forward to more updates...........
Posted By: johnscudashop
Re: T/A Challenger Replica Project - 06/13/11 02:50 AM
awesome work!!!!!!!
Posted By: wally426ci
Re: T/A Challenger Replica Project - 06/25/11 01:48 PM
Looks great! I hope that you and your daughter are doing well.
Posted By: cataclysm80
Re: T/A Challenger Replica Project - 06/27/11 10:17 PM
Quote:
Looks great! I hope that you and your daughter are doing well.

Tav
Posted By: jrwoodjoe
Re: T/A Challenger Replica Project - 07/08/11 05:32 AM
Quote:
Looks great! I hope that you and your daughter are doing well.
Thanks guys. My daughter is doing much better and is eating and drinking like any other kid. It's like all the problems we had are a thing of the past. I, unfortunately, had to have knee surgery last month. I'm back to working on the car again but it's a little slow going. I ordered some parts due to missing/incomplete/incorrect items. Have had a few things come over the last few days. Should have more updates soon.
Posted By: wally426ci
Re: T/A Challenger Replica Project - 07/12/11 06:59 PM
Good to hear. Its so hard to think about a child going through health issues. Keep that knee moving!! I had my ACL done 8 years ago and mobility is key.

Posted By: jrwoodjoe
Re: T/A Challenger Replica Project - 09/08/11 11:13 PM
Though I have not posted much, I have been working on the car. Been doing quite a bit on the Drivetrain sub assembly and in the process realized some things were not correct or parts I thought I had were either in bad shape or needed replacing. I have made a lot of progress on getting the engine ready to install and will post some photos and more info. on that later.
As I waited/wait for parts, I have tried to move on to other areas to keep things moving along. I installed the sailboards and grips for the headliner as well as the headliner bow "holders" and Seatbelt brackets.
While doing some of this work, I noticed a spot on the passenger door where a paint problem was developing. The guy who painted the car came and looked at it this past weekend and agreed that it needed to be fixed. We carefully removed the door and he is working it into his schedule. I'm bummed that it happened but I'm glad he is the stand up kind of guy and is taking care of it.
Moparts Member FINOKE helped me out pretty huge again and I'm beginning to think 1/2 the car parts might be his.

I'll have pics and more on that this weekend.
That brings me to what I have been doing over the last few weeks and that is POLISHING. I should say POLISHING, and POLISHING and POLISHING....

I'm about 1/2 way done so you know what I'll be doing next week too. Here's a pic of one of the rear window trim pieces. I'll post another update this weekend.
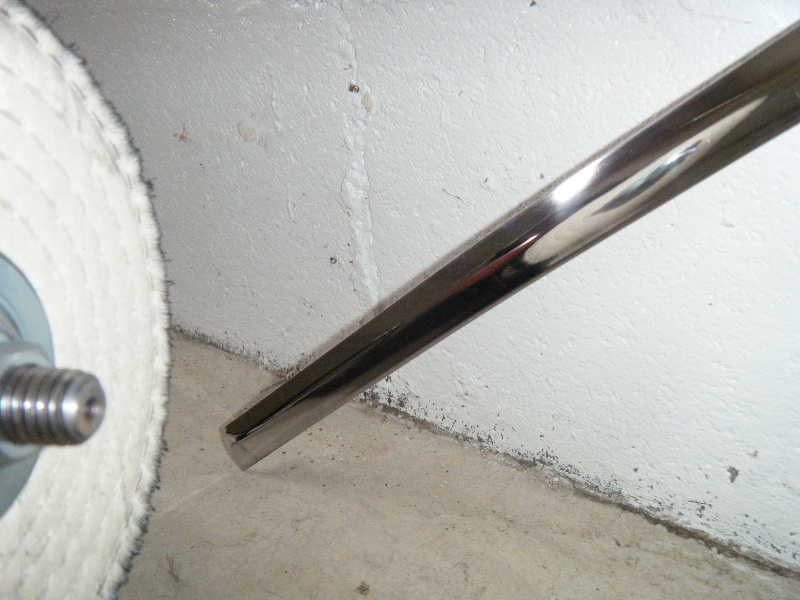
Posted By: JDMopar
Re: T/A Challenger Replica Project - 09/09/11 02:06 AM
OMG!!

I just remembered I was supposed to look for that PS fitting for you!

The polished piece looks good.

Have you zinged one back at yourself when you get to the end yet?

I'll look for the fitting tomorrow.

Posted By: jrwoodjoe
Re: T/A Challenger Replica Project - 09/09/11 02:20 AM
I have had one zinger that (fortunately) did no damage. But, it did reminded me of what NOT to do. I got a small cut on one finger yesterday from the trim but it was because my hand slid down it and I got snagged. Not from buffing. Sent you a PM JD. but I picked up a fitting already. Thanks anyway!

Posted By: cataclysm80
Re: T/A Challenger Replica Project - 09/09/11 10:29 PM
after polishing them to perfection, are you going to coat them with something like RPM or Zoops to provide some abrasion resistance from normal wear and tear? I've heard amazing things about RPM, but haven't tried it myself yet.
Tav
Posted By: jrwoodjoe
Re: T/A Challenger Replica Project - 09/11/11 01:31 AM
Hey Tav! To be honest, I really had not thought about treating it with anything other than polish.

Here some more pics as promised. I cleaned and installed the driver door latch and adjusted the striker.
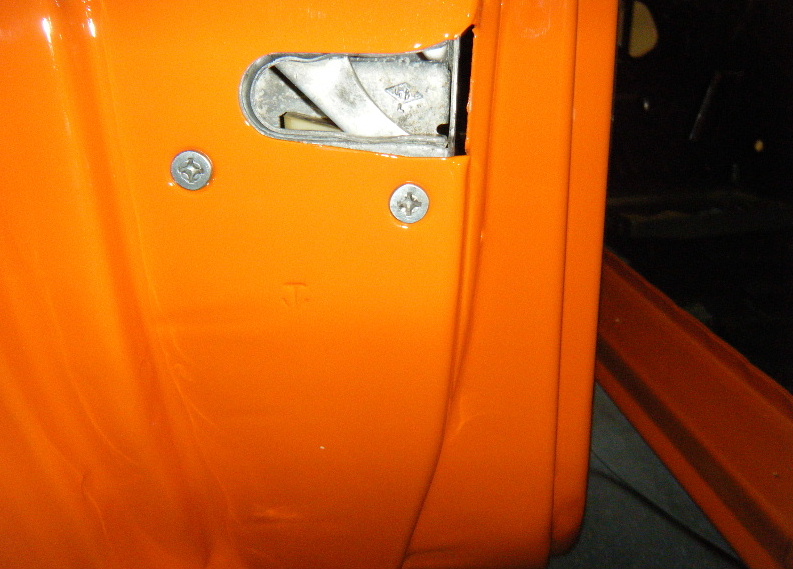
Posted By: jrwoodjoe
Re: T/A Challenger Replica Project - 09/11/11 01:44 AM
About a month ago, I finally found an originally fan shroud and brackets. Wouldn't you know that it was FINOKE that had it. This car is starting to feel like a Race Car and when I post on it I'll need to thank my sponsors. So the JDMopar, Finoke, Moparts Challenger T/A Replica is really coming together and I can't wait to get out on the track.

Here's the Fan Shroud from Tom. A little power washing and it will look like new.
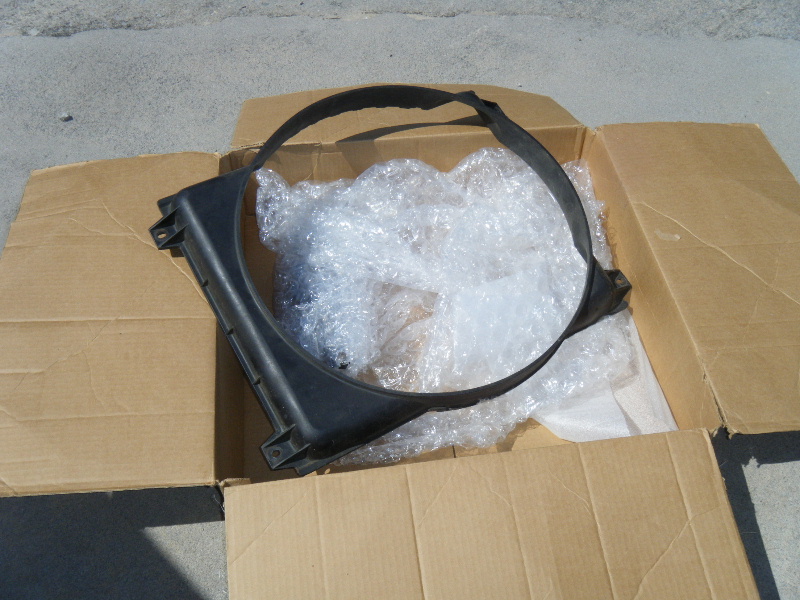
Posted By: jrwoodjoe
Re: T/A Challenger Replica Project - 09/11/11 01:47 AM
As I had mentioned, the Drivetrain Sub assembly is coming together. I recently received the fuel filter from Dante and will need to install all the fuel lines from the pump to the carbs. I also still need to install the linkages for the carbs. The suspension is done but I still need to install the rotors and calipers. I'll change the air cleaner base to the correct one after I install the engine.
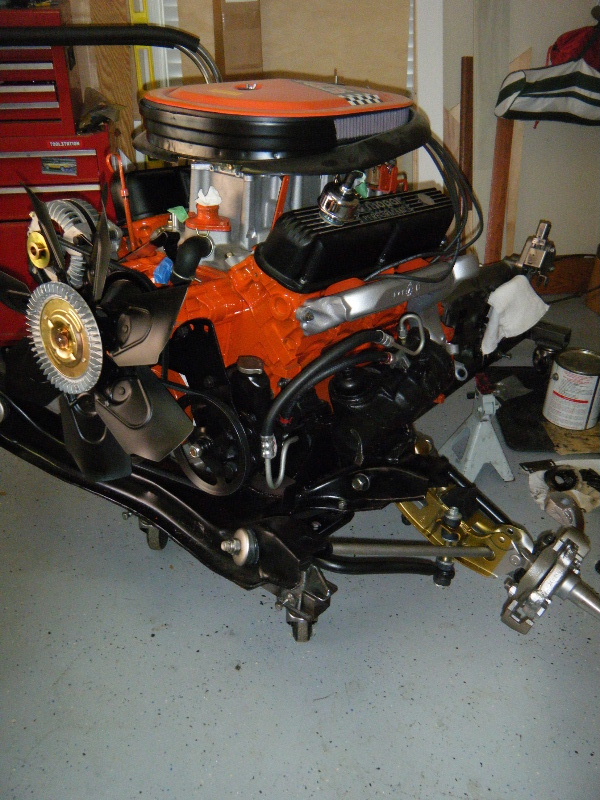
Posted By: jrwoodjoe
Re: T/A Challenger Replica Project - 09/11/11 01:52 AM
Today, I started with the headliner install. I glued in the headliner insulation and began working the headliner. I left it in the sun for an hour or so then began installing it using tips from RestoRick. They are excellent. I still have some stretching and tweaking to do but had to stop for the day. I haven't done a headliner in a long time but it's shaping up.
That's all for now, more later.

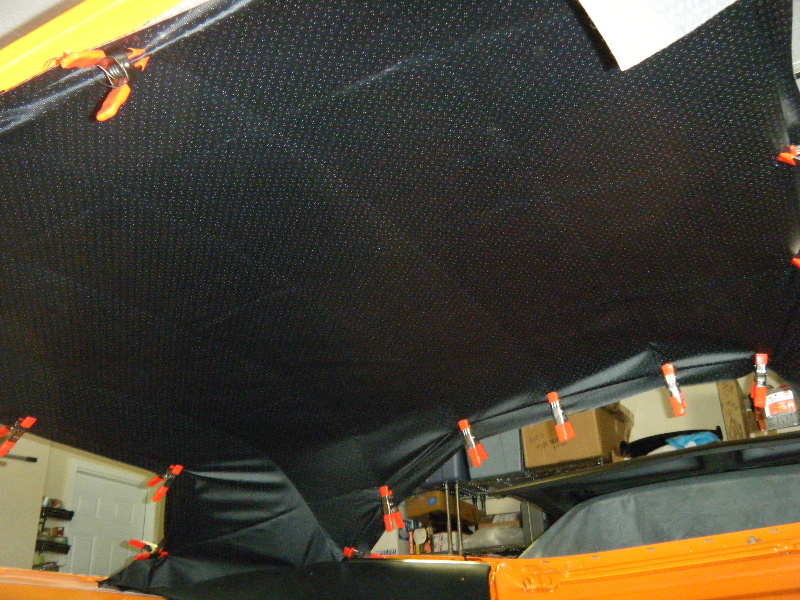
Posted By: 19cuda73
Re: T/A Challenger Replica Project - 09/11/11 06:28 AM
Joe That drivetrain and headliner are looking sweet good job. Thanks for sharing the pictures.

Posted By: JDMopar
Re: T/A Challenger Replica Project - 09/11/11 08:02 PM
Lookin good Joe.

I used Ricks instructions too, when I did the yellow car. If you haven't already found out, be careful of the teeth that hold it in the front and back. They're kinda sharp and will make you

when you stick one half way thru your finger tip!

DAMHIK

Posted By: jrwoodjoe
Re: T/A Challenger Replica Project - 09/13/11 01:10 AM
Quote:
If you haven't already found out, be careful of the teeth that hold it in the front and back. They're kinda sharp and will make you  when you stick one half way thru your finger tip!
  DAMHIK
Too late. 

Posted By: jrwoodjoe
Re: T/A Challenger Replica Project - 10/05/11 09:25 PM
Finished pulling the headliner wrinkles out and began installing the drip rail molding and c-channel trim. I'll have to post some pics of that later since I did not have my camera battery charged at the time. Had to have something done to my back and was told to "take it easy" for 2 weeks by the doc.
So I took it easy and began working on some of the interior stuff. Cleaned the sunvisors and detailed them. I also took the mirror apart and redid it. Here's the before pic.
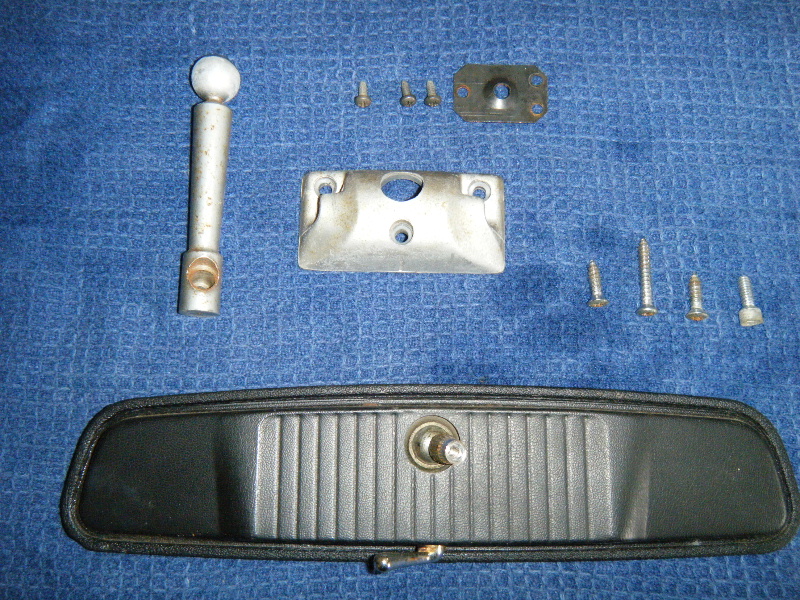
Posted By: jrwoodjoe
Re: T/A Challenger Replica Project - 10/05/11 09:26 PM
Here's the after...
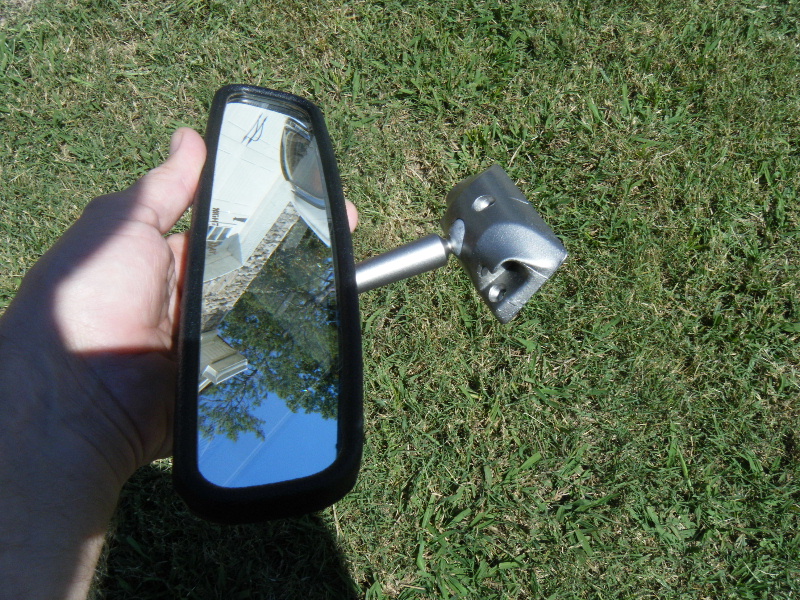
Posted By: cdstl
Re: T/A Challenger Replica Project - 10/20/11 03:50 PM
Did you repaint the metal on your mirror and if so what color did you use? Looks good.
Posted By: jrwoodjoe
Re: T/A Challenger Replica Project - 10/21/11 01:33 AM
I used this...Seymour Stainless Steel

Posted By: jrwoodjoe
Re: T/A Challenger Replica Project - 10/21/11 04:41 PM
OK, I had most of the pieces for the rear defroster with speaker option but there was one bracket that was missing. My friend sent me an original and I had a guy take some metal strips and bend the correct lips onto it. I then finished bending them to match the originals and drilled the holes. Since these are not reproduced, I think they came out pretty good. The original bracket is obviously the one in the front.
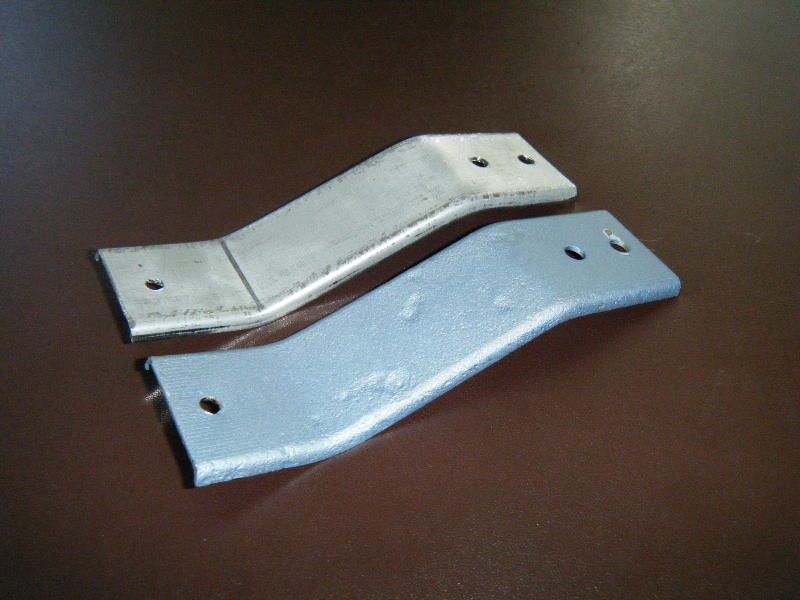
Posted By: jrwoodjoe
Re: T/A Challenger Replica Project - 10/21/11 04:42 PM
This shows the bends the guy put into them for me.
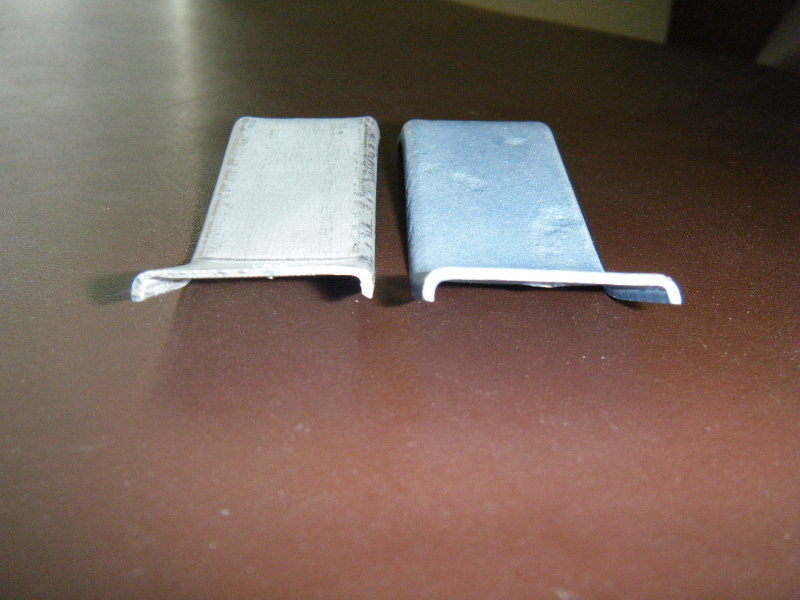
Posted By: rayztoy
Re: T/A Challenger Replica Project - 10/27/11 10:49 PM
Joe,
Nice work...

Ray
Posted By: cataclysm80
Re: T/A Challenger Replica Project - 10/31/11 07:50 PM
That stereo defog bracket looks excellent Joe! You might want to make a few extra to sell as reproductions.
Tav
Posted By: jrwoodjoe
Re: T/A Challenger Replica Project - 11/02/11 06:23 PM
Thanks Ray and Tav!
I cleaned up the interior metal trim and got all of the old window sealer off. Finished cleaning them, primed then painted. Also, picked the door up from the painter. So. I'll get it back on the car shortly.
Joe
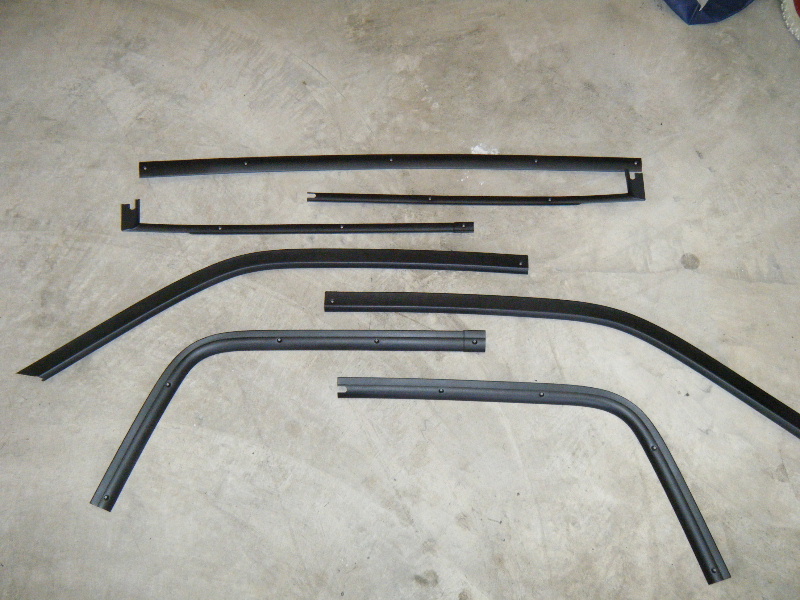
Posted By: SCATPACK 1
Re: T/A Challenger Replica Project - 12/09/11 10:15 PM
Any recent updates or pics?
I hope you remembered to paint the window channels black before you installed the front and rear glass rubber/caulk rope strips. I forgot to do that on my back window and now you can see the orange along the edges of the glass on the rear window.
Posted By: jrwoodjoe
Re: T/A Challenger Replica Project - 12/15/11 04:47 PM
Have not painted the channels yet but did find out a few weeks ago that I needed to do that. Thanks for the heads up though. Little things like that can really mess you up.
Haven't been able to work on the car as much as I have hoped to but have been working on restoring the seatbelts. Here's a few shots. Here's a before shot, they look Blue but are supposed to be black.
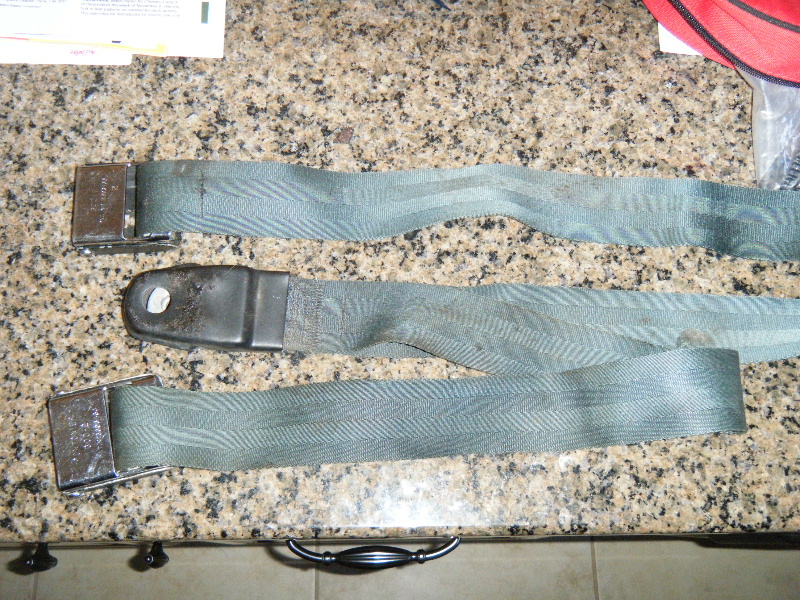
Posted By: jrwoodjoe
Re: T/A Challenger Replica Project - 12/15/11 04:49 PM
I removed the buckles and washed them in the Kitchen sink (sshhh, don't tell the wife). This photo gives you an idea of what clean (before) water looks like.
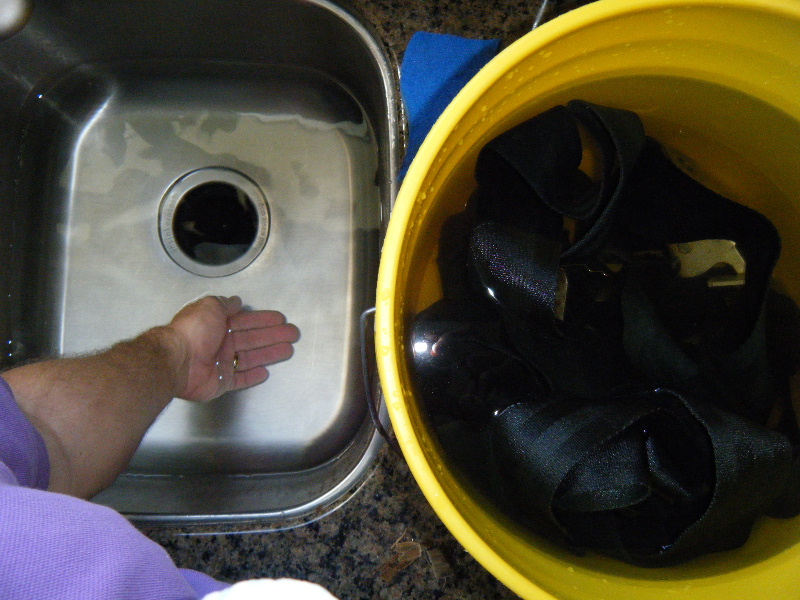
Posted By: jrwoodjoe
Re: T/A Challenger Replica Project - 12/15/11 04:50 PM
And this is what the water looks like after washing off 40 years of grime.
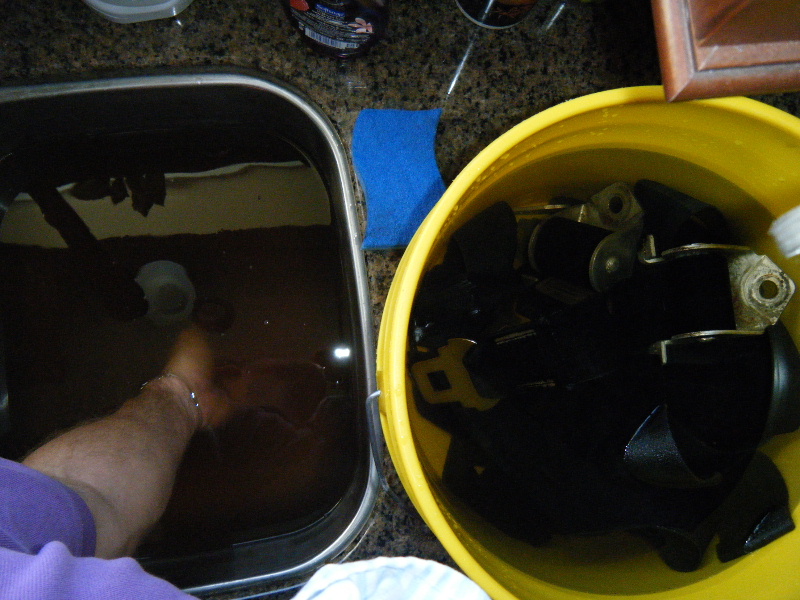
Posted By: jrwoodjoe
Re: T/A Challenger Replica Project - 12/15/11 04:52 PM
As not to smell up the house or get dye on things I shouldn't, I got a cheap pot and an electric burner and using RIT Dye began to dye the belts outside.
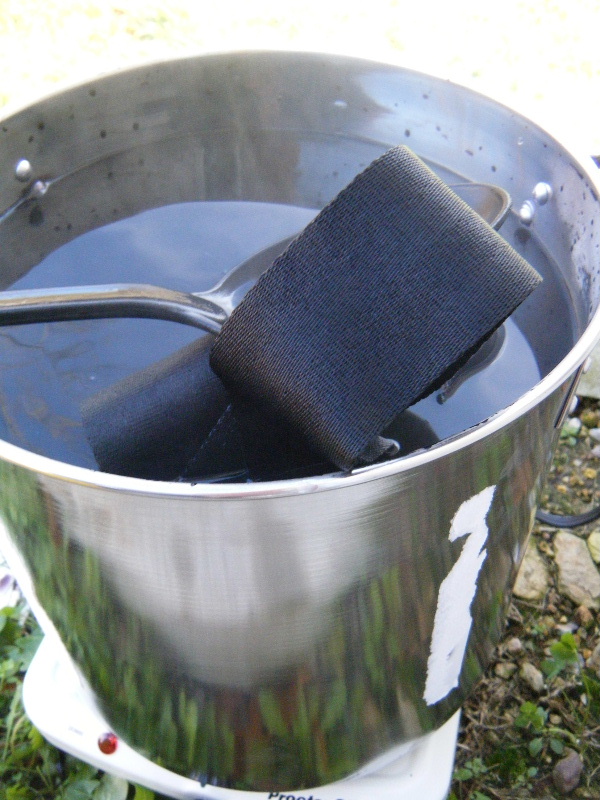
Posted By: jrwoodjoe
Re: T/A Challenger Replica Project - 12/15/11 04:53 PM
Then, rinse.. hang and dry. Next up, seatbelt buckle restoration.
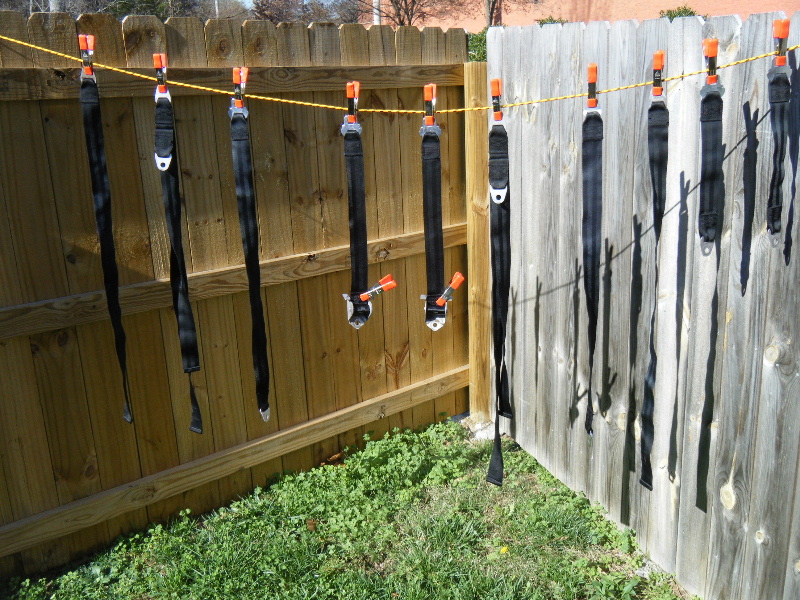
Posted By: 19cuda73
Re: T/A Challenger Replica Project - 12/15/11 08:38 PM
Joe those belts look great.

I just cleaned mine but you took it to the next level. I may need to rethink my method.

That is the nice thing about this web site. Sharing ideas and results. Looking great keep up the good work..
Share the pictures of the buckles as well.
Posted By: jrwoodjoe
Re: T/A Challenger Replica Project - 12/15/11 10:22 PM
If you do decide to redye yours, ECS sells repro. seatbelt tags. I'm thinking of putting these on mine.
http://www.ecsautomotive.com/productdesc.php?co=c&id=51
Posted By: 68427vette
Re: T/A Challenger Replica Project - 12/16/11 04:26 PM
love the thread,, looks great,, for me, i'd have to change the valve covers, to original looking ones

but overall excellent!!

Posted By: jrwoodjoe
Re: T/A Challenger Replica Project - 12/17/11 03:25 AM
Thanks for the kind words. I may end up changing the valve covers. Originally, I was going to use stock valve covers but I have never had a car this "ORANGE"

I thought about doing some vintage Direct Connection Chrome valve covers but they will reflect all the "ORANGE".

So, I'm not sure how it will end up. I do like the Black Valve Covers and they break up all the Orange a bit. May run it for a while and then change them out.

Joe
Posted By: Finoke
Re: T/A Challenger Replica Project - 12/17/11 04:43 PM
How did the seatbelts turn out????
Posted By: JDMopar
Re: T/A Challenger Replica Project - 12/17/11 05:03 PM
Quote:
Thanks for the kind words. I may end up changing the valve covers. Originally, I was going to use stock valve covers but I have never had a car this "ORANGE"  I thought about doing some vintage Direct Connection Chrome valve covers but they will reflect all the "ORANGE".
  So, I'm not sure how it will end up. I do like the Black Valve Covers and they break up all the Orange a bit. May run it for a while and then change them out.
Joe
 Orange you glad you didn't paint it Purple?
 The seat belts look nice.
Posted By: jrwoodjoe
Re: T/A Challenger Replica Project - 12/18/11 12:22 AM
Quote:
 Orange you glad you didn't paint it Purple?
 The seat belts look nice.
 Actually, I am. The Orange and Black thing is looking pretty good to me. Just itching to get it finished up.
Tom, the seatbelt dying has turned out pretty good but I think I may do one more round for good measure. they are black but I think they could be a bit darker. I probably should have put extra dye in the first batch or done them longer. I did them for the least amount of time as specified on the bottle but after they dried they "lightned" a little. They are no longer blue but I think they could be a deeper black so I'll do'em one more time.
Posted By: jrwoodjoe
Re: T/A Challenger Replica Project - 12/18/11 01:02 AM
Here's a photo of the polished drip rail trim installed. Hard to get a good photo of it. Considering I'd never polished trim before, I'm pretty happy with the way it turned out.
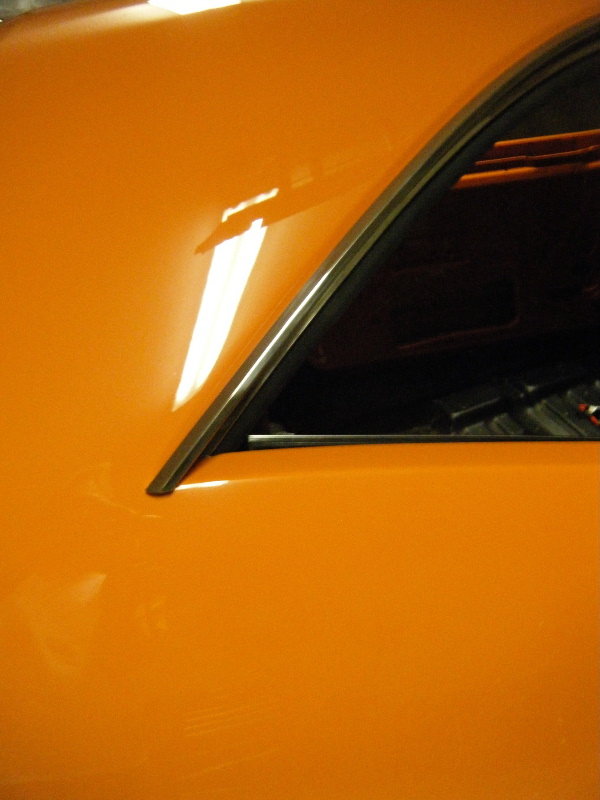
Posted By: Finoke
Re: T/A Challenger Replica Project - 12/18/11 05:17 PM
[quote Tom, the seatbelt dying has turned out pretty good but I think I may do one more round for good measure. they are black but I think they could be a bit darker. I probably should have put extra dye in the first batch or done them longer. I did them for the least amount of time as specified on the bottle but after they dried they "lightned" a little. They are no longer blue but I think they could be a deeper black so I'll do'em one more time.
I found the seatbelt material to be really resistant to dying. I think you got the right idea. Maybe do one more time and really let it soak in scolding water.
I can't wait to see this car finished. Its gonna look awesome in orange and black 
Posted By: NV69B7RR
Re: T/A Challenger Replica Project - 12/18/11 09:19 PM

I can't wait to see it finished too.
How hard was it to polish the drip rails? Did you have just a regular buffer and a polish kit from Eastwood? Thinking of doing mine which is why I ask.
Posted By: jrwoodjoe
Re: T/A Challenger Replica Project - 12/25/11 09:37 PM
I bought a buffing wheel from Harbor Freight on sale for less than 50 bucks. I then used it with buffing compounds that I bought from ACE hardware (they were cheapest in my area for that). Using tips from this website
Buffing Website I was able to get a pretty nice end result. My drip rails were not badly scratched so I did not need to sand them, the buffing and polishing took care of what fine scratches were there. I then hand rubbed in some Mother's liquid Metal Polish and buffed it out using an old dremel shoe buffer (was recommended by another moparts member). The lower front windshield molding has a some heavier scratches and I'm sure I will need to do some sanding before I try to buff it.
It wasn't hard, just time consuming. The more you buff and polish the nicer it gets. You have to be careful and be in the right frame of mind to do it so you don't hurt yourself or damage your trim. Hope that helps, sorry it took me so long to respond. Good luck!

Posted By: brads70
Re: T/A Challenger Replica Project - 12/27/11 11:11 PM
Looking great! Great idea on the seat belts!
Posted By: peterroshouse
Re: T/A Challenger Replica Project - 01/25/12 07:51 AM
Quote:
OK, I had most of the pieces for the rear defroster with speaker option but there was one bracket that was missing. My friend sent me an original and I had a guy take some metal strips and bend the correct lips onto it. I then finished bending them to match the originals and drilled the holes. Since these are not reproduced, I think they came out pretty good. The original bracket is obviously the one in the front.
Do you have any measurements for that bracket? I have all the parts but that one.
Posted By: jrwoodjoe
Re: T/A Challenger Replica Project - 04/17/12 03:20 PM
I have been off Moparts for a while dealing with some of the challenges of life. Will be starting back on the car this weekend.
Richard, sorry for not seeing your post regarding the bracket until now. Sent you a pm.
Posted By: burdar
Re: T/A Challenger Replica Project - 04/17/12 05:12 PM
I've been wondering where you went.
Posted By: cataclysm80
Re: T/A Challenger Replica Project - 04/22/12 04:07 PM
Quote:
I've been wondering where you went.
 Good to have you back Joe!
I haven't been on here much myself lately.
Tav
Posted By: jrwoodjoe
Re: T/A Challenger Replica Project - 06/19/12 03:25 AM
Guess it's time for a quick update. Today, I installed the rear window and trim. I have removed several but never installed one. It went very well because JDMOPAR took the time to tell me how he does them.

Though, this photo does not show it, I also finished trimming the rear of the headliner and installed the rear window interior trim. I installed the vacuum lines on the engine and heater hose in the engine compartment. Things moving forward again. Woohoo!
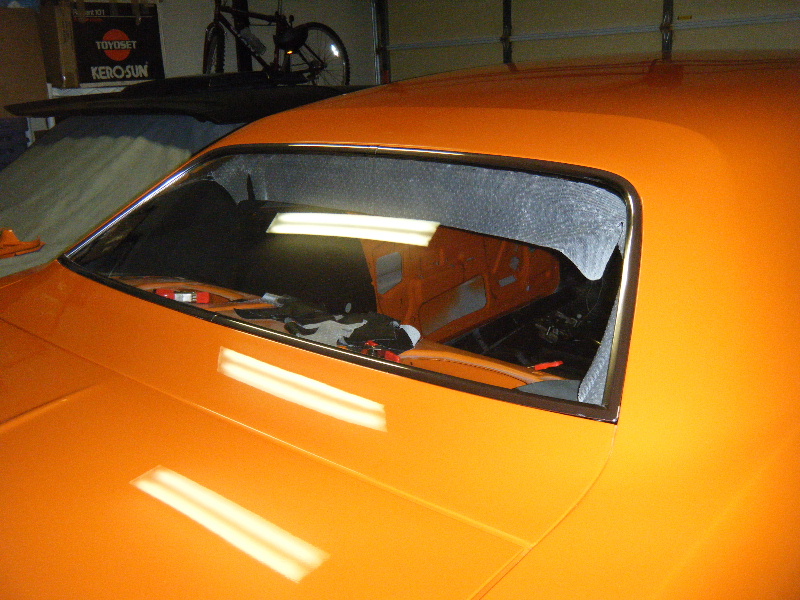
Posted By: burdar
Re: T/A Challenger Replica Project - 06/19/12 03:32 AM

Good deal! I was afraid you ran into problems and it was just sitting. I'm glad to hear things are still moving forward.
Posted By: jrwoodjoe
Re: T/A Challenger Replica Project - 06/20/12 01:16 AM
Busy day today. I had planned on putting in the front windshield but it did not arrive in time so I moved on to the engine. I've ordered some Firecore plug wires for it but they have not come yet. I test fit the repro-fiberglass T/A air cleaner base that came with the project and it did not fit. So I ended up leaving the regular base on for now. I finished running vacuum lines and tightening some of the suspension components.
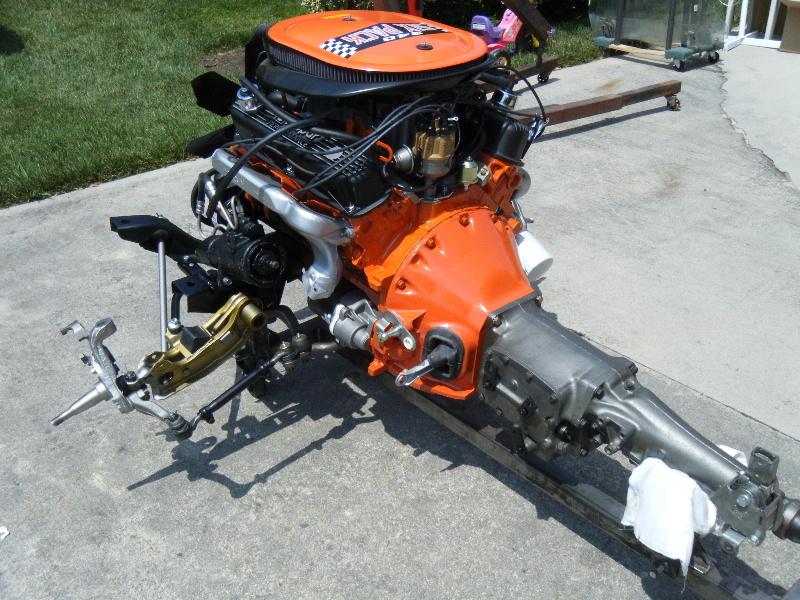
Posted By: jrwoodjoe
Re: T/A Challenger Replica Project - 06/20/12 01:19 AM
I then got everything ready to put the drivetrain back in the car from the bottom. It was really hot and wearing a dark shirt was a bad idea. I almost had heat exhaustion. My 8 yo was nice enough to bring water out to me several times during the course of the install. Oh, and I was so focused on getting this done that I totally forgot to get the "MONEY SHOT" of the engine going in from the bottom.

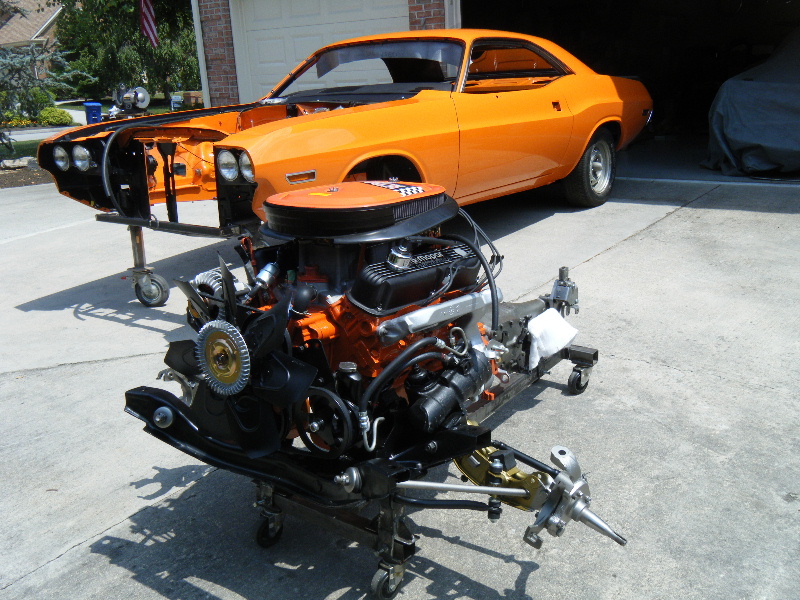
Posted By: jrwoodjoe
Re: T/A Challenger Replica Project - 06/20/12 01:20 AM
So here it is installed.
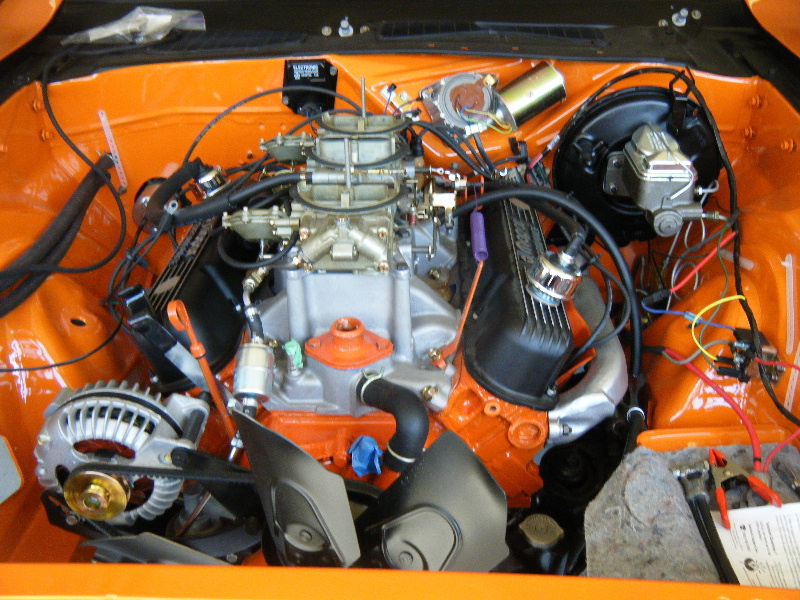
Posted By: jrwoodjoe
Re: T/A Challenger Replica Project - 06/20/12 01:21 AM
Last one for now.
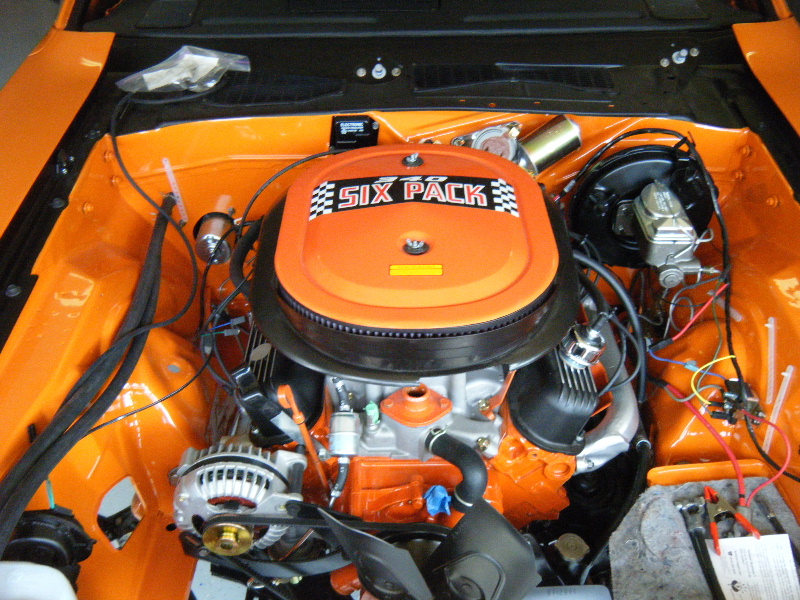
Posted By: burdar
Re: T/A Challenger Replica Project - 06/20/12 02:22 AM


Great job. Did it go right in or did it fight you?
Posted By: jrwoodjoe
Re: T/A Challenger Replica Project - 06/20/12 02:26 AM
It went in pretty easy. I thought the K-member bolts would be the hardest but had more trouble with getting the tranny mount holes lined up. Who'd a thunk it?

Posted By: JDMopar
Re: T/A Challenger Replica Project - 06/20/12 04:09 AM
Wow! That looks great!

Glad it went in pretty easy. You should have that thing back on all 4's before long. It might be a blessing in disguise about the windshield not showing up yet

. If you're like the rest of us...you'd sit in the car making engine noises and slobber all over the inside of the new glass!


It's supposed to be hot for a while, so drink the water today that you will need to sweat tomorrow.

Posted By: jrwoodjoe
Re: T/A Challenger Replica Project - 06/22/12 03:40 AM
Can't really sit in it too good yet, so I just keep making the exhaust noises while I'm walking by it working.

I connected the spindles to the upper ball joints. (Jackie, that caliper mount look familiar?

) I also started connecting engine wires. Wired the alt, starter and ignition coil. I began to hook up the 4 speed shifter rods that came in a box with the car and ran into a problem. 2 of them were correct but one seemed to be wrong for the car. I called Wayne at Brewer's and after talking to him, we believe that the 3/4 gear rod is not correct. So, I've ordered one from him. The new Firecore wires I ordered should be here tomorrow.
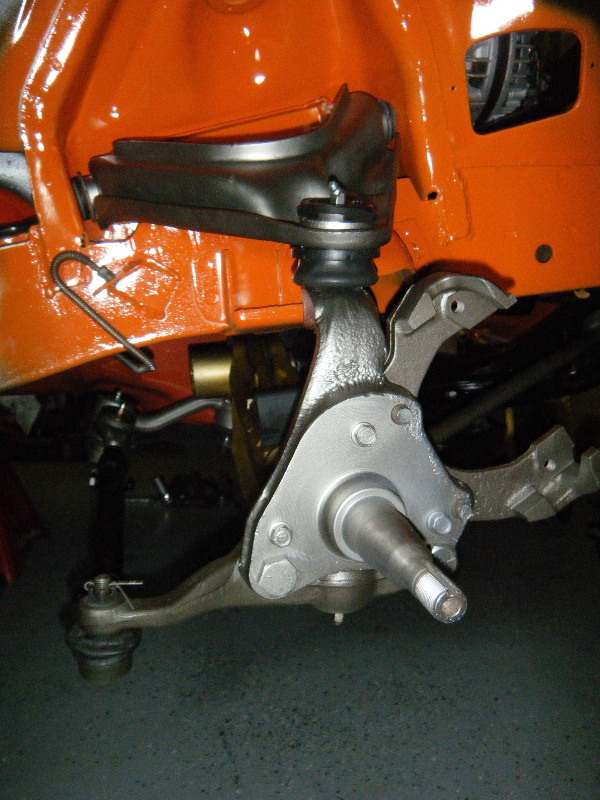
Posted By: Finoke
Re: T/A Challenger Replica Project - 06/23/12 12:40 AM
Nice job! It's looking real good

Posted By: wally426ci
Re: T/A Challenger Replica Project - 06/23/12 07:06 PM
Great work, glad to see you back at it again!!

Posted By: demon440
Re: T/A Challenger Replica Project - 06/24/12 12:02 AM
Looks good.
Did you forget the shocks?
Posted By: jrwoodjoe
Re: T/A Challenger Replica Project - 06/24/12 01:27 AM
I have new shocks for it but they are the wrong color and I haven't scuffed and painted them yet.
Thanks Tom! I've had you on my mind lately and have been meaning to give you a call. I'll try to call you this week and see what you are up to.
Thanks Shawn, glad to be working on it again. I'll be cleaning and painting some small parts this week so I can make some more progress.
Posted By: JDMopar
Re: T/A Challenger Replica Project - 06/24/12 03:07 AM
Posted By: jrwoodjoe
Re: T/A Challenger Replica Project - 07/07/12 03:46 AM
The last few days I've been been able to get a little more done. The new 3/4 shift rod arrived from Brewer's and it was different than what I had. It did fit correctly and all the rods are installed and adjusted. With the help of Moparts members in the Q&A section (including 1 Wild RT), I installed the z-bar using all new parts and got the clutch pedal working as it should. The speedometer is now in place along with the back-up dash light wiring. Also arriving this week was the correct E-Brake Cable from Fine Lines. The one I had ordered from them was apparently for a Barracuda and too short but they sent me the correct one right away. I appreciate their customer service and willingness to correct the problem. I installed the radiator w/ fan shroud but ran into a problem with the fan blades hitting the shroud. I found a similar thread in the Resto section of Moparts and realized that the fan blade was 20" and that I need an 18". So, I will track down a correct one this week so that I can complete that.
Today, I installed the rotors, calipers, brake hoses etc. I still need to do the shocks and torsion bars before I can sit the front back on the ground. I wrapped up the day with installing the front windshield. Using JDMOPARs method it also went really well. My mother-in-law was my assistant with the front and rear glass installs and have to say she is pretty good at it.

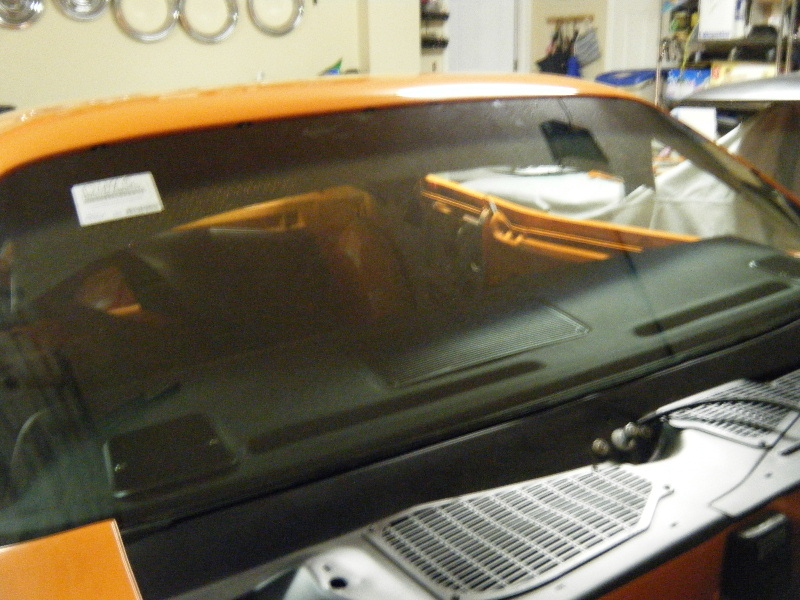
Posted By: JDMopar
Re: T/A Challenger Replica Project - 07/07/12 03:24 PM
Looks great Joe. Glad it went well. It's kind of a one shot deal setting the glass in...lol. If you miss your marks or drop it too soon,it's a pain to cut it back out,scrape all the goo off and start over again. When you install the trim,run some tape around the opening to keep from scratching the paint. You can experiment with the placement of the tape to find the sweet spot, so it will protect the paint...but not be so far down that the trim captures it and makes it hard to pull off when you're done.

Posted By: jrwoodjoe
Re: T/A Challenger Replica Project - 07/08/12 12:57 AM
Using the tape as alignment marks for the installing the glass is really key to getting it right the first time. I didn't use any tape when installing the rear trim. Guess I was lucky or careful enough because I didn't scratch the paint any. I will probably use it on the front though. I installed the new torsion bars today and will probably paint the shocks on Monday. I have to get some new dust covers, thought I had those but didn't. Here's a shot of the disc brake conversion using A-body spindles and 73 Challenger rotors, calipers and brake hoses.
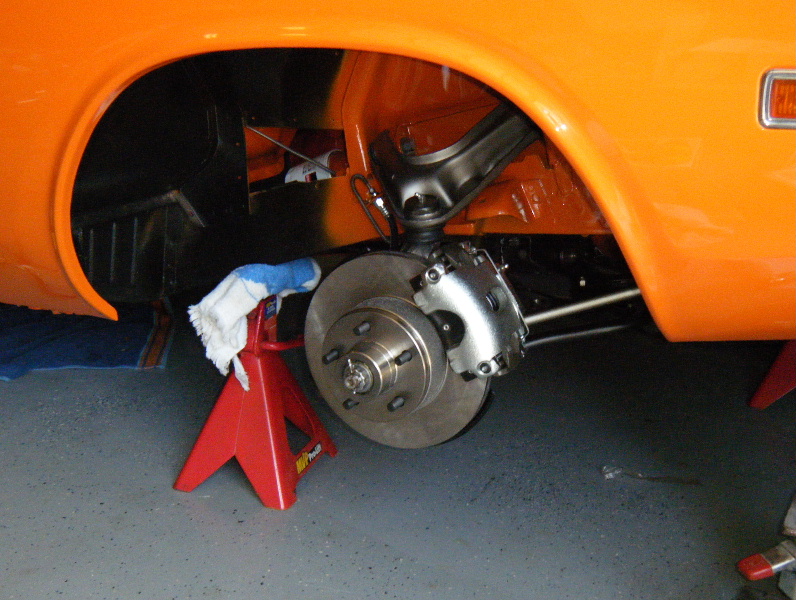
Posted By: jrwoodjoe
Re: T/A Challenger Replica Project - 07/14/12 01:38 AM
I sent out the old rimblow to Moparts member Plumbeeper to be restored and sent it back a nice and clean. Here's how it turned out.
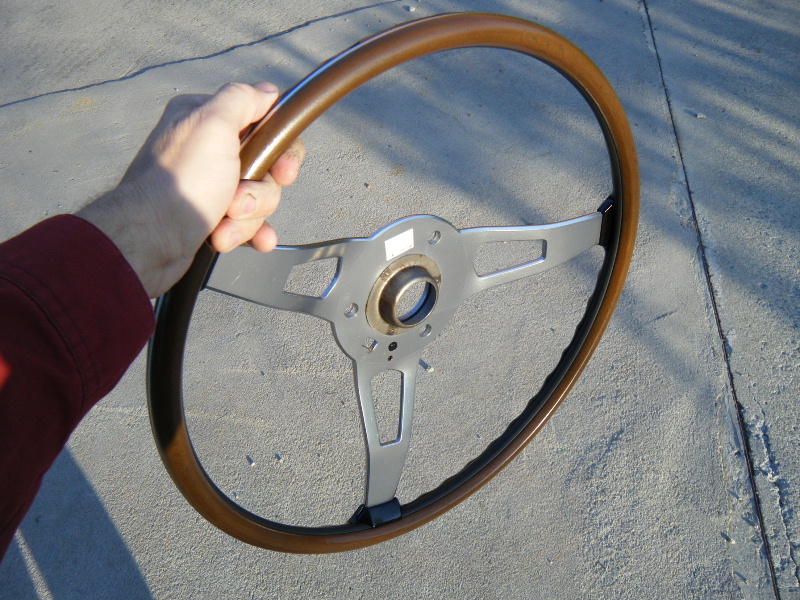
Posted By: jrwoodjoe
Re: T/A Challenger Replica Project - 07/14/12 01:39 AM
Close-up
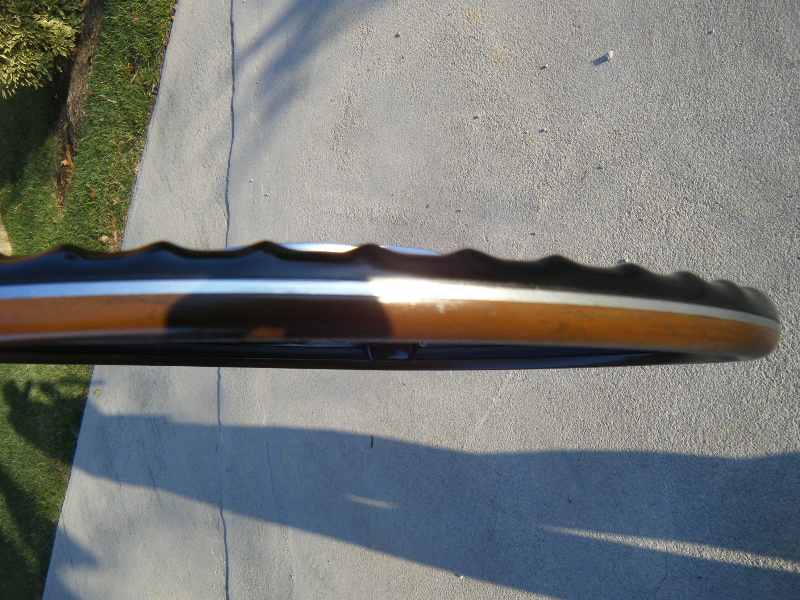
Posted By: jrwoodjoe
Re: T/A Challenger Replica Project - 07/14/12 01:40 AM
I took the steering column completely apart.
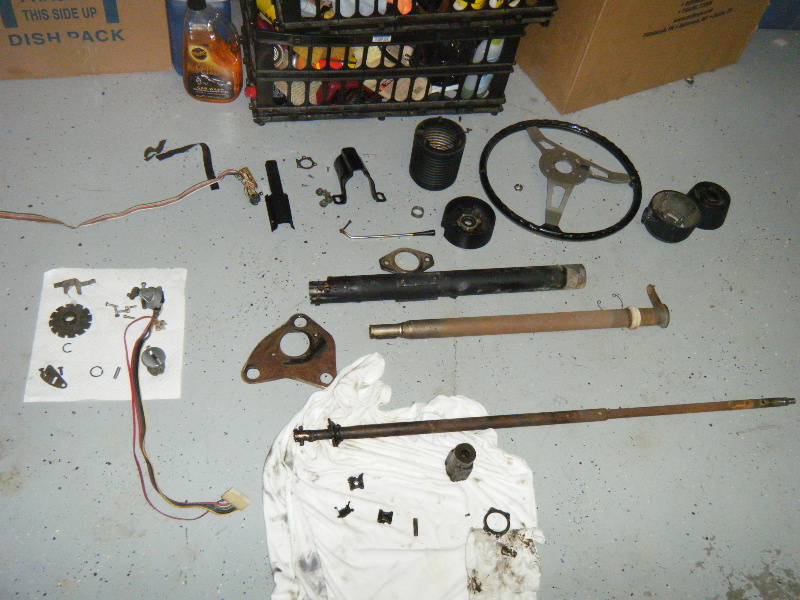
Posted By: jrwoodjoe
Re: T/A Challenger Replica Project - 07/14/12 01:41 AM
And refinished all the pieces.
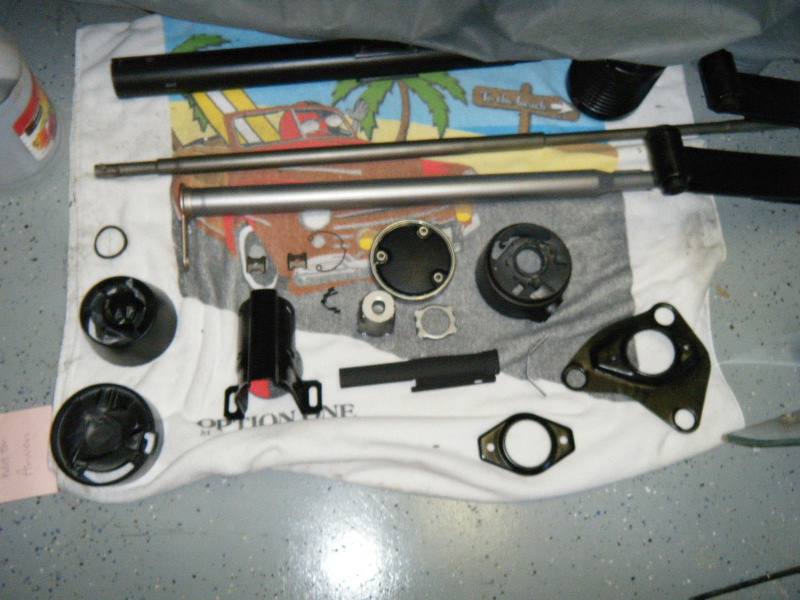
Posted By: jrwoodjoe
Re: T/A Challenger Replica Project - 07/14/12 01:42 AM
This is what it looked like before...
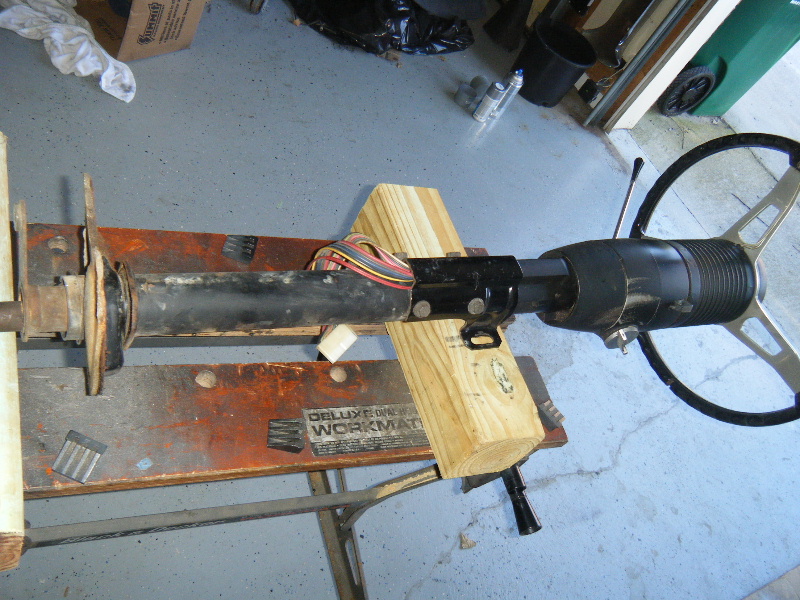
Posted By: jrwoodjoe
Re: T/A Challenger Replica Project - 07/14/12 01:43 AM
And here's the after. I used a friends used horn button since I don't have the correct one myself. Still looking for a good used Dodge one.
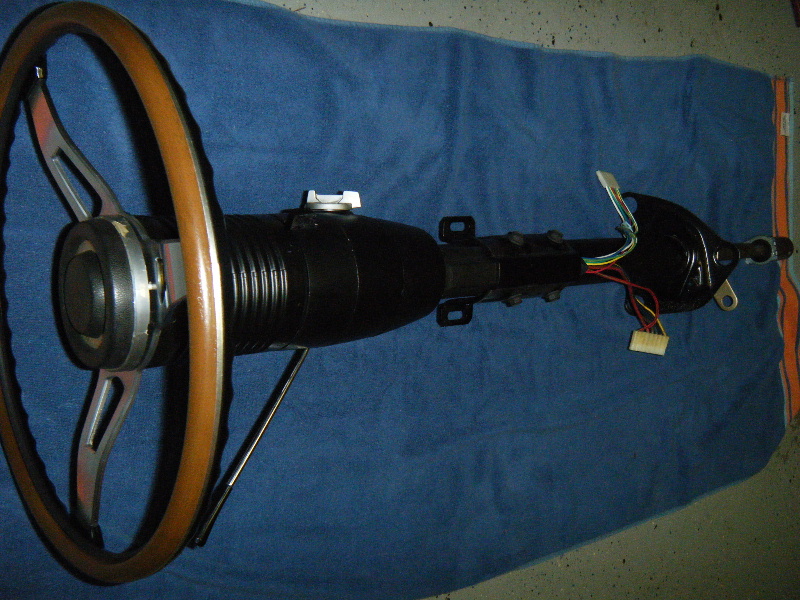
Posted By: jrwoodjoe
Re: T/A Challenger Replica Project - 07/14/12 01:44 AM
Last one for now...
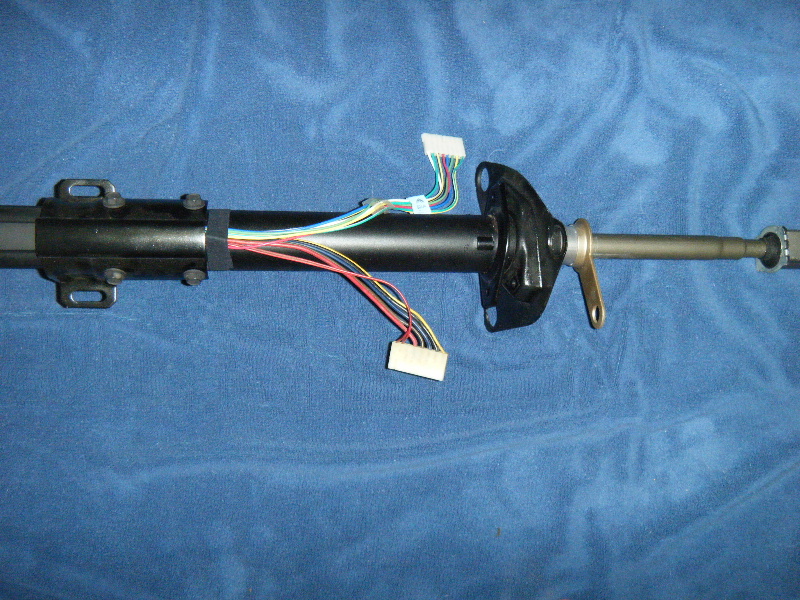
Posted By: brads70
Re: T/A Challenger Replica Project - 07/14/12 01:50 AM
Looks great! Love the colour!

Posted By: wally426ci
Re: T/A Challenger Replica Project - 07/15/12 03:08 AM
Great work as always Joe. Hey, how's little girl doin?! Hope all is well.

Posted By: jrwoodjoe
Re: T/A Challenger Replica Project - 07/16/12 12:36 AM
Thanks guys!
Thanks for asking Shawn. She is doing really well and is eating/drinking like your average kid. In many ways, she eats better. She wanted Sushi a few weeks ago. She is still pretty skinny but is so different than the kid she was 2 years ago.
Joe

Posted By: wally426ci
Re: T/A Challenger Replica Project - 07/16/12 06:01 PM
Great news Joe. It looks like she is happy (and hungry), and Dad is doing a great job. I'm really happy to hear all is well.

It will be cool if she takes a liking to Mopars. Our 2-1/2 yr. old has for sure.

Posted By: jrwoodjoe
Re: T/A Challenger Replica Project - 07/22/12 03:15 PM
I have been working on the car but unfortunately, don't really have anything to show for it. Saturday was one of those days you wonder why you bother. I had planned on picking up a new Spectra Gas Tank at a small local car show and then heading back to the house to replace the 20" fan blade with the new 18" blade. Well, wouldn't you know that the Gas Tank vendor decided not to attend the show this year. STRIKE 1. Then, I ran into a Moparts member whom I chatted with and in the course of our conversation realized I left the fan blade in another town (was out of town when I ordered it) and so there was no way that was going to get done. STRIKE 2. I went back to the house and decided to go ahead and install the drive shaft. As luck would have it, the new yoke I got this week PLUS the new 3rd member require the use of Hybrid U joints as opposed to the standard U-joints the car was running. Had to order those so it will be Monday before I have them. STRIKE 3. I'm OUT. Got so frustrated that I knew it would not be a "good" car day and called it done. I'll try again this week.

Posted By: JDMopar
Re: T/A Challenger Replica Project - 07/23/12 12:28 AM
When you have those kinda days....just scroll back up from here a little, and look at that mile wide grin. That should help.

Hate I missed seeing you at the show, and that the gas tank dude didn't show up.

Posted By: jrwoodjoe
Re: T/A Challenger Replica Project - 07/23/12 02:53 AM
You didn't miss much. It was pretty dead. They were only parking cars on the side you usually park. There were a few new cars that I hadn't seen before but I was in and out pretty quick.

On a good note, just ordered a tank from Rock Auto so should be here this week most likely.
Posted By: jrwoodjoe
Re: T/A Challenger Replica Project - 08/25/12 10:46 PM
Worked on the car today and I'm totally EXHAUSTED!

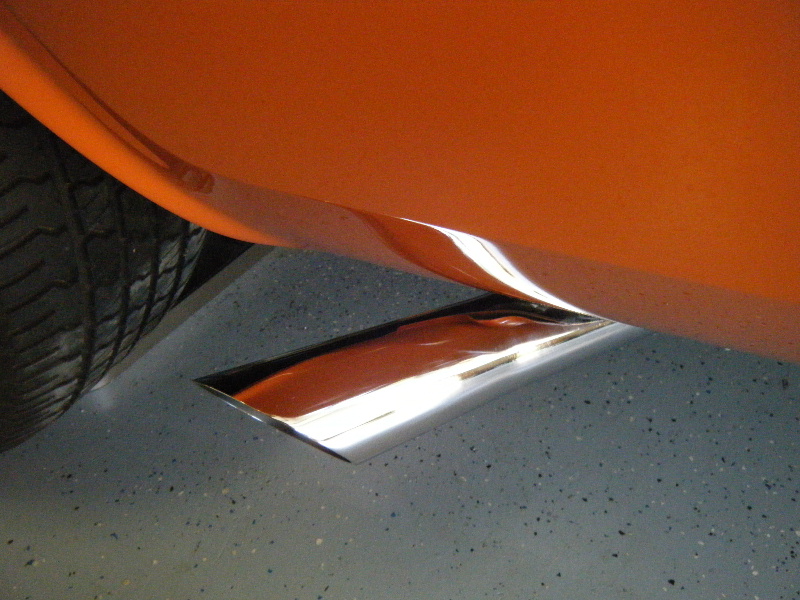
Posted By: JDMopar
Re: T/A Challenger Replica Project - 08/26/12 03:06 AM
You forgot the


Posted By: Edison62
Re: T/A Challenger Replica Project - 08/27/12 04:36 PM
.. Joe, was checking out the pic's. Great job, lot's of detail.... sweet looking ride, nice work!
Bryan
Posted By: jrwoodjoe
Re: T/A Challenger Replica Project - 08/27/12 08:56 PM
Thanks Bryan. I'm trying to take my time and do things the best I can. Really have worked on my patience with this one. I've had several set backs but dealing with them the best I can. Since this was an early car it did not have the rear sway bar nor the dimples in the frame rail for where it installs. JDMOPAR was nice enough to get me some measurements and and the bar fell inline with the measurements he gave so it should be correct. I did install the correct front brake cable as well, the next big task is the fuel tank/tube install. Here's a photo of the sway bar in place and the mufflers.
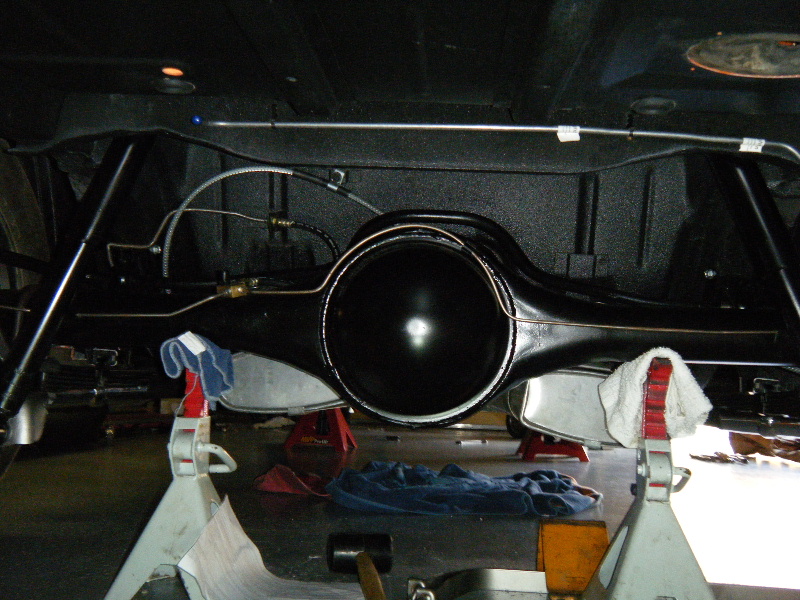
Posted By: Finoke
Re: T/A Challenger Replica Project - 09/01/12 09:31 PM
Hey Joe, looking good! I wish I was close enough to eyeball it up

Posted By: jrwoodjoe
Re: T/A Challenger Replica Project - 09/03/12 12:36 AM
Quote:
Hey Joe, looking good! I wish I was close enough to eyeball it up 
"Eyeball it"??? Heck, I wish you were close enough to help. 
 Wife pitched in a hand today to help me install the steering column. It all went well until the coupler retainer (that was tight) became loose. So, I think I'm going to have to pull it back out again and redo the coupler retainer.
Posted By: Finoke
Re: T/A Challenger Replica Project - 09/03/12 02:07 PM
Quote:
Wife pitched in a hand today to help me install the steering column.
Families that Mopar together, stay together  I too have had my wife as my beautiful assistant
I got my 70 Cuda back to my house. It's darn close to being ready for paint. I've been toying with the idea of sending it out for paint over the winter 
Your heading to the finish line with the T/A and it's looking spectacular!
Posted By: jrwoodjoe
Re: T/A Challenger Replica Project - 09/04/12 07:15 PM
Great News on the Cuda, but now that you used the Hemi engine in the Challenger what will you do for a motor?
I don't have any car guy neighbors except for one guy who has medical issues a lot and is unable to help much. Moparts member Burkenator was nice enough to come over a couple of times to lend a hand but I just hate to bother people too much. I know they are busy and have lives and projects too. So my wife has been good about helping on small stuff.

Posted By: Finoke
Re: T/A Challenger Replica Project - 09/15/12 12:39 PM
Any updates Joe?

Posted By: Homerr
Re: T/A Challenger Replica Project - 09/17/12 05:09 AM
Hi Joe - I just spent this evening reading this thread and wow! it's a great looking car! Looks like the end might be in sight now that the motor and some of the glass is in.
Thanks for mentioning some of the sources you've used and your experience. I'm bookmarking them as I see them. I restored a '69 Charger almost 20 years ago. It wasn't quite the right car for me and eventually let it go. However, I've gotten the itch to work on another Mopar and threads like this are great to read so I can figure out how to do it 'right' this time. Thanks!
Posted By: jrwoodjoe
Re: T/A Challenger Replica Project - 09/20/12 02:06 AM
Thanks Homerr, I don't know that I'm "doing it right" but I'm doing it anyway.

Sorry Tom, I don't have too much to report. When I installed the steering column, the coupler retainer cap came off so I will need to pull the steering column out and redo it. I've spent the last 2 weeks battling a rezoning issue near my home and this weekend my oldest is in a Soccer tournament. She has 4 games and the youngest has one 1 too. I did order some parts from Dante so I can install the gas tank. That's next on the todo list. Should be able to get that in within the next week or two I hope. I had hoped to have this thing running by now but you know how that goes.

Posted By: jrwoodjoe
Re: T/A Challenger Replica Project - 10/09/12 02:54 AM
I apologize for not answering some of your emails, I had not logged in for a while but I just responded to them.
In the last week or so, I installed the fuel tank, filler neck and gas cap.
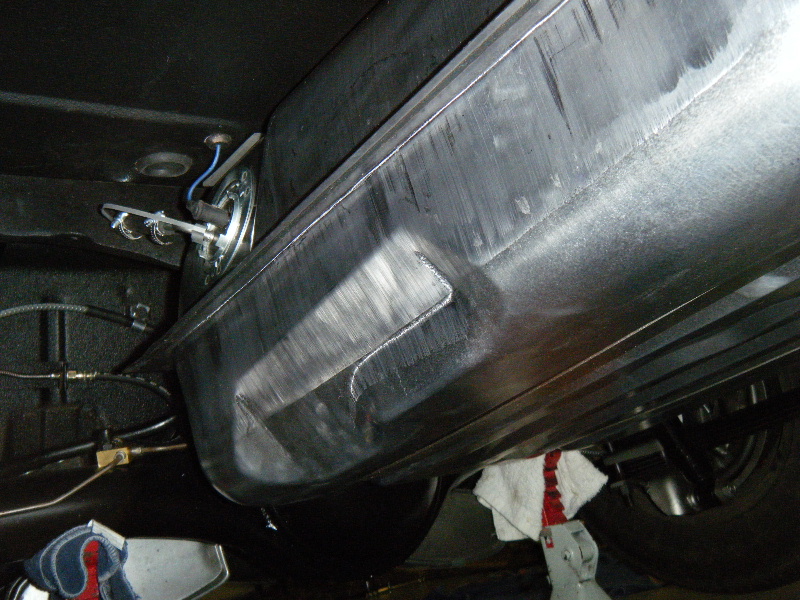
Posted By: jrwoodjoe
Re: T/A Challenger Replica Project - 10/09/12 02:57 AM
With the fuel tank in, the rear valance went on. Looks like I need to dust the rear bumper or work a little faster.

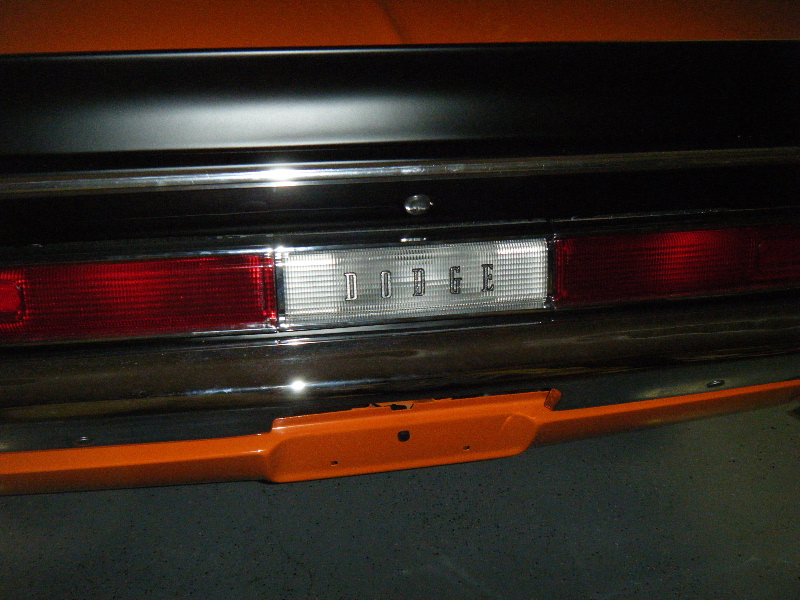
Posted By: mopar383
Re: T/A Challenger Replica Project - 11/24/12 05:11 AM
Looking good
Posted By: wally426ci
Re: T/A Challenger Replica Project - 12/03/12 12:58 PM
Checking in to see:
-How the car is doing?
-How little girl is doing?
-How the zoning issue went?
Hope all is well.

Posted By: JDMopar
Re: T/A Challenger Replica Project - 12/29/12 06:07 PM
Hey Joe.

Hope you and your family had a nice Christmas.

If you need anything....holler!

Posted By: jrwoodjoe
Re: T/A Challenger Replica Project - 01/07/13 02:47 PM
Thanks Jackie!
Wally, sorry for not getting back to you sooner. Daughter is doing very well. She eats and drinks great but is still on the thin side. Otherwise very healthy and keeping me hopping. Rezoning went in our favor but they had a year before they could come at us again. Instead of taking the deal we offered up, they are going to hit us again when their time is up. Big guy v/s little guy thing and we're the little guy. Such a waste of time but I'll fight for what's right all day long just on principle.
Nothing happening on the car right now. It is really close to being fired up, just can't carve out time to wrap it up.

Happy New Year though!

Posted By: wally426ci
Re: T/A Challenger Replica Project - 01/07/13 05:02 PM
No worries, Great to hear that all is well!! I'm glad to hear everyone is healthy and happy.
My 2 little girls keep me moving constantly as well.
Looking forward to seeing progress!

Posted By: jrwoodjoe
Re: T/A Challenger Replica Project - 01/31/13 01:17 AM
The former owner of the car and good friend of mine came to pick-up some parts the other day and he was nice enough to help me with a few things.
For the first time in a LONG while, the car is sitting on the ground on all 4 wheels. I need to adjust the front ride height, it is too high. I did a rough alignment on it but it needs to be properly aligned. I have not restored the wheels or put new tires on it. I'll do that before having it aligned though. We put the hood and hinges on and after a little tweaking it settled into place nicely. The hood fits really good with the fenders and this thing is finally beginning to look like a car again.
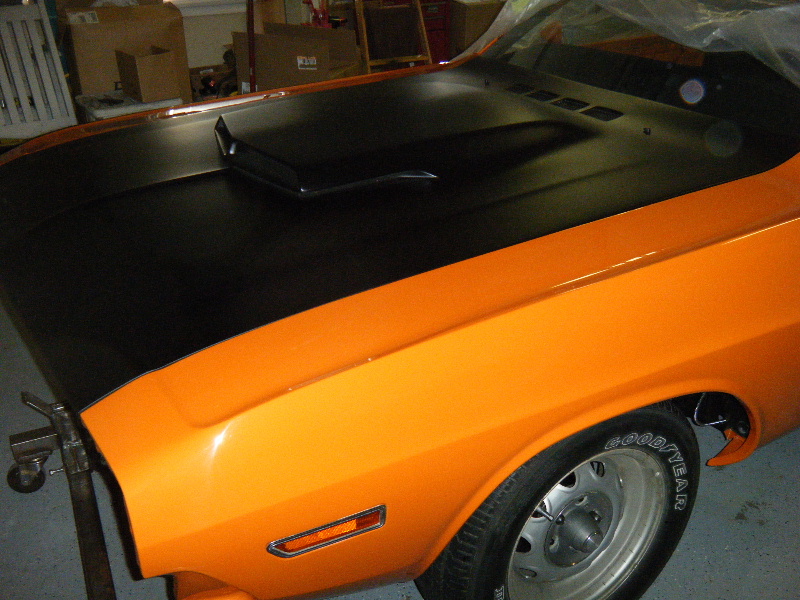
Posted By: Publicbottle
Re: T/A Challenger Replica Project - 02/04/13 06:04 AM
Nice work! Thanks Joe for responding to my emails...seems like youre a busy dude.
Where did you get the t/a hood?
Posted By: wally426ci
Re: T/A Challenger Replica Project - 02/07/13 01:01 PM
Nice work as always!

Posted By: jrwoodjoe
Re: T/A Challenger Replica Project - 02/25/13 02:54 PM
Thanks guys!
The hood was a "scratch and dent" hood that came from Year One. The repairs needed were very small. I don't know who made it and it isn't as "accurate" as some of the other aftermarket hoods but it does follow the fender body lines nicely.
I'm currently trying to carve out a little time in March to work on some more stuff. I'll post up pics as I get things done. Thanks to everyone for your interest in the project. It means a lot.

Joe
Posted By: jrwoodjoe
Re: T/A Challenger Replica Project - 03/27/13 07:45 PM
Making baby steps but hey...progress is progress. Hood pins installed. It was a riveting process.

Joe
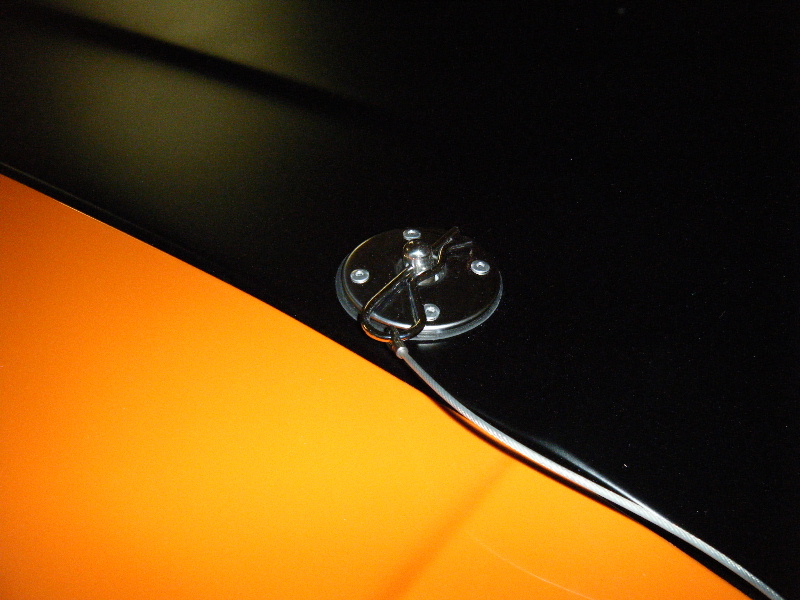
Posted By: Anonymous
Re: T/A Challenger Replica Project - 03/29/13 09:53 PM
That's absolutely right, progress is progress. Just keep on keepen on.
Posted By: jrwoodjoe
Re: T/A Challenger Replica Project - 05/14/13 02:28 AM
Last week or so, I did a little indoor grilleing. He he he. I also installed the hood trim. YO said that you could not install it on this hood, I beg to differ.

I can't find the light bezel screws I have packed up somewhere so I'll have to get some, then I can install those.
Part of the delay in finishing the car is that I have been living in two cities for the past 2 years and haven't been able to do too much. It appears that may finally change and I will be back on track. As Tom Petty says... I'm Running Down a Dream.

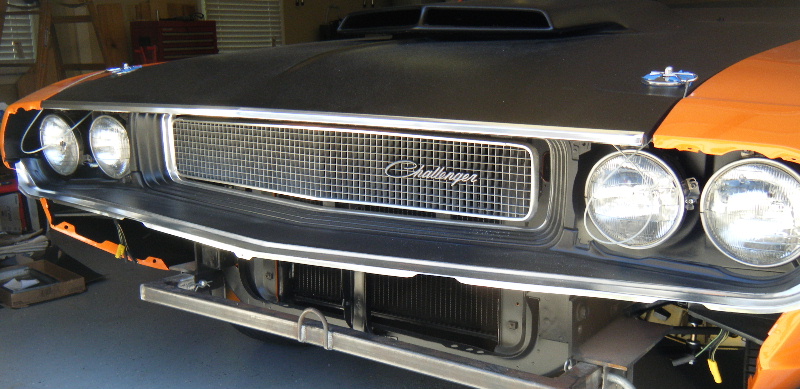
Posted By: burdar
Re: T/A Challenger Replica Project - 05/14/13 02:38 AM
Looks good. I'm glad you redid the grill correctly. I see too many off them completely black.
Posted By: jrwoodjoe
Re: T/A Challenger Replica Project - 05/12/14 02:37 PM
Thanks Darren! Can't believe it's been almost a year since I have logged in to Moparts. For those that have been wondering, we have had a relocation and a sick family member. Been too busy to get time to work on it. Car is sitting in the garage waiting for me to finish it up. Hope everyone has been doing well.

Joe
Posted By: burdar
Re: T/A Challenger Replica Project - 05/12/14 06:05 PM
I was just thinking about this project yesterday. How weird is that?
Posted By: Finoke
Re: T/A Challenger Replica Project - 05/12/14 06:23 PM
Welcome back! Hope the move went smoothly and family is well

Posted By: wally426ci
Re: T/A Challenger Replica Project - 07/01/14 06:55 PM
Hope all is well. keep coming back, it works if you work it.

Posted By: jrwoodjoe
Re: T/A Challenger Replica Project - 04/19/15 02:25 AM
Hi everyone, hope you all have been doing well. Have been caring for my mother who has Cancer and have not been able to do much car wise. My youngest daughter and wife went camping with Girl Scouts . My oldest daughter and I had the day to ourselves. I asked her what she wanted to do and she said "Can we work on the Challenger together?" So we did.

It was a brake system bleeding kind of day.

Posted By: wally426ci
Re: T/A Challenger Replica Project - 03/09/16 05:28 PM
Hey Joe, sorry to hear of your mom. I hope the family is doing well. Almost a year later; how is everything?
Posted By: jrwoodjoe
Re: T/A Challenger Replica Project - 11/30/20 10:30 PM
Hope everyone is well. Haven't posted on the project in a while, and thought I would give a little update. These are a few of the things I have recently installed:
Rear antenna, rear defrost with speakers, package tray, door handles, front windshield trim, front bumper, valance, chin spoilers, rearview mirror, sunvisors, A pillar trim pieces and dome light. I installed the rear quarter windows this weekend but still need to figure out if I have them adjusted against the rubber weatherstrip correctly (see my other recent post question). Here a few pics.
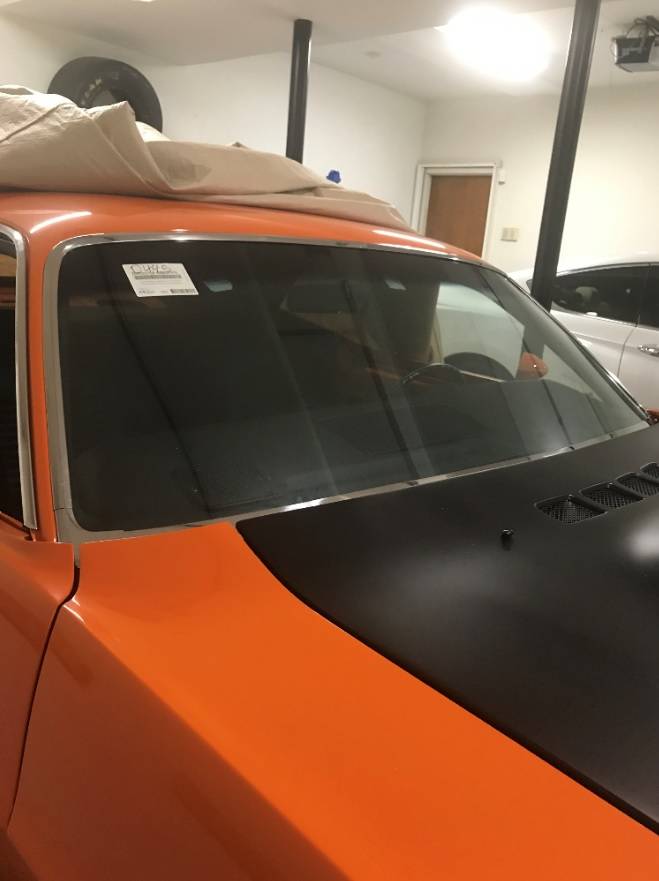
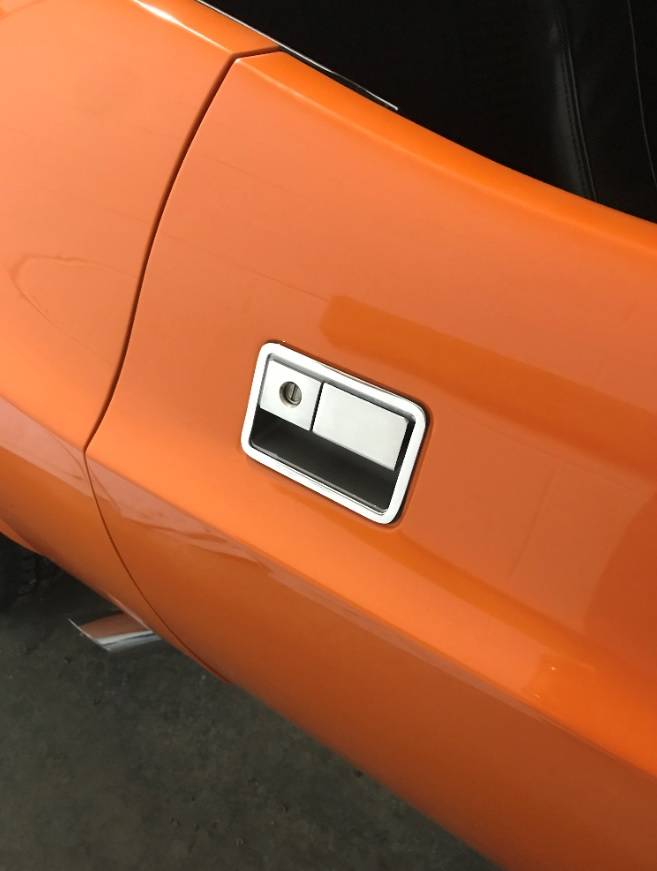
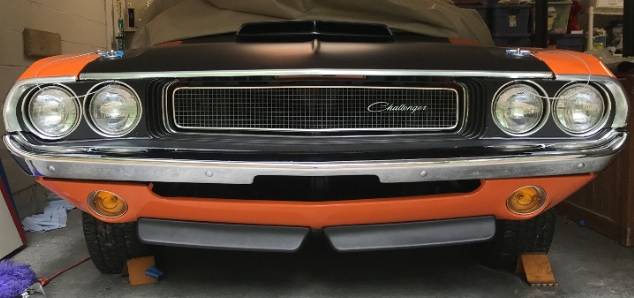


 Glad I stumbled across this thread. Your grill looks terrific! Keep up the good work, I'll be watching here.
  Might even post my own.


 I know you have got to be excited. It's lookin good.


 Wow! It's movin along

 Looks good. If your back trouble is a pulled muscle right above your butt cheek, a massage therapist will do more good than anything. I've pulled those muscles a few times myself


 Hope it was the washable markers.
  ! It just looks hard to make that area of the hood look good if you don't do that kind of work everyday.
 Getting ready to take my flywheel to get resurfaced. I'll think on it some while driving there and back.


 Oh....and word on the street is, that 2 little girls in Knoxville are asking for hush money to not tell Mommy about the stinky black thingies hanging off the kitchen cabinets!


 The seat belts look nice.
 If you need anything....holler!


