Moparts

replacement cab.

Posted By: scratchnfotraction

replacement cab. - 07/20/13 02:04 AM

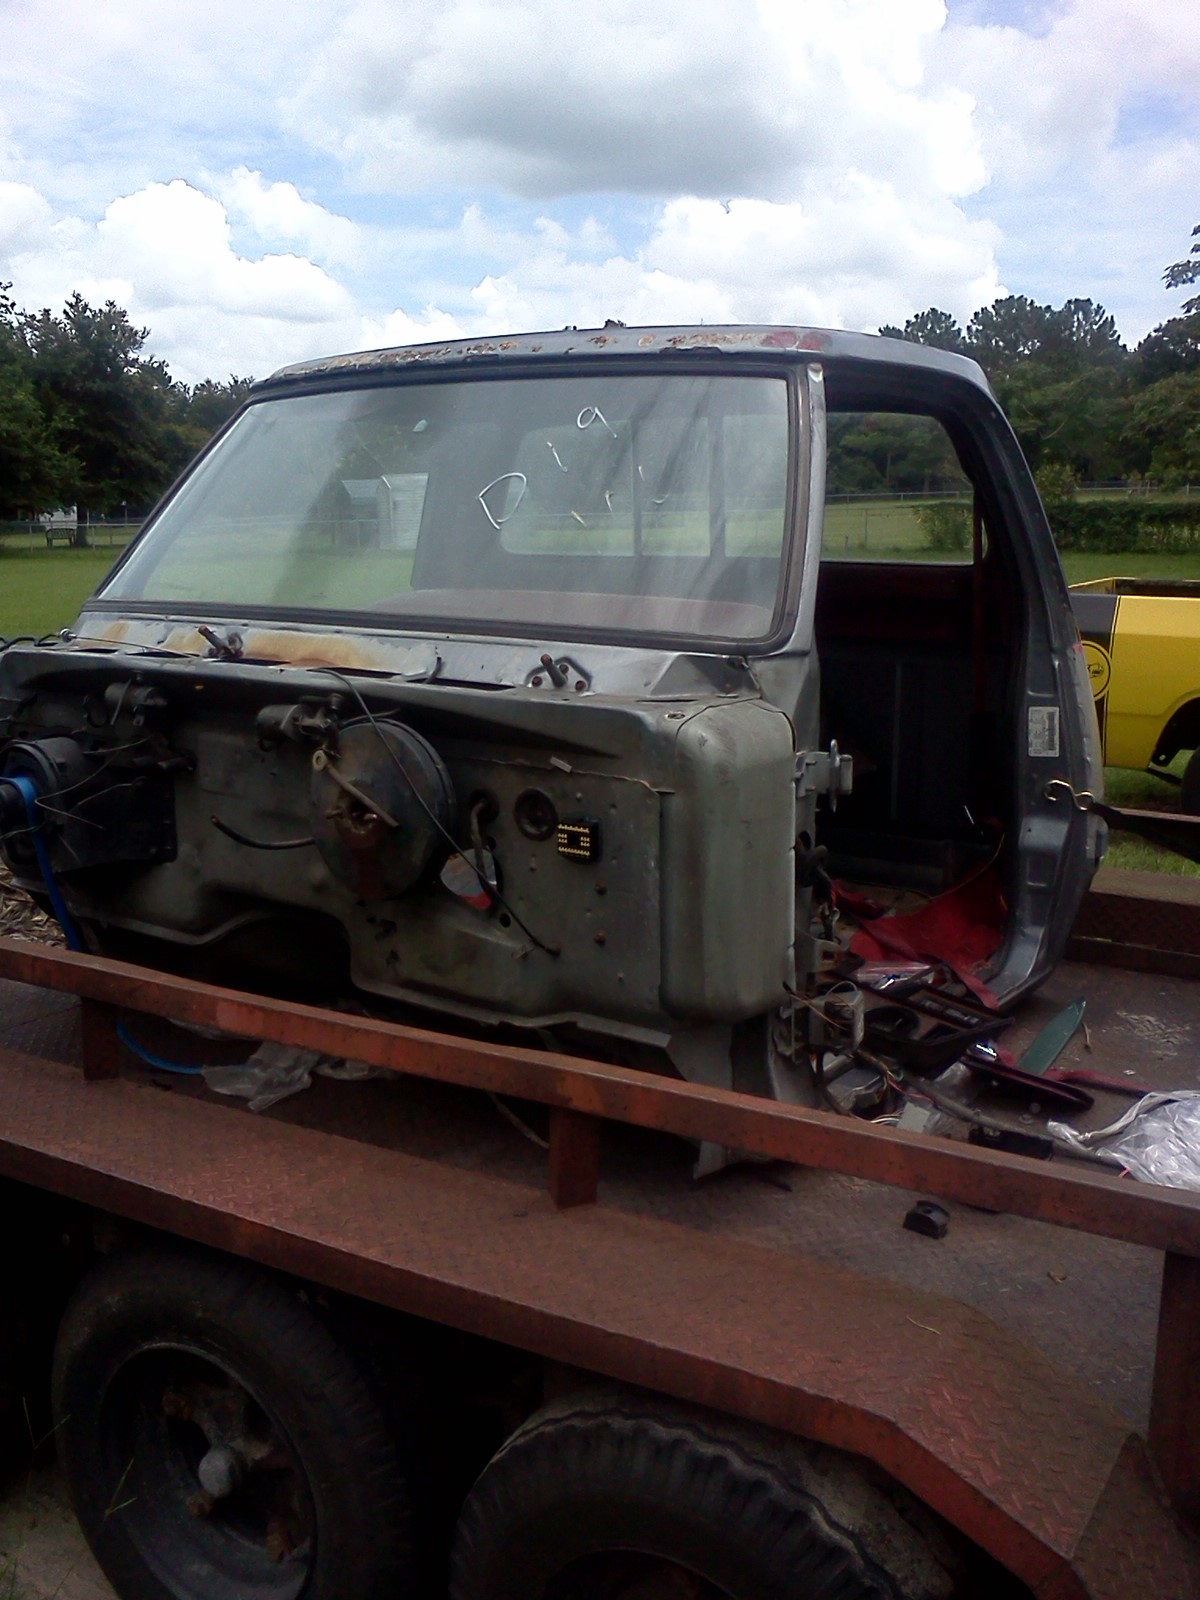
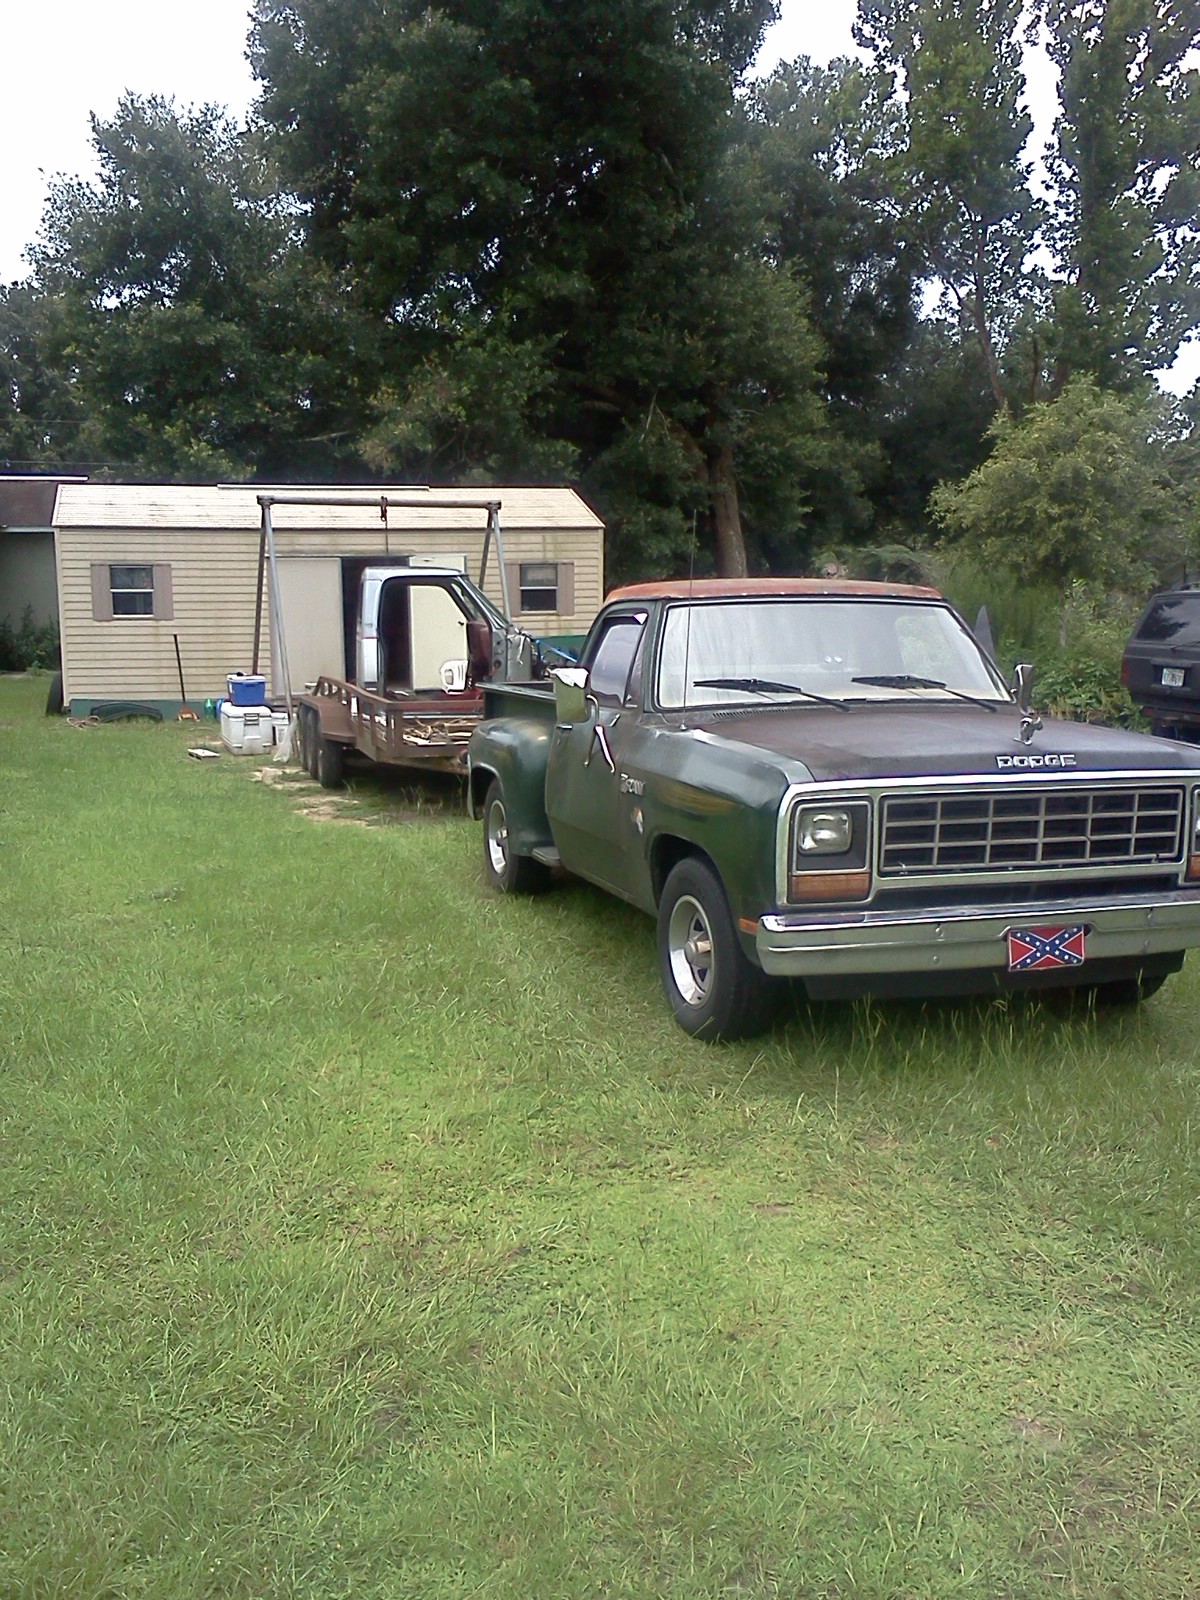
got the 91 cab home. just need to strip the rest of the inside down.

91 D150 LE.. i see it has/had power mirrors,PW,PL,map/dome/cargo light. i wont need any of the 91 stuff so i will be listing some of the good pieces that someone might be able to use.

the 85 cab is a little rusty and getting a little to much draft inside at speed. so it is time to replace the cab with a new one to gain the hydro clutch system. swap in the 5 speed while cab is off.

looks dont matter just need less rust holes and most likly will get a spray bomb flat black with palmetto pron camo paint.

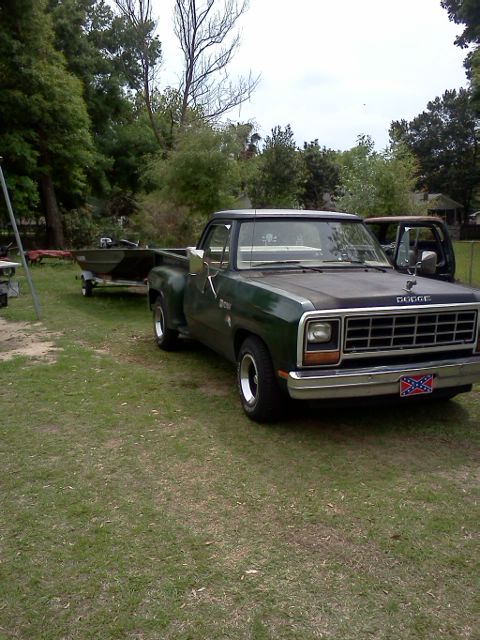
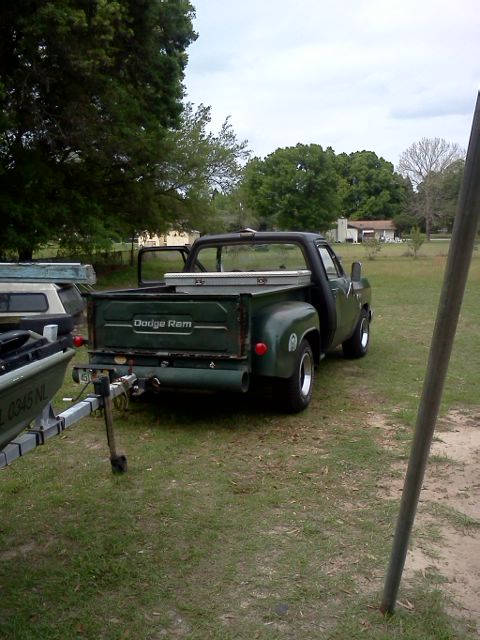
with a 80 mile trip today the whiplash roller cam rolled 500+ miles today pulling the 20 foot long 3 axle trailer today.

found the sweet spot on the timing,locked it down and ride sally ride.

sits and chops a way with a little shake and bake jiggle wiggle till you step on the throttle. then it snaps up the rpm & pulls right off with a light throttle and a smooth burble gurgle in the ol glass packs. hitting 3rd gear at 30 mph towing.

yep, no doubt it is the exact same performance as the luntai VooDoo roller cam I pulled out. works well with the comp 901-16 springs, been to 5500 rpm and pulling. still getting 18+ mpgs with it under 60 mph

I got exactly what I wanted with the whiplash.I like the lunati VooDoo roller with no complants. it worked great since 07' but was a smooth stock idle.

the nv4500 5 speed with a 3.55 locker should work well with the whiplash cam. now to get it done.

done before the rain came.
Attached picture 7782906-newproject1.jpg
Posted By: scratchnfotraction

Re: replacement cab. - 07/20/13 02:05 AM


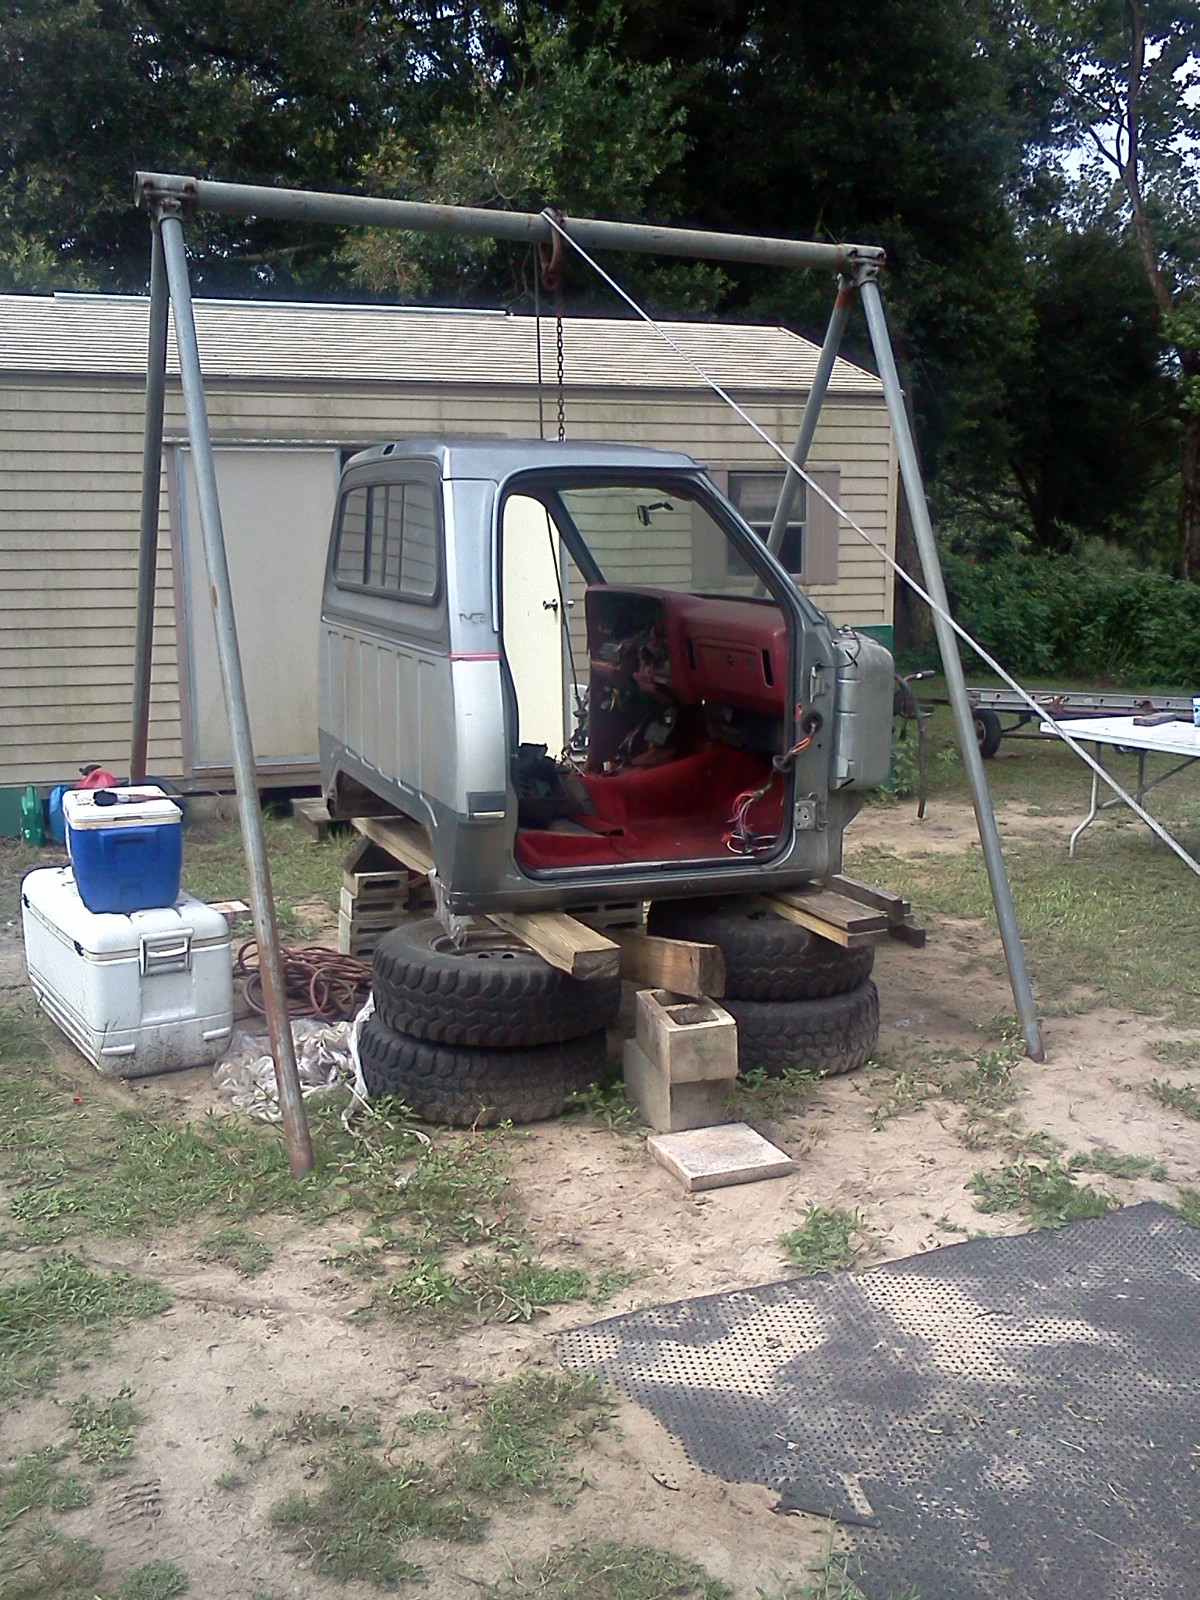
Attached picture 7782907-newproject2.jpg
Posted By: 340SHORTY

Re: replacement cab. - 07/20/13 02:18 AM

More work for Ace huh...
Posted By: redraptor

Re: replacement cab. - 07/20/13 12:26 PM

Quote:


I got exactly what I wanted with the whiplash.I like the lunati VooDoo roller with no complants. it worked great since 07' but was a smooth stock idle.


I think that was their claim to fame. Big power, smooth idle = more vacuum at idle.

Cab looks in great shape. The 'ole swingset is gonna get another workout!
Posted By: scratchnfotraction

Re: replacement cab. - 07/20/13 12:49 PM

just a swingin


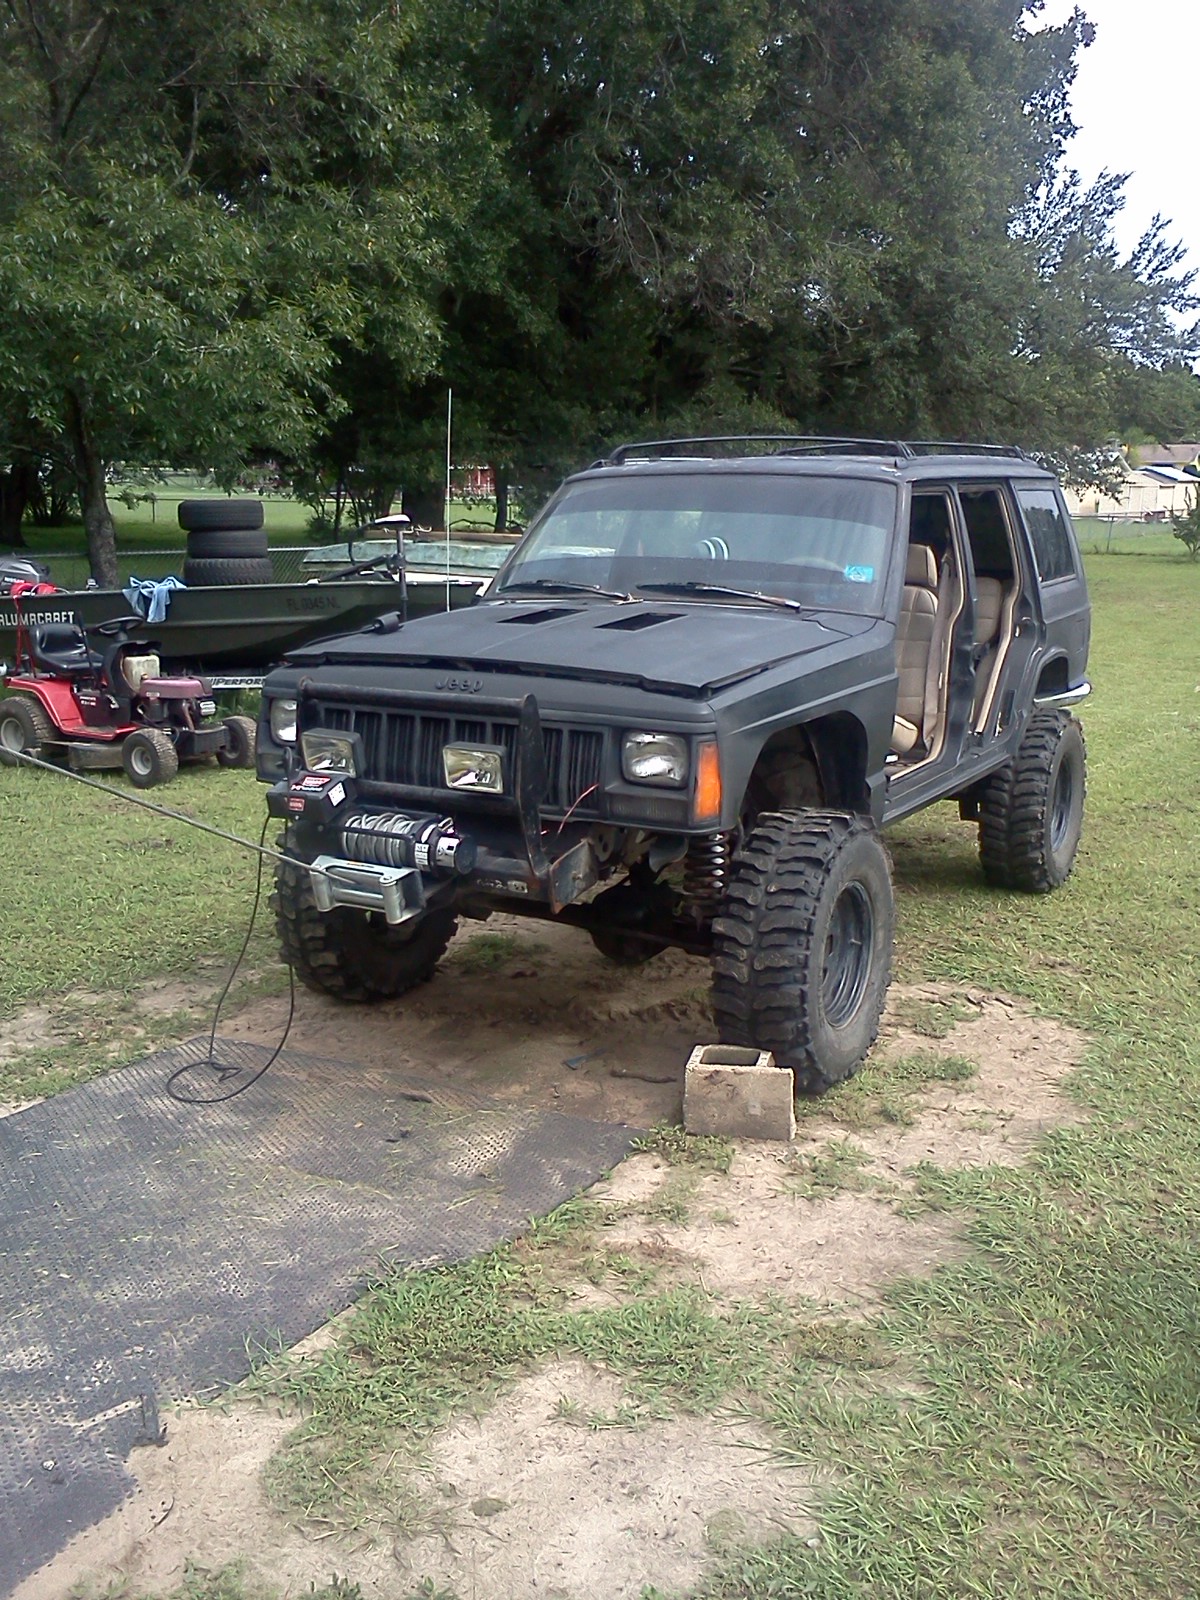
wait for the pics to come..gonna let piglet use the winch on the jeep to go over the top of swing set and lift the cab for me to set it up on horses.

well.. after i mow the yard like the wify said.

Ace will be guiding me thru the floor patch for sure, but i ready to drill spot welds/cutting and do some welding.

i get the hydro clutch pedels in while dash is out so that part wont be that hard.

looks like the 440 truck will be pulling some daily driver work soon.
Posted By: jagrunt551

Re: replacement cab. - 07/20/13 04:39 PM

Hey Mike You still using that County Swing??
Posted By: scratchnfotraction

Re: replacement cab. - 07/21/13 01:00 PM

Quote:

Hey Mike You still using that County Swing??


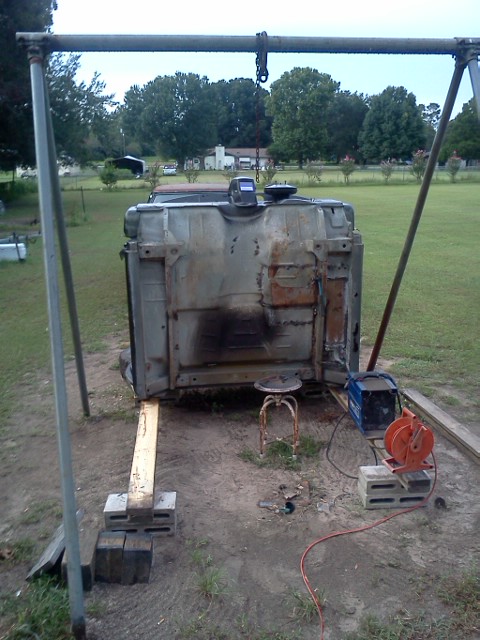
yep,as a matter of fact, i am still using it. whinch cable over the top to tilt/lift the cab working it up on stands.

piglet likes to play with the whinch so I gave him a task to do.

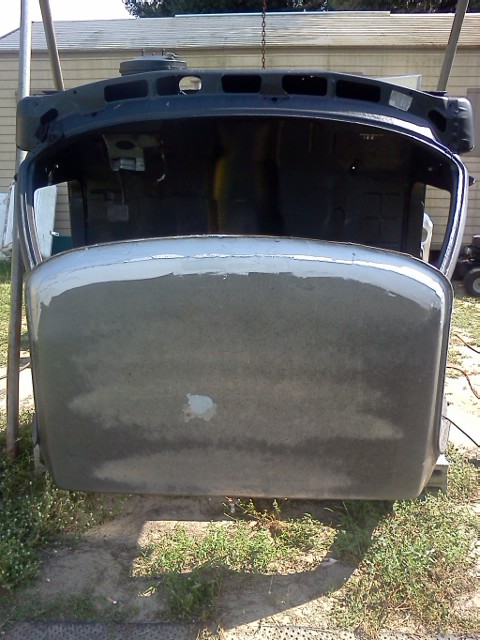
pulled it right up with no trouble.

Attached picture 7784222-cab2.jpg
Posted By: scratchnfotraction

Re: replacement cab. - 07/21/13 01:01 PM


Attached picture 7784223-cab3.jpg
Posted By: scratchnfotraction

Re: replacement cab. - 07/21/13 01:04 PM

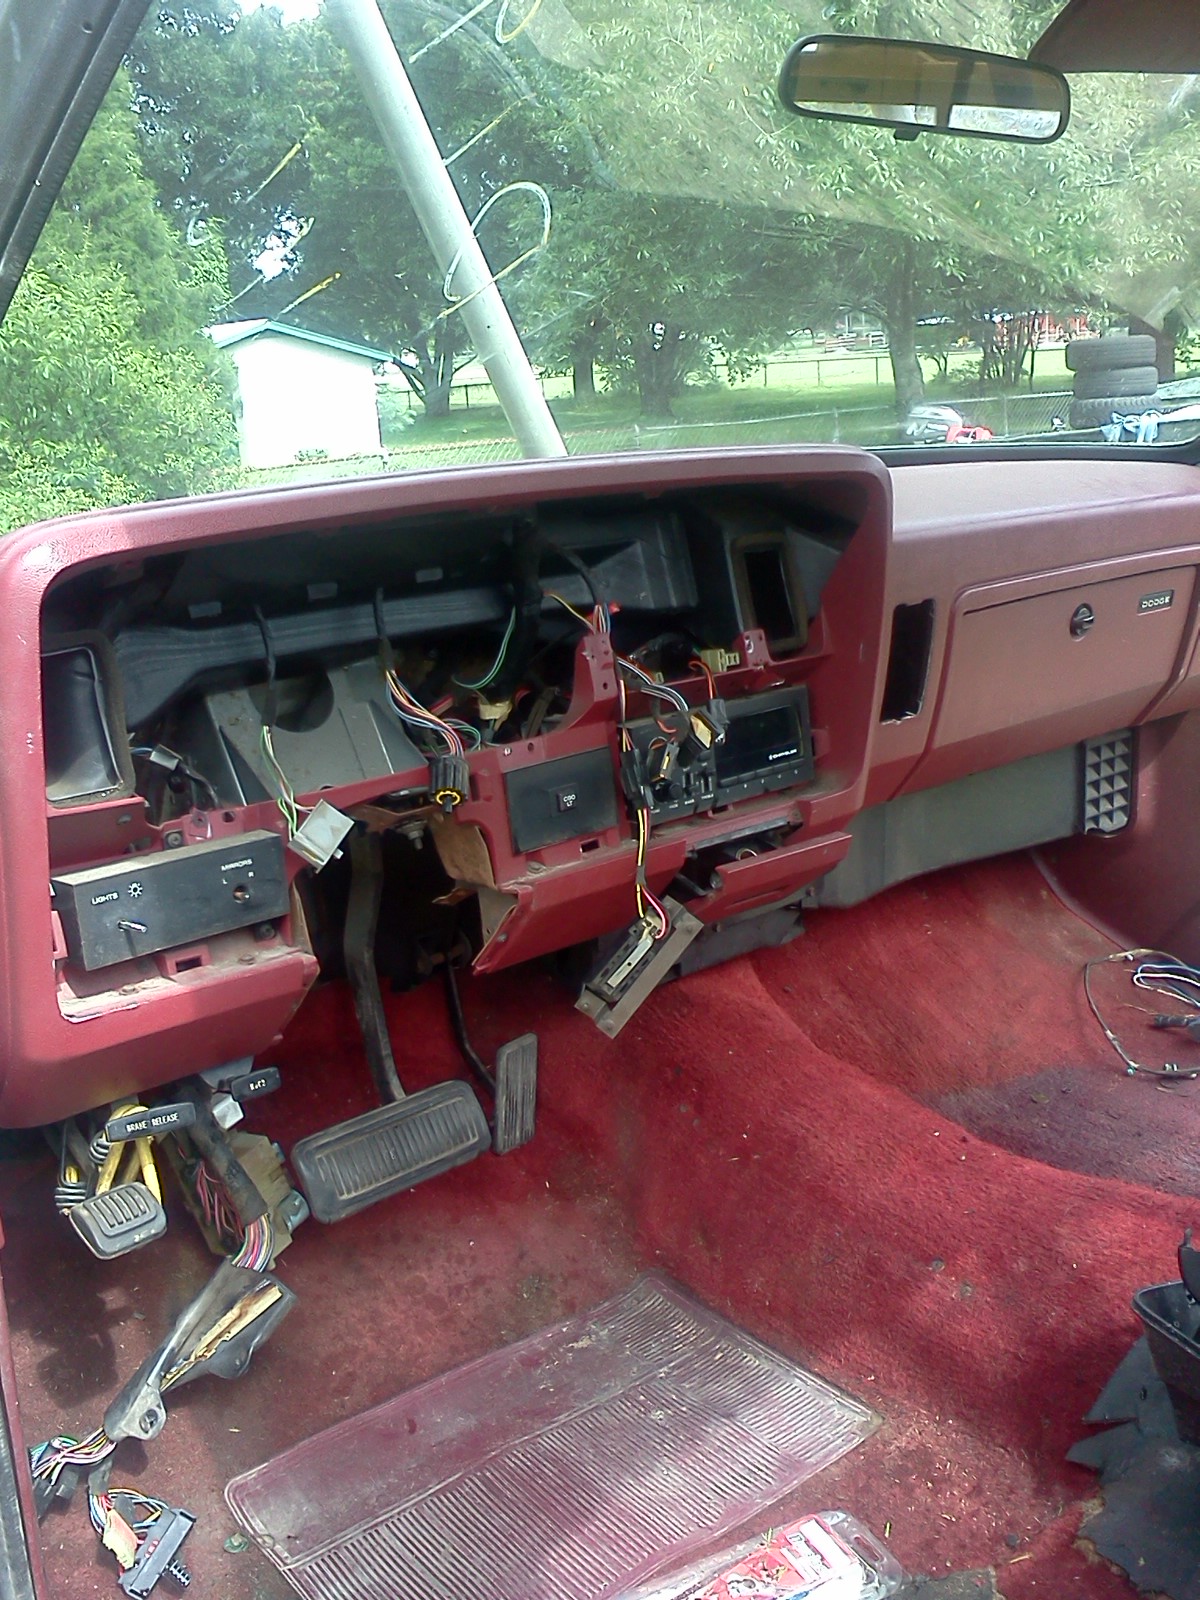
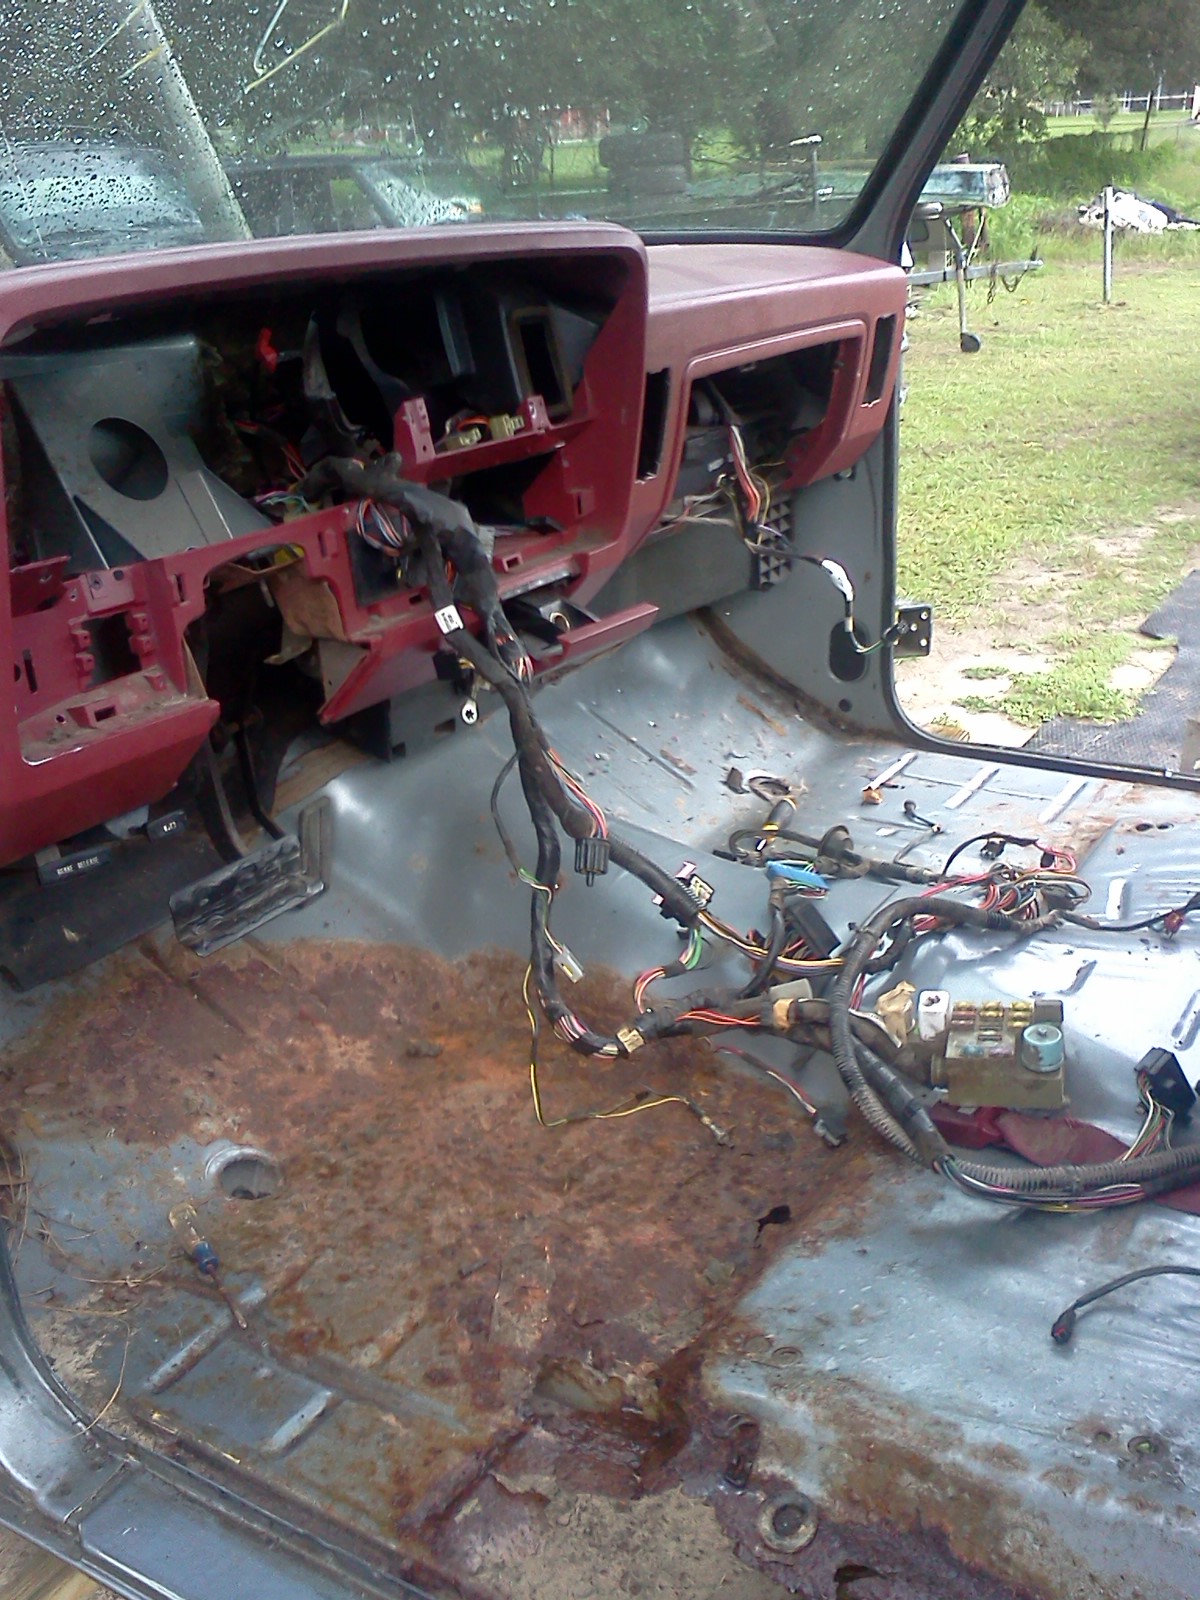
getting started, to bad I cant use the 91 harness it is un-cut and has power locks/PW/Power mirrors.

they only kept the cluster/heater control/colum/seat

oh well, dash all comes out to be replaced.


Attached picture 7784224-cab1.jpg
Posted By: scratchnfotraction

Re: replacement cab. - 07/21/13 01:05 PM


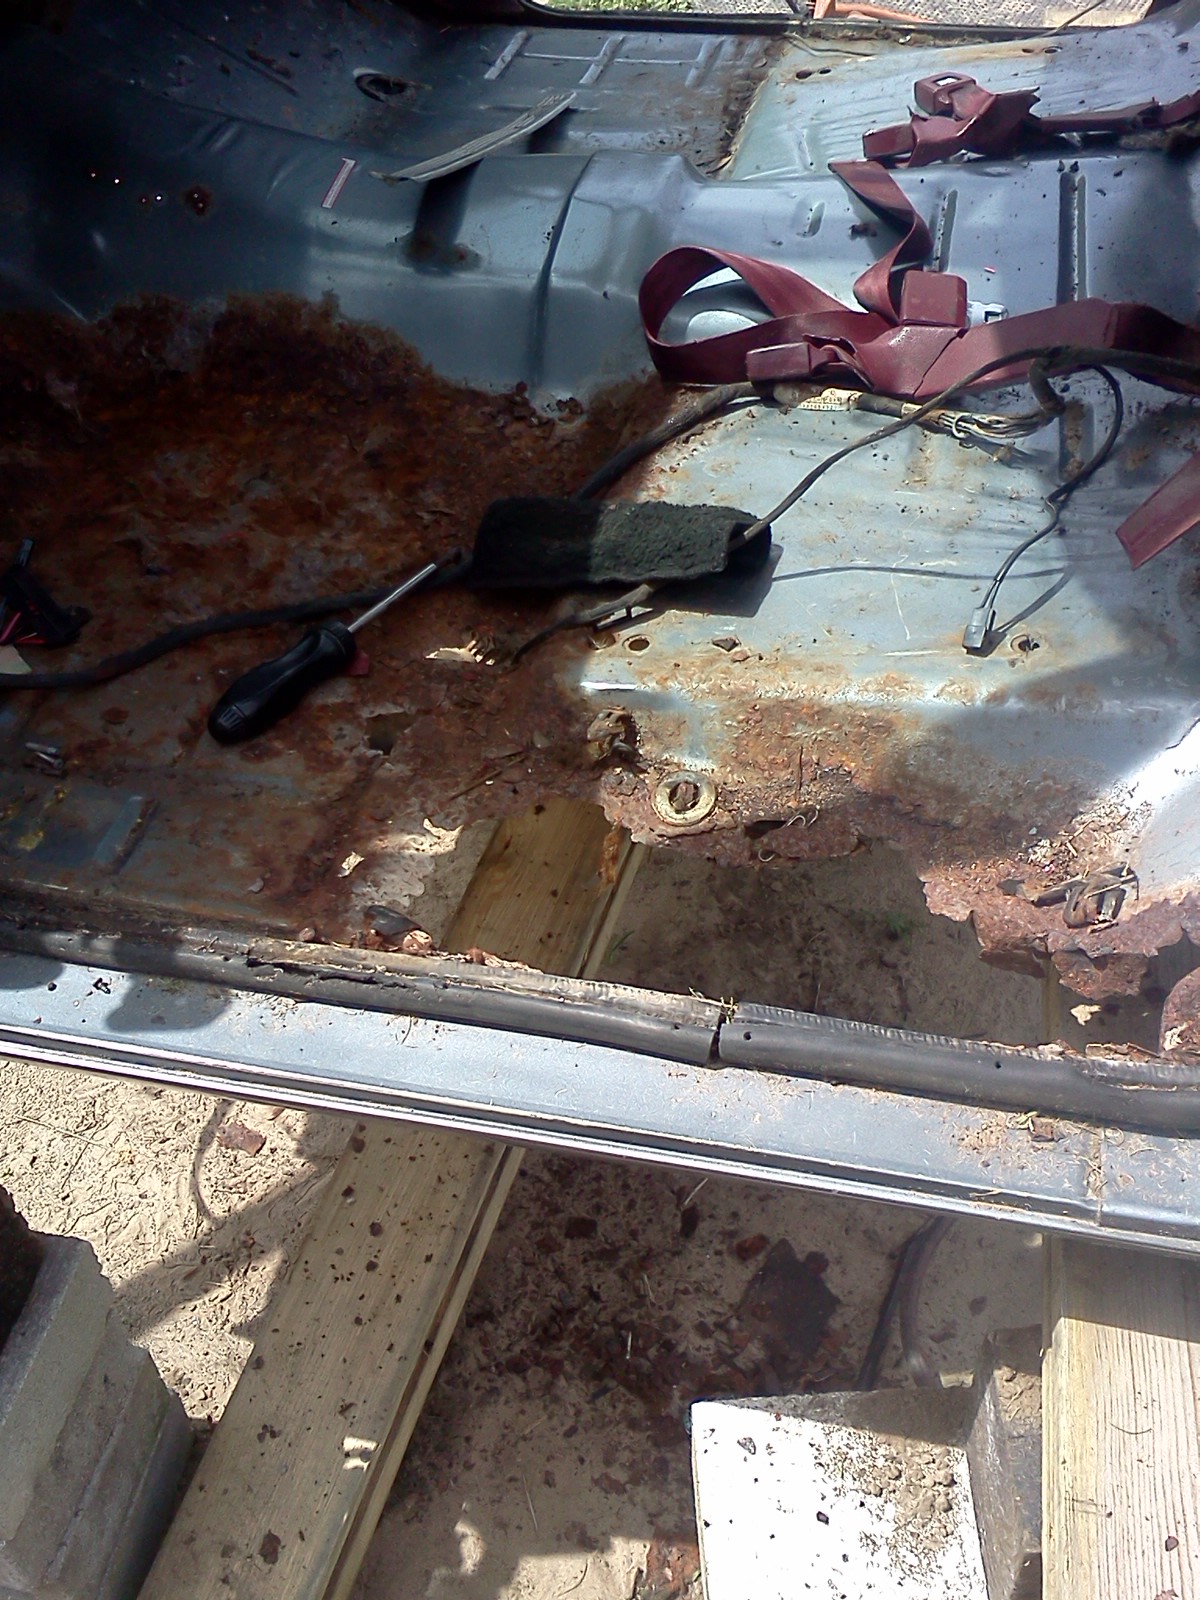
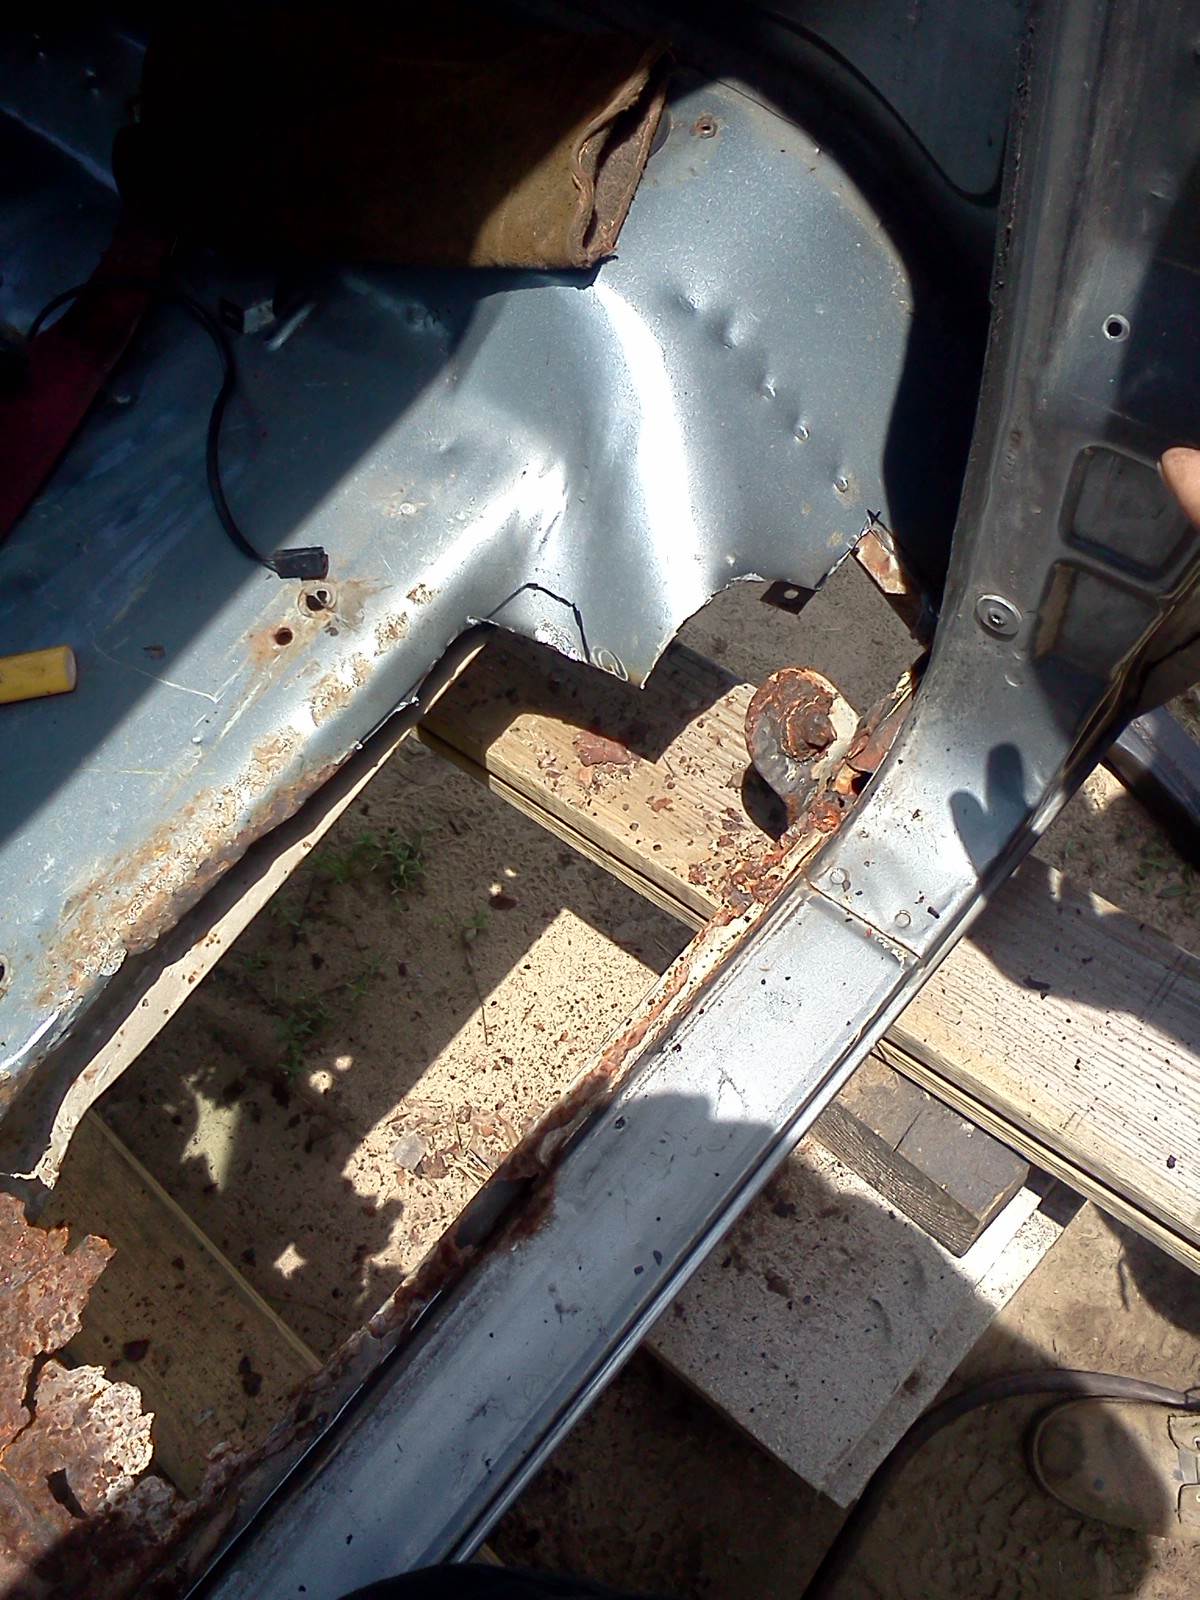
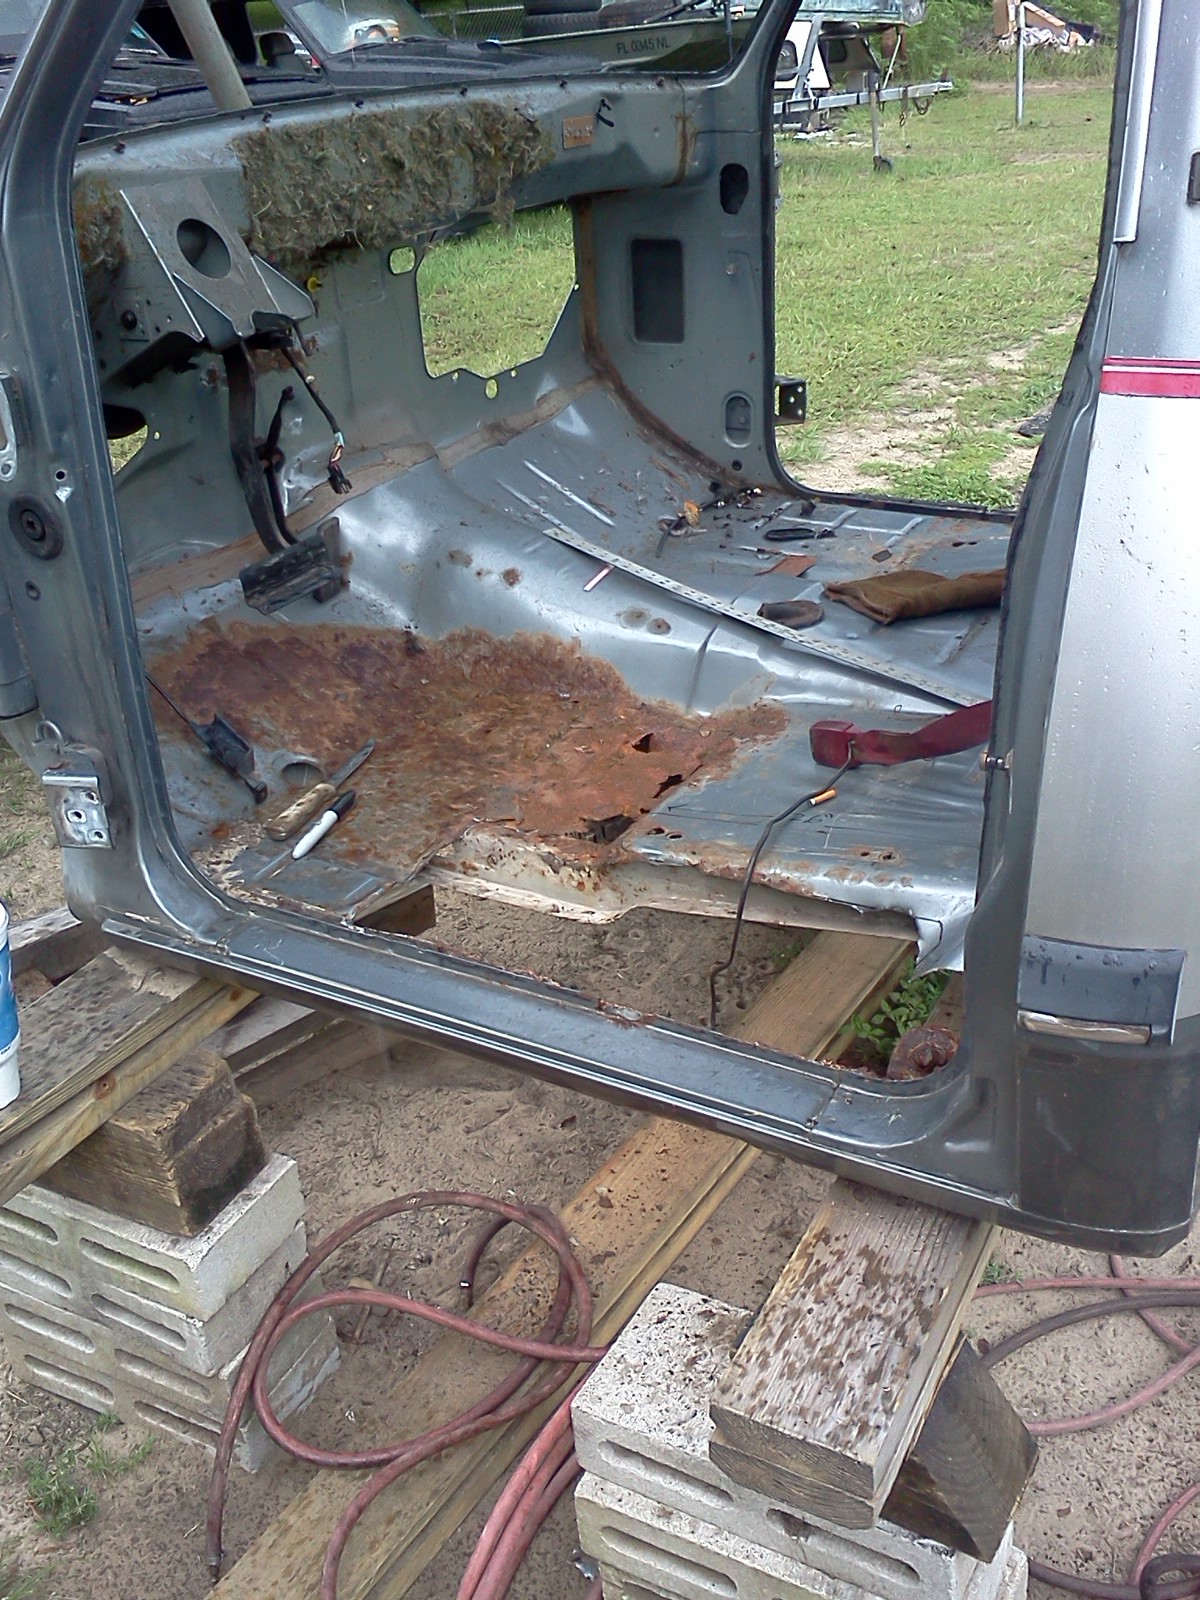
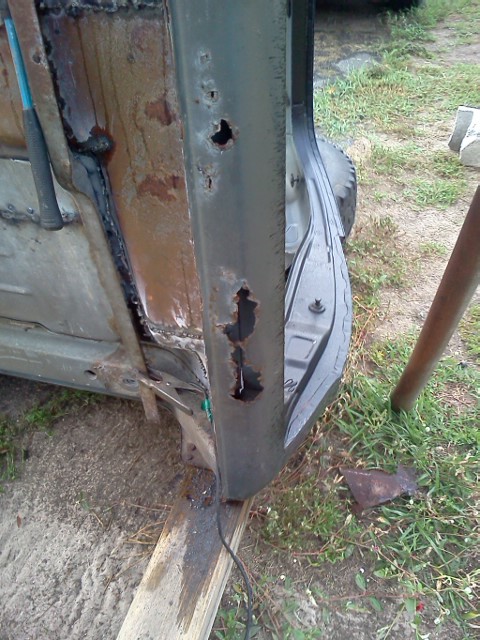
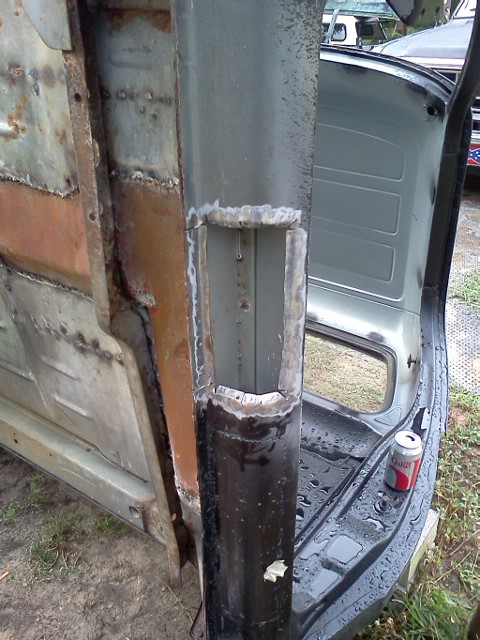
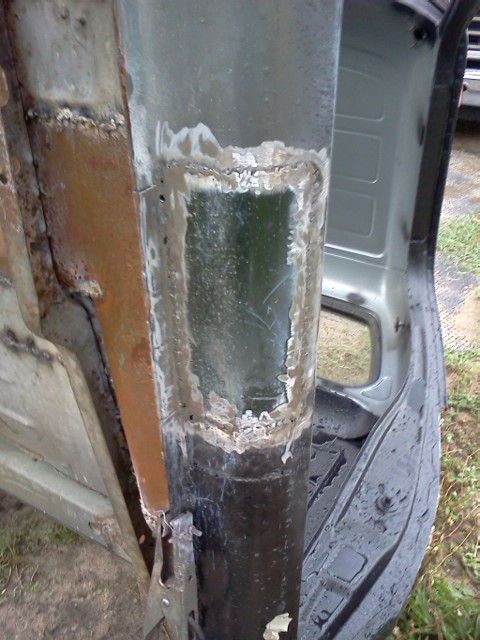
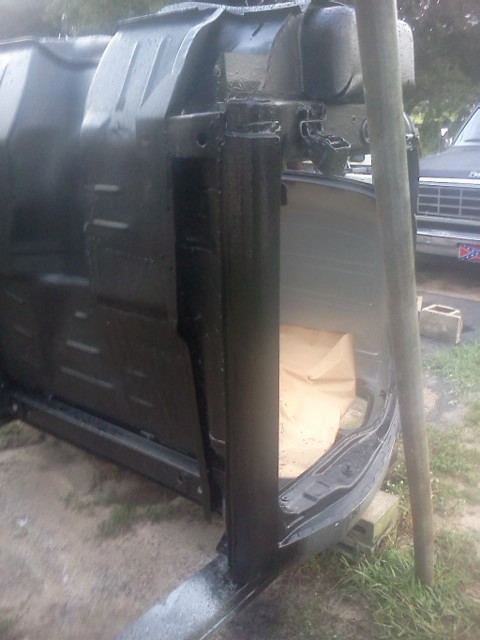
1 good size hole and a rocker to repair, so it is way better than the 85 cab with no floor and parting roof shell.

Attached picture 7784227-cab4.jpg
Posted By: scratchnfotraction

Re: replacement cab. - 07/21/13 01:11 PM

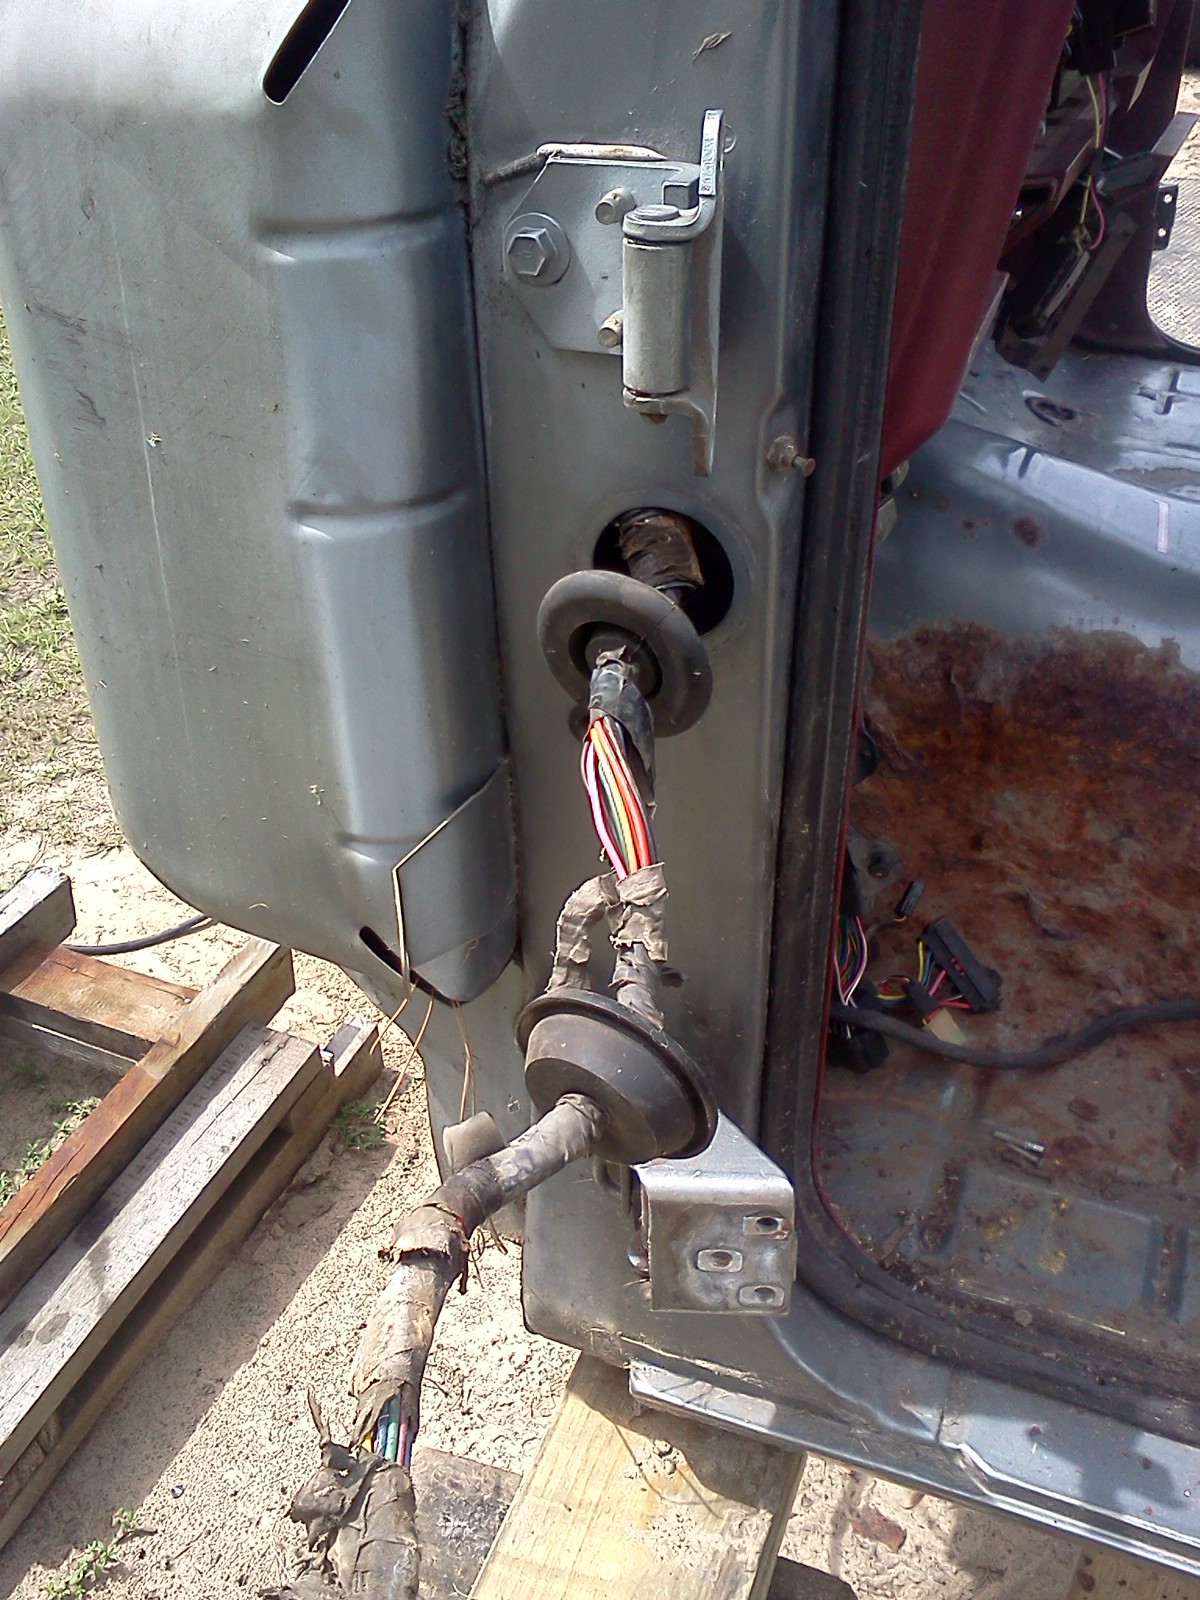
got to be another way to fish these rubber boots thru the small holes, I cut them off the harnes and had a heck of a time fishing the power switch connections back thru.

the pass side was a little better, the door harness unplugs behind the glovebox. it came right out.

Attached picture 7784232-cab5.jpg
Posted By: scratchnfotraction

Re: replacement cab. - 07/21/13 01:14 PM

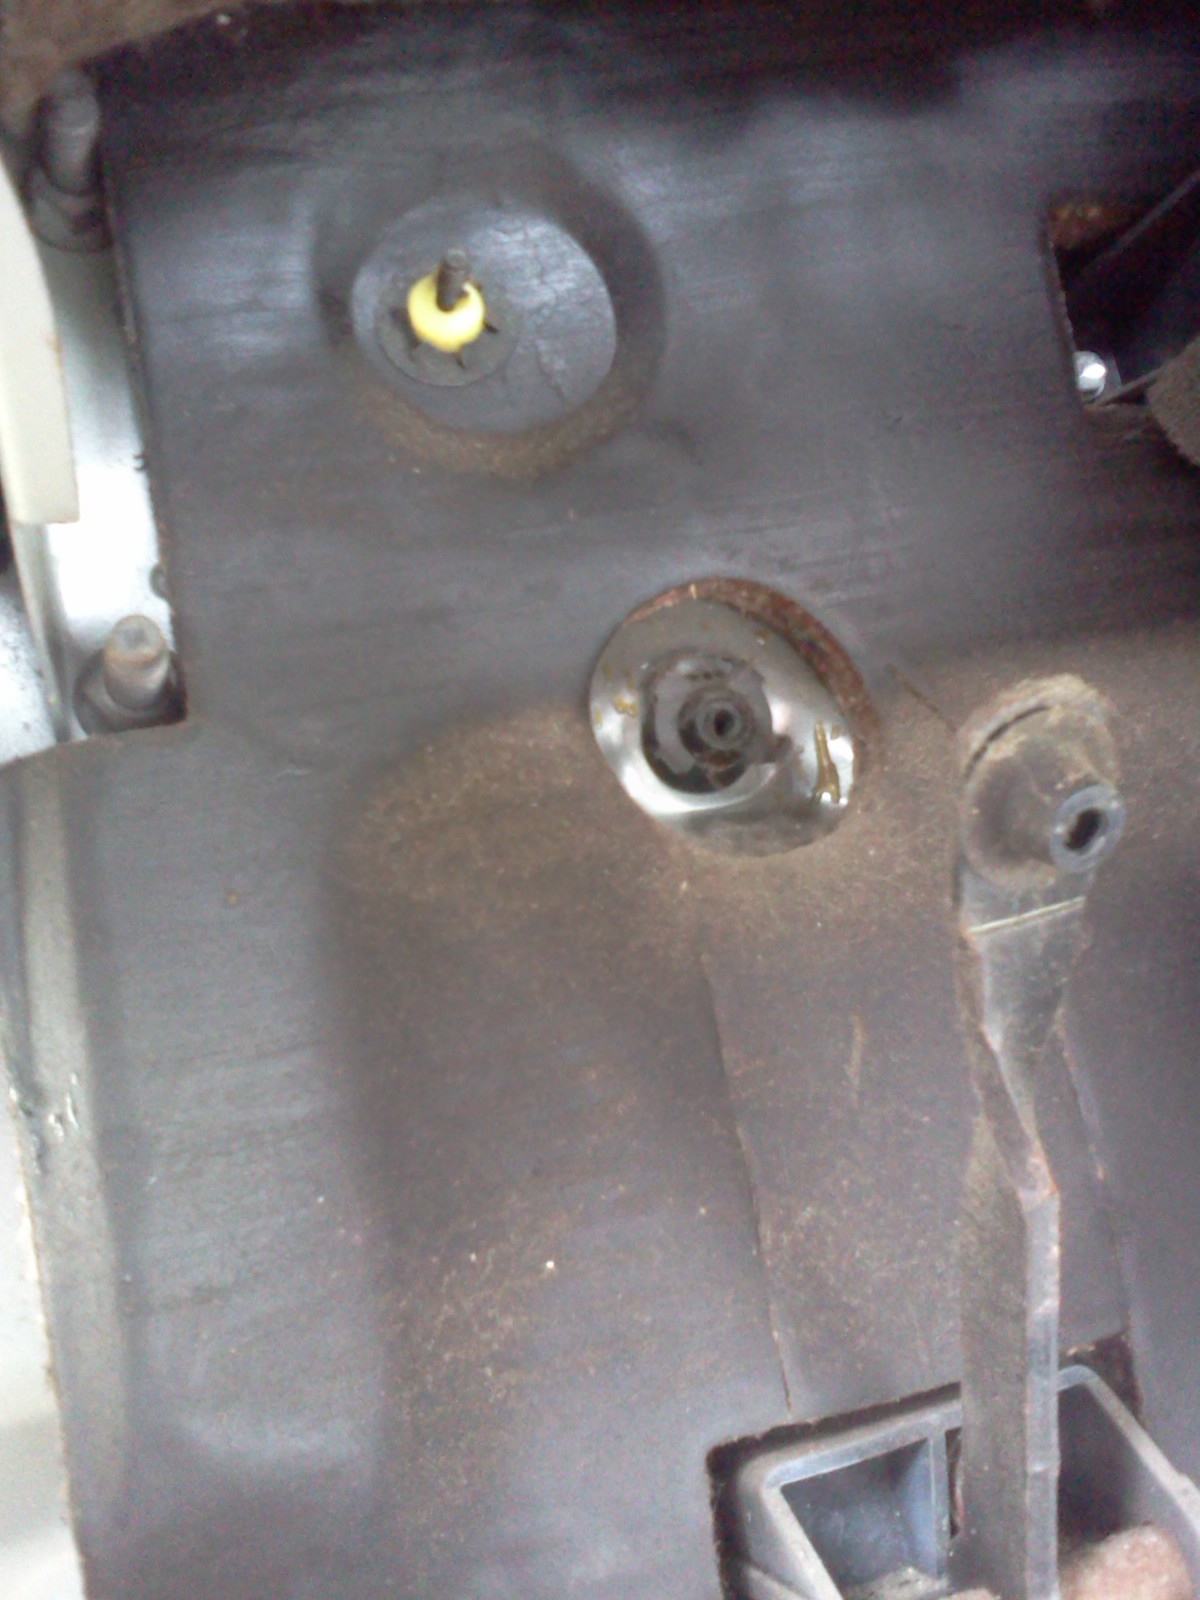
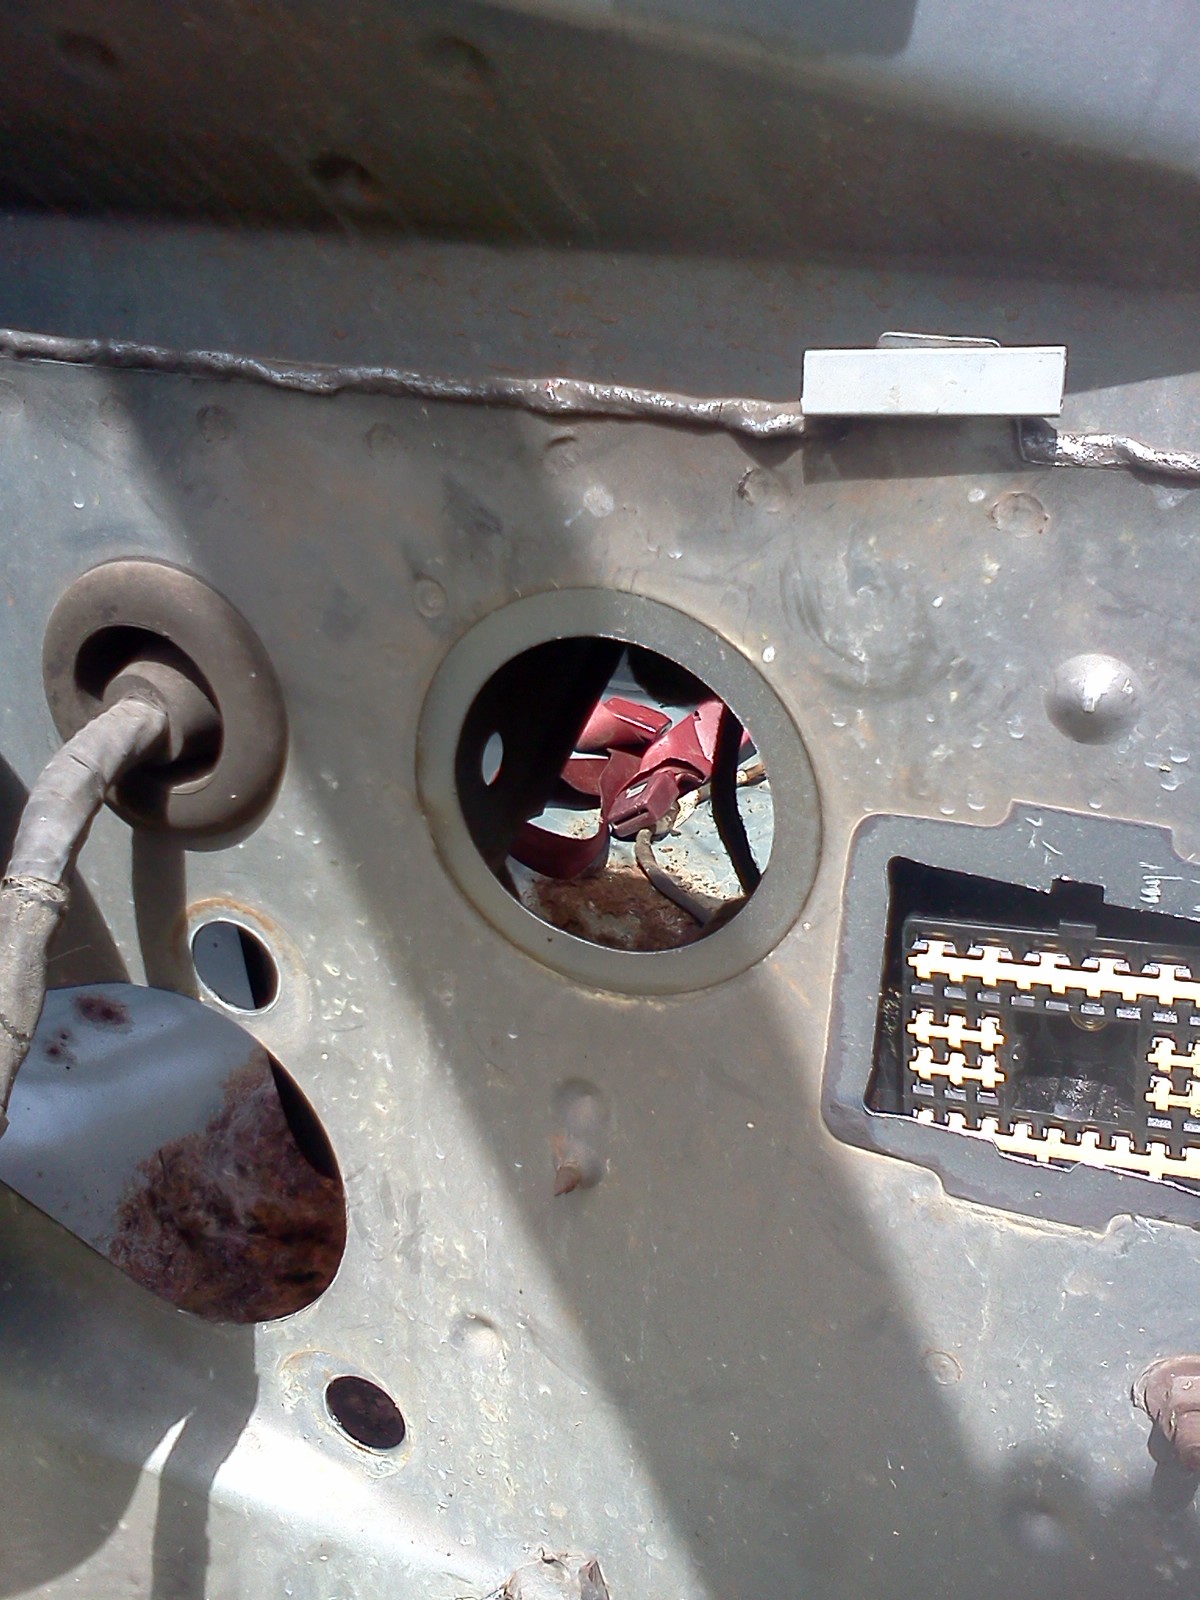
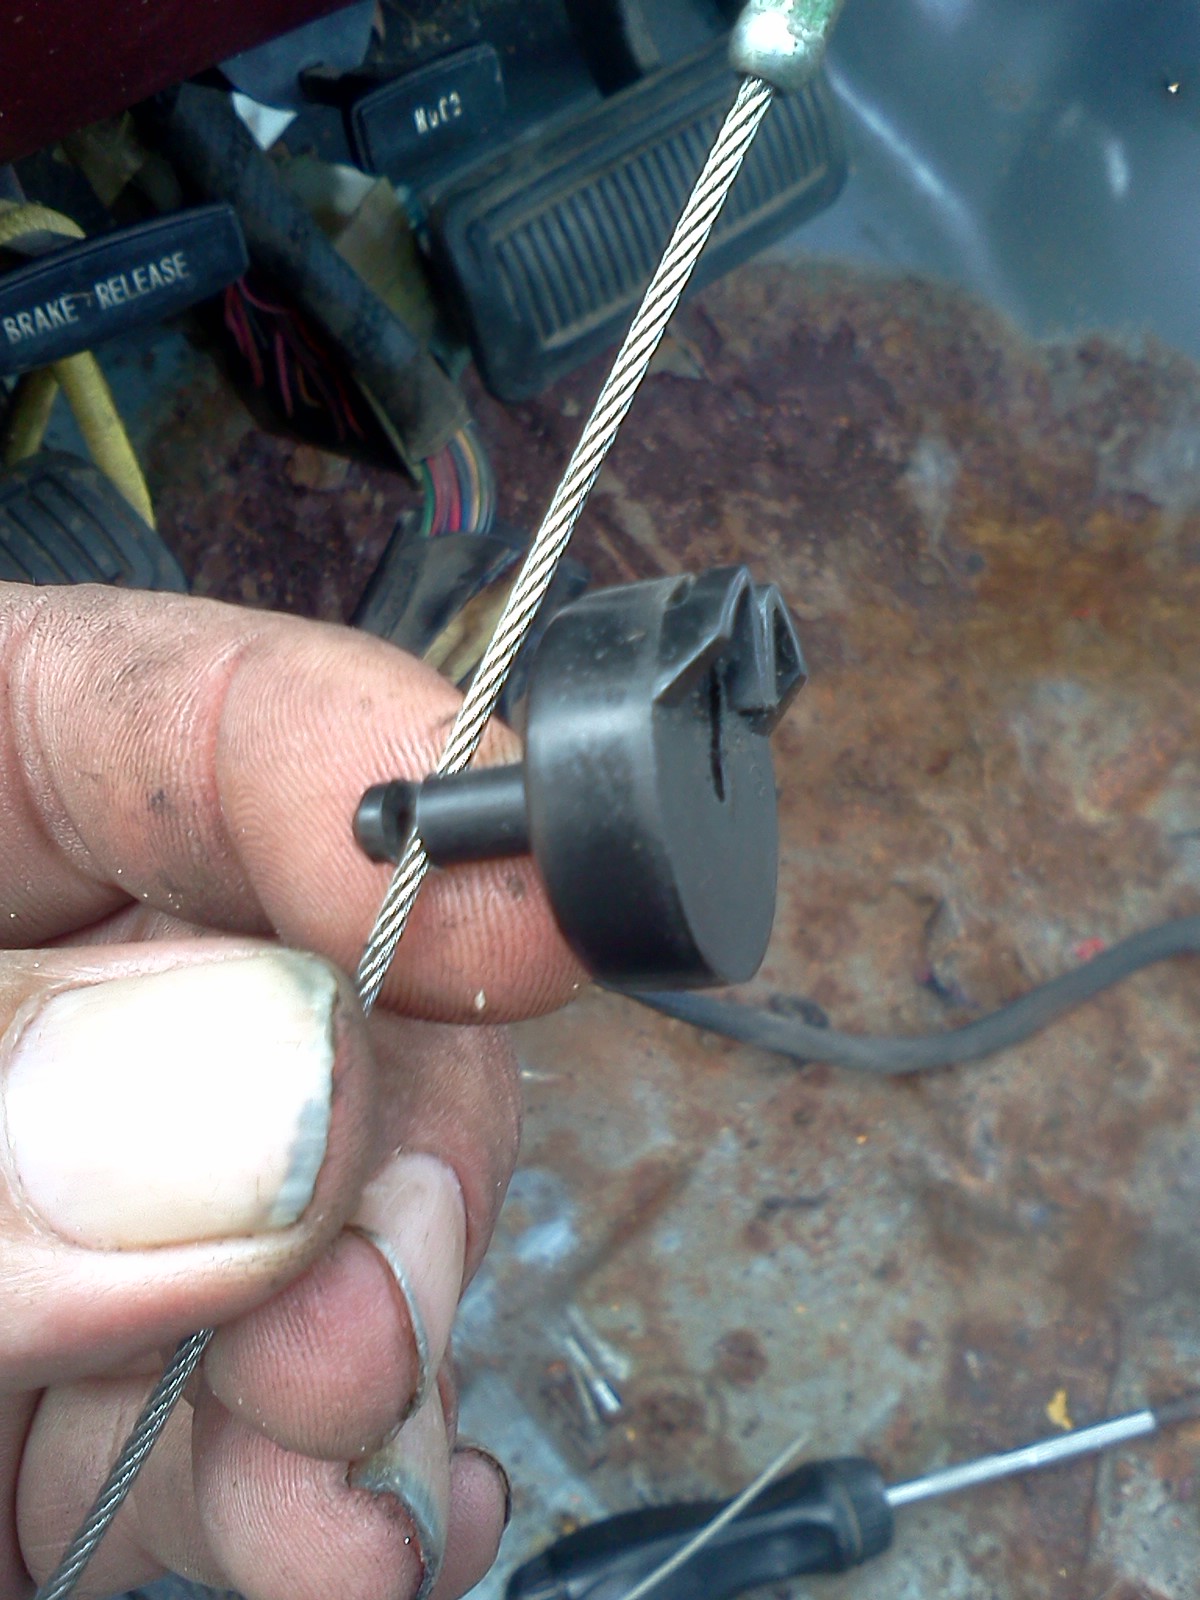
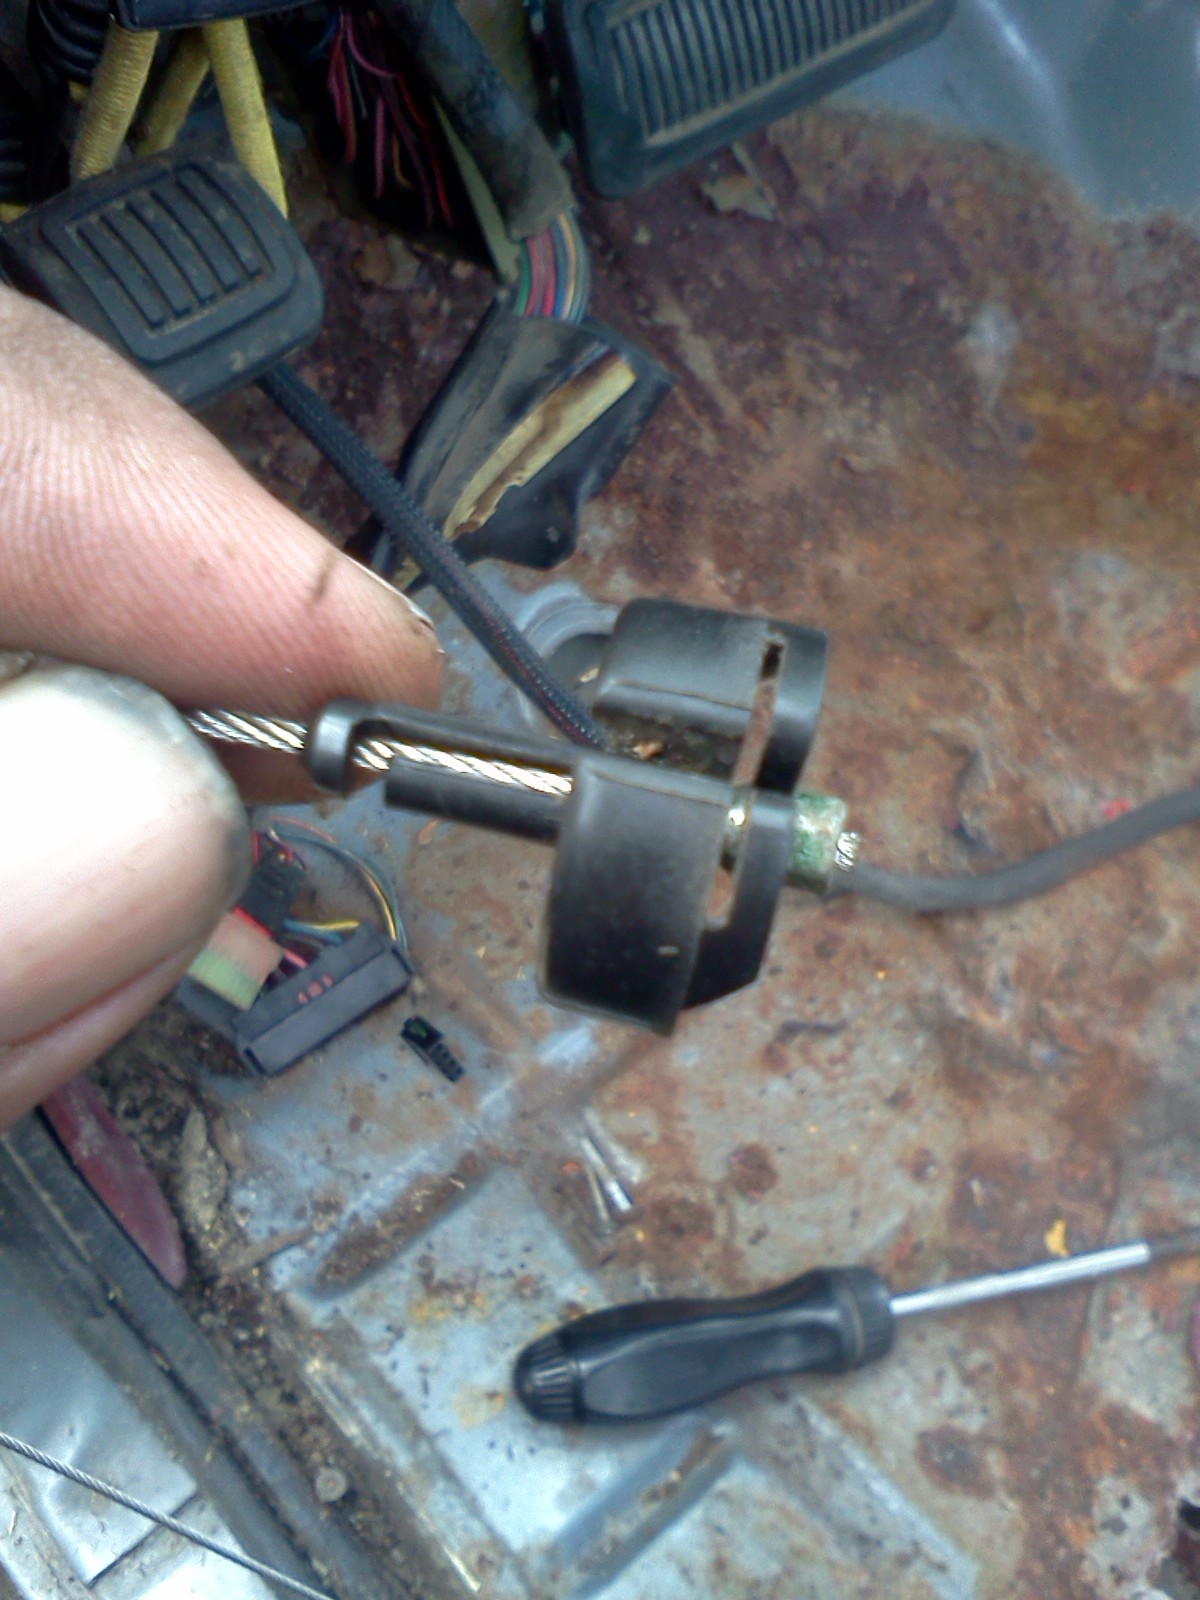
first problem I see is the TBI throttle pedel/cable is different than the 85 truck.

not sure what the fix will be at this time. the 85 has a square hole in the firewall and the 91 has a round hole.

not sure what the end of the tbi cable looks like, it was cut and MIA

Attached picture 7784234-cab6.jpg
Posted By: scratchnfotraction

Re: replacement cab. - 07/21/13 01:16 PM

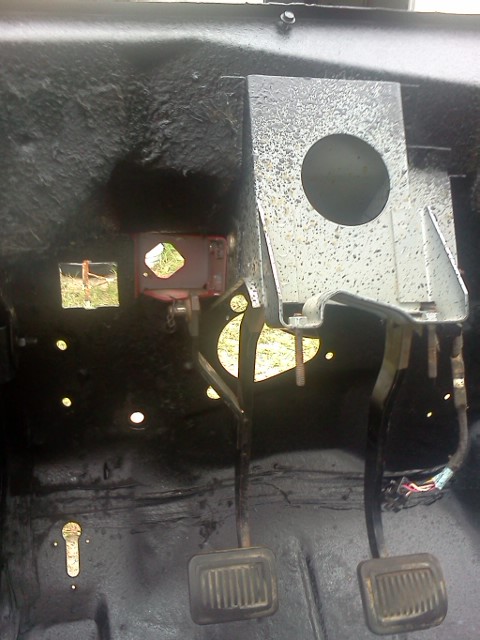
here is the main thing I am after well i do want some floor under my feet but the hydro clutch set up is going to be nice with a 5 speed.

Attached picture 7784237-cab7.jpg
Posted By: scratchnfotraction

Re: replacement cab. - 07/21/13 01:18 PM

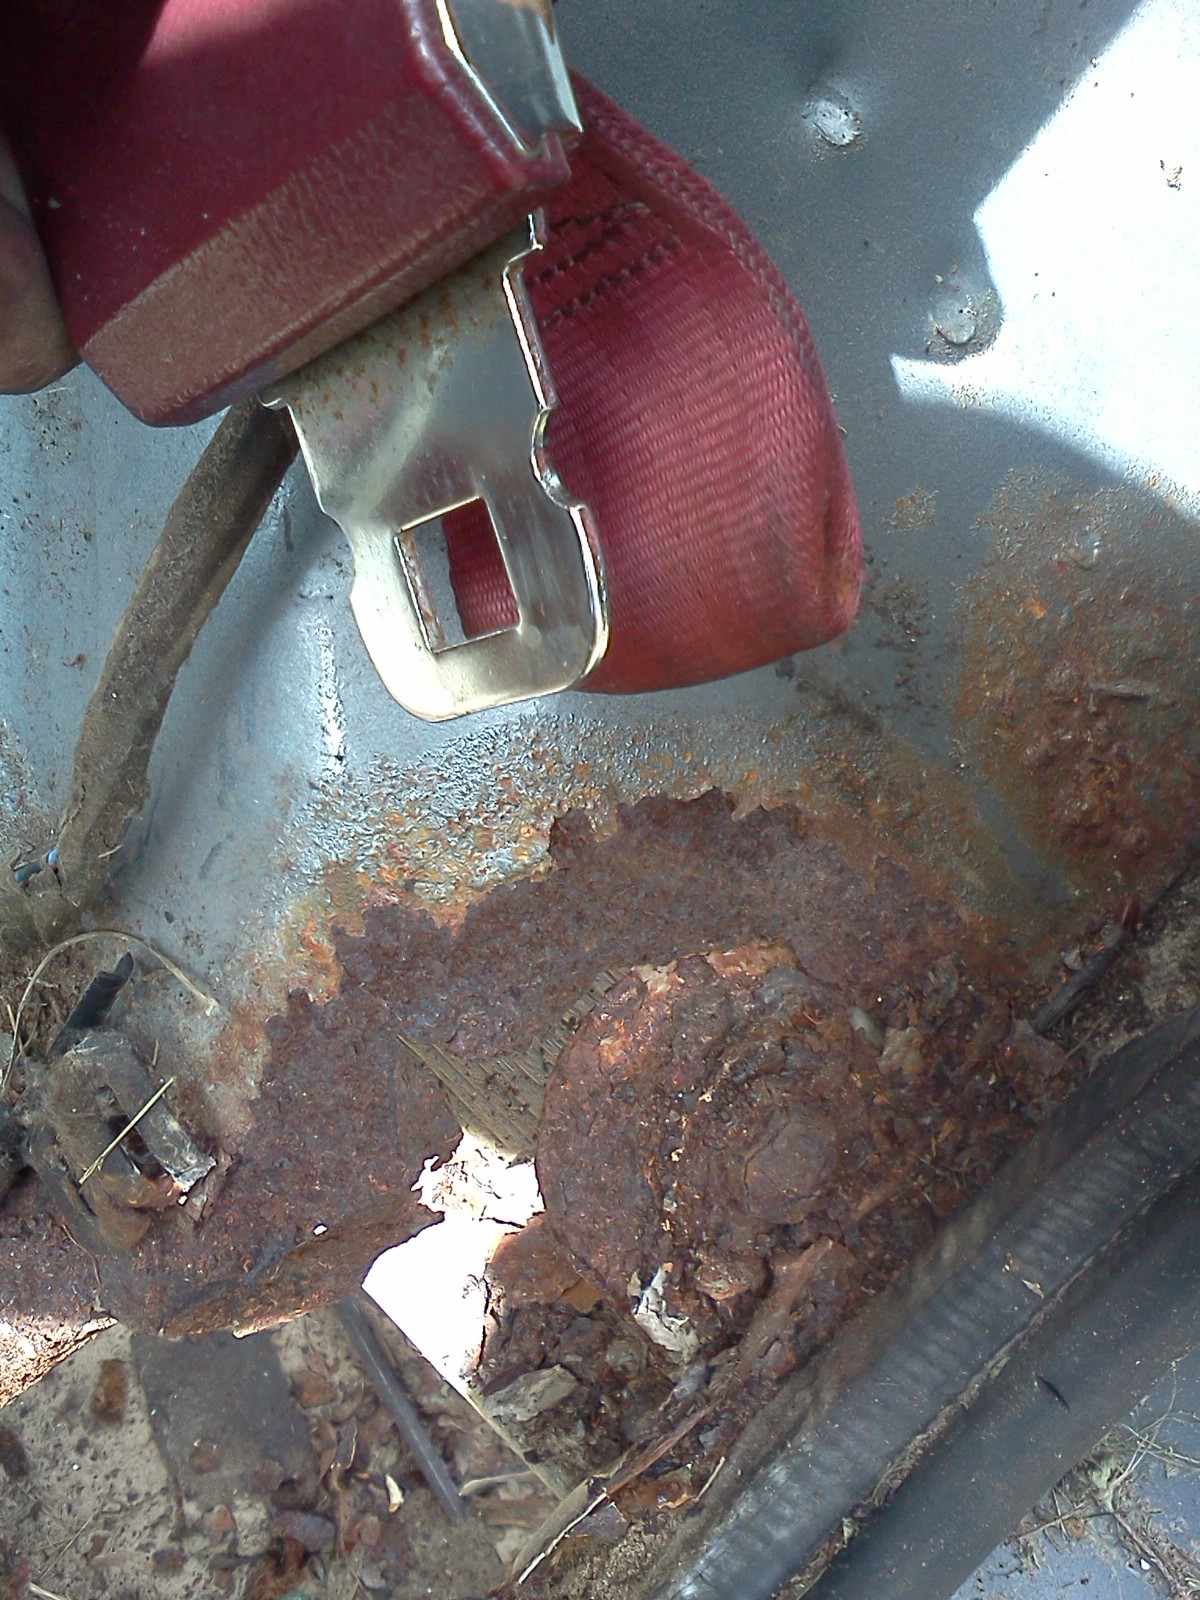
need to replace a seat belt on driver side. seems the bolt/hook are rusted to the point they are MIA.

Attached picture 7784239-cab8.jpg
Posted By: scratchnfotraction

Re: replacement cab. - 07/21/13 01:20 PM

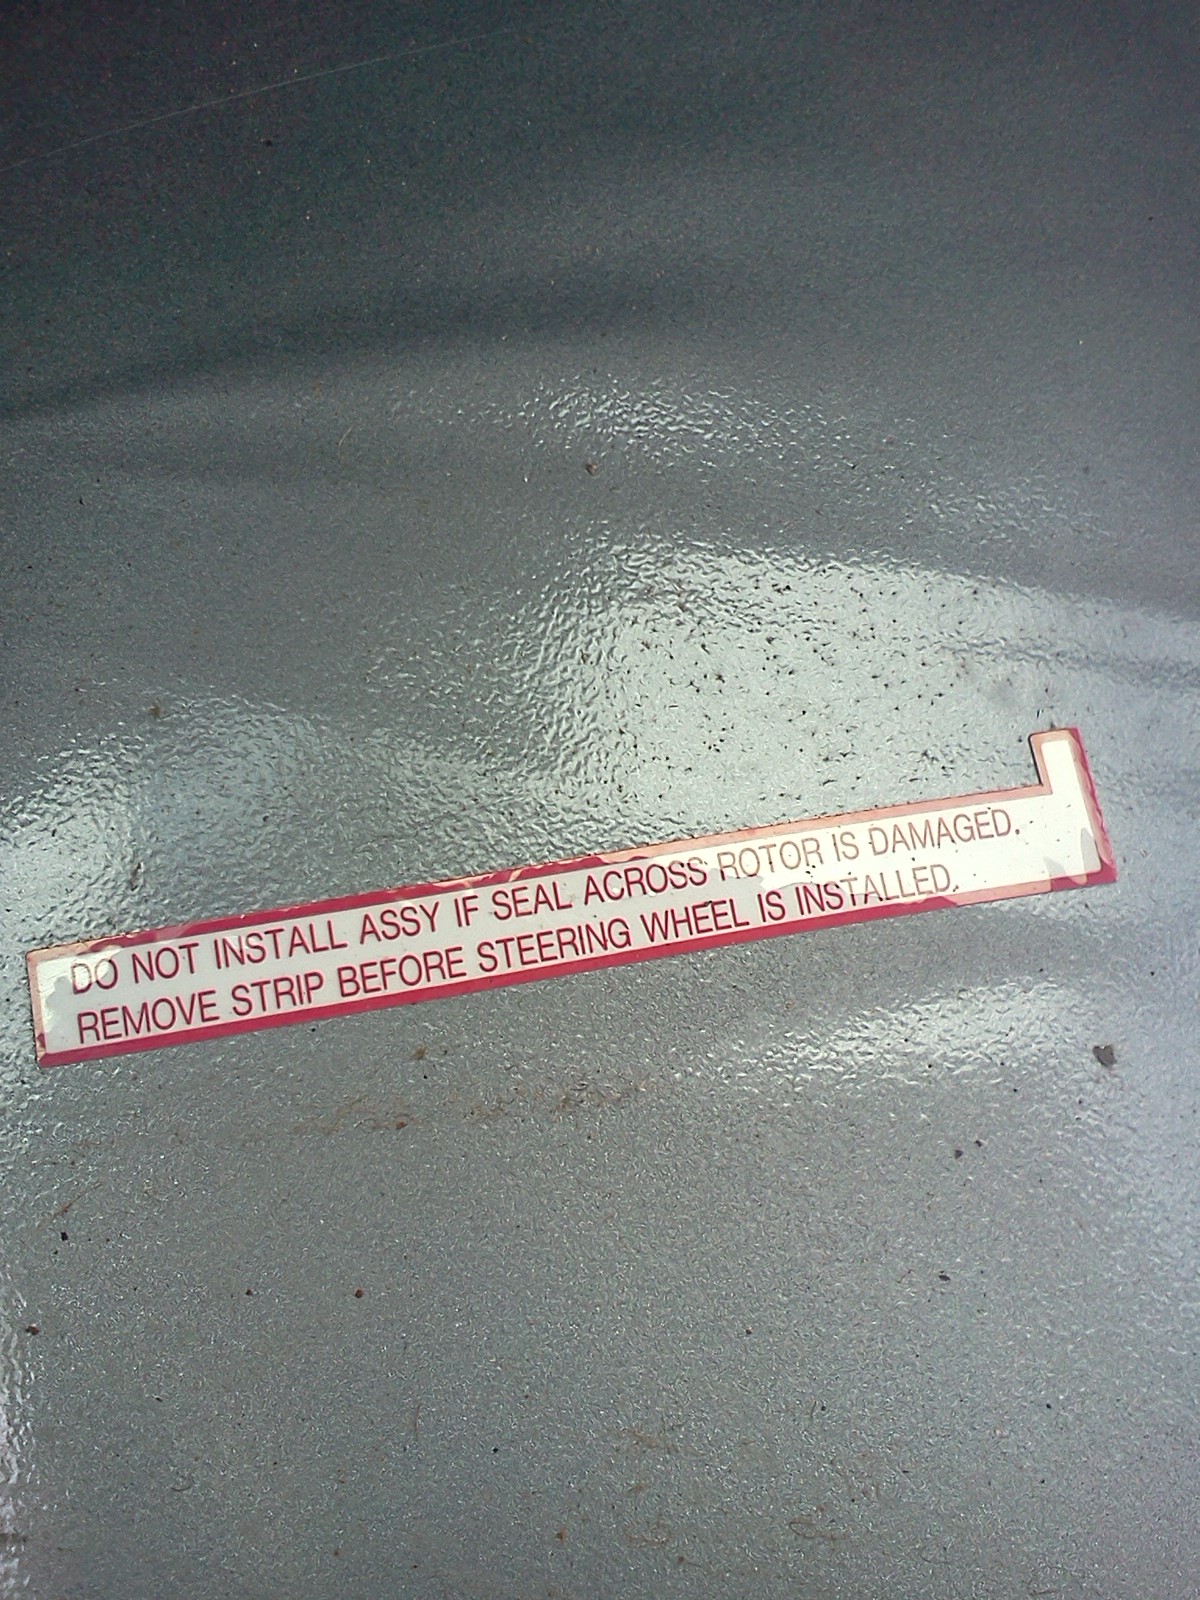
not sure what this sticker under the carpet is all about??

what rotor under steering wheel??

must be for the worker as it comes down the line to remind him lunch is over and check before mounting the wheel.

Attached picture 7784240-cab9.jpg
Posted By: scratchnfotraction

Re: replacement cab. - 07/21/13 01:22 PM

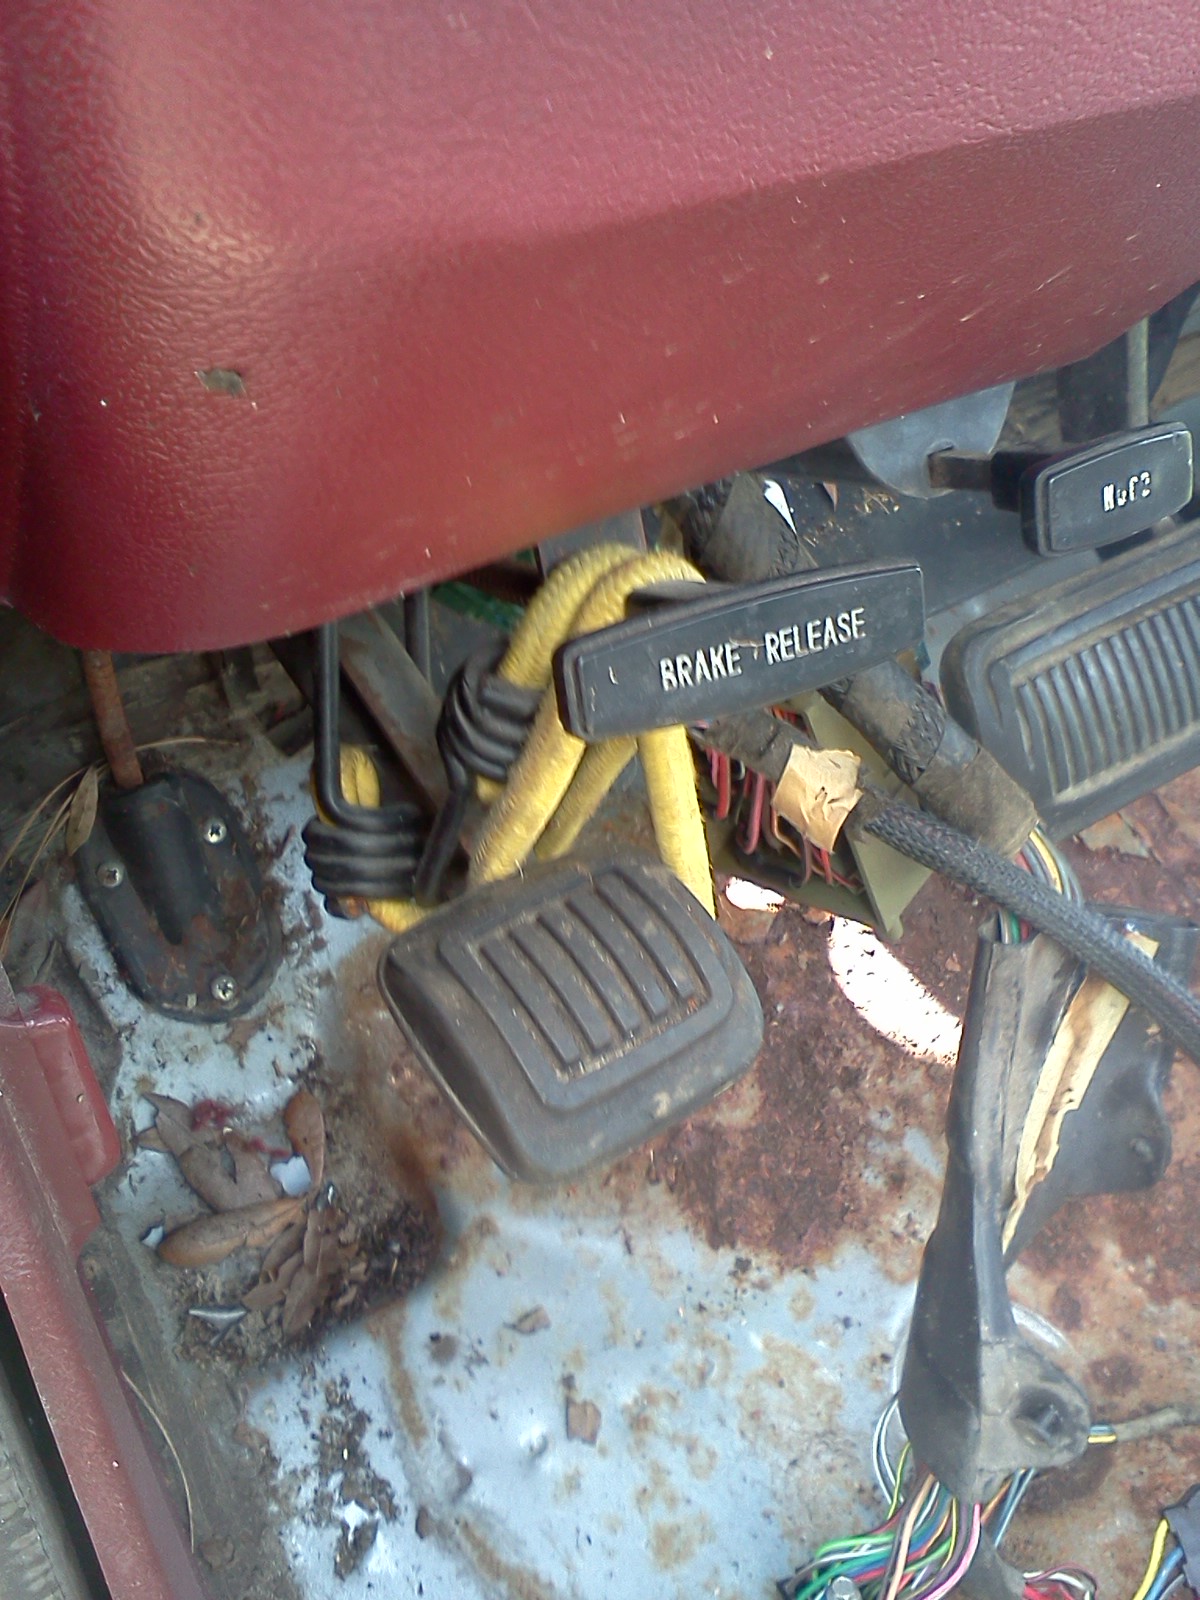
bungy does not look stock..guess this is because the cable is cut.

Attached picture 7784241-cab10.jpg
Posted By: scratchnfotraction

Re: replacement cab. - 07/21/13 01:24 PM

throttle pedel end sure did change.

Attached picture 7784245-cab12.jpg
Posted By: scratchnfotraction

Re: replacement cab. - 07/21/13 01:25 PM


Attached picture 7784247-cab13.jpg
Posted By: scratchnfotraction

Re: replacement cab. - 07/21/13 01:28 PM

got most of the harness out and will work on the a/c box next and finish striping the cab clean for repairs.

looks like heavy rian in a few mins. done for the day.

Attached picture 7784249-cab14.jpg
Posted By: scratchnfotraction

Re: replacement cab. - 07/21/13 01:30 PM

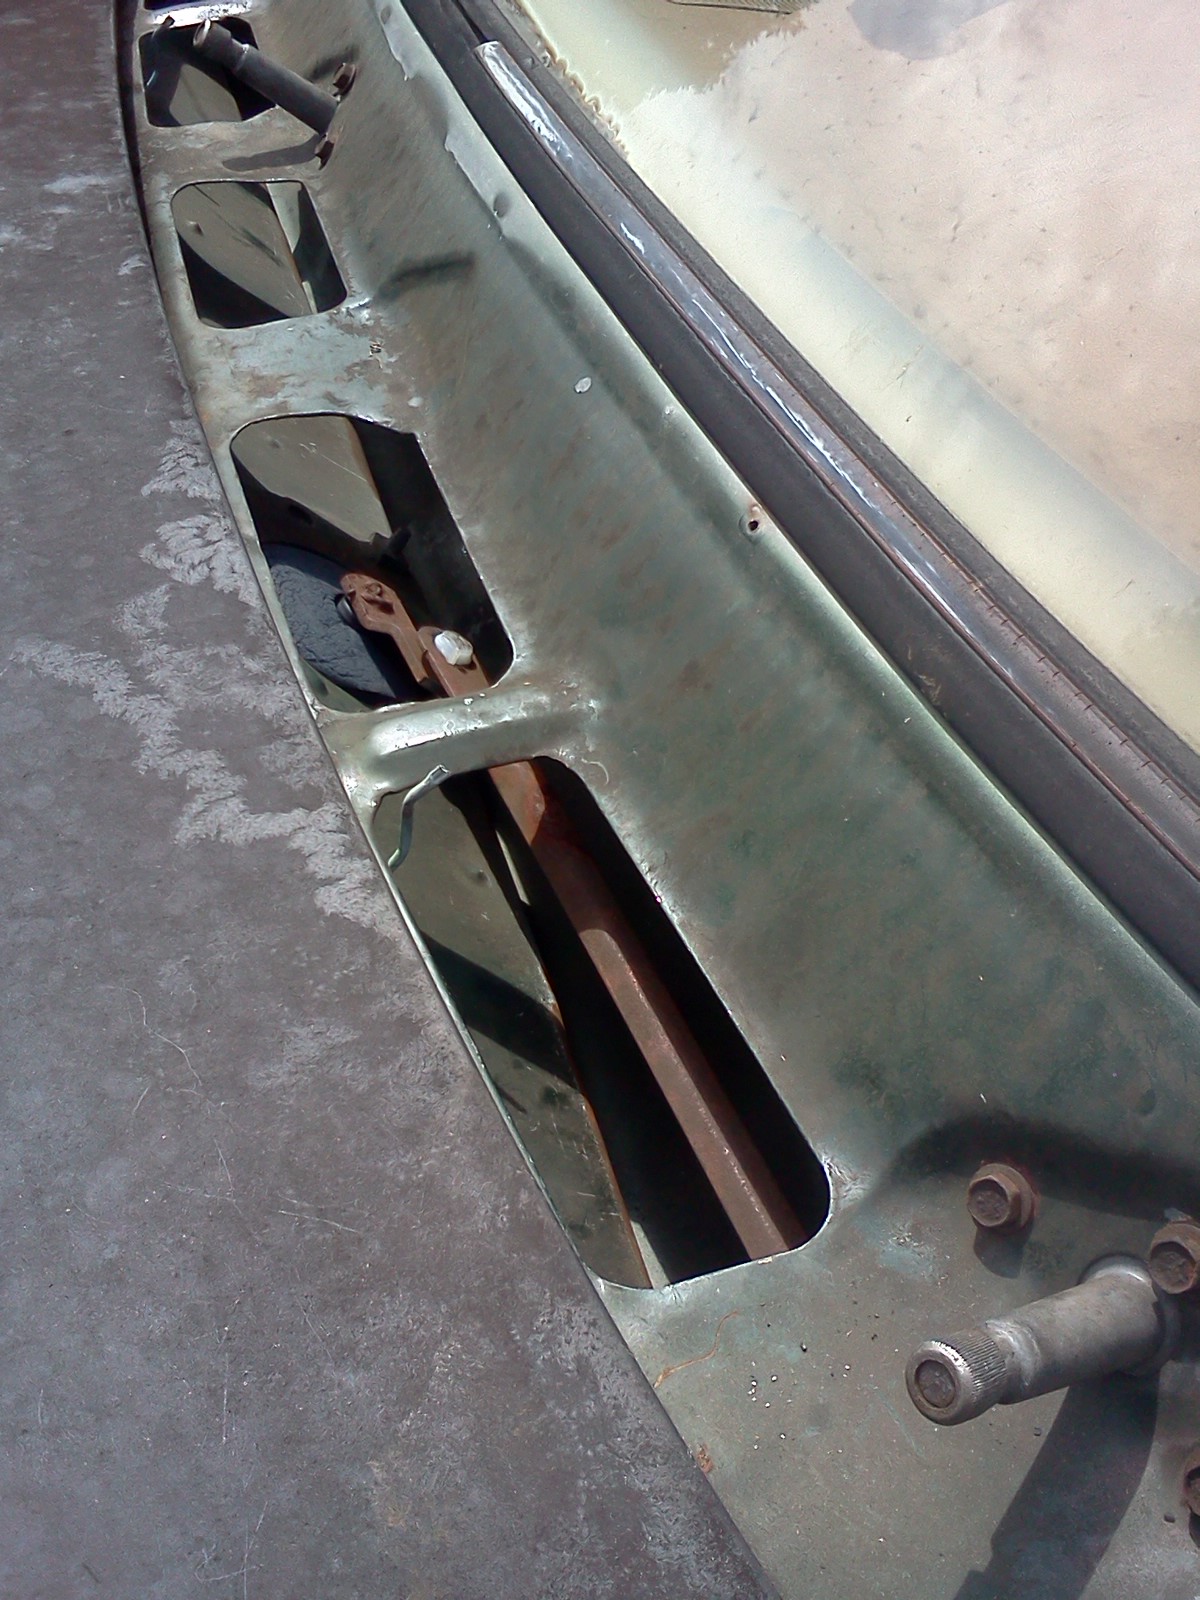
it rain so hard friday the wipers on the 85 blew a bushing, i managed to replace all 4 for 8 bux before the rain.


Attached picture 7784250-cab11.jpg
Posted By: 340SHORTY

Re: replacement cab. - 07/21/13 08:56 PM

All your work is makeing me tired. I need a nap..
Posted By: 76dodgeboy

Re: replacement cab. - 07/22/13 04:36 AM

Quote:

first problem I see is the TBI throttle pedel/cable is different than the 85 truck.

not sure what the fix will be at this time. the 85 has a square hole in the firewall and the 91 has a round hole.

not sure what the end of the tbi cable looks like, it was cut and MIA


Hp383 went from Bone stock 93 Rc to a carbed 440. I know we had the pedal cut and welded at a local shop do to the pedal hang when we swapped it. I was hoping to go there today or tuesday but funds dont allow it. Maybe my next day off. I can get pics.
Posted By: magnum440d100

Re: replacement cab. - 07/22/13 04:42 AM

Whatcha doin with the red carpet

Looking great
Posted By: scratchnfotraction

Re: replacement cab. - 07/22/13 03:19 PM

Quote:

Whatcha doin with the red carpet

Looking great


tossing it out, it got wet with no doors the day i got it home. it was not in bad shape if you want it,just cover the ride.

plenty of sunshine so I can get it dry, maybe dry already.it is laying in the yard spred out.

how do you fix the square hole/round hole in the firewall for the cable?

yea pics would be great.
Posted By: magnum440d100

Re: replacement cab. - 07/22/13 08:40 PM

Quote:

Quote:

Whatcha doin with the red carpet

Looking great


tossing it out, it got wet with no doors the day i got it home. it was not in bad shape if you want it,just cover the ride.

plenty of sunshine so I can get it dry, maybe dry already.it is laying in the yard spred out.

how do you fix the square hole/round hole in the firewall for the cable?

yea pics would be great.


Flat rate box

Shipping to 92508. Wonder how much?
Posted By: 76dodgeboy

Re: replacement cab. - 07/22/13 09:34 PM

Flat rate .
They don't have that big of flat rate.
Posted By: scratchnfotraction

Re: replacement cab. - 07/22/13 09:40 PM

parcel post is cheap. i let you know what i can find for it.

I check on it tonight and flod it back up if it is dry.

good thing you said something, it was going to the trash with some other stuff.

if anyone needs anything off the cab speak up in a PM or something all free you cover the ride.
Posted By: magnum440d100

Re: replacement cab. - 07/22/13 10:13 PM

Quote:

parcel post is cheap. i let you know what i can find for it.

I check on it tonight and flod it back up if it is dry.

good thing you said something, it was going to the trash with some other stuff.

if anyone needs anything off the cab speak up in a PM or something all free you cover the ride.


Was the old cab a 4 speed hump? If so, and I'll make it worth your while. Had an offer from another member, but my email dumps emails every so often, and I can't find them.

Thanks mike
Posted By: scratchnfotraction

Re: replacement cab. - 07/23/13 01:27 PM

no,small auto hump.
Posted By: magnum440d100

Re: replacement cab. - 07/23/13 10:06 PM

Quote:

no,small auto hump.


Bummer. Just the carpet then haha
Posted By: redraptor

Re: replacement cab. - 07/24/13 12:11 AM

Yeah it's funny how some things are so similar but you can't really use anything but the seatbelts & dashpad out of that cab. What about the HVAC?
Posted By: scratchnfotraction

Re: replacement cab. - 07/24/13 01:32 AM

Quote:

Yeah it's funny how some things are so similar but you can't really use anything but the seatbelts & dashpad out of that cab. What about the HVAC?


the control switch in dash is MIA, but the vac lines are in good shape, the heater/a/c was all working when parted out a couple days ago.

I will be removing the heater core box and all duct work.

I am going to strip it down and install everything from my 85 truck exept the heater core box.

I figure I can cut a patch piece with the square hole needed for the 85 throttle cable and weld it into the 91 cab while it is off, gonna take a couple days to patch the floor and driver rocker panel.

working on finding some patch panels, i rather weld in stock preformed pieces.

at this point the 1 hole is less than the 7 holes in the 85 so it might ride as is if it slows me down too much.
Posted By: scratchnfotraction

Re: replacement cab. - 07/29/13 01:07 AM

8:00 AM...airchisle goes off in the overcast muggy morning calm in my back yard. new rental family nextdoor.

8:01 AM, I see them looking out the window with the WTF look! wearing a bedtime hairdoo.


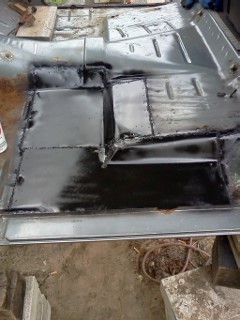
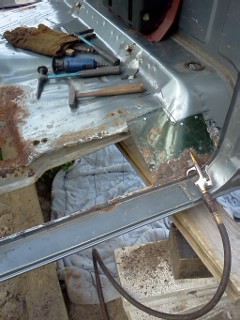
got some rust cut out back to good solid metal around the seatbelt anchor. looks like I can rape the seatbelt anchor and some floor patch around it and the rocker patch from the 85 cab.

a little sandblasting and see how thin the flat under heel floor is.

following the advice of ACE on cutting, it looks like i got this cab in time, it is rather solid other than this driver side floor rocket rust.


Attached picture 7793609-floorpatch1.jpg
Posted By: scratchnfotraction

Re: replacement cab. - 07/29/13 01:18 AM

with all of the LE trim inside I think the water leak was unseen.

it has had a new gasket/winshield replaced at one time. lots of screw holes for the headline foam padand trim pieces, told ACe i am not going for looks and I am not welding all those holes,allmetel is faster.

guess i need to find 2 low back bucket seats and 2 drive side lower bases(no flip hinge) from a RC/TD

not sure I am ready for race seats in the daily driver yet.

Attached picture 7793621-floorpatch2.jpg
Posted By: MoPar Jamie

Re: replacement cab. - 07/29/13 02:08 AM

You can actually bolt the tilt bases solid. Pull the latch and hinge and bolt it to the floor. I did that on an old '86 I had.
Posted By: basketcase

Re: replacement cab. - 07/29/13 04:52 PM

Quote:

first problem I see is the TBI throttle pedel/cable is different than the 85 truck.

not sure what the fix will be at this time. the 85 has a square hole in the firewall and the 91 has a round hole.

not sure what the end of the tbi cable looks like, it was cut and MIA


hey Mike, been out of town and haven't read far enough to see if you figured this out. when I did my V8 swap, I ran into the same thing. The '88 had a different pedal and cable set up than the '87 donor. The holes for the cable were different holes like yours. I stuck the round cable from the '87 in the square hole( or was it the other way around..?) and it's worked fine for three months.
Posted By: scratchnfotraction

Re: replacement cab. - 07/29/13 06:12 PM

kool,I was thinking of trying the square plug in the round hole thing also.

did you get the rubber pieces for splash sheilds? IIRc you had the mats. did the rubber make shiping go up any? I will get $ on the way when you are ready. I know work is ruff so when you have the time.
Posted By: redraptor

Re: replacement cab. - 07/29/13 11:45 PM

Quote:

with all of the LE trim inside I think the water leak was unseen.


Holy crap! Almost as bad as the raptor. Only thing left was the seatbelt anchor. Well it's still solid enough. Woulda liked a pic of the neighbors.
Posted By: scratchnfotraction

Re: replacement cab. - 08/04/13 01:41 PM

cut a seatbelt anchor/patch from the 85 cab, about the only good thing left on the driver side floor of that cab. so a piece of the 85 lives on.


Attached picture 7801818-floorpatch3.jpg
Posted By: scratchnfotraction

Re: replacement cab. - 08/04/13 01:44 PM

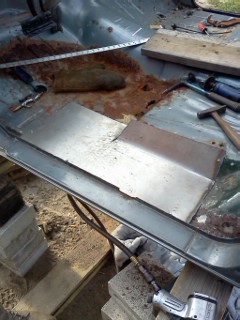
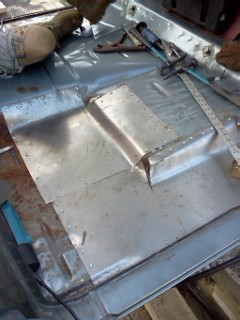
choped up some 20 gauge sheet metal and patching away. I followed Ace and his advice on where and how to make the cuts and piece it right in.


Attached picture 7801822-floorpatch4.jpg
Posted By: scratchnfotraction

Re: replacement cab. - 08/04/13 01:46 PM

slowly comeing together.

Attached picture 7801825-floorpatch5.jpg
Posted By: scratchnfotraction

Re: replacement cab. - 08/04/13 01:48 PM


Attached picture 7801827-floorpatch6.jpg
Posted By: scratchnfotraction

Re: replacement cab. - 08/04/13 01:53 PM

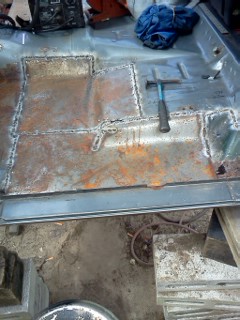
a little paint to keep the flash rust down, go back and grind the welds down flat. and its patched.

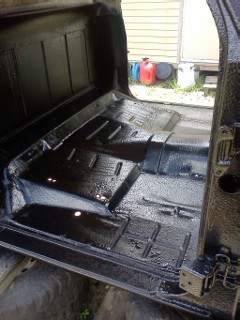
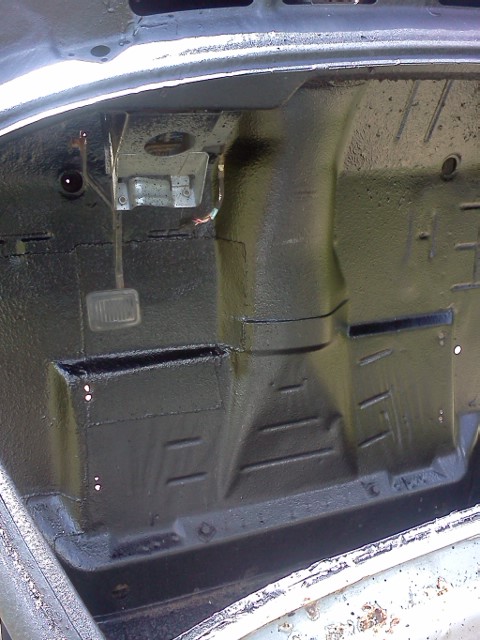
do a little sand blasting on the surface rust on the rest of driver floor, then a coat of bed liner sprayed inside.

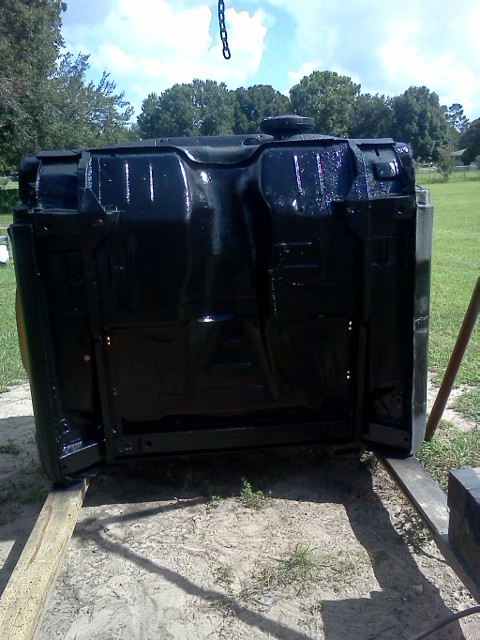
then it is ready to flip on its back so I can weld the back side of patch, then coat the firewall/cab bottom with the bed spay on bed liner.

ACE did a 59 chebby and I do like the finished look of the spray on bed liner inside and out of the cab. easy clean up with a hose and not soggy carpet.


Attached picture 7801830-floorpatch7.jpg
Posted By: basketcase

Re: replacement cab. - 08/04/13 04:46 PM

Posted By: redraptor

Re: replacement cab. - 08/06/13 12:29 AM

Quote:

then a coat of bed liner sprayed inside.


Copycat!! What are you going to use?
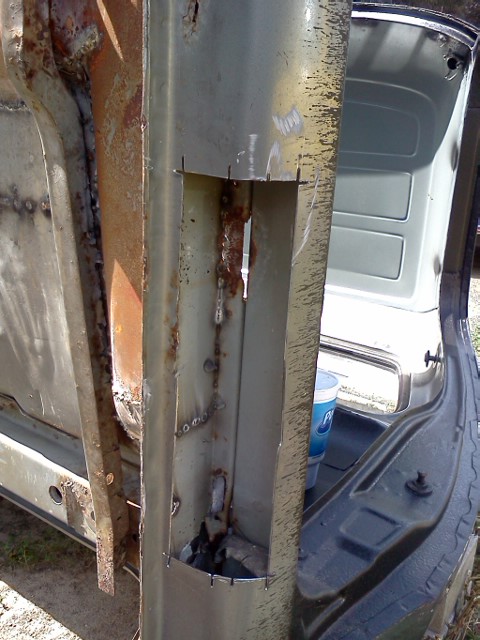
Posted By: scratchnfotraction

Re: replacement cab. - 08/06/13 07:01 PM

last 3 trucks Ace has sprayed,he used the rustoleum rubberized spray bed liner.

same finish look you have there in the raptor.

the 64 chebby got it in the lower cab with a gloss white dash and upper 1/2 of cab.

the 59 chebby got same inside with a full undercoating and all of the underhood/engine bay.

what was a fast patch up to swap in the 5 speed is turning into a little more body work than i had thought about doing.

but I am really enjoying the project again for a change.

I am ready to flip the cab and weld up the bottom next,then on to sparying the bedliner.

Posted By: 340SHORTY

Re: replacement cab. - 08/06/13 08:52 PM

Posted By: MOPARS6768

Re: replacement cab. - 08/06/13 09:34 PM

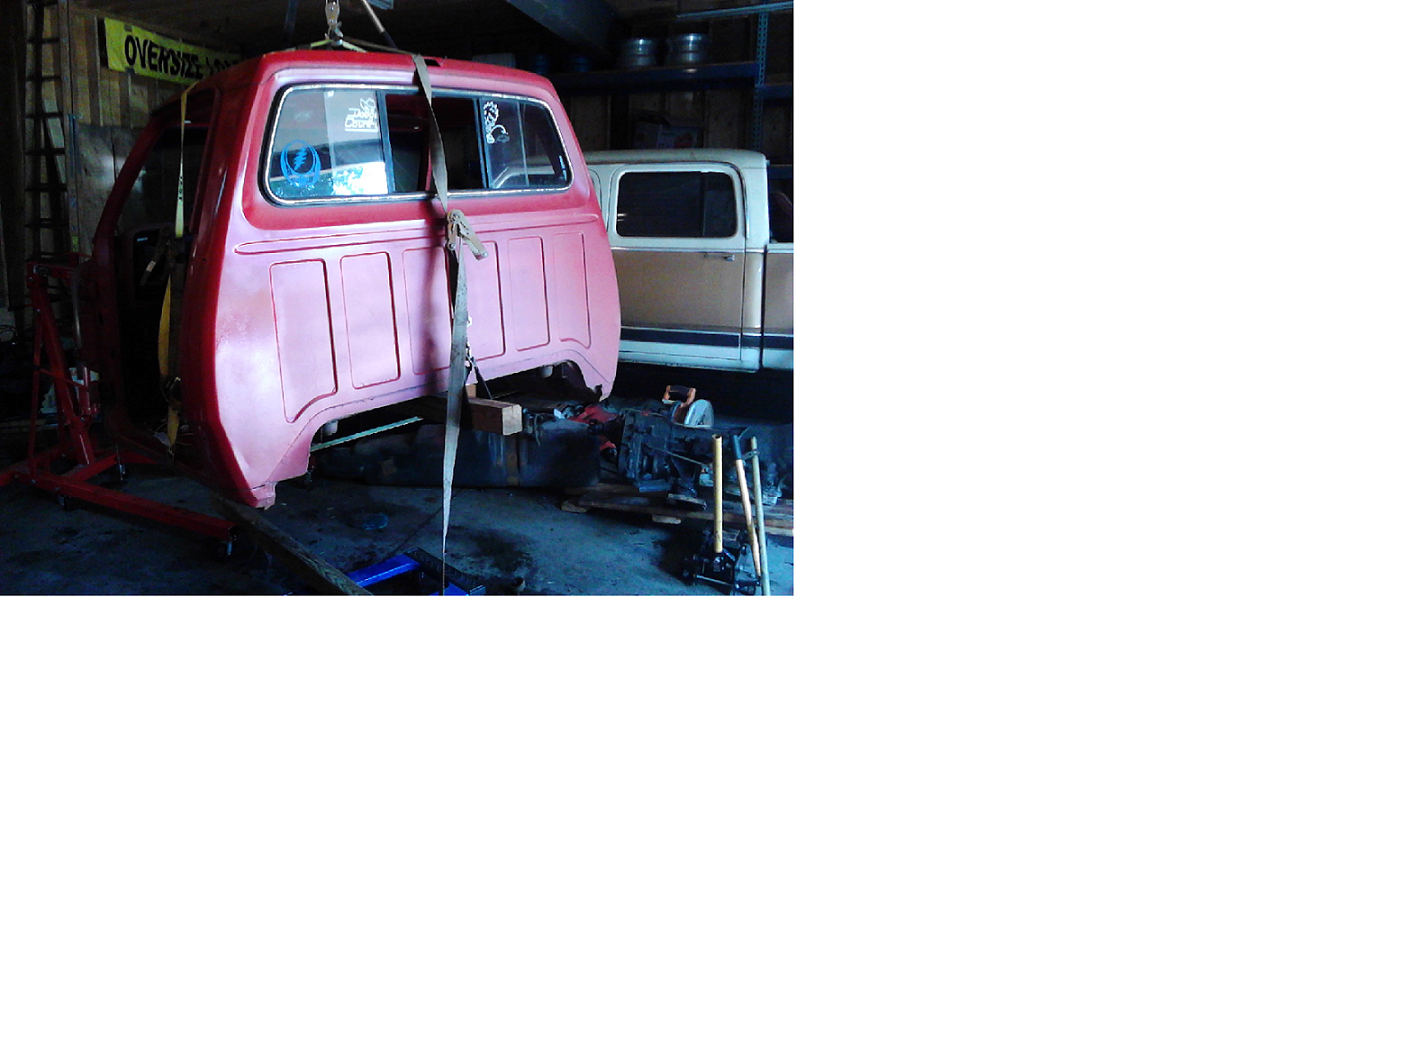
Looks like you are moving right along I will be following this closely I just started my first cab swap, I havnt gotten nearly as far as you yet my cab is still hanging from the beam in my garage here are a few pics of my project.

Attached picture 7804793-cab.png
Posted By: MOPARS6768

Re: replacement cab. - 08/06/13 09:45 PM

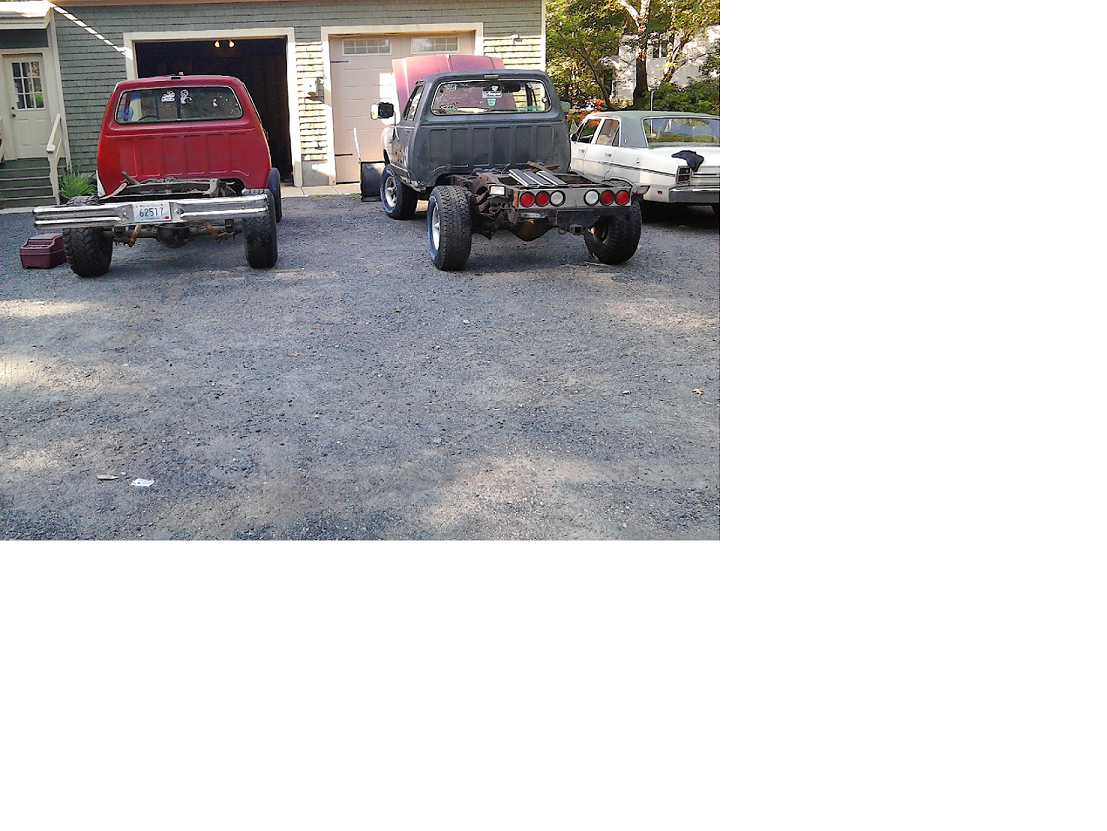
Here are my trucks befor I pulled the donor cab

Attached picture 7804816-trucks2.png
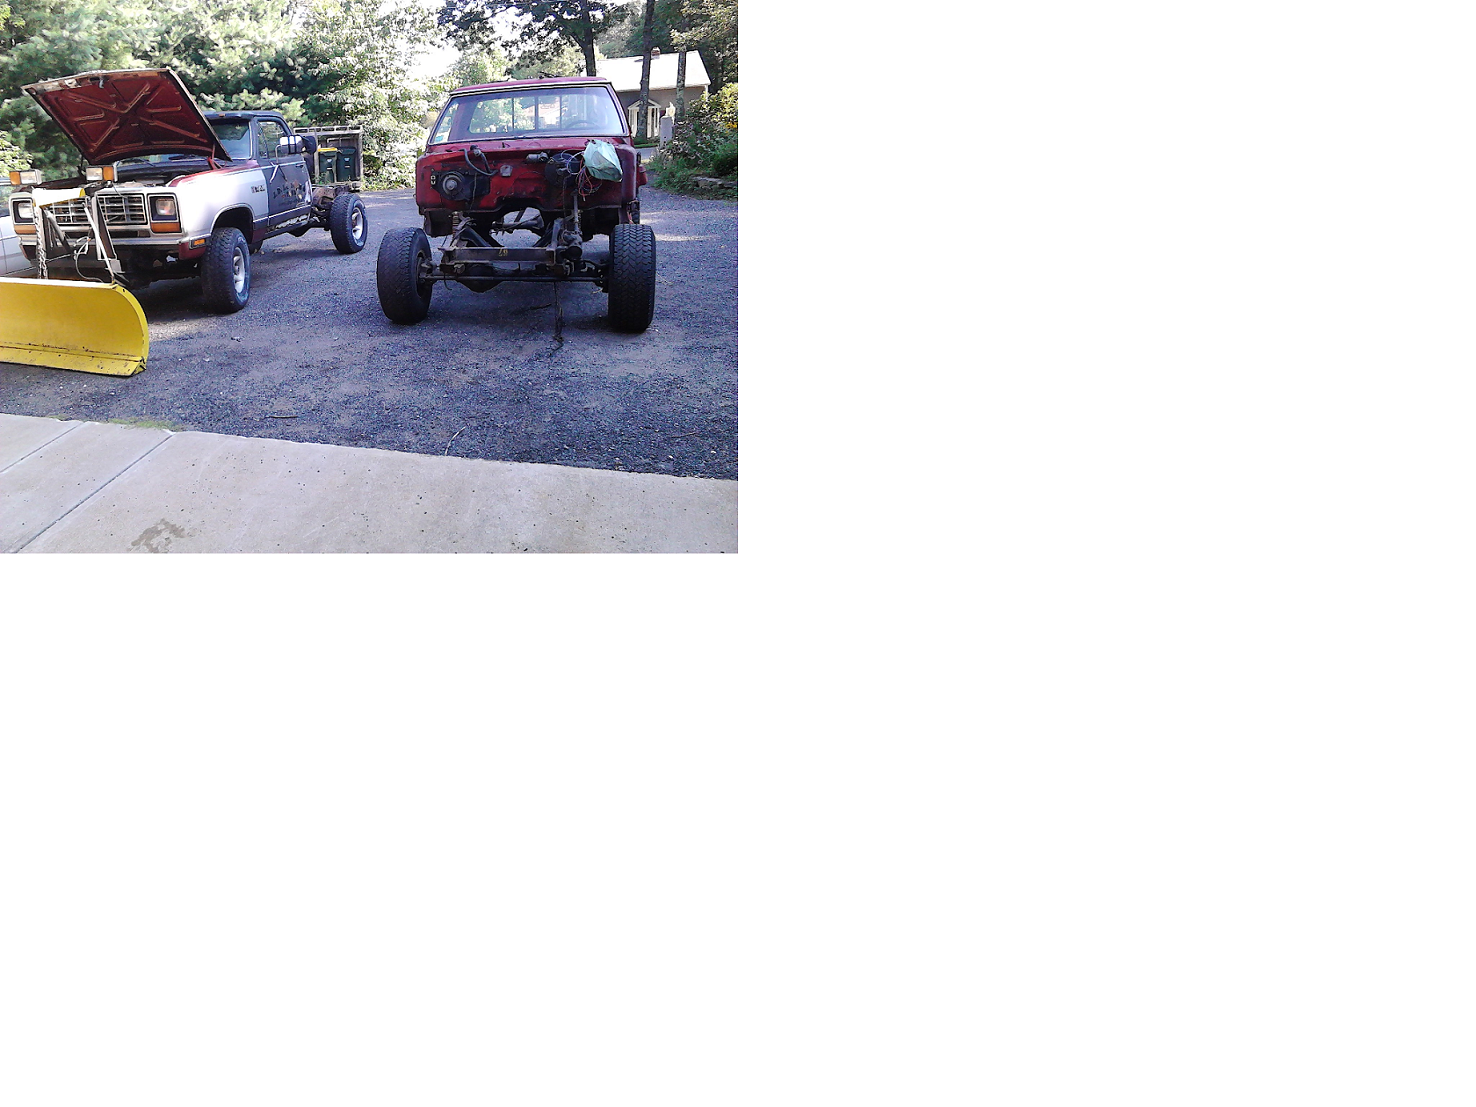
Posted By: MOPARS6768

Re: replacement cab. - 08/06/13 10:07 PM

another

Attached picture 7804839-trucks.png
Posted By: cudabitten

Re: replacement cab. - 08/08/13 09:27 PM

You gonna bring donuts over to the neighbor?
Posted By: scratchnfotraction

Re: replacement cab. - 08/11/13 01:41 AM

got some spray on bed liner done today, now to let it cure a couple days and it is flip over for bottom side.


Attached picture 7809843-floorpatch9.jpg
Posted By: scratchnfotraction

Re: replacement cab. - 08/11/13 01:43 AM

another one

Attached picture 7809846-floorpatch10.jpg
Posted By: scratchnfotraction

Re: replacement cab. - 08/11/13 01:43 AM

and another shot.

20$ for sheet metal,60$ for bedliner = 80$ for patch work so far. with cab/tax = 400$ to replace the 85 cab. well worth the effort and cash so far. hope to squeeze it all in under the 550$ cash mark.

going to need another roll of wire for welder, another gallon of bedliner to finish up the cab.

little progress at a time.

the 5 speed conversion is coming in under 900$ but still need to build a drive shaft yet.

the whiplash roller cam swap added another 550$ to the bill.

it will be like a new truck for less than 2000$ invested. which is better than a 350$/month 5 yr payment plan right now.


Attached picture 7809847-floorpatch11.jpg
Posted By: 340SHORTY

Re: replacement cab. - 08/11/13 03:38 AM

Isnt the bedliner on the inside gonna get messed up when your weldung on the bottom ?
Posted By: Hemi_Ram

Re: replacement cab. - 08/11/13 04:29 AM

Mike, lookin D****** good my friend!!! I took my junkyard truck for a ride today; have to dial in my distributor as I switched from an MSD mechanical to a firecore vacuum advance. It runs a lot cooler with the vacuum but I think it suffers a bit on HP. It lights them up on demand and is a blast to drive. Bodywork and paint are next but it will be a while as I am enjoying it as a rat rod and the looks on peoples faces when I pop the hood or shut them down. LOL
Posted By: redraptor

Re: replacement cab. - 08/11/13 12:56 PM

Quote:

Isnt the bedliner on the inside gonna get messed up when your weldung on the bottom ?


I think he's done with the cab floor.
Posted By: G-Money1320

Re: replacement cab. - 08/14/13 12:14 AM

I did a whole cab swap on my truck last year,its a lot more solid and quiet now Your donor cab didnt have the lower rear window trim did it? I would be interested if so.
Posted By: scratchnfotraction

Re: replacement cab. - 08/15/13 03:07 AM

Quote:

Quote:

Isnt the bedliner on the inside gonna get messed up when your weldung on the bottom ?


I think he's done with the cab floor.


yes, i got it done, waiting to do the rocker next,i got to chop rust out first, then chop greenie up a little more to patch the rocker.

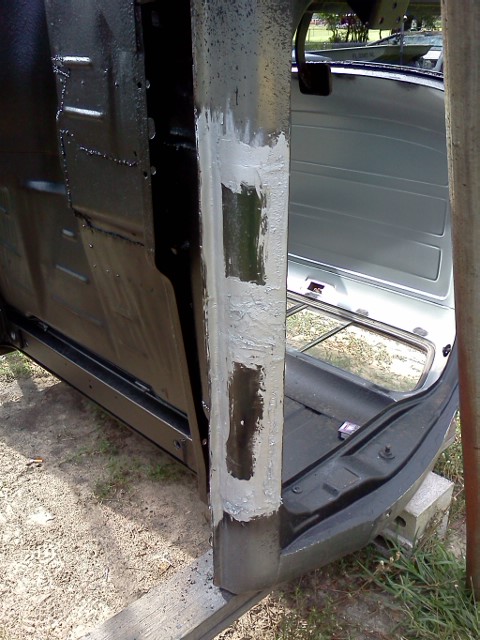
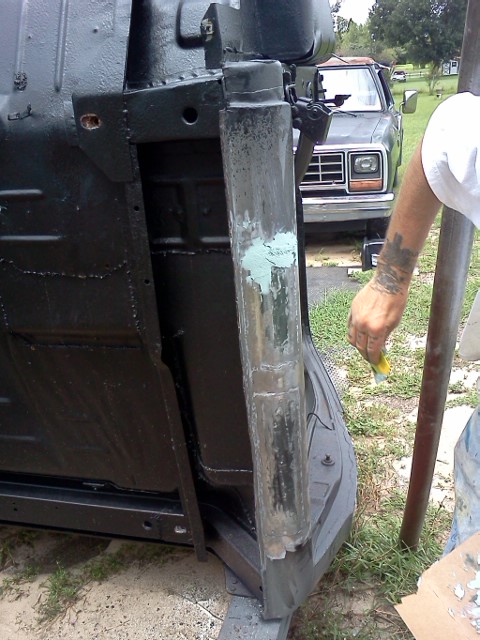
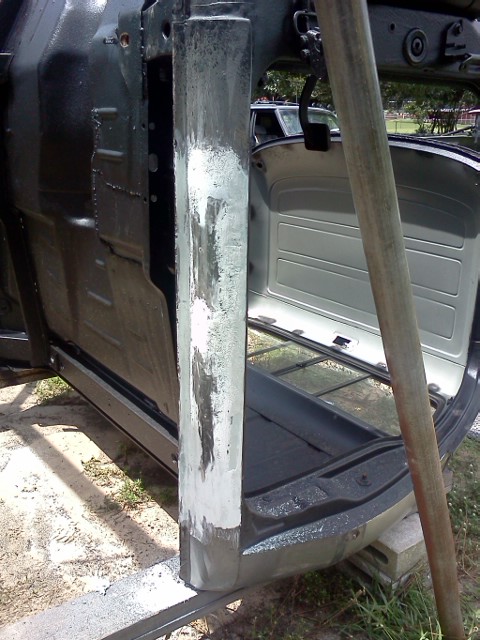
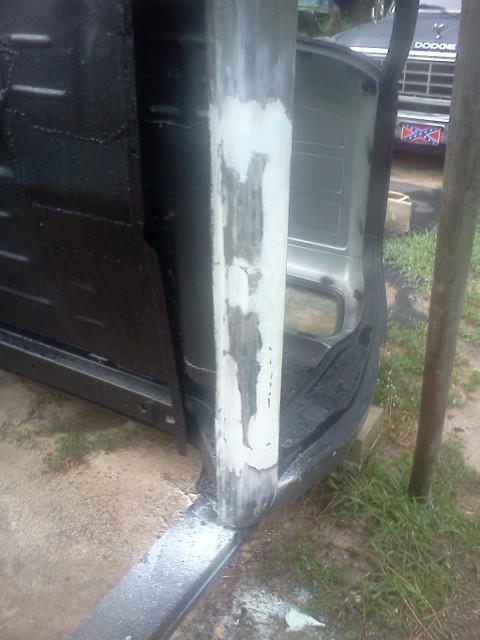
when its all done it will get another gallon bedliner on the bottom. if you look I did the a-pillers/jambs and plan to do the lower rockers along with the floot bottom.

once thats done its on to the front drip rail/roof repair. clean/cut/weld/allmetal should fix up the weak spots and small holes. looks like i will have to trim the front driprail edge middle section out. main thing is to be able to get the pinch weld solid,glass/gasket in, then seal it up across the top of gasket with body sealer.

ran out of wire today so add another 20$ for a 100$ total for patch repair.

still ahead at 450$ for rust free cab replacment.

Attached picture 7814631-floorpatch12.jpg
Posted By: scratchnfotraction

Re: replacement cab. - 08/15/13 03:08 AM


the rocker is next up for repair, my first rocker patch.

pretty solid exept for the holes. the 85 cab has 2 good solid rockers to chop away at.


Attached picture 7814632-floorpatch13.jpg
Posted By: scratchnfotraction

Re: replacement cab. - 08/17/13 12:20 AM

pulled the pin and swaped in the pedels and test fitted the the clutch MC.


Attached picture 7816836-floorpatch14.jpg
Posted By: scratchnfotraction

Re: replacement cab. - 08/17/13 12:39 AM

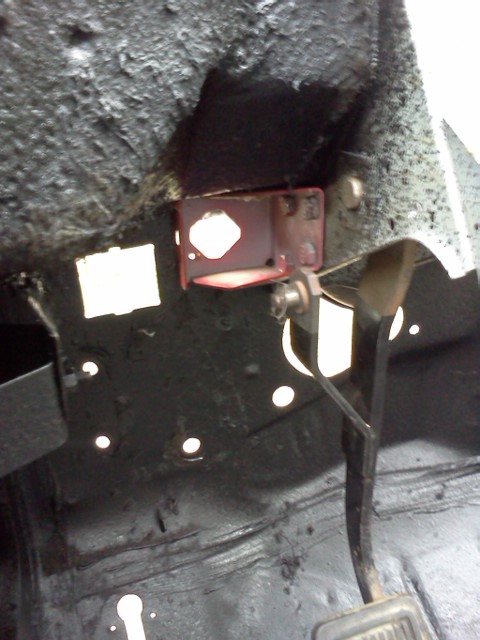
this little jem of a bracket will make it ez to go hydro clutch in something else.

the 85 cab does not have the holes for the 4 bolts but could be welded right in place once a hole in the fire wall is cut. if a mech linkage set of pedels are on hand, they would just need a small piece welded up for MC hook up.

with the correct v-6/v-8 hydro bellhousing the 833/833OD/5-speed can be used.

been scratching around in the JY and have come up with a bracket/pedels from a truck.

picked up a 94 DAK/AX-15 5 speed with its own 9 bolt hydro bell housing. free fit the budget, just hauled the rest off for the owner some recycler cash.

looks like the folks over at dodge did not have to think too hard to come up with the hydro system upgrading the antique mech linkage.

Attached picture 7816856-floorpatch15.jpg
Posted By: redraptor

Re: replacement cab. - 08/17/13 04:40 PM

Cool!
Posted By: basketcase

Re: replacement cab. - 08/17/13 05:38 PM

lookin good Mike
Posted By: scratchnfotraction

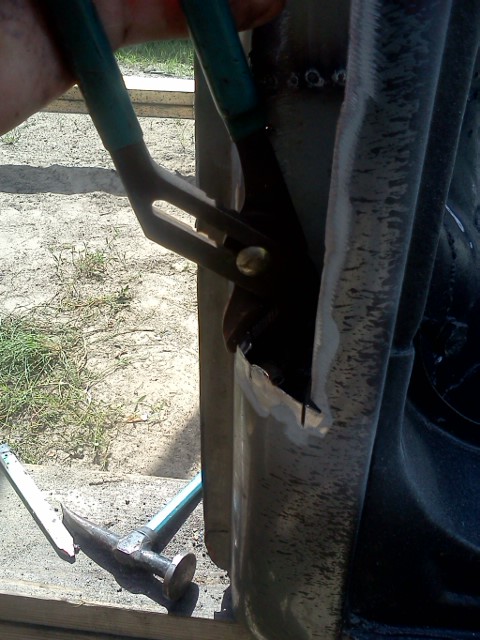
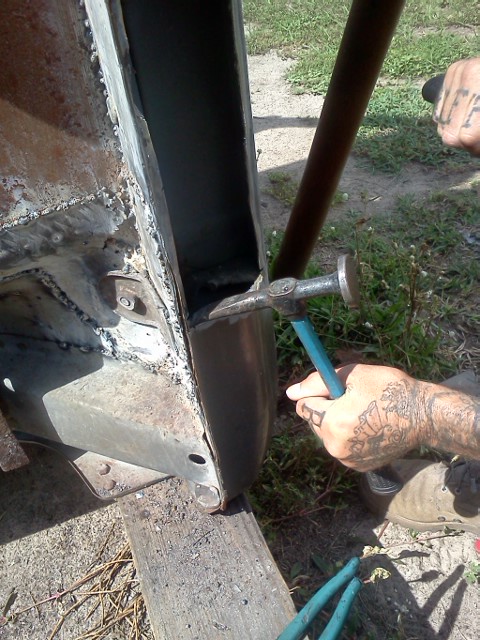
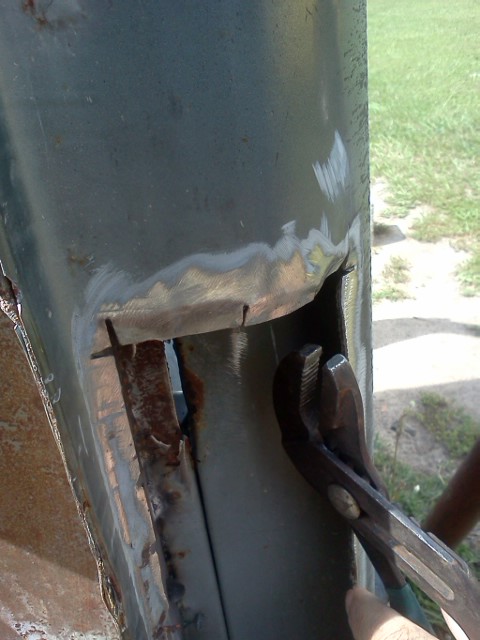
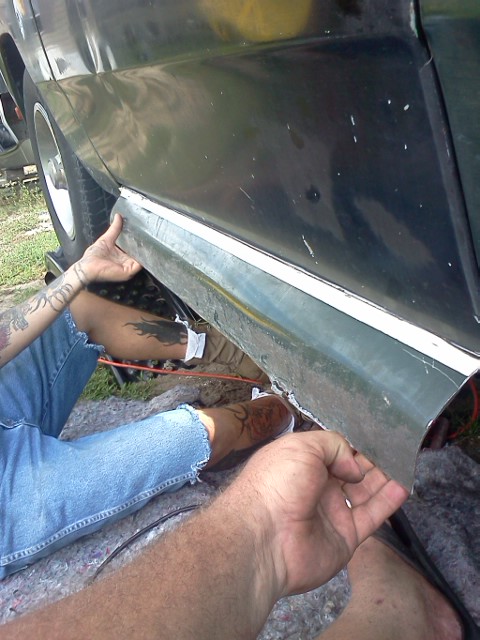
Re: replacement cab. - 08/18/13 03:26 AM

Quote:

lookin good Mike


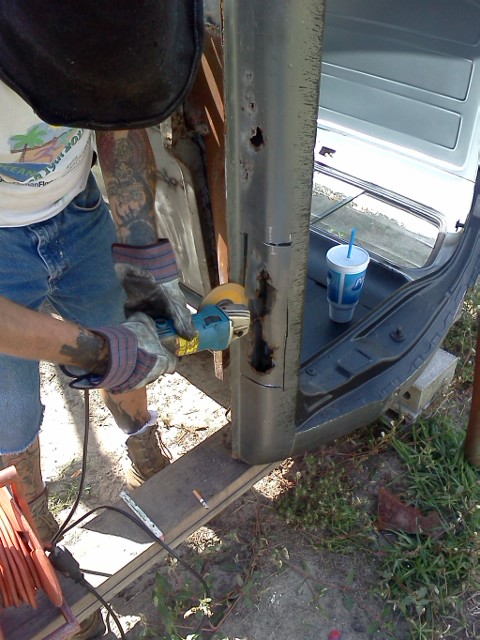
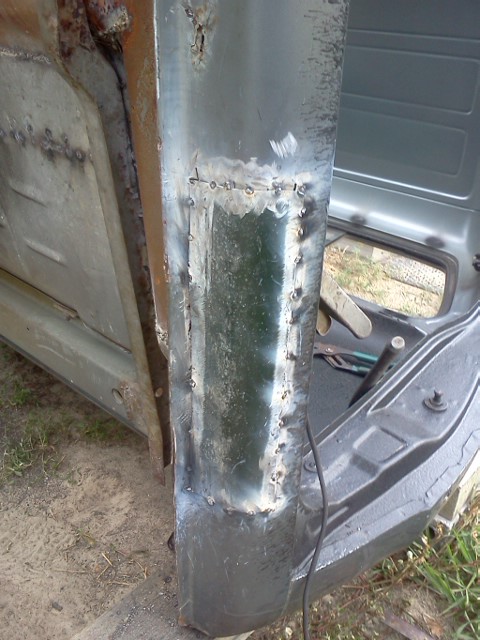
rocker panel repair 101

Ace has me doing and watching small things as we do the first hole, 2nd smaller hole is mine to do after todays lesson.

small tricks save time, $$$, labor.

first cut rust out and square up the cuts.

then bend edges in slightly so patch welds in flush, giving a nice overlap on edges.

Attached picture 7818082-floorpatch16.jpg
Posted By: scratchnfotraction

Re: replacement cab. - 08/18/13 03:27 AM


was able to finish off some small patching from backside after rocker is open. got the backside of seatbelt anchor welded up good.

Attached picture 7818083-floorpatch17.jpg
Posted By: scratchnfotraction

Re: replacement cab. - 08/18/13 03:29 AM

next up,

a few small cuts then work the edge towards the inside a little.

Attached picture 7818090-floorpatch18.jpg
Posted By: scratchnfotraction

Re: replacement cab. - 08/18/13 03:32 AM

moving right along now.

Attached picture 7818093-floorpatch19.jpg
Posted By: scratchnfotraction

Re: replacement cab. - 08/18/13 03:34 AM

just about ready for a patch

Attached picture 7818096-floorpatch20.jpg
Posted By: scratchnfotraction

Re: replacement cab. - 08/18/13 03:36 AM

jump over to ol' greenie and chop out some patch pieces.

Attached picture 7818099-floorpatch21.jpg
Posted By: scratchnfotraction

Re: replacement cab. - 08/18/13 03:38 AM

getting drafty with all the holes choped in GOOD metal on ol'greenie

Attached picture 7818102-floorpatch22.jpg
Posted By: scratchnfotraction

Re: replacement cab. - 08/18/13 03:43 AM

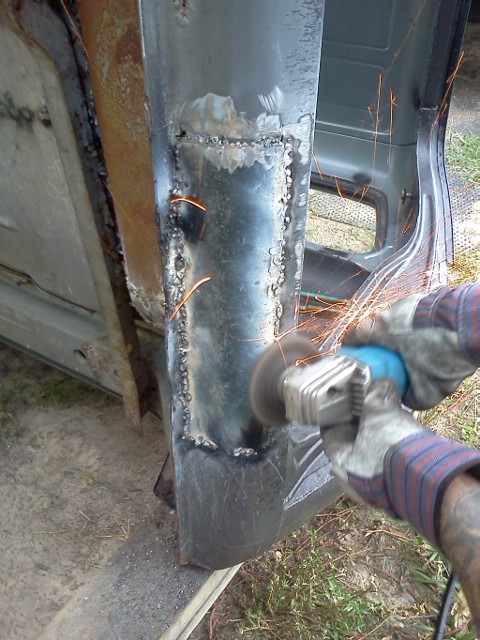
time to burn some wire. the trick is to weld in the patch as flush as i can get it, not to much goober welding and less grinding.

it will skim over good with allmetal and get sprayed with bed liner when done, should not really be able to see this patch that low on the rocker so that helps hide it.


Attached picture 7818107-floorpatch23.jpg
Posted By: scratchnfotraction

Re: replacement cab. - 08/18/13 03:45 AM

moving along and burning wire, hope to finish before the rain starts today.

Attached picture 7818110-floorpatch24.jpg
Posted By: scratchnfotraction

Re: replacement cab. - 08/18/13 03:49 AM

little more grinding and it is done for today, the rain has started to fall.

got 1 small rocker hole to go and i think I will weld up the cargo light hole. this looks to be were some water was getting inside. the mounting screws rusted right off in the cab sheet metal.


Attached picture 7818121-floorpatch25.jpg
Posted By: redraptor

Re: replacement cab. - 08/18/13 12:22 PM

Quote:

not to much goober welding and less grinding.


I likes goober welding!
Posted By: scratchnfotraction

Re: replacement cab. - 08/19/13 02:43 AM

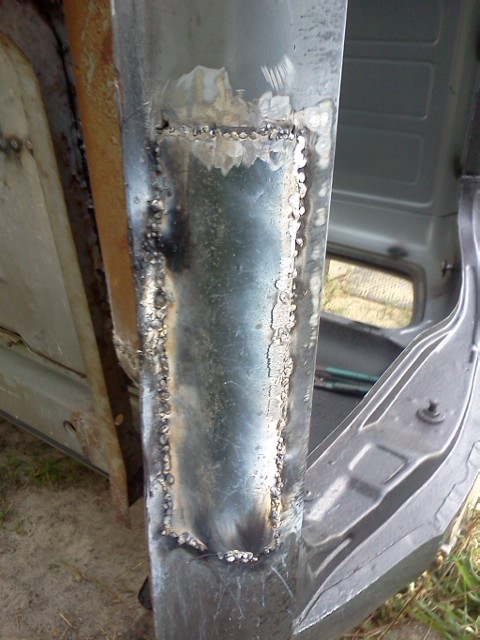
with Ace as my shadow, I gave it a good try for my first hand at patching the rocker myself.

I would say it turned out better than the first patch.

skim coat and bedliner will hide it well enuff to go fishing.


Attached picture 7819156-floorpatch26.jpg
Posted By: scratchnfotraction

Re: replacement cab. - 08/19/13 02:48 AM

rocker is patched.

windsheild/pinchweld/driprail up next.

Attached picture 7819163-floorpatch27.jpg
Posted By: bboogieart

Re: replacement cab. - 08/20/13 12:34 AM

Your doing a great job.
Fun to watch as I have some similar work to do on my 76. there are Basically no rocker panels left but I have replacements from the 84.
Posted By: scratchnfotraction

Re: replacement cab. - 08/20/13 02:33 AM

thanks,I guess the biggest part of learning how to do it is doing it.

I enjoyed doing all the body work on the 440 truck, and now more practice with the 85 truck.

the more I do the better I should get as I fix my own rusted junk.

helps having a paint & body man to guide me thru how it is done. i just follow his advice. he does a little but has me doing most of the cutting/drilling/welding/grinding for practice.

I can tell you for sure that last saturday,if I was paying myself to do this work i would have fired me..
Posted By: scratchnfotraction

Re: replacement cab. - 08/22/13 03:15 AM

just a little sanding on the allmetal to smooth it out a bit, spray it and the bottom side is done up nice with a thick coat of bed liner.

got a 2nd coat on the cab floor under foot.


Attached picture 7823172-fp28.jpg
Posted By: scratchnfotraction

Re: replacement cab. - 08/22/13 03:19 AM

2nd coat under foot

Attached picture 7823177-floorpatch29.jpg
Posted By: scratchnfotraction

Re: replacement cab. - 08/22/13 03:20 AM

rust removed and patched up with it sealed with a nice thick coat of bedliner.

Attached picture 7823182-floorpatch30.jpg
Posted By: old_goat

Re: replacement cab. - 08/22/13 01:23 PM

Looking good Mike!
Like I always say
"Ya just lack finishing"
Posted By: scratchnfotraction

Re: replacement cab. - 08/22/13 02:28 PM


it is a never ending story.
Posted By: 340SHORTY

Re: replacement cab. - 08/22/13 09:05 PM

Hey Scratchy, are yuseing roll on or spray on bedliner??
Posted By: scratchnfotraction

Re: replacement cab. - 08/22/13 09:46 PM

it is the rustoleum spray on bed liner. it goes on good,covers good,holds up to abuse, and has a nice finish texture to it.

not gritty like the herculiner roll on I used on the 440 truck.

60$ a gallon, I will be using 6 gallons on the stepside when its all done.

the cab has 2 gallons and is done now. 2 more gallons for the underhood,inner fenders,backside of inner fenders, backside of fenders,core support,all get a coat.

bed gets 2 gallons for underside and inside box,underside of rear fenders.

the local bedliner shops want 400$-500$ to do just inside the bed.

Ace wants to paint it army green(olive drab) then add the hotrod flat black palmetto camo paint.(door handles down)

a few of my hunt club 4x4 buddys have this paint job on their hunting truck, blends right in to the swamps.
Posted By: redraptor

Re: replacement cab. - 08/22/13 11:44 PM

Quote:


the local bedliner shops want 400$-500$ to do just inside the bed.


Lookin' good! Don't forget those guys at the bedliner shop should use about 4 gallons to do the bed right @ about $100 a gal.
Posted By: old_goat

Re: replacement cab. - 08/23/13 02:40 AM

Quote:


Ace wants to paint it army green(olive drab) then add the hotrod flat black palmetto camo paint.(door handles down)

a few of my hunt club 4x4 buddys have this paint job on their hunting truck, blends right in to the swamps.


Gee Mike,
I don't know if I would go huntin if ya paint it like that...
Ya might lose yer truck!!
Posted By: scratchnfotraction

Re: replacement cab. - 08/25/13 04:15 AM

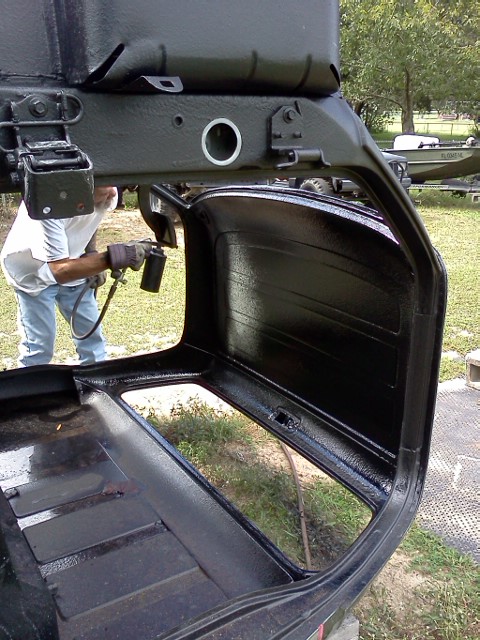
finished up the rocker repair, removed most all of the all-metal but filled the welds good. did a little bondo and hand rubbing to smooth it out the rest of the way. got it sprayed with 2 coats of bed liner.

pass side rocker got its 2nd coat and another good thick coat under drivers feet.

now onto painting the inside roof and cleaning/repairing the drip rail window channel.


Attached picture 7826313-floorpatch31.jpg
Posted By: scratchnfotraction

Re: replacement cab. - 08/25/13 04:17 AM

inch by inch anything is a cinch.

Attached picture 7826317-floorpatch32.jpg
Posted By: scratchnfotraction

Re: replacement cab. - 08/25/13 04:21 AM

meter by meter life is sweeter.

looks like rain coming, got to hurry now.

Attached picture 7826321-floorpatch33.jpg
Posted By: scratchnfotraction

Re: replacement cab. - 08/25/13 04:22 AM

done for today. needs to cure a little.

Attached picture 7826324-floorpatch34.jpg
Posted By: Hooligan

Re: replacement cab. - 08/25/13 09:54 PM

OMG Mike! I see that you found my ambition! Can I have it back when you are done with it?
Looks like a great job so far by you and Ace!

I show go out in the garage, and see if my Super Bee is still there under all that dust!

Steve
Posted By: scratchnfotraction

Re: replacement cab. - 09/01/13 05:00 AM

got the seam sealer removed and pinchweld cleaned up, now to weld in some patch metal and get it ready for paint.


Attached picture 7834892-floorpatch35.jpg
Posted By: scratchnfotraction

Re: replacement cab. - 09/01/13 05:01 AM

slow but steady in the heat of the day, i hope fall is on the way. i could use less rain and heat for a change.


Attached picture 7834894-floorpatch36.jpg
Posted By: 340SHORTY

Re: replacement cab. - 09/01/13 12:26 PM

Quote:

slow but steady in the heat of the day, i hope fall is on the way. i could use less rain and heat for a change.


wuss
Posted By: scratchnfotraction

Re: replacement cab. - 09/01/13 03:02 PM

Quote:

Quote:

slow but steady in the heat of the day, i hope fall is on the way. i could use less rain and heat for a change.


wuss


25 yrs ago I would have beg to differ on that.. but I tend to agree with it nowdays.

the older i get the better i was.
Posted By: redraptor

Re: replacement cab. - 09/02/13 01:18 PM

Quote:


the older i get the better i was.


Posted By: 1moparman

Re: replacement cab. - 09/05/13 03:40 AM

Quote:

it is the rustoleum spray on bed liner. it goes on good,covers good,holds up to abuse, and has a nice finish texture to it.

not gritty like the herculiner roll on I used on the 440 truck.

60$ a gallon, I will be using 6 gallons on the stepside when its all done.

the cab has 2 gallons and is done now. 2 more gallons for the underhood,inner fenders,backside of inner fenders, backside of fenders,core support,all get a coat.

bed gets 2 gallons for underside and inside box,underside of rear fenders.

the local bedliner shops want 400$-500$ to do just inside the bed.

Ace wants to paint it army green(olive drab) then add the hotrod flat black palmetto camo paint.(door handles down)

a few of my hunt club 4x4 buddys have this paint job on their hunting truck, blends right in to the swamps.


Posted By: 340SHORTY

Re: replacement cab. - 09/05/13 03:46 AM

Quote:

Quote:

Quote:

slow but steady in the heat of the day, i hope fall is on the way. i could use less rain and heat for a change.


wuss


25 yrs ago I would have beg to differ on that.. but I tend to agree with it nowdays.

the older i get the better i was.


I hear ya Scratch,, It takes me all night to do what I used to do all night..
Posted By: scratchnfotraction

Re: replacement cab. - 09/08/13 05:54 AM

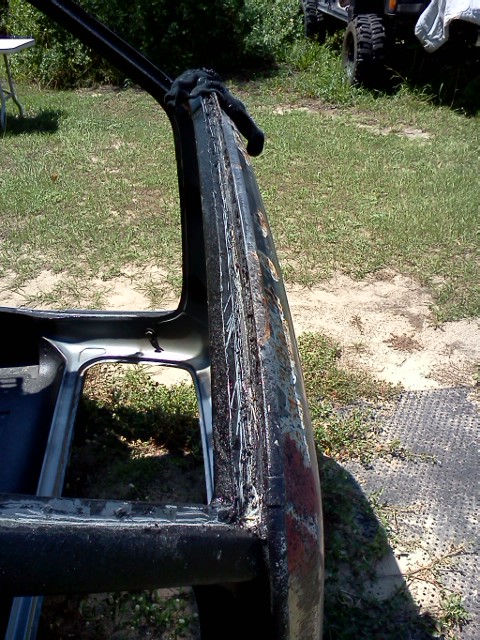
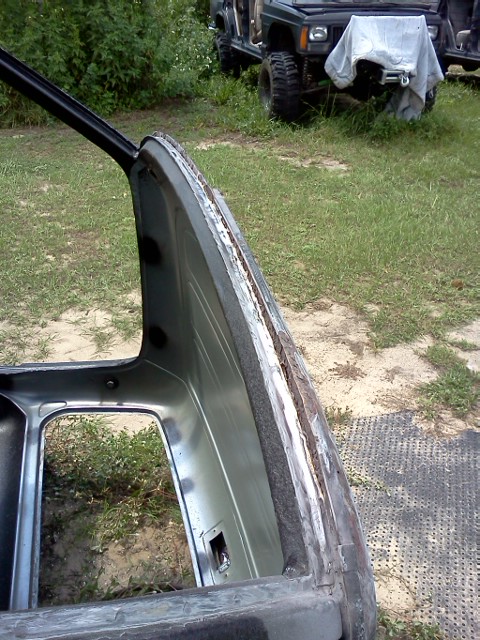
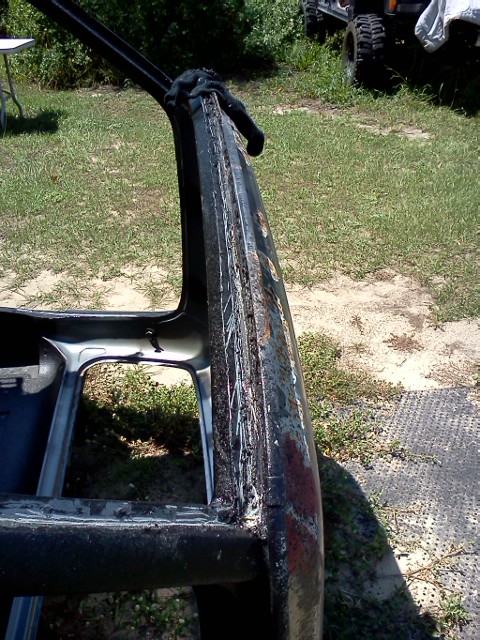
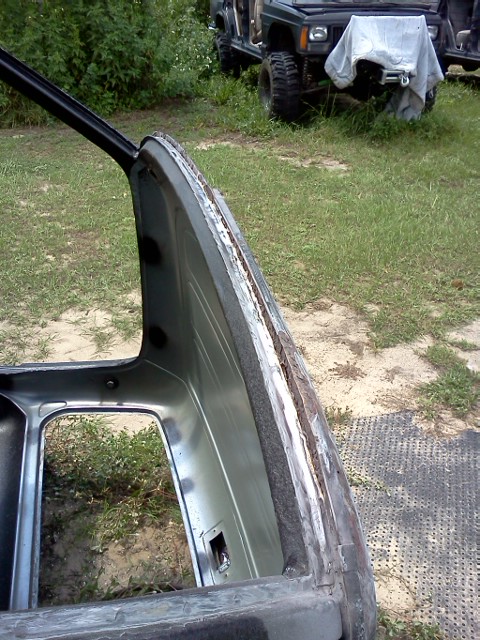
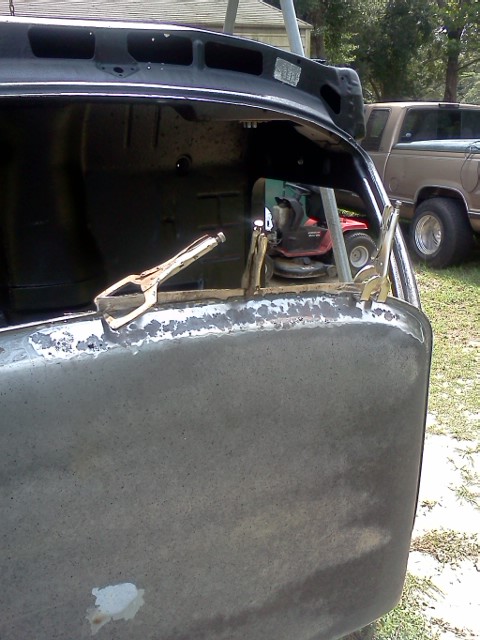
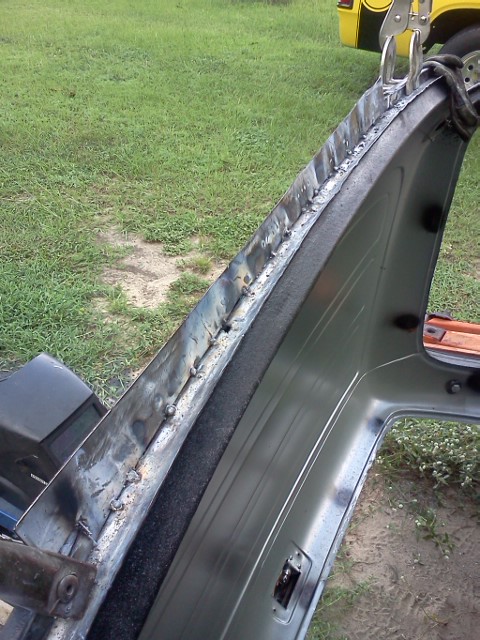
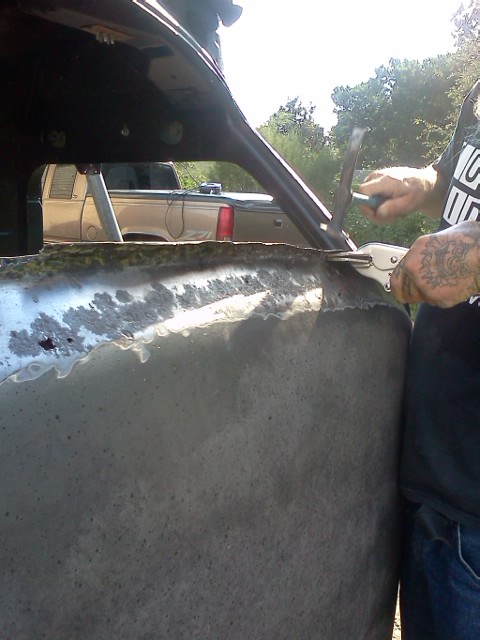
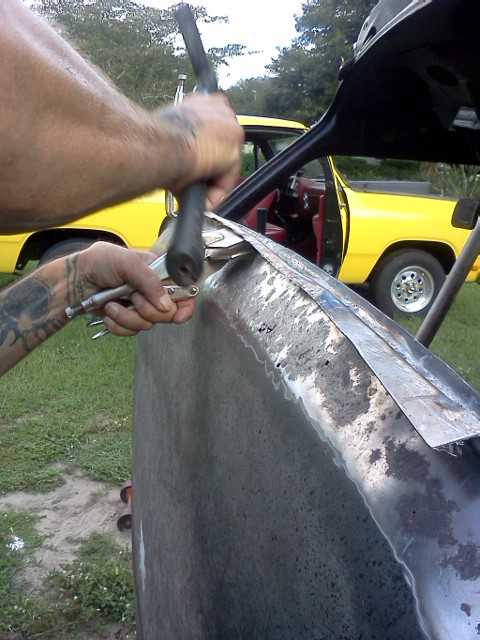
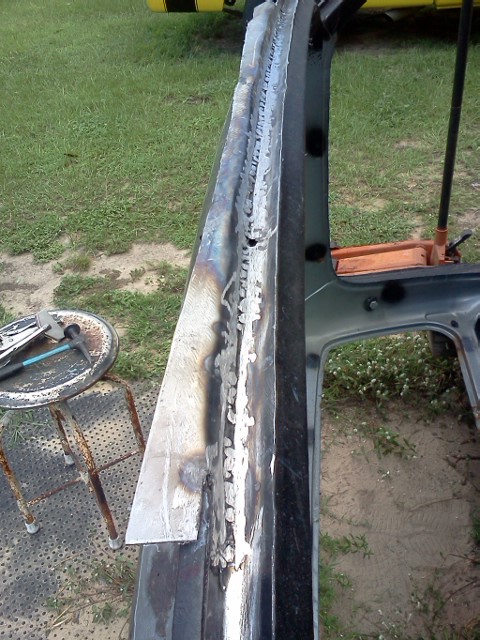
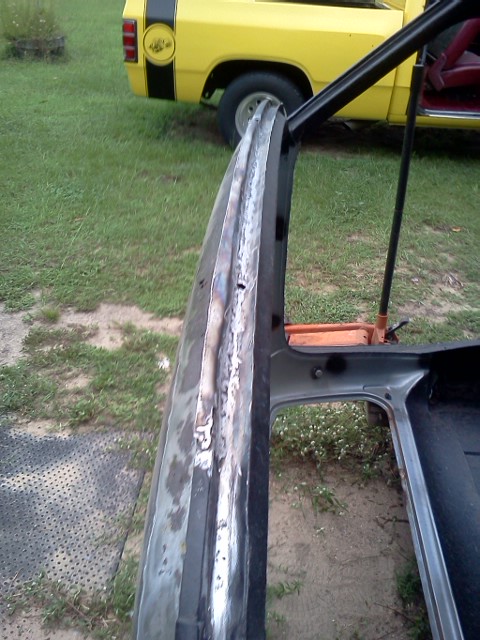
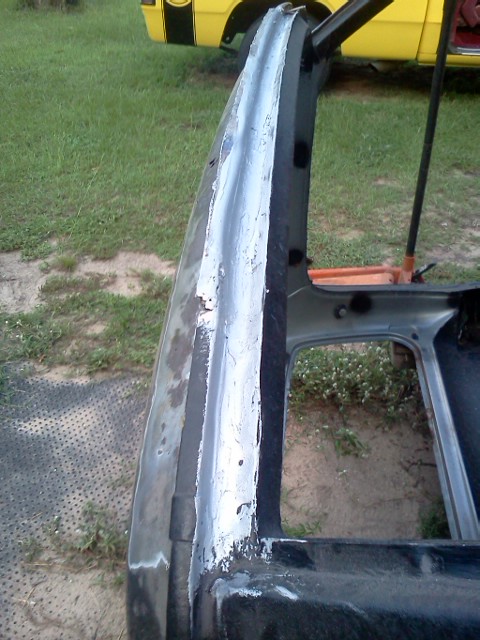
got the driprail/roof skin/pinchweld all tied back together by patching in a piecs and bending it so as to make the drip rail front edge.

got it welded up. did some grinding to smooth it,fingerd in some all metal to seal and fill it up good.

i think this will be better than any body sealer, it wont shrink and should seal the front pinch weld above and behind the top of window gasket.

this is where most of the rust/leaks come from on the roof IMHO.

not perfect but pretty good for a patch up before windshield goes back in.

now just hit it in the AM to smooth the all metal out some and it ready to patch up the roof skin across the front edge and fix a hole on the driver side top corner.

Attached picture 7843703-floorpatch35.jpg
Posted By: scratchnfotraction

Re: replacement cab. - 09/08/13 05:55 AM


Attached picture 7843704-floorpatch36.jpg
Posted By: scratchnfotraction

Re: replacement cab. - 09/08/13 05:56 AM

patching 101

Attached picture 7843705-floorpatch37.jpg
Posted By: scratchnfotraction

Re: replacement cab. - 09/08/13 05:57 AM

tie both side to patch by stitch welding in the flat piece

Attached picture 7843707-floorpatch38.jpg
Posted By: scratchnfotraction

Re: replacement cab. - 09/08/13 05:57 AM


Attached picture 7843708-floorpatch39.jpg
Posted By: scratchnfotraction

Re: replacement cab. - 09/08/13 06:01 AM

slow and steady with the stitch welding the grinder will fix the ugly.

Attached picture 7843710-floorpatch40.jpg
Posted By: scratchnfotraction

Re: replacement cab. - 09/08/13 06:02 AM

get r done

Attached picture 7843711-floorpatch41.jpg
Posted By: scratchnfotraction

Re: replacement cab. - 09/08/13 06:02 AM

bend and trim the front drip rail edge

Attached picture 7843712-floorpatch42.jpg
Posted By: scratchnfotraction

Re: replacement cab. - 09/08/13 06:03 AM

more hammer time more grinding starting to shpe up.

Attached picture 7843714-floorpatch43.jpg
Posted By: scratchnfotraction

Re: replacement cab. - 09/08/13 06:06 AM

man i need a lunch break soon.

Attached picture 7843715-floorpatch44.jpg
Posted By: scratchnfotraction

Re: replacement cab. - 09/08/13 06:09 AM

welds are almost ready to fill in with all metal.

trimed the driprail, so it has a front edge that lines up with the solid parts of the driprail that were not removed.

Attached picture 7843717-floorpatch45.jpg
Posted By: scratchnfotraction

Re: replacement cab. - 09/08/13 06:10 AM

done for the day

got one small piece to weld in the hole on driprail, i will get it tommarow.

Attached picture 7843720-floorpatch46.jpg
Posted By: redraptor

Re: replacement cab. - 09/08/13 12:53 PM

Cool fix. That would uber difficult if it weren't laying on the ground like that.
Posted By: cudabitten

Re: replacement cab. - 09/09/13 02:08 PM

Hey Scratch,
Are those panels any diff to weld on than the older automotive metals used back before 1980 or so? I thought I read that it is more difficult to weld on newer steel? What gauge metal mostly are you working with? What kind of welder?
Posted By: scratchnfotraction

Re: replacement cab. - 09/15/13 05:37 AM

got some more work done on the roof line today, very slow 1 day a weekend for progress. but the big hurdle is over, a little hand rubbing and it is ready for the gasket/glass.

pated up the holes left after sanding/grinding the rtv and rust out along the roof line/driprail.

finished filling it with all metal, last patch welded in the driprail edge.

trim long patches and stitch welded them across the front roof line. beded them in with all metal, needs some hand rubbing to smooth it out with some filler for a finished look.


Attached picture 7852364-floorpatch47.jpg
Posted By: scratchnfotraction

Re: replacement cab. - 09/15/13 05:38 AM

another pic

Attached picture 7852366-floorpatch48.jpg
Posted By: scratchnfotraction

Re: replacement cab. - 09/15/13 05:39 AM

and another

Attached picture 7852367-floorpatch49.jpg
Posted By: scratchnfotraction

Re: replacement cab. - 09/15/13 05:40 AM

welding 101 and grinding 202..?

Attached picture 7852368-floorpatch50.jpg
Posted By: scratchnfotraction

Re: replacement cab. - 09/15/13 05:42 AM

one more

Attached picture 7852372-floorpatch51.jpg
Posted By: scratchnfotraction

Re: replacement cab. - 09/15/13 05:43 AM

another

Attached picture 7852374-floorpatch52.jpg
Posted By: scratchnfotraction

Re: replacement cab. - 09/15/13 05:44 AM

getting closer

Attached picture 7852379-floorpatch53.jpg
Posted By: scratchnfotraction

Re: replacement cab. - 09/15/13 05:48 AM

done for the weekend, gots to let it dry and then do some hand rubbing to finish it off along the front roof line.

hope to start tear down on the 85 next weekend, first up is install the dash then have glass installed.

just got to see how it falls together. not sure if i will swap cabs then install dash/glass or before we swap them out on the frame.

i am leaning tward after cab shell is bolted to frame so lees chance of it cranking when lifting it. and it will be less weight to lift.


Attached picture 7852383-floorpatch54.jpg
Posted By: MoPar Jamie

Re: replacement cab. - 09/15/13 06:46 AM

Dashes dont add too much weight. Trust me, flipped several cabs by myself. As long as you're careful it shouldnt matter too much with the glass in, but it for sure would cut down on weight with it out.
Posted By: 340SHORTY

Re: replacement cab. - 09/15/13 07:06 AM

a will fix that problem....
Posted By: basketcase

Re: replacement cab. - 09/15/13 03:10 PM

lookin good Mike
Posted By: redraptor

Re: replacement cab. - 09/18/13 12:00 AM

What ole greenie sounds like now!
http://www.youtube.com/watch?v=Qjtpc5Kzdy0
Posted By: 340SHORTY

Re: replacement cab. - 09/18/13 12:52 AM

sounds like theres lumps in the gas
Posted By: old_goat

Re: replacement cab. - 09/18/13 12:54 AM

Thanks RedRaptor for posting the video of the whiplash cam in Mike's truck! Sounds great!
Posted By: scratchnfotraction

Re: replacement cab. - 09/18/13 01:04 PM

x2 Thanks Red
Posted By: basketcase

Re: replacement cab. - 09/18/13 05:40 PM

dang Mike, that thing has an awful miss.....
Posted By: scratchnfotraction

Re: replacement cab. - 09/18/13 08:42 PM

Quote:

dang Mike, that thing has an awful miss.....


I have been saying it has bad plug wire when people ask whats in it.

man, that thing shakes and bakes at the redlight in gear, idles around 650-700 rpm, torques right up and purrrs at 55 mph.

with the stock high stall 727 non lock up TC it will idle along 20-25 mph in 3rd with a nice choppy chop chop idle.

but the 2.76 gear-235/75/15 makes it a little slugish off the line but it will still light up the one wheel peel if I stab the q-jet hard enuff.

from 55 to 110 it jumps right out in the passing lane on the interstate. sounds awsome cruzing 70+ mph.

old greenie is getting there little by little.
Posted By: scratchnfotraction

Re: replacement cab. - 09/29/13 03:09 PM

made some progress, been raining for 2 weeks and it has been slow going on the body work.

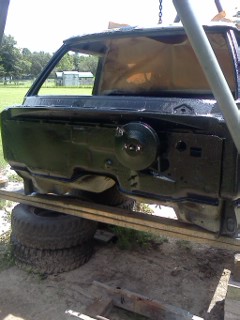
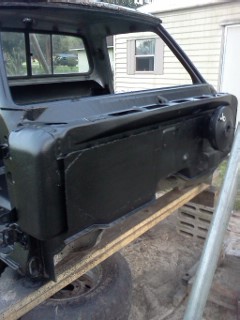
but got the last couple spots filled in, got the inside cab roof sprayed with bedliner so all of inside is coated.

got the roof top finished up, smoothed the all metal across the front edge, filled in the pinchweld arcoss top of windshield so it is sealed up good and got a coat of bedliner to seal it up well.

should have no leaks now and is a 99.9% rust free cab.


Attached picture 7869528-floorpatch55.jpg
Posted By: scratchnfotraction

Re: replacement cab. - 09/29/13 03:12 PM


ace having fun with a spry gun.

Attached picture 7869530-floorpatch#56.jpg
Posted By: scratchnfotraction

Re: replacement cab. - 09/29/13 03:12 PM


Attached picture 7869532-floorpatch#57.jpg
Posted By: scratchnfotraction

Re: replacement cab. - 09/29/13 03:14 PM

dry time now.

Attached picture 7869535-floorpatch#58.jpg
Posted By: redraptor

Re: replacement cab. - 10/01/13 12:08 AM

Ummm. How much of the truck is gonna be bedliner and how are you gonna blend/section?
Posted By: scratchnfotraction

Re: replacement cab. - 10/01/13 01:13 AM

the whole truck inside and out top to bottom

just the cab shell and inside of doors. the door panels,dash get painted/clear coated. Ace did a job on a chrysler and has almost a full quart left over. crysler champange.

I plan to do the back side of feneders,inner fender wells,core support with the bed liner.

the underside of the stepside bed/fenders along with the inside of bed/tailgate get bedliner.

the hood gets flat black camo paint. the fenders,doors,bed sides & rear fenders,tailgate get the olive drab flat green camo paint.

I changed my mind on the centron green macho truck paint...figured I would not drive it to the woods or fishing if I did that. so I am replacing the cab and fixing up the bed a little.

putting some anti-scratch protection on it. I can wash the inside out with a hose when it is muddy. plus the cab is sealed up and rust free now, so that should help keep it that way.

I will save plans for the centron green macho truck paint for the mid 80s gasser truck project thats next.
Posted By: VL21

Re: replacement cab. - 10/01/13 01:38 AM


Gonna have to swap the 440 into this truck to lug all that `liner around, Scratch.
Posted By: bboogieart

Re: replacement cab. - 10/01/13 03:17 AM

Quote:

I will save plans for the centron green macho truck paint for the mid 80s gasser truck project thats next.


Can't wait to see this one.
Oh great werk so far.
Posted By: scratchnfotraction

Re: replacement cab. - 10/01/13 01:23 PM

Quote:


Gonna have to swap the 440 into this truck to lug all that `liner around, Scratch.


I dont think I will need it, it has a whiplash roller cam,getting a nv4500 5 speed with a 3.55 locker. it should scratch ok where I am going...which is about 20 miles west of you on the left.

you know...in Lachoochee,on the withlachoochee river.

never know on the gasser project.. if I find the pieces or a 4x4 frame I can get started.

I would prefer to find a short 4X4 frame but if I can get a couple of the pieces from a 4x4 needed i can turn the 88-440 truck right into a gasser.
Posted By: 76dodgeboy

Re: replacement cab. - 10/01/13 01:54 PM

I sent you a message on REC and here I believe. Local guy parting an RC chassis and I have some front springs. You can have springs just pay for the ride. He said make offer on hangers and shackles
Posted By: rickstershemi

Re: replacement cab. - 10/01/13 10:53 PM

The New Bedliner Poster Child......can't wait to see.....I Like Different....

Rickster
Posted By: 76dodgeboy

Re: replacement cab. - 10/01/13 11:12 PM

There's a 94-01 Body style around the area that's line x'd. He had it forsale awhile back and was dam proud of it. Very small group to sell to when its All lined.
Posted By: 76dodgeboy

Re: replacement cab. - 10/01/13 11:14 PM

Im going to have to go back and read through. Haven't followed the whole time. Wanna know what liner and gun used. Would be Sick on a trail rig
Posted By: scratchnfotraction

Re: replacement cab. - 10/07/13 03:23 AM

Quote:

The New Bedliner Poster Child......can't wait to see.....I Like Different....

Rickster


Hi Rickster...yea, I guess I am kinda different when it comes to being me.

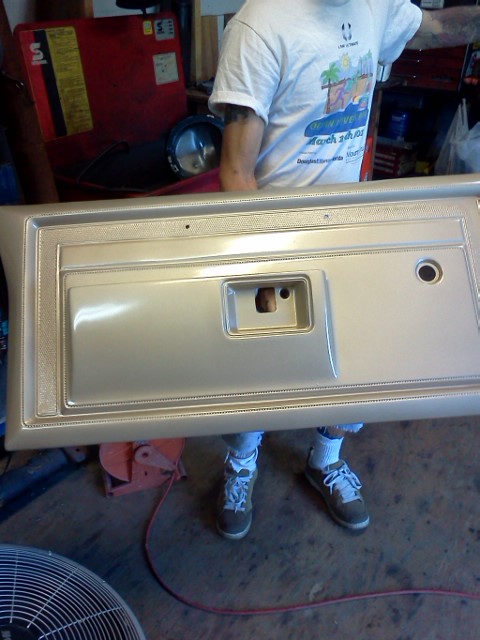
i got the dash painted and cleared, door panels painted/cleared, installed dash in the cab and started wireing it up. got the new gauge cluster with the white face gauges (thanks TOOMANY62s)

the chrysler champage color is nice looking in the all black cab shell and with the door panels to match is gonna make it even better.

and for now a woodgrain a/c bezel...i will find a black non a/c somewere down the line..

I thought the 85 harness bulkhead plug was going to be bigger than the hole in the 91 cab... but the 91 cab holes is correct size...it just looks smaller because of the plug on the harness I guess. but no cutting so all is good.

got 2nd coat of liner on the roof and back wall of cab, took a little time to seal the cargo light rubber base up good around the edges for a leak proof seal.

a littl paint on the manual steer colum and a blinker switch repair and it will be ready for install.

now to get the cab bushings and weather strip kit and get after the cab swap and cutting the shifter hole next.


Attached picture 7878638-floorpatch#59.jpg
Posted By: scratchnfotraction

Re: replacement cab. - 10/07/13 03:25 AM

another pic.. i liky the champage

Attached picture 7878639-floorpatch#60.jpg
Posted By: scratchnfotraction

Re: replacement cab. - 10/07/13 03:26 AM

some more looky see pics

Attached picture 7878641-floorpatch#61.jpg
Posted By: scratchnfotraction

Re: replacement cab. - 10/07/13 03:27 AM

another one

Attached picture 7878642-floorpatch62.jpg
Posted By: scratchnfotraction

Re: replacement cab. - 10/07/13 03:29 AM

you liky the color??

better than 28 yrs of dirt and the ugly azz tan/rawhide/buff looking color it came with.

Attached picture 7878645-floorpatch#63.jpg
Posted By: scratchnfotraction

Re: replacement cab. - 10/07/13 03:30 AM

now the white face gauges look like they fit better with the new dash color and black inside.

here is a shot of the 85 plug in the 91 cab hole...so no cutting...just to clear up the ? about the size when mixing yrs.

the hydro clutch MC does not alter the bulkhead [lug hole size.

Attached picture 7878648-floorpatch#64.jpg
Posted By: scratchnfotraction

Re: replacement cab. - 10/07/13 03:33 AM

last one till next weekend update.

Attached picture 7878654-floorpatch#65.jpg
Posted By: 340SHORTY

Re: replacement cab. - 10/07/13 05:47 AM

That champage would look much better in the 440 truck and get rid of that horrible red...
Posted By: 76dodgeboy

Re: replacement cab. - 10/07/13 07:14 AM

It would look better with the yellow and red better with the black
Posted By: scratchnfotraction

Re: replacement cab. - 10/07/13 01:16 PM

Quote:

It would look better with the yellow and red better with the black


what??? yellow truck will look better with black dash door panels??

I will be getting back to the 440 truck once ol green is back up and running.

the red carpet is coming out for bed liner lower 1/2 of cab. and will be pulling the windsheild to chase a leak up there in a driving rain. so I will paint the dash and door panels on it.

it is gloss black inside now and the lower 1/2 will get bed liner...

so what color??

yellow dash/door panels? black? champage?
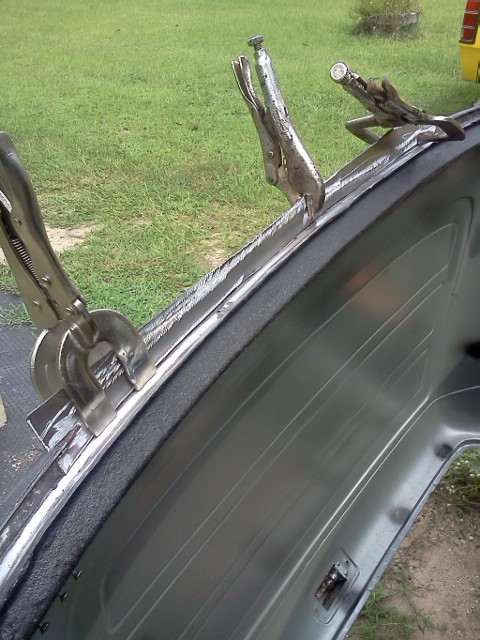
Posted By: redraptor

Re: replacement cab. - 10/07/13 11:01 PM

Bees are yellow and black. So black.
Posted By: scratchnfotraction

Re: replacement cab. - 10/08/13 01:12 PM

Quote:

Bees are yellow and black. So black.


kinda what I was thinking. it is already that way exept for the red inside.

it kinda works as red and yellow are ok and red and black are ok so the 3 colors dont clash that mutch.

but one thing for sure..the wet carpet is got to go.
Posted By: scratchnfotraction

Re: replacement cab. - 10/20/13 03:14 PM

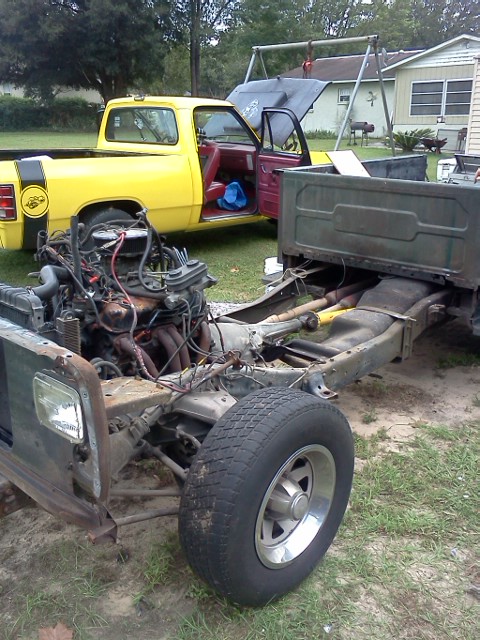
got some wrenching done on the 85 truck coming apart.

it down for the count now till it starts going back together.

as allways thing snowball when you open the can of worms. i see now that I might as well pull the engine off the frame for some TLC.

it has 3 freeze plugs leaking, must have not replaced them 3 yrs agao when it went in the 85 truck.

so I figure I might as well degreese it,paint it up nice and orange, replace all the gaskets at this time.

then stick the 5 speed on the back of it and install it back in the frame.


Attached picture 7893905-floorpatch#66.jpg
Posted By: scratchnfotraction

Re: replacement cab. - 10/20/13 03:15 PM


Attached picture 7893909-floorpatch#67.jpg
Posted By: scratchnfotraction

Re: replacement cab. - 10/20/13 03:16 PM

done for today

Attached picture 7893911-floorpatch#68.jpg
Posted By: old_goat

Re: replacement cab. - 10/20/13 03:32 PM

Moving right along!

Posted By: 340SHORTY

Re: replacement cab. - 10/20/13 10:18 PM

That canopy would look good on my Dually.. You can keep the boat, they cost money..
Posted By: ChinooK440

Re: replacement cab. - 10/20/13 10:32 PM

Who the paints their driveshaft yellow......

Attached picture 7894366-yeoledshaft.jpg
Posted By: 340SHORTY

Re: replacement cab. - 10/21/13 01:44 AM

Quote:

Who the paints their driveshaft yellow......


3 guesses and the first 2 dont count....its easier to find when you drop it in those nasty mall parking lots...
Posted By: ejtmopar

Re: replacement cab. - 10/21/13 01:56 AM

I gotta say I admire your passion and follow through man! Keep up the good work!
Seems like a can never get a project done before a new one rolls in..
Posted By: scratchnfotraction

Re: replacement cab. - 10/21/13 03:07 PM

Quote:

Who the paints their driveshaft yellow......


I got that custom yellow shaft out of chicago for my yellow 440 truck.

some RV guy painted it up there.

so 3rd guess is no good either.
Posted By: ChinooK440

Re: replacement cab. - 10/21/13 11:43 PM

See what happens when you install a yellow shaft in a green truck !!! ... .... .... ...... .....don,t say i didnt warn ya... ............
Posted By: redraptor

Re: replacement cab. - 10/22/13 12:13 AM

Quote:

Who the paints their driveshaft yellow......


Poor greenie.
Posted By: 72d100

Re: replacement cab. - 10/22/13 01:44 AM

Quote:

See what happens when you install a yellow shaft in a green truck !!! ... .... .... ...... .....don,t say i didnt warn ya... ............


its a packers fan
Posted By: DusterKrazy

Re: replacement cab. - 10/22/13 02:49 AM

Are these cabs pretty much the same from '72-93?
I traded for a '92 D350 with a Cummins. I'd like to restore it..kinda

Yes, restore a '92

This is a cool thread. Did you just swap the dash for a different colored one?

I'm thinking about swapping mine out. Don't want it all cracked up.
Posted By: 340SHORTY

Re: replacement cab. - 10/22/13 05:52 AM

The 2 differences Iv seen is the hole for the bulkhead connector and the steering colume saddle.. and the floor pan difference between the auto floor or the 4 speed/4X4 pan..
Posted By: goldmember

Re: replacement cab. - 10/22/13 06:07 AM

bring your painter and that undercoating up for the turbocharged Shelby Dakota in my driveway.......
Posted By: scratchnfotraction

Re: replacement cab. - 10/22/13 02:42 PM

Quote:

See what happens when you install a yellow shaft in a green truck !!! ... .... .... ...... .....don,t say i didnt warn ya... ............




Posted By: scratchnfotraction

Re: replacement cab. - 10/22/13 02:53 PM
Quote:

Are these cabs pretty much the same from '72-93?

I traded for a '92 D350 with a Cummins. I'd like to restore it..kinda

Yes, restore a '92

This is a cool thread. Did you just swap the dash for a different colored one?

I'm thinking about swapping mine out. Don't want it all cracked up.


sorta all the same,but lots of small changes over the yrs.I work with mid 80s trucks myself nowdays.

so 82-93 cabs. the 87-93 have the firewall hole for hydro clutch which is why I went with a 91 cab,and the auto floor pan has the changes made so it can run a manual trans with out being the large wide 4x4 trans tunnel. as far as I can tell that is...but I have a cut wheel and welder to make it so if not.

the steering colum mount has 4 predrilled holes for the hydro clutch MC mounting bracket that is need along with the large hole in firewall.

door striker post change in late 70s-early 80s, cab has a more ronded rear edge on the 70s cab, body lines changed in 82

the core supports change a couple times for headlight/grill changes also 82-85 86-89 90-93 IIRC

so there are some difference when mixing the parts, you just need to pick the right parts..

I used the 85 dash that was a tan color,I scuffed it, then spray primer,then a base coat with a clear coat of crysler champage.
Posted By: scratchnfotraction

Re: replacement cab. - 10/28/13 01:39 AM

more progress...got the auto trans/linkage removed,then got the 5 speed bolted up to the engine. xmember bolted in stock location with a little cutting and grinding.

turned the trans mount around and trimed the edge of the xmember,then a little triming on the trans mount itself.

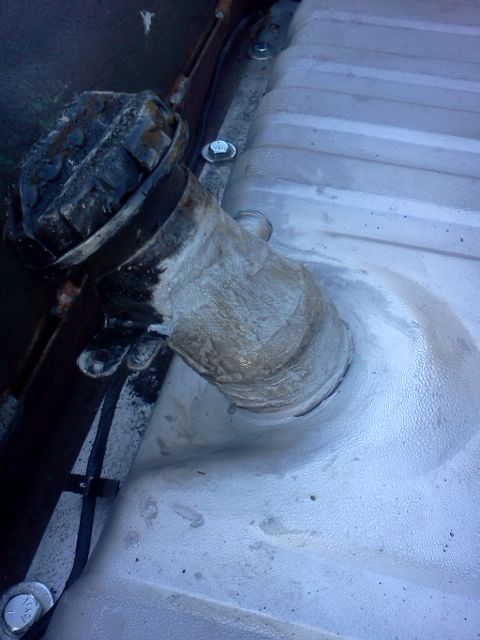
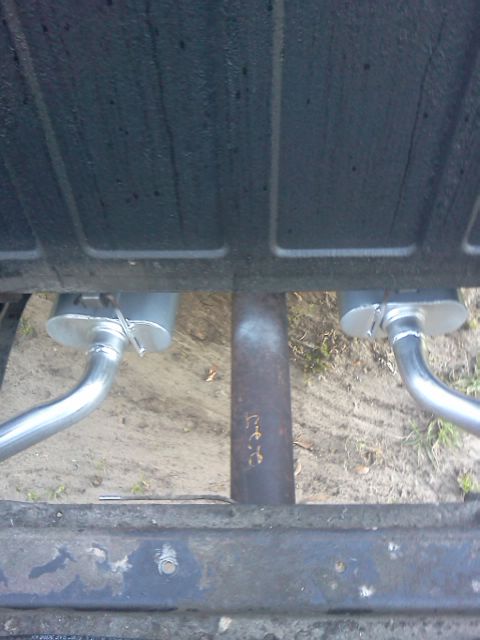
this allowed me to keep the stock saddle tank and my duel pipes..

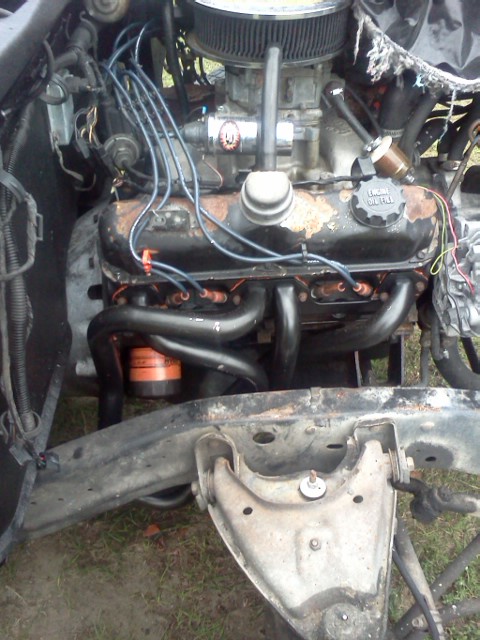
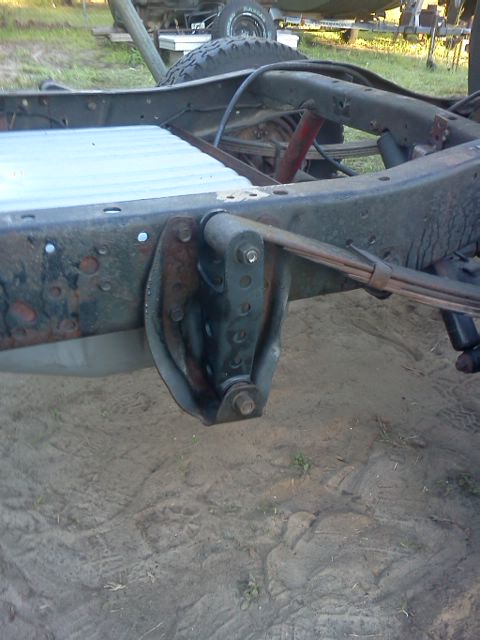
the van motor mount had the engine pushed over making the header hit the frame, so i got the truck mounts swaped in with a new set of rubber biscuts.

this raised the engine back up and level sitting in the chassis, pulled the trans forward just a tad to make just enuff clearance at the back of the 5 speed.

in the pic you can see the dent in the header and how hight the correct truck mounts lift the engine back up level. it was tilted a lot to make the pipe rub the frame edge.

this also let me get the exhaust pipes bolted back up to headers with less hassles. i found those 3 lifter/rocker arm taping sounds I had in the cab with rusted floors...muff shop miss 3 good spots on the top of pipes when welding them up.. i bet the goob did that on purpose...i saw him check it with a mirror.. but never double checked his work myself.

look for the black soot blowing out the welds on the pipes in the pics. I will get those welded up before cab goes back on for sure..cant stand exhaust leaks.

got the poly cab bushing ready to go, orderd them for the 85 truck,as they dont seem to list a set for a 91 cab..it is the same bushing set. the differance is the bolts and how the bushing washer stack up.

85 has a shoulder bolt with a nut/washers and goes in from the top with nut on bottom.

91 uses a bolt with metel sleeves and a couple washer with a big ID hole and a couple more with a smaller ID hole to sit on the sleeves...sort like a shoulder bolt would. and bolts go in from bottom into captured/adjustable speed nuts in cab floor.

just have to use washer supply and maybe a few of the washers from the stock cab bushing.. i used a couple of my old ones to get washers where the needed to be and take up enuff of the bolt so it is not to long.

drive shaft did not work out, so I will chop down a long one to fit.comes up just a little short.

next up is cutting the hole in cab floor and mounting the cab to frame.

the under hood wiring goes in place.

Attached picture 7902976-floorpatch#69.jpg
Posted By: scratchnfotraction

Re: replacement cab. - 10/28/13 01:40 AM

pics

Attached picture 7902978-floorpatch#70.jpg
Posted By: scratchnfotraction

Re: replacement cab. - 10/28/13 01:41 AM

another pic

Attached picture 7902980-floorpatch#71.jpg
Posted By: scratchnfotraction

Re: replacement cab. - 10/28/13 01:42 AM

looky see

Attached picture 7902981-floorpatch#72.jpg
Posted By: scratchnfotraction

Re: replacement cab. - 10/28/13 01:42 AM

slow going,but going.

Attached picture 7902982-floorpatch#73.jpg
Posted By: scratchnfotraction

Re: replacement cab. - 10/28/13 01:43 AM

another pic

Attached picture 7902984-floorpatch#74.jpg
Posted By: scratchnfotraction

Re: replacement cab. - 10/28/13 01:44 AM

more work

Attached picture 7902986-floorpatch#75.jpg
Posted By: scratchnfotraction

Re: replacement cab. - 10/28/13 01:45 AM

still working at it.

Attached picture 7902987-floorpatch#76.jpg
Posted By: scratchnfotraction

Re: replacement cab. - 10/28/13 01:47 AM

still working at it

Attached picture 7902990-floorpatch#77.jpg
Posted By: scratchnfotraction

Re: replacement cab. - 10/28/13 01:47 AM


Attached picture 7902992-floorpatch#78.jpg
Posted By: scratchnfotraction

Re: replacement cab. - 10/28/13 01:49 AM

last one for the day, i am tired. back at it next weekend.

Attached picture 7902995-floorpatch#79.jpg
Posted By: Hemi_Ram

Re: replacement cab. - 10/31/13 04:52 AM

Mike, you have to be younger than me as all of this work is making me whipped out and needing a nap or a beverage. Great progress pix and I will be following it, although it makes me tired, LOL

Larry
Posted By: scratchnfotraction

Re: replacement cab. - 11/10/13 02:13 AM

well after a weekend of rain, got some clear weather and progress made.

the xmember needed some more mods to fit the speedo cable to speedo housing in trans. jeust needed a notch a little biger on the one side.

pulled measurement and cut the first hole in the floor to get started, then trim as needed for trans/tunnel clearance on the auto cab floor.

well we naild the center of hole with shift tower, but a lot more of the top of trans has to come up in the tunnel. trim/bind till it fit, then thinking of future trans work decided to go bigger so I could remove the top cover with shift rails/forks if need be.

the plan is to build a bolt in trans tunnel box to cover the hole and be small enuff to use the stock shifter boot.

the is a little bigger than I was expecting, but the 5 speed is a little bigger, so now I have room to R&R the top cover, lift the tailhousing up to R&R trans mount/xmember, has enuff clearance for the trans to move around a little with engine torque and not touch any of the floor pan/tunnel.

poly mounts went right on, so the listing stoped at 85 trucks but had a listing for 90-93 RC which has more hocky pucks than a truck.

you just use the correct bolt/sleeves/washer or the shoulder bolt/washers.

have to use all the new sin the kit and add a few of the stock washers with the correct ID hole stacked in the correct order for the bushing to bolt up.

now i will work on the wireharness and get it along with wiper motor/arms swaped over. going to make up some ground wires for everthing as I lay the harness in place.

feels good in the seat, shifter is in arms reach for shifting and no stretching.

I lucked out tinkering with the stock xmember/mount bolting in the stock 85 location and saved the hassle of a tank/exhaust change.

now to measure for a shft cut down and balance.


Attached picture 7918195-floorpatch#80.jpg
Posted By: scratchnfotraction

Re: replacement cab. - 11/10/13 02:14 AM


Attached picture 7918197-floorpatch#81.jpg
Posted By: scratchnfotraction

Re: replacement cab. - 11/10/13 02:15 AM


top of trans holding the cab up off of the front mounts a couple inches, time to trim to allow the trans to come up into the cab floor.

Attached picture 7918199-floorpatch#82.jpg
Posted By: scratchnfotraction

Re: replacement cab. - 11/10/13 02:16 AM


Attached picture 7918201-floorpatch#83.jpg
Posted By: scratchnfotraction

Re: replacement cab. - 11/10/13 02:17 AM


Attached picture 7918204-floorpatch#84.jpg
Posted By: scratchnfotraction

Re: replacement cab. - 11/10/13 02:19 AM


Attached picture 7918210-floorpatch#85.jpg
Posted By: redraptor

Re: replacement cab. - 11/10/13 01:05 PM

That's a tight fit even for the bellhousing.
Posted By: scratchnfotraction

Re: replacement cab. - 11/10/13 01:48 PM

Quote:

That's a tight fit even for the bellhousing.


yes it is. that trans is big/tall compaierd to an auto. I do think the smaller A535 5 speed would not have been this big of issue geting it in.

I had to keep cutting till the cab sat down on the cab mounts and the trans did not touch any of the floor.

had to tweek the pass side a little, the 3-4x4 shifter bolt bosses stick out a good bit. I will grind those off ifin I ever pull this trans out for service.
Posted By: scratchnfotraction

Re: replacement cab. - 11/11/13 12:44 AM

made a little more progress then hit a wall. moved onto something else and made some progress then hit another wall.

progress..got the wire harness pluged up at bulkhead connecter, run across fire wall to wiper motor,then engine harness wired up to coil/VR/ALT/water temp send/grounds for harness and engine to cab/chassis.

1st wall... hydro system from 88-d100 v-6 with a535 5 speed has slave on pass side of bell...this bell does not fit NV4500

92-93 5.2-5.9 nv4500 bell has slave on driver side of trans.

so driver side slave is clocked different for mounting to bell and hydro line is clocked per side mounting.

far as I can tell??? i dont have a slave for driver side mounting.

the slave will not bolt to driver side...BUT MAYBE if i was to chop enuff floor/tunnel away I could get it to bolt up to bell.

trouble will be clearance on hydro line at slave port.

backed up regrouped..installed wiper linkage ground wire for wipers done..

went to bolt mini starter up..

!@#$%^&*()_

92-93 v-8 magnum bell on a pre-mag engine will not bolt up in the 85 chassis with 85 2x truck long tube headers..

!@#$%^&*()

so to keep moving along. I installed the seat/seat belts, tie wraped up the under dash harness a little and got the plugs all ready for colum to plug up.

so??? magnum manifolds??? magnum style ram headers?? hedman headers for a 92-93 magnum d15-/250/RC???

maybe pre-mag center dump manifolds?? LRE style cross over pipe with stacks??


Attached picture 7919408-floorpatch#86.jpg
Posted By: scratchnfotraction

Re: replacement cab. - 11/11/13 12:46 AM


Attached picture 7919410-floorpatch#87.jpg
Posted By: scratchnfotraction

Re: replacement cab. - 11/11/13 12:46 AM


Attached picture 7919412-floorpatch#88.jpg
Posted By: 340SHORTY

Re: replacement cab. - 11/11/13 01:21 AM

Posted By: redraptor

Re: replacement cab. - 11/12/13 01:09 AM

I thought the blessing on a hydro clutch is if you ran enuff tubing can be mounted where you want/need. Need more pics.
Posted By: scratchnfotraction

Re: replacement cab. - 11/16/13 01:36 AM

Quote:

I thought the blessing on a hydro clutch is if you ran enuff tubing can be mounted where you want/need. Need more pics.


this is true...but no replacment or repair for the plastic tube part.unless you buy a complete pre-bleed system...if they have it available.

I can buy the correct slave for the driver side mount nv4500 bell and add it to the set up I have.... or order the complete system for the 92-93 5.9 6cyl diesel for 158$.... and if slave does not fit...replace the slave for the gas engine for another 65$...thats the only way to get a correct line for the 92-93 d250 trucks.

I am leaning towards the complete system for the 92-93 5.9 5cyl diesel for 158$ rolling the dice on the slave fitting/working out. then another 65$ for the correct slave if it comes up craps.

this saves my complete 88 d100 hydro system for the 88 v-6 bell for a 4 speed or smaller 5 speed project.

dealer shows 2 part #s for 92-93 only,gas or diesel...not sure what the differance would be on the slave cyl though.

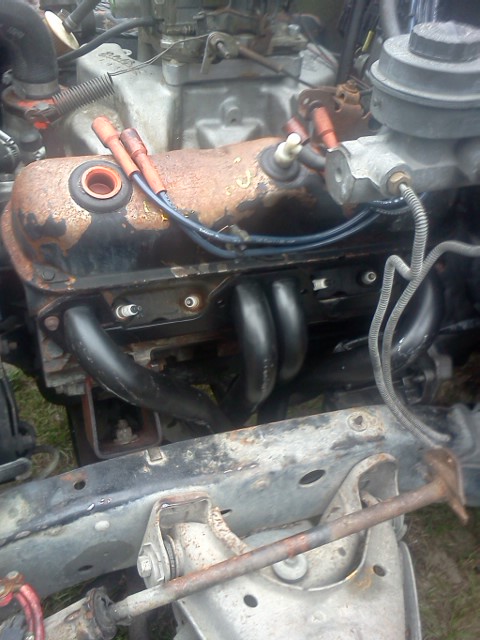
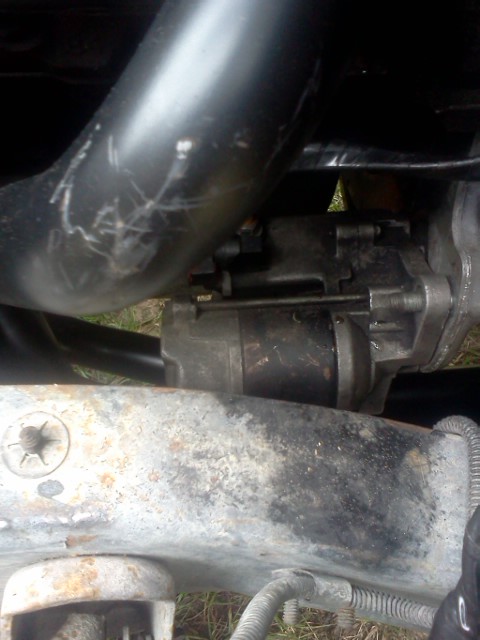
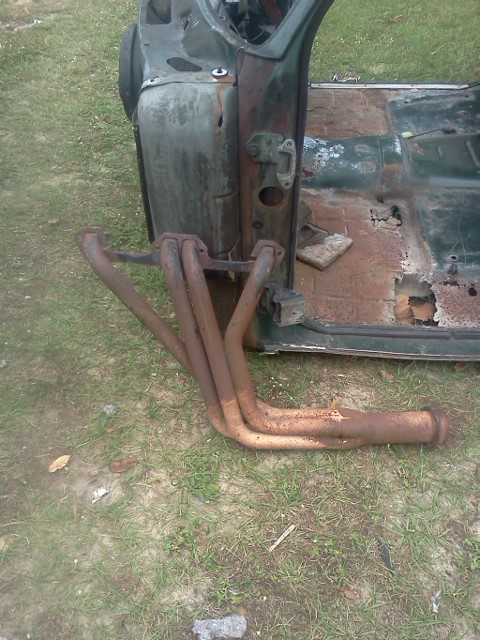
got the header/starter problem solved today.

orderd the hedman 79170 75-91 w150/RC and they fit the 85 2x chassis with the short LA starter and plenty of room for a mini starter.

swung by at lunch today and droped the old header down/out and slide the new header up/into place,then test fit the stater.

didnt have to jack the 2x truck up to remove or install them, took about 30 mins to mock them up on the driver side.

will need to add a little pipe for the hook ups, which is good/cheaper.

Attached picture 7925525-hedman79170-1.jpg
Posted By: scratchnfotraction

Re: replacement cab. - 11/16/13 01:39 AM


Attached picture 7925531-hedman79170-2.jpg
Posted By: scratchnfotraction

Re: replacement cab. - 11/16/13 01:40 AM


Attached picture 7925534-hedman79170-3.jpg
Posted By: 340SHORTY

Re: replacement cab. - 11/16/13 02:15 AM

Are you going to put some lipstick on the engine ??
Posted By: scratchnfotraction

Re: replacement cab. - 11/16/13 02:36 PM

that was the plan, but looks like budget/time is short so it goes together dirty again.

the cab shell is done so all i need to do is work the bed,2 fenders,2 doors,hood for the paint job.

I plan to pull the bed for body work over the 3 week christmas break and paint the fenders/doors/bed all at the same time, then bolt it together.

nothing cramps my style more than no $$$$, not that I have style..but if i did it would be cramped up about now.
Posted By: scratchnfotraction

Re: replacement cab. - 11/16/13 08:12 PM

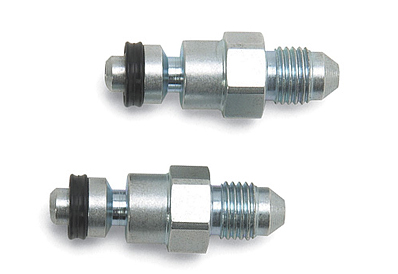
well solved the hydro clutch line issue

orderd up the correct slave cyl and a set of Russel clutch adator to -AN fittings

this will let me make up a -3 AN braided hose for the clutch hydro line from master to slave.

another problem solved.

now onto fixing the blinker switch in the manual shift steer colum.


Attached picture 7926267-hydrofittings.jpg
Posted By: 340SHORTY

Re: replacement cab. - 11/17/13 07:07 AM

Quote:

well solved the hydro clutch line issue

orderd up the correct slave cyl and a set of Russel clutch adator to -AN fittings

this will let me make up a -3 AN braided hose for the clutch hydro line from master to slave.

another problem solved.

now onto fixing the blinker switch in the manual shift steer colum.


My hero !!
Posted By: redraptor

Re: replacement cab. - 11/17/13 12:27 PM

Quote:

Quote:

well solved the hydro clutch line issue

orderd up the correct slave cyl and a set of Russel clutch adator to -AN fittings

this will let me make up a -3 AN braided hose for the clutch hydro line from master to slave.

another problem solved.

now onto fixing the blinker switch in the manual shift steer colum.


My hero !!


Posted By: scratchnfotraction

Re: replacement cab. - 11/18/13 02:46 AM

made some progress, got pass side header bolted up,bolted up the doors,fenders,inner fenders,core support polly bushings installed,steering colum installed,finished wireing everything up.

hope to have the steering wheek clocked right this go round.

need to scratch up some of the speed nuts for the fenders/valance.

beat up doors and fenders went back on for now,I will scratch up another set to prep and paint while i do the bed body work, they change them out and install the bed after painting.


Attached picture 7927783-hedman79170-4.jpg
Posted By: scratchnfotraction

Re: replacement cab. - 11/18/13 02:48 AM


Attached picture 7927786-floorpatch#89.jpg
Posted By: scratchnfotraction

Re: replacement cab. - 11/18/13 02:50 AM

ol green looking better as it goes back together,even dirty and beat up, the new cab does wonders for the looks. big differance having floor board under foot.

cant wait to row the gears.

Attached picture 7927790-floorpatch#90.jpg
Posted By: basketcase

Re: replacement cab. - 11/19/13 10:39 PM

looking good Mike
Posted By: stacks79

Re: replacement cab. - 11/26/13 05:04 PM

Been awhile since I've been on here, trucks are looking great scratch! I've been playing with my d100 the last two years and the flip flop rear setup you recommended works great!

Thanks,
John
Posted By: scratchnfotraction

Re: replacement cab. - 11/26/13 10:07 PM

Quote:

Been awhile since I've been on here, trucks are looking great scratch! I've been playing with my d100 the last two years and the flip flop rear setup you recommended works great!

Thanks,
John


Hi John, sure has been a long while. yep.i have done a few truck with the flip flop and they just ride so much better like that IMHO.

you gotta come round more and post up some pics of the d100. i used to like to drool over you trucks till I lost track of them.

and my 3rd project coming up is a 2x gasser truck on a 4x4 chassis with a straight tube axle.
Posted By: stacks79

Re: replacement cab. - 11/28/13 05:18 AM

That sounds like it's going to be an awesome project!! Maybe if I get some time over the weekend I will write up a blog about the d100 and post up some pics. Been having too much fun tearing around this summer with it!

Thanks,
John
Posted By: old_goat

Re: replacement cab. - 12/14/13 06:39 AM

How's progress going Mike?
Posted By: scratchnfotraction

Re: replacement cab. - 12/17/13 04:16 PM

been slow and now the holidays are upon us.

I got the windshield installed with a new gasket,should have the rear glass in today.

I got the correct gear oil at 85$ + 27$ shipping for 2.5 gallons and then order up a gallon jug at 35$ + 18$ shipping.

filled trans with the gallon jug and plan to keep oil on the shelf for future work on the trans.

I will be adding some billet alum finned heatsink coolers on both of the PTO covers (found coolers over on RCC) so I figure I can run it a while then change oil and add coolers to it later.


cut/balanced a drive shaft to 55" and got it installed,then finshed up some small stuff under the hood and took it for a shakedown run.

WOW!! that thing shifts smooth and with a 2.76 axle gear/235/75/15 tire it is long winded in all gears.

BUT! I can see I need to swap in the 3.55 gear to level it out some,it is lugging in 5th gear at 55 mph.


I am thinking of a daily driver I can take to the woods fishing. so I will cut down another 8 3/4 to a-body specs, add some 12" wide rims,flop axle on top of spring with a shackle flip.

this sits the truck down lower/level. then use a 14/35/15 ground hawg tucked in the fenders to get some ground clearance and sit the truck back up to stock ride height.

I figure a 3.91sg with the nv4500 turning a 35" tire should be well balanced as a driver and have some lowend grunt with the 5th gear overdrive not lugging at 55 mph.

got the rest of the weather striping for the cab/doors on order.

plan to prep/paint a set of front fenders/valace/doors in the cintron green,then remove the bed to patch,prep,paint citron green.

then swap out the old fenders,doors with the bed going back on,repaint the hood,cowl in hotrod black to finsh out the paint job.

I sure enjoy the change from turdflight blues to rowin 5
Posted By: redraptor

Re: replacement cab. - 12/18/13 12:28 AM

Cool! I don't get the whole axle flip/ 35" tire thing. Do you want a lowered look and still have ground clearance?
Posted By: scratchnfotraction

Re: replacement cab. - 12/18/13 03:30 AM

Quote:

Cool! I don't get the whole axle flip/ 35" tire thing. Do you want a lowered look and still have ground clearance?


correct! when the stepside had the flip flop with the 235/75/15 it would drag the gas tank and would get stuck rather easy due to ground clearance.

when in the sand or ruts it would bottom out on the saddle tank/frame and if the tires spin any the axle would bottom out.

if I had taller tires the truck would have more clearance on the chassis/axle and still sit level and not have a tall ride height for a 2x truck.

not looking to 4 wheel it but it does have to scratch good when the swamps get wet or on a sand/dirt boat ramp.

just helped a buddy do his 83 shortbed this way with a skinny 34" super swamper on a 8" rim, full width truck axle with the flip flop. runs 255/70/15 on 8" rims up front stock front end.

talk about cutting tater rows

same idea for the gasser truck, 33x21.50x15 fattys with a flip flop on the rear of a 4x4 chassis.

then a tube straight axle with 4" lift springs. then flop the tube axle on top of the springs to lower it down some but still have the nose up rake to the chassis like a gasser.

macho 4x4 paint on a mid 80s truck set up as a 60s era flip nose gasser truck.

Imagine, Believe, Achieve!


Posted By: 340SHORTY

Re: replacement cab. - 12/18/13 03:37 AM

Posted By: scratchnfotraction

Re: replacement cab. - 01/18/14 03:56 PM

some more progress made..

got the dash lights allsorted out and working. the white face gauges are very nice and a big help on night time driving.

nice green glow on low beam and a nice bright whit with a green tint to it on high beams.


big thank you to member 'to many 62s' for the whitface gauges.


swaped in the 3.55 gear 9 1/4 rear axle, worked good with the 33" boggers but did feel like 33" is a tad tall for it. swaped on the 235/75/15 on a 8" rim and that did the trick. picked mpg up to around the 19+ mark again. feels great for lowend torque and about 1800/2000 rpm in 5th gear is 55 mph. just the way I likes it.

this week end I am swaping in a 3.21 gear 8 1/4 rear axle to try that gear to see how it does.

I will swap the 10" brakes to 11" brakes on the 9 1/4 and install the lockright locker in it while it is on the bench for brakes.

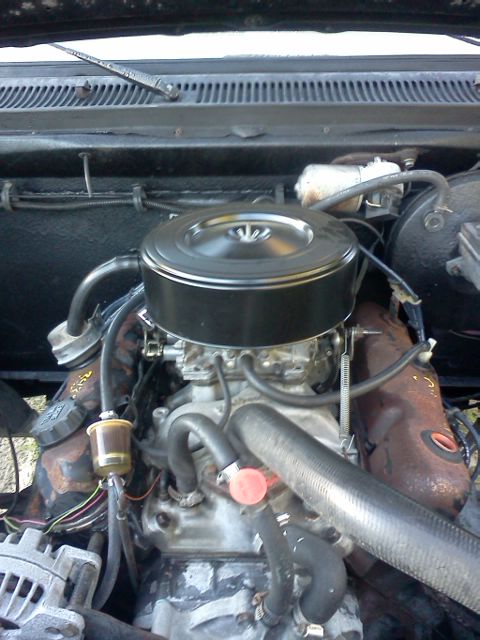
3.55 gear smokes 1,2,3 real ez but start getting wheel hop hitting 3rd gear. buy I cant get the bog out of the q-jet with out some re-jetting so I swaped the eddy 60 back on the LD4B intake.

that changed the whole package with the whiplash roller cam, boy does it relly scream now..no bogs or flat spots and torque is awesome all thru the rpm range.

a big surprise is the eddy 600 is getting better mpg than the q-jet did and runs a lot smoother now//still chops good at a 750 idle and snaps right to 5500 rpm.

got some solid super joints on the way.. hope the cheapy u-joints hold out till then. need some tires already too.

Attached picture 8002193-whitefacegauges1.jpg
Posted By: scratchnfotraction

Re: replacement cab. - 01/18/14 03:57 PM

bright high beams.. no mistaking them on high beam

Attached picture 8002195-whitefacegauges2.jpg
Posted By: redraptor

Re: replacement cab. - 01/19/14 02:25 PM

Sweet!
And, Mr. Fancy Britches is putting in a real locker! Not like mine
Posted By: scratchnfotraction

Re: replacement cab. - 01/21/14 02:04 AM

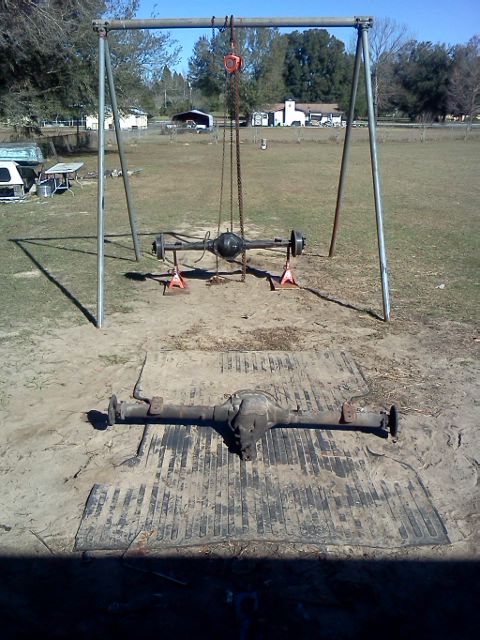
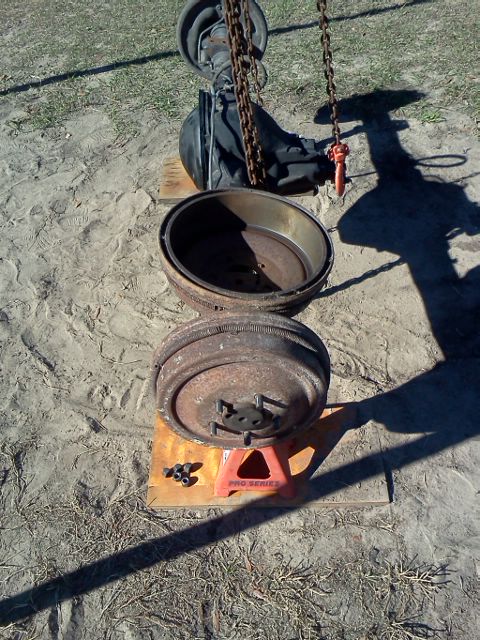
got the 9 1/4 pulled and the 3.21 gear 8 1/4 I picked back up from VL21, then got the backing plates and lines swaped from the 8 1/4 to the 9 1/4

BIG THANKS! to VL21 for a nice used set of drums he had turned. that saved me a chunk of coin

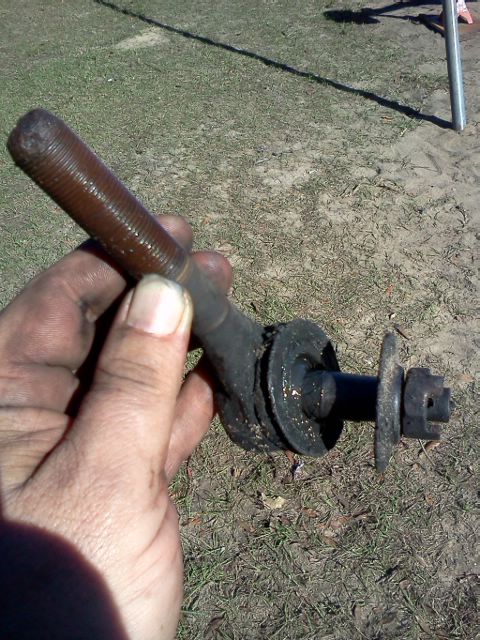
he also had tossed in a new tie rod end to replace the worn out one on my 85 truck..got motivated and changed that today as well.

I will chalk it up to being lazy for not changing the outer tie rod end sooner. 1.5 yrs and was long over due. drives nice and tight once again.


next weekend I will install the locker with some pics as it goes in.

Attached picture 8005549-axlework.jpg
Posted By: scratchnfotraction

Re: replacement cab. - 01/21/14 02:05 AM


Attached picture 8005553-axlework2.jpg
Posted By: scratchnfotraction

Re: replacement cab. - 01/21/14 02:14 AM

done for the day

Attached picture 8005573-axlework3.jpg
Posted By: scratchnfotraction

Re: replacement cab. - 01/21/14 02:30 AM

the old 85 stock frontend has only had a centerlink and this one outer tierod replaced in 29 yrs. that's dodge tuff in my book.


Attached picture 8005601-tierodreplaced.jpg
Posted By: scratchnfotraction

Re: replacement cab. - 01/29/14 05:39 PM

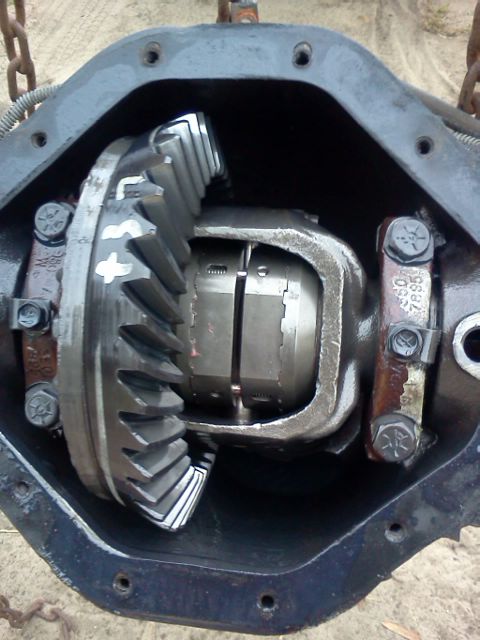
got the lock right locker installed and now to put the 9 1/4 back under the truck for a while I hope.

I am thinking of doing the flip flop again and use the SSM lift bars for traction on the street.

I dont think they would be a problem getting to my fishing spots or dirt boat launch.

it smokes 1,2 and starts to wheel hop in 3rd. I can be rolling in 3rd and lay down on it and smoke the tire and not get wheel hop.. it is a open diff 3.21 so I am not sure why I get so much hop

maybe its one side hopping? better get a spare shaft ready and some solid u-joints for it.

this should get both tires smoking.

Attached picture 8016955-lockrightlocker.jpg
Posted By: 1moparman

Re: replacement cab. - 01/29/14 08:36 PM

looking good Mike let me know how you like the lock right. Your making me miss my ol stepside.
Posted By: 85_Ram_4speed

Re: replacement cab. - 01/30/14 02:18 AM

Ya, let us know how you like the Lock Rite. I have one but am undecided if I want to install it. I hear they can be a little unnerving when cornering. I may just put a regular sure grip in instead.
Posted By: scratchnfotraction

Re: replacement cab. - 01/30/14 04:45 PM

it was much ez-er install with rear axle in the back of truck on jack stands. it takes some fiddling with it to get it all together and in place. lot tuffer under the truck with gravity working against you installing the c-clips.

first time I heard it, i thought it broke something, it does make some noise but MAN! does it lock them together
Posted By: redraptor

Re: replacement cab. - 01/31/14 01:08 AM

SWEET!
Posted By: 85_Ram_4speed

Re: replacement cab. - 01/31/14 01:35 AM

Quote:

it was much ez-er install with rear axle in the back of truck on jack stands. it takes some fiddling with it to get it all together and in place. lot tuffer under the truck with gravity working against you installing the c-clips.

first time I heard it, i thought it broke something, it does make some noise but MAN! does it lock them together


So you have driven on this before then I take it. How is it when cornering? I have heard when its wet out it can be spooky because you don't know when it may lock during the turn. I had a Dart with a spool, and if you know that is the way it's going to be then it is predictable, but with something that is locking and unlocking....I guess i can give it a shot.
Posted By: scratchnfotraction

Re: replacement cab. - 01/31/14 05:31 PM

I guess it is like a spool but much more forgiving in the turns. but agian it is spooky and does tend to lock if you gas it in the middle of the turn.

we hammerd this 75-9 1/4 rear axle with this same locker behind a 408 with a TKO 5 speed. it has held up fine and does the job well for locking the tires together. how long we shall see behind my whiplash roller 318 and nv 4500 5 speed.

the only reason my buddy sold me the axle/locker for 75 bux was it just eat him up with the noise the thing makes when locking -unlocking.

first time you hear it you think WOW! what broke?? it just has to do its thing and I got used to it. most times I am hammer down with them anyways.

I had one person on RCC show me pics of his that broke but high HP and larger mud tires are tuff on any of them.

I will mainly take advantage of the traction off road in the swamps/trails/woods getting to my fishing spots. nothing bad but a challege sometimes in a 2x truck when wet and 1 wheel peel.

best thing is less than 30 mins to R&R and replace the spiders if you dont like it. then send it to me.
Posted By: basketcase

Re: replacement cab. - 01/31/14 06:48 PM

my


uncle had a buddy that delivered mail in rural Pa. he had four door '70ish Dart that he crammed a few extra clutches in the Sure Grip, It snapped and popped in a turn, but it sure was fun doing doughnuts.
Posted By: scratchnfotraction

Re: replacement cab. - 03/10/14 10:25 PM

well got around to moving the gas tank to the rear and getting ready for new pipes turn out under the steps.

used a 69/70 mustang/couger 22 gallon gas tank, so far simple enuff relocation.

I chose to move it all the way to the rear pipe bumper and stick the fill tube out from under the bed end rail as opposed to a trap door in the bed floor.

just need to finish up the fill tube and figer what the 2 wires on the 85 sender are for...I assume the one with tracer is a ground??

Attached picture 8069039-gastank2.jpg
Posted By: scratchnfotraction

Re: replacement cab. - 03/10/14 10:26 PM

2 sender wires on the 85 tank??

Attached picture 8069041-gastank6.jpg
Posted By: scratchnfotraction

Re: replacement cab. - 03/10/14 10:27 PM

cut, weld, bolt it in

Attached picture 8069043-gastank1.jpg
Posted By: scratchnfotraction

Re: replacement cab. - 03/10/14 10:28 PM


Attached picture 8069044-gastank3.jpg
Posted By: scratchnfotraction

Re: replacement cab. - 03/10/14 10:29 PM

going right together

Attached picture 8069045-gastank4.jpg
Posted By: scratchnfotraction

Re: replacement cab. - 03/10/14 10:32 PM

last one today, finish up fill tube tomarrow.. it is spring break and I am off for the week so I plan to get some stuff done up on both trucks.

replaced all 3 rubber brake lines on the stepside and doing the same 3 rubber hoses/brakes/rotors/drums on the 440 truck.


Attached picture 8069048-gastank5.jpg
Posted By: redraptor

Re: replacement cab. - 03/11/14 12:48 AM

Nice fit. How did you come across that?
Posted By: 72d100

Re: replacement cab. - 03/11/14 04:03 AM

are you running a mechanical fuel pump or an electric?
Posted By: 77ProStreet

Re: replacement cab. - 03/11/14 04:25 AM

Thanks for the pics Scratch! I have been wanting to do this for a while. I'm going to try and hook it up to the factory rear gas filler tube. I'm trying to figure a way to use the engine hoist to lift bed off or just call the boys over to give me a hand. Then I can C notch and do the gas tank thing. keep the pics coming!

Mark
Posted By: scratchnfotraction

Re: replacement cab. - 03/11/14 02:19 PM

Quote:

Nice fit. How did you come across that?


right here on MOPARTS! read a post by 727builder on doing his stepside truck, member 88shortbed post a link on the tank and a write up on a ferd truck mounting it in the back. very good read on it. popular with the old ford trucks.

they put the fill tube up thru the bed floor and use a cool cap for the gas cap mounting in the floor.

I have the 6" pipe bumper that's not coming off so I moved mine baack to fill between the bed end rail and bumper.

I will still run the mech pump and just move the hose to new tank.

the ford sender is same ohms as mopar so the stock gauge should still work.

I got the plan for pipes laid out just need to decide on what muffs I want to run this go round with it.
Posted By: 72d100

Re: replacement cab. - 03/11/14 04:41 PM

sweet. may i also ask where you got the tank at?
Posted By: basketcase

Re: replacement cab. - 03/12/14 03:24 AM

looks good Mike. My '87 had the two wire sender too.
Posted By: scratchnfotraction

Re: replacement cab. - 03/12/14 03:50 AM

Quote:

sweet. may i also ask where you got the tank at?


got the tank on ebay from Mustang Unlimited dot com out of Georgia - 1-888-229-2929

got the 22 gallon tank kit for a 69/70-mustang/couger that came with a new galvinised tank with drain plug/new sender/filler neck hose.

free shipping to the dorr for 124$

the sender is the same ohms as a mopar sender...if I can just figure out how the 2 wires work.. the ford sender is a one wire...so I assume on of the wires on my truck is a ground and the other a sender hot wire.

put 10 gallons in on first run ti check for leaks..no leaks and sender o-ring sealed up no problems.

went and had some straight pipes with a nice set of muffs with turn outs under the steps.
Posted By: 72d100

Re: replacement cab. - 03/12/14 04:00 AM

Quote:

Quote:

sweet. may i also ask where you got the tank at?


got the tank on ebay from Mustang Unlimited dot com out of Georgia - 1-888-229-2929

got the 22 gallon tank kit for a 69/70-mustang/couger that came with a new galvinised tank with drain plug/new sender/filler neck hose.

free shipping to the dorr for 124$

the sender is the same ohms as a mopar sender...if I can just figure out how the 2 wires work.. the ford sender is a one wire...so I assume on of the wires on my truck is a ground and the other a sender hot wire.

put 10 gallons in on first run ti check for leaks..no leaks and sender o-ring sealed up no problems.

went and had some straight pipes with a nice set of muffs with turn outs under the steps.


i wound up ordering one this morning from kentucky classic mustangs. how thick of metal did you use for your bracket?
Posted By: scratchnfotraction

Re: replacement cab. - 03/12/14 01:46 PM

1.5 x 1.5 x 1/8" angle. I removed the rear cross brace and bolt in piece for spare tire.

I put the angle on the inside of lower frame rail and weld it to frame. the tank had pre-drilled holes in the tank flange.

I was thinking of 1x1 square tube to raise it a little in the frame rail but did not have help test fitting the bed so I went to bottom of rail.

it works out as there is a little room on top of tank to help get at the rear frame/bed bolts. (I think? I will be doing that today.)

I looked at takes from there but I went free shipping.

works good so far and I try to hook up gauge today as well.
Posted By: 72d100

Re: replacement cab. - 03/13/14 02:53 AM

they offer free shipping now plus i got the spectra truck with the drain plug
Posted By: scratchnfotraction

Re: replacement cab. - 03/14/14 04:28 AM

I read on the ferd link to stay away from the spectra tanks or maybe it was senders..???

got the new muffs and tail pipes turned out in front of rear tires,way better than the old tubes down one side and glass packs.

got the 1966 dodge dart /6 10" unsilenced air breather painted and put on. kinda kool and looks good. it will go with the 68 VC with push on oil cap. got the oil cap with air breather..

I got my fill tube done today, I snagged a chebby stepside fill tube for a screw on cap. mounts in a plastic piece behind a gas door on the chebby stepside...I only used the short fill tube only.

I cleaned the gas tank paint/coating off the neck of tank fill tube,cleaned the chebby fill tube, pluged a vent tube hole in it, stuck it down into the fill tube on the tank, it is a slight 45* bend so it kind pressed down in there good and sticks...somewhat..nice and tight.

I used all-metal to fill the small gap on the 2 tubes, then spred a nice bead of all-metal around the whole joint/coneection to bond them together. looks better than a rubber hose with clamps for sure.

I got the drop shackles on for a 2" drop in the rear to level it out for street duty.

next up I am working on building some traction bars for the rear, going on top of leafs to the front spring mount.

I got a torque strap built and mounted from frame to front of engine, used 2 engine to trans braces welded together, then used some rubber shock bushings/cup washer/bolt thru the frame. cut down on vibs and gives just a little when engine torques hard.

got dark on me so I will get pics in the morning.

Posted By: 72d100

Re: replacement cab. - 03/14/14 05:02 AM

hope it was the sdender because the tank looks pretty nice

Attached picture 8073324-newfuel.jpg
Posted By: scratchnfotraction

Re: replacement cab. - 03/14/14 03:18 PM

I think it was on sender?? but I only read the one negative coment IIRC.

that looks like the same tank I gots..does it have the sender? drain plug?

remember..I moved mine back further so you may want to mock yours up good before you decide.

I was able to get the fill tube where I wanted it, and just enff room with tank/bumper brackets to get the bed bolts back in.

hers those pics of progress.

Attached picture 8073544-progress1filltube.jpg
Posted By: scratchnfotraction

Re: replacement cab. - 03/14/14 03:20 PM

drop shackles this go round

Attached picture 8073547-progress2reardropshackles.jpg
Posted By: scratchnfotraction

Re: replacement cab. - 03/14/14 03:22 PM

worky worky

Attached picture 8073548-progress3muffsouttheside.jpg
Posted By: scratchnfotraction

Re: replacement cab. - 03/14/14 03:28 PM

I will settle for a smaller 10" un-silenced air breather from a 1966 /6 charger 225 as the larger ones are crazy $$$ even these small ones fetch some $$ I got this on on moparts for 15 bux

I will swap on my 68 VC on so the push on oil cap I got with the air breather will hook up to it. I like old and retro look of it.


Attached picture 8073557-progress4airbreather.jpg
Posted By: scratchnfotraction

Re: replacement cab. - 03/14/14 03:29 PM

made up a torque strap from 2 engine to trans braces, used some shock rubber bushings/cup washer on a bolt thru the frame..ugly but cheap and effective.

Attached picture 8073559-progress5torquestrap.jpg
Posted By: scratchnfotraction

Re: replacement cab. - 03/14/14 03:31 PM

started fabbing up the traction bars, hope to have them welded up and installed today,then get bed back on for some street fun around town

Attached picture 8073561-progress6tractionbarbushing.jpg
Posted By: scratchnfotraction

Re: replacement cab. - 03/14/14 03:35 PM

get these welded on to the u-bolt top plates and weld up a rod with a hiem joint,drill the front hanger and install the bushings.

this is a cheap effective traction aid for a axle under leaf and work great on my 4x4..so it should performe just as good for street duty.

between the torque strap and the traction bar it should get rid of the wheel hop issues I have with the 5 speed.

Attached picture 8073568-progress7tractionbarclevispoint.jpg
Posted By: 98RAM1500

Re: replacement cab. - 03/14/14 07:19 PM

see you got some 2 chamber mufflers, how they sound with the 318 scratch
Posted By: redraptor

Re: replacement cab. - 03/15/14 01:04 AM

Quote:

made up a torque strap from 2 engine to trans braces, used some shock rubber bushings/cup washer on a bolt thru the frame..ugly but cheap and effective.


Are you gonna side step the clutch at 5k?
Posted By: 340SHORTY

Re: replacement cab. - 03/15/14 03:38 AM

Quote:

Quote:

made up a torque strap from 2 engine to trans braces, used some shock rubber bushings/cup washer on a bolt thru the frame..ugly but cheap and effective.


Are you gonna side step the clutch at 5k?


not with a 318
Posted By: scratchnfotraction

Re: replacement cab. - 03/15/14 06:18 AM

Quote:

Quote:

Quote:

made up a torque strap from 2 engine to trans braces, used some shock rubber bushings/cup washer on a bolt thru the frame..ugly but cheap and effective.


Are you gonna side step the clutch at 5k?


not with a 318


what??? that is the only way to get a 318 to do anything.

the muff are nice. whole new sound for it, and the whiplash roller cam gives them a nice burble gurgle 750 rpm idle.

the torque strap on the engine along with the traction bars are just what it needed to day.
Posted By: basketcase

Re: replacement cab. - 03/15/14 10:33 PM

looking good Mike. I was just thinking the other day I'd like to finish my duals comint out in front the the rear wheels, but way too many irons in the fire this year. sucks cause there is a RC rear tank in the classifieds.
Posted By: 72d100

Re: replacement cab. - 03/16/14 03:50 AM

Quote:

I think it was on sender?? but I only read the one negative coment IIRC.

that looks like the same tank I gots..does it have the sender? drain plug?

remember..I moved mine back further so you may want to mock yours up good before you decide.


my tank came with everything including bolts. the sender was api brand or something but it looks like nice quality. the tank does have the drain plug. i also opted for the 20 gallon over the 22 galon so it gives me a little more room on top i hope. im gonna put my cap in the bed floor
Posted By: dodgeram440

Re: replacement cab. - 03/17/14 08:57 PM

Hey Mike, looks like you made some good progress since my visit. Cool. Hammer down, Buddy! Love your 440 truck. That was a fun cruise around town.

Missing my truck. Wish I could have got the 440 put in it and all I wanted to do, but it's all gone now. Actually, the only thing I have left is the dash cluster bezel panel thing, and a pair of the 6 x 9 gm style door mirrors with the inner door brackests. Maybe my wife will let me hang them on the wall as souveniers.
Posted By: BulletBob

Re: replacement cab. - 03/18/14 02:54 AM

Looking good Mike!!
Posted By: basketcase

Re: replacement cab. - 03/18/14 08:50 PM

Quote:


Missing my truck. Wish I could have got the 440 put in it and all I wanted to do, but it's all gone now. Actually, the only thing I have left is the dash cluster bezel panel thing, and a pair of the 6 x 9 gm style door mirrors with the inner door brackests. Maybe my wife will let me hang them on the wall as souveniers.


Hey Doger, glad to see you pop in, been wondering how you've been.
Posted By: scratchnfotraction

Re: replacement cab. - 03/28/14 10:42 PM

thanks for the kudos guys. lot of work to go fishing.

the traction bars are done and work great.

got the boat cleaned up a rewired the lights, just need to add a pigtail to the truck harness next.

drop shackles dropped it just enuff I don't have to lift the trailer now.

dirt boat ramps should be no trouble now.

Attached picture 8092128-tractionbar.jpg
Posted By: scratchnfotraction

Re: replacement cab. - 03/28/14 10:44 PM

July 13' to March 14' fixing the truck to hook up and go fishing.

Attached picture 8092130-boathookedup.jpg
Posted By: scratchnfotraction

Re: replacement cab. - 03/28/14 10:45 PM

now if I only had enuff butt splices with out a trip to town.

Attached picture 8092133-boathookedup2.jpg
Posted By: Hemi_Ram

Re: replacement cab. - 03/28/14 11:02 PM

Quote:

Quote:

Quote:

made up a torque strap from 2 engine to trans braces, used some shock rubber bushings/cup washer on a bolt thru the frame..ugly but cheap and effective.


Are you gonna side step the clutch at 5k?


not with a 318


Uhh, quickd100 made a 318 that will!! Don't underestimate the 318.

https://board.moparts.org/ubbthreads/show...rue#Post7934687
© 2024 Moparts Forums