Moparts

Electrolytic Rust and Paint Removal

Posted By: kentj340

Electrolytic Rust and Paint Removal - 09/23/16 06:08 AM

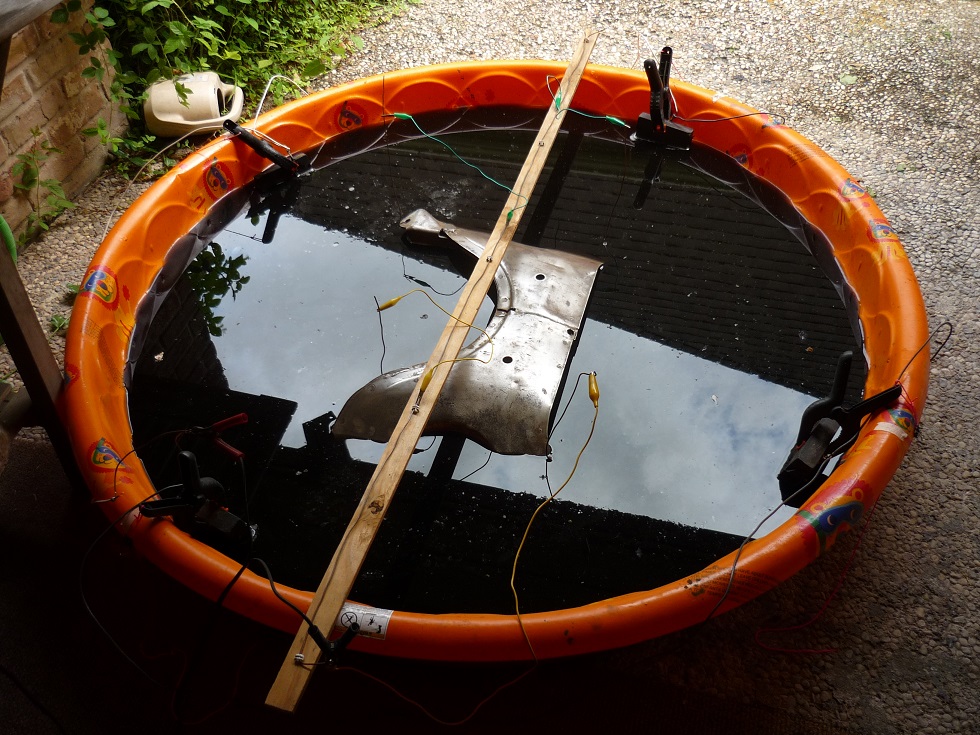
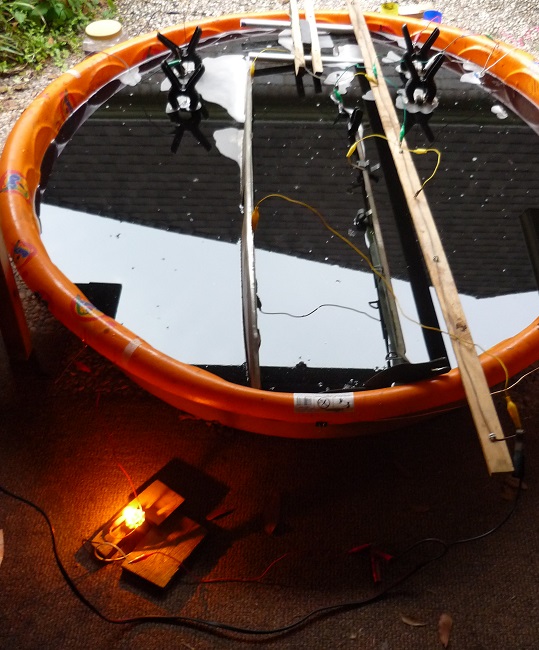
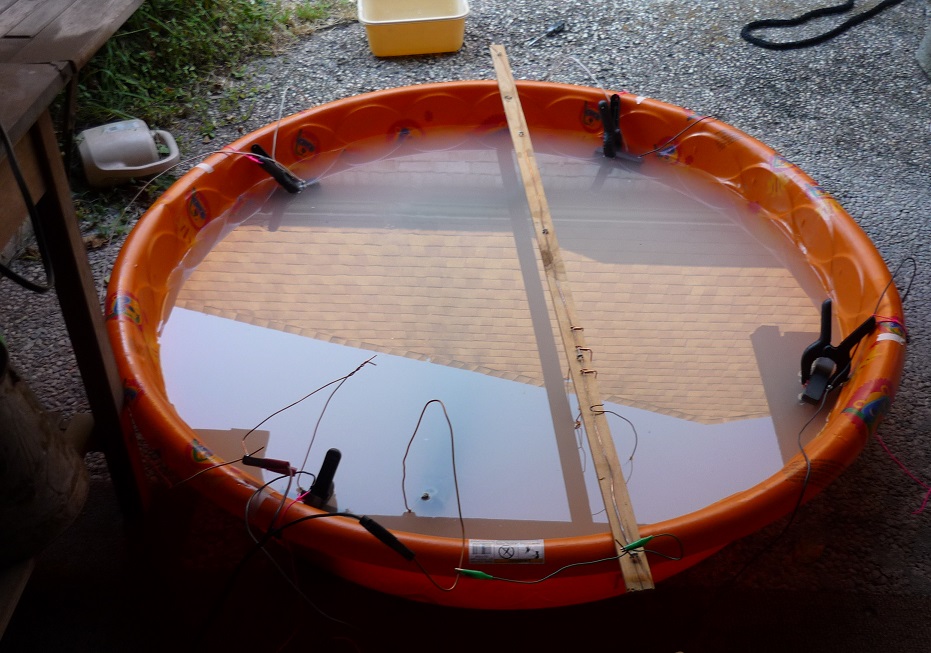
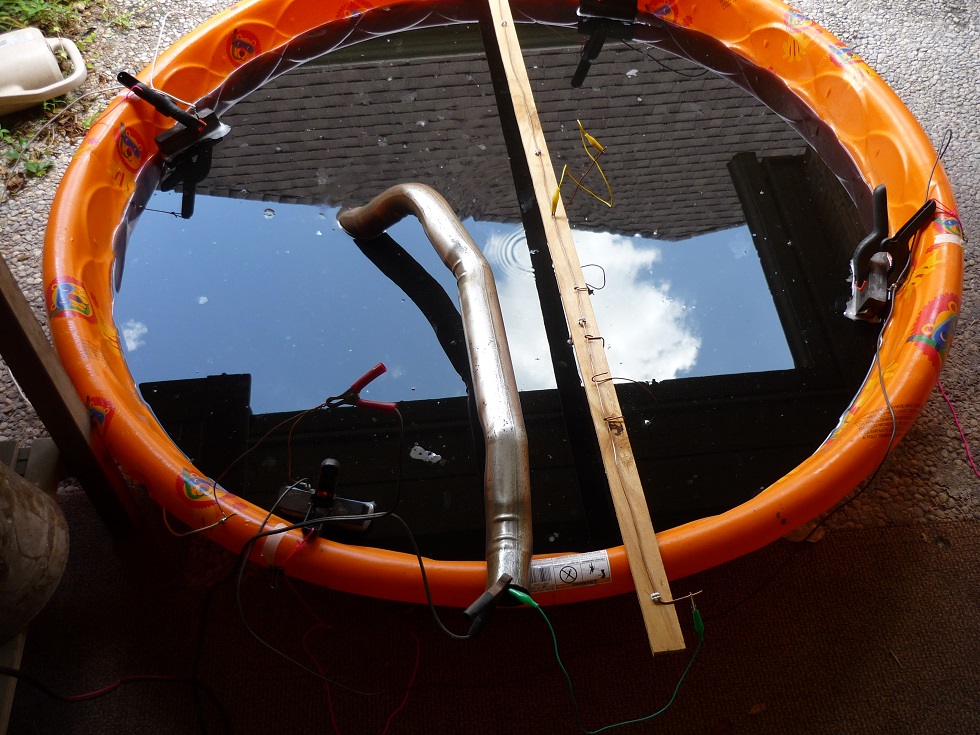
Top photo shows a milky solution of washing soda in water with a submerged tail pipe. I'm using a battery charger on low setting with 4 sacrificial graphite blocks. The tail pipe is bare steel - this process will remove the coating from any galvanized, aluminized, or painted parts and can harm non-iron/steel metal such as brass, babbitt, solder, etc.

The solution turned black from the graphite. This is the other tailpipe with more bends that wouldn't fit in the pool except by double dipping. I used the tail pipes just to test the process and get it started.

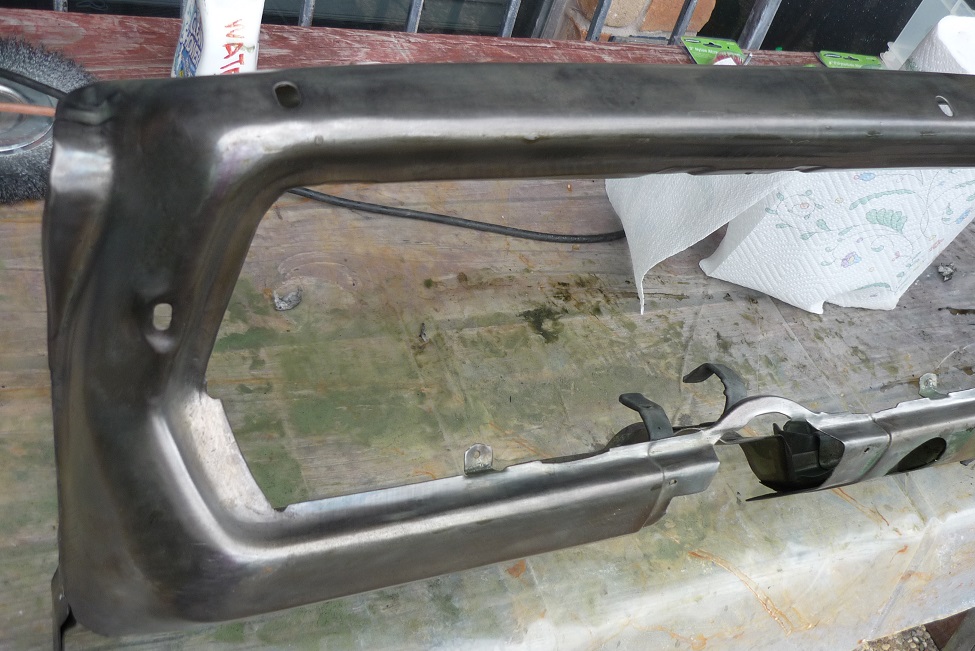
Bottom photo is a K-frame, also double dipped. I'm very pleased with how the tail pipes and the K-frame turned out after electrolysis.
Attached picture Electrolytic rust removal2.jpg
Attached picture P1040446.jpg
Attached picture P1040564.jpg
Posted By: kentj340

Re: Electrolytic Rust and Paint Removal - 09/23/16 06:15 AM

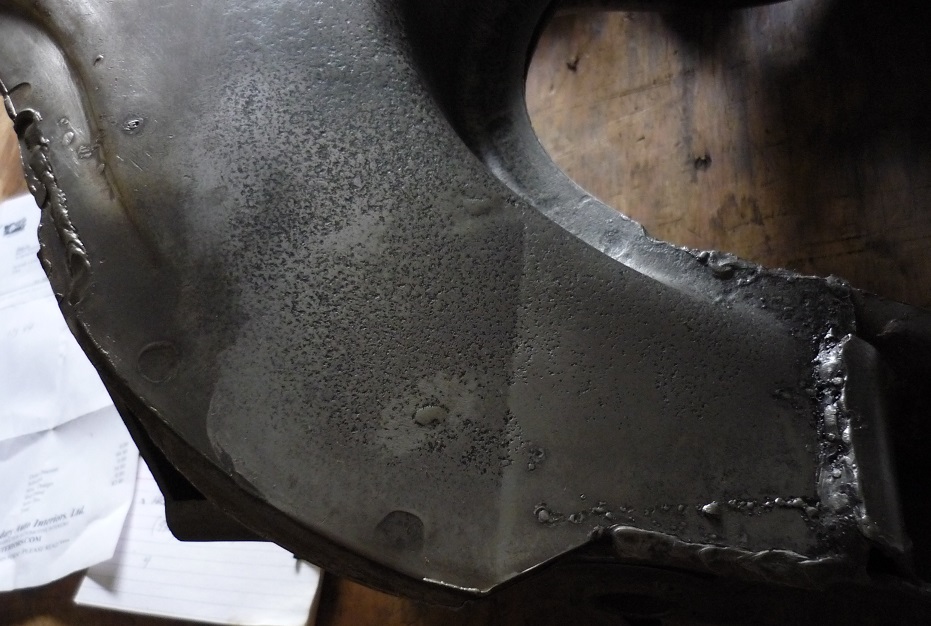
Close up of the K-frame. The right side of the dip line is mostly finished. Left of the dip line the rust pits still had rust in the bottoms and needed more time in the process.

Following electrolysis I wire wheeled the part. Places that couldn't get wire wheeled or hand wire brushed were wet sanded. With a coat of Rust Cure phosphoric acid that was thoroughly wiped off while wet, the K-frame is now ready for paint.

I could have de-rusted the inside of the K-frame if I could have placed a sacrificial graphite anode in there. The anode would need to be wrapped in plastic screen mesh to prevent it from touching the K-frame and causing an electrical short circuit. Instead, I'll just flood the inside as best I can with Rust Cure.


Attached picture P1040577.jpg
Posted By: kentj340

Re: Electrolytic Rust and Paint Removal - 09/23/16 06:24 AM

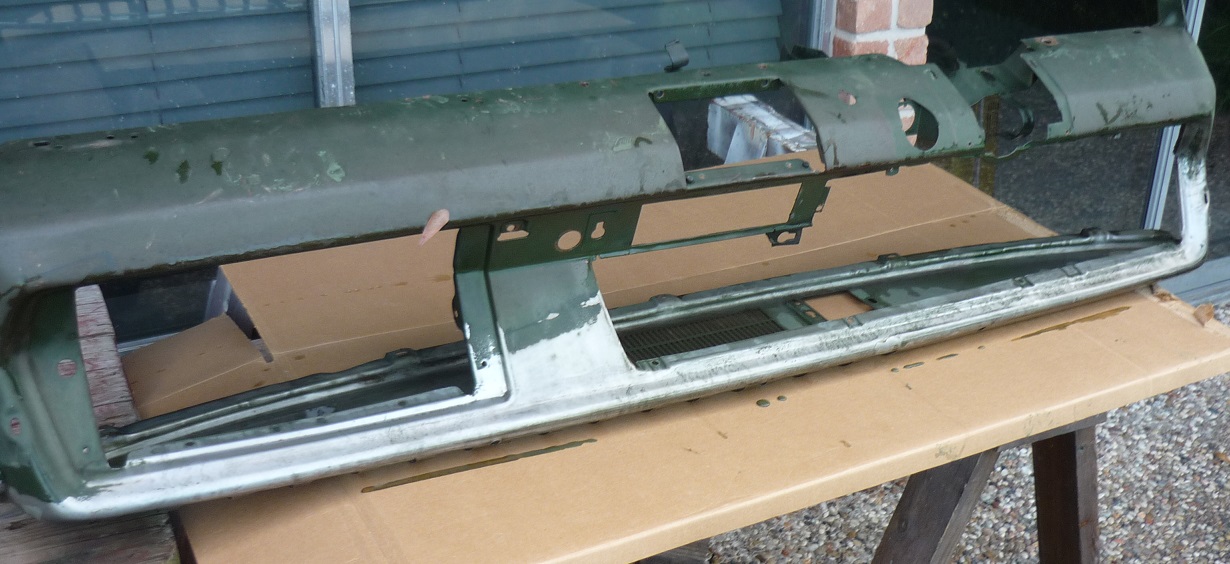
Here's my dash frame now in process showing paint removal on a slant, because the part is too long for the wading pool. The process didn't quite clean off all the paint that's missing in the photo - I did do a little wet sanding. No more than 10-15 minutes of light sanding.

The bottom photo shows the side of the part that was facing down in the pool and not facing the graphite. So it only got partially cleaned. All I have to do is put it back in the pool facing the graphite, and the paint will disappear like magic.

Attached picture P1040581.jpg
Attached picture P1040580.jpg
Posted By: Morty426

Re: Electrolytic Rust and Paint Removal - 09/23/16 05:48 PM

Do you have any before pictures of the tail pipe or K frame?
Posted By: 71birdJ68

Re: Electrolytic Rust and Paint Removal - 09/23/16 07:36 PM

Where do you get the graphite blocks?
Posted By: cudaman1969

Re: Electrolytic Rust and Paint Removal - 09/24/16 01:04 AM

Originally Posted By 71birdJ68
Where do you get the graphite blocks?

What I was going to ask.
Posted By: kentj340

Re: Electrolytic Rust and Paint Removal - 09/24/16 03:52 AM

Just Google graphite blocks for sale:

http://www.ebay.com/bhp/graphite-block

https://www.alibaba.com/showroom/graphite-blocks-for-sale.html

Some discussions of the process on YouTube videos mention band sawing the blocks to thinner slabs. I'm using whole blocks about 1" x 5" x 6" and have not sawn them. Not sure which is better, but I wonder if turning some of the graphite into saw dust puts you ahead.

I paid $100 for 5 blocks that were $0.05 per cubic centimeter. The average price was $0.20, and the highest was $0.83. I needed a spread sheet to find the best deals. My guess is that I have used the blocks mostly every day for 2 months, and they are about 1/3 consumed.

A wading pool about 54" diameter x 10" deep holds 100 gallons, so you can do the math on Evapo-Rust plus some kind of pump and trickle arrangement for big pieces like the dash frame.
Posted By: kentj340

Re: Electrolytic Rust and Paint Removal - 09/24/16 04:06 AM

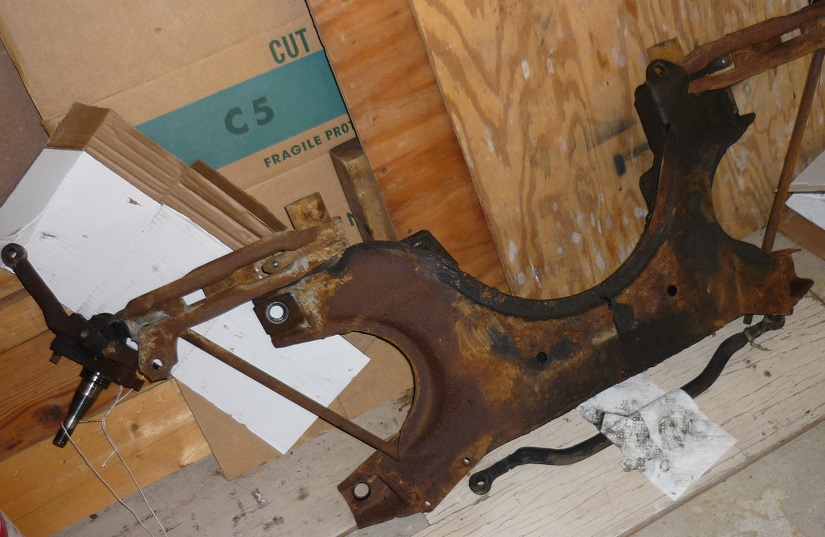
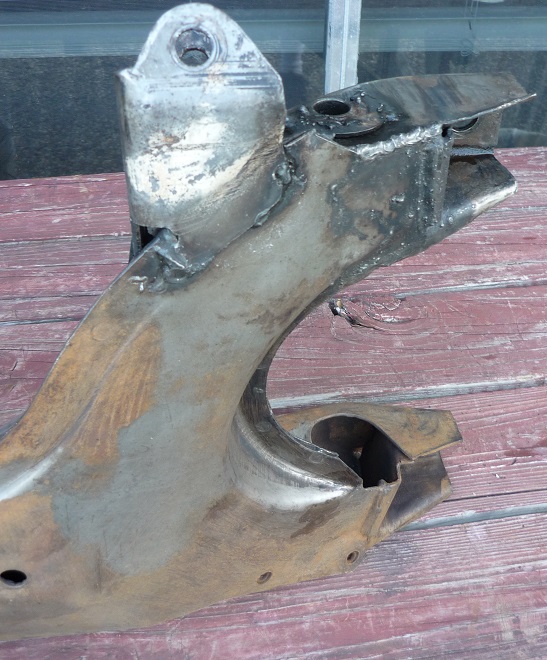
This is what the K-frame looked like coming off the car. I later steam cleaned it and did some rust removal with Rust Cure phosphoric acid.

On average it was slightly worst than the bottom photo.

Attached picture 23-148 Frame. K frame.jpg
Attached picture 23-148 K Frame.white paint mark2.jpg
Posted By: kentj340

Re: Electrolytic Rust and Paint Removal - 09/24/16 04:50 AM

Sorry, I didn't take any before photos of the tail pipes. They are new, unused aftermarket pipes that I bought and garaged for 35 years - they had minor pitting and a lot of surface rust.

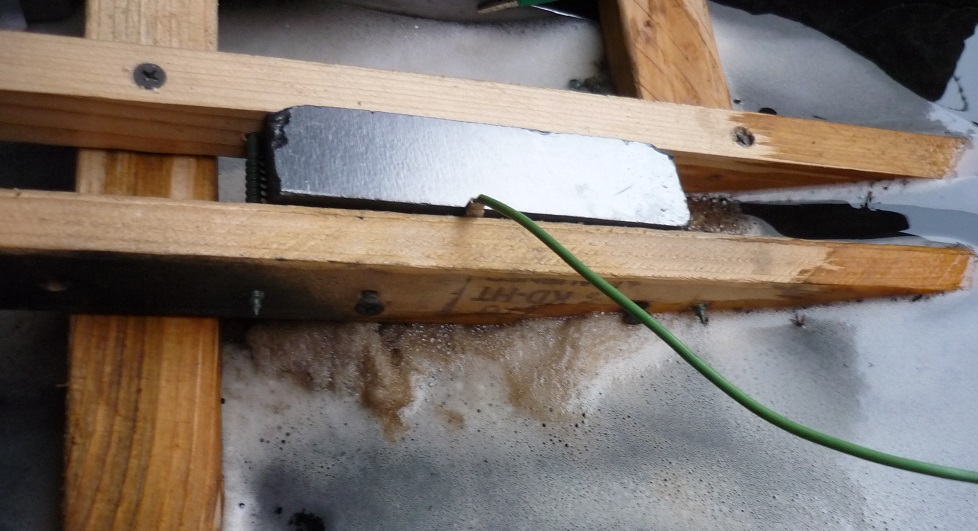
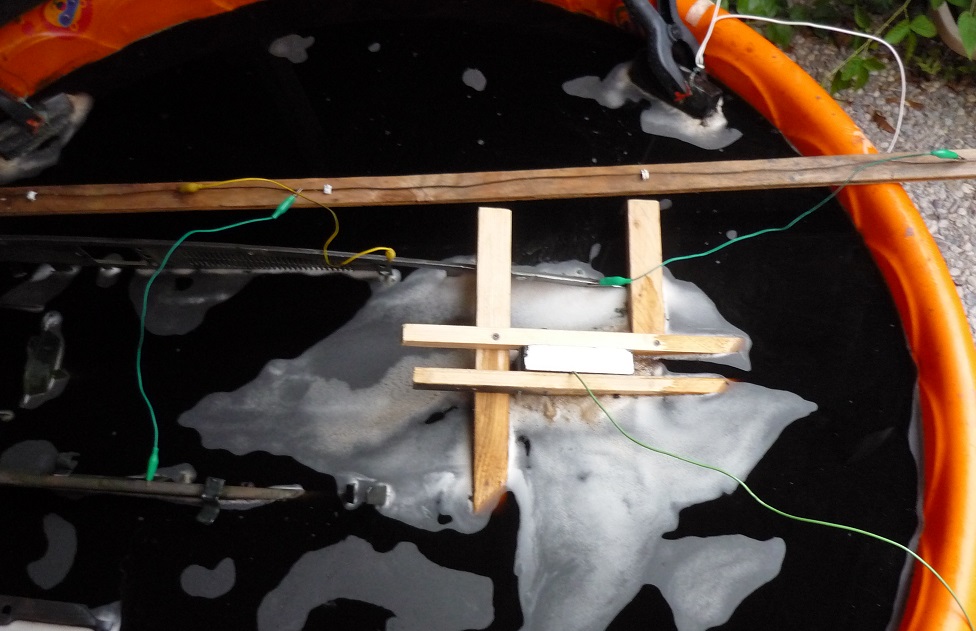
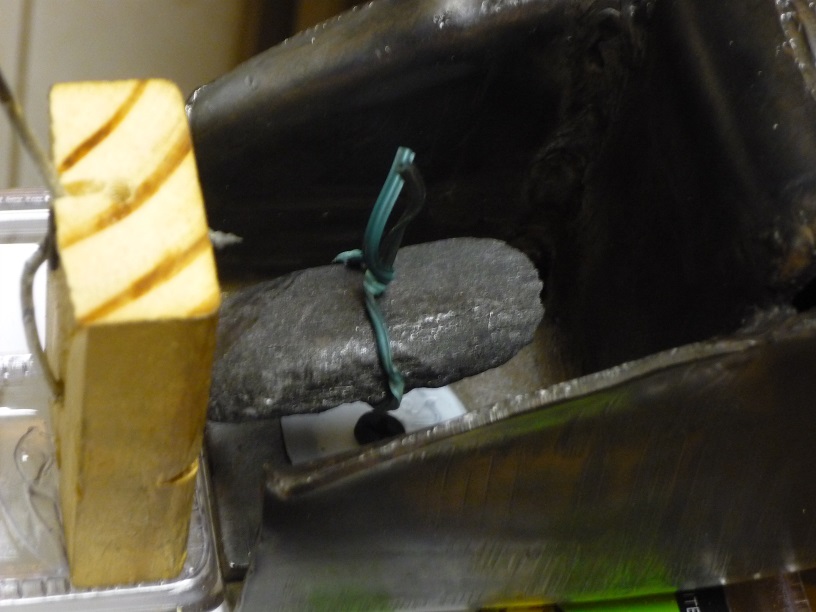
Today I made a wooden jig to hold a graphite block in the interior of the dash frame, top photo. Because the process is mostly "line of sight", meaning the graphite needs to be aimed directly at the part for best results, this had to be done or the inside of the frame would not get much electrolysis.

The 2nd photo shows the block is placed in the interior of the dash. Note vigorous foaming and bubbles compared to the two blocks at the top of the photo. Those two blocks would be doing more work (more bubbling) if they were more parallel and closer to the dash.

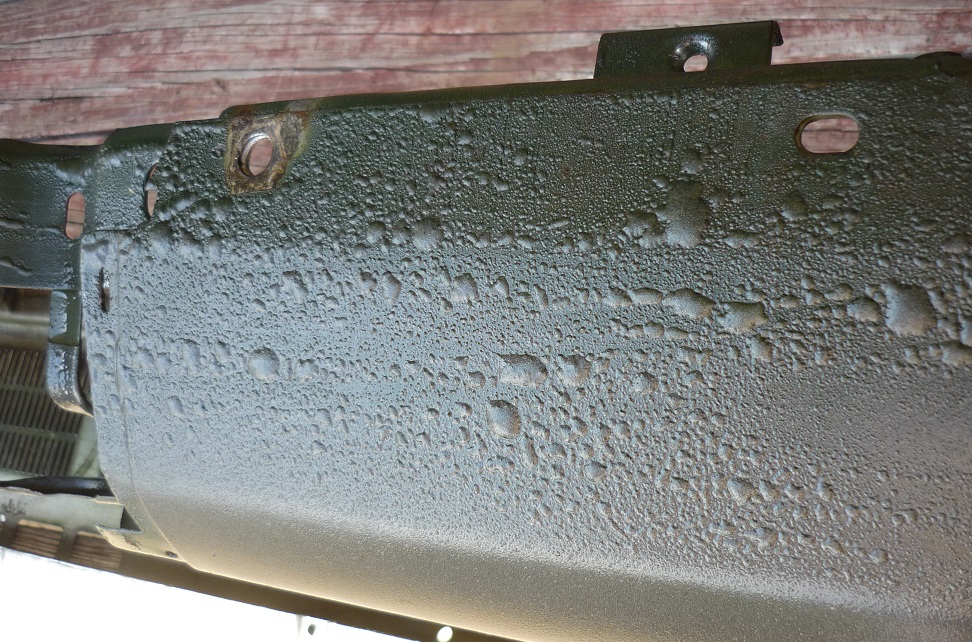
Bottom photo shows todays results on the paint. Maybe the paint would eventually fall off, but I prefer to remove the part each day, clean, inspect, and put it back in the pool if not finished.

Those of you who have done more body work than I probably already know this, but I found out that wire brushing the paint off beats the heck out of wet sanding. I used a corded variable speed drill motor with a wire wheel.

Attached picture P1040587.jpg
Attached picture P1040584.jpg
Attached picture P1040582.jpg
Posted By: kentj340

Re: Electrolytic Rust and Paint Removal - 09/28/16 05:11 AM

Since wet wood likely caused an electrical short between the graphite and the part, that was a bad call. Little work was accomplished in that session. Changed some of the wood to PVC pipe.

My battery charger has a built in amp meter. Previously, using 4 graphite blocks, the process pulled 2 or 3 amps, and the results were very good. Now for some reason, using 5 blocks pulls 7 amps, which makes a lot of bubbles and is more amperage than recommended. The 7 amps probably also wastes graphite.

So I spliced a muscle car era #1157 tail light bulb into the circuit, and that pulled the power down. This is a mystery to me: If I light up the smaller and dimmer tail light filament, the process pulls 1 amp. But if I light up the much brighter brake light filament, the process pulls 2 amps. Somebody please explain that to me.


Attached picture P1040622.jpg
Posted By: kentj340

Re: Electrolytic Rust and Paint Removal - 09/28/16 05:24 AM

The dash frame is looking great, but not finished yet. It does not show well in this photo, but the surface is a transparent black, which is black rust deposited by the process. It is this black rust that under the right circumstances can quickly change to red rust and is called flash rusting. The black rust deposition is a desired part of this process and is a good sign. Apparently too much amperage does not make black rust.

Attached picture P1040598.jpg
Posted By: kentj340

Re: Electrolytic Rust and Paint Removal - 09/28/16 06:13 AM

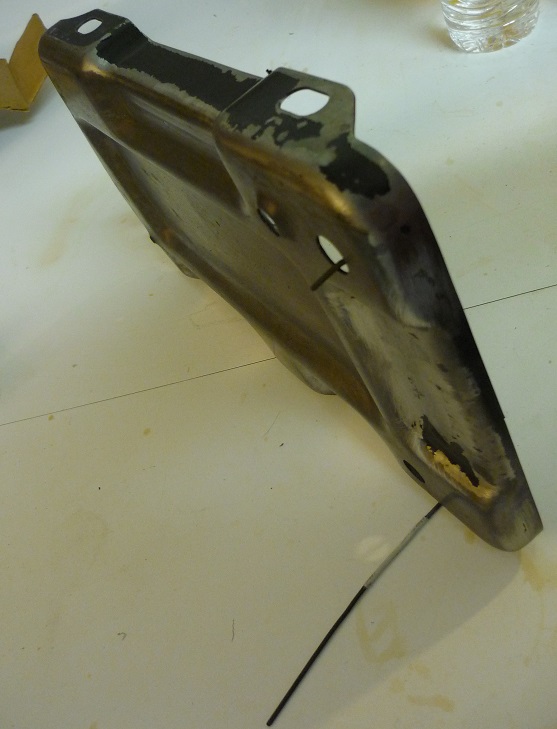
This process is effective, low labor, and relatively cheap for big parts. Small parts may be placed in the pool facing the backsides of the graphite at the same time as big parts that are facing the other side of the graphite. For maximum exposure to the graphite, small parts can be stood up by using bare wire. See photo of battery tray.

Since each band saw cut of a block doubles the surface area, sawing should be an advantage.

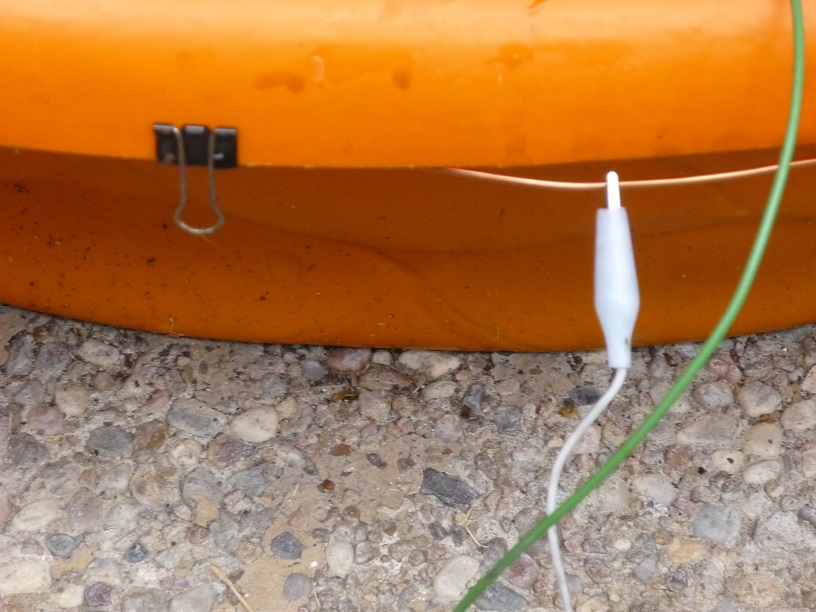
To make the wiring convenient, I ran a bare ground wire from Romex around the perimeter of the pool held by binder clips. This is for the sacrificial anode, the graphite. A wooden bridge across the top carries another bare wire for alligator clipping to the cathode, the part to be cleaned.

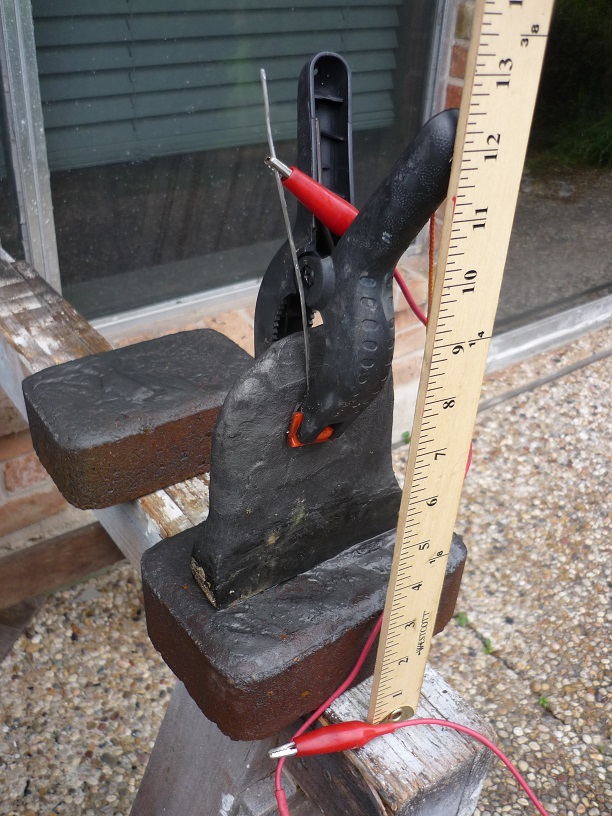
My graphite is rounded from use. I put the graphite on top of a brick to raise it up slightly, along with a bare steel wire clamped to it for making an electrical connection with alligator clips. The muck on top of the bricks is expended graphite.

Wires submerged in electrolyte should be bare steel. If nickel, copper, or zinc is in the electrolyte, these metals may plate onto your part. For example alligator clips are typically nickel plated and should not be submerged.


Attached picture P1040597.jpg
Attached picture P1040600.jpg
Attached picture P1040606.jpg
Posted By: Morty426

Re: Electrolytic Rust and Paint Removal - 09/28/16 09:36 AM

Cool deal. Thanks for the before pics.
Posted By: Baller

Re: Electrolytic Rust and Paint Removal - 09/28/16 03:52 PM

Why the graphite blocks? I have done this before and I used some old steel bolts where you used the blocks.
Posted By: kentj340

Re: Electrolytic Rust and Paint Removal - 09/28/16 08:44 PM

Either graphite or carbon steel (not stainless) can be used for the sacrificial anodes. Scrap steel anodes are cheaper but more messy. Graphite anodes are cleaner. I'll try steel when my graphite is used up.

One advantage of steel sheets is you can have a lot of area easily and cheaply. Bolts wouldn't seem to have much area and might not work well with big parts. The areas of the cathodes and anodes are important for the process and a function of amperage draw.
Posted By: R/T1968R/T

Re: Electrolytic Rust and Paint Removal - 09/28/16 11:42 PM

made this one, works great!!!

http://www.diyncrafts.com/12491/lifehack...t-removal-trick
Posted By: Baller

Re: Electrolytic Rust and Paint Removal - 09/29/16 04:22 AM

Originally Posted By kentj340
Either graphite or carbon steel (not stainless) can be used for the sacrificial anodes. Scrap steel anodes are cheaper but more messy. Graphite anodes are cleaner. I'll try steel when my graphite is used up.

One advantage of steel sheets is you can have a lot of area easily and cheaply. Bolts wouldn't seem to have much area and might not work well with big parts. The areas of the cathodes and anodes are important for the process and a function of amperage draw.


Good to know, thanks.
Posted By: kentj340

Re: Electrolytic Rust and Paint Removal - 09/29/16 07:28 AM

Concerning using graphite vs. steel as a sacrificial anode, I noticed that many who do electrolysis preferred to use graphite rather than steel, so that's what I started with.

But since big parts of sheet metal that need cleaning, such as a dash frame, have a lot of area, likewise the anode needs a lot of area too. It may turn out that I'll like using scrap steel sheet for anodes with a lot of area better than graphite with not so much area.

Concerning the use of bolts and rebar as anodes, these have only enough area to treat small parts efficiently.

"They (anodes) should present a large surface area relative to that of the piece being cleaned and be able to 'see' most of the surface of the piece from all around to minimize areas of non-cleaning due to shadowing effects, as the current in the electrolyte tends to travel in direct lines rather than around corners. An anode made from a small piece of steel rod, for example, will work to a degree, but is less than satisfactory....An alternative (to completely surrounding the part on all sides, top, and bottom with anode material) would be to simply turn the piece part way through the process to make sure any surfaces which had suffered shadowing effects are treated."

from http://myweb.tiscali.co.uk/andyspatch/rust.htm

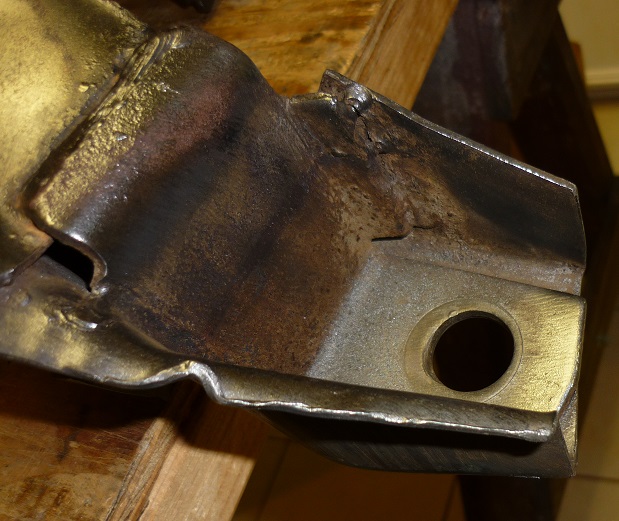
Concerning current in the electrolyte tending to travel in direct or straight lines rather than around corners, this is more acute when using a small container such as a 5-gallon bucket. When using a container as big as a wading pool, this effect is less pronounced. My dash frame did in fact get some cleaning on the side facing the bottom of the pool and not facing the anodes. On the other hand, at the 4 big bolt holes for fastening my K frame to my unit body, there are pockets, one shown in the photo, that were "shadowed". I will need to redo those K frame pockets with a special setup - anodes that stick into the shadowed areas.

Attached picture P1040615.jpg
Attached picture P1040612.jpg
Posted By: larry4406

Re: Electrolytic Rust and Paint Removal - 09/29/16 12:00 PM

Interesting thread and excellent results!

I used this method to cleanup an old vise. I used expanded metal as the sacrificial anode and lined the inner surface of a 5 gallon bucket. The vise, once cleaned, had a blackish coating on it that scrubbed off with a scotch brite. I used Arm and Hammer Washing Soda to improve the conductivity of the water.
Posted By: kentj340

Re: Electrolytic Rust and Paint Removal - 10/11/16 05:10 AM

Here's new information on electrolytic paint removal: Submerged copper wires are better than steel wires to connect the graphite anodes to the circuit.

Copper wires from residential Romex cable works well.

The reason is that steel wires will be quickly consumed as part of the sacrificial anode, which means they will fall into the electrolyte in the middle of the night with the attached alligator clip. The result will be a ruined alligator clip that will need to be scrapped and replaced.

Copper wires will plate copper onto your part a little bit, but it won't matter much, because the part isn't clean enough for the copper to stick anyway.

The copper wires will be eventually consumed same as the steel ones. Inspect them daily for replacement before loss of another alligator clip. Need a dozen or more alligator clip ends in reserve.

When I changed from all steel wires to all copper, the current draw went from about 1 amp to almost 2 amps. Two or 3 amps is optimal.

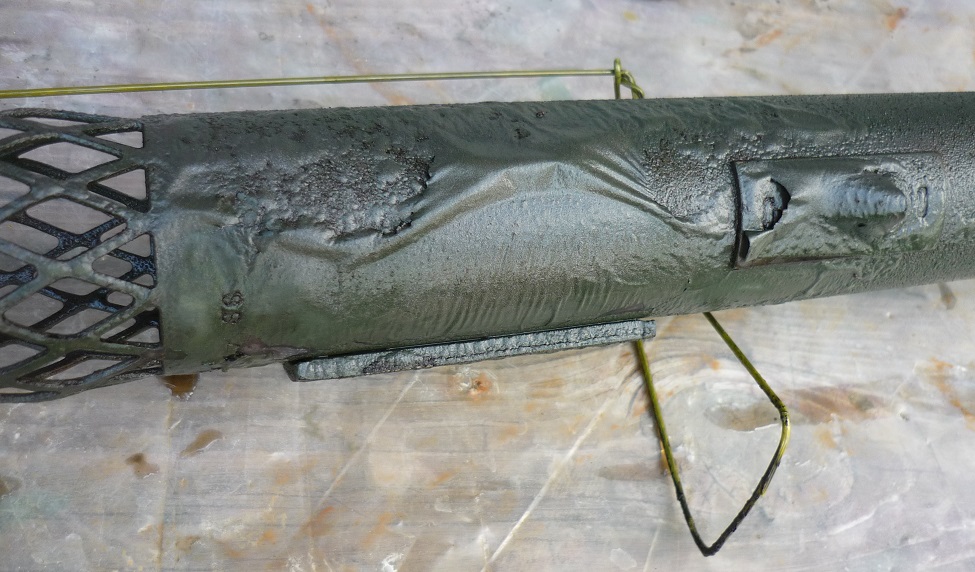
Photo shows paint removal from steering column jacket.

Attached picture P1040634.jpg
Posted By: cudaman1969

Re: Electrolytic Rust and Paint Removal - 10/11/16 02:56 PM

I tried the molasses, now I'll empty the tank and try this way awile. Still need to do the fenders and hood over, molasses didn't work right, probably the mixture was off, but I don't like the orange scum that is hard to get off. I have a few of the ho train transformers (dc) that I'll be trying.
Posted By: kentj340

Re: Electrolytic Rust and Paint Removal - 10/12/16 08:39 PM

It should be mentioned that baked on acrylic enamel over 2 or 3 coats of primer is not as easy to get off with electrolysis as the interior paint on the dash frame and steering column. It's still a good way, just not as fast.

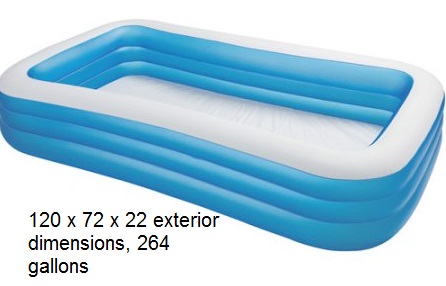
Since I want to use electrolysis on hood, fenders, trunk, and doors, I need a bigger pool. The 52" round hard plastic one was a good starter for about $17. Wal-Mart has bigger soft plastic inflatable rectangular ones for about $50 + an inflator for under $20.

https://www.walmart.com/ip/Intex-Wet-Set.../21950307#about

Attached picture a1110173-055d-4692-b80e-d2c7a2dcf46f_1_413fd011d3ce63bf1895e2c4856232d0.jpg
Posted By: kentj340

Re: Electrolytic Rust and Paint Removal - 11/01/16 08:04 AM

Don't bother with the vinyl wading pool pictured above. It leaks down enough air in a half day to start spilling water.
© 2024 Moparts Forums