Posted By: MY340
headliner install in progress pics - 09/14/10 04:44 PM
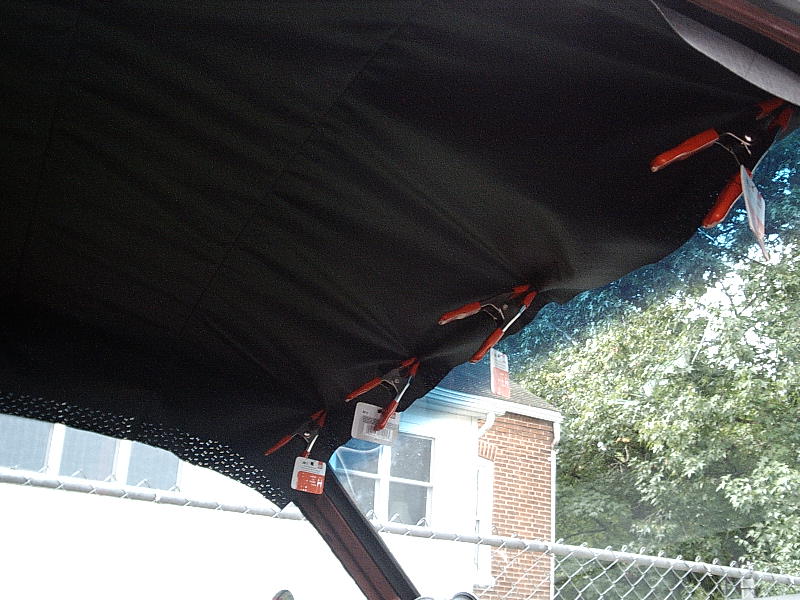
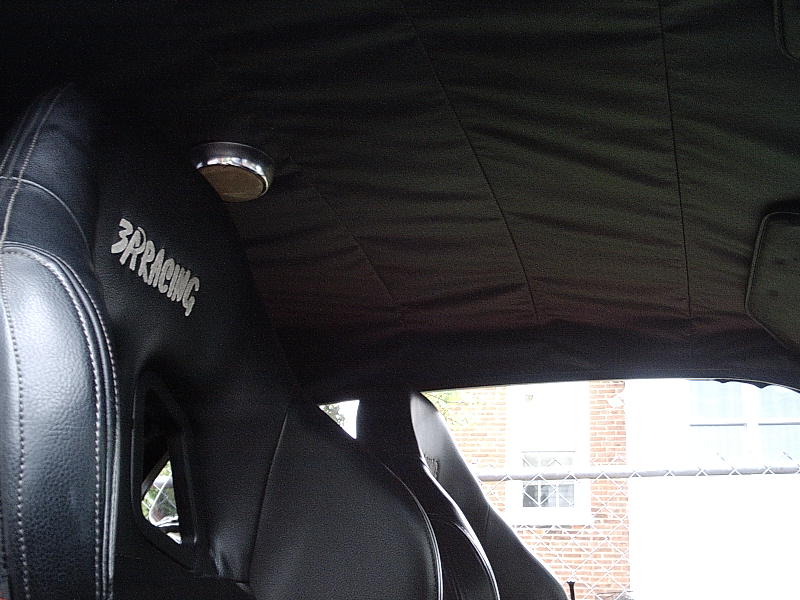
Here's some pics of my new headliner install. When I bought the car it had no headliner in it and no bows. Found the bows thru Moparts

and purchased the headliner on Ebay.
I'm following Resto Ricks install guide for the most part. Luckily my old oil furnace filter uses that polyester fiber media he used for a sound deadener.

The pics are after the first trimming that I did and I'm going to take the back seat out to get the metal quarter window mouldings off to make sure I get a good tuck fit. If I need to I might take the package tray out too to tuck it under it also.
Not a bad job just takes time and patience. I'm not done strechting it yet but so far it all look fine when I've pulled on it.
Posted By: MY340
Re: headliner install in progress pics - 09/14/10 04:46 PM
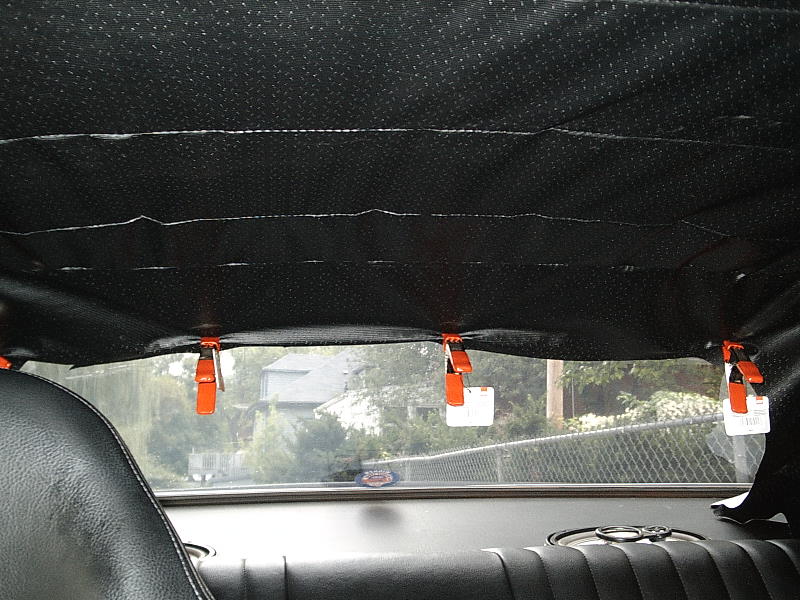
The clips are from Lowes. I left the tags on them so I can take them back when I'm done.

Posted By: 72blubird
Re: headliner install in progress pics - 09/14/10 05:25 PM
Keep the pics coming would like to see sail panel install also.
Nice Job

Posted By: MY340
Re: headliner install in progress pics - 09/14/10 06:14 PM
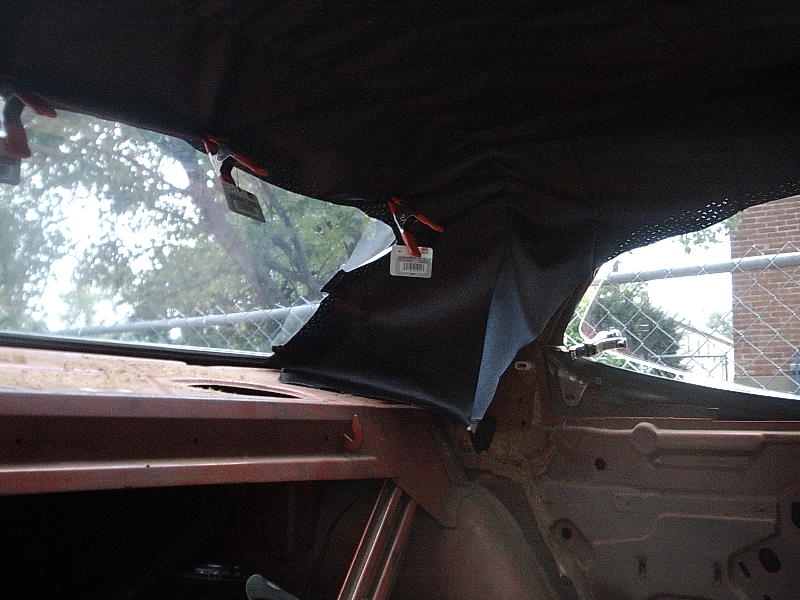
I'm working on that now as I removed the rear seat, package tray, rear trim panels and the metal qarter window moulding. They are gettin a fresh spray of semi gloss black which they needed anyway.
I guess it's easier to leave the backseat & stuff in till the headliner & bows are installed since you can sit in the seats at first. That's the way I did it at least.


Lots of trimming to get the rear window & sail panel areas looking correct. The sides and front will be easy compared to the rear/side panel areas.
Posted By: Commando1
Re: headliner install in progress pics - 09/14/10 09:48 PM
You're a lucky, lucky, dog.
The headliner install on my 66 Fury required the removal of the F & R glass...

Posted By: swifter
Re: headliner install in progress pics - 09/15/10 01:28 AM
He is not so lucky--If thats his duster HE WILL be taking out the front and rear glass--No way around it--the headliner tucks and wraps around both--Steve
Posted By: sthemi
Re: headliner install in progress pics - 09/15/10 06:33 AM
Nice, keep the photos coming... I have one to install on my Roadrunner...
Still having some cold feet, to try it myself...

Posted By: 69440
Re: headliner install in progress pics - 09/15/10 01:33 PM
C'mon guys, this is not a tough job, and contrary to popular belief, the glass does not have to be removed. The headliner is a little easier to install with the glass out, but it's not necessary. There's "Teeth" front and rear, for the headliner to attatch to, then work from side to side, from center of car, outward to stretch out any small wrinkles, hold in place with with headliner clips, trim it out, and you're done. Please remember, I do this kind of thing every day, and have for a very long time, so if any of you members have any questions, please ask. I'm always glad to help. Just send me a PM, or give me a call. Thanks, Bill 931-703-5574
Posted By: MY340
Re: headliner install in progress pics - 09/15/10 06:36 PM
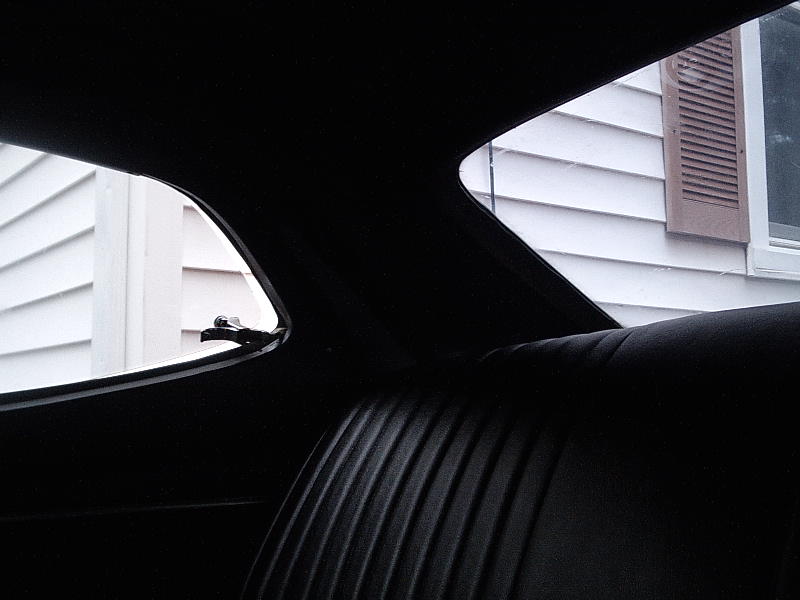
Well the sail panel areas turned out good but I still have some wrinkles in the top area to try and work out later. Trying to pull side to side I don't get much movement? I used the blunt end of a flat file to shove the vinyl under the front & rear gaskets and onto the teeth. No holes or tears so that's a good thing.
For my first time and a budget driver car I'm happy with it.
Posted By: MY340
Re: headliner install in progress pics - 09/15/10 06:38 PM
How's the best way to remove some more wrinkles? No looking for perfection here.

Posted By: cptn60
Re: headliner install in progress pics - 09/15/10 07:24 PM
multiple speed hairdryer worked for me, hth

Posted By: rapom
Re: headliner install in progress pics - 09/15/10 09:37 PM
Looks like you could have pulled the headliner a little harder. I didn't even need a hair dryer when I did mine (68 charger). And I did mine with the windows in. Never again.
Posted By: RestoRick
Re: headliner install in progress pics - 09/16/10 02:03 AM
Yep... you need to pull it much more...
Rick
Posted By: 69440
Re: headliner install in progress pics - 09/16/10 10:03 AM
It looks like it should really be pulled a little tighter. If you're in a warm weather climate, let the car set outside, on a hot day, with the windows up. The heat will help the headliner go into the position where it wants to be. A hair dryer works well for small wrinkles and the folds in the material from being in the box, but the larger wrinkles need to be pulled out. Sometimes, you can also use a small spot of contact cement, but only put it in areas that aren't going to be visable. Just work at it a little and you'll figure out different ways to accomplish your goals.
Posted By: Mopar_Country
Re: headliner install in progress pics - 09/16/10 06:32 PM
Looks pretty good. Here is a headliner that Mopar Muscle did, and that's what is suggested to let it sit out in the sun.
http://www.moparmusclemagazine.com/howto/mopp_0608_mopar_car_headliner_replacement/photo_24.html
 and purchased the headliner on Ebay.
 The pics are after the first trimming that I did and I'm going to take the back seat out to get the metal quarter window mouldings off to make sure I get a good tuck fit. If I need to I might take the package tray out too to tuck it under it also.
 and purchased the headliner on Ebay.
 The pics are after the first trimming that I did and I'm going to take the back seat out to get the metal quarter window mouldings off to make sure I get a good tuck fit. If I need to I might take the package tray out too to tuck it under it also.


