 headliner install in progress pics
#801159
headliner install in progress pics
#801159
09/14/10 12:44 PM
09/14/10 12:44 PM
|
Joined: Jan 2003
Posts: 5,270
Missouri
MY340
 OP
OP
master
|
OP
master
Joined: Jan 2003
Posts: 5,270
Missouri
|
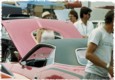
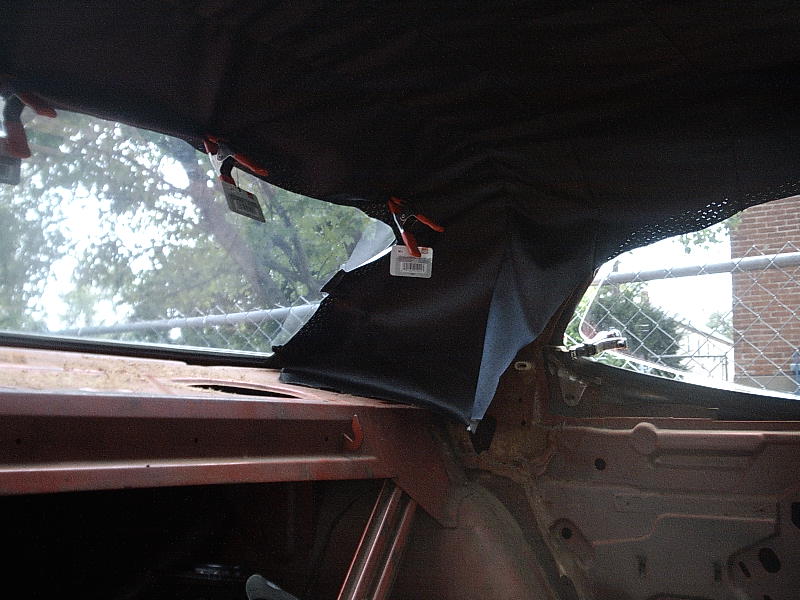
Here's some pics of my new headliner install. When I bought the car it had no headliner in it and no bows. Found the bows thru Moparts  and purchased the headliner on Ebay. I'm following Resto Ricks install guide for the most part. Luckily my old oil furnace filter uses that polyester fiber media he used for a sound deadener.  The pics are after the first trimming that I did and I'm going to take the back seat out to get the metal quarter window mouldings off to make sure I get a good tuck fit. If I need to I might take the package tray out too to tuck it under it also. Not a bad job just takes time and patience. I'm not done strechting it yet but so far it all look fine when I've pulled on it.
1970 FE5 Duster 360/904/3.91's SOLD
1973 TB3 SpaceDuster 340/4spd/4.10's SOLD
Moparless for now but when the opportunity is right I'll have another one.
|
|
|
 Re: headliner install in progress pics
[Re: MY340]
#801161
Re: headliner install in progress pics
[Re: MY340]
#801161
09/14/10 01:25 PM
09/14/10 01:25 PM
|
Joined: Jan 2003
Posts: 4,046
Minnesota
72blubird
master
|
master
Joined: Jan 2003
Posts: 4,046
Minnesota
|
Keep the pics coming would like to see sail panel install also. Nice Job
What was I thinking....
|
|
|
Re: headliner install in progress pics
[Re: 72blubird]
#801162
09/14/10 02:14 PM
09/14/10 02:14 PM
|
Joined: Jan 2003
Posts: 5,270
Missouri
MY340
OP
master
|
OP
master
Joined: Jan 2003
Posts: 5,270
Missouri
|
I'm working on that now as I removed the rear seat, package tray, rear trim panels and the metal qarter window moulding. They are gettin a fresh spray of semi gloss black which they needed anyway. I guess it's easier to leave the backseat & stuff in till the headliner & bows are installed since you can sit in the seats at first. That's the way I did it at least.  Lots of trimming to get the rear window & sail panel areas looking correct. The sides and front will be easy compared to the rear/side panel areas.
Last edited by MY340; 09/14/10 03:29 PM.
1970 FE5 Duster 360/904/3.91's SOLD
1973 TB3 SpaceDuster 340/4spd/4.10's SOLD
Moparless for now but when the opportunity is right I'll have another one.
|
|
|
Re: headliner install in progress pics
[Re: Commando1]
#801164
09/14/10 09:28 PM
09/14/10 09:28 PM
|
Joined: Nov 2008
Posts: 301
wisconsin
swifter
enthusiast
|
enthusiast
Joined: Nov 2008
Posts: 301
wisconsin
|
He is not so lucky--If thats his duster HE WILL be taking out the front and rear glass--No way around it--the headliner tucks and wraps around both--Steve
2007 Ram 2500 Cummins
2008 Dodge Nitro
1970 340 Valiant Duster
|
|
|
Re: headliner install in progress pics
[Re: sthemi]
#801166
09/15/10 09:33 AM
09/15/10 09:33 AM
|
Joined: Oct 2007
Posts: 1,064
Washington
69440
super stock
|
super stock
Joined: Oct 2007
Posts: 1,064
Washington
|
C'mon guys, this is not a tough job, and contrary to popular belief, the glass does not have to be removed. The headliner is a little easier to install with the glass out, but it's not necessary. There's "Teeth" front and rear, for the headliner to attatch to, then work from side to side, from center of car, outward to stretch out any small wrinkles, hold in place with with headliner clips, trim it out, and you're done. Please remember, I do this kind of thing every day, and have for a very long time, so if any of you members have any questions, please ask. I'm always glad to help. Just send me a PM, or give me a call. Thanks, Bill 931-703-5574
|
|
|
Re: headliner install in progress pics
[Re: 69440]
#801167
09/15/10 02:36 PM
09/15/10 02:36 PM
|
Joined: Jan 2003
Posts: 5,270
Missouri
MY340
OP
master
|
OP
master
Joined: Jan 2003
Posts: 5,270
Missouri
|
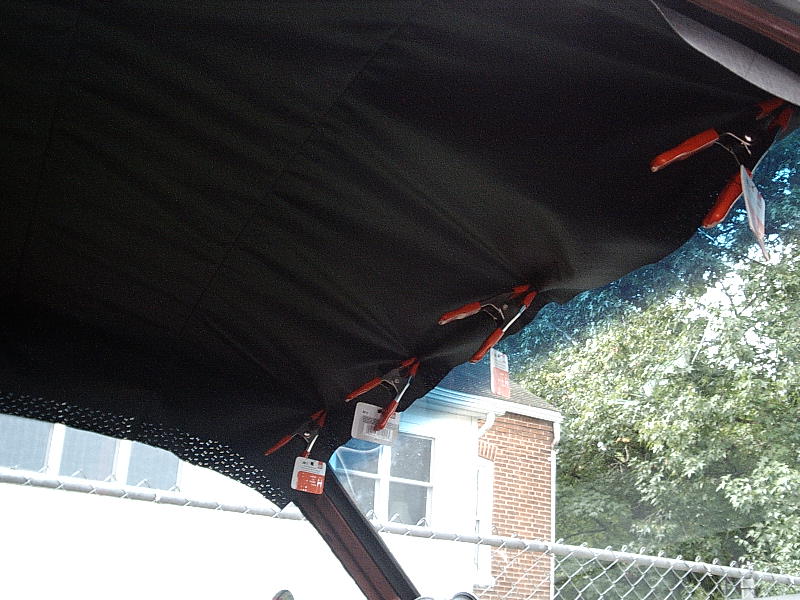
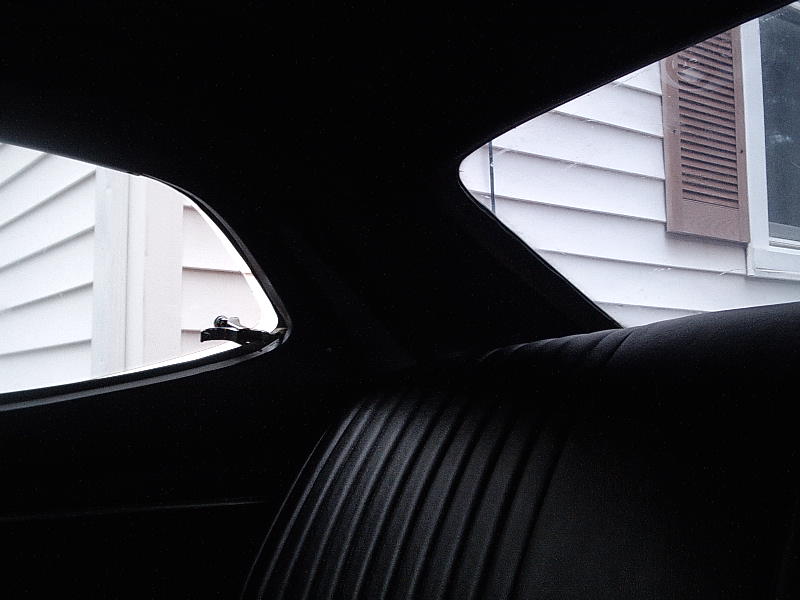
Well the sail panel areas turned out good but I still have some wrinkles in the top area to try and work out later. Trying to pull side to side I don't get much movement? I used the blunt end of a flat file to shove the vinyl under the front & rear gaskets and onto the teeth. No holes or tears so that's a good thing.
For my first time and a budget driver car I'm happy with it.
1970 FE5 Duster 360/904/3.91's SOLD
1973 TB3 SpaceDuster 340/4spd/4.10's SOLD
Moparless for now but when the opportunity is right I'll have another one.
|
|
|
Re: headliner install in progress pics
[Re: RestoRick]
#801173
09/16/10 01:25 PM
09/16/10 01:25 PM
|
Joined: Mar 2007
Posts: 5,660
Flint, MI
Gusteve
I Love the Unicorn Song!!
|
I Love the Unicorn Song!!
Joined: Mar 2007
Posts: 5,660
Flint, MI
|
Quote:
Yep... you need to pull it much more...
Rick
Yup - a lot more. As mentioned, parking it outside in the sun will help a lot. Good job on the sail panel, BTW. My roof looks fine after mucho pulling and stretching, but one of my sail panels is just awful. I never could get it right and had to settle for "good enough".
|
|
|
Re: headliner install in progress pics
[Re: MY340]
#801175
09/16/10 05:56 PM
09/16/10 05:56 PM
|
Joined: Sep 2003
Posts: 1,168
Vancouver, WA
MoparMarq
super stock
|
super stock
Joined: Sep 2003
Posts: 1,168
Vancouver, WA
|
Quote:
How's the best way to remove some more wrinkles? No looking for perfection here.
With wrinkles in those directions (front to rear), the tension in the headliner is too great front to rear (not likely) or not enough tension side-to-side (most likely). It needs a little more pulling to the sides to eliminate most of those wrinkles. Generally, a wrinkle means not quite enough tension in a direction perpendicular to the crest of the wrinkle.
|
|
|
|
|


