|
 Re: New Paint job on a budget thread Part III
[Re: 69DartGT]
#39554
Re: New Paint job on a budget thread Part III
[Re: 69DartGT]
#39554
07/02/11 12:05 AM
07/02/11 12:05 AM
|
Joined: Jul 2011
Posts: 5
North East, USA
Ursan

member
|
member
Joined: Jul 2011
Posts: 5
North East, USA
|
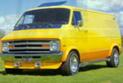
Hi all. I've been lurking here for quite some time gathering information about how things should be done. I really appreciate the efforts of everyone before me and the moderators for keeping the various threads alive. I do not have a Chrysler.Mopar vehicle, so please don't hold it against me.  Though my first car was a 1971 Dart 2-door with a 318. I am painting my car with Interlux Brightside (white) using an HVLP sprayer. I've removed everything I could. Windshield (to correct other damage), bumpers, lights, trim, quarter windows etc. I scuffed the entire car with a Scotch bright pad and repaired what few rust spots the car had and filled in with spot putty. Where I have exposed metal, I primed with white Interlux Prt-Kote primer. I'm thinking I probably should not have used white primer as it's kind of hard to see where I've painted (oops) I waited about a day after priming and I sanded the primer with 320 paper to flatten it out and put down 2 coats of paint thinned down with 10% Interlux 216 thinner. Question, should I sand the primer? Or is the texture of the un-sanded primer better for paint adhesion? The car is 20 years old and overall the original paint is in good condition, though I don't know what kind of paint it is originally (Volvo) I do know that it was a basecoat only and not a base/clear application. So far I've painted the trunk. I have some orange peel. I know it's something of an inevitability, but what suggestions are there to lessen it's appearance? Add more thinner? More paint and less air in the mix? The last time I painted a car, lacquer was was still the way to go. I don't recall this much orange peel. It's not that bad, but it is noticeable. I have the gun set to lay own a vertical pattern using about 38-40 PSI. I have up to about 90-100 PSI @ 15CFM available to me. After painting, I'm planning on basically reassembling the car(lightly) and wait for it to harden up for 30 or so days. Then I'll wet sand it then polish it out. What's the preferred polishing compound these days? I have a dual action polisher as well as a 5" 8" (D/A) buffer and a single action polisher with a wool buffing pad. I know much of this may have been covered, but I was hoping if there were recent developments or updated procedures that anyone might have available. I won't clog up this thread with photos, so here is my photo bucket link to the painting project page: http://s366.photobucket.com/albums/oo110/Ursan_780/780%20Project/780_Painting/ Thanks all.
|
|
|
Re: New Paint job on a budget thread Part III
[Re: joeshmo]
#39558
07/07/11 12:18 PM
07/07/11 12:18 PM
|
Joined: Jul 2011
Posts: 5
North East, USA
Ursan
member
|
member
Joined: Jul 2011
Posts: 5
North East, USA
|
Joeshmo, I got the gun dialed in thank you. My steps were to prime those areas that were bare metal. The car originally had 4 (four) layers of primer plus the base. It wasn't clear coated from the factory so in accordance from Interlux, I shot directly onto the cars original paint which I had gone over with a scotch pad and or 320 grit paper. Where I had the primer I also sanded.. The procedure was: scuff original paint and primer (using a block) (Friday)apply paint allow to dry 12-18 hours (Saturday)wet sand 800 grit second coat allow to dry (Sunday) wet sand 800 grit third coat allow to dry (again, 12-18 hours) (Monday)wet sand 1200 grit fourth coat. Leave alone for 48 hours in nice warm garage. I'll wait a few weeks to wet sand 2000-2500 and give it a final buffing. The main reason I didn't do the catalyzed paint is my concern over painting directly over the existing paint and using special primers. The gallon of interlux, solvent and 2 cans of primer came to less than a single gallon of the catalyzed paint not including what ever specific hardeners and primers it might have required, at least according to the pricing over at The Eastwood Company . Plus I don't have access to a respirator or anything else like that. At the moment I'm just starting to re-assemble the car. The trunk went back on last night. Just handling the paint it still feels like it's not quite set even though I did the final coat this past Monday (today is Thursday)
|
|
|
Re: New Paint job on a budget thread Part III
[Re: Ursan]
#39559
07/07/11 02:44 PM
07/07/11 02:44 PM
|
Joined: Sep 2009
Posts: 66
NY
joeshmo
member
|
member
Joined: Sep 2009
Posts: 66
NY
|
Quote:
Joeshmo, I got the gun dialed in thank you.
My steps were to prime those areas that were bare metal. The car originally had 4 (four) layers of primer plus the base. It wasn't clear coated from the factory so in accordance from Interlux, I shot directly onto the cars original paint which I had gone over with a scotch pad and or 320 grit paper. Where I had the primer I also sanded..
The procedure was:
scuff original paint and primer (using a block)
(Friday)apply paint
allow to dry 12-18 hours
(Saturday)wet sand 800 grit
second coat
allow to dry
(Sunday) wet sand 800 grit
third coat
allow to dry (again, 12-18 hours)
(Monday)wet sand 1200 grit
fourth coat. Leave alone for 48 hours in nice warm garage.
I'll wait a few weeks to wet sand 2000-2500 and give it a final buffing.
The main reason I didn't do the catalyzed paint is my concern over painting directly over the existing paint and using special primers. The gallon of interlux, solvent and 2 cans of primer came to less than a single gallon of the catalyzed paint not including what ever specific hardeners and primers it might have required, at least according to the pricing over at The Eastwood Company . Plus I don't have access to a respirator or anything else like that.
At the moment I'm just starting to re-assemble the car. The trunk went back on last night. Just handling the paint it still feels like it's not quite set even though I did the final coat this past Monday (today is Thursday)
Whenever I have priced interlux, it goes for about 30 dollars a quart which is about what I pay for my catalyzed paint (actually less, a gallon with hardener runs me about 80$). I can definitely understand the concern over base-coat stability though.
Your plan sounds good with the 2000 grit but IMO there is little need to go to 2500 grit. You might be better off going 1500-2000 then buffing it nice and shiny. If you do end up doing that, here is a tip:
Wetsand at a 45 degree angle and alternate directions. For example, sanding with 1500 grit I will sand diagonally towards the driver side mirror. When I start with 2000 grit, I will sand diagonally towards the pass. side mirror. This way you can see when you have sanded uniformly as all the scratching marks will be going in only one direction.
|
|
|
Re: New Paint job on a budget thread Part III
[Re: Ursan]
#39561
07/08/11 06:35 PM
07/08/11 06:35 PM
|
Joined: Sep 2009
Posts: 66
NY
joeshmo
member
|
member
Joined: Sep 2009
Posts: 66
NY
|
Quote:
How long should I realistically wait before wet sanding and polishing?
The reason I ask is I can't replace the drip molding until the polishing is done and therefore I can't replace the rear quarter windows. Or if I do, I can't seal them into place as they need to be.
I can use the car for a short while with them just screwed into place, but I don't want to press my luck.
It kinda depends. Can you still dent the paint with your fingernail? If so it is much too soft. With catalyzed 2k I can usually wetsand/buff the next day. With uncatalyzed urethane... maybe a week? Hard to say.
|
|
|
Re: New Paint job on a budget thread Part III
[Re: Ursan]
#39564
07/16/11 11:25 PM
07/16/11 11:25 PM
|
Joined: Jun 2011
Posts: 2
HI
kdeuce
member
|
member
Joined: Jun 2011
Posts: 2
HI
|
can i get a matte/satin finish using Rusto's Smoke Gray? do they have other satin paints besides white? i want to paint my car flat gray.
Last edited by kdeuce; 07/17/11 03:25 AM.
|
|
|
Re: New Paint job on a budget thread Part III
[Re: 69chargeryeehaa]
#39569
10/02/11 08:04 PM
10/02/11 08:04 PM
|
Joined: Oct 2011
Posts: 1
Disneyland, USA
StreetVanFan
member
|
member
Joined: Oct 2011
Posts: 1
Disneyland, USA
|
Quote:
So, been a long time since i was on here....but i still keep getting emails on how the paint is holding up, ect....so here is a pic that was taken a few months ago so it's recent and shows the paint condition after 8 or so years....give or take. And this car gets DRIVEN!!! the paint still looks like the day i did it!!!
 
Awesome! You're Bug still looks great!
I just spent the past couple weeks working my way through the whole epic saga (5 years+?!!) of this thread. I wondered if you still stopped by to check in. So glad to see you do and that you brought an update. I know you've heard it a million times before, but THANKS AGAIN for pioneering this method. I plan to go with Brightside (if I can get the right color) method because Aussie Driver's results were so amazing.
69ChargerYeeHaa, did you ever use the free clear Tremclad sent you? I don't remember seeing it in the thread, but it was a long journey and I could have missed it. I'd like to know if you got Rustoleom/Tremclad to shine like Brightside.
Glad to see you and THANK YOU THANK YOU THANK YOU!
|
|
|
Re: New Paint job on a budget thread Part III
[Re: StreetVanFan]
#39570
10/04/11 10:35 AM
10/04/11 10:35 AM
|
Joined: Jan 2006
Posts: 1,220
toronto canada
69chargeryeehaa
pro stock
|
pro stock
Joined: Jan 2006
Posts: 1,220
toronto canada
|
streetvanfan - thankyou so much for all the kind words  I'd also like to thank MOPARTS for tolerating this thread!! But ya, i still have that case of clear in my basement, and a case of more orange paint!! i experimented with the clear coat stuff and it was really nice and when i thinned it just a bit, it went on like glass, basically no buffing....which kinda turns this into a base/clear process but i haven't painted anything large with it, i just tried it on a old VW engine lid. The results were very very nice. I could picture just laying down what would be the base, and wetsanding it with 800 or so until completely dull and perfectly smooth, and just hit it with the clear...it would make it very easy!!! But the brightside option looks very nice...i would like to try that one day to compare. I never thought about that stuff, but i have used it on a boat before a long time ago, not sure if it was brightside or not, but i remember the results were very amazing, smooth and very shiny.
|
|
|
Re: New Paint job on a budget thread Part III
[Re: 69chargeryeehaa]
#39571
10/07/11 08:29 PM
10/07/11 08:29 PM
|
Joined: Oct 2011
Posts: 1
Denver, Colorado
BigPete
member
|
member
Joined: Oct 2011
Posts: 1
Denver, Colorado
|
Charger, just wanted to tell you that I have read every page of this 5+ year thread. You are a pioneer and trendsetter. I can't believe your bug looks that great after all these years. It literally looks identical to the pictures you posted in 2006. Beautiful work my man, and that Charger? All it's missing is a black 01 on the side of the doors and flag on the roof (as was stated 5 years ago. haha) Anyways, amazing jobs you did. I have started work on my 1983 CJ7. I practiced on my doors, and although not perfect because I had to work outside, and the last 2 coats were put on while it was WINDY, and they got dust and a few tiny bits blown onto it, it still looks fantastic. I hung the doors today even though I haven't wet-sanded and put on another coat if it needs because of the wind blown contaminants, but because it is so cold today and I needed to use Jeep to pick up kids from school, I just couldn't keep them off any longer. lol. Picture does show some stuff sticking to door, but I can wipe those off as it's just random leaves and such that is currently blowing on everyone's cars. Anyways, here is picture of it on my jeep I just took this afternoon. Makes the rest of my Jeep look like crap. haha. I owe it to you my friend. Maaco said minimum of $2500 to paint my jeep without the top. I am only in this Jeep for $120, and that includes a gallon of black (I know, hardest color cause shows everything), bondo, tape, rollers, trays, tack cloth, mineral spirits, grinders, sandpaper, other tools, etc... You saved me a ton. If you're ever in Denver, I'll buy you a beer! http://imageshack.us/f/855/20111007114158.jpg/
Last edited by BigPete; 10/07/11 08:55 PM.
|
|
|
|
|


 and then finish off with Meguiar's 205


