|
 A new start for my '77 Cordoba
#2762393
A new start for my '77 Cordoba
#2762393
04/10/20 04:07 PM
04/10/20 04:07 PM
|
Joined: Jan 2003
Posts: 3,704
MICHIGAN
DynoDave
 OP
OP
master
|
OP
master
Joined: Jan 2003
Posts: 3,704
MICHIGAN
|
I'll save all the details on this for another day. But the car has been in our family since new. 1977, 38k miles, 400 4barrel, Formal Sunfire Black Metallic paint, black halo top, black leather interior. The body needs work, and the suspension needs some love. The interior is good, and the car complete. A recent job changefor both the wife and I (pre-C-19 virus) has me hopefully that I can finally get some work done on this (and other) projects. First step, gutting the old repo battery to make room inside for an Odyssey PC925. Inspiration from Moparts members RealWing and 6PKRTSE. A proper resto battery is THE look for these cars when they have an original, uncut battery ThermoGard. I'm starting on that tonight. BATTERY THREAD 1BATTERY THREAD 2Before Tuesday I want to get the radiator out of it. It split open the last time I drove the car. It's been confined to the front garage (which is heated in the winter) ever since. There's a local shop that I want to have re-core it (putting in a 2 row in place of the factory 1 row). If I can keep the momentum up through the spring and summer, the gas tank should be pulled and cleaned at a minimum. Preferably I'll swap it for a narrow (dual exhaust) tank. I have a couple of options there. While that's out, I'd like to also swap axles. The factory 8.25 with 2.4 ratio on open diff is not gonna get it long term. I have a complete, drum-to-drum '71 Road Runner 8.75 3.23 ratio SureGrip axle with good leaf springs sitting on the floor. I would like to clean it up before I put it in. The springs are badly needed, as the originals have 100% failed, and it is sitting on it's bump stops. ![[Linked Image]](https://live.staticflickr.com/65535/49750175276_9e6064c364_b.jpg) ![[Linked Image]](https://live.staticflickr.com/65535/49750503292_565b0bb689_b.jpg)
Last edited by DynoDave; 04/10/20 04:11 PM.
|
|
|
Re: A new start for my '77 Cordoba
[Re: Magnumguy]
#2762835
04/11/20 08:04 PM
04/11/20 08:04 PM
|
Joined: Jan 2003
Posts: 3,704
MICHIGAN
DynoDave
OP
master
|
OP
master
Joined: Jan 2003
Posts: 3,704
MICHIGAN
|
Ran out last night and picked up a few battery conversion supplies. Deep tub that I can reuse for parts storage after, and if there's any "splash", it should help contain that. Kitchen gloves that reach half way up my forearms Vs my nitrile gloves. And a couple of big boxes of baking soda. The old gal looks sorta past it. But it's been in there since the early '90s, a Turbo Start unit that lasted 8-9 years with little use and a battery tender. ![[Linked Image]](https://live.staticflickr.com/65535/49762585261_2dabbeda11_b.jpg) I have a whole box of these cut-offs from when we built the shop in back. 3 of them should be perfect for protecting the posts when the battery is inverted. ![[Linked Image]](https://live.staticflickr.com/65535/49762585156_463e2166bd_b.jpg) I removed the vent caps, set her inside, and rolled her into place. Amazingly drama-free. ![[Linked Image]](https://live.staticflickr.com/65535/49762056333_4a876dccfc_b.jpg) And out flows what's left of the acid. ![[Linked Image]](https://live.staticflickr.com/65535/49762584996_d0a7c05eb8_b.jpg) Set the lid over it, but left a little room to let fumes out if needed. The caps went into a bath of baking soda and water. ![[Linked Image]](https://live.staticflickr.com/65535/49762915012_65f1e34b51_b.jpg) After a half hour soak, they were cleaned with an old tooth brush, rinsed, and look good as new. ![[Linked Image]](https://live.staticflickr.com/65535/49762673256_0df9e71844_b.jpg) While the caps dried and the battery finishes dripping, I took a moment to check out the battery tray. When the battery was installed, the tray was solid, but had surface rust. It was neutralized, coated in POR-15, and sprayed over with Eastwood battery tray coating. Two layers of Battery Mat were cut to shape. The upper layer is dirty from sitting, as is the rest of the engine compartment. But no other wear or damage. ![[Linked Image]](https://live.staticflickr.com/65535/49762584711_1e4bb9b4fb_b.jpg) The lower mat and tray look like the day I put them in. ![[Linked Image]](https://live.staticflickr.com/65535/49762914762_84802da64e_b.jpg) I'll get another hour or so out there this evening.
|
|
|
Re: A new start for my '77 Cordoba
[Re: UCUDANT]
#2763172
04/12/20 07:37 PM
04/12/20 07:37 PM
|
Joined: Jan 2003
Posts: 3,704
MICHIGAN
DynoDave
OP
master
|
OP
master
Joined: Jan 2003
Posts: 3,704
MICHIGAN
|
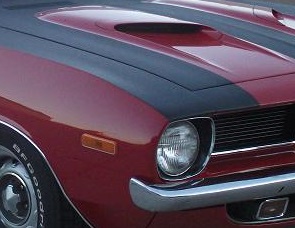
Yes sir UCUDANT! I've always loved the colors of this car. Looks fantastic when it's all clean and shiny.Can't wait (any longer) to make it look that way again. After sitting overnight, and rolling the battery around to drain it as best I could, this is all that came out. She was pretty dry. ![[Linked Image]](https://live.staticflickr.com/65535/49765564847_4f355575eb_b.jpg) Neutralized with a layer of baking soda. ![[Linked Image]](https://live.staticflickr.com/65535/49764706113_083ecf3c35_b.jpg) Dried off, and noticed there is a crack radiating from the positive post. It's still very solid, not loose in the case. Should not matter for what I want to do with it. Not happy about it, but it should not be a show stopper. ![[Linked Image]](https://live.staticflickr.com/65535/49764705963_dbc63663e4_b.jpg) Refilled with a mixture of baking soda and water. ![[Linked Image]](https://live.staticflickr.com/65535/49765564317_d1c81924df_b.jpg) I drained out the "acid" from the tub, and left the layer of baking soda. After letting the battery sit all day with the soda/water mix inside, it's back into the tub to drain. ![[Linked Image]](https://live.staticflickr.com/65535/49766864881_541b51cddf_b.jpg) I'll pull this out of the tub, drain the tub one more time, and refill the battery with pure water, and let it sit over night.
|
|
|
Re: A new start for my '77 Cordoba
[Re: DynoDave]
#2763691
04/14/20 12:52 AM
04/14/20 12:52 AM
|
Joined: Jan 2003
Posts: 3,704
MICHIGAN
DynoDave
OP
master
|
OP
master
Joined: Jan 2003
Posts: 3,704
MICHIGAN
|
I had a good final day off before returning to work tomorrow. Stayed on schedule with the Cordoba, my daughter helped me in the shop quite a bit, and I even found toilet paper on the shelf at Meijer today! I'll need to find replacements for these decals at some point. ![[Linked Image]](https://live.staticflickr.com/65535/49771323893_3b2b12afa2_b.jpg) ![[Linked Image]](https://live.staticflickr.com/65535/49771323833_8e6850ef18_b.jpg) The car was very cooperative today. Upper radiator hose came off the neck without issue (no coolant, as expected). The four bolts for the shroud and 4 at the water pump for the fan clutch and fan blade assembly came right out, and the shroud/fan/clutch all lifted right out of the way. ![[Linked Image]](https://live.staticflickr.com/65535/49771858101_c6880e7f47_b.jpg) The brass is green with corrosion, and the steel side brackets are rusty, but it seems structurally sound to me. ![[Linked Image]](https://live.staticflickr.com/65535/49772187552_d8b8bf91ca_b.jpg) Bottom hose put up a little bit of a fight, but came off clean, with no damage to the tank or nipple. Got about a gallon of coolant out of the block/water pump housing, all clean and bright green. I couldn't have been happier about that. Having topped it off with pure water when the radiator split eons ago, I was afraid there would be some corrosion inside the engine. But no signs of that here. ![[Linked Image]](https://live.staticflickr.com/65535/49772187487_10a037dd68_b.jpg) Taking a break from the radiator, I dumped the pure water out of the battery, and set the fan up to try and dry the battery out as much as possible before I start drilling on it. ![[Linked Image]](https://live.staticflickr.com/65535/49771323513_b2635be321_b.jpg) Back to the radiator. Last night, I found that the threaded adapters in the lower tank for the trans cooler lines would turn in the tank. Good news. The the lager nut on the line would turn on the adapter. Also good news. But then I noticed that on both the inlet and outlet lines, the nut was NOT spinning on the tube, but was corroded to it. Any major effort to turn them would twist the cooler lines. So before I turned in, I dropped some PB Blaster on them, and let it soak overnight. Today we broke out the small acetyline torch set I have, and heated both nuts (I did one, my daughter did the other), then tapped on the nuts and pipes with a hammer. Tried them both again with a line wrench, and they came apart smooth as butter. Four more bolts on the radiator frame, and out she came. ![[Linked Image]](https://live.staticflickr.com/65535/49771326513_0c5503b3c4_b.jpg) Rod that ties the two frame sides together. Threaded only on the last inch of the end with the nut. This end is just like a nail head. ![[Linked Image]](https://live.staticflickr.com/65535/49771326403_d0814926e7_b.jpg) Hard to believe that a thread and nut that rusty and that small will come apart. We'll see what they can do with it. I went ahead and hit it with PB Blaster tonight, so it can soak until I take it over to them tomorrow. ![[Linked Image]](https://live.staticflickr.com/65535/49771326353_4591e58a1d_b.jpg) Given it's age, I didn't think it looked too bad inside. Upper and lower hose openings into the upper and lower tanks shown. ![[Linked Image]](https://live.staticflickr.com/65535/49771860346_392fba523e_b.jpg) [img] https://live.staticflickr.com/65535/49772189872_f02e8f82d5_b.jpg[/img] That "extra" tank width from having one one row or core makes a great place for debris to get trapped behind the condenser. [img] https://live.staticflickr.com/65535/49771326048_d61f266120_b.jpg[/img]
|
|
|
Re: A new start for my '77 Cordoba
[Re: DynoDave]
#2764438
04/15/20 10:01 PM
04/15/20 10:01 PM
|
Joined: Jan 2003
Posts: 3,704
MICHIGAN
DynoDave
OP
master
|
OP
master
Joined: Jan 2003
Posts: 3,704
MICHIGAN
|
Was going to dig into the battery from the bottom yesterday. Even started to center punch the holes I was going to drill in the bottom of the case. But I thought I should make sure it was completely dead. So I checked it with a multi-meter, and the darned thing is still making volts! 2.6-2.7v to be exact. ![[Linked Image]](https://live.staticflickr.com/65535/49775123442_ffe2d95784_b.jpg) Lacking a carbon pile load tester to drain off the remaining voltage, I added an 1157-style bulb on some test leads. Not enough voltage to illuminate it, but hoped by giving the current a load, that I could drain it. After sitting like that all night, I'm happy to say that as of this morning, I'm down to 00.8v, not even enough to create a spark when I jumper the two terminals together. So I think I'm going to call that good enough, and dig into it tonight. Edit: Well, I would have dug into it more. But....SQUIRREL! I got distracted by another set of headers for sale. Was pretty excited about them though, so I spent most of my "old car" time tonight driving. After I got home, I did take the time to disconnect everything from the battery, flip it over, and drilled holes in the four corners. I'll let it sit tonight, with the fan blowing through those holes to try and dry the inside some more. Then tomorrow I will "connect the dots" to slice the bottom open.
|
|
|
Re: A new start for my '77 Cordoba
[Re: DynoDave]
#2764833
04/16/20 10:00 PM
04/16/20 10:00 PM
|
Joined: Jan 2003
Posts: 3,704
MICHIGAN
DynoDave
OP
master
|
OP
master
Joined: Jan 2003
Posts: 3,704
MICHIGAN
|
Started to cut the case open. Painting mask, rubber gloves, safety glasses, hat. Glad there was no one to take a picture of me. I had bought this HF tool when they were on some super sale...was less than $10 as I recall. Never had a need for it until now. Cuts pretty good. I'm not so hot at cutting a straight line, even when using the edge of the tool along the edge of the battery as a guide. Not quite sure how that happens. ![[Linked Image]](https://live.staticflickr.com/65535/49782120998_133d47bbfa_b.jpg) Then the bit snapped. Of course, in our current C-19 world...do I have a spare? I do not. Are any of the stores that would have one open? They are not. So I guess I'm done with battery work for the night. ![[Linked Image]](https://live.staticflickr.com/65535/49782983052_18b7cc22df_b.jpg) As a note to anyone who might do this same job later....the bottom of this case is not the same material as the sides. Almost seems like a poured material of some sort. When center punching it, or drill holes, it chips and flakes apart to a small degree. Makes a fair amount of dust when cutting it, so I kept a vacuum handy. Doesn't smell too good either.
|
|
|
Re: A new start for my '77 Cordoba
[Re: jughed]
#2765263
04/17/20 09:27 PM
04/17/20 09:27 PM
|
Joined: Jan 2003
Posts: 3,704
MICHIGAN
DynoDave
OP
master
|
OP
master
Joined: Jan 2003
Posts: 3,704
MICHIGAN
|
Thanks jughed! It's not as nice as the pictures make it look, but I'll take the compliment! And I'm glad I've kept all my old cars. Don't think I haven't taken a ribbing from just about everyone over it. A less than wonderful garage day. Broke another rotozip bit, but had purchased 4! Got around the perimeter of the bottom of the case. Tried to leave an edge to put some screws into later for a new bottom plate, but I think that's going to have to come off, which isn't going to be easy now. Two corners of the case cracked, one quite seriously. I hope it holds together through the rest of the process of gutting it. Thank God I have a Thermoguard to cover it. And is it just the lead and acid fumes, or did none of my photos come out in-focus this time? ![[Linked Image]](https://live.staticflickr.com/65535/49786868107_0684ef1cab_b.jpg) ![[Linked Image]](https://live.staticflickr.com/65535/49786545471_59408fc664_b.jpg) ![[Linked Image]](https://live.staticflickr.com/65535/49786006278_1a7ecb5aa0_b.jpg) ![[Linked Image]](https://live.staticflickr.com/65535/49786006203_07ded16f85_b.jpg)
|
|
|
Re: A new start for my '77 Cordoba
[Re: DynoDave]
#2765724
04/18/20 11:59 PM
04/18/20 11:59 PM
|
Joined: Jan 2003
Posts: 3,704
MICHIGAN
DynoDave
OP
master
|
OP
master
Joined: Jan 2003
Posts: 3,704
MICHIGAN
|
Like most things I jump into for the first time, this is a longer, messier job than I thought it would be. (rofl) Only one way to the bottom, err, top. Keep on digging! Gasket scraper to separate several plates about 3/4 - 1" down, one of granspa's old ball-peen hammers to tap it in, regular pliers to rip out a little section, needle nose piers for the more stubborn wires at the edges of the plates. Do it again, and again, and..... Got a couple of hours in on it today. Added clamps to help support all four corners, hoping to avoid further damage. Trimmed off a little more of the bottom, so I could more easily remove plates all the way to the edges and ends. I'm about 2 cells short of finishing my second pass. I'm gonna say I'm 1/3 to 1/2 half way to the top when I finish this row. Doesn't seem like that's going to be this weekend though. ![[Linked Image]](https://live.staticflickr.com/65535/49790762943_862bbbfd90_b.jpg) ![[Linked Image]](https://live.staticflickr.com/65535/49791617827_0e69bf76d1_b.jpg)
|
|
|
Re: A new start for my '77 Cordoba
[Re: DynoDave]
#2766158
04/19/20 11:35 PM
04/19/20 11:35 PM
|
Joined: Jan 2003
Posts: 3,704
MICHIGAN
DynoDave
OP
master
|
OP
master
Joined: Jan 2003
Posts: 3,704
MICHIGAN
|
AM: The odds of this little project succeeding got a little bit longer today, when this sizeable hole appeared in the side of the case. Not good. The case is old and brittle, and does not like me hammering and tugging at it. I haven't even looked at the top, to see how that crack around the negative post is looking. I'm trying to be careful, but there's only so much I can do. ![[Linked Image]](https://live.staticflickr.com/65535/49793335448_2504bfe9c0_b.jpg) Plan B is it to scrap the case and save just the top, if it comes to that. But this top needs to be functional, with the cables attached. I'm not sure if the repro toppers have real terminals that pass all the way through or not. But something like that is plan C. Buying another repro battery is the last stop for this train wreck. Hey, nothing ventured, nothing gained. The good thing for me is that all of the sides, and 50% of the top are hidden by the Thermoguard. So I can get away with a lot. PM: At last...a breakthrough. While breaking off little 1/2" squares of lead plate, I finally got a large piece of a plate! ![[Linked Image]](https://live.staticflickr.com/65535/49795679056_83f75cc570_b.jpg) Seems that while much of the battery is badly decayed, including all of the battery at the bottom (top as viewed), the further I dig down toward the top of the case, the better the condition of the plates, and some are hanging together well enough to come out in larger pieces. After a few more rows pulled out in the a similar fashion, I broke through into the fluid space at the top! ![[Linked Image]](https://live.staticflickr.com/65535/49795678811_75378dea8b_b.jpg) The rest of that cell, and the couple next to it came apart in a more typical (difficult) fashion. Then this cell started pulling apart in huge pieces, until I could see the first daylight through of the cap holes on the top cover! I feel like I just escaped from Shawshank! ![[Linked Image]](https://live.staticflickr.com/65535/49795983202_2ac3917b6b_b.jpg) Here's where I left off for the night. Did a little shop cleanup, and called it a day. ![[Linked Image]](https://live.staticflickr.com/65535/49795983102_9f05980421_b.jpg) ![[Linked Image]](https://live.staticflickr.com/65535/49795678126_0494a30d3c_b.jpg)
|
|
|
Re: A new start for my '77 Cordoba
[Re: DynoDave]
#2767249
04/22/20 10:03 PM
04/22/20 10:03 PM
|
Joined: Jan 2003
Posts: 3,704
MICHIGAN
DynoDave
OP
master
|
OP
master
Joined: Jan 2003
Posts: 3,704
MICHIGAN
|
Took yesterday off, but got back at it today for an hour +. So I'm left with these spots...lead tie plate, with the remaining ends of the lead battery plates attached. You can see in the cells marked 1 and 3, the ends of the lead battery plates have all but fallen apart, with little remaining to be removed. ![[Linked Image]](https://live.staticflickr.com/65535/49807175653_30fc27244f_b.jpg) In cell 2, I have taken a Dremel, and cut about 2/3 of the way through them horizontally (that's as far as the cut-off wheel would reach), and using pliers I have started to twist them off, working right to left. Cell 4 is what most started out looking like. To get a "clean" stack of plates to cut as in cell 2, I had to use a small screwdriver to scrape the debis from behind one plate, fold it over, clean the next gap, go to the next, all the way across. Here's the "finished" product. The lugs in the upper left and upper right corners are the underside of the posts on the top of the battery. Here I have trimmed them down to be round posts on the inside, more or less. And I think this is about as far as I'm going to go. Working to cut away more of the remaining tie plates is difficult, and stressing the plastic case pretty severally. The corner posts are not going to live, as there's nothing tied to them on the underside. And the small battery I'm going to place in here will come no where near the remaining lead pieces. Tomorrow I'll give it a bath. ![[Linked Image]](https://live.staticflickr.com/65535/49808035997_b8973b6c80_b.jpg) The good news...an inspection of the exterior of the case, sides and top, showed no more damage than what we had already seen. The crack around the positive post on the top of the battery has not changed since I removed the battery from the car. With some repairs, I think the case is entirely salvageable.
|
|
|
Re: A new start for my '77 Cordoba
[Re: dmoore]
#2768183
04/25/20 05:01 PM
04/25/20 05:01 PM
|
Joined: Jan 2003
Posts: 3,704
MICHIGAN
DynoDave
OP
master
|
OP
master
Joined: Jan 2003
Posts: 3,704
MICHIGAN
|
Man that's a beautiful example dmoore. I can only hope mine turns out as nice some day. I do have one advantage. A member of my 3rd gen Charger forum goes to a fall show that I attend as well. And he travels to the show with a few friends. One is a painter/body man, and he just redid this fellows Charger SE in the same color. Gives me an exact idea of what he could do with my car, and what it would look like when done. I hope to put him to work on it in the not too distant future. ![[Linked Image]](https://live.staticflickr.com/4606/39154675354_e43d3da05b_b.jpg) ![[Linked Image]](https://live.staticflickr.com/4762/39832569352_14e62febb5_b.jpg) And my car, back in the day. ![[Linked Image]](https://live.staticflickr.com/65535/49819150387_800be29480_o.png)
|
|
|
Re: A new start for my '77 Cordoba
[Re: DynoDave]
#2768187
04/25/20 05:11 PM
04/25/20 05:11 PM
|
Joined: Jan 2003
Posts: 3,704
MICHIGAN
DynoDave
OP
master
|
OP
master
Joined: Jan 2003
Posts: 3,704
MICHIGAN
|
Well, the NFL draft is close enough to over for me to get back to work! Cleaned up the mess I made gutting the battery, and cleaned and oiled the tools. I'll start in on cleaning the case later tonight. Was going to call it a morning, then started looking at the mess the engine compartment is. Where to start? EVERYTHING needs cleaning, replacing, work work work. I thought if I was going to start to work in here, then cleaning up around where the radiator mounts would be the place, before the radiator is re-installed. There were quite a few bent over fins on the condenser (I think the radiator has been in and out once before), so straightening that out and cleaning that area was the thing to do, it seemed. A few "before" photos of the damaged areas. ![[Linked Image]](https://live.staticflickr.com/65535/49818075268_ce2288f0ee_b.jpg) ![[Linked Image]](https://live.staticflickr.com/65535/49818922177_20808c4dd1_b.jpg) The magic radiator comb! ![[Linked Image]](https://live.staticflickr.com/65535/49818922097_a181c70a5d_b.jpg) Some of those areas are too bent up for the comb to get through, so I did a little pre-work in spots with a small screwdriver. ![[Linked Image]](https://live.staticflickr.com/65535/49818609986_848af27bfe_b.jpg) ![[Linked Image]](https://live.staticflickr.com/65535/49818074728_294e64940a_b.jpg) Those same two spots "after". Worked pretty darned good, I must say. ![[Linked Image]](https://live.staticflickr.com/65535/49818074578_608eb0b7bd_b.jpg) ![[Linked Image]](https://live.staticflickr.com/65535/49818074423_f2cee2ff60_b.jpg) After working my way the rest of the way across, blowing it out with compressed air, then brushing it off, it turned out pretty nice. Not bad for 43 years old. ![[Linked Image]](https://live.staticflickr.com/65535/49818609436_39415055b3_b.jpg)
|
|
|
Re: A new start for my '77 Cordoba
[Re: DynoDave]
#2768899
04/27/20 10:31 PM
04/27/20 10:31 PM
|
Joined: Dec 2008
Posts: 1,323
Virginia's Eastern Shore
dmoore
pro stock
|
pro stock
Joined: Dec 2008
Posts: 1,323
Virginia's Eastern Shore
|
Man that's a beautiful example dmoore. I can only hope mine turns out as nice some day. I do have one advantage. A member of my 3rd gen Charger forum goes to a fall show that I attend as well. And he travels to the show with a few friends. One is a painter/body man, and he just redid this fellows Charger SE in the same color. Gives me an exact idea of what he could do with my car, and what it would look like when done. I hope to put him to work on it in the not too distant future. And my car, back in the day. That back in the day pic is very sinister! Wow, if you could achieve that again you will be a happy man!
|
|
|
Re: A new start for my '77 Cordoba
[Re: dmoore]
#2769178
04/28/20 04:19 PM
04/28/20 04:19 PM
|
Joined: Jan 2003
Posts: 3,704
MICHIGAN
DynoDave
OP
master
|
OP
master
Joined: Jan 2003
Posts: 3,704
MICHIGAN
|
That back in the day pic is very sinister! Wow, if you could achieve that again you will be a happy man! I agree. I'm going to add a nice stereo, a floor shift console, and some forged '80's Cordoba wheels (those hubcaps are from the '80s J-car based Cordoba that my great Aunt/Uncle traded this car in on...then my Grandma bought this car, then I bought it from her...the aunt preferred the original '77 hubcaps, and had the dealer swap them when she traded). Lots of mechanical mods in mind, but the appearance will be very much like this. I'm just starting to clean up the grungy engine compartment, especially in the area around the radiator. And I have a few questions. If you could help me dmoore (or anyone with an original, unmolested car), I'd appreciate it. Photos would be very helpful. 1) Here's a yet-uncleaned are of the core support, right by the battery Thermoguard. Notice the little wiring harness retainer. I don't have a harness in this area. That means I unwrapped it 20 years ago and have forgotten what goes there (likely), or??? Do you have a harness in this location? If so, what circuits are in it / where do the wires go? ![[Linked Image]](https://live.staticflickr.com/65535/49827981001_a886056c38_b.jpg) 2) Photo two is of the passenger side front corner of the engine compartment. In stock form, the washer fluid fluid bottle would be in this corner. On mine you will see the charcoal canister and an air intake duct. When I cleaned this surface off (this is a quick working ladies bath guys, not a pro detail...baby steps) there are the old adhesive remnants of a factory decal. As can be seen in the photos I posted on the 14th, the Buy MOPAR Parts decal, and antifreeze decal are still in place on the core support. Do you have a decal in this location, and if so, what is it for? It might have been an oddly placed oil change decal, but it seems too small for that. ![[Linked Image]](https://live.staticflickr.com/65535/49828295622_e68875d673_b.jpg) 3) No mystery here...this is where the factory thin rubber hood-to-cowl seal mounted on the underside of the hood. Mine was there once upon a time, but was literally as fragile as a thin potato chip, and just shattered into pieces over the years. I don't have any good photos of a factor one in place. If yours is intact, I'd love some photos of it. ![[Linked Image]](https://live.staticflickr.com/65535/49828295562_188f978c6c_b.jpg) 4) A couple of surface finish questions here. ![[Linked Image]](https://live.staticflickr.com/65535/49827980771_643f9c3803_b.jpg) - Arrow 1 is the a/c condenser bracket. appears to have had a black painted finish on it, which is largely popping off of this bracket. I'm assuming is some form of supplier sprayed flat or semi-gloss / chassis black. What does your look like? - Arrow 2 is the horn bracket, and horn. Like the a/c condenser bracket, this one is decayed enough that it's hard to tell what the supplier finish was. If yours are in batter shape, photos would be great. - Arrow 3 is the top of the frame rail. I have not cleaned it here, so I'll show a photo (below) of the same area on the passenger side. I have not cleaned that little pocket on either side, but it looks like it might have been chassis black, and not Formal Black Metallic. What finish is on that surface on your white car? It should stand out a lot more on your white car Vs my black one. ![[Linked Image]](https://live.staticflickr.com/65535/49827451363_ed4e350cc3_b.jpg)
Last edited by DynoDave; 04/28/20 04:26 PM.
|
|
|
|
|


![[Linked Image]](https://live.staticflickr.com/65535/49800199027_5a09dbf0fe_b.jpg)
![[Linked Image]](https://live.staticflickr.com/65535/49799344193_fc24c6f730_b.jpg)
![[Linked Image]](https://live.staticflickr.com/65535/49800198527_1ed4a58681_b.jpg)
