 '70 Challenger Rallye Gauge Cluster Restoration
#1397190
'70 Challenger Rallye Gauge Cluster Restoration
#1397190
03/04/13 10:36 AM
03/04/13 10:36 AM
|
Joined: Feb 2013
Posts: 401
California, USA
filmsurgeon
 OP
OP
mopar
|
OP
mopar
Joined: Feb 2013
Posts: 401
California, USA
|
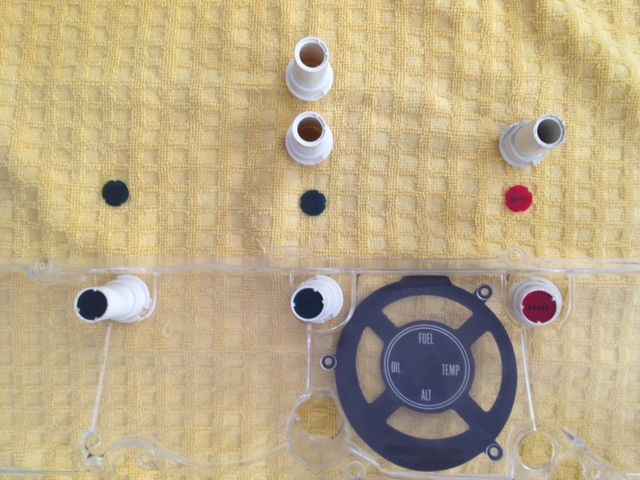
I realize that similar topics have been posted in the past, but rather than piggy-back on an older post, I thought it might be better to start a fresh one. I have searched this sight and others for info, and have read everything I could find. I am "restoring/updating" the 1970 Rallye gauge cluster that the prior owner installed back in 2003. I successfully removed everything including the switch panel from the dash (thanks to the advice/knowledge I gained from this site). I also disassembled everything (see attached photos of individual components). The cluster and instruments/gauges are in excellent condition. However, the clock hasn't worked since I've owned the car (6.5 years; and probably has not worked for long before that); and the prior owner had installed an Auto-Meter Tach (looked like s**t). Several years ago, I bought: a restored original 8K Rallye Tach (can't remember from who); a solid state quartz movement for the clock; new light tubes and lenses; new woodgrain faceplates. I'd like to do as much as I can myself to save on cost. I know the Tach will need to be updated/converted to solid state in order to work with my MSD style ignition box; I'll also need a solid state voltage limiter; I want to have the Ammeter converted to a Volt Meter; and the fuel, temp and oil gauges should be calibrated. All orange needles need to be repainted due to fading (except for the Tach which is fully restored). Fortunately for me, I live 20 minutes from Redline Gauge Works. I visited them last week and showed them high res photos (on my laptop) of my individual components, and we discussed what they could do, and for what price. Following is my "take-away" from that visit. What I will do: (1) Install the new woodgrain faceplate to the gauge/instrument cluster plastic bezel. Redline doesn't really do that (but they did do it once??); and when they build new Rallye clusters for customers, they buy the bezels with the faceplates already installed. *** Any recommendations on this installation will be greatly appreciated *** I read another post where someone described bending the faceplate around a 3/4" pipe. http://www.cuda-challenger.com/cc/index.php?topic=44460.0 Is this really the best way? (2) "Restore" the switch cluster. Basically, clean it up, repaint the switch knobs and lever, and install the new woodgrain faceplate. *** Any recommendations on this installation ***; as well as correct paint for the headlight toggle switch lever, wiper switch knob, and dimmer switch knob will be greatly appreciated. What Redline will do: (I think all service and parts come with a 2 year warranty) *** All needles will be repainted (except Tach, as it is a fully restored instrument) (1) Speedometer "repair" = $180. This is a recommendation from Redline. I explained to them that the speedo looks like it's brand new. They said it's best to take it apart and check and re-lube everything. I don't know that a full price "repair" is in order. Thoughts?? (2) Tach Conversion to solid state = $200. I have no questions here. They don't use RTE or PDD boards, or MSD adapters. They have their own conversion approach. I'd rather have it done by professionals, rather than trying to do it myself. I have read where others have done this fairly easily using the above mentioned conversion options, but I feel it's best to leave this to those who have done it for years. (3) Solid State Voltage Limiter = $43. I have no questions here. (4) Calibrate: Fuel, Oil, Temp Gauges = $40 (1/2 hour labor). I have no questions here. (5) Quartz Clock Conversion = $80 (1 hour labor). I have no questions here. They will use my part (same ones they use), and just charge me labor for install. (6) Amp to Volt Meter Conversion = $160. I have no questions here. This should be done considering the power hungry non-stock add-ons (i.e. audio system, etc.). Besides, it's just simply a safer alternative. (7) Assembly and Detail = $80 (1 hour labor). I have no questions here. This includes polishing the clear plastic gauge/instrument cluster lens. Total Redline cost = $783.00 *** I am also looking for help/info on installing the new indicator lenses (left, right, brake). *** Any feedback about any aspect of this project is greatly appreciated. Thanks. 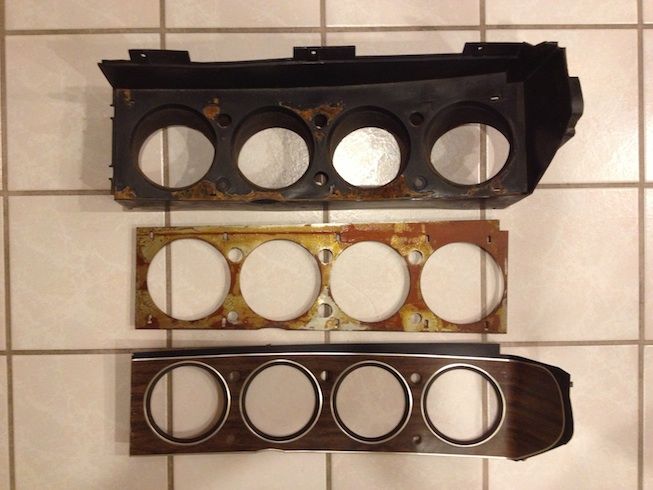 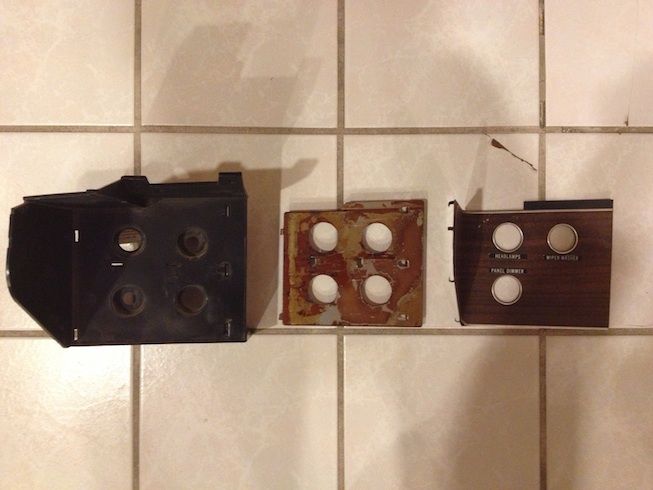 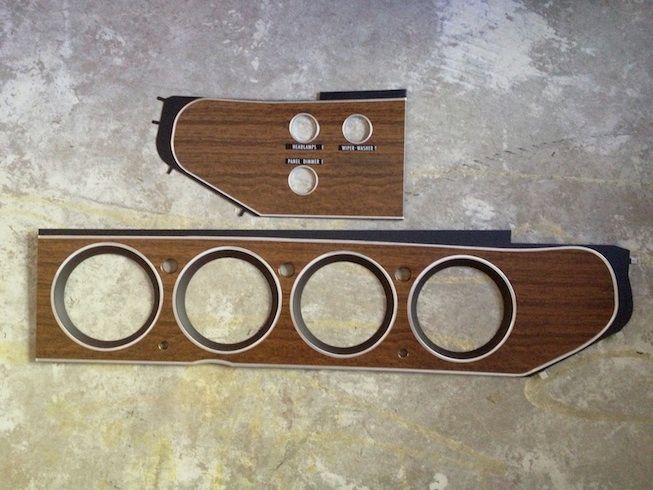 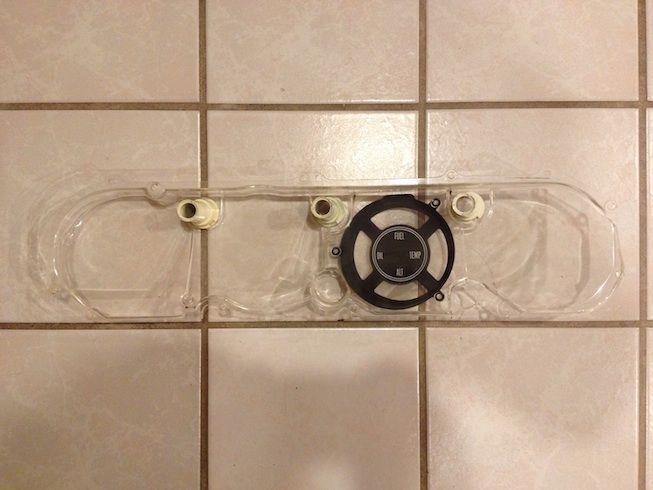 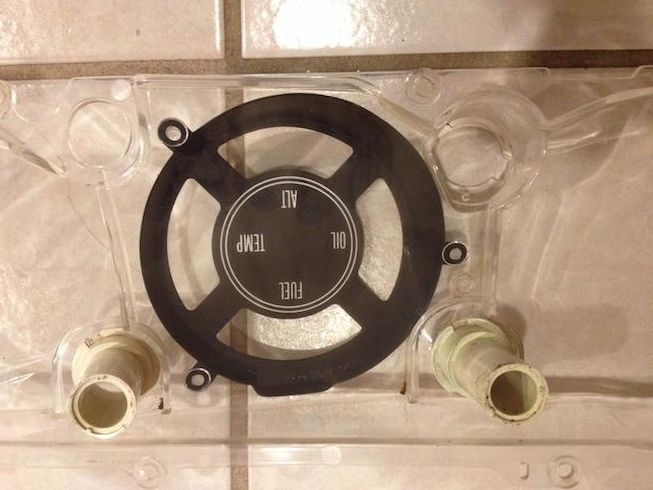 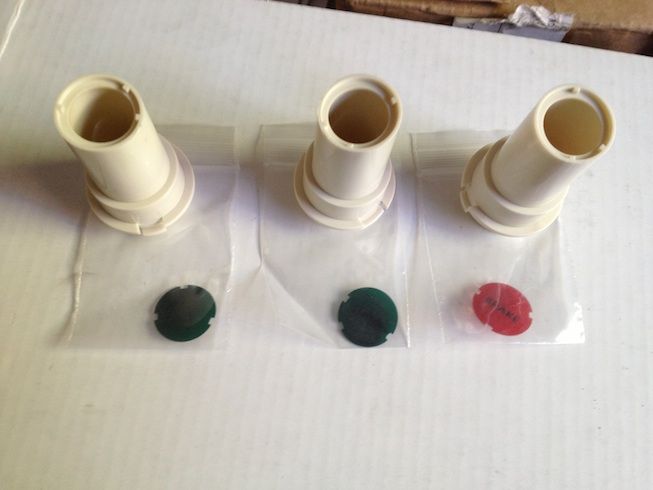  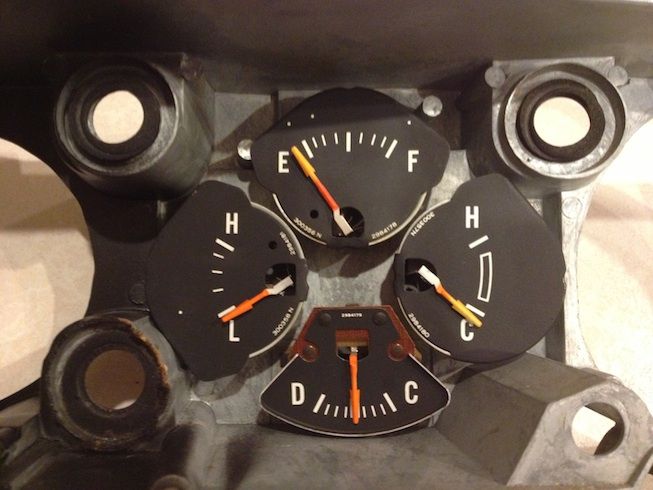 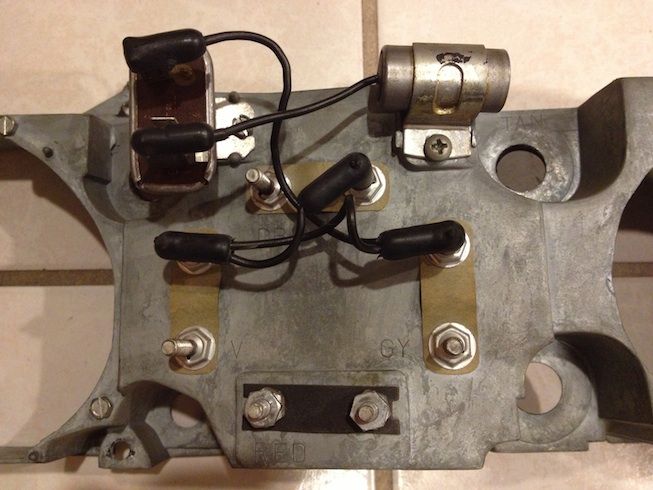 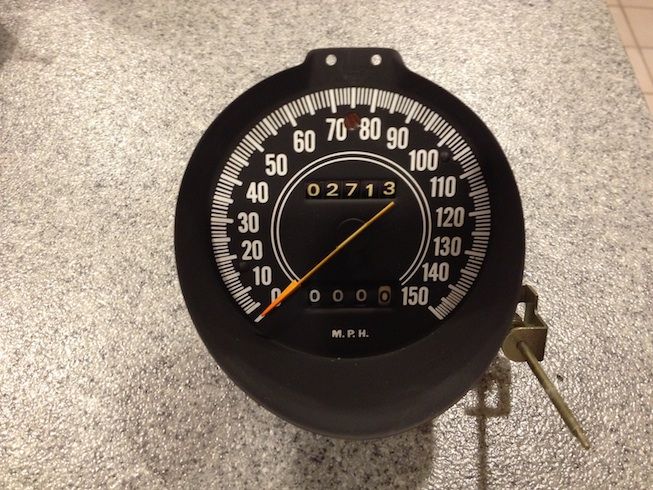 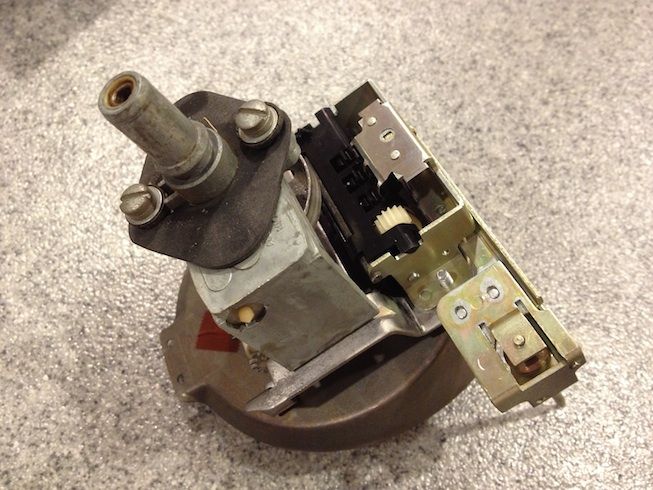 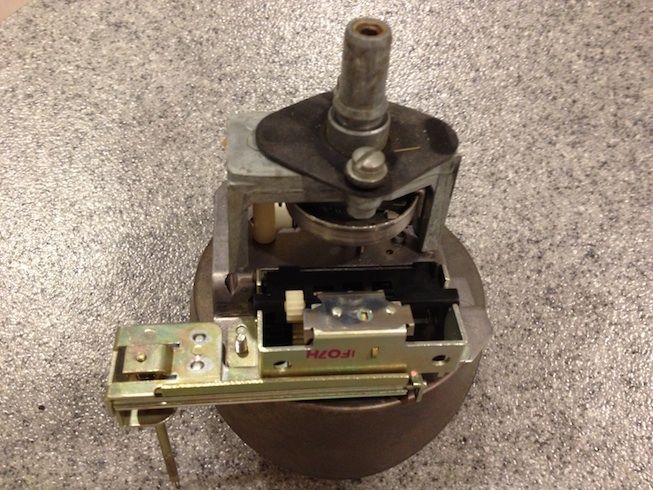  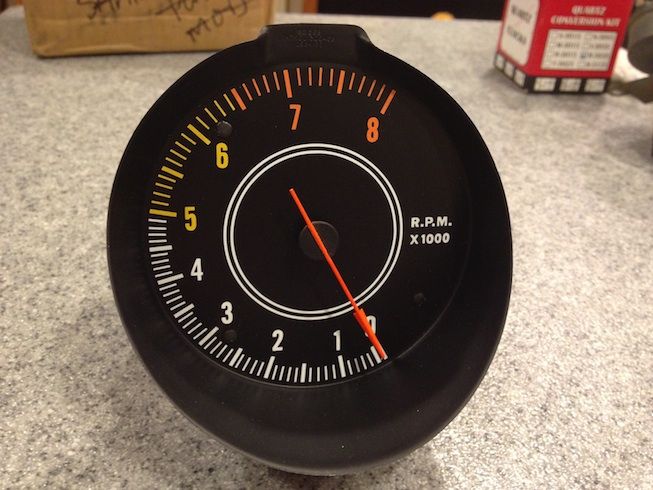 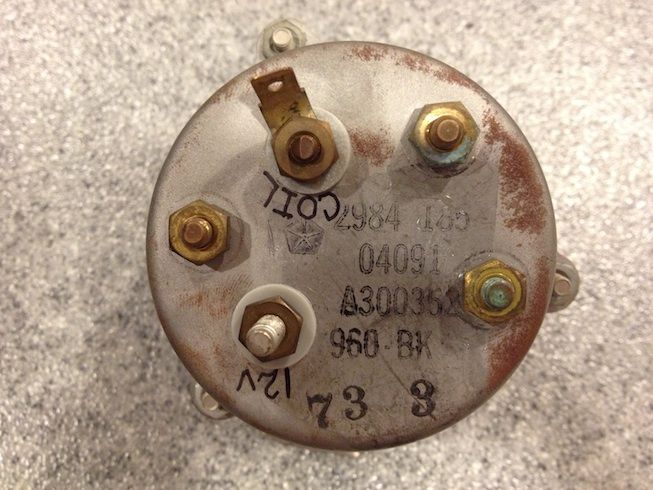 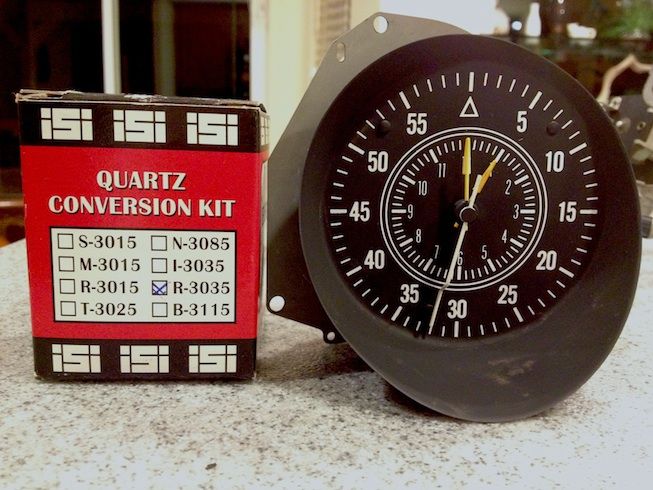 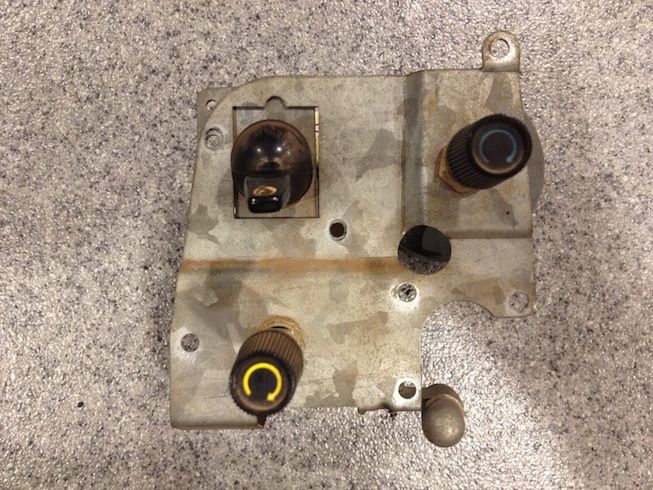 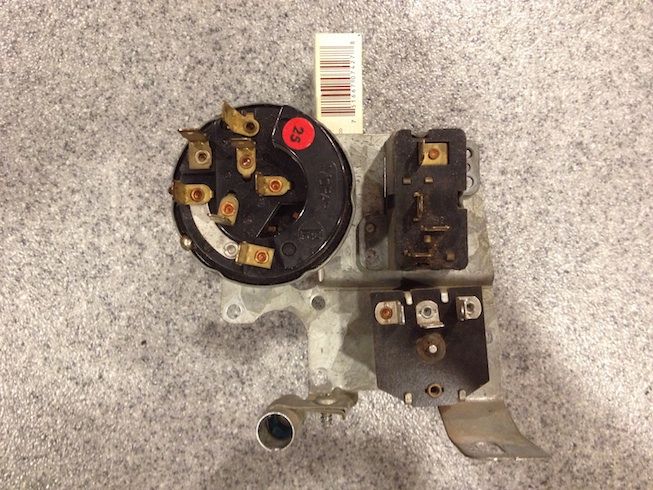
|
|
|
Re: '70 Challenger Rallye Gauge Cluster Restoration
[Re: Iceman01]
#1397193
03/11/13 02:14 PM
03/11/13 02:14 PM
|
Joined: Feb 2013
Posts: 401
California, USA
filmsurgeon
OP
mopar
|
OP
mopar
Joined: Feb 2013
Posts: 401
California, USA
|
Quote:
Wanna sure-fire way to get some replies?
Add a line or two asking where to get a repro fender tag because you lost yours and don't have a build sheet... 
That's a funny one.  I usually get timely and sufficient responses from the members here on most of my other posts. Don't know why there's been "zero" constructive feedback on this one. I usually get timely and sufficient responses from the members here on most of my other posts. Don't know why there's been "zero" constructive feedback on this one. 
|
|
|
Re: '70 Challenger Rallye Gauge Cluster Restoration
[Re: filmsurgeon]
#1397194
03/11/13 02:38 PM
03/11/13 02:38 PM
|
Joined: Dec 2011
Posts: 67
wyo
70 vcodecuda
member
|
member
Joined: Dec 2011
Posts: 67
wyo
|
I don't think those light tubes will work ,they all look like they have the same spacing for the lens ,I had to use two of my old tubes and one new one
fun project!!
1970 Cuda V code 4speed Shaker
2009 Challenger RT
2003 Ram 2500 Quad Cab CTD
|
|
|
Re: '70 Challenger Rallye Gauge Cluster Restoration
[Re: 70 vcodecuda]
#1397195
03/11/13 04:24 PM
03/11/13 04:24 PM
|
Joined: Feb 2013
Posts: 401
California, USA
filmsurgeon
OP
mopar
|
OP
mopar
Joined: Feb 2013
Posts: 401
California, USA
|
Quote:
I don't think those light tubes will work ,they all look like they have the same spacing for the lens ,I had to use two of my old tubes and one new one
fun project!!
WOW!! Good eye! What a bummer!  I had not even realized that the lenses have different notch patterns (nor did I realize that the tubes are "tabbed" specifically for the individual lenses). I just now looked at what I took out of the car; one of the three tubes on the clear lens was incorrect (2 same, one different, instead of three different). Although all my new tubes are the same (for the RIGHT lens only), luckily it's the one that was missing (I had two BRAKE tubes in the clear lens). Why are these being sold this way? I did buy my new ones several years ago, but I just looked on the web, and sellers are still selling 3 matching tubes. I guess when they repopped these, they didn't realize that each tube is unique. At least the repop LEFT, RIGHT, BRAKE lenses are correctly notched though. I had not even realized that the lenses have different notch patterns (nor did I realize that the tubes are "tabbed" specifically for the individual lenses). I just now looked at what I took out of the car; one of the three tubes on the clear lens was incorrect (2 same, one different, instead of three different). Although all my new tubes are the same (for the RIGHT lens only), luckily it's the one that was missing (I had two BRAKE tubes in the clear lens). Why are these being sold this way? I did buy my new ones several years ago, but I just looked on the web, and sellers are still selling 3 matching tubes. I guess when they repopped these, they didn't realize that each tube is unique. At least the repop LEFT, RIGHT, BRAKE lenses are correctly notched though.
|
|
|
Re: '70 Challenger Rallye Gauge Cluster Restoration
[Re: filmsurgeon]
#1397198
03/11/13 10:29 PM
03/11/13 10:29 PM
|
Joined: Jun 2008
Posts: 1,822
Colorado
denfireguy
top fuel
|
top fuel
Joined: Jun 2008
Posts: 1,822
Colorado
|
I did my cluster myself. I took the speedometer to a local speedo shop for rebuild. The trip odometer would jam and all the digits would lock together and spin in unison.
I got it back in a clear plastic bag. After they worked on it, there was metal debris in the head that really screwed it up. And the digits on the trip odometer were still messed up. I am sure that Redline will do a better job for you. Lubrication is critical in all parts of the odometer but especially the mileage indicator and the trip odometer.
I redid mine by buying a used speedometer off ebay. I used the newer head and the trip assembly but my odometer so it was still semi accurate. Everything was cleaned electrosonically and then used lubriplate white grease on all moving part surfaces.
The needle was broken since the day I owned it. It was in the bezel still. I put a small copper wire in the channel on the pointer and super glued it to the dial hub. Painted it with Testors Coast Guard orange and put it all together. The repair is undetectable.
I did replace one light tube as was heat distorted years ago.
I did put RT Engineering's Quartz clock and electronic voltage limiter in as well.
Craig
Last edited by denfireguy; 03/11/13 10:32 PM.
2014 Ram 1500 Laramie, 73 Cuda
Previous mopars: 62 Valiant, 65 Fury III, 68 Fury III, 72 Satellite, 74 Satellite, 89 Acclaim, 98 Caravan, 2003 Durango
Only previous Non-Mopar: Schwinn Tornado
|
|
|
Re: '70 Challenger Rallye Gauge Cluster Restoration
[Re: JulesdaWiperman]
#1397202
06/02/13 07:32 PM
06/02/13 07:32 PM
|
Joined: Feb 2013
Posts: 401
California, USA
filmsurgeon
OP
mopar
|
OP
mopar
Joined: Feb 2013
Posts: 401
California, USA
|
Thank you very much for the feedback Jules. I do agree with everything you said. See comments below in Bold. Quote:
The brake/left and right lens do not go on the tubes.
They go on the black housing and then the plastic is lightly melted around the lens keeping them in place.
That is why the light tubes are sold all the same.
Yes, I noticed when I disassembled the cluster, that the indicator lenses were actually secured in the holes on the backside of the black plastic housing. The thin foam-like seals were there, but they were deteriorated, so I removed them. I had bought a set of new light tubes, and another member pointed out that they were all the same. I looked at my originals, and noticed they were not. I noticed that the lenses have notches in different positions/patterns to match their respective light tubes.
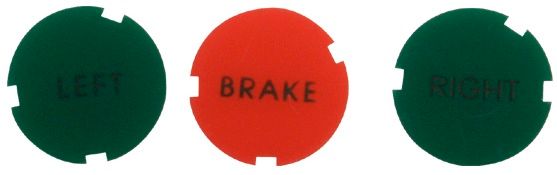
I figured, if I place the lenses in the holes of the black housing, I probably wouldn't get the notches to match up with the "tabs" in the light tubes. So, I decided to just put them into the light tubes, where I could accurately align the lens notches with the tabs in the tubes. I realize this was not how it was done originally. BTW - I ended up using 2 of my original tubes, and 1 new tube (see my post above from March 11th regarding my lenses and light tubes).
The texture inside the black housing is correct.
Thank you. I guess I just need to figure out the best way to get them "black" again. Any suggestion?
IMO and I repeat IMO. The gauge metal housing was bead blasted beyond requirement. It almost looks painted grey.
Too much of the metal surface finish was removed and thus you lost the original look
of the metal that was once poured.
I see your point, and respect your opinion. The photos may not do justice to Redline's work. I assure that in person, the housing does not look painted, although likely more pristine than how they were originally.
In one of your pictures , why is your OIL gauge already showing a reading?
That picture was taken by Redline. I believe at the time (before I picked up the cluster) they were in the process of bench testing the gauges. They were replying to a post on Cuda-Challenger regarding Amp to Volt meter conversions.
http://www.cuda-challenger.com/cc/index.php?topic=67781.msg916382#msg916382
You can see in one of the other photos that I took, the gauge is not showing a reading.
The 2 rubber vibration grommets on the speedo should have been replaced as one already looks split.
I agree. Do you know where I can get these? They are dried-out/cracked, and I'd like to replace them.
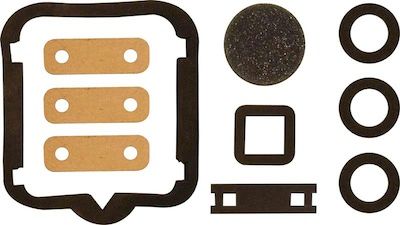
The small round foam seals are available for the black plastic housing
light tube area. Contact Mr.Heaterbox 613-532-2587
I did buy a "cluster seal kit", and installed the new foam ring seals that go on the front-side of the the black plastic housing (the ones that seal the "back-side" of the light tubes to the housing). I believe these may be the same as what is available from Mr. Heaterbox. Do you know if his are the same?
Jules
|
|
|
Re: '70 Challenger Rallye Gauge Cluster Restoration
[Re: filmsurgeon]
#1986986
01/09/16 05:02 PM
01/09/16 05:02 PM
|
Joined: Mar 2015
Posts: 23
SoCal
droptail
member
|
member
Joined: Mar 2015
Posts: 23
SoCal
|
It looks like this is incorrectly wired (6th image down).
I don't believe there should be the black lead from the alternator Ammeter post to the housing (tach mounting post/nut).
This would be a direct short from hot ammeter to chassis ground.
The Black lead to the Ammeter is battery supply line.
The Red is the load.
I am trying to wire my (4) leads going to the ammeter.
' '70 Cuda convt - 383 bored/ported, Hemi cam, Rhoads, rollers, Mellings, MSD, 750 DP, LT dual 3", lowered, snubber, police chuck, discs, springs, sway bars, Transgo, posi, shaker, aluminum 17" rallyes w/275-285/40 EXTREMECONTACT SPORT, leather...
|
|
|
Re: '70 Challenger Rallye Gauge Cluster Restoration
[Re: filmsurgeon]
#1987148
01/09/16 09:21 PM
01/09/16 09:21 PM
|
Joined: Mar 2005
Posts: 1,406
New Jersey, USA
yella71
pro stock
|
pro stock
Joined: Mar 2005
Posts: 1,406
New Jersey, USA
|
Why is the amp gauge at max discharge ? it should be centered at rest (no currant flow).
71 challenger convertable, 64 sport fury 383 ci with factory air
99 sebring convertable
89 CTD pup
|
|
|
|
|


.JPG)