Moparts

Run Stand - Starter set up

Posted By: clovis

Run Stand - Starter set up - 10/10/23 11:23 AM

I have another thread going on my oil pressure issue but have now got another issue going with my starter on the run stand.

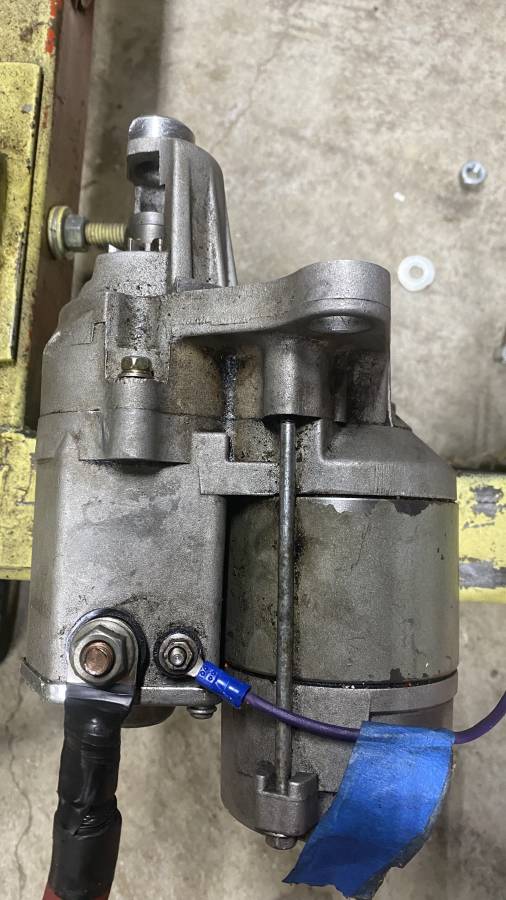
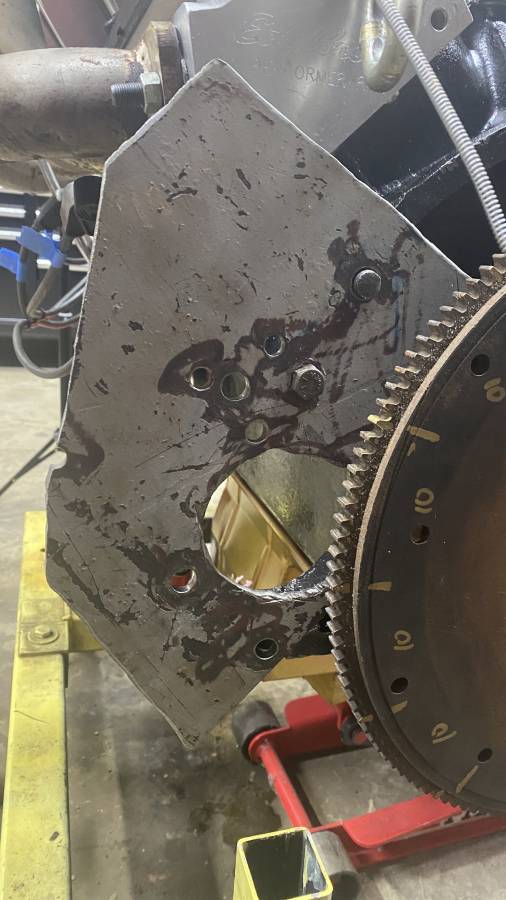
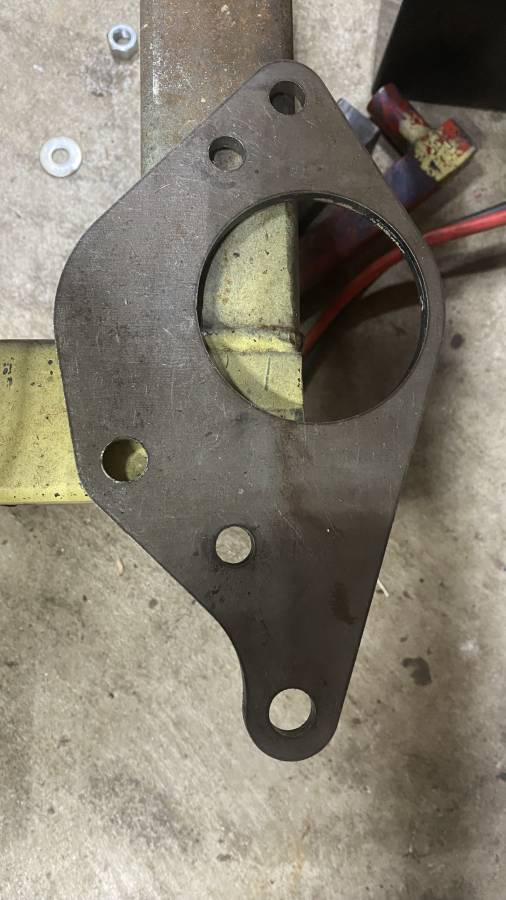
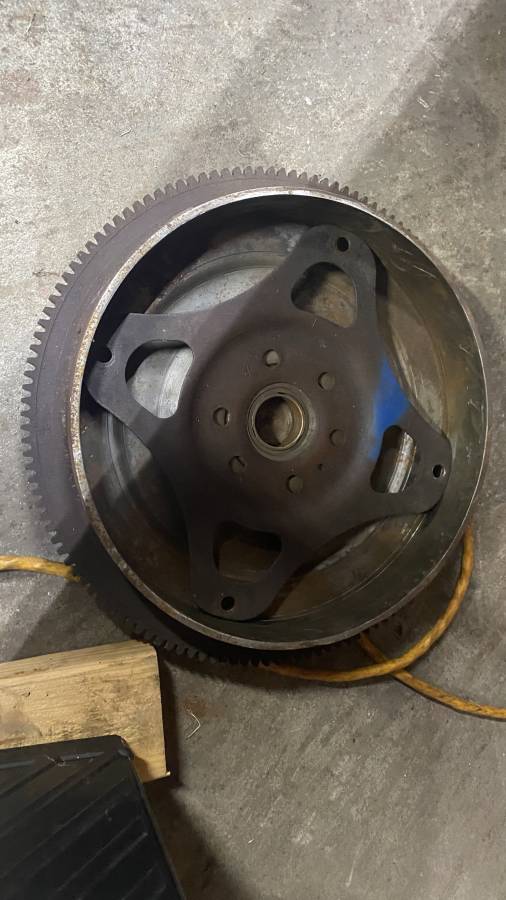
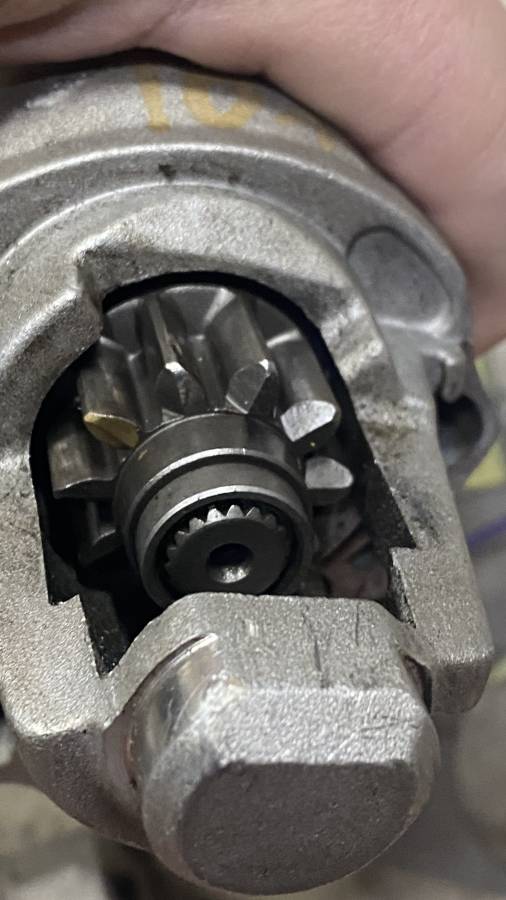
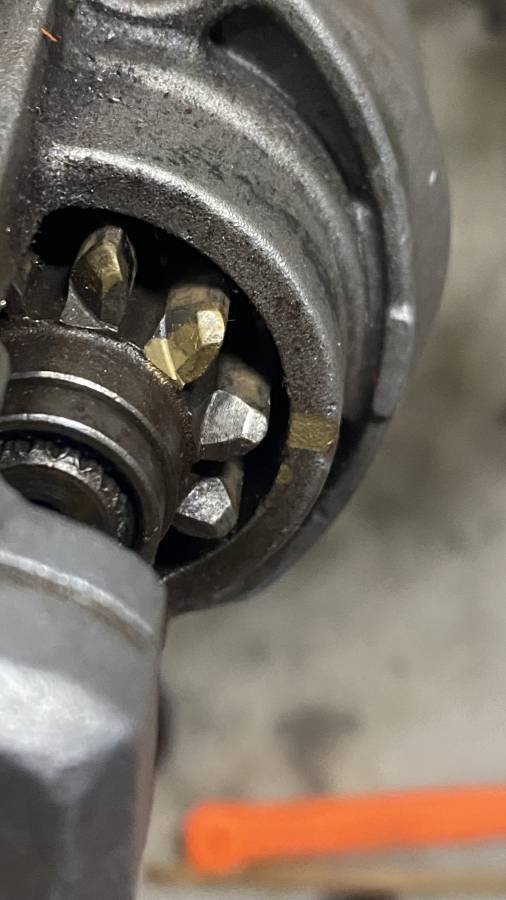
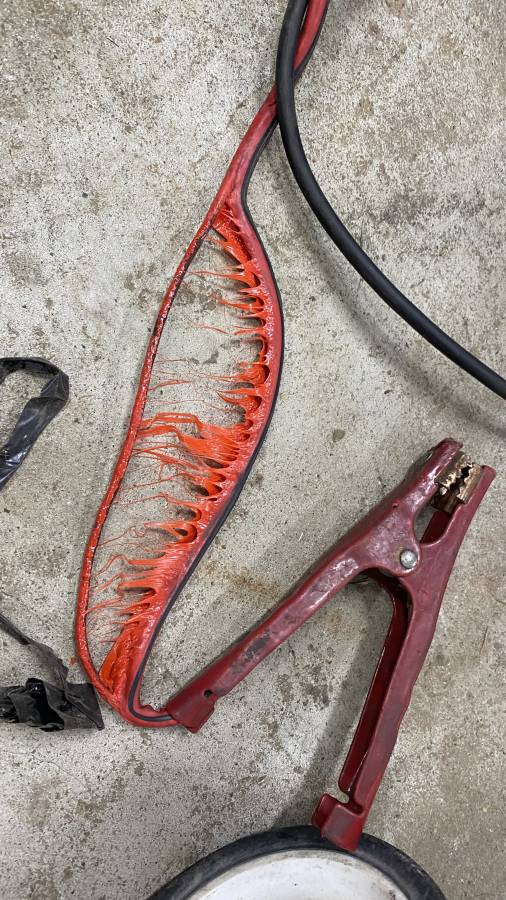
I have had issues in the past with mounting the starter on the run stand. I have a cut-up torque converter from a 318 and a 143 tooth flywheel from a truck. I have two mounting plates and I have two starters booth 10 tooth. I had my spare on the run stand and was having trouble with it turning the engine over and it keep blowing my fused 12v connection to the distribution/coil. I just had everything together with clamps and thought that was my issue. I have the primary power going to the starter via a set of jumper cables. I secured everything and then put my wheeled box charger on the battery to ensure my voltage stayed up. Spun the motor over a few times then noticed smoke coming from my jumper cables to the starter. The wire burned through the insulation, so I am going to assume my starter has some type of short.

I am using my homemade plate and the 143 tooth flywheel to start.

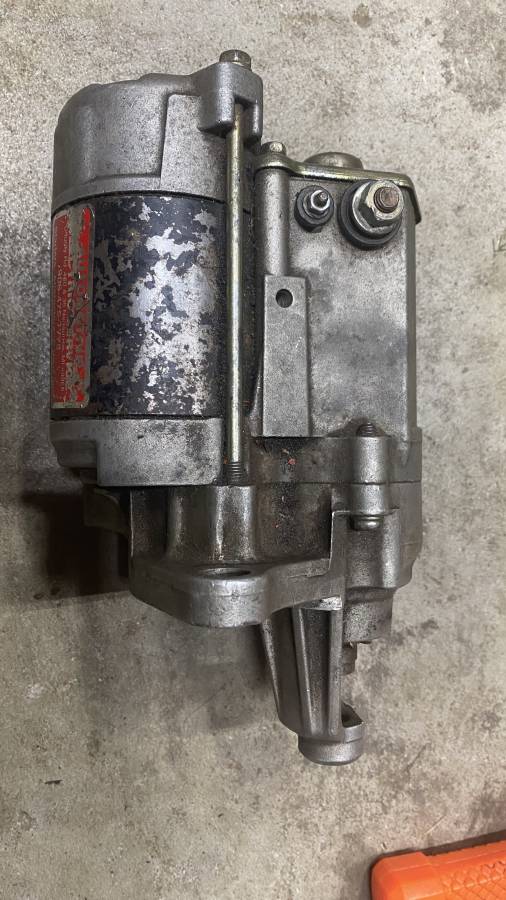
Fast forward, I grab the starter off the car (which I believe is from a Dakota). Now i am having alignment issues with the flywheel. The two starters do not put the bendix in the same location and the teeth have a different shape-they are close but not the same. I guess my primary question what is the proper distance that the bendix is from the flywheel? I do have a little wiggle room in moving the starter but it seems no matter where I put it it doesn’t want to engage properly to the flywheel. Would the Dakota starter not work with the 143 tooth flywheel for some reason (i.e. tooth design)?
Attached picture IMG_4351.jpeg
Attached picture IMG_4354.jpeg
Attached picture IMG_4355.jpeg
Attached picture IMG_4358.jpeg
Posted By: B1duster

Re: Run Stand - Starter set up - 10/10/23 02:34 PM

I believe the starters are the same. My guess would be you need to open the holes in the mounting plate a little and give the starter gear more clearance out away from the flywheel.
Posted By: clovis

Re: Run Stand - Starter set up - 10/10/23 03:01 PM

The only reason why I say the starters are different is when I use my other starter plate with the 318 converter, the little starter bendix will hit the ring and not allow you to mount the starter when you put in the big starter it will allow you to mount it.

Attached picture IMG_4357.jpeg
Attached picture IMG_4361.jpeg
Attached picture IMG_4360.jpeg
Attached picture IMG_4359.jpeg
Posted By: rickseeman

Re: Run Stand - Starter set up - 10/10/23 03:34 PM

I'm no expert on this but I just went through this on my test stand. (Mine is big block.) I had a 143 tooth flywheel and a 10-1/2" bellhousing but that flywheel is for a 11" clutch. (I think they use the same starter.) So I got a 10-1/2" flywheel. That worked with my bellhousing.
Posted By: Hemi_Joel

Re: Run Stand - Starter set up - 10/12/23 01:04 AM

The problem is your jumper cables, they are junk. It looks like about a 10 gauge wire. Too much resistance, too much voltage drop. Go back to the original starter that fits, use some real battery cables of at least 4 gauge, or even 2 gauge, properly connected.
Posted By: moparx

Re: Run Stand - Starter set up - 10/12/23 06:32 PM

guys are very often misled about jumper cables because of the size of the insulation around the cable itself.
a quick peek at where the clamps are attached to the cable reveals the true size of the cable itself.
you won't find quality jumper cables at your local wally world.............
beer
Posted By: clovis

Re: Run Stand - Starter set up - 10/12/23 08:40 PM

Looks like I am one of those guys.

I have a box of wire, so I already some 0/1 and 0/2 wire. I will move my battery to the side of the stand and create a short run of 0/1 wire to the starter. I will go back to my "big" starter and see where that gets me.
What you guys are saying makes perfect sense and after looking at the wire, its probably 8 gauge at best and it is at least 6 feet. I should be able to give it a go tomorrow, so I will update.

Appreciate the help.
Posted By: Cab_Burge

Re: Run Stand - Starter set up - 10/13/23 01:42 AM

Originally Posted by Hemi_Joel
The problem is your jumper cables, they are junk. It looks like about a 10 gauge wire. Too much resistance, too much voltage drop. Go back to the original starter that fits, use some real battery cables of at least 4 gauge, or even 2 gauge, properly connected.
iagree whiney work
Posted By: clovis

Re: Run Stand - Starter set up - 10/13/23 06:39 PM

Went down to the shop at lunch.

Used about 3 feet of 1/0 wire from the battery to the starter (big starter) and a 6 gauge wire for the ground-crazy thing fired right up.

Thank for the help.
Posted By: BANDIT

Re: Run Stand - Starter set up - 10/13/23 07:30 PM

I know you went to a lot of work to make your flex plates, and I'm not knocking them. I just use a 6 and an 8-bolt neutral balanced flywheel and a bellhousing for an LA and B engine. If I need to, I bolt weight on for cast cranks. I have an older factory Denso starter with the snout cut off, and it works fine on either one. Snout was cut so that it worked on my RB/Powerglide set-up. I do have a Chevy starter and ring gear laying around, also.
Posted By: Hemi_Joel

Re: Run Stand - Starter set up - 10/13/23 08:51 PM

Originally Posted by clovis
Went down to the shop at lunch.

Used about 3 feet of 1/0 wire from the battery to the starter (big starter) and a 6 gauge wire for the ground-crazy thing fired right up.

Thank for the help.


Glad it worked out! up
Posted By: moparx

Re: Run Stand - Starter set up - 10/14/23 05:53 PM

happy you seem to have the problem solved. up
beer
Posted By: Cab_Burge

Re: Run Stand - Starter set up - 10/15/23 07:35 AM

Originally Posted by clovis
Went down to the shop at lunch.

Used about 3 feet of 1/0 wire from the battery to the starter (big starter) and a 6 gauge wire for the ground-crazy thing fired right up.

Thank for the help.

You need a bigger "ground" cable than the positive side, all the current in batteries travels, flows, out the negative side and returns to the battery through the circuit on the positive cable scope work
Hence the old adage that you can never have to many good grounds on D.C battery powered circuits scope wrench
Posted By: clovis

Re: Run Stand - Starter set up - 11/10/23 04:48 AM

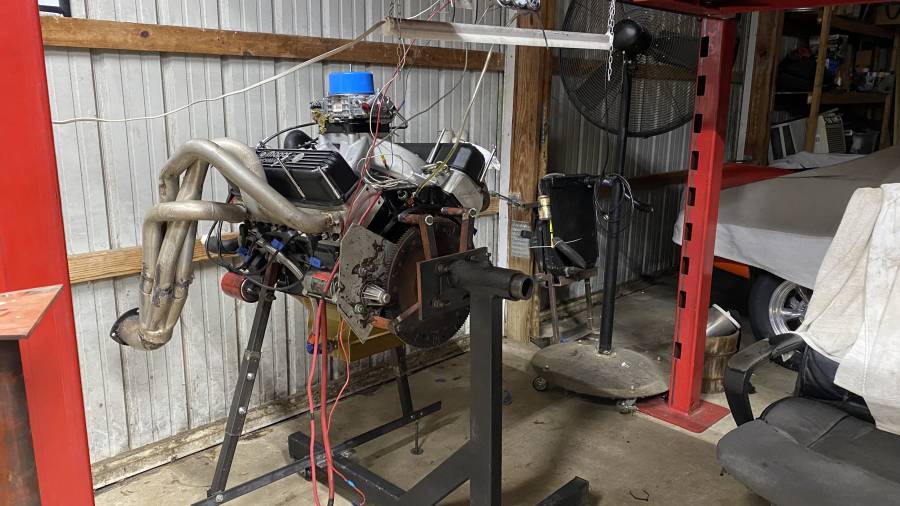
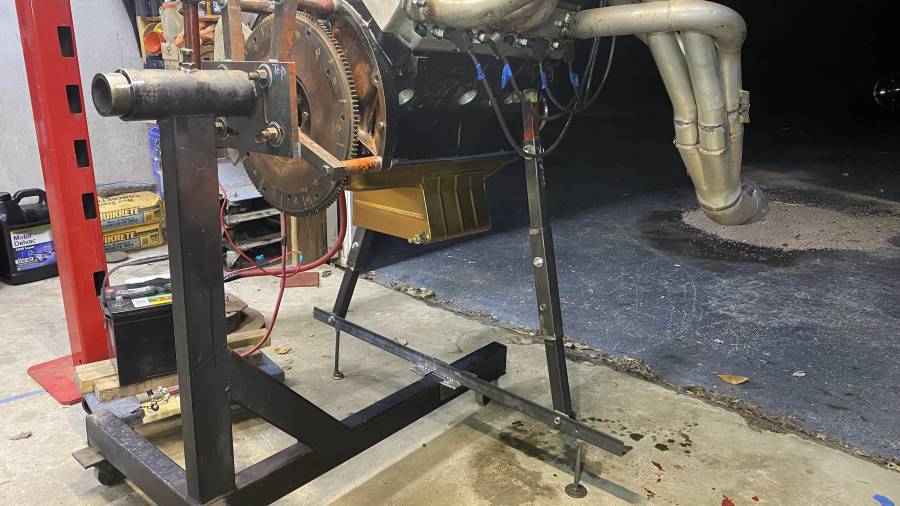
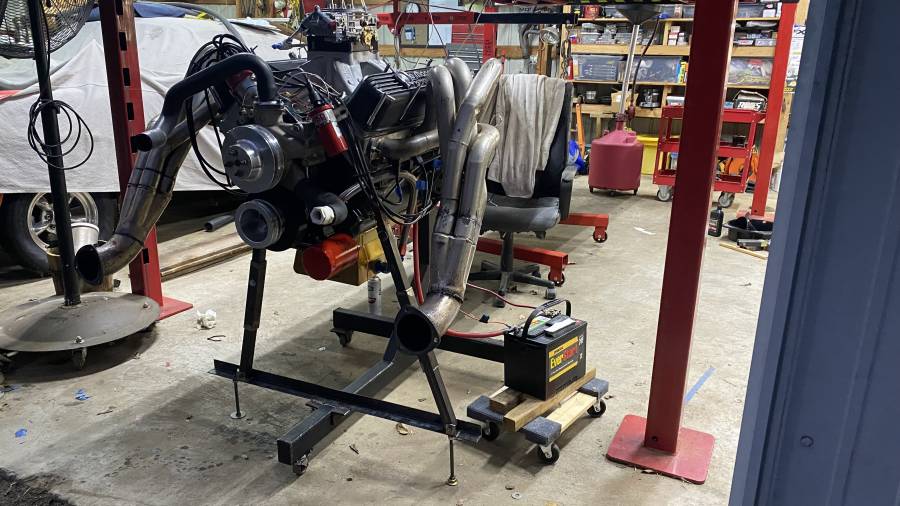
This has actually caused me to make my own run stand. The one I use now, belongs to a friend and it is a nice beefy stand but I usually have to spend a little time converting it back to a big block Chrysler as he does a variety of builds and he changes it up. The second down side is storage it is nice and beefy but it takes up a lot of space in the shop. Third, because of its footprint it is very difficult to get my cherry picker close enough to get the engine mounted. In the end, i wanted something easy to store, and would allow an easy transition from the build stand.

I looked at a ton of pictures and come up with the idea to build an adapter to the run stand. I ran across an ancient build stand on the cheap that was pretty well built and had a couple of things you didn’t have in the standard stands you get now days. The first was a full front gusset and the second was longer attachment tubes that would allow room for the flex plate. I built a simple crossmember that allows me to attach two legs to the block mounts and have some adjustment for length (upward pressure). Since I used angle iron for the crossmember I made feet for each end that can extend to the floor, this actually made the whole thing very solid.

I rolled it over under my lift and zip tied a set of gauges to the lift and put the battery on little dolly I can roll around. In less than 30 minutes I can have it able to run. The only thing I have to store is 1 piece of angle iron and 2 pieces of square tubing that are less than two feet long.

Attached picture IMG_4637.jpeg
Attached picture IMG_4651.jpeg
Attached picture IMG_4644.jpeg
Posted By: BANDIT

Re: Run Stand - Starter set up - 11/12/23 06:45 PM

I built my own, also. It is all self contained, fuel, battery, and cooling system. Built it out of stuff laying around shop. Its hi enough that my cherry picker slides underneath, and stout enough to hold anything. Does take up a little more room, but if i leave an engine on it, I can go out to shop in the middle of winter and fire up an open headered motor for the fun of it! Most of the time it just collects spare parts until I need it again.

Attached picture IMG_0165[782].jpg
Attached picture IMG_0166[781].jpg
© 2024 Moparts Forums